Jie-Ying Lee ·
Yi-Ruei Liu ·
Shr-Ruei Tsai ·
Wei-Cheng Chang ·
Chung-Ho Wu
Jiewen Chan ·
Zhenjun Zhao ·
Chieh Hubert Lin ·
Yu-Lun Liu
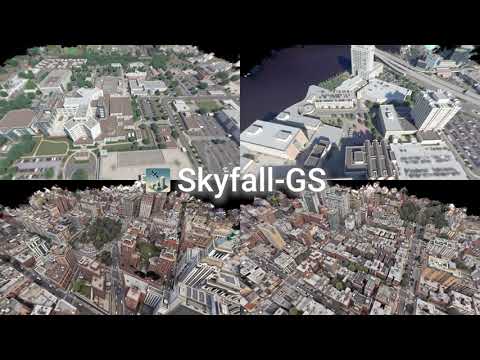
Synthesizing large-scale, explorable, and geometrically accurate 3D urban scenes is a challenging yet valuable task in providing immersive and embodied applications. The challenges lie in the lack of large-scale and high-quality real-world 3D scans for training generalizable generative models. In this paper, we take an alternative route to create large-scale 3D scenes by synergizing the readily available satellite imagery that supplies realistic coarse geometry and the open-domain diffusion model for creating high-quality close-up appearances. We propose Skyfall-GS, the first large-scale 3D-scene creation framework without costly 3D annotations, also featuring real-time, immersive 3D exploration. We tailor a curriculum-driven iterative refinement strategy to progressively enhance geometric completeness and photorealistic textures. Extensive experiments demonstrate that Skyfall-GS provides improved cross-view consistent geometry and more realistic textures compared to state-of-the-art approaches.
- Installation
- Dataset
- Training
- Automated Training Scripts
- Evaluation
- Rendering and Visualization
- Online Viewer
- Useful Scripts
- Acknowledgement
- Citation
- License
-
Clone the repository:
git clone --recurse-submodules https://github.com/jayin92/Skyfall-GS.git cd Skyfall-GS -
Create and activate a Conda environment:
conda create -y -n skyfall-gs python=3.10
conda activate skyfall-gs
-
Install dependencies:
conda install cuda-toolkit=12.8 cuda-nvcc=12.8 -c nvidia

pip install -r requirements.txt

pip install --force-reinstall torch torchvision torchaudio

pip install submodules/diff-gaussian-rasterization-depth
pip install submodules/simple-knn
pip install submodules/fused-ssim
The datasets required to train the Skyfall-GS model should be placed in the data/ directory.
The JAX and NYC datasets are available for download from Google Drive.
-
Download the zip files:
-
Unzip the datasets into the
data/directory:unzip datasets_JAX.zip unzip datasets_NYC.zip
After unzipping, the directory structure inside the data/ directory should look like this:
data/
├── datasets_JAX/
│   ├── JAX_004
│   ├── JAX_068
│   └── ...
└── datasets_NYC/
    ├── NYC_004
    ├── NYC_010
    └── ...
The training process is divided into two main stages.
This stage focuses on reconstructing the initial 3D scene from satellite imagery.
python train.py \
    -s ./data/datasets_JAX/JAX_068/ \
    -m ./outputs/JAX/JAX_068 \
    --eval \
    --port 6209 \
    --kernel_size 0.1 \
    --resolution 1 \
    --sh_degree 1 \
    --appearance_enabled \
    --lambda_depth 0 \
    --lambda_opacity 10 \
    --densify_until_iter 21000 \
    --densify_grad_threshold 0.0001 \
    --lambda_pseudo_depth 0.5 \
    --start_sample_pseudo 1000 \
    --end_sample_pseudo 21000 \
    --size_threshold 20 \
    --scaling_lr 0.001 \
    --rotation_lr 0.001 \
    --opacity_reset_interval 3000 \
--sample_pseudo_interval 10This stage refines the geometry and synthesizes high-quality textures using an iterative dataset update strategy. This stage uses a pretrained model from Stage 1.
python train.py \
    -s ./data/datasets_JAX/JAX_068/ \
    -m ./outputs/JAX_idu/JAX_068 \
    --start_checkpoint ./outputs/JAX/JAX_068/chkpnt30000.pth \
    --iterative_datasets_update \
    --eval \
    --port 6209 \
    --kernel_size 0.1 \
    --resolution 1 \
    --sh_degree 1 \
    --appearance_enabled \
    --lambda_depth 0 \
    --lambda_opacity 0 \
    --idu_opacity_reset_interval 5000 \
    --idu_refine \
    --idu_num_samples_per_view 2 \
    --densify_grad_threshold 0.0002 \
    --idu_num_cams 6 \
    --idu_use_flow_edit \
    --idu_render_size 1024 \
    --idu_flow_edit_n_min 4 \
    --idu_flow_edit_n_max 10 \
    --idu_grid_size 3 \
    --idu_grid_width 512 \
    --idu_grid_height 512 \
    --idu_episode_iterations 10000 \
    --idu_iter_full_train 0 \
    --idu_opacity_cooling_iterations 500 \
    --lambda_pseudo_depth 0.5 \
    --idu_densify_until_iter 9000 \
--idu_train_ratio 0.75The scripts/ directory contains scripts for automated training on different datasets and configurations.
scripts/run_jax.py: Runs Stage 1 training for the JAX dataset scenes.scripts/run_jax_idu.py: Runs Stage 2 (IDU) training for the JAX dataset scenes.scripts/run_jax_naive.py: Runs a naive training for the JAX dataset scenes without advanced features.scripts/run_nyc.py: Runs Stage 1 training for the NYC dataset scenes.scripts/run_nyc_idu.py: Runs Stage 2 (IDU) training for the NYC dataset scenes.scripts/run_nyc_naive.py: Runs a naive training for the NYC dataset scenes.
The eval.py script is used for evaluating the performance of a trained model. It computes various metrics by comparing the rendered images with ground truth images.
The evaluation data, which includes the ground truth videos and the rendered videos from other methods, can be downloaded from Google Drive.
After downloading, unzip the file and place the results_eval directory in the root of the project.
python eval.py \
    --data_dir results_eval/data_eval_JAX \
    --temp_dir temp_frames_JAX \
    --methods mip-splatting sat-nerf eogs corgs ours_stage1 ours_stage2 \
    --output_file metrics_results_JAX.csv \
    --frame_rate 30 \
    --resolution 1024 \
    --batch_size 64

python eval.py \
    --data_dir results_eval/data_eval_NYC \
    --temp_dir temp_frames_NYC \
    --methods citydreamer gaussiancity corgs ours_stage1 ours_stage2 \
    --output_file metrics_results_NYC.csv \
    --frame_rate 24 \
    --no_resize \
    --batch_size 64
The script calculates the following metrics:
- PSNR: Peak Signal-to-Noise Ratio
- SSIM: Structural Similarity Index
- LPIPS: Learned Perceptual Image Patch Similarity
- CLIP-FID: FID score calculated using CLIP features
- CMMD: CLIP Maximum Mean Discrepancy
The render_video.py script can be used to render a video from a trained model using a specified camera path.
python render_video.py \
    -m <path_to_model_directory> \
    --camera_path <path_to_camera.json> \
    --load_from_checkpoints \
    --iteration <checkpoint_iteration> \
    --save_images \
--depth-m: Path to the model directory.--camera_path: Path to the camera trajectory JSON file.--load_from_checkpoints: Load the model from a checkpoint.--iteration: The checkpoint iteration to use.--save_images: Save individual frames of the video.--depth: Render depth maps instead of RGB images.
You can also render a video from a .ply file using render_video_from_ply.py:
python render_video_from_ply.py \
    --ply_path <path_to_ply_file> \
--camera_path <path_to_camera.json>After training, you can create a fused PLY file for visualization in an online viewer.
-
Generate the fused PLY file:
python create_fused_ply.py -m ./output_stage2/JAX_068 --output_ply fused/JAX_068_fused.ply --iteration 80000 --load_from_checkpoints
-
Visualize in the online viewer:
Use the online viewer to visualize the trained model. For optimal viewing, use the following settings:
- Up vector:
0,0,1 - SH degree:
1 - Camera origin:
0,0,200
- Up vector:
This project includes several other useful scripts:
align_ges.py: Find optimal target altitude by comparing with ground truth.convert.py: A COLMAP converter script.dsmr.py: Functions for DSM registration.evaluate_gs_geometry.py: Evaluate geometry accuracy for a single scene.gen_render_path.py: Generate a camera path for an orbit view around a target point.render_videos.py: A script for batch rendering of videos from multiple models and camera paths.sat_utils.py: Utility functions for handling satellite images and georeferenced data.scripts/merge_images.py: Merge two frames into one.
This codebase is built upon the following open-source projects:
We thank the authors for their contributions.
This research was funded by the National Science and Technology Council, Taiwan, under Grants NSTC 112-2222-E-A49-004-MY2 and 113-2628-EA49-023-. The authors are grateful to Google, NVIDIA, and MediaTek Inc. for their generous donations. Yu-Lun Liu acknowledges the Yushan Young Fellow Program by the MOE in Taiwan.
If you find this work useful, please consider citing:
@article{lee2025SkyfallGS,
  title = {{Skyfall-GS}: Synthesizing Immersive {3D} Urban Scenes from Satellite Imagery},
  author = {Jie-Ying Lee and Yi-Ruei Liu and Shr-Ruei Tsai and Wei-Cheng Chang and Chung-Ho Wu and Jiewen Chan and Zhenjun Zhao and Chieh Hubert Lin and Yu-Lun Liu},
  journal = {arXiv preprint},
  year = {2025},
  eprint = {2510.15869},
  archivePrefix = {arXiv}
}This project is licensed under the terms of the Apache 2 License.