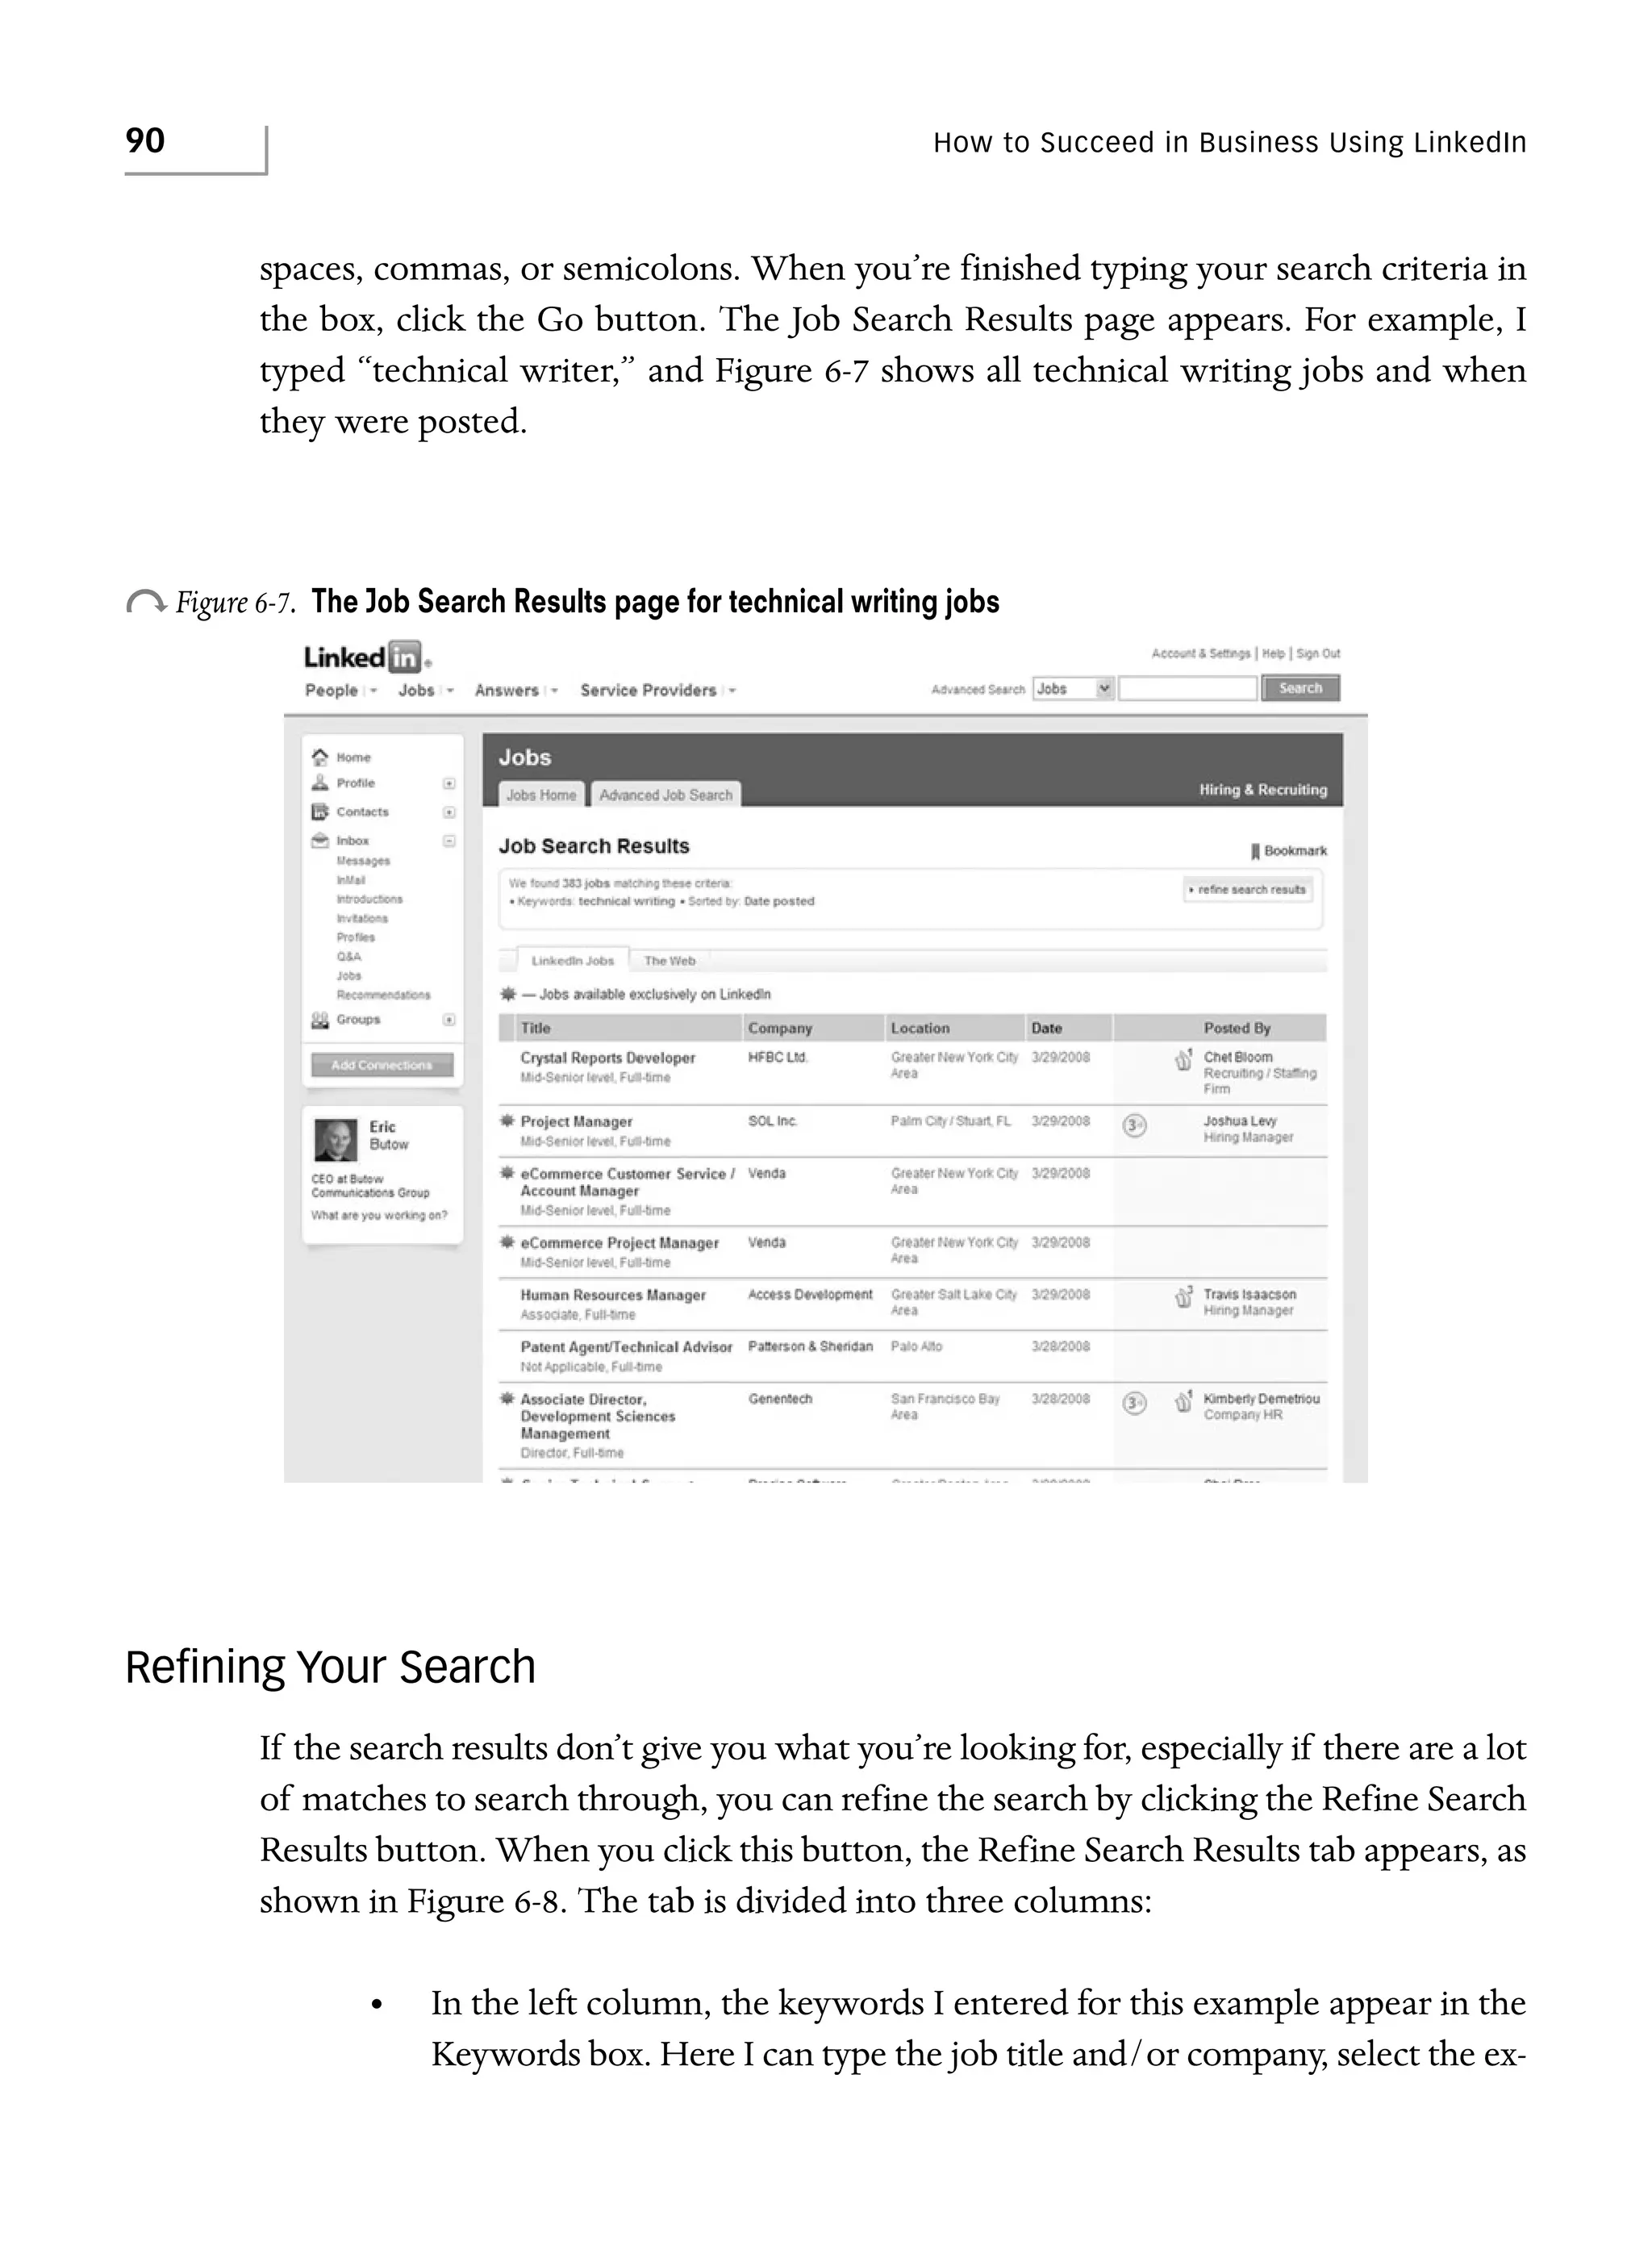
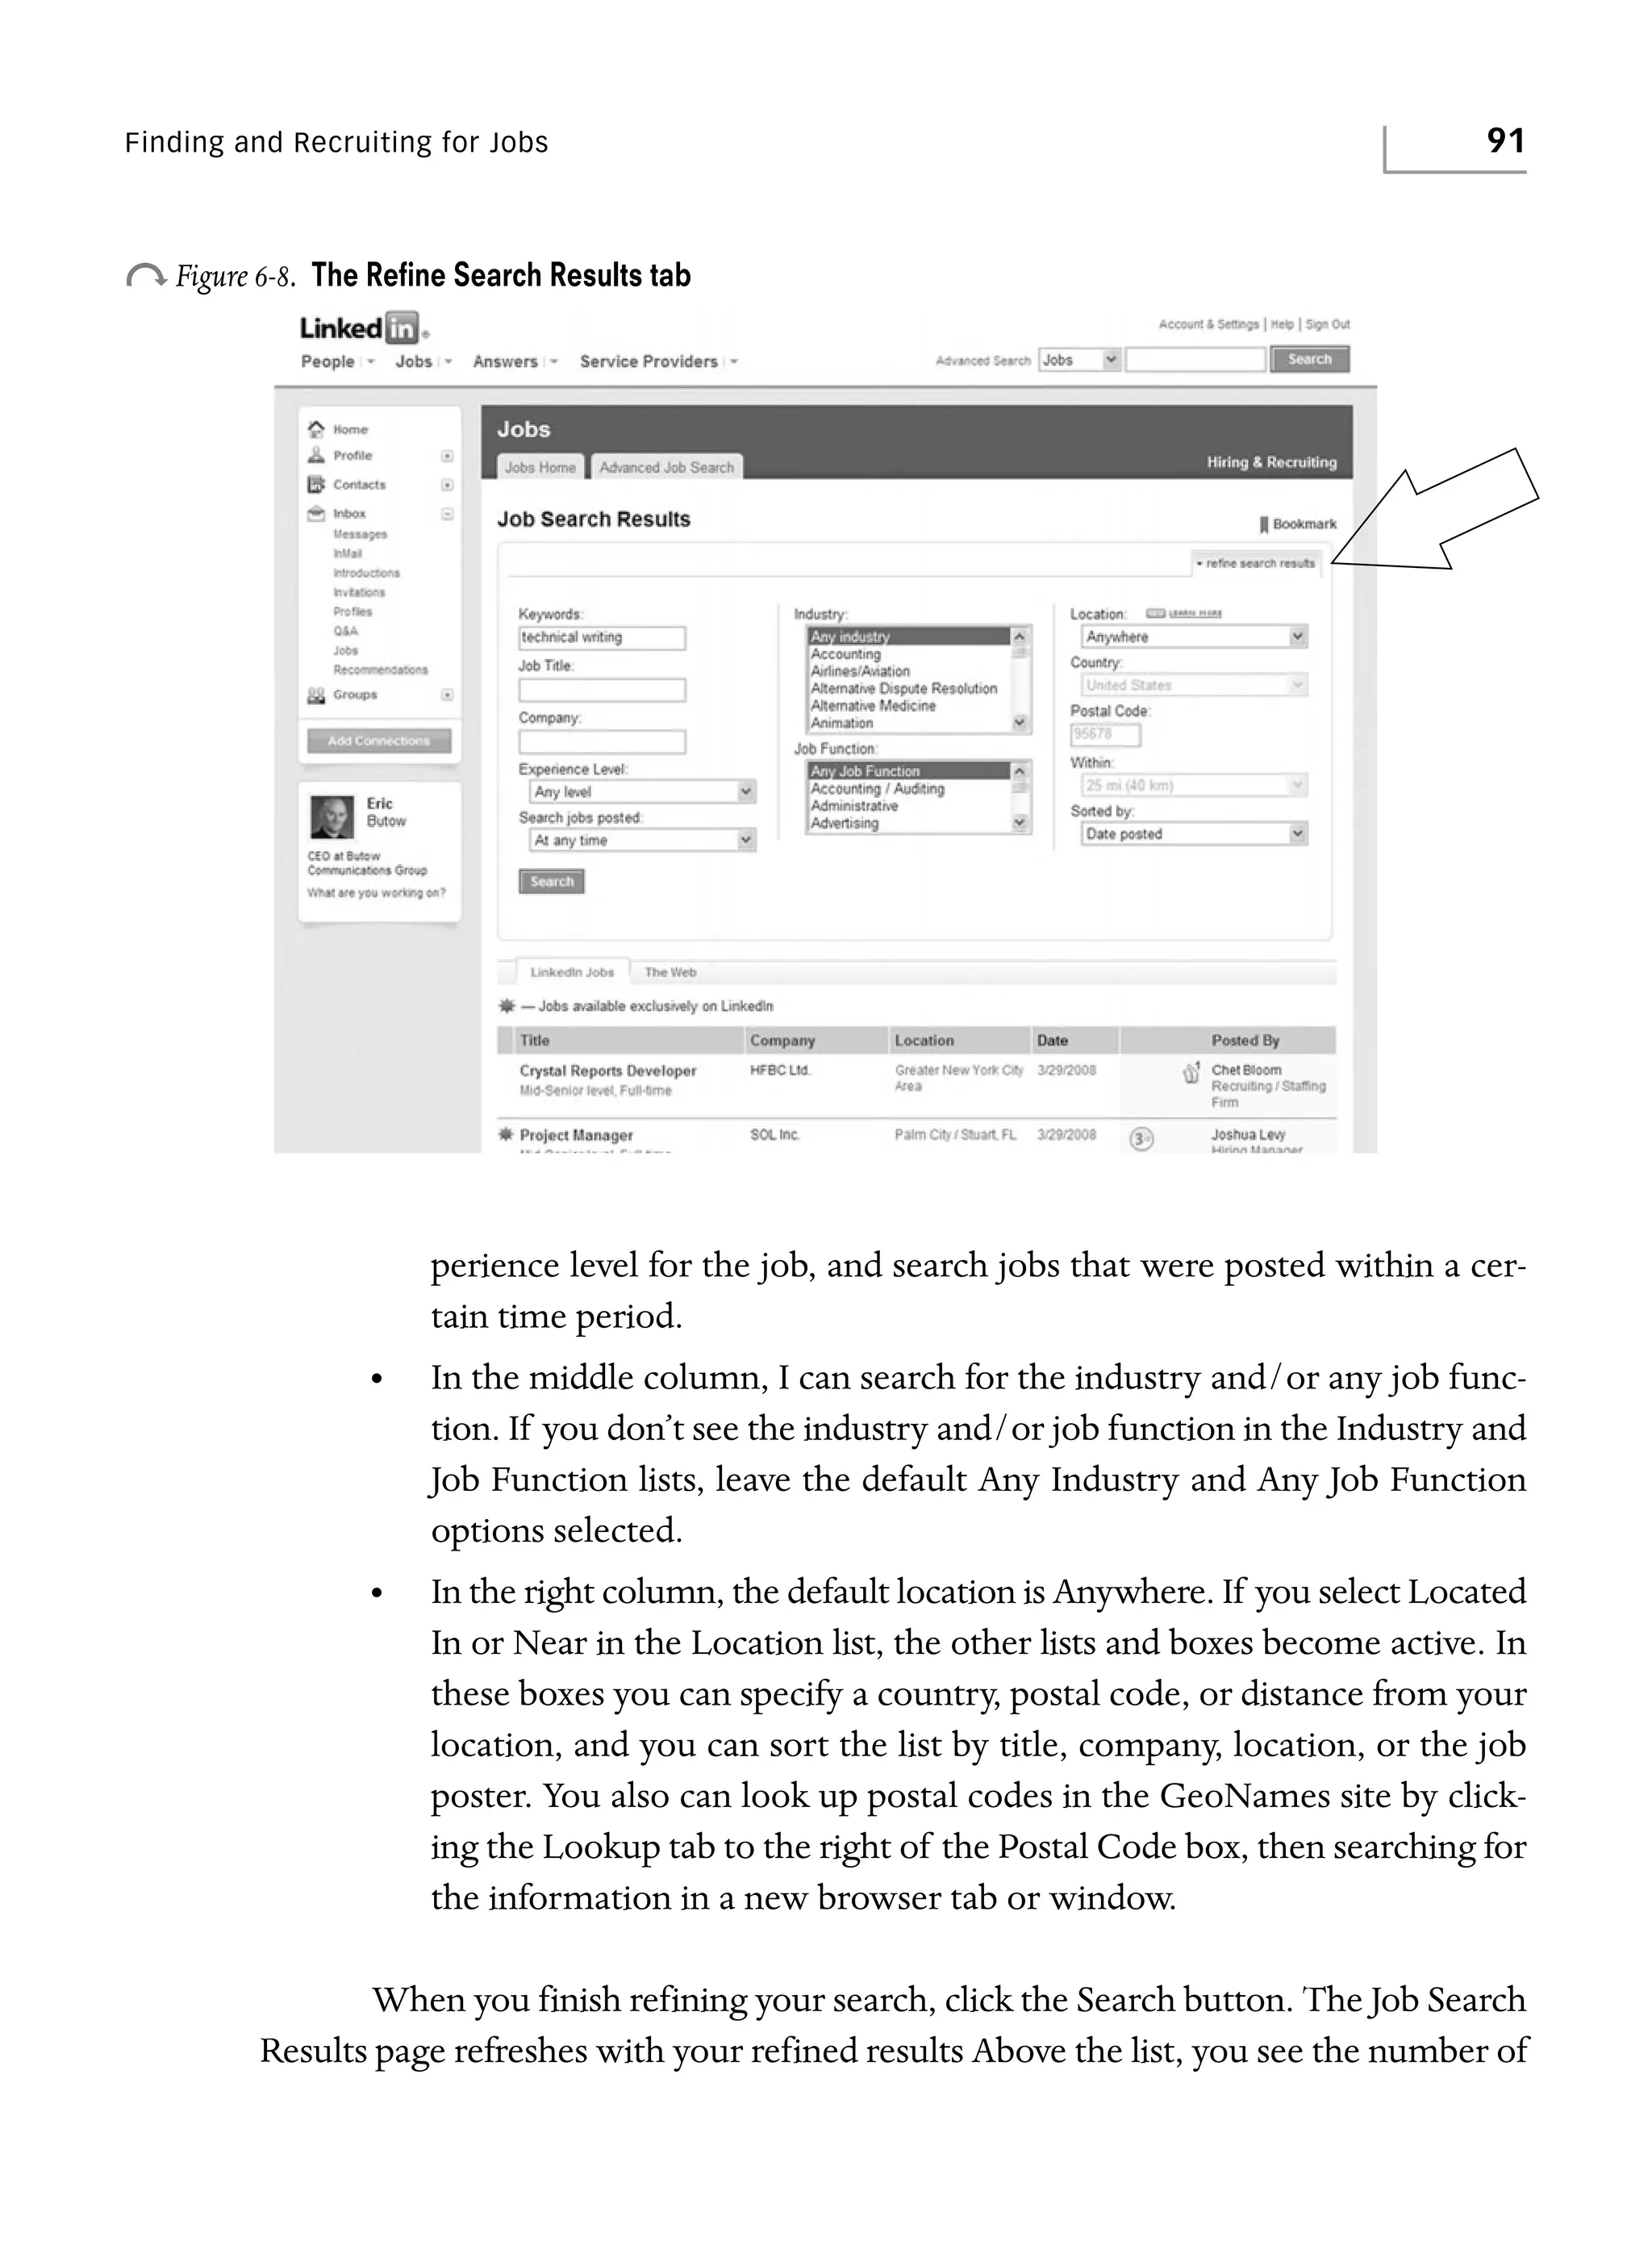
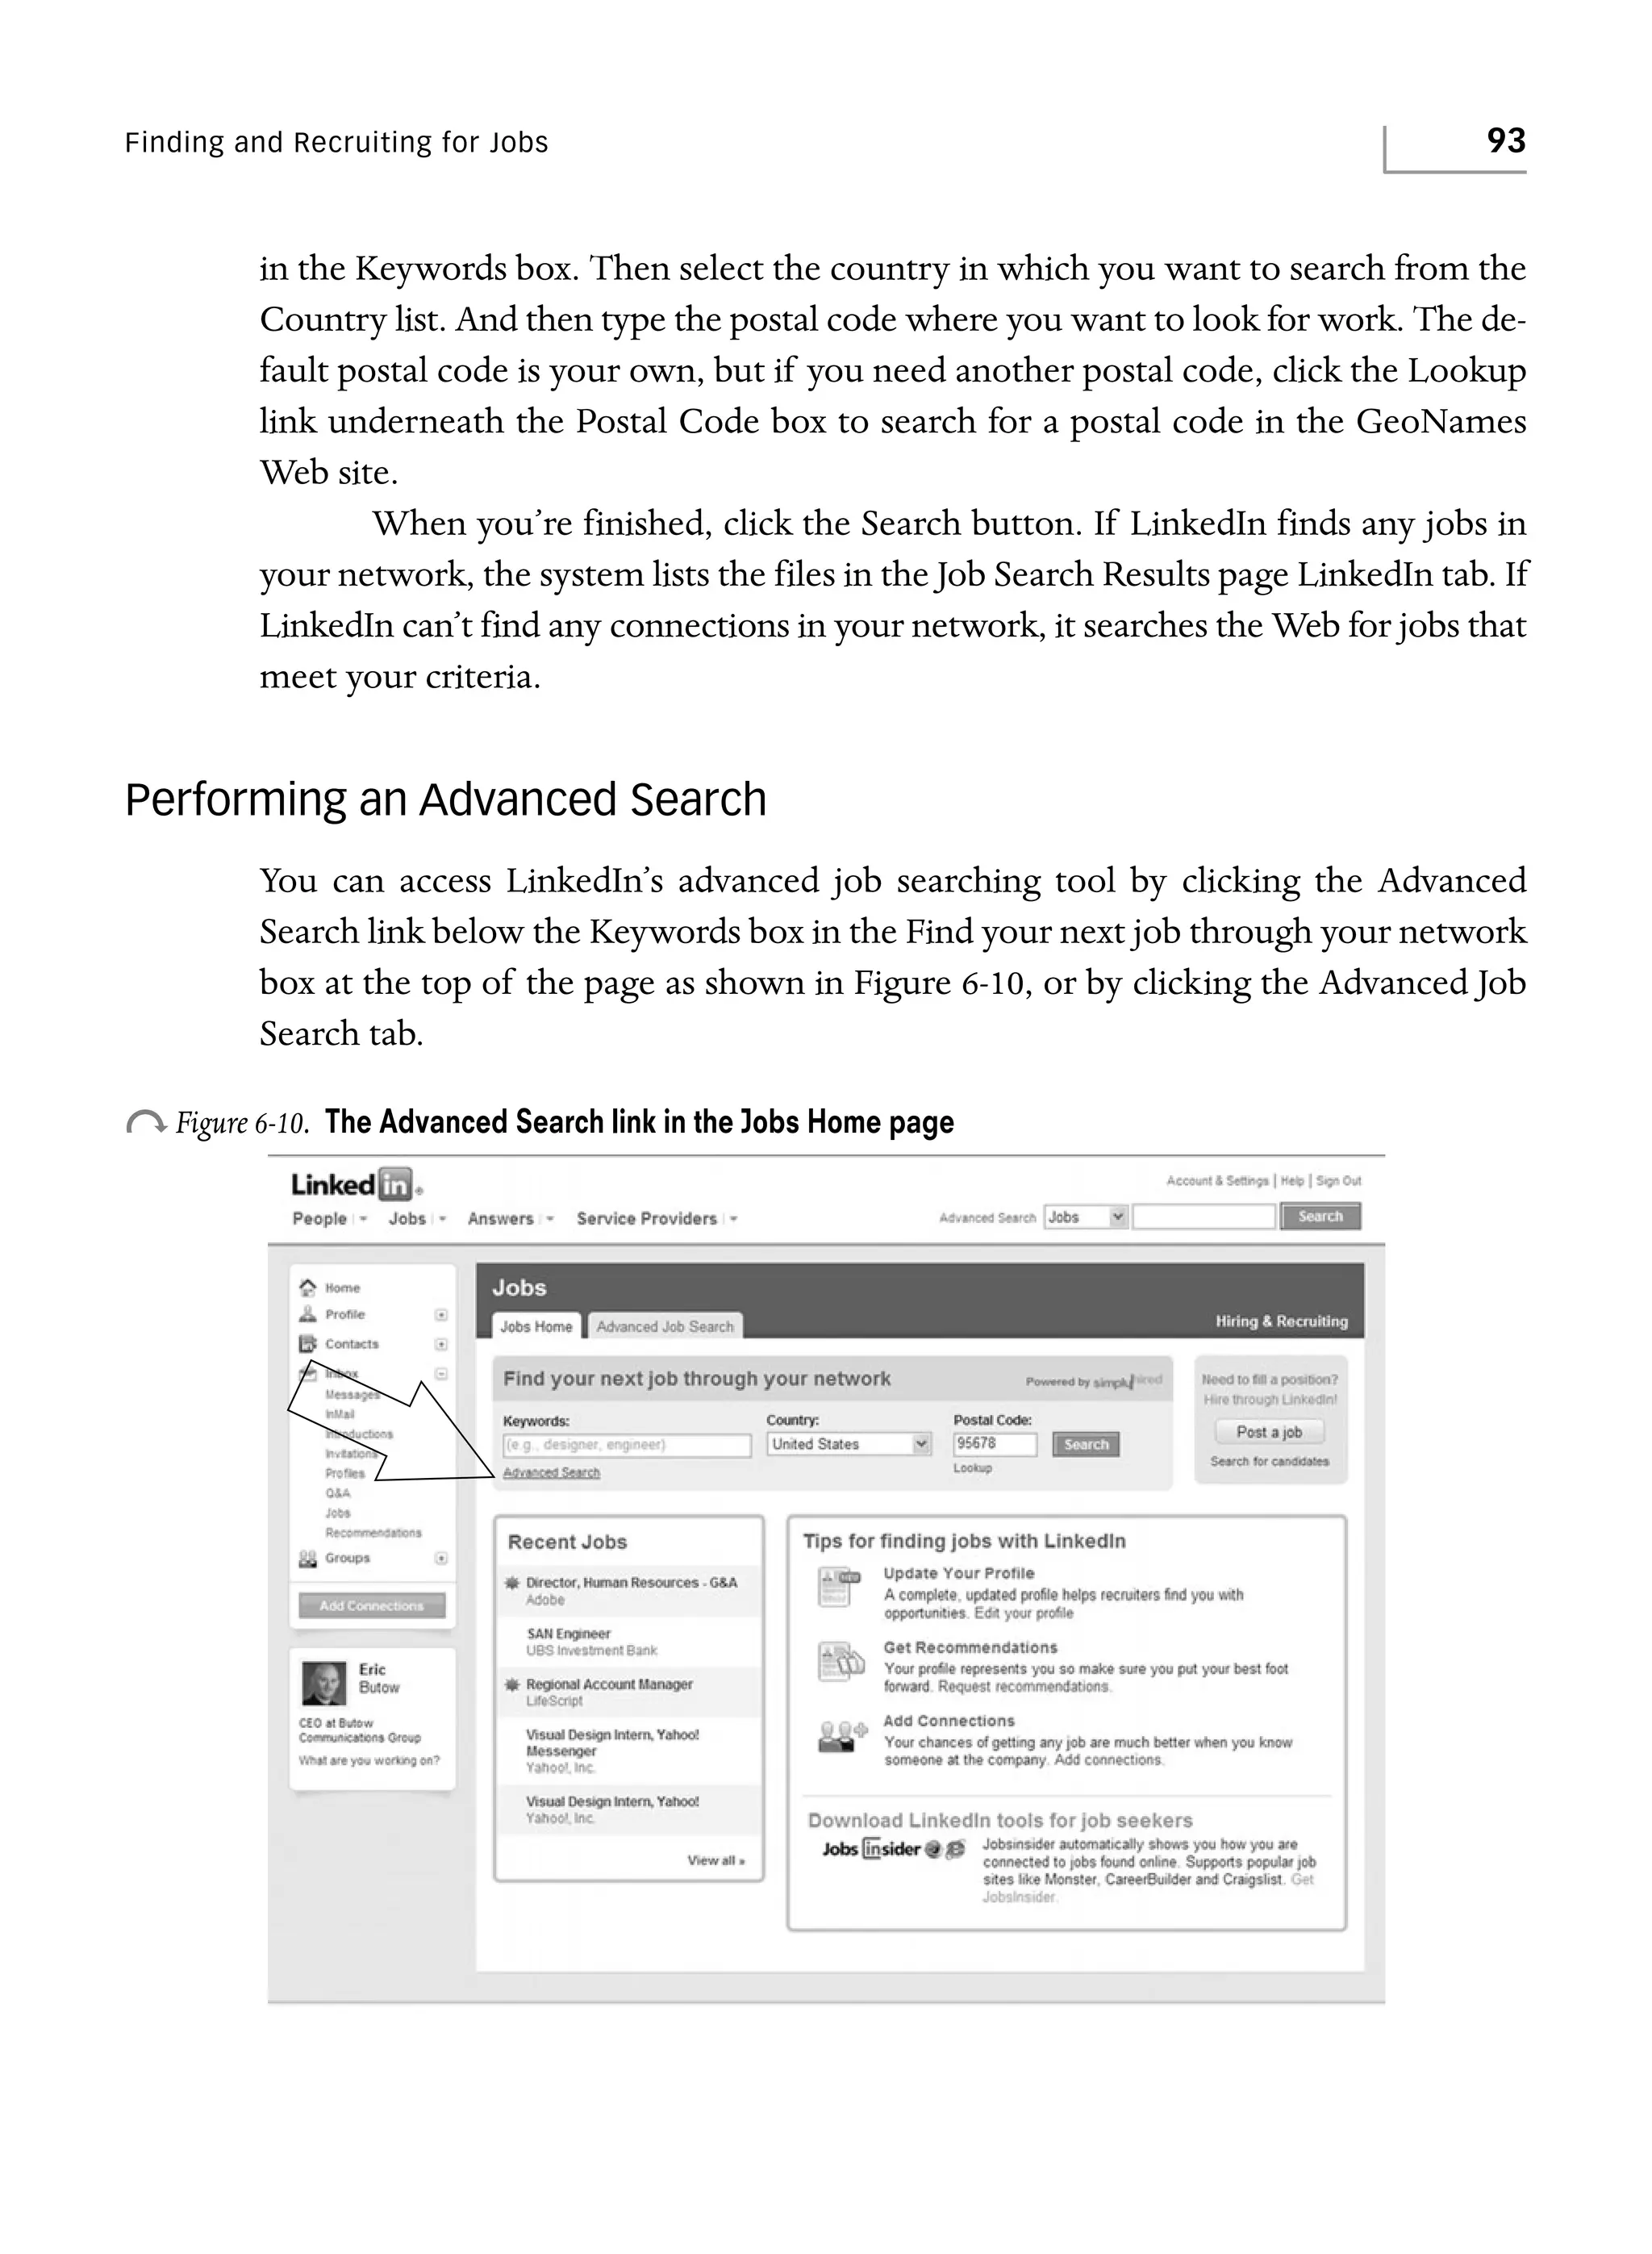
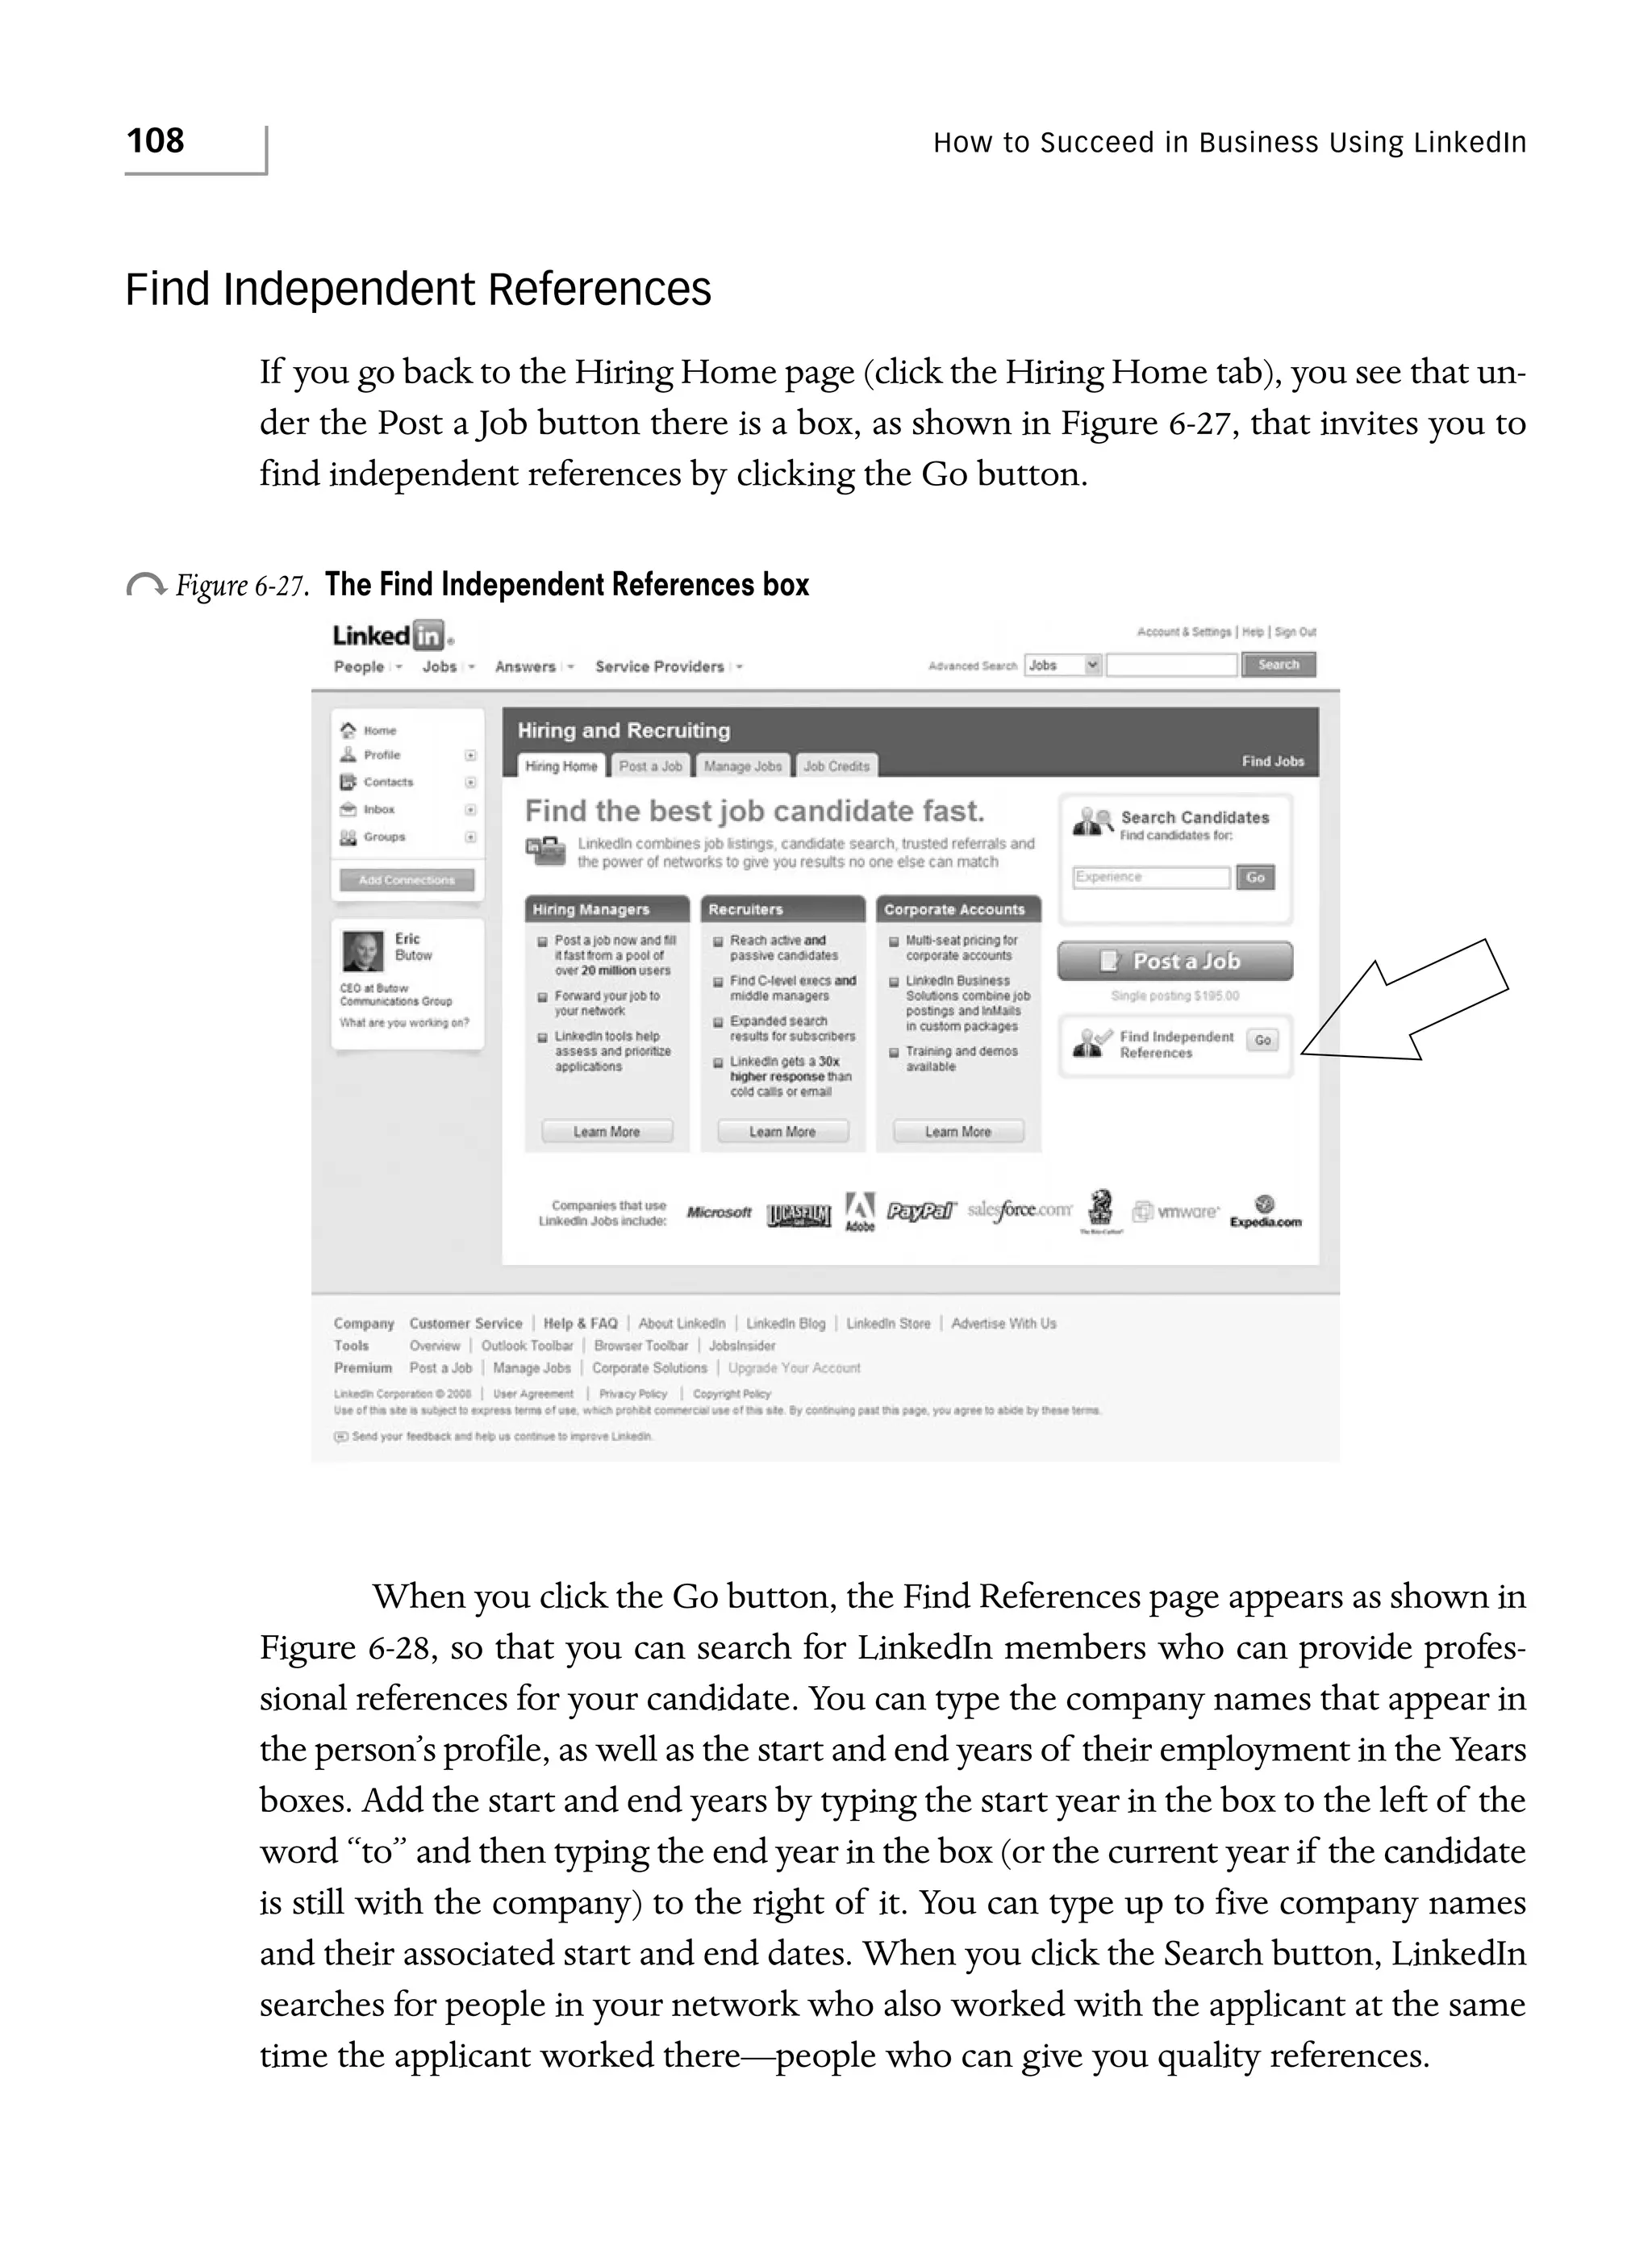
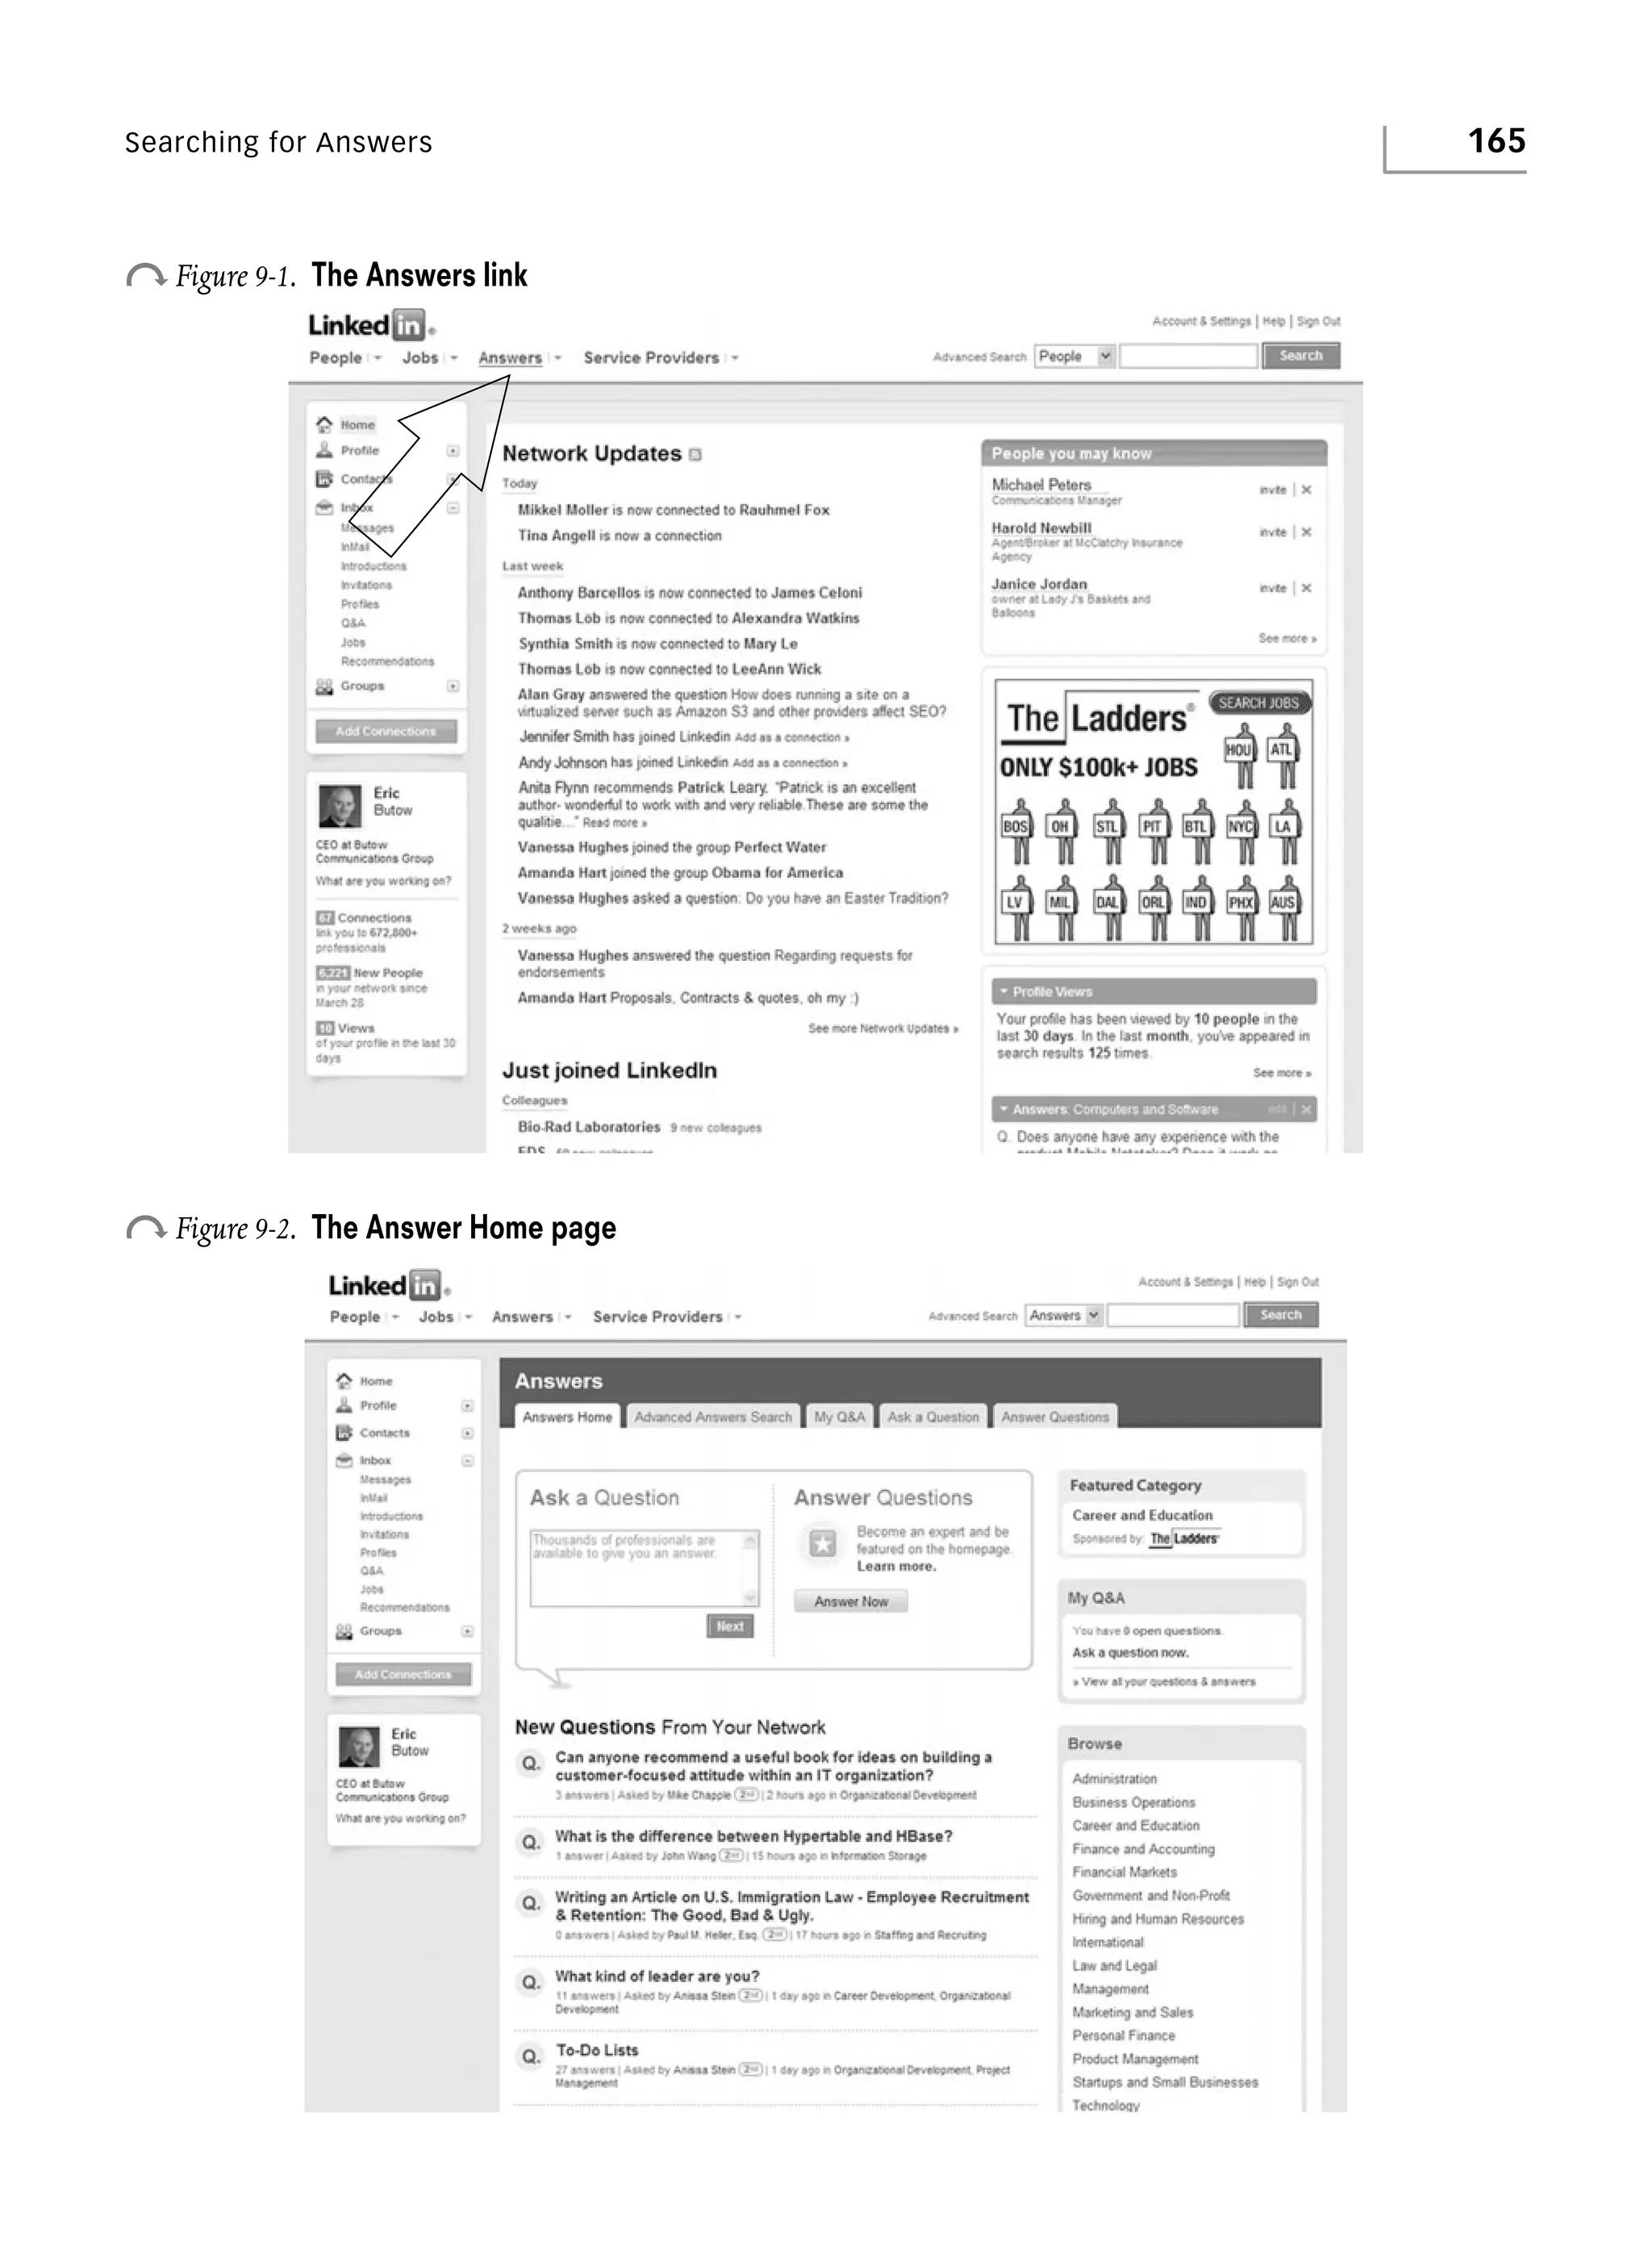
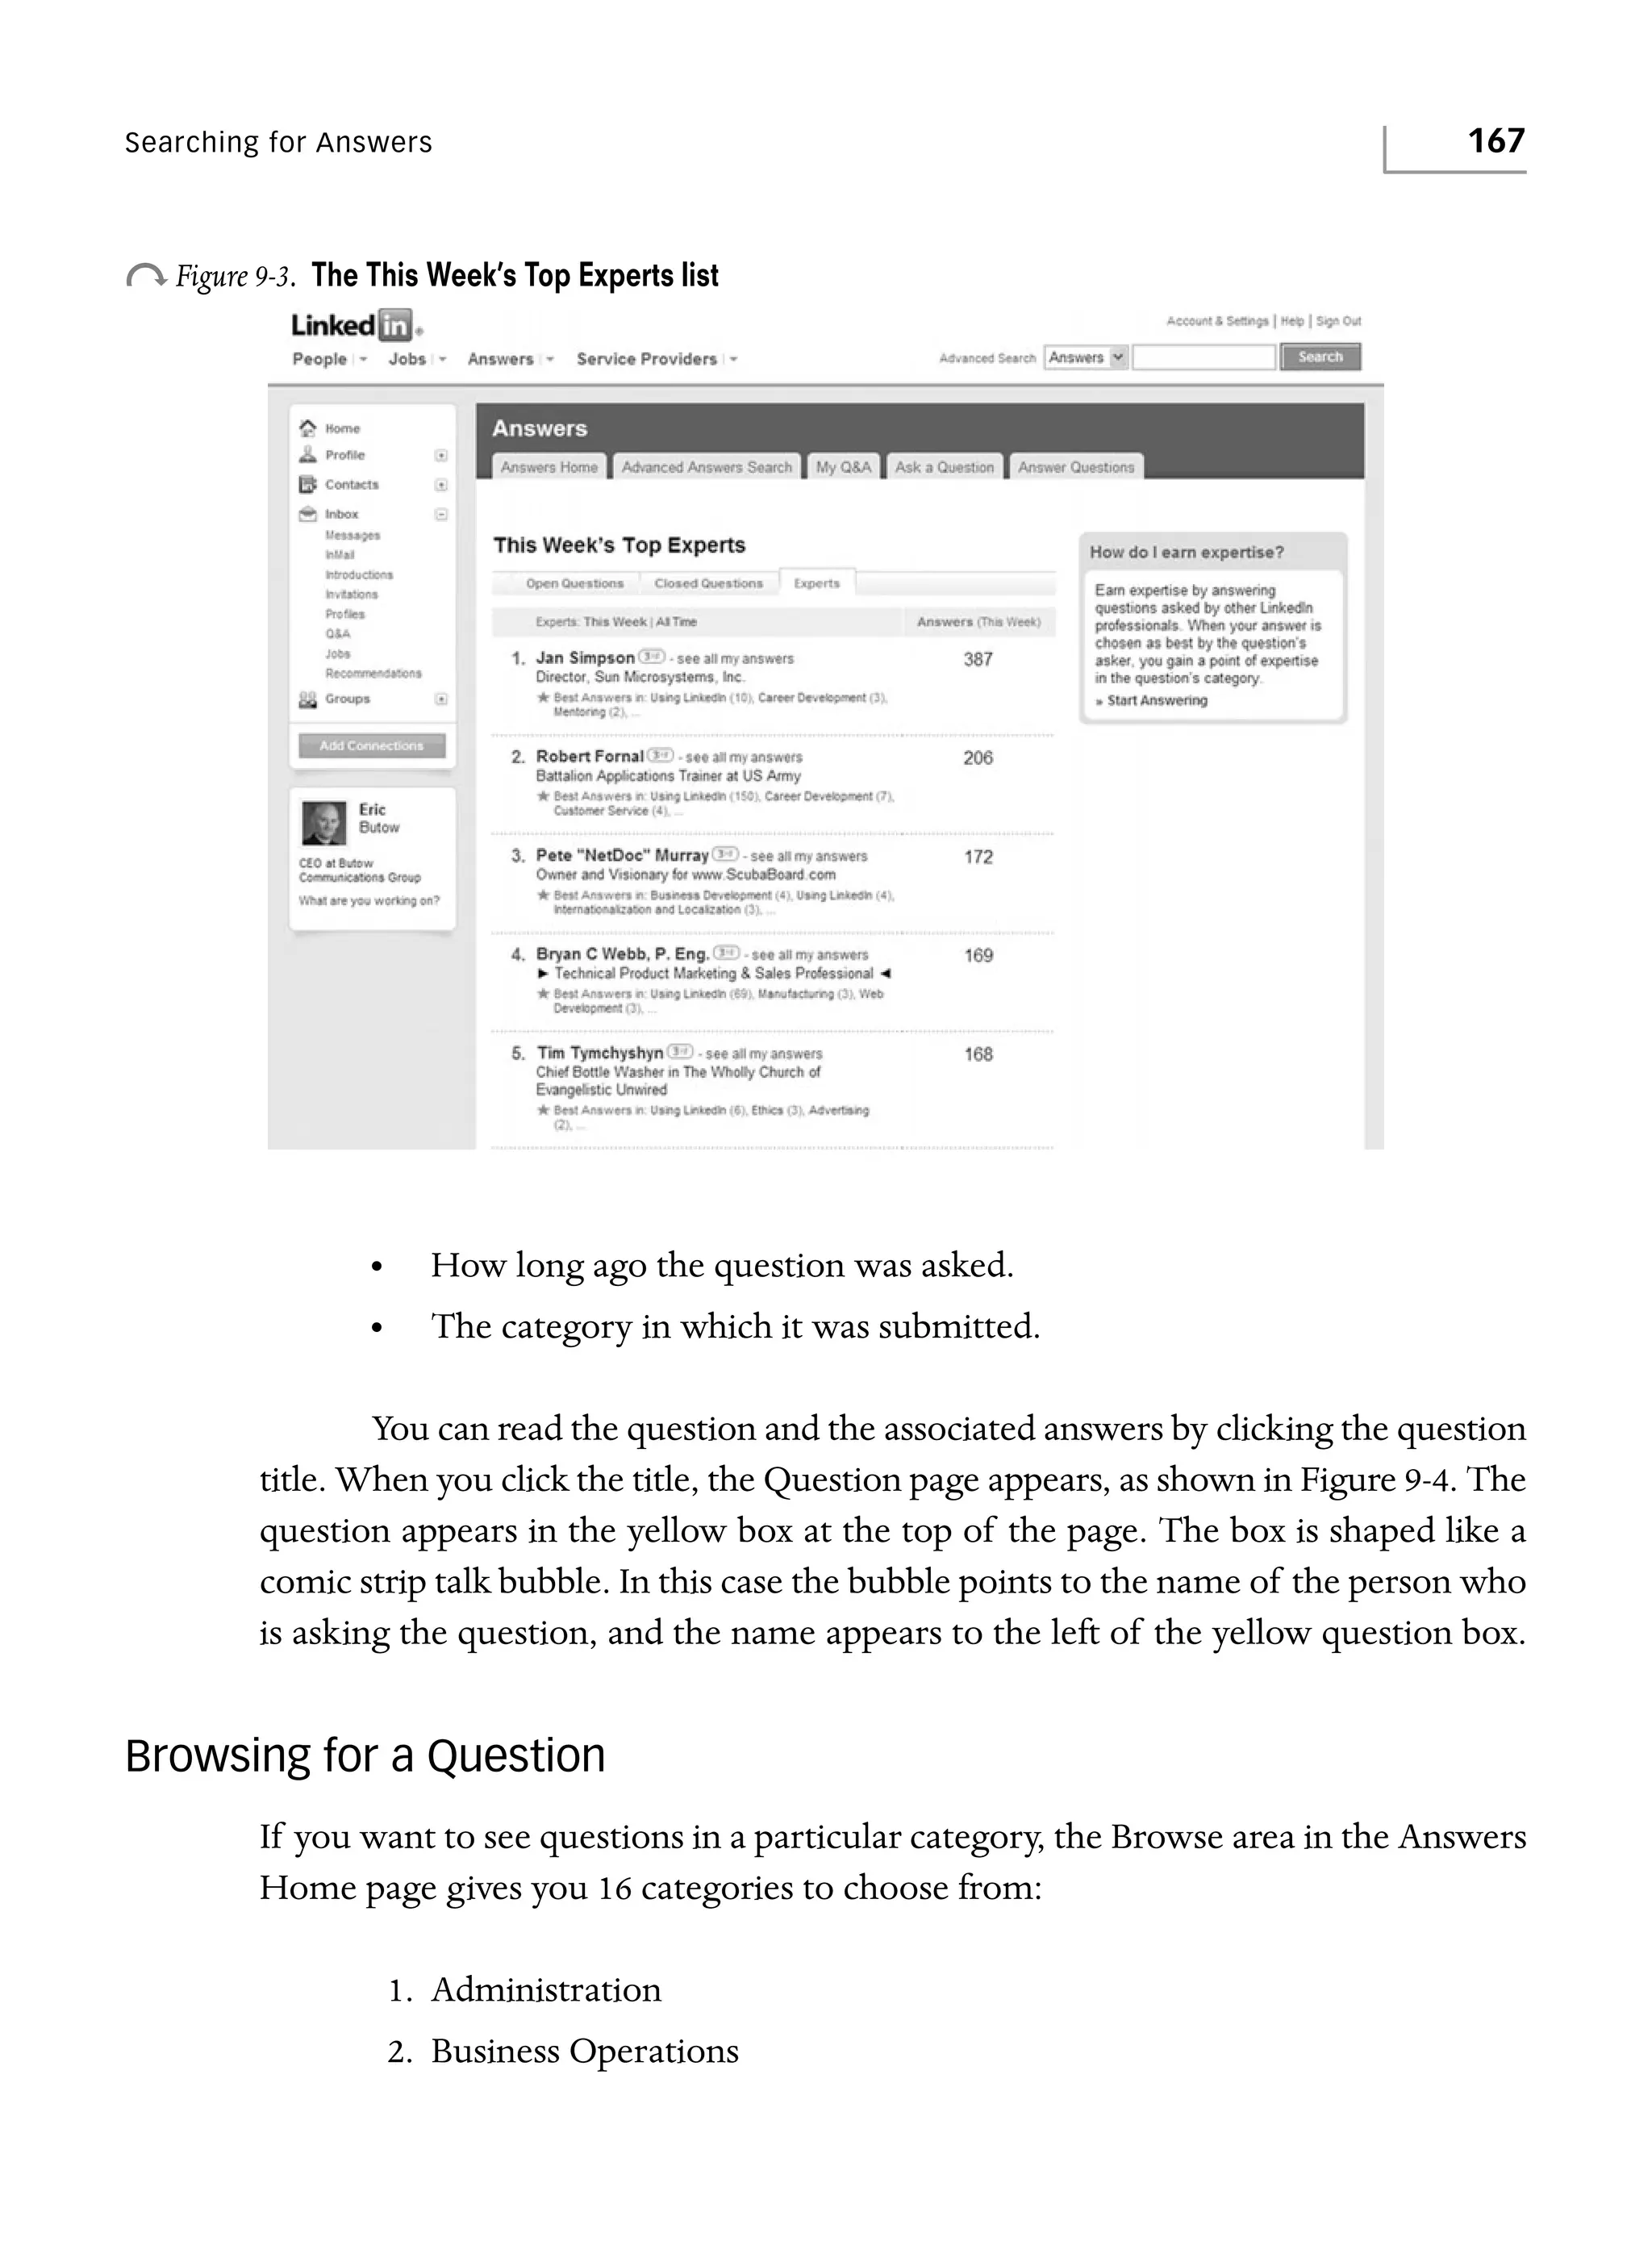
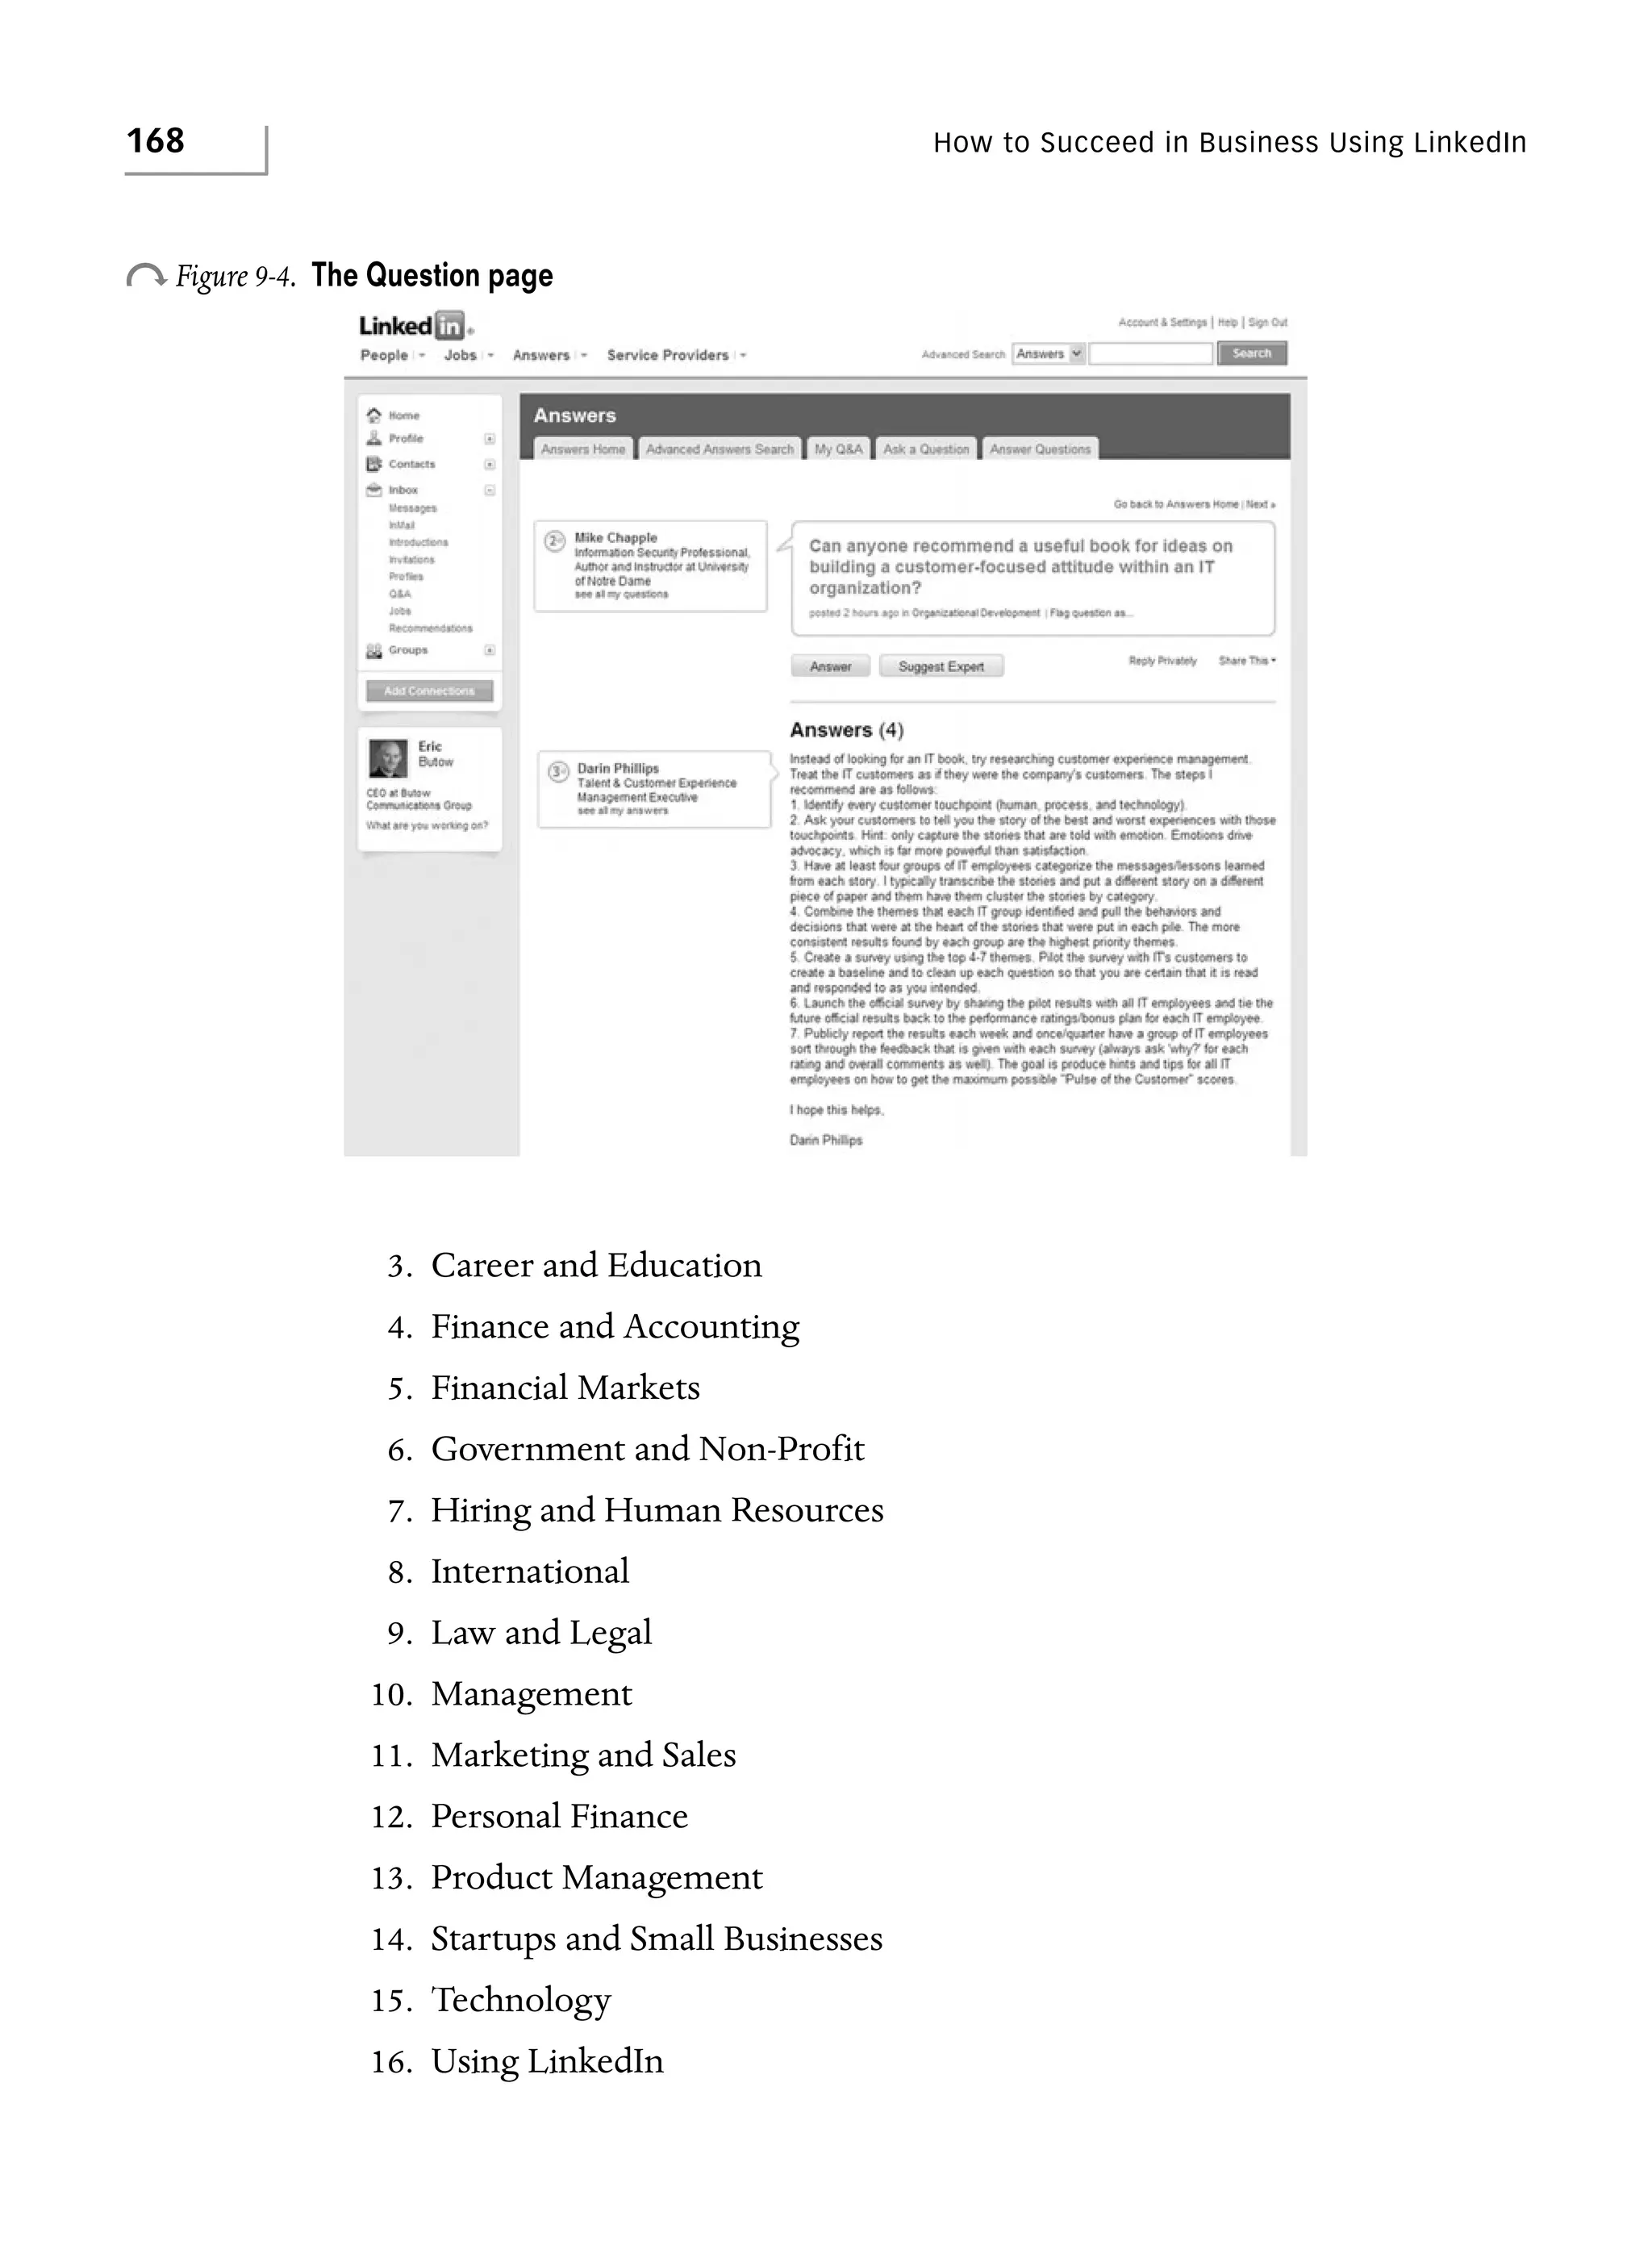
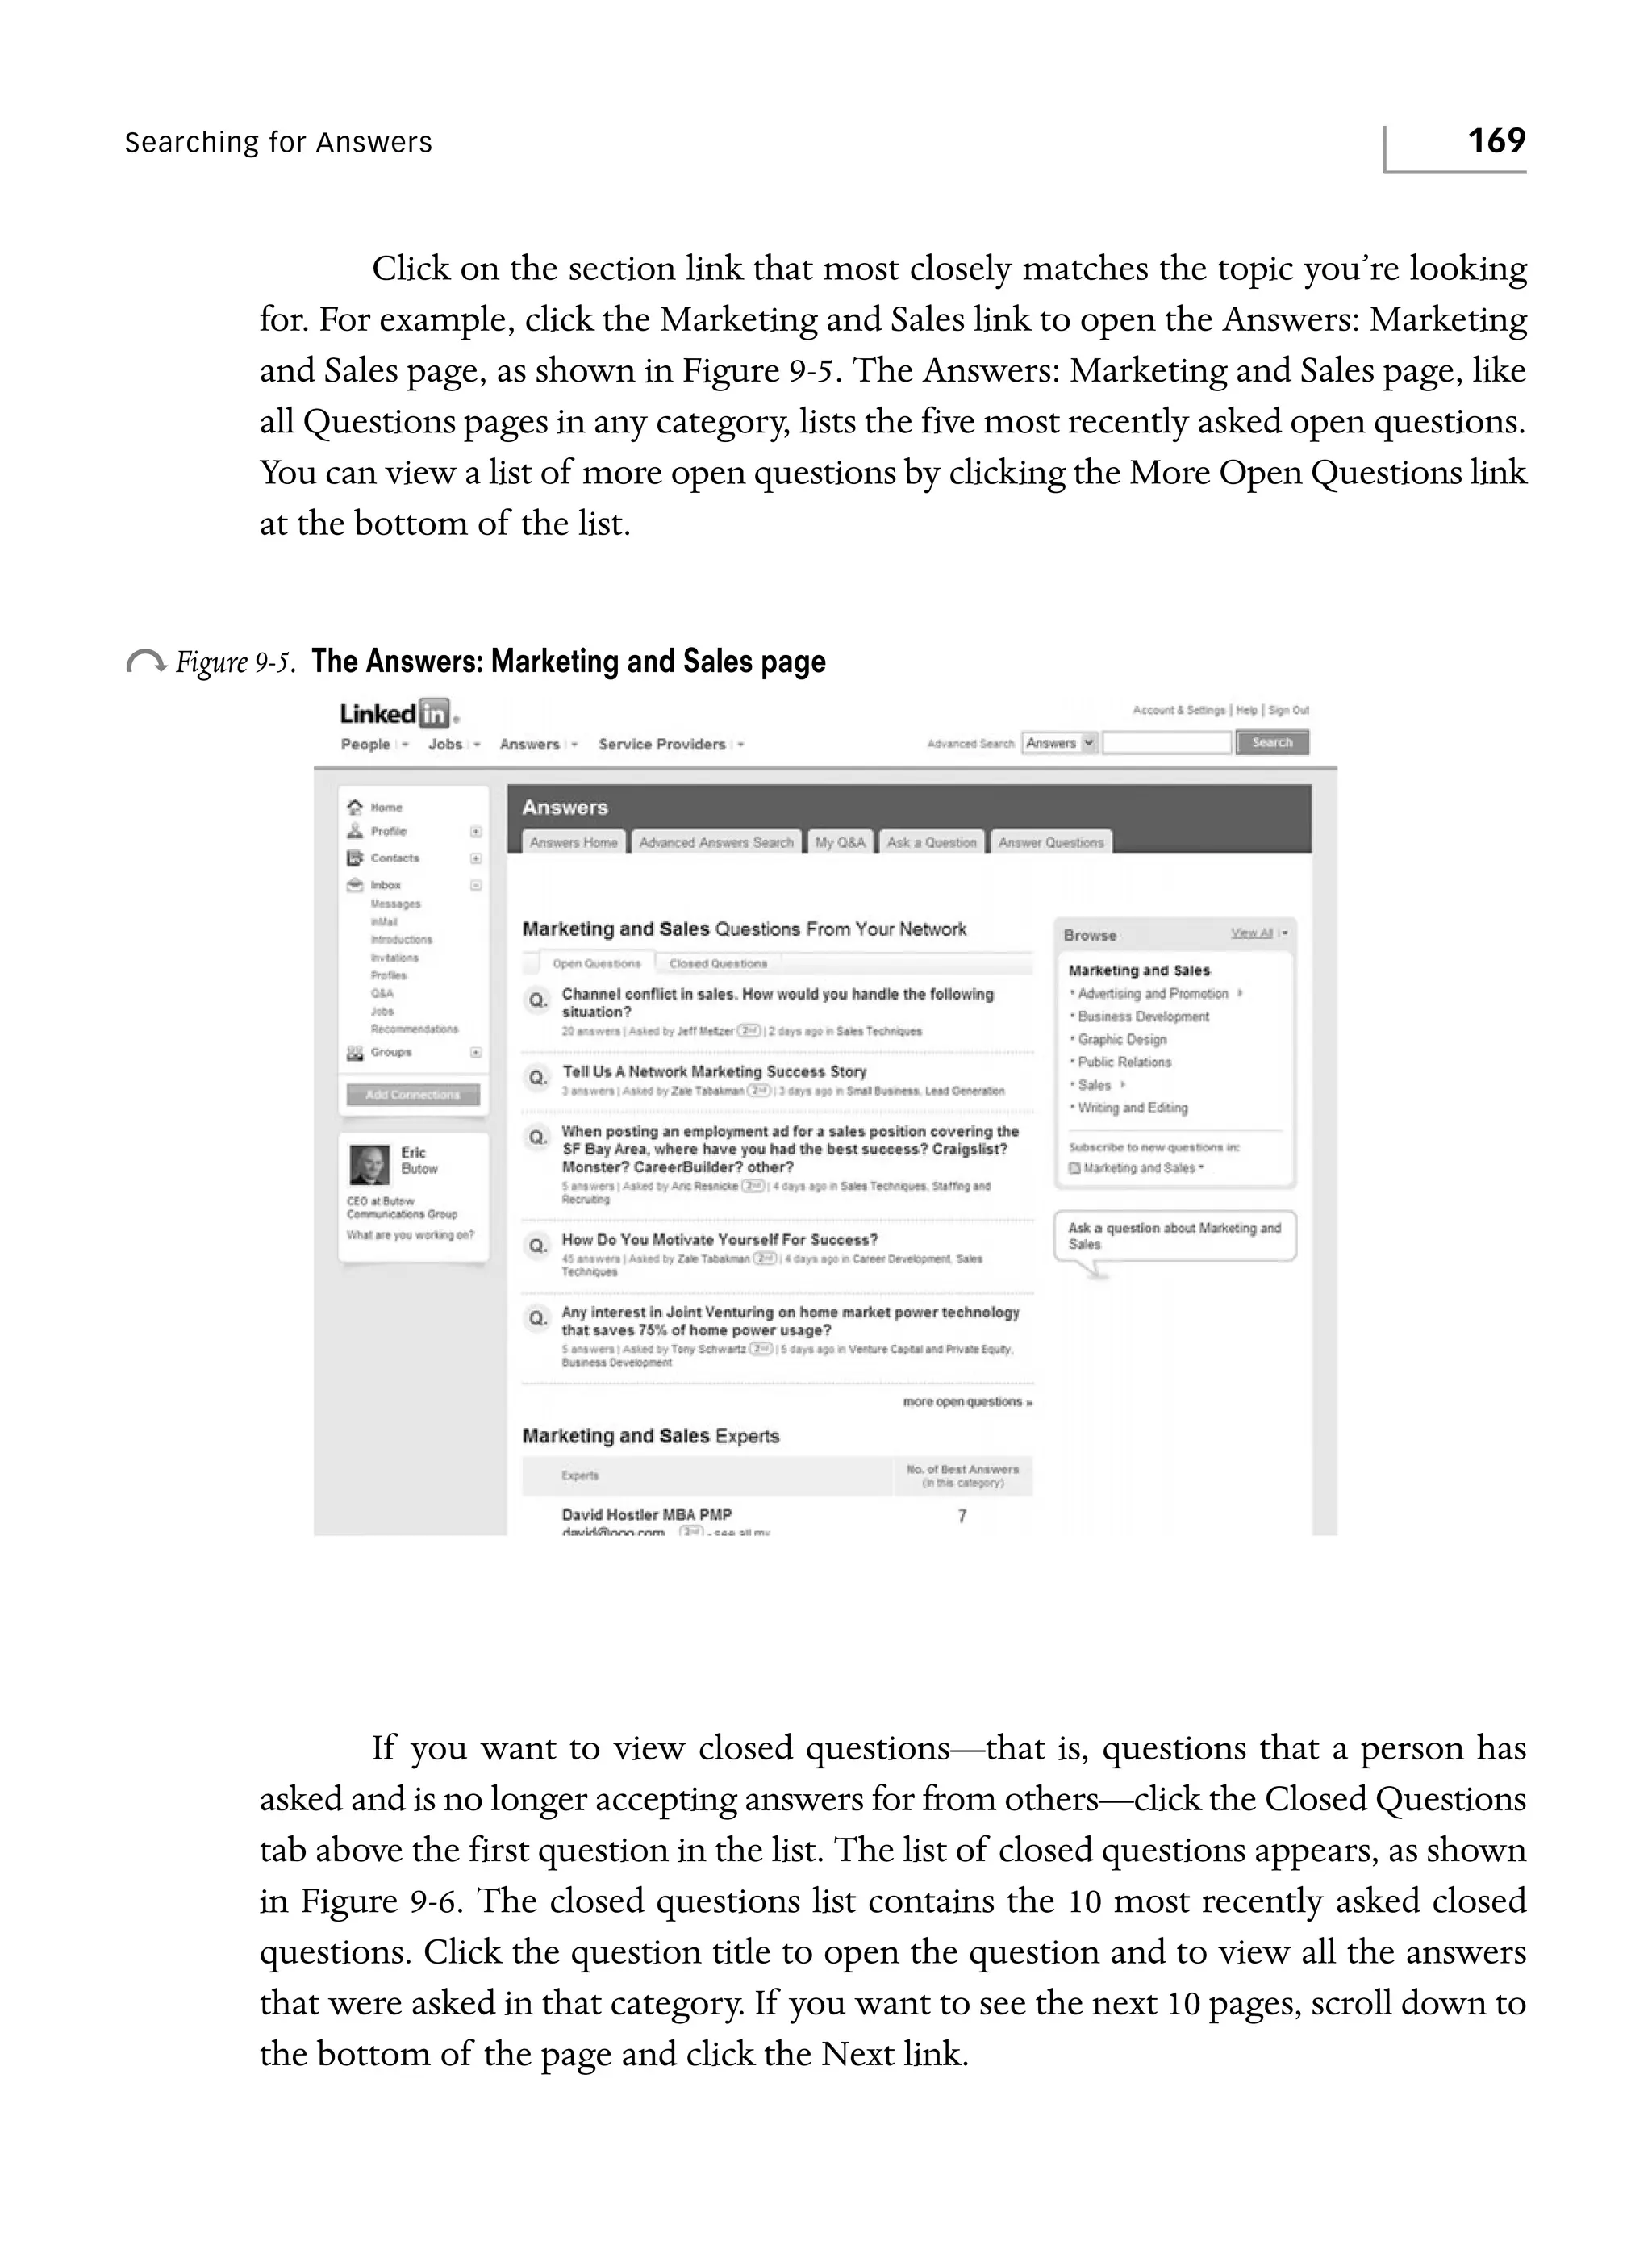
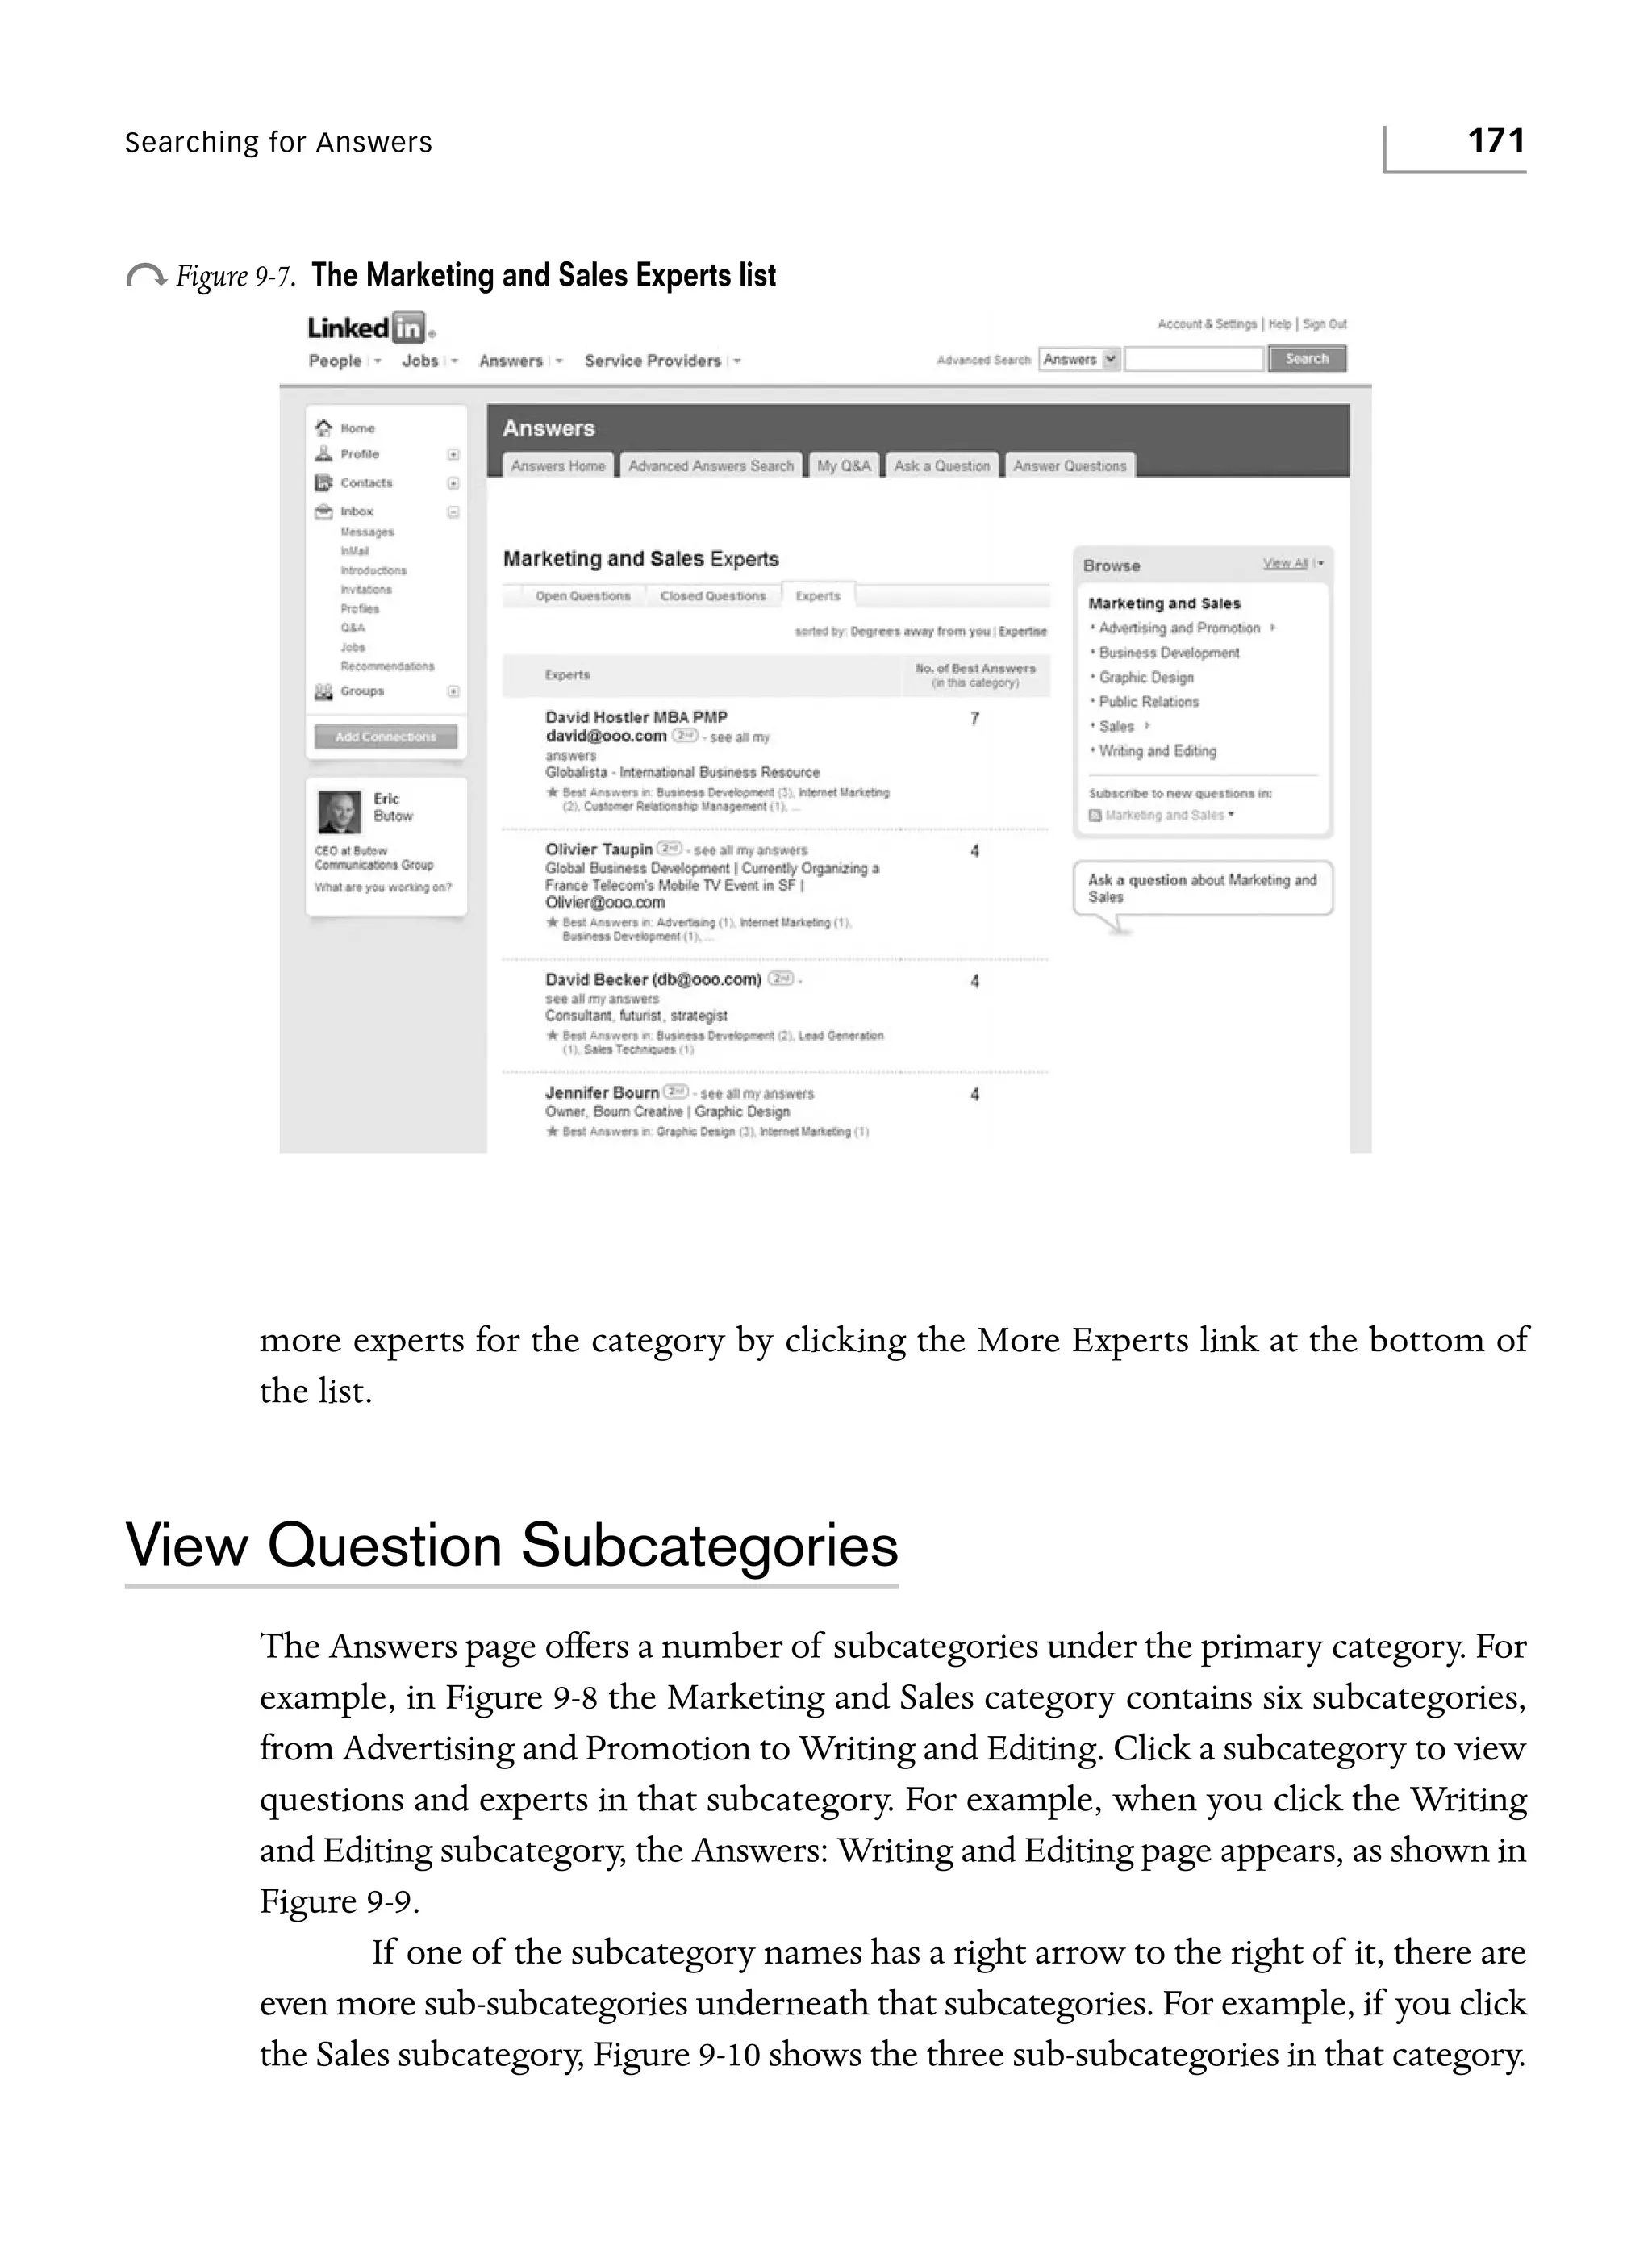
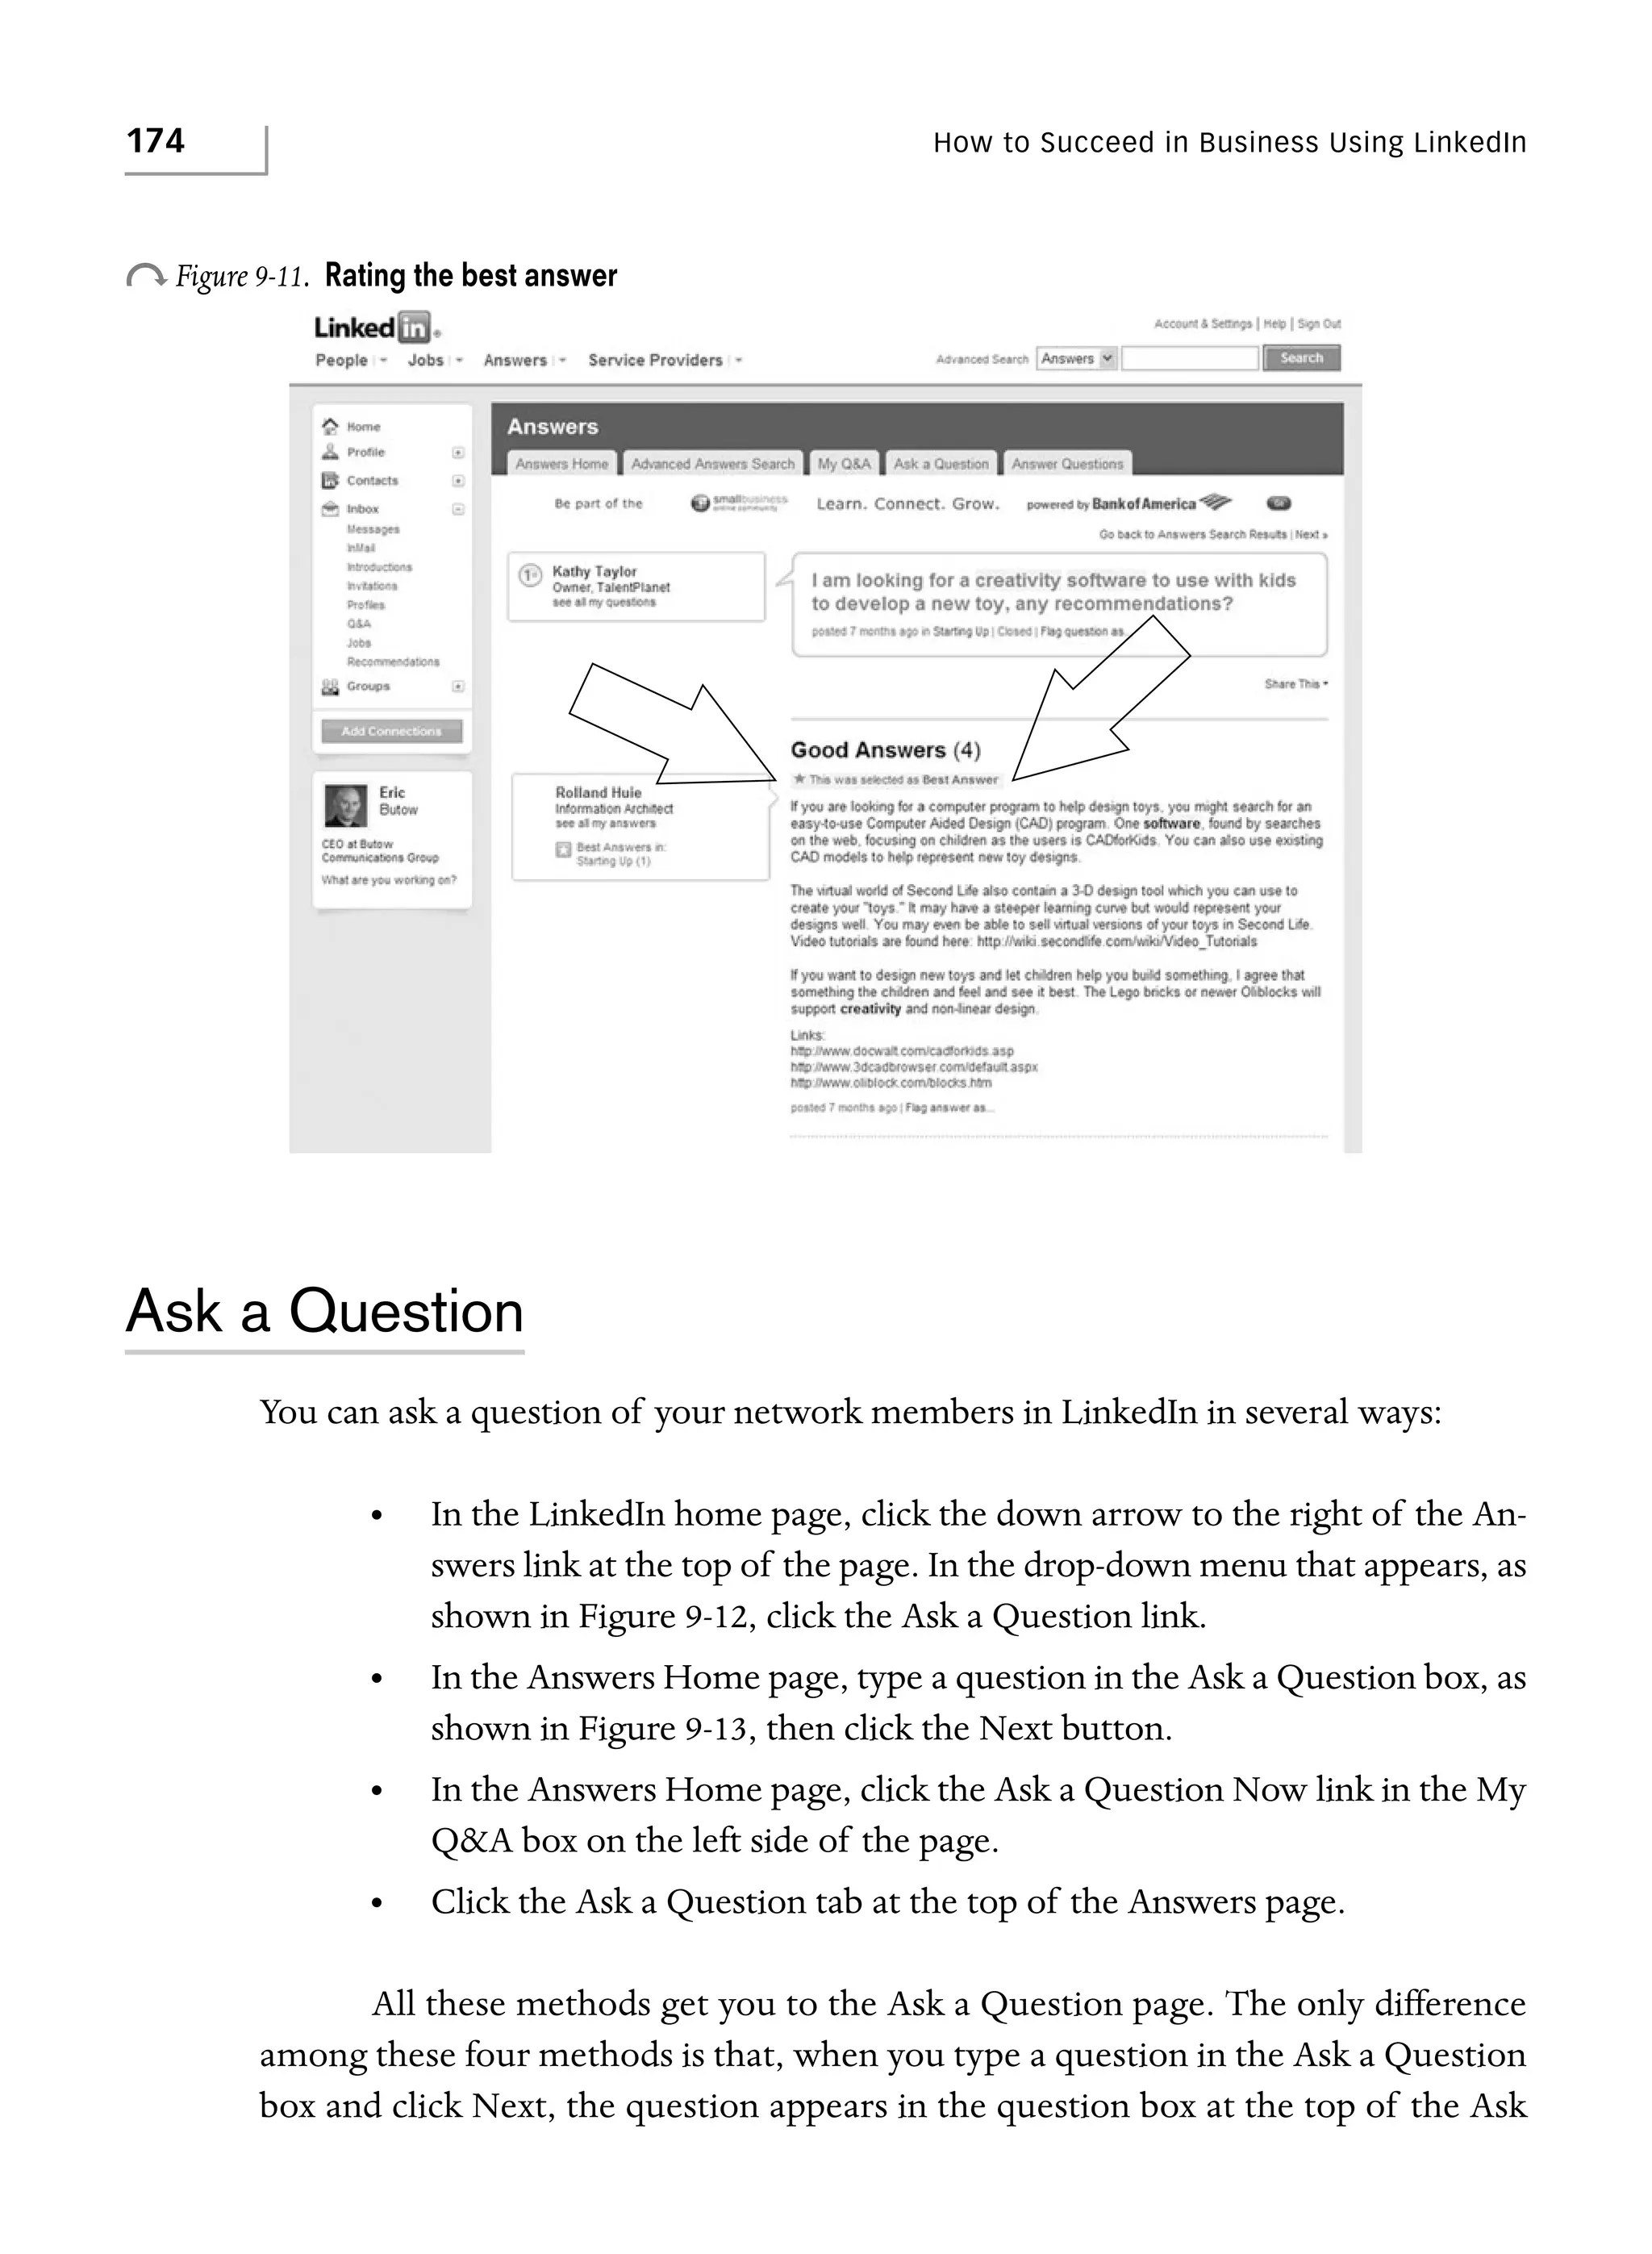
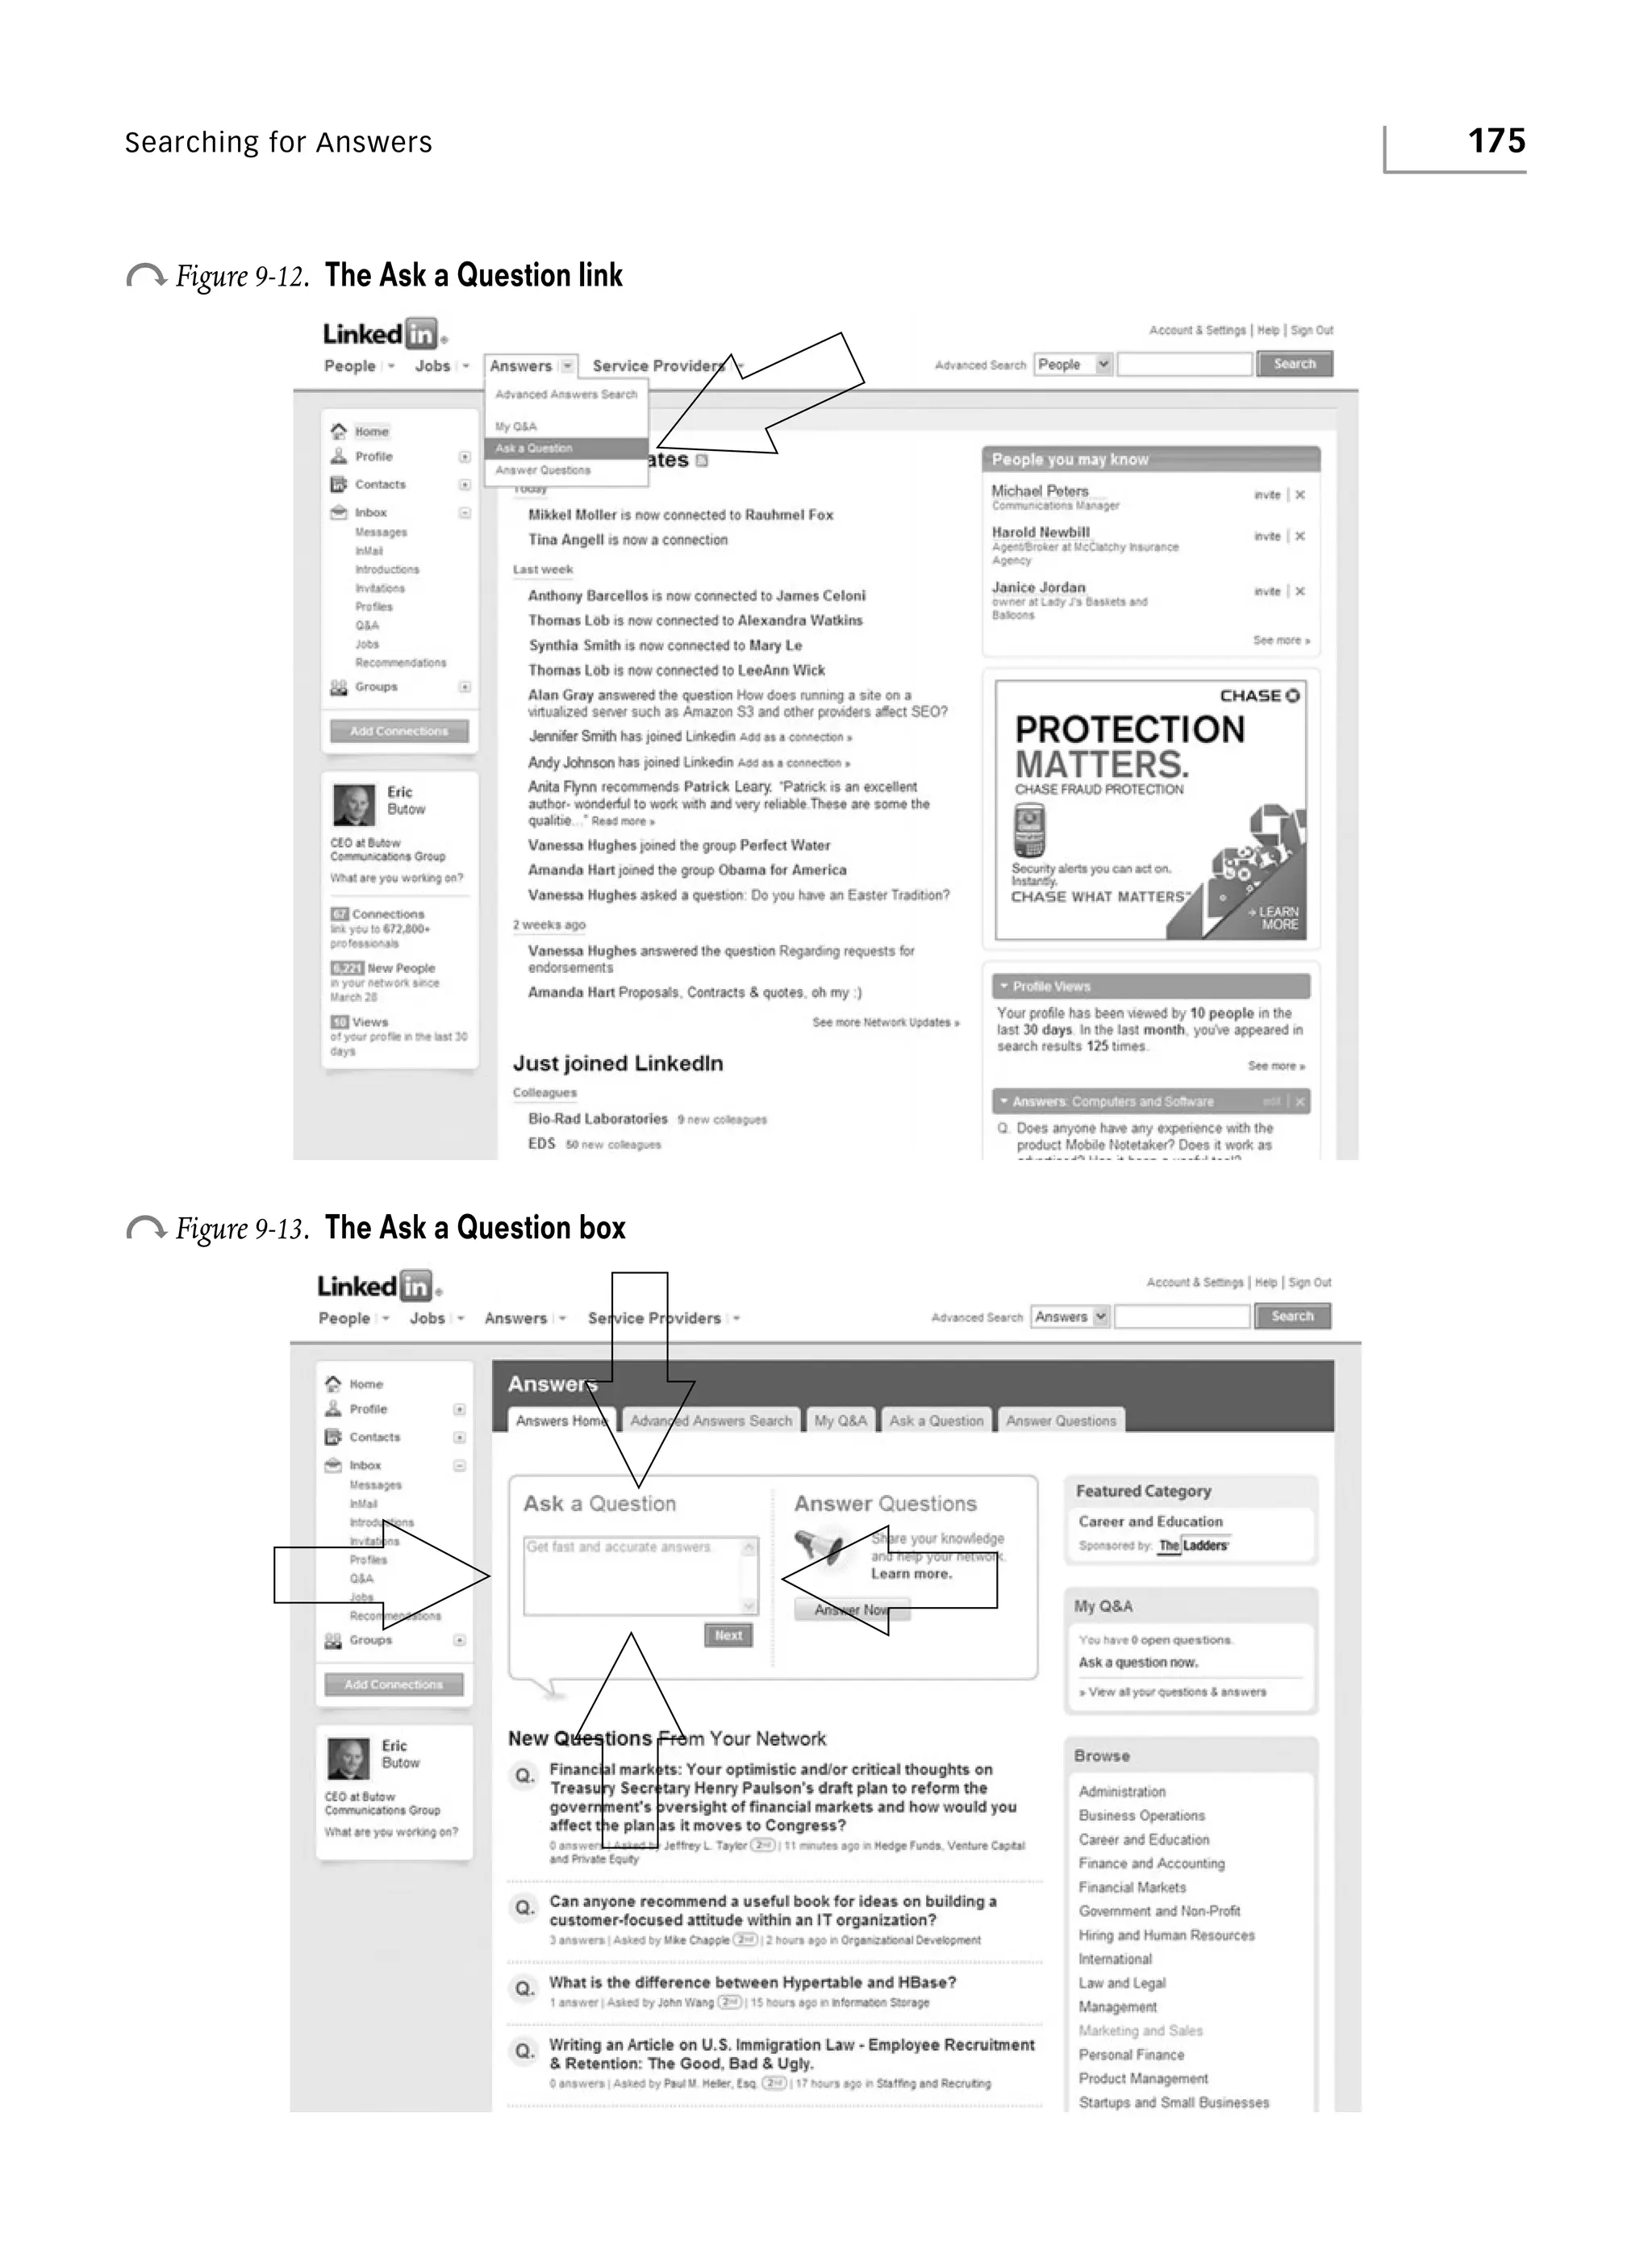
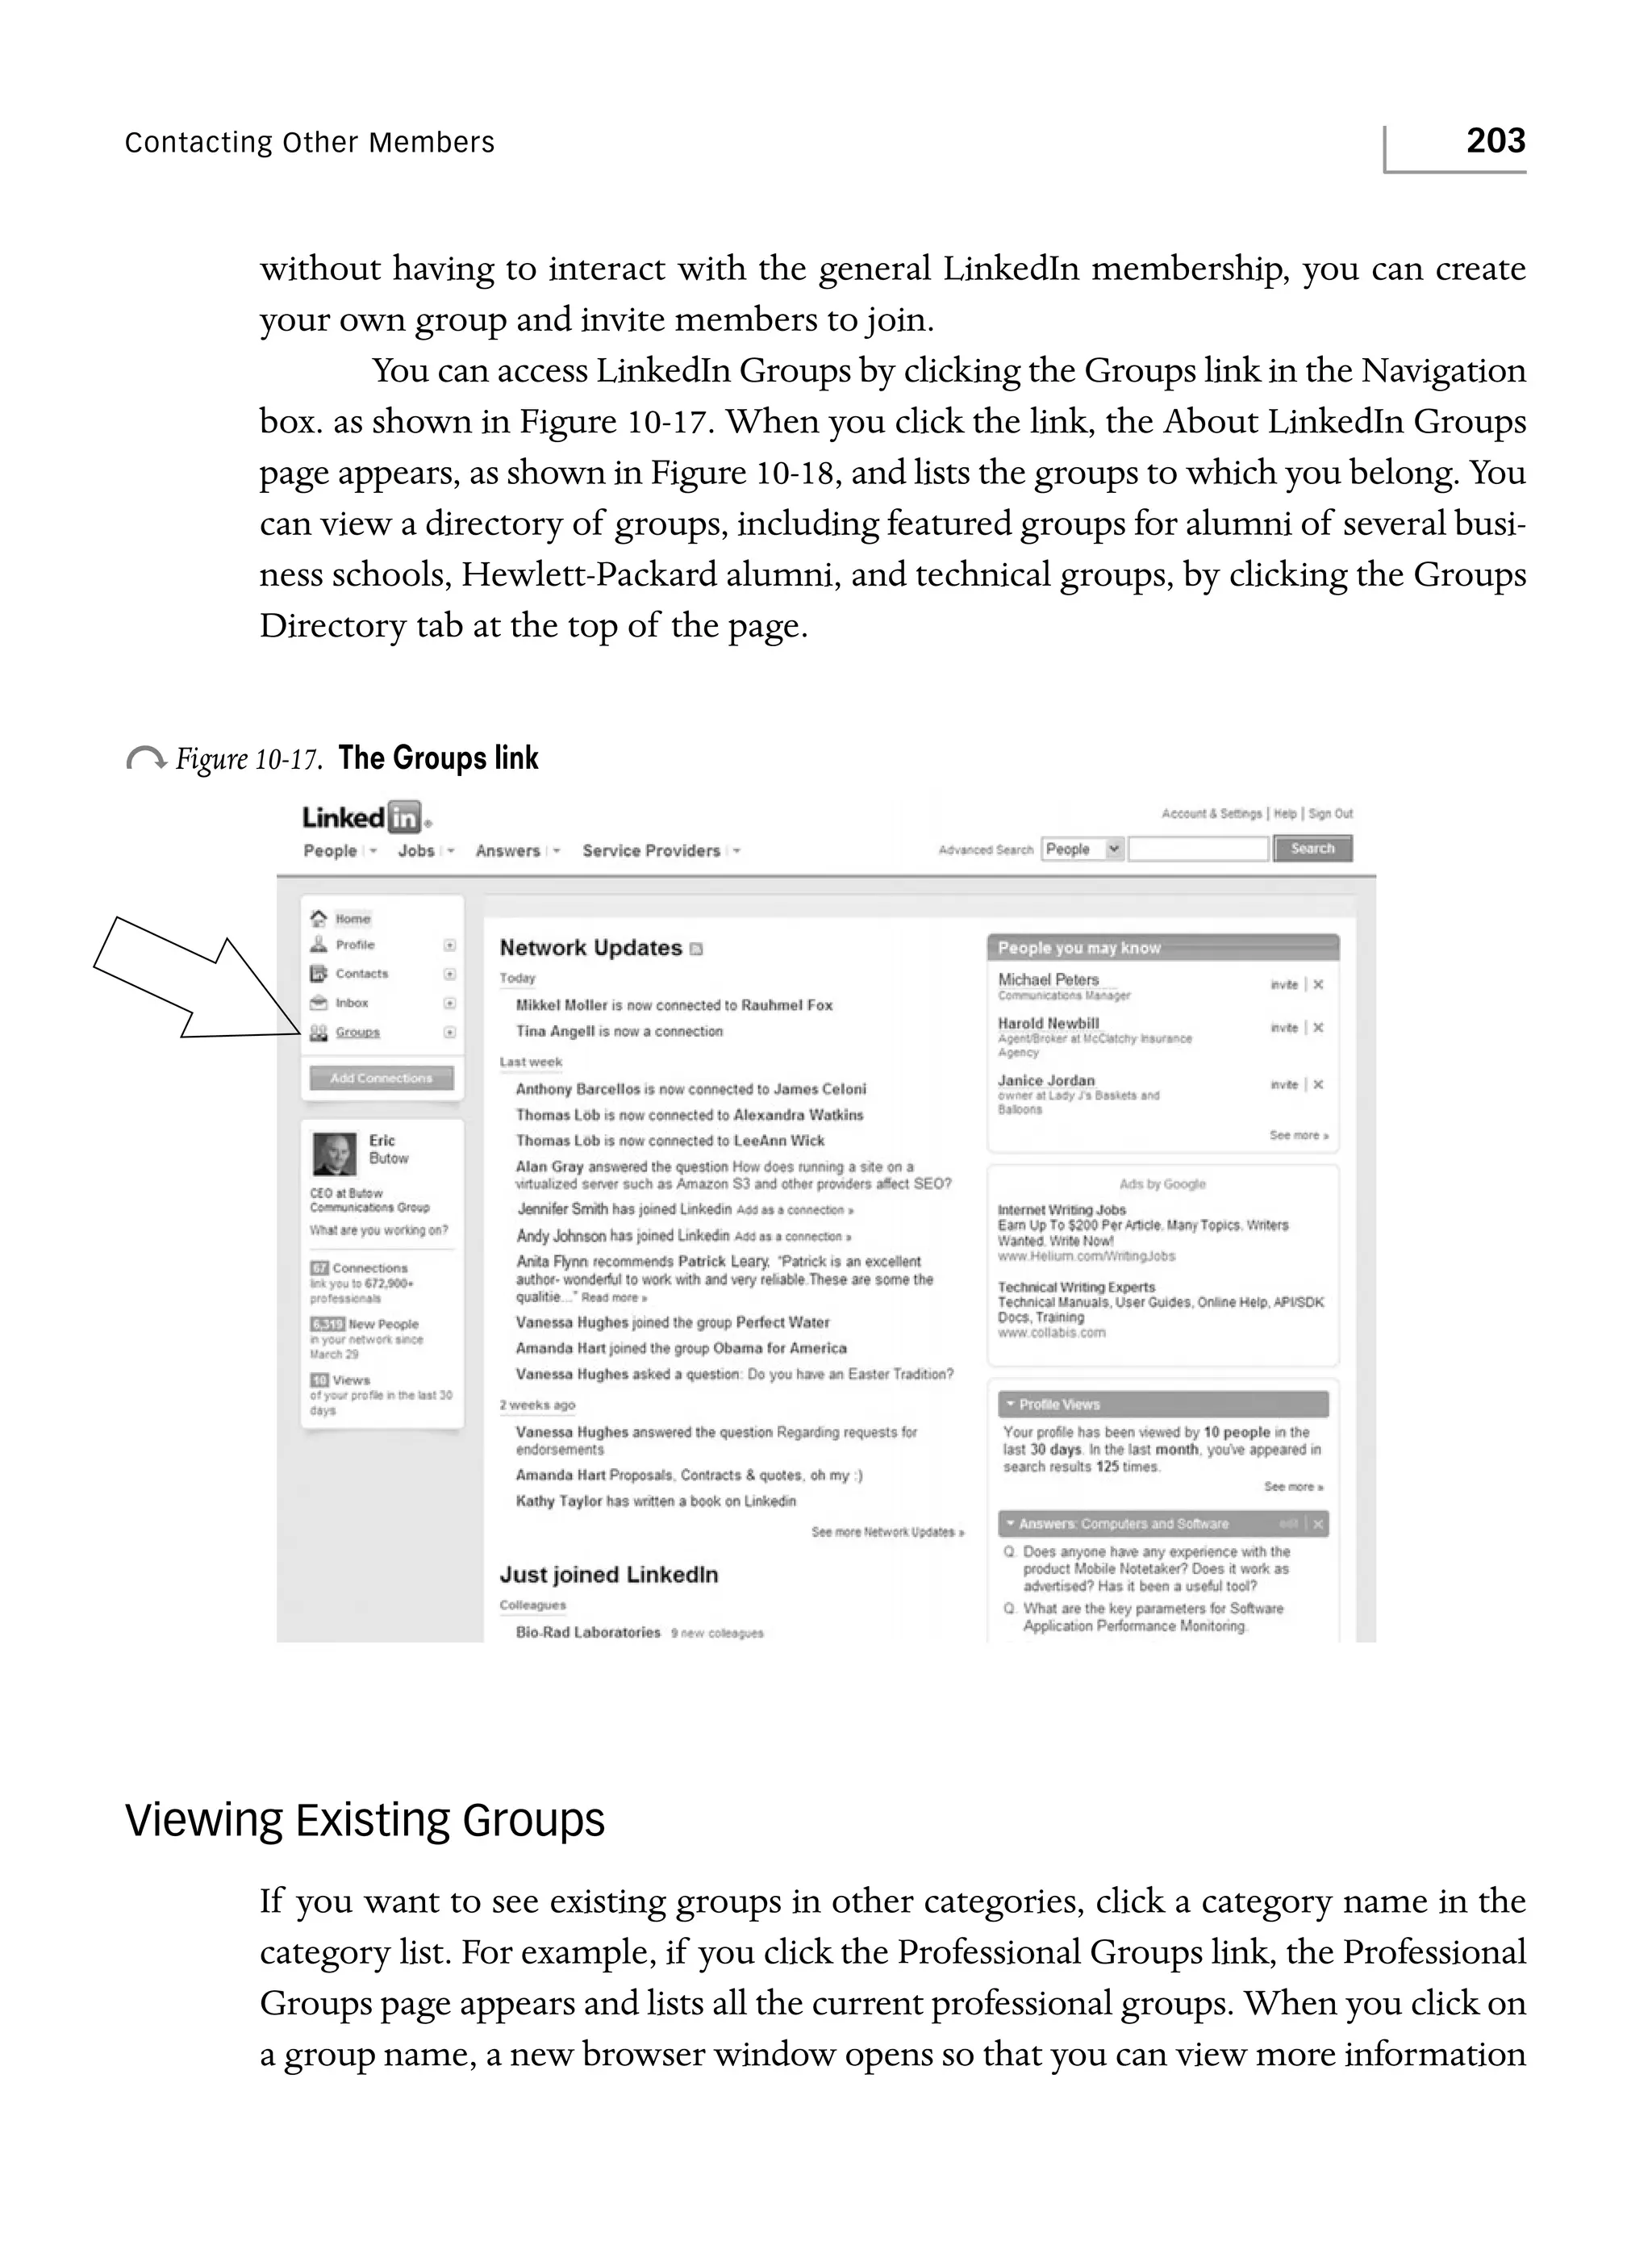
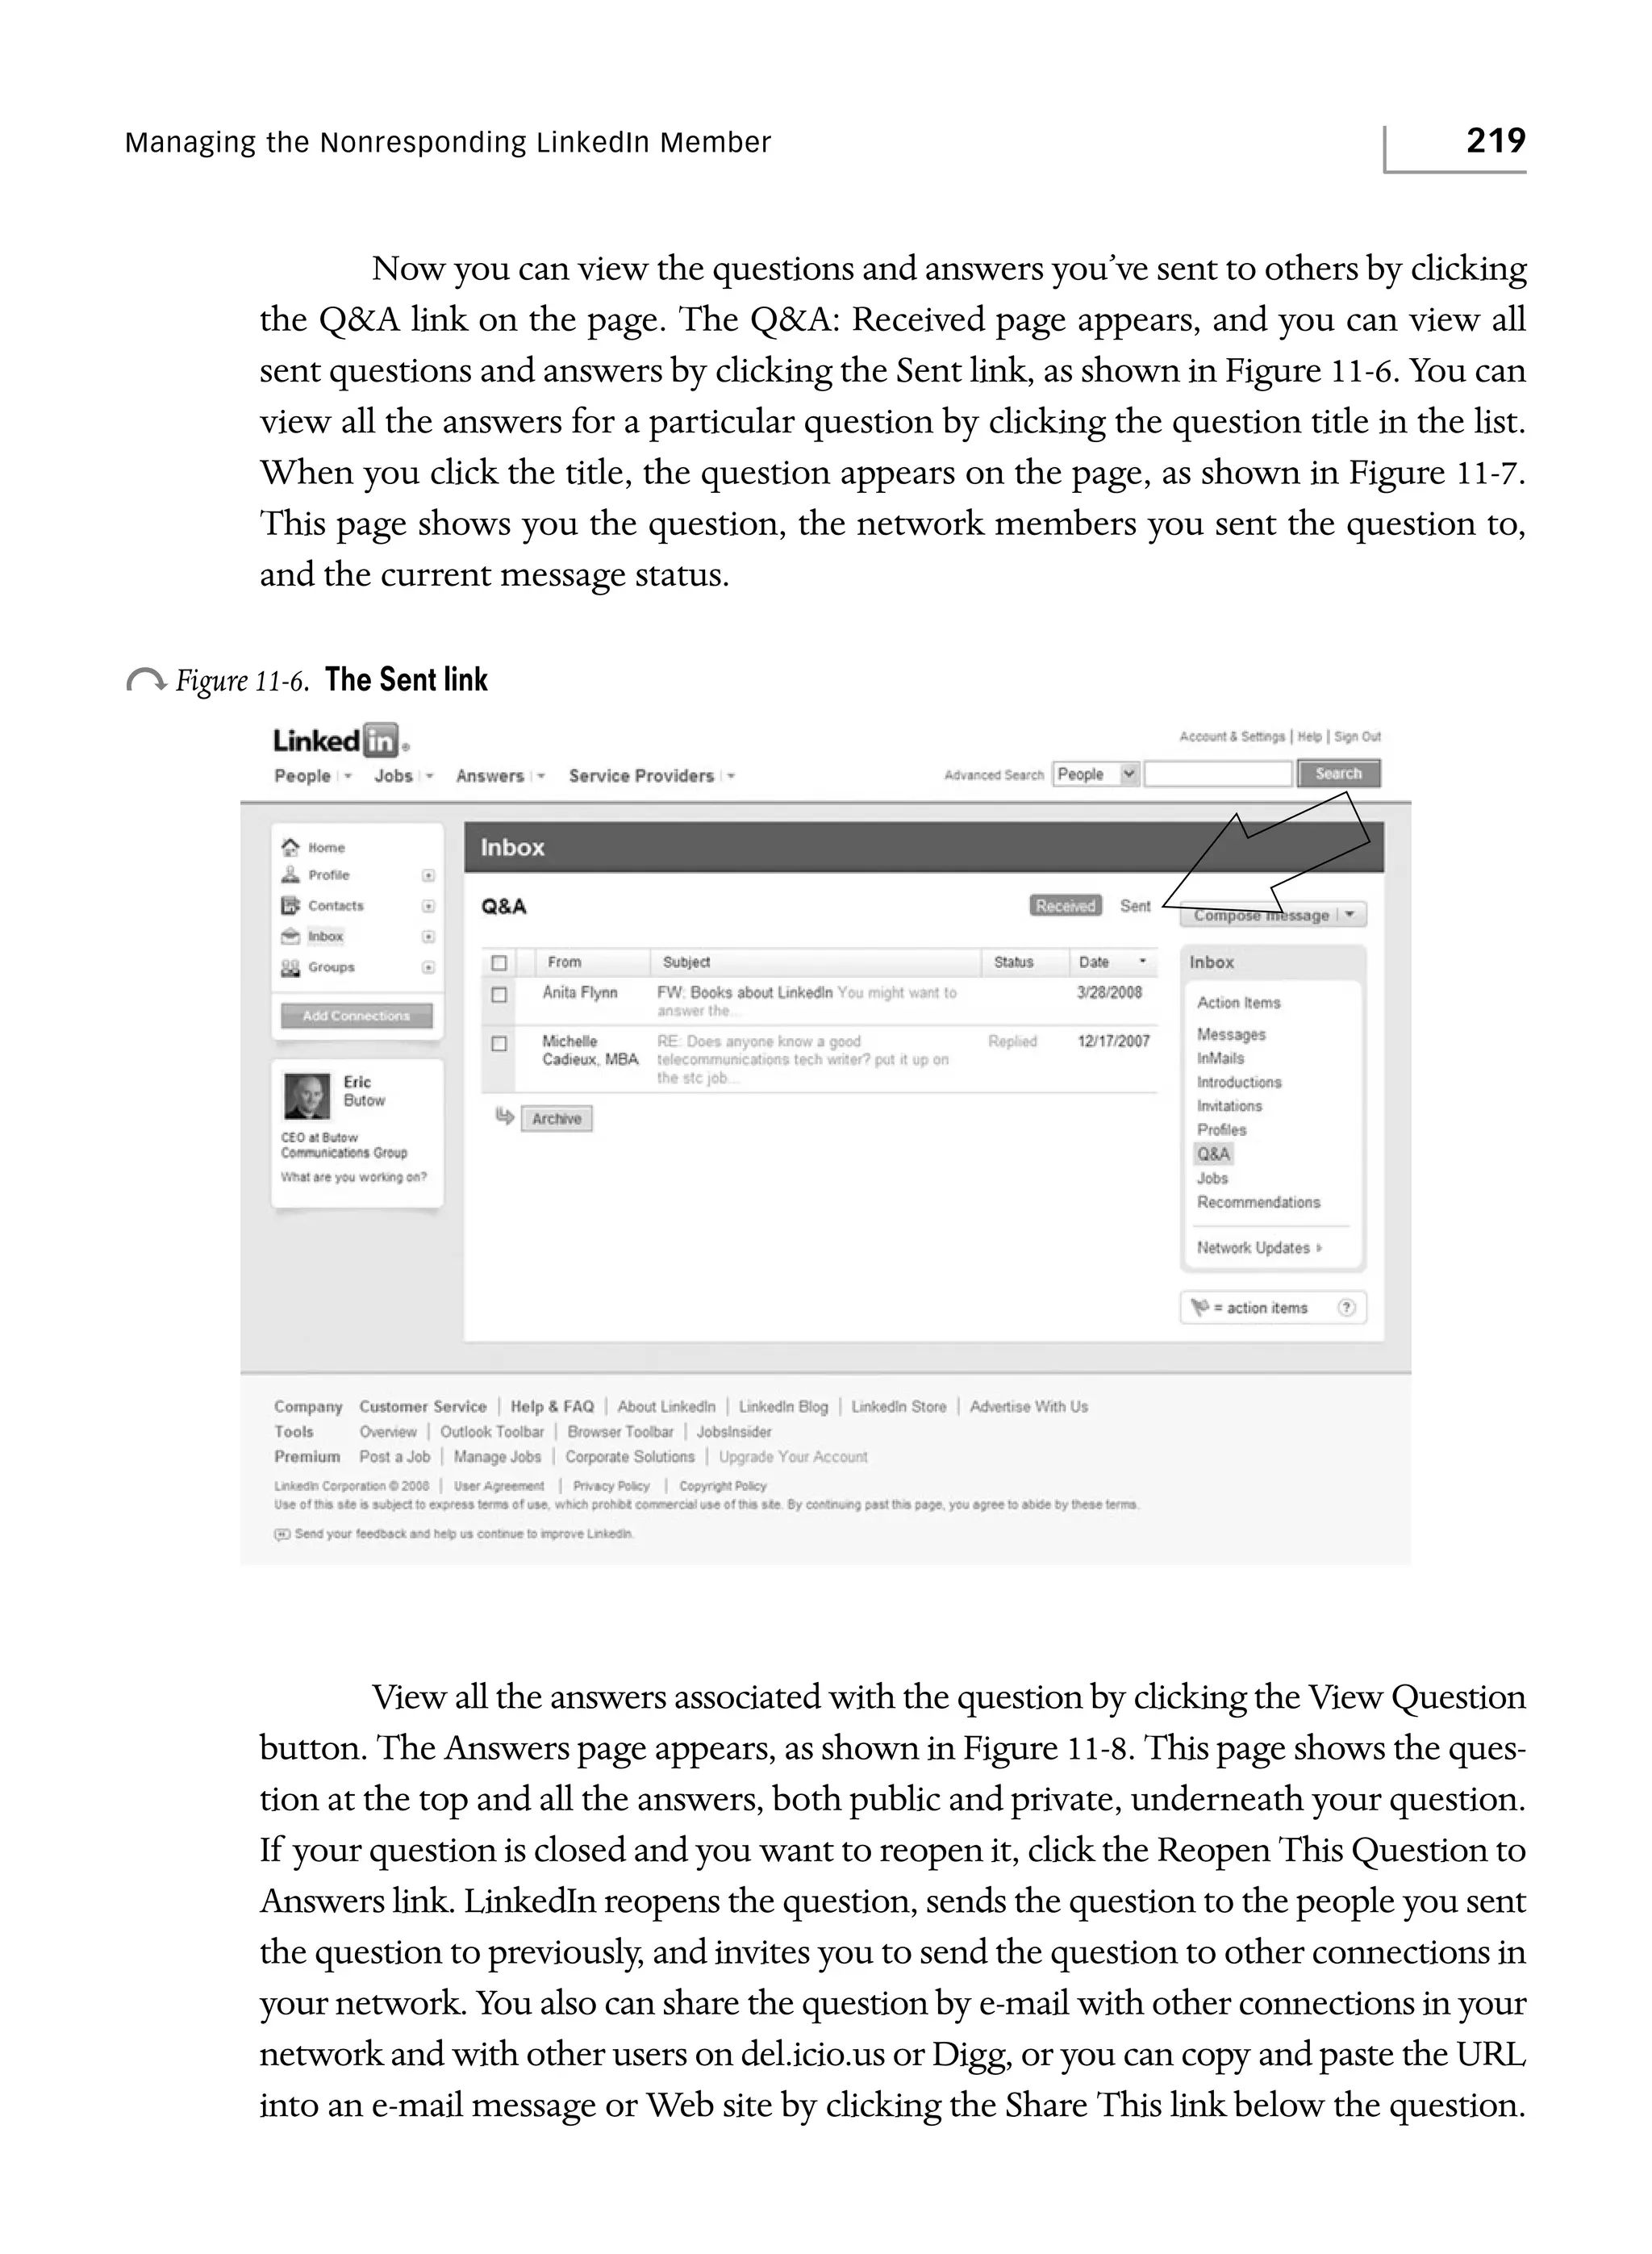
Downloaded 10 times


![Managing the Nonresponding LinkedIn Member
221
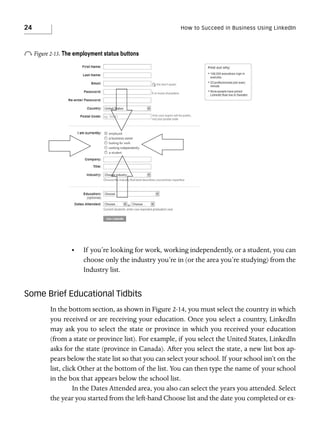
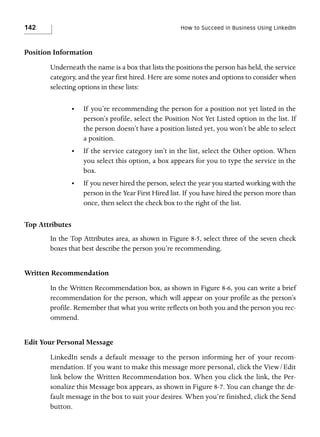
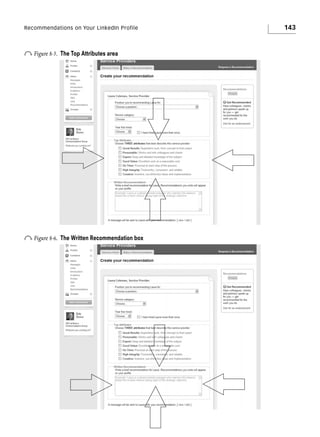
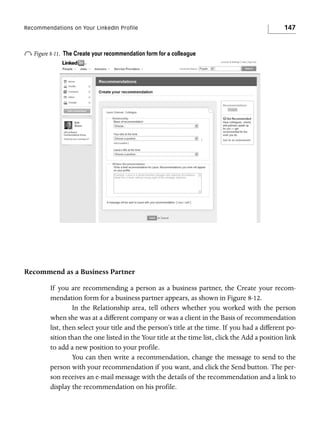
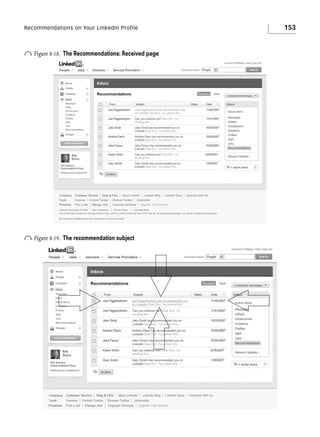
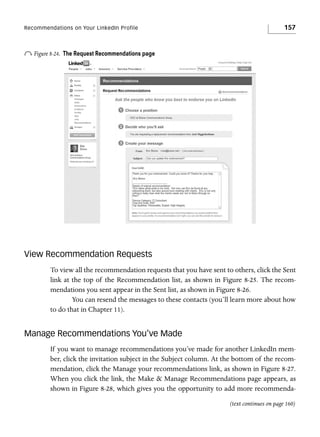
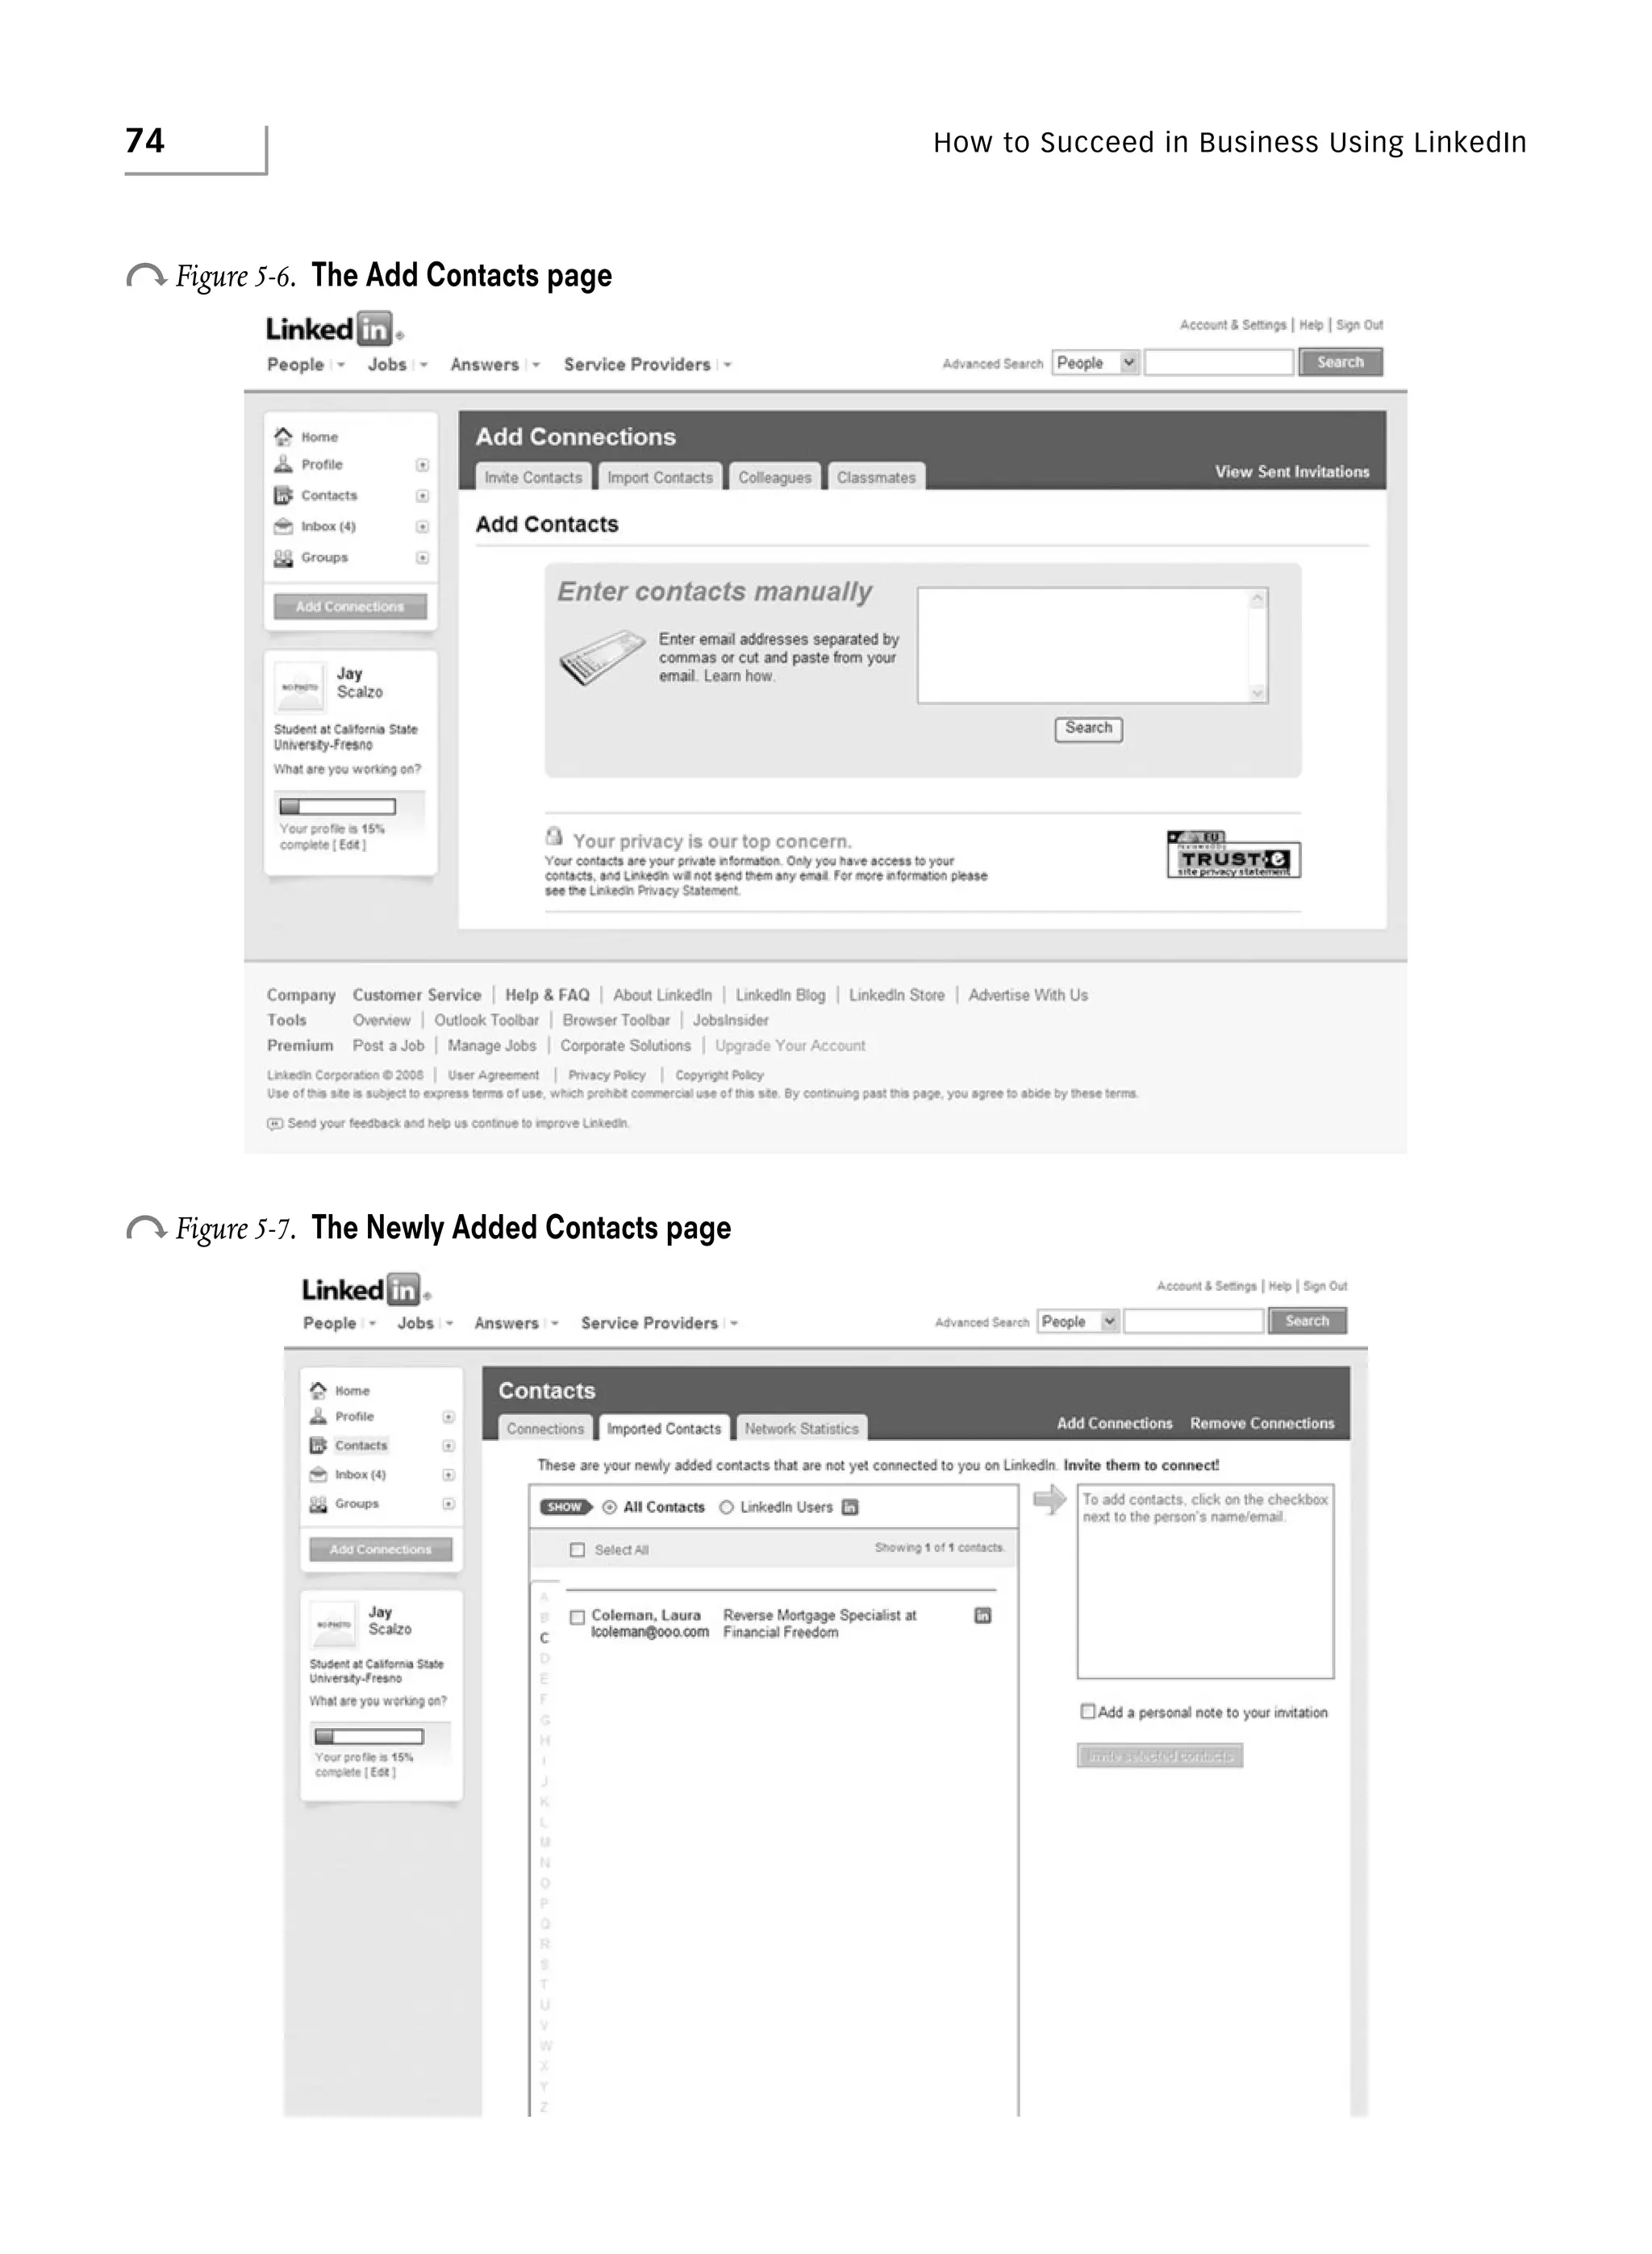
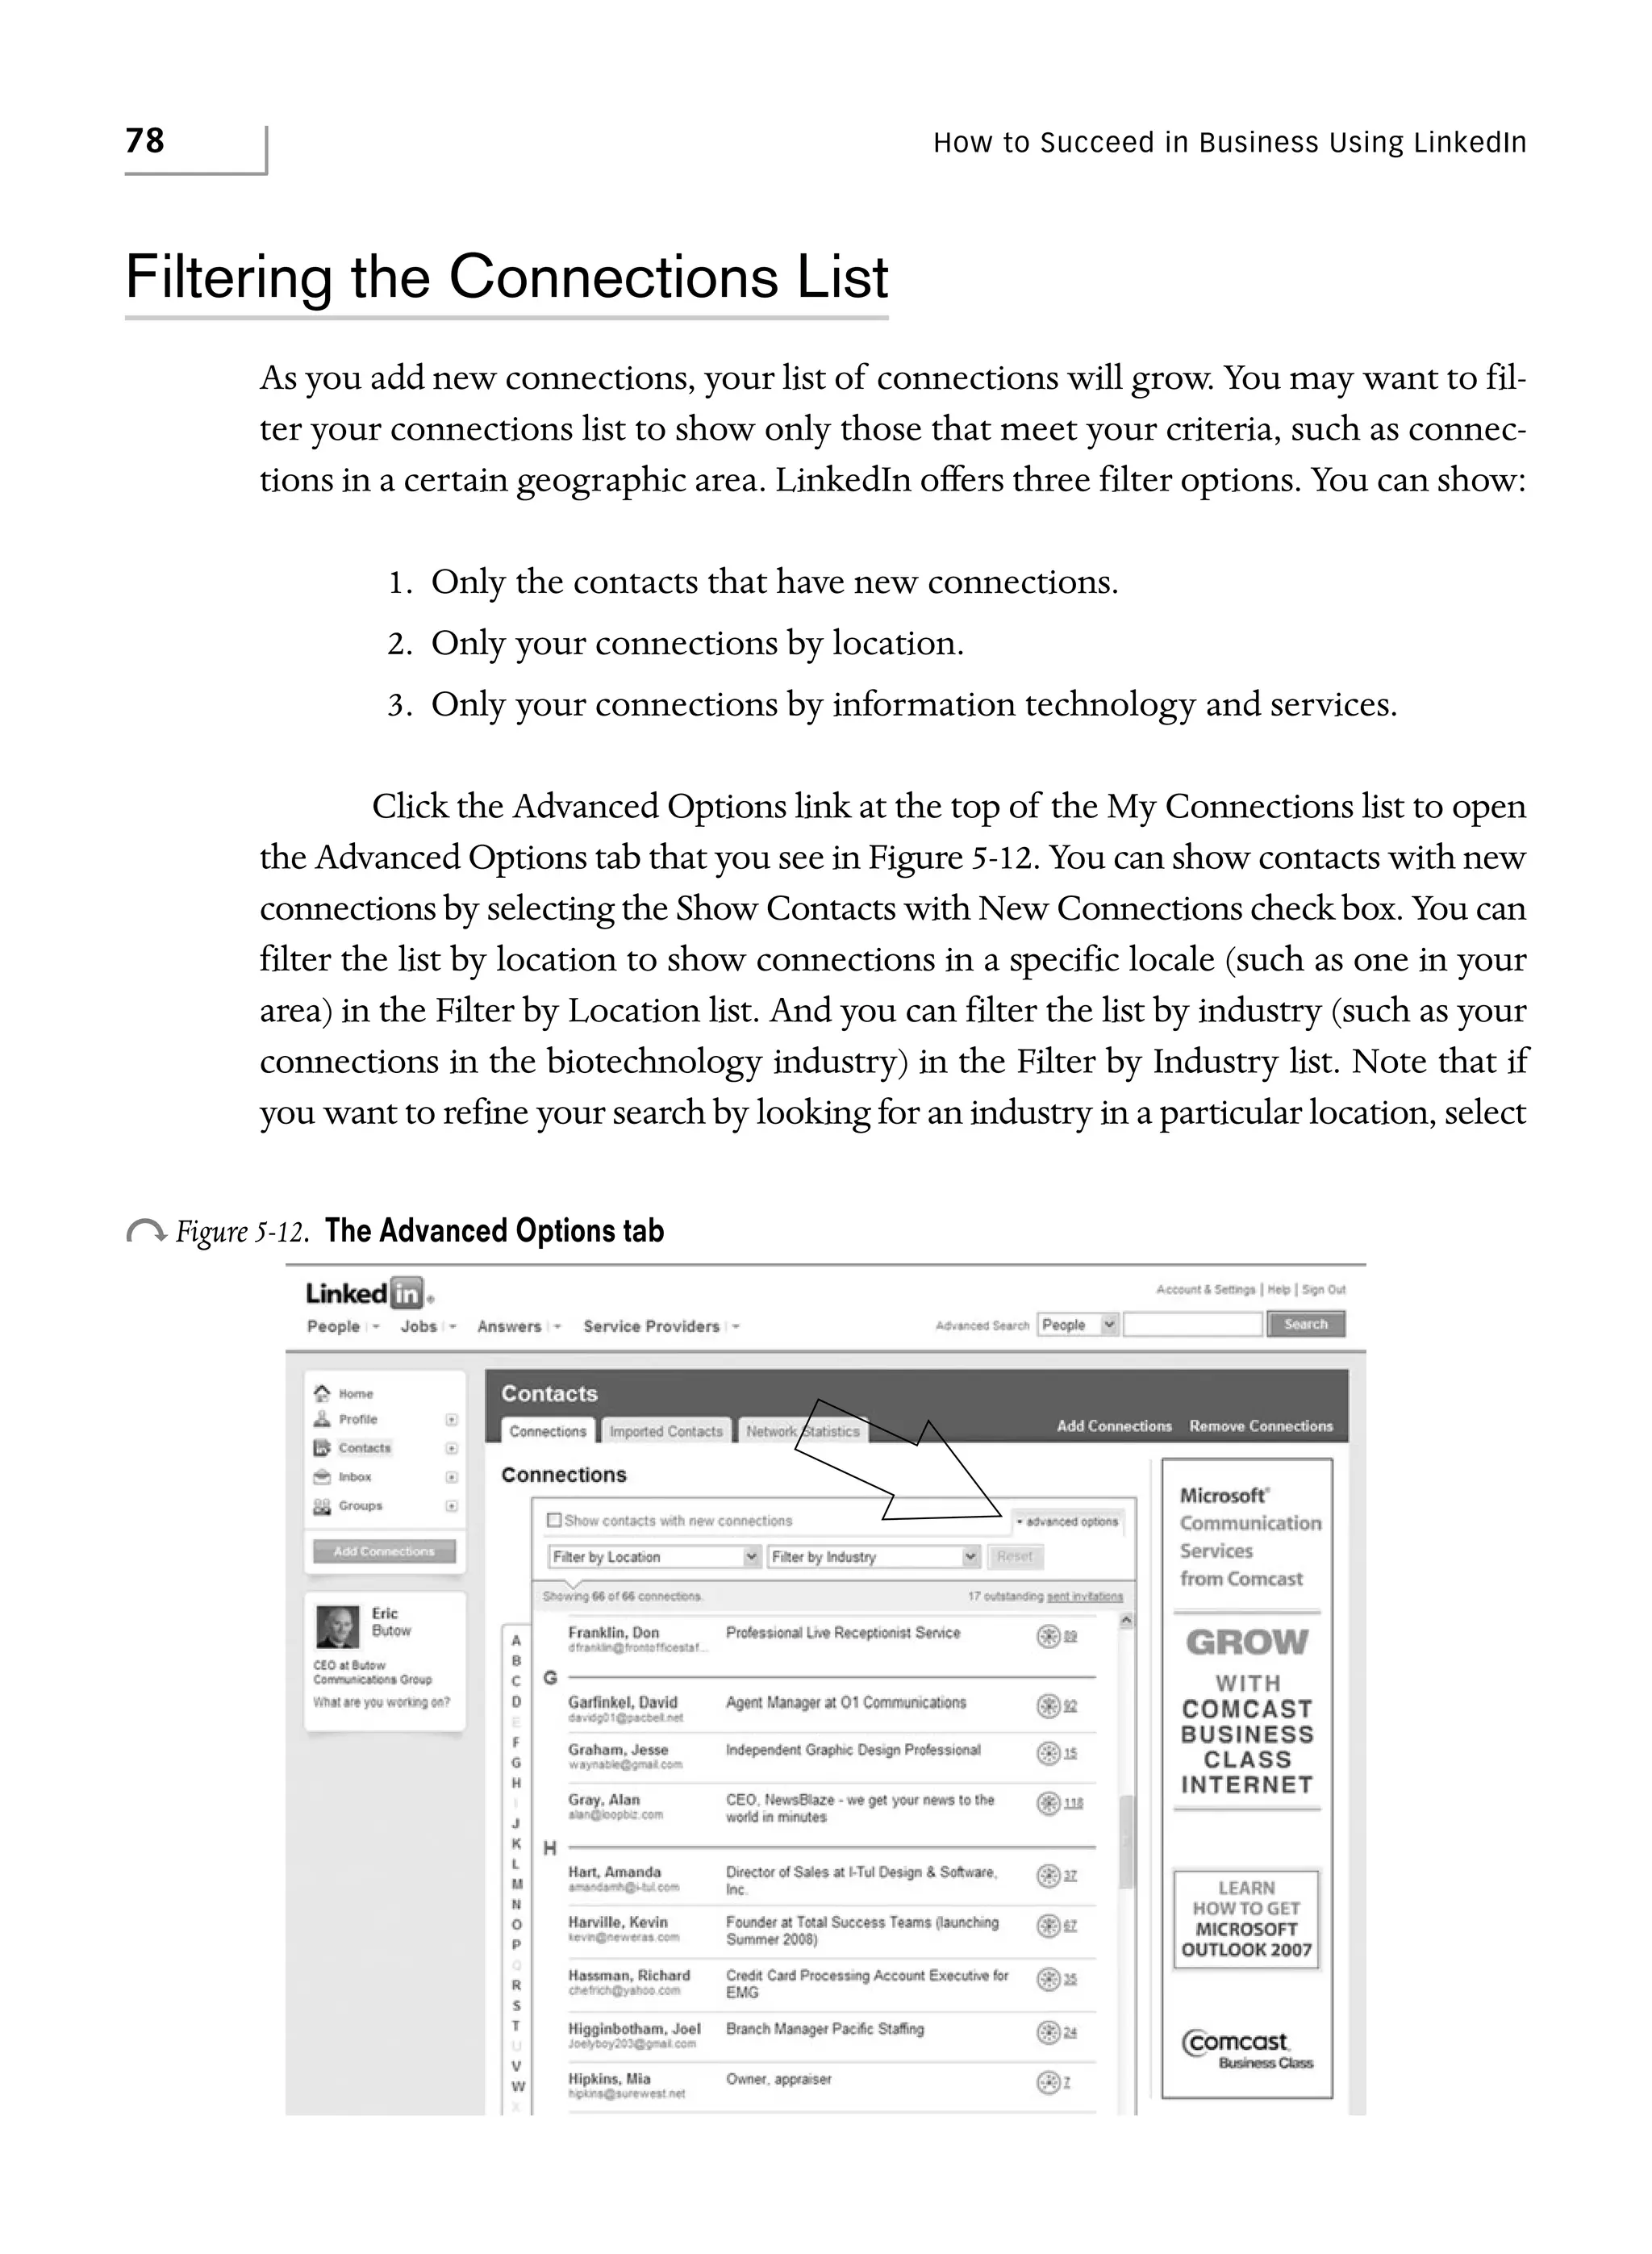
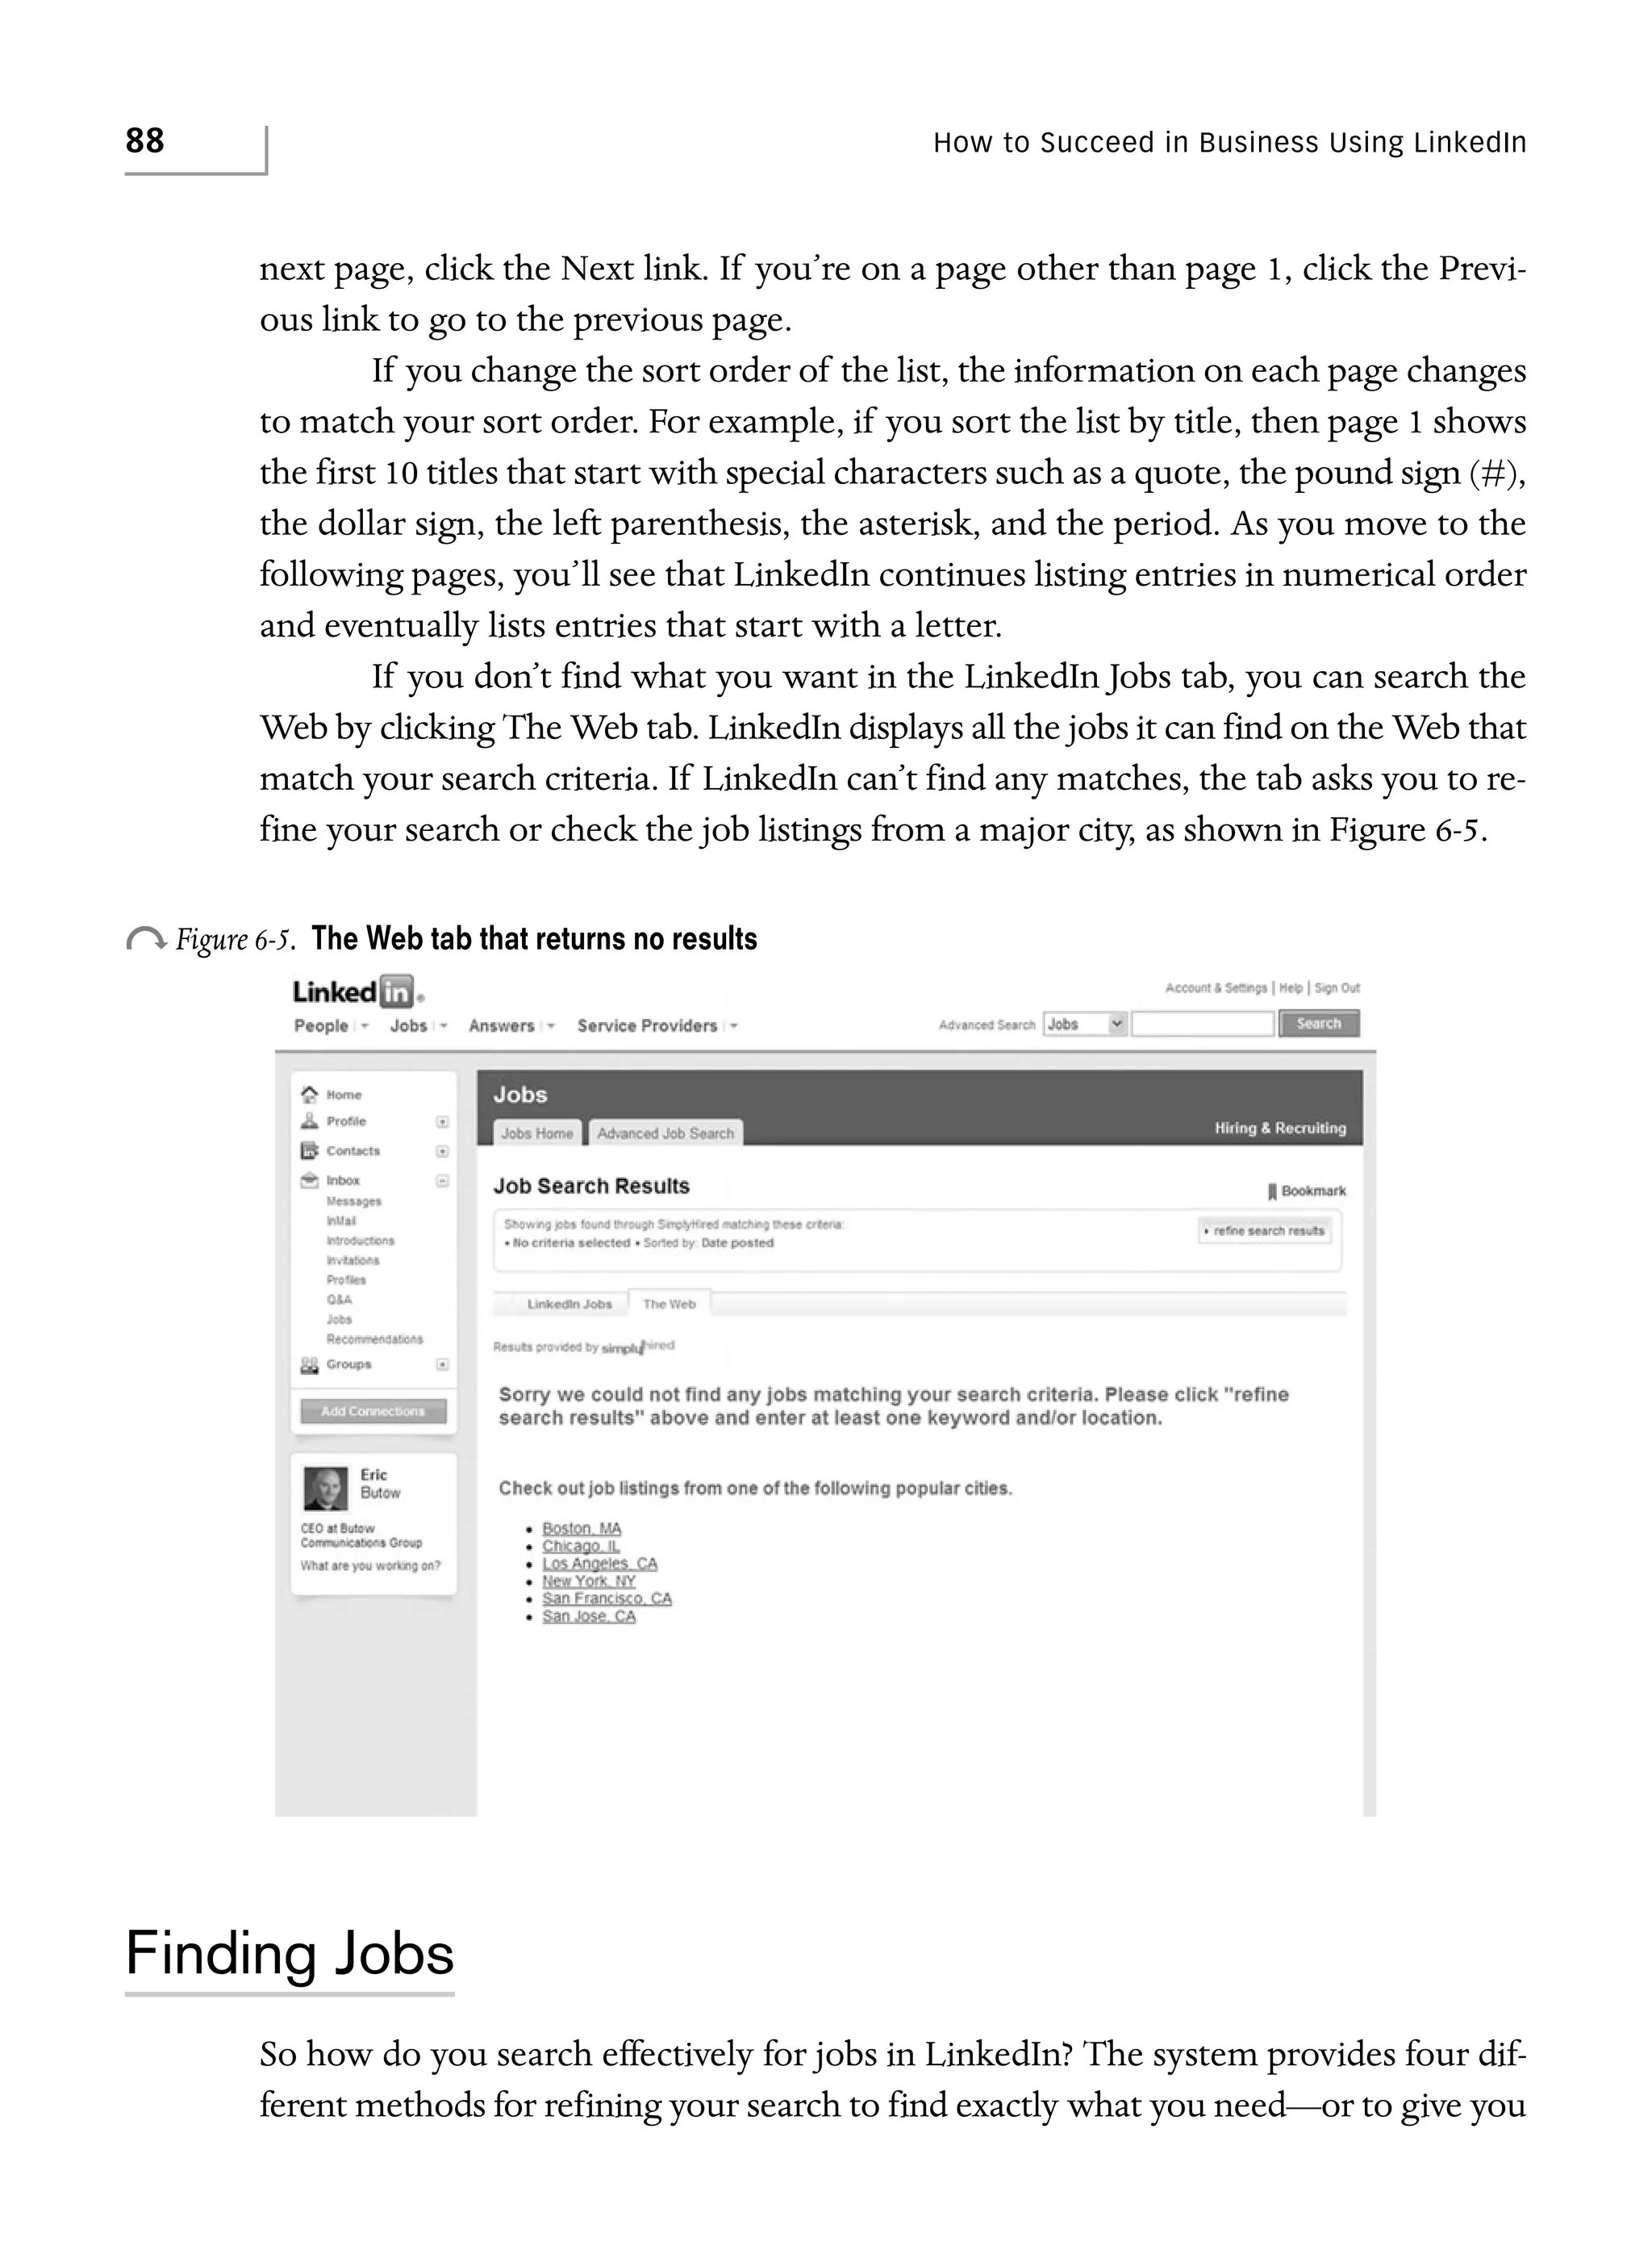
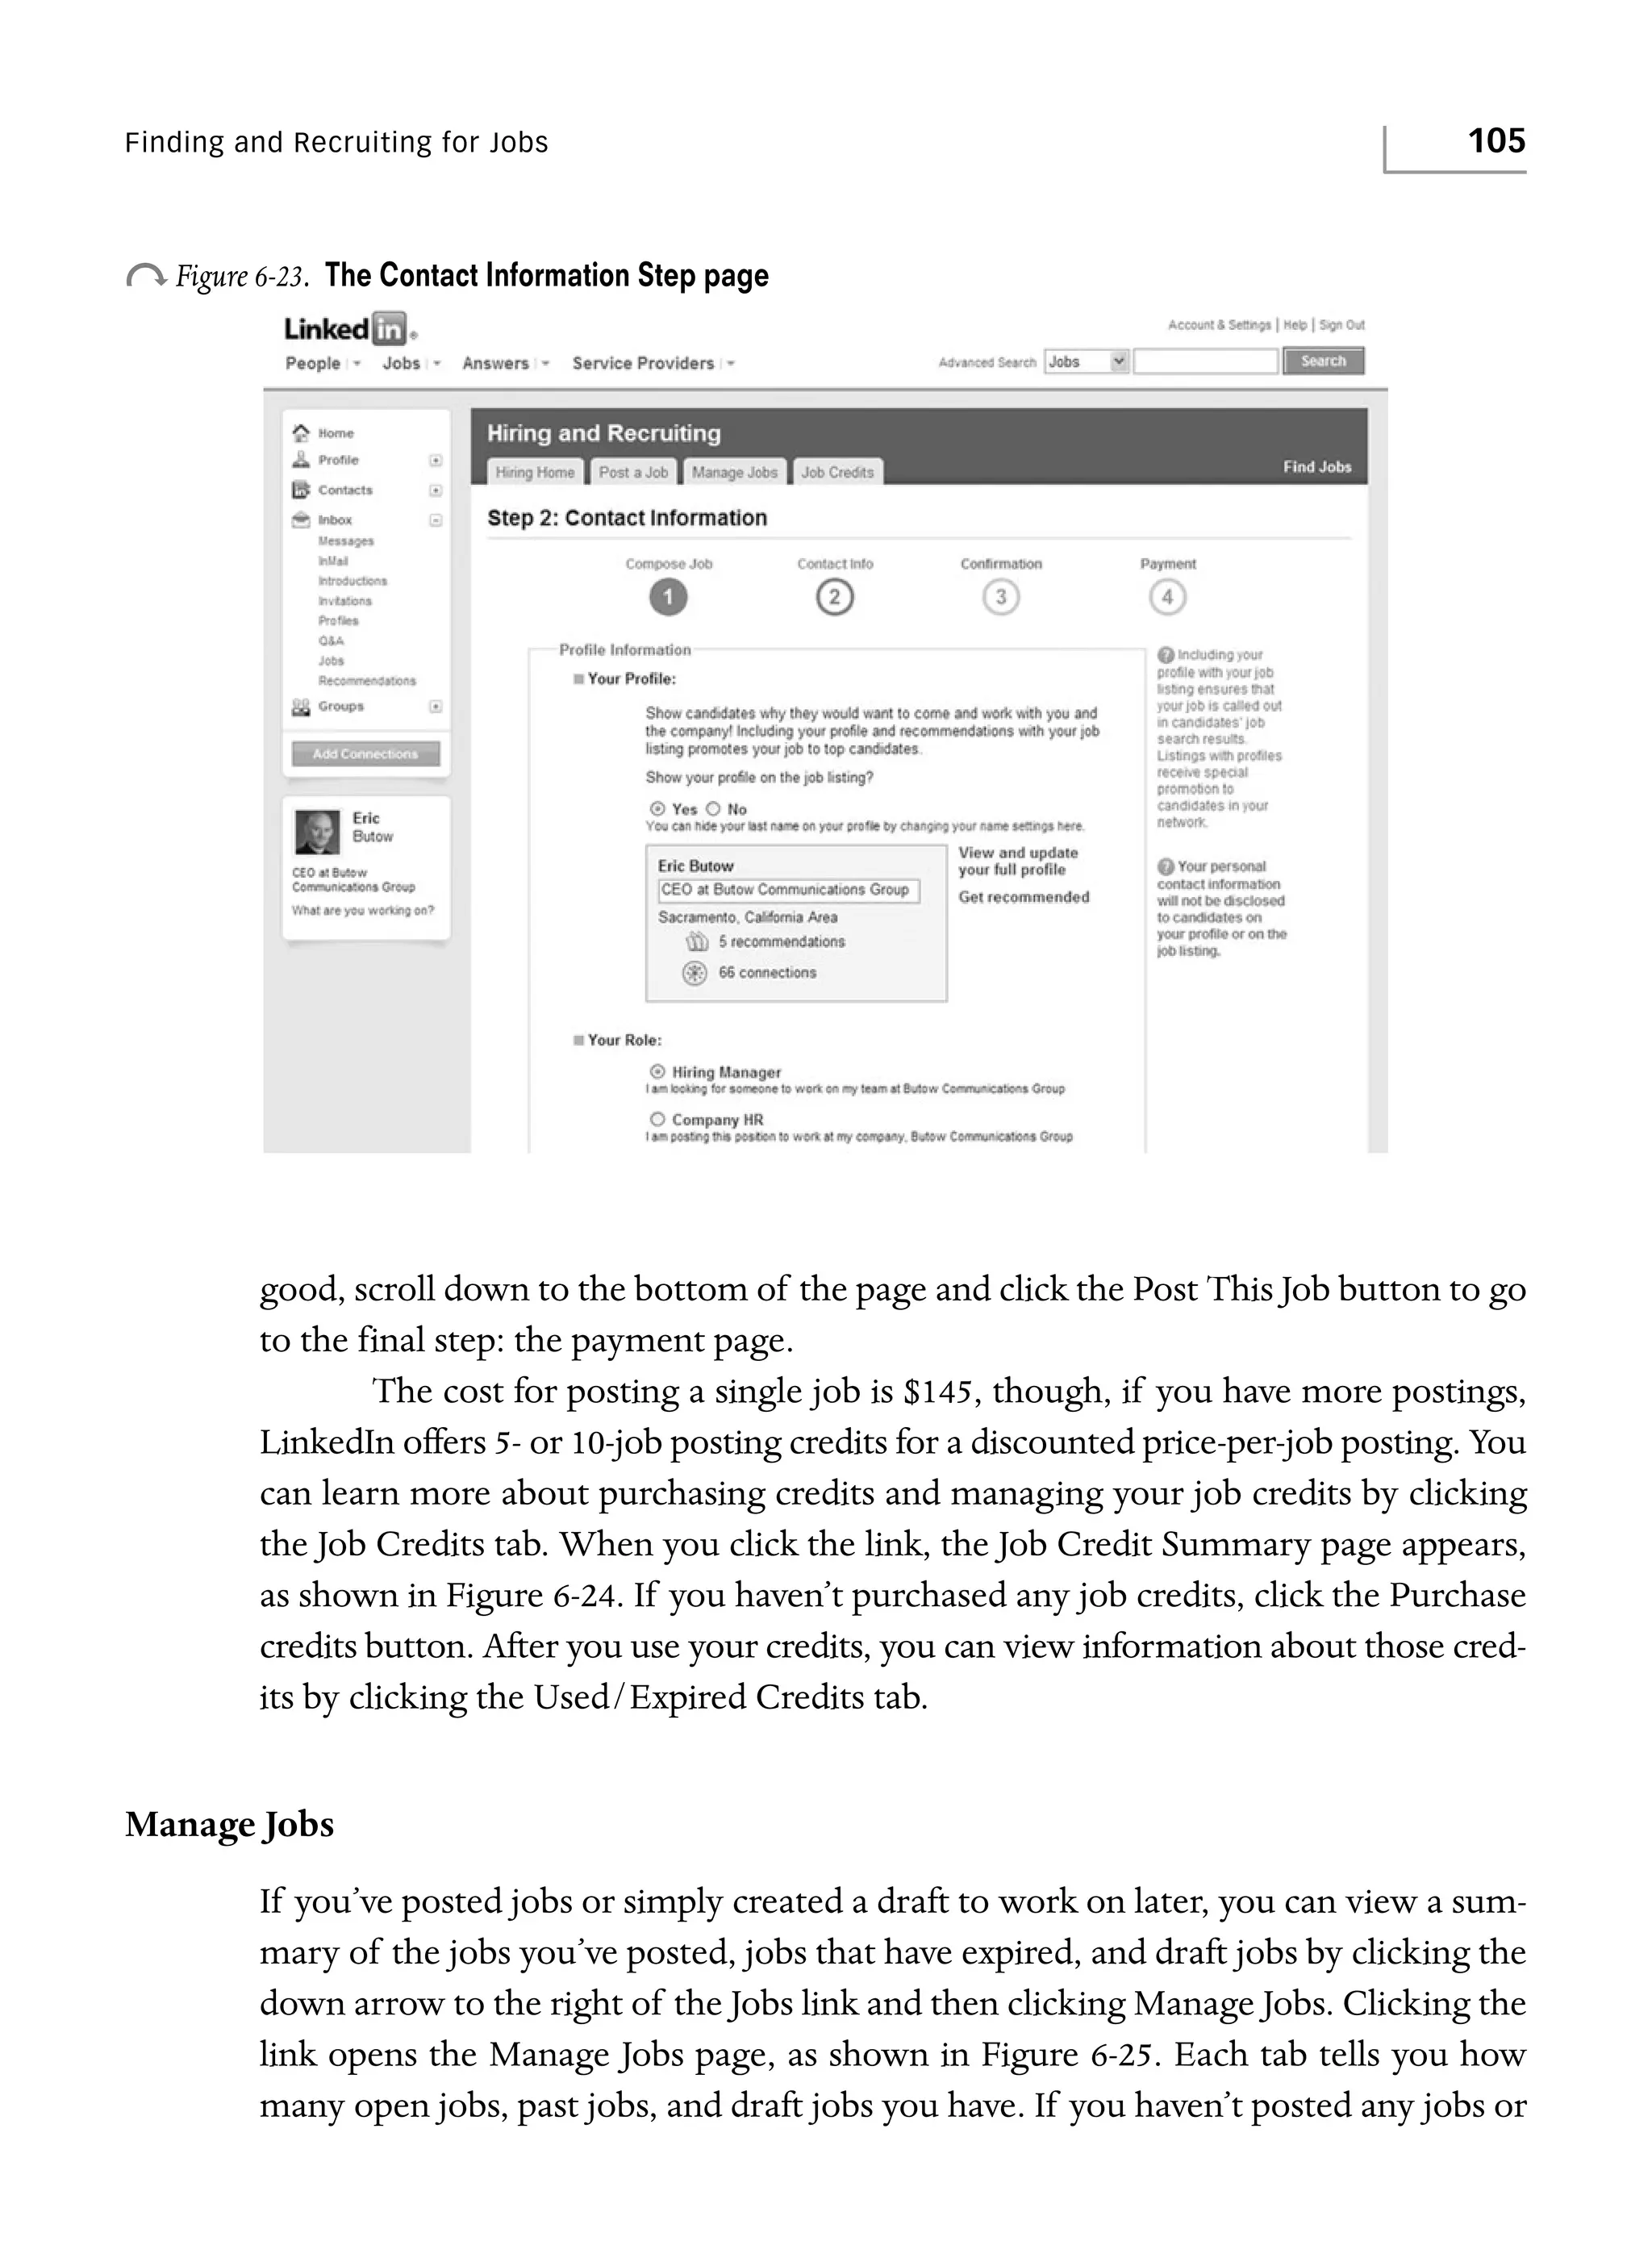
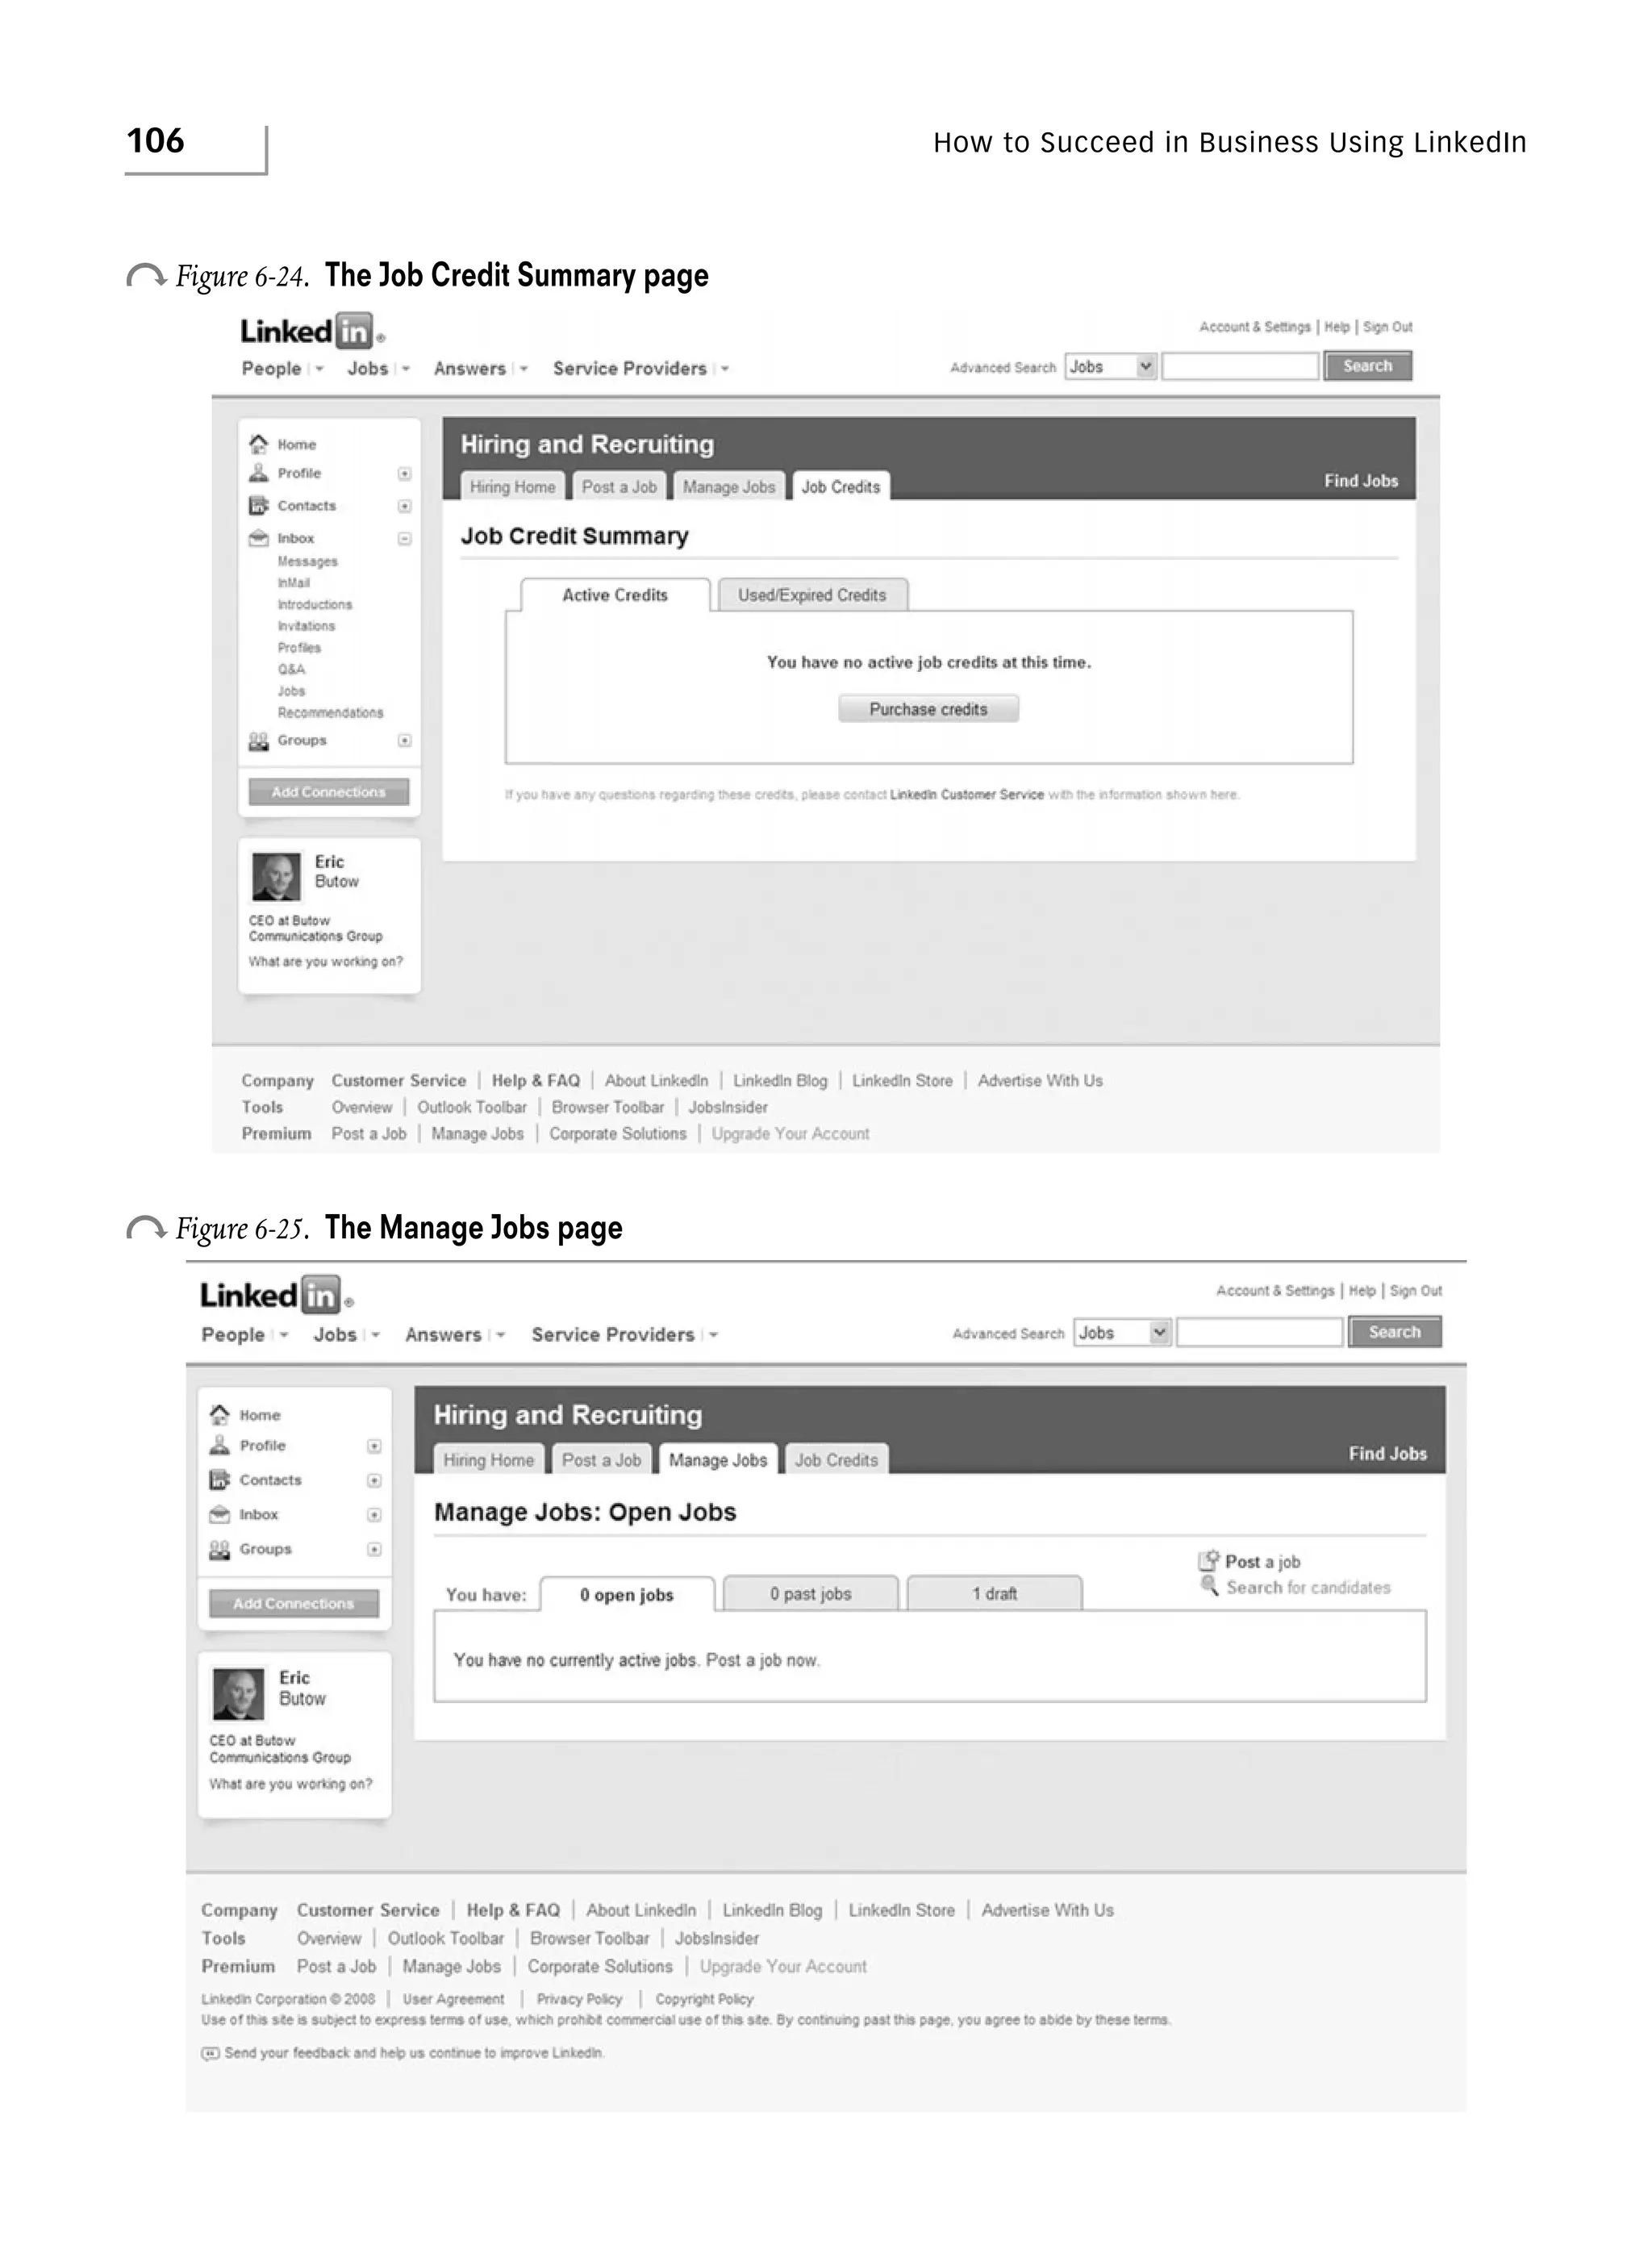
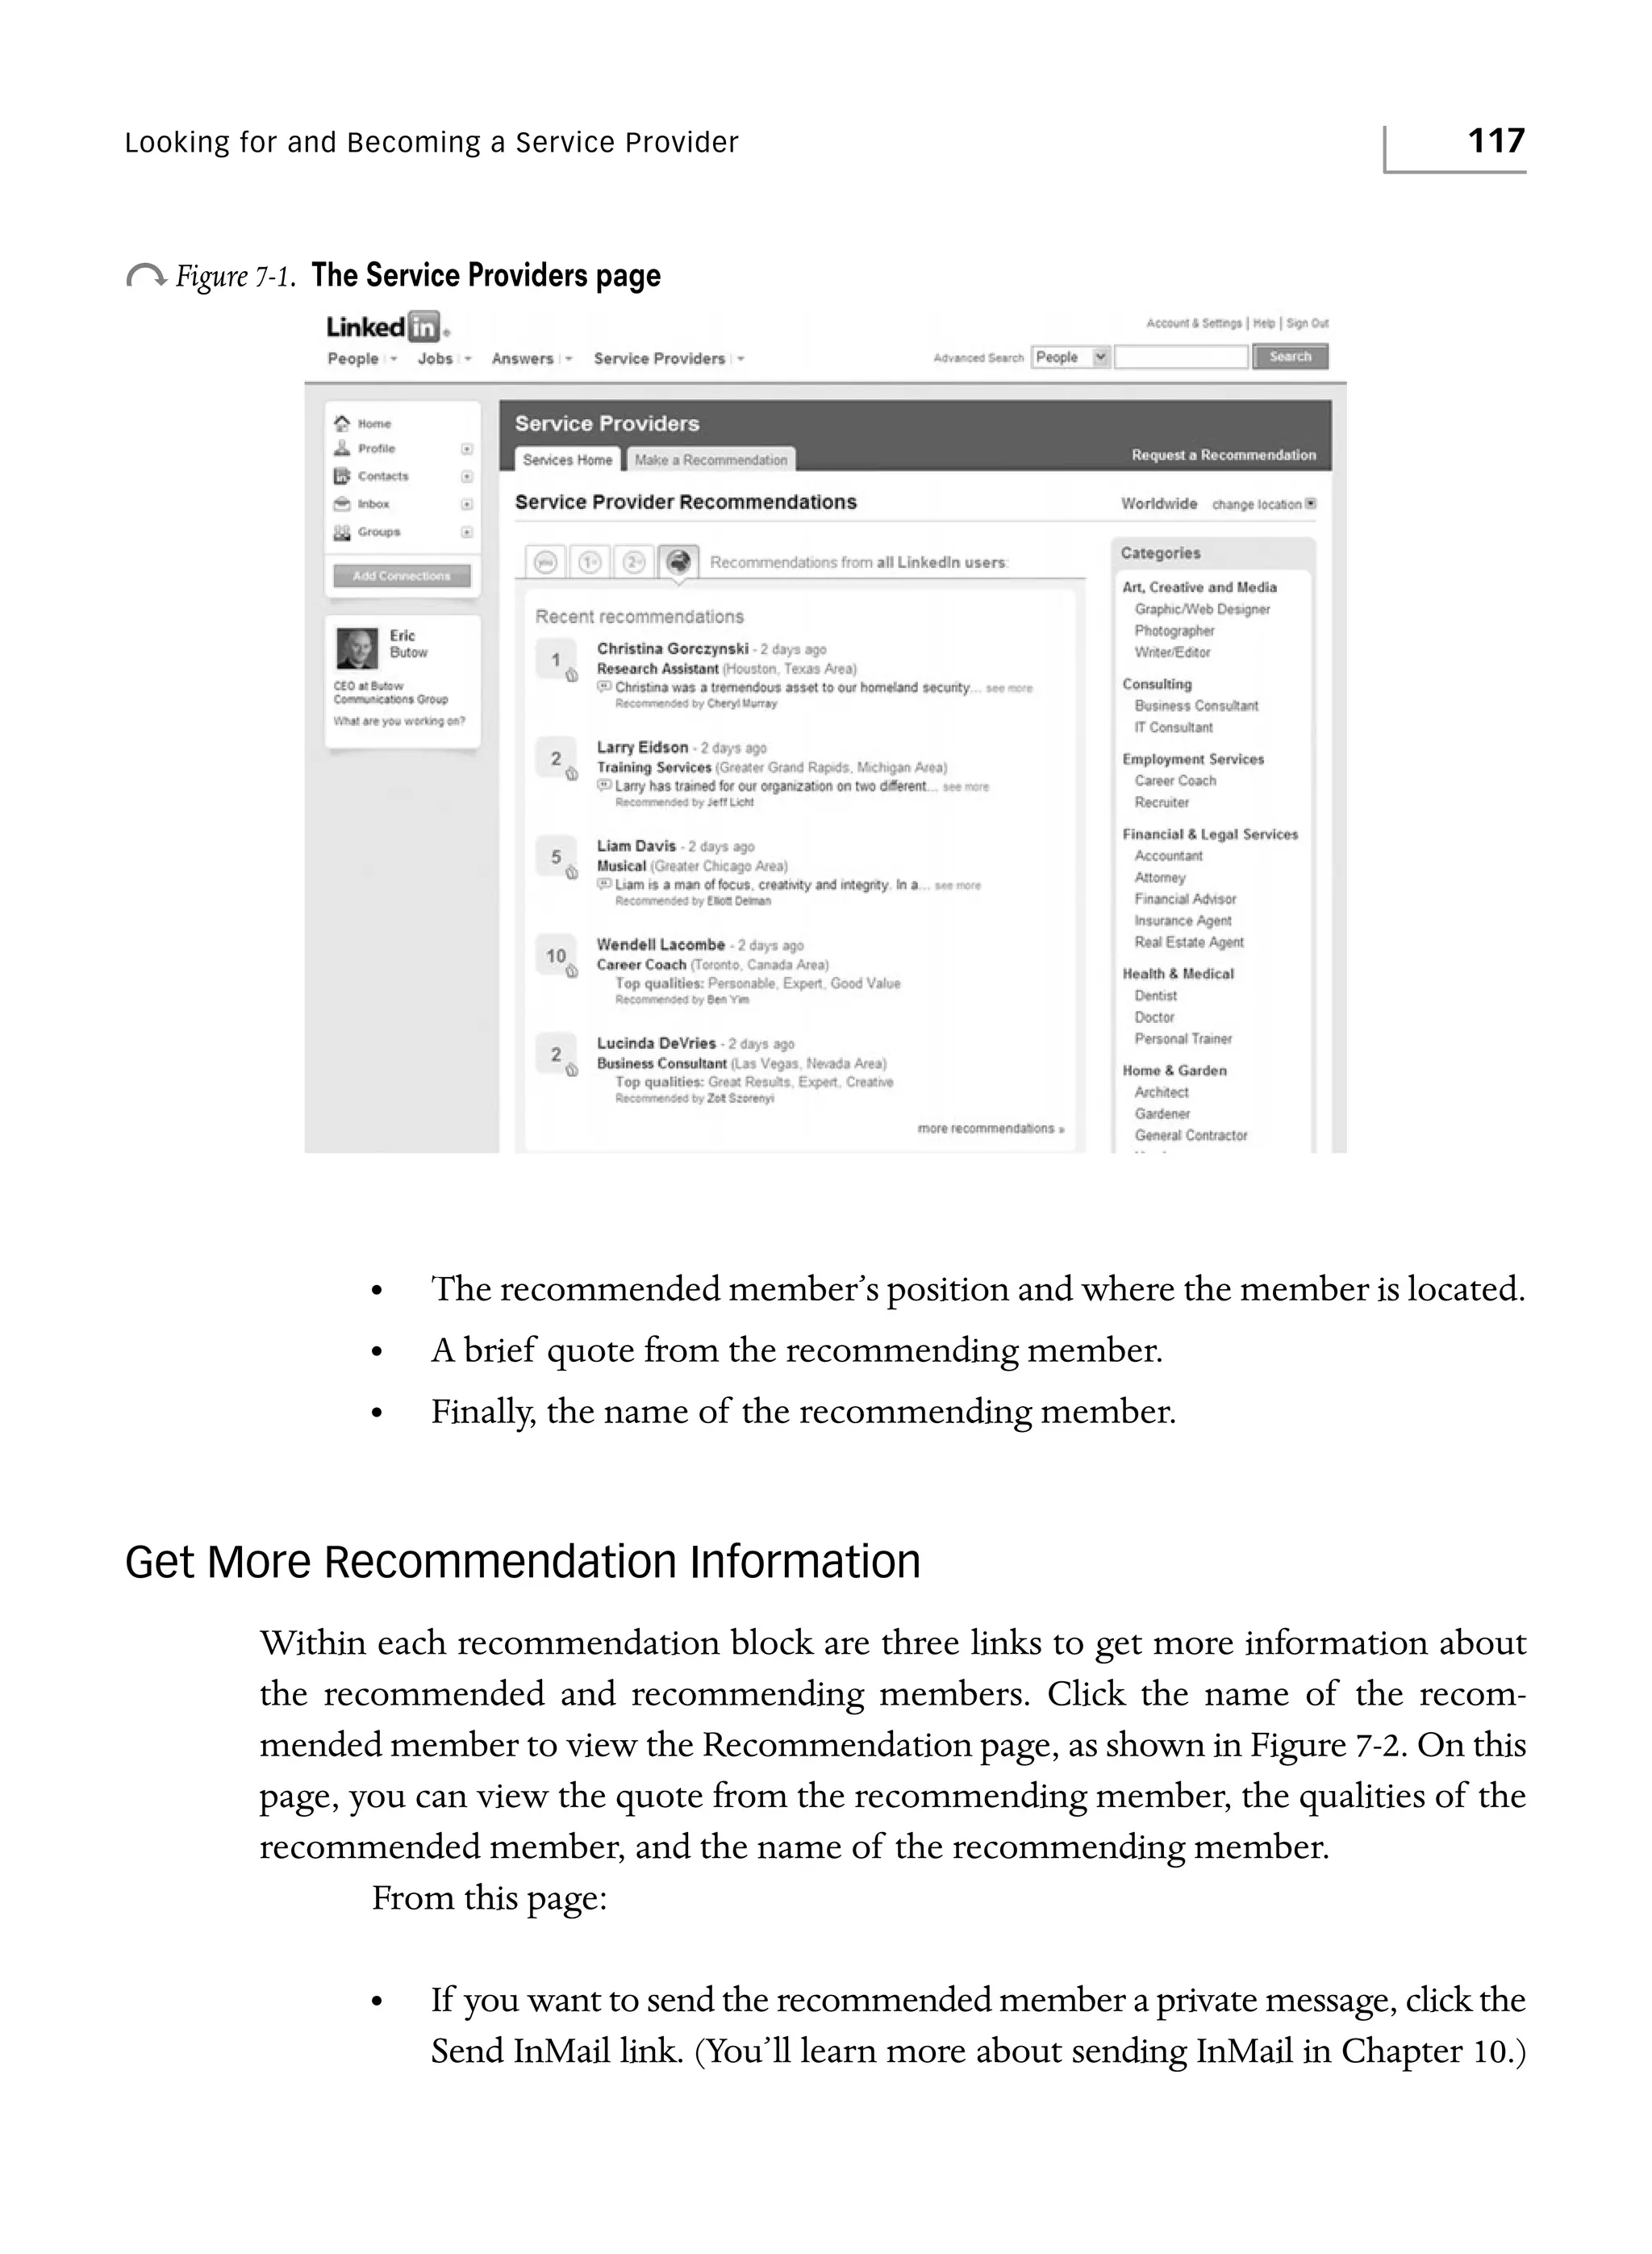
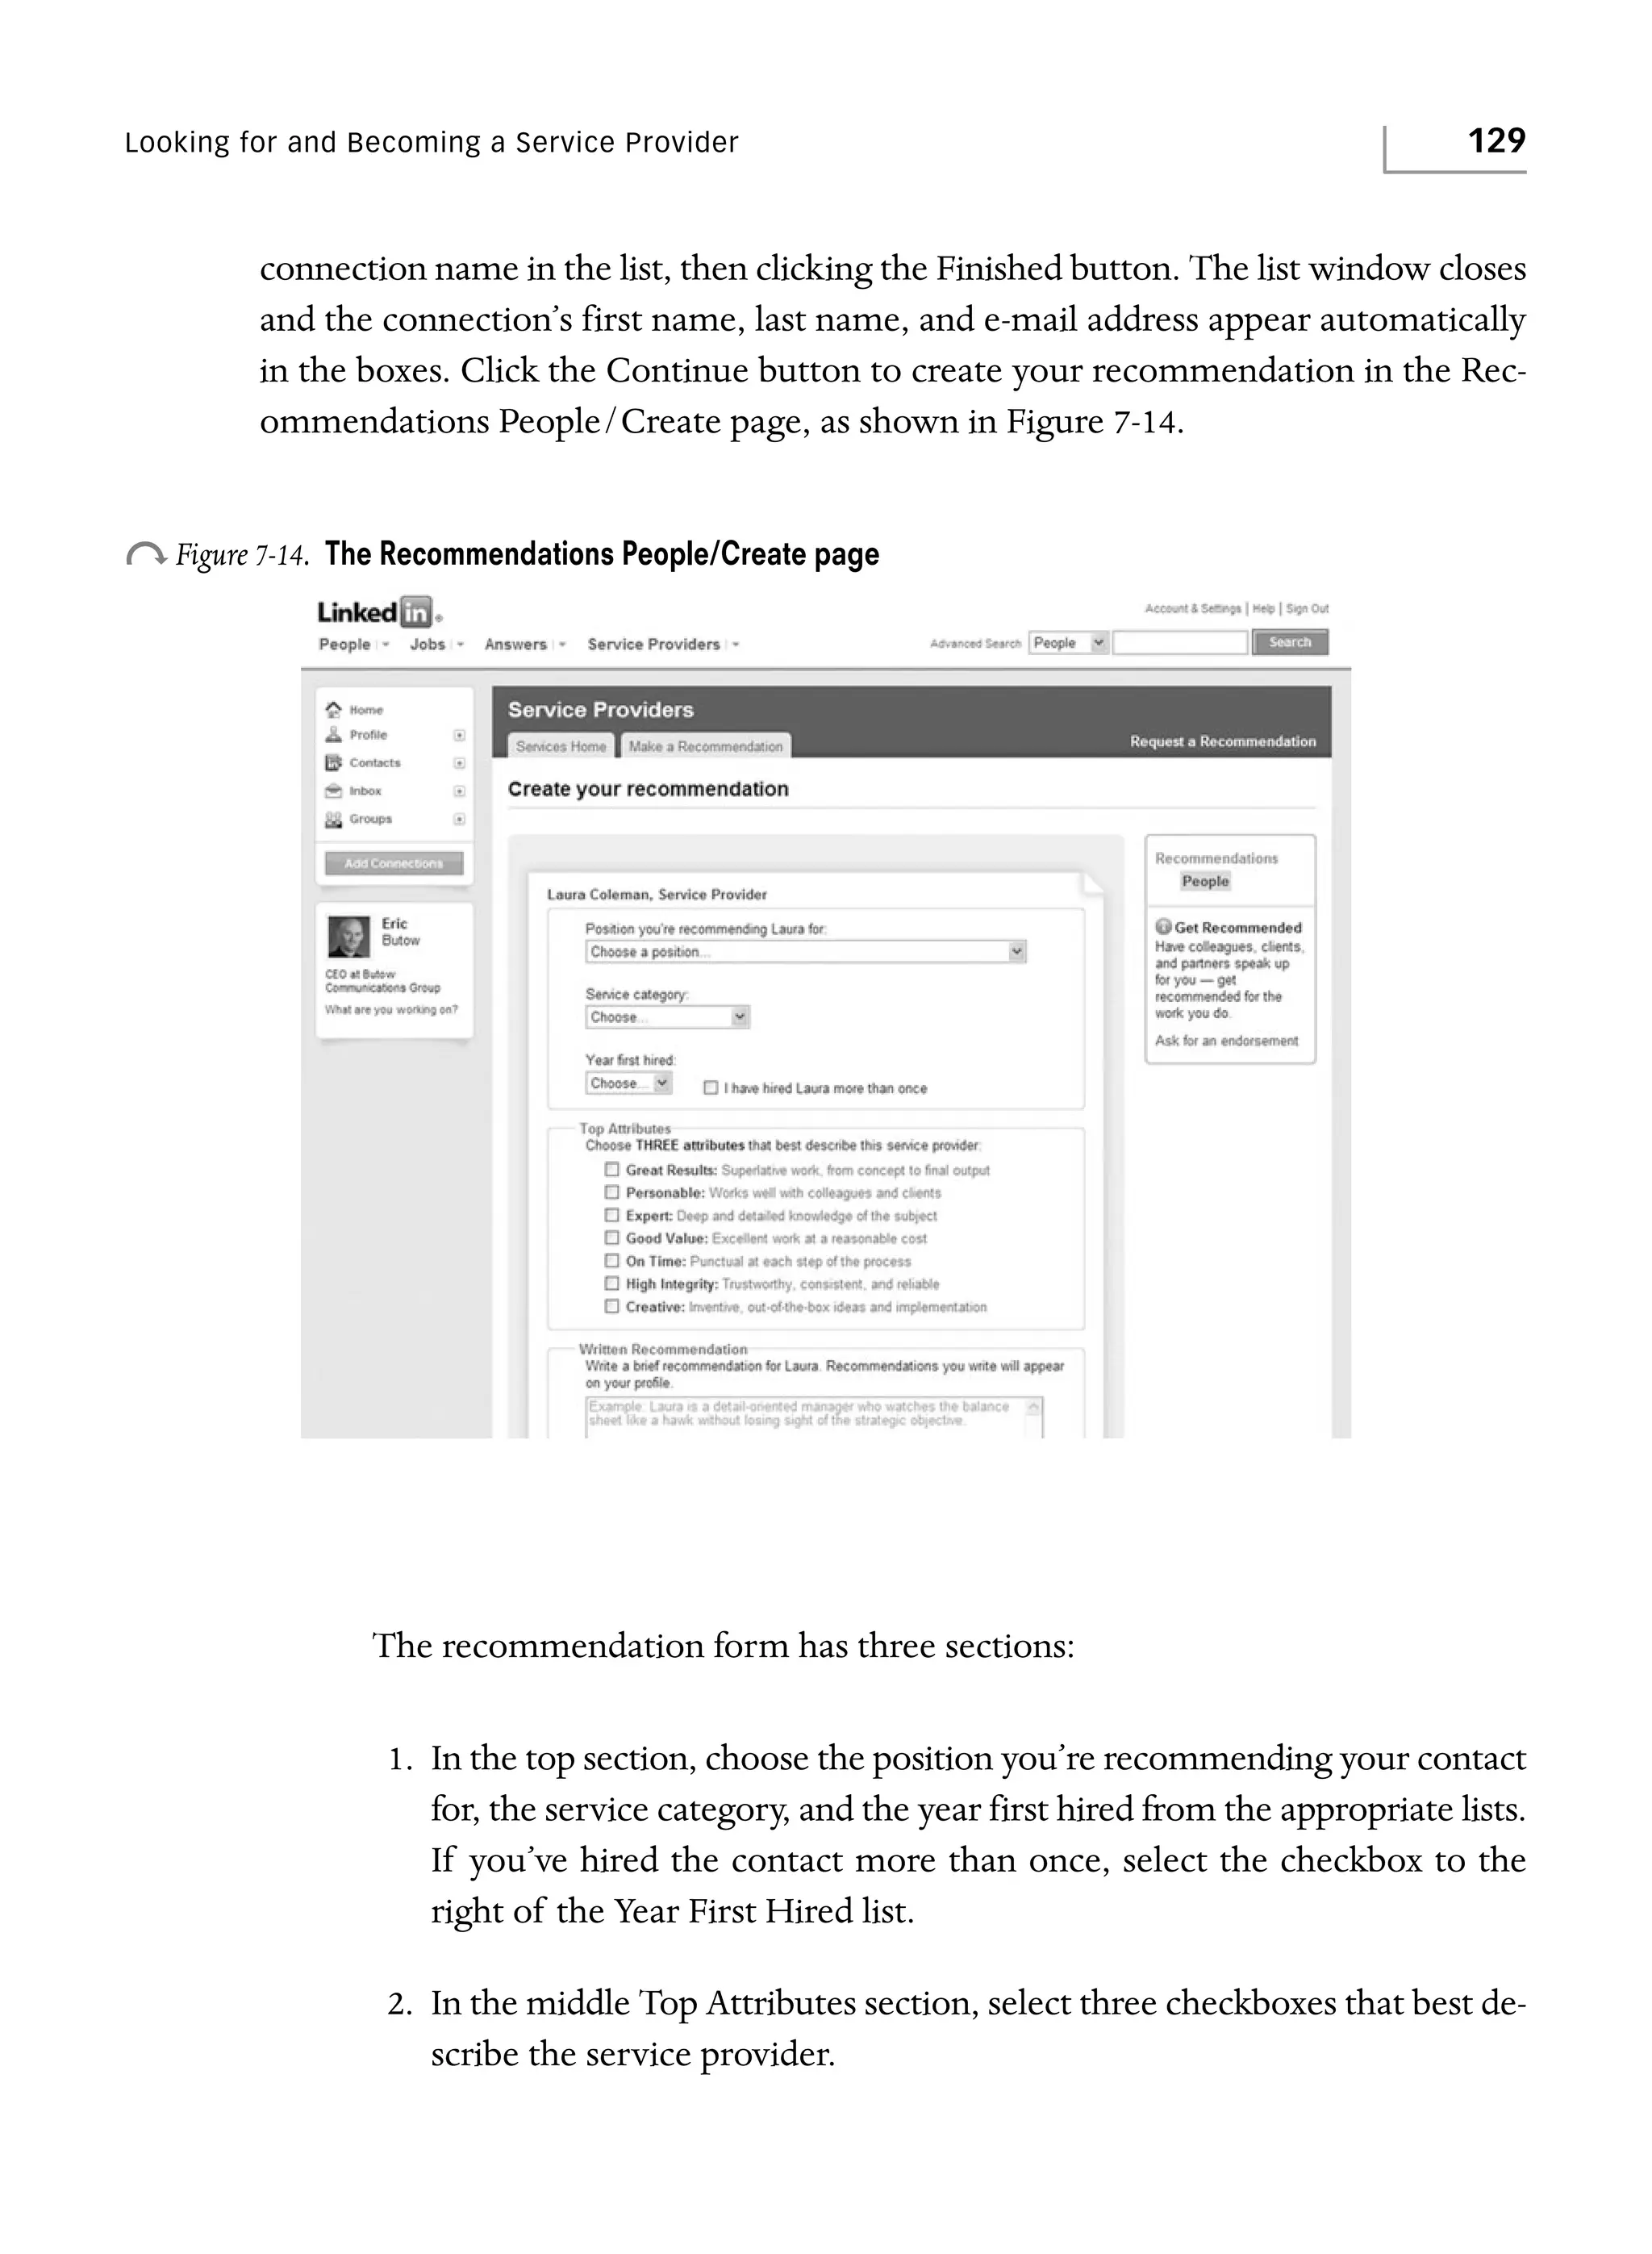
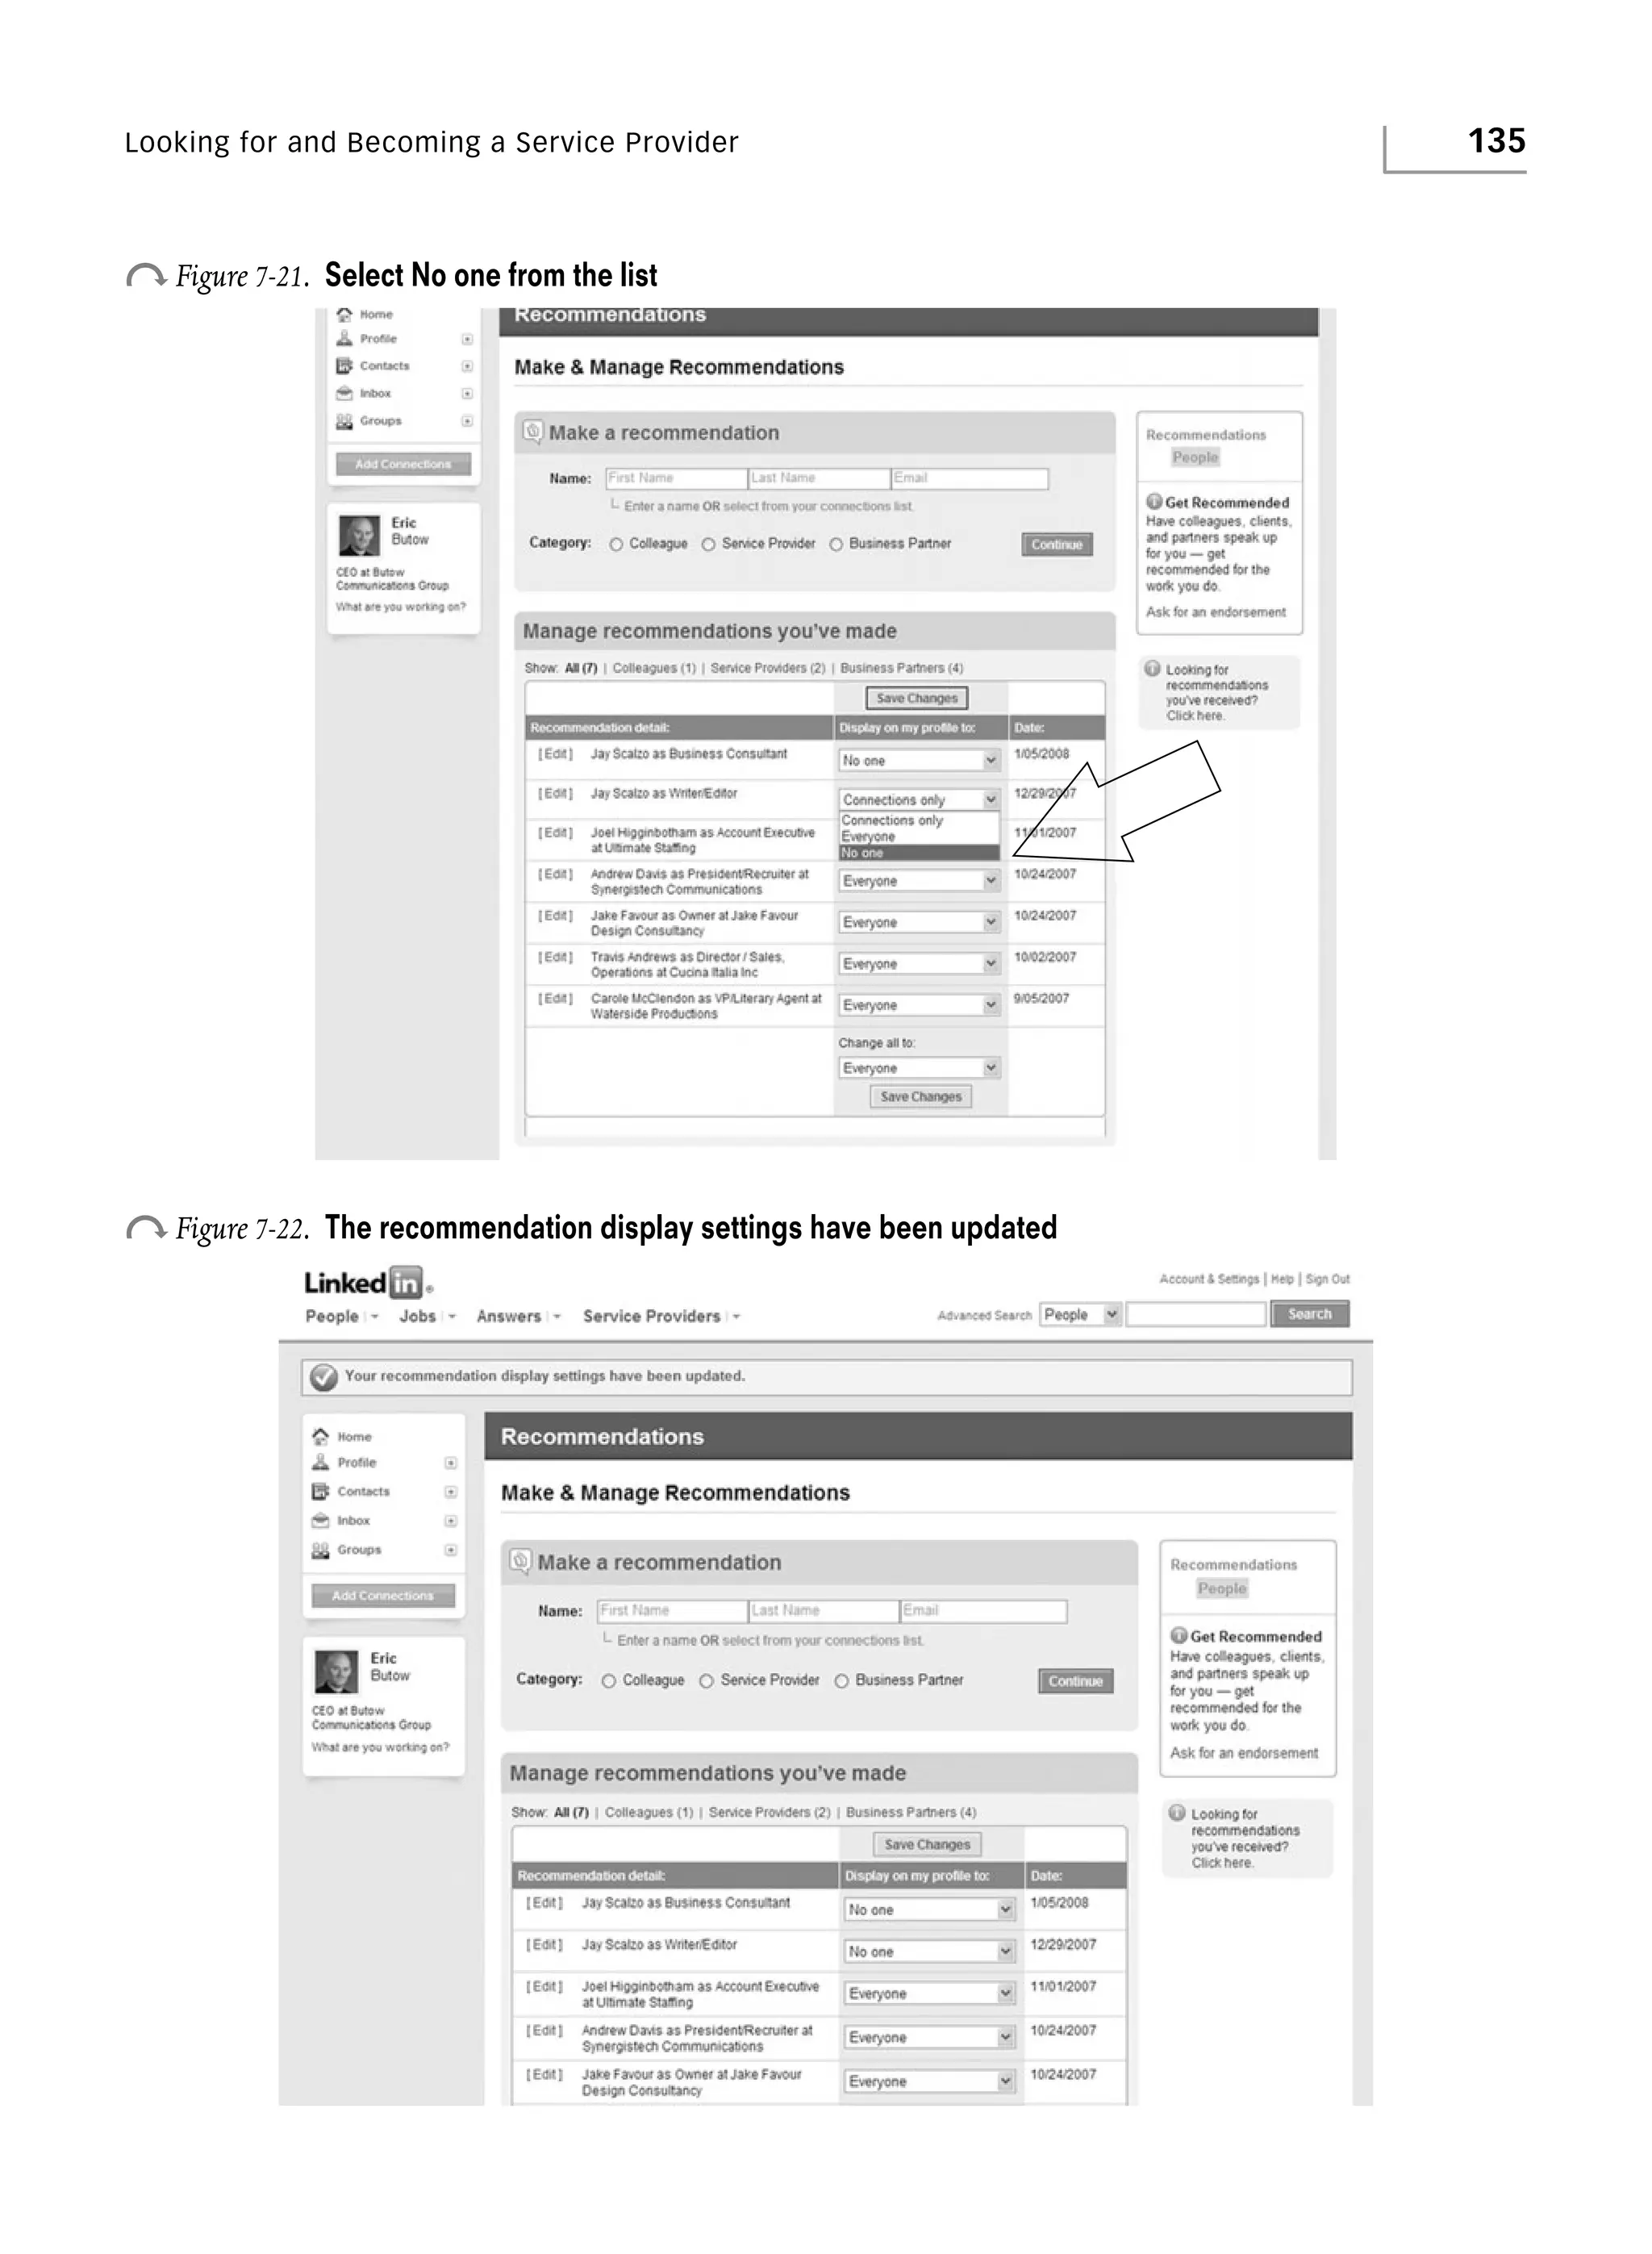
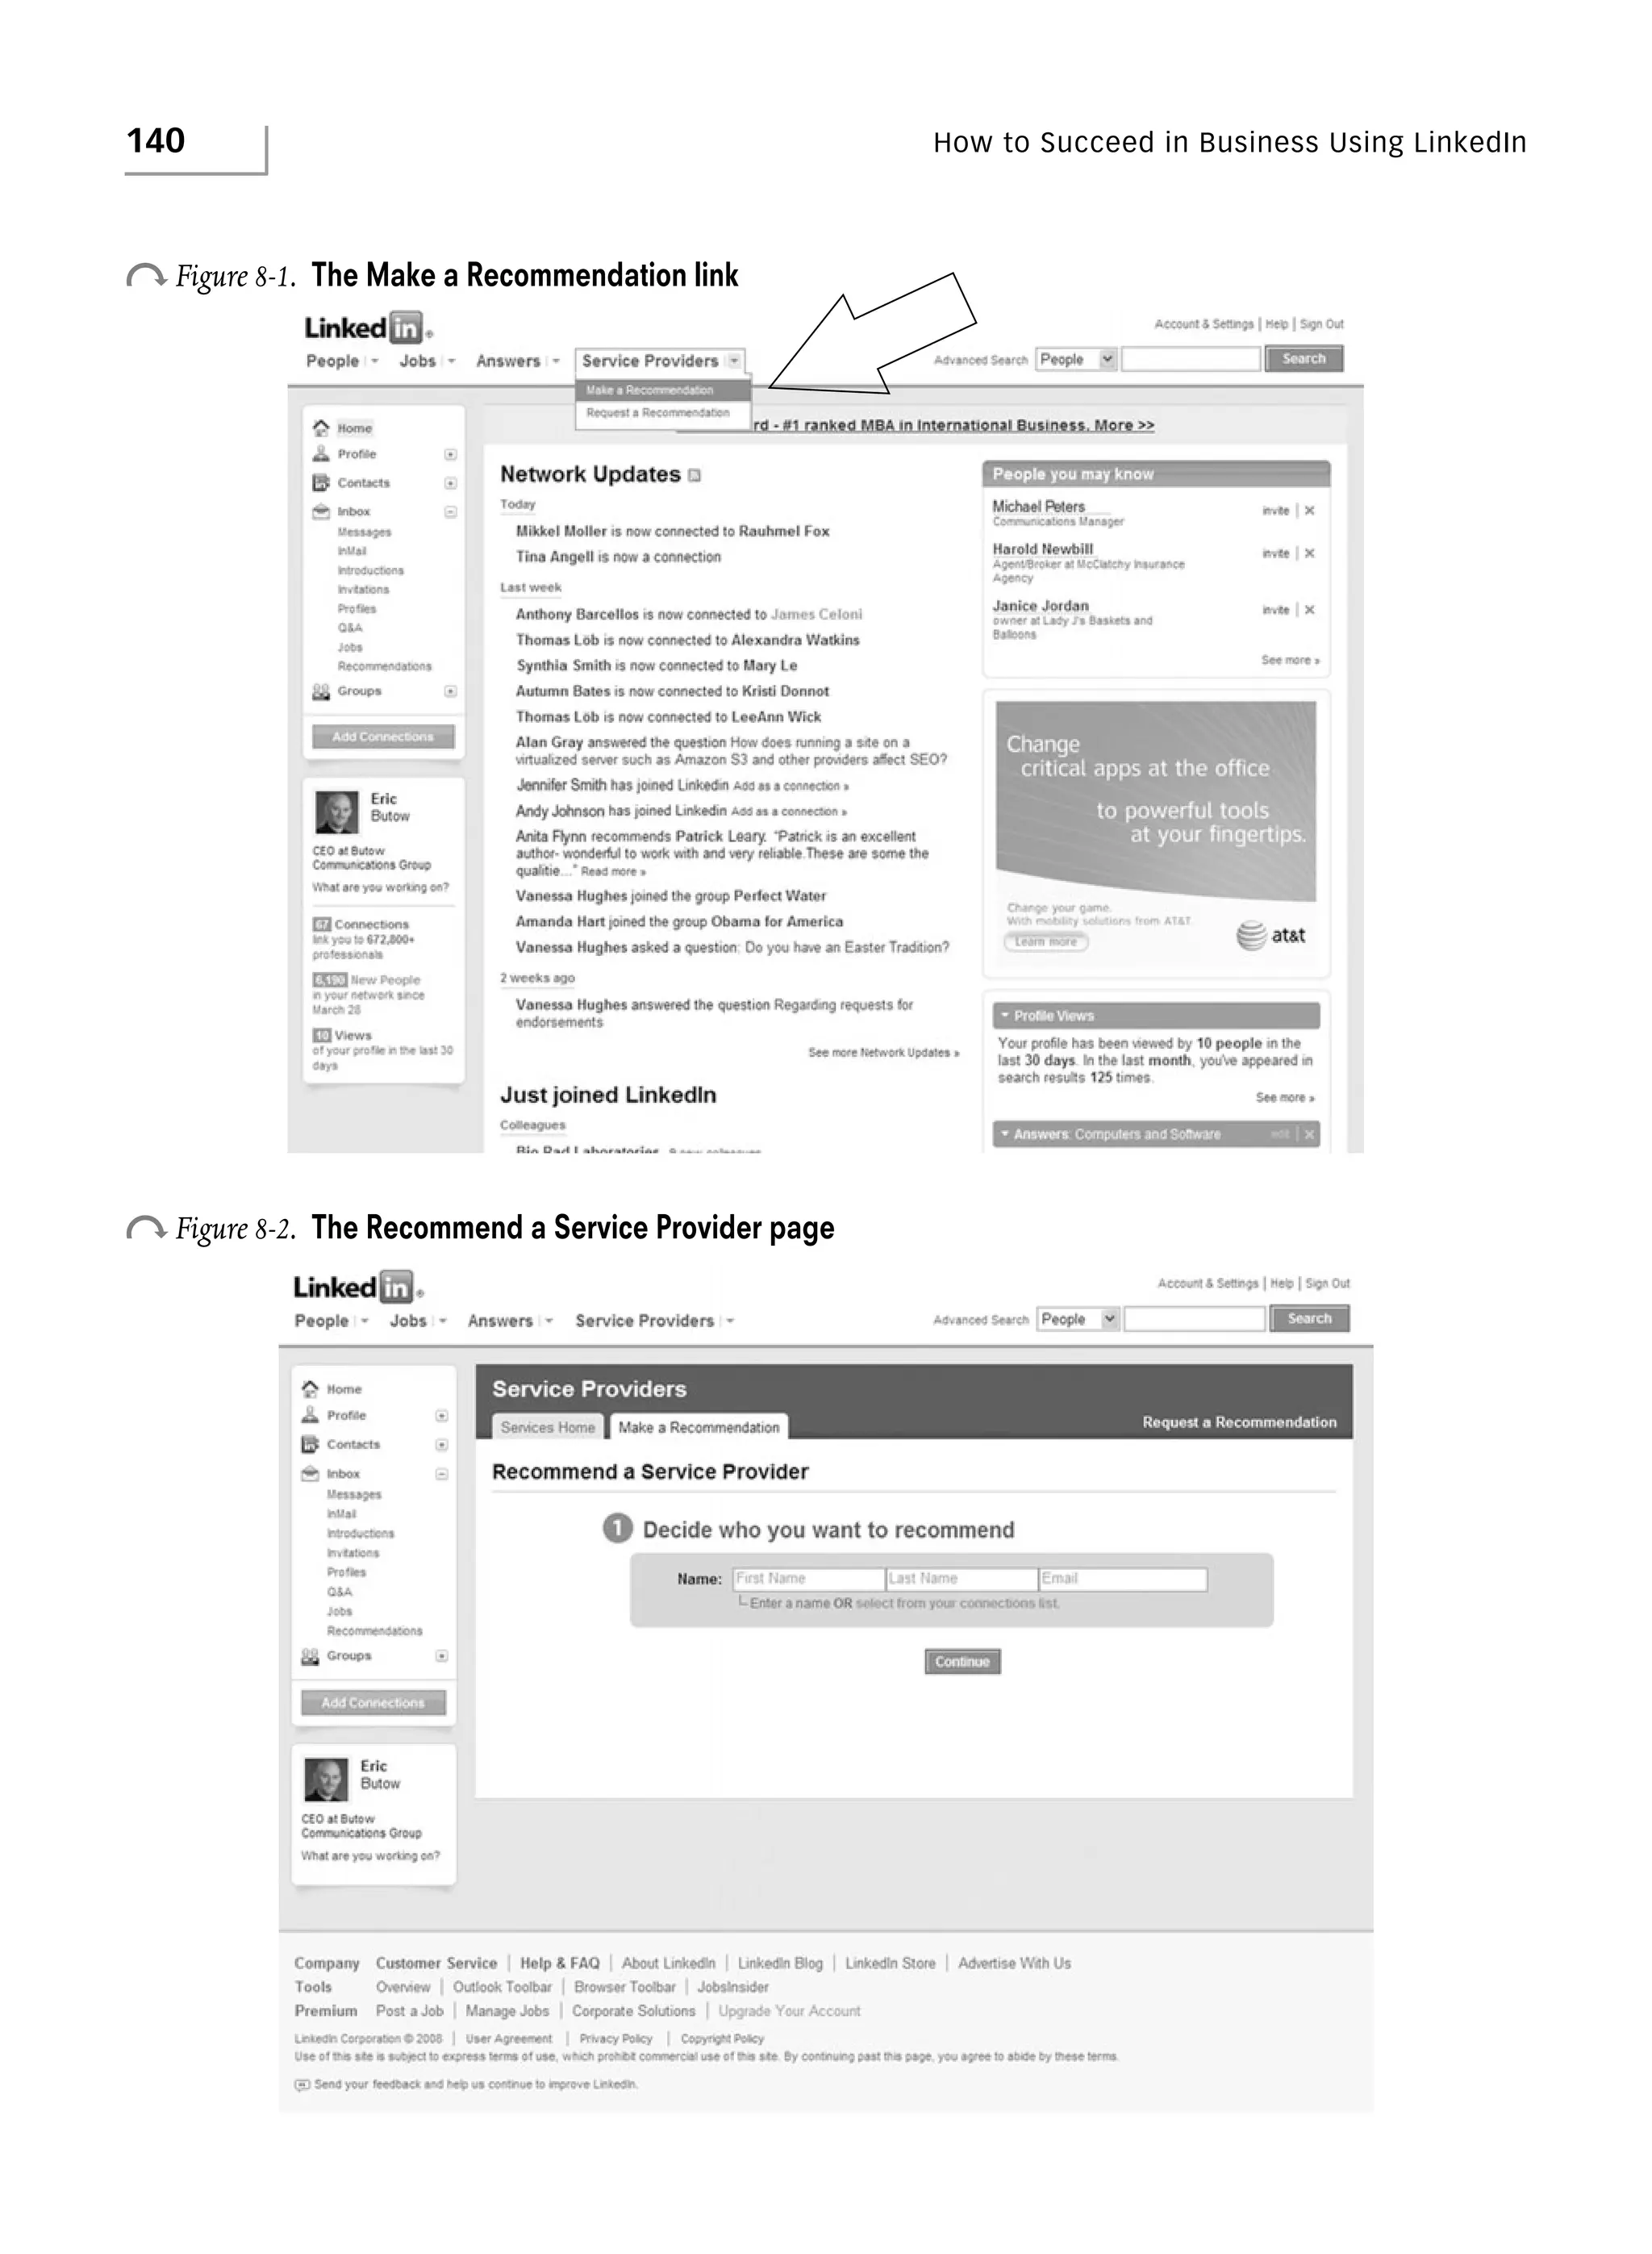
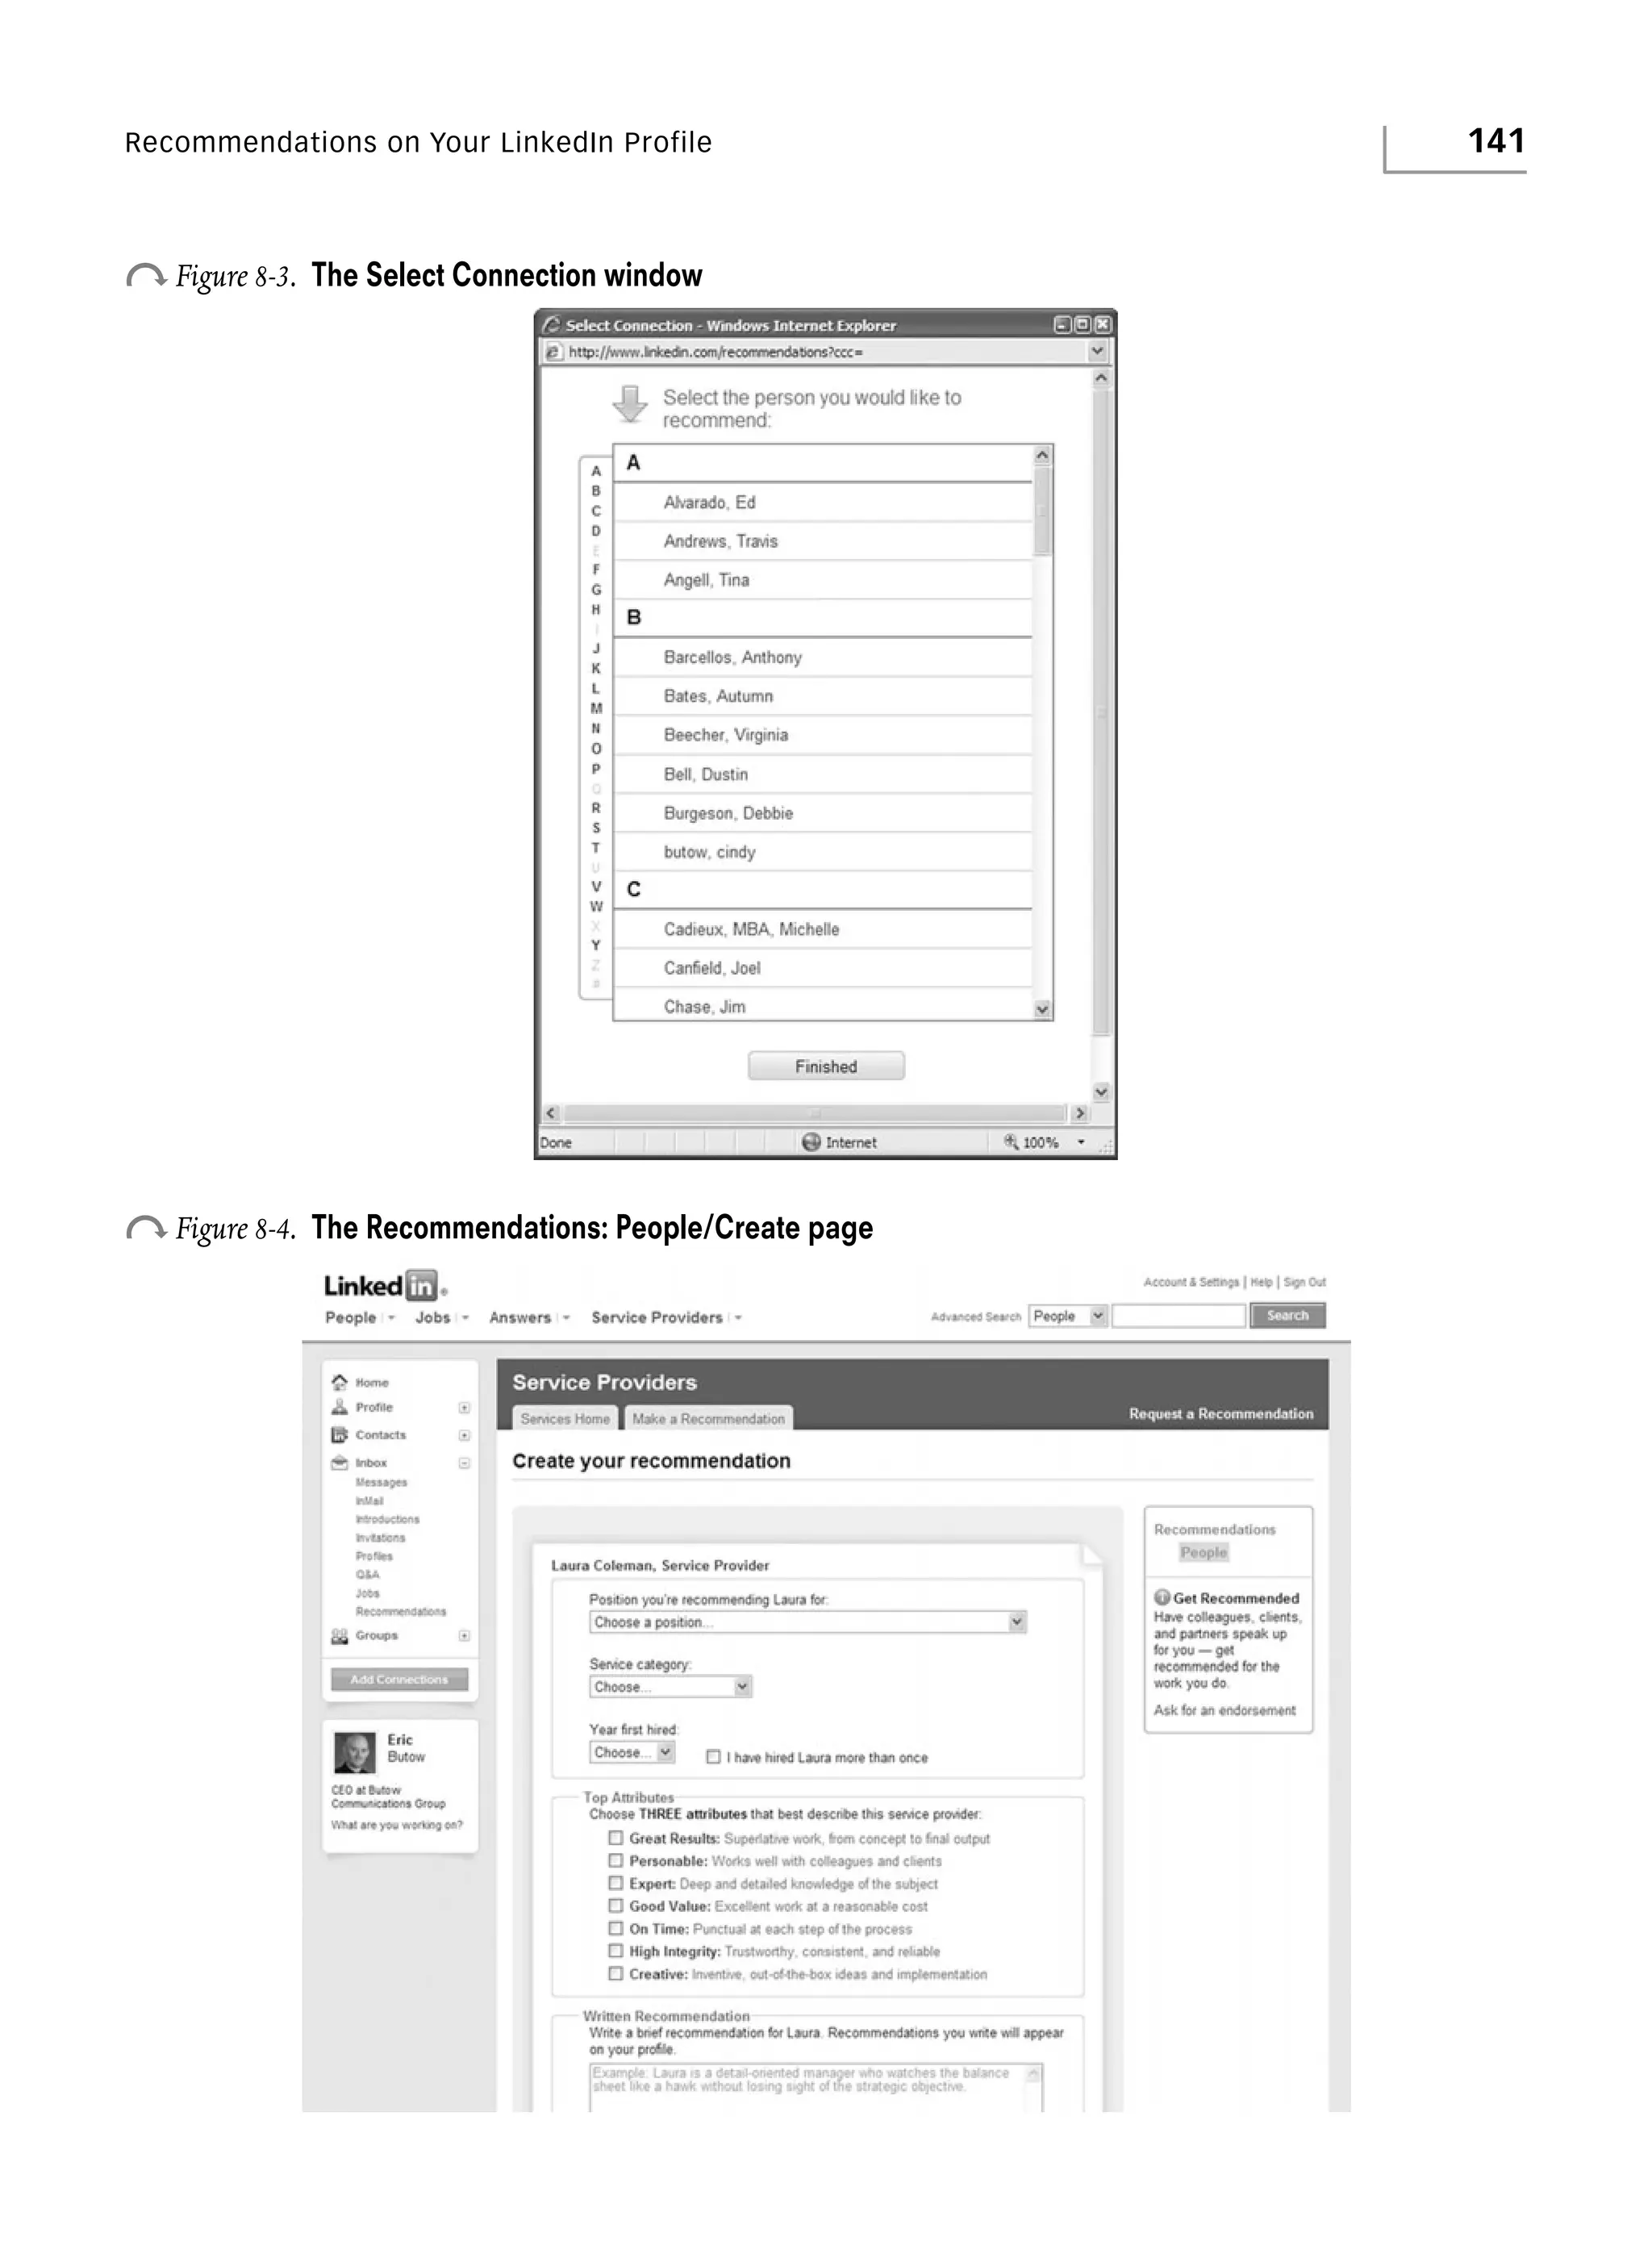
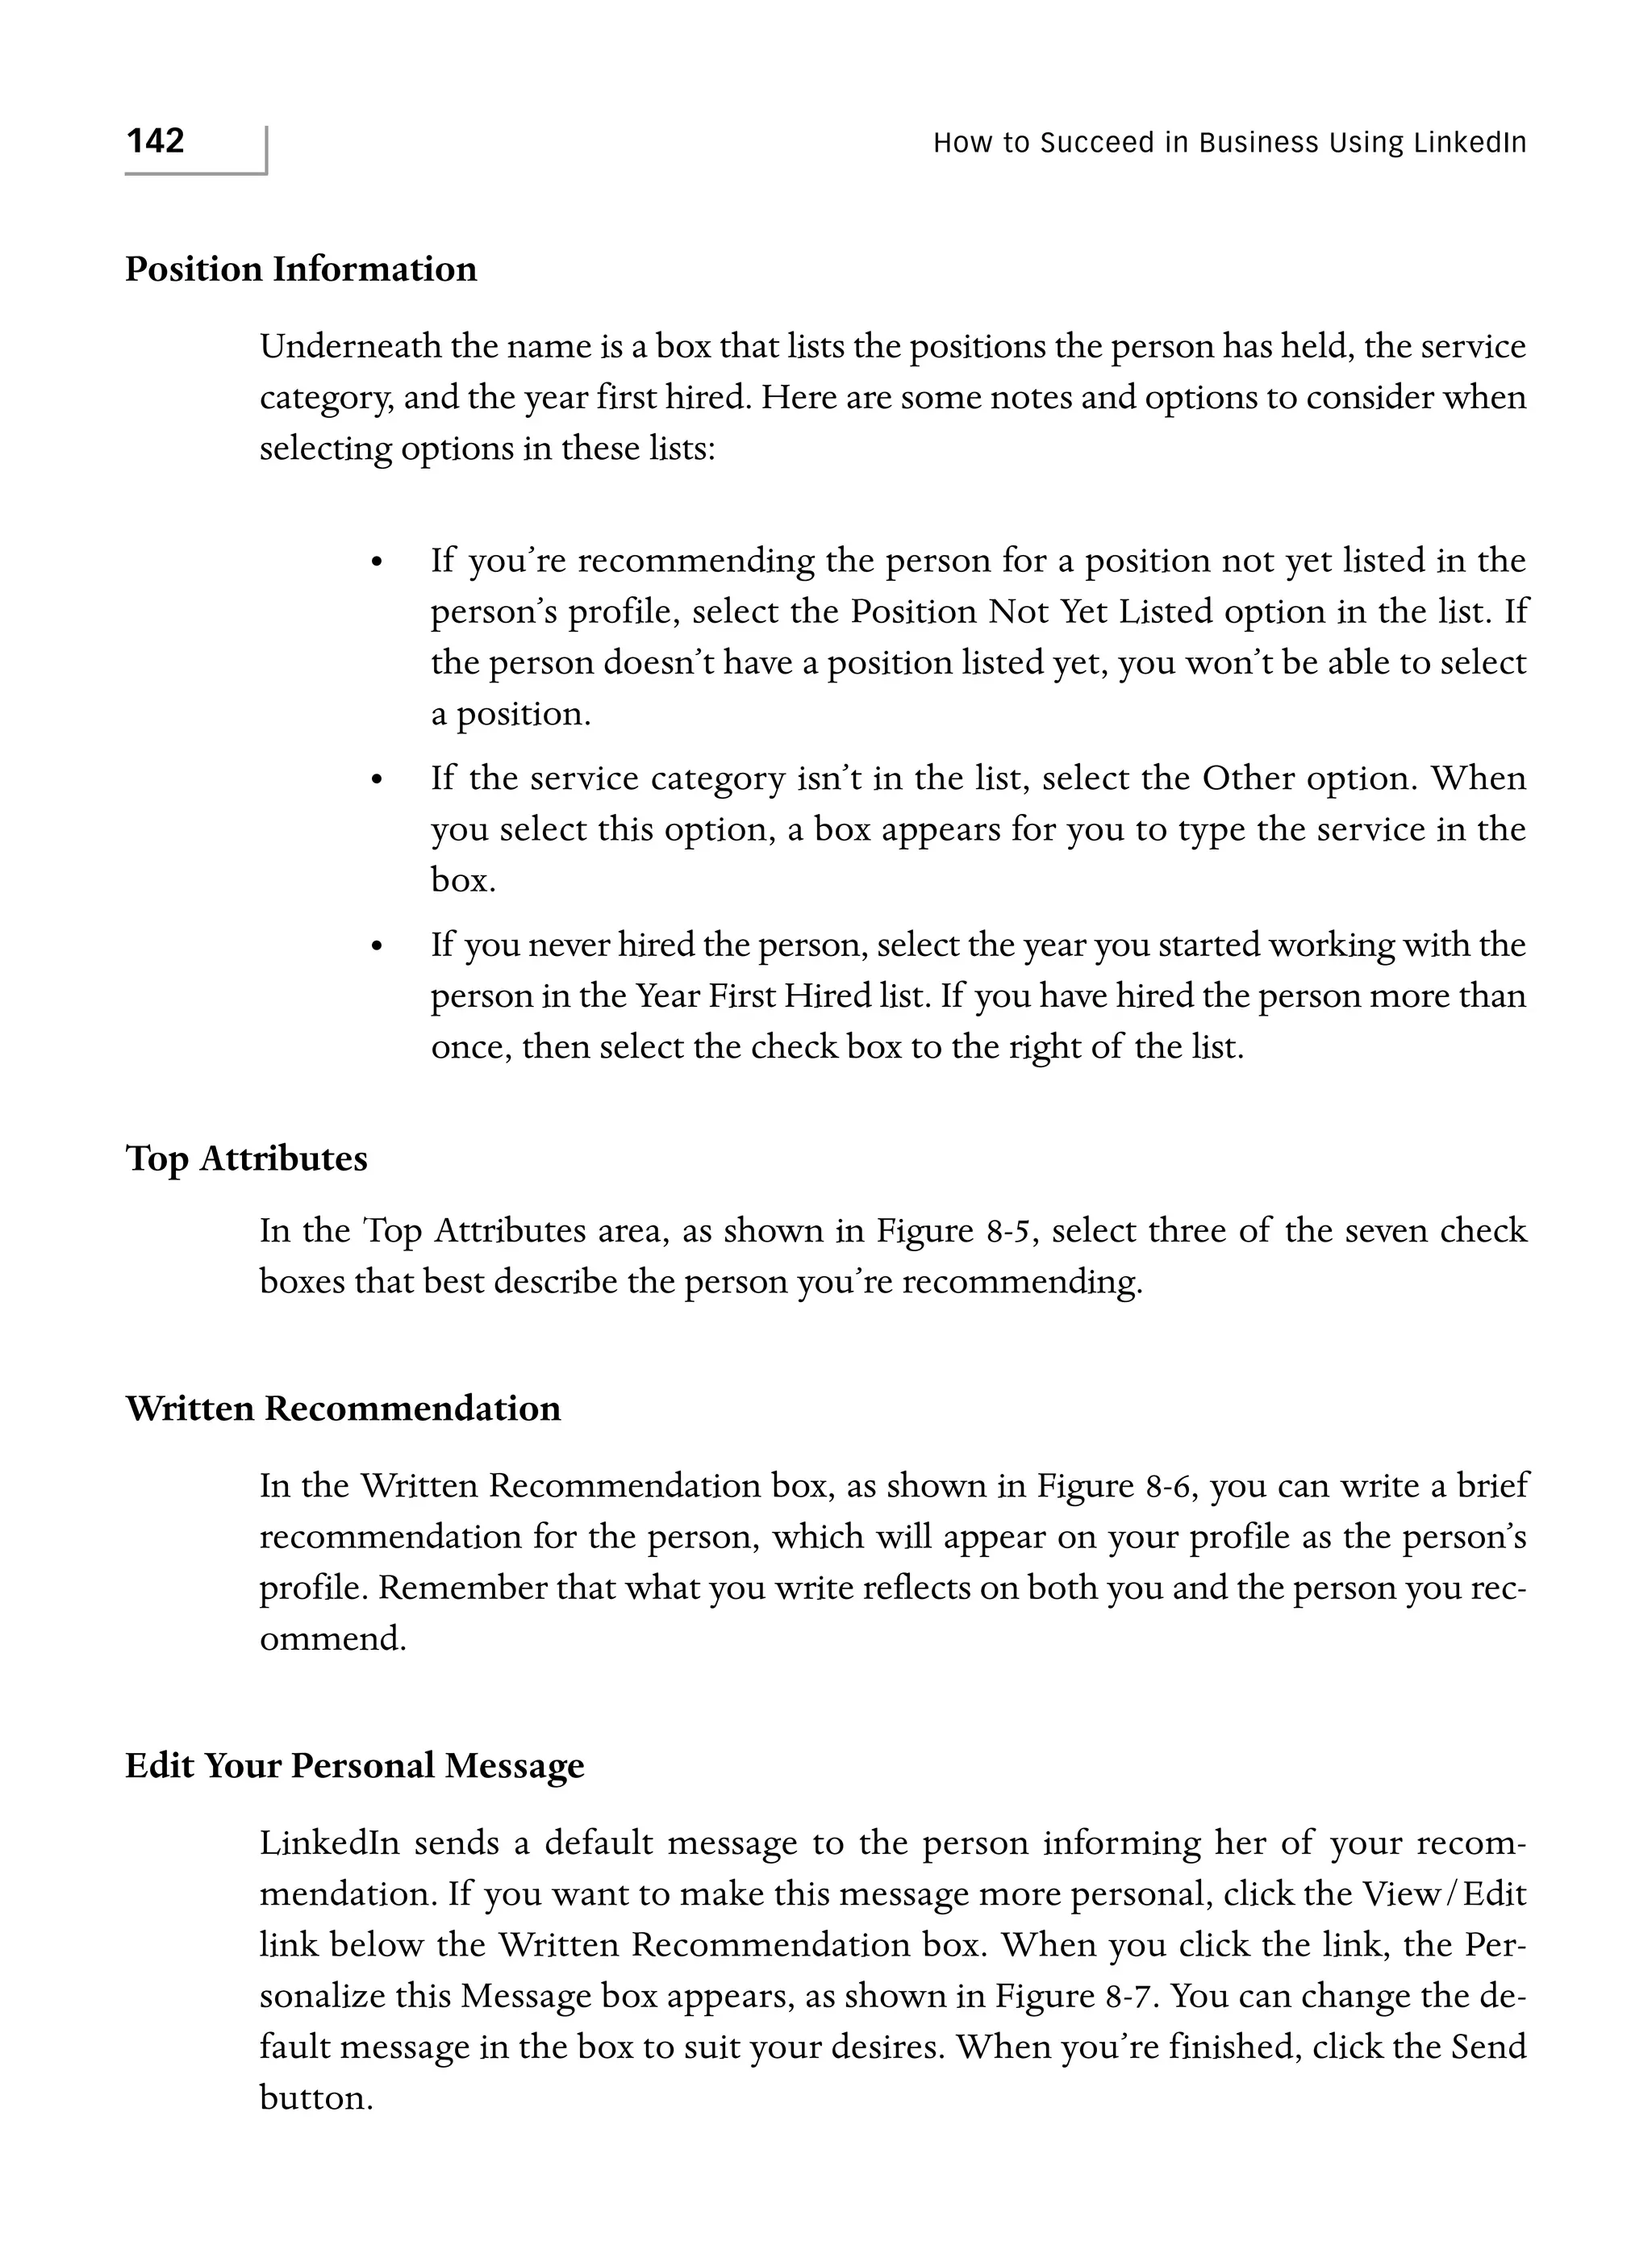
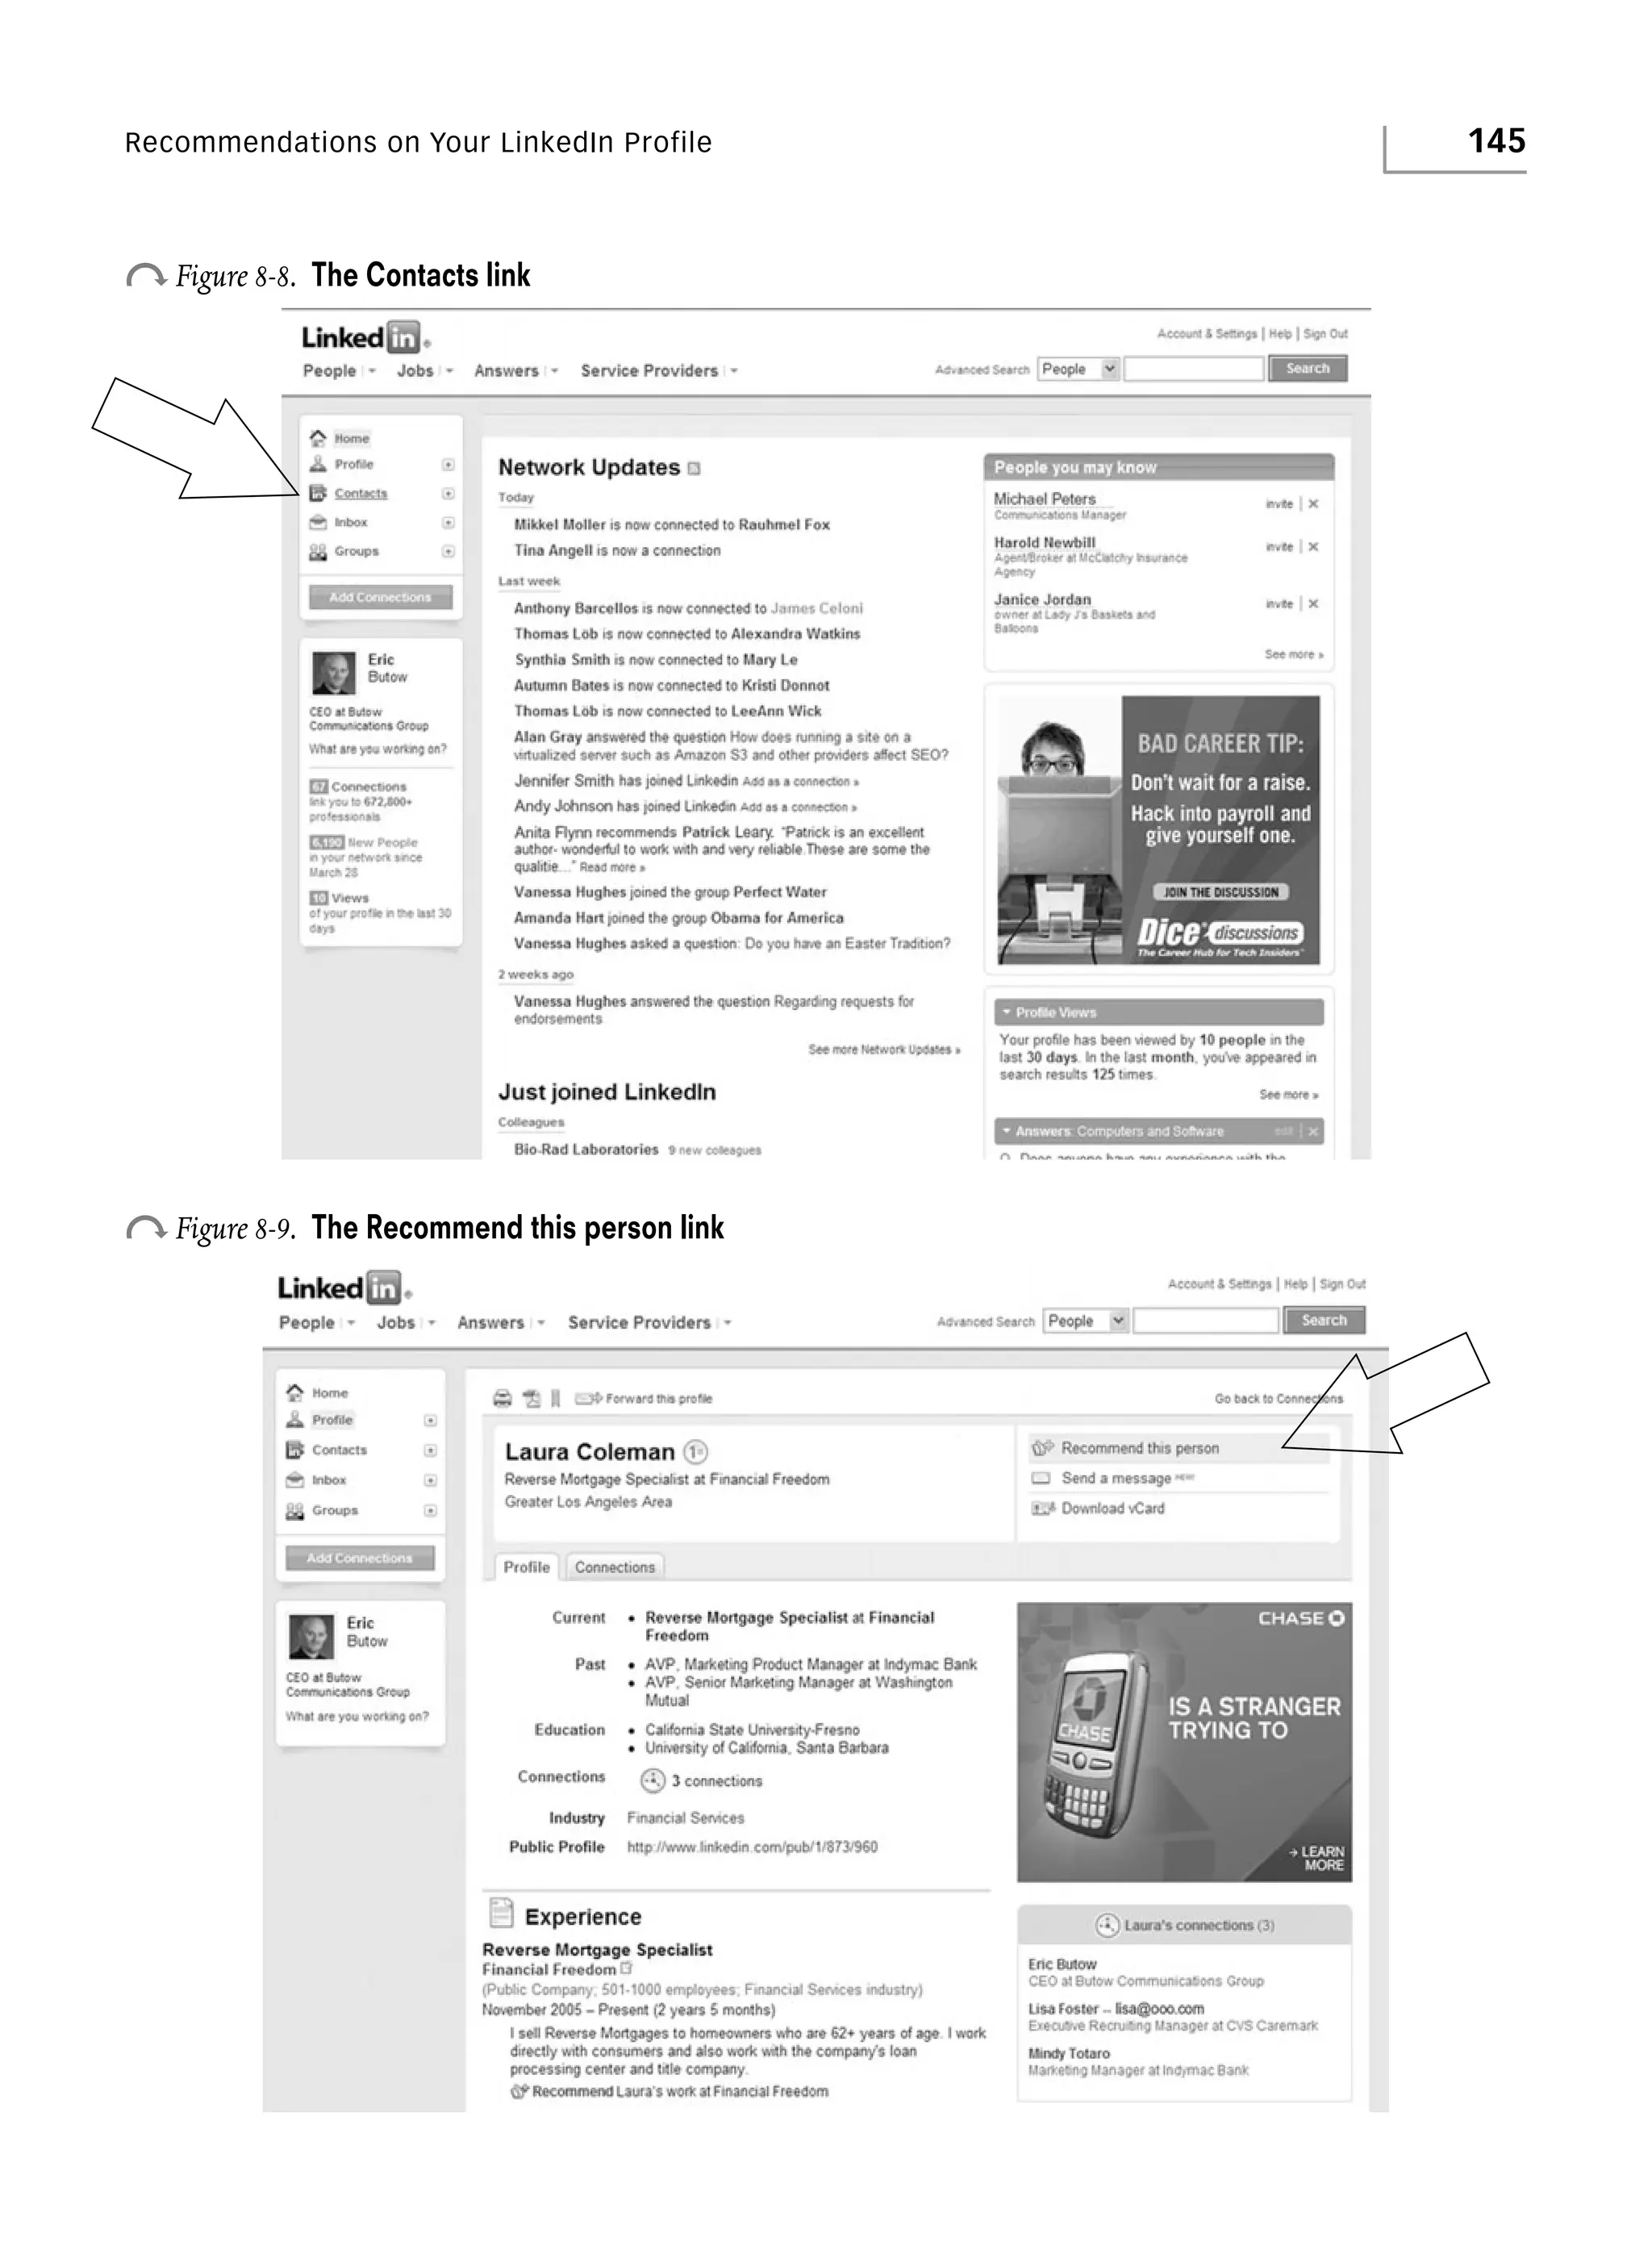
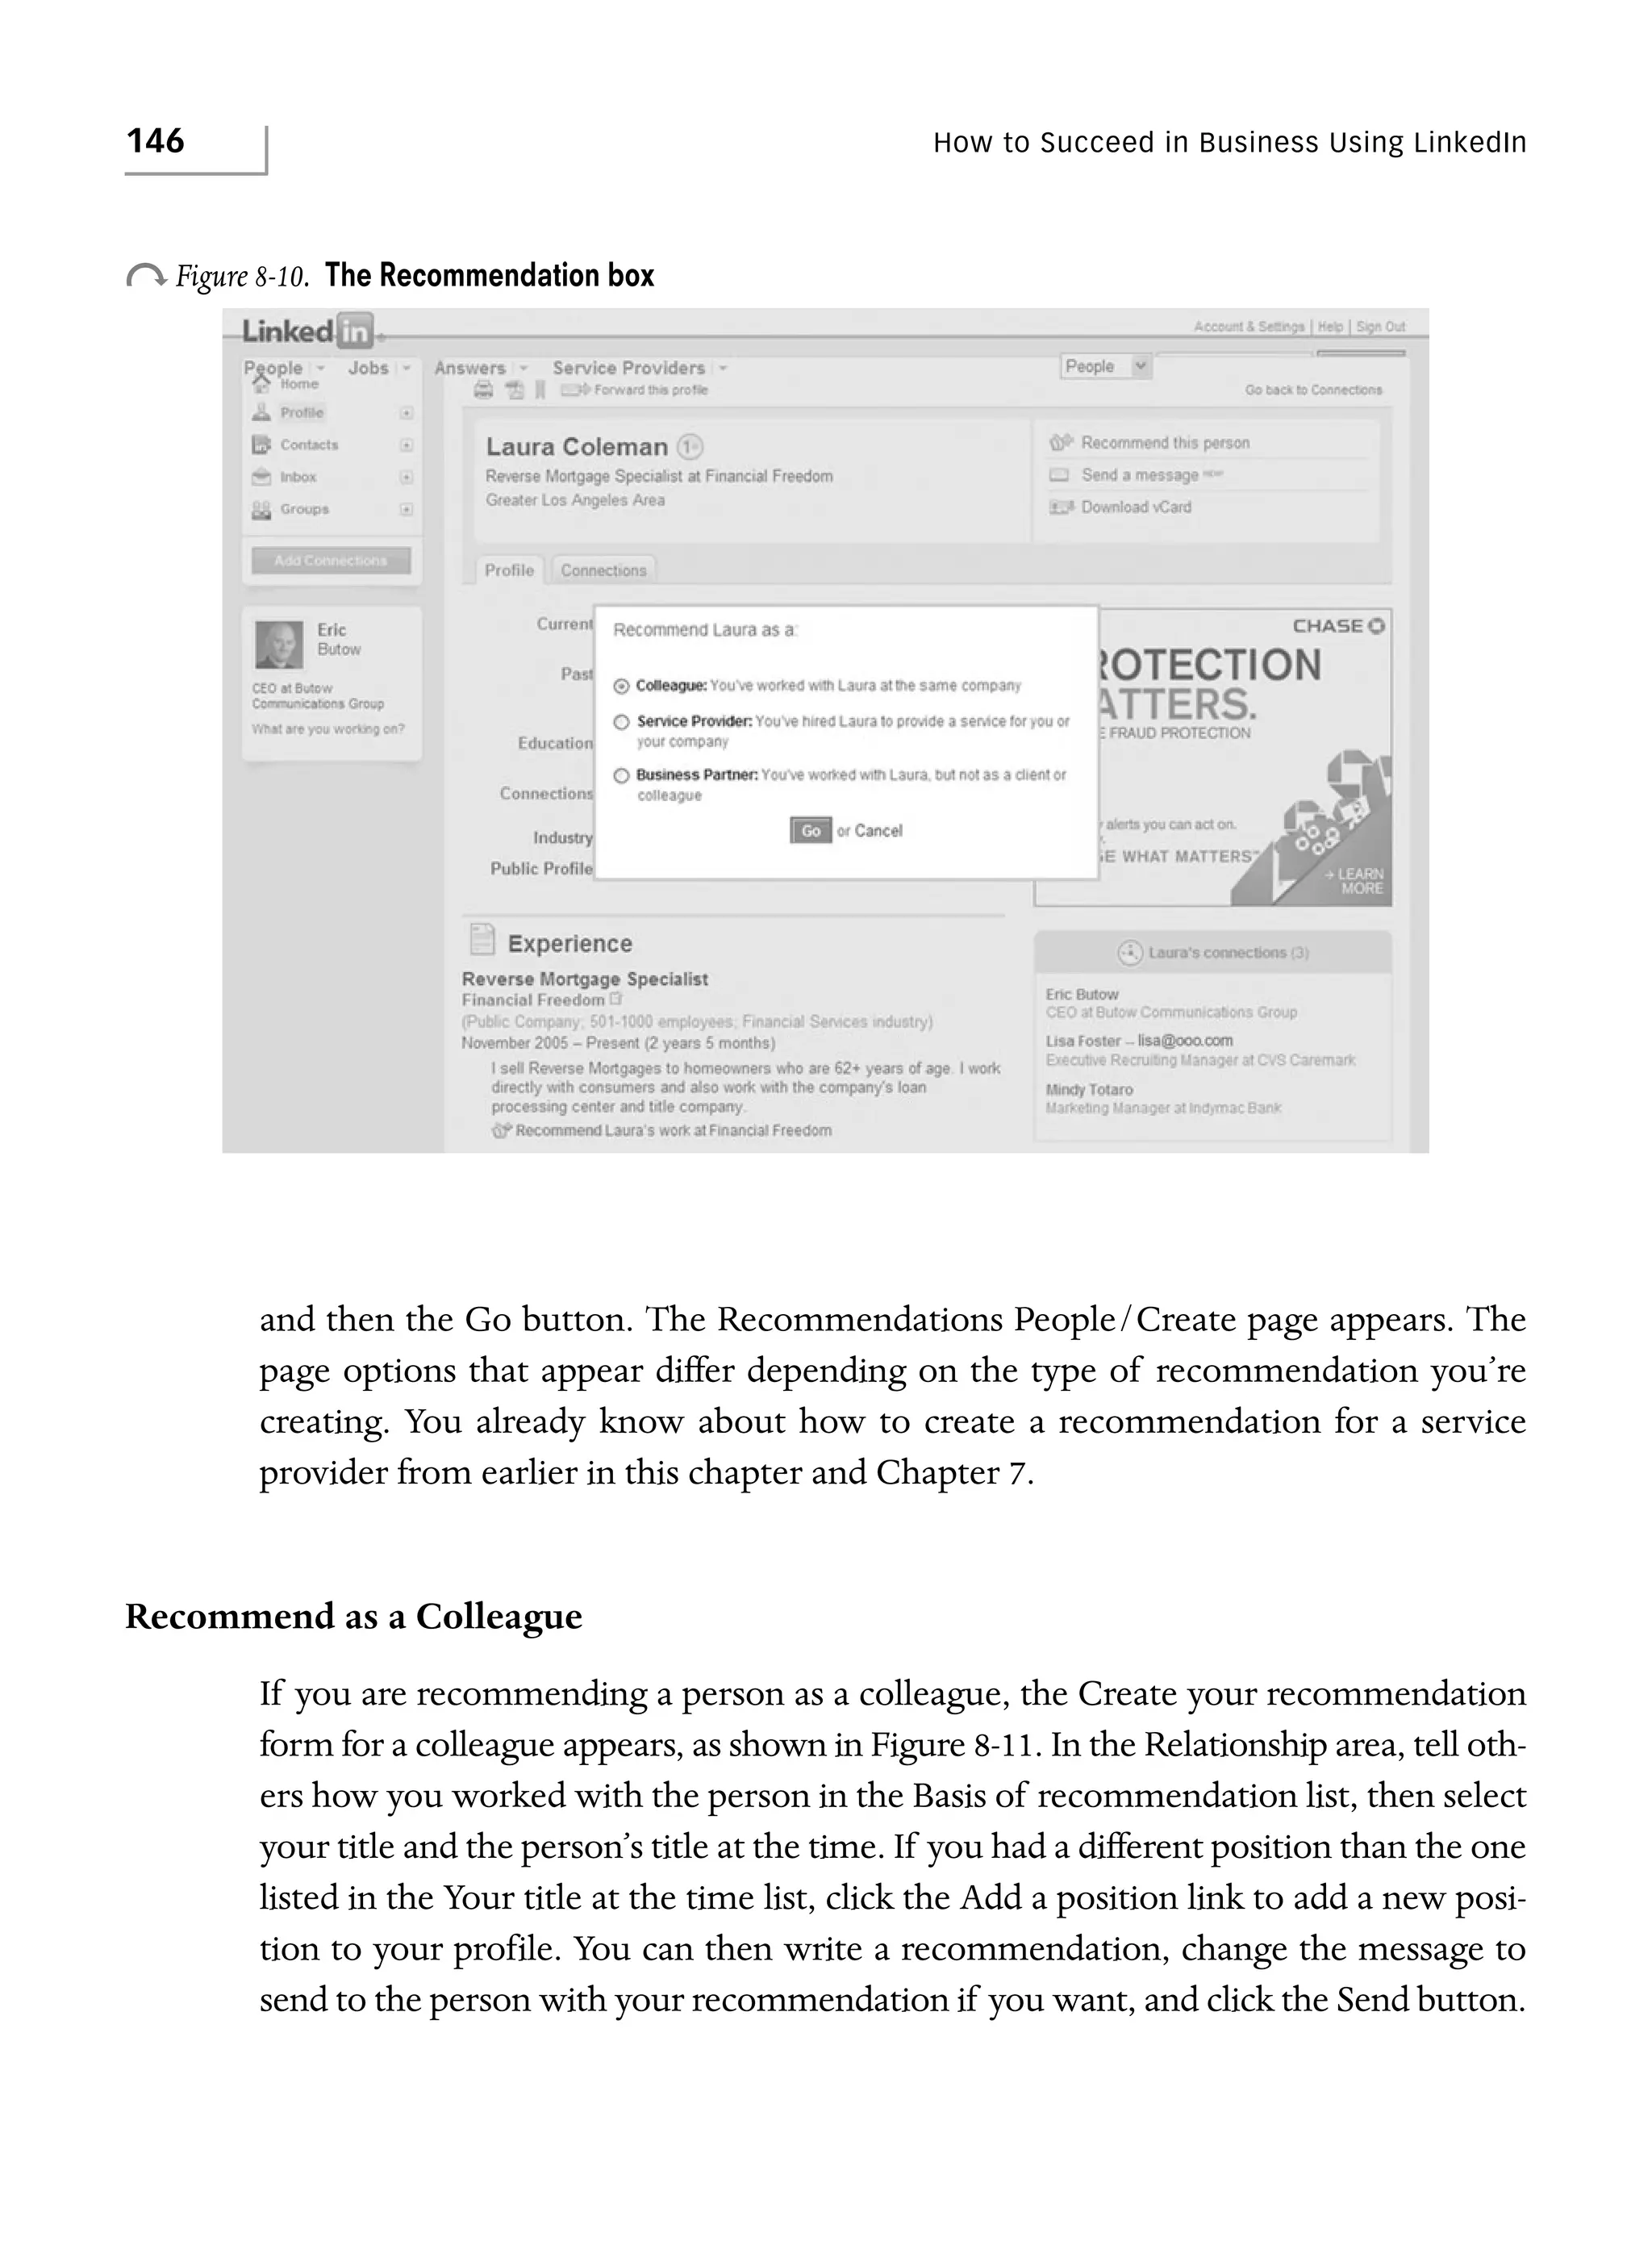
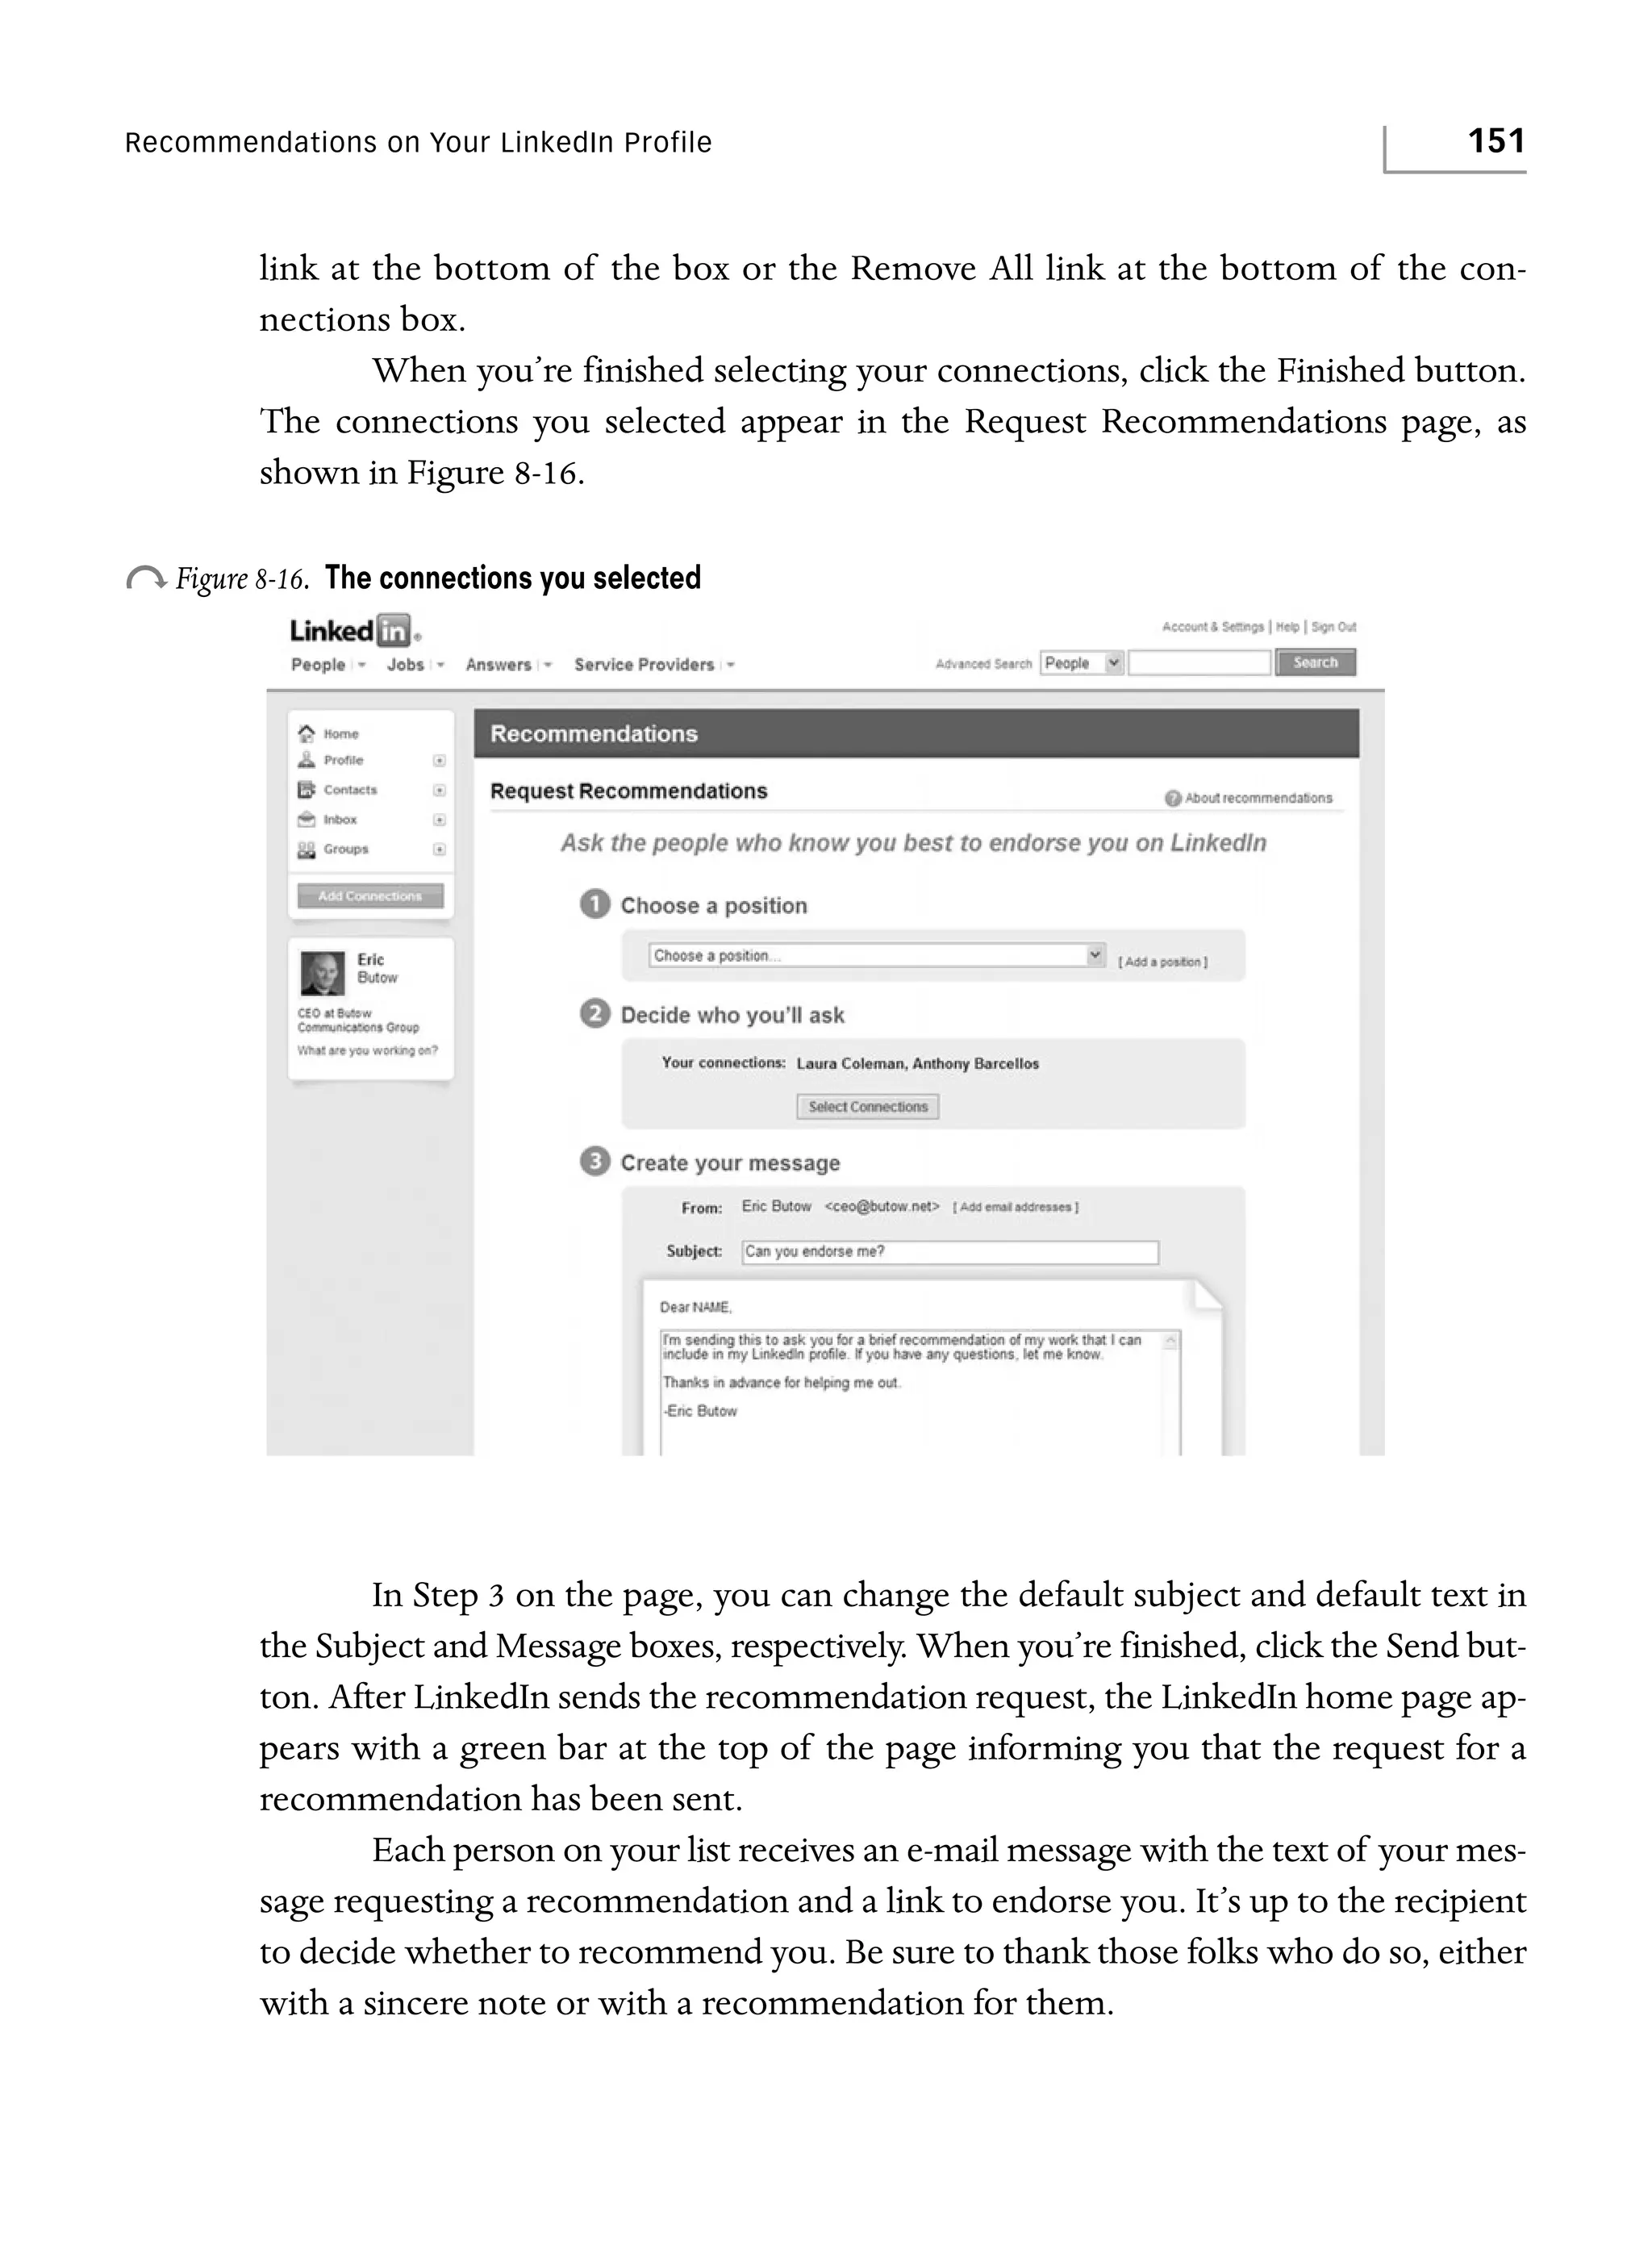
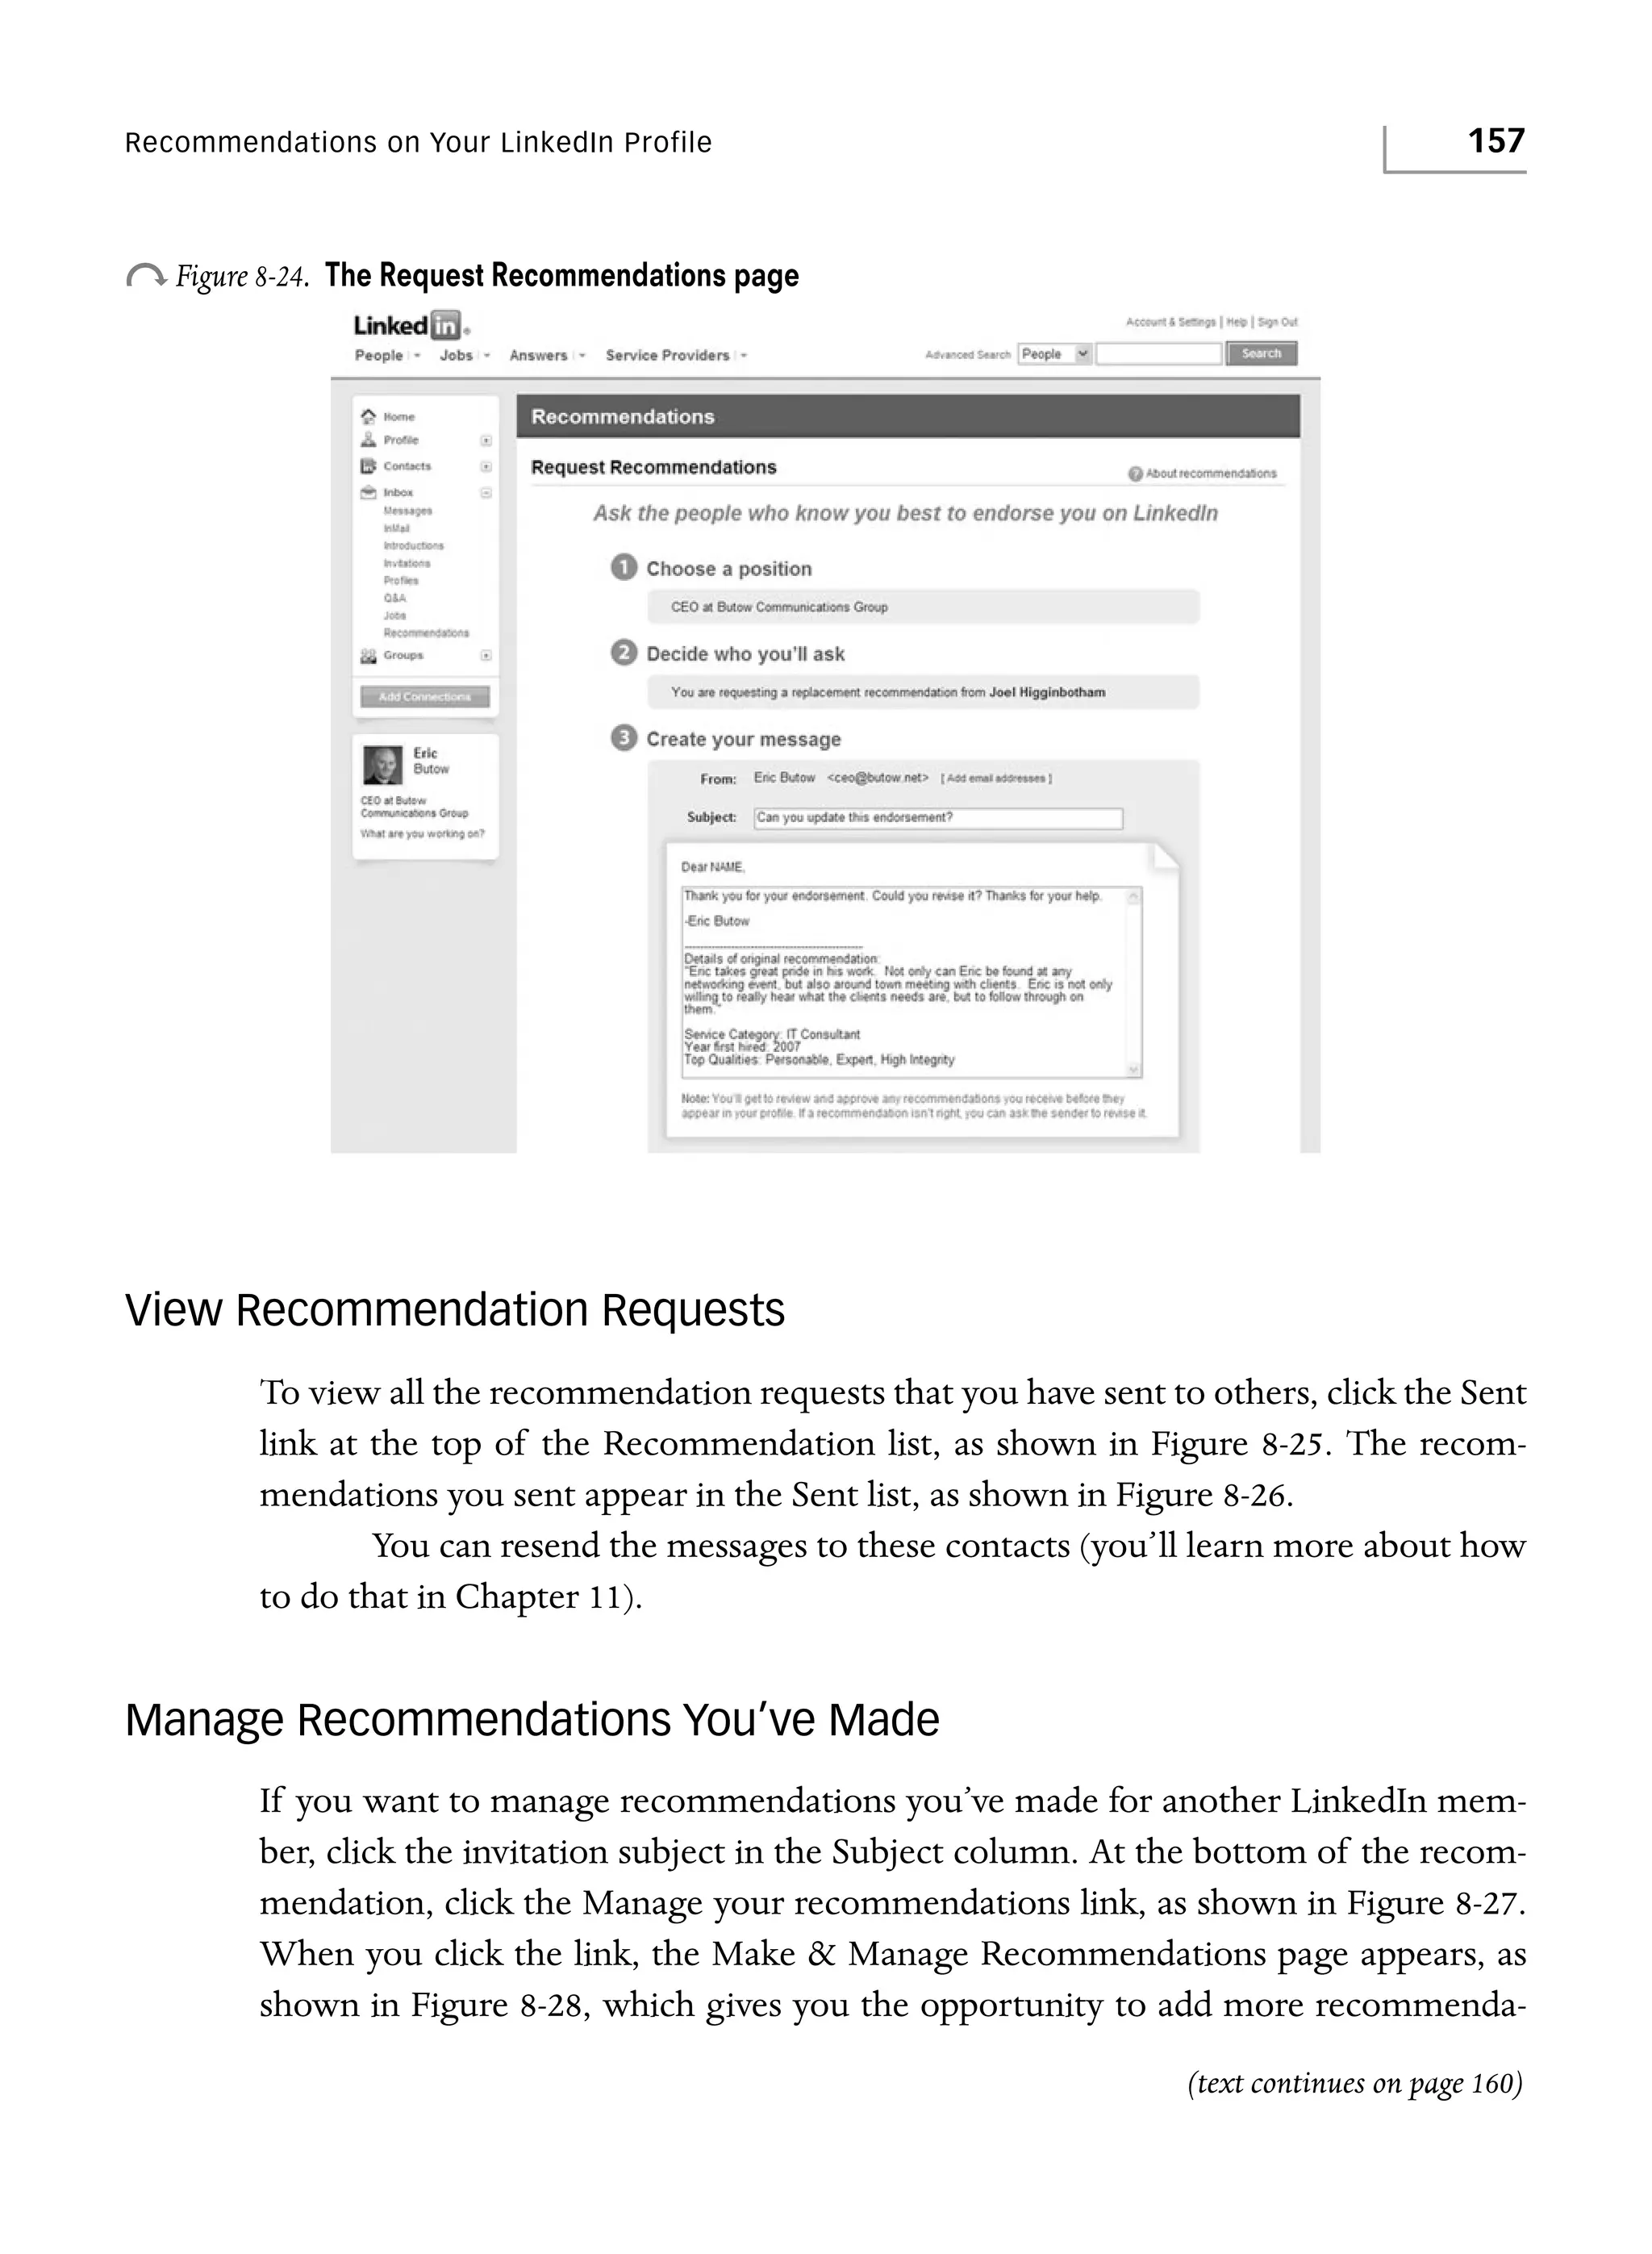
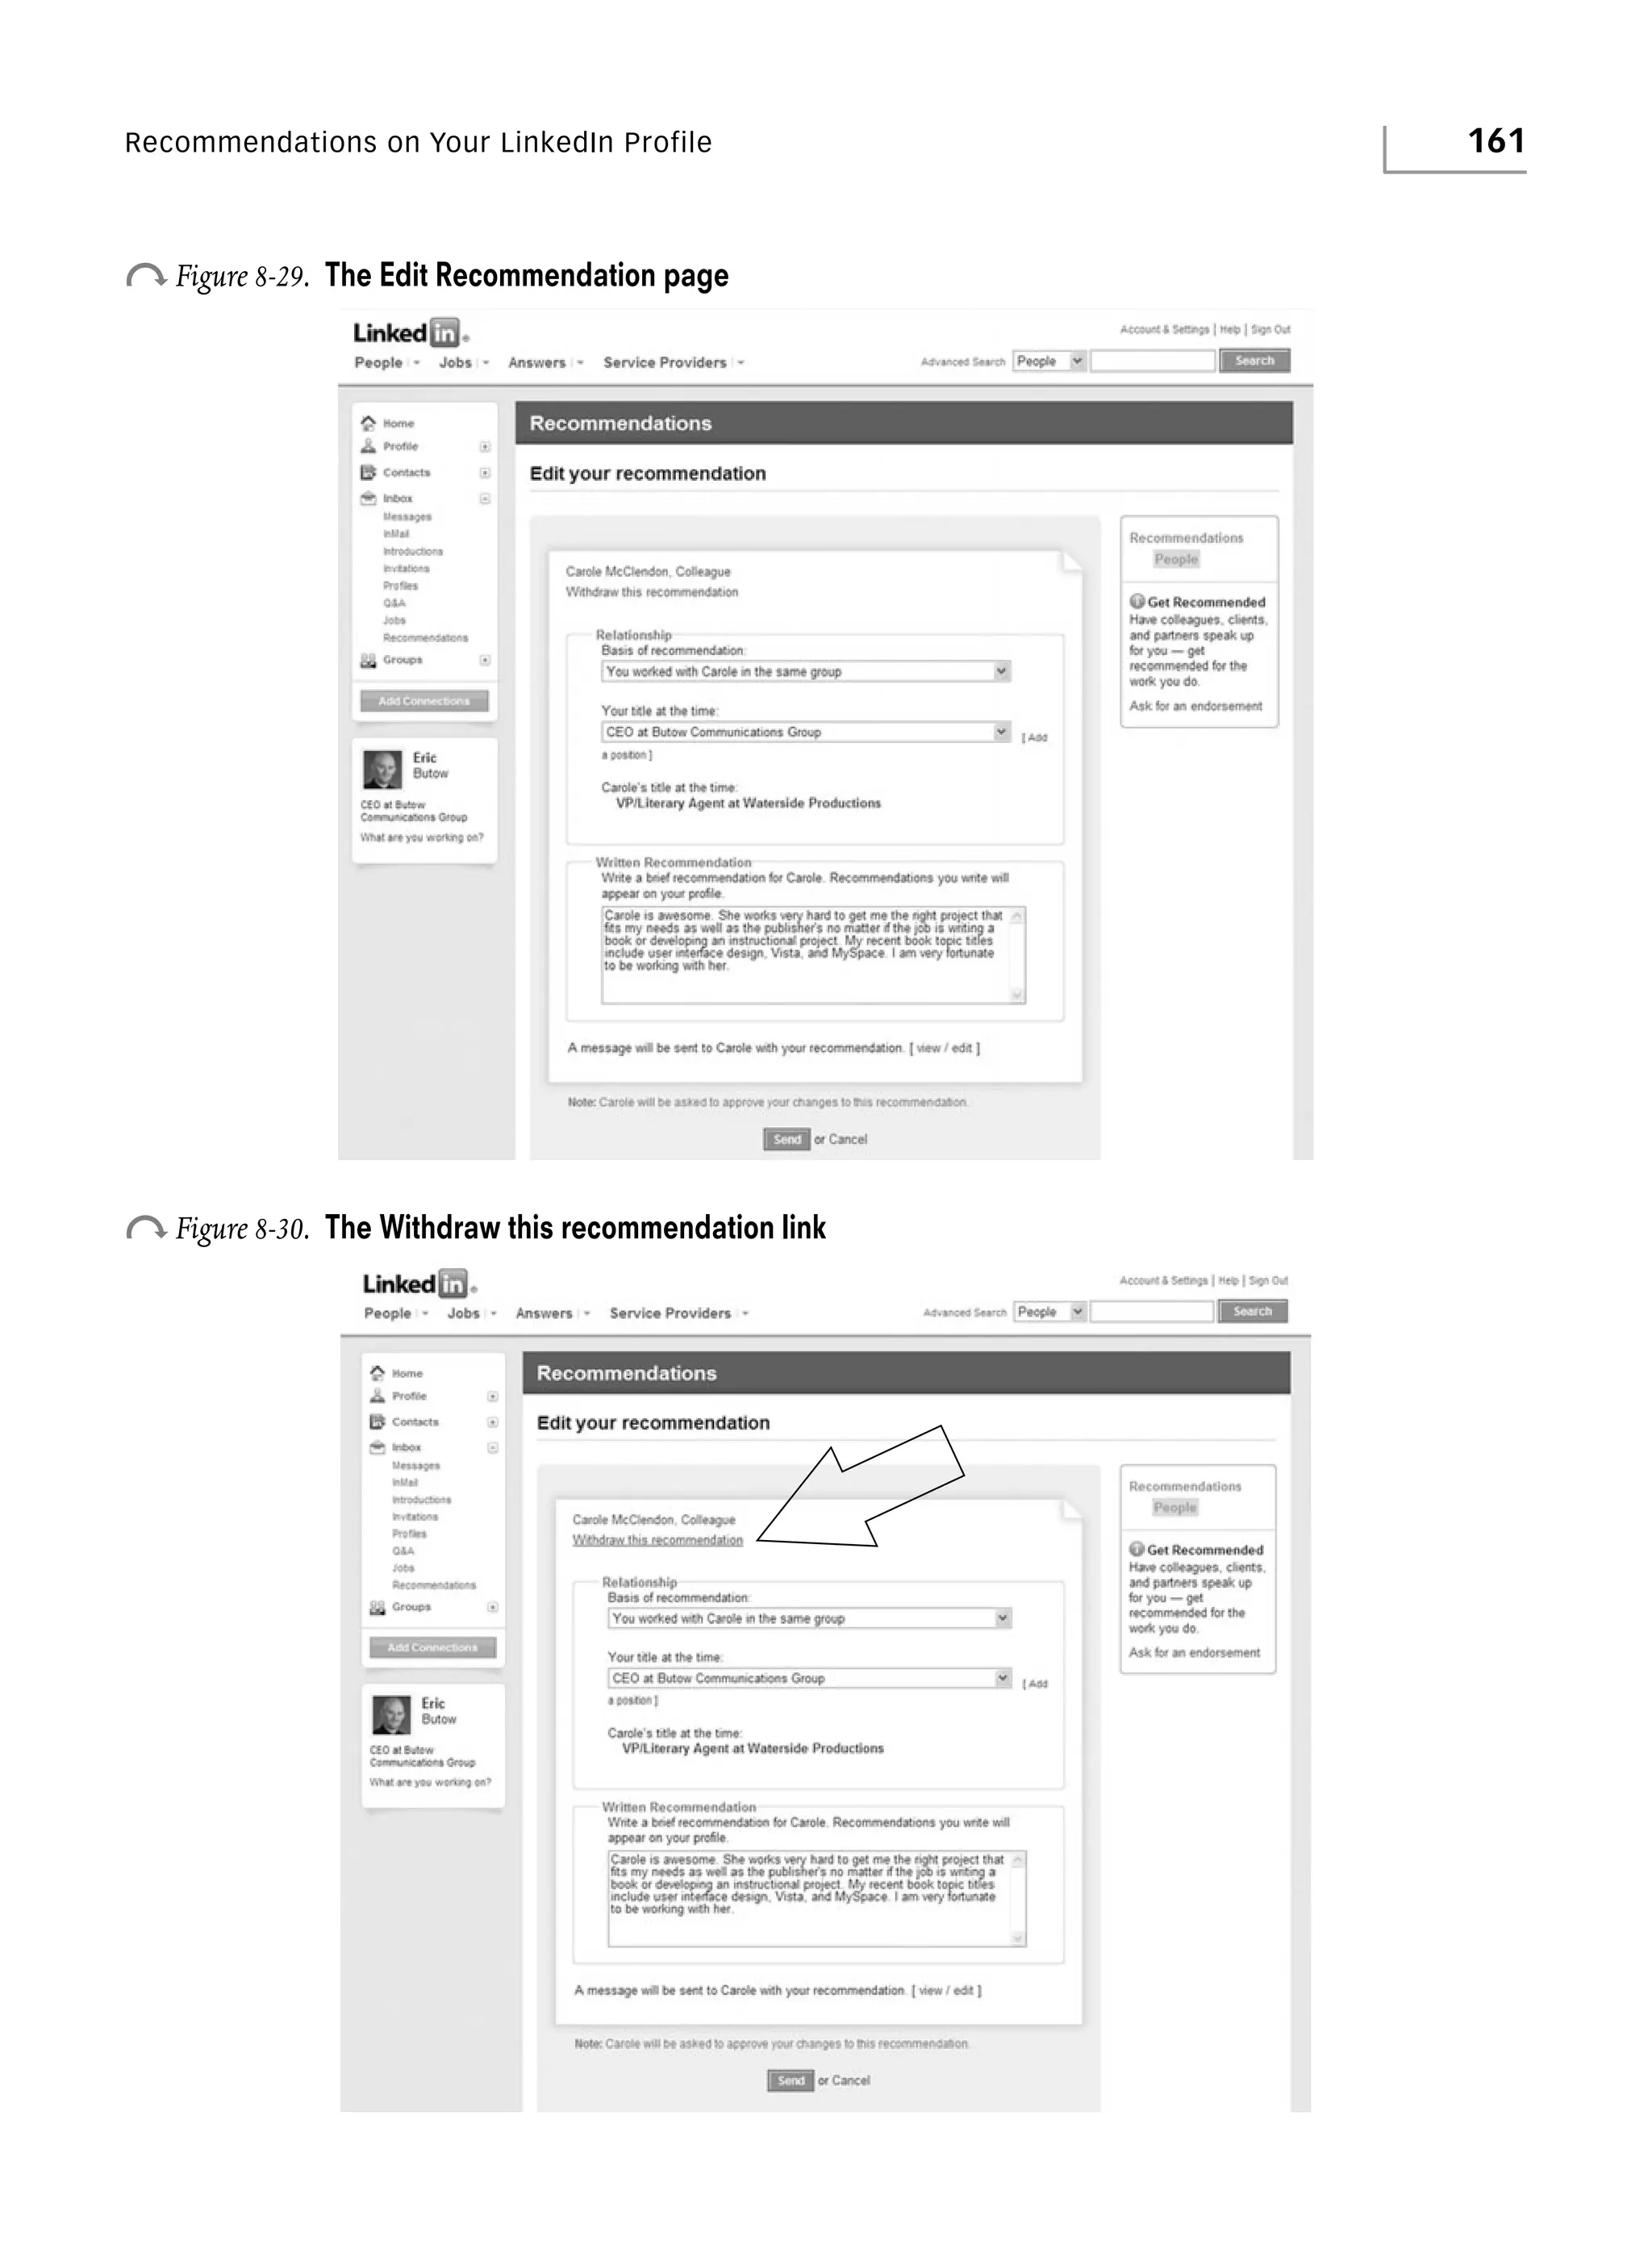
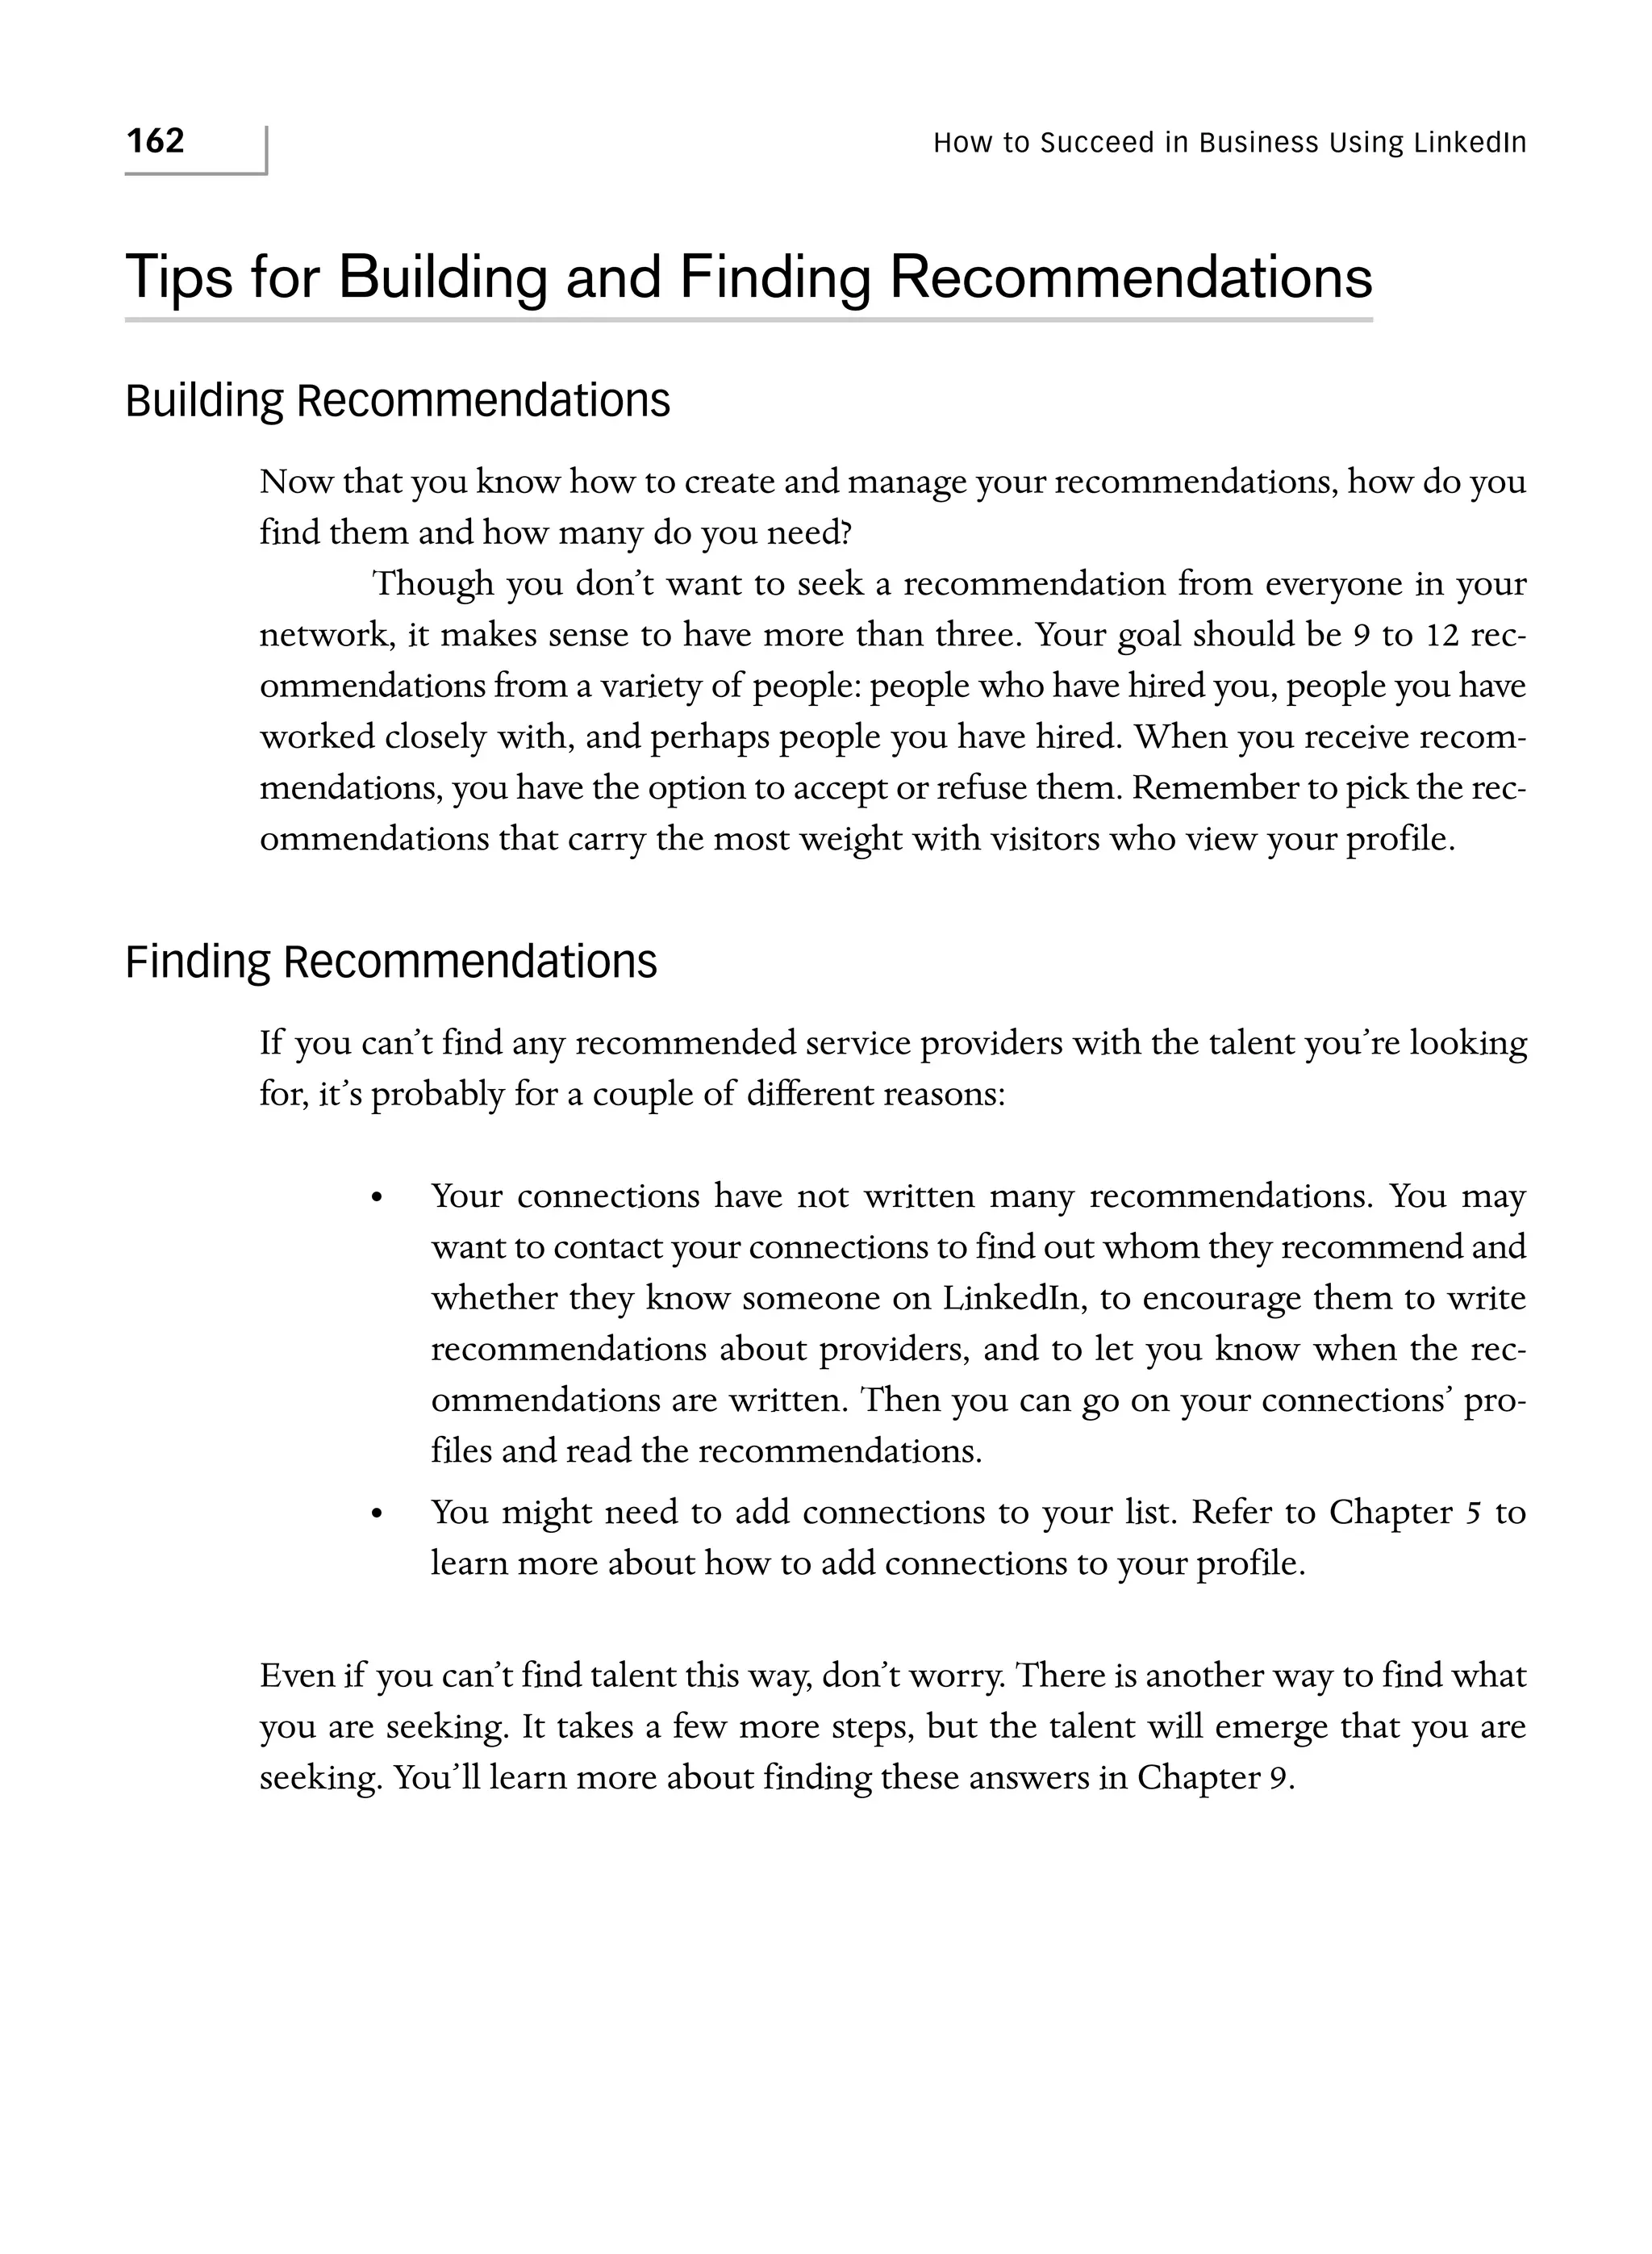
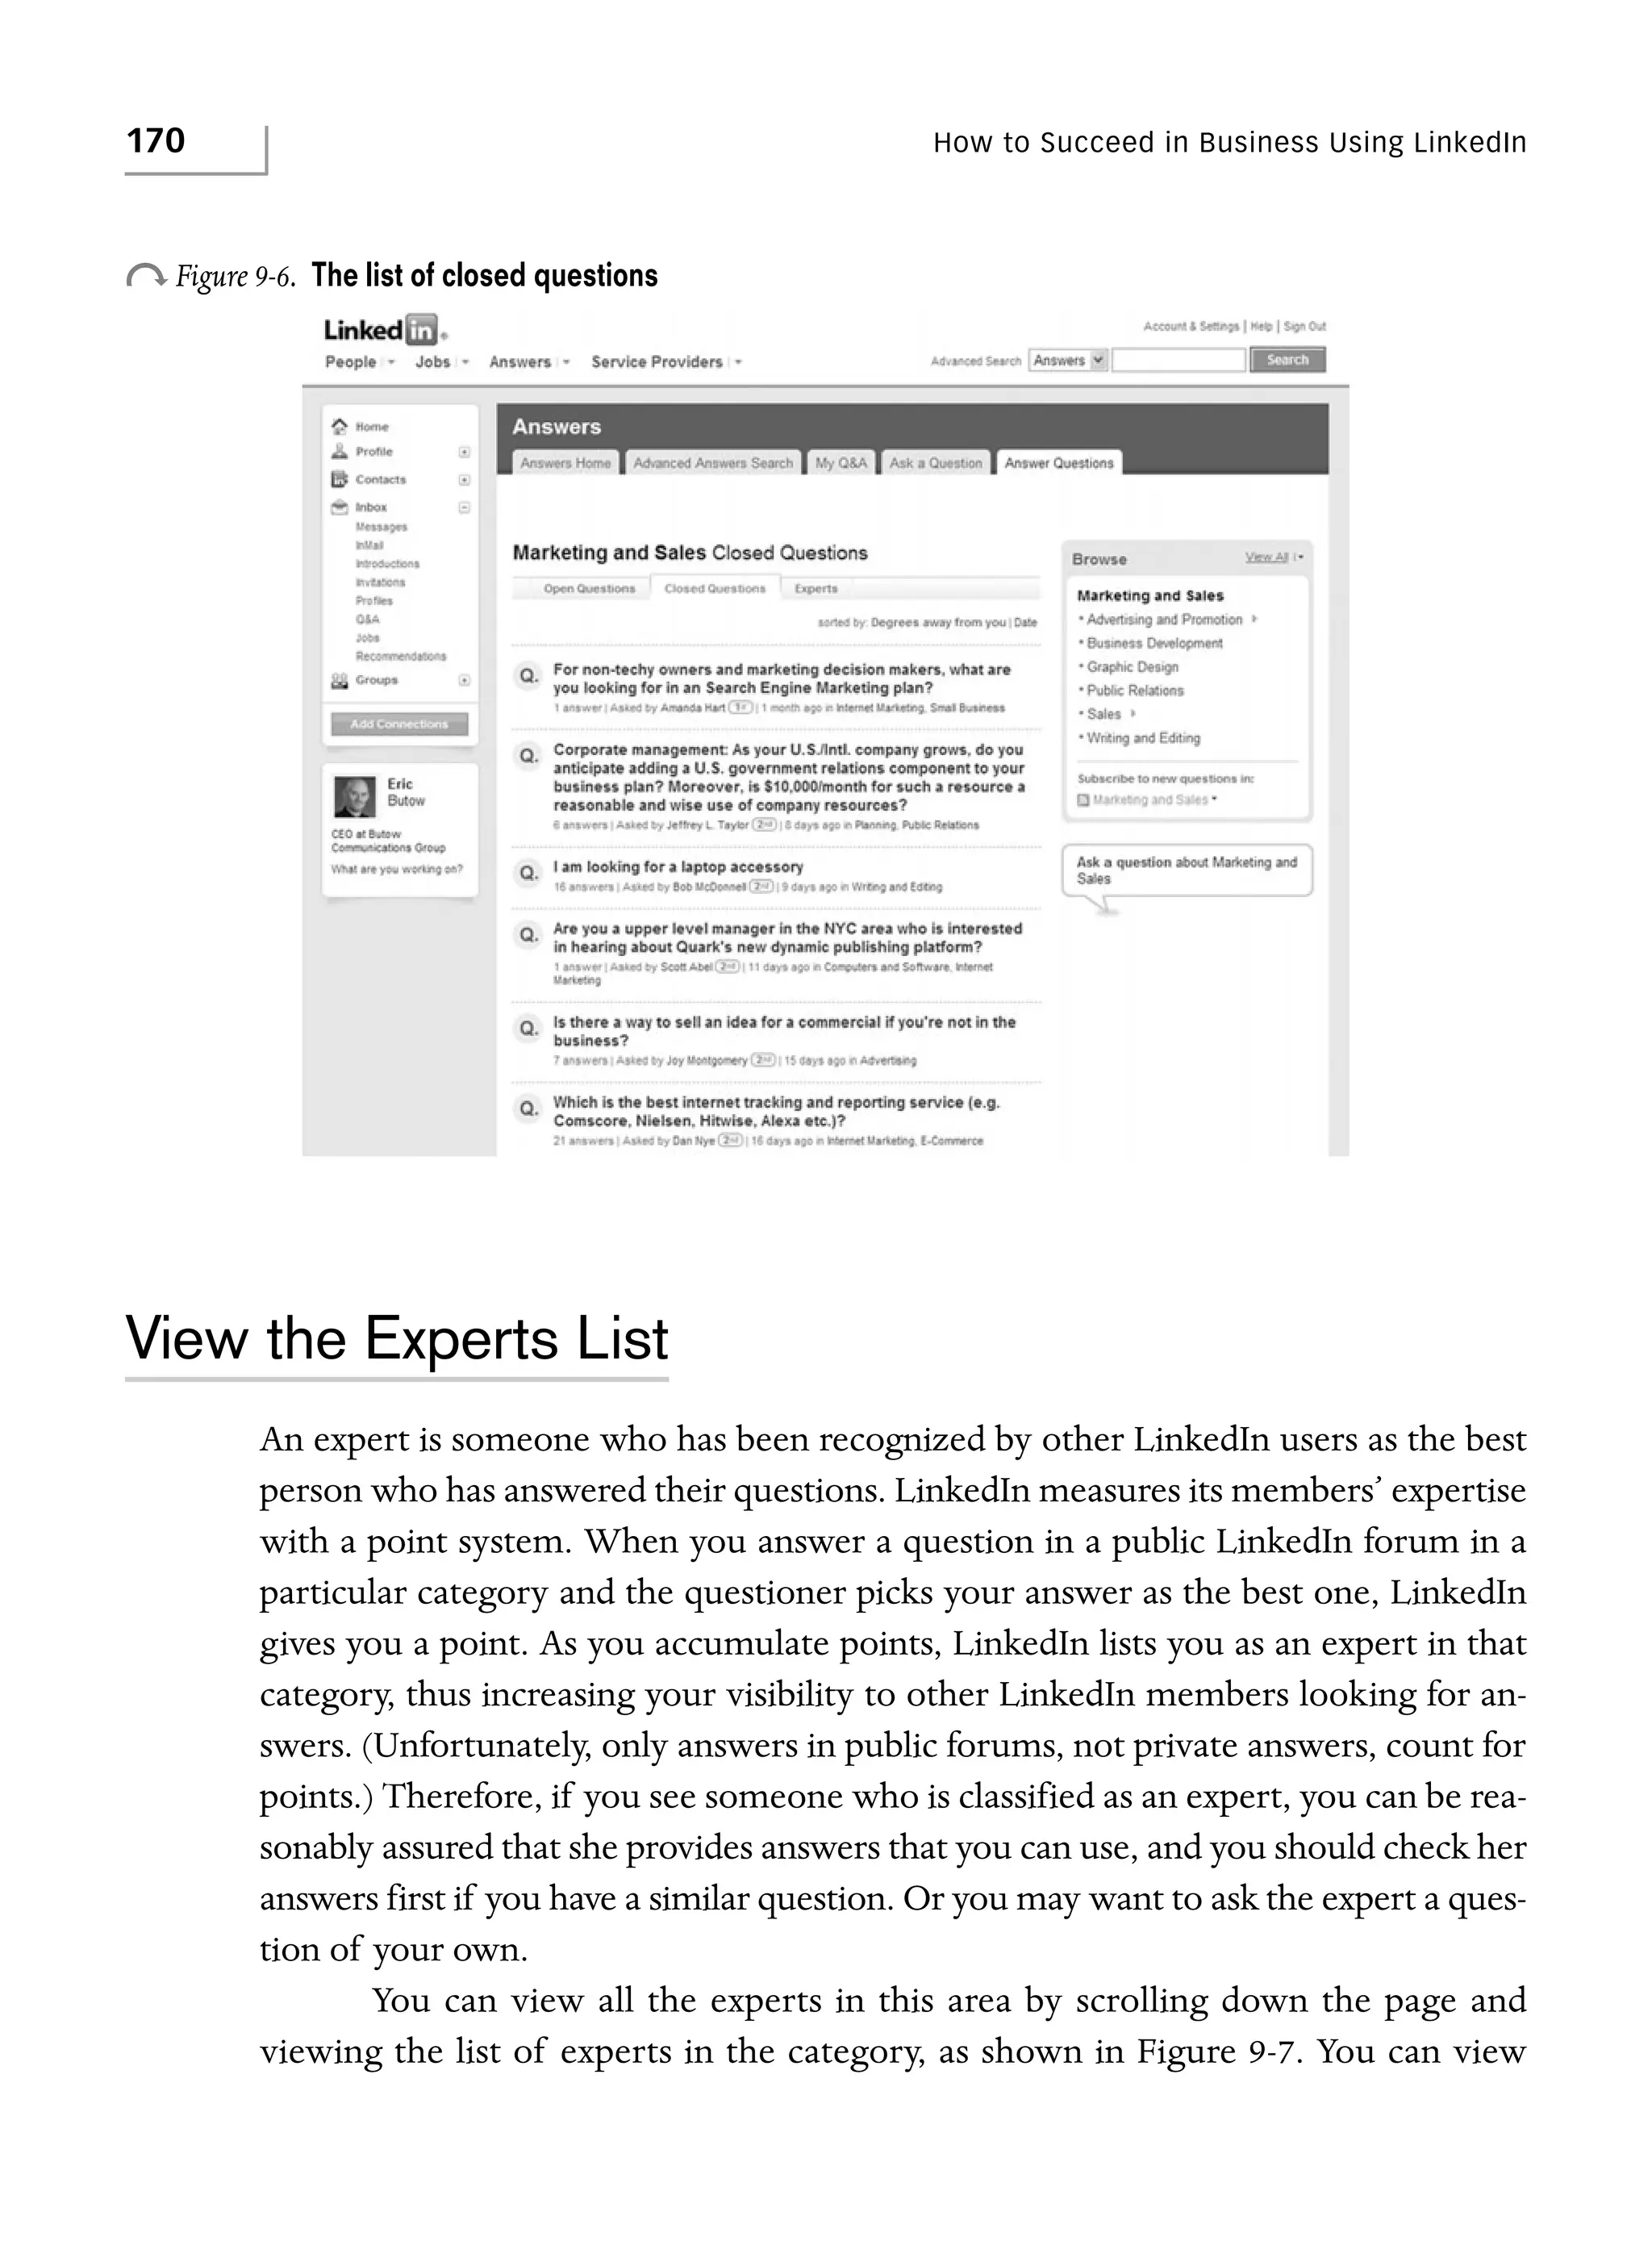
Pending Recommendation Requests
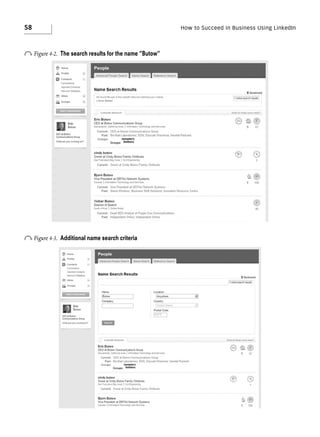
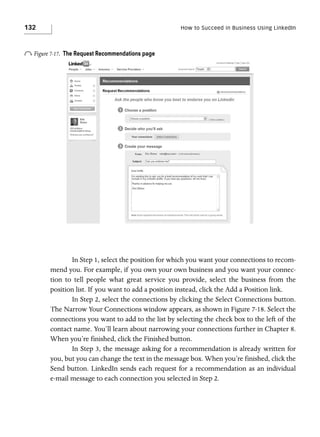
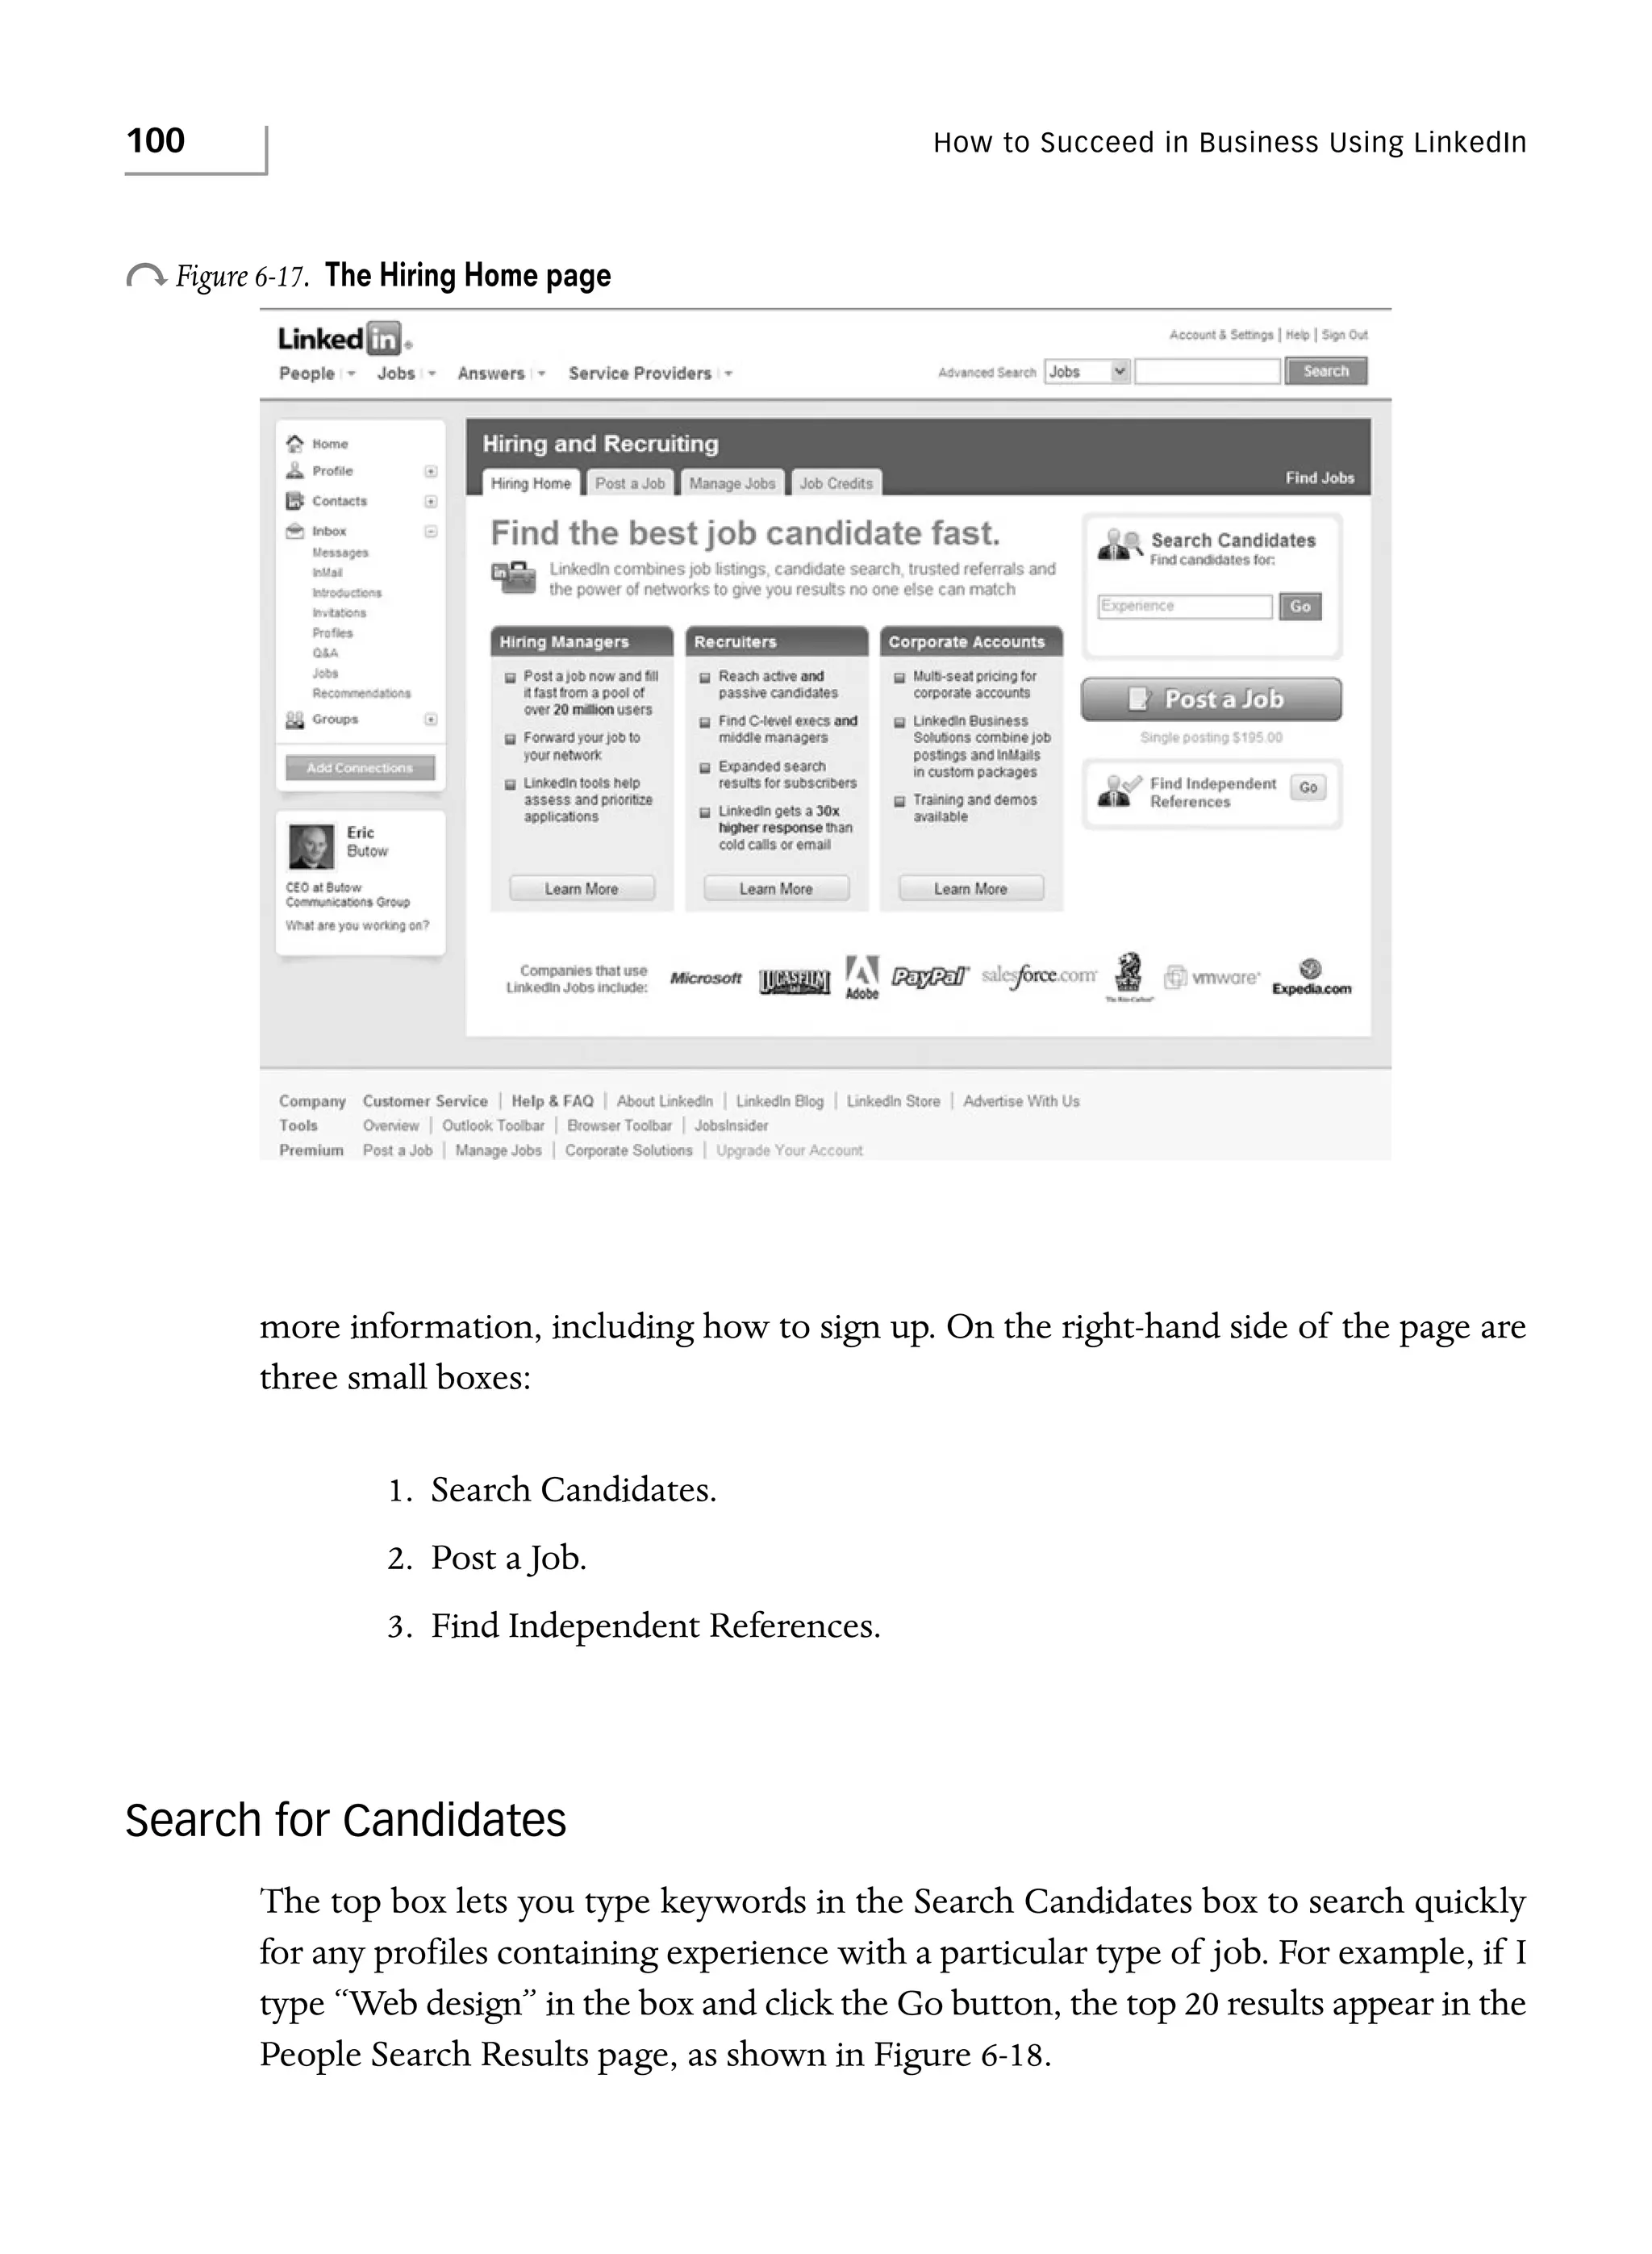
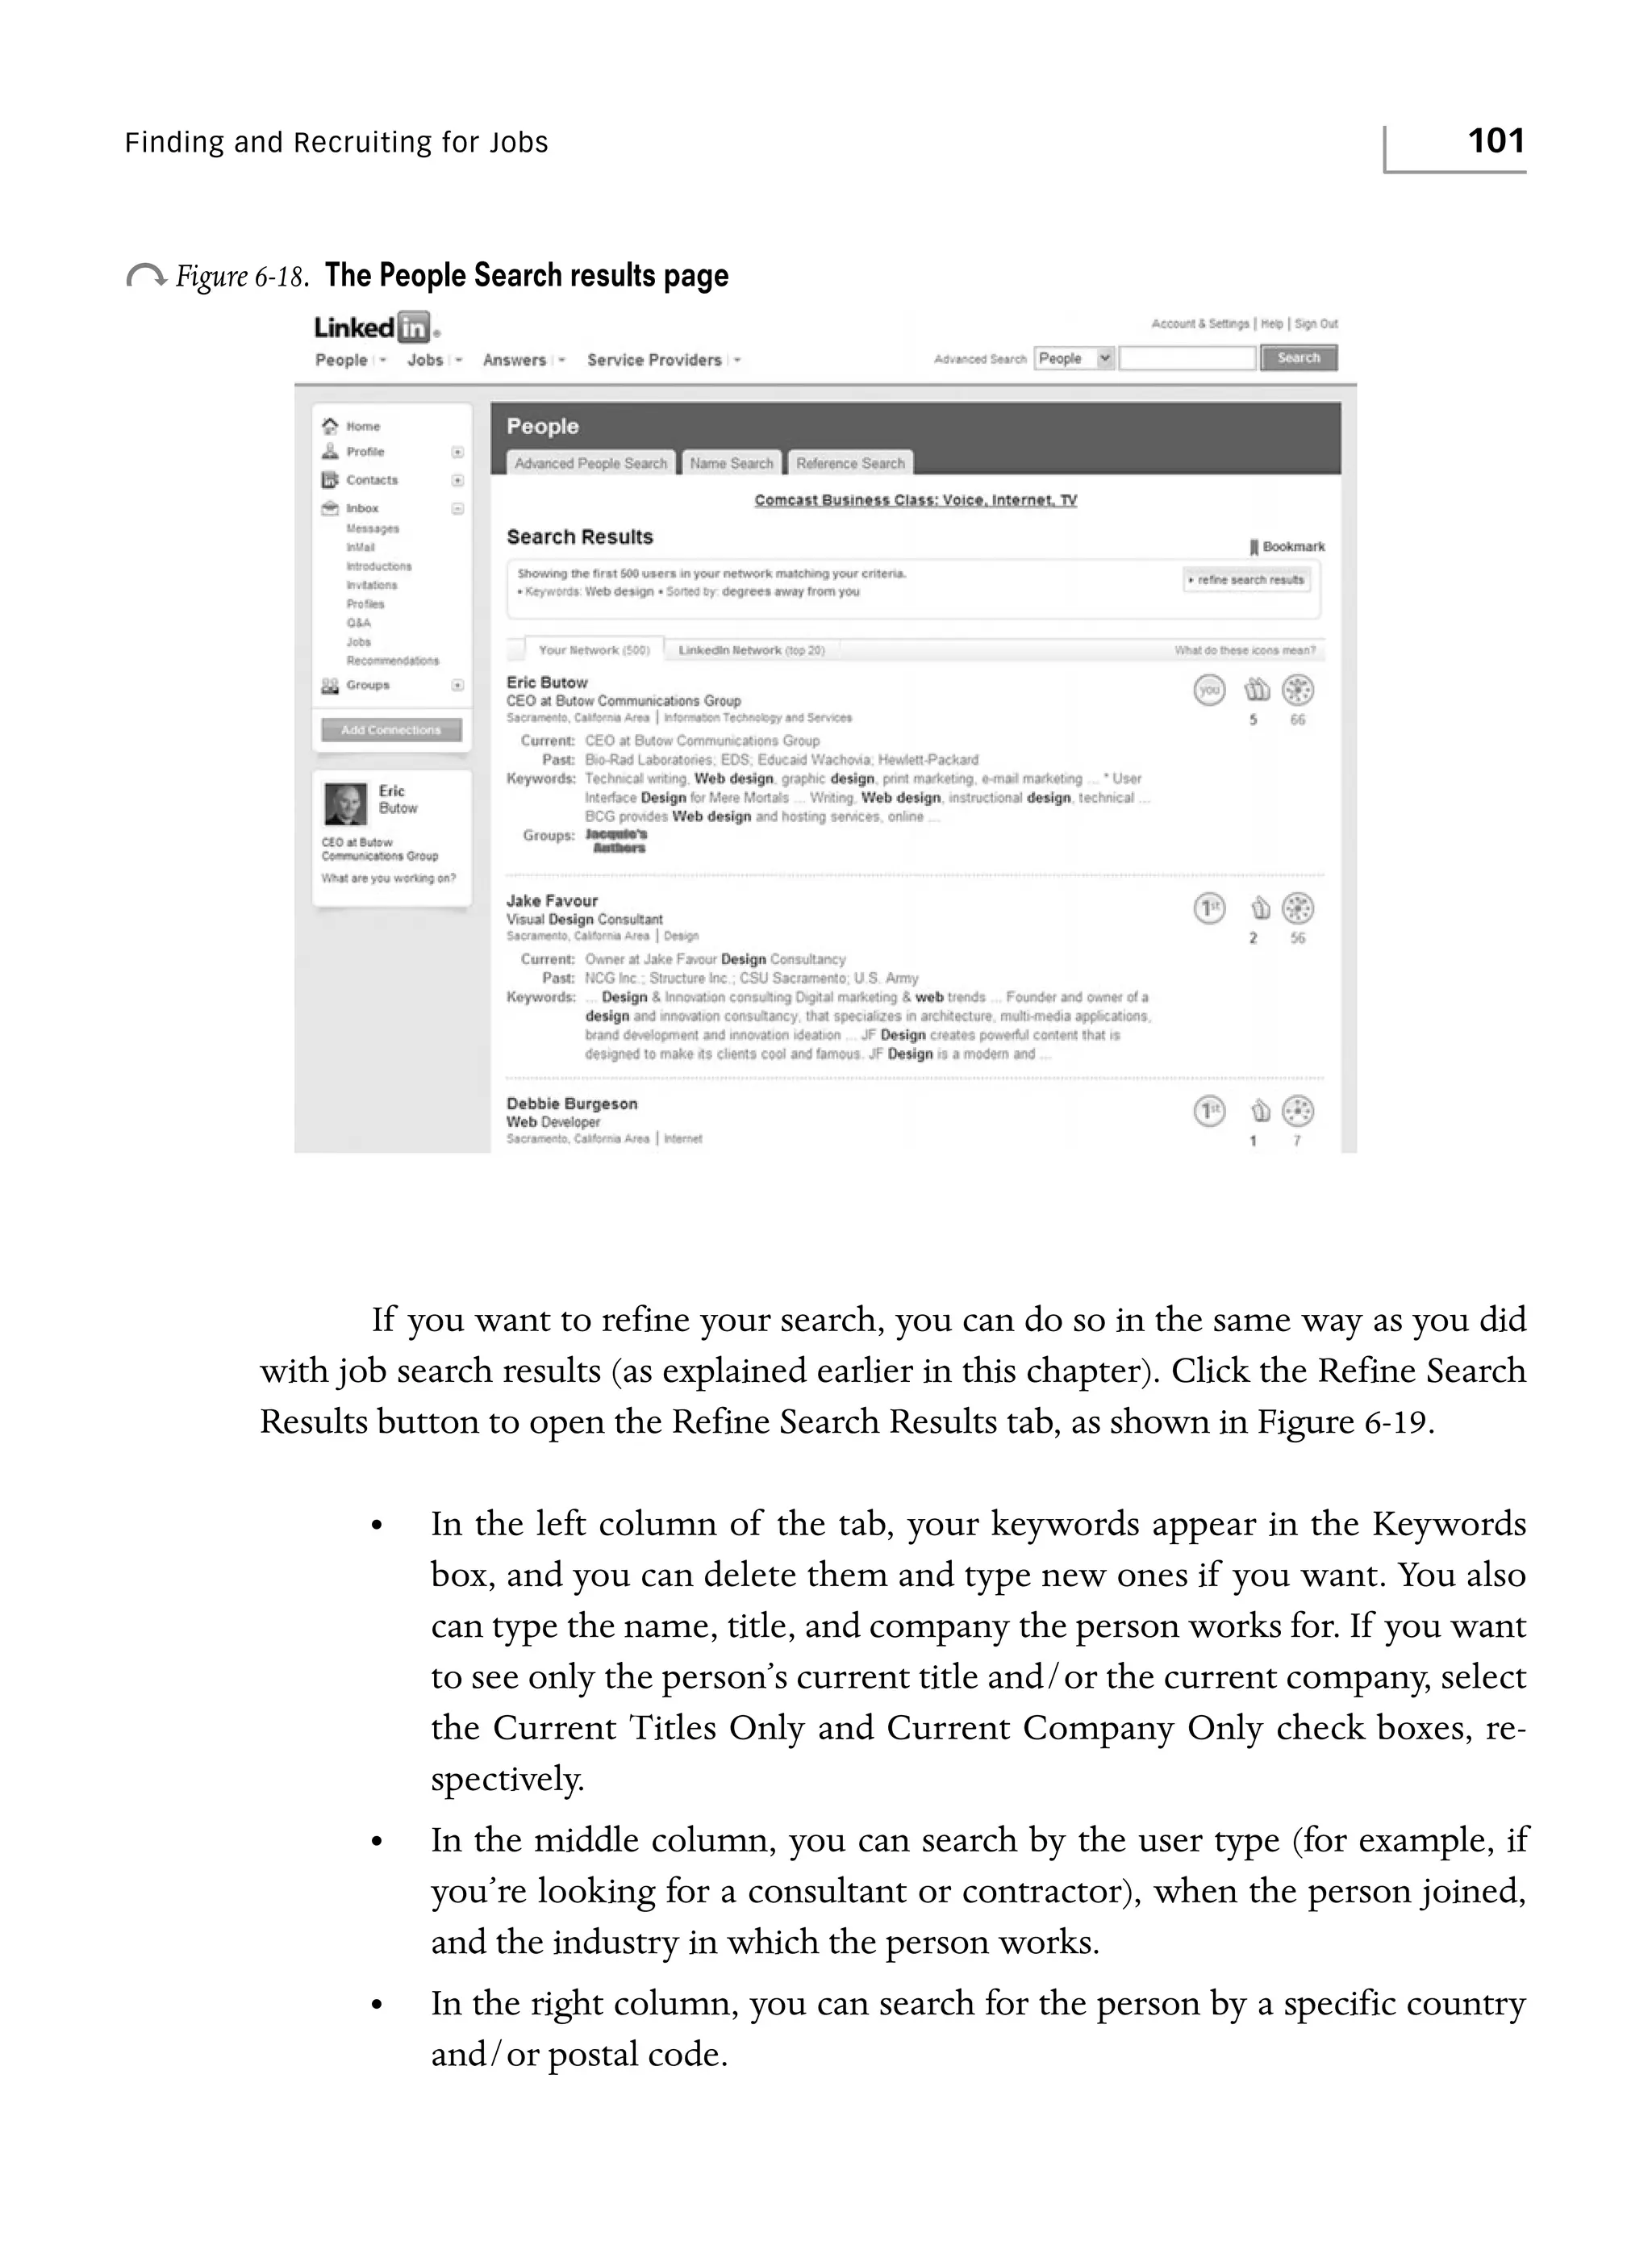
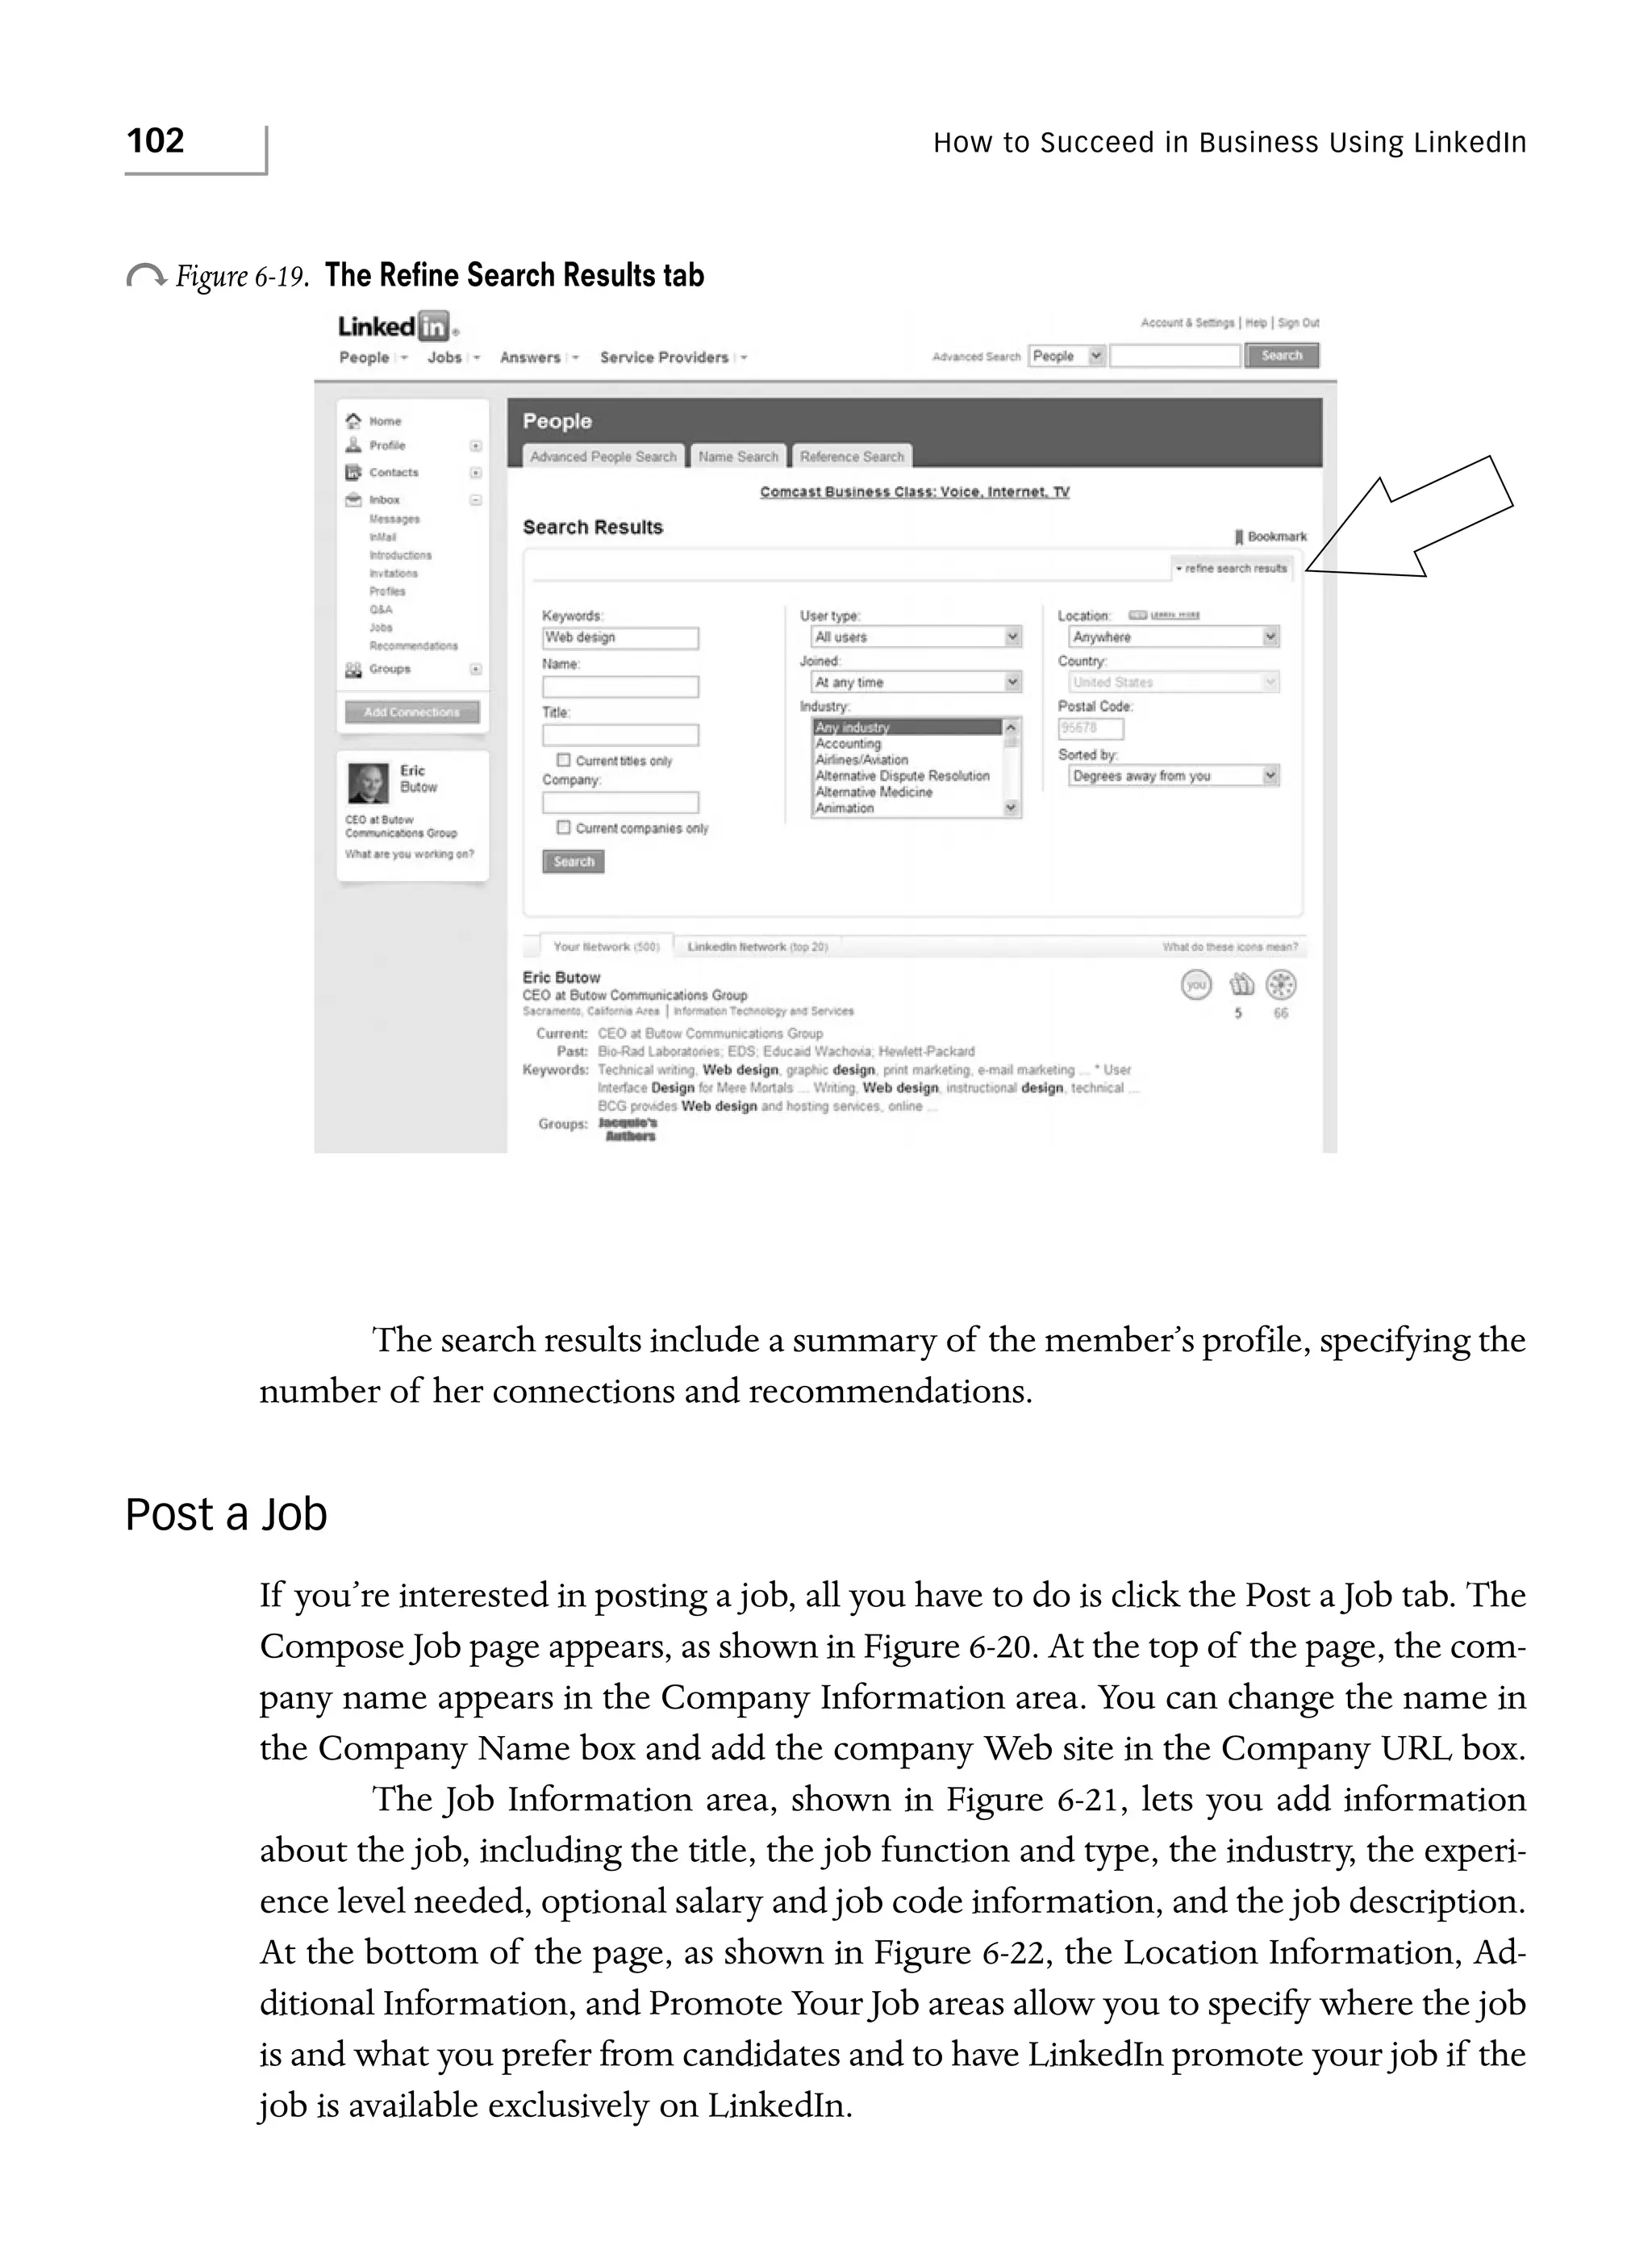
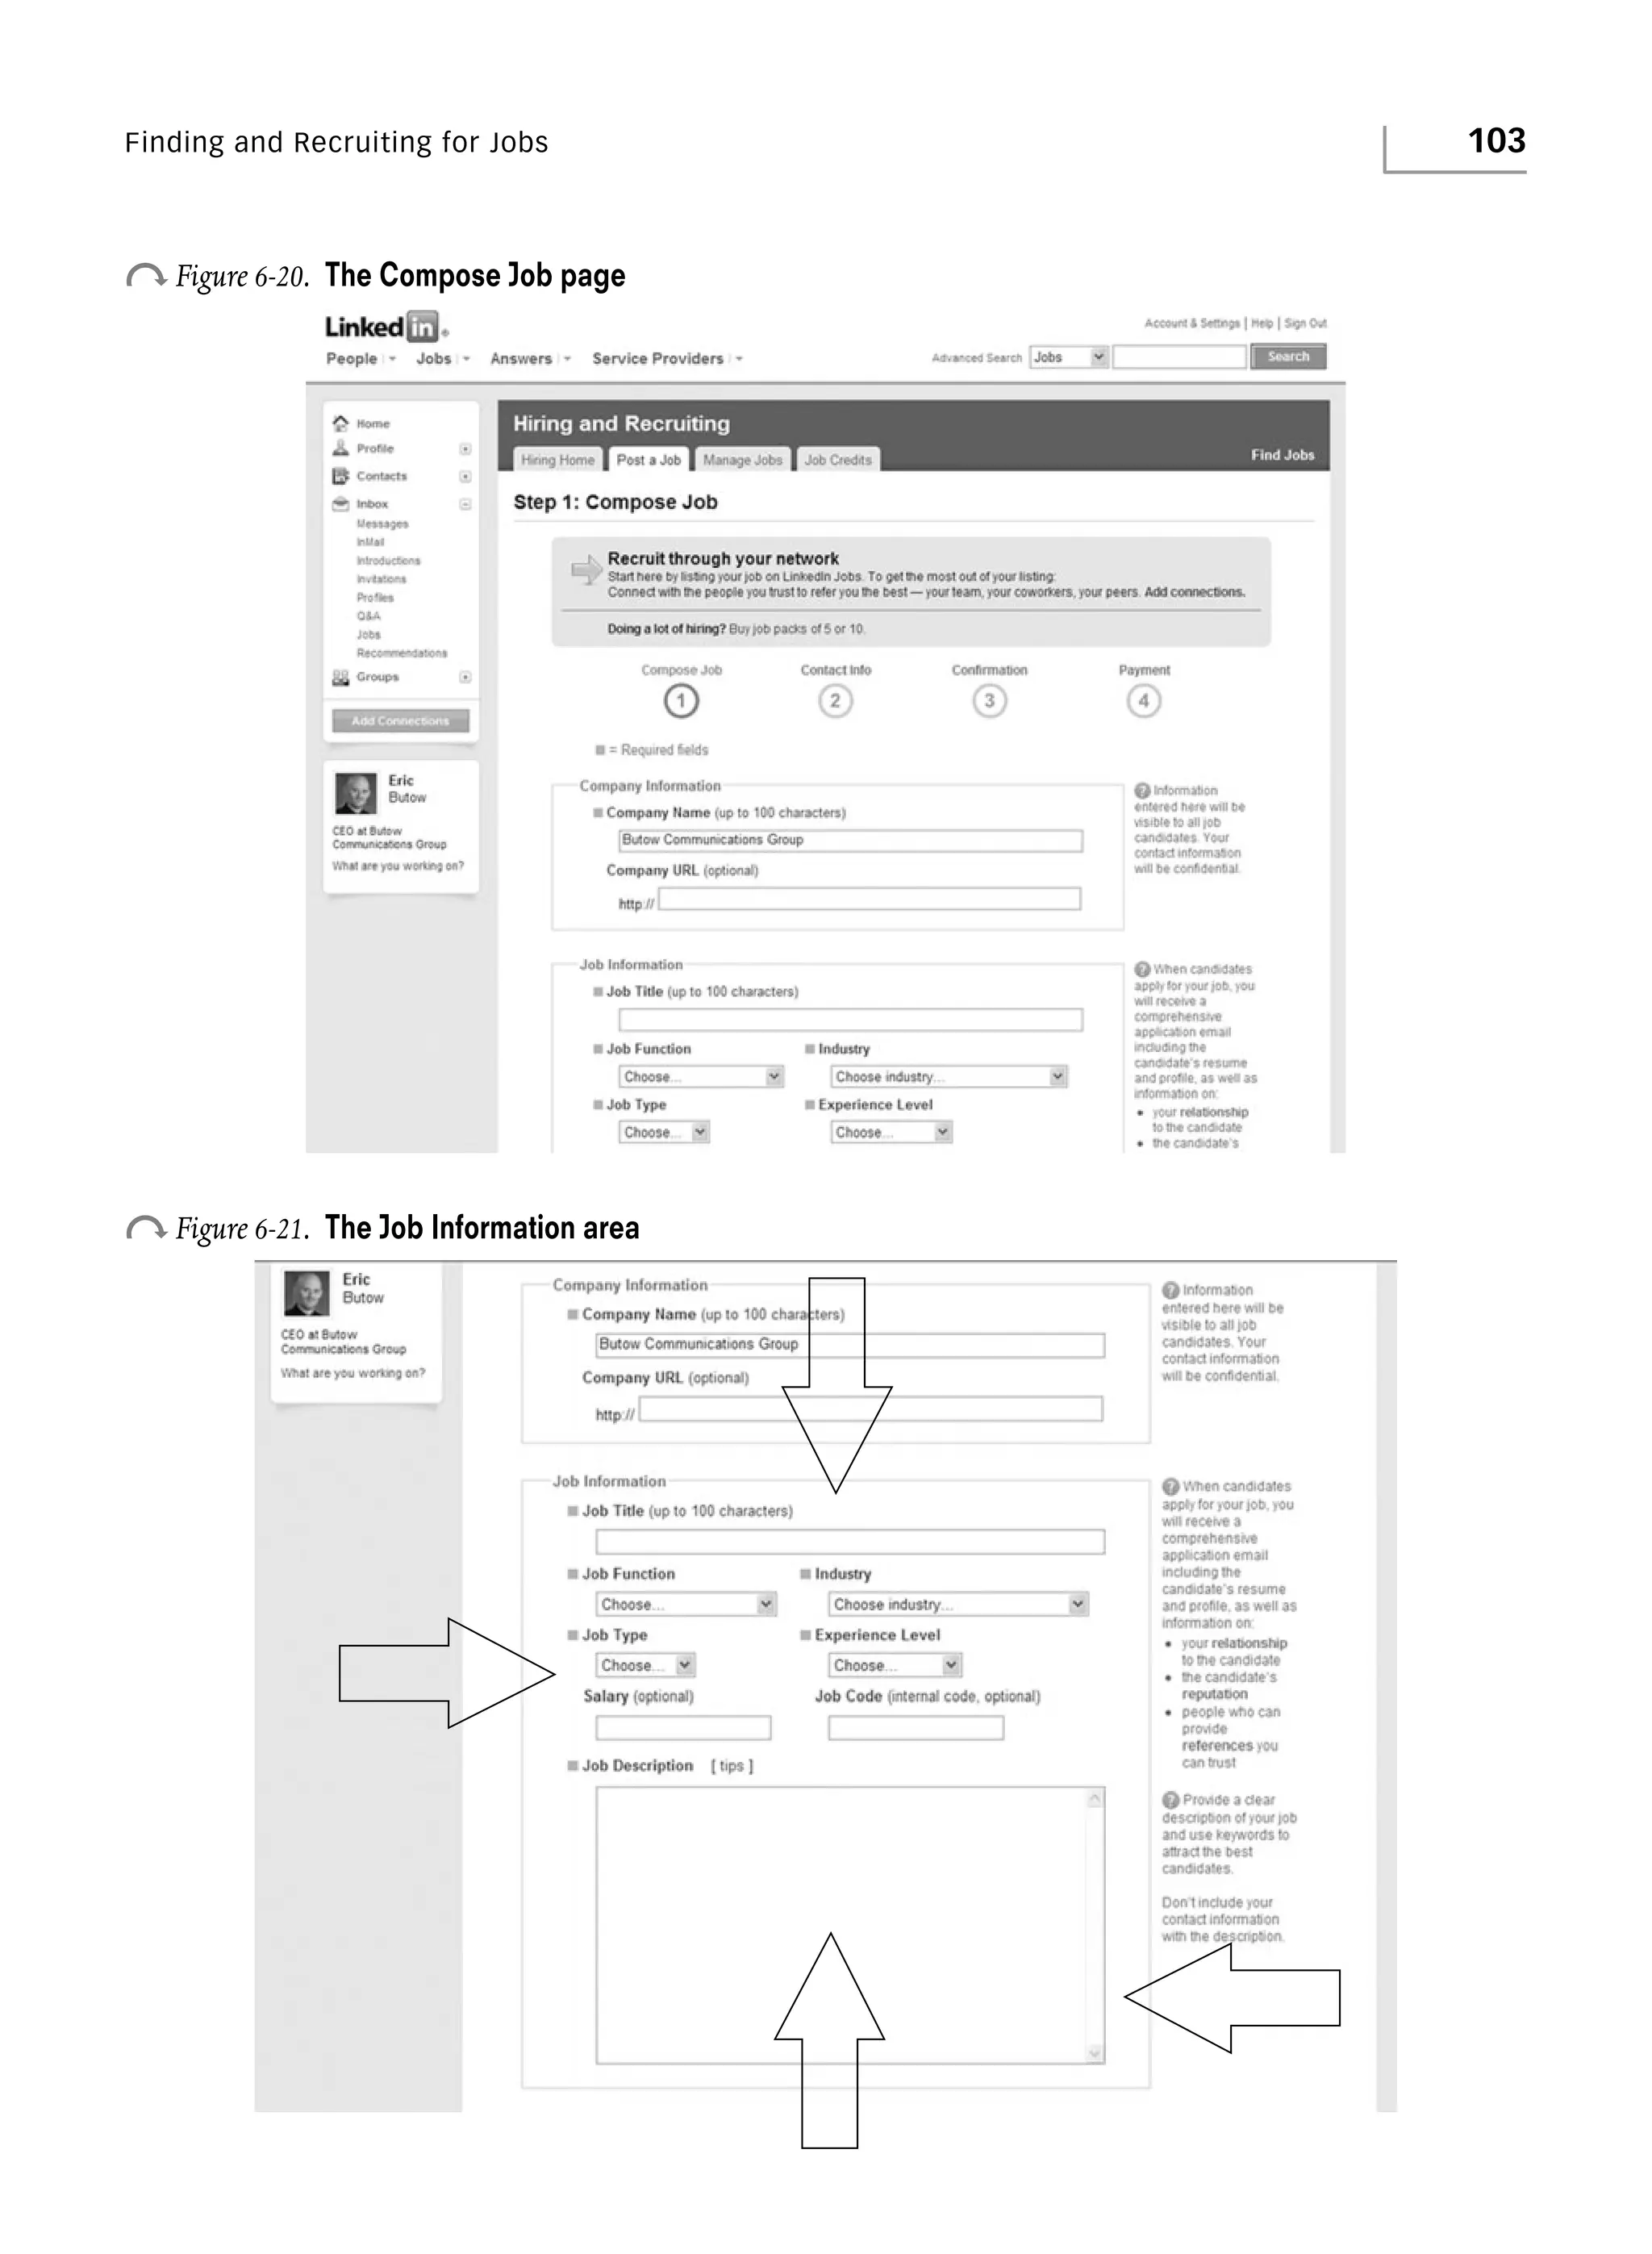
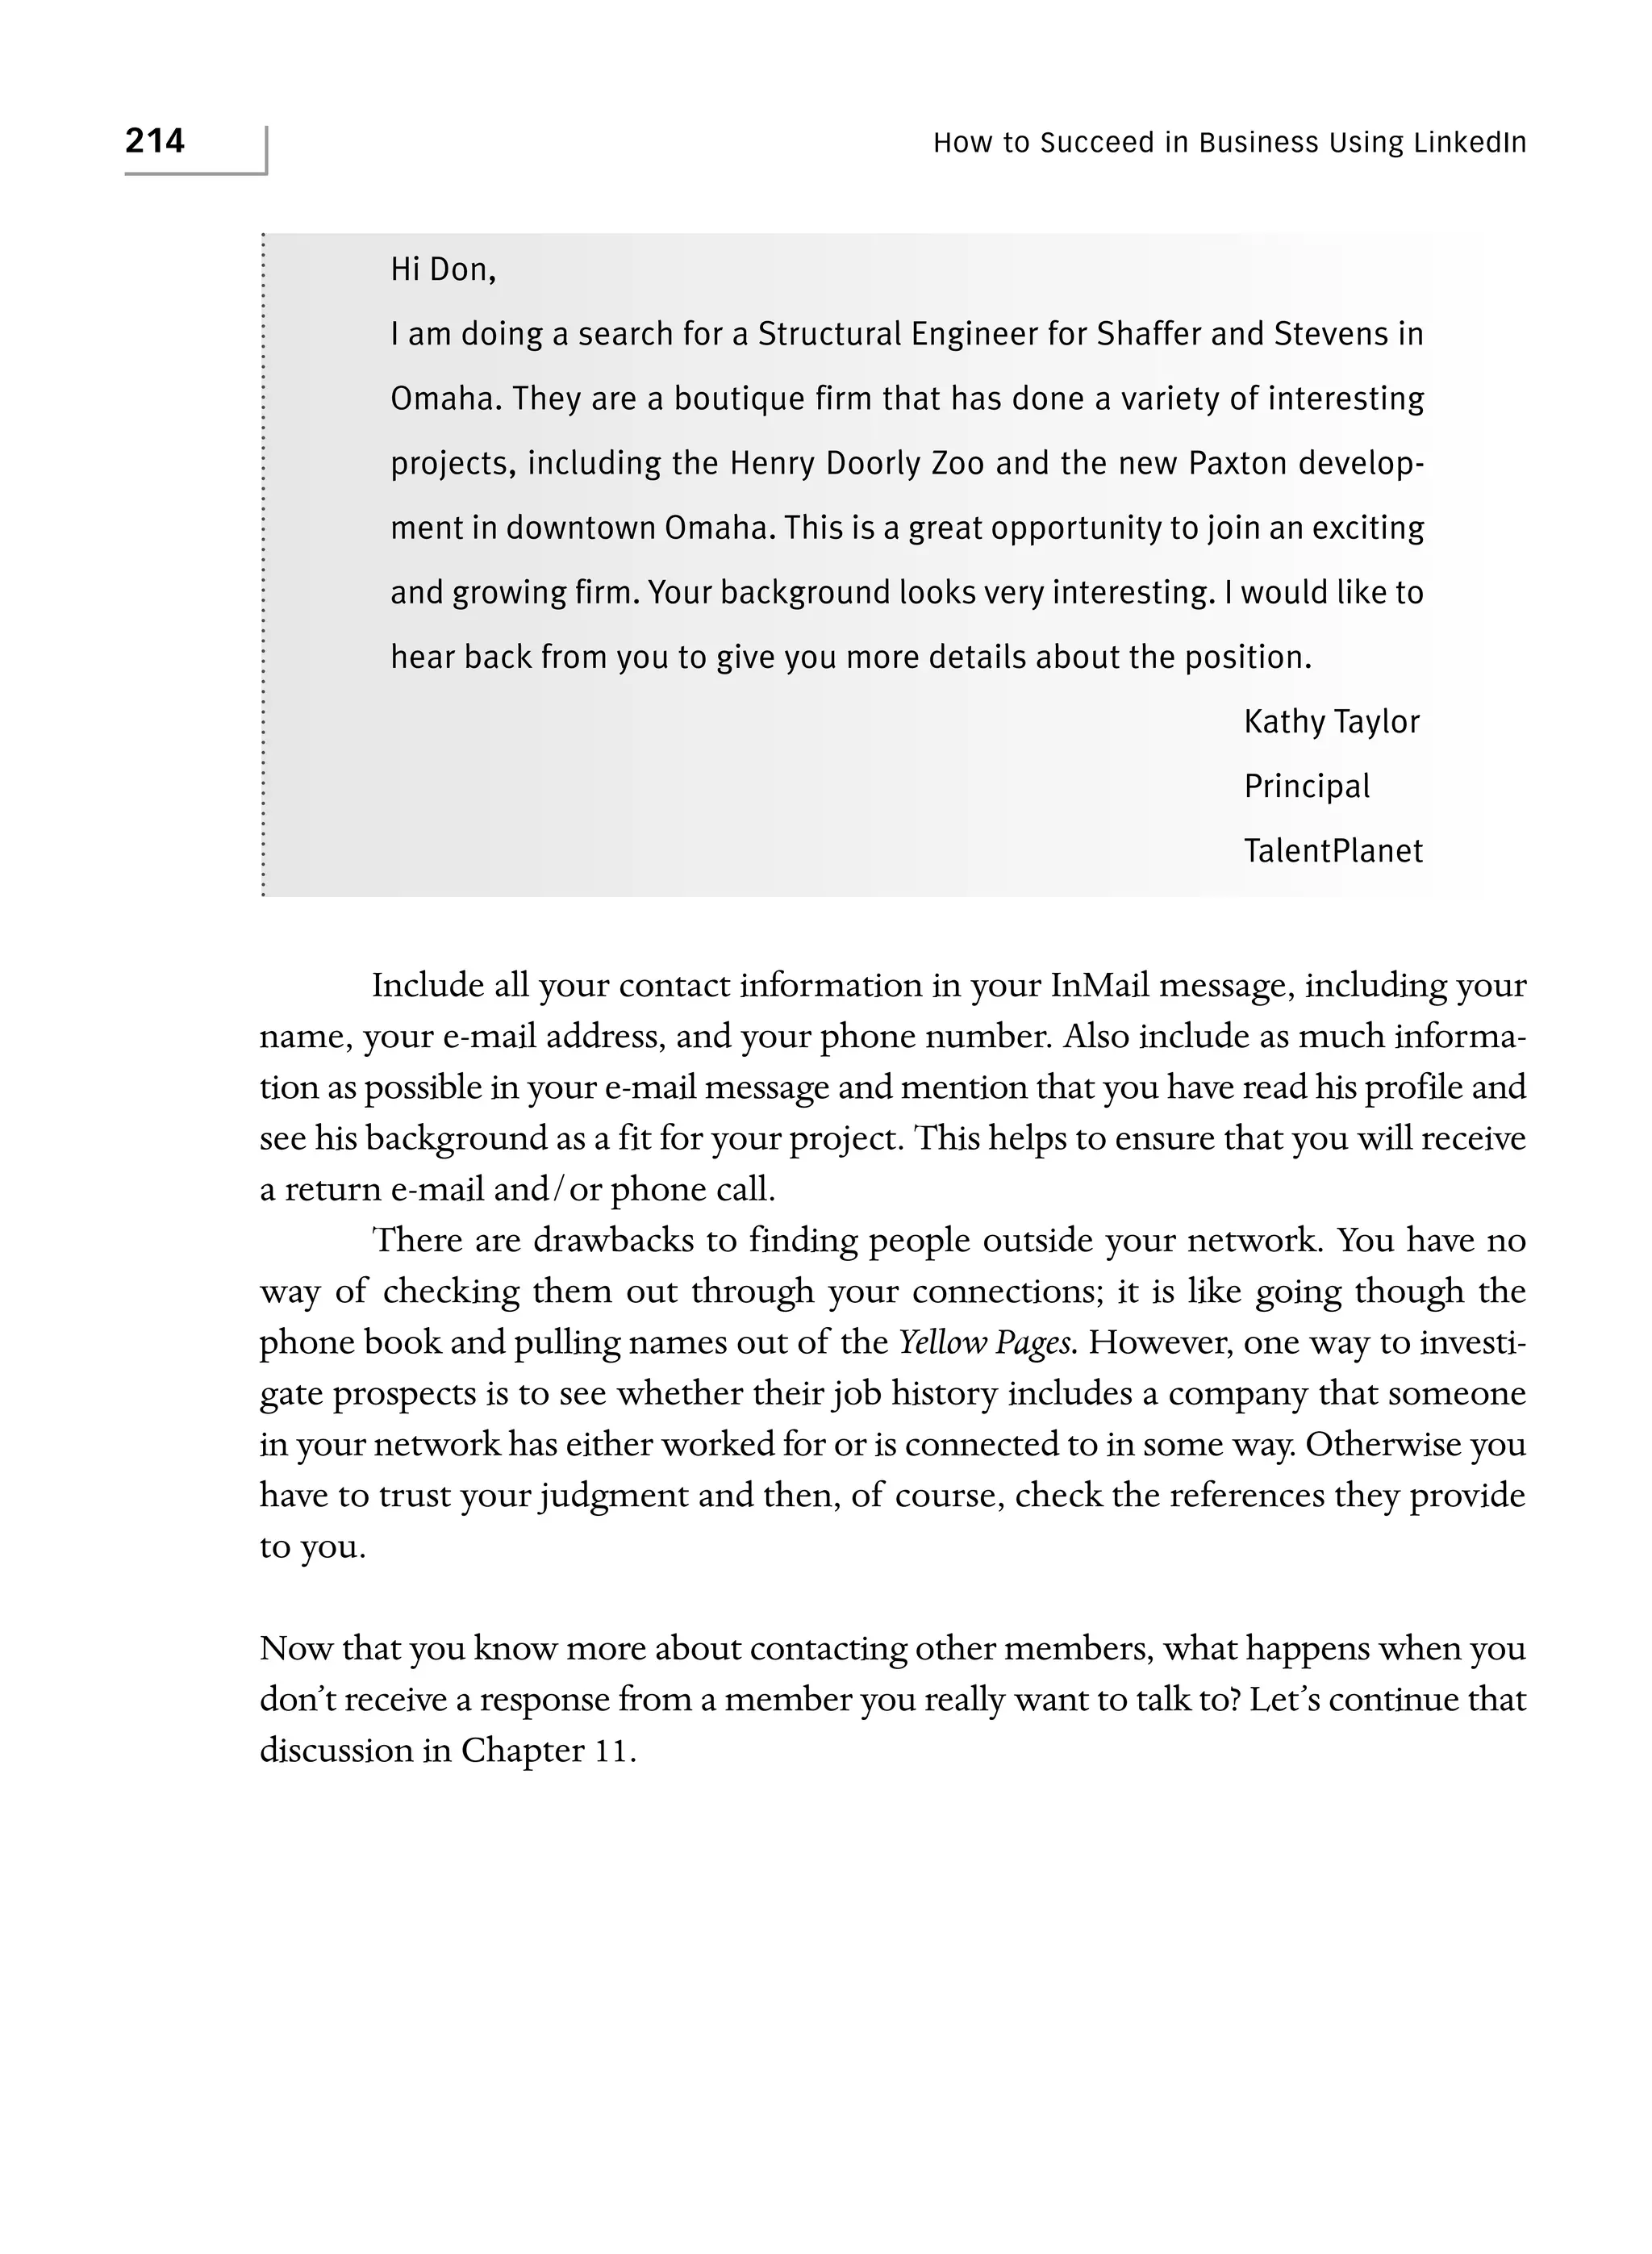
If you’ve sent recommendation requests to other members but have yet to receive a
response, you can check the status of those requests in two ways. You can click the
Recommendations link in your inbox, or you can manage the recommendations you
have received.
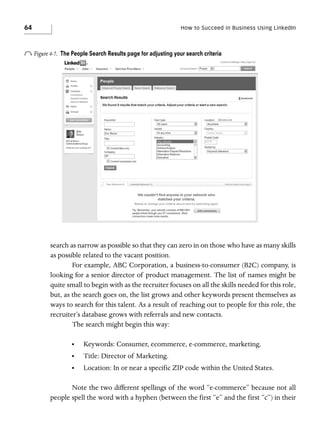
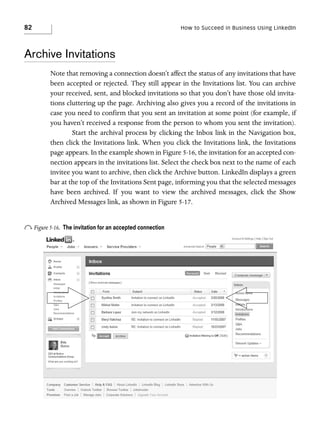
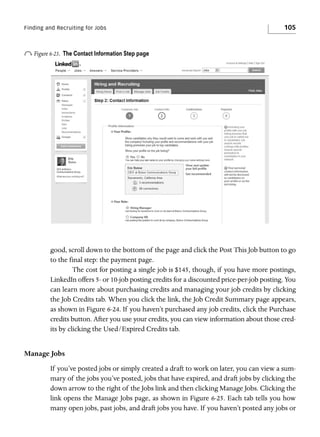
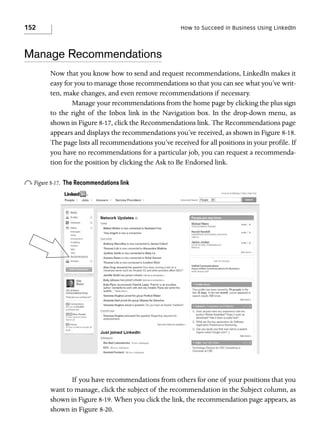
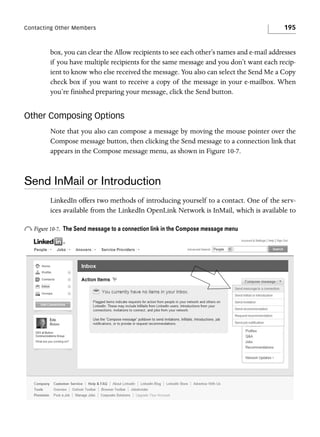
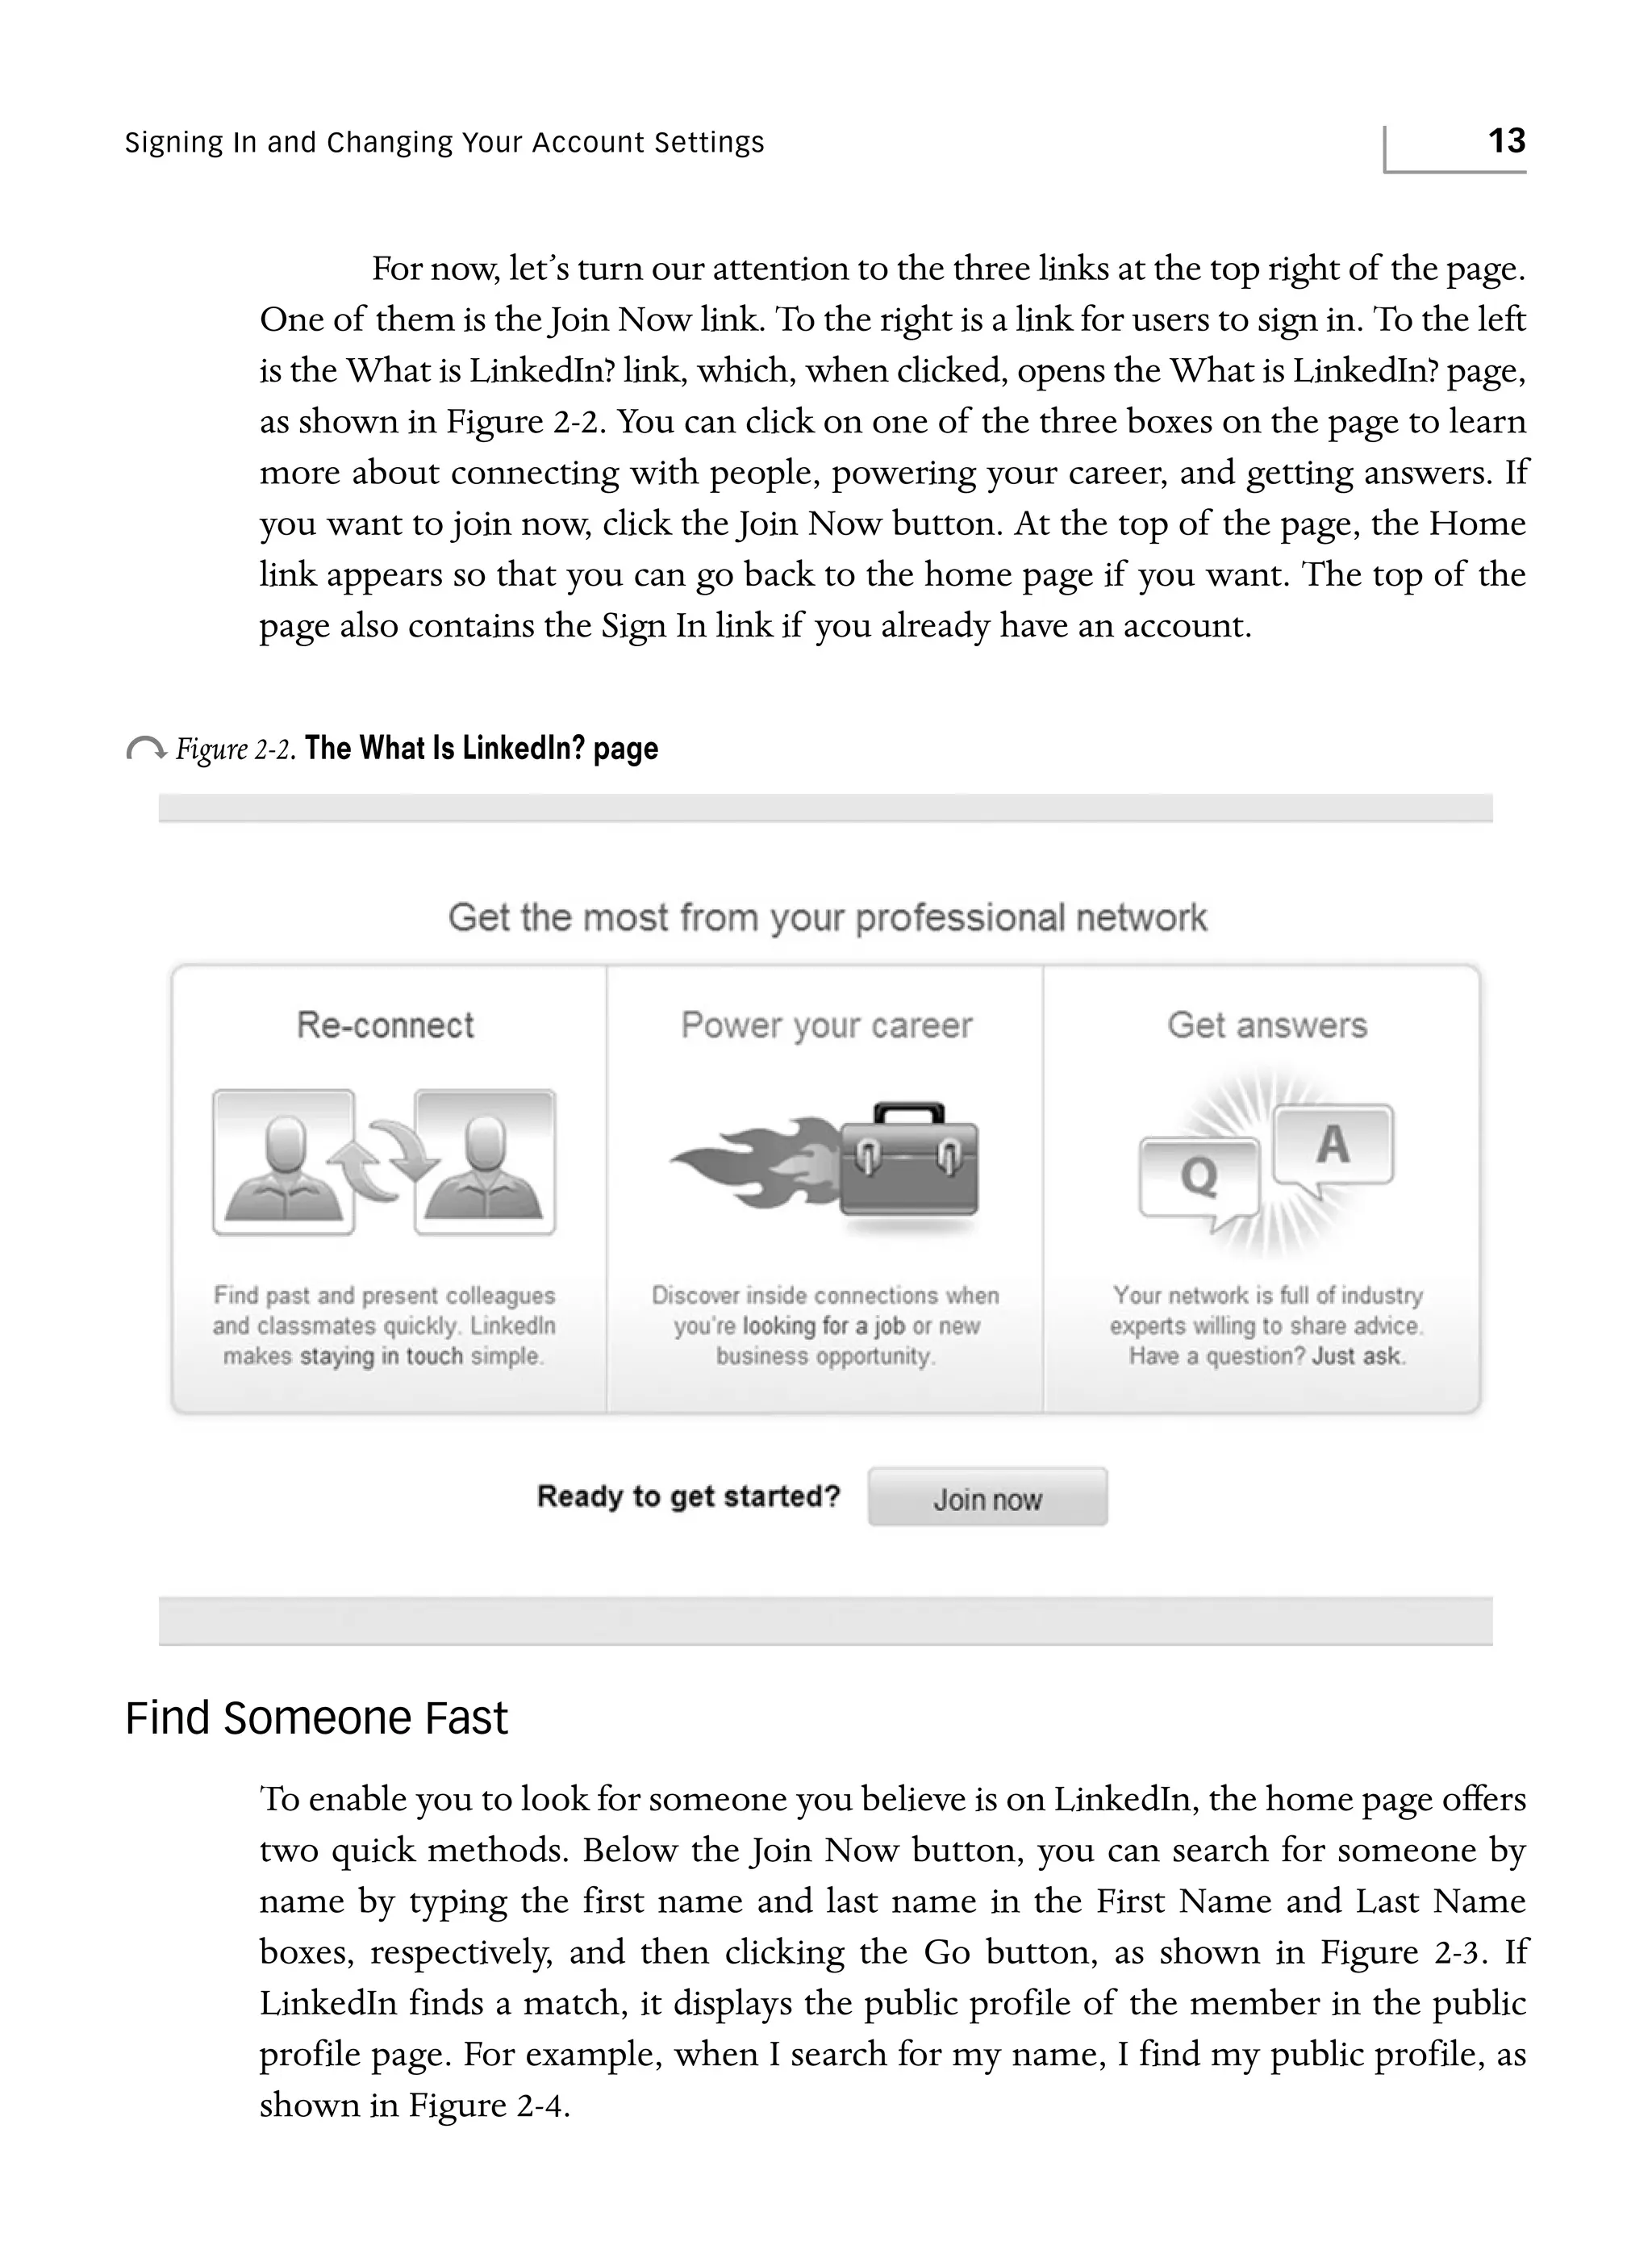
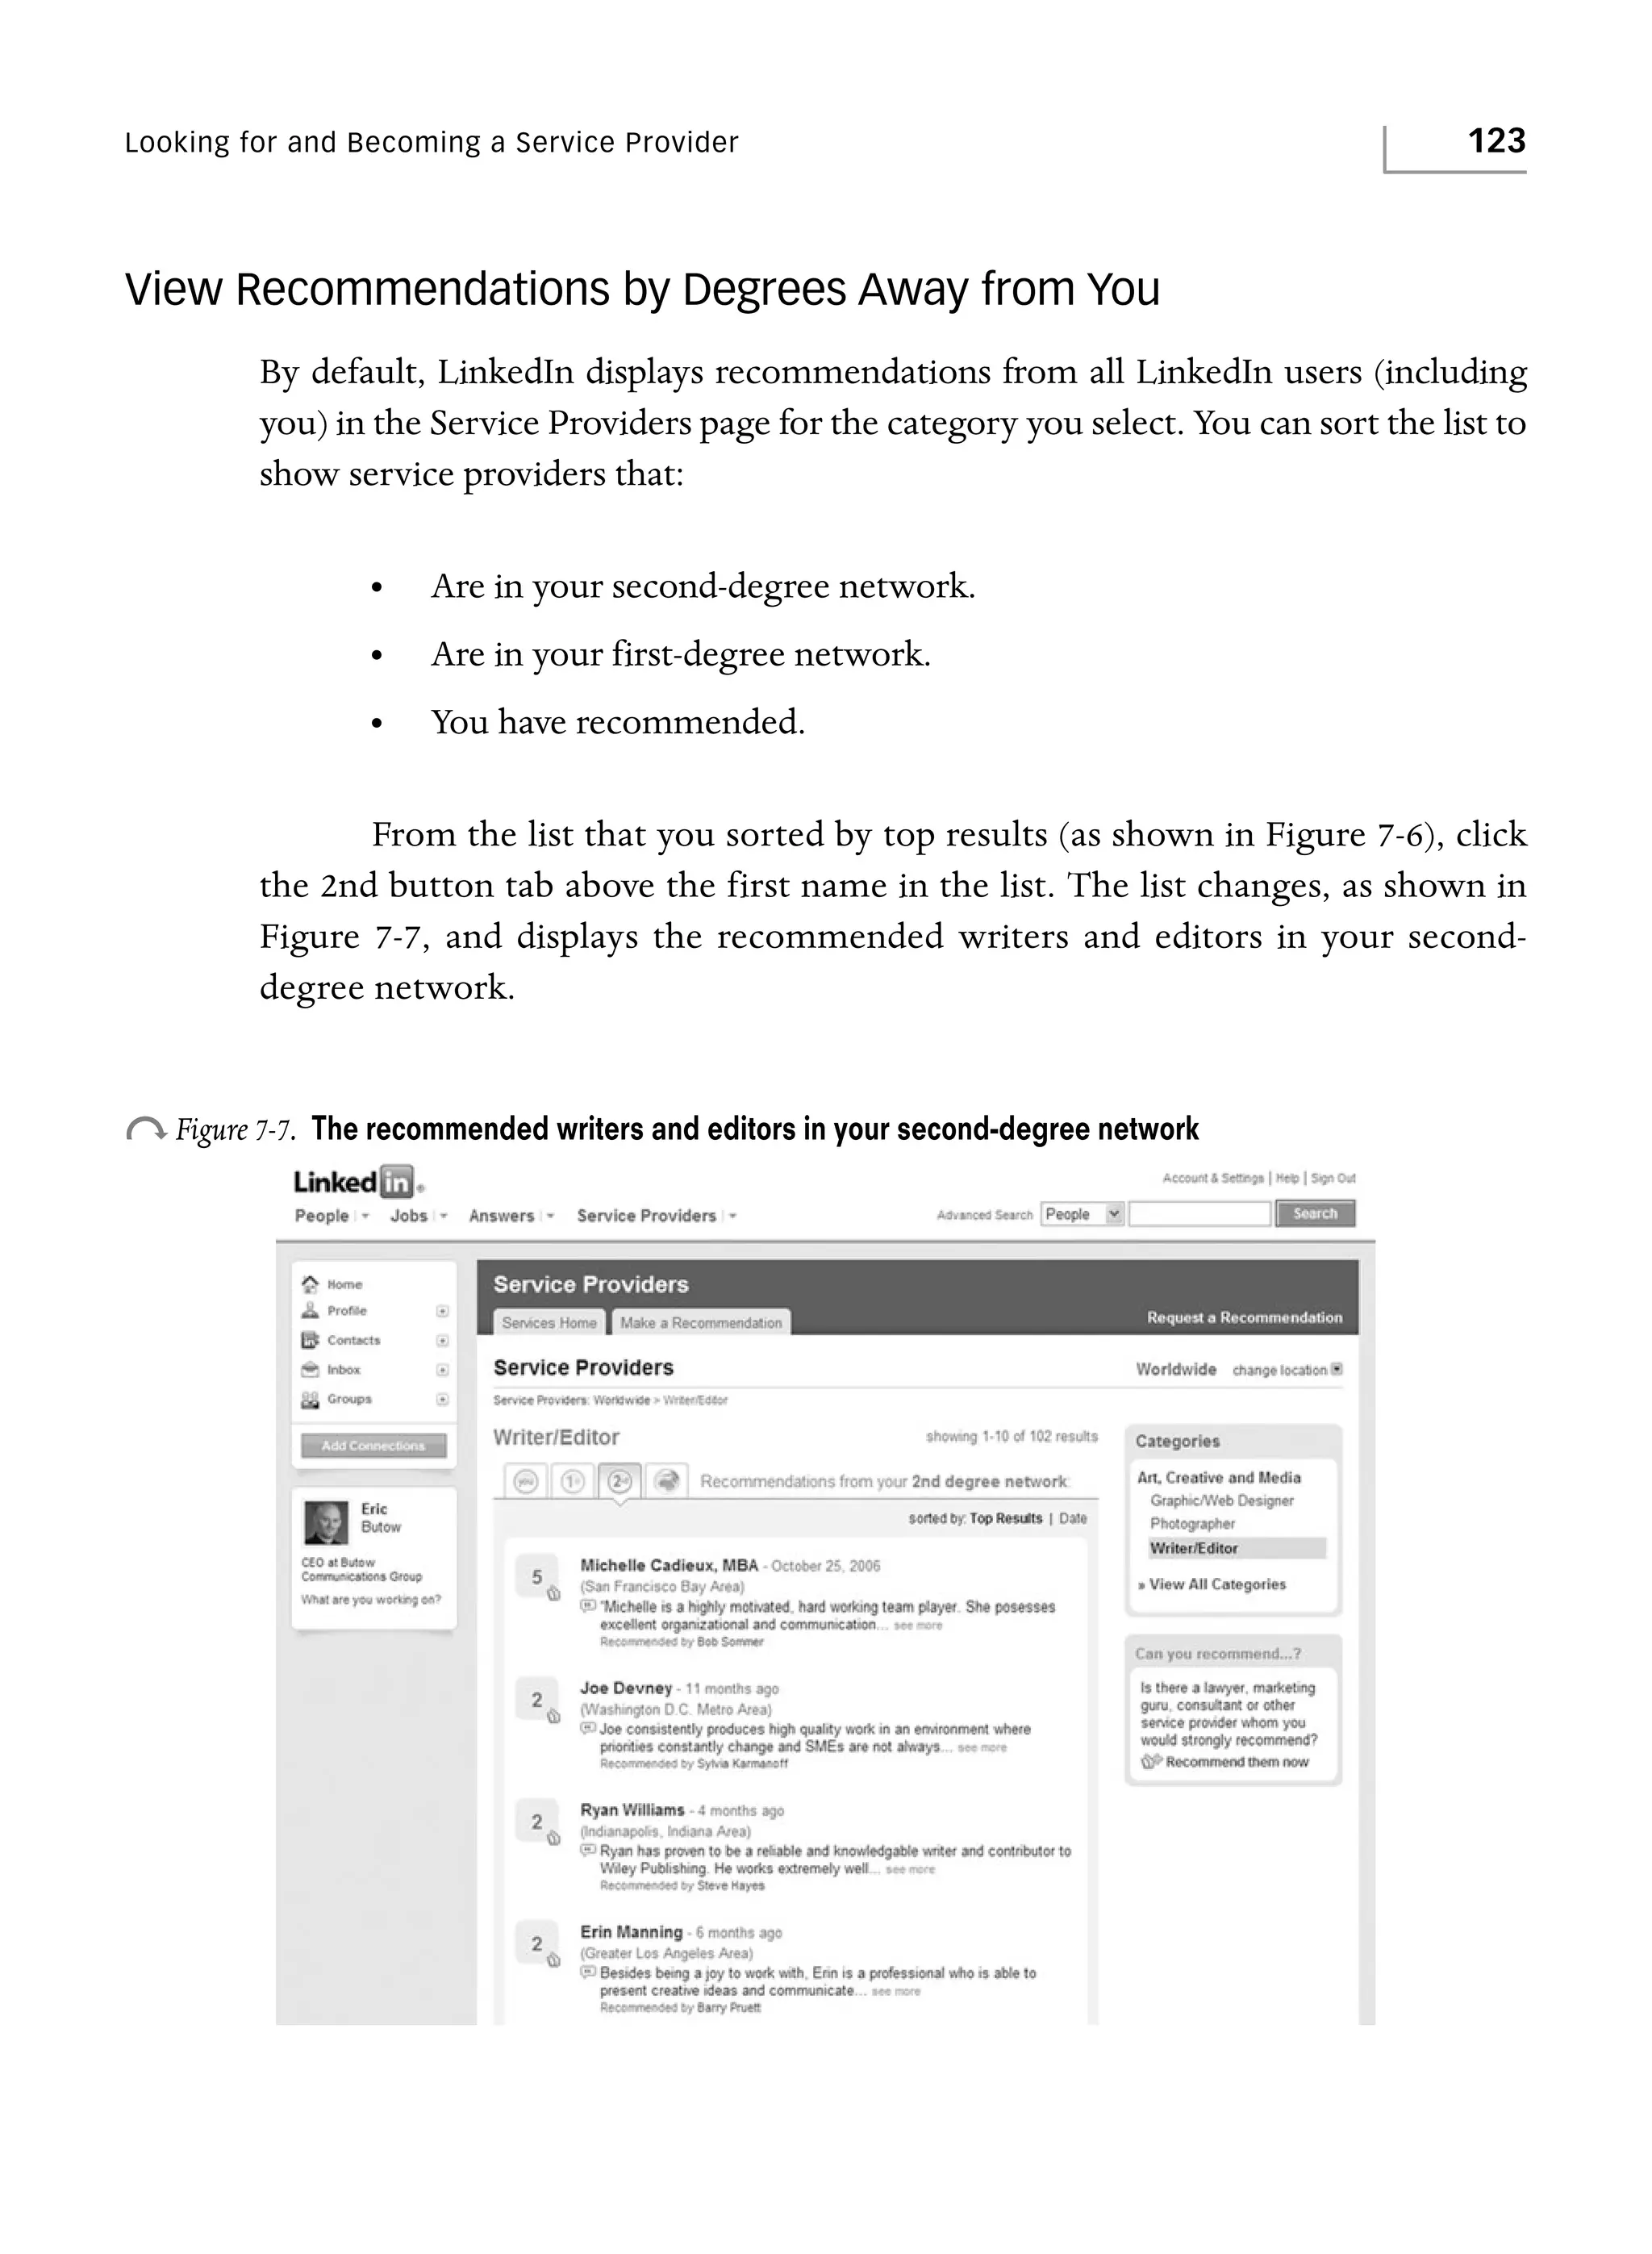
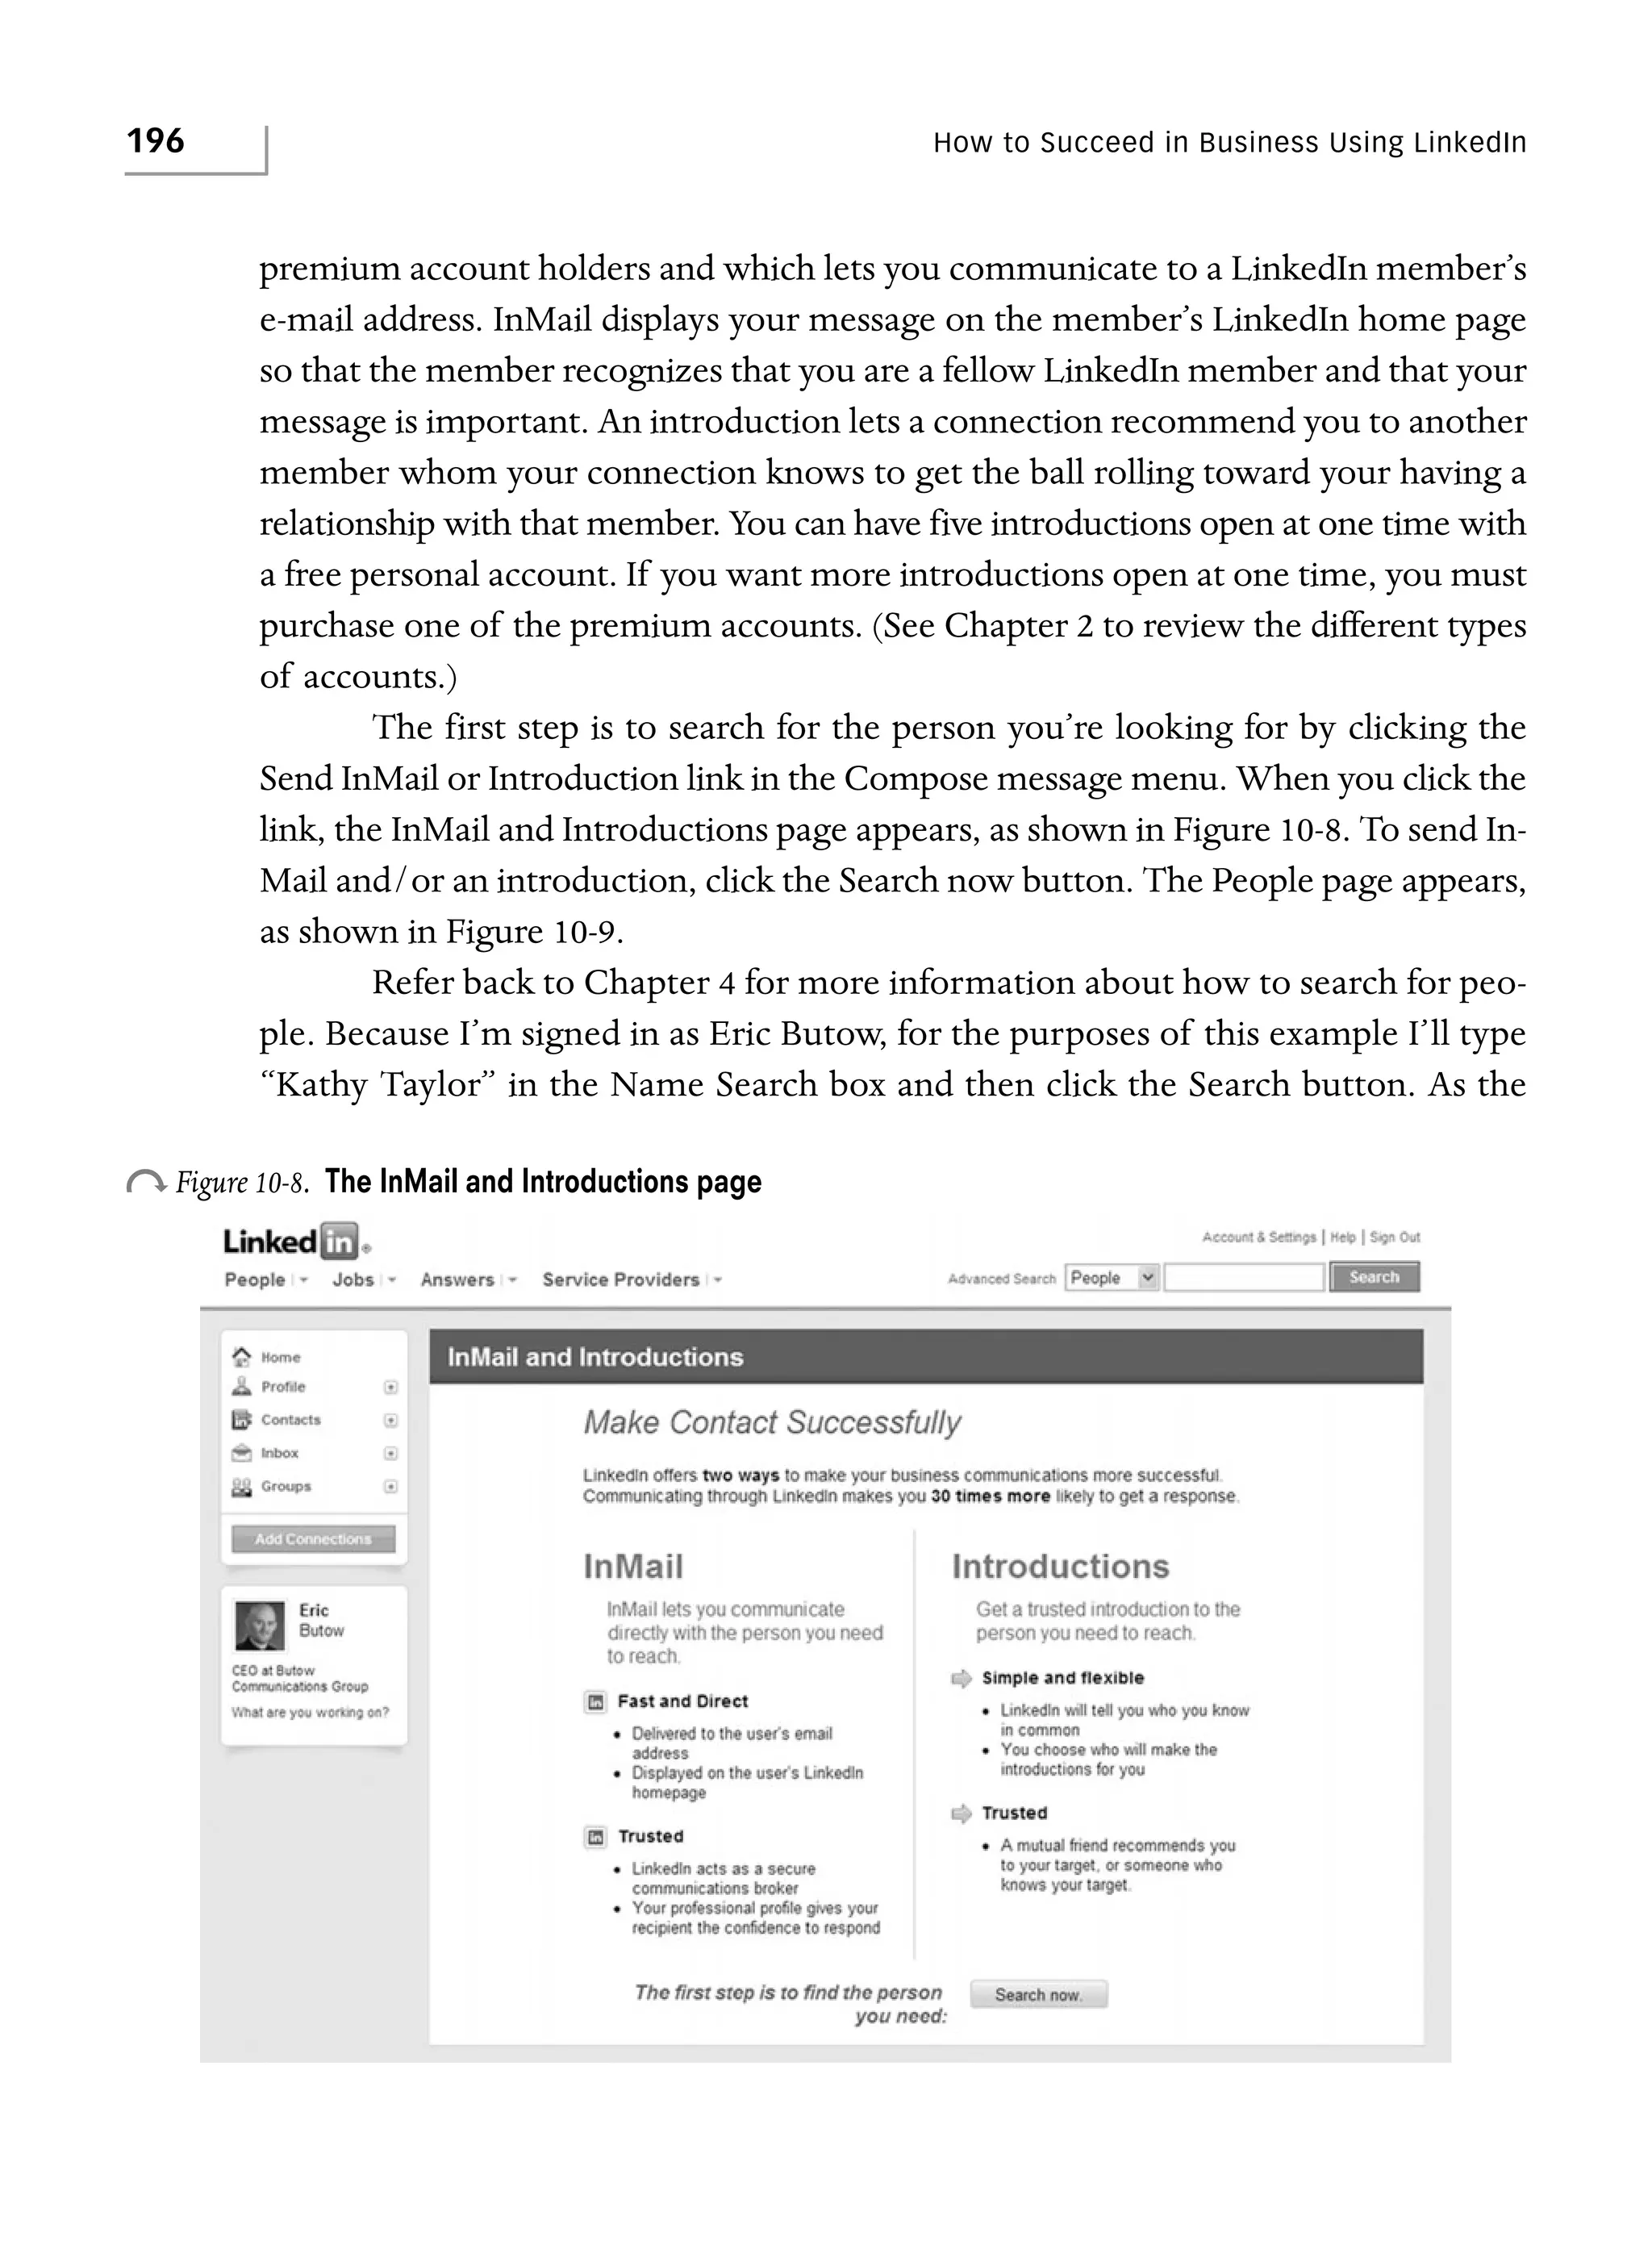
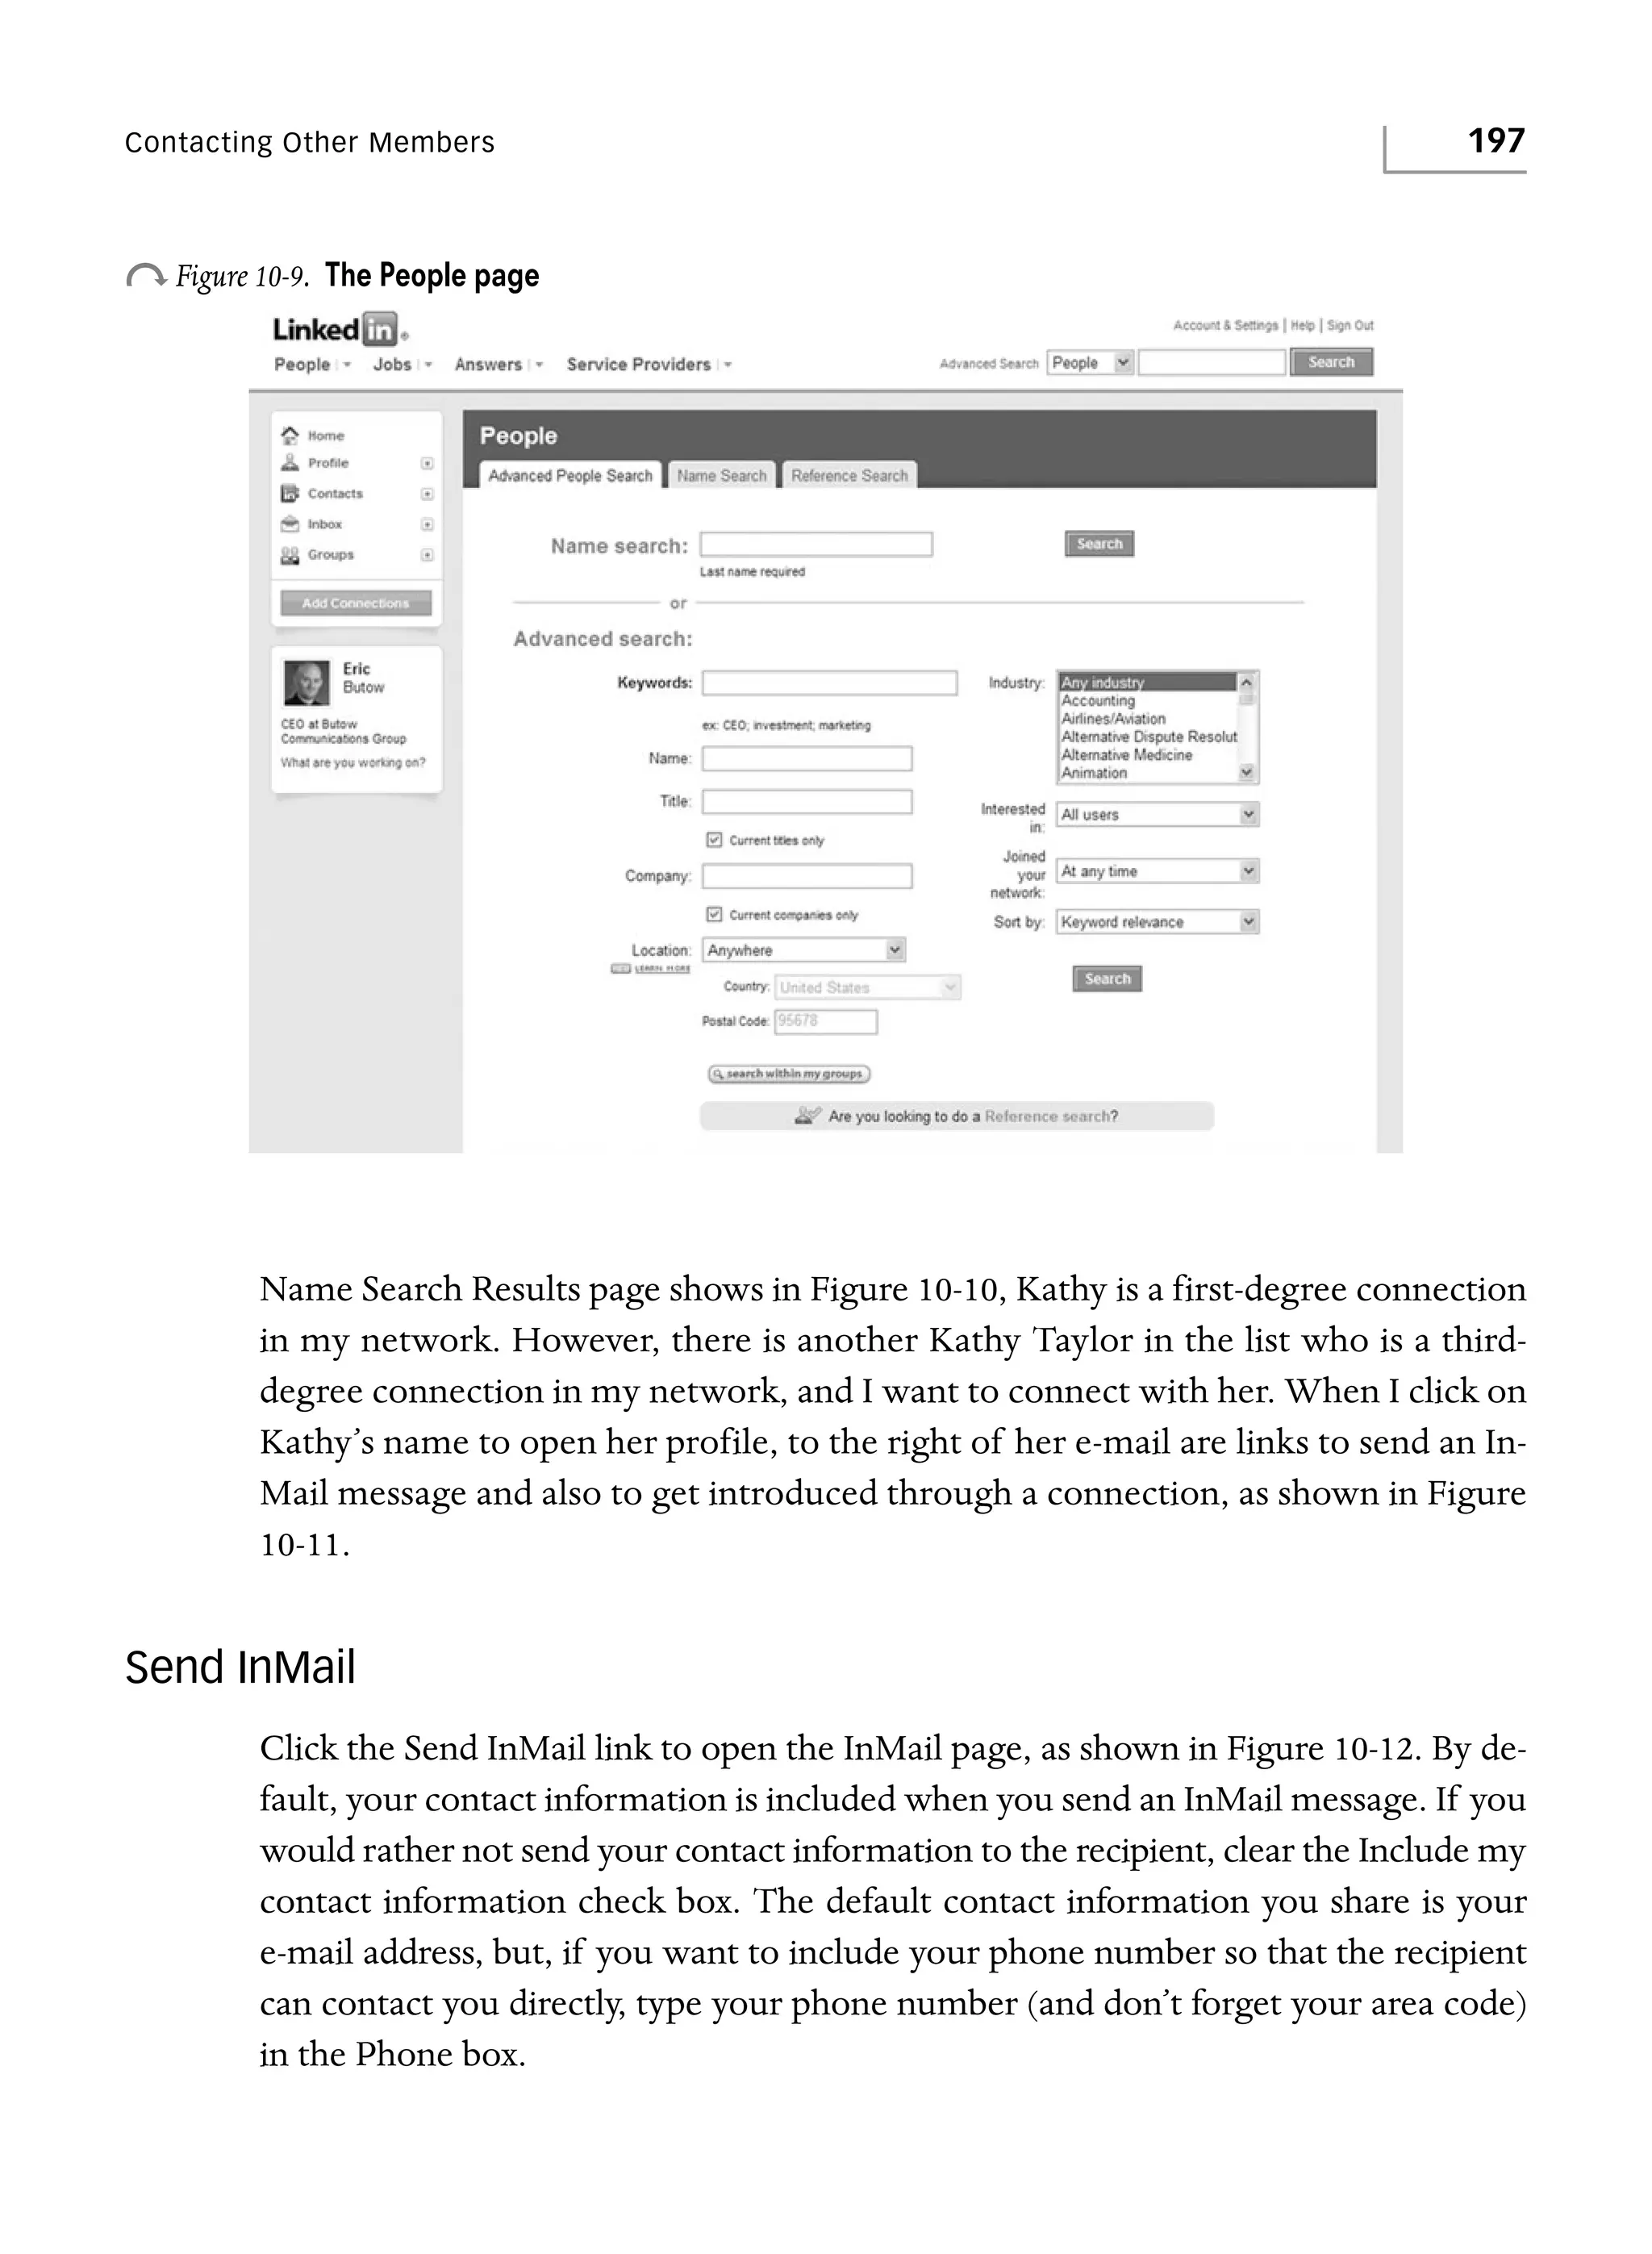
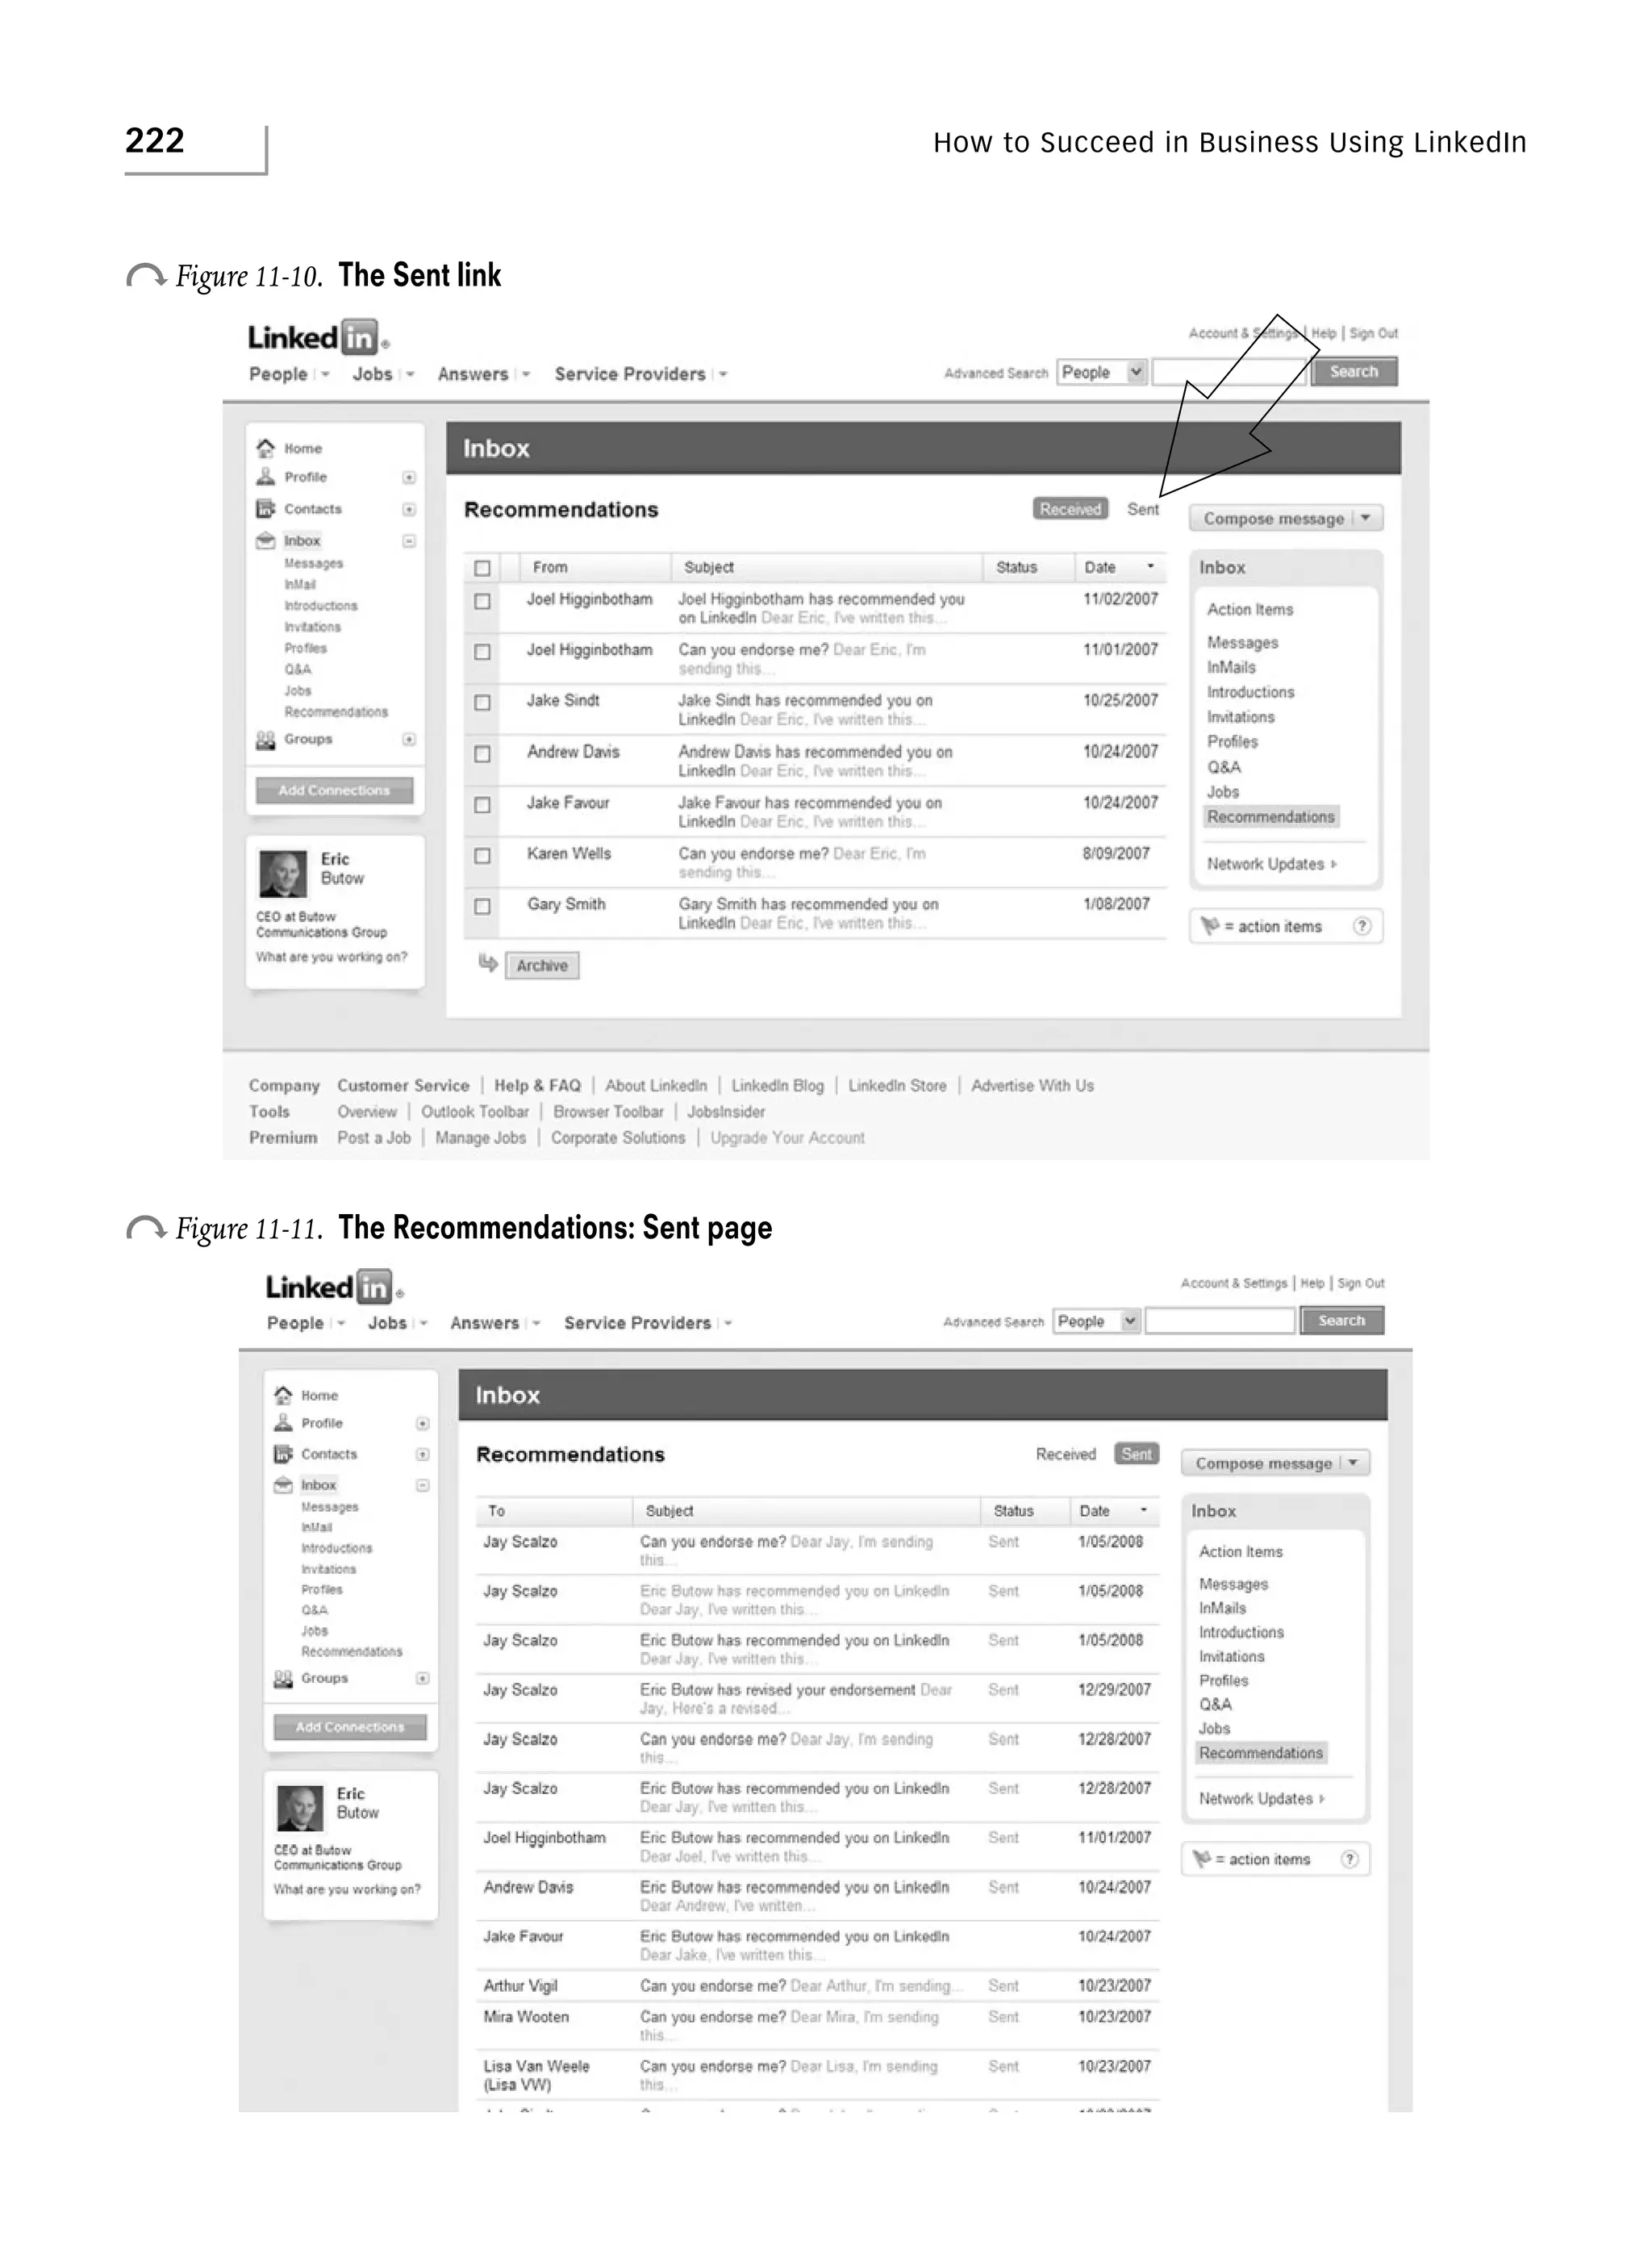
View Recommendations in Your Inbox
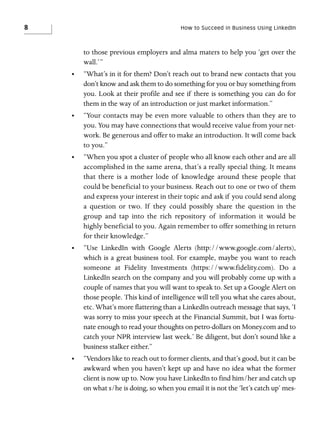
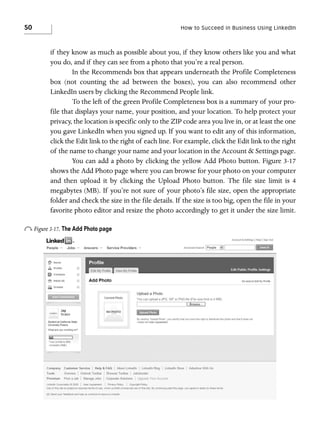
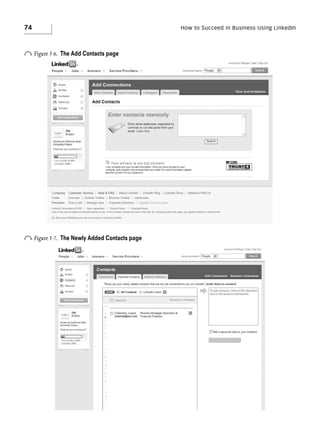
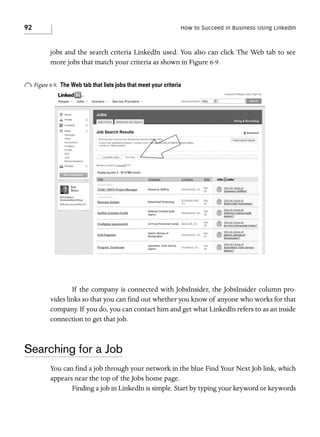
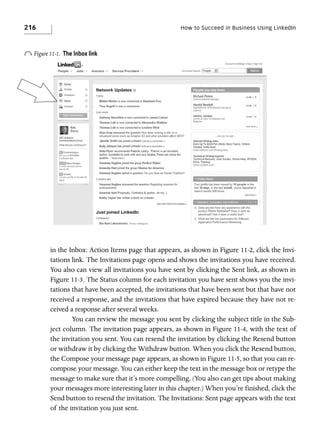
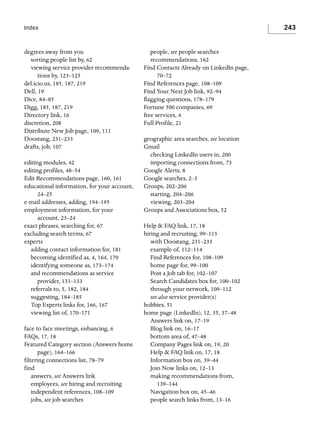
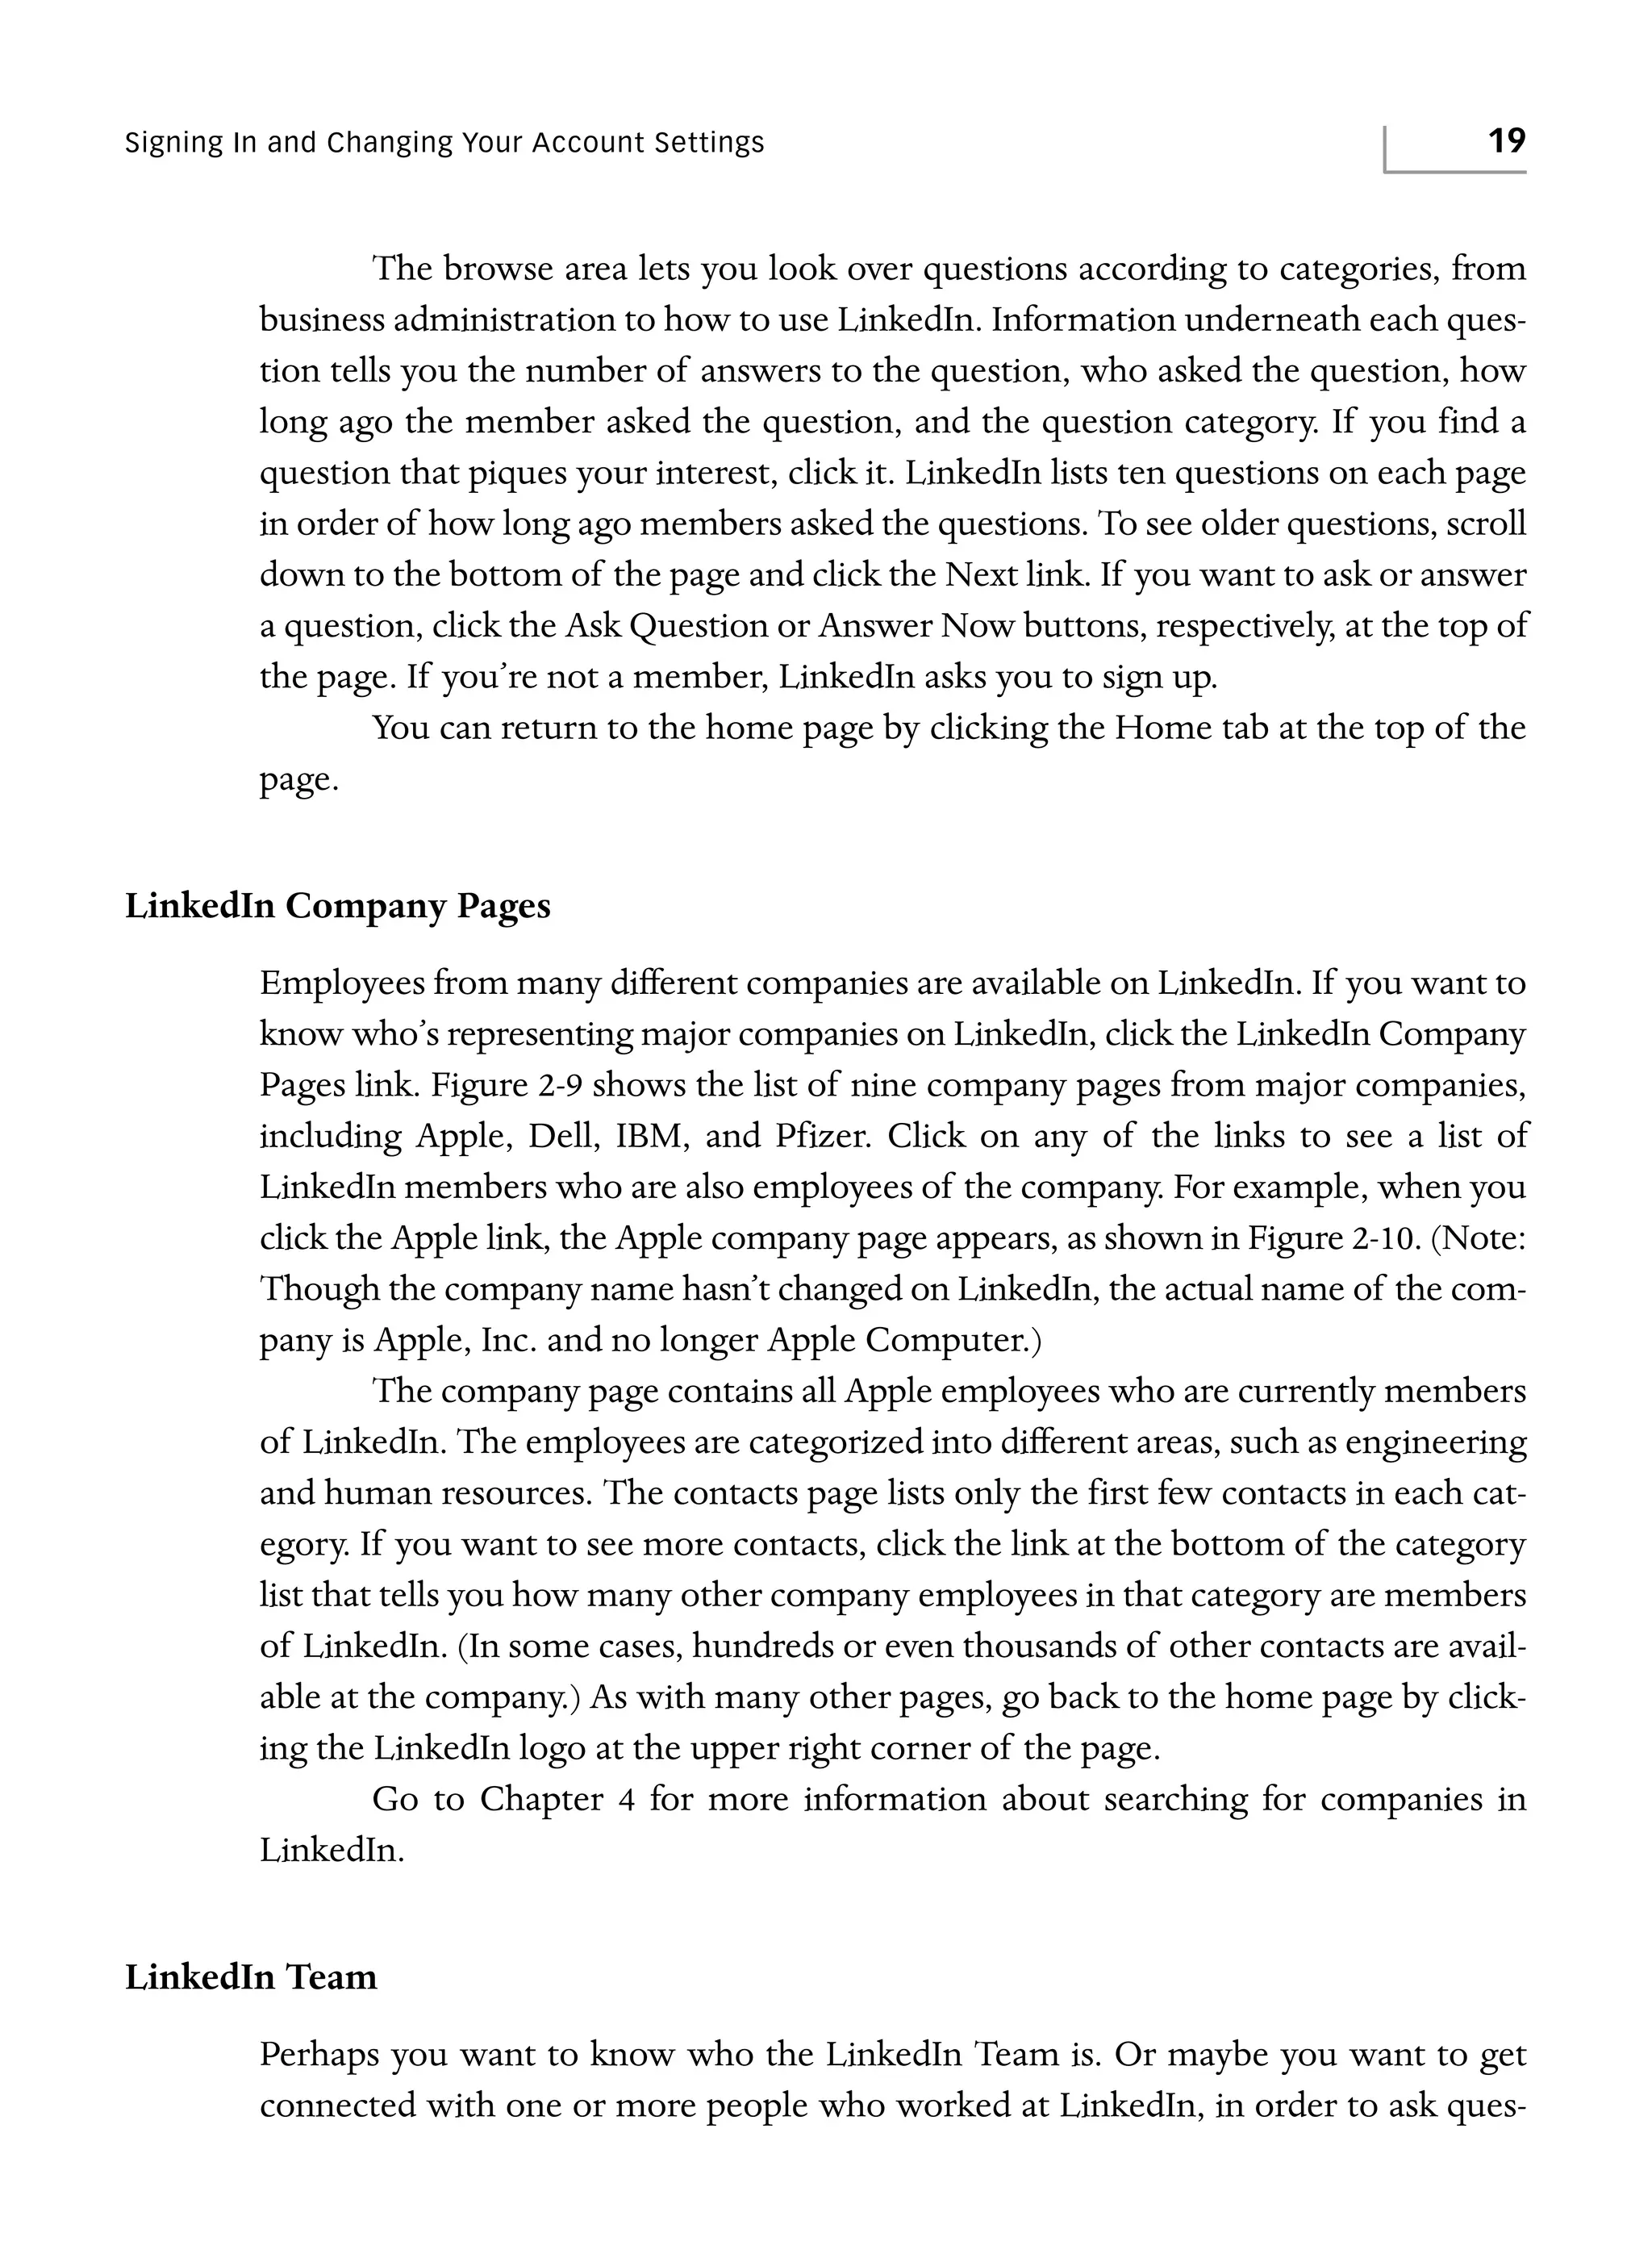
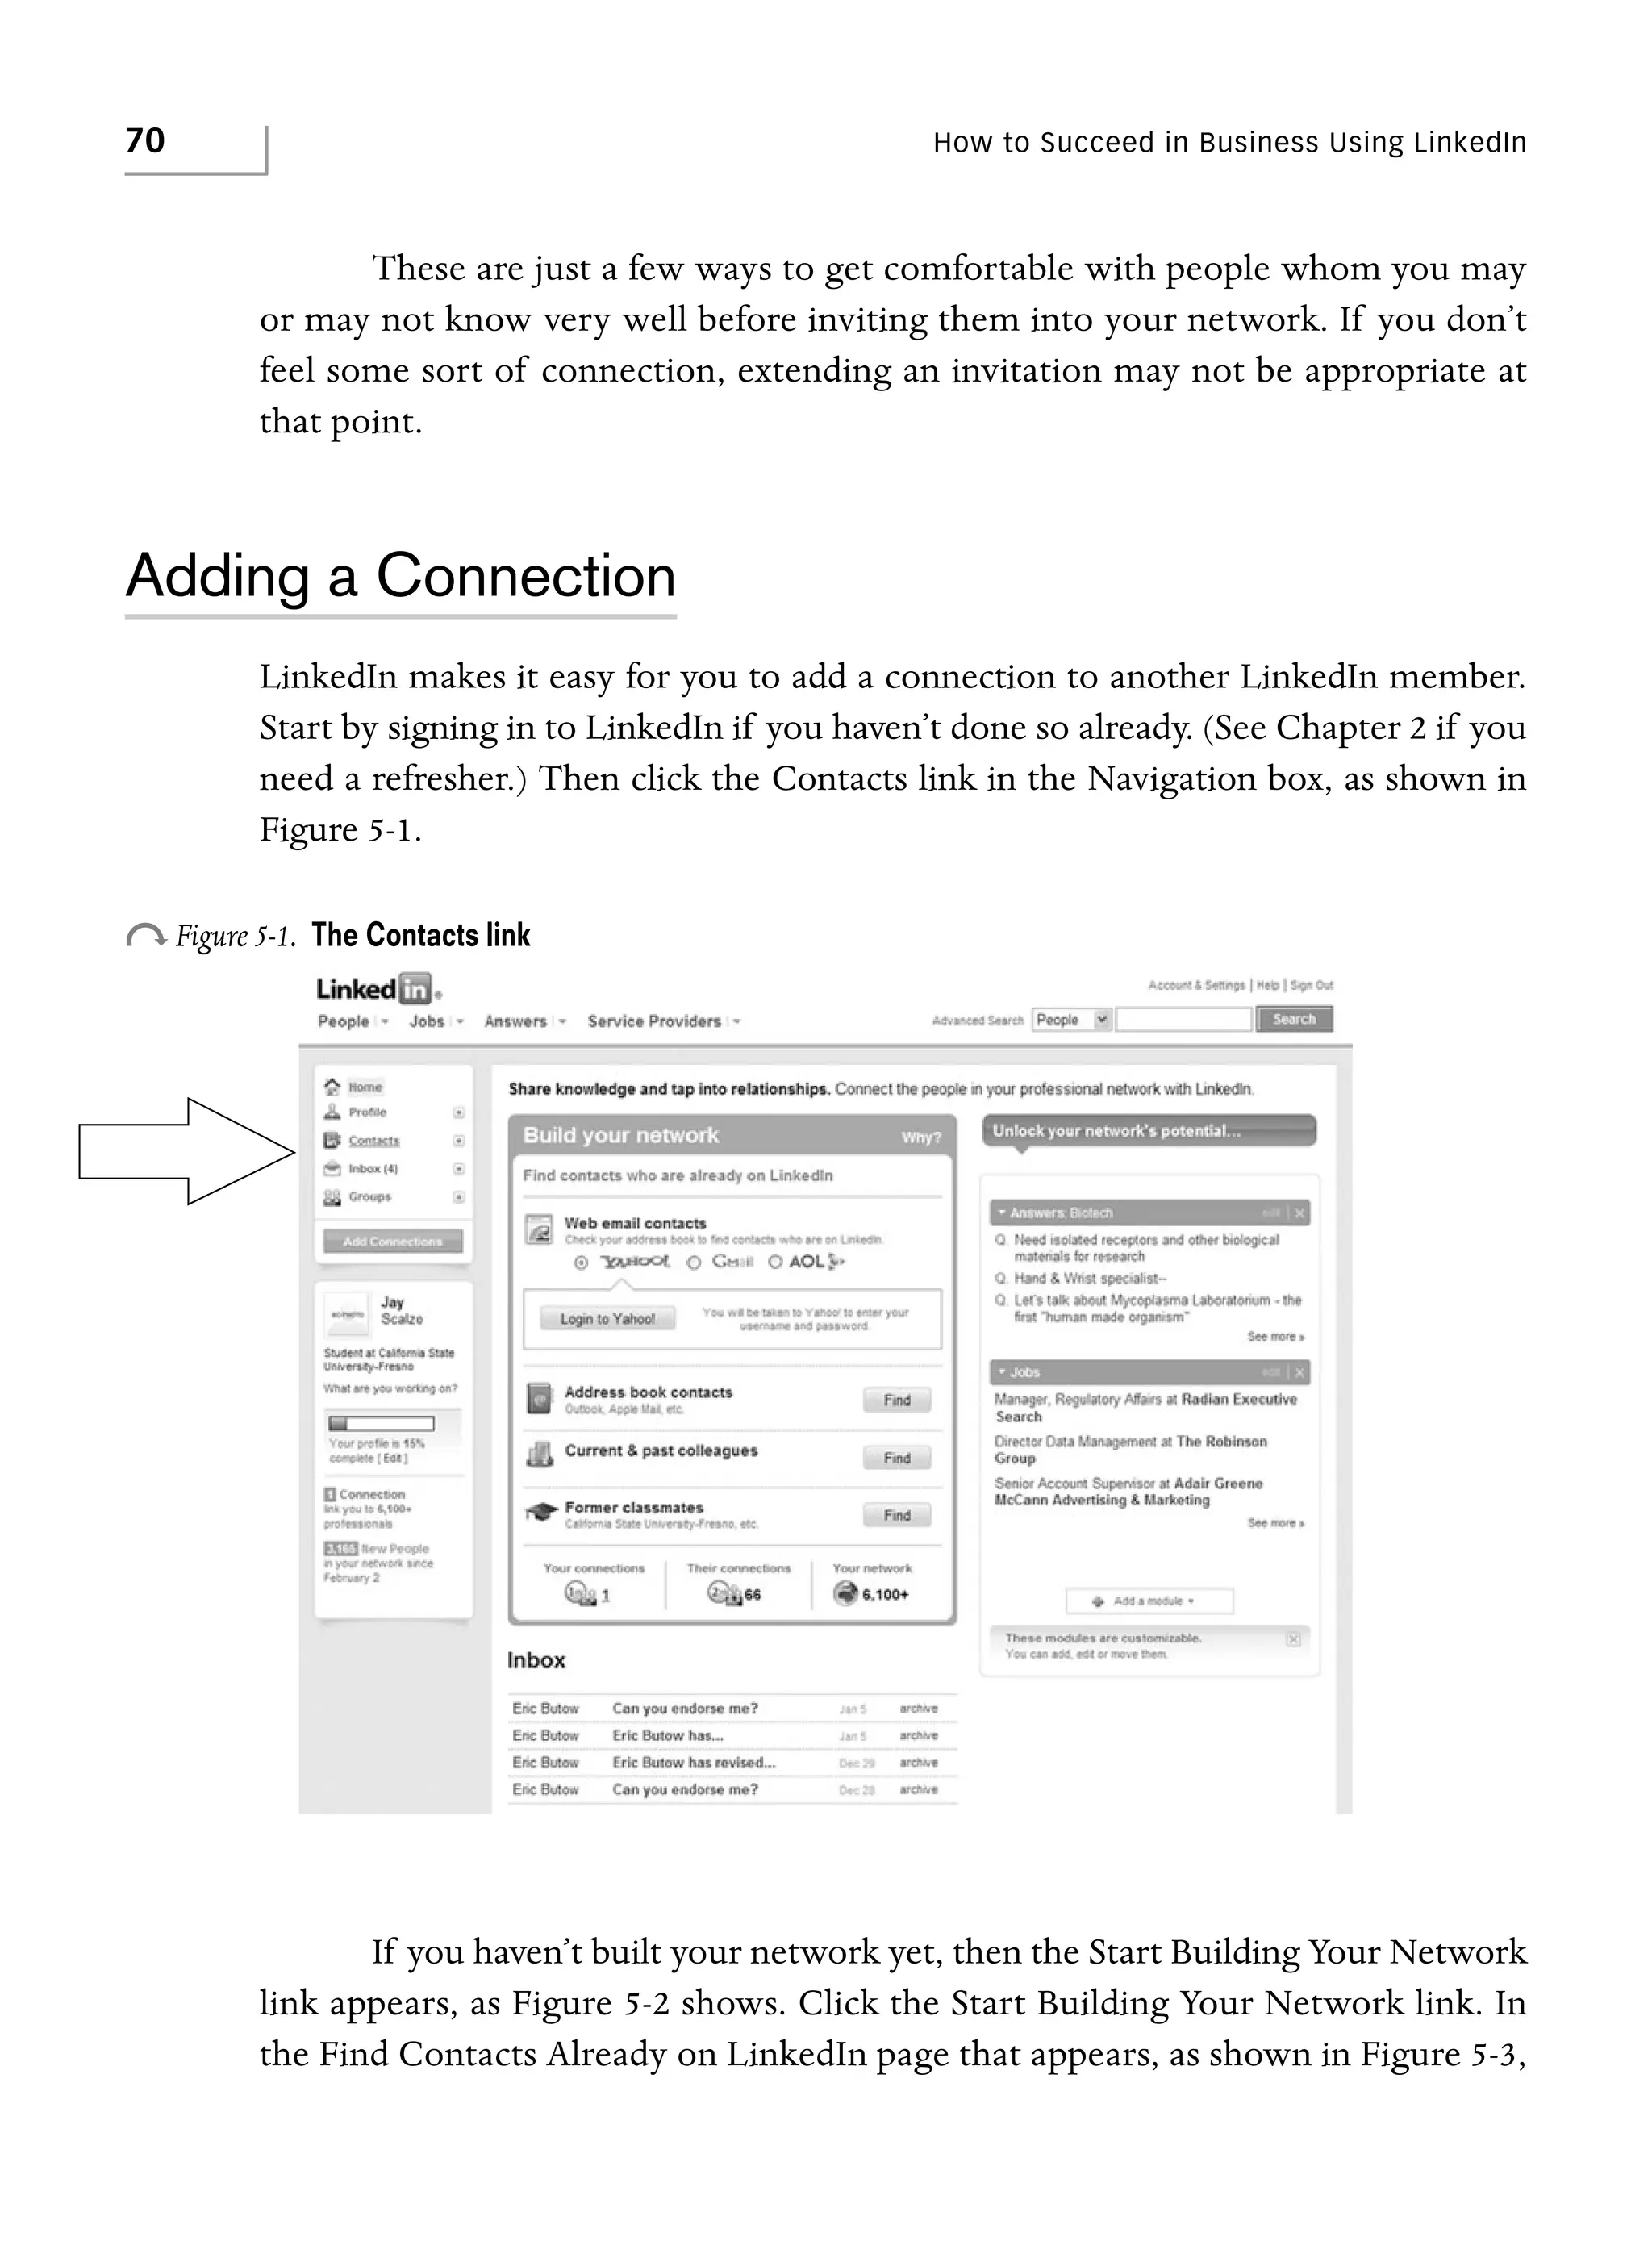
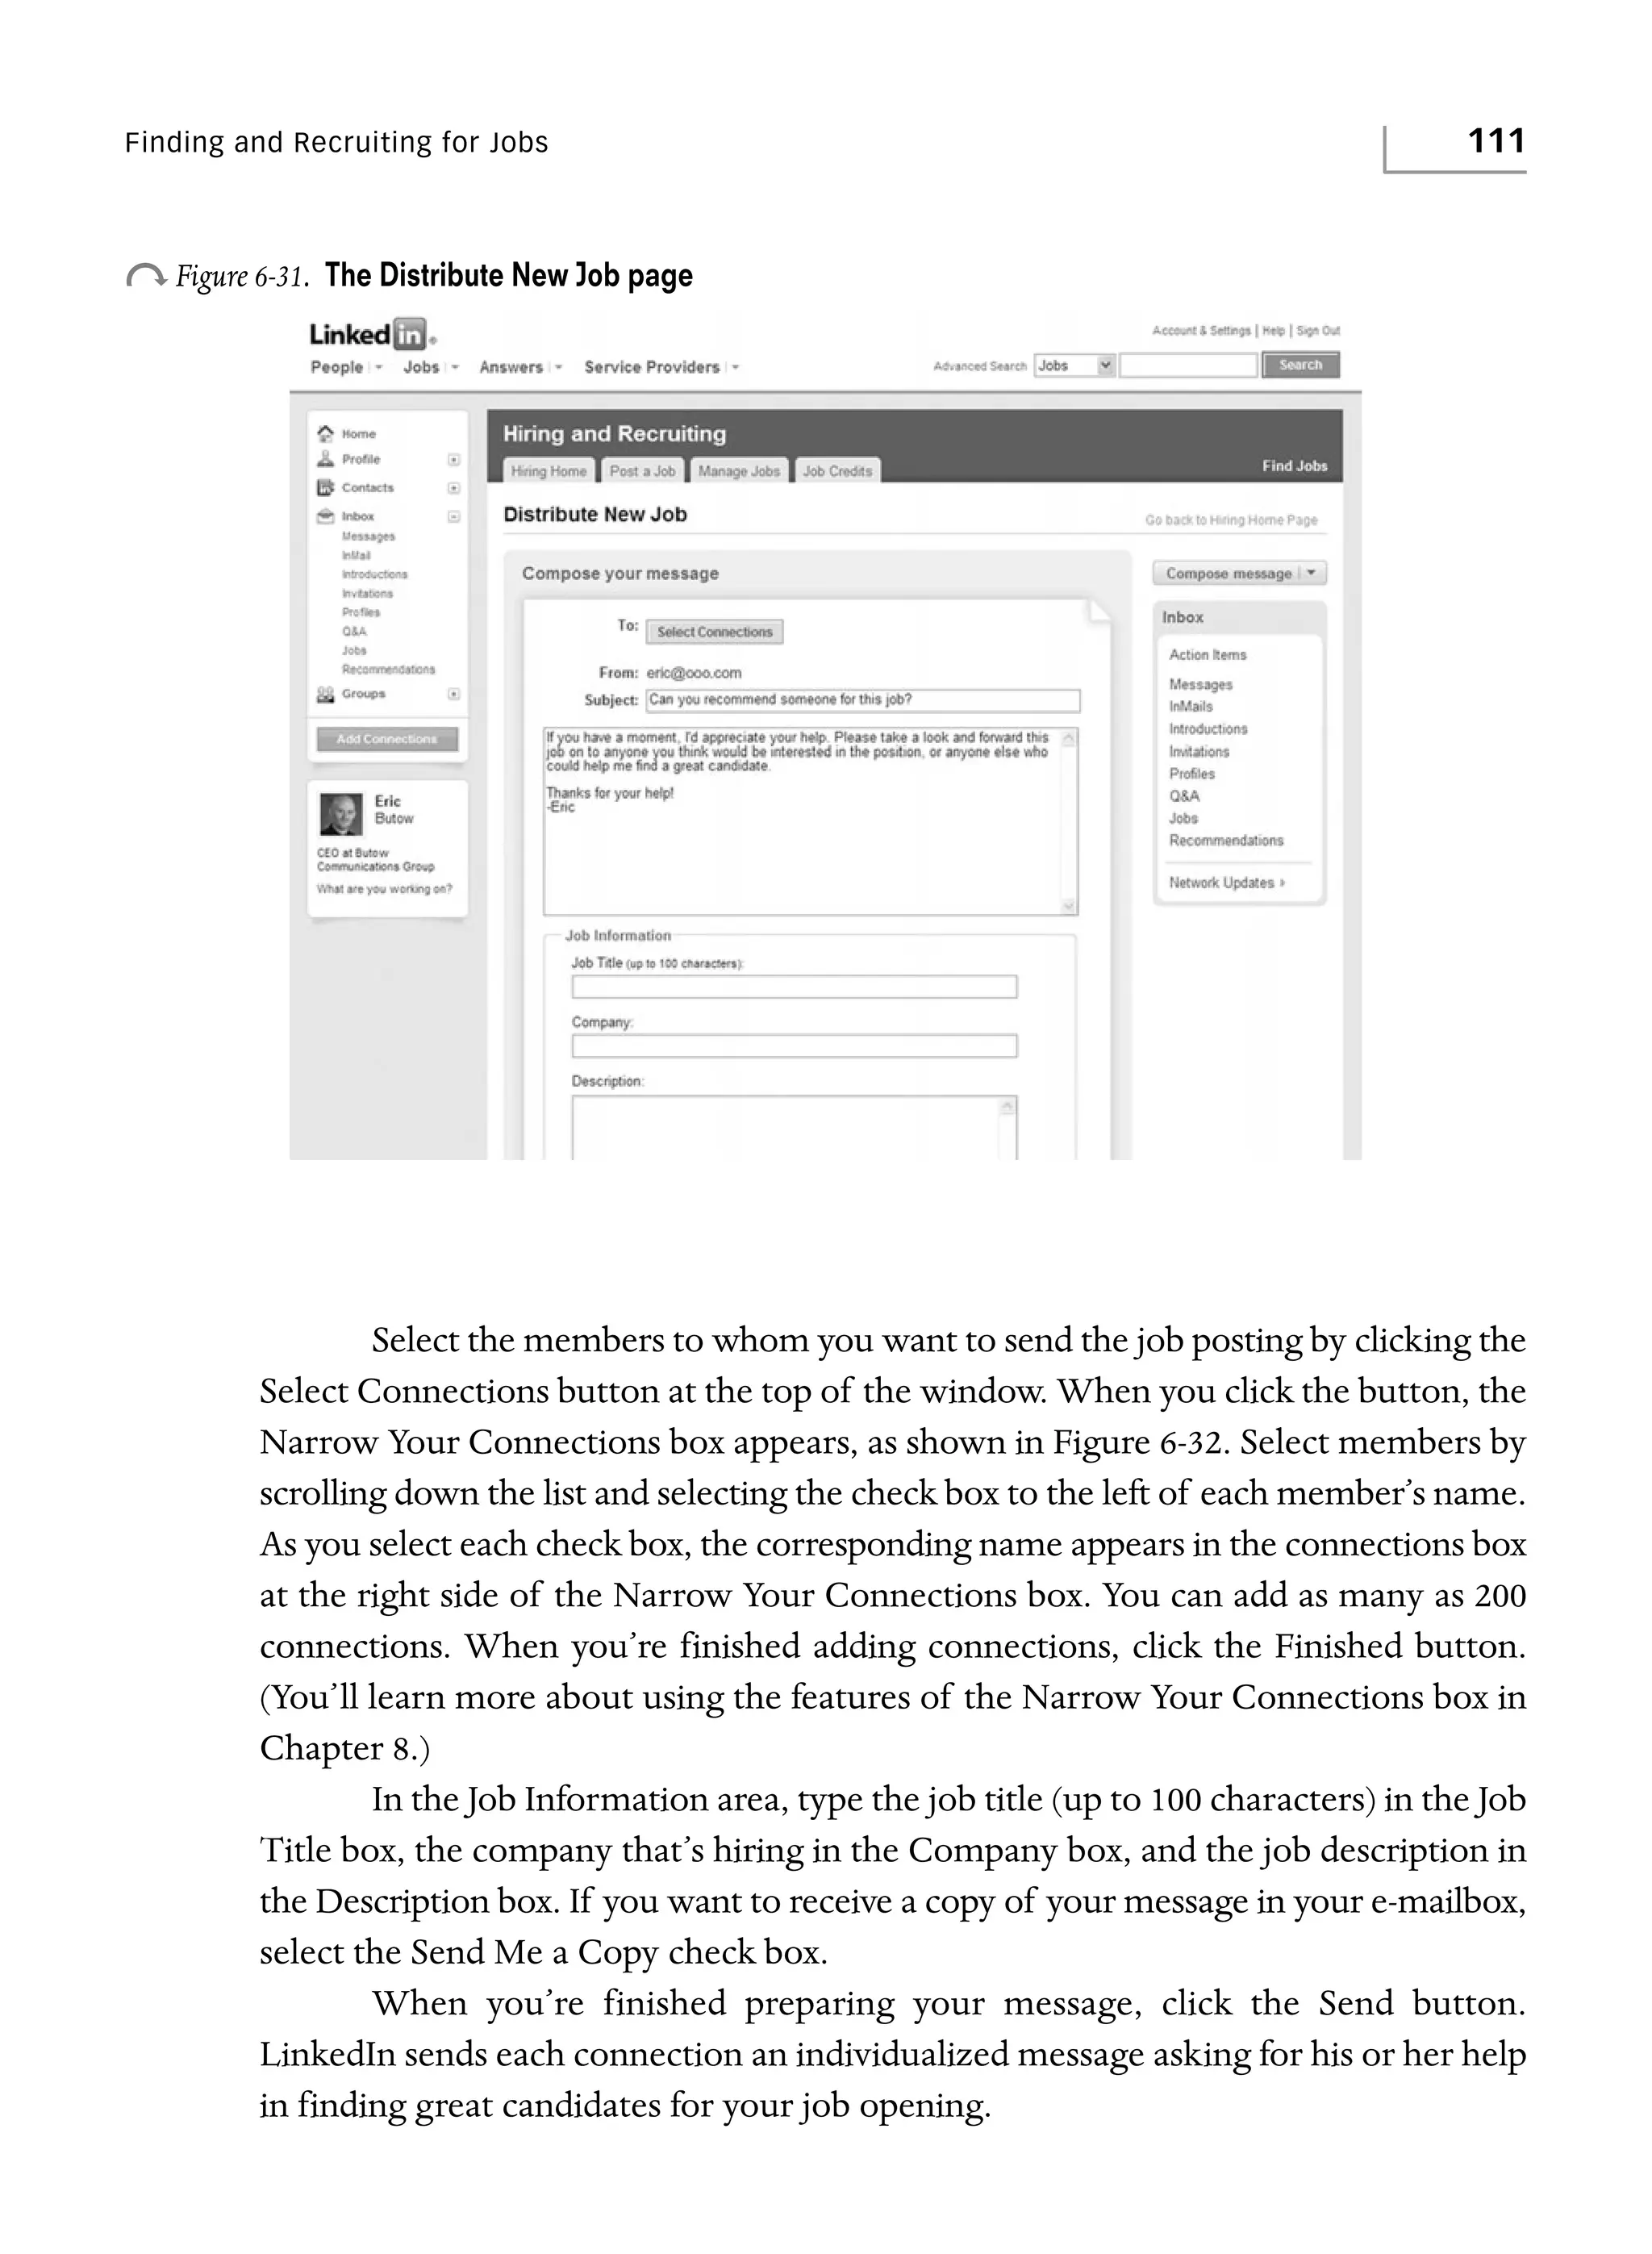
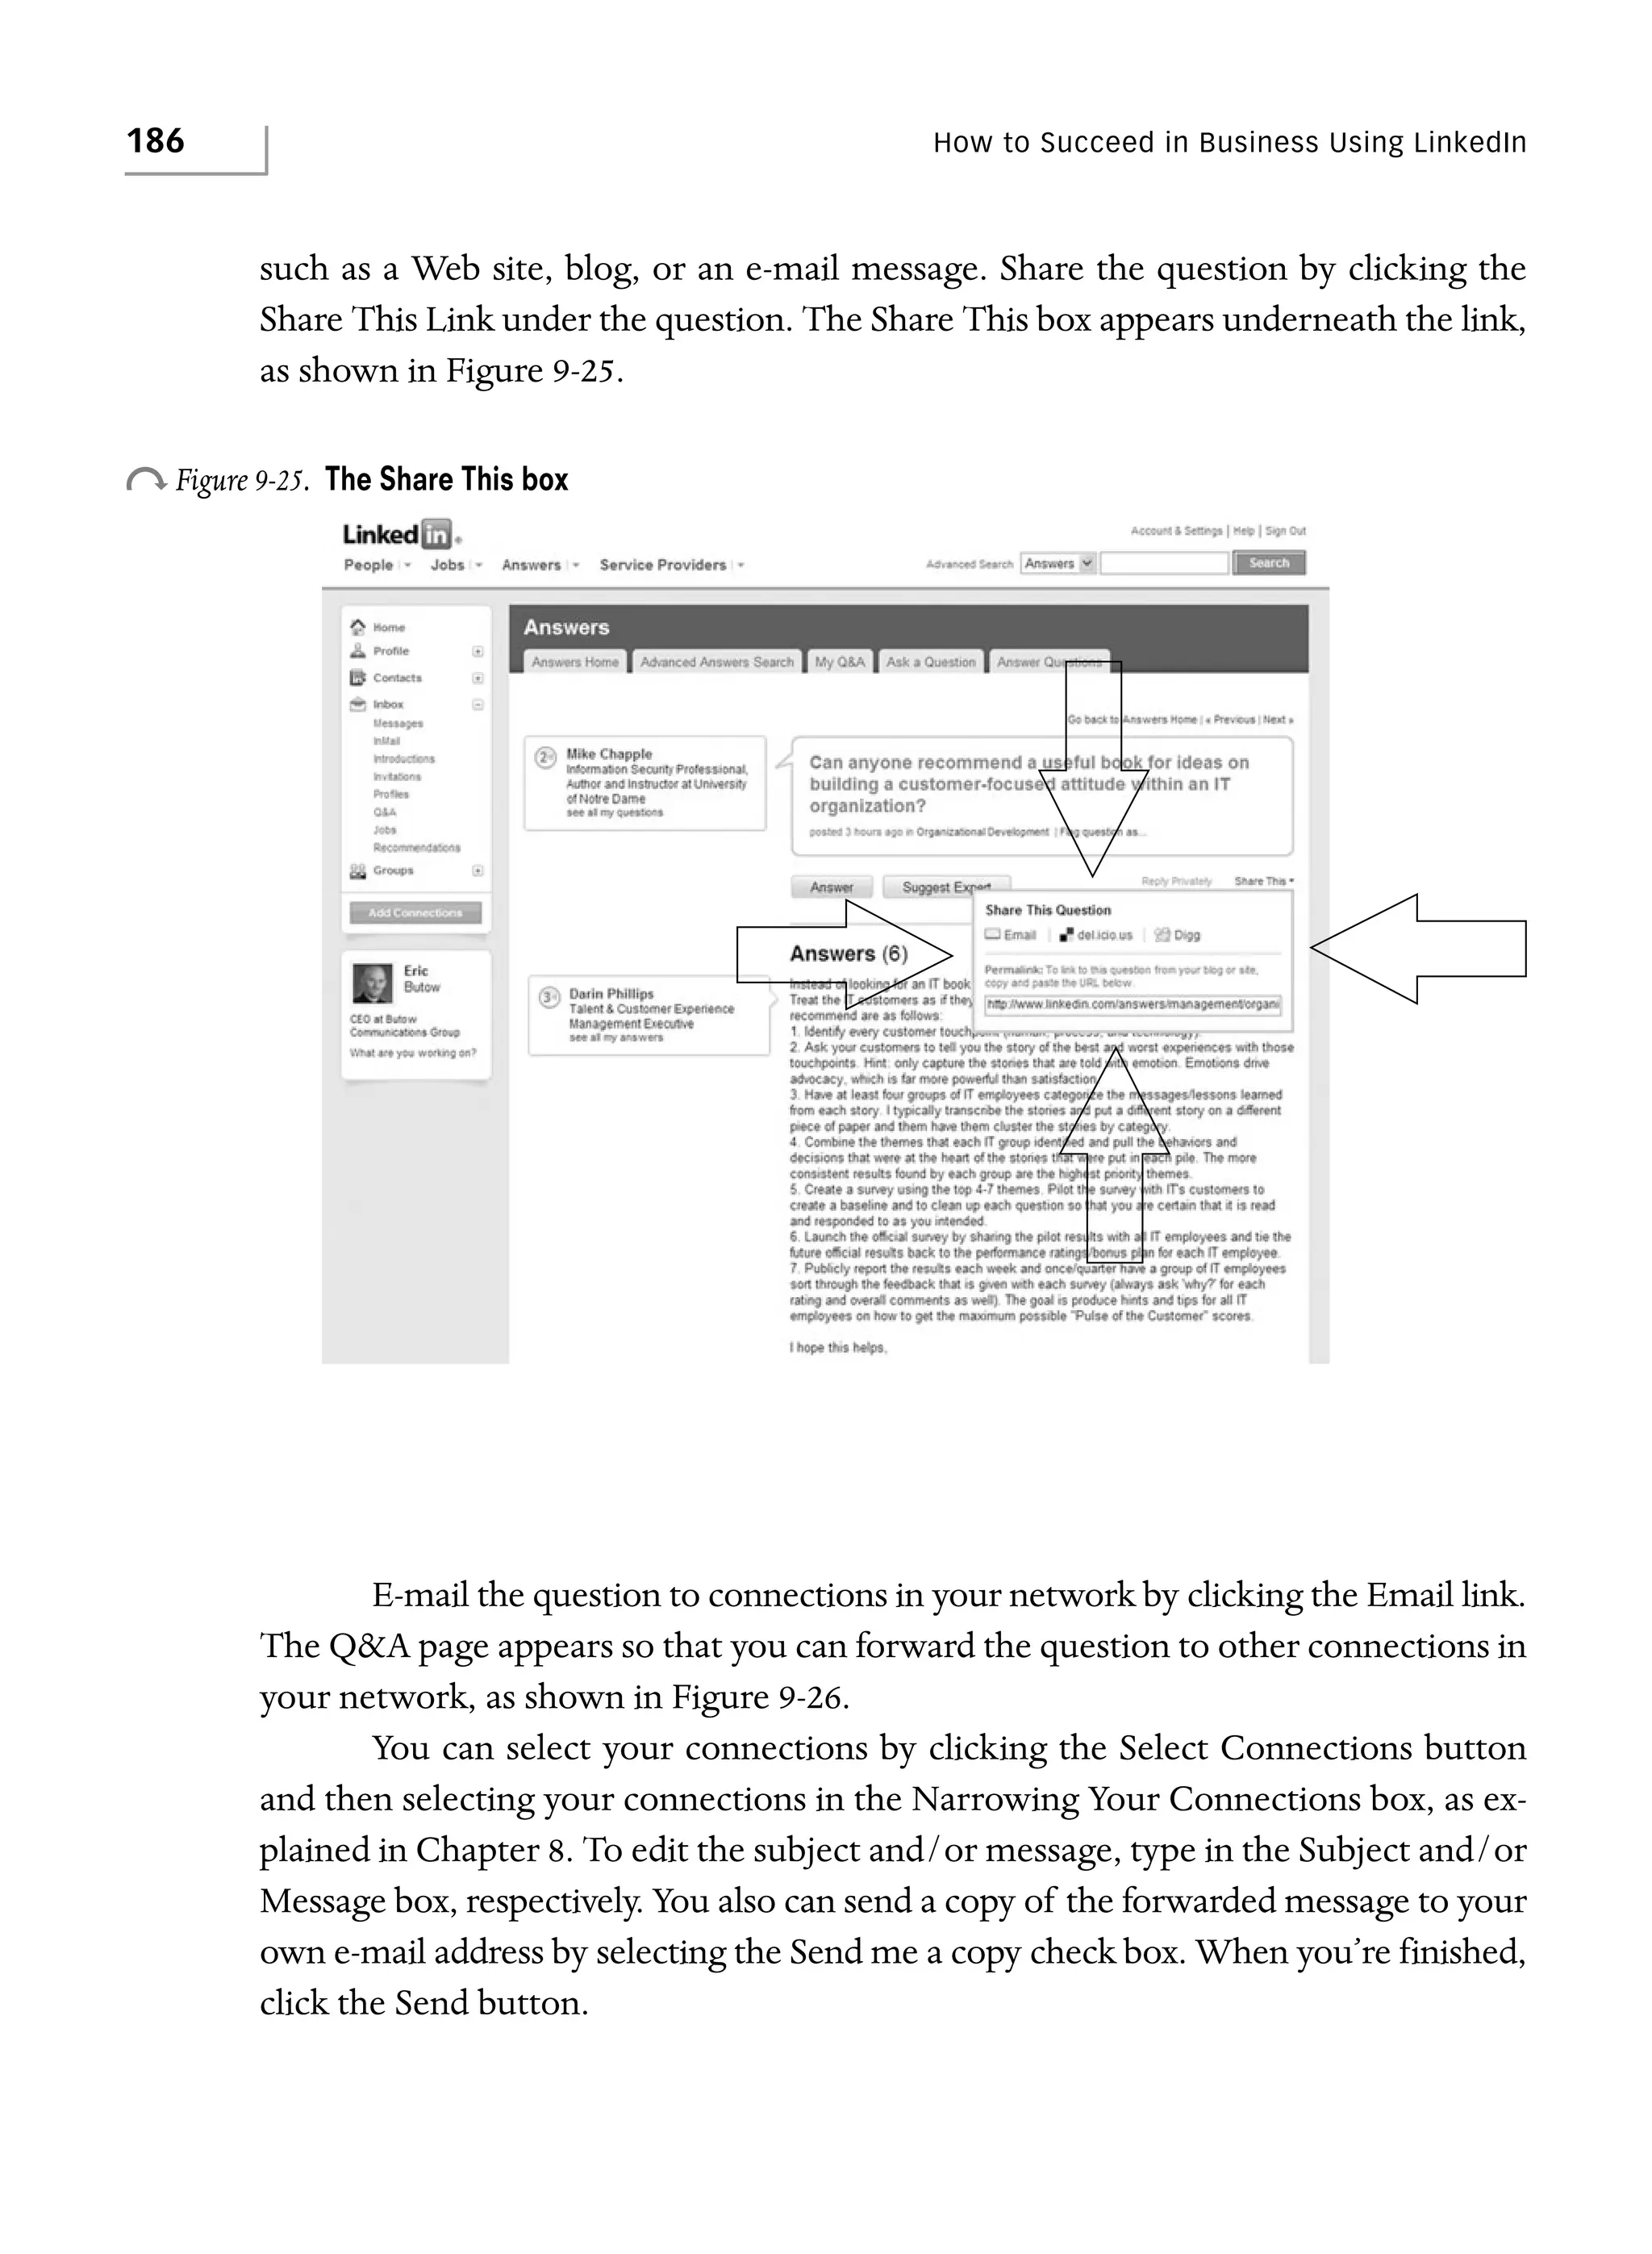
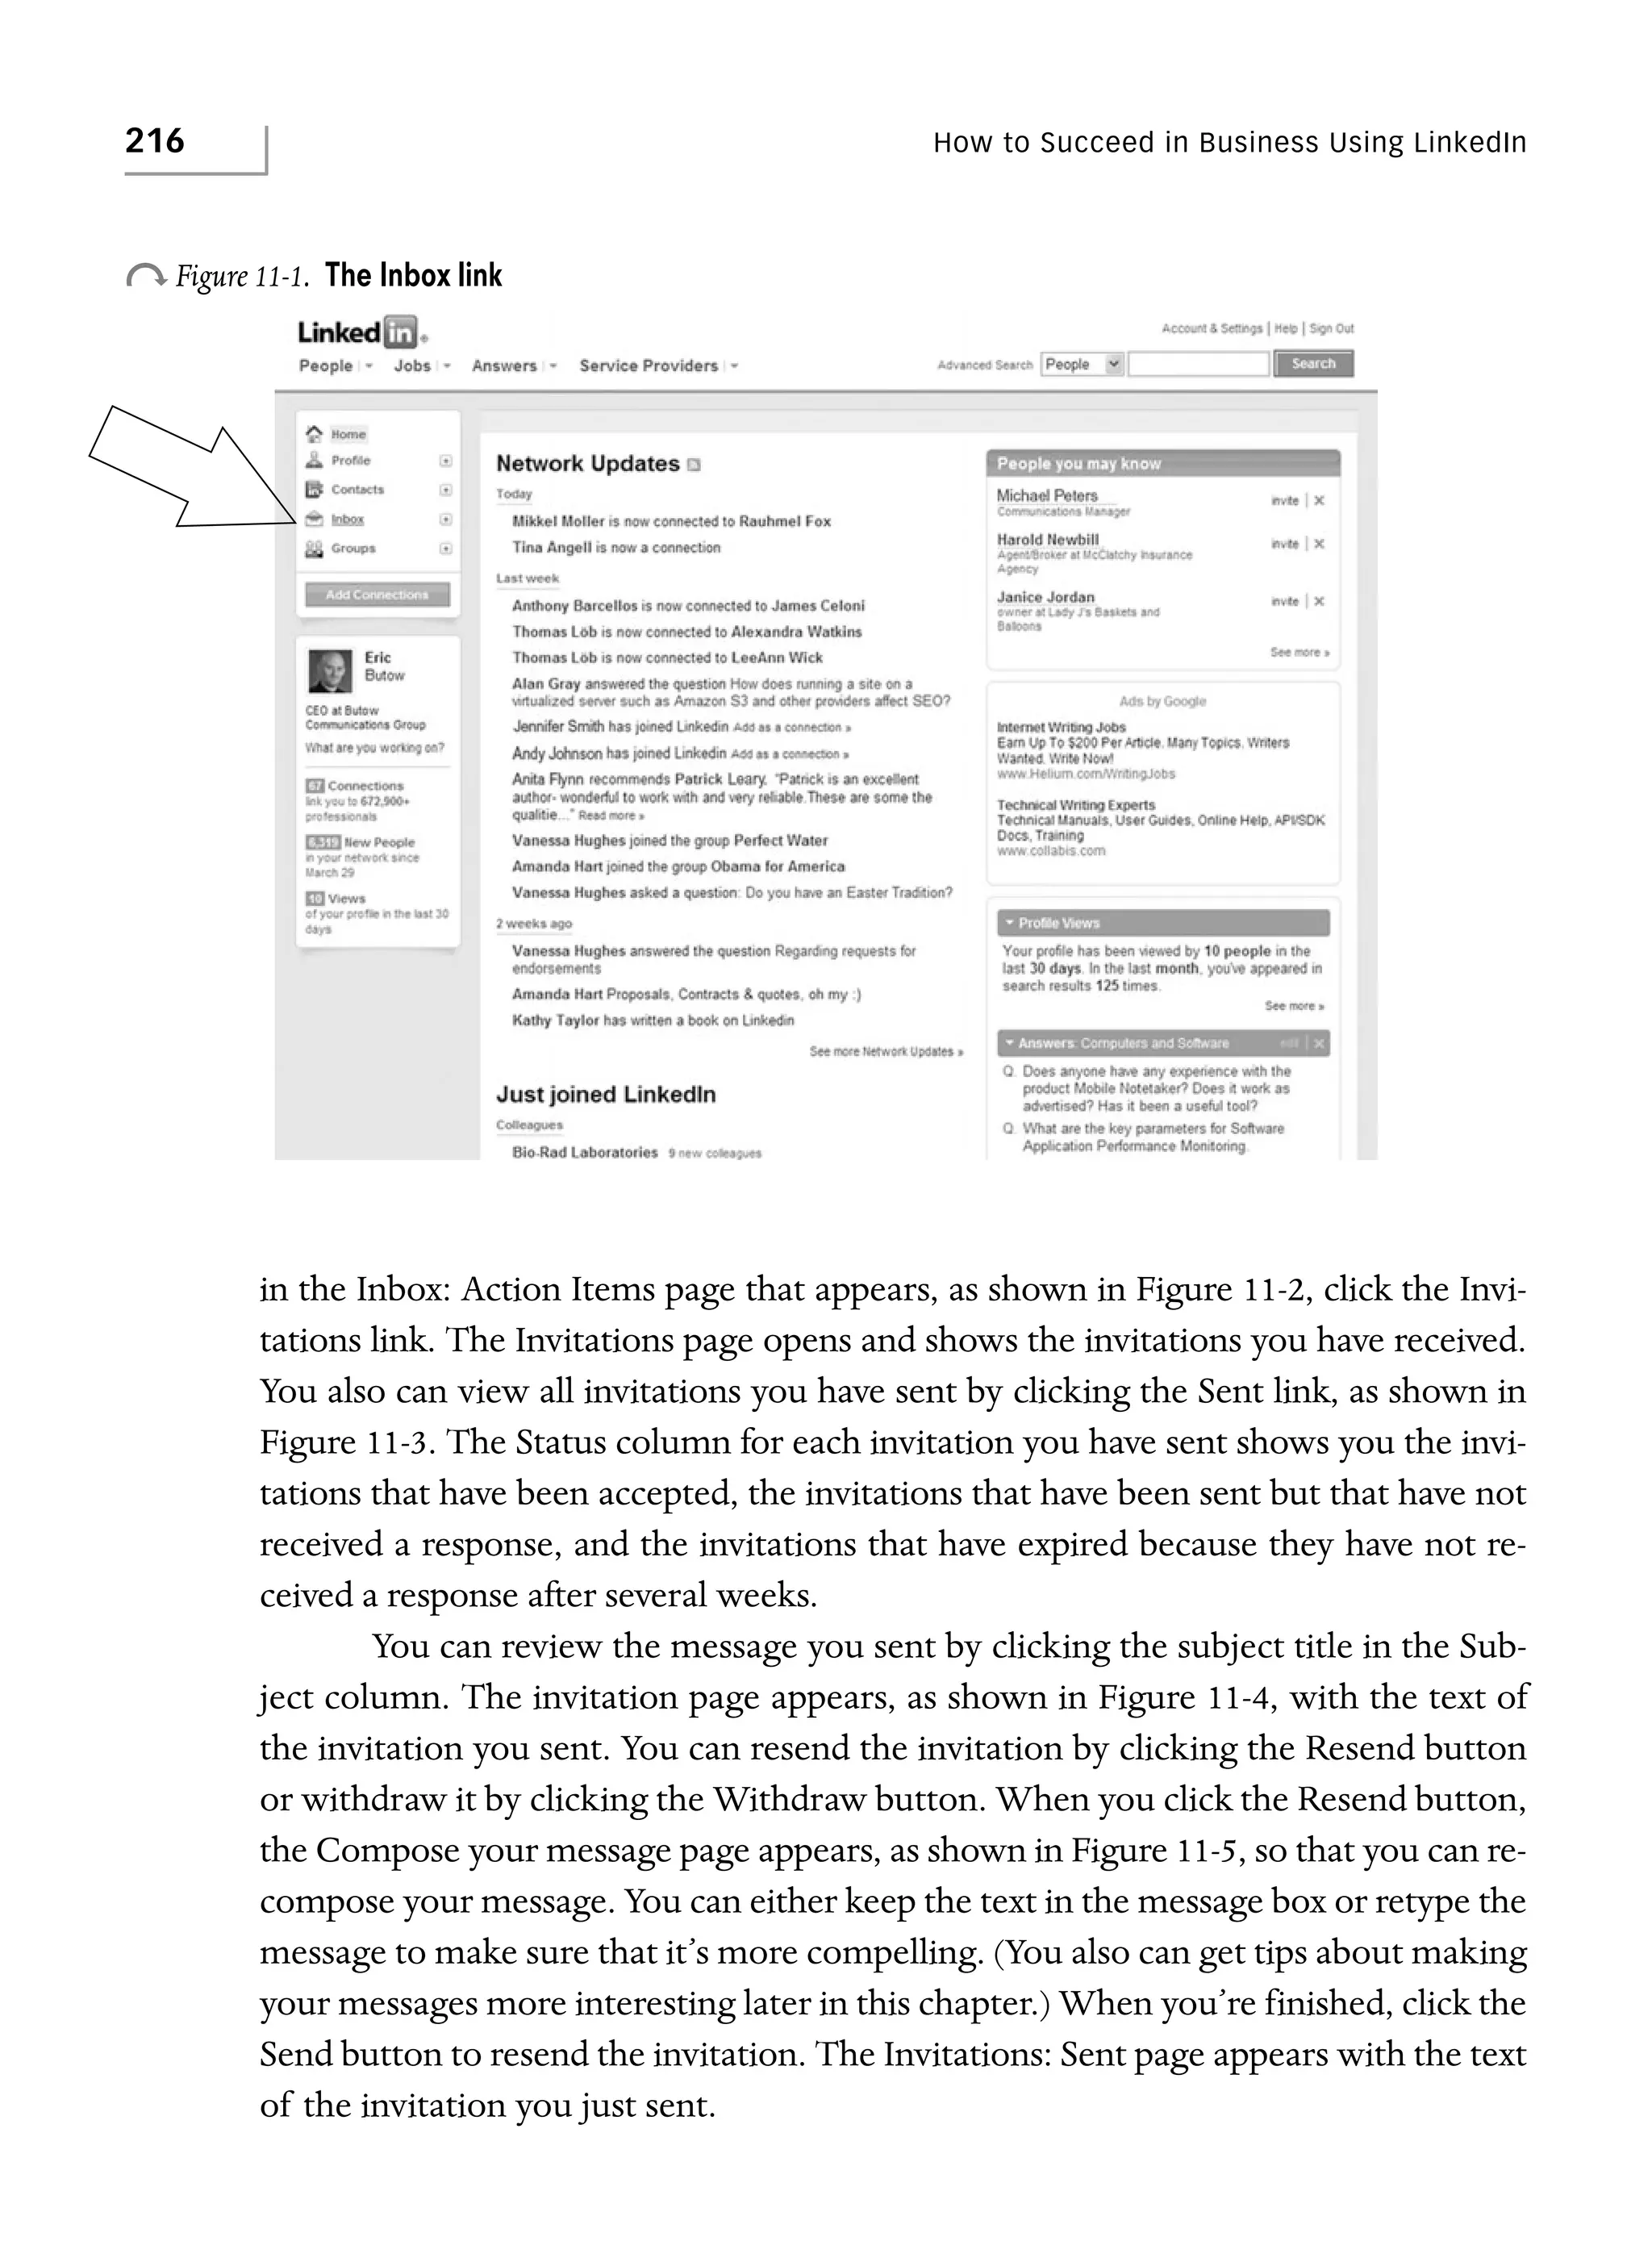
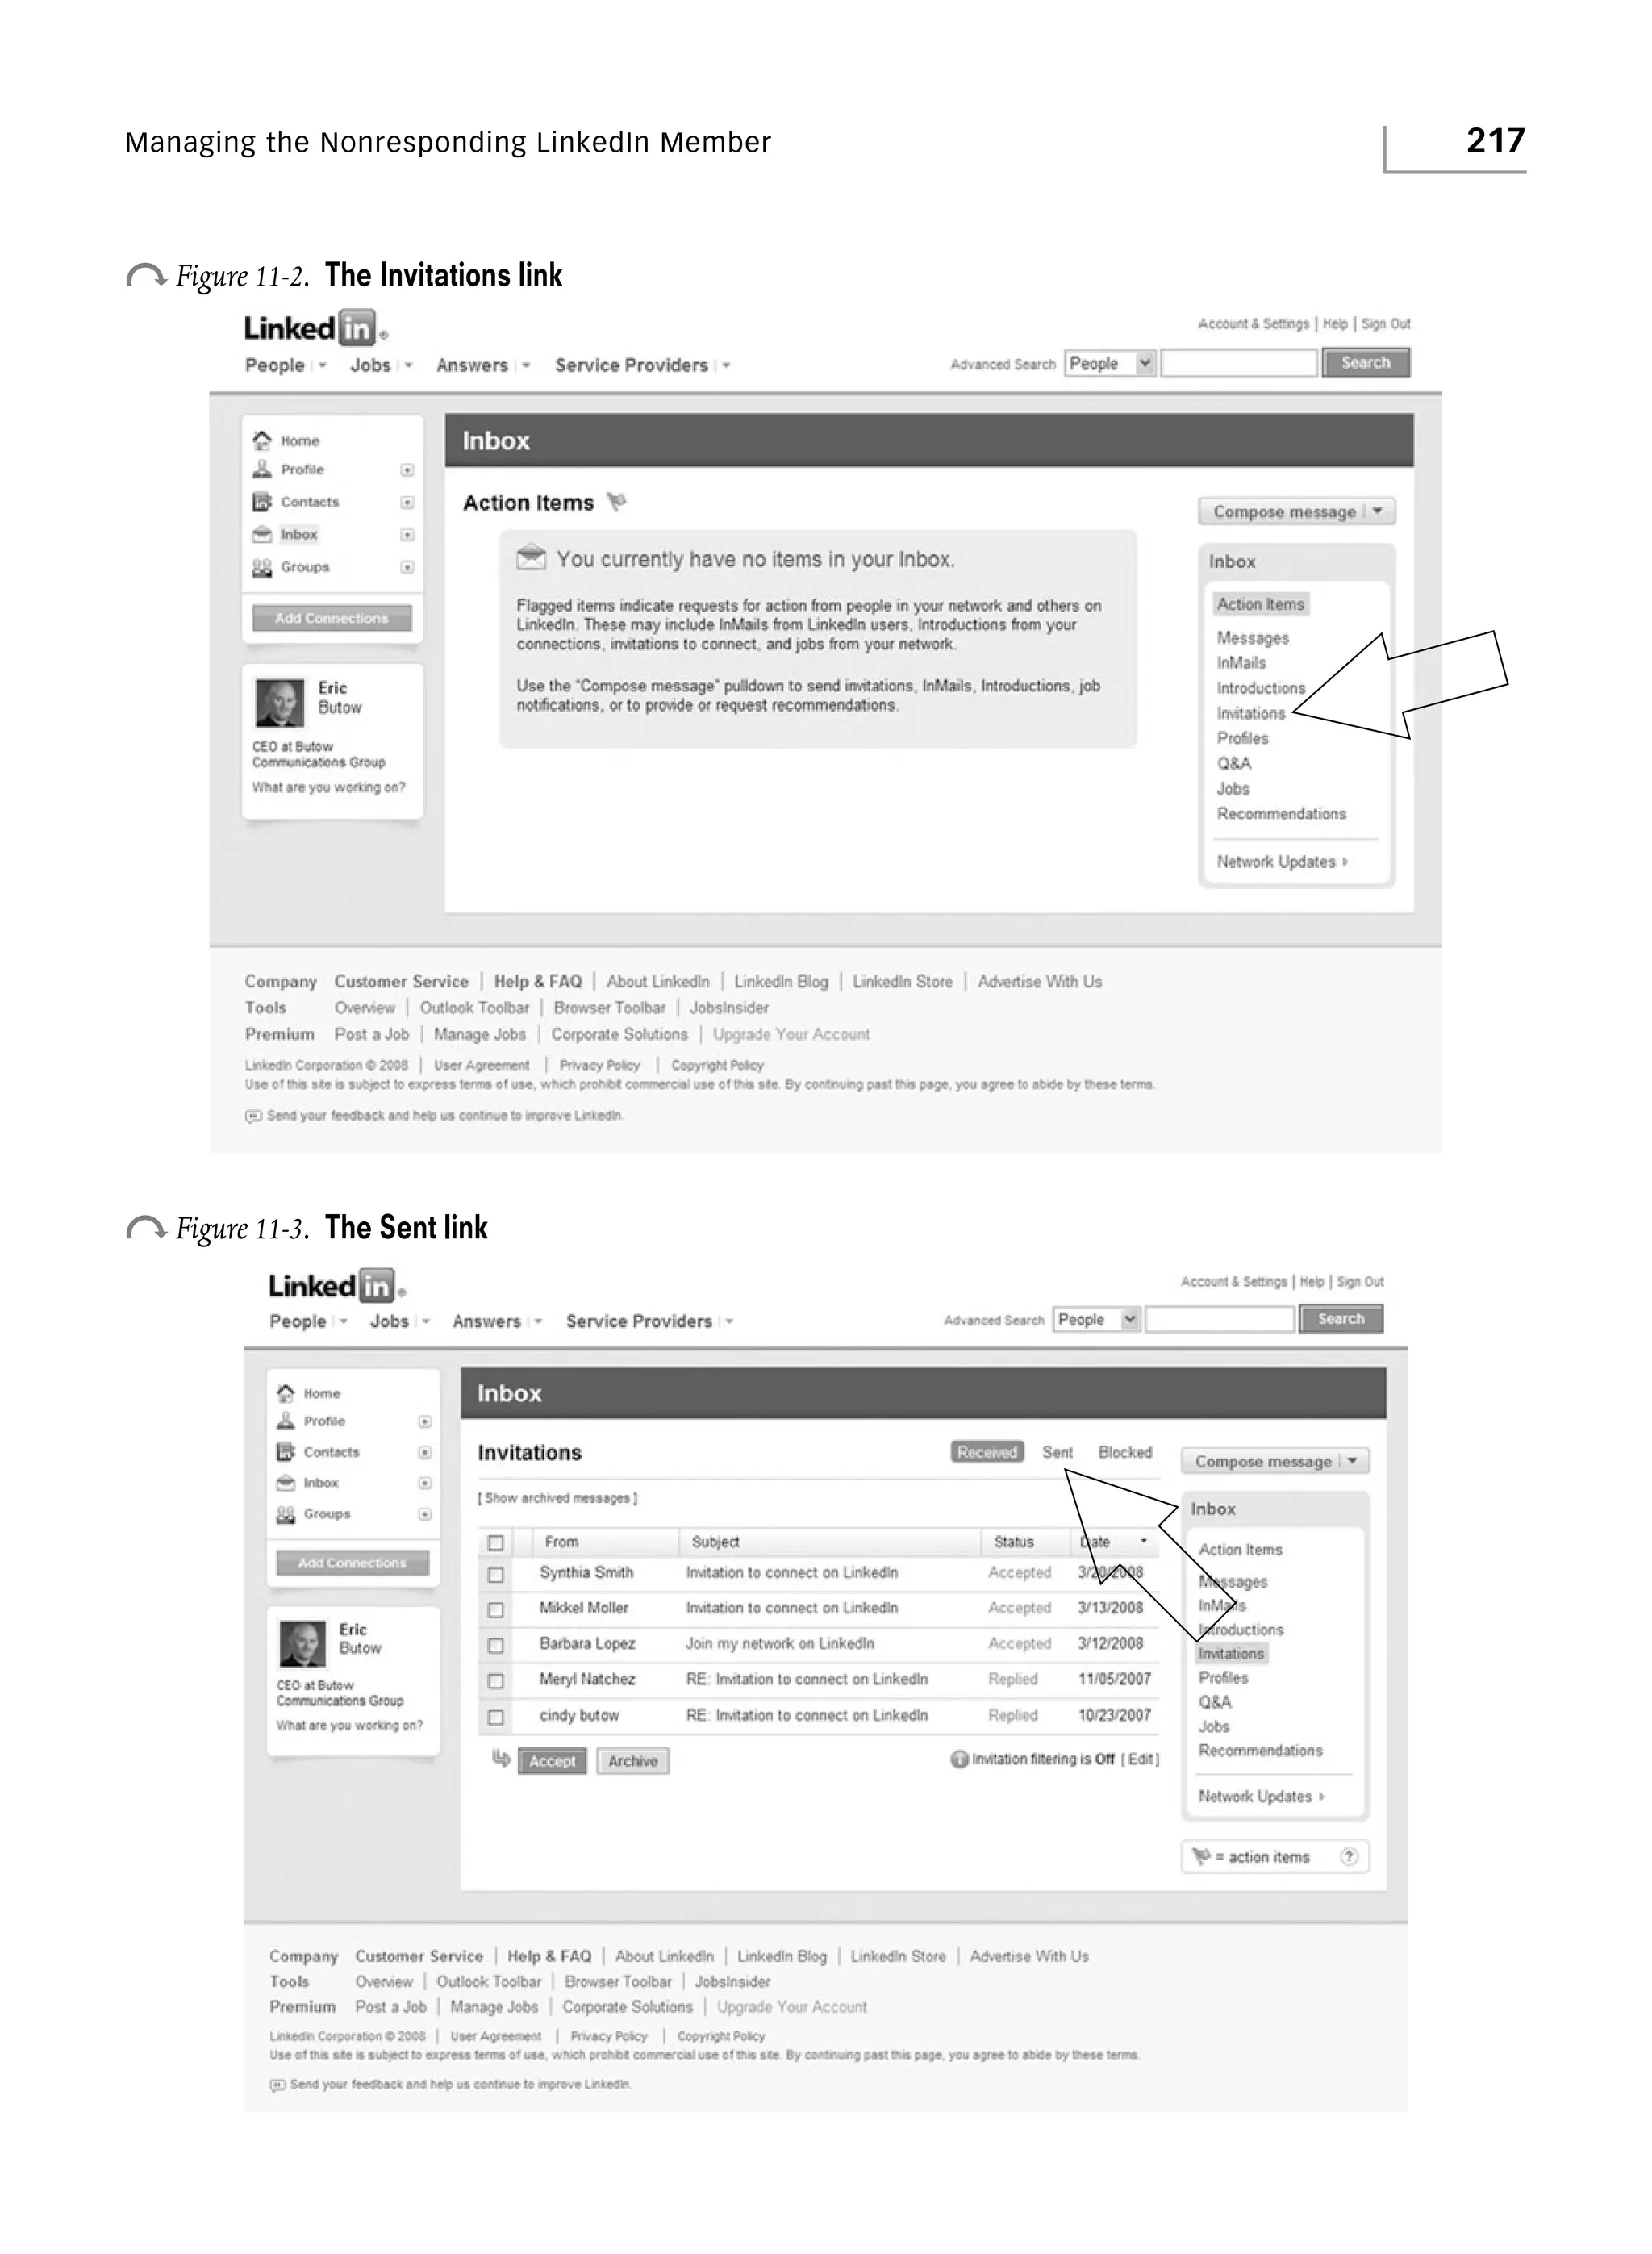
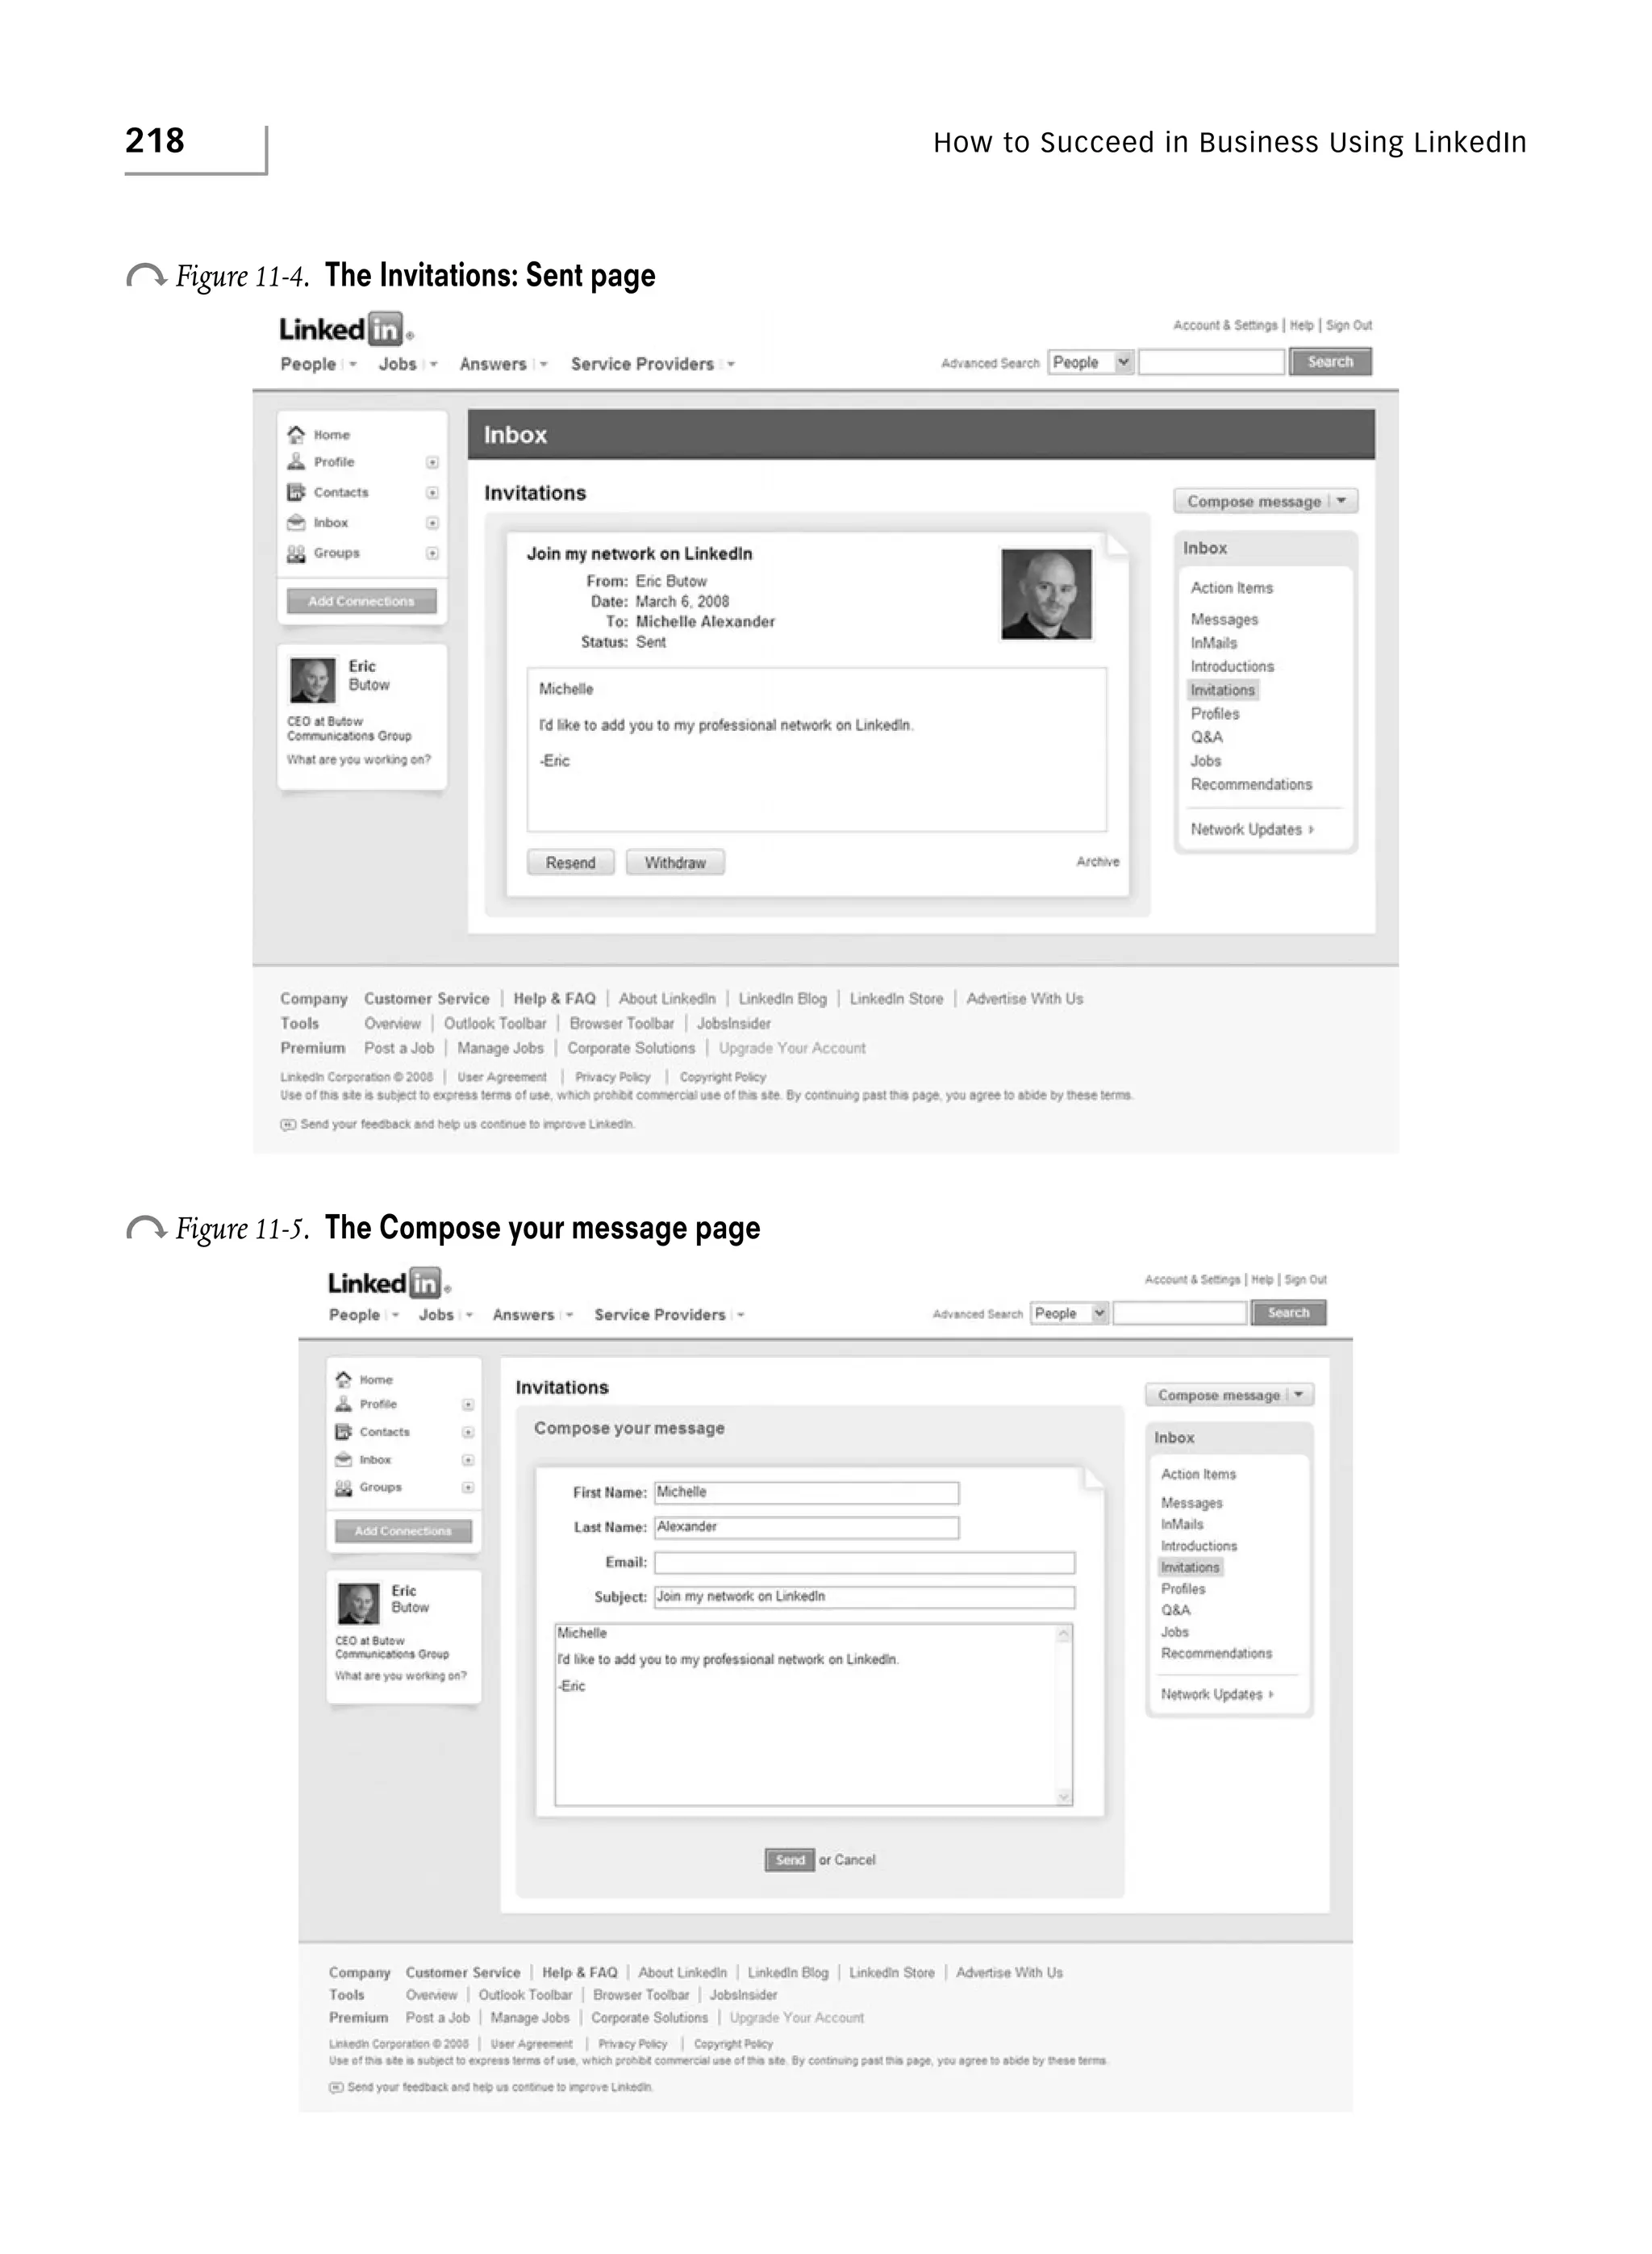
Open Recommendations in Your Inbox by clicking the plus sign to the right of the Inbox link in the Navigation box and then clicking the Recommendations link, as shown
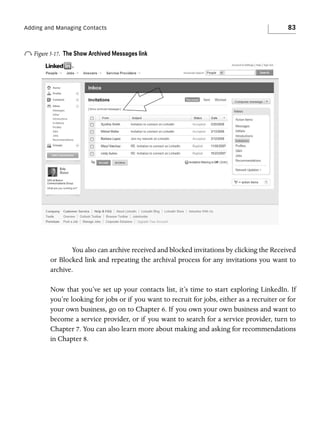
in Figure 11-9. In the Recommendations page that appears, you see all recommendation
requests you’ve received. You can also click the Sent link, as shown in Figure 11-10, to
view all the recommendation requests you’ve sent. In the Recommendations: Sent page
that appears, as shown in Figure 11-11, click the recommendation request that you sent
in the list. The recommendation contains the text “[Your Name] has recommended you
on LinkedIn,” where “[Your Name]” is your own name. At the bottom of the recom-
o Figure 11-9.
The Recommendations link in the Navigation box](https://image.slidesharecdn.com/howtosucceedinbusinessusinglinkedin-140106085854-phpapp02/85/How-to-succeed-in-business-using-linked-in-230-320.jpg)


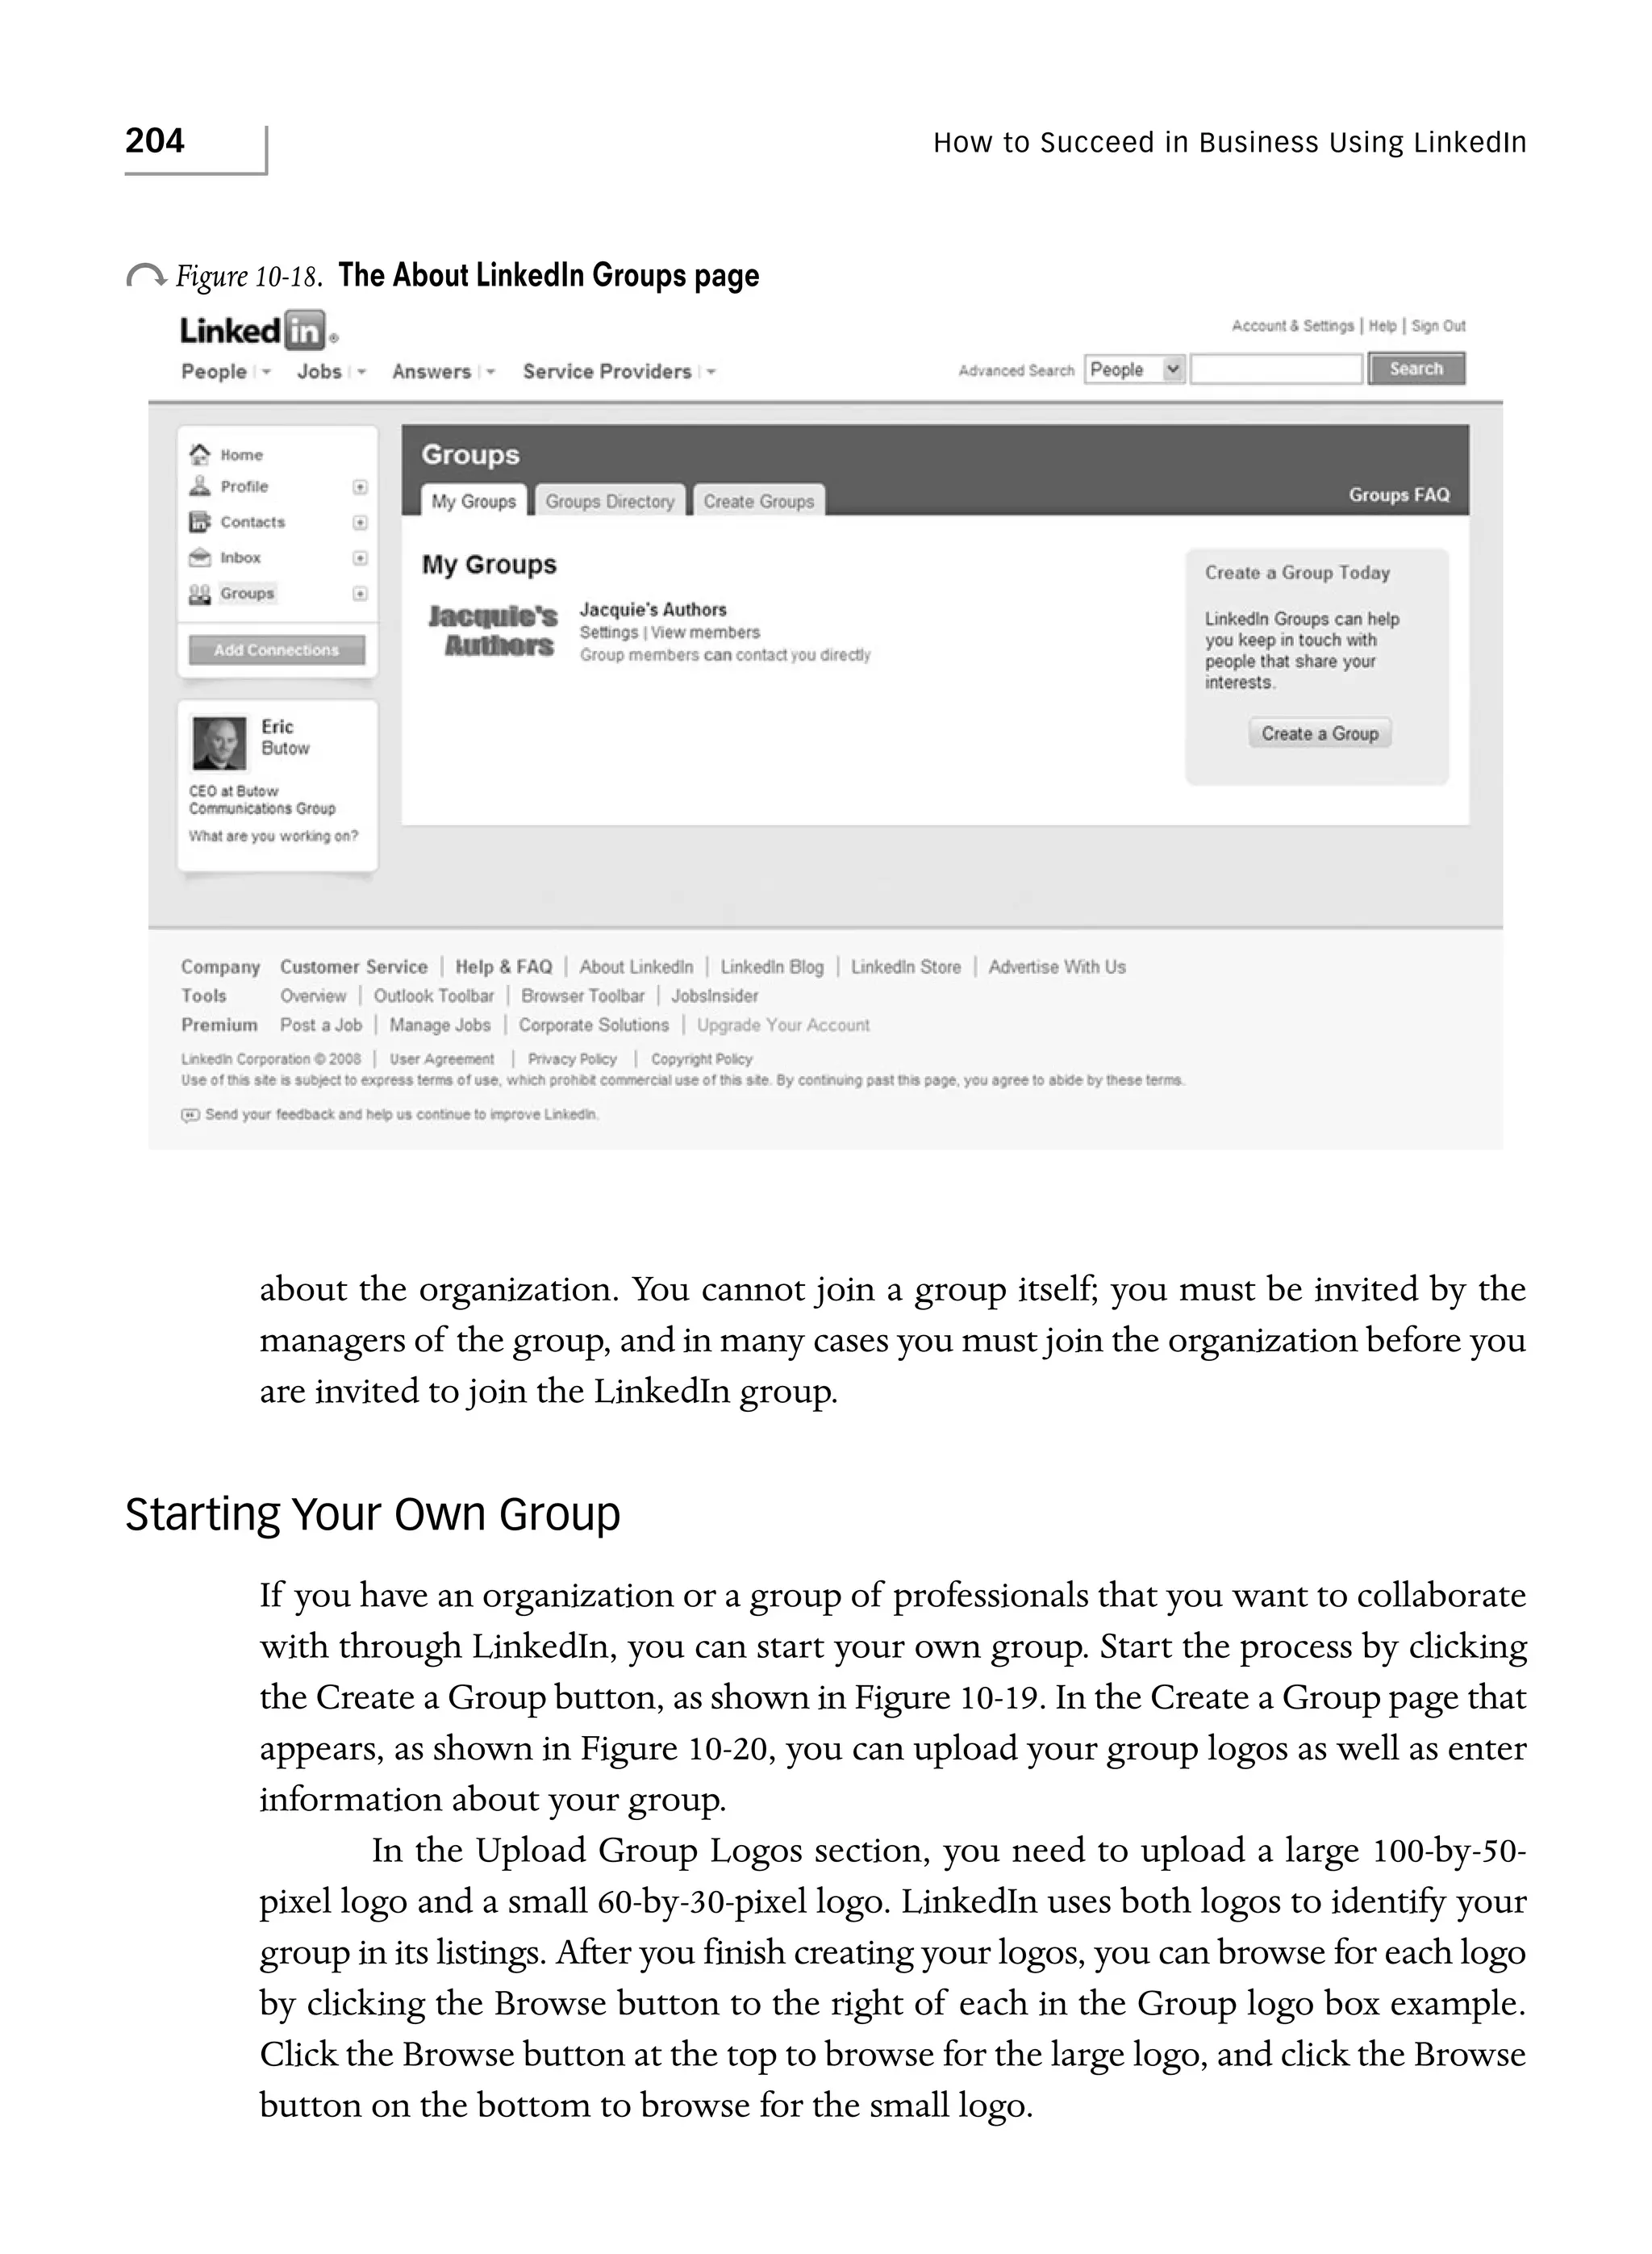


![Managing the Nonresponding LinkedIn Member
221
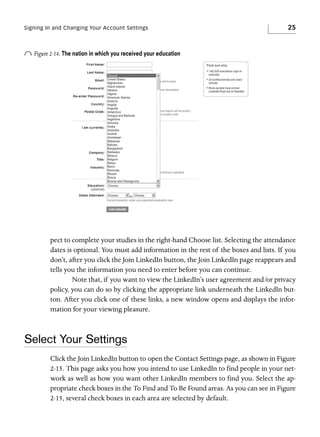
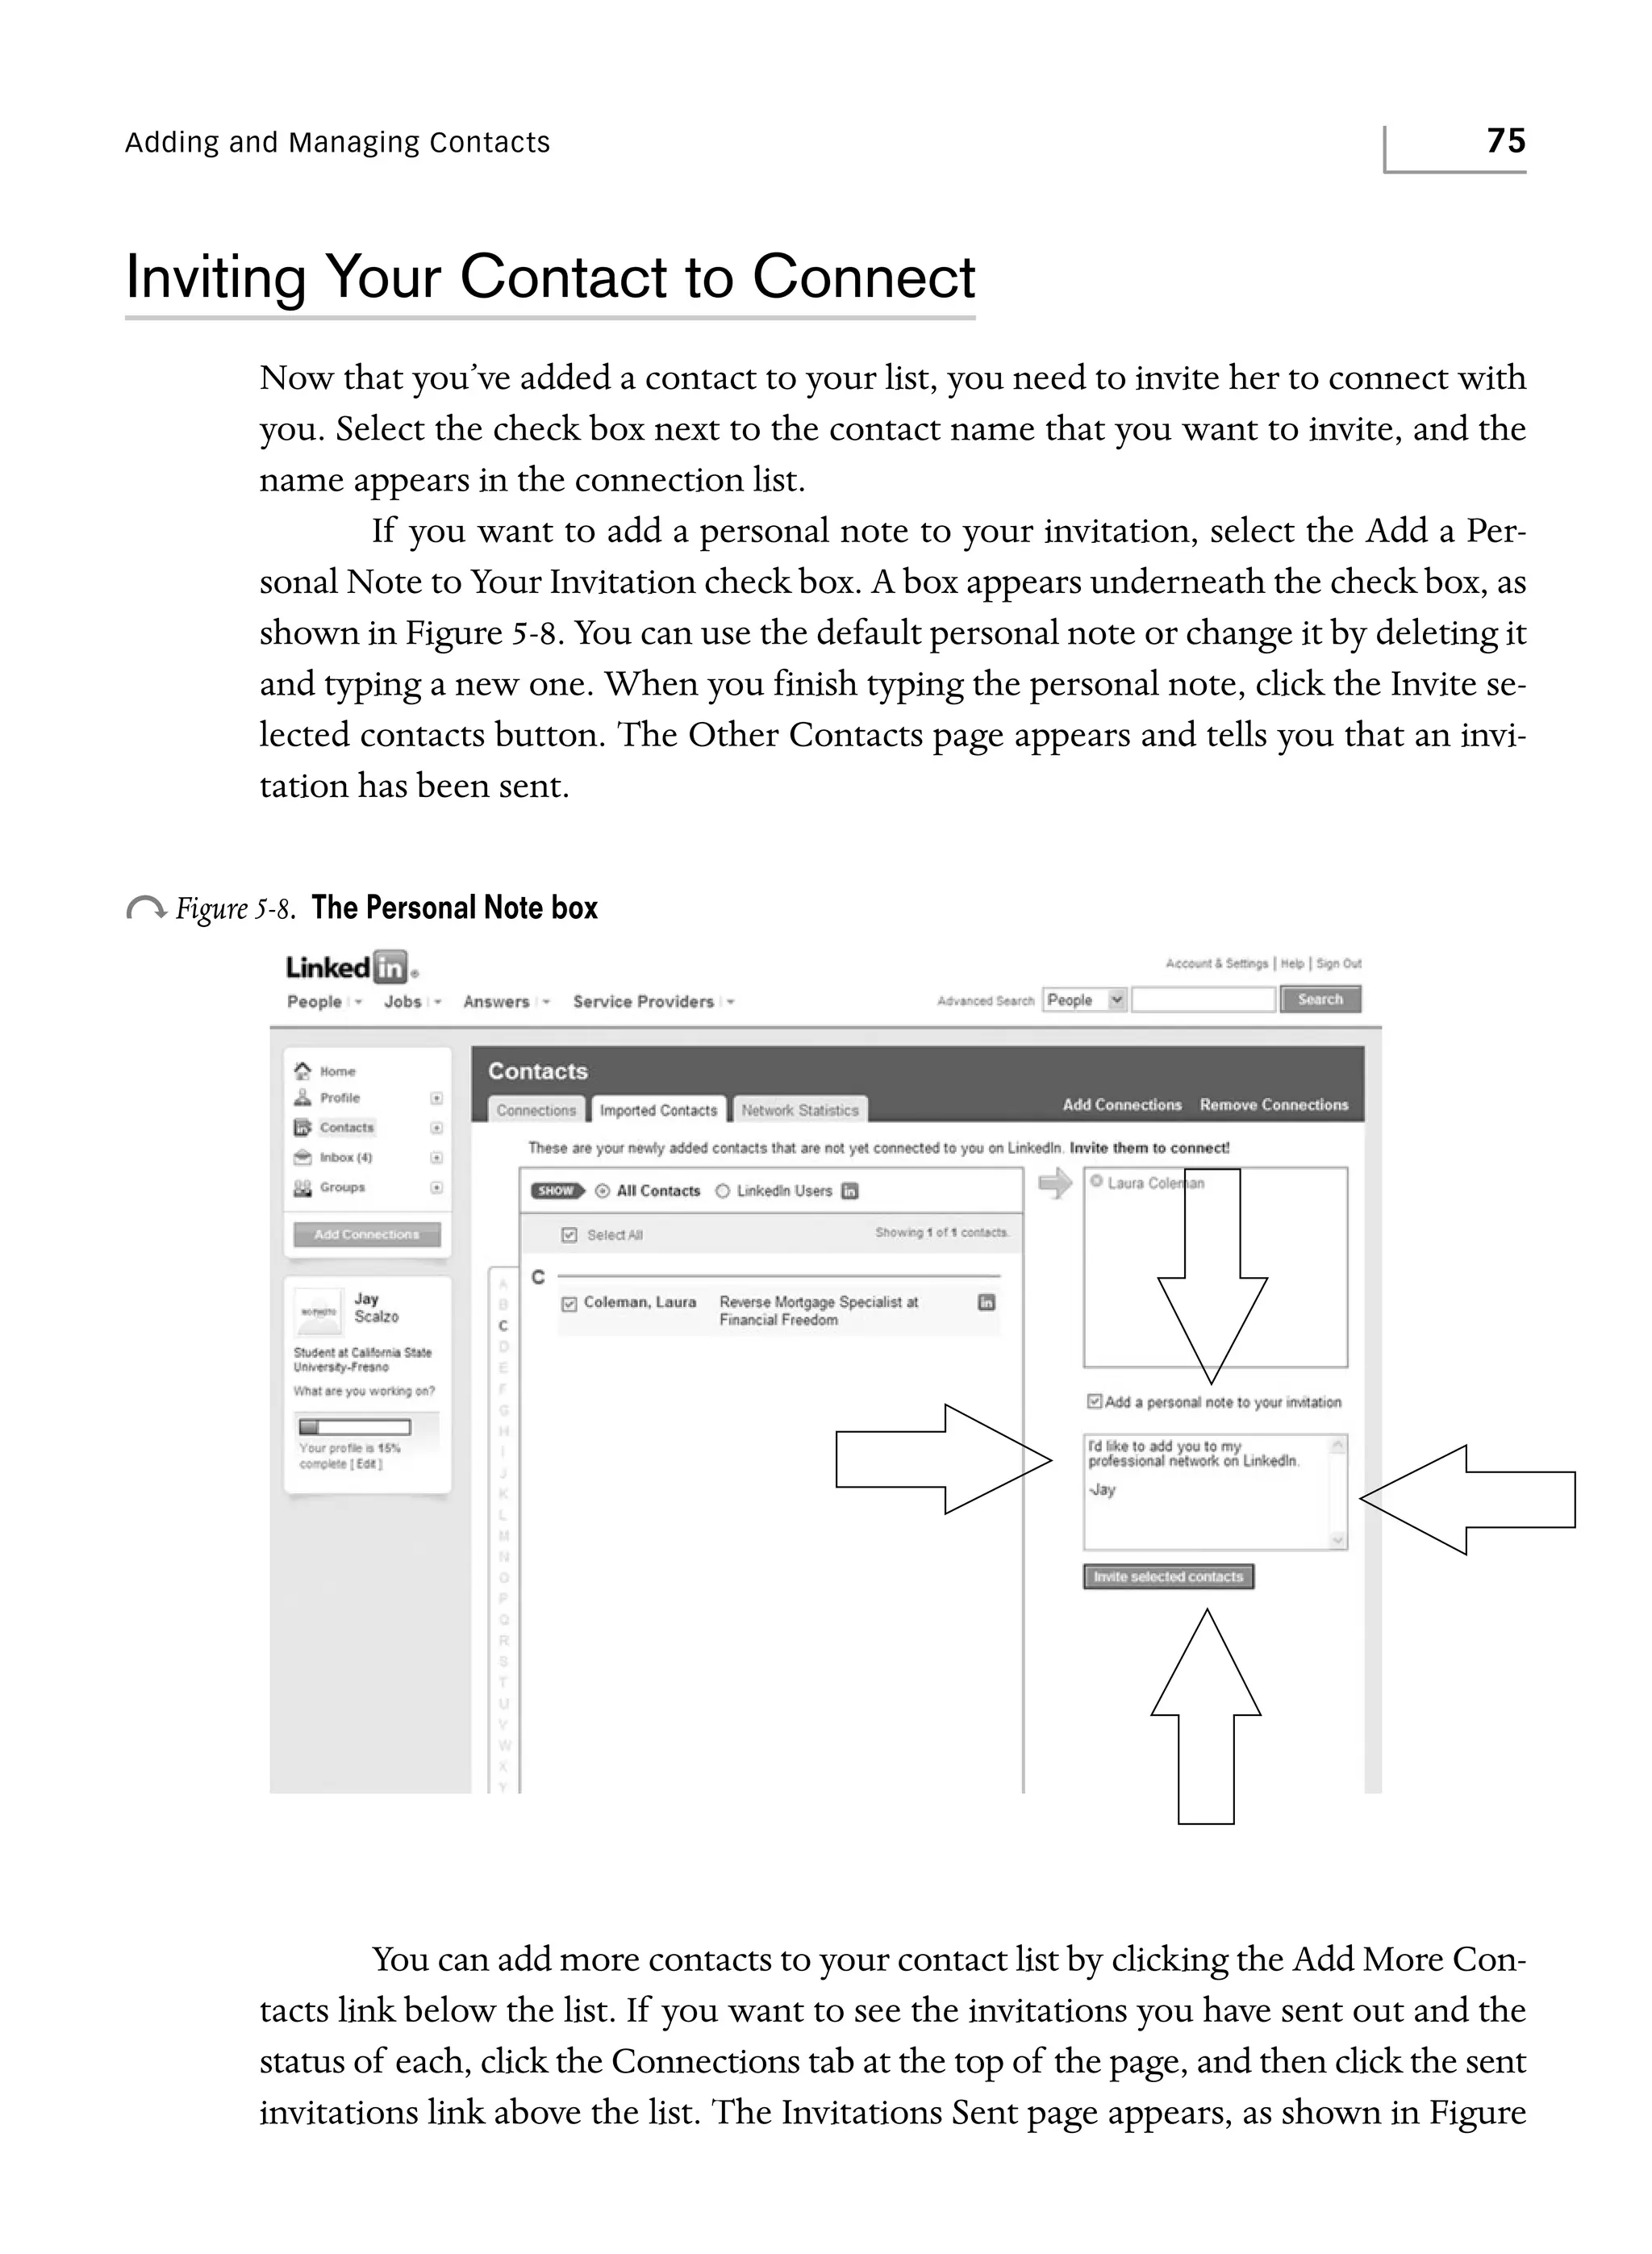
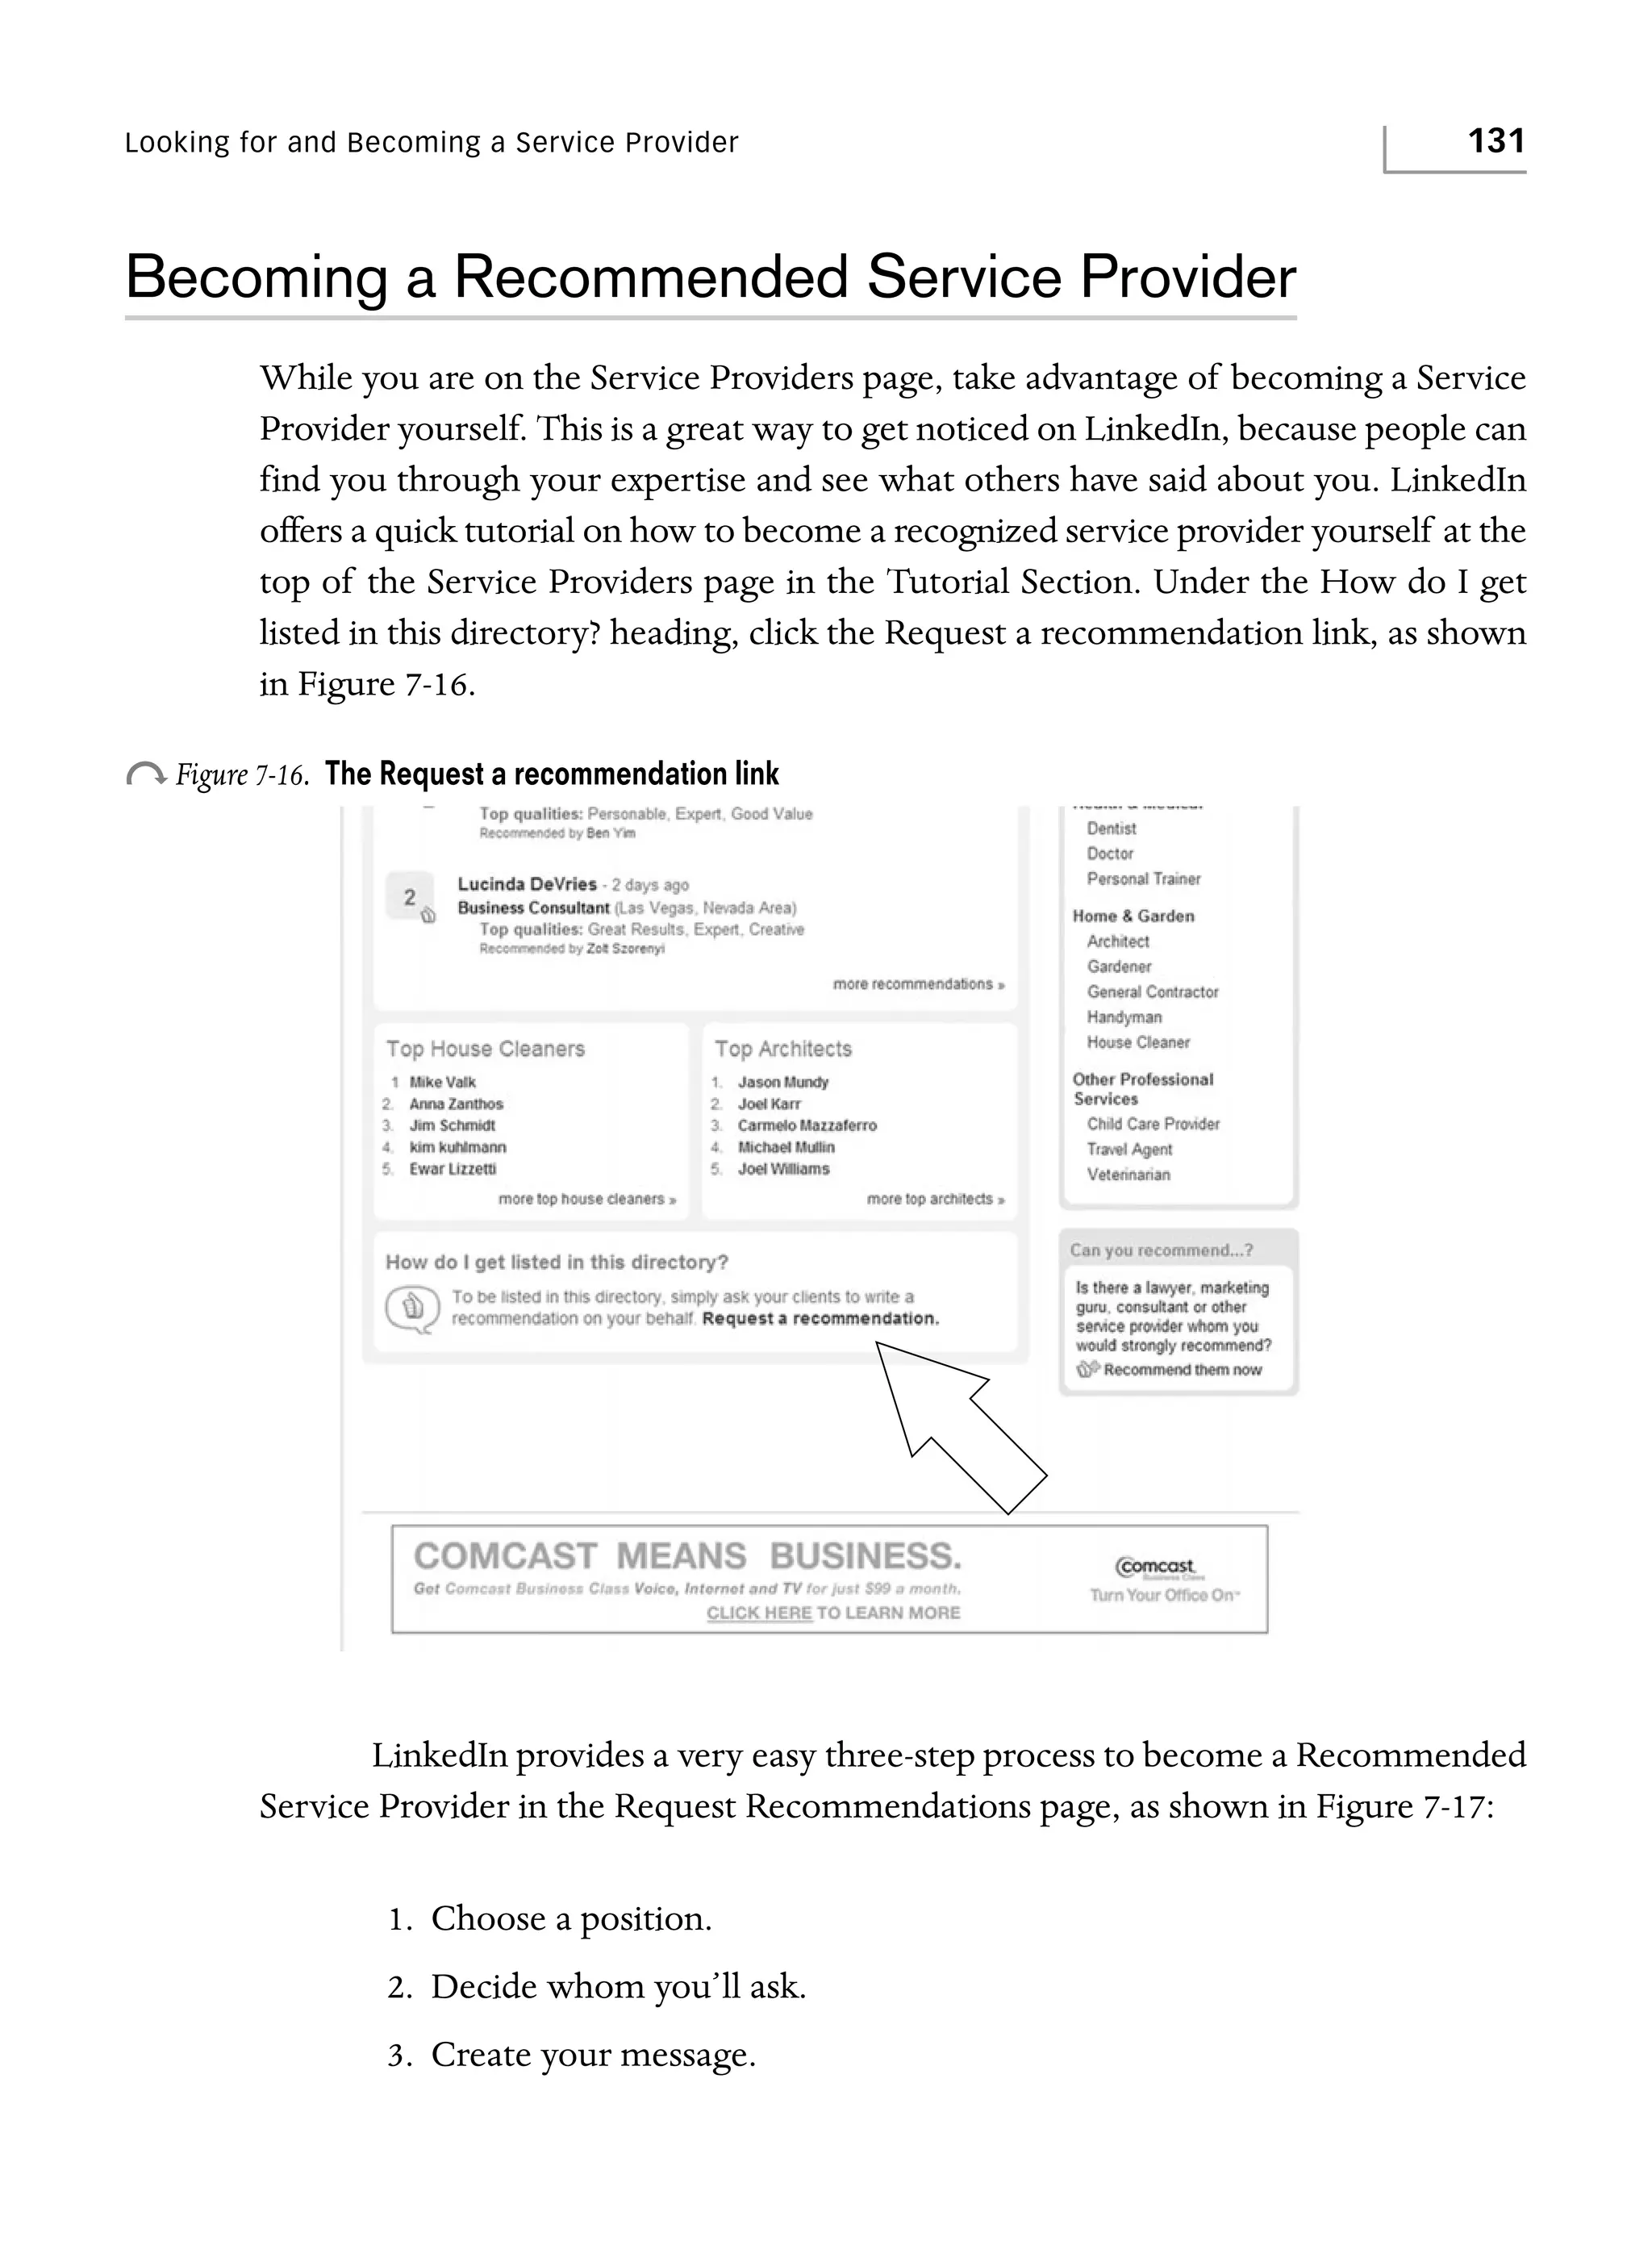
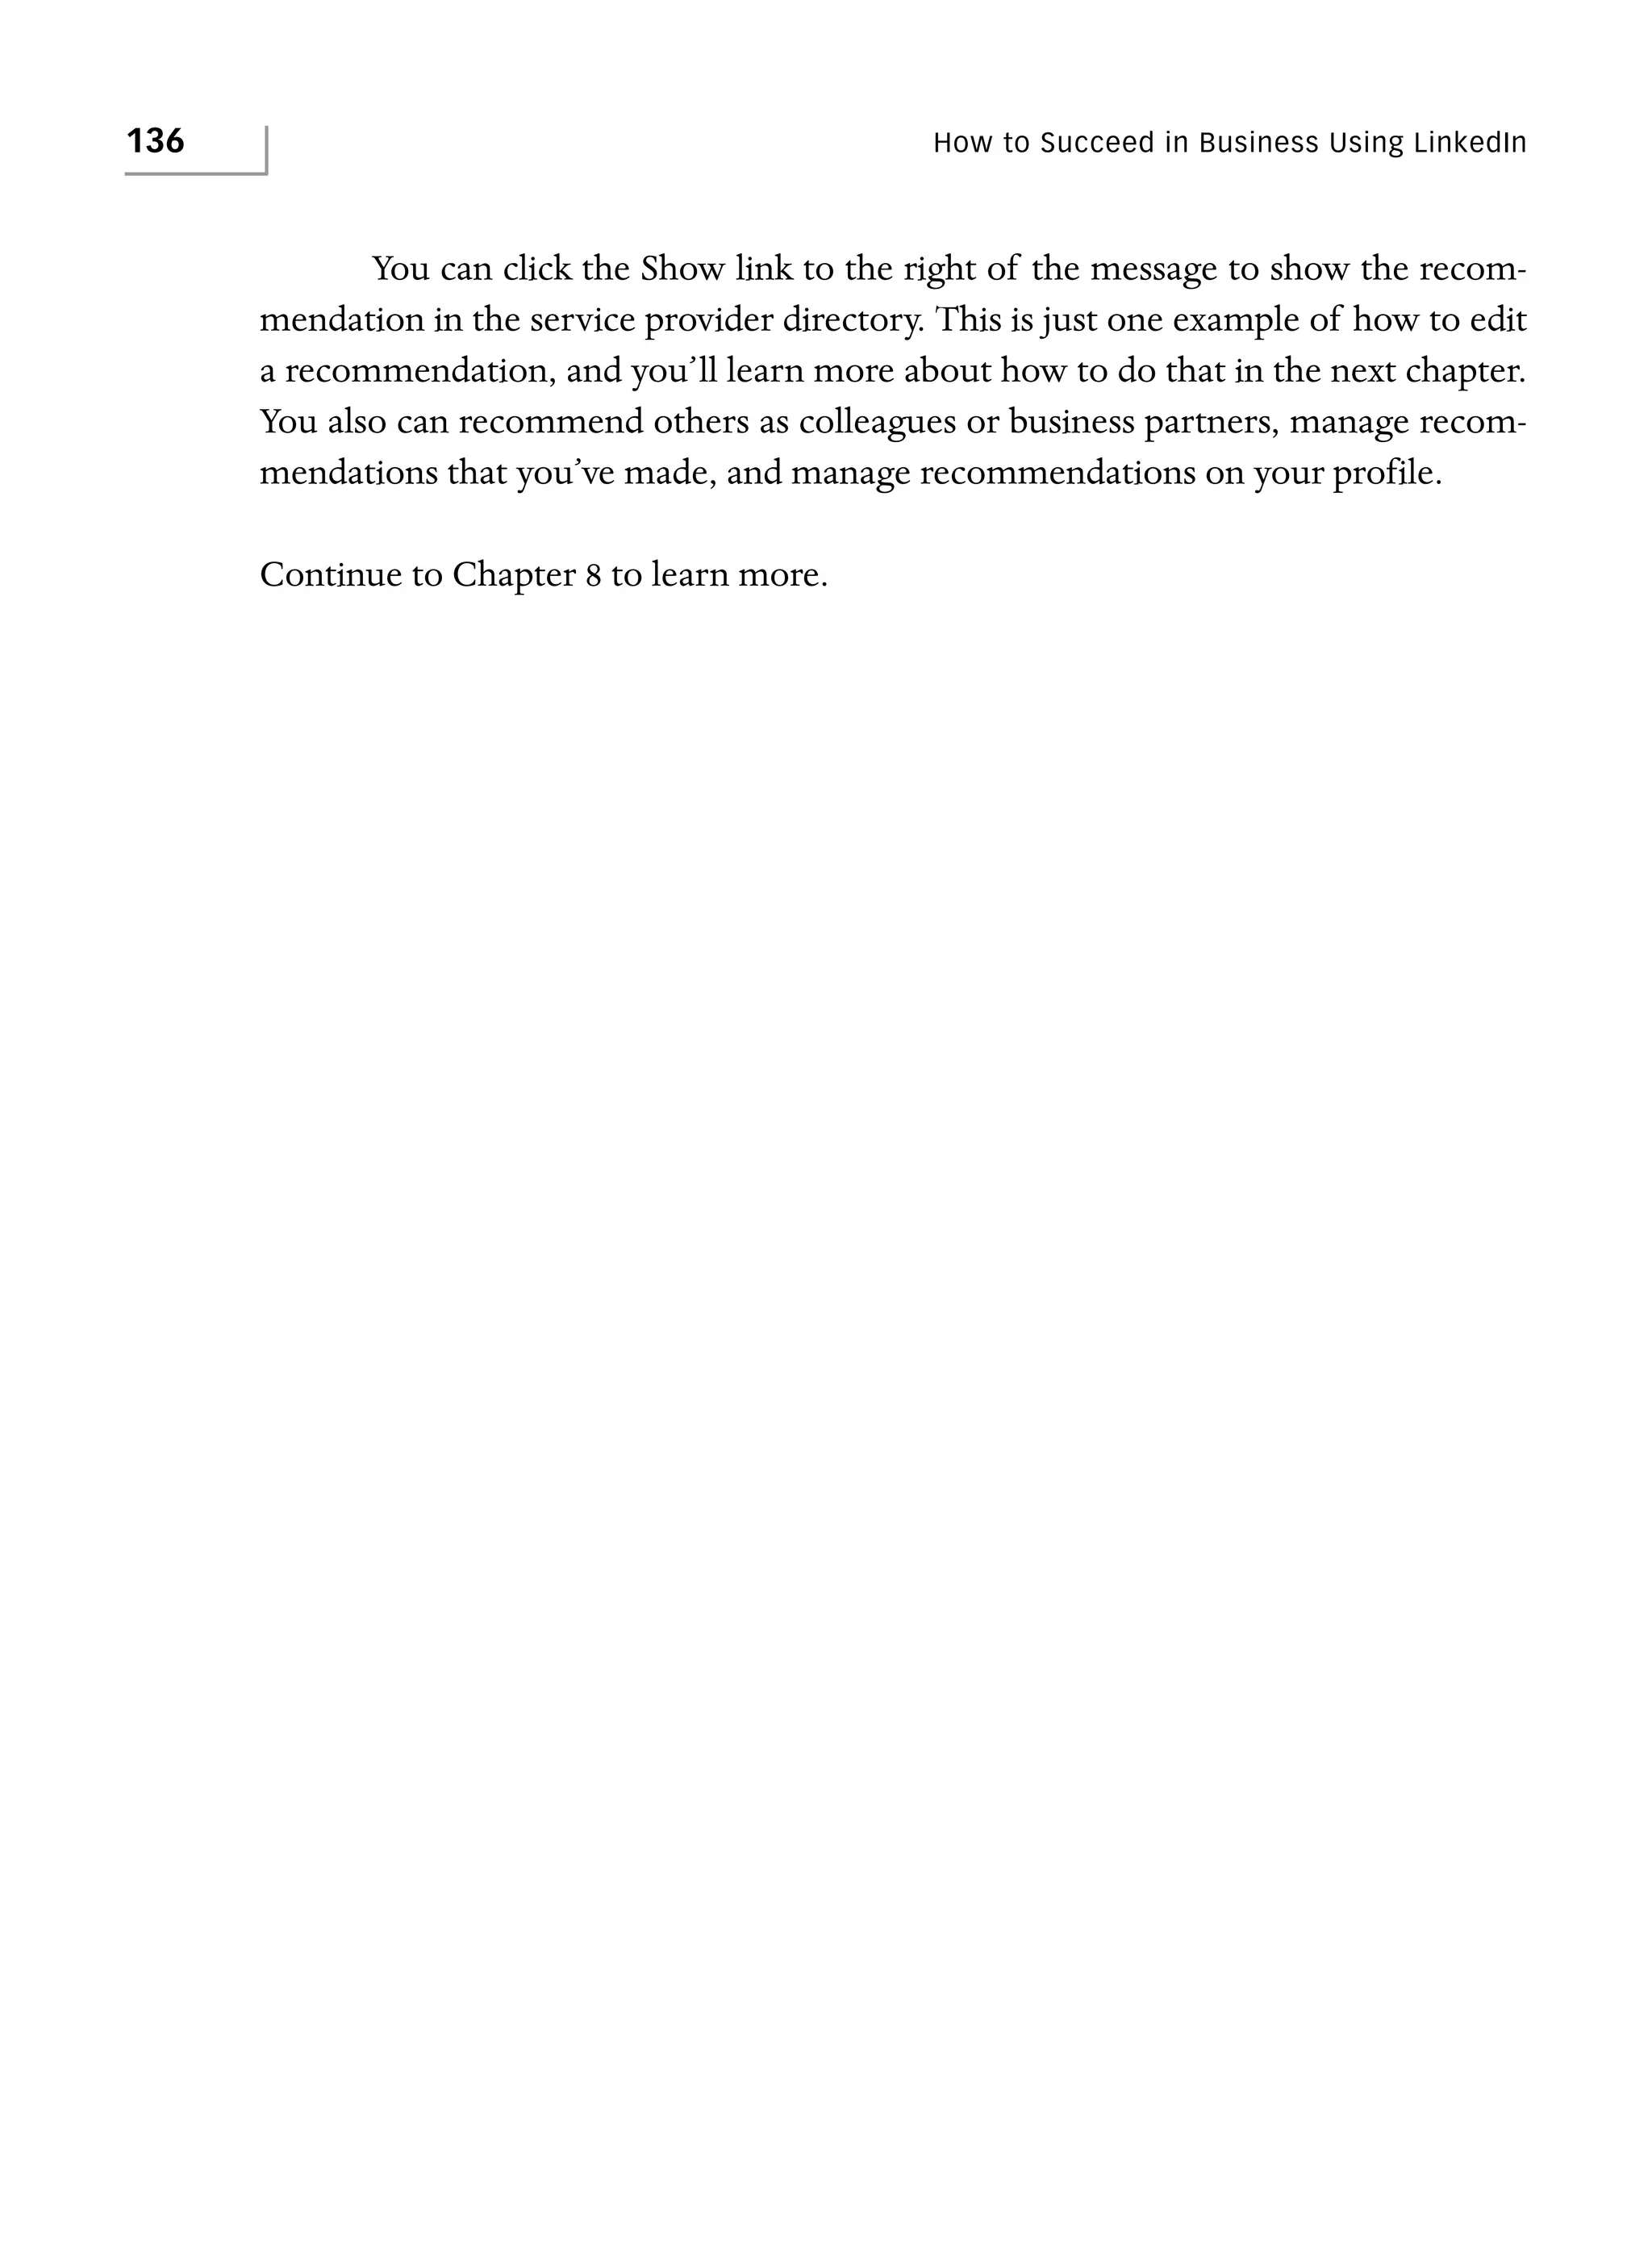
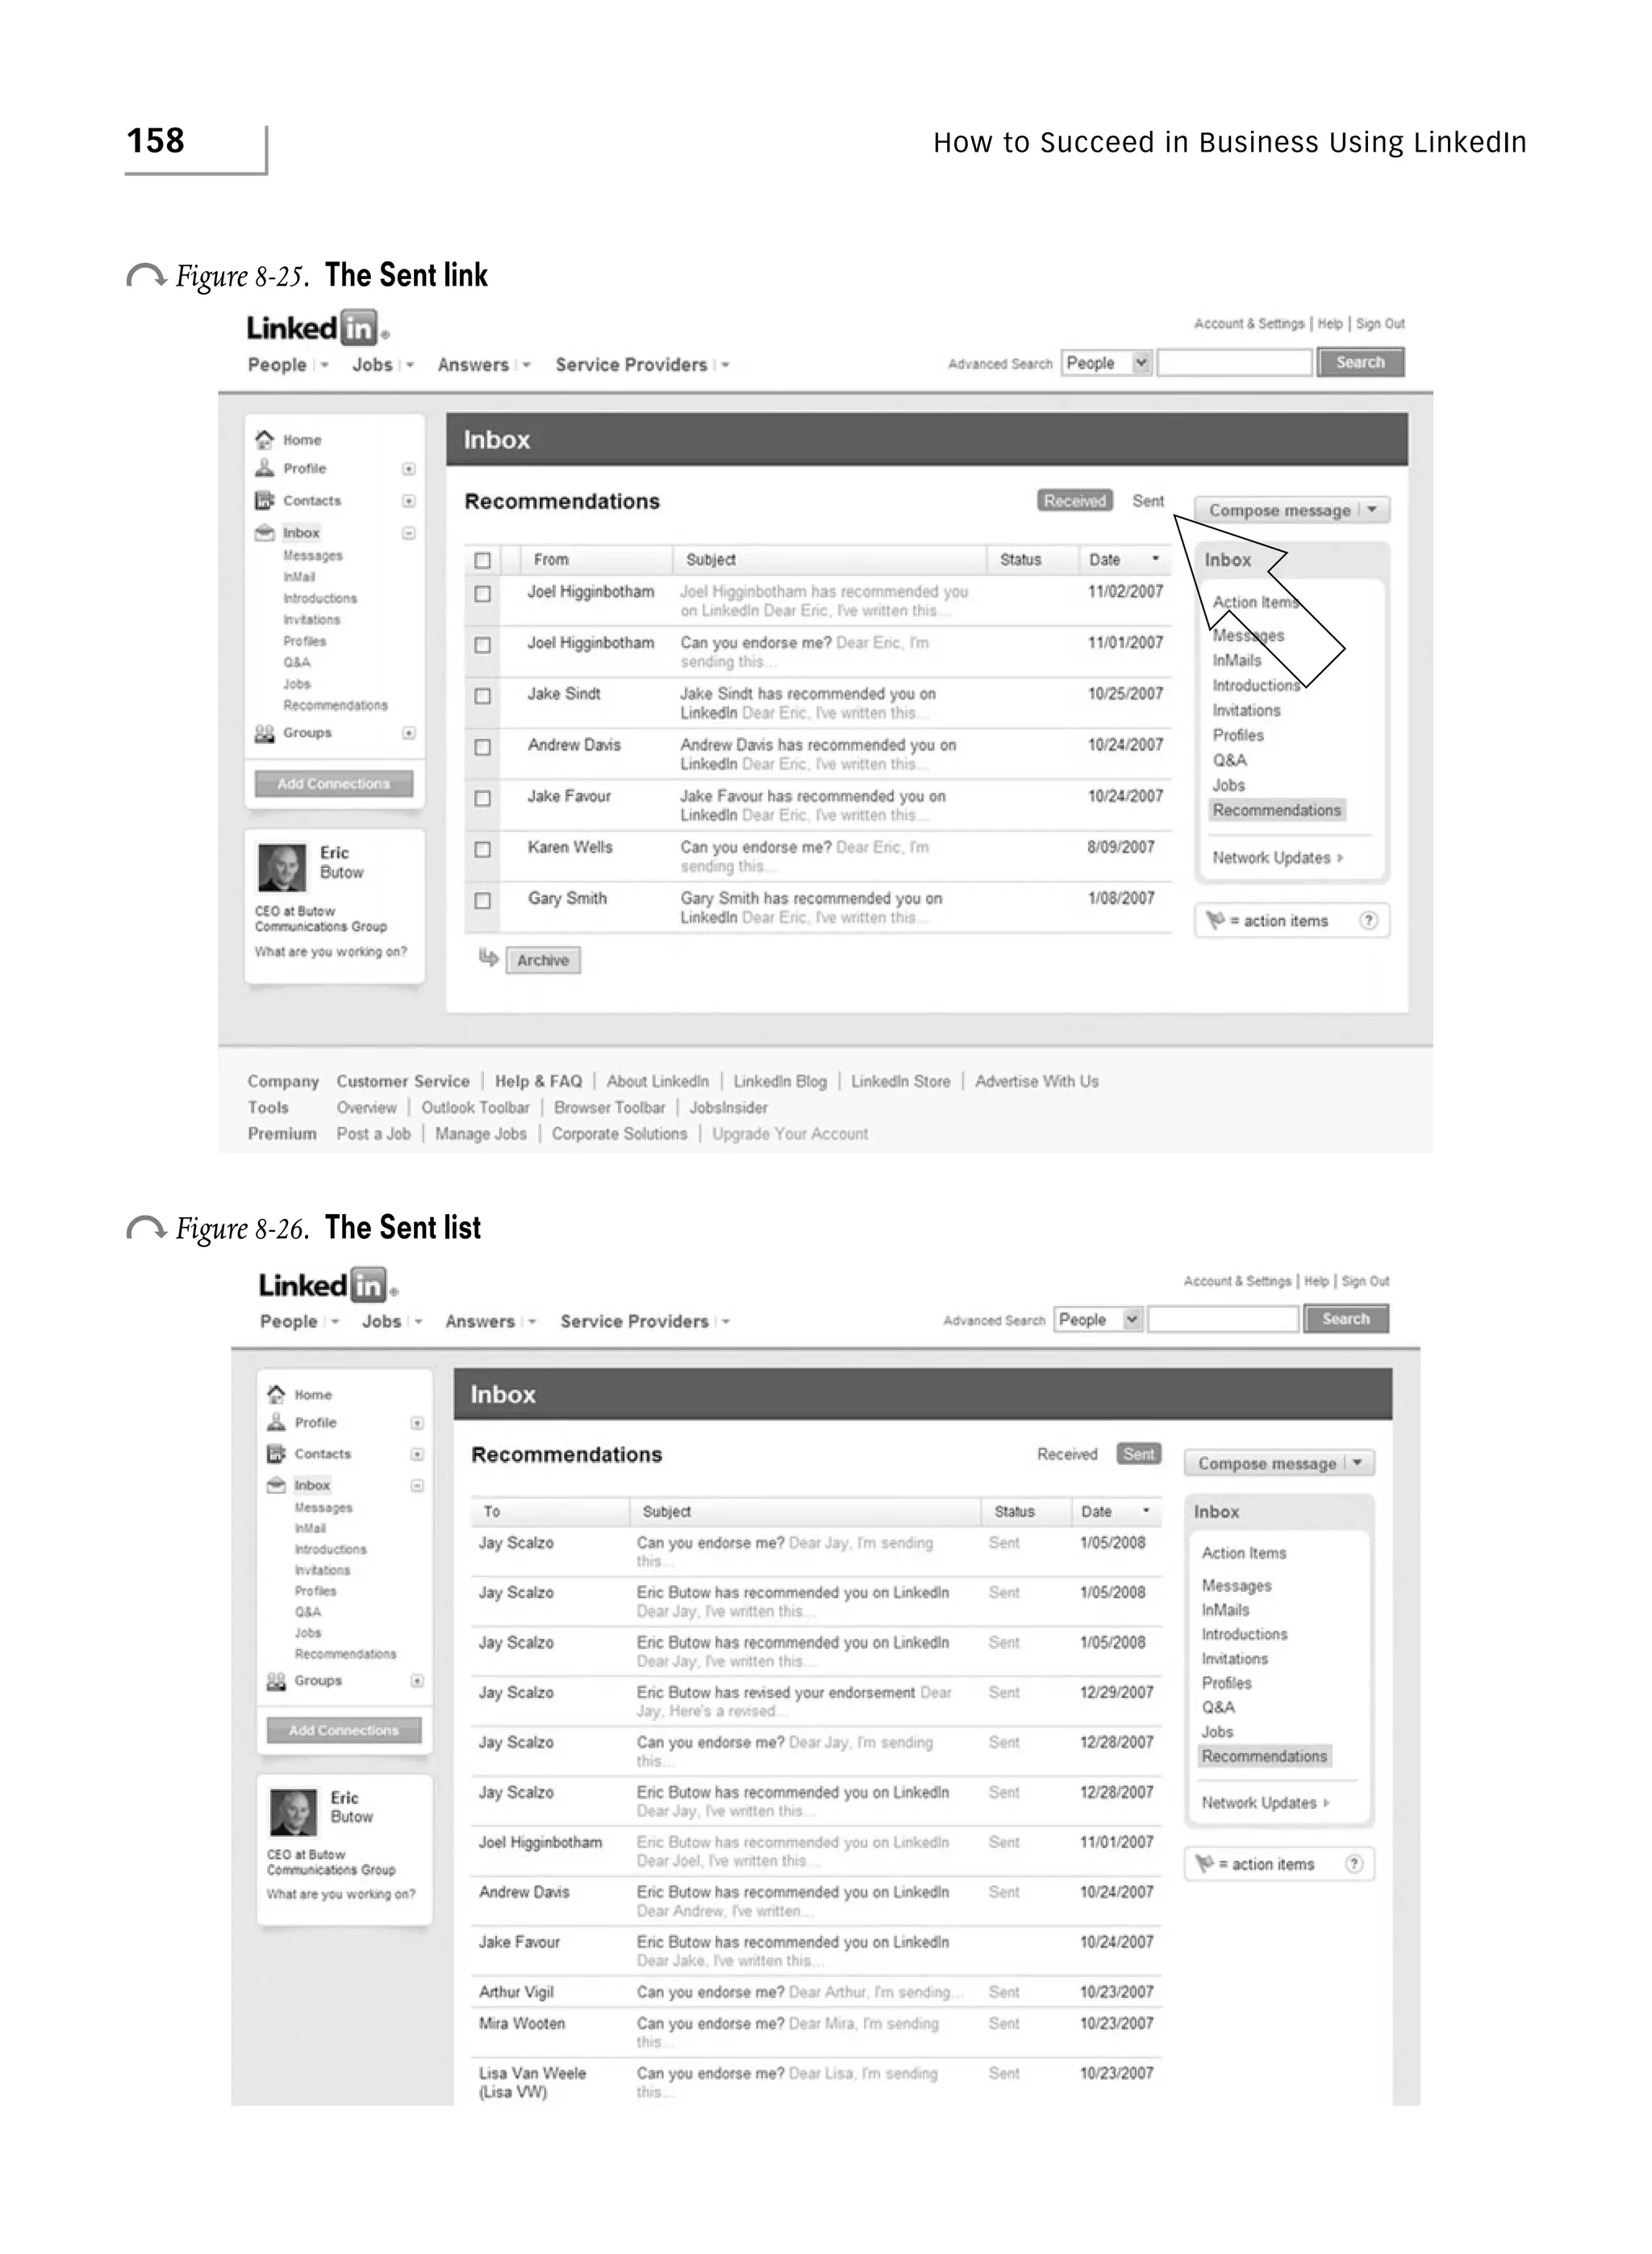
Pending Recommendation Requests
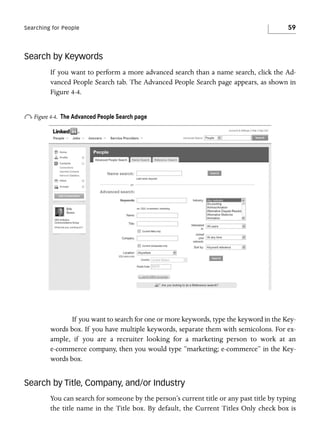
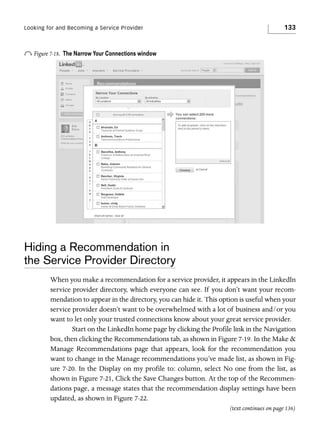
If you’ve sent recommendation requests to other members but have yet to receive a
response, you can check the status of those requests in two ways. You can click the
Recommendations link in your inbox, or you can manage the recommendations you
have received.
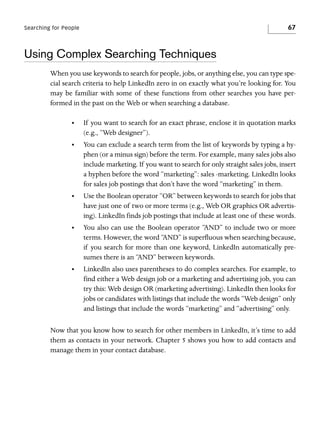
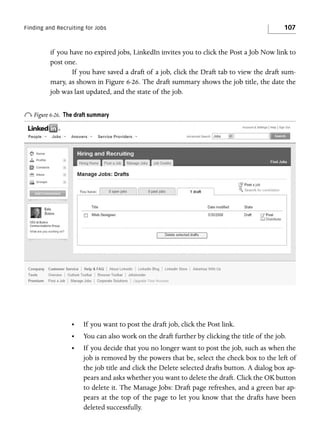
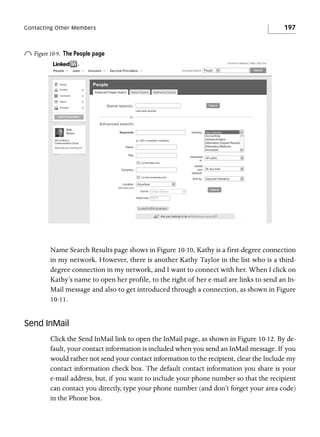
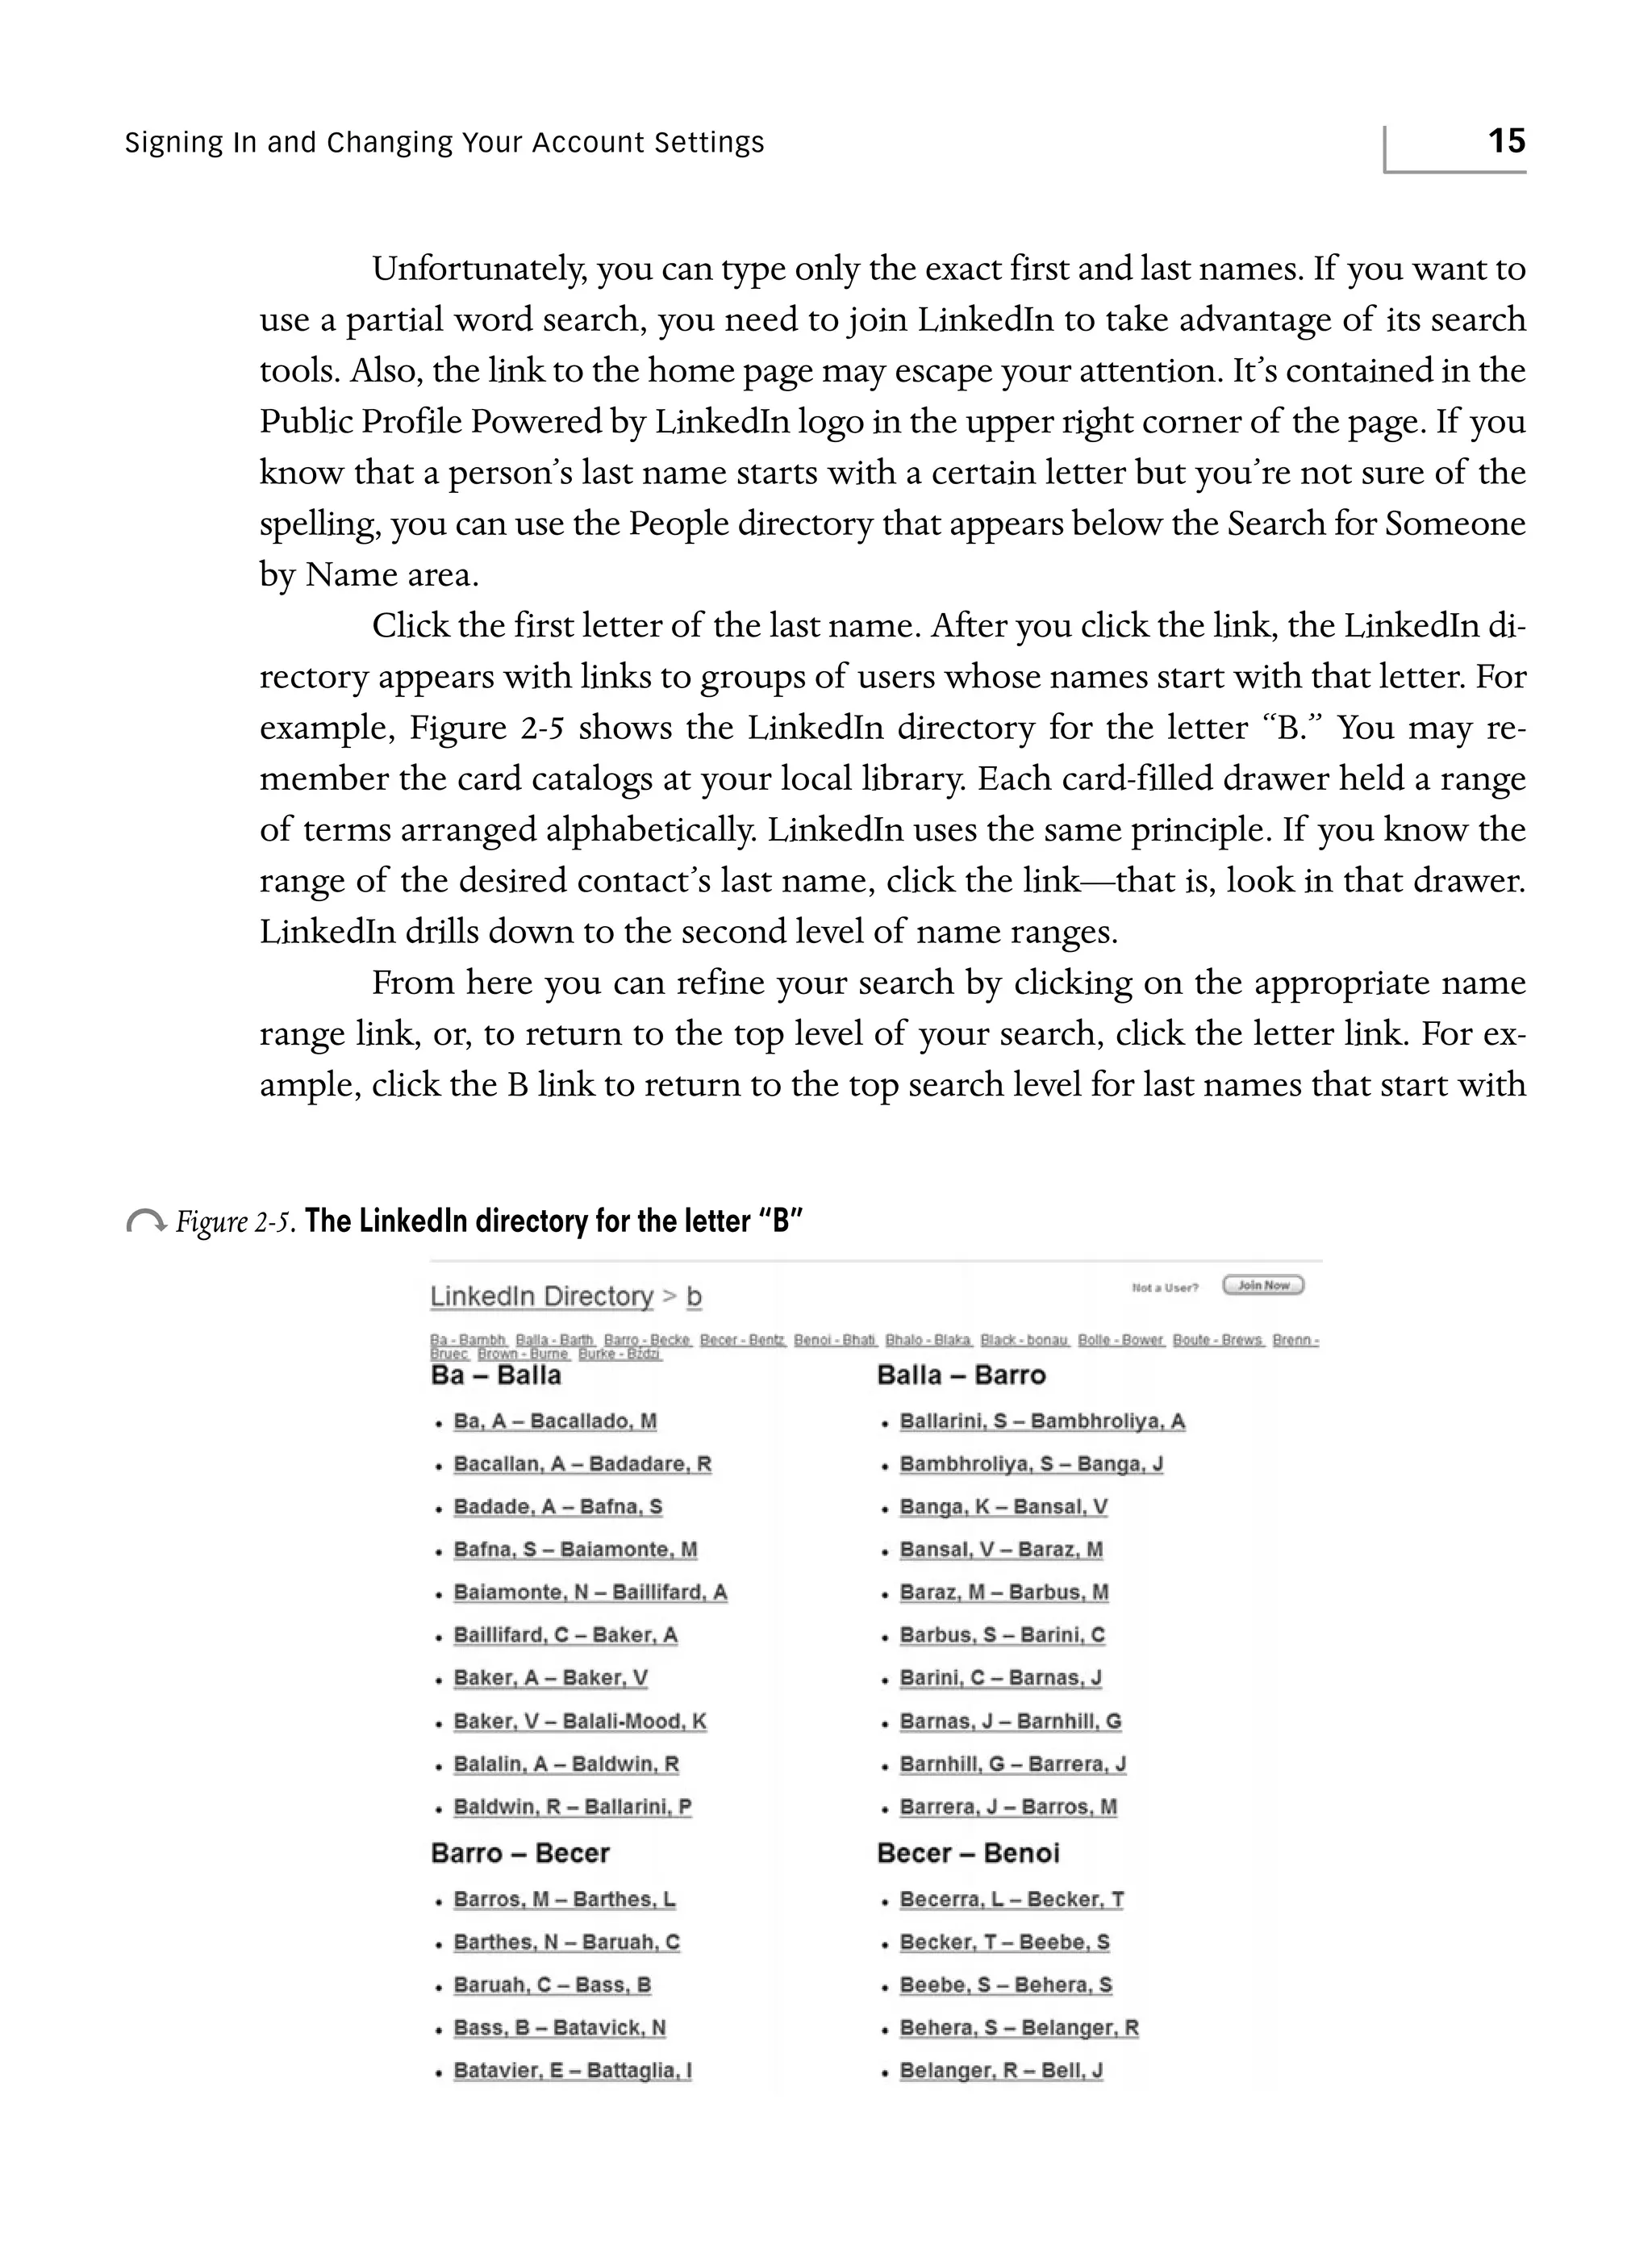
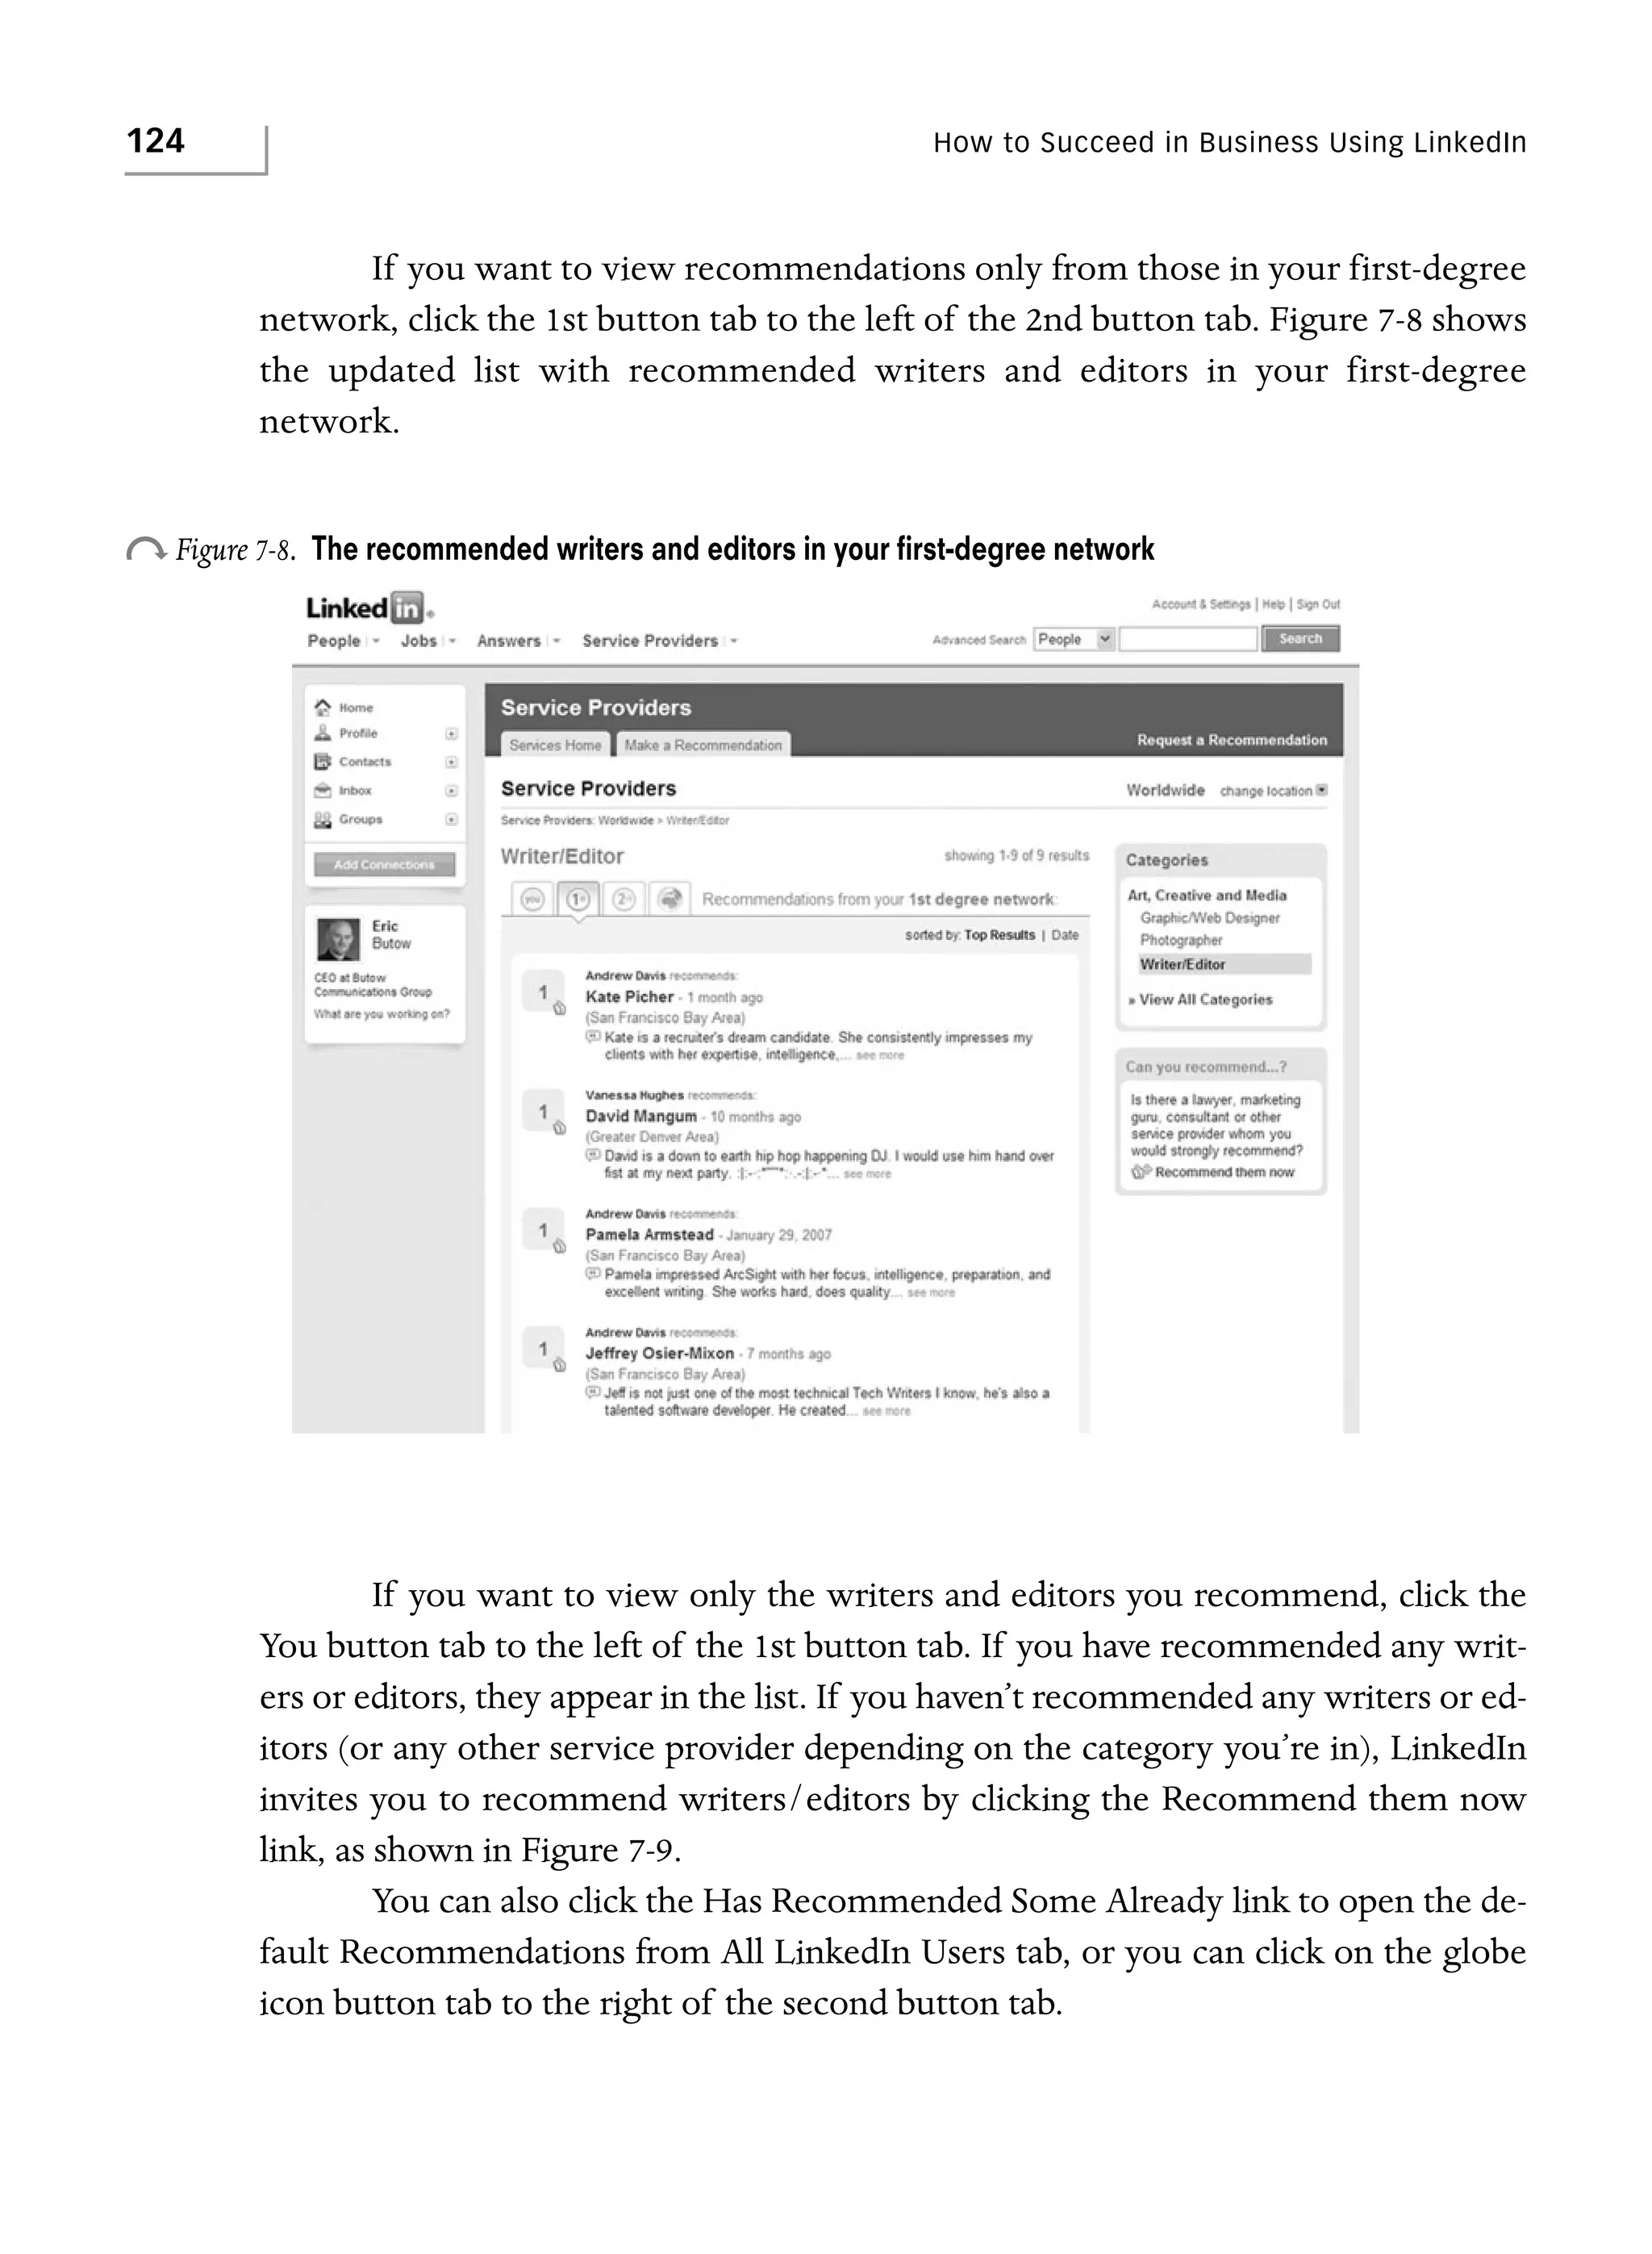
View Recommendations in Your Inbox
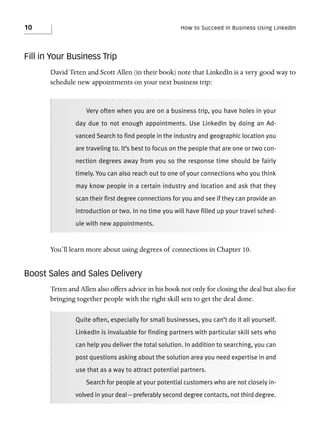
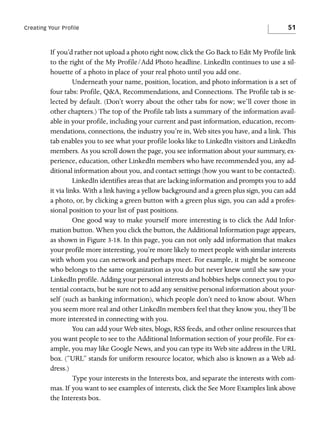
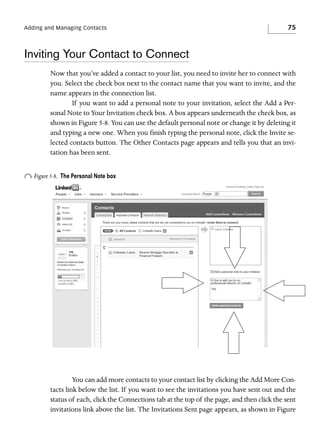
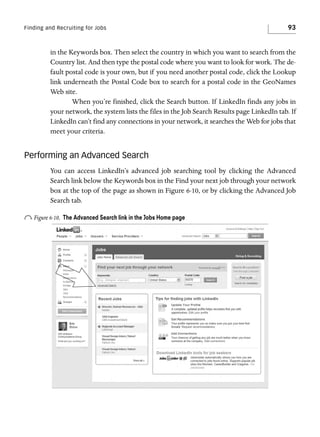
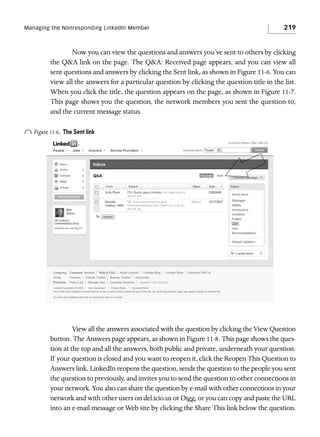
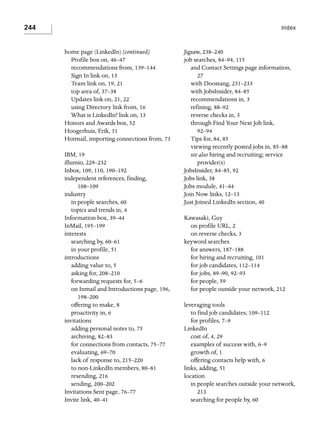
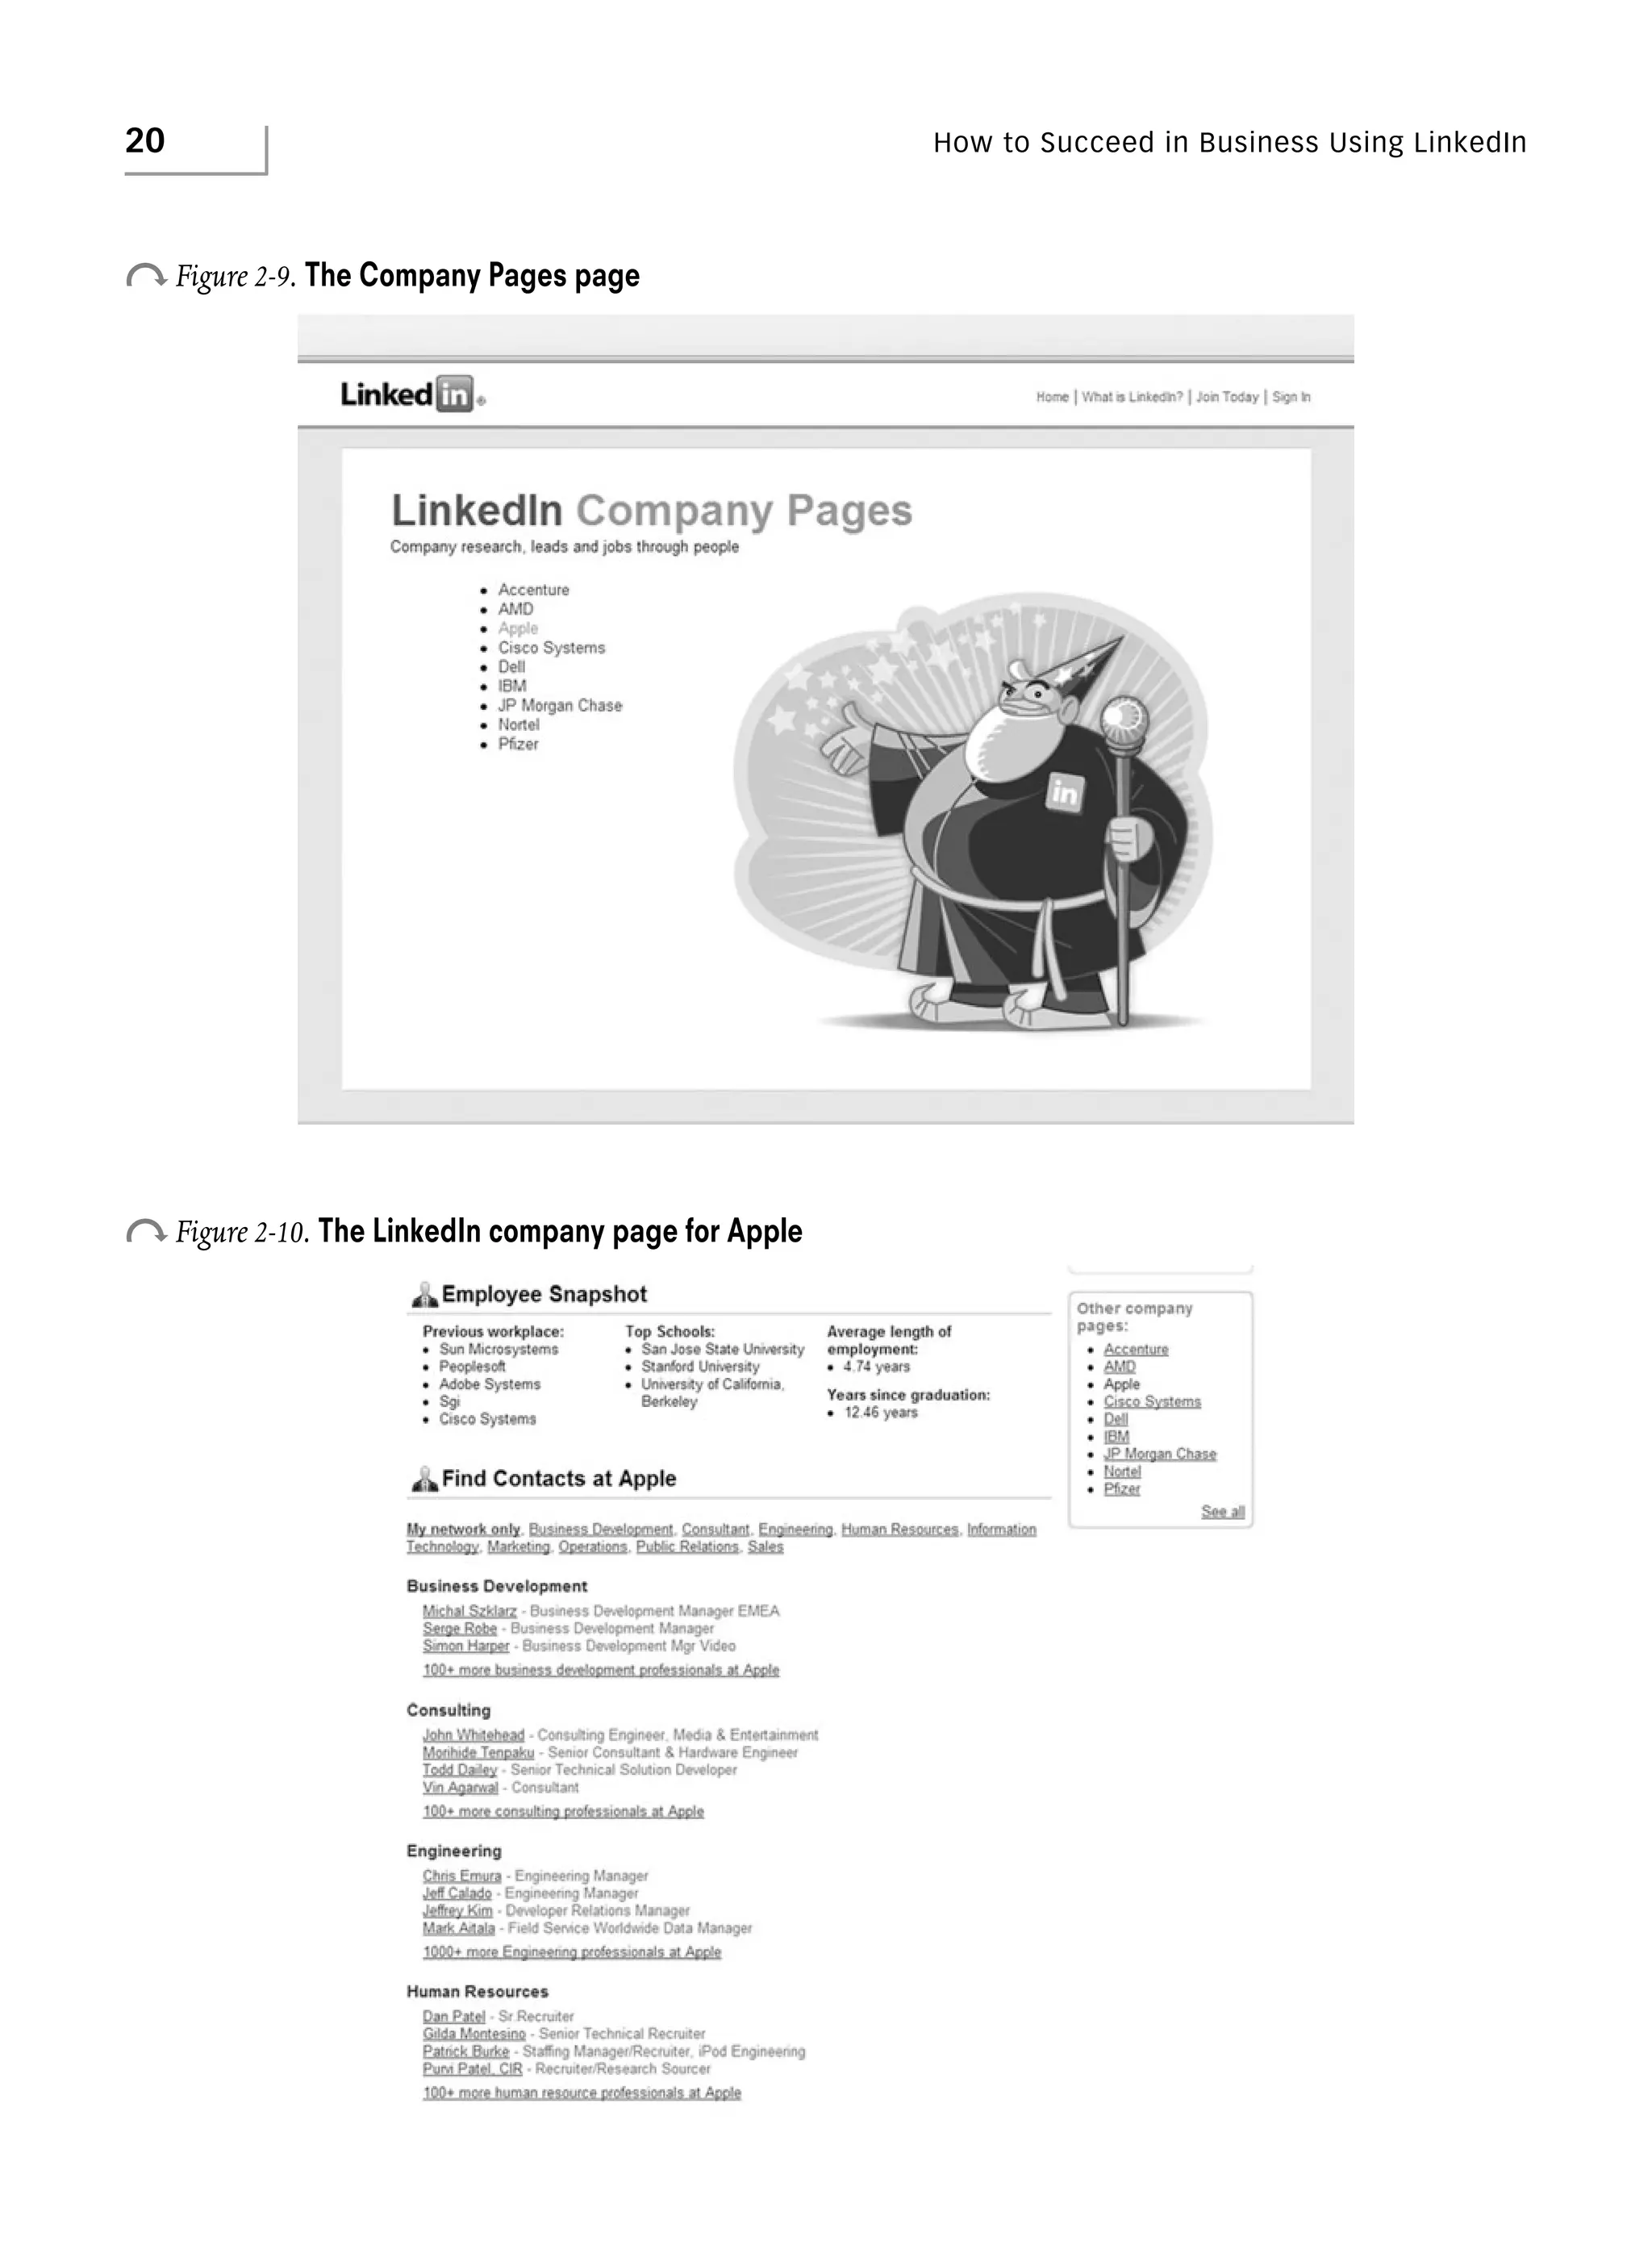
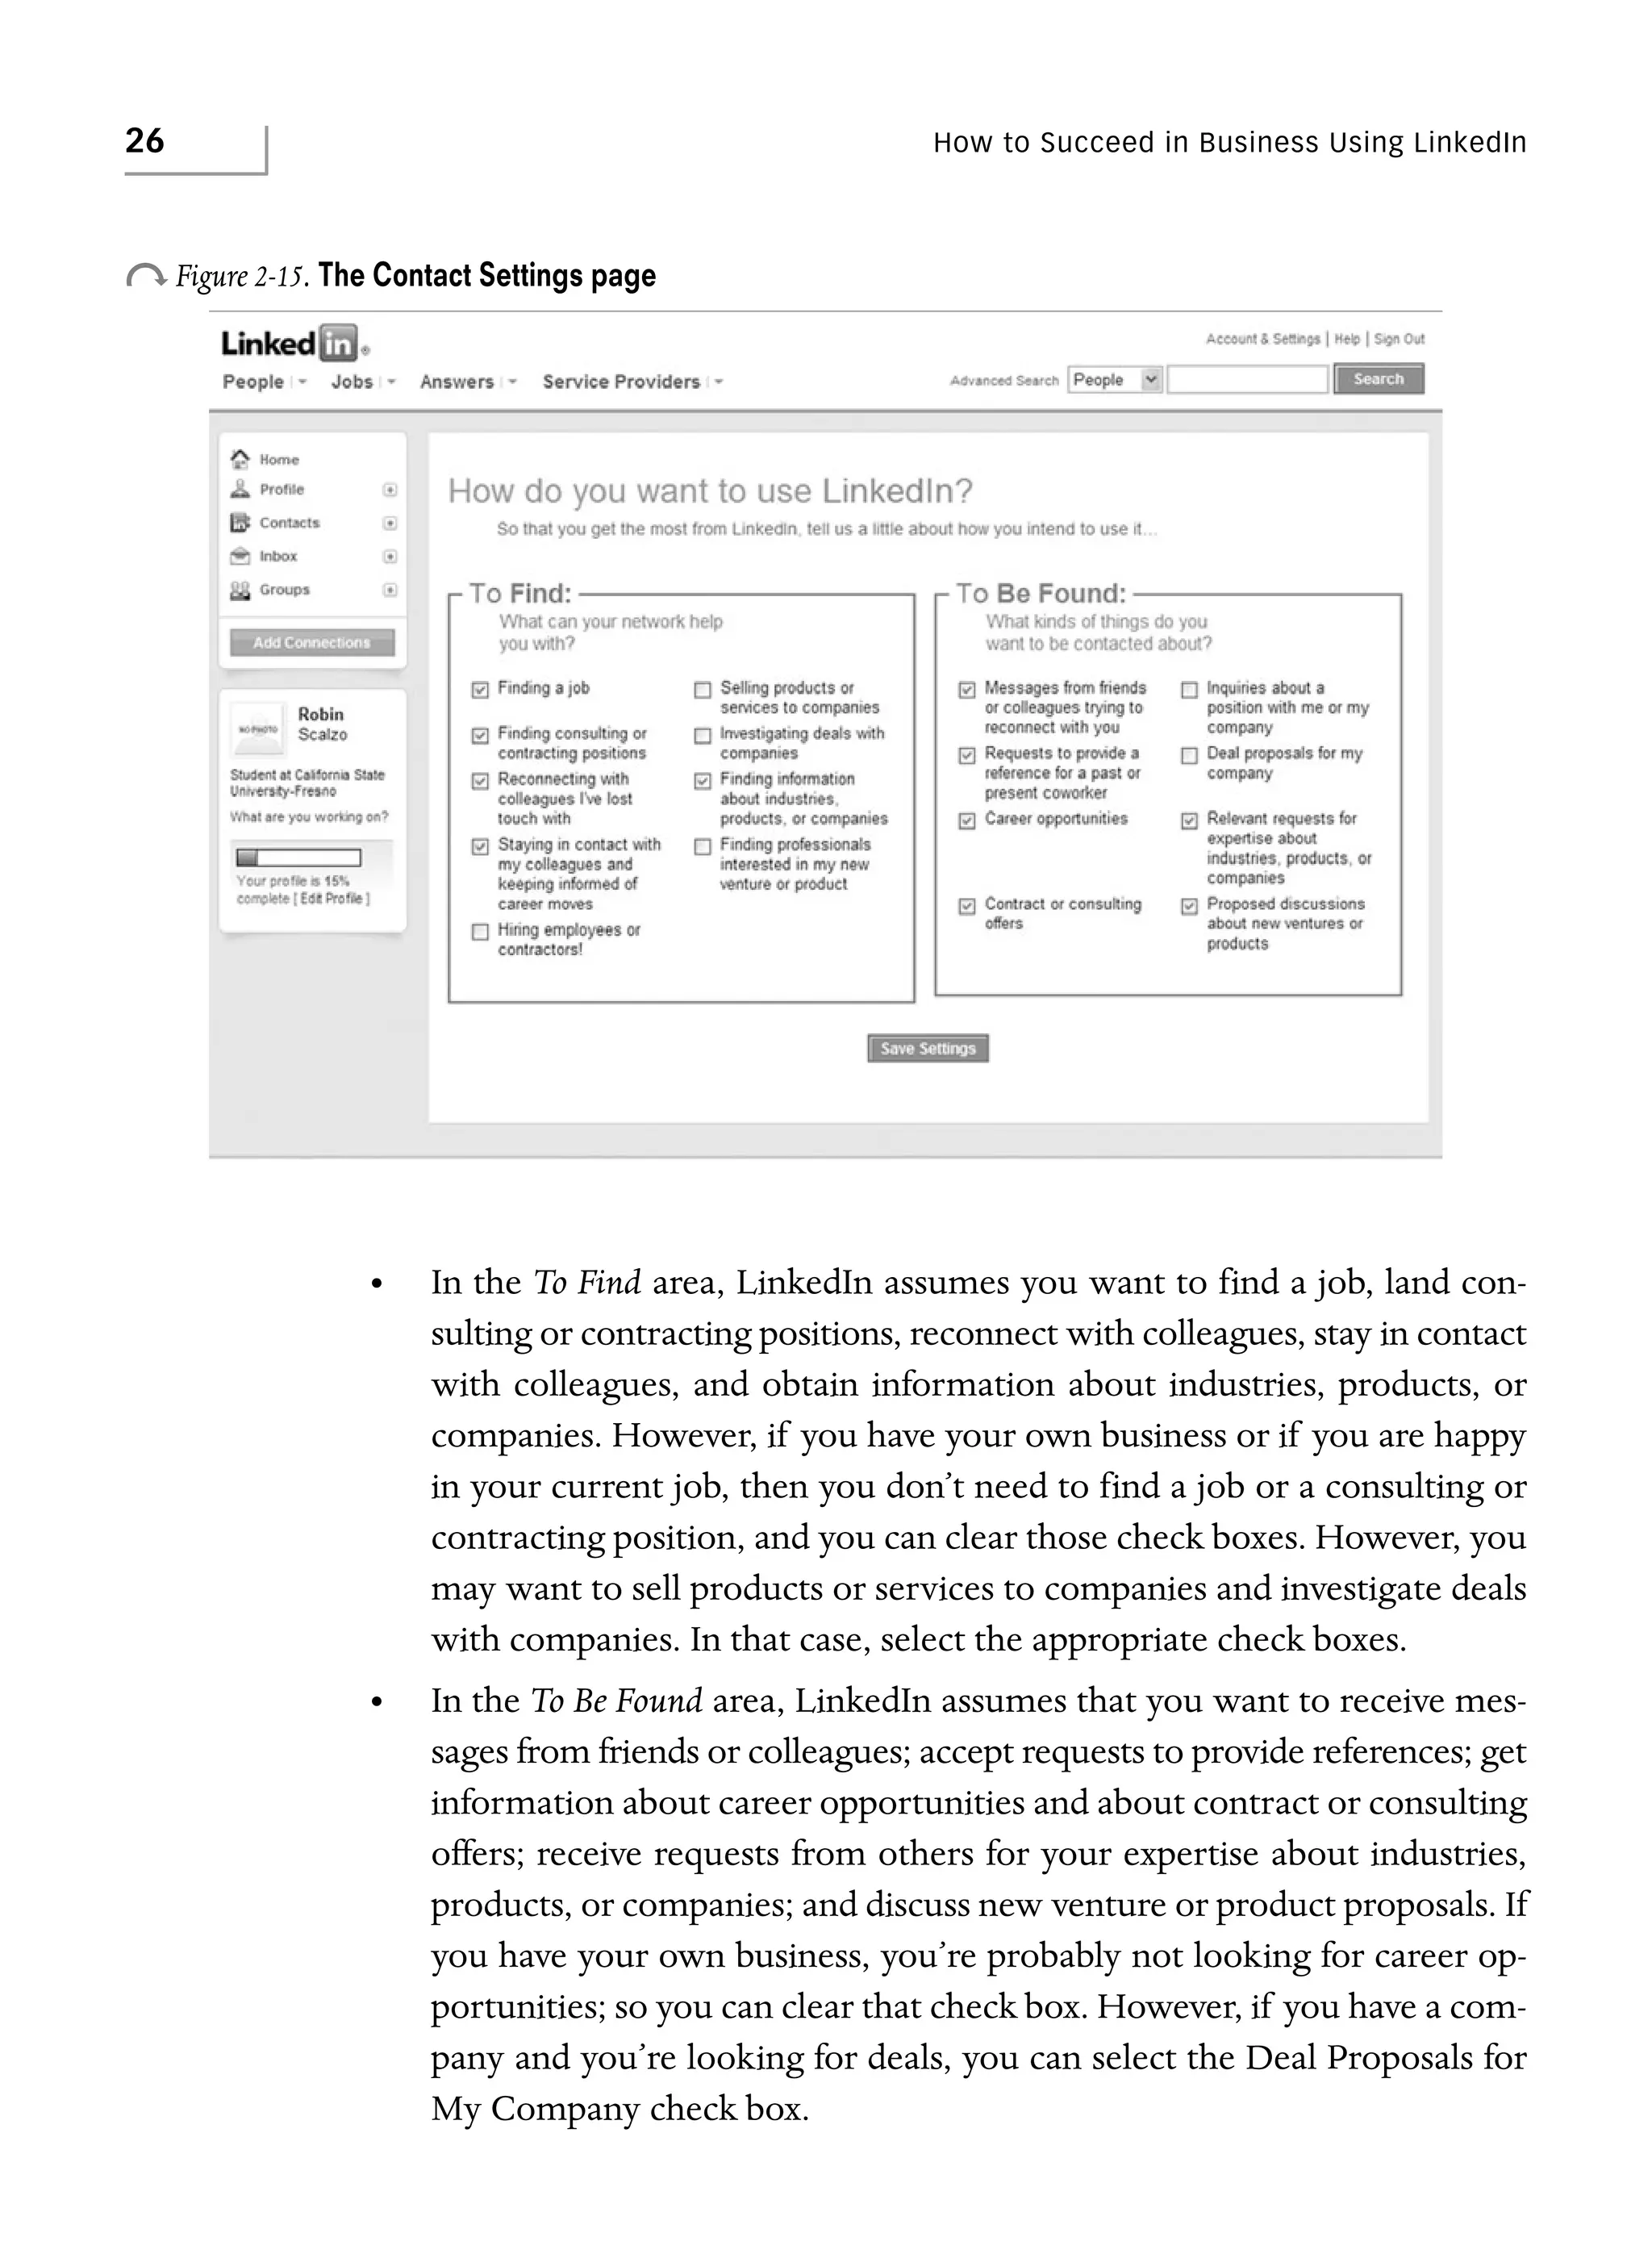
Open Recommendations in Your Inbox by clicking the plus sign to the right of the Inbox link in the Navigation box and then clicking the Recommendations link, as shown
in Figure 11-9. In the Recommendations page that appears, you see all recommendation
requests you’ve received. You can also click the Sent link, as shown in Figure 11-10, to
view all the recommendation requests you’ve sent. In the Recommendations: Sent page
that appears, as shown in Figure 11-11, click the recommendation request that you sent
in the list. The recommendation contains the text “[Your Name] has recommended you
on LinkedIn,” where “[Your Name]” is your own name. At the bottom of the recom-
o Figure 11-9.
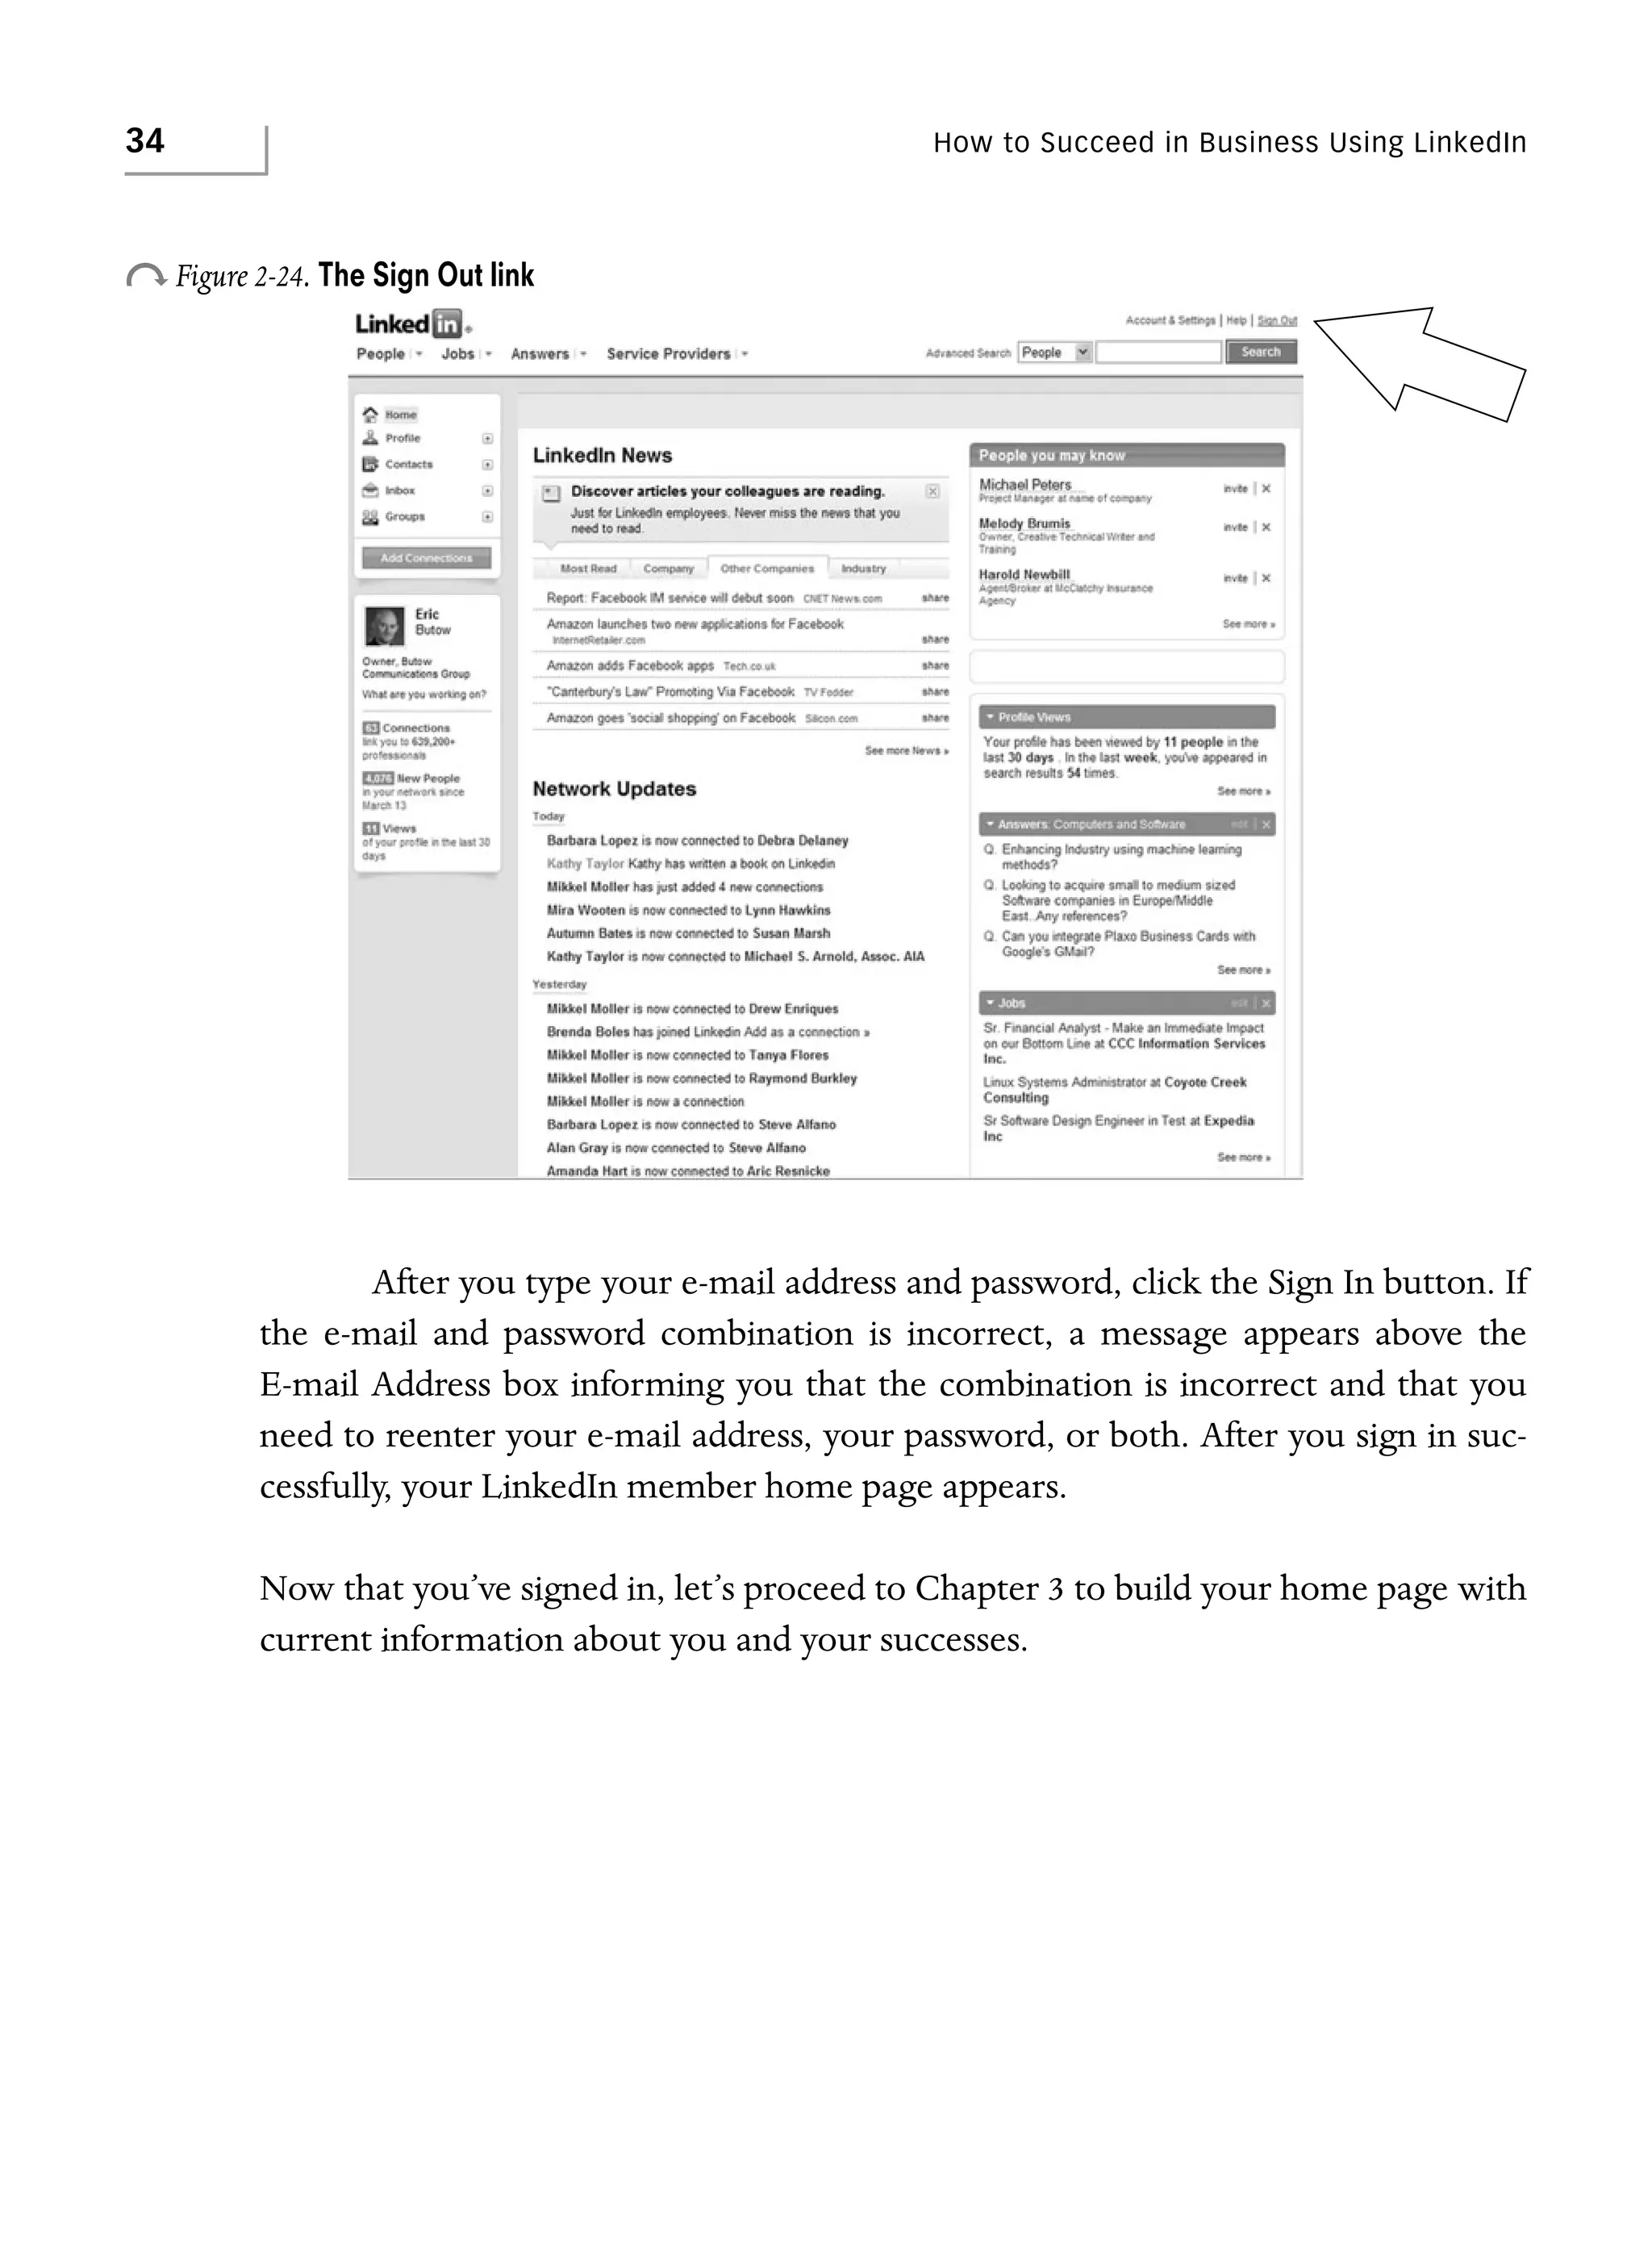
The Recommendations link in the Navigation box](https://image.slidesharecdn.com/howtosucceedinbusinessusinglinkedin-140106085854-phpapp02/75/How-to-succeed-in-business-using-linked-in-230-2048.jpg)


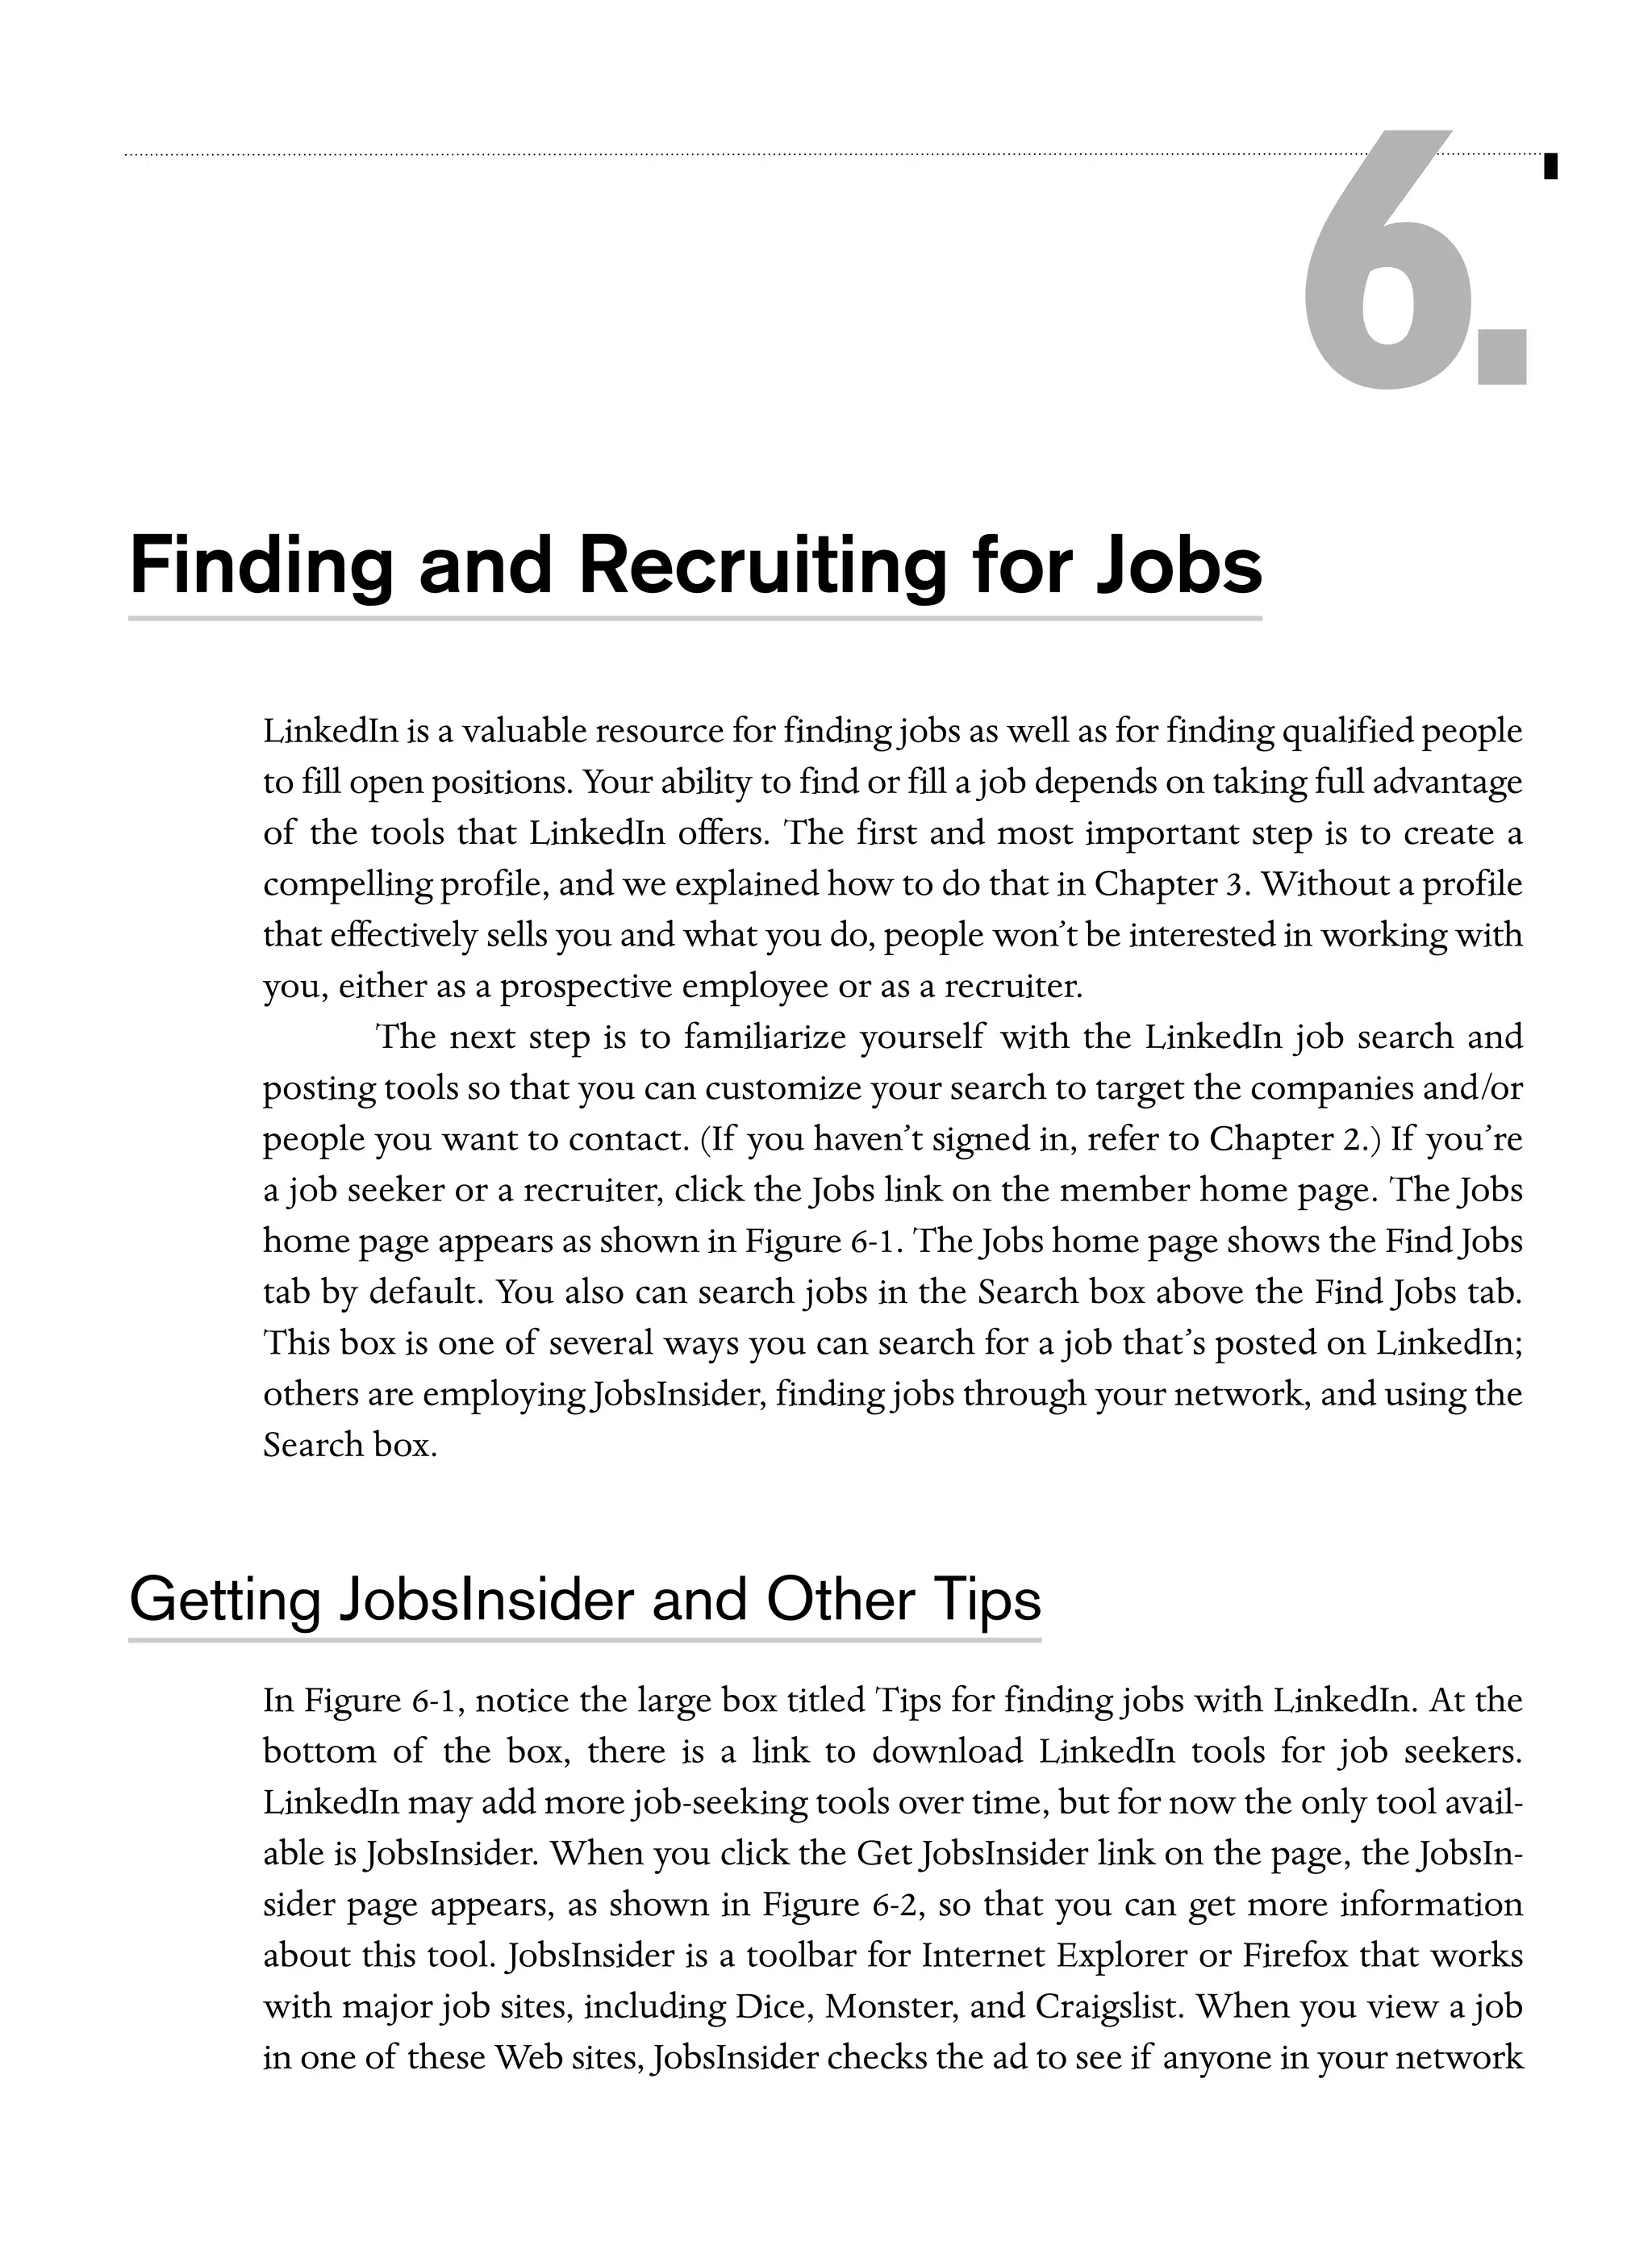
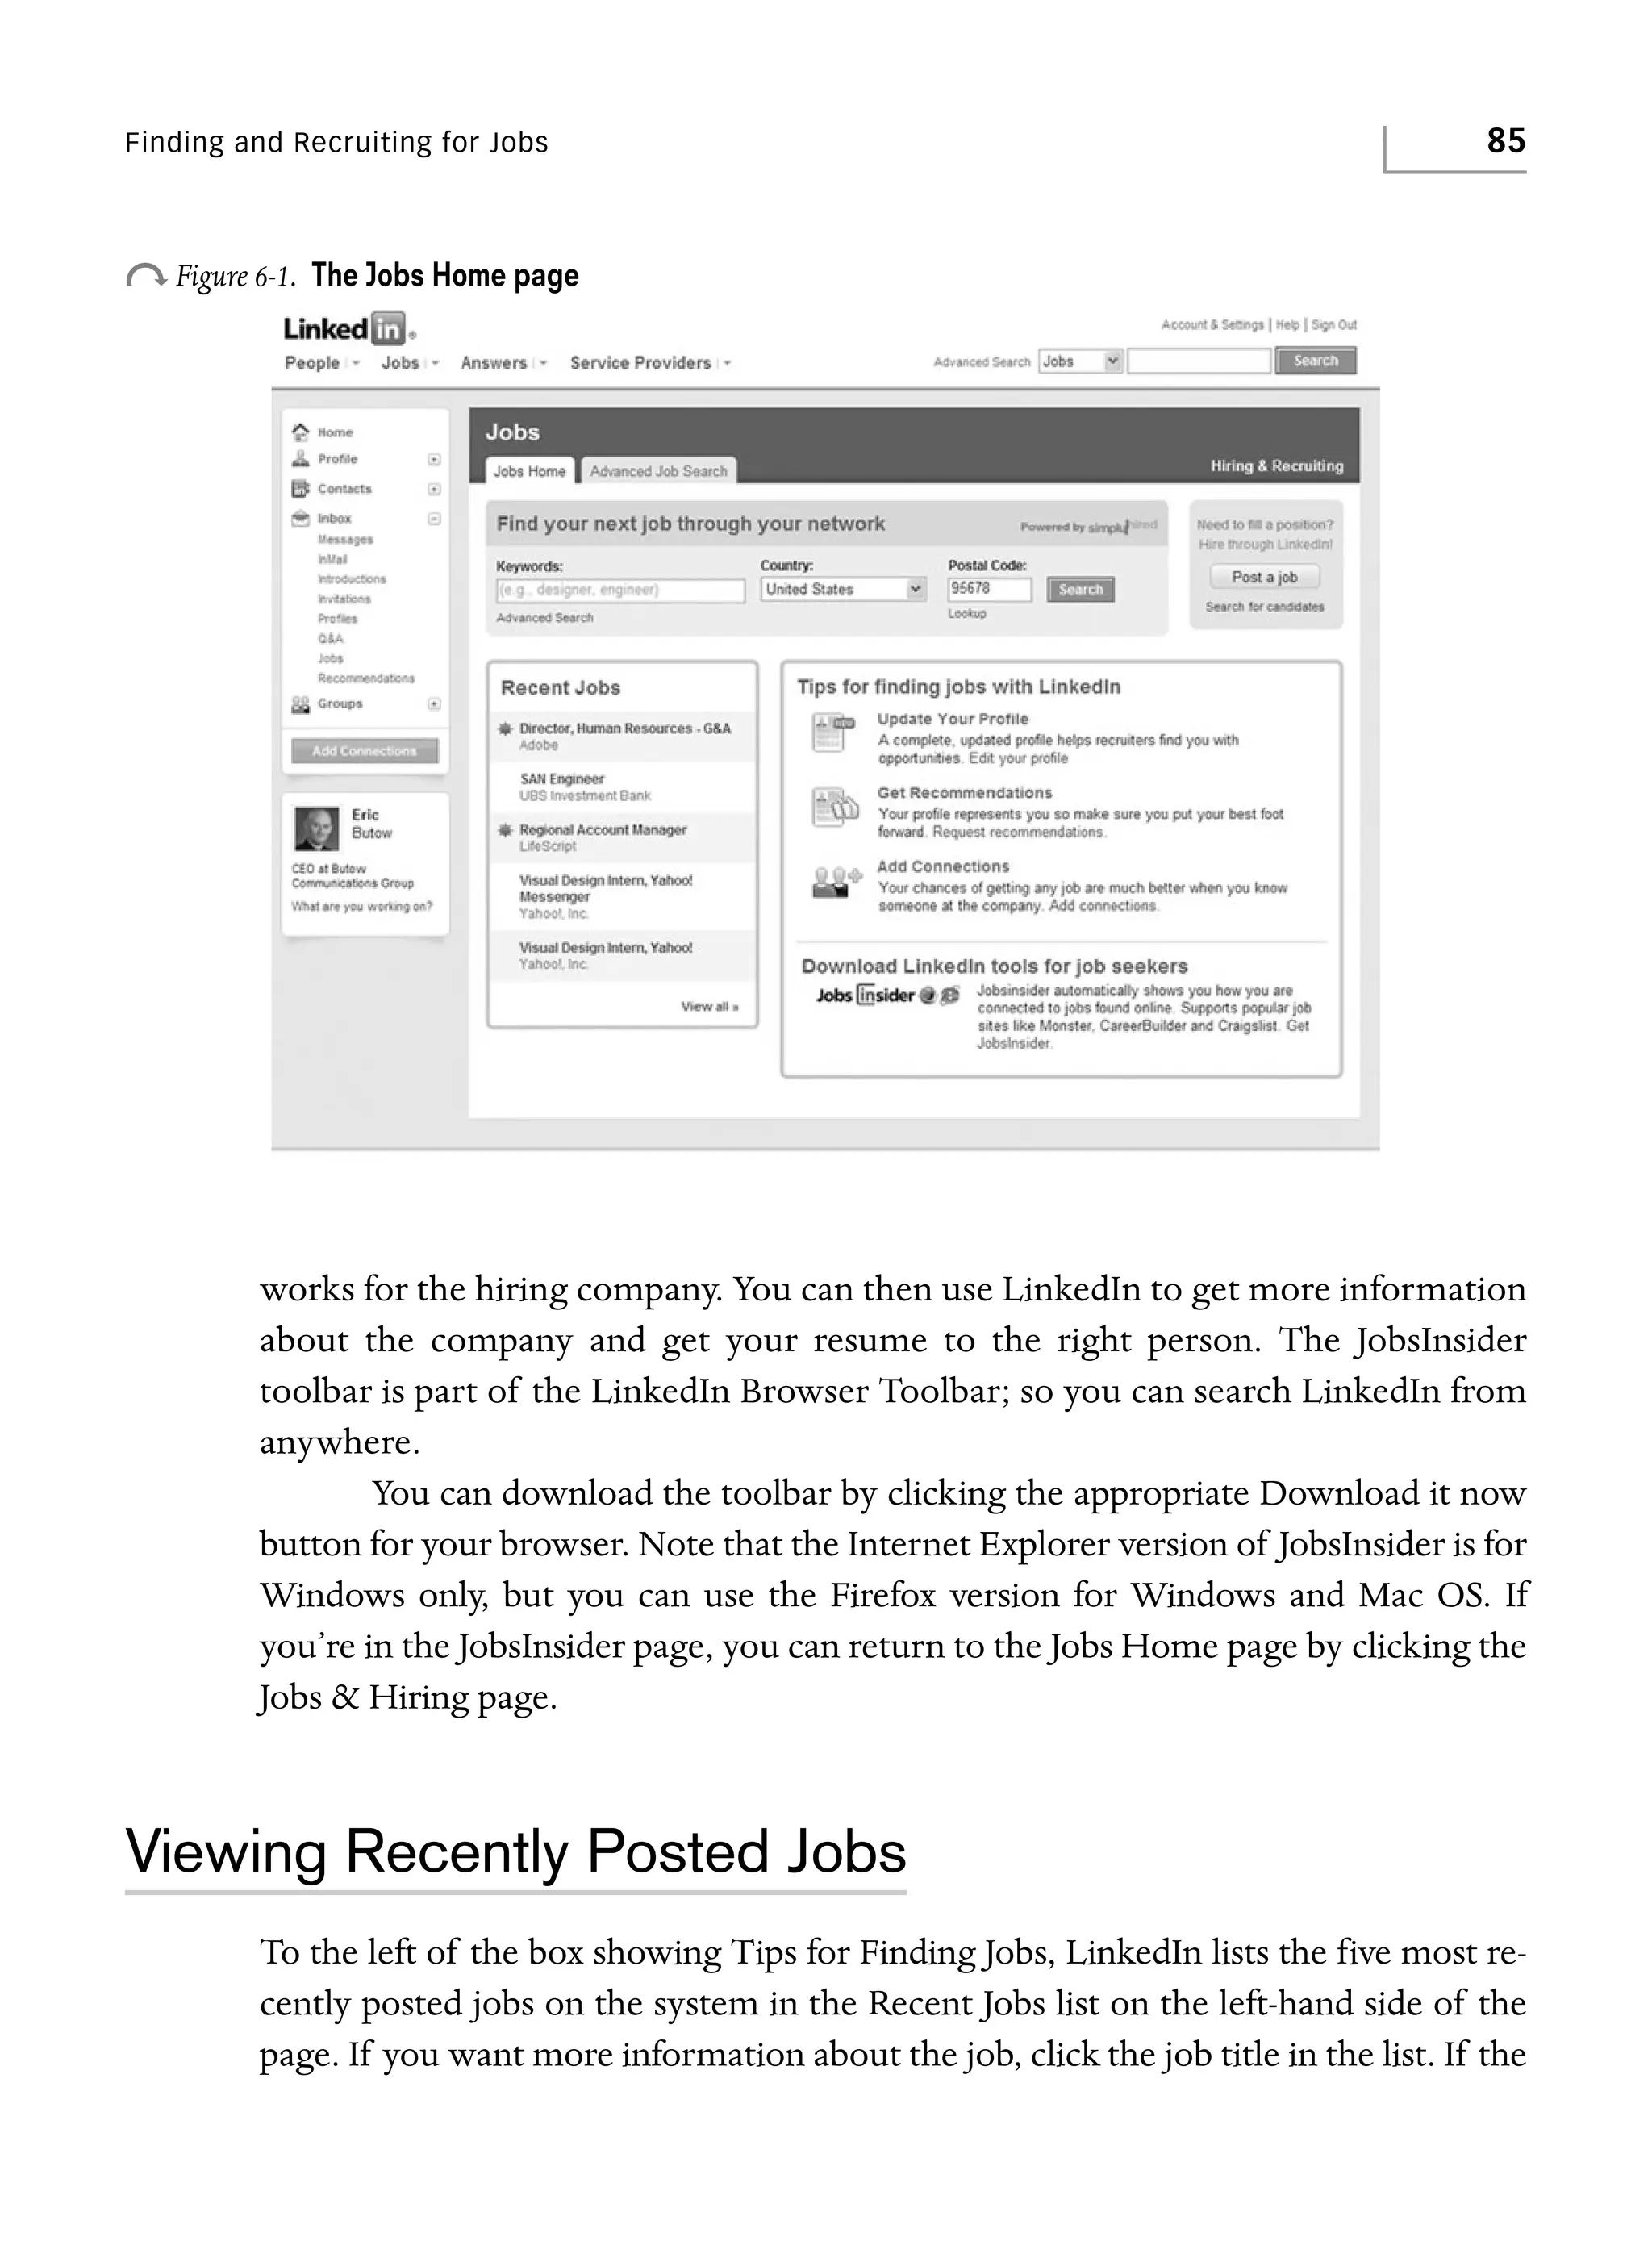
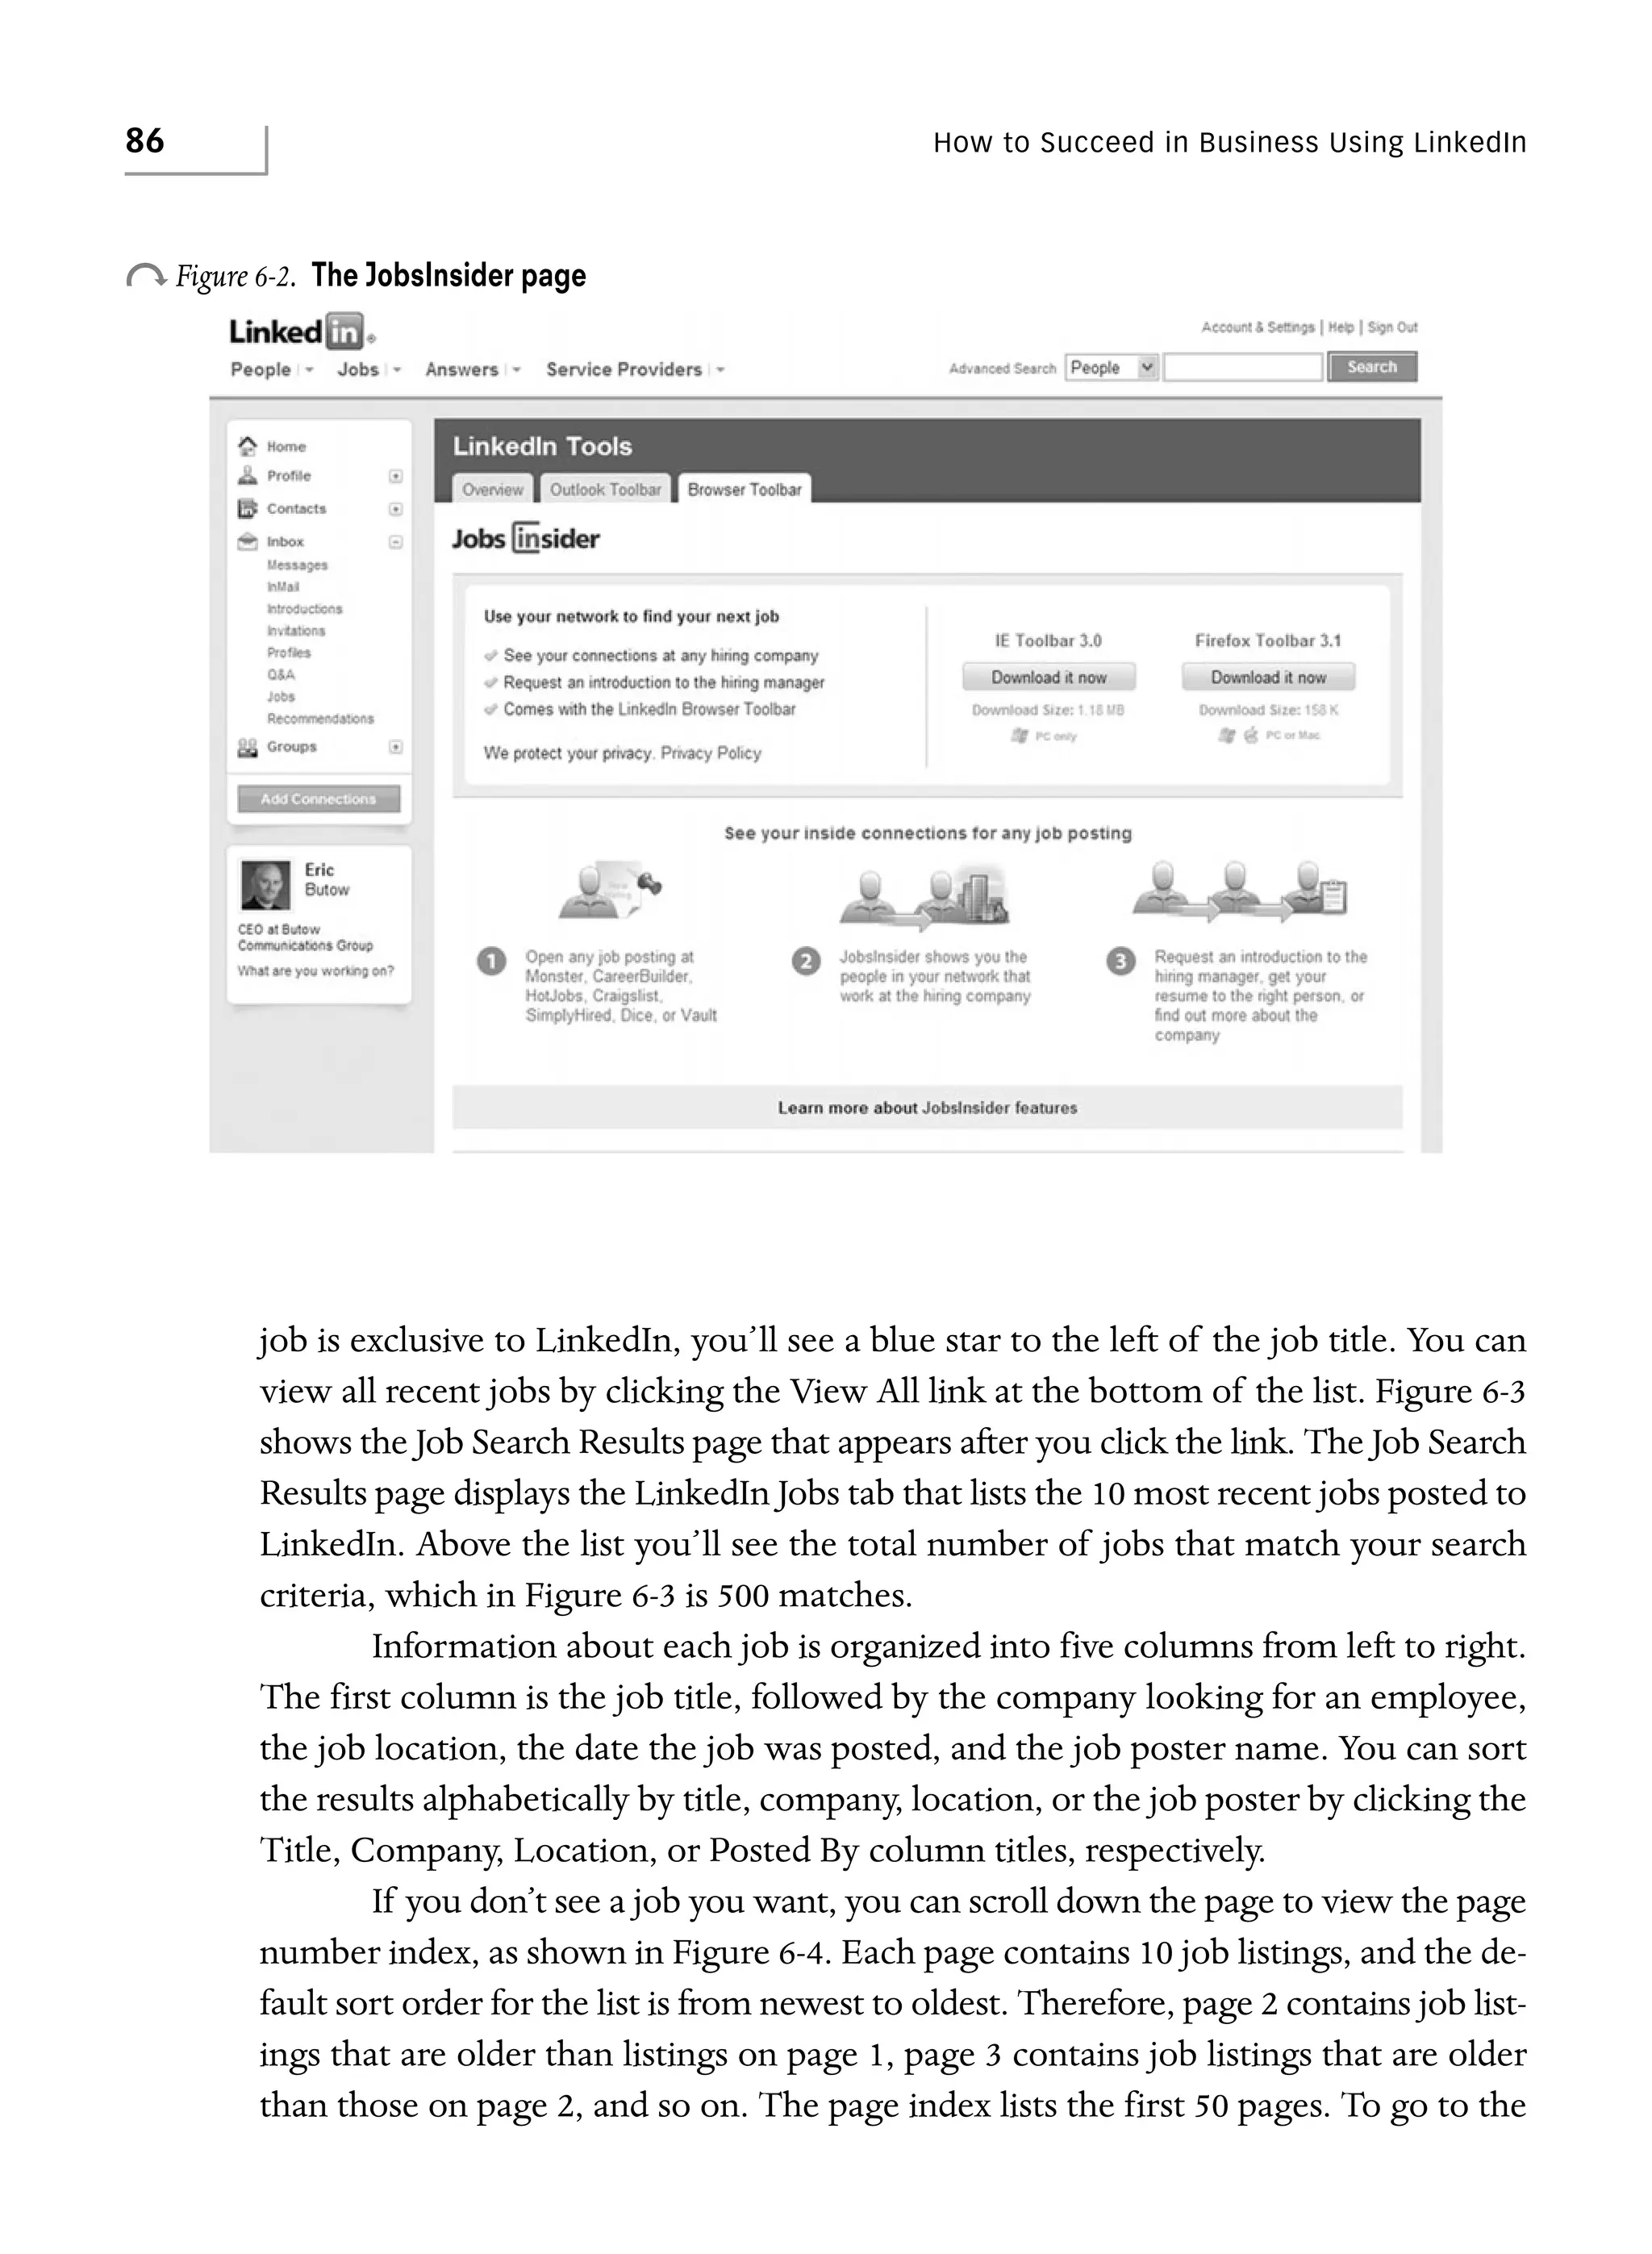
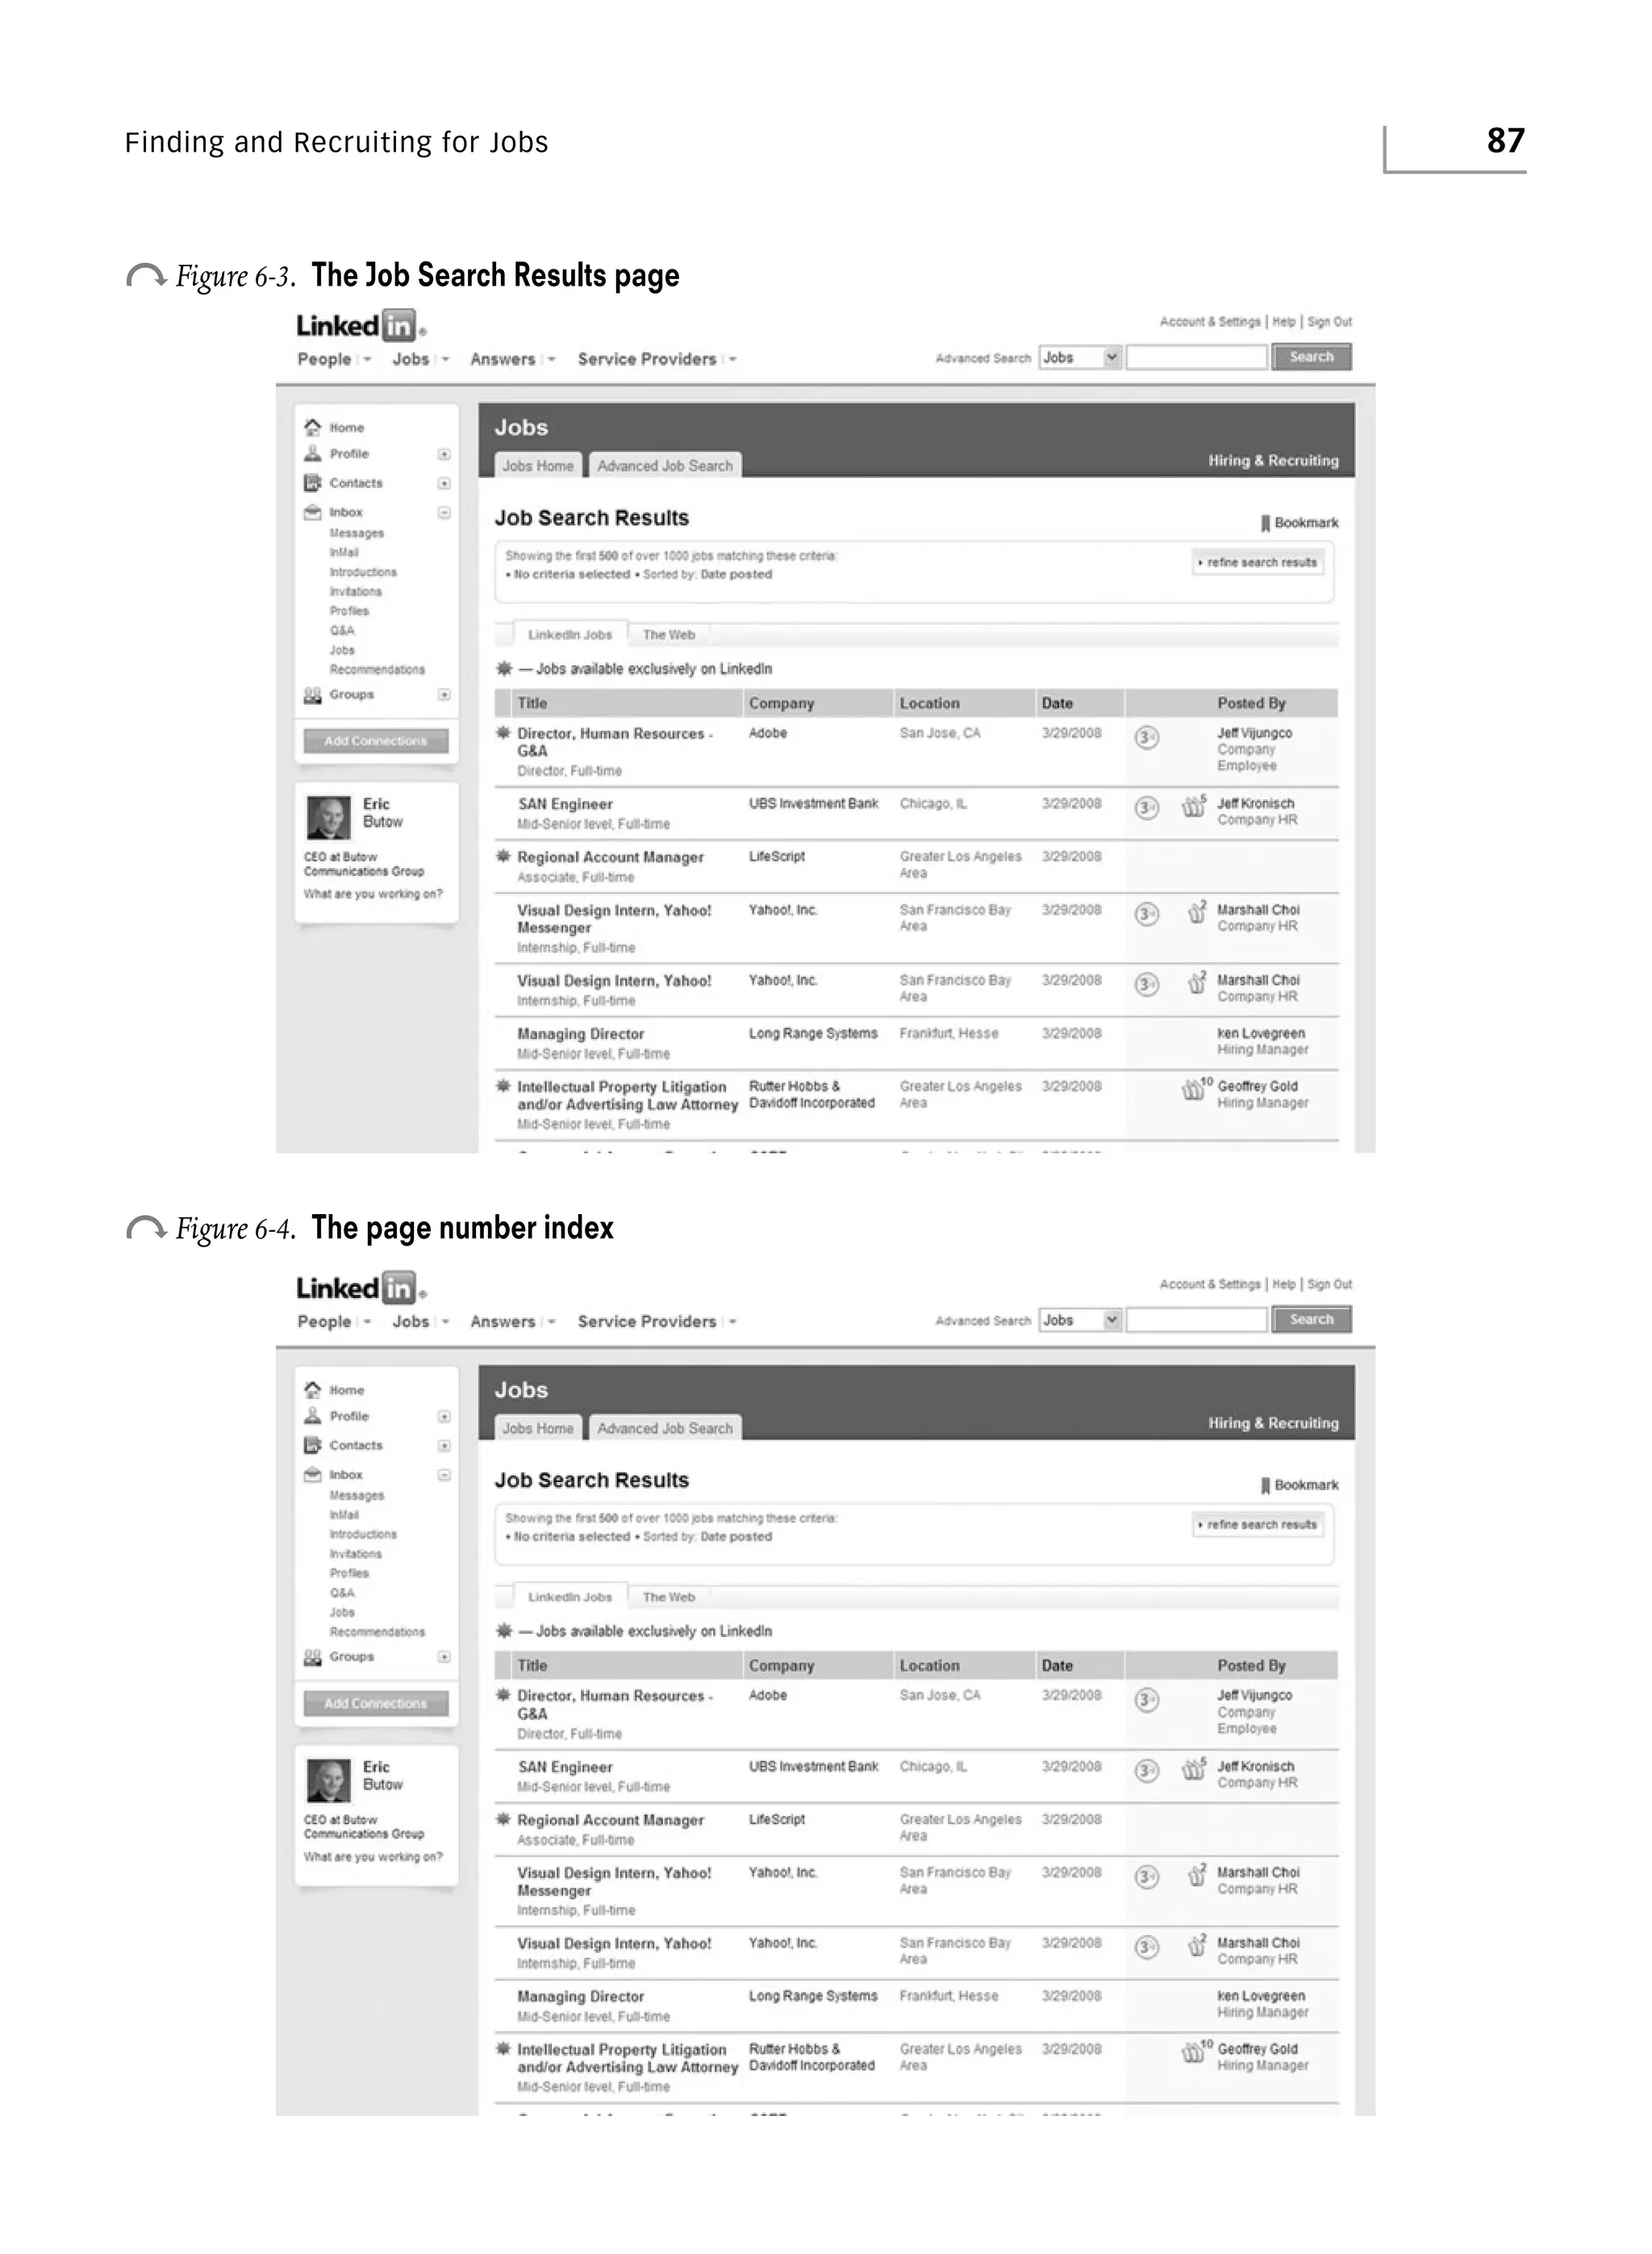
This document provides an overview of how to use LinkedIn to promote yourself and your business, grow your professional network, find jobs and business opportunities, exchange information and advice, and increase your chances of business success. It discusses how LinkedIn allows you to create a professional profile, connect with colleagues, search for people with shared interests, find and post jobs, ask and answer questions, and make valuable business contacts.


