Download to read offline
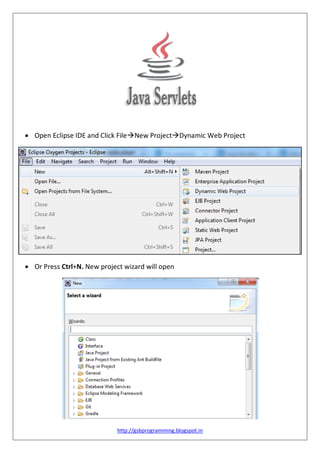


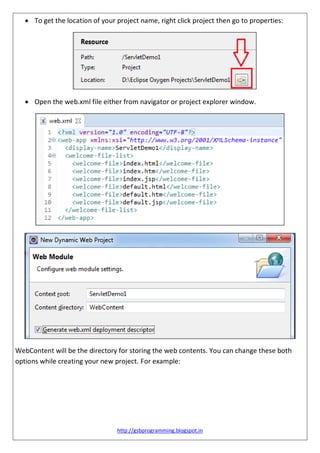
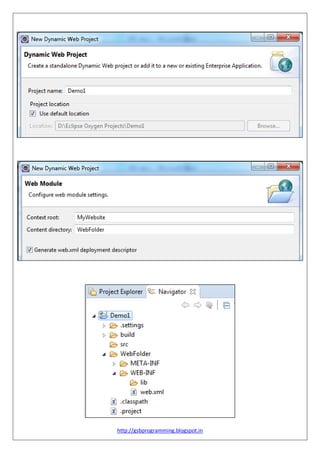
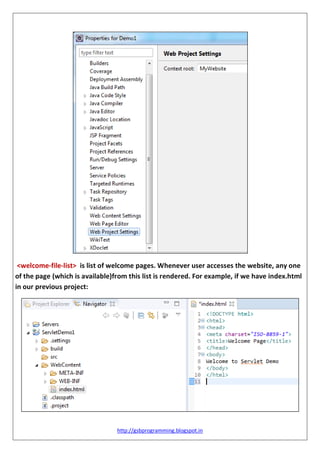
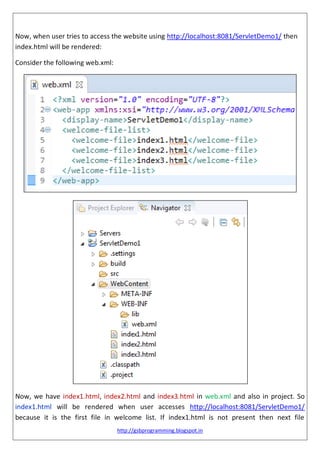
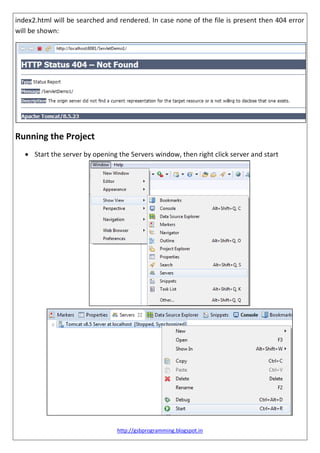
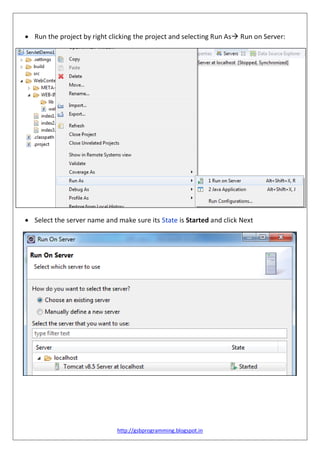

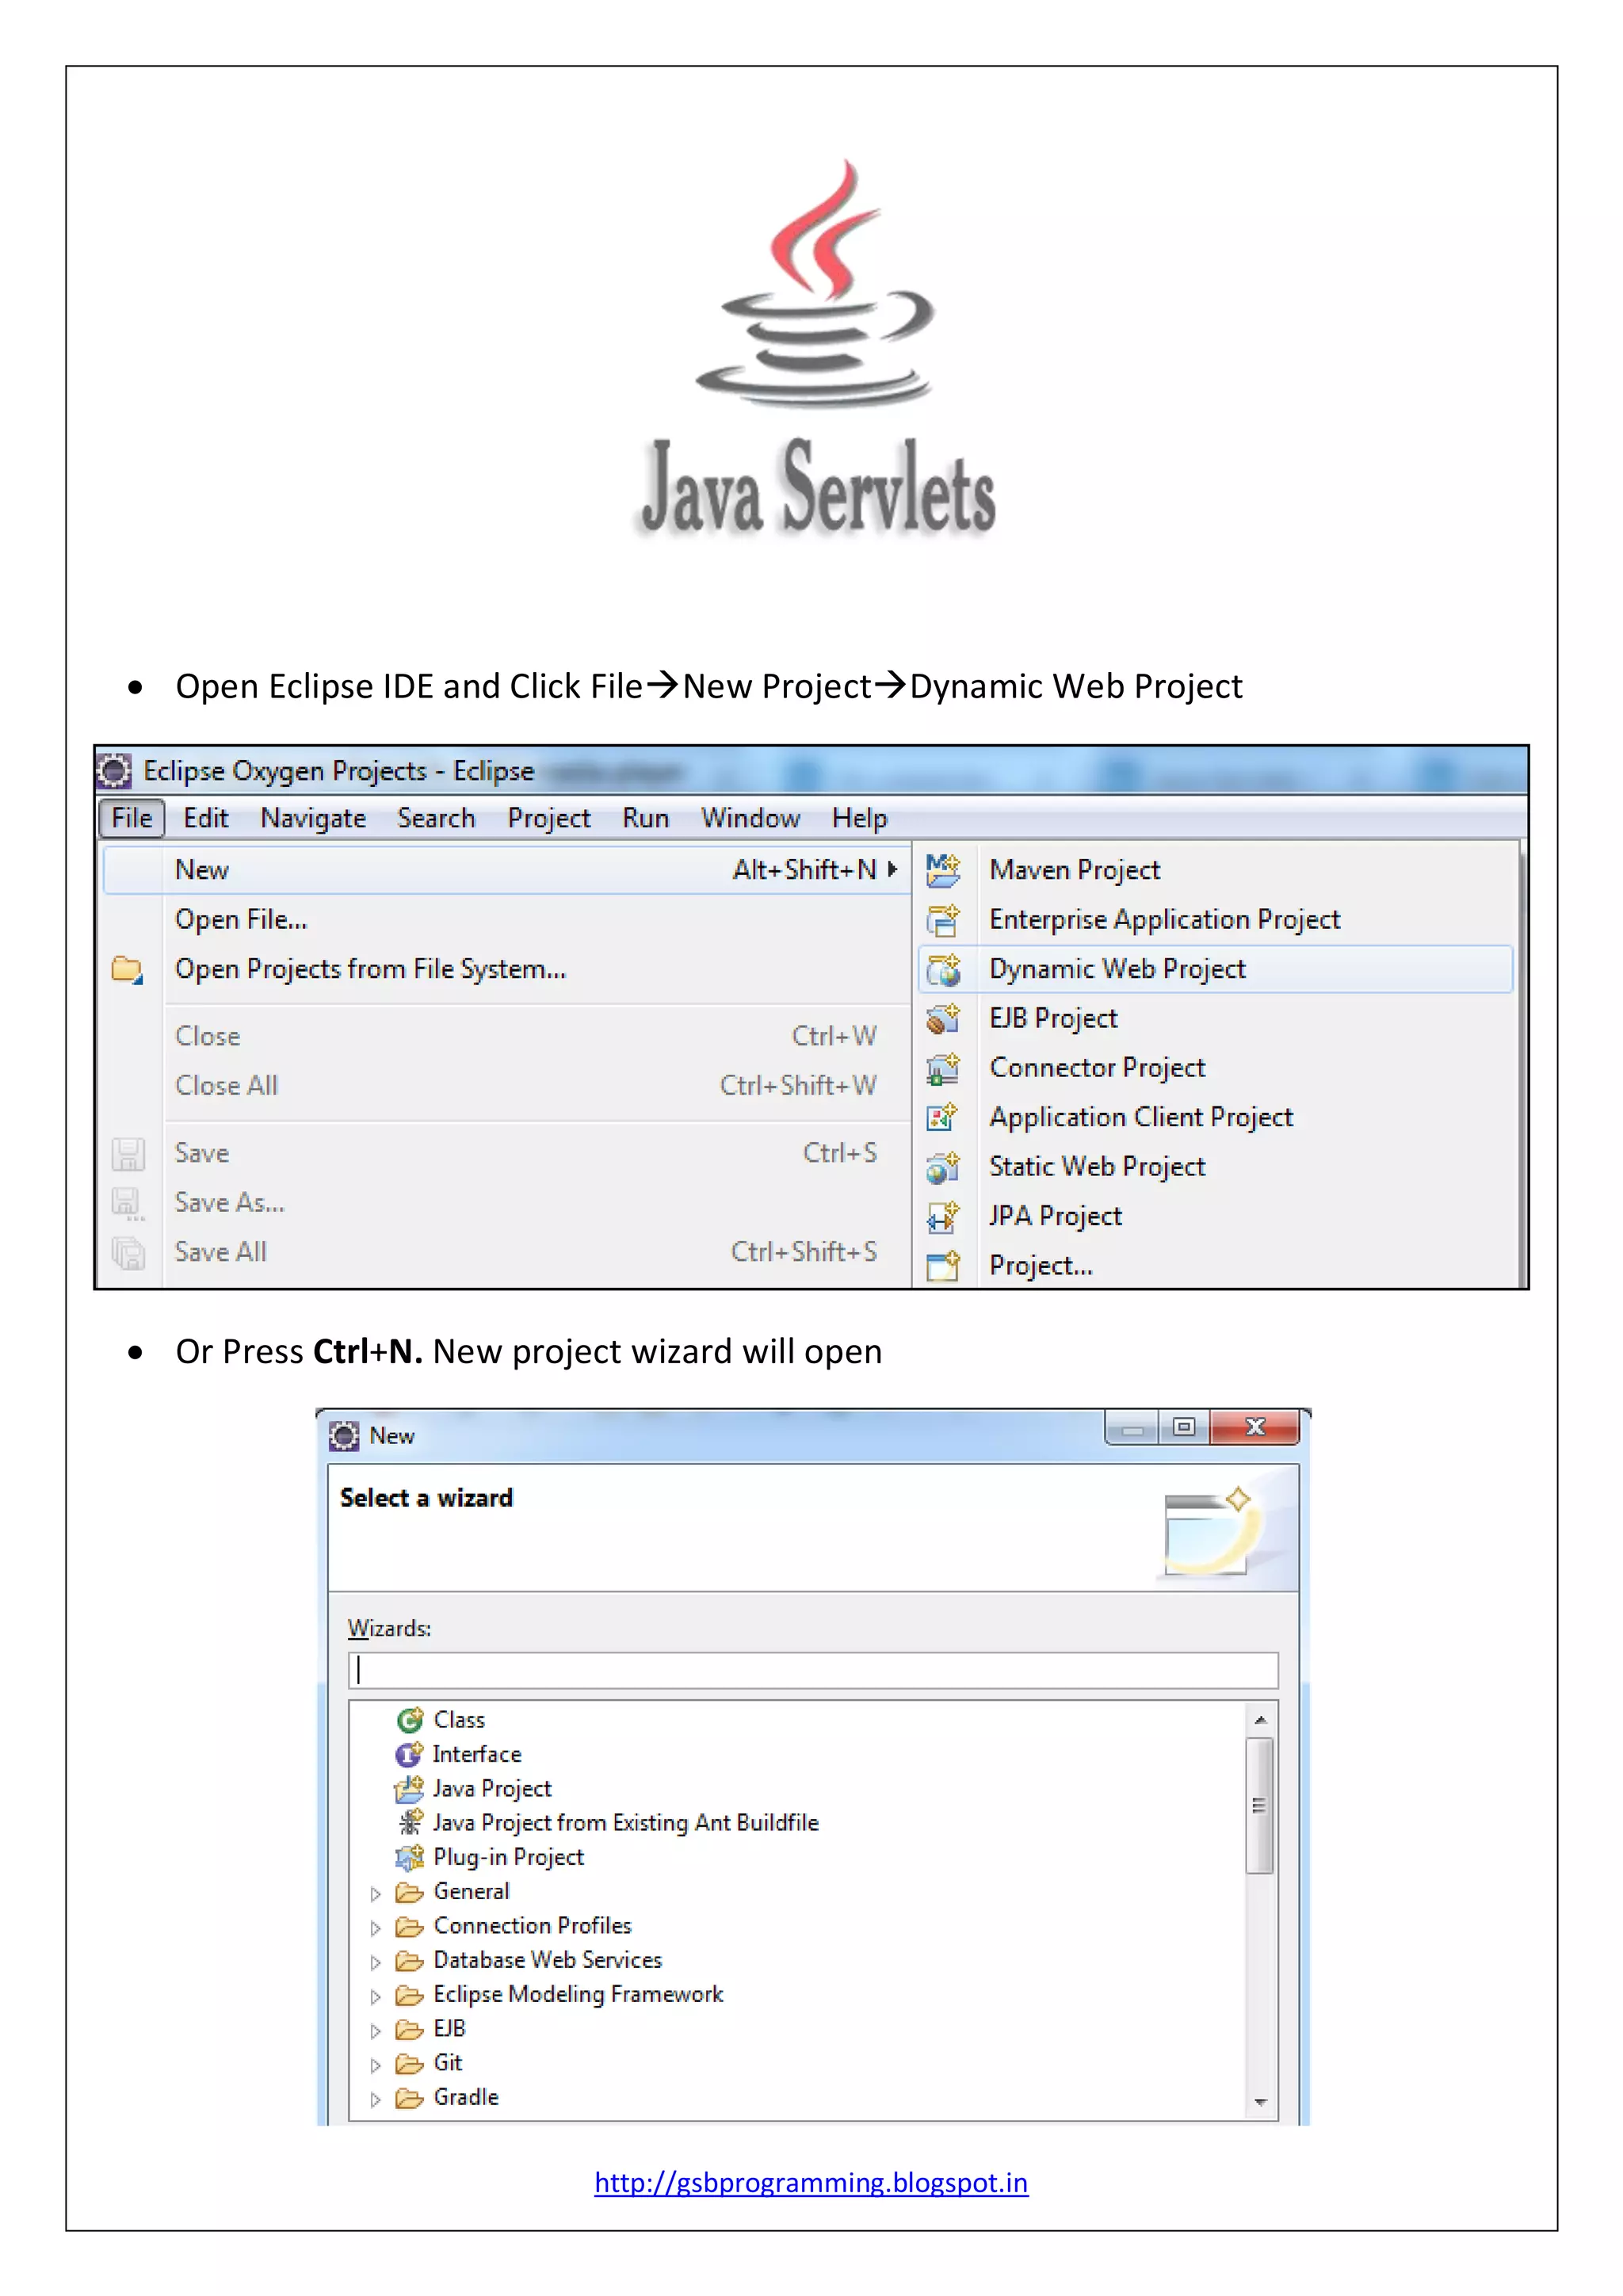

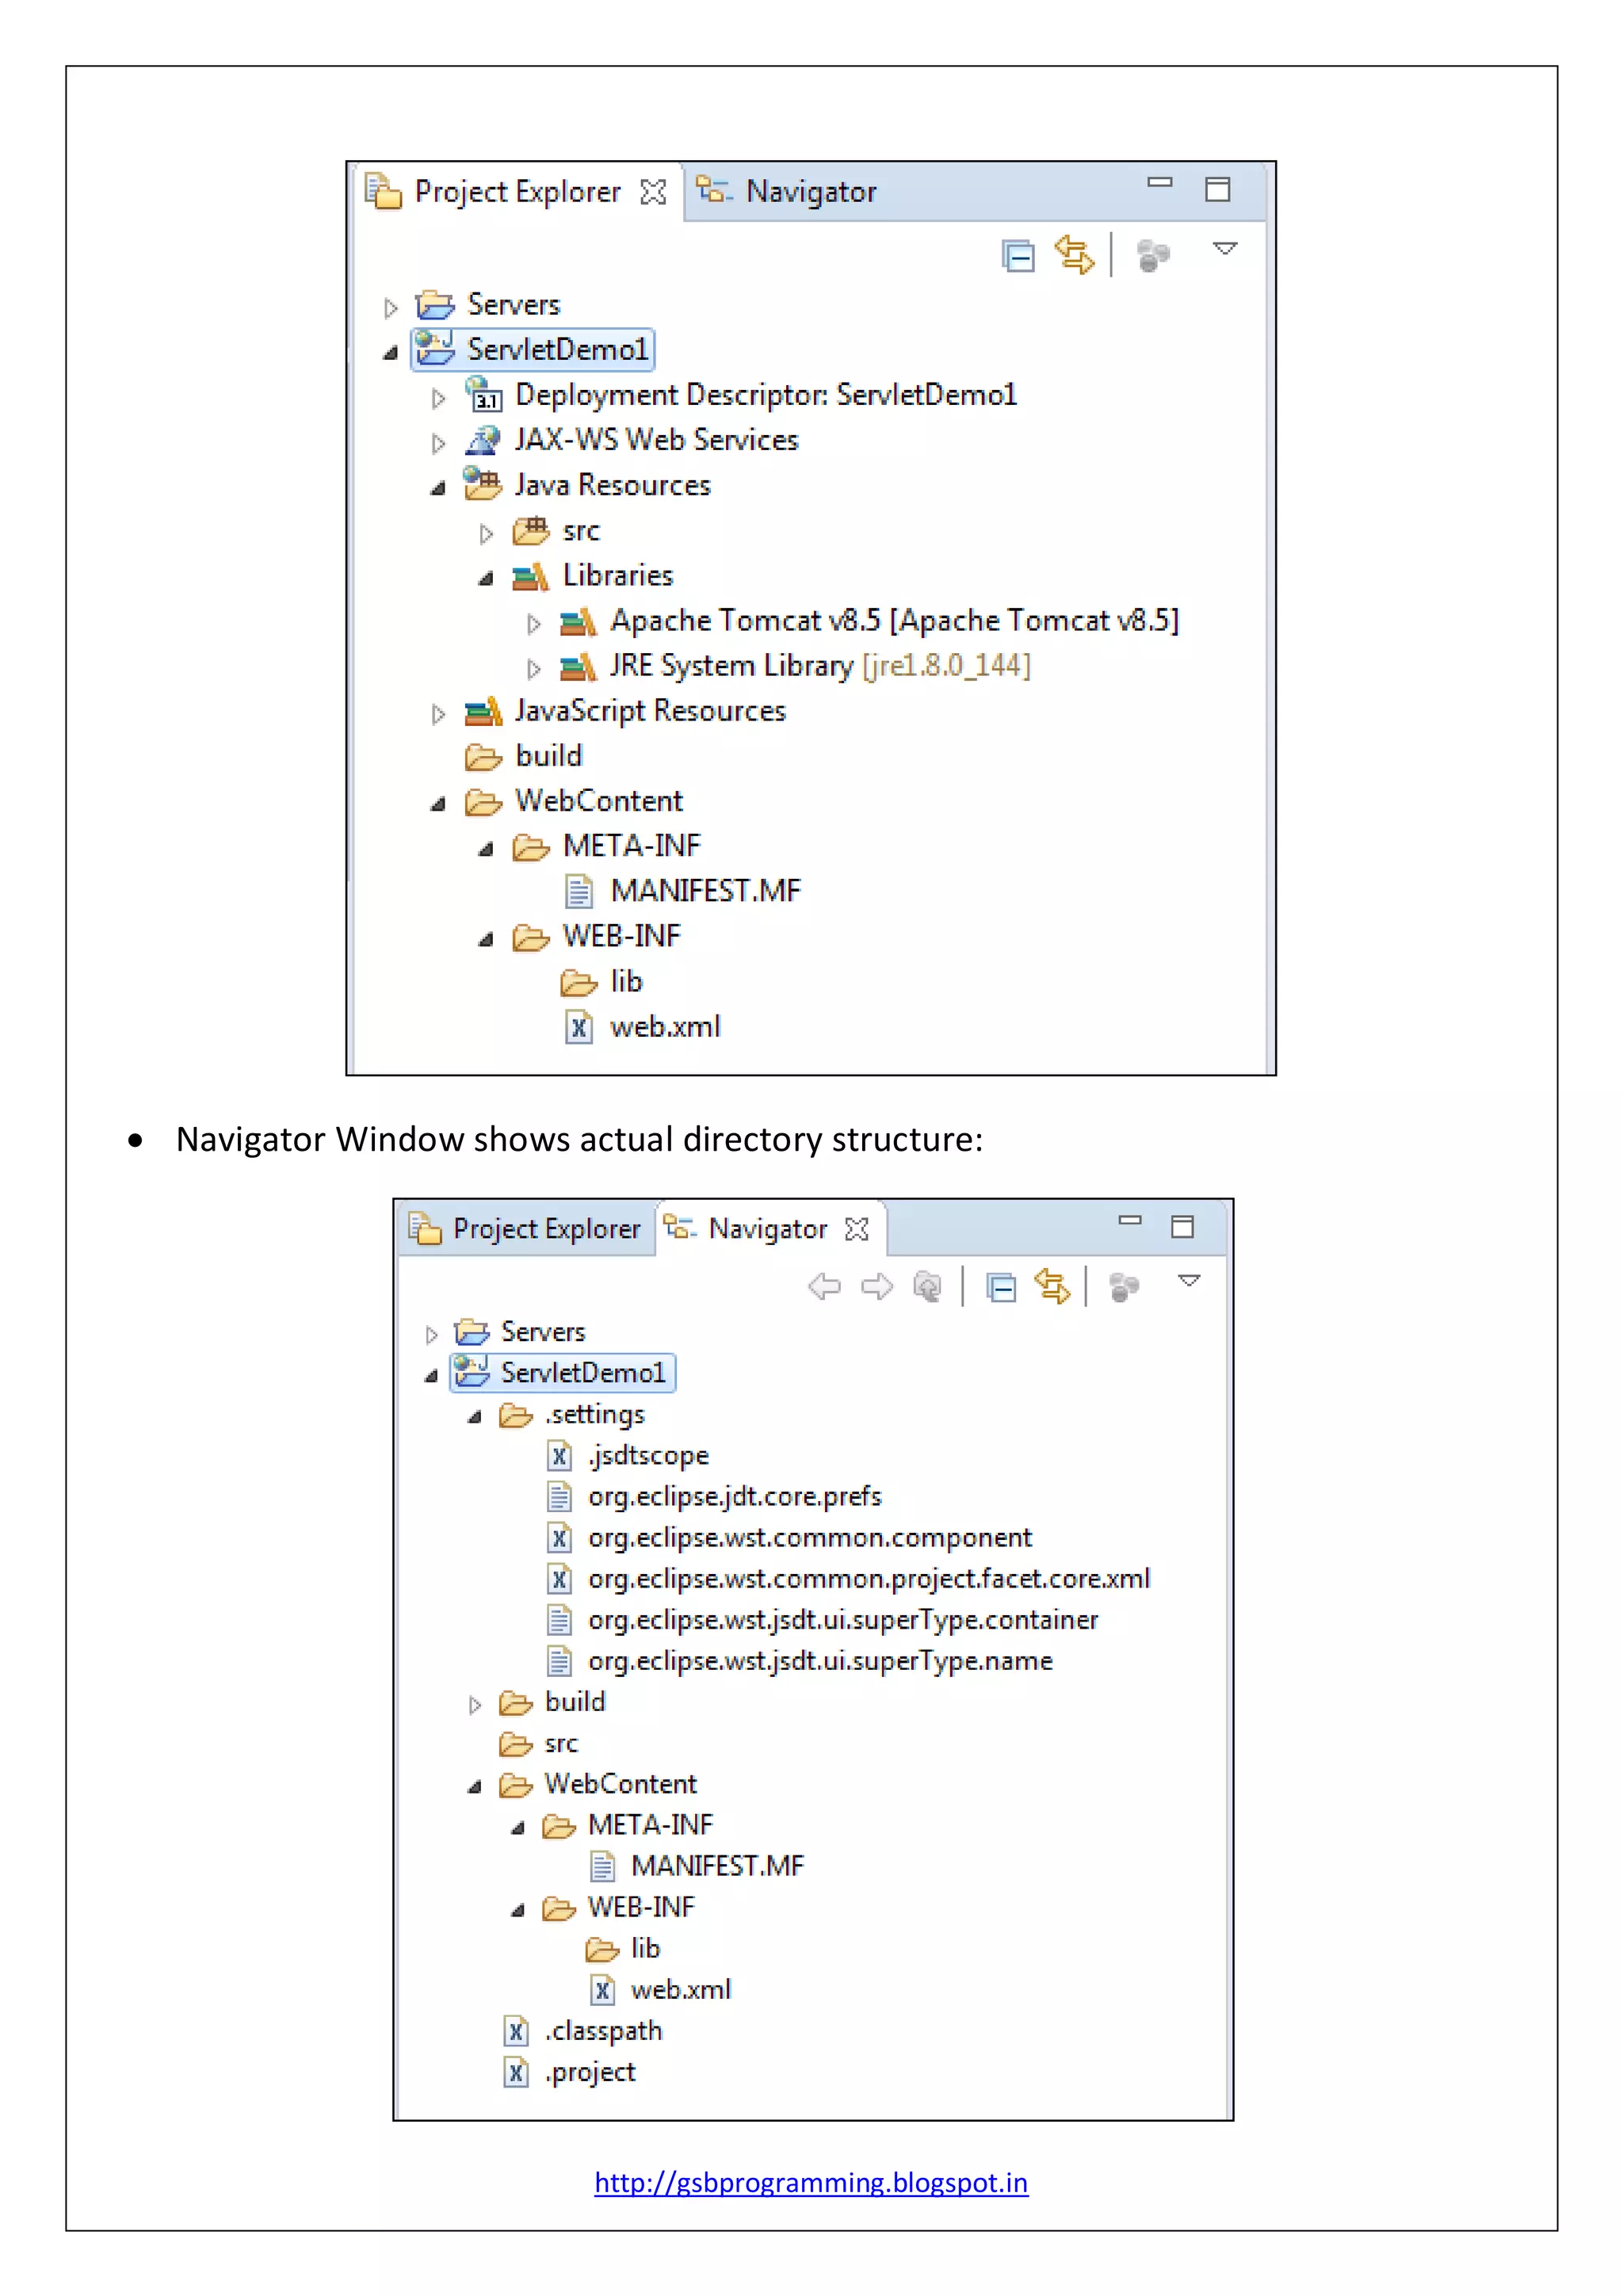
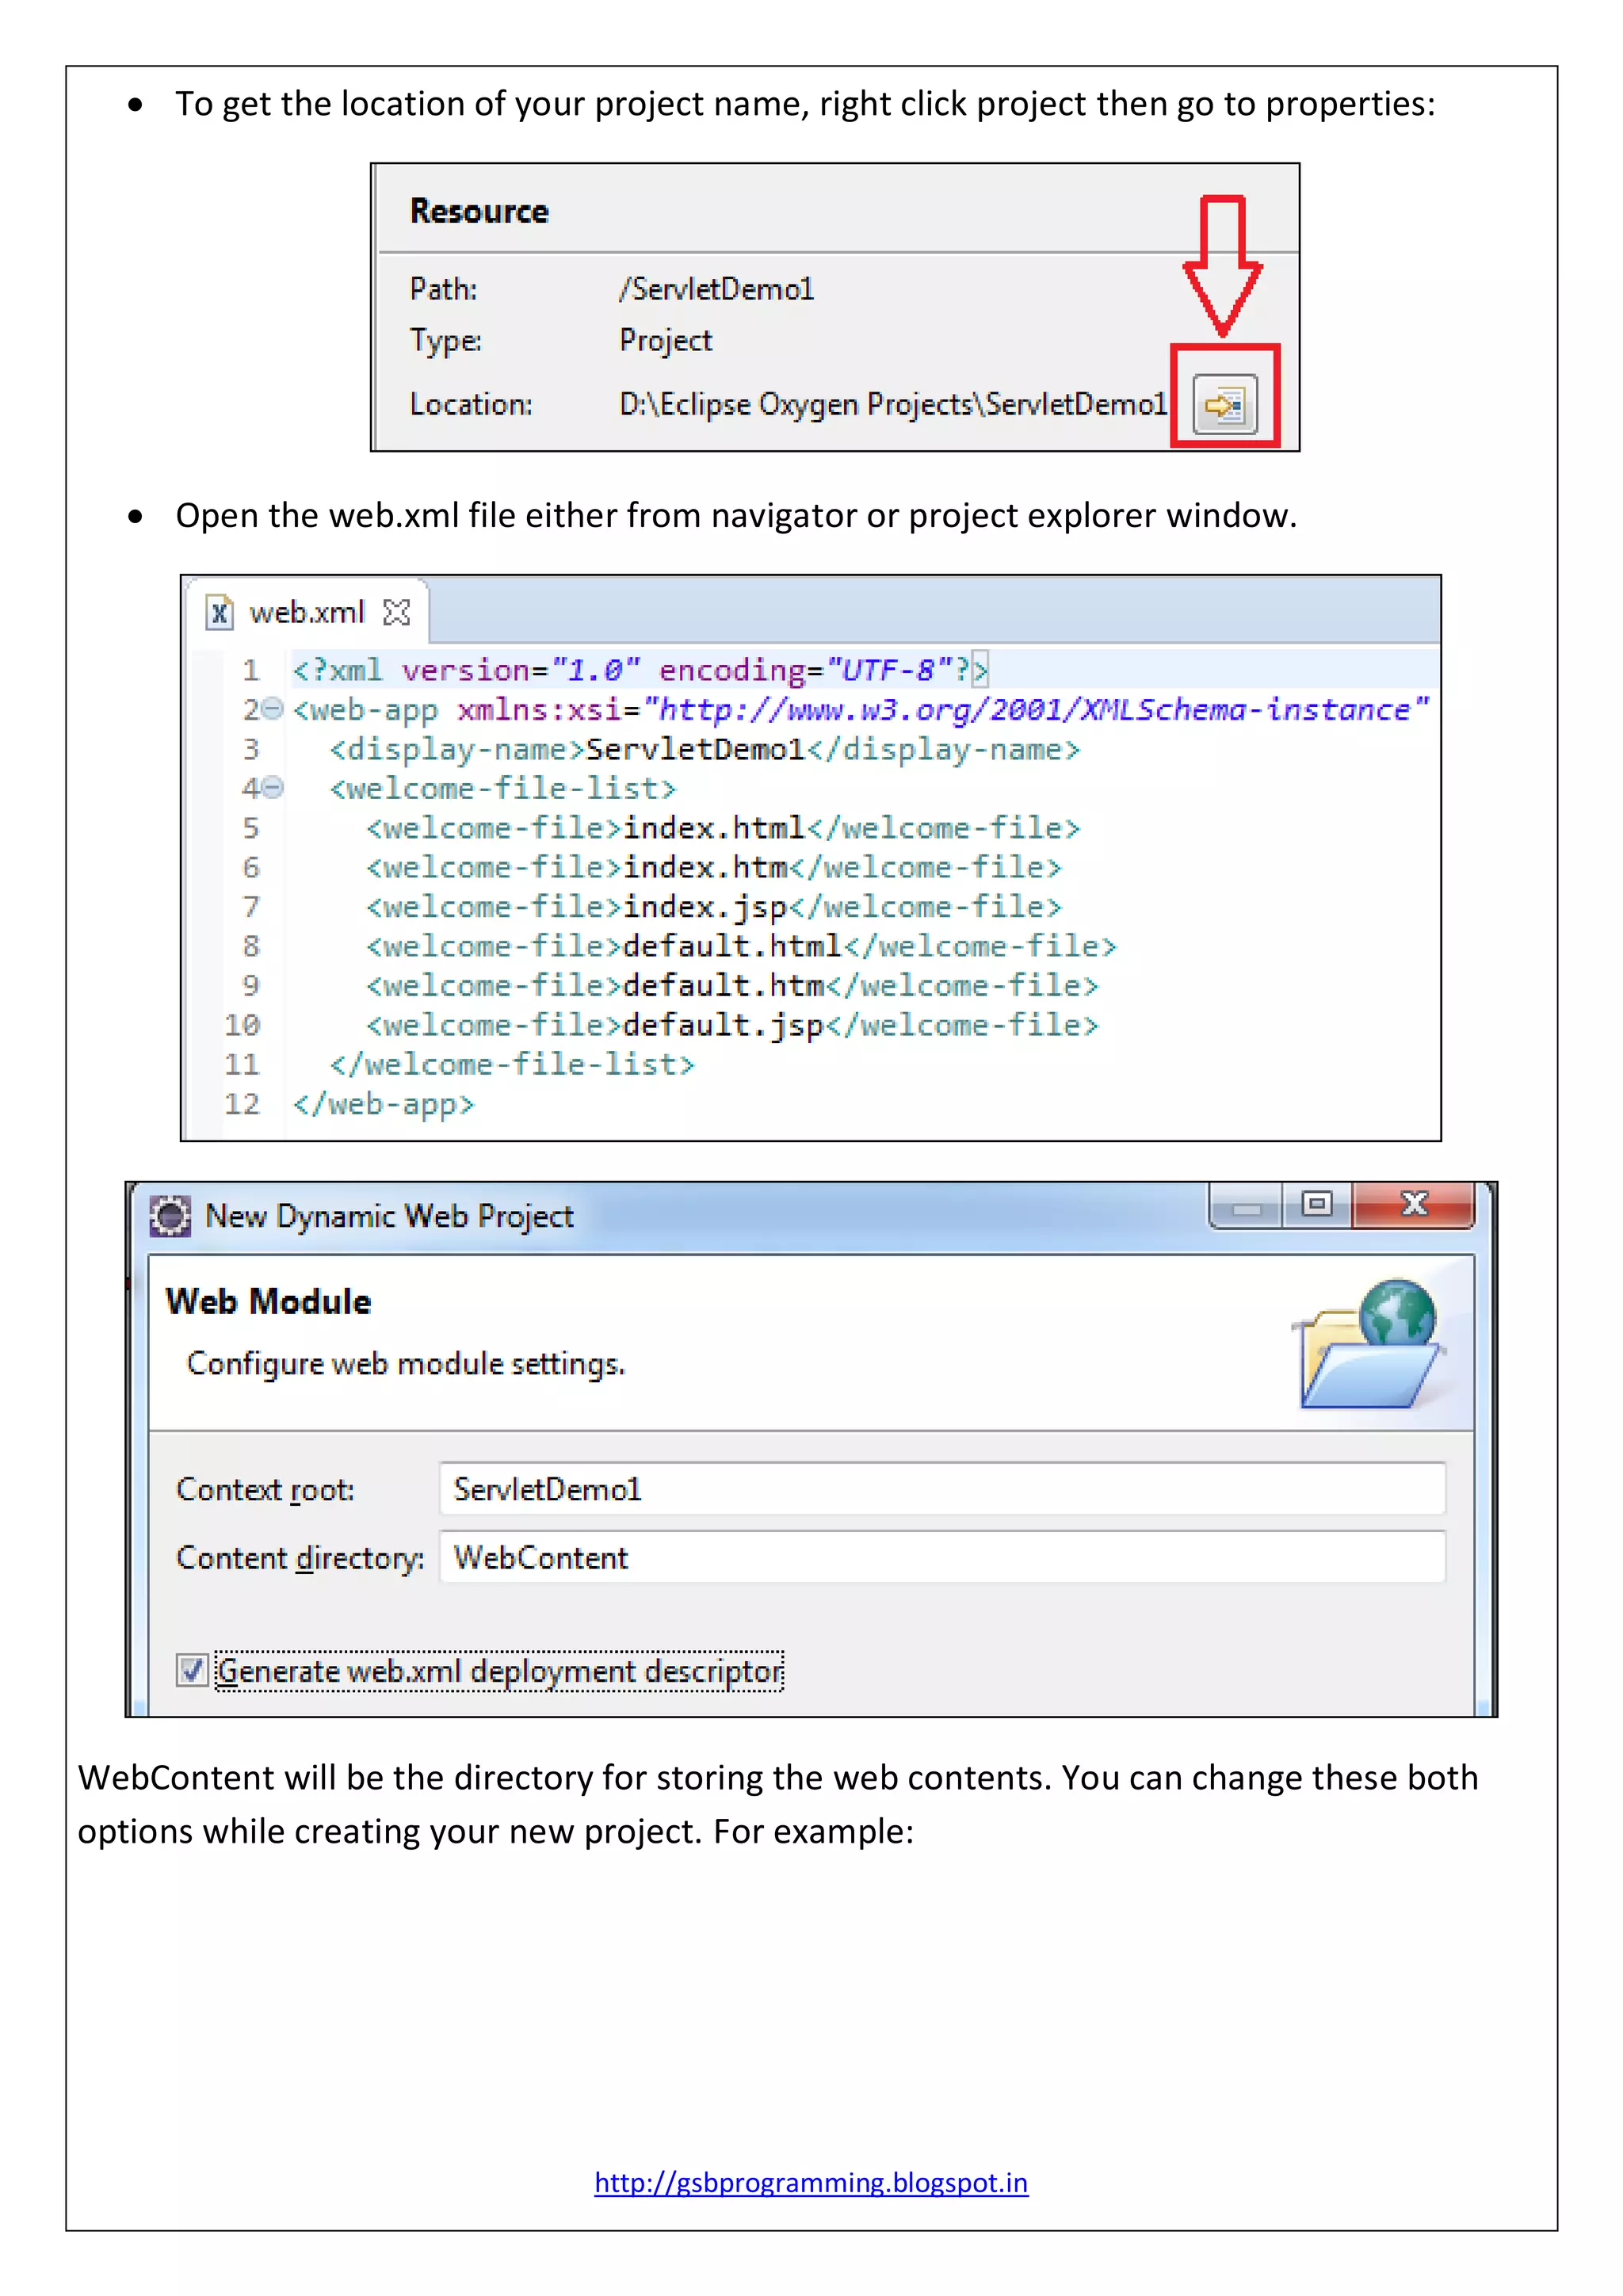
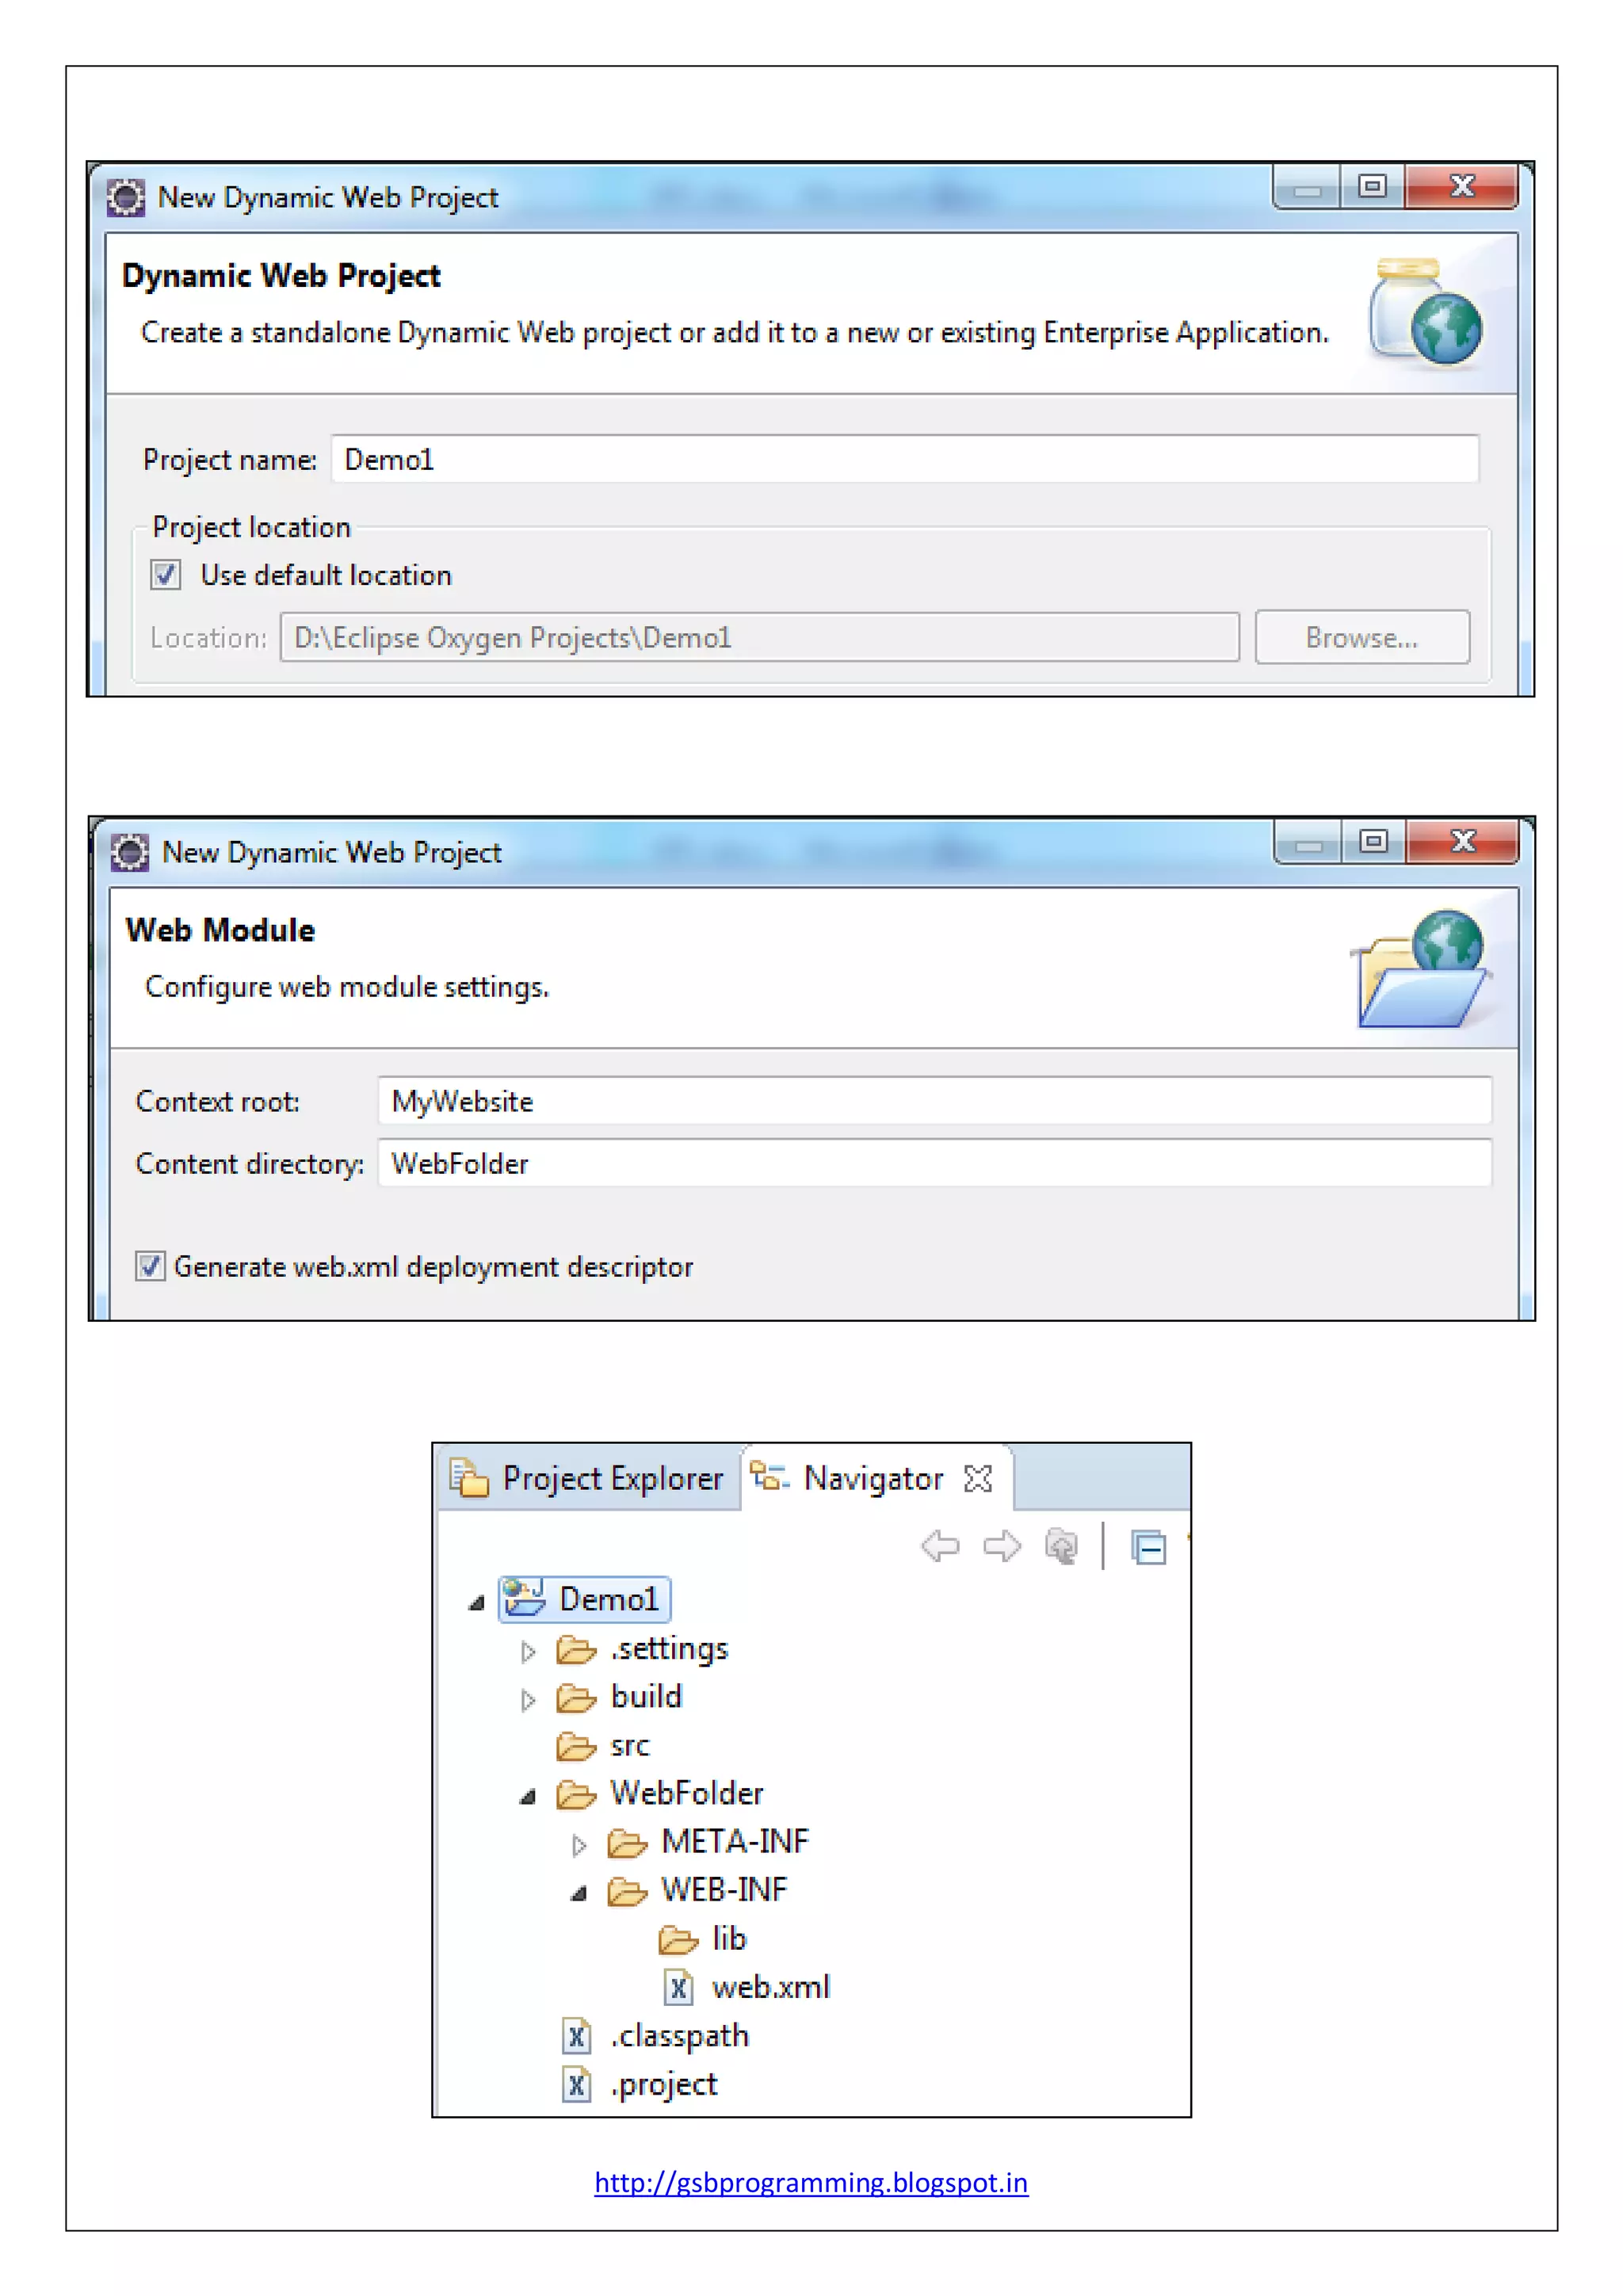
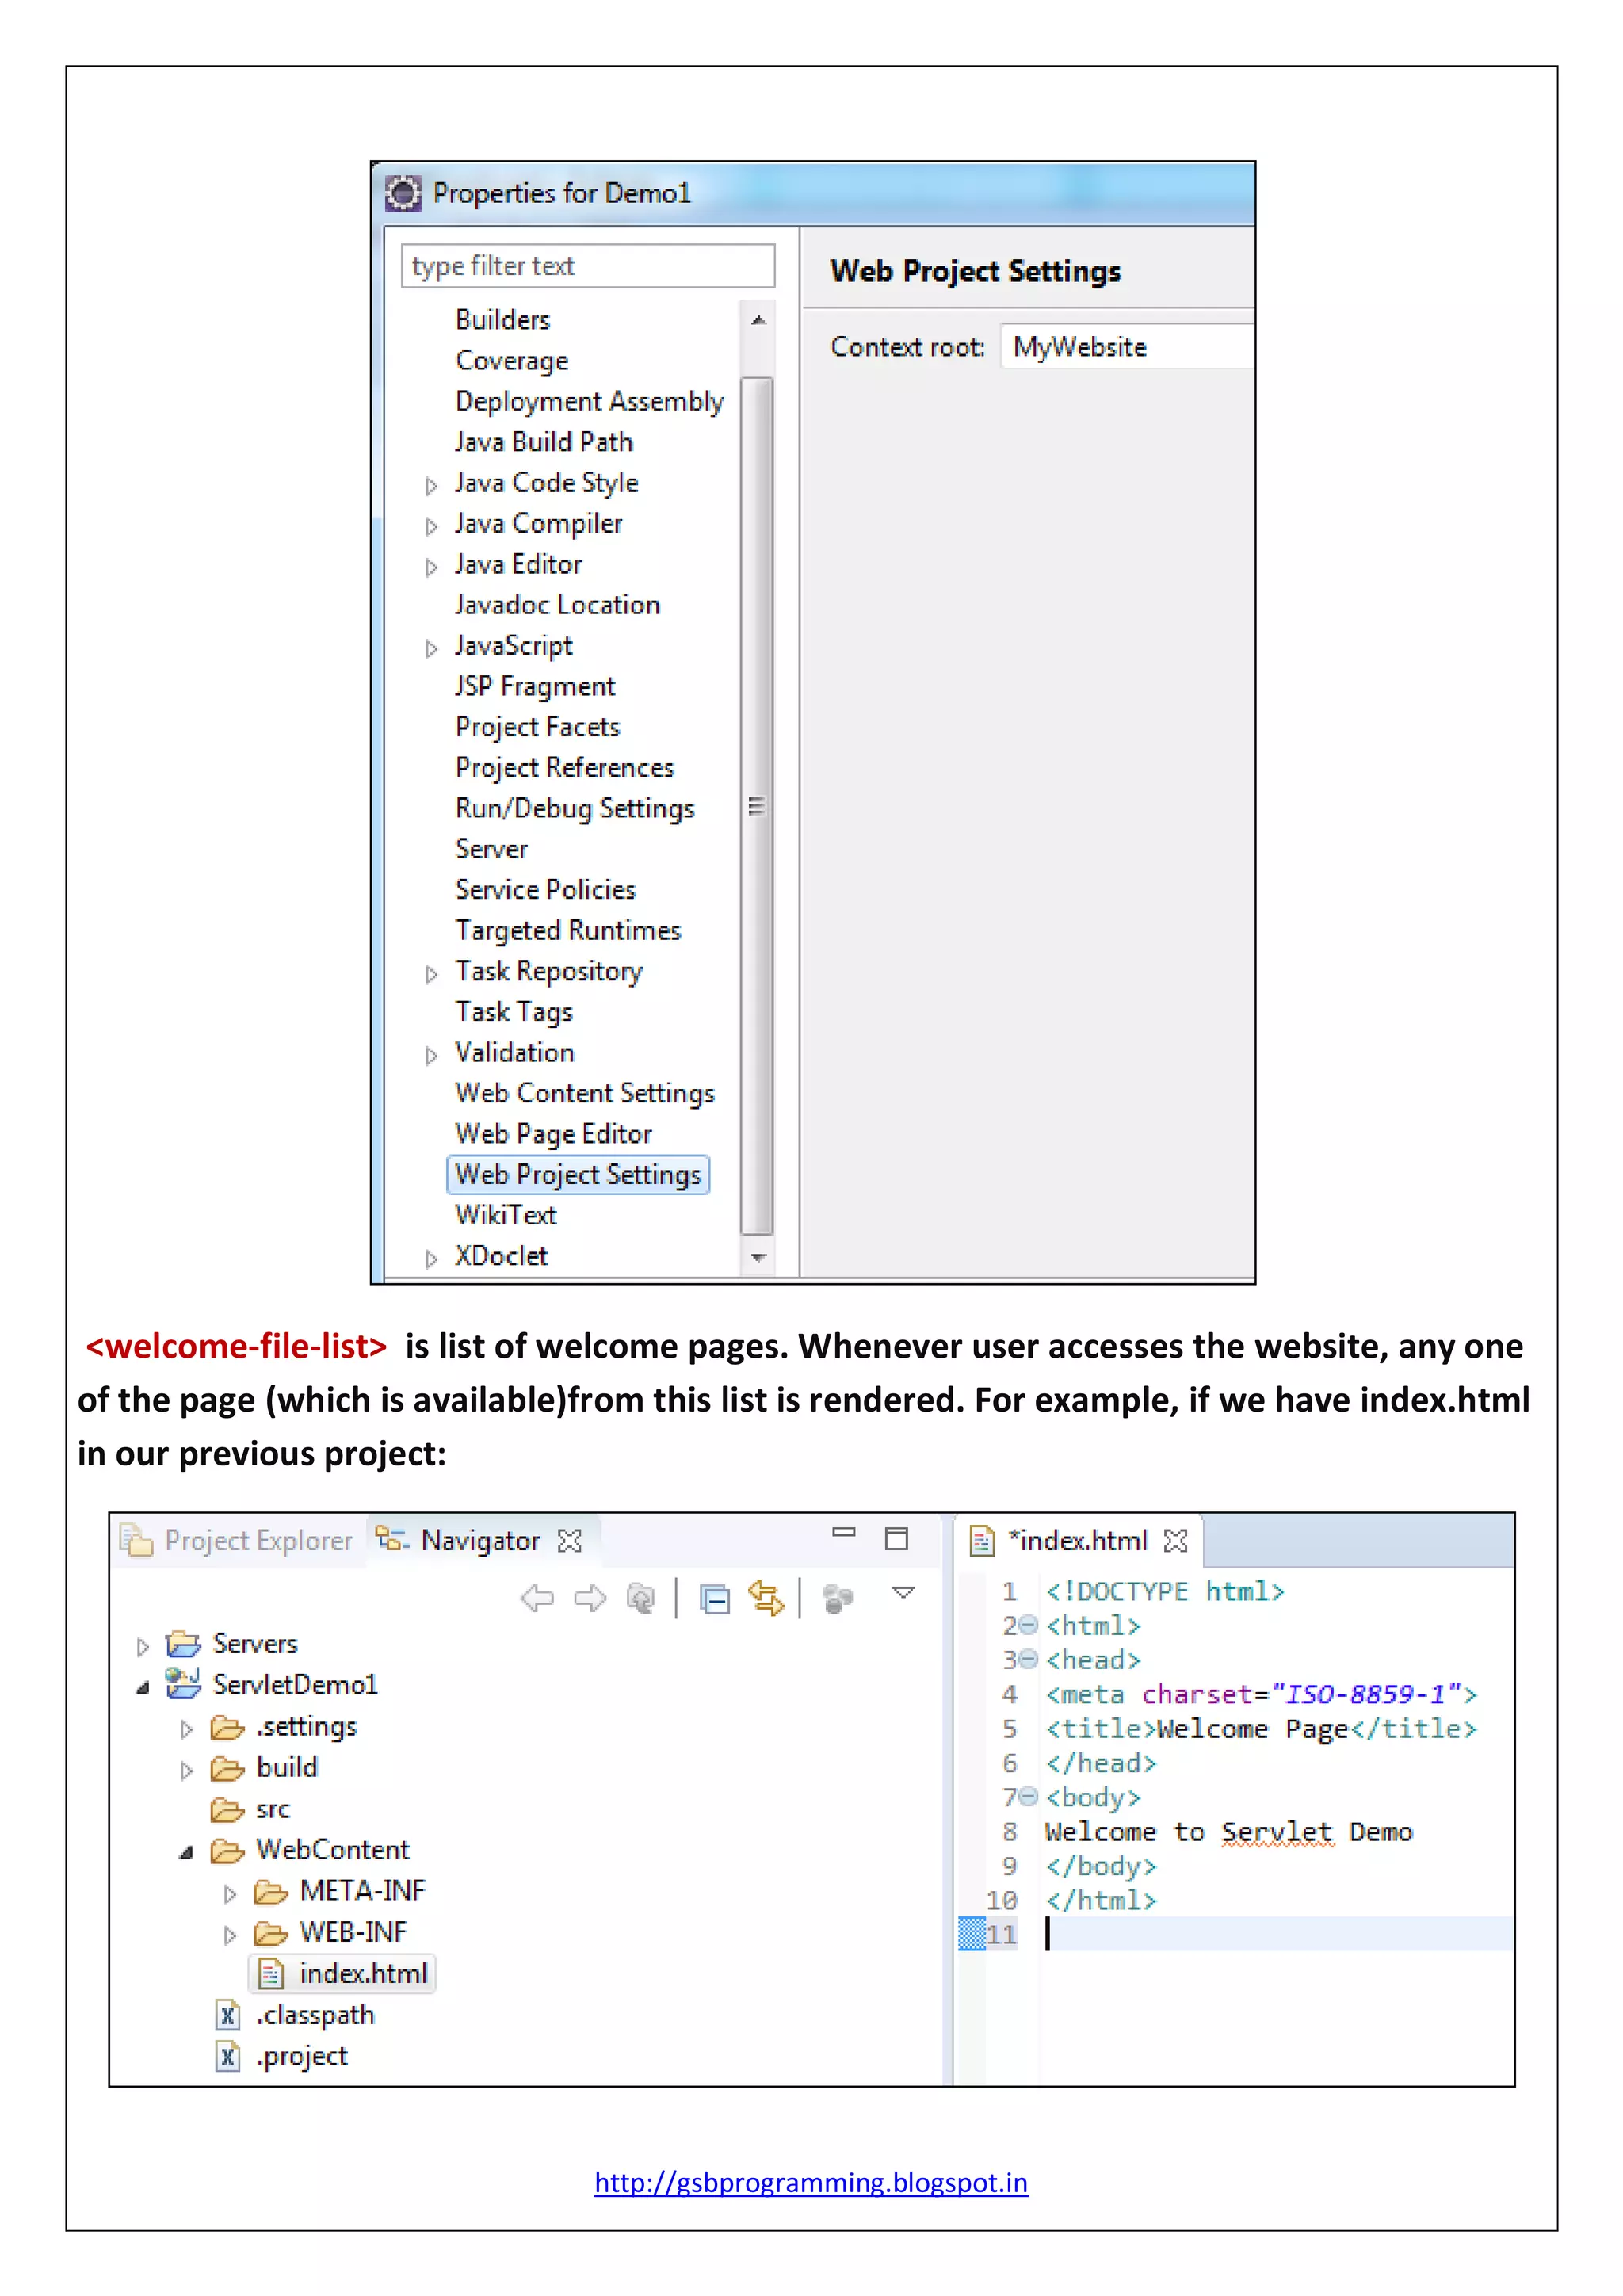
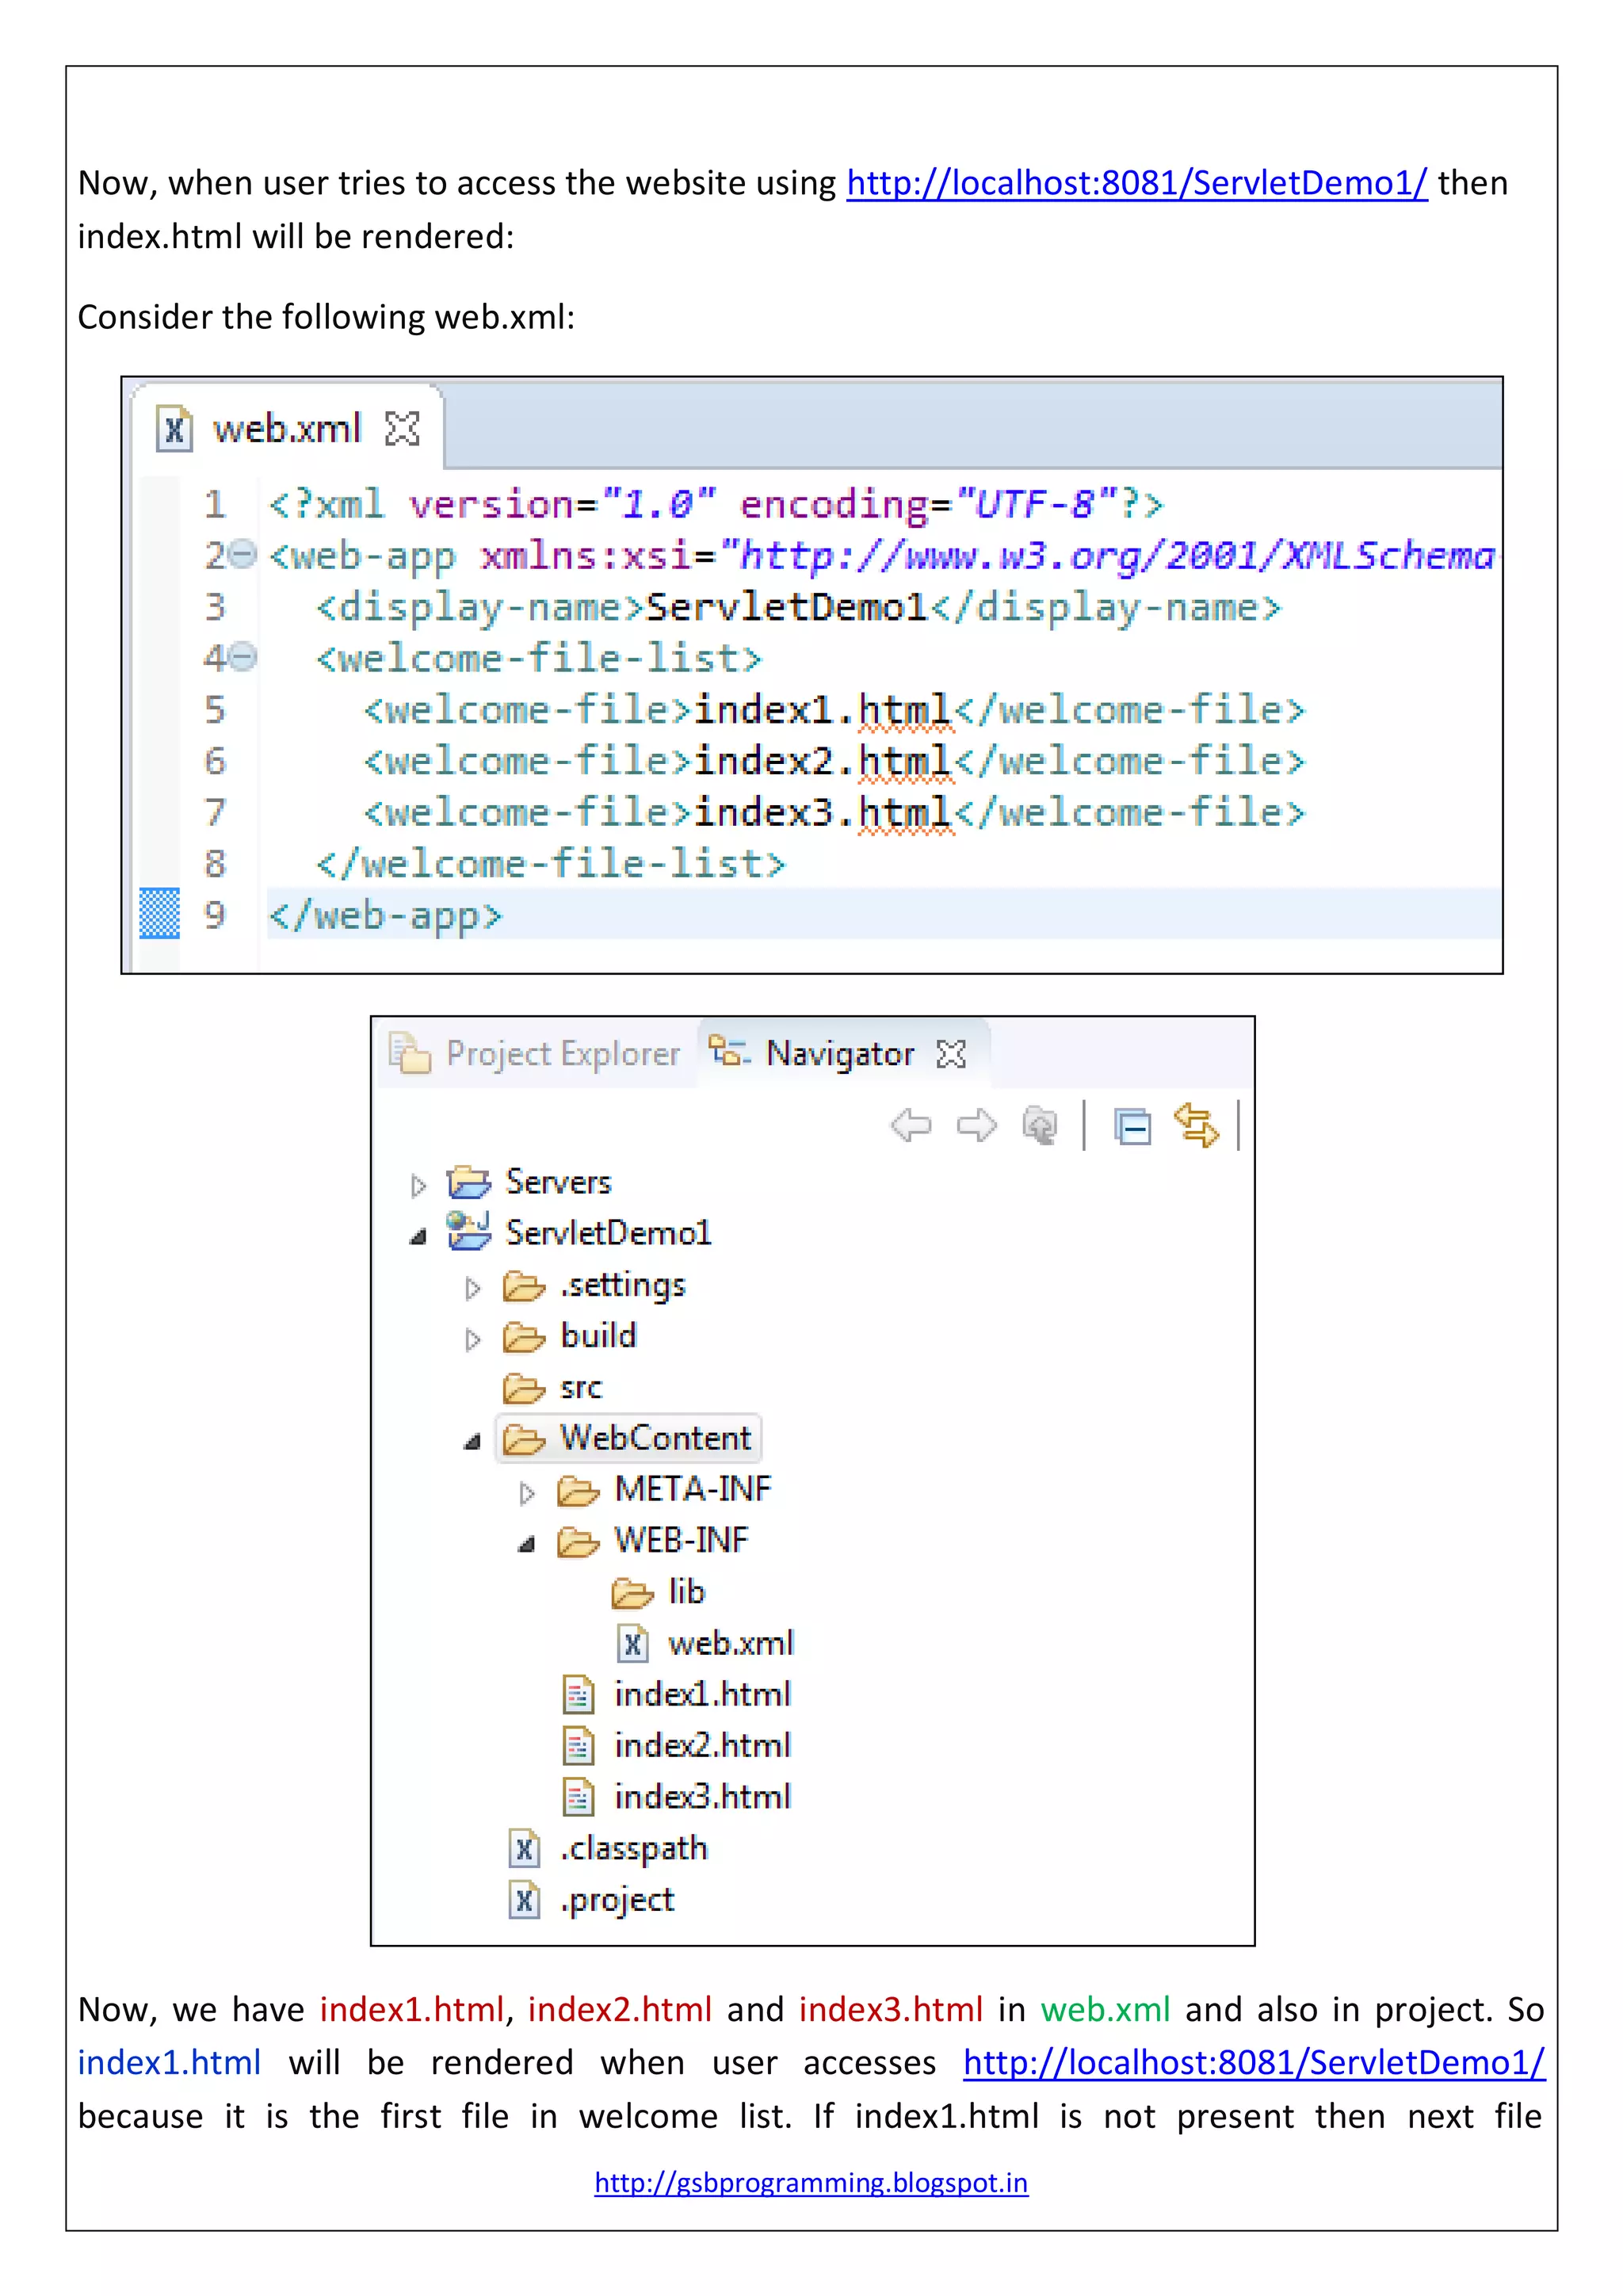
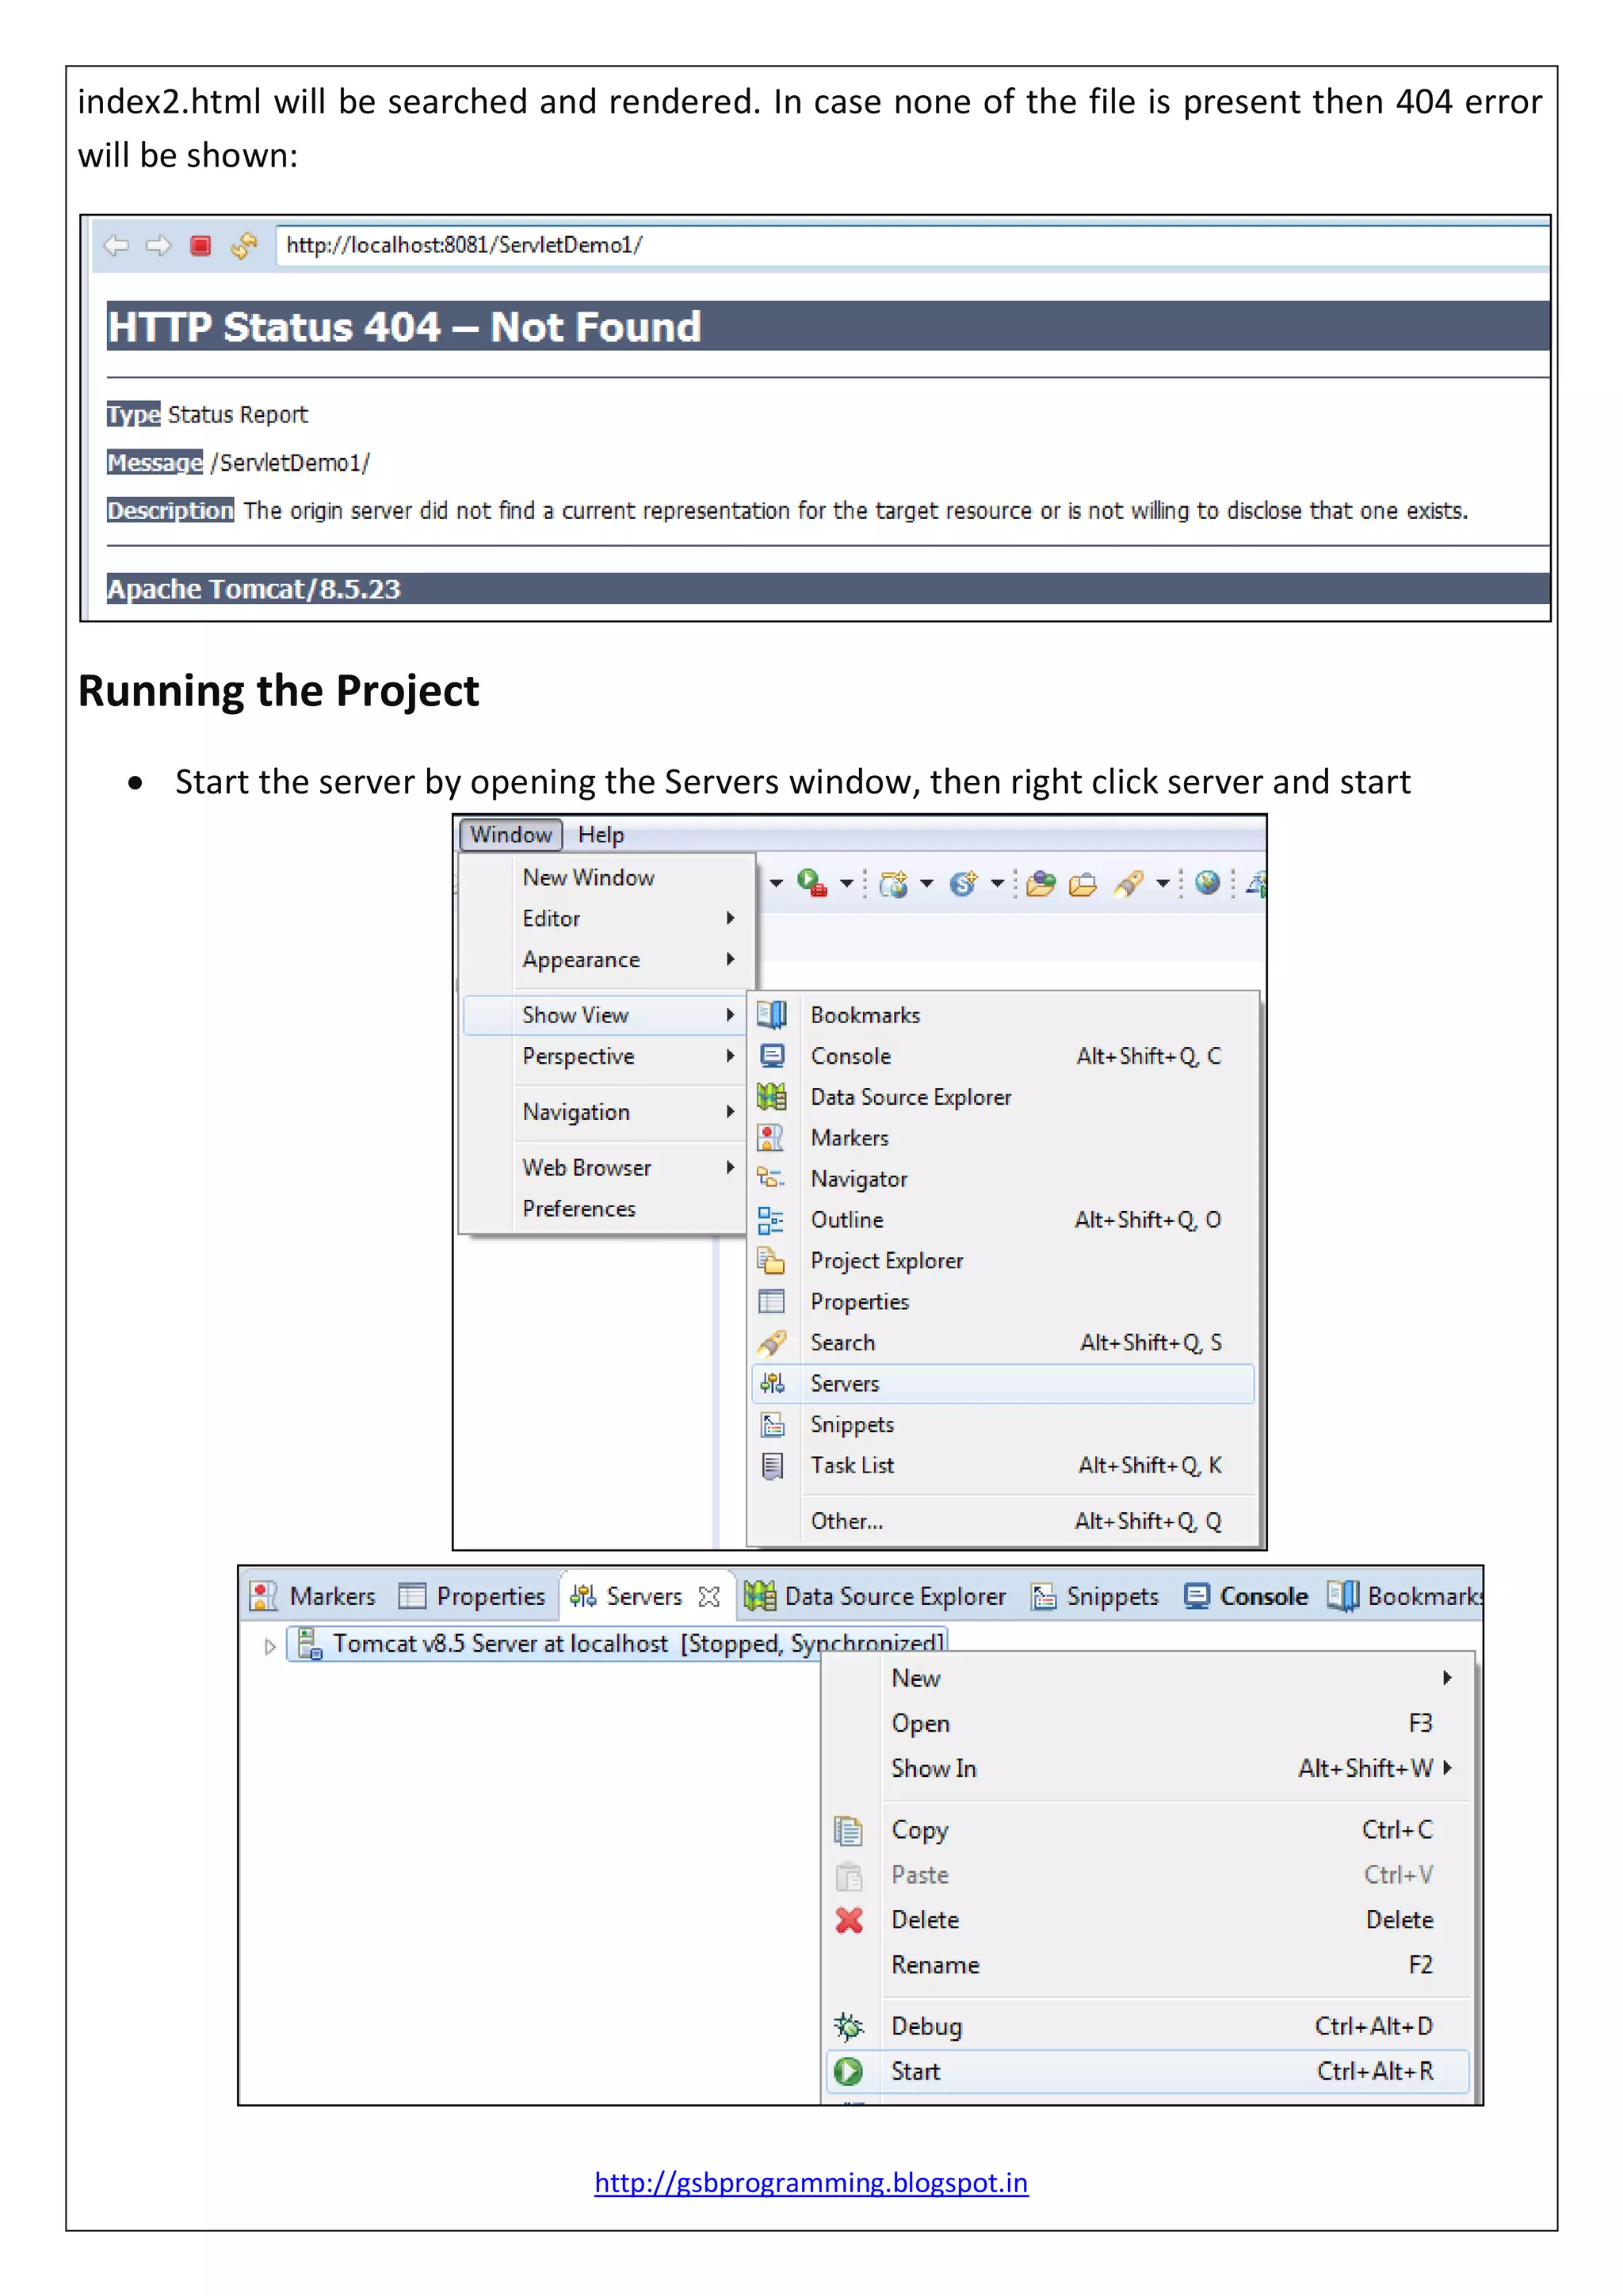
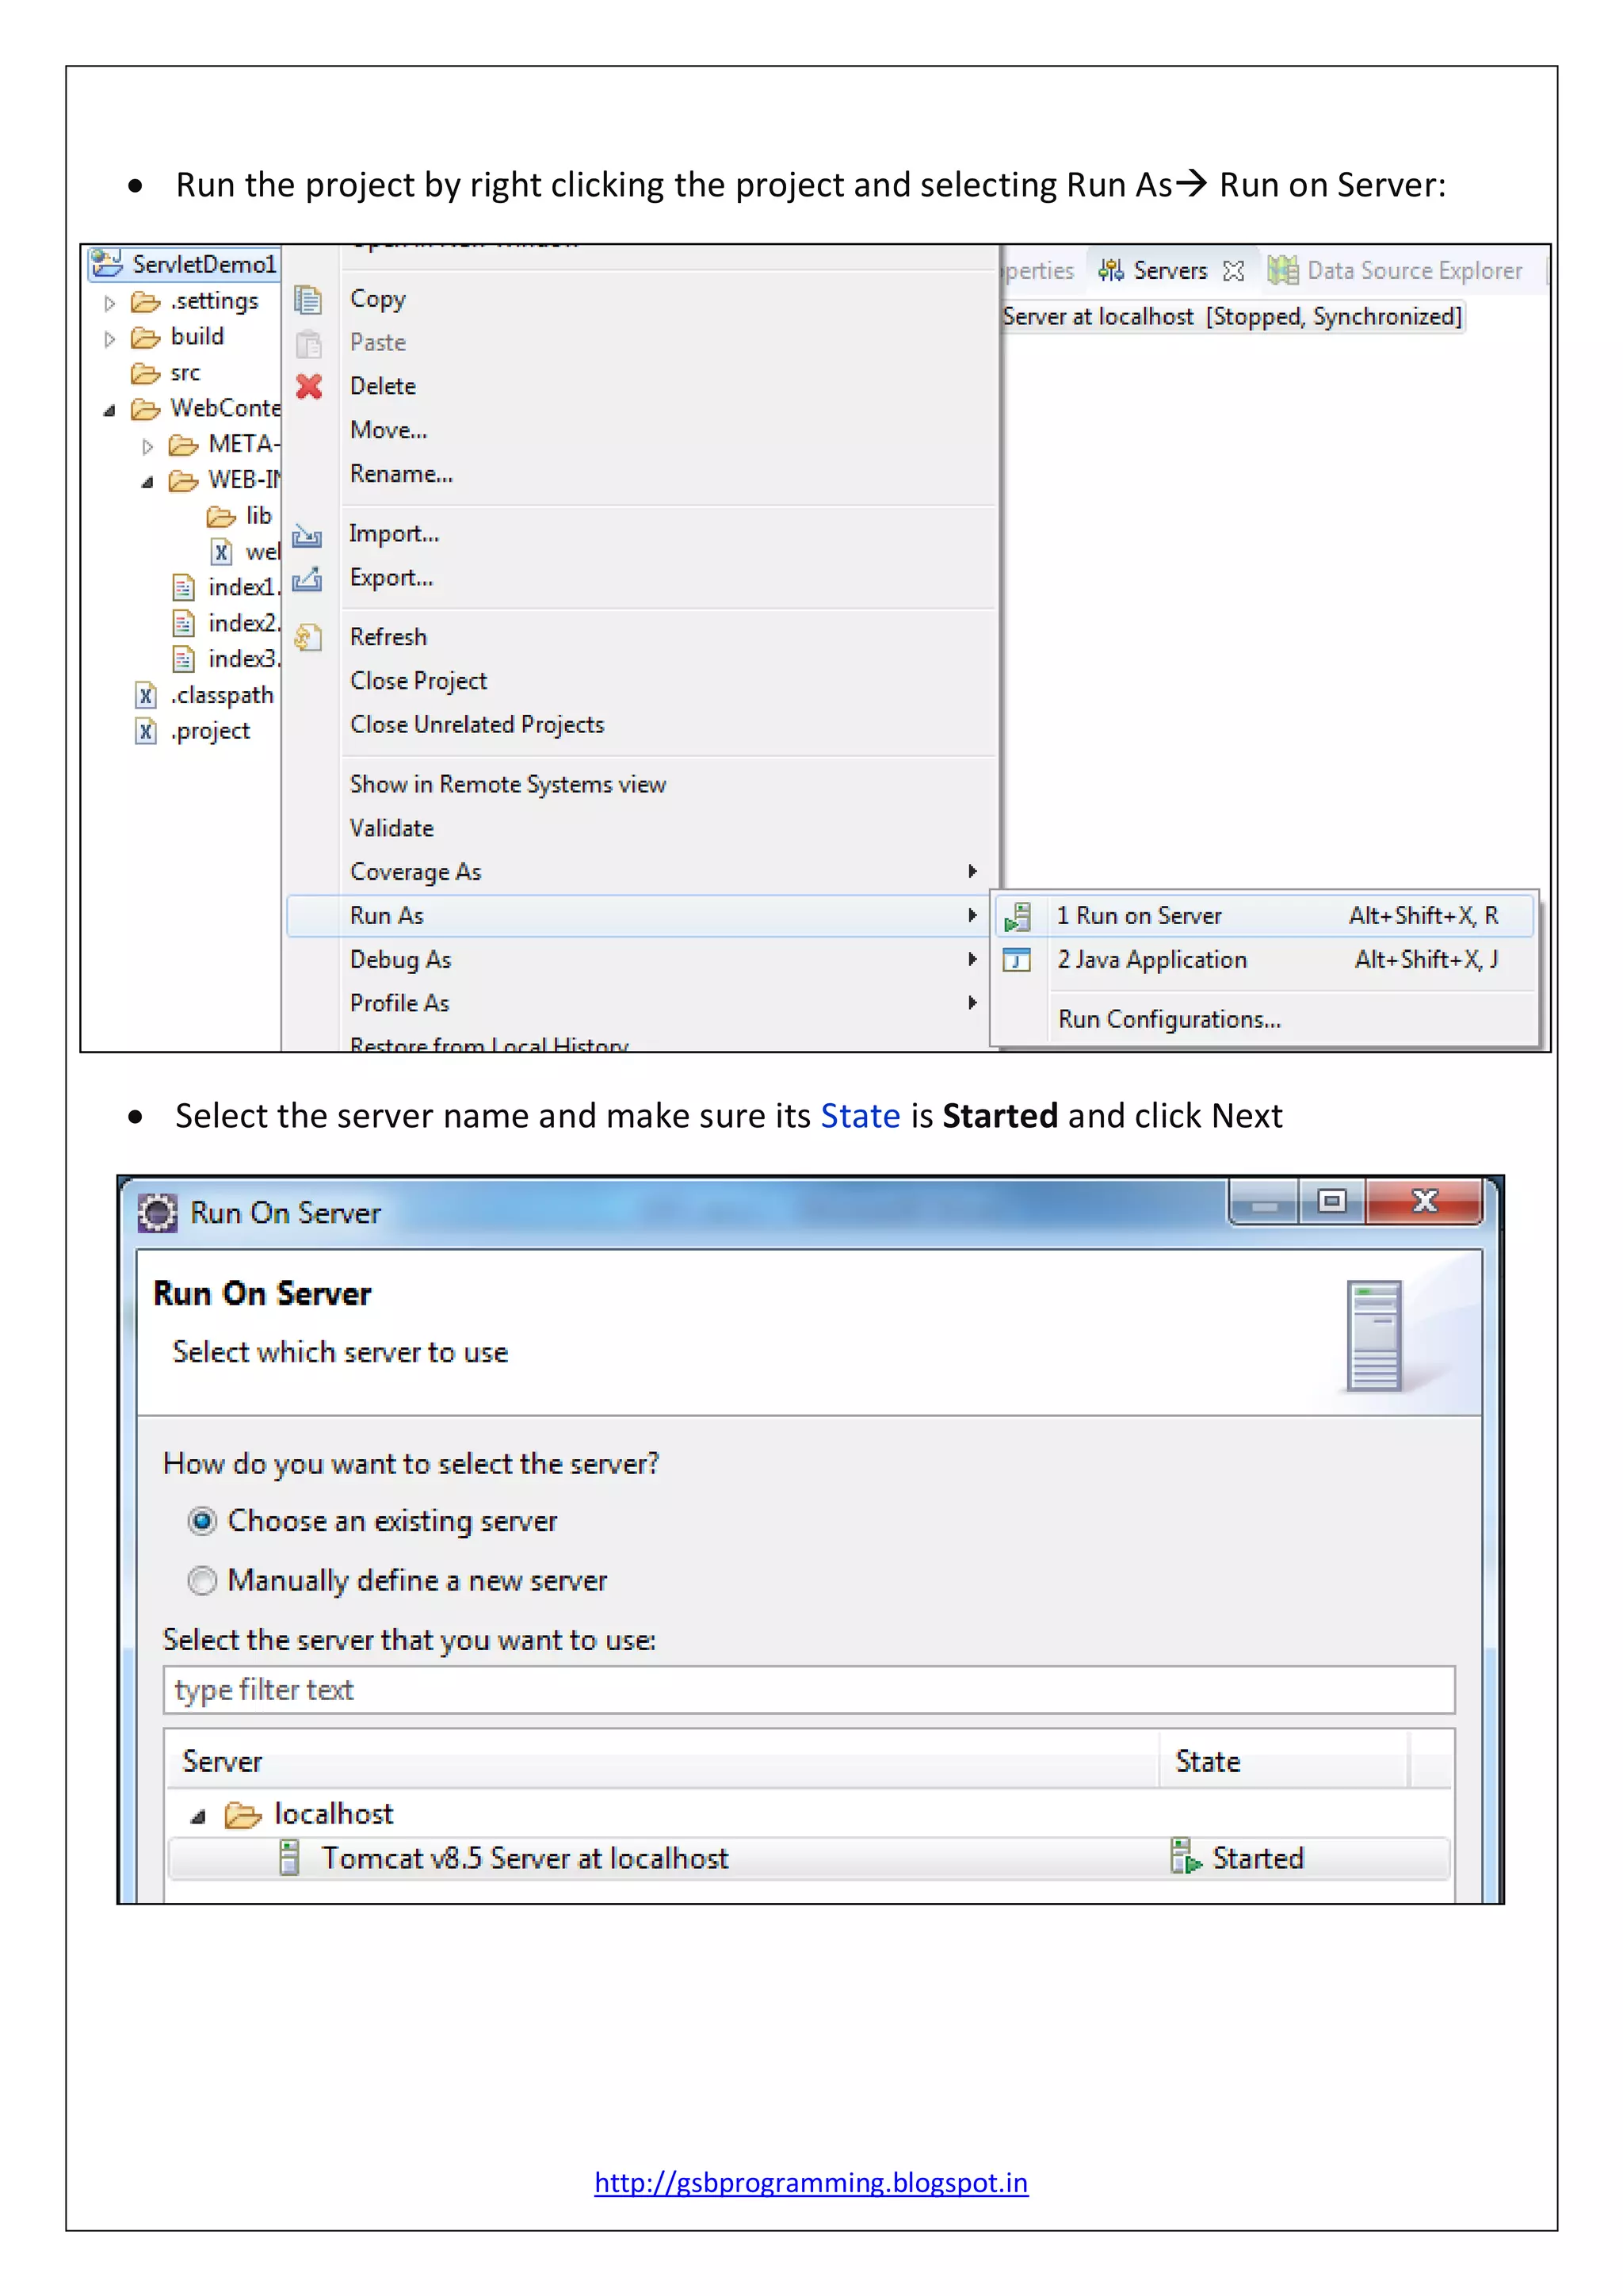
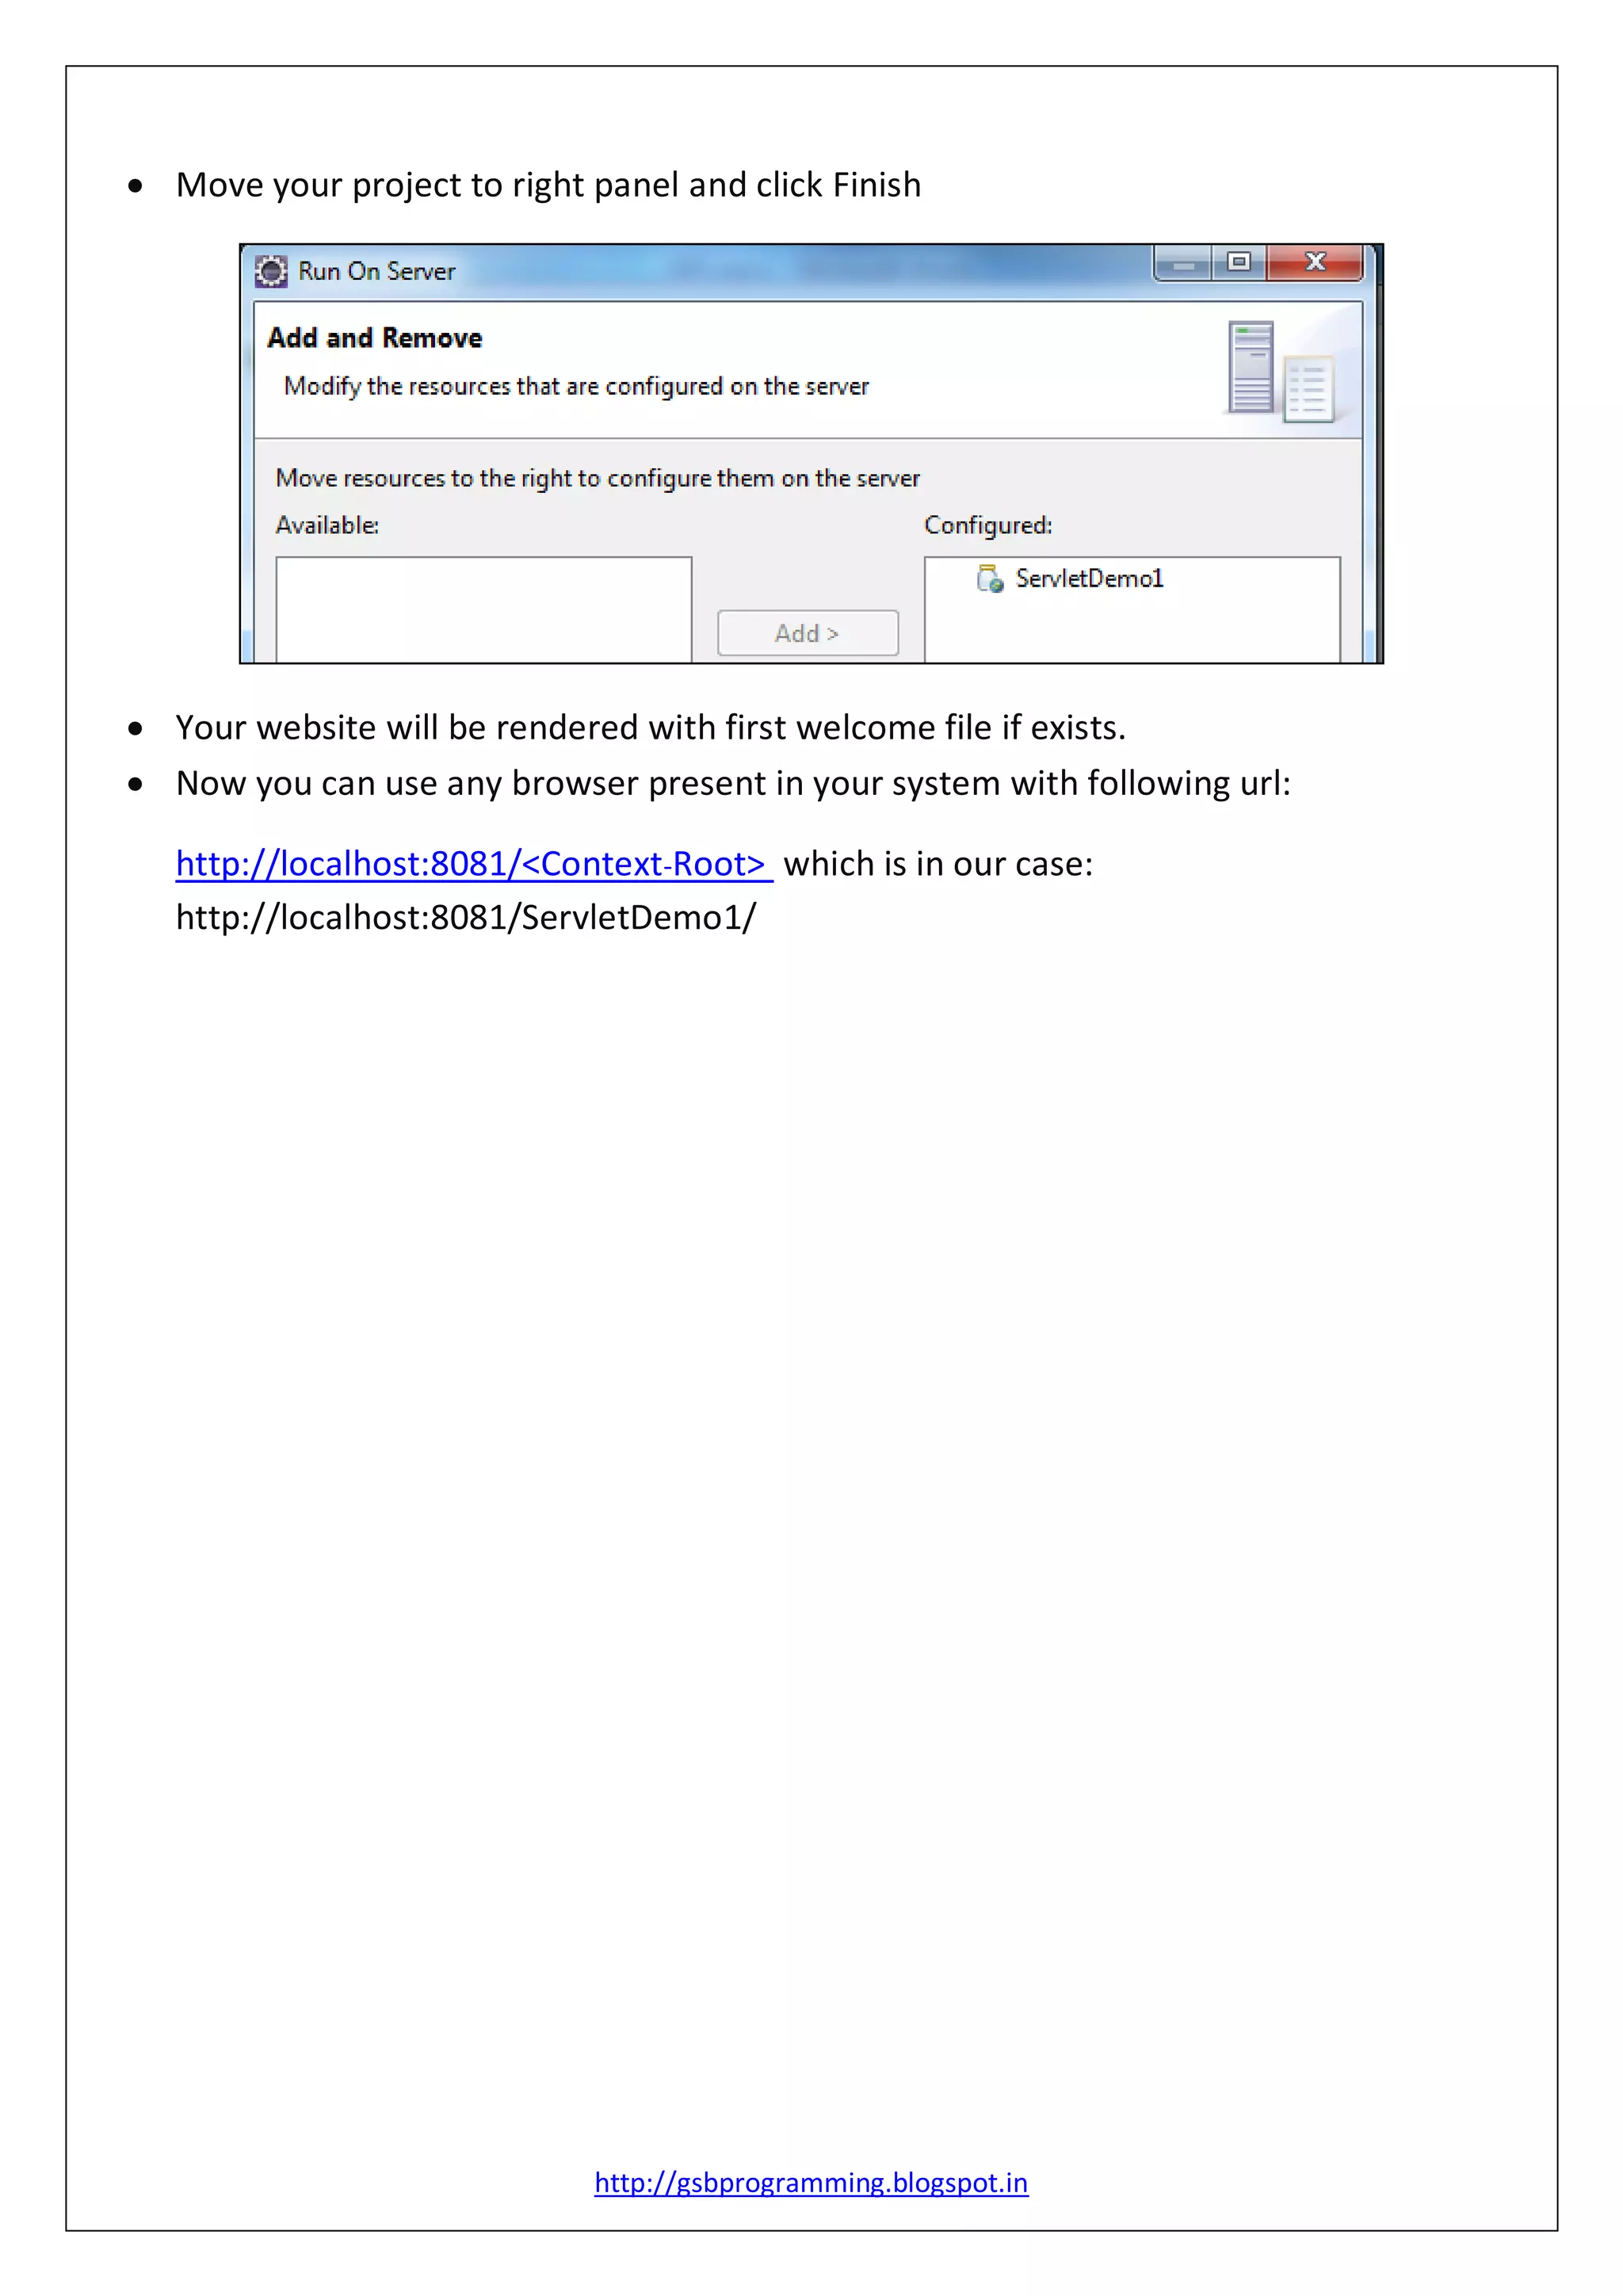

This document provides step-by-step instructions for creating and configuring a dynamic web project in Eclipse IDE. It covers project setup, including generating a web.xml deployment descriptor, setting up welcome files, and running the project on a server. The instructions conclude with guidance on accessing the website via a local URL.


