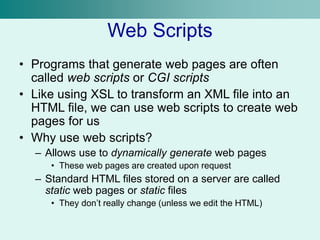
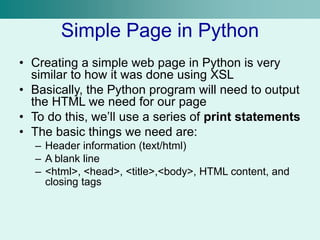
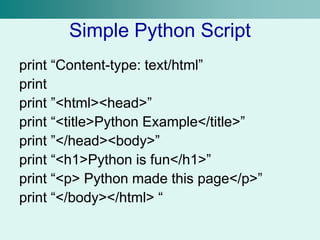
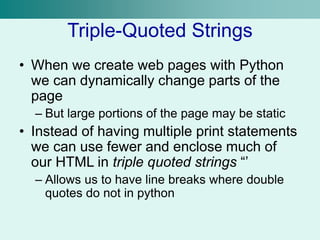
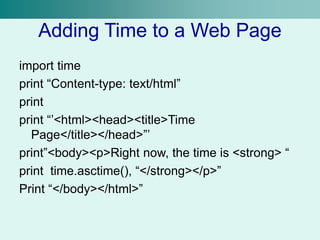
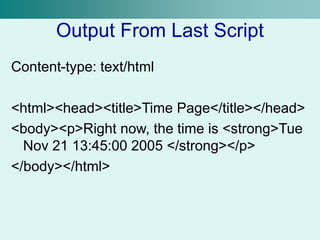
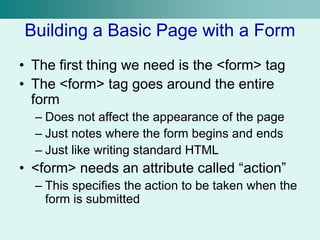
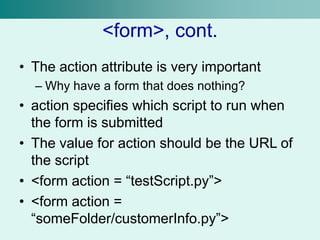
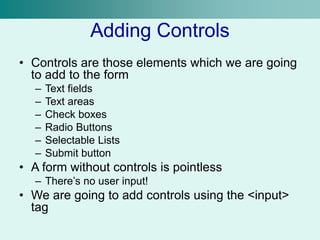
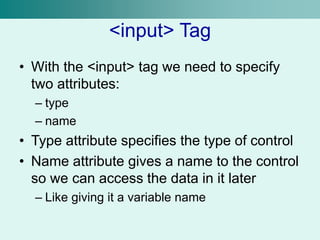
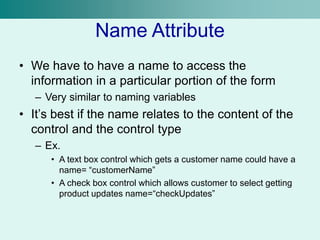
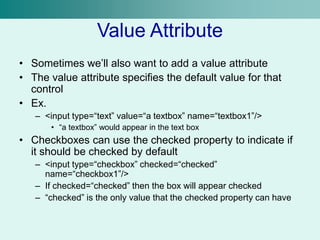
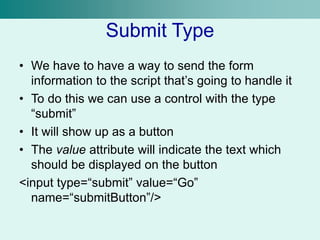
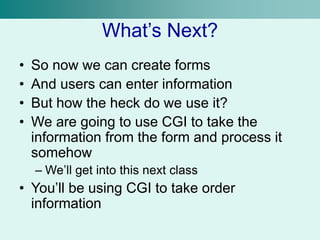
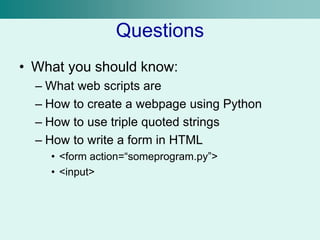
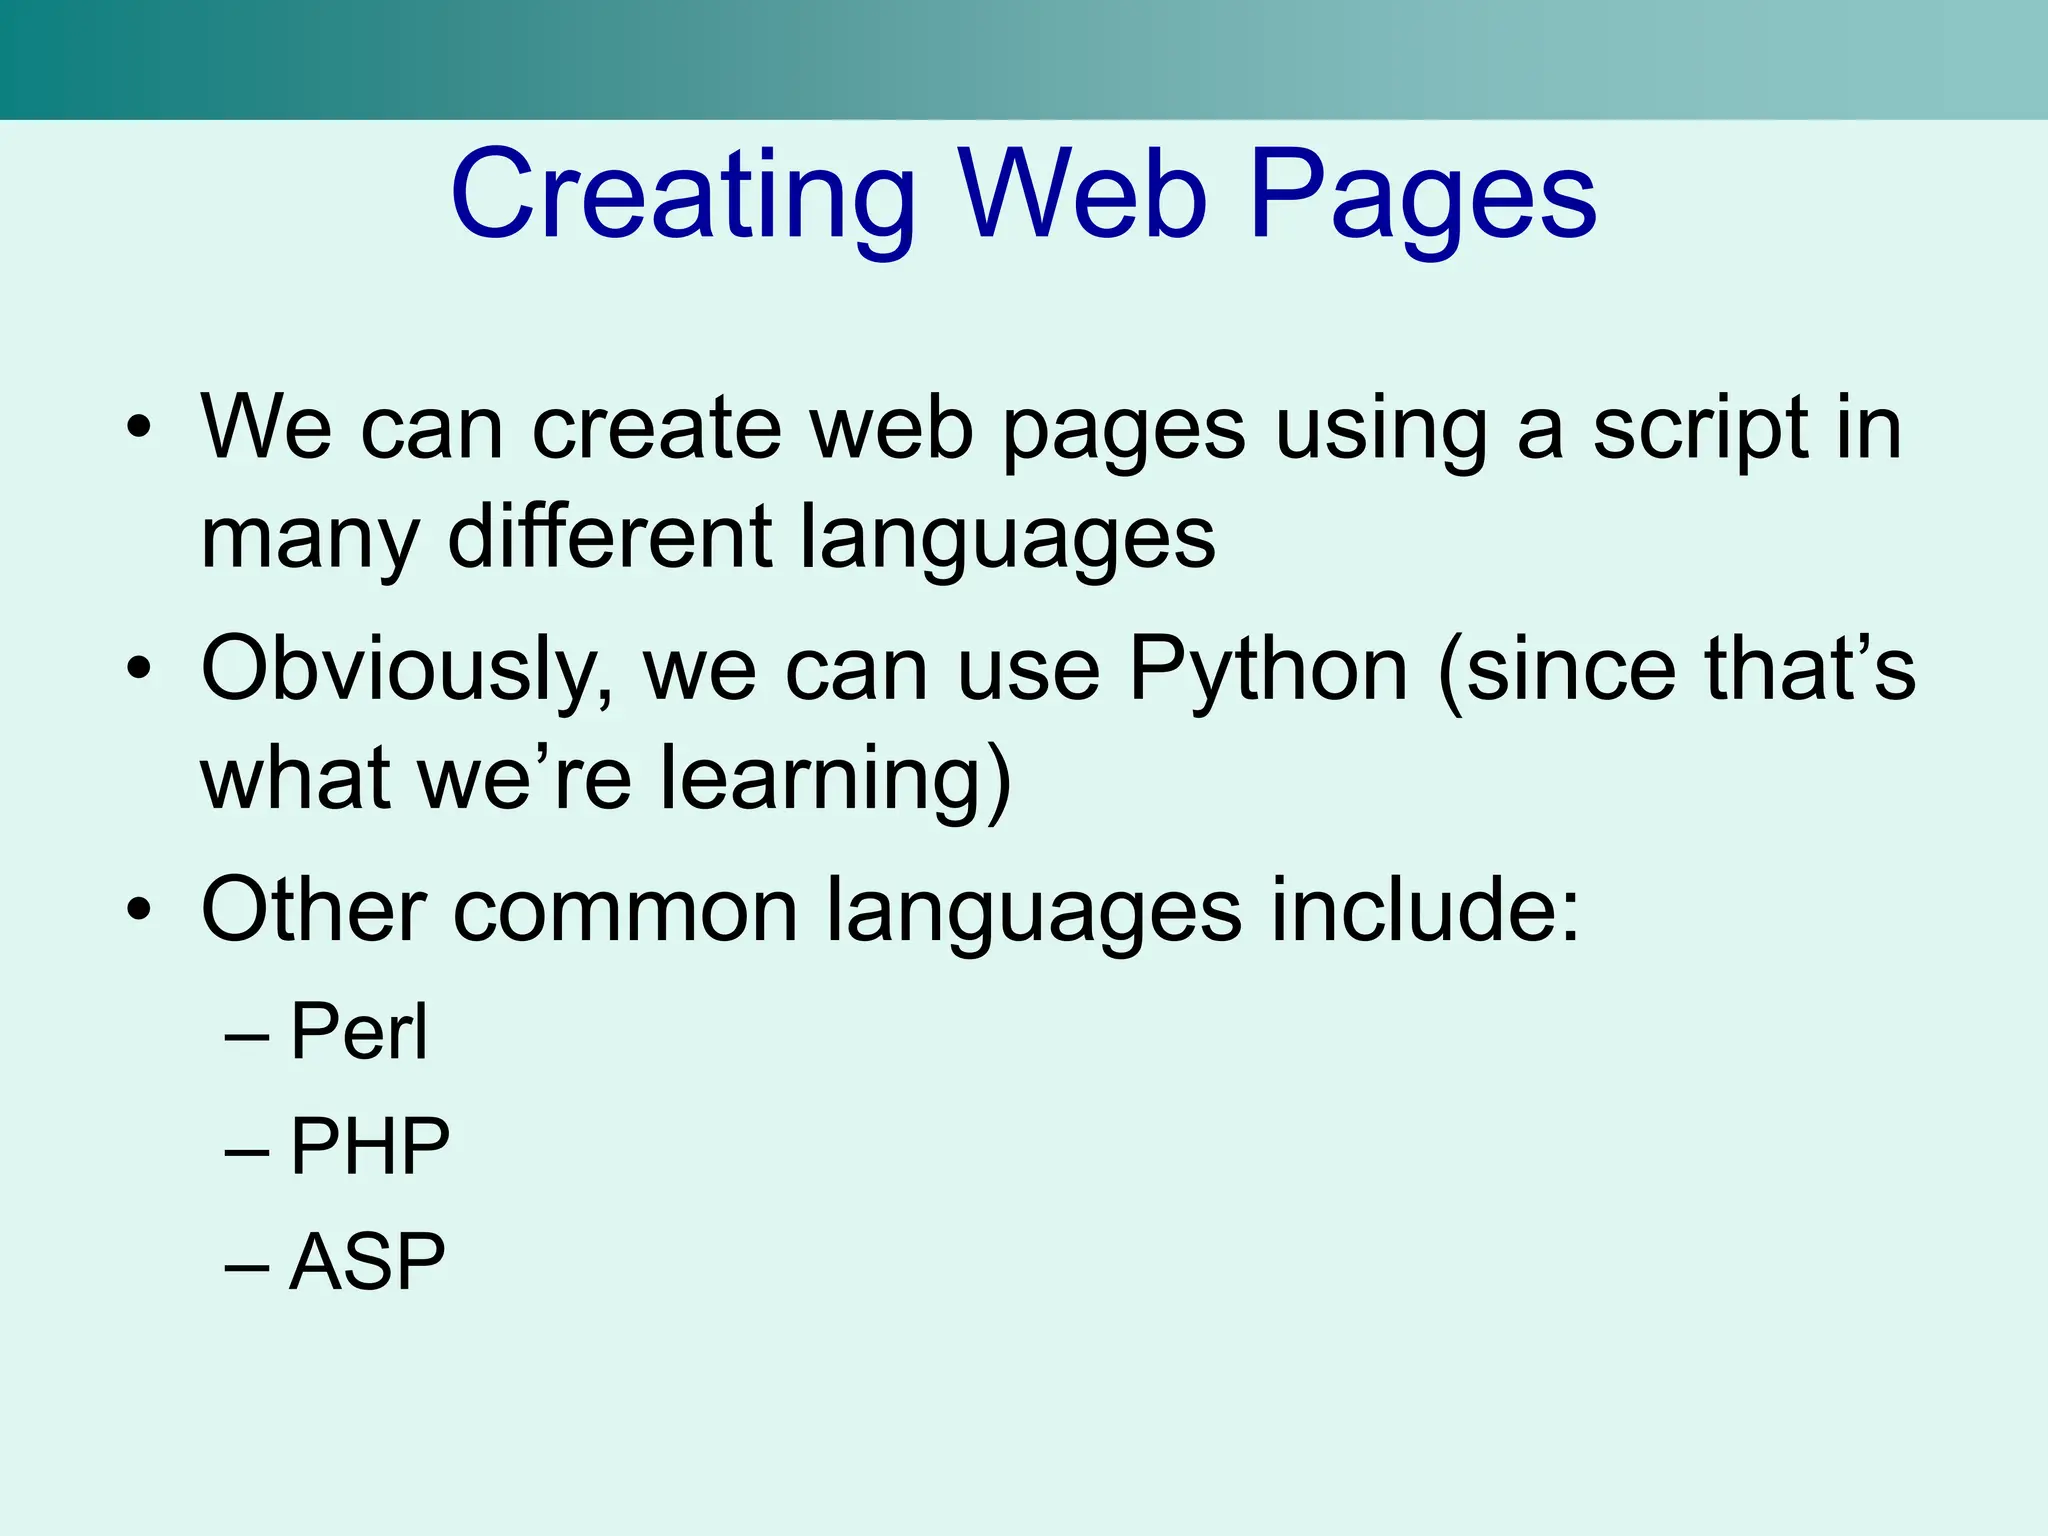
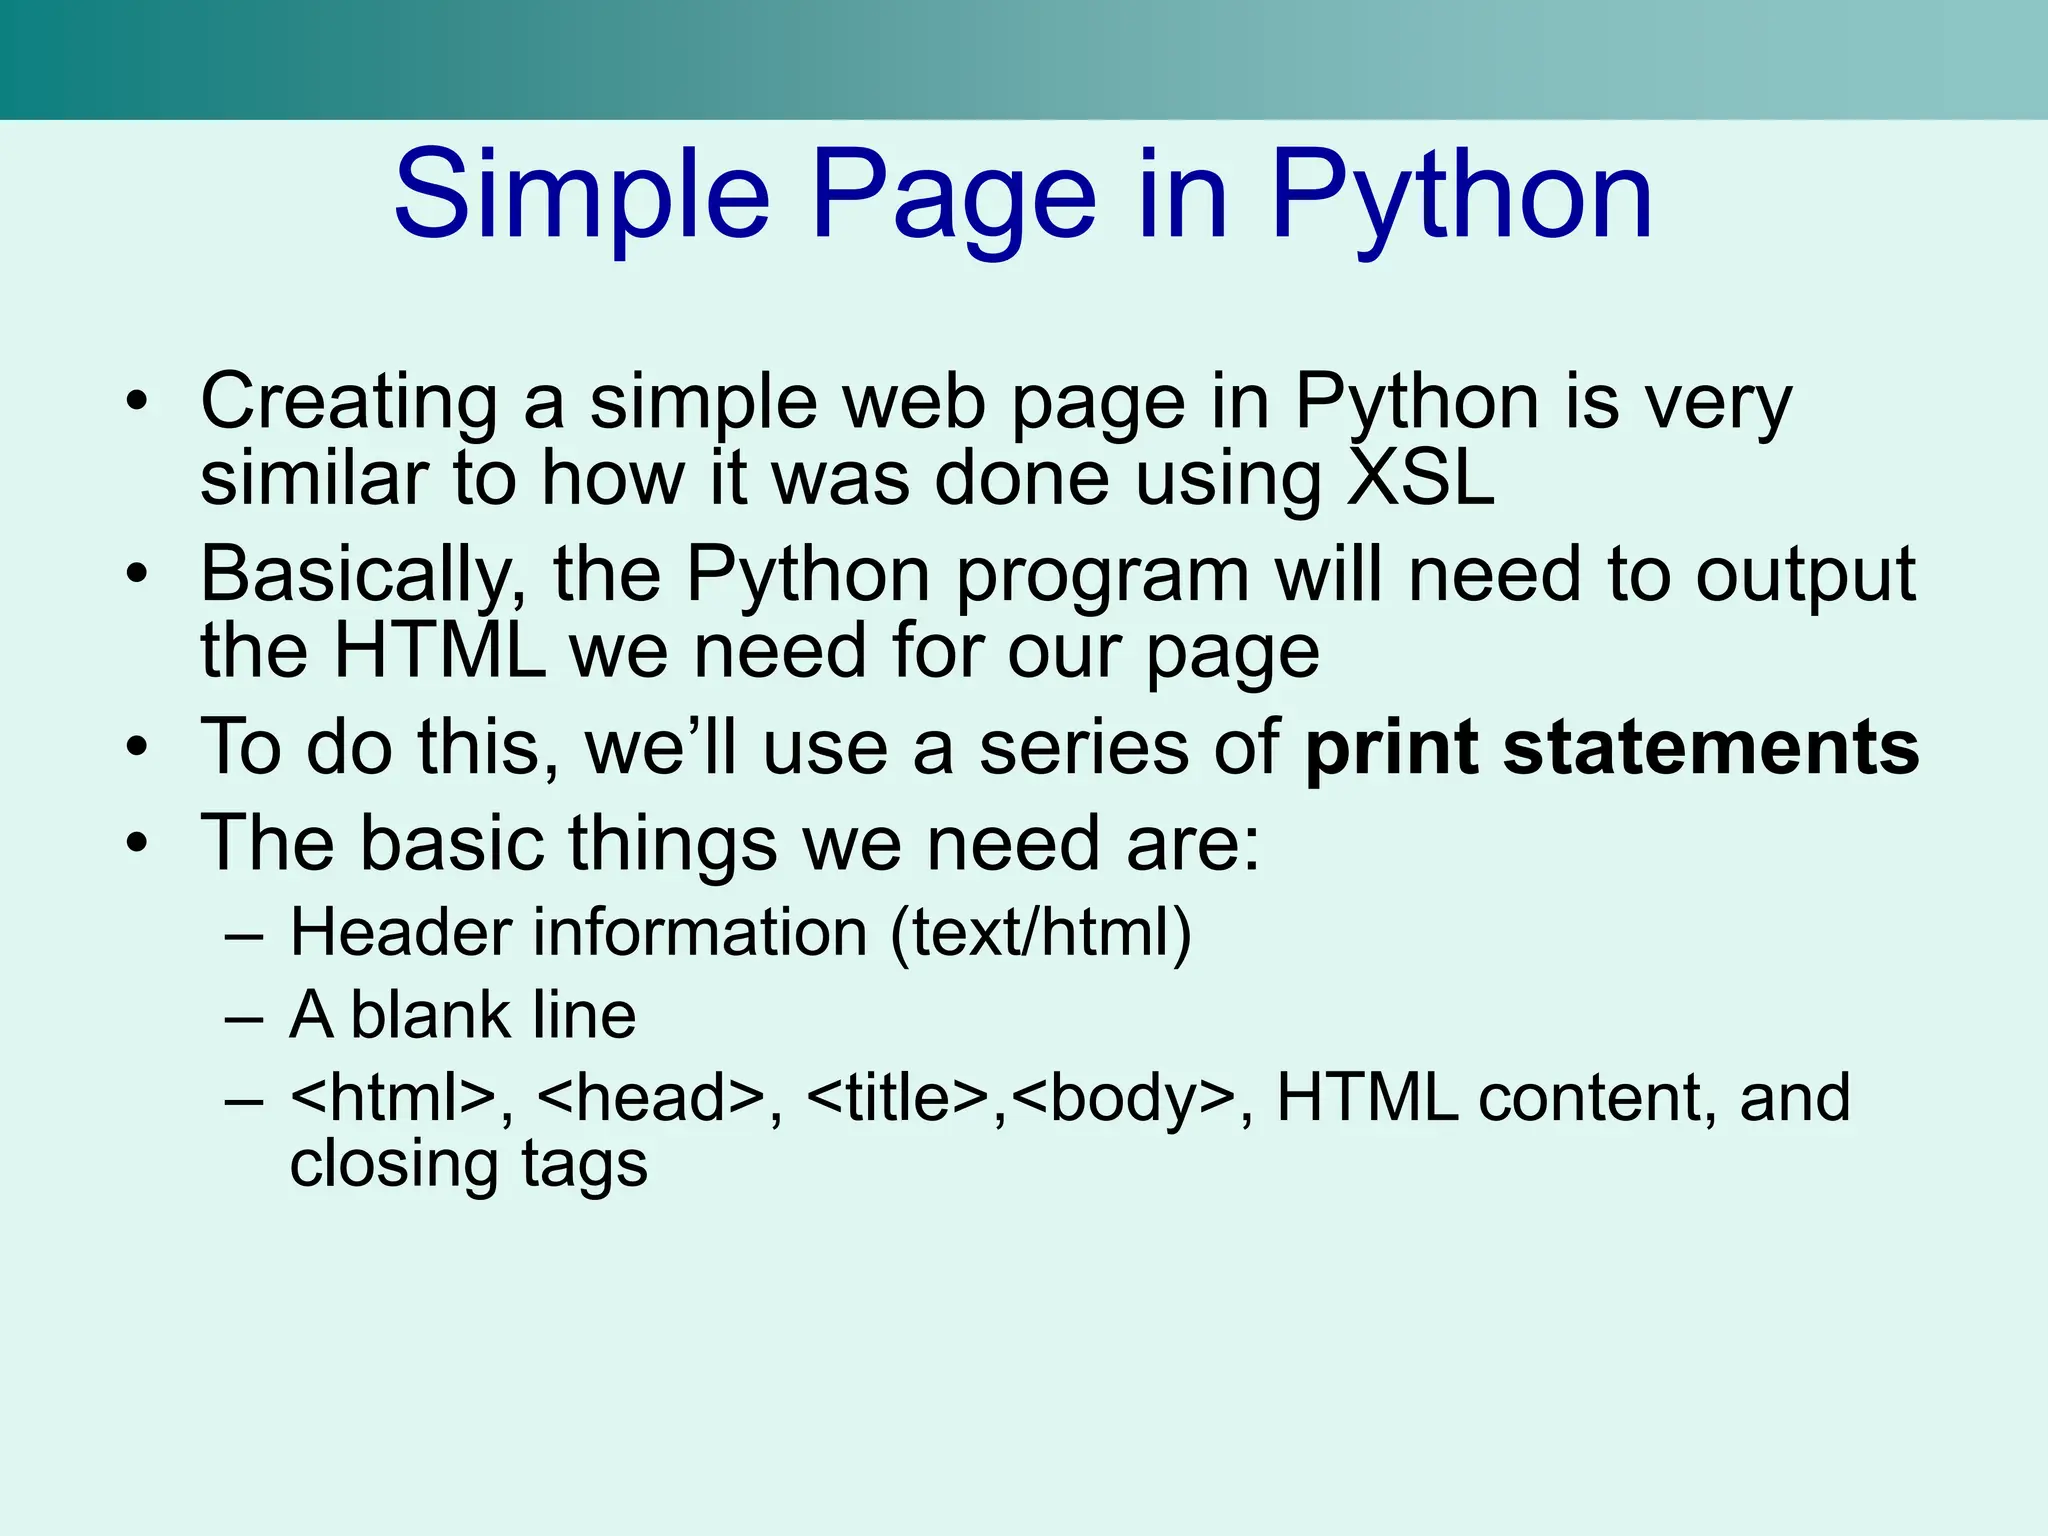
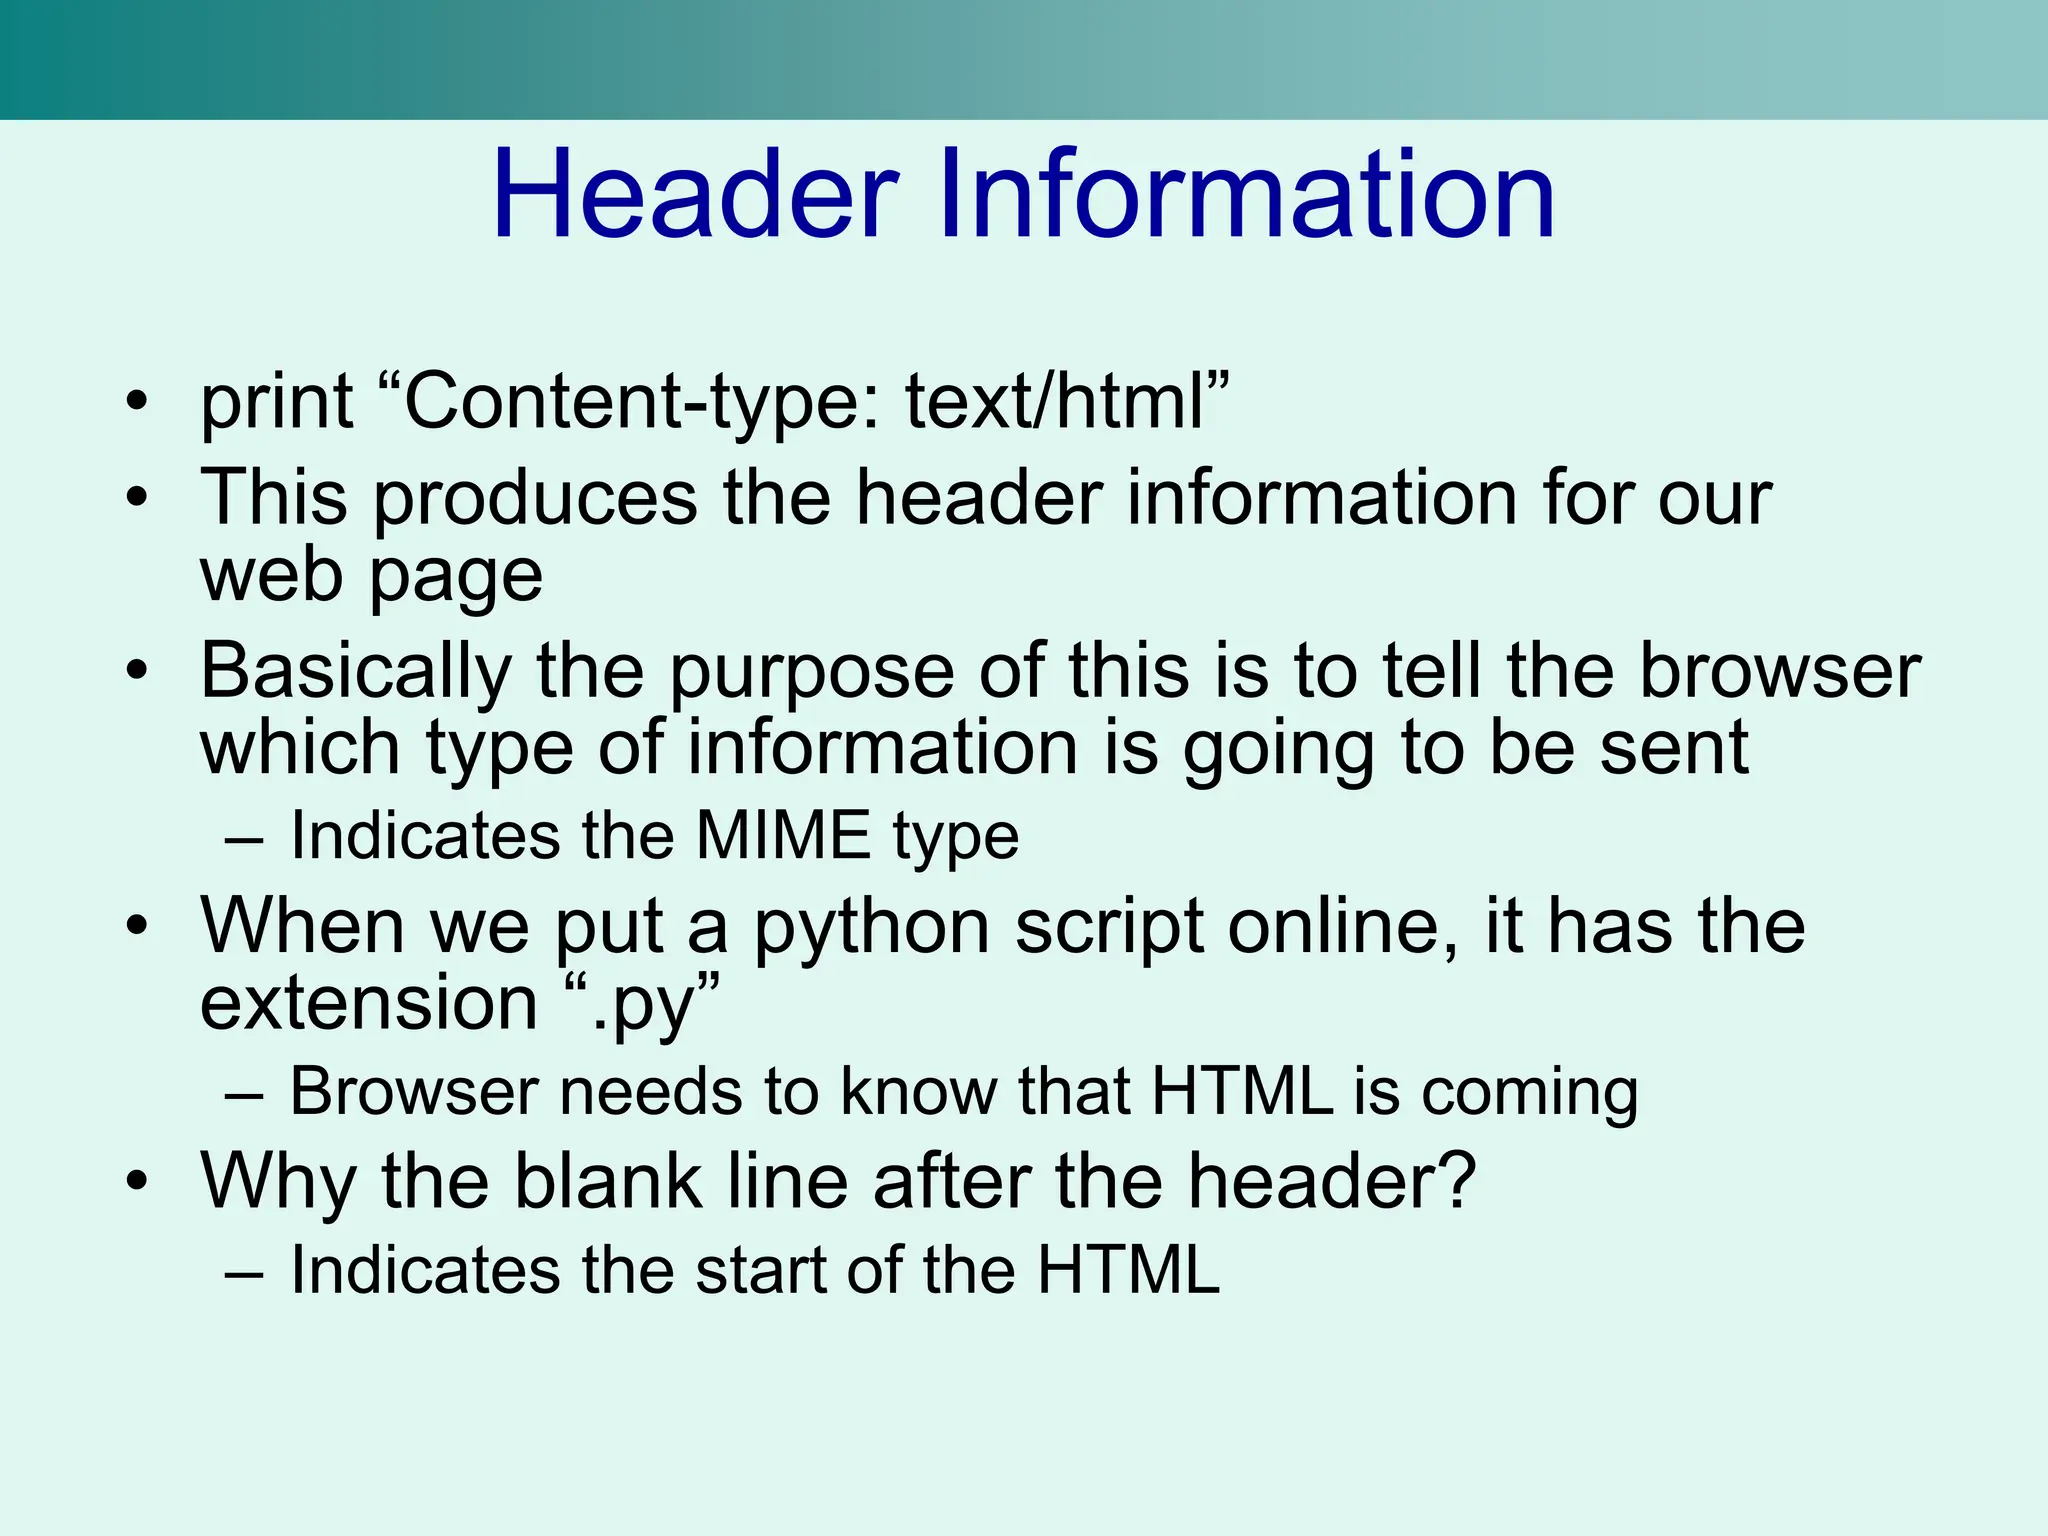
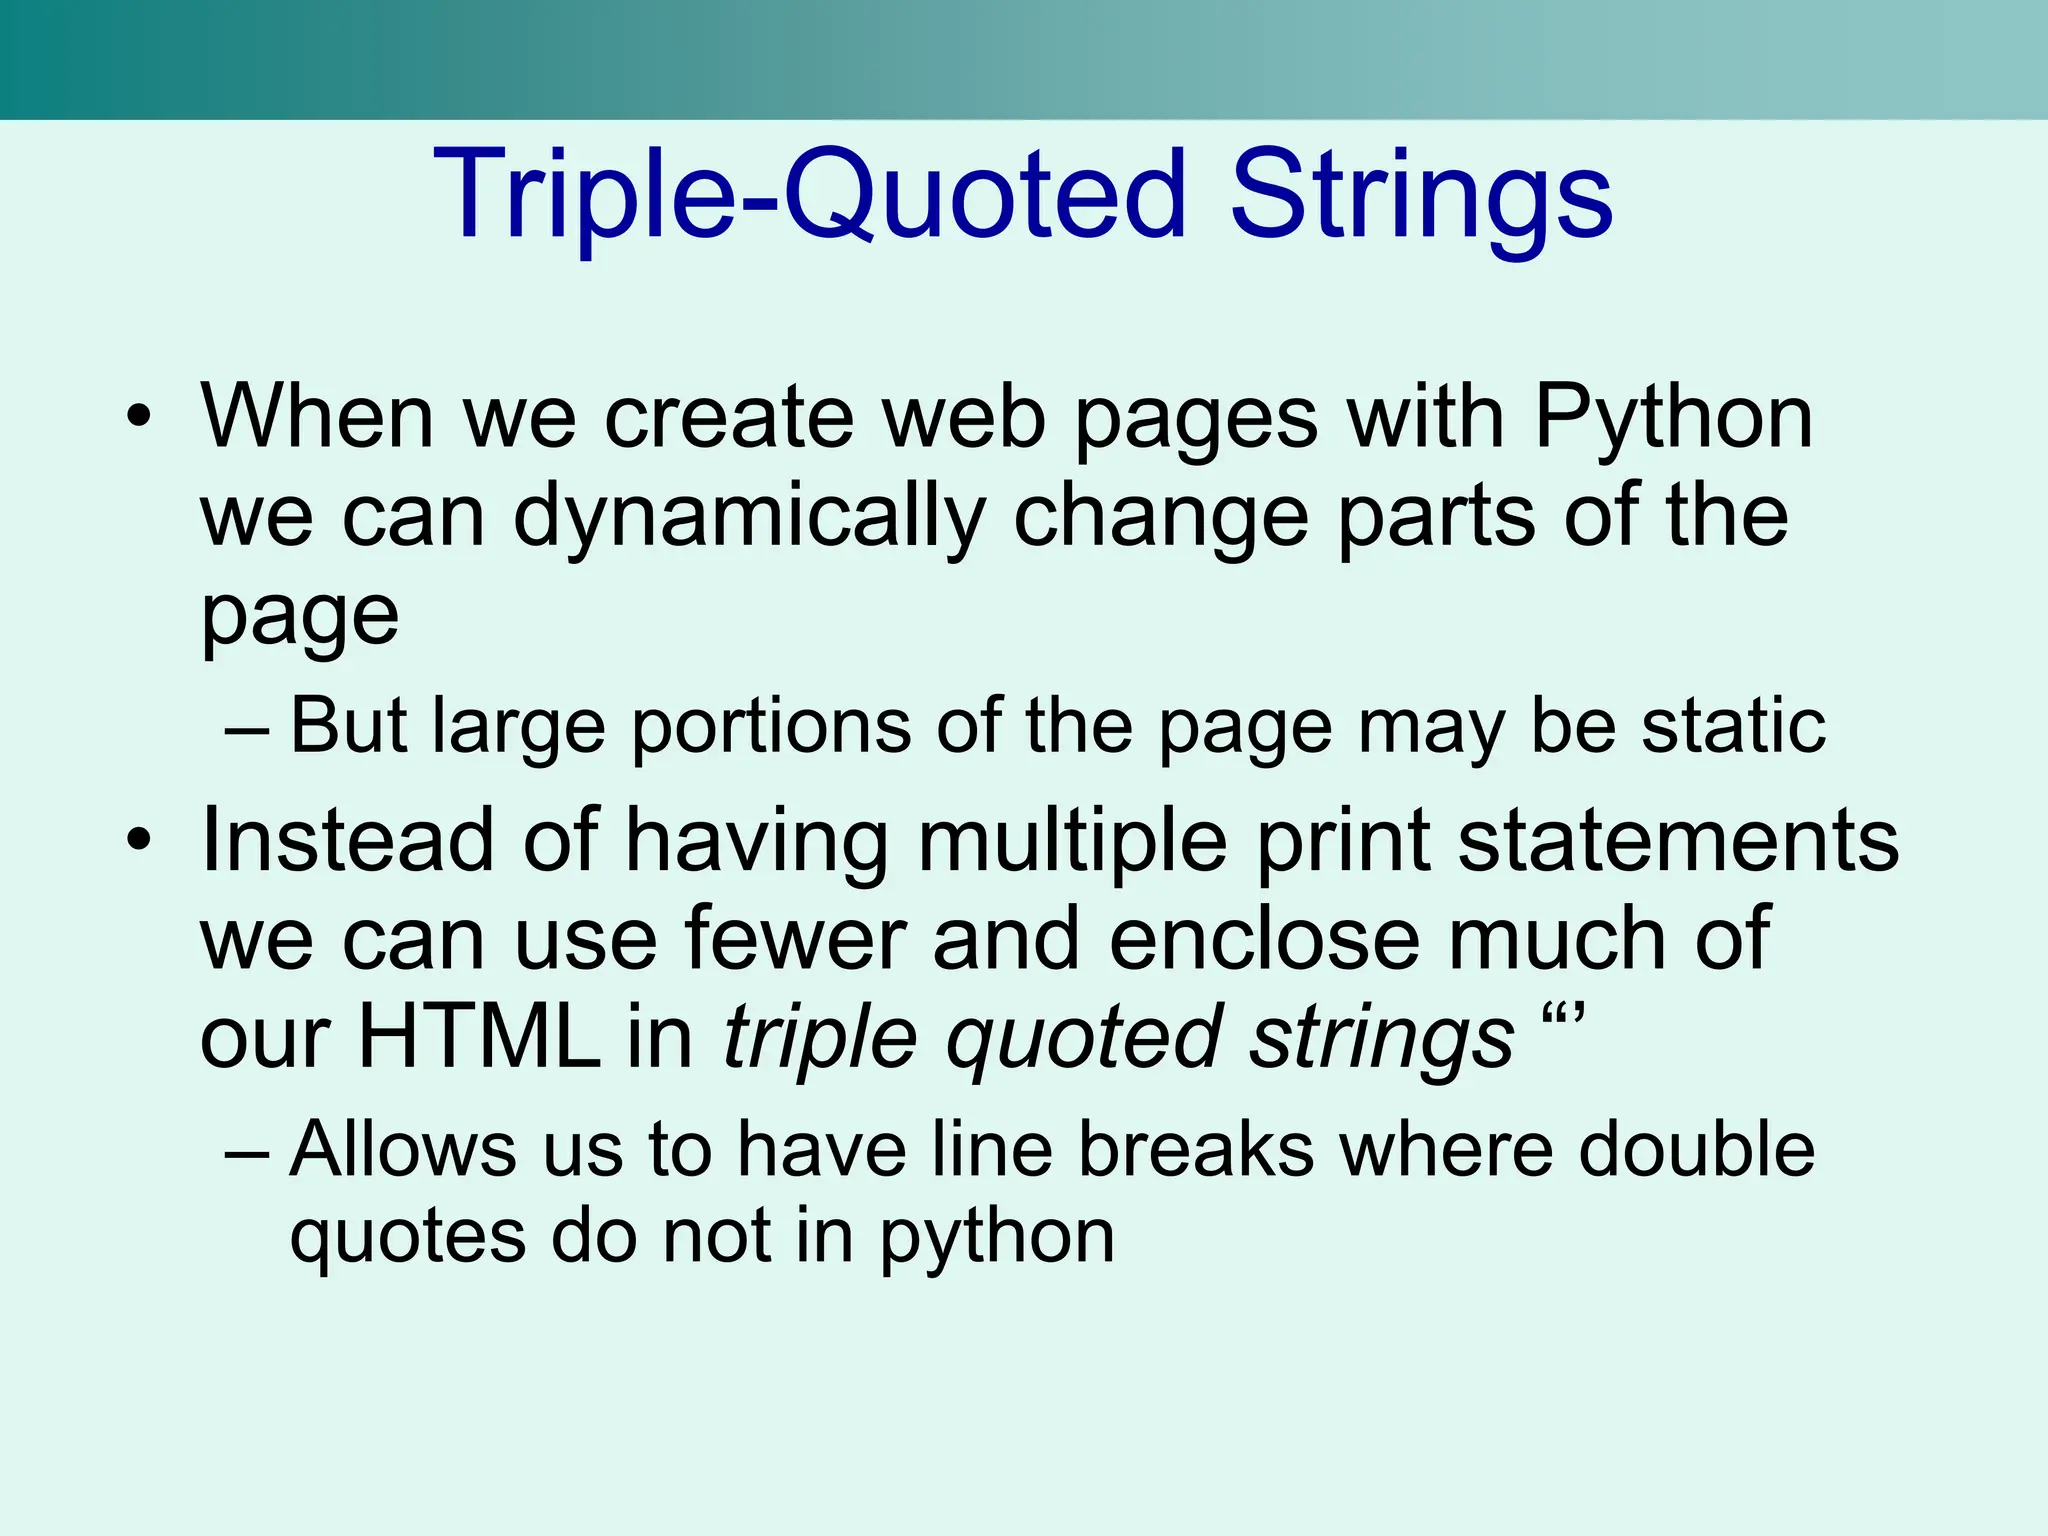
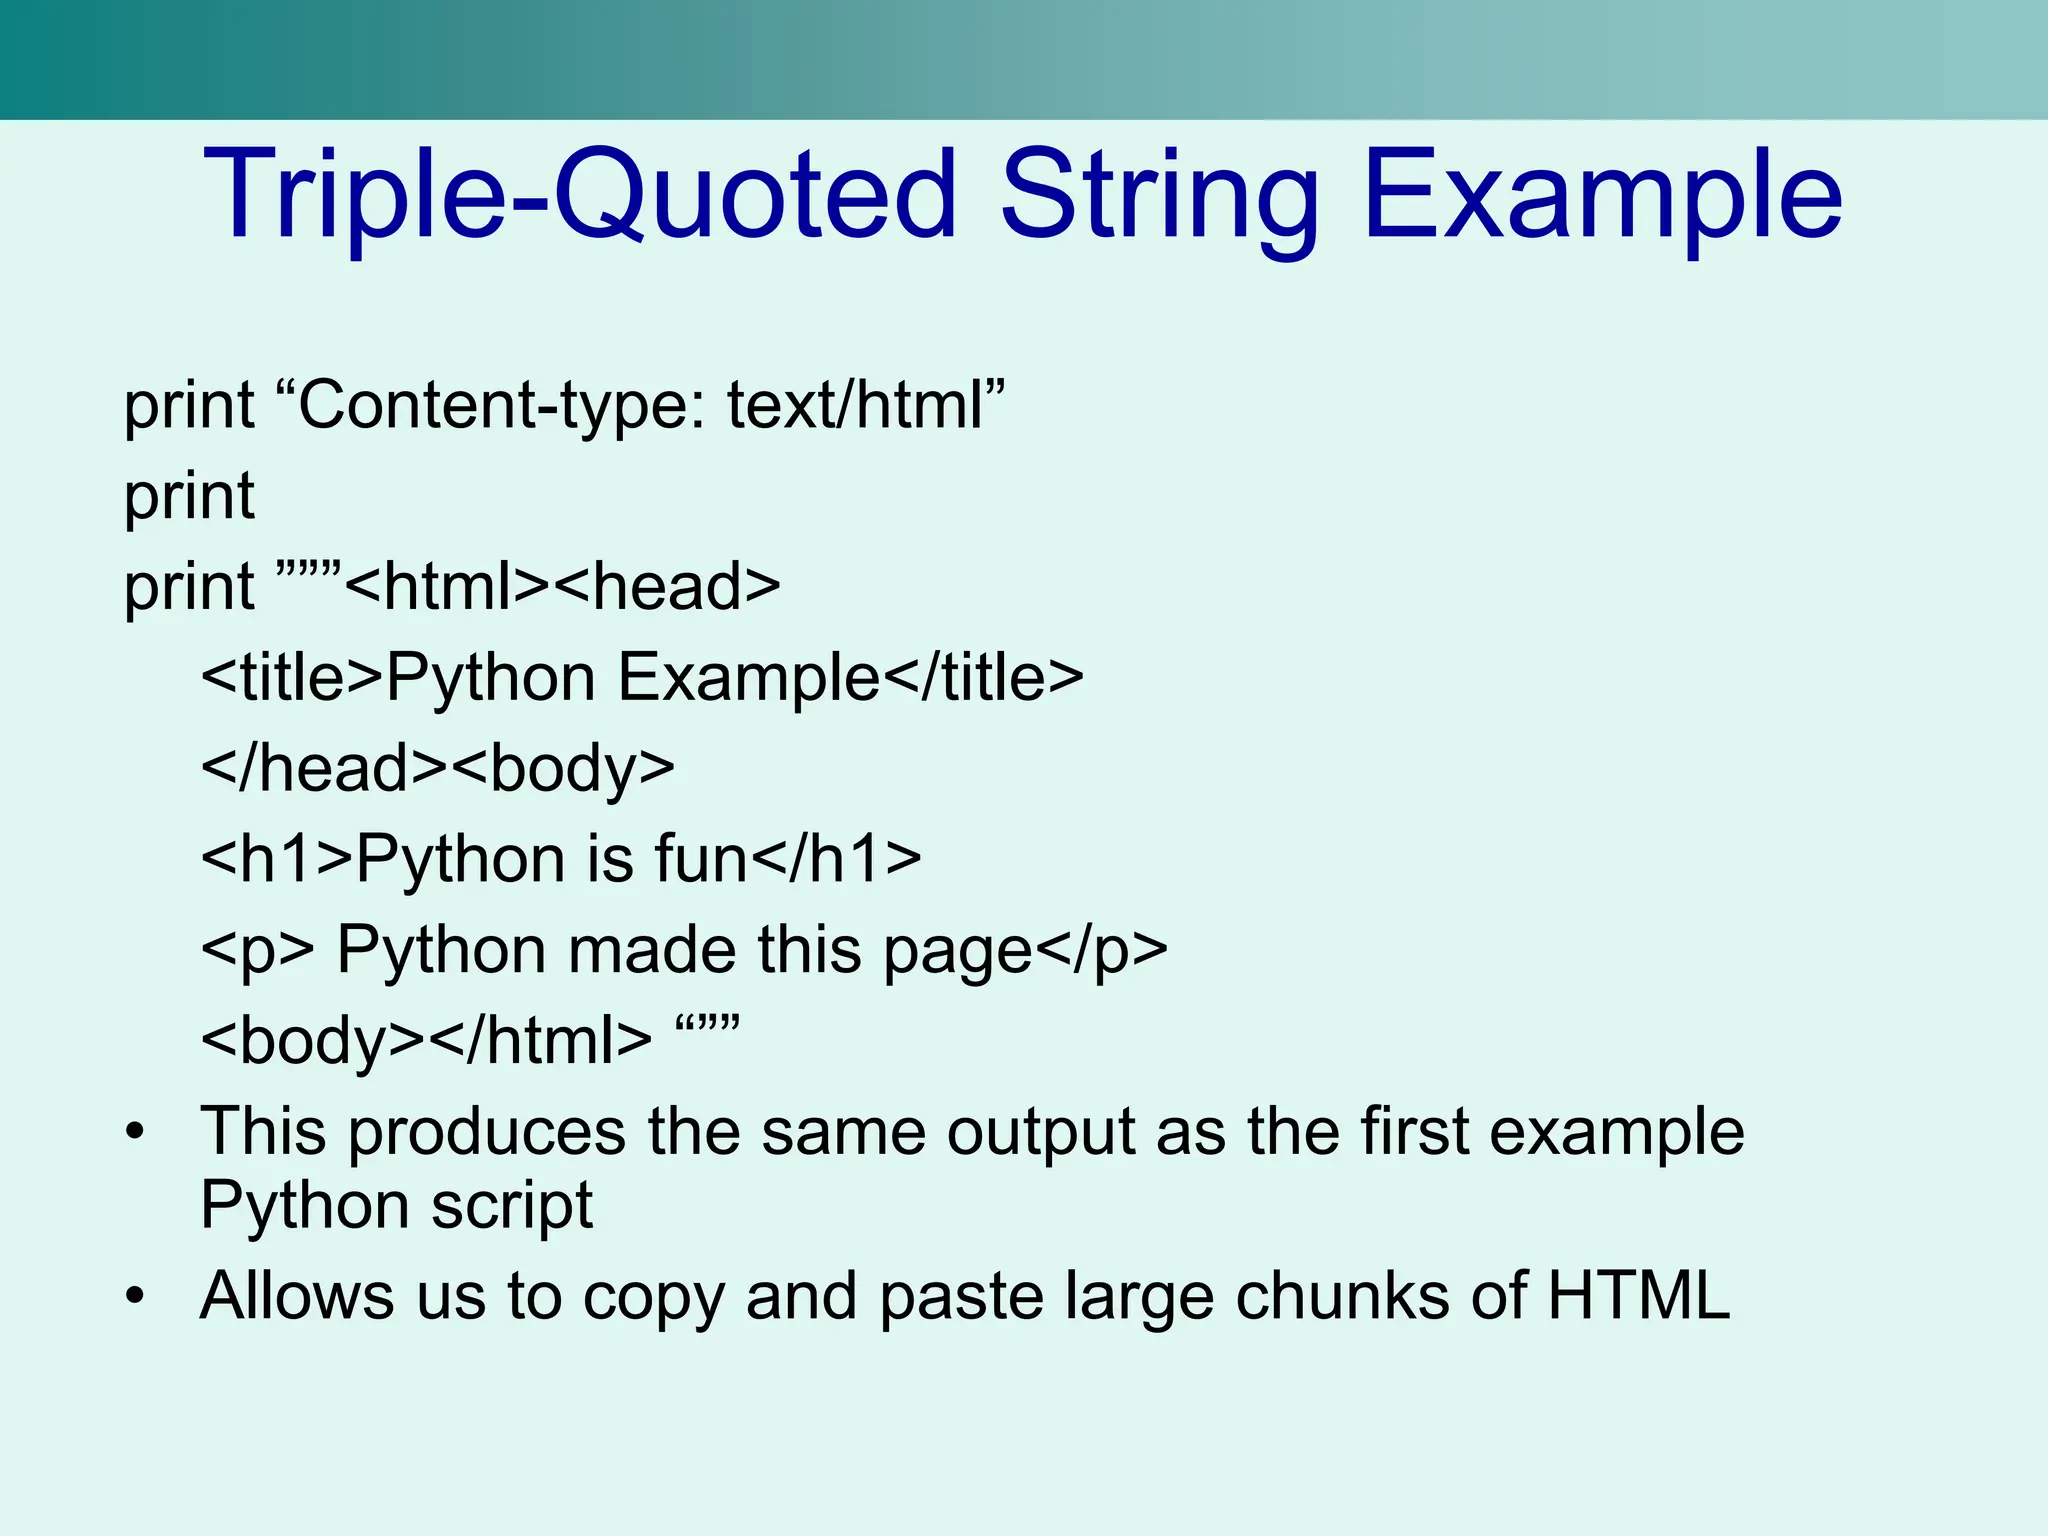
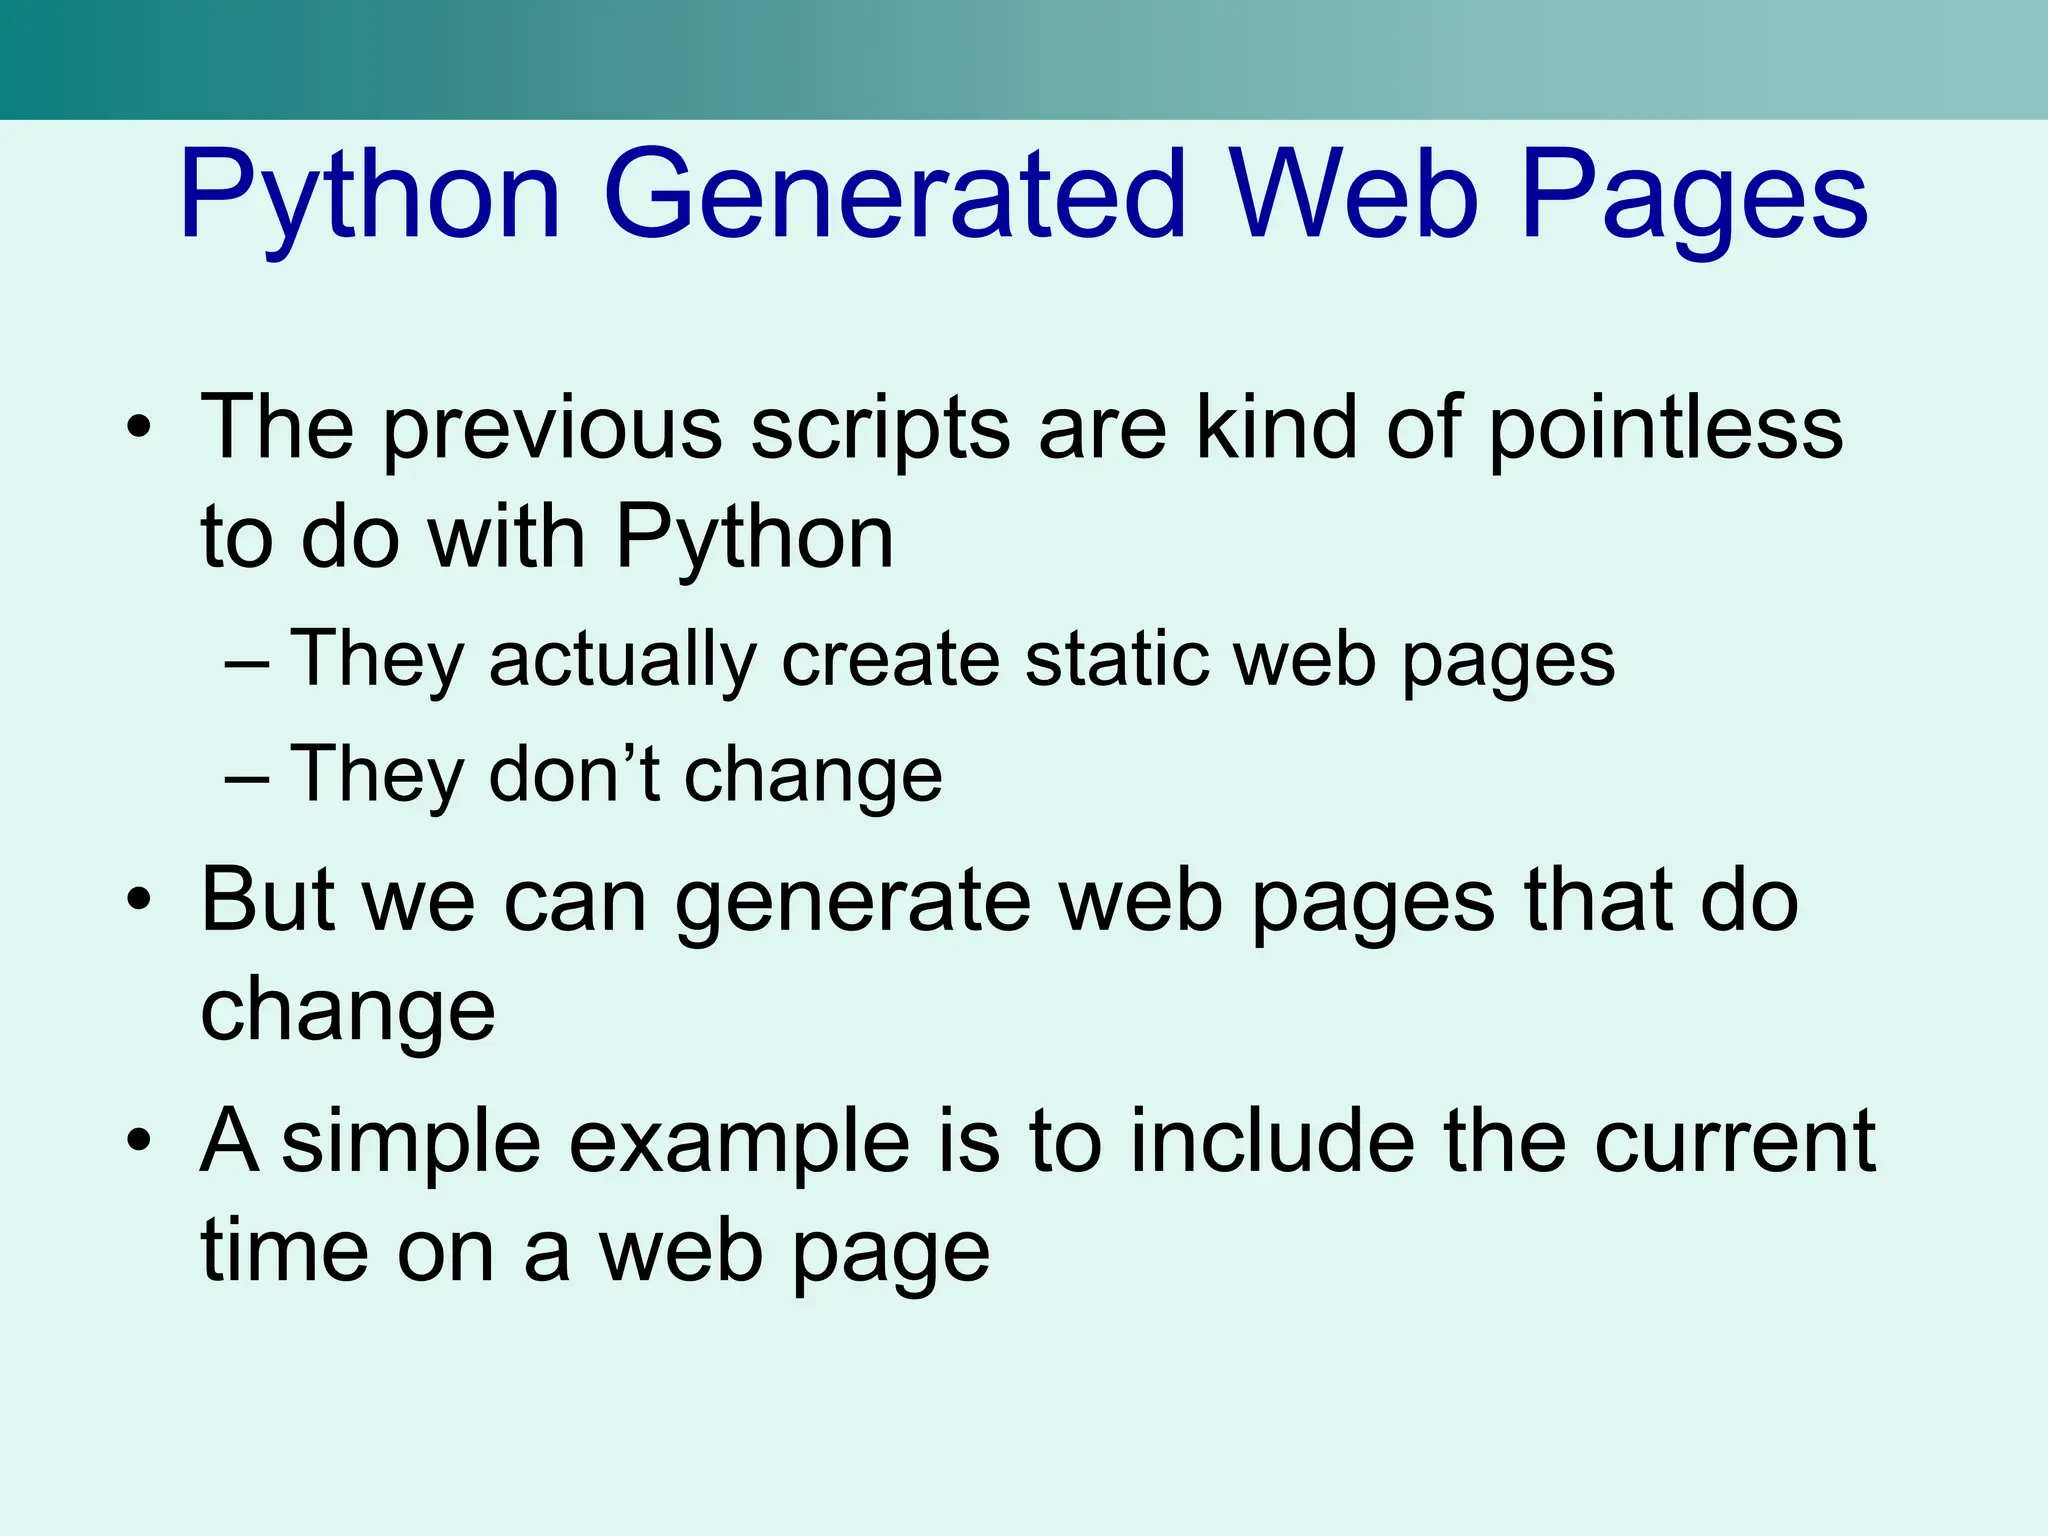
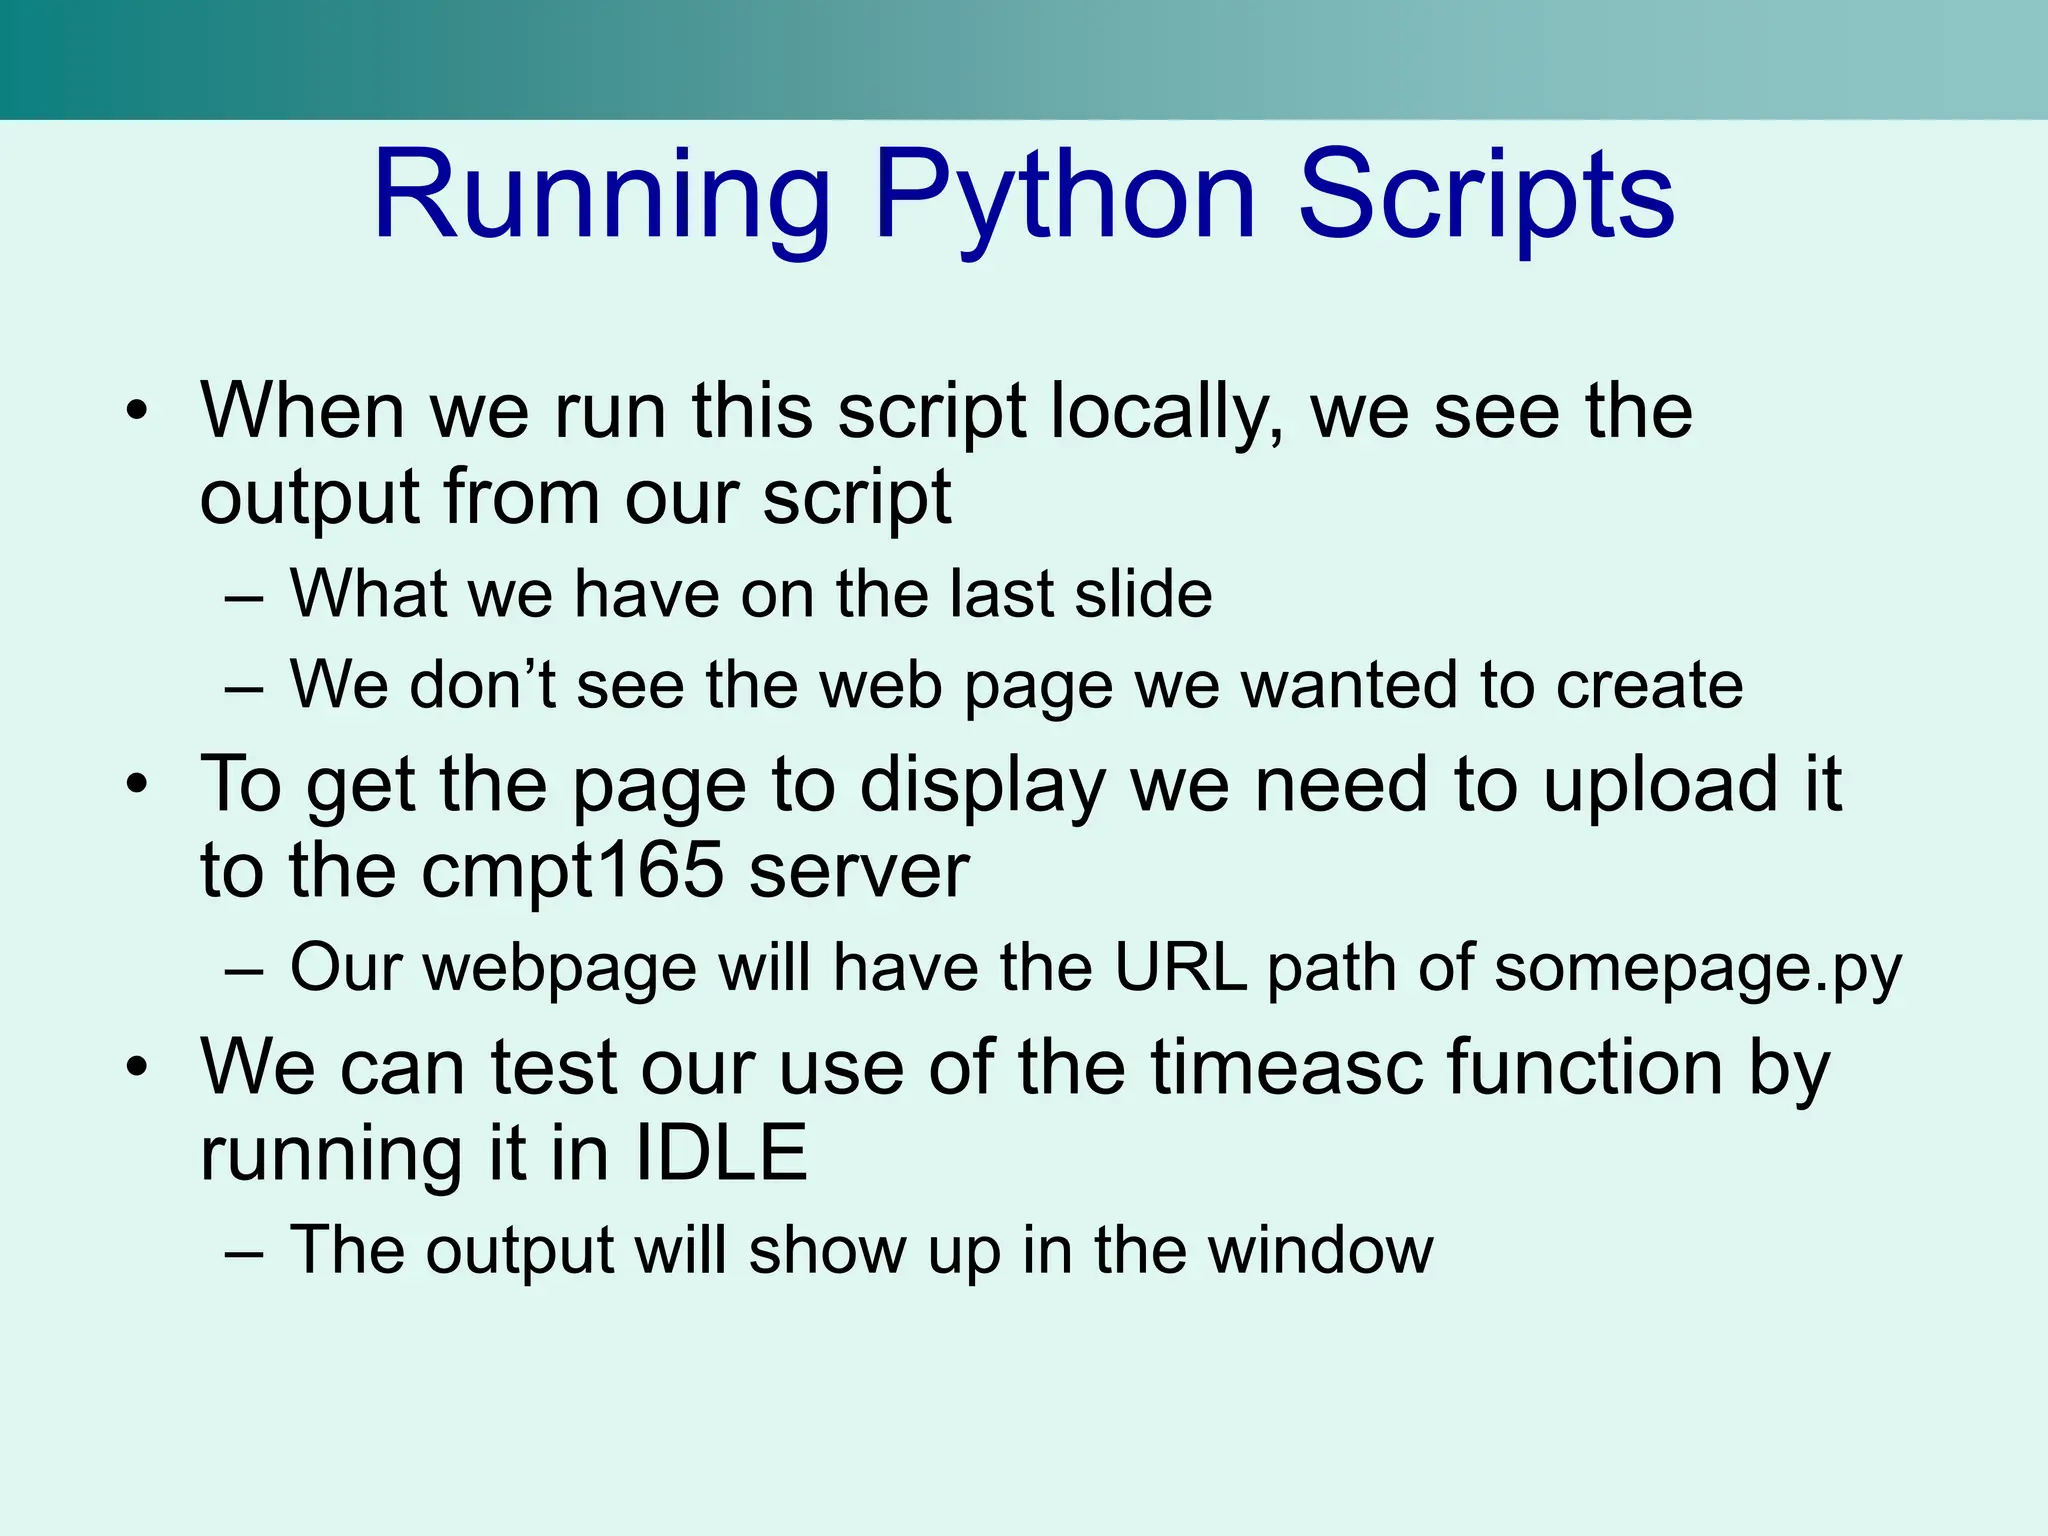
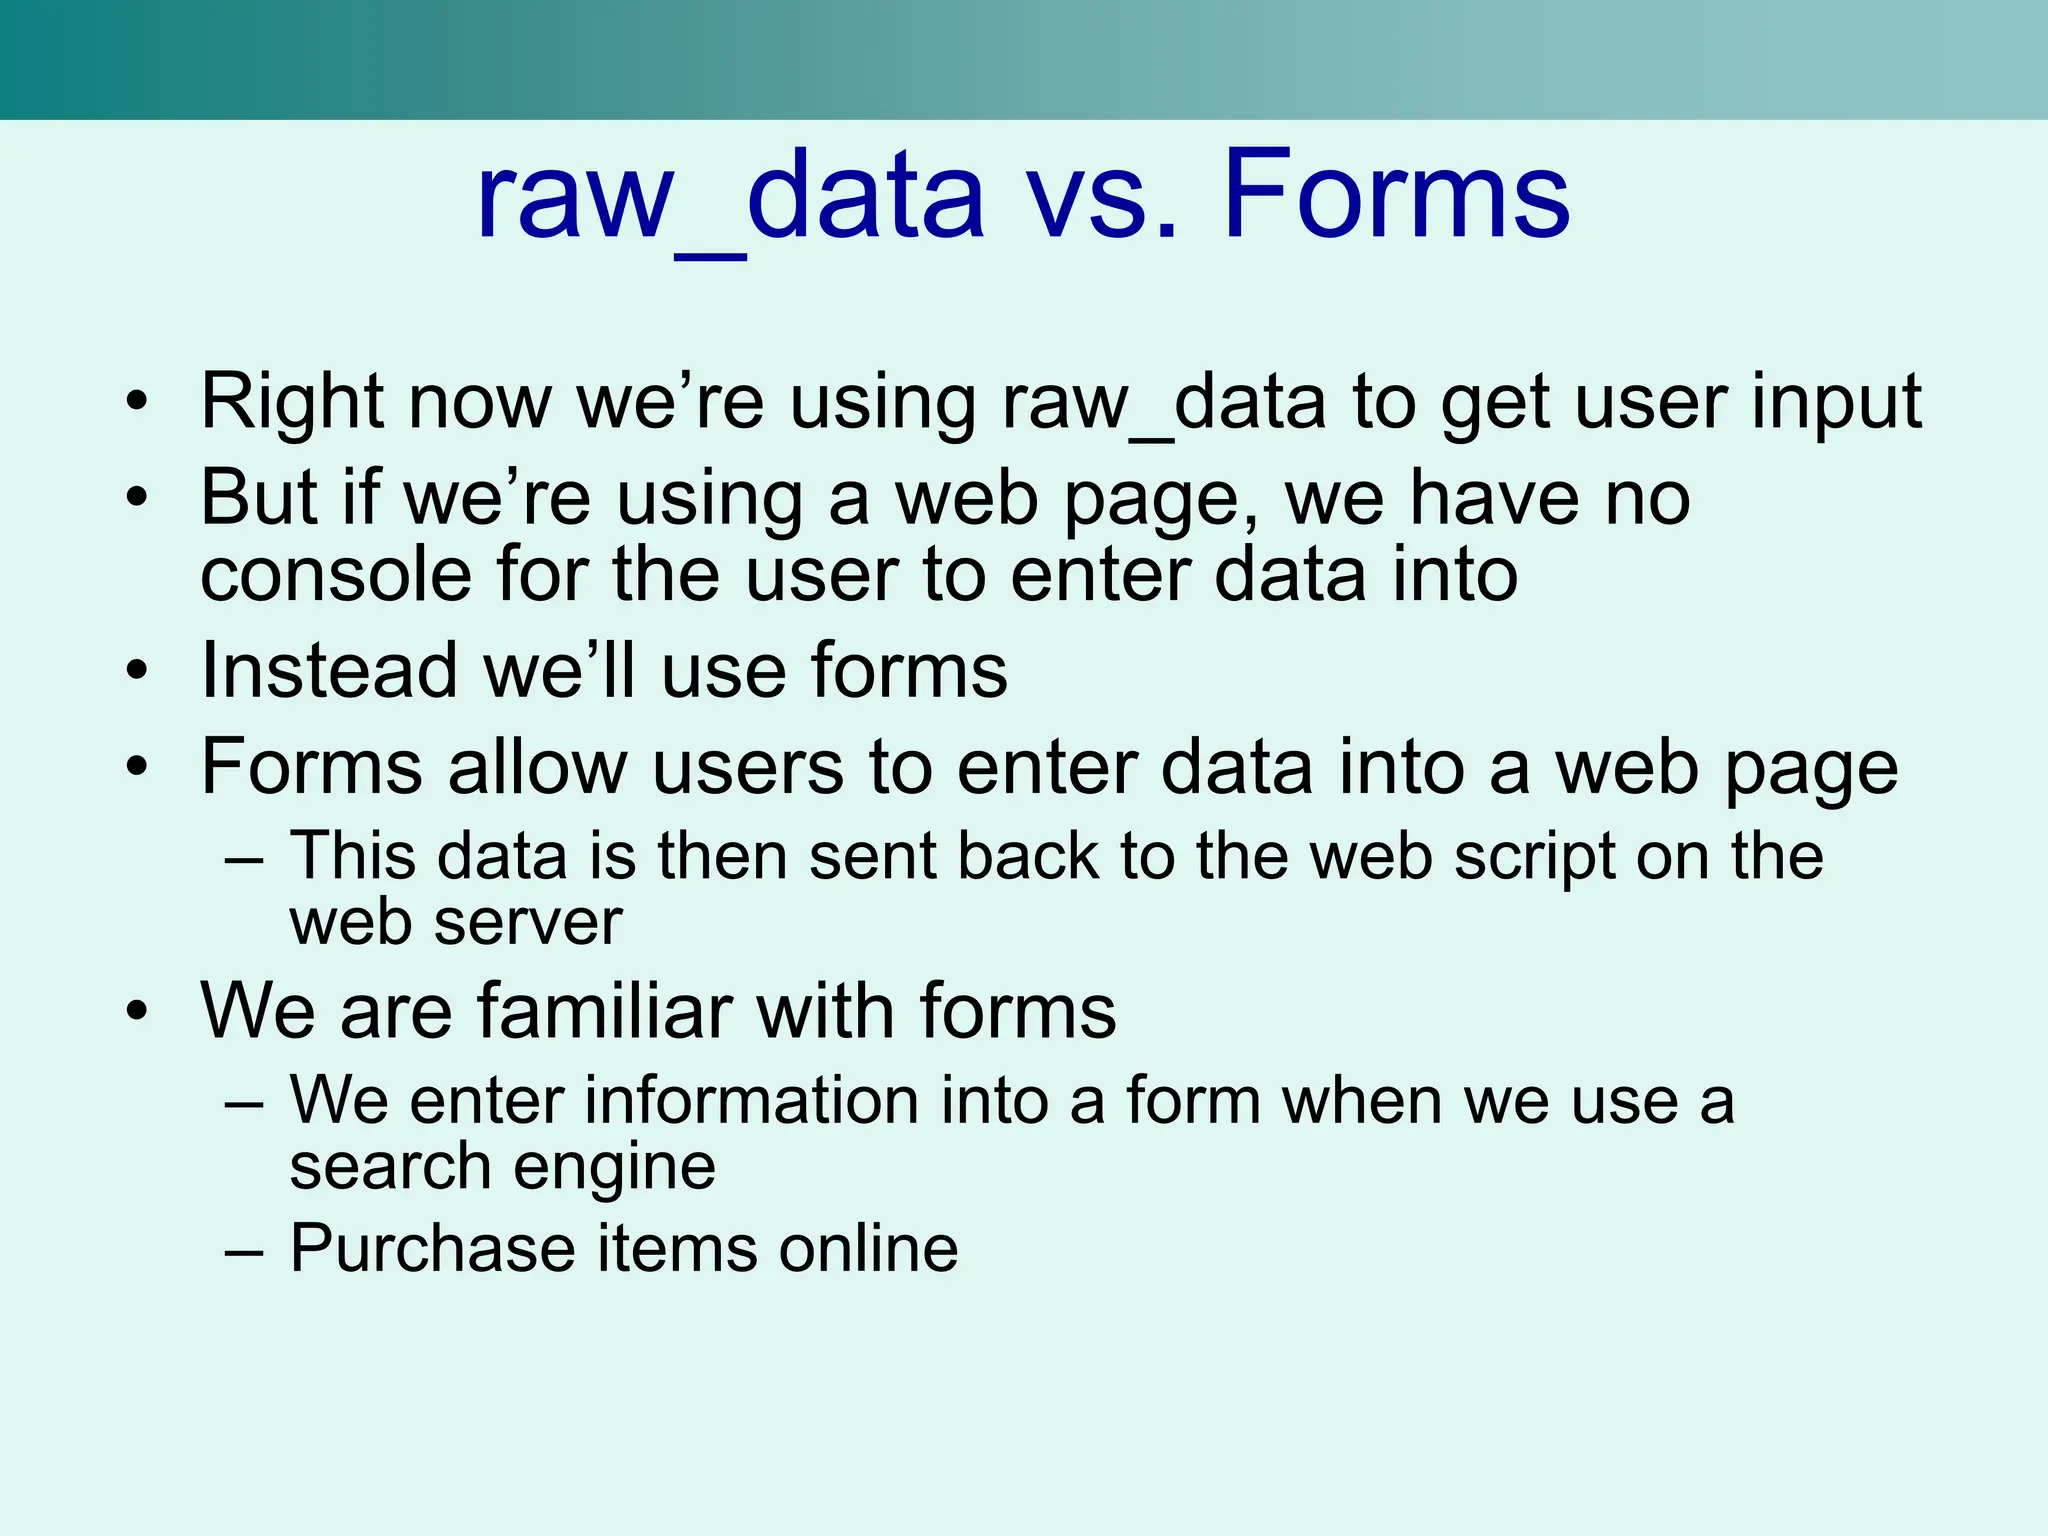
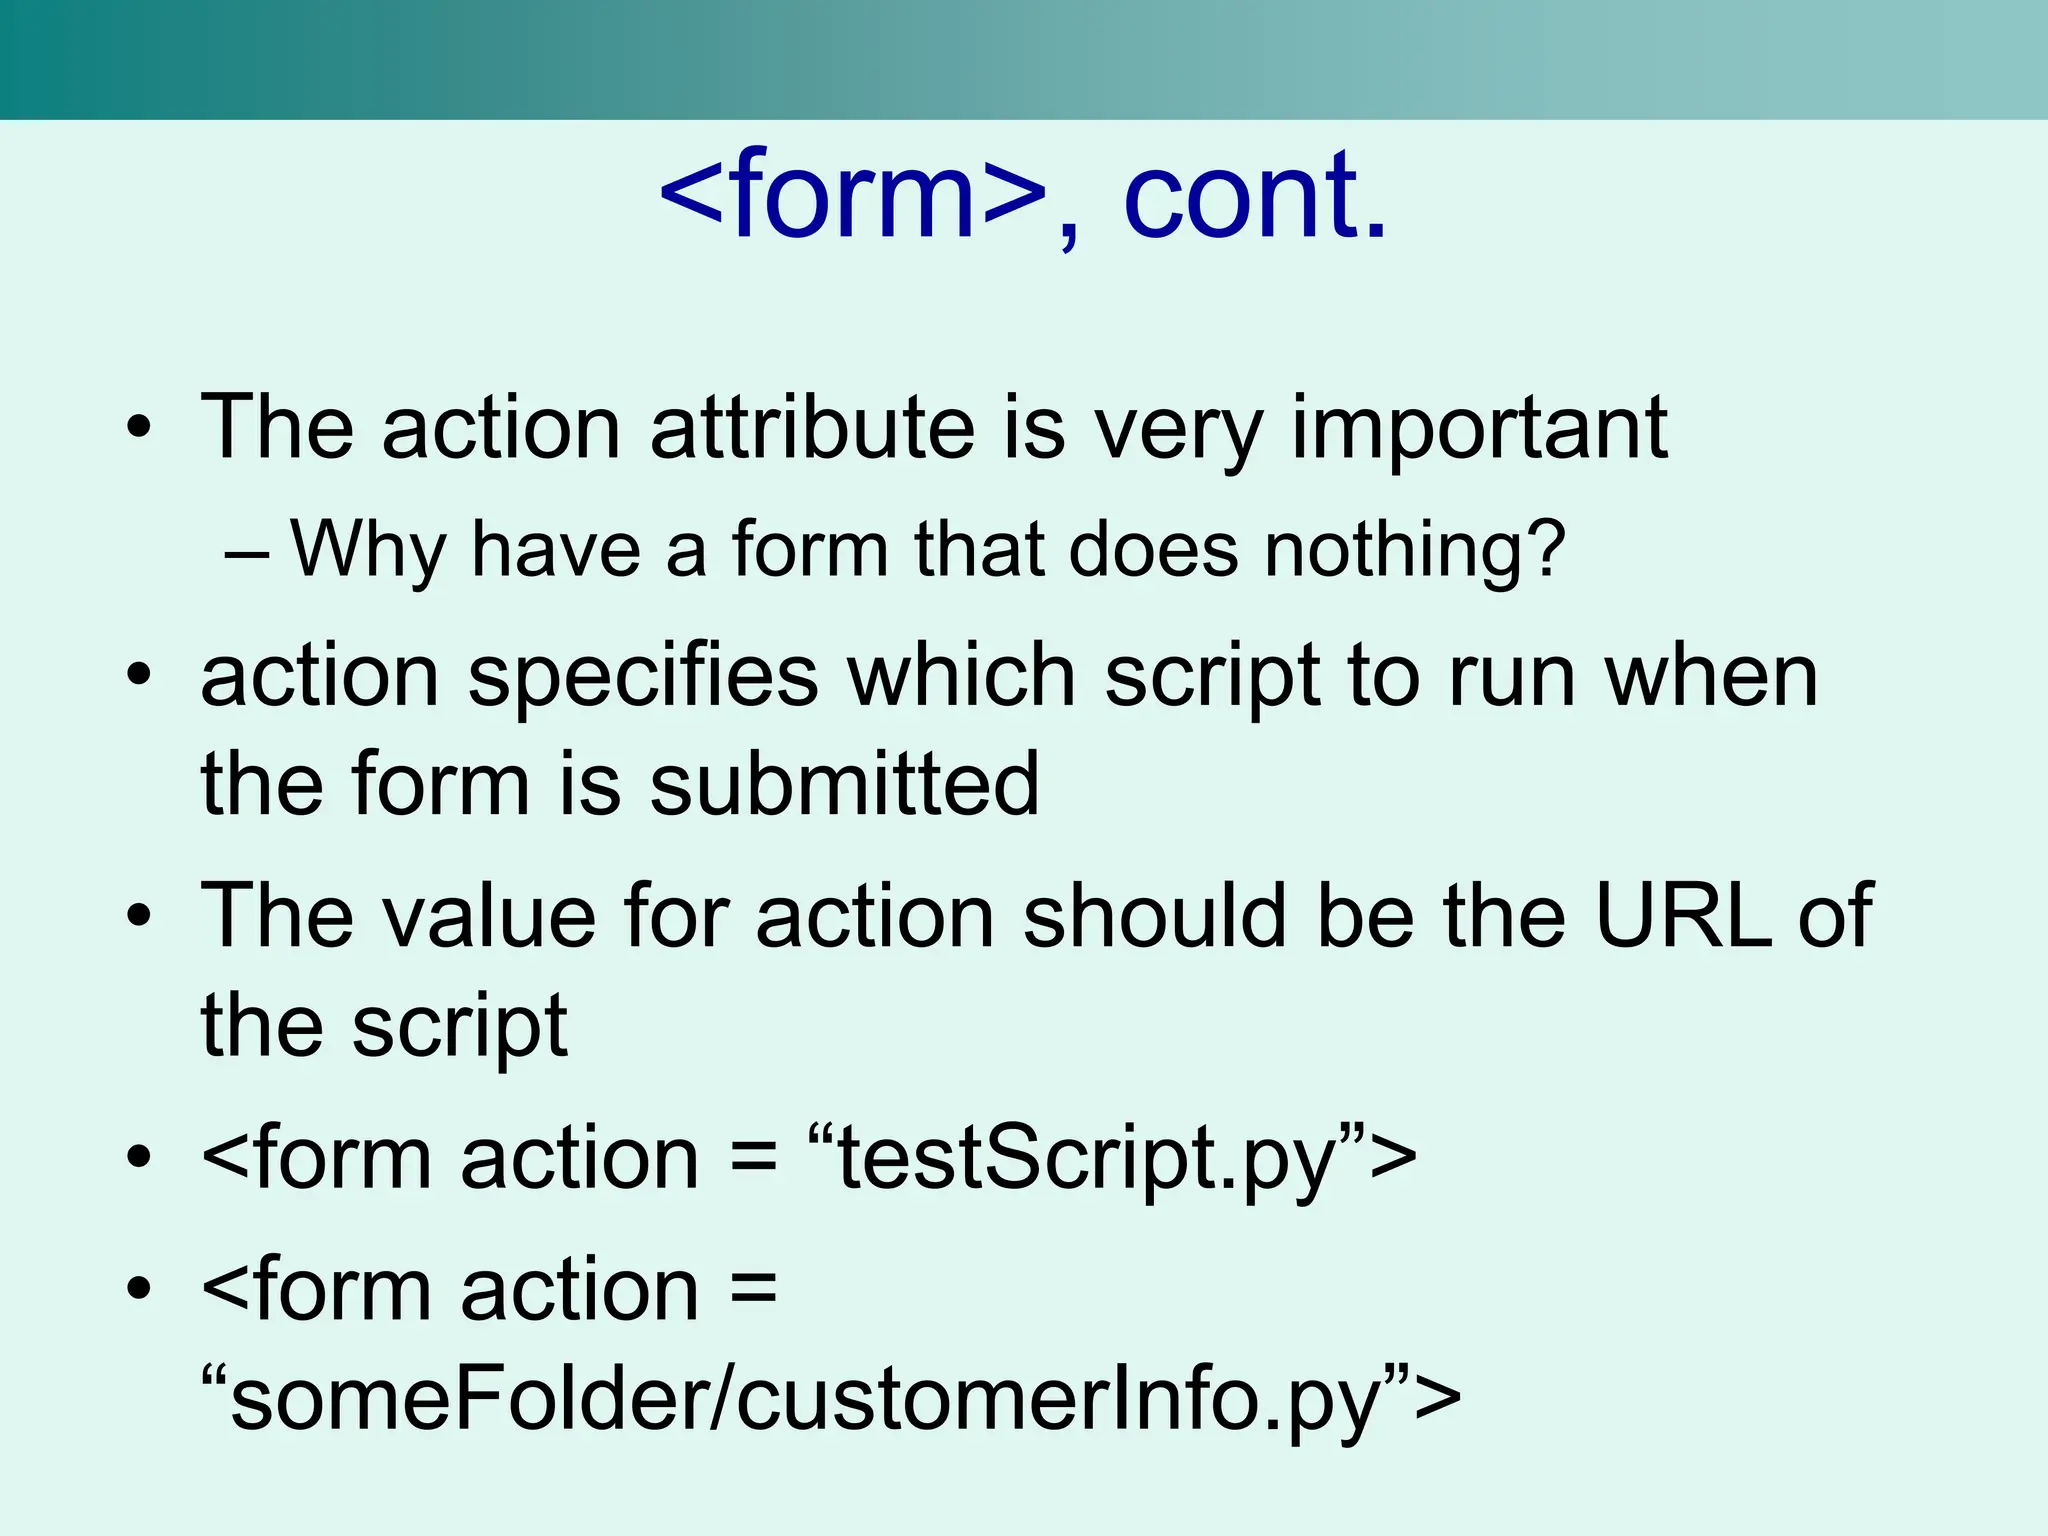
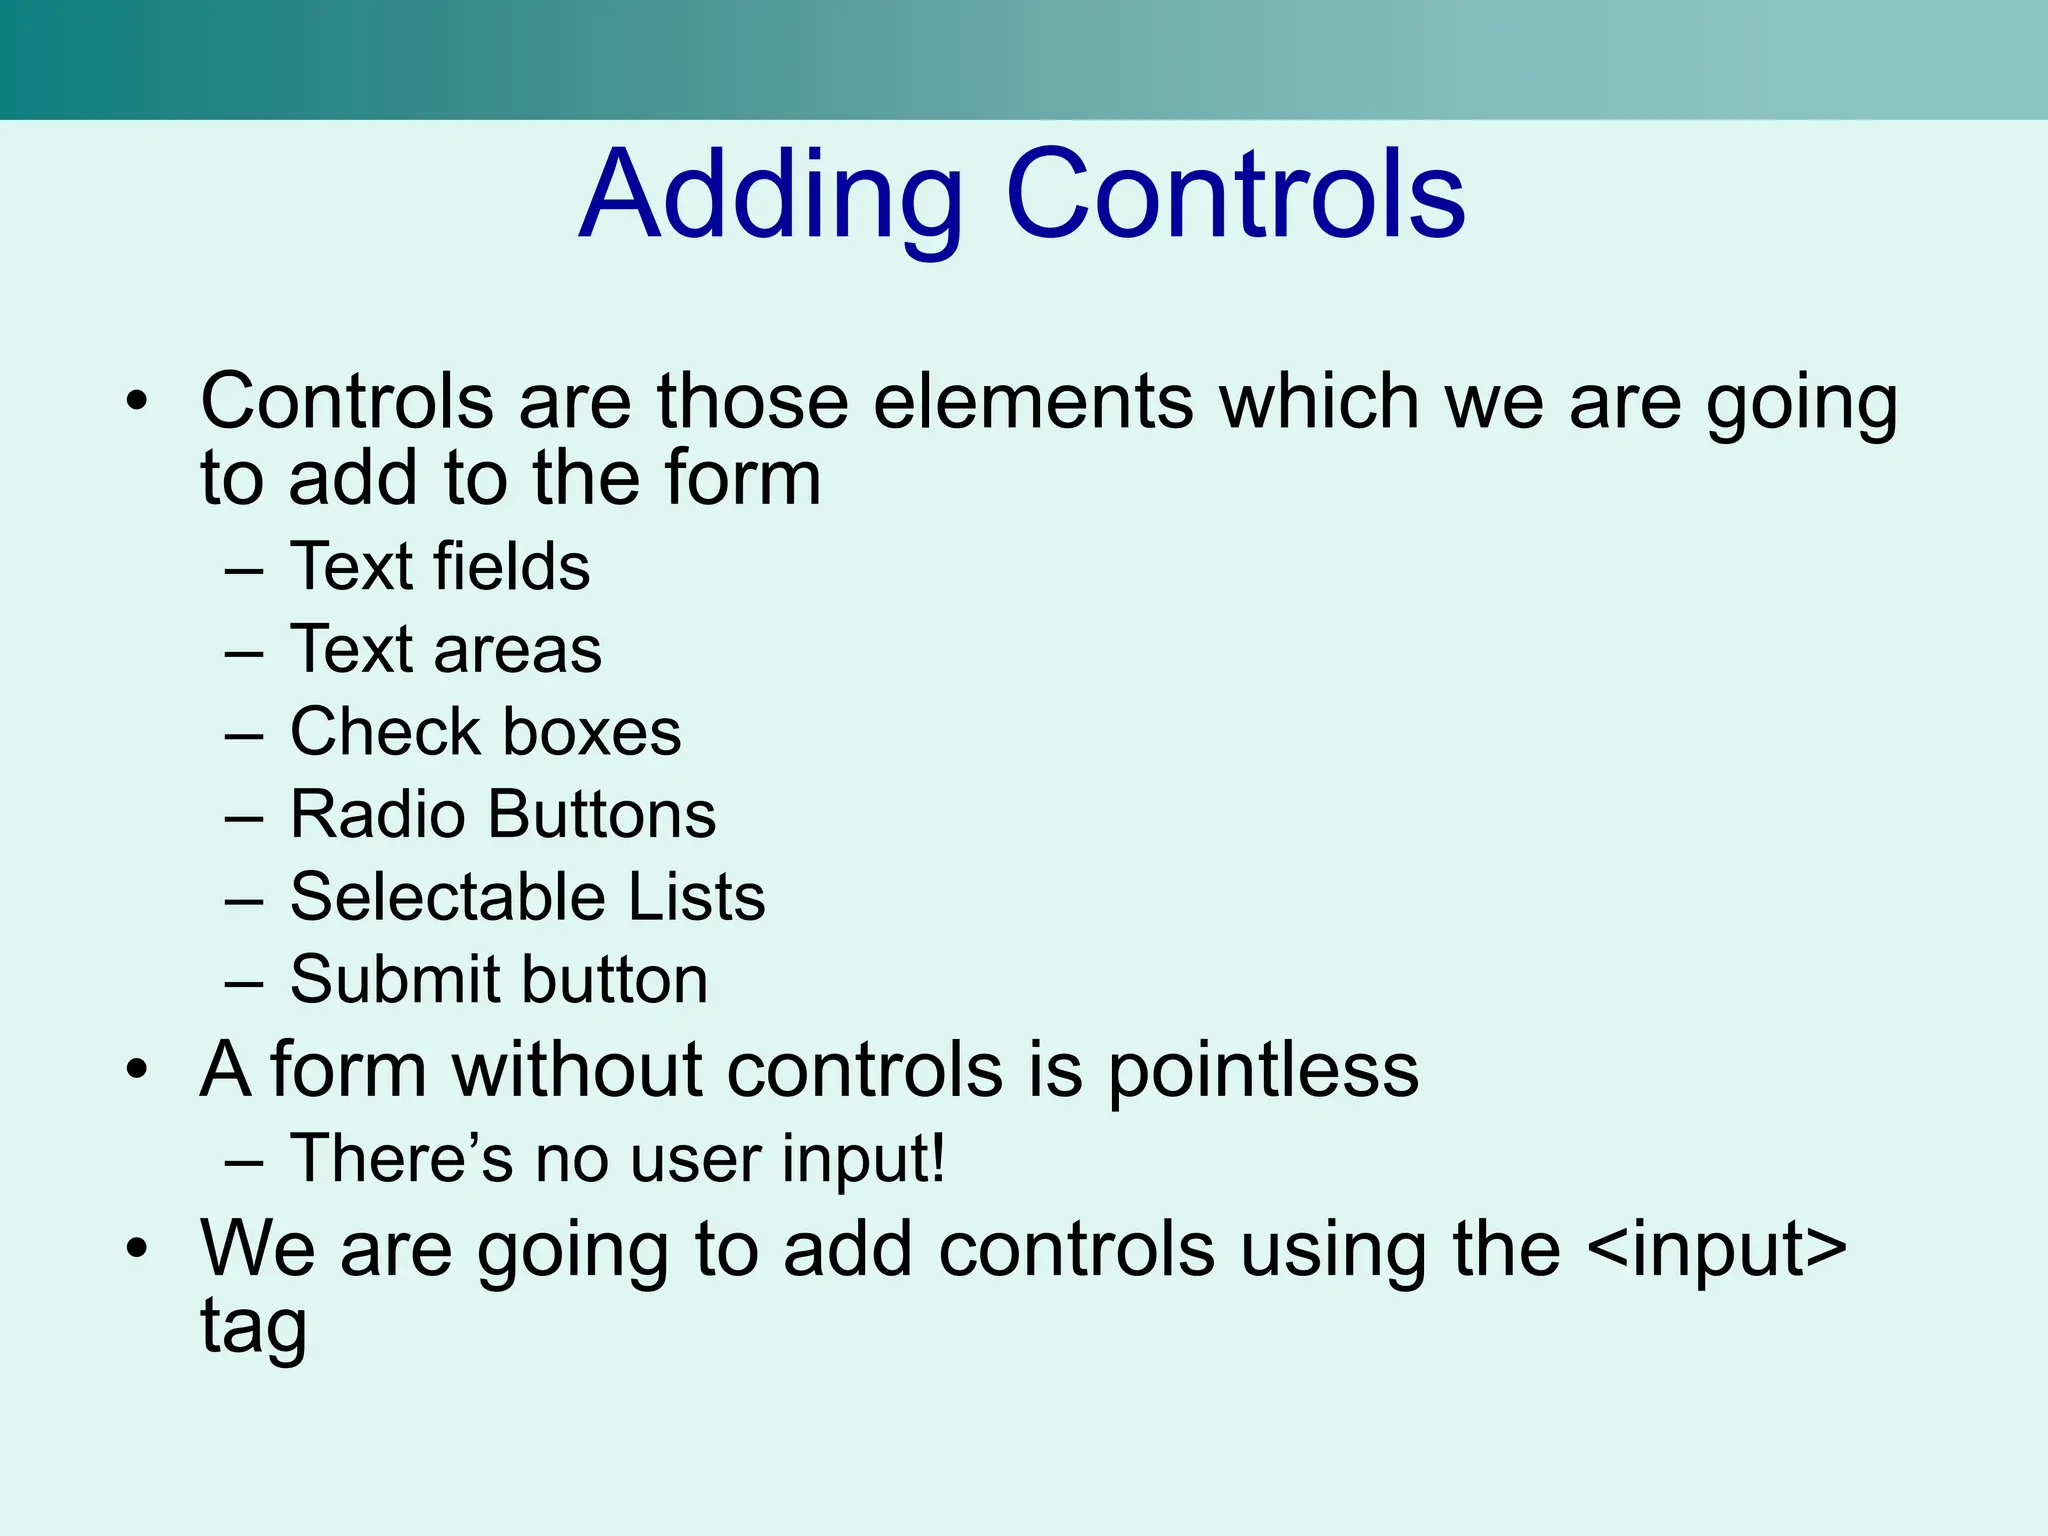
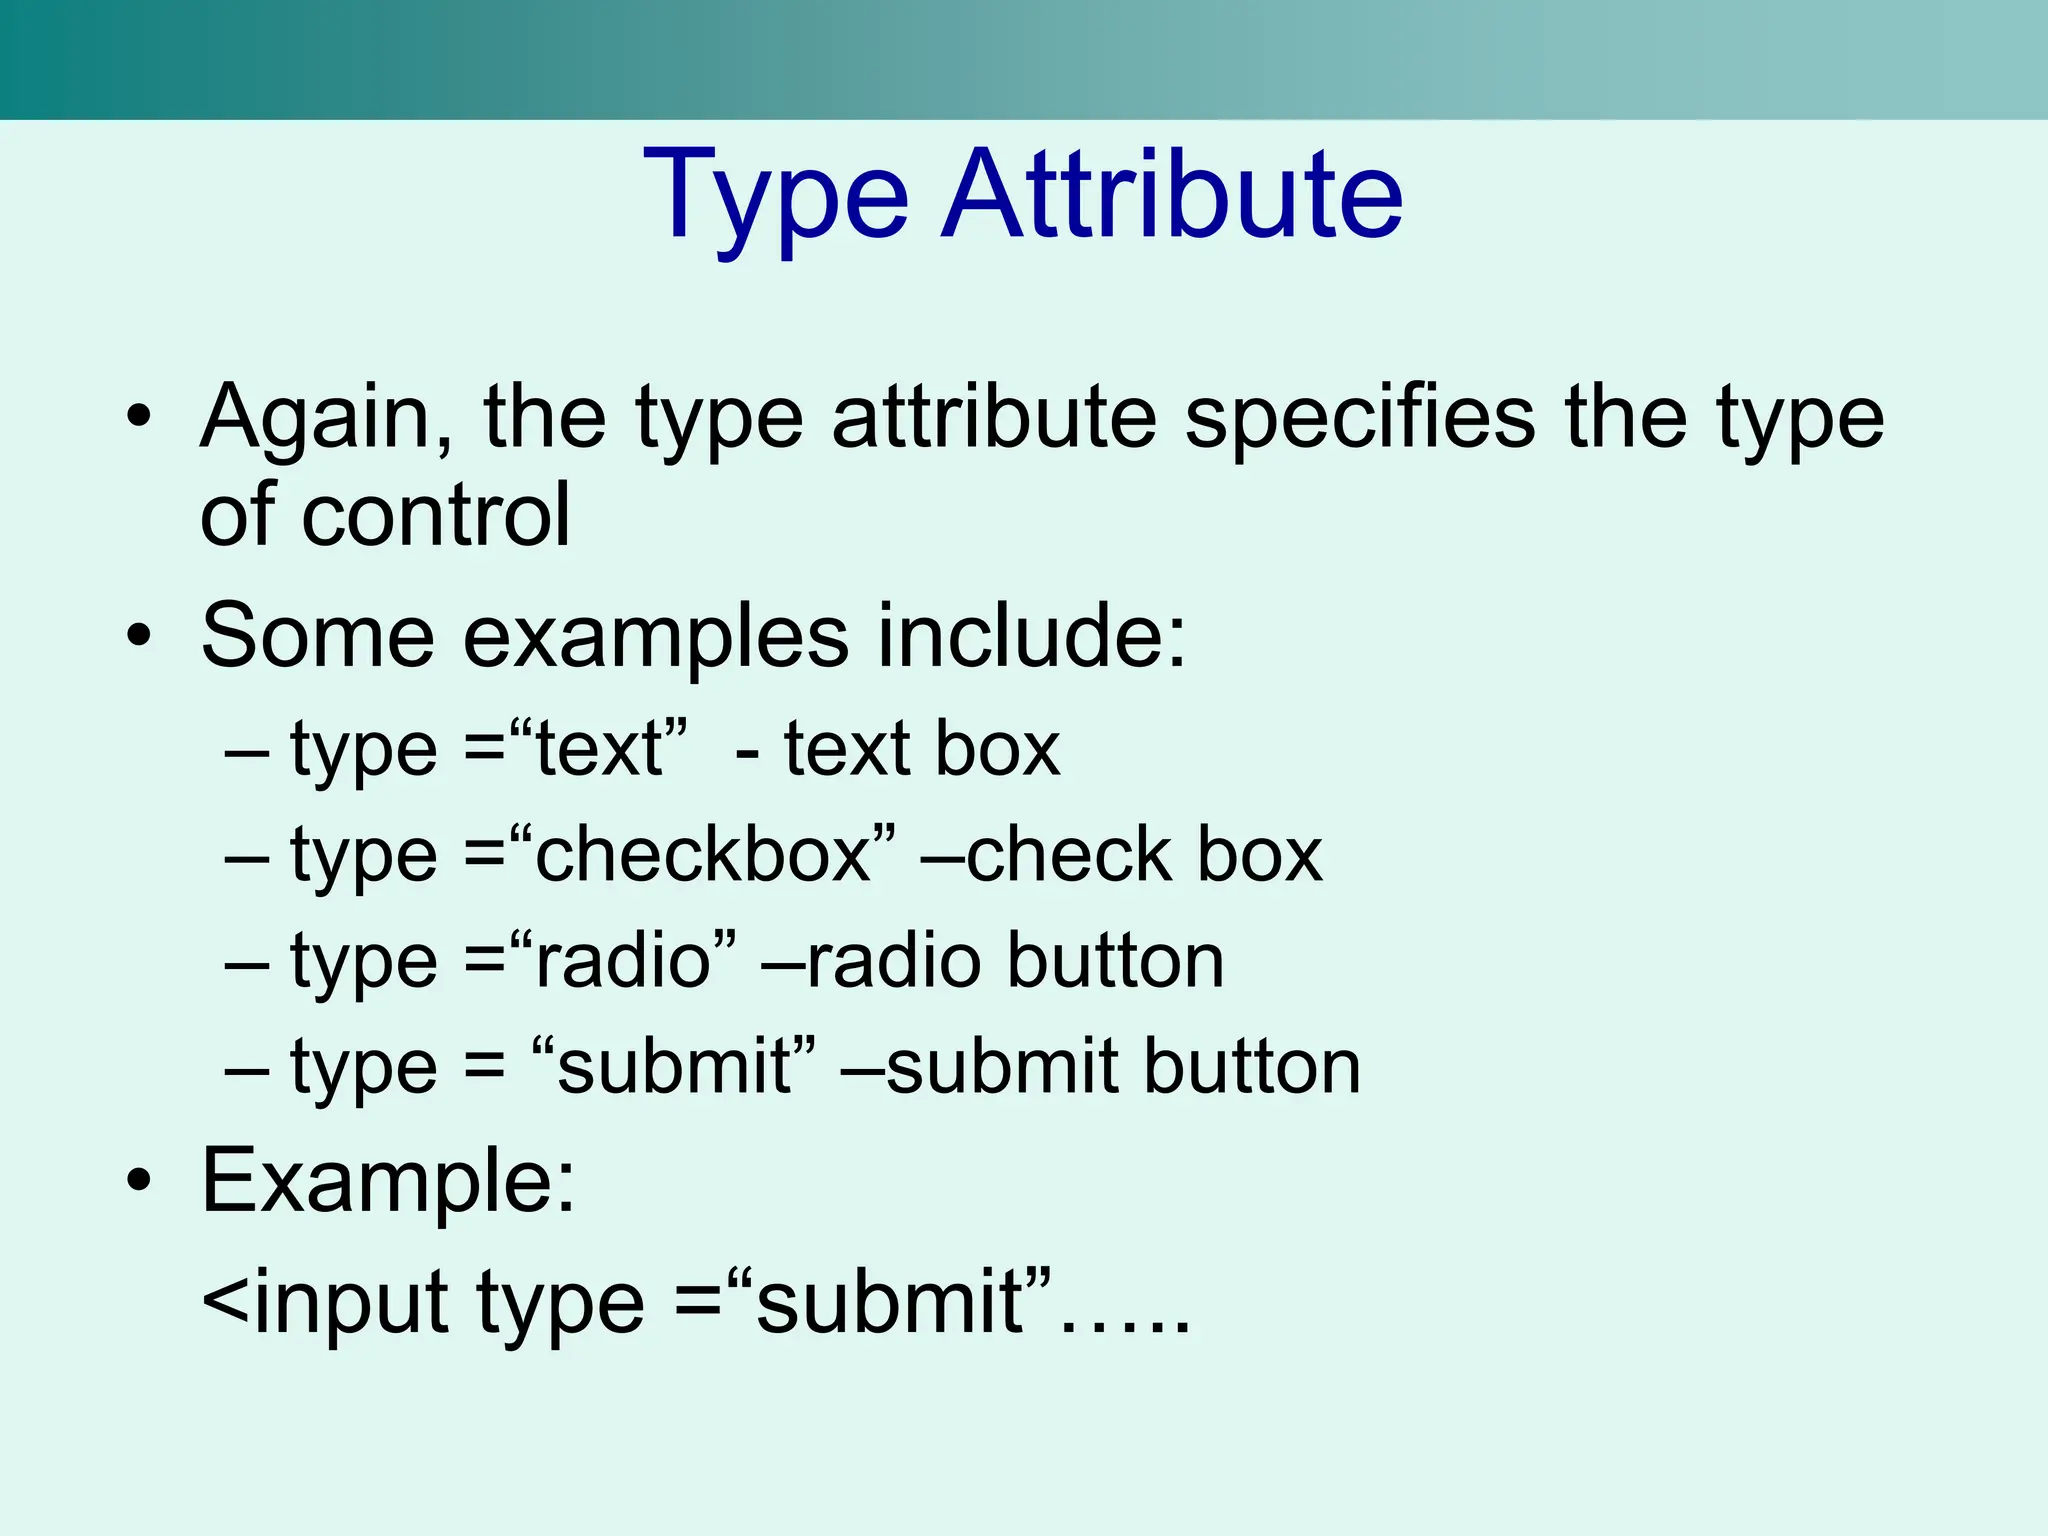
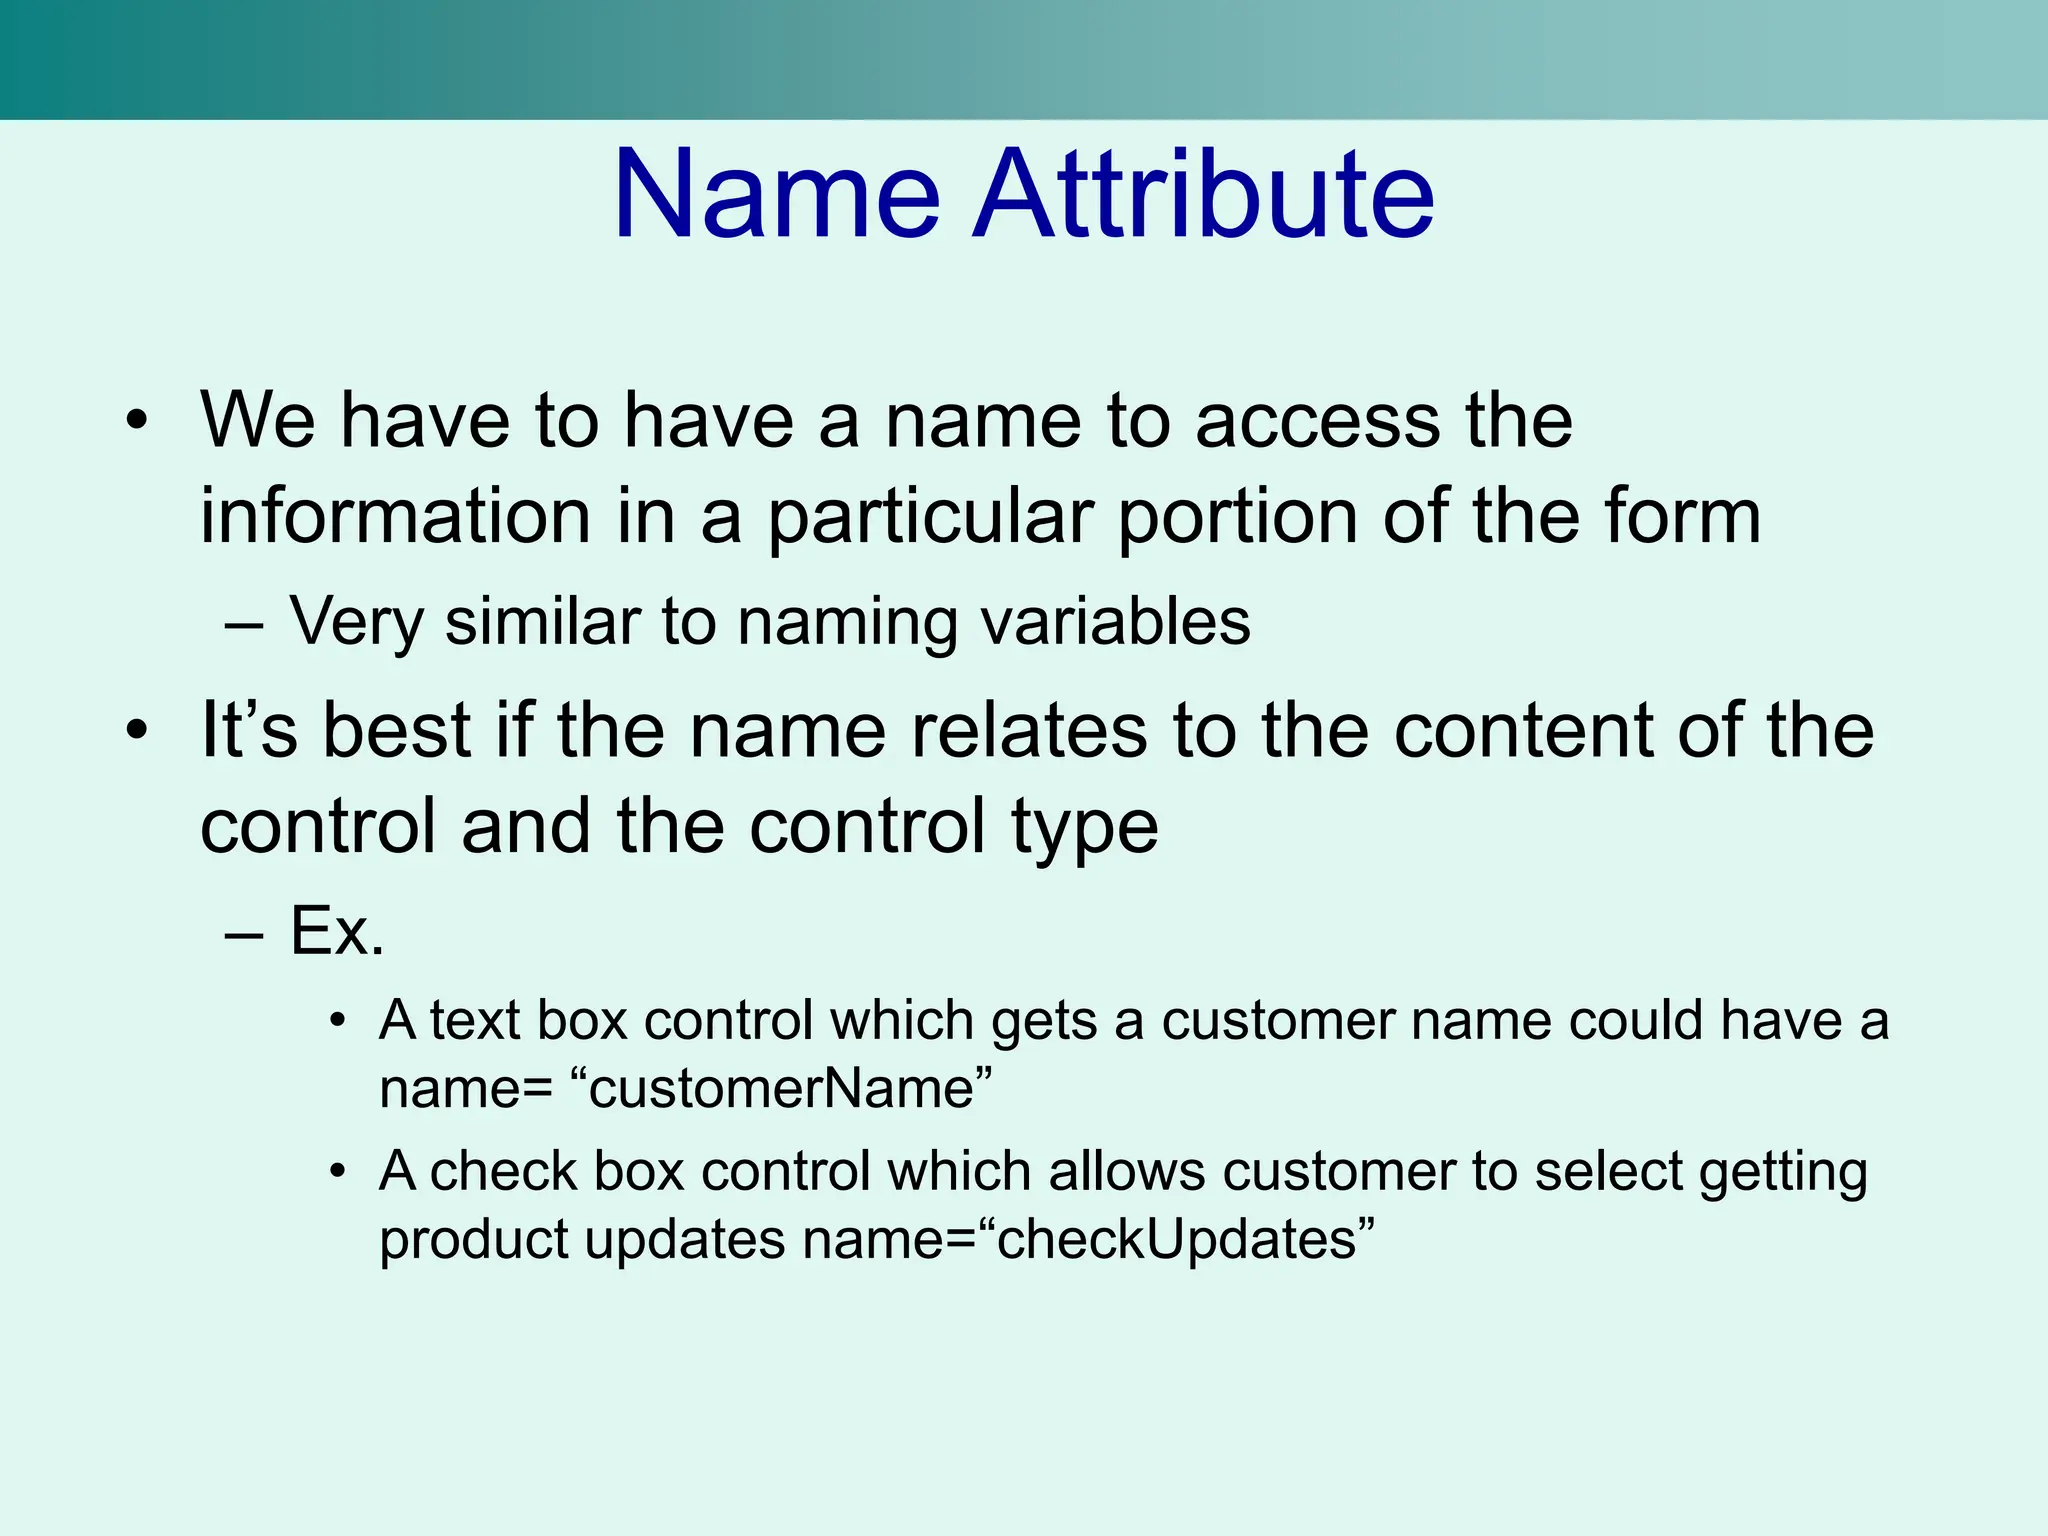
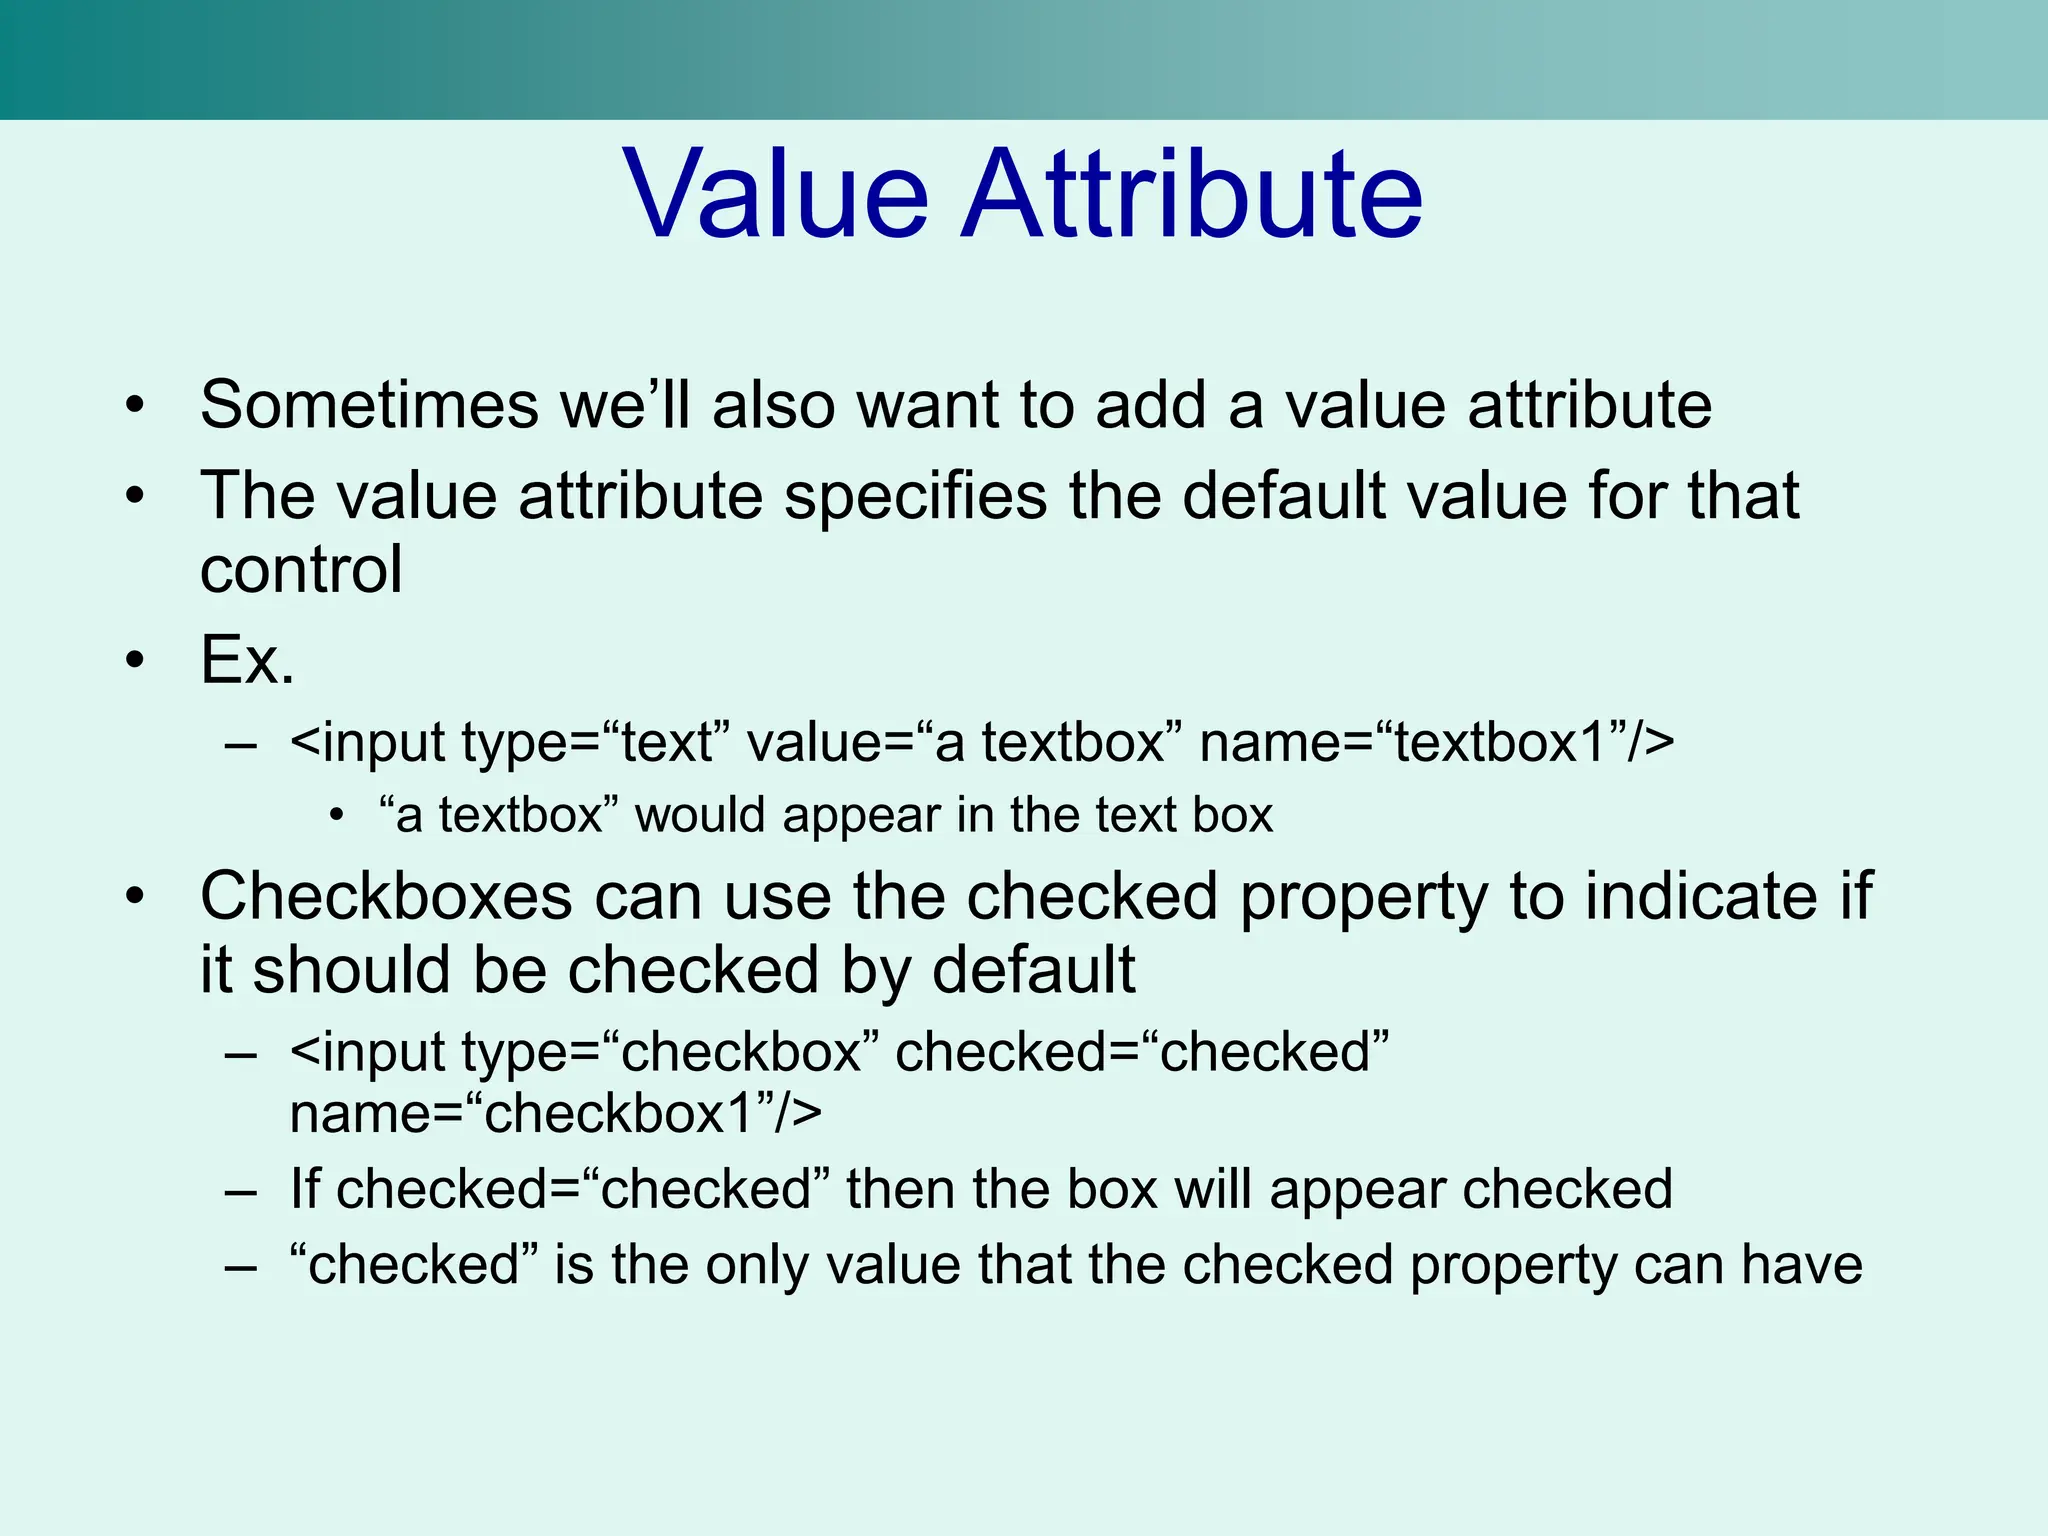
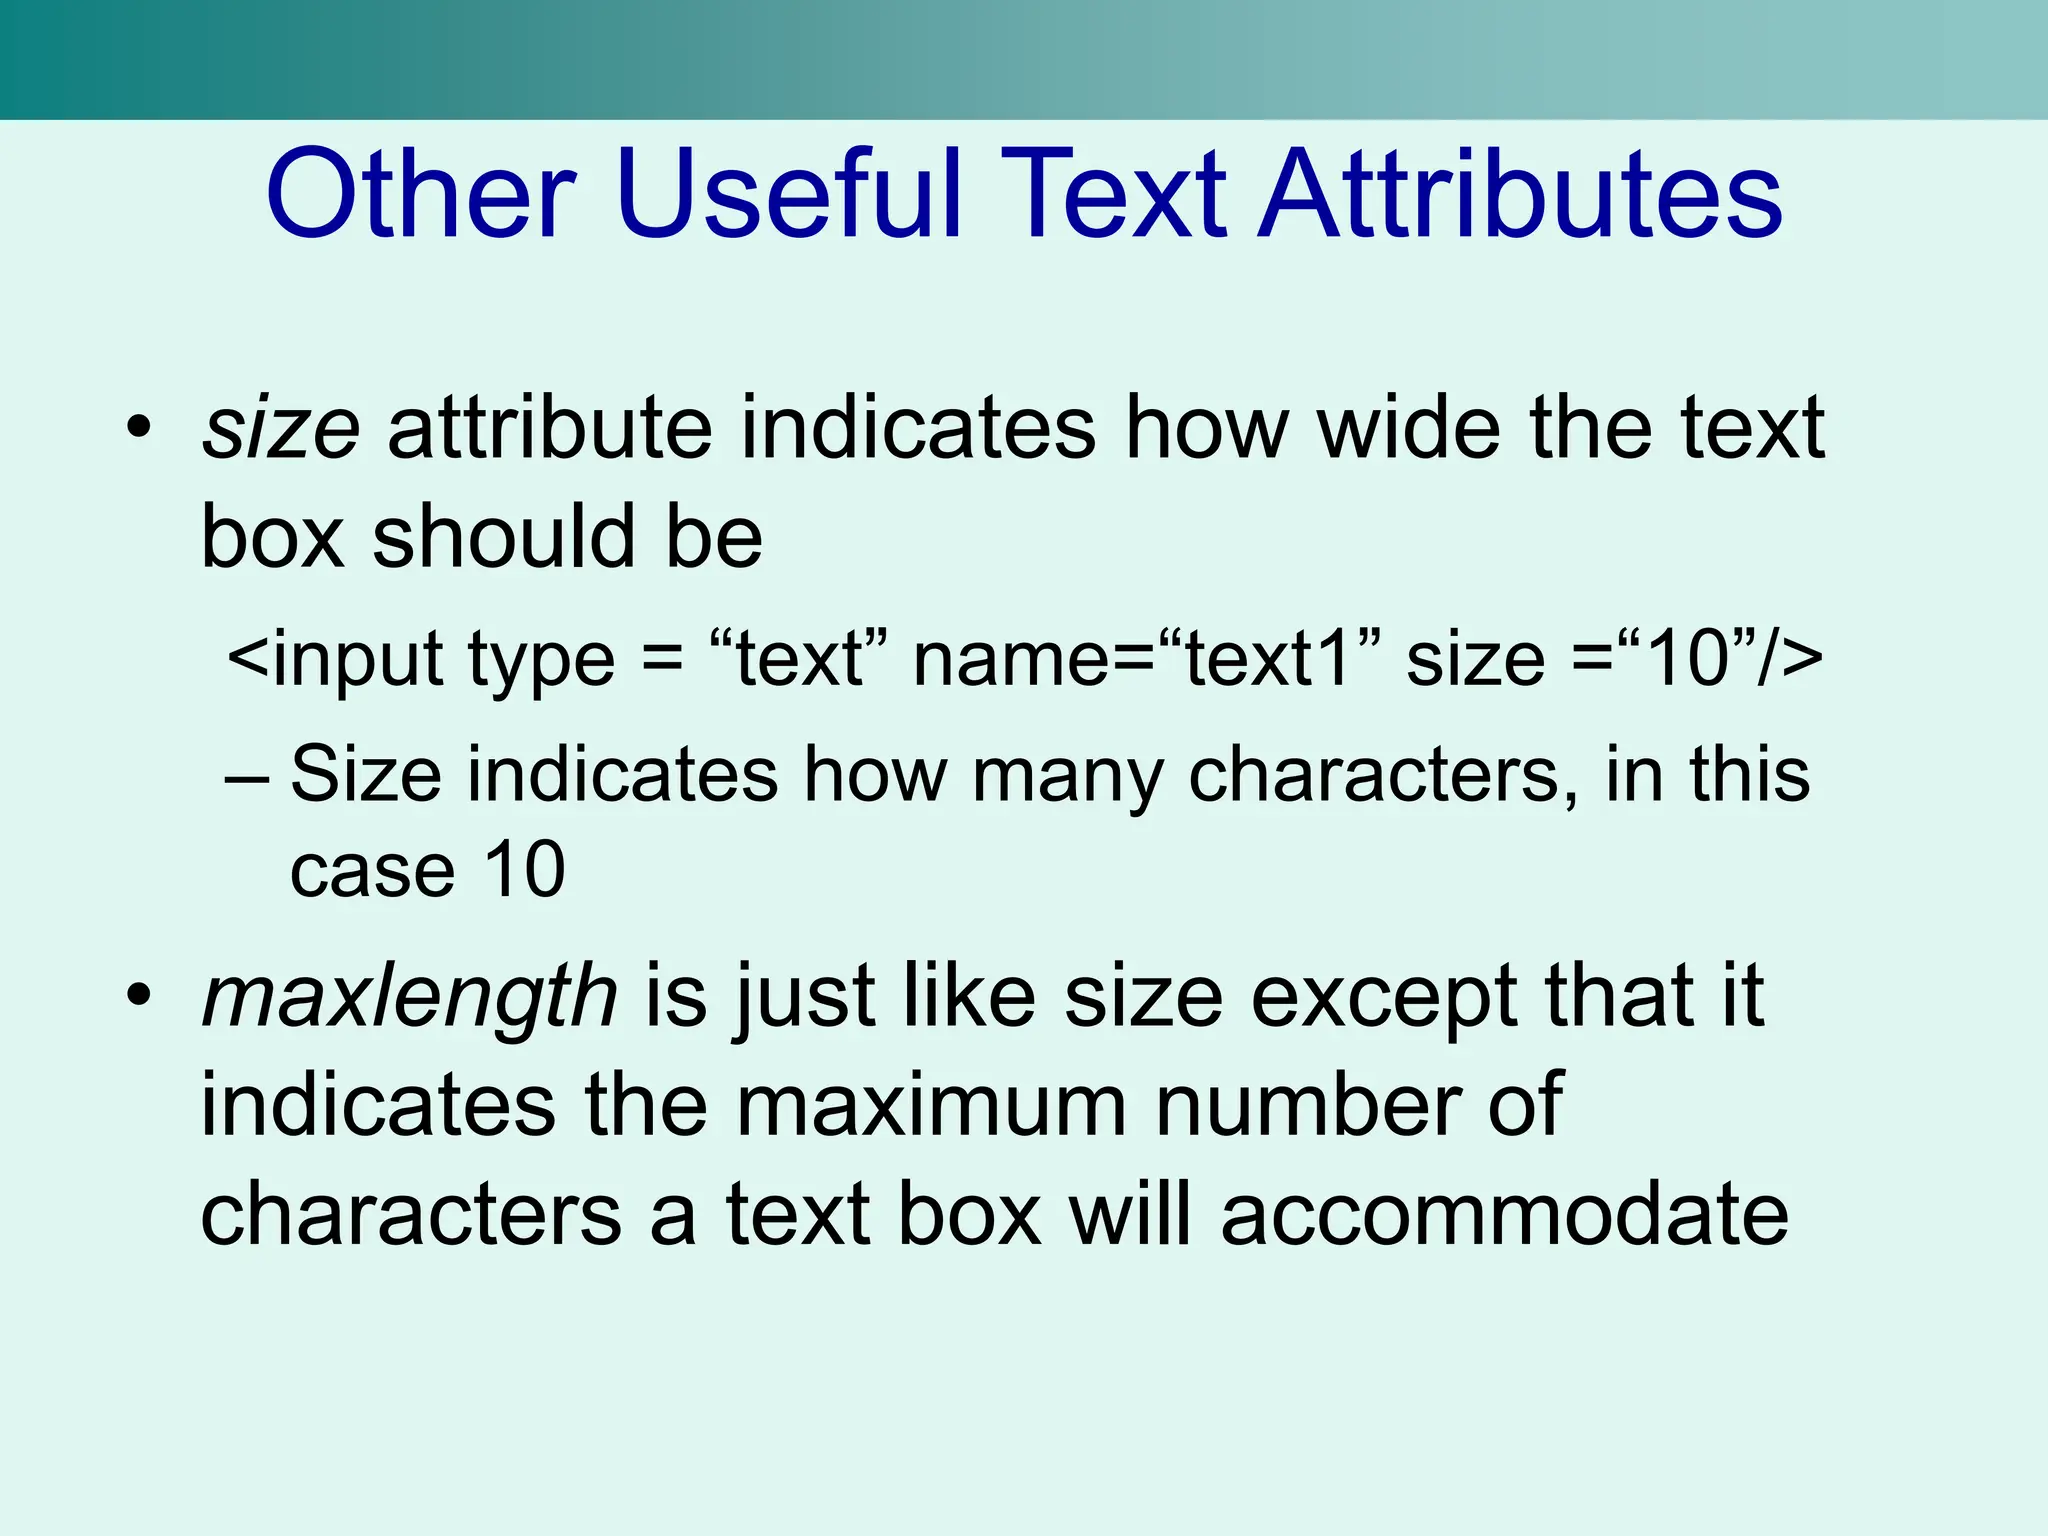
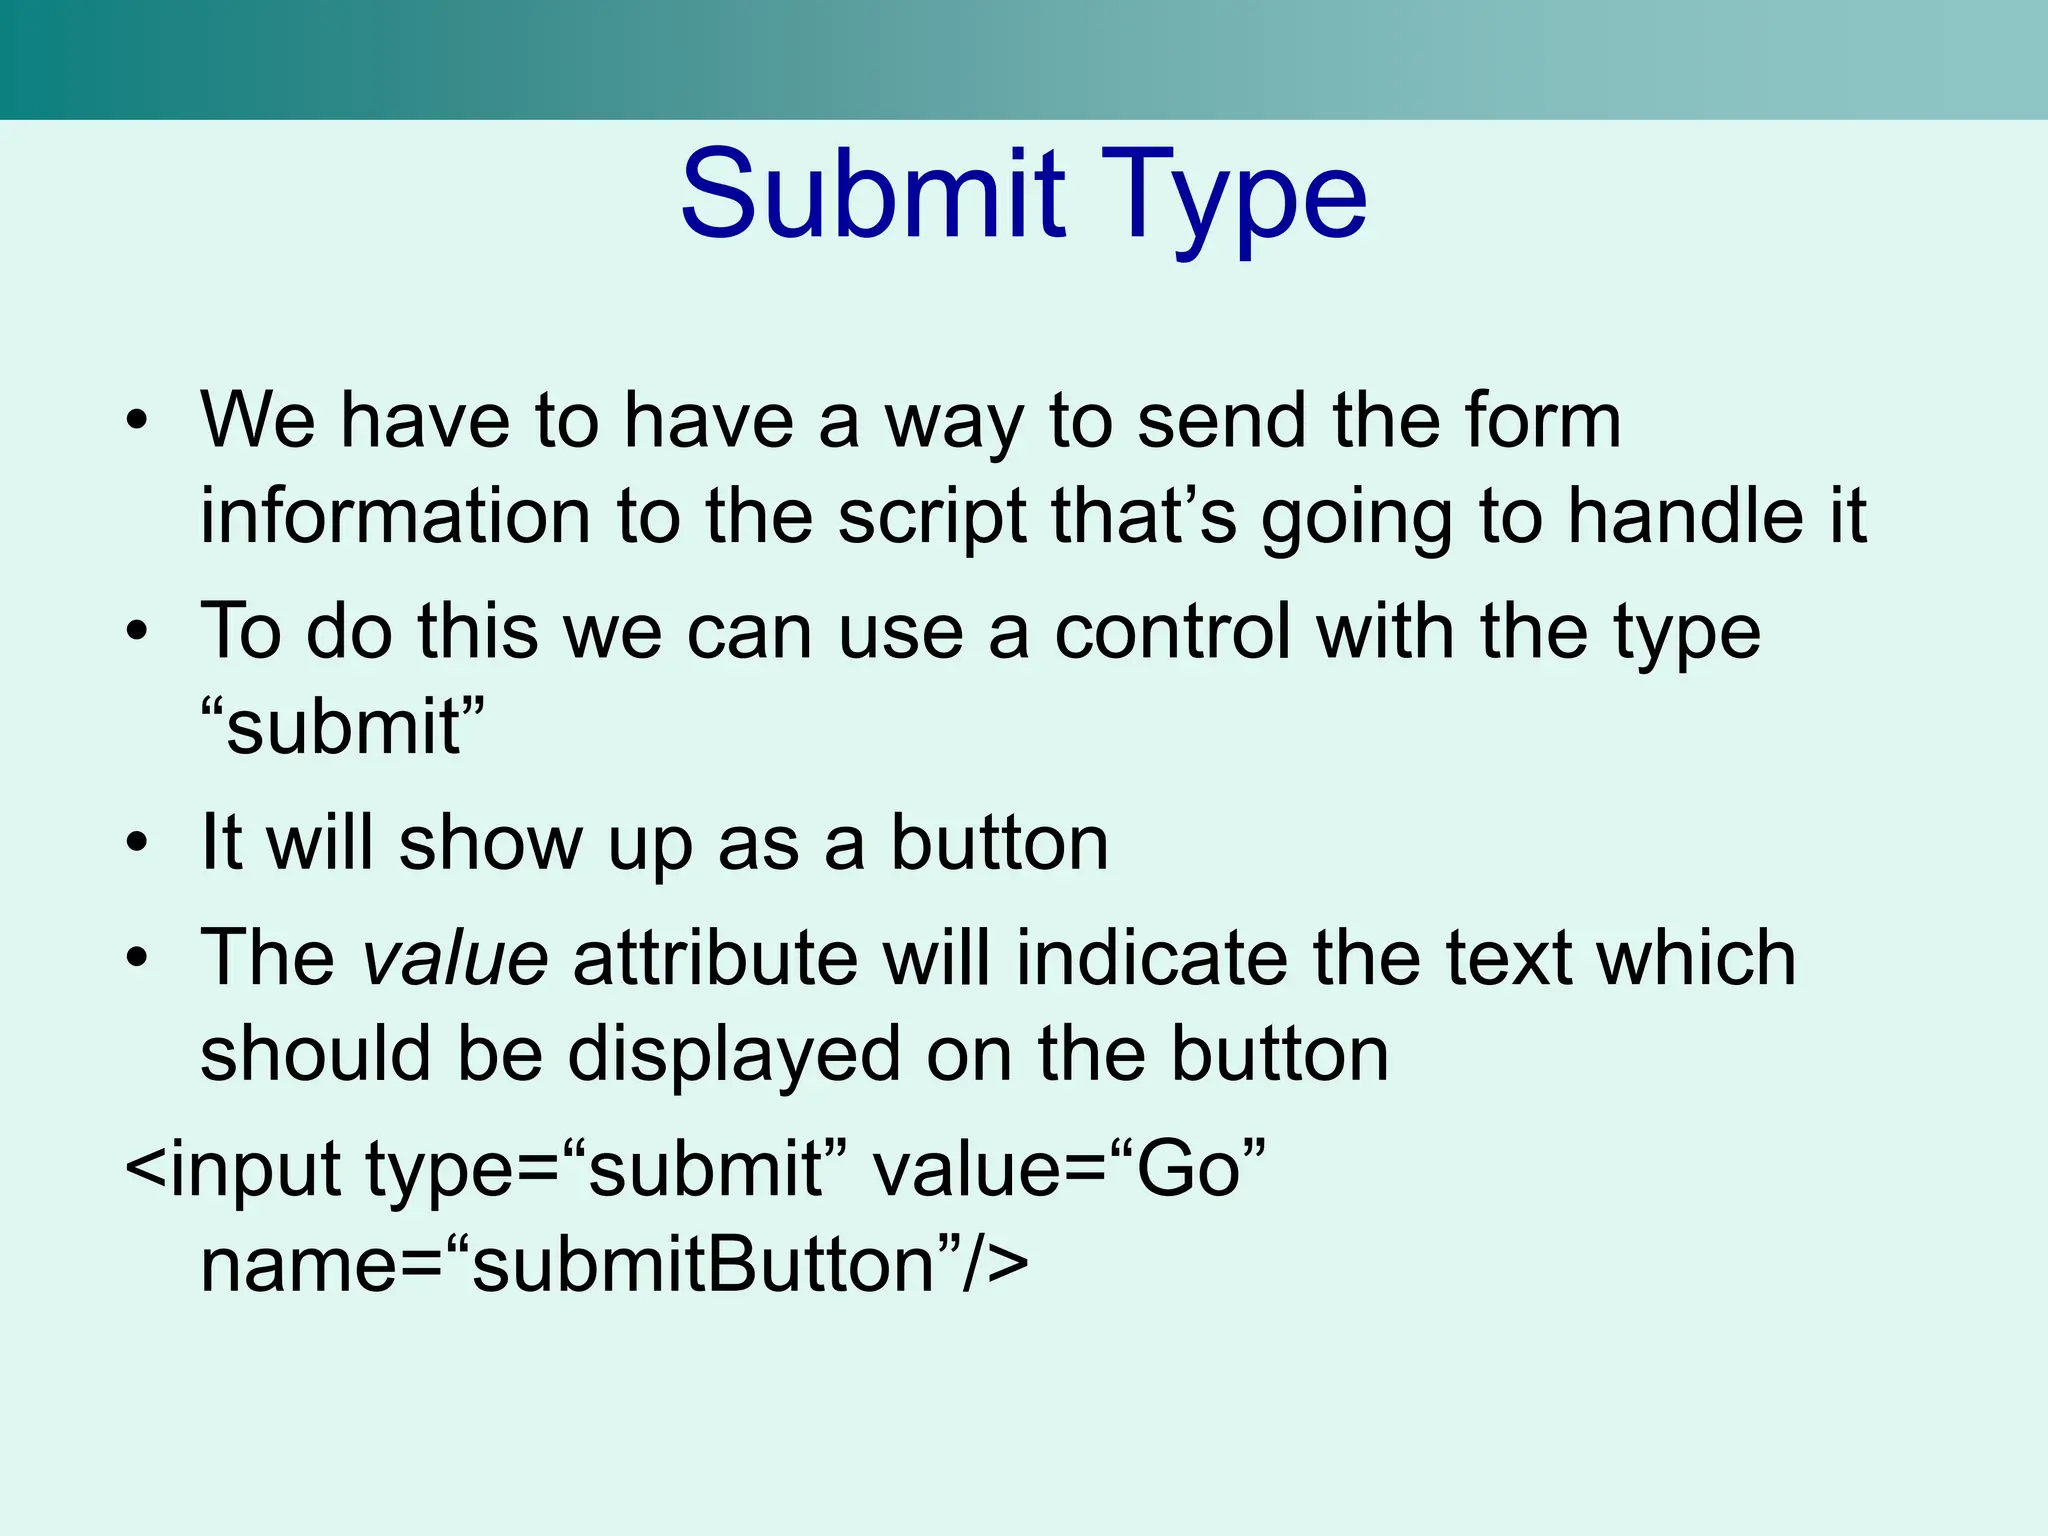
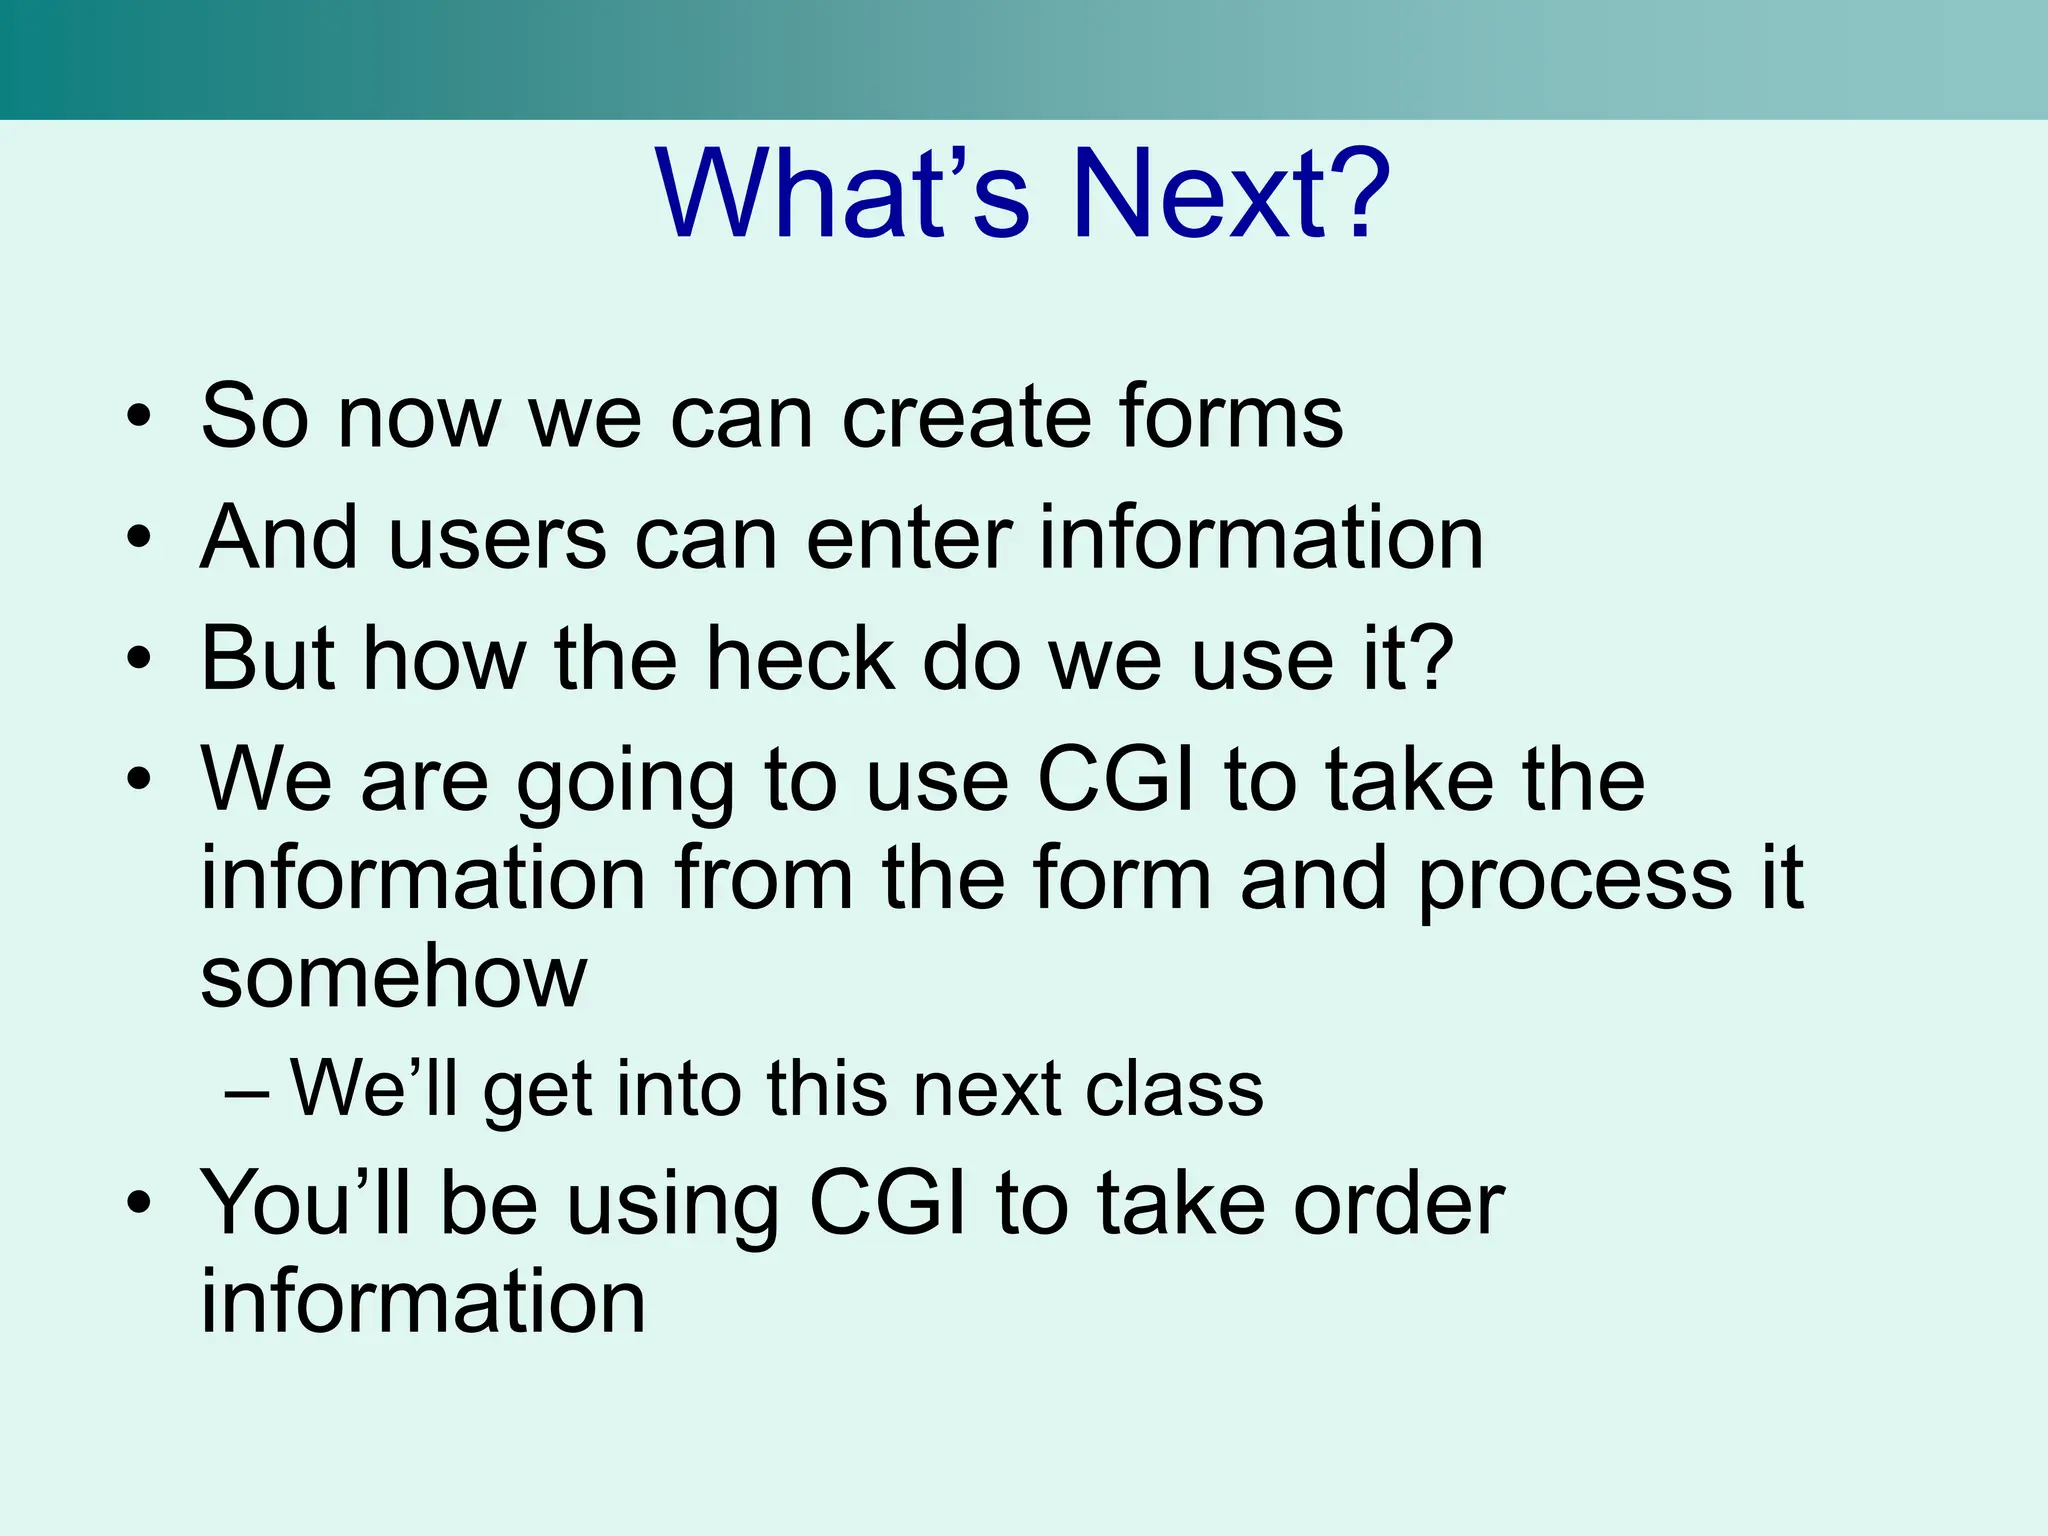
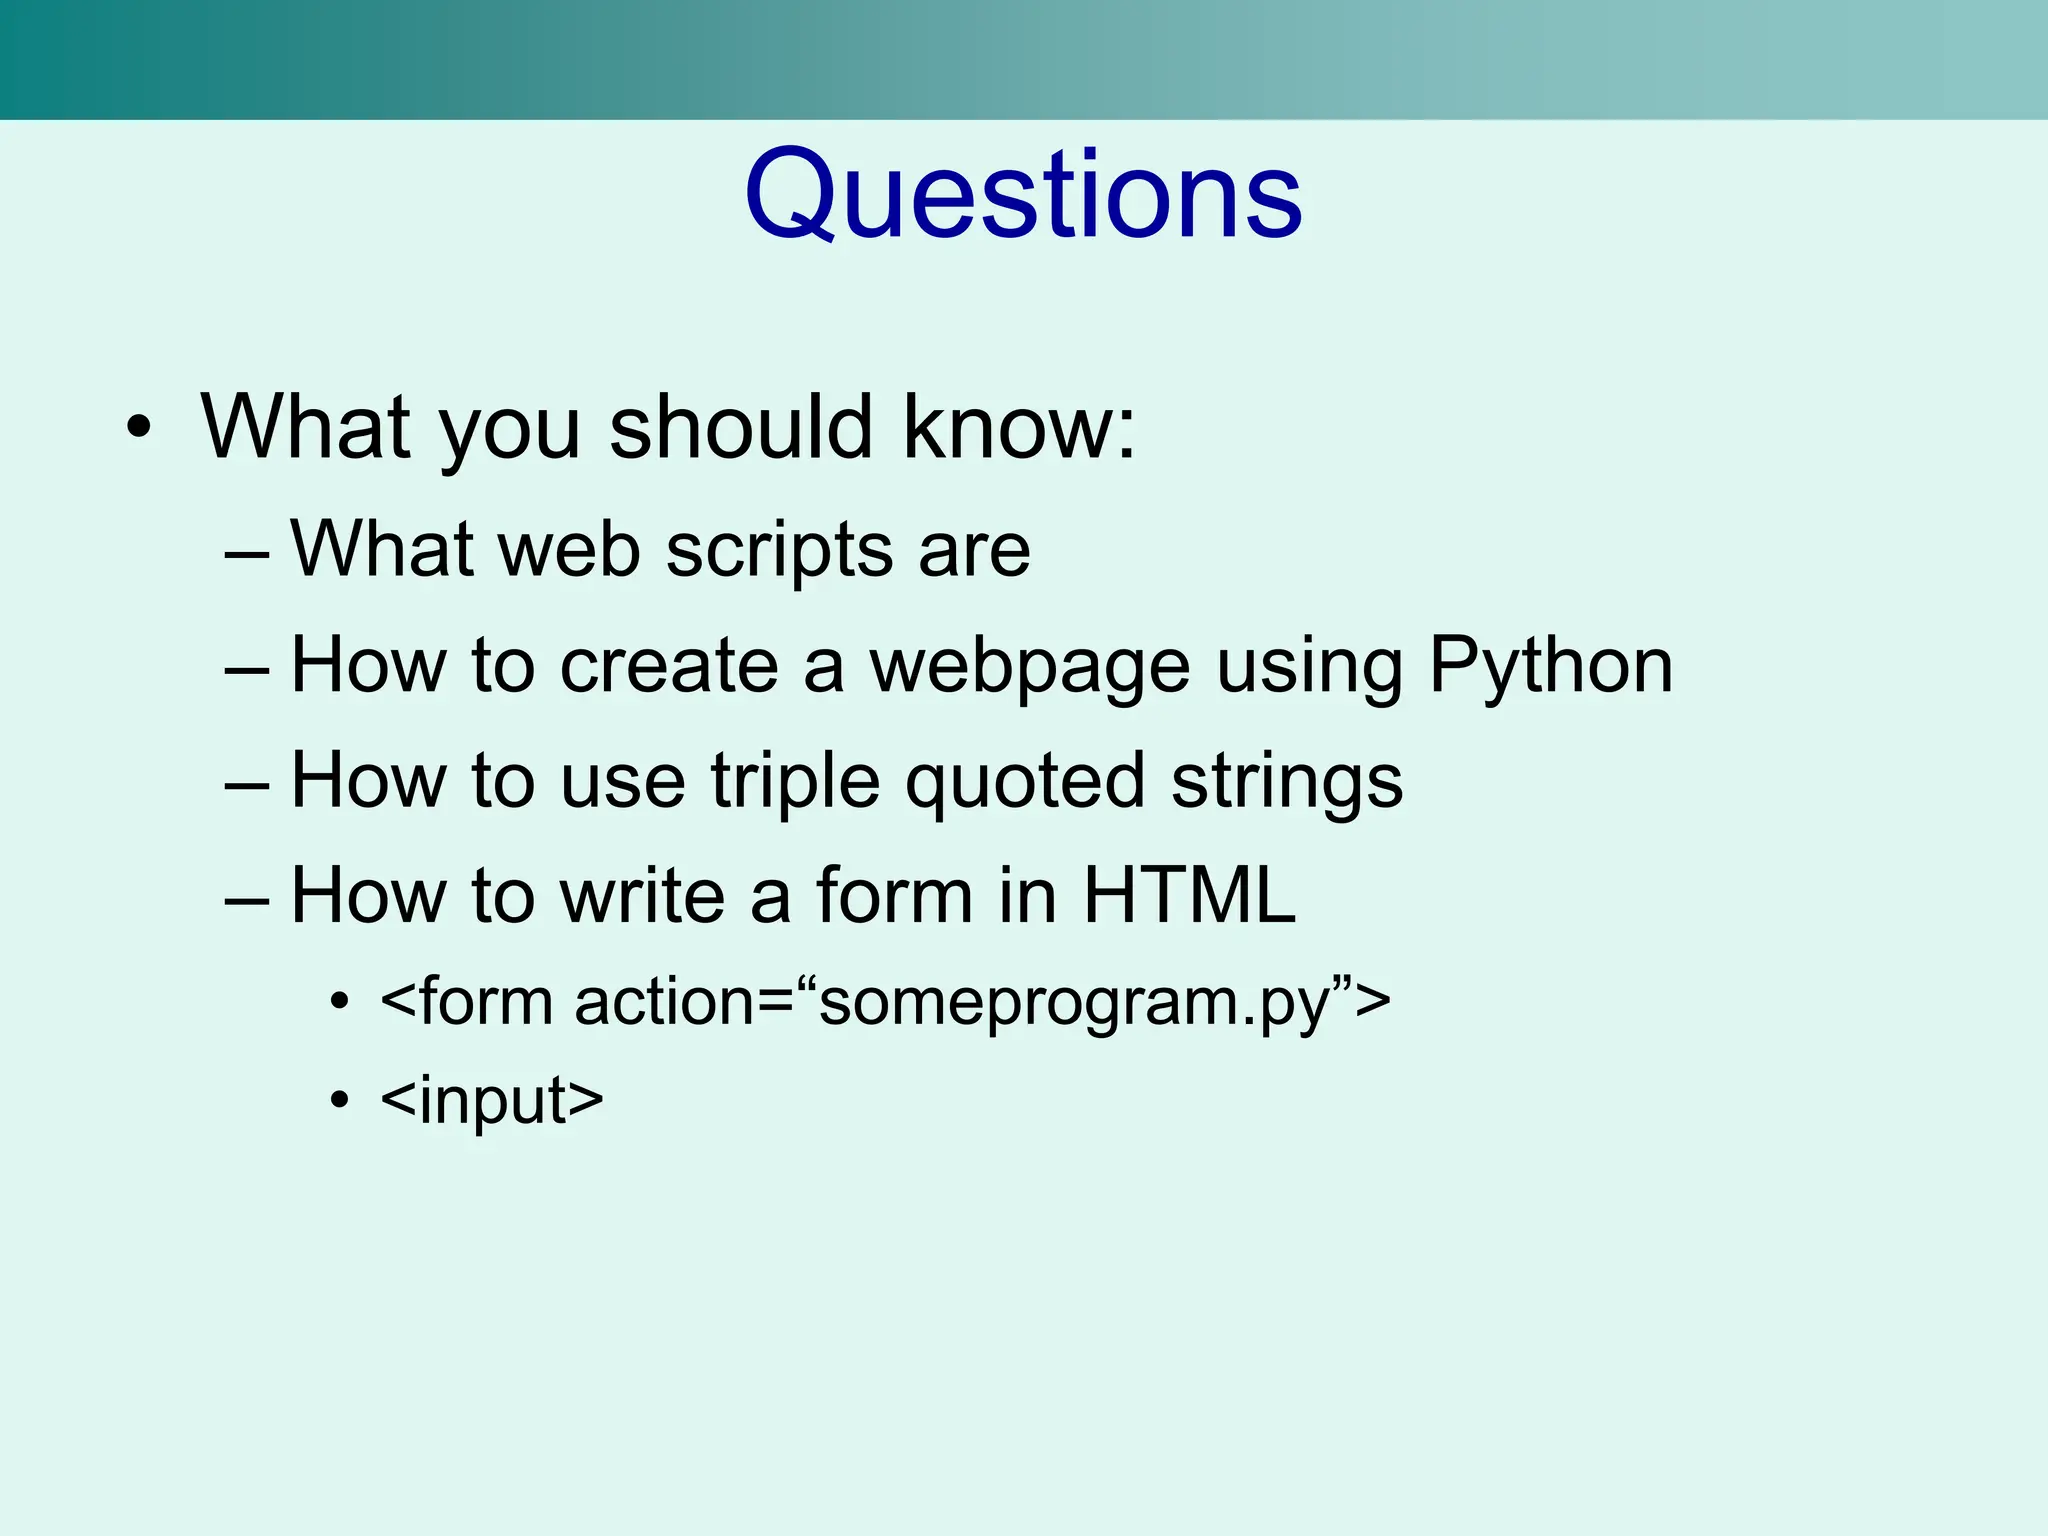
KEMBAR78
python and web for data science prfrograminh | PPT
Python and Web
Programming
November 21, Unit 8
Web Scripts
• Programs that generate web pages are often
called web scripts or CGI scripts
• Like using XSL to transform an XML file into an
HTML file, we can use web scripts to create web
pages for us
• Why use web scripts?
– Allows use to dynamically generate web pages
• These web pages are created upon request
– Standard HTML files stored on a server are called
static web pages or static files
• They don’t really change (unless we edit the HTML)
Creating Web Pages
• We can create web pages using a script in
many different languages
• Obviously, we can use Python (since that’s
what we’re learning)
• Other common languages include:
– Perl
– PHP
– ASP
Simple Page in Python
• Creating a simple web page in Python is very
similar to how it was done using XSL
• Basically, the Python program will need to output
the HTML we need for our page
• To do this, we’ll use a series of print statements
• The basic things we need are:
– Header information (text/html)
– A blank line
– <html>, <head>, <title>,<body>, HTML content, and
closing tags
Simple Python Script
print “Content-type: text/html”
print
print ”<html><head>”
print “<title>Python Example</title>”
print ”</head><body>”
print “<h1>Python is fun</h1>”
print “<p> Python made this page</p>”
print “</body></html> “
Header Information
• print “Content-type: text/html”
• This produces the header information for our
web page
• Basically the purpose of this is to tell the browser
which type of information is going to be sent
– Indicates the MIME type
• When we put a python script online, it has the
extension “.py”
– Browser needs to know that HTML is coming
• Why the blank line after the header?
– Indicates the start of the HTML
Triple-Quoted Strings
• When we create web pages with Python
we can dynamically change parts of the
page
– But large portions of the page may be static
• Instead of having multiple print statements
we can use fewer and enclose much of
our HTML in triple quoted strings “’
– Allows us to have line breaks where double
quotes do not in python
Triple-Quoted String Example
print “Content-type: text/html”
print
print ”””<html><head>
<title>Python Example</title>
</head><body>
<h1>Python is fun</h1>
<p> Python made this page</p>
<body></html> “””
• This produces the same output as the first example
Python script
• Allows us to copy and paste large chunks of HTML
Python Generated Web Pages
• The previous scripts are kind of pointless
to do with Python
– They actually create static web pages
– They don’t change
• But we can generate web pages that do
change
• A simple example is to include the current
time on a web page
Adding Time to a Web Page
import time
print “Content-type: text/html”
print
print “’<html><head><title>Time
Page</title></head>”’
print”<body><p>Right now, the time is <strong> “
print time.asctime(), “</strong></p>”
Print “</body></html>”
Output From Last Script
Content-type: text/html
<html><head><title>Time Page</title></head>
<body><p>Right now, the time is <strong>Tue
Nov 21 13:45:00 2005 </strong></p>
</body></html>
Running Python Scripts
• When we run this script locally, we see the
output from our script
– What we have on the last slide
– We don’t see the web page we wanted to create
• To get the page to display we need to upload it
to the cmpt165 server
– Our webpage will have the URL path of somepage.py
• We can test our use of the timeasc function by
running it in IDLE
– The output will show up in the window
raw_data vs. Forms
• Right now we’re using raw_data to get user input
• But if we’re using a web page, we have no
console for the user to enter data into
• Instead we’ll use forms
• Forms allow users to enter data into a web page
– This data is then sent back to the web script on the
web server
• We are familiar with forms
– We enter information into a form when we use a
search engine
– Purchase items online
Building a Basic Page with a Form
• The first thing we need is the <form> tag
• The <form> tag goes around the entire
form
– Does not affect the appearance of the page
– Just notes where the form begins and ends
– Just like writing standard HTML
• <form> needs an attribute called “action”
– This specifies the action to be taken when the
form is submitted
<form>, cont.
• The action attribute is very important
– Why have a form that does nothing?
• action specifies which script to run when
the form is submitted
• The value for action should be the URL of
the script
• <form action = “testScript.py”>
• <form action =
“someFolder/customerInfo.py”>
Adding Controls
• Controls are those elements which we are going
to add to the form
– Text fields
– Text areas
– Check boxes
– Radio Buttons
– Selectable Lists
– Submit button
• A form without controls is pointless
– There’s no user input!
• We are going to add controls using the <input>
tag
<input> Tag
• With the <input> tag we need to specify
two attributes:
– type
– name
• Type attribute specifies the type of control
• Name attribute gives a name to the control
so we can access the data in it later
– Like giving it a variable name
Type Attribute
• Again, the type attribute specifies the type
of control
• Some examples include:
– type =“text” - text box
– type =“checkbox” –check box
– type =“radio” –radio button
– type = “submit” –submit button
• Example:
<input type =“submit”…..
Name Attribute
• We have to have a name to access the
information in a particular portion of the form
– Very similar to naming variables
• It’s best if the name relates to the content of the
control and the control type
– Ex.
• A text box control which gets a customer name could have a
name= “customerName”
• A check box control which allows customer to select getting
product updates name=“checkUpdates”
Value Attribute
• Sometimes we’ll also want to add a value attribute
• The value attribute specifies the default value for that
control
• Ex.
– <input type=“text” value=“a textbox” name=“textbox1”/>
• “a textbox” would appear in the text box
• Checkboxes can use the checked property to indicate if
it should be checked by default
– <input type=“checkbox” checked=“checked”
name=“checkbox1”/>
– If checked=“checked” then the box will appear checked
– “checked” is the only value that the checked property can have
Other Useful Text Attributes
• size attribute indicates how wide the text
box should be
<input type = “text” name=“text1” size =“10”/>
– Size indicates how many characters, in this
case 10
• maxlength is just like size except that it
indicates the maximum number of
characters a text box will accommodate
Submit Type
• We have to have a way to send the form
information to the script that’s going to handle it
• To do this we can use a control with the type
“submit”
• It will show up as a button
• The value attribute will indicate the text which
should be displayed on the button
<input type=“submit” value=“Go”
name=“submitButton”/>
HTML Form Example
In class Example
What’s Next?
• So now we can create forms
• And users can enter information
• But how the heck do we use it?
• We are going to use CGI to take the
information from the form and process it
somehow
– We’ll get into this next class
• You’ll be using CGI to take order
information
Questions
• What you should know:
– What web scripts are
– How to create a webpage using Python
– How to use triple quoted strings
– How to write a form in HTML
• <form action=“someprogram.py”>
• <input>

python and web for data science prfrograminh

  • 1.
  • 2.
    Web Scripts • Programsthat generate web pages are often called web scripts or CGI scripts • Like using XSL to transform an XML file into an HTML file, we can use web scripts to create web pages for us • Why use web scripts? – Allows use to dynamically generate web pages • These web pages are created upon request – Standard HTML files stored on a server are called static web pages or static files • They don’t really change (unless we edit the HTML)
  • 3.
    Creating Web Pages •We can create web pages using a script in many different languages • Obviously, we can use Python (since that’s what we’re learning) • Other common languages include: – Perl – PHP – ASP
  • 4.
    Simple Page inPython • Creating a simple web page in Python is very similar to how it was done using XSL • Basically, the Python program will need to output the HTML we need for our page • To do this, we’ll use a series of print statements • The basic things we need are: – Header information (text/html) – A blank line – <html>, <head>, <title>,<body>, HTML content, and closing tags
  • 5.
    Simple Python Script print“Content-type: text/html” print print ”<html><head>” print “<title>Python Example</title>” print ”</head><body>” print “<h1>Python is fun</h1>” print “<p> Python made this page</p>” print “</body></html> “
  • 6.
    Header Information • print“Content-type: text/html” • This produces the header information for our web page • Basically the purpose of this is to tell the browser which type of information is going to be sent – Indicates the MIME type • When we put a python script online, it has the extension “.py” – Browser needs to know that HTML is coming • Why the blank line after the header? – Indicates the start of the HTML
  • 7.
    Triple-Quoted Strings • Whenwe create web pages with Python we can dynamically change parts of the page – But large portions of the page may be static • Instead of having multiple print statements we can use fewer and enclose much of our HTML in triple quoted strings “’ – Allows us to have line breaks where double quotes do not in python
  • 8.
    Triple-Quoted String Example print“Content-type: text/html” print print ”””<html><head> <title>Python Example</title> </head><body> <h1>Python is fun</h1> <p> Python made this page</p> <body></html> “”” • This produces the same output as the first example Python script • Allows us to copy and paste large chunks of HTML
  • 9.
    Python Generated WebPages • The previous scripts are kind of pointless to do with Python – They actually create static web pages – They don’t change • But we can generate web pages that do change • A simple example is to include the current time on a web page
  • 10.
    Adding Time toa Web Page import time print “Content-type: text/html” print print “’<html><head><title>Time Page</title></head>”’ print”<body><p>Right now, the time is <strong> “ print time.asctime(), “</strong></p>” Print “</body></html>”
  • 11.
    Output From LastScript Content-type: text/html <html><head><title>Time Page</title></head> <body><p>Right now, the time is <strong>Tue Nov 21 13:45:00 2005 </strong></p> </body></html>
  • 12.
    Running Python Scripts •When we run this script locally, we see the output from our script – What we have on the last slide – We don’t see the web page we wanted to create • To get the page to display we need to upload it to the cmpt165 server – Our webpage will have the URL path of somepage.py • We can test our use of the timeasc function by running it in IDLE – The output will show up in the window
  • 13.
    raw_data vs. Forms •Right now we’re using raw_data to get user input • But if we’re using a web page, we have no console for the user to enter data into • Instead we’ll use forms • Forms allow users to enter data into a web page – This data is then sent back to the web script on the web server • We are familiar with forms – We enter information into a form when we use a search engine – Purchase items online
  • 14.
    Building a BasicPage with a Form • The first thing we need is the <form> tag • The <form> tag goes around the entire form – Does not affect the appearance of the page – Just notes where the form begins and ends – Just like writing standard HTML • <form> needs an attribute called “action” – This specifies the action to be taken when the form is submitted
  • 15.
    <form>, cont. • Theaction attribute is very important – Why have a form that does nothing? • action specifies which script to run when the form is submitted • The value for action should be the URL of the script • <form action = “testScript.py”> • <form action = “someFolder/customerInfo.py”>
  • 16.
    Adding Controls • Controlsare those elements which we are going to add to the form – Text fields – Text areas – Check boxes – Radio Buttons – Selectable Lists – Submit button • A form without controls is pointless – There’s no user input! • We are going to add controls using the <input> tag
  • 17.
    <input> Tag • Withthe <input> tag we need to specify two attributes: – type – name • Type attribute specifies the type of control • Name attribute gives a name to the control so we can access the data in it later – Like giving it a variable name
  • 18.
    Type Attribute • Again,the type attribute specifies the type of control • Some examples include: – type =“text” - text box – type =“checkbox” –check box – type =“radio” –radio button – type = “submit” –submit button • Example: <input type =“submit”…..
  • 19.
    Name Attribute • Wehave to have a name to access the information in a particular portion of the form – Very similar to naming variables • It’s best if the name relates to the content of the control and the control type – Ex. • A text box control which gets a customer name could have a name= “customerName” • A check box control which allows customer to select getting product updates name=“checkUpdates”
  • 20.
    Value Attribute • Sometimeswe’ll also want to add a value attribute • The value attribute specifies the default value for that control • Ex. – <input type=“text” value=“a textbox” name=“textbox1”/> • “a textbox” would appear in the text box • Checkboxes can use the checked property to indicate if it should be checked by default – <input type=“checkbox” checked=“checked” name=“checkbox1”/> – If checked=“checked” then the box will appear checked – “checked” is the only value that the checked property can have
  • 21.
    Other Useful TextAttributes • size attribute indicates how wide the text box should be <input type = “text” name=“text1” size =“10”/> – Size indicates how many characters, in this case 10 • maxlength is just like size except that it indicates the maximum number of characters a text box will accommodate
  • 22.
    Submit Type • Wehave to have a way to send the form information to the script that’s going to handle it • To do this we can use a control with the type “submit” • It will show up as a button • The value attribute will indicate the text which should be displayed on the button <input type=“submit” value=“Go” name=“submitButton”/>
  • 23.
    HTML Form Example Inclass Example
  • 24.
    What’s Next? • Sonow we can create forms • And users can enter information • But how the heck do we use it? • We are going to use CGI to take the information from the form and process it somehow – We’ll get into this next class • You’ll be using CGI to take order information
  • 25.
    Questions • What youshould know: – What web scripts are – How to create a webpage using Python – How to use triple quoted strings – How to write a form in HTML • <form action=“someprogram.py”> • <input>