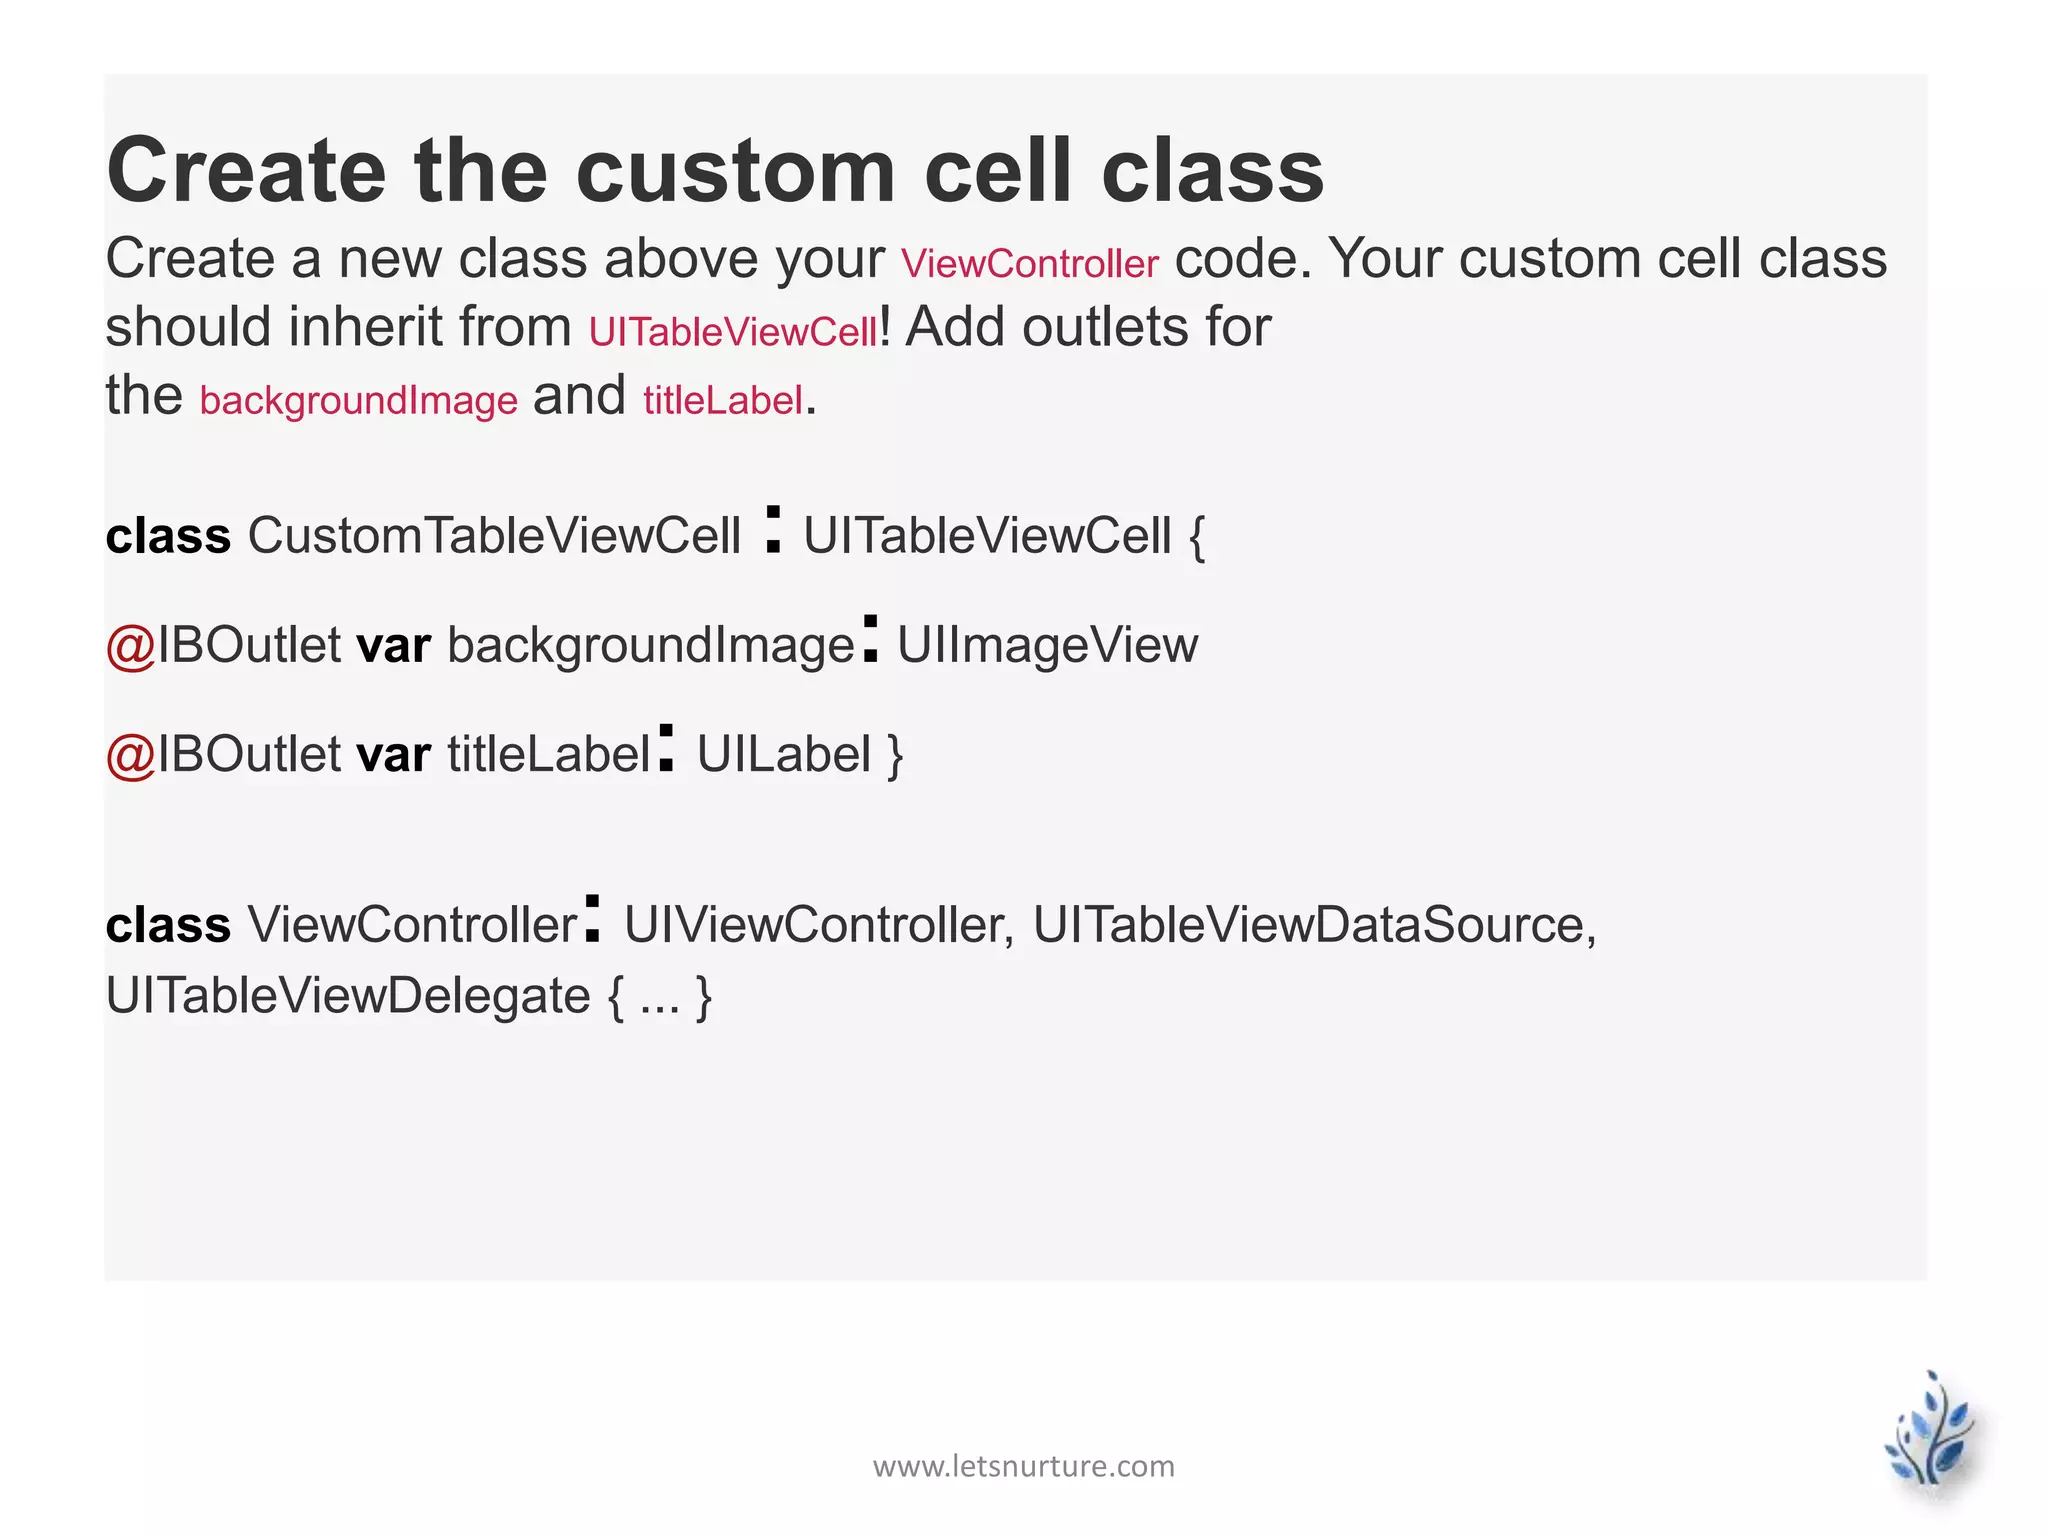
Downloaded 29 times


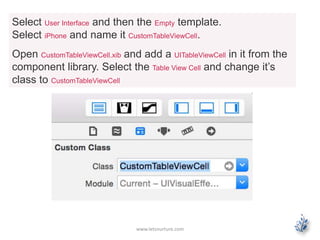


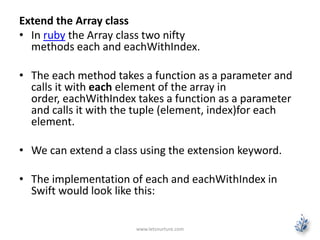
![www.letsnurture.com
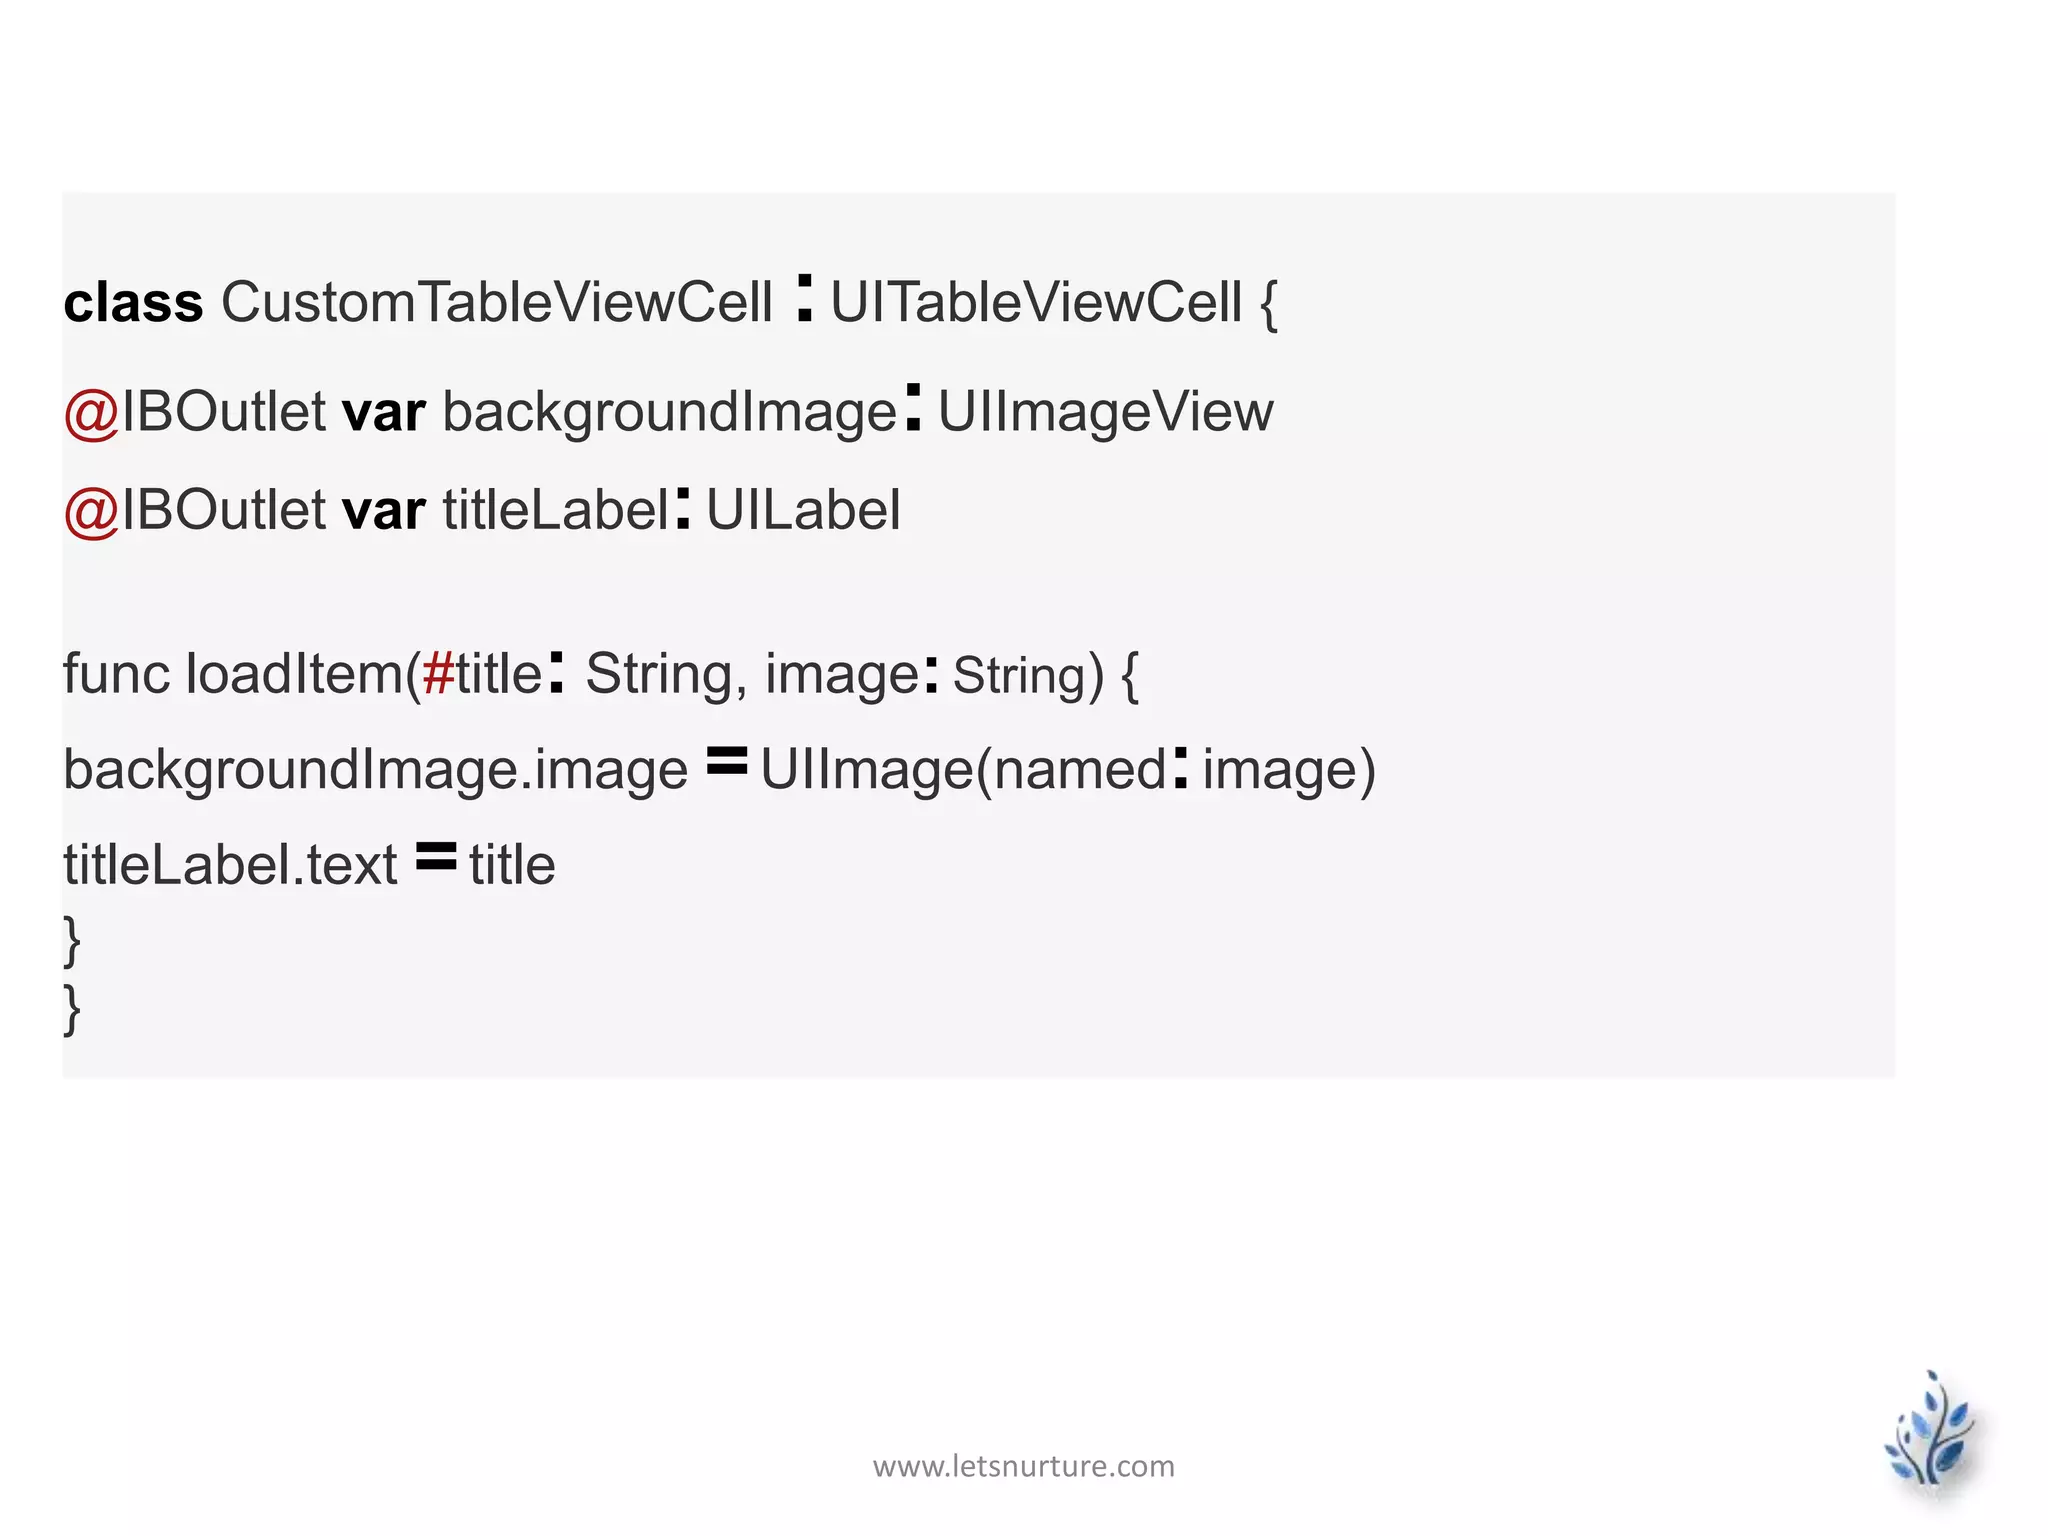
The first value will represent the title and the second
one the imageName.
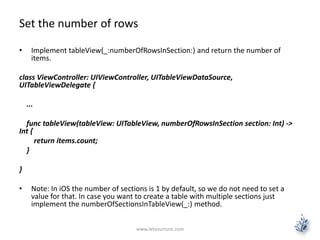
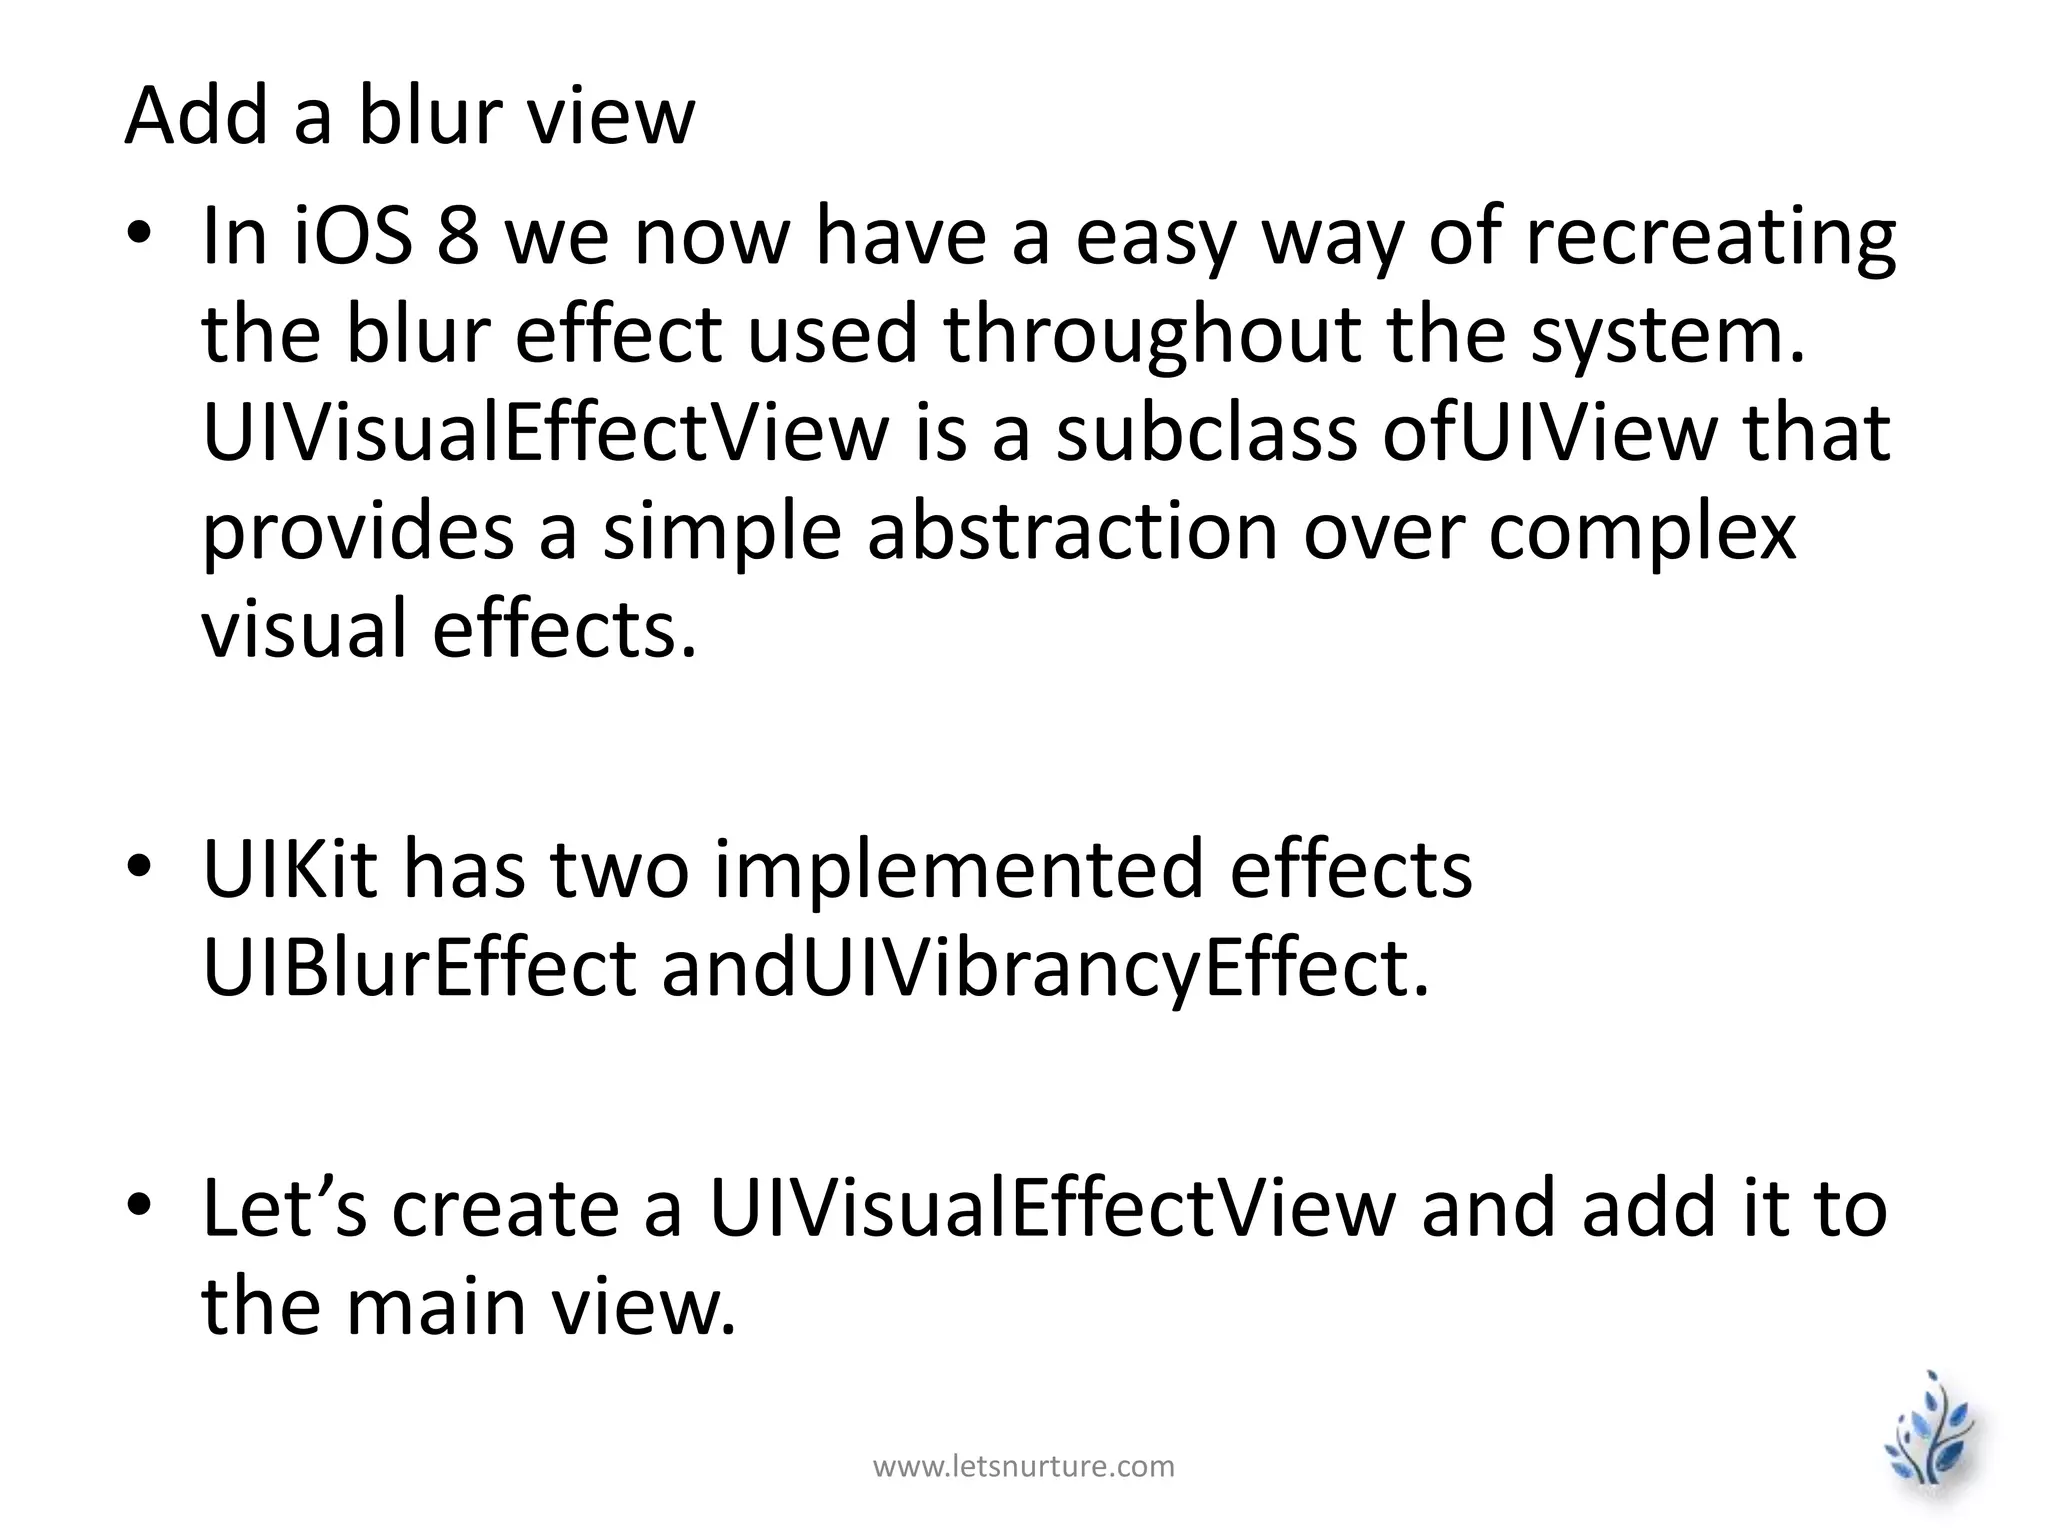
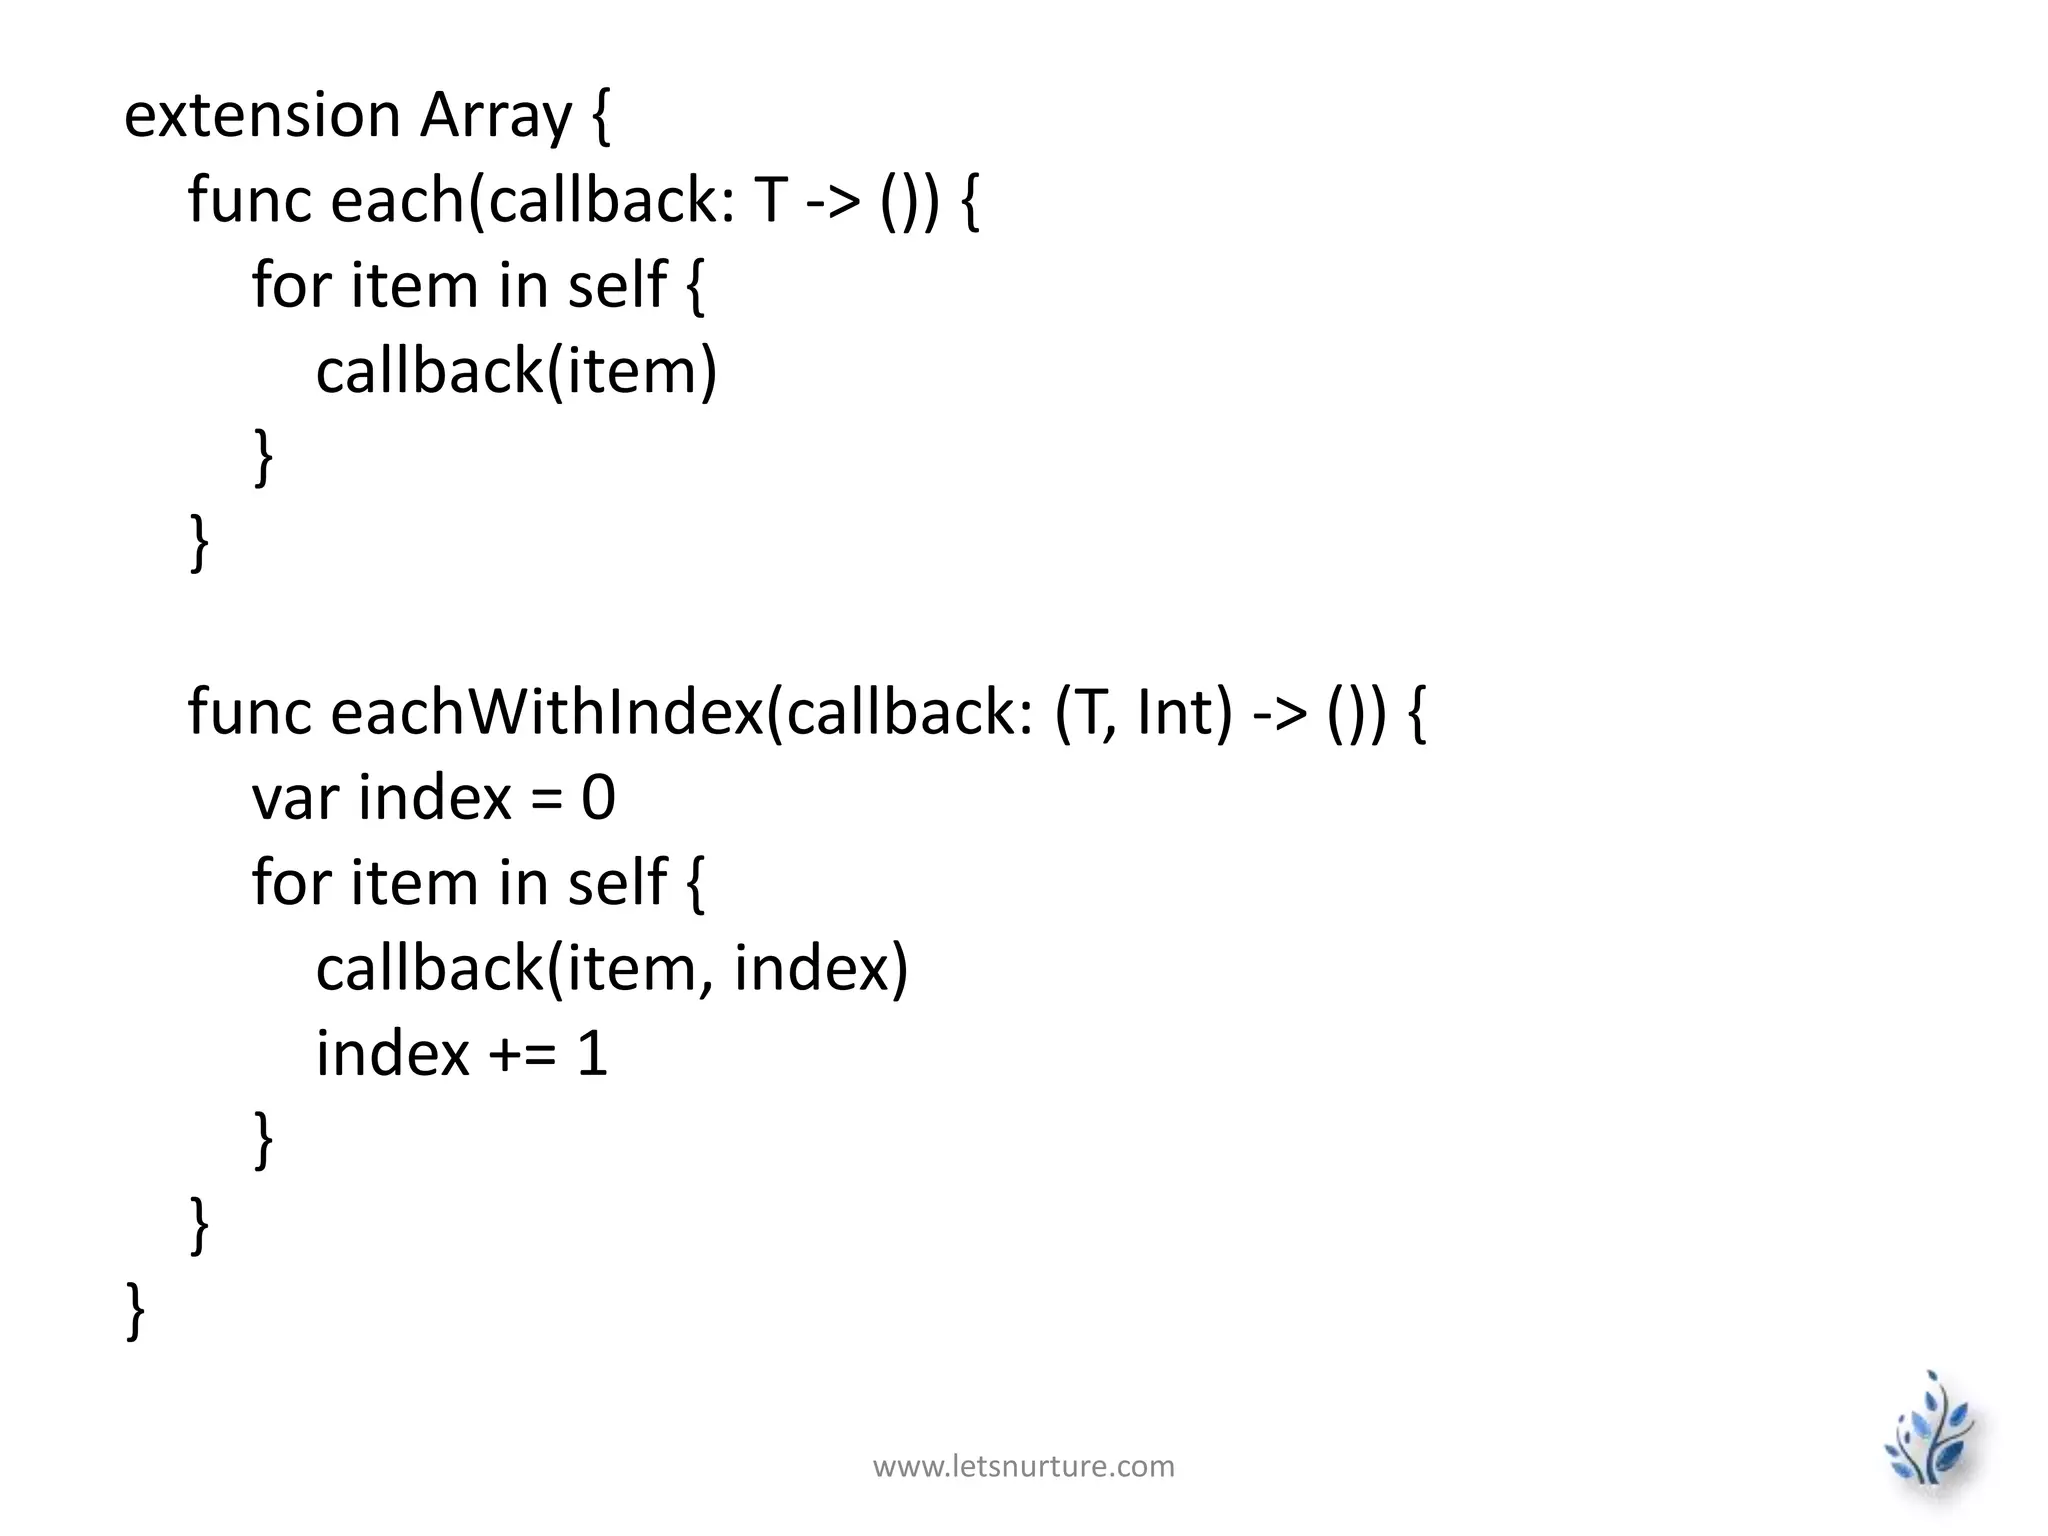
class ViewController: UIViewController, UITableViewDataSource, UITableViewDelegate {
...
var items:[(String, String)] = [
("❤", "swift 1.jpeg"),
("We", "swift 2.jpeg"),
("❤", "swift 3.jpeg"),
("Swift", "swift 4.jpeg"),
("❤", "swift 5.jpeg")
]
}](https://image.slidesharecdn.com/swifttableview-141229062046-conversion-gate02/85/Swift-Tableview-iOS-App-Development-17-320.jpg)

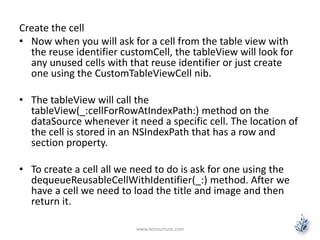
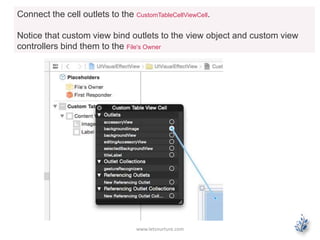
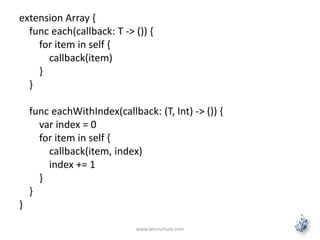
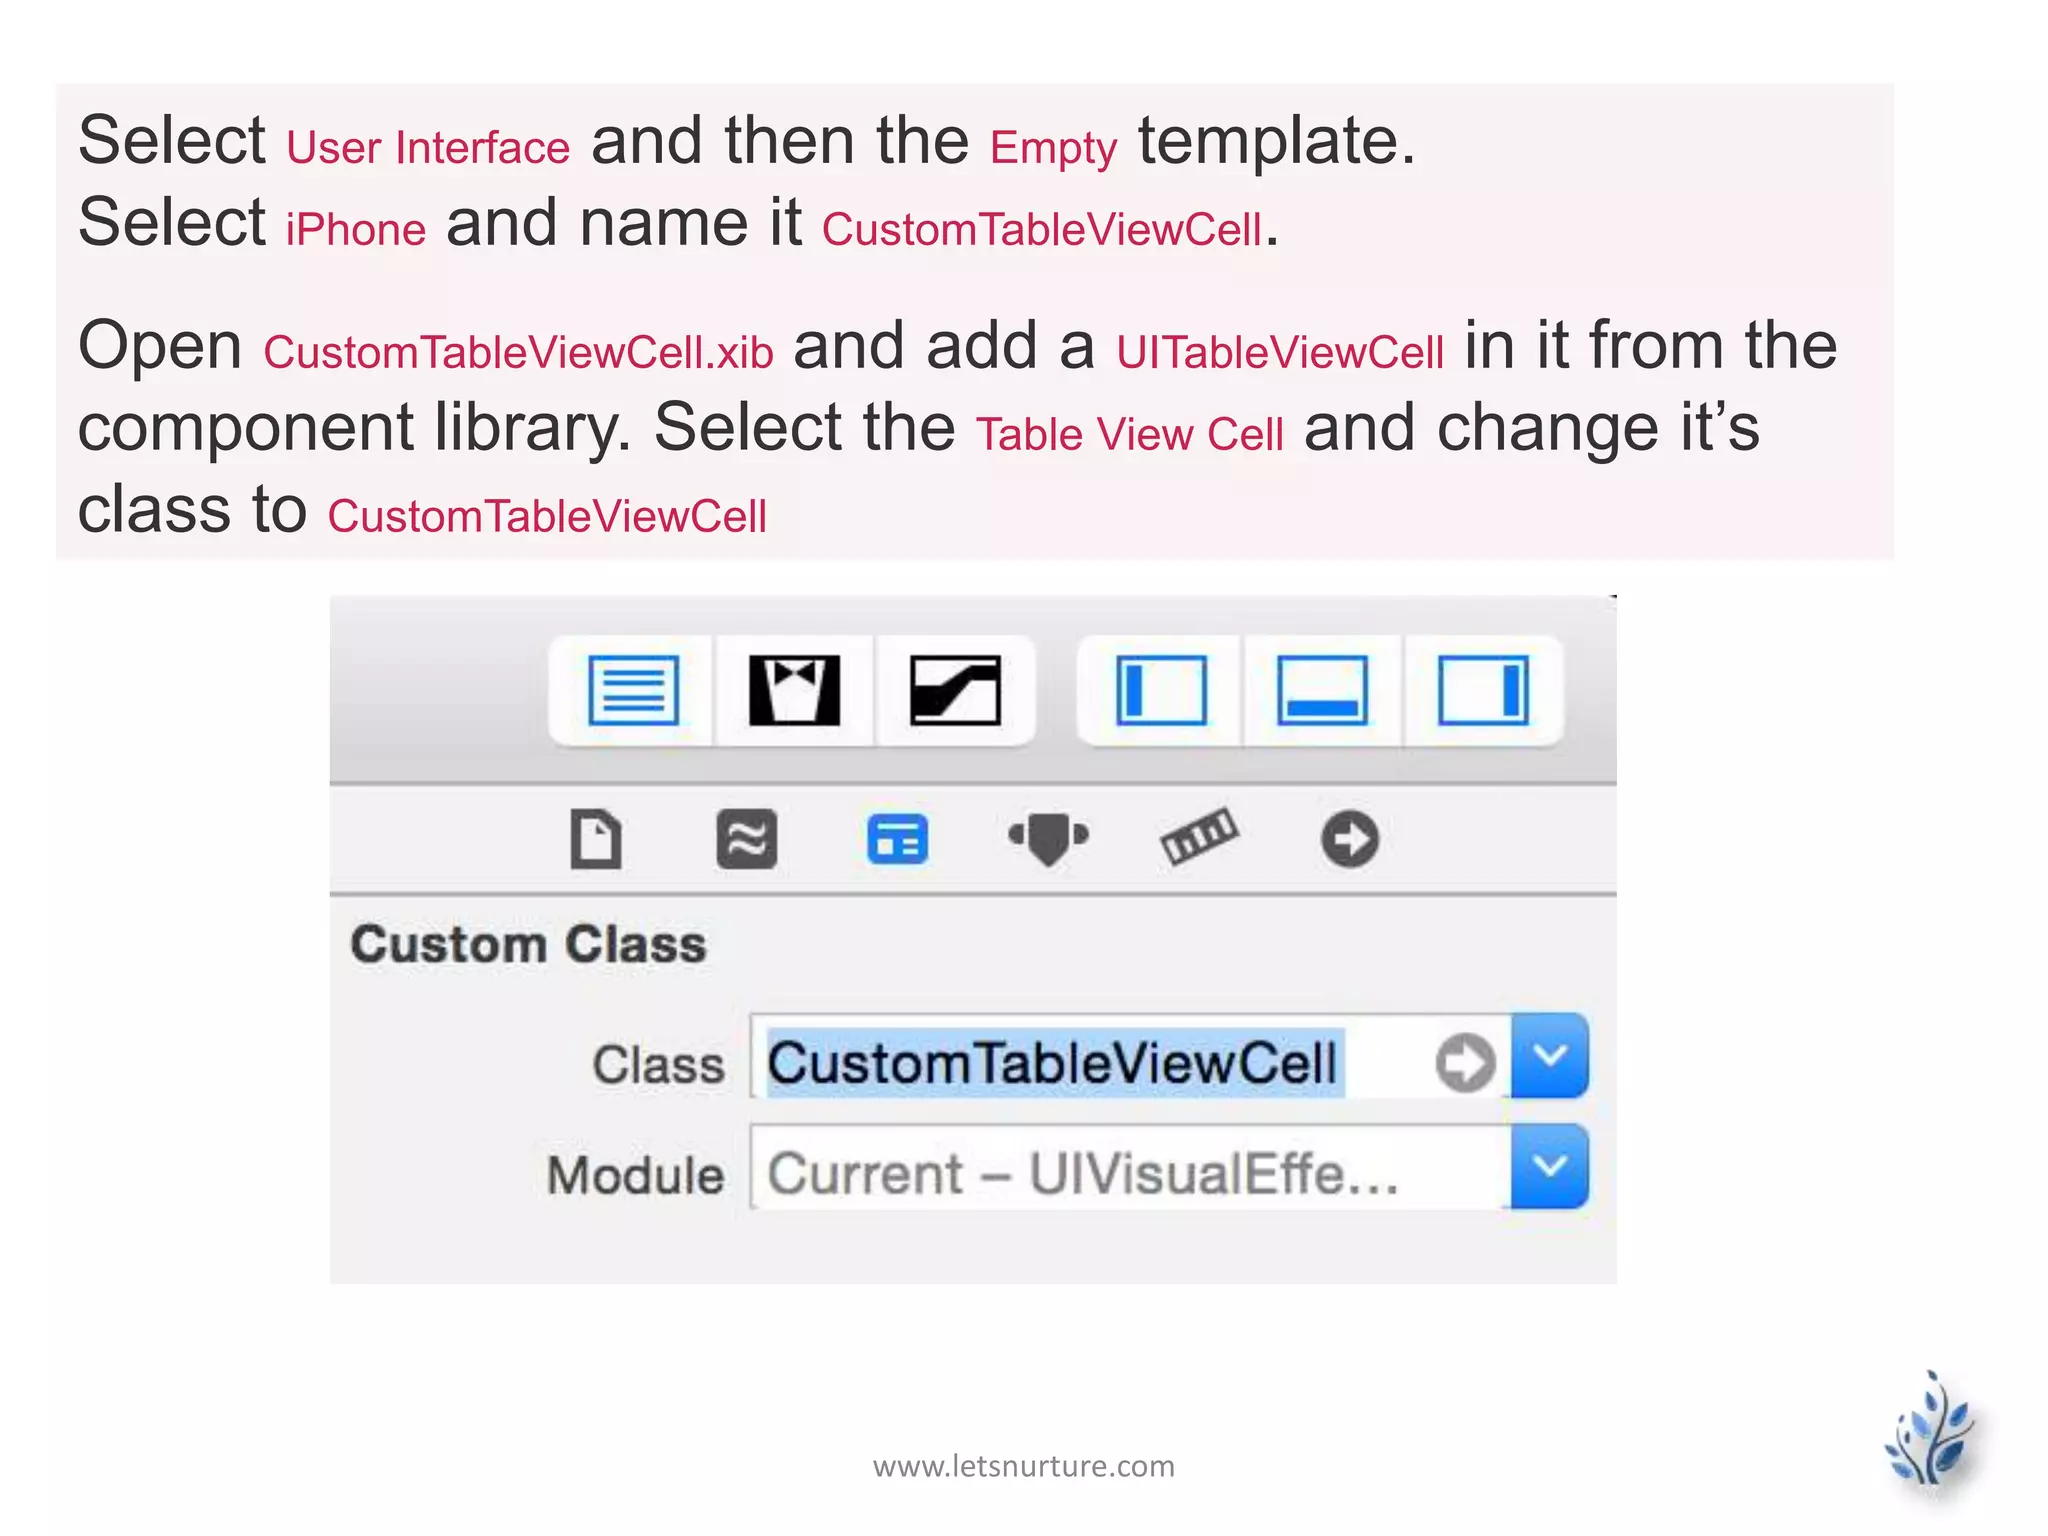
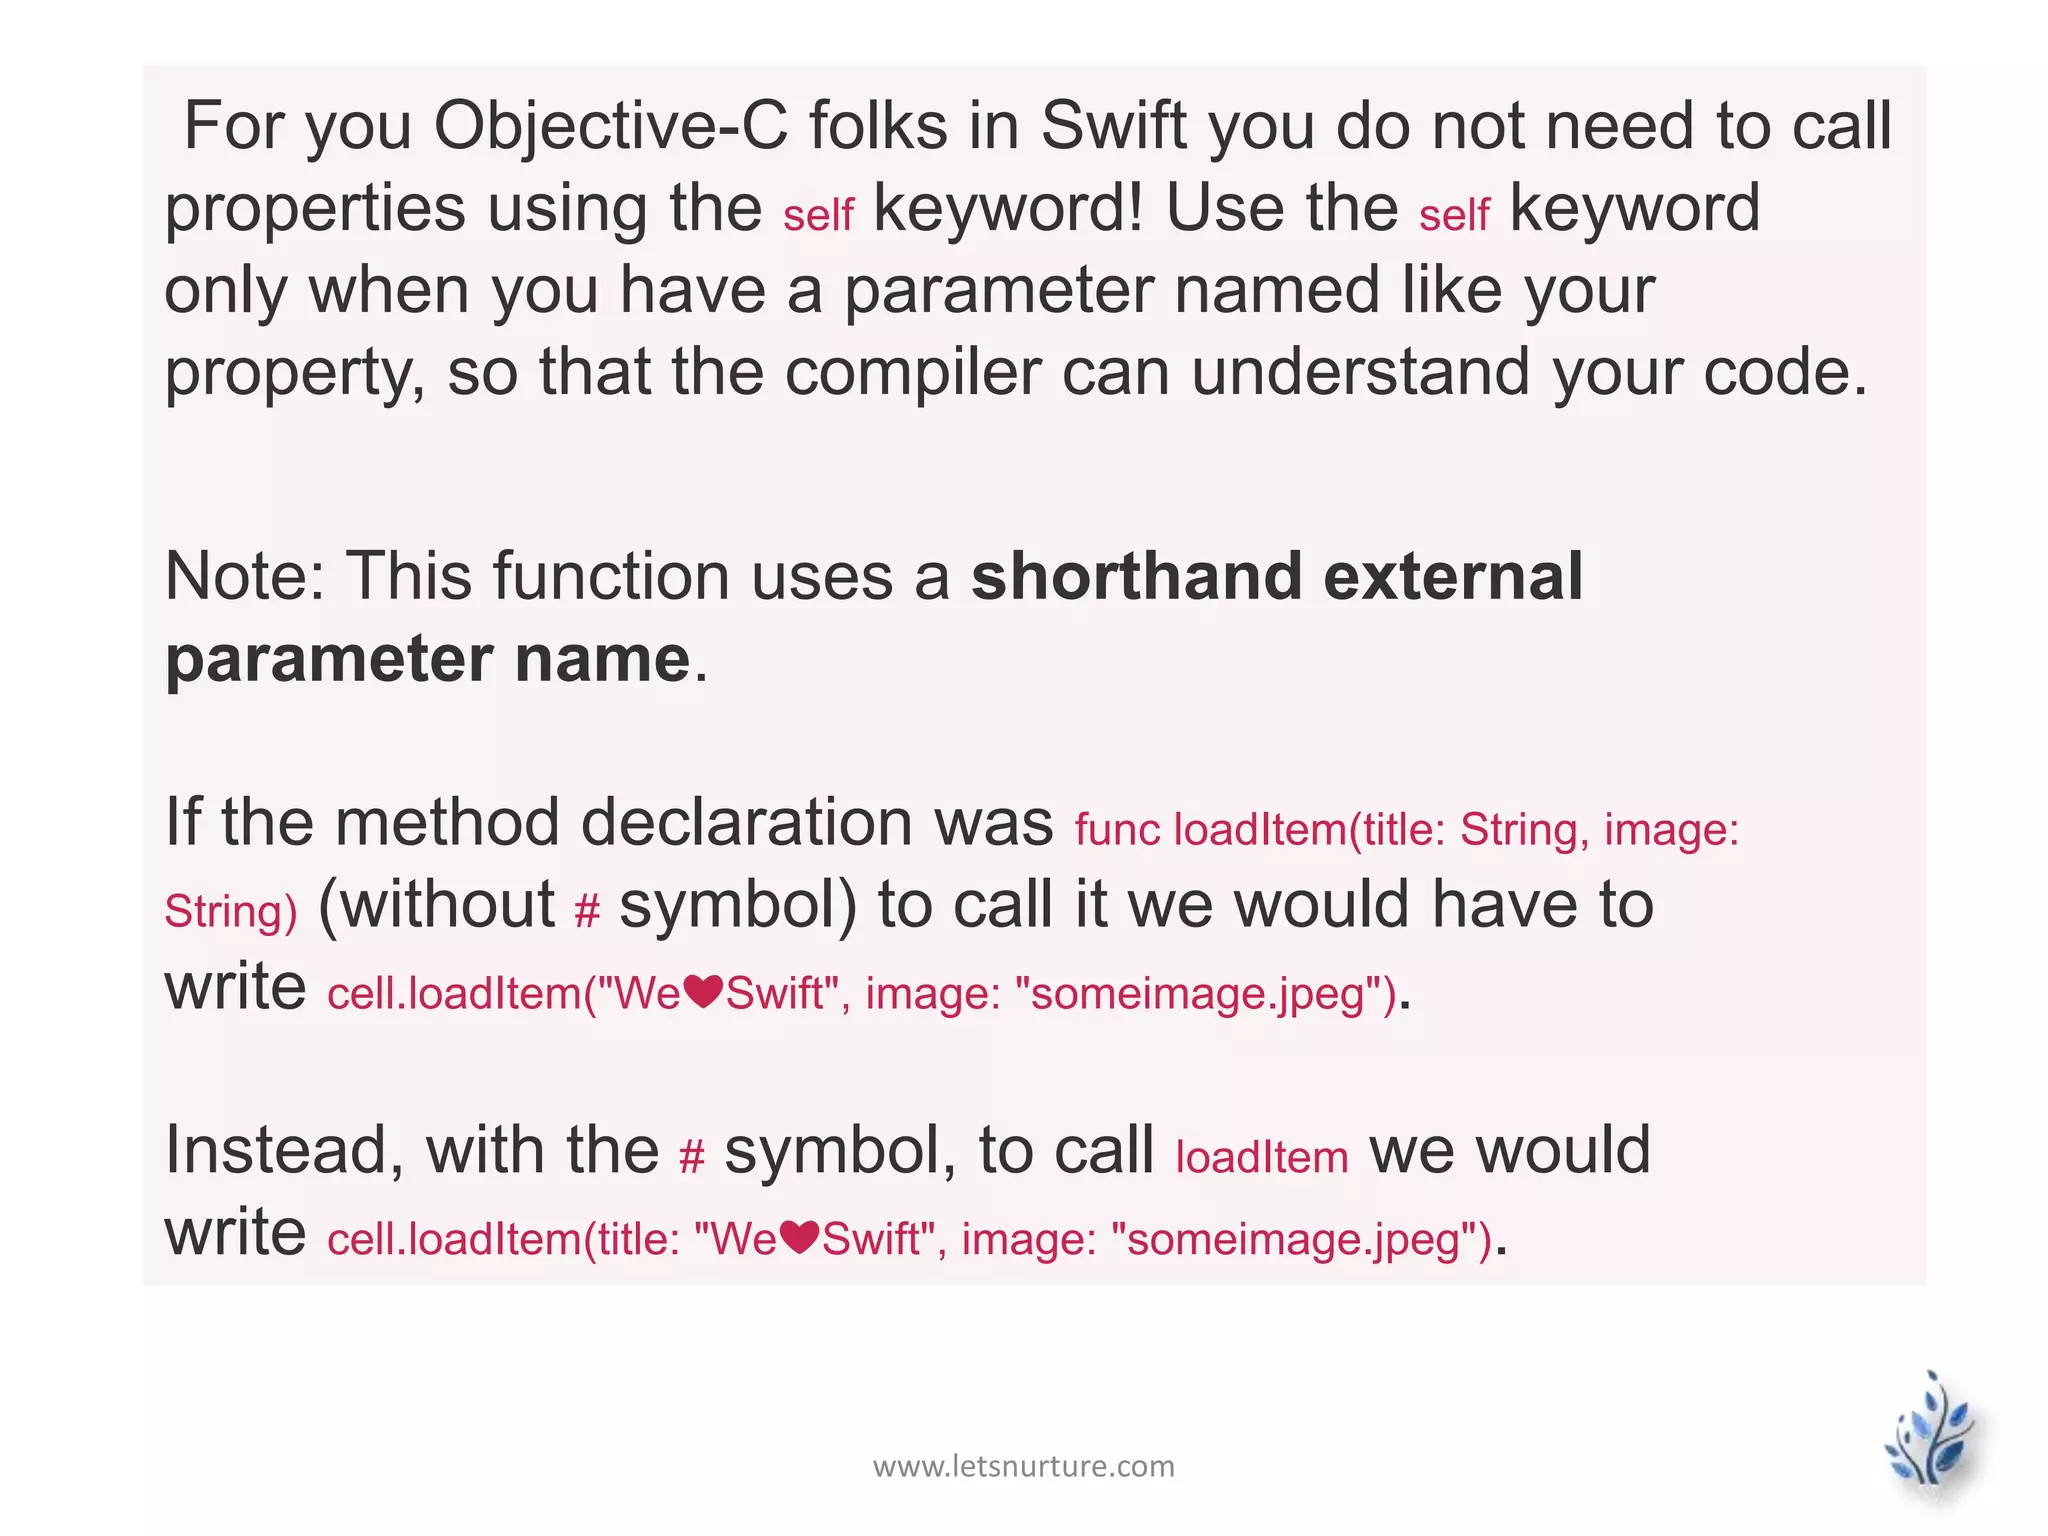
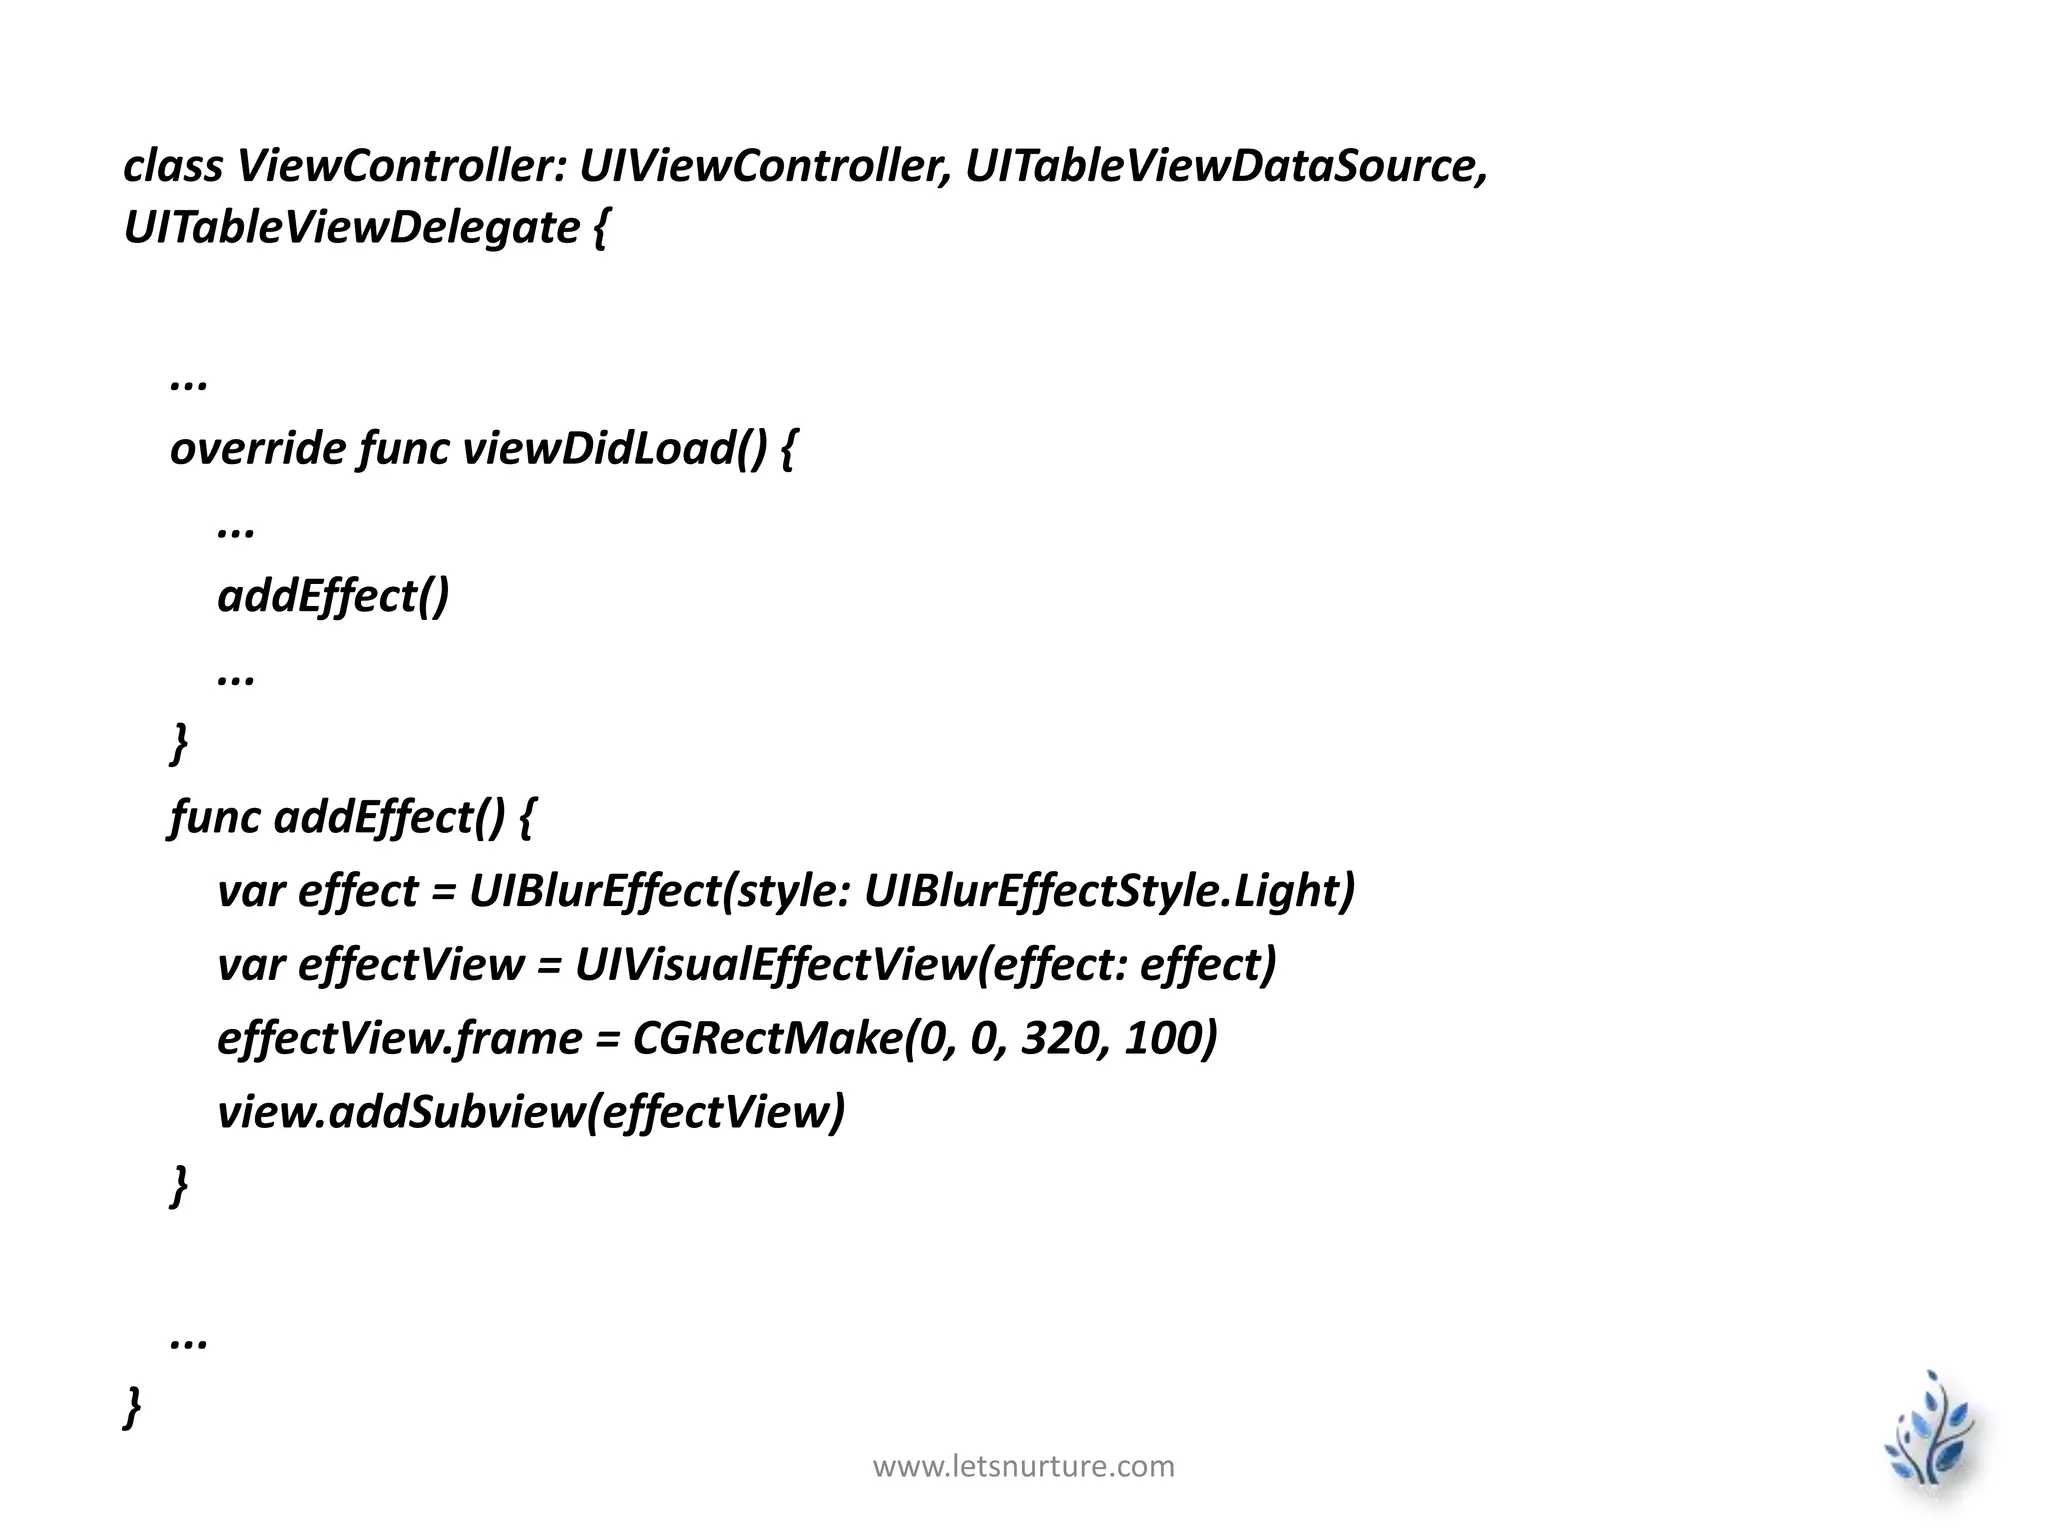
![class ViewController: UIViewController, UITableViewDataSource,
UITableViewDelegate {
...
func tableView(tableView: UITableView!, cellForRowAtIndexPath
indexPath: NSIndexPath!) -> UITableViewCell {
var cell:CustomTableViewCell =
self.tableView.dequeueReusableCellWithIdentifier("customCell") as
CustomTableViewCell
// this is how you extract values from a tuple
var (title, image) = items[indexPath.row]
cell.loadItem(title: title, image: image)
return cell
}
}
www.letsnurture.com](https://image.slidesharecdn.com/swifttableview-141229062046-conversion-gate02/85/Swift-Tableview-iOS-App-Development-21-320.jpg)
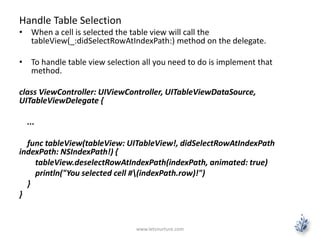


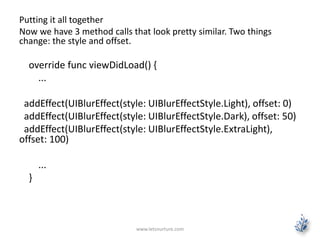
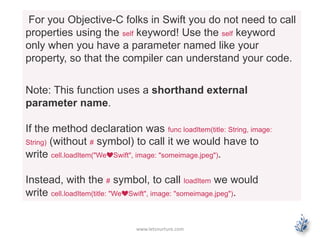
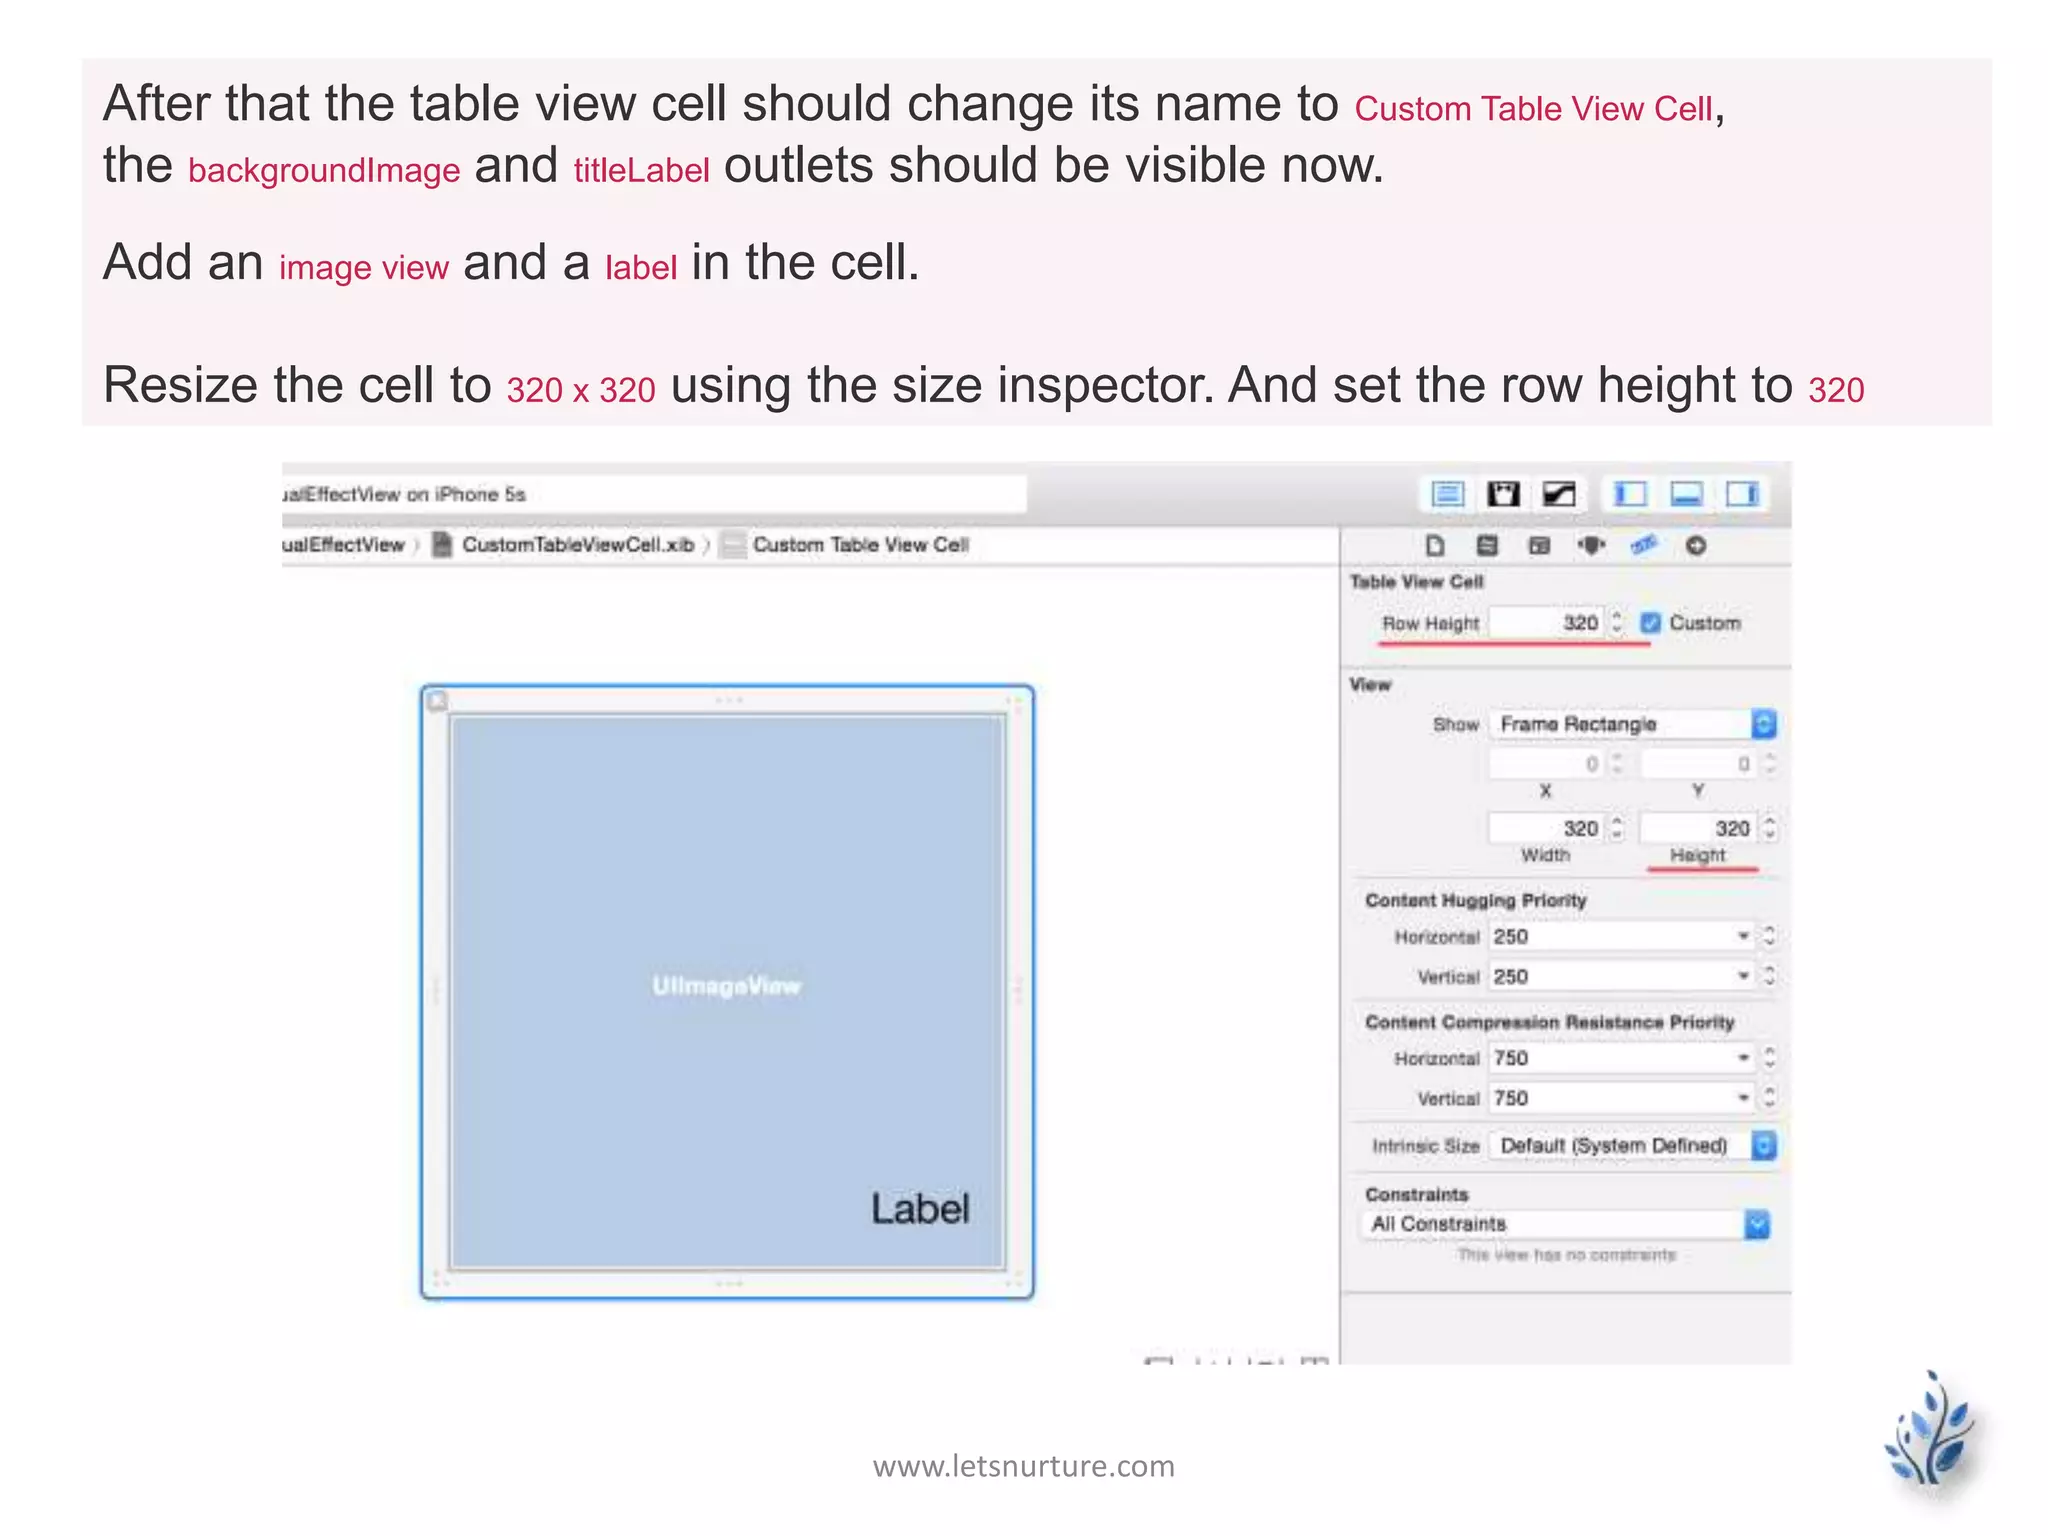
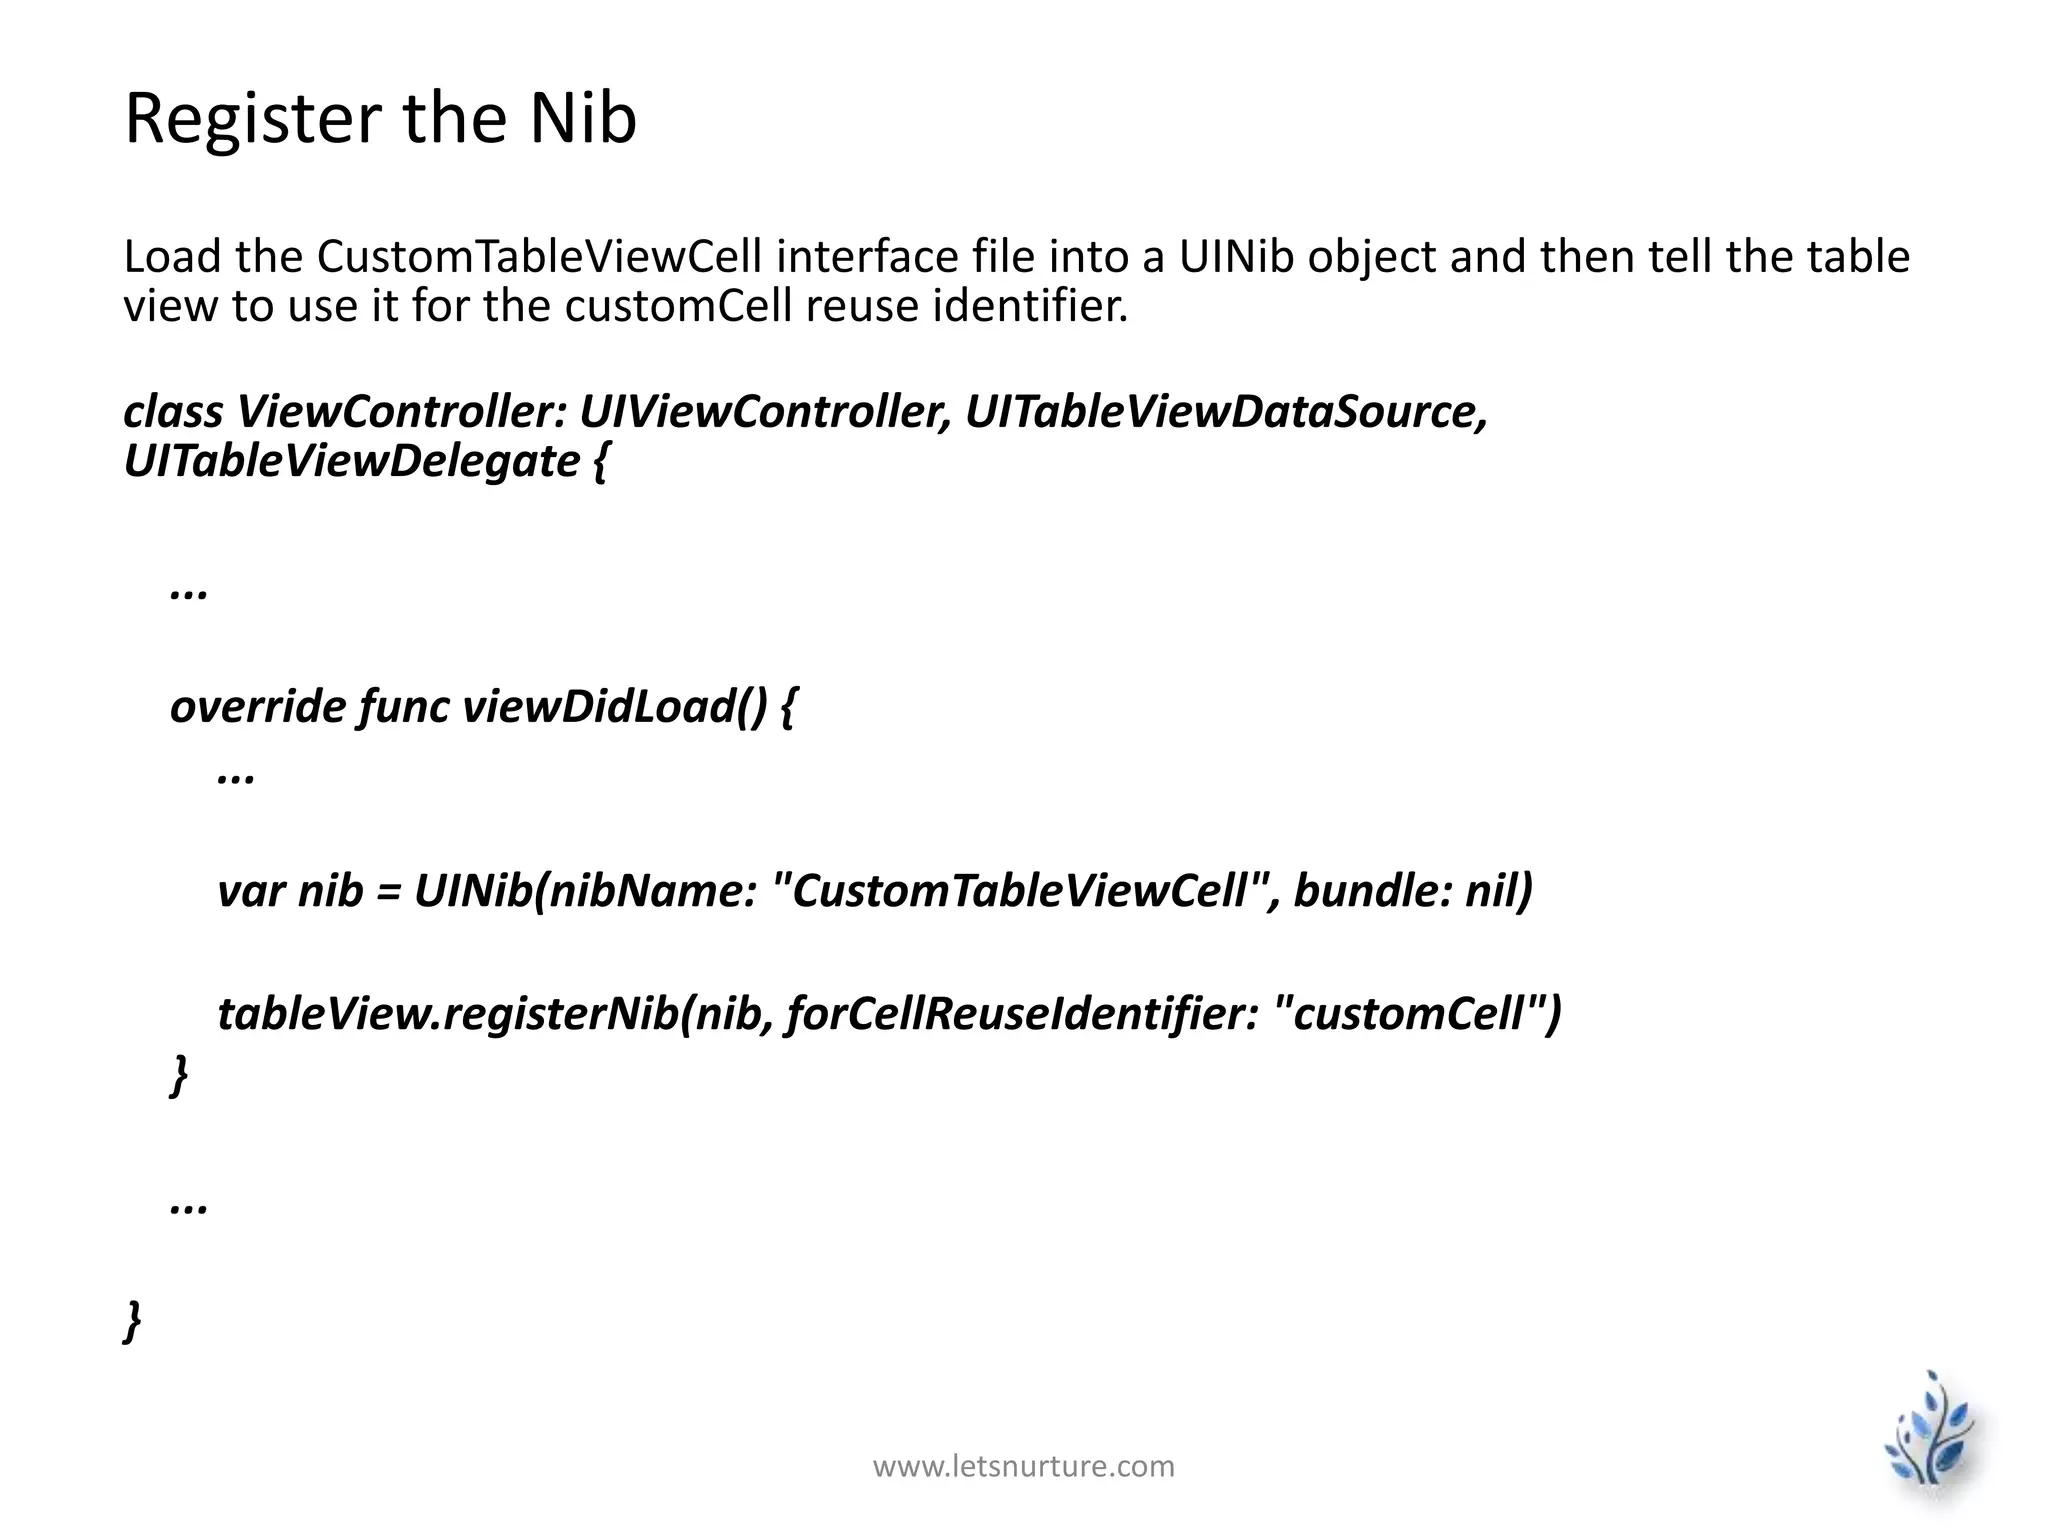
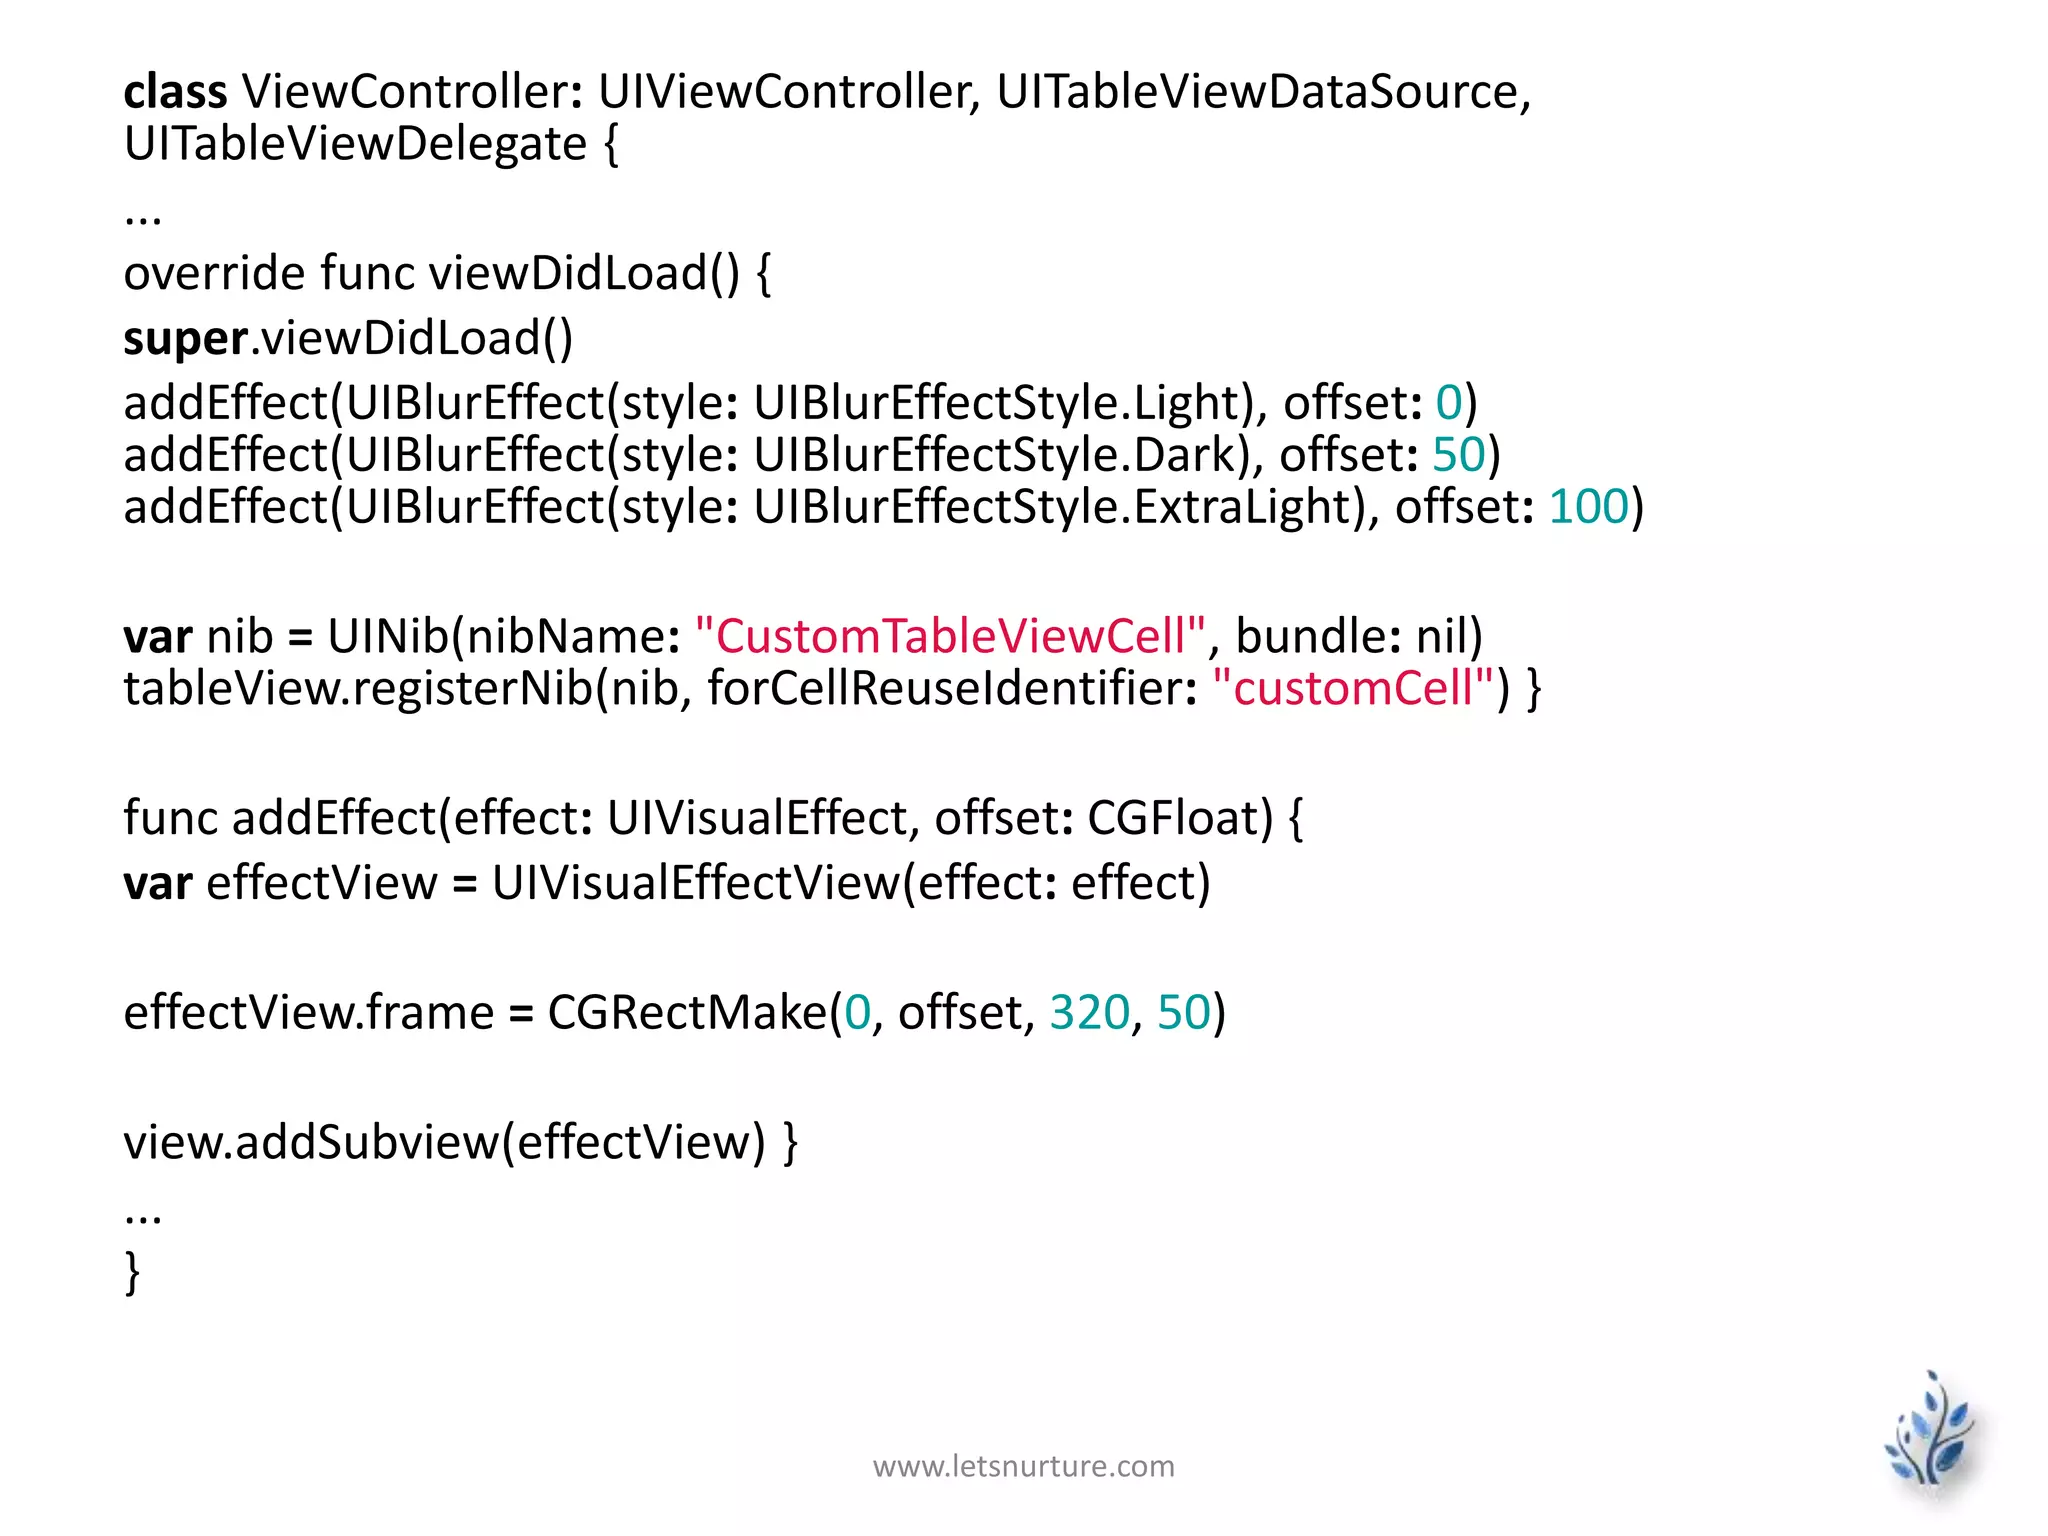
![class ViewController: UIViewController, UITableViewDataSource, UITableViewDelegate {
...
override func viewDidLoad() {
...
addEffects()
...
}
func addEffects() {
[
UIBlurEffect(style: UIBlurEffectStyle.Light),
UIBlurEffect(style: UIBlurEffectStyle.Dark),
UIBlurEffect(style: UIBlurEffectStyle.ExtraLight)
].eachWithIndex { (effect, index) in
var effectView = UIVisualEffectView(effect: effect)
effectView.frame = CGRectMake(0, CGFloat(50 * index), 320, 50)
self.view.addSubview(effectView)
}
}
...
}
www.letsnurture.com](https://image.slidesharecdn.com/swifttableview-141229062046-conversion-gate02/85/Swift-Tableview-iOS-App-Development-30-320.jpg)
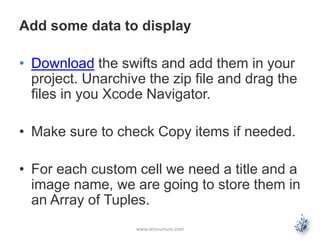
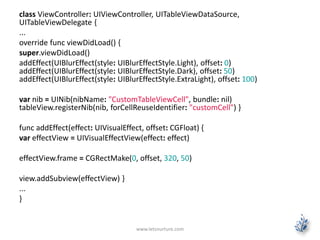
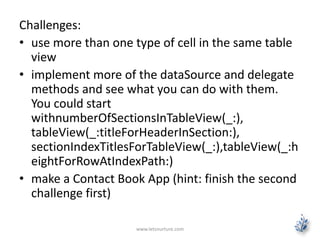
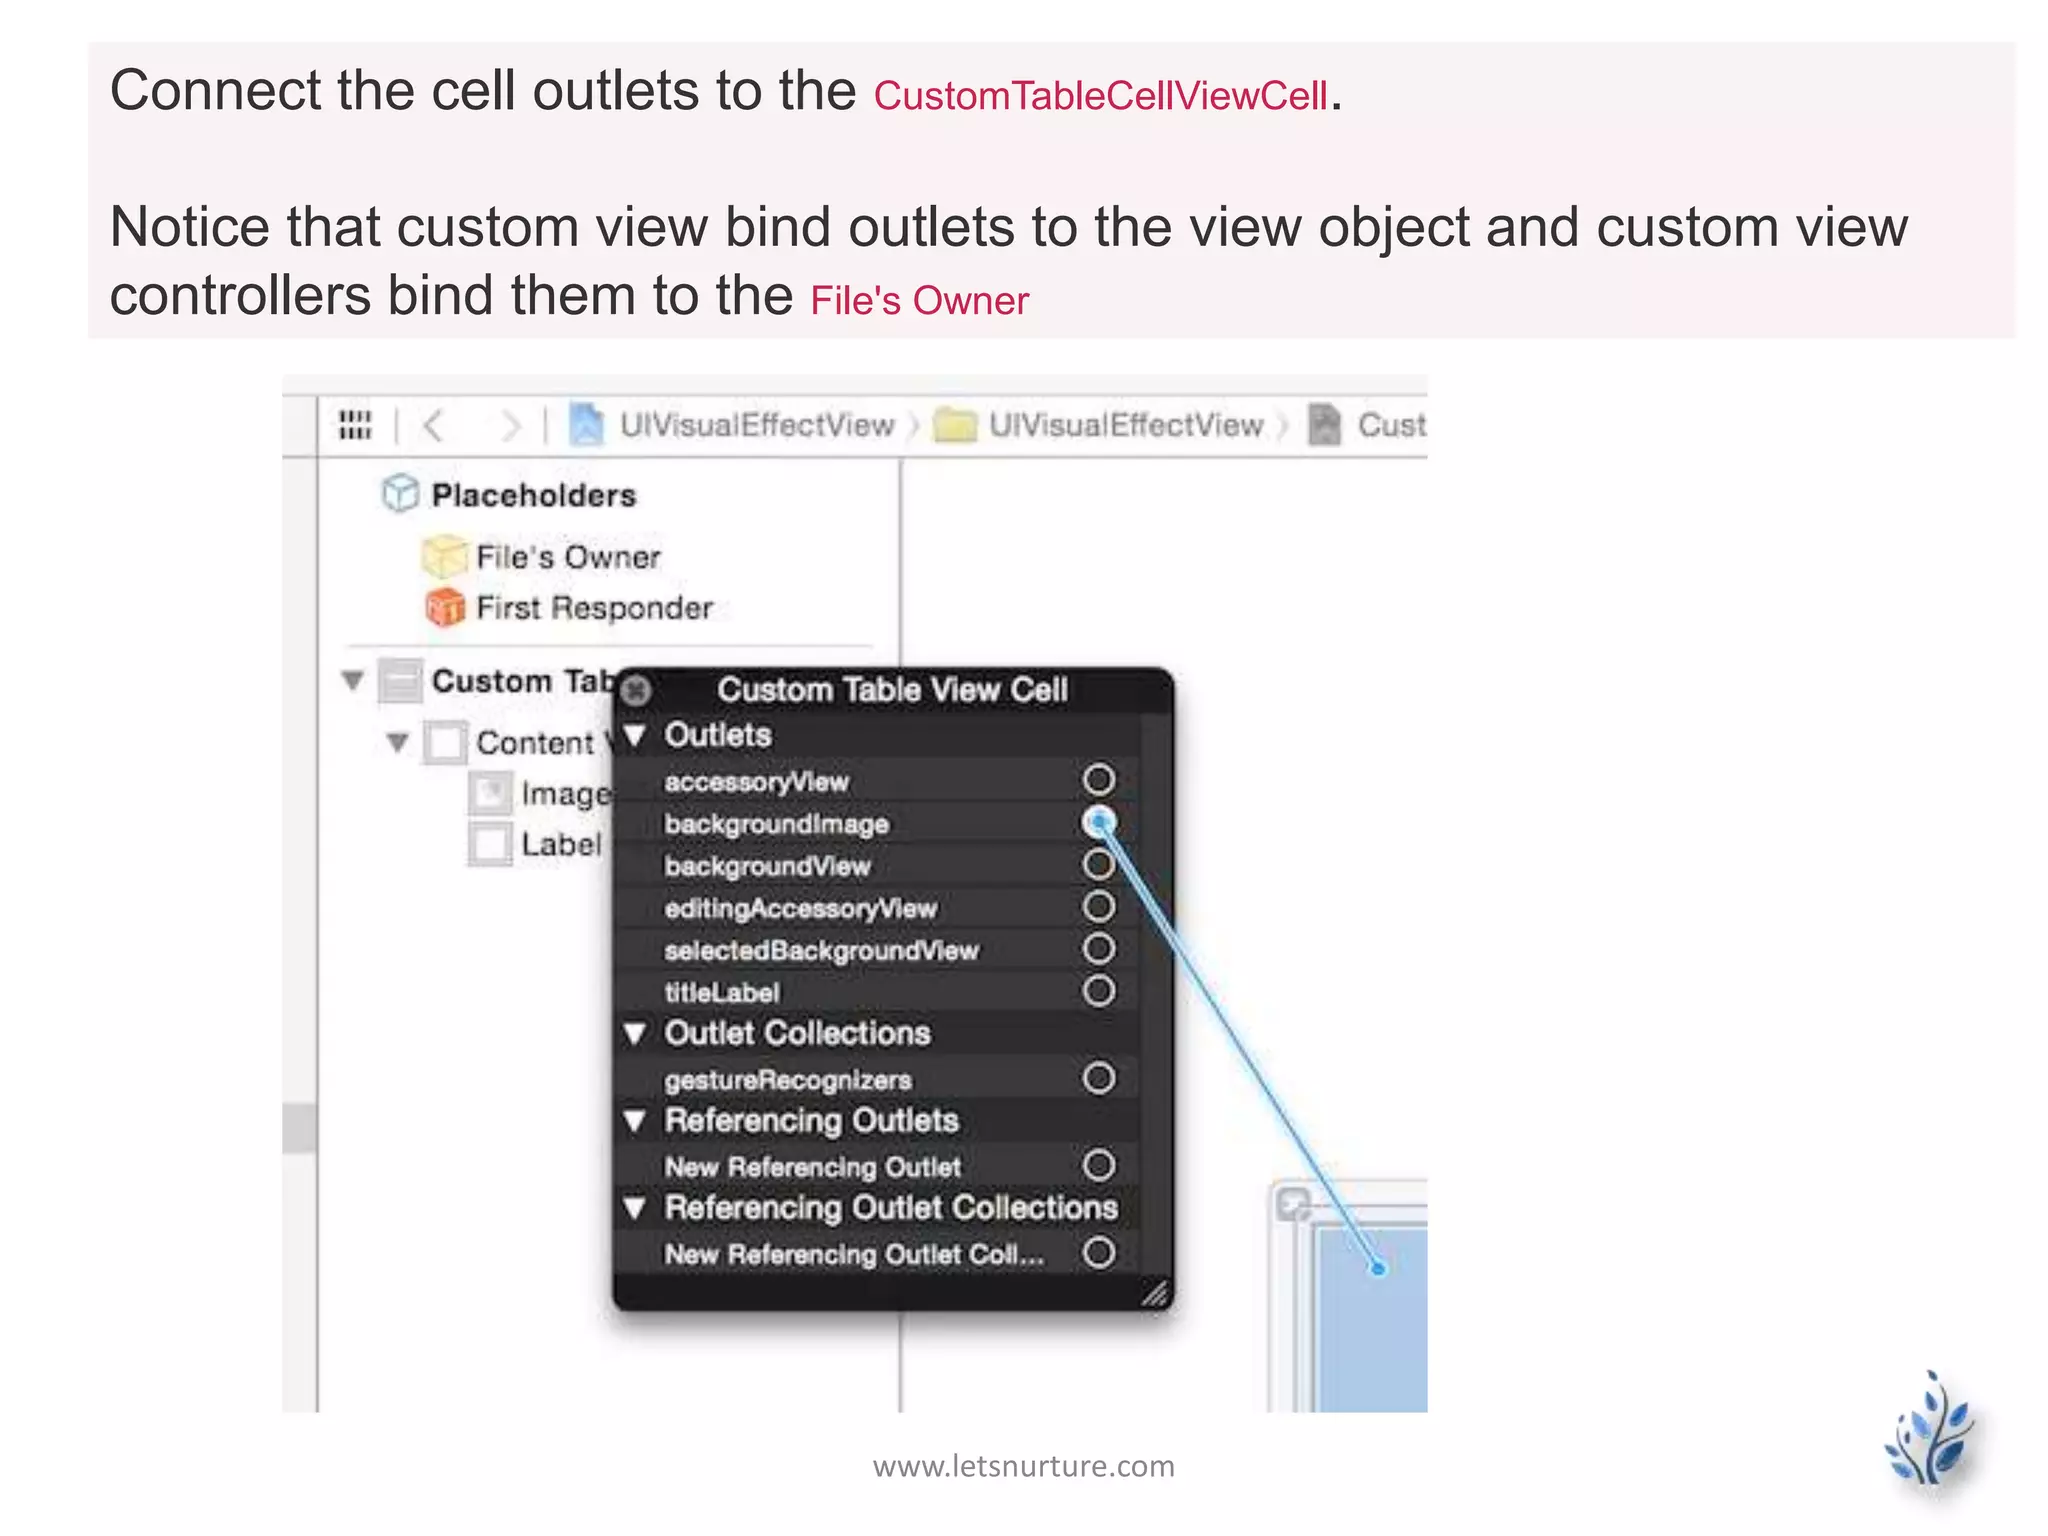
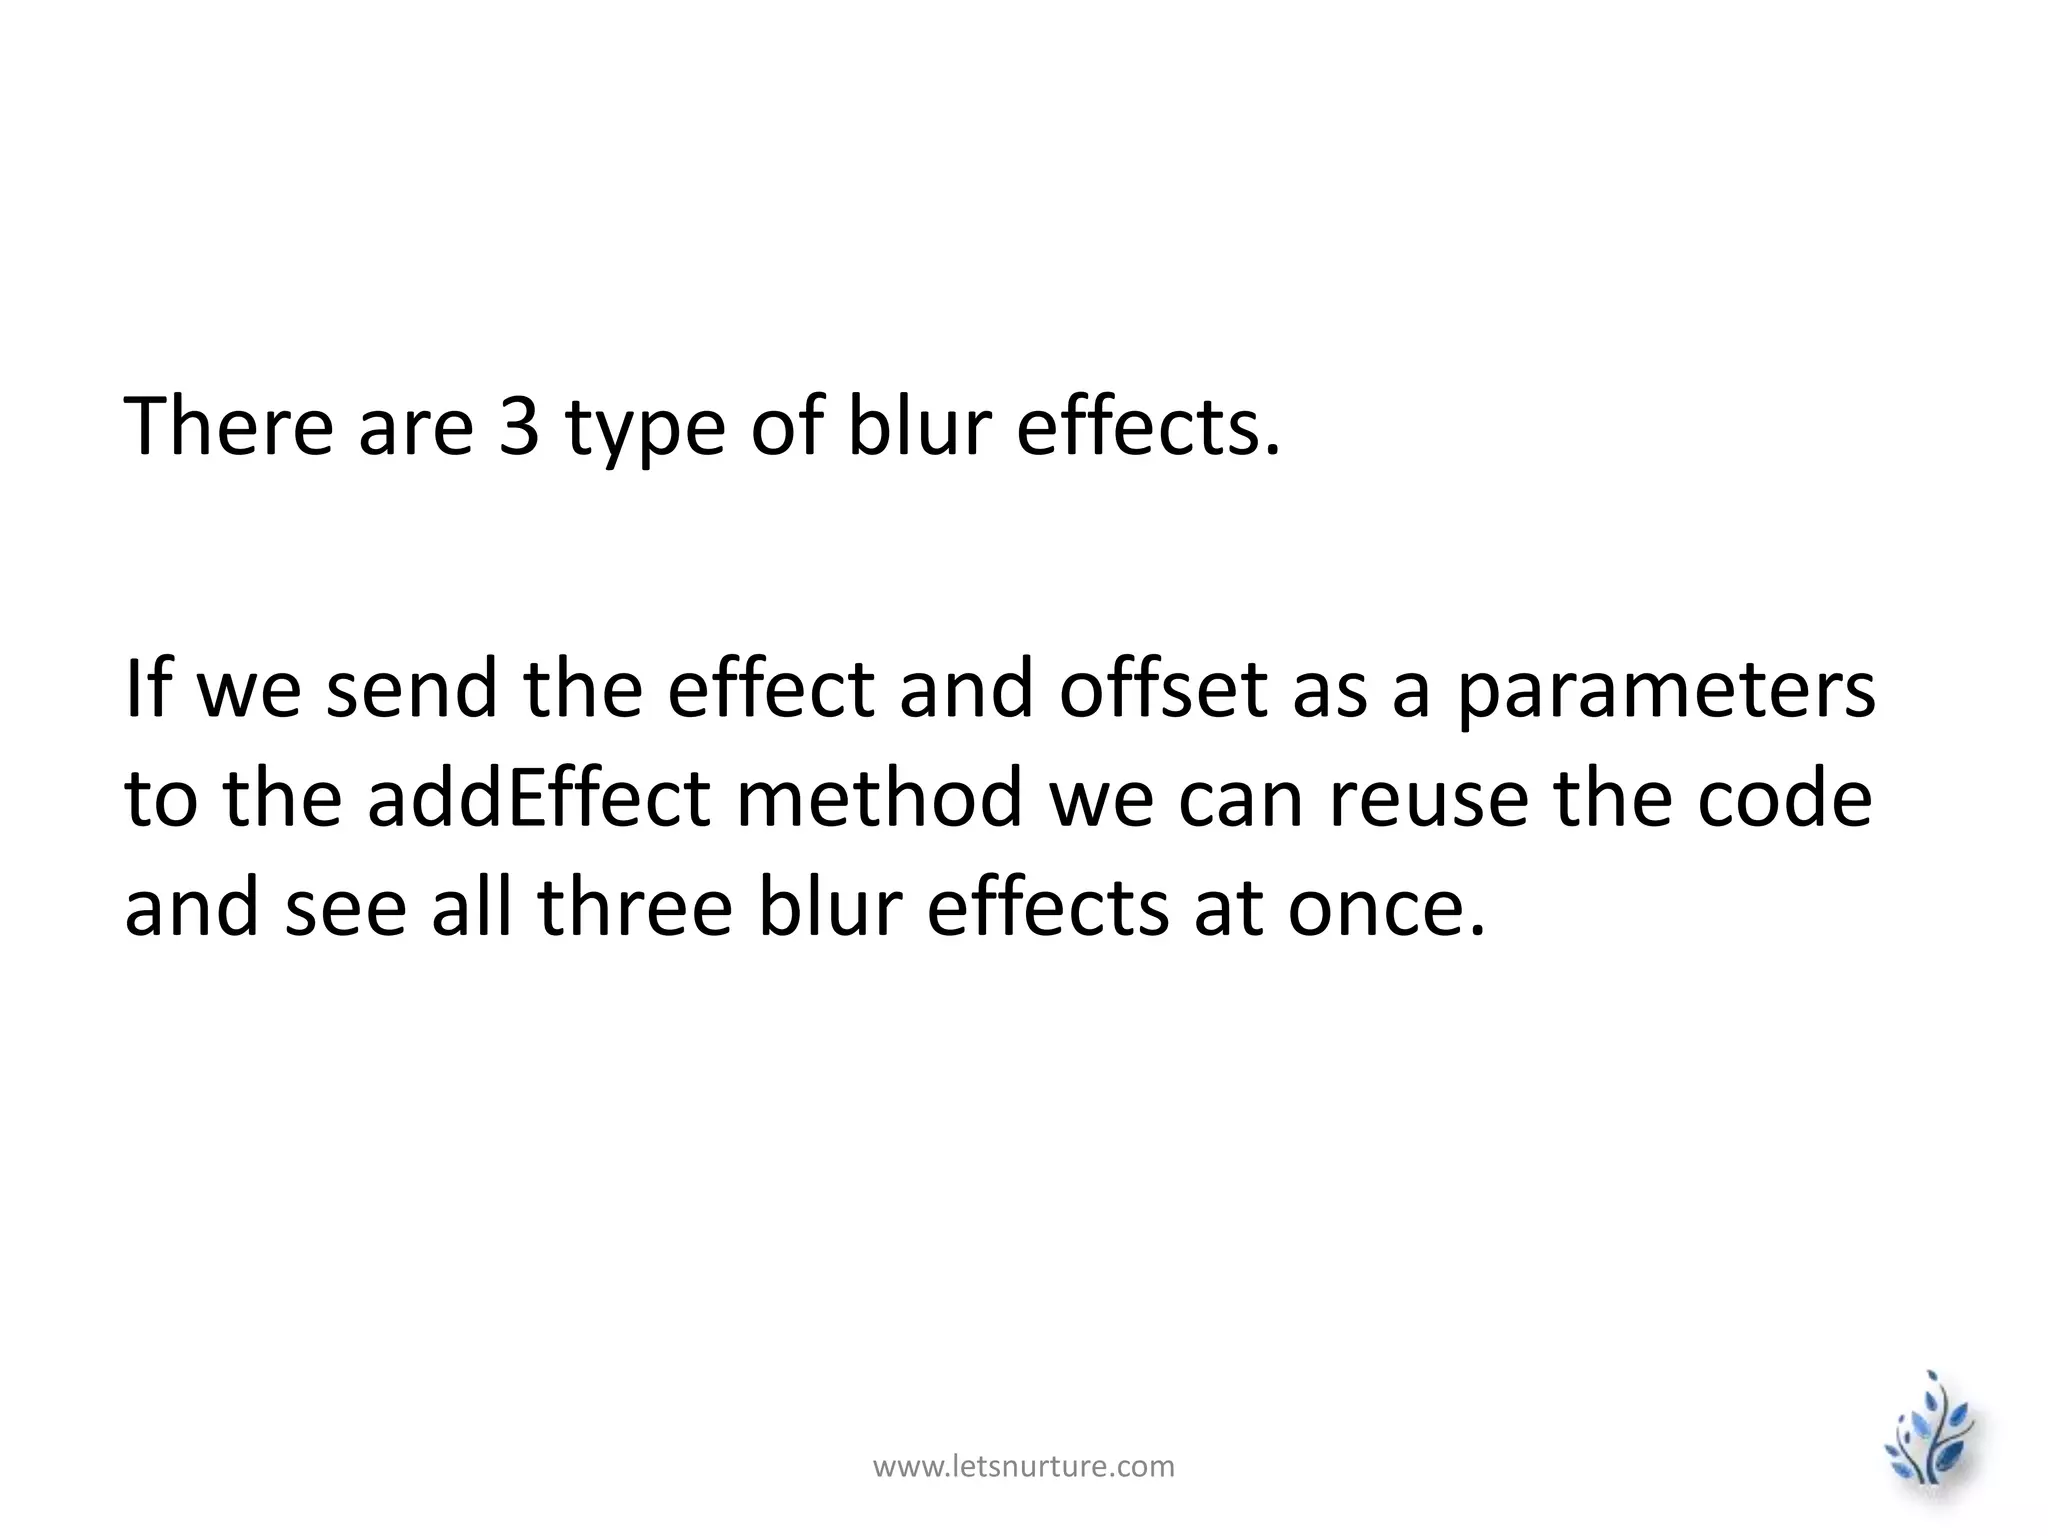
![We can do one thing here and use the map function:
func addEffects() {
[
UIBlurEffectStyle.Light,
UIBlurEffectStyle.Dark,
UIBlurEffectStyle.ExtraLight
].map {
UIBlurEffect(style: $0)
}.eachWithIndex { (effect, index) in
var effectView = UIVisualEffectView(effect: effect)
effectView.frame = CGRectMake(0, CGFloat(50 * index), 320, 50)
self.view.addSubview(effectView)
}
} www.letsnurture.com](https://image.slidesharecdn.com/swifttableview-141229062046-conversion-gate02/85/Swift-Tableview-iOS-App-Development-31-320.jpg)


![www.letsnurture.com
The first value will represent the title and the second
one the imageName.
class ViewController: UIViewController, UITableViewDataSource, UITableViewDelegate {
...
var items:[(String, String)] = [
("❤", "swift 1.jpeg"),
("We", "swift 2.jpeg"),
("❤", "swift 3.jpeg"),
("Swift", "swift 4.jpeg"),
("❤", "swift 5.jpeg")
]
}](https://image.slidesharecdn.com/swifttableview-141229062046-conversion-gate02/75/Swift-Tableview-iOS-App-Development-17-2048.jpg)


![class ViewController: UIViewController, UITableViewDataSource,
UITableViewDelegate {
...
func tableView(tableView: UITableView!, cellForRowAtIndexPath
indexPath: NSIndexPath!) -> UITableViewCell {
var cell:CustomTableViewCell =
self.tableView.dequeueReusableCellWithIdentifier("customCell") as
CustomTableViewCell
// this is how you extract values from a tuple
var (title, image) = items[indexPath.row]
cell.loadItem(title: title, image: image)
return cell
}
}
www.letsnurture.com](https://image.slidesharecdn.com/swifttableview-141229062046-conversion-gate02/75/Swift-Tableview-iOS-App-Development-21-2048.jpg)


![class ViewController: UIViewController, UITableViewDataSource, UITableViewDelegate {
...
override func viewDidLoad() {
...
addEffects()
...
}
func addEffects() {
[
UIBlurEffect(style: UIBlurEffectStyle.Light),
UIBlurEffect(style: UIBlurEffectStyle.Dark),
UIBlurEffect(style: UIBlurEffectStyle.ExtraLight)
].eachWithIndex { (effect, index) in
var effectView = UIVisualEffectView(effect: effect)
effectView.frame = CGRectMake(0, CGFloat(50 * index), 320, 50)
self.view.addSubview(effectView)
}
}
...
}
www.letsnurture.com](https://image.slidesharecdn.com/swifttableview-141229062046-conversion-gate02/75/Swift-Tableview-iOS-App-Development-30-2048.jpg)
![We can do one thing here and use the map function:
func addEffects() {
[
UIBlurEffectStyle.Light,
UIBlurEffectStyle.Dark,
UIBlurEffectStyle.ExtraLight
].map {
UIBlurEffect(style: $0)
}.eachWithIndex { (effect, index) in
var effectView = UIVisualEffectView(effect: effect)
effectView.frame = CGRectMake(0, CGFloat(50 * index), 320, 50)
self.view.addSubview(effectView)
}
} www.letsnurture.com](https://image.slidesharecdn.com/swifttableview-141229062046-conversion-gate02/75/Swift-Tableview-iOS-App-Development-31-2048.jpg)


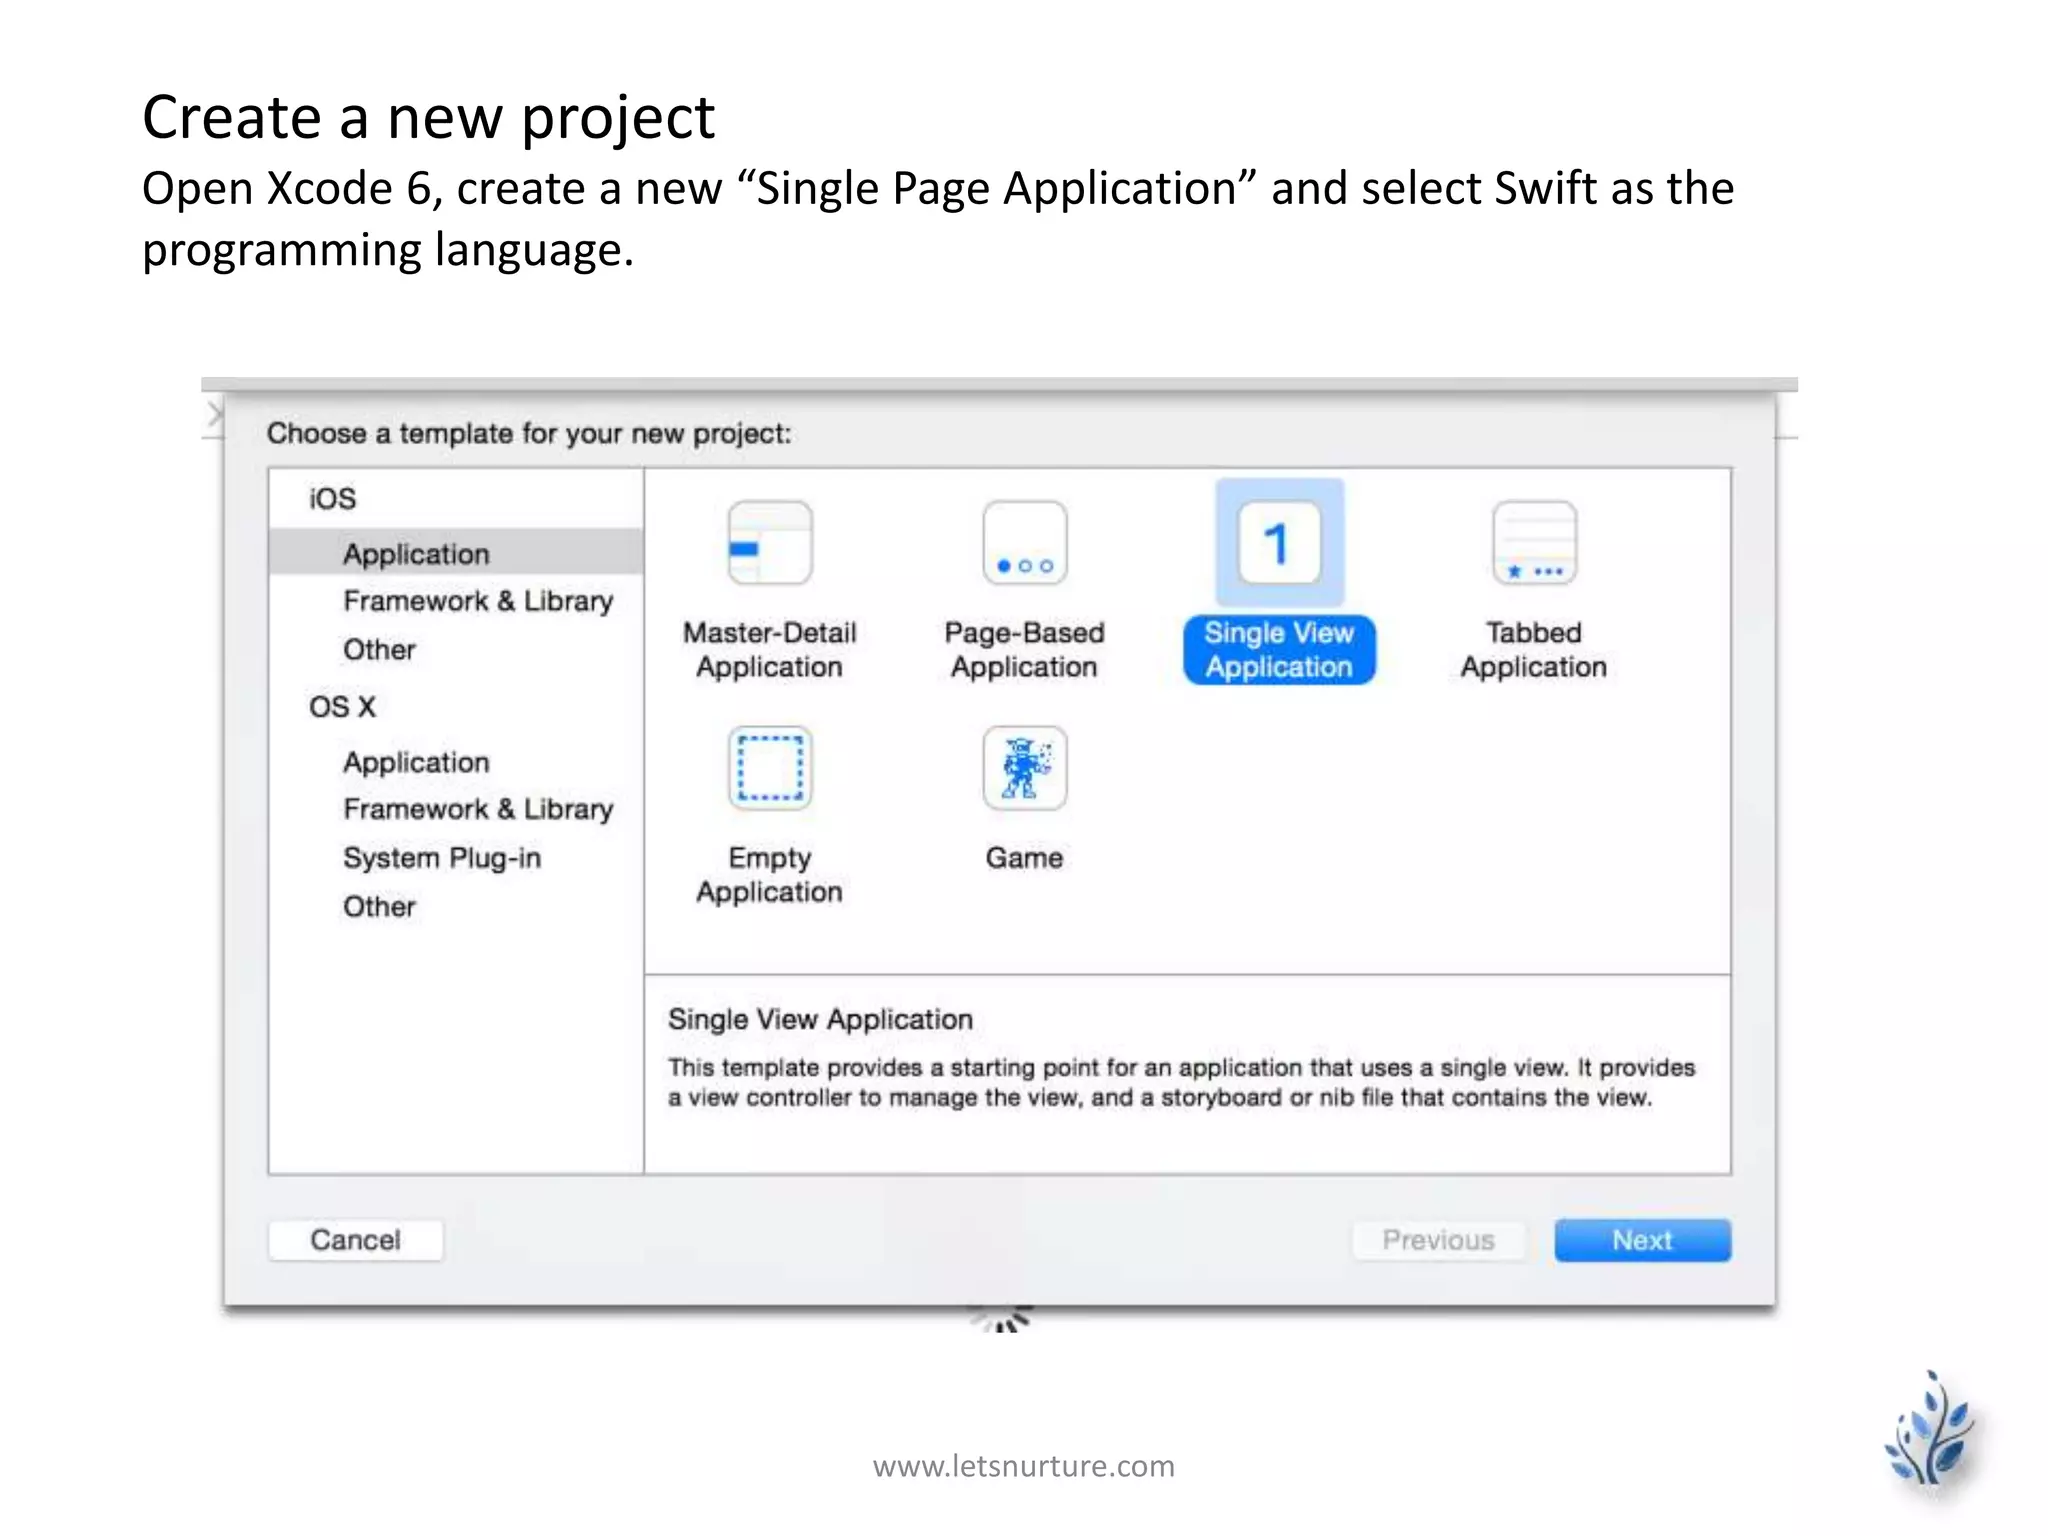
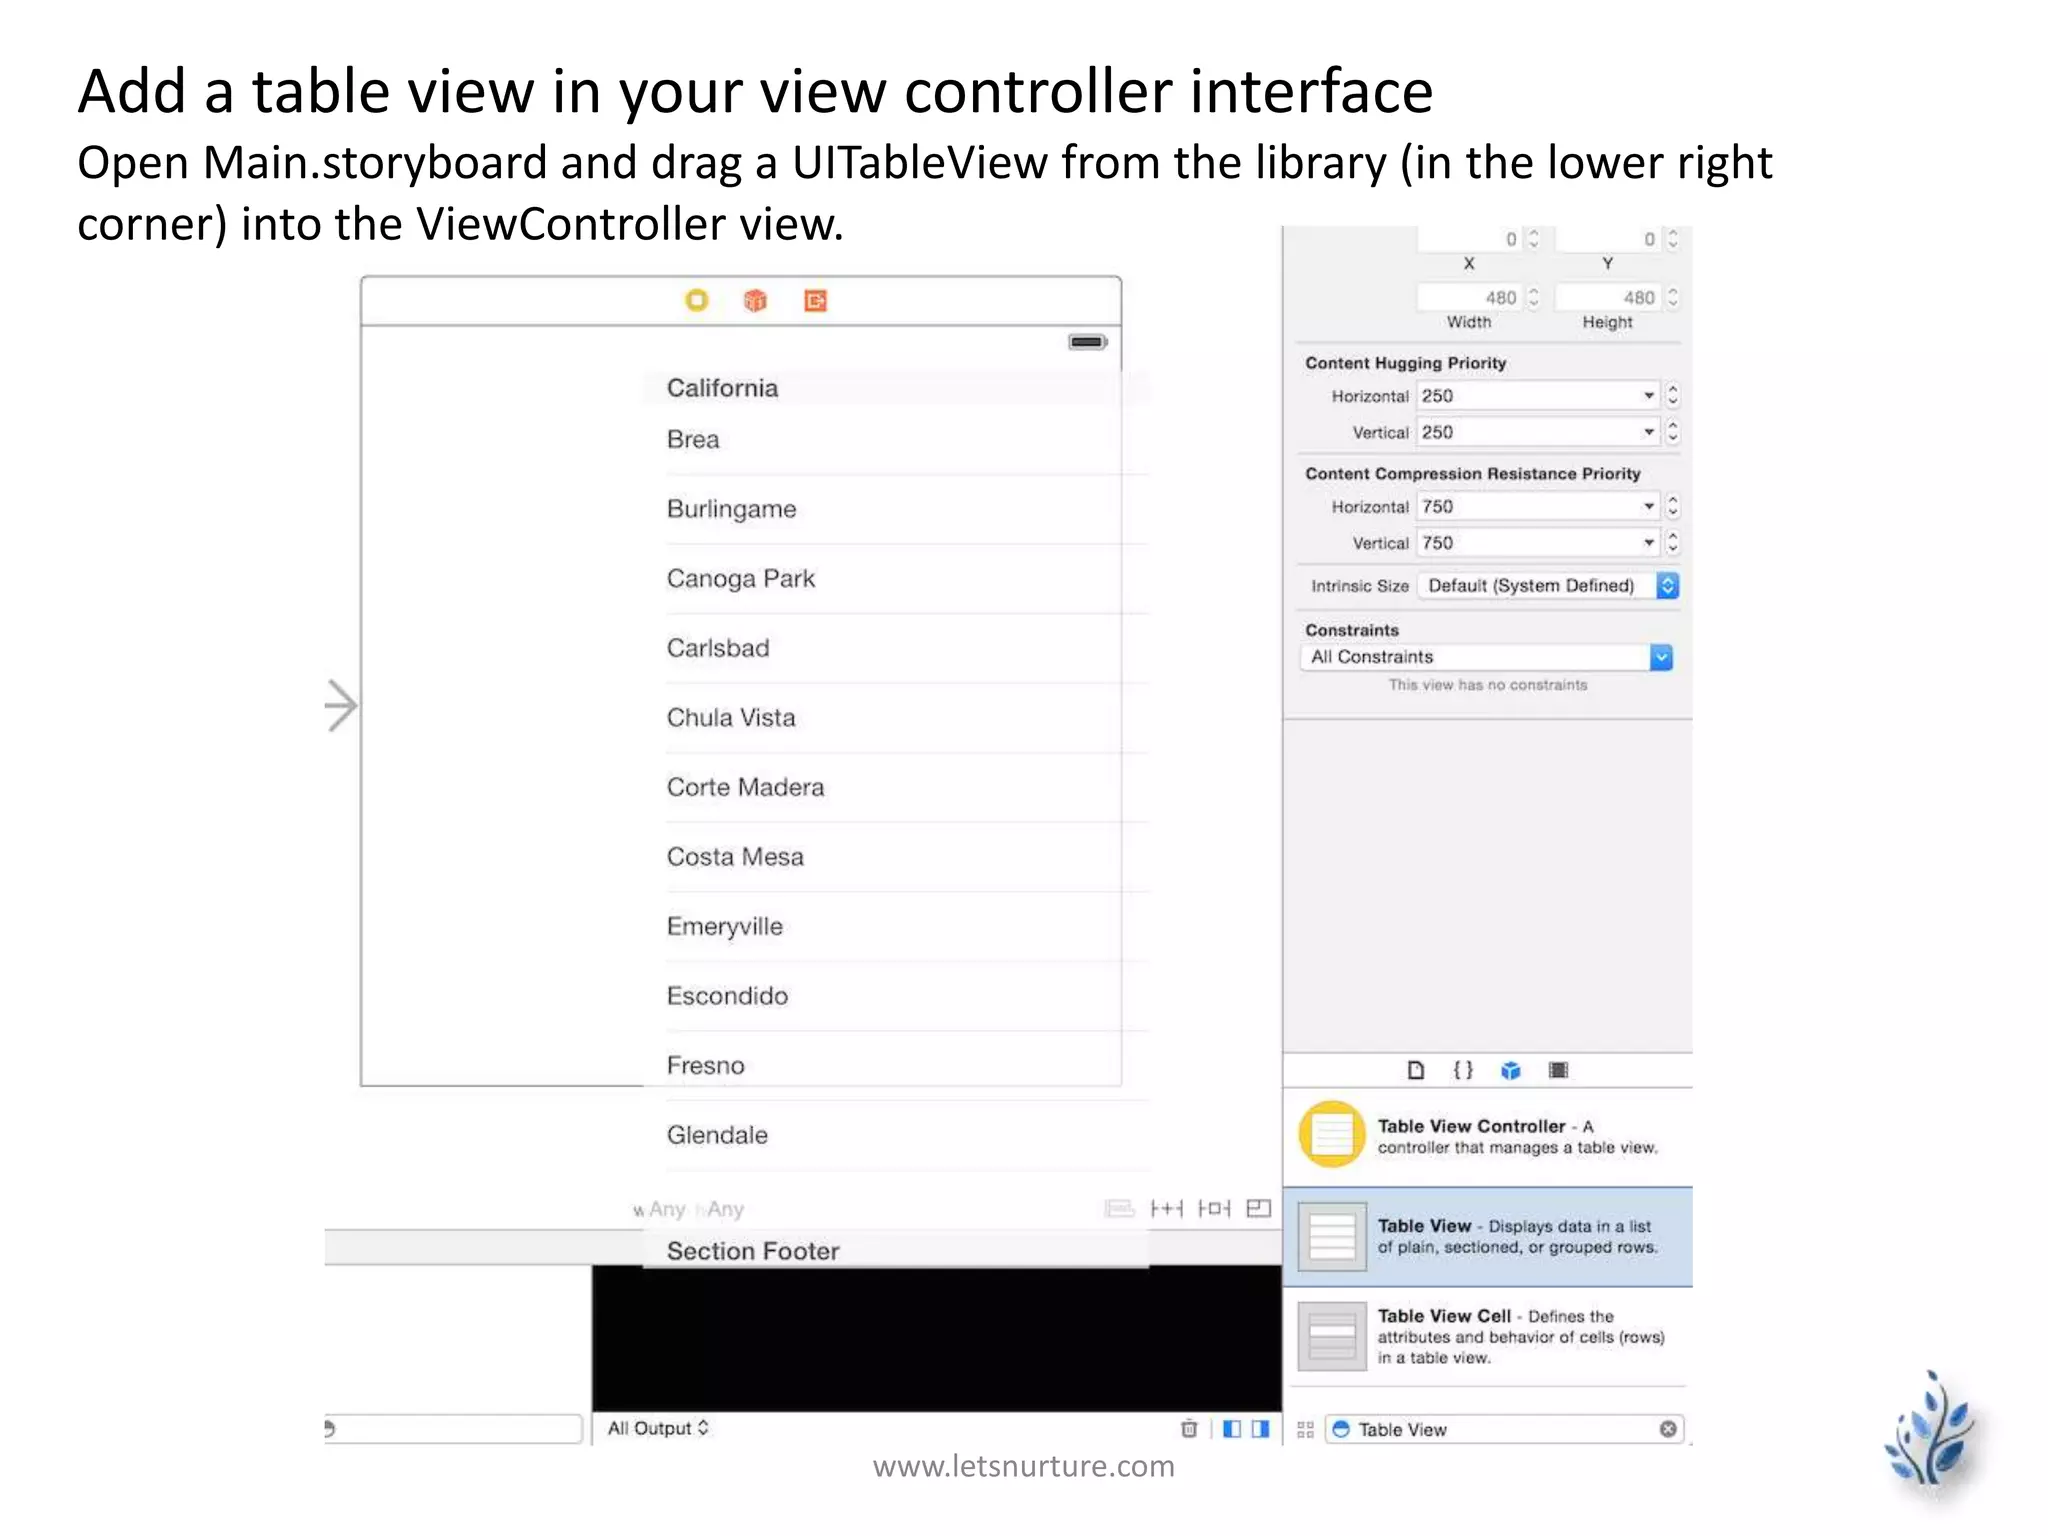
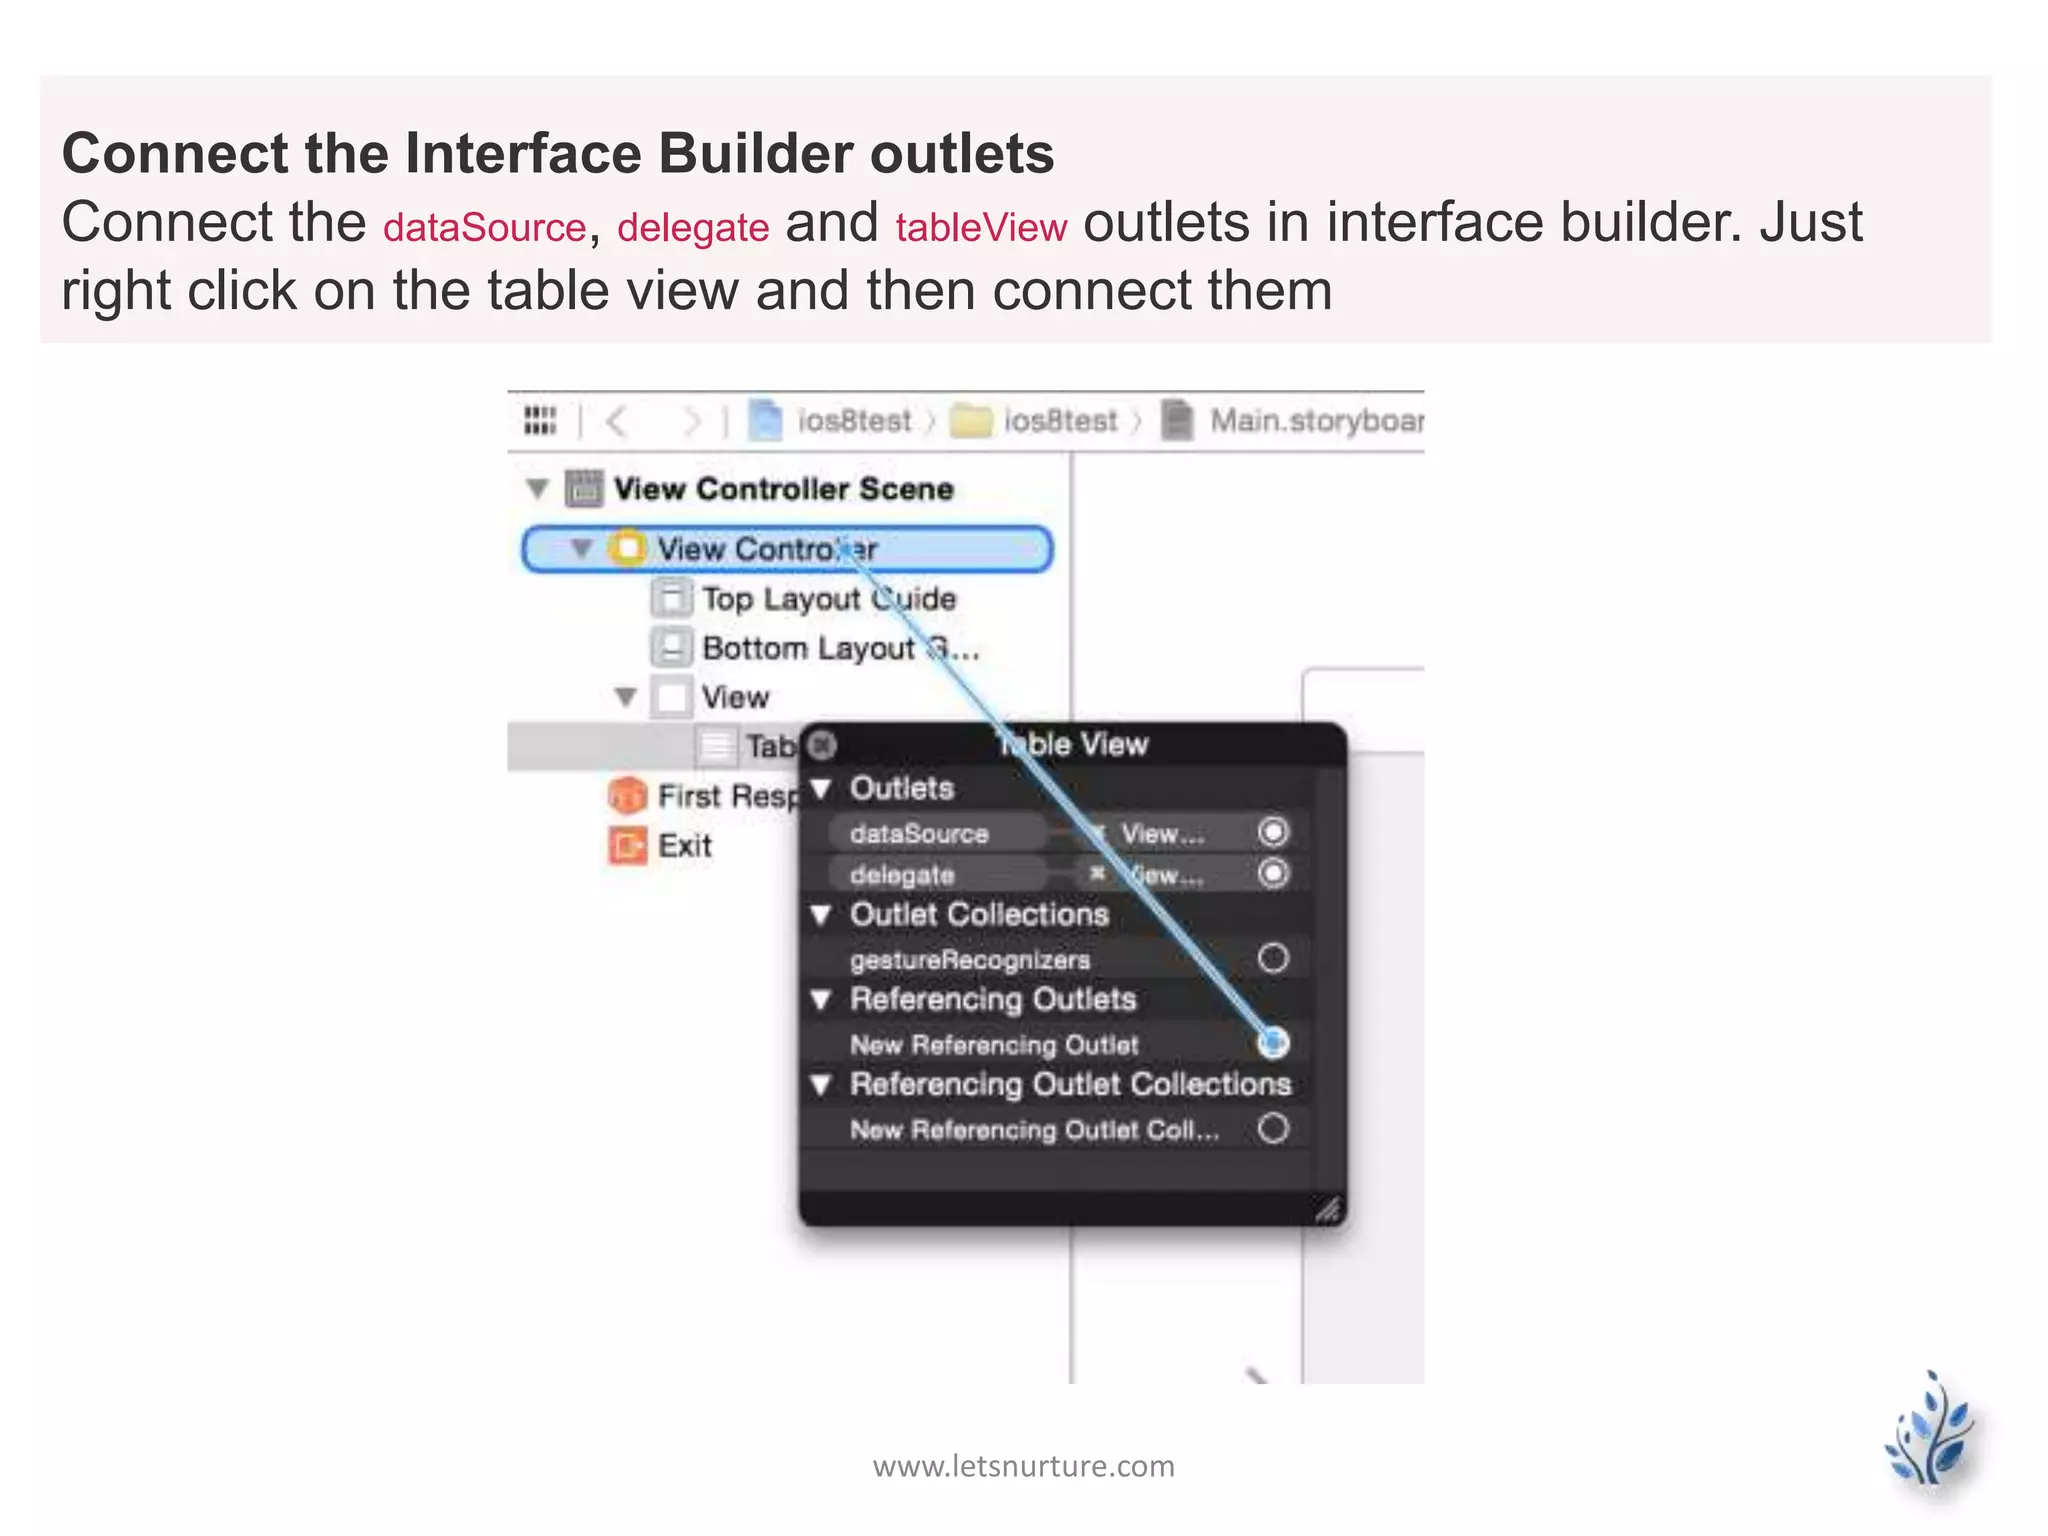
The document provides a detailed guide on creating a table view using Swift in Xcode, including setting up project configurations, adding a table view, creating custom cell classes, and implementing data source and delegate methods. It explains how to connect UI components in Interface Builder, manage cell data, and handle user interactions, alongside implementing visual effects and creating reusable code through method extensions. The document also proposes challenges for further development and offers references to additional resources.


