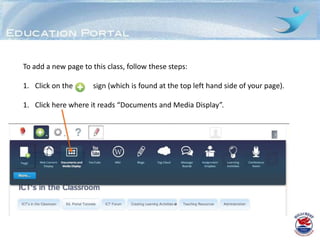
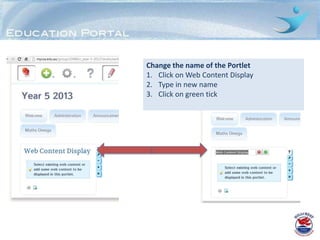
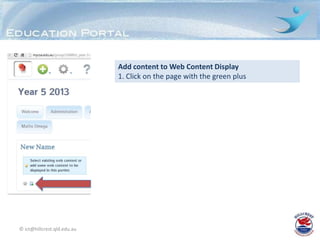
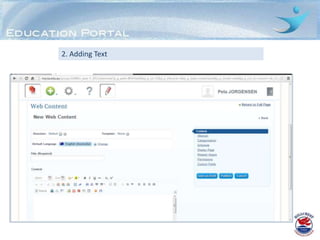
Download to read offline
![Web
Content
Display
- Text [font style, colour size etc]
- Images
- Hyperlinks
- YouTube](https://image.slidesharecdn.com/addingwebcontentdisplaytutorial-130410135601-phpapp01/85/Adding-web-content-display-Tutorial-1-320.jpg)


![Web
Content
Display
- Text [font style, colour size etc]
- Images
- Hyperlinks
- YouTube](https://image.slidesharecdn.com/addingwebcontentdisplaytutorial-130410135601-phpapp01/75/Adding-web-content-display-Tutorial-1-2048.jpg)


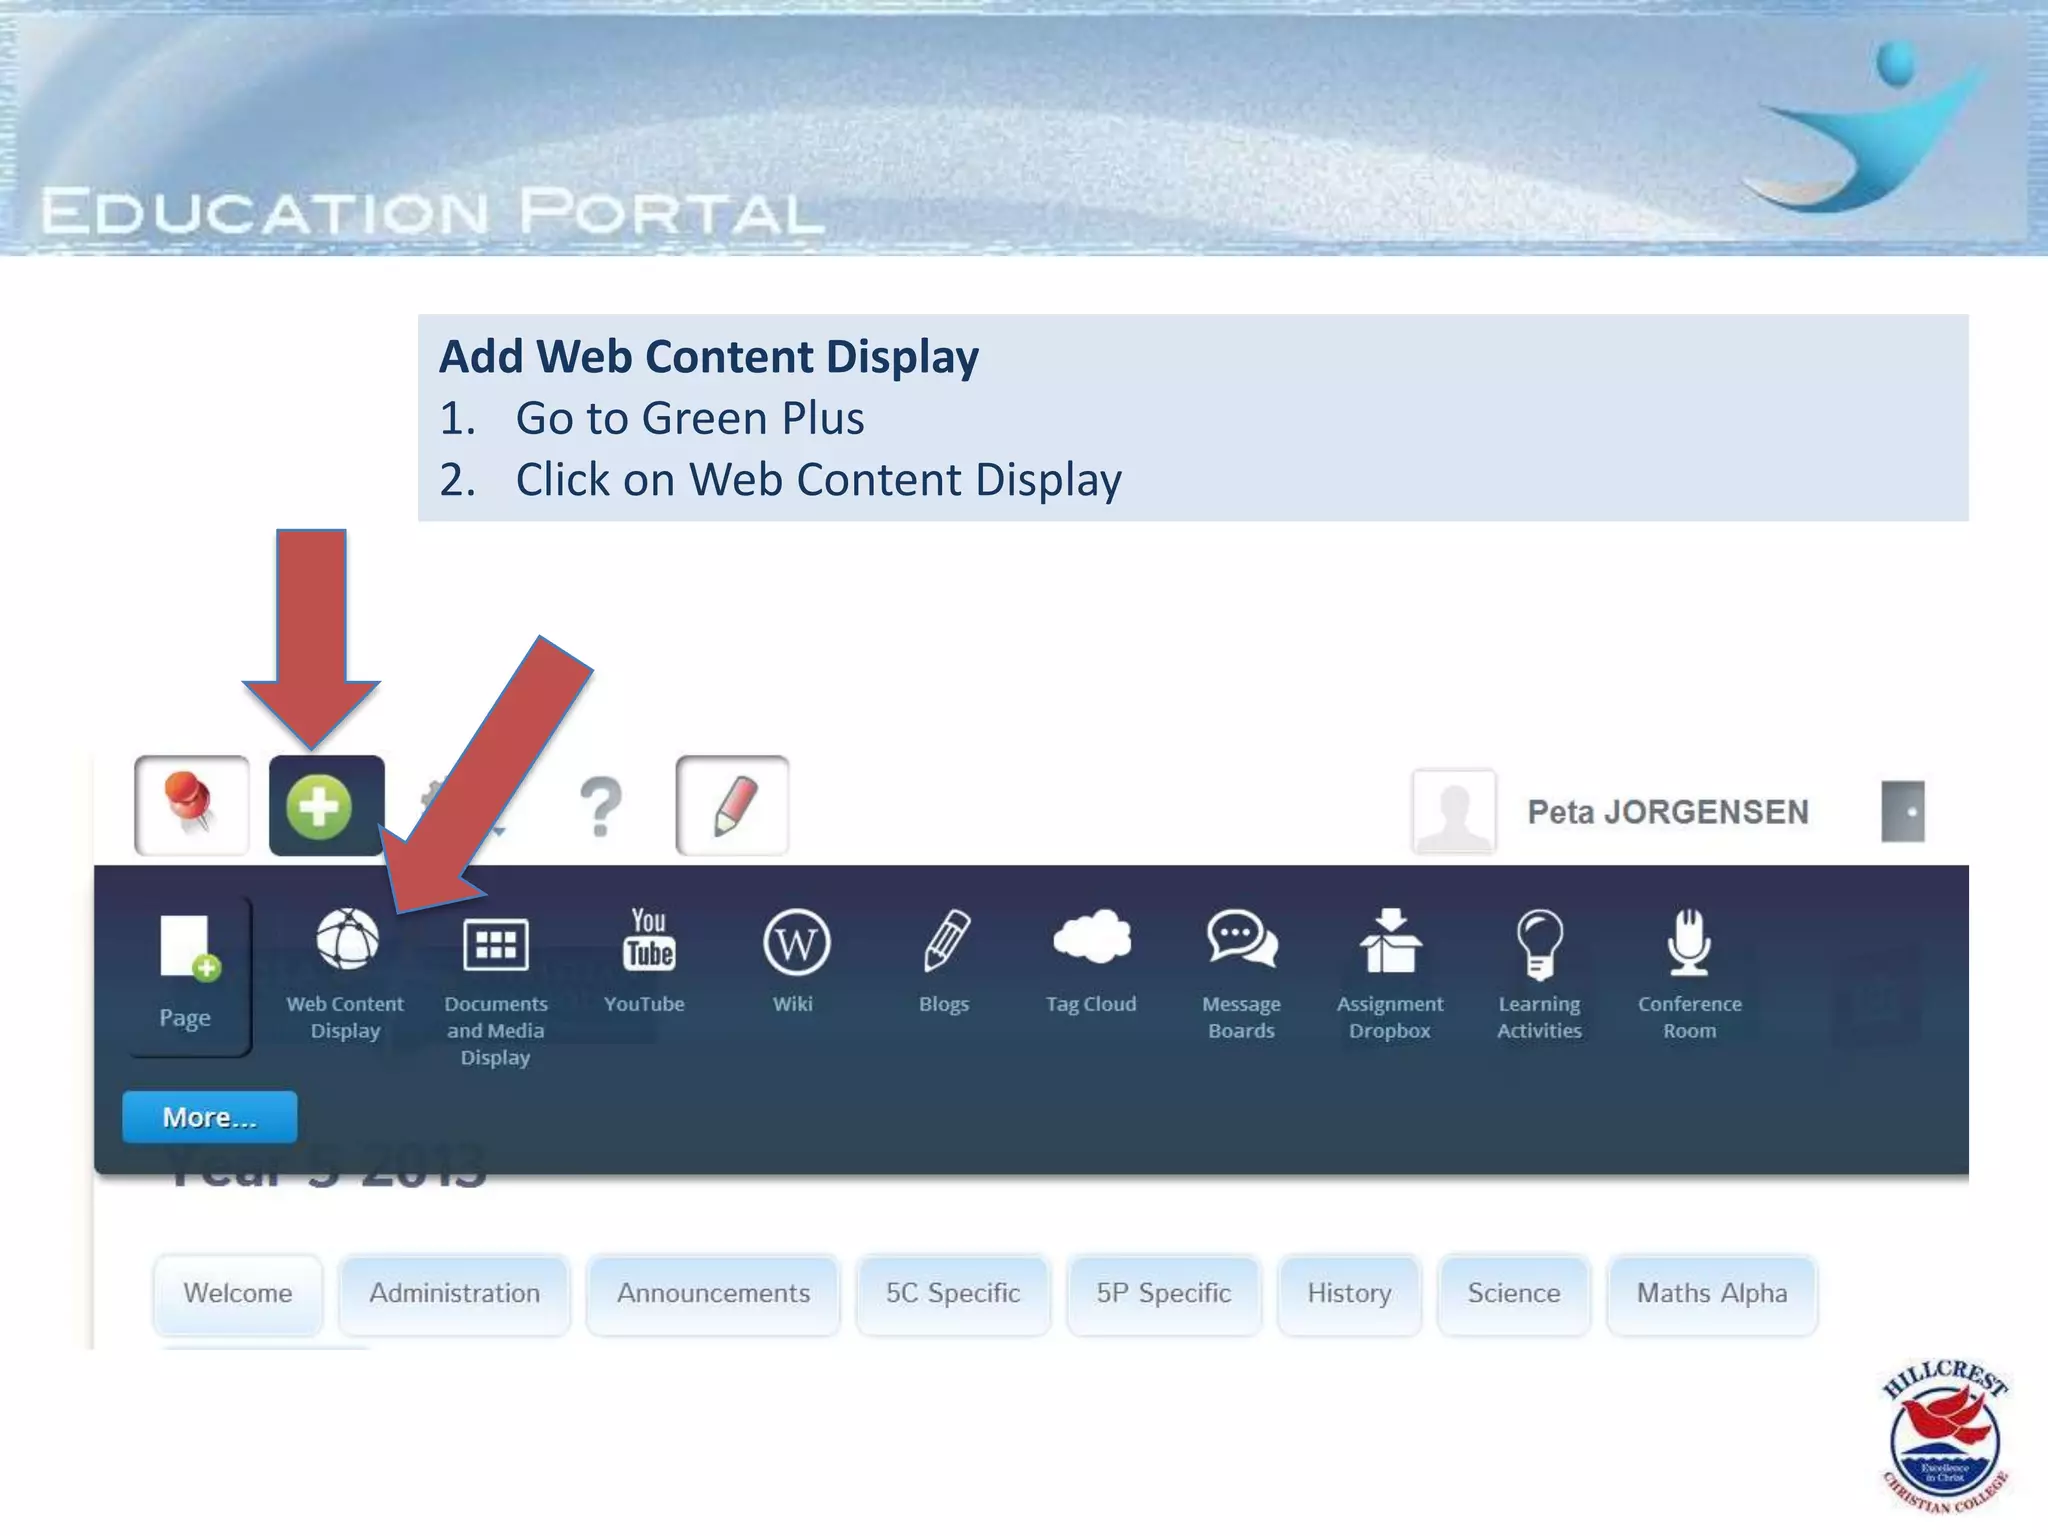
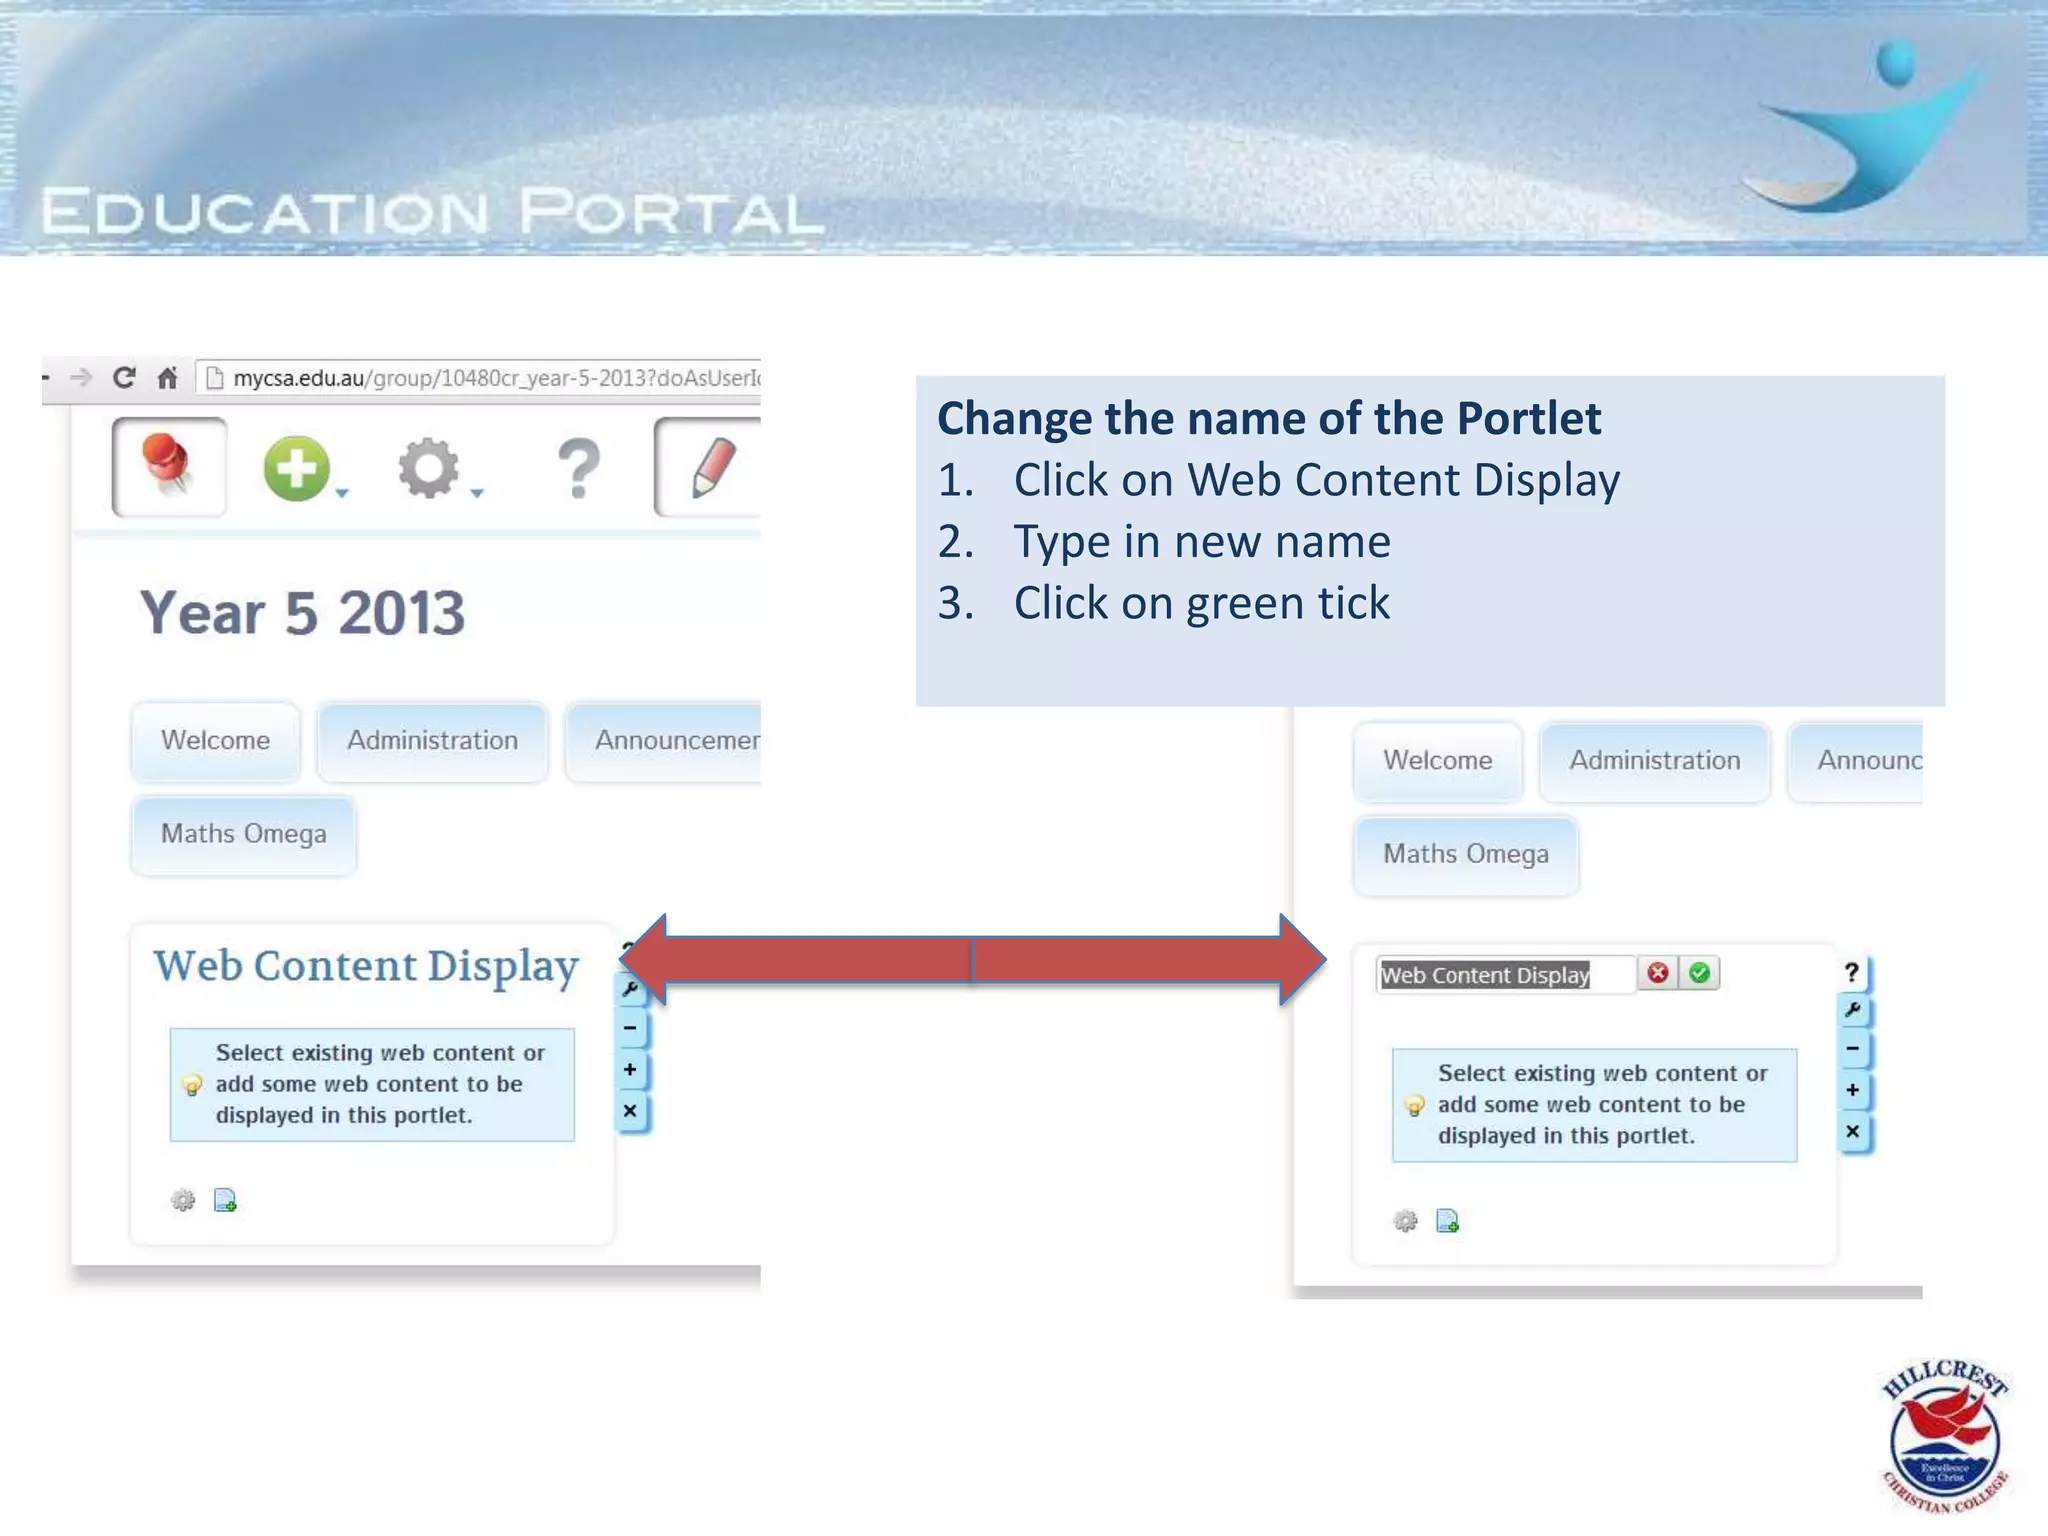


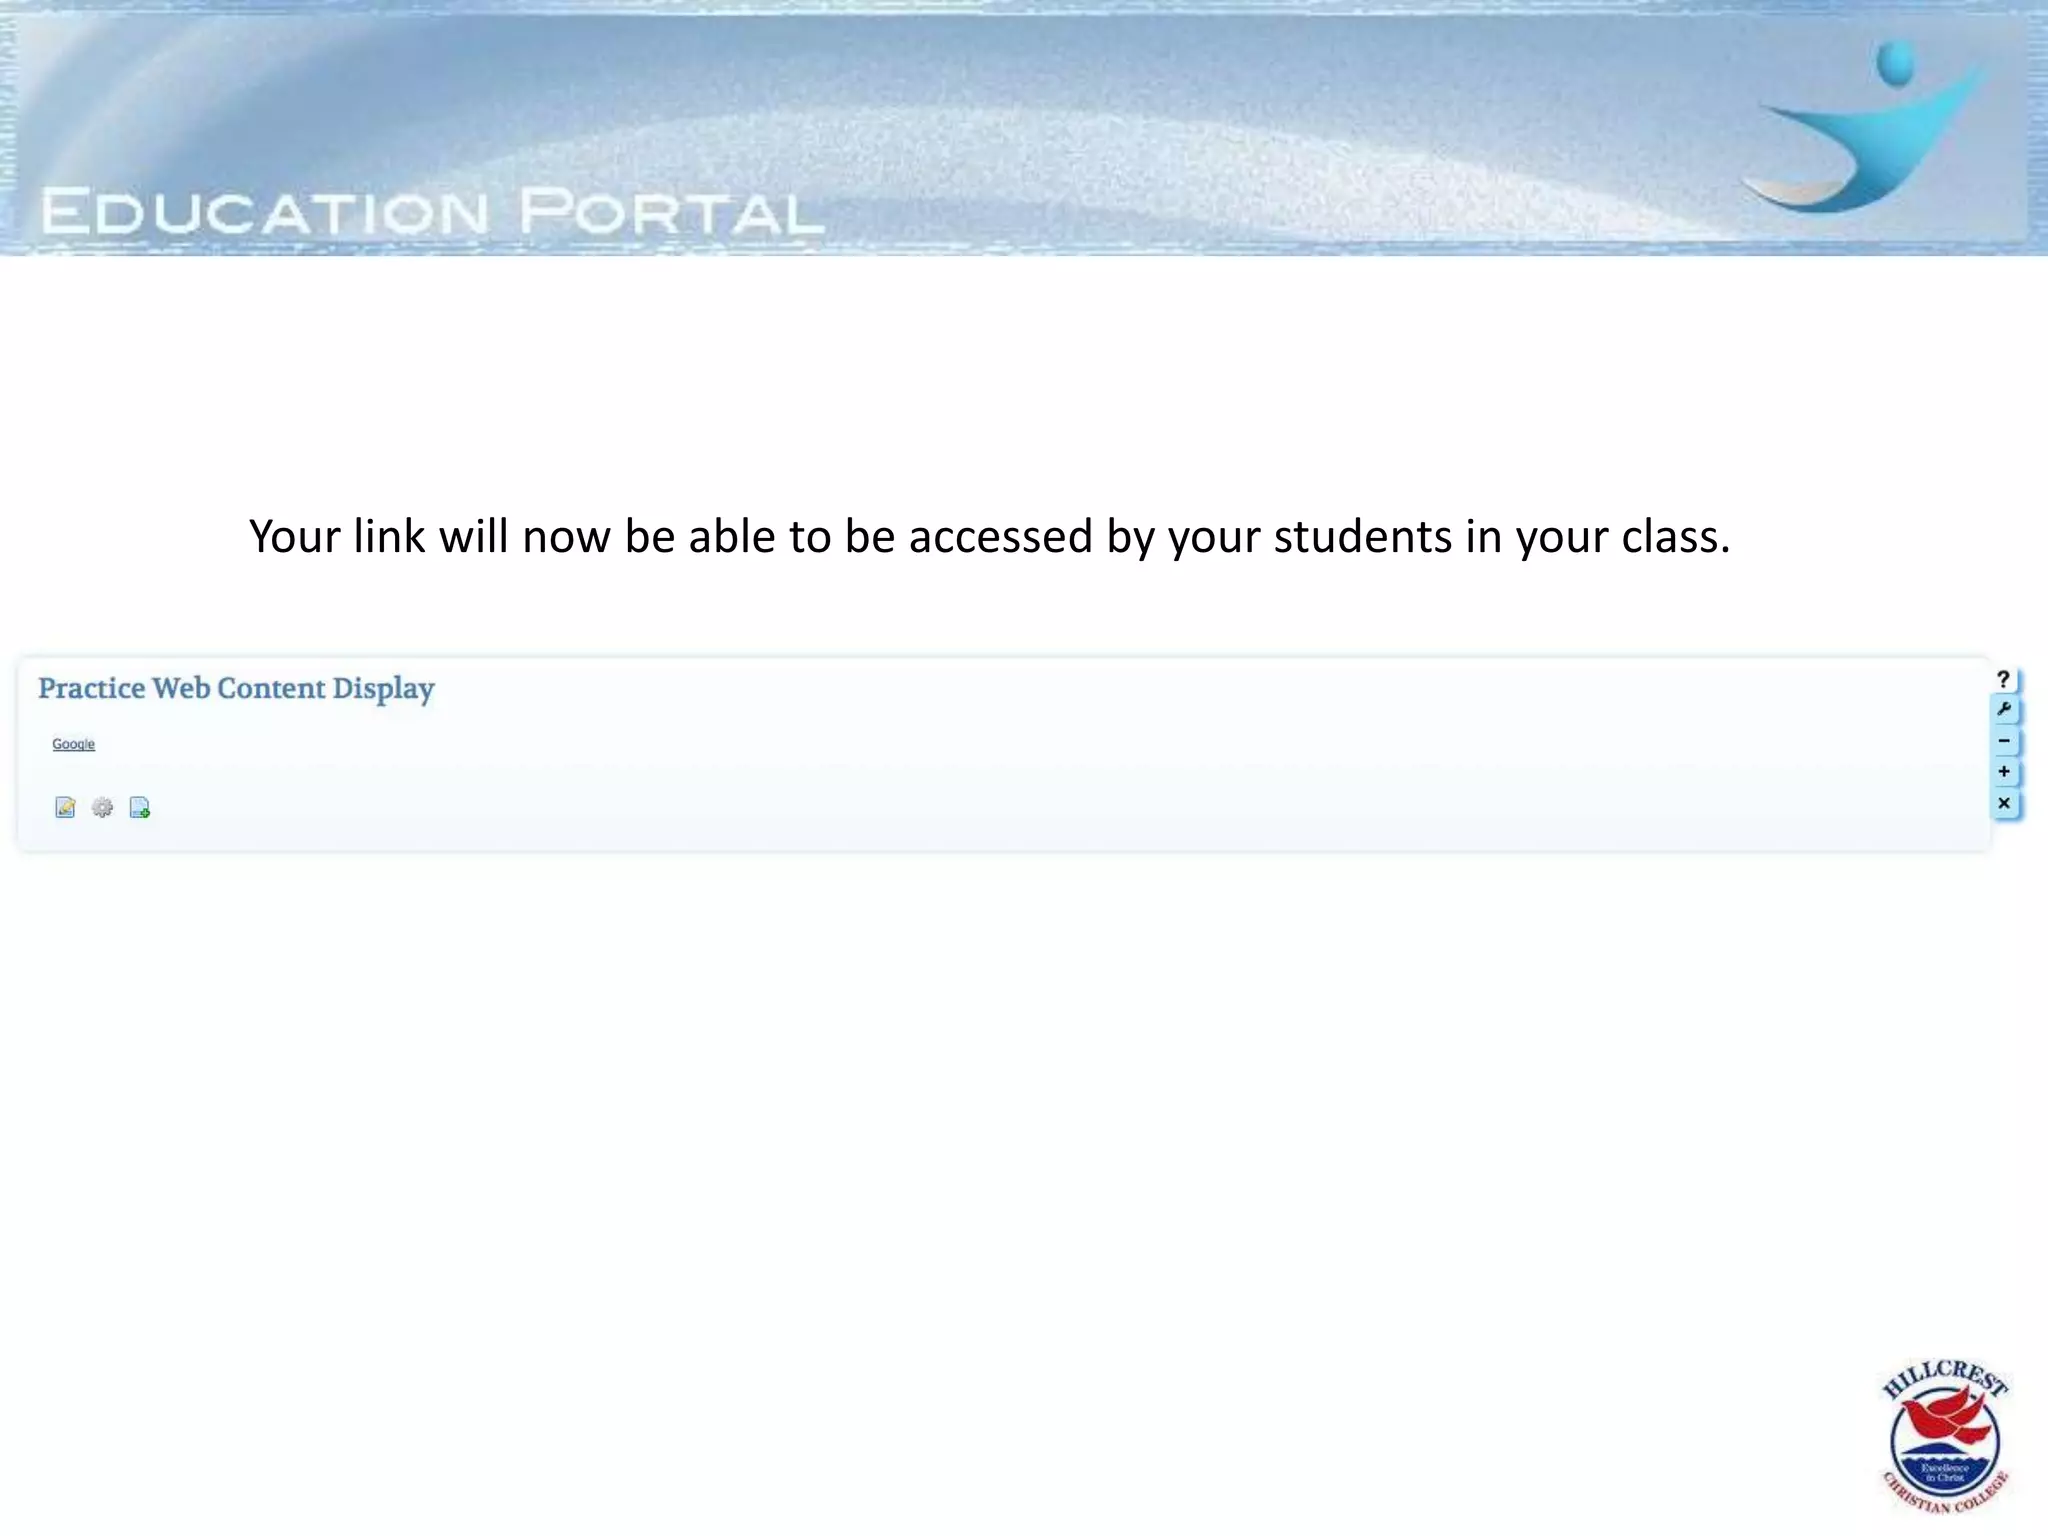

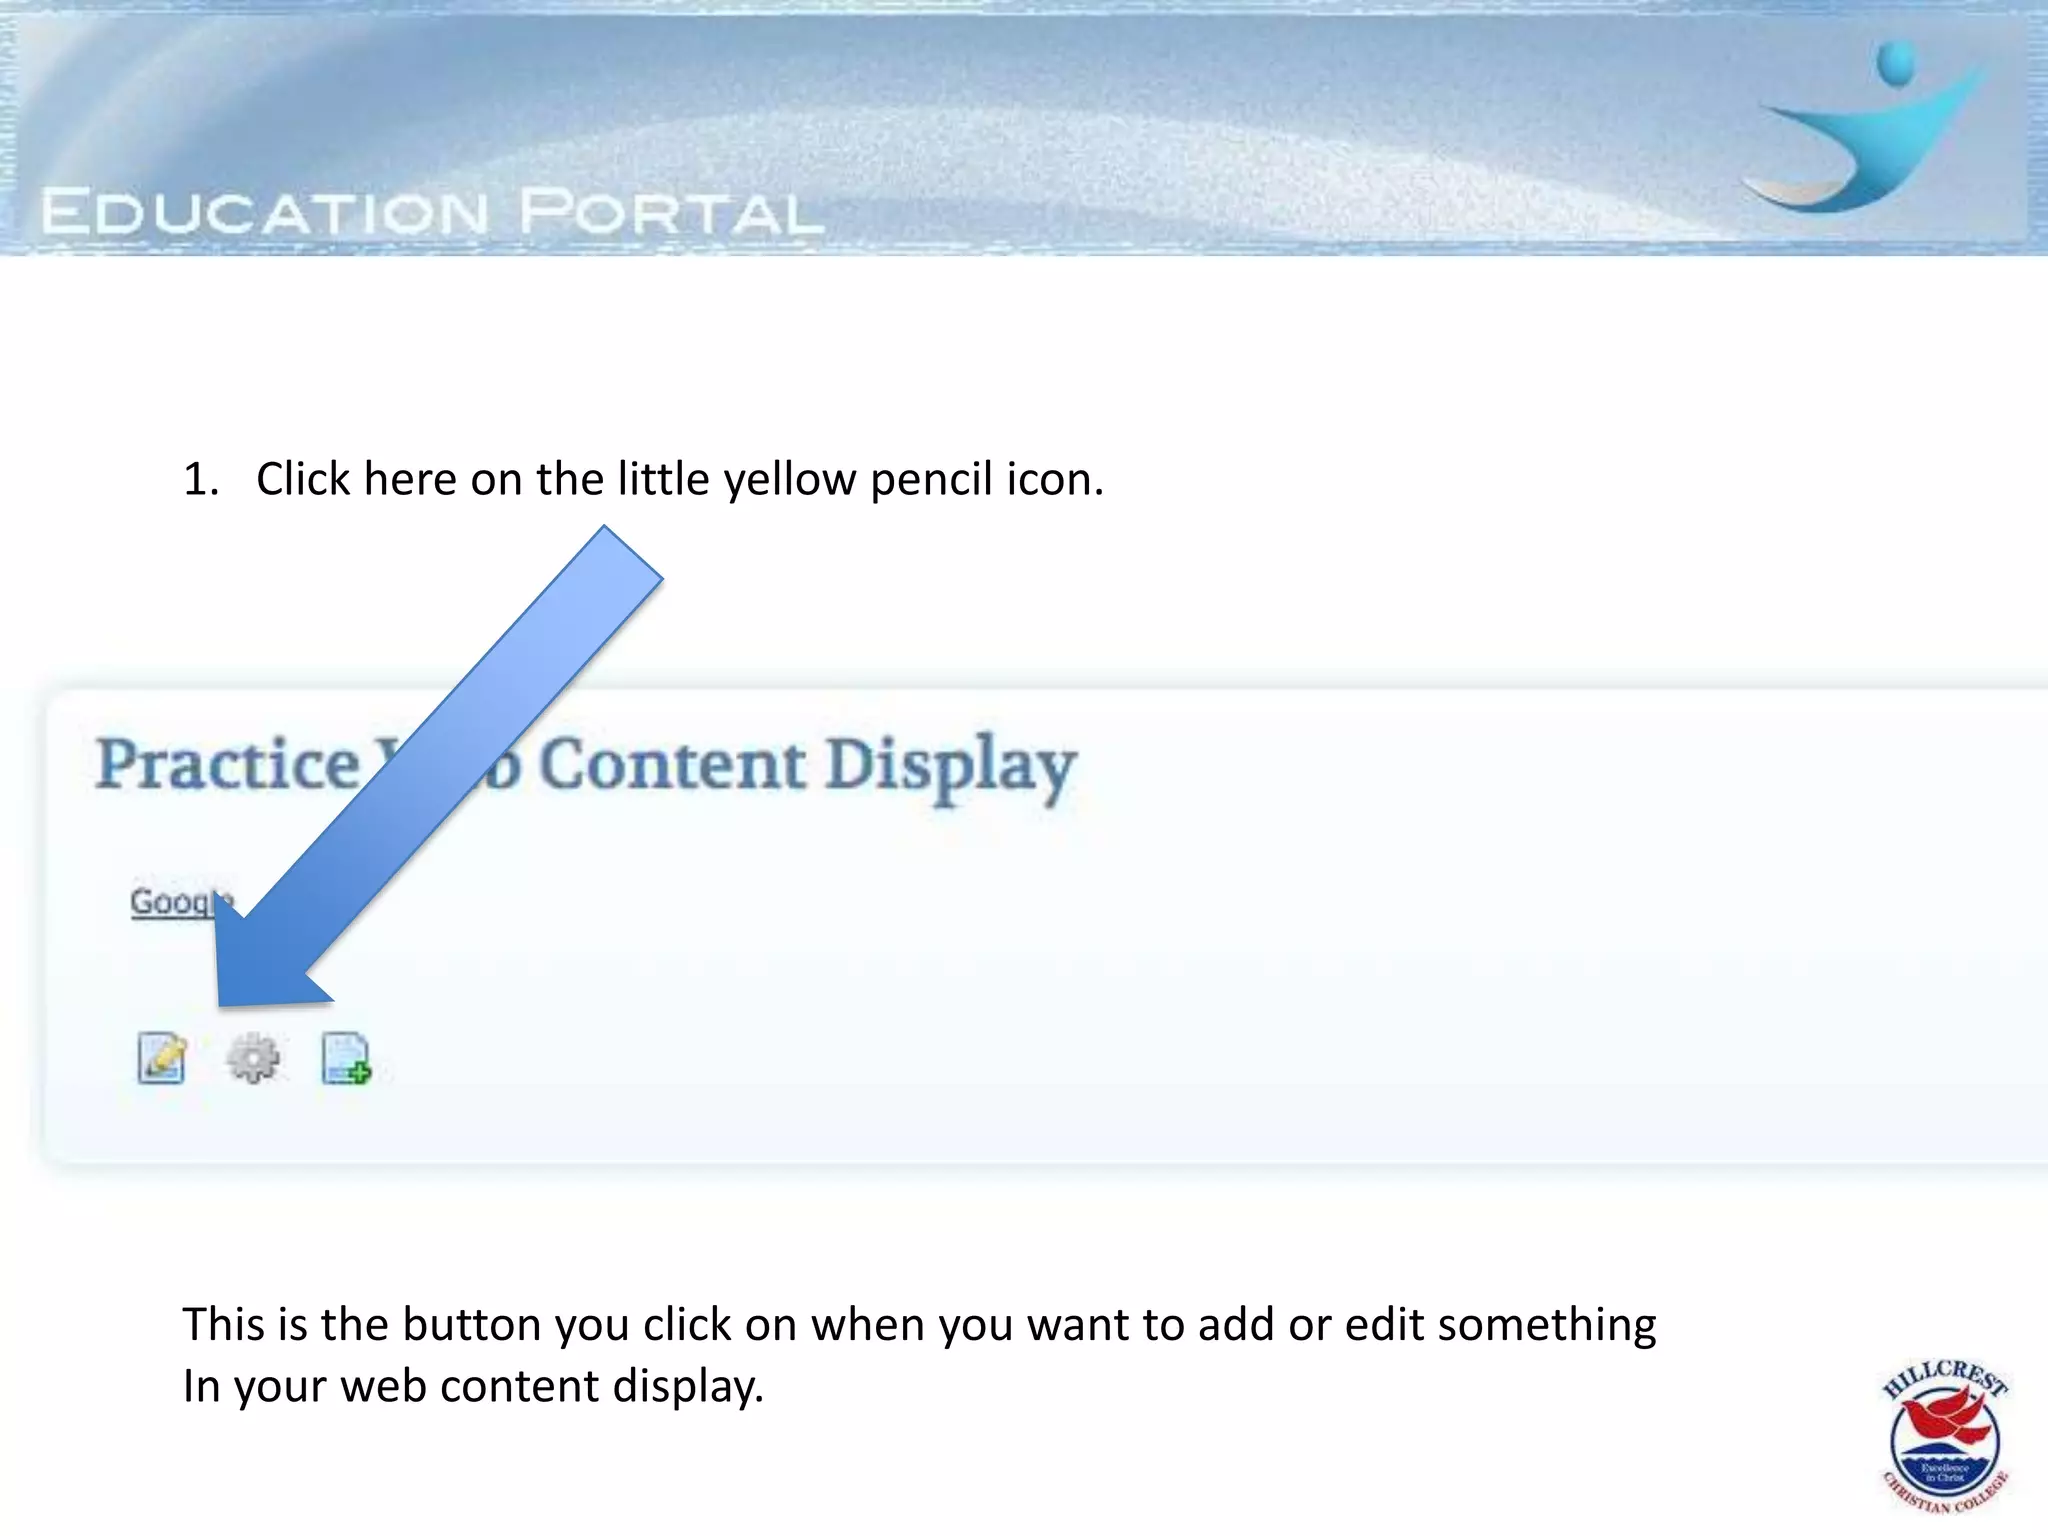
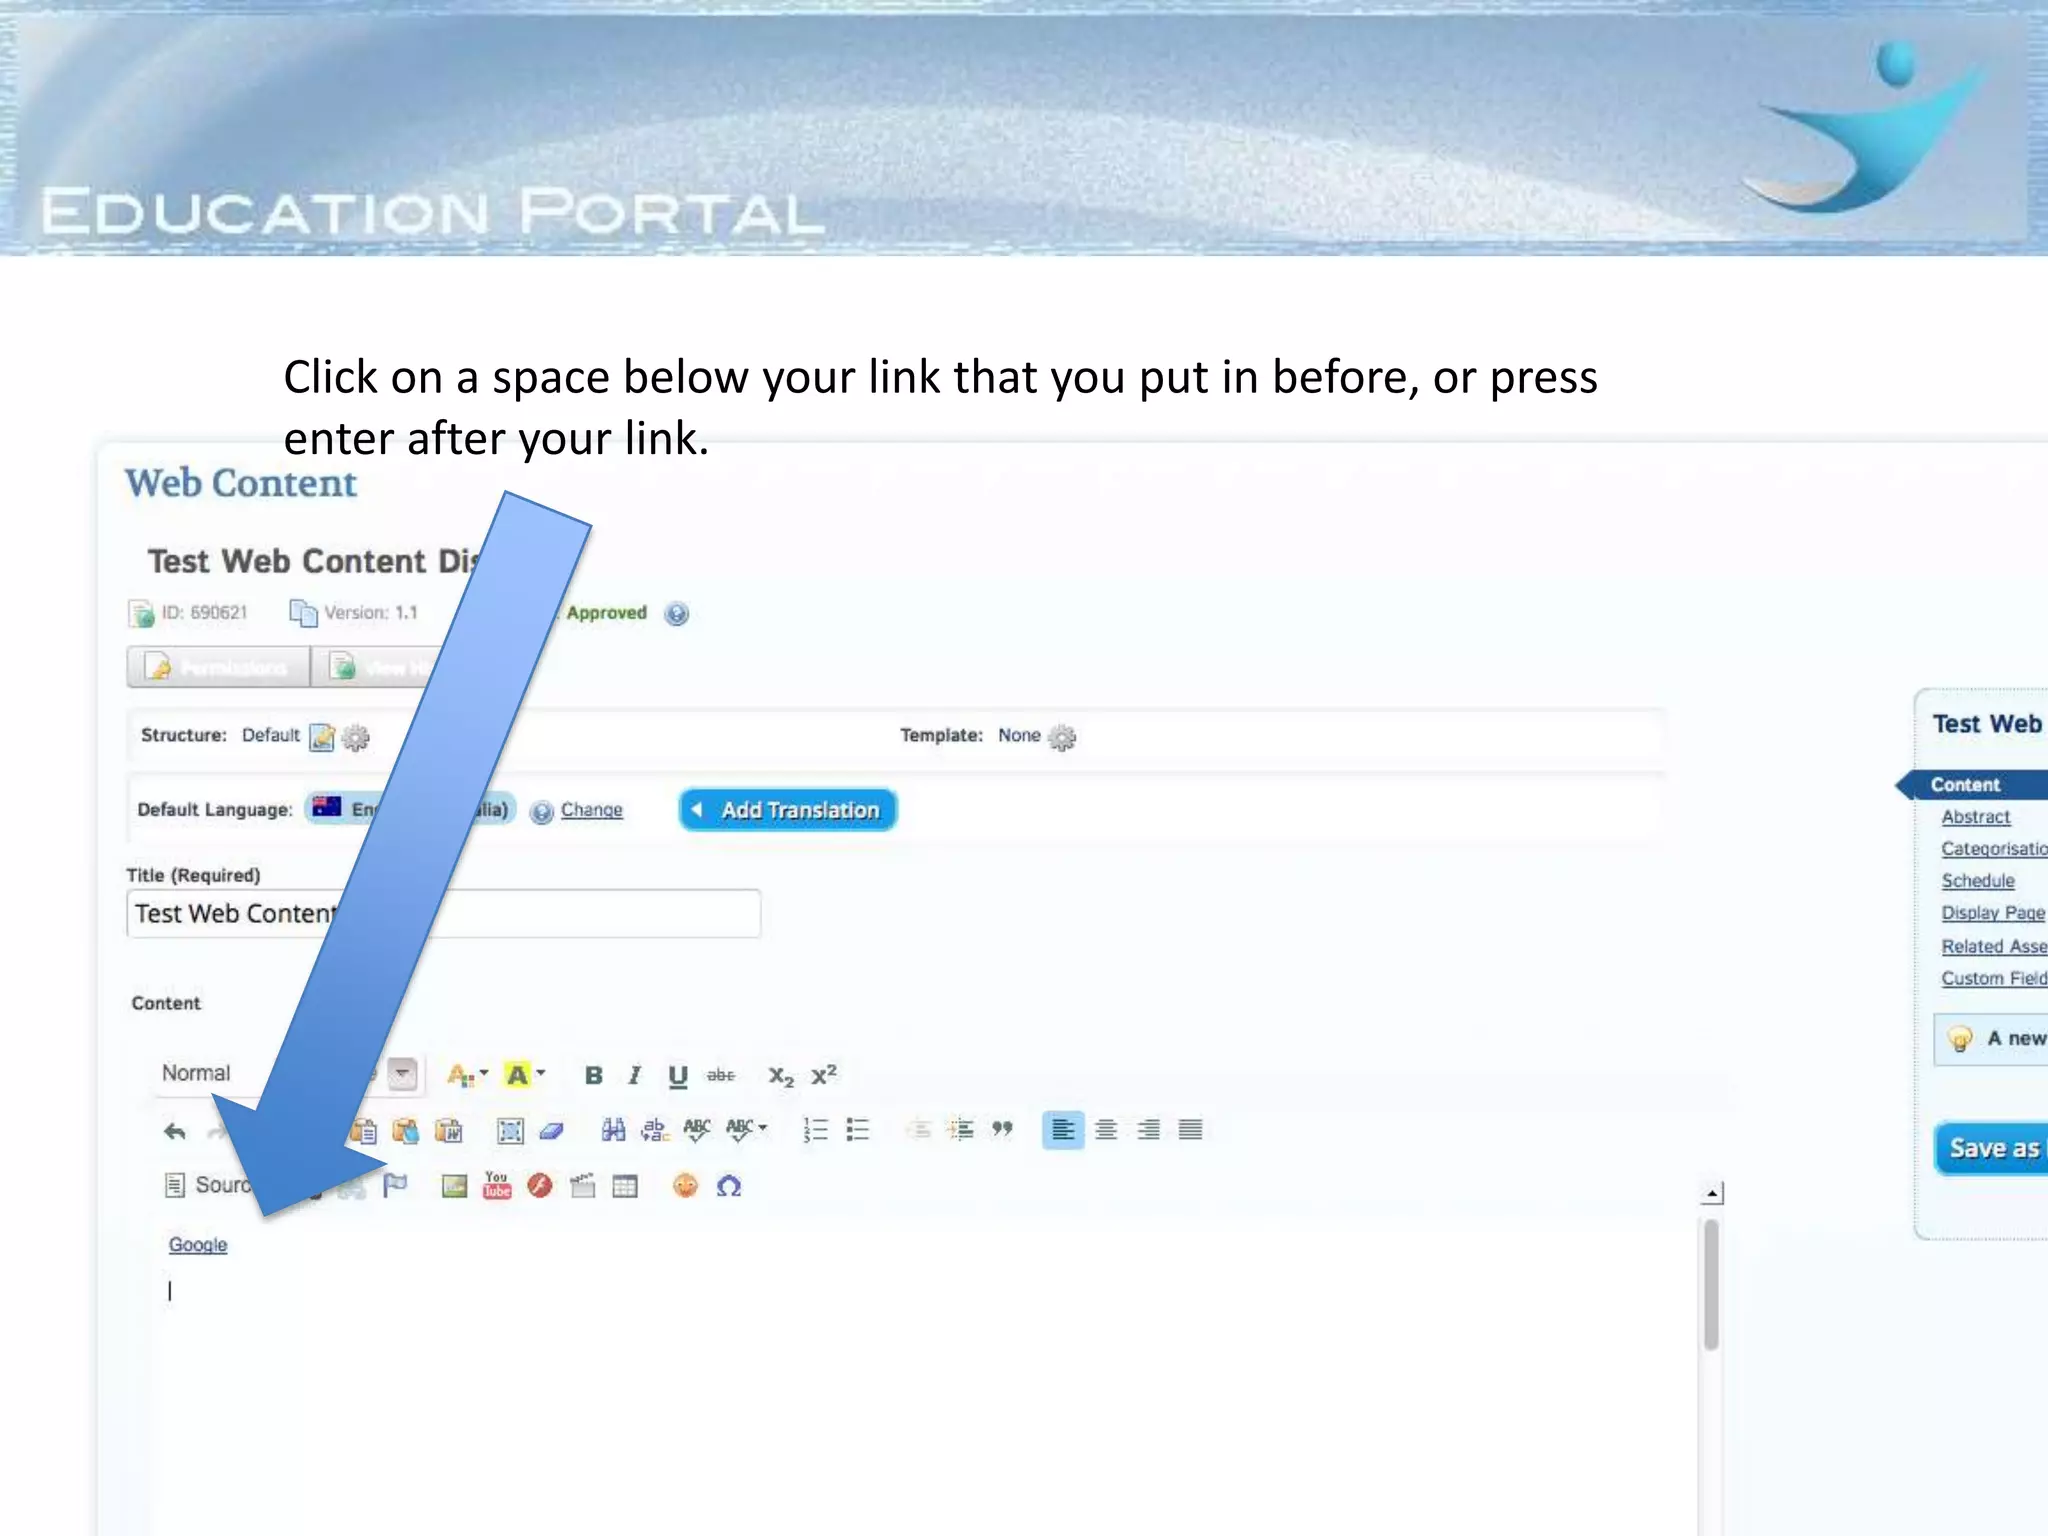
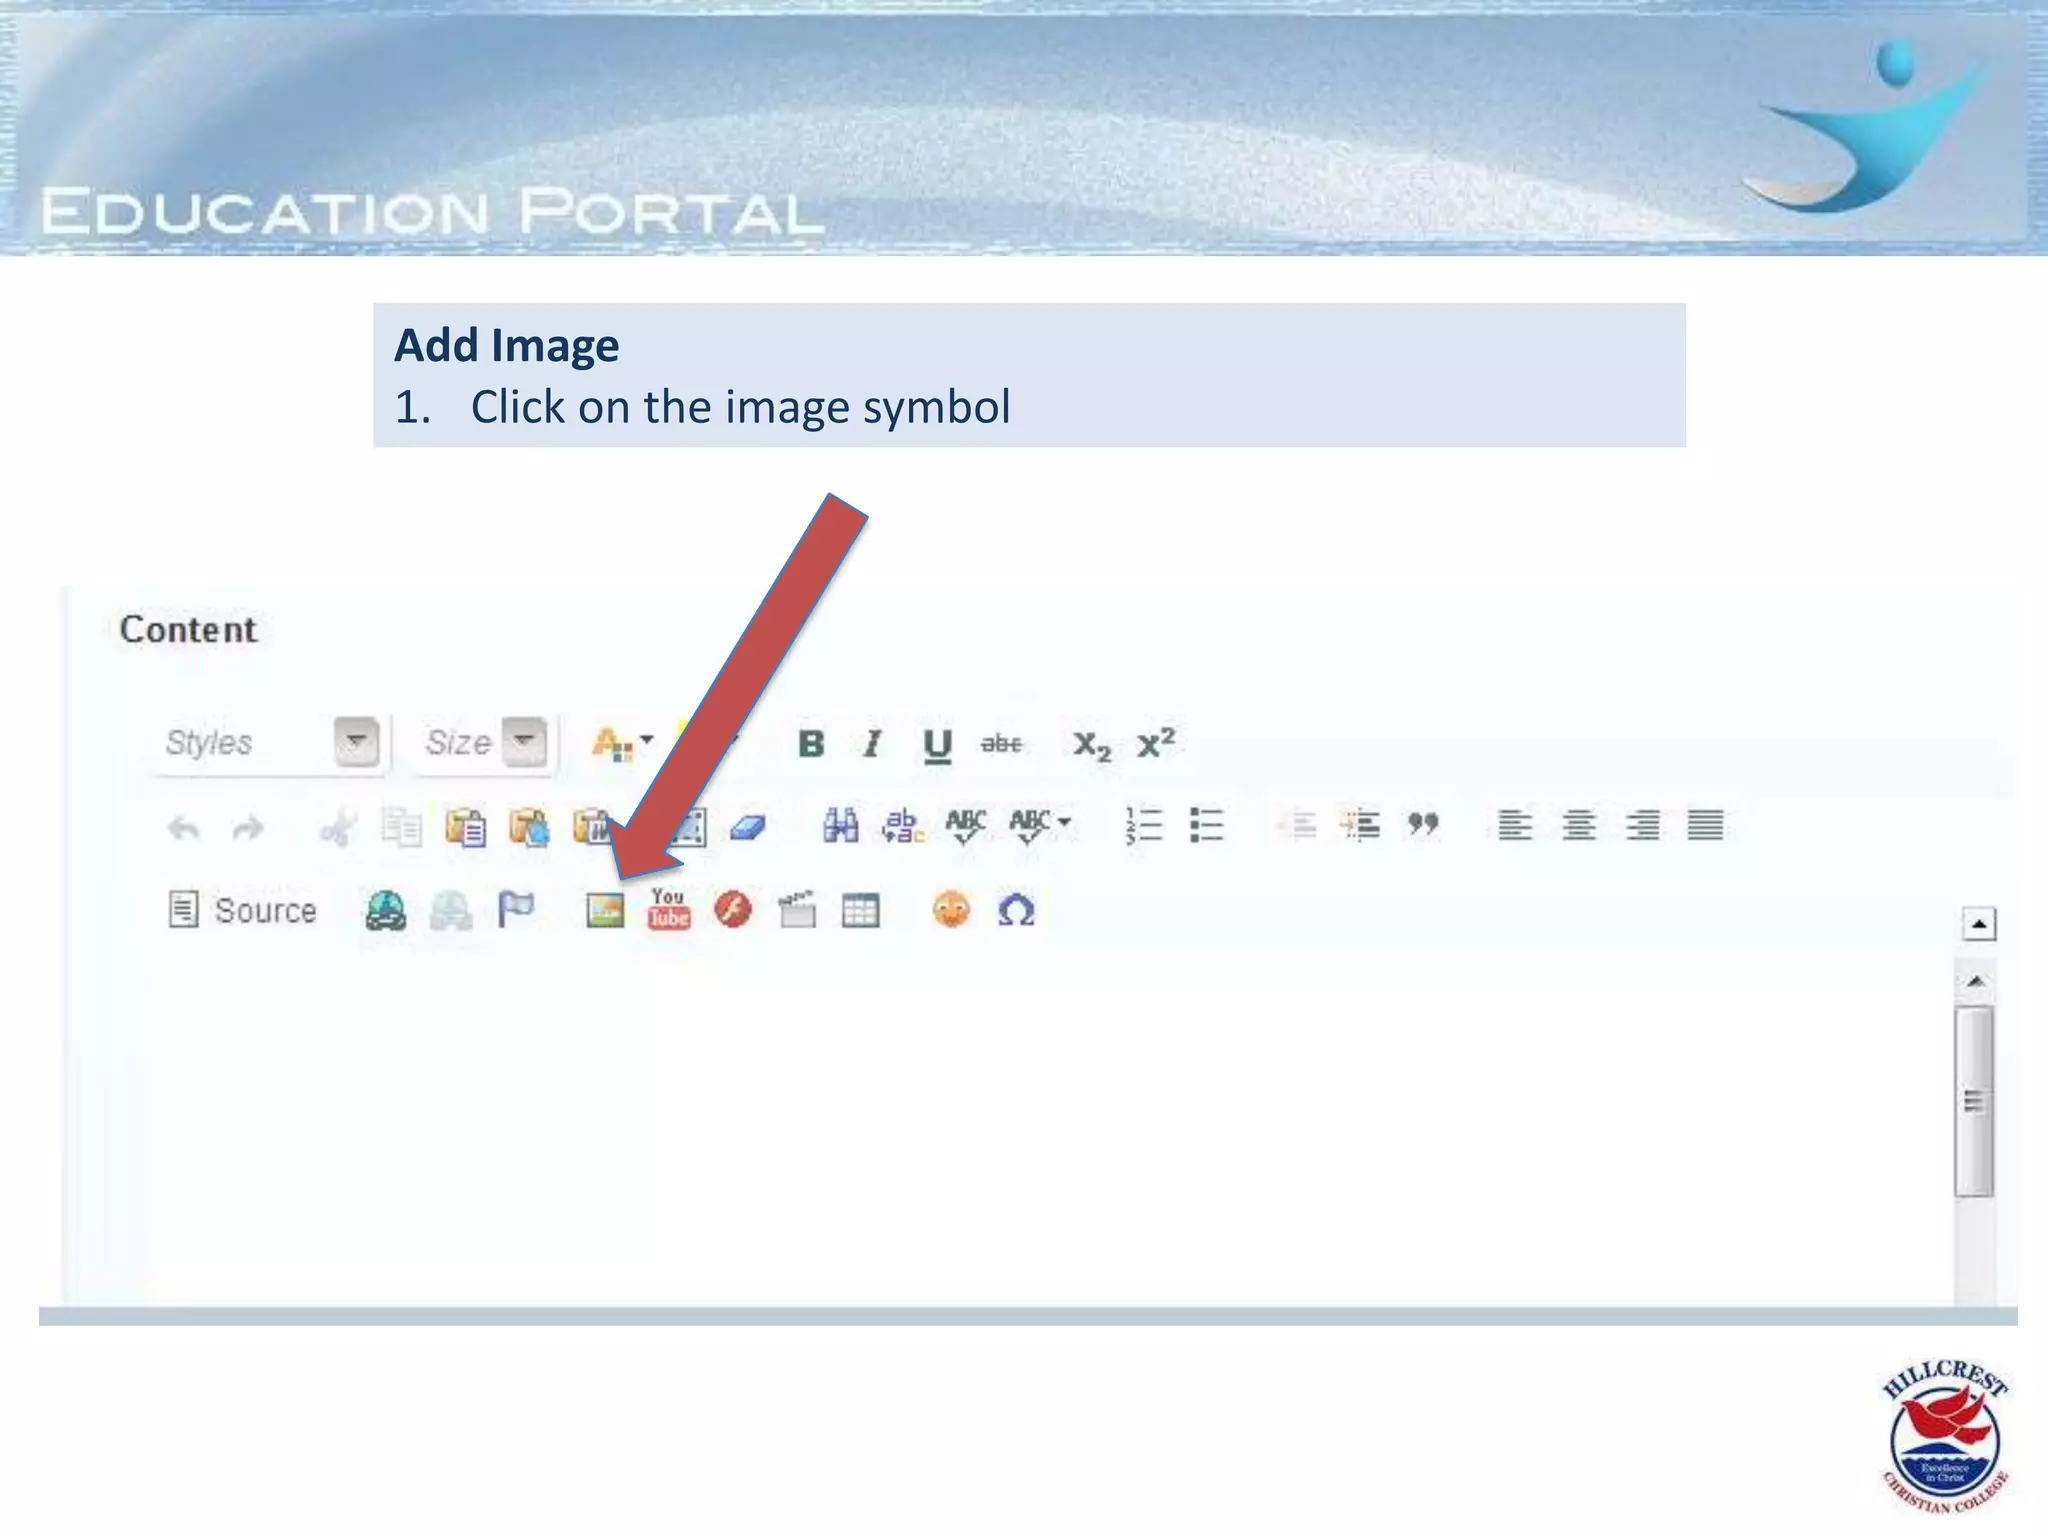


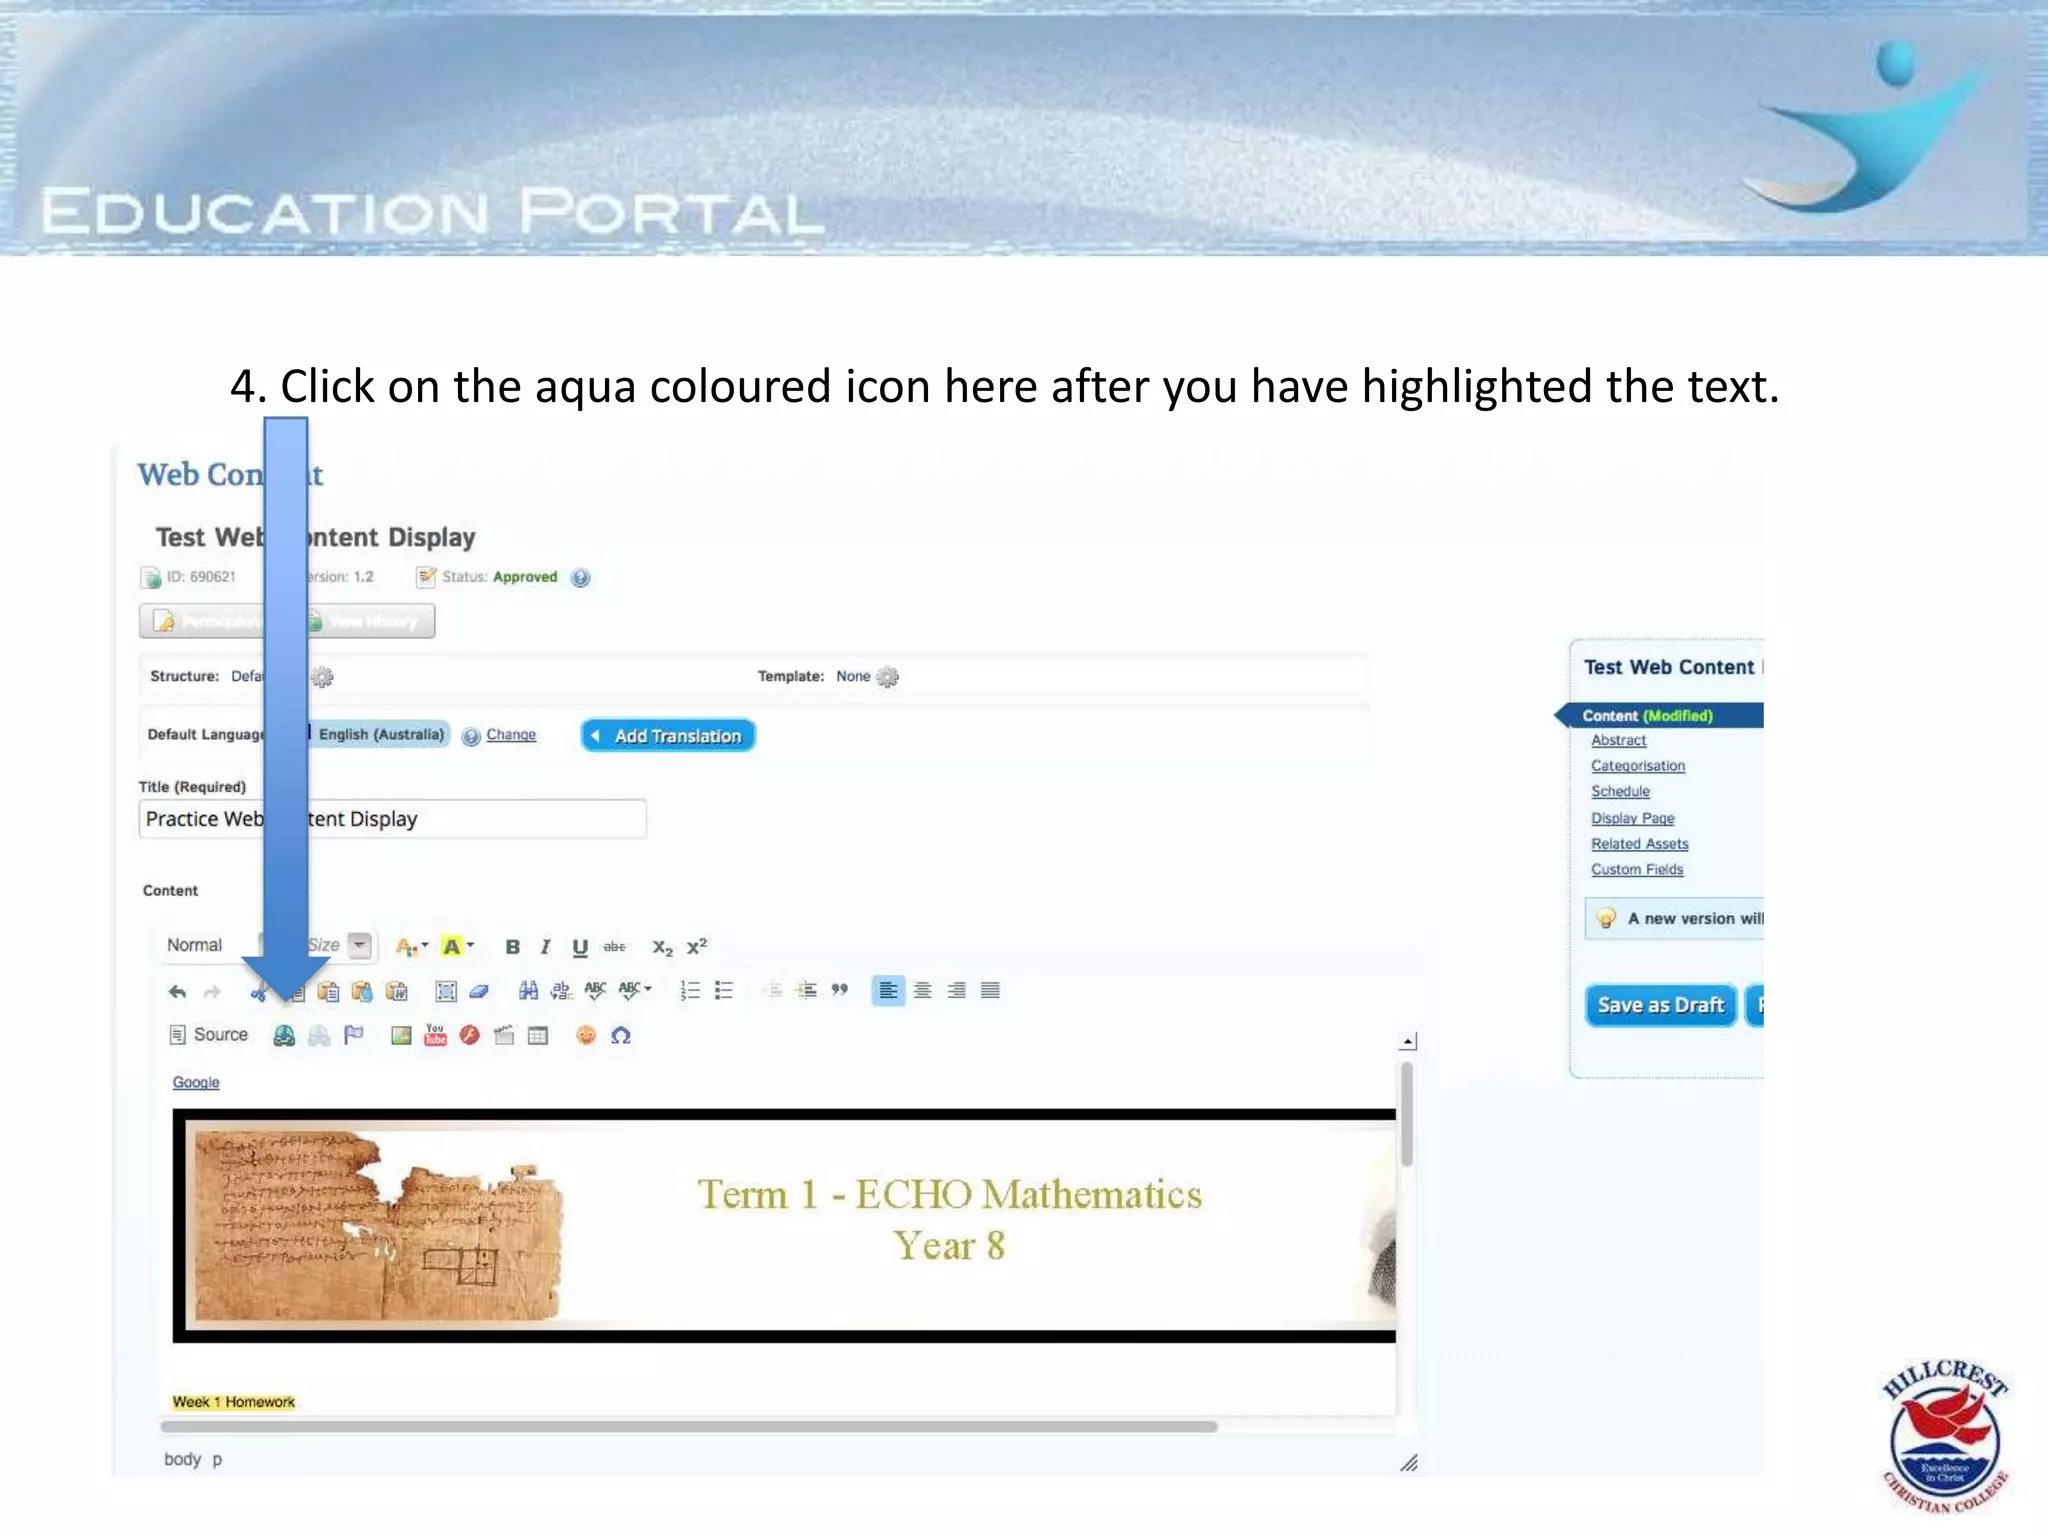
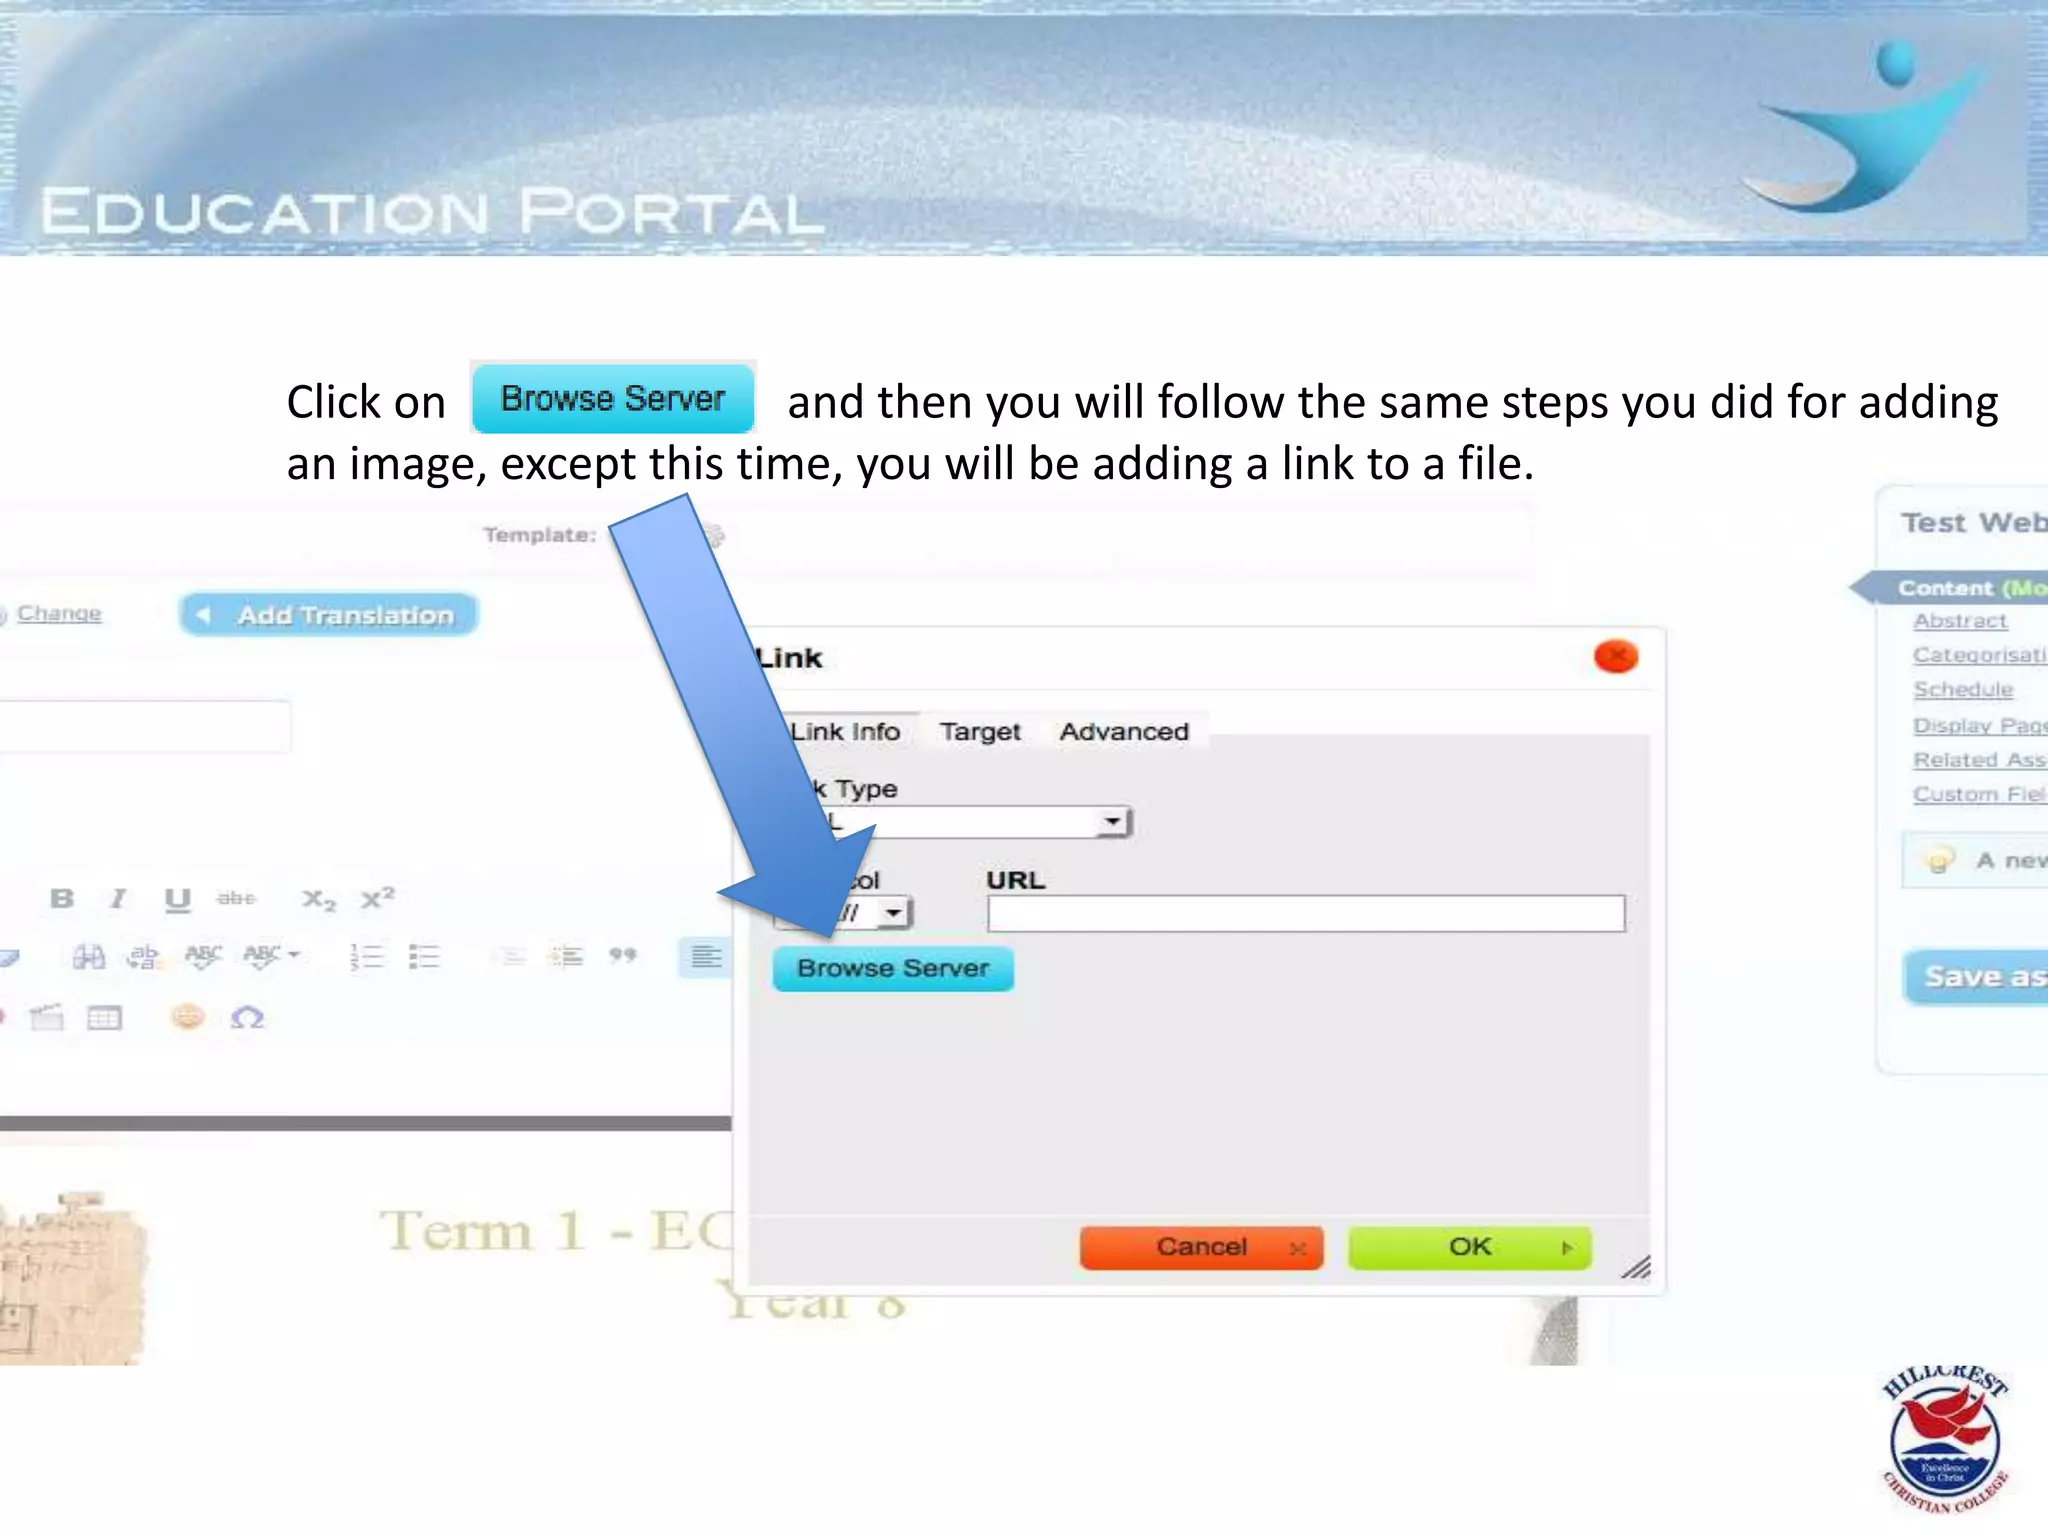

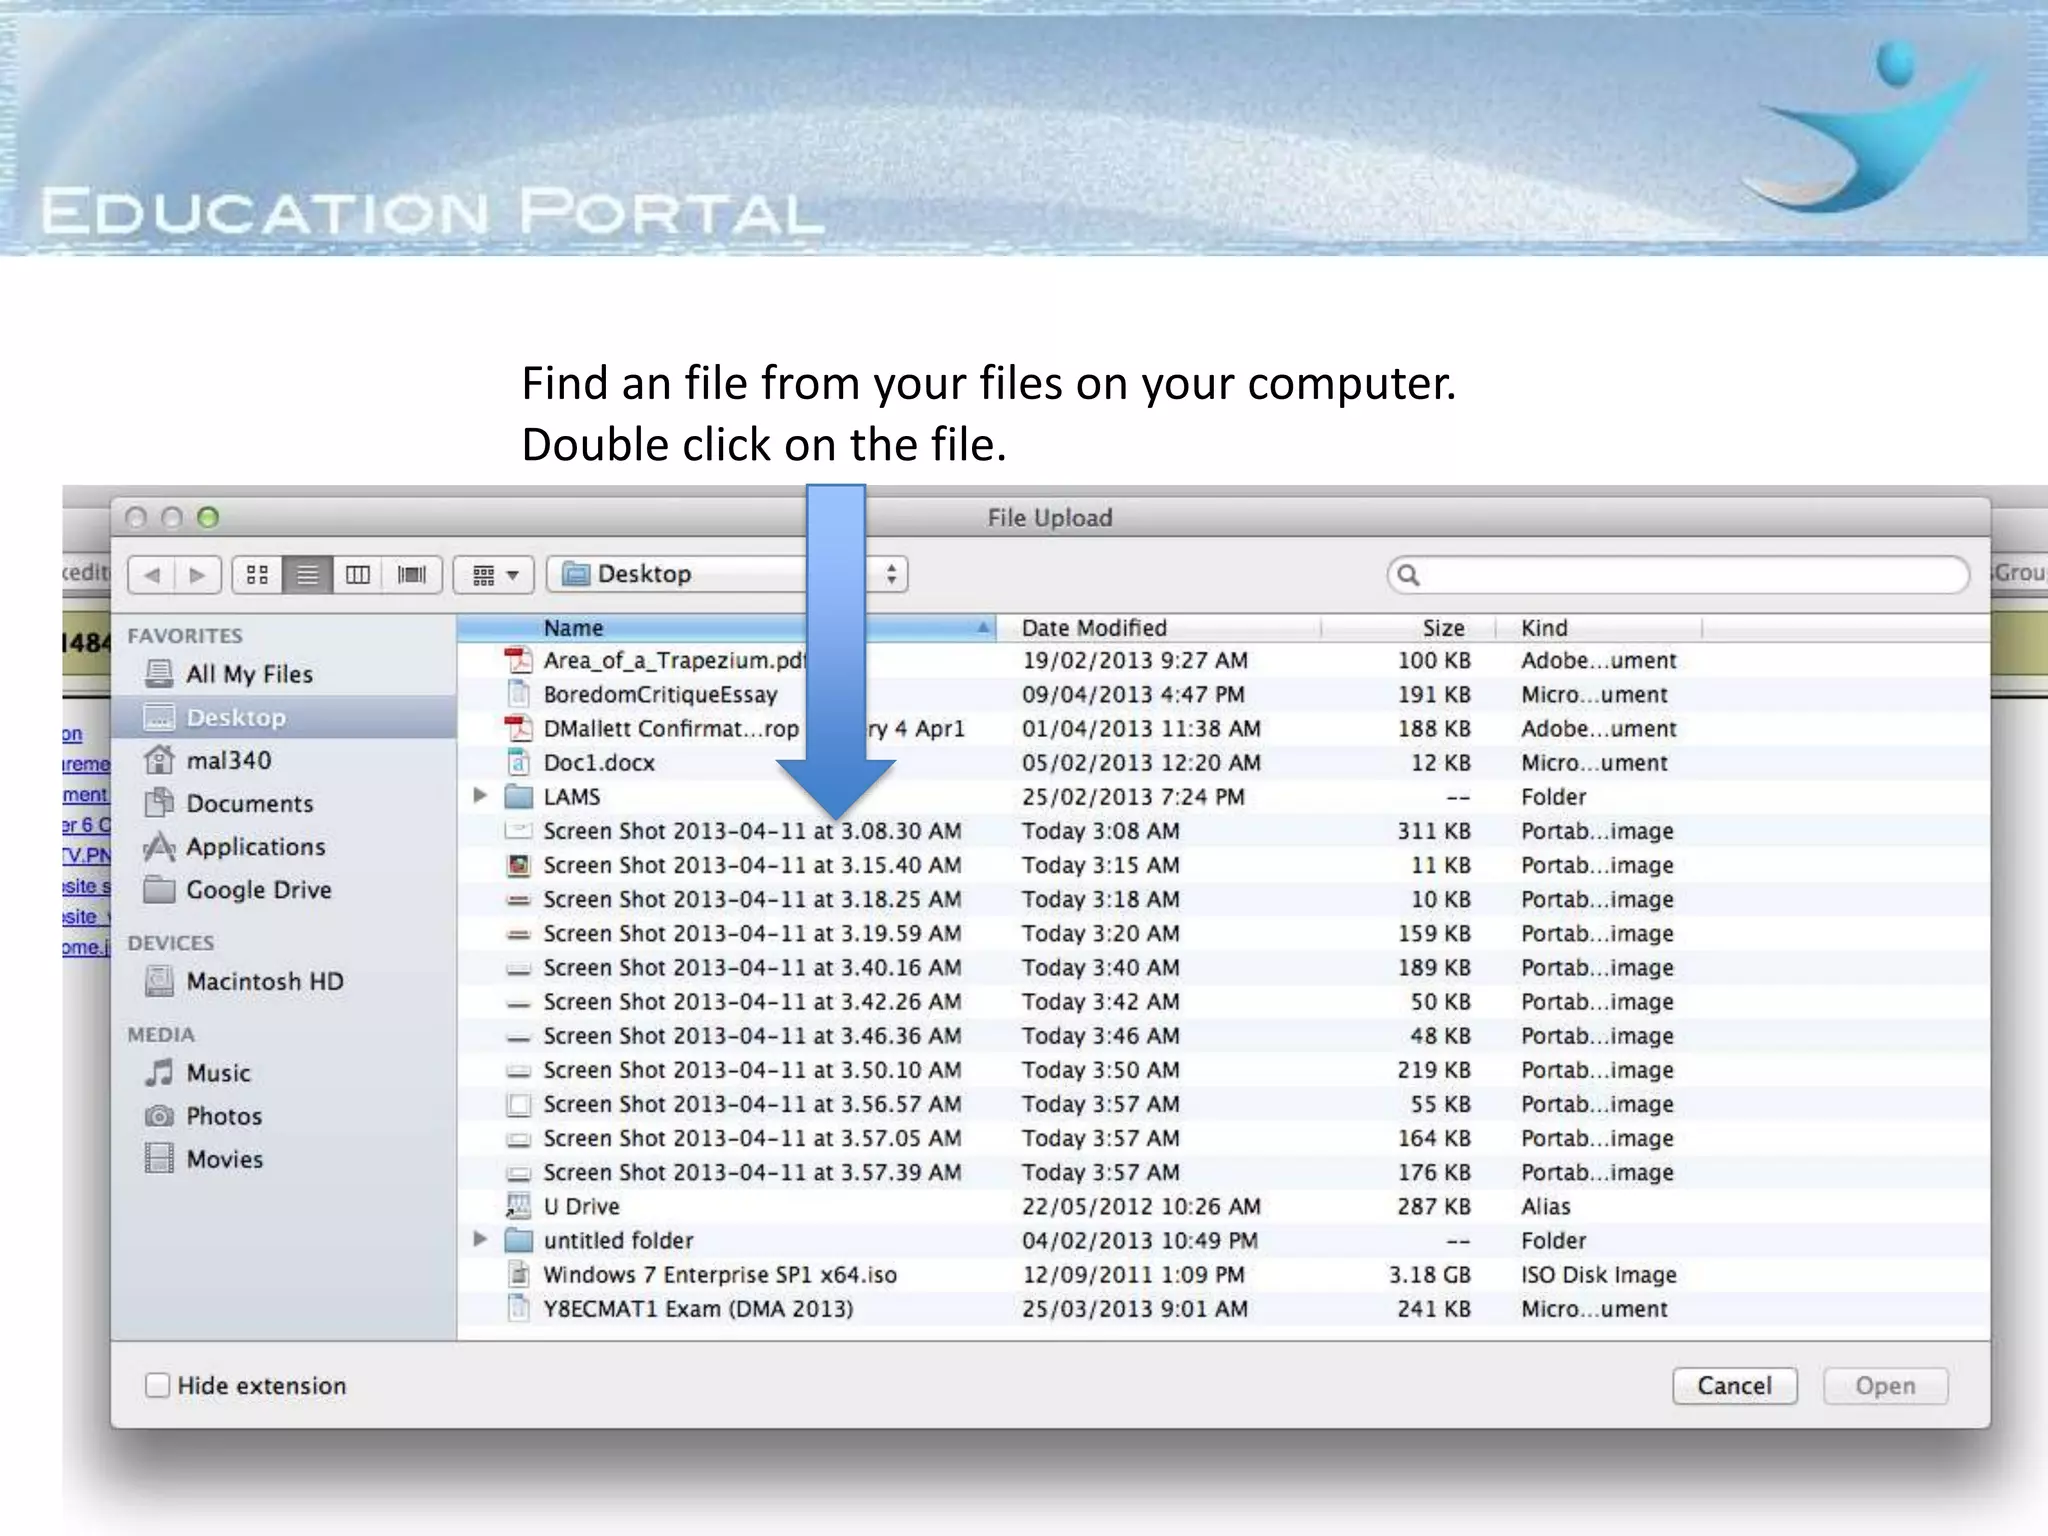
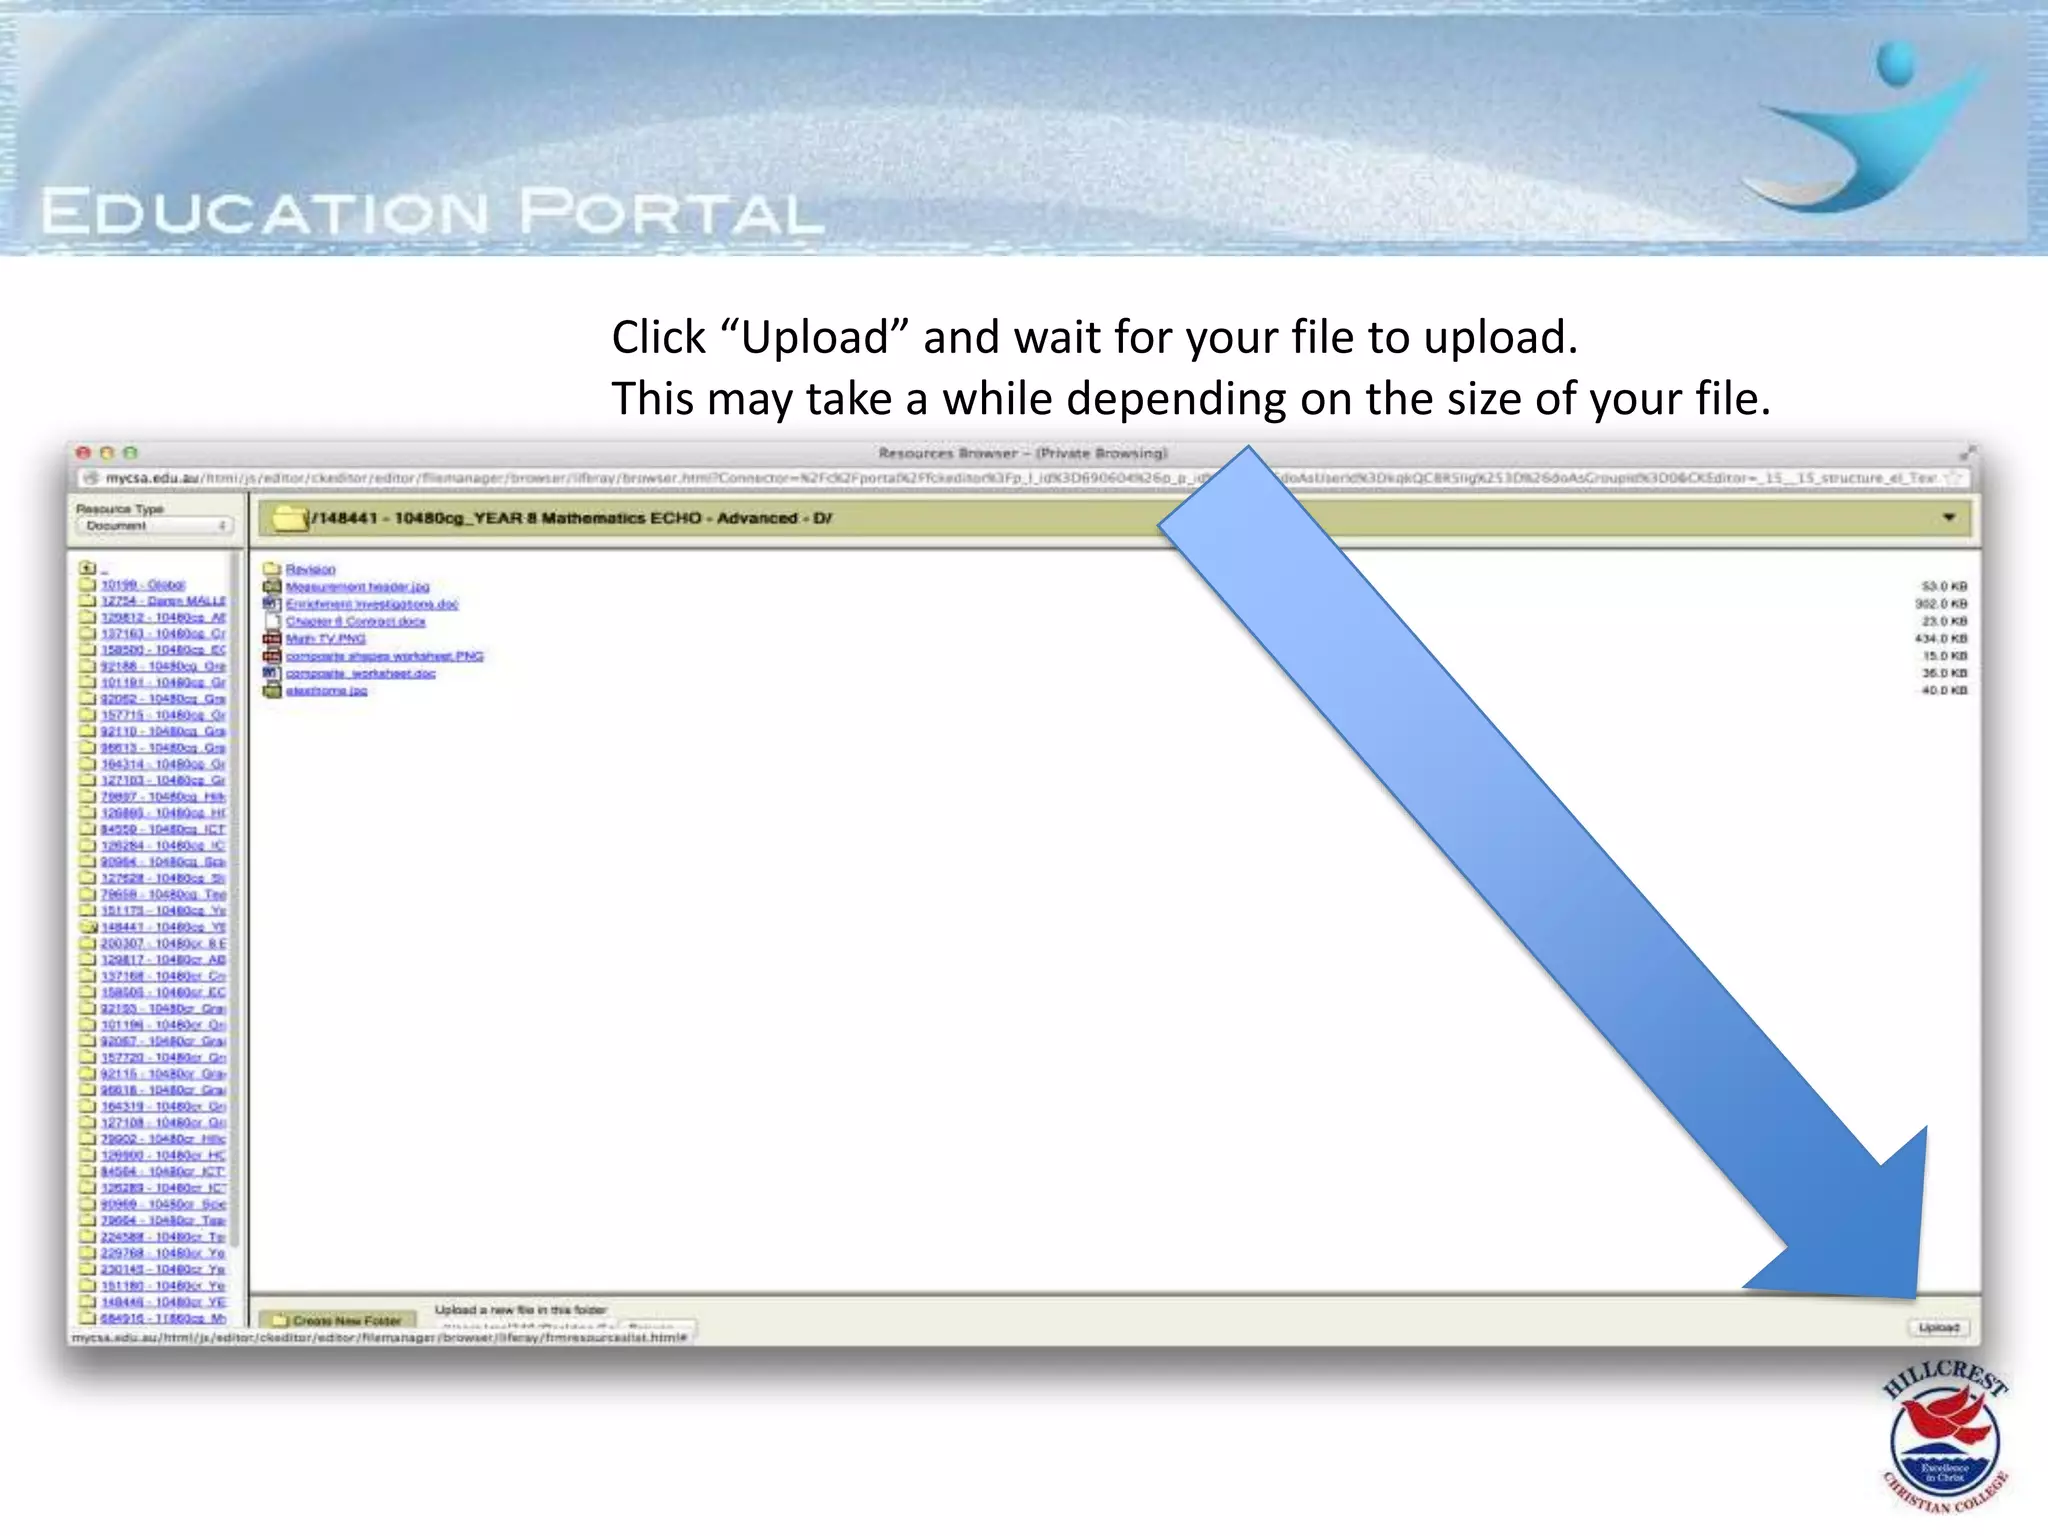


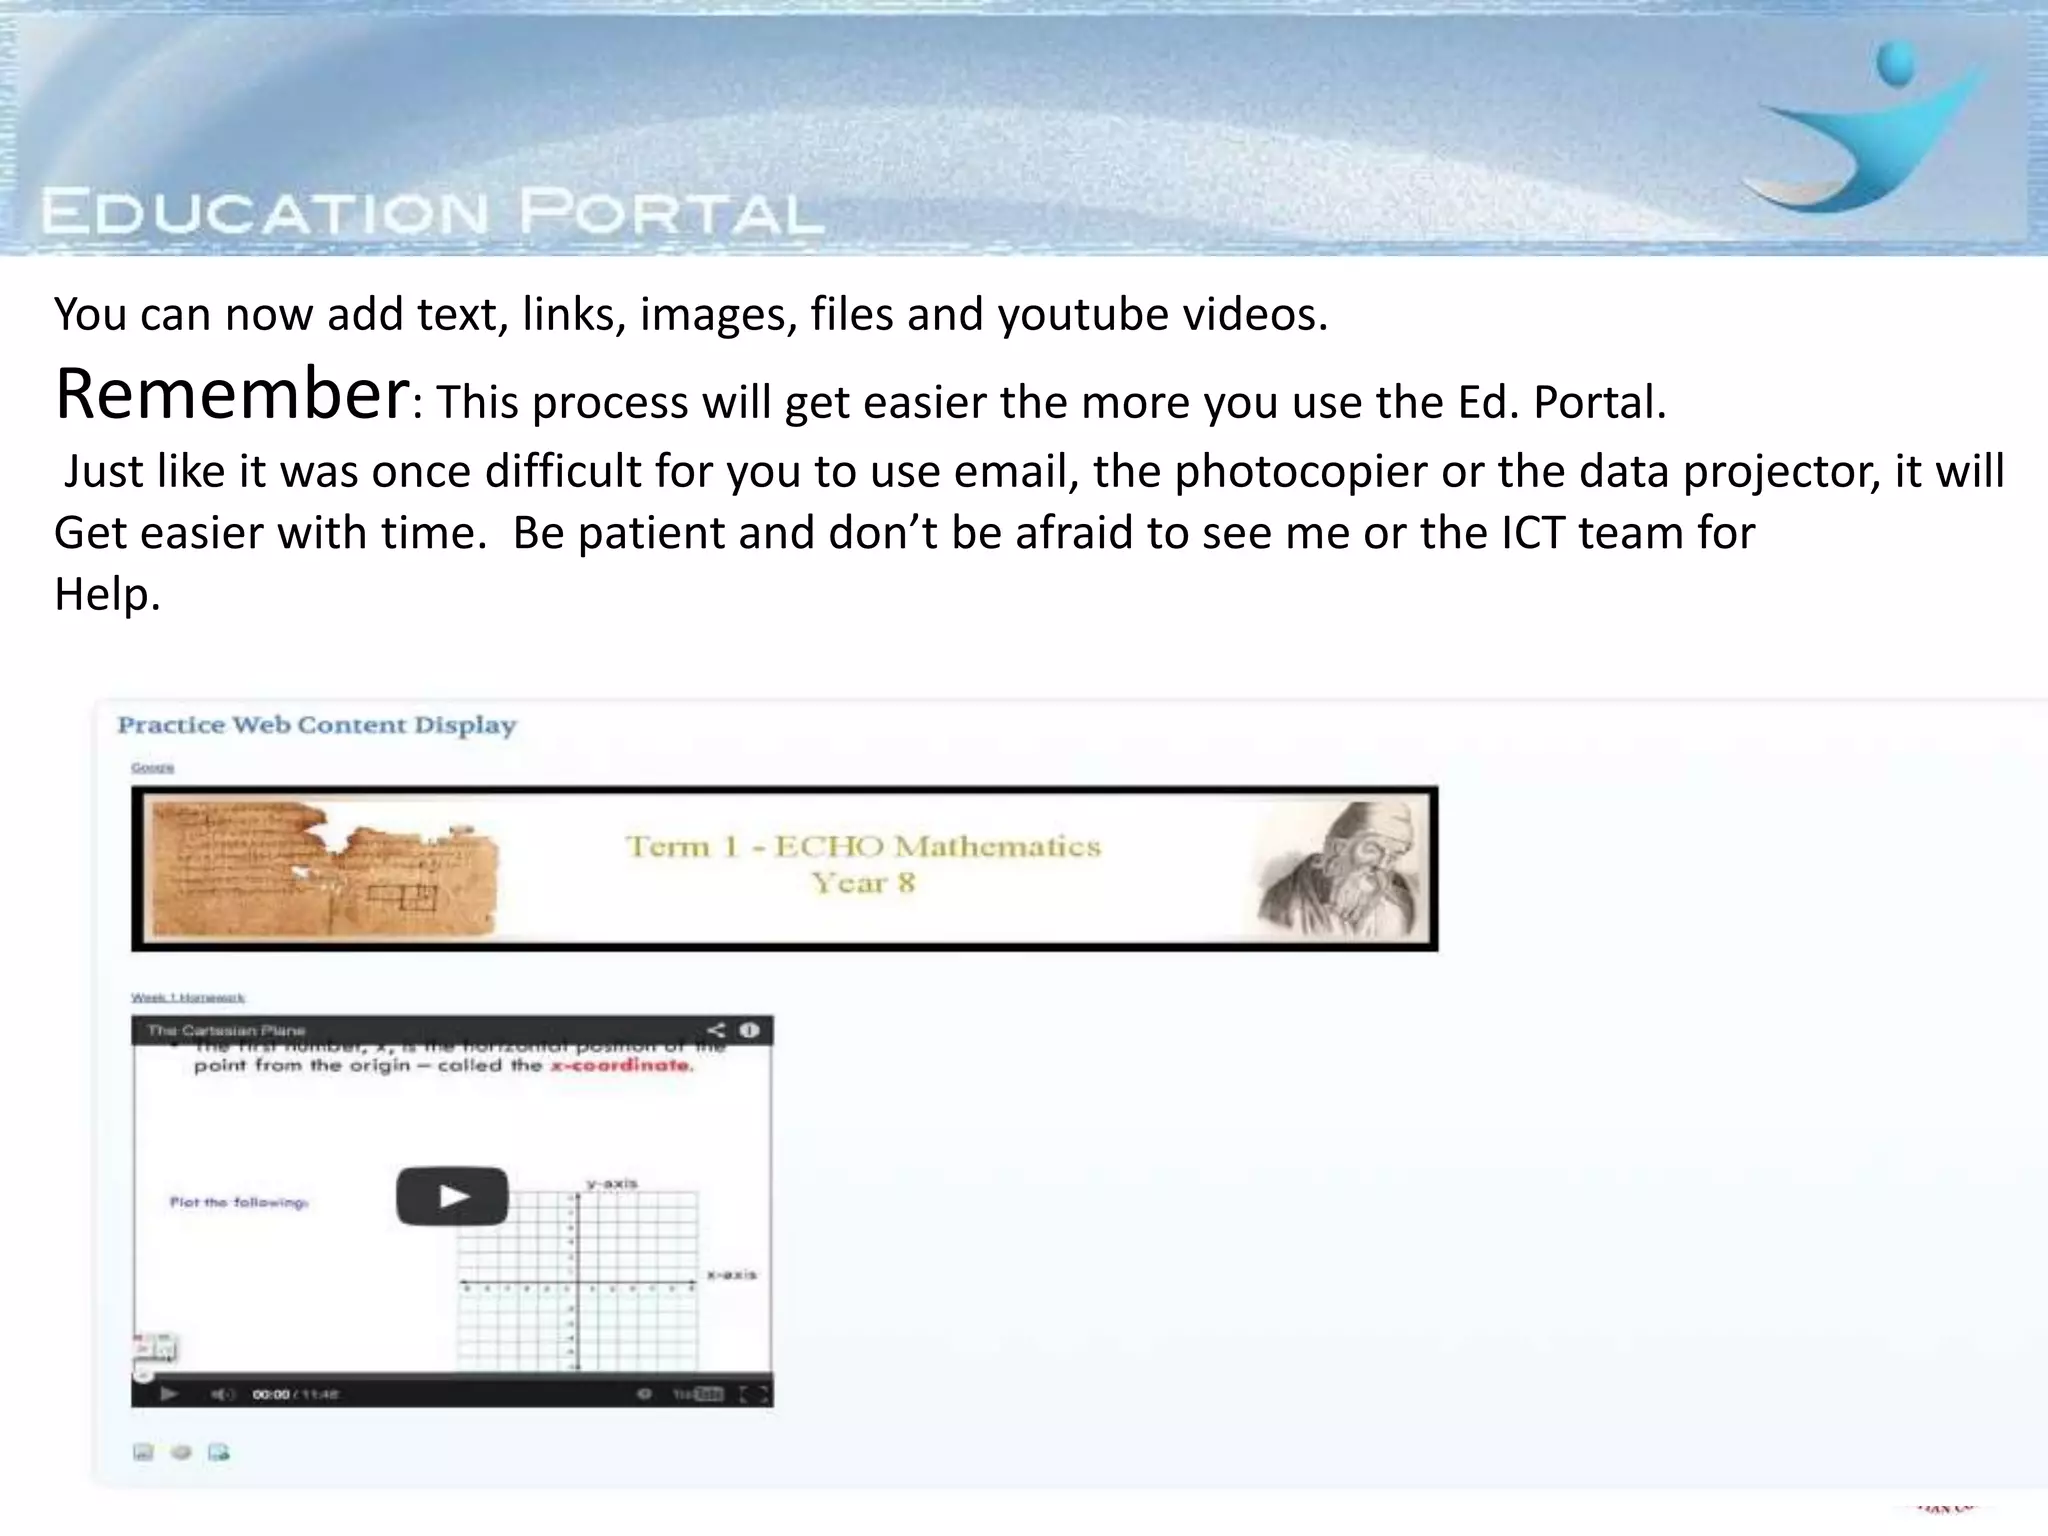

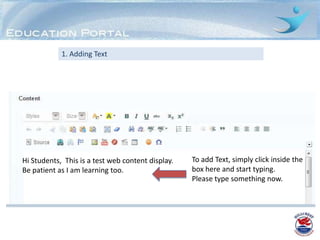
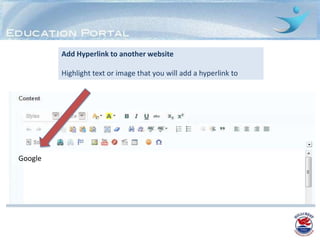
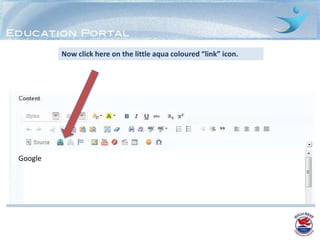
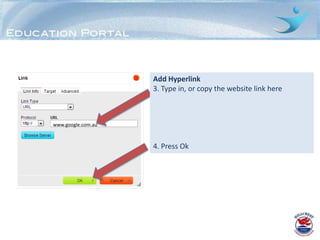
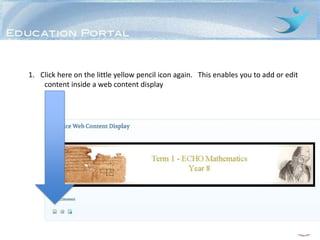
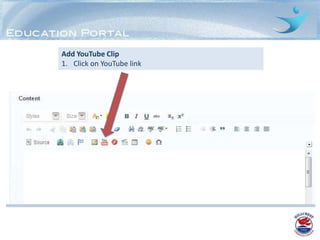
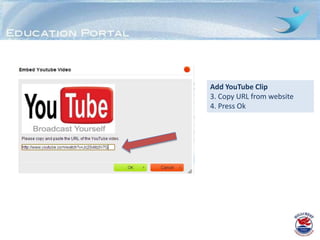
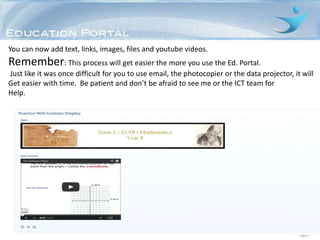
This document provides instructions for adding different types of content to a Web Content Display portlet, including text, images, files, hyperlinks, and YouTube videos. It outlines the steps to take the Ed. Portal to create a new page, add a Web Content Display, and then insert various types of content. The goals are to learn how to utilize this tool to share materials with students and provide multiple formats of content on a single page. Practice and patience are advised as the skills develop over time.


