Download as PDF, PPTX


![www.webstackacademy.com
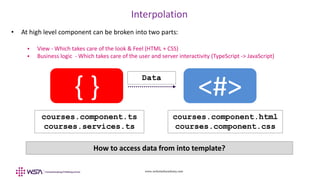
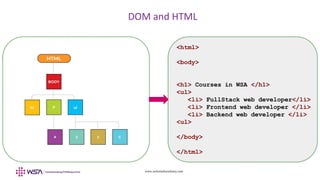
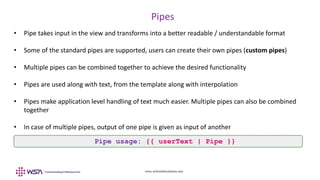
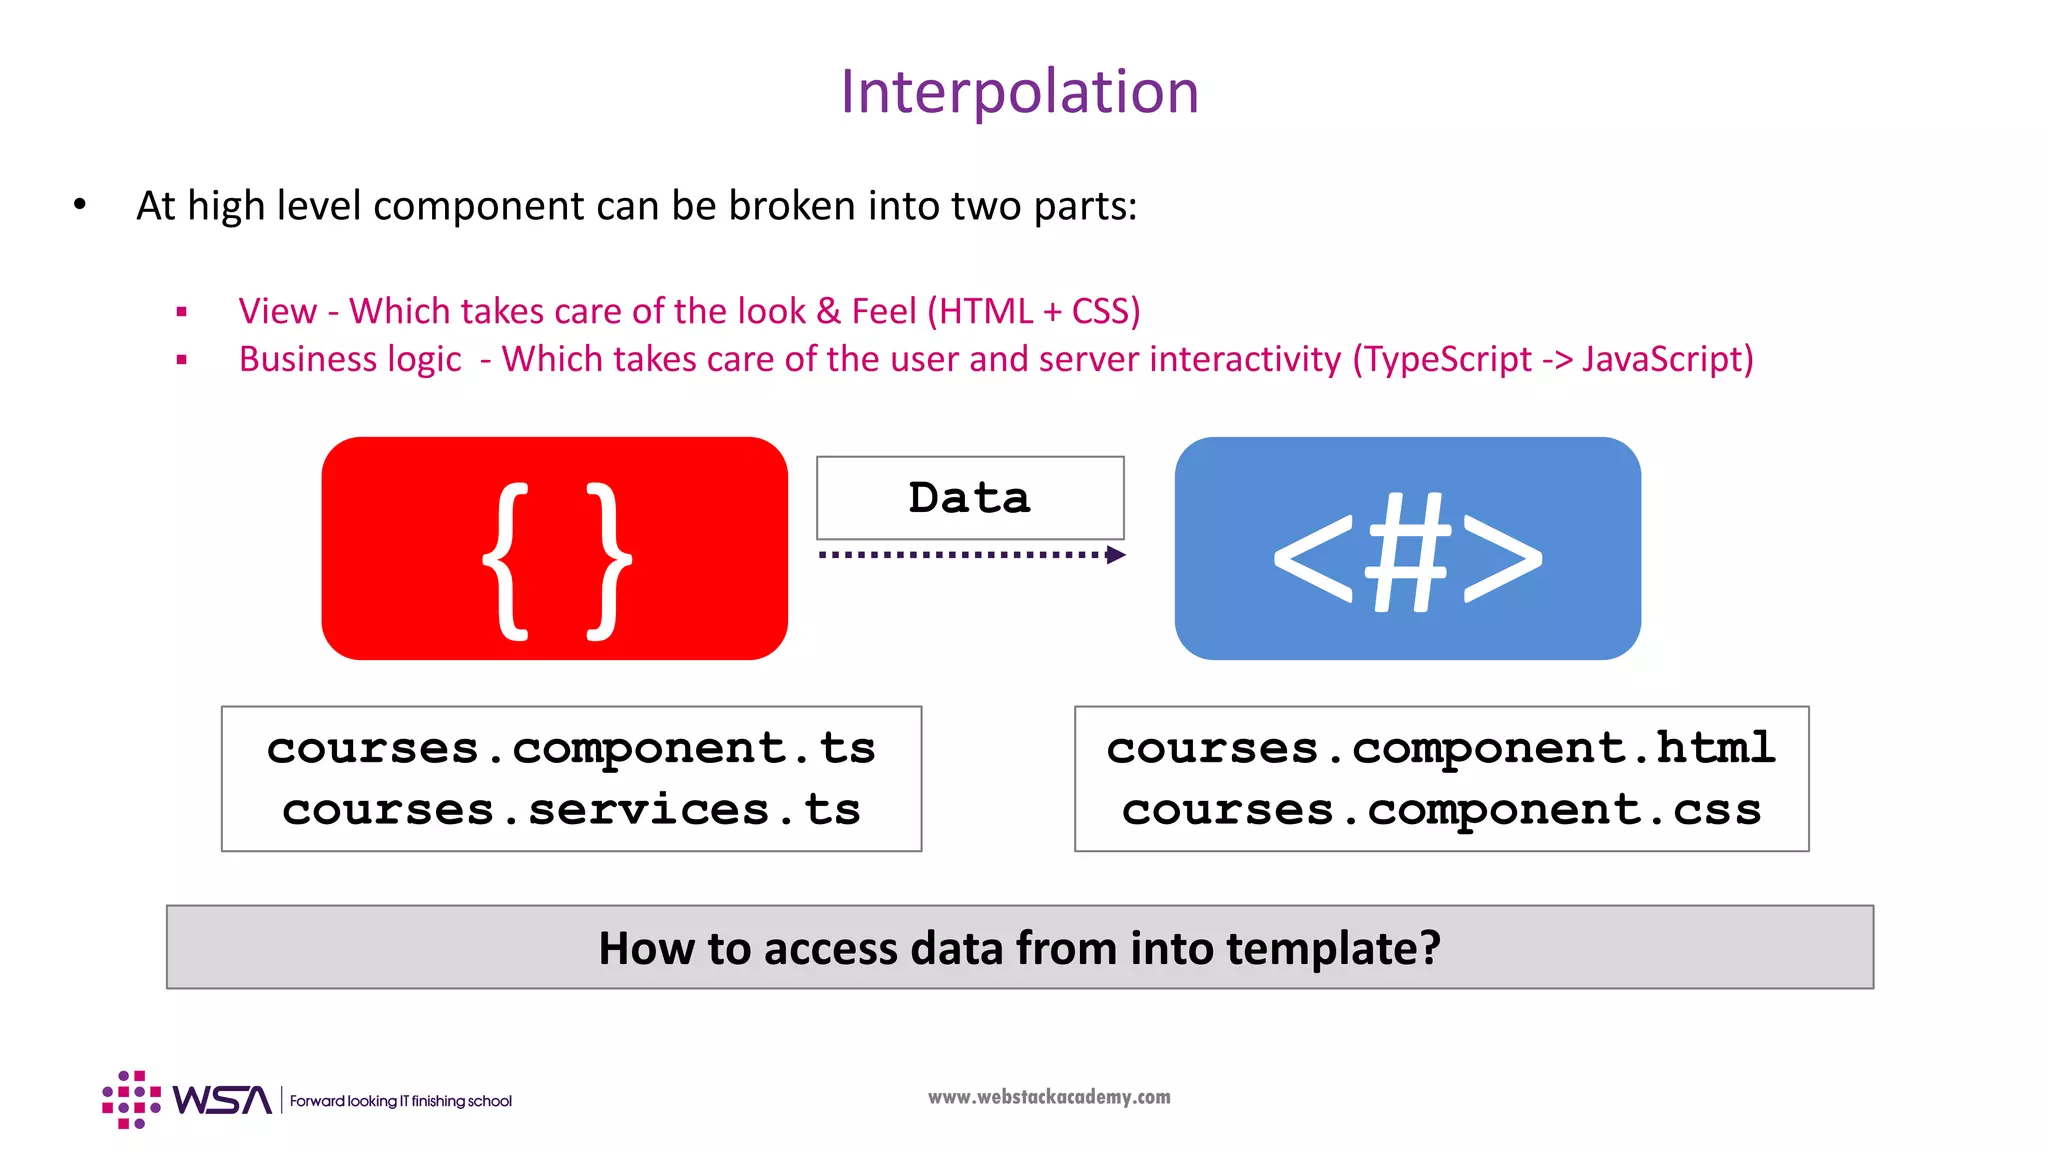
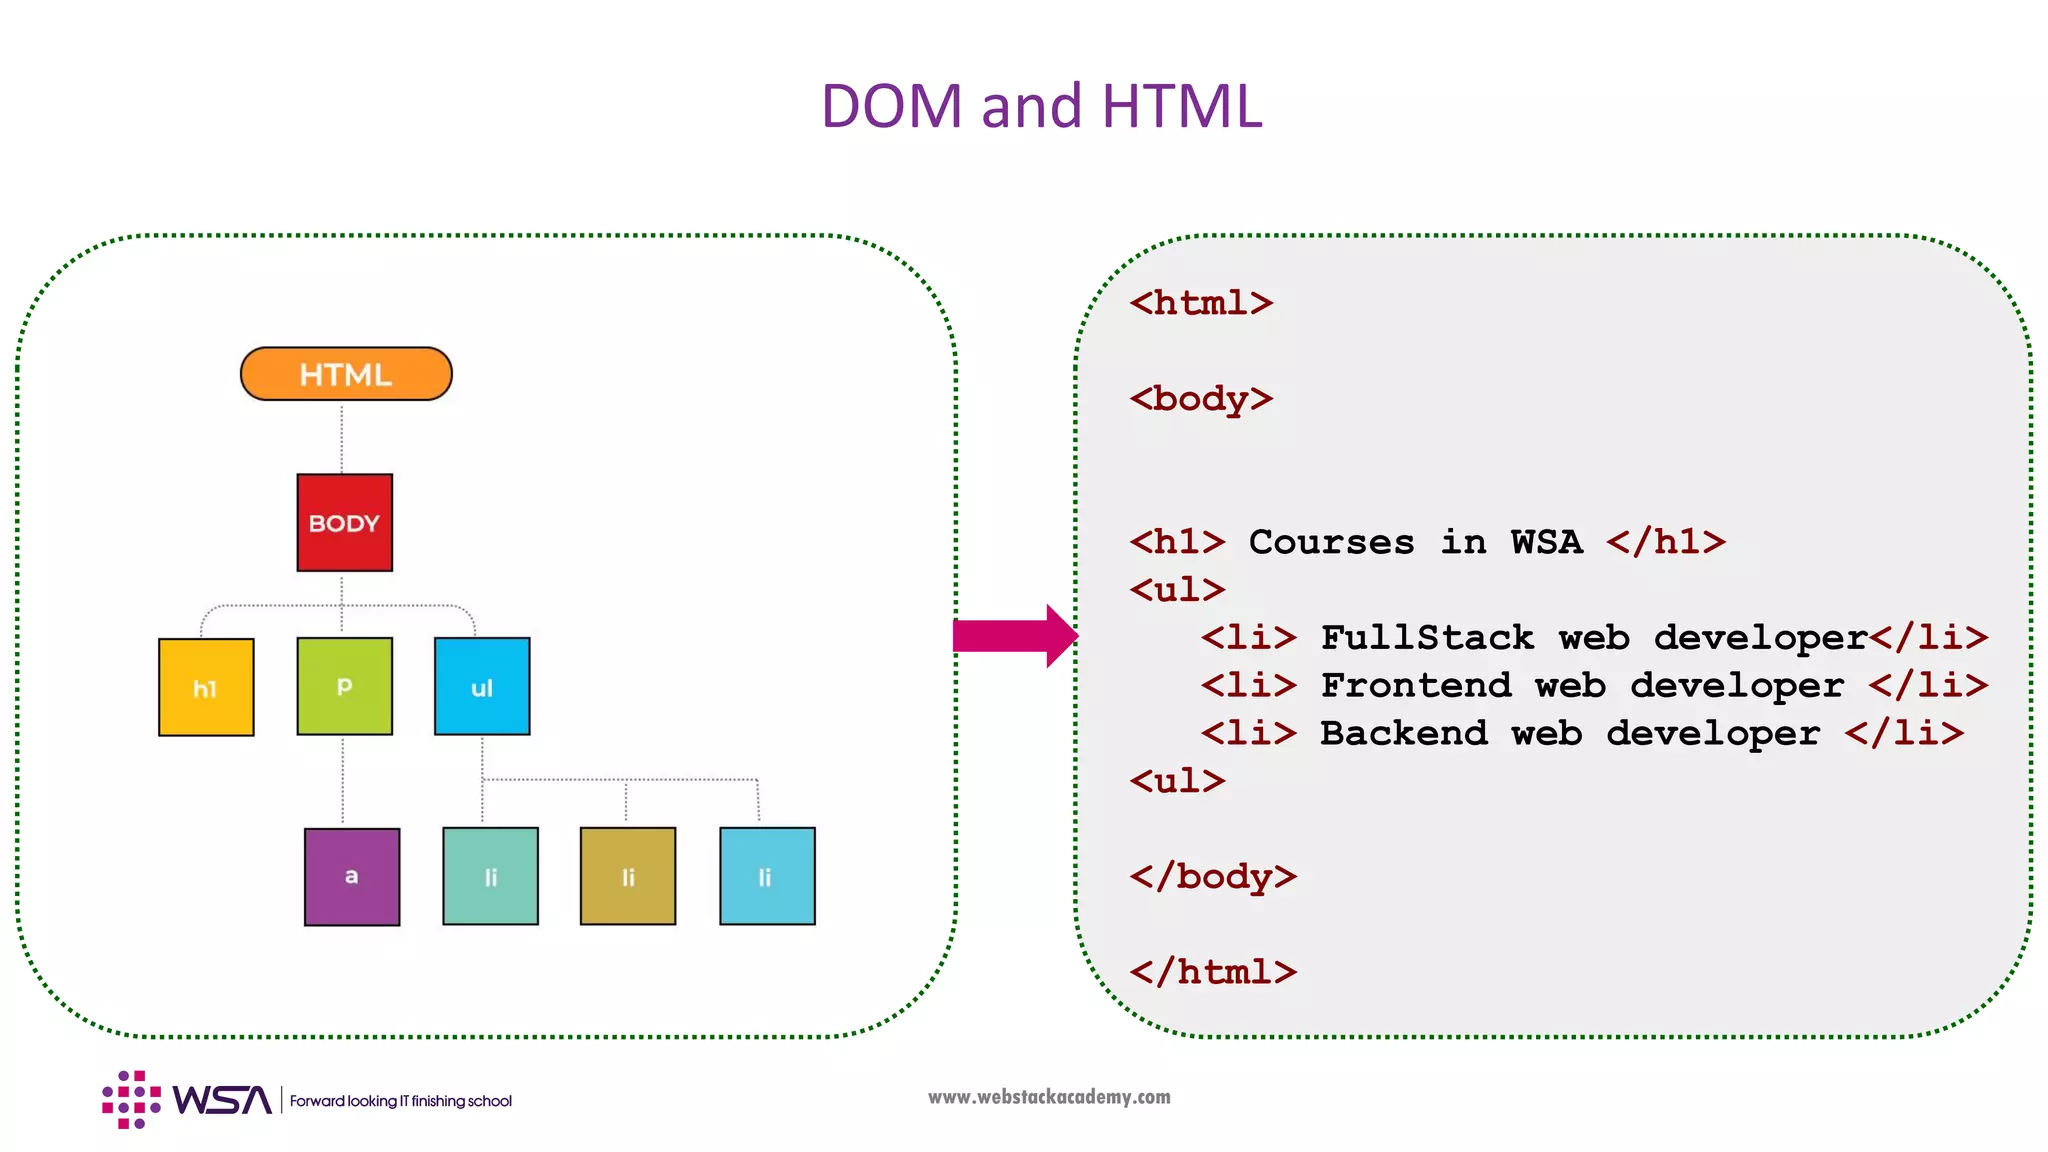
Interpolation
@Component({
selector: 'courses',
template: `
<h2> {{title}}</h2>
<ul> {{courses}}</ul>
`
})
export class CoursesComponent {
title = 'List of courses in WSA:';
courses = ["FullStack","FrontEnd","BackEnd"]
}
{}
<#>](https://image.slidesharecdn.com/004angulardataevents-190503100806/85/Angular-Chapter-4-Data-and-Event-Handling-5-320.jpg)


![www.webstackacademy.com
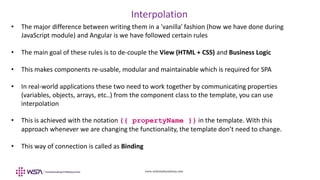
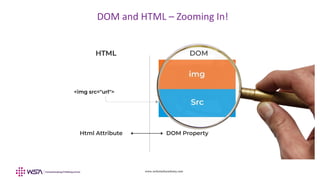
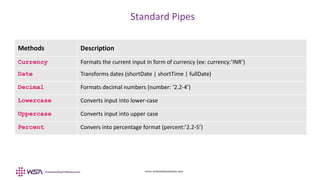
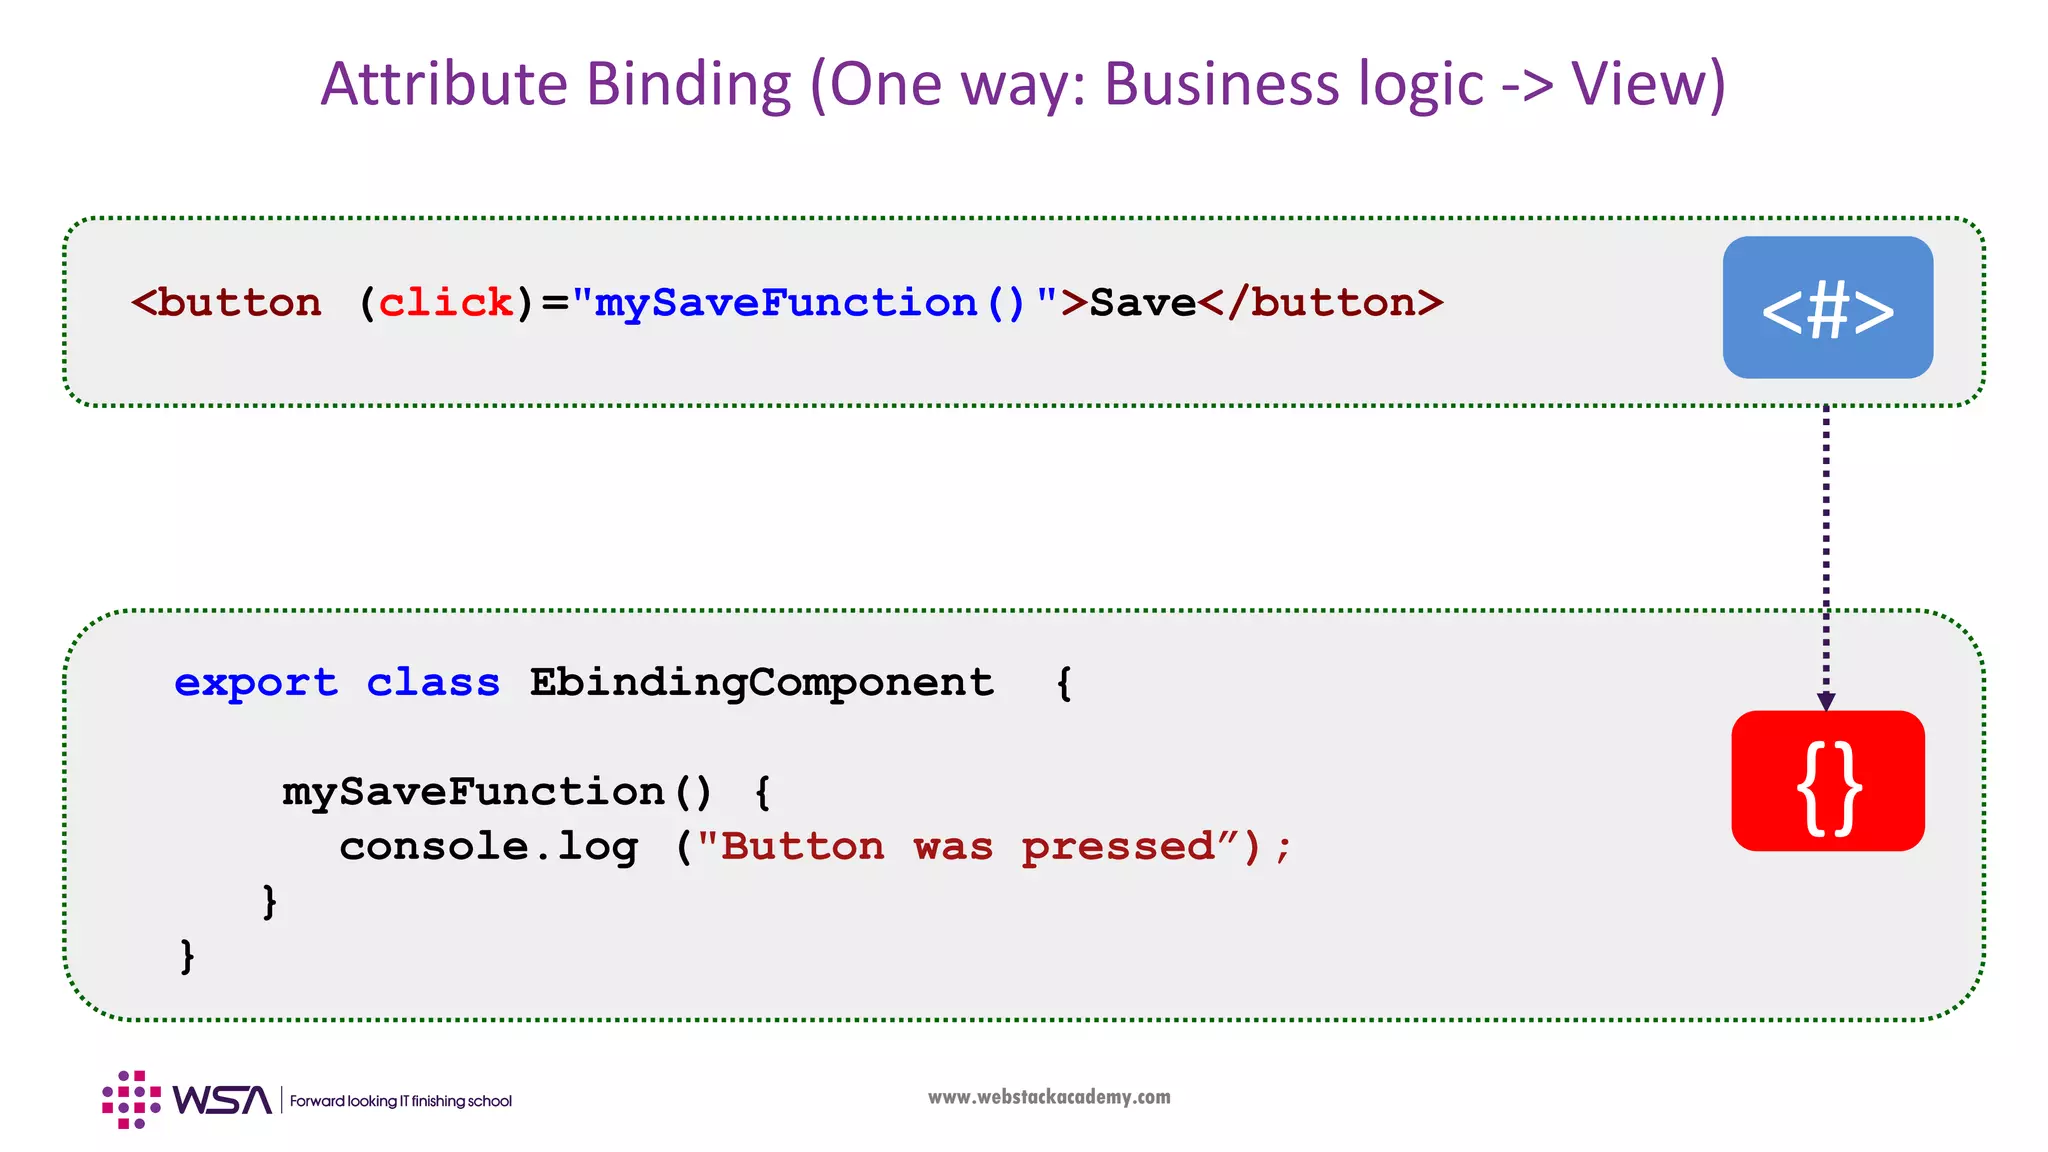
Attribute Binding (One way: Business logic -> View)
export class BindingComponent {
imageLink = "http://www.testimage.com/side-image.png";
}
<p><b>Example of property binding: Image</b></p>
<img [src]= "imageLink"/>
{}
<#>](https://image.slidesharecdn.com/004angulardataevents-190503100806/85/Angular-Chapter-4-Data-and-Event-Handling-12-320.jpg)


![www.webstackacademy.com
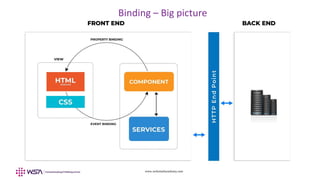
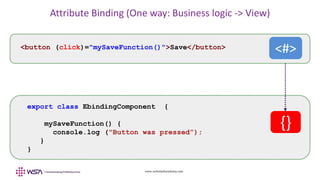
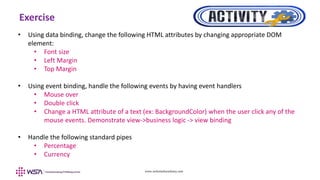
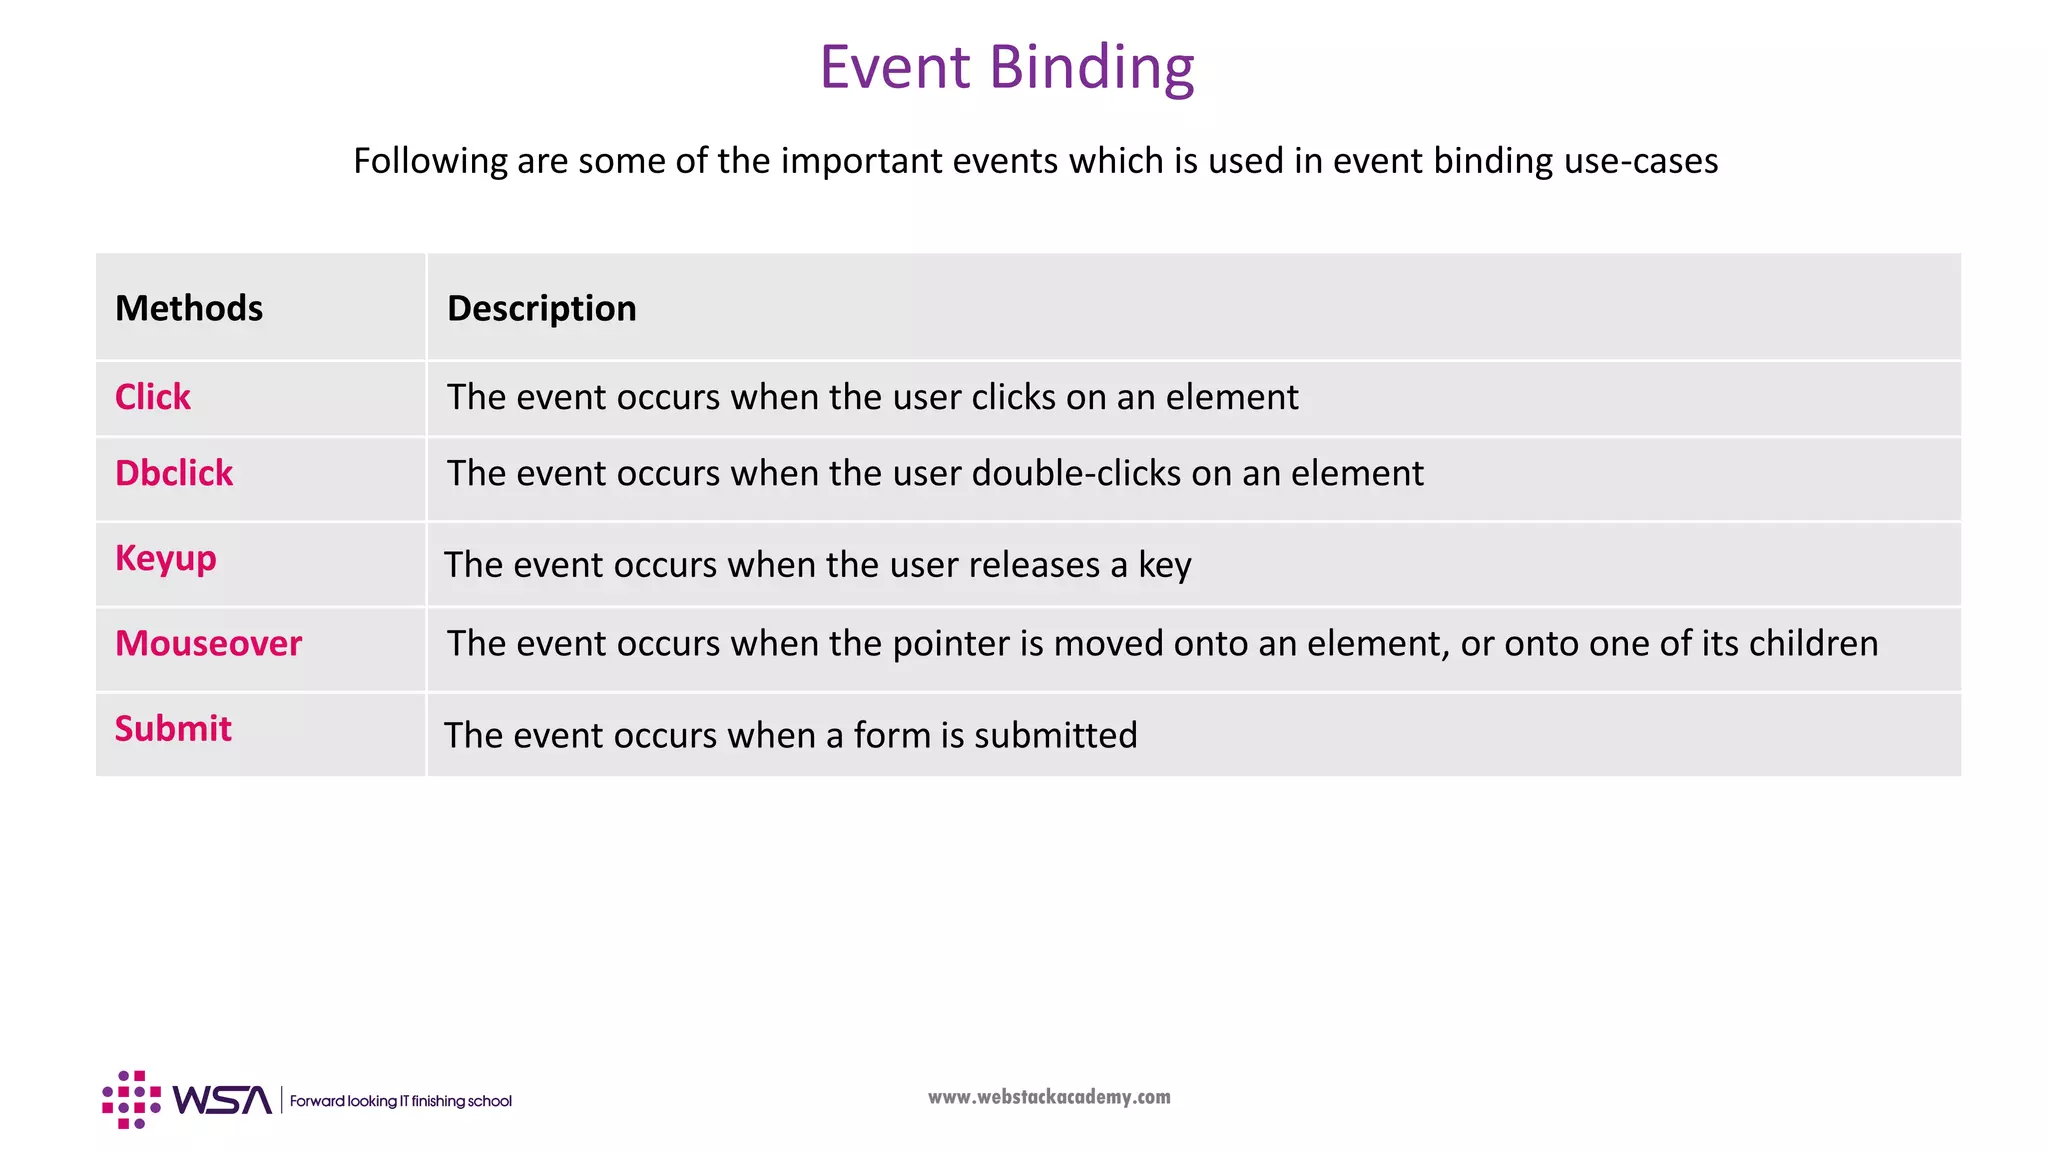
Event Binding
• In property binding, typically the changes done in the business logic (functionality part) is
getting accessed from the view. It was achieved by the []notation, in combination with the
template (HTML) elements
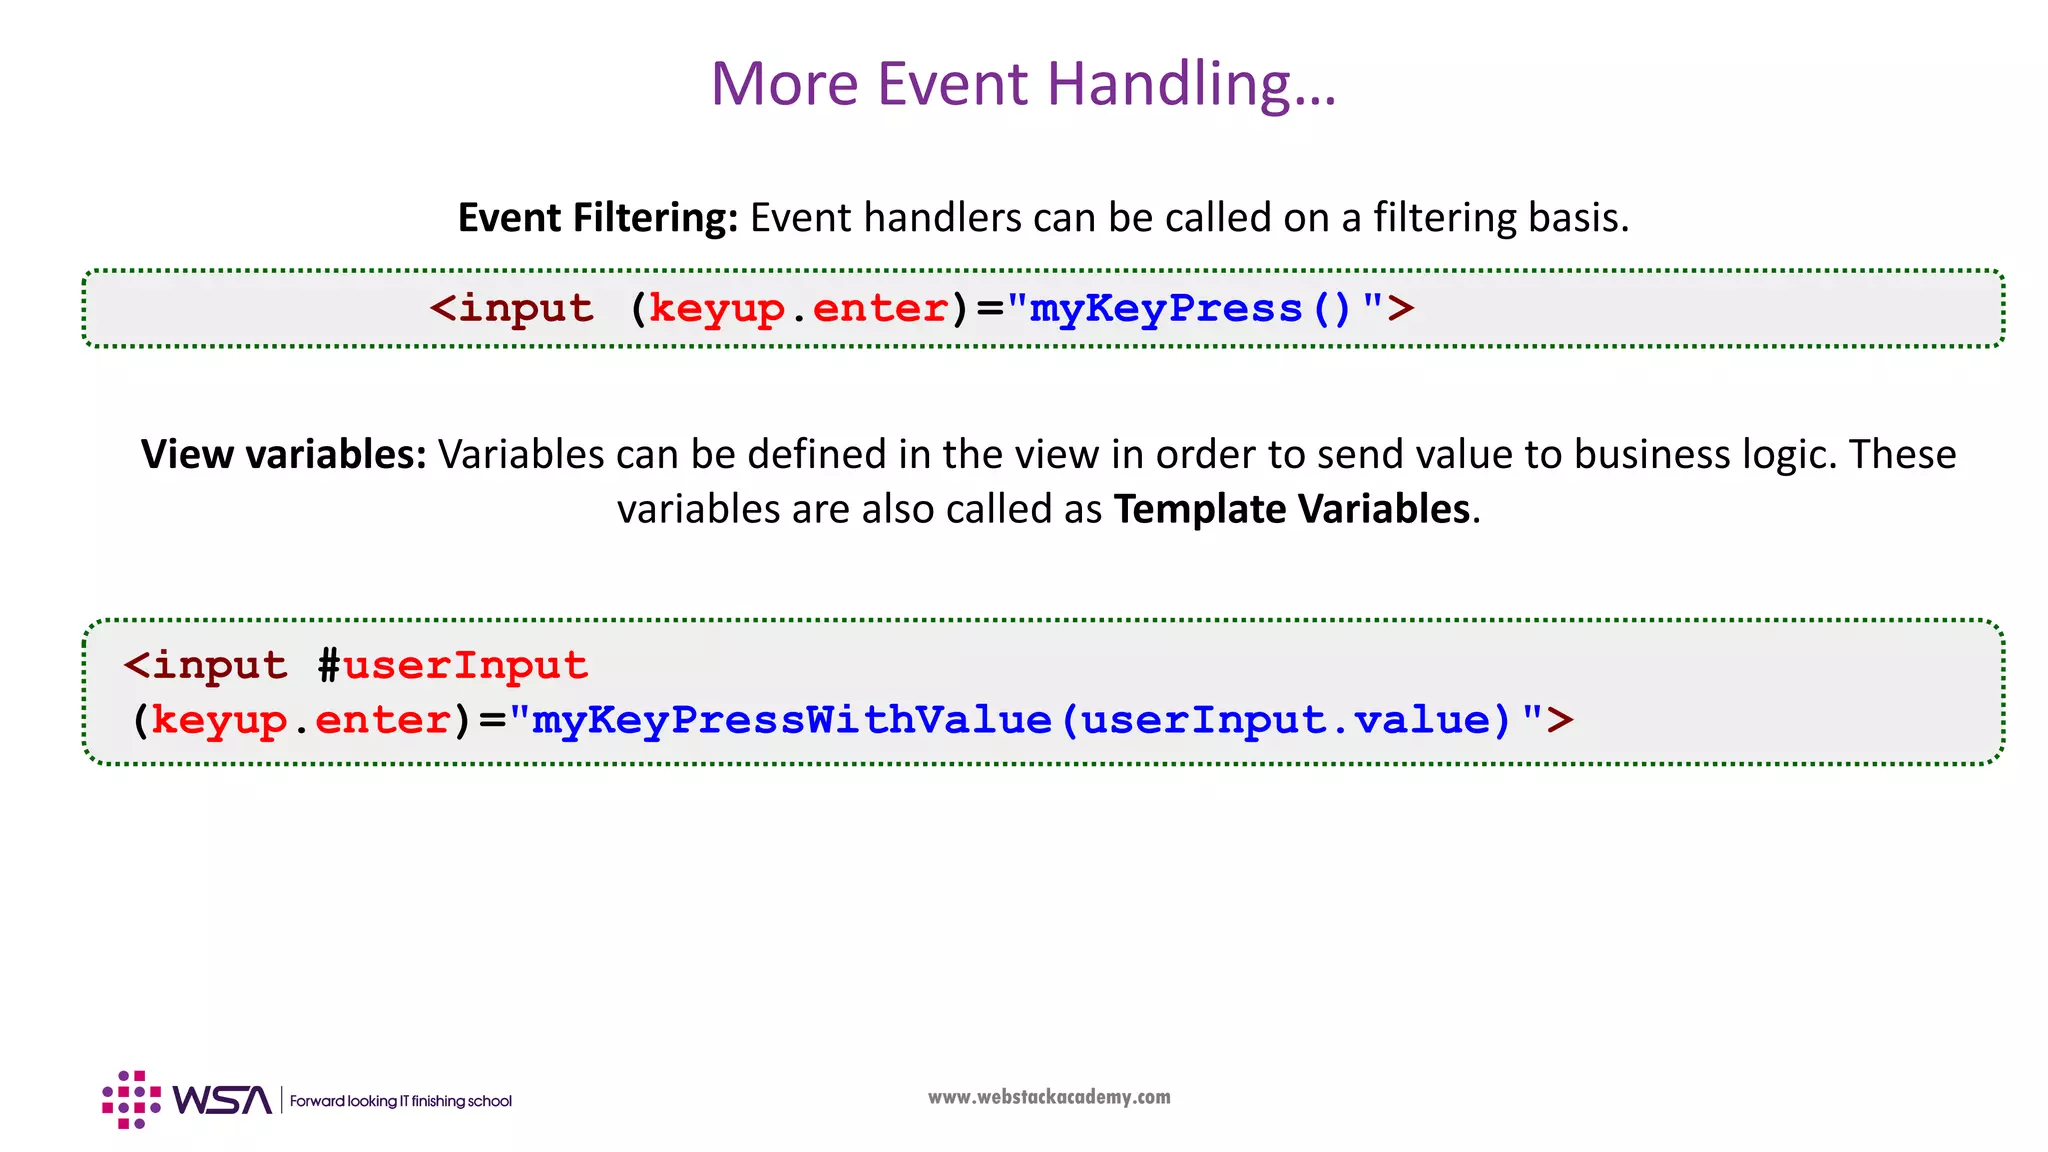
• Event binding is the opposite of property binding where events from the template is sent back
to the business logic in form of event notification functions.
• Similar to how it was done with vanilla JavaScript, each event to have a call-back function along
with the event in order to notify in case of events
• User actions such as clicking a link, pushing a button, and entering text raise DOM events.
• This event binding is achieved with the ()notation](https://image.slidesharecdn.com/004angulardataevents-190503100806/85/Angular-Chapter-4-Data-and-Event-Handling-15-320.jpg)


![www.webstackacademy.com
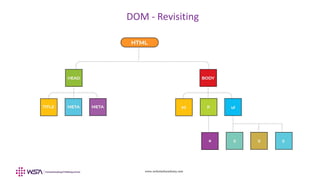
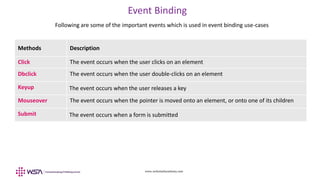
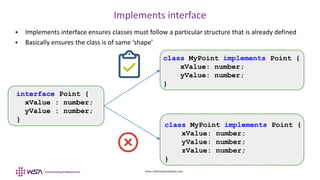
Two way Binding
• One way binding in Angular is achieved in the following ways:
From View to Business Logic (Event binding) : ()notation
From Business logic to view (Data binding) : []notation
• They are also used in a combined manner. An event from the view
triggers a change in a HTML attribute (View->Business Logic->View)
[Ex: Changing another paragraph’s background with a button click
event]
• However handling two way binding is still not feasible with such
approaches.
• There are some ways we have achieved (ex: $event), but parameter
passing quite complex
• In order to achieve two way binding ngModel directive is used](https://image.slidesharecdn.com/004angulardataevents-190503100806/85/Angular-Chapter-4-Data-and-Event-Handling-20-320.jpg)
![www.webstackacademy.com
What is ngModel directive?
• ngModel is one of the directives supported by Angular to achieve two-way binding
• A directive is a custom HTML element (provided by Angular) that is used to extend the
power of HTML (More on this during next chapter)
• To set up two-way data binding with ngModel, you need to add an input in the template
and achieve binding them using combination of both square bracket and parenthesis
• With this binding whatever changes you are making in both view and business-logic get
synchronized automatically without any explicit parameter passing
<input [(ngModel)]="userInput" (keyup.enter)="userKeyPress()"/>](https://image.slidesharecdn.com/004angulardataevents-190503100806/85/Angular-Chapter-4-Data-and-Event-Handling-21-320.jpg)


![www.webstackacademy.com
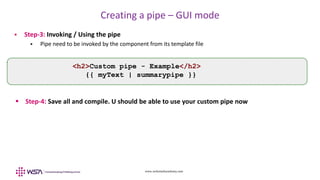
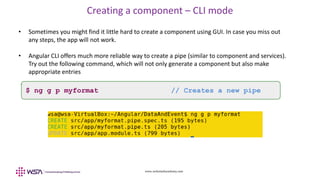
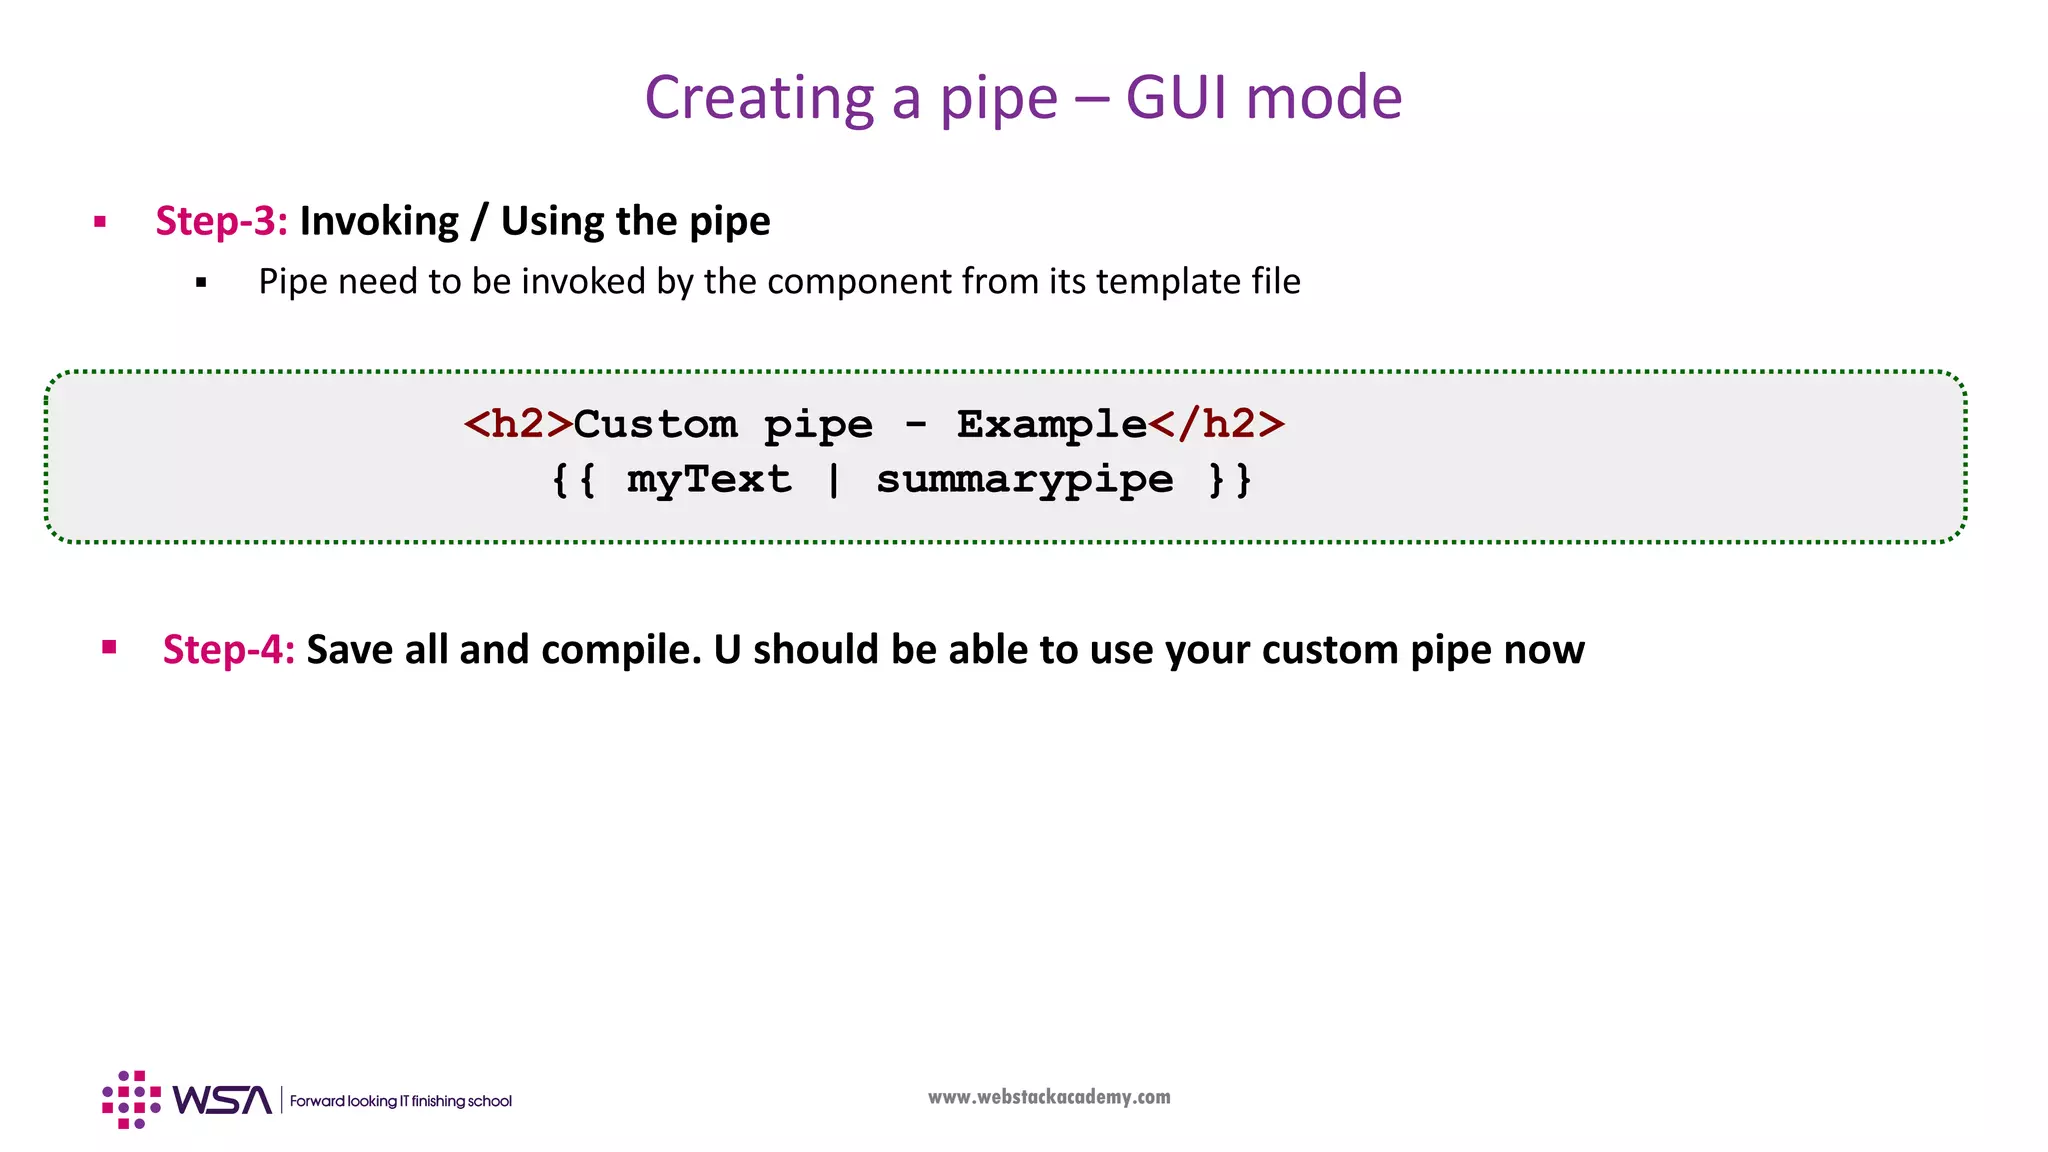
Creating a pipe – GUI mode
Step-1: Creating / Adding your pipe TS file
• Open your Angular project folder (ex: myFirstApp) in your editor (ex: VS code). Go to src/app folder.
• Add a new file in the following format: <pipe_name>.pipe.ts (ex: summarypipe.pipe.ts)
• Add the following lines into your new pipe file. Details given as comments.
import { Pipe, PipeTransform } from '@angular/core';
@Pipe({ // Pipe decorator to tell Angular that we are implementing a pipe
name: 'summarypipe' // Pipe name, which need to be used in interpolation
})
export class SummarypipePipe implements PipeTransform {
transform(value: any,…, args?: any[]): any {
// Implement your pipe functionality here
}](https://image.slidesharecdn.com/004angulardataevents-190503100806/85/Angular-Chapter-4-Data-and-Event-Handling-28-320.jpg)
![www.webstackacademy.com
PipeTransform Interface
The PipeTransform interface is defined in Angular (ref – below)
The transform method is where the custom pipe functionality is implemented, which guides the
compiler to have a look-up and execute in run-time
It will accept any number of any type of arguments and return the transformed value which also can be
of any type
interface PipeTransform {
transform(value: any, ...args: any[]): any
}
Angular official documentation URL: https://angular.io/guide/pipes](https://image.slidesharecdn.com/004angulardataevents-190503100806/85/Angular-Chapter-4-Data-and-Event-Handling-30-320.jpg)
![www.webstackacademy.com
Creating a pipe – GUI mode
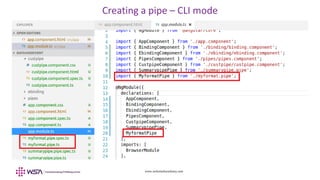
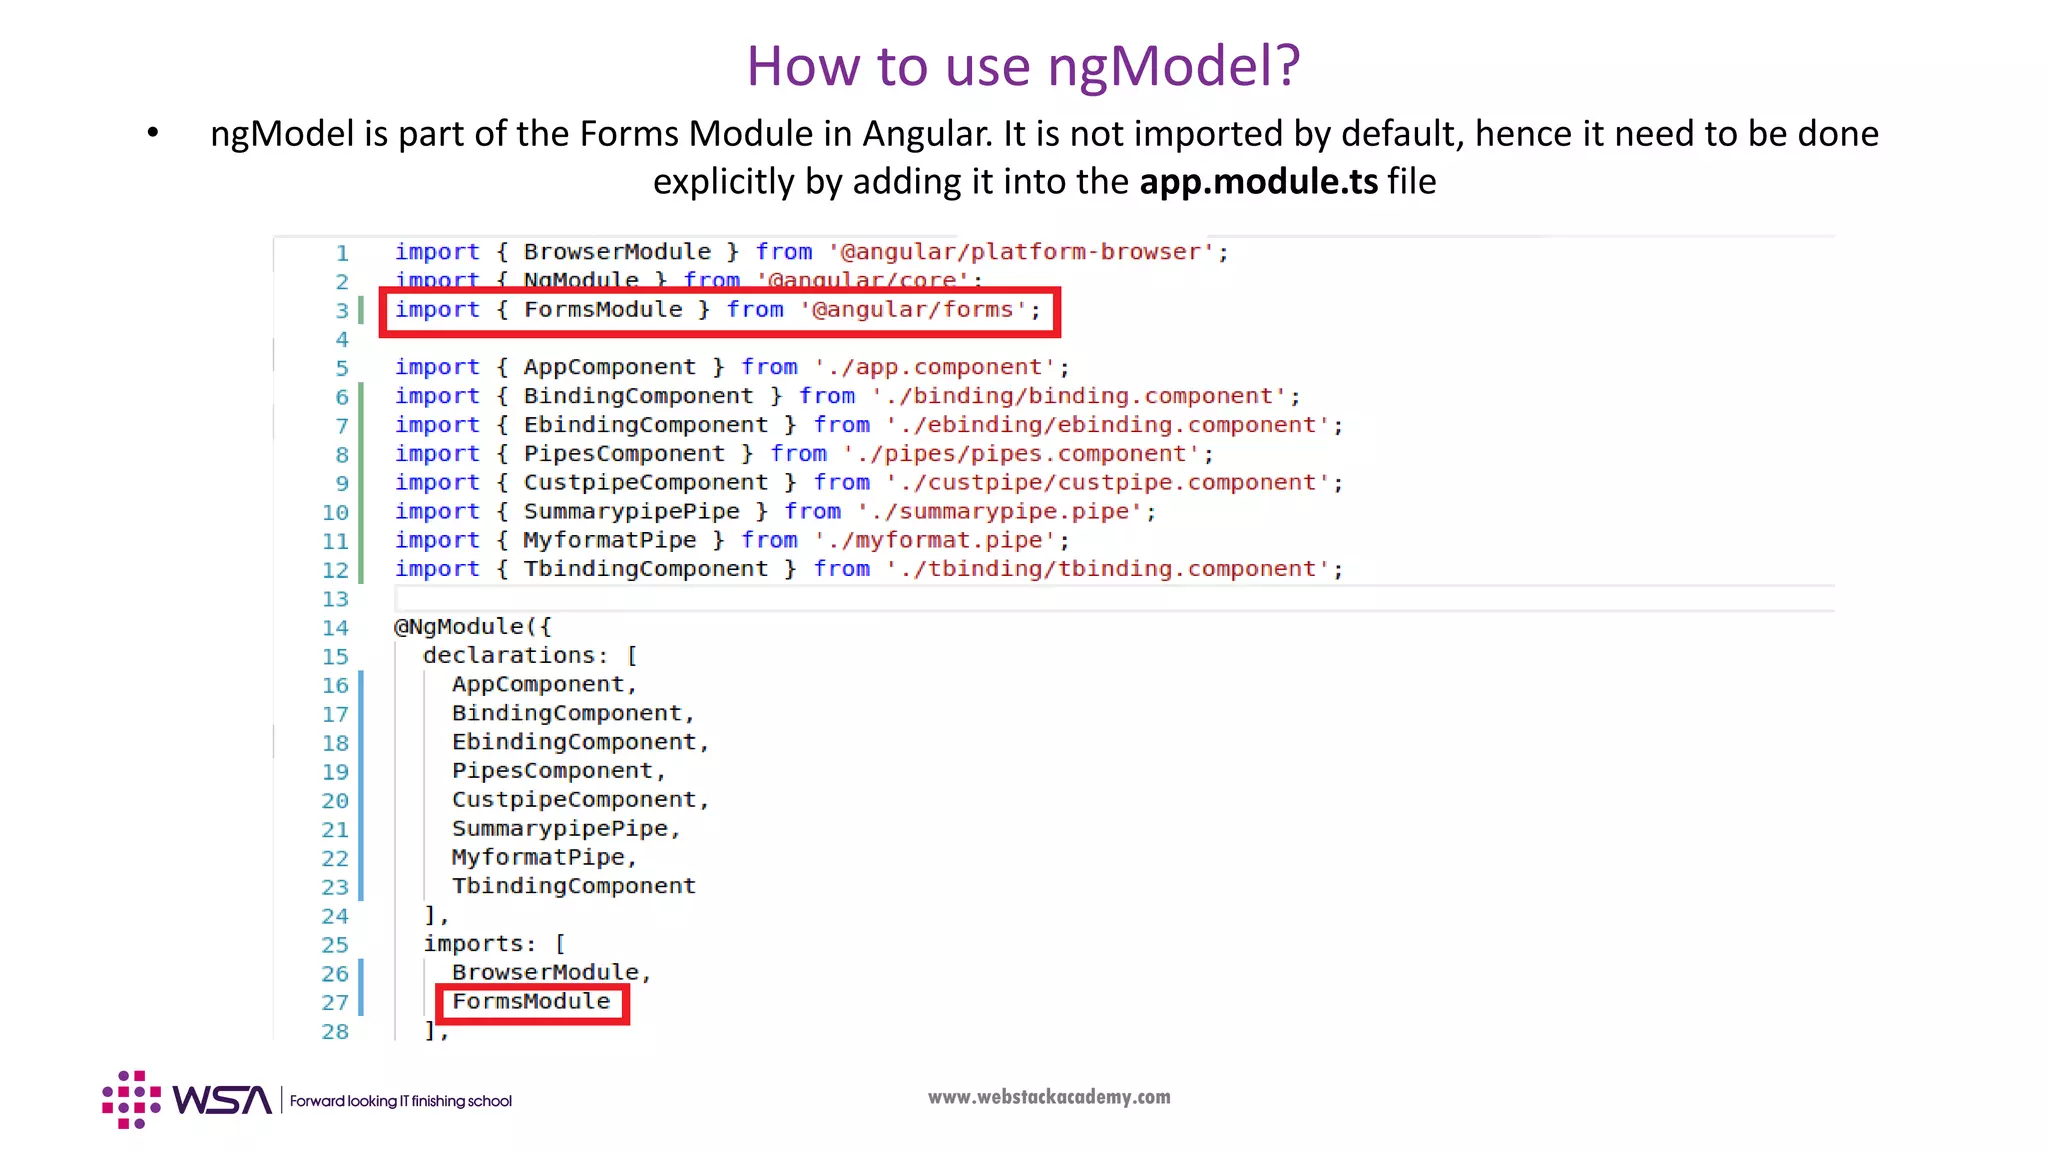
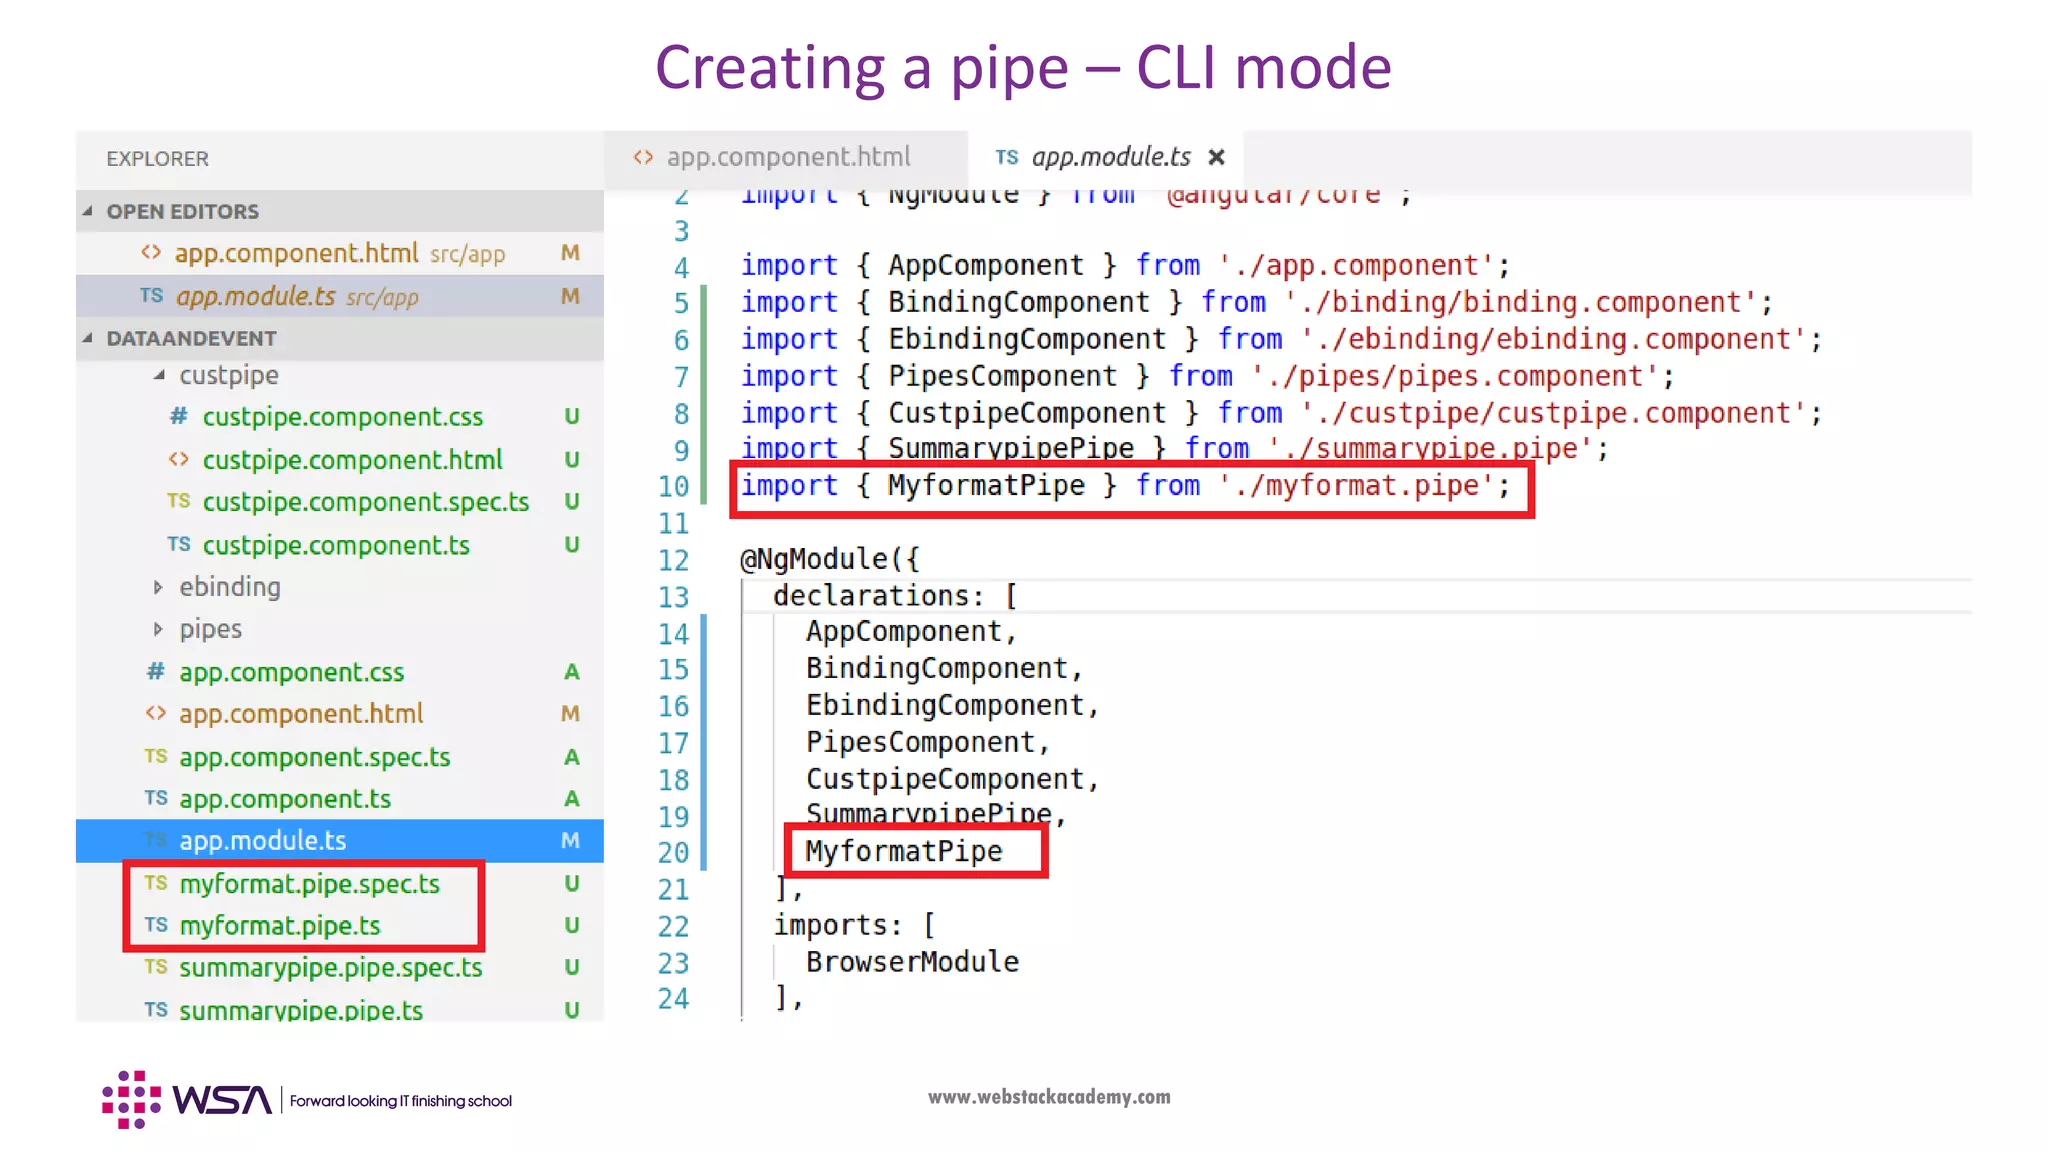
Step-2: Make your pipe as a part of the module (app.module.ts file)
• Add your new pipe (ex: SummaryPipe) under the declarations sections of the module.
• Ensure you import appropriate pipe files, similar to components
@NgModule({
declarations: [
AppComponent,
SummaryPipe
],
imports: [
BrowserModule,
],
providers: [],
bootstrap: [AppComponent]
})](https://image.slidesharecdn.com/004angulardataevents-190503100806/85/Angular-Chapter-4-Data-and-Event-Handling-31-320.jpg)


![www.webstackacademy.com
Interpolation
@Component({
selector: 'courses',
template: `
<h2> {{title}}</h2>
<ul> {{courses}}</ul>
`
})
export class CoursesComponent {
title = 'List of courses in WSA:';
courses = ["FullStack","FrontEnd","BackEnd"]
}
{}
<#>](https://image.slidesharecdn.com/004angulardataevents-190503100806/75/Angular-Chapter-4-Data-and-Event-Handling-5-2048.jpg)


![www.webstackacademy.com
Attribute Binding (One way: Business logic -> View)
export class BindingComponent {
imageLink = "http://www.testimage.com/side-image.png";
}
<p><b>Example of property binding: Image</b></p>
<img [src]= "imageLink"/>
{}
<#>](https://image.slidesharecdn.com/004angulardataevents-190503100806/75/Angular-Chapter-4-Data-and-Event-Handling-12-2048.jpg)

![www.webstackacademy.com
Event Binding
• In property binding, typically the changes done in the business logic (functionality part) is
getting accessed from the view. It was achieved by the []notation, in combination with the
template (HTML) elements
• Event binding is the opposite of property binding where events from the template is sent back
to the business logic in form of event notification functions.
• Similar to how it was done with vanilla JavaScript, each event to have a call-back function along
with the event in order to notify in case of events
• User actions such as clicking a link, pushing a button, and entering text raise DOM events.
• This event binding is achieved with the ()notation](https://image.slidesharecdn.com/004angulardataevents-190503100806/75/Angular-Chapter-4-Data-and-Event-Handling-15-2048.jpg)

![www.webstackacademy.com
Two way Binding
• One way binding in Angular is achieved in the following ways:
From View to Business Logic (Event binding) : ()notation
From Business logic to view (Data binding) : []notation
• They are also used in a combined manner. An event from the view
triggers a change in a HTML attribute (View->Business Logic->View)
[Ex: Changing another paragraph’s background with a button click
event]
• However handling two way binding is still not feasible with such
approaches.
• There are some ways we have achieved (ex: $event), but parameter
passing quite complex
• In order to achieve two way binding ngModel directive is used](https://image.slidesharecdn.com/004angulardataevents-190503100806/75/Angular-Chapter-4-Data-and-Event-Handling-20-2048.jpg)
![www.webstackacademy.com
What is ngModel directive?
• ngModel is one of the directives supported by Angular to achieve two-way binding
• A directive is a custom HTML element (provided by Angular) that is used to extend the
power of HTML (More on this during next chapter)
• To set up two-way data binding with ngModel, you need to add an input in the template
and achieve binding them using combination of both square bracket and parenthesis
• With this binding whatever changes you are making in both view and business-logic get
synchronized automatically without any explicit parameter passing
<input [(ngModel)]="userInput" (keyup.enter)="userKeyPress()"/>](https://image.slidesharecdn.com/004angulardataevents-190503100806/75/Angular-Chapter-4-Data-and-Event-Handling-21-2048.jpg)
![www.webstackacademy.com
Creating a pipe – GUI mode
Step-1: Creating / Adding your pipe TS file
• Open your Angular project folder (ex: myFirstApp) in your editor (ex: VS code). Go to src/app folder.
• Add a new file in the following format: <pipe_name>.pipe.ts (ex: summarypipe.pipe.ts)
• Add the following lines into your new pipe file. Details given as comments.
import { Pipe, PipeTransform } from '@angular/core';
@Pipe({ // Pipe decorator to tell Angular that we are implementing a pipe
name: 'summarypipe' // Pipe name, which need to be used in interpolation
})
export class SummarypipePipe implements PipeTransform {
transform(value: any,…, args?: any[]): any {
// Implement your pipe functionality here
}](https://image.slidesharecdn.com/004angulardataevents-190503100806/75/Angular-Chapter-4-Data-and-Event-Handling-28-2048.jpg)
![www.webstackacademy.com
PipeTransform Interface
The PipeTransform interface is defined in Angular (ref – below)
The transform method is where the custom pipe functionality is implemented, which guides the
compiler to have a look-up and execute in run-time
It will accept any number of any type of arguments and return the transformed value which also can be
of any type
interface PipeTransform {
transform(value: any, ...args: any[]): any
}
Angular official documentation URL: https://angular.io/guide/pipes](https://image.slidesharecdn.com/004angulardataevents-190503100806/75/Angular-Chapter-4-Data-and-Event-Handling-30-2048.jpg)
![www.webstackacademy.com
Creating a pipe – GUI mode
Step-2: Make your pipe as a part of the module (app.module.ts file)
• Add your new pipe (ex: SummaryPipe) under the declarations sections of the module.
• Ensure you import appropriate pipe files, similar to components
@NgModule({
declarations: [
AppComponent,
SummaryPipe
],
imports: [
BrowserModule,
],
providers: [],
bootstrap: [AppComponent]
})](https://image.slidesharecdn.com/004angulardataevents-190503100806/75/Angular-Chapter-4-Data-and-Event-Handling-31-2048.jpg)


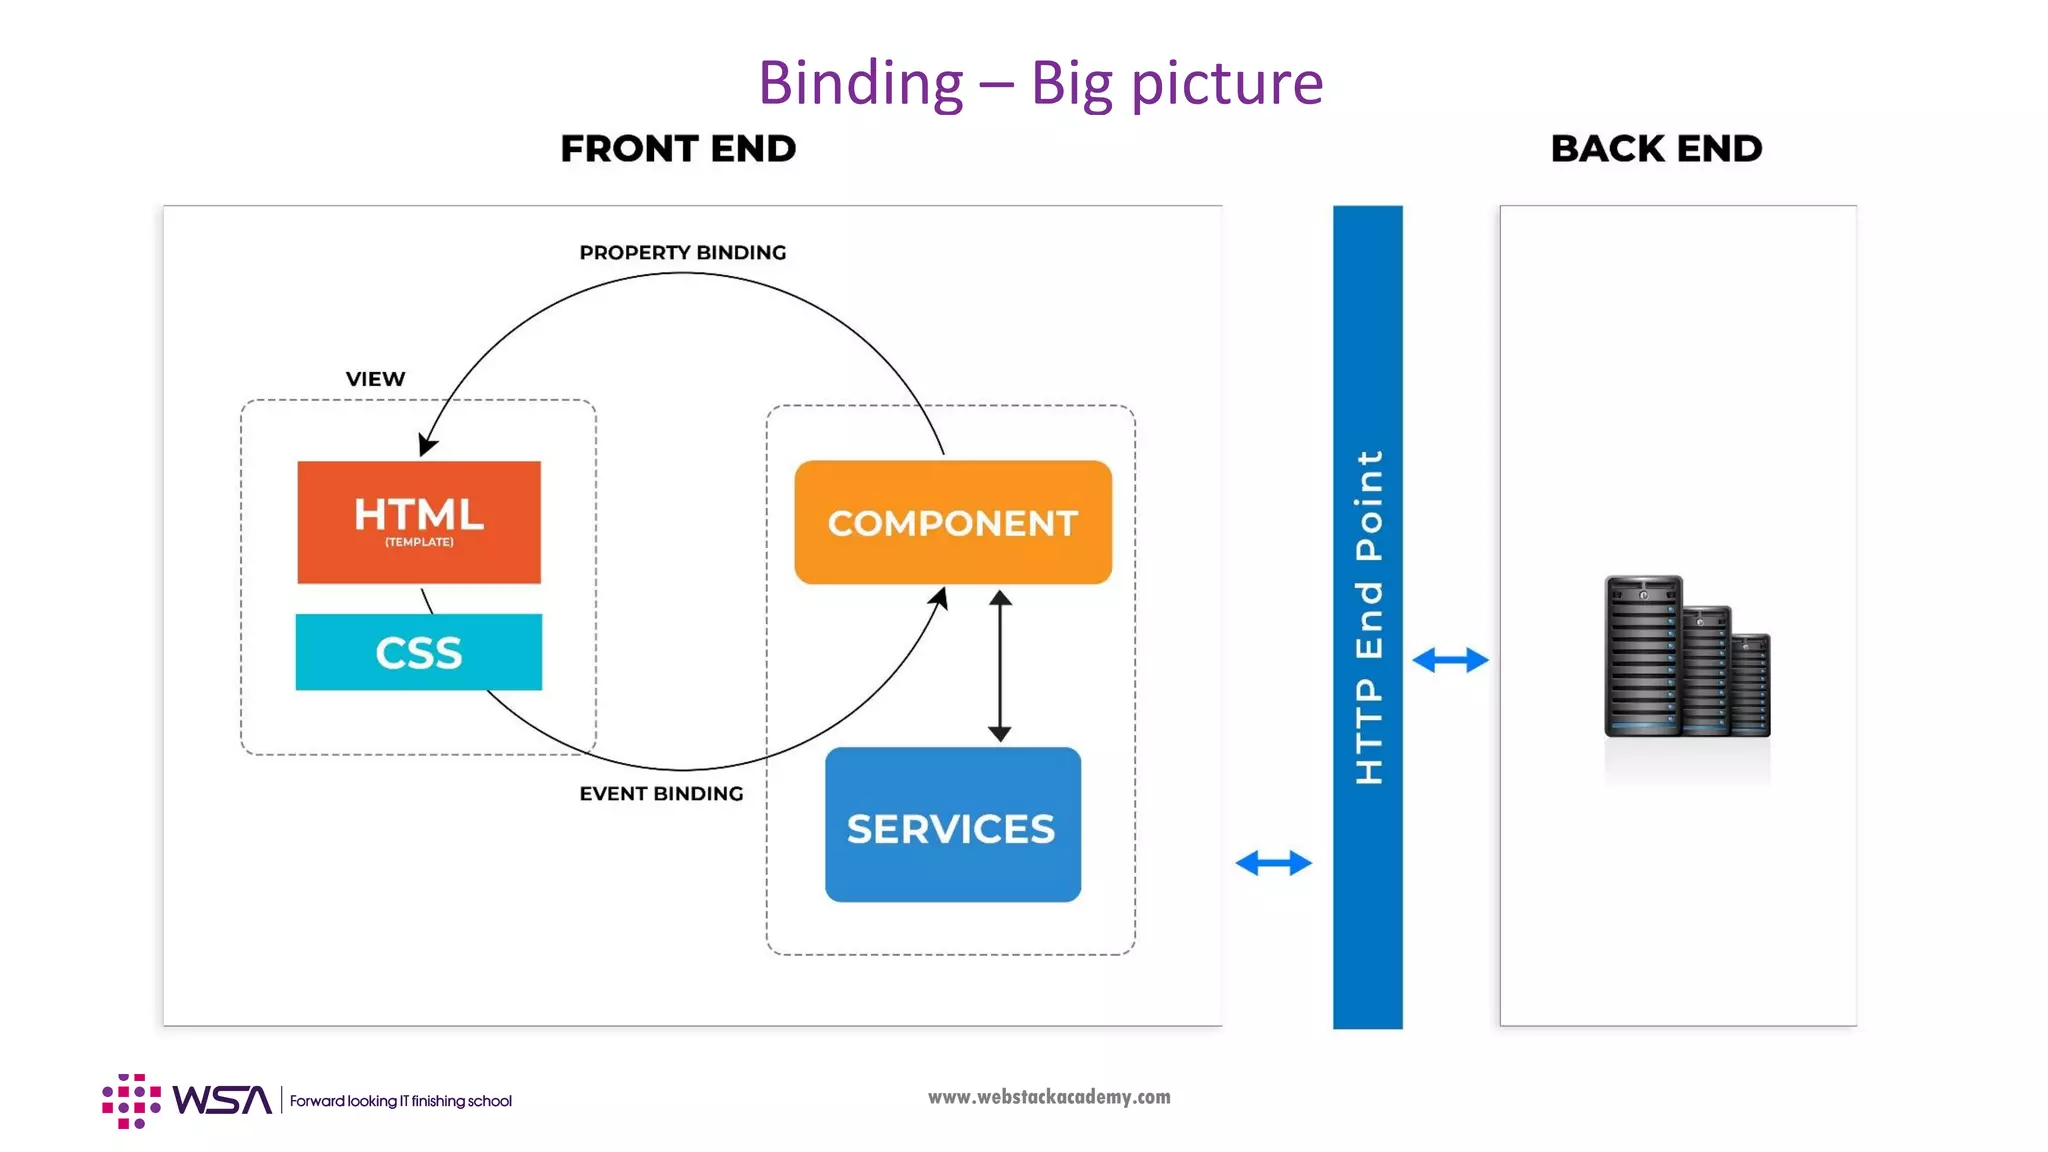
The document provides information about Angular data binding and event handling. It discusses how interpolation can be used to connect data from a component class to its template. It also explains how property binding and event binding allow two-way communication between the component class and template. Finally, it introduces ngModel for setting up two-way data binding between an input element and a property.


