Downloaded 692 times

![View Save Total
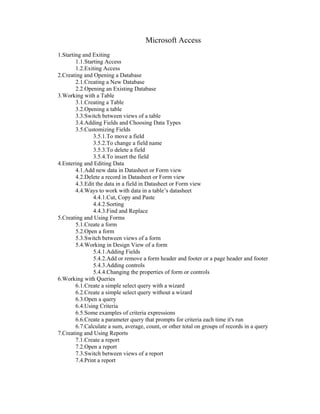
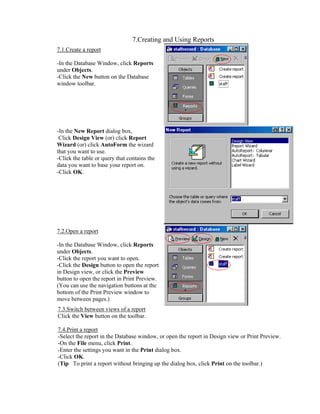
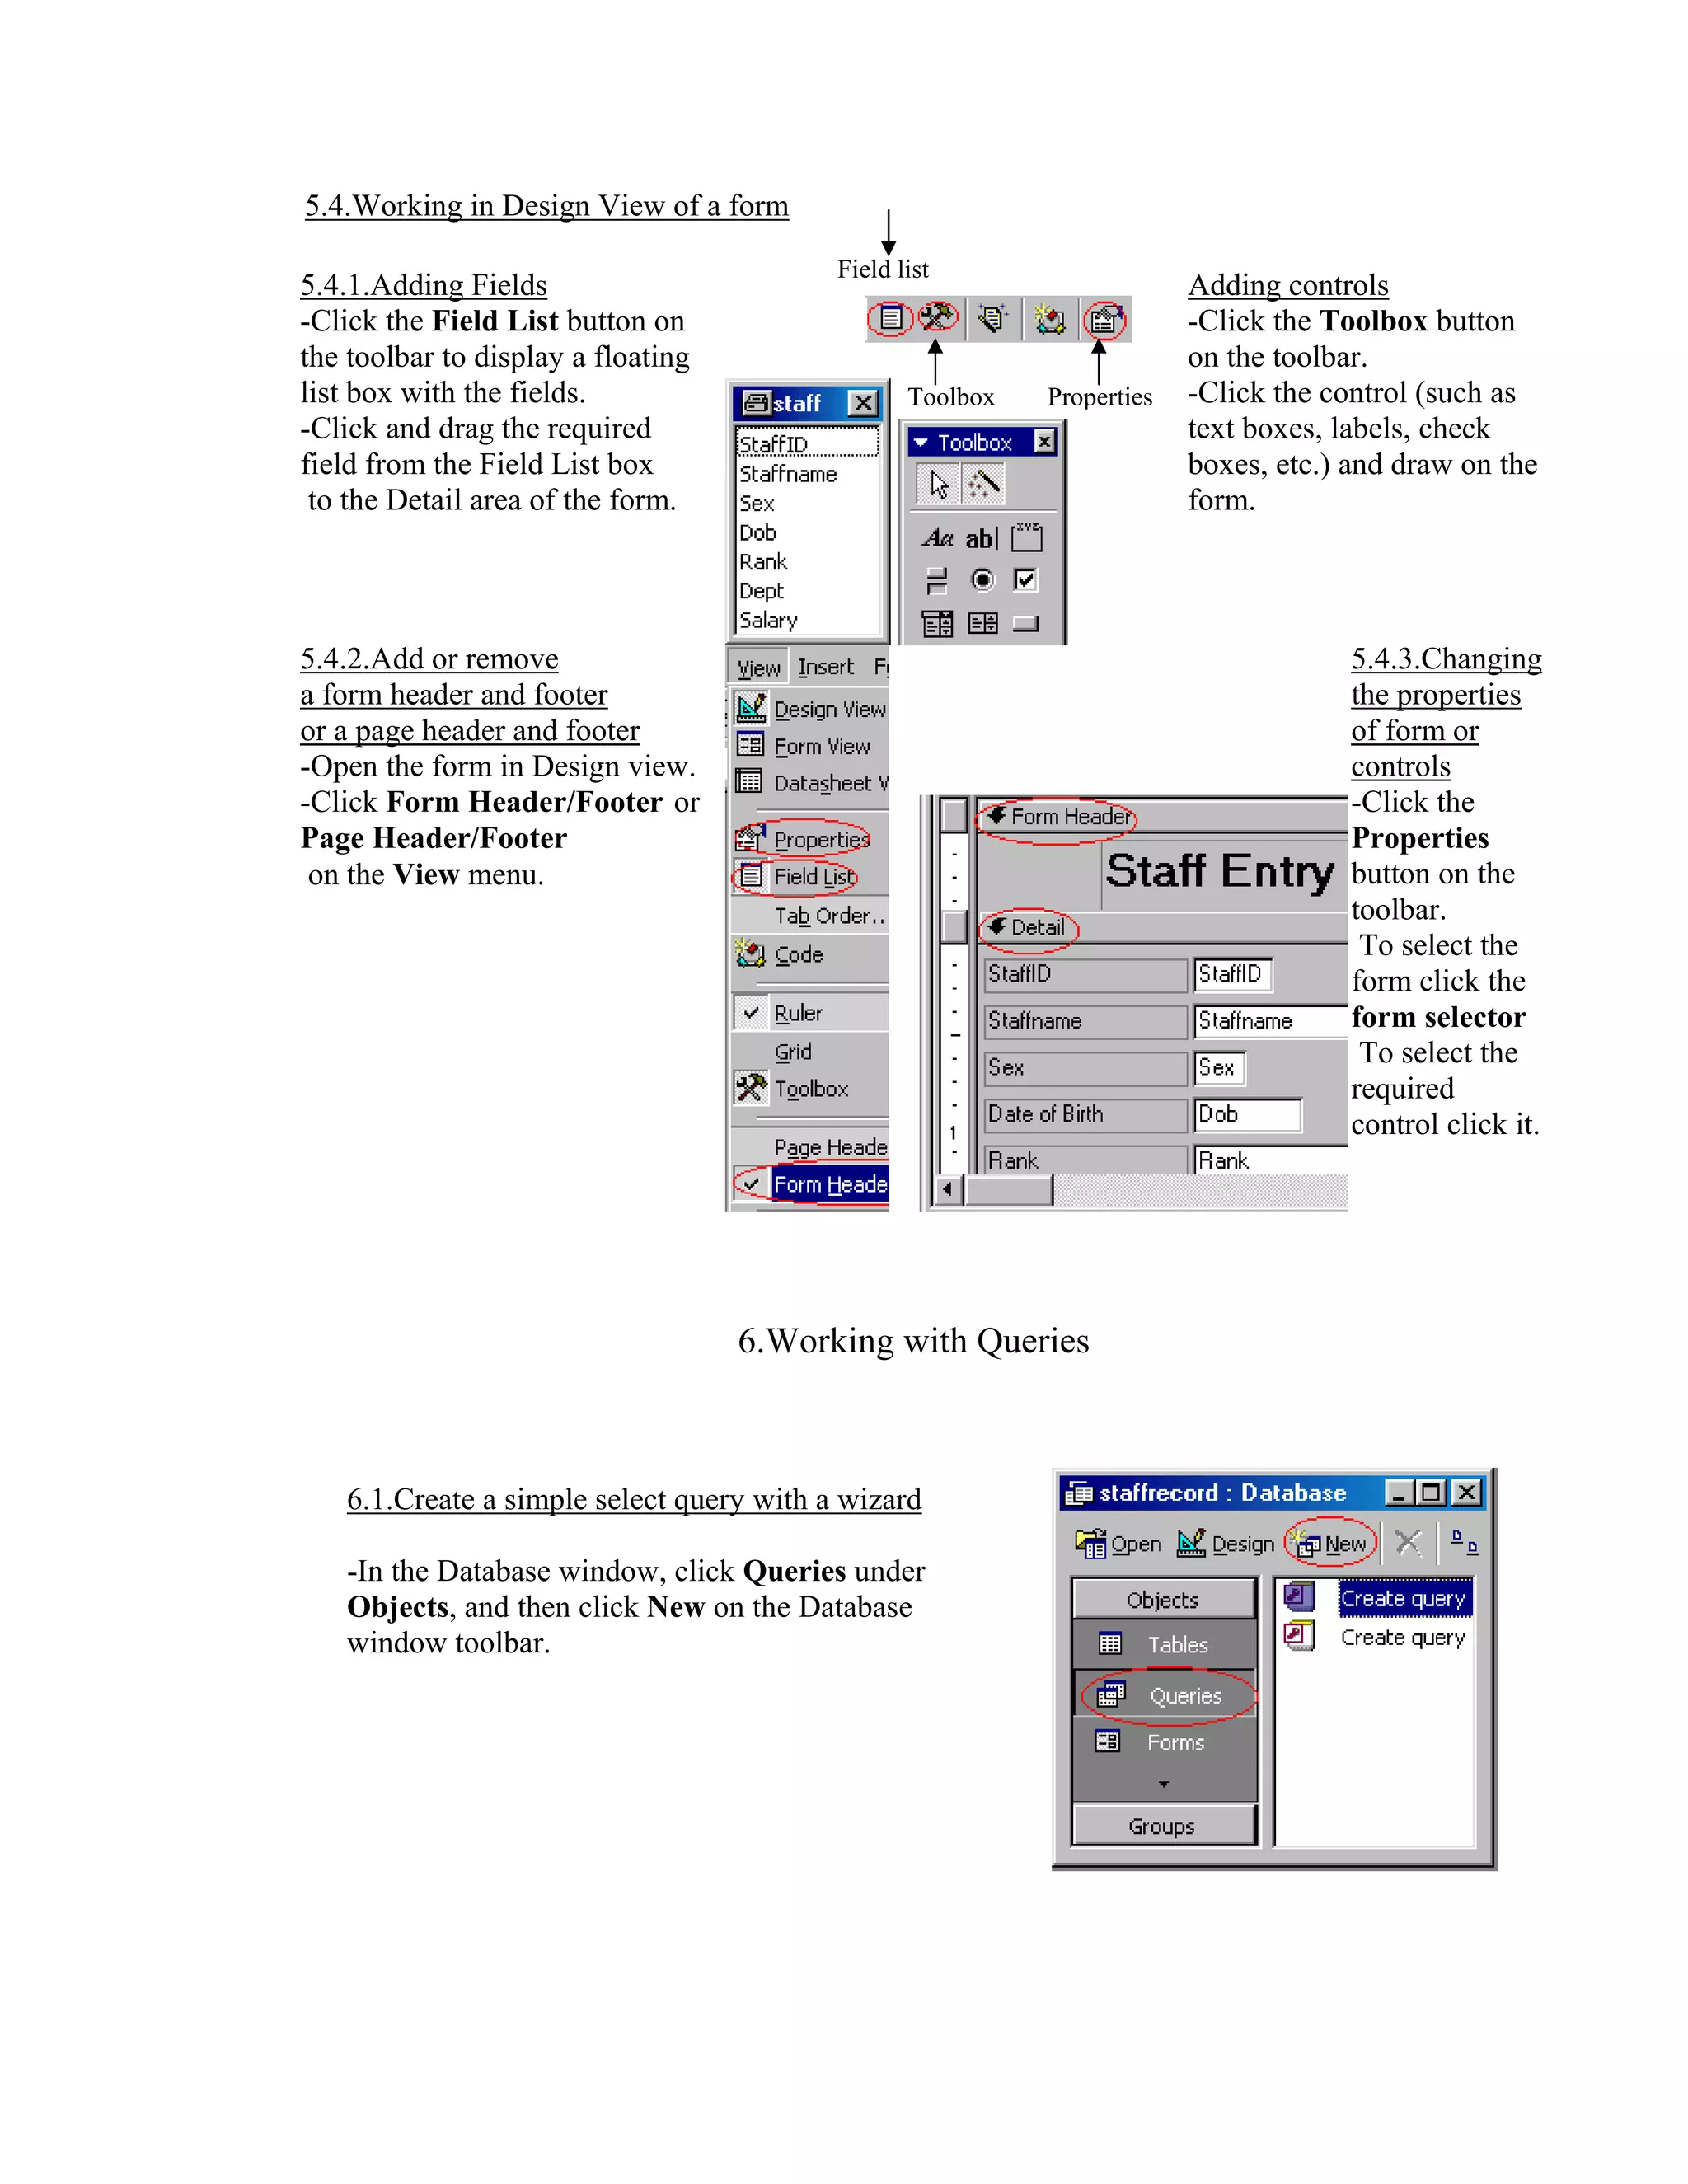
6.4.Using Criteria
-Open a query in Design view.
-Click the Criteria cell for the field
you want to set criteria for.
-Enter the criteria expression by typing
it or by using the Expression Builder.
(To display the Expression Builder,
right-click in the Criteria cell, and then
click Build.)
6.5.Some examples of criteria expressions
Field Expression Description
StaffName "Mg Mg" Staff name is Mg Mg
StaffName Like "S*" Staff name starts with the letter S.
Sex “m” For male staff
Dob Between #1/5/70# And Uses the Between...And operator to display
#1/10/75# staff no earlier than 5-Jan-70 and no later
than 10-Jan-75.
Dept "che" Or "phy" Uses the Or operator to display Department
to phy or che.
Salary >=7500 Salary is greater then 7500
6.6.Create a parameter query that prompts for criteria each time it's run
-Open a select query in Design view.
-In the Criteria cell for each field you want to use as a parameter, type a prompt enclosed in
square brackets.
E.g >=[Type the Salary]
LIKE [Enter the first character to search by: ] & "*"
(Microsoft Access will display this prompt when the query is run.)
-To view the results, click View on the toolbar, and then type a value for the parameter.
6.7.Calculate a sum, average, count, or other total on groups of records in a query
-Open a select query in Design view.
-Click Totals on the toolbar. (Microsoft Access displays the Total row in the design grid.)
-For the field or fields you want to group on, leave Group By in the Total cell.
-For each field you want to calculate, click its cell in the Total row, and then click one of the
following aggregate functions: Sum, Avg, Min, Max, Count.
-If you want, enter criteria to affect the results of the calculation.
-If you want, sort the results.
-Click View on the toolbar to view the results.](https://image.slidesharecdn.com/accessnotesps-110520024514-phpapp01/85/Basic-Access-Notes-9-320.jpg)


![View Save Total
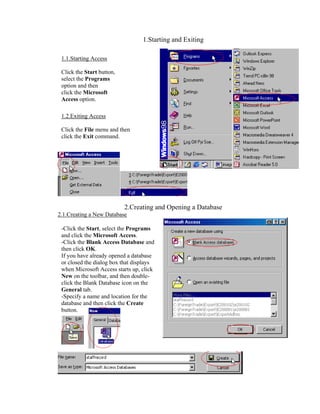
6.4.Using Criteria
-Open a query in Design view.
-Click the Criteria cell for the field
you want to set criteria for.
-Enter the criteria expression by typing
it or by using the Expression Builder.
(To display the Expression Builder,
right-click in the Criteria cell, and then
click Build.)
6.5.Some examples of criteria expressions
Field Expression Description
StaffName "Mg Mg" Staff name is Mg Mg
StaffName Like "S*" Staff name starts with the letter S.
Sex “m” For male staff
Dob Between #1/5/70# And Uses the Between...And operator to display
#1/10/75# staff no earlier than 5-Jan-70 and no later
than 10-Jan-75.
Dept "che" Or "phy" Uses the Or operator to display Department
to phy or che.
Salary >=7500 Salary is greater then 7500
6.6.Create a parameter query that prompts for criteria each time it's run
-Open a select query in Design view.
-In the Criteria cell for each field you want to use as a parameter, type a prompt enclosed in
square brackets.
E.g >=[Type the Salary]
LIKE [Enter the first character to search by: ] & "*"
(Microsoft Access will display this prompt when the query is run.)
-To view the results, click View on the toolbar, and then type a value for the parameter.
6.7.Calculate a sum, average, count, or other total on groups of records in a query
-Open a select query in Design view.
-Click Totals on the toolbar. (Microsoft Access displays the Total row in the design grid.)
-For the field or fields you want to group on, leave Group By in the Total cell.
-For each field you want to calculate, click its cell in the Total row, and then click one of the
following aggregate functions: Sum, Avg, Min, Max, Count.
-If you want, enter criteria to affect the results of the calculation.
-If you want, sort the results.
-Click View on the toolbar to view the results.](https://image.slidesharecdn.com/accessnotesps-110520024514-phpapp01/75/Basic-Access-Notes-9-2048.jpg)


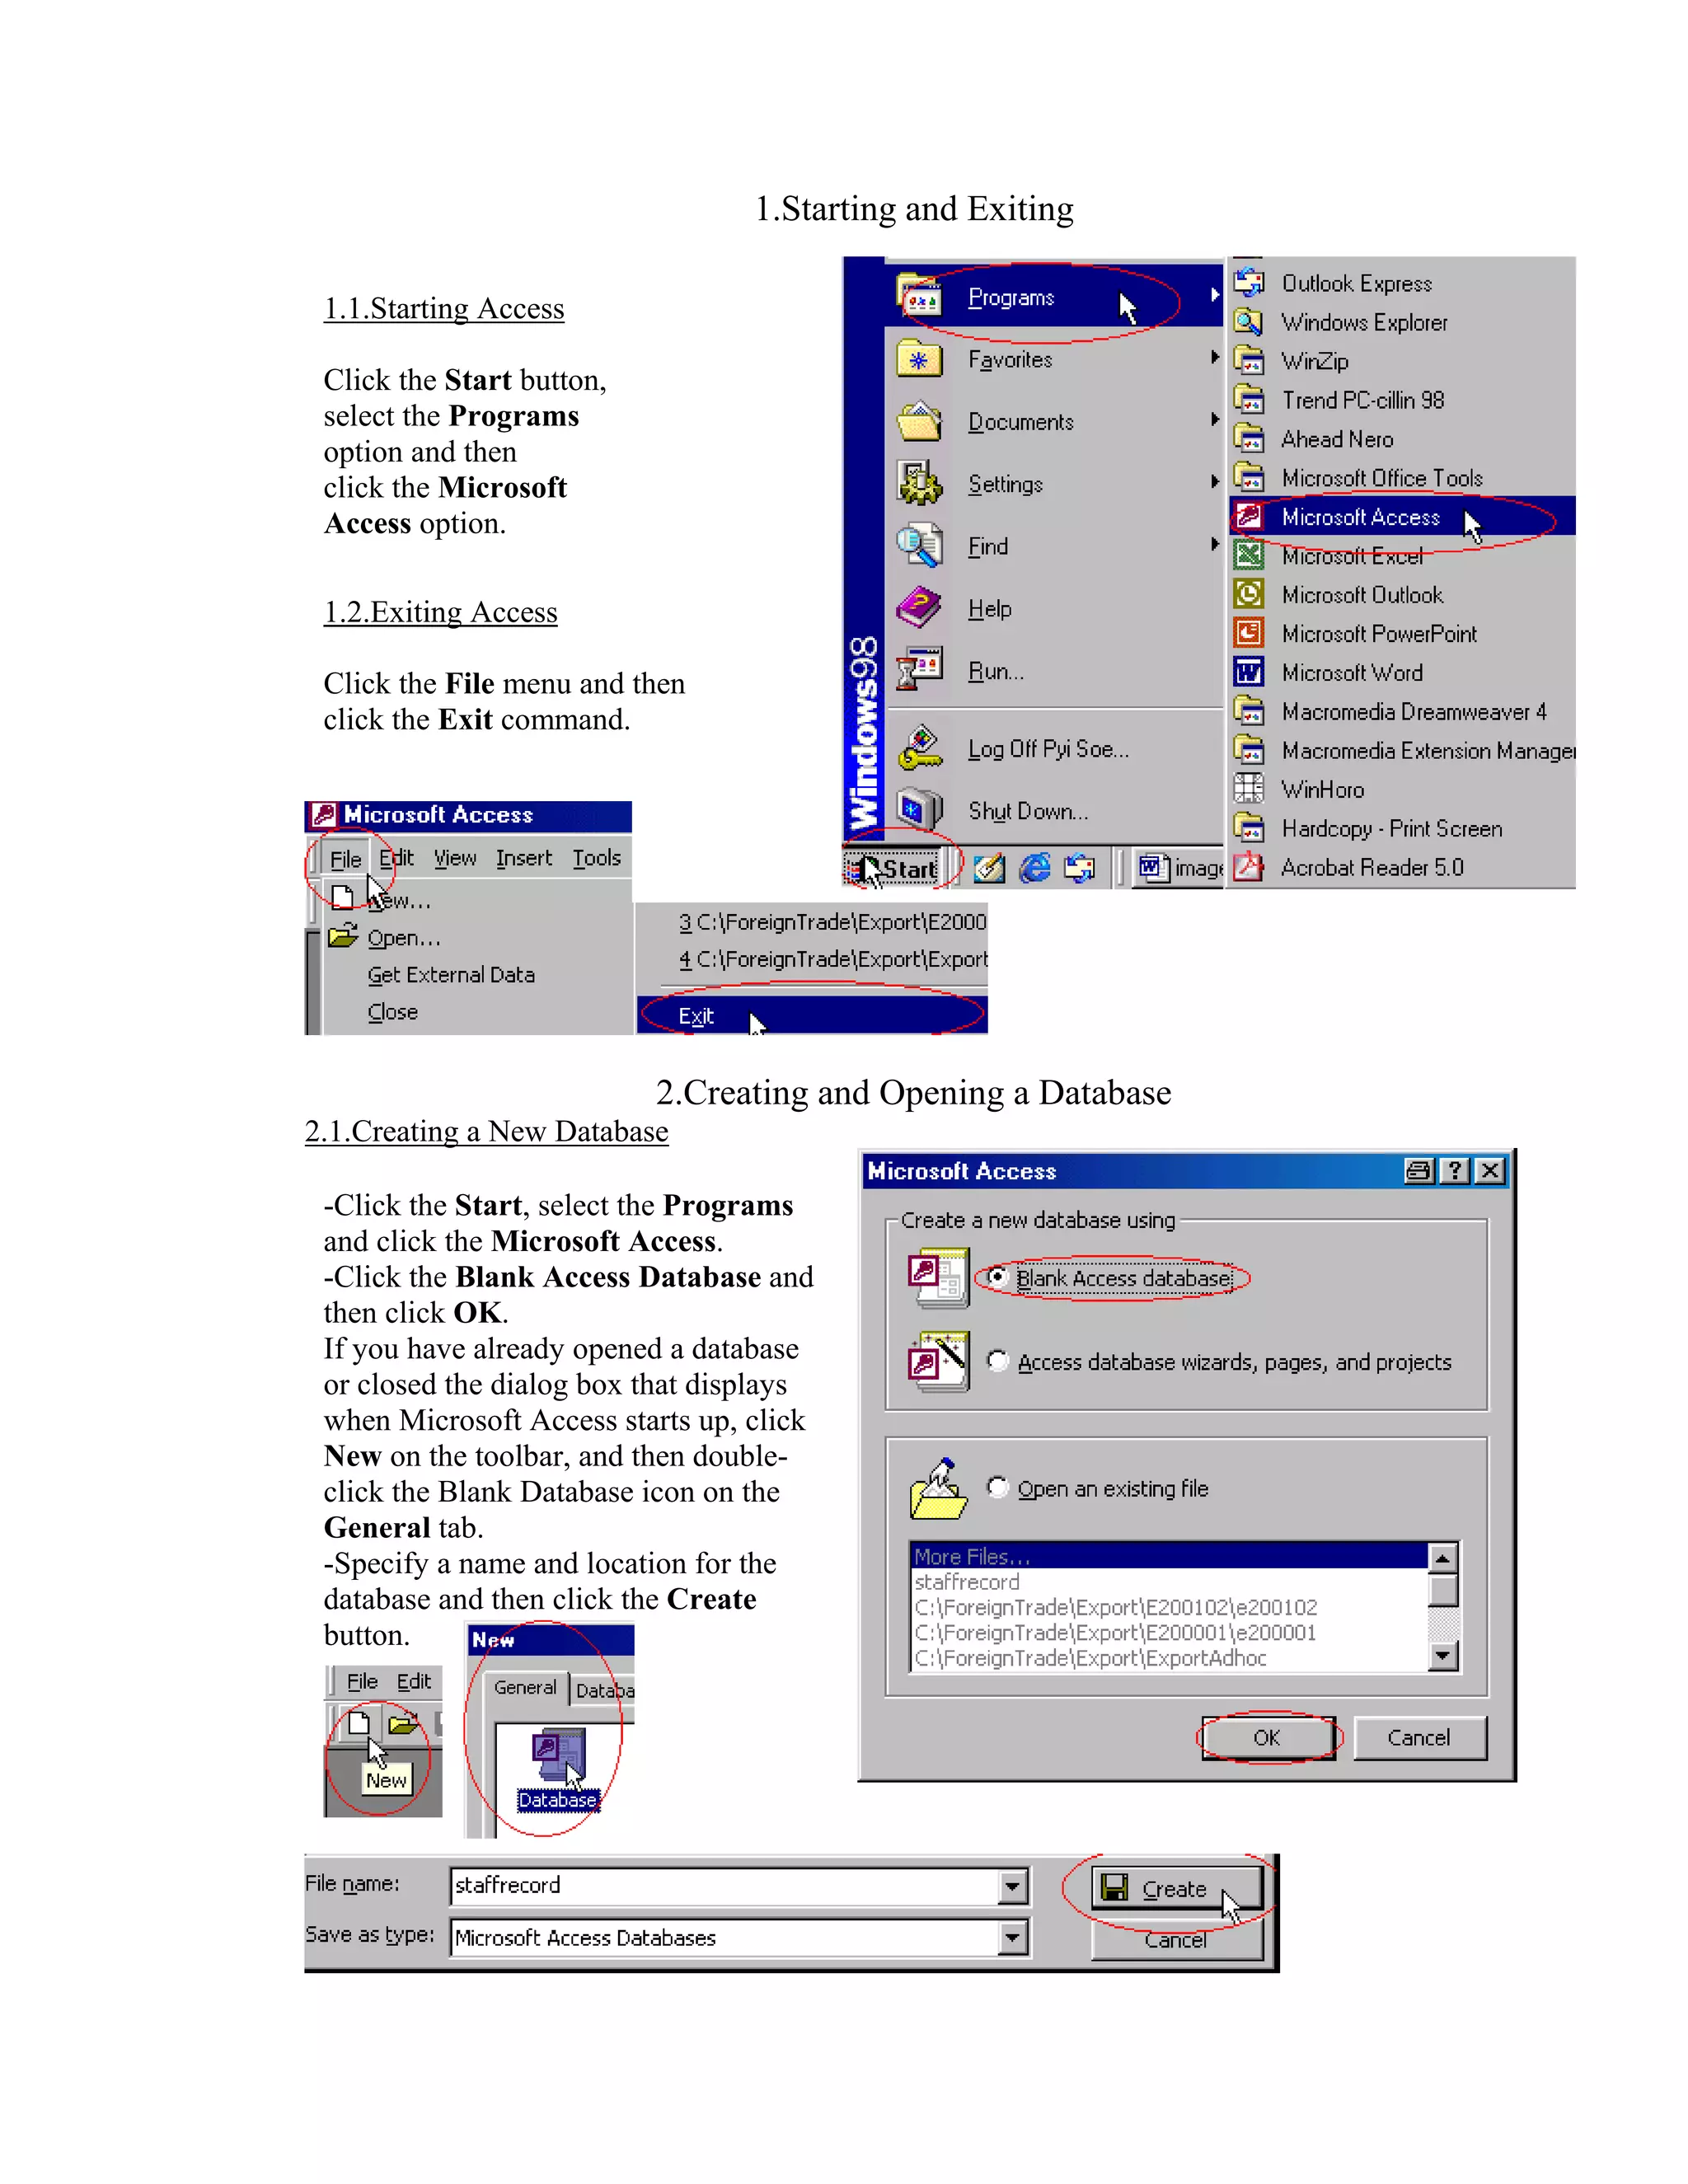
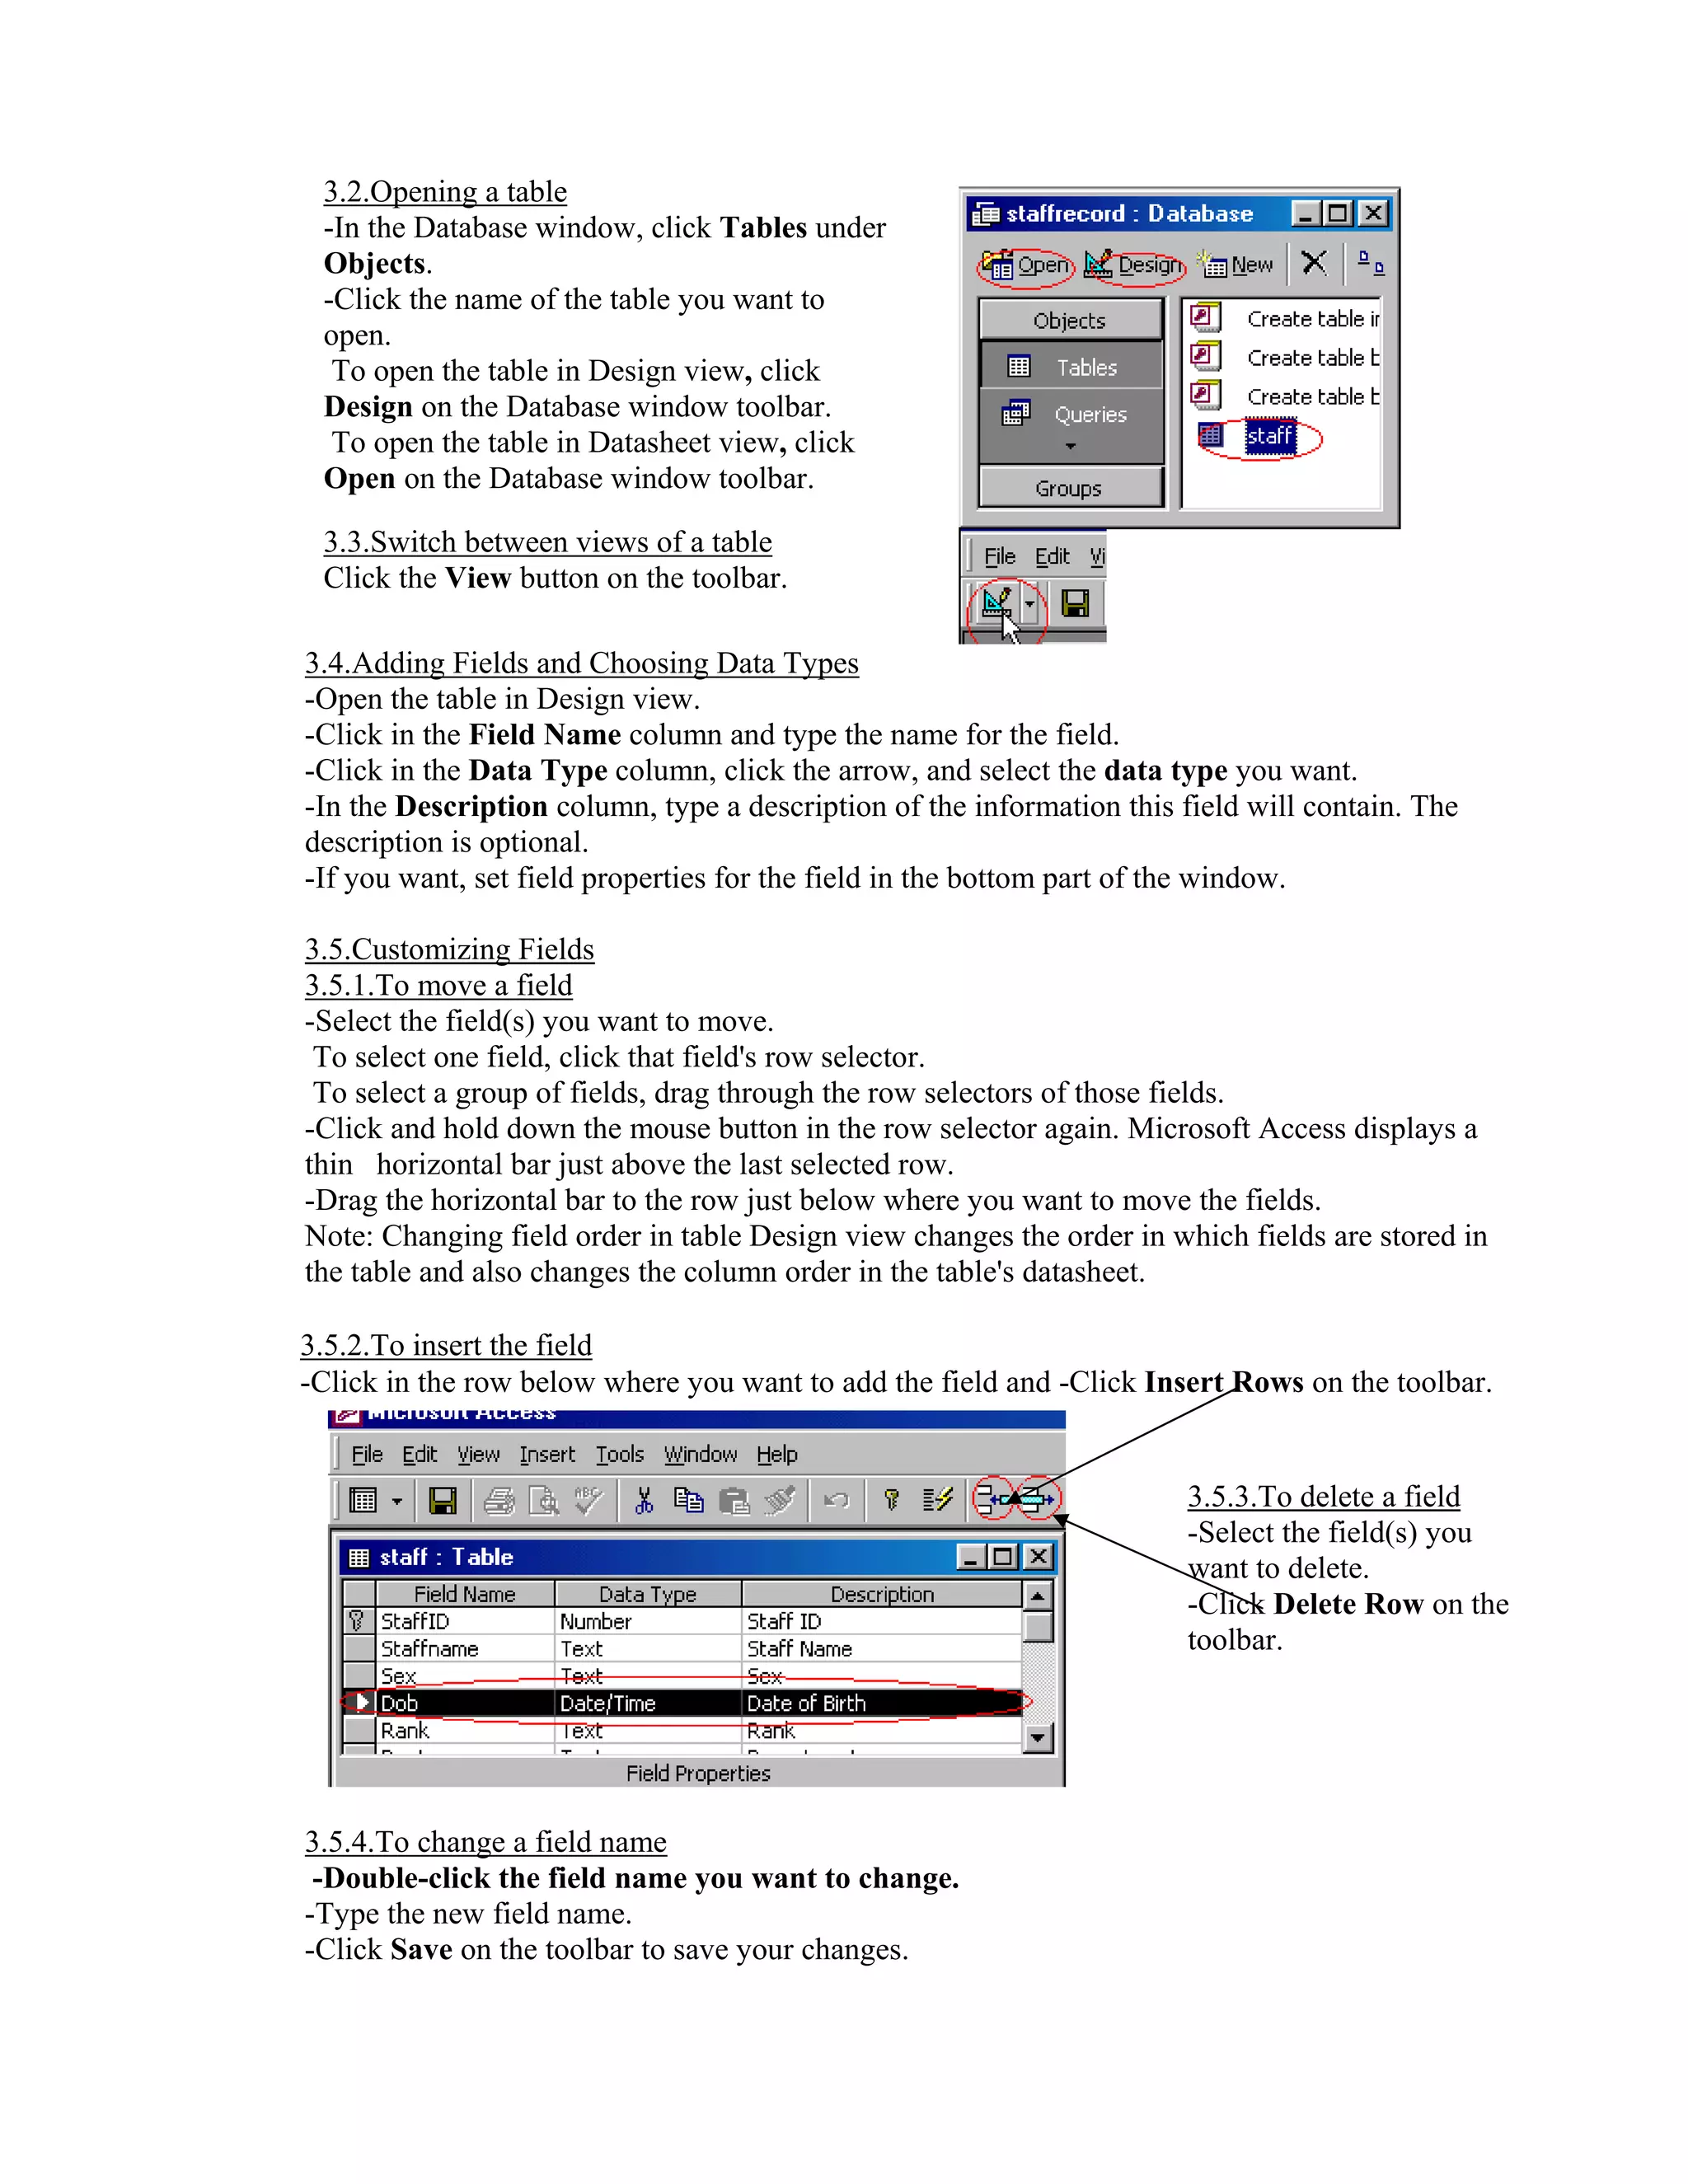
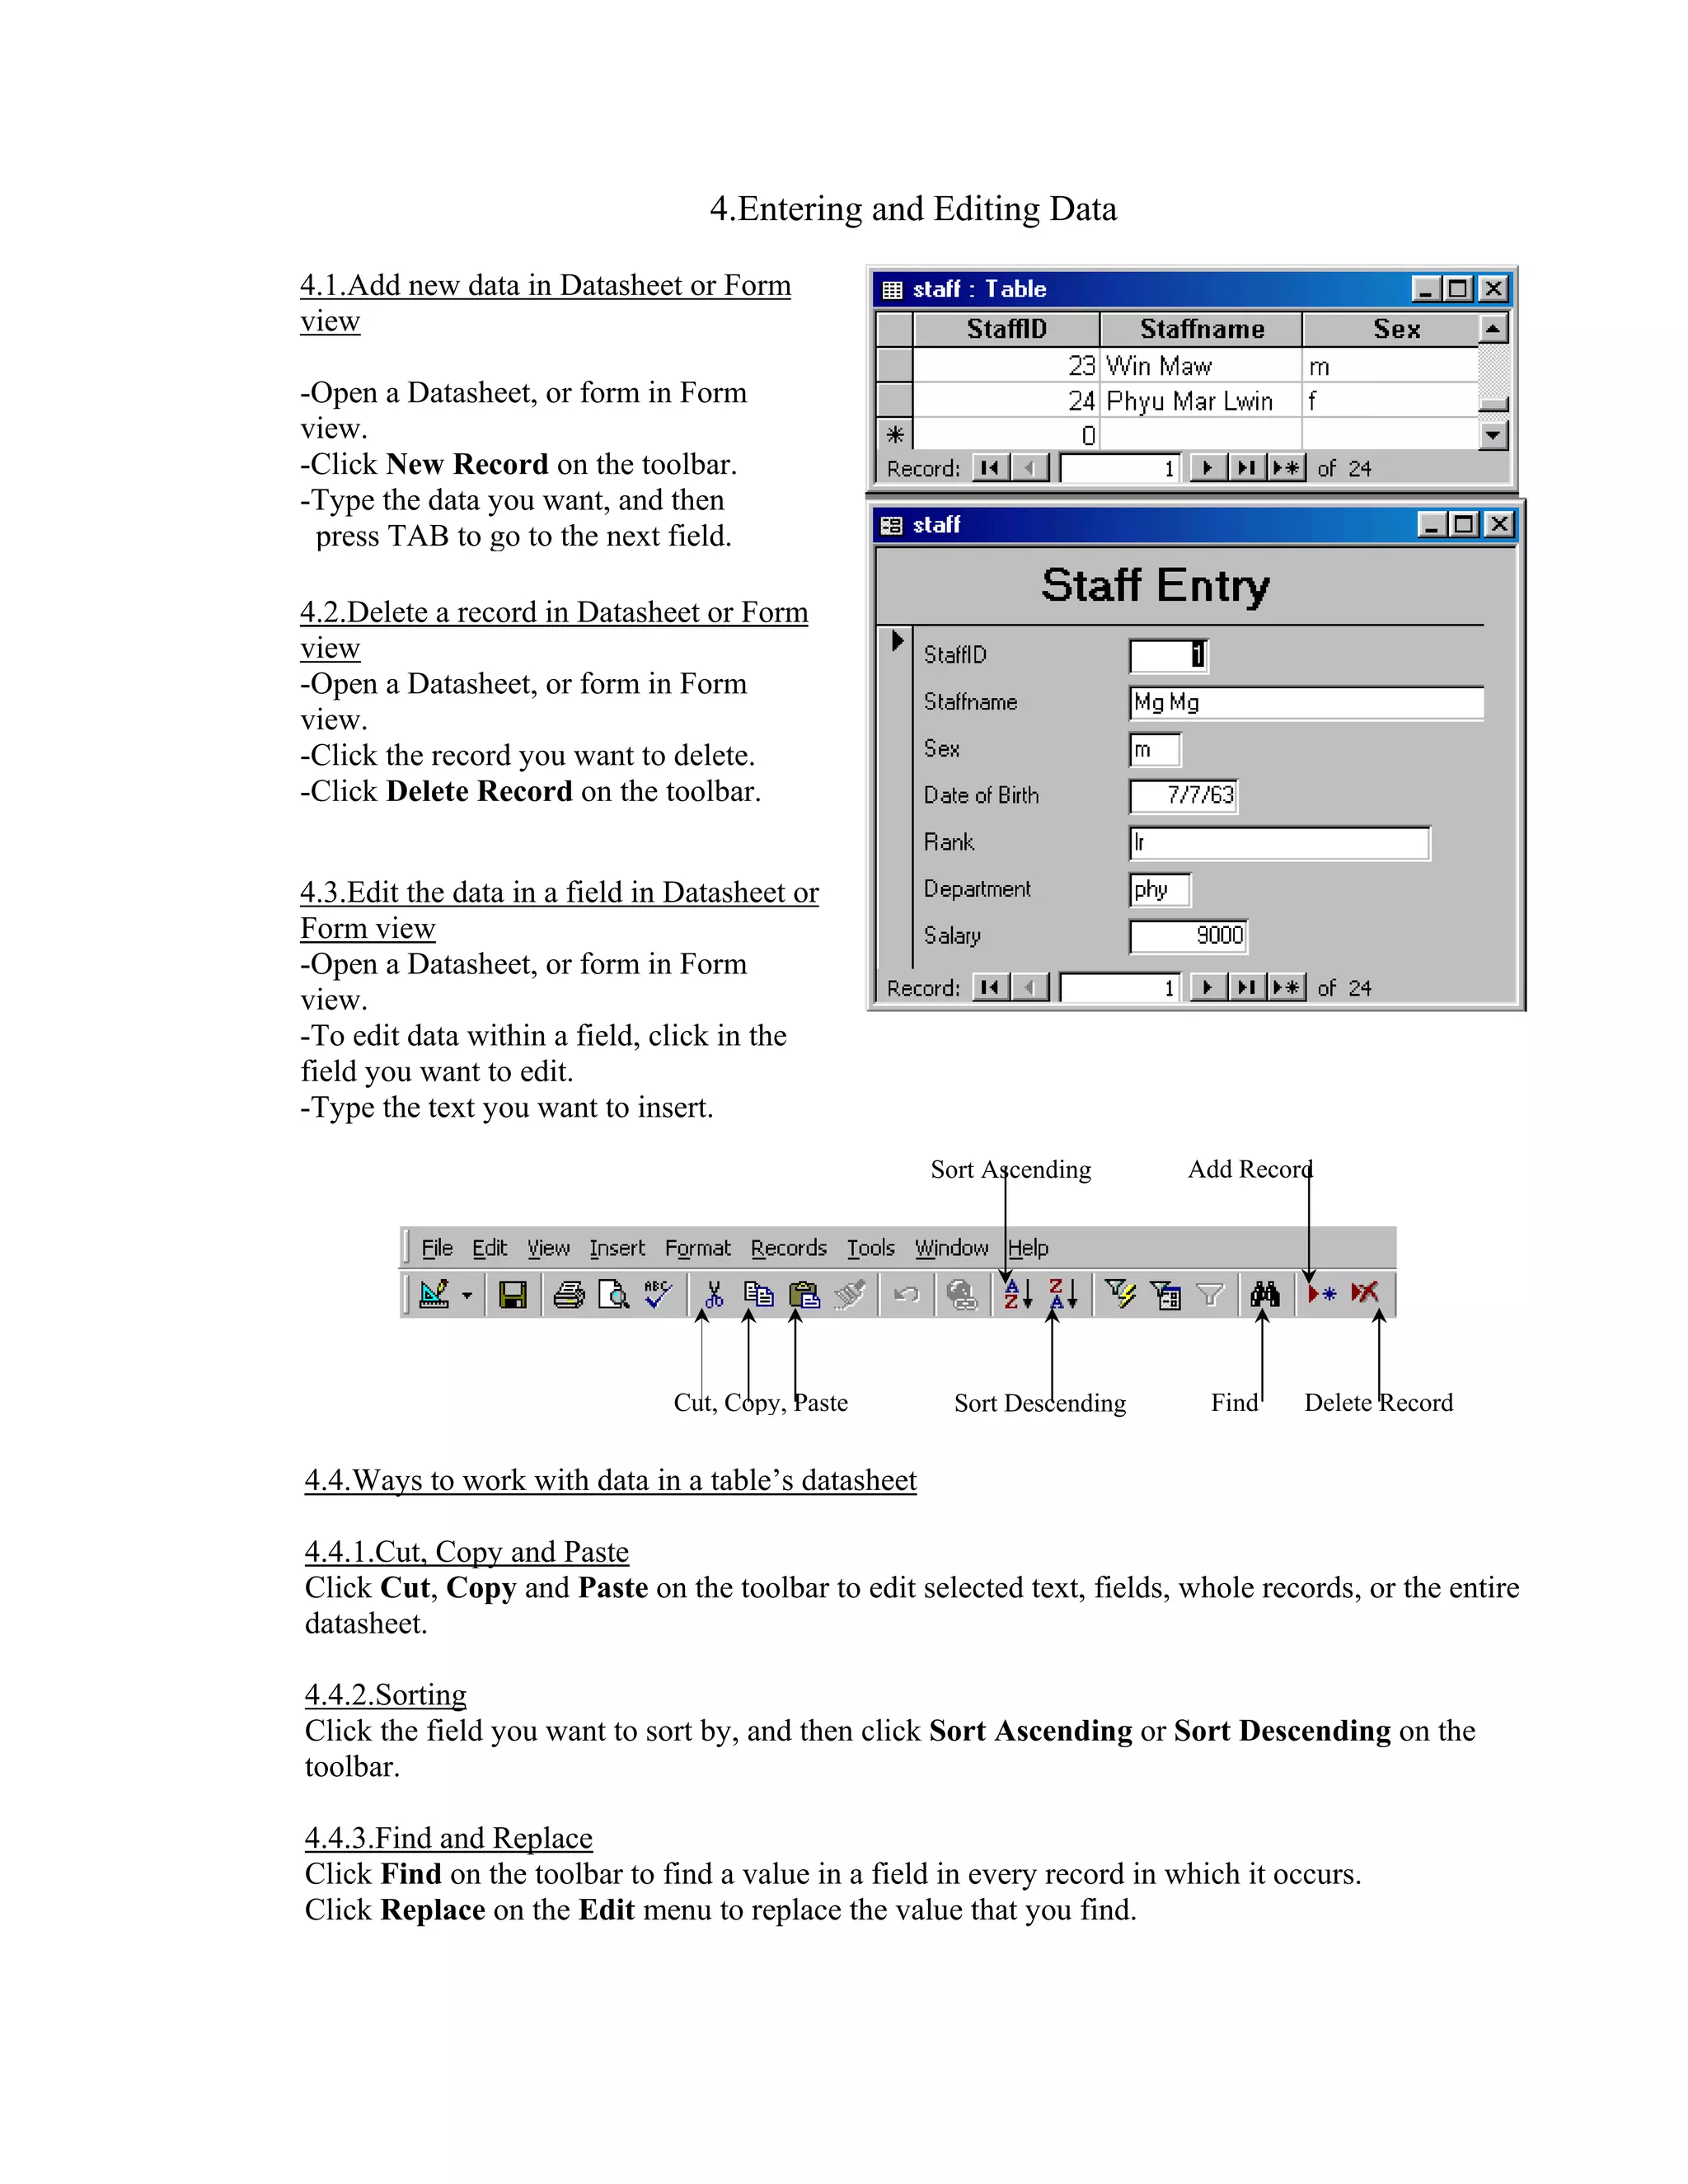
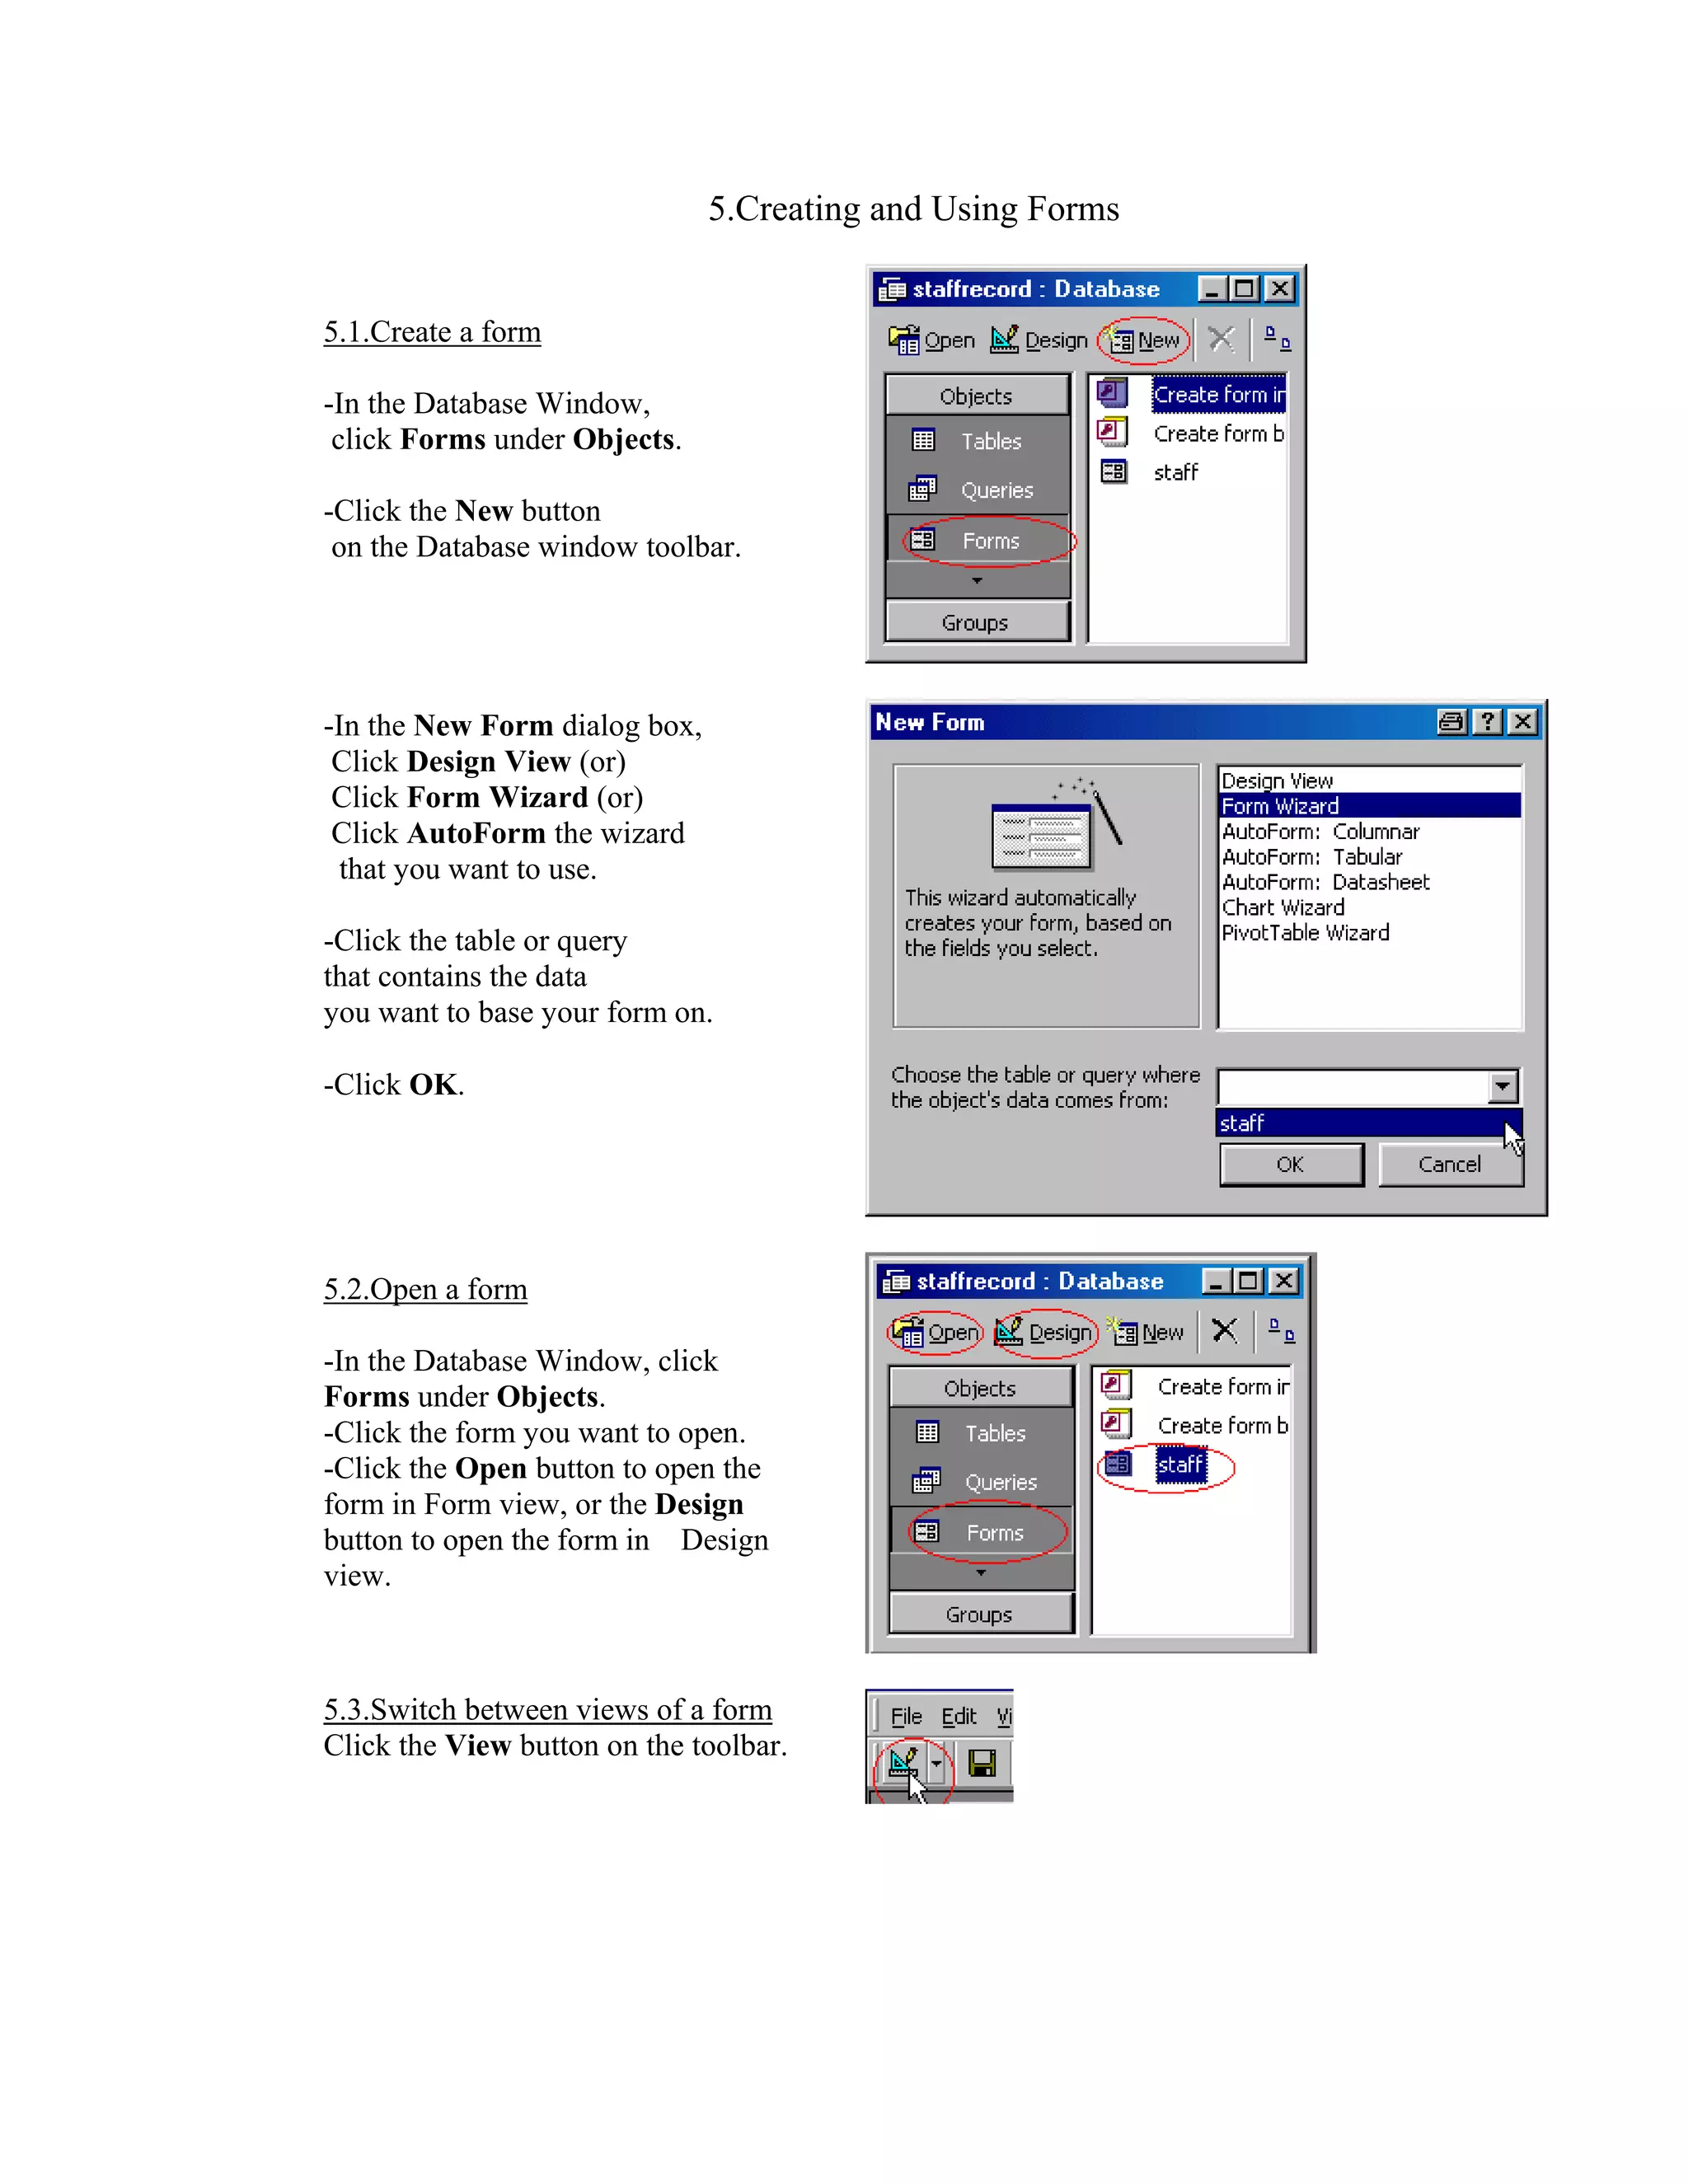
1. Microsoft Access allows users to create and work with databases, tables, forms, queries, and reports. It provides tools for starting and exiting the program, creating and opening databases, and designing and manipulating tables, forms, queries, and reports. 2. Key features include creating and customizing tables with fields and records, entering and editing data, generating forms and reports from tables, and building queries to extract and calculate specific data. 3. Microsoft Access gives users flexibility in how they view and interact with different database components, allowing switching between design and data entry views, customizing properties and layouts, and printing finished reports.
Introduction to starting and exiting Access, creating, and opening databases.
Methods for creating, opening, and customizing tables in Microsoft Access.
Instructions for adding, deleting, editing data in Datasheet or Form view.
Steps for creating, opening forms, and working in Design View, including adding fields.
How to create queries with or without wizards, using criteria, and performing calculations.
Guidelines for creating, opening, viewing, and printing reports in Microsoft Access.


