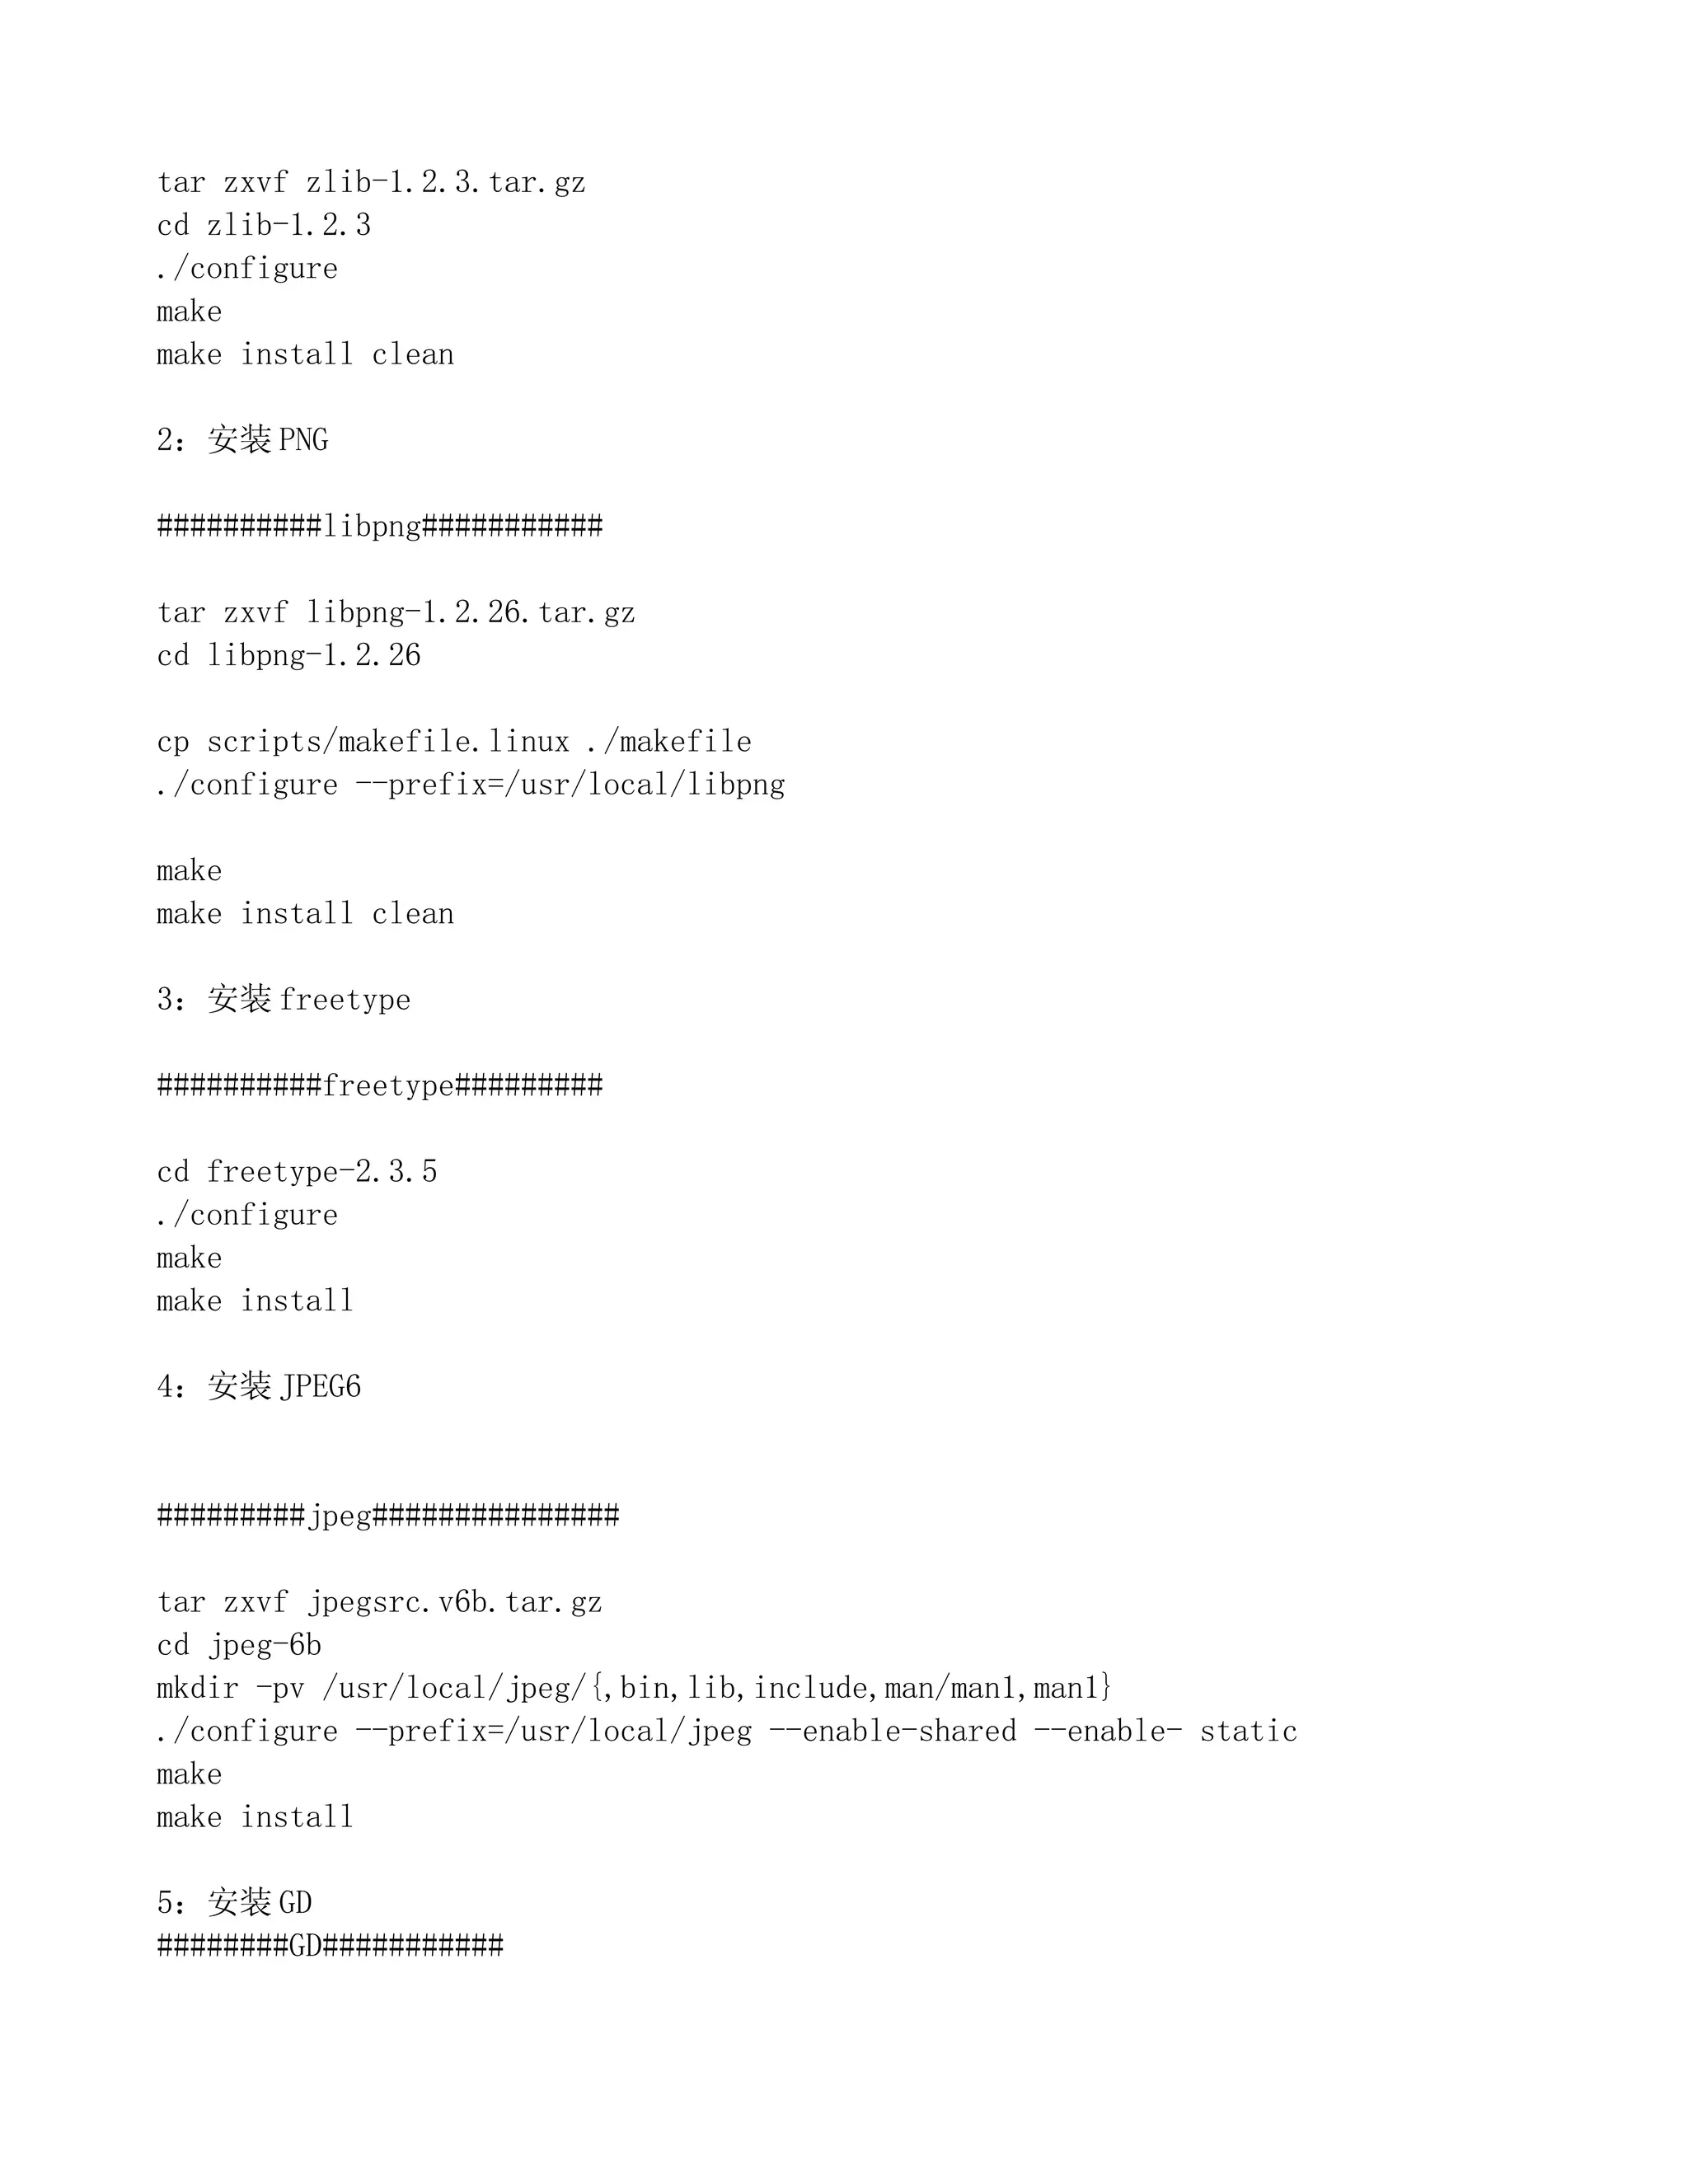
tar zxvf zlib-1.2.3.tar.gz
cdzlib-1.2.3
./configure
make
make install clean
2:安装 PNG
##########libpng###########
tar zxvf libpng-1.2.26.tar.gz
cd libpng-1.2.26
cp scripts/makefile.linux ./makefile
./configure --prefix=/usr/local/libpng
make
make install clean
3:安装 freetype
##########freetype#########
cd freetype-2.3.5
./configure
make
make install
4:安装 JPEG6
#########jpeg###############
tar zxvf jpegsrc.v6b.tar.gz
cd jpeg-6b
mkdir -pv /usr/local/jpeg/{,bin,lib,include,man/man1,man1}
./configure --prefix=/usr/local/jpeg --enable-shared --enable- static
make
make install
5:安装 GD
########GD###########
10.
tar zxvf gd-2.0.35.tar.gz
cdgd-2.0.35
./configure --with-png --with-freetype --with-jpeg=/usr/local/jpeg/
make
make install
5.4 安装 php
1:安装 LIBXML2
#####libxml2 #####
tar zxvf libxml2-2.6.31.tar.gz
cd libxml2-2.6.31
./configure --prefix=/usr/local/libxml2
make
make install
cp xml2-config /usr/bin
2::安装 PHP5.2.5
#########php##########
tar zxvf php-5.2.5.tar.gz
cd php-5.2.5
./configure --prefix=/usr/local/php5 --with-mysql=/usr/local/mysql5 --with-
apxs2=/usr/local/apache2/bin/apxs --with-jpeg-dir=/usr/local/jpeg --with-freetype-
dir=/usr/local/include/freetype2 --with-zlib --with-png-dir=usr/local/libpng12
--with-libxml-dir=/usr/local/libxml2 --with-gd --enable-ftp --enable-sockets
make
make test
make install
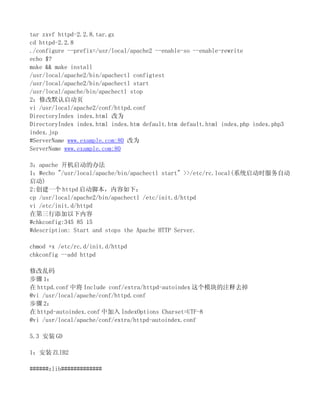
3:配置
cp php.ini-dict /usr/local/php5/lib/php.ini
编辑 httpd.conf
/usr/local/apache2/conf/httpd.conf
加载 php 模块,去掉注释,我的版本是缺省就启用的。
LoadModule php5_module modules/libphp5.so
加上下面两行

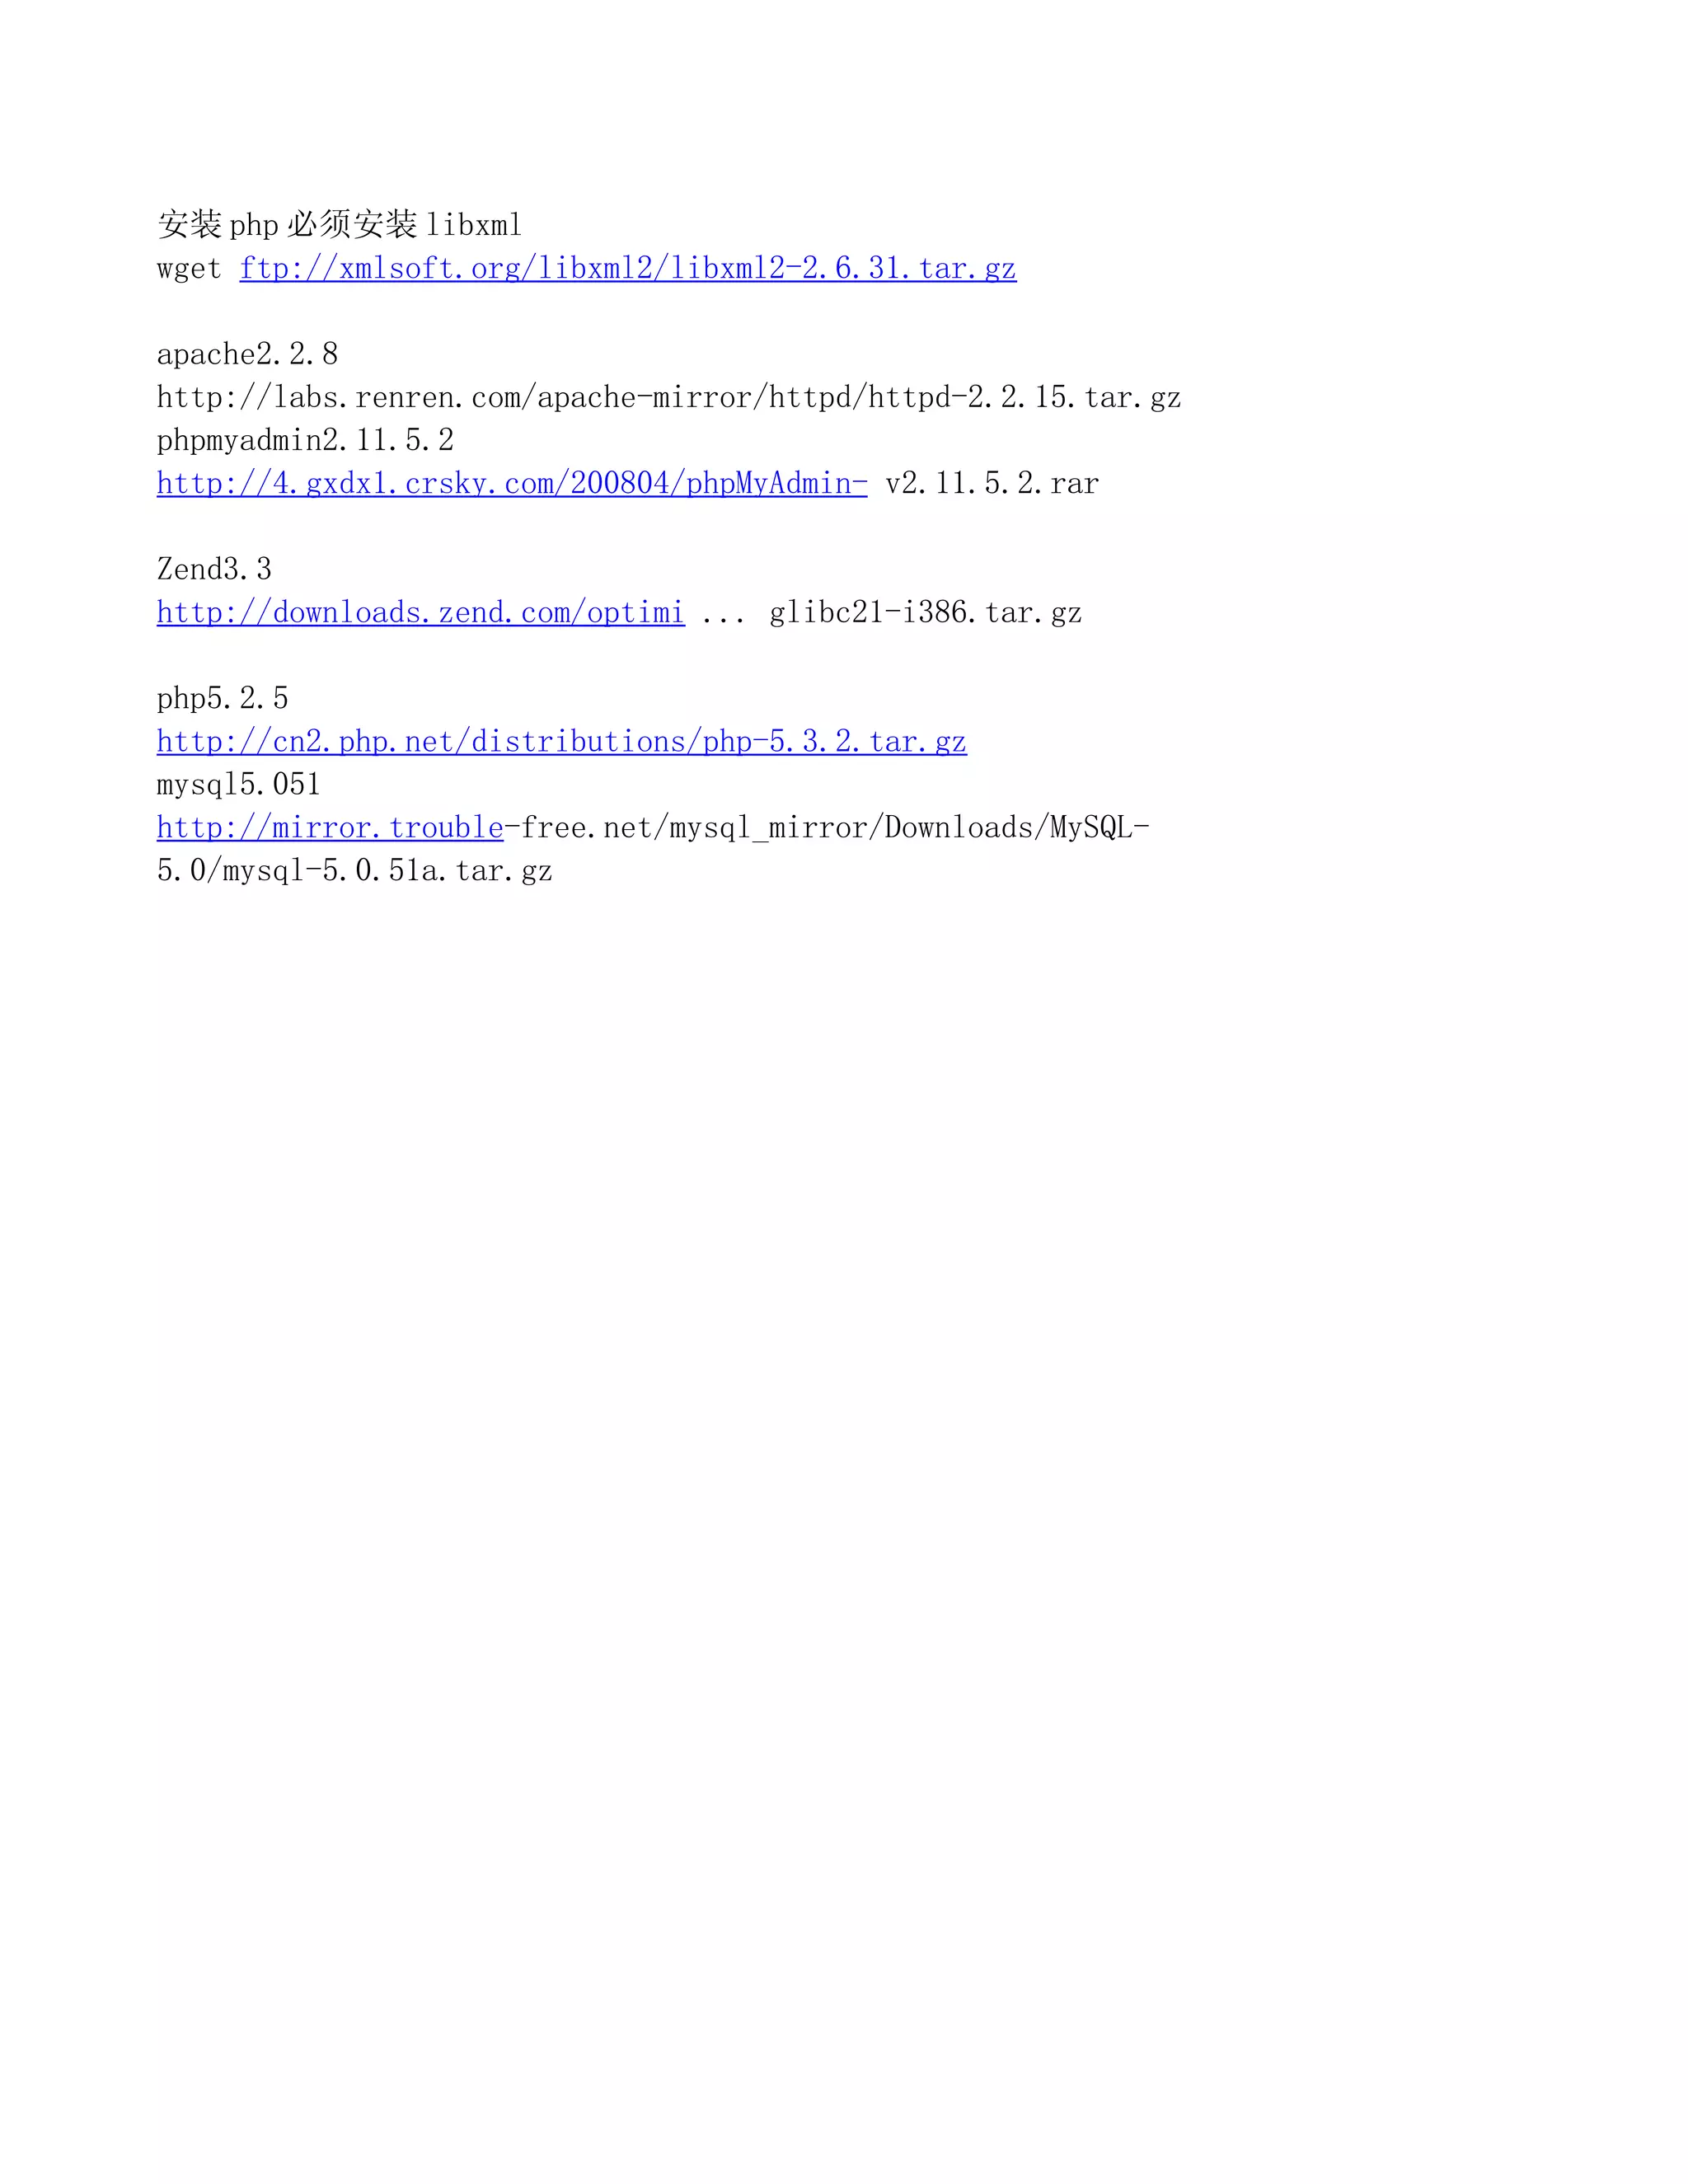
![3.3 配置 ssh
修改两个地方
vi /etc/ssh/sshd_config
#PermitRootLogin yes 改为
PermitRootLogin yes
#UseDNS yes 改为
UseDNS no
3.4 配置 yum
mv /etc/yum.repos.d/CentOS-Base.repo /etc/yum.repos.d/CentOS-Base.repo.save
vi /etc/yum.repos.d/CentOS-Base.repo
######################
[base]
name=CentOS-5 - Base
repo=os
baseurl=http://centos.ustc.edu.cn/centos/5.1/os/$basearch/
gpgcheck=1
gpgkey=http://centos.ustc.edu.cn/centos/RPM-GPG-KEY-CentOS-5
[update]
name=CentOS-5 - Updates
baseurl=http://centos.ustc.edu.cn/centos/5.1/updates/$basearch/
gpgcheck=1
gpgkey=http://centos.ustc.edu.cn/centos/RPM-GPG-KEY-CentOS-5
[addons]
name=CentOS-5 - Addons
baseurl=http://centos.ustc.edu.cn/centos/5.1/addons/$basearch/
gpgcheck=1
gpgkey=http://centos.ustc.edu.cn/centos/RPM-GPG-KEY-CentOS-5
[extras]
name=CentOS-5 - Extras
baseurl=http://centos.ustc.edu.cn/centos/5.1/extras/$basearch/
gpgcheck=1](https://image.slidesharecdn.com/5132234/85/CentOS5-apache2-mysql5-php5-Zend-5-320.jpg)
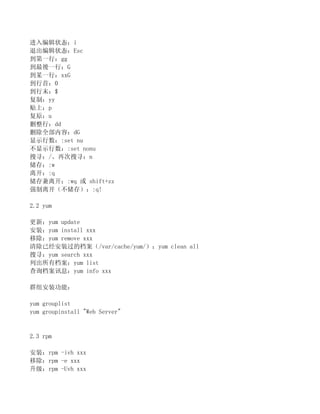
![gpgkey=http://centos.ustc.edu.cn/centos/RPM-GPG-KEY-CentOS-5
[centosplus]
name=CentOS-5 - Plus
baseurl=http://centos.ustc.edu.cn/centos/5.1/centosplus/$basearch/
gpgcheck=1
enabled=0
gpgkey=http://centos.ustc.edu.cn/centos/RPM-GPG-KEY-CentOS-5
[contrib]
name=CentOS-5 - Contrib
baseurl=http://centos.ustc.edu.cn/centos/5.1/contrib/$basearch/
gpgcheck=1
enabled=0
gpgkey=http://centos.ustc.edu.cn/centos/RPM-GPG-KEY-CentOS-5
###################
rpm --import http://centos.ustc.edu.cn/centos/5.1/os/i386/RPM-GPG-KEY-CentOS-5
yum update
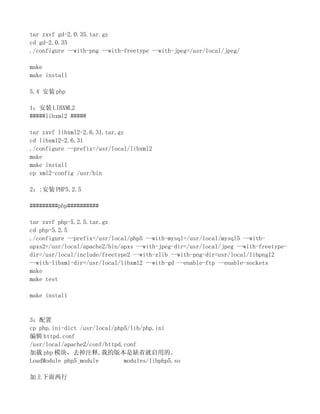
4 :编译前准备
4.1 安装编译器 gcc
最小化安装,没有安装编译器
yum install gcc
4.2 gcc-c++
如果不安装,在编译 mysql 的时候会出现【exec: g++: not found】错误
yum install gcc-c++
5:安装软件
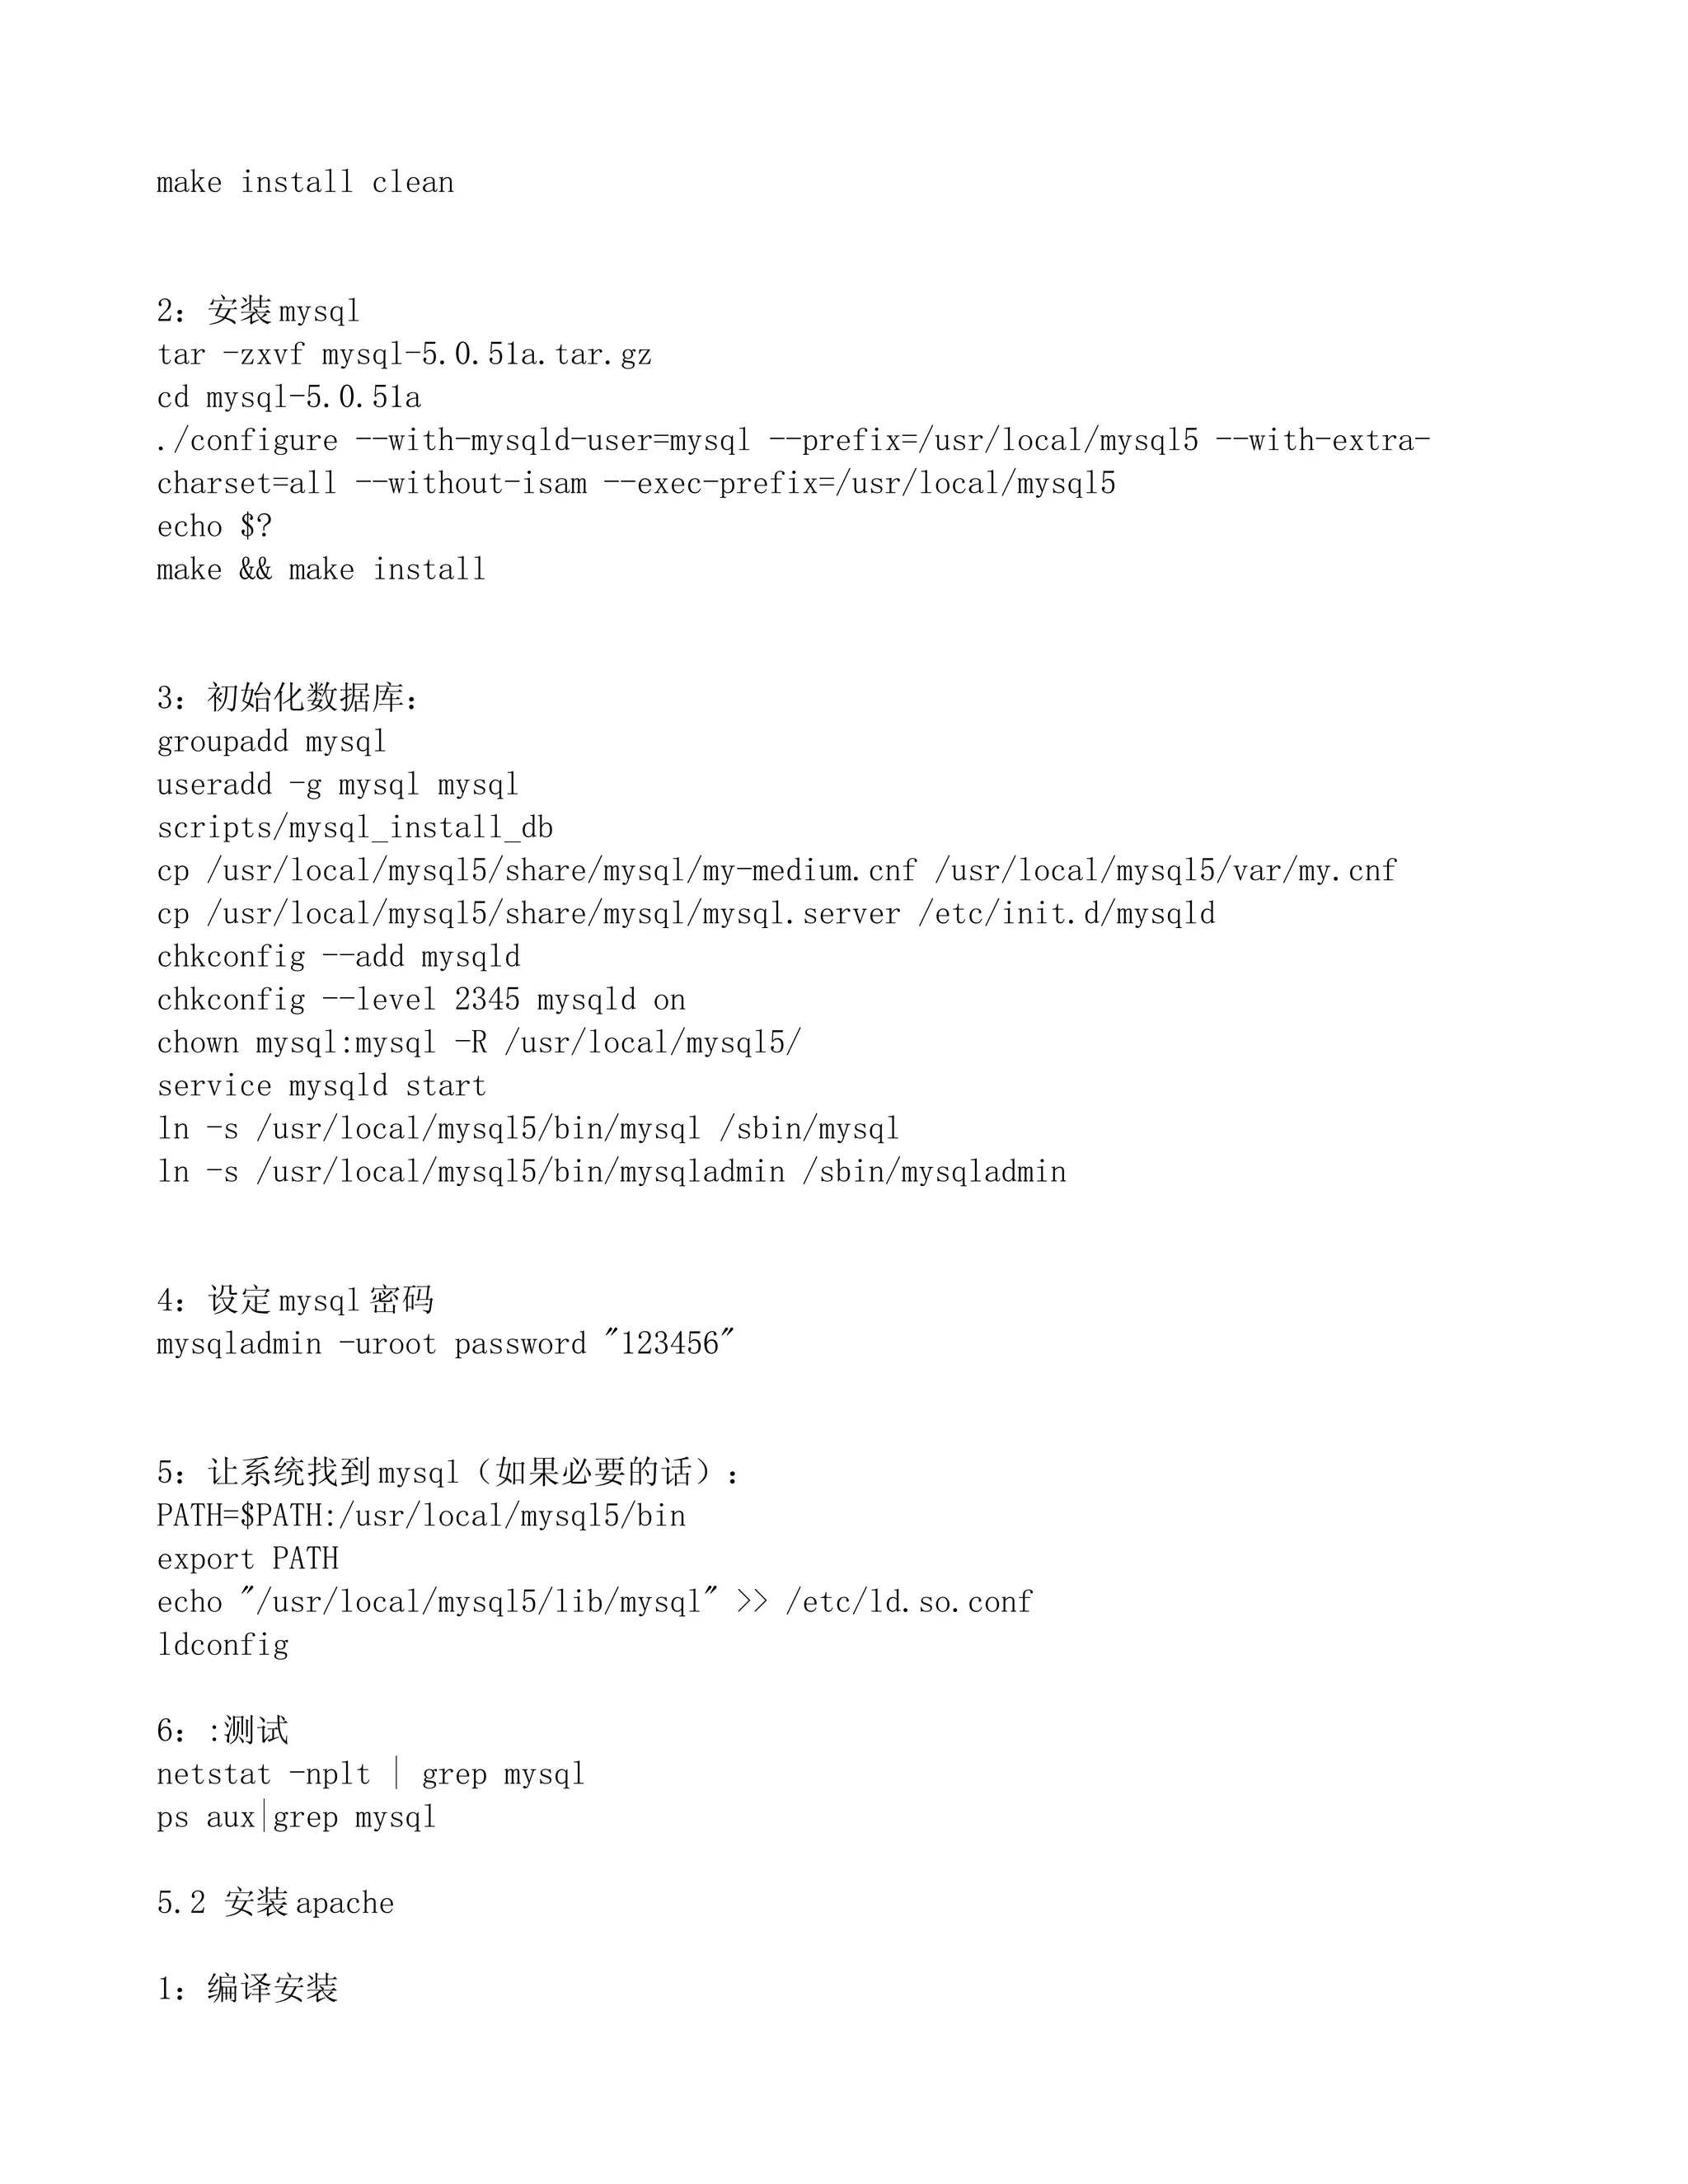
5.1 安装 mysql
1:去下载一个 ncurses-5.6.tar.gz,
tar zxvf ncurses-5.6.tar.gz
cd ncurses-5.6
./configure --prefix=/usr --with-shared --without-debug
make](https://image.slidesharecdn.com/5132234/85/CentOS5-apache2-mysql5-php5-Zend-6-320.jpg)


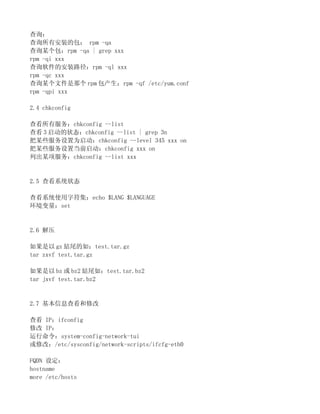
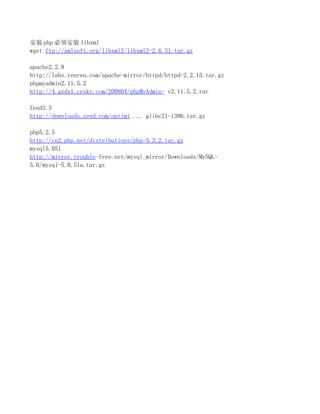
![AddType application/x-httpd-php .php .phtml
AddType application/x-httpd-php-source .phps
5.5 安装 zend
tar -zxvf ZendOptimizer-3.0.0-linux-glibc23- x86_64.tar.gz
cd ZendOptimizer-3.0.0-linux-glibc23-x86_64
./install
5.6 安装 phpmyadmin
cp -rf phpMyAdmin-v2.11.5.2 /usr/local/apache2/htdocs/phpmyadmin
cd /usr/local/apache2/htdocs/phpmyadmin/
cp config.sample.inc.php config.inc.php
vi config.inc.php
$cfg['blowfish_secret'] = ''改为
$cfg['blowfish_secret'] = 'dd'
只要不为空就可以了,这样就可以登陆,如果还有问题,就修改一下语言就解决“配置文件现
在需要绝密的短语密码(blowfish_secret)”这个错误了。
6:软件
ncurses
http://ftp.gnu.org/pub/gnu/ncurses/ncurses- 5.6.tar.gz
安装 GD 库和 GD 库所需的环境
zlib
http://www.zlib.net/zlib-1.2.3.tar.gz
jpeg
ftp://ftp.uni-leipzig.de/pub/linux/ftp:robot.informatik.uni-leipzig.de/Sources/System/Libs/jpegsrc.v6b.tar.gz
freetype
http://download.savannah.gnu.org/releases/freetype/freetype-2.3.5.tar.gz
png
http://sourceforge.net/projects/libpng/files/00-libpng-
stable/1.2.42/libpng-1.2.42.tar.gz/download
GD
http://www.libgd.org/releases/gd-2.0.35.tar.gz](https://image.slidesharecdn.com/5132234/85/CentOS5-apache2-mysql5-php5-Zend-11-320.jpg)
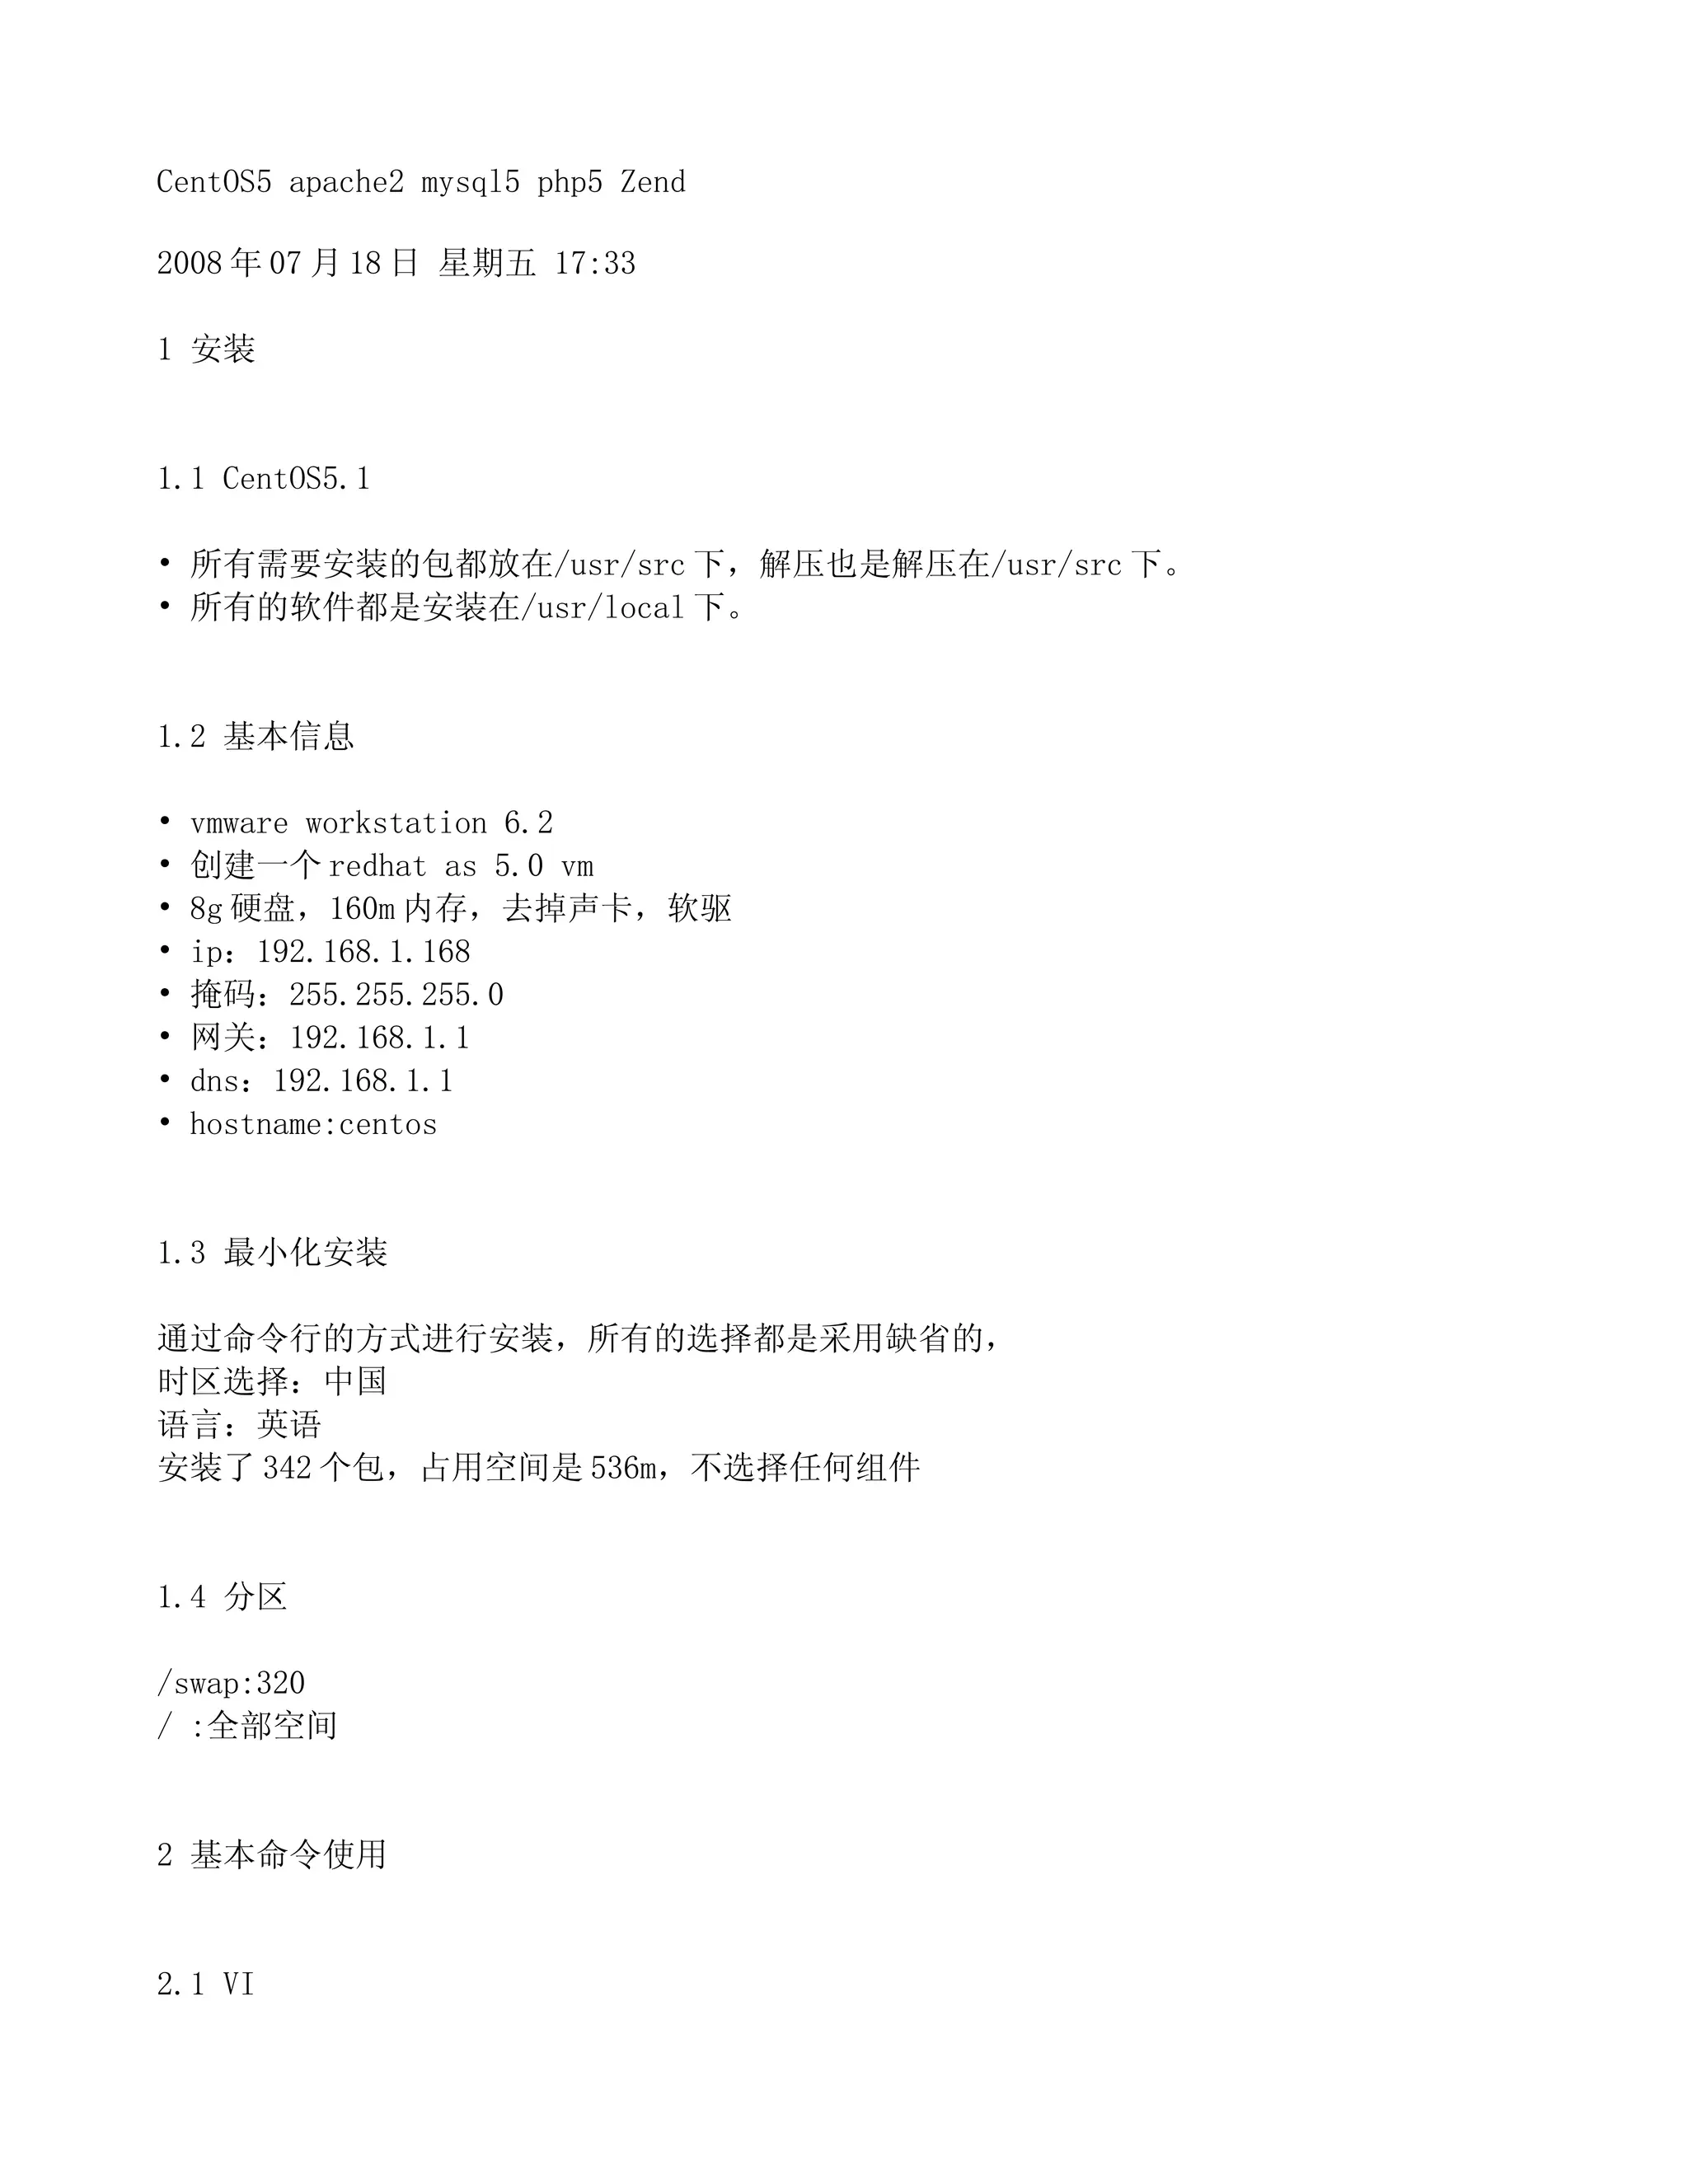


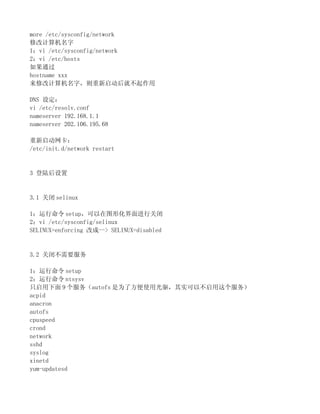
![3.3 配置 ssh
修改两个地方
vi /etc/ssh/sshd_config
#PermitRootLogin yes 改为
PermitRootLogin yes
#UseDNS yes 改为
UseDNS no
3.4 配置 yum
mv /etc/yum.repos.d/CentOS-Base.repo /etc/yum.repos.d/CentOS-Base.repo.save
vi /etc/yum.repos.d/CentOS-Base.repo
######################
[base]
name=CentOS-5 - Base
repo=os
baseurl=http://centos.ustc.edu.cn/centos/5.1/os/$basearch/
gpgcheck=1
gpgkey=http://centos.ustc.edu.cn/centos/RPM-GPG-KEY-CentOS-5
[update]
name=CentOS-5 - Updates
baseurl=http://centos.ustc.edu.cn/centos/5.1/updates/$basearch/
gpgcheck=1
gpgkey=http://centos.ustc.edu.cn/centos/RPM-GPG-KEY-CentOS-5
[addons]
name=CentOS-5 - Addons
baseurl=http://centos.ustc.edu.cn/centos/5.1/addons/$basearch/
gpgcheck=1
gpgkey=http://centos.ustc.edu.cn/centos/RPM-GPG-KEY-CentOS-5
[extras]
name=CentOS-5 - Extras
baseurl=http://centos.ustc.edu.cn/centos/5.1/extras/$basearch/
gpgcheck=1](https://image.slidesharecdn.com/5132234/75/CentOS5-apache2-mysql5-php5-Zend-5-2048.jpg)
![gpgkey=http://centos.ustc.edu.cn/centos/RPM-GPG-KEY-CentOS-5
[centosplus]
name=CentOS-5 - Plus
baseurl=http://centos.ustc.edu.cn/centos/5.1/centosplus/$basearch/
gpgcheck=1
enabled=0
gpgkey=http://centos.ustc.edu.cn/centos/RPM-GPG-KEY-CentOS-5
[contrib]
name=CentOS-5 - Contrib
baseurl=http://centos.ustc.edu.cn/centos/5.1/contrib/$basearch/
gpgcheck=1
enabled=0
gpgkey=http://centos.ustc.edu.cn/centos/RPM-GPG-KEY-CentOS-5
###################
rpm --import http://centos.ustc.edu.cn/centos/5.1/os/i386/RPM-GPG-KEY-CentOS-5
yum update
4 :编译前准备
4.1 安装编译器 gcc
最小化安装,没有安装编译器
yum install gcc
4.2 gcc-c++
如果不安装,在编译 mysql 的时候会出现【exec: g++: not found】错误
yum install gcc-c++
5:安装软件
5.1 安装 mysql
1:去下载一个 ncurses-5.6.tar.gz,
tar zxvf ncurses-5.6.tar.gz
cd ncurses-5.6
./configure --prefix=/usr --with-shared --without-debug
make](https://image.slidesharecdn.com/5132234/75/CentOS5-apache2-mysql5-php5-Zend-6-2048.jpg)


![AddType application/x-httpd-php .php .phtml
AddType application/x-httpd-php-source .phps
5.5 安装 zend
tar -zxvf ZendOptimizer-3.0.0-linux-glibc23- x86_64.tar.gz
cd ZendOptimizer-3.0.0-linux-glibc23-x86_64
./install
5.6 安装 phpmyadmin
cp -rf phpMyAdmin-v2.11.5.2 /usr/local/apache2/htdocs/phpmyadmin
cd /usr/local/apache2/htdocs/phpmyadmin/
cp config.sample.inc.php config.inc.php
vi config.inc.php
$cfg['blowfish_secret'] = ''改为
$cfg['blowfish_secret'] = 'dd'
只要不为空就可以了,这样就可以登陆,如果还有问题,就修改一下语言就解决“配置文件现
在需要绝密的短语密码(blowfish_secret)”这个错误了。
6:软件
ncurses
http://ftp.gnu.org/pub/gnu/ncurses/ncurses- 5.6.tar.gz
安装 GD 库和 GD 库所需的环境
zlib
http://www.zlib.net/zlib-1.2.3.tar.gz
jpeg
ftp://ftp.uni-leipzig.de/pub/linux/ftp:robot.informatik.uni-leipzig.de/Sources/System/Libs/jpegsrc.v6b.tar.gz
freetype
http://download.savannah.gnu.org/releases/freetype/freetype-2.3.5.tar.gz
png
http://sourceforge.net/projects/libpng/files/00-libpng-
stable/1.2.42/libpng-1.2.42.tar.gz/download
GD
http://www.libgd.org/releases/gd-2.0.35.tar.gz](https://image.slidesharecdn.com/5132234/75/CentOS5-apache2-mysql5-php5-Zend-11-2048.jpg)