Download to read offline

![1
2
3
4
5
6
7
8
9
10
11
12
13
14
15
16
17
18
19
20
21
22
23
24
25
26
27
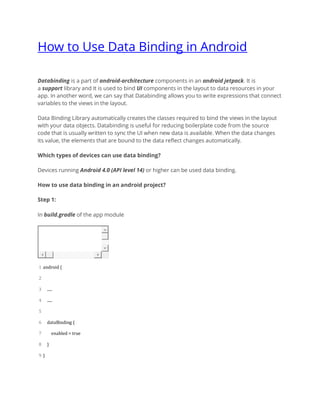
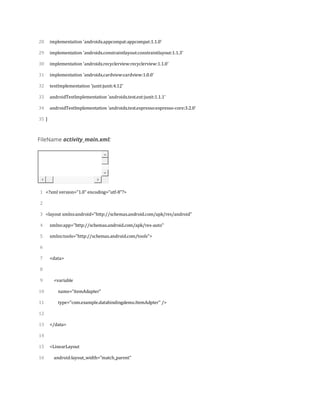
apply plugin: 'com.android.application'
android {
compileSdkVersion 29
buildToolsVersion "29.0.3"
defaultConfig {
applicationId "com.example.databindingdemo"
minSdkVersion 15
targetSdkVersion 29
versionCode 1
versionName "1.0"
testInstrumentationRunner "androidx.test.runner.AndroidJUnitRunner"
}
buildTypes {
release {
minifyEnabled false
proguardFiles getDefaultProguardFile('proguard-android-optimize.txt'), 'proguard-rules.pro'
}
}
dataBinding {
enabled = true
}
}
dependencies {
implementation fileTree(dir: 'libs', include: ['*.jar'])](https://image.slidesharecdn.com/howtousedatabindinginandroid-200417122024/85/How-to-use-data-binding-in-android-6-320.jpg)

![14
15
16
17
18
19
20
21
22
23
24
25
26
27
28
29
30
31
32
33
34
35
36
37
38
39
40
41
42
43
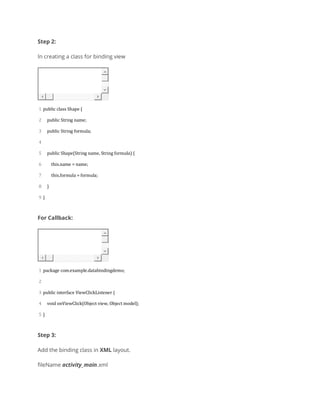
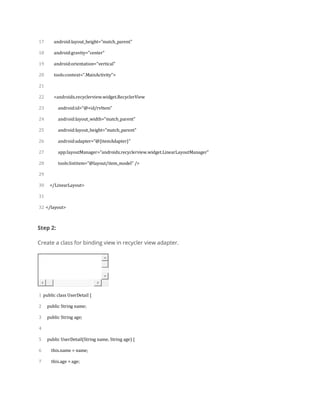
public class ItemAdpter extends RecyclerView.Adapter<ItemAdpter.ItemViewHolder> {
private Context context;
private String name[] = {"John", "Jelina", "Jonathan", "Marchel", "Richy"};
private String age[] = {"23", "26", "64", "20", "22"};
public ItemAdpter(Context context) {
this.context = context;
}
@NonNull
@Override
public ItemViewHolder onCreateViewHolder(@NonNull ViewGroup parent, int viewType) {
ItemLayoutBinding itemLayoutBinding = DataBindingUtil.inflate(LayoutInflater.from(parent.getContext()),
R.layout.item_layout, parent, false);
return new ItemViewHolder(itemLayoutBinding);
}
@Override
public void onBindViewHolder(@NonNull final ItemViewHolder holder, final int position) {
final UserDetail userDetail = new UserDetail(name[position], age[position]);
holder.bindItem(userDetail);
holder.itemLayoutBinding.setItemClickListener(new ViewClickListener() {
@Override
public void onViewClick(Object view, Object model) {
UserDetail user = (UserDetail) model;
Toast.makeText(context, "Hello " + user.name + ", You are " + user.age + " year old.",
Toast.LENGTH_SHORT).show();
}
});](https://image.slidesharecdn.com/howtousedatabindinginandroid-200417122024/85/How-to-use-data-binding-in-android-12-320.jpg)


![1
2
3
4
5
6
7
8
9
10
11
12
13
14
15
16
17
18
19
20
21
22
23
24
25
26
27
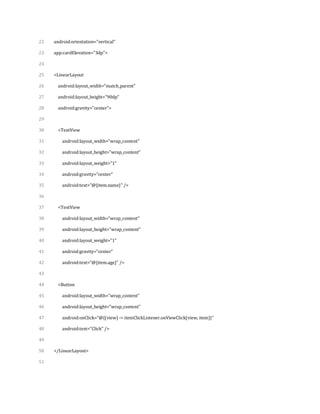
apply plugin: 'com.android.application'
android {
compileSdkVersion 29
buildToolsVersion "29.0.3"
defaultConfig {
applicationId "com.example.databindingdemo"
minSdkVersion 15
targetSdkVersion 29
versionCode 1
versionName "1.0"
testInstrumentationRunner "androidx.test.runner.AndroidJUnitRunner"
}
buildTypes {
release {
minifyEnabled false
proguardFiles getDefaultProguardFile('proguard-android-optimize.txt'), 'proguard-rules.pro'
}
}
dataBinding {
enabled = true
}
}
dependencies {
implementation fileTree(dir: 'libs', include: ['*.jar'])](https://image.slidesharecdn.com/howtousedatabindinginandroid-200417122024/75/How-to-use-data-binding-in-android-6-2048.jpg)


![14
15
16
17
18
19
20
21
22
23
24
25
26
27
28
29
30
31
32
33
34
35
36
37
38
39
40
41
42
43
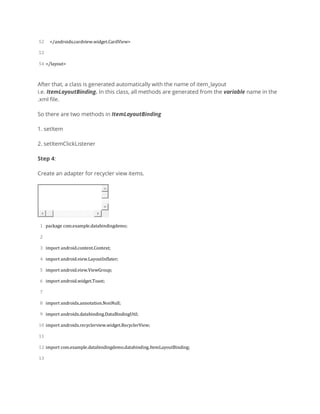
public class ItemAdpter extends RecyclerView.Adapter<ItemAdpter.ItemViewHolder> {
private Context context;
private String name[] = {"John", "Jelina", "Jonathan", "Marchel", "Richy"};
private String age[] = {"23", "26", "64", "20", "22"};
public ItemAdpter(Context context) {
this.context = context;
}
@NonNull
@Override
public ItemViewHolder onCreateViewHolder(@NonNull ViewGroup parent, int viewType) {
ItemLayoutBinding itemLayoutBinding = DataBindingUtil.inflate(LayoutInflater.from(parent.getContext()),
R.layout.item_layout, parent, false);
return new ItemViewHolder(itemLayoutBinding);
}
@Override
public void onBindViewHolder(@NonNull final ItemViewHolder holder, final int position) {
final UserDetail userDetail = new UserDetail(name[position], age[position]);
holder.bindItem(userDetail);
holder.itemLayoutBinding.setItemClickListener(new ViewClickListener() {
@Override
public void onViewClick(Object view, Object model) {
UserDetail user = (UserDetail) model;
Toast.makeText(context, "Hello " + user.name + ", You are " + user.age + " year old.",
Toast.LENGTH_SHORT).show();
}
});](https://image.slidesharecdn.com/howtousedatabindinginandroid-200417122024/75/How-to-use-data-binding-in-android-12-2048.jpg)


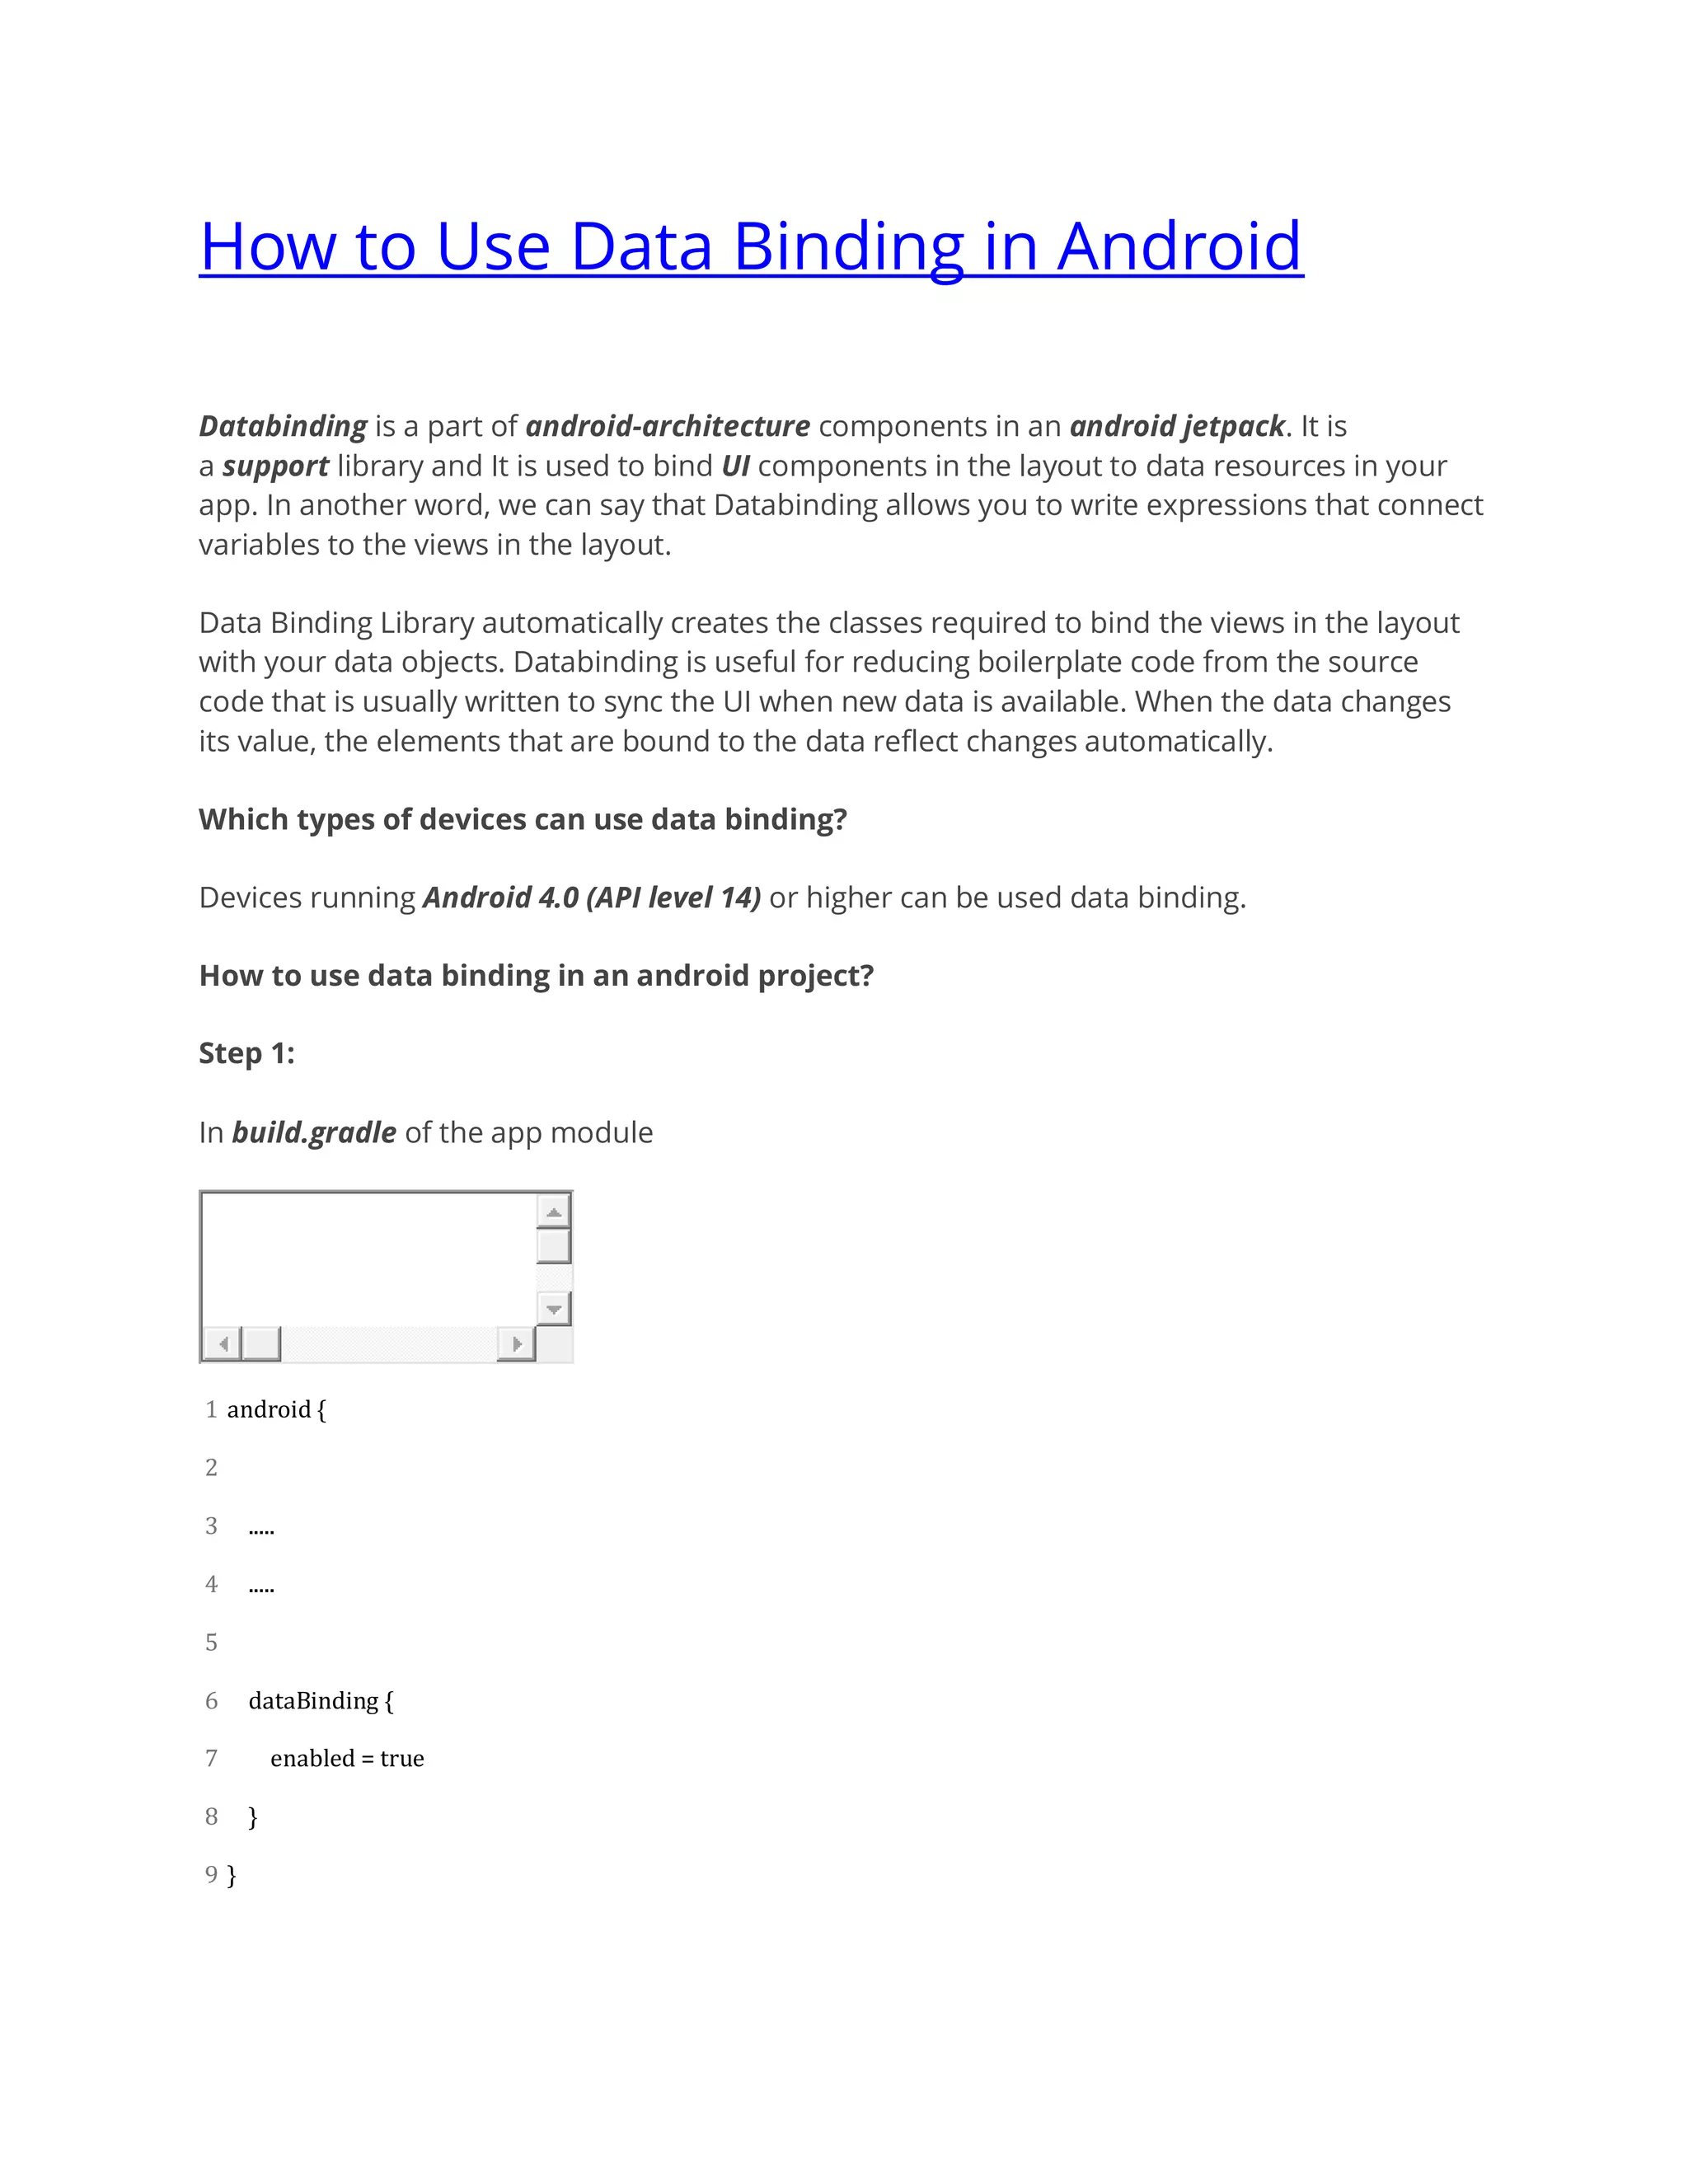
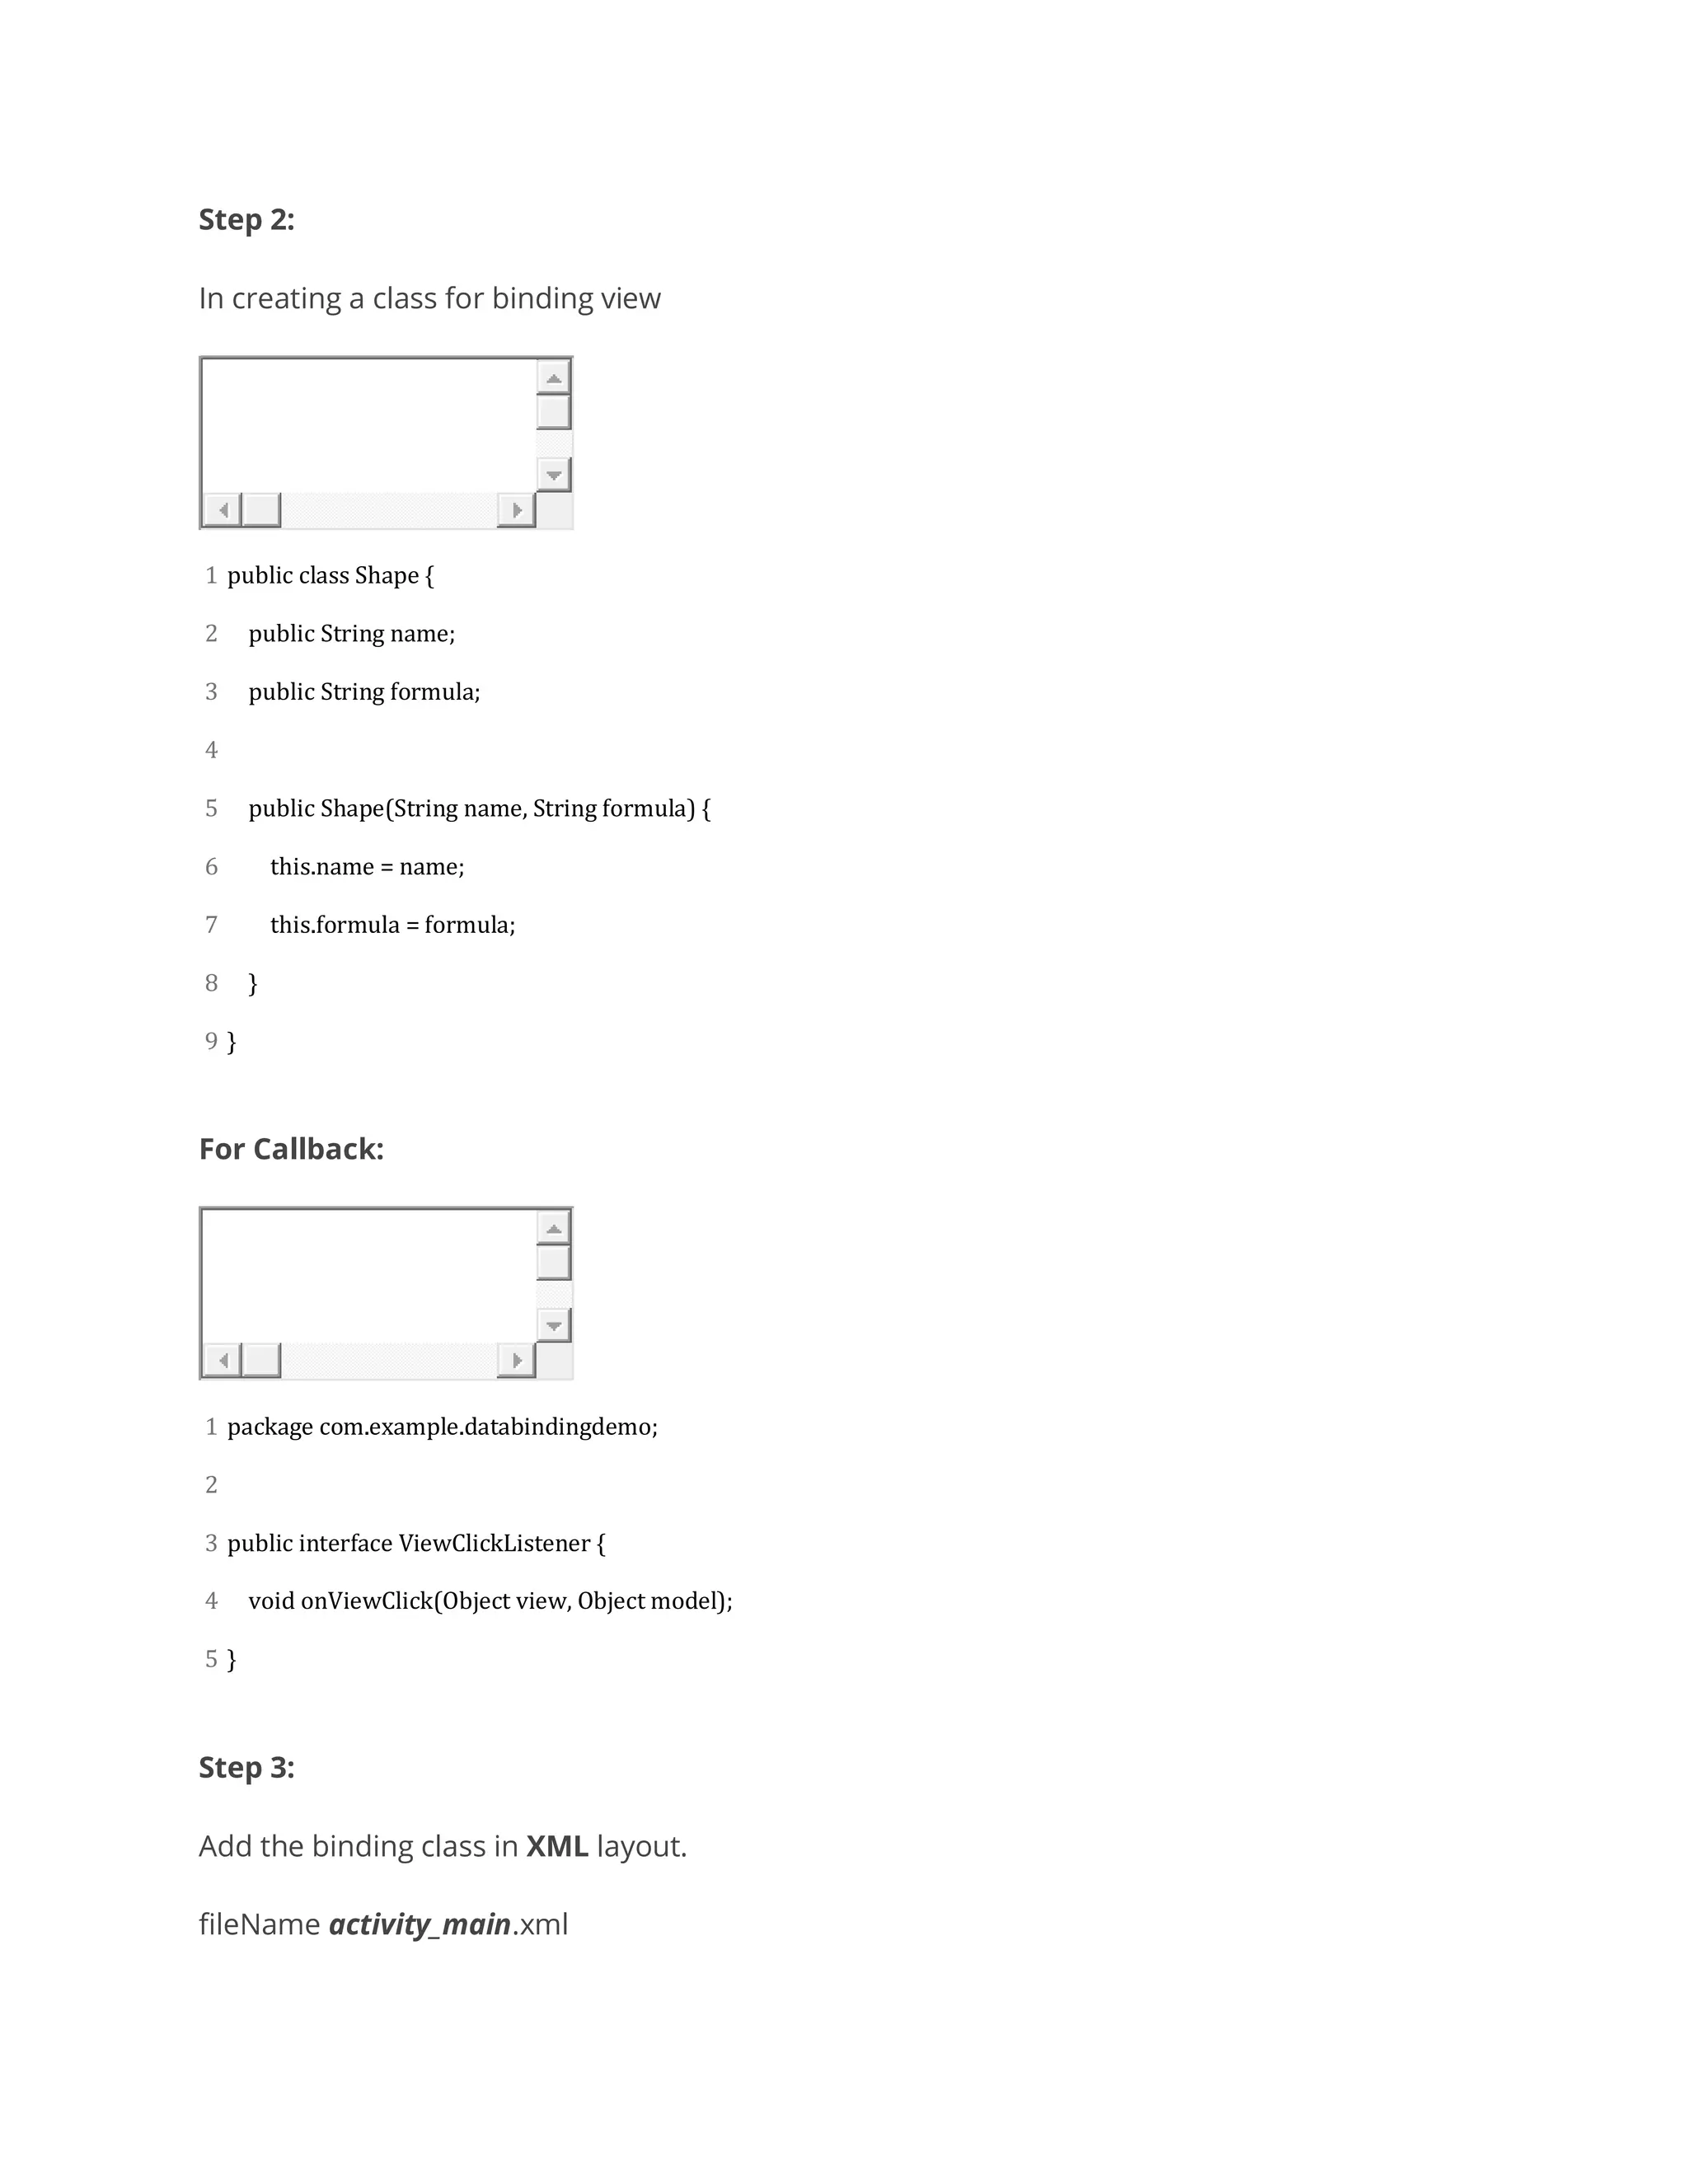
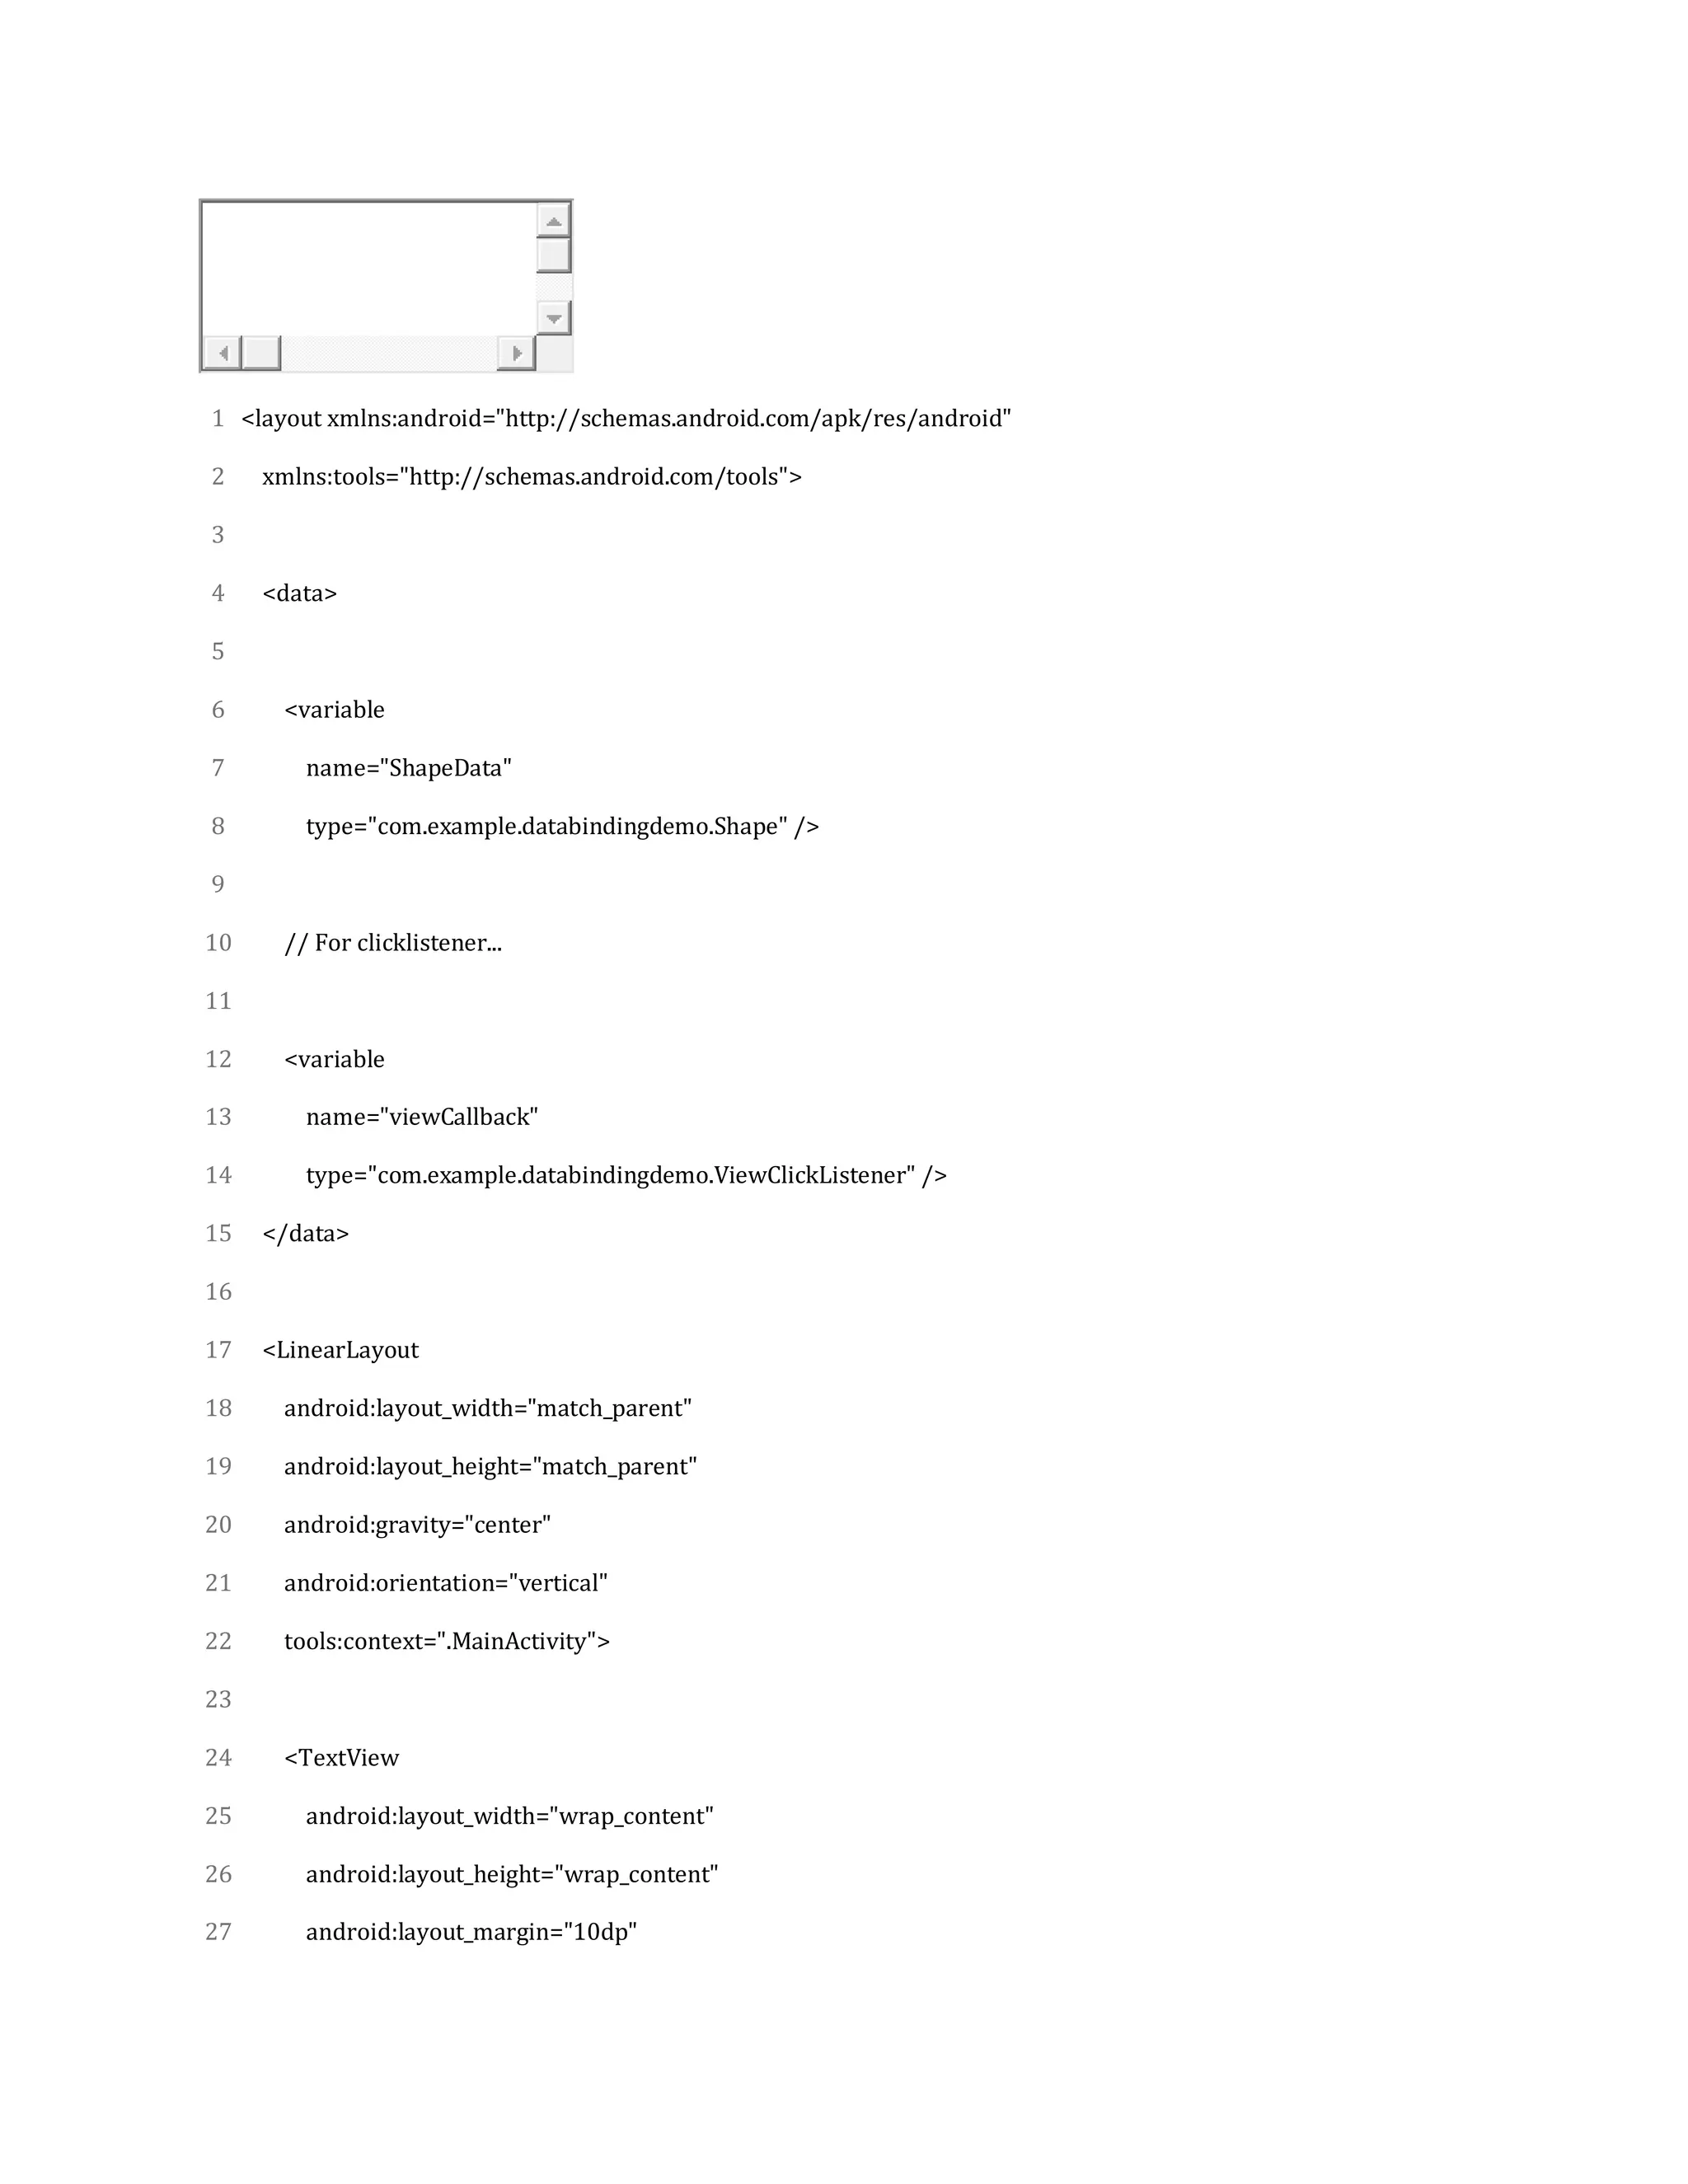
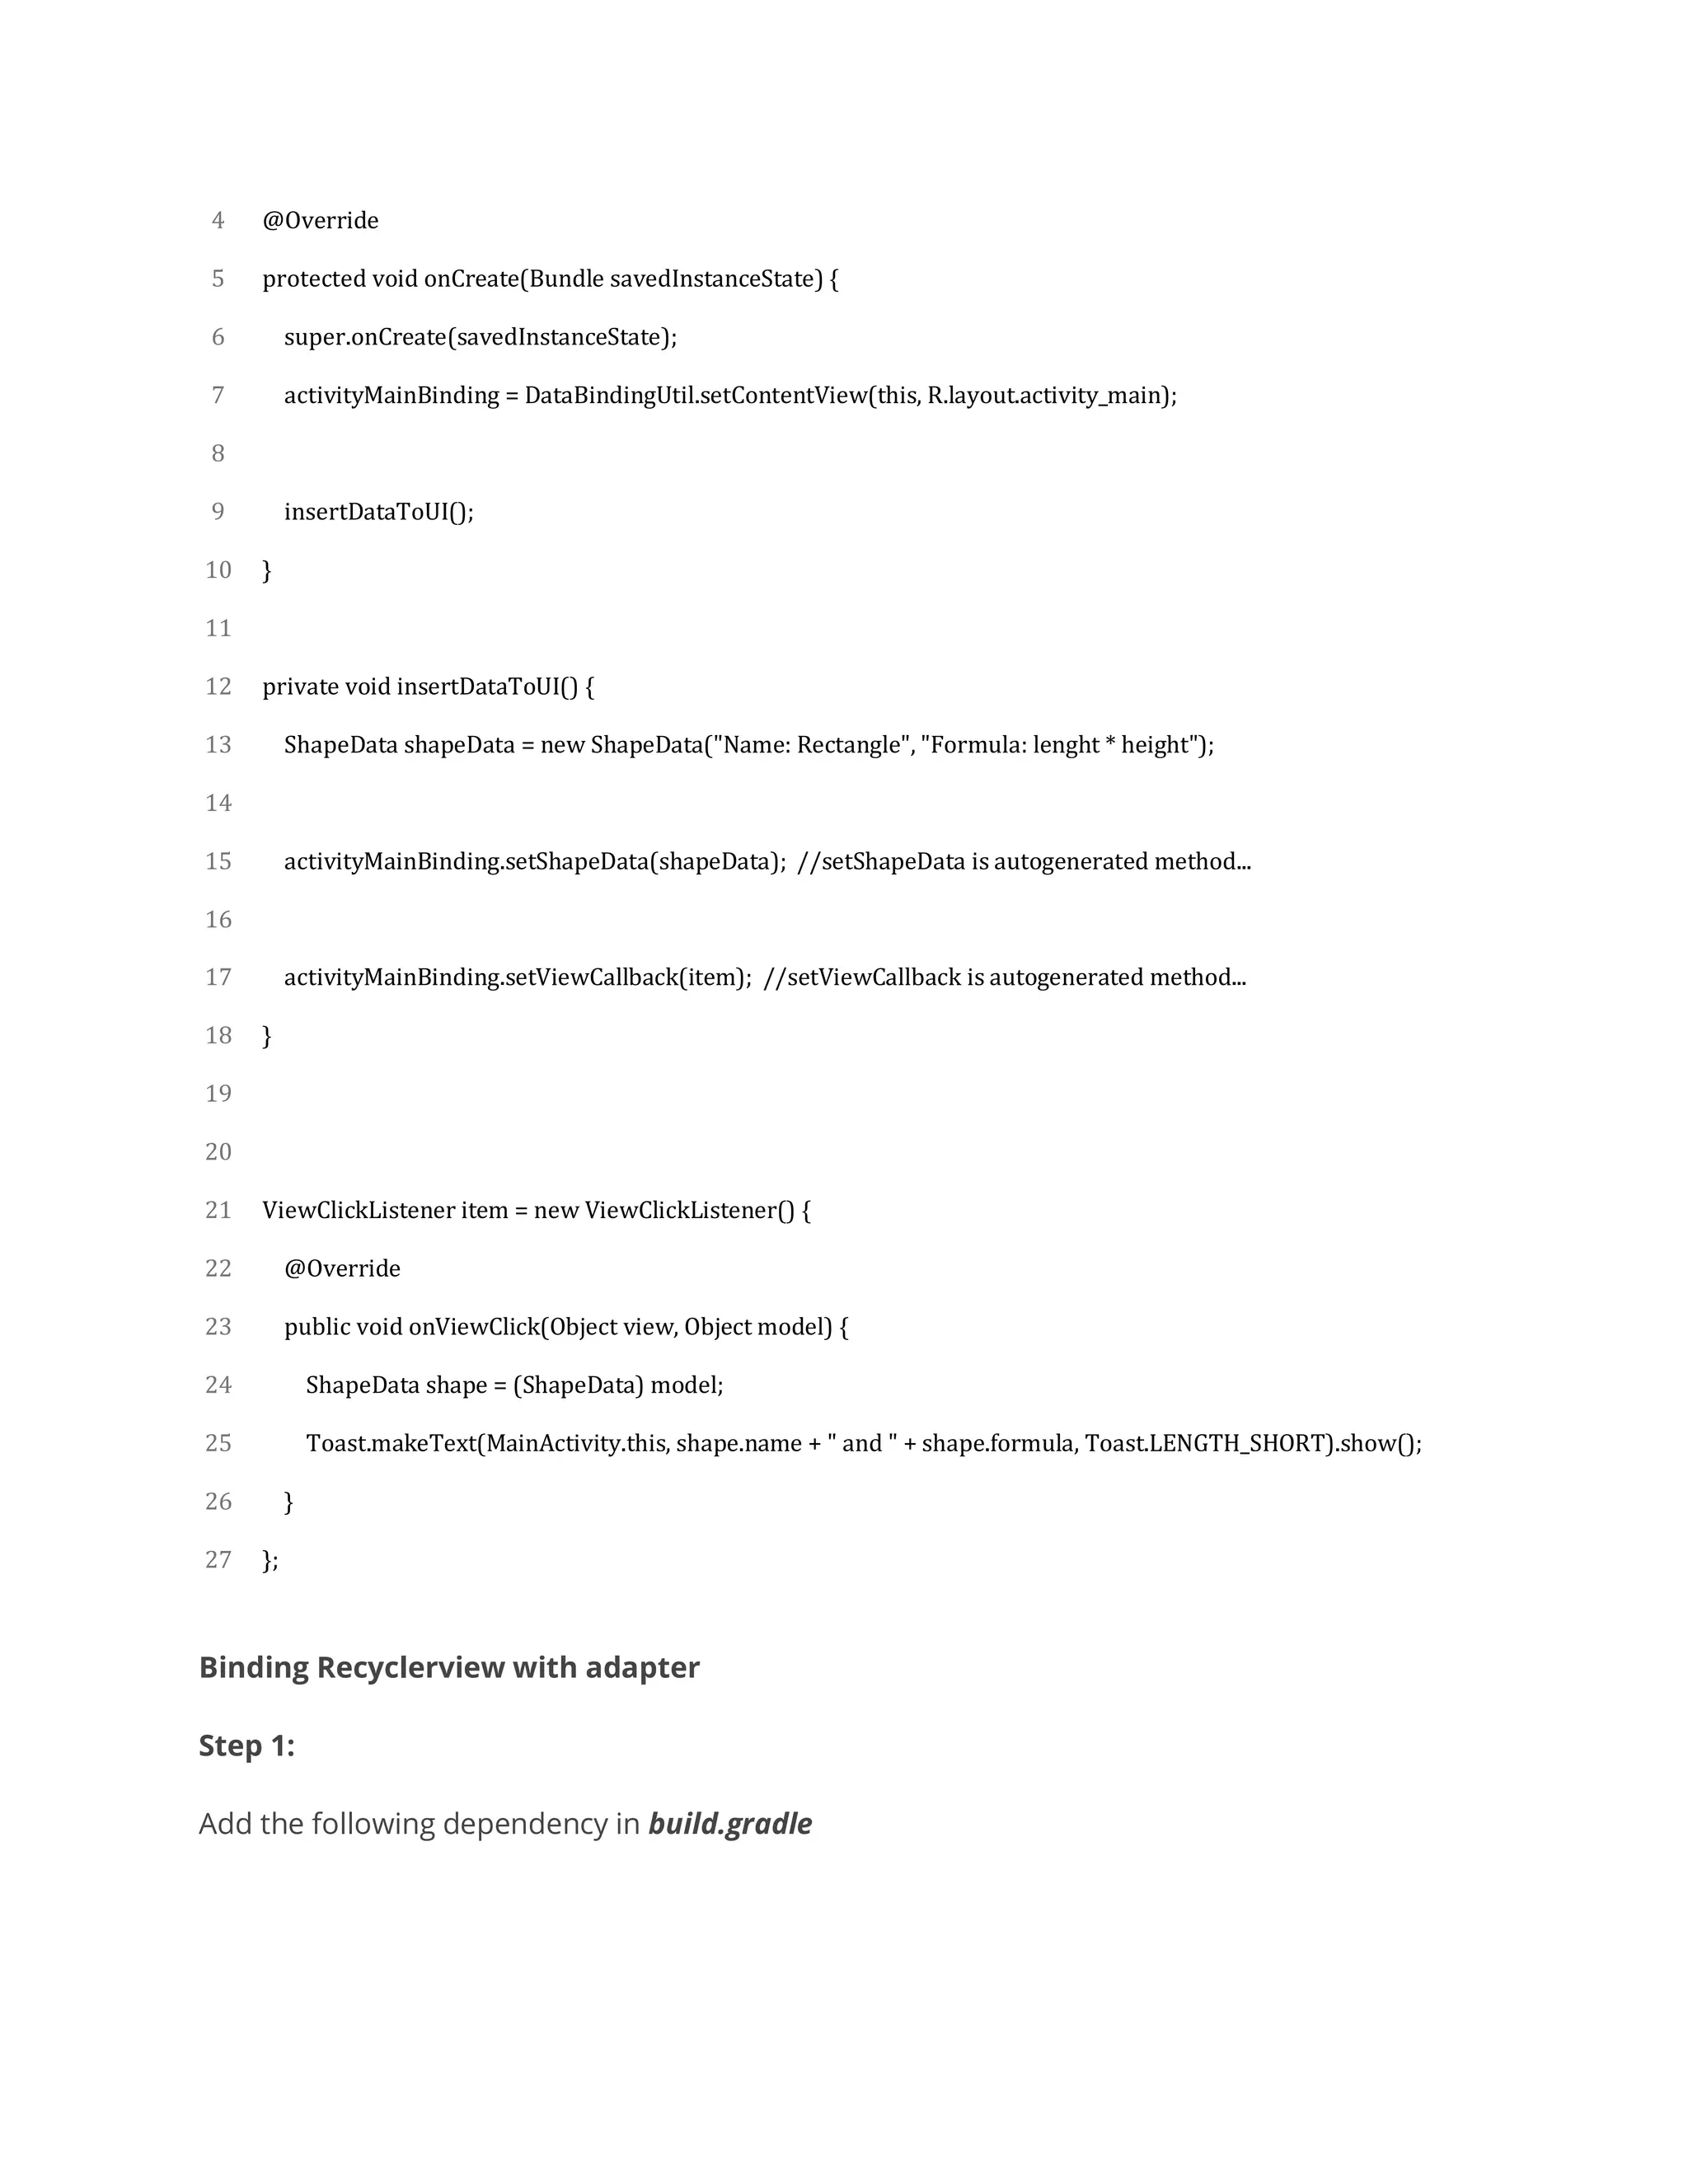
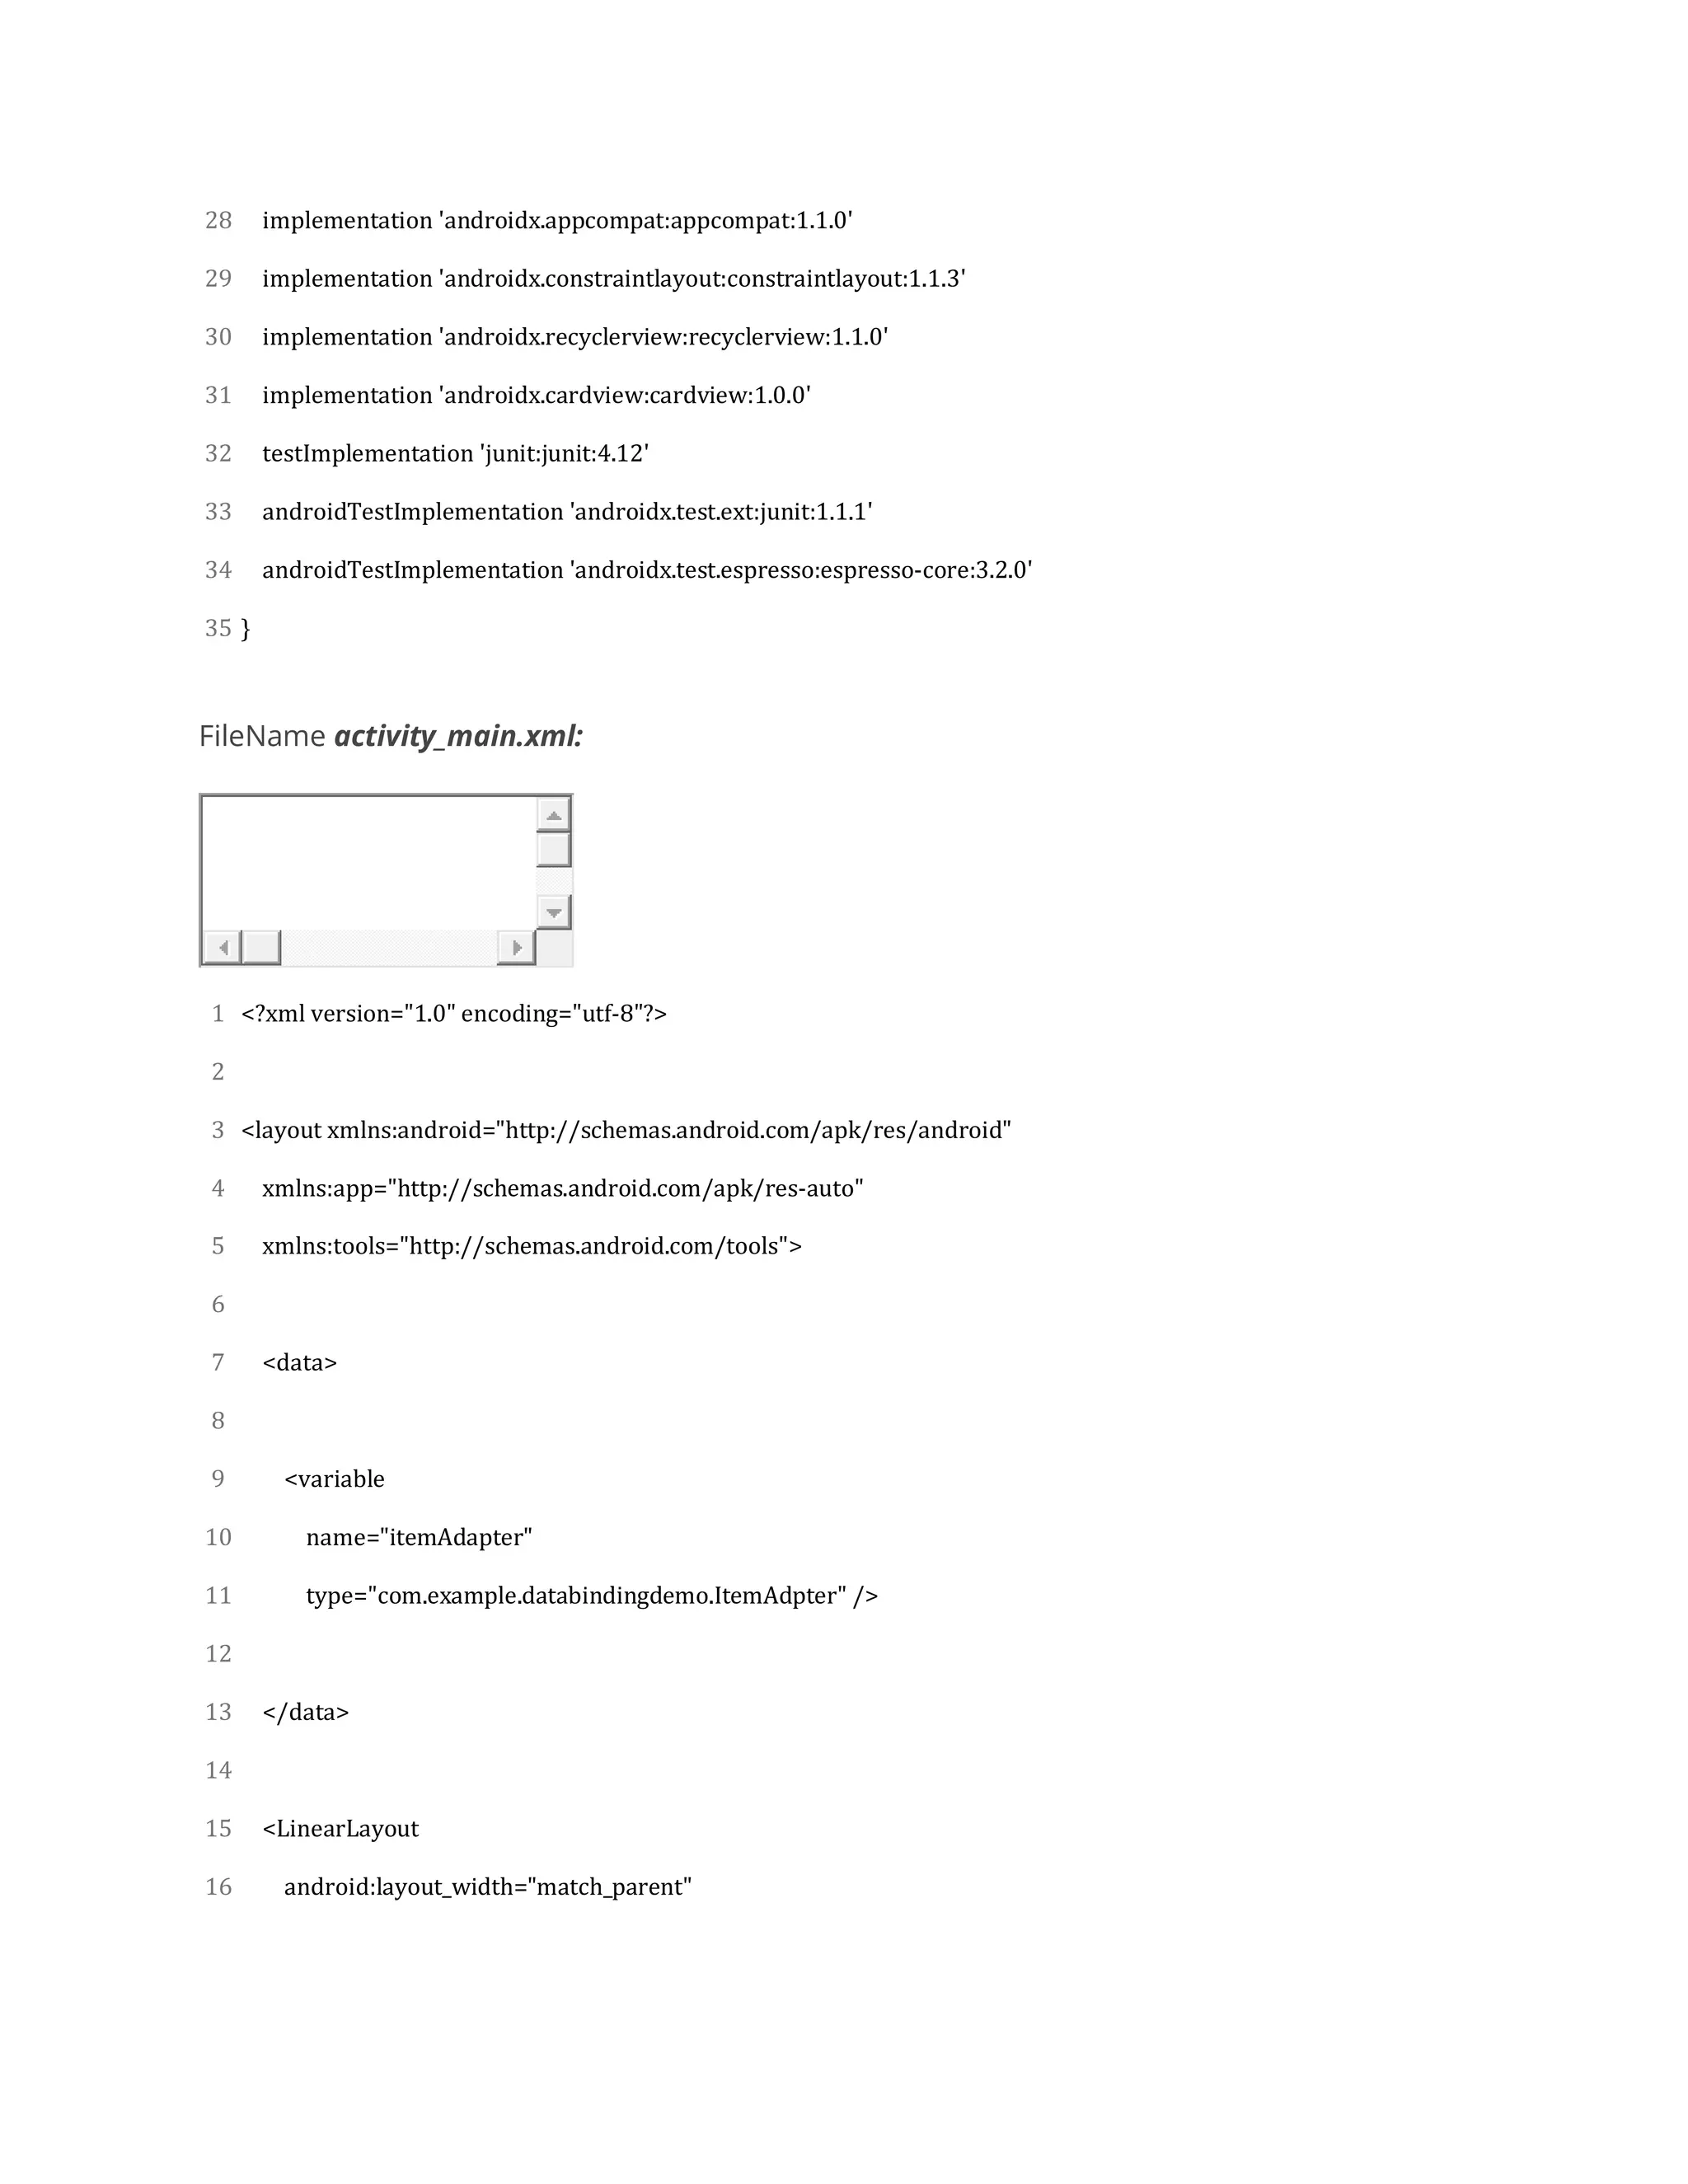
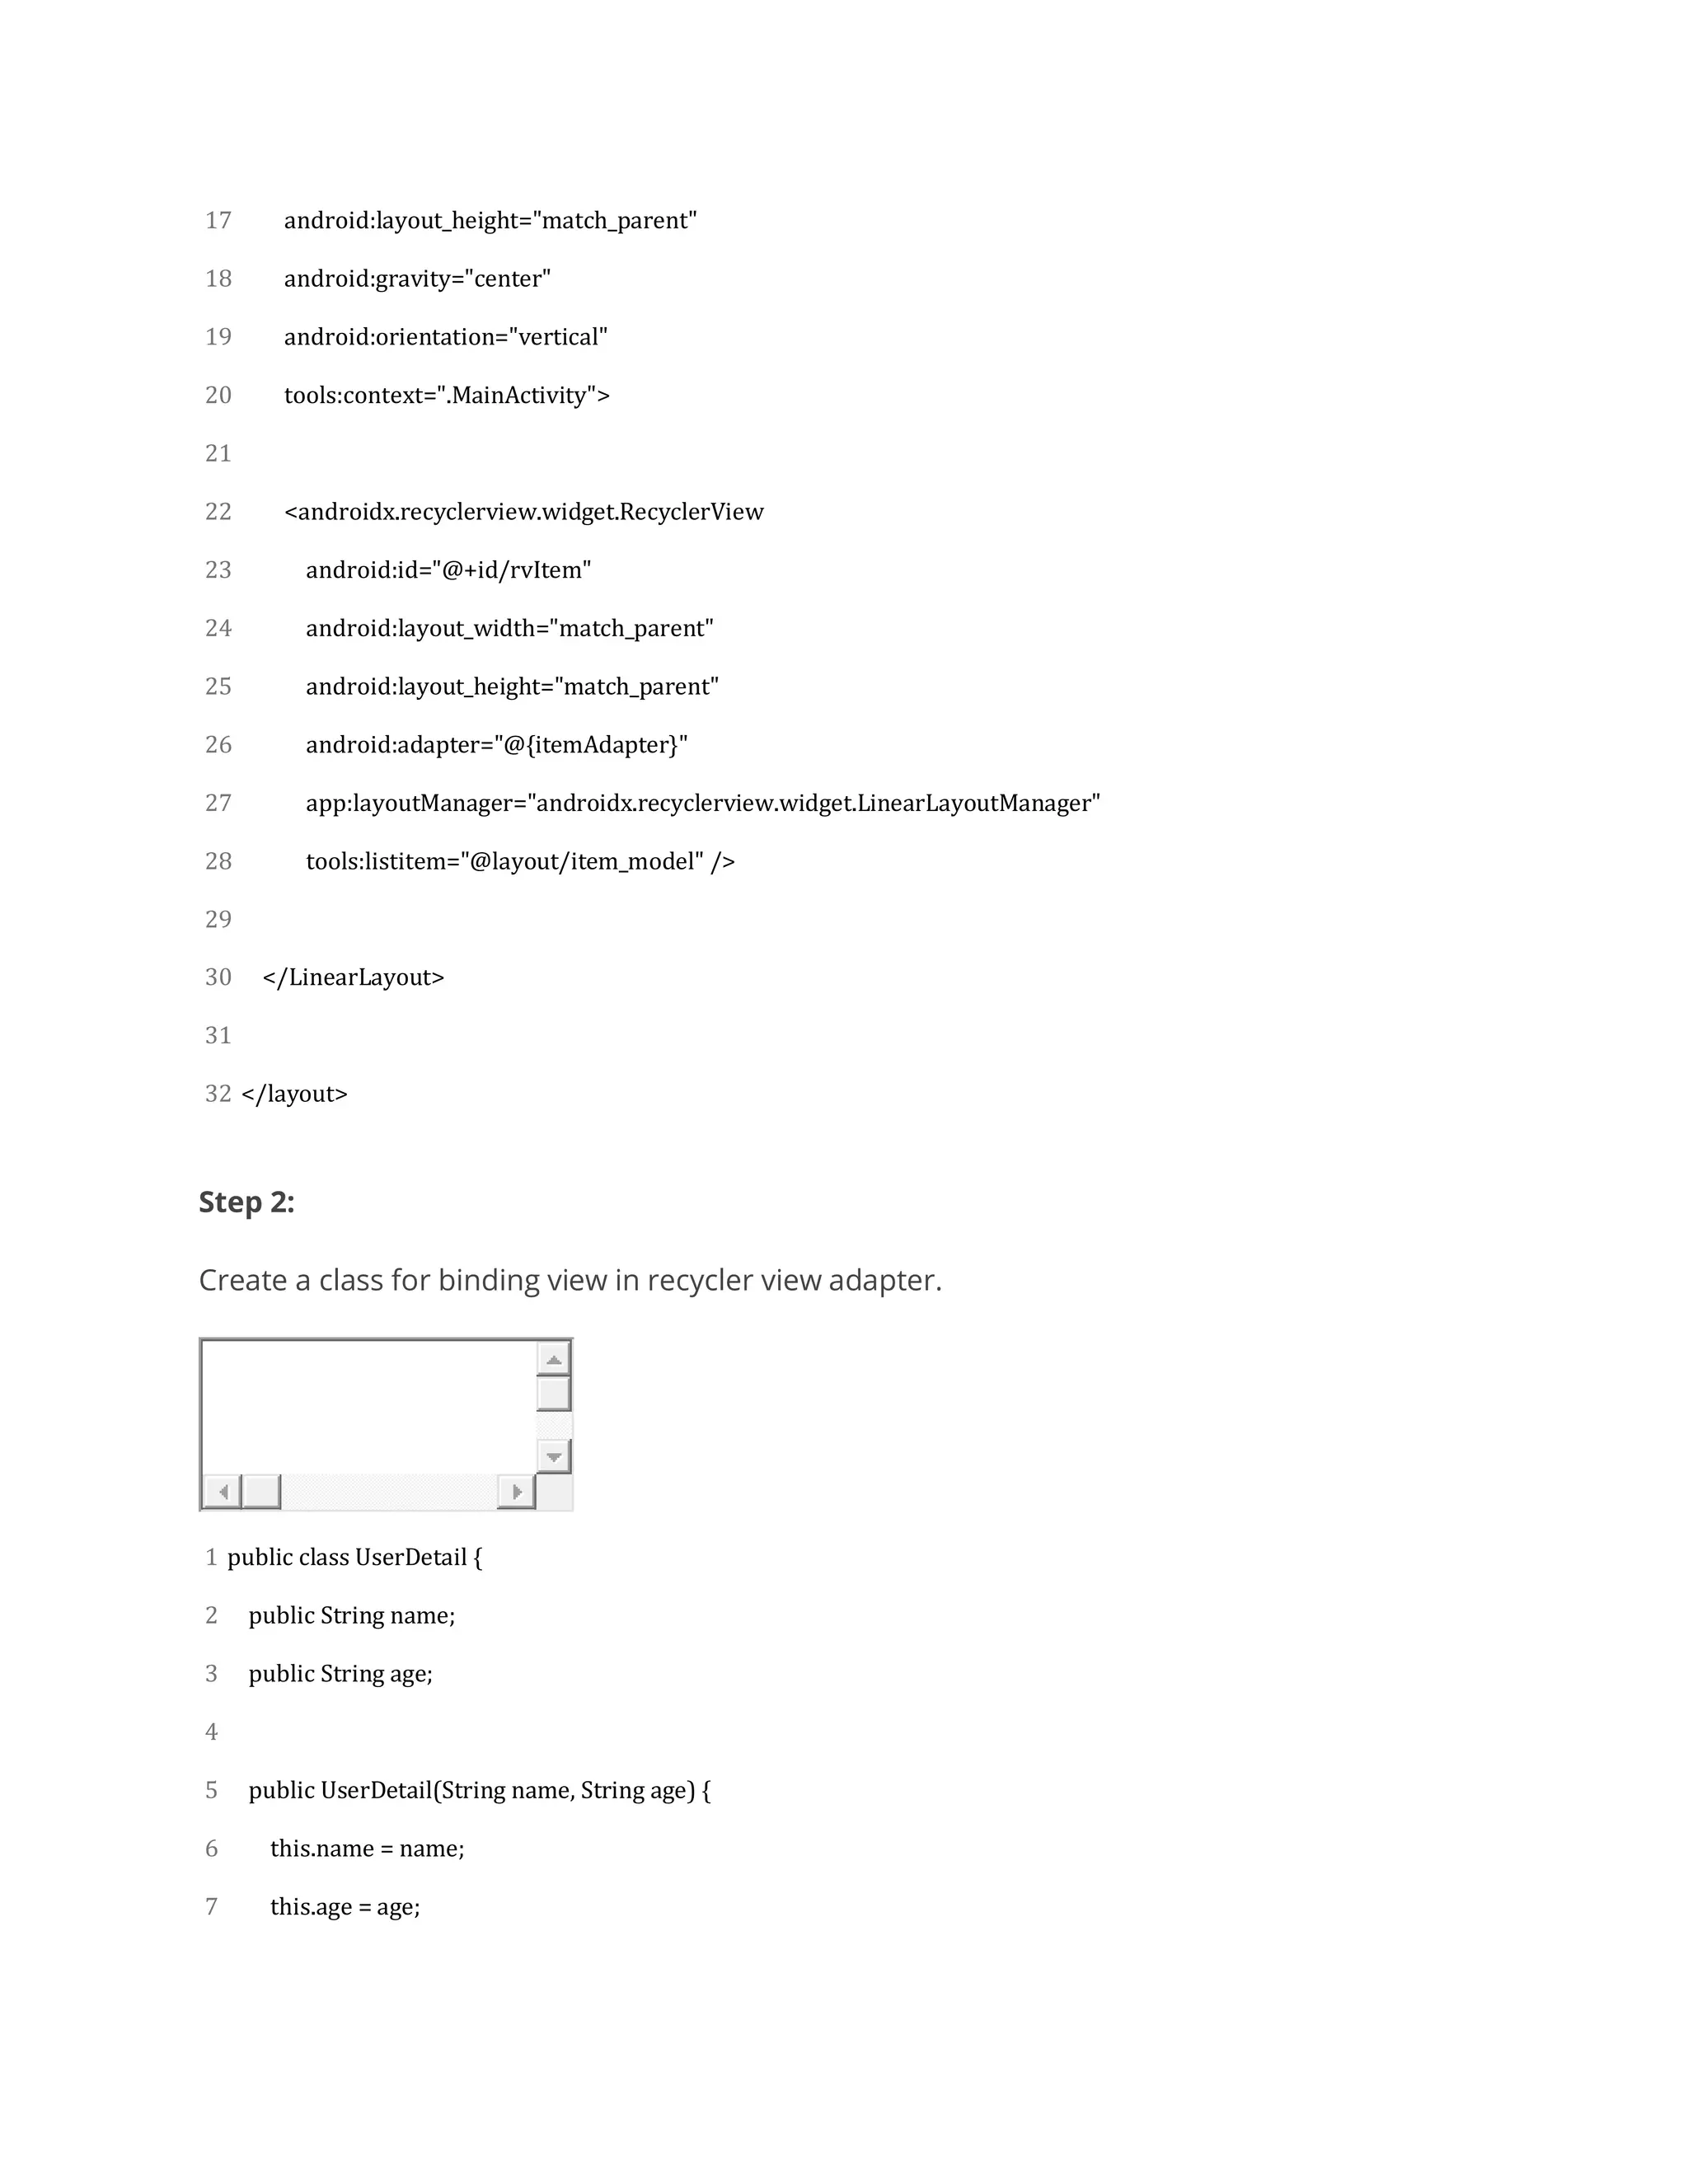
Databinding allows binding UI components in layouts to data sources in an Android app. The databinding library automatically generates classes to bind views to data objects. When data changes, bound views are automatically updated. To use databinding, enable it in build.gradle and add binding variables to layout XML. Generated binding classes provide methods to set data and callbacks. Databinding can also be used with RecyclerView by generating item bindings and setting an adapter.

![[2019] 스몰 스텝: Android 렛츠기릿!](https://cdn.slidesharecdn.com/ss_thumbnails/nhnforward201935-200123072807-thumbnail.jpg?width=600ounds&width=560&fit=bounds)
![[2019] 벅스 5.0 (feat. Kotlin, Jetpack)](https://cdn.slidesharecdn.com/ss_thumbnails/nhnforward201928-200122095924-thumbnail.jpg?width=600ounds&width=560&fit=bounds)


