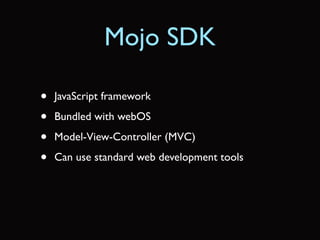
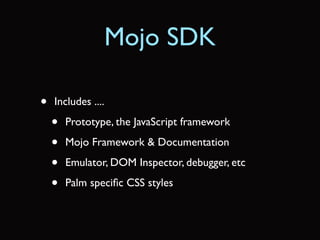
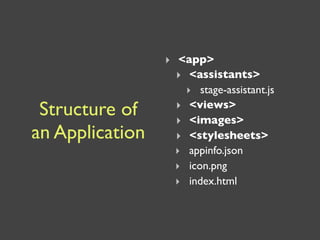
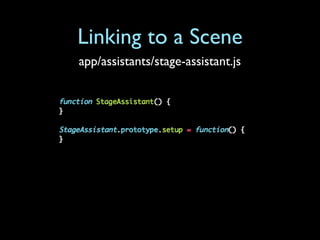
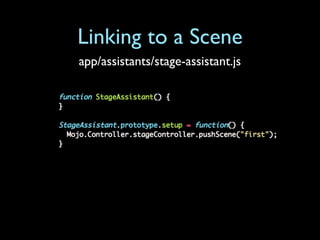
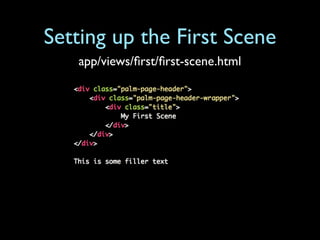
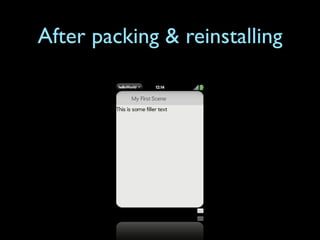
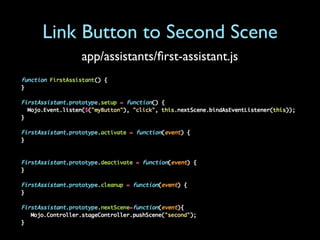
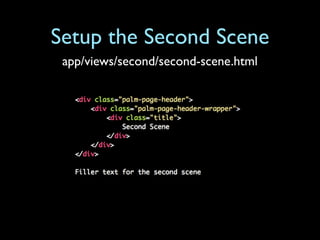
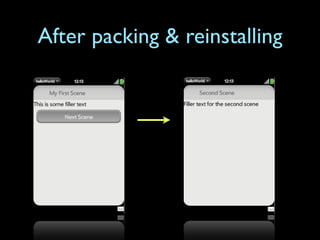
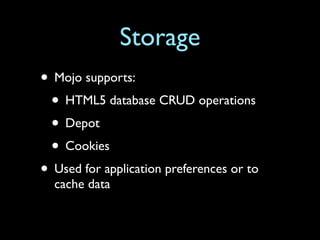
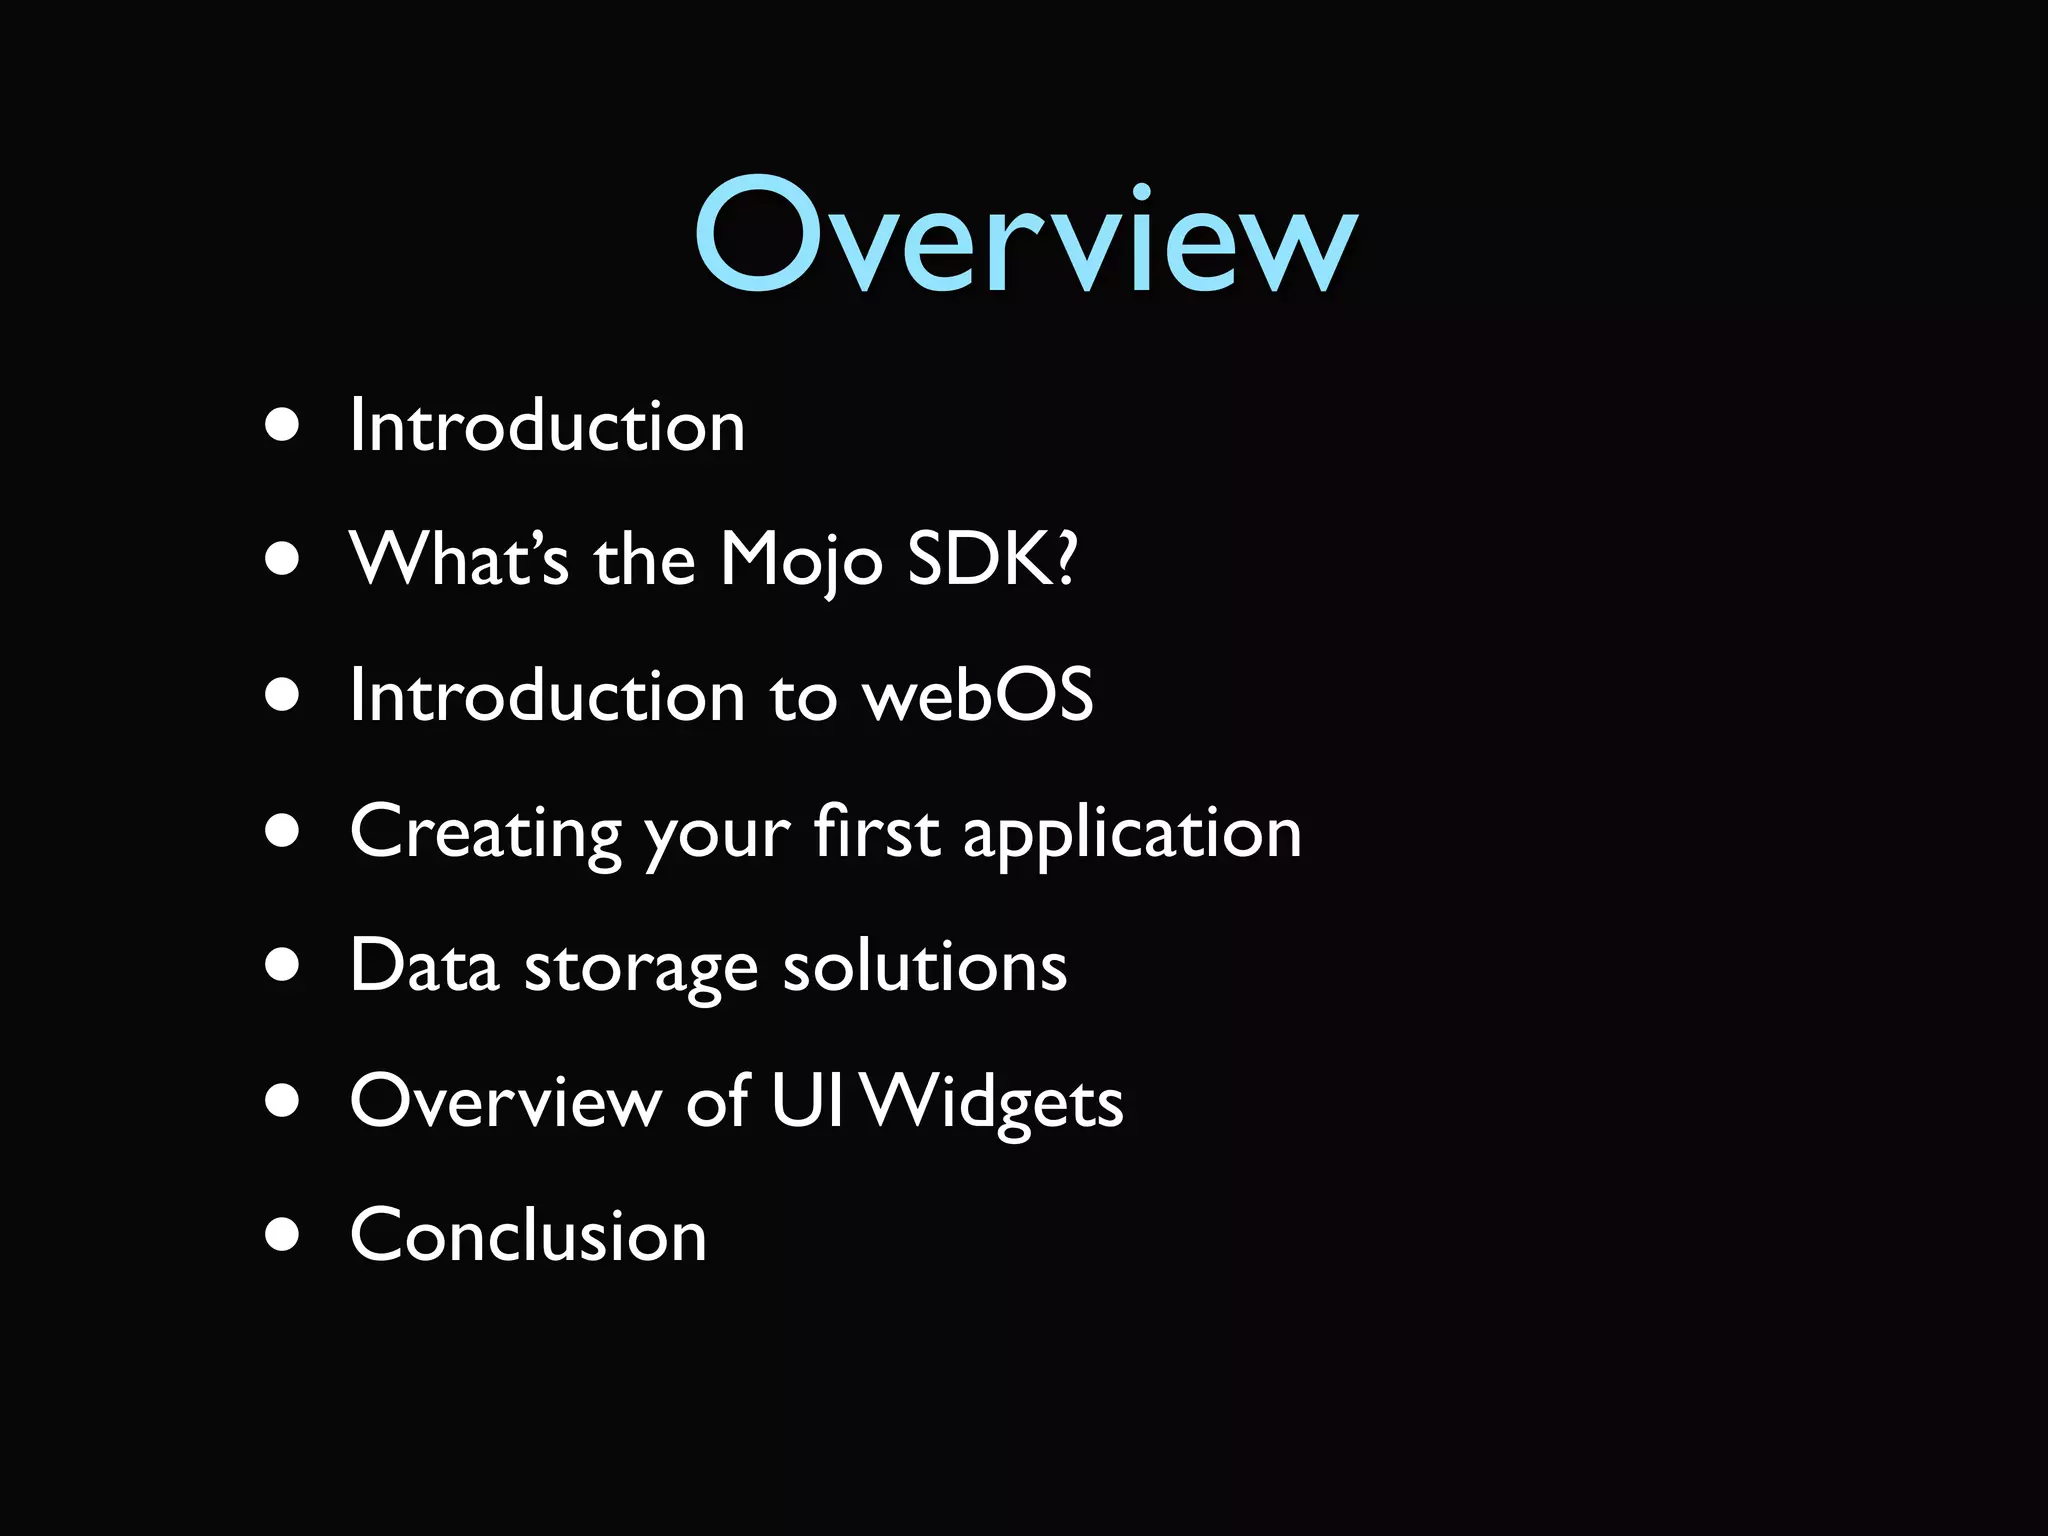
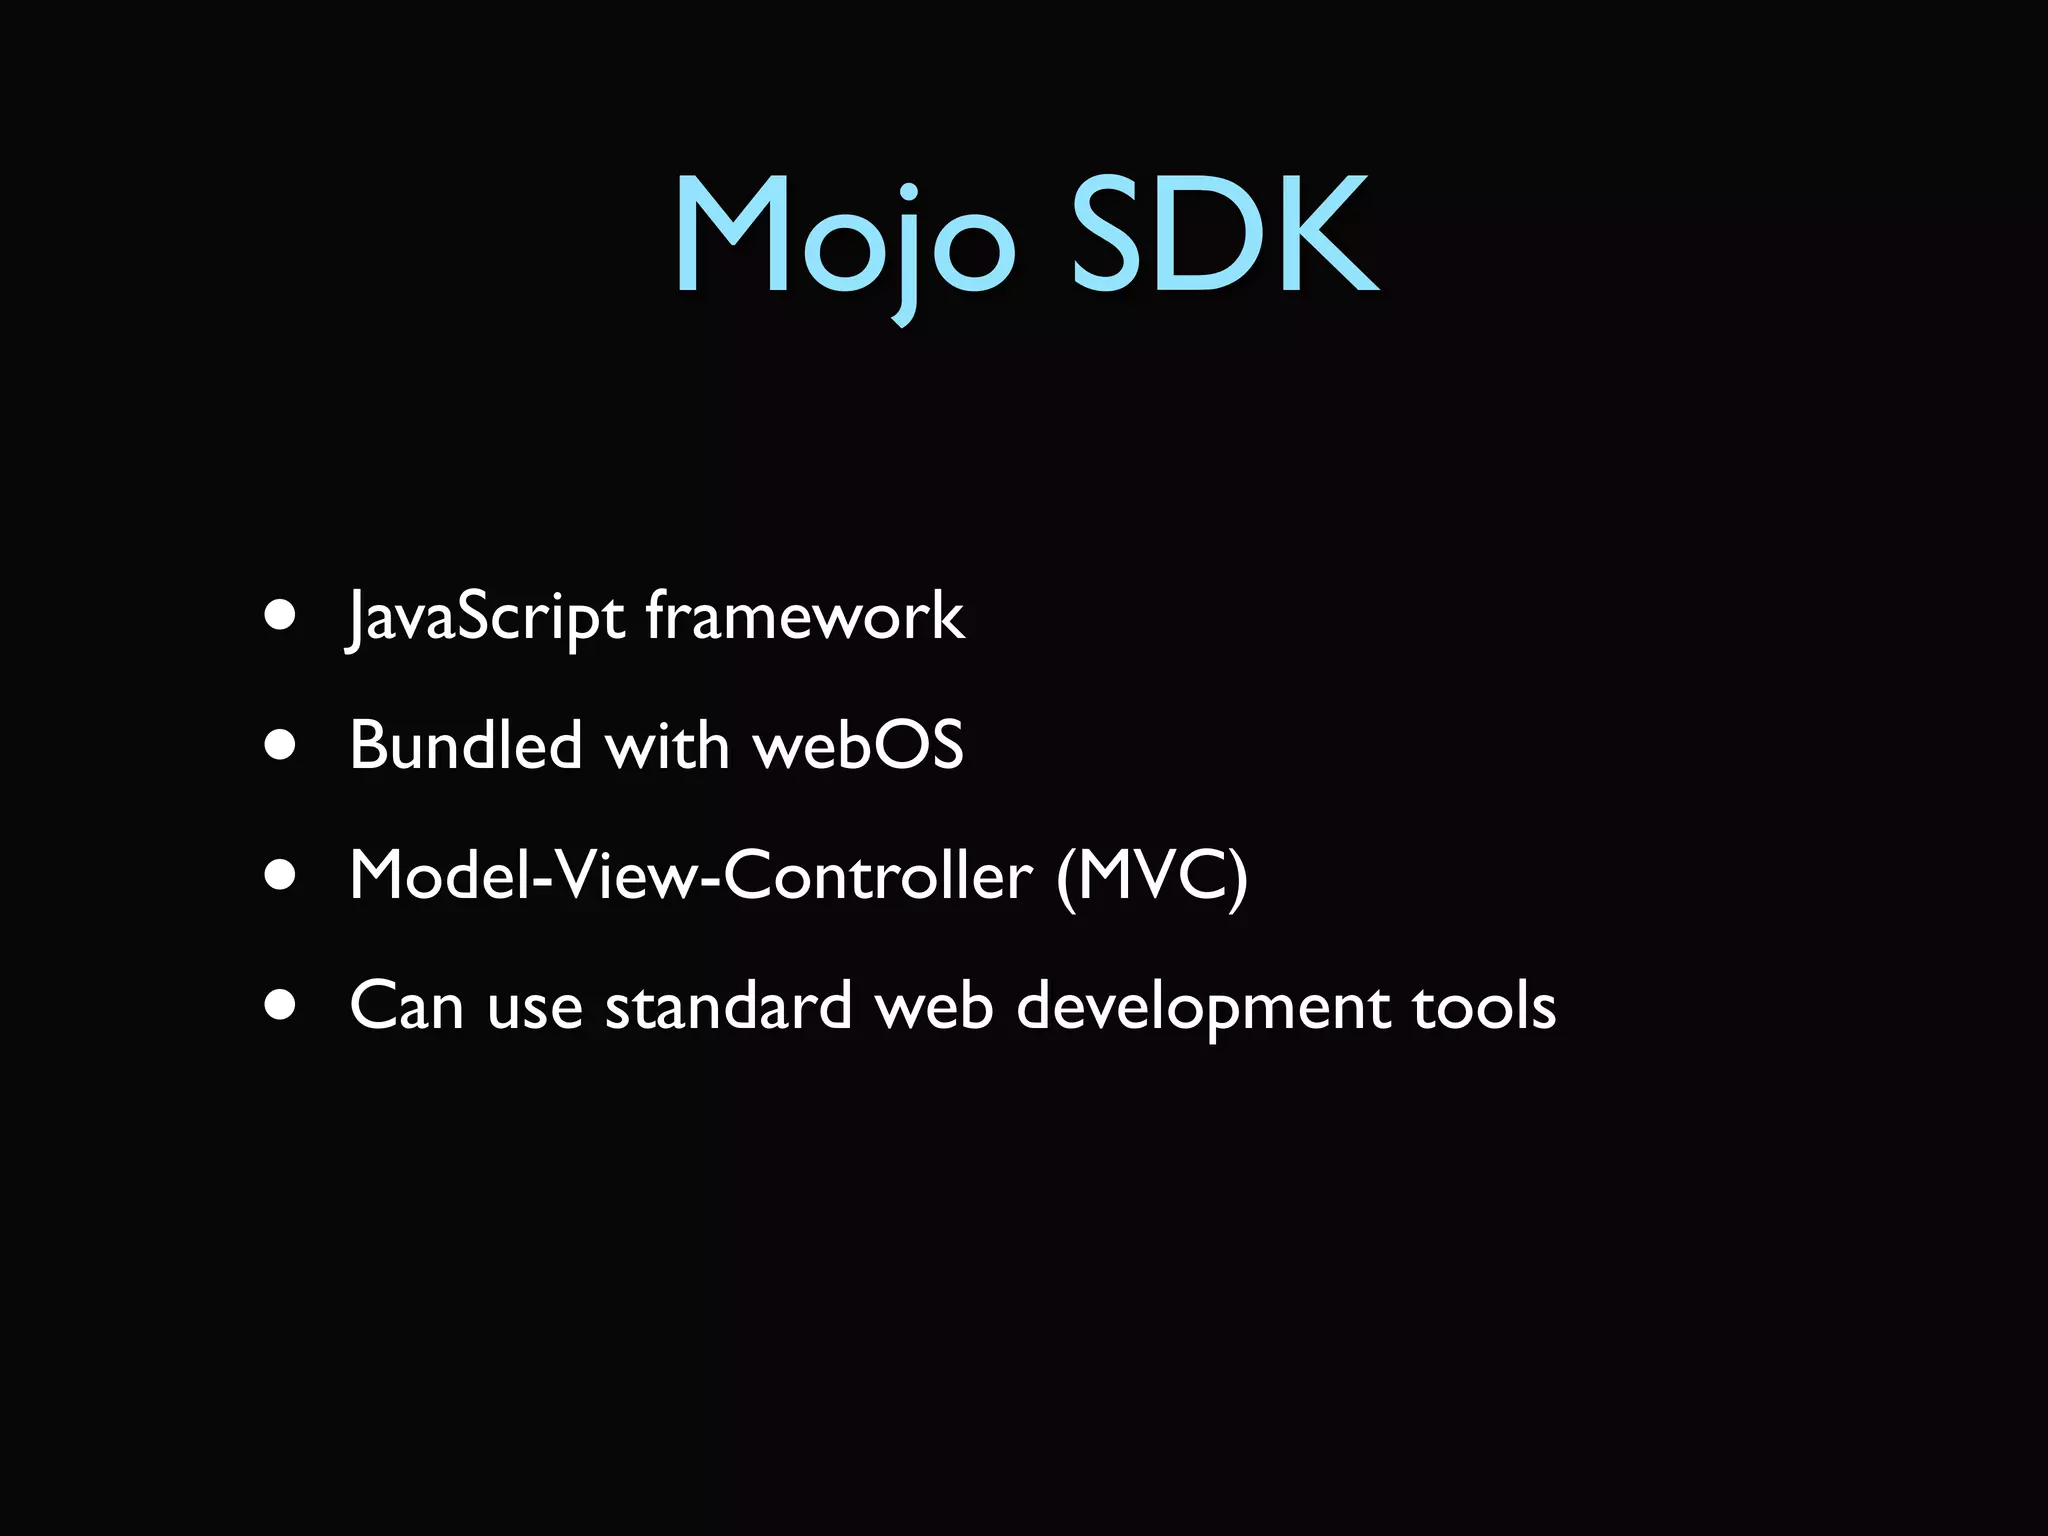
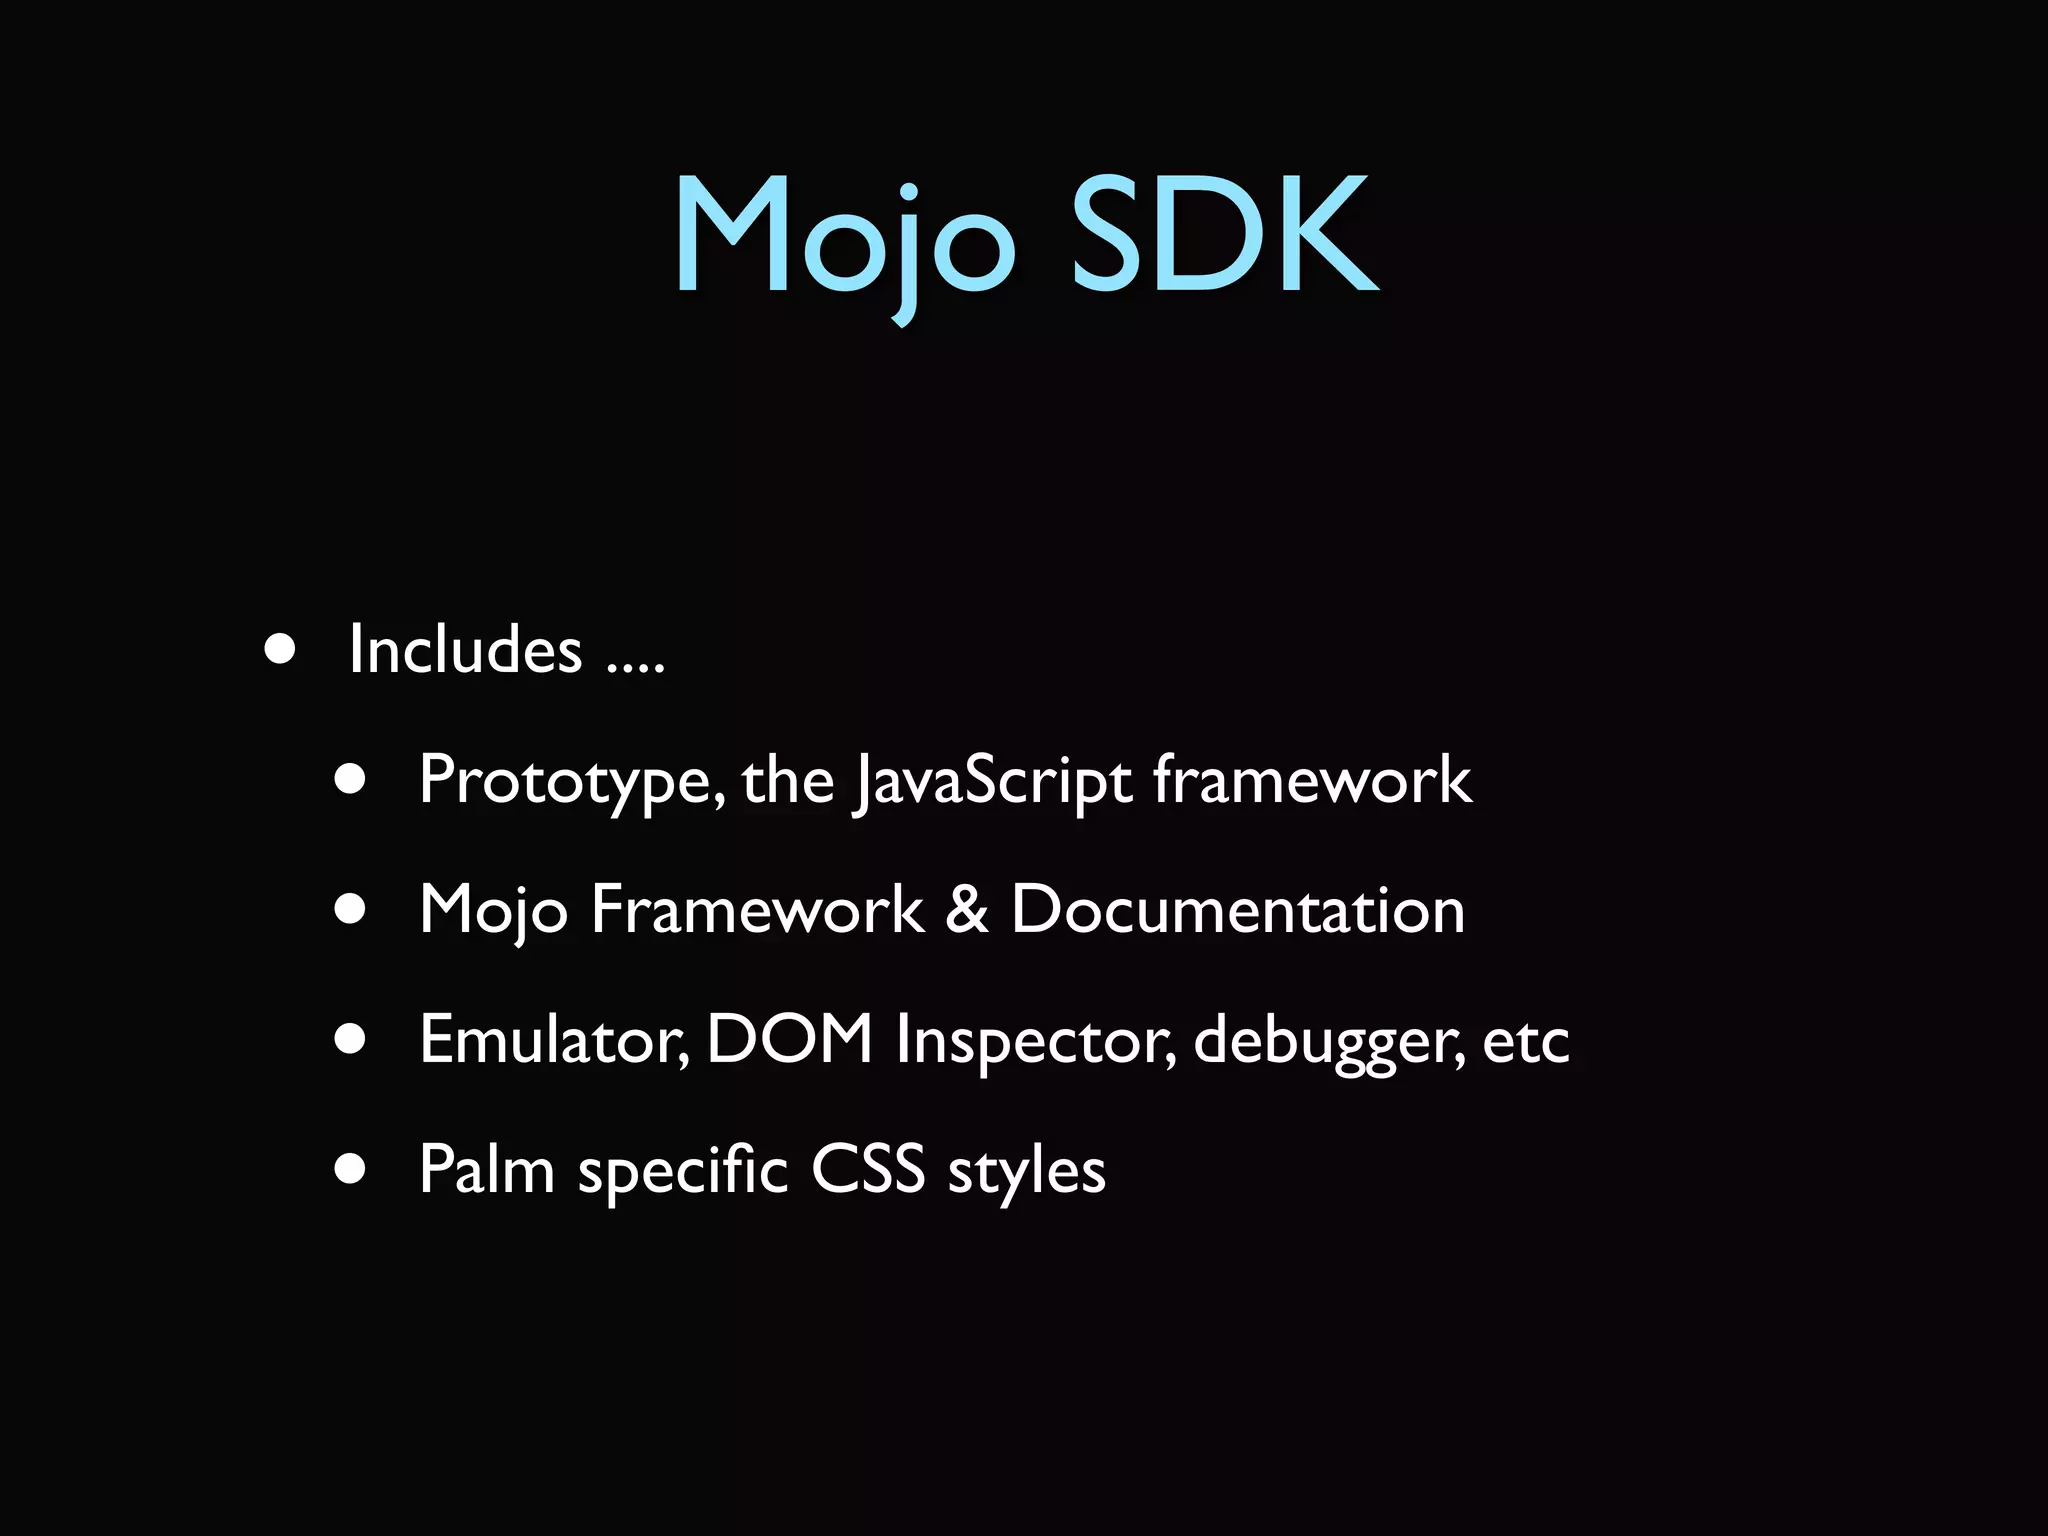
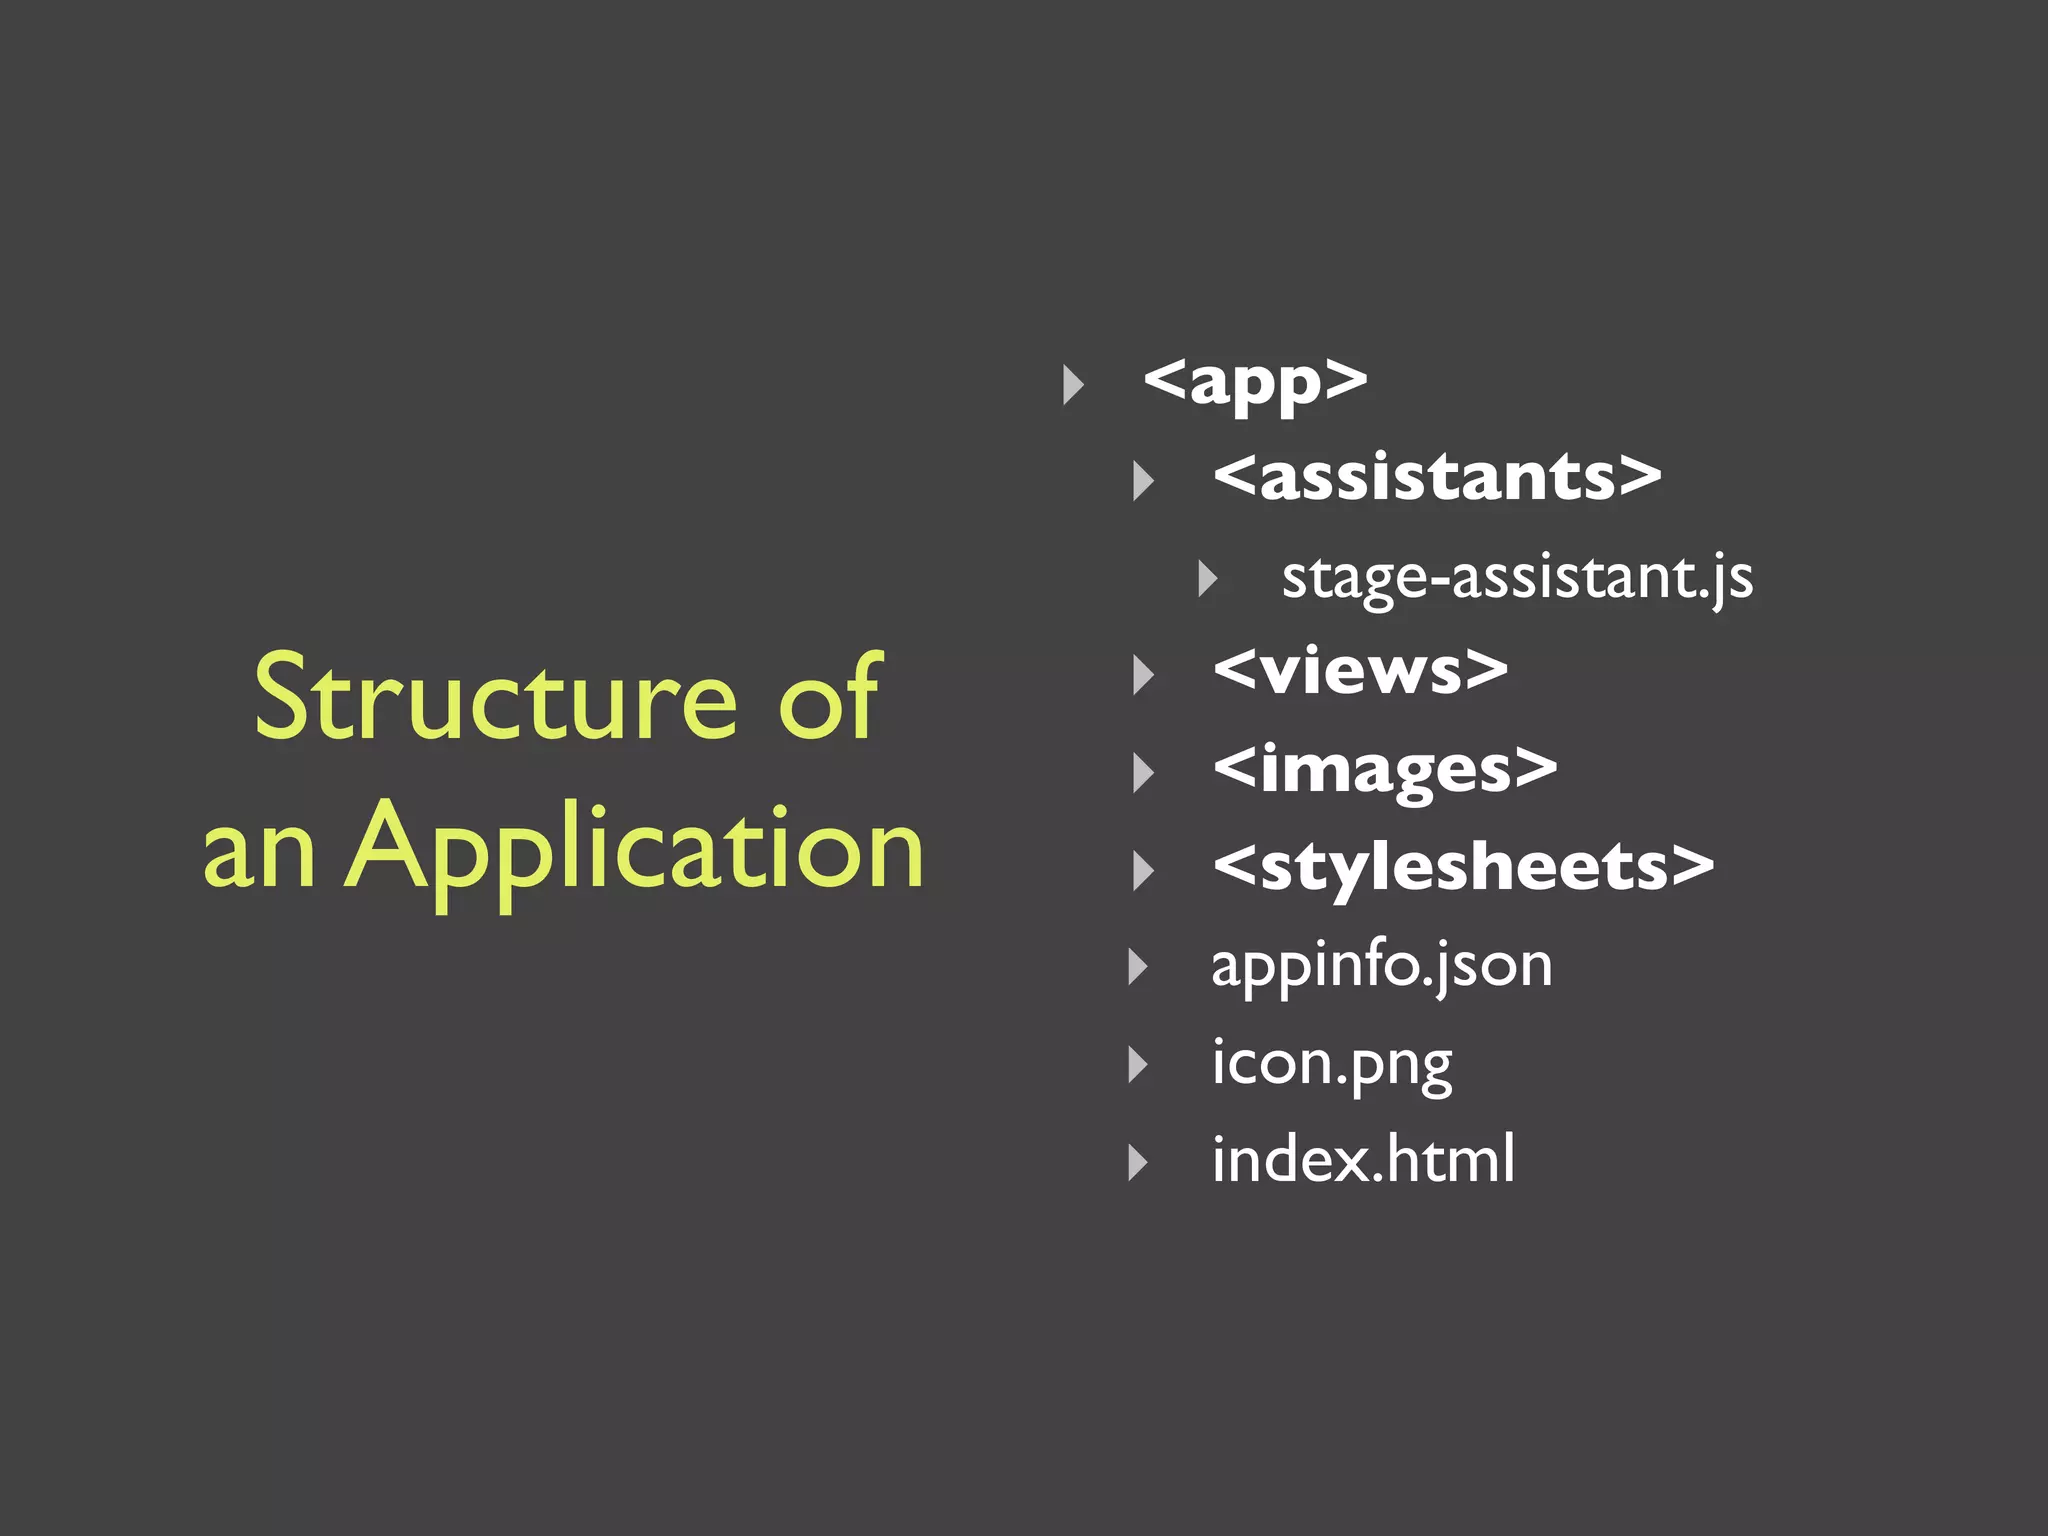
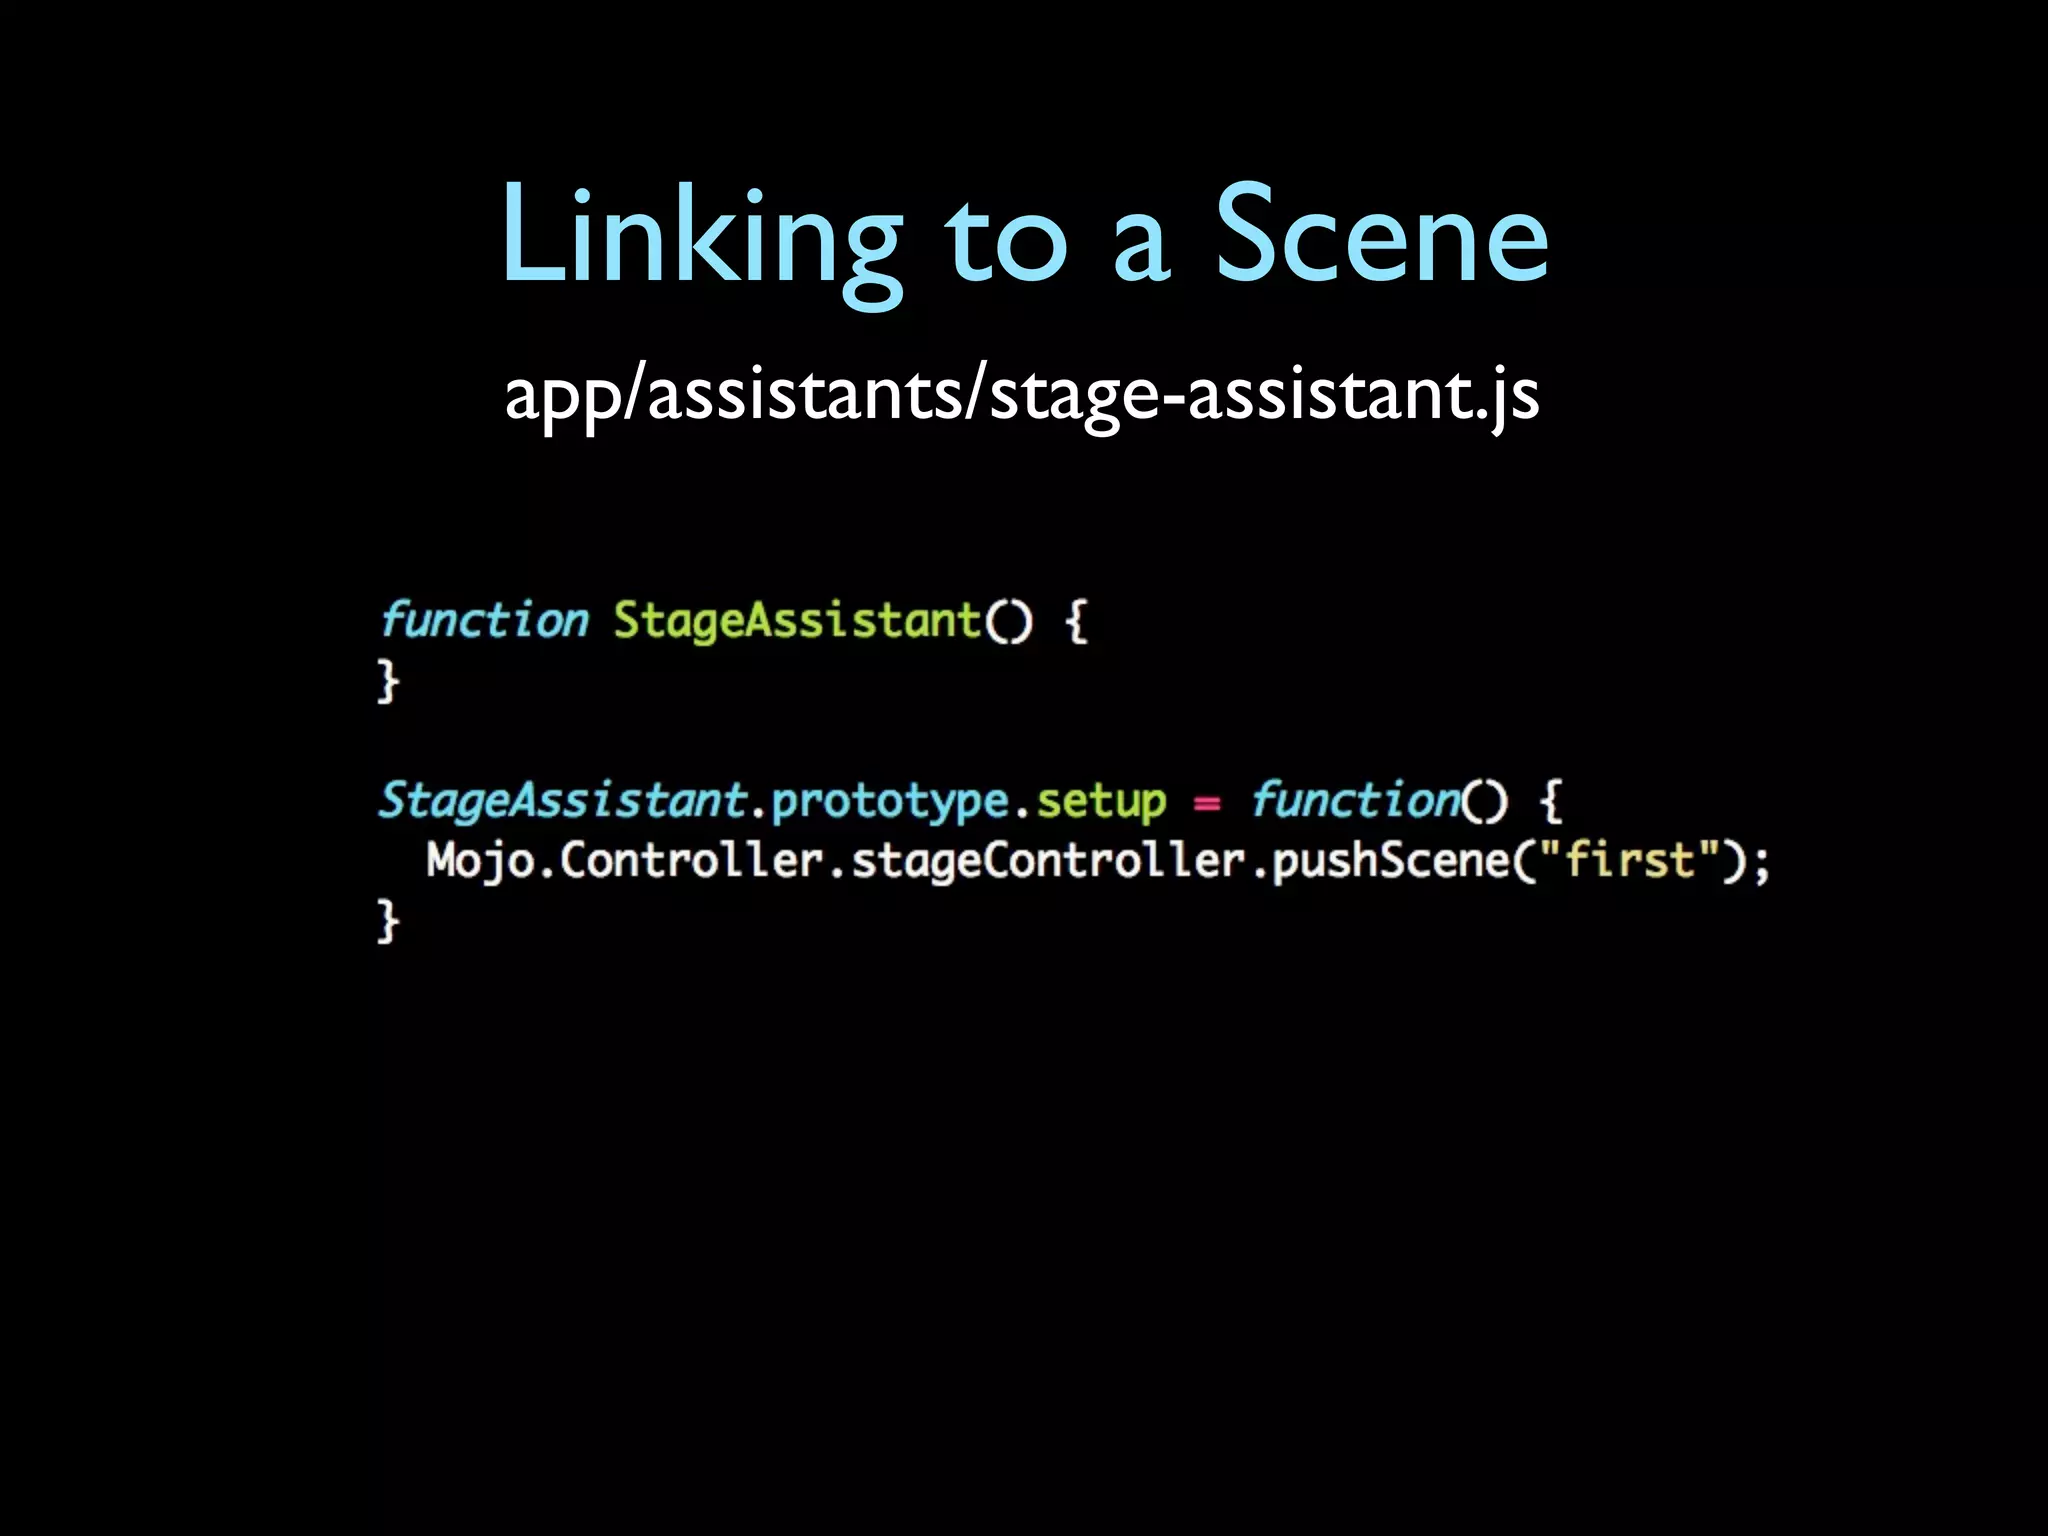
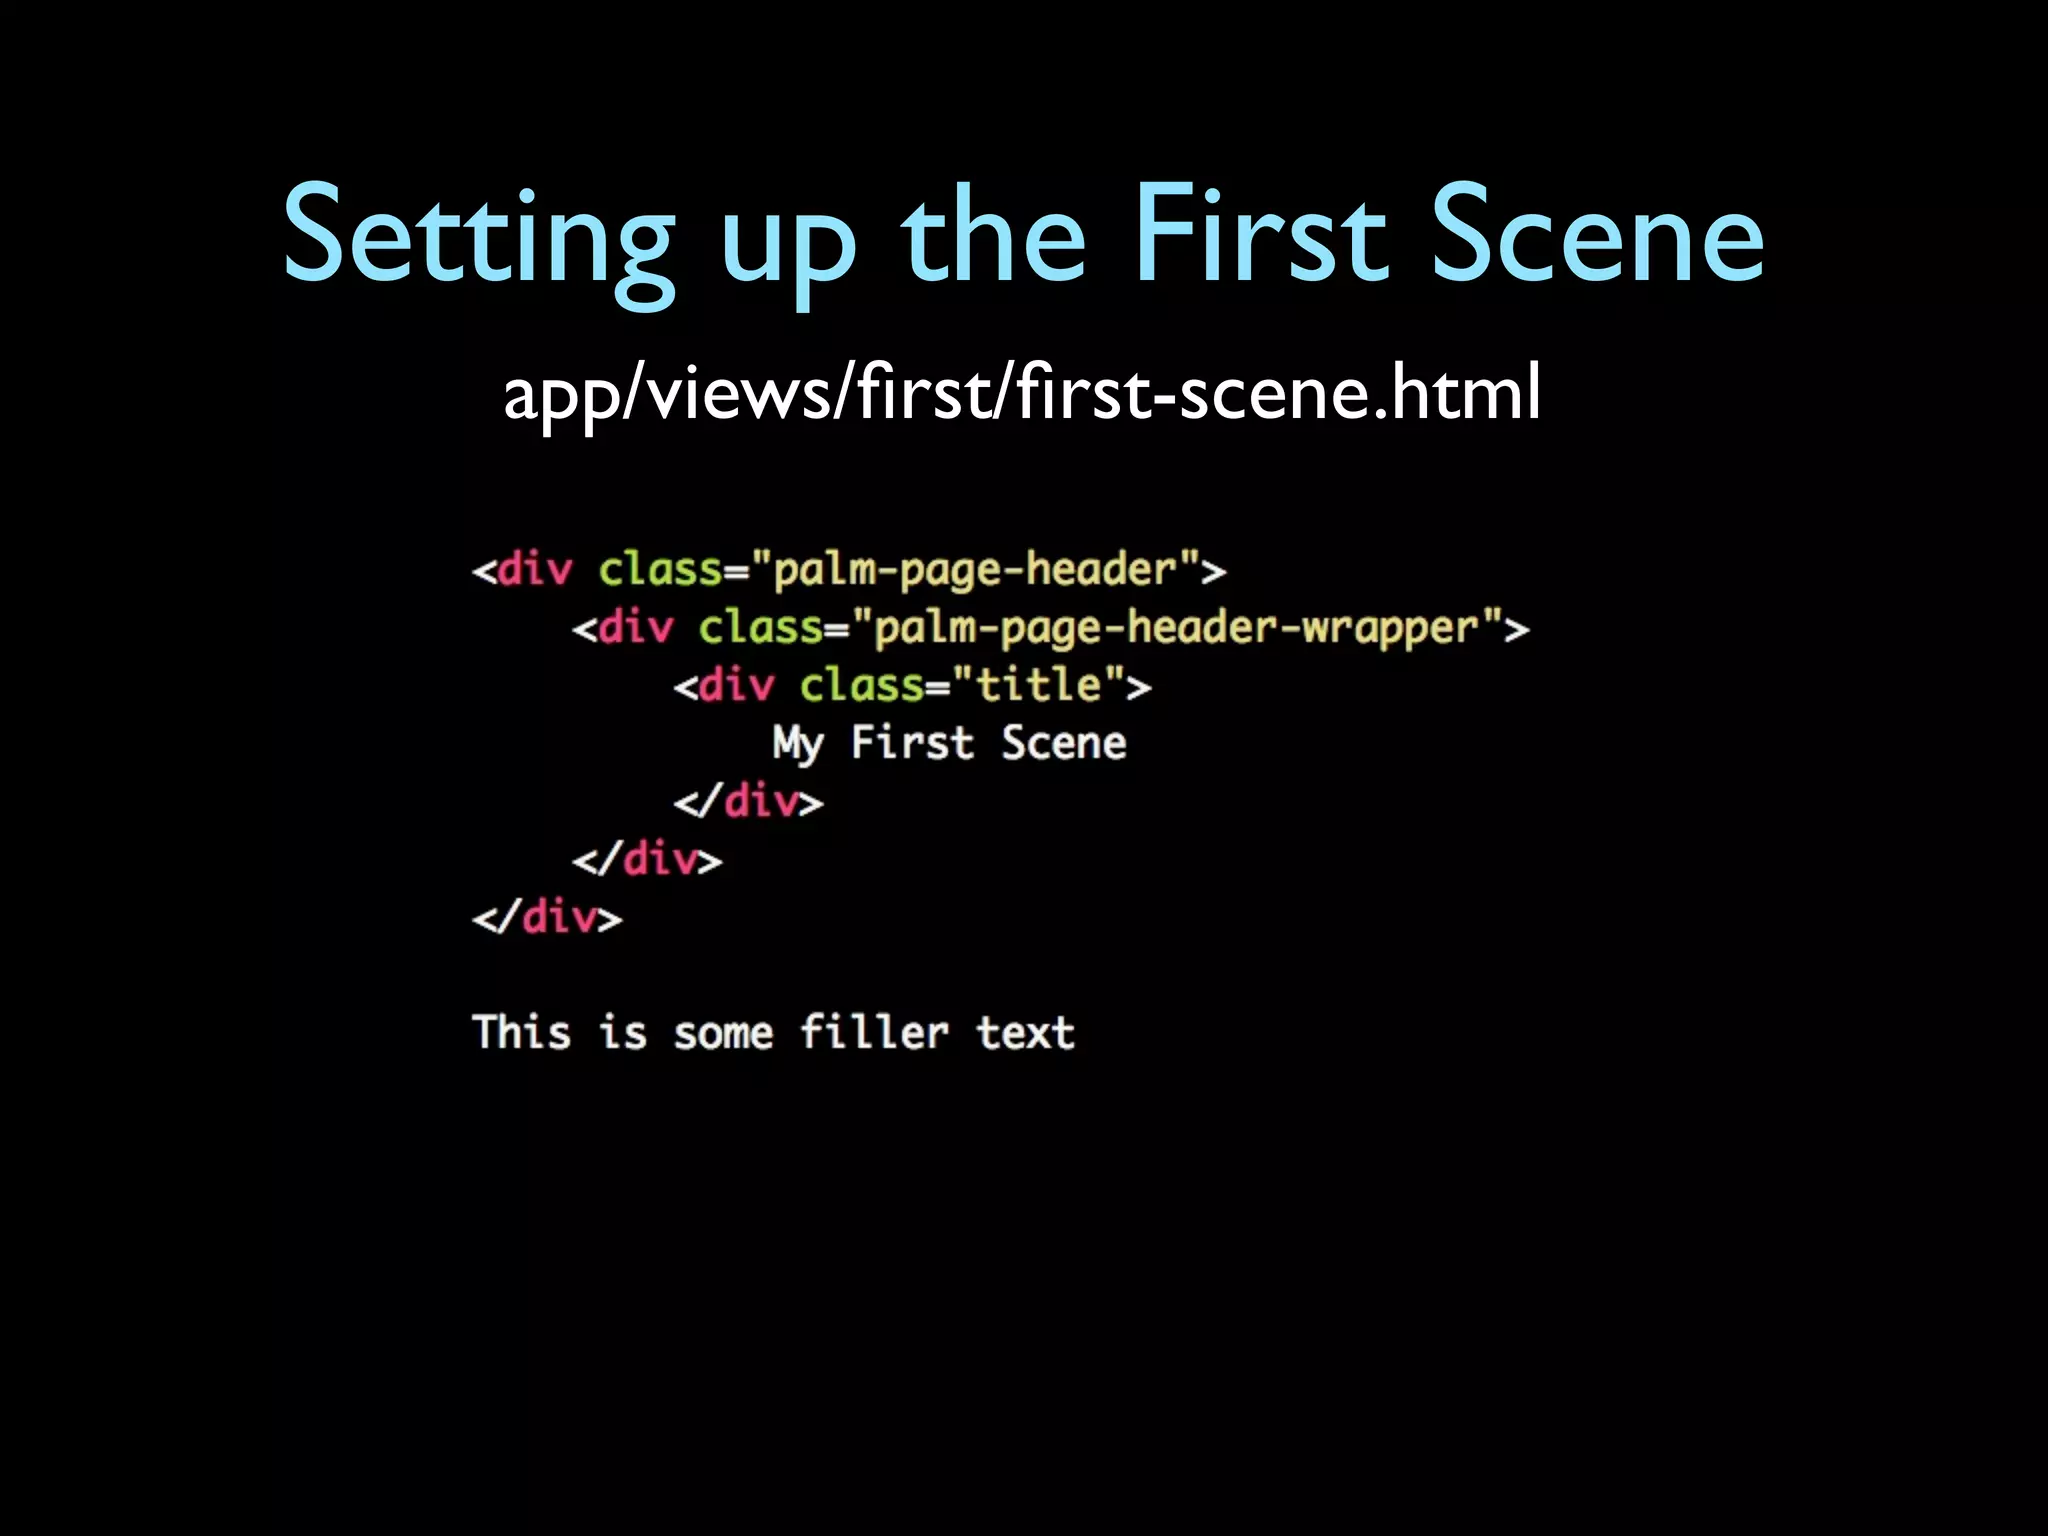
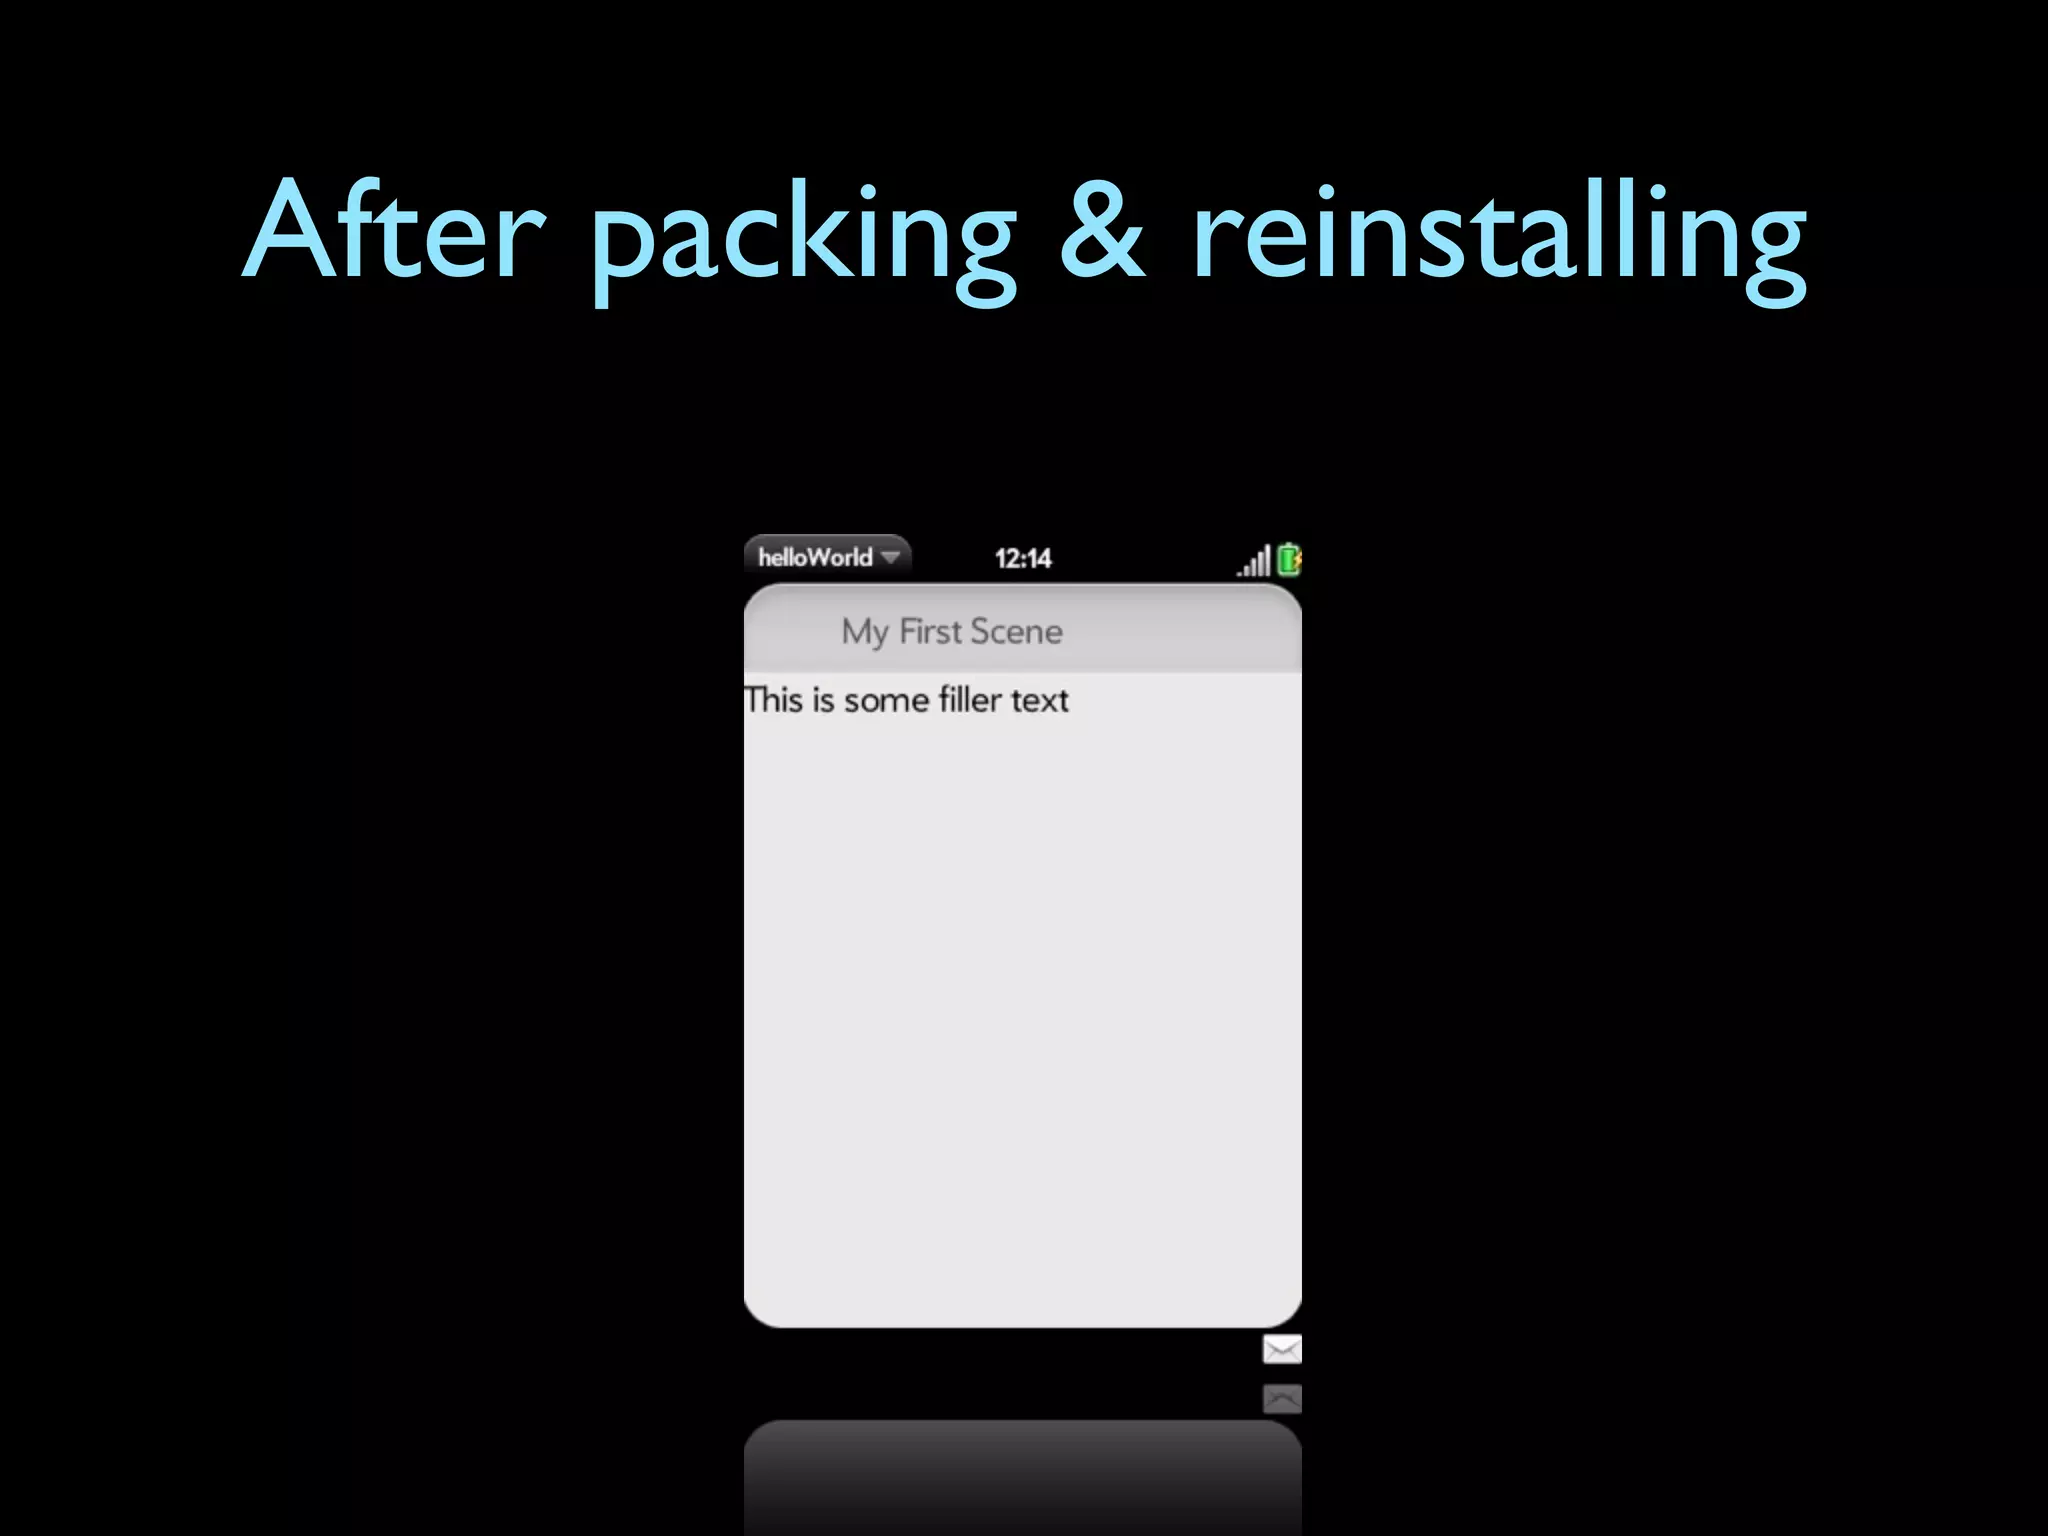
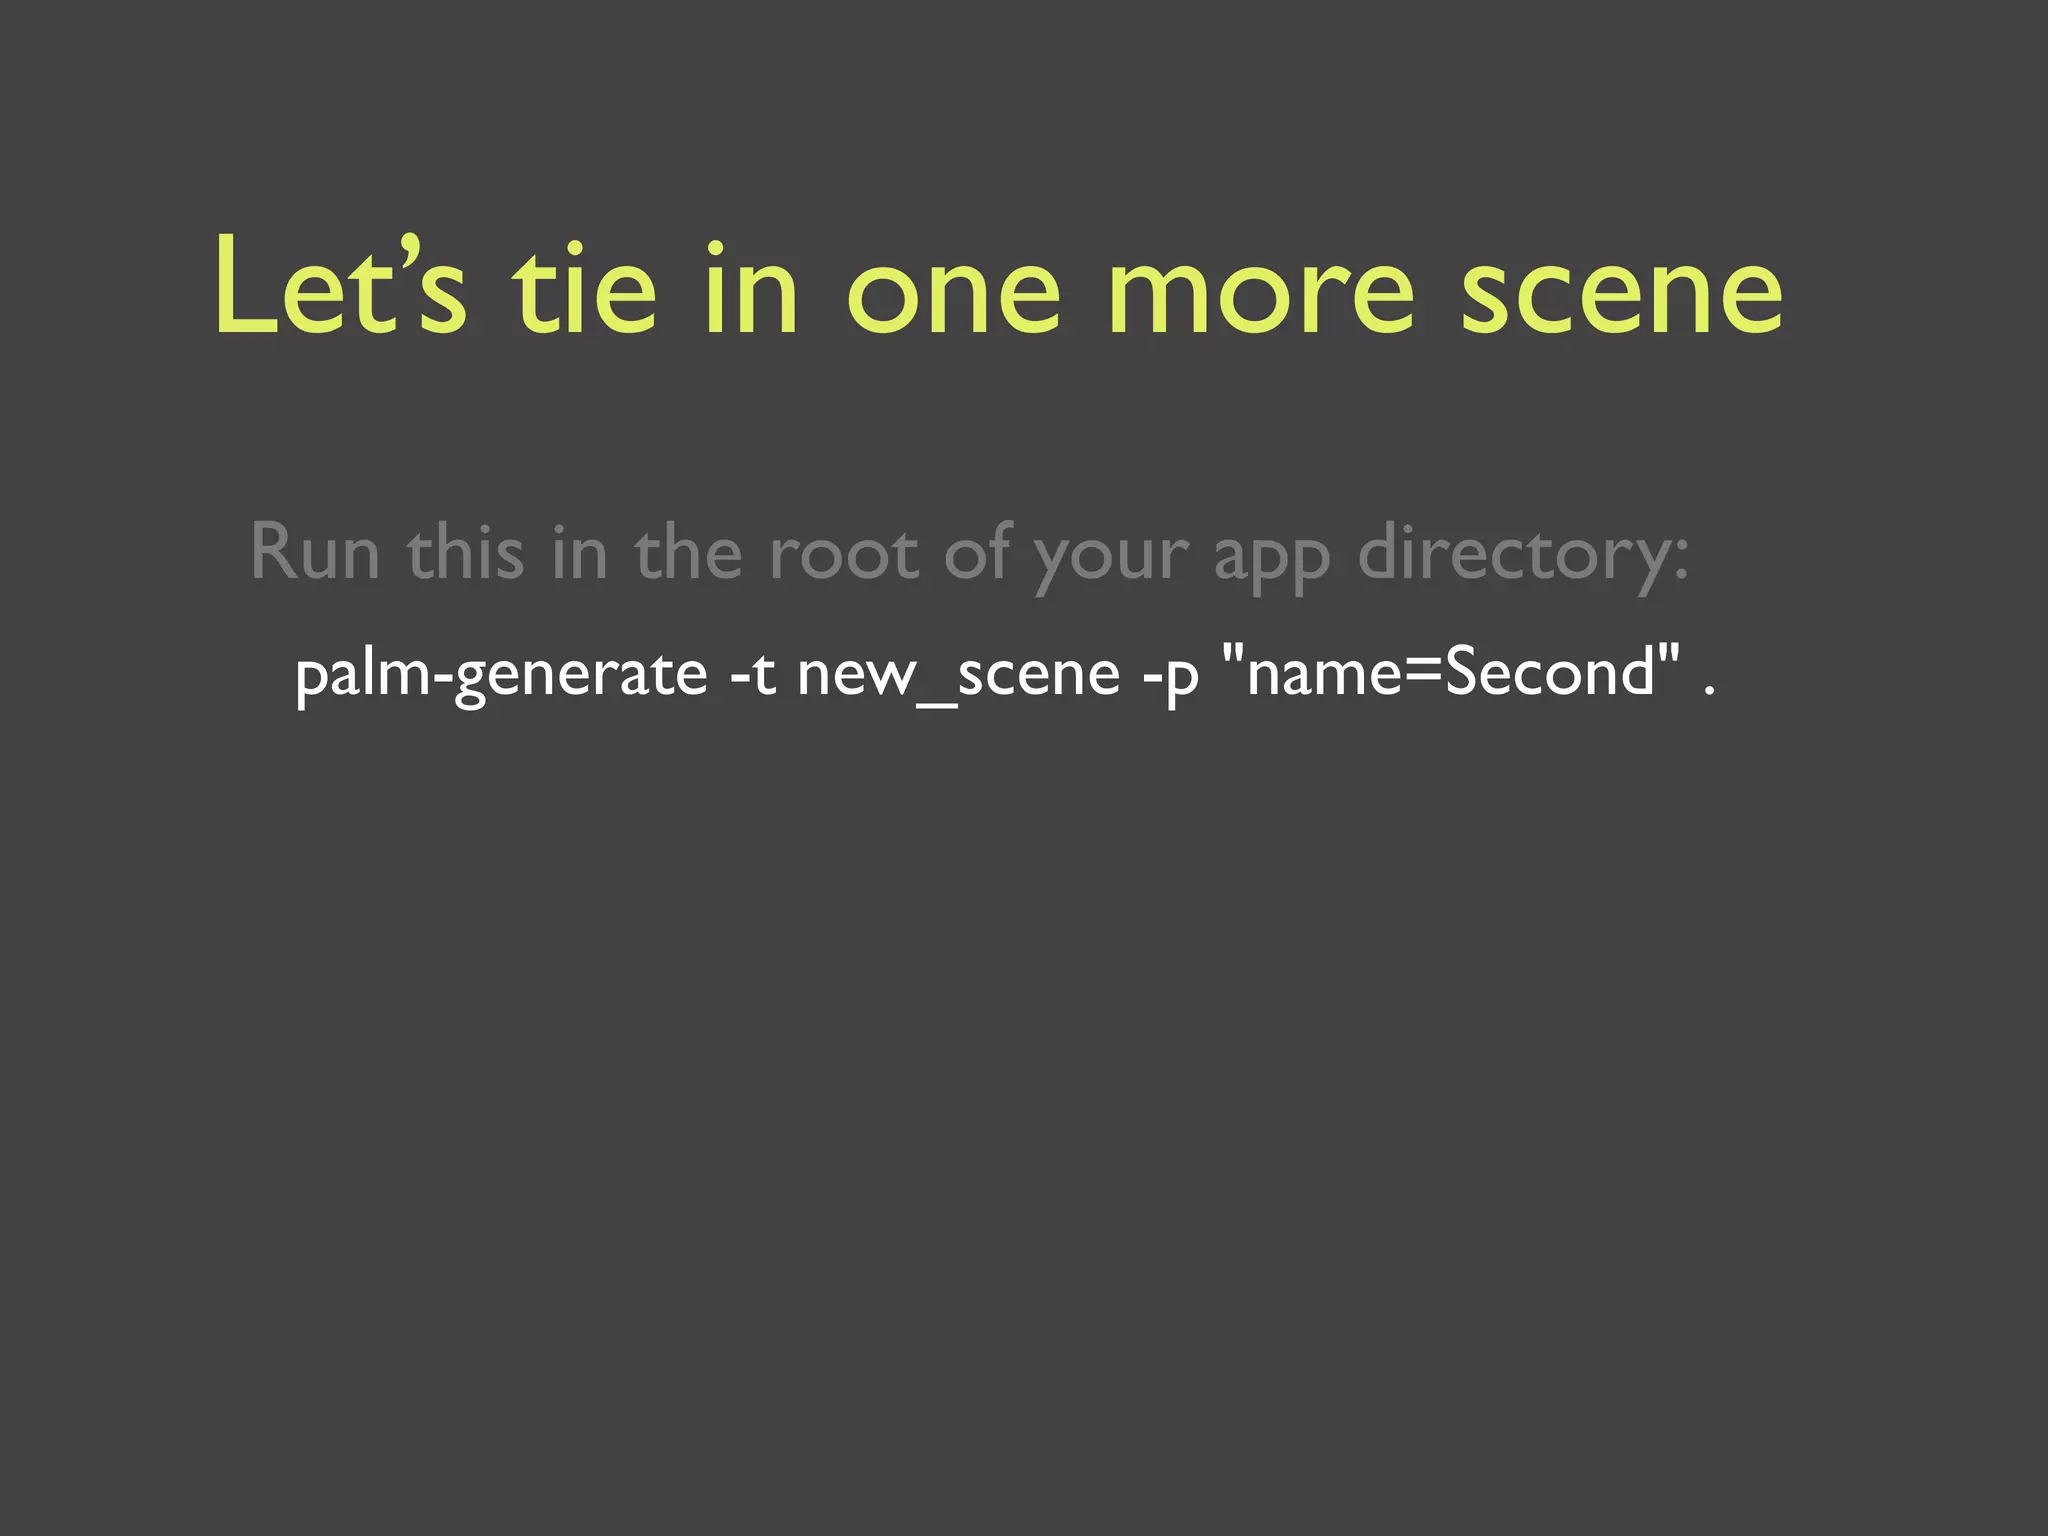
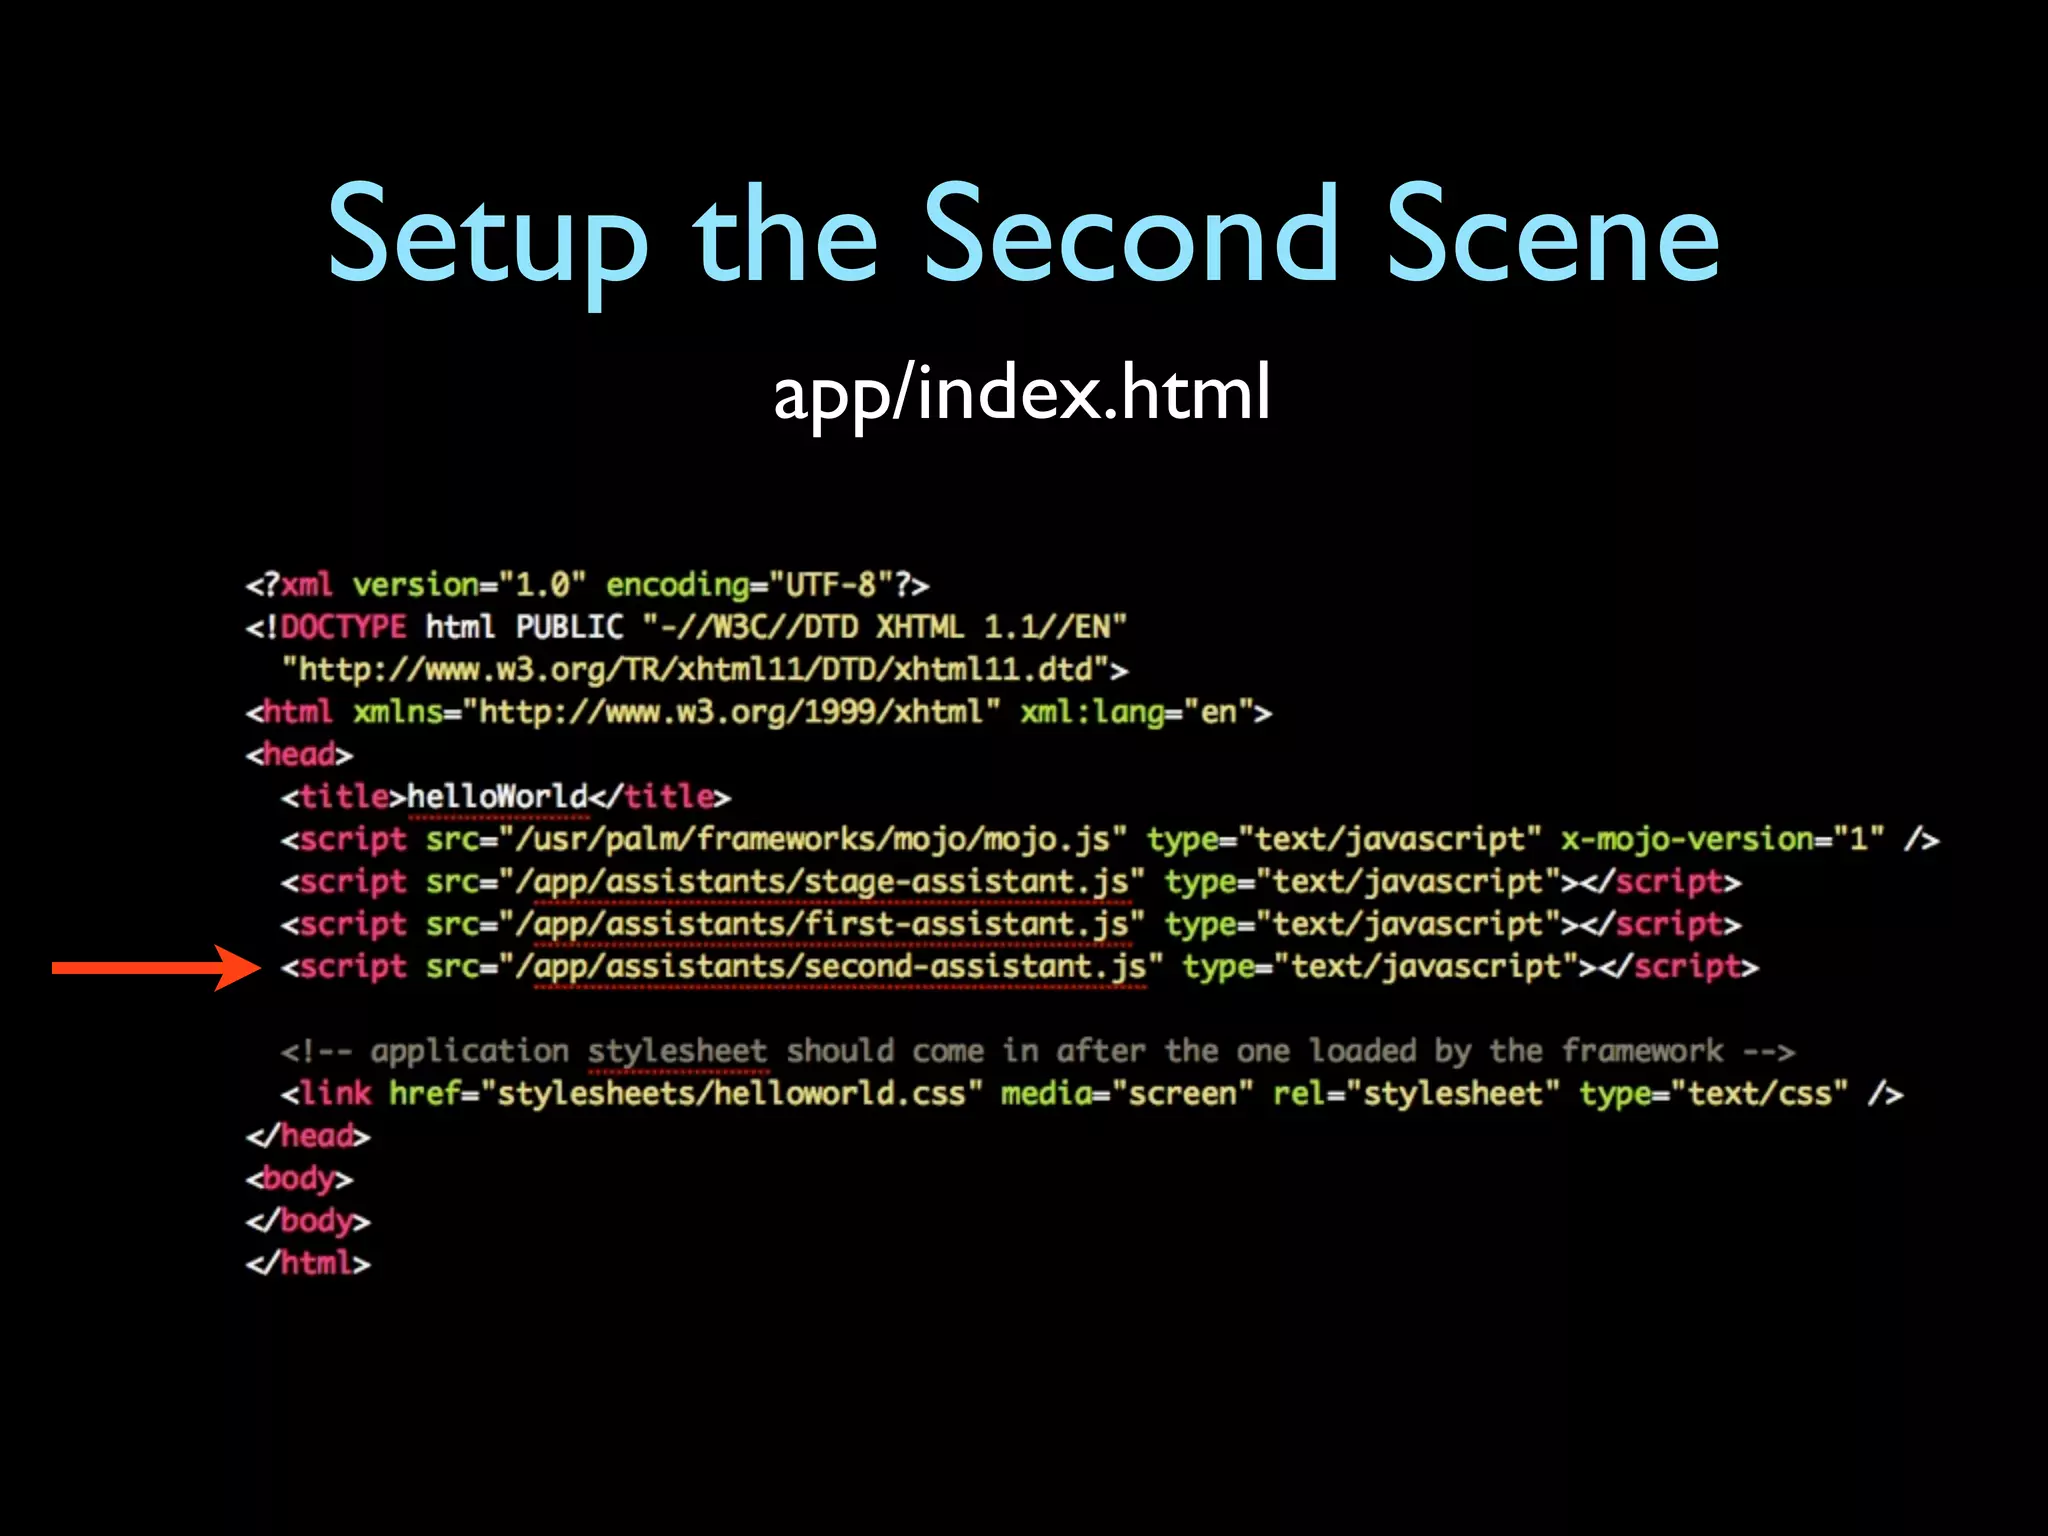
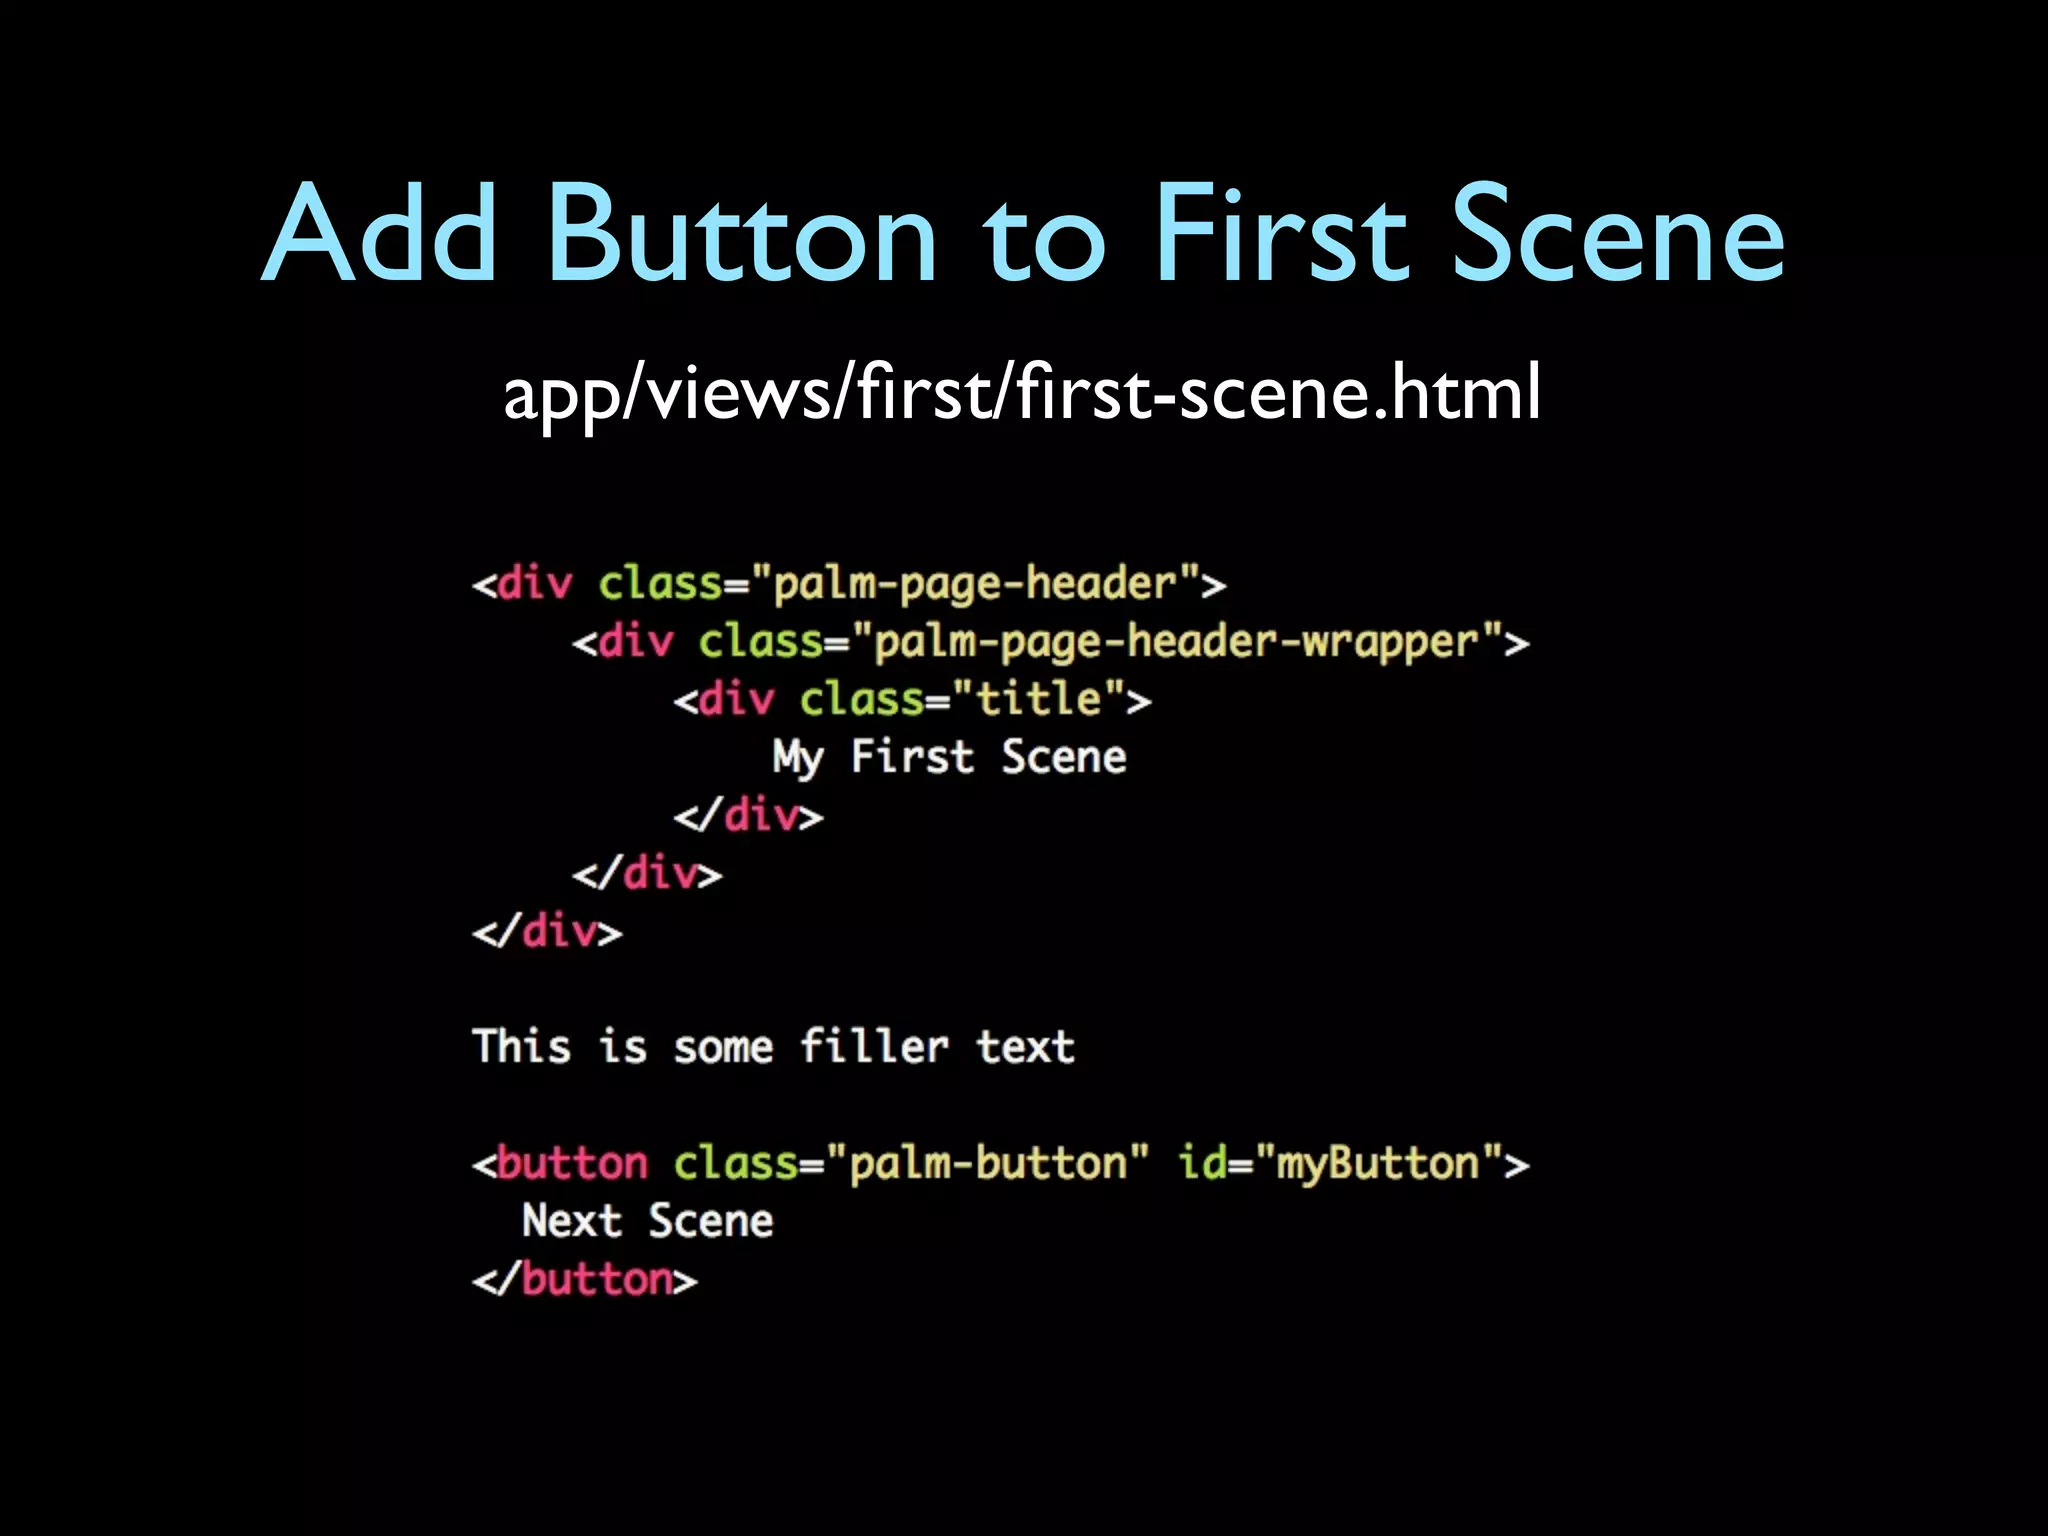
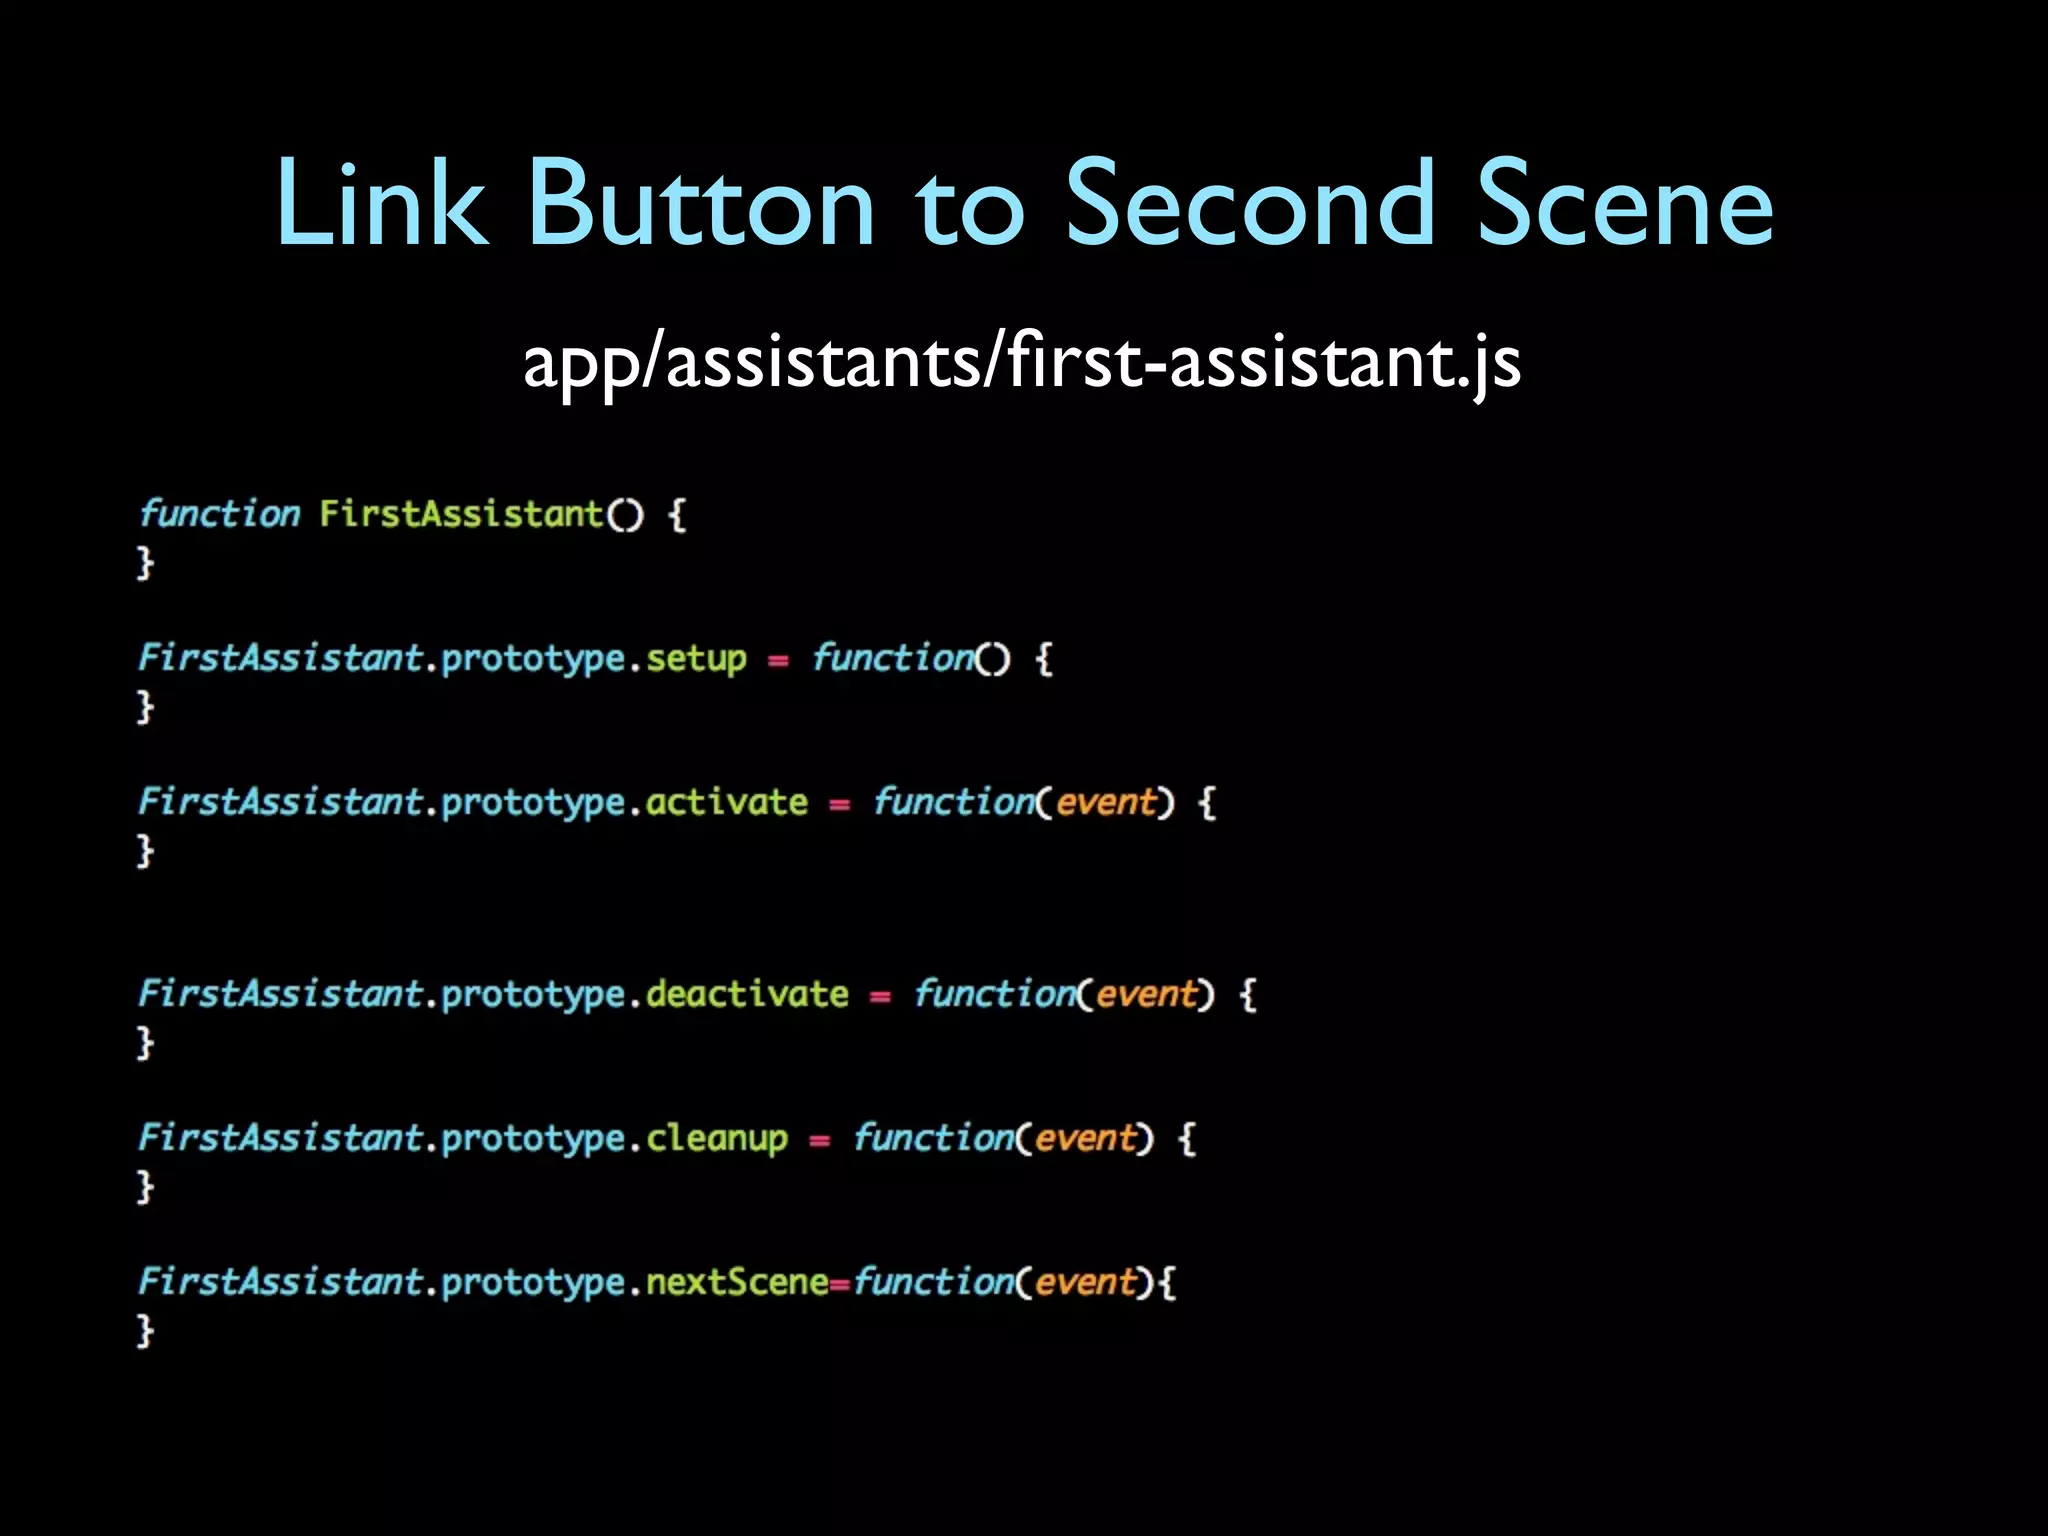
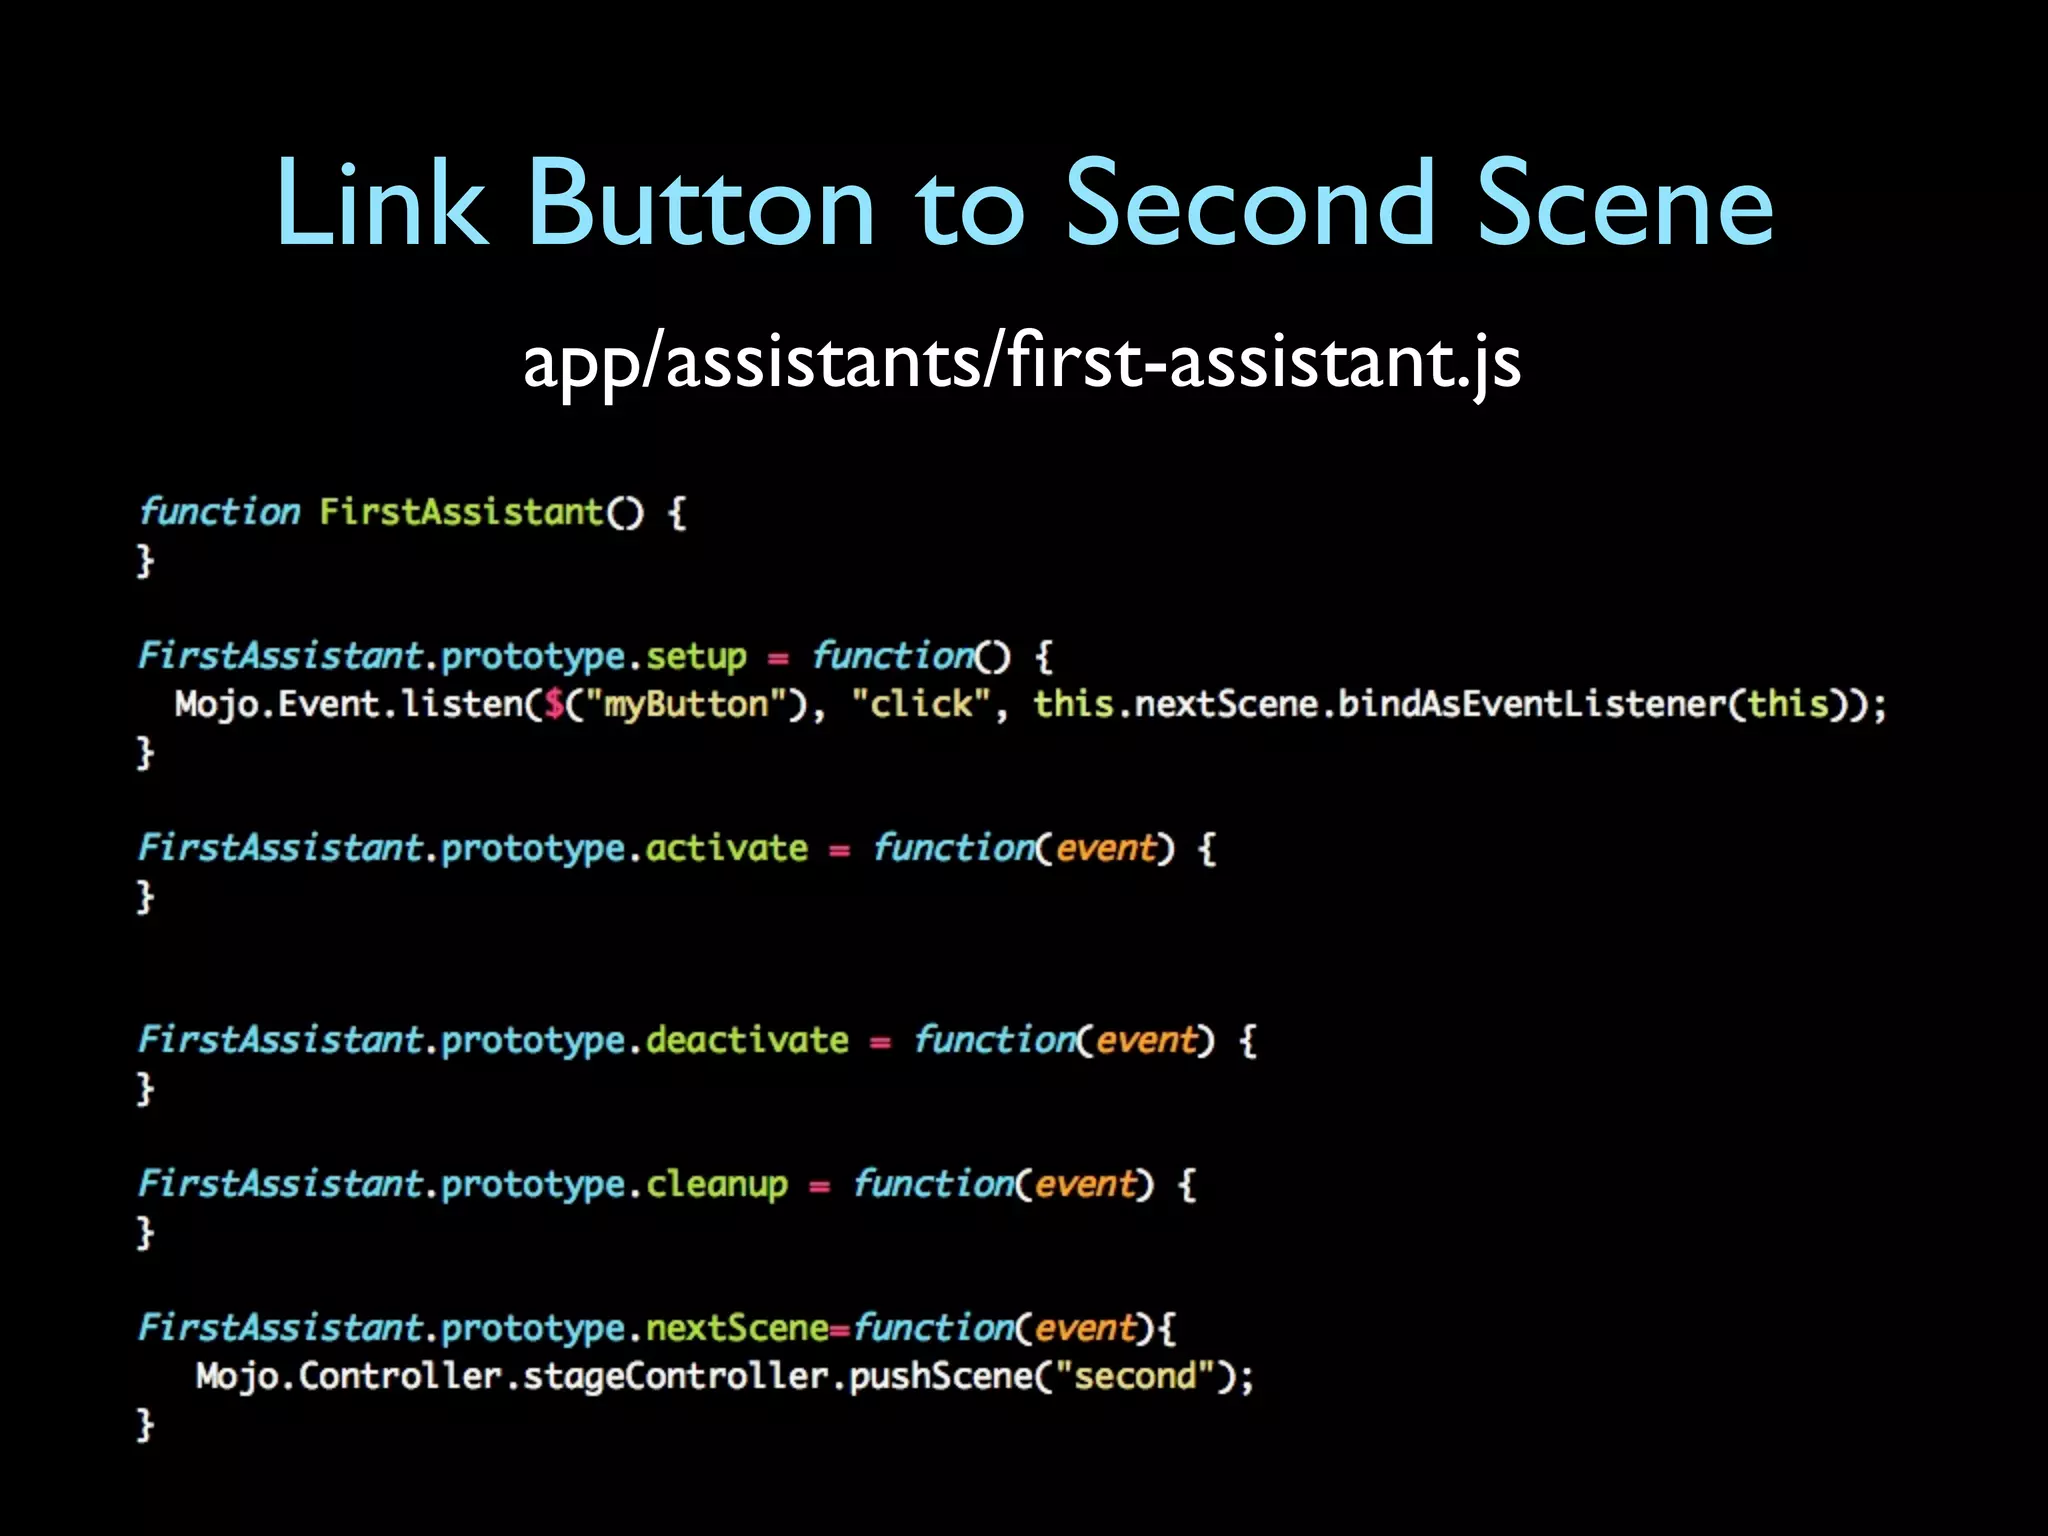
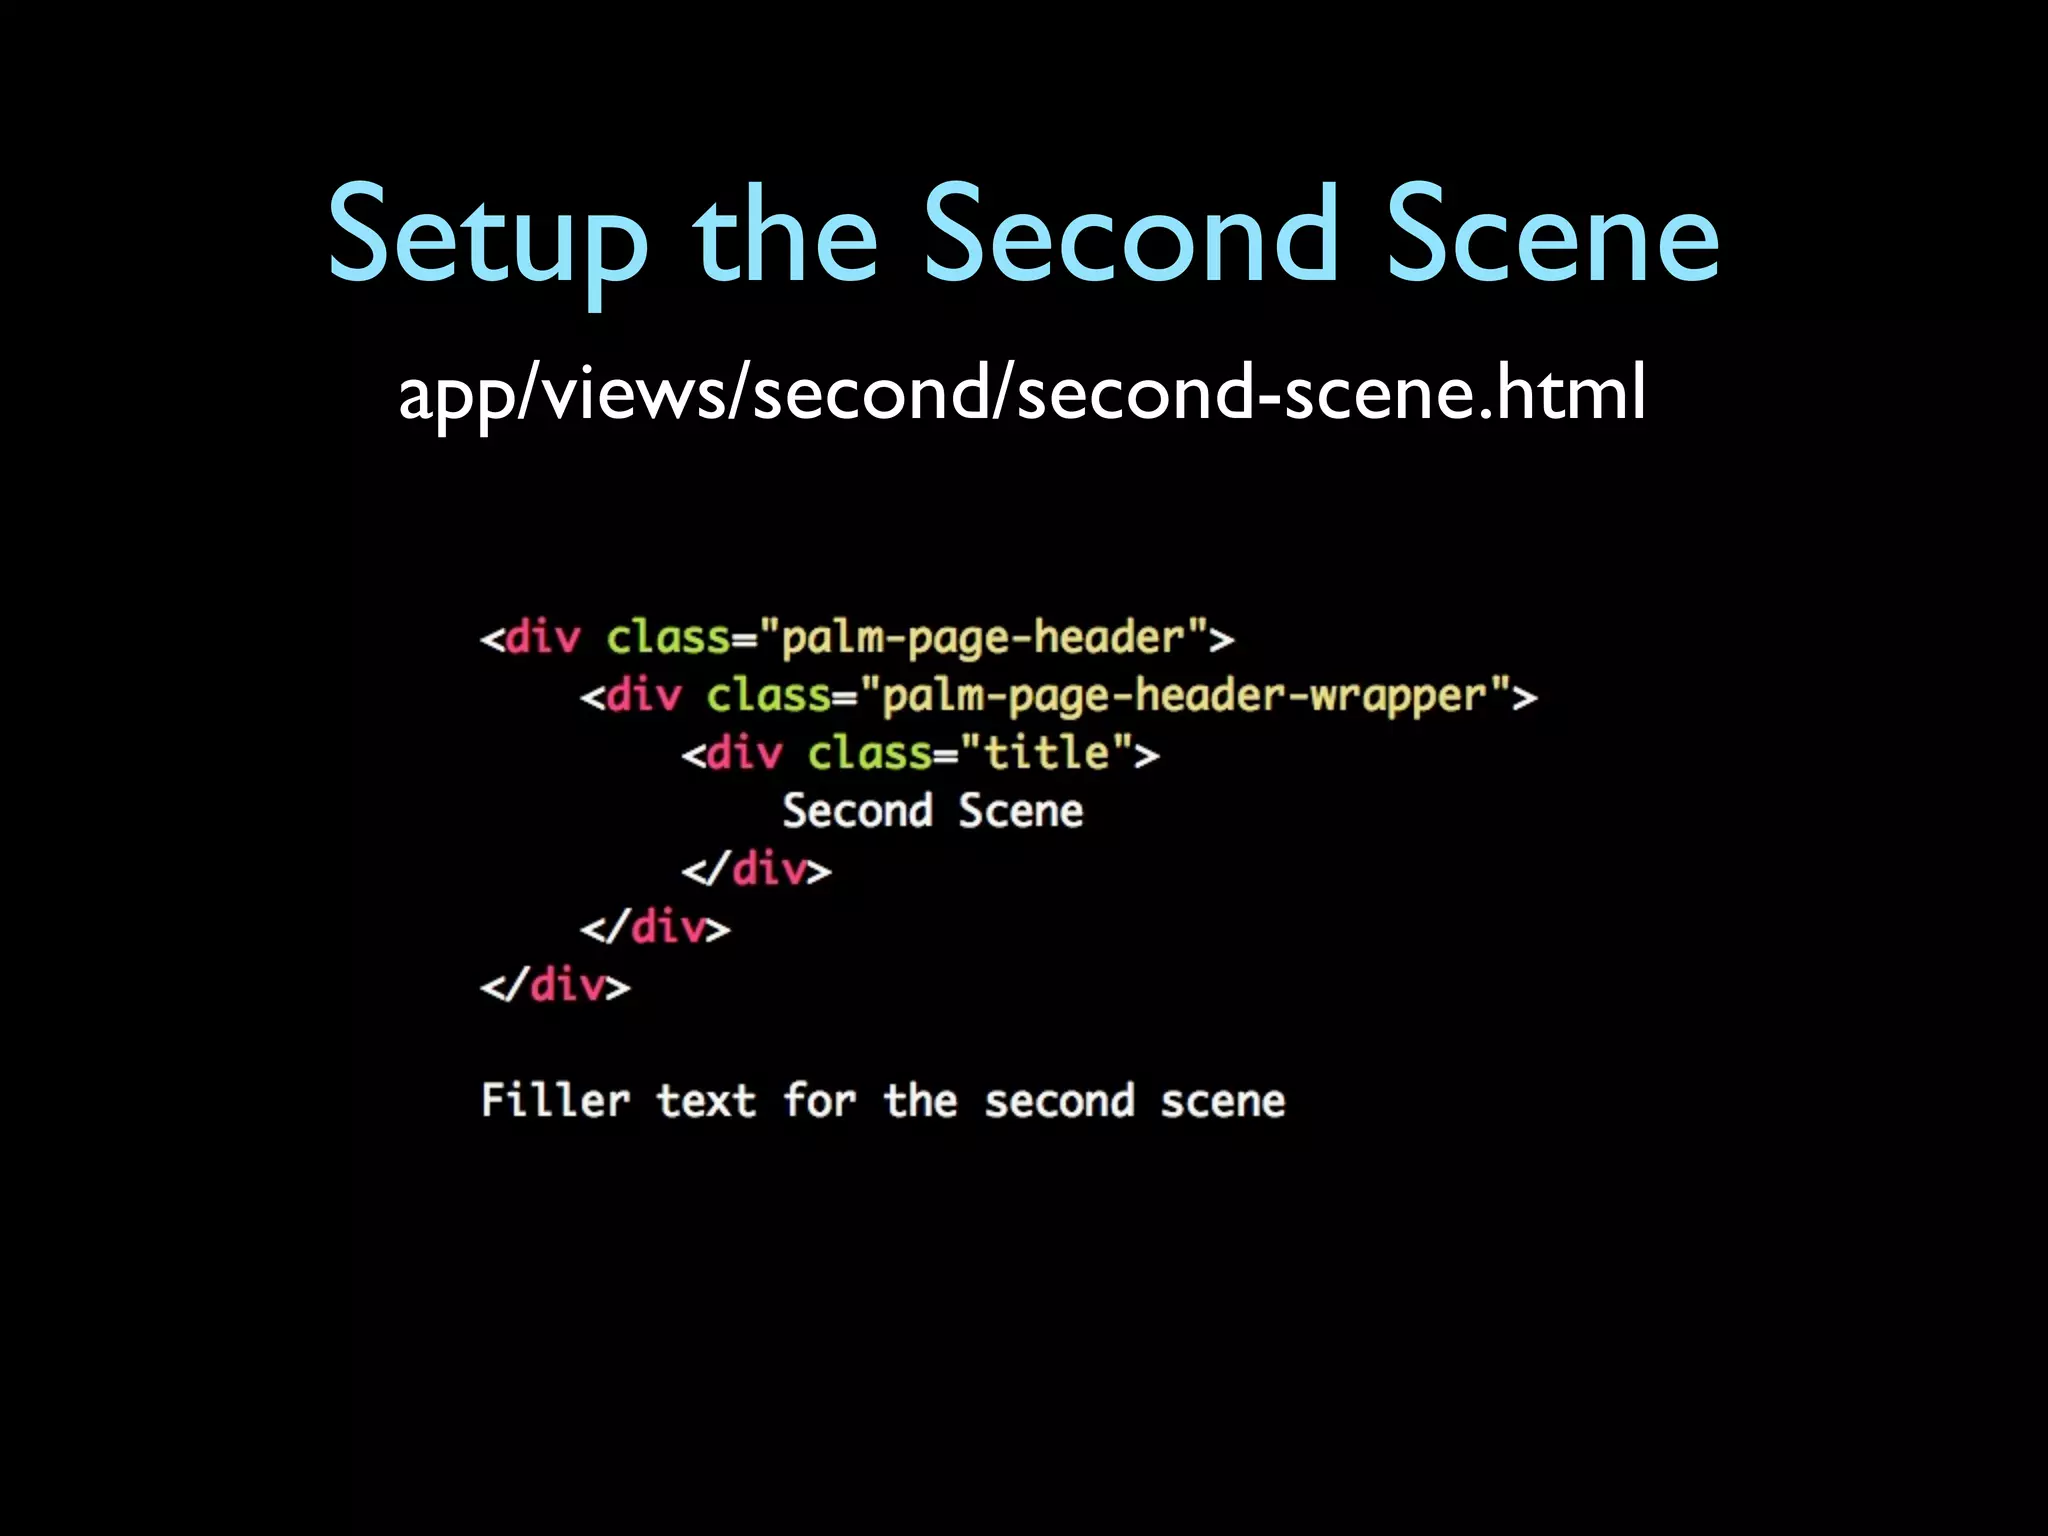
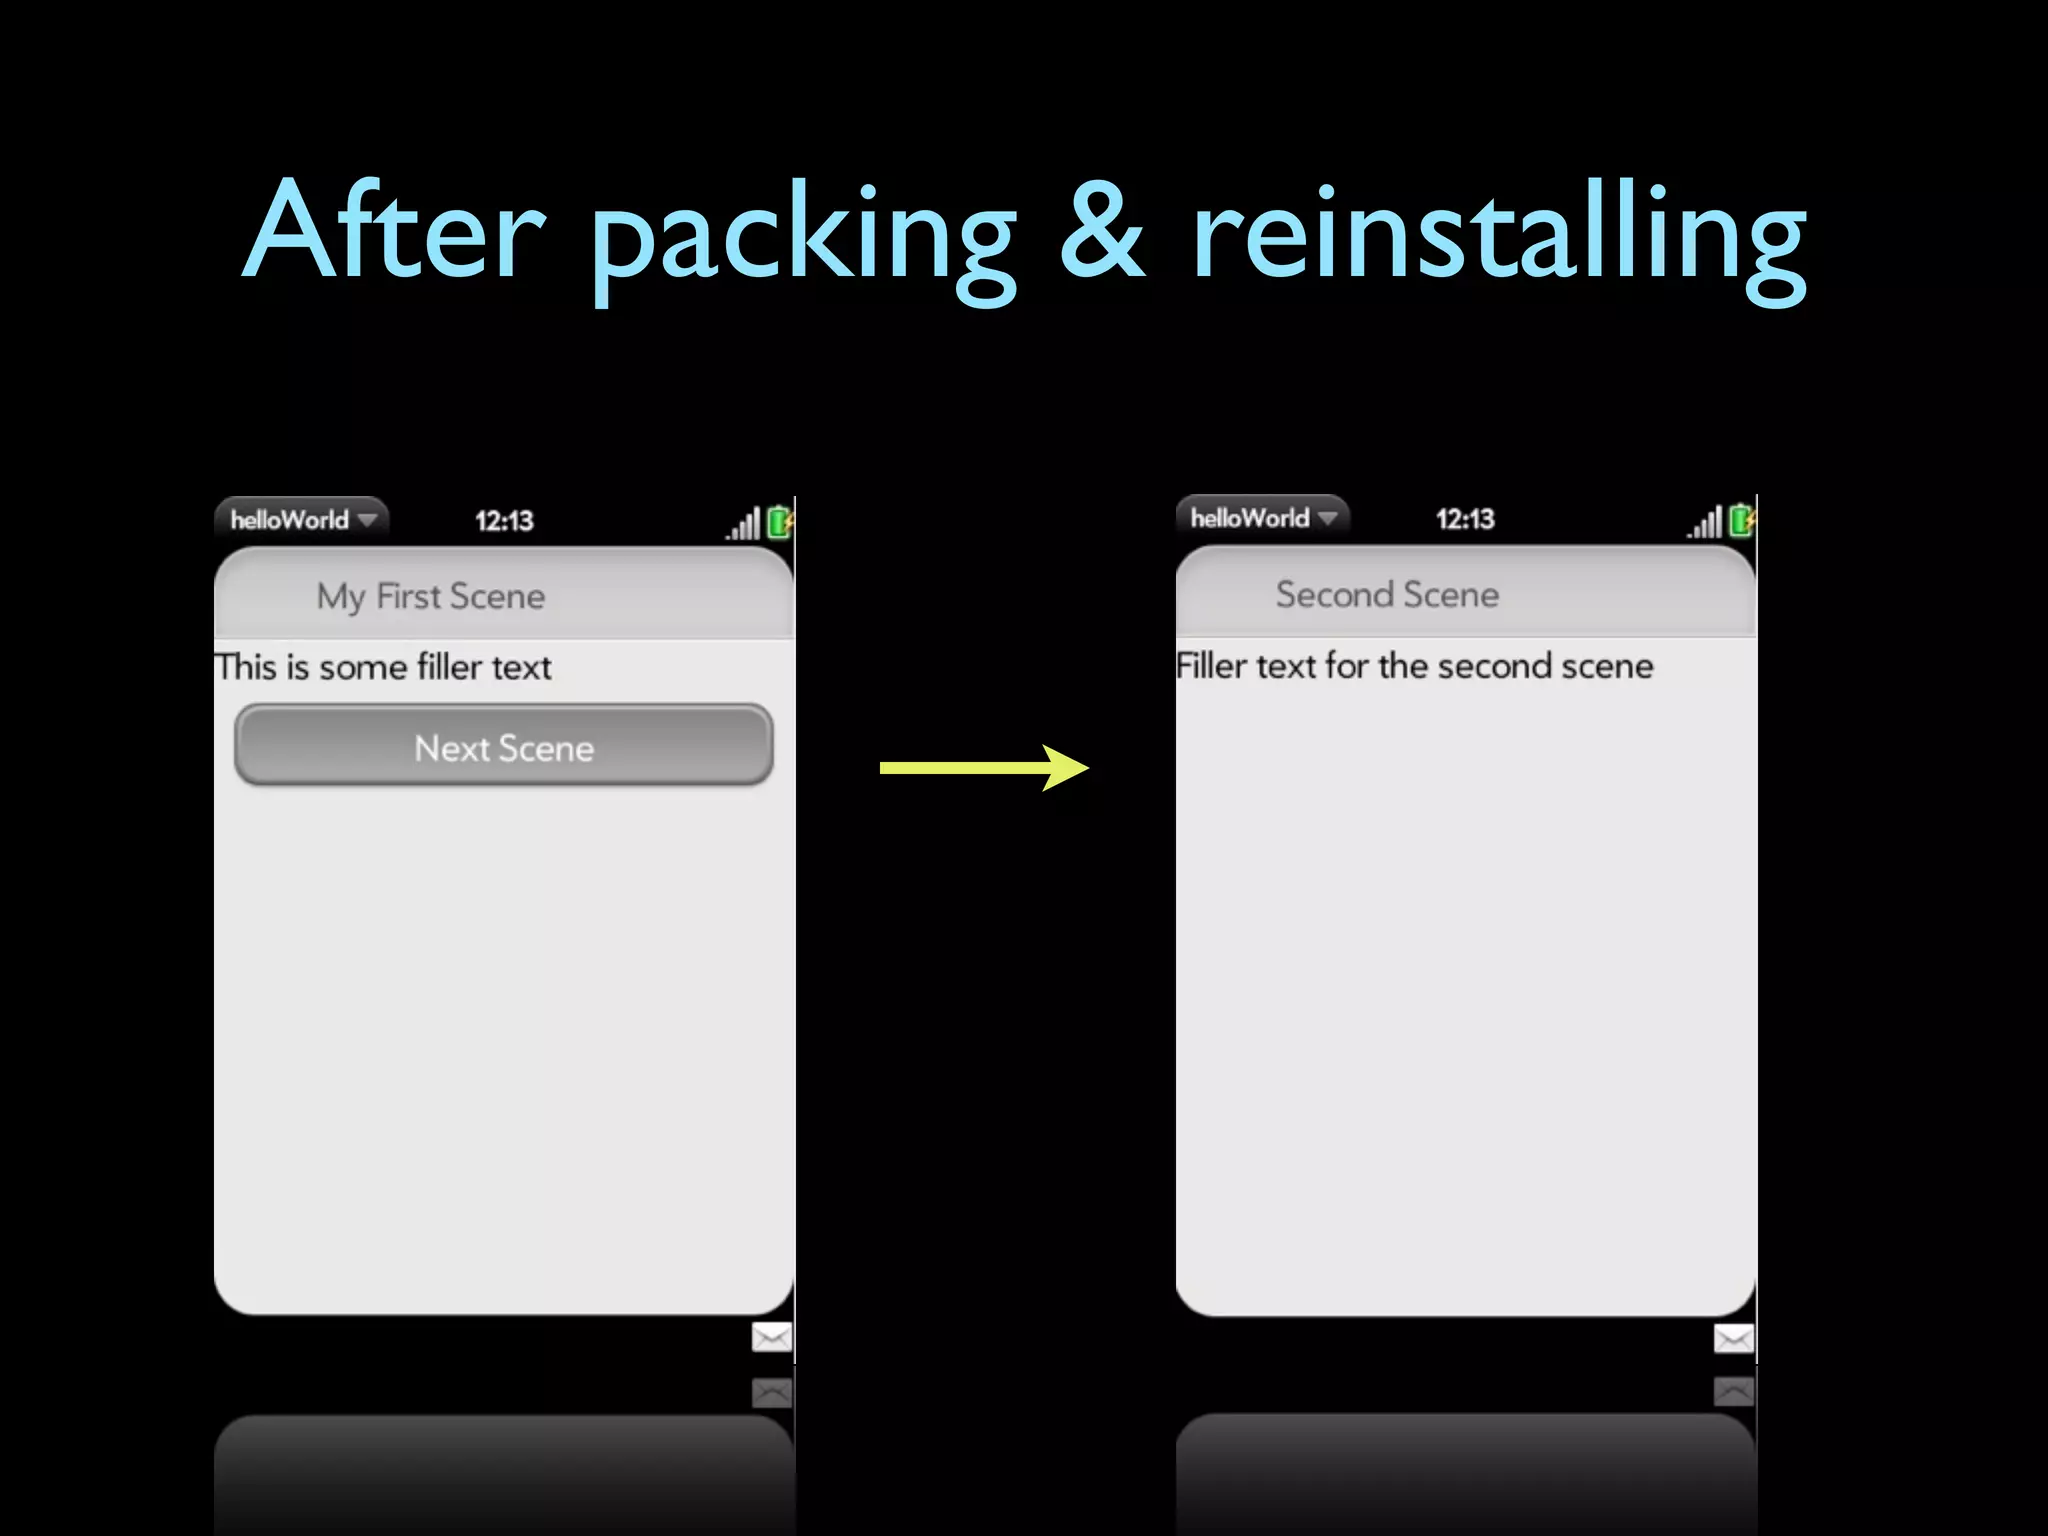
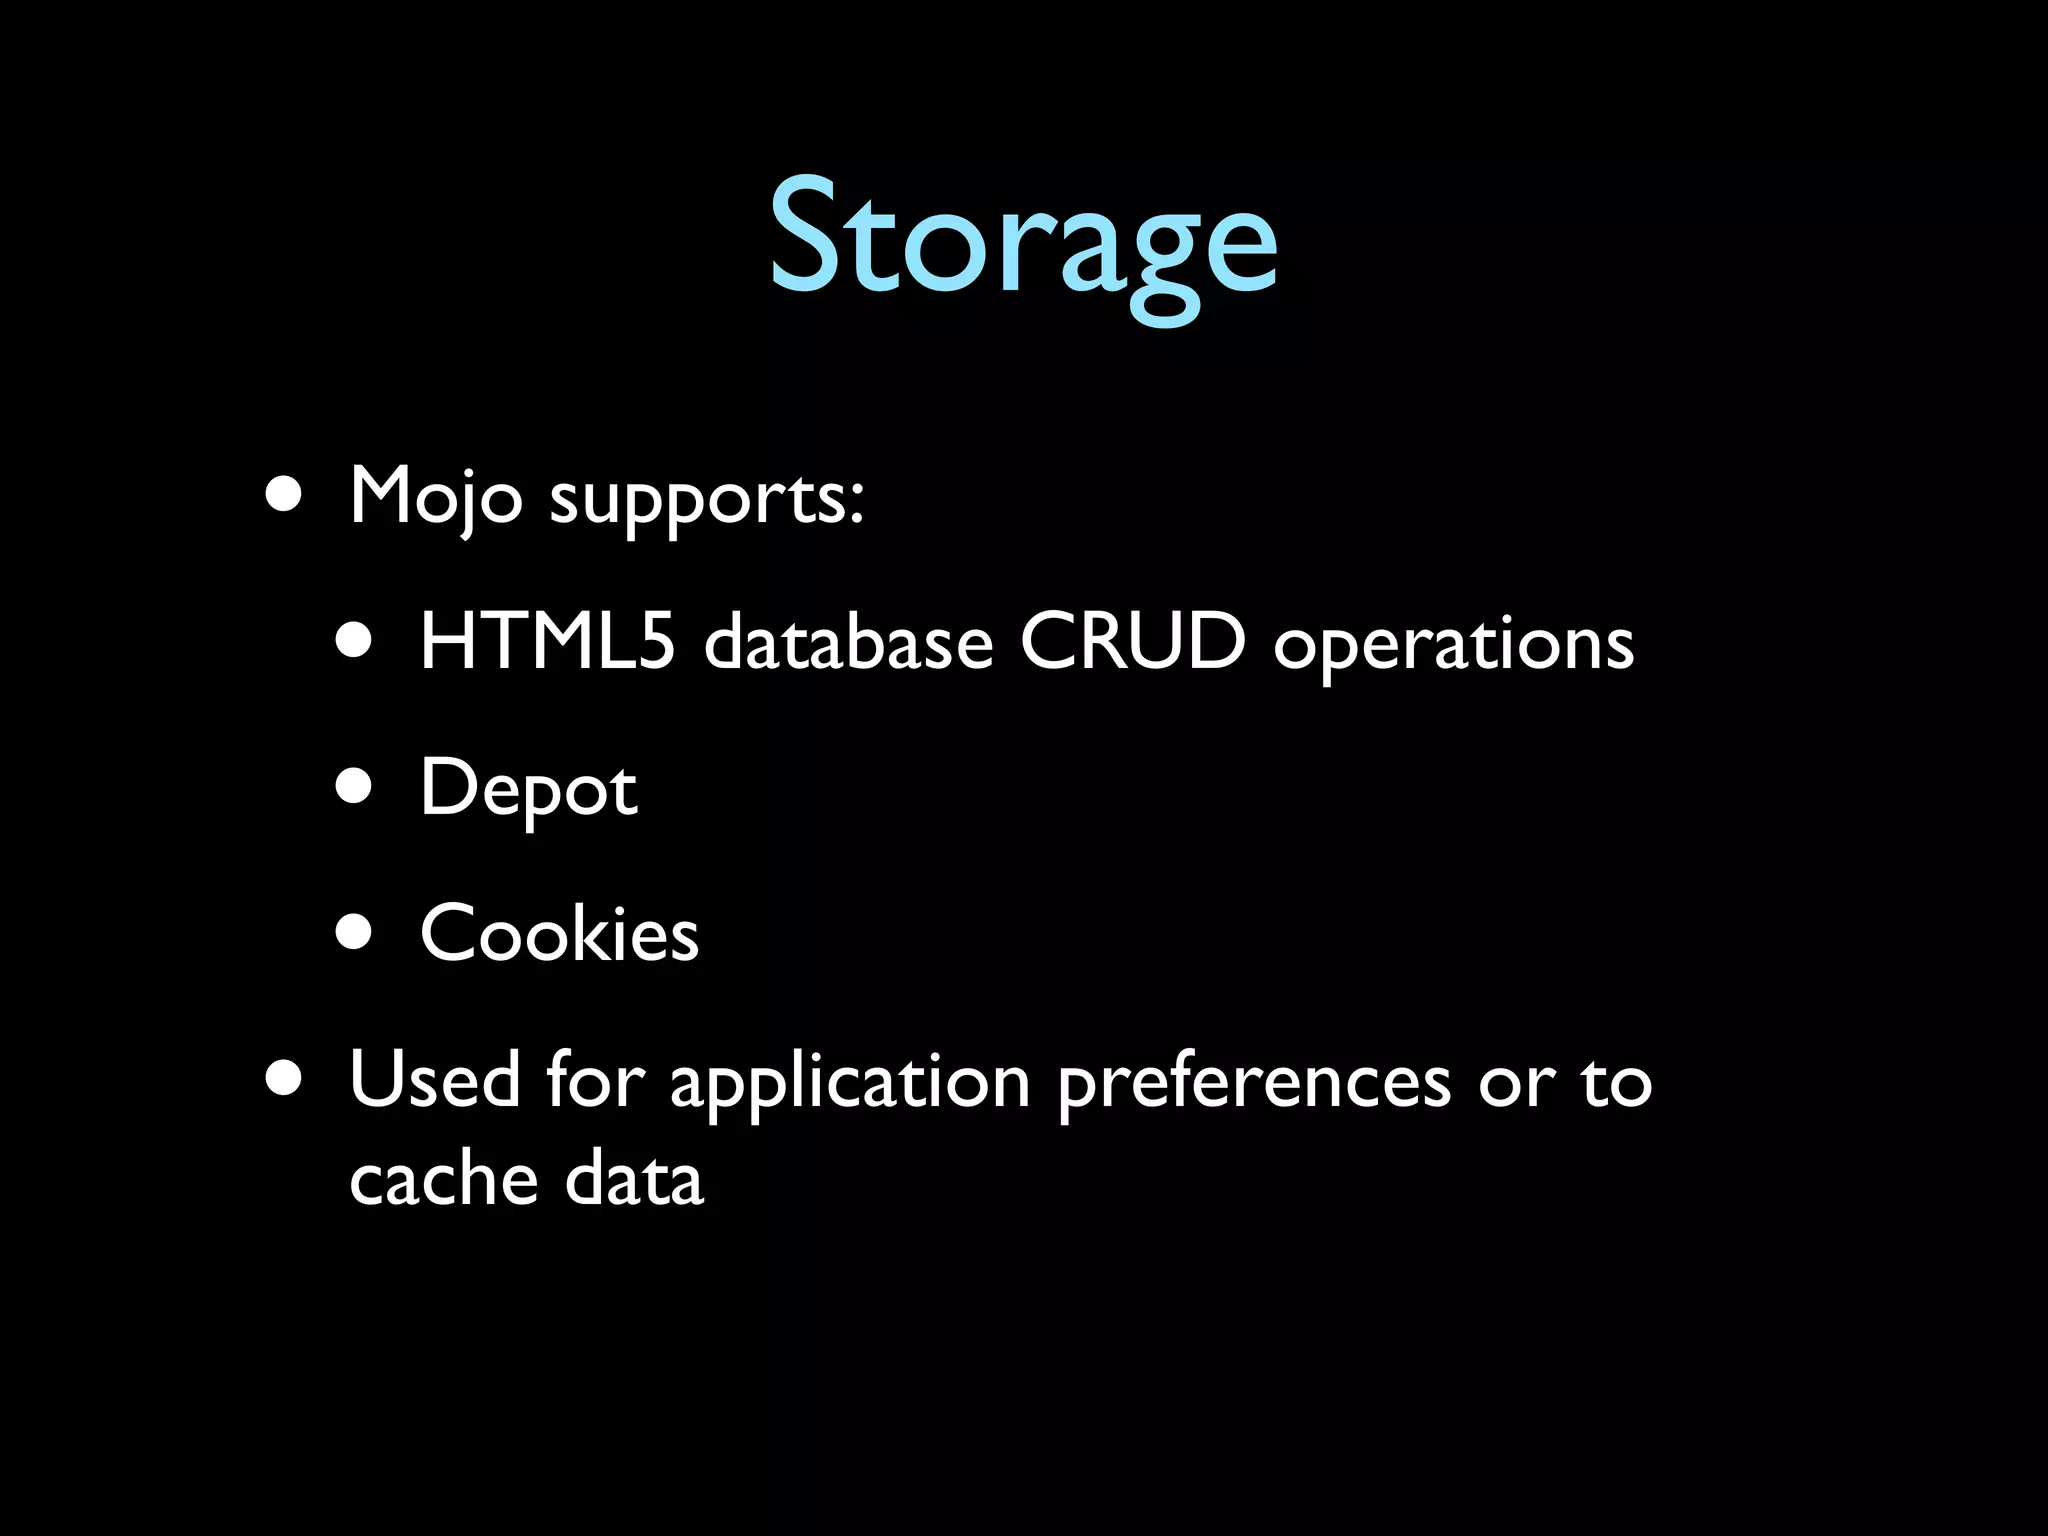
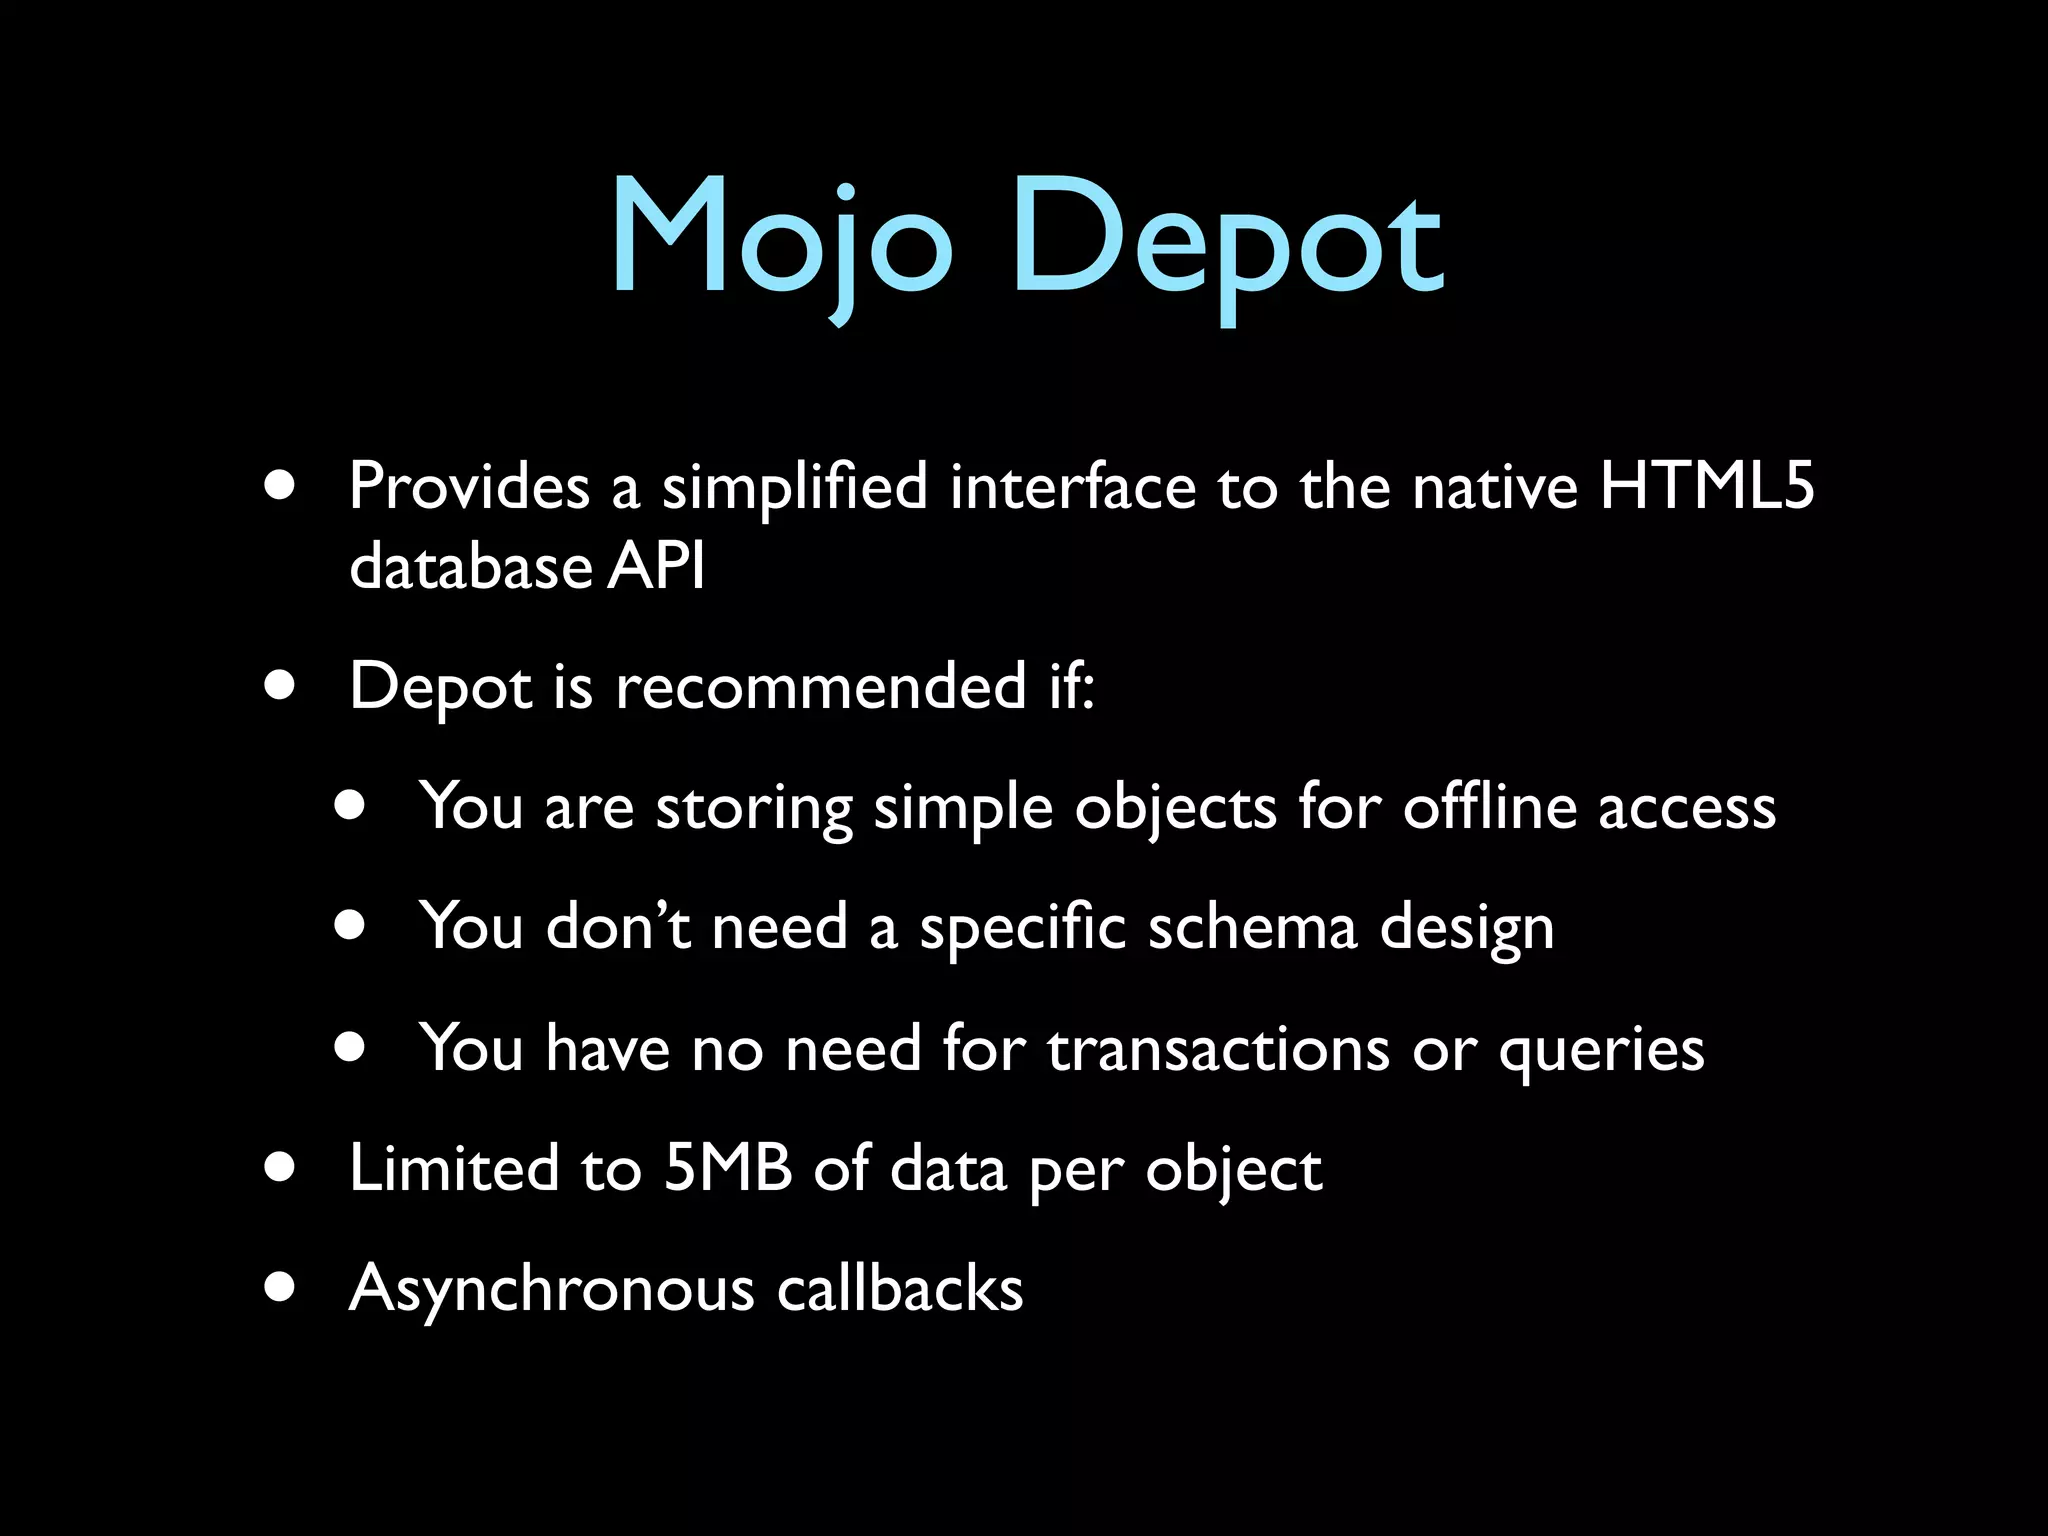
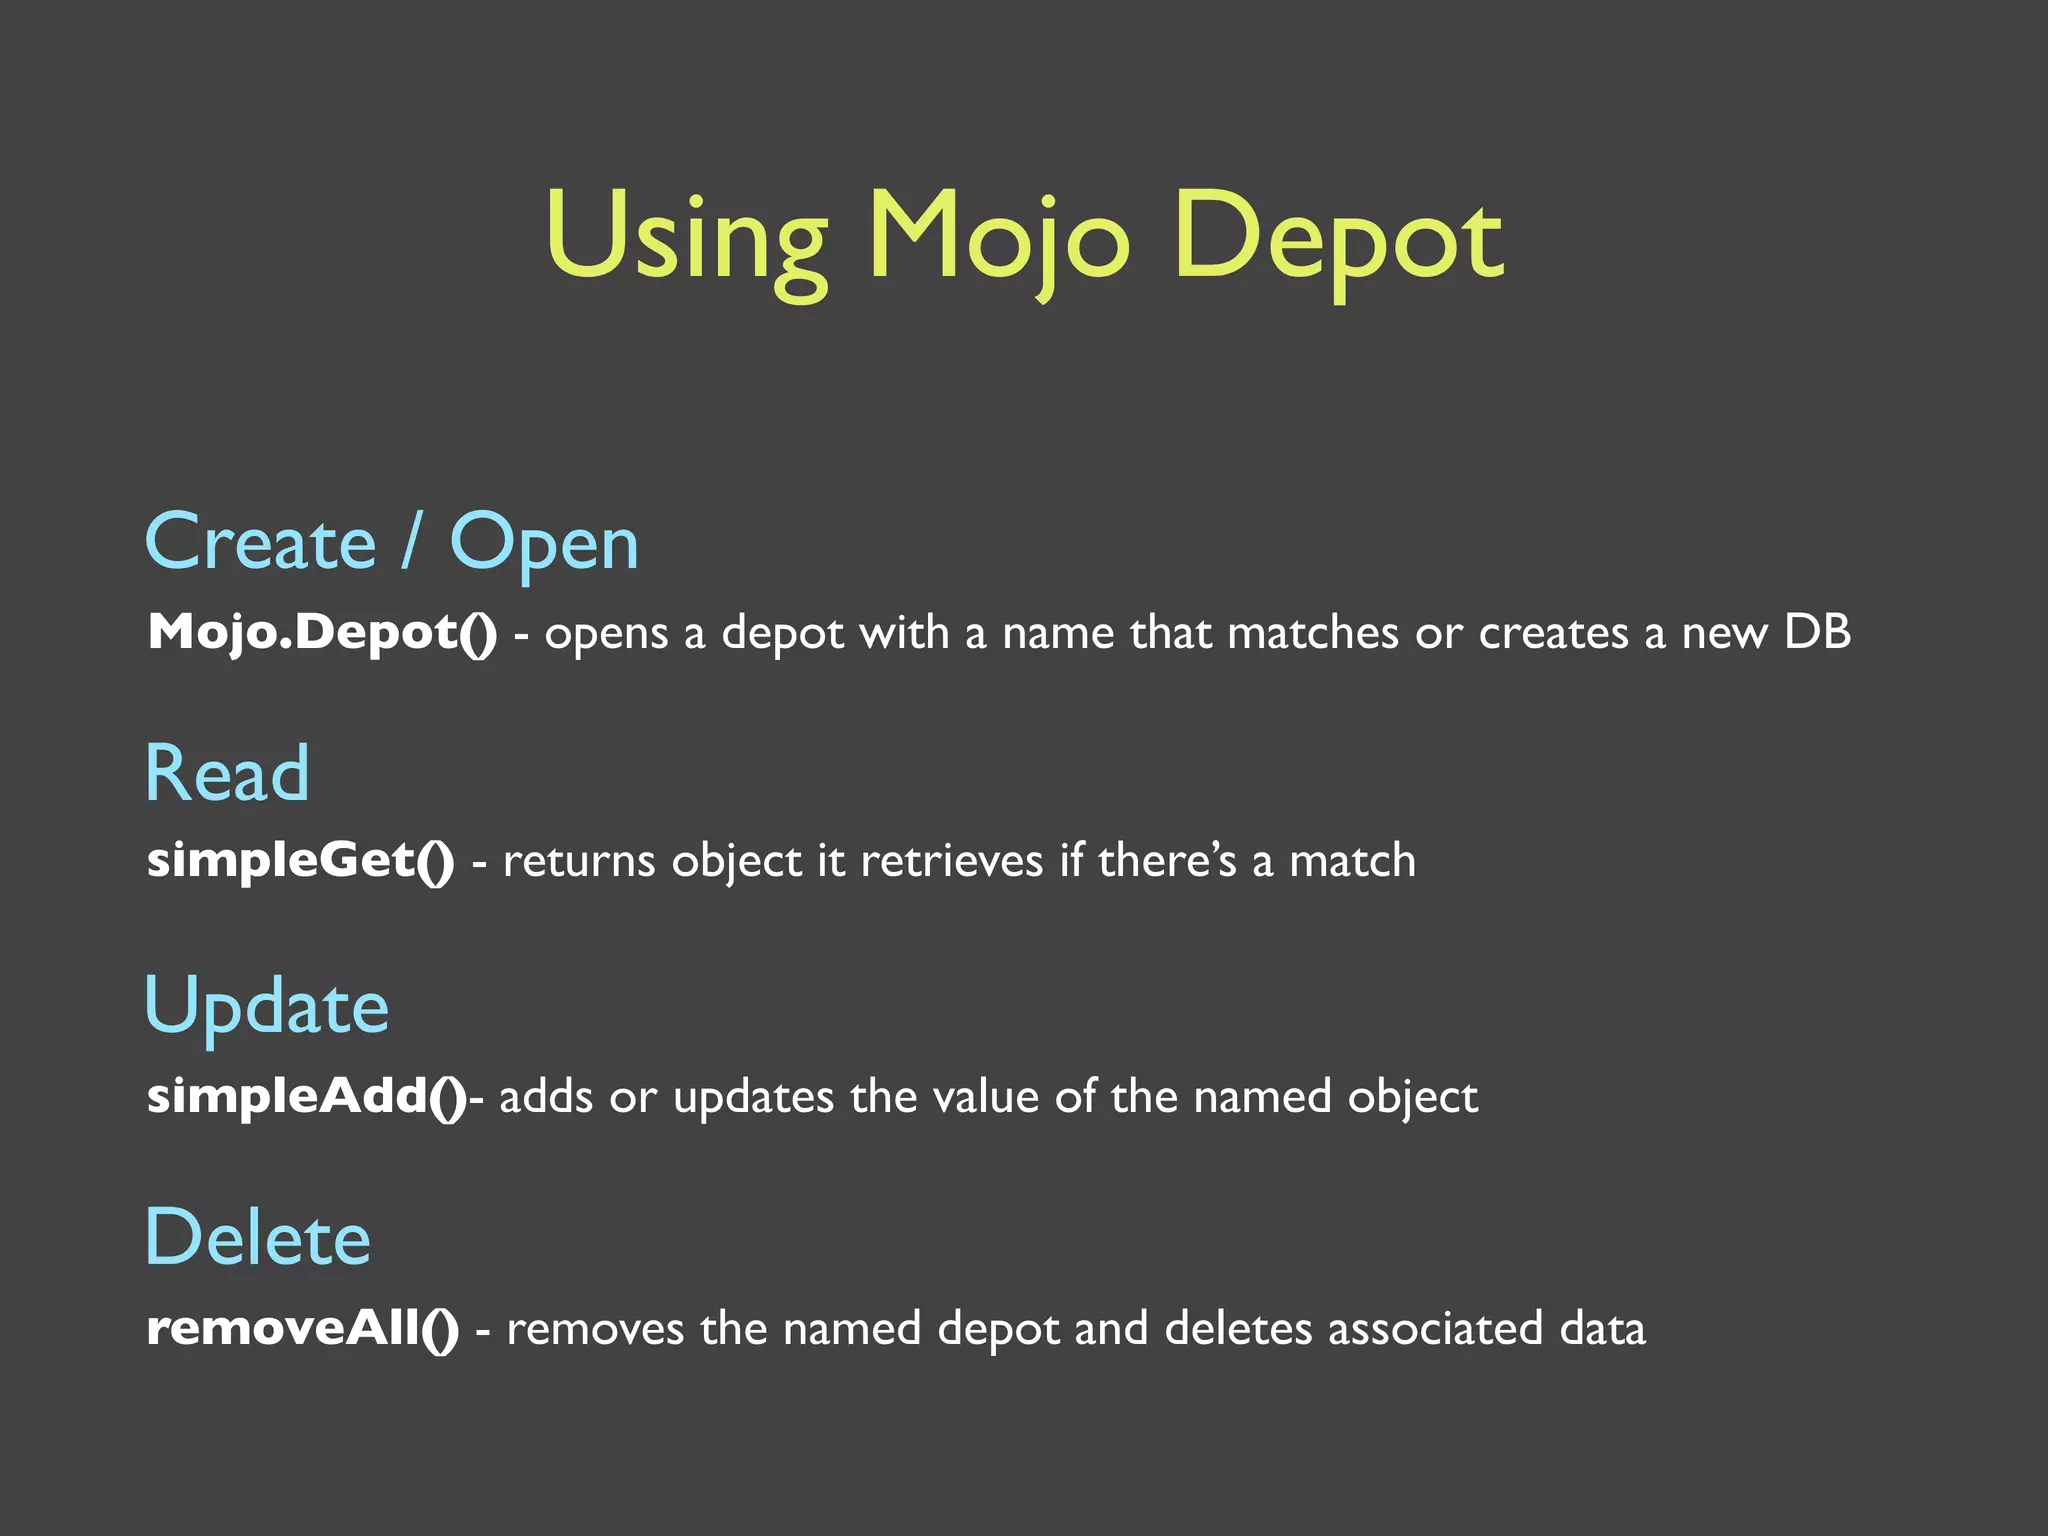
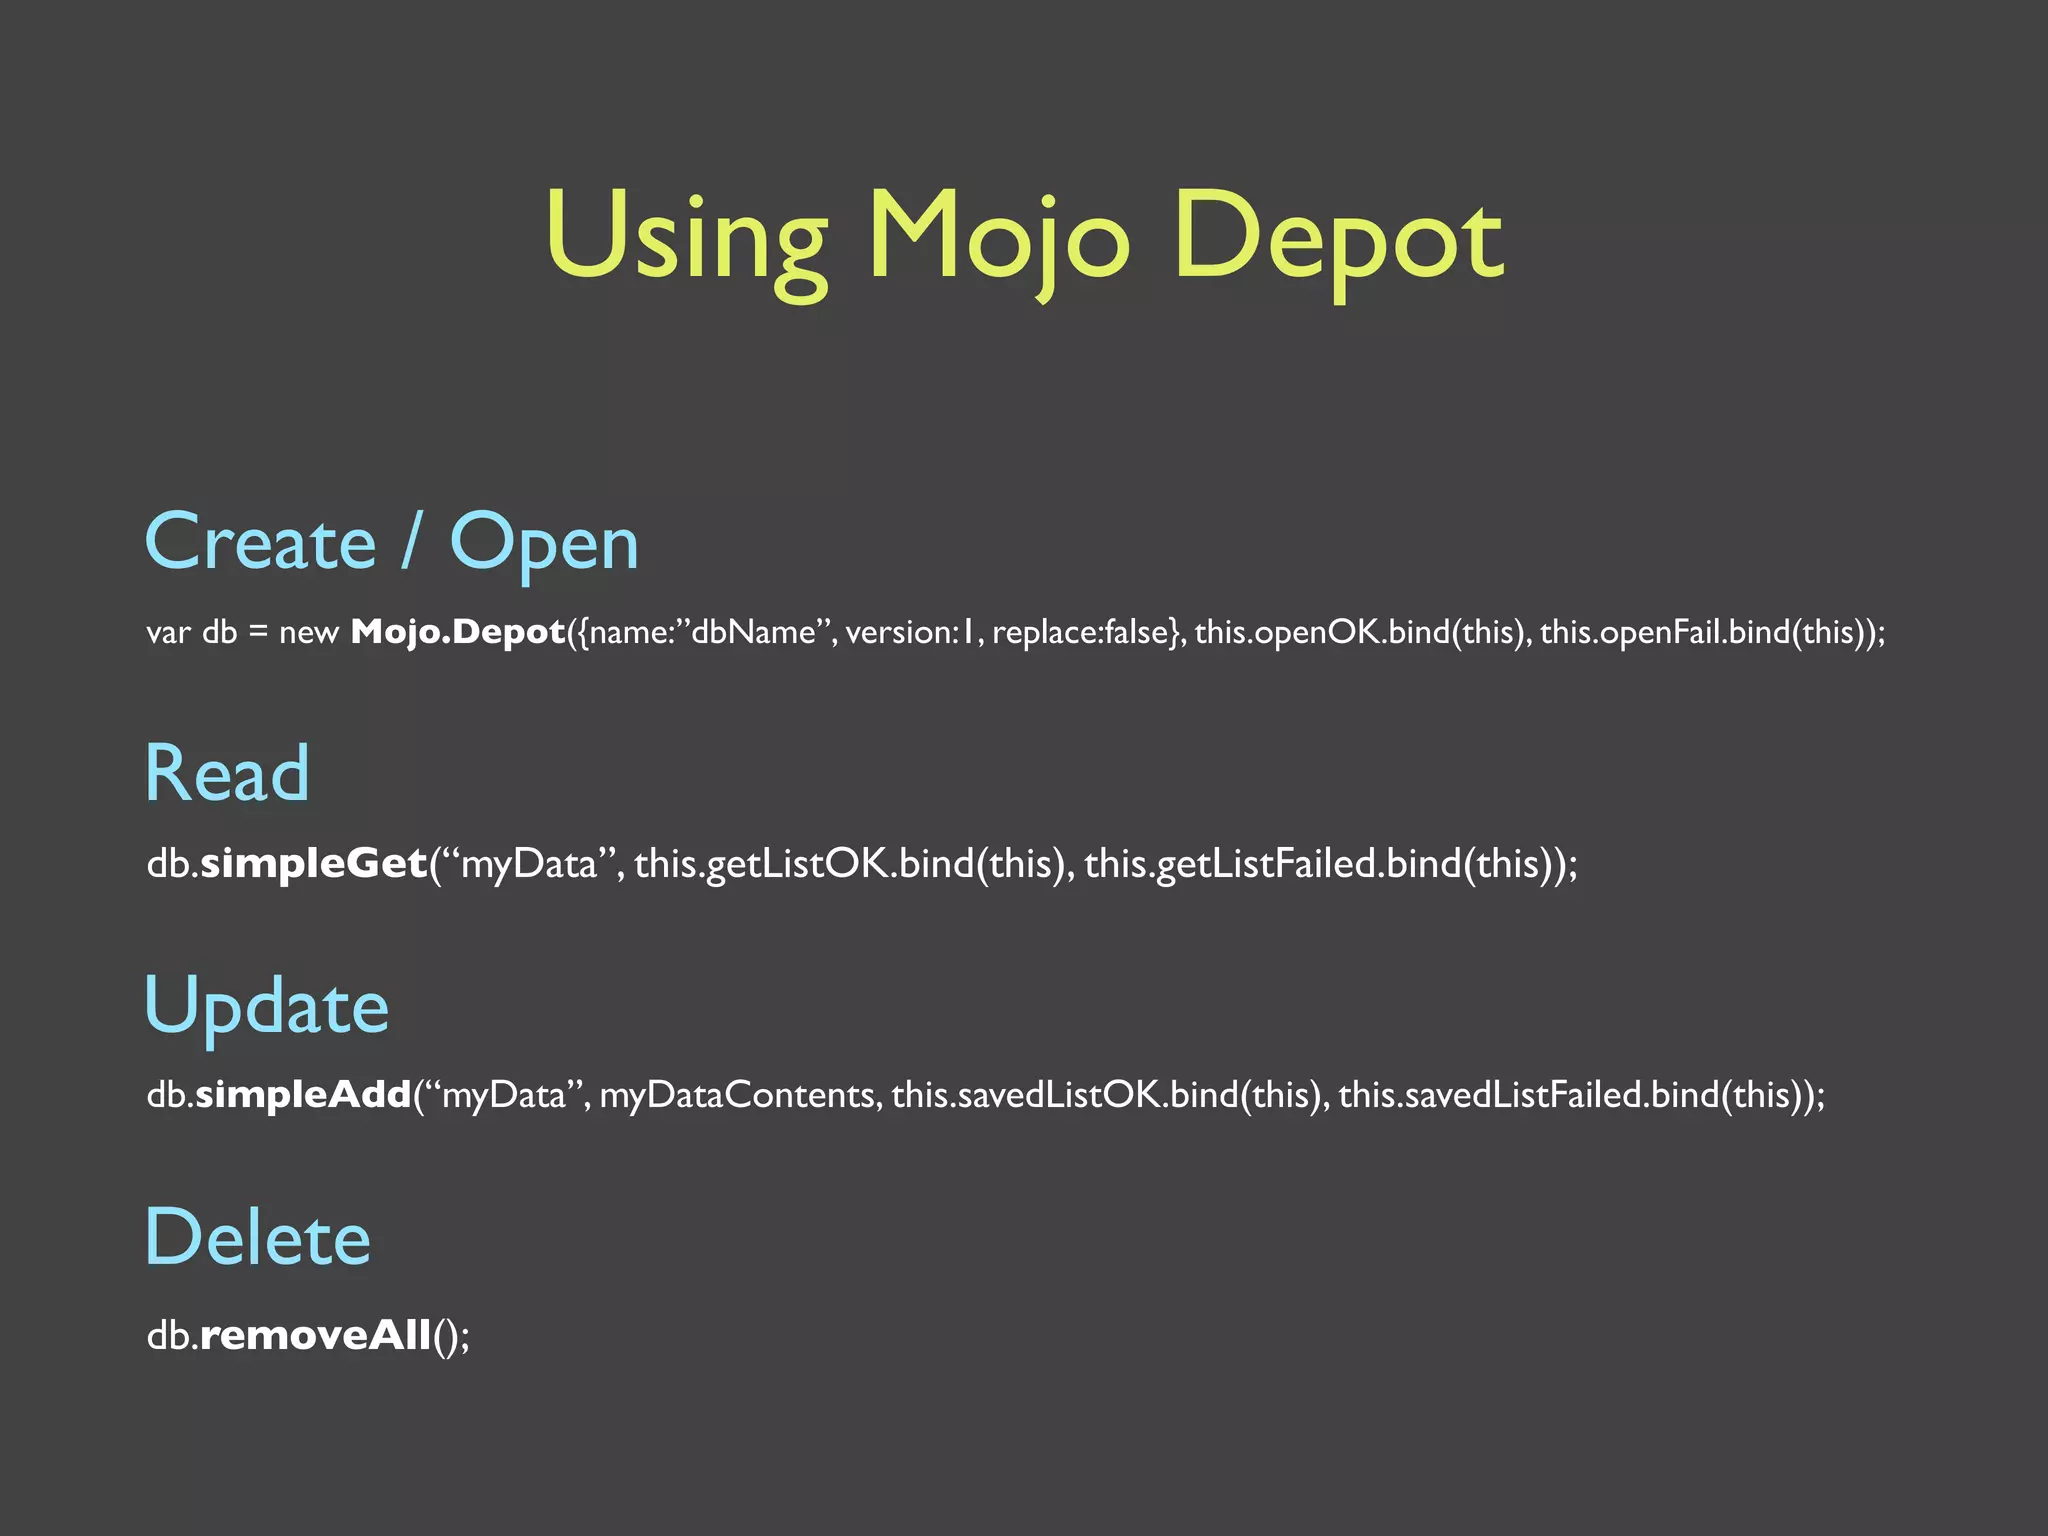
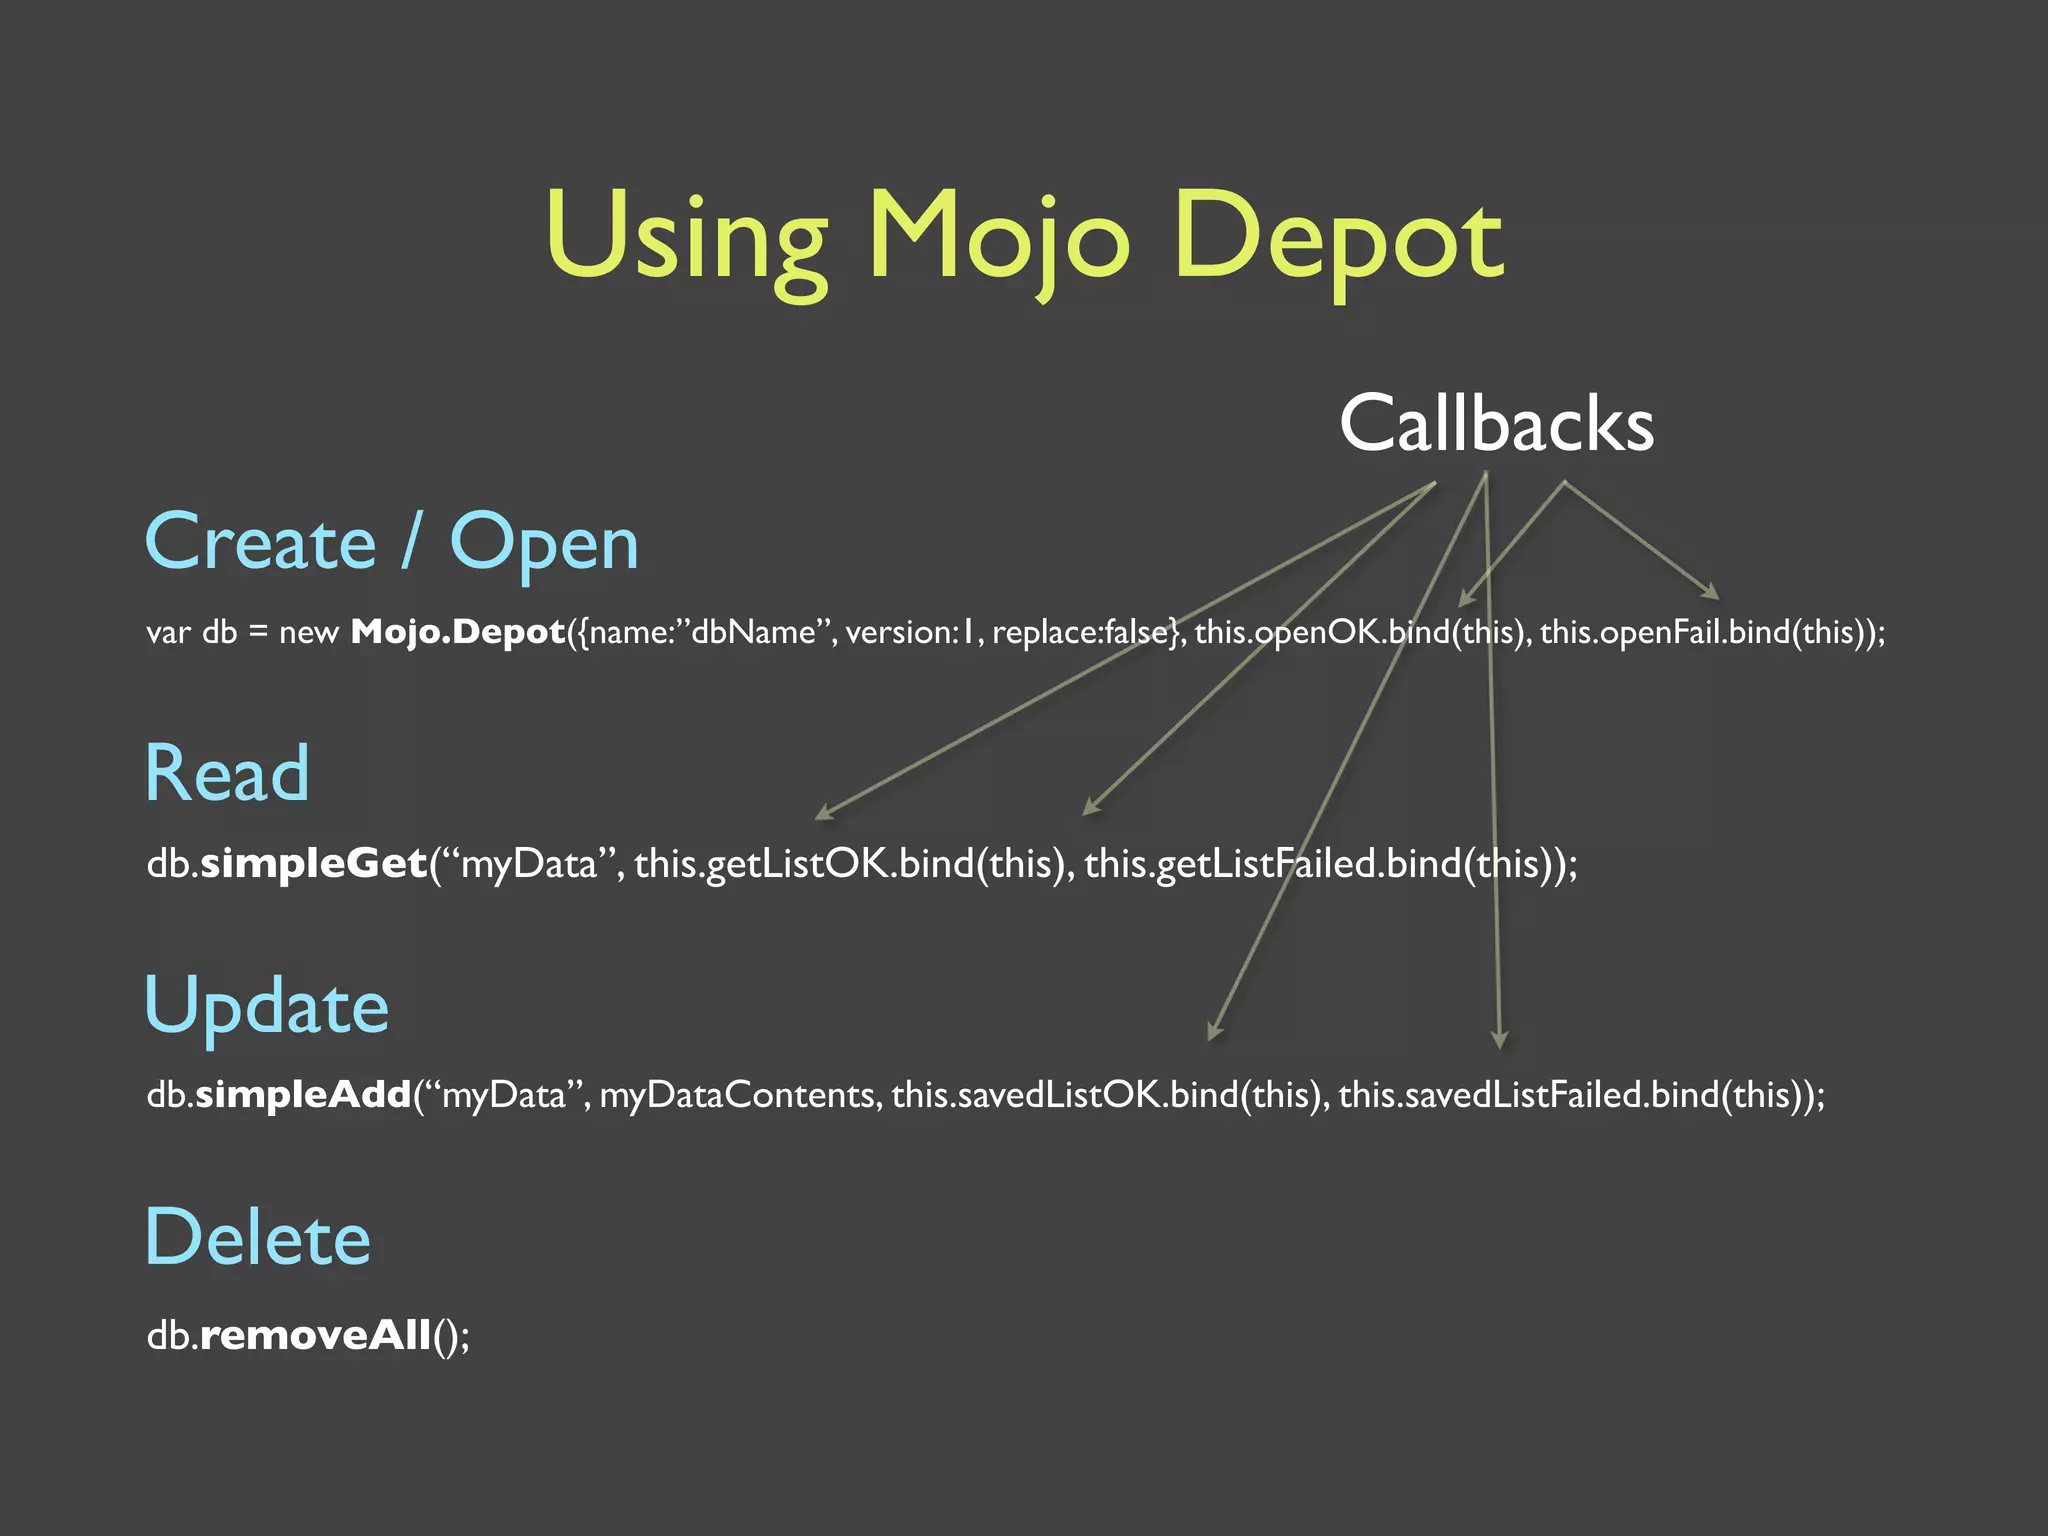
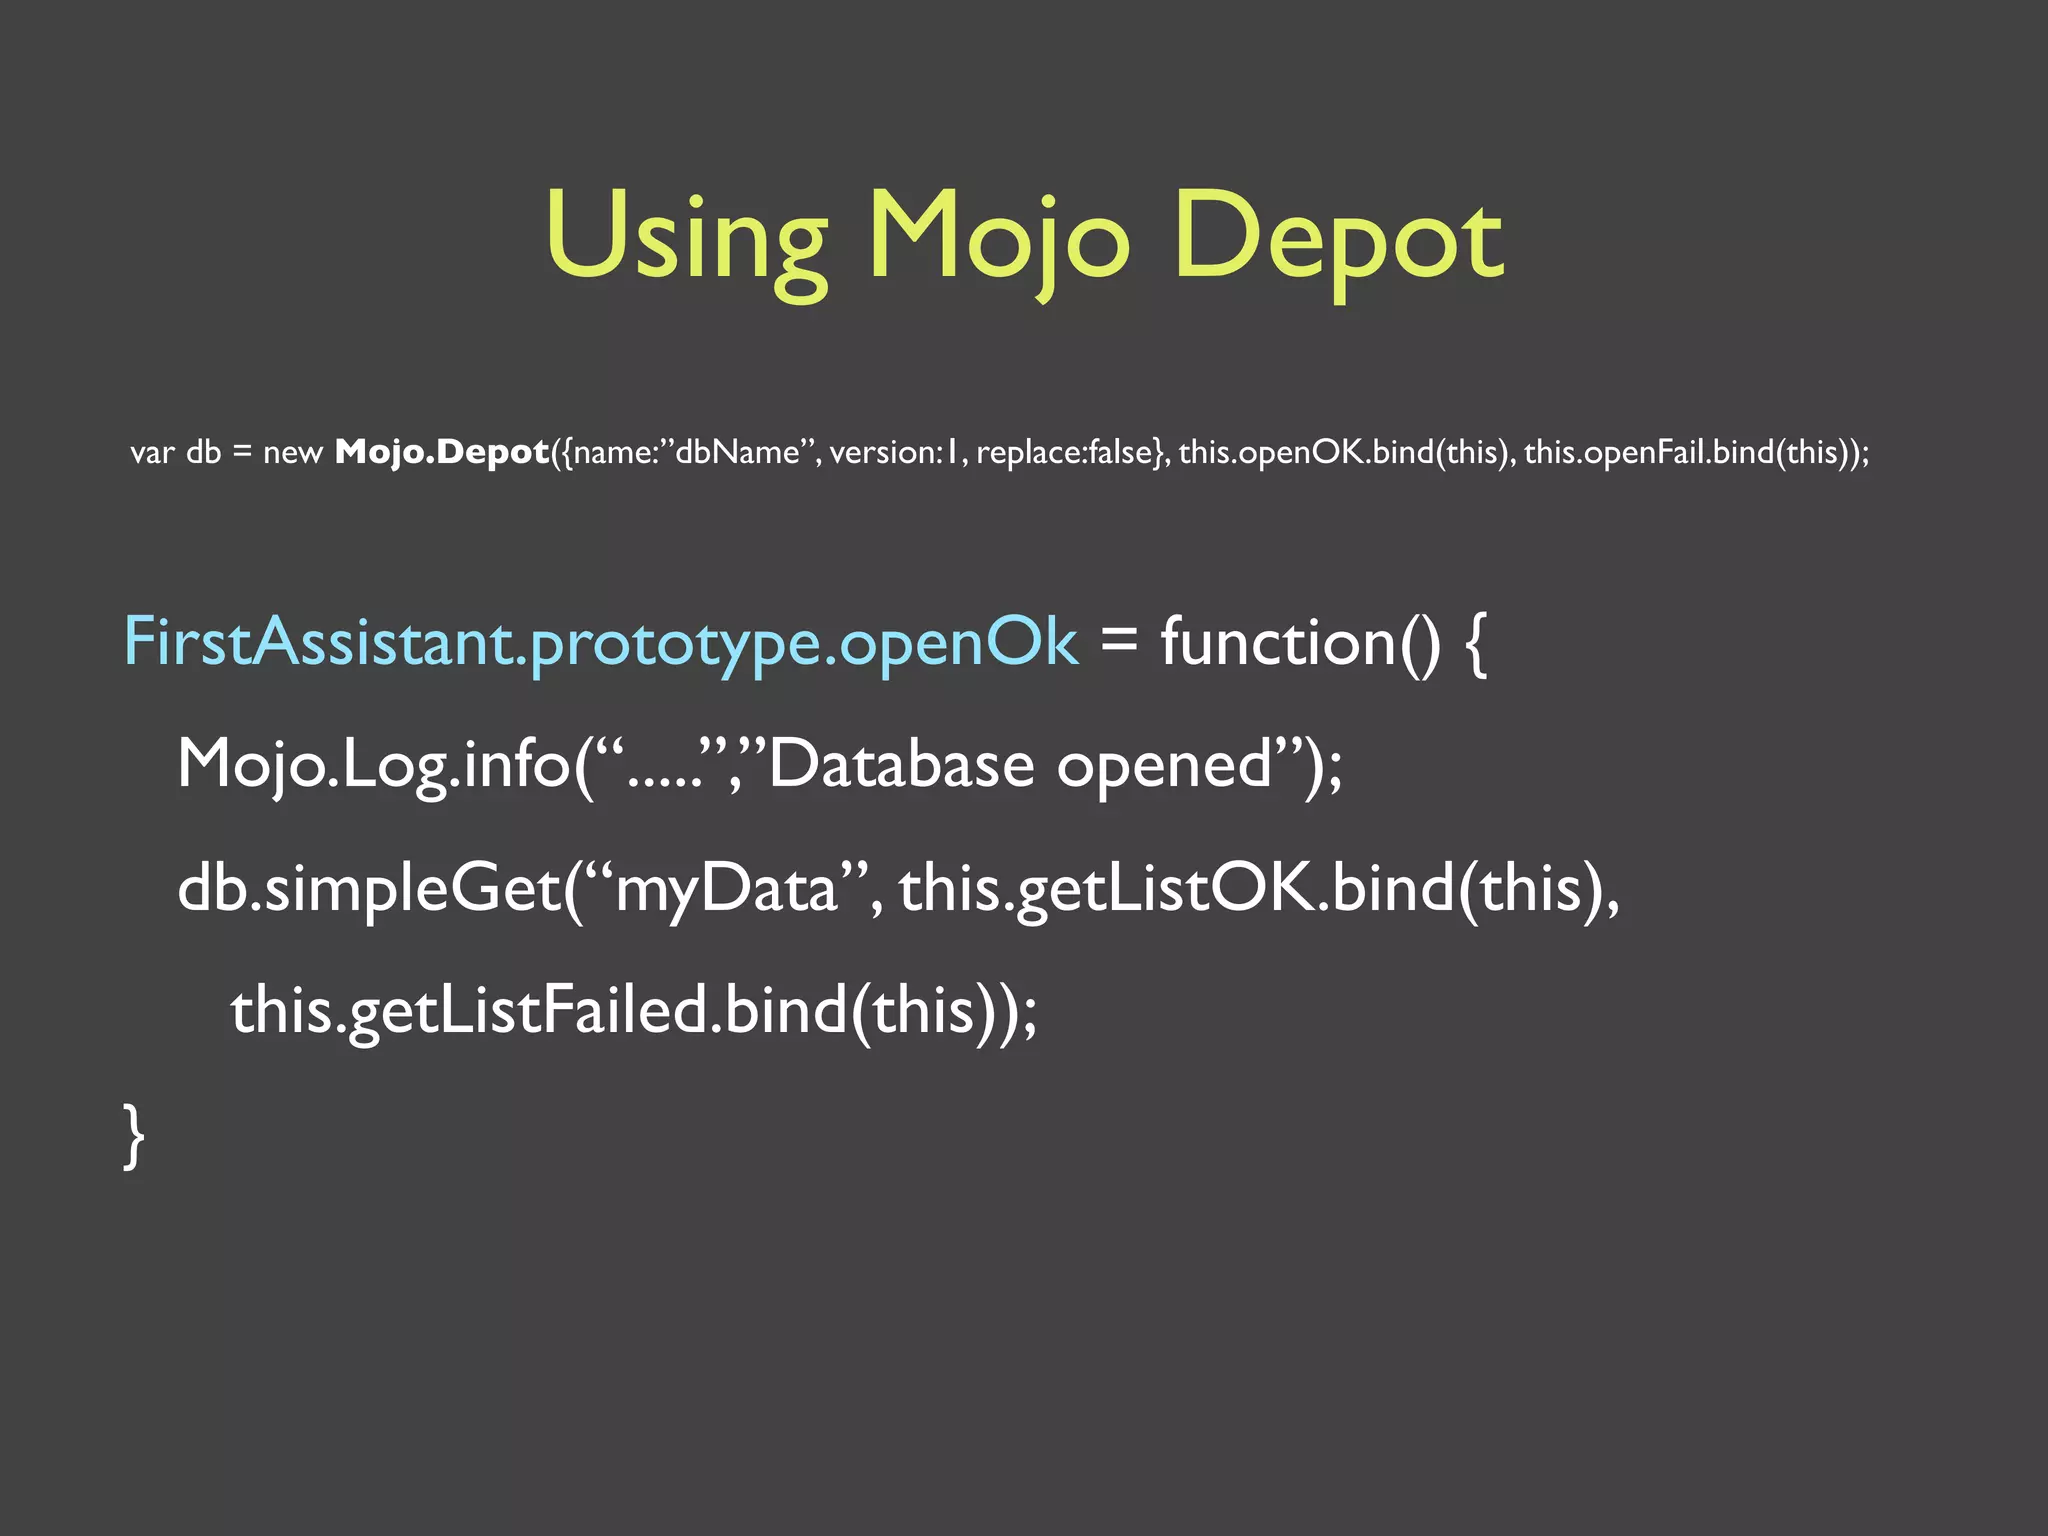
KEMBAR78
Introduction to Palm's Mojo SDK | KEY
Introduction to
Palm’s Mojo SDK
      Brendan G. Lim
   brendan@intridea.com
       @brendanlim
Overview
•   Introduction
•   What’s the Mojo SDK?
•   Introduction to webOS
•   Creating your first application
•   Data storage solutions
•   Overview of UI Widgets
•   Conclusion
Do you know HTML?
Do you know CSS?
Do you know
 JavaScript?
The Mojo SDK
is a perfect fit
Mojo SDK

•   JavaScript framework

•   Bundled with webOS

•   Model-View-Controller (MVC)

•   Can use standard web development tools
Mojo SDK

•   Includes ....

    •   Prototype, the JavaScript framework

    •   Mojo Framework & Documentation

    •   Emulator, DOM Inspector, debugger, etc

    •   Palm specific CSS styles
webOS
• Palm’s next-gen operating system
• Applications built using standard web
  technologies and languages (HTML, CSS,
  JavaScript)
• Designed to run on a variety of hardware
  with different screen sizes & resolutions
webOS
• User experience is optimized for launching
  and managing multiple applications at once
• Integrates a card-based OS with a web
  browser
• Applications can run in the background
• Applications run off Ajax-based web
  application model
Native App Model

     Native Client

      User Interface


     Server Logic Data
Ajax Web App Model
       Browser Client
         User Interface


        Server Logic Data


    HTTP             DHTML/JavaScript
           Web Server


        Server Logic Data

     Server-side Systems
Launcher


           Quick Launch bar
Cards
        Card View


Cards               Activity
Stages
Card    Activity   Dashboard
Generate an App

palm-generate helloWorld
‣ <app>
                   ‣ <assistants>
                     ‣ stage-assistant.js
 Structure of      ‣ <views>
                   ‣ <images>
an Application     ‣ <stylesheets>
                   ‣ appinfo.json
                   ‣ icon.png
                   ‣ index.html
appinfo.json
{
    "id": "com.yourdomain.helloworld",
    "version": "1.0",
    "vendor": "My Company",
    "type": "web",
    "main": "index.html",
    "title": "helloWorld",
    "icon": "icon.png"
}
appinfo.json
•   vender - person or company who made the app
•   vendorurl - URL of the vendor
•   visible - whether or not the application is visible within the
    launcher
•   removeable - tells webOs if you can uninstall this
    application
•   miniicon - path to icon to be used in the notification area
•   category - category for the application
•   noWindow - indivates that this is a headless application that
    will be only called by other applications
helloWorld App
   app/index.html
Packaging an Application

     palm-package helloWorld


The directory where your application was generated
Packaging an Application
Which ends up creating this package:
com.yourdomain.helloworld_1.0_all.ipk
Packaging an Application
     Which ends up creating this package:
     com.yourdomain.helloworld_1.0_all.ipk

   That you can install by doing the following:
palm-install com.yourdomain.helloworld_1.0_all.ipk
Tada!
Scenes
•   Can think of scenes as separate pages within a
    website.
•   Mutually exclusive views of the application
    within a Stage
•   Most applications have different scenes within
    the same stage.
•   An application must have at least one scene.
•   Scenes are supported by a controller
    •   Referred to as a scene assistant
‣ <app>
                                   ‣ <assistants>
                                     ‣ stage-assistant.js
                                   ‣ <views>
Generate a Scene                   ‣ <images>
                                   ‣ <stylesheets>
palm-generate
 -t new_scene -p "name=First" .    ‣ appinfo.json
                                   ‣ icon.png
                                   ‣ index.html
‣ <app>
                                  ‣ <assistants>
                                    ‣ first-assistant.js
                                    ‣ stage-assistant.js
                                  ‣ <views>
Generate a Scene                    ‣ <first>
palm-generate                         ‣ first-scene.html
 -t new_scene -p "name=First" .   ‣ <images>
                                  ‣ <stylesheets>
                                  ‣ appinfo.json
                                  ‣ icon.png
                                  ‣ index.html
Linking to a Scene
    app/index.html
Linking to a Scene
app/assistants/stage-assistant.js
Linking to a Scene
app/assistants/stage-assistant.js
Setting up the First Scene
   app/views/first/first-scene.html
After packing & reinstalling
Let’s tie in one more scene
Run this in the root of your app directory:
 palm-generate -t new_scene -p "name=Second" .
Setup the Second Scene
       app/index.html
Add Button to First Scene
   app/views/first/first-scene.html
Link Button to Second Scene
    app/assistants/first-assistant.js
Link Button to Second Scene
    app/assistants/first-assistant.js
Setup the Second Scene
 app/views/second/second-scene.html
After packing & reinstalling
Storage
• Mojo supports:
 • HTML5 database CRUD operations
 • Depot
 • Cookies
• Used for application preferences or to
  cache data
Mojo Depot
•   Provides a simplified interface to the native HTML5
    database API
•   Depot is recommended if:
    •   You are storing simple objects for offline access
    •   You don’t need a specific schema design
    •   You have no need for transactions or queries
•   Limited to 5MB of data per object
•   Asynchronous callbacks
Using Mojo Depot

Create / Open
Mojo.Depot() - opens a depot with a name that matches or creates a new DB

Read
simpleGet() - returns object it retrieves if there’s a match


Update
simpleAdd()- adds or updates the value of the named object

Delete
removeAll() - removes the named depot and deletes associated data
Using Mojo Depot

Create / Open
var db = new Mojo.Depot({name:”dbName”, version:1, replace:false}, this.openOK.bind(this), this.openFail.bind(this));


Read
db.simpleGet(“myData”, this.getListOK.bind(this), this.getListFailed.bind(this));


Update
db.simpleAdd(“myData”, myDataContents, this.savedListOK.bind(this), this.savedListFailed.bind(this));


Delete
db.removeAll();
Using Mojo Depot
                                                                                Callbacks
Create / Open
var db = new Mojo.Depot({name:”dbName”, version:1, replace:false}, this.openOK.bind(this), this.openFail.bind(this));


Read
db.simpleGet(“myData”, this.getListOK.bind(this), this.getListFailed.bind(this));


Update
db.simpleAdd(“myData”, myDataContents, this.savedListOK.bind(this), this.savedListFailed.bind(this));


Delete
db.removeAll();
Using Mojo Depot
var db = new Mojo.Depot({name:”dbName”, version:1, replace:false}, this.openOK.bind(this), this.openFail.bind(this));


FirstAssistant.prototype.openOk = function() {
    Mojo.Log.info(“.....”,”Database opened”);
    db.simpleGet(“myData”, this.getListOK.bind(this),
      this.getListFailed.bind(this));
}
Mojo Cookies
•   Simplified interface to cookies
•   Intended to be used to store small amounts of data
    •   Application Preferences, versions, or state
        information
•   webOS creates a “fake domain” for individual cookies
    based on the application’s ID.
•   Limited to 4KB, but multiple cookies per application is
    acceptable
•   Synchronous callbacks
Using Mojo Cookies

Create / Open
Mojo.Model.Cookie(id) - opens or creates cookie that matches the id

Read
get() - returns object it retrieves if there’s a match


Update
put()- adds or updates object with an optional date/time to expire

Delete
remove() - removes the cookie and it’s data
Using Mojo Cookies

Create / Open
this.cookie = new Mojo.Model.Cookie(“Preferences”);


Read
var retrievedPrefs = this.cookie.get();


Update
this.cookie.put({ ...jsonKey: jsonValue ... });


Delete
this.cookie.remove();
UI Widgets
•   User interface controls to create feature-rich
    interactive applications
•   Types of widgets:
    •   Static/dynamic lists, button controls, selectors,
        text fields, menus, dialogs, pickers, viewers
•   Instantiated in a scene’s assistant setup method
    or when specified in an HTML template used by
    another widget.
UI Widgets: Lists
• Most important widget in the framework
• webOS user experience was built around a
  fast and powerful list widget
• Can be used bind dynamic data sources
• Can embed other widgets & objects within
  your lists
UI Widgets: Menus
• Menu widgets can be used with specified
  areas of the screen
 • View & Command menus
  • Fully customizable
 • App menu handled by the system
  • Custom items can be added to these
Summary
• If you have a general understanding of
  HTML, CSS, and JavaScript you can start
  developing for Palm’s webOS
• The MojoSDK is a solid framework that
  allows us to create applications easily
• There is MUCH more to the MojoSDK and
  webOS than was covered in this
  presentation.
Questions?

Introduction to Palm's Mojo SDK

  • 1.
    Introduction to Palm’s MojoSDK Brendan G. Lim brendan@intridea.com @brendanlim
  • 2.
    Overview • Introduction • What’s the Mojo SDK? • Introduction to webOS • Creating your first application • Data storage solutions • Overview of UI Widgets • Conclusion
  • 8.
  • 9.
  • 10.
    Do you know JavaScript?
  • 11.
    The Mojo SDK isa perfect fit
  • 12.
    Mojo SDK • JavaScript framework • Bundled with webOS • Model-View-Controller (MVC) • Can use standard web development tools
  • 13.
    Mojo SDK • Includes .... • Prototype, the JavaScript framework • Mojo Framework & Documentation • Emulator, DOM Inspector, debugger, etc • Palm specific CSS styles
  • 14.
    webOS • Palm’s next-genoperating system • Applications built using standard web technologies and languages (HTML, CSS, JavaScript) • Designed to run on a variety of hardware with different screen sizes & resolutions
  • 15.
    webOS • User experienceis optimized for launching and managing multiple applications at once • Integrates a card-based OS with a web browser • Applications can run in the background • Applications run off Ajax-based web application model
  • 16.
    Native App Model Native Client User Interface Server Logic Data
  • 17.
    Ajax Web AppModel Browser Client User Interface Server Logic Data HTTP DHTML/JavaScript Web Server Server Logic Data Server-side Systems
  • 18.
    Launcher Quick Launch bar
  • 19.
    Cards Card View Cards Activity
  • 20.
    Stages Card Activity Dashboard
  • 21.
  • 22.
    ‣ <app> ‣ <assistants> ‣ stage-assistant.js Structure of ‣ <views> ‣ <images> an Application ‣ <stylesheets> ‣ appinfo.json ‣ icon.png ‣ index.html
  • 23.
    appinfo.json { "id": "com.yourdomain.helloworld", "version": "1.0", "vendor": "My Company", "type": "web", "main": "index.html", "title": "helloWorld", "icon": "icon.png" }
  • 24.
    appinfo.json • vender - person or company who made the app • vendorurl - URL of the vendor • visible - whether or not the application is visible within the launcher • removeable - tells webOs if you can uninstall this application • miniicon - path to icon to be used in the notification area • category - category for the application • noWindow - indivates that this is a headless application that will be only called by other applications
  • 25.
    helloWorld App app/index.html
  • 26.
    Packaging an Application palm-package helloWorld The directory where your application was generated
  • 27.
    Packaging an Application Whichends up creating this package: com.yourdomain.helloworld_1.0_all.ipk
  • 28.
    Packaging an Application Which ends up creating this package: com.yourdomain.helloworld_1.0_all.ipk That you can install by doing the following: palm-install com.yourdomain.helloworld_1.0_all.ipk
  • 29.
  • 30.
    Scenes • Can think of scenes as separate pages within a website. • Mutually exclusive views of the application within a Stage • Most applications have different scenes within the same stage. • An application must have at least one scene. • Scenes are supported by a controller • Referred to as a scene assistant
  • 31.
    ‣ <app> ‣ <assistants> ‣ stage-assistant.js ‣ <views> Generate a Scene ‣ <images> ‣ <stylesheets> palm-generate -t new_scene -p "name=First" . ‣ appinfo.json ‣ icon.png ‣ index.html
  • 32.
    ‣ <app> ‣ <assistants> ‣ first-assistant.js ‣ stage-assistant.js ‣ <views> Generate a Scene ‣ <first> palm-generate ‣ first-scene.html -t new_scene -p "name=First" . ‣ <images> ‣ <stylesheets> ‣ appinfo.json ‣ icon.png ‣ index.html
  • 33.
    Linking to aScene app/index.html
  • 34.
    Linking to aScene app/assistants/stage-assistant.js
  • 35.
    Linking to aScene app/assistants/stage-assistant.js
  • 36.
    Setting up theFirst Scene app/views/first/first-scene.html
  • 37.
    After packing &reinstalling
  • 38.
    Let’s tie inone more scene Run this in the root of your app directory: palm-generate -t new_scene -p "name=Second" .
  • 39.
    Setup the SecondScene app/index.html
  • 40.
    Add Button toFirst Scene app/views/first/first-scene.html
  • 41.
    Link Button toSecond Scene app/assistants/first-assistant.js
  • 42.
    Link Button toSecond Scene app/assistants/first-assistant.js
  • 43.
    Setup the SecondScene app/views/second/second-scene.html
  • 44.
    After packing &reinstalling
  • 45.
    Storage • Mojo supports: • HTML5 database CRUD operations • Depot • Cookies • Used for application preferences or to cache data
  • 46.
    Mojo Depot • Provides a simplified interface to the native HTML5 database API • Depot is recommended if: • You are storing simple objects for offline access • You don’t need a specific schema design • You have no need for transactions or queries • Limited to 5MB of data per object • Asynchronous callbacks
  • 47.
    Using Mojo Depot Create/ Open Mojo.Depot() - opens a depot with a name that matches or creates a new DB Read simpleGet() - returns object it retrieves if there’s a match Update simpleAdd()- adds or updates the value of the named object Delete removeAll() - removes the named depot and deletes associated data
  • 48.
    Using Mojo Depot Create/ Open var db = new Mojo.Depot({name:”dbName”, version:1, replace:false}, this.openOK.bind(this), this.openFail.bind(this)); Read db.simpleGet(“myData”, this.getListOK.bind(this), this.getListFailed.bind(this)); Update db.simpleAdd(“myData”, myDataContents, this.savedListOK.bind(this), this.savedListFailed.bind(this)); Delete db.removeAll();
  • 49.
    Using Mojo Depot Callbacks Create / Open var db = new Mojo.Depot({name:”dbName”, version:1, replace:false}, this.openOK.bind(this), this.openFail.bind(this)); Read db.simpleGet(“myData”, this.getListOK.bind(this), this.getListFailed.bind(this)); Update db.simpleAdd(“myData”, myDataContents, this.savedListOK.bind(this), this.savedListFailed.bind(this)); Delete db.removeAll();
  • 50.
    Using Mojo Depot vardb = new Mojo.Depot({name:”dbName”, version:1, replace:false}, this.openOK.bind(this), this.openFail.bind(this)); FirstAssistant.prototype.openOk = function() { Mojo.Log.info(“.....”,”Database opened”); db.simpleGet(“myData”, this.getListOK.bind(this), this.getListFailed.bind(this)); }
  • 51.
    Mojo Cookies • Simplified interface to cookies • Intended to be used to store small amounts of data • Application Preferences, versions, or state information • webOS creates a “fake domain” for individual cookies based on the application’s ID. • Limited to 4KB, but multiple cookies per application is acceptable • Synchronous callbacks
  • 52.
    Using Mojo Cookies Create/ Open Mojo.Model.Cookie(id) - opens or creates cookie that matches the id Read get() - returns object it retrieves if there’s a match Update put()- adds or updates object with an optional date/time to expire Delete remove() - removes the cookie and it’s data
  • 53.
    Using Mojo Cookies Create/ Open this.cookie = new Mojo.Model.Cookie(“Preferences”); Read var retrievedPrefs = this.cookie.get(); Update this.cookie.put({ ...jsonKey: jsonValue ... }); Delete this.cookie.remove();
  • 54.
    UI Widgets • User interface controls to create feature-rich interactive applications • Types of widgets: • Static/dynamic lists, button controls, selectors, text fields, menus, dialogs, pickers, viewers • Instantiated in a scene’s assistant setup method or when specified in an HTML template used by another widget.
  • 55.
    UI Widgets: Lists •Most important widget in the framework • webOS user experience was built around a fast and powerful list widget • Can be used bind dynamic data sources • Can embed other widgets & objects within your lists
  • 56.
    UI Widgets: Menus •Menu widgets can be used with specified areas of the screen • View & Command menus • Fully customizable • App menu handled by the system • Custom items can be added to these
  • 57.
    Summary • If youhave a general understanding of HTML, CSS, and JavaScript you can start developing for Palm’s webOS • The MojoSDK is a solid framework that allows us to create applications easily • There is MUCH more to the MojoSDK and webOS than was covered in this presentation.
  • 58.

Editor's Notes

  • #5 Some of our products include applications like Present.ly, a microblogging solution for businesses.
  • #6 Scalr, which allows you to take advantage of Amazon&amp;#x2019;s EC2 service without poking your eyeballs out.
  • #7 CrowdSound, which allows your customers to leave feedback on your applications.
  • #8 ... and MediaPlug which allows you to offload long user uploads and do complex transcoding and manipulations automagically without your users having to leave your site.
  • #17 This is the native application model, which Palm OS had and other major mobile platforms use. In this model the app is installed as an executable on the native OS with direct access to the OS&amp;#x2019;s data and services.
  • #18 This is the application model that Palm&amp;#x2019;s webOS uses. Ajax apps have some nice advantages over embedded apps. They can be more easily deployed and updated through the same techniques used for web applications. It&amp;#x2019;s also much easier for most developers to jump in since it&amp;#x2019;s just like web apps. This is big for web development shops with developers that aren&amp;#x2019;t familiar with Java or Objective-C. Since they all know how to make web apps, they are all essentially mobile developers bc of Palm&amp;#x2019;s Mojo SDK.
  • #20 Cards were inspired by the way one person handles a deck of cards. webOS works similarly by allowing you to scroll through cards, select cards and flicking cards off the top of the screen to remove them or select them and drag them to a new location. There are cards, the expanded card view and the individual activity view.
  • #21 webOS applications can have one or more stages. Here you can see the Card stage, Activity stage, and the Dashboard stage. Stages are declarative HTML structures similar to a traditional HTML window or browser tab. For example the Inbox view may be one stage and the screen to create a new e-mail would be another stage.
  • #23 So, this is the initial structure of the application after you generate your helloWorld application. Within app there is the assistants folder, views for your HTML files, images, stylsheets, etc. The important file here is appinfo.json which holds all the info for your application. The icon is what is shown in the launcher for your application. Also, like a regular web page, index.html is the initial view that is loaded.
  • #24 So the appinfo.json file is one of the most important files in your application. It contains the information to load and launch your application. The id specifies the package name for your account. Everything else is pretty much self explanatory. There&amp;#x2019;s a bunch of other options you can include here as well ...
  • #25 Here are some of the other options you can add in to your appInfo.json
  • #26 So, this is the index.html page that is automatically generated for you. The mojo framework is automatically included for you in the script tag above. You must include this in every application. Also you can notice below, there&amp;#x2019;s sample text that is automatically generated for you to verify that your application actually runs. If you end up creating other stages or other scenes you have to include the assistants for those. We&amp;#x2019;ll go into this in just a second.
  • #31 Most applications will have multiple scenes. An example of an application with only one scene, though, would be a Calculator. Scenes are managed like a stack with new scenes &amp;#x2018;pushed&amp;#x2019; onto and off of the stack with the last scene on the stack visible in the view.
  • #32 palm-generate -t (task) new_scene with properties of name = to first. So you can see on the right the old directory structure from when we initially generated the application earlier.
  • #33 So, after you run this command you can see that the first assistant was added and a new folder called &amp;#x2018;first&amp;#x2019; and an html page called first-scene.html has been created.
  • #34 So, if we go into index.htm, we&amp;#x2019;re going to want to add in stage-assistant and first-assistant. The stage assistant sets up any application-wide objects and pushes the first scene onto the stack. The scene assistant allows you to control that scene&amp;#x2019;s behavior.
  • #35 This is the code generated for you within stage-assistant sans the comments. Here we&amp;#x2019;re going to want to add a new call to the setup method, which gets run when the application gets started.
  • #36 Here, we&amp;#x2019;re telling the stage assistant to go ahead and load the first scene when we launch the application.
  • #37 Since it won&amp;#x2019;t be any fun to link to a bank page, we&amp;#x2019;re going to add some html to our first scene. As you can see here, it&amp;#x2019;s just straight HTML. The CSS classes you see above are built in styling that comes with the MojoSDK, which you can also override if you want to. Palm actually has a set of Human Interface Guidelines just like Apple does with the iPhone -- so make sure that if you do end up overriding these styles, you are within their guidelines.
  • #38 So, after
  • #40 Now that we&amp;#x2019;ve created the second scene, we have to do what we did to the first scene and add in the second-assistant to our index page.
  • #41 So, within our first scene I&amp;#x2019;m adding a button with the standard palm-button styling and with an id of myButton so that I can reference it within an assistant.
  • #42 So, this here is what is generated for you for a specific assistant. In this case this is our first assistant file that was generated for us earlier when we created that scene. I made sure to take out the comments within the javascript file since it took up way too much space to fit within this slide.
  • #43 So, within the setup function, which gets called when this scene is loaded, we&amp;#x2019;re going to want to setup an event listener for &amp;#x2018;myButton&amp;#x2019;, which we specifically specified in the html page. So when we &amp;#x2018;click&amp;#x2019; we&amp;#x2019;re going to want to go to launch the nextScene function. So if you look on the bottom you can see in the nextScene function, we make the Mojo controller push the second scene onto the stack.
  • #44 and like the first, let&amp;#x2019;s add some goods to our second scene so we have something to look at.
  • #46 Depot, which is just a simplified interface to the HTML5 database API Cookies are your standard HTTP cookies
  • #55 Widgets support the webOS interface and Mojo defines the styles for each of the widgets. The styling for them is already available by declaring and using the widgets -- although styling can be overridden with custom CSS. The List widget is the most important in the framework since webOS was built around a fast and power list widget experience.
  • #56 The List widget is the most important in the framework since webOS was built around a fast and power list widget experience. You can use lists to bind dynamic data sources with instant filtering and you can also embed other widgets &amp; objects within your lists
  • #57 Menu widgets can be used with specified areas of the screen. - The App Menu is a regular desktop style menu on the top left of the screen. - The View Menu applies to menus across the top of the screen and can be used as your display header - The Command Menu is used to set a menu at the bottom of the screen Unlike other widgets, the menu widgets aren&amp;#x2019;t declared in your scene view. They are instantiated completely within the scene assistant within the setupWidget call.