Downloaded 183 times

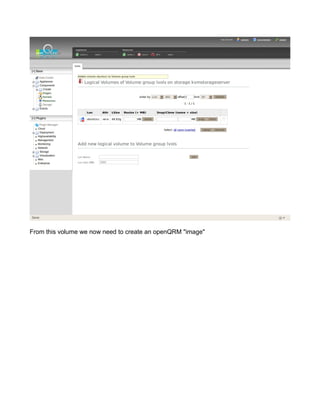
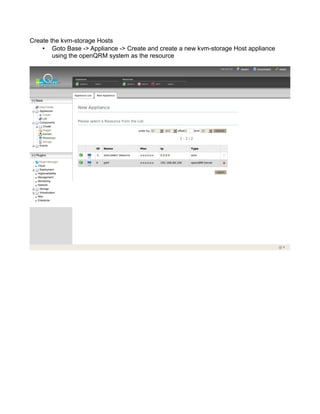


![Export an openQRM Image to Amazon EC2
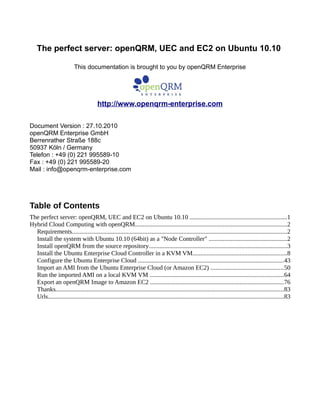
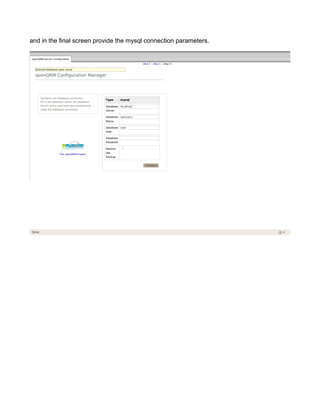
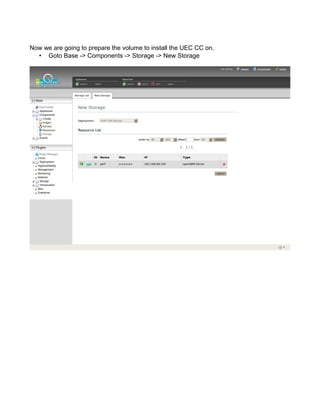
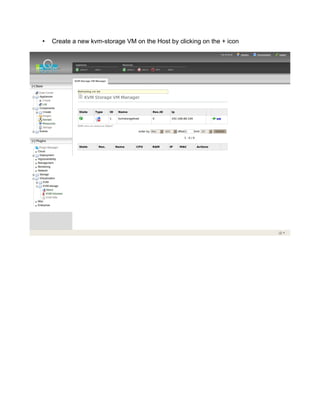
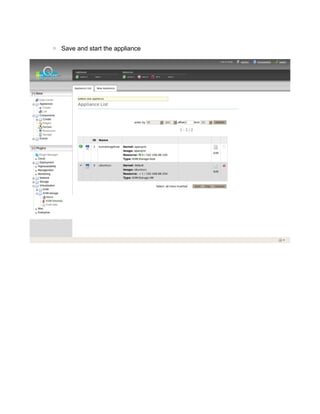
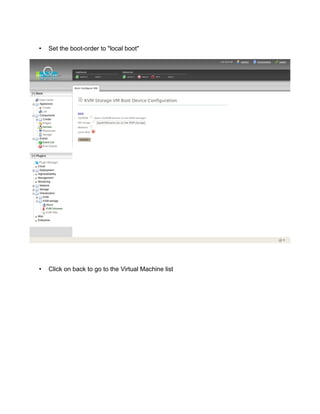
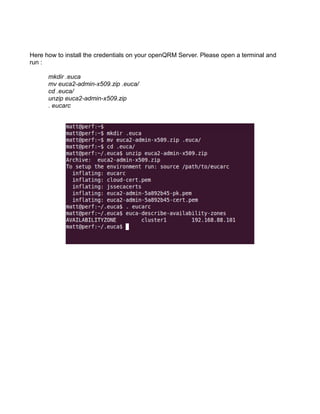
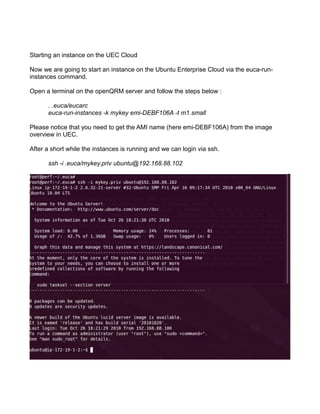
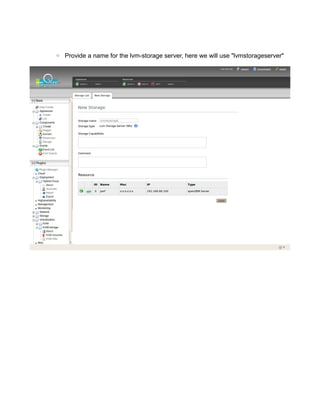
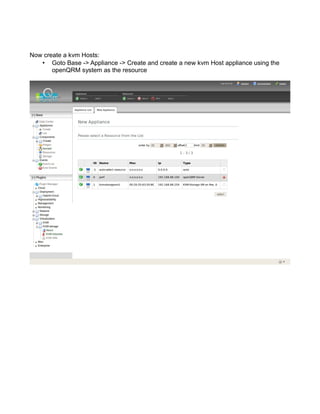
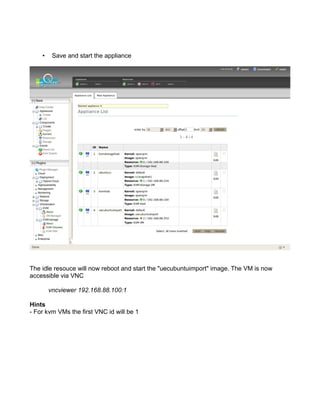
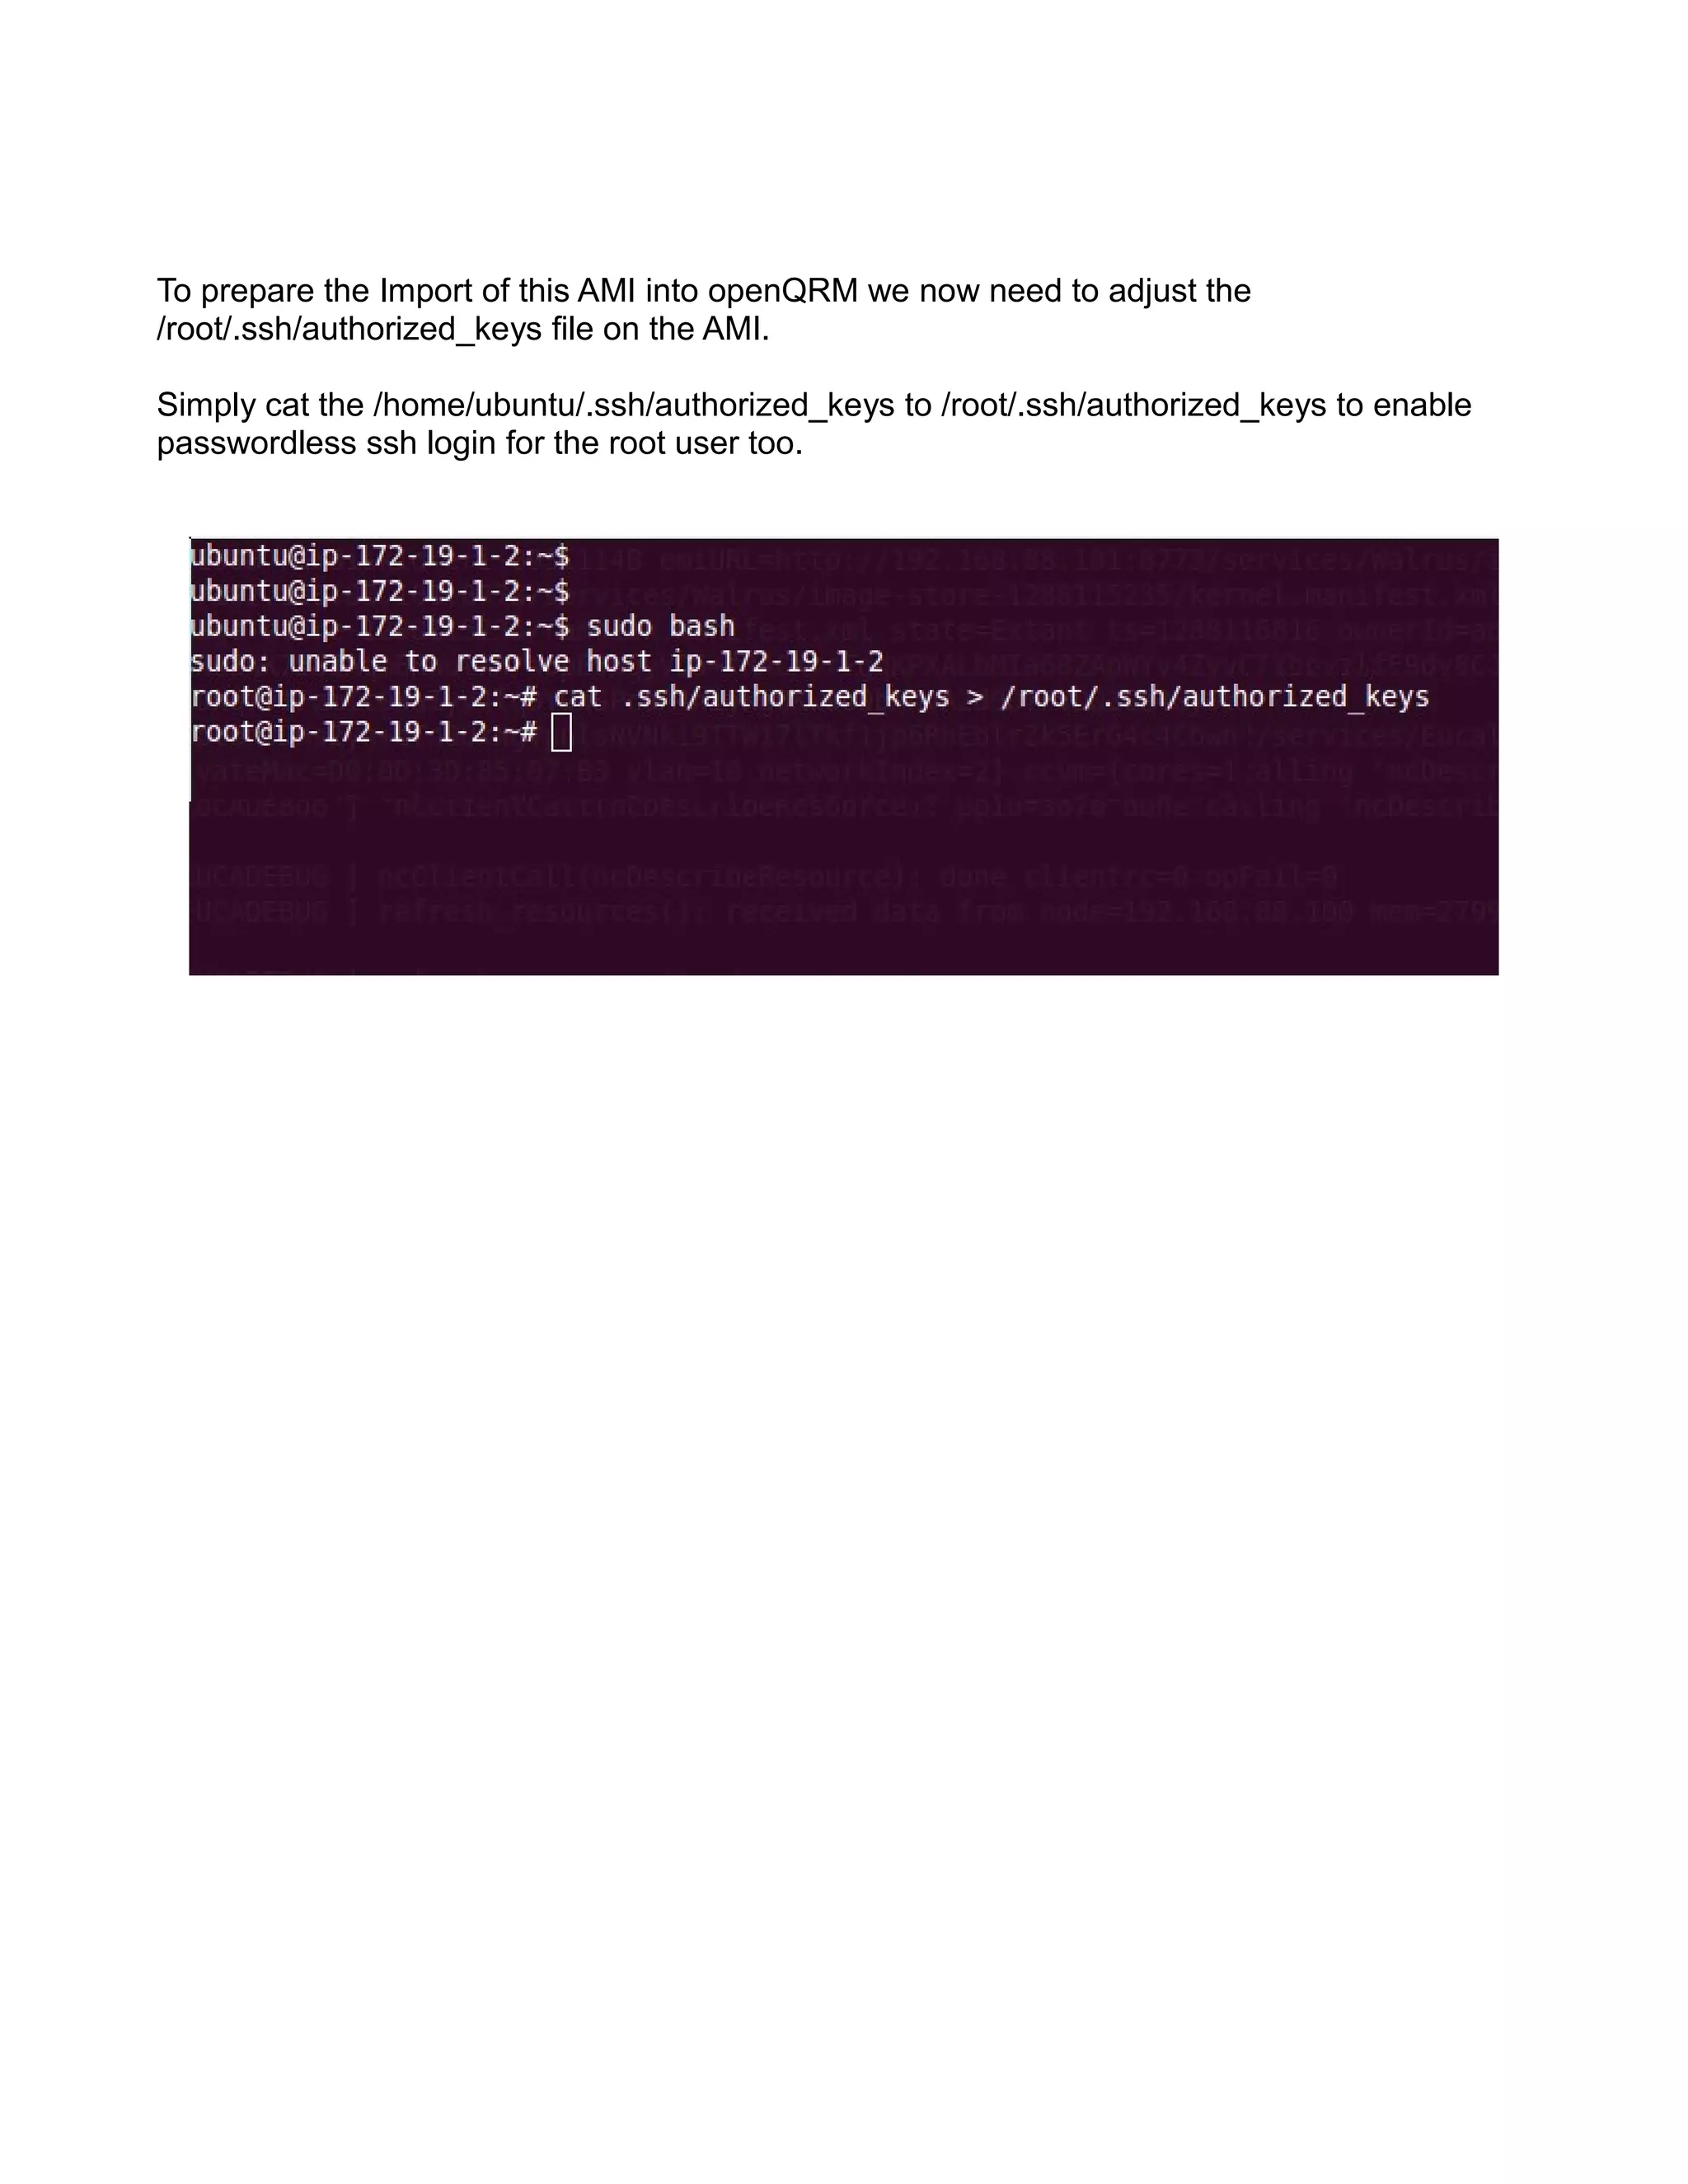
To export an openQRM Image to Amazon EC2 (or to an Ubuntu Enterprise Cloud) we first
have to install the Amazon ec2-ami-tools and ec2-api-tools.
Download the Amazon EC2 API Tools from http://aws.amazon.com/developertools/351
Download the Amazon EC2 AMI Tools from http://aws.amazon.com/developertools/368
Install both tools on the openQRM Server at /home/[username]/aws
cd
mkdir -p aws .ec2
cp ec2-ami-tools.zip ec2-api-tools.zip aws
cd aws
unzip ec2-ami-tools.zip
unzip ec2-api-tools.zip
Please make sure to have a java jdk installed. Also you need to install ruby and curl.
sudo apt-get install ruby curl
The ec2-tools require this.
Next step is to create a Amazon rc-config file allowing the ec2-tools to work seamlessly.
A sample ec2rc config file looks like this (of course this example contains random user data):
# for java to work ok
export JAVA_HOME=/home/matt/java/jdk1.6.0_14
# aws api tools
export EC2_HOME=/home/matt/aws/ec2-api-tools-1.3-57419
# aws ami tools
export EC2_AMITOOL_HOME=/home/matt/aws/ec2-ami-tools-1.3-57676
export EC2_PRIVATE_KEY=/home/matt/.ec2/pk-123456.pem
export EC2_CERT=/home/matt/.ec2/cert-123456.pem
# EU
export EC2_URL=https://ec2.eu-west-1.amazonaws.com
# US
#export EC2_URL=https://us-east-1.ec2.amazonaws.com
# keys
export EC2_ACCESS_KEY='123456'
export EC2_SECRET_KEY='123456'
export PATH=$JAVA_HOME/bin:$PATH:$EC2_HOME/bin:
$EC2_AMITOOL_HOME/bin:/usr/games:/home/matt/scripts
# aws user id for the cmdline tools
export EC2_USER_ID="123456"](https://image.slidesharecdn.com/openqrm-uec-ec2-howto-101031075919-phpapp01/85/openQRM-how-to-Setup-UEC-and-openQRM-cloud-76-320.jpg)
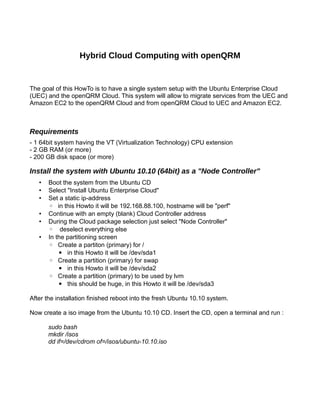
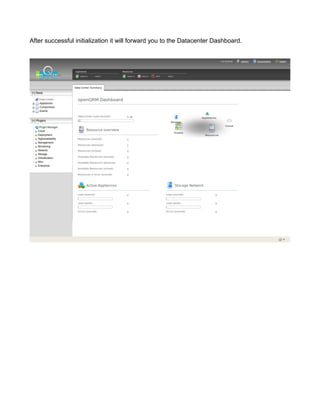
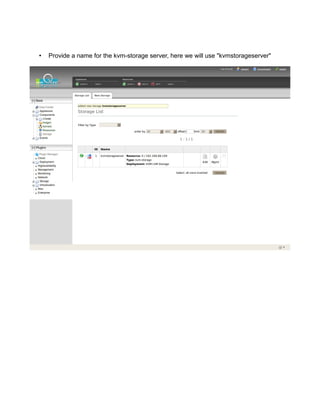
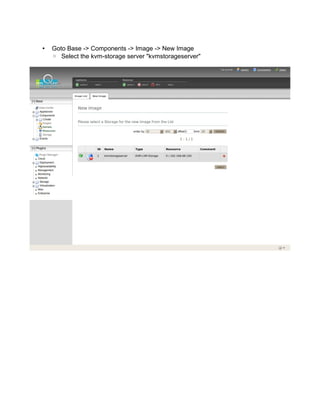
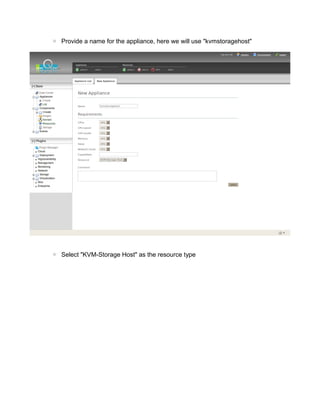
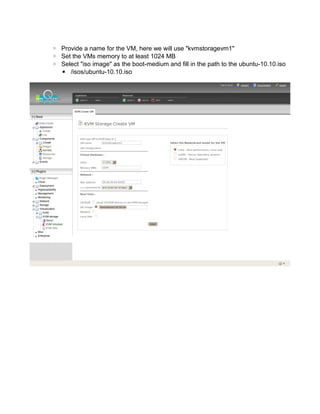
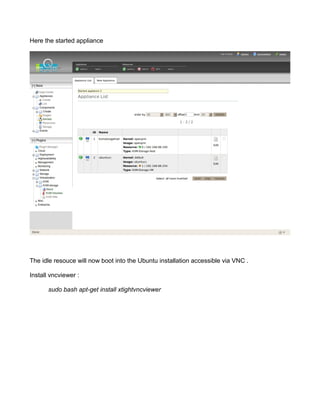
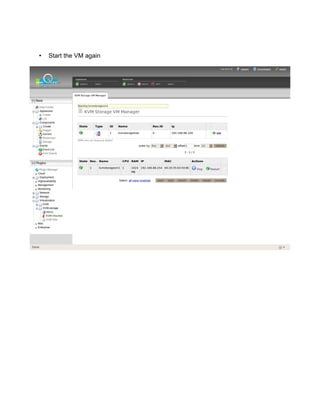
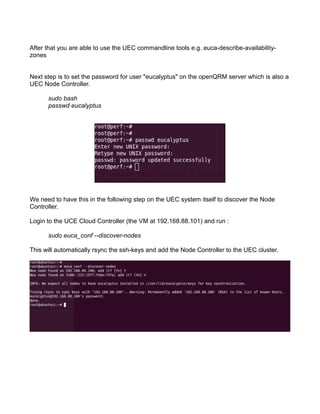
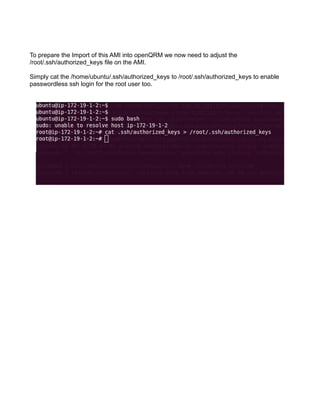
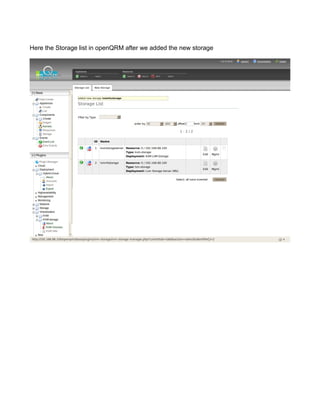
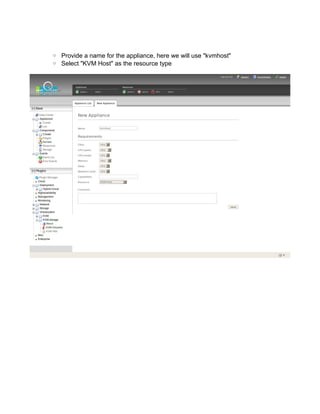
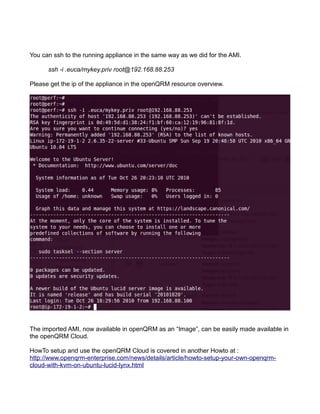
![Please save content as /home/[username]/.ec2/ec2rc
Also please download your AWS Private-key and your AWS Certificate to /home/
[username]/.ec2/
After that please source the ec2rc and check the functionality of the ec2-tools by running
“ec2-describe-regions”.](https://image.slidesharecdn.com/openqrm-uec-ec2-howto-101031075919-phpapp01/85/openQRM-how-to-Setup-UEC-and-openQRM-cloud-77-320.jpg)
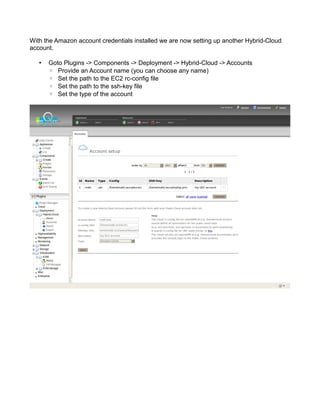
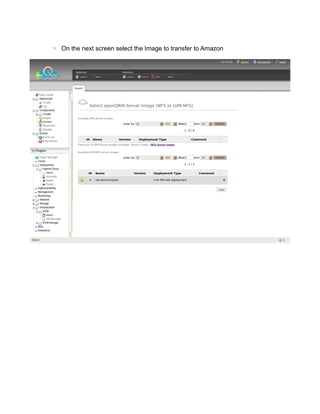

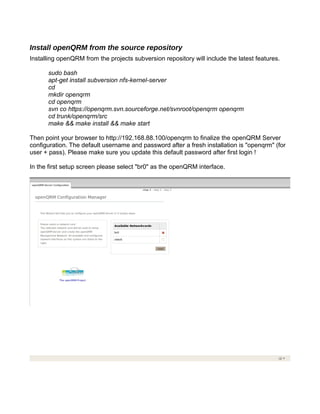
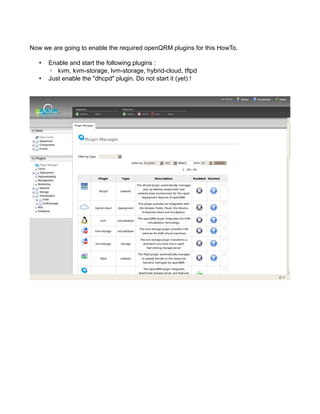
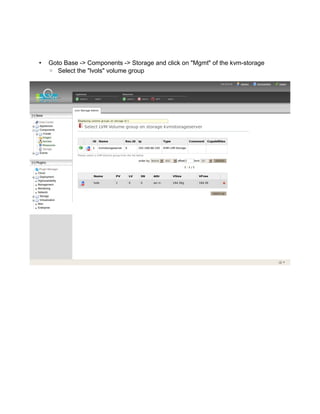
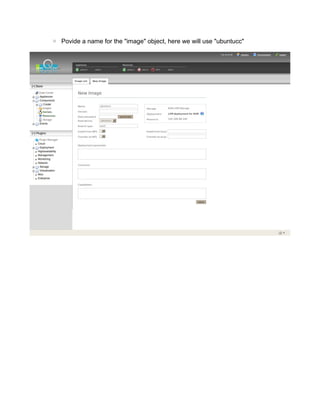
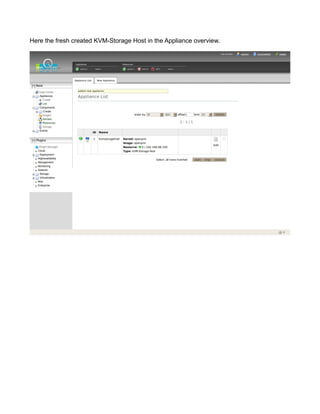
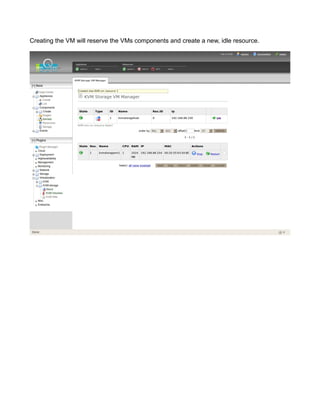
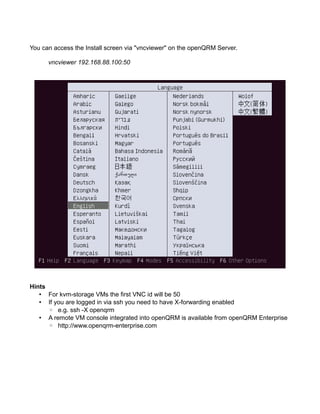
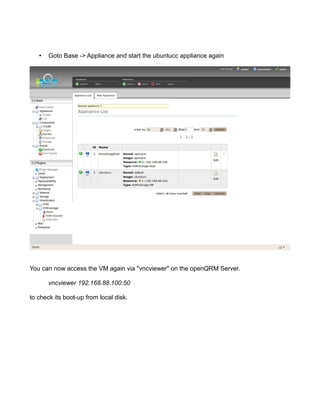
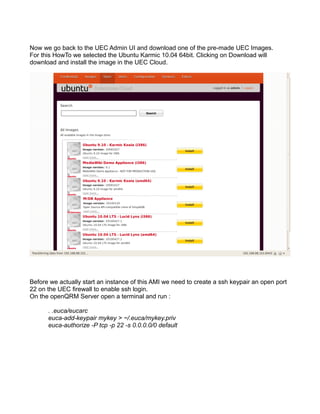
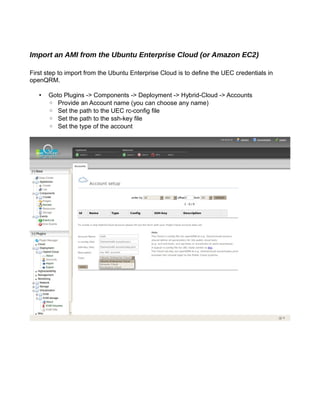
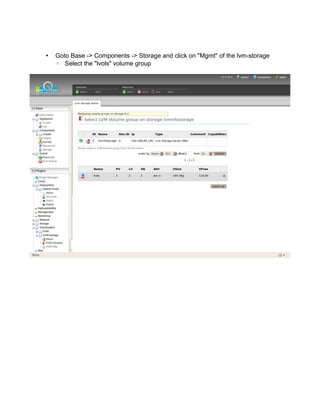
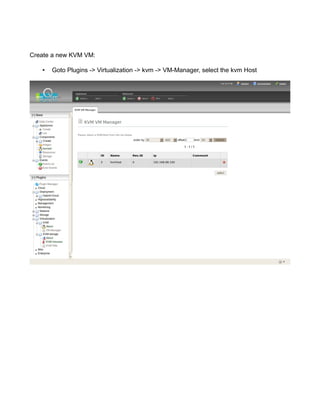
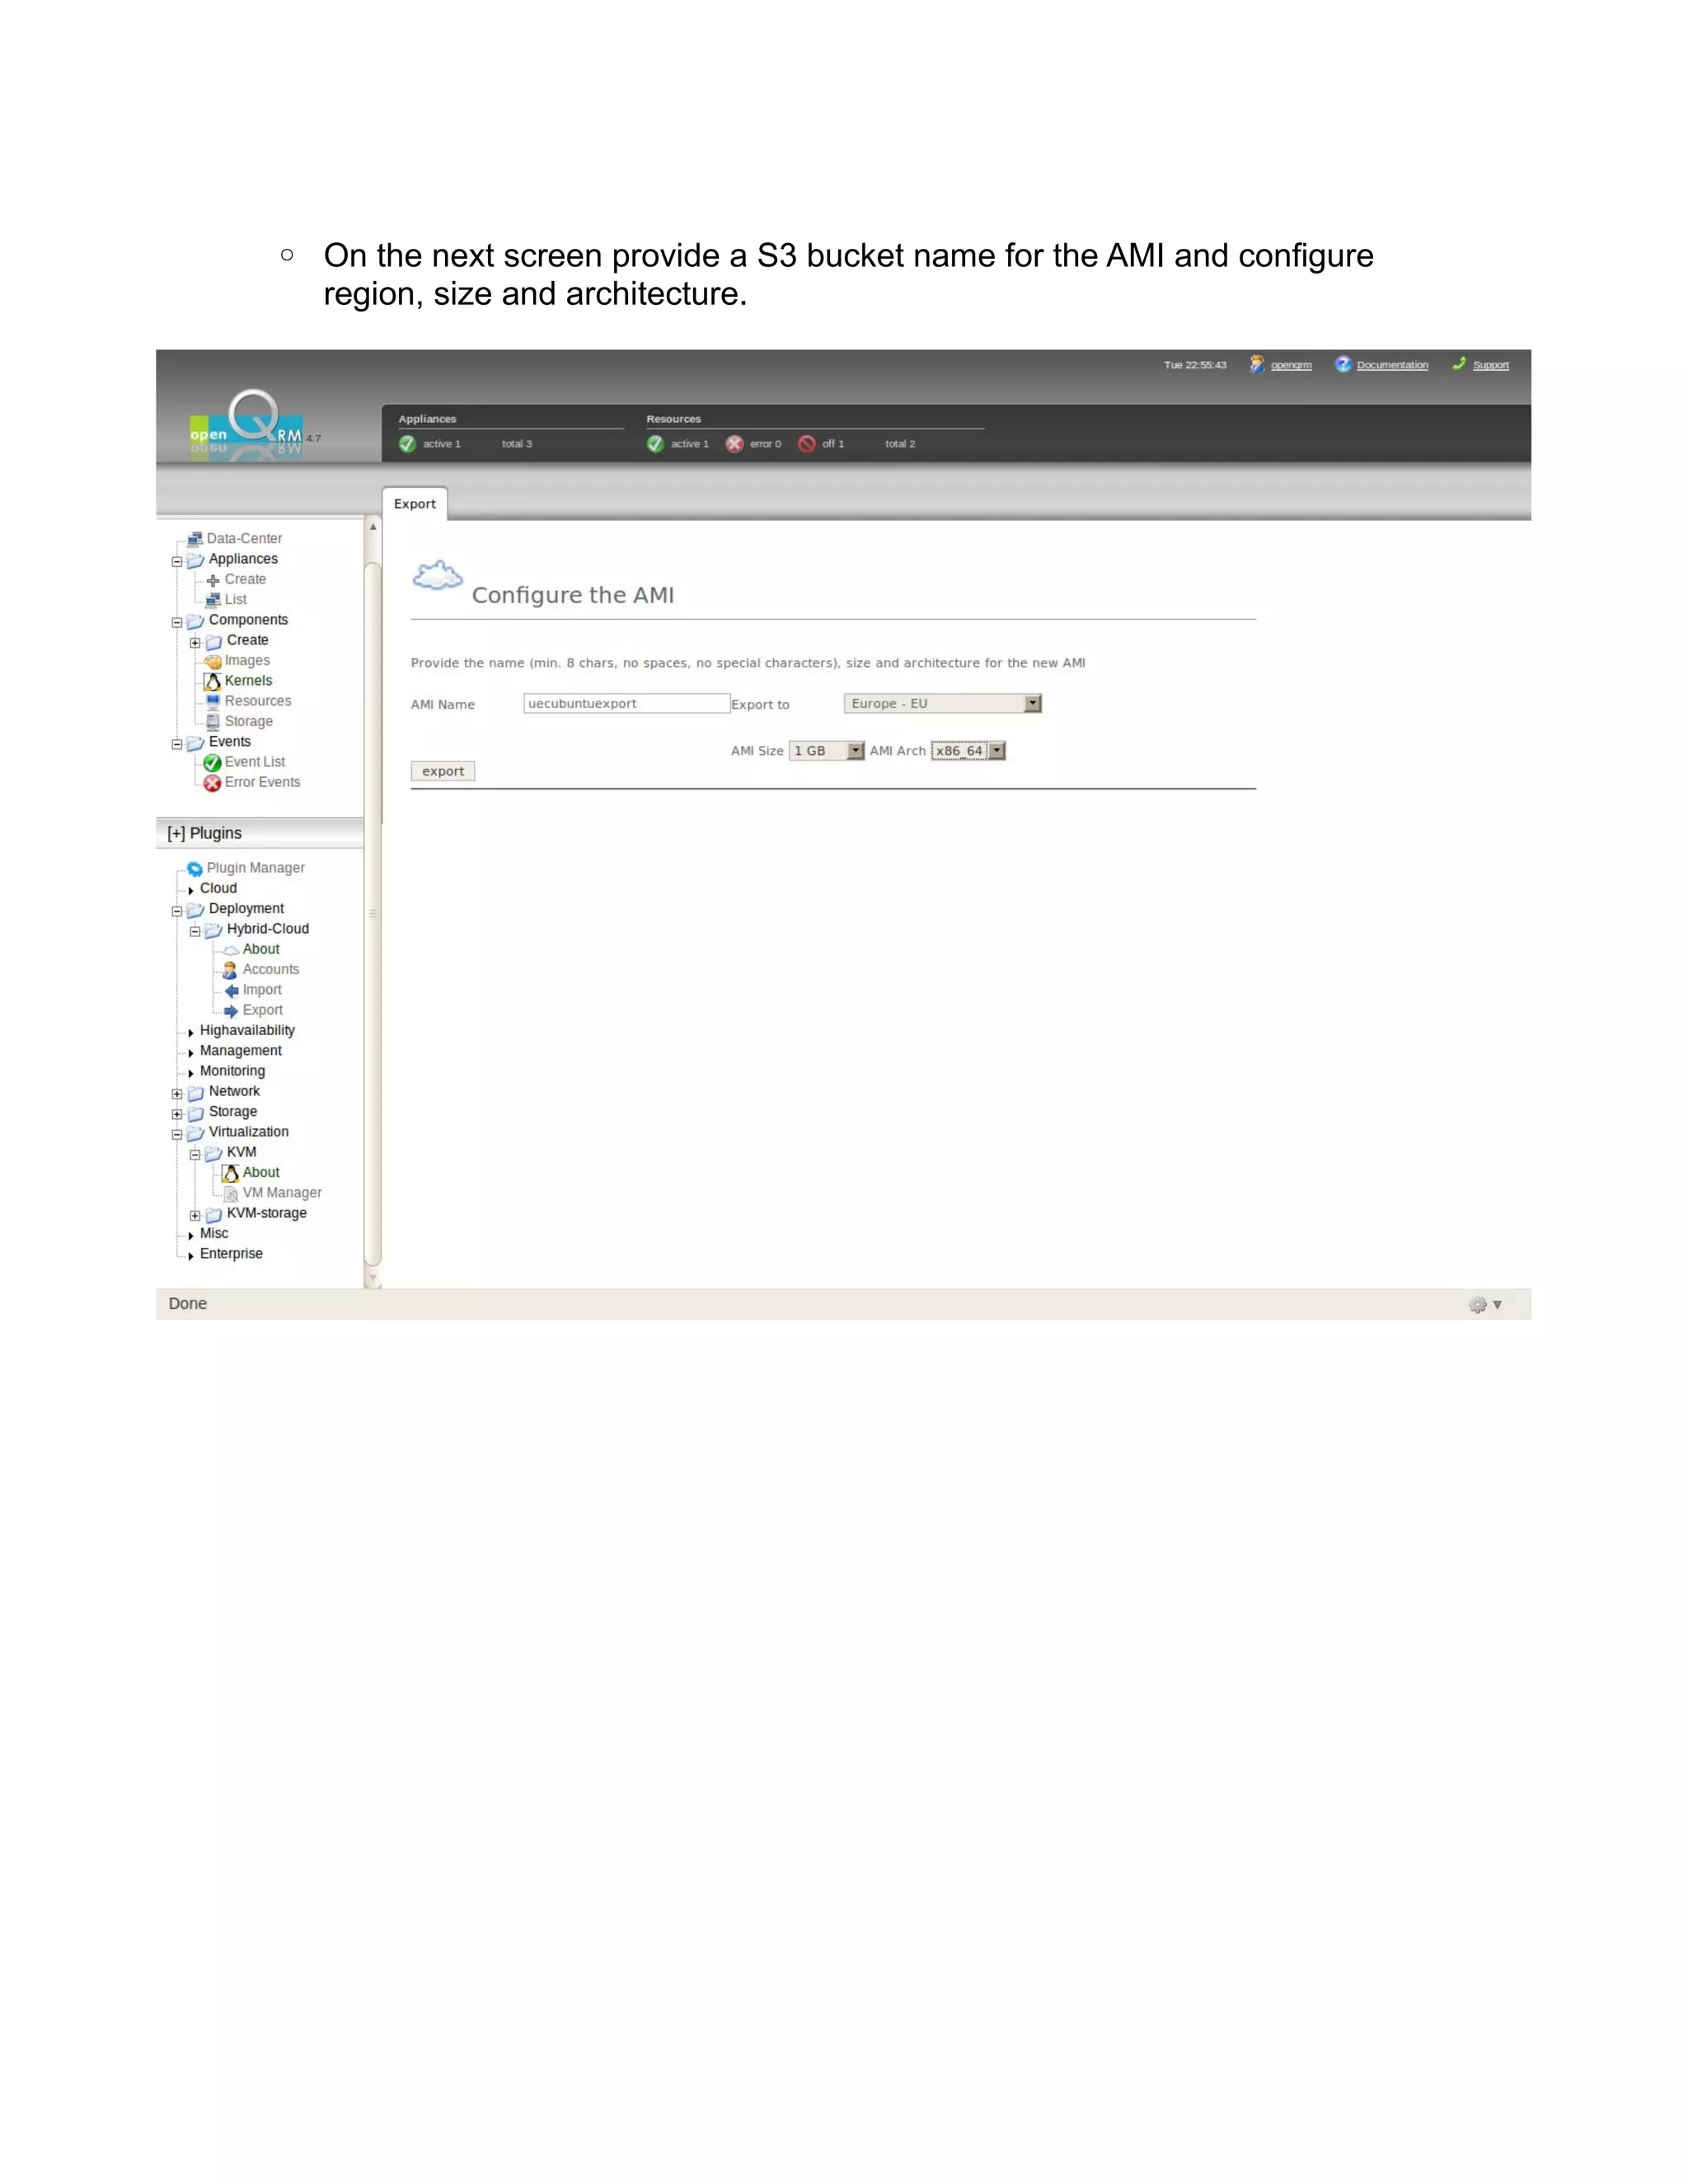
![Clicking on "export" will start the migration.
openQRM is now transferring the Image to the Amazon Cloud as a new AMI.
It will be available for deployment after bundling and uploading the AMI finished.
You can get a detailed log about the migration at /tmp/uecubuntuexport.export.debug.log.
tail -f /tmp/uecubuntuexport.export.debug.log
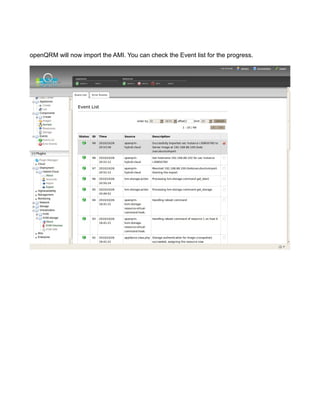
Same as for the Import you can also check the Event list for the progress.
As soon as the migration finished the exported openQRM Image will be available at the
Amazon EC2 Cloud. You can start it e.g. via the EC2 commadline tools on the openQRM
Server. Open a terminal an run :
. /home/[username]/.ec2/ec2rc
ec2-run-instances [ami-name] -k [ssh-keypair]](https://image.slidesharecdn.com/openqrm-uec-ec2-howto-101031075919-phpapp01/85/openQRM-how-to-Setup-UEC-and-openQRM-cloud-82-320.jpg)
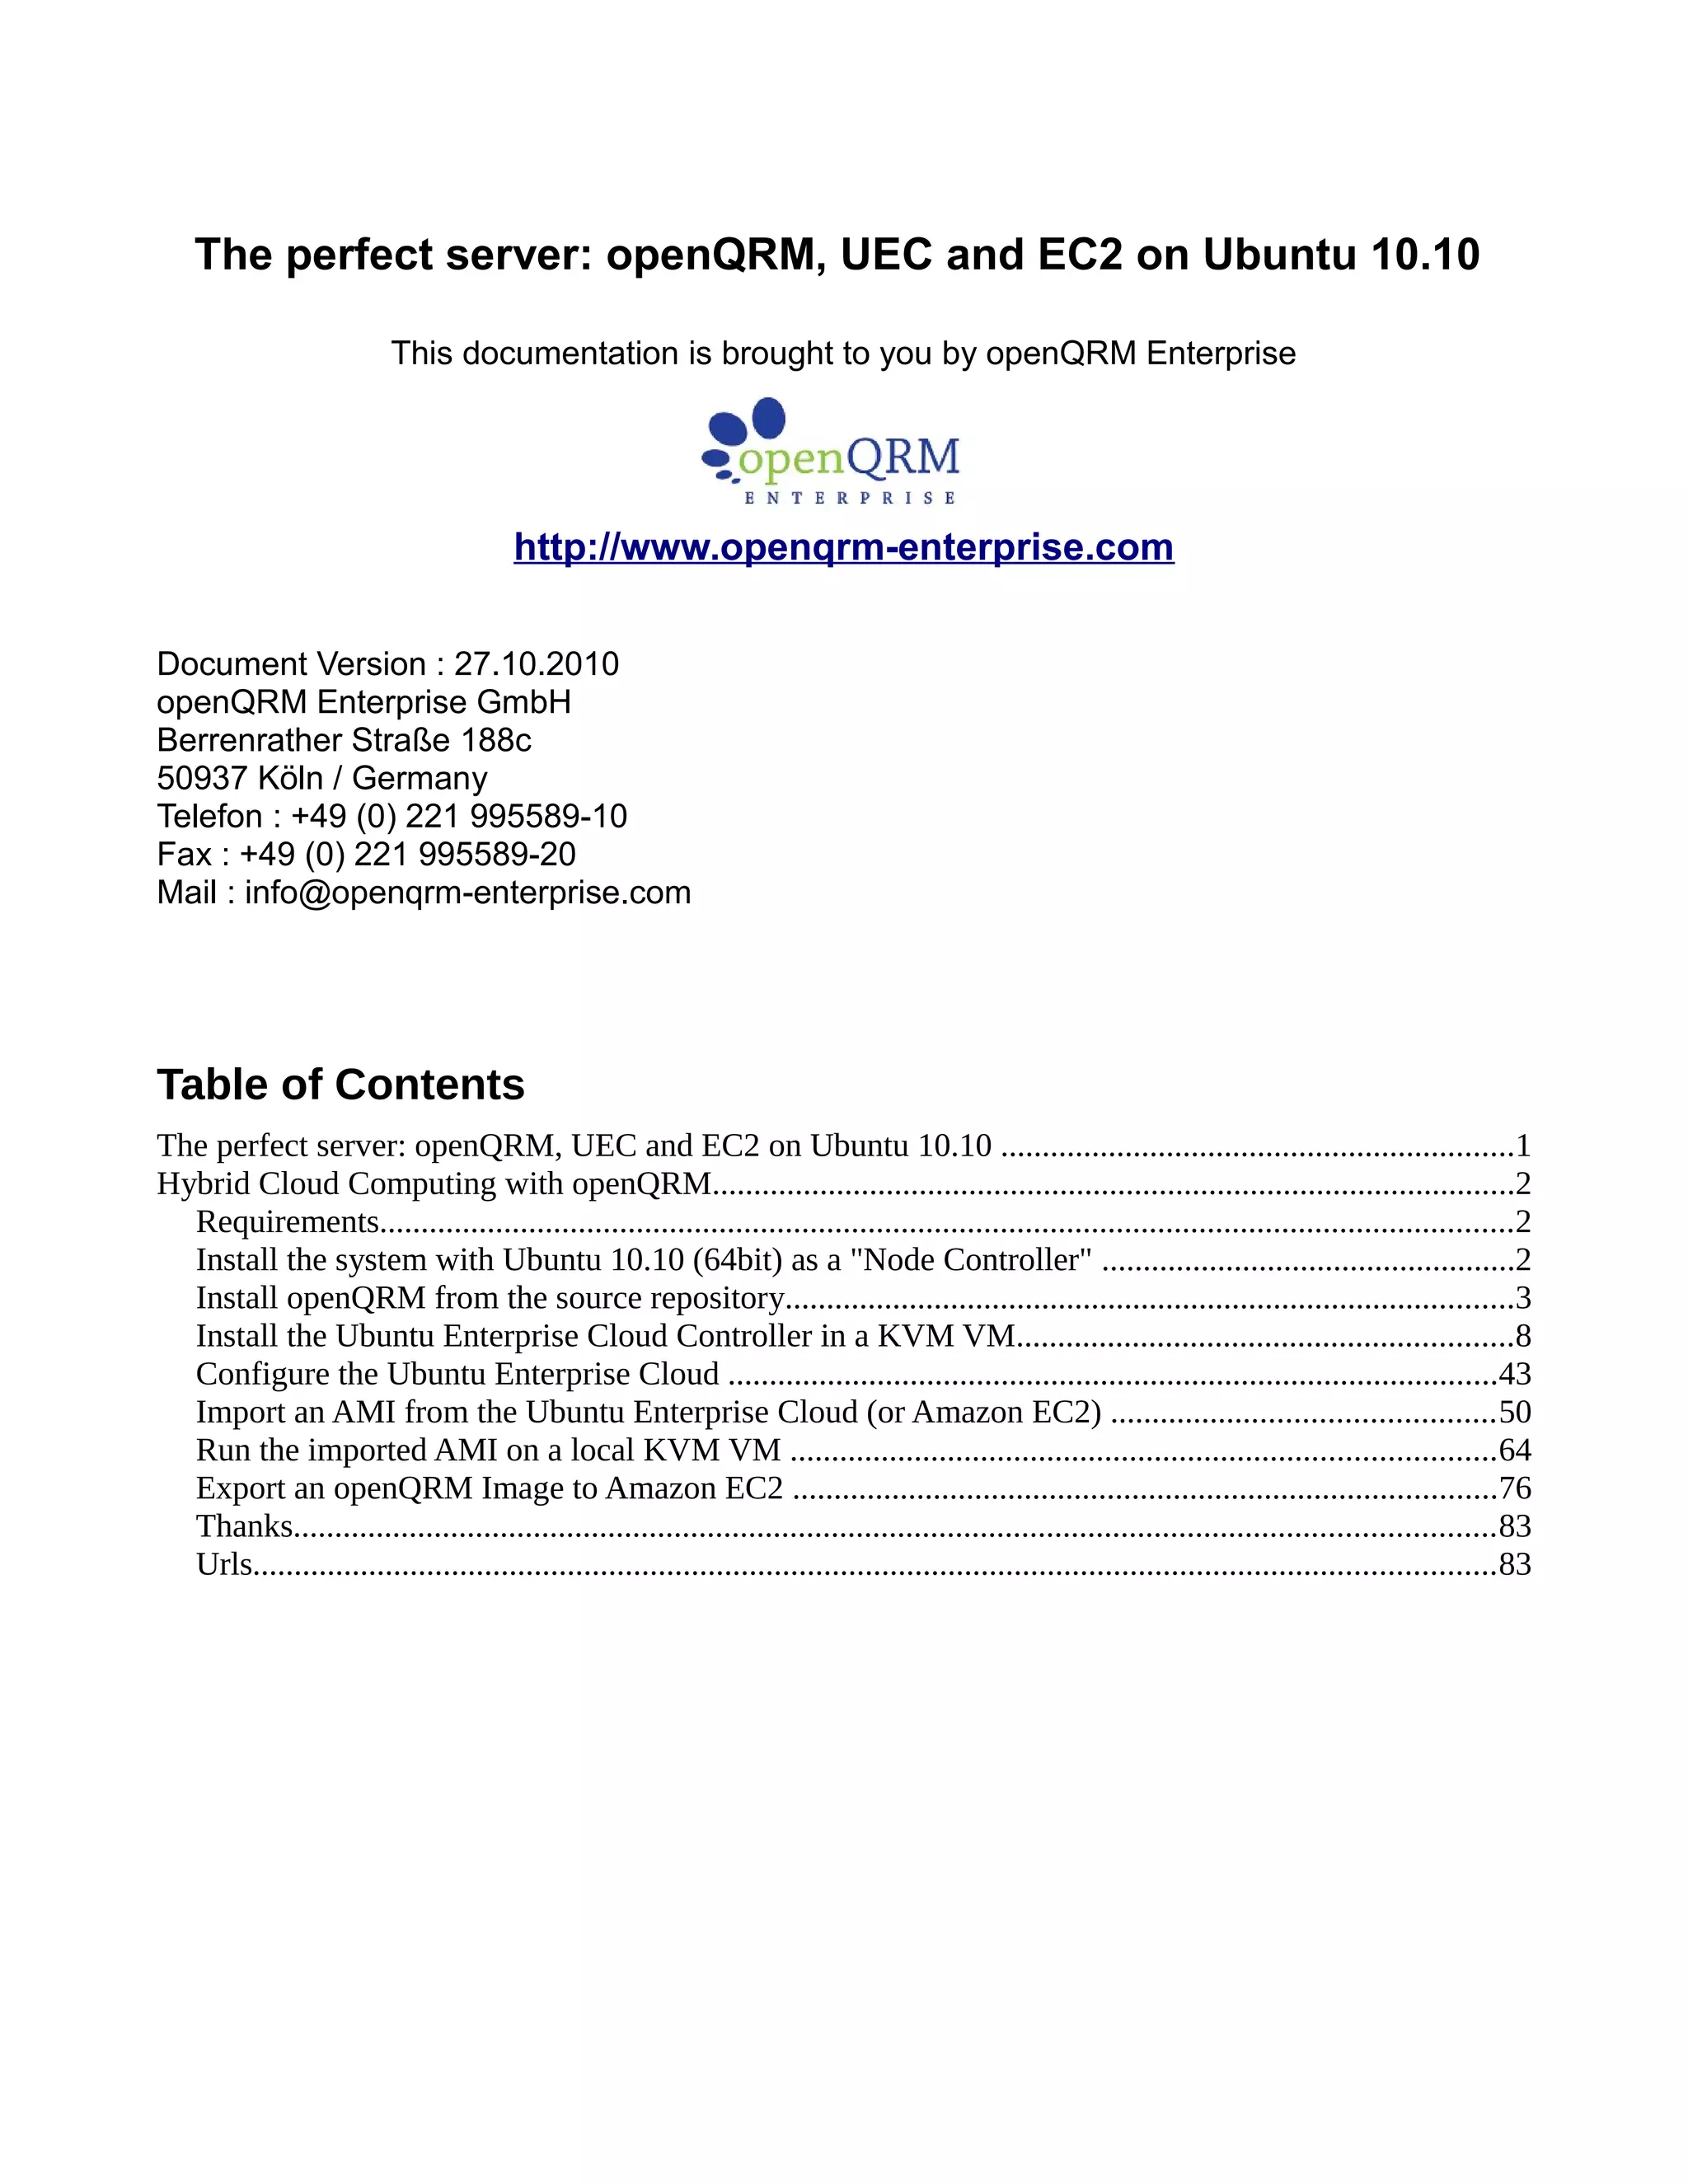


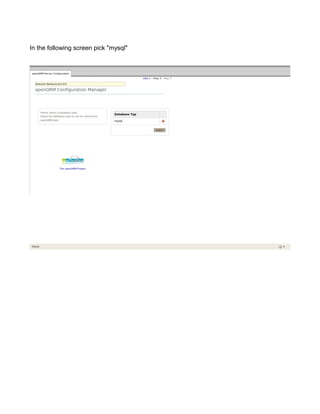
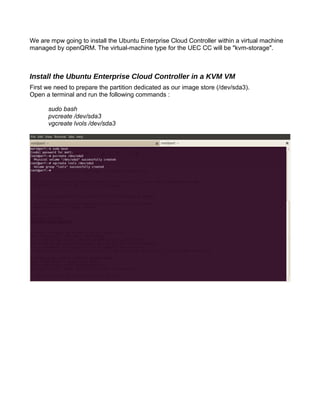
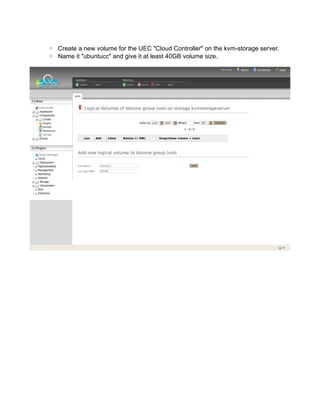
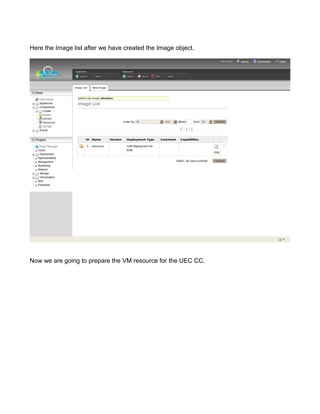
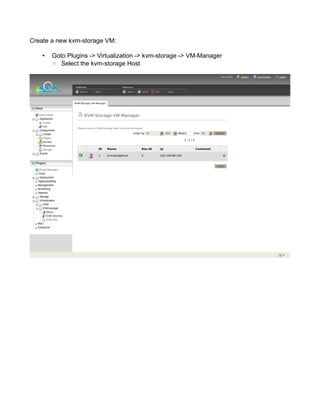
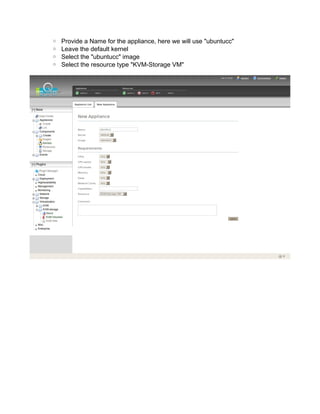
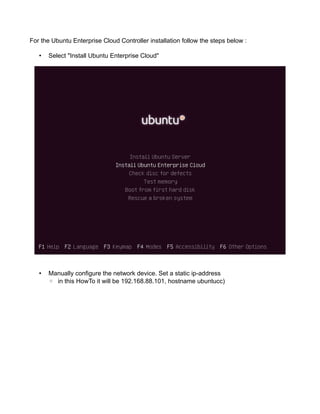
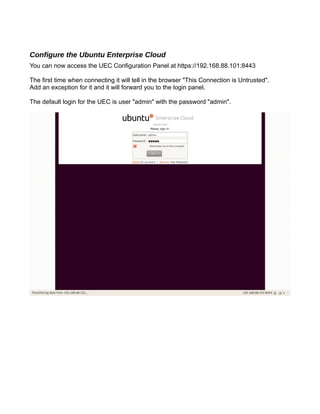
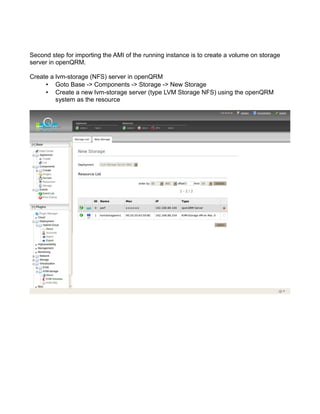
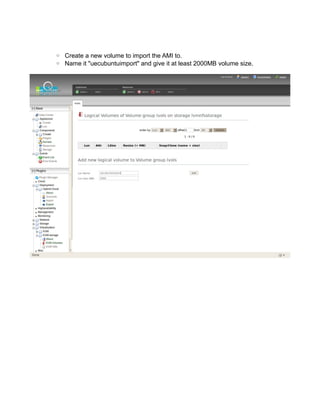
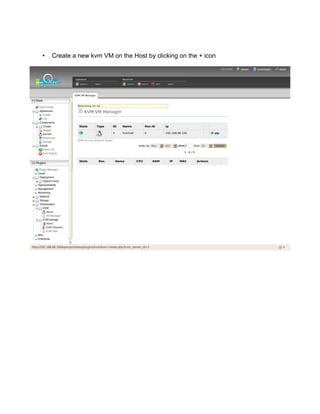
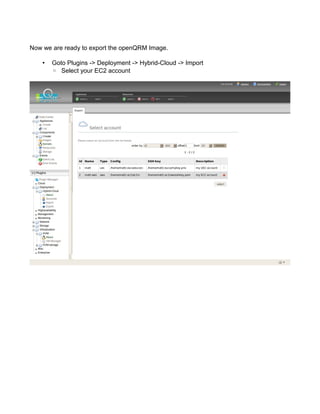
![Export an openQRM Image to Amazon EC2
To export an openQRM Image to Amazon EC2 (or to an Ubuntu Enterprise Cloud) we first
have to install the Amazon ec2-ami-tools and ec2-api-tools.
Download the Amazon EC2 API Tools from http://aws.amazon.com/developertools/351
Download the Amazon EC2 AMI Tools from http://aws.amazon.com/developertools/368
Install both tools on the openQRM Server at /home/[username]/aws
cd
mkdir -p aws .ec2
cp ec2-ami-tools.zip ec2-api-tools.zip aws
cd aws
unzip ec2-ami-tools.zip
unzip ec2-api-tools.zip
Please make sure to have a java jdk installed. Also you need to install ruby and curl.
sudo apt-get install ruby curl
The ec2-tools require this.
Next step is to create a Amazon rc-config file allowing the ec2-tools to work seamlessly.
A sample ec2rc config file looks like this (of course this example contains random user data):
# for java to work ok
export JAVA_HOME=/home/matt/java/jdk1.6.0_14
# aws api tools
export EC2_HOME=/home/matt/aws/ec2-api-tools-1.3-57419
# aws ami tools
export EC2_AMITOOL_HOME=/home/matt/aws/ec2-ami-tools-1.3-57676
export EC2_PRIVATE_KEY=/home/matt/.ec2/pk-123456.pem
export EC2_CERT=/home/matt/.ec2/cert-123456.pem
# EU
export EC2_URL=https://ec2.eu-west-1.amazonaws.com
# US
#export EC2_URL=https://us-east-1.ec2.amazonaws.com
# keys
export EC2_ACCESS_KEY='123456'
export EC2_SECRET_KEY='123456'
export PATH=$JAVA_HOME/bin:$PATH:$EC2_HOME/bin:
$EC2_AMITOOL_HOME/bin:/usr/games:/home/matt/scripts
# aws user id for the cmdline tools
export EC2_USER_ID="123456"](https://image.slidesharecdn.com/openqrm-uec-ec2-howto-101031075919-phpapp01/75/openQRM-how-to-Setup-UEC-and-openQRM-cloud-76-2048.jpg)
![Please save content as /home/[username]/.ec2/ec2rc
Also please download your AWS Private-key and your AWS Certificate to /home/
[username]/.ec2/
After that please source the ec2rc and check the functionality of the ec2-tools by running
“ec2-describe-regions”.](https://image.slidesharecdn.com/openqrm-uec-ec2-howto-101031075919-phpapp01/75/openQRM-how-to-Setup-UEC-and-openQRM-cloud-77-2048.jpg)

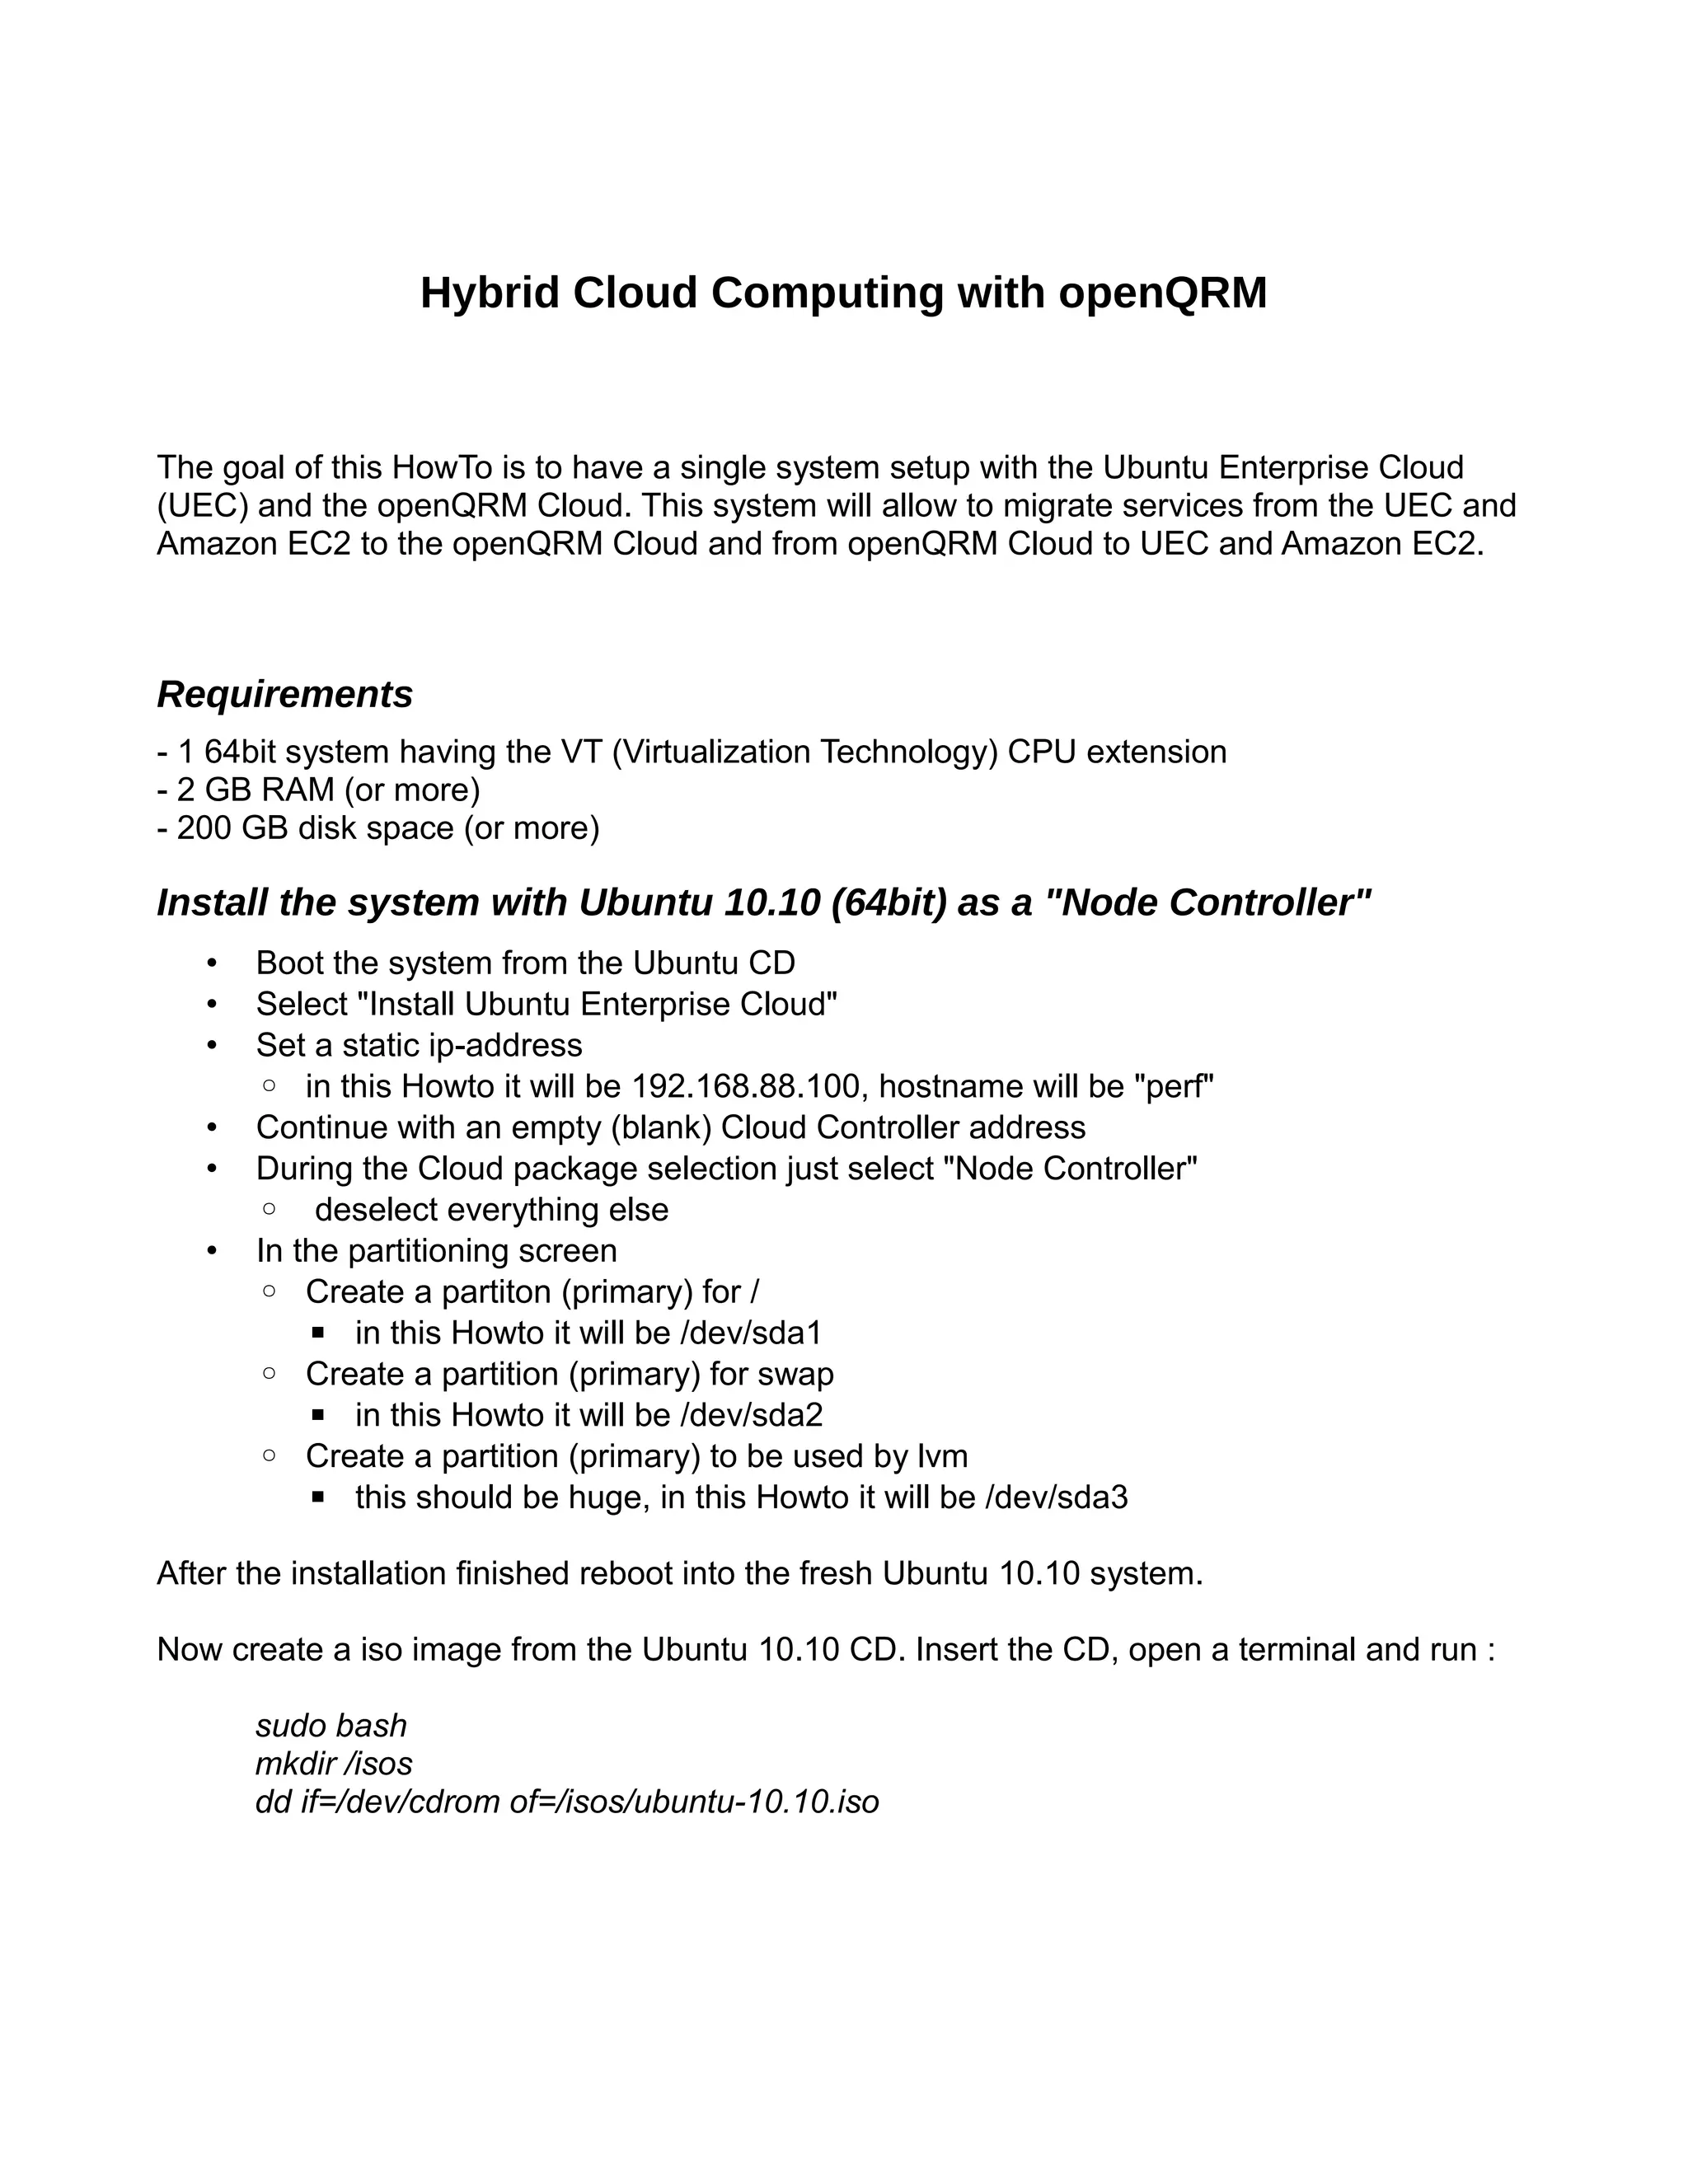
![Clicking on "export" will start the migration.
openQRM is now transferring the Image to the Amazon Cloud as a new AMI.
It will be available for deployment after bundling and uploading the AMI finished.
You can get a detailed log about the migration at /tmp/uecubuntuexport.export.debug.log.
tail -f /tmp/uecubuntuexport.export.debug.log
Same as for the Import you can also check the Event list for the progress.
As soon as the migration finished the exported openQRM Image will be available at the
Amazon EC2 Cloud. You can start it e.g. via the EC2 commadline tools on the openQRM
Server. Open a terminal an run :
. /home/[username]/.ec2/ec2rc
ec2-run-instances [ami-name] -k [ssh-keypair]](https://image.slidesharecdn.com/openqrm-uec-ec2-howto-101031075919-phpapp01/75/openQRM-how-to-Setup-UEC-and-openQRM-cloud-82-2048.jpg)

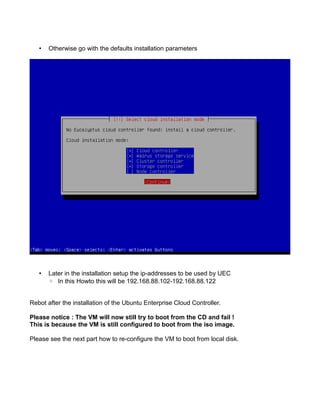
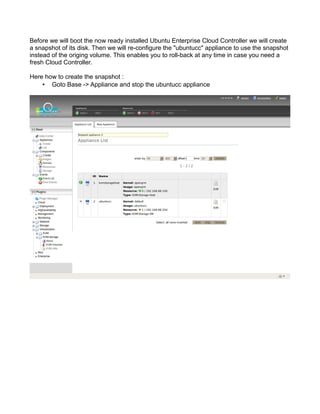
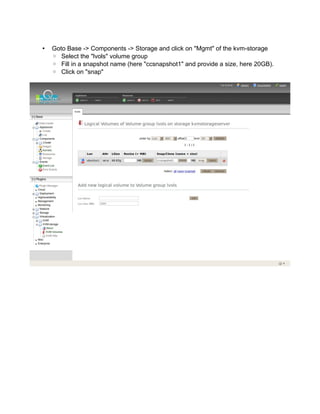
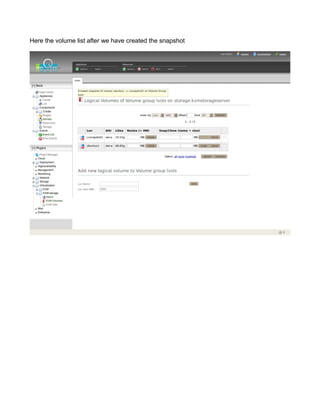
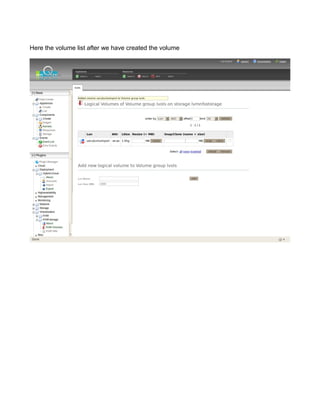
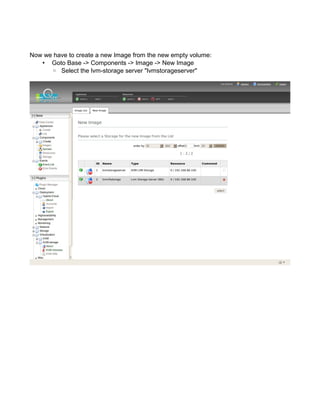
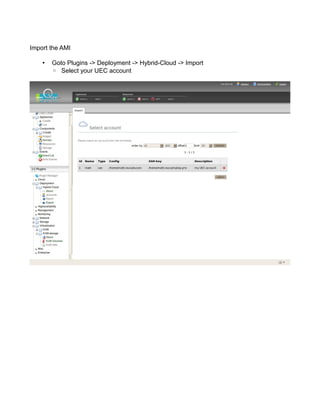
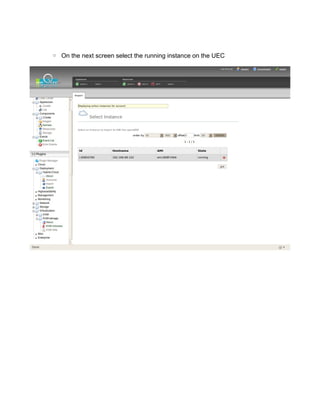
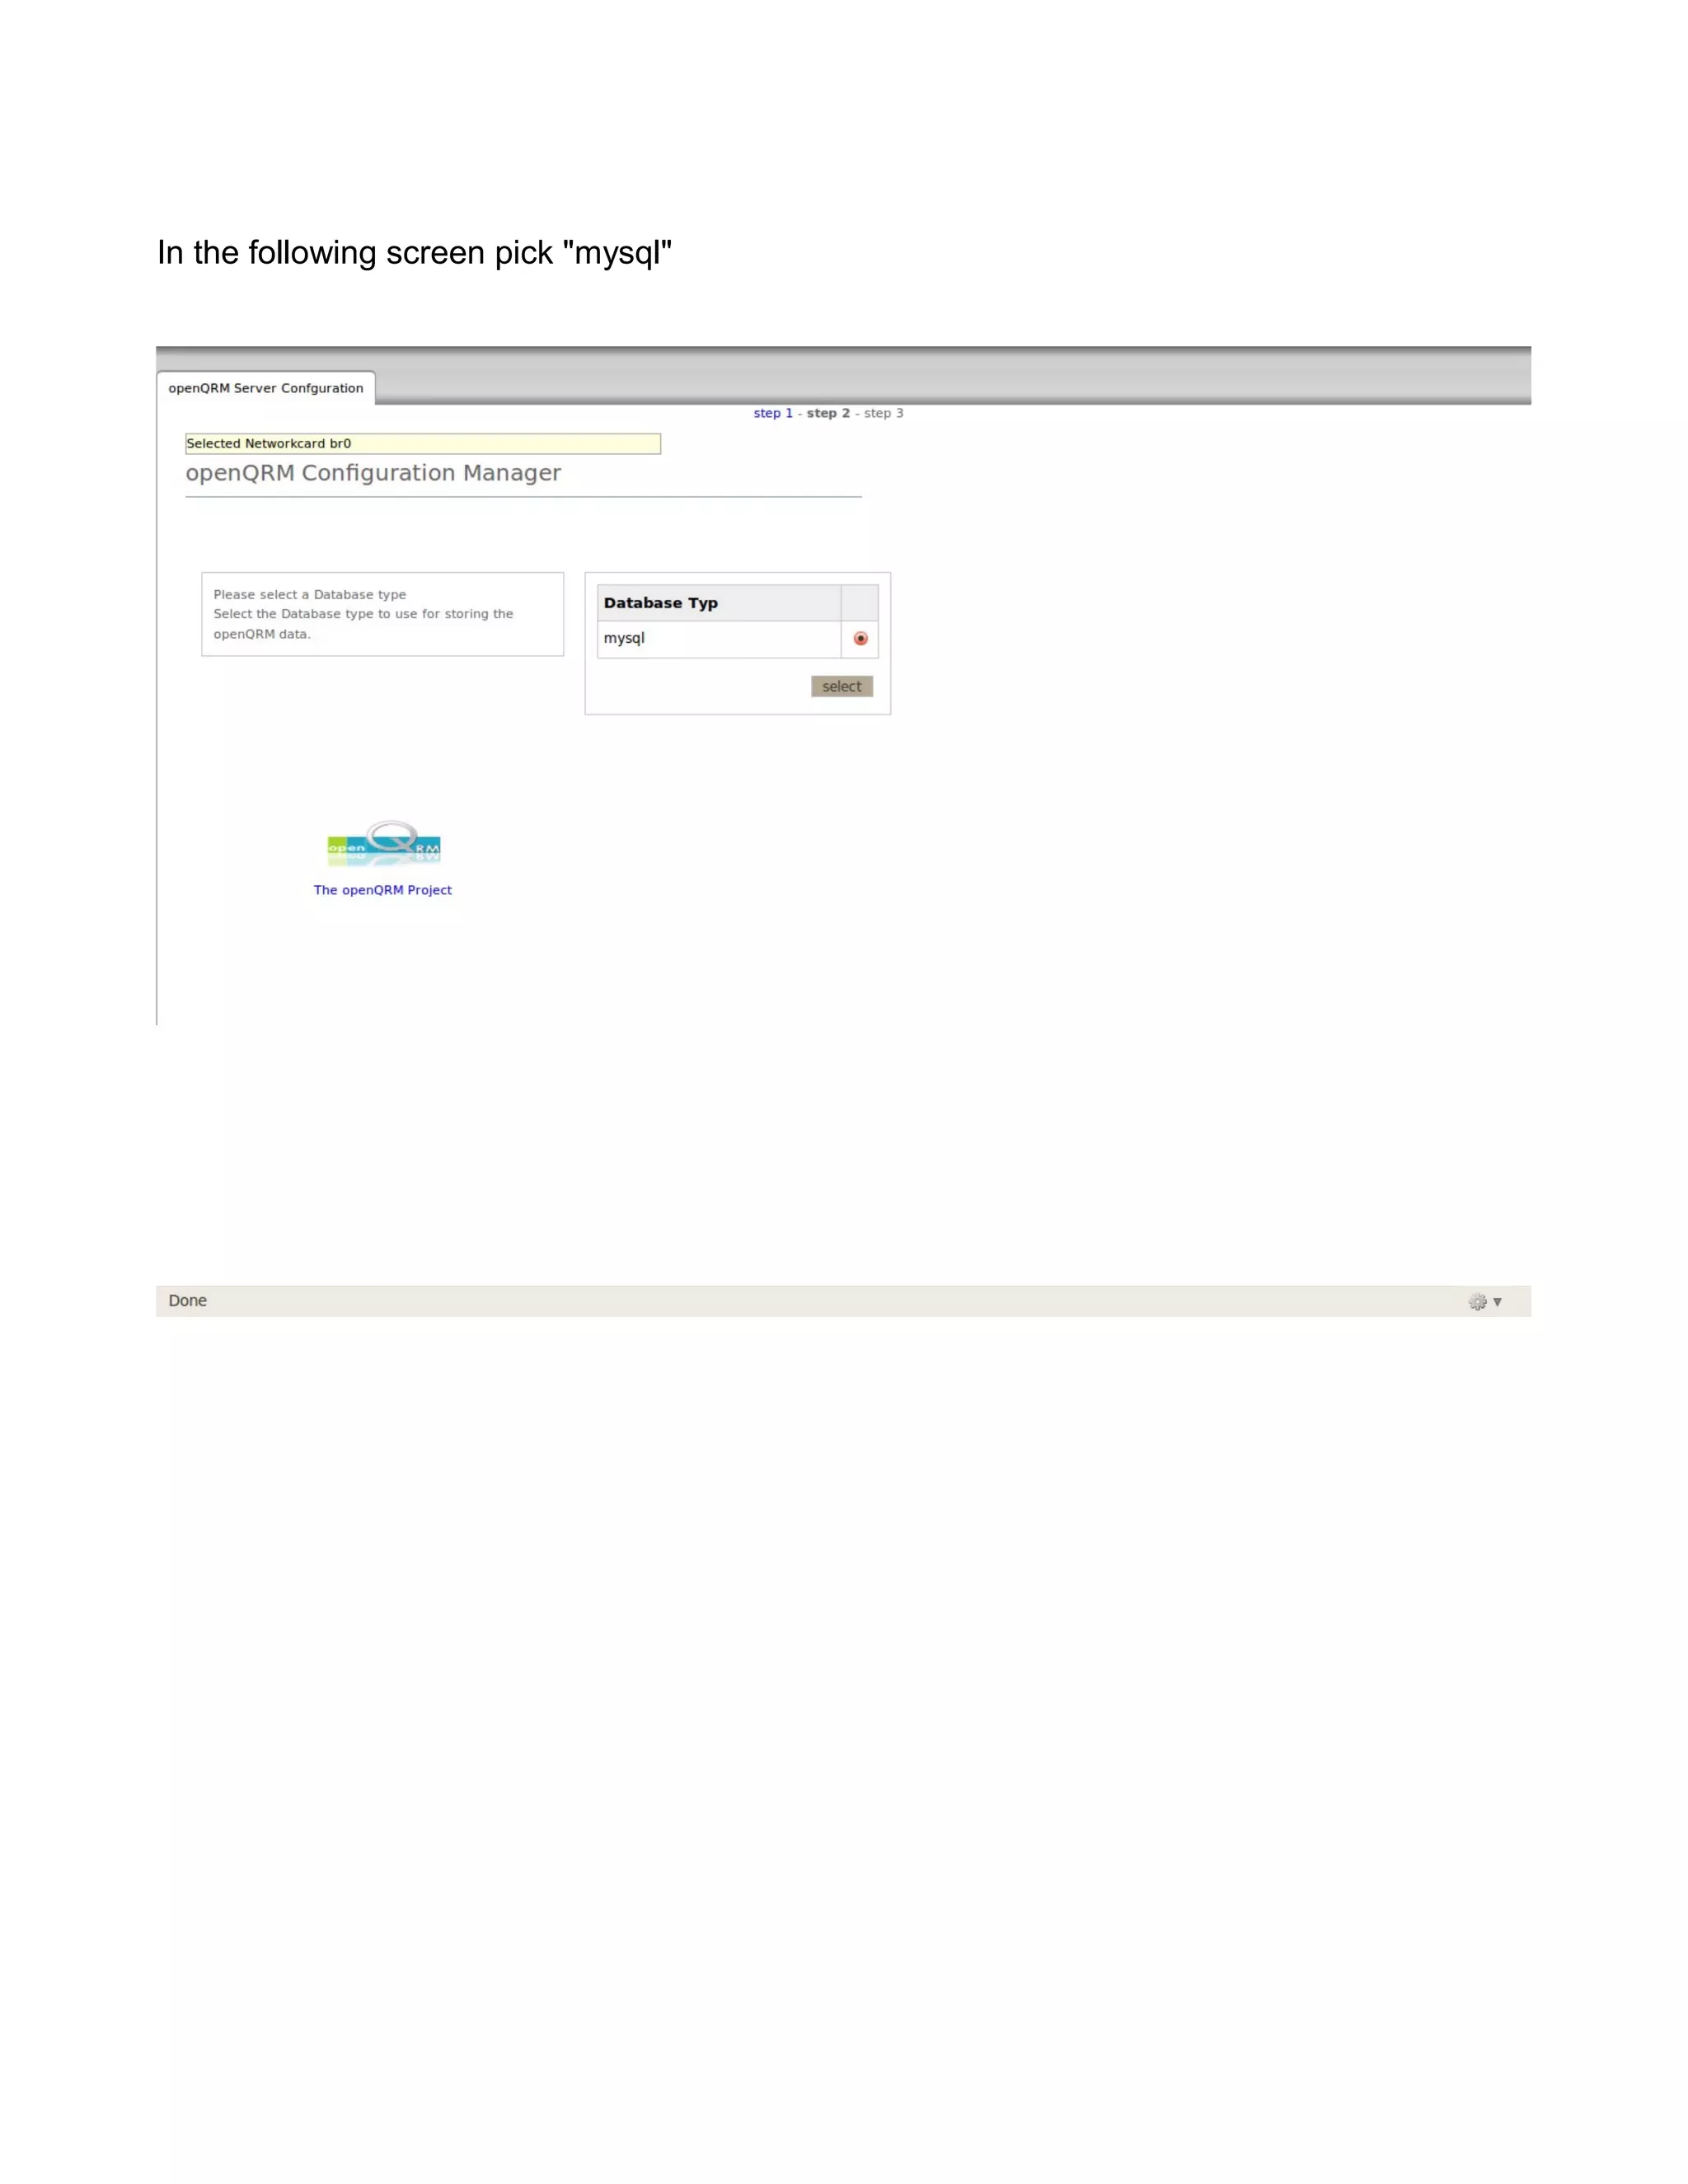
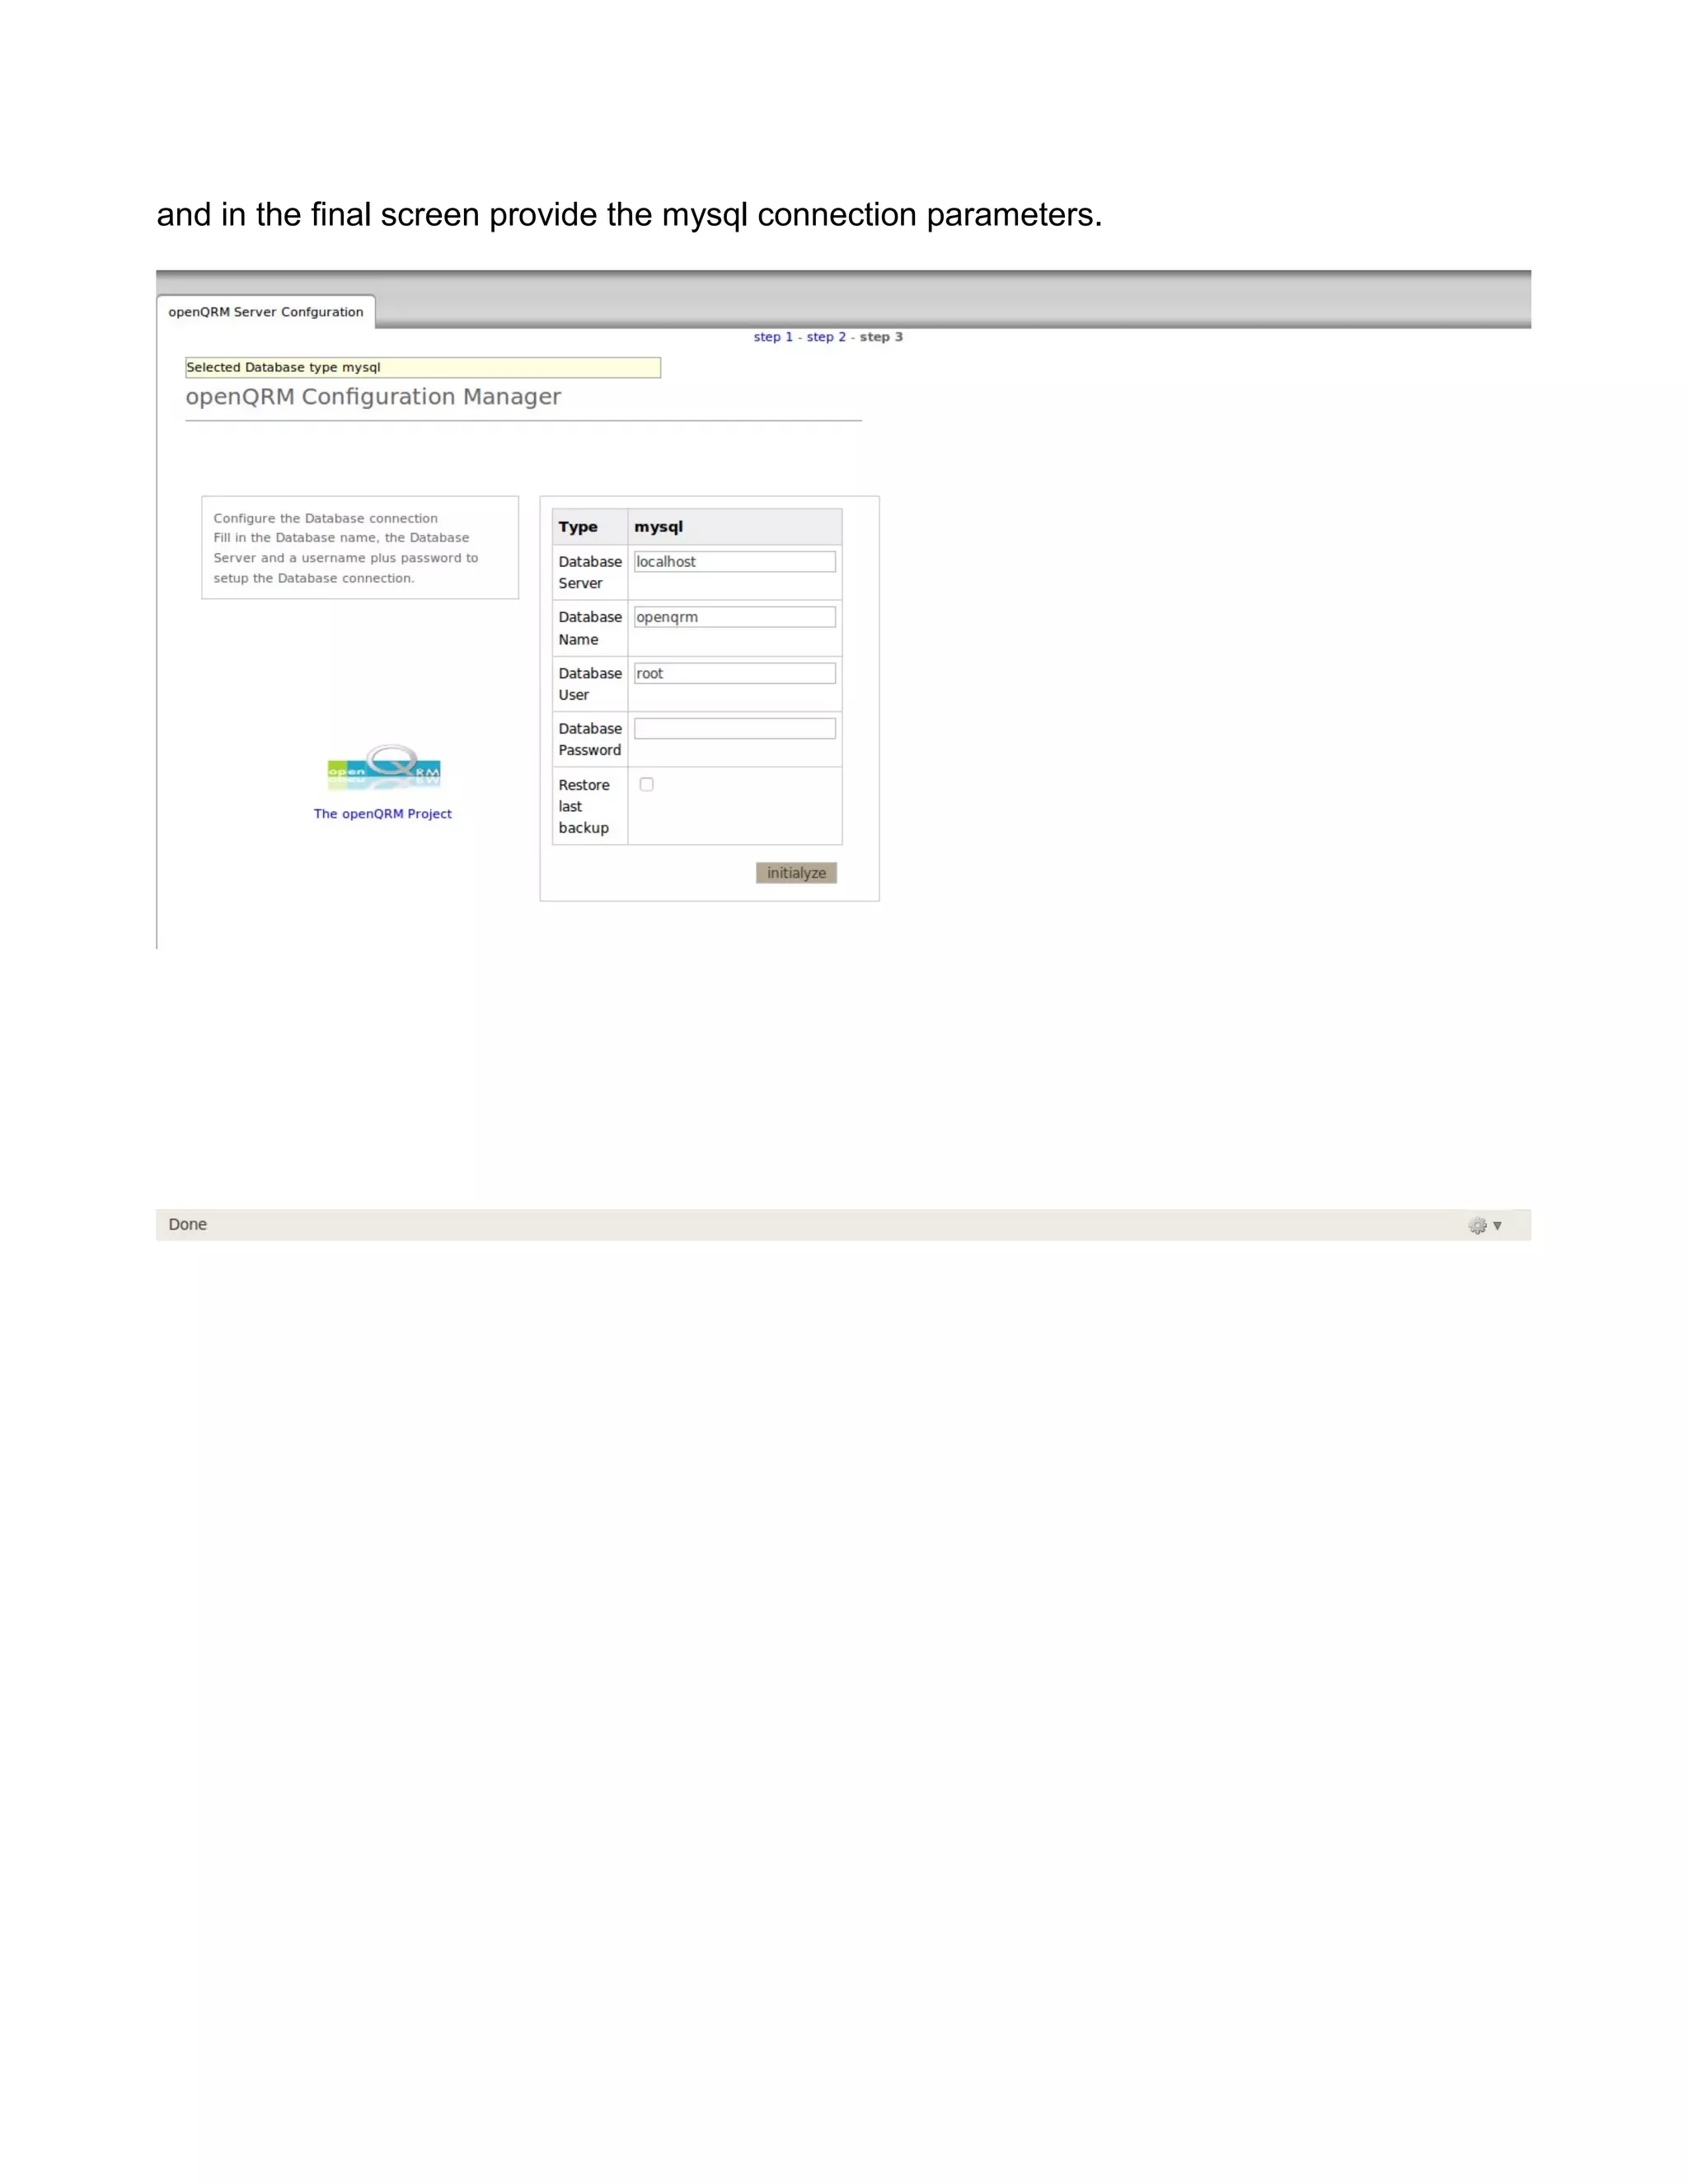
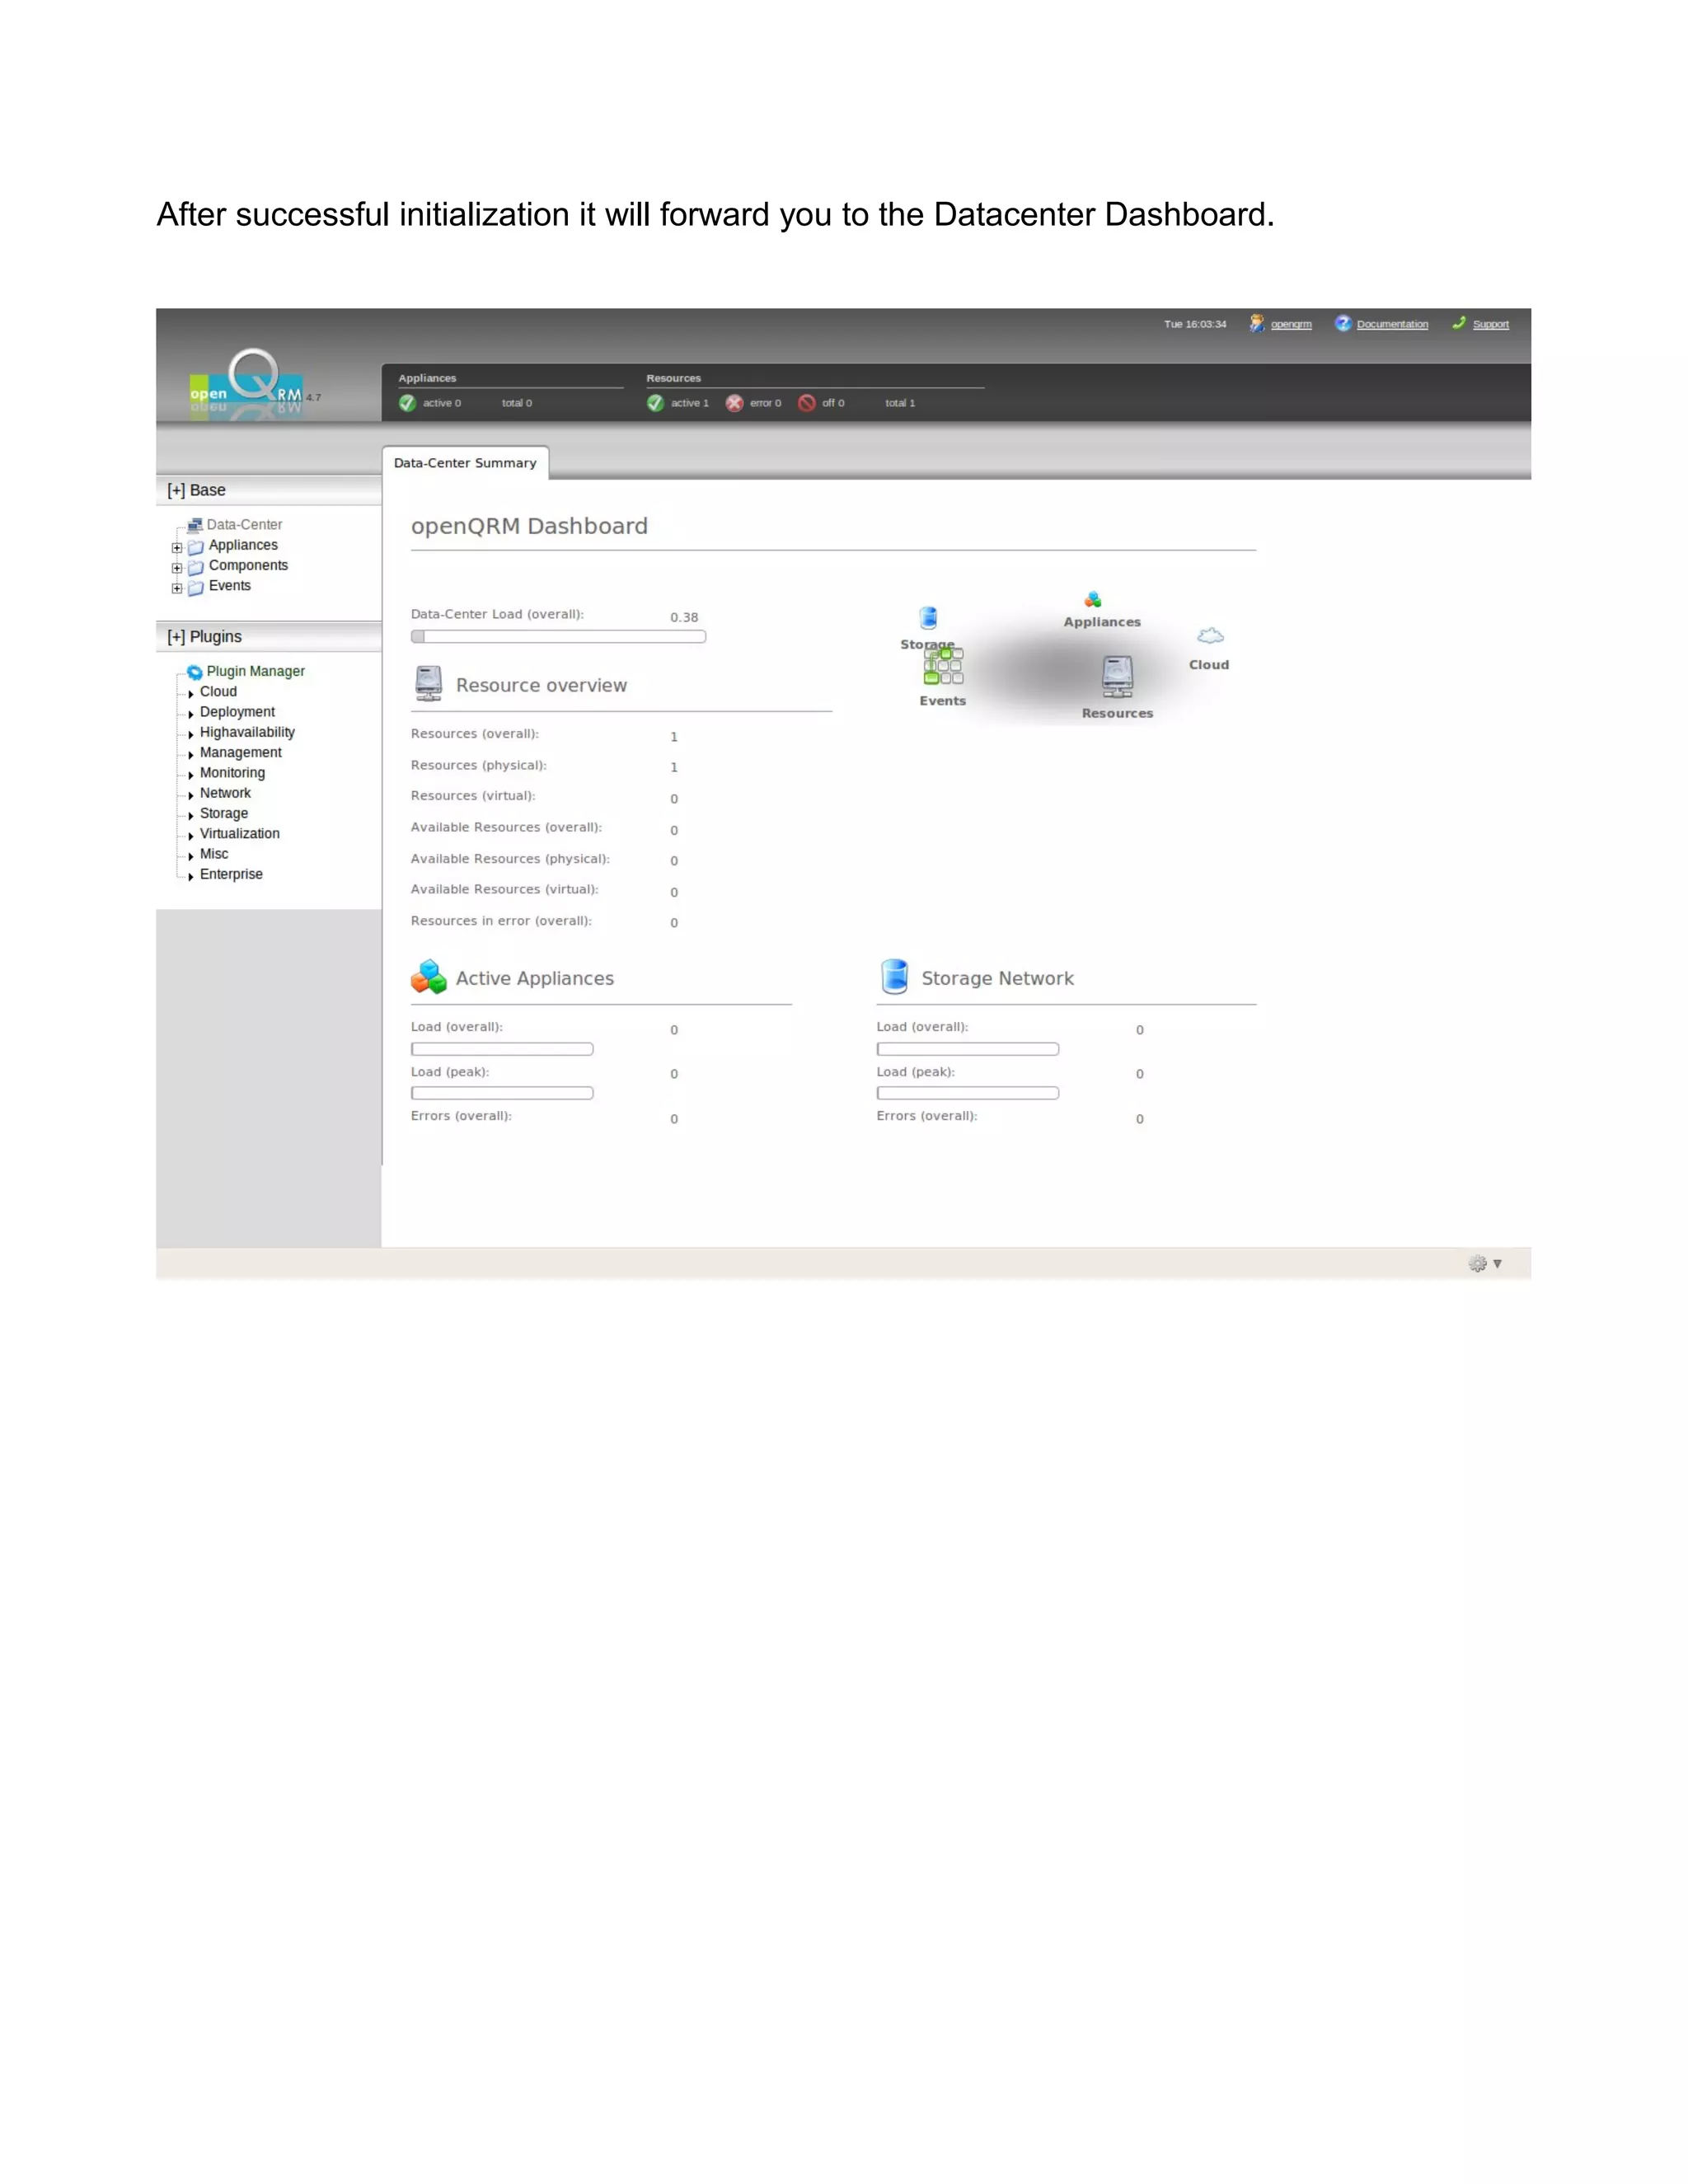
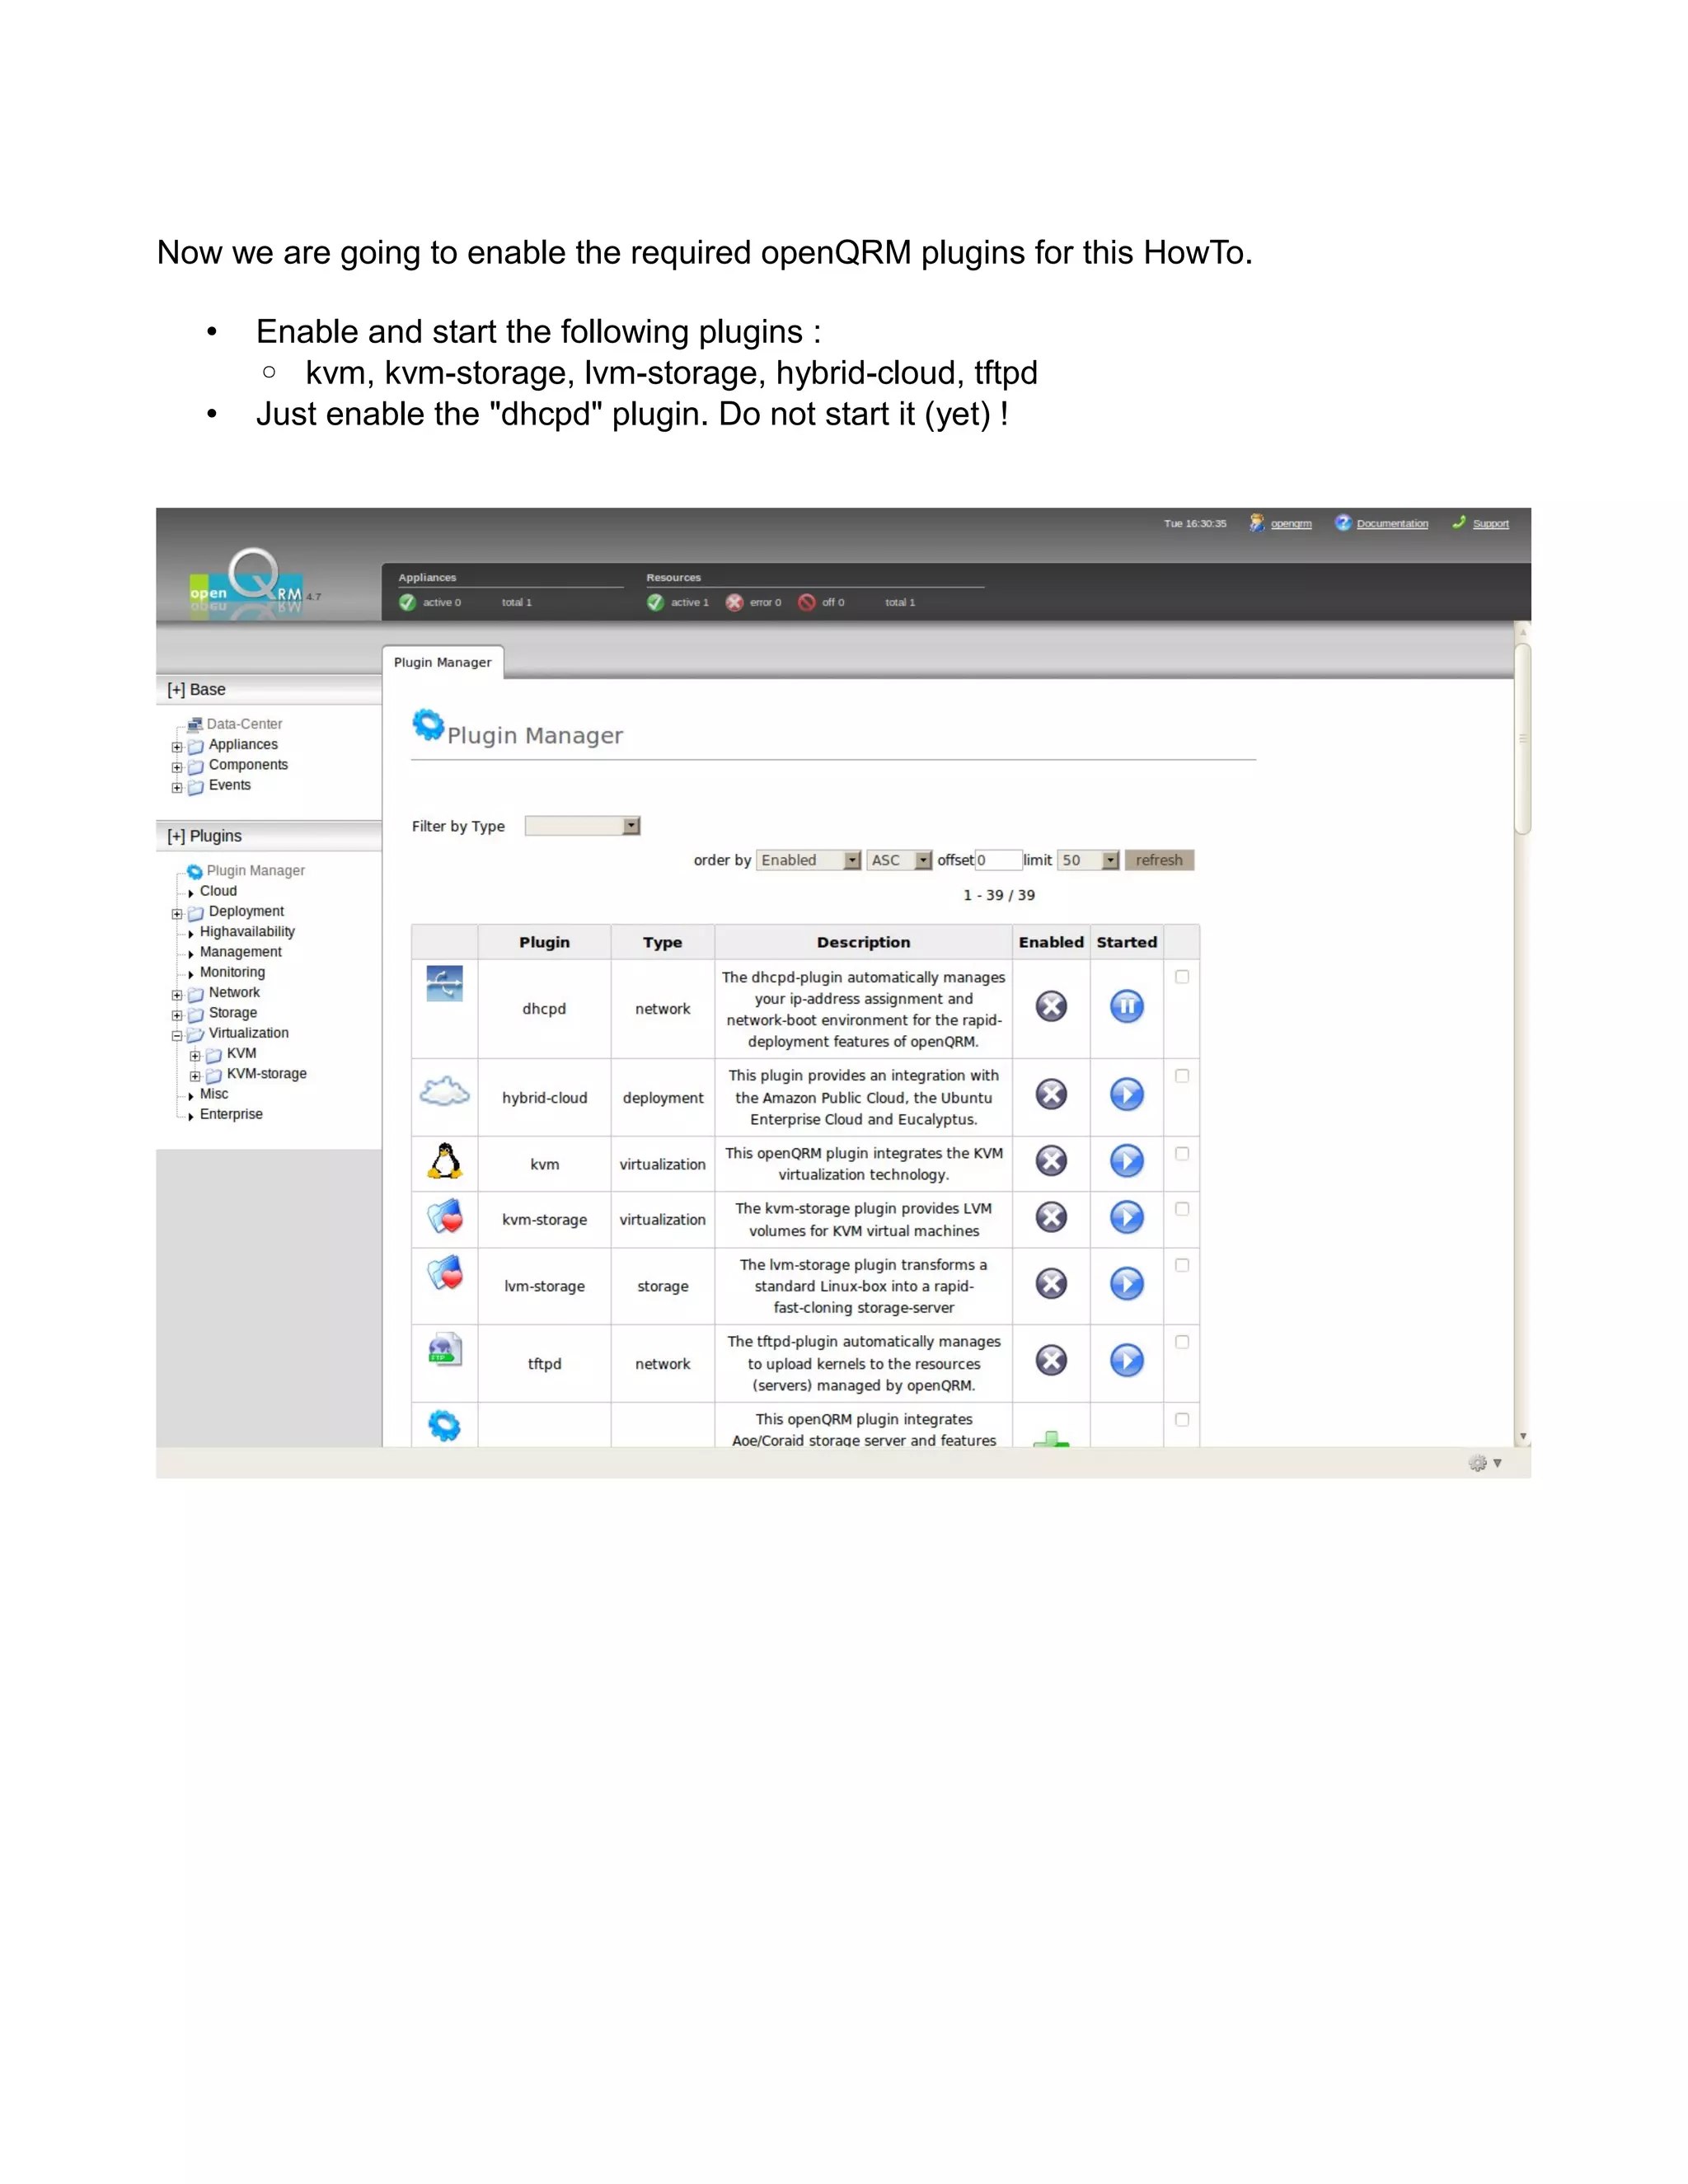
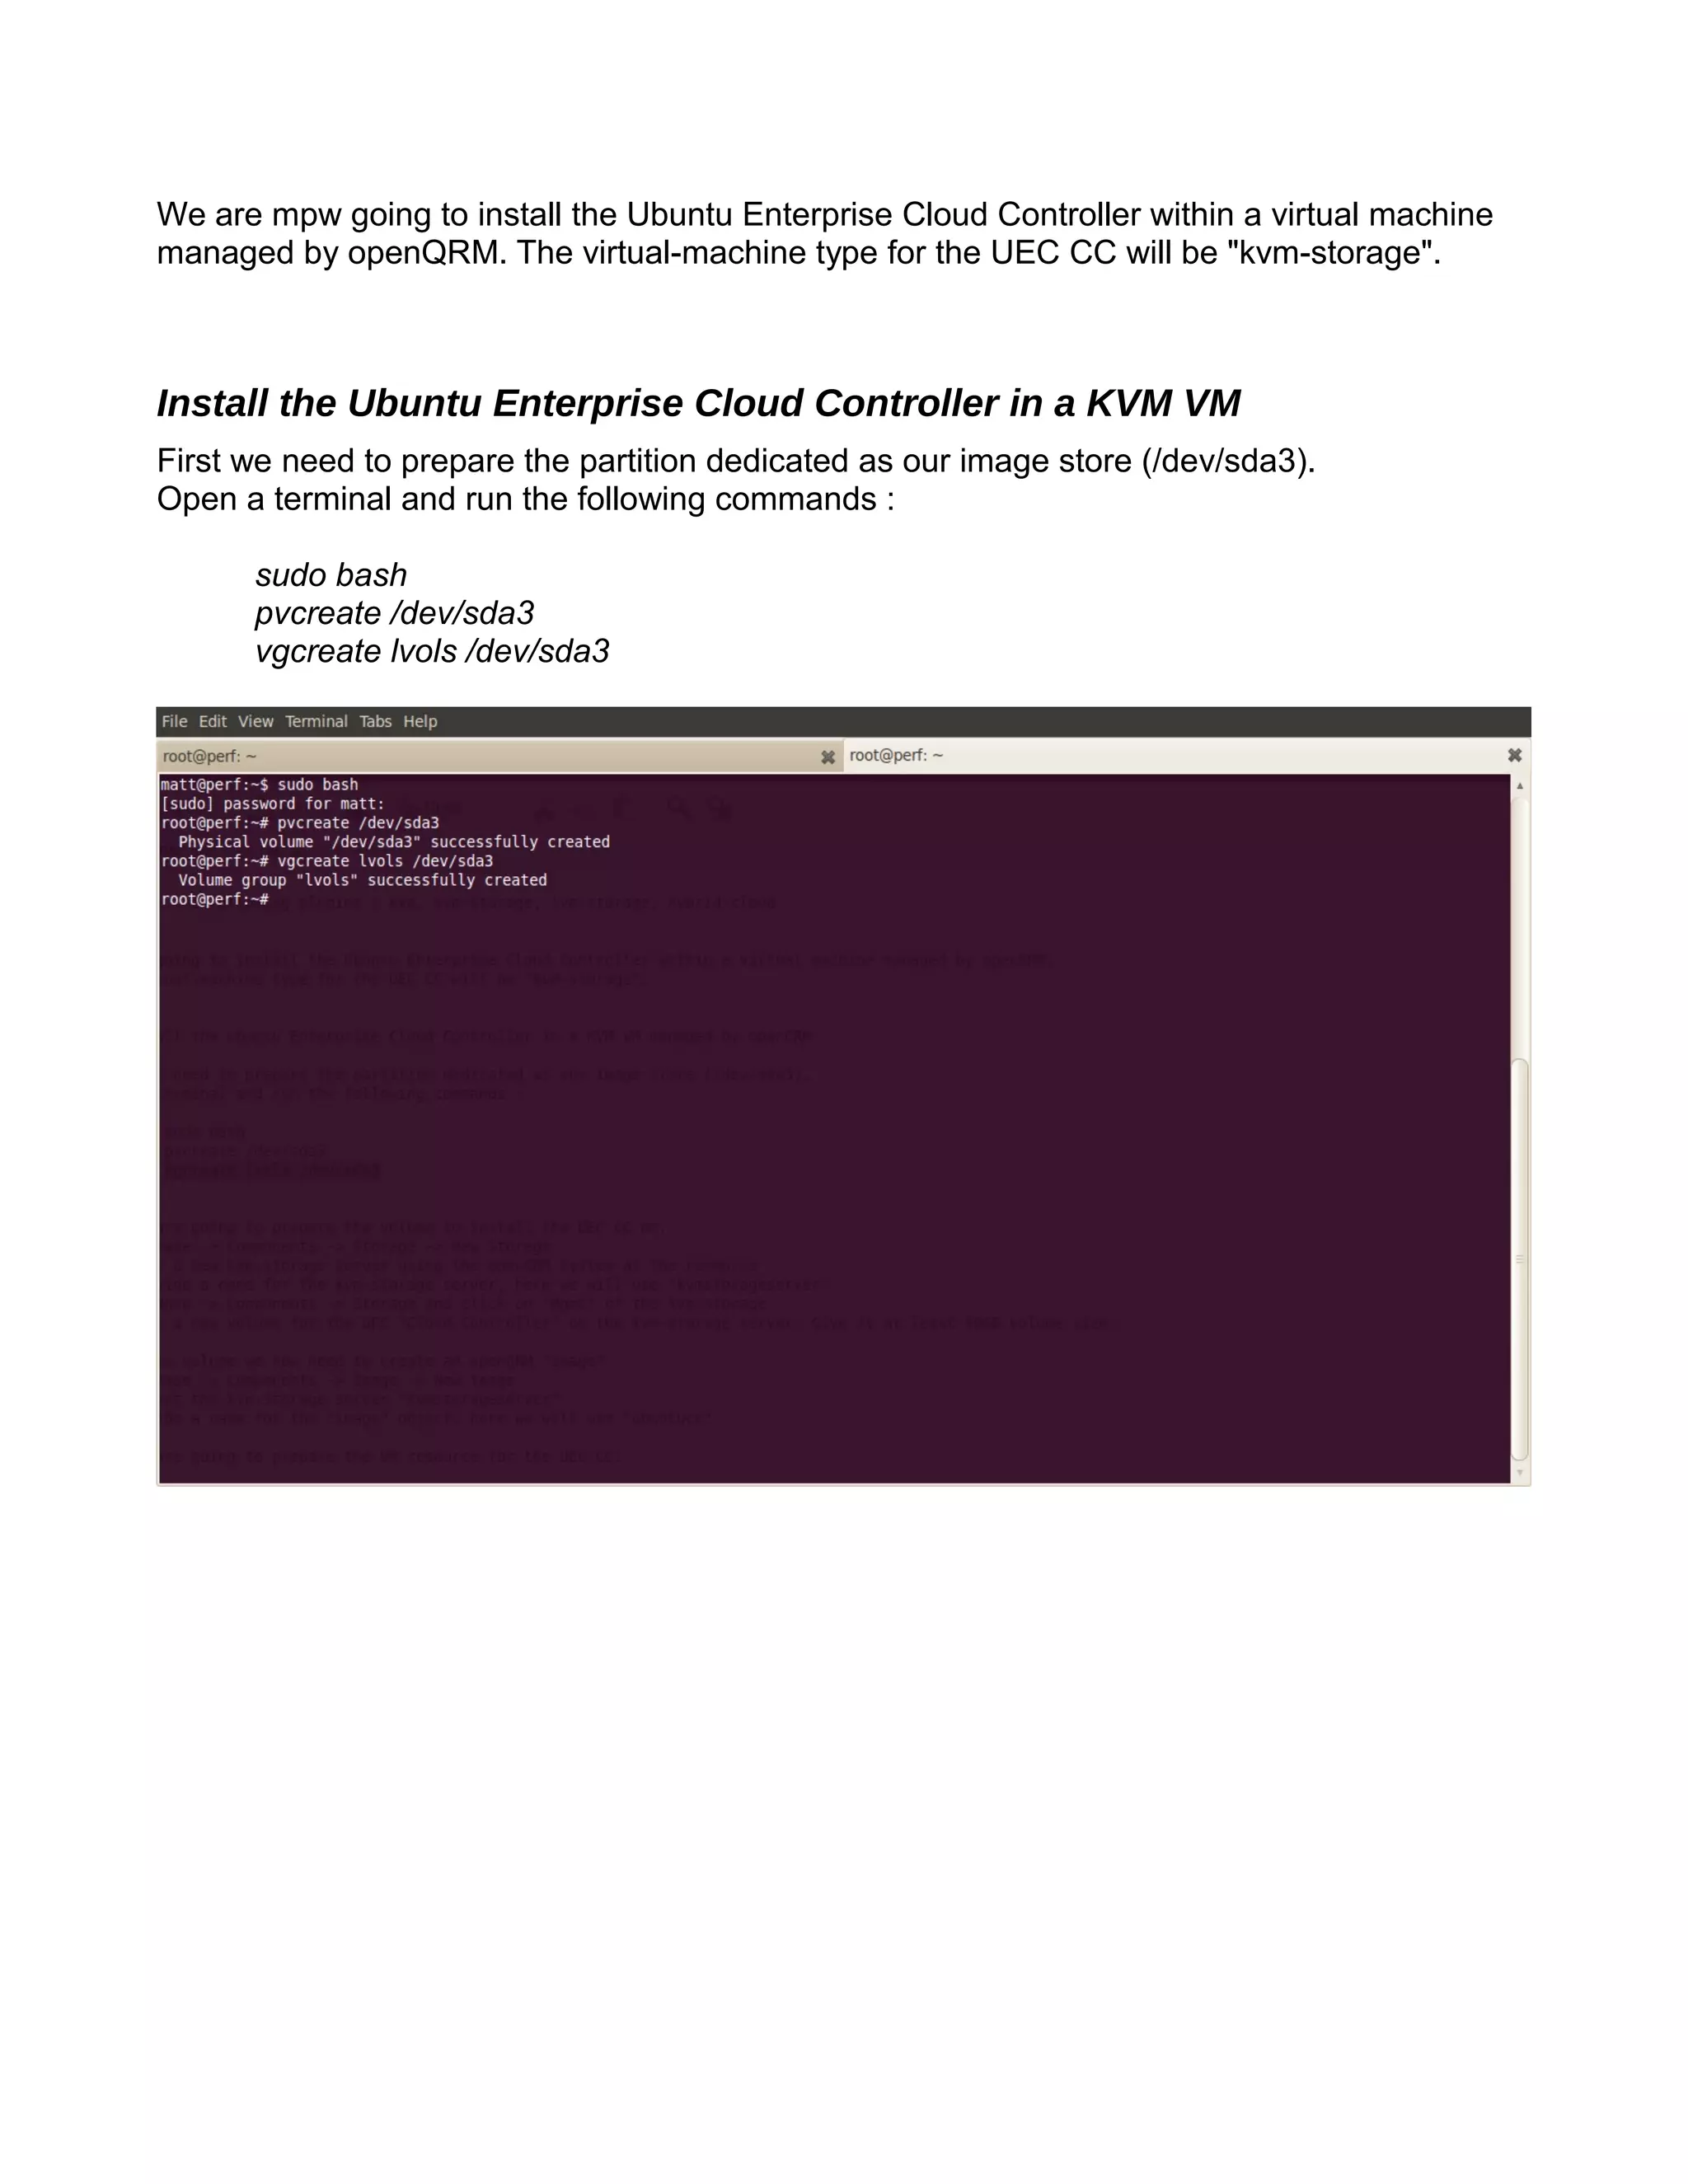
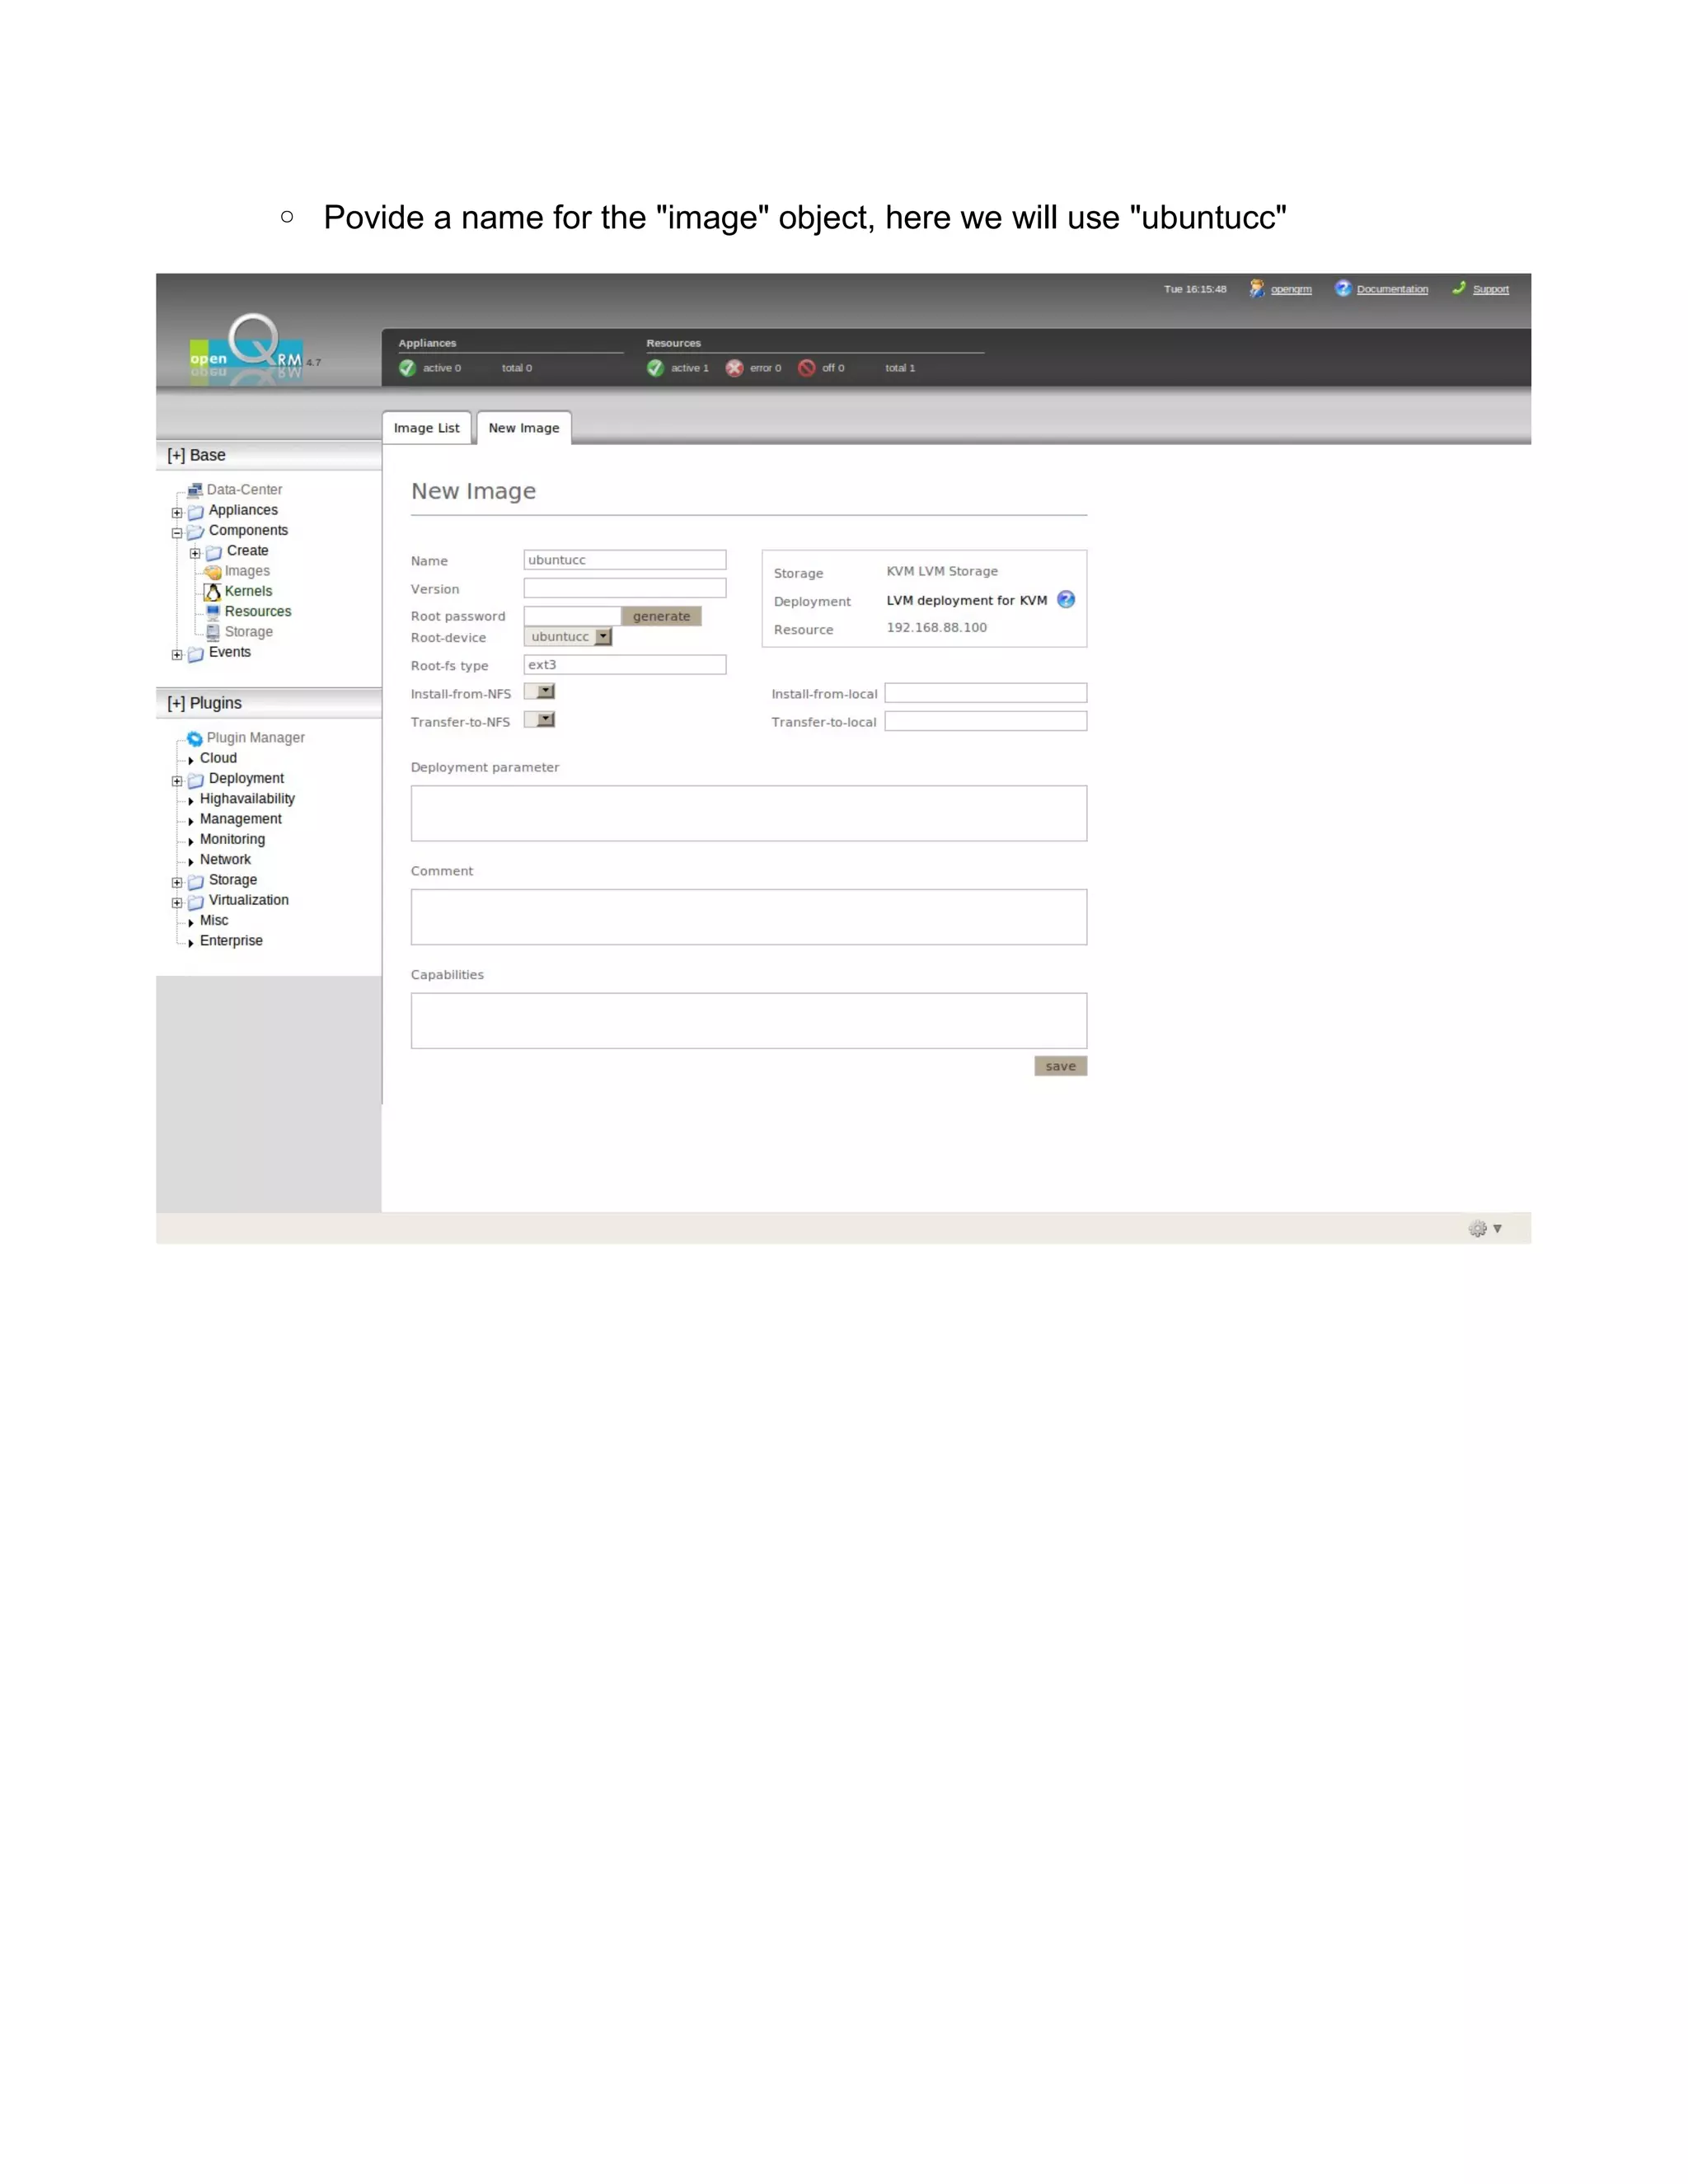
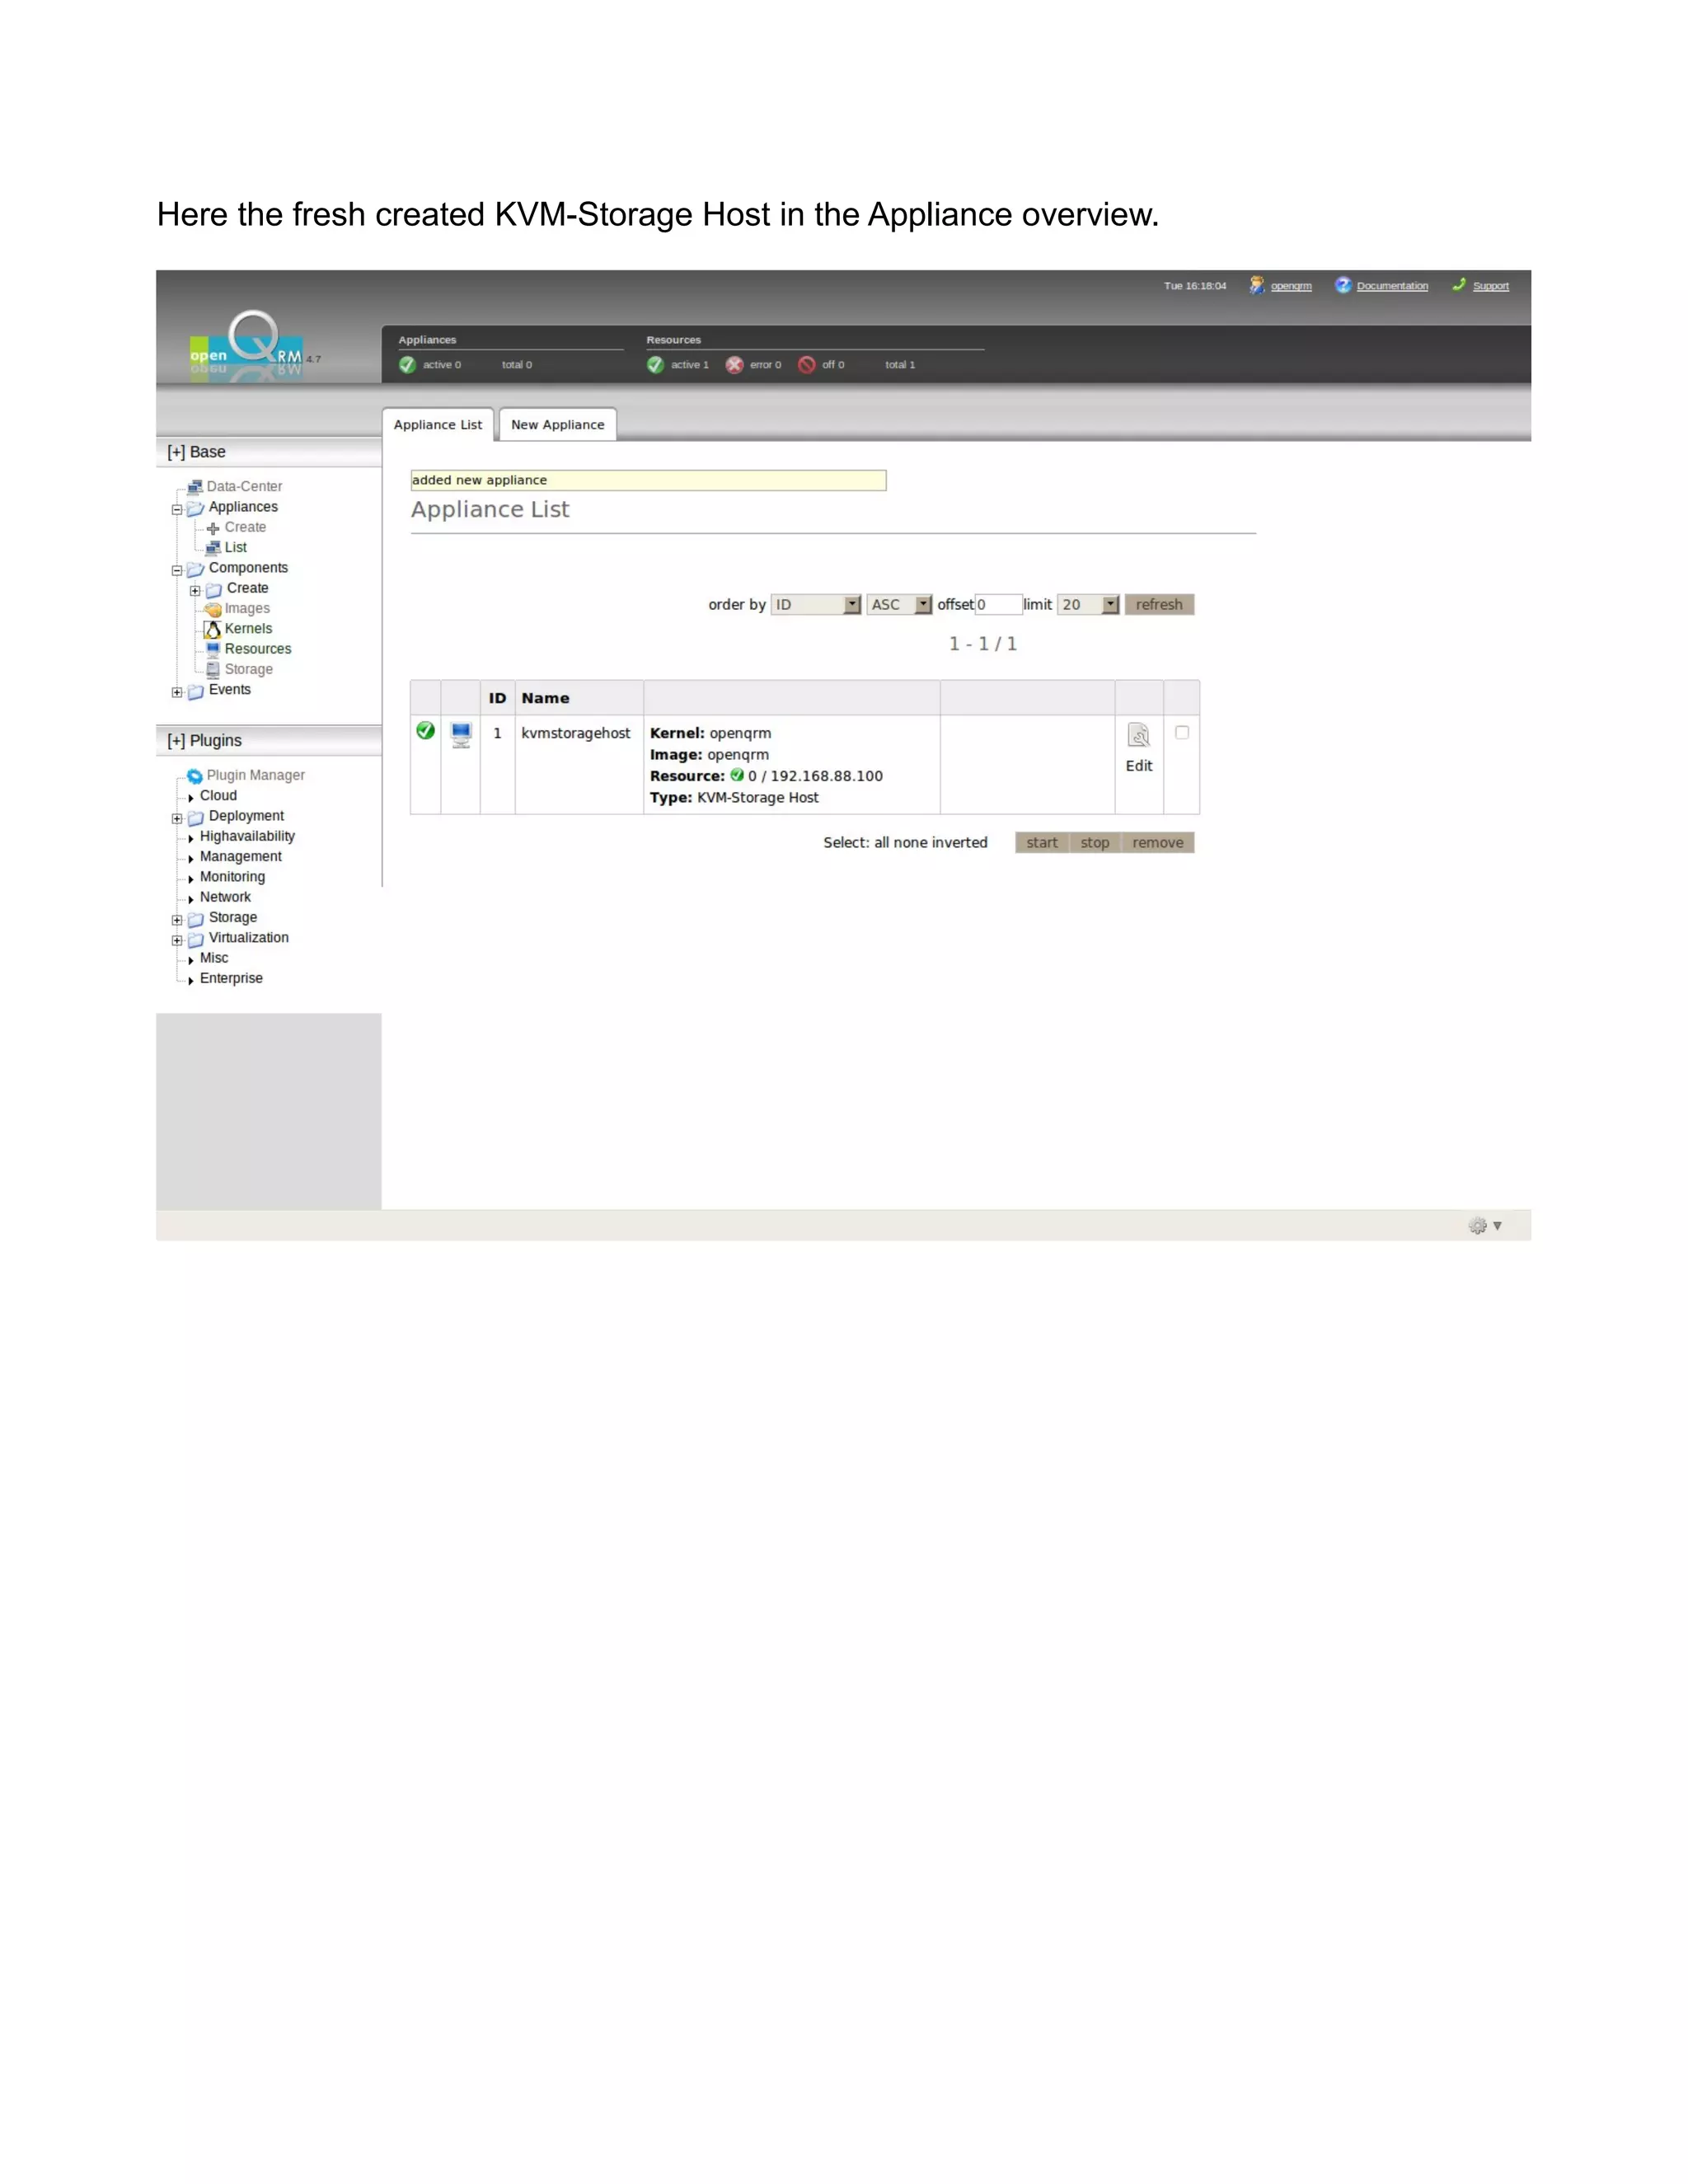
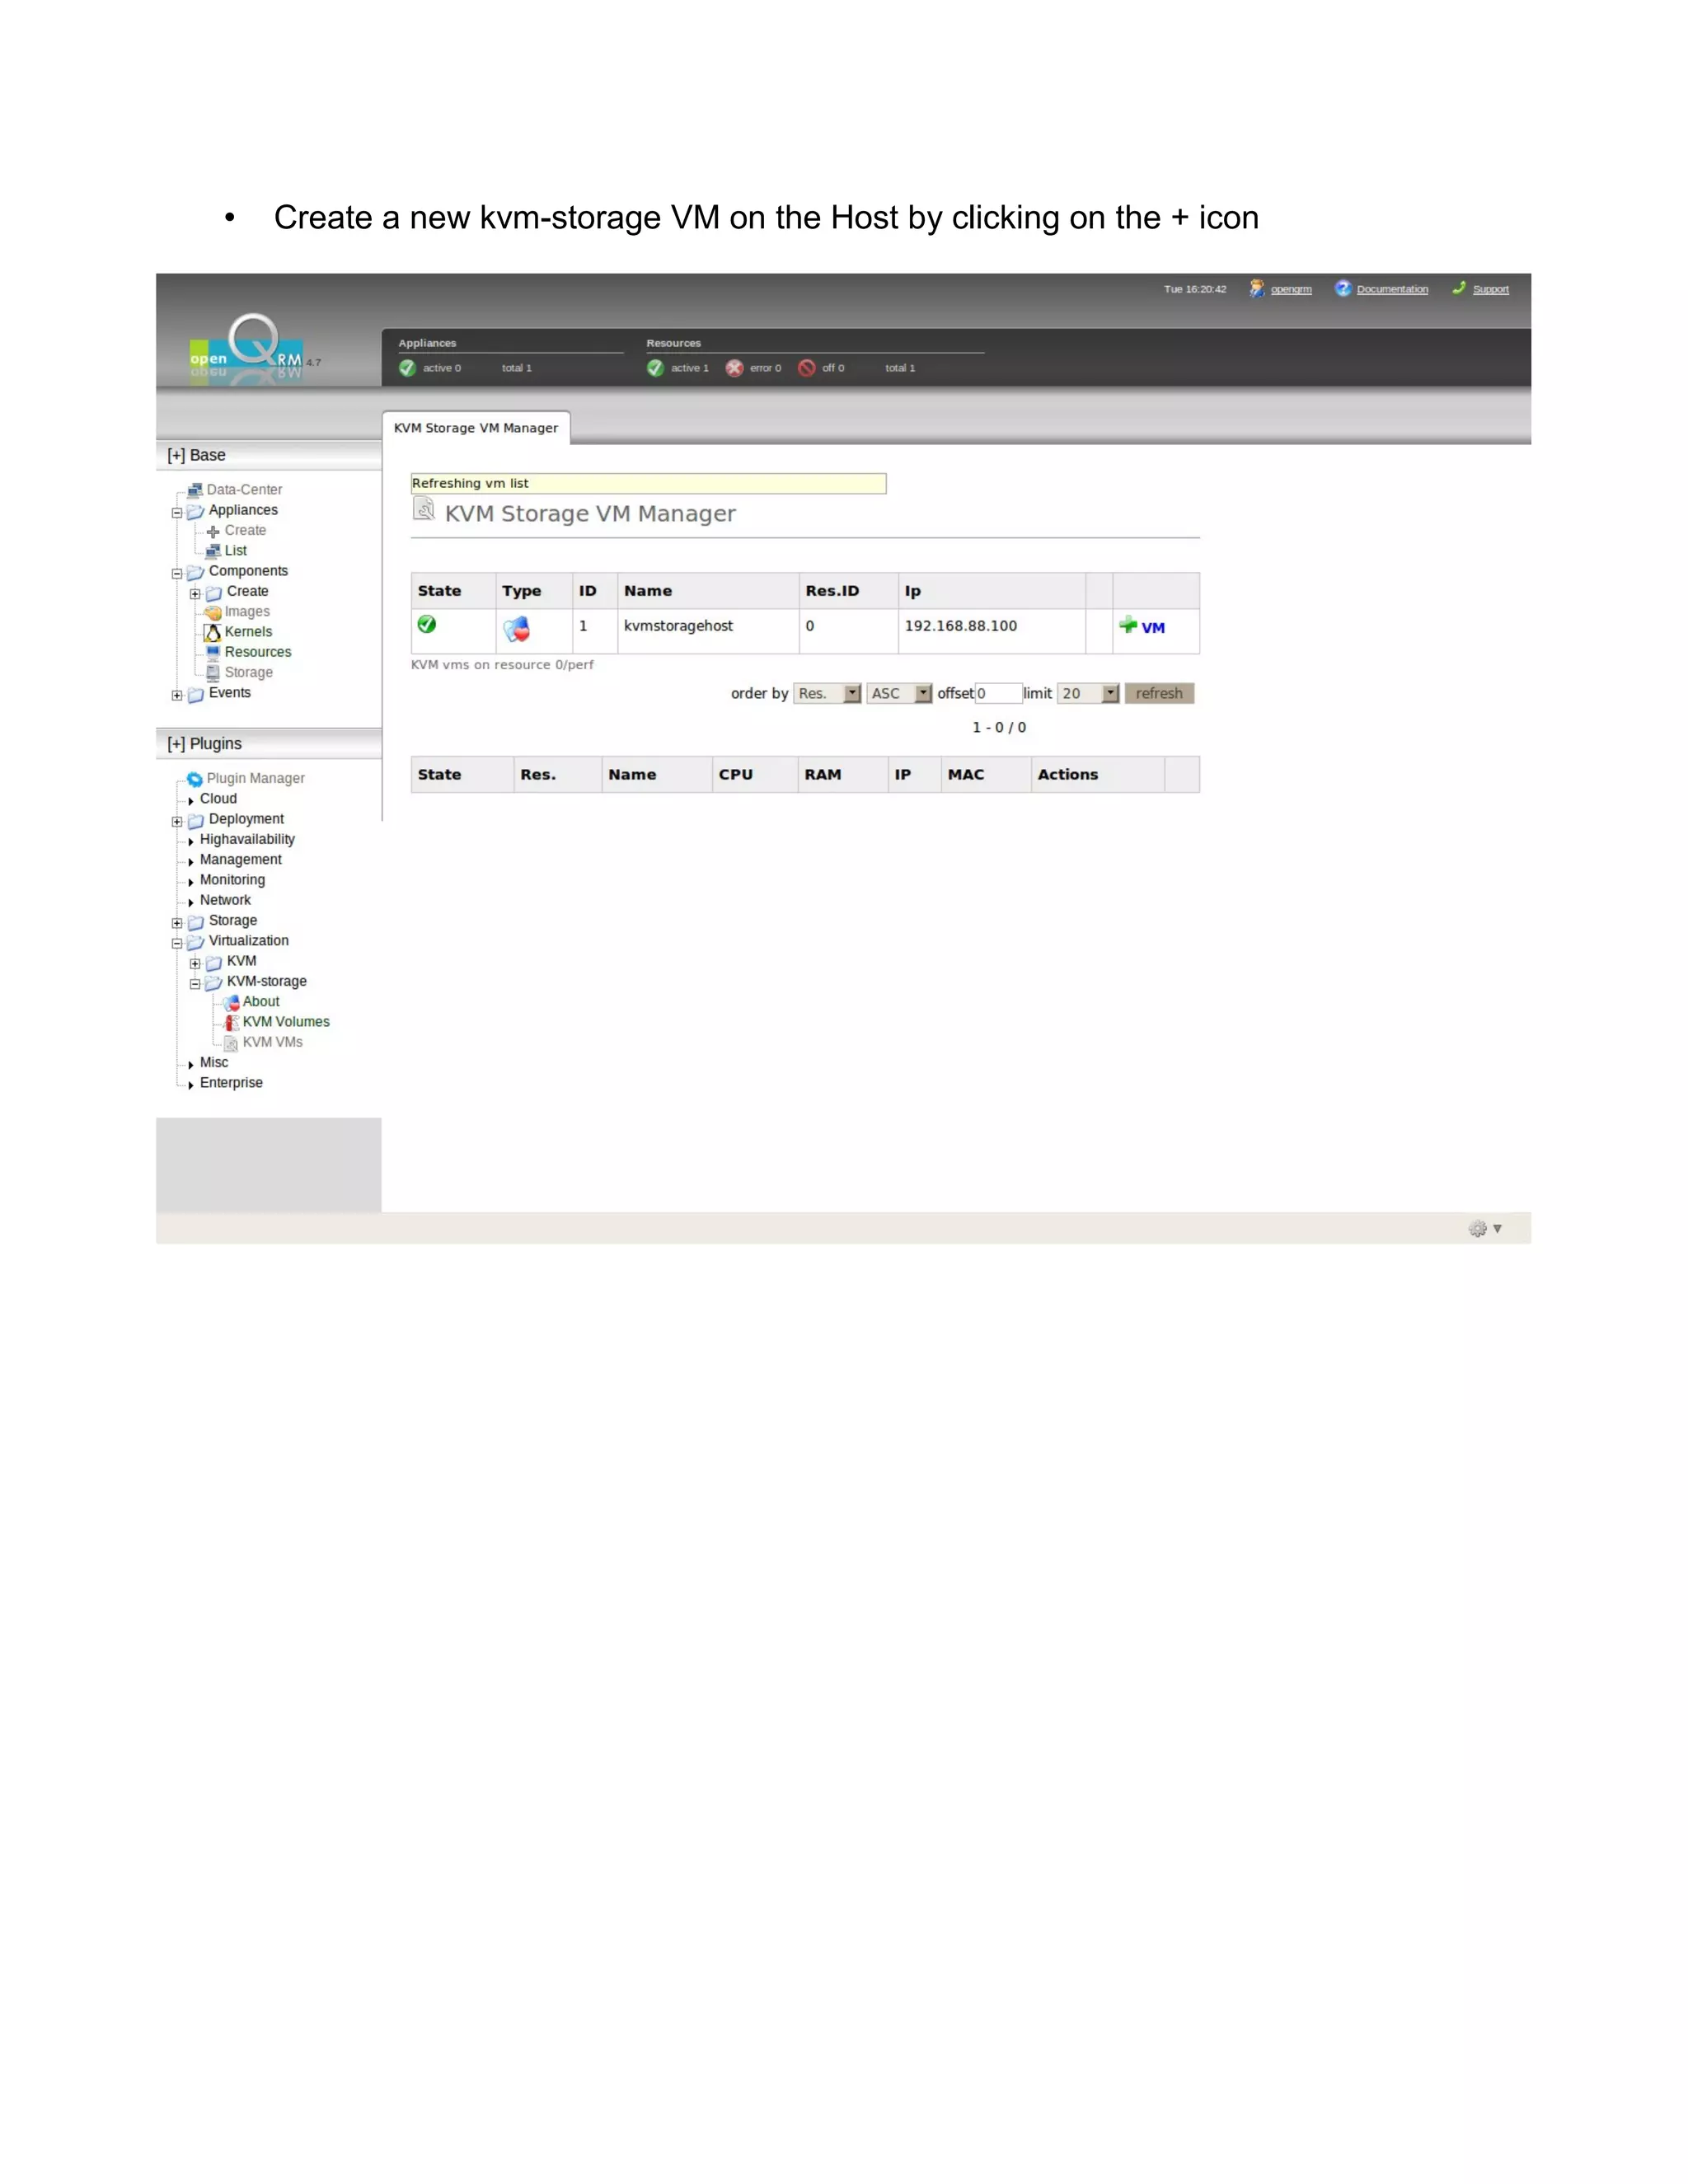
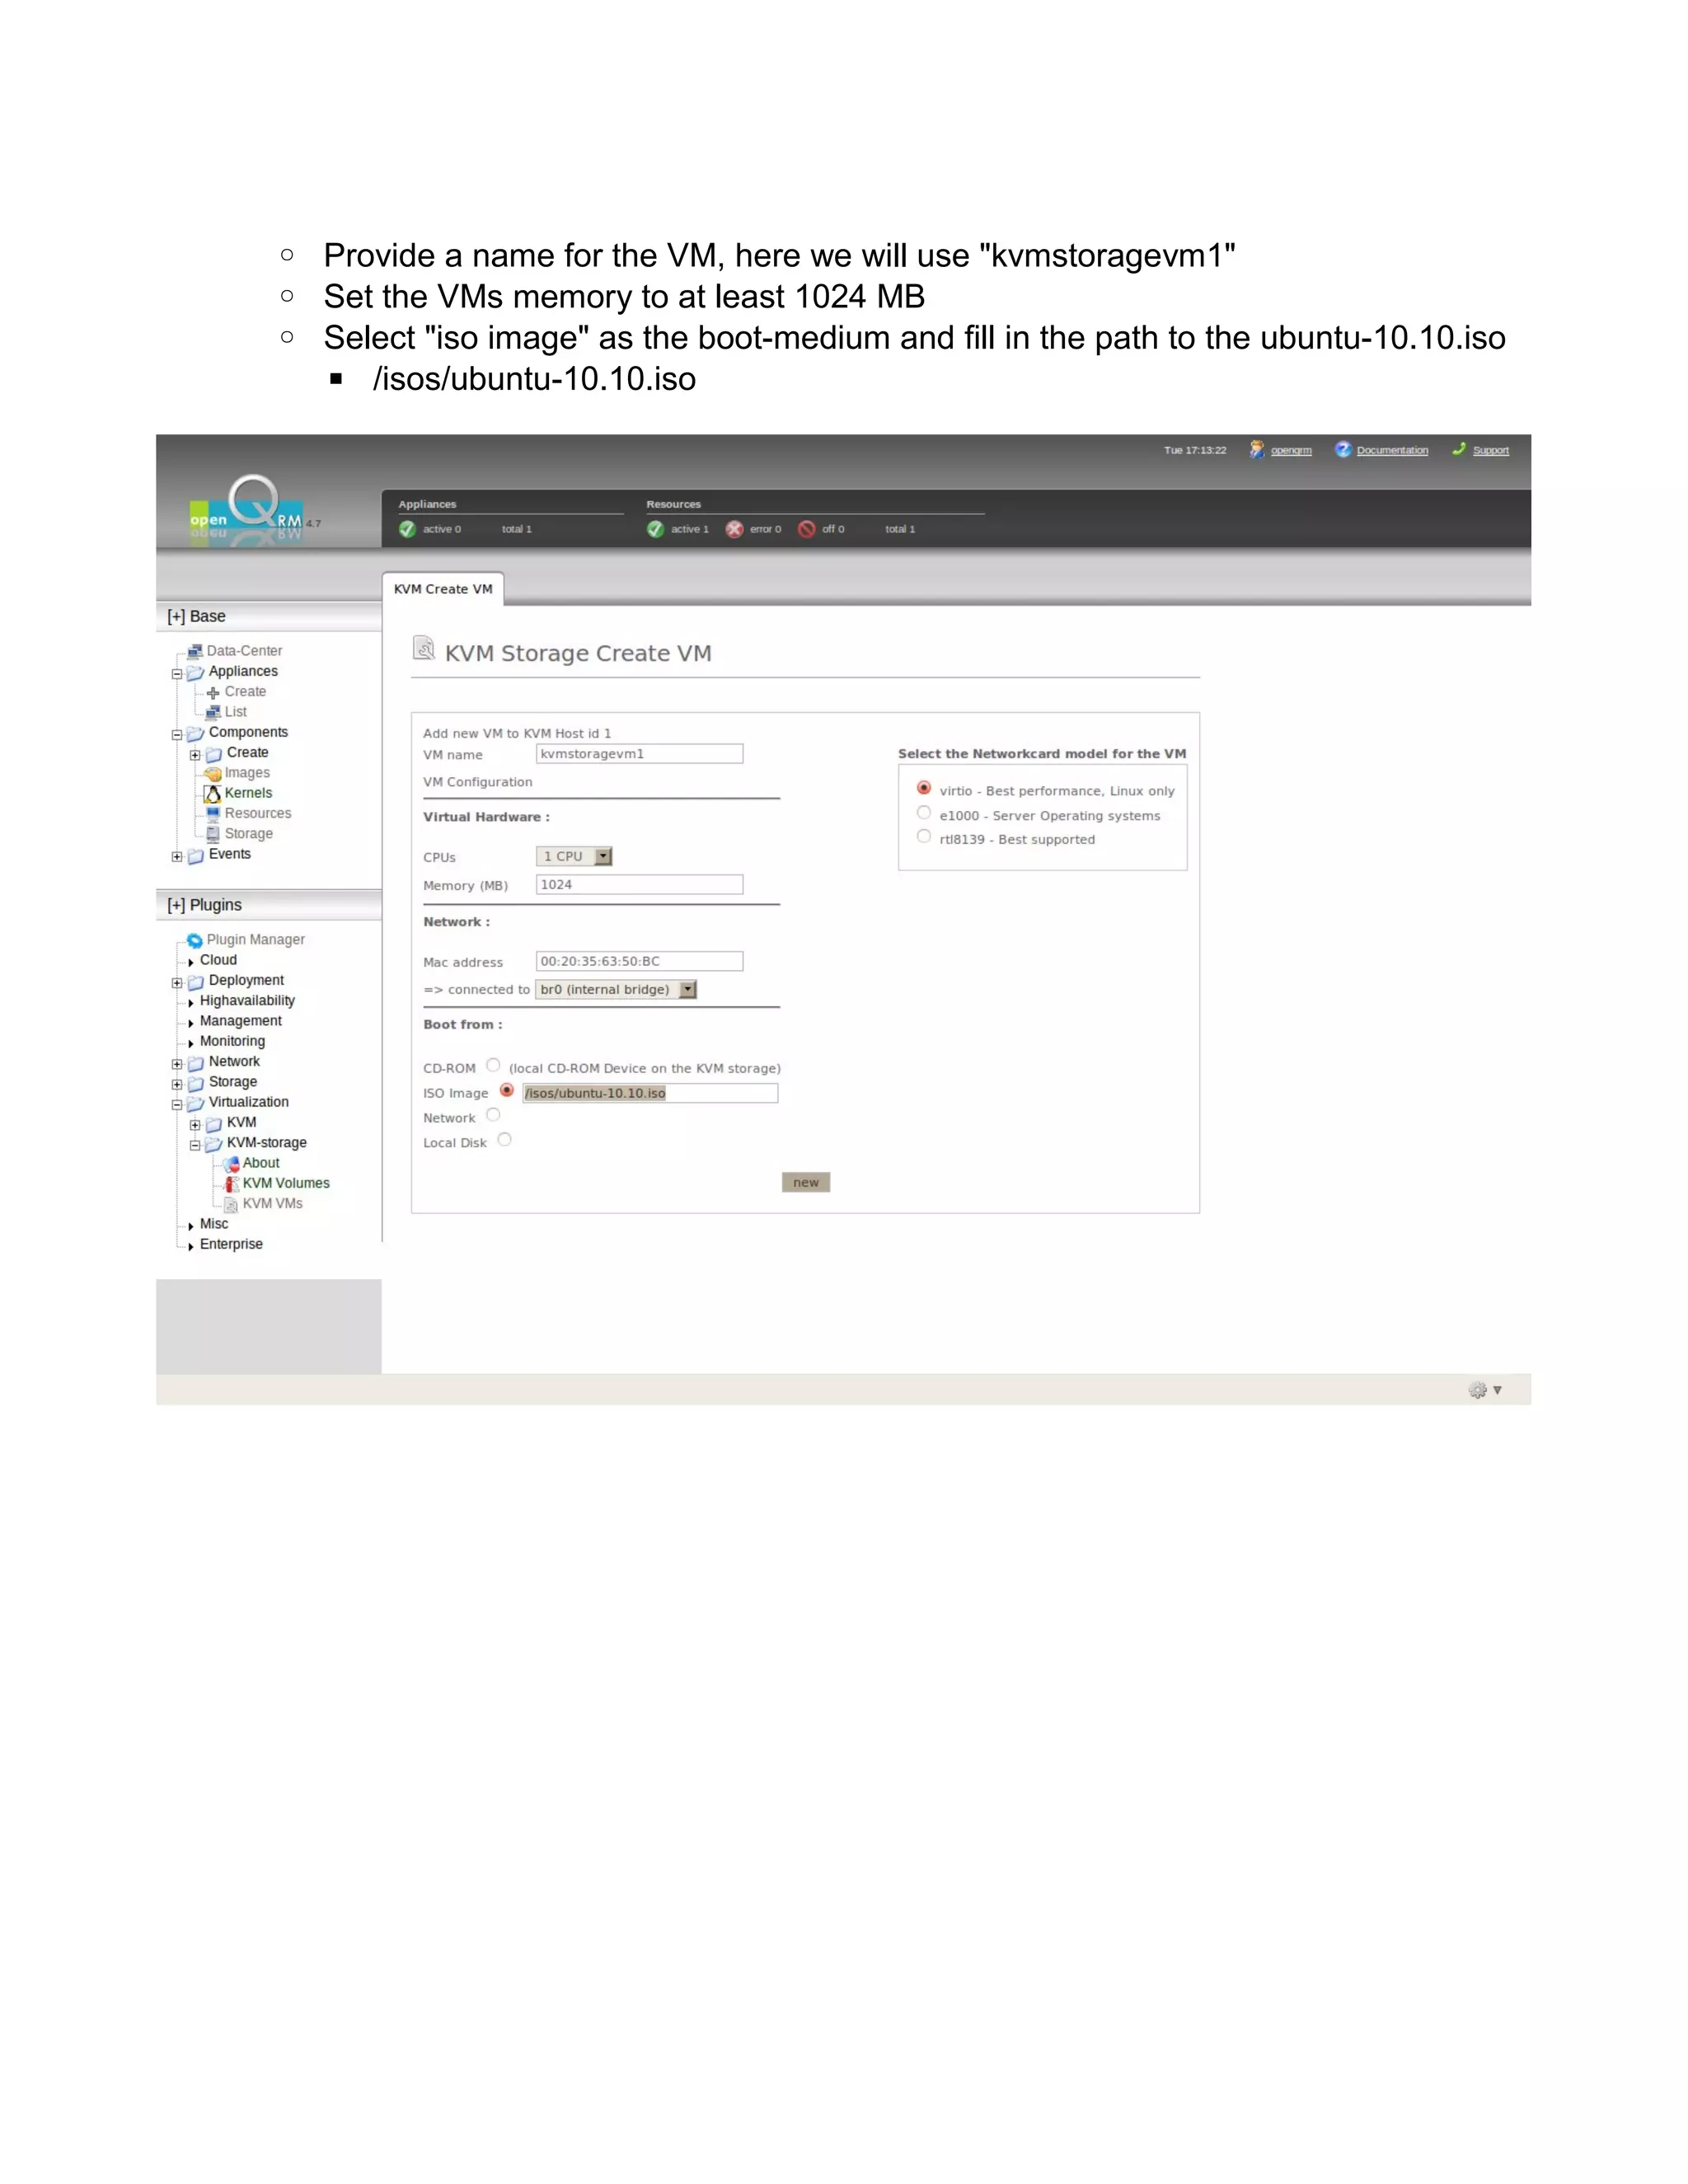
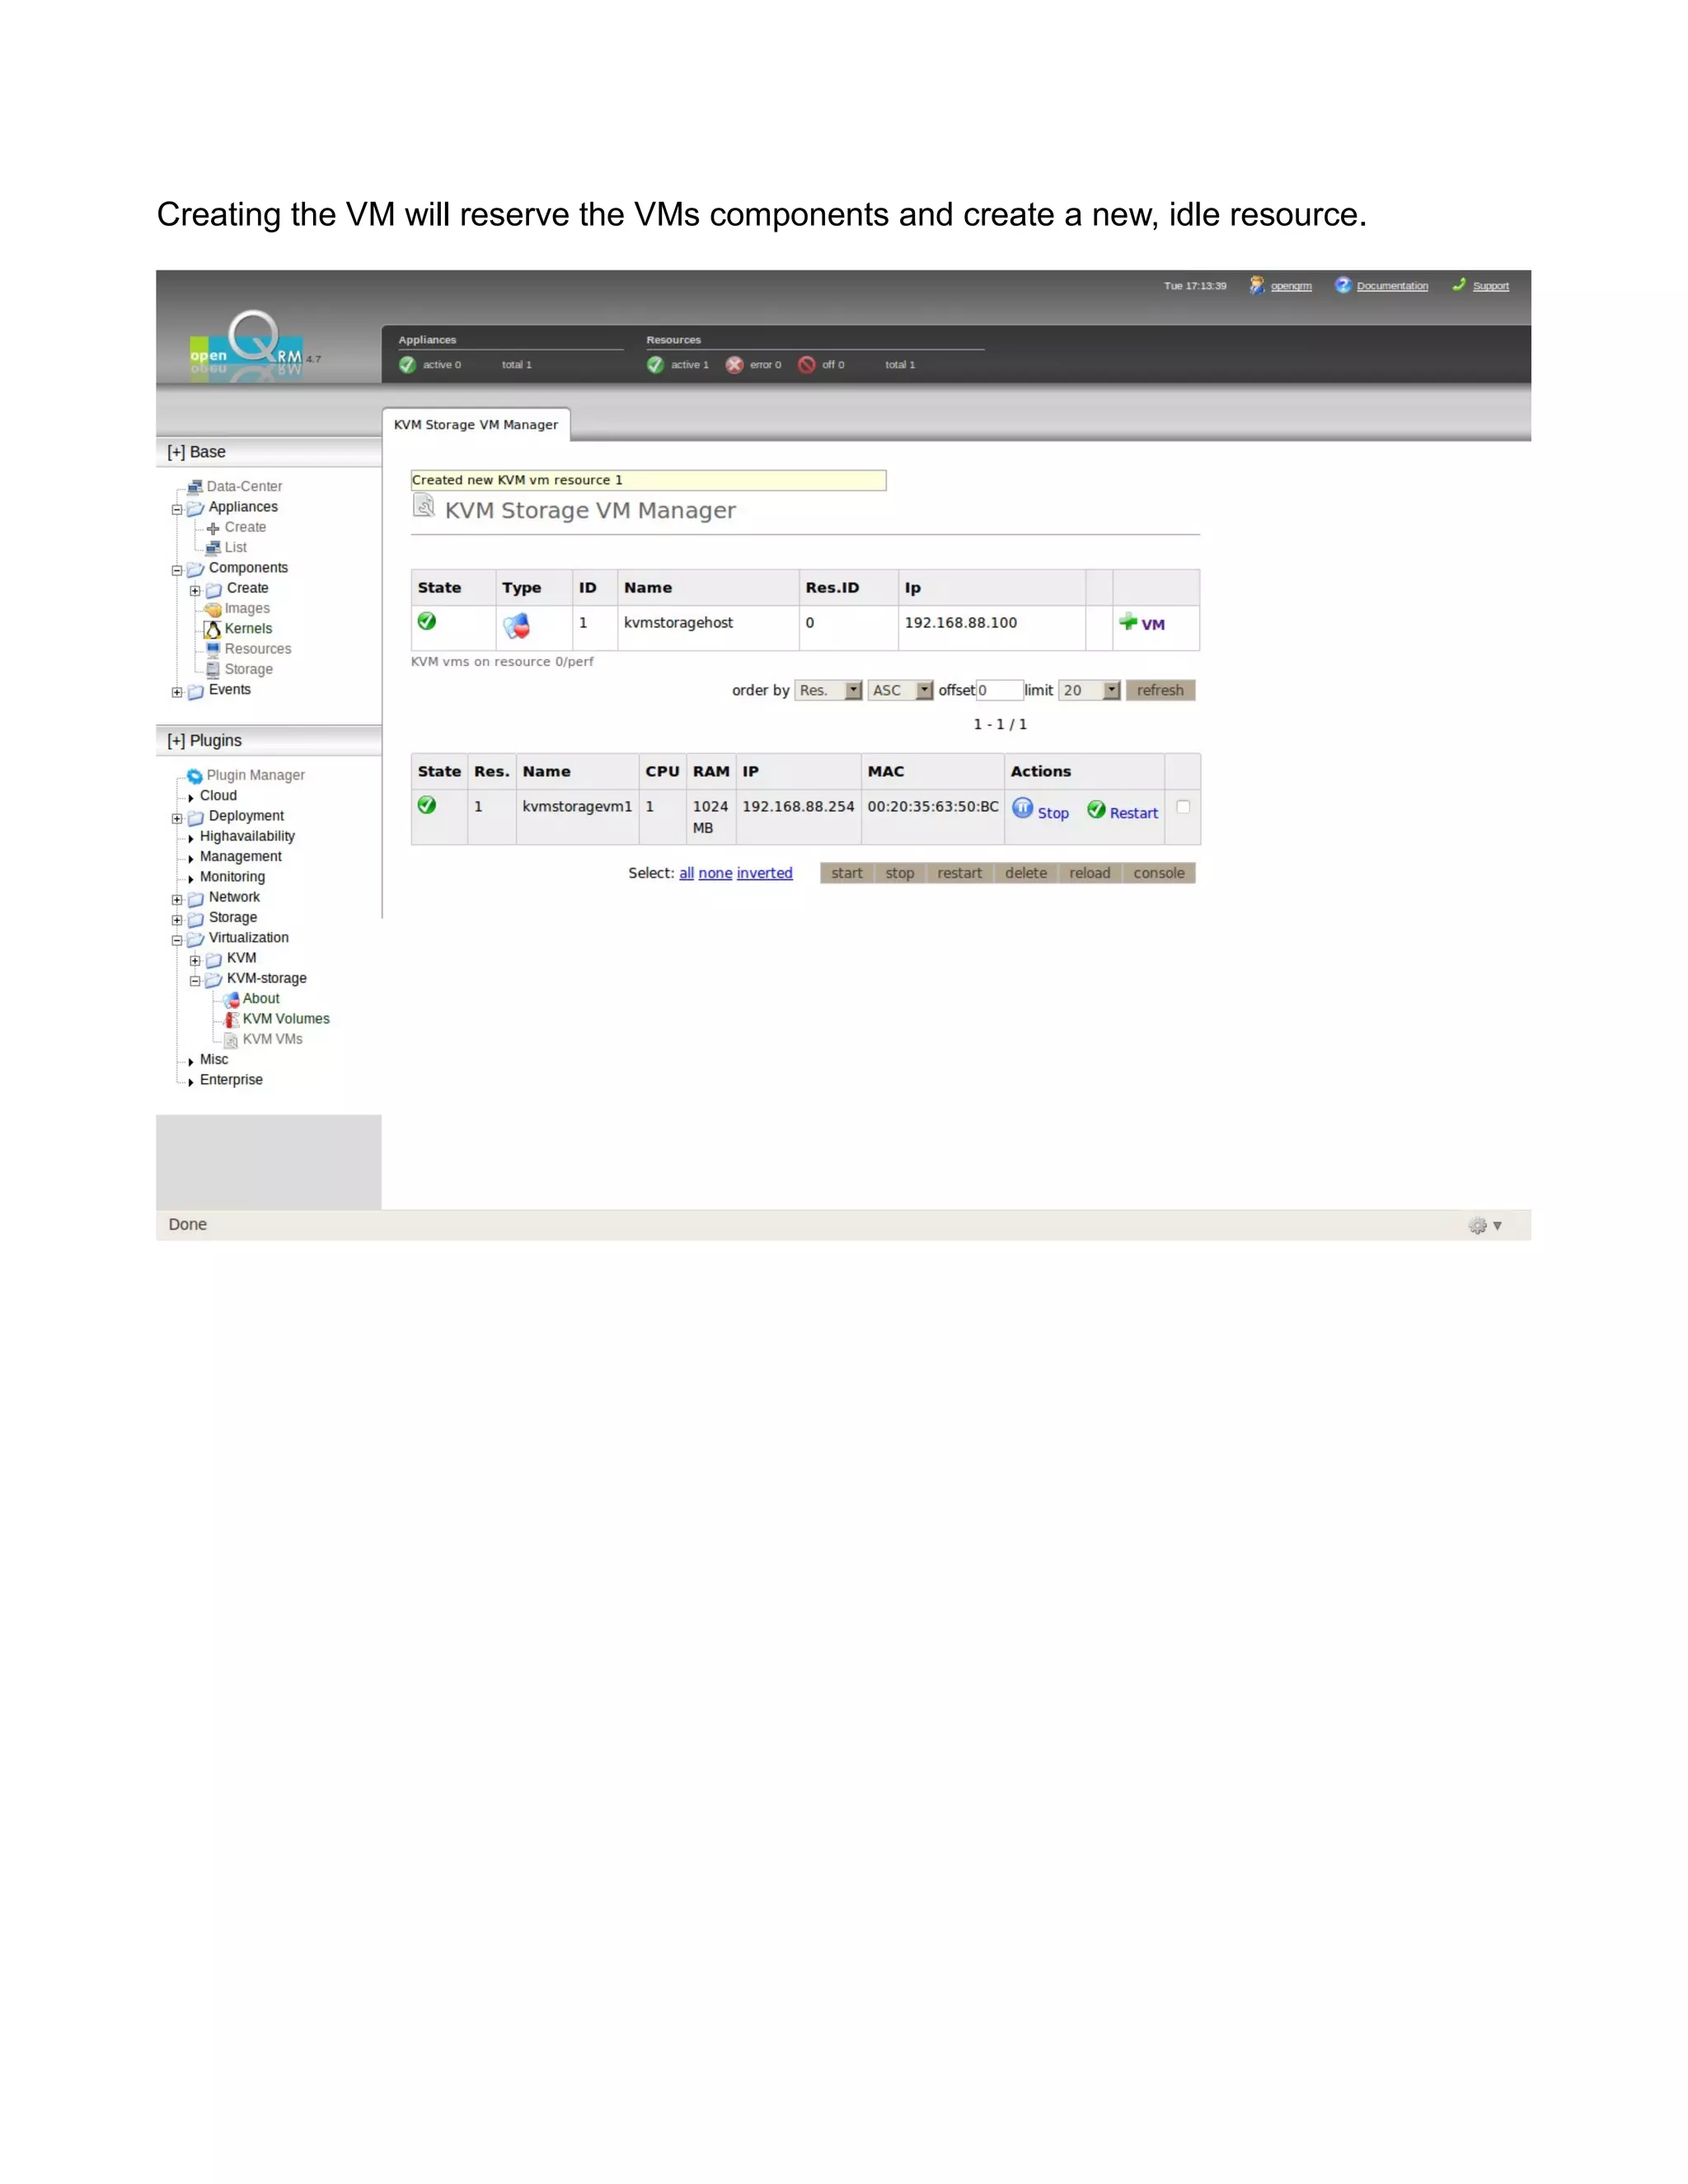
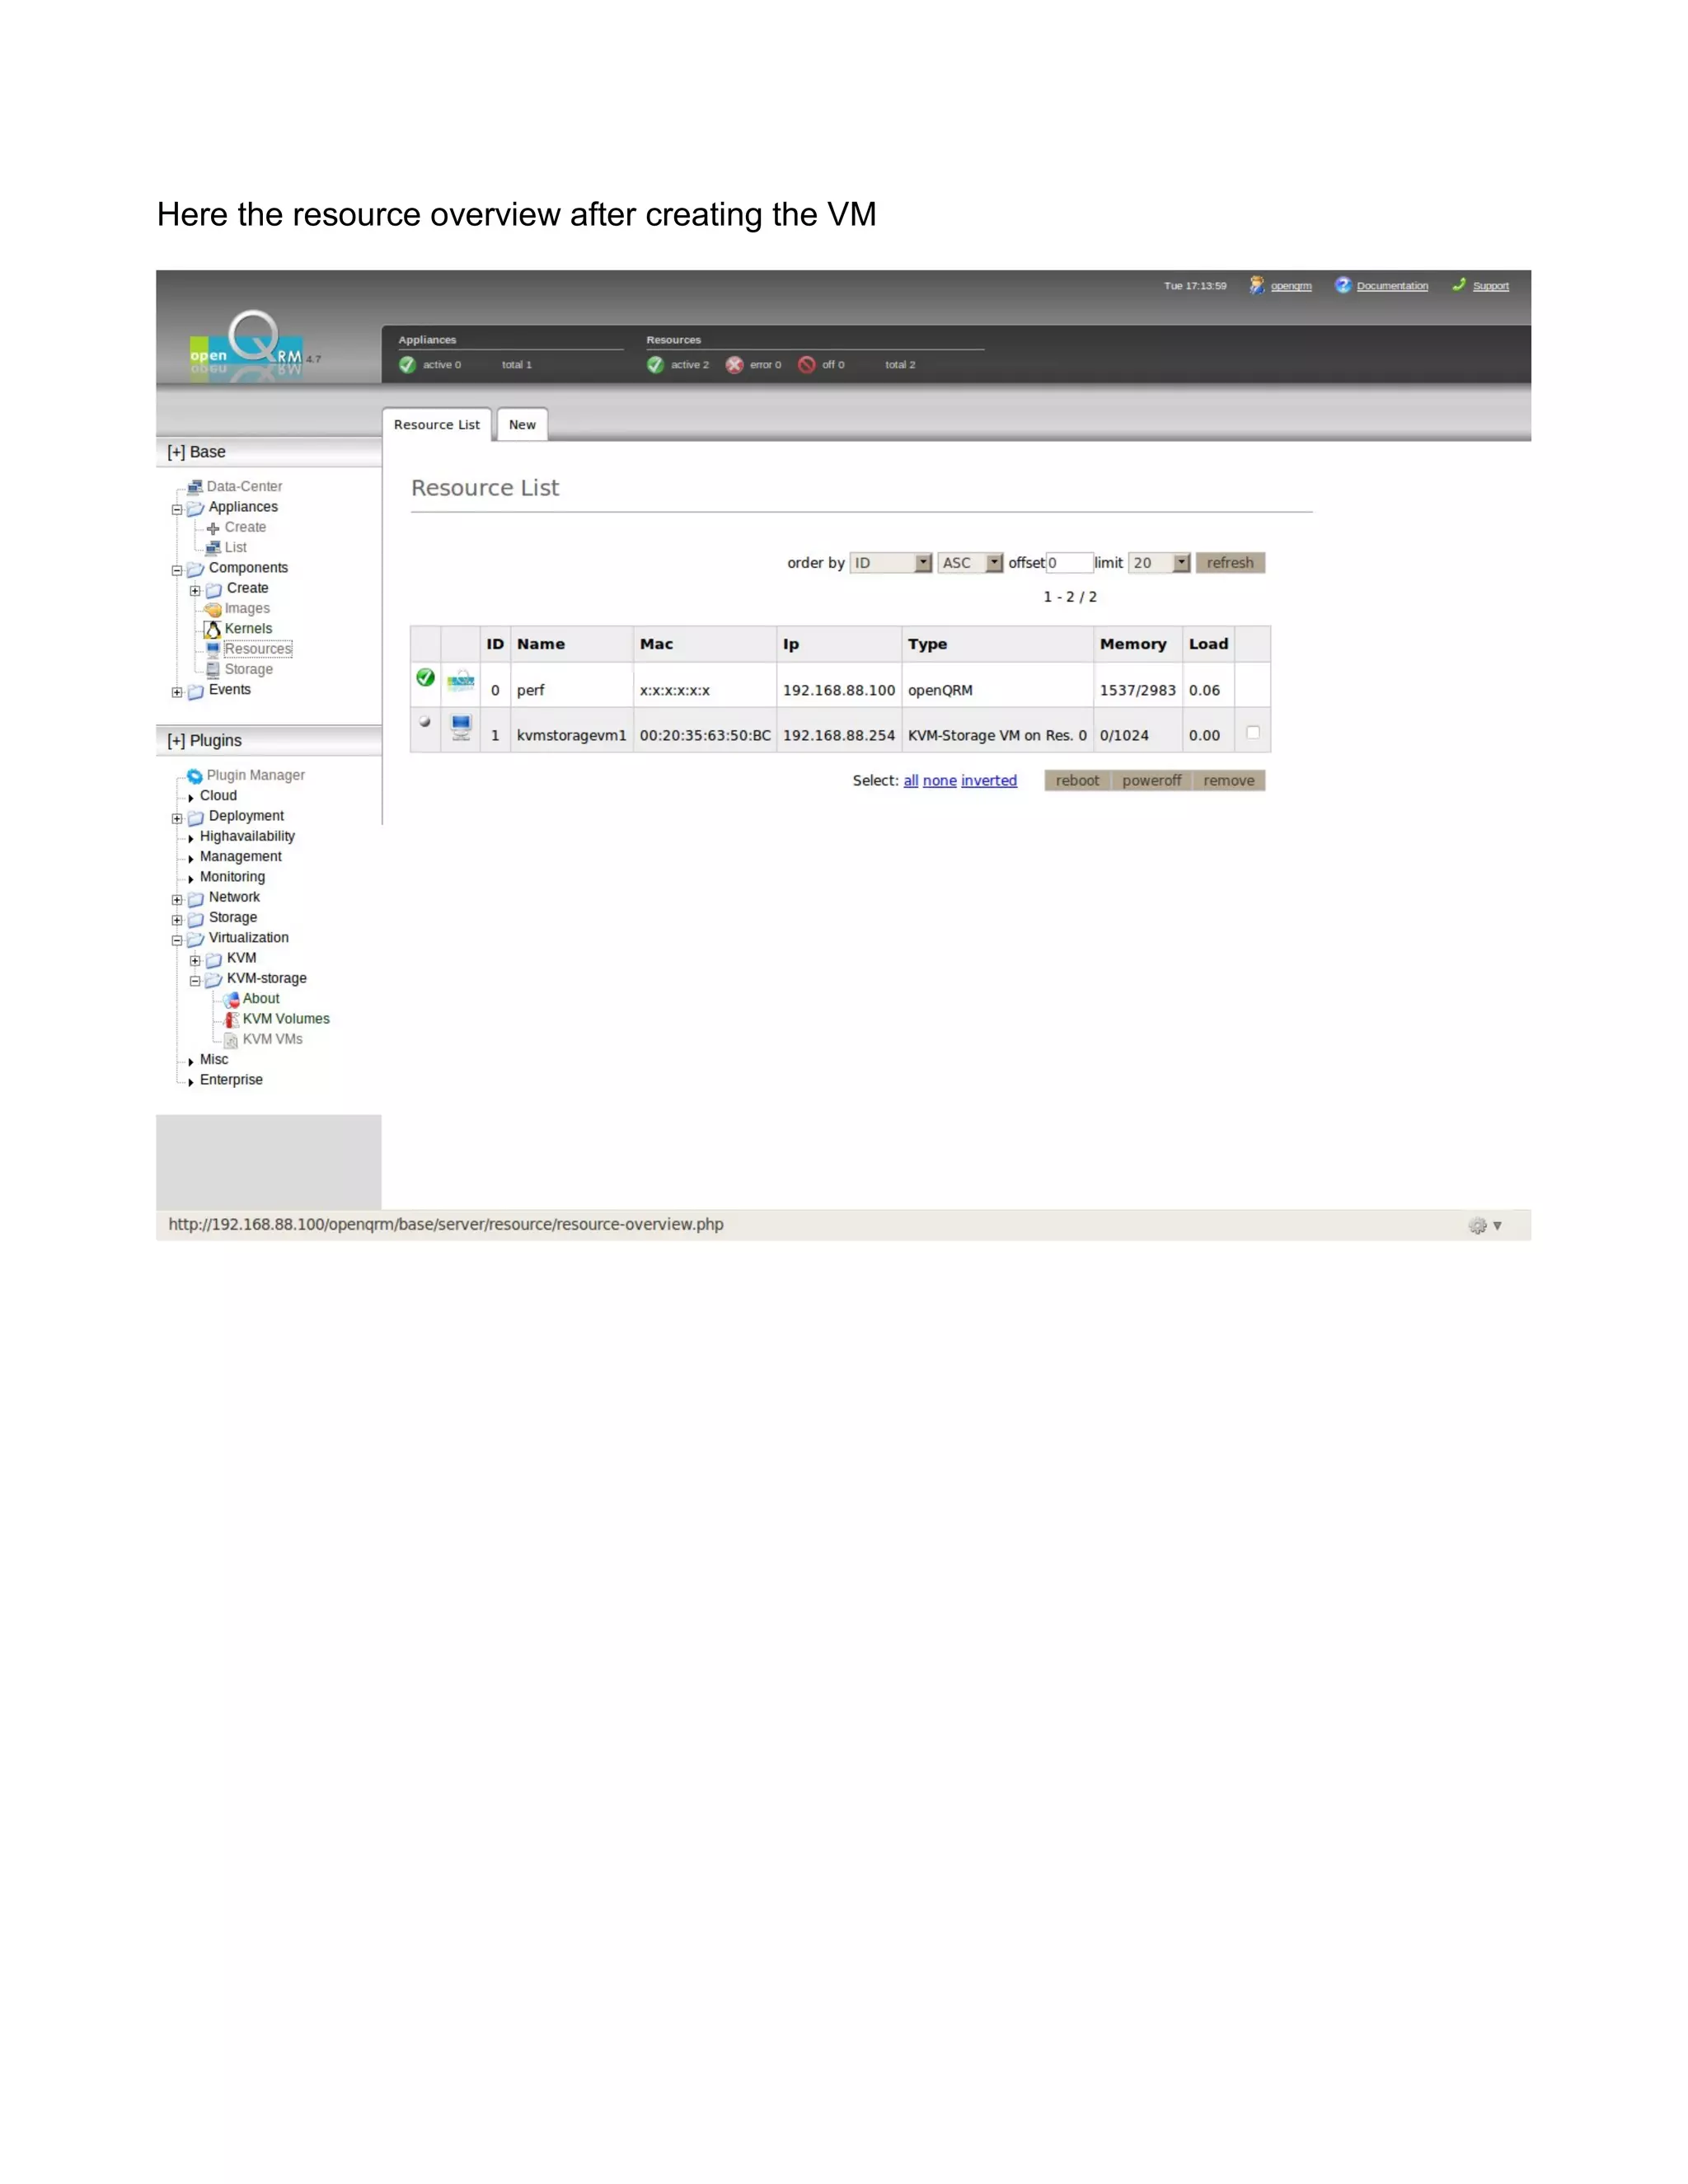
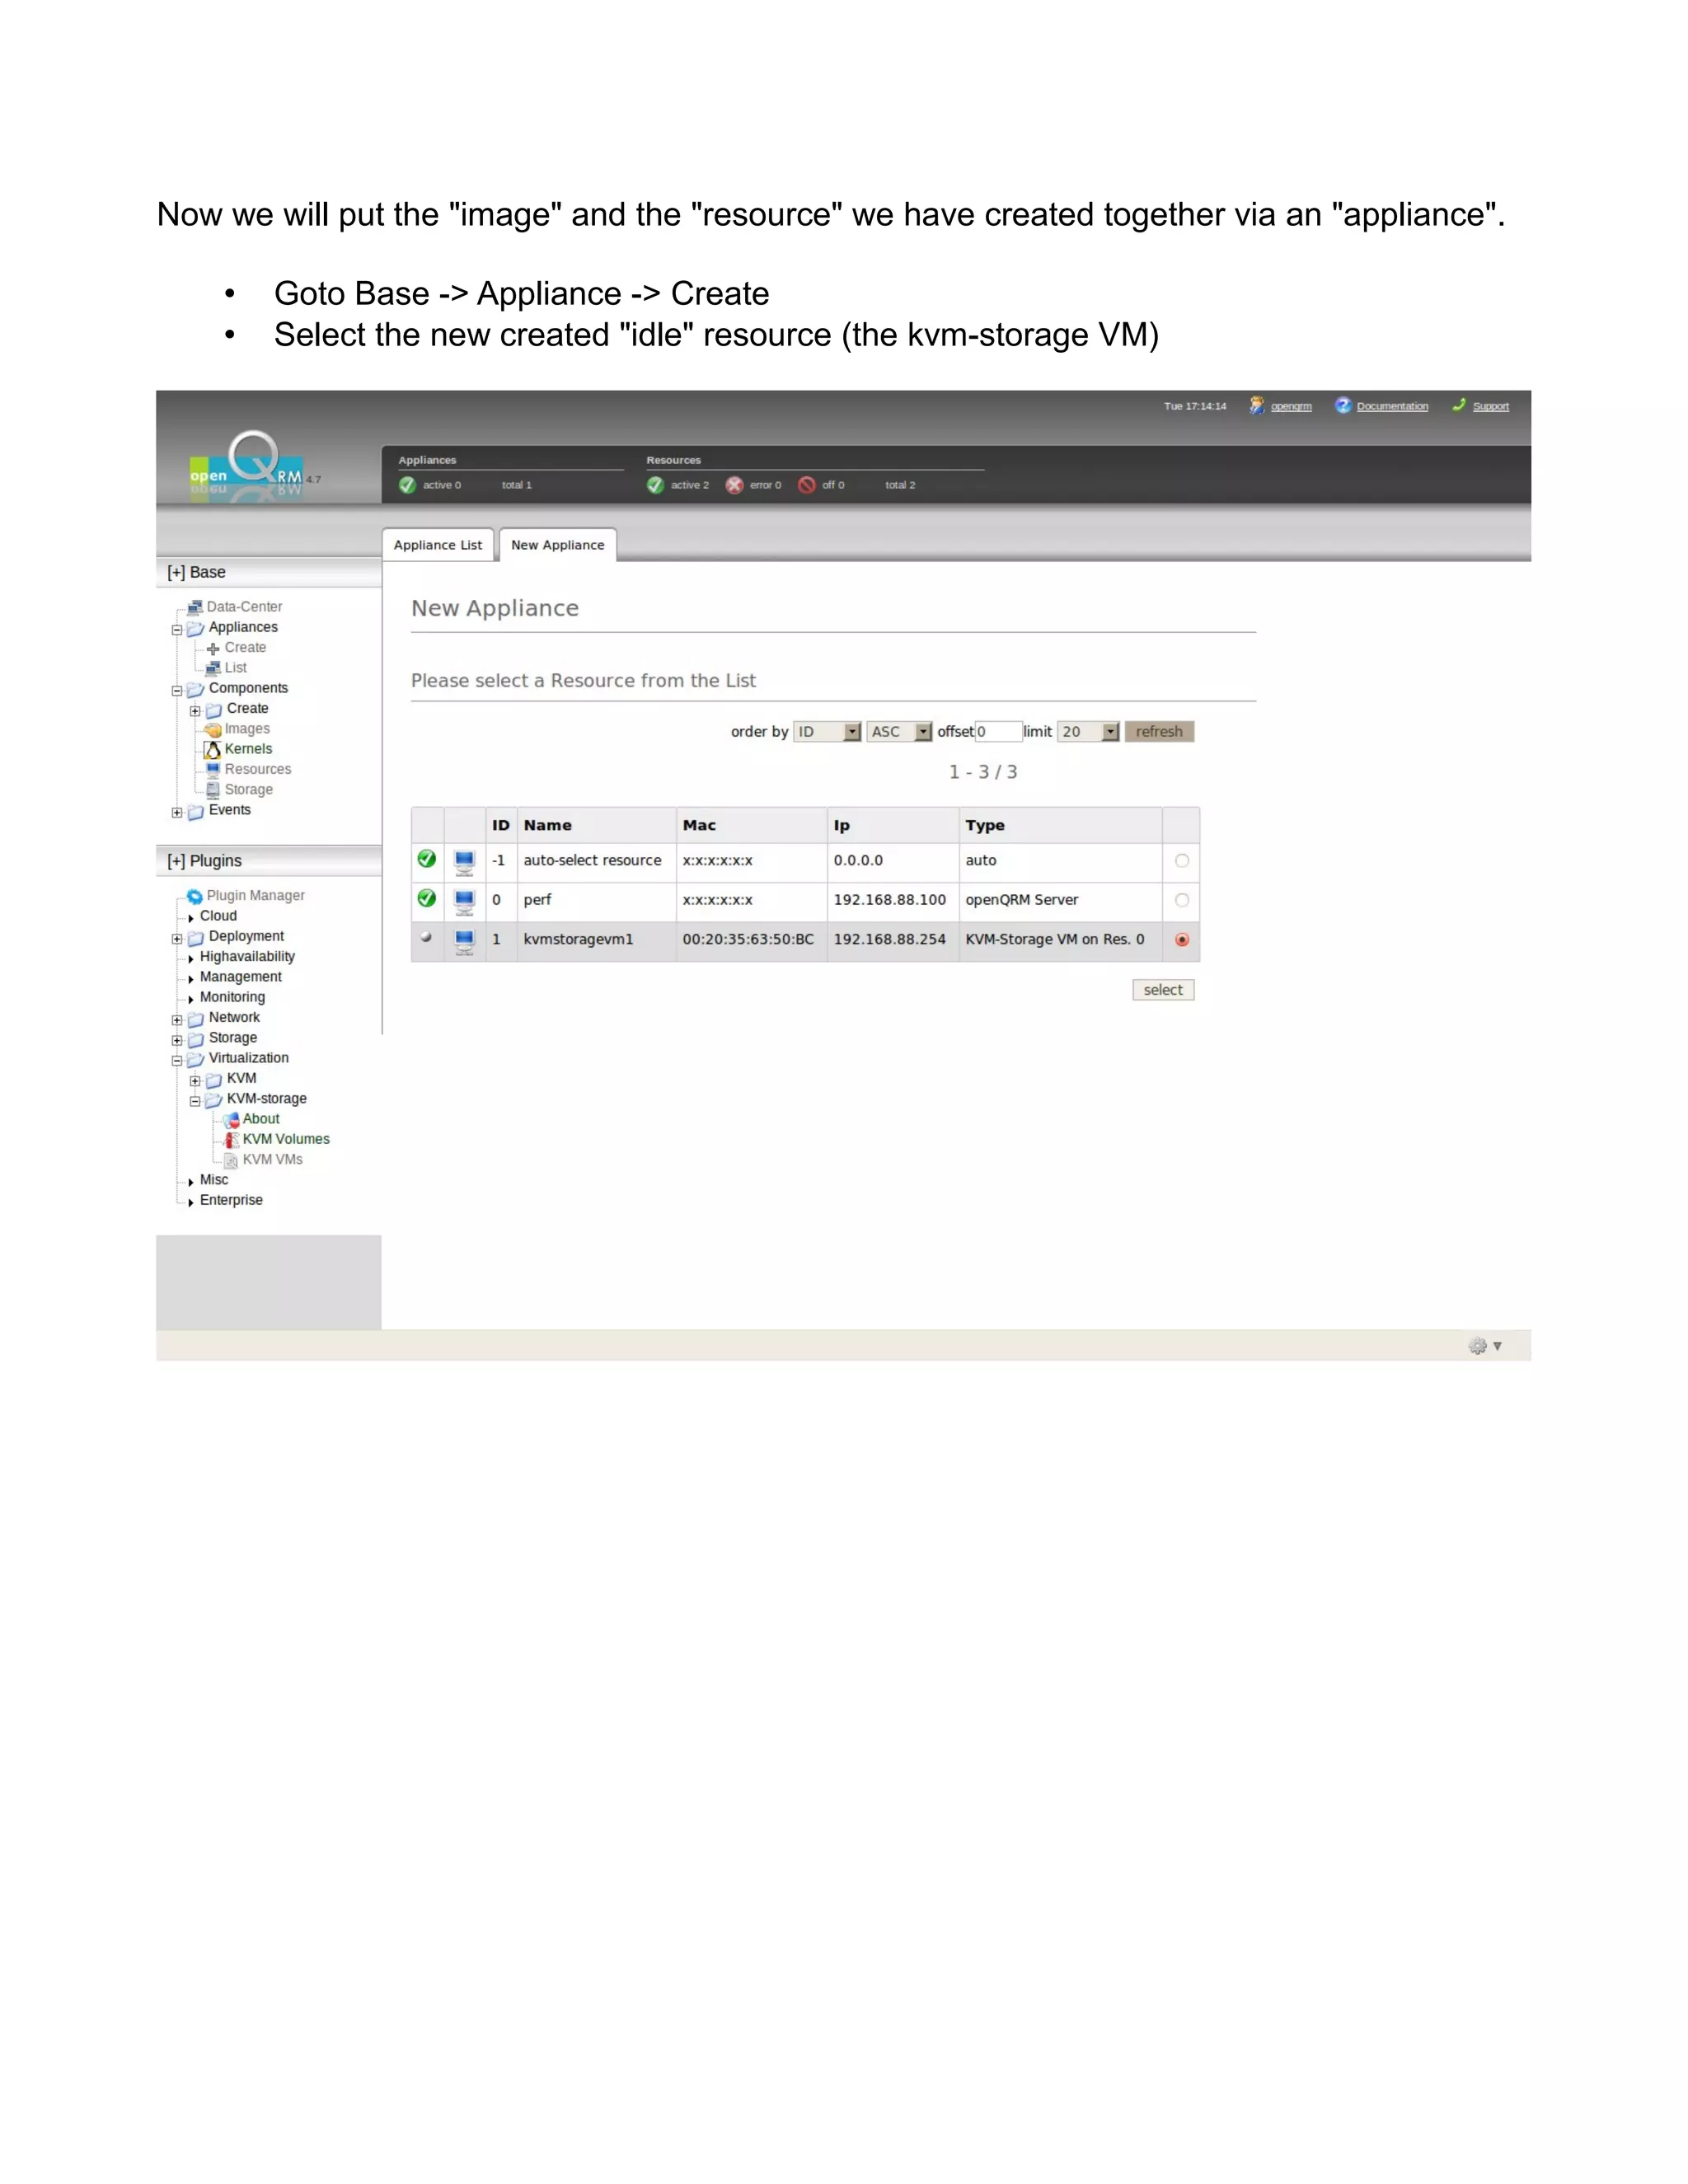
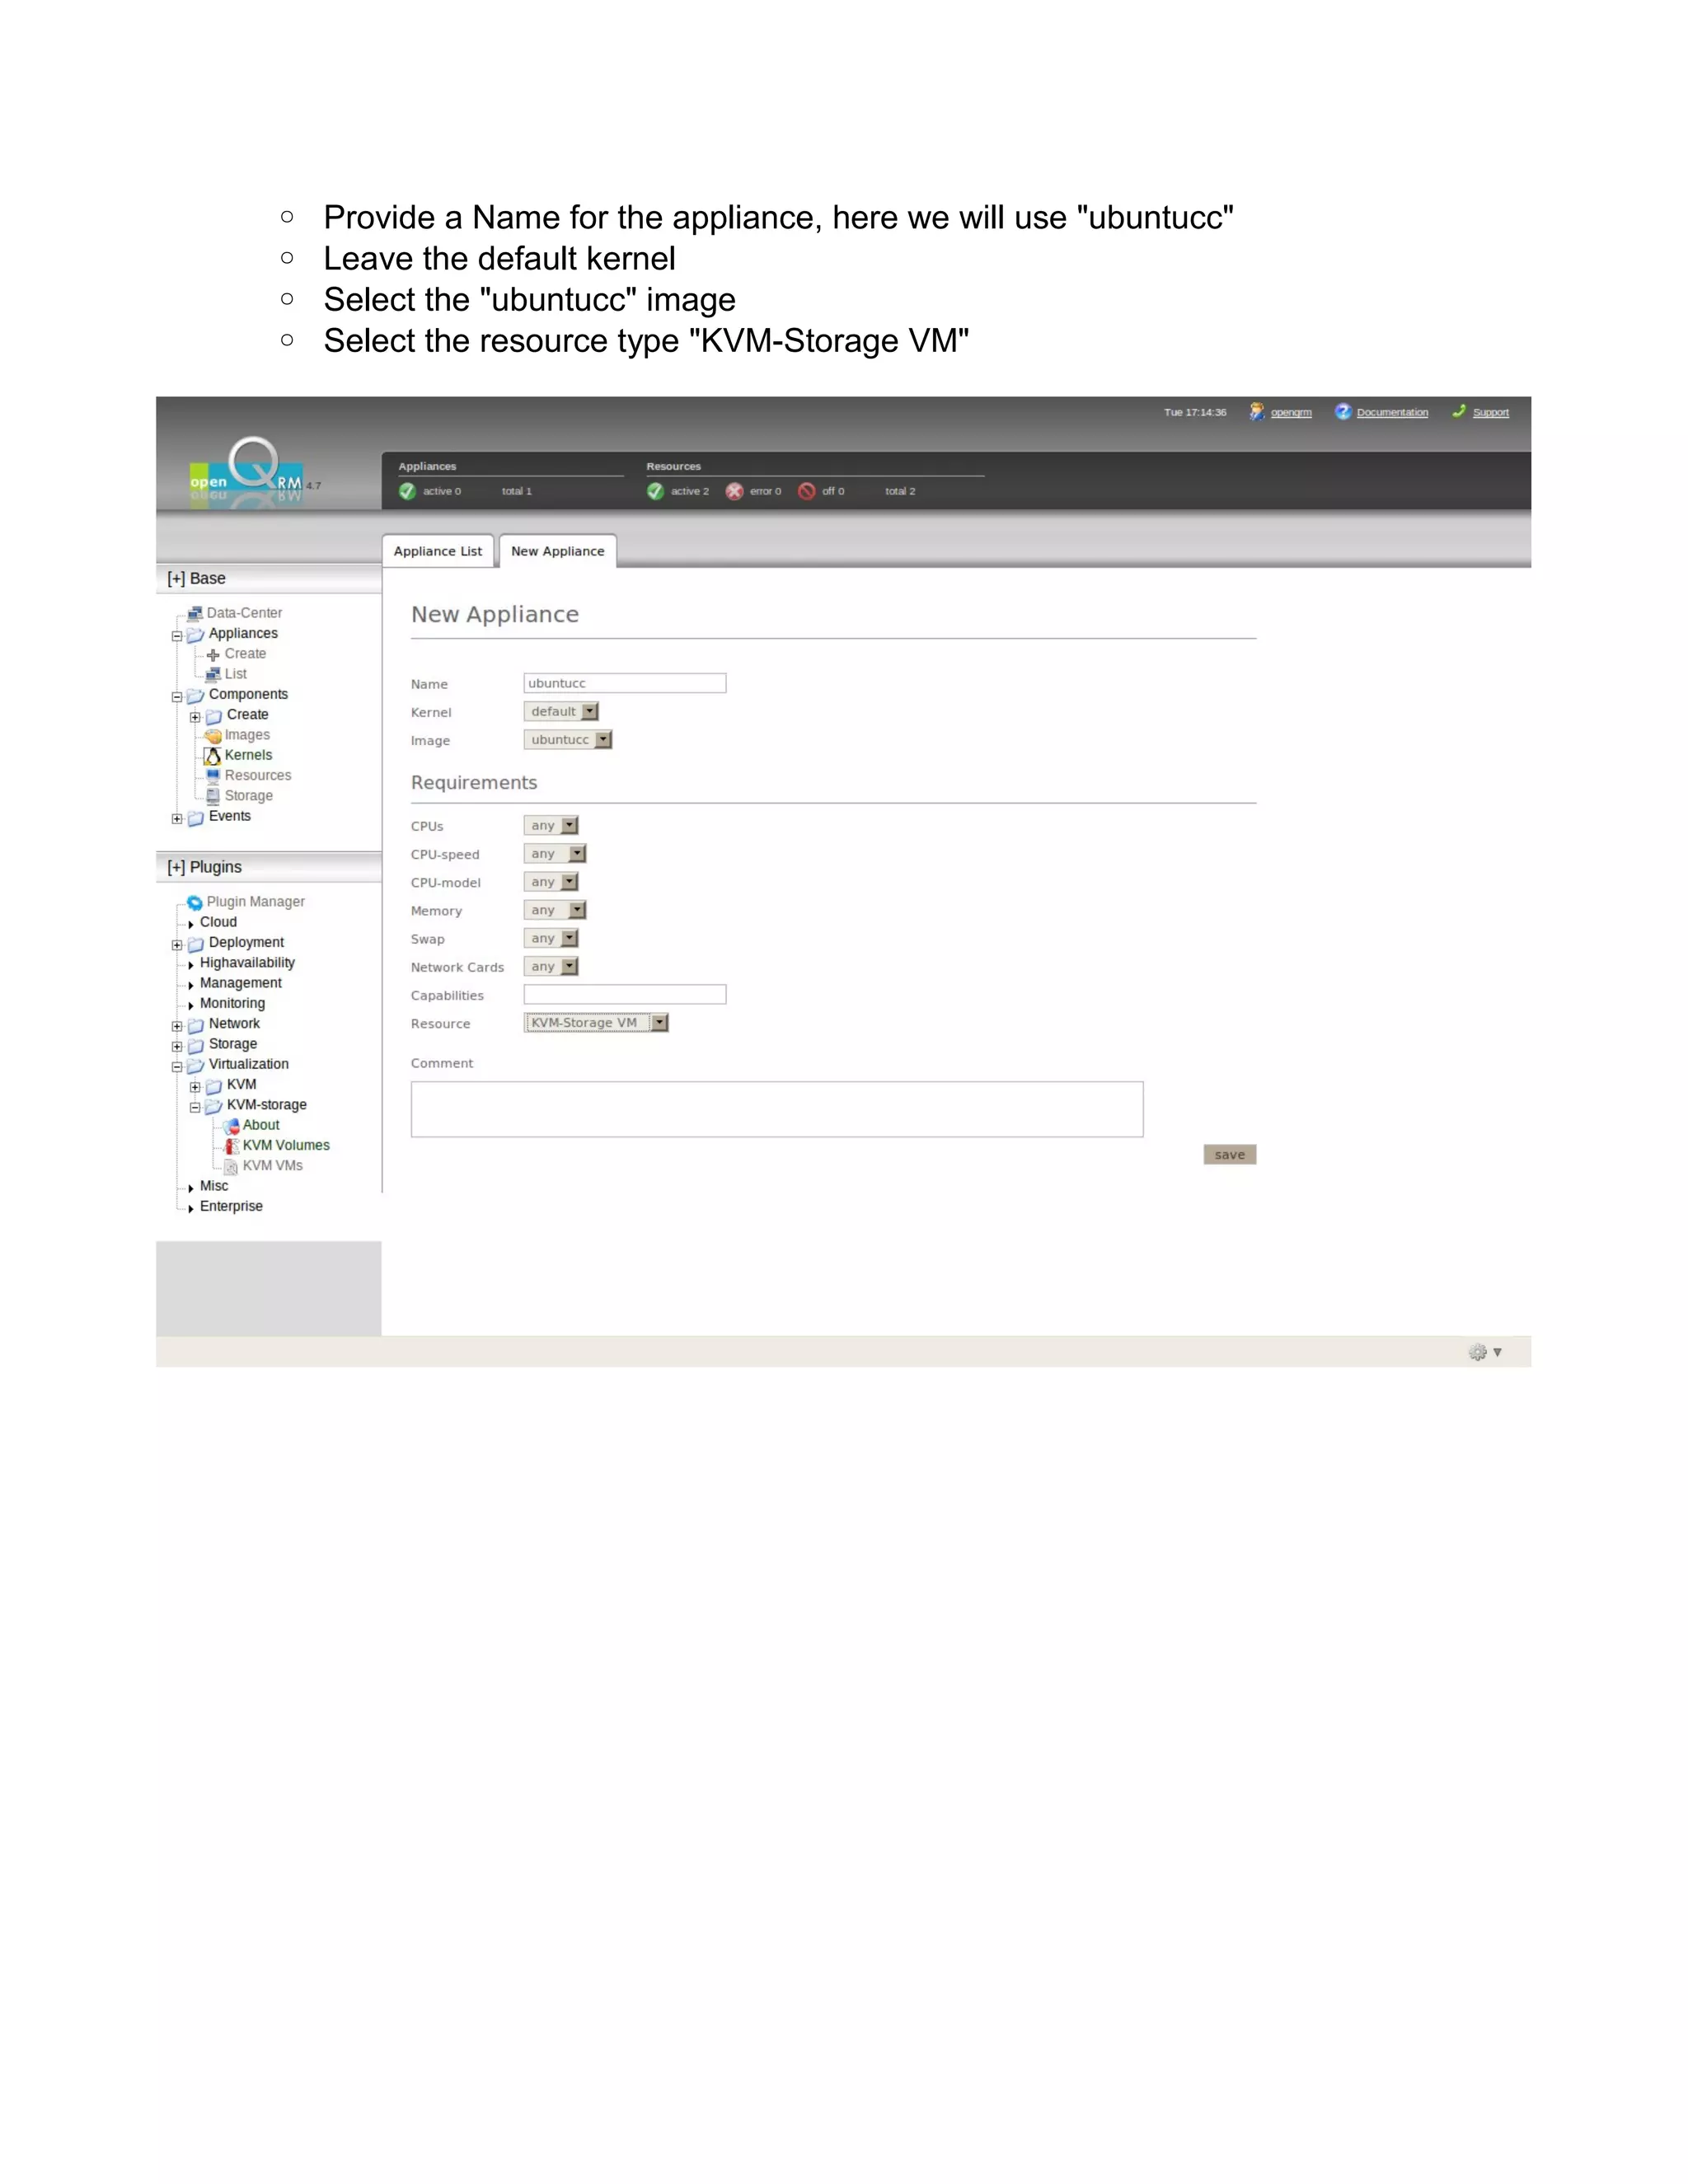
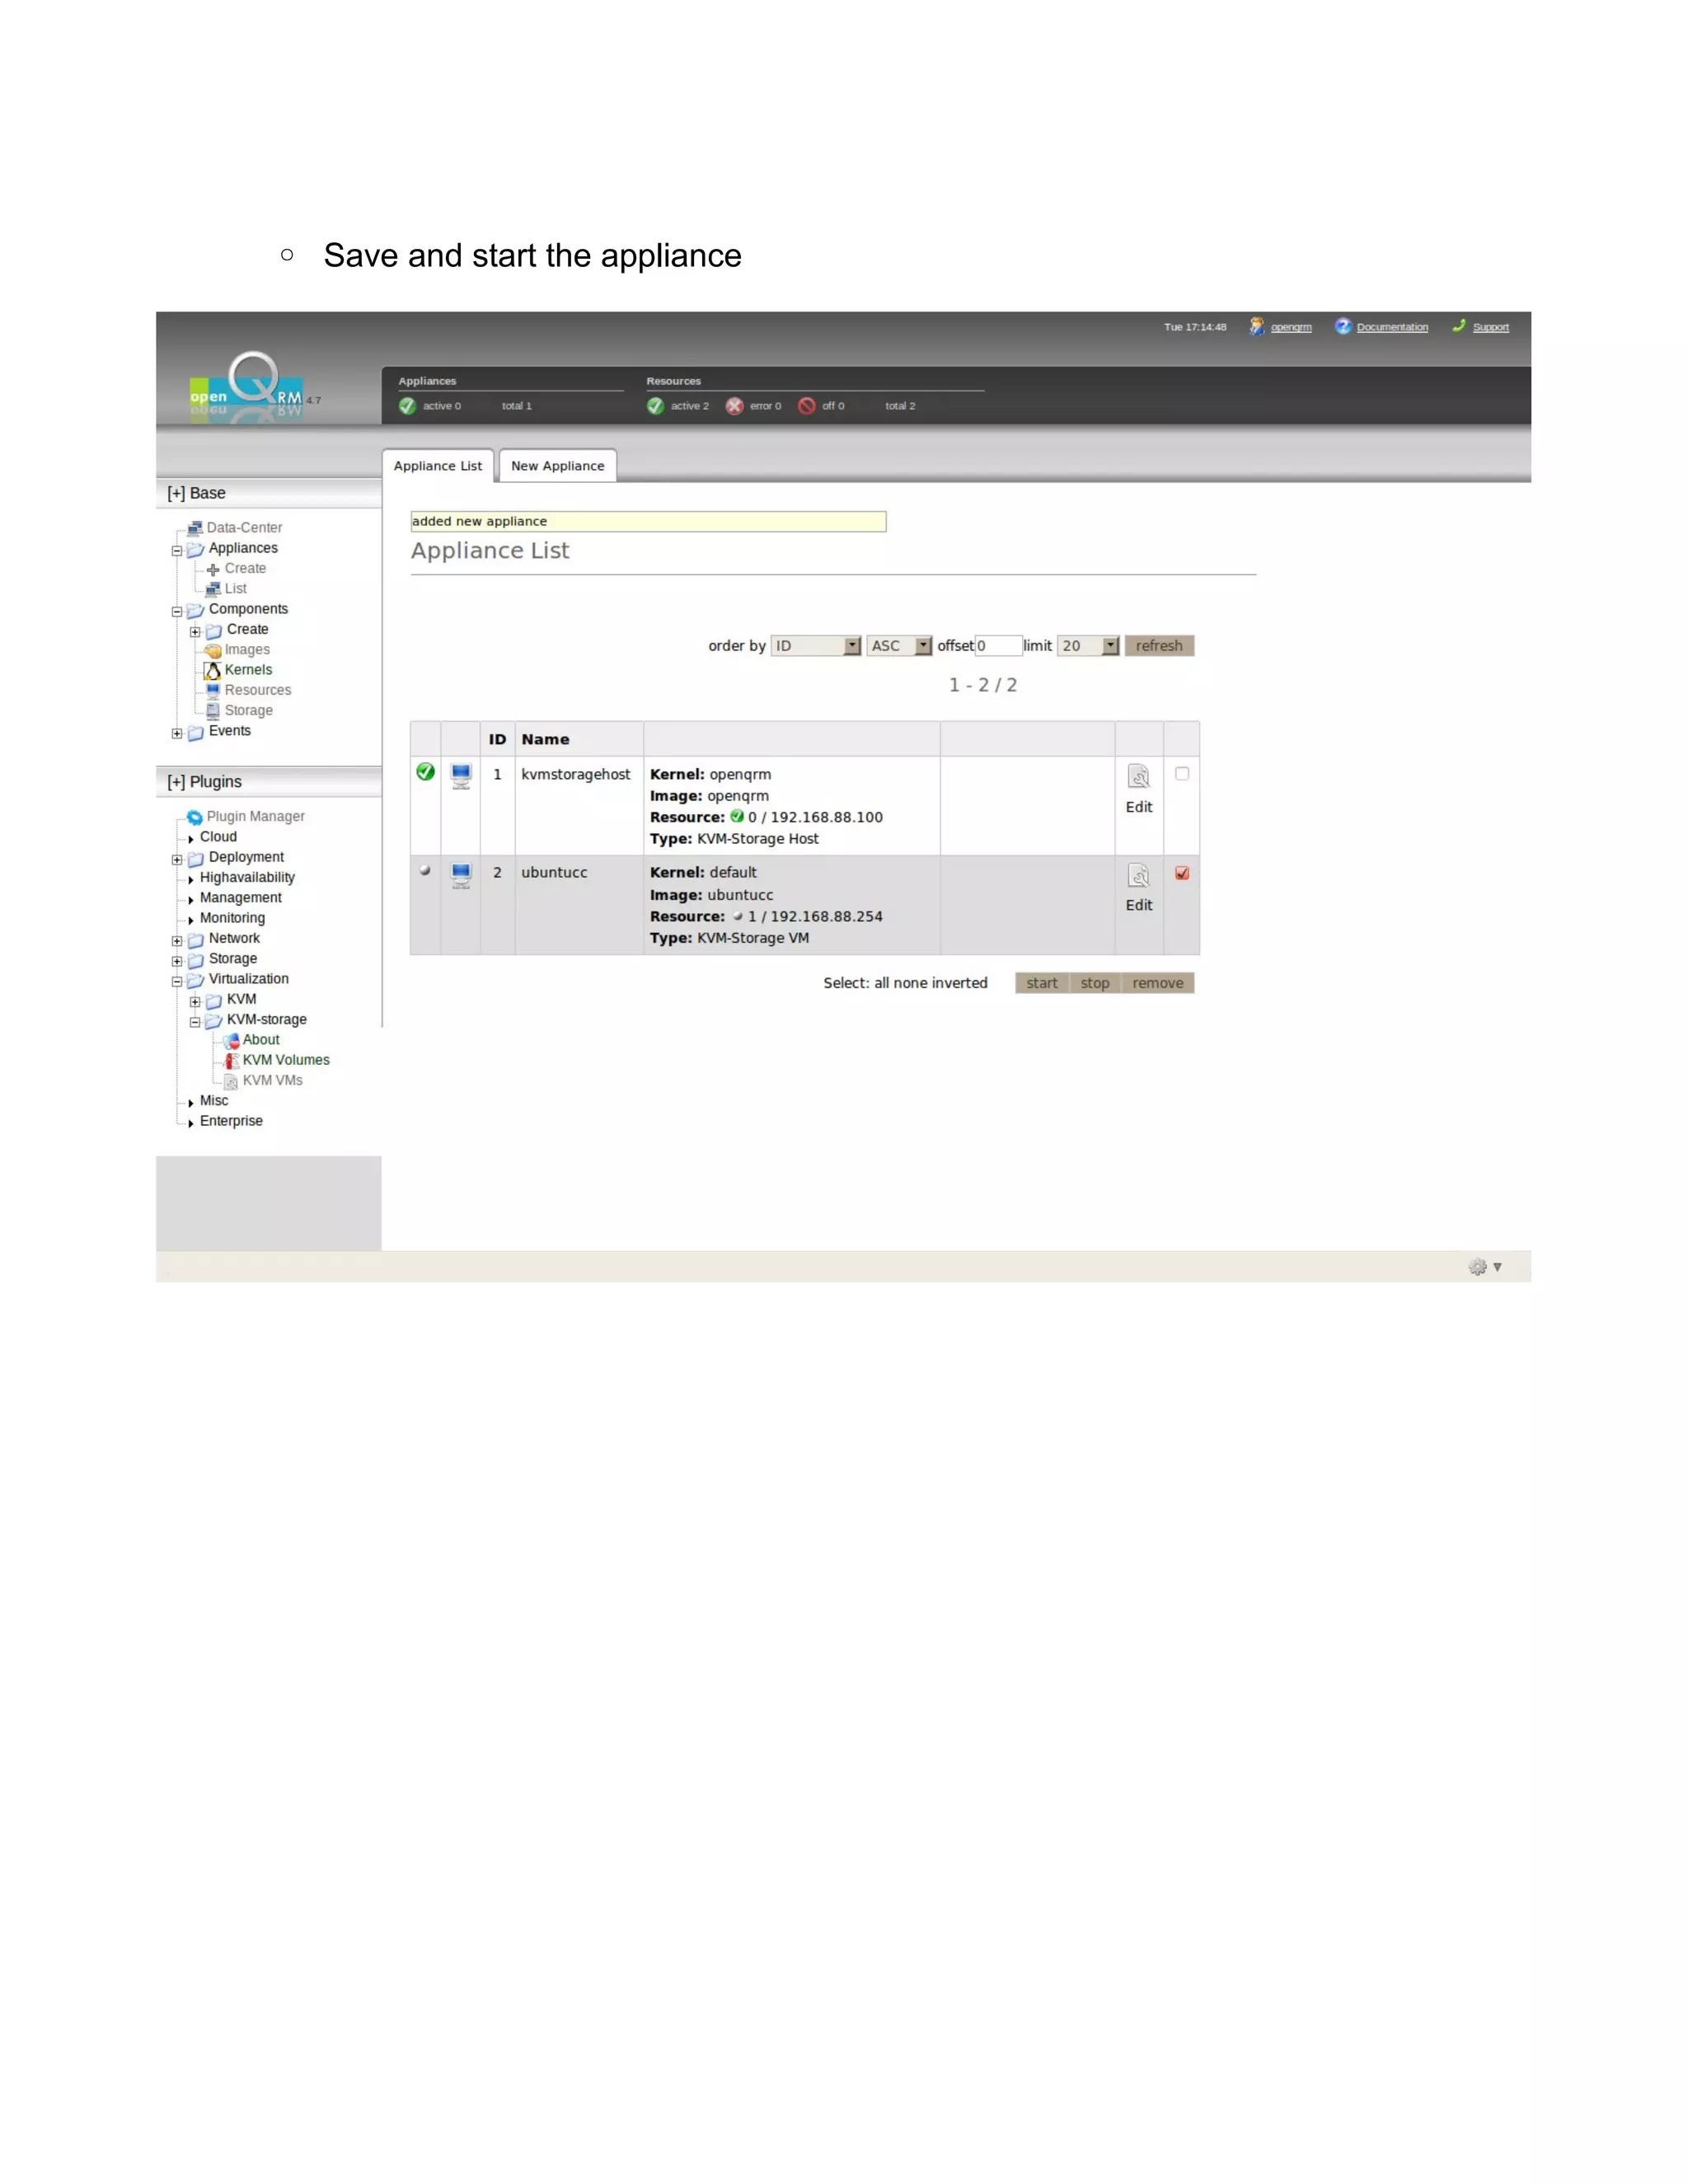
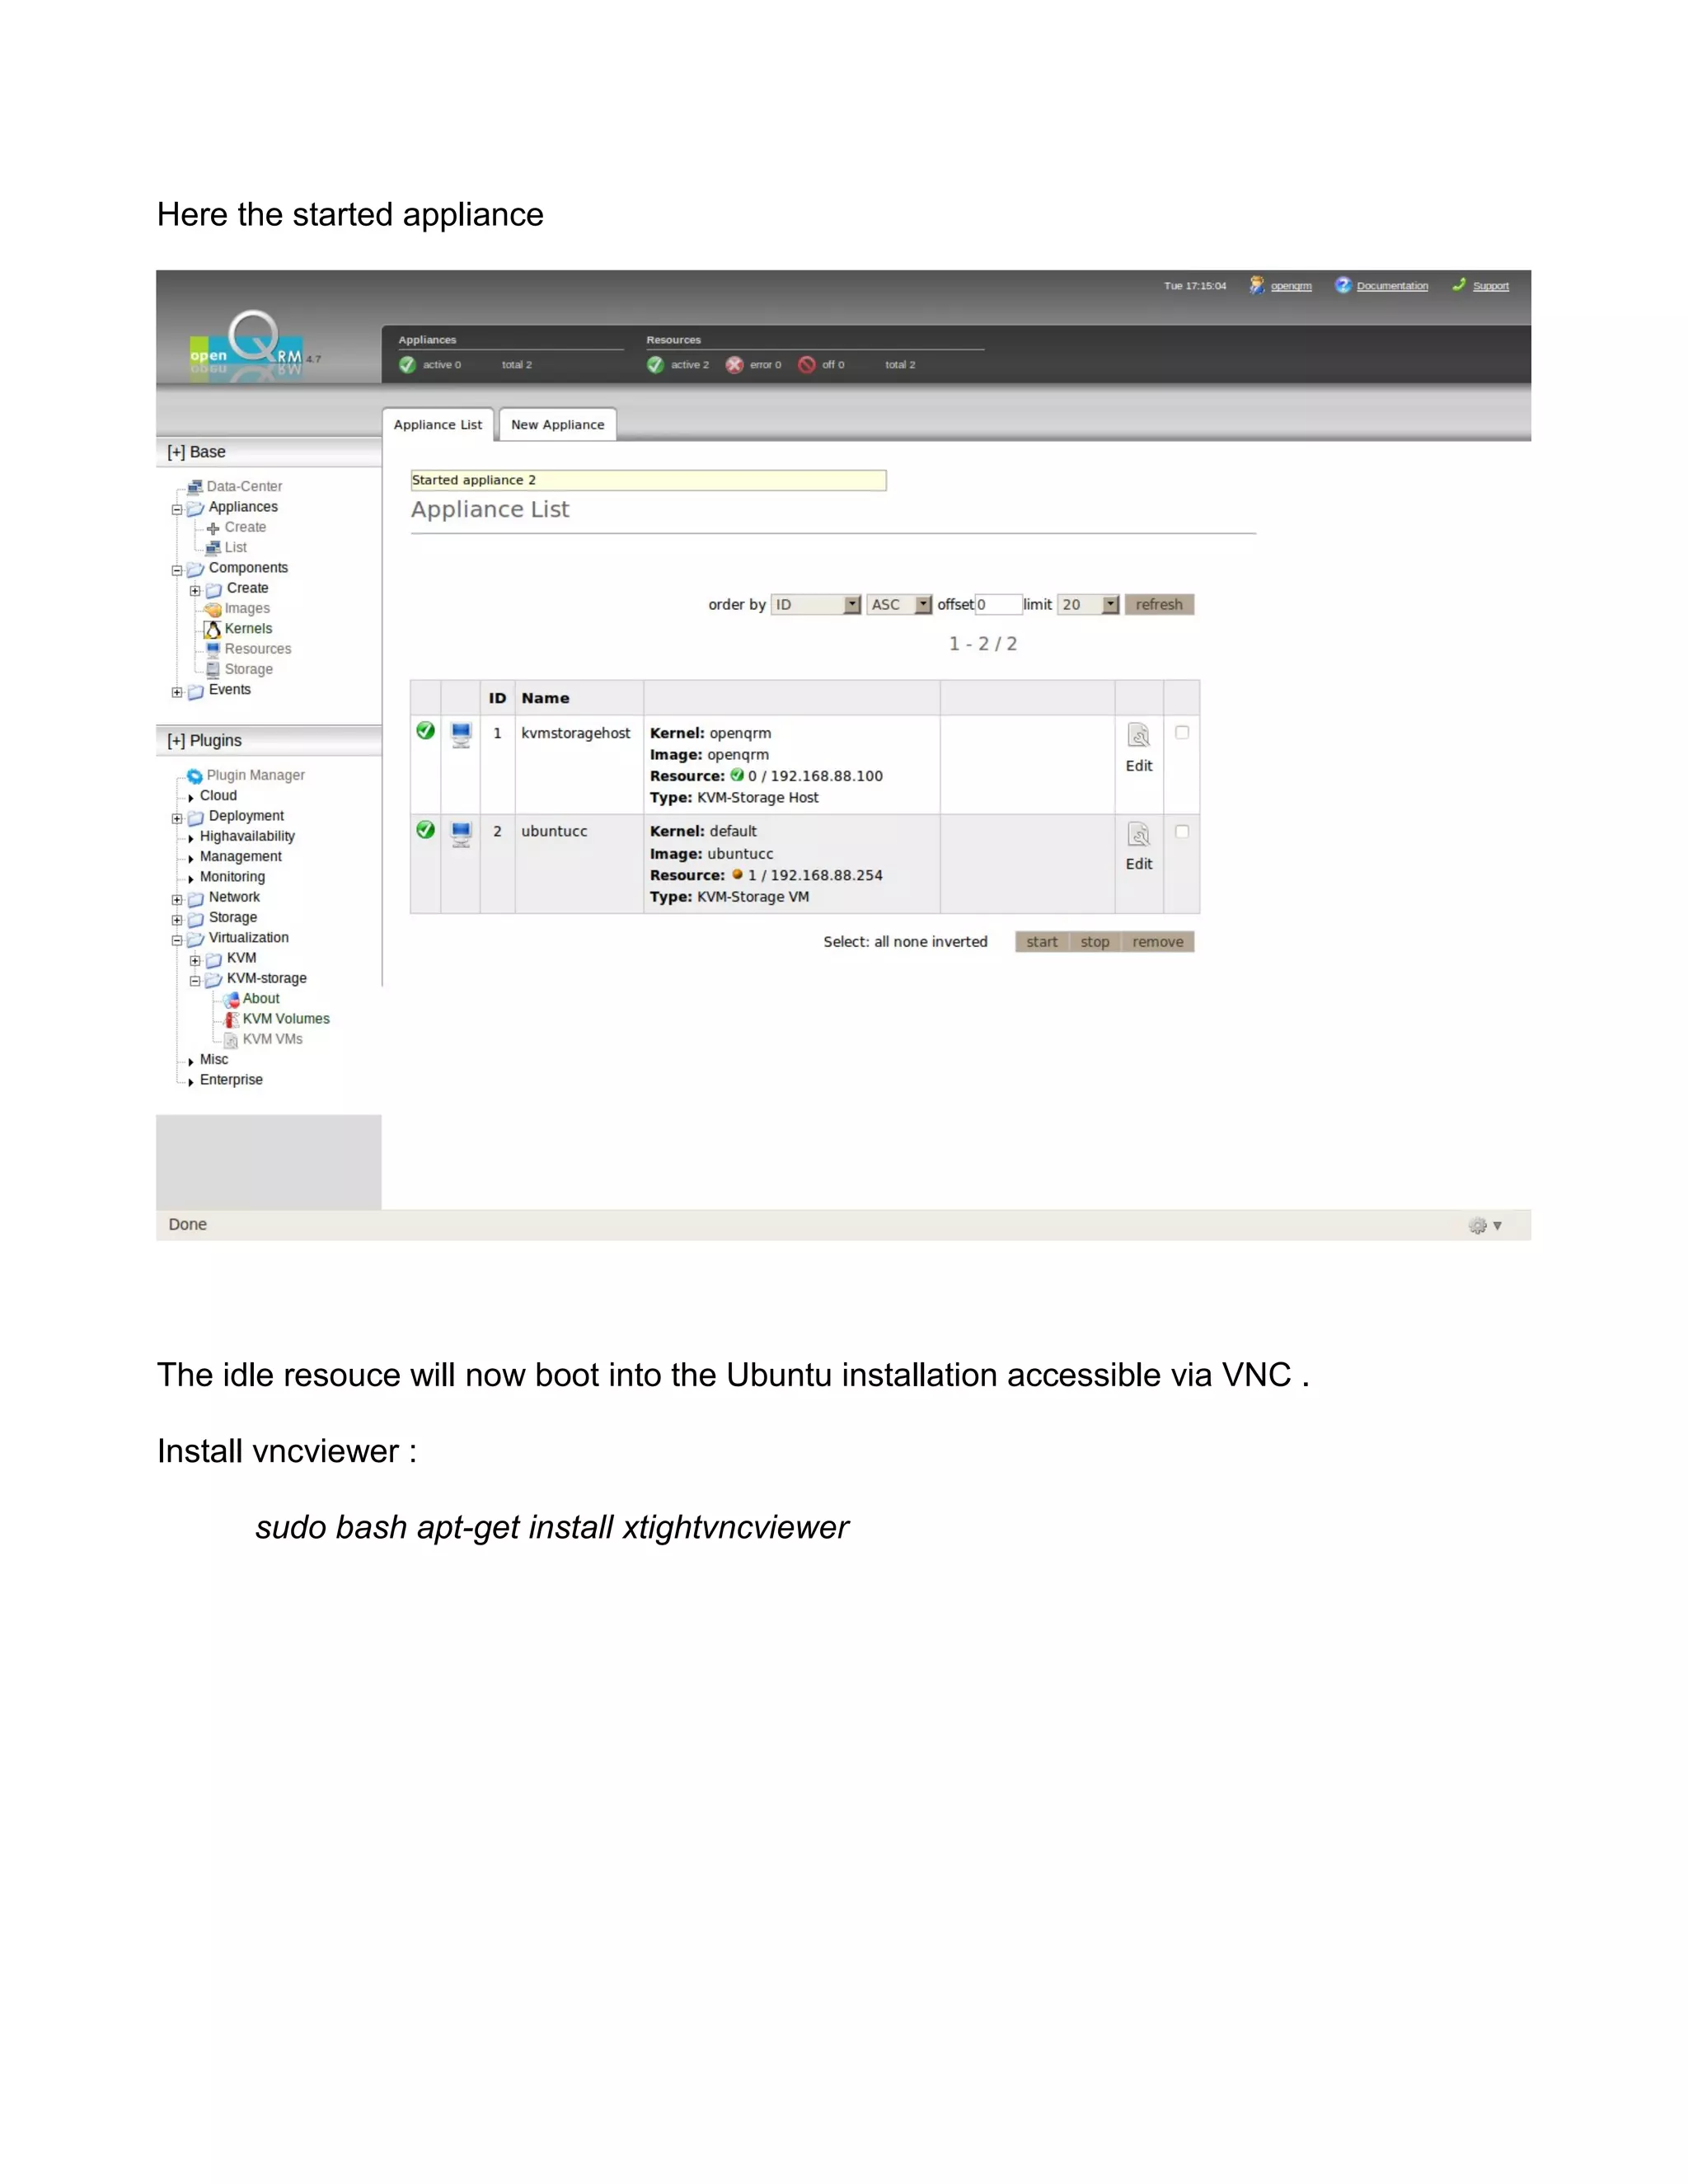
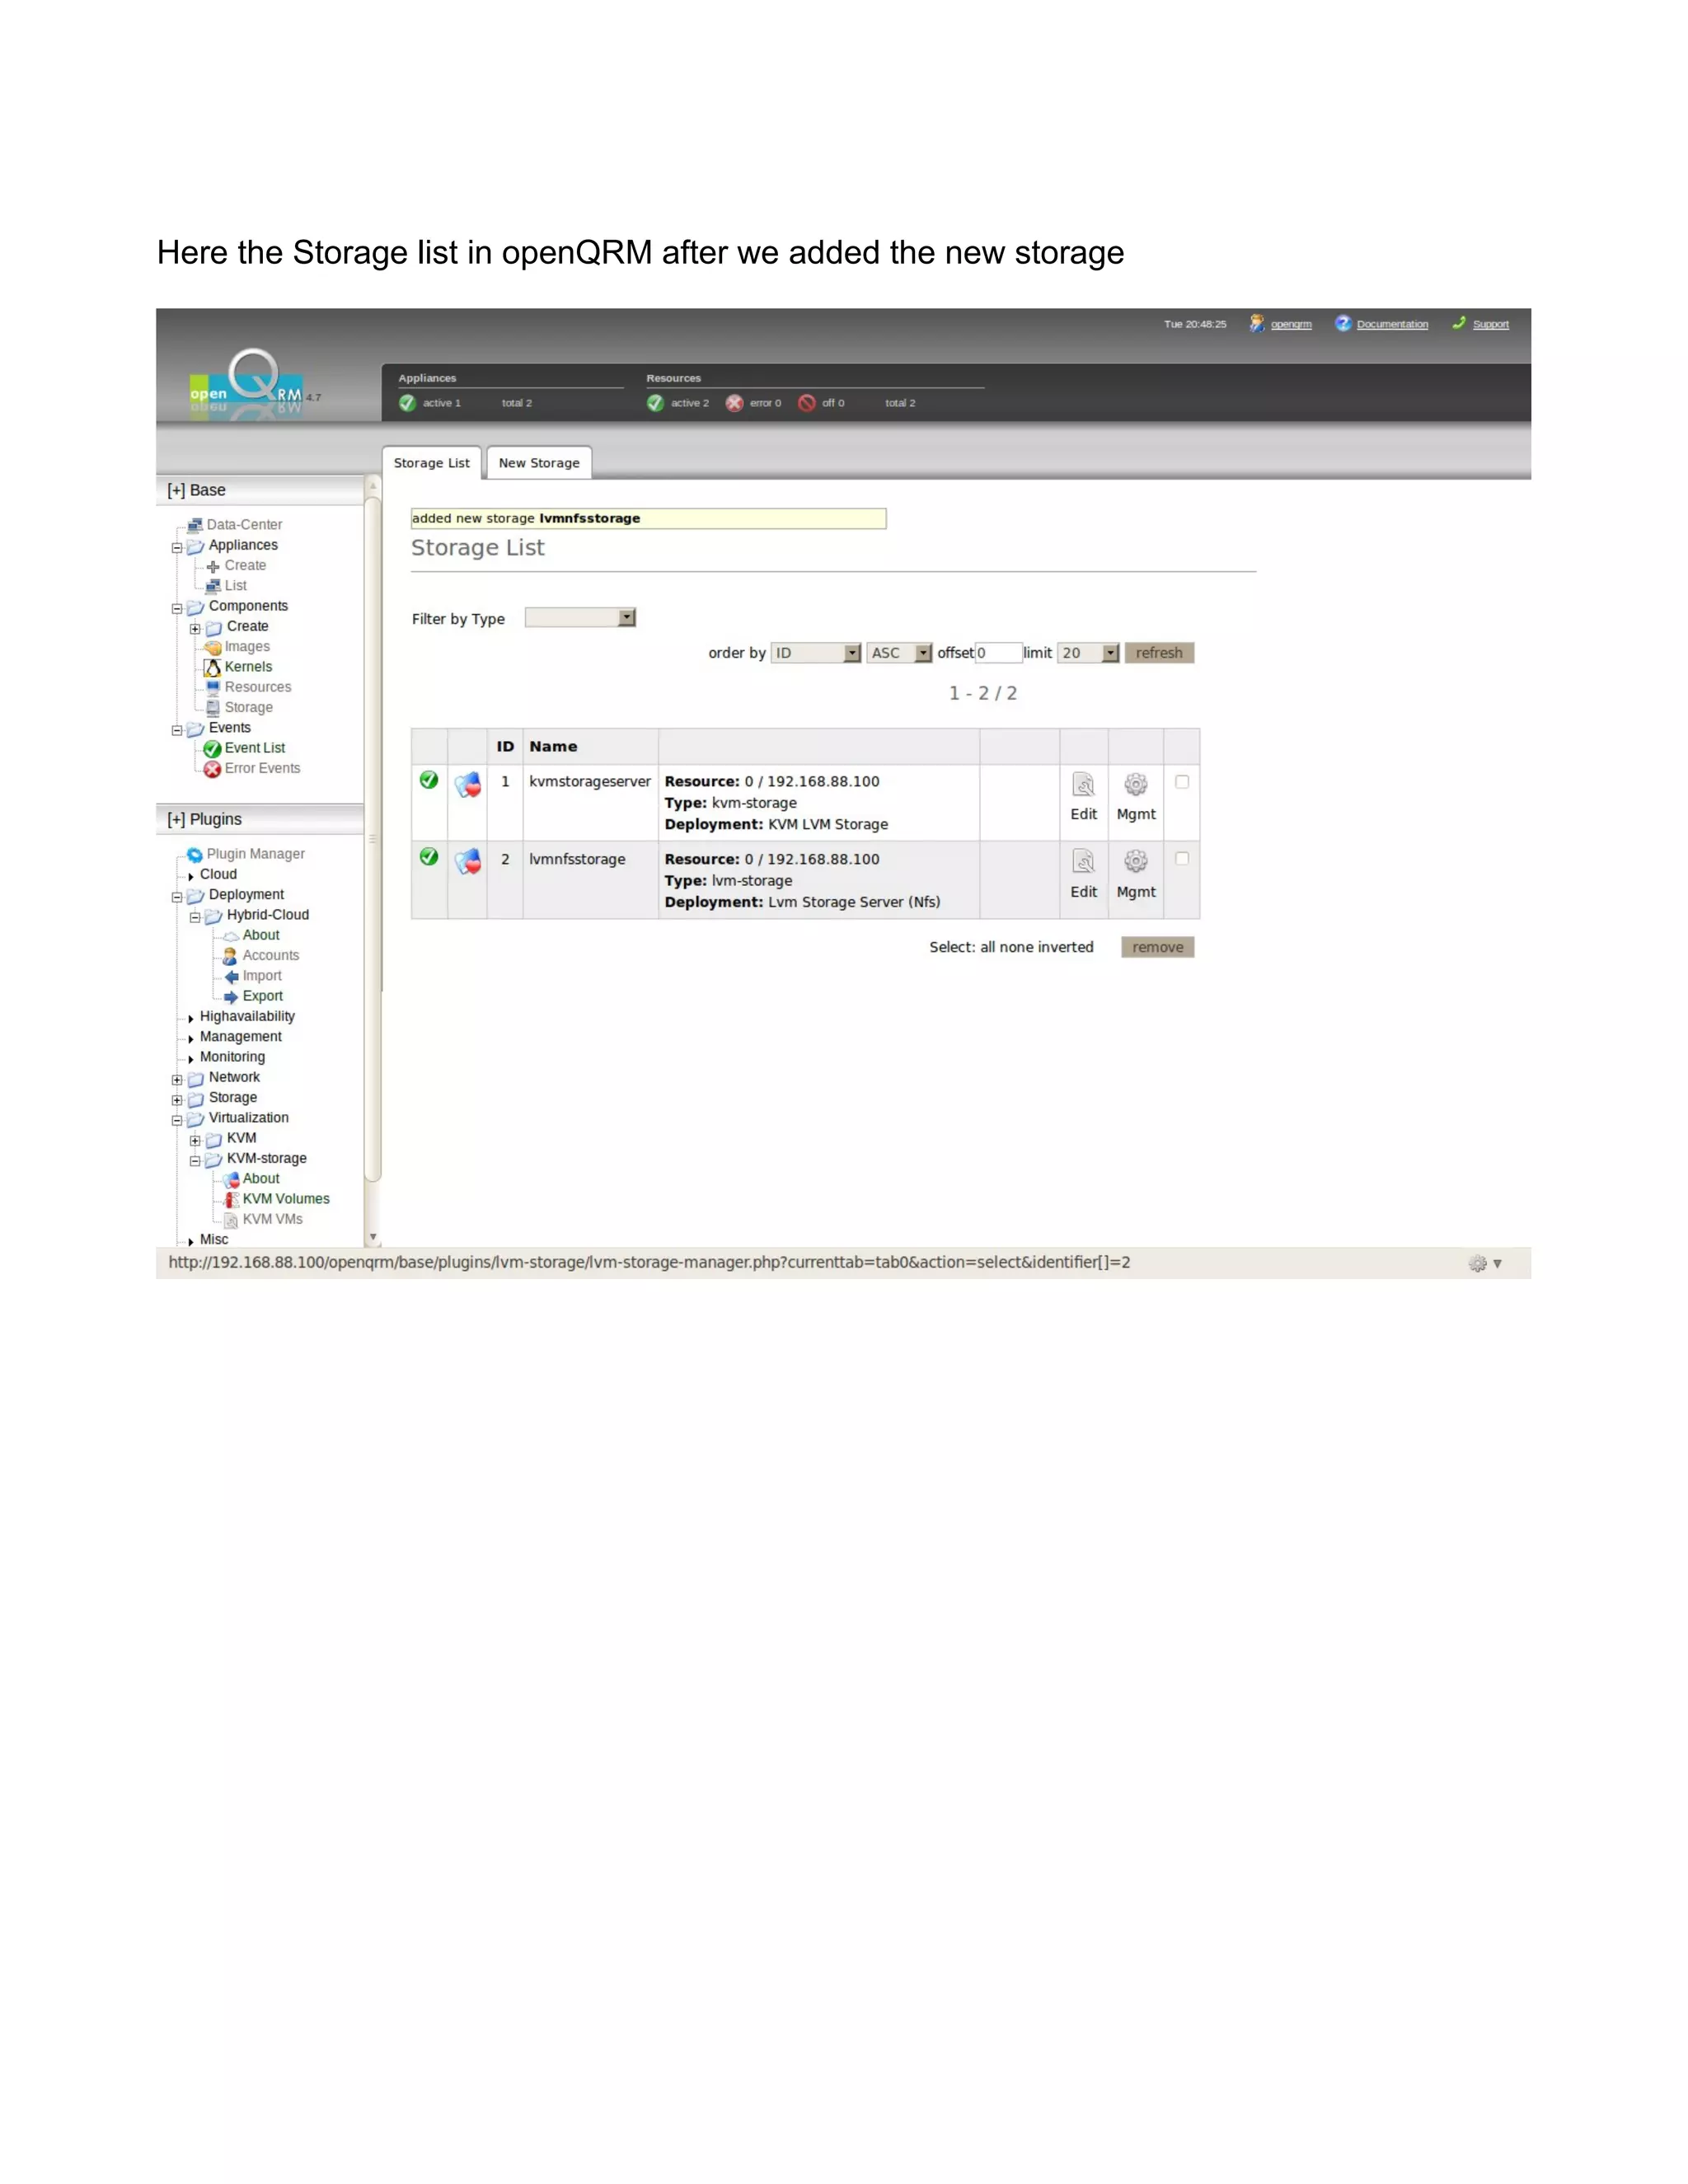
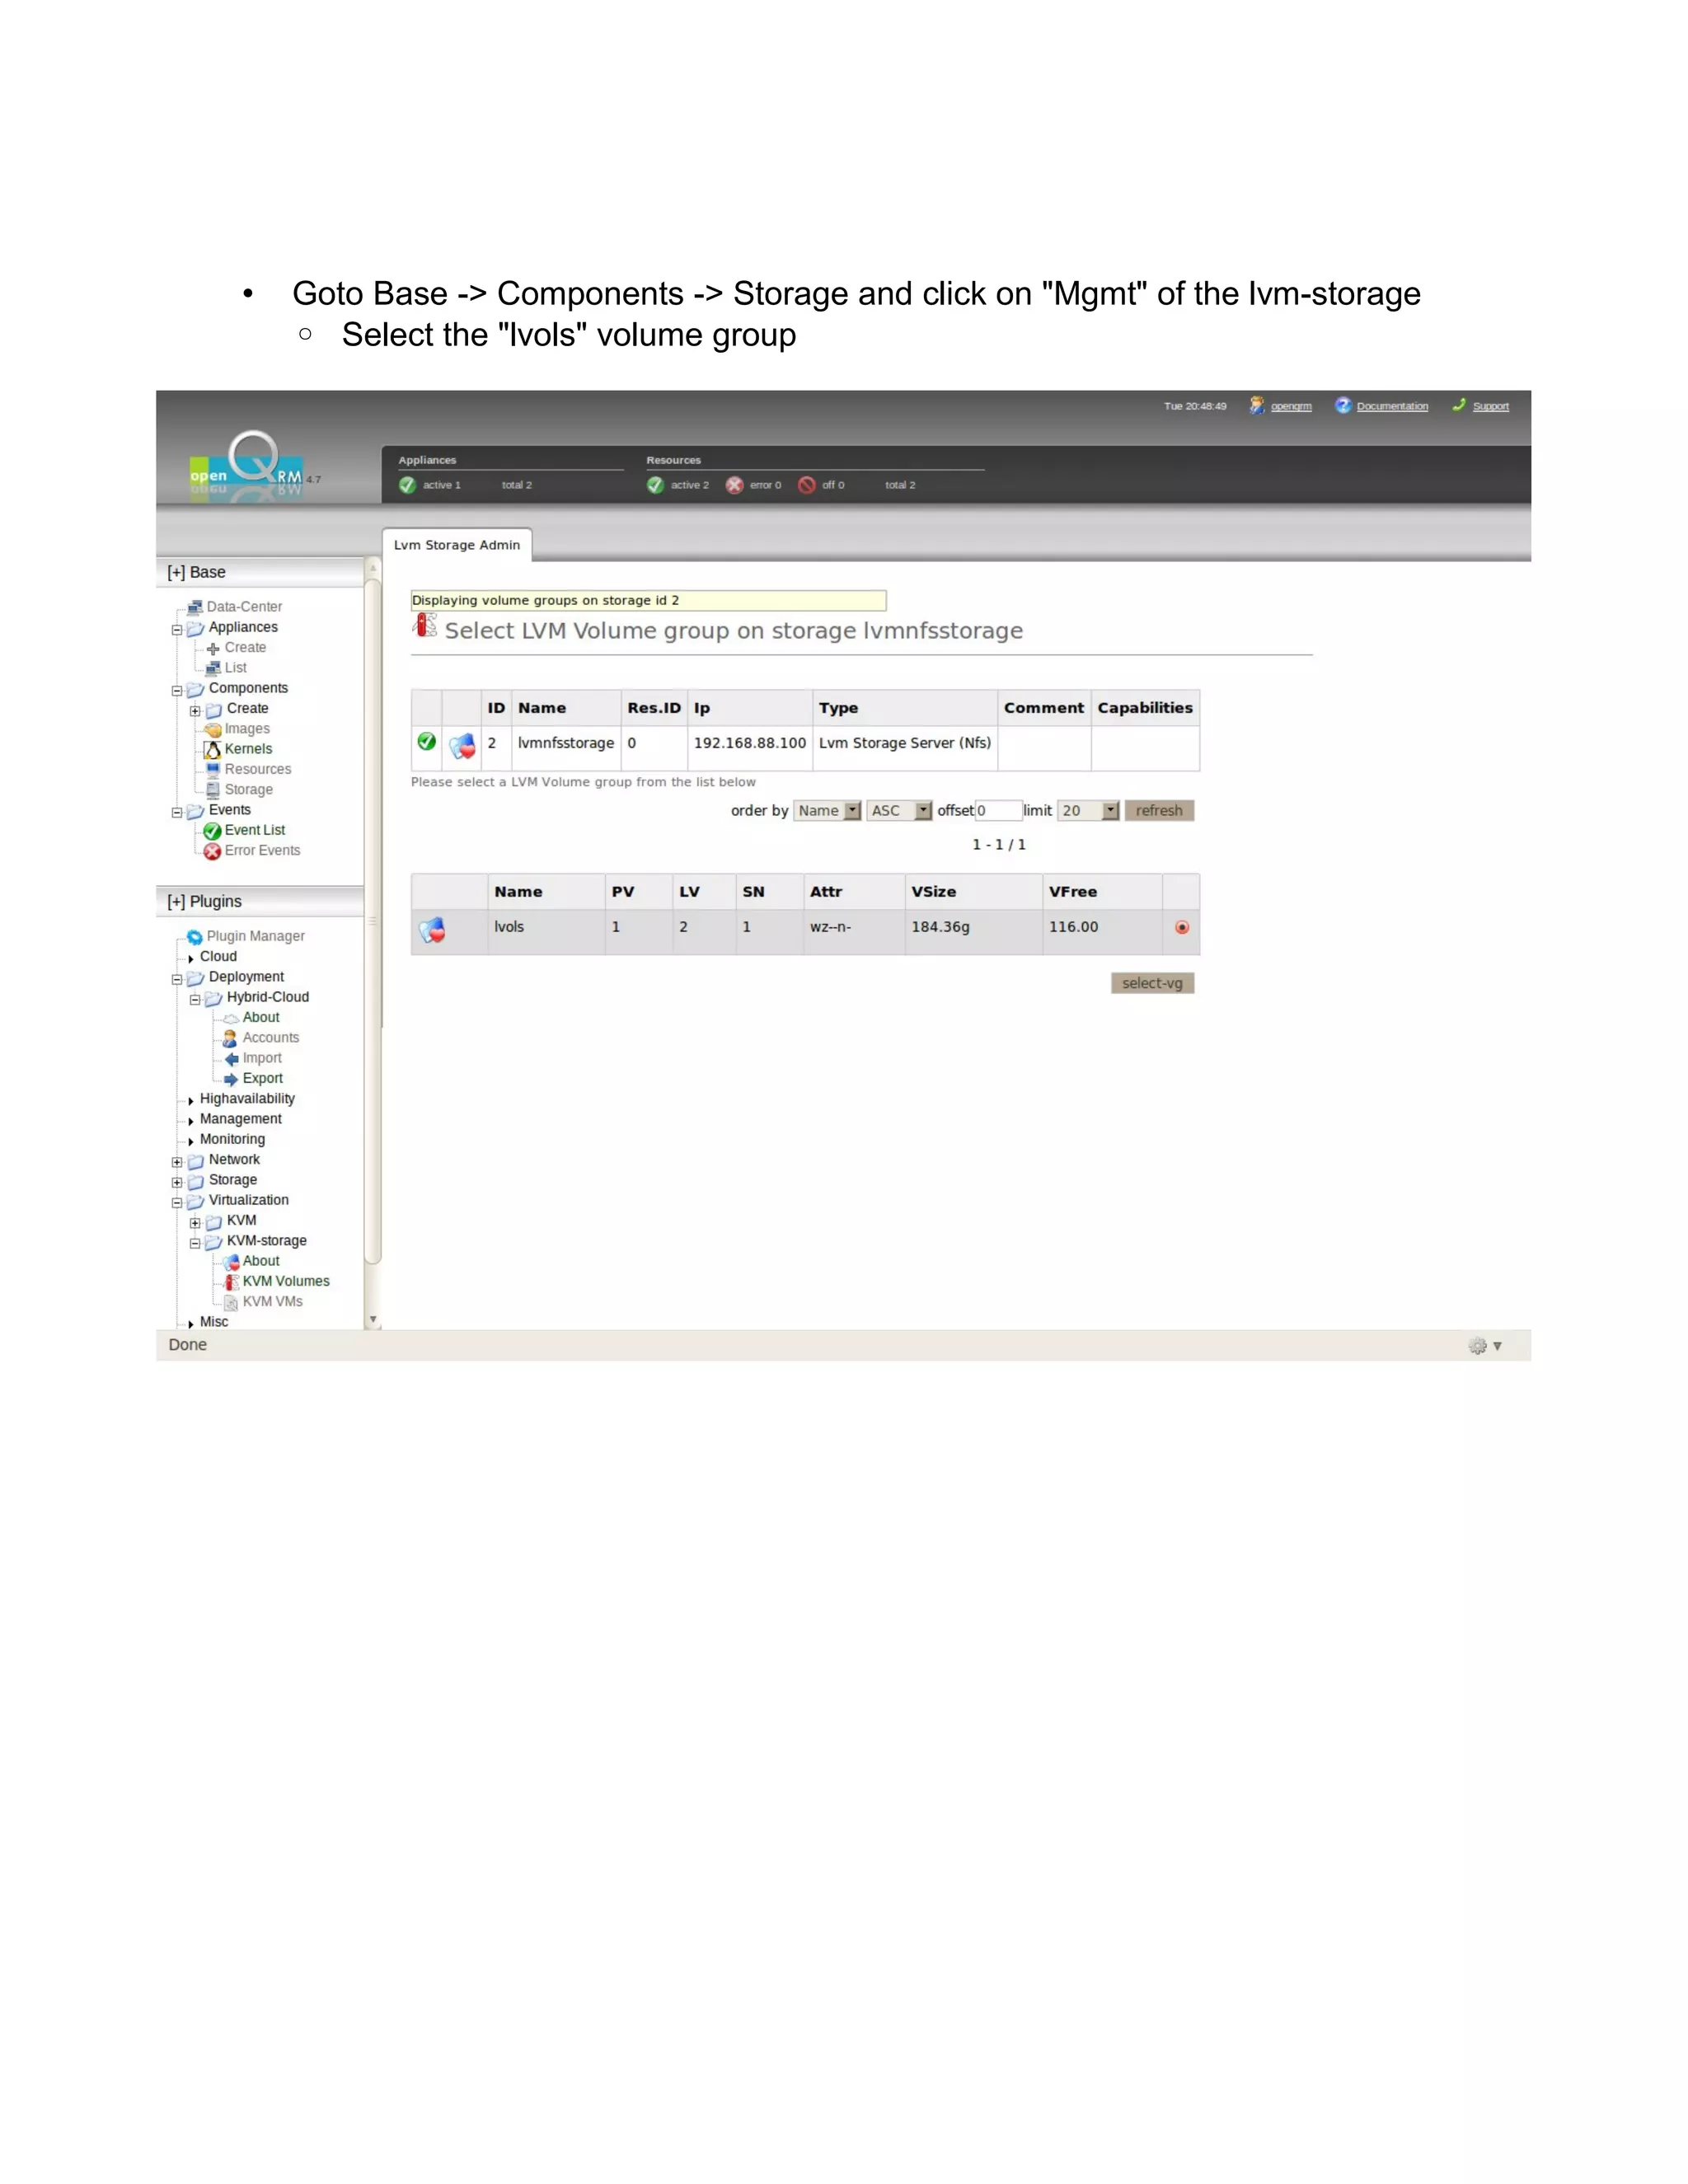
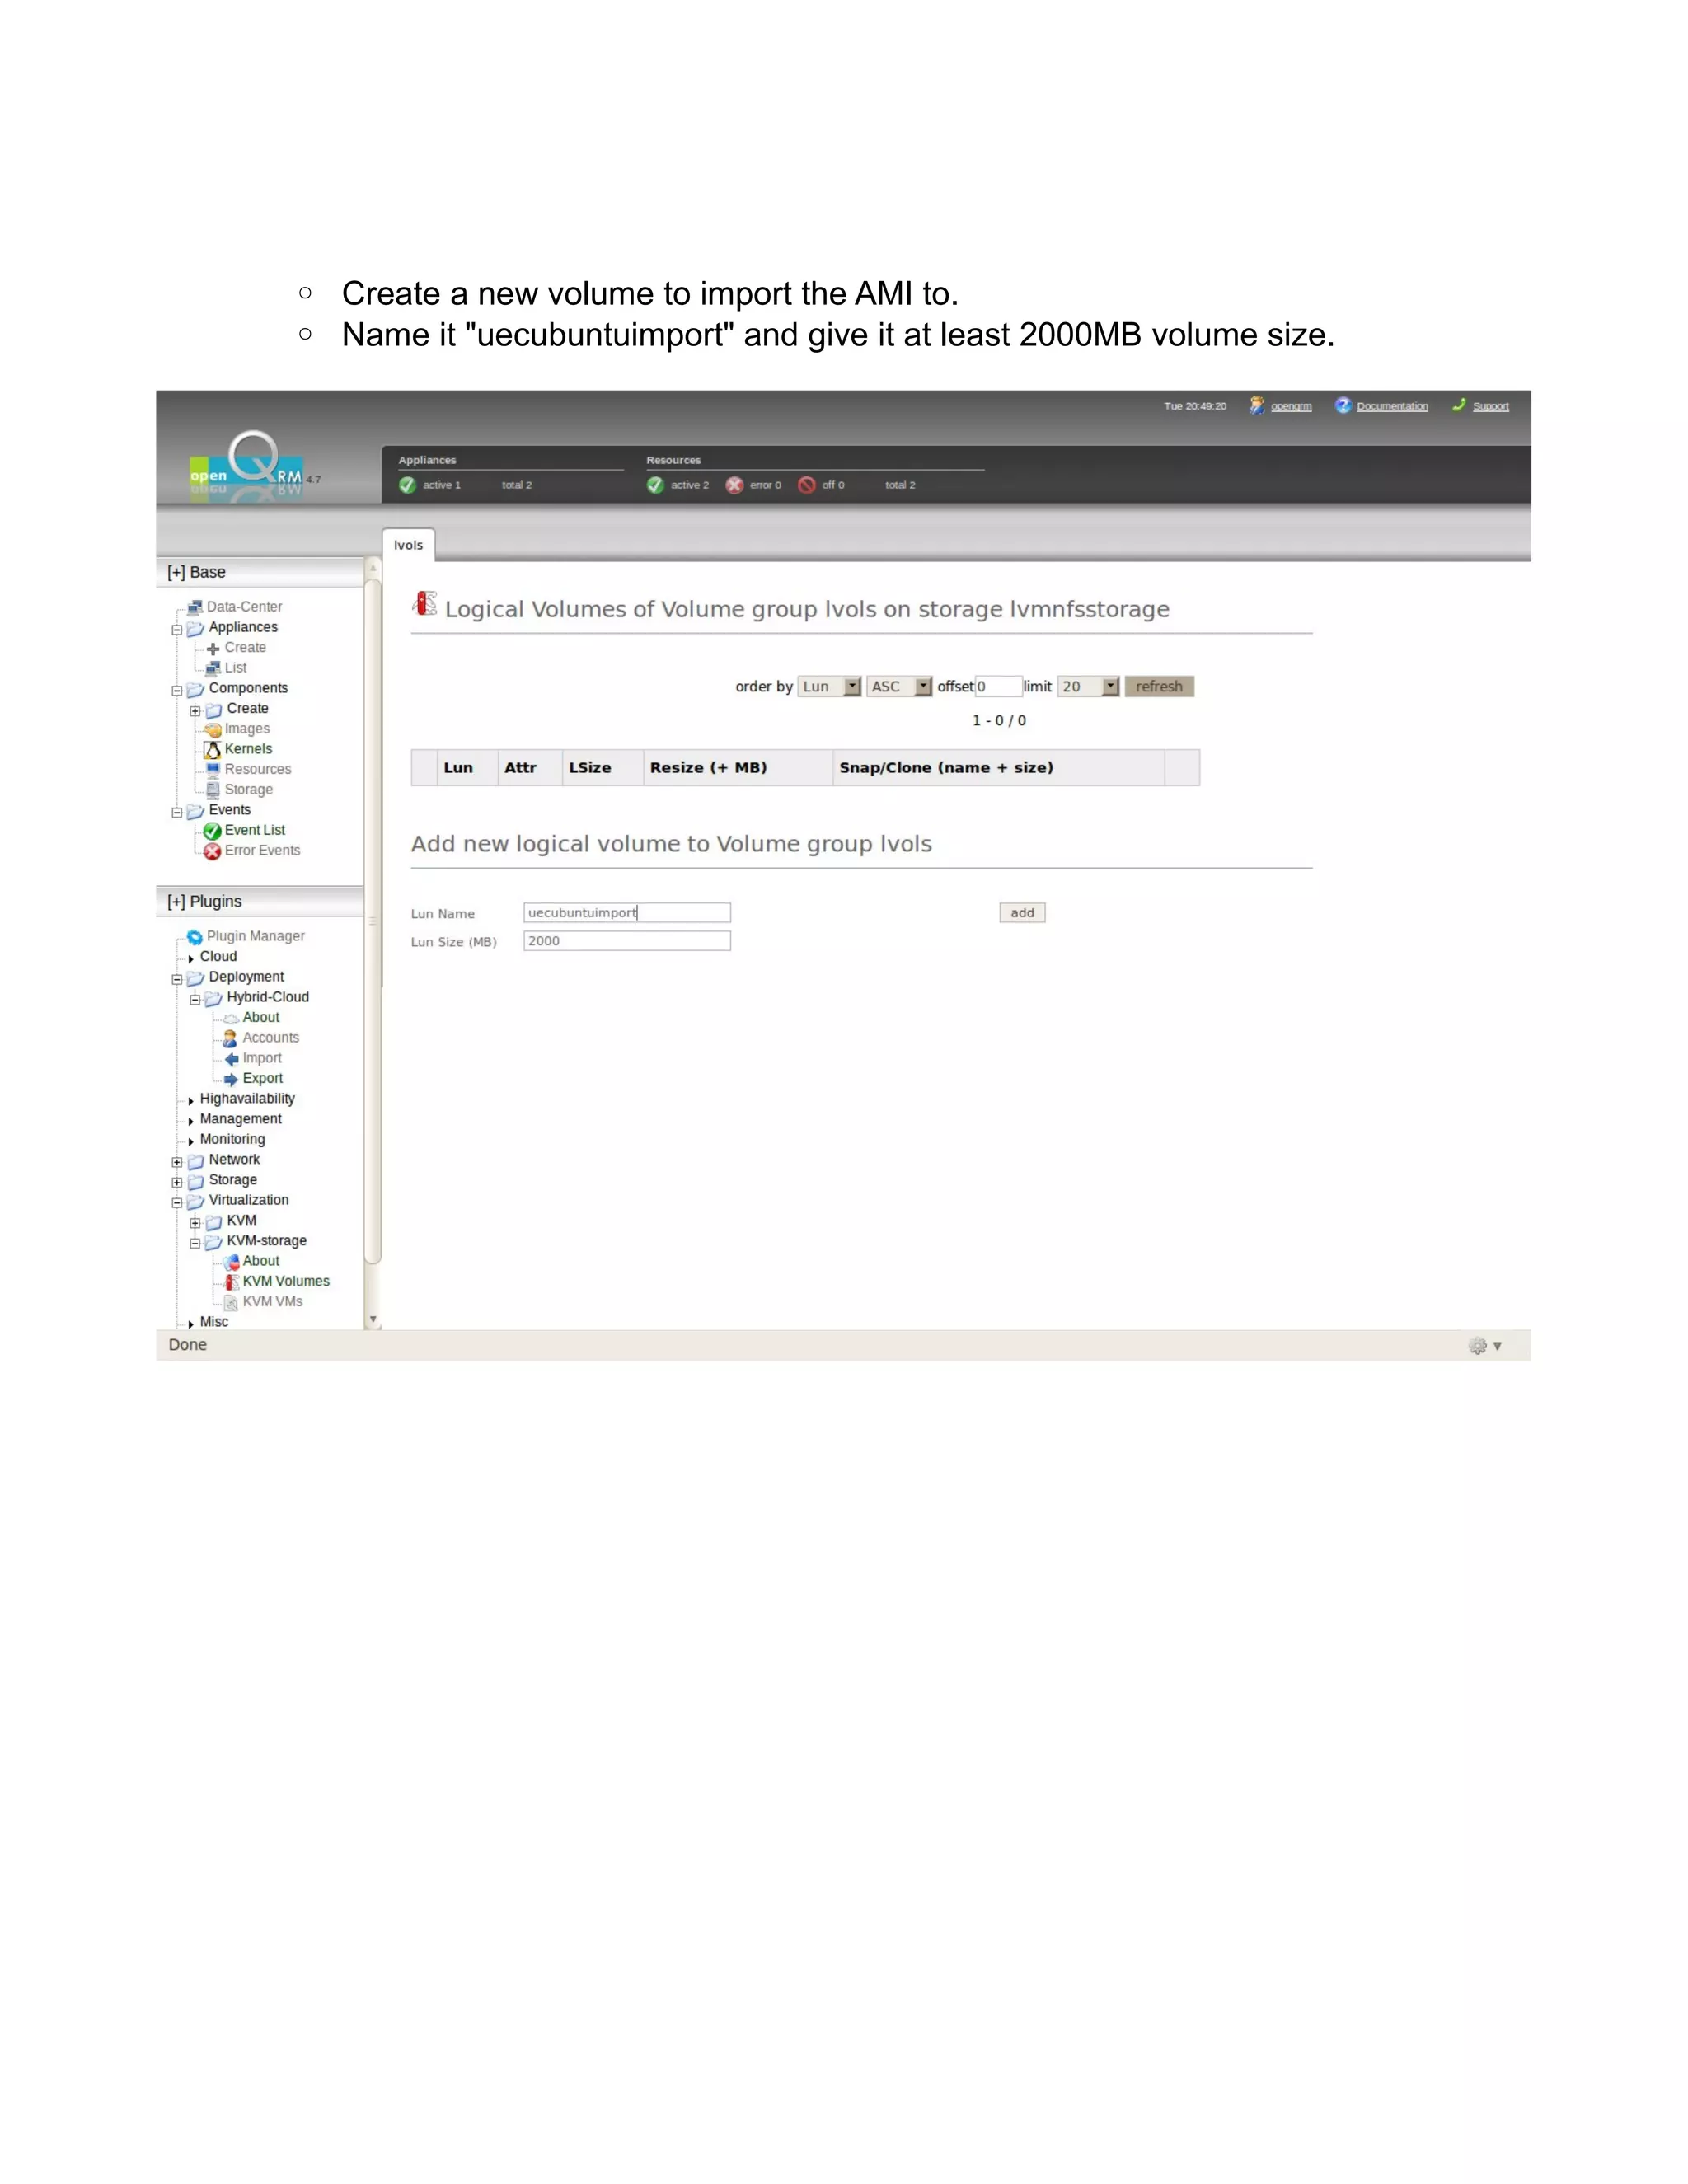
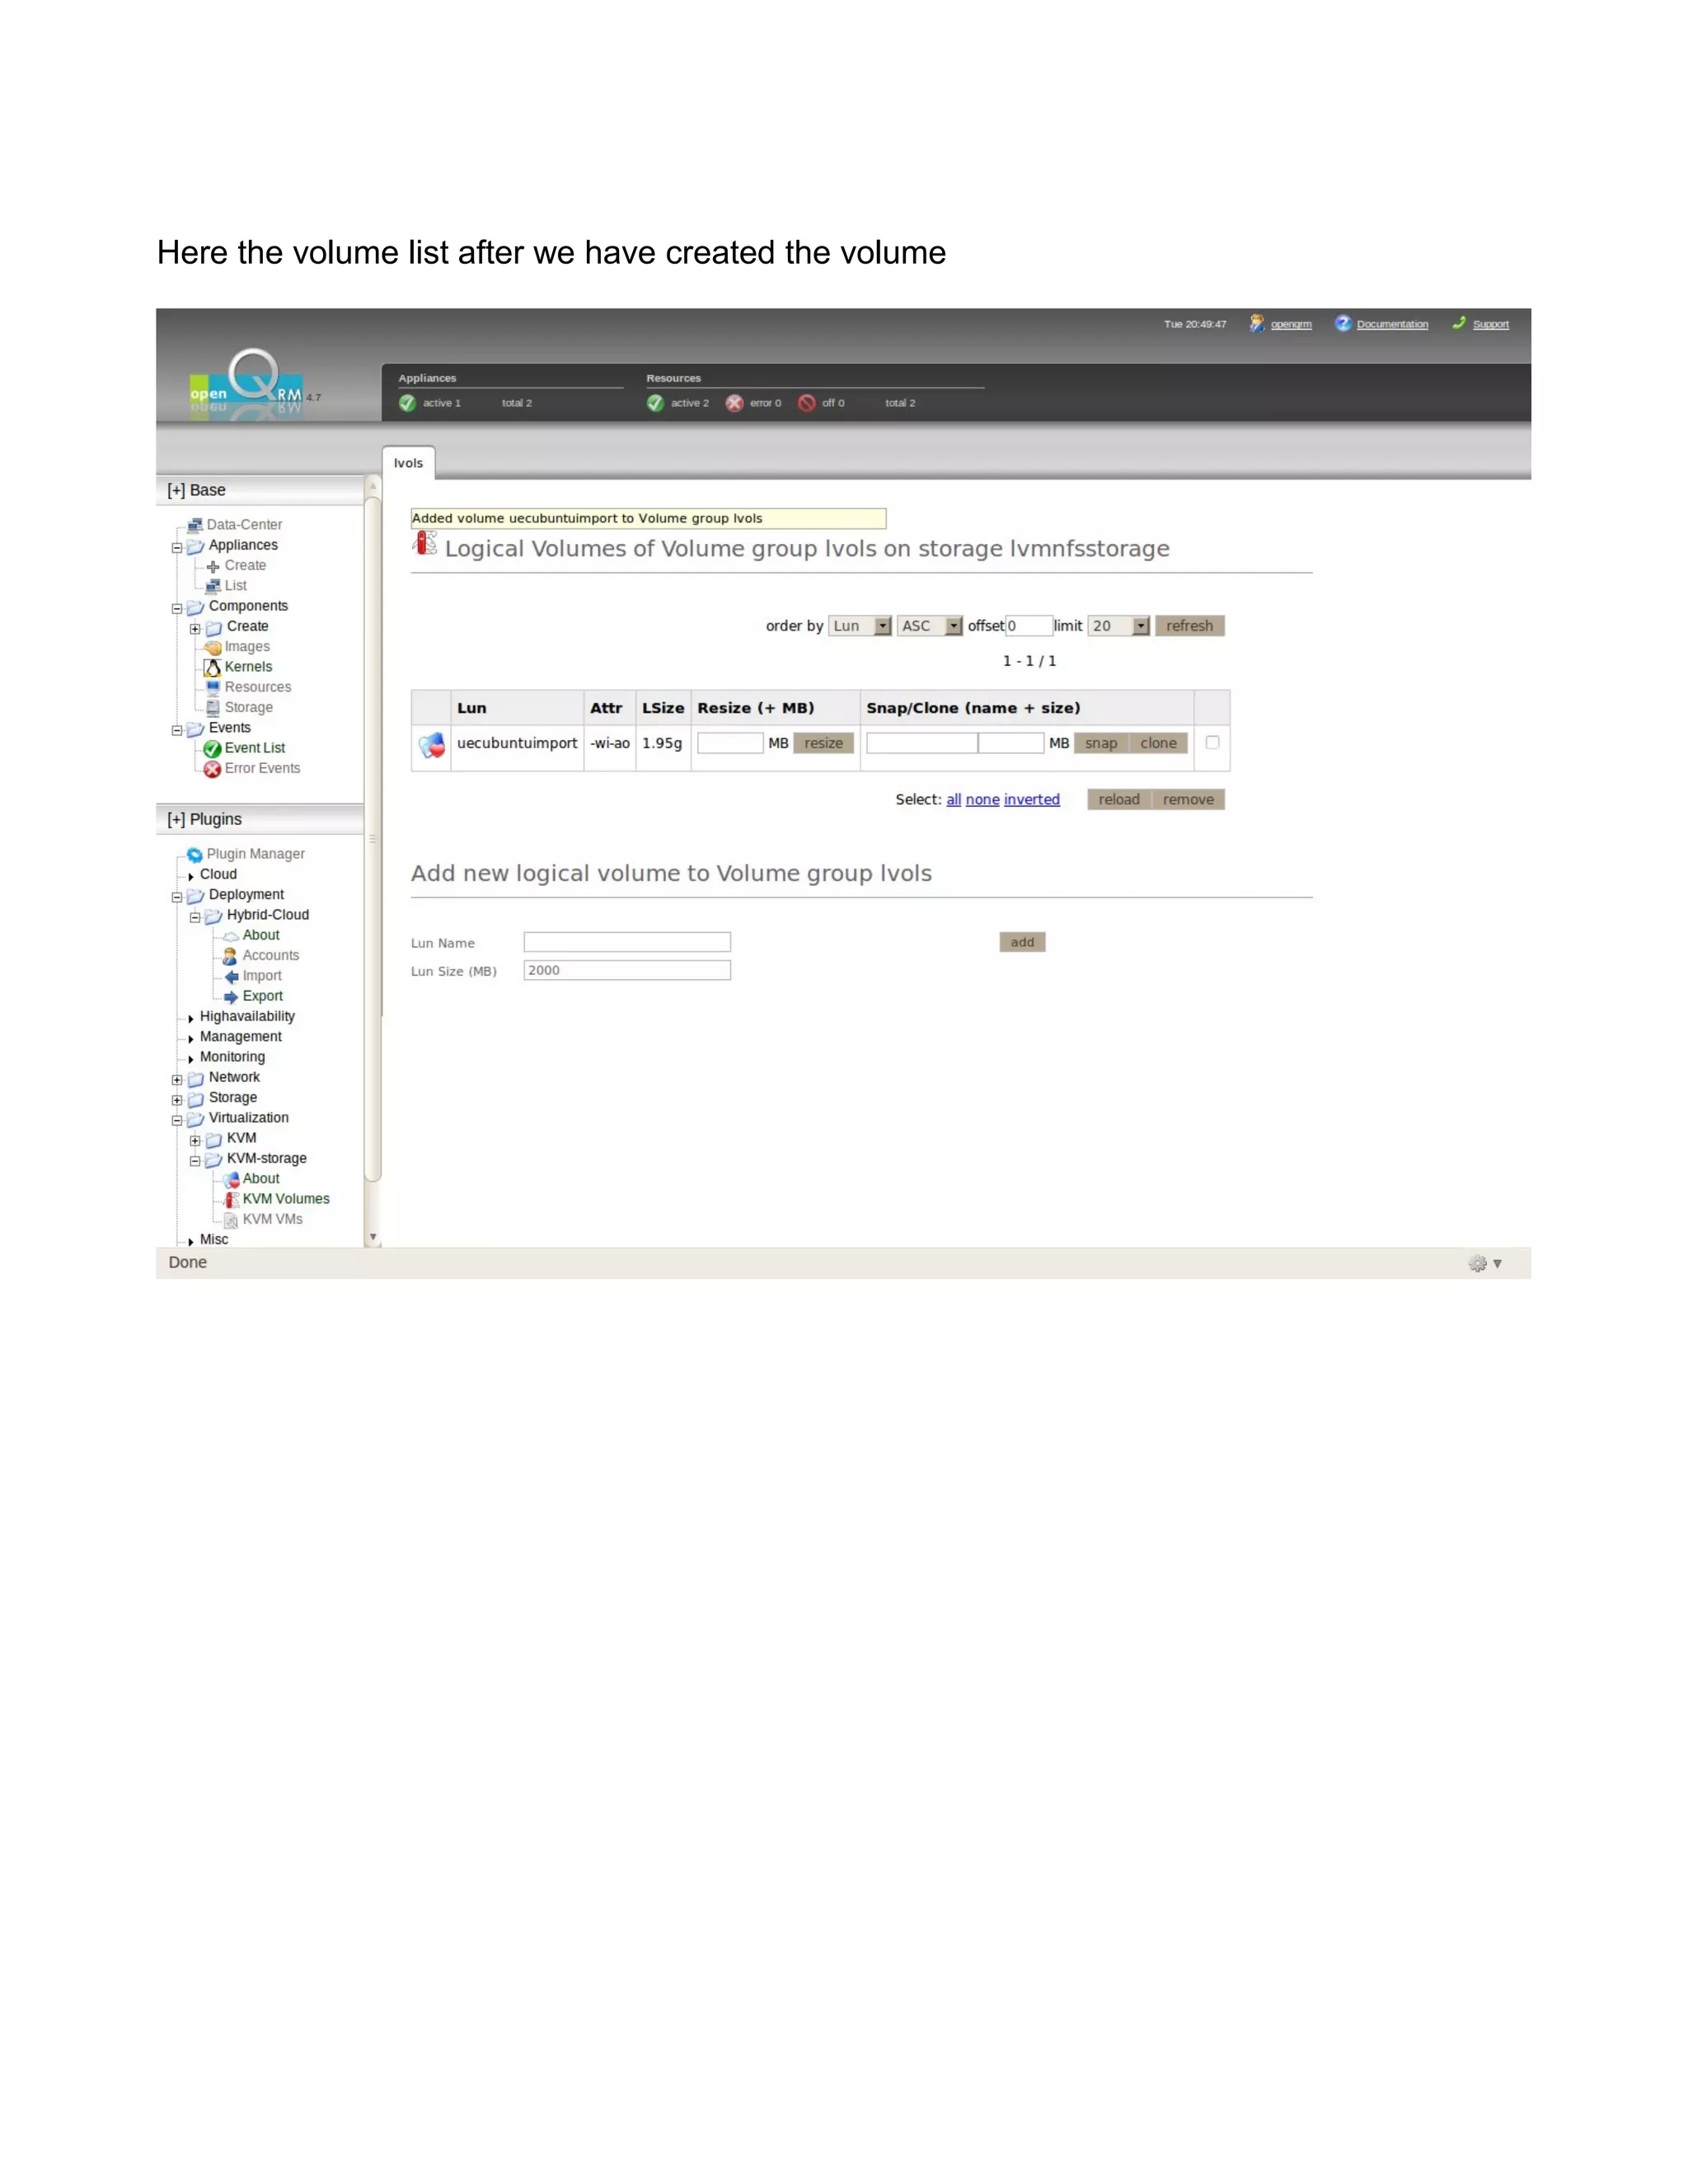
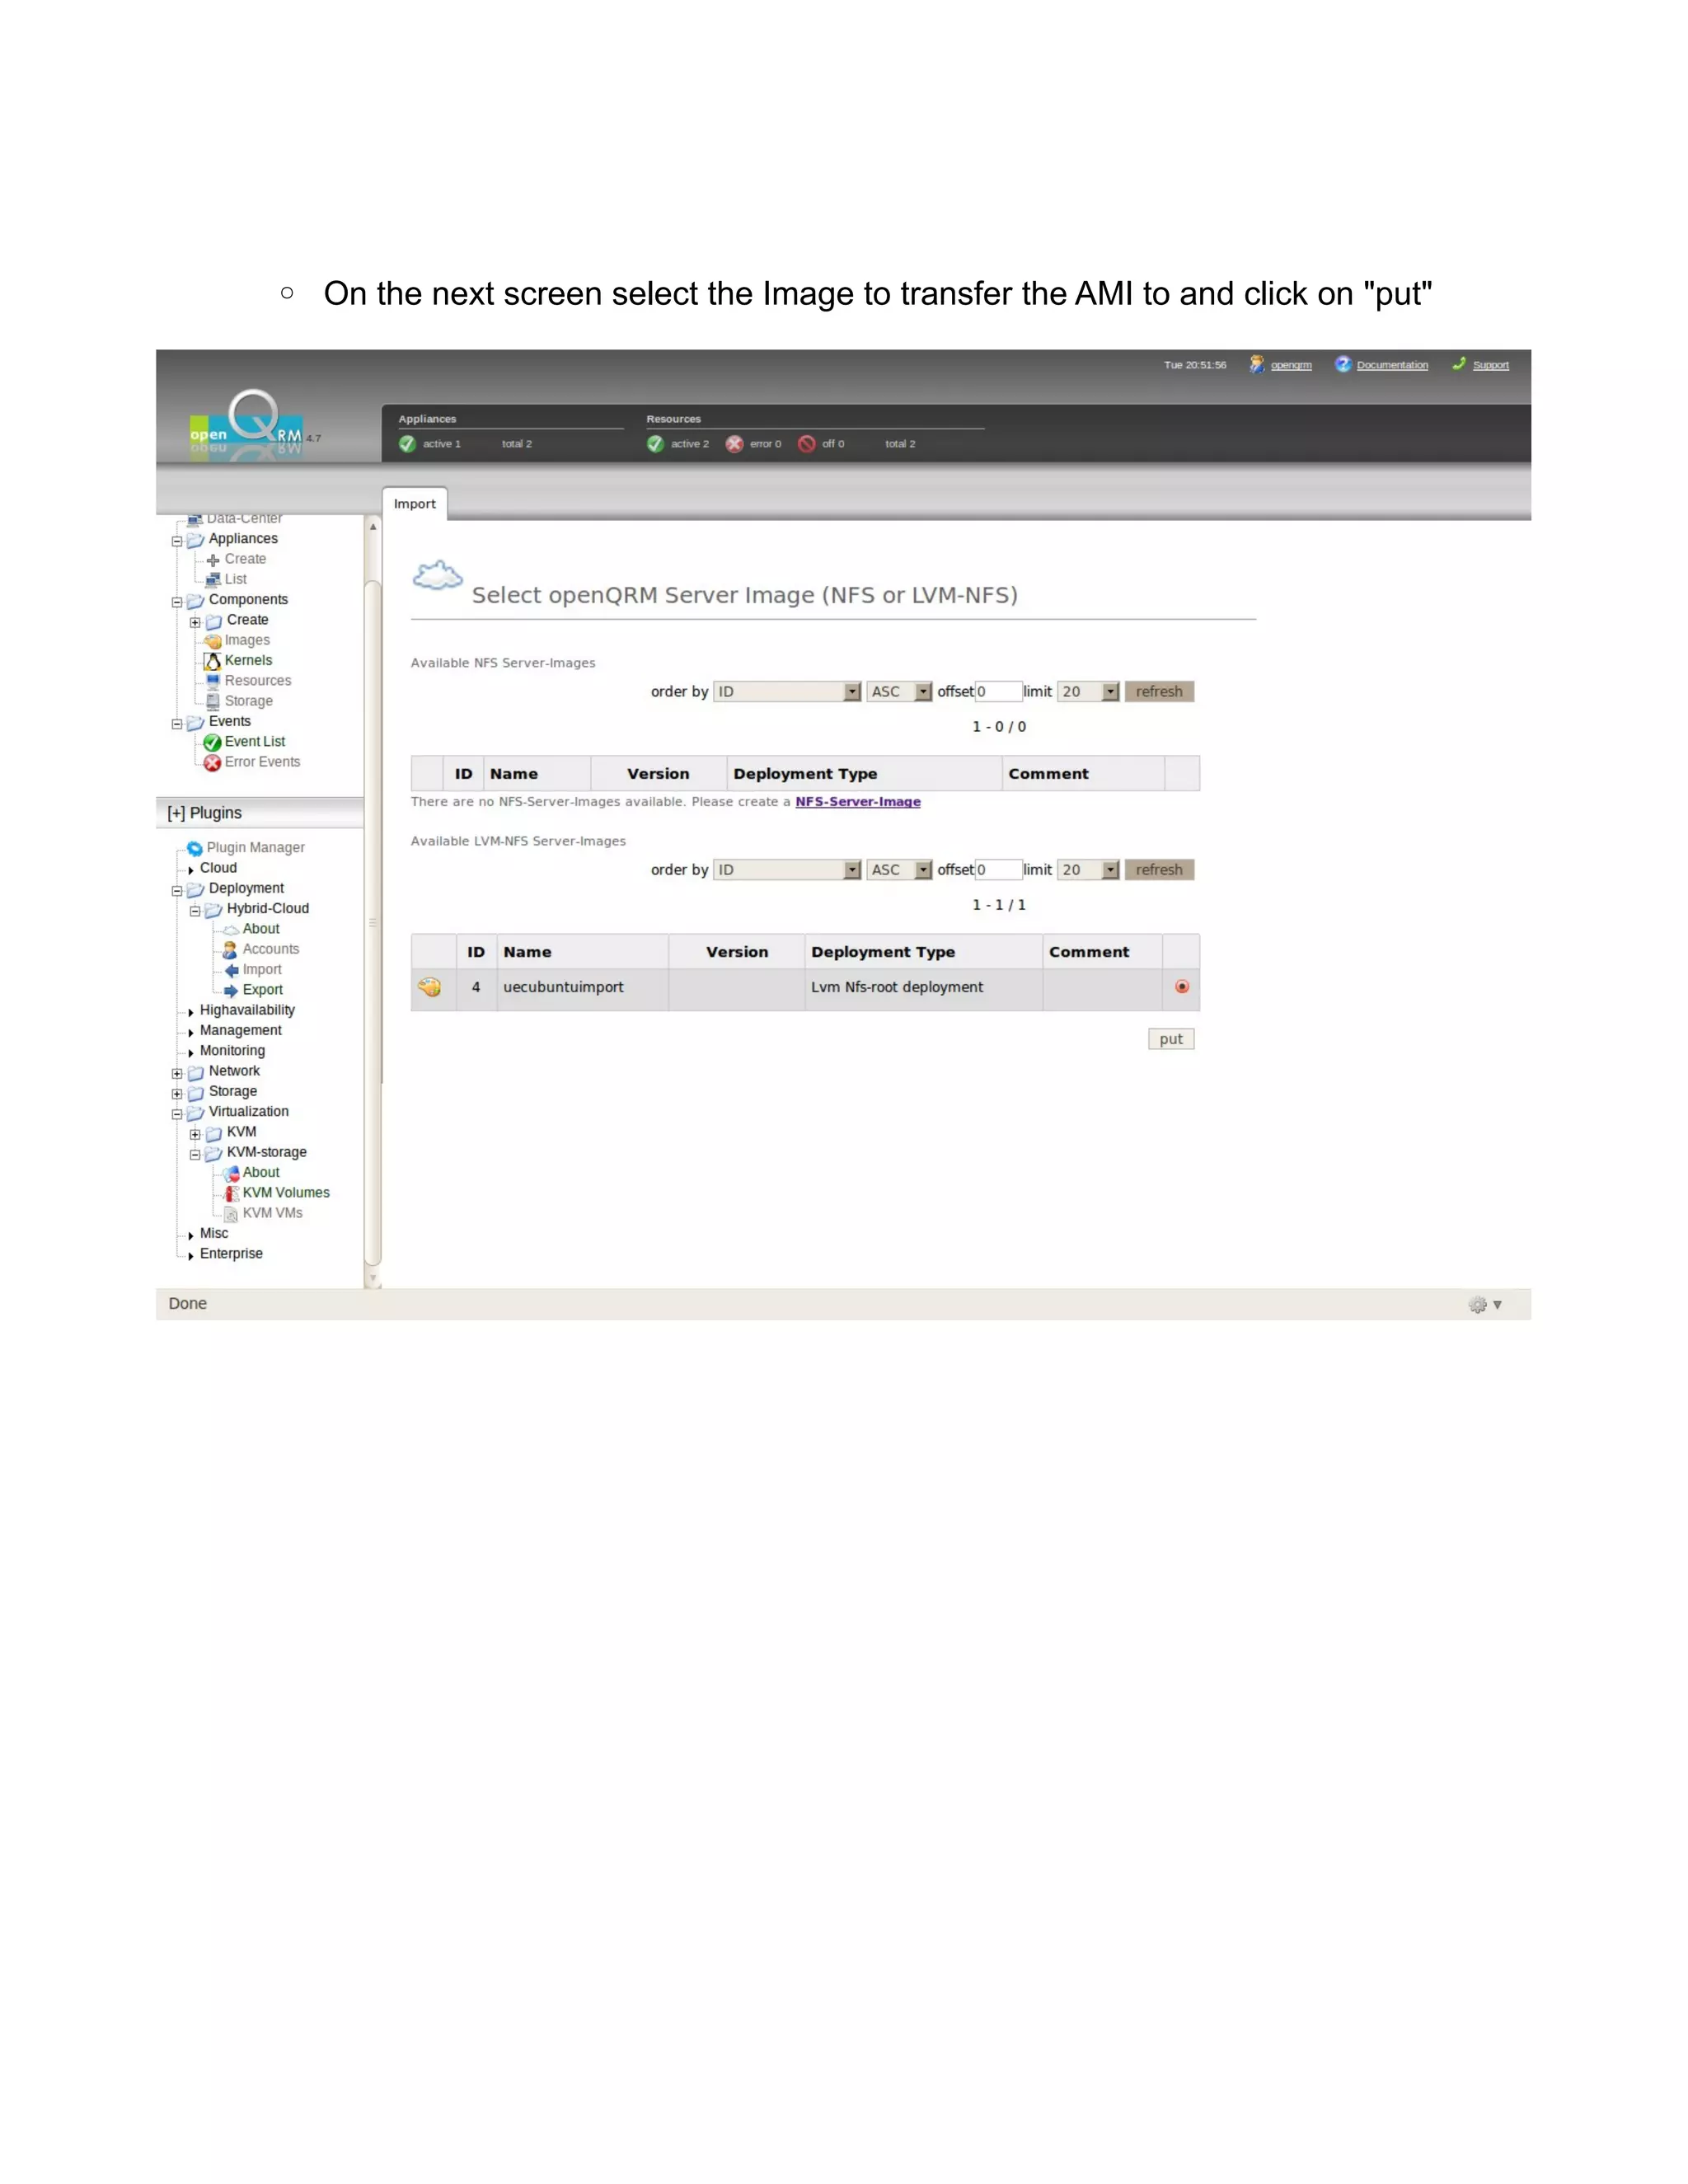
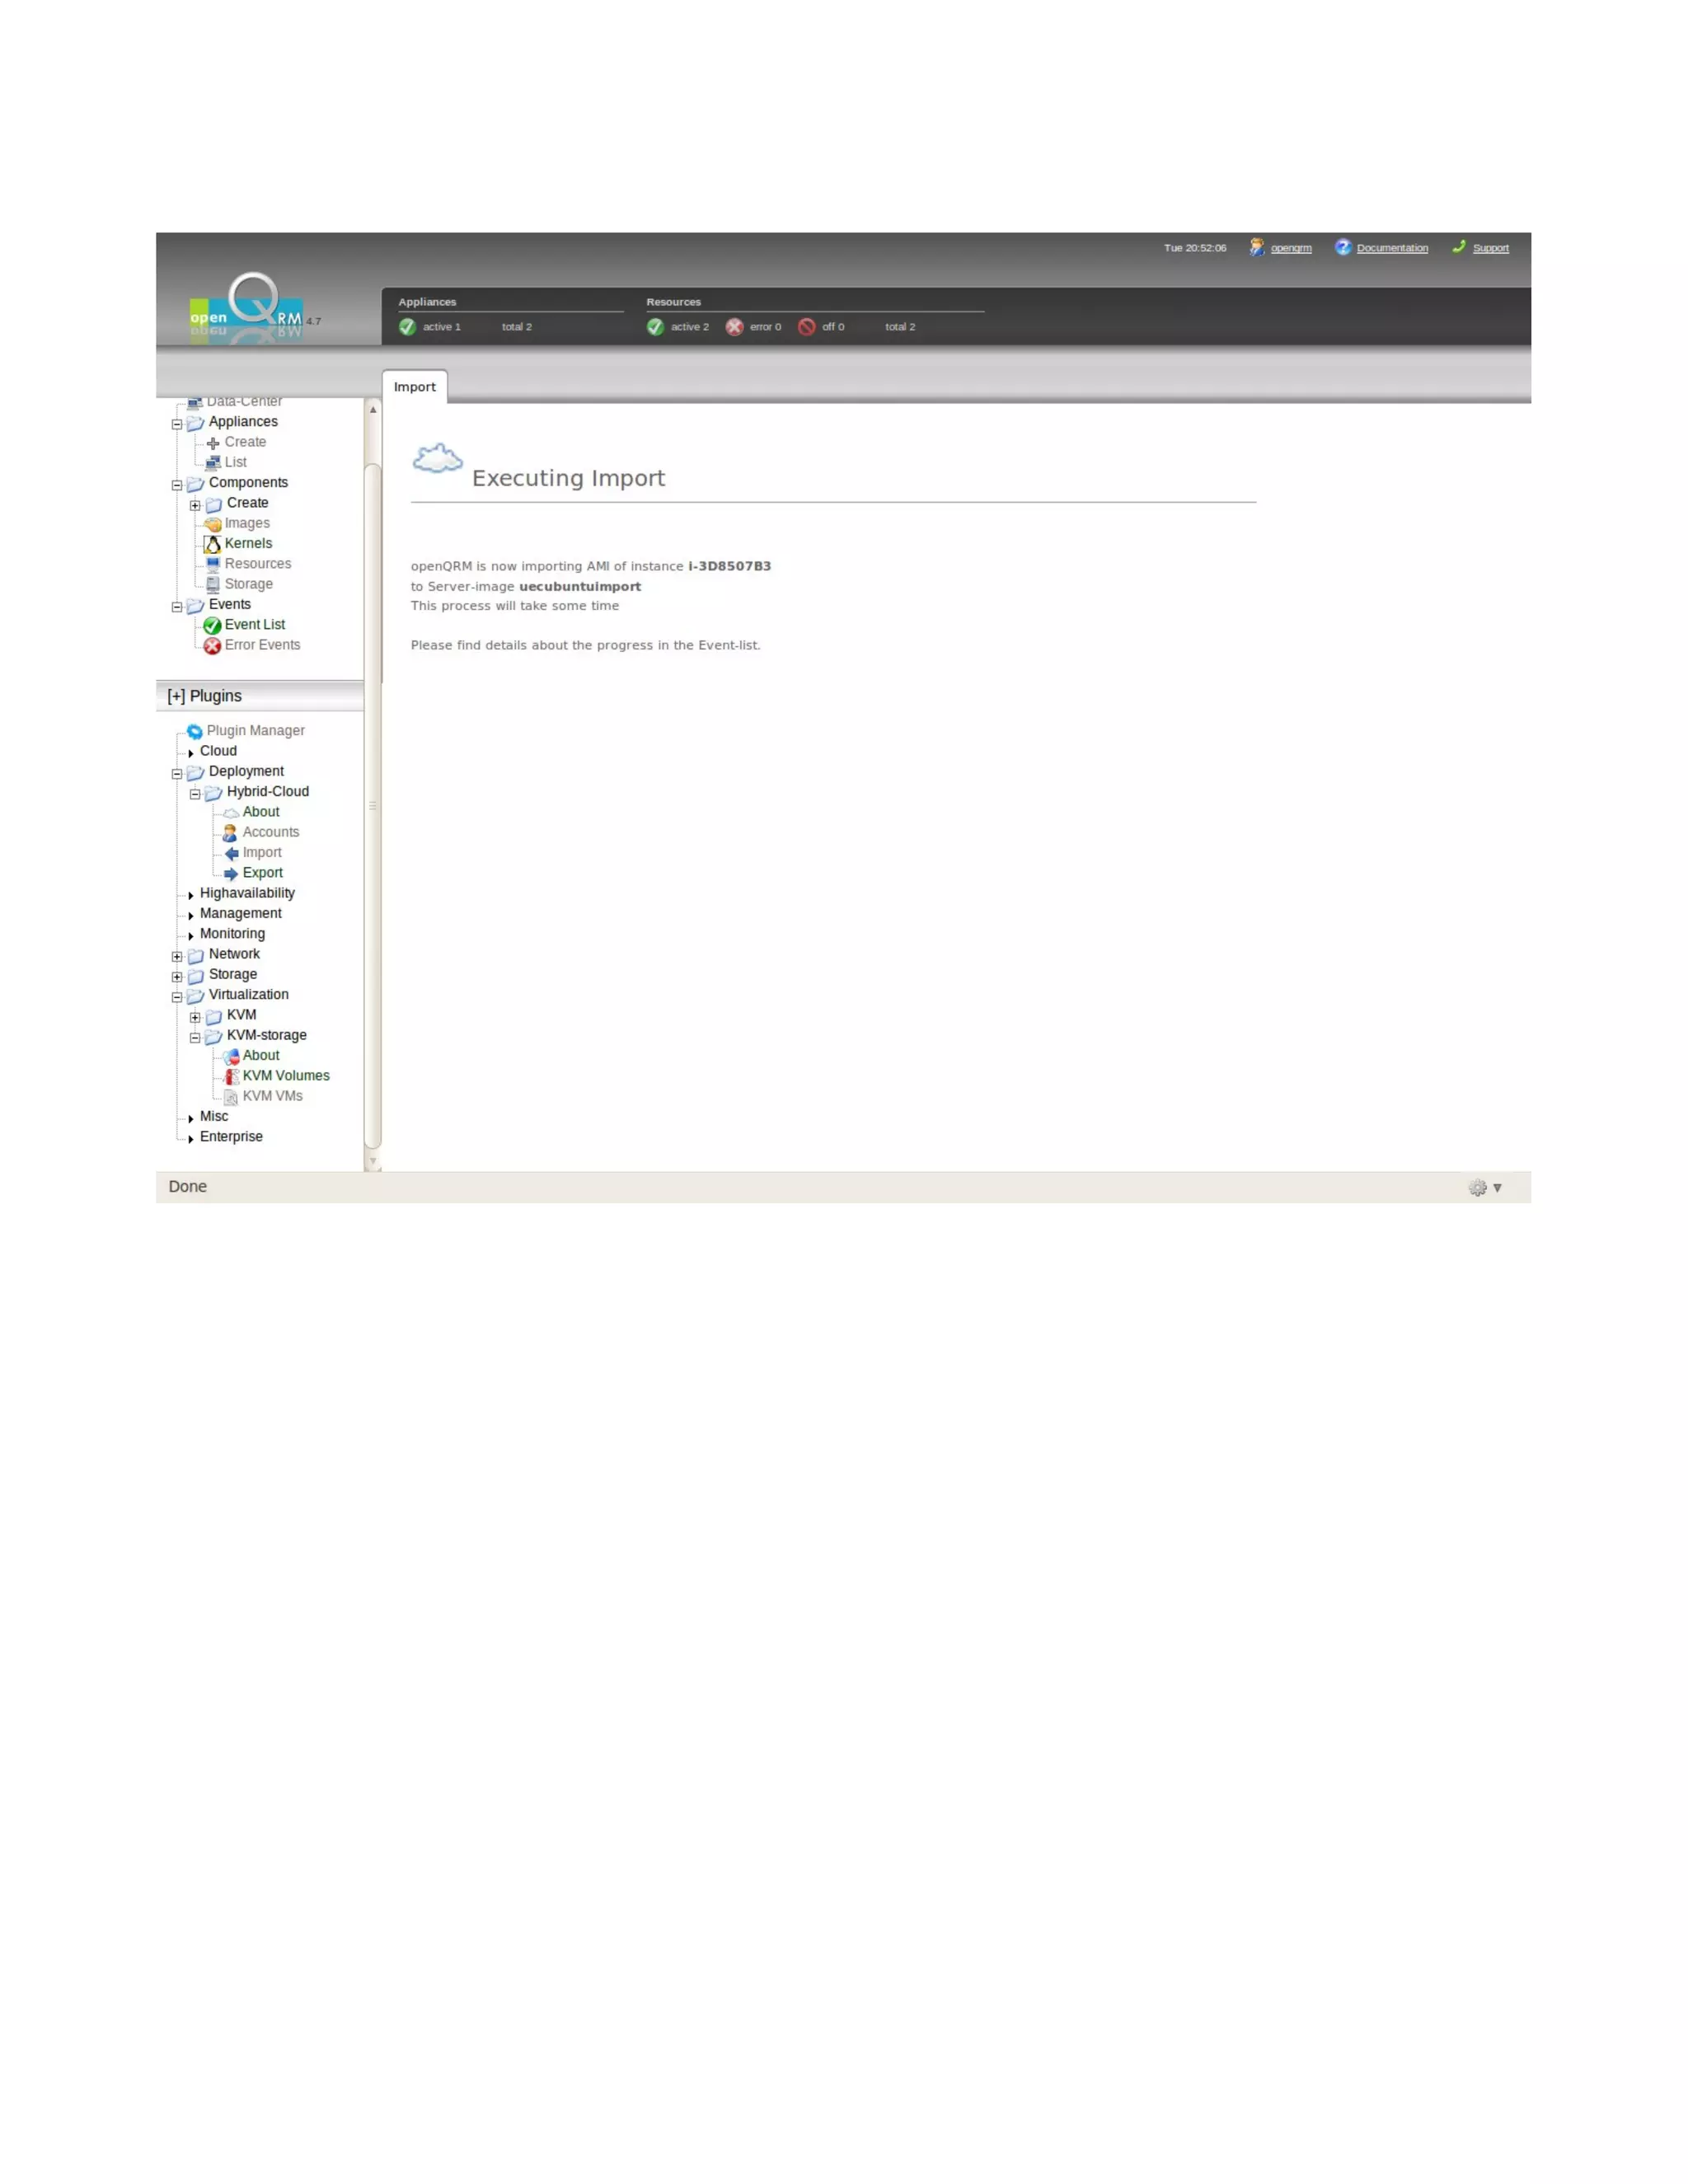
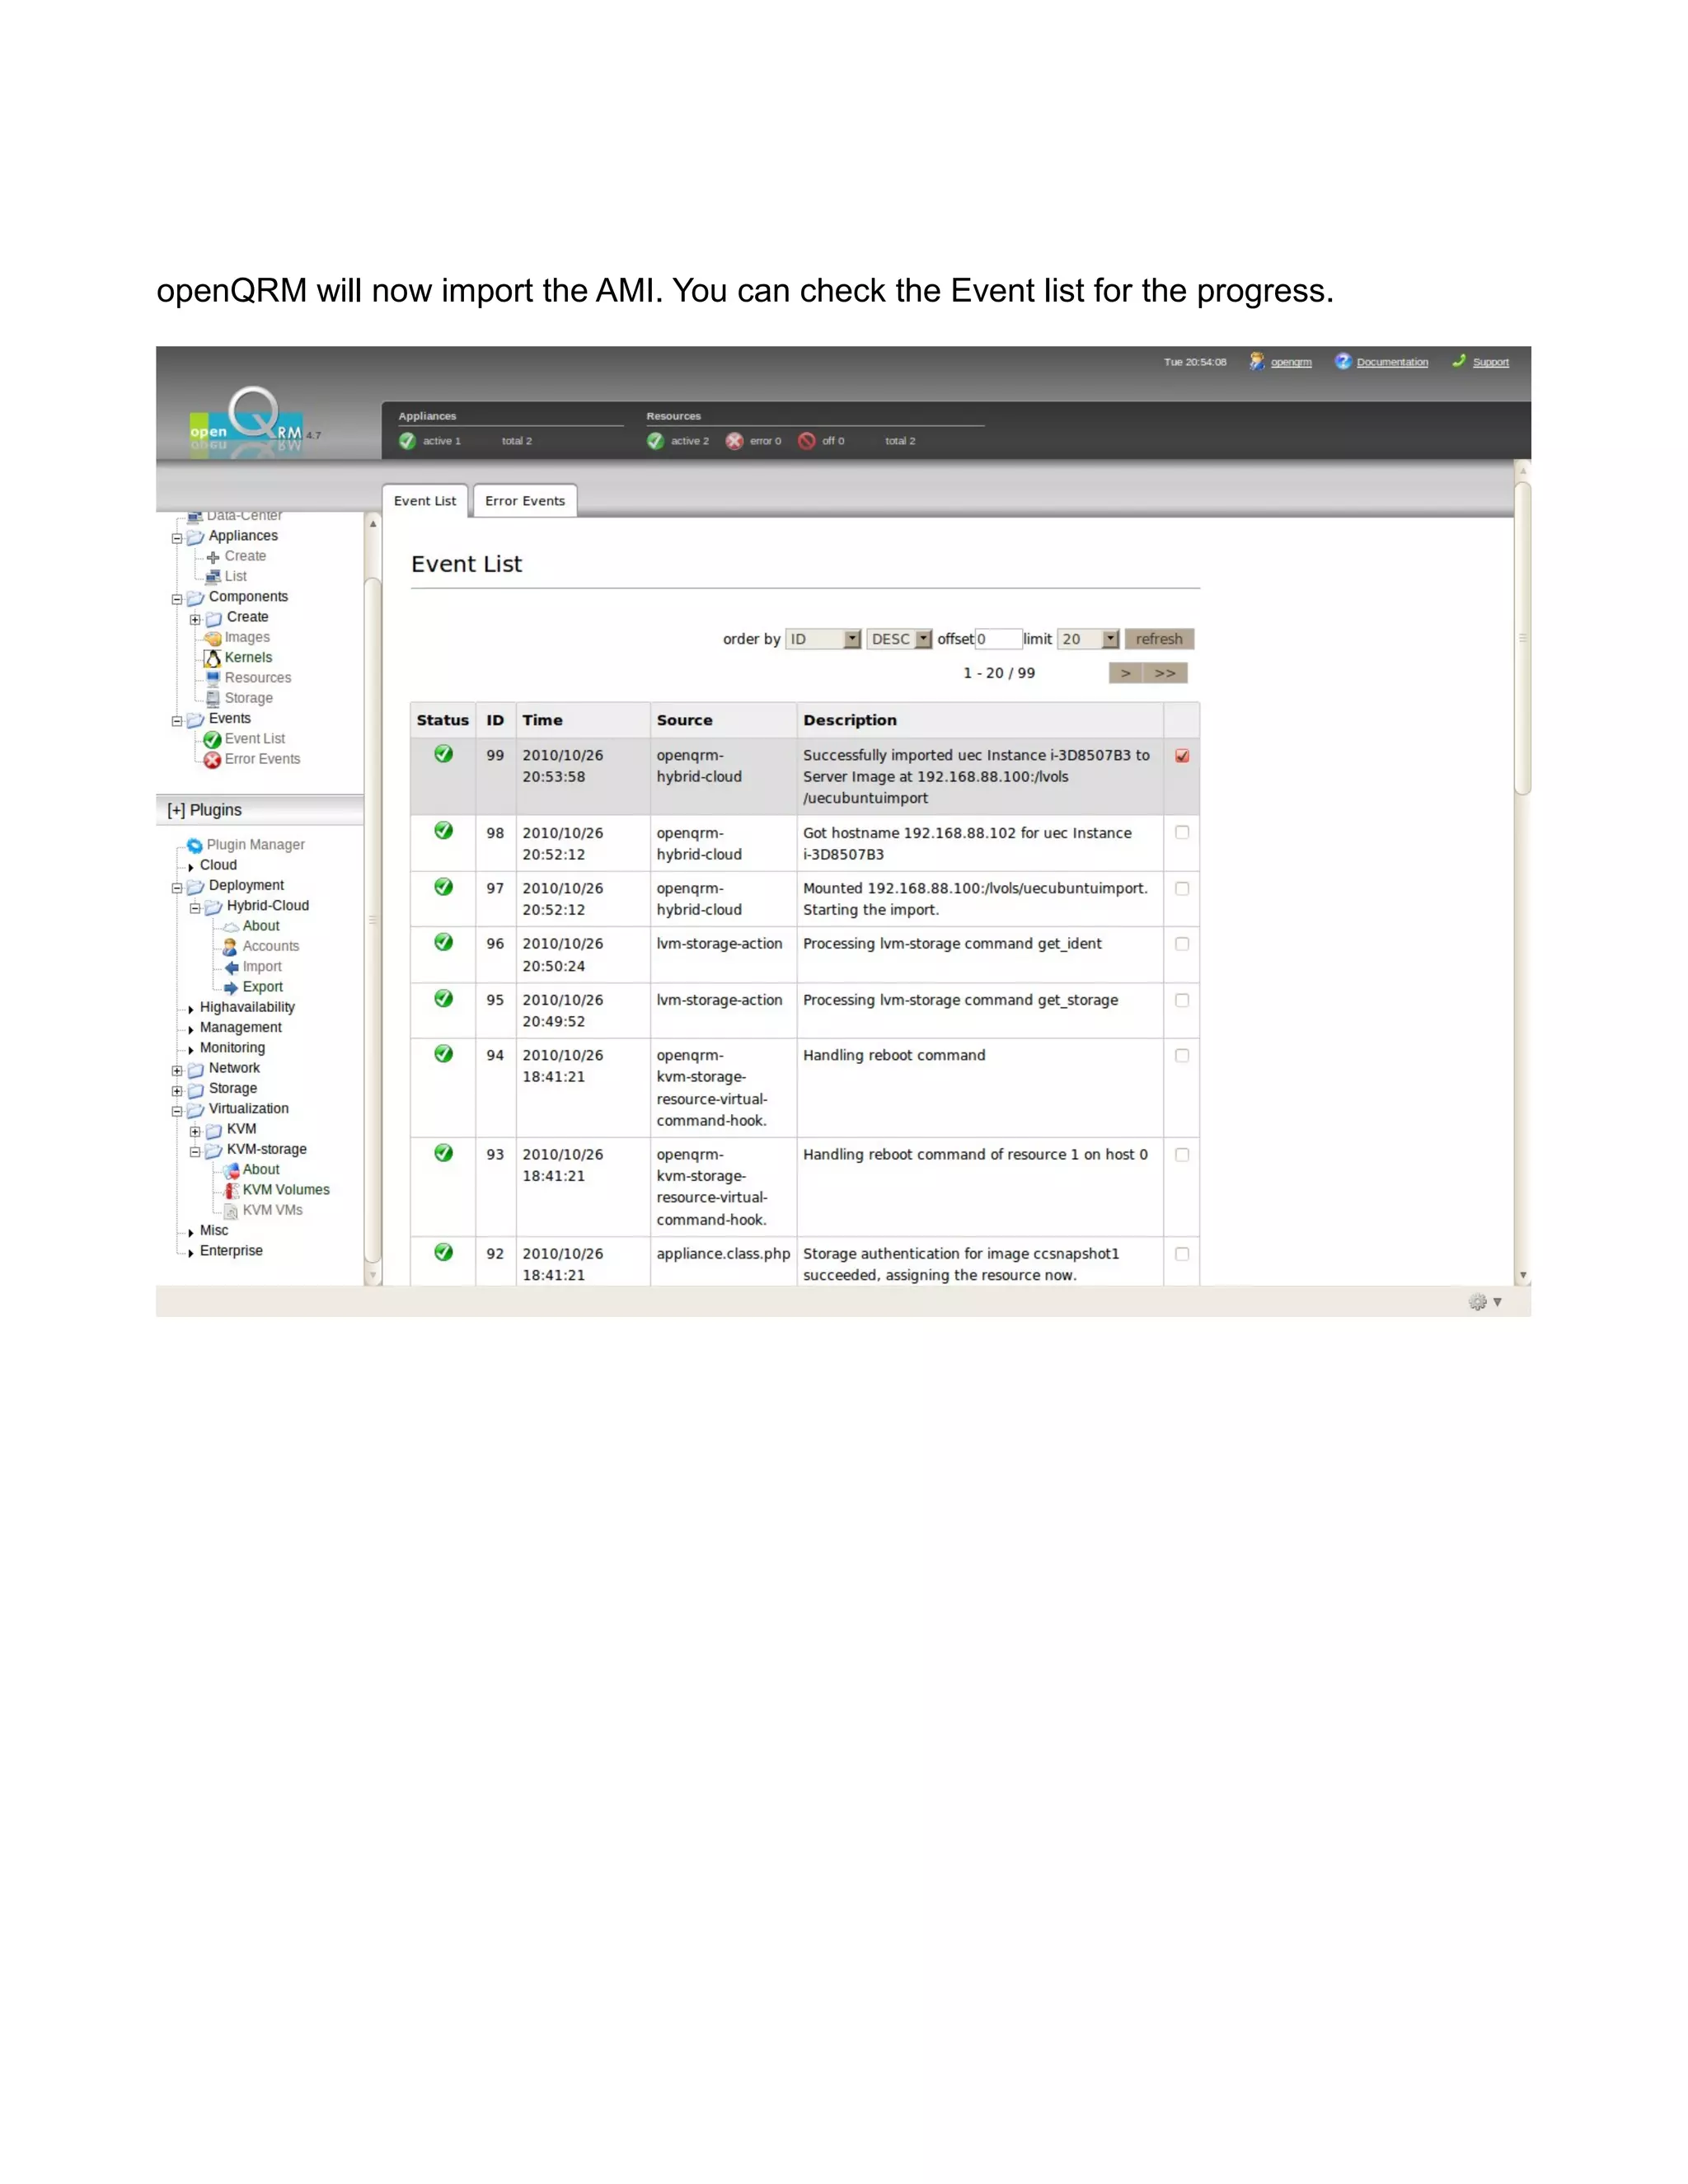
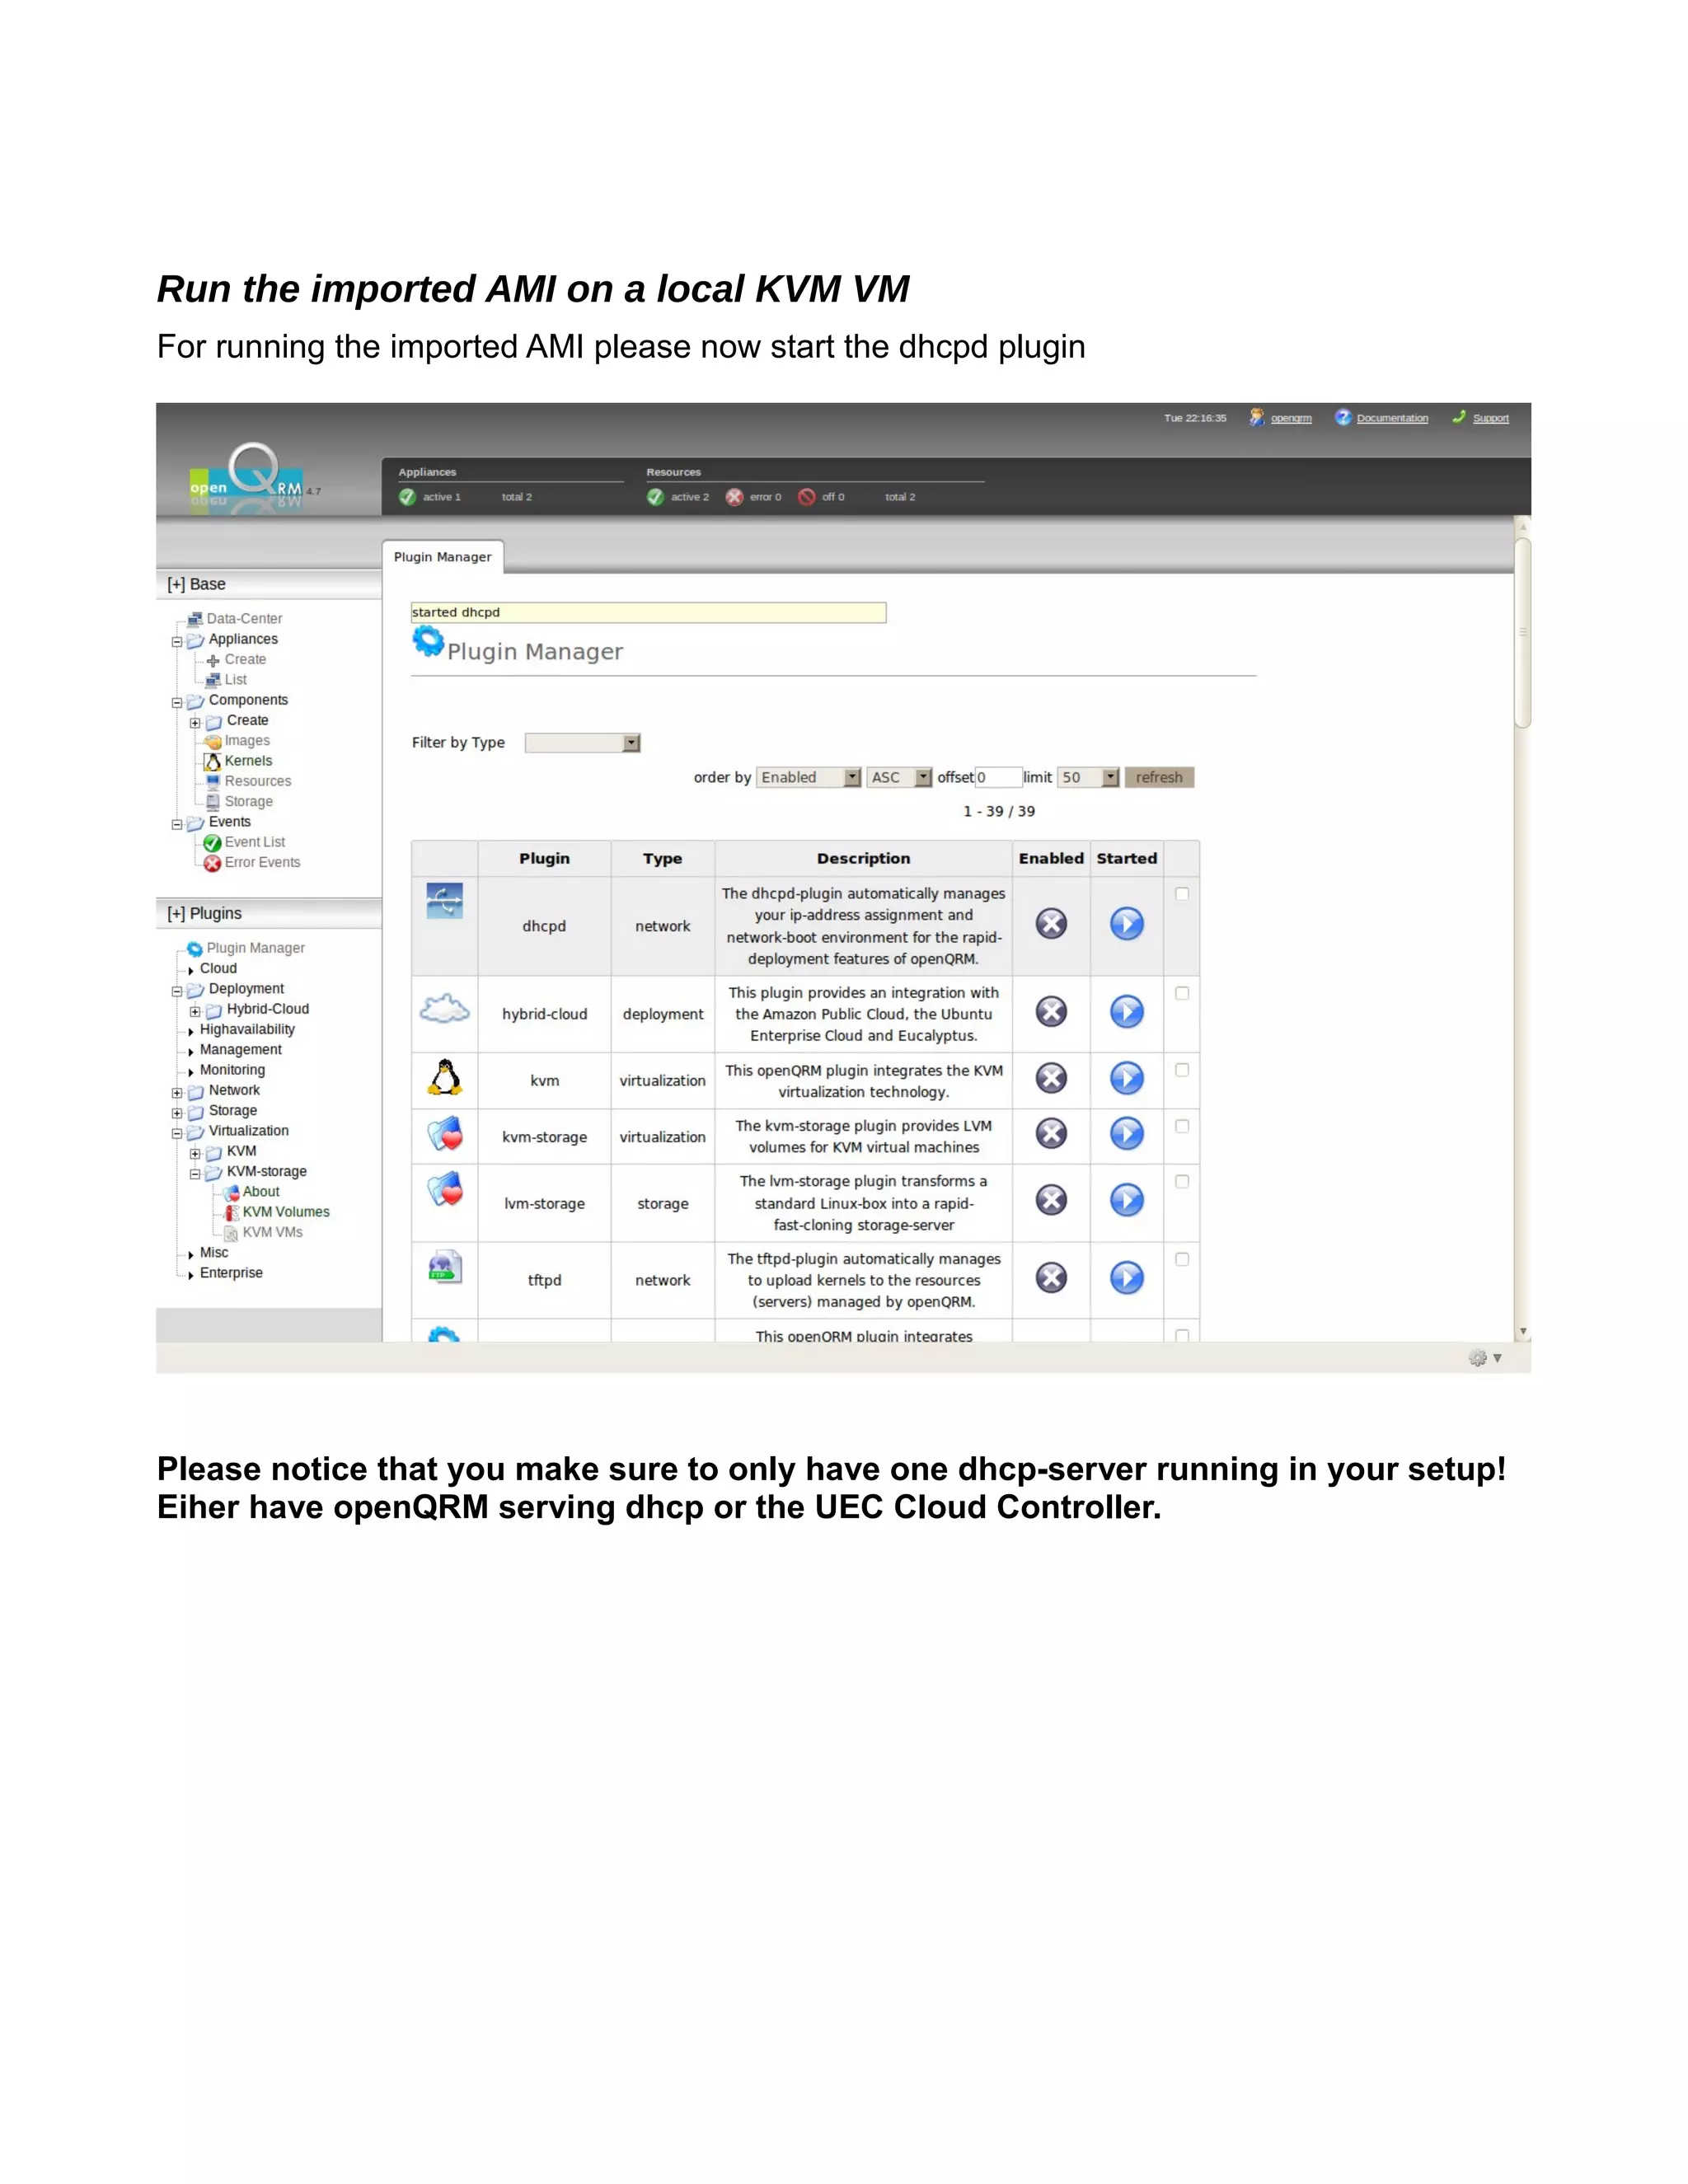
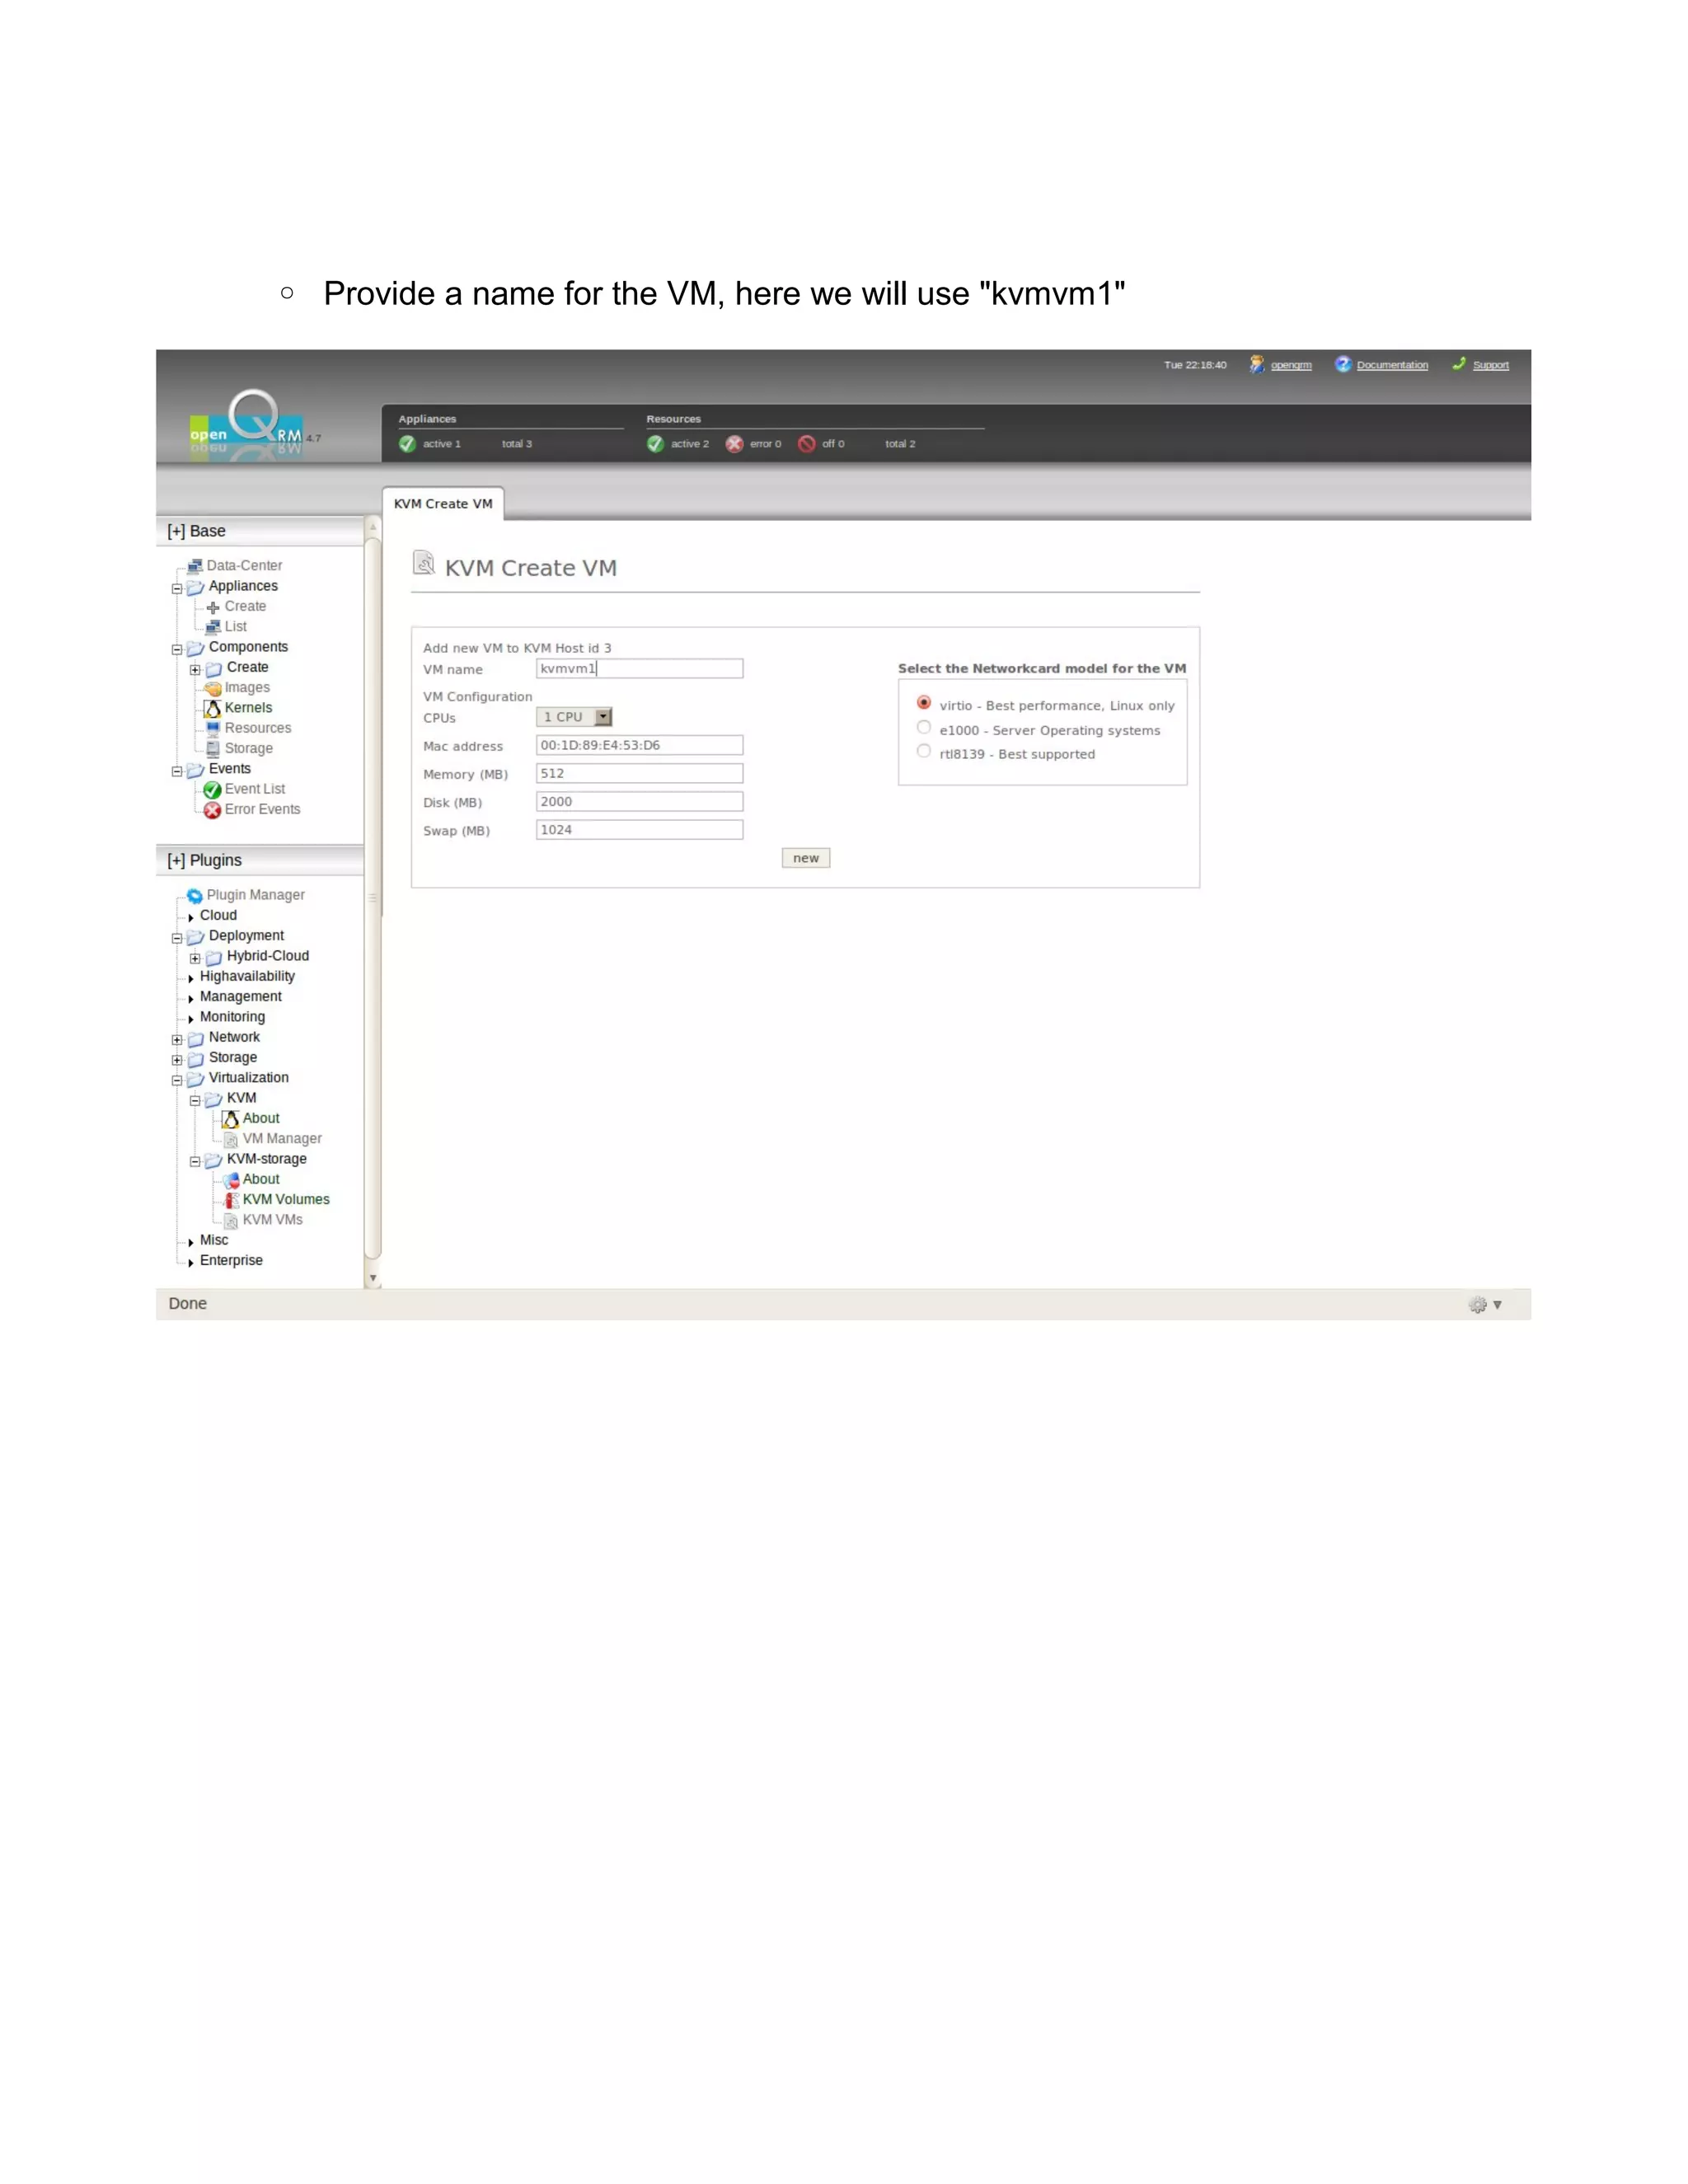
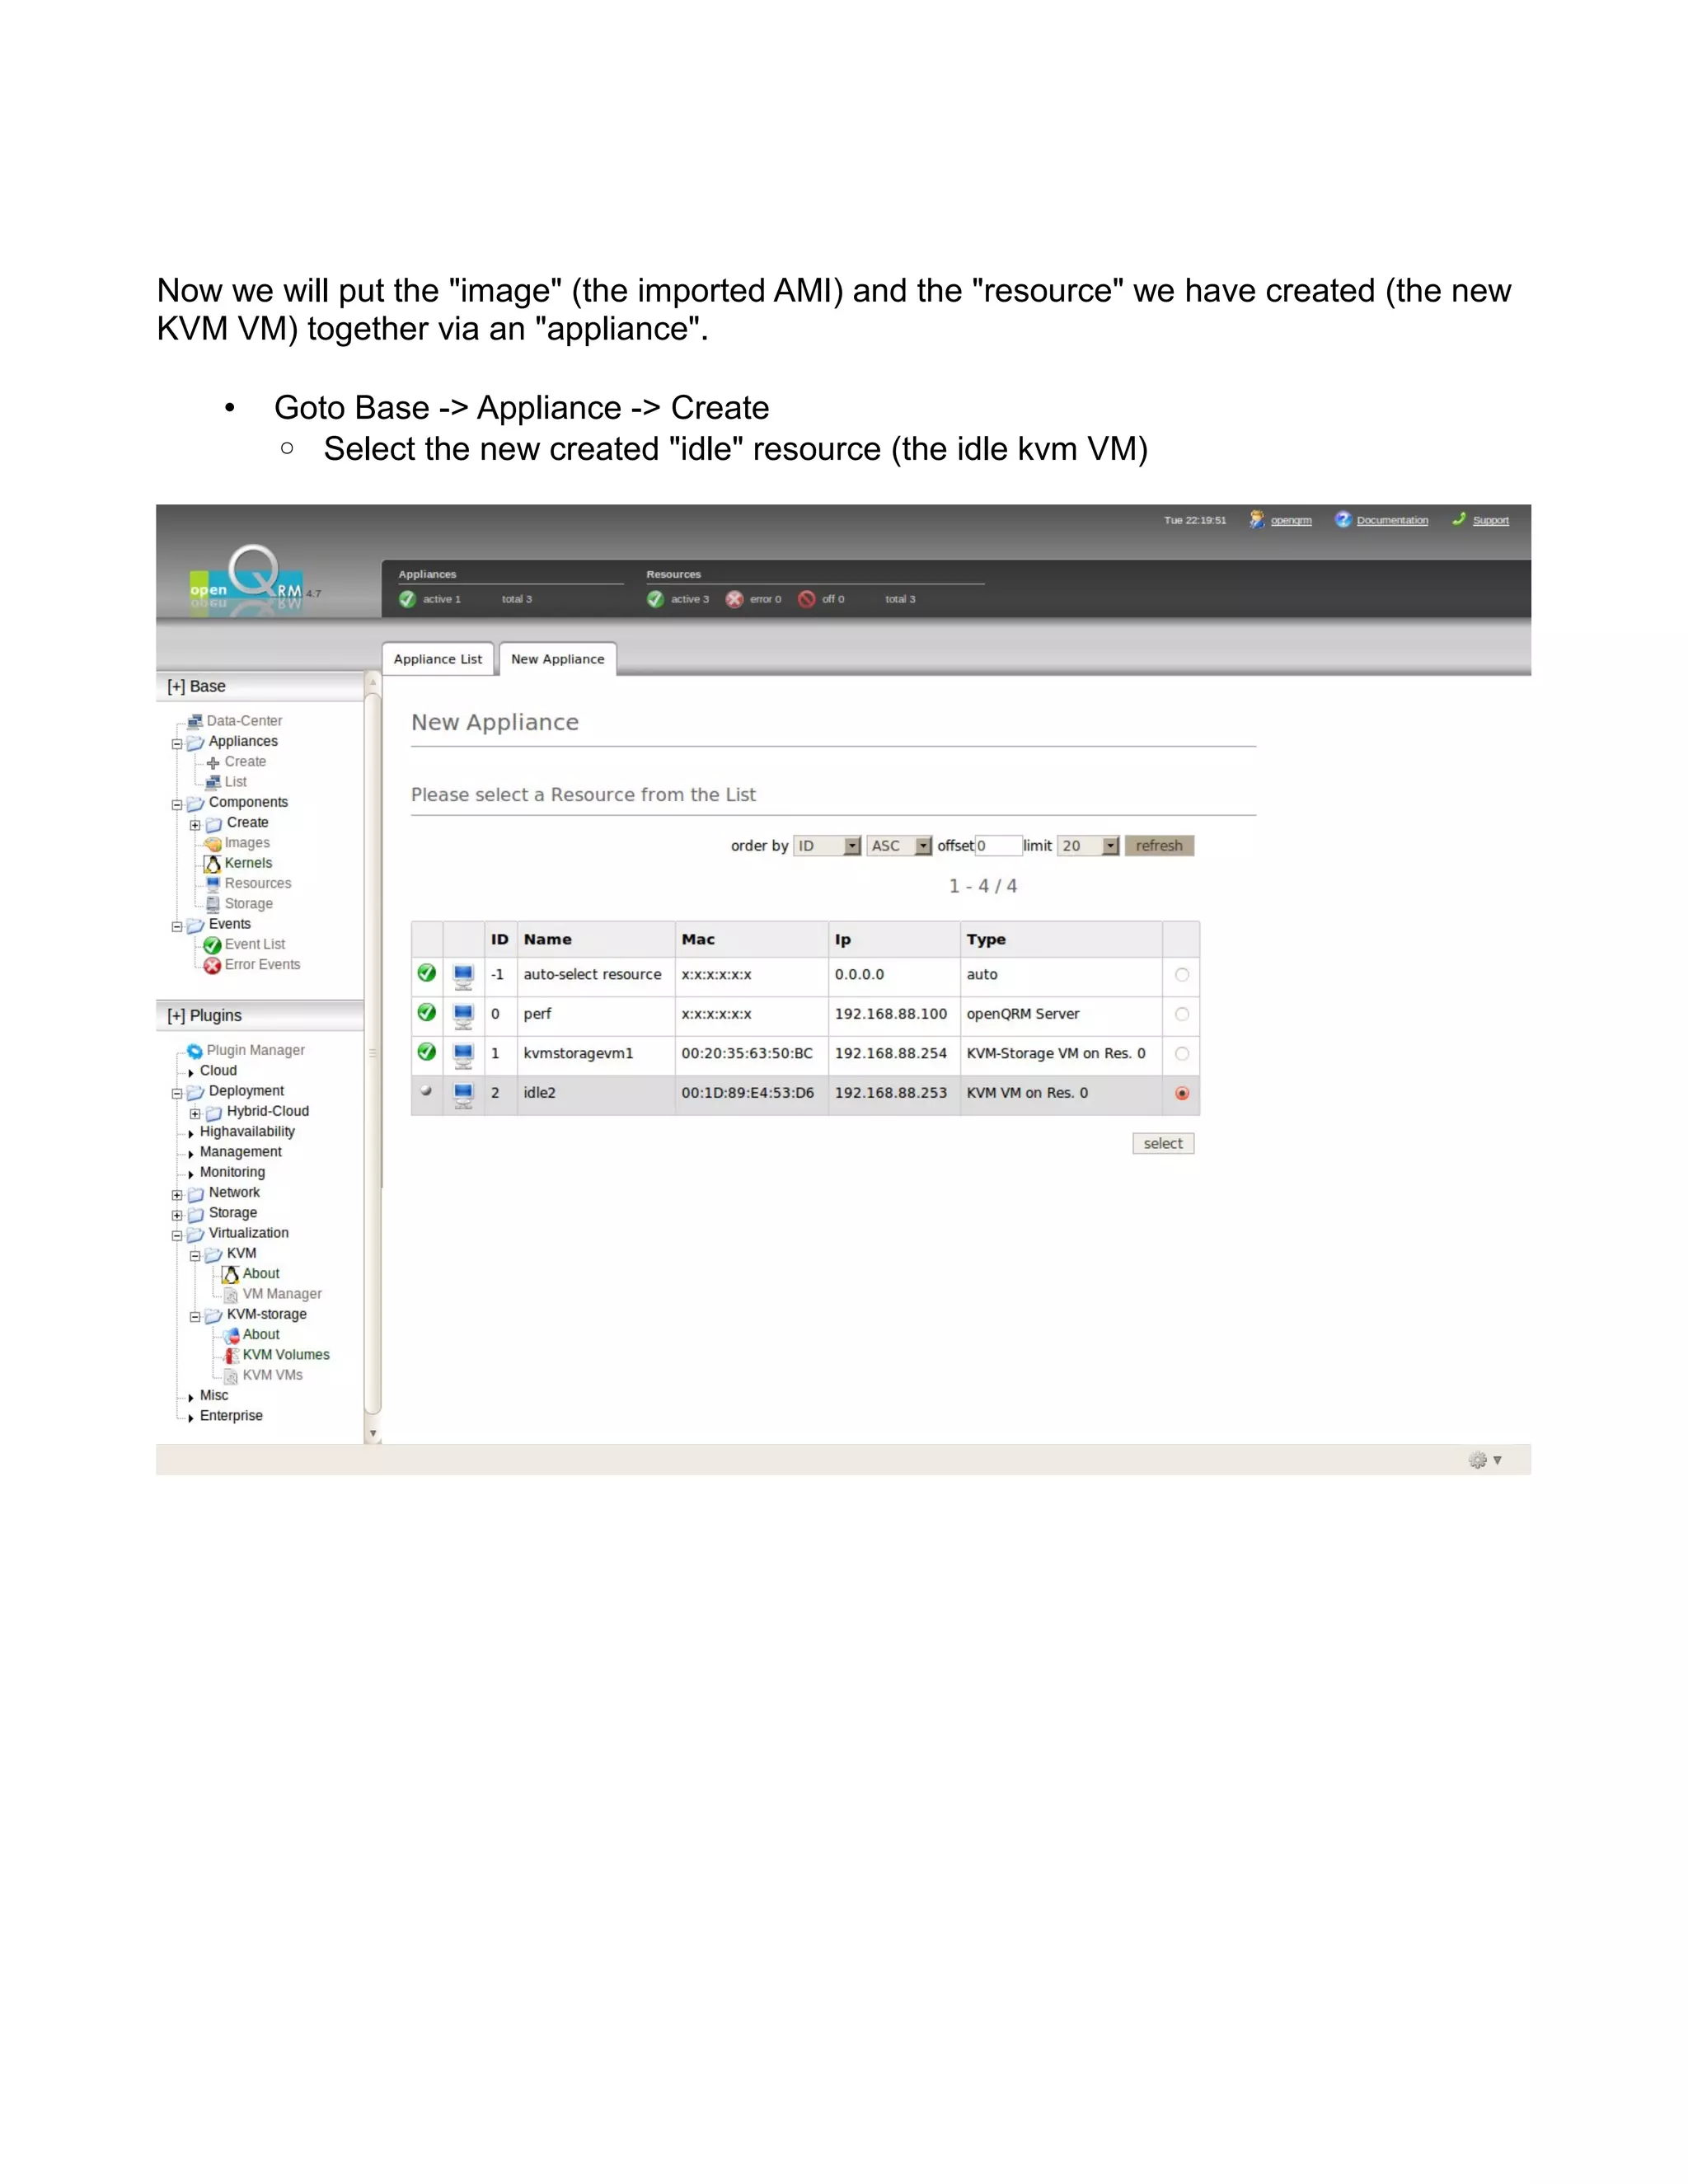
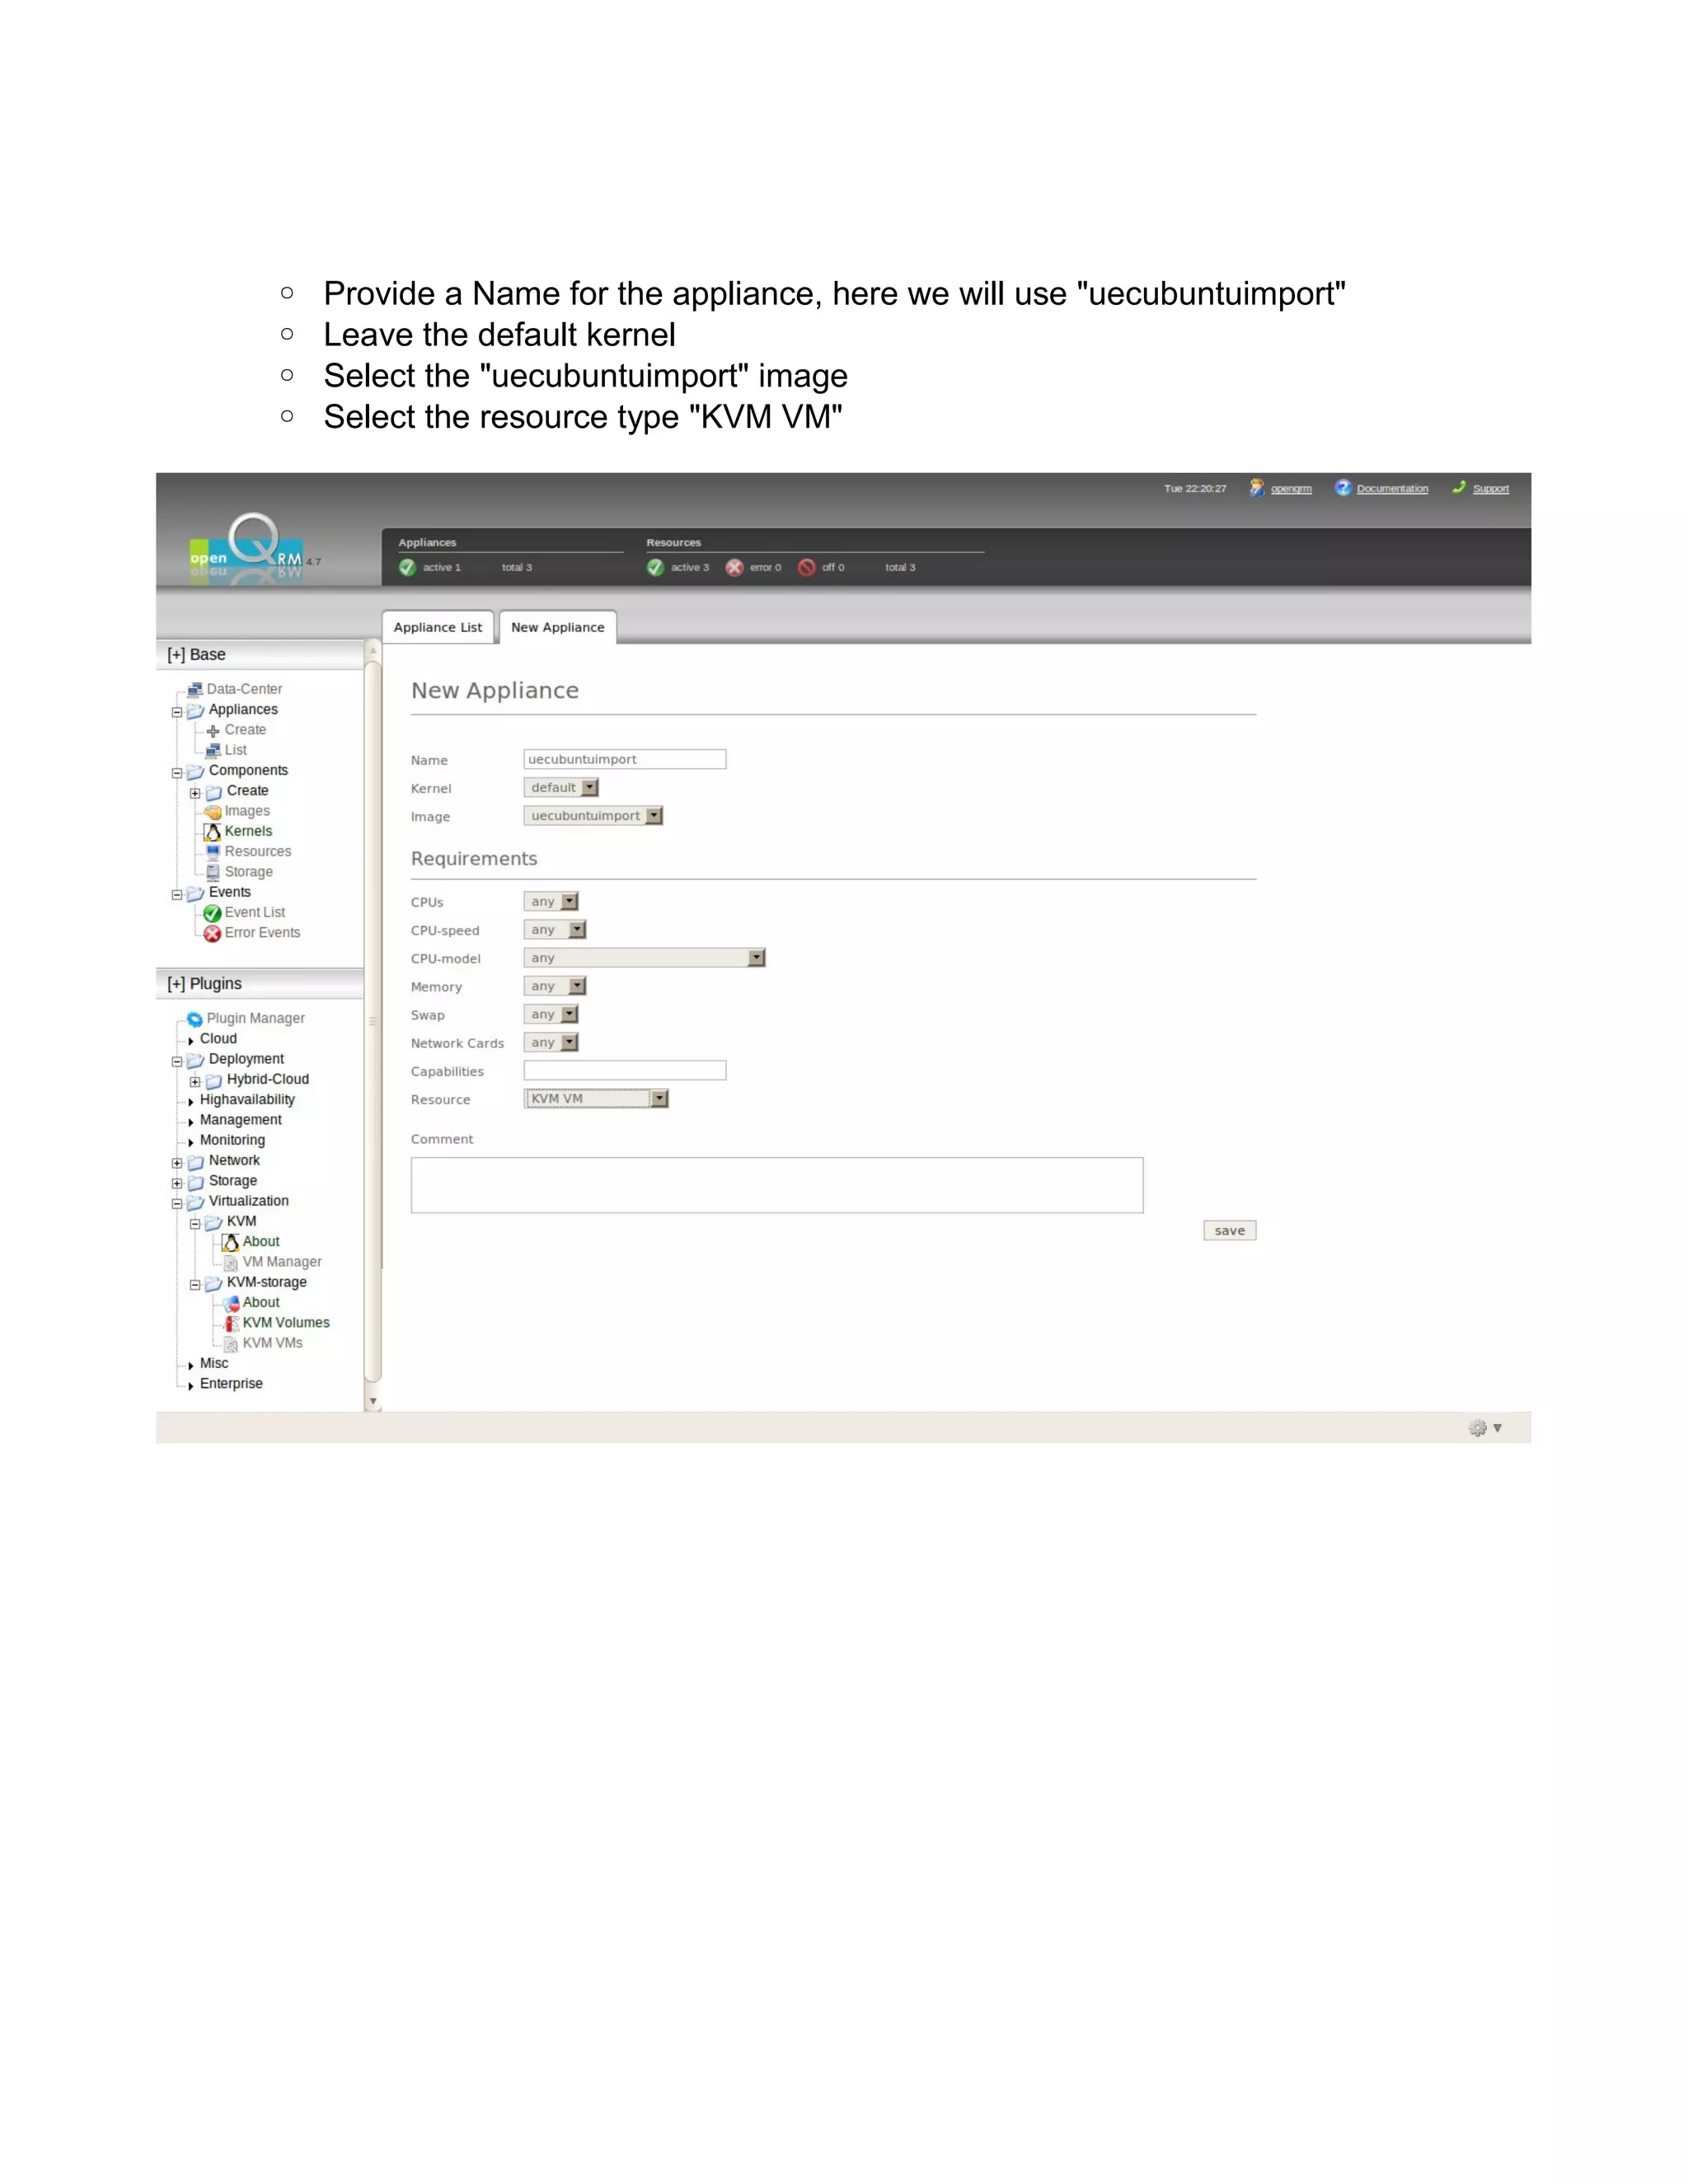
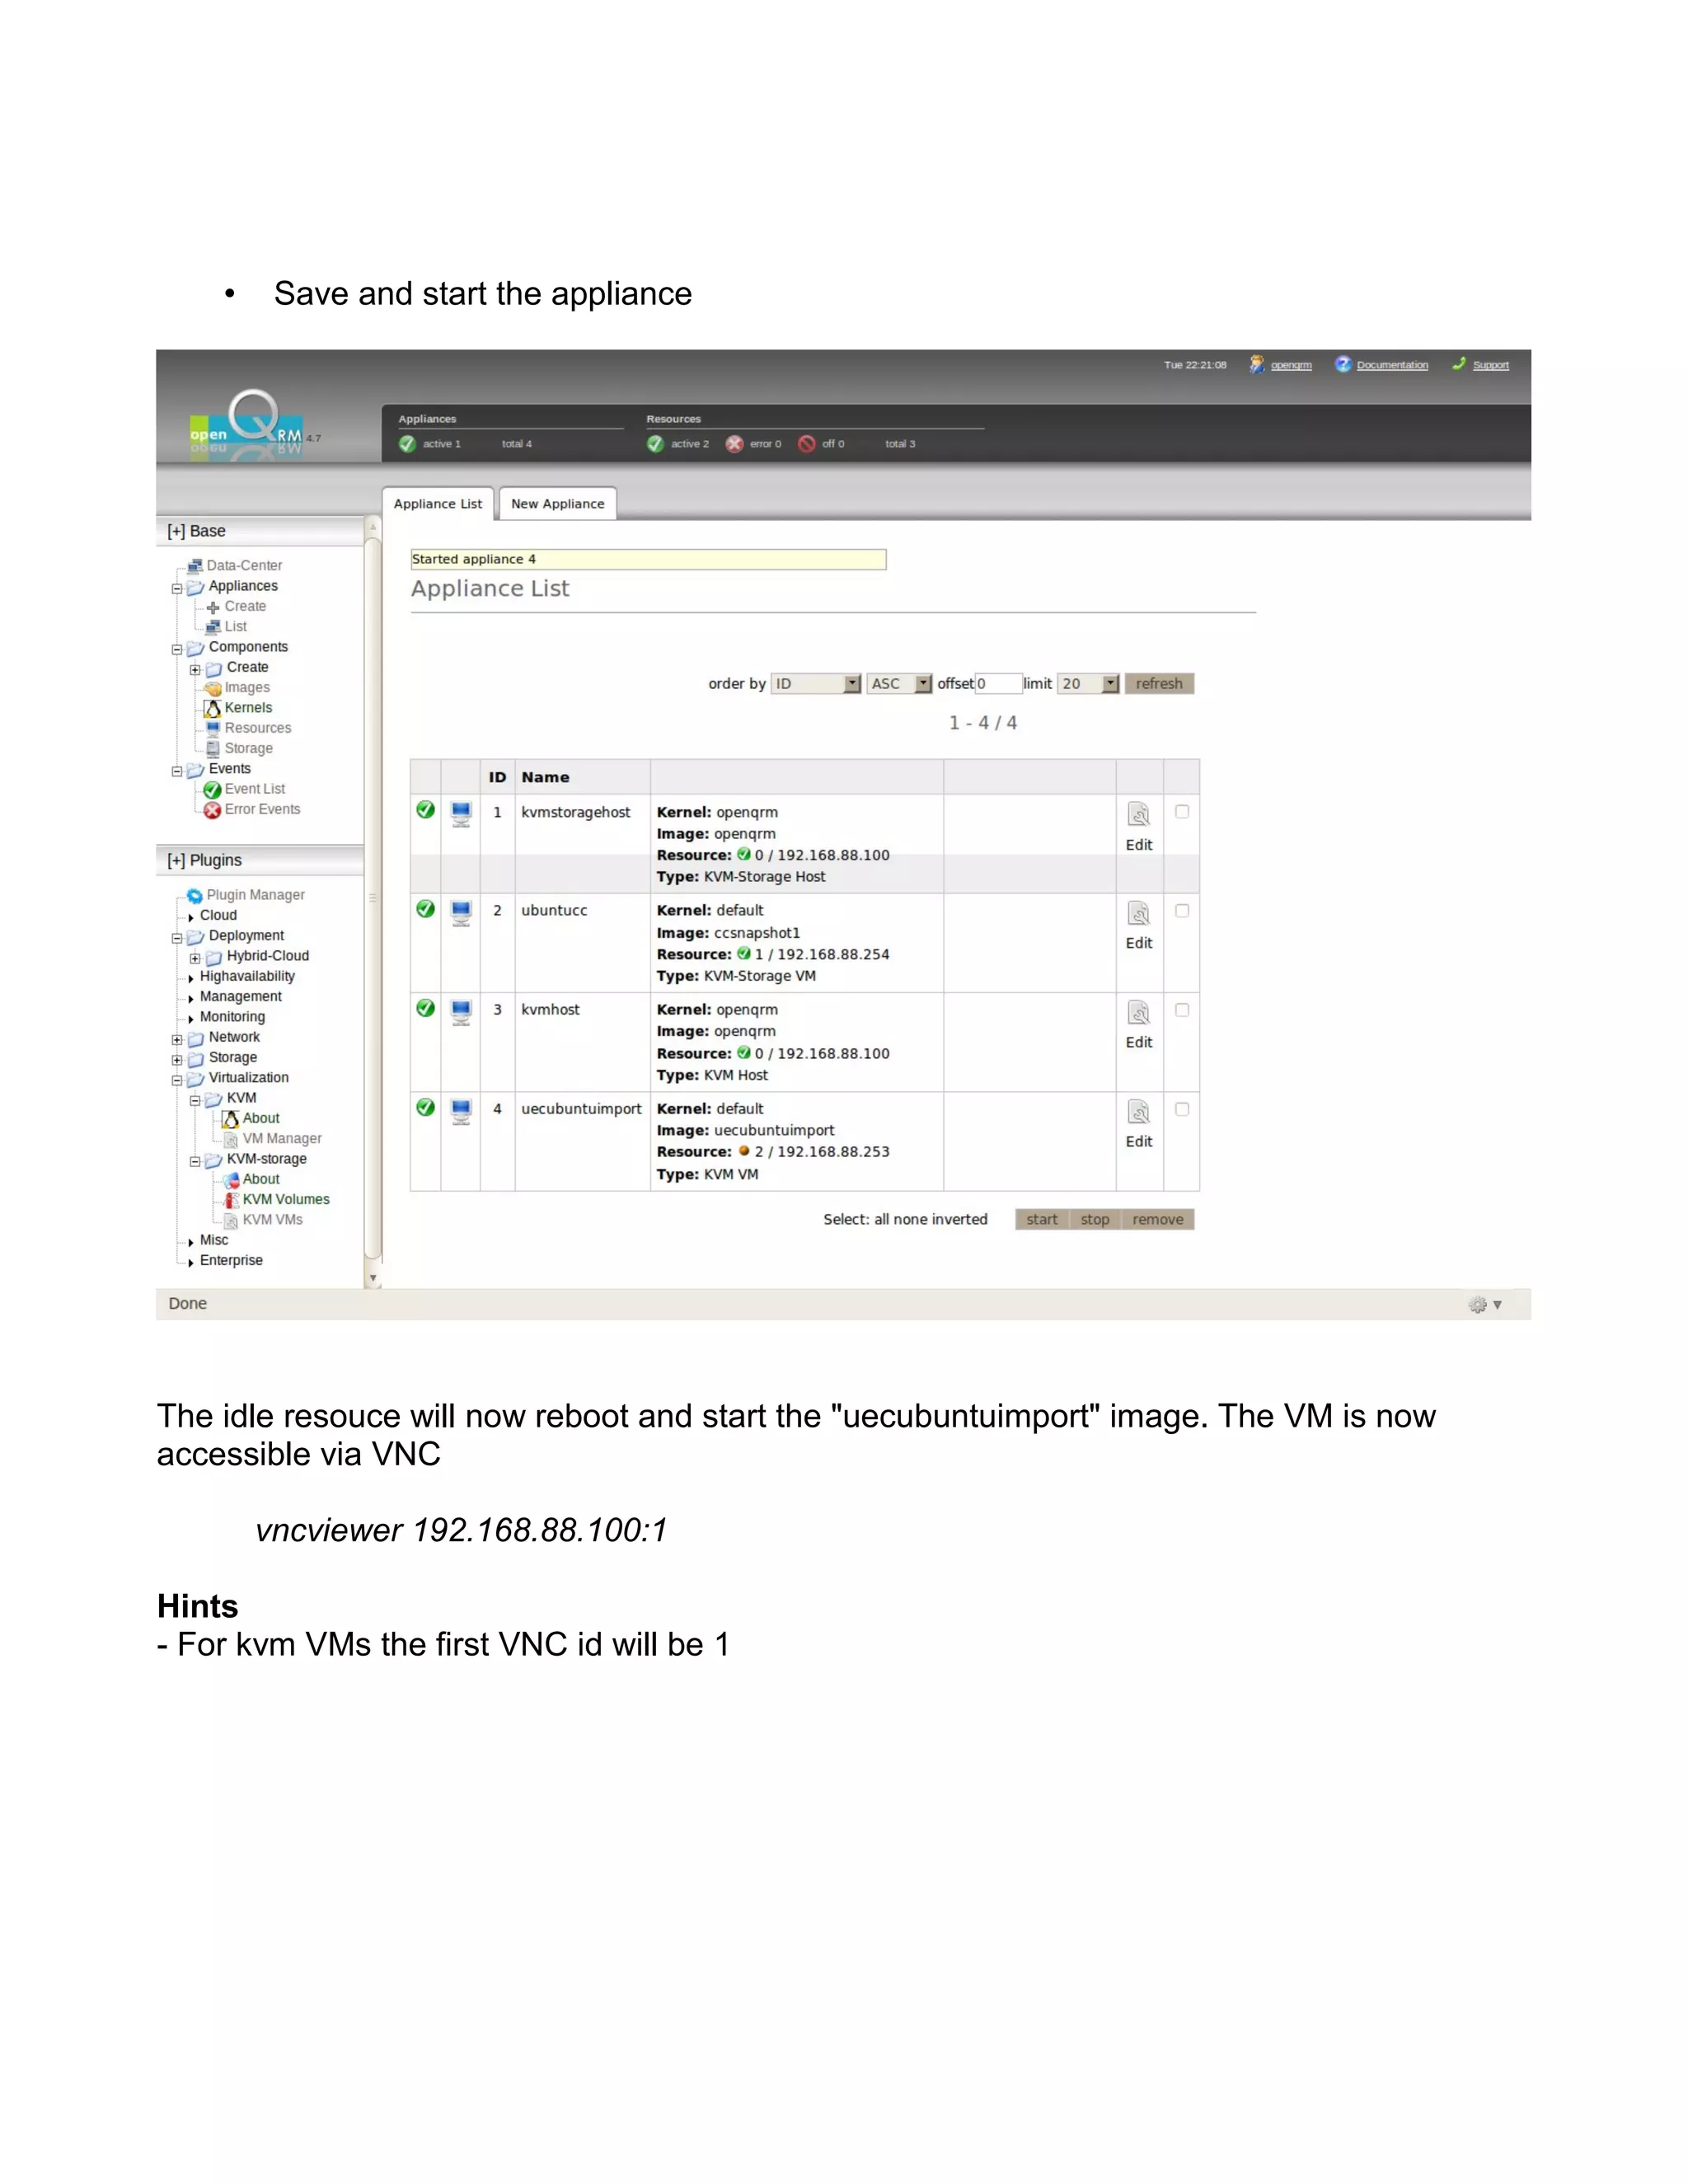
This document provides a comprehensive guide for setting up a hybrid cloud environment using OpenQRM, Ubuntu Enterprise Cloud (UEC), and Amazon EC2 on Ubuntu 10.10. It details the requirements, installation, configuration of the OpenQRM server, and the integration of UEC, including steps for migrating services between the platforms and managing virtual machines. The guide is structured into sections covering installation, configuration, and operational procedures with specific command line instructions to assist users in the cloud setup process.


