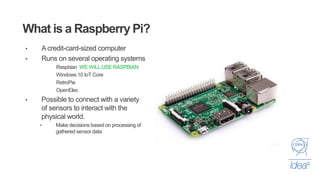
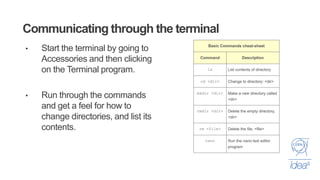
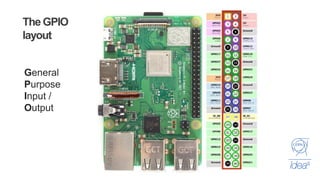
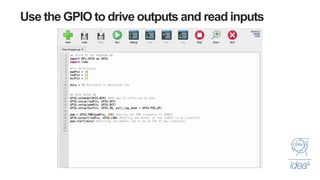
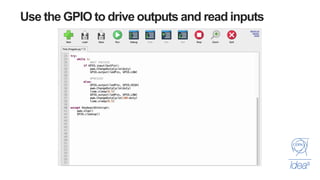
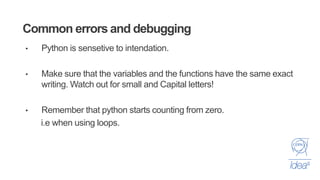
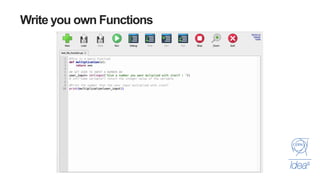
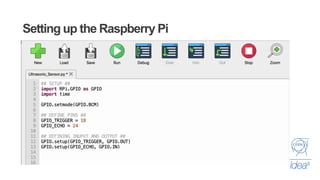
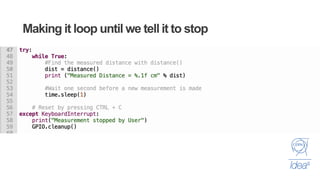
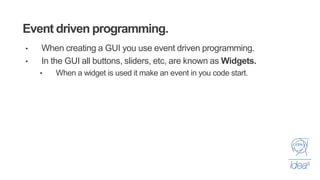
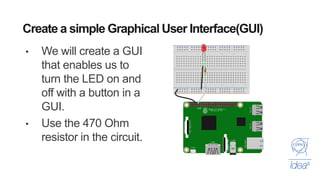
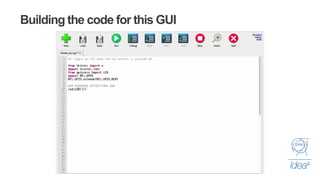
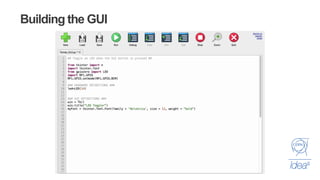
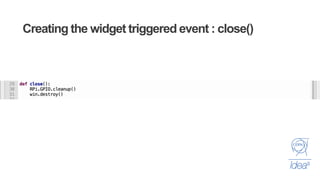
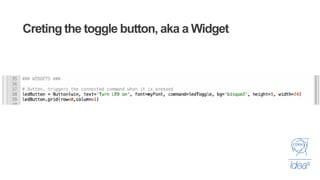
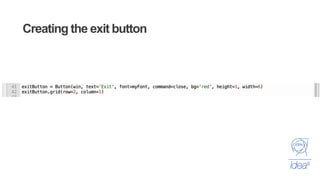
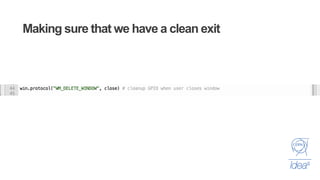
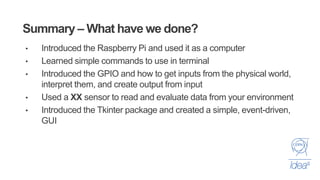
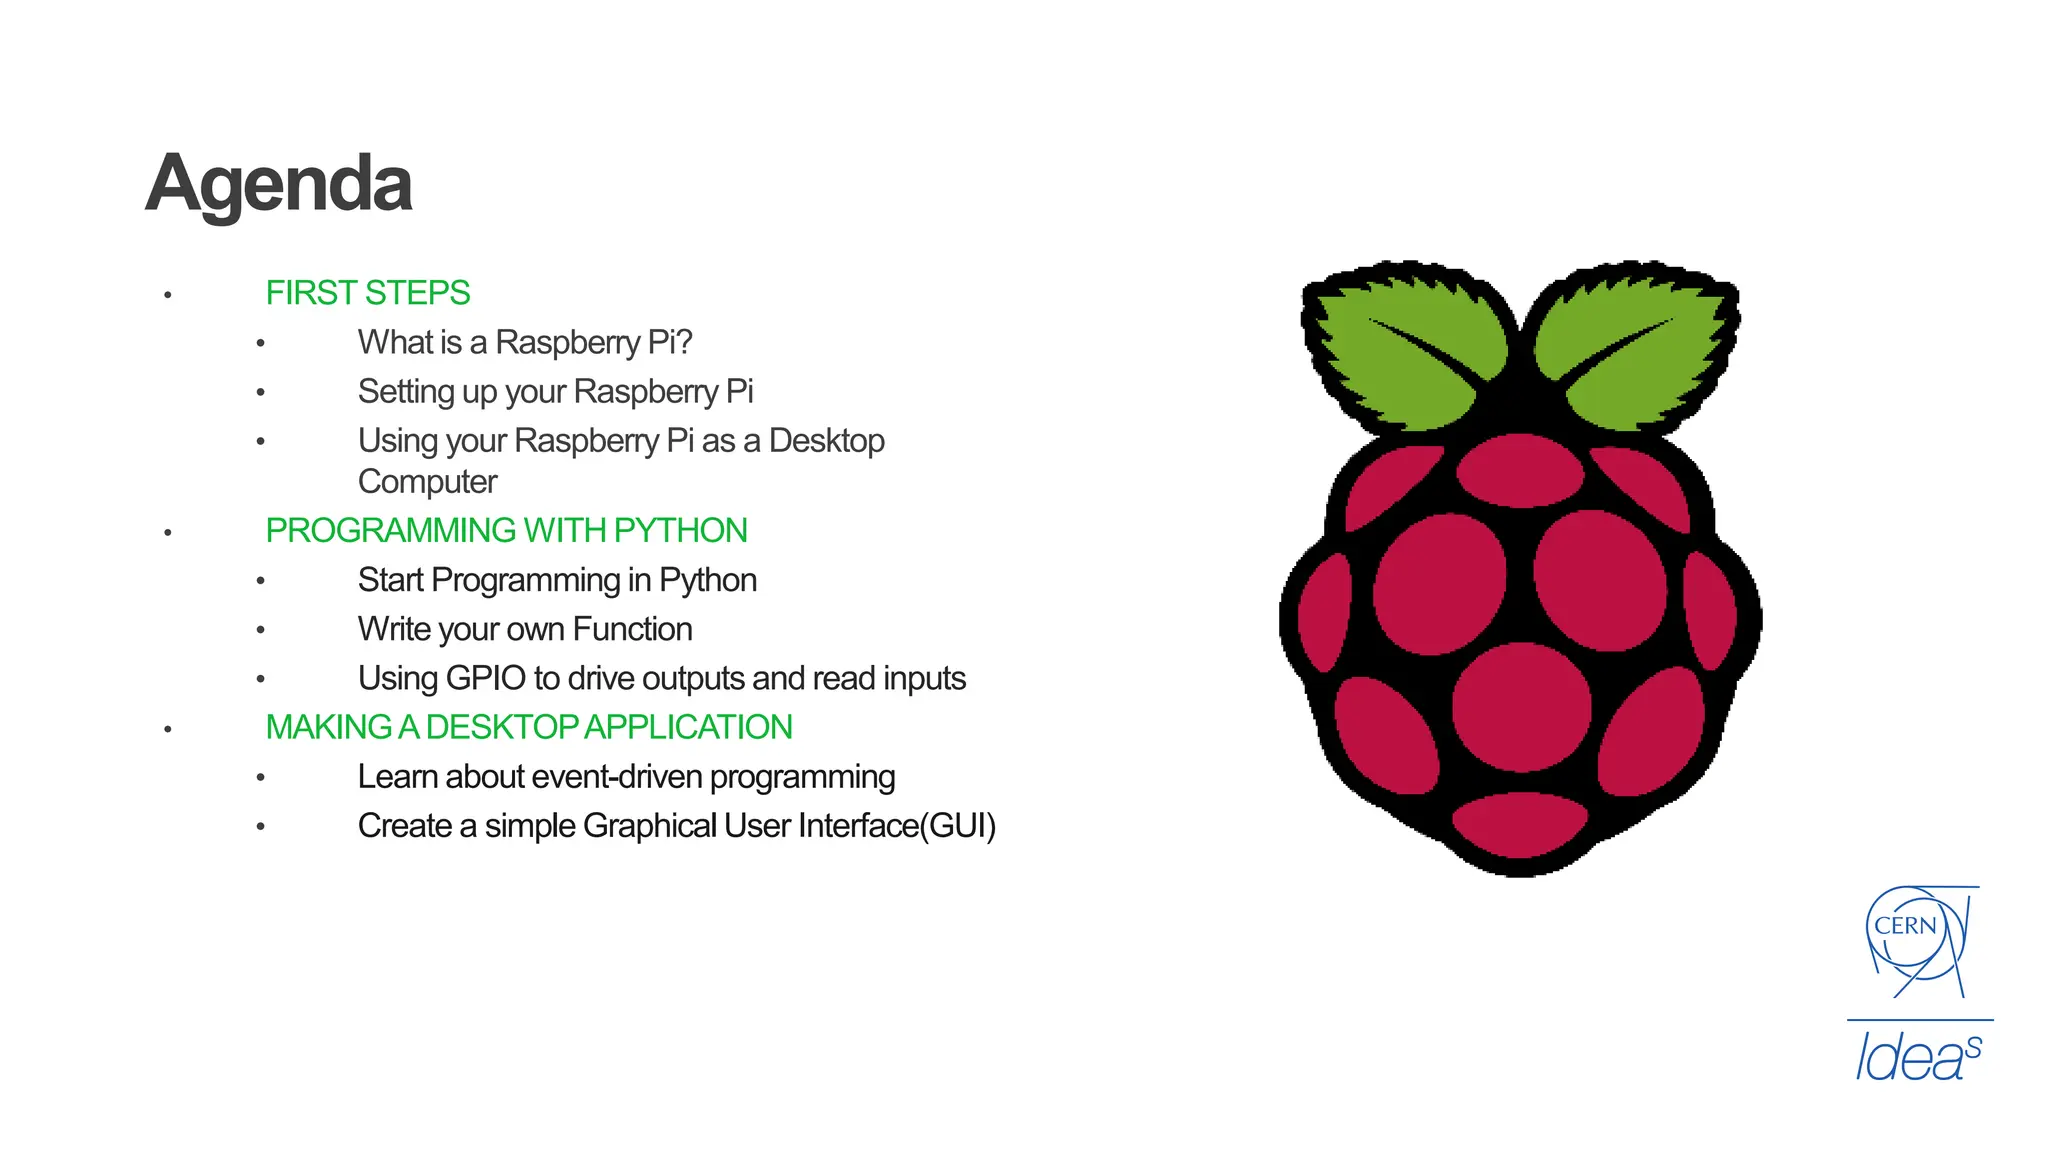
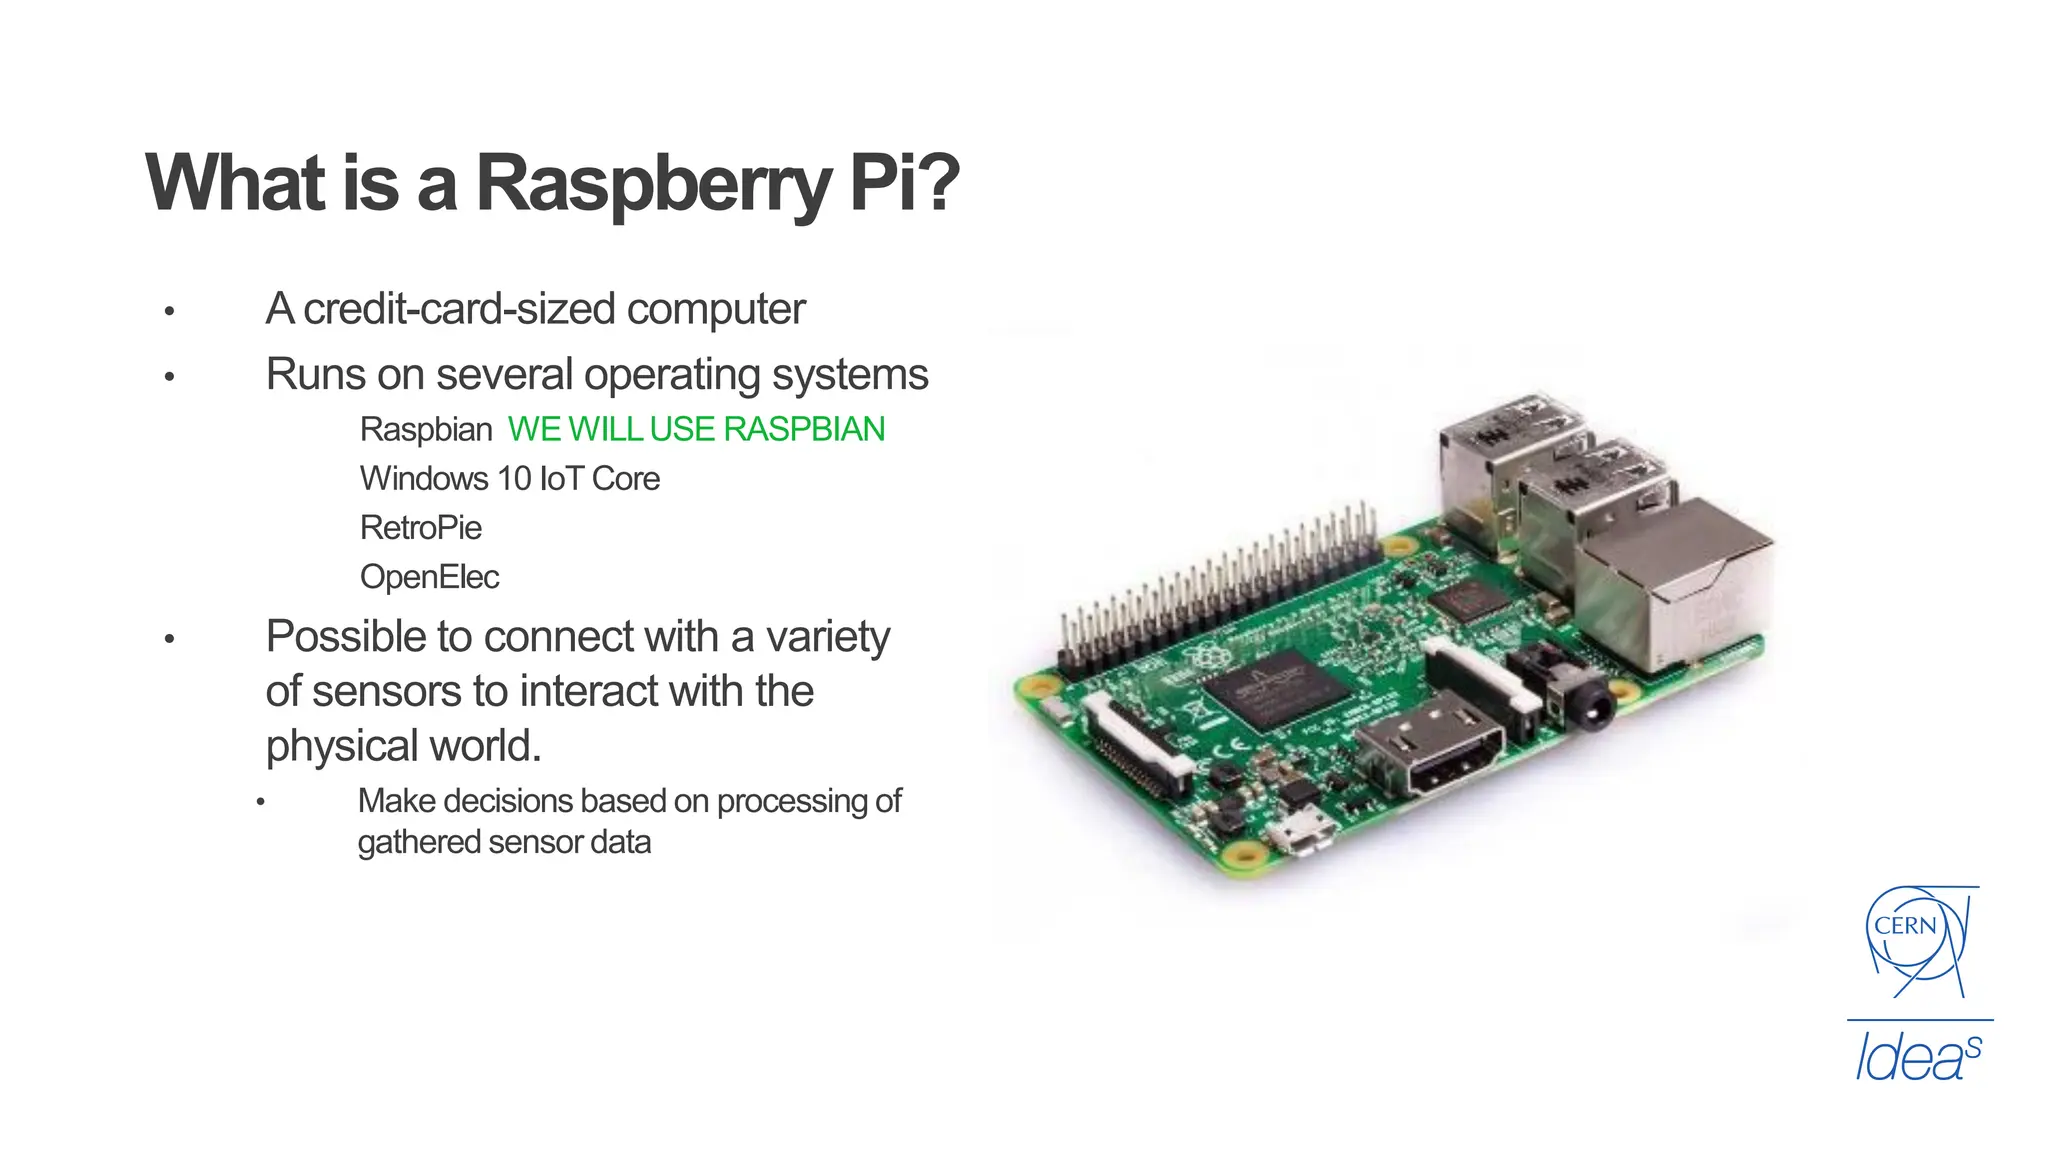
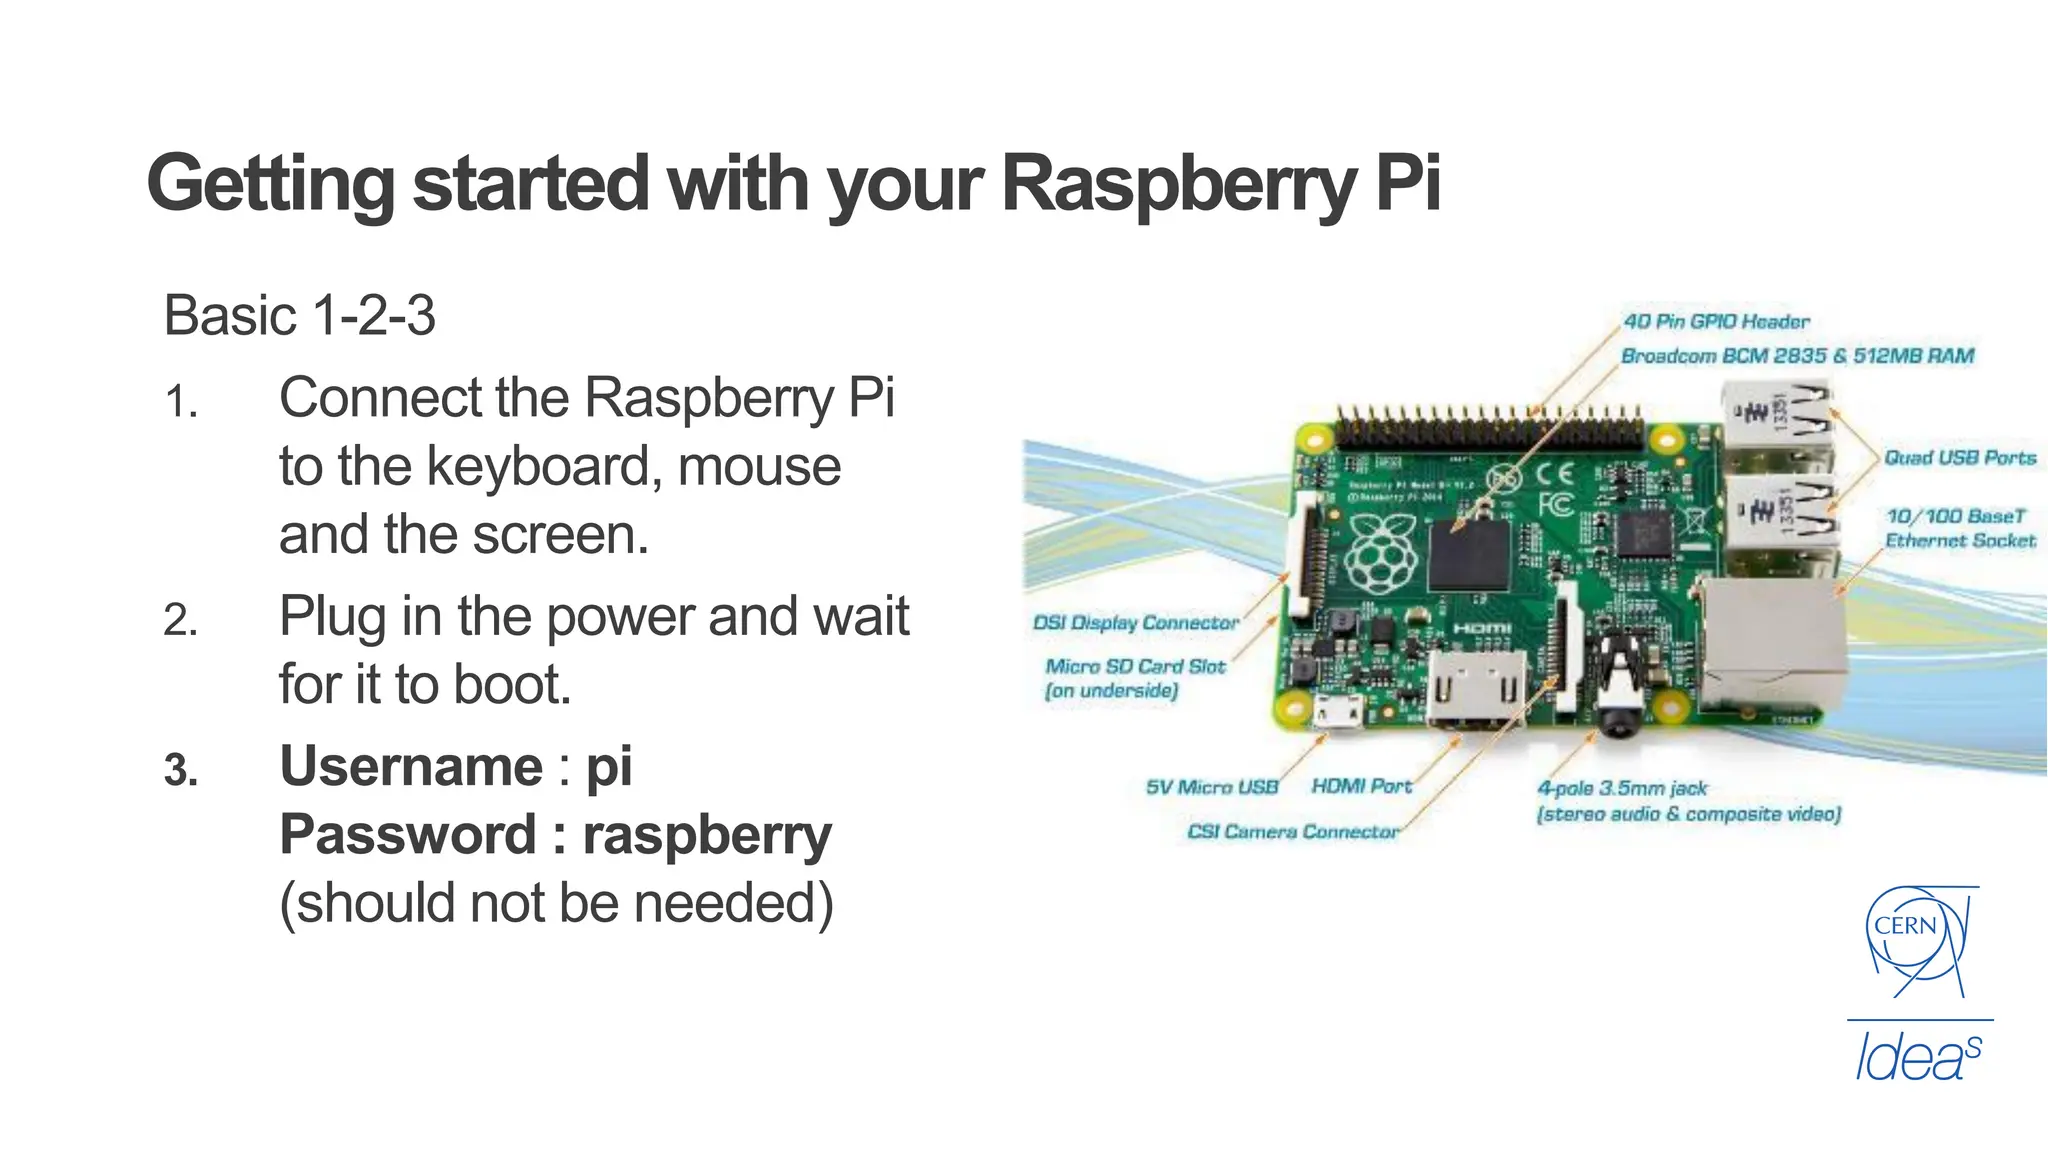
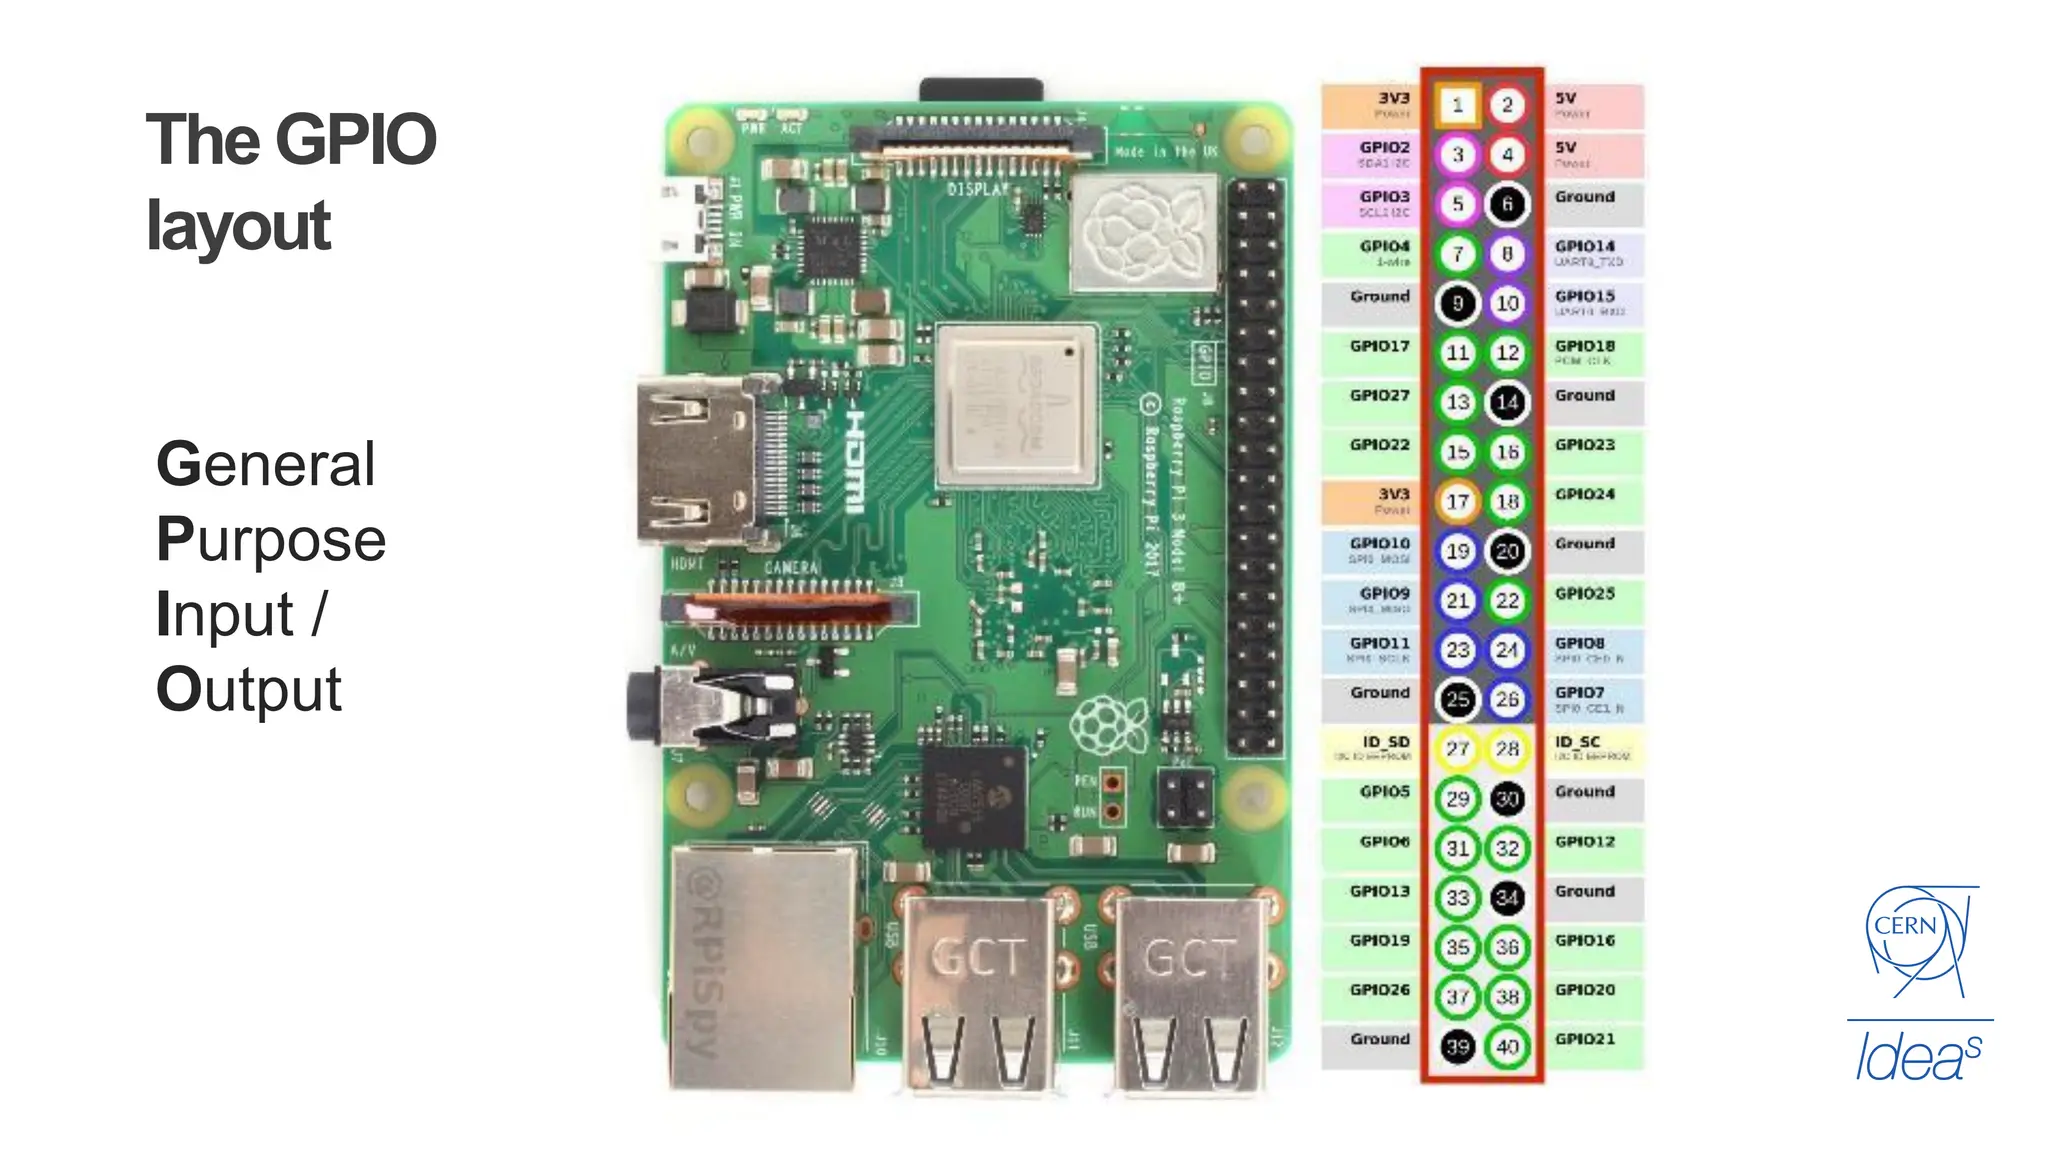
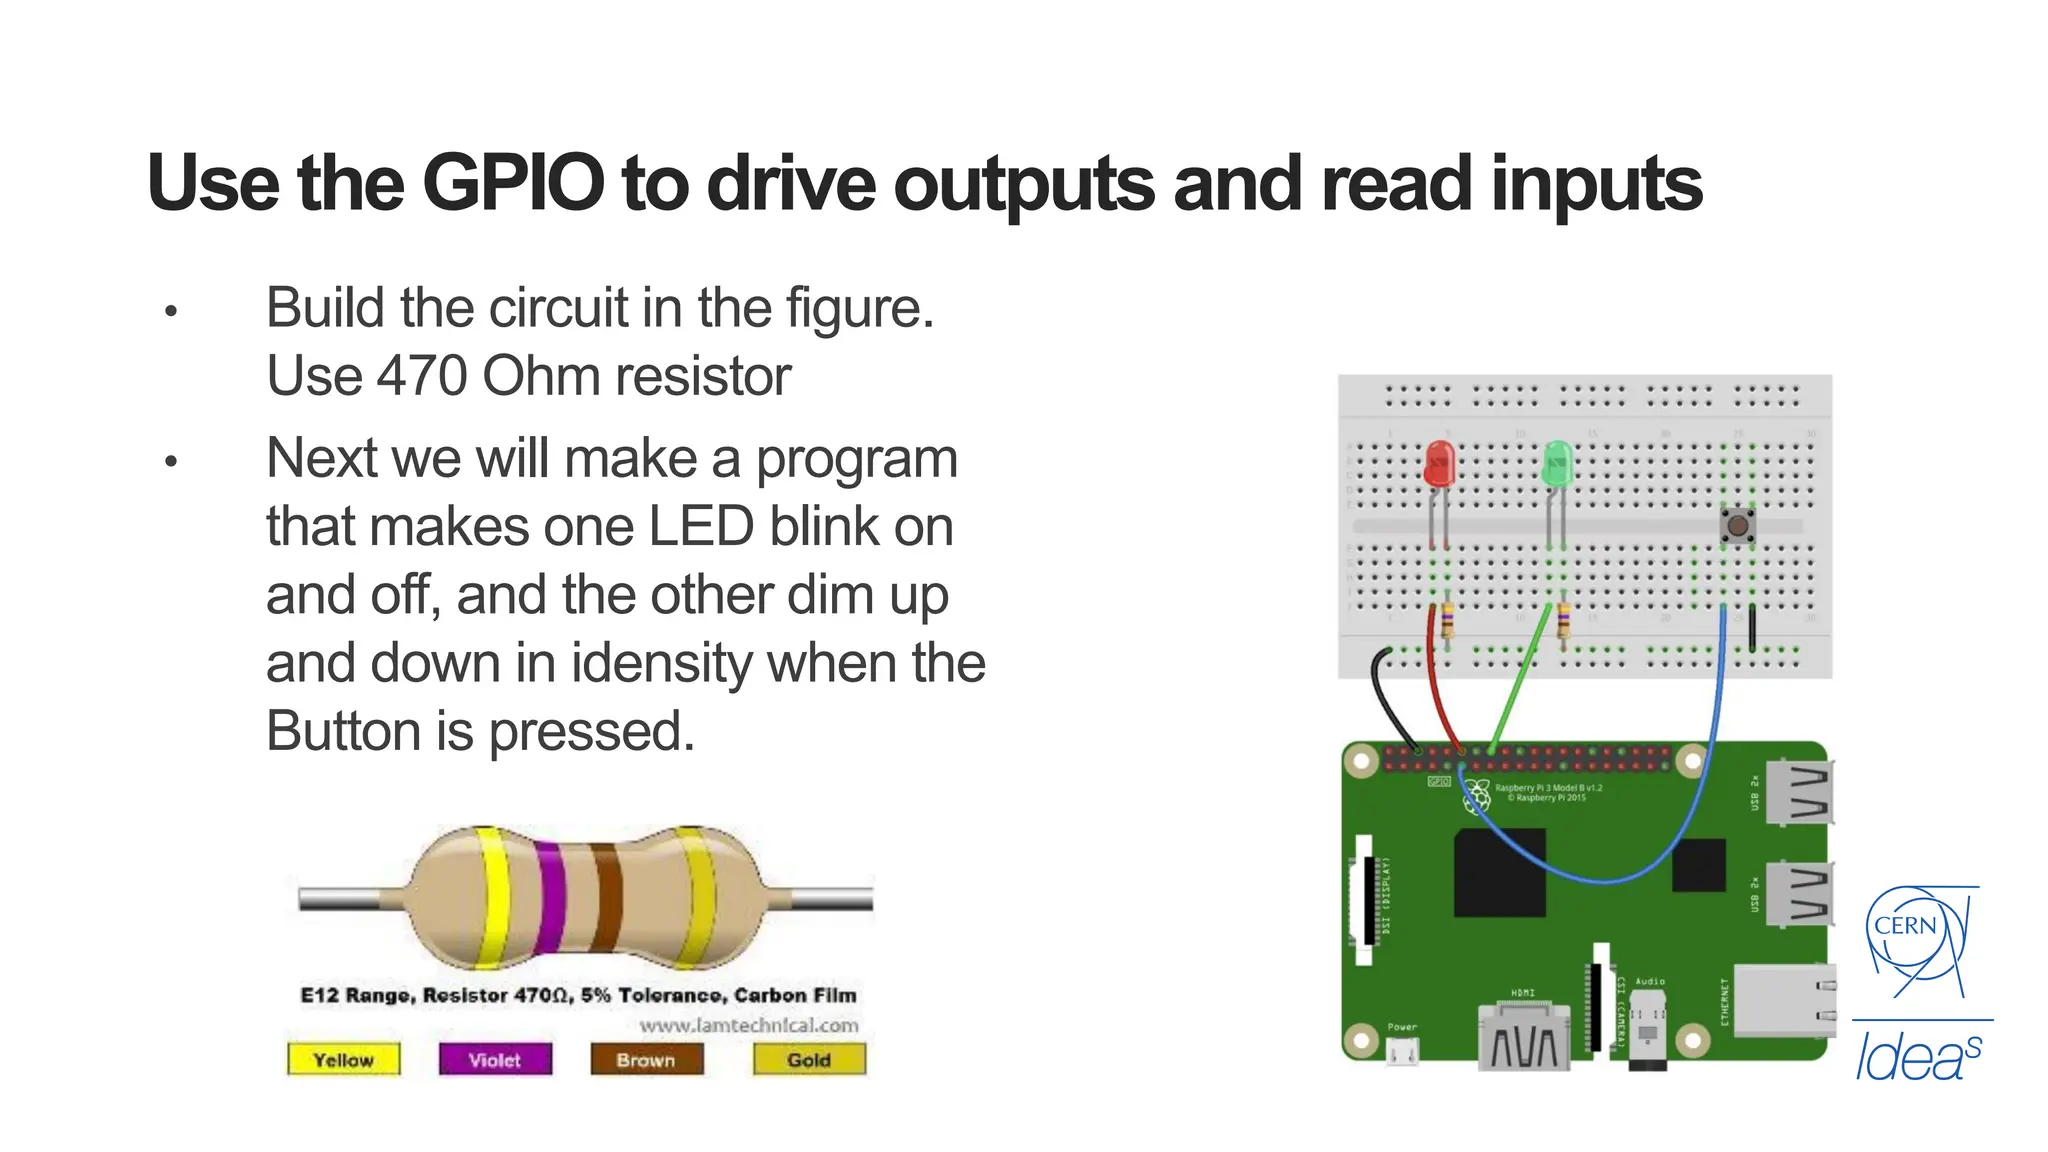
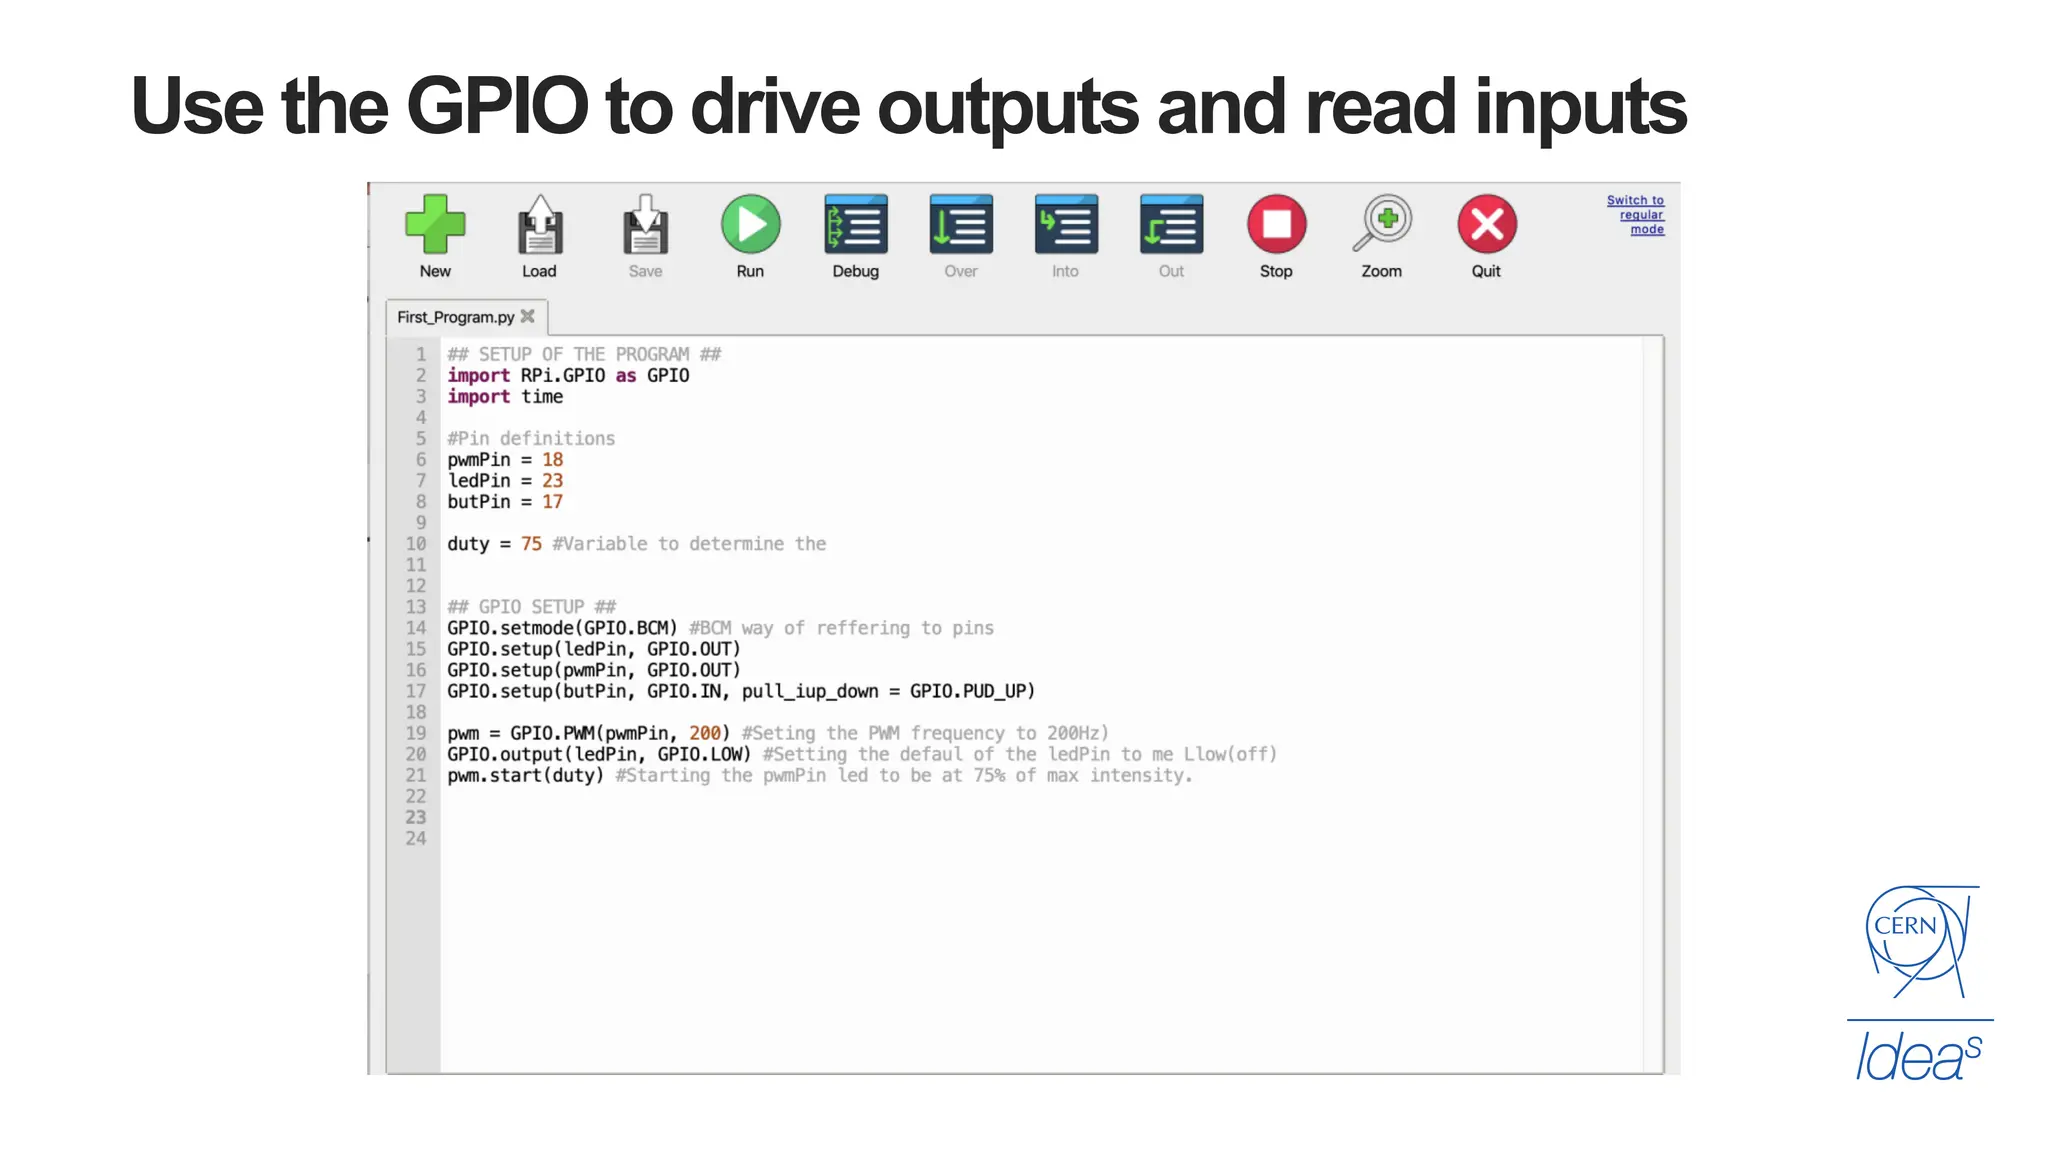
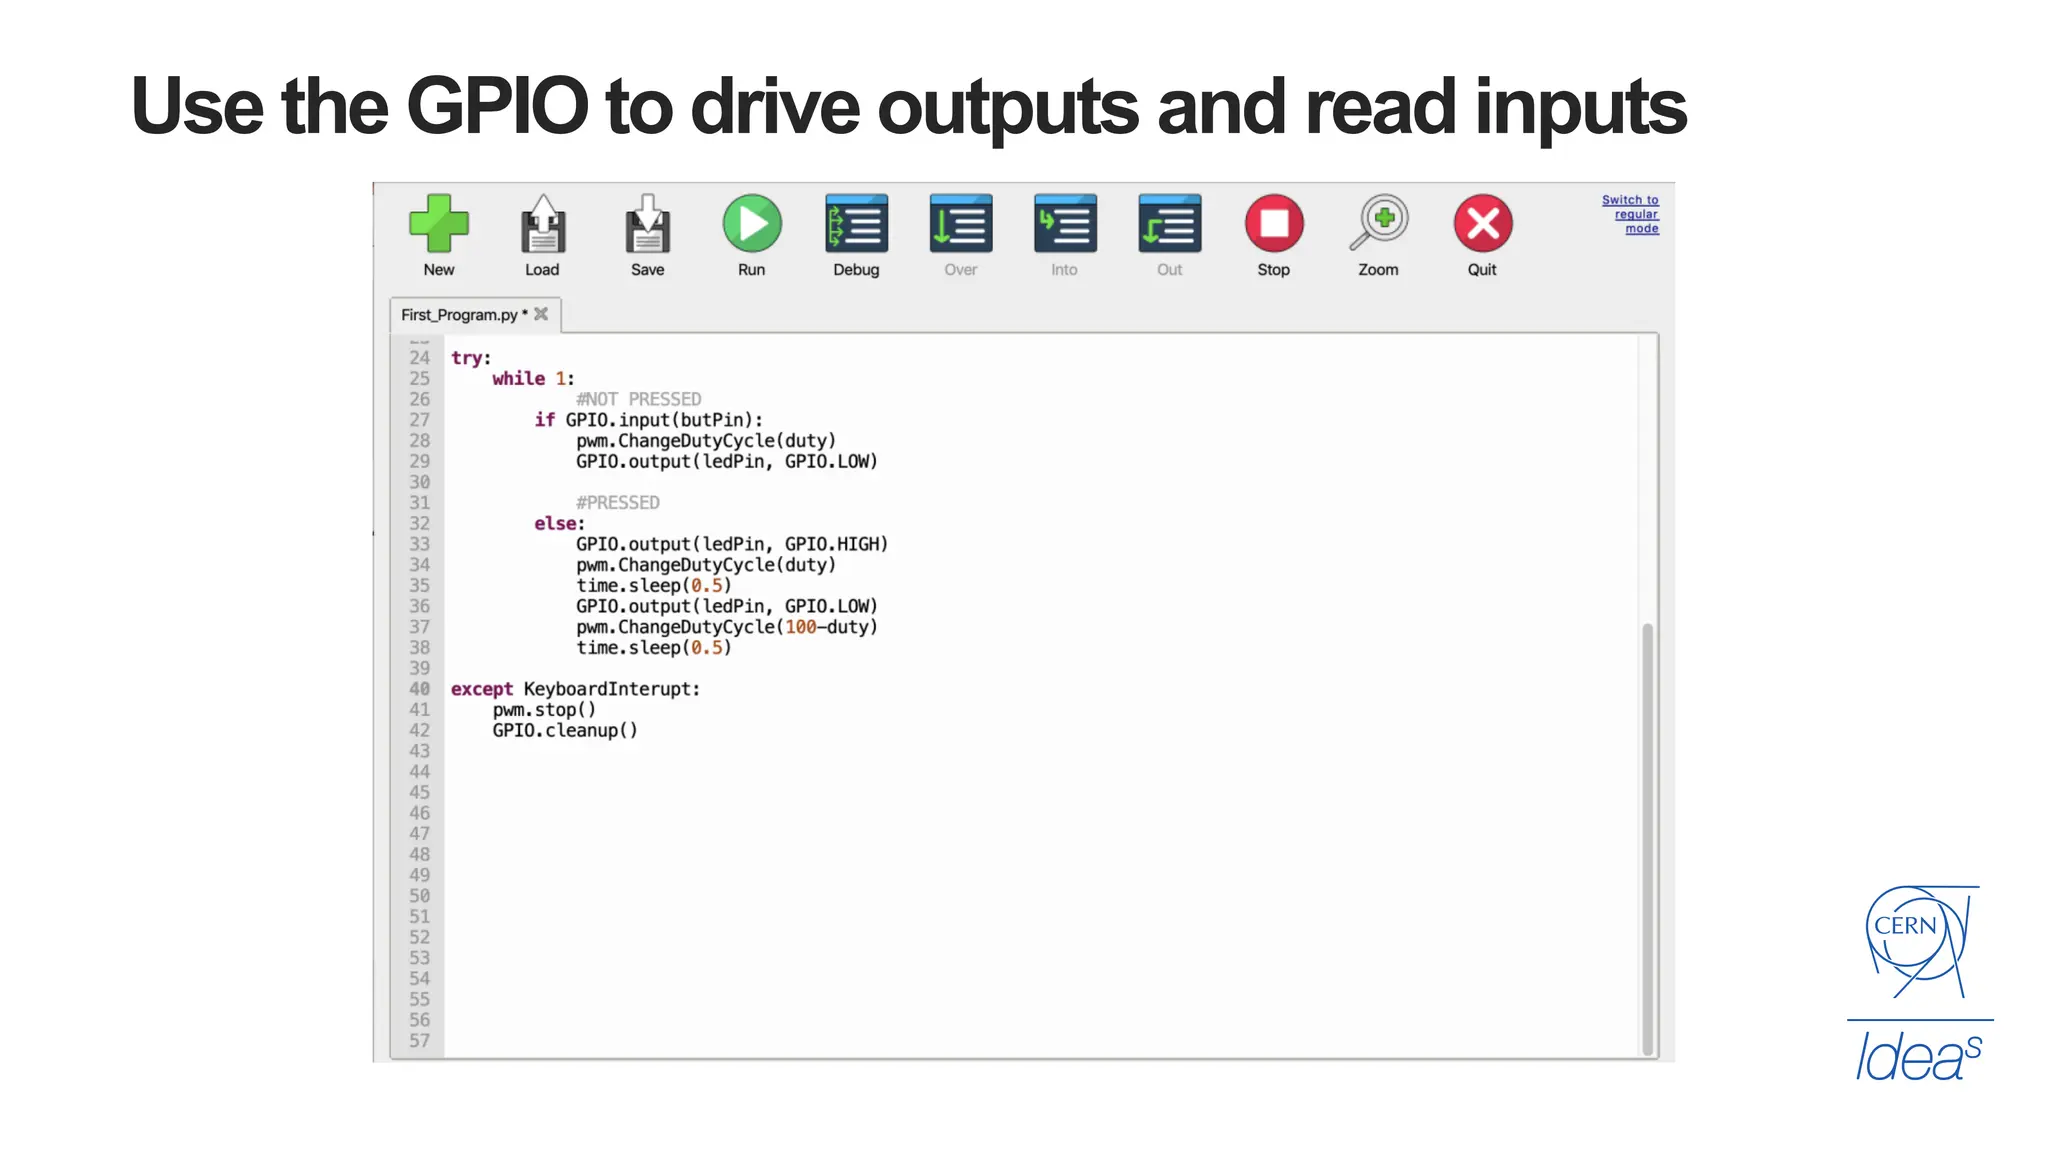
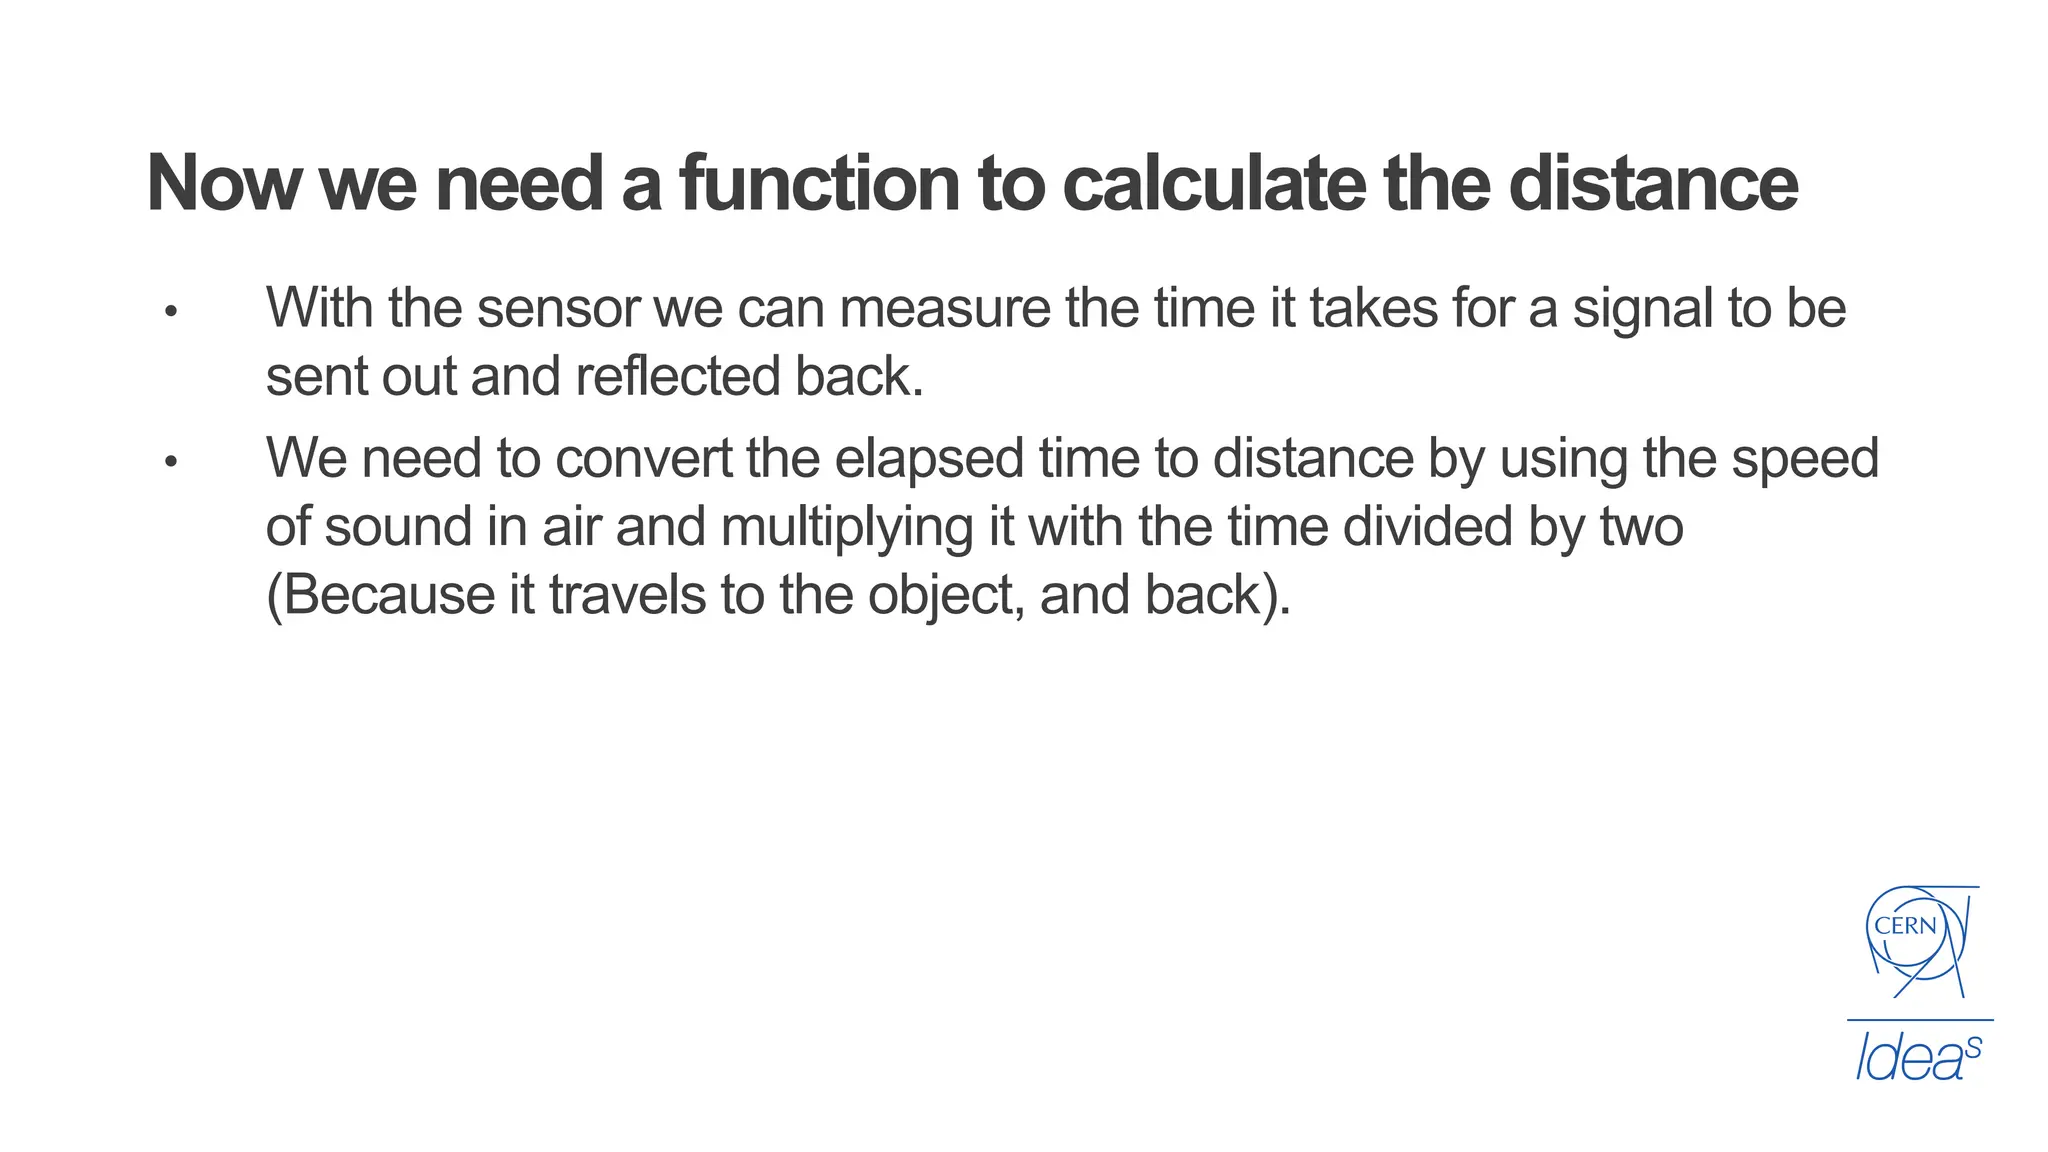
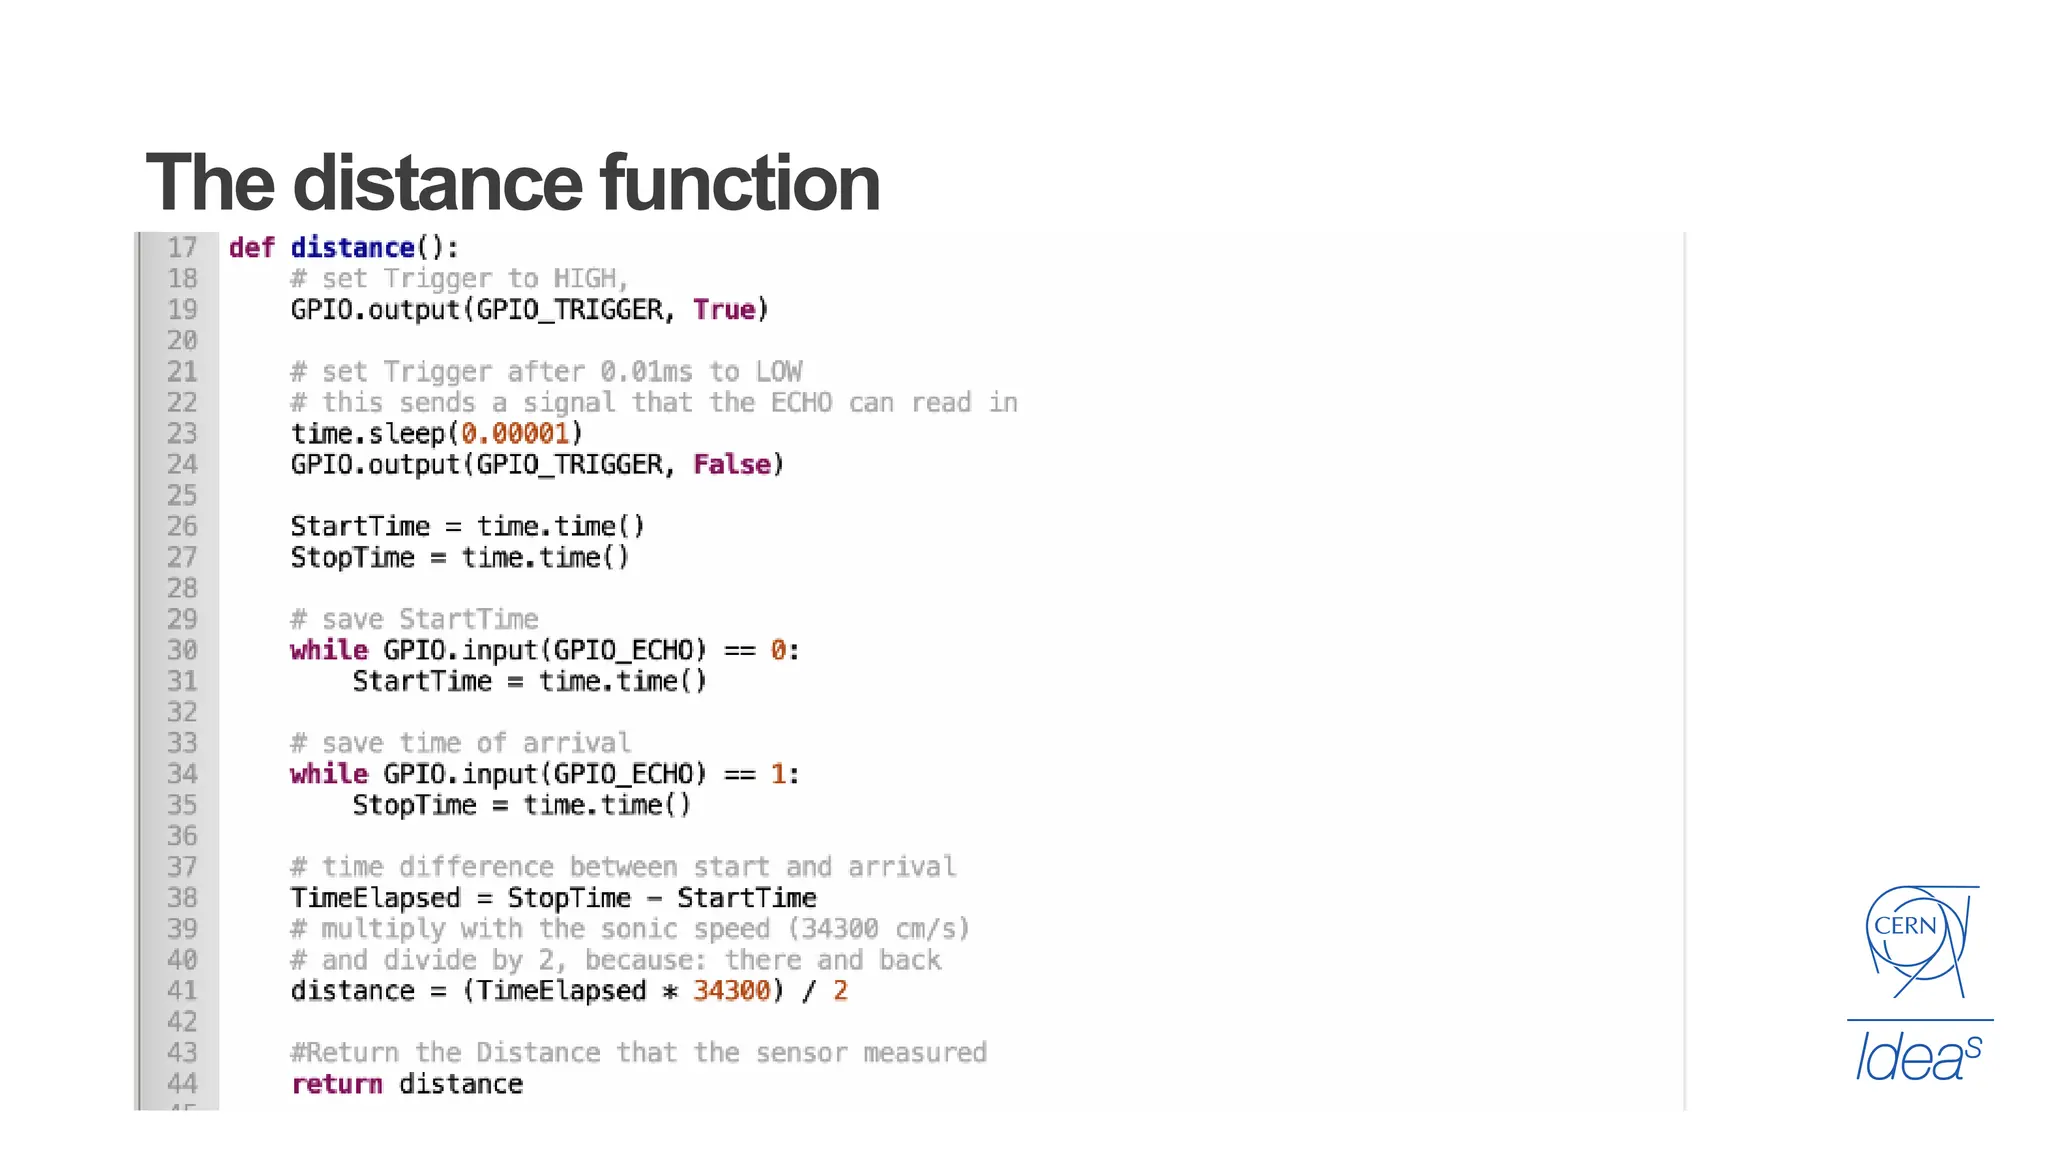
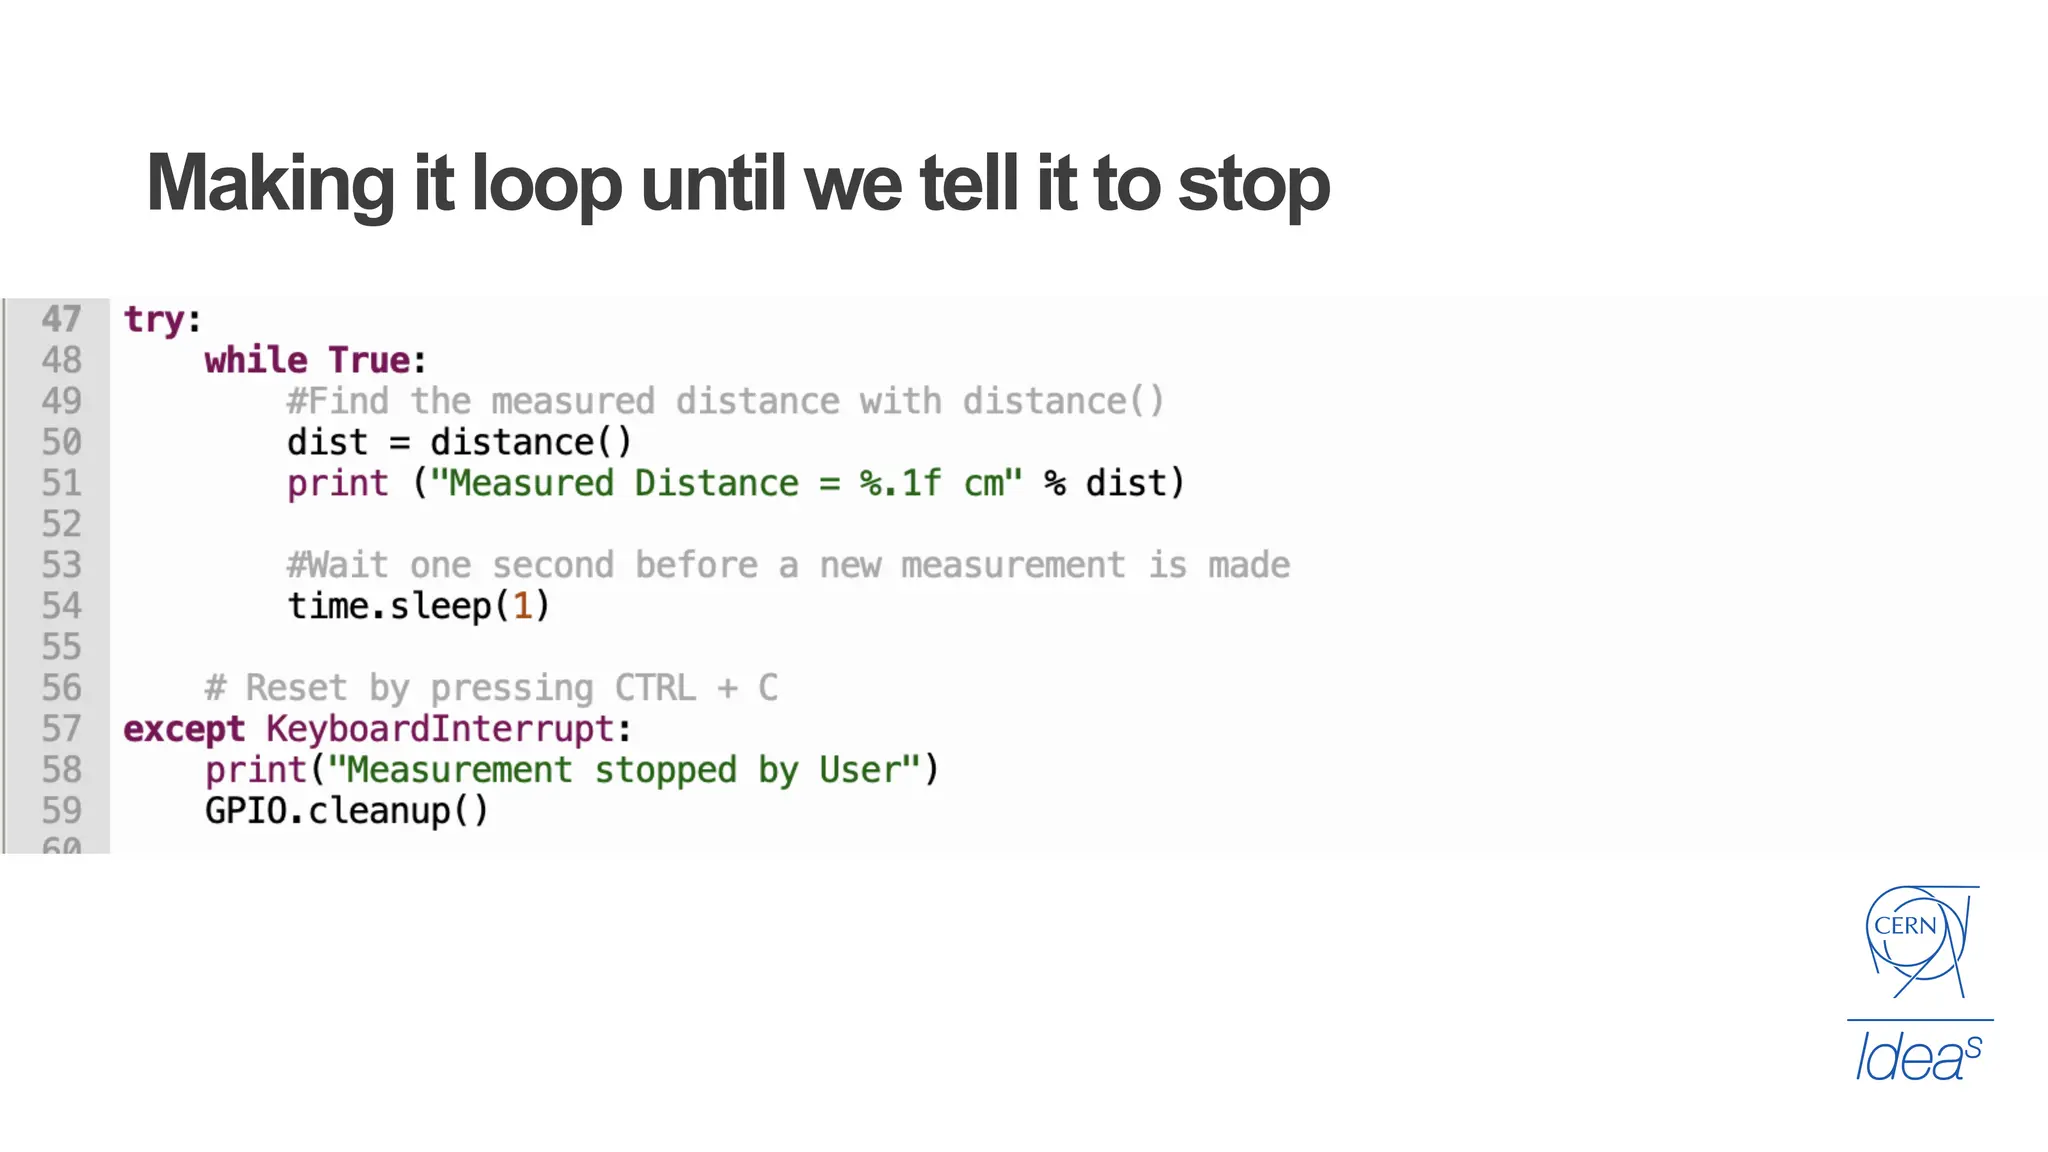
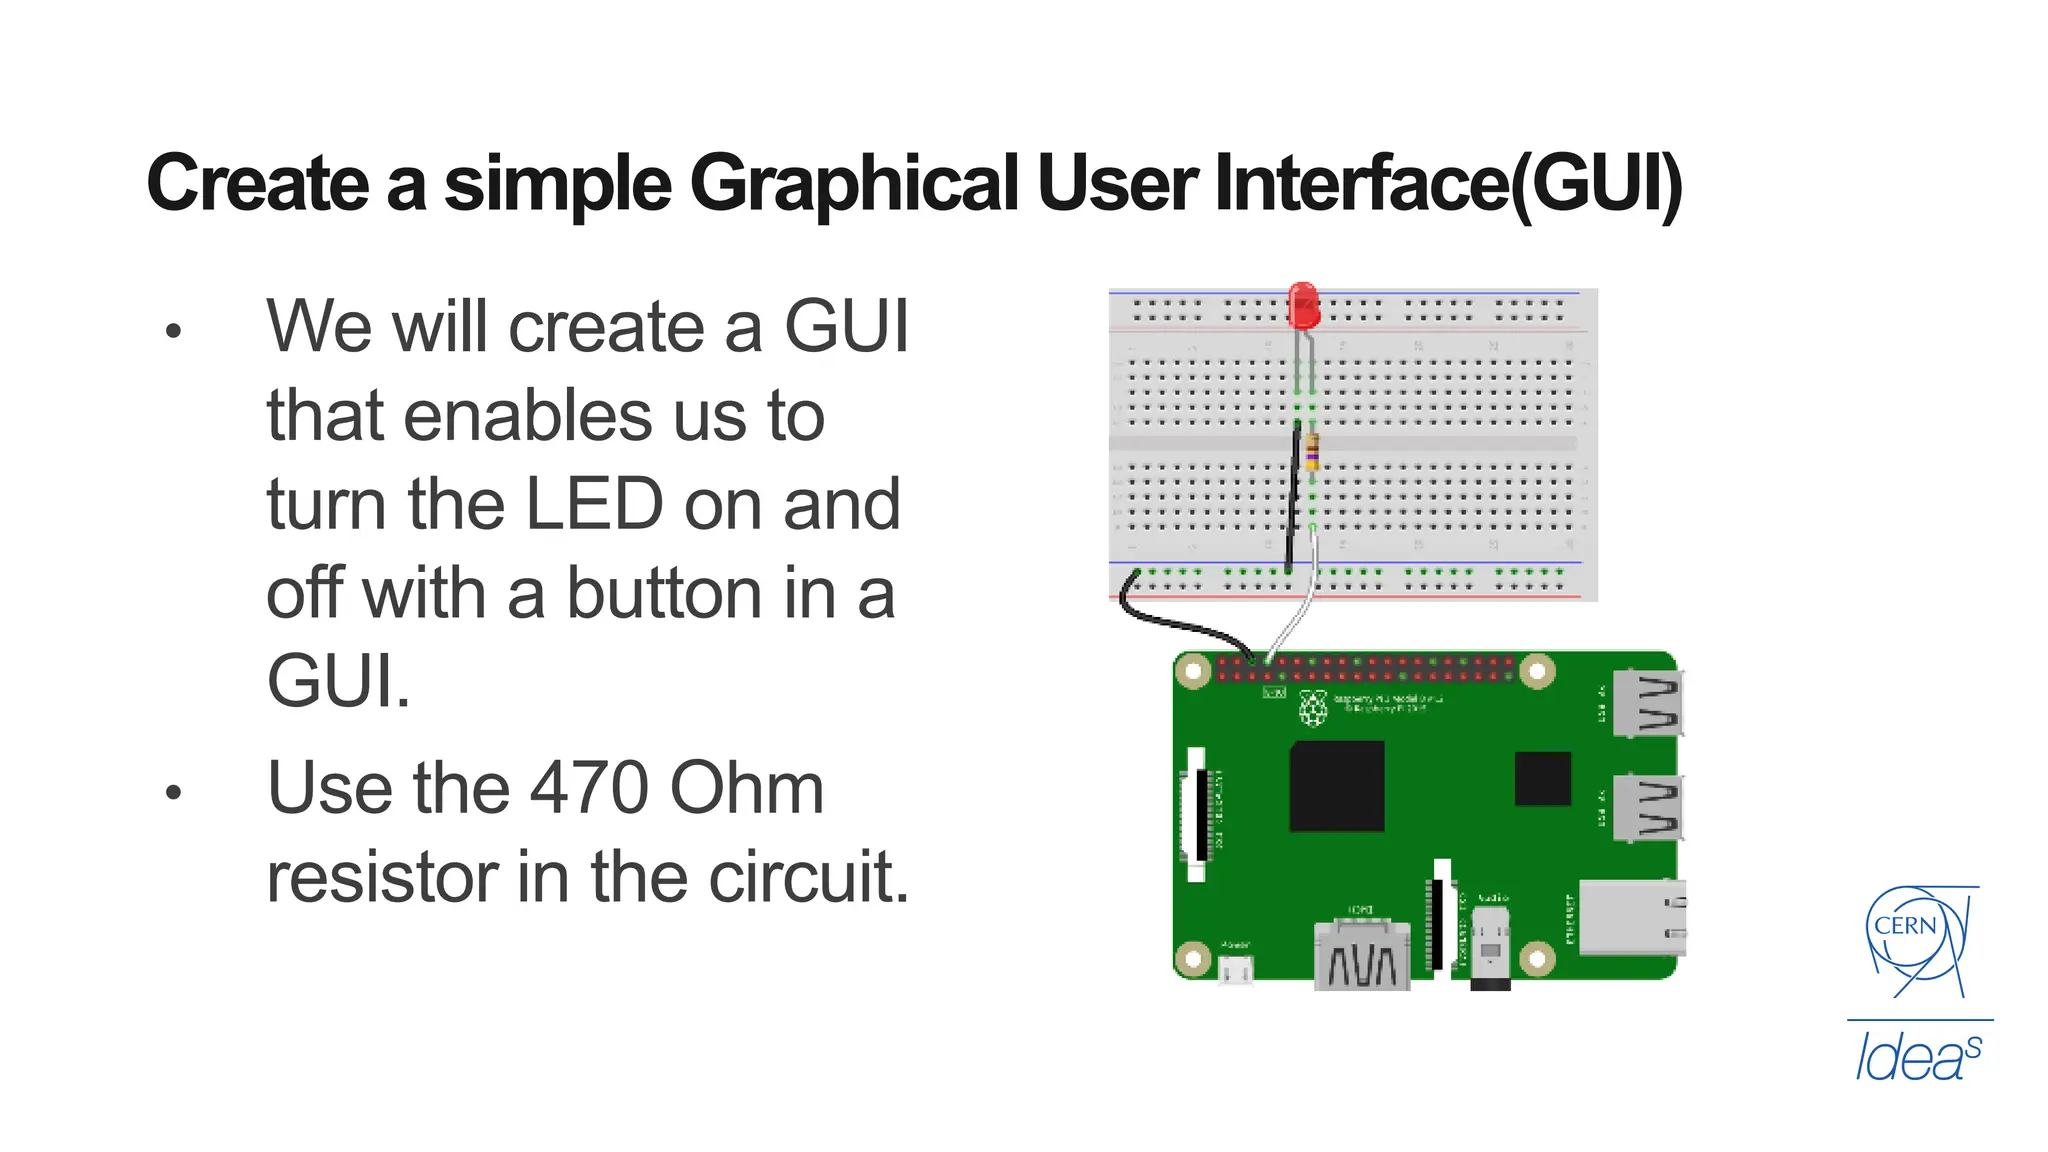
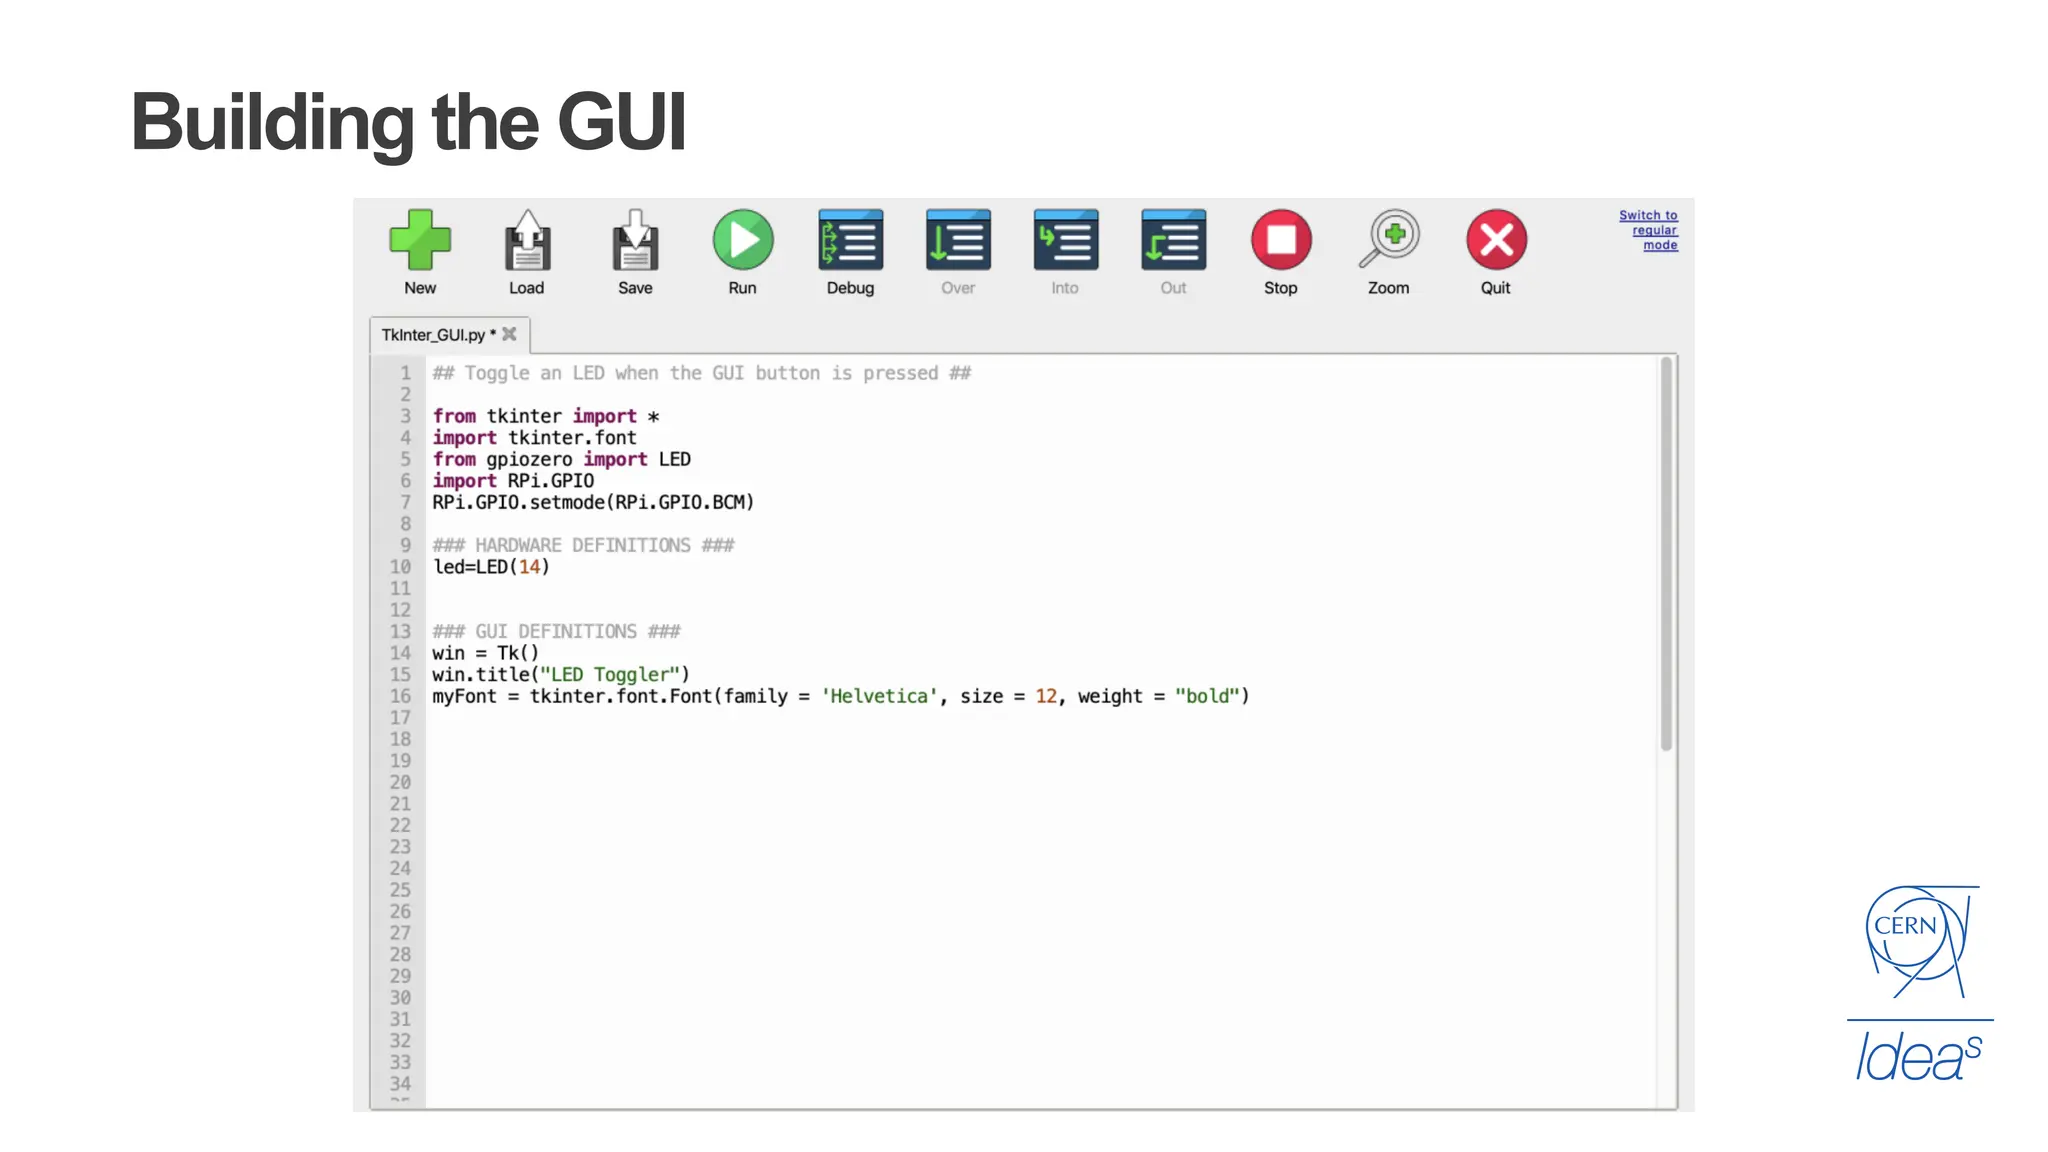
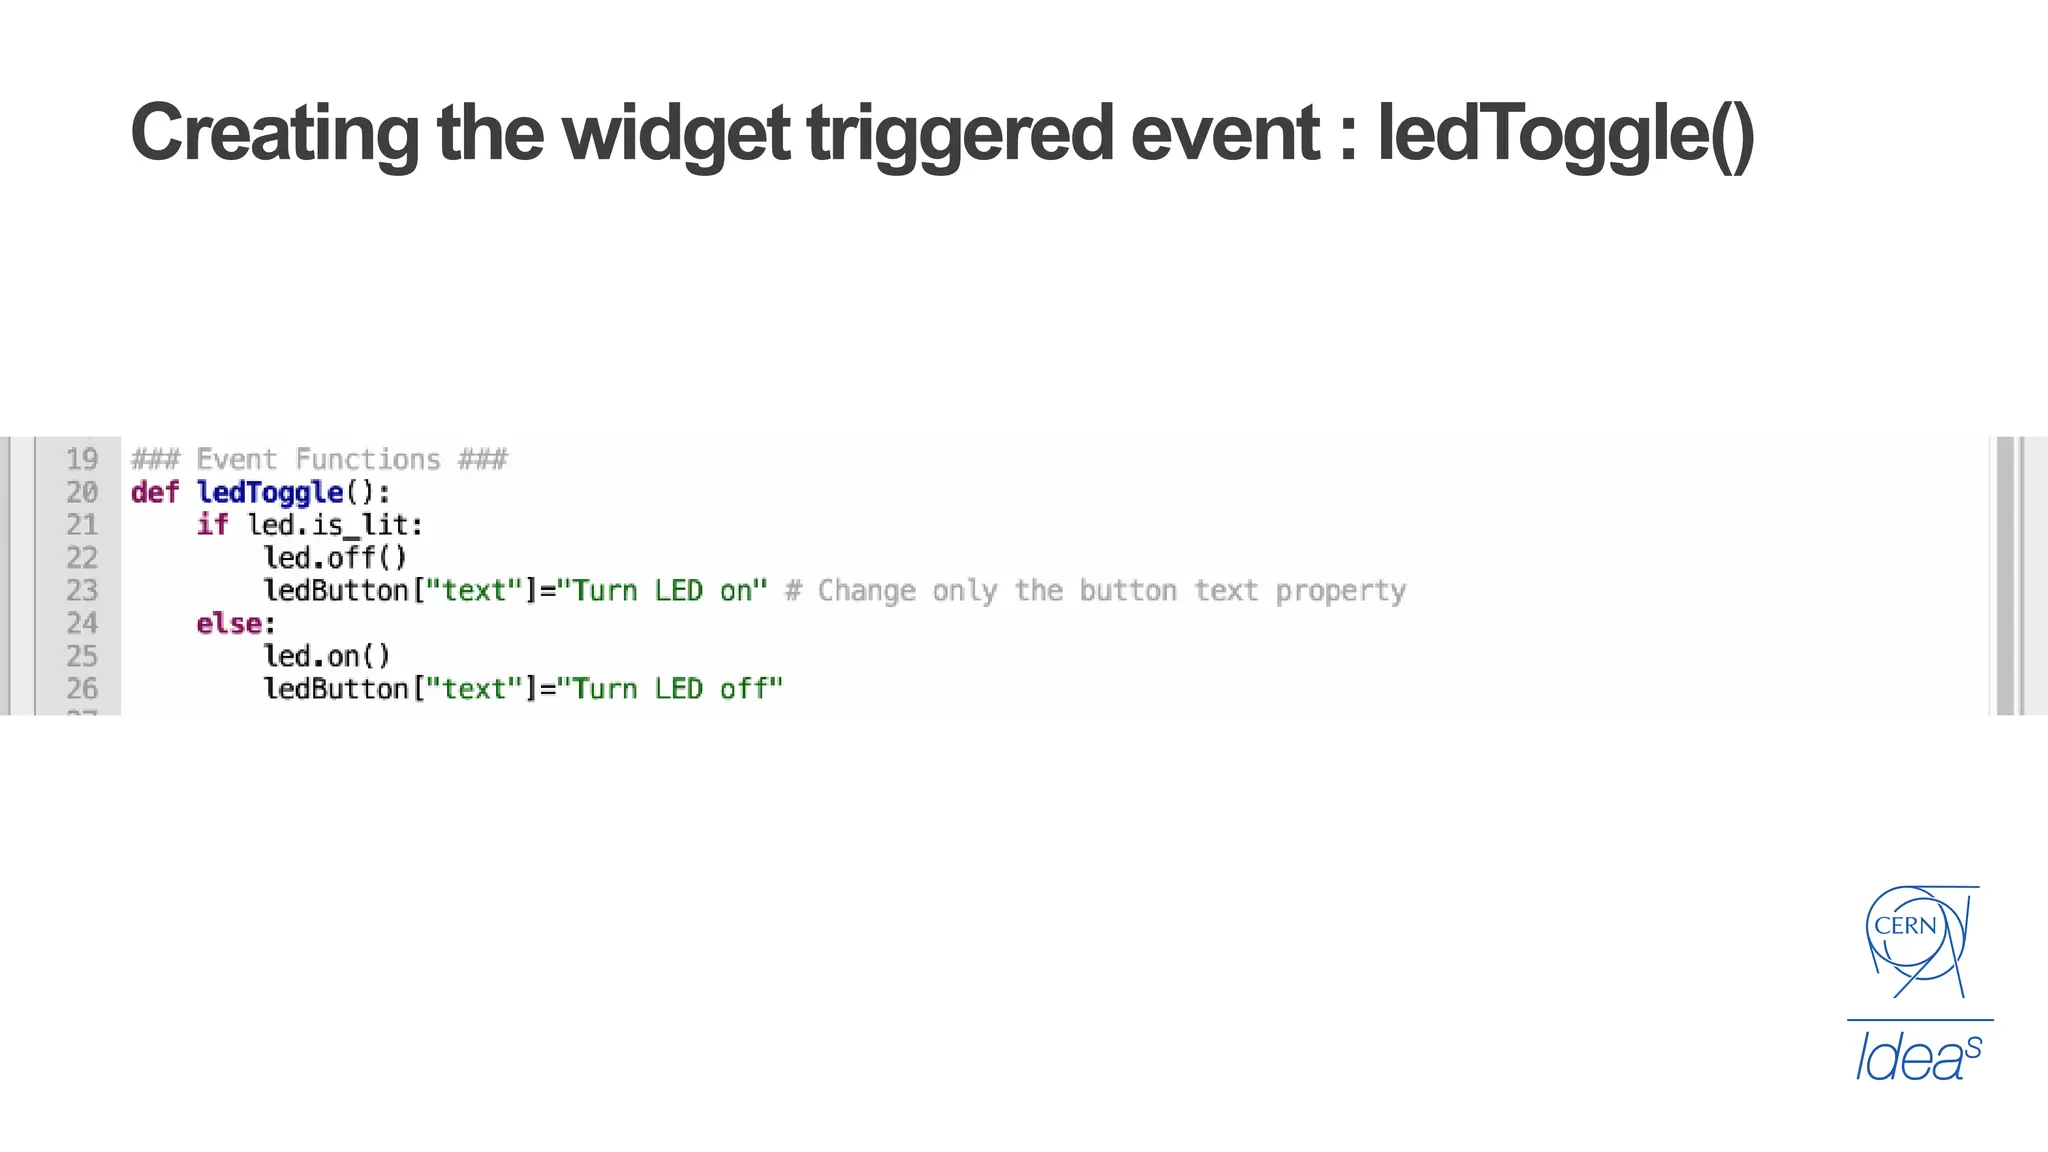
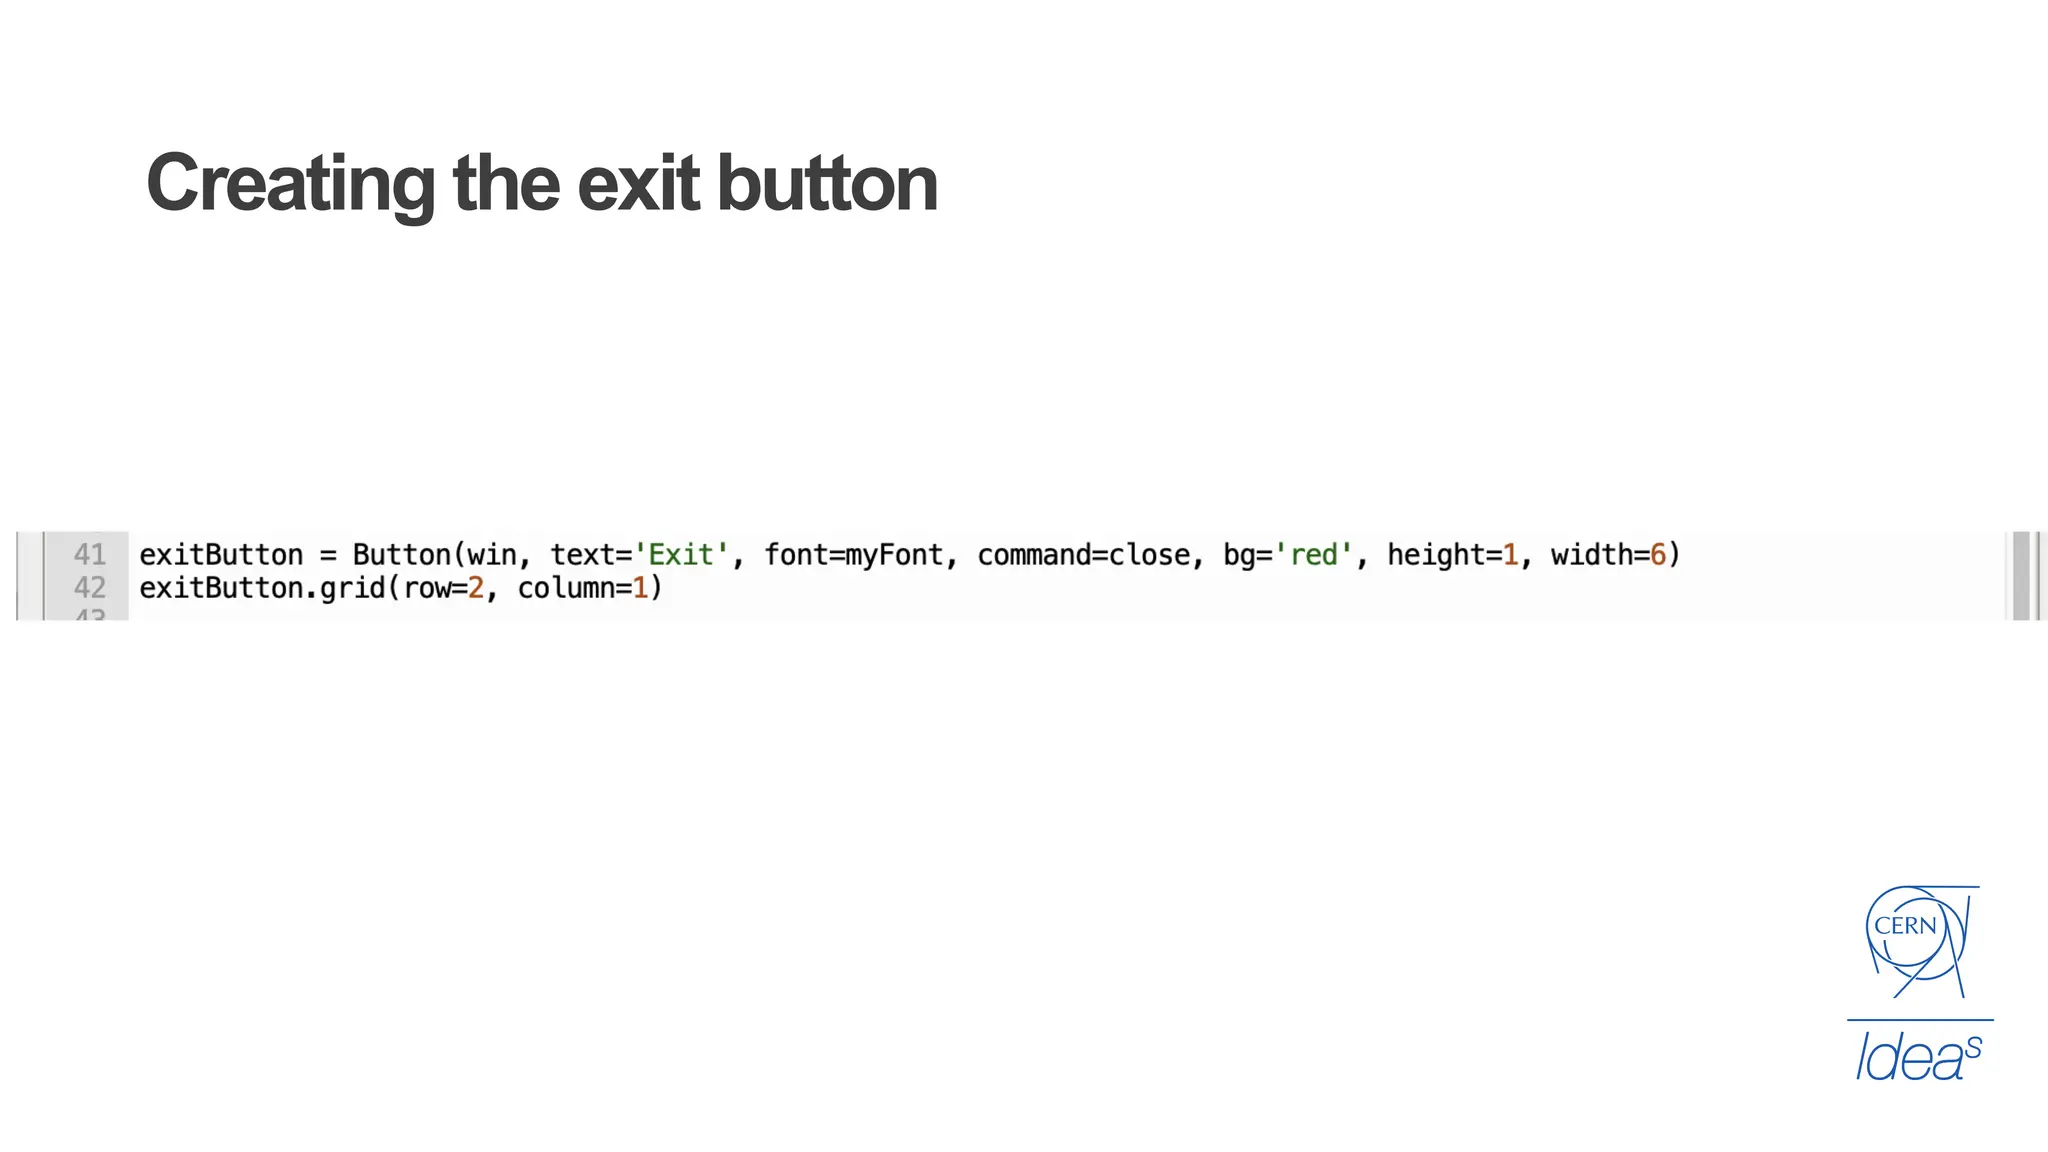
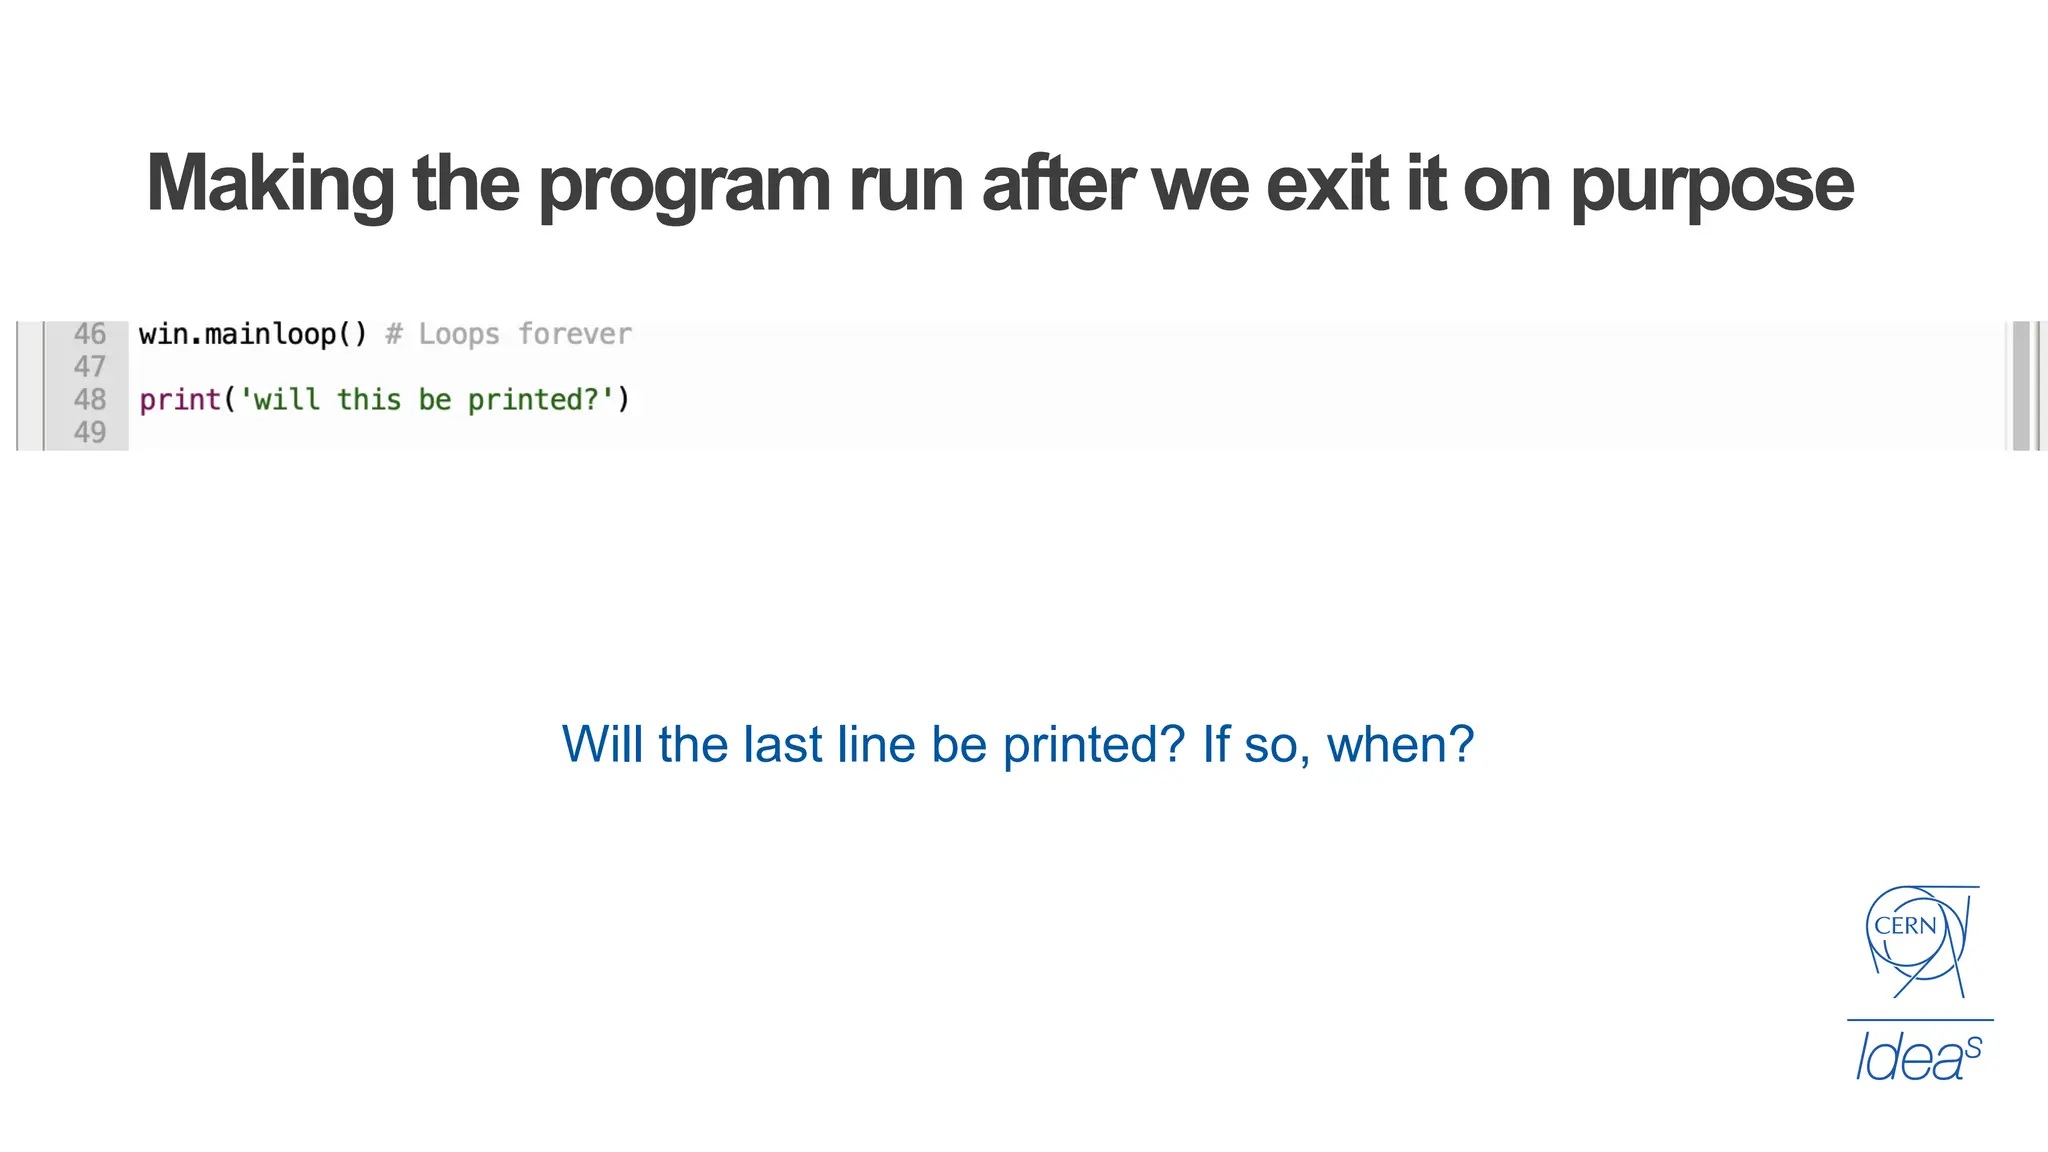
KEMBAR78
RaspberryPi_Workshop and Programming with python. | PDF
Introduction to the Raspberry Pi
Jani Kalasniemi
Agenda
• FIRST STEPS
• What is a Raspberry Pi?
• Setting up your Raspberry Pi
• Using your Raspberry Pi as a Desktop
Computer
• PROGRAMMING WITH PYTHON
• Start Programming in Python
• Write your own Function
• Using GPIO to drive outputs and read inputs
• MAKINGADESKTOPAPPLICATION
• Learn about event-driven programming
• Create a simple Graphical User Interface(GUI)
FIRST STEPS
• A credit-card-sized computer
• Runs on several operating systems
Raspbian WE WILLUSE RASPBIAN
Windows 10 IoT Core
RetroPie
OpenElec
• Possible to connect with a variety
of sensors to interact with the
physical world.
• Make decisions based on processing of
gathered sensor data
What is a Raspberry Pi?
Getting started with your Raspberry Pi
Basic 1-2-3
1. Connect the Raspberry Pi
to the keyboard, mouse
and the screen.
2. Plug in the power and wait
for it to boot.
3. Username : pi
Password : raspberry
(should not be needed)
Using you Raspberry Pi as a Desktop Computer
• Try to access the internet through your Raspberry Pi and find a
picture that reflects your group. Hands up when you are done, for
help if needed!
• Save this picture to the desktop.
Communicating through the terminal
• Start the terminal by going to
Accessories and then clicking
on the Terminal program.
• Run through the commands
and get a feel for how to
change directories, and list its
contents.
PROGRAMMING WITH PYTHON
Programming in Python3
• General-purpose programming language used for scientific and
numerical applications as well as desktop and web applications.
• Open source language that has a lot of online resources for problems
you might come across.
• We are using Thonny IDE for programming with Python3 in our
Raspberry Pi 3 Model B
• https://stackoverflow.com is your best friend for programming
troubles
The GPIO
layout
General
Purpose
Input /
Output
Use the GPIO to drive outputs and read inputs
• Build the circuit in the figure.
Use 470 Ohm resistor
• Next we will make a program
that makes one LED blink on
and off, and the other dim up
and down in idensity when the
Button is pressed.
Use the GPIO to drive outputs and read inputs
Common errors and debugging
• Python is sensetive to intendation.
• Make sure that the variables and the functions have the same exact
writing. Watch out for small and Capital letters!
• Remember that python starts counting from zero.
i.e when using loops.
Test your program and what you have made!
Questions?
Write you own Functions
Making a sin(x) function to get some output
Should return something like this
Using a sensor with the Raspberry Pi
• The GPIO on the Raspberry Pi can only handle a maximum of 3.3V,
but many of the available sensors can return a signal of 5V to the
GPIO. This will damage the Raspberry Pi.
• How do we deal with this?
• Resistors connected as voltage dividers.
• Important to be aware of this.
MeasuringDistancewitha UltrasonicSensor:HC-SR04
• The Trigger sends a burst of
sound that bounces and hits the
Echo.
• If we measure the time it takes
from sending to receiving we can
calculate the distance.
• NOTE: Two different resistors
here
Setting up the Raspberry Pi
Now we need a function to calculate the distance
• With the sensor we can measure the time it takes for a signal to be
sent out and reflected back.
• We need to convert the elapsed time to distance by using the speed
of sound in air and multiplying it with the time divided by two
(Because it travels to the object, and back).
The distance function
Making it loop until we tell it to stop
If the program is not giving any measurements
• Check the wiring!
• Check you code one more time.
• Check the resistors
• Check the wiring!
Questions?
MAKING A DESKTOP APPLICATION
Introducing Tkinter :AGUI Toolkit for Python
• De facto standard GUI for Python
• Toolkit for GUI programming in Python. Not the only one, but the most
commonly used one.
• Enables you to build GUI’s with buttons, sliders, drop downs, and
other interactions for the user of the program/device you build.
Event driven programming.
• When creating a GUI you use event driven programming.
• In the GUI all buttons, sliders, etc, are known as Widgets.
• When a widget is used it make an event in you code start.
• We will create a GUI
that enables us to
turn the LED on and
off with a button in a
GUI.
• Use the 470 Ohm
resistor in the circuit.
Create a simple Graphical User Interface(GUI)
Building the code for this GUI
Building the GUI
Building the GUI
• Now we need do decide what the GUI will actually do.
1. We will create a button that will switch the LED on and off
2. We also have to make an exit button so that when we exit the
program the LED turns off, and the GPIO port is reset to default as
input ports.
Creating the widget triggered event : ledToggle()
Creating the widget triggered event : close()
Creting the toggle button, aka a Widget
Creating the exit button
What happensif we exit the programthrough the window
exit?
This exit
Making sure that we have a clean exit
What happensif you run your program and pressa GUI
button?
Making the program run after we exit it on purpose
Will the last line be printed? If so, when?
Test your program and what you have made!
Questions?
Summary – What have we done?
• Introduced the Raspberry Pi and used it as a computer
• Learned simple commands to use in terminal
• Introduced the GPIO and how to get inputs from the physical world,
interpret them, and create output from input
• Used a XX sensor to read and evaluate data from your environment
• Introduced the Tkinter package and created a simple, event-driven,
GUI
Resources
• Raspberry Pi GPIO examples:
https://sourceforge.net/p/raspberry-gpio-python/wiki/Examples/
• Python Documentation:
https://www.python.org/doc/
• Tkinter Documentation:
https://www.tutorialspoint.com/python/python_gui_programming.htm
RaspberryPi_Workshop and Programming with python.

RaspberryPi_Workshop and Programming with python.

  • 1.
    Introduction to theRaspberry Pi Jani Kalasniemi
  • 2.
    Agenda • FIRST STEPS •What is a Raspberry Pi? • Setting up your Raspberry Pi • Using your Raspberry Pi as a Desktop Computer • PROGRAMMING WITH PYTHON • Start Programming in Python • Write your own Function • Using GPIO to drive outputs and read inputs • MAKINGADESKTOPAPPLICATION • Learn about event-driven programming • Create a simple Graphical User Interface(GUI)
  • 3.
  • 4.
    • A credit-card-sizedcomputer • Runs on several operating systems Raspbian WE WILLUSE RASPBIAN Windows 10 IoT Core RetroPie OpenElec • Possible to connect with a variety of sensors to interact with the physical world. • Make decisions based on processing of gathered sensor data What is a Raspberry Pi?
  • 5.
    Getting started withyour Raspberry Pi Basic 1-2-3 1. Connect the Raspberry Pi to the keyboard, mouse and the screen. 2. Plug in the power and wait for it to boot. 3. Username : pi Password : raspberry (should not be needed)
  • 6.
    Using you RaspberryPi as a Desktop Computer • Try to access the internet through your Raspberry Pi and find a picture that reflects your group. Hands up when you are done, for help if needed! • Save this picture to the desktop.
  • 7.
    Communicating through theterminal • Start the terminal by going to Accessories and then clicking on the Terminal program. • Run through the commands and get a feel for how to change directories, and list its contents.
  • 8.
  • 9.
    Programming in Python3 •General-purpose programming language used for scientific and numerical applications as well as desktop and web applications. • Open source language that has a lot of online resources for problems you might come across. • We are using Thonny IDE for programming with Python3 in our Raspberry Pi 3 Model B • https://stackoverflow.com is your best friend for programming troubles
  • 10.
  • 11.
    Use the GPIOto drive outputs and read inputs • Build the circuit in the figure. Use 470 Ohm resistor • Next we will make a program that makes one LED blink on and off, and the other dim up and down in idensity when the Button is pressed.
  • 12.
    Use the GPIOto drive outputs and read inputs
  • 13.
    Use the GPIOto drive outputs and read inputs
  • 14.
    Common errors anddebugging • Python is sensetive to intendation. • Make sure that the variables and the functions have the same exact writing. Watch out for small and Capital letters! • Remember that python starts counting from zero. i.e when using loops.
  • 15.
    Test your programand what you have made! Questions?
  • 16.
    Write you ownFunctions
  • 17.
    Making a sin(x)function to get some output
  • 18.
  • 19.
    Using a sensorwith the Raspberry Pi • The GPIO on the Raspberry Pi can only handle a maximum of 3.3V, but many of the available sensors can return a signal of 5V to the GPIO. This will damage the Raspberry Pi. • How do we deal with this? • Resistors connected as voltage dividers. • Important to be aware of this.
  • 20.
    MeasuringDistancewitha UltrasonicSensor:HC-SR04 • TheTrigger sends a burst of sound that bounces and hits the Echo. • If we measure the time it takes from sending to receiving we can calculate the distance. • NOTE: Two different resistors here
  • 21.
    Setting up theRaspberry Pi
  • 22.
    Now we needa function to calculate the distance • With the sensor we can measure the time it takes for a signal to be sent out and reflected back. • We need to convert the elapsed time to distance by using the speed of sound in air and multiplying it with the time divided by two (Because it travels to the object, and back).
  • 23.
  • 24.
    Making it loopuntil we tell it to stop
  • 25.
    If the programis not giving any measurements • Check the wiring! • Check you code one more time. • Check the resistors • Check the wiring!
  • 26.
  • 27.
    MAKING A DESKTOPAPPLICATION
  • 28.
    Introducing Tkinter :AGUIToolkit for Python • De facto standard GUI for Python • Toolkit for GUI programming in Python. Not the only one, but the most commonly used one. • Enables you to build GUI’s with buttons, sliders, drop downs, and other interactions for the user of the program/device you build.
  • 29.
    Event driven programming. •When creating a GUI you use event driven programming. • In the GUI all buttons, sliders, etc, are known as Widgets. • When a widget is used it make an event in you code start.
  • 30.
    • We willcreate a GUI that enables us to turn the LED on and off with a button in a GUI. • Use the 470 Ohm resistor in the circuit. Create a simple Graphical User Interface(GUI)
  • 31.
    Building the codefor this GUI
  • 32.
  • 33.
    Building the GUI •Now we need do decide what the GUI will actually do. 1. We will create a button that will switch the LED on and off 2. We also have to make an exit button so that when we exit the program the LED turns off, and the GPIO port is reset to default as input ports.
  • 34.
    Creating the widgettriggered event : ledToggle()
  • 35.
    Creating the widgettriggered event : close()
  • 36.
    Creting the togglebutton, aka a Widget
  • 37.
  • 38.
    What happensif weexit the programthrough the window exit? This exit
  • 39.
    Making sure thatwe have a clean exit
  • 40.
    What happensif yourun your program and pressa GUI button?
  • 41.
    Making the programrun after we exit it on purpose Will the last line be printed? If so, when?
  • 42.
    Test your programand what you have made! Questions?
  • 43.
    Summary – Whathave we done? • Introduced the Raspberry Pi and used it as a computer • Learned simple commands to use in terminal • Introduced the GPIO and how to get inputs from the physical world, interpret them, and create output from input • Used a XX sensor to read and evaluate data from your environment • Introduced the Tkinter package and created a simple, event-driven, GUI
  • 44.
    Resources • Raspberry PiGPIO examples: https://sourceforge.net/p/raspberry-gpio-python/wiki/Examples/ • Python Documentation: https://www.python.org/doc/ • Tkinter Documentation: https://www.tutorialspoint.com/python/python_gui_programming.htm