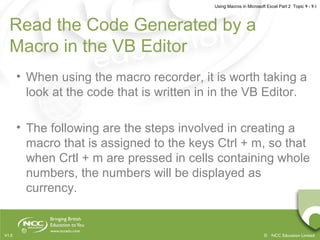
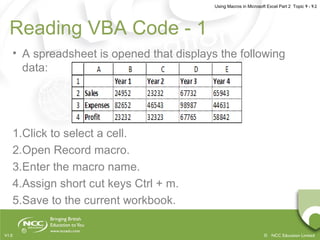
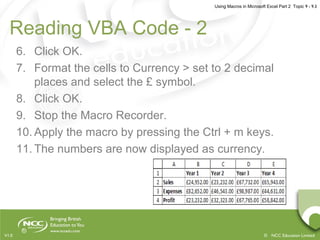
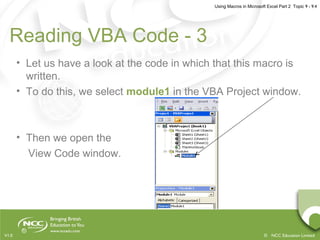
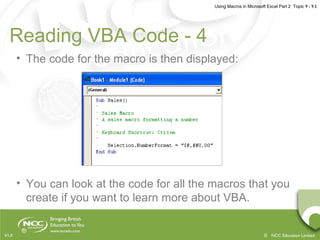
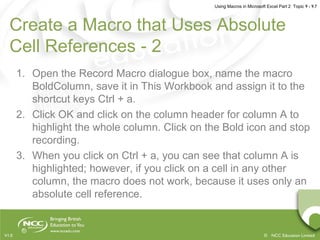
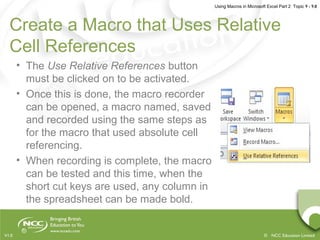
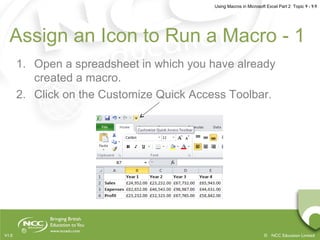
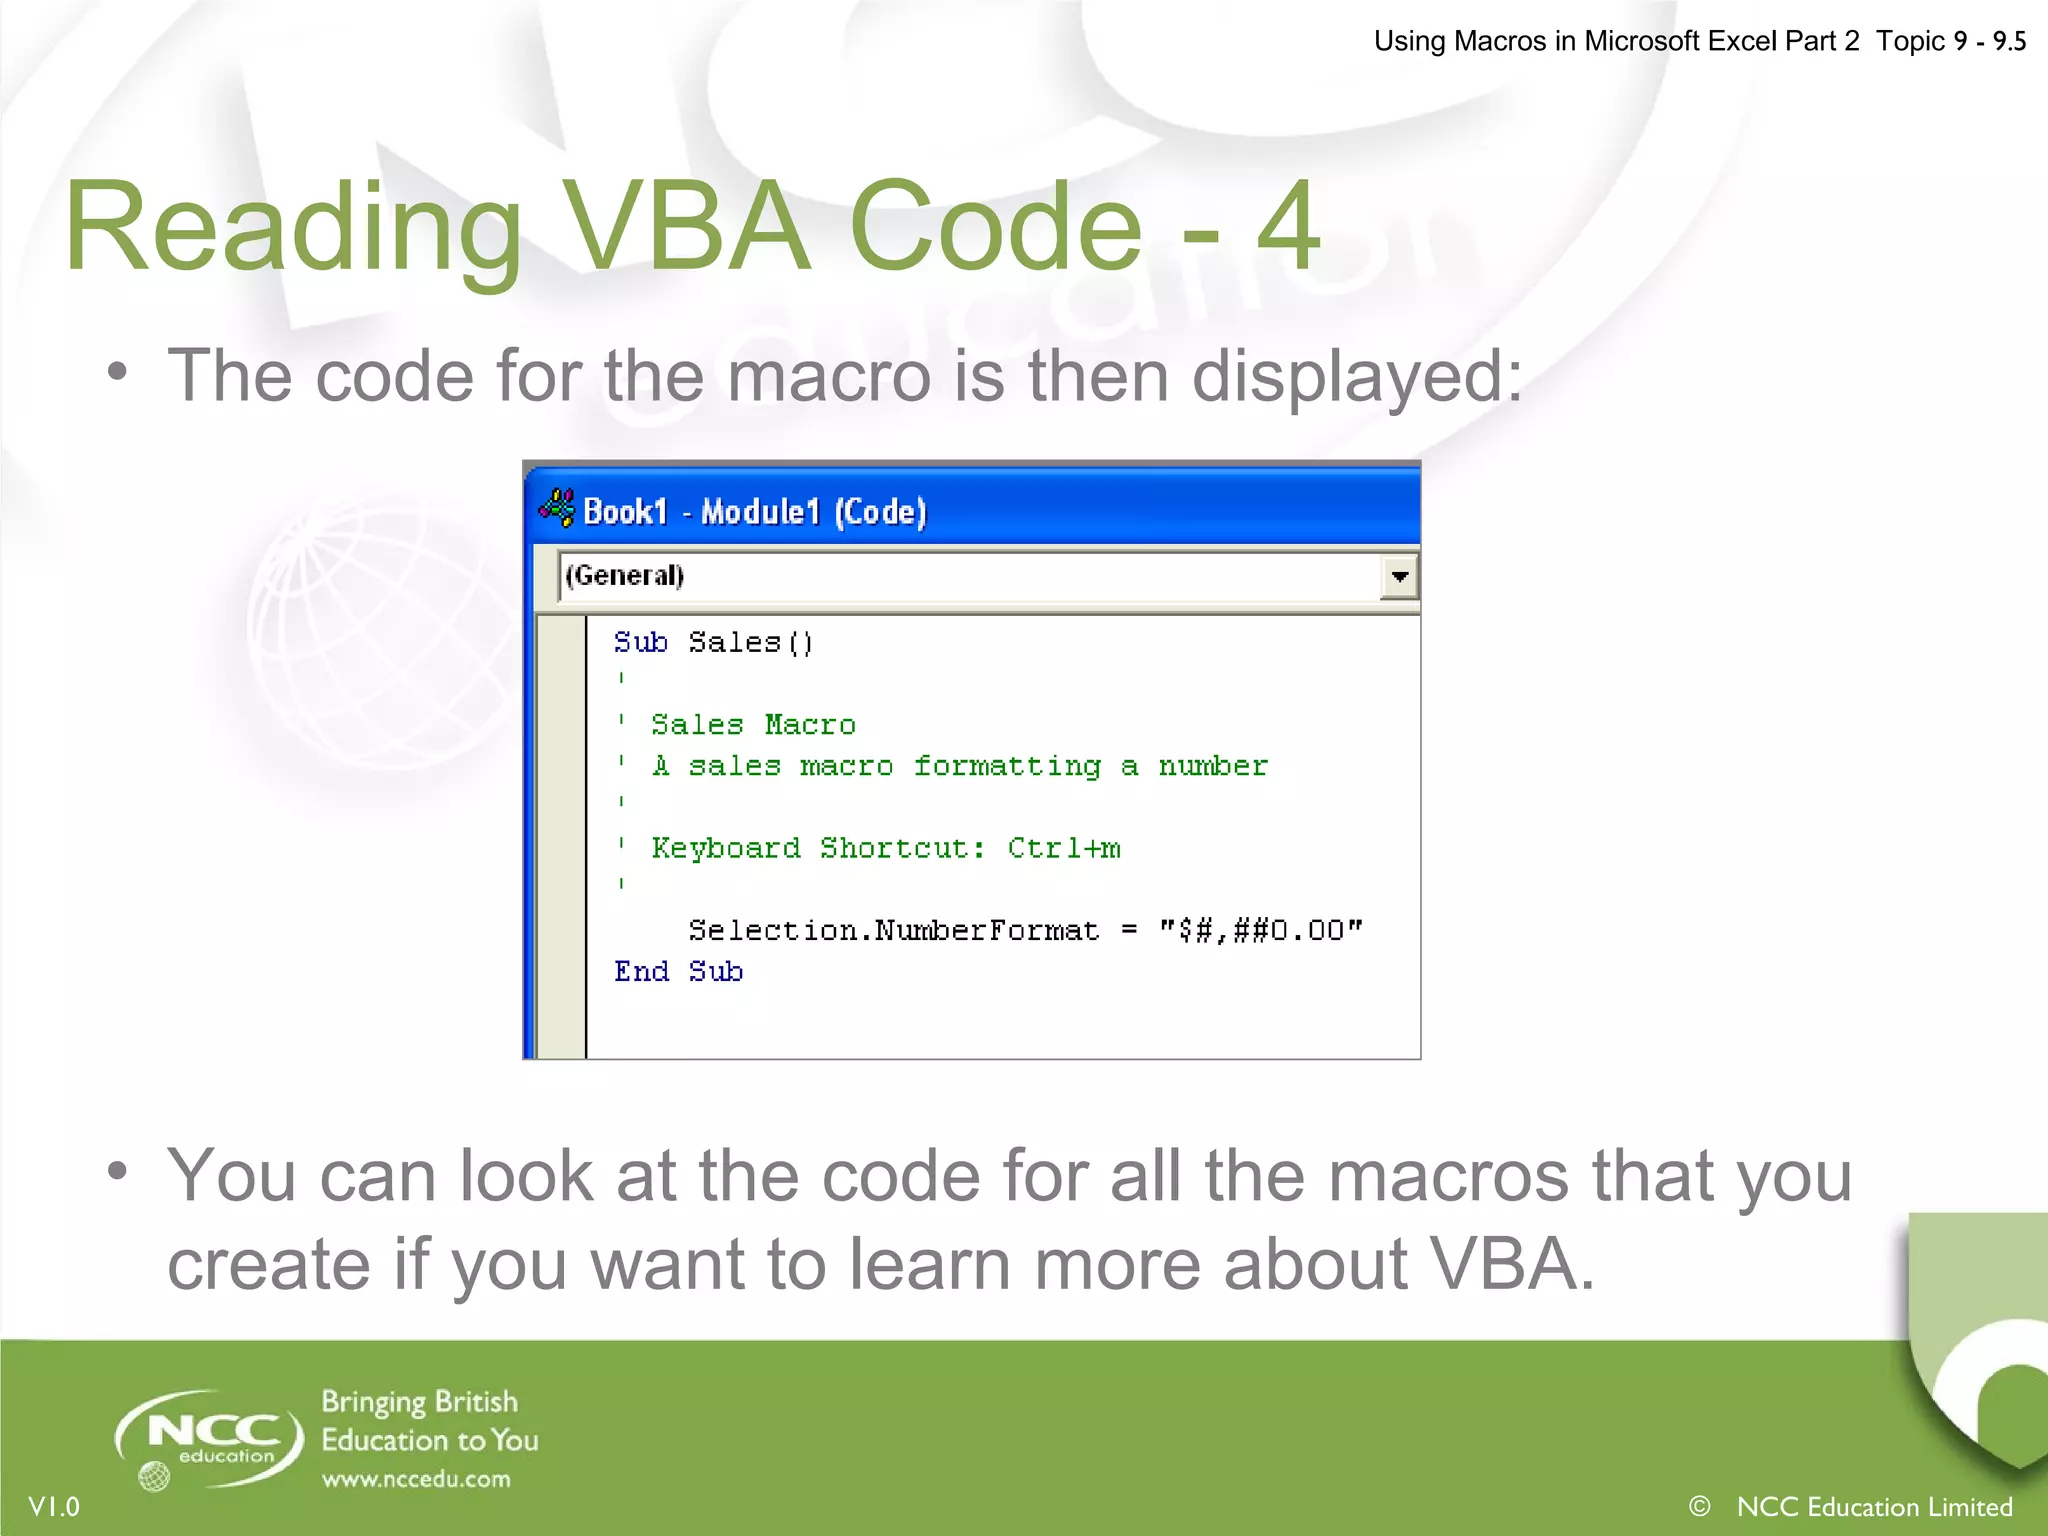
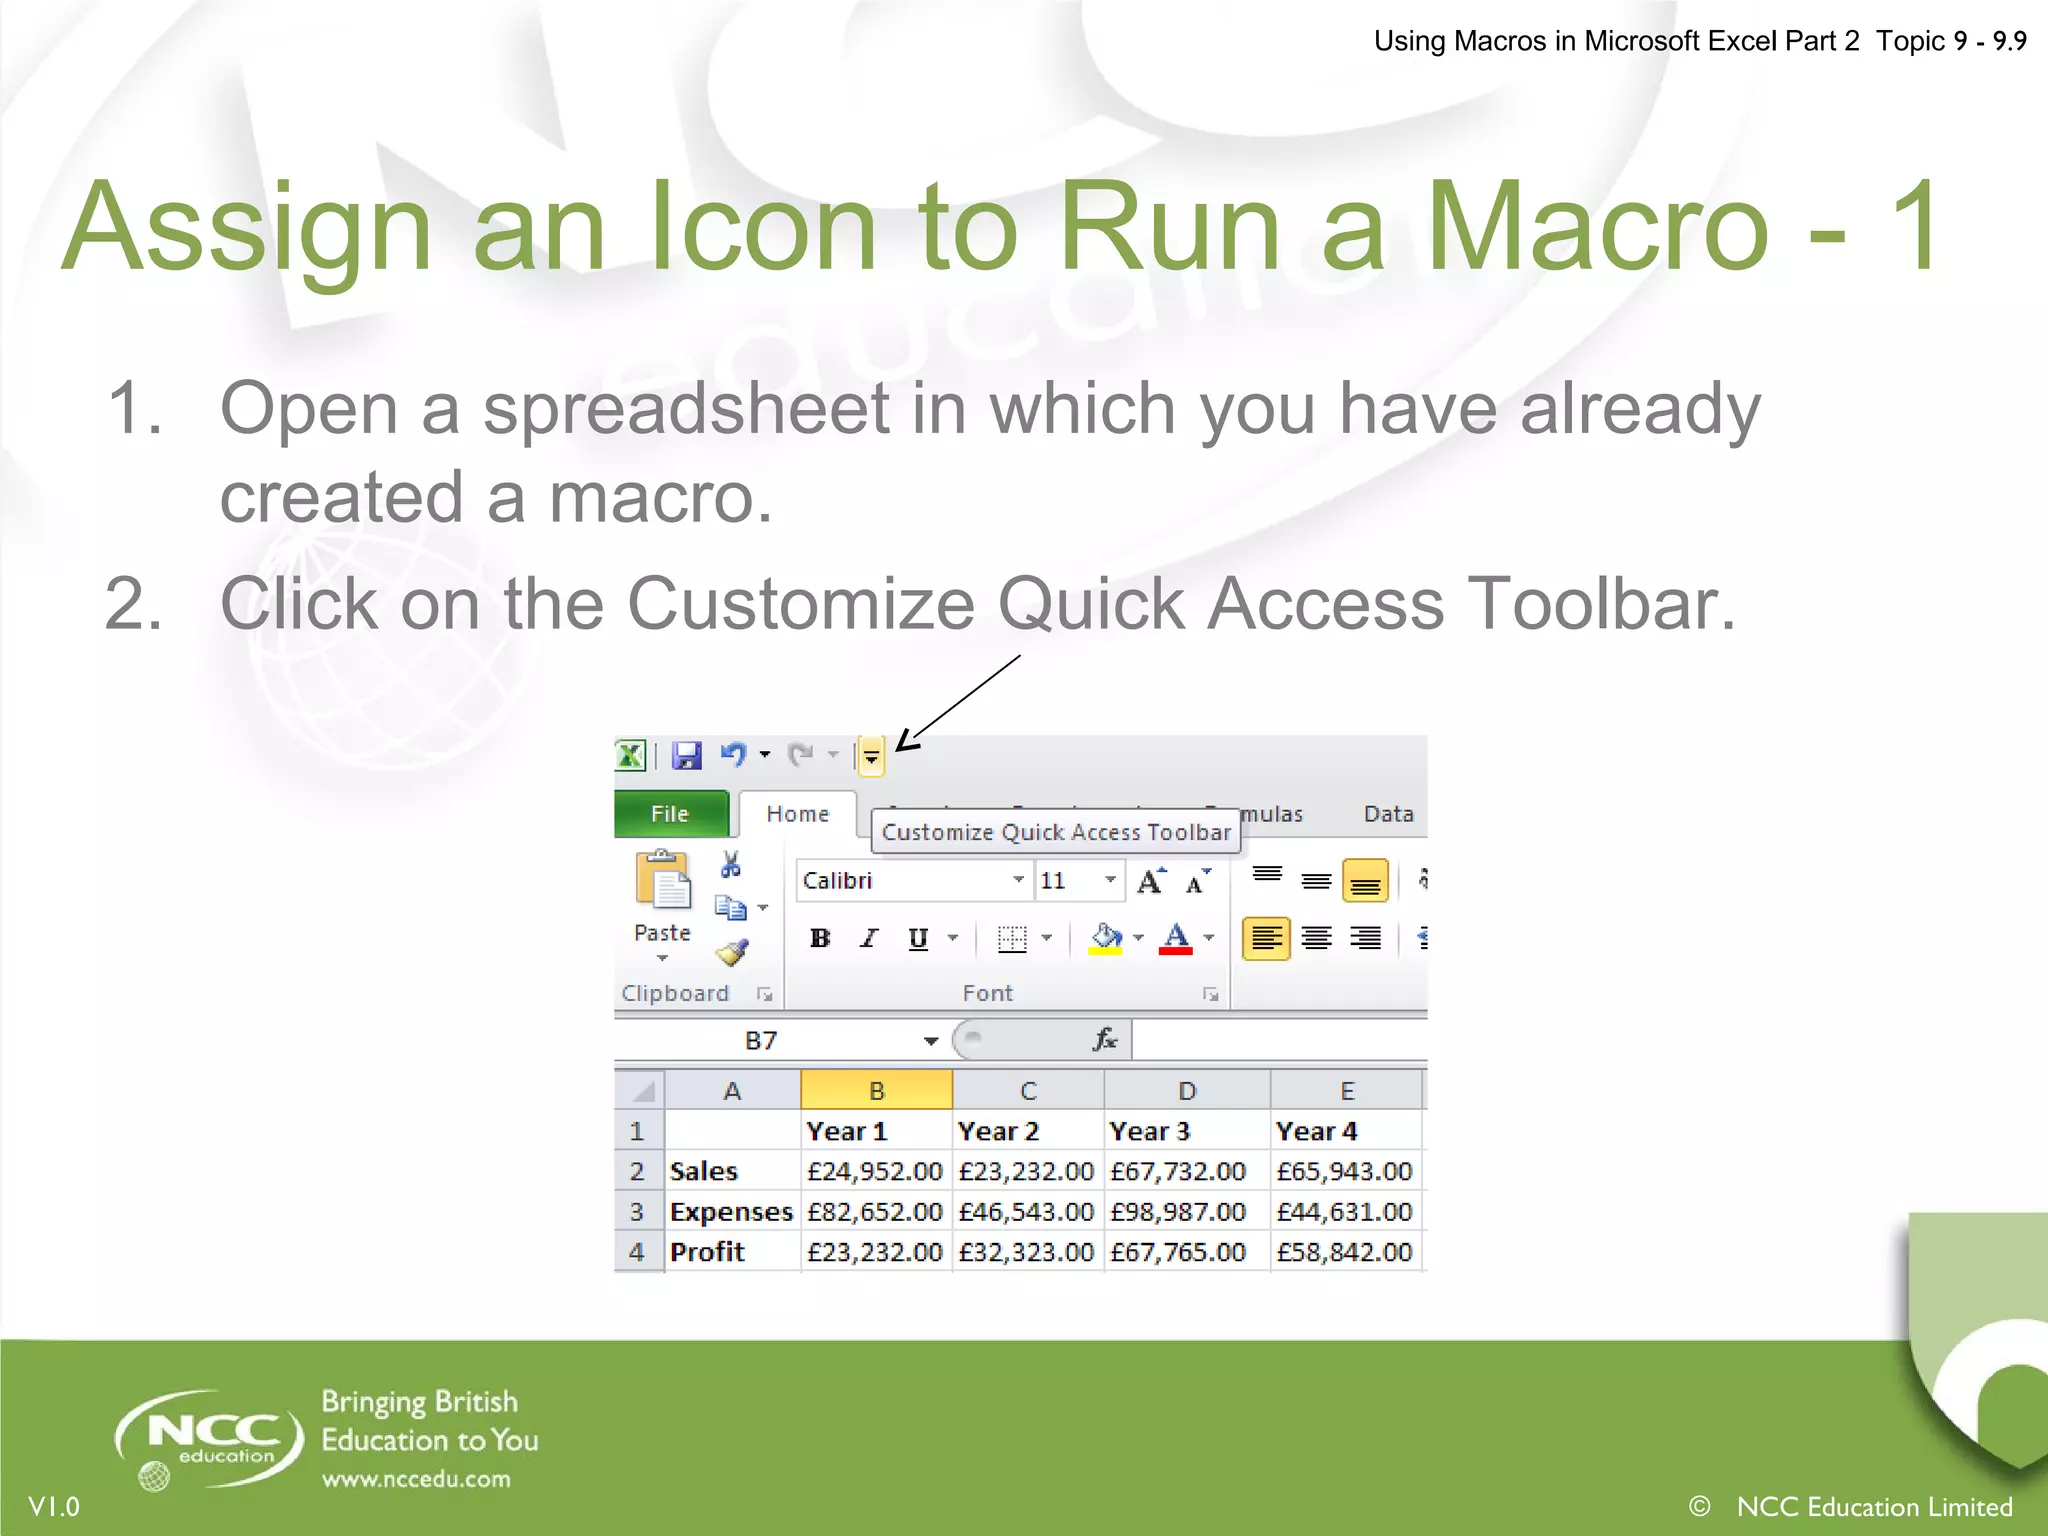
This document discusses various techniques for working with macros in Microsoft Excel, including reading the code generated by macros, using absolute and relative cell references in macros, assigning icons to run macros, automating printing with a macro, adding digital signatures to macros, and references for further reading on the topic. Specific steps are outlined for creating macros that format cells as currency, bold a column, and automate printing. The importance of examining the Visual Basic code that macros generate is also emphasized.


![Using Macros in Microsoft Excel Part 2 Topic 9 - 9.16
© NCC Education LimitedV1.0
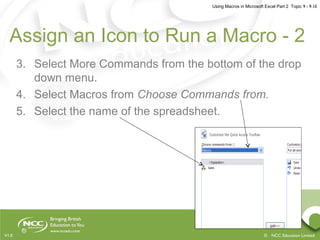
References
• Gonzalez, J., Meister, C., Ozgur, S., Dilworth, B., Troy, A.
and Brandt, T. (2006). Office VBA Macros You Can Use
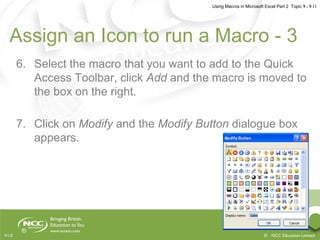
Today: Over 100 Amazing Ways to Automate Word, Excel,
PowerPoint, Outlook & Access, Holy Macroi Press.
• Microsoft Office: Digital Signatures. (2011). [Available
Online] http://office.microsoft.com](https://image.slidesharecdn.com/usingmacrosinmicrosoftexcel-part2-180722043732/85/Using-macros-in-microsoft-excel-part-2-16-320.jpg)


![Using Macros in Microsoft Excel Part 2 Topic 9 - 9.16
© NCC Education LimitedV1.0
References
• Gonzalez, J., Meister, C., Ozgur, S., Dilworth, B., Troy, A.
and Brandt, T. (2006). Office VBA Macros You Can Use
Today: Over 100 Amazing Ways to Automate Word, Excel,
PowerPoint, Outlook & Access, Holy Macroi Press.
• Microsoft Office: Digital Signatures. (2011). [Available
Online] http://office.microsoft.com](https://image.slidesharecdn.com/usingmacrosinmicrosoftexcel-part2-180722043732/75/Using-macros-in-microsoft-excel-part-2-16-2048.jpg)