Download to read offline

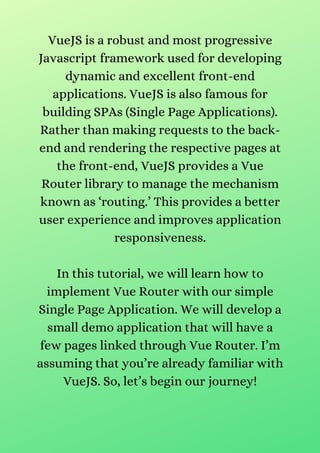


![router/index.js
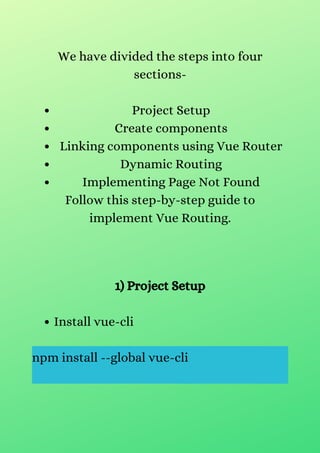
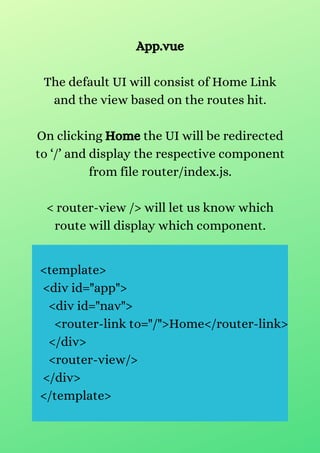
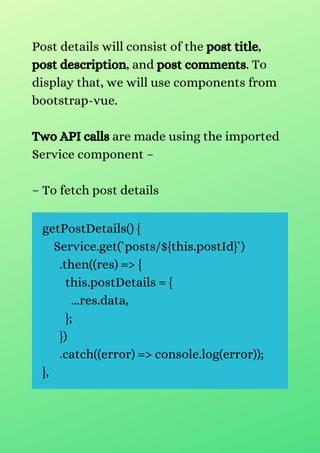
Import vue-router package to set the
navigating to the components. There are in-
total five routes, but primarily we will cover
the first two routes for setting up the basic
routing.
import Vue from 'vue'
import VueRouter from 'vue-router'
import Posts from
"../components/pages/Posts.vue";
Vue.use(VueRouter)
const routes = [
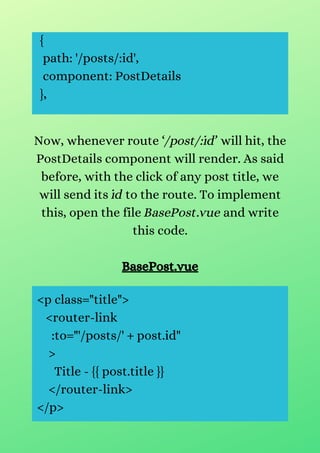
{
path: '/', redirect: '/posts'
},
{
path: '/posts',
component: Posts,
},
]](https://image.slidesharecdn.com/vueroutingtutorialgettingstartedwithvuerouter-210706032230/85/Vue-routing-tutorial-getting-started-with-vue-router-14-320.jpg)
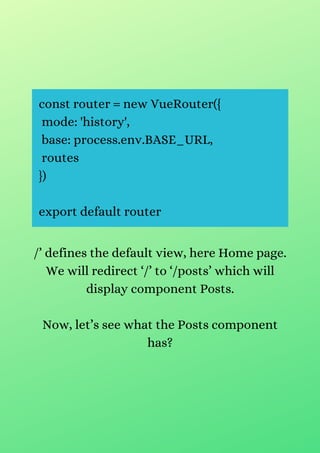

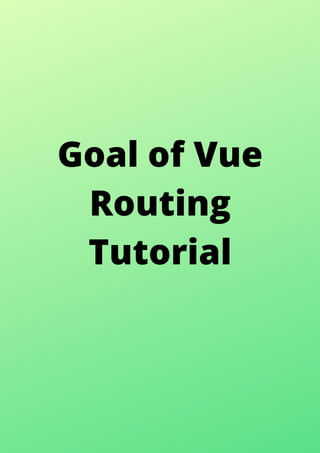
![data() {
return {
allPosts: [],
}
},
methods: {
getAllPosts() {
Service.get(`posts`)
.then(res => {
this.allPosts = res.data;
})
.catch(error => console.log(error));
},
}
}
</script>
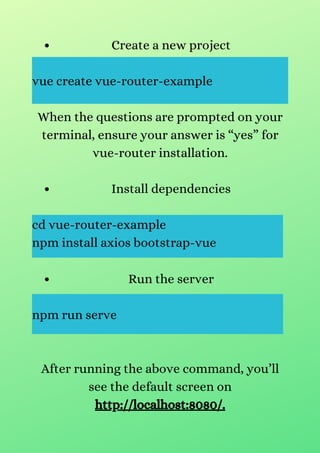
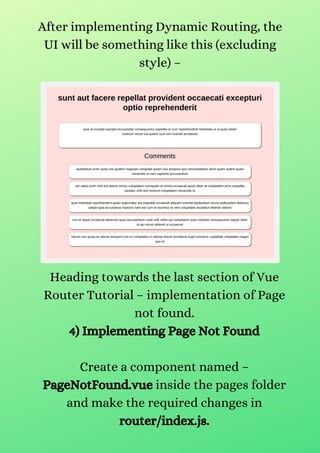
We have imported](https://image.slidesharecdn.com/vueroutingtutorialgettingstartedwithvuerouter-210706032230/85/Vue-routing-tutorial-getting-started-with-vue-router-17-320.jpg)
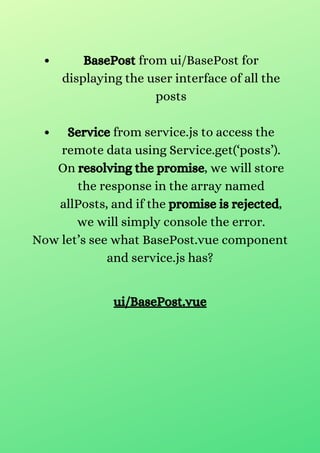

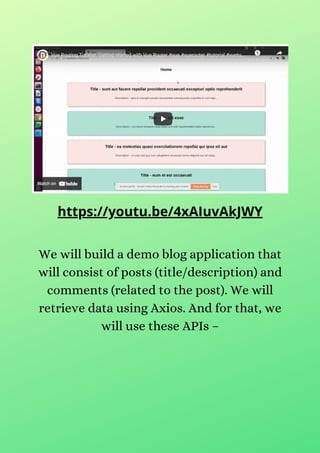
![</div>
</template>
<script>
export default {
name: "basePost",
props: ["posts"],
methods: {
background: function(postId) {
return postId % 2 == 0 ? "#B5E0D9" :
"#FFE6E6";
},
},
};
</script>
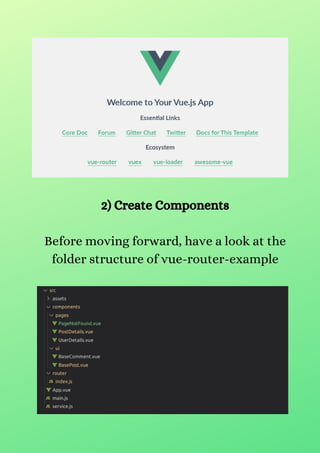
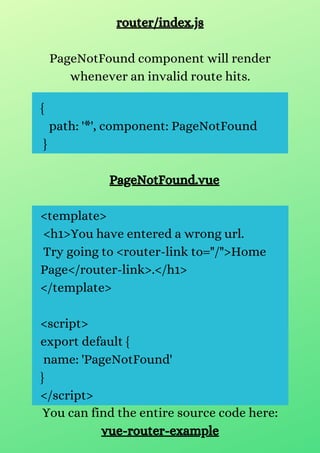
We have used , < b-row / >, and < b-col / >
from the bootstrap-vue.
All the posts will be displayed using posts
prop with Post Title and Post Description.](https://image.slidesharecdn.com/vueroutingtutorialgettingstartedwithvuerouter-210706032230/85/Vue-routing-tutorial-getting-started-with-vue-router-20-320.jpg)

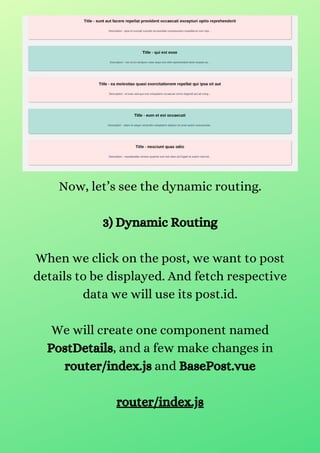
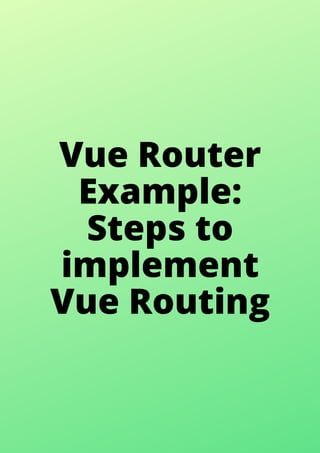
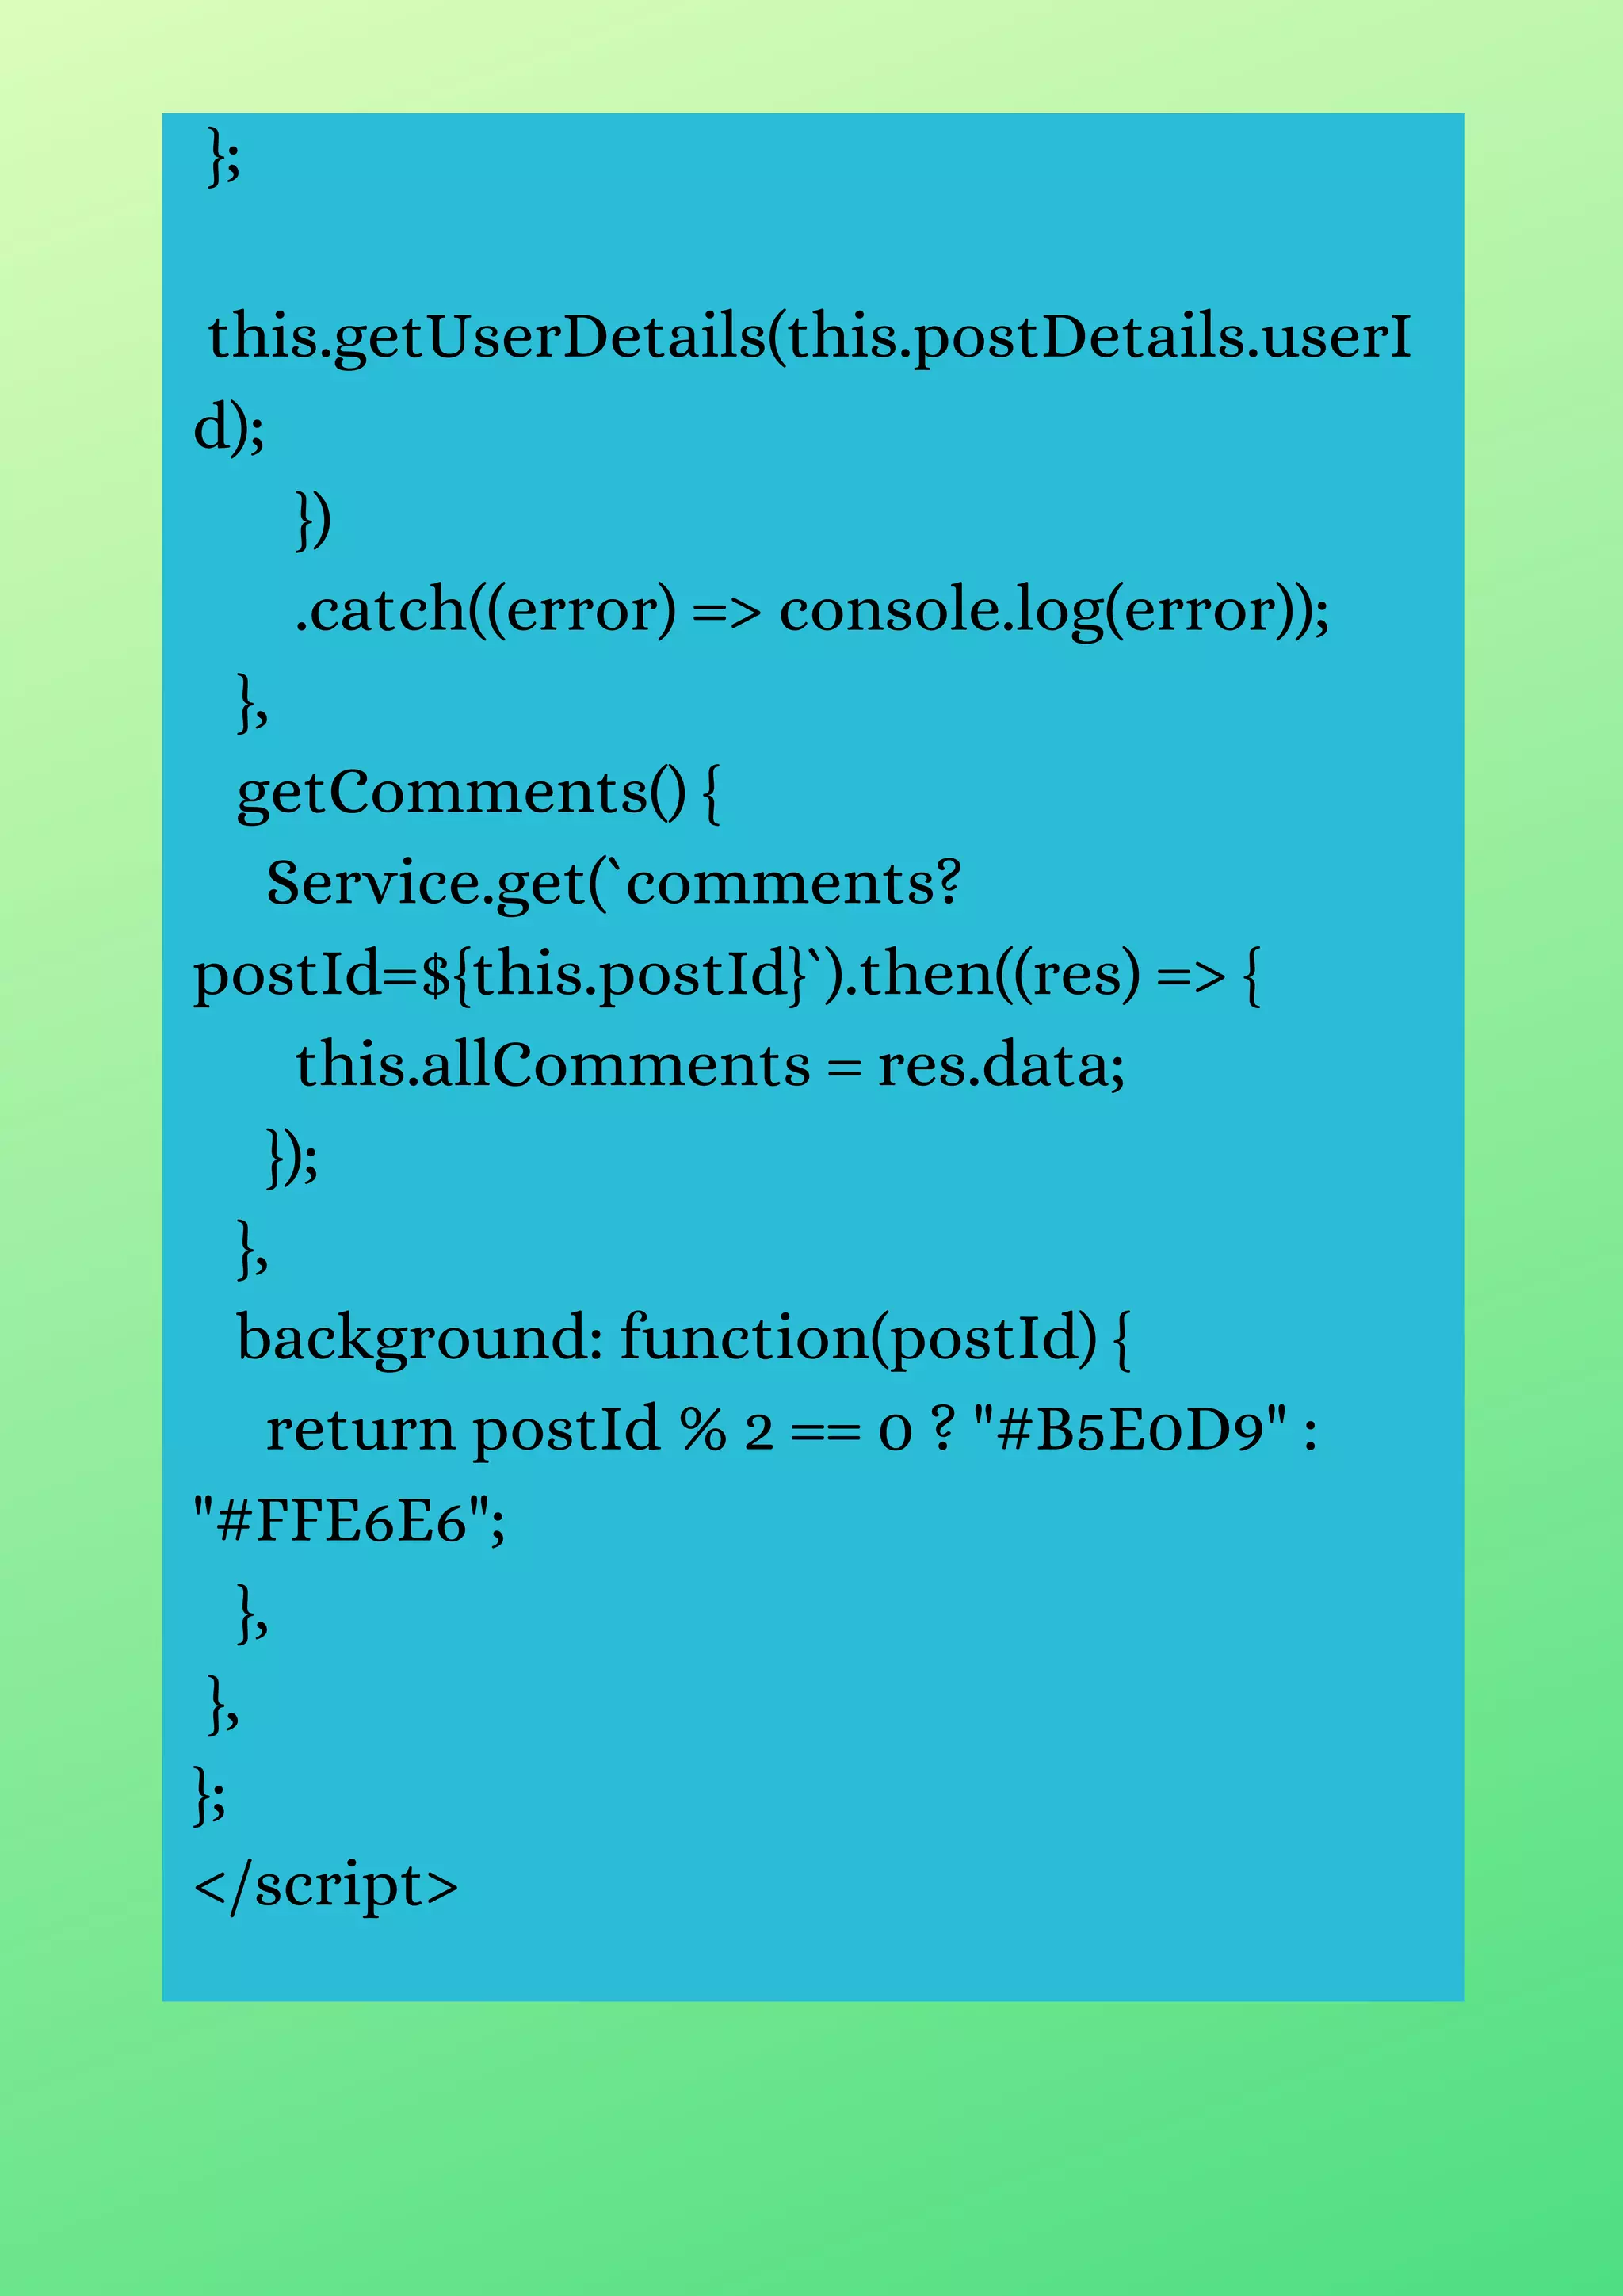
![export default {
name: "PostDetails",
components: {
baseComment,
},
mounted() {
this.getPostDetails();
this.getComments();
},
data() {
return {
postId: this.$route.params.id,
postDetails: null,
allComments: [],
};
},
methods: {
getPostDetails() {
Service.get(`posts/${this.postId}`)
.then((res) => {
this.postDetails = {
...res.data,](https://image.slidesharecdn.com/vueroutingtutorialgettingstartedwithvuerouter-210706032230/85/Vue-routing-tutorial-getting-started-with-vue-router-26-320.jpg)

![<template>
<div>
<b-col cols="12" v-if="comments">
<b-col cols="10" v-for="comment in
comments"
:key="comment.id" class="comment">
{{ comment.body }}
</b-col>
</b-col>
<h5 v-else>Loading....</h5>
</div>
</template>
<script>
export default {
name: "baseComment",
props: ["comments"],
};
</script>](https://image.slidesharecdn.com/vueroutingtutorialgettingstartedwithvuerouter-210706032230/85/Vue-routing-tutorial-getting-started-with-vue-router-30-320.jpg)


![router/index.js
Import vue-router package to set the
navigating to the components. There are in-
total five routes, but primarily we will cover
the first two routes for setting up the basic
routing.
import Vue from 'vue'
import VueRouter from 'vue-router'
import Posts from
"../components/pages/Posts.vue";
Vue.use(VueRouter)
const routes = [
{
path: '/', redirect: '/posts'
},
{
path: '/posts',
component: Posts,
},
]](https://image.slidesharecdn.com/vueroutingtutorialgettingstartedwithvuerouter-210706032230/75/Vue-routing-tutorial-getting-started-with-vue-router-14-2048.jpg)
![data() {
return {
allPosts: [],
}
},
methods: {
getAllPosts() {
Service.get(`posts`)
.then(res => {
this.allPosts = res.data;
})
.catch(error => console.log(error));
},
}
}
</script>
We have imported](https://image.slidesharecdn.com/vueroutingtutorialgettingstartedwithvuerouter-210706032230/75/Vue-routing-tutorial-getting-started-with-vue-router-17-2048.jpg)

![</div>
</template>
<script>
export default {
name: "basePost",
props: ["posts"],
methods: {
background: function(postId) {
return postId % 2 == 0 ? "#B5E0D9" :
"#FFE6E6";
},
},
};
</script>
We have used , < b-row / >, and < b-col / >
from the bootstrap-vue.
All the posts will be displayed using posts
prop with Post Title and Post Description.](https://image.slidesharecdn.com/vueroutingtutorialgettingstartedwithvuerouter-210706032230/75/Vue-routing-tutorial-getting-started-with-vue-router-20-2048.jpg)
![export default {
name: "PostDetails",
components: {
baseComment,
},
mounted() {
this.getPostDetails();
this.getComments();
},
data() {
return {
postId: this.$route.params.id,
postDetails: null,
allComments: [],
};
},
methods: {
getPostDetails() {
Service.get(`posts/${this.postId}`)
.then((res) => {
this.postDetails = {
...res.data,](https://image.slidesharecdn.com/vueroutingtutorialgettingstartedwithvuerouter-210706032230/75/Vue-routing-tutorial-getting-started-with-vue-router-26-2048.jpg)

![<template>
<div>
<b-col cols="12" v-if="comments">
<b-col cols="10" v-for="comment in
comments"
:key="comment.id" class="comment">
{{ comment.body }}
</b-col>
</b-col>
<h5 v-else>Loading....</h5>
</div>
</template>
<script>
export default {
name: "baseComment",
props: ["comments"],
};
</script>](https://image.slidesharecdn.com/vueroutingtutorialgettingstartedwithvuerouter-210706032230/75/Vue-routing-tutorial-getting-started-with-vue-router-30-2048.jpg)
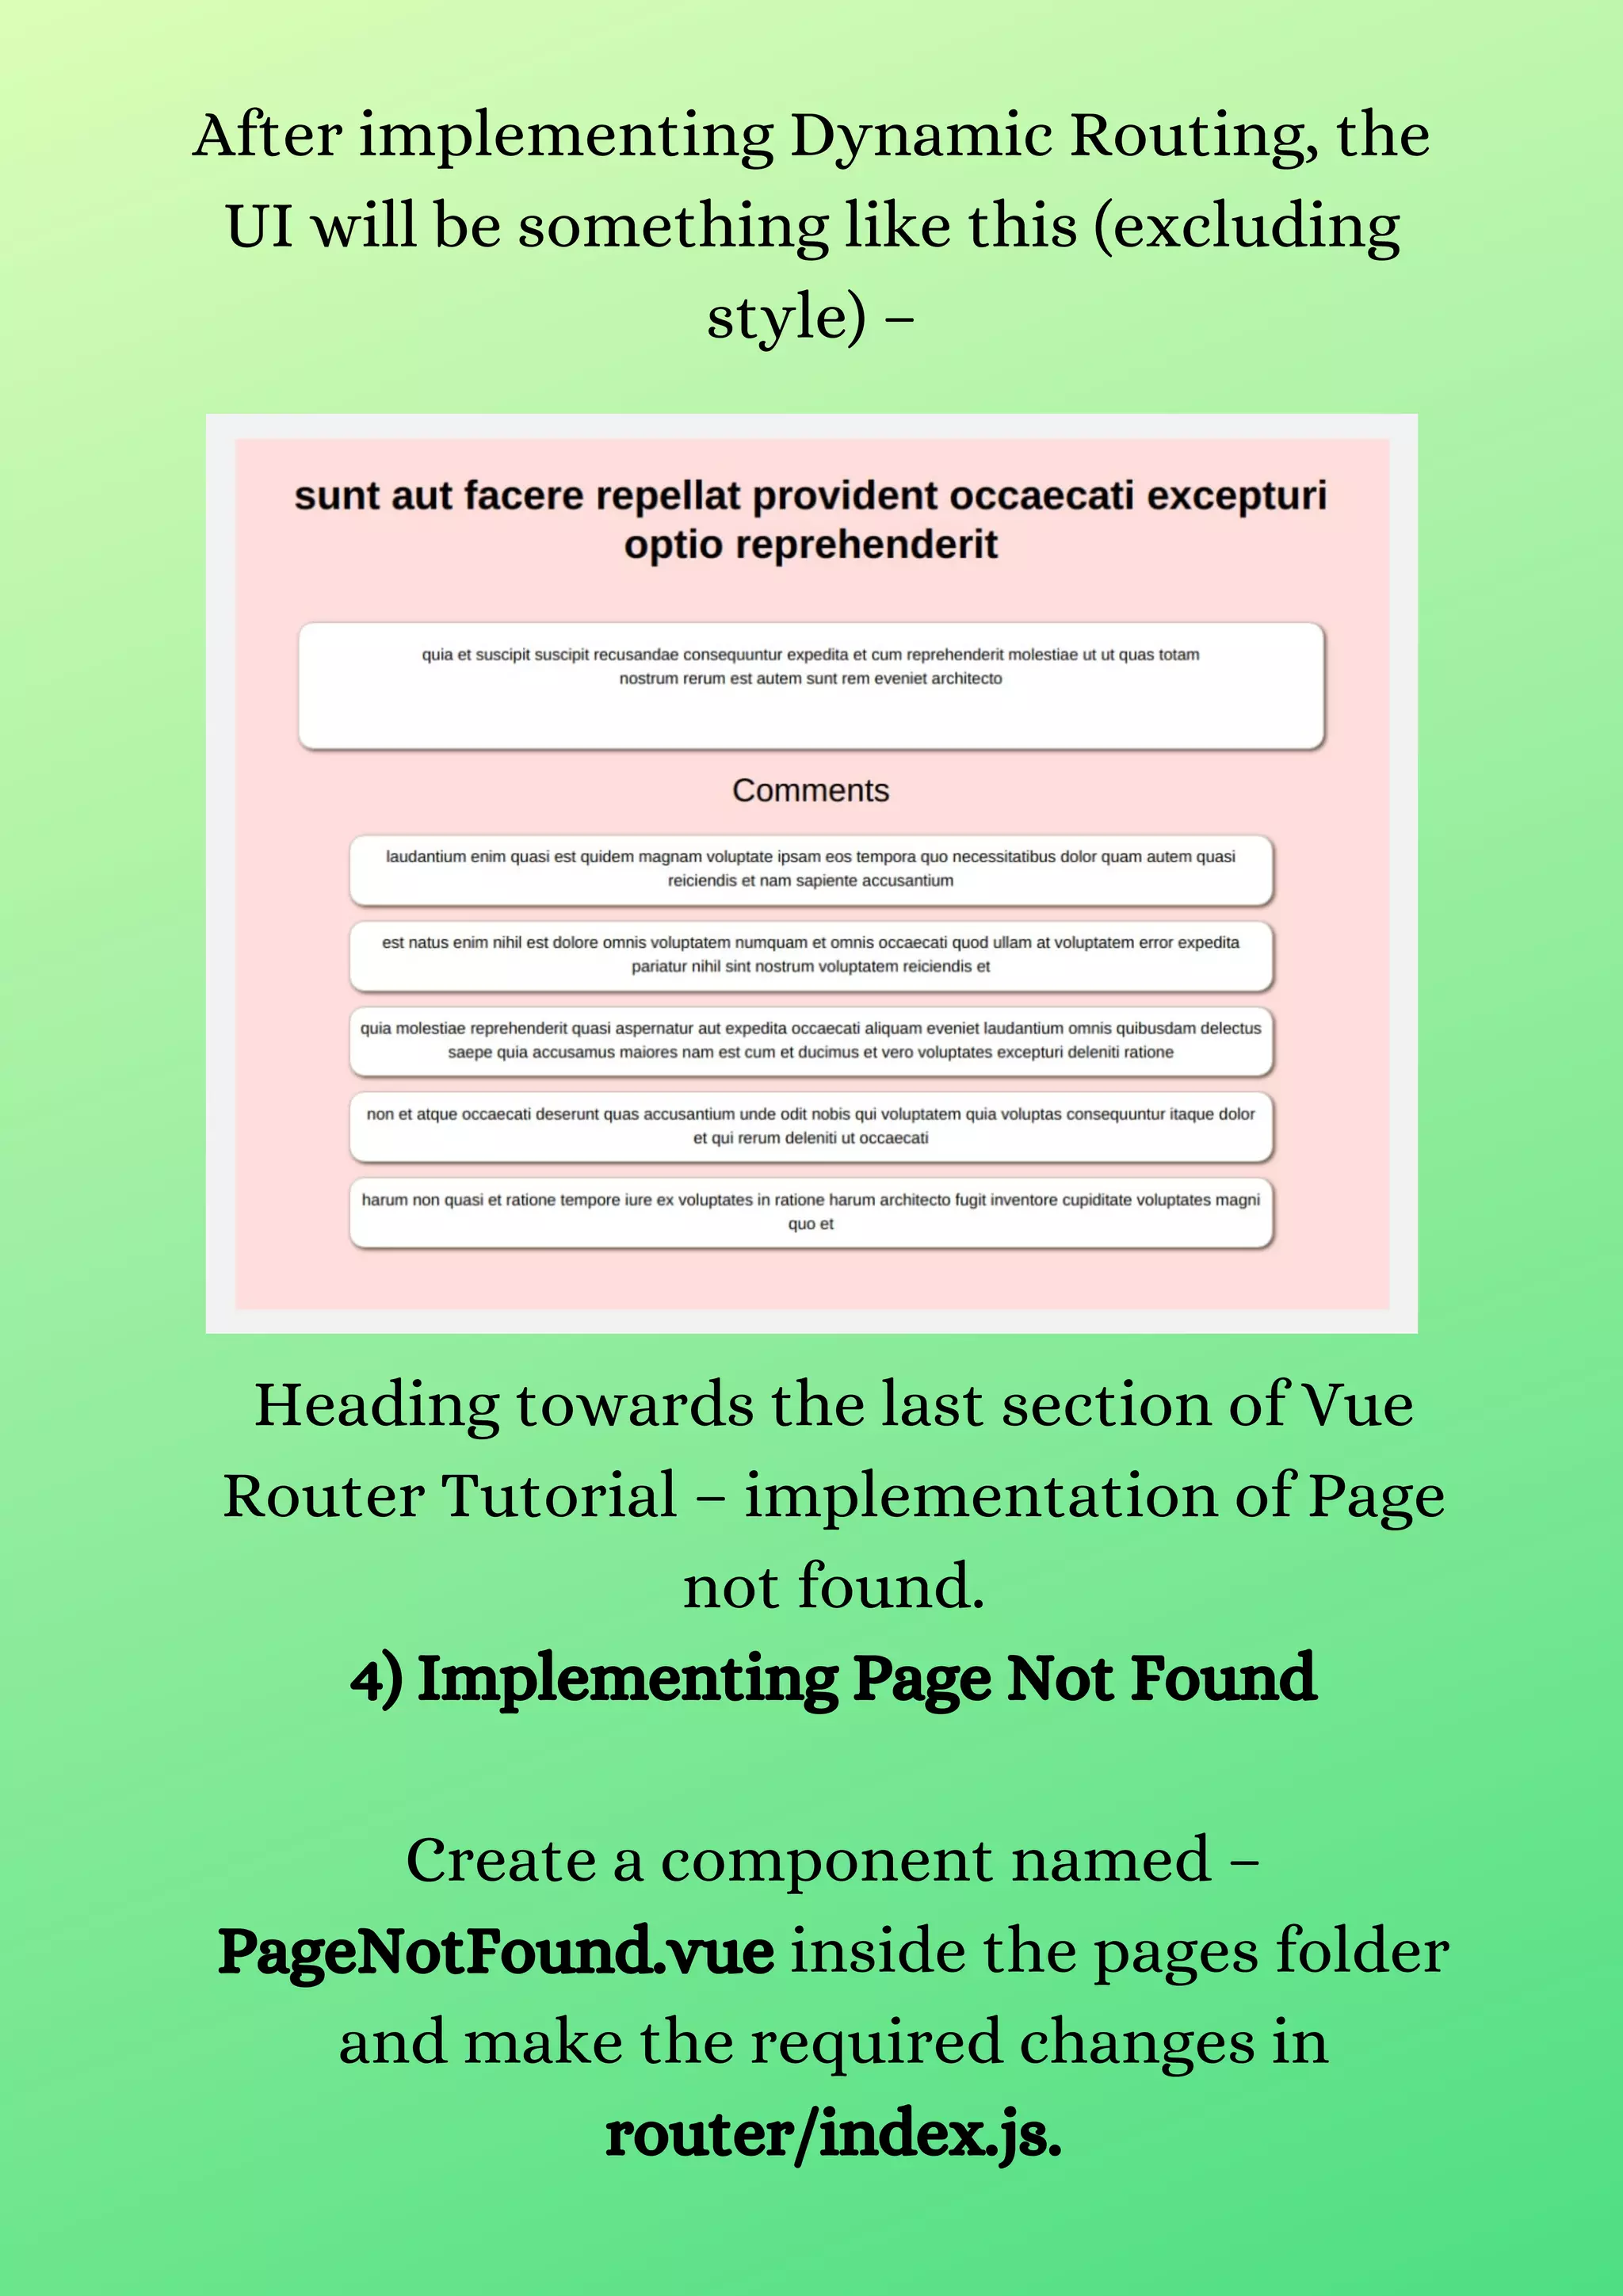
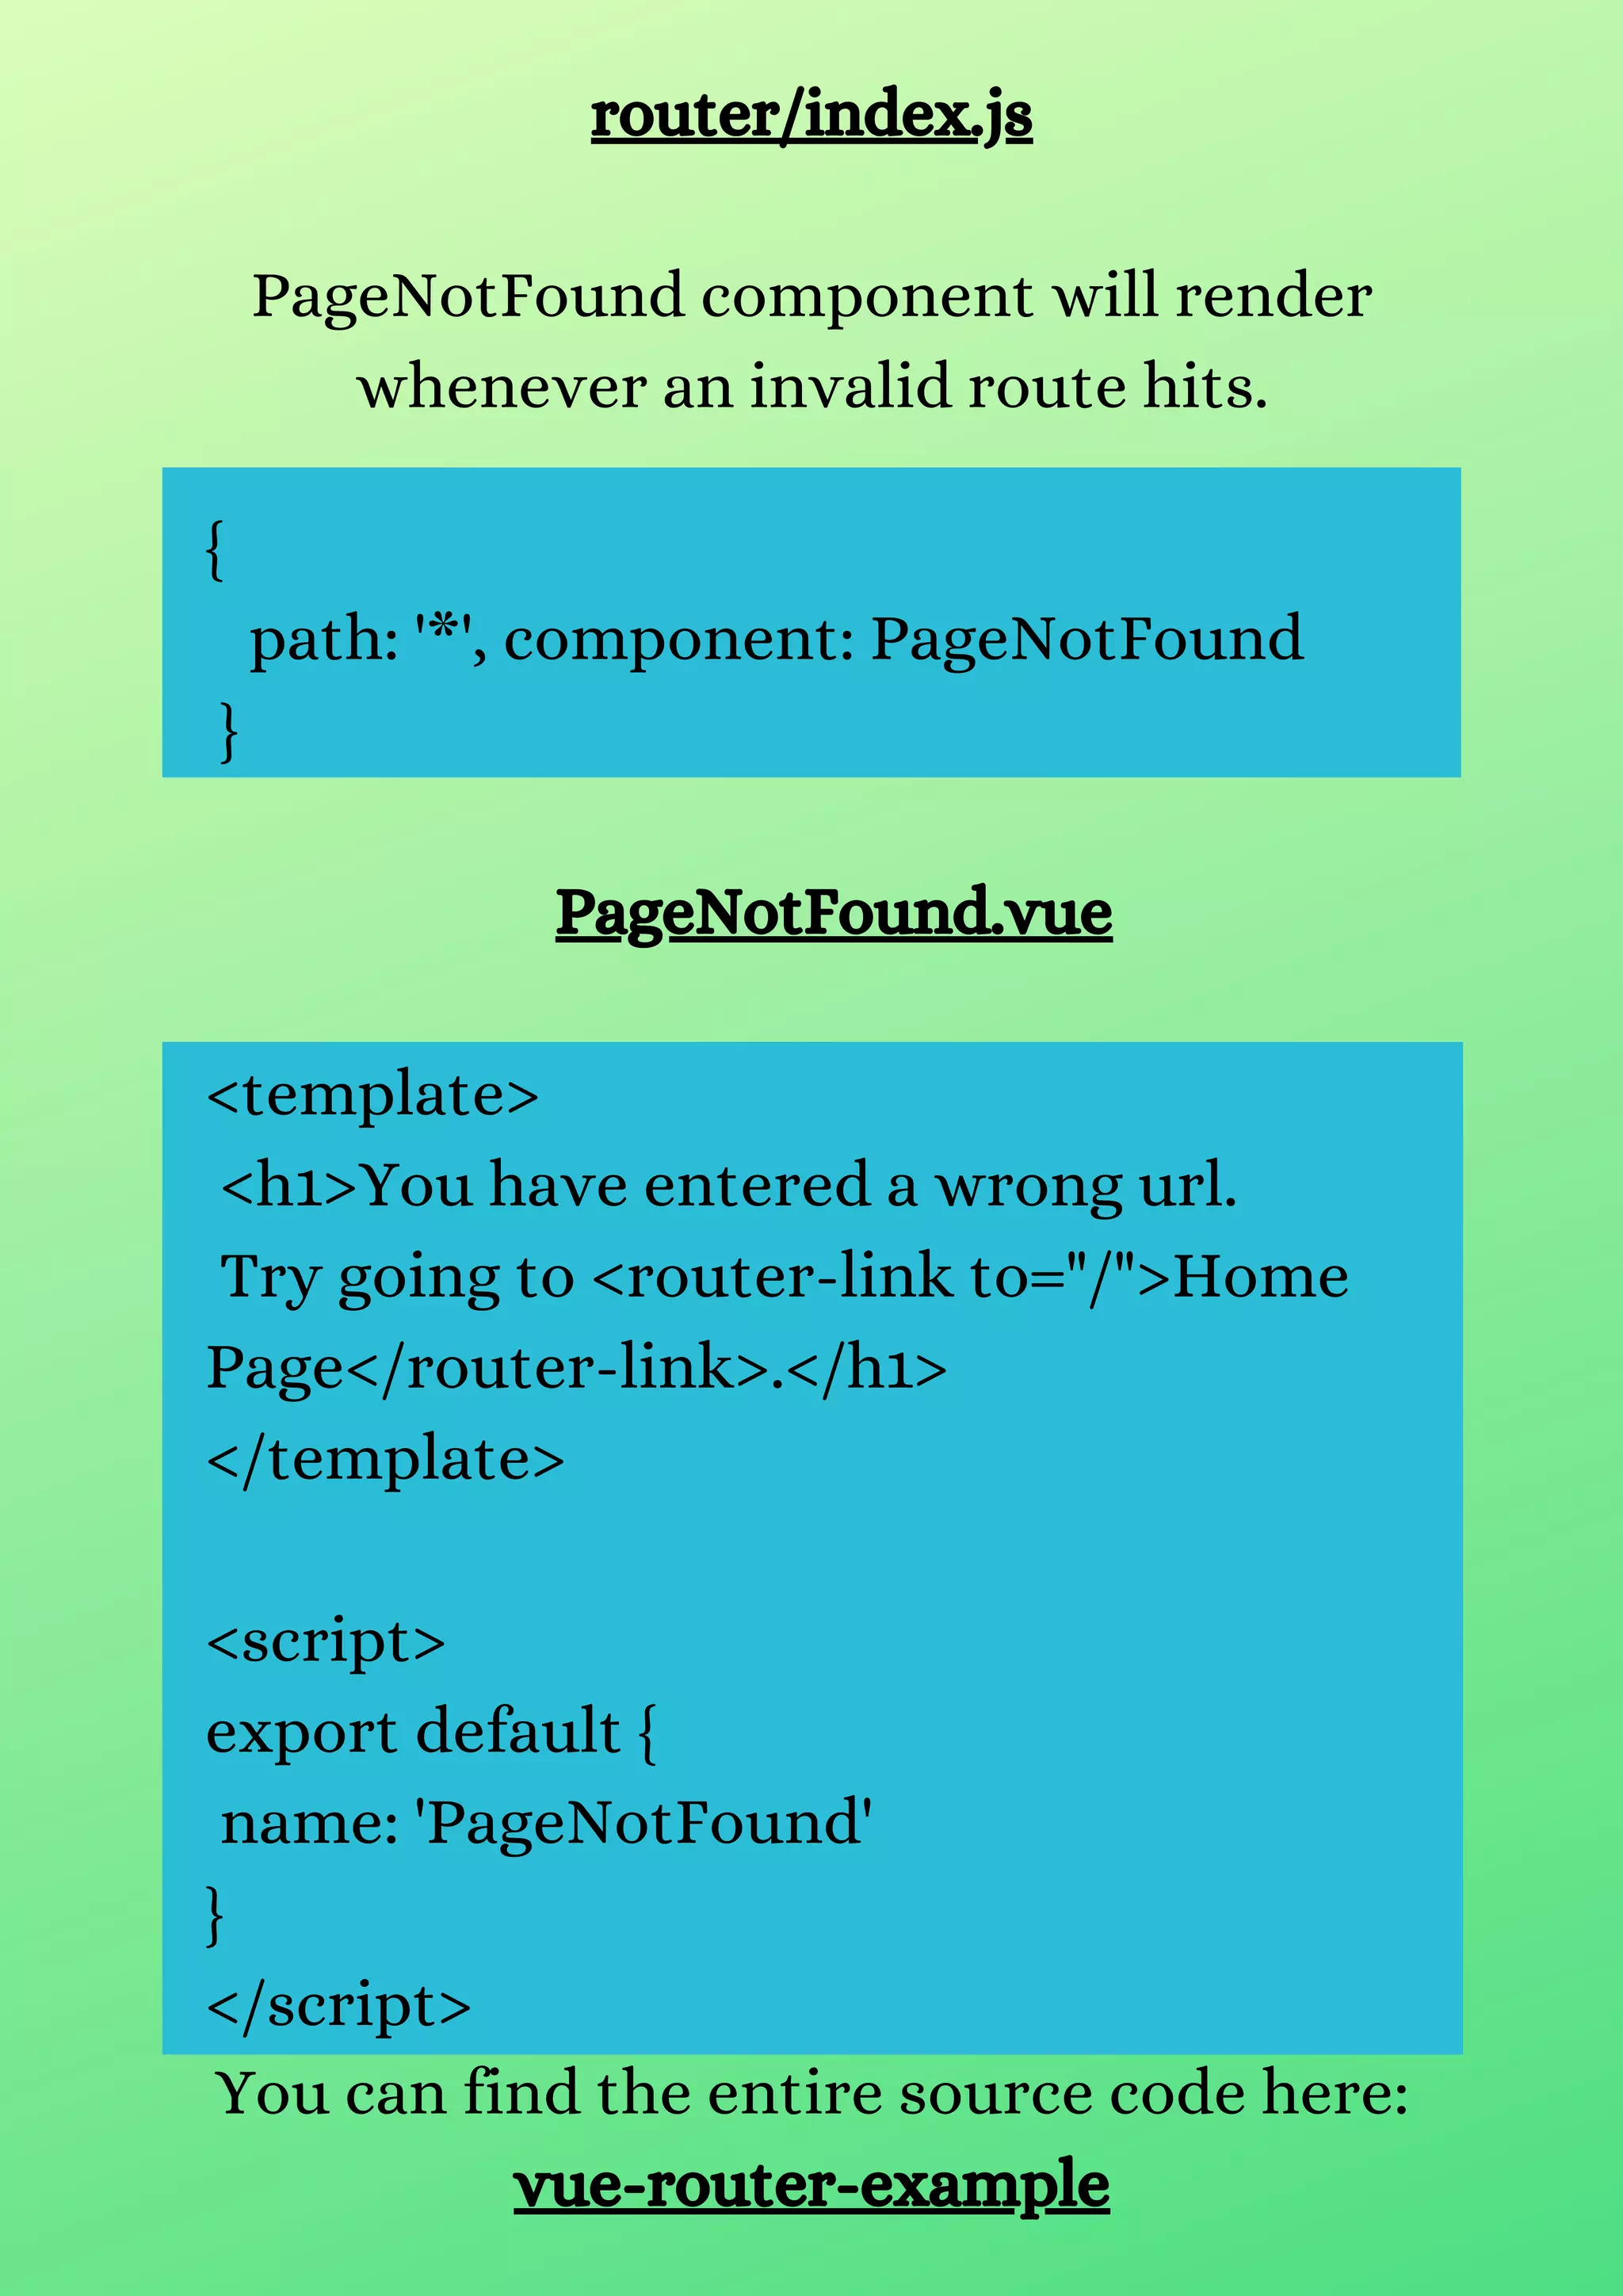


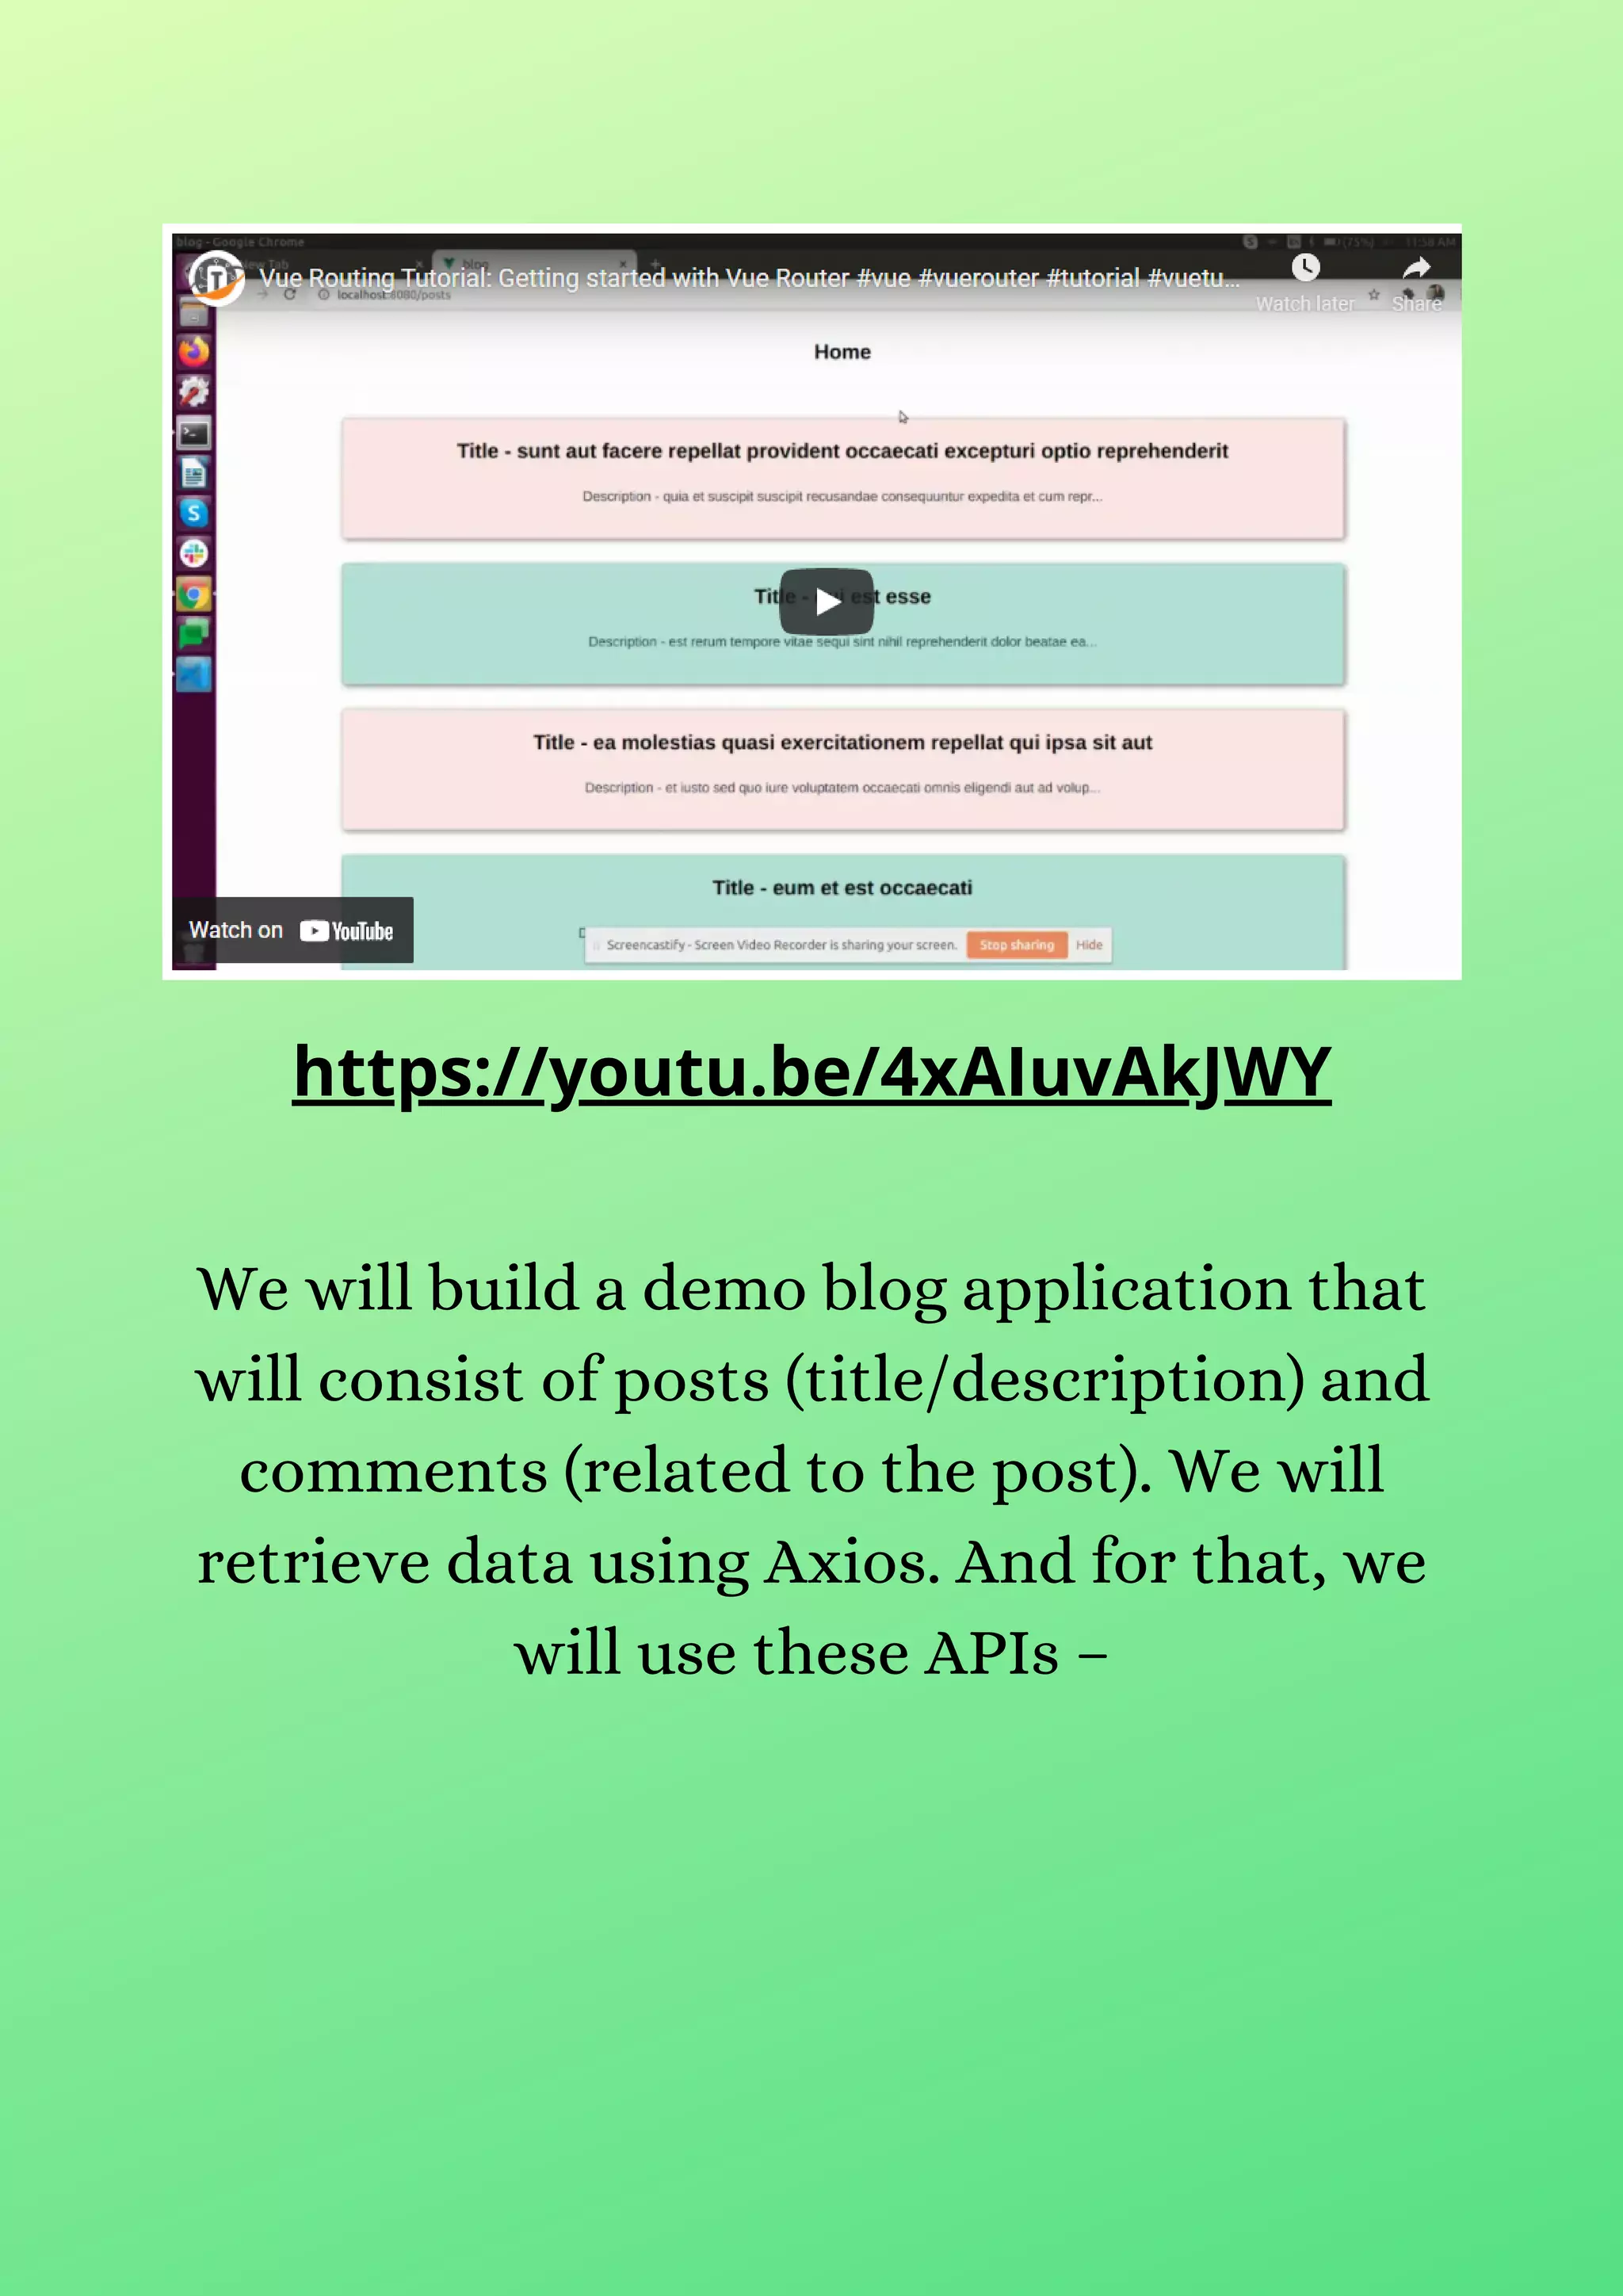
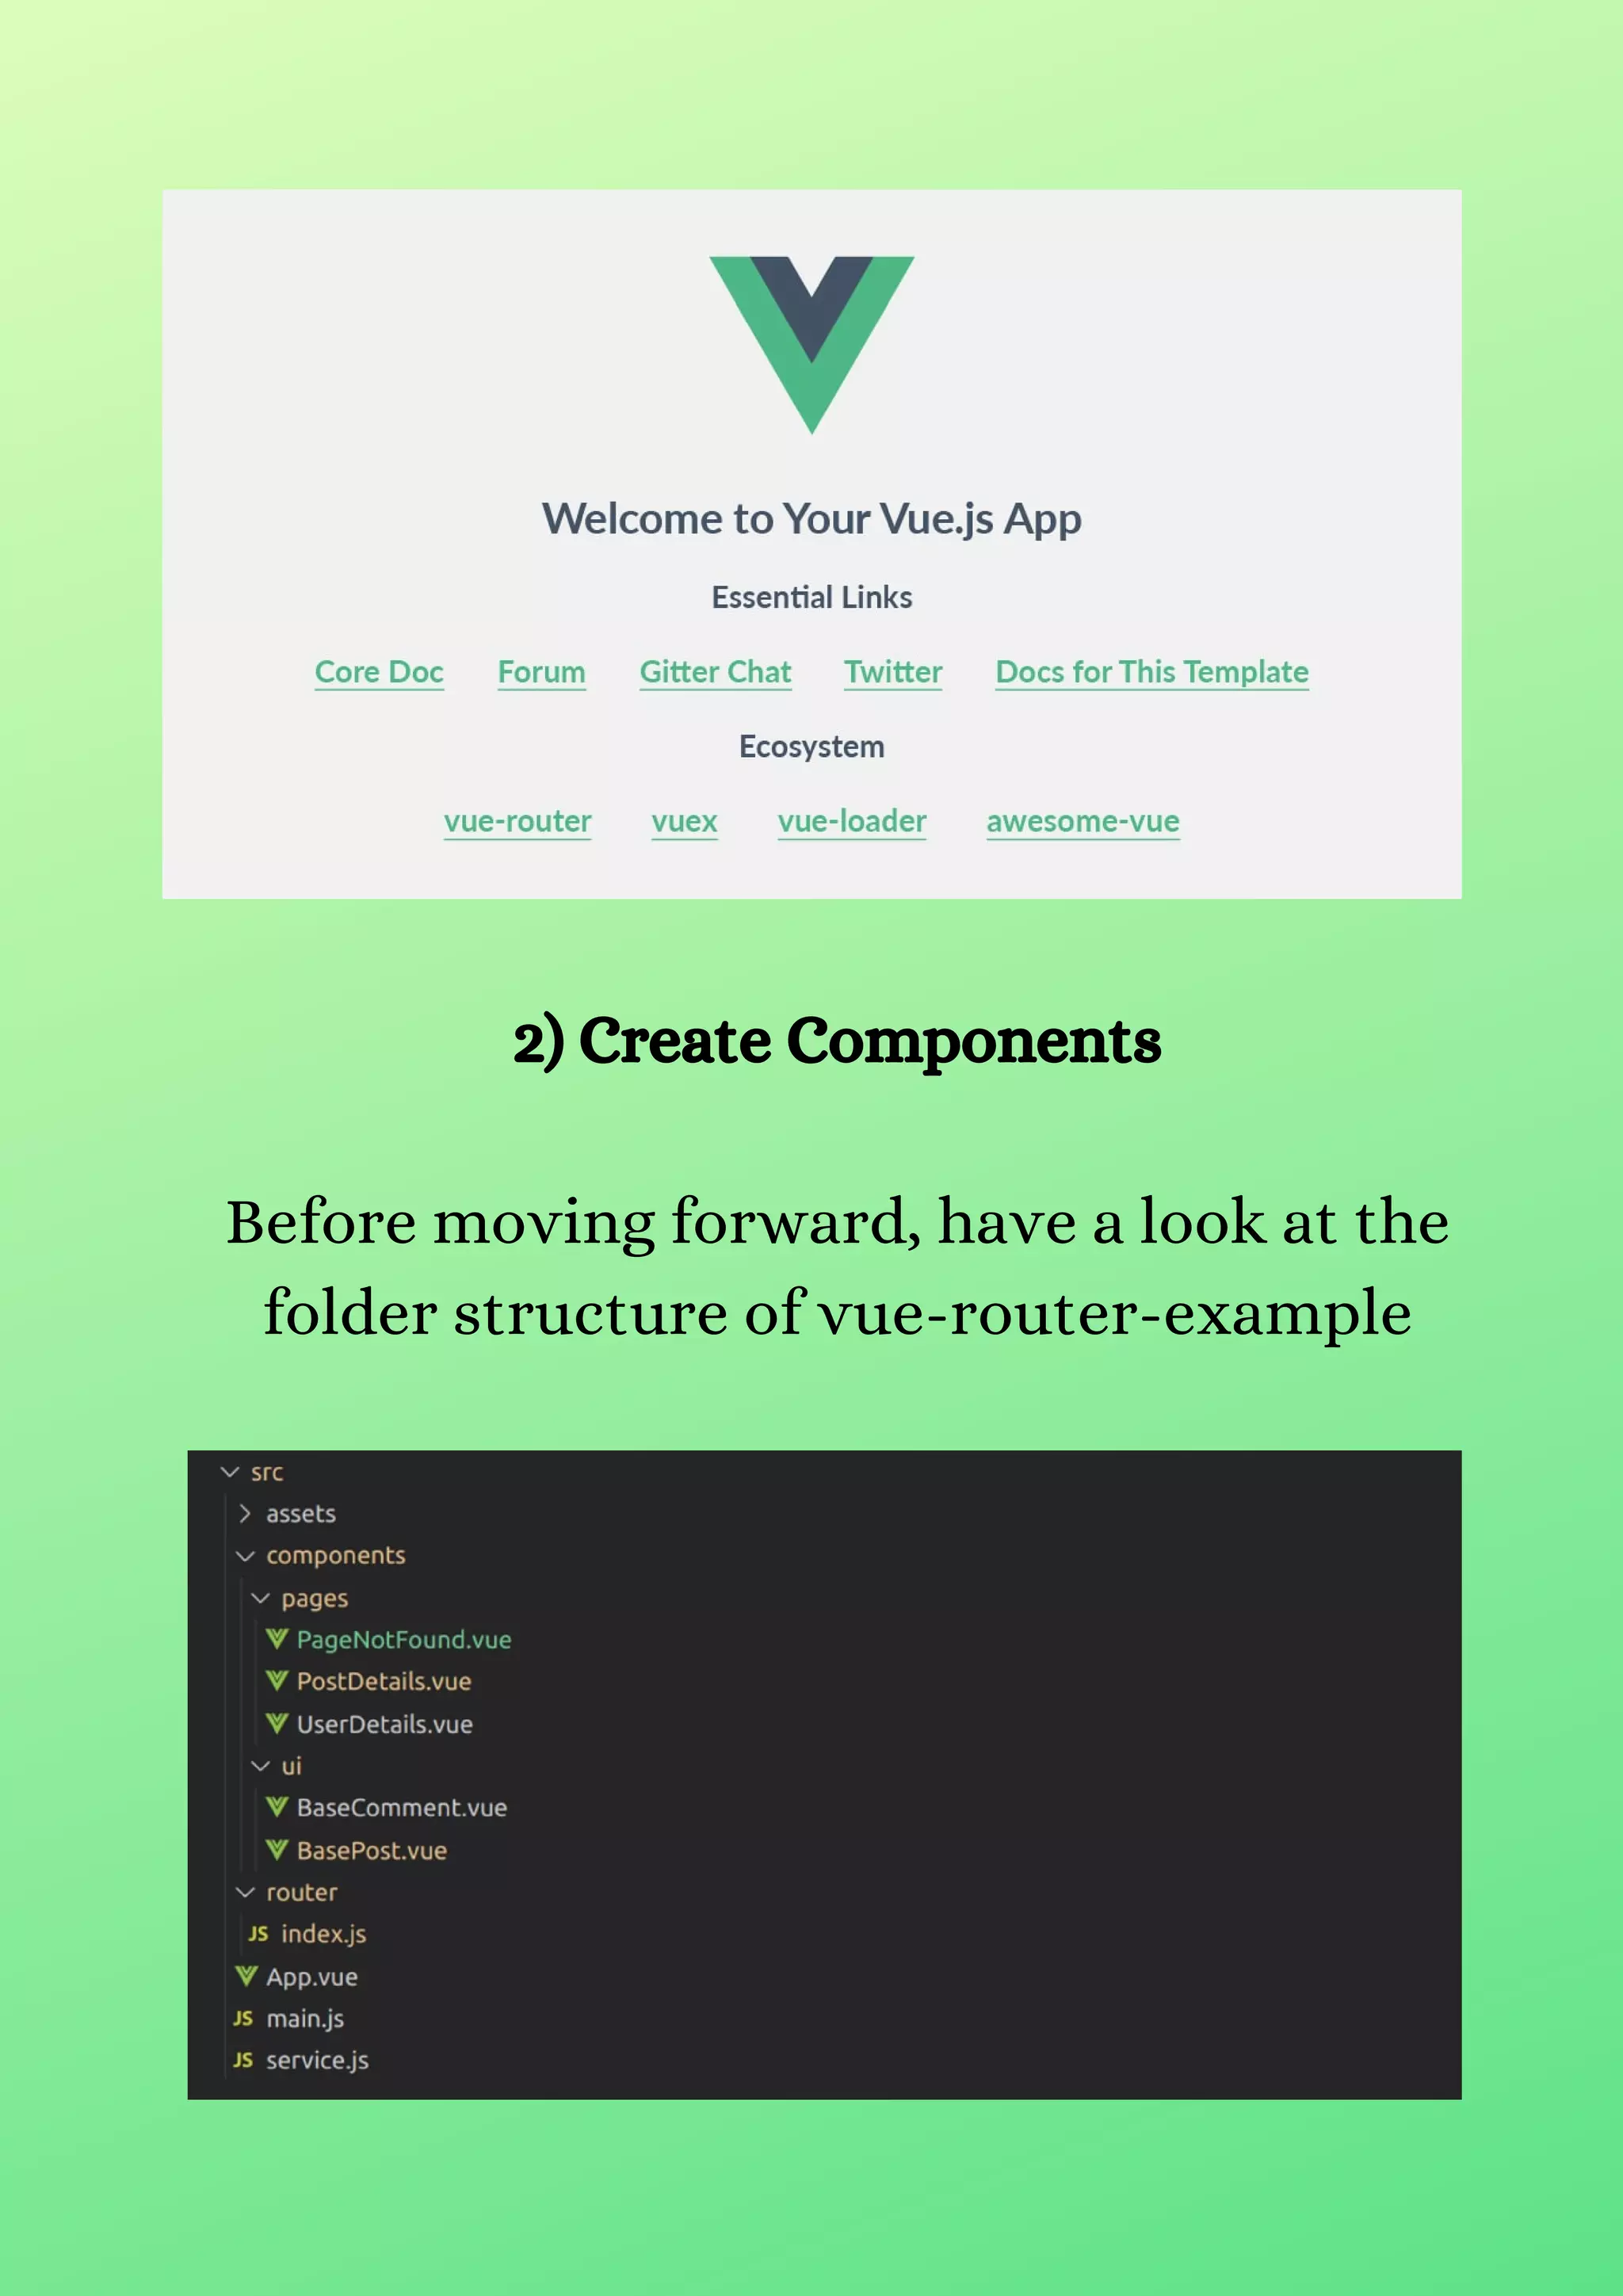
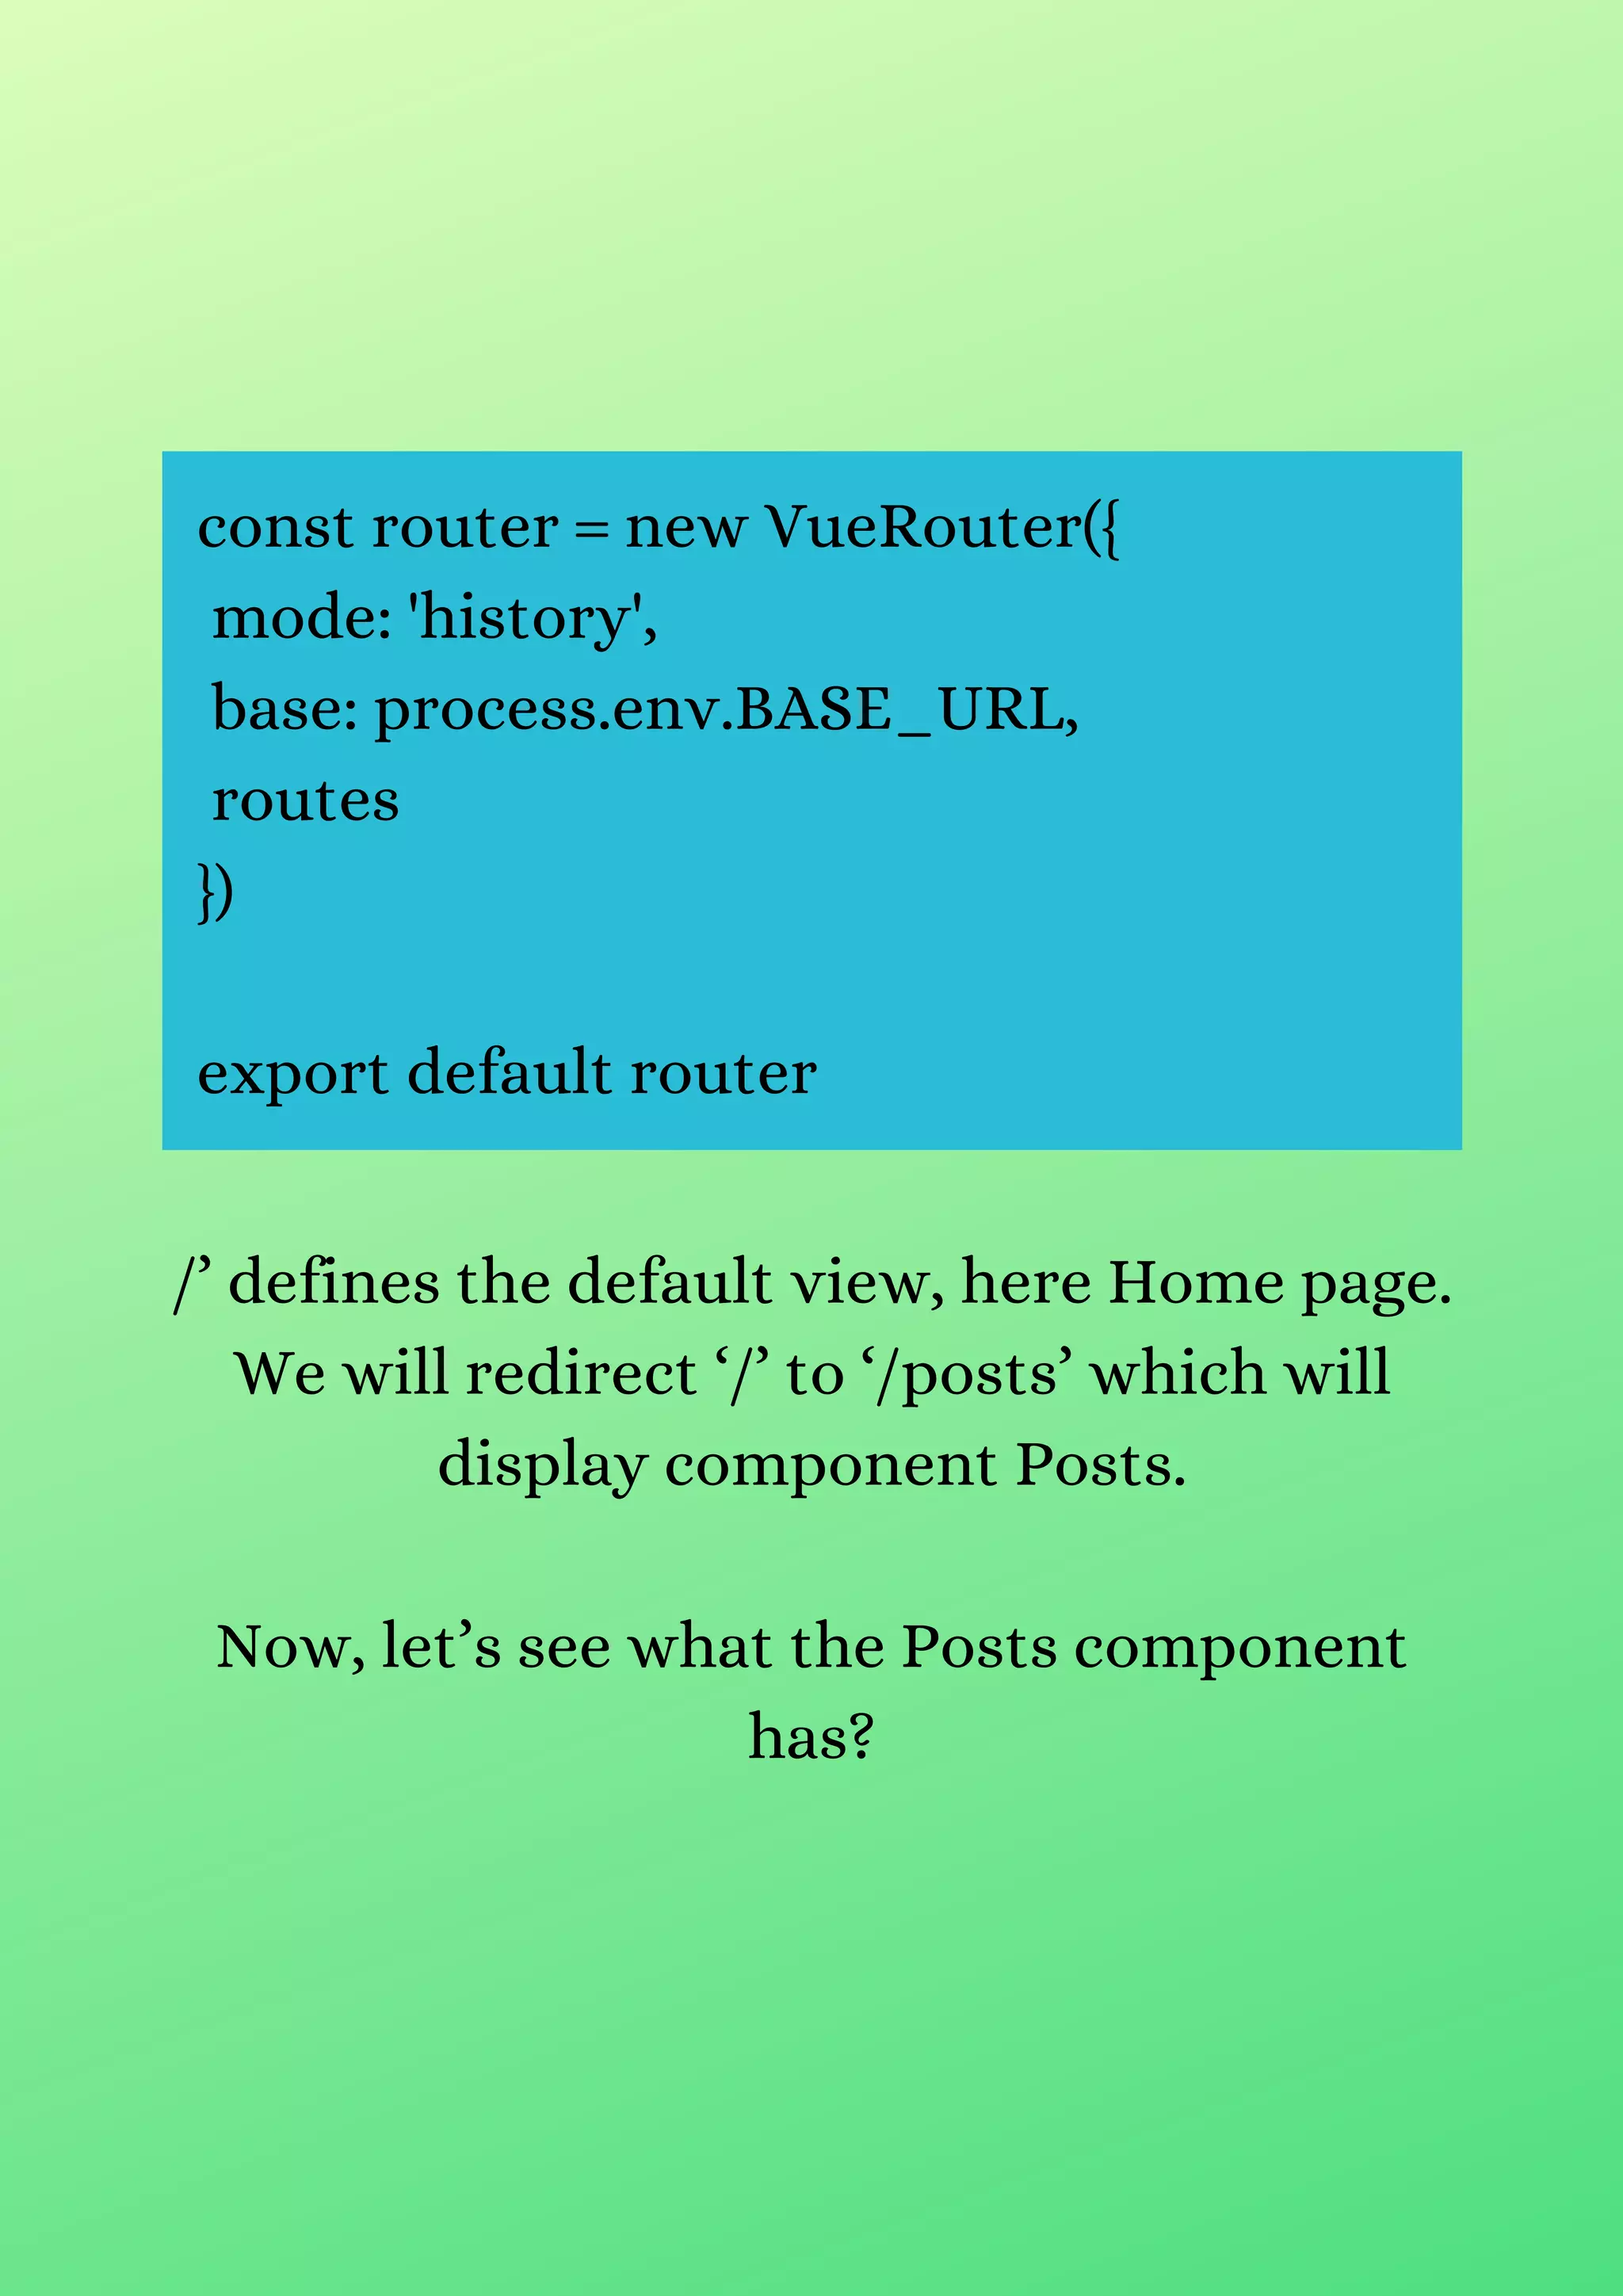
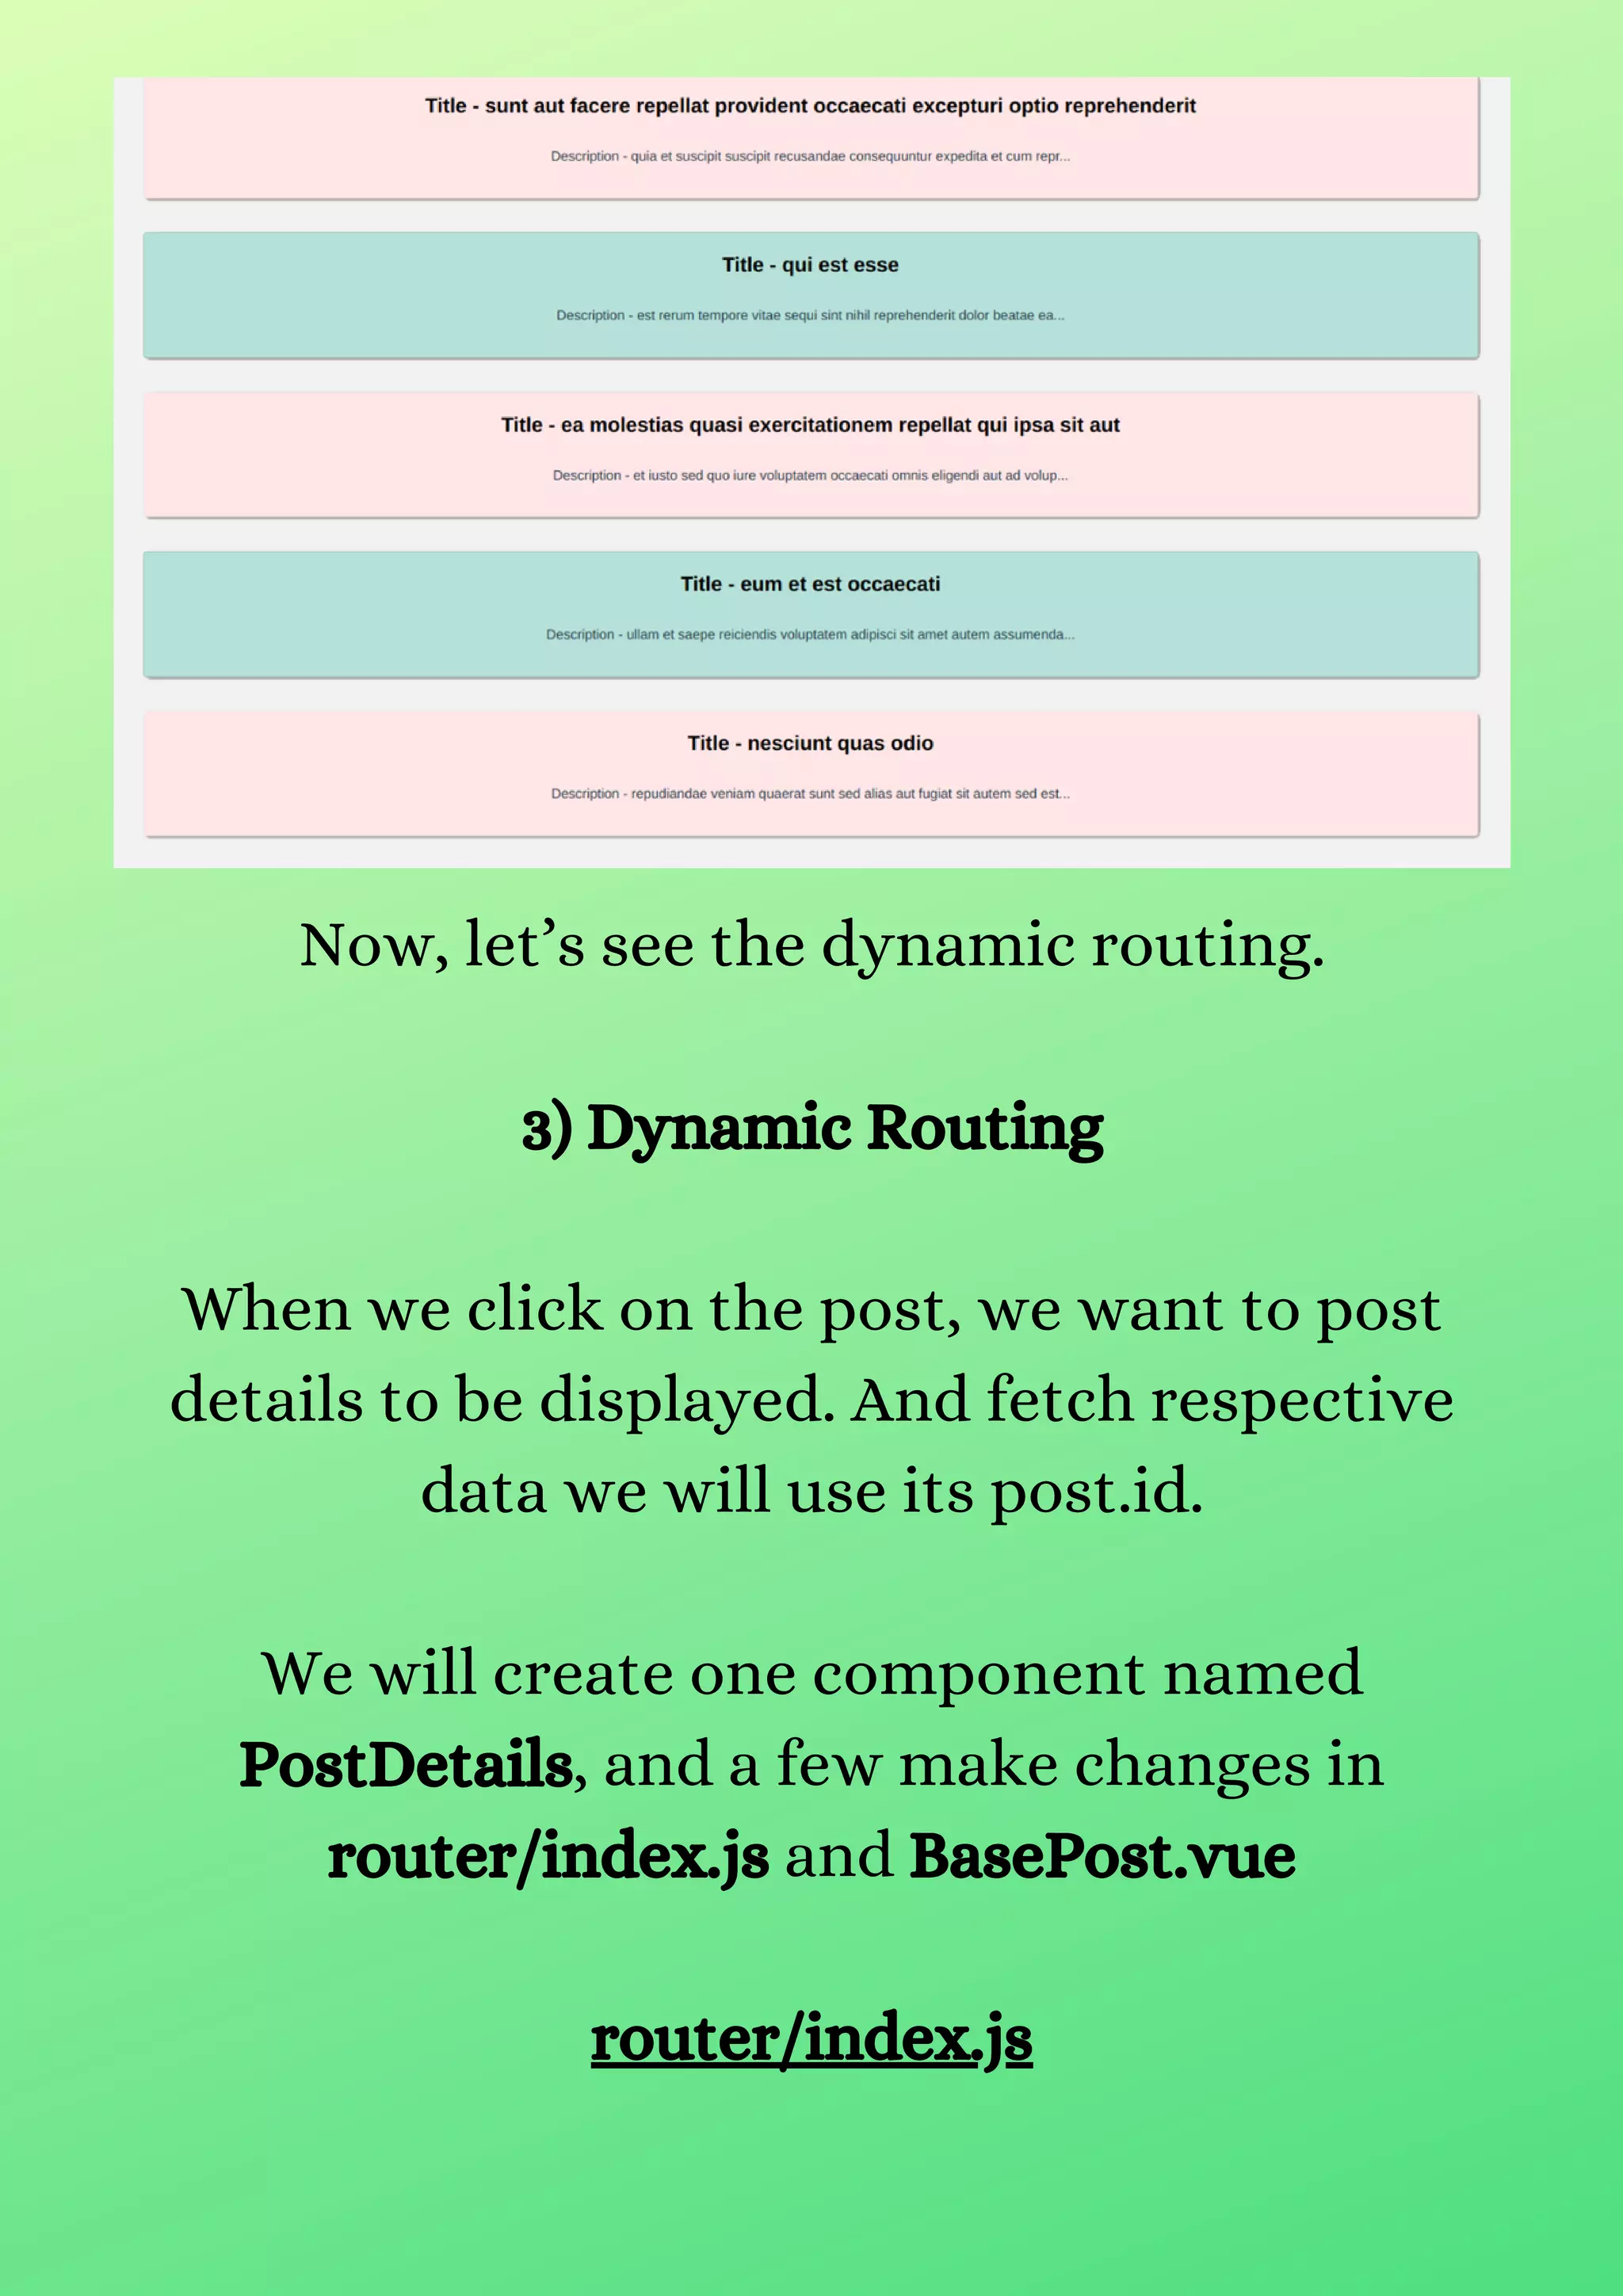
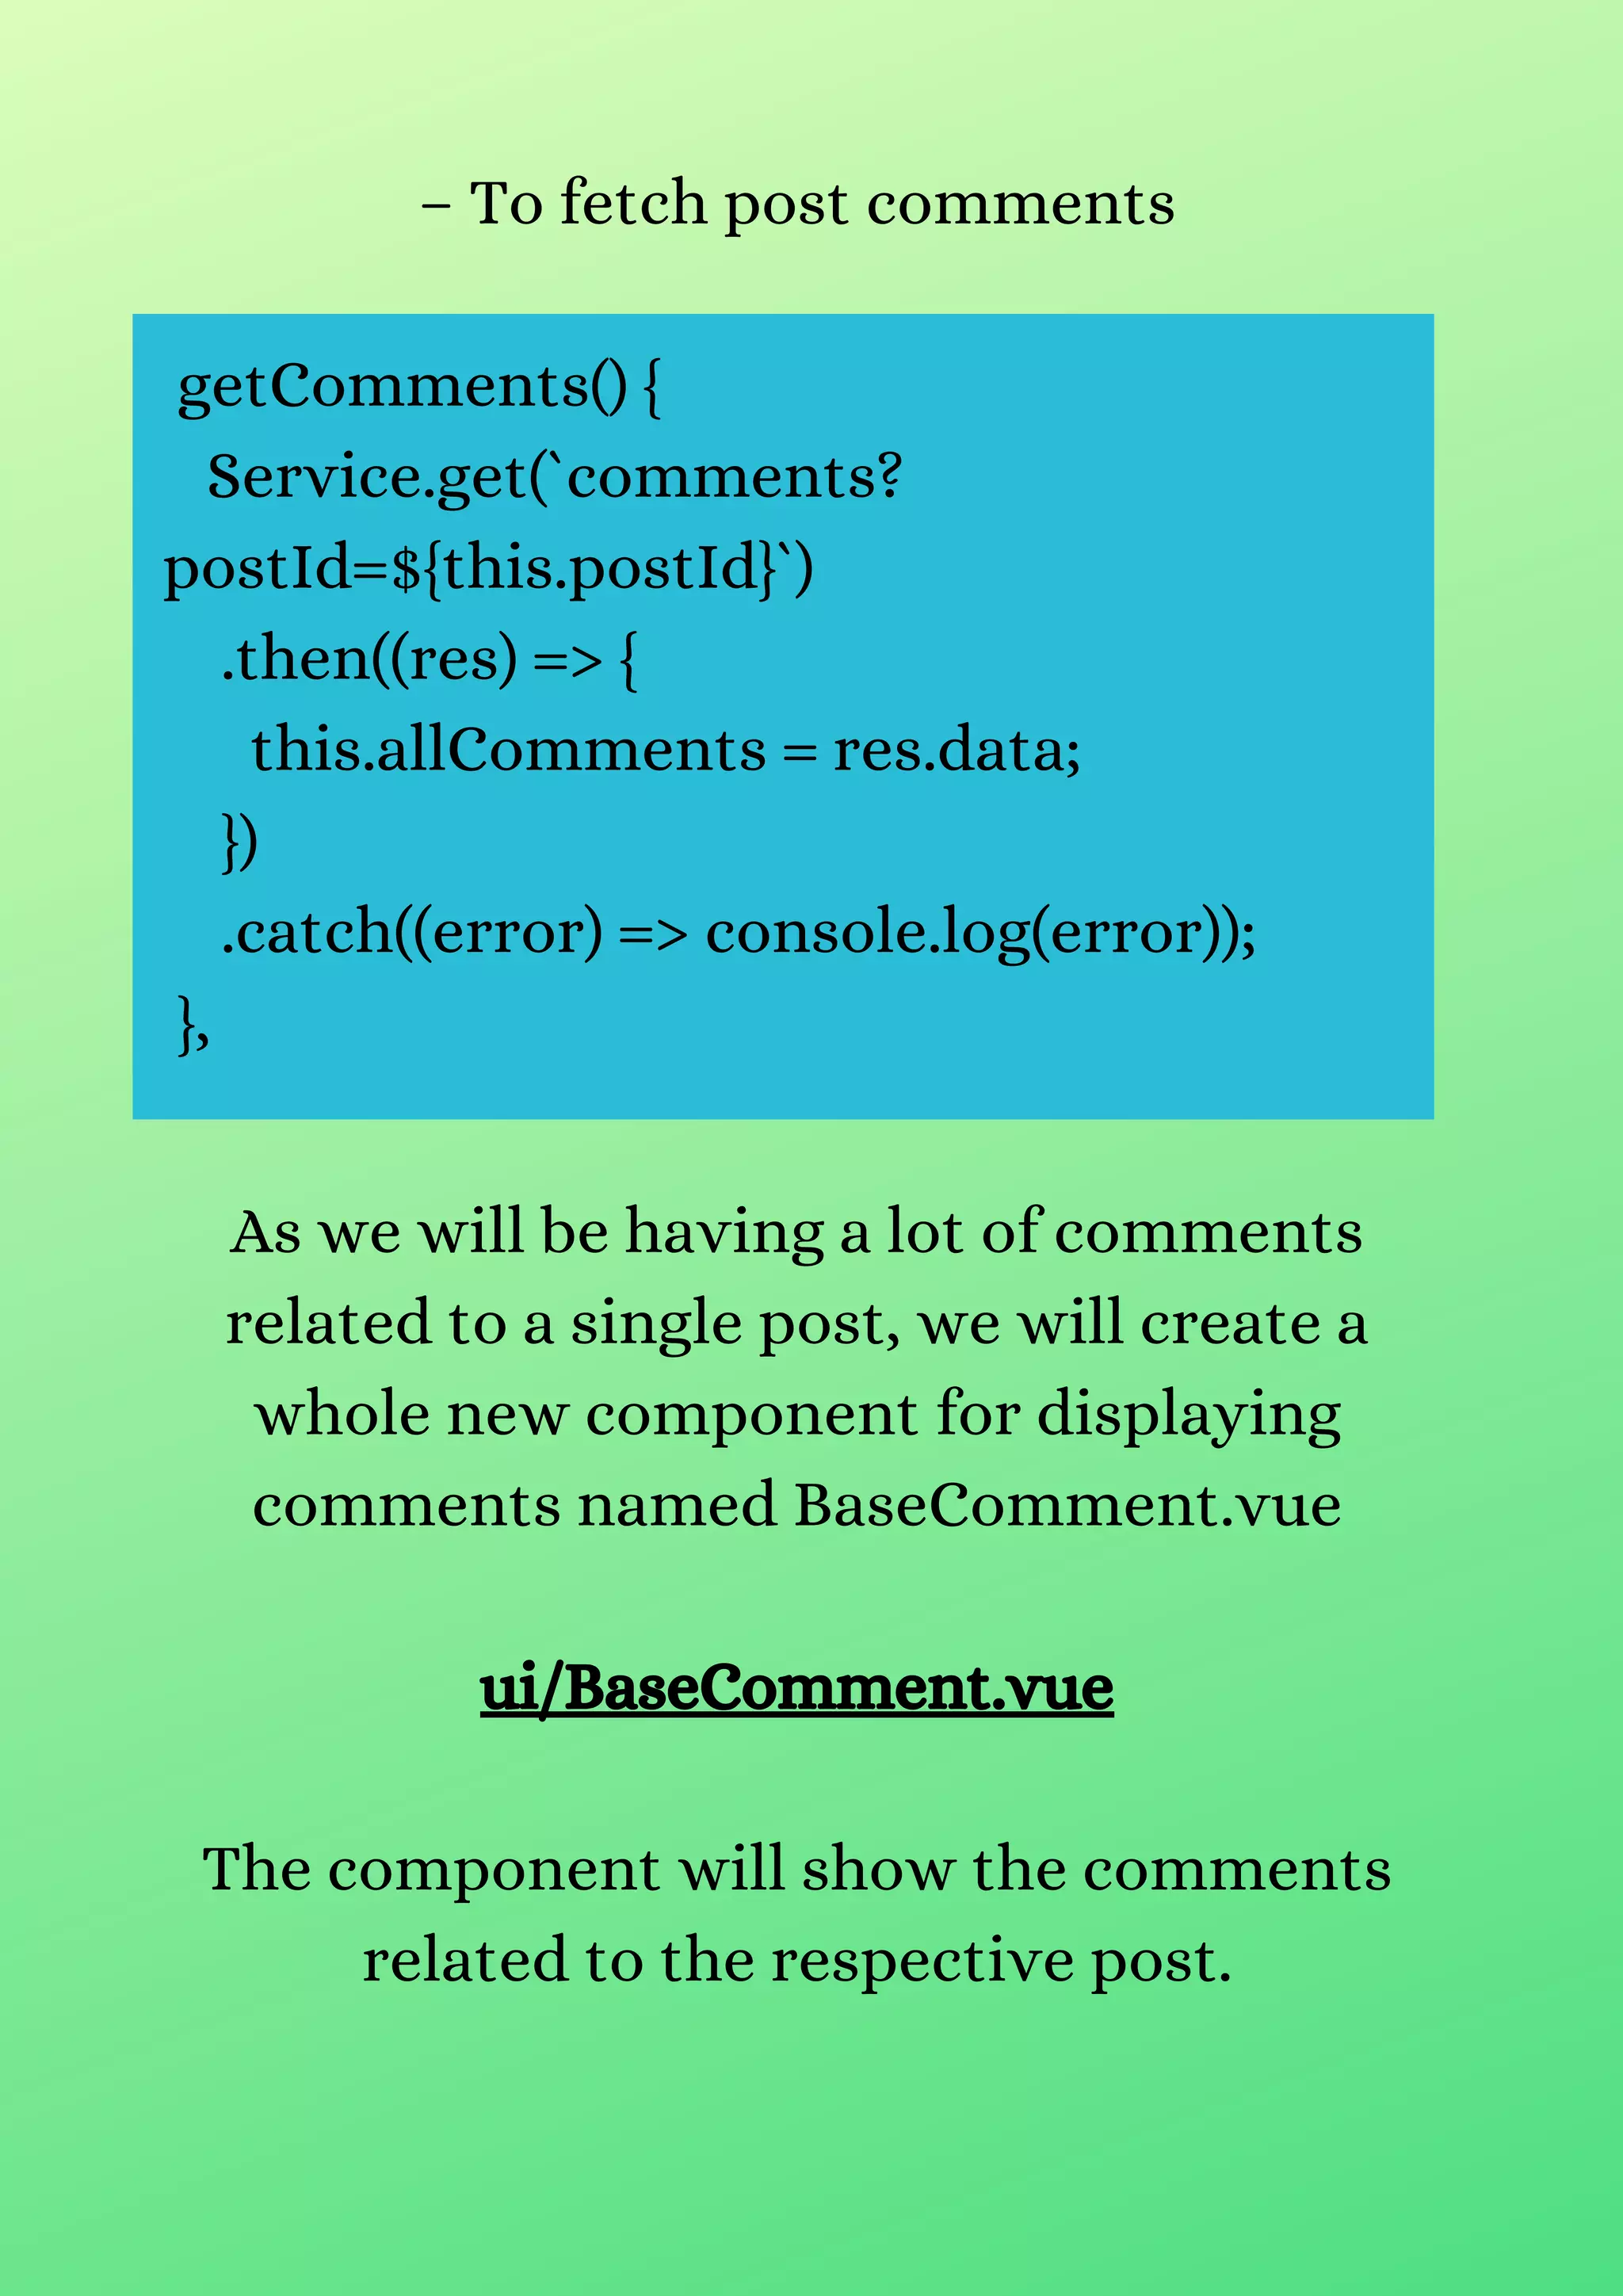
This document provides a tutorial on implementing Vue Router for single-page applications using Vue.js, highlighting step-by-step instructions and code examples. The demo application consists of a blog where users can view posts and comments, incorporating dynamic routing to display post details and comments based on user interactions. The tutorial also covers setting up a page for invalid routes to enhance user experience.


![第一次用 Vue.js 就愛上 [改]](https://cdn.slidesharecdn.com/ss_thumbnails/vuejs-160518081021-thumbnail.jpg?width=600ounds&width=560&fit=bounds)


