Download as PDF, PPTX


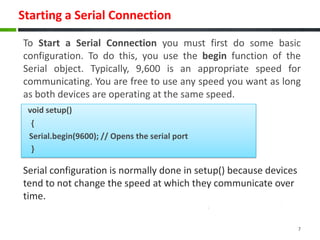

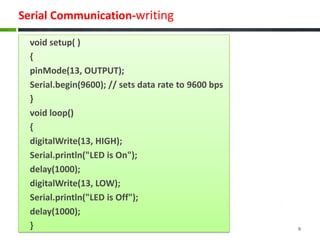
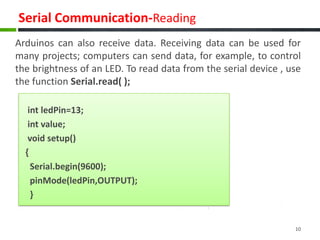
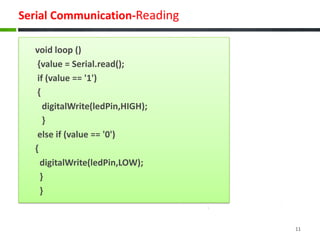


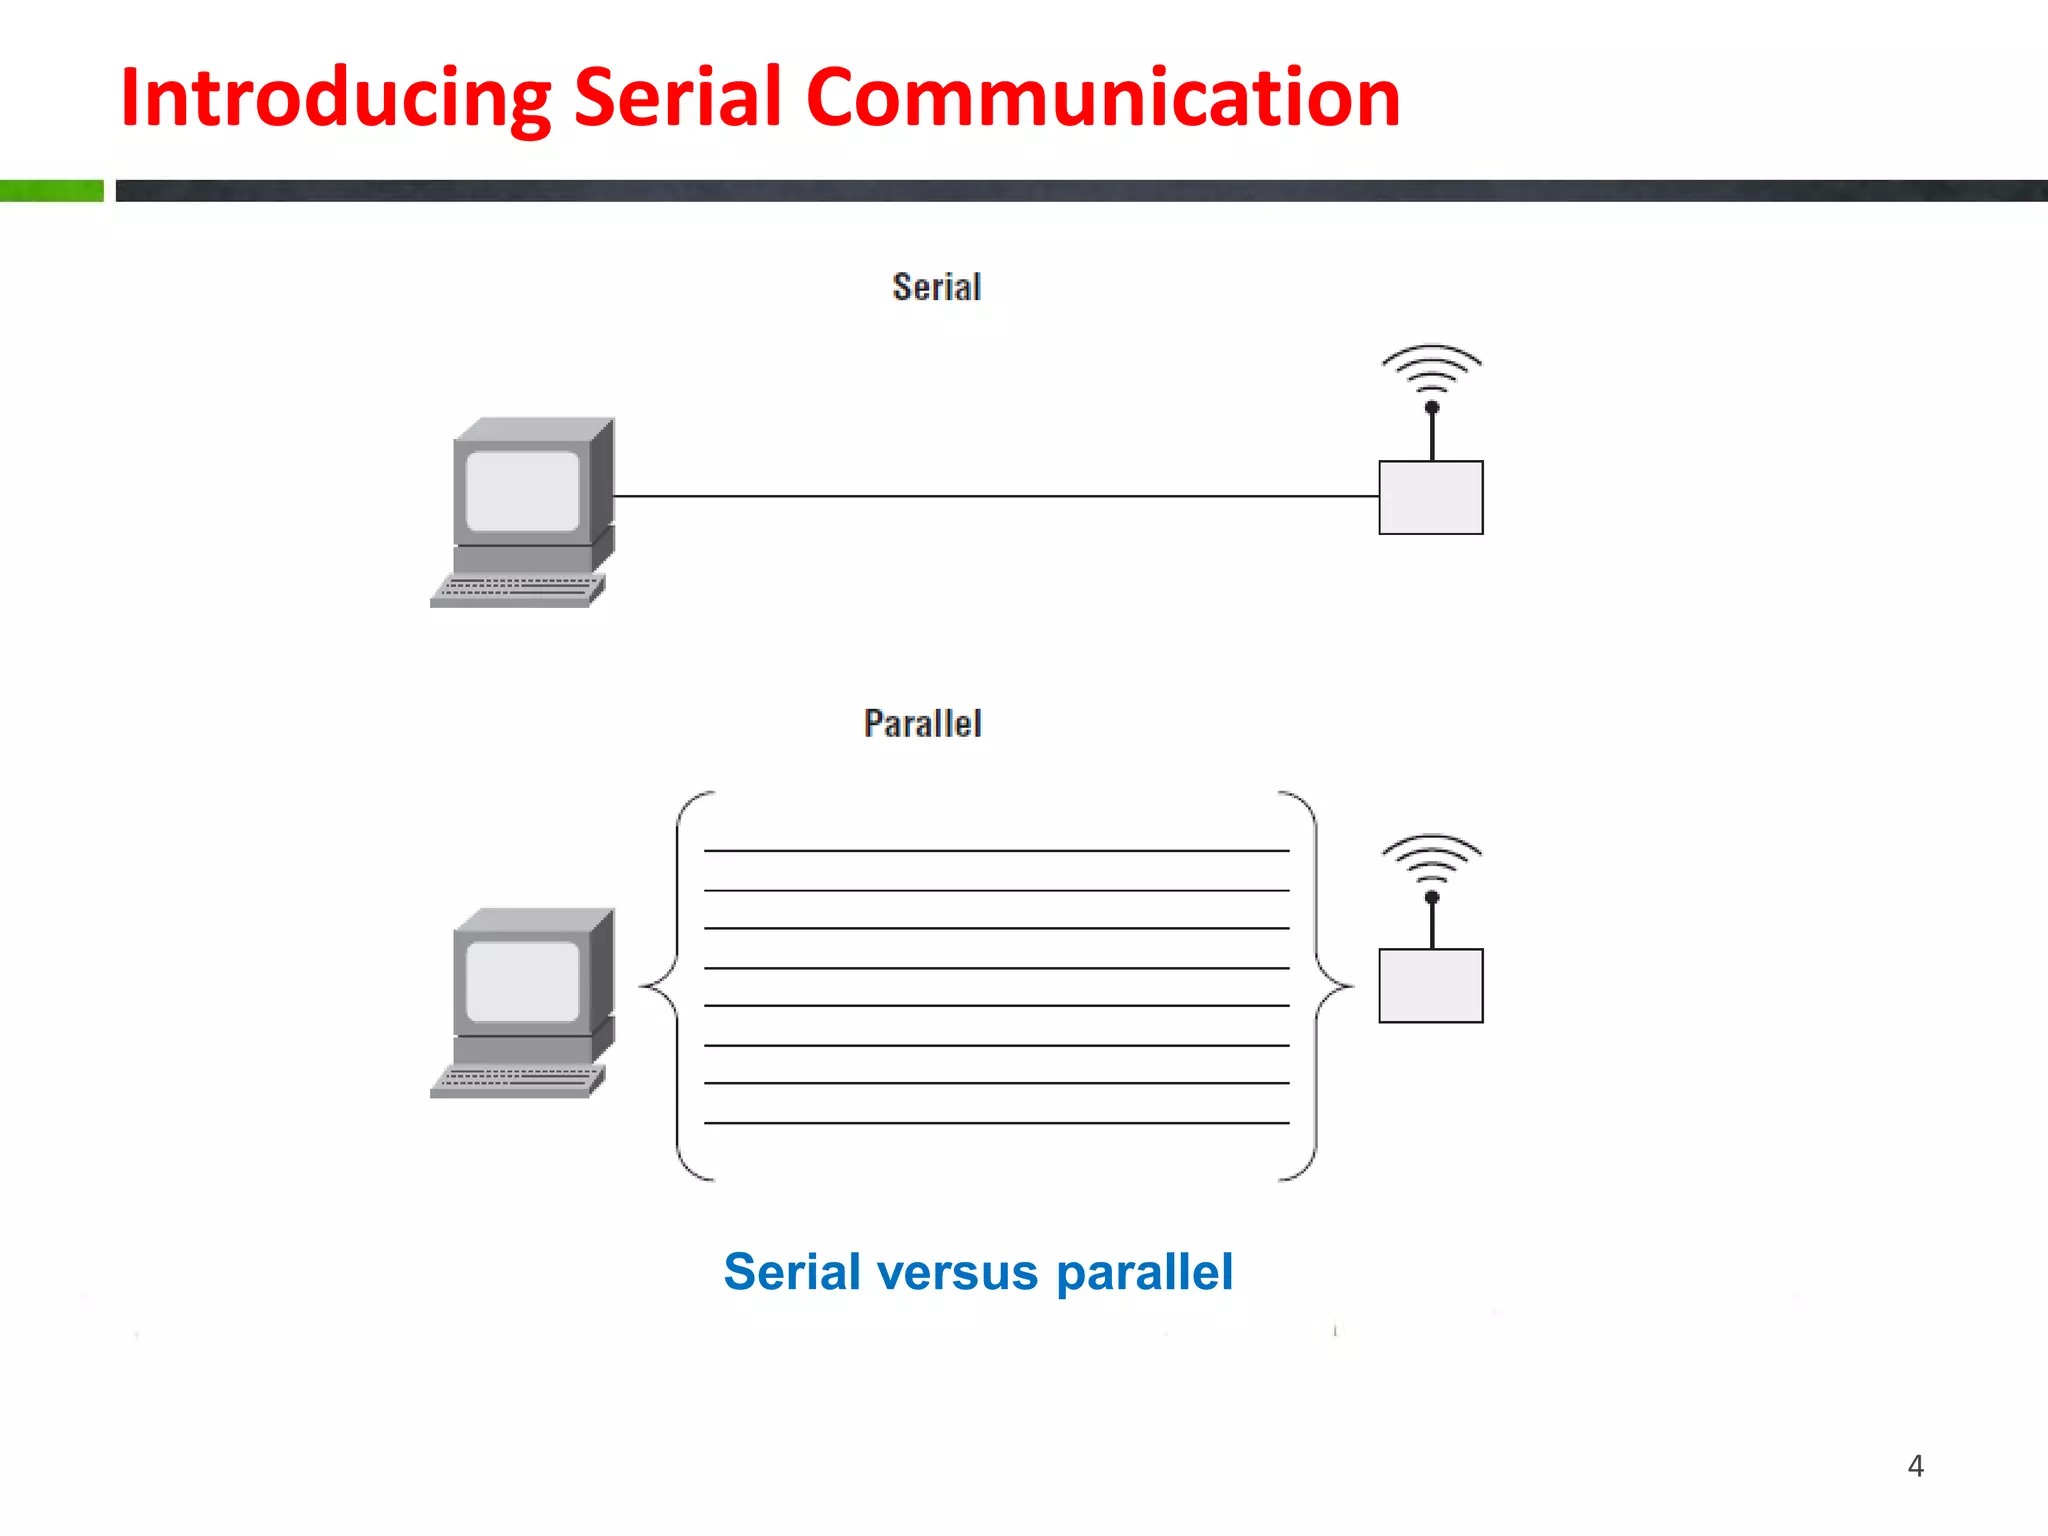
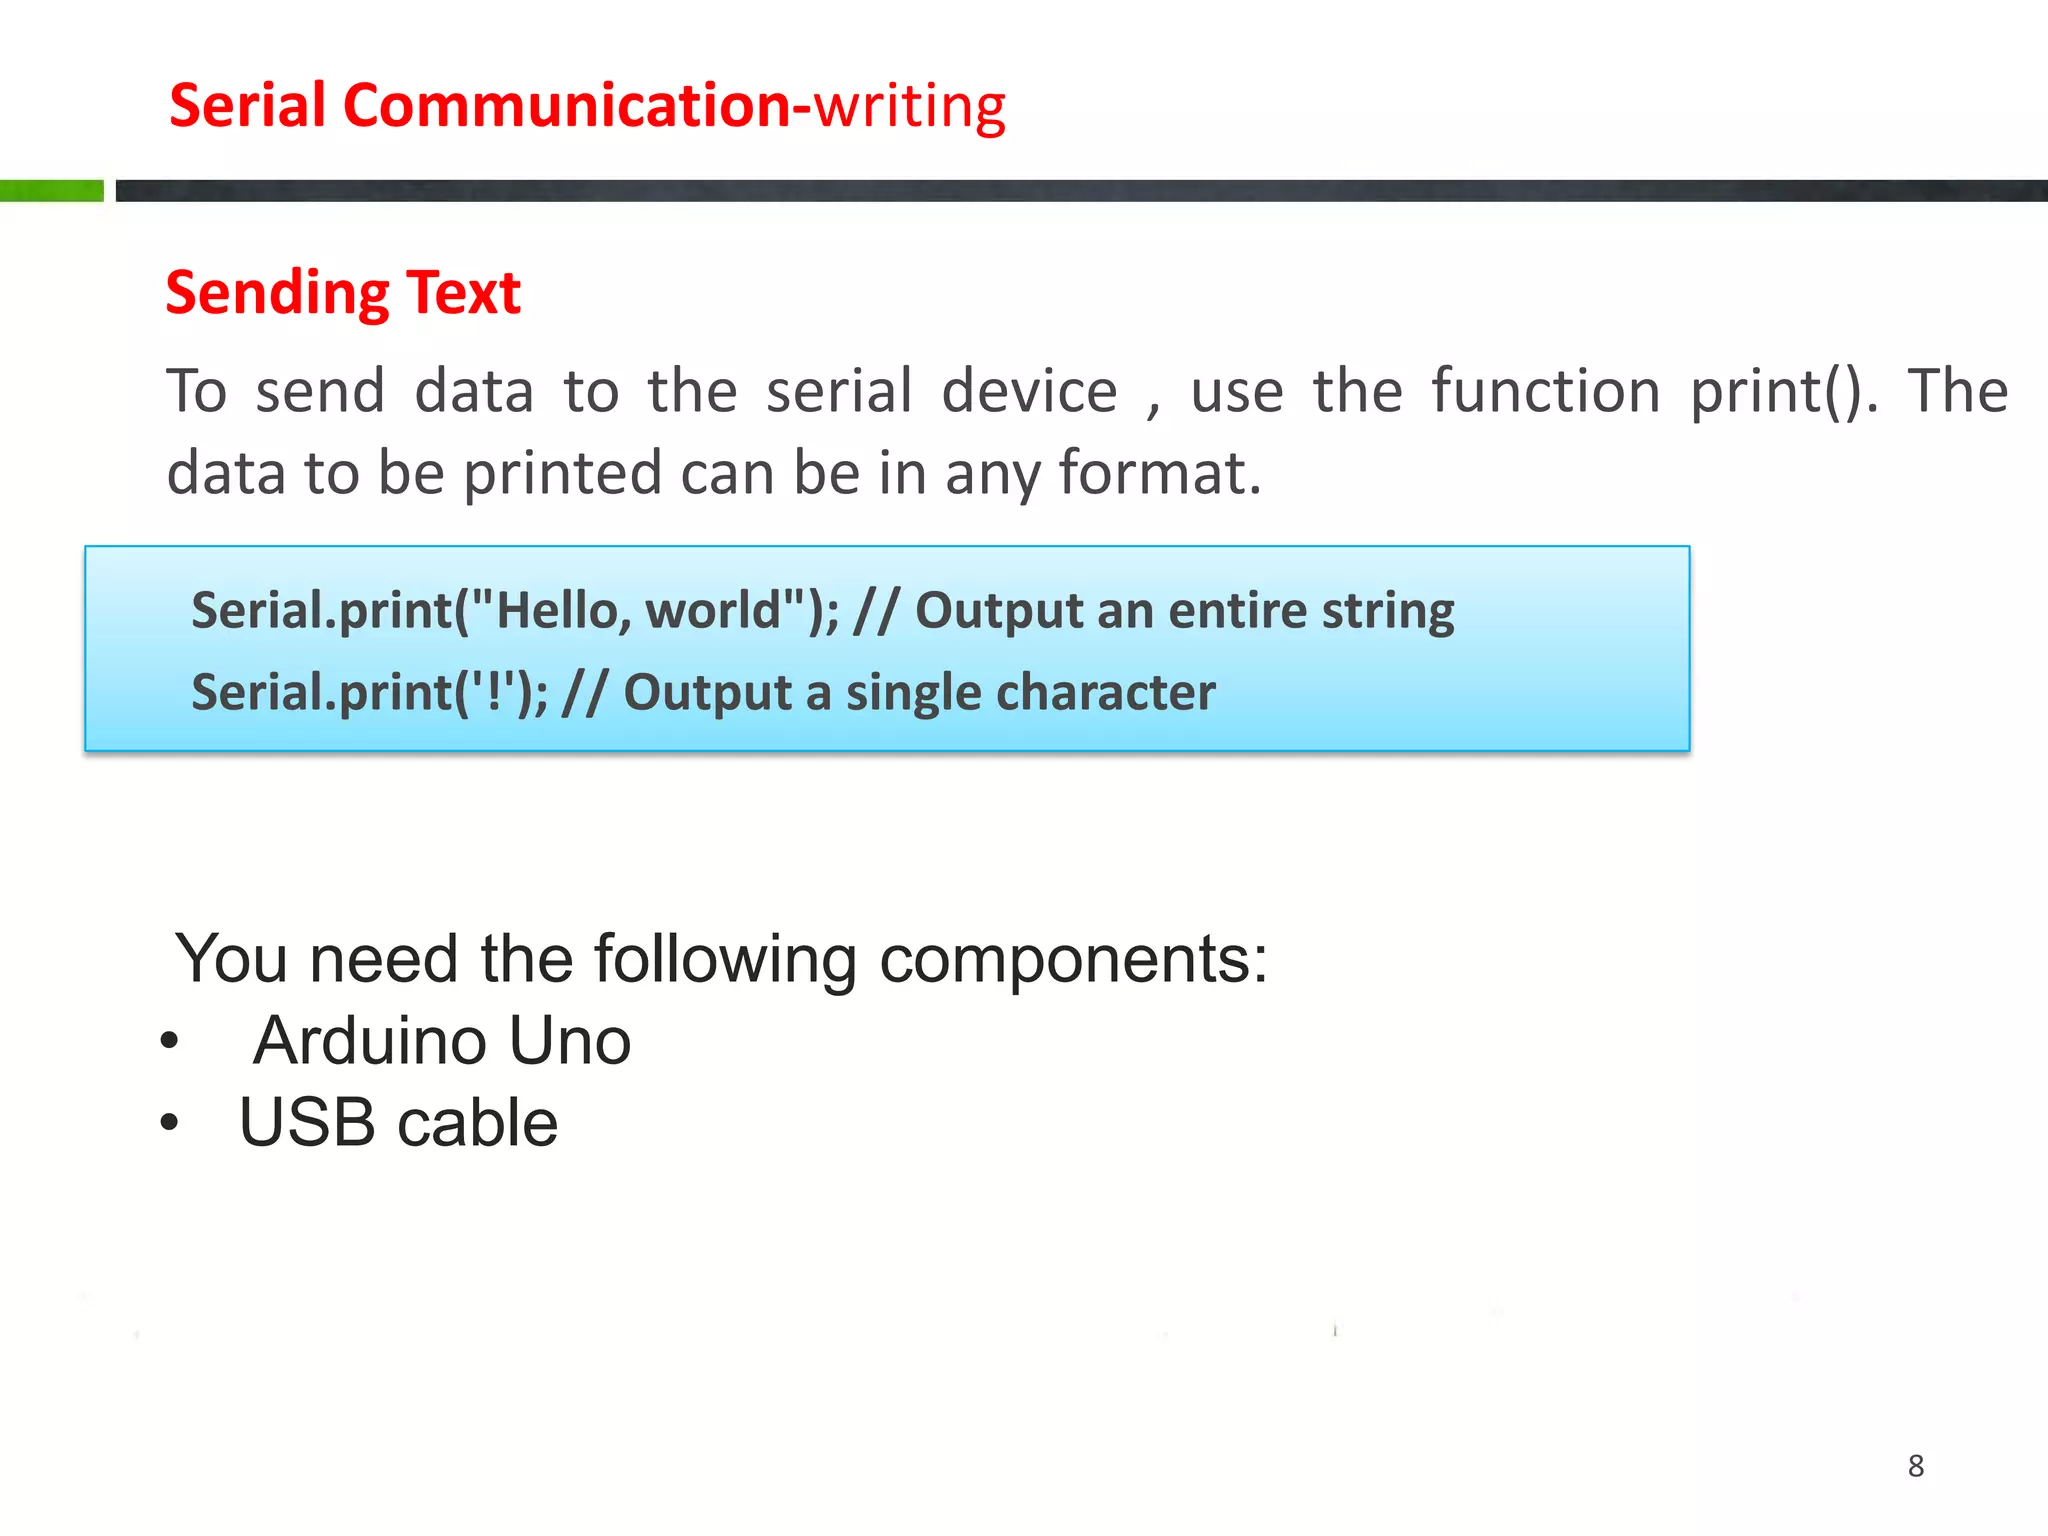
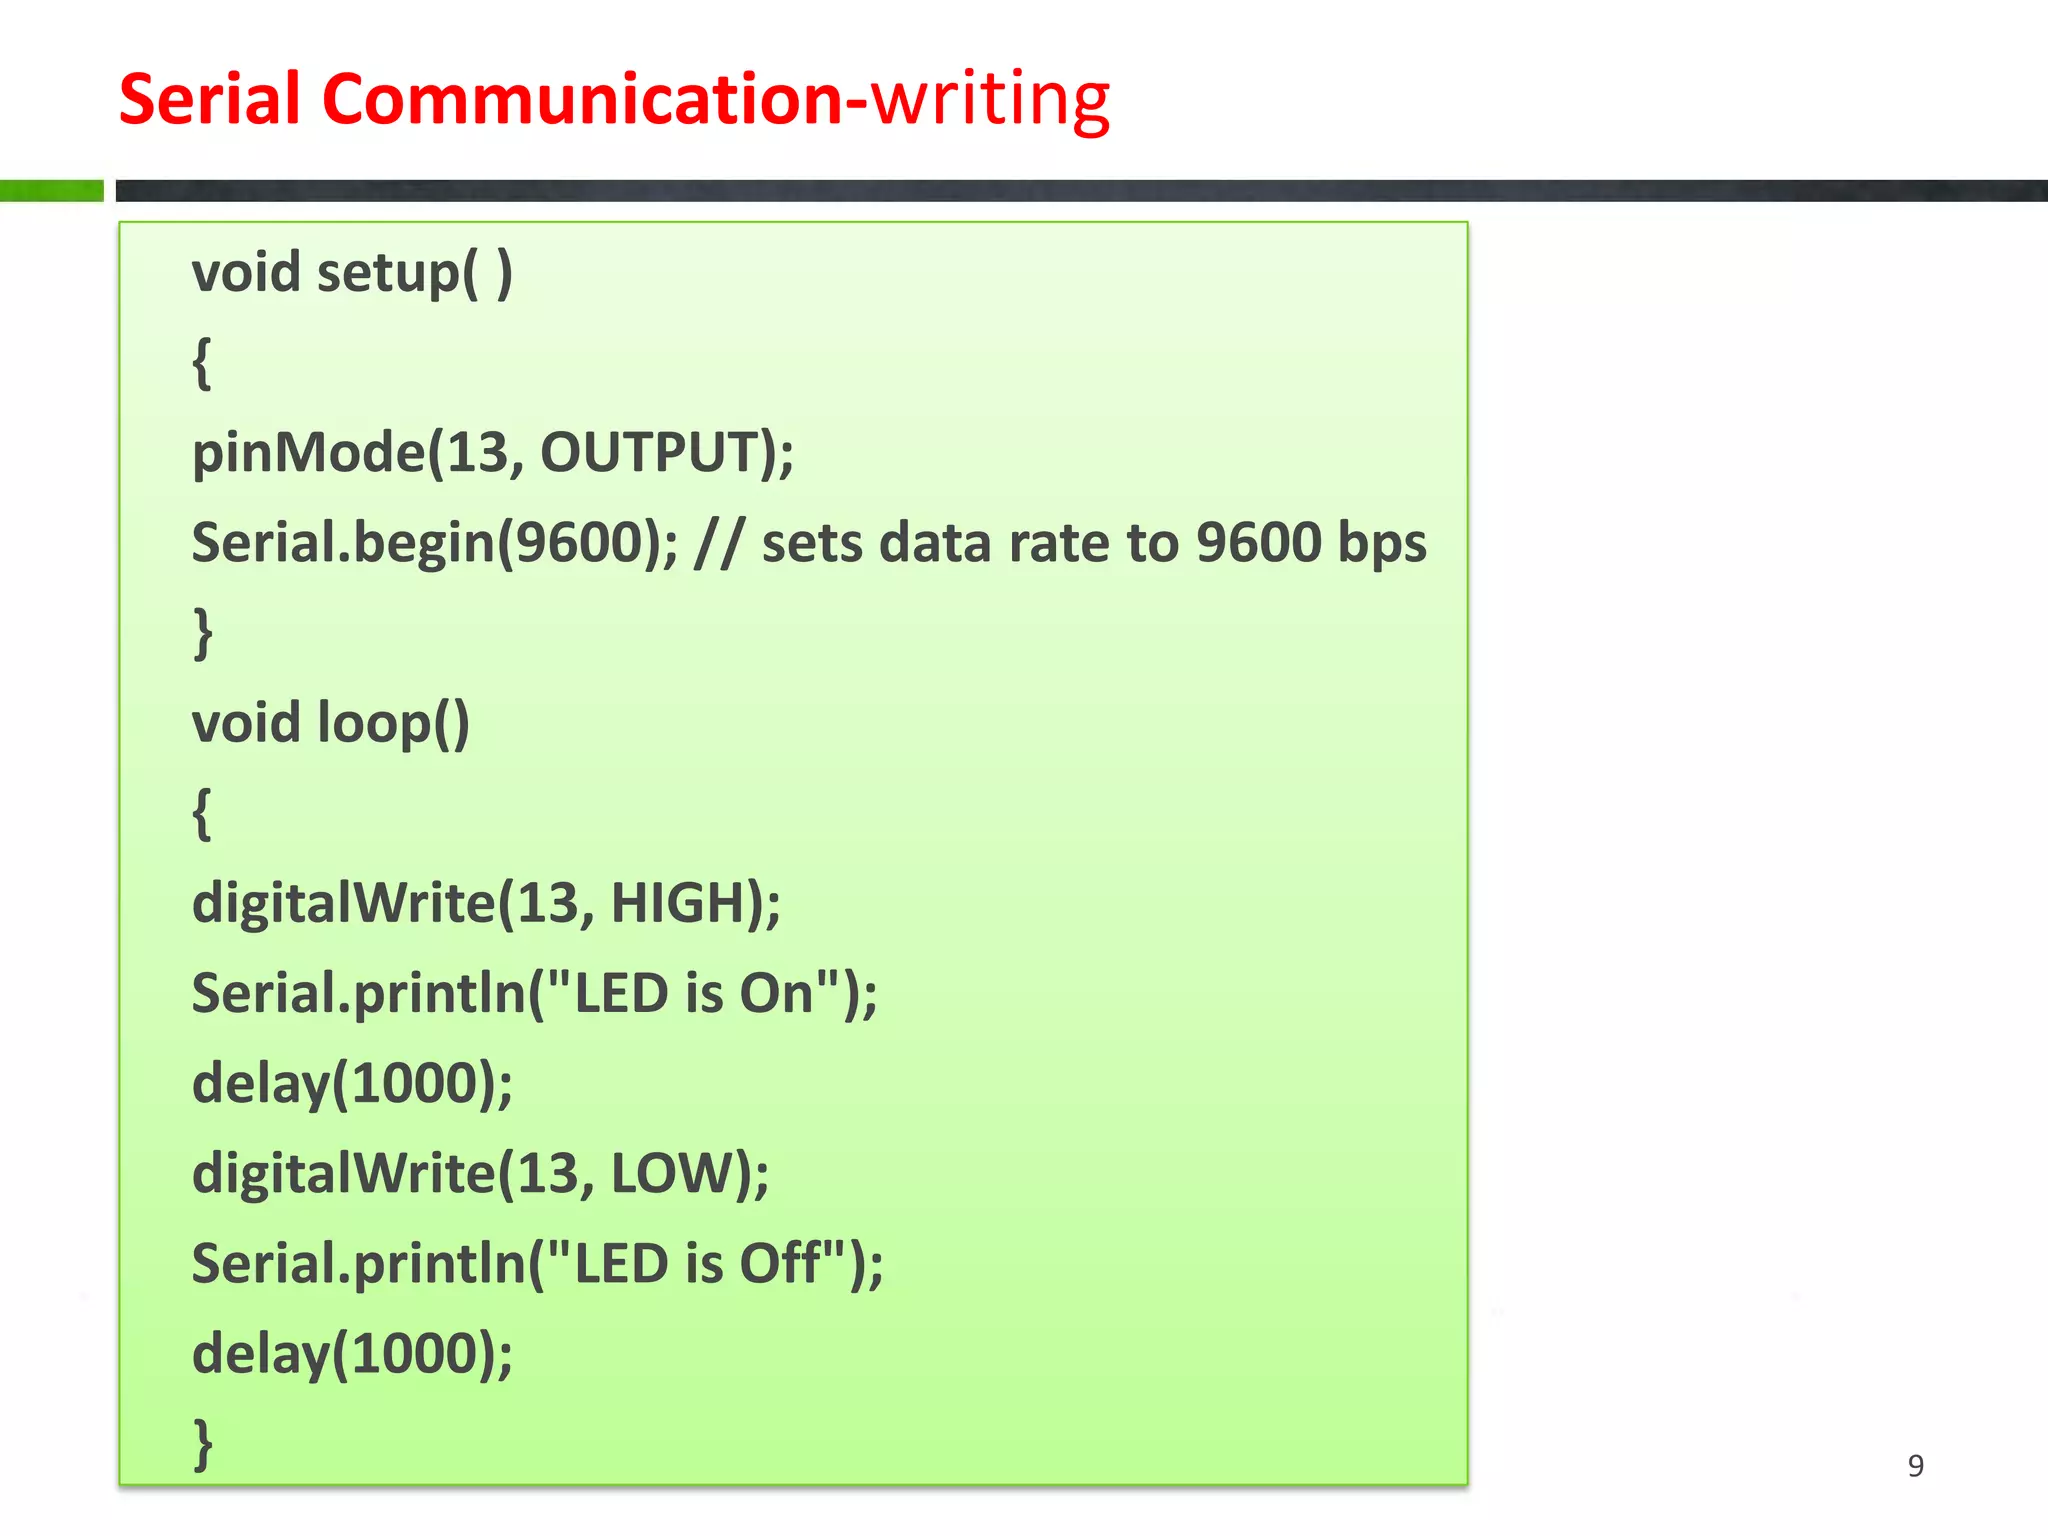


The document discusses serial communication, highlighting that it transmits data one bit at a time over a single wire, unlike parallel communication which uses multiple wires. It explains how Arduinos utilize serial ports, including USB, for communication with computers and devices, and provides examples of configuring serial connections, sending, and receiving data. The document also includes sample code for basic serial communication tasks.


![Introduction to ESP32 Programming [Road to RIoT 2017]](https://cdn.slidesharecdn.com/ss_thumbnails/roadtoriotsurabayagettingstartedesp32-170726155154-thumbnail.jpg?width=600ounds&width=560&fit=bounds)


