Download to read offline


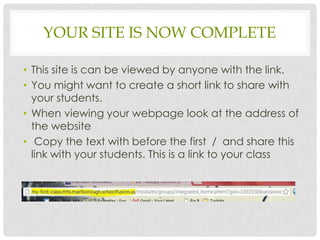
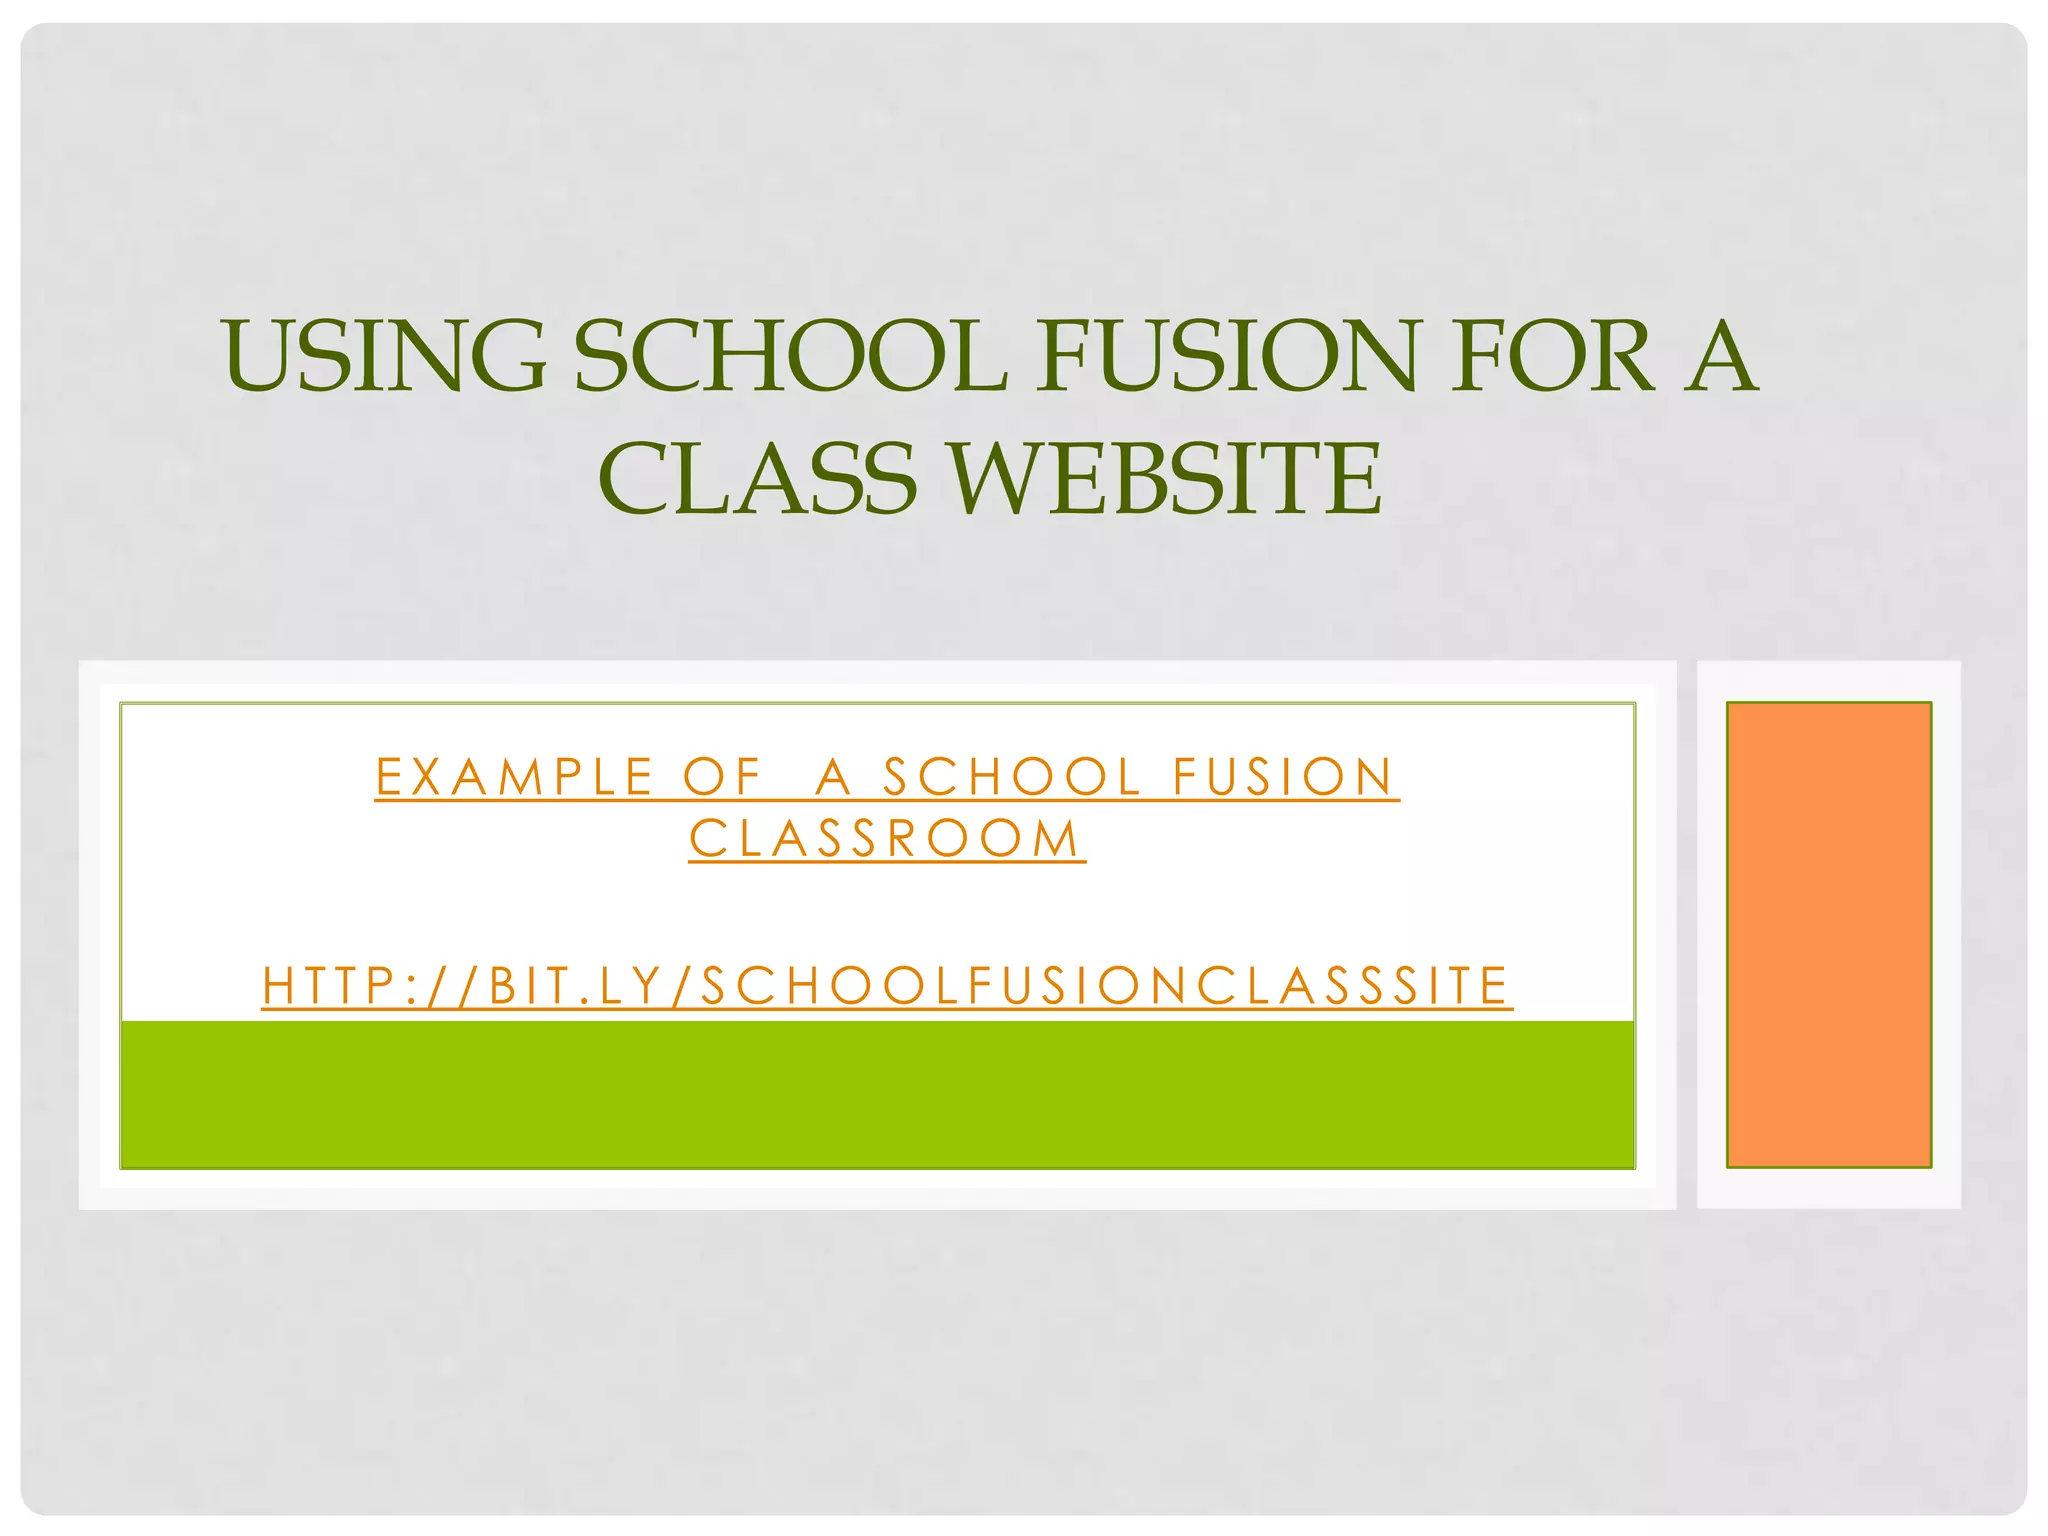
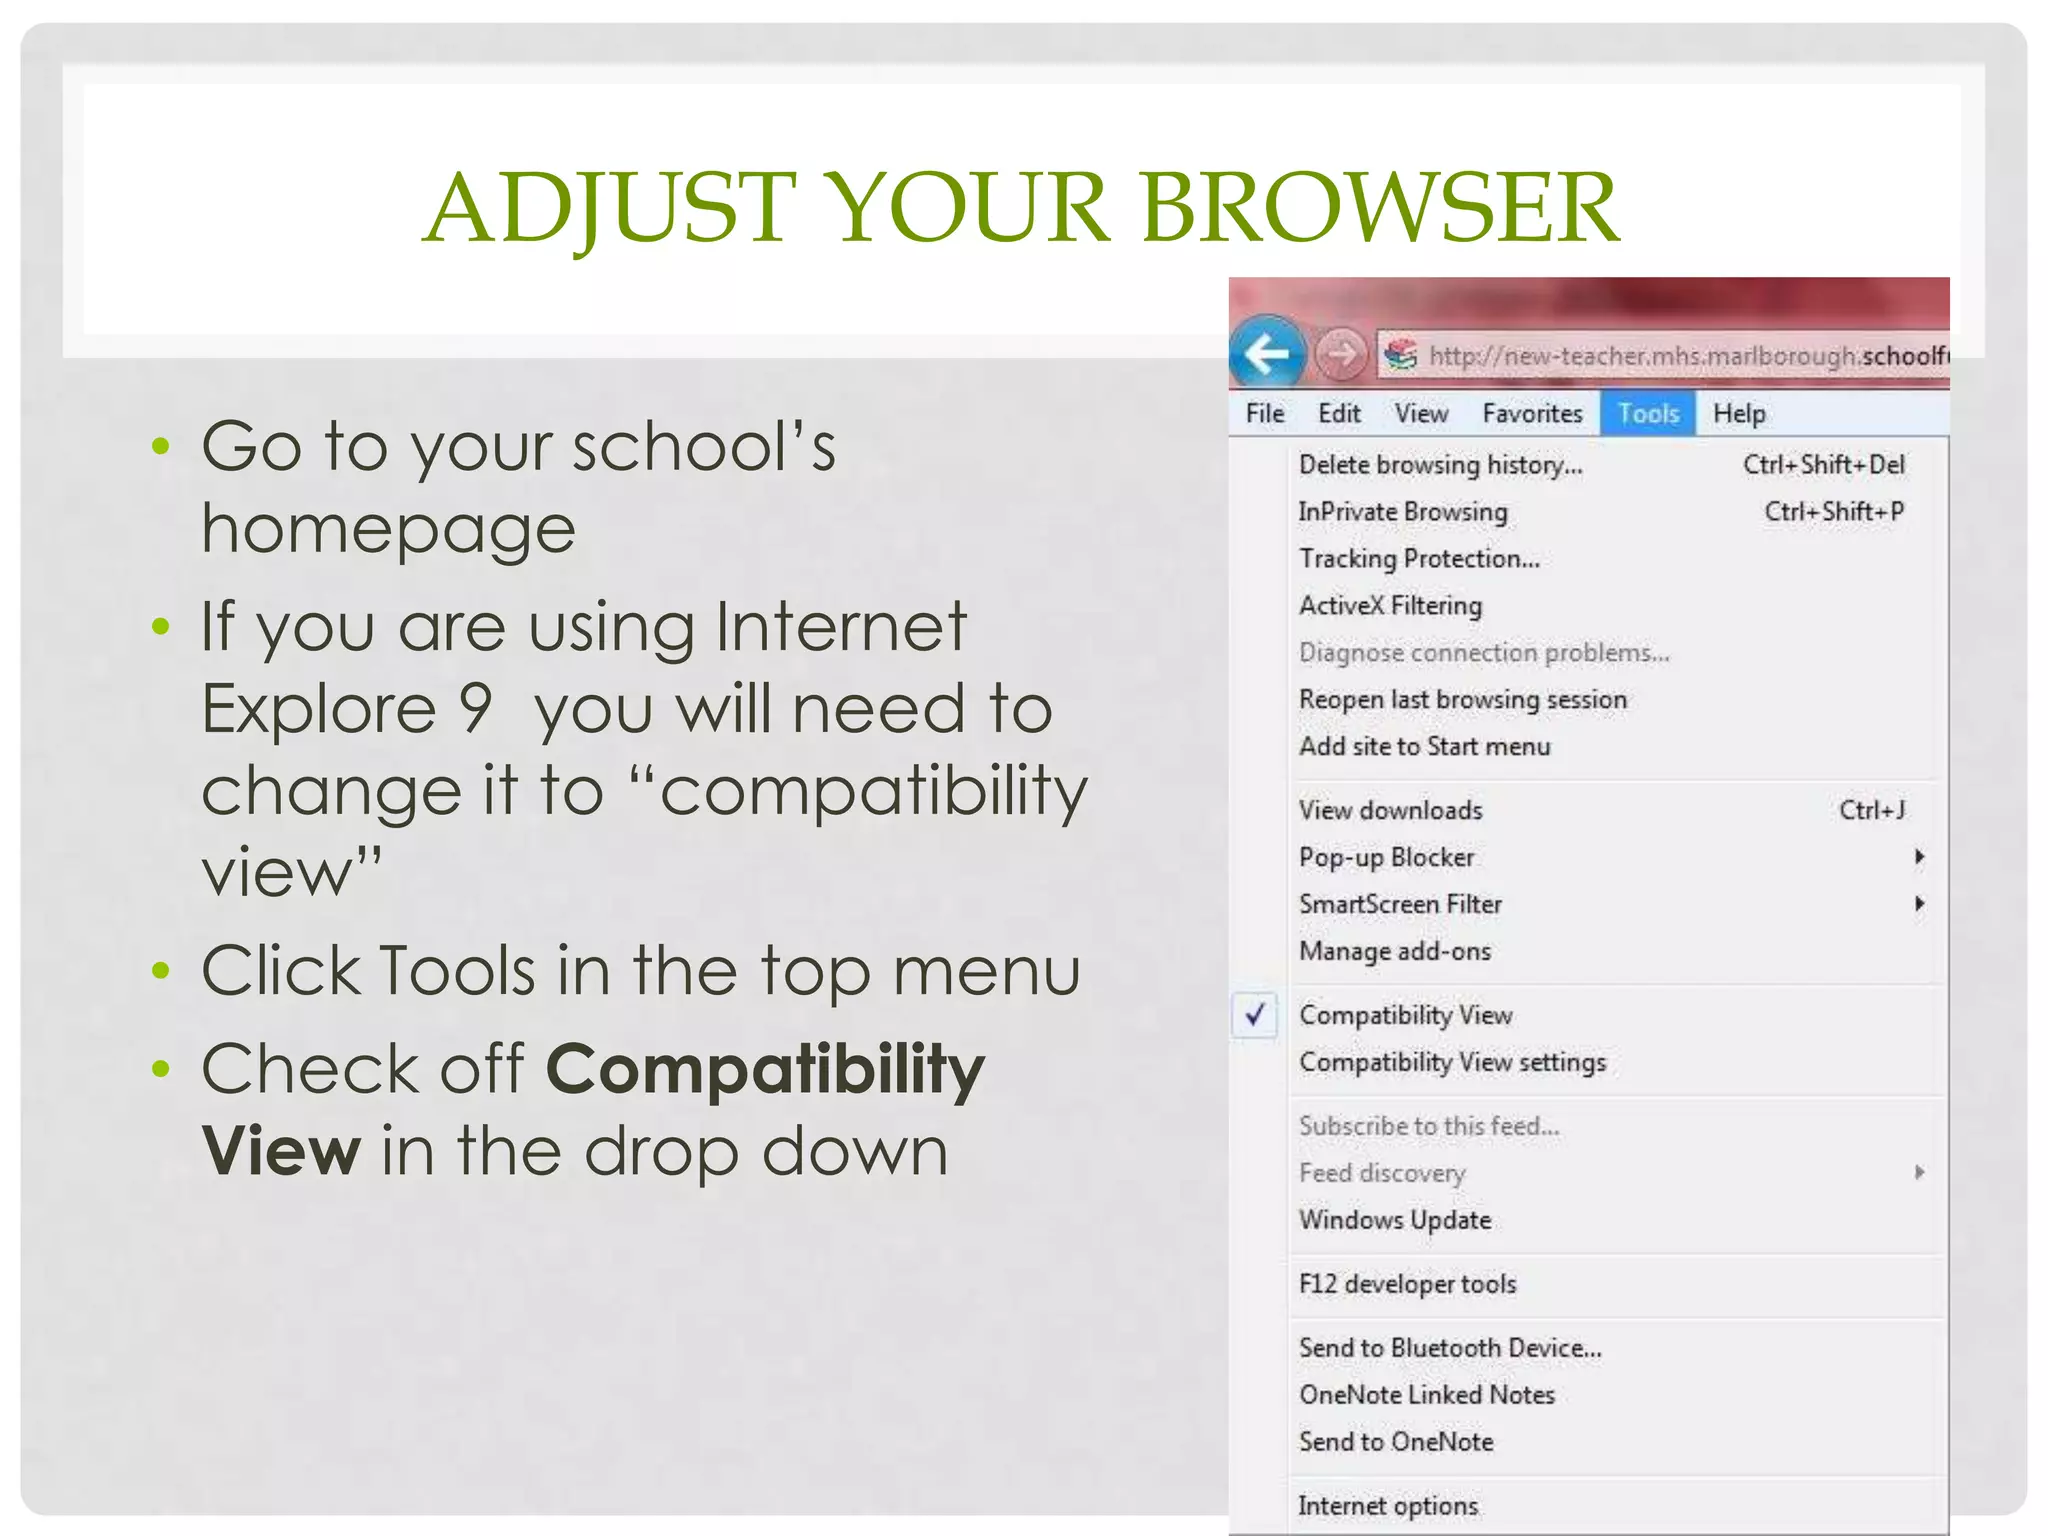
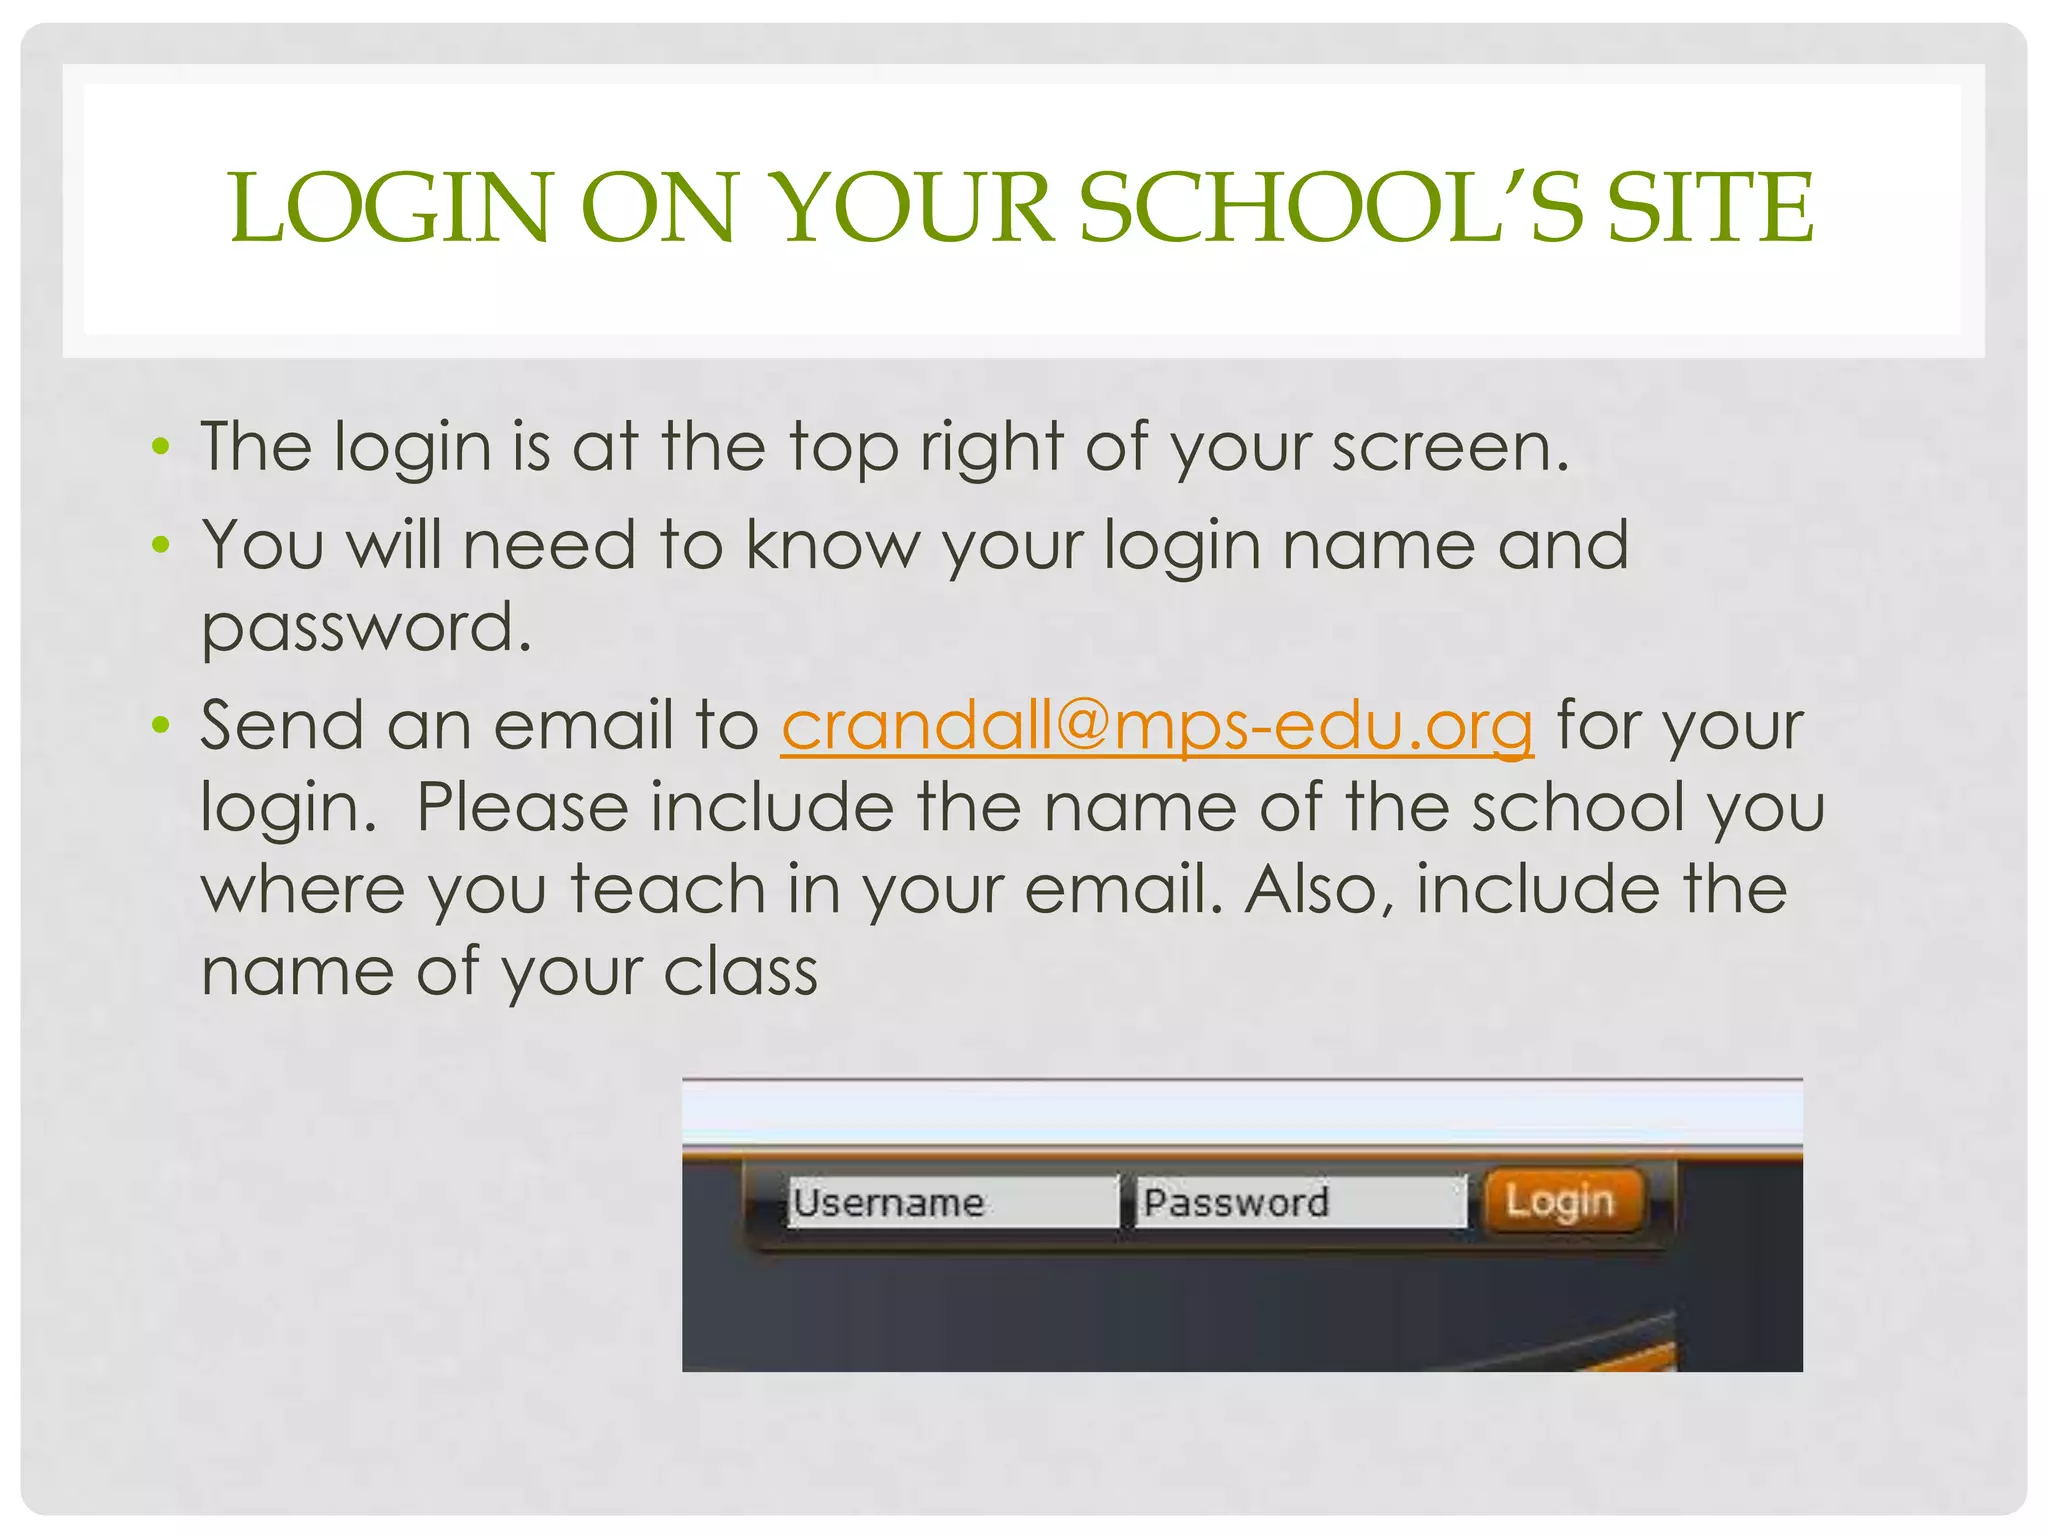
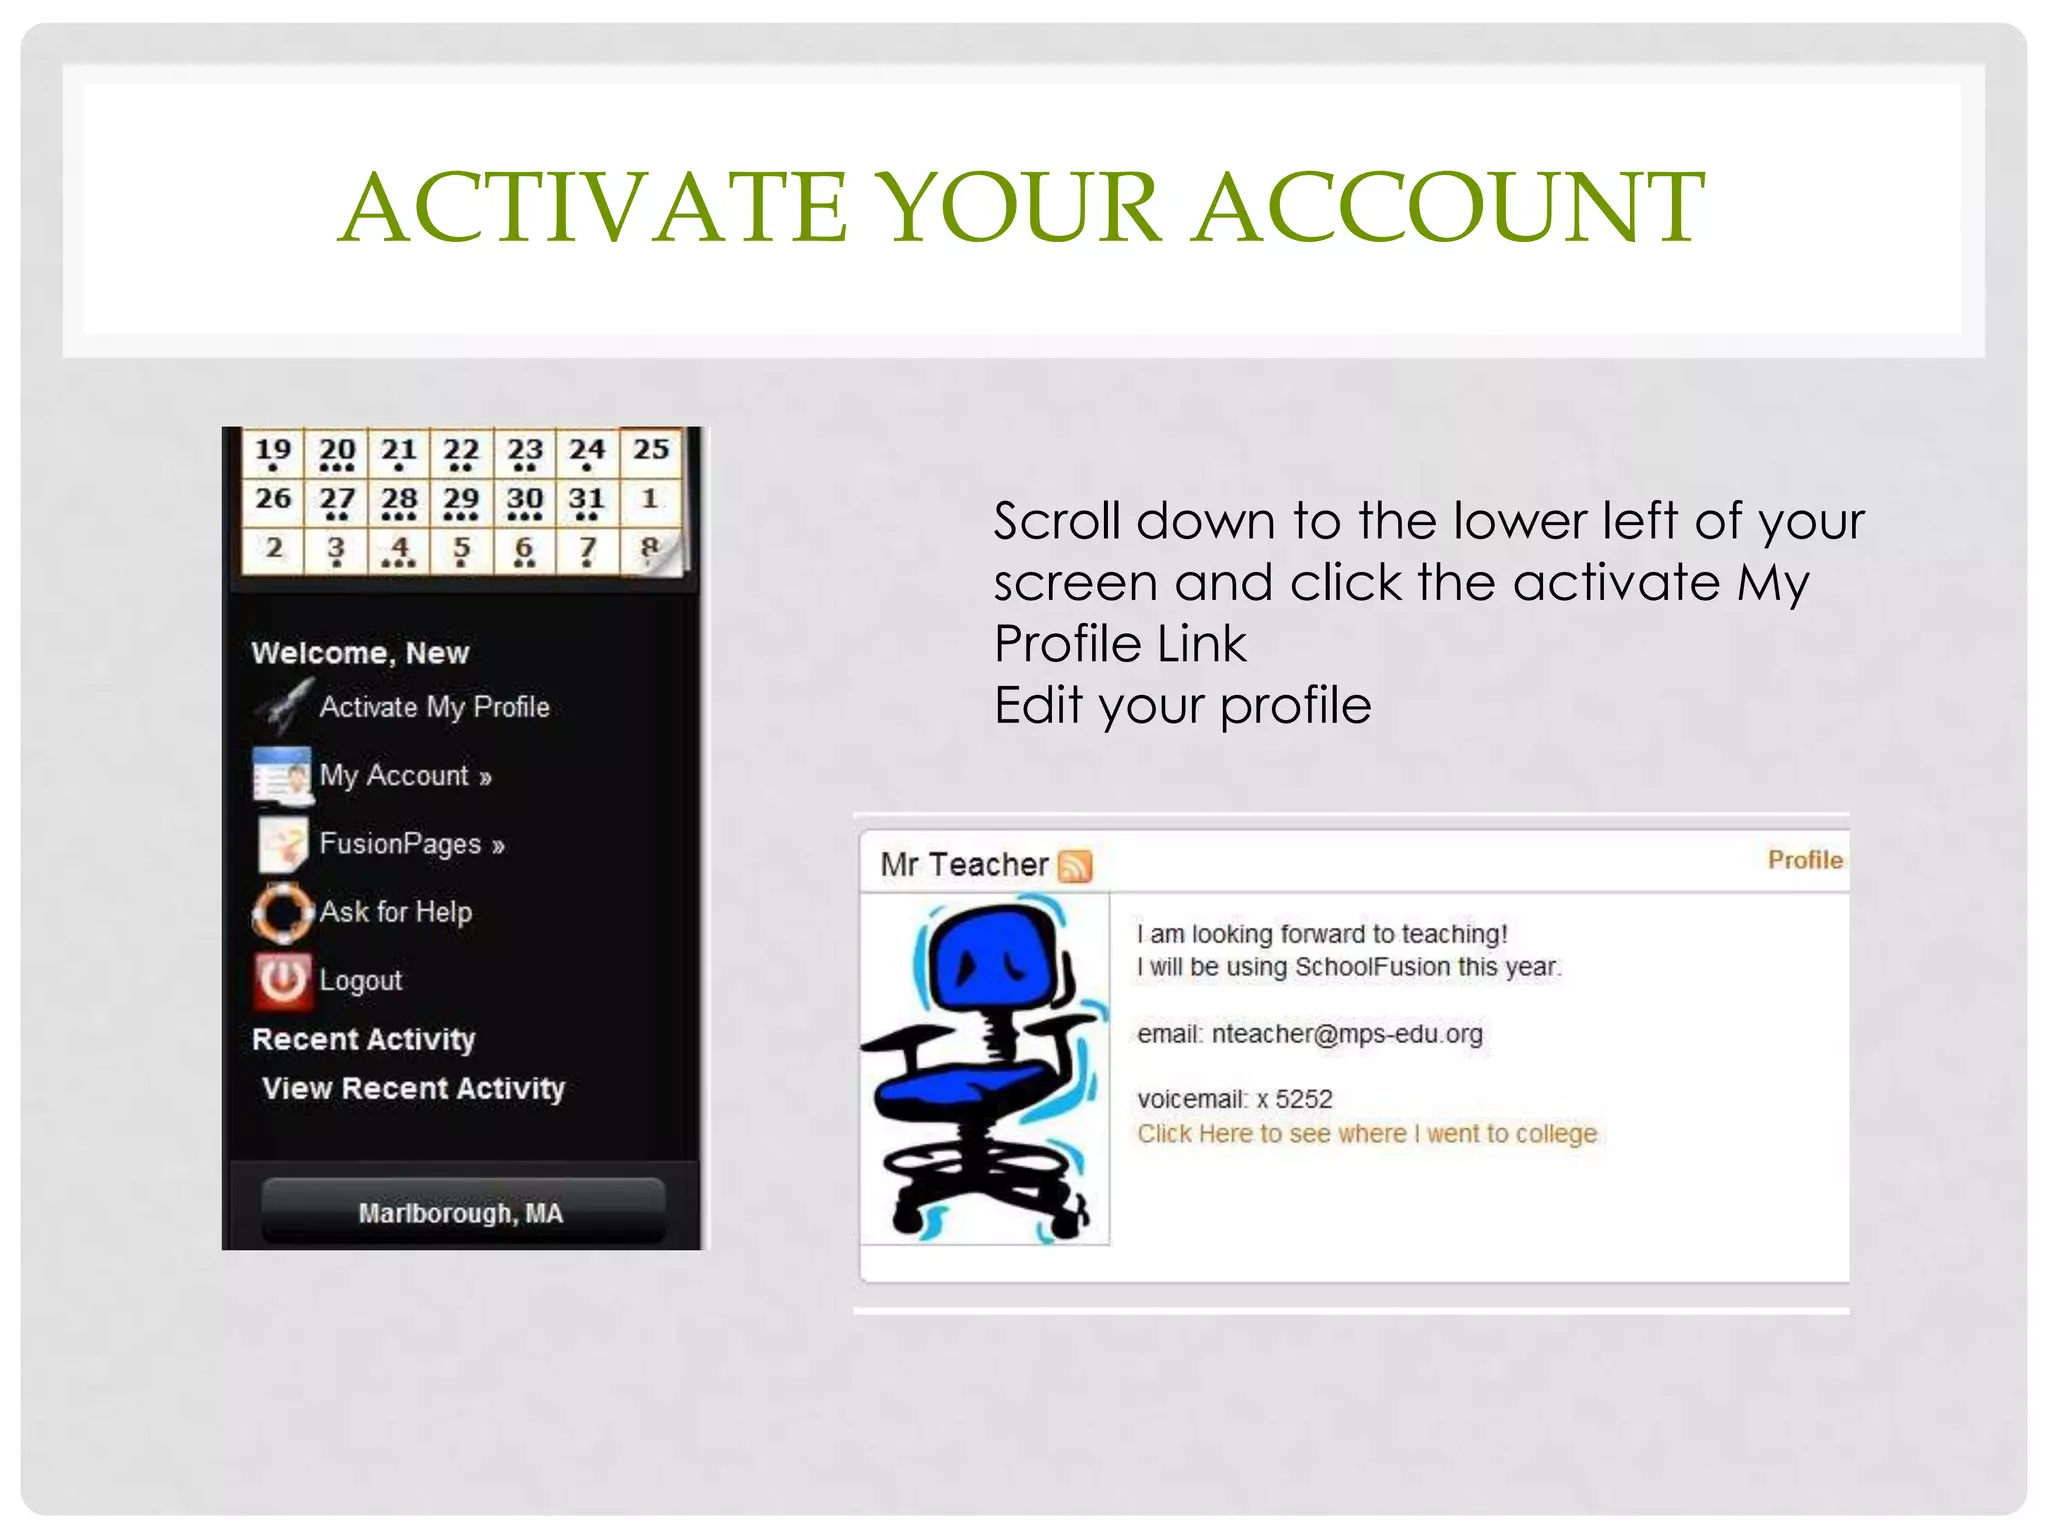
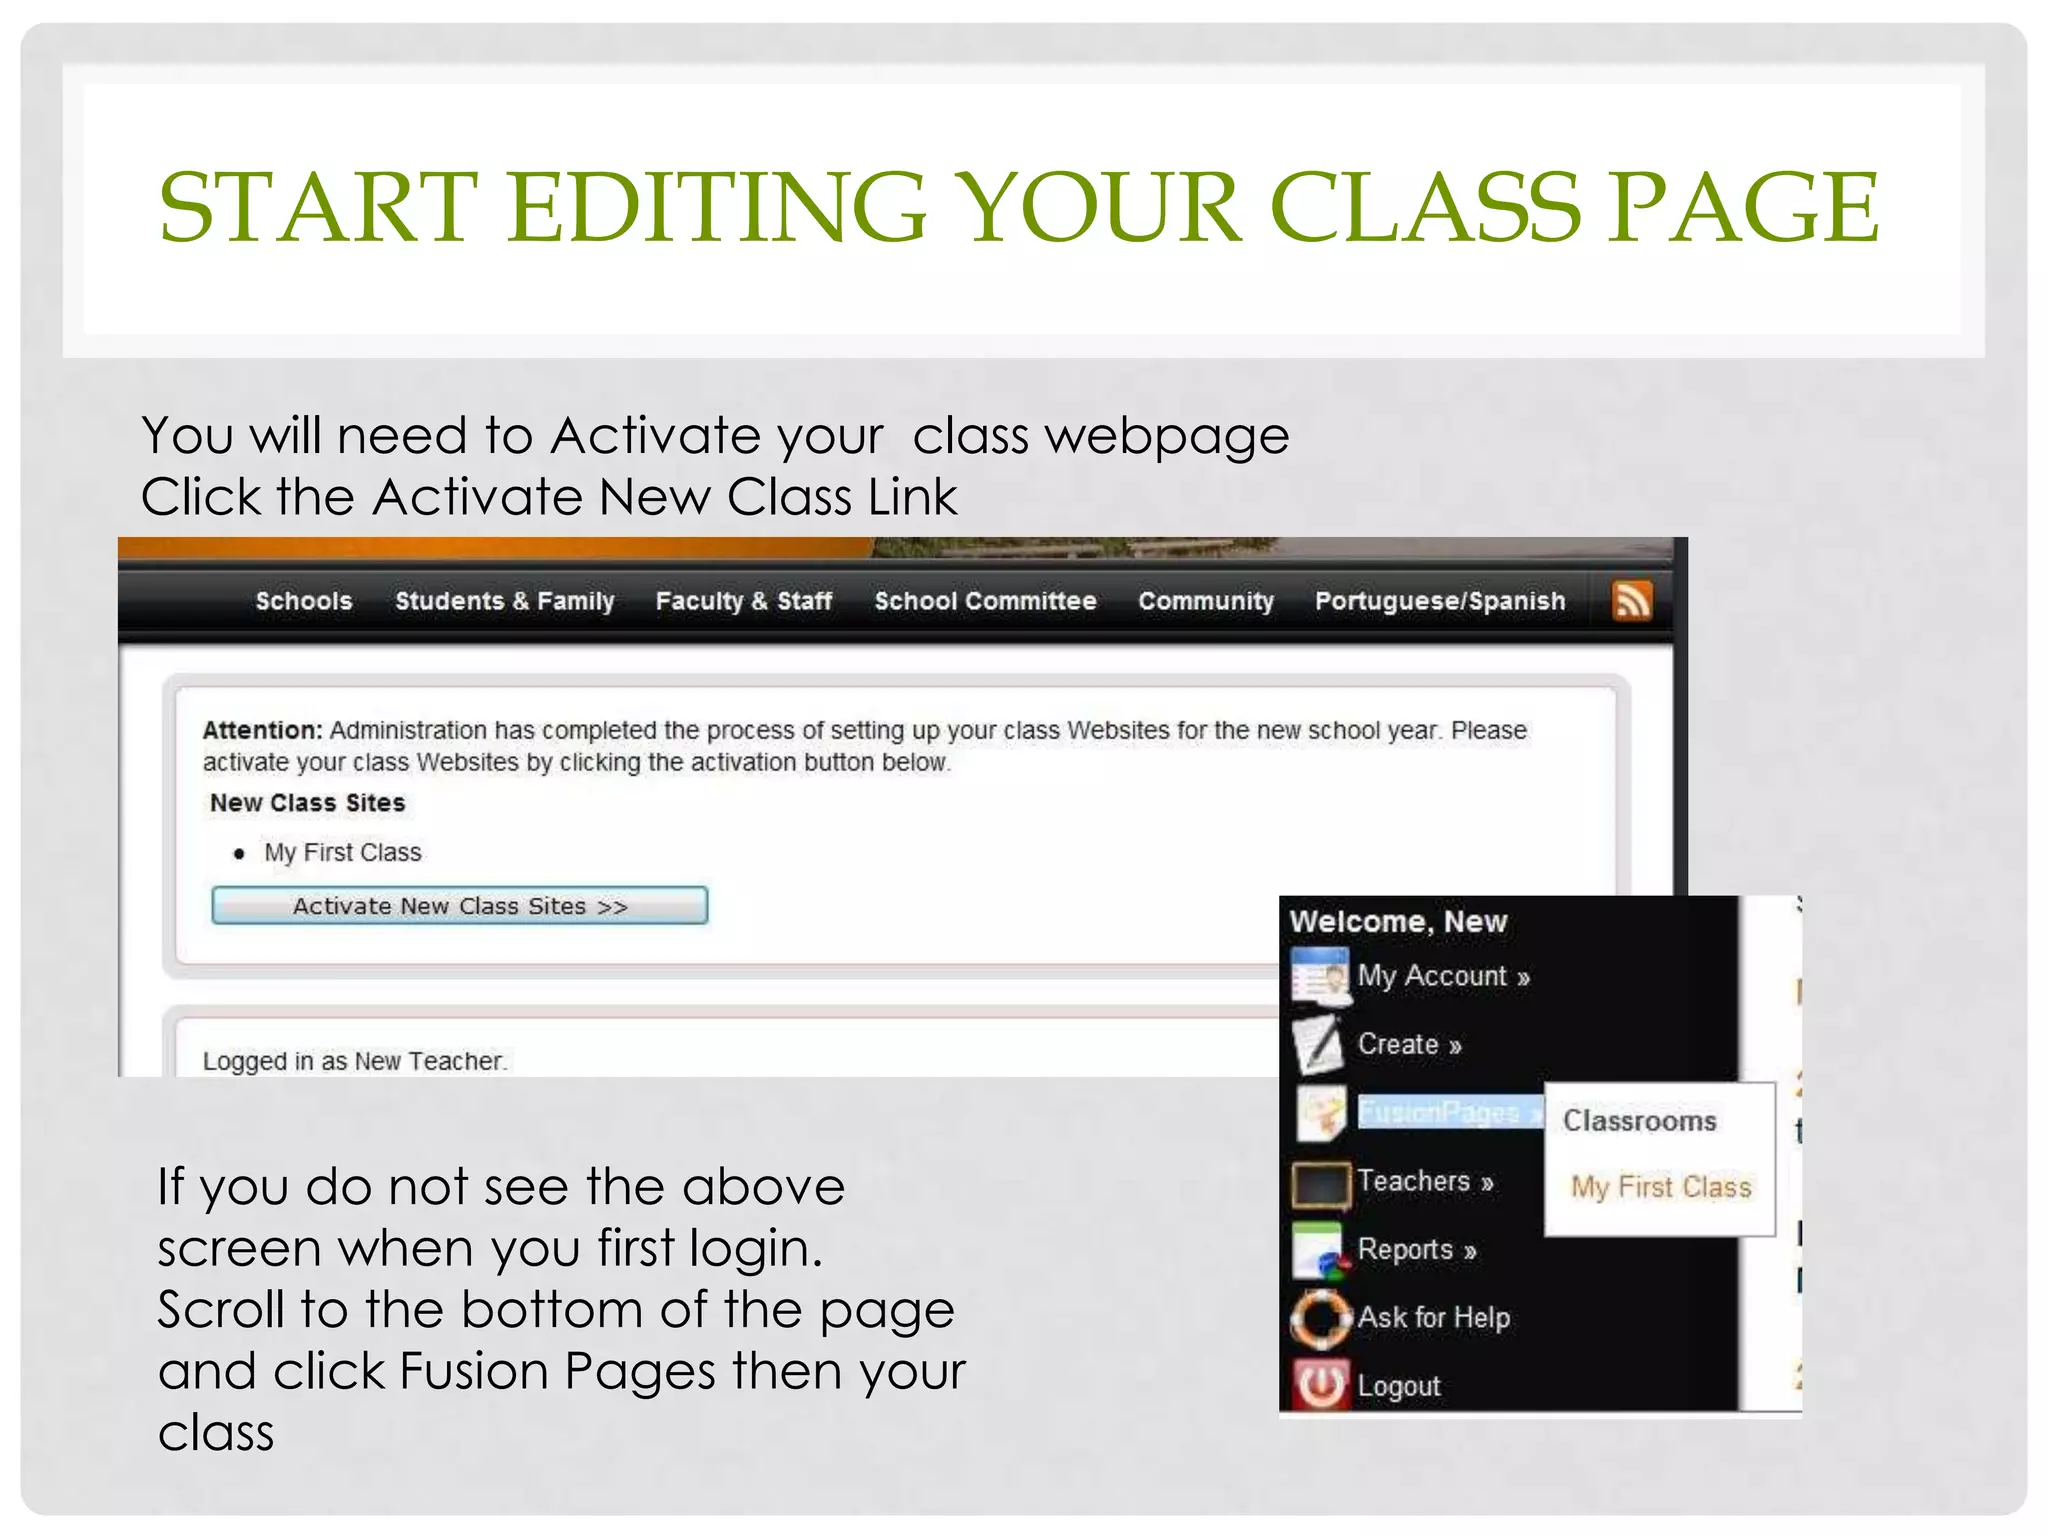
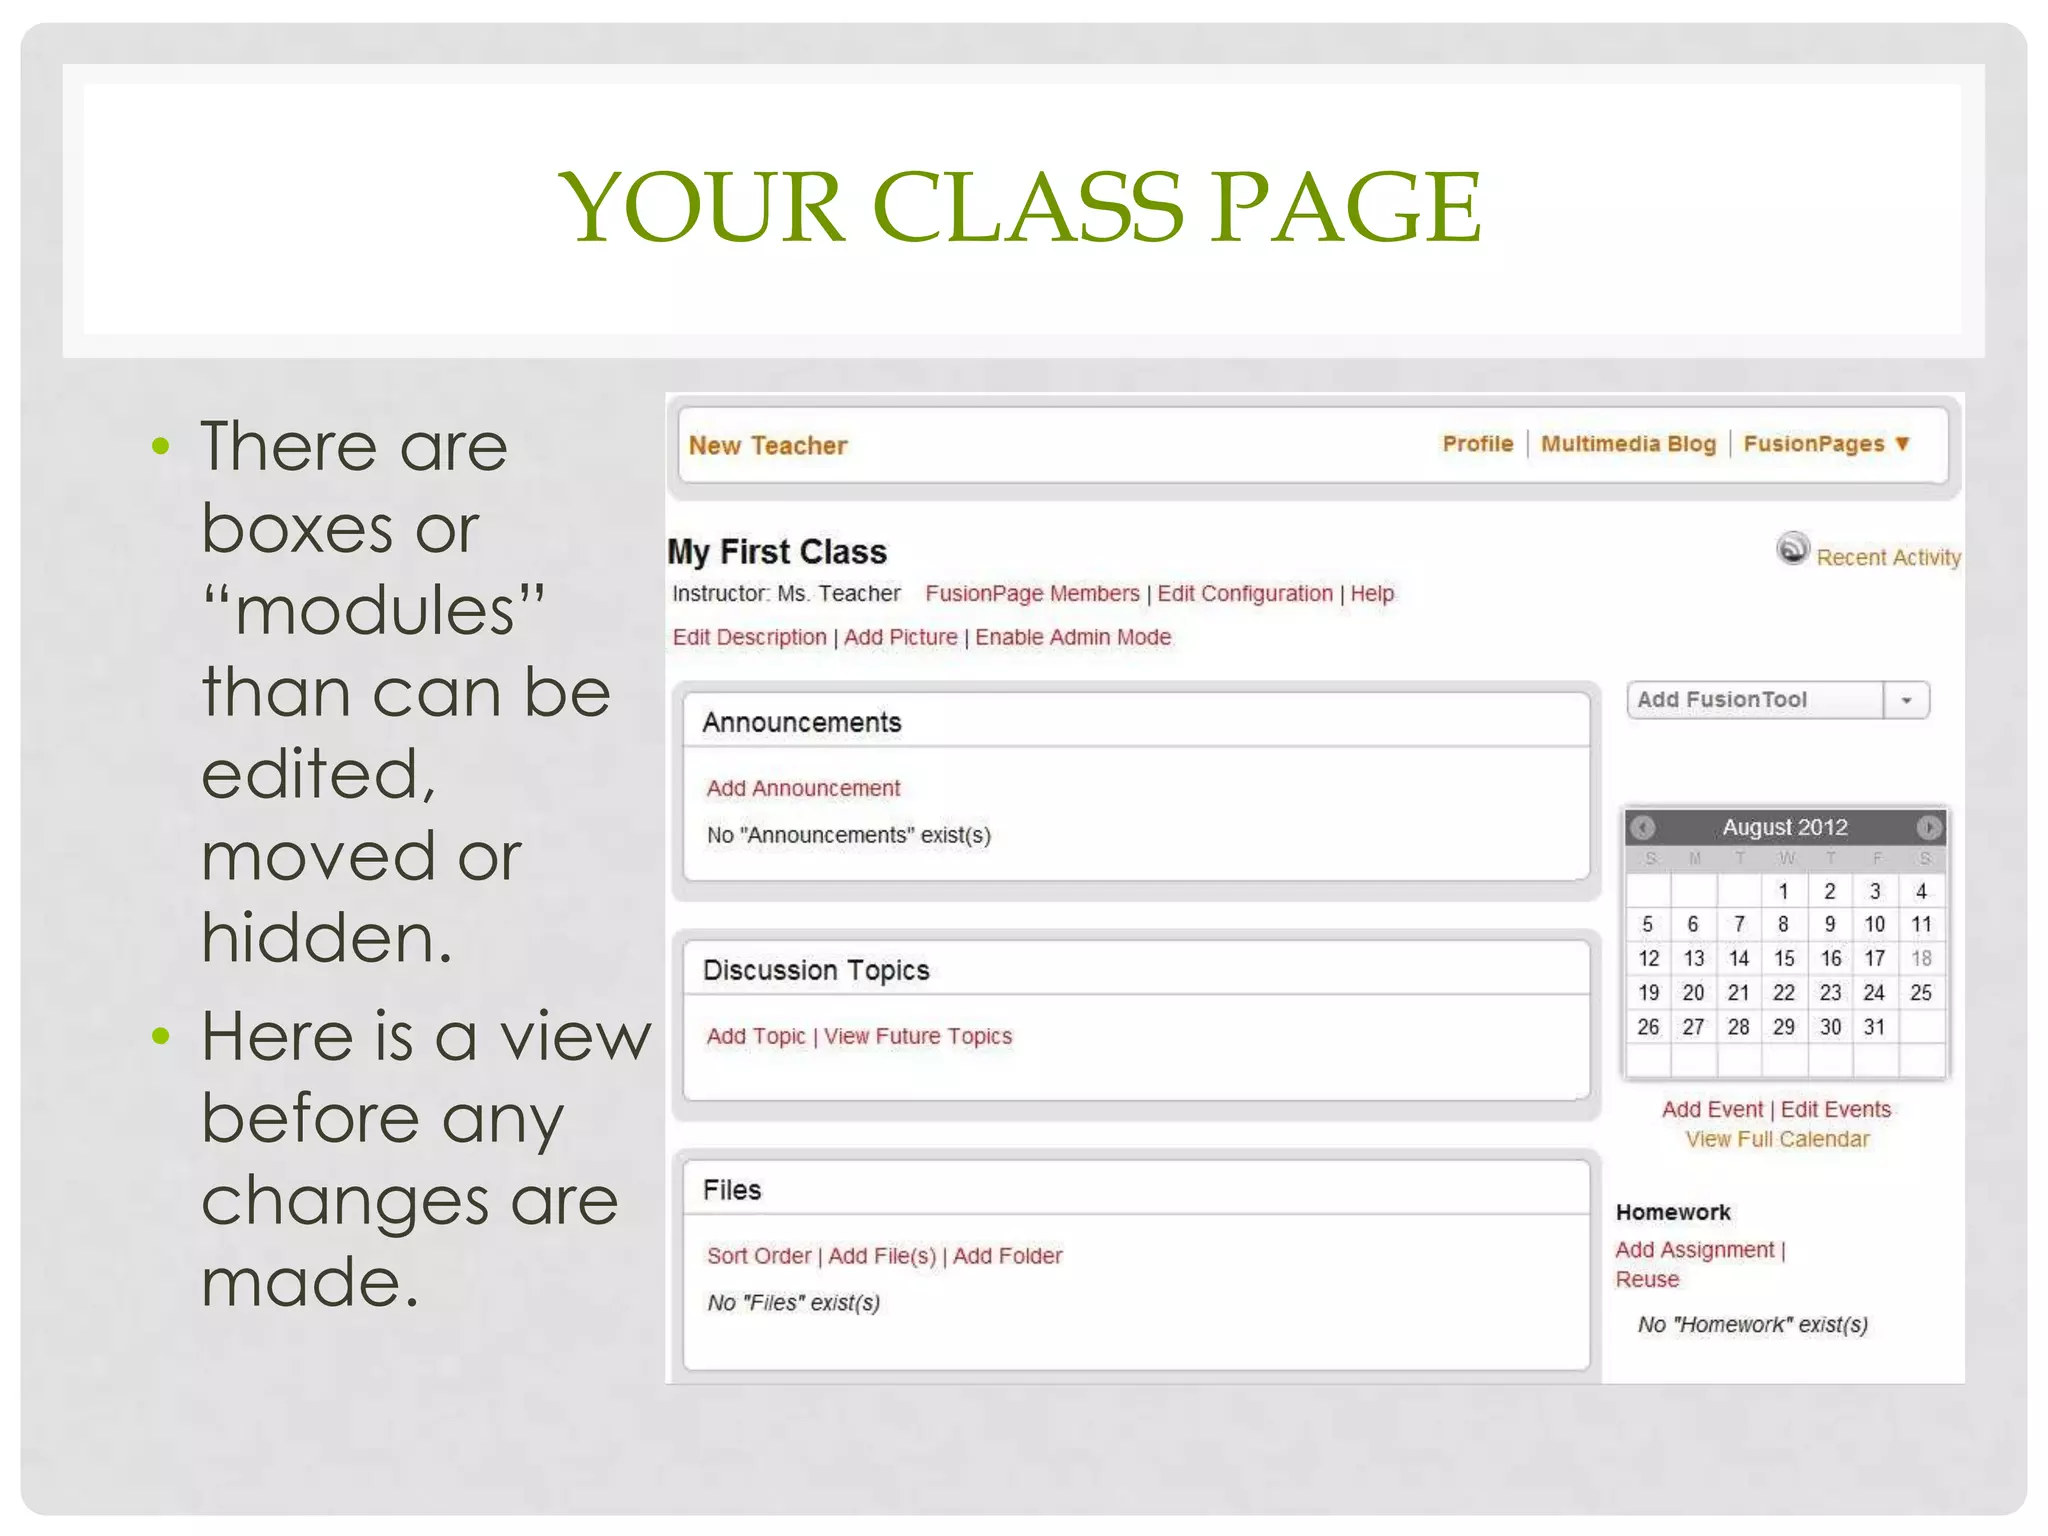
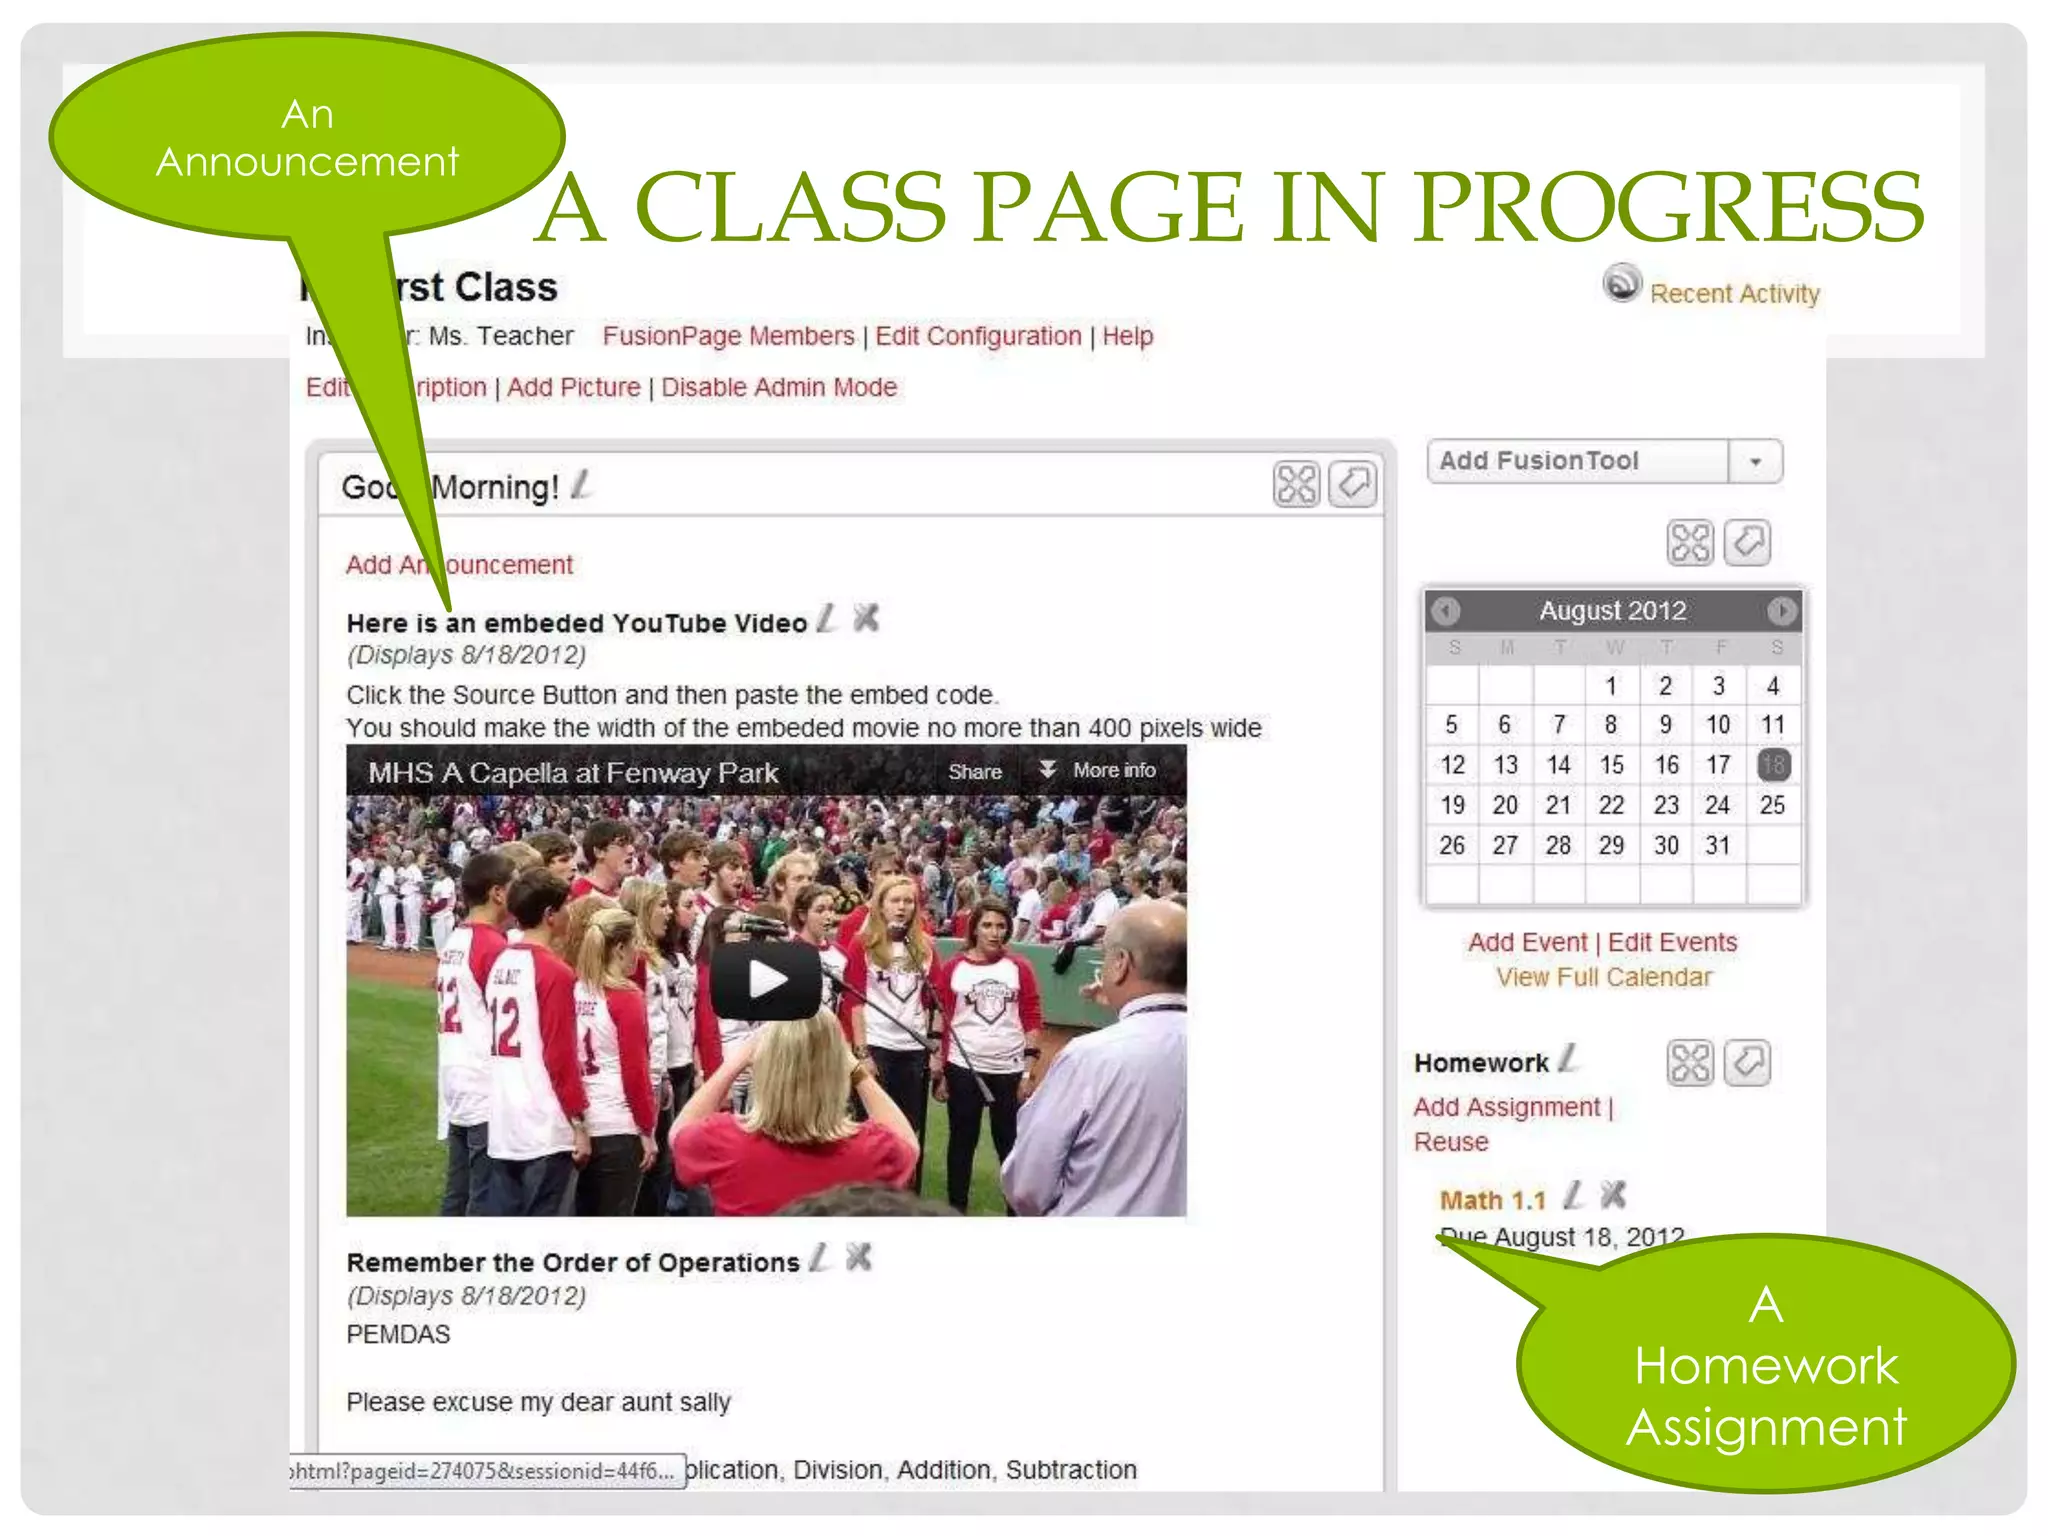
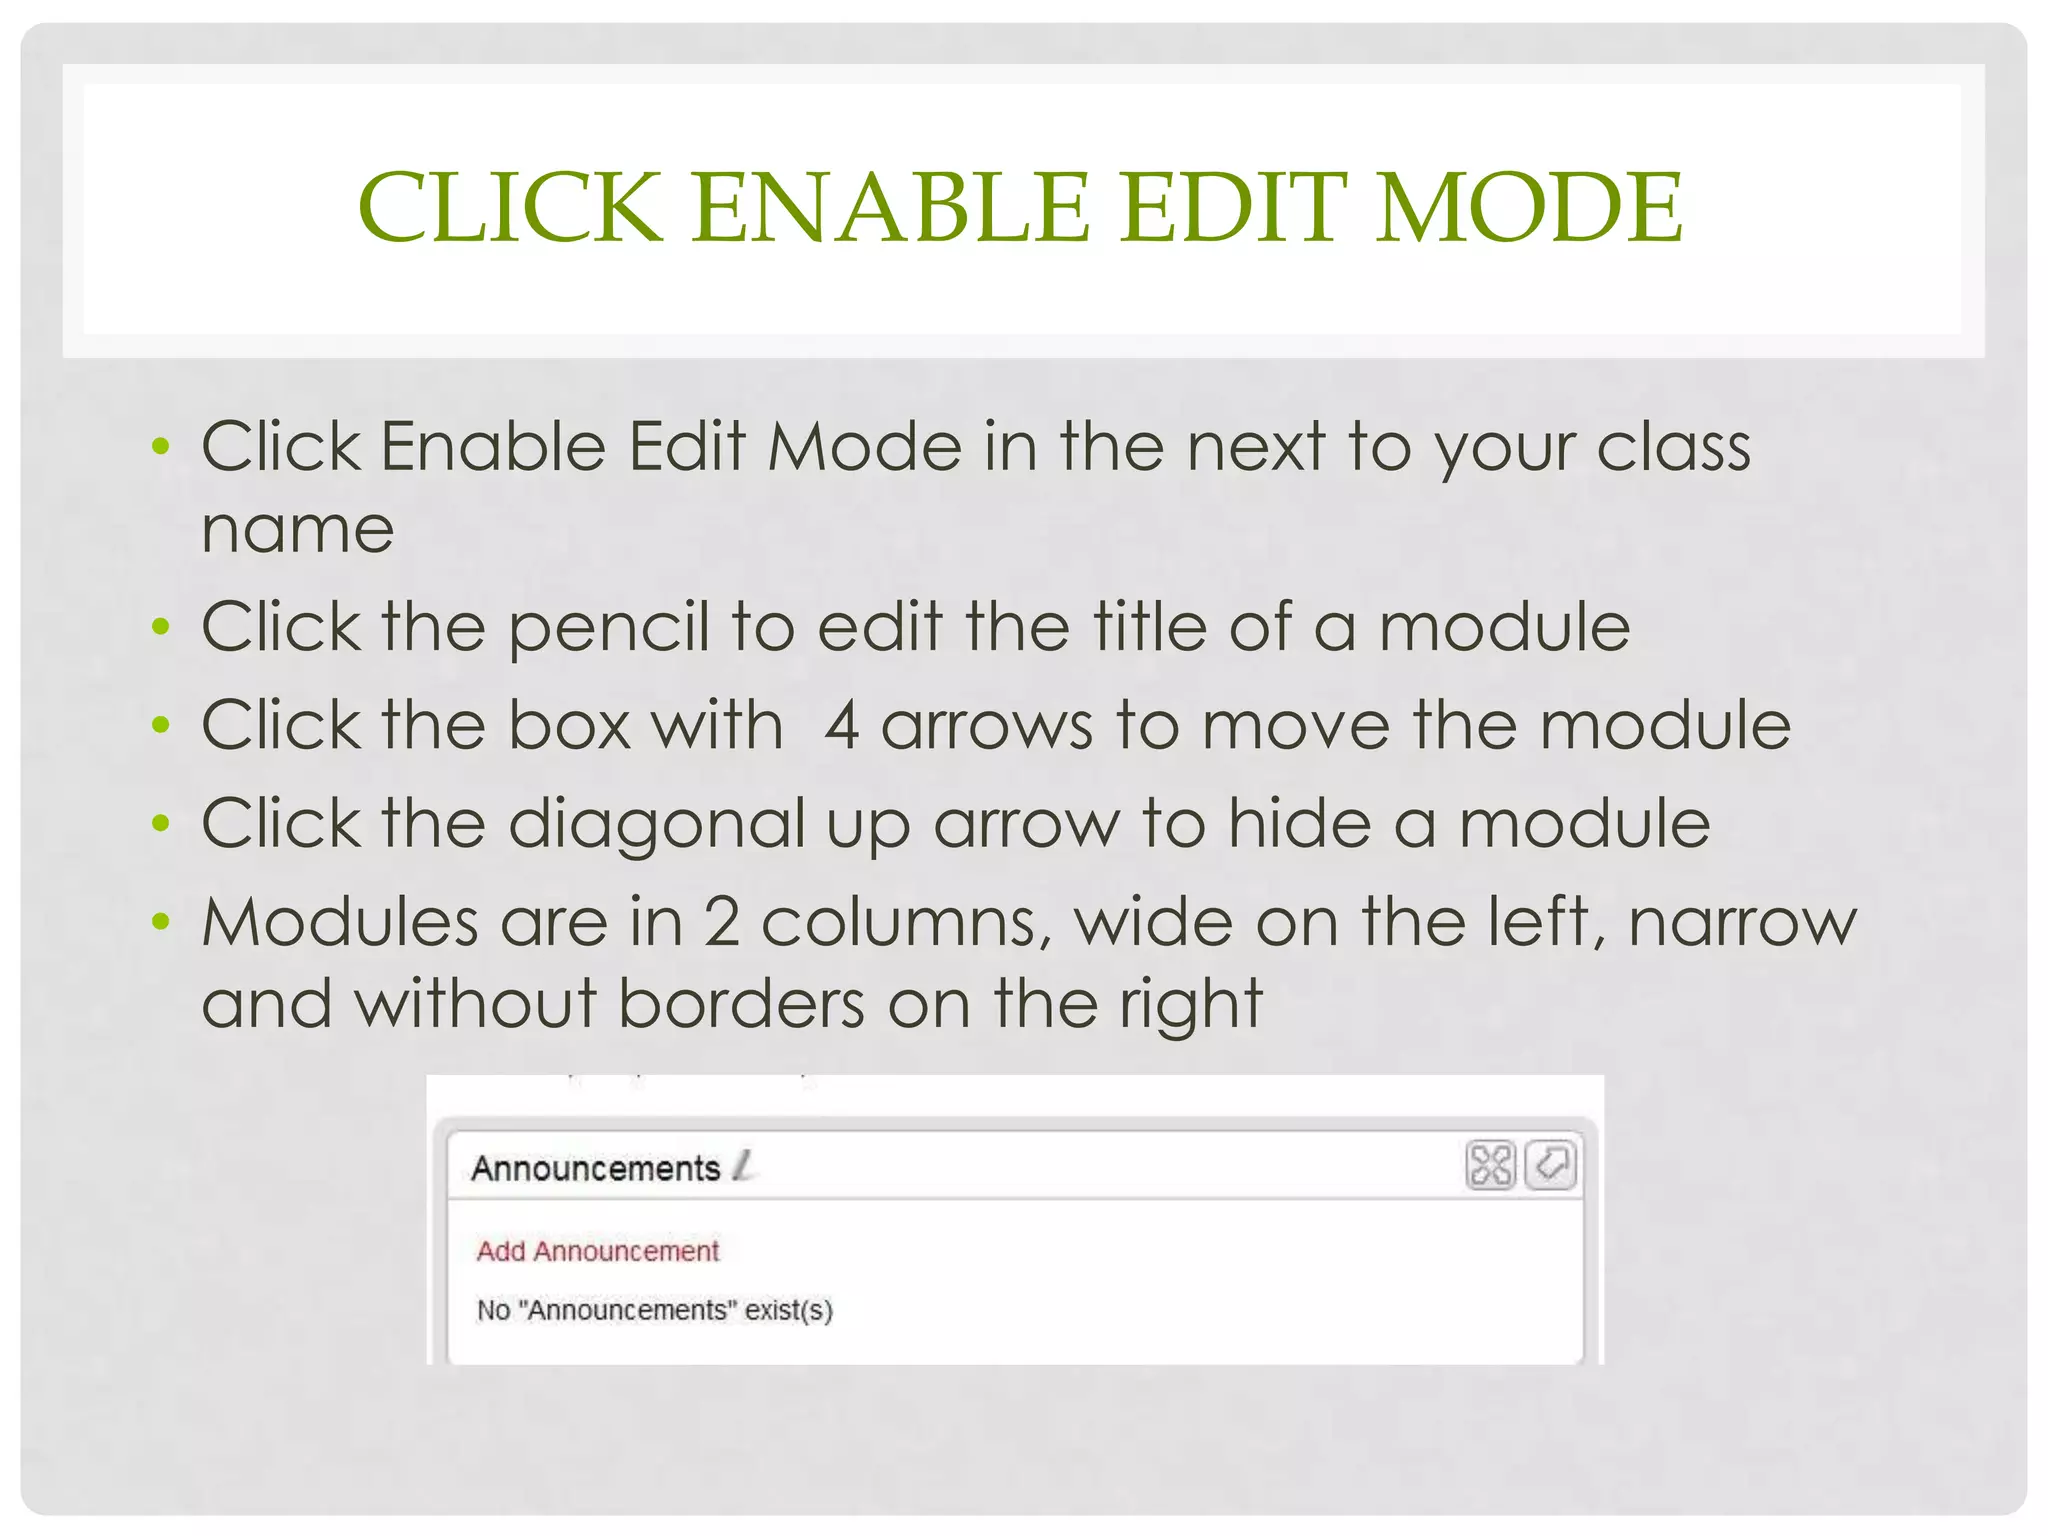
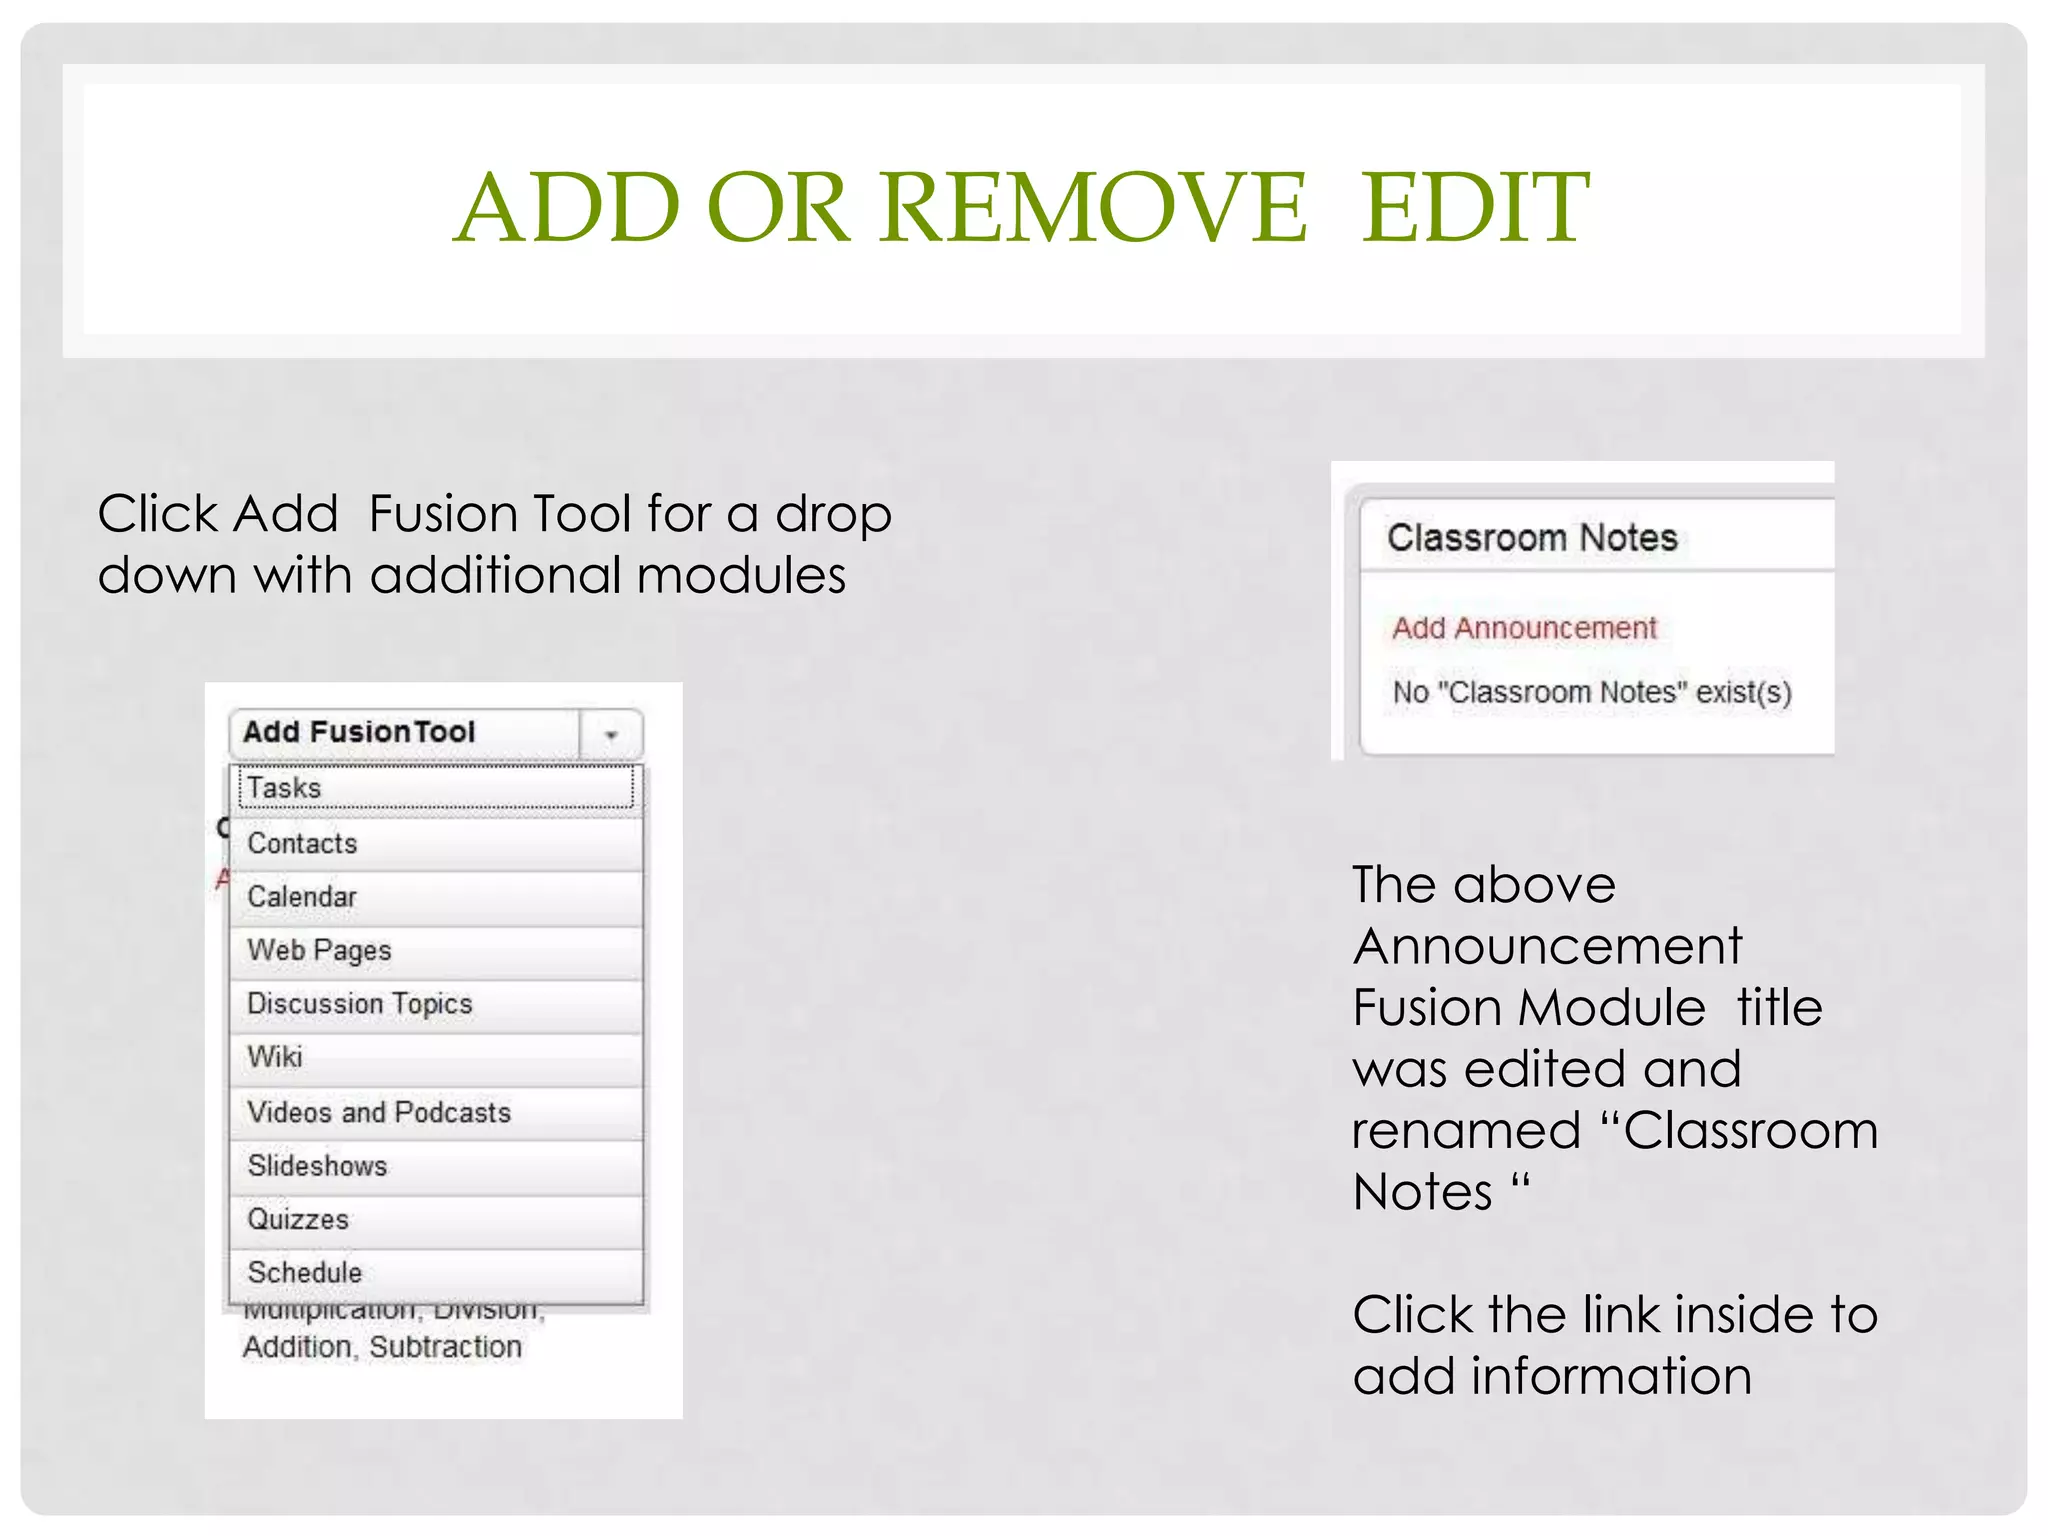
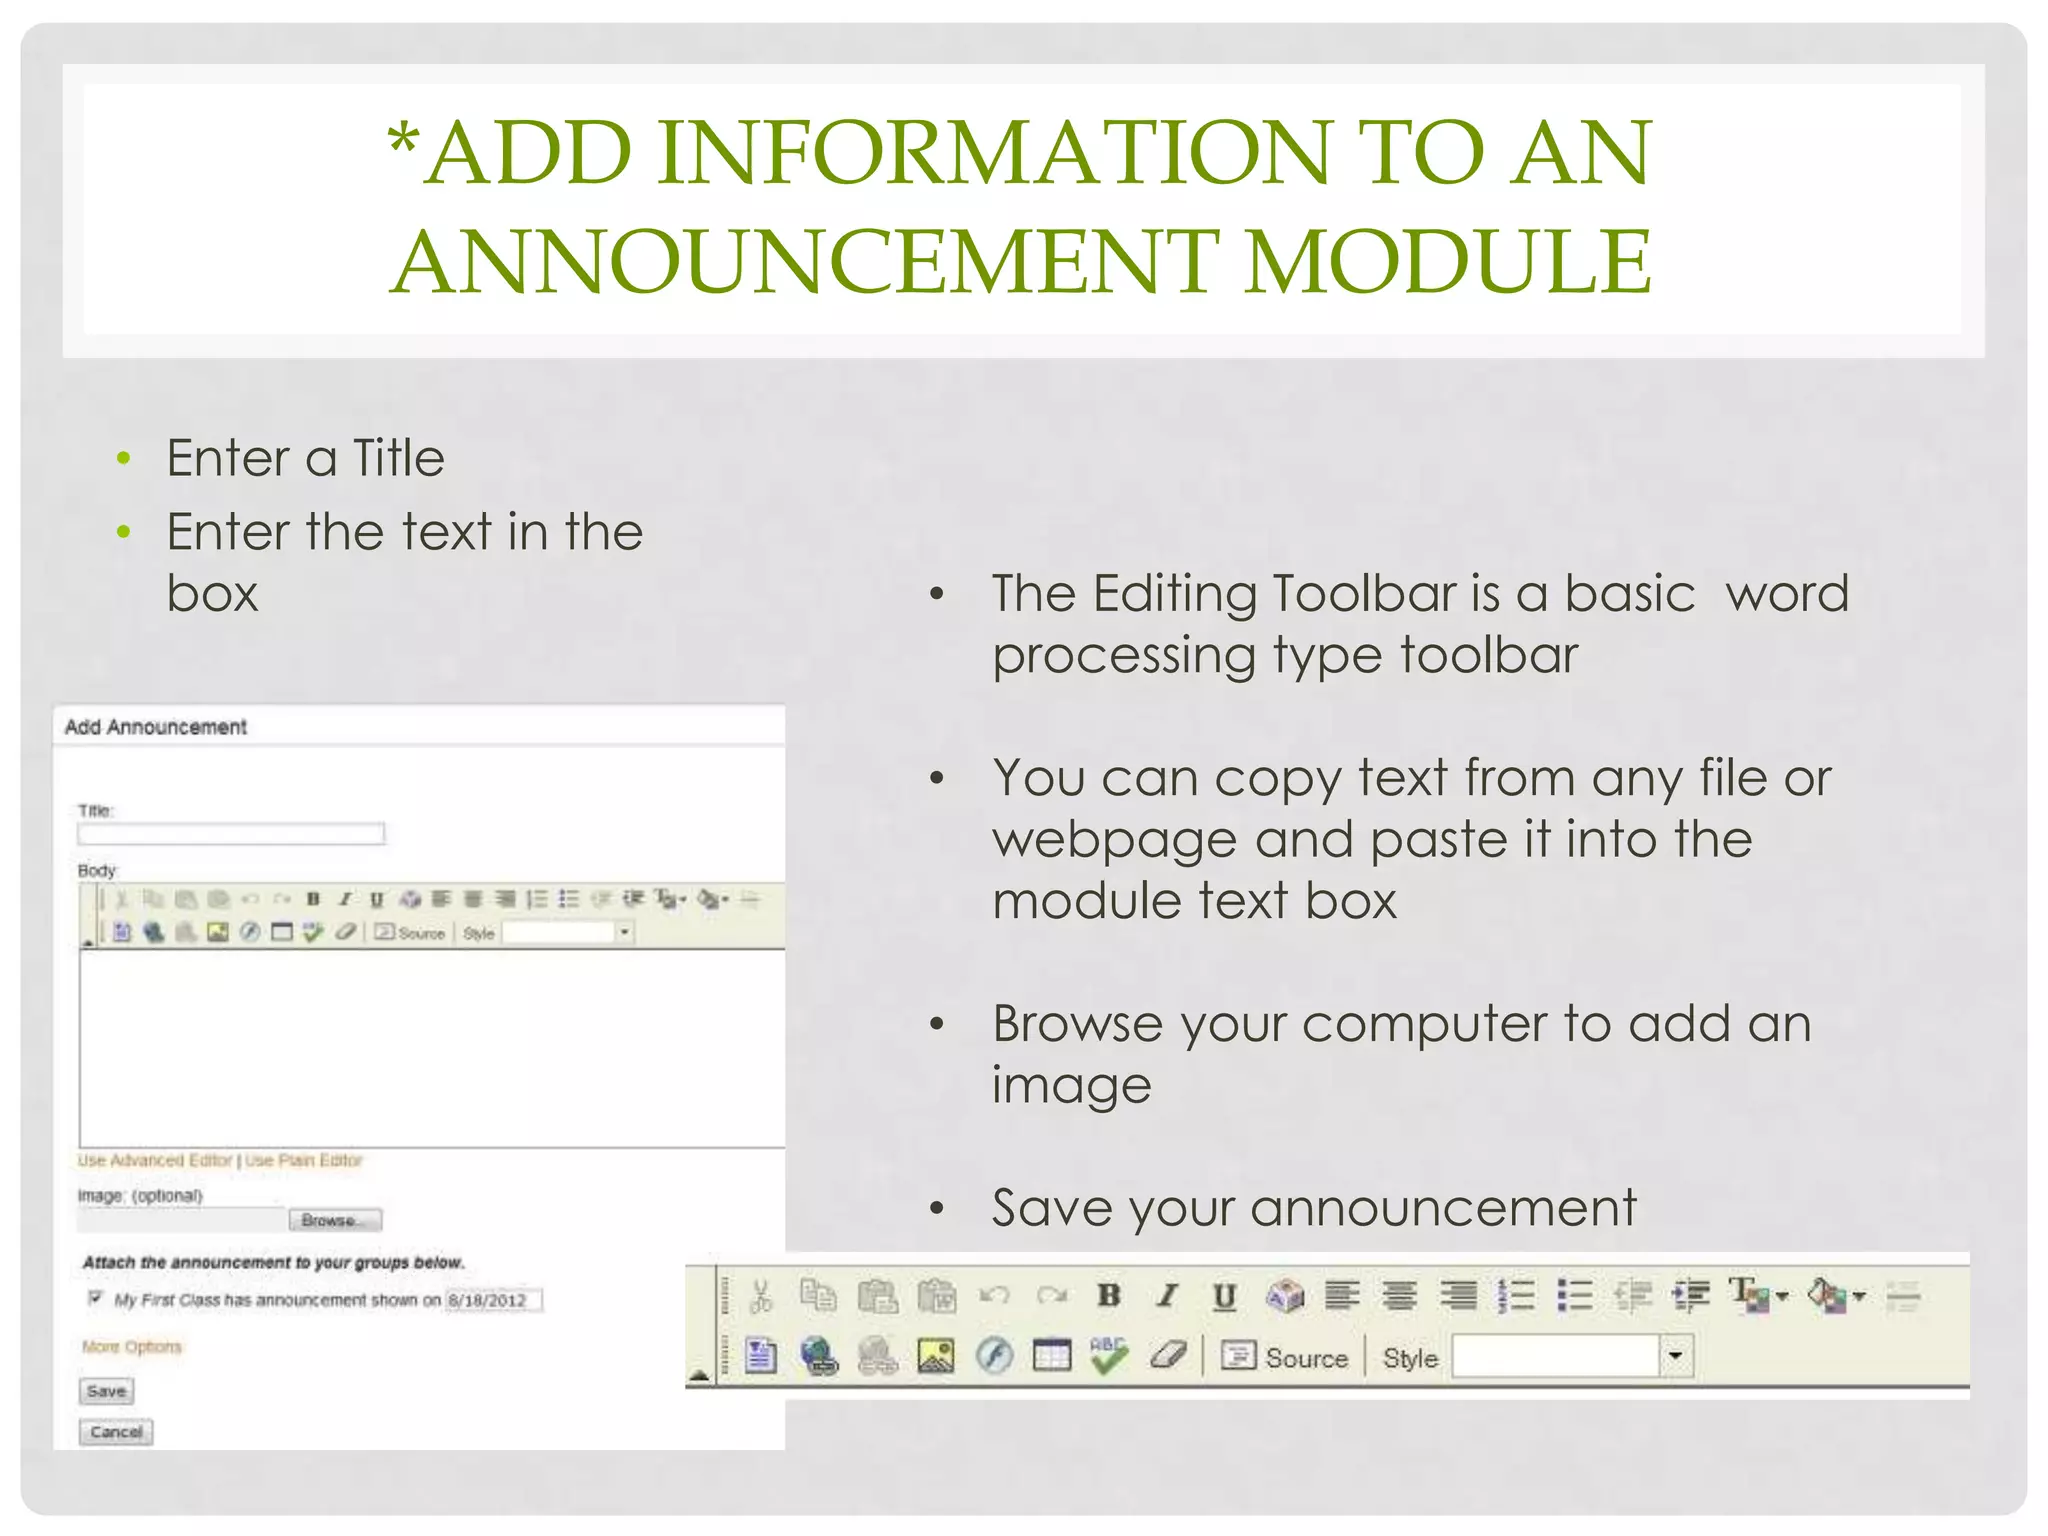
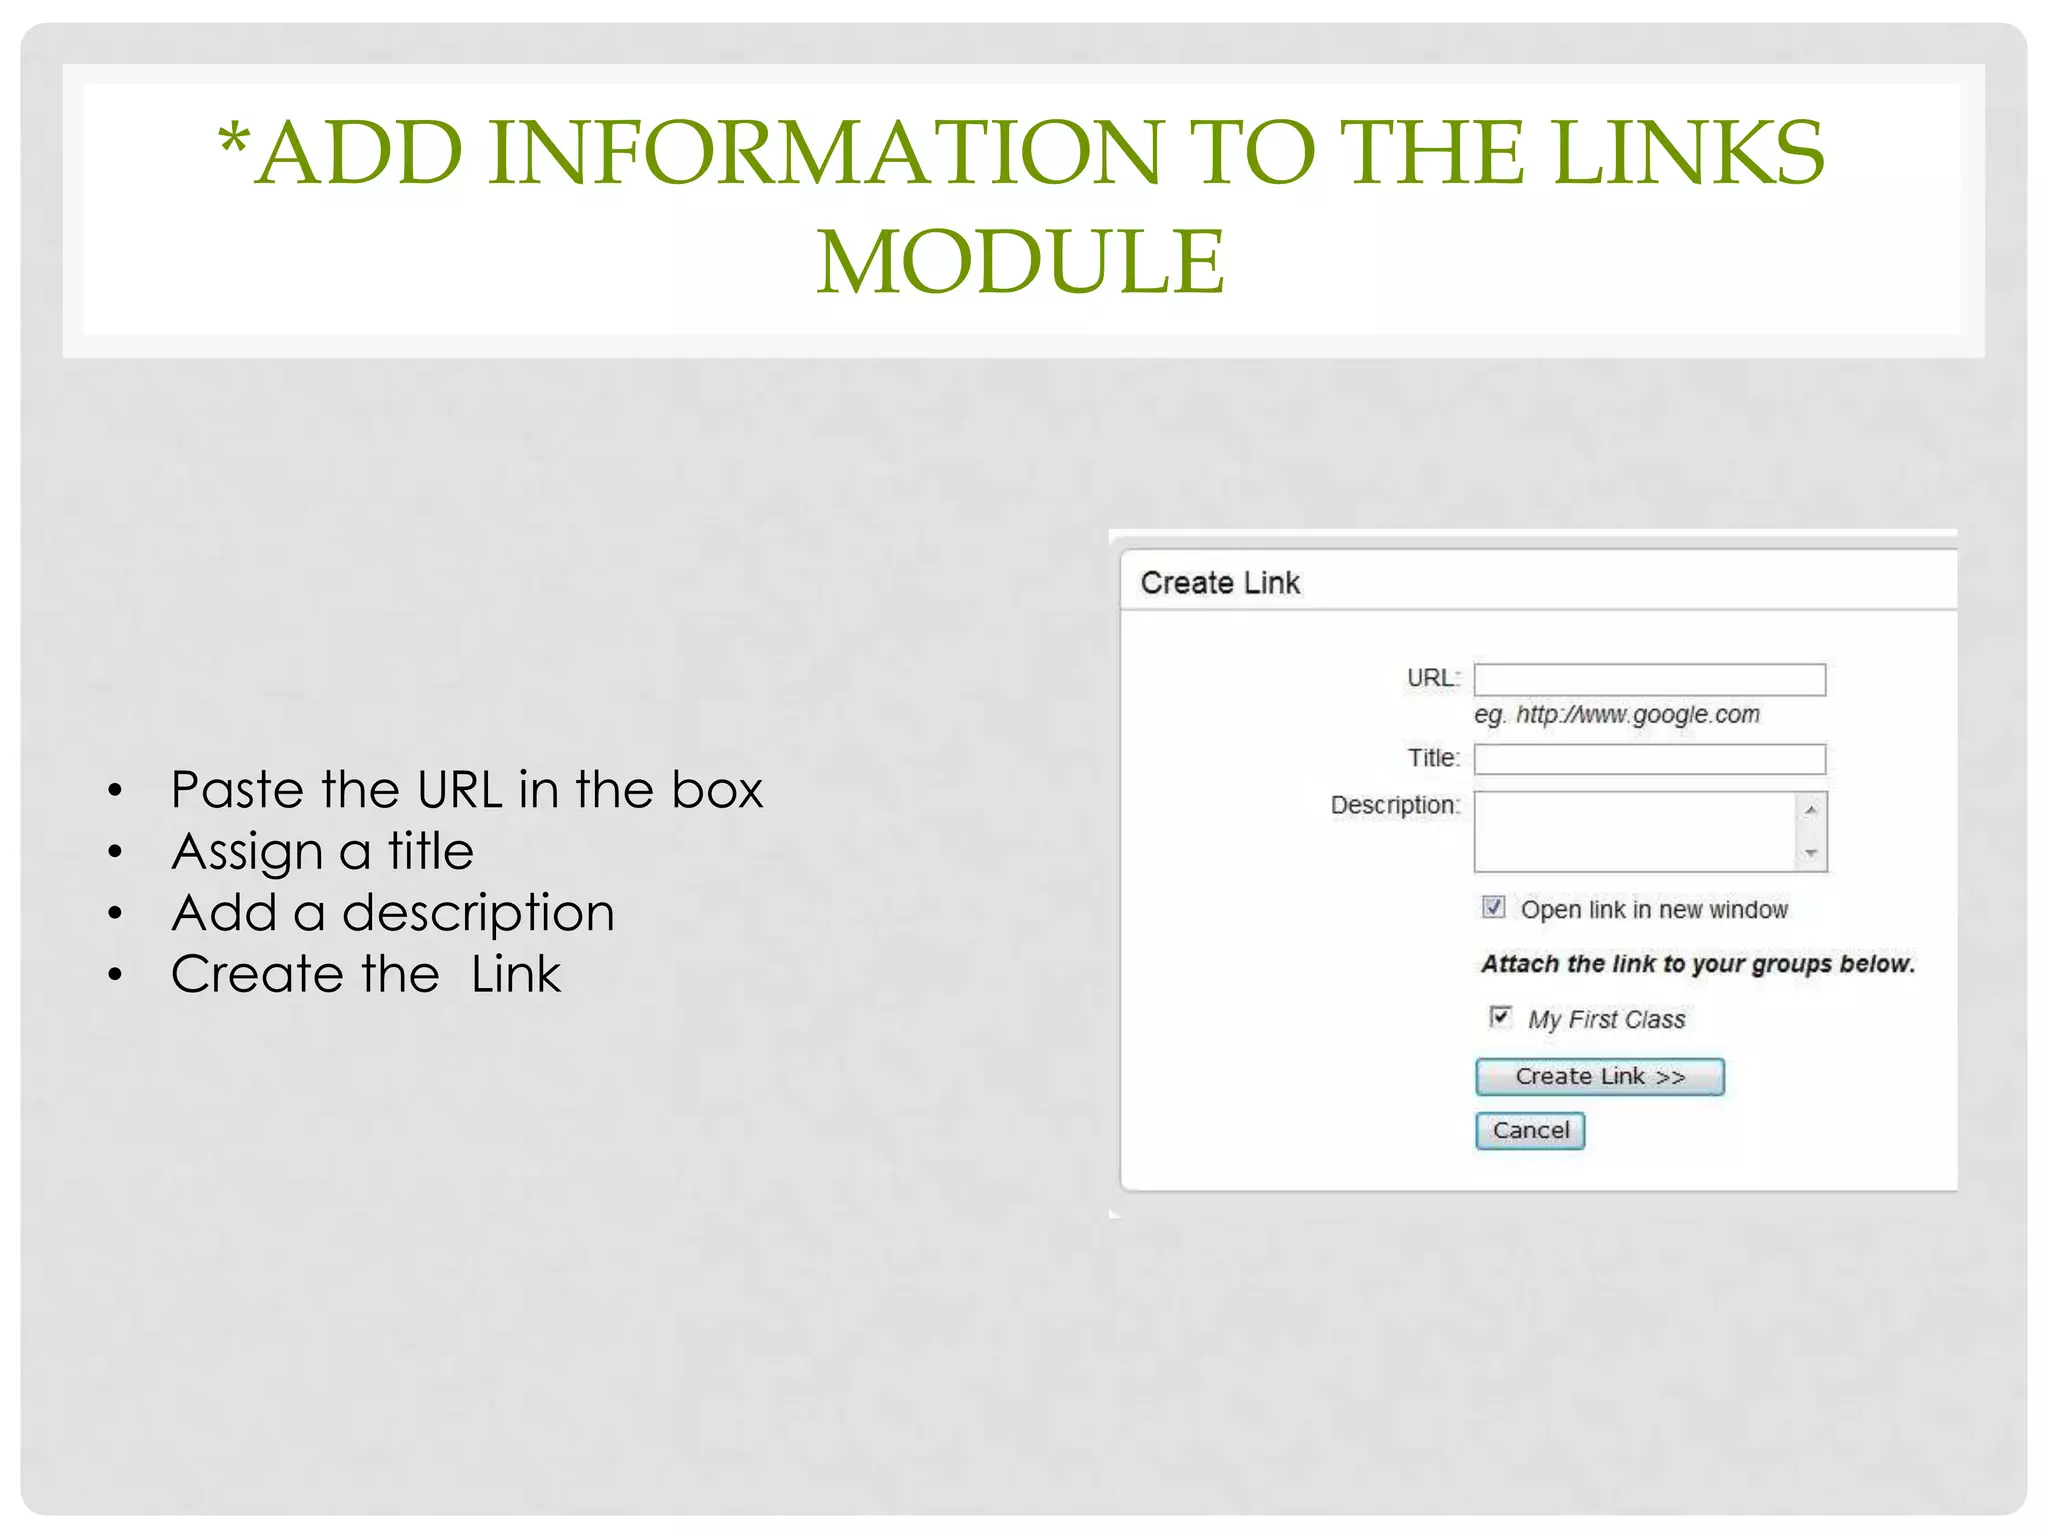
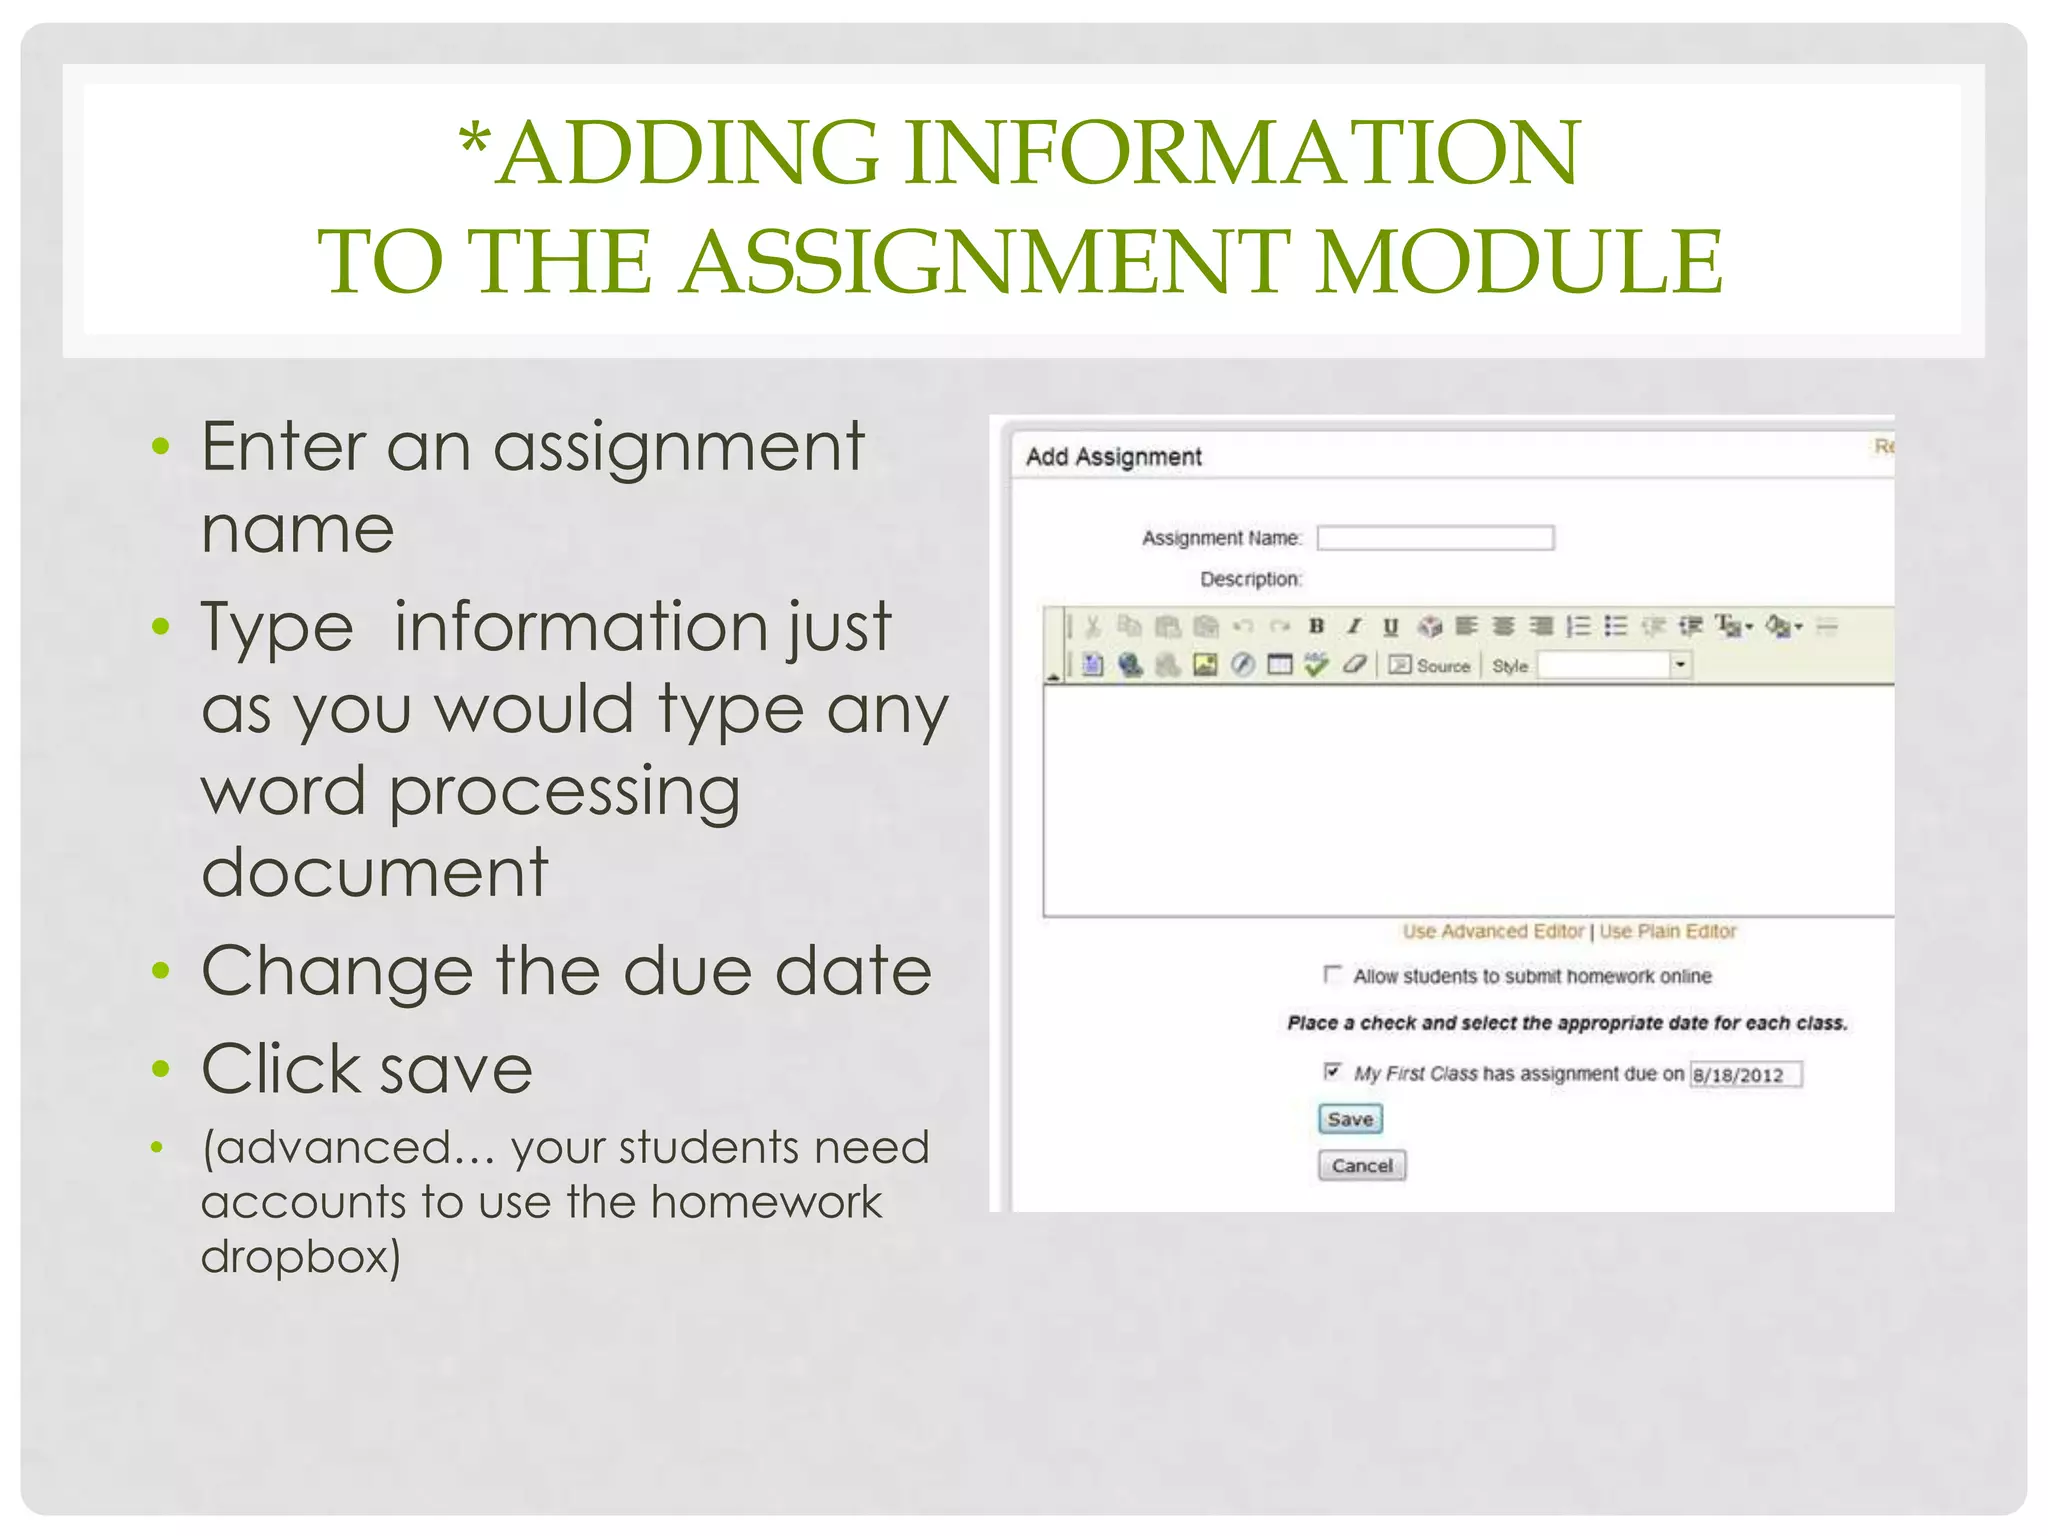
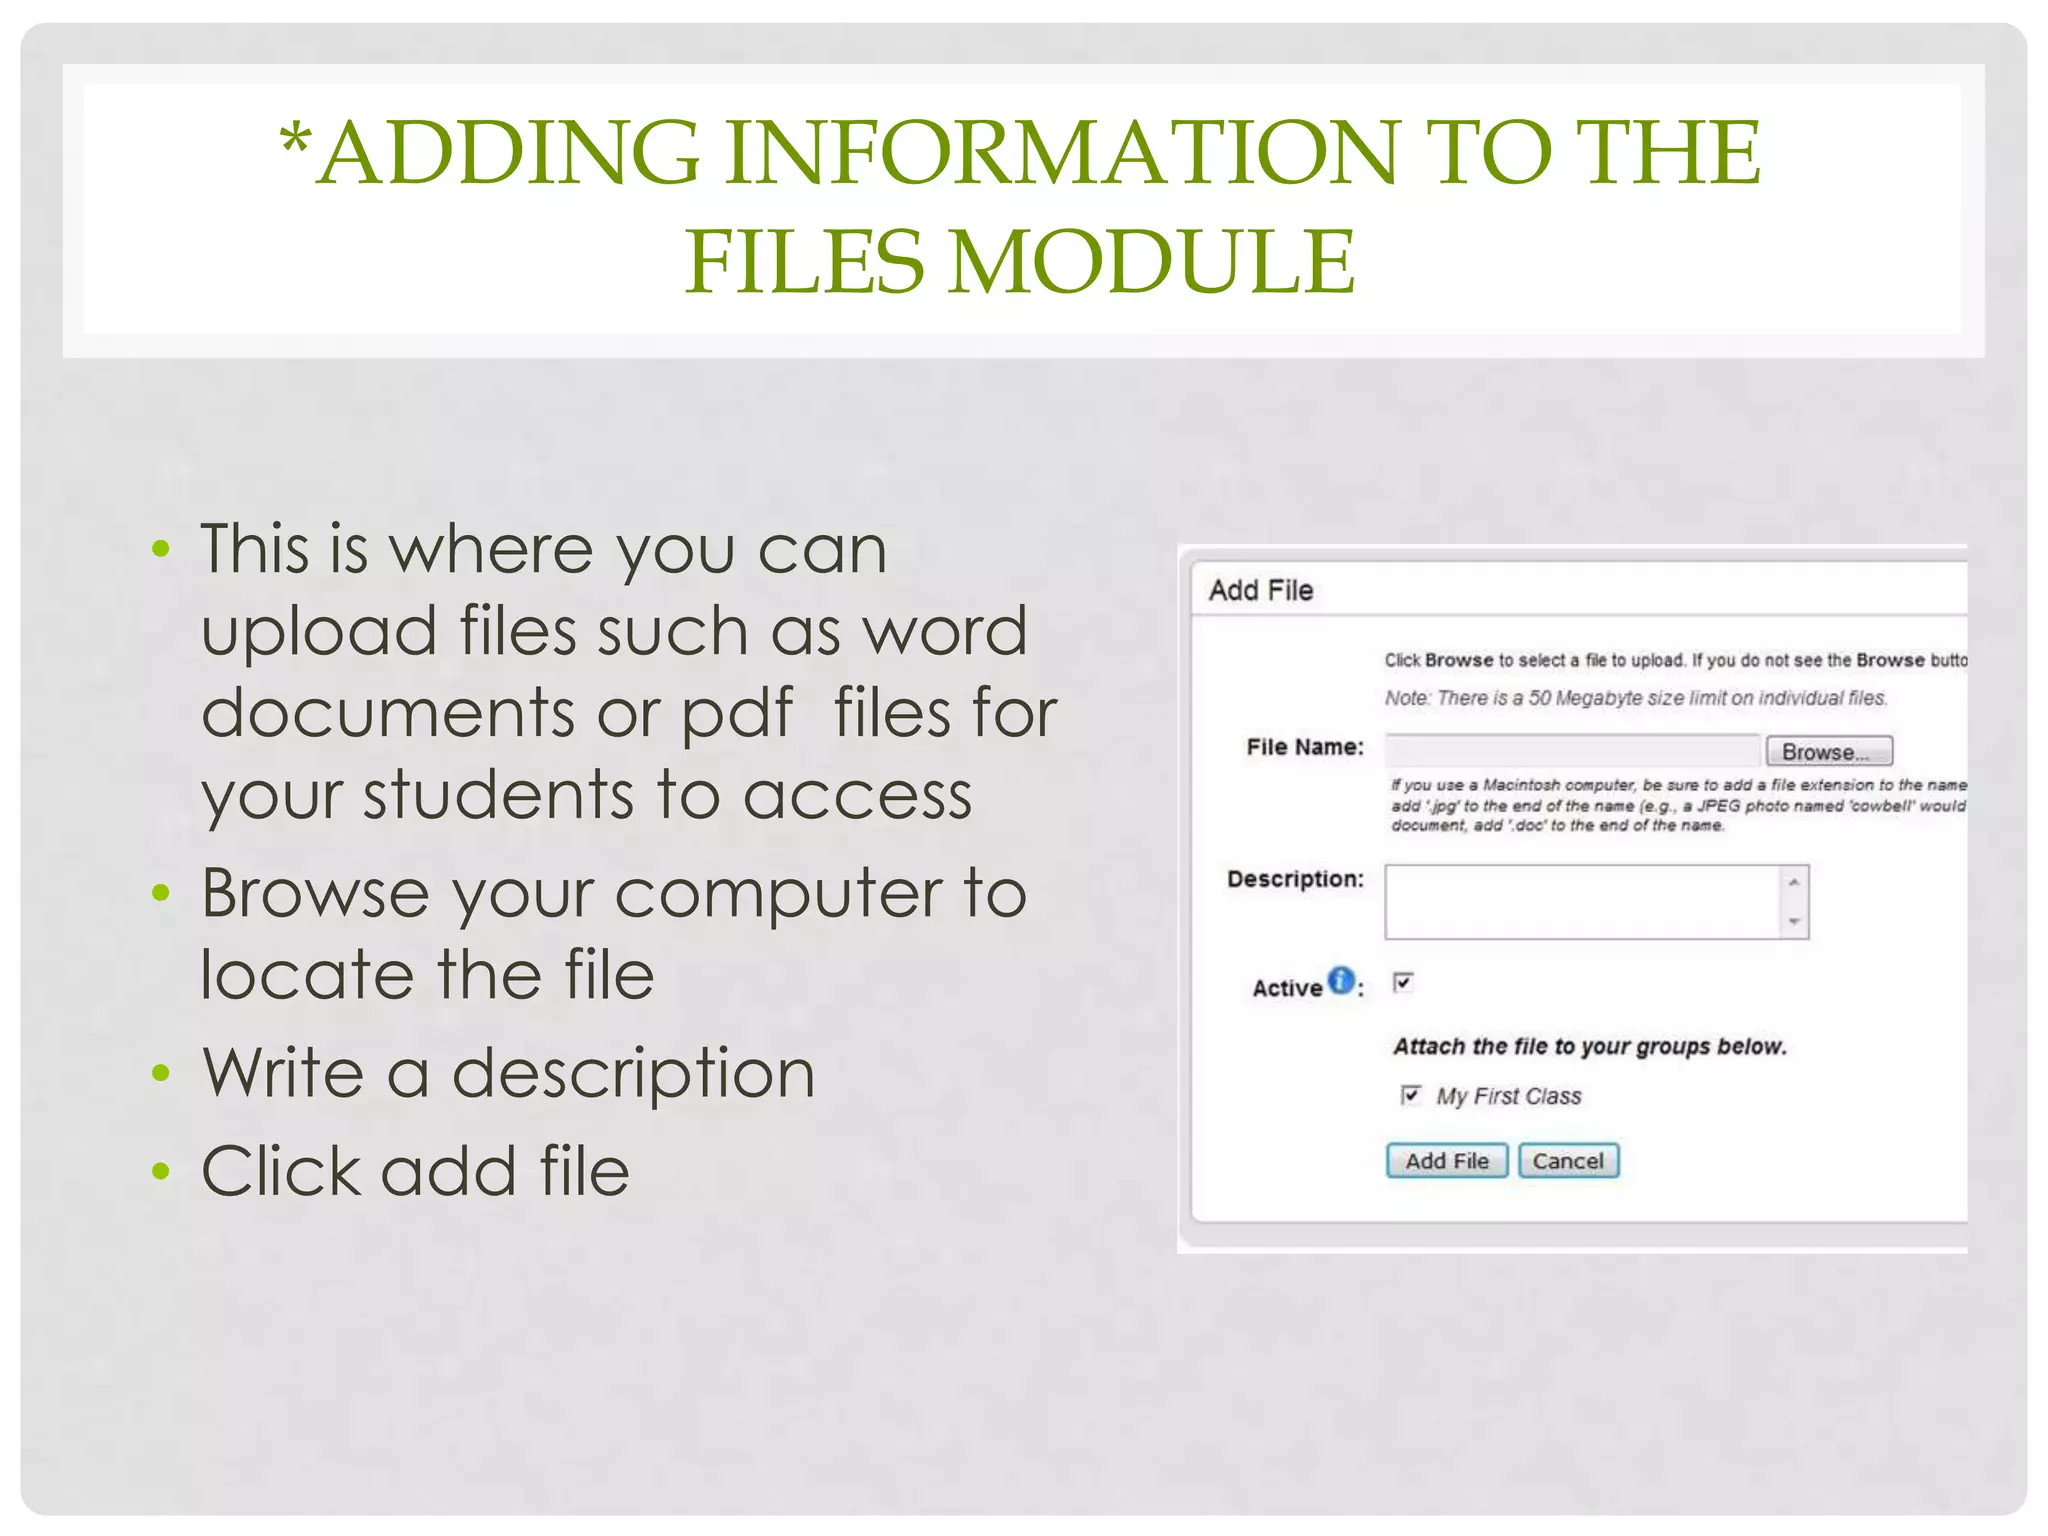
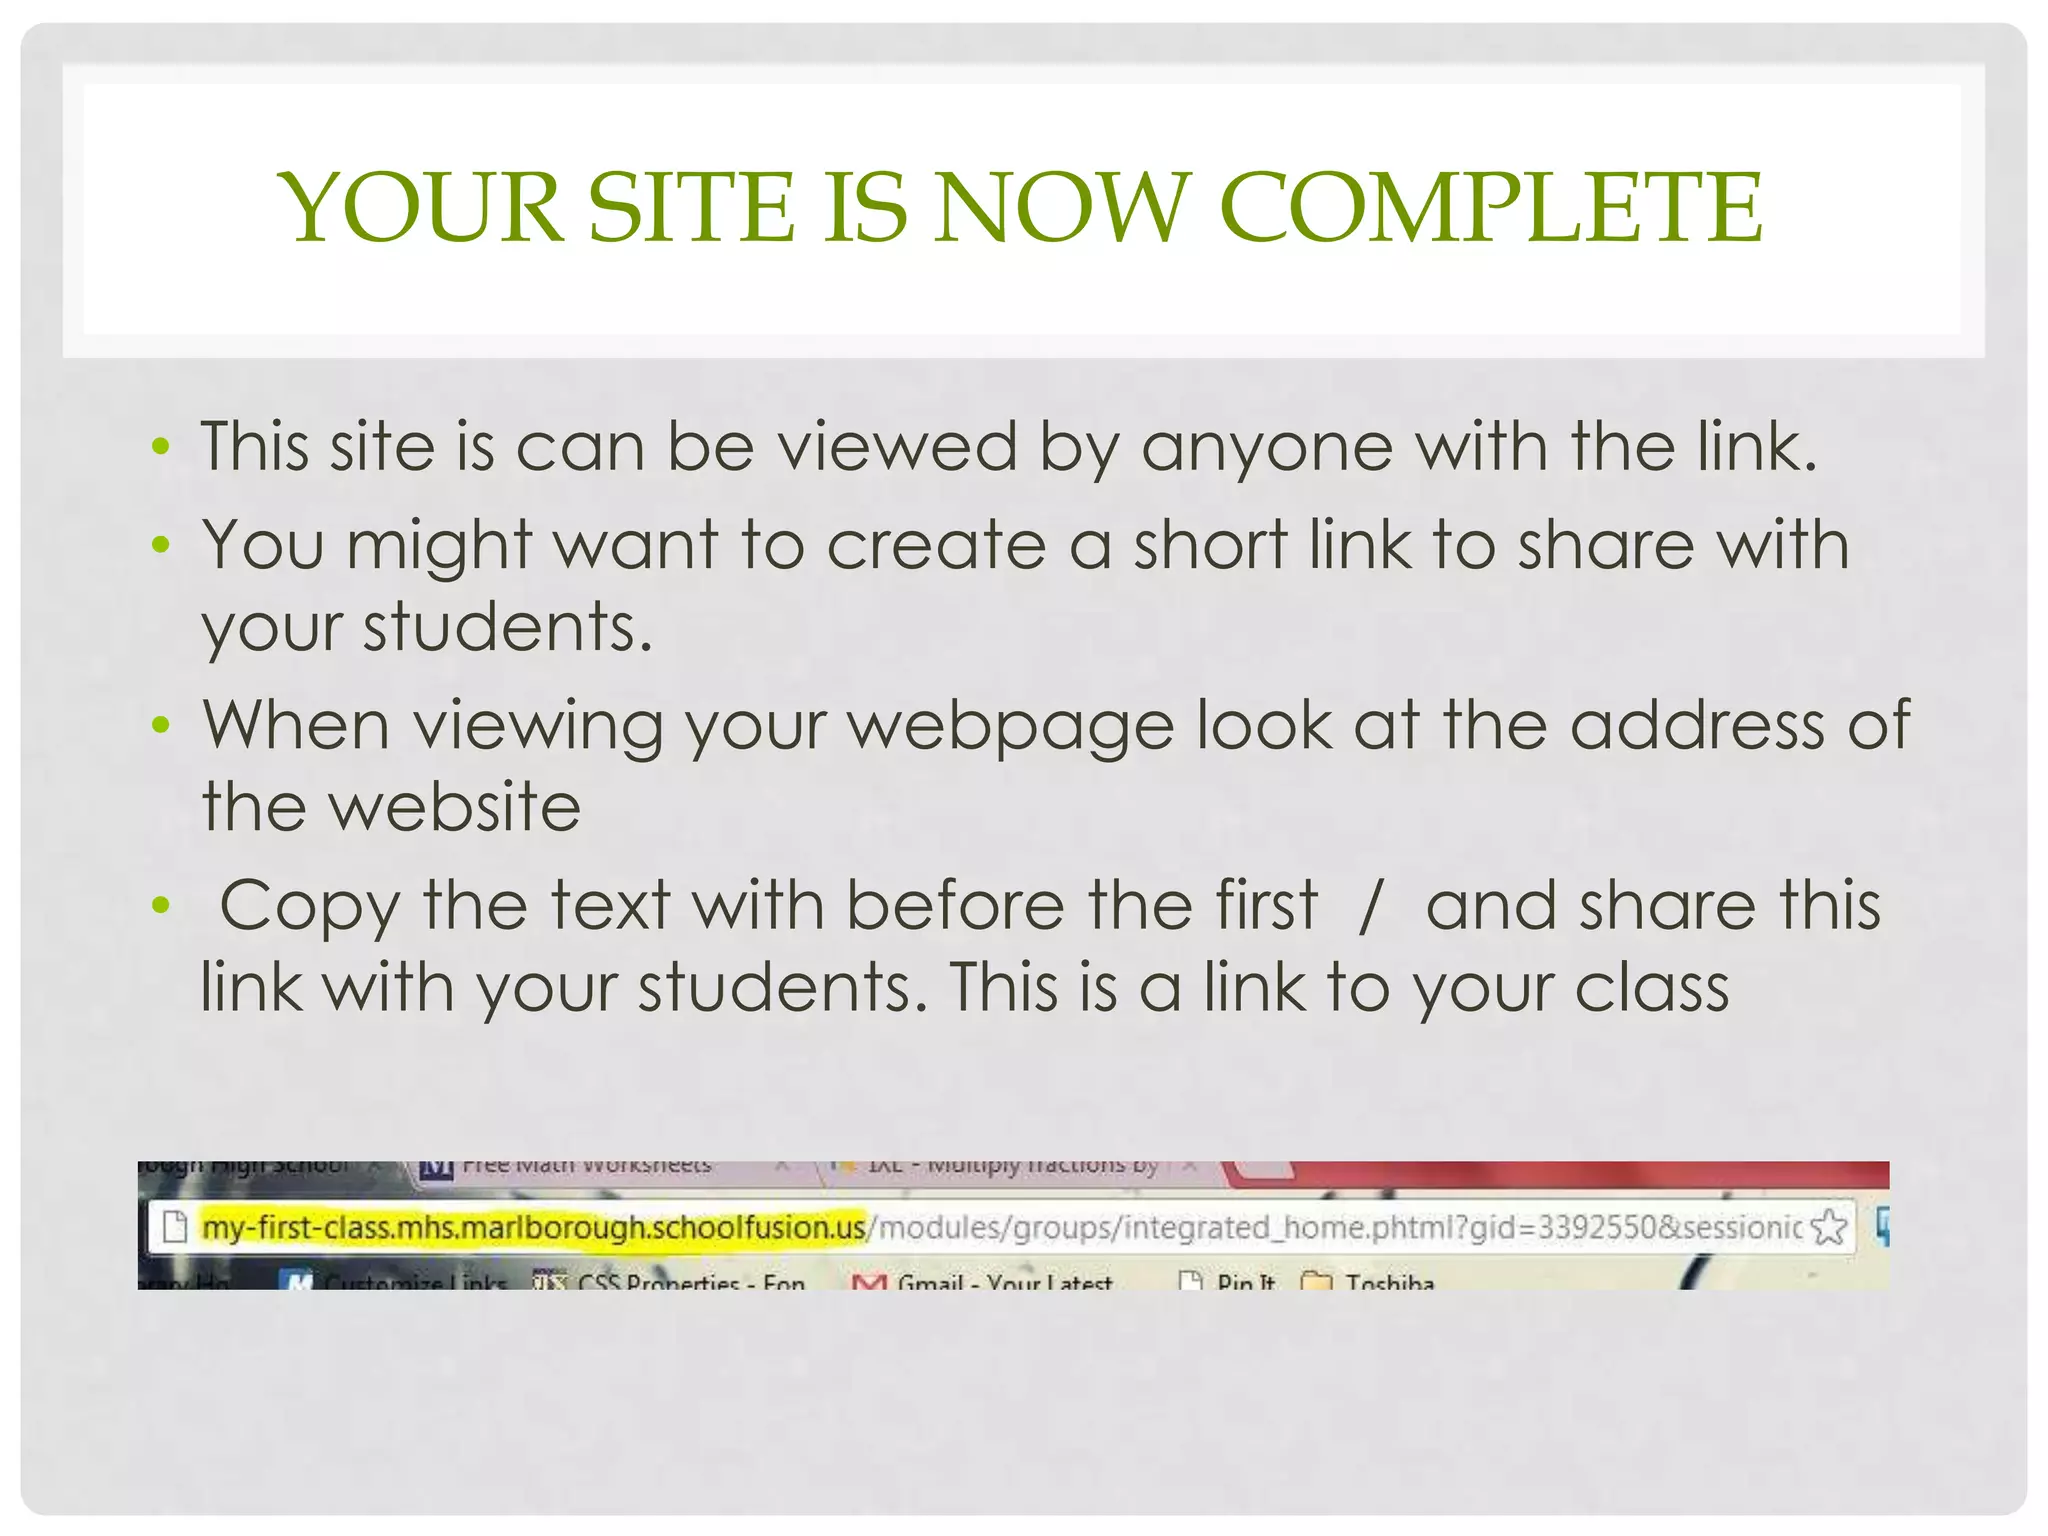

The document provides a step-by-step guide on using School Fusion for creating a class website, including logging in, activating accounts, and editing class pages. It details how to add and manage various modules such as announcements, links, assignments, and files, including the necessary editing tools and processes. Finally, it explains how to share the completed site with students using a shortened link.


