Download to read offline
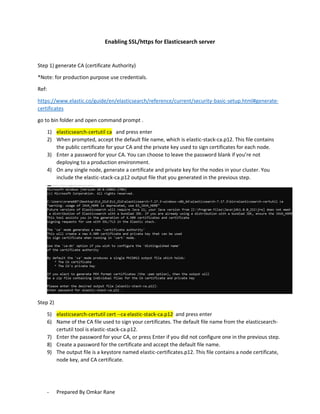
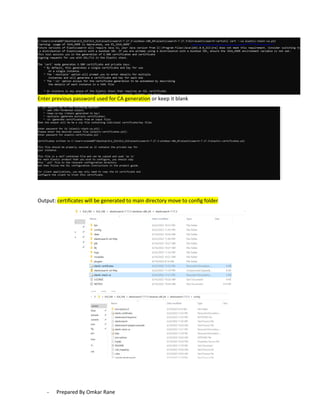
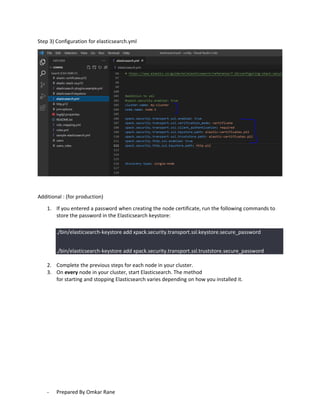
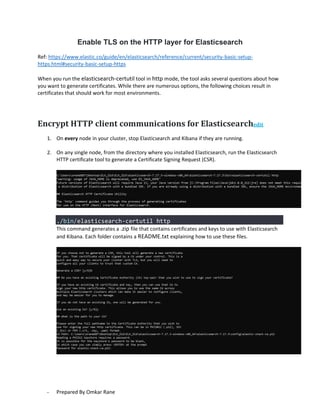

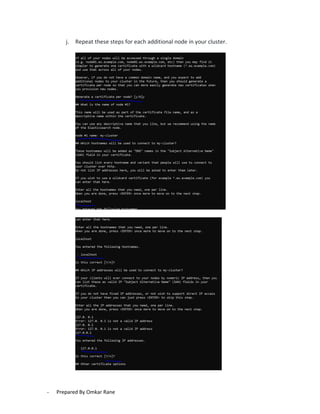
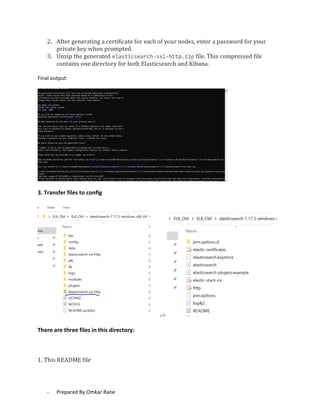
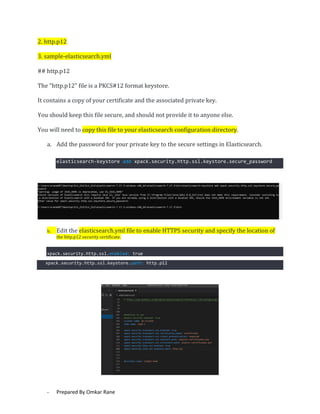
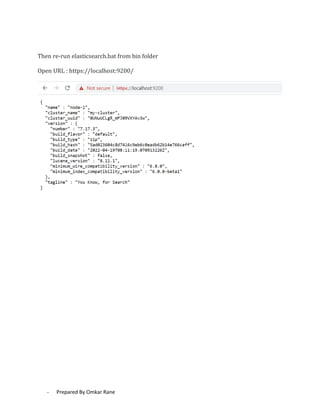
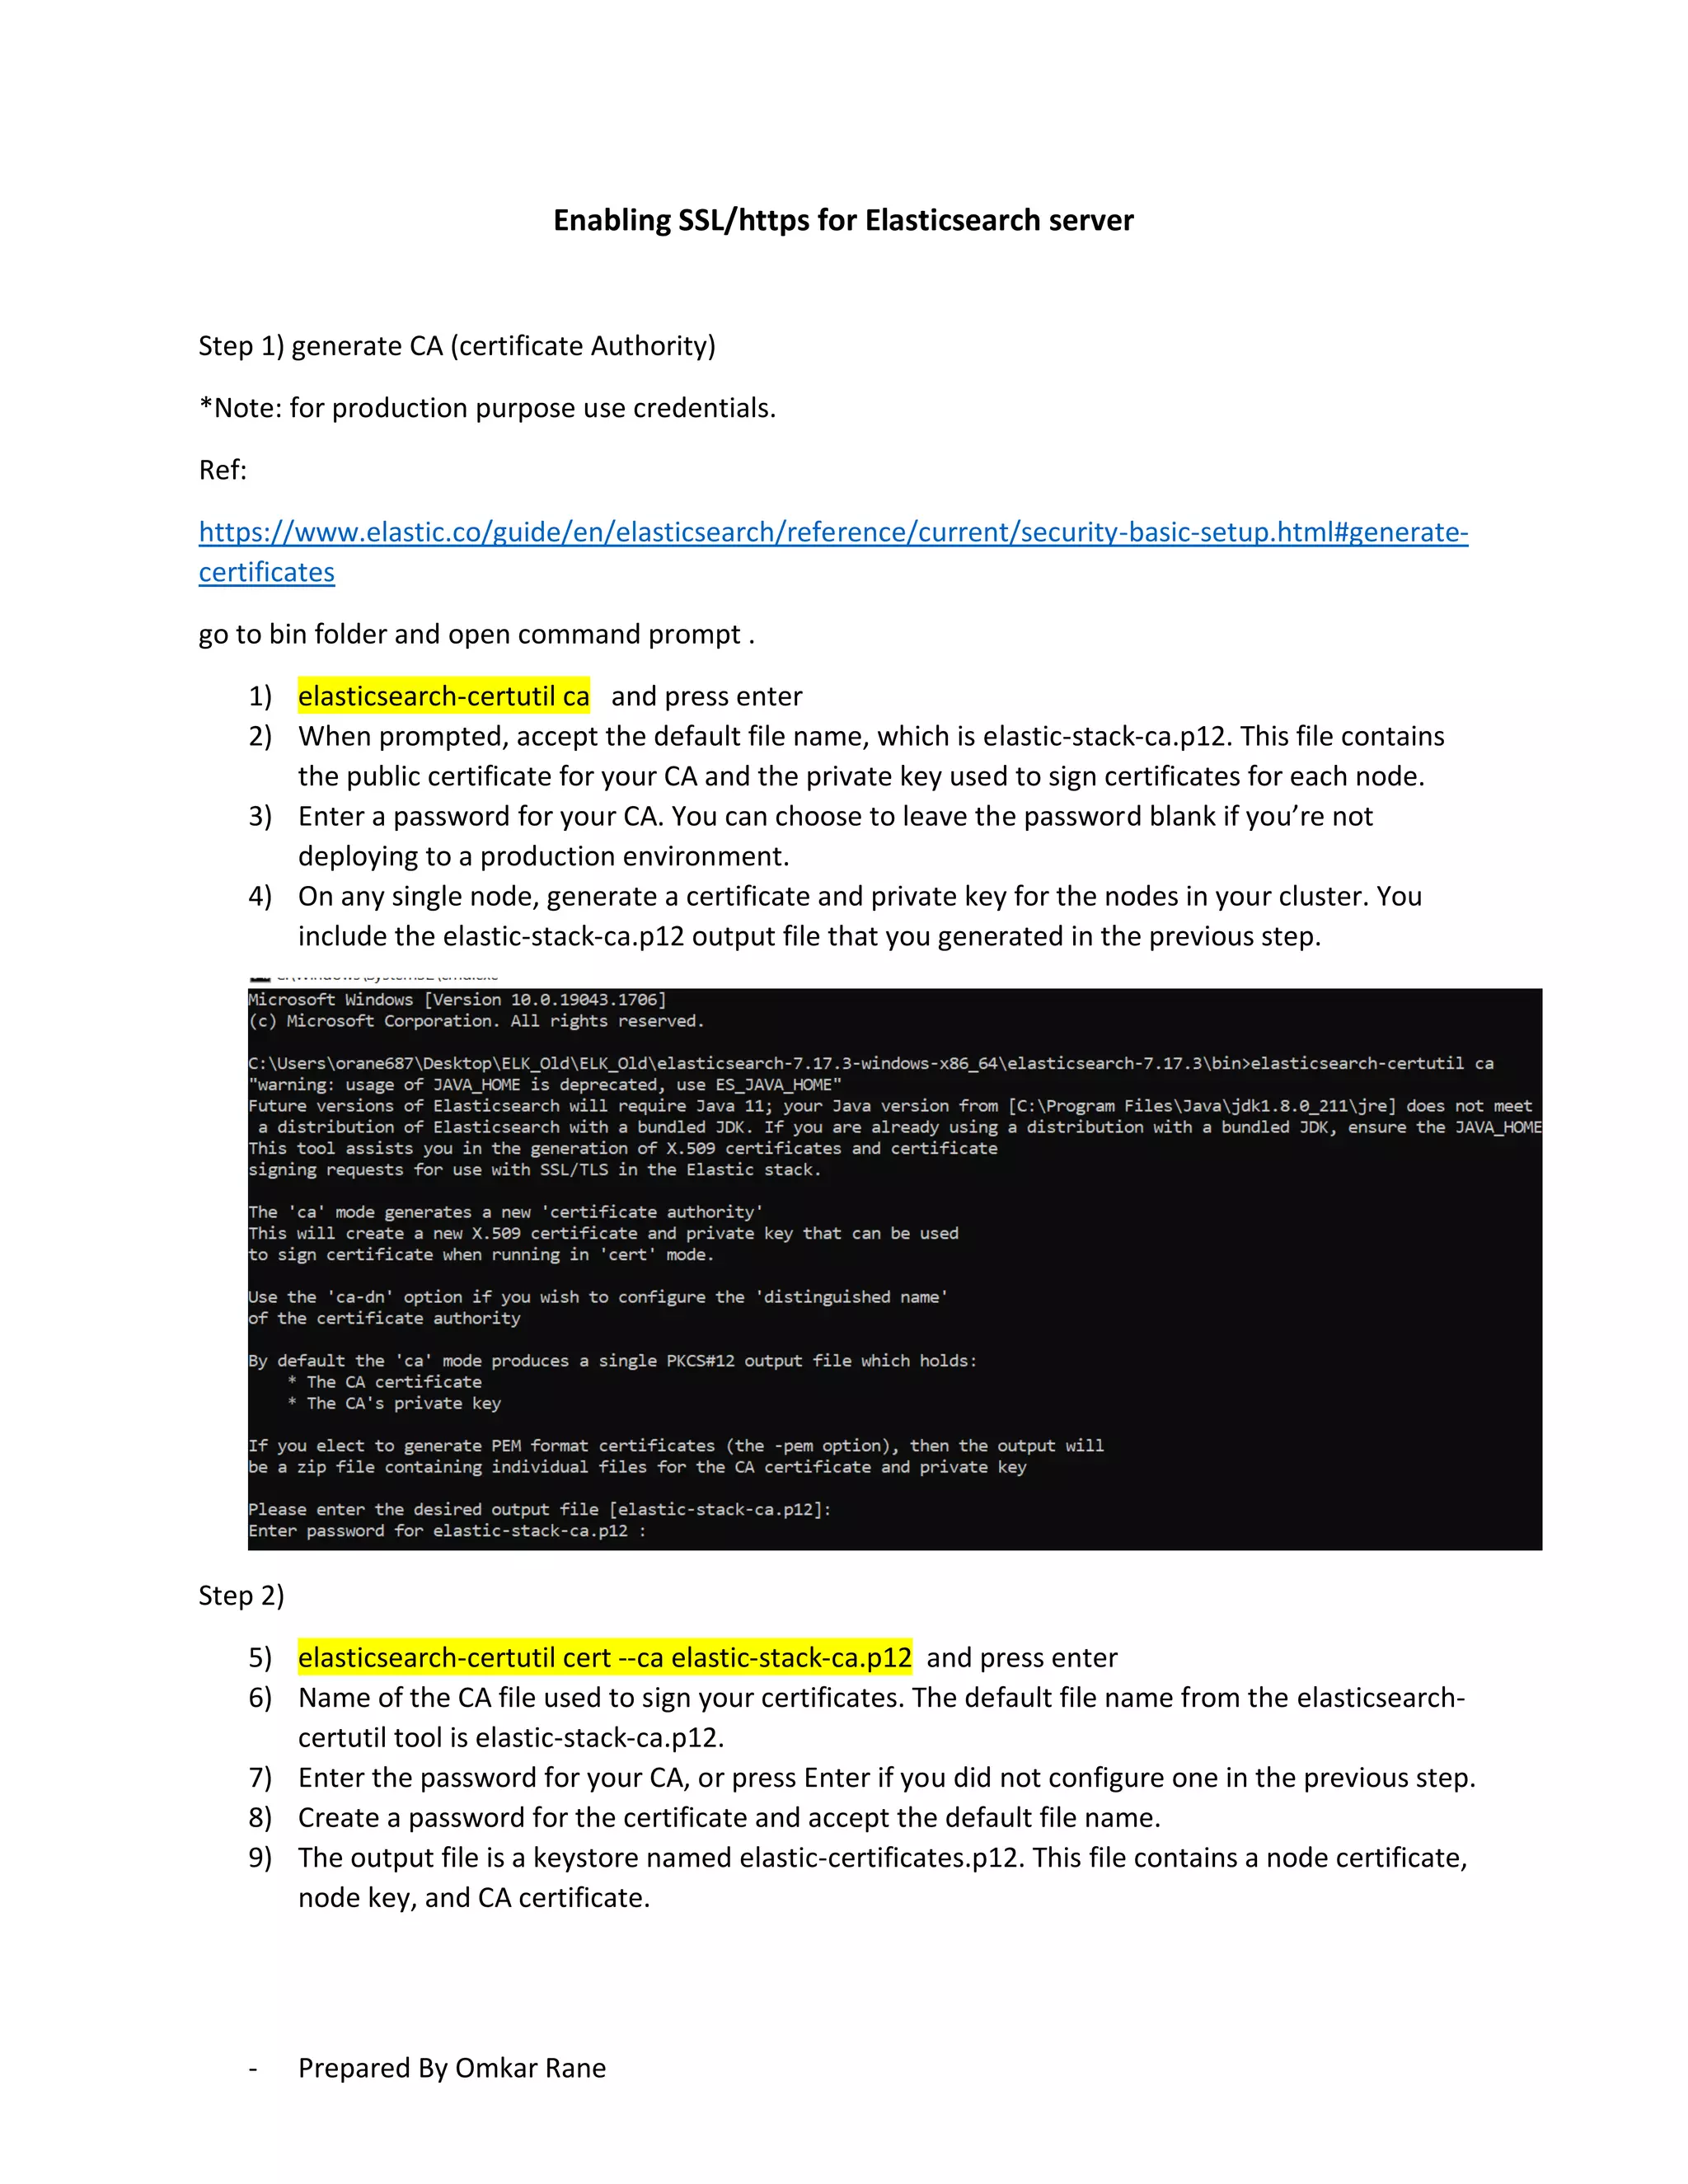

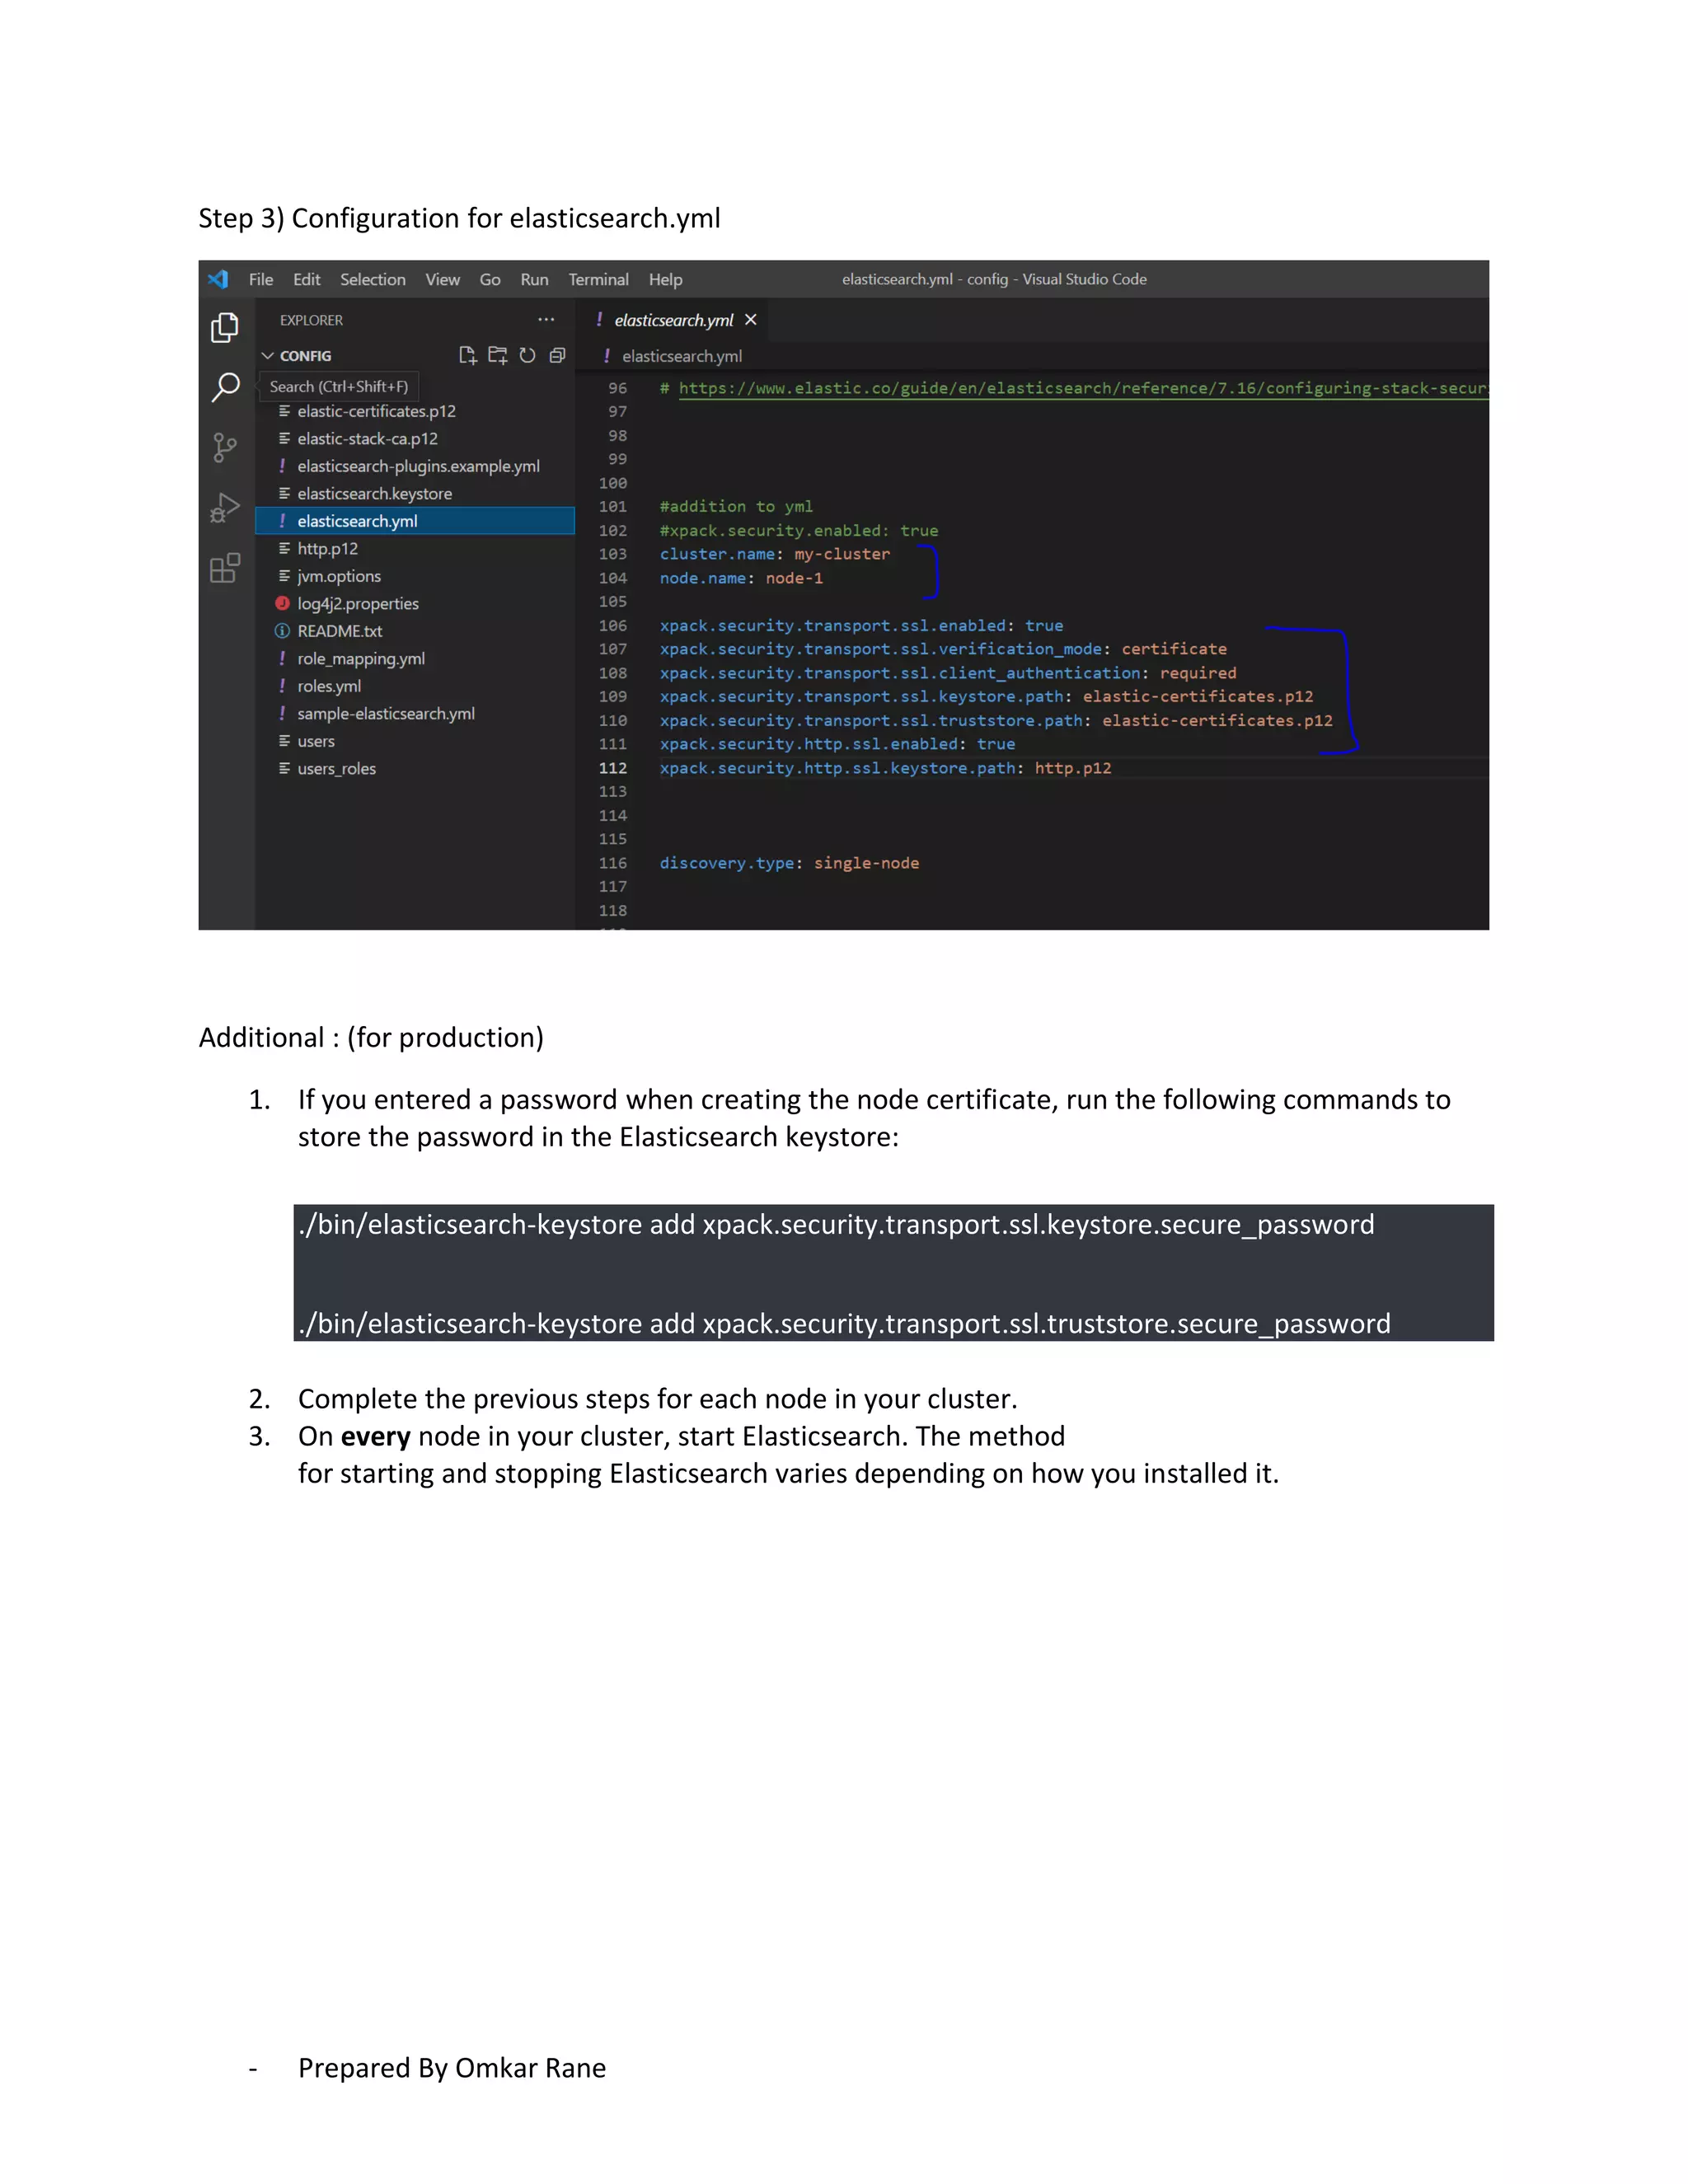
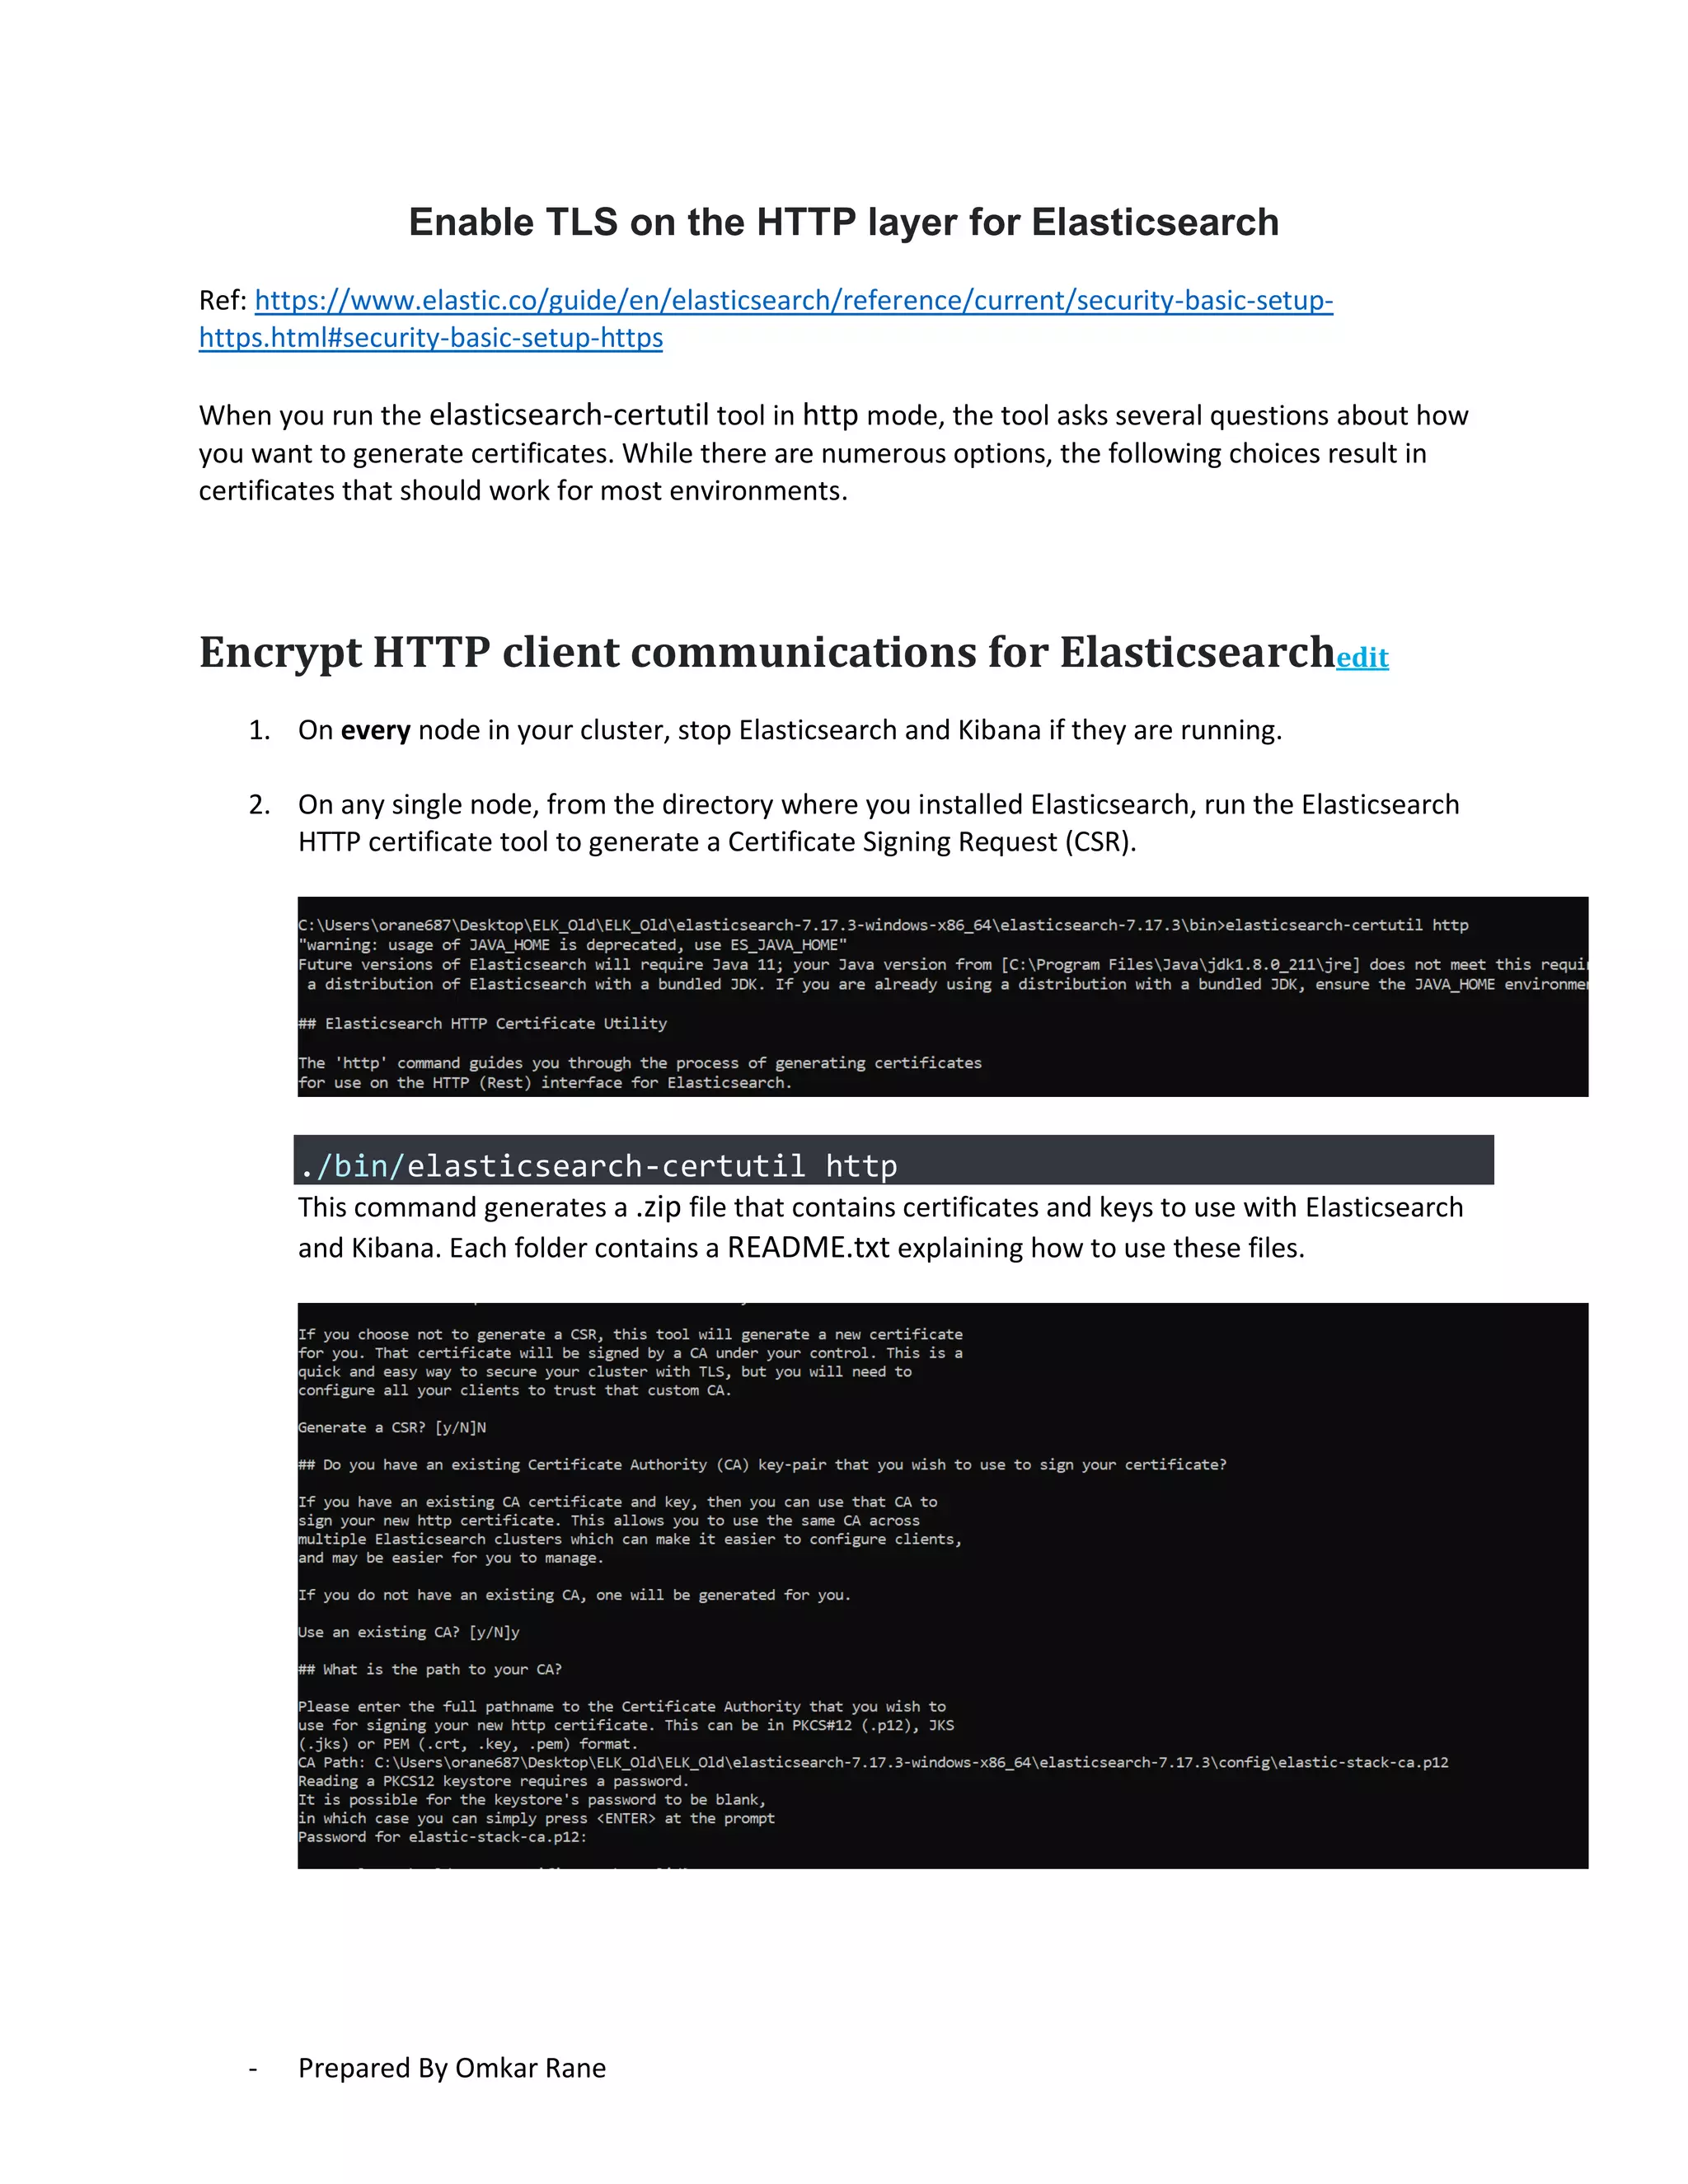
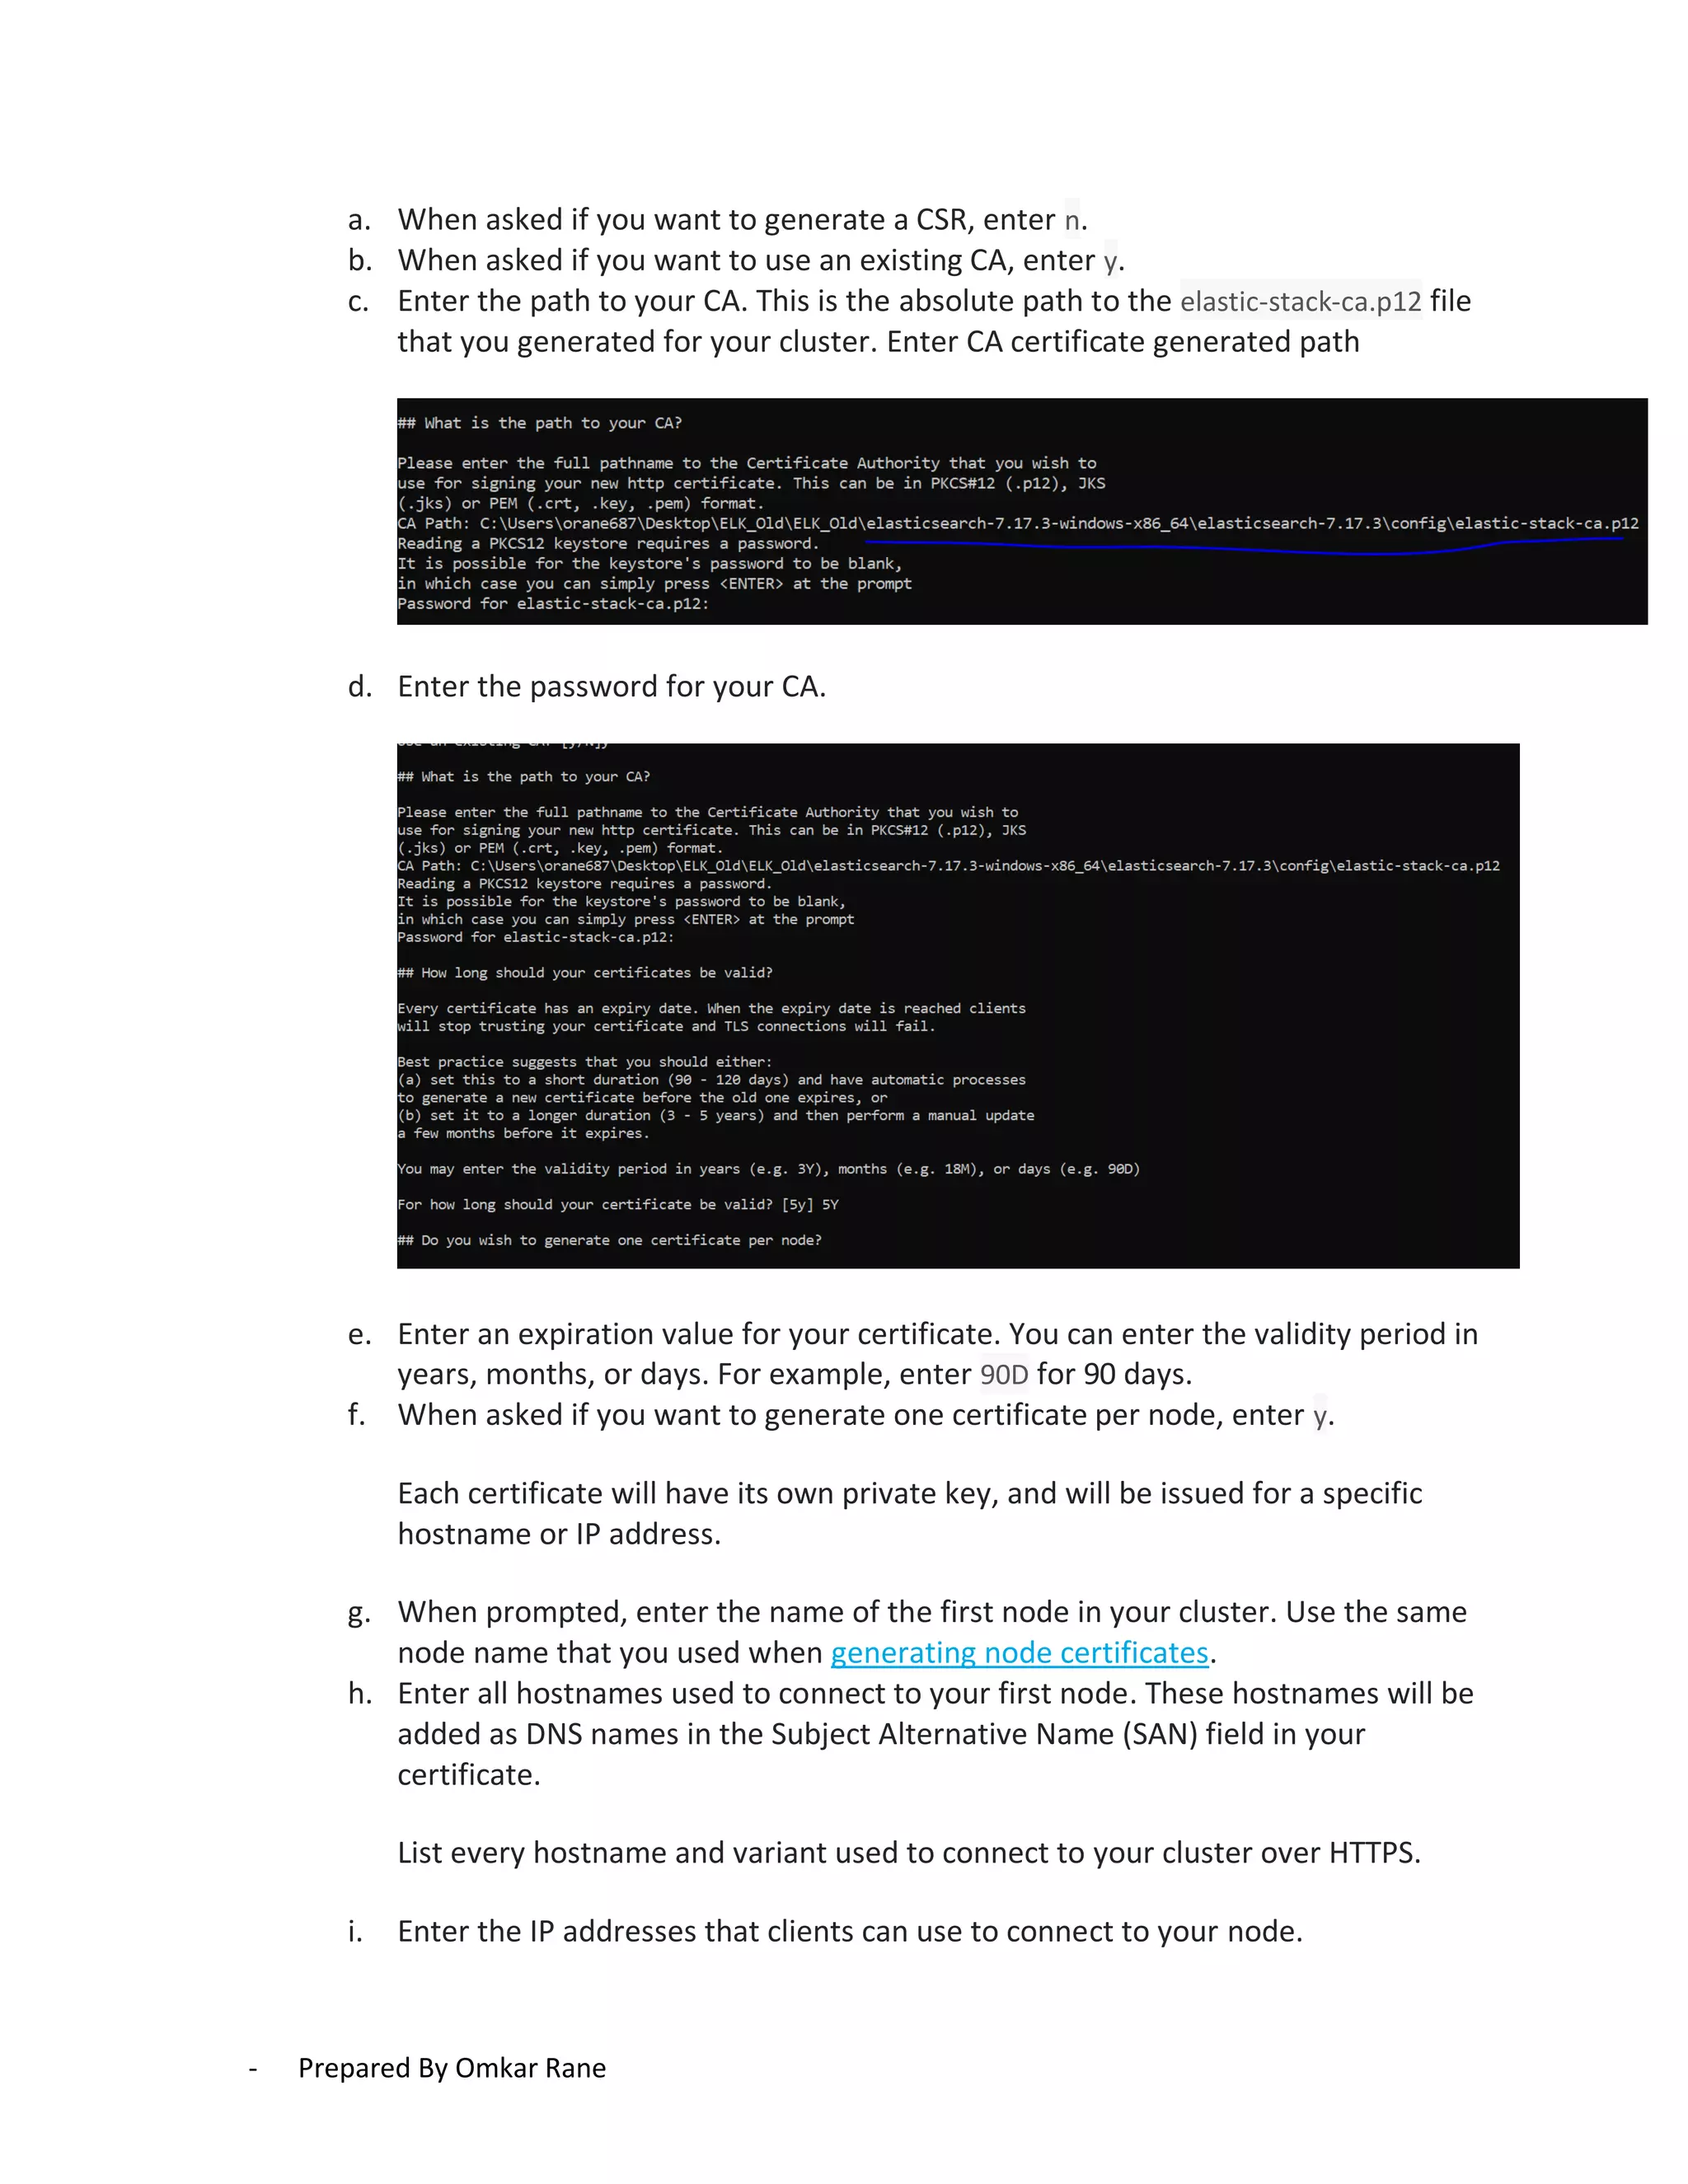
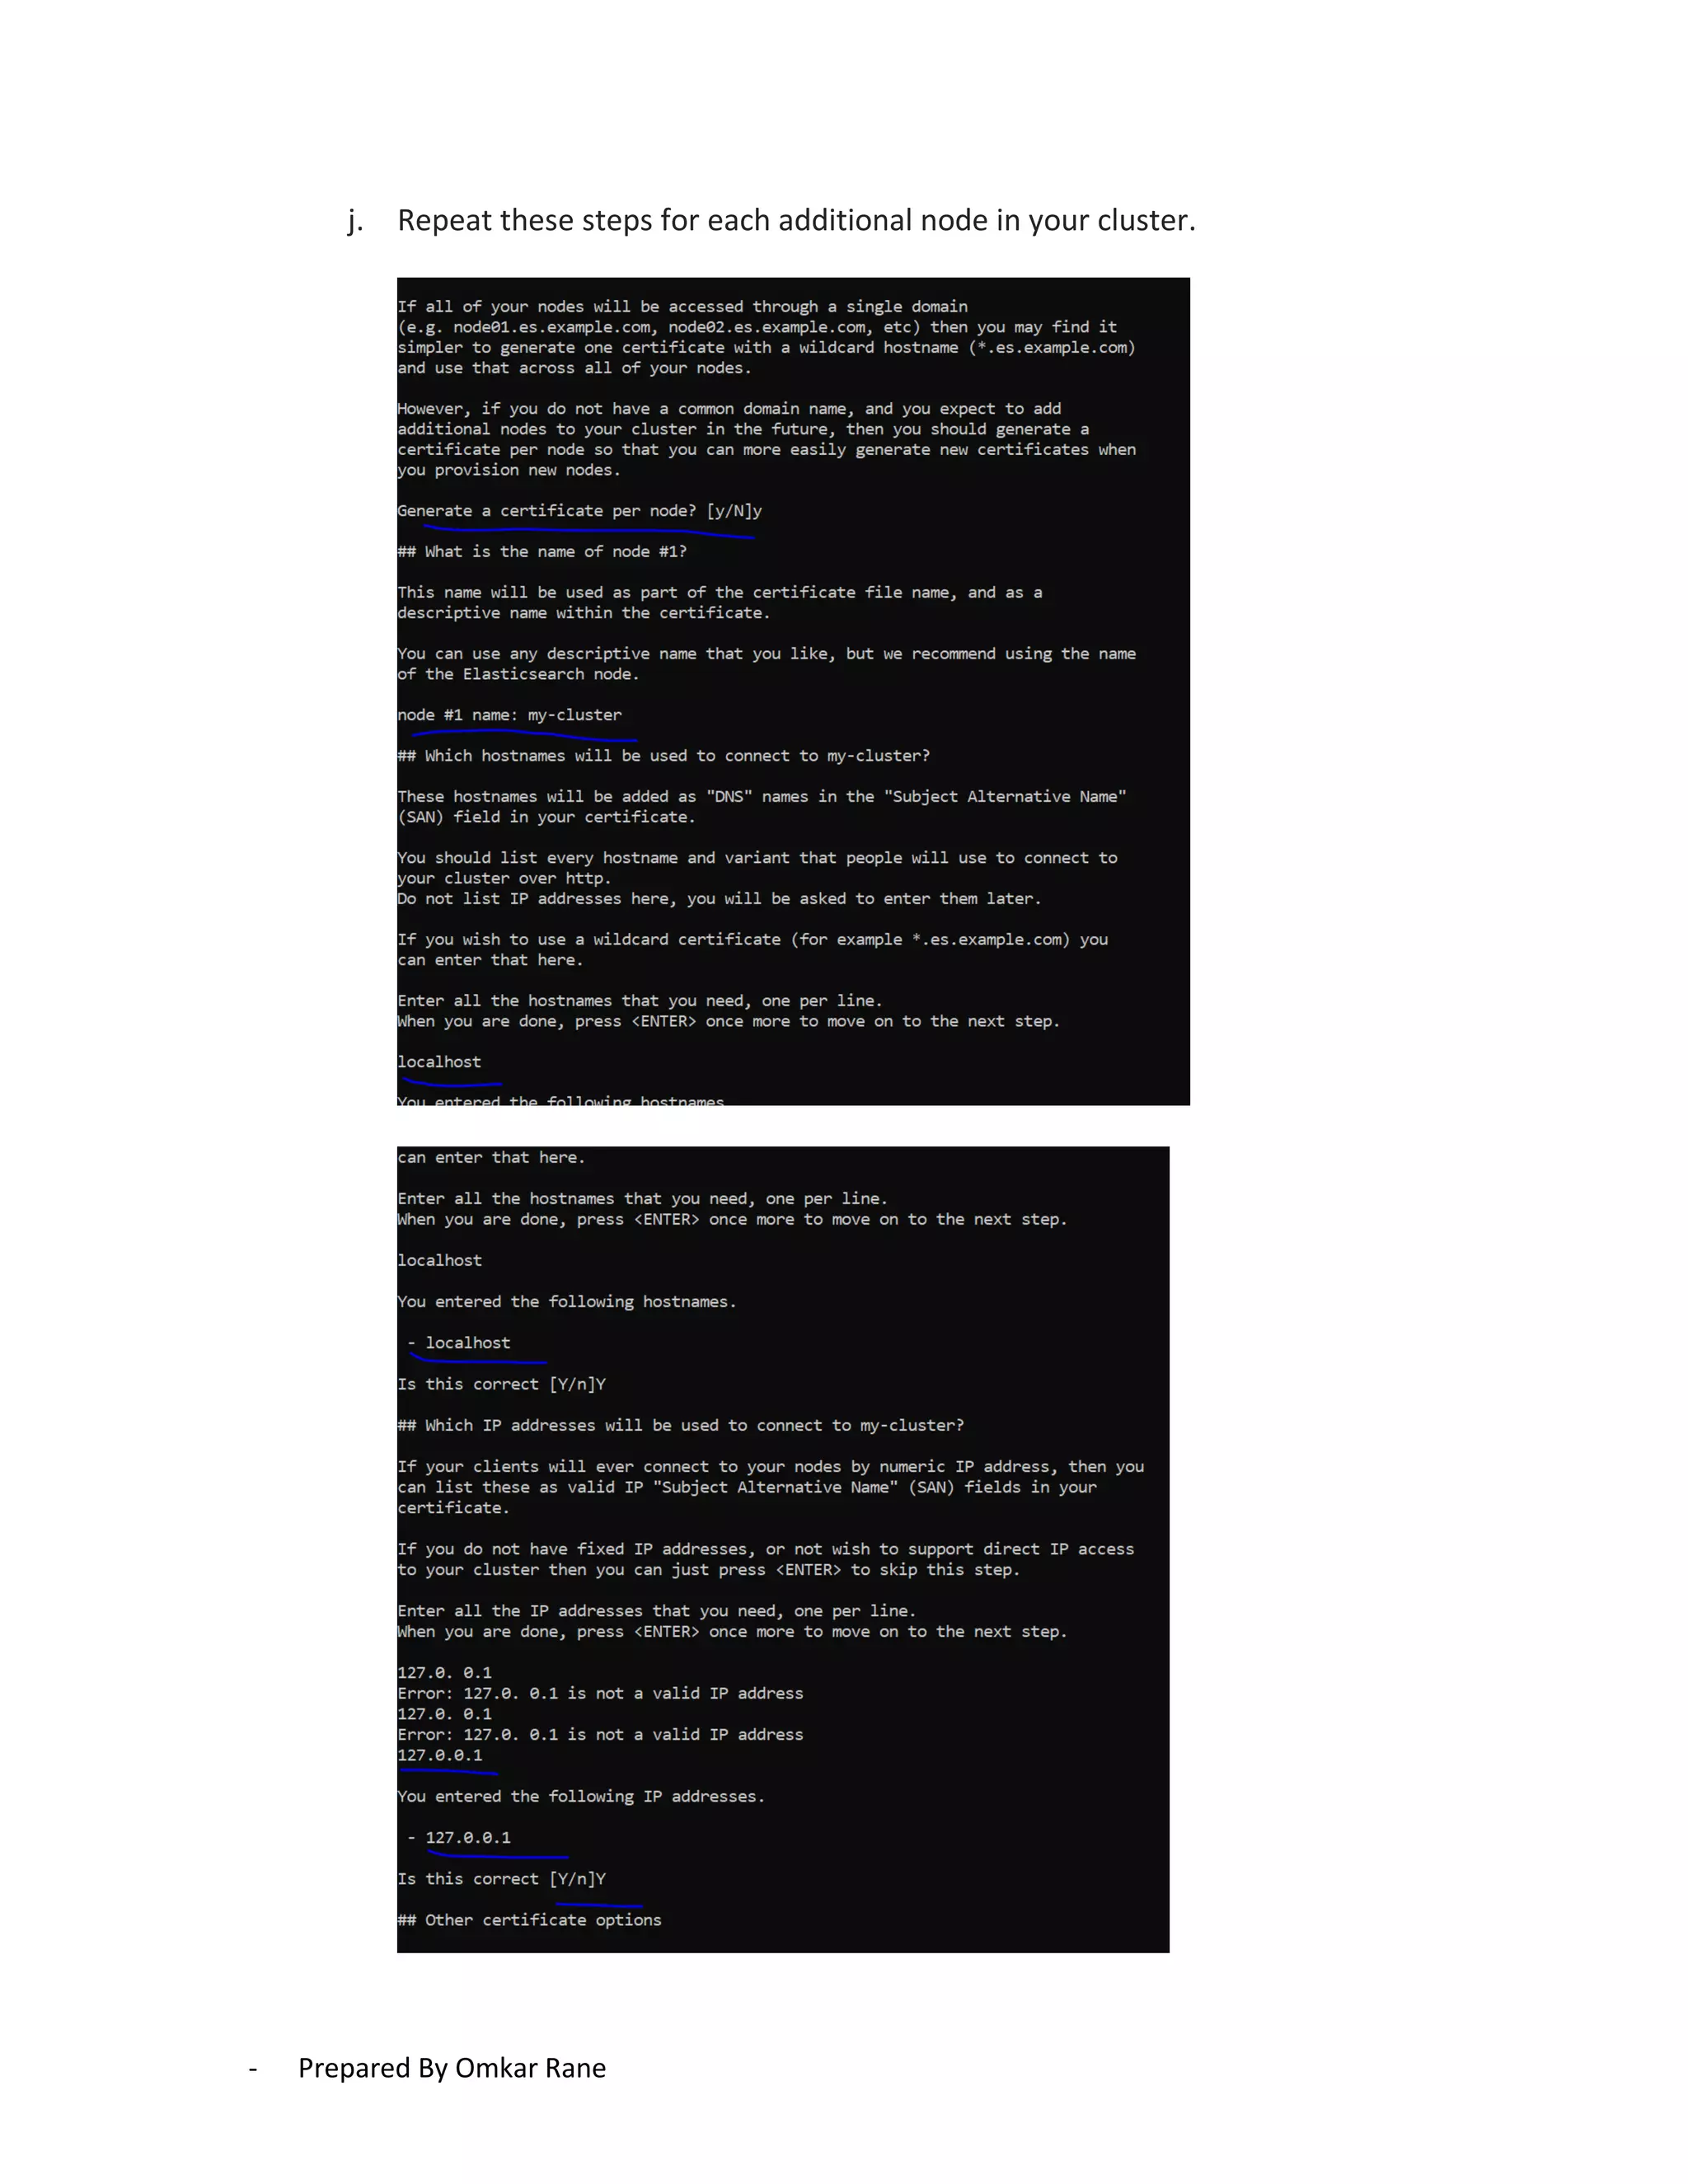
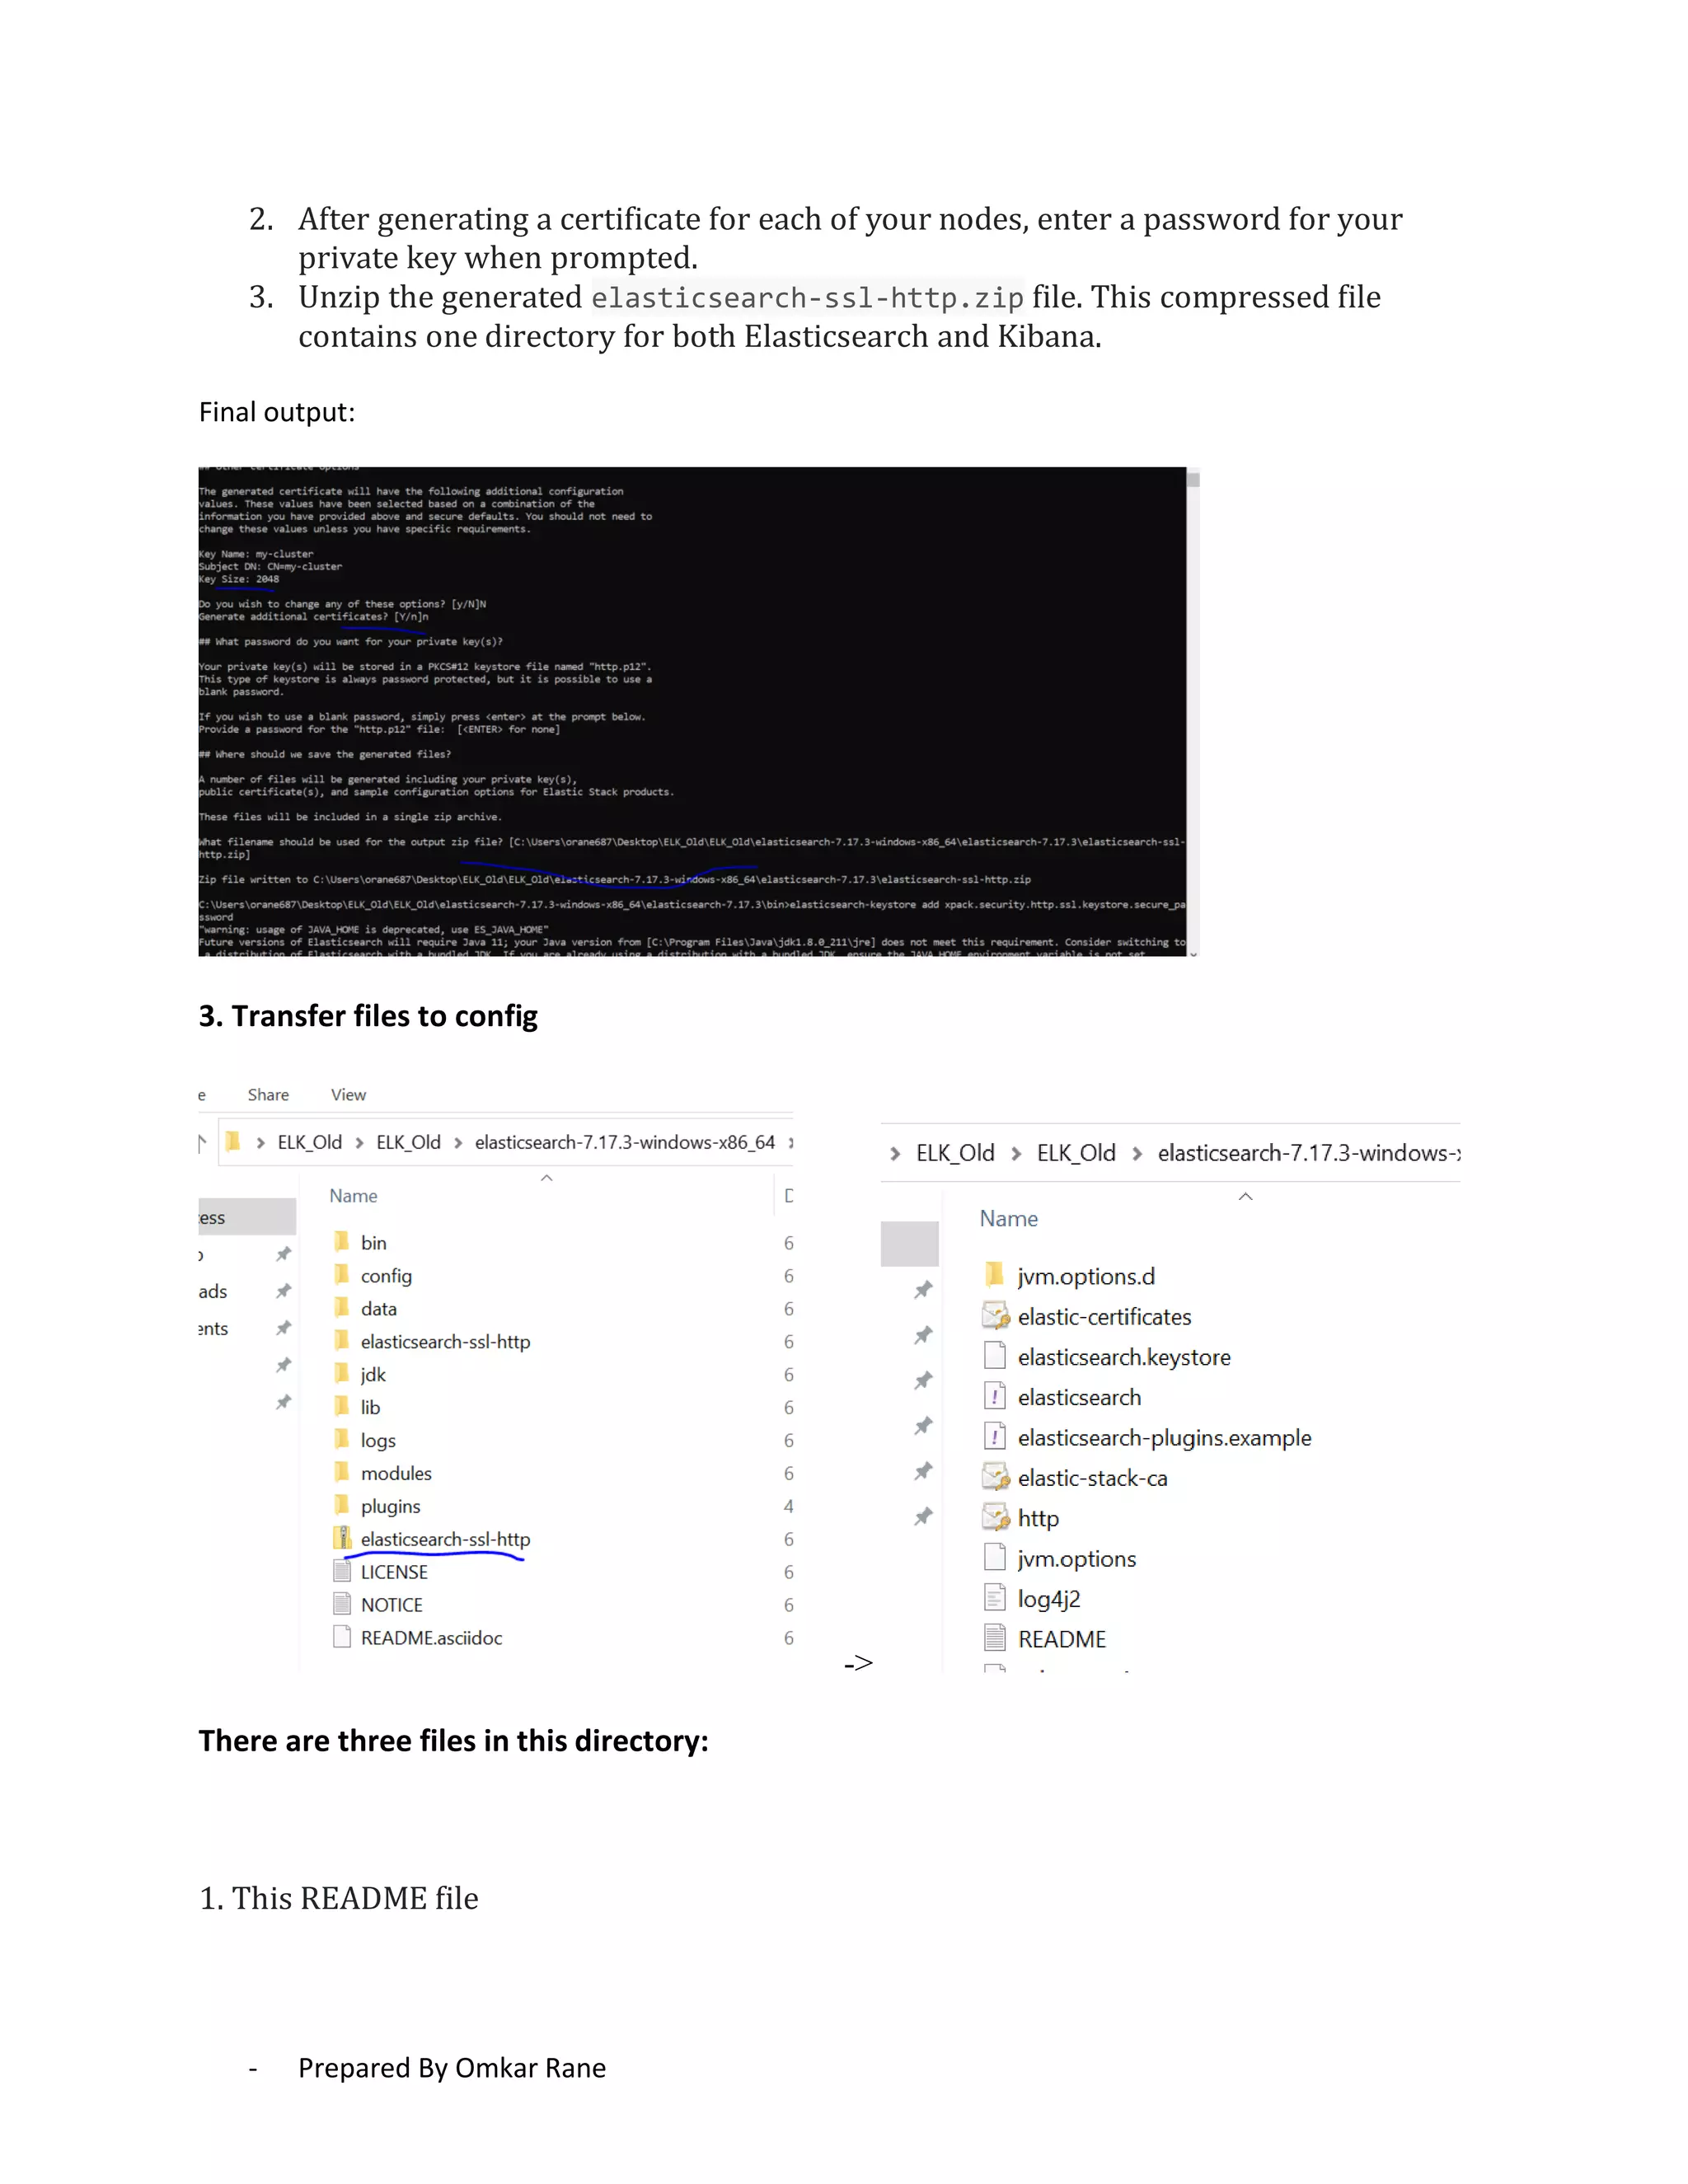

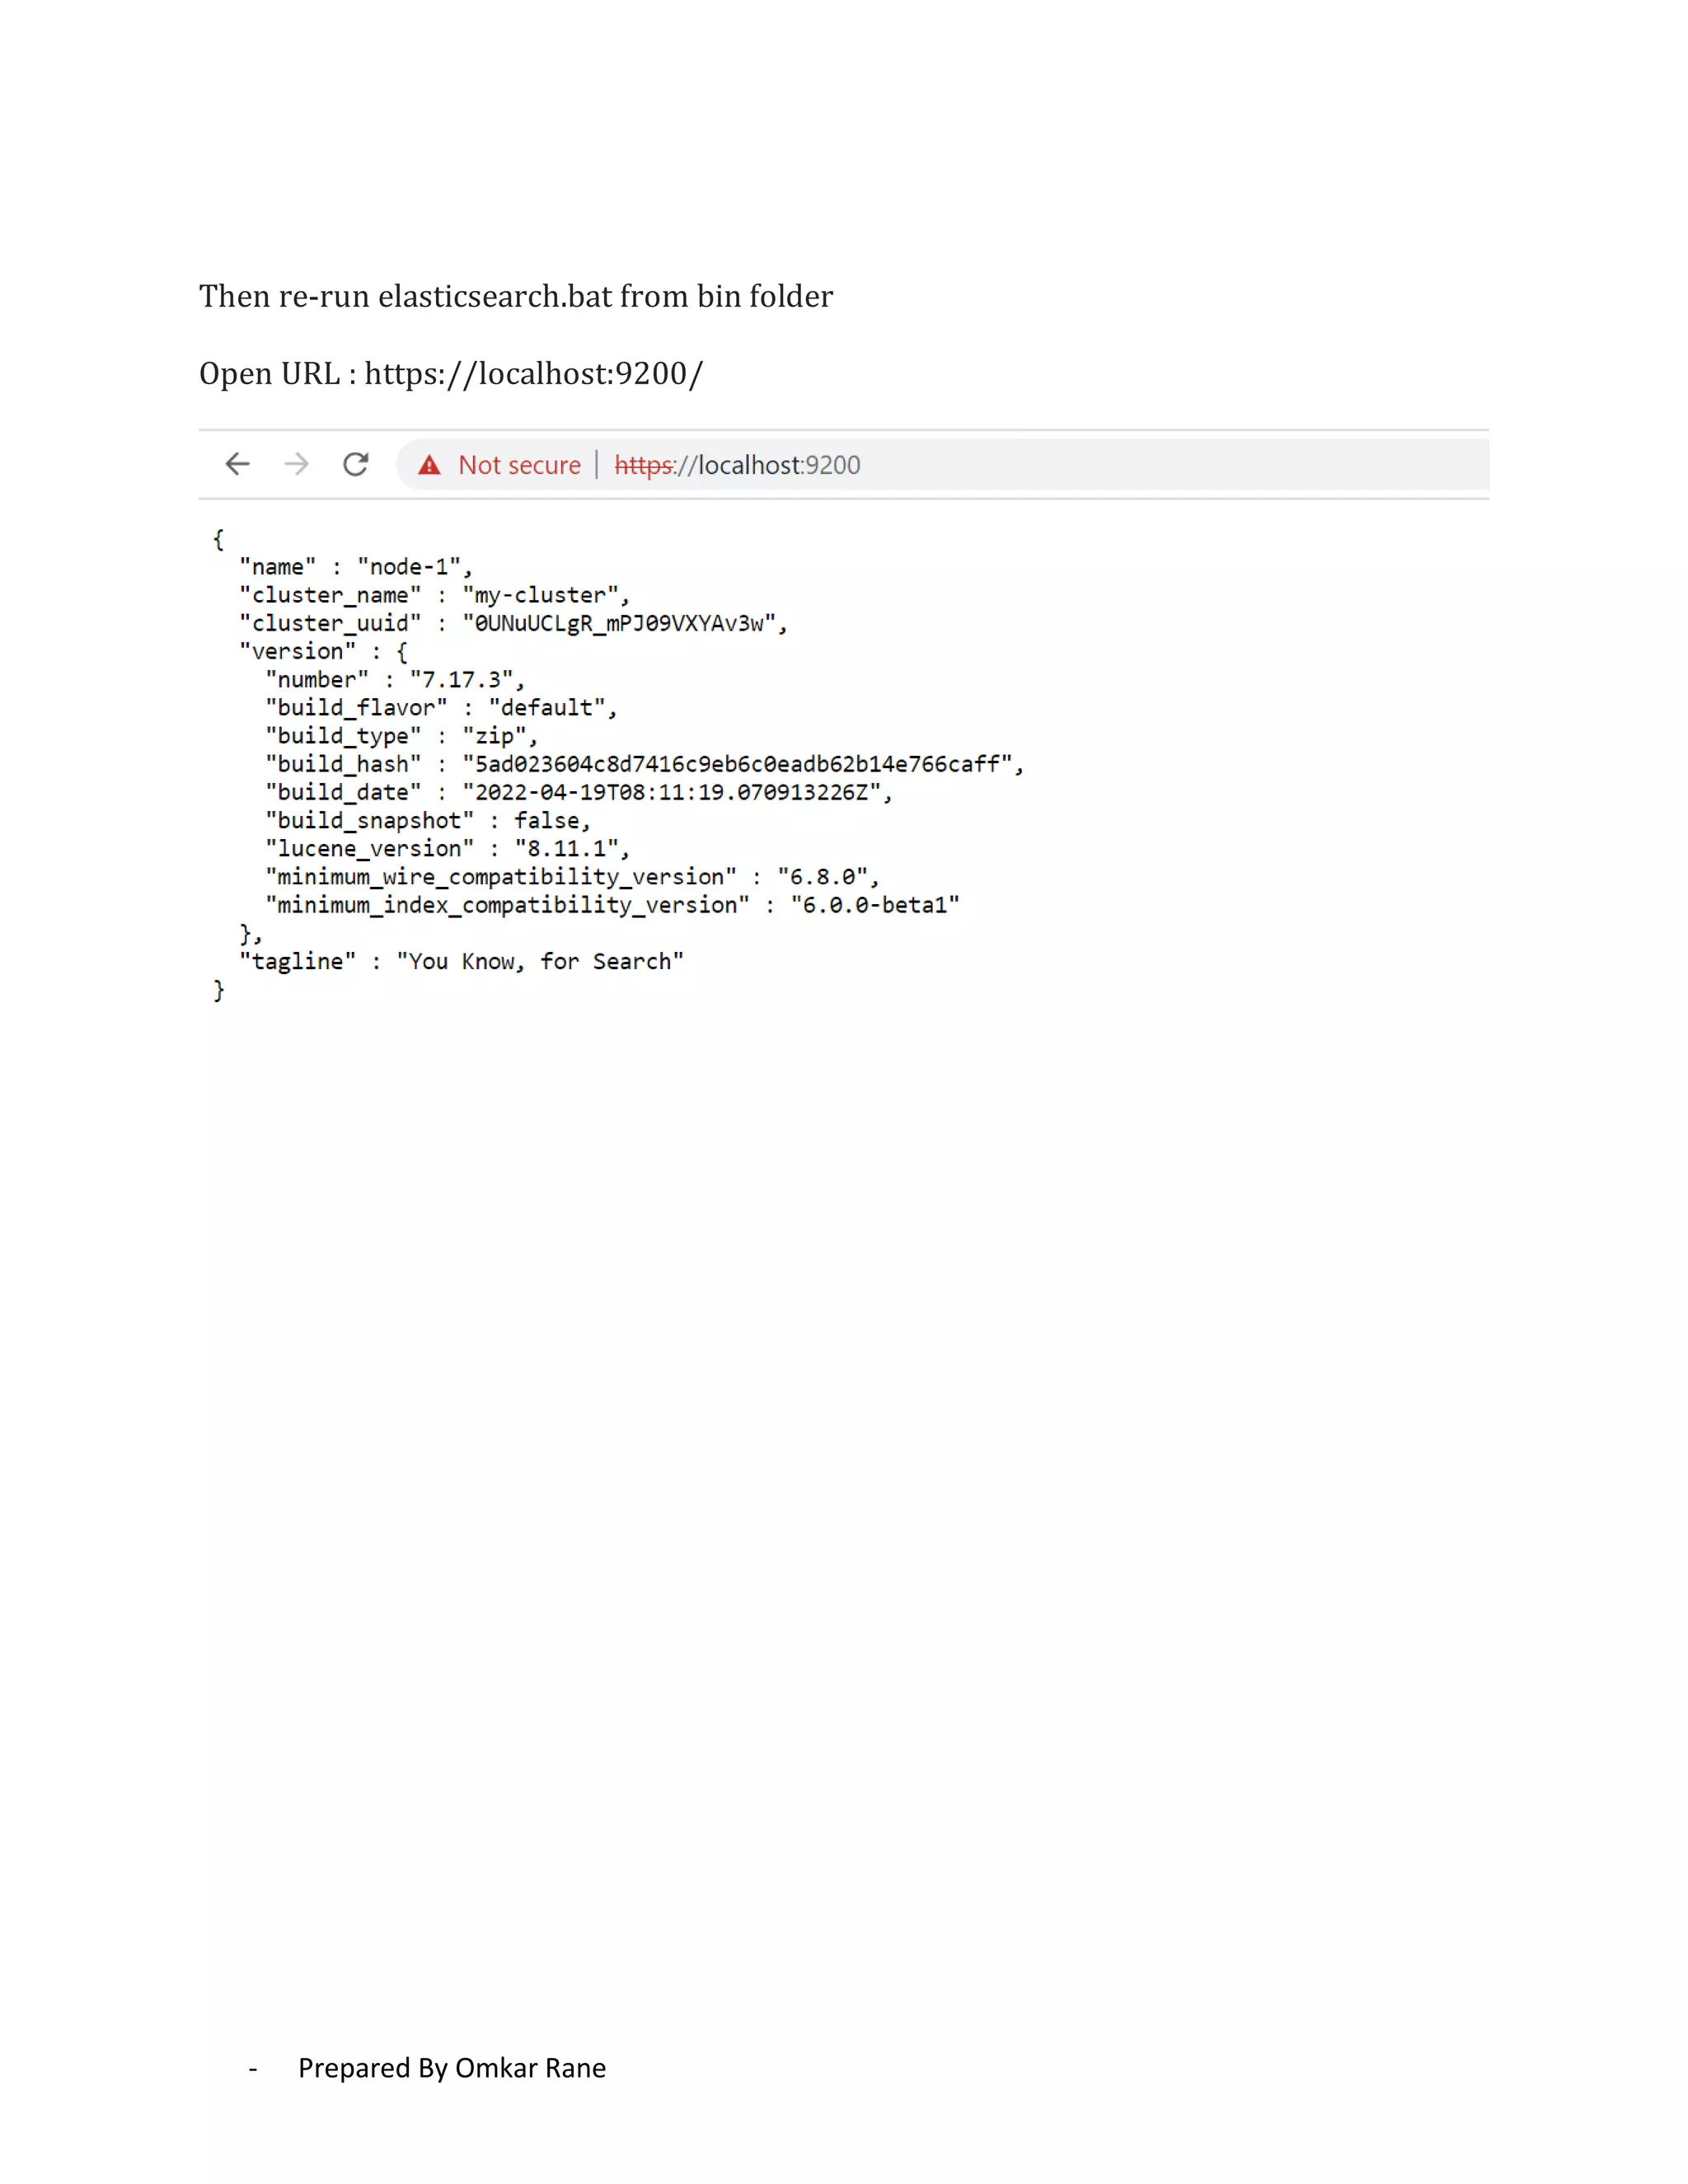

This document provides steps to enable SSL/HTTPS for an Elasticsearch server. It involves generating certificates, configuring Elasticsearch, and enabling TLS for both transport and HTTP layers. The process includes generating a CA certificate, creating node certificates signed by the CA, editing the Elasticsearch configuration file, and restarting Elasticsearch to enable HTTPS.


![Agentic Systems and Compliance - A brief intro [1.2]](https://cdn.slidesharecdn.com/ss_thumbnails/agenticsystemsandcompliace-1-251018025303-958a42ec-thumbnail.jpg?width=600ounds&width=560&fit=bounds)


