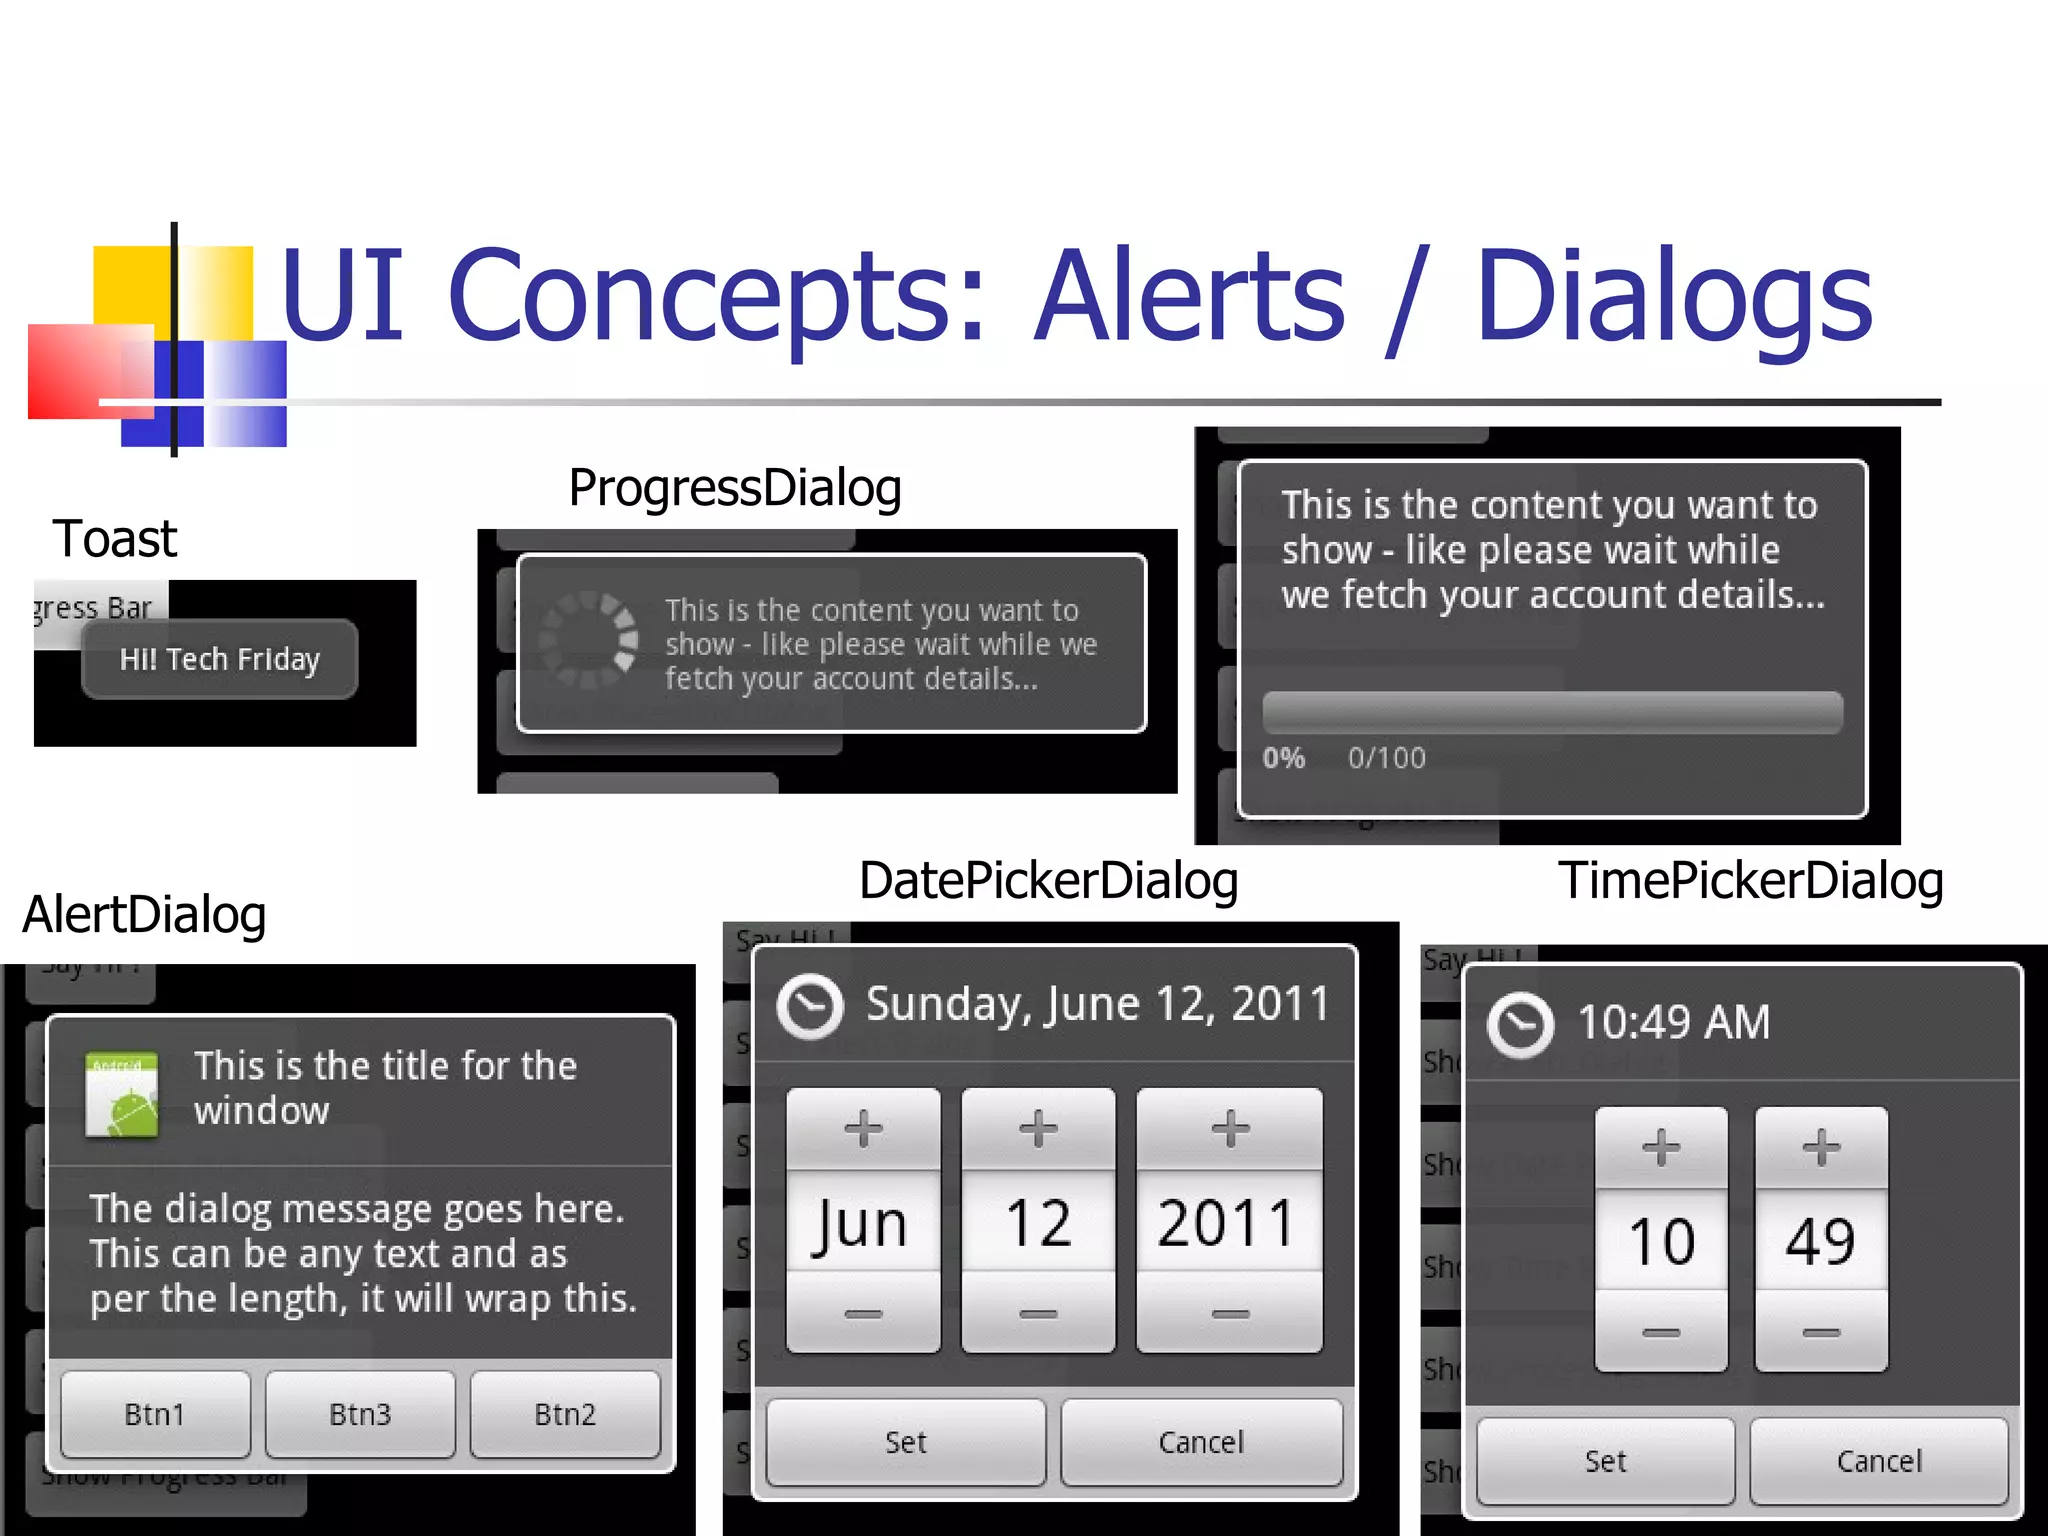
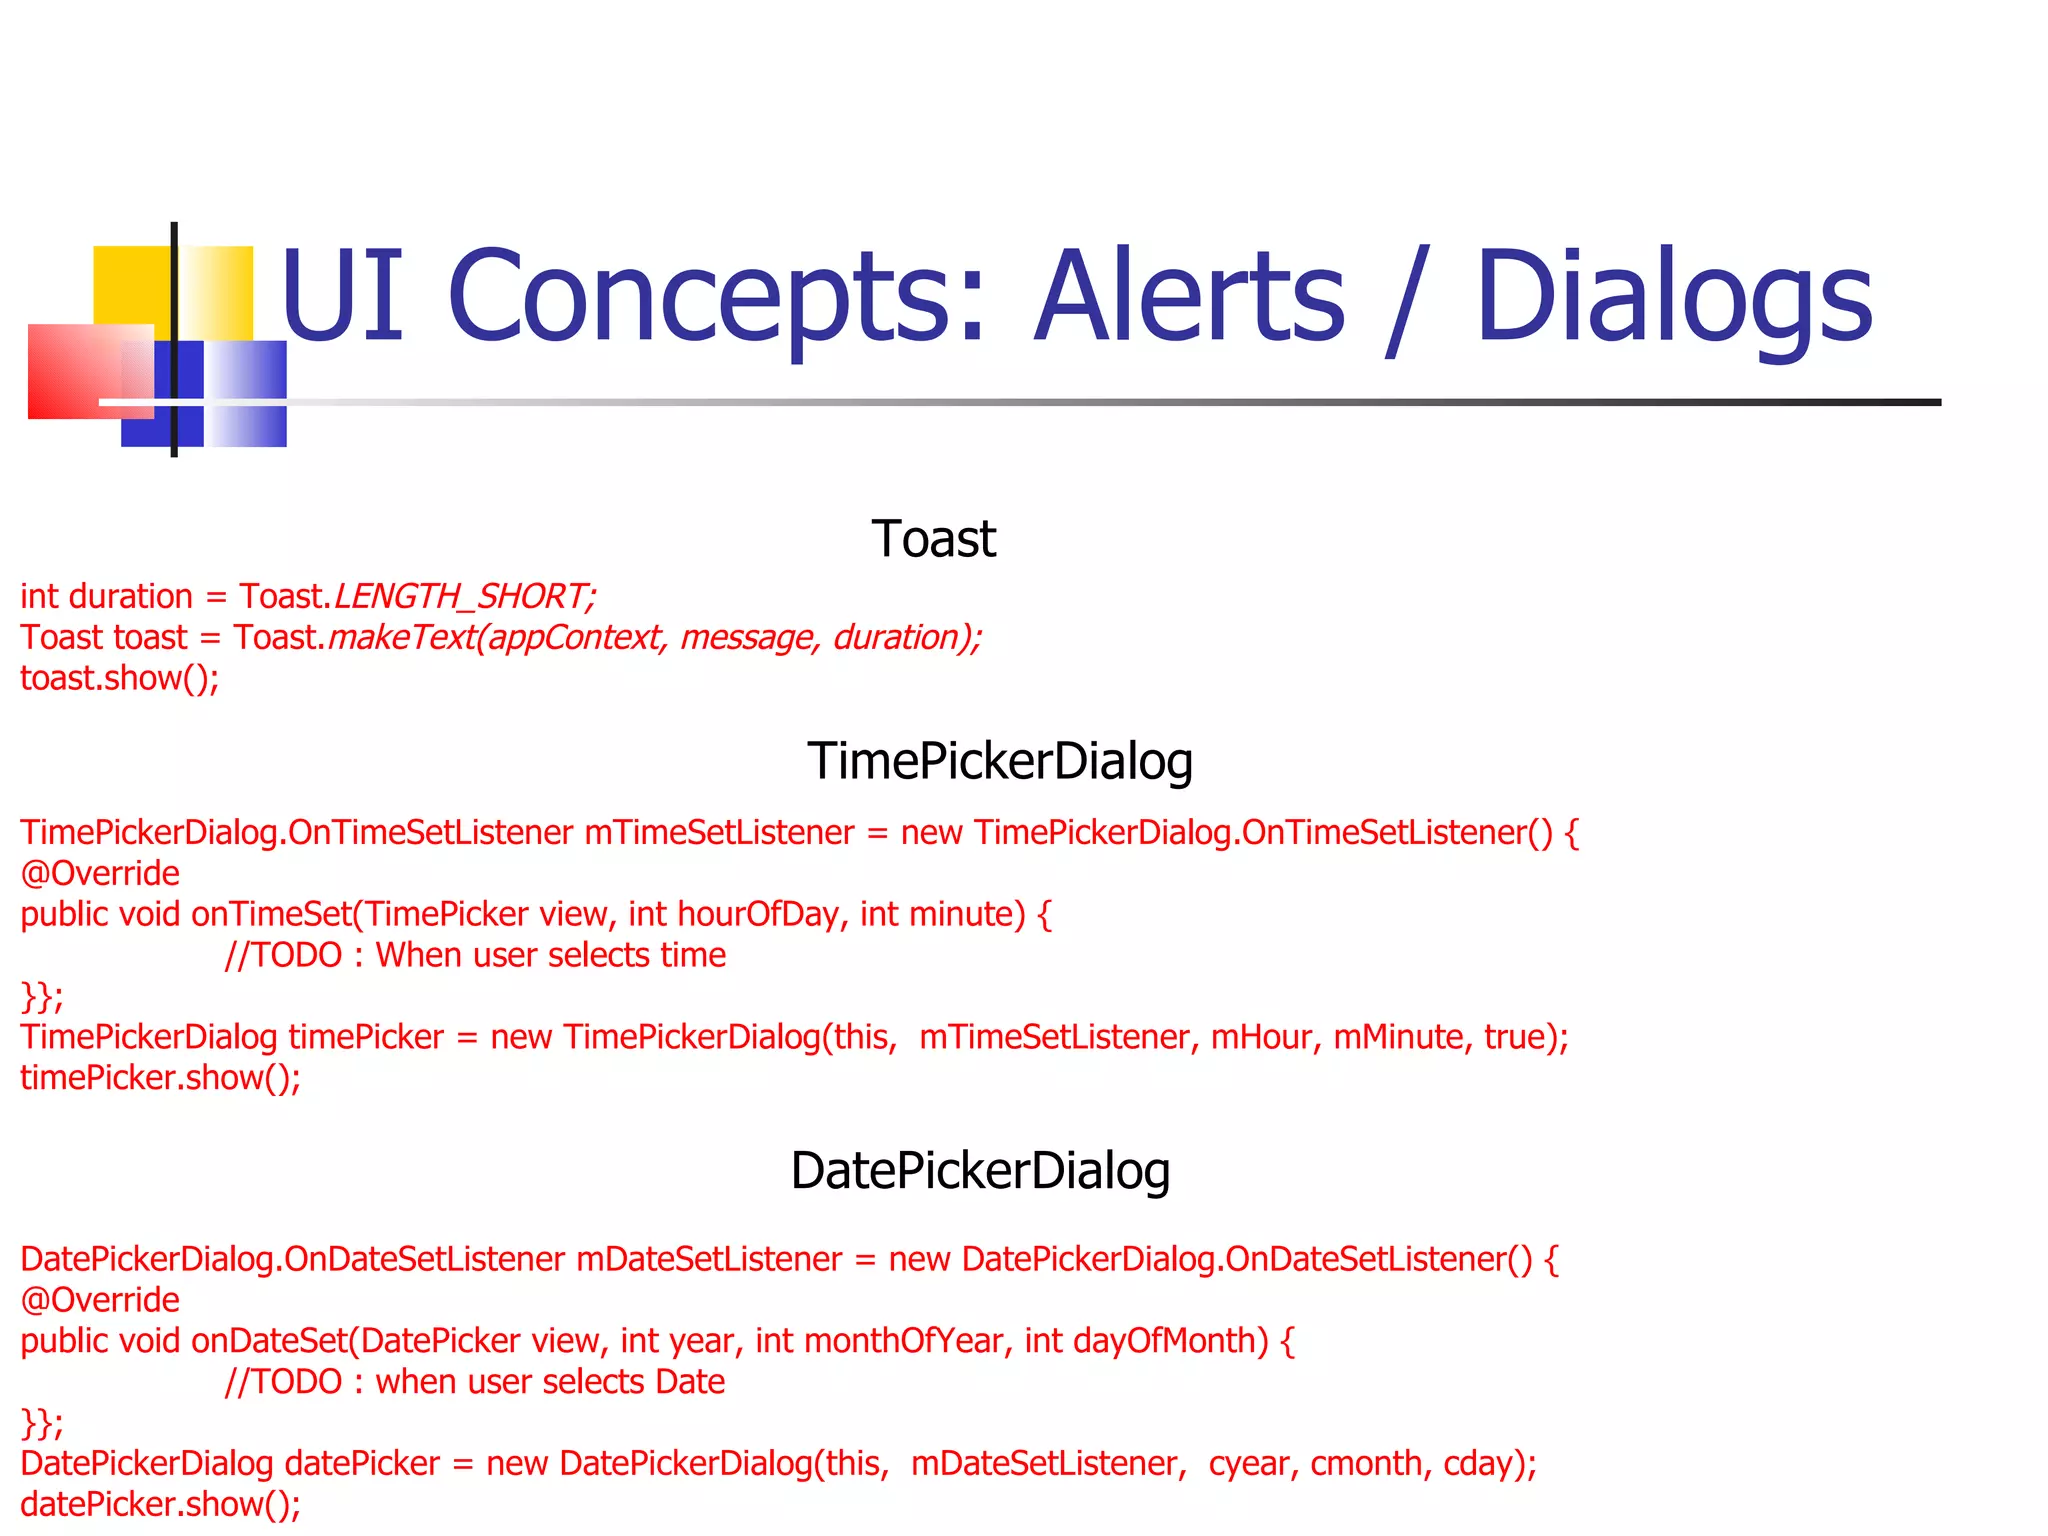
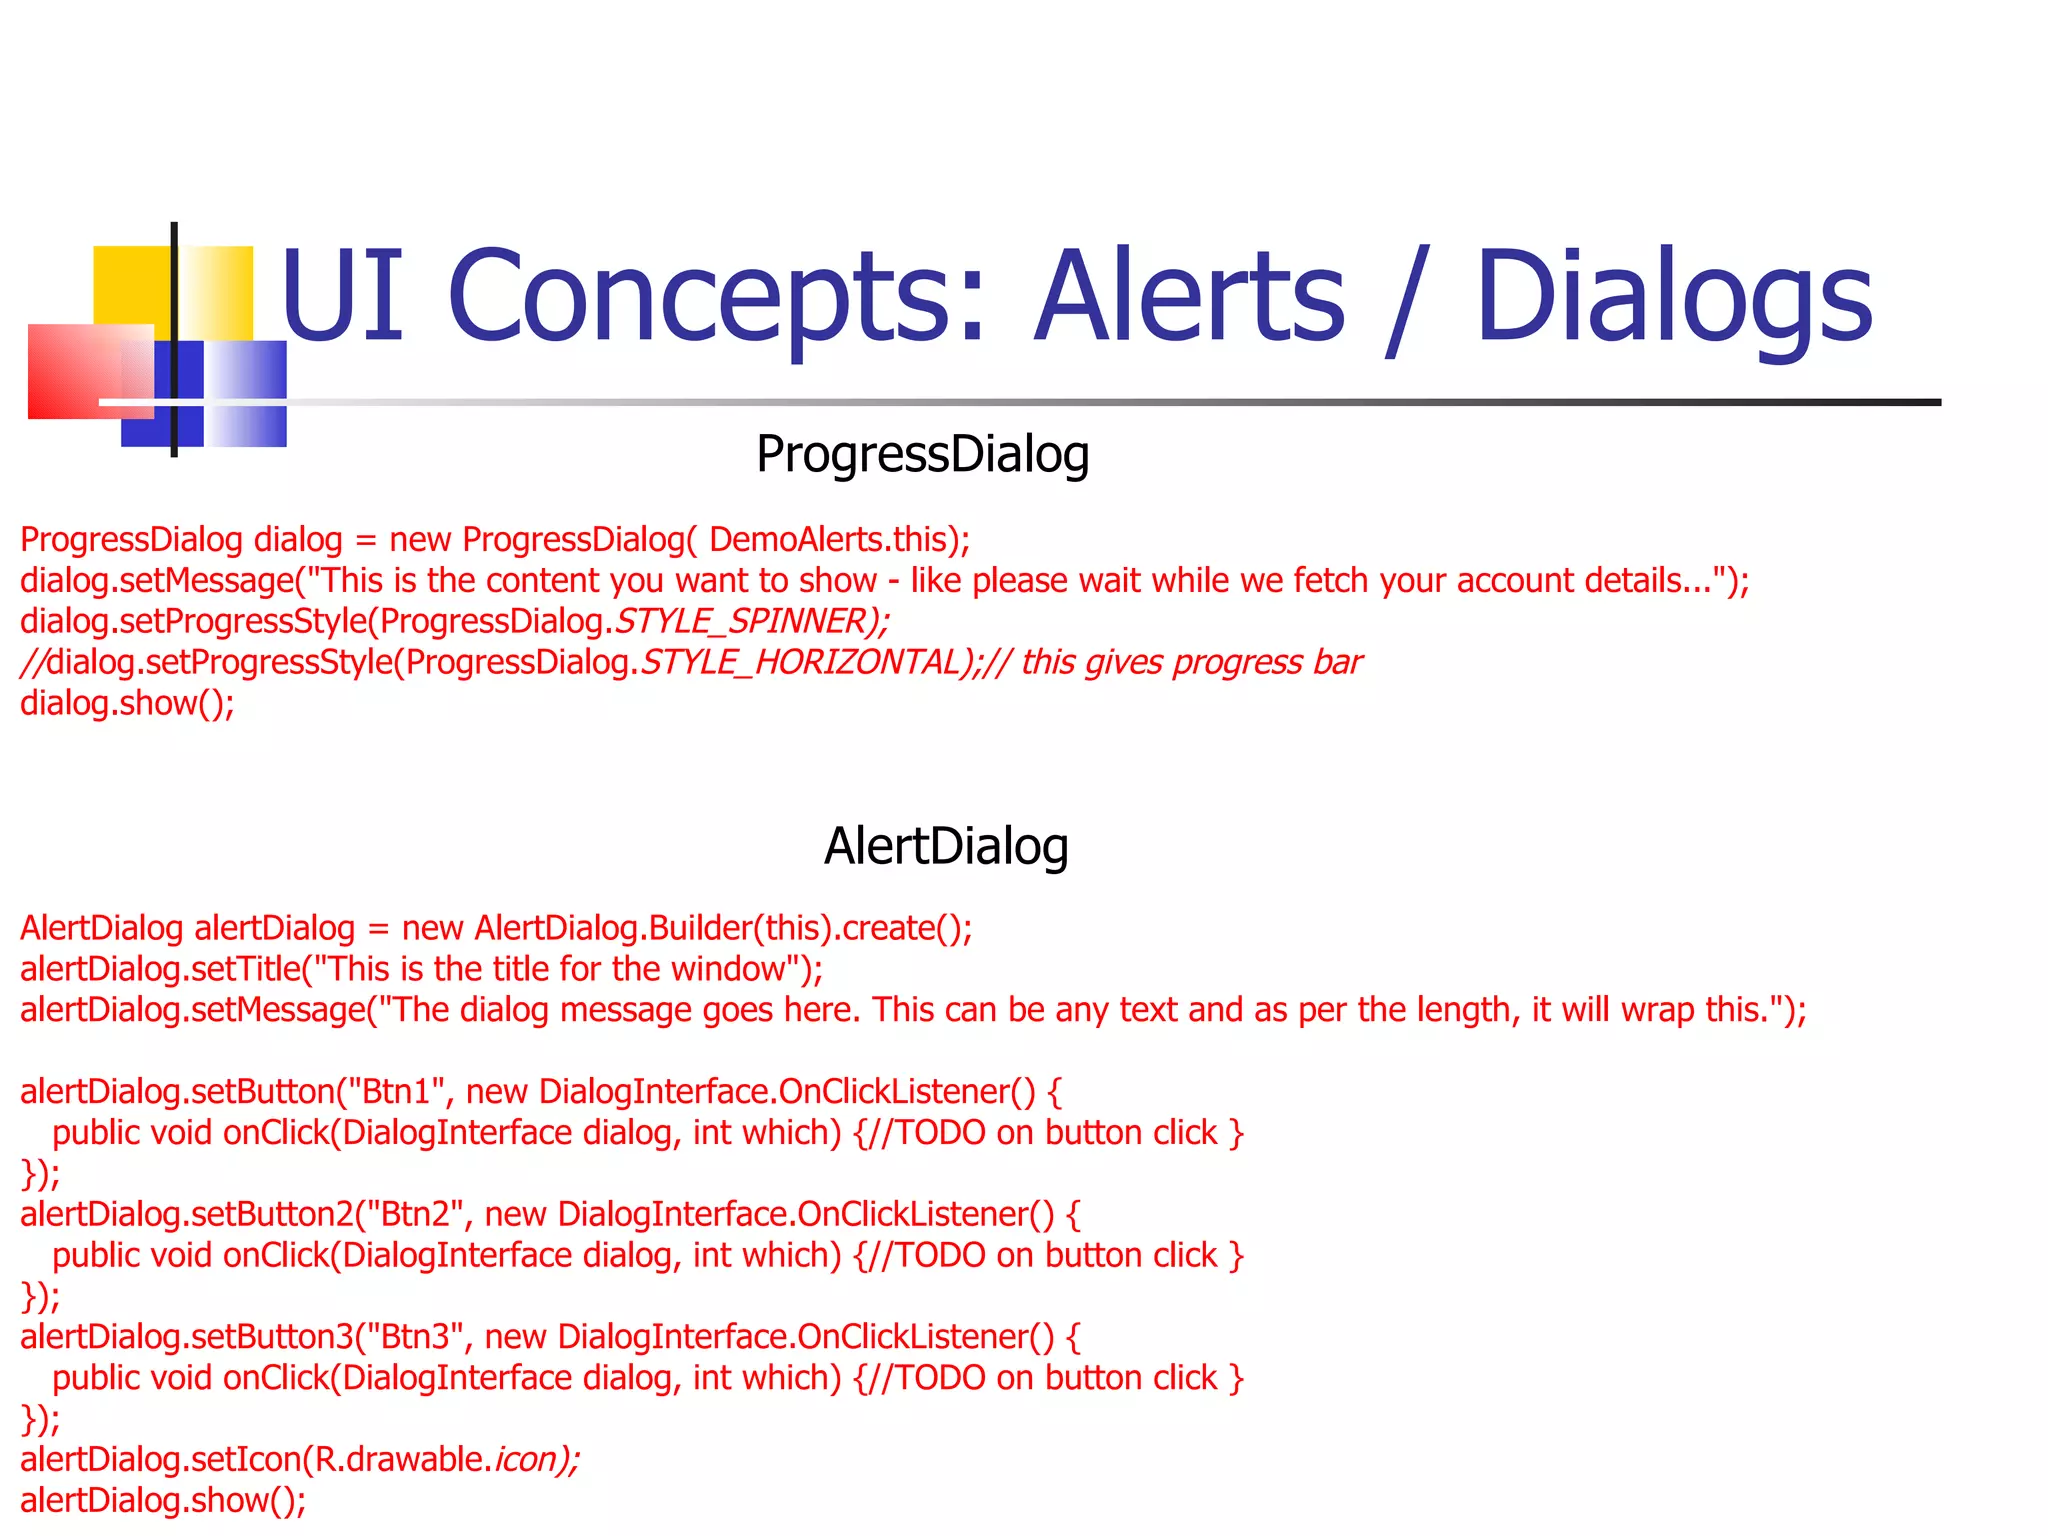
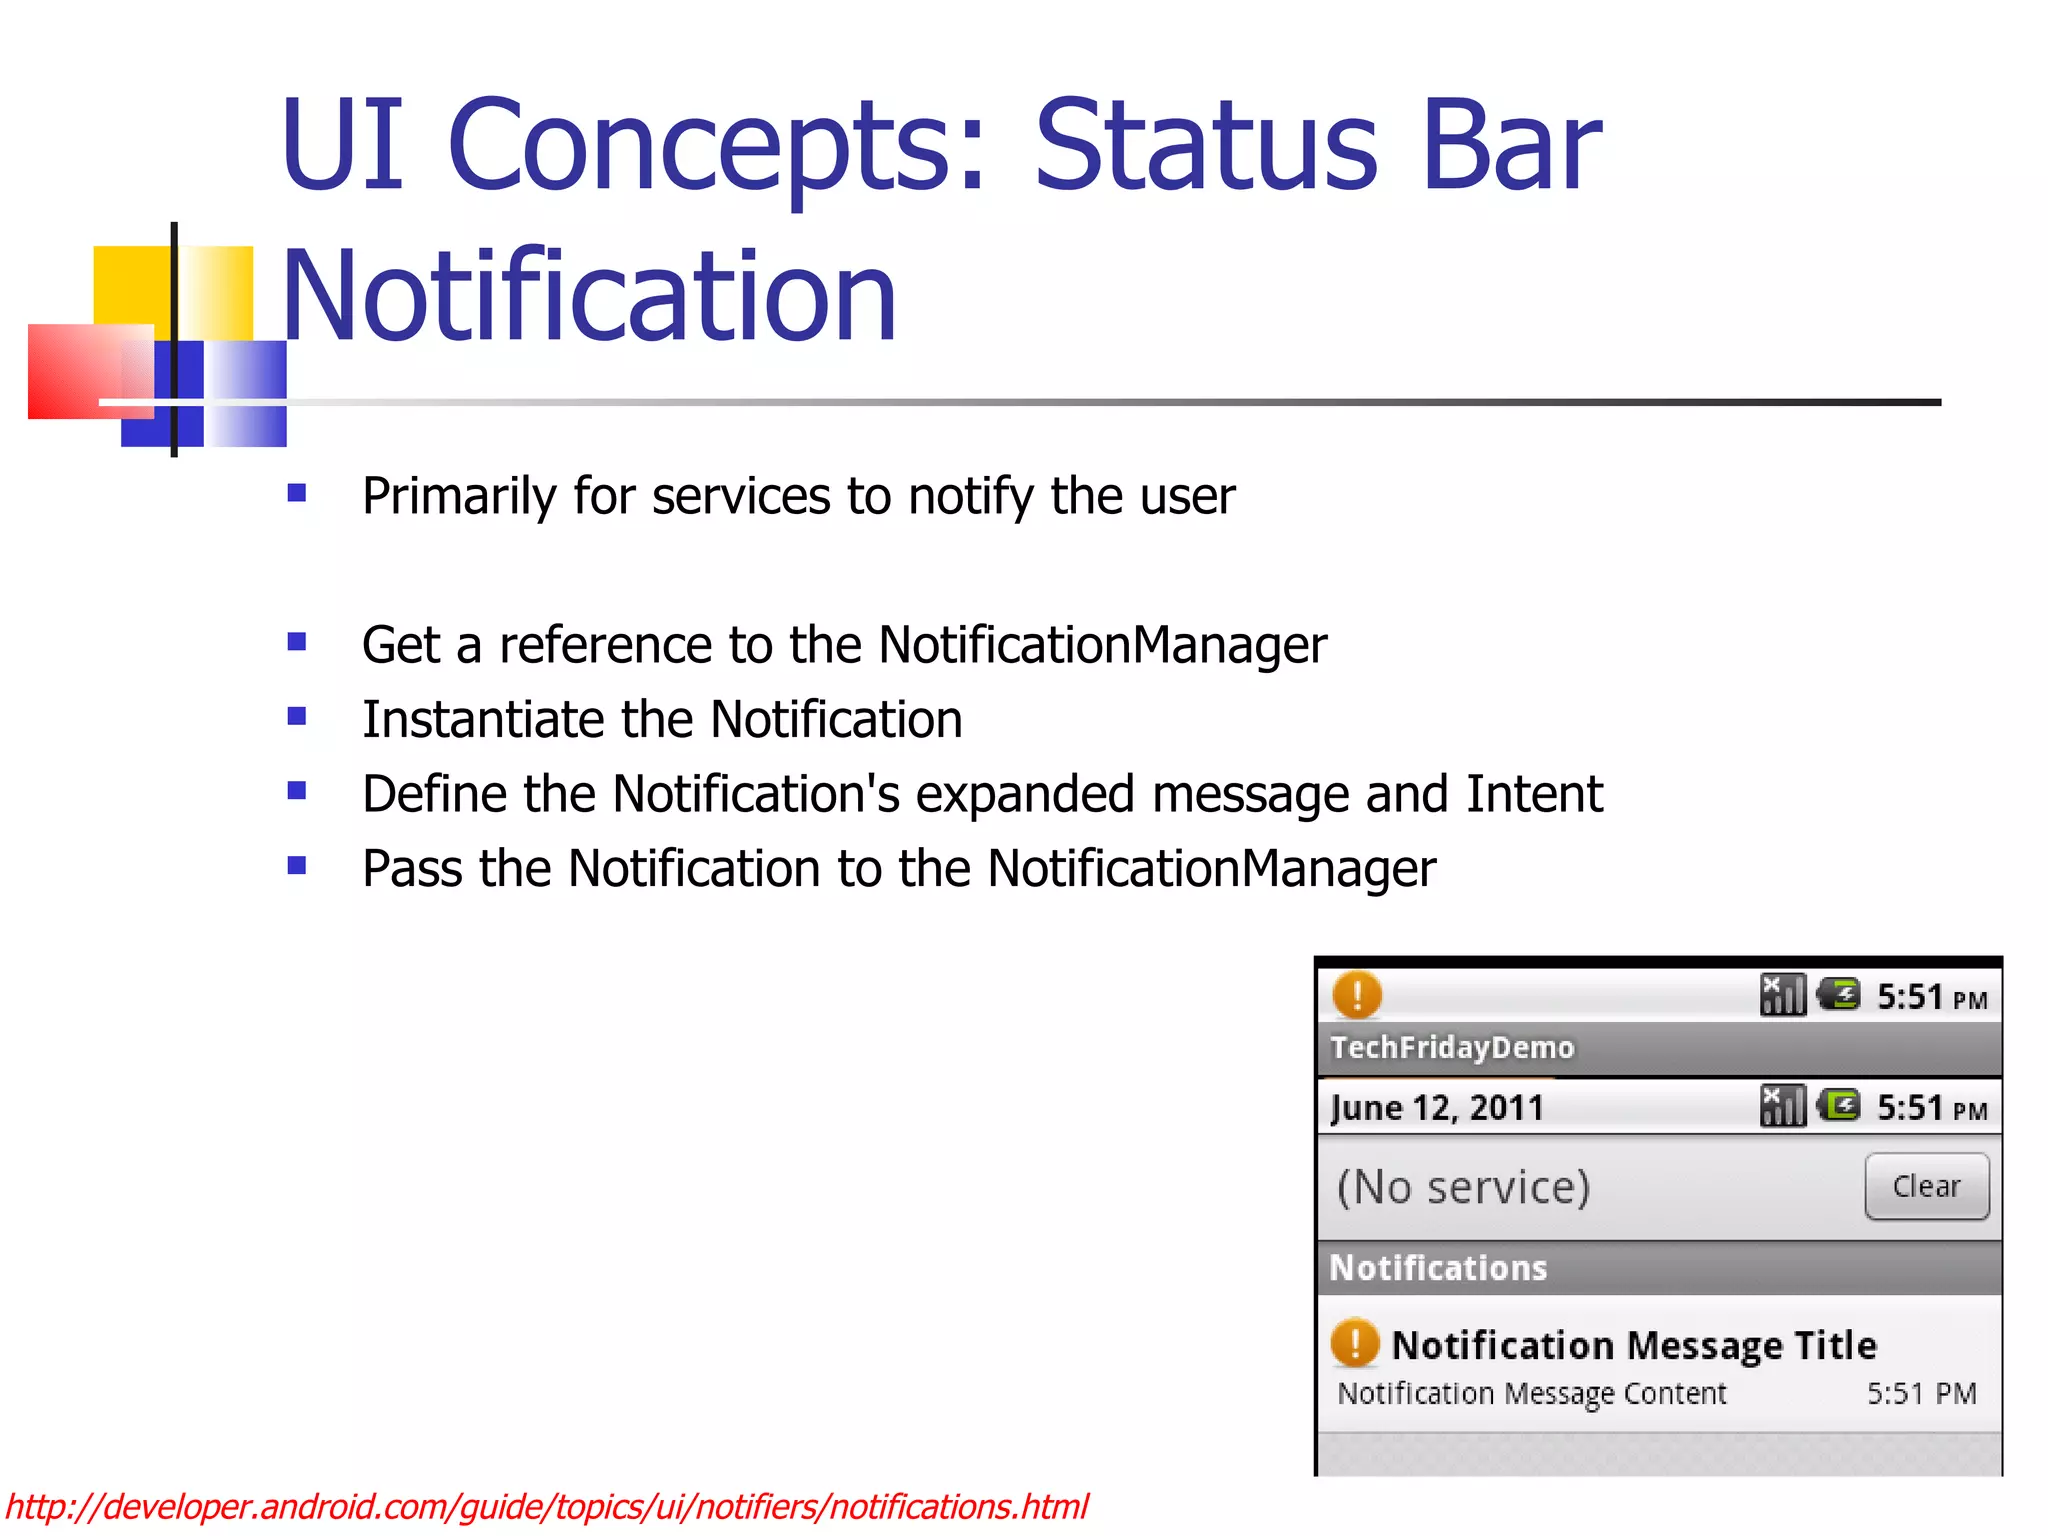
Downloaded 325 times
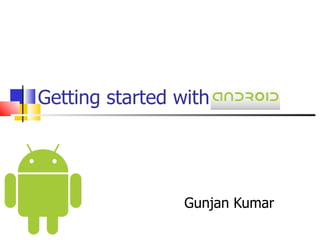

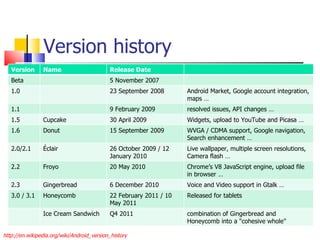

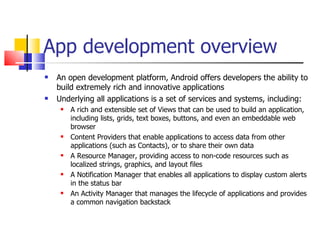

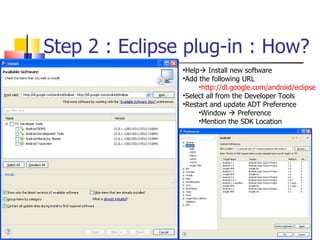


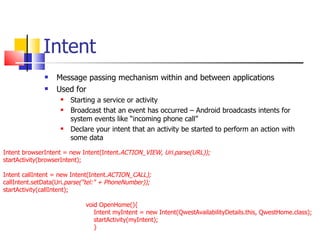


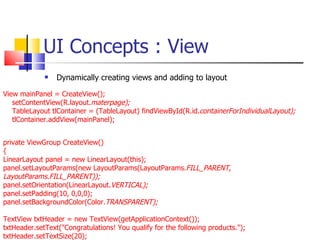


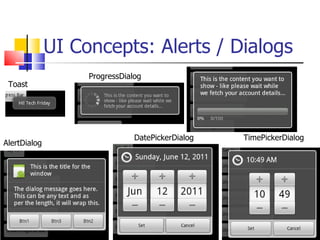


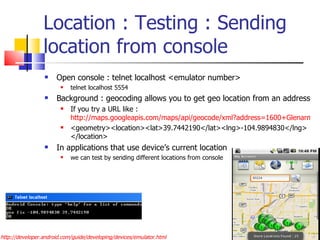
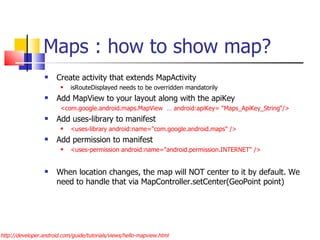
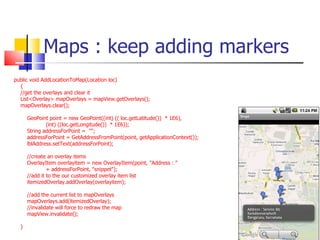
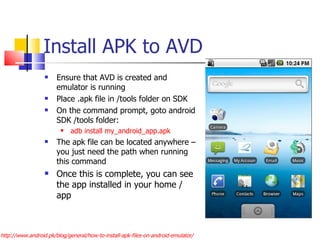
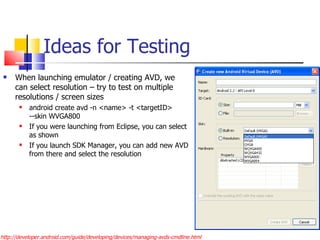
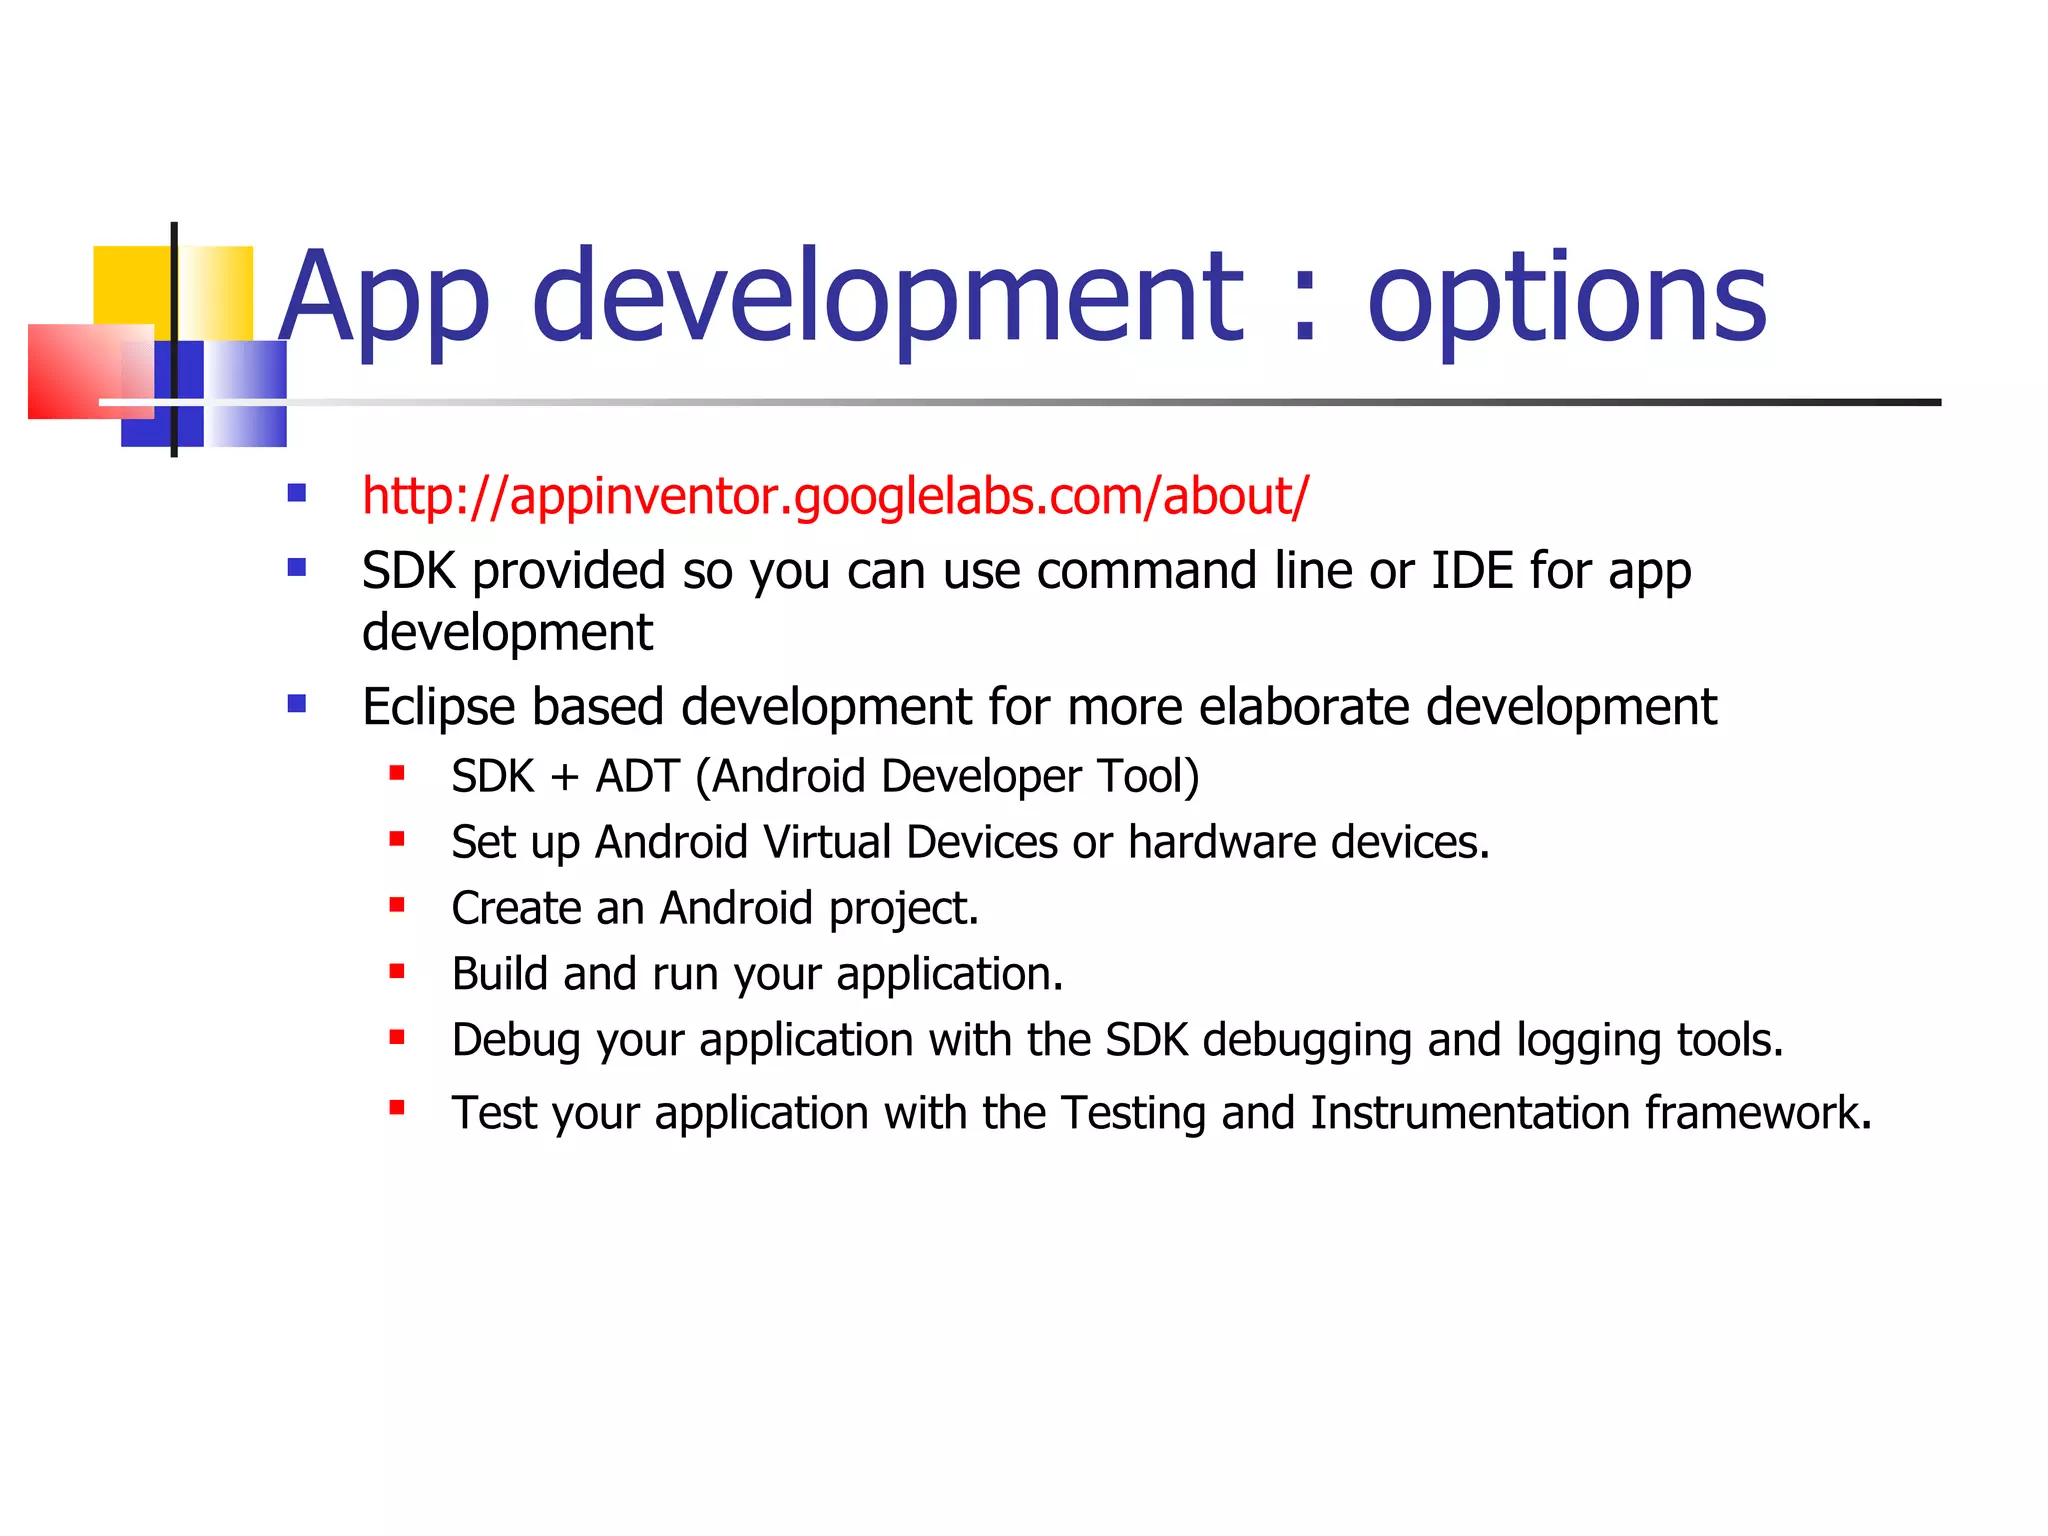
![Sensors SensorManager lets you access device sensors Like other system services, you need to get a reference to it getSystemService( SENSOR_SERVICE) Determine the sensor you want to listen to (accelerometer, orientation, temperature etc.) private static final int sensorToListenFor = SensorManager.SENSOR_ORIENTATION; Since services work in a publish-subscribe mode, implement a listener and override the onSensorChanged One of the values you get is “ float[] values ” and this will contain values depending on the type of sensor you are listening to http://developer.android.com/reference/android/hardware/SensorEvent.html#values Since sensors involve lot of processing to get the data, register and unregister to save battery and processing power http://developer.android.com/reference/android/hardware/SensorManager.html](https://image.slidesharecdn.com/gettingstartedwithandroid-devandtestperspective-110613072000-phpapp02/85/Getting-started-with-android-dev-and-test-perspective-45-320.jpg)
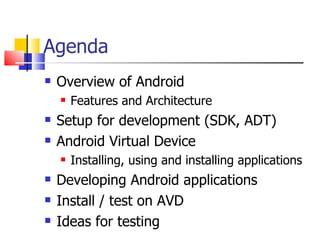
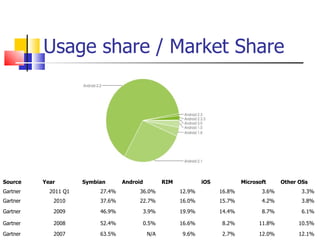
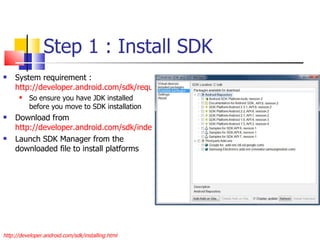
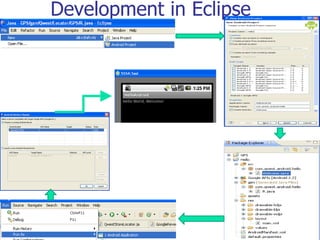
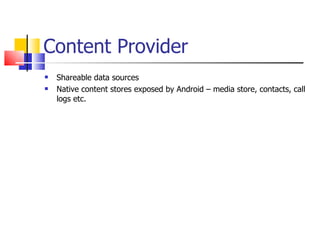
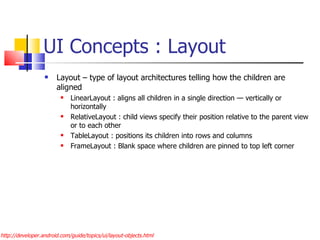
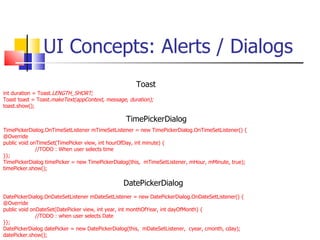
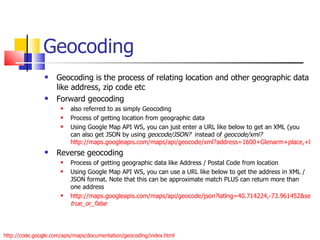
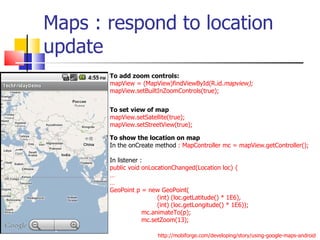
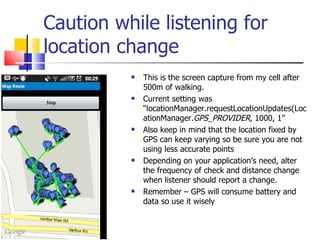
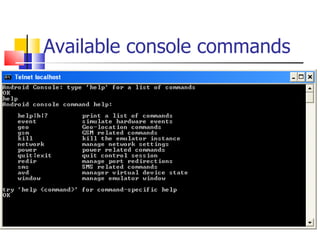
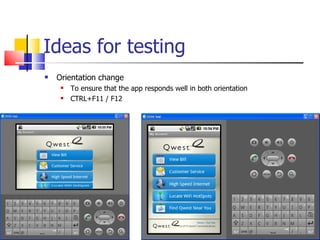
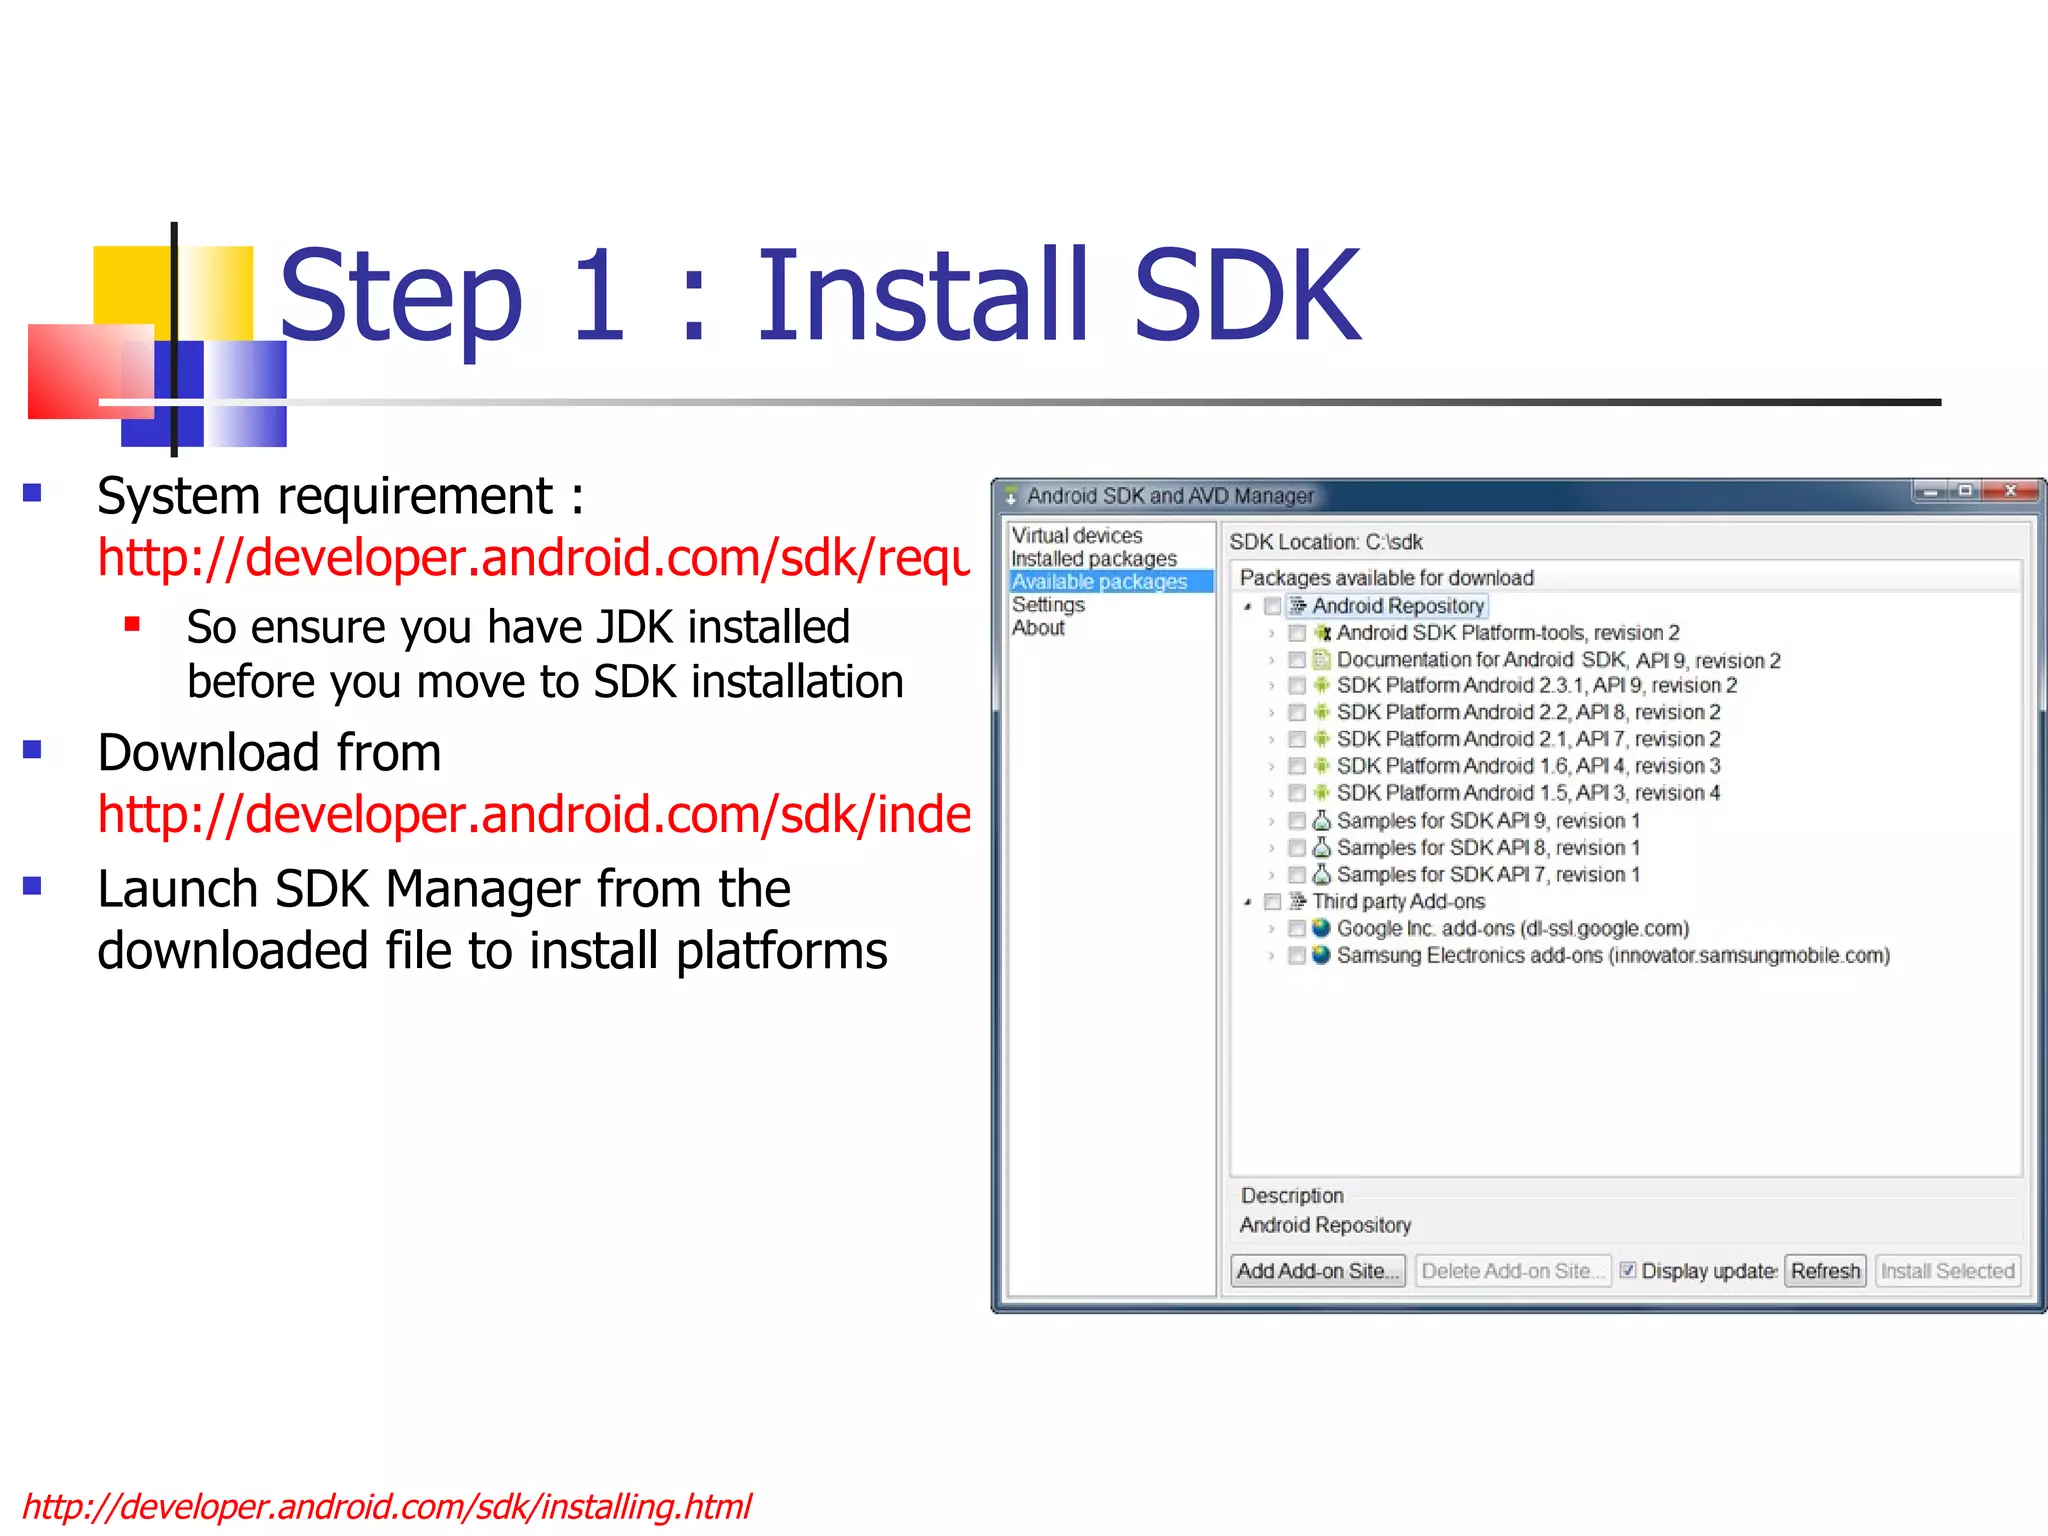
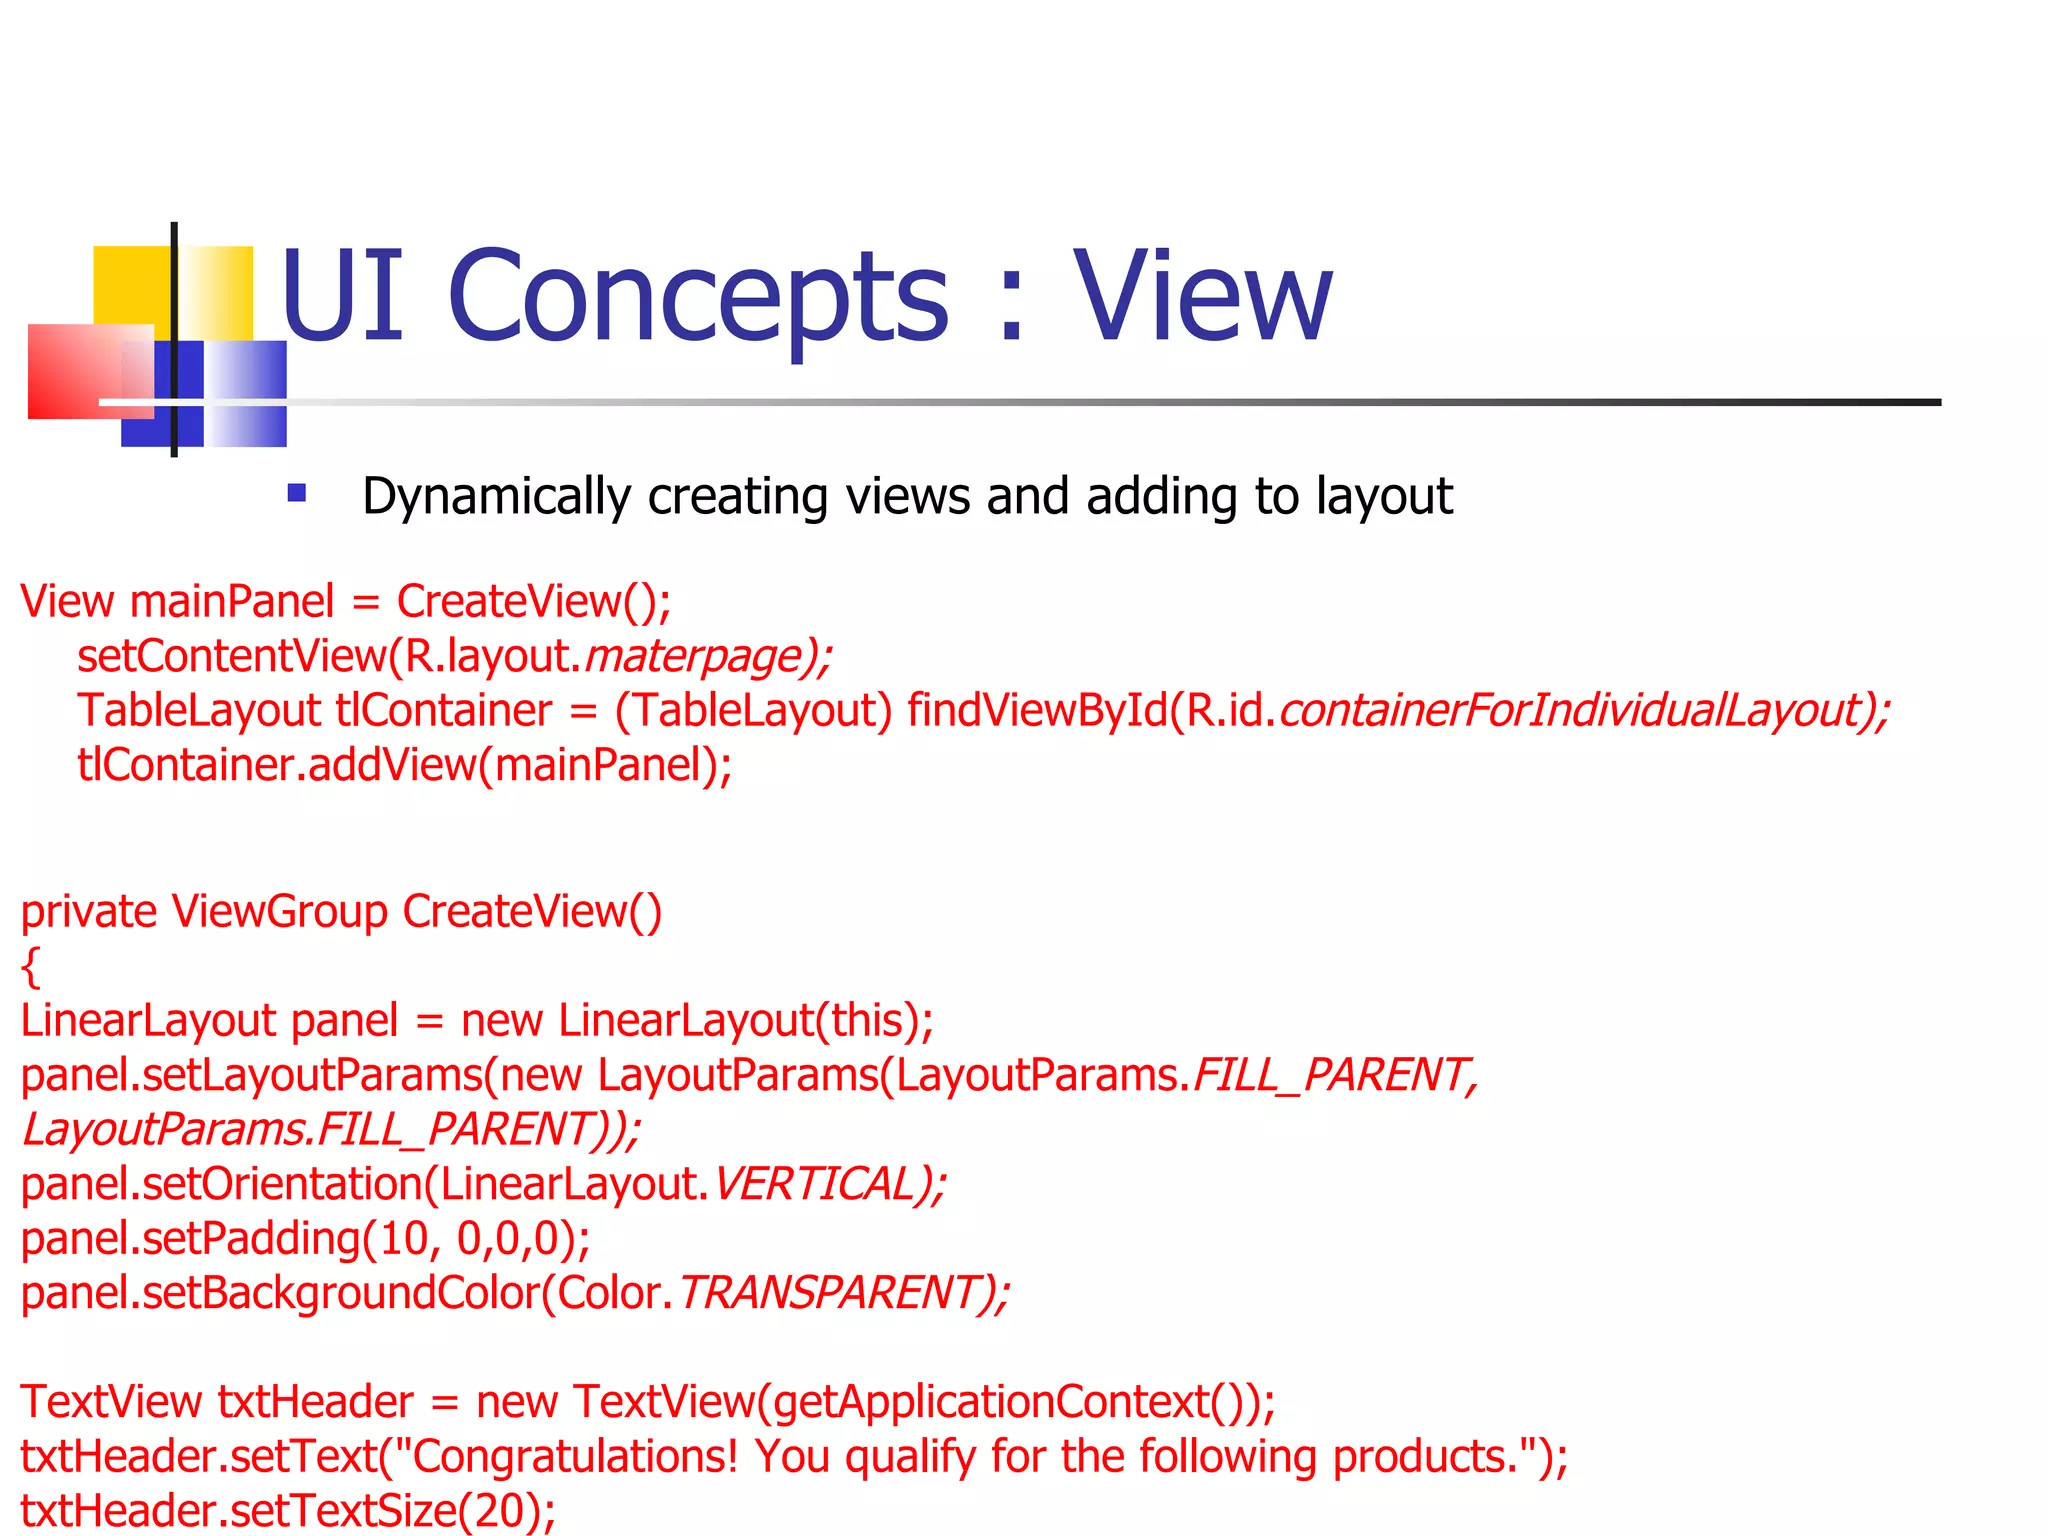
![Sensors Example - orientation Get an instance by calling Context.getSystemService sensorManager = (SensorManager)getSystemService( SENSOR_SERVICE); Determine the sensors you want to get data from private static final int sensorToListenFor = SensorManager.SENSOR_ORIENTATION; Implement a listener and override onSensorChanged Register and unregister listener to this in the resume and pause http://developer.android.com/reference/android/hardware/SensorManager.html @Override public void onResume() / onPause() { super.onResume(); sensorManager.registerListener / unregisterListener (this, sensorToListenFor); } public void onSensorChanged(int sensor, float[] values) { if(sensor == sensorToListenFor) { float azimuth = Math. round(values[0]); float pitch = Math. round(values[1]); float roll = Math. round(values[2]);](https://image.slidesharecdn.com/gettingstartedwithandroid-devandtestperspective-110613072000-phpapp02/85/Getting-started-with-android-dev-and-test-perspective-46-320.jpg)
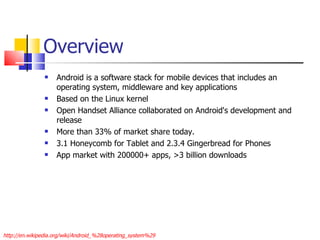
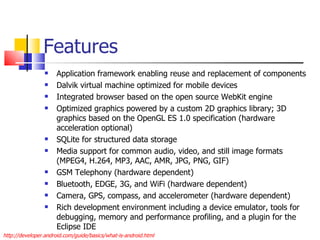
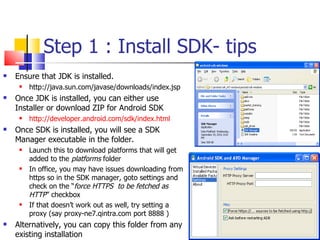
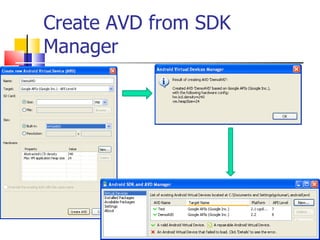
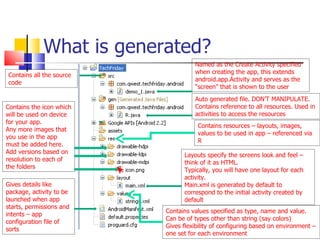
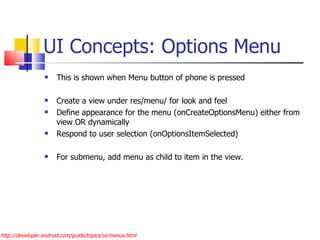
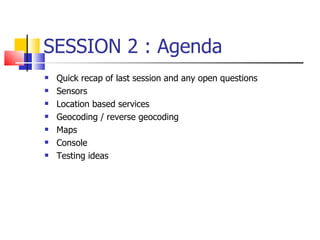
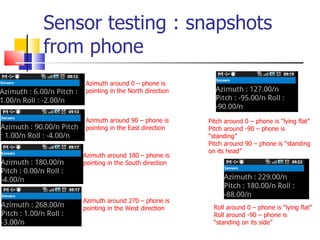
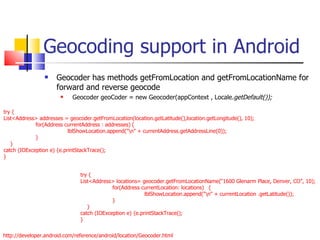
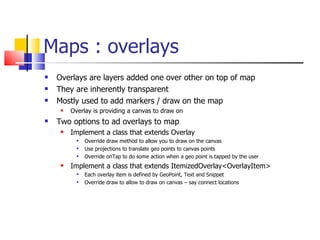
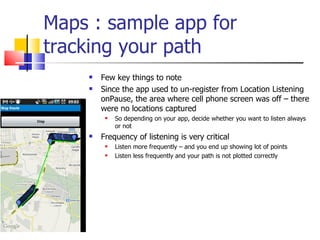
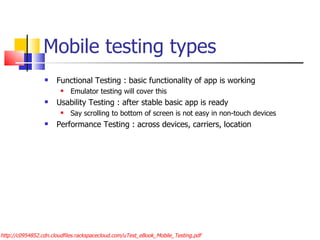
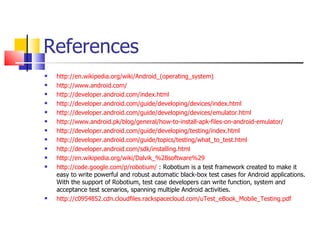
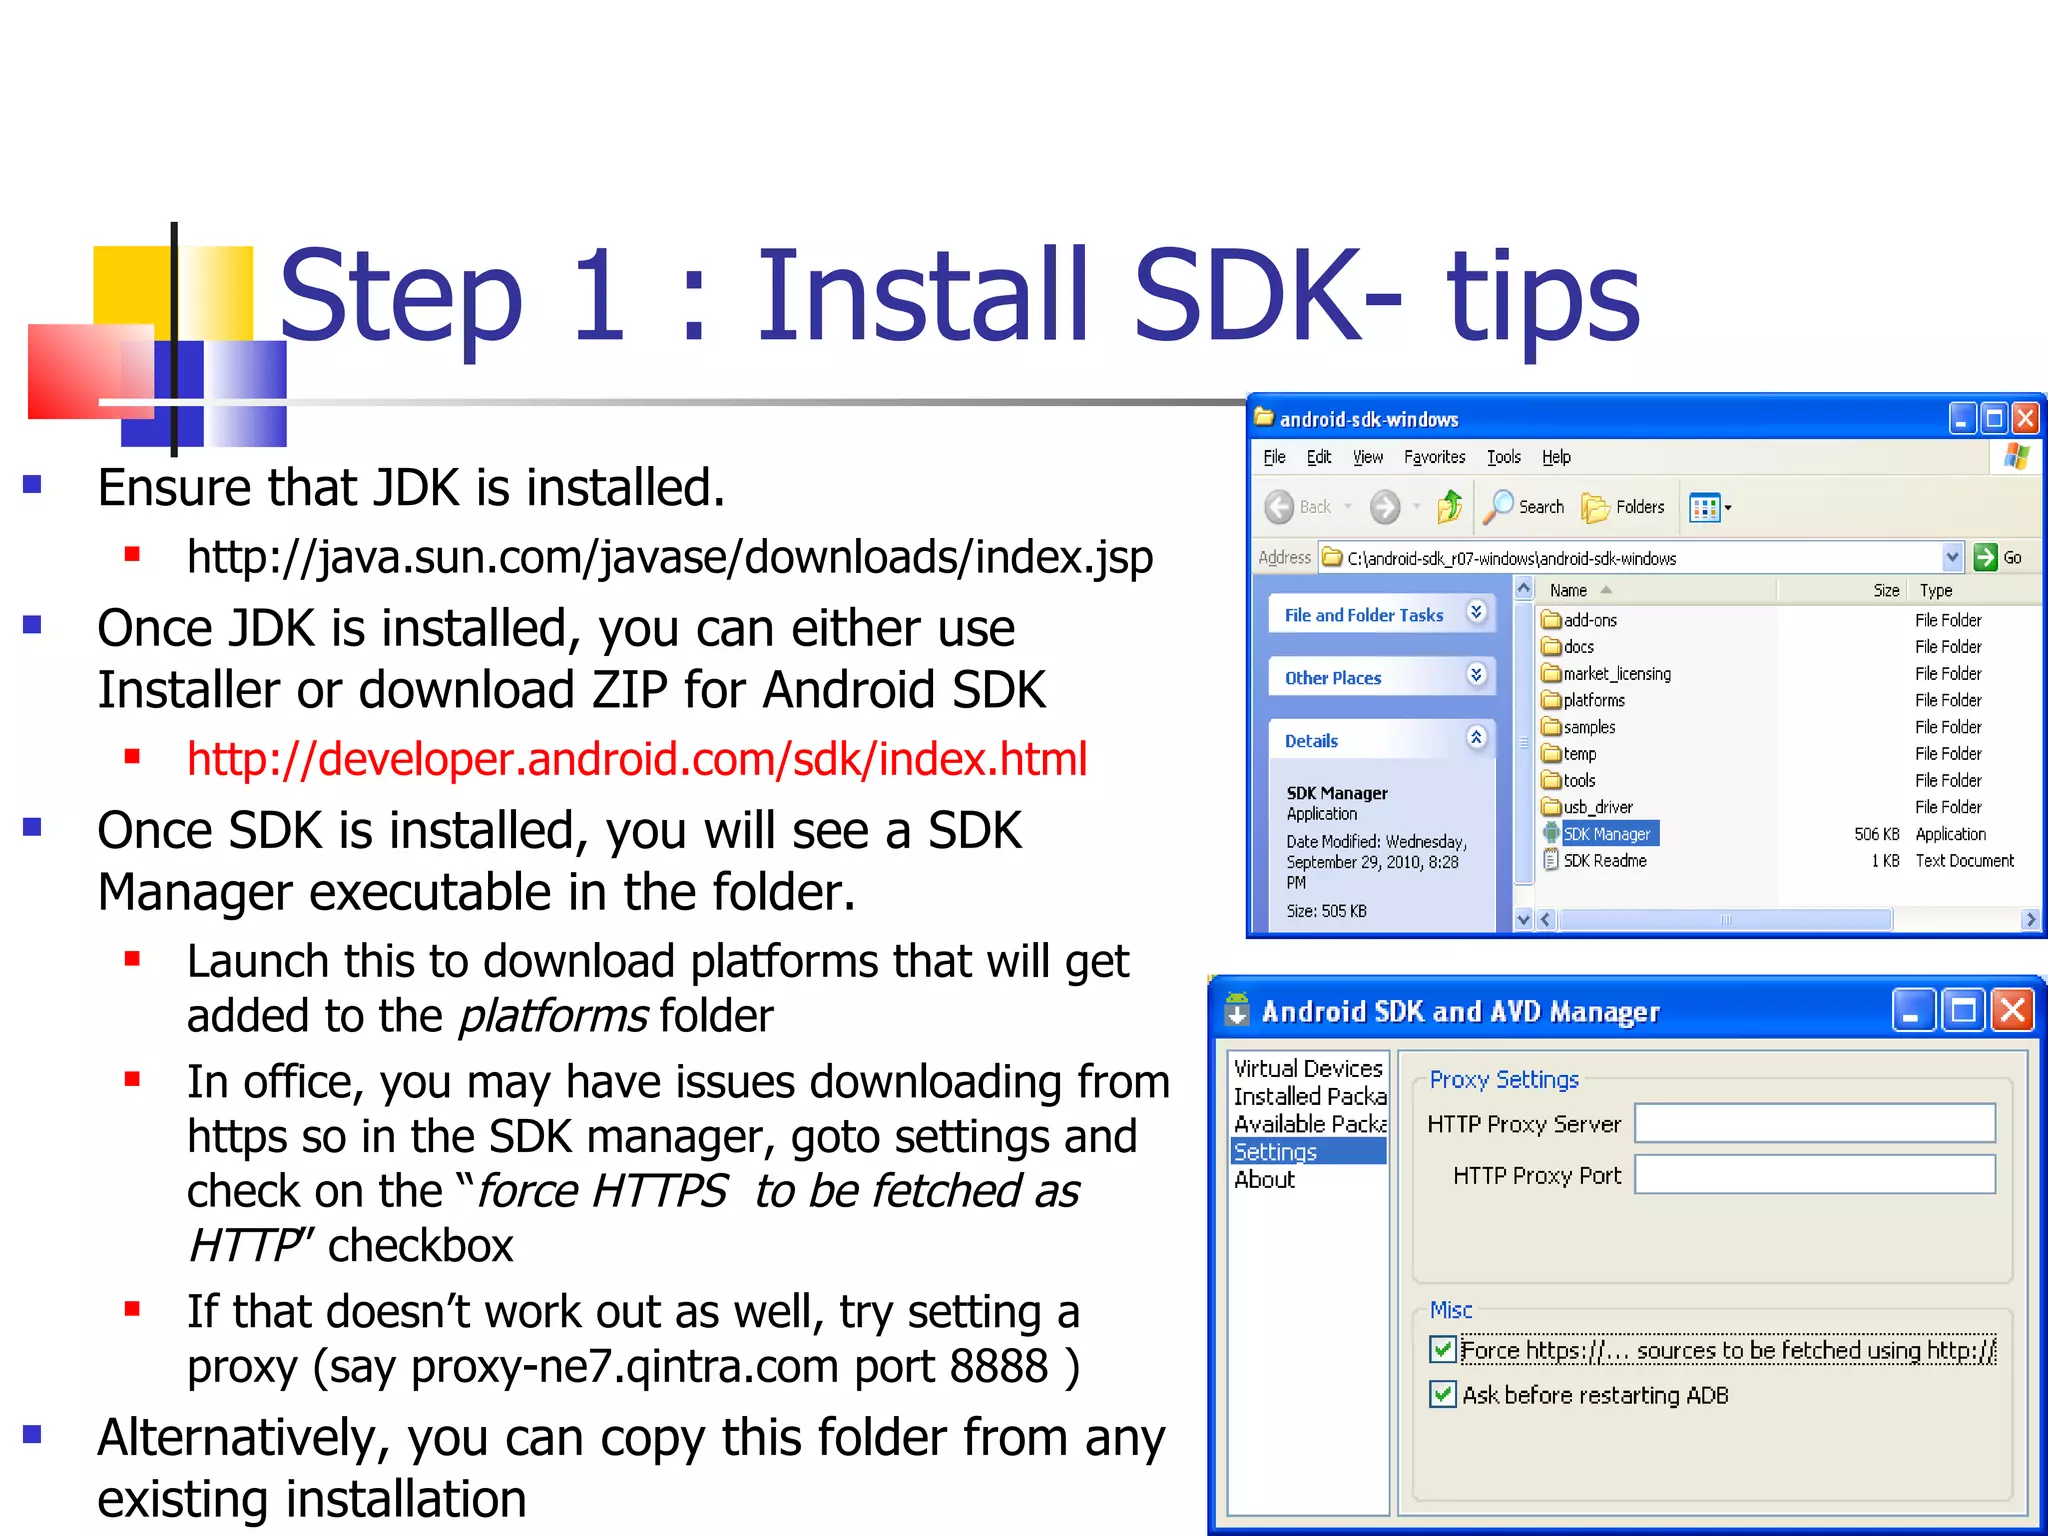
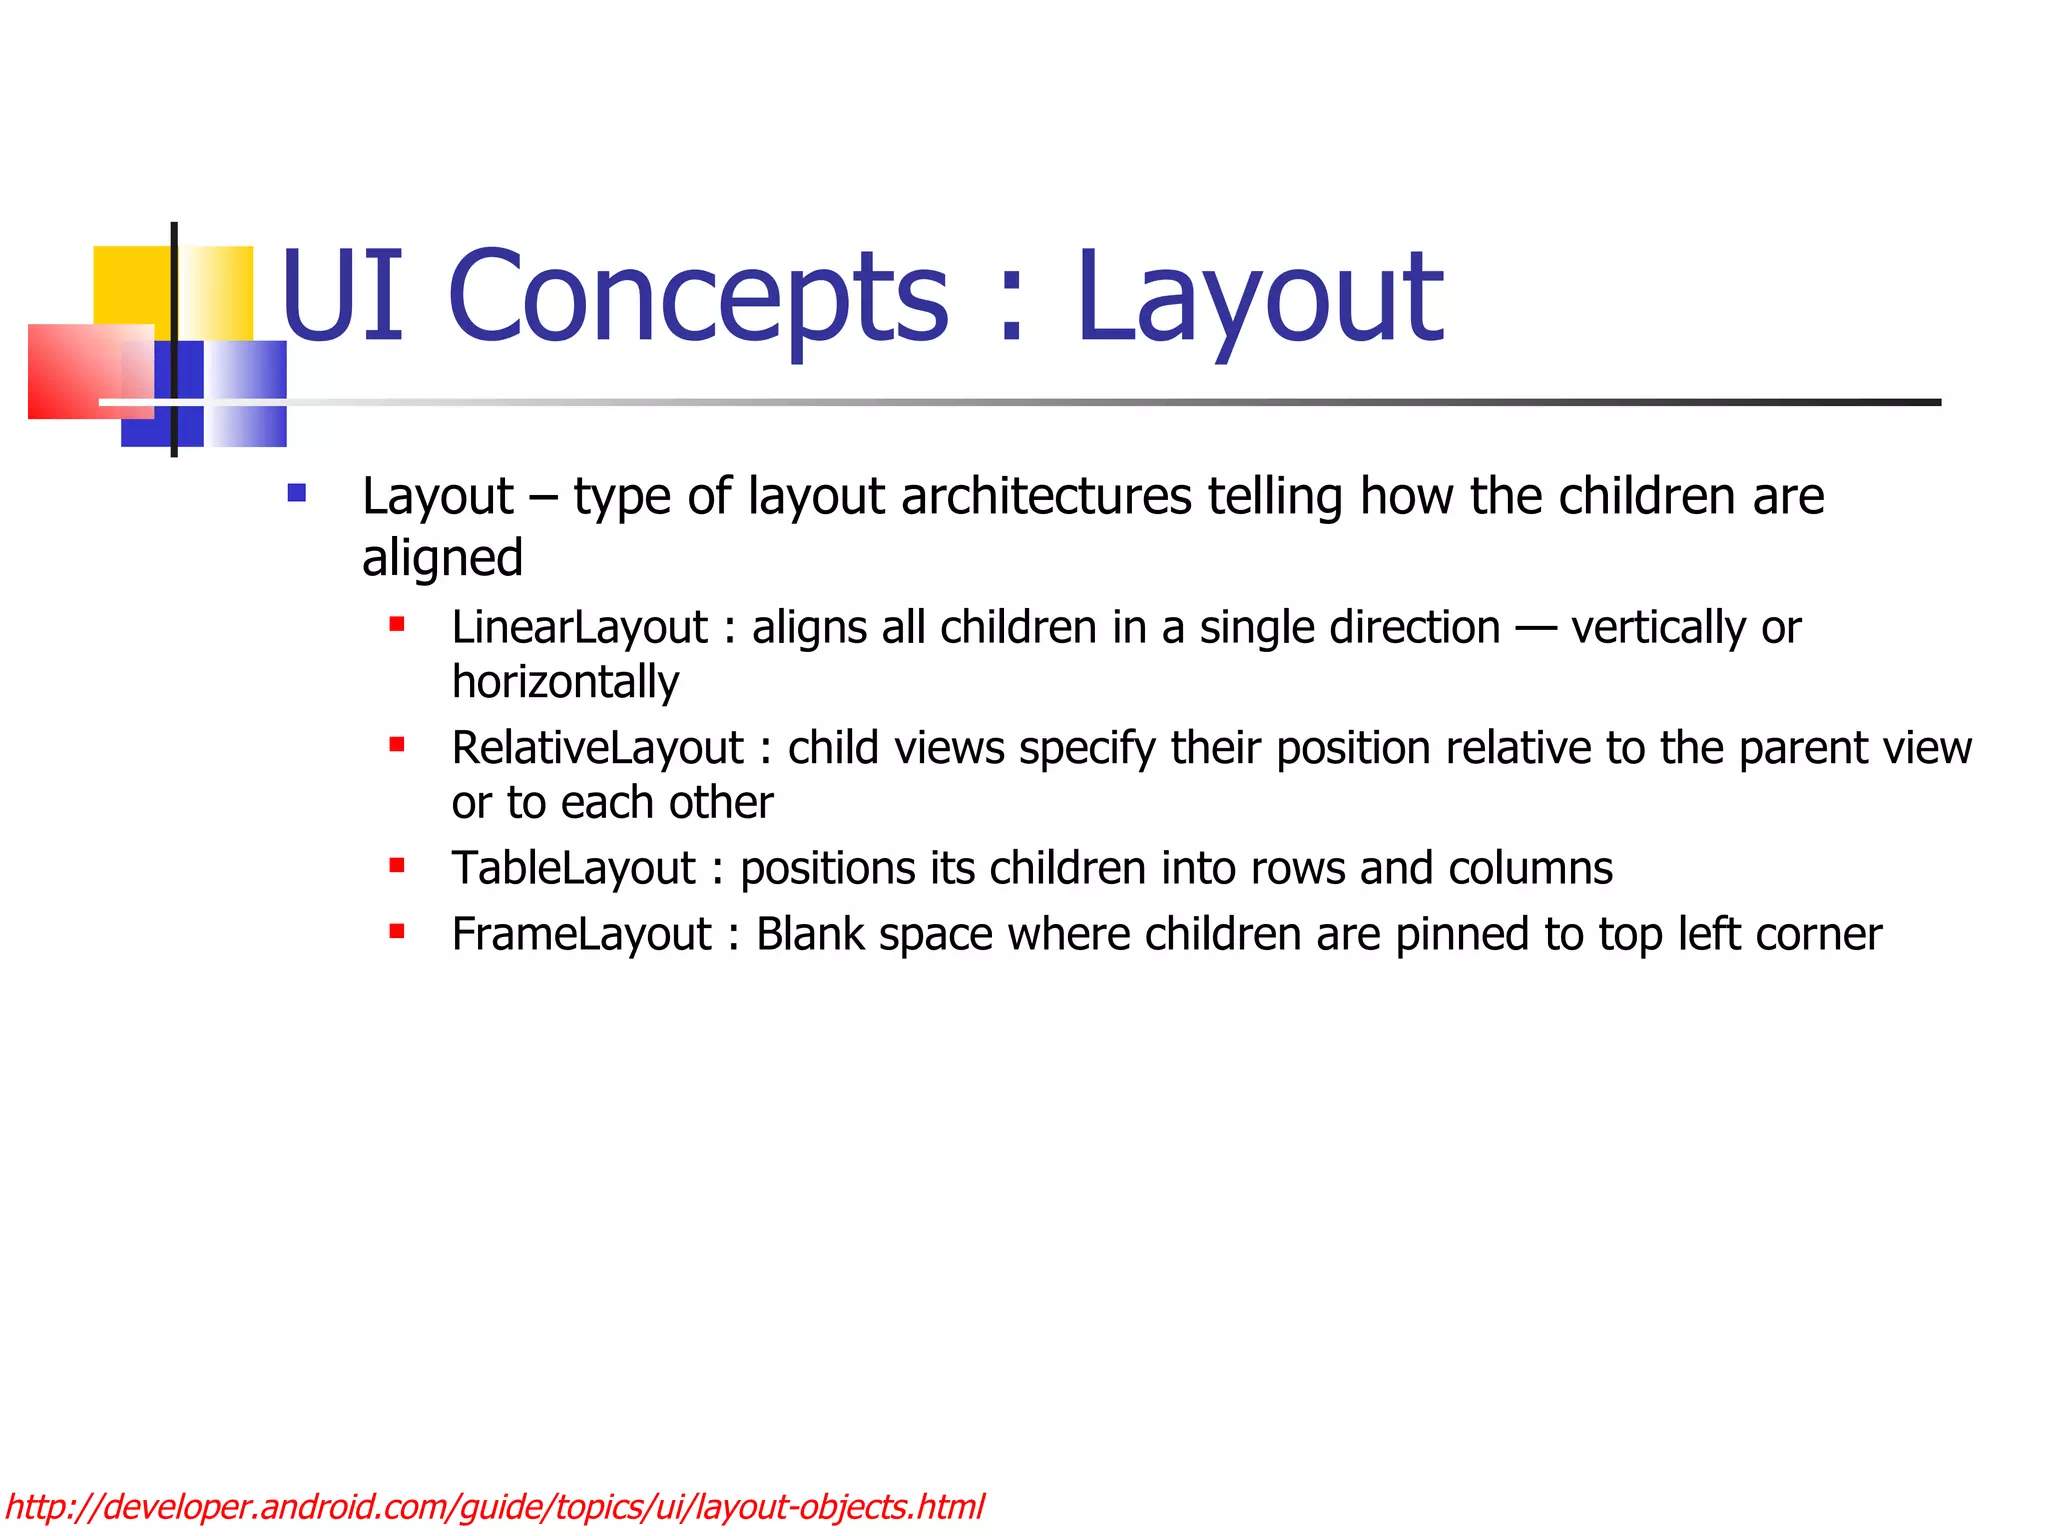
![Sensors Example - orientation values[0]: Azimuth, angle between the magnetic north direction and the y-axis, around the z-axis (0 to 359). 0=North, 90=East, 180=South, 270=West values[1]: Pitch, rotation around x-axis (-180 to 180), with positive values when the z-axis moves toward the y-axis. values[2]: Roll, rotation around y-axis (-90 to 90), with positive values when the x-axis moves toward the z-axis.](https://image.slidesharecdn.com/gettingstartedwithandroid-devandtestperspective-110613072000-phpapp02/85/Getting-started-with-android-dev-and-test-perspective-47-320.jpg)


![Thank You [email_address] [email_address]](https://image.slidesharecdn.com/gettingstartedwithandroid-devandtestperspective-110613072000-phpapp02/85/Getting-started-with-android-dev-and-test-perspective-79-320.jpg)


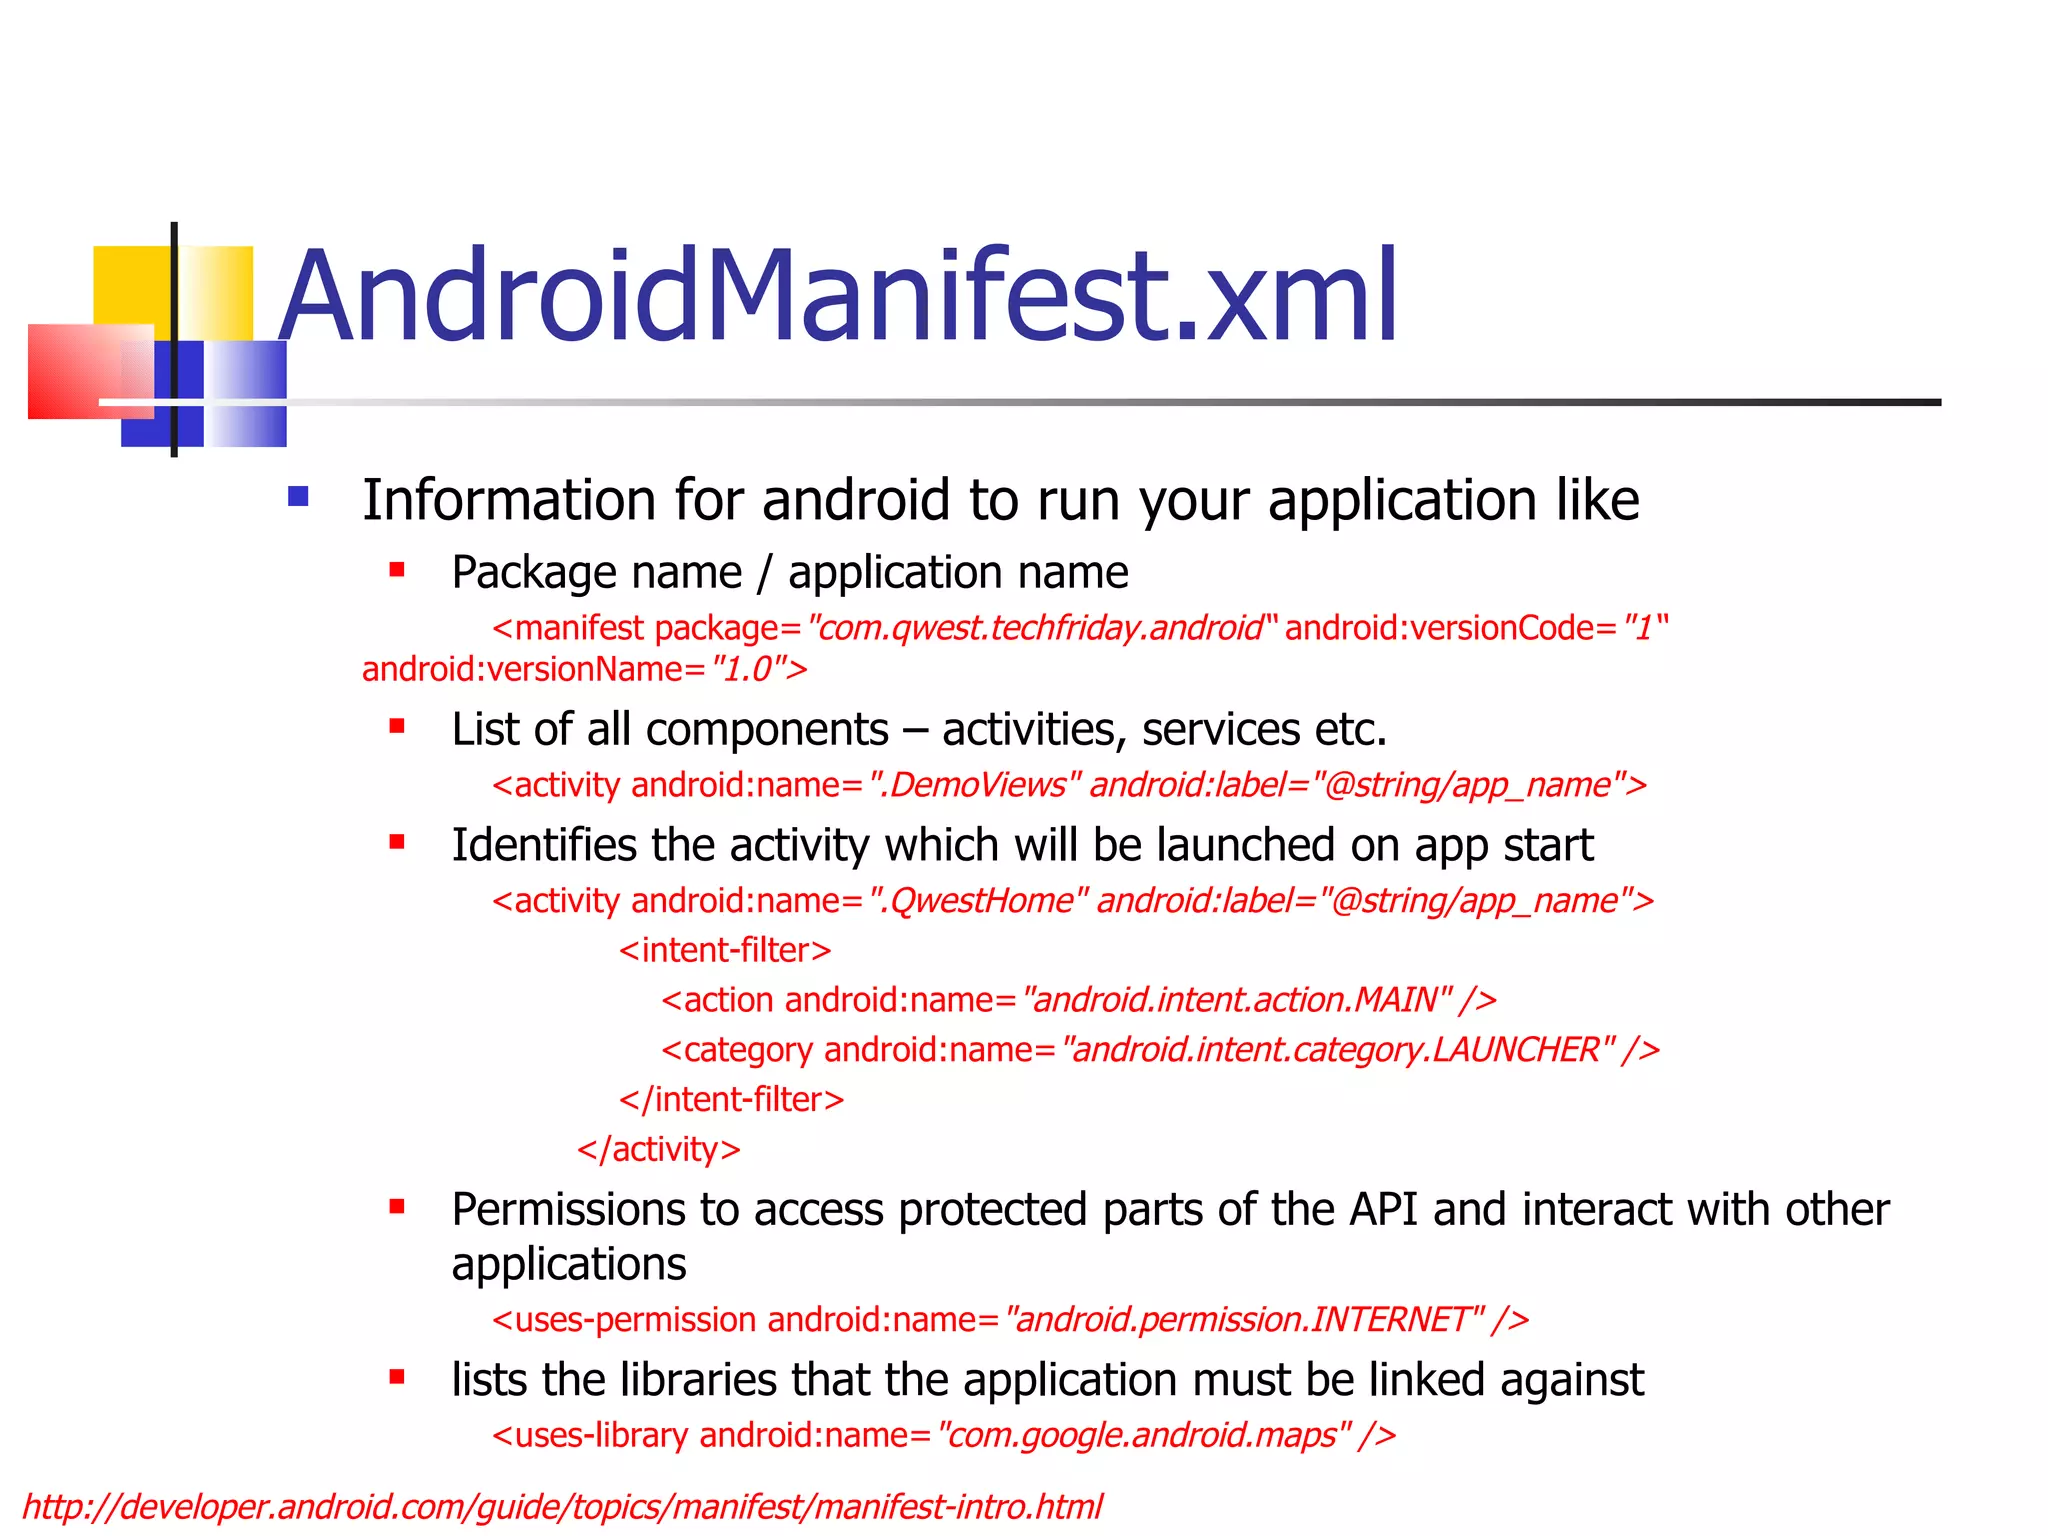

![Sensors SensorManager lets you access device sensors Like other system services, you need to get a reference to it getSystemService( SENSOR_SERVICE) Determine the sensor you want to listen to (accelerometer, orientation, temperature etc.) private static final int sensorToListenFor = SensorManager.SENSOR_ORIENTATION; Since services work in a publish-subscribe mode, implement a listener and override the onSensorChanged One of the values you get is “ float[] values ” and this will contain values depending on the type of sensor you are listening to http://developer.android.com/reference/android/hardware/SensorEvent.html#values Since sensors involve lot of processing to get the data, register and unregister to save battery and processing power http://developer.android.com/reference/android/hardware/SensorManager.html](https://image.slidesharecdn.com/gettingstartedwithandroid-devandtestperspective-110613072000-phpapp02/75/Getting-started-with-android-dev-and-test-perspective-45-2048.jpg)
![Sensors Example - orientation Get an instance by calling Context.getSystemService sensorManager = (SensorManager)getSystemService( SENSOR_SERVICE); Determine the sensors you want to get data from private static final int sensorToListenFor = SensorManager.SENSOR_ORIENTATION; Implement a listener and override onSensorChanged Register and unregister listener to this in the resume and pause http://developer.android.com/reference/android/hardware/SensorManager.html @Override public void onResume() / onPause() { super.onResume(); sensorManager.registerListener / unregisterListener (this, sensorToListenFor); } public void onSensorChanged(int sensor, float[] values) { if(sensor == sensorToListenFor) { float azimuth = Math. round(values[0]); float pitch = Math. round(values[1]); float roll = Math. round(values[2]);](https://image.slidesharecdn.com/gettingstartedwithandroid-devandtestperspective-110613072000-phpapp02/75/Getting-started-with-android-dev-and-test-perspective-46-2048.jpg)
![Sensors Example - orientation values[0]: Azimuth, angle between the magnetic north direction and the y-axis, around the z-axis (0 to 359). 0=North, 90=East, 180=South, 270=West values[1]: Pitch, rotation around x-axis (-180 to 180), with positive values when the z-axis moves toward the y-axis. values[2]: Roll, rotation around y-axis (-90 to 90), with positive values when the x-axis moves toward the z-axis.](https://image.slidesharecdn.com/gettingstartedwithandroid-devandtestperspective-110613072000-phpapp02/75/Getting-started-with-android-dev-and-test-perspective-47-2048.jpg)


![Thank You [email_address] [email_address]](https://image.slidesharecdn.com/gettingstartedwithandroid-devandtestperspective-110613072000-phpapp02/75/Getting-started-with-android-dev-and-test-perspective-79-2048.jpg)

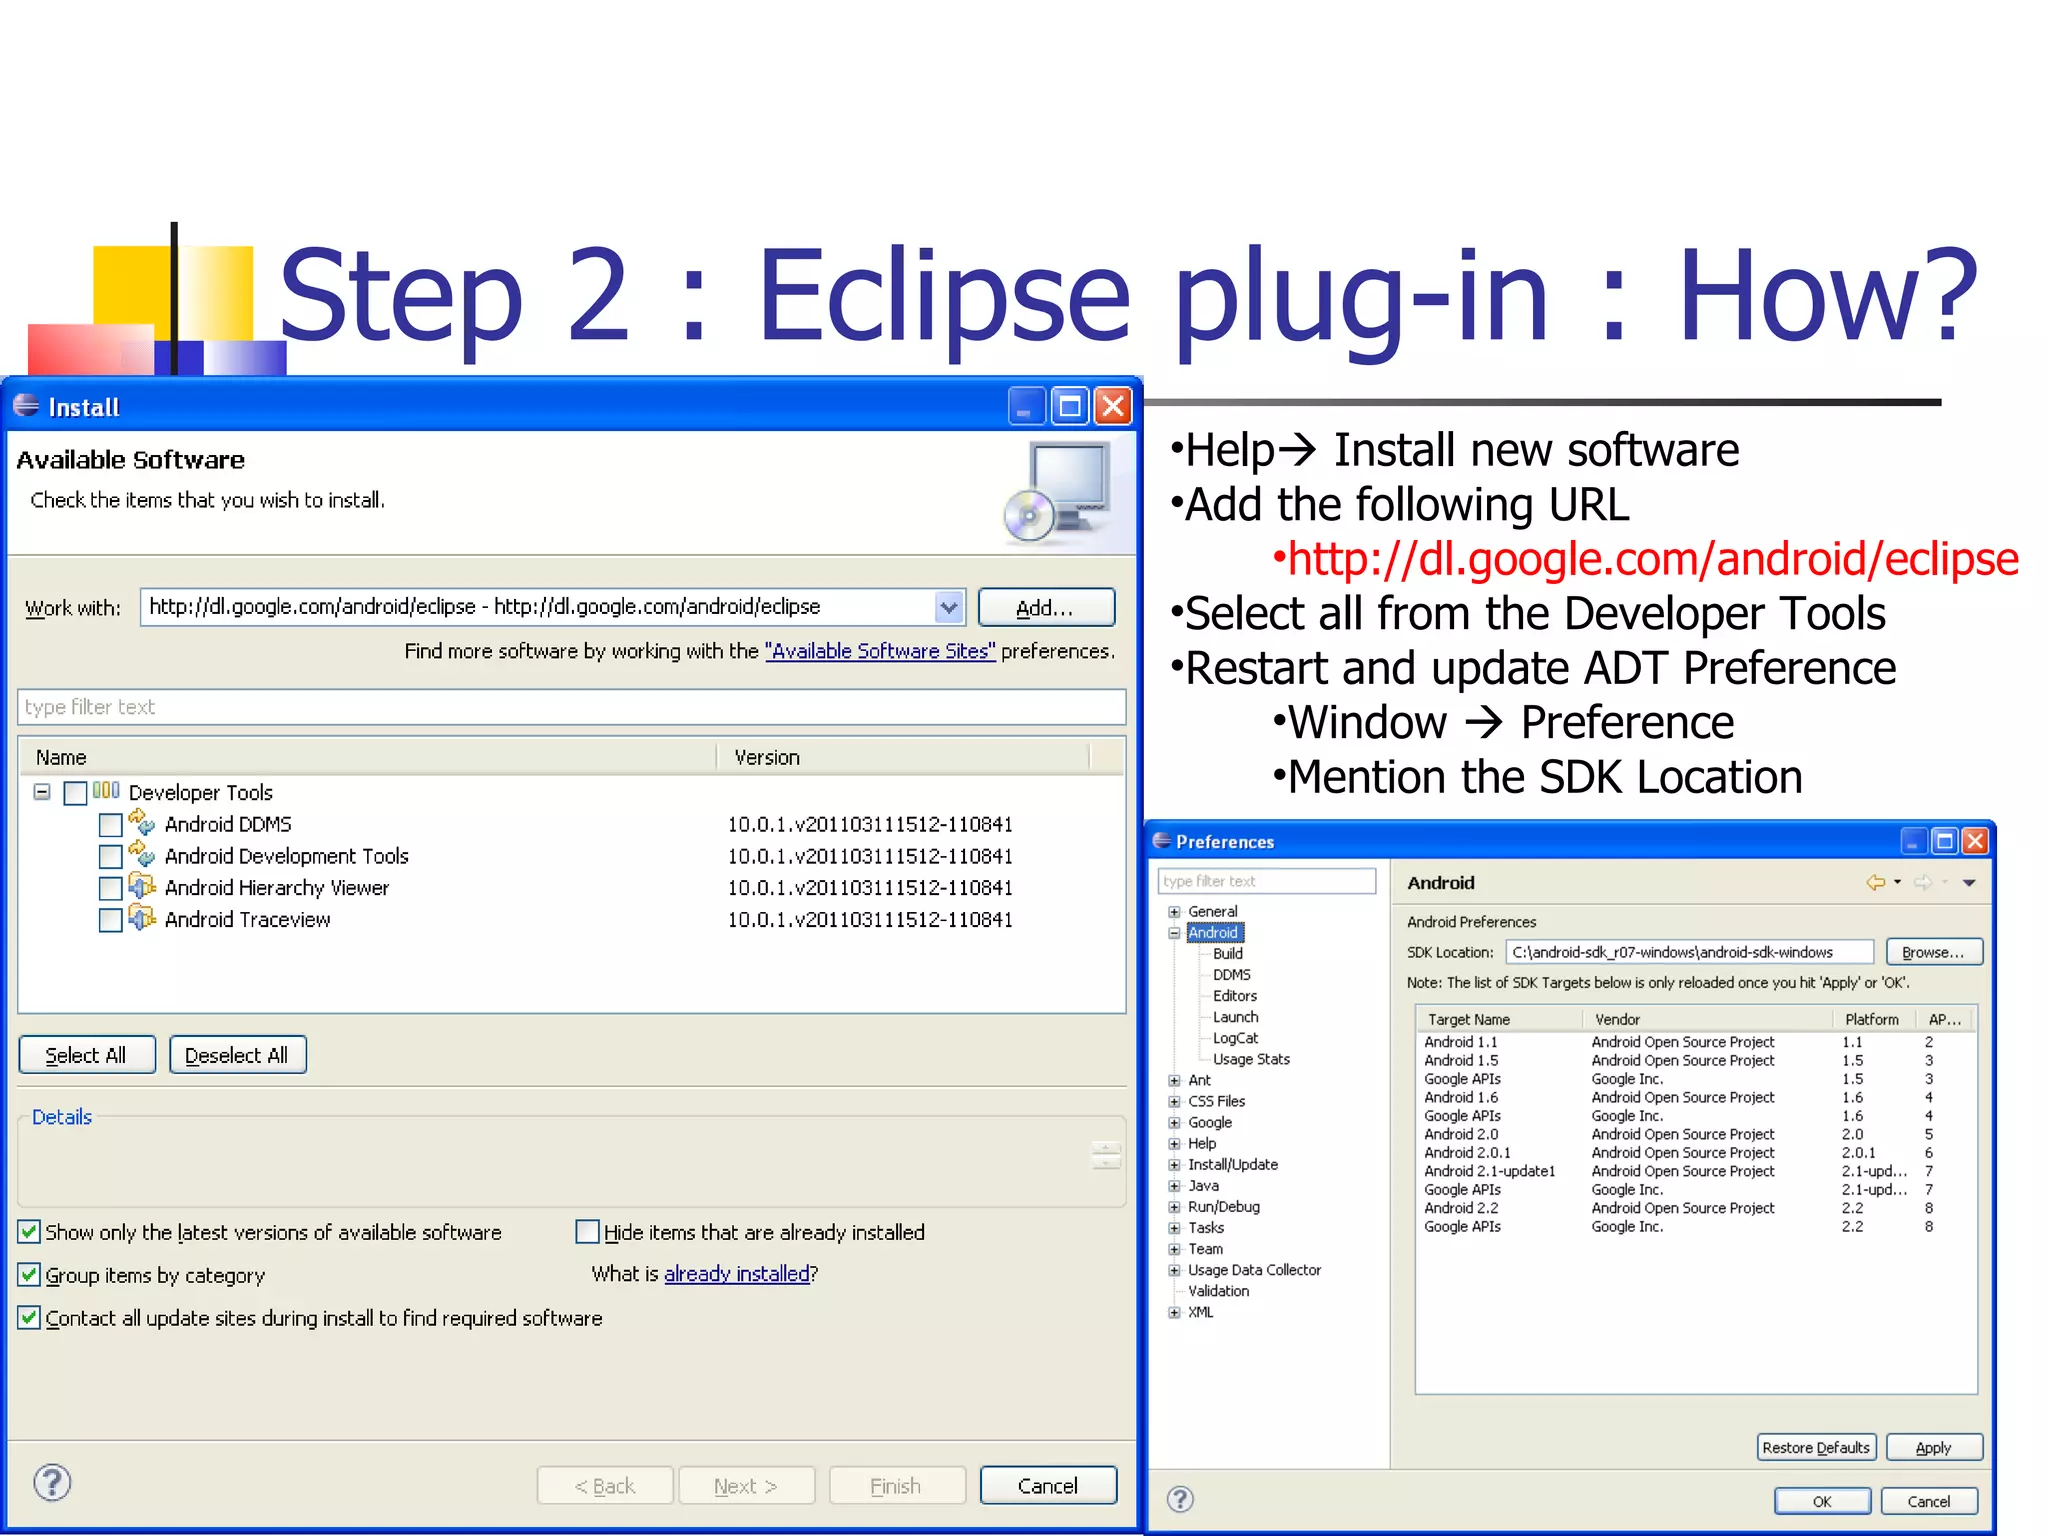
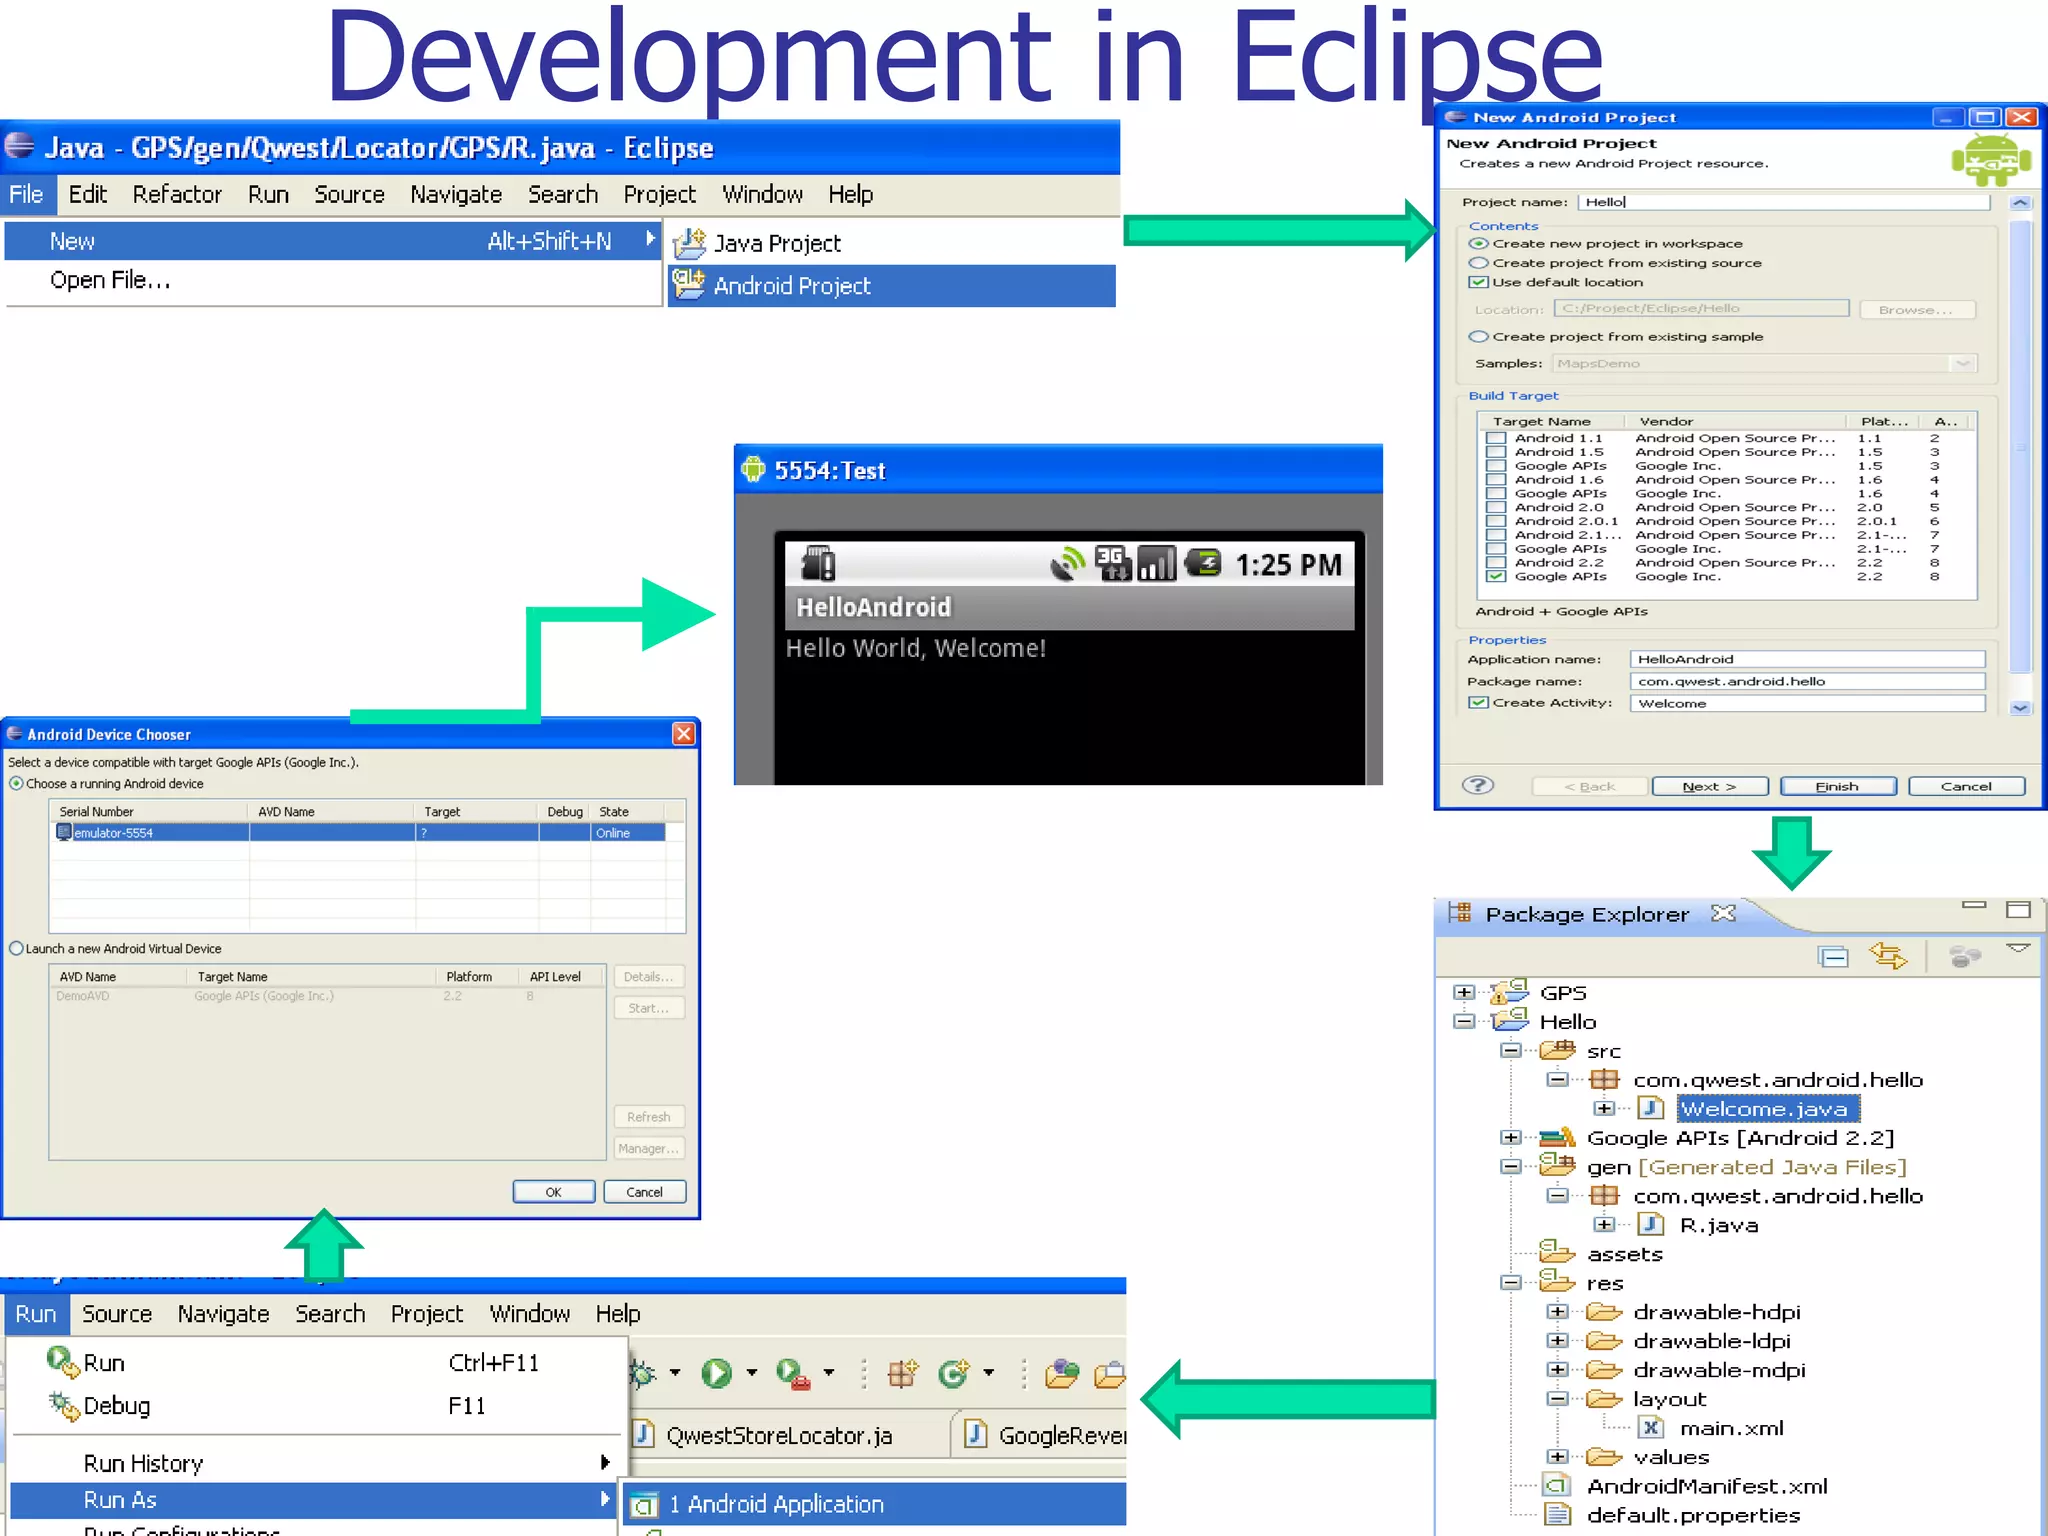
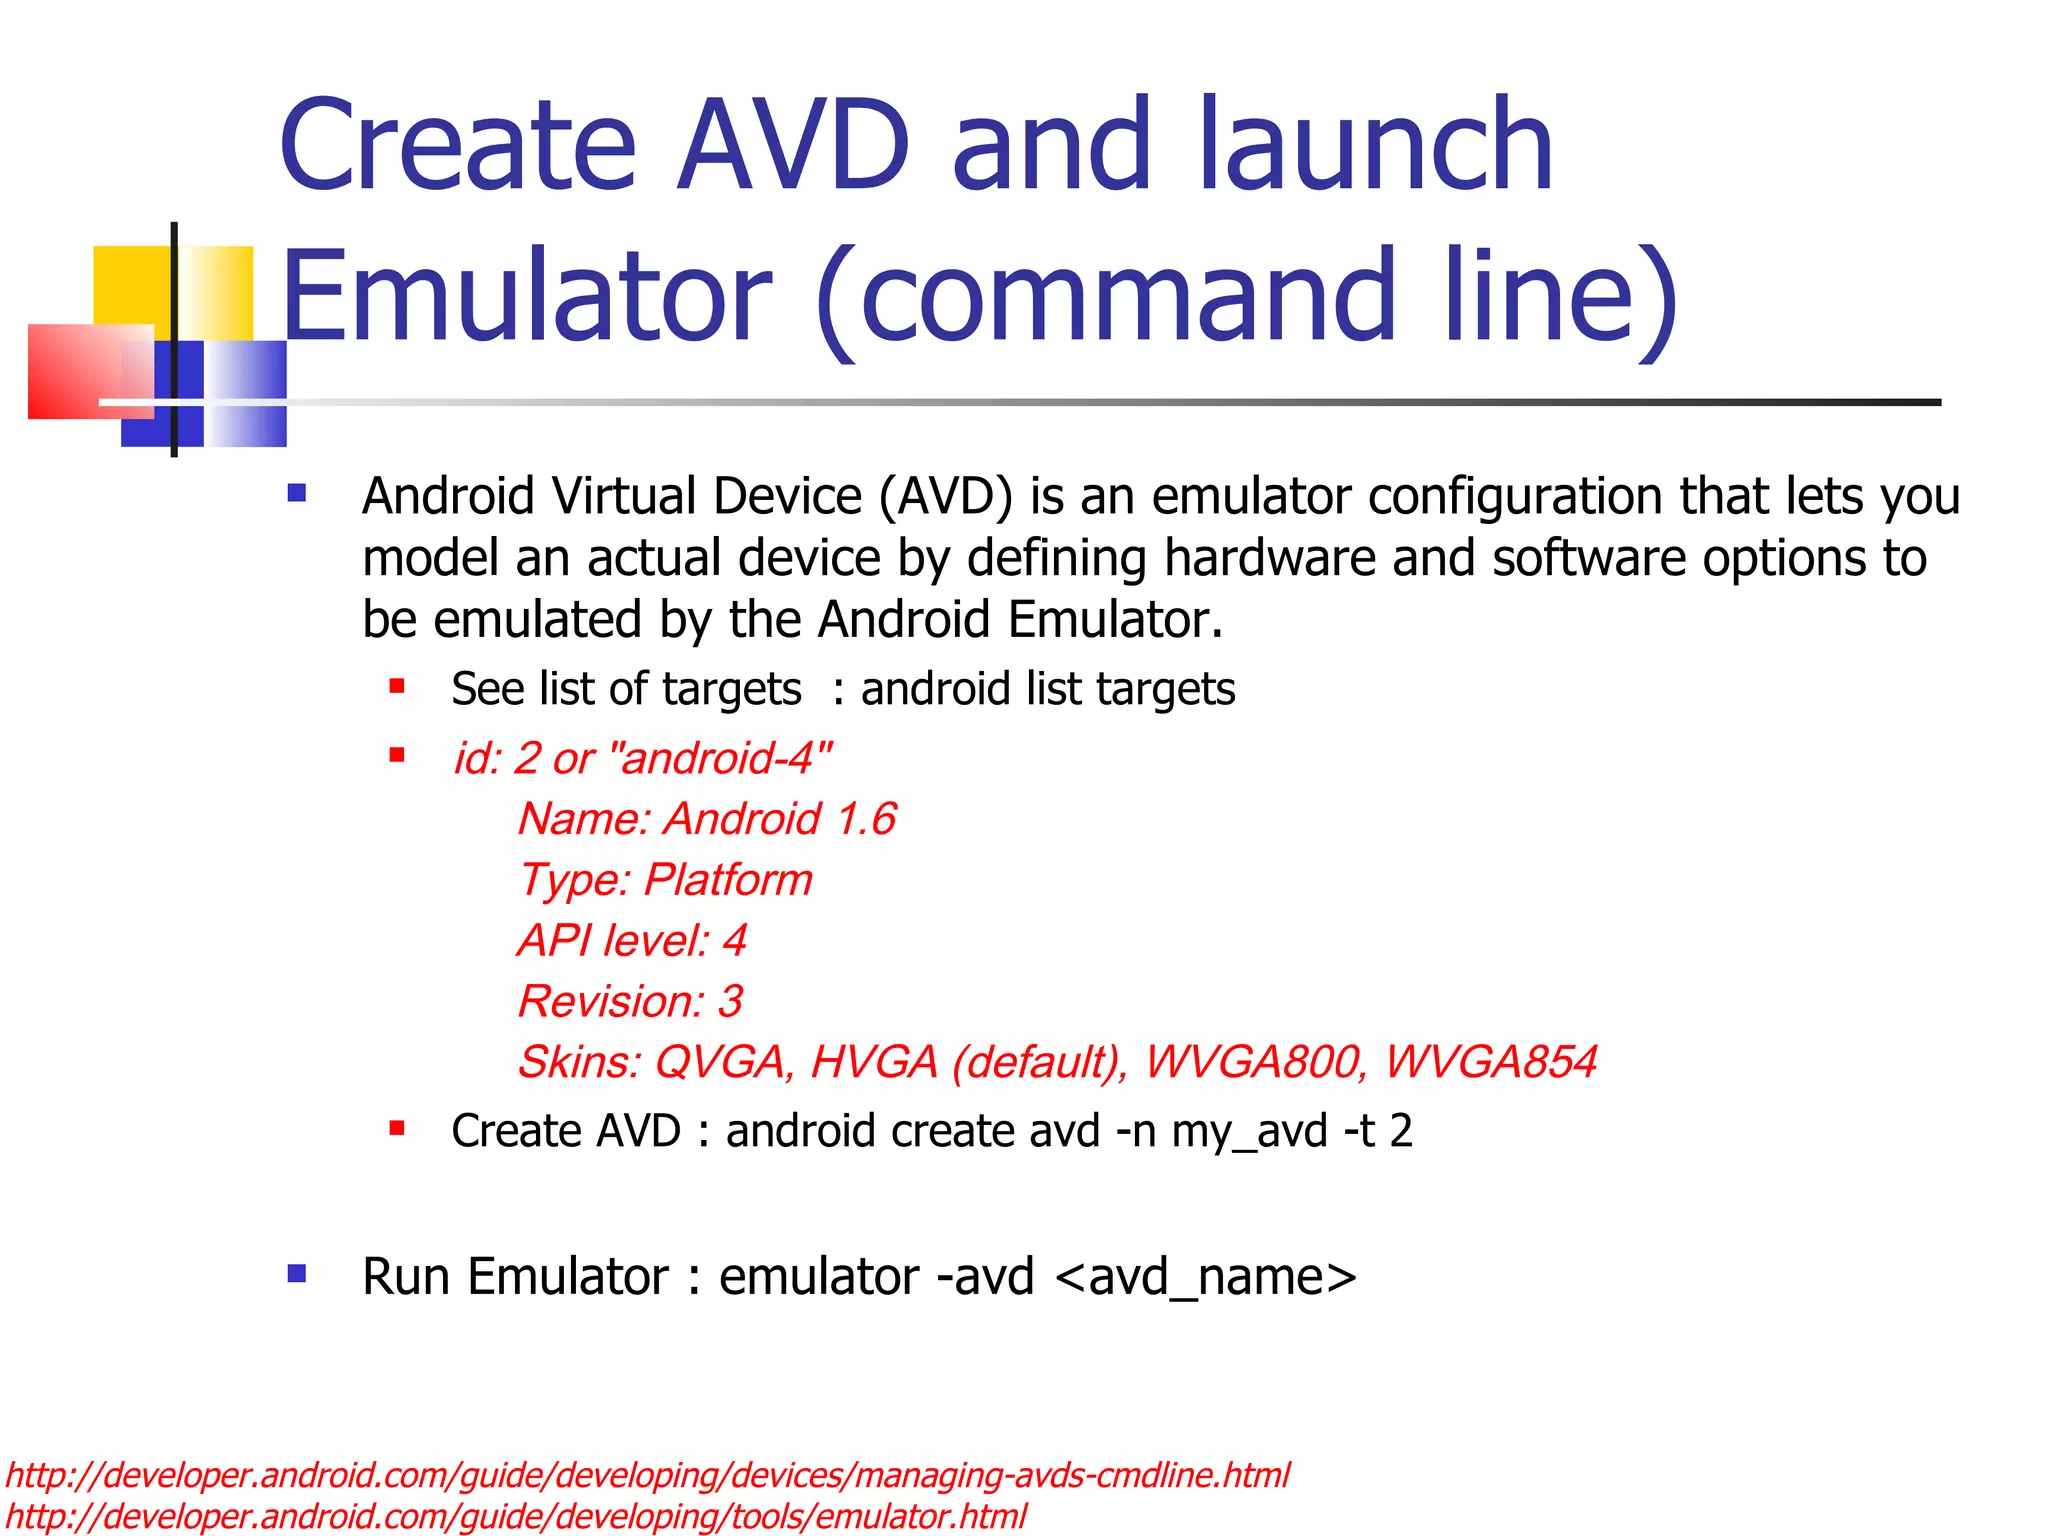
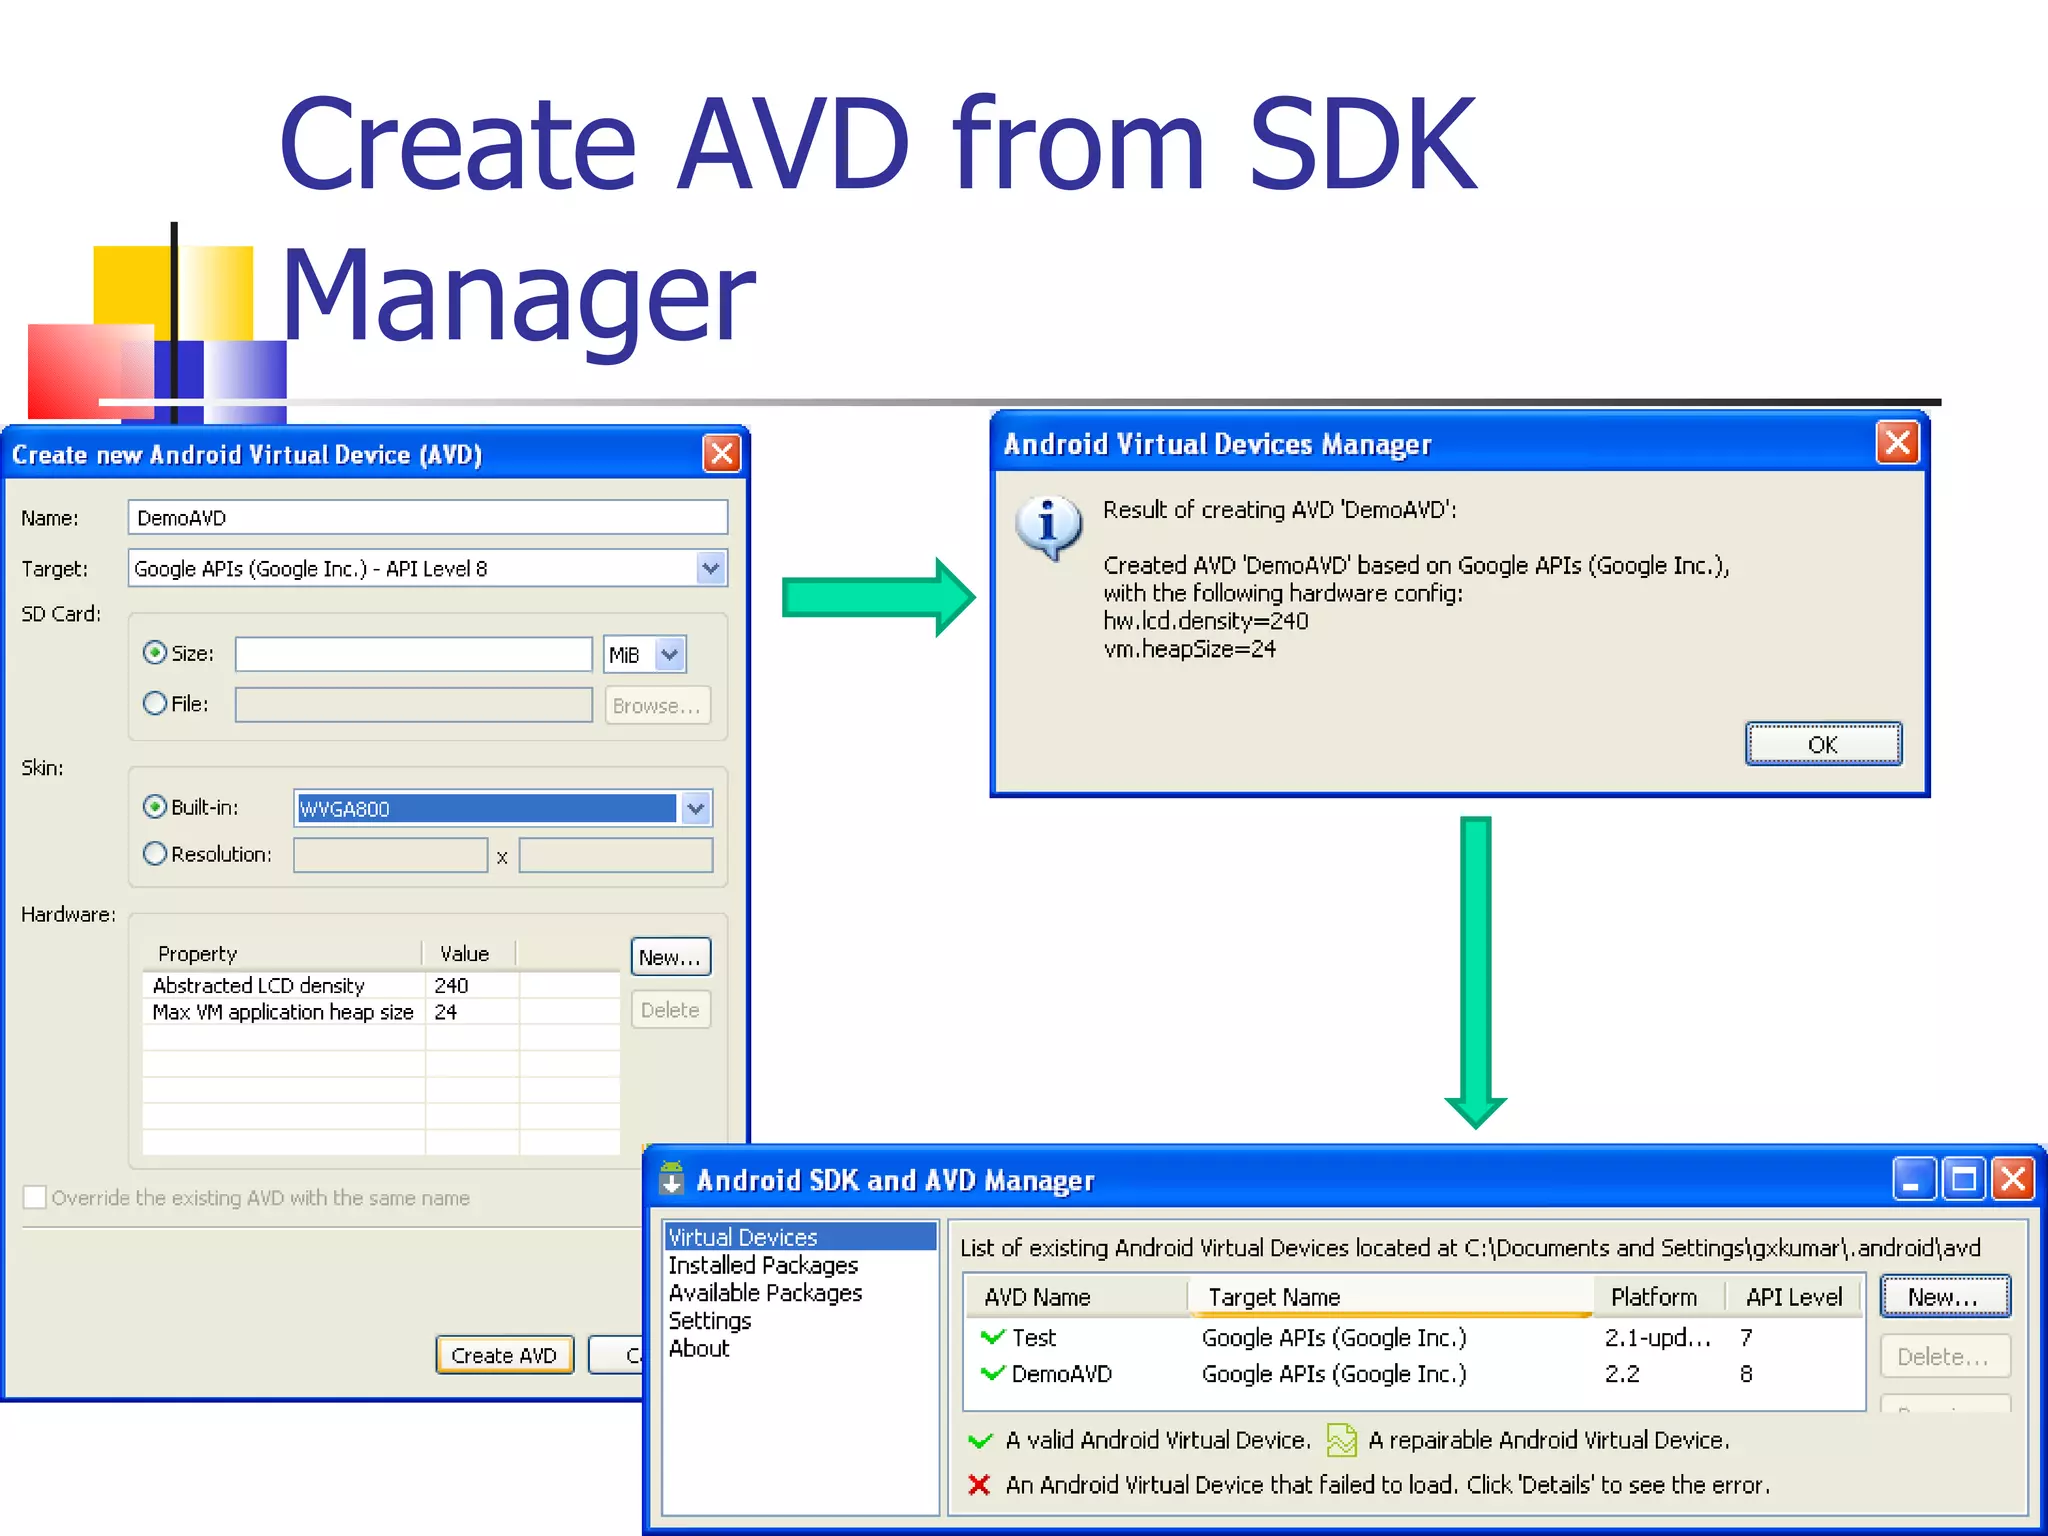
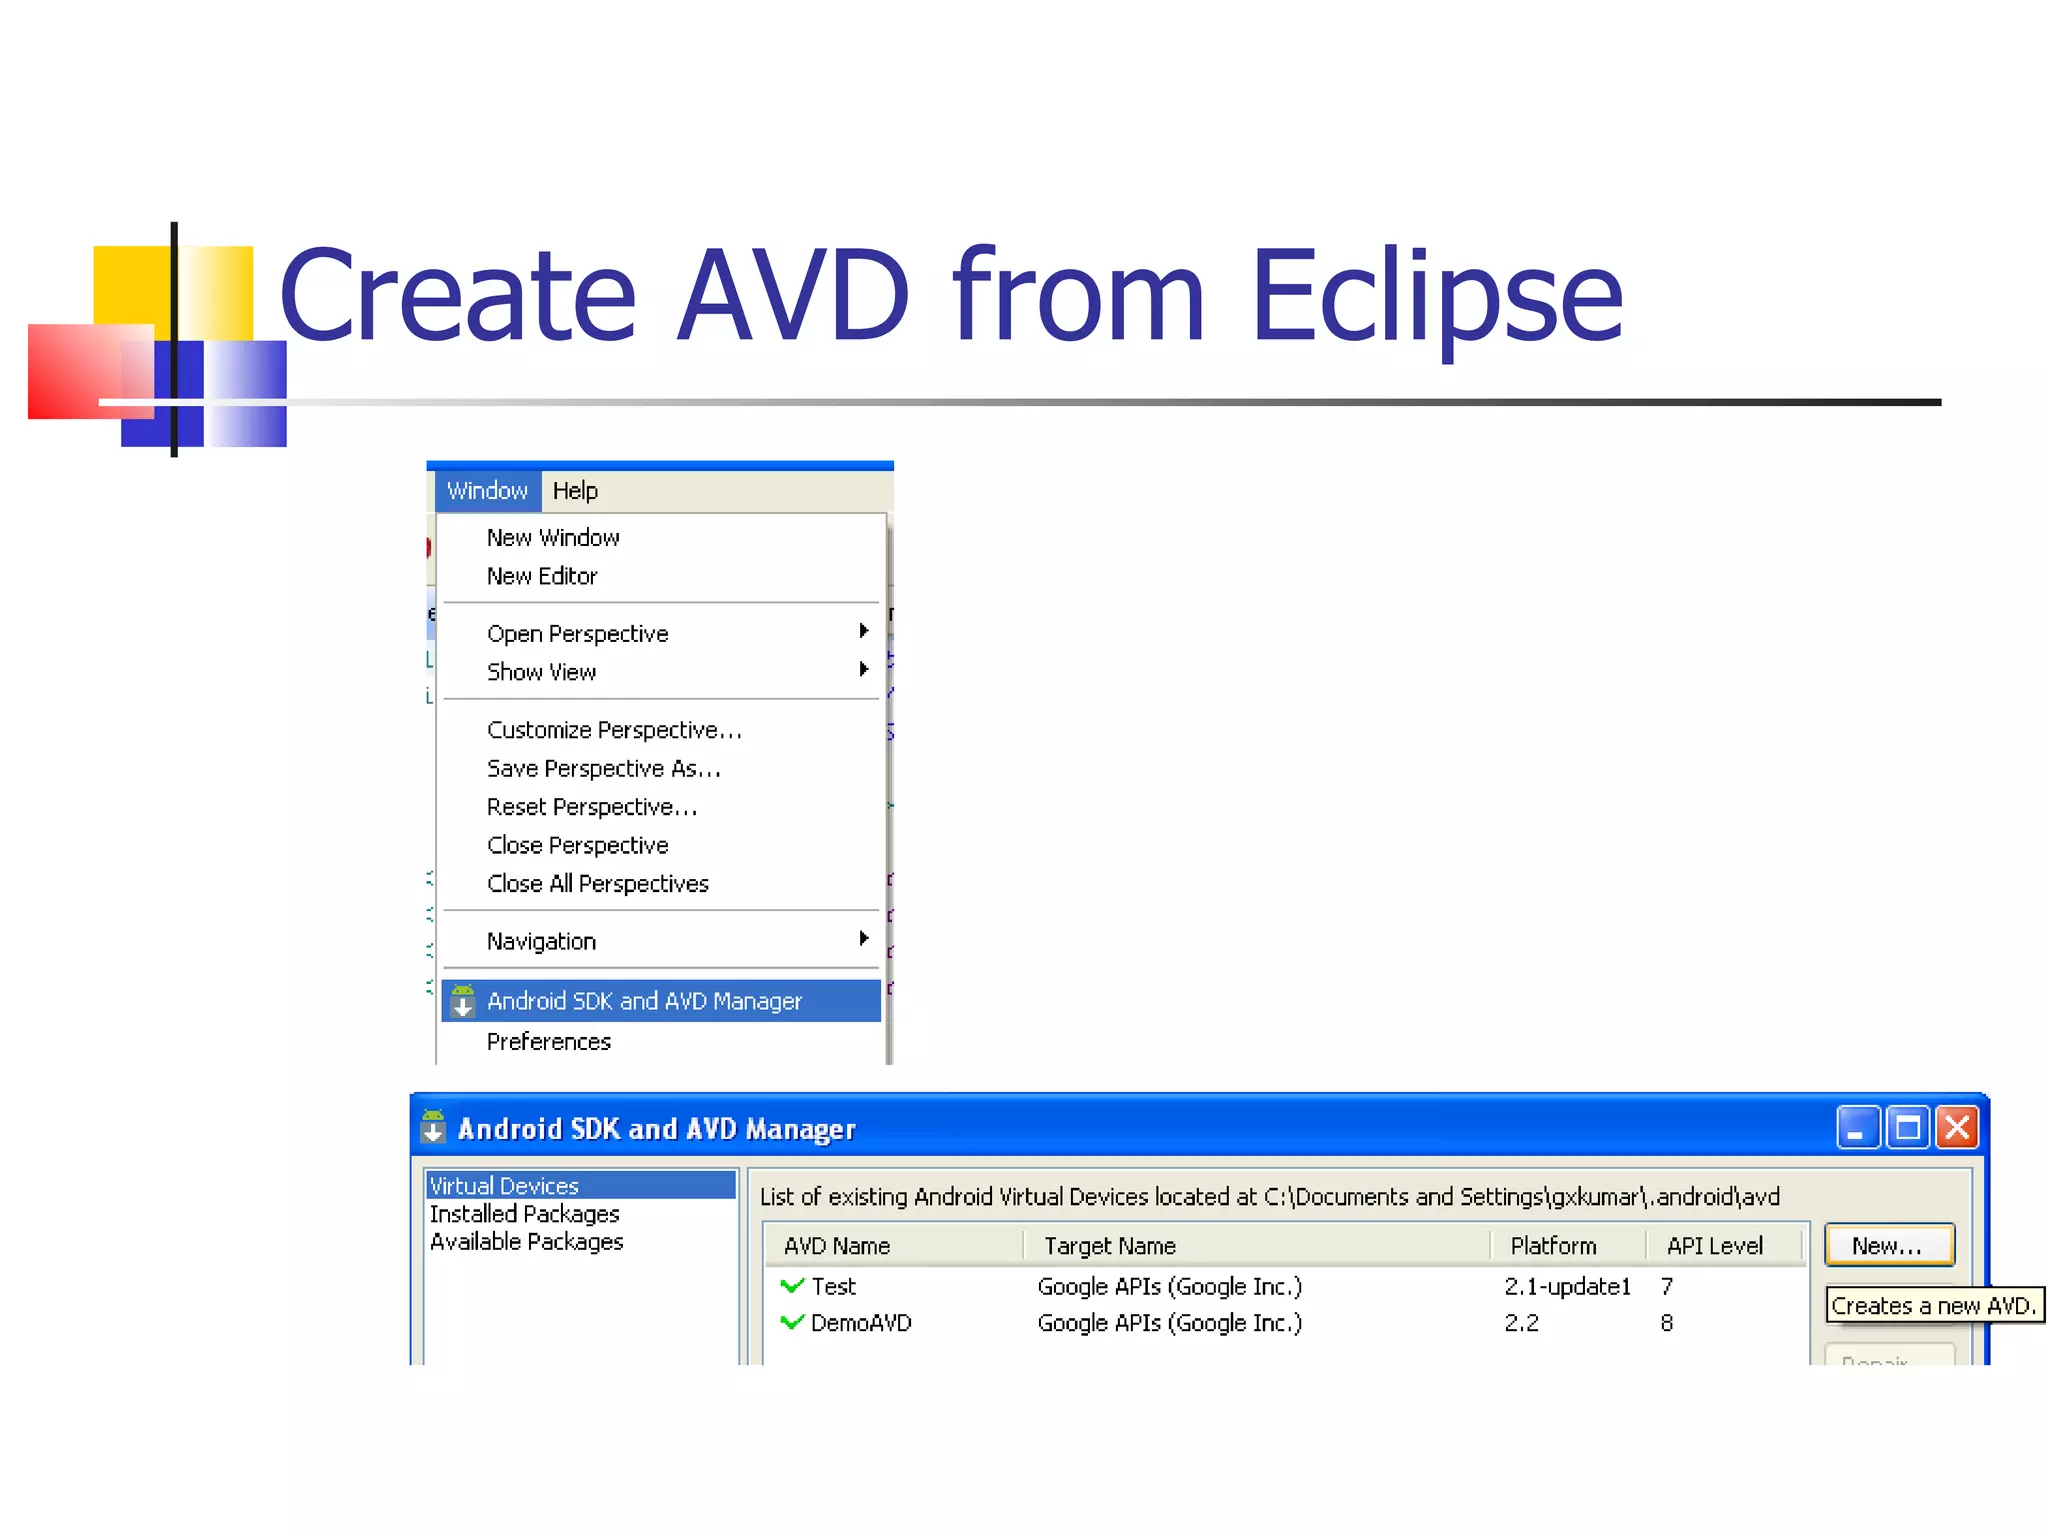
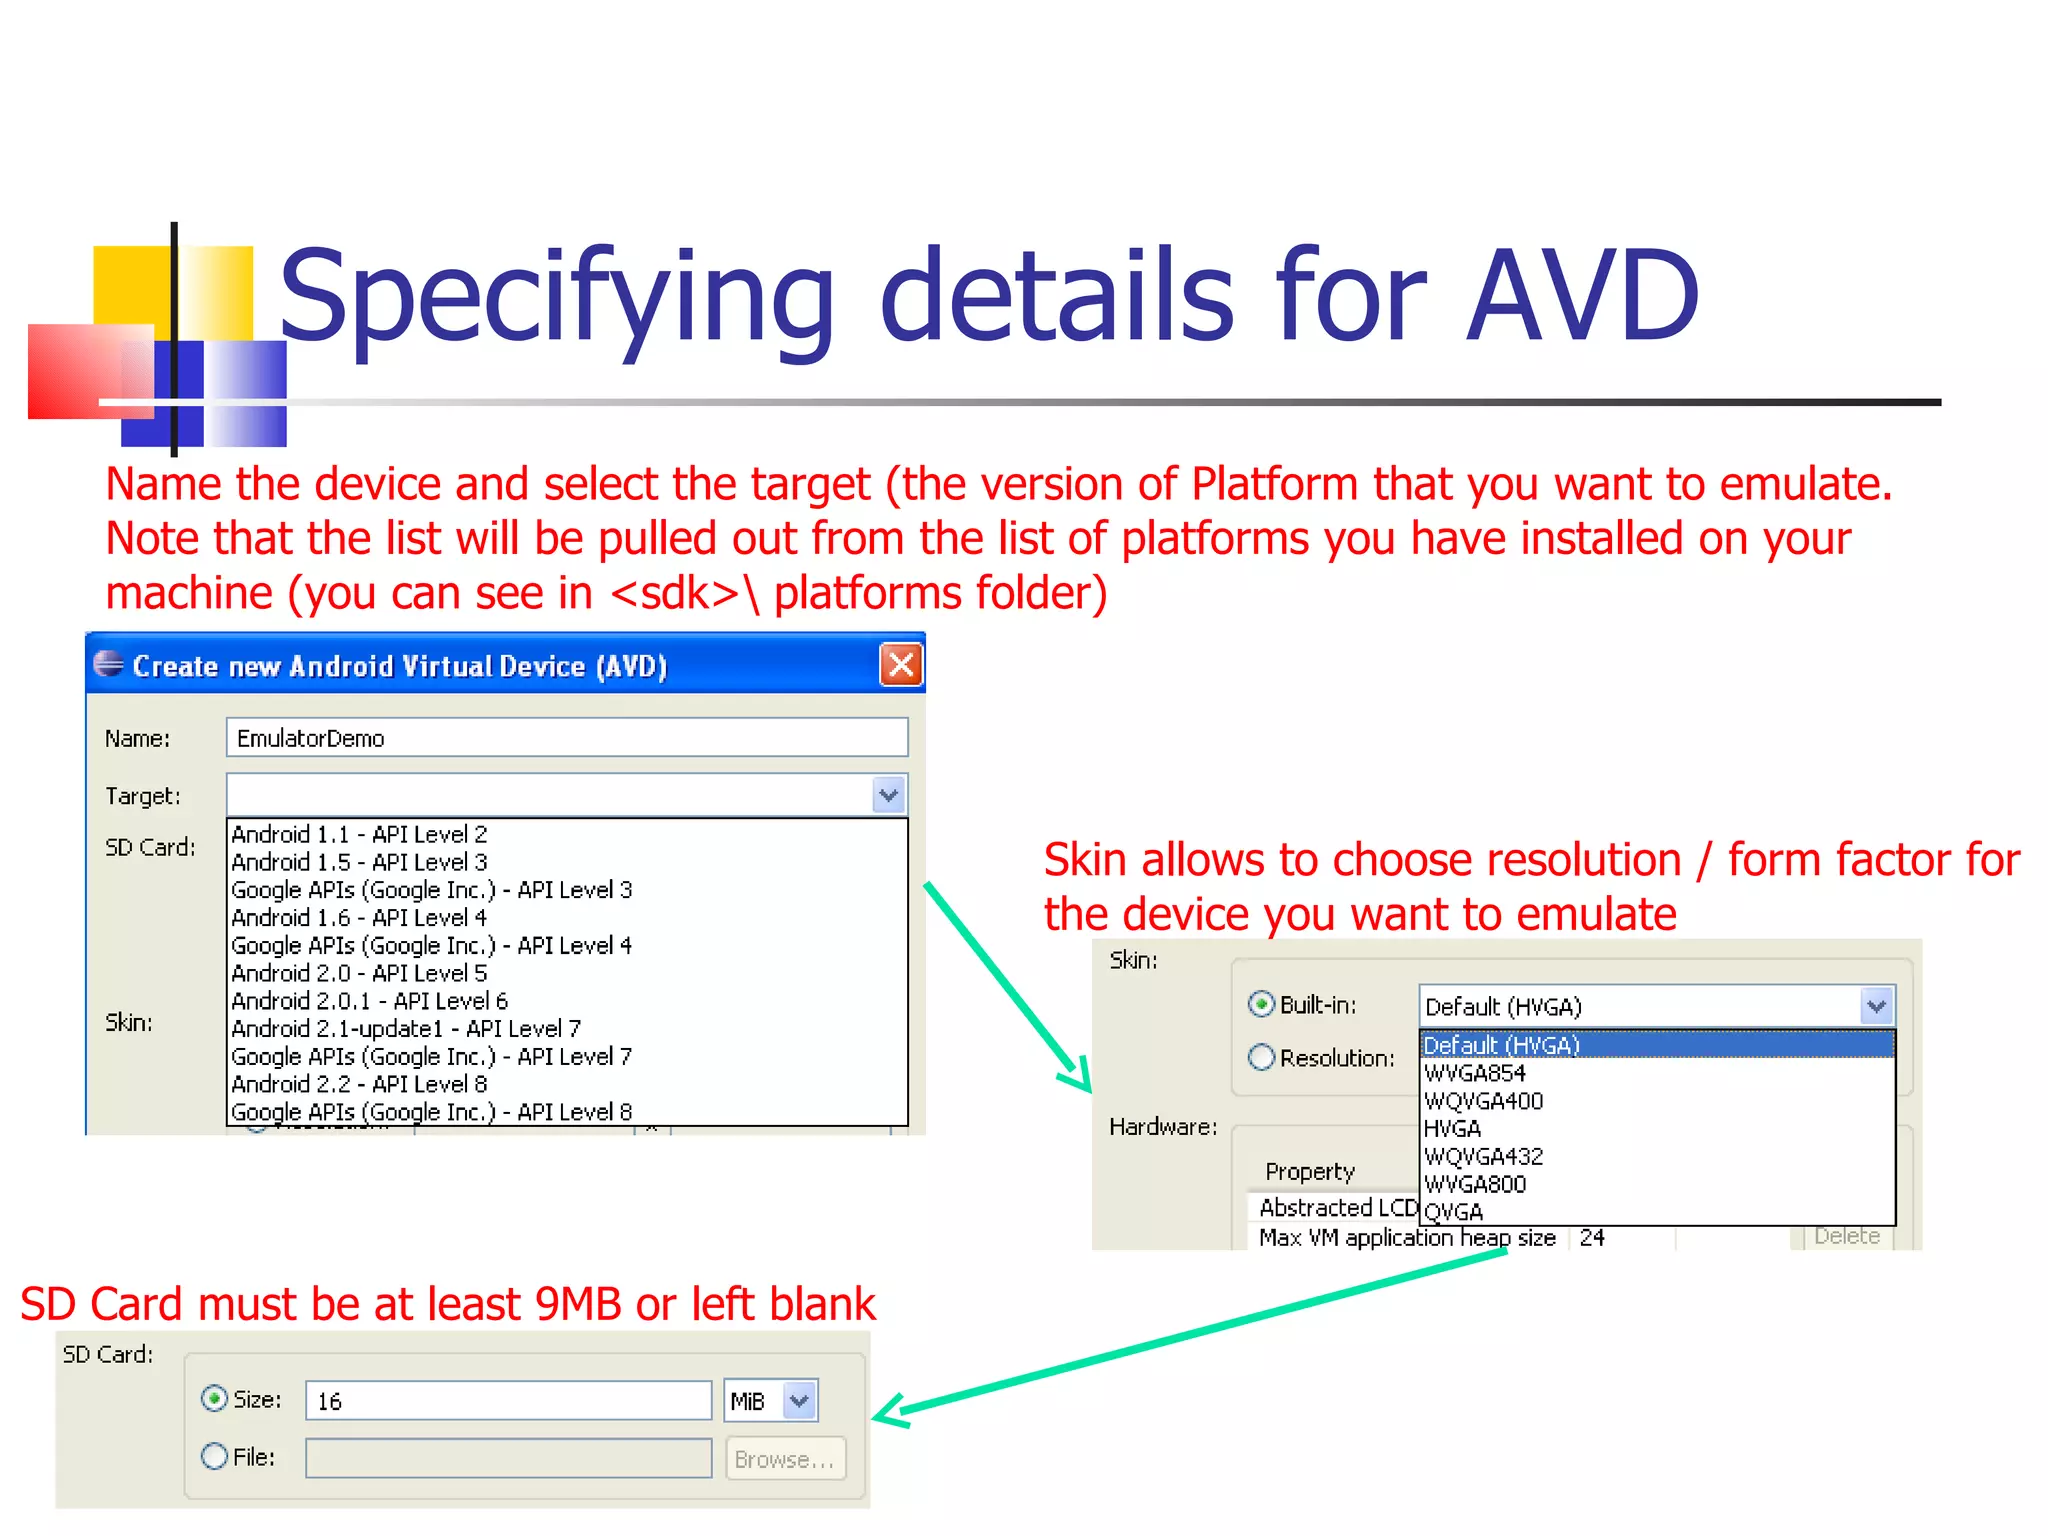
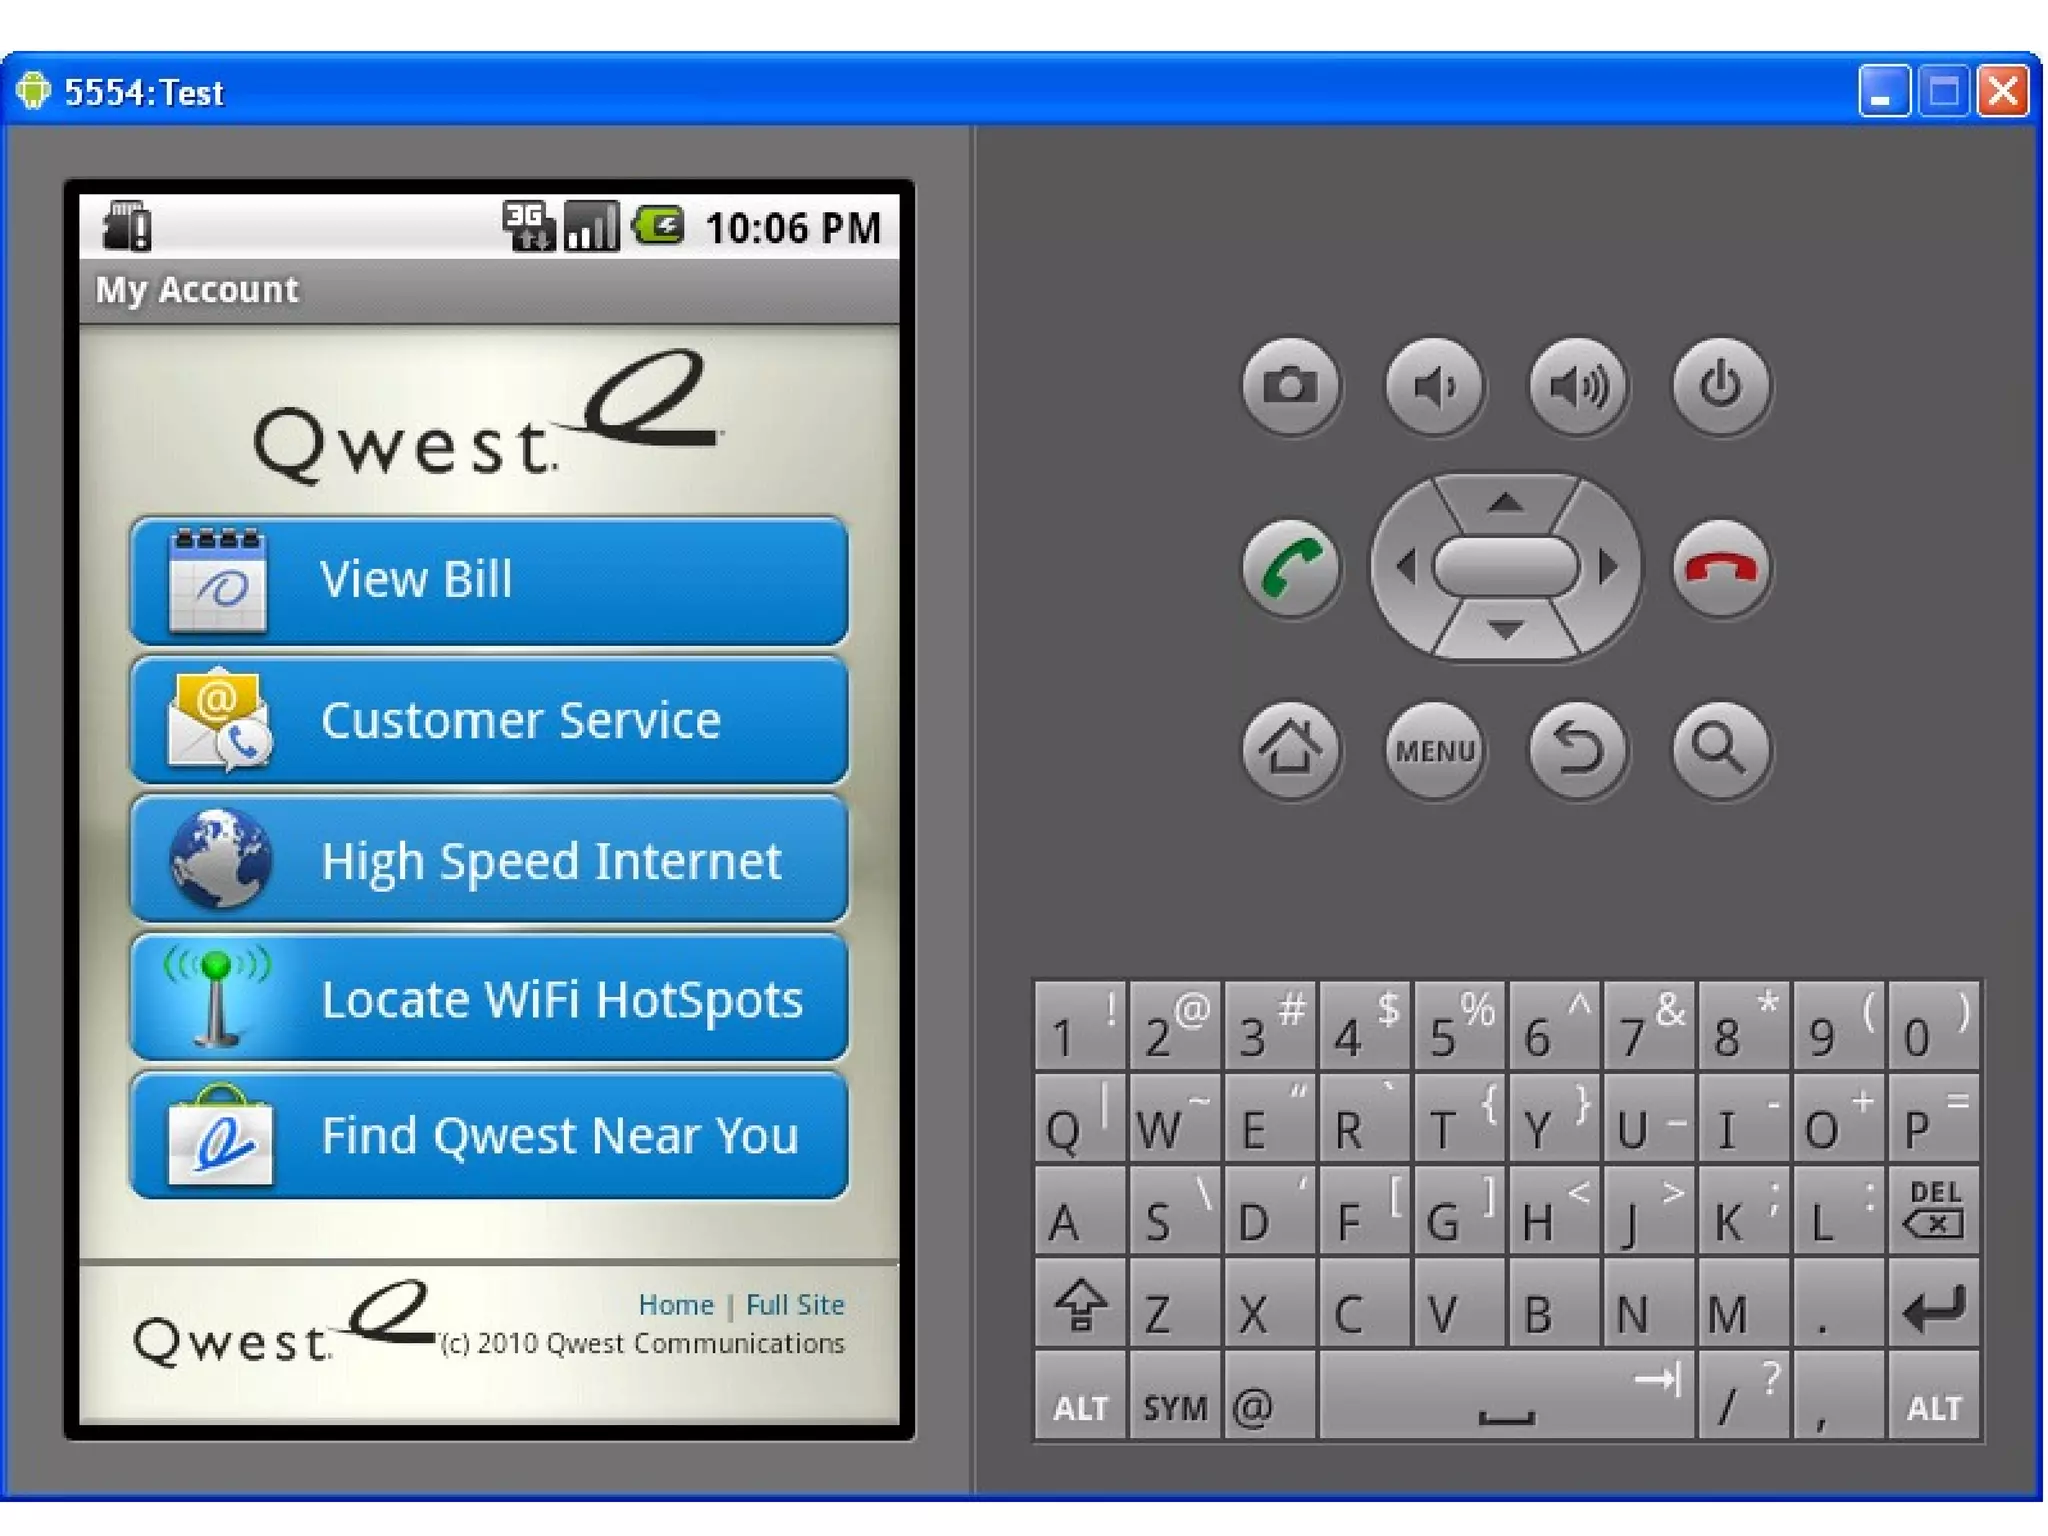
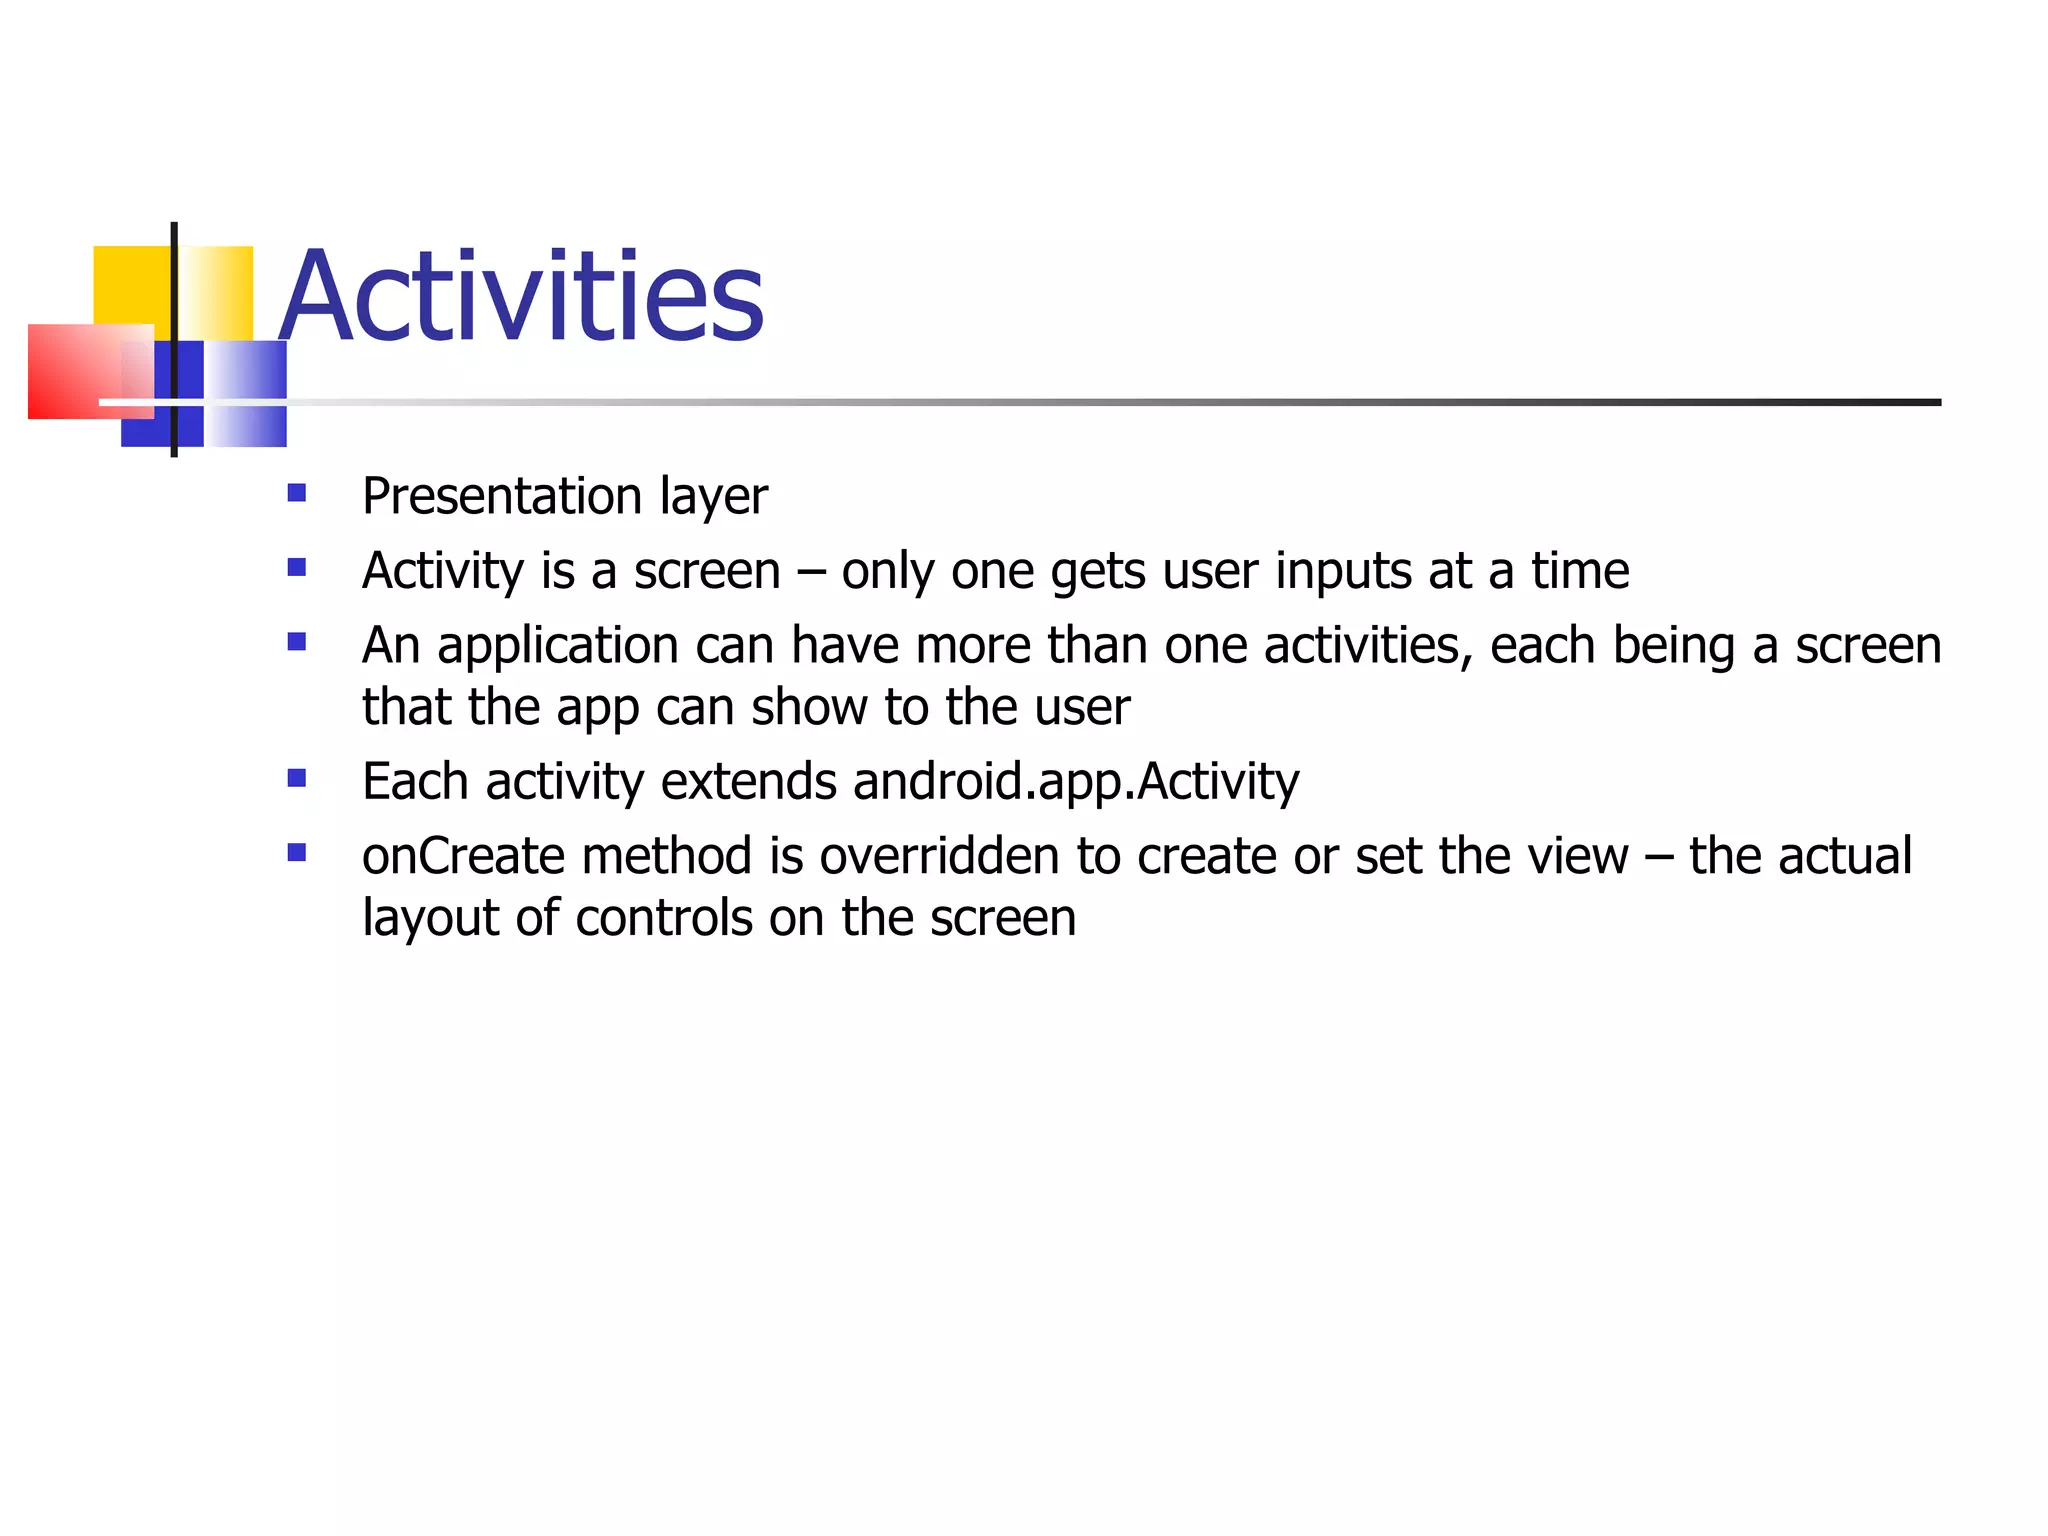
The document provides a comprehensive overview of Android, detailing its history, features, architecture, and the development setup for applications, including installation of the SDK and Eclipse plugins. It discusses the Android operating system as a mobile platform, its market share, and various versions along with their key improvements. Additionally, it covers development options, activities, layouts, UI concepts, and app components such as intents, services, and content providers.


