Download to read offline


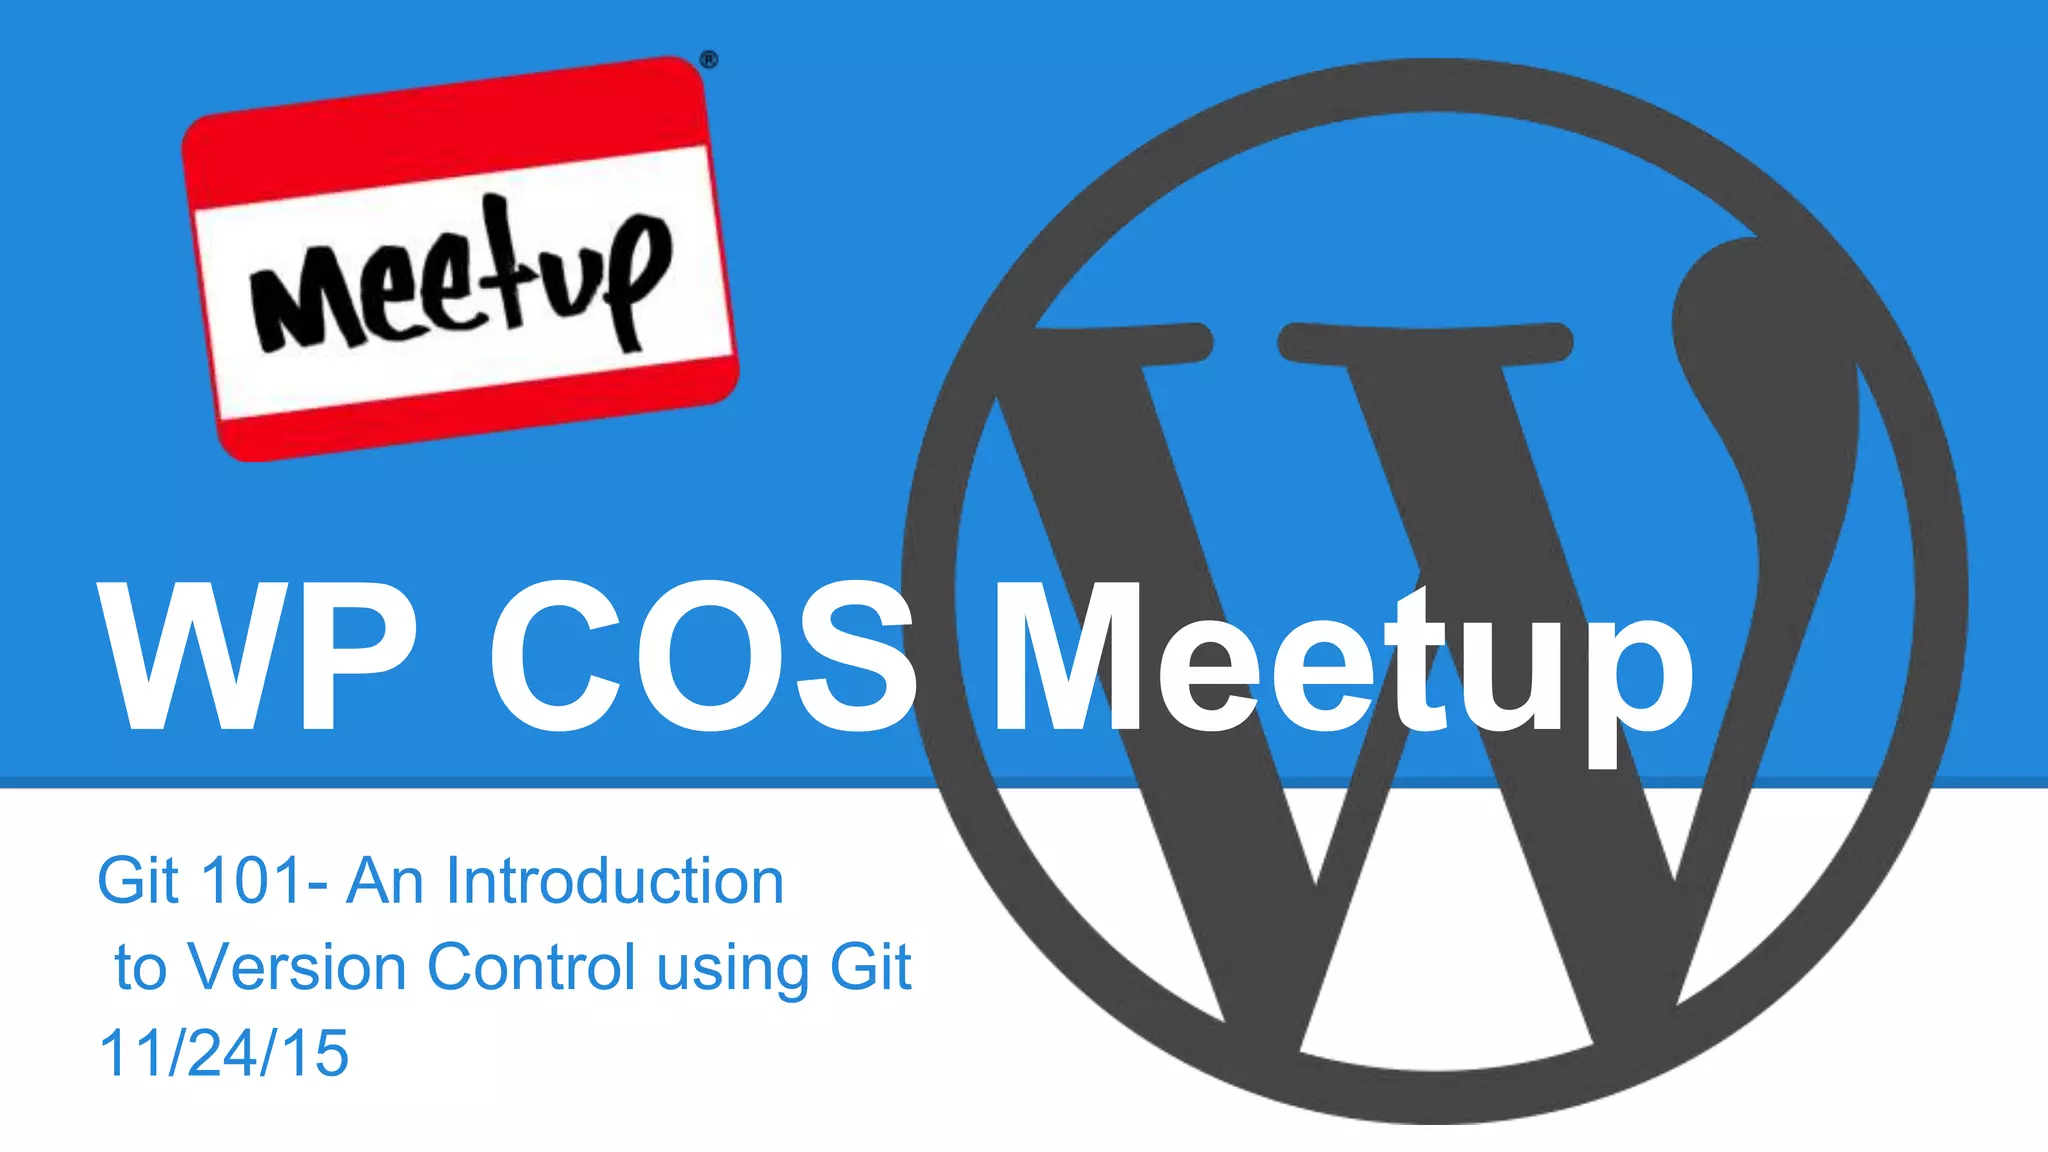
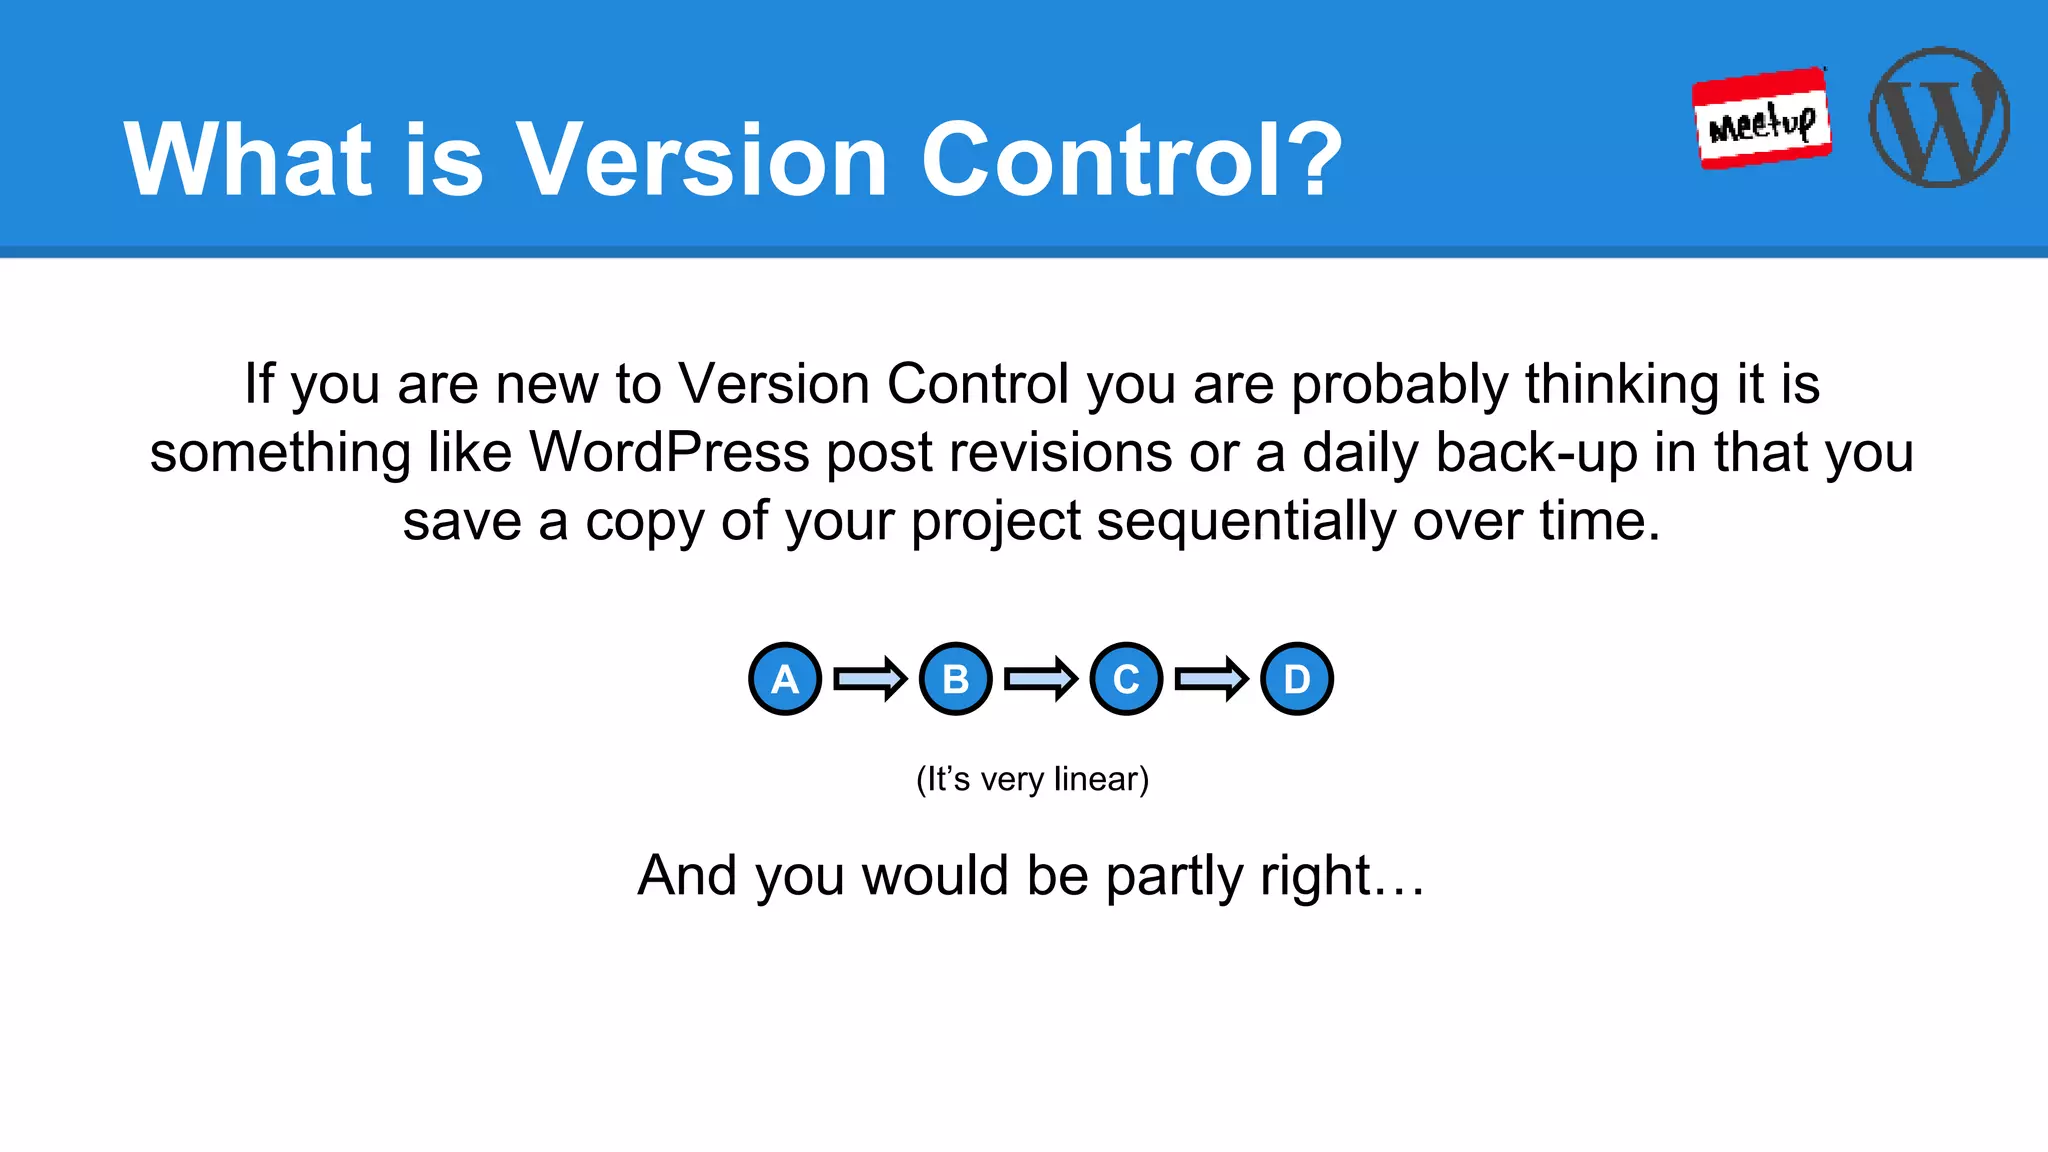

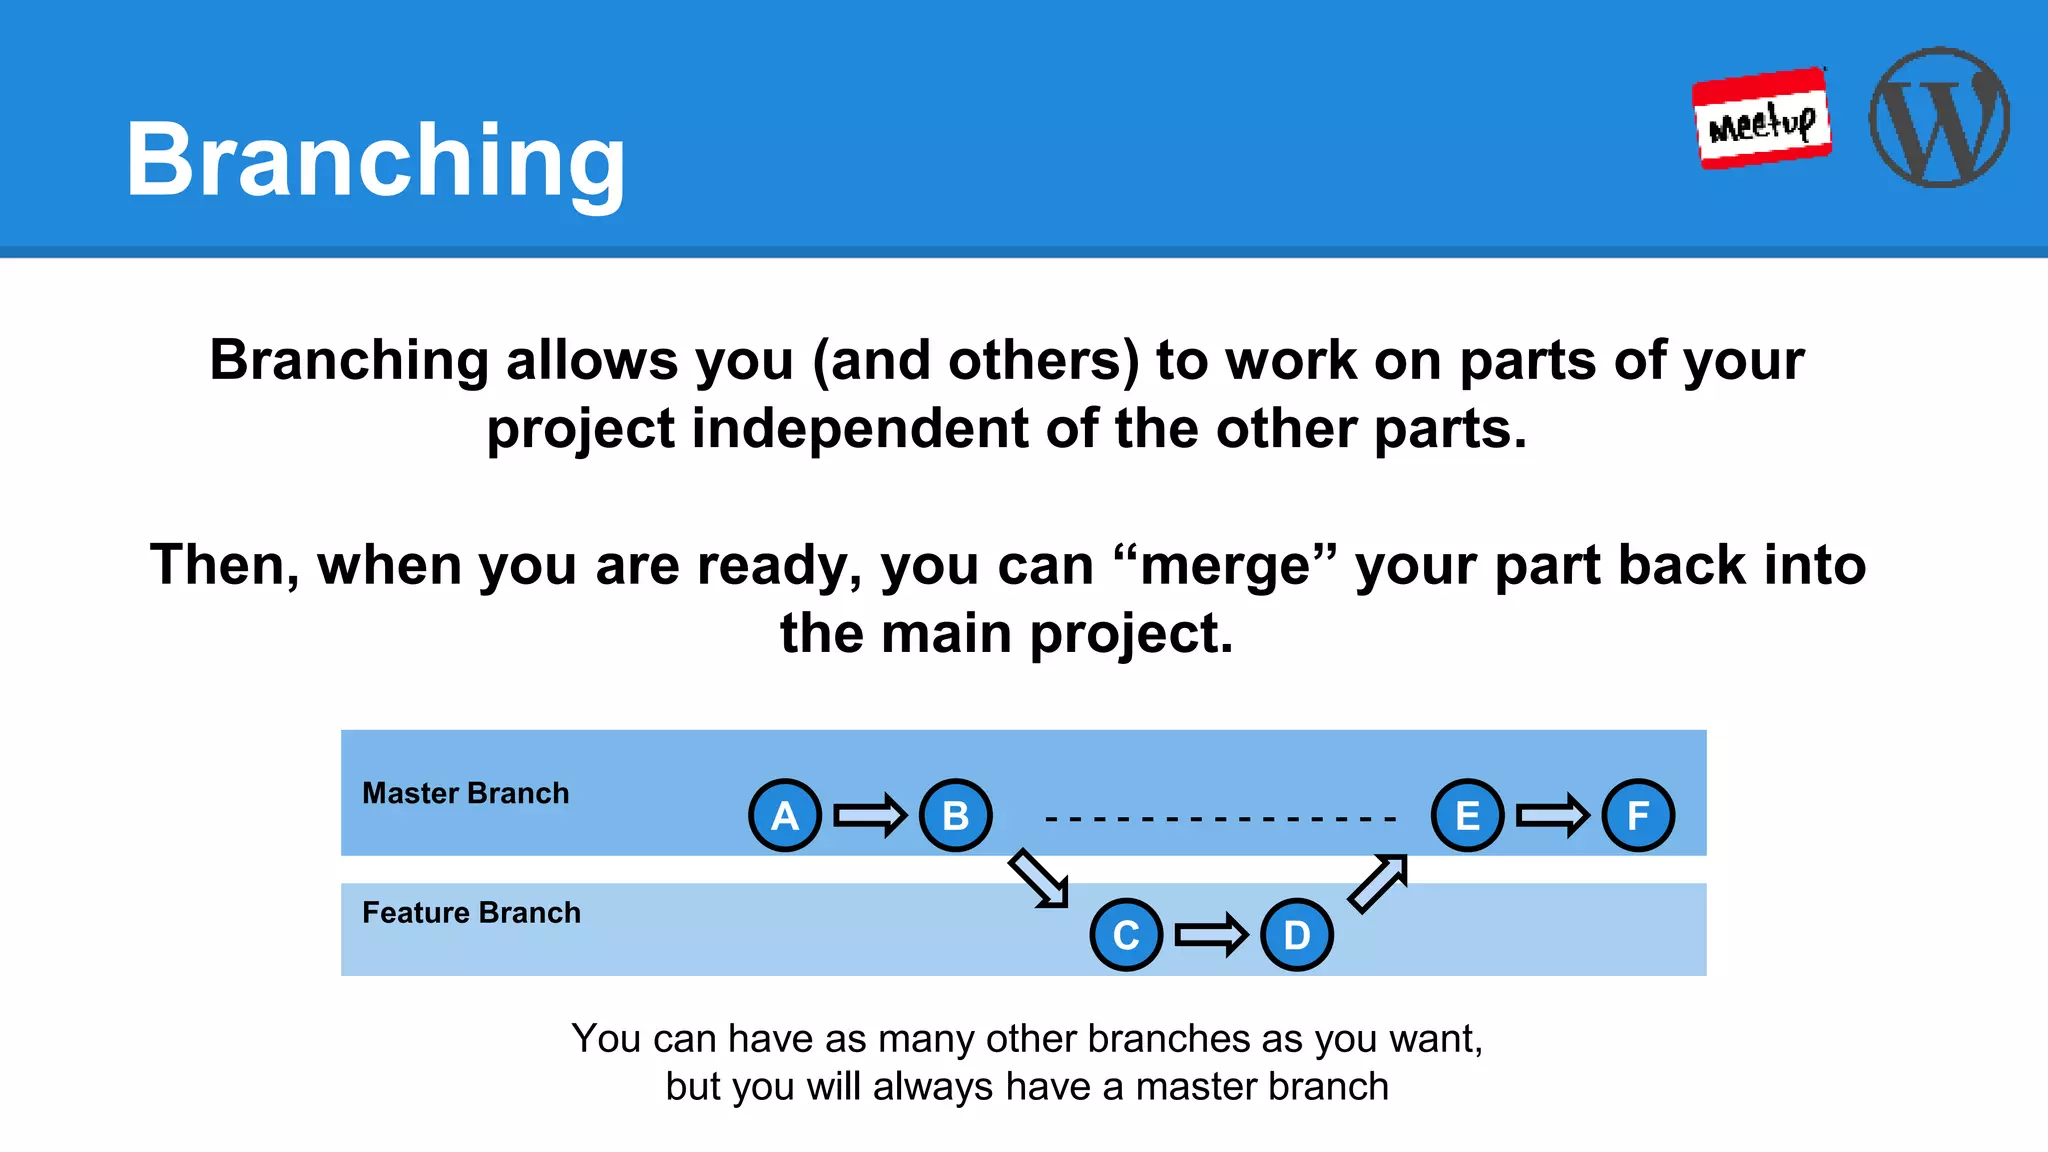
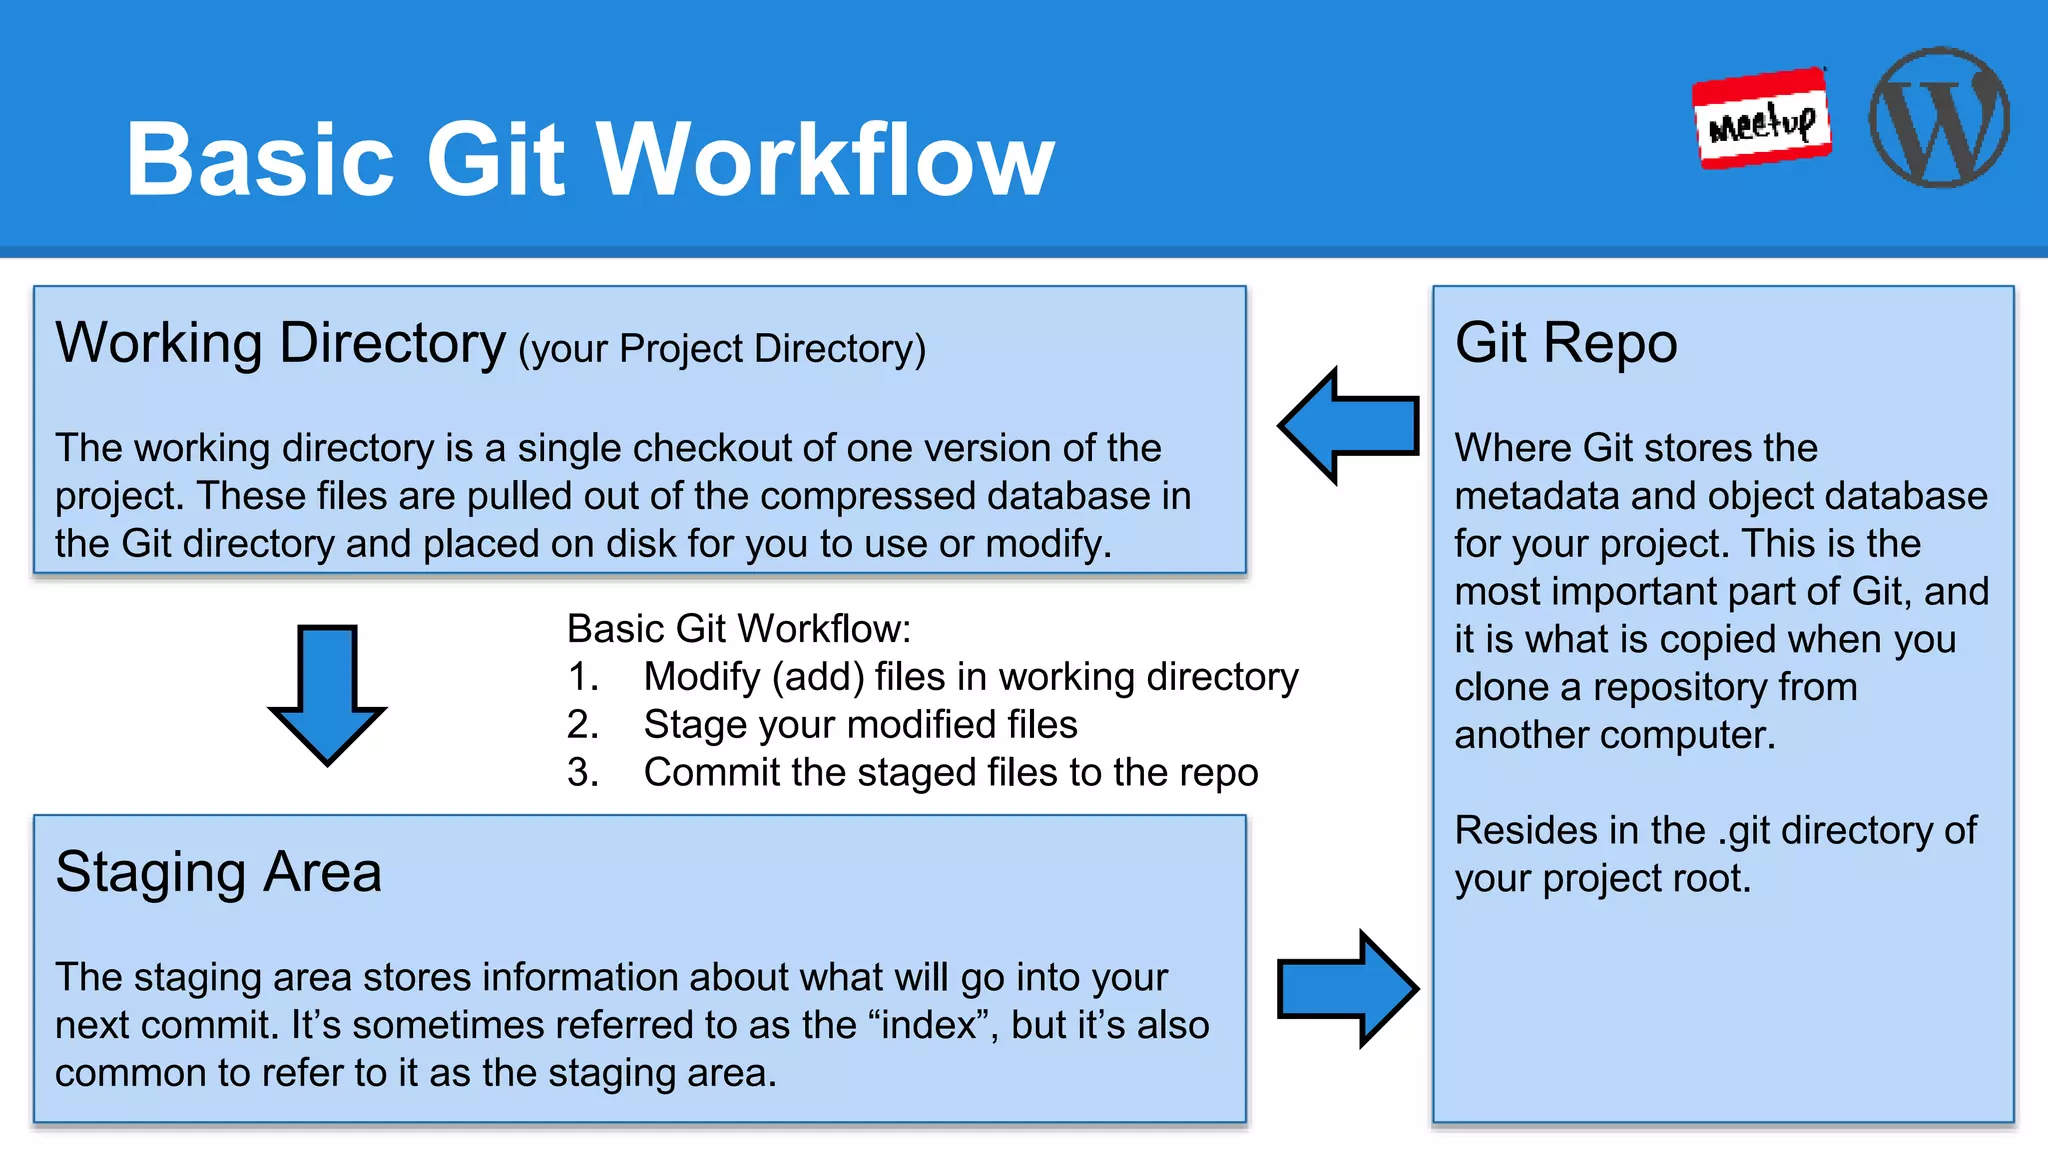


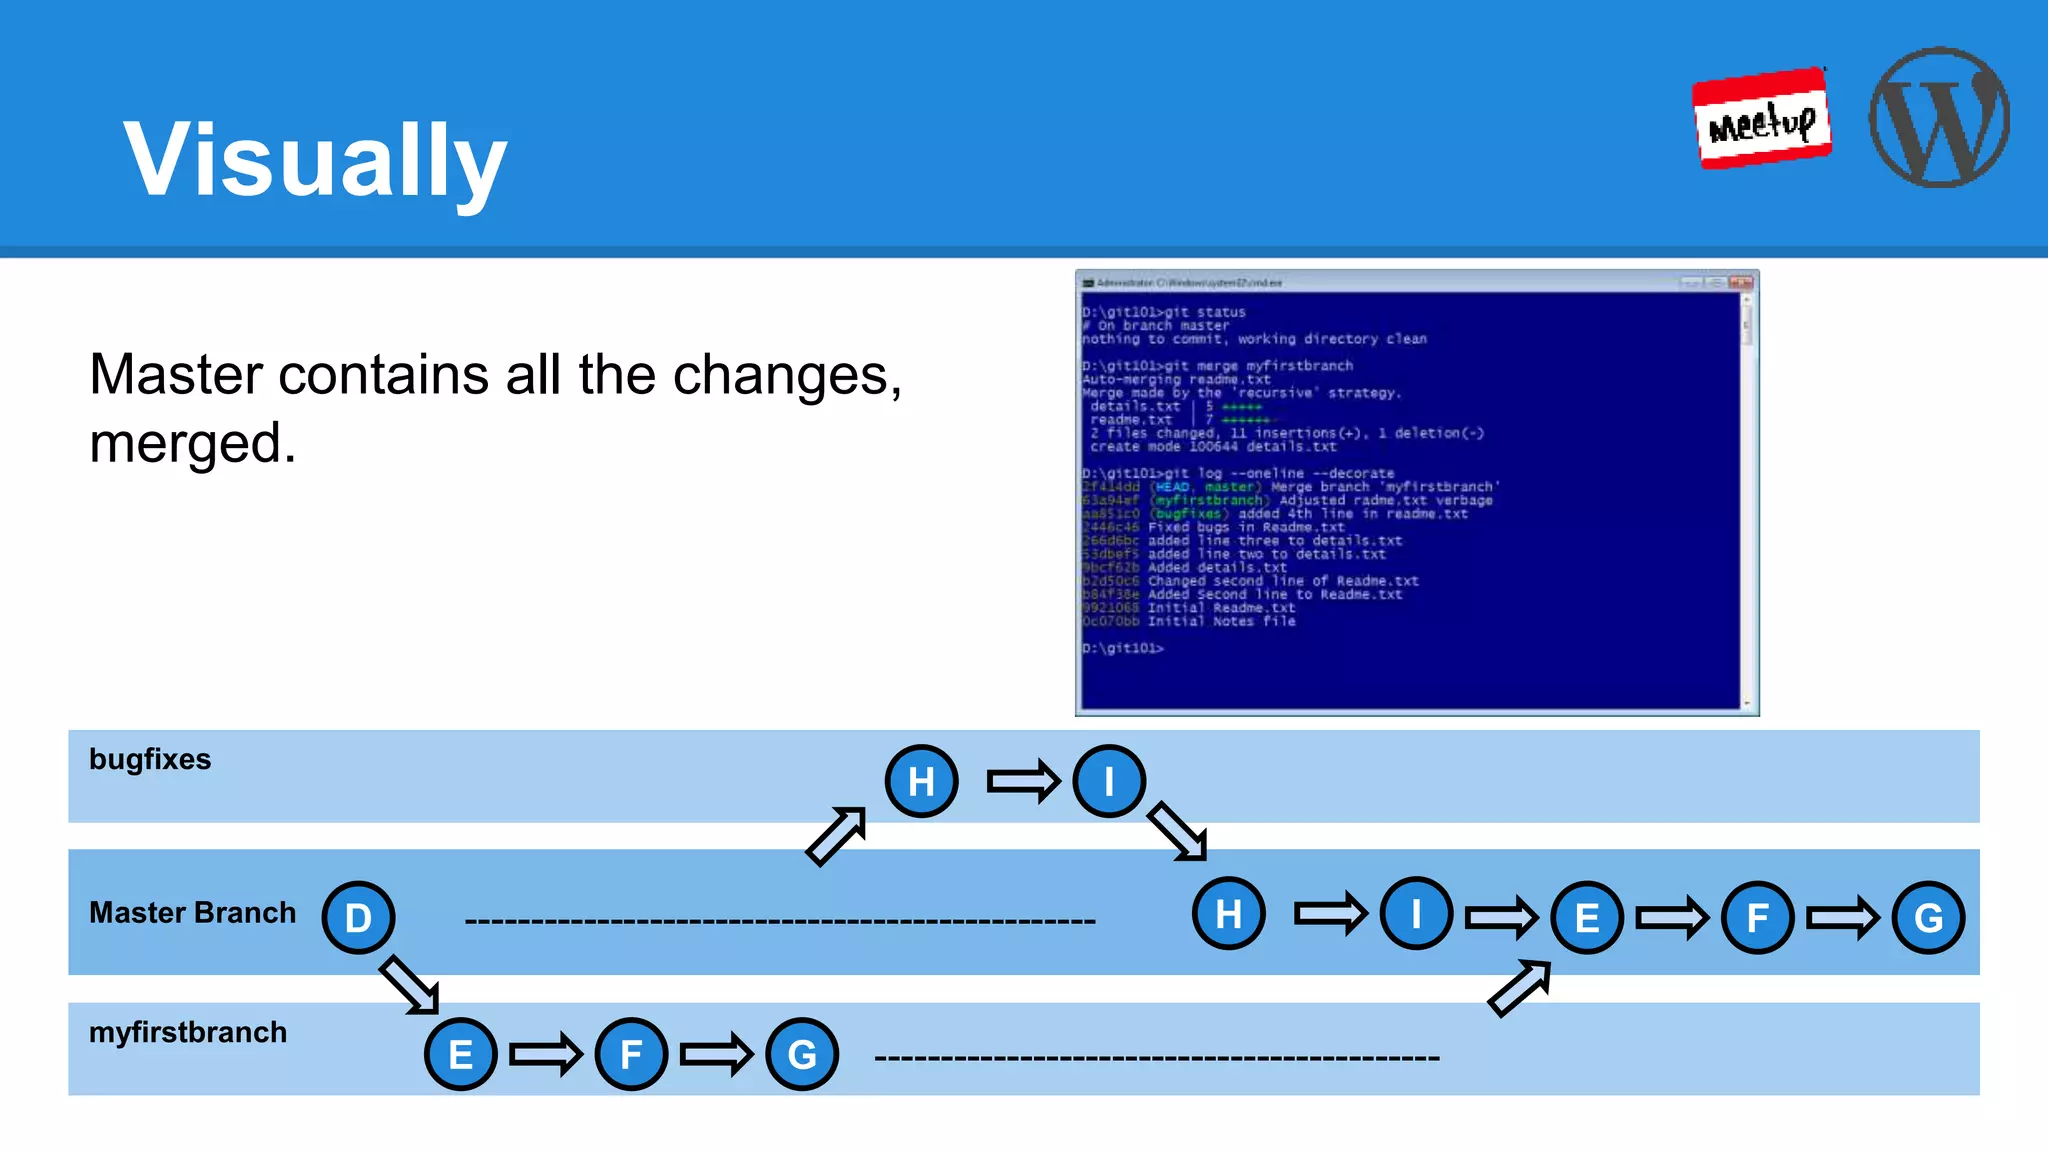
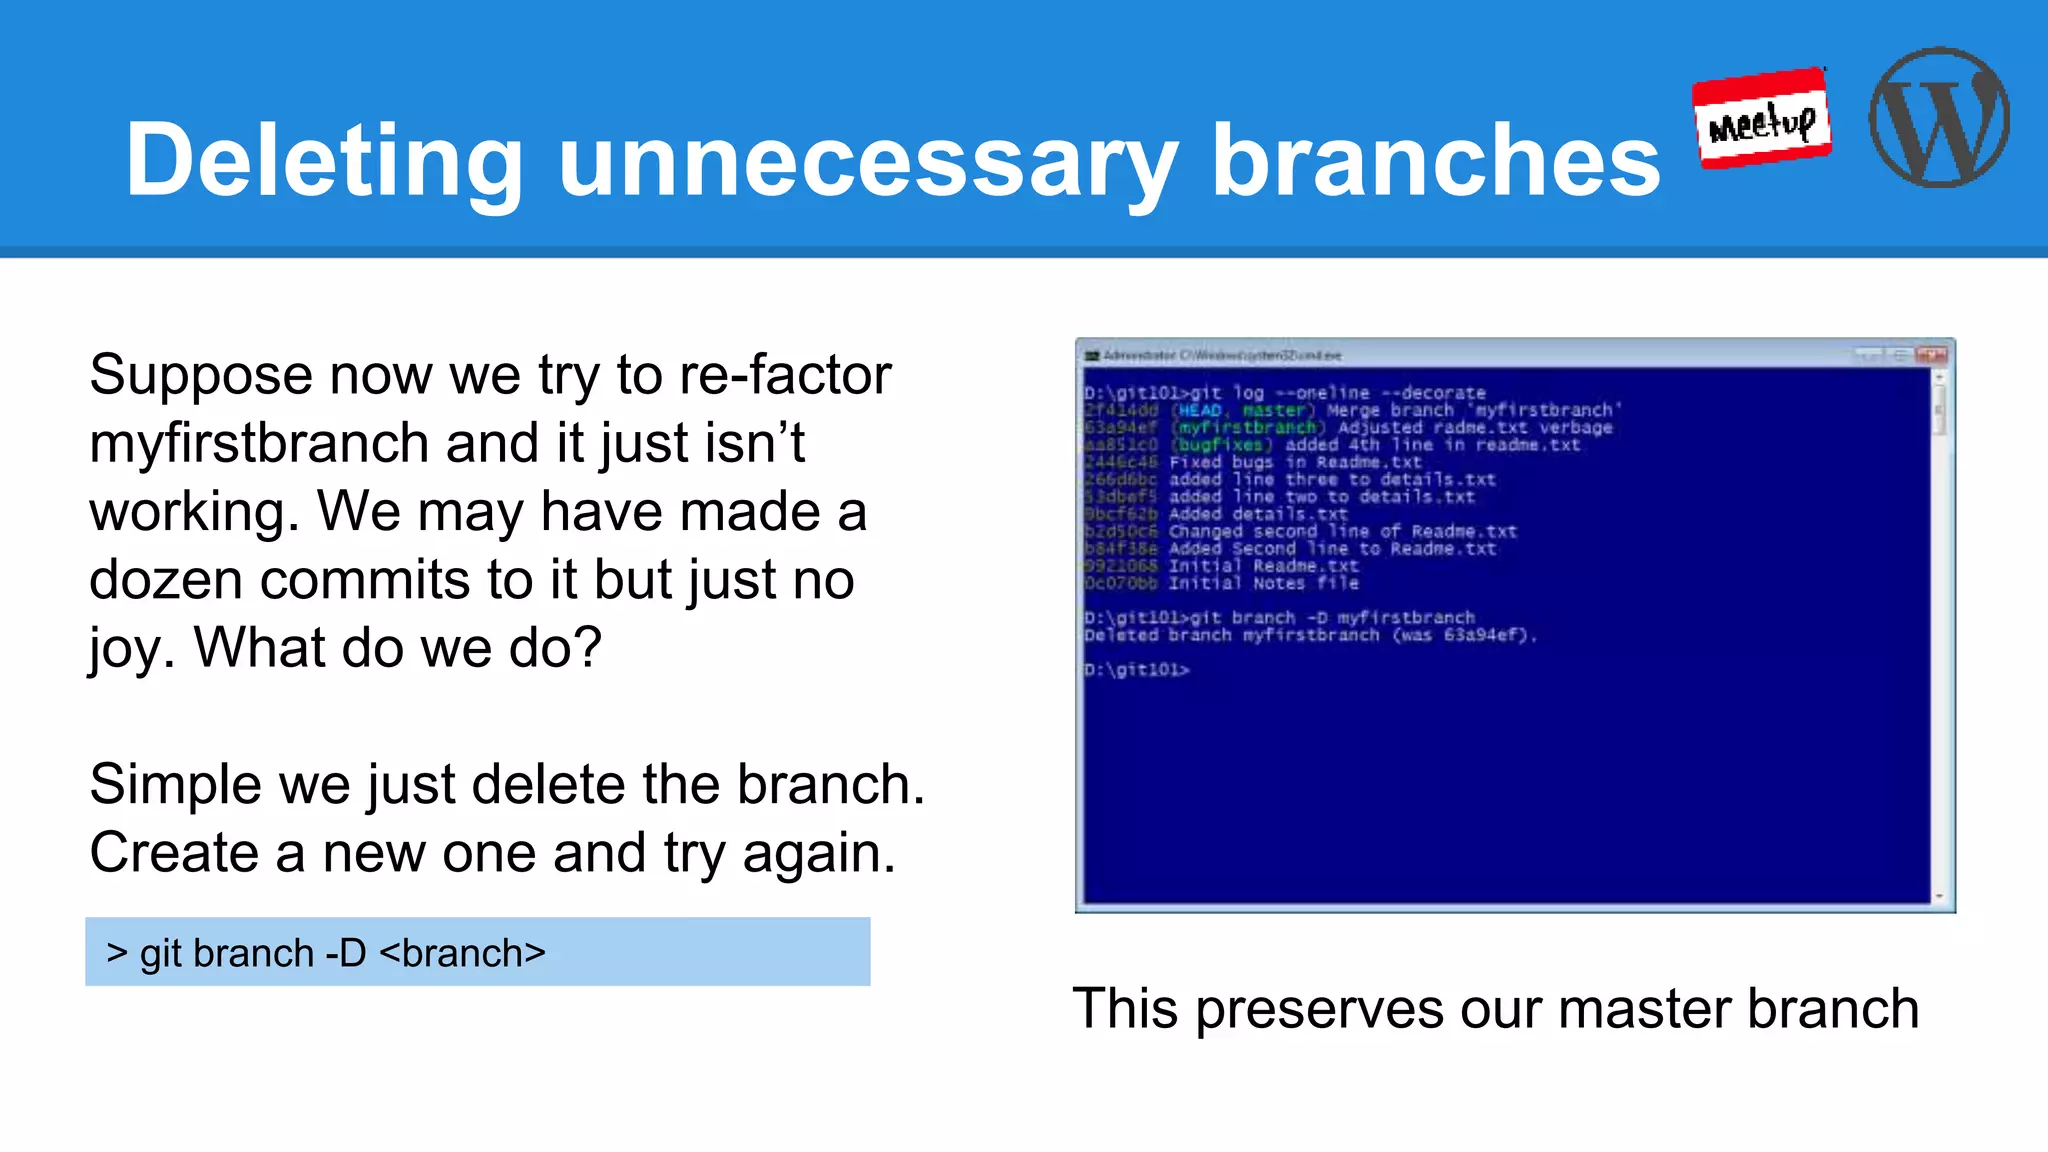

This document provides an introduction to version control using Git. It explains that Git allows for non-linear development through branching, which allows developers to work independently on different parts of a project. The document walks through setting up a local Git repository and making commits on different branches. It demonstrates how to merge branches together and delete branches that are no longer needed.


