This chapter discusses how to create tables and forms in HTML. It covers defining table elements like rows and columns, inserting captions and headers. It also covers different form controls like text boxes, checkboxes, dropdowns and buttons. It provides examples and code to create a table and form, and describes how to style them for responsive design across viewports. The chapter aims to help readers plan, design and code tables and forms for use on webpages.
Chapter 8 introduces the creation of tables and forms using HTML5 and CSS3, including objectives to define table elements and form controls.
Continues with defining rows, columns, and cells in tables; explains their structure and purpose in organizing data effectively. Instructions on how to create tables using HTML tags, including borders, headers, and captions to improve readability and structure.
Discusses table styling options for various viewports, including separated and collapsed borders to enhance the visual presentation.
Introduces webpage forms for data collection, emphasizing their role in user interaction and information gathering.
Details various input controls within forms such as text fields, checkboxes, and buttons, explaining their functionality and attributes.
Covers form attributes like action and method used for processing submitted data, including GET and POST methods for data handling.
Describes CSS styling for forms to enhance usability and visual appeal across different device viewports.
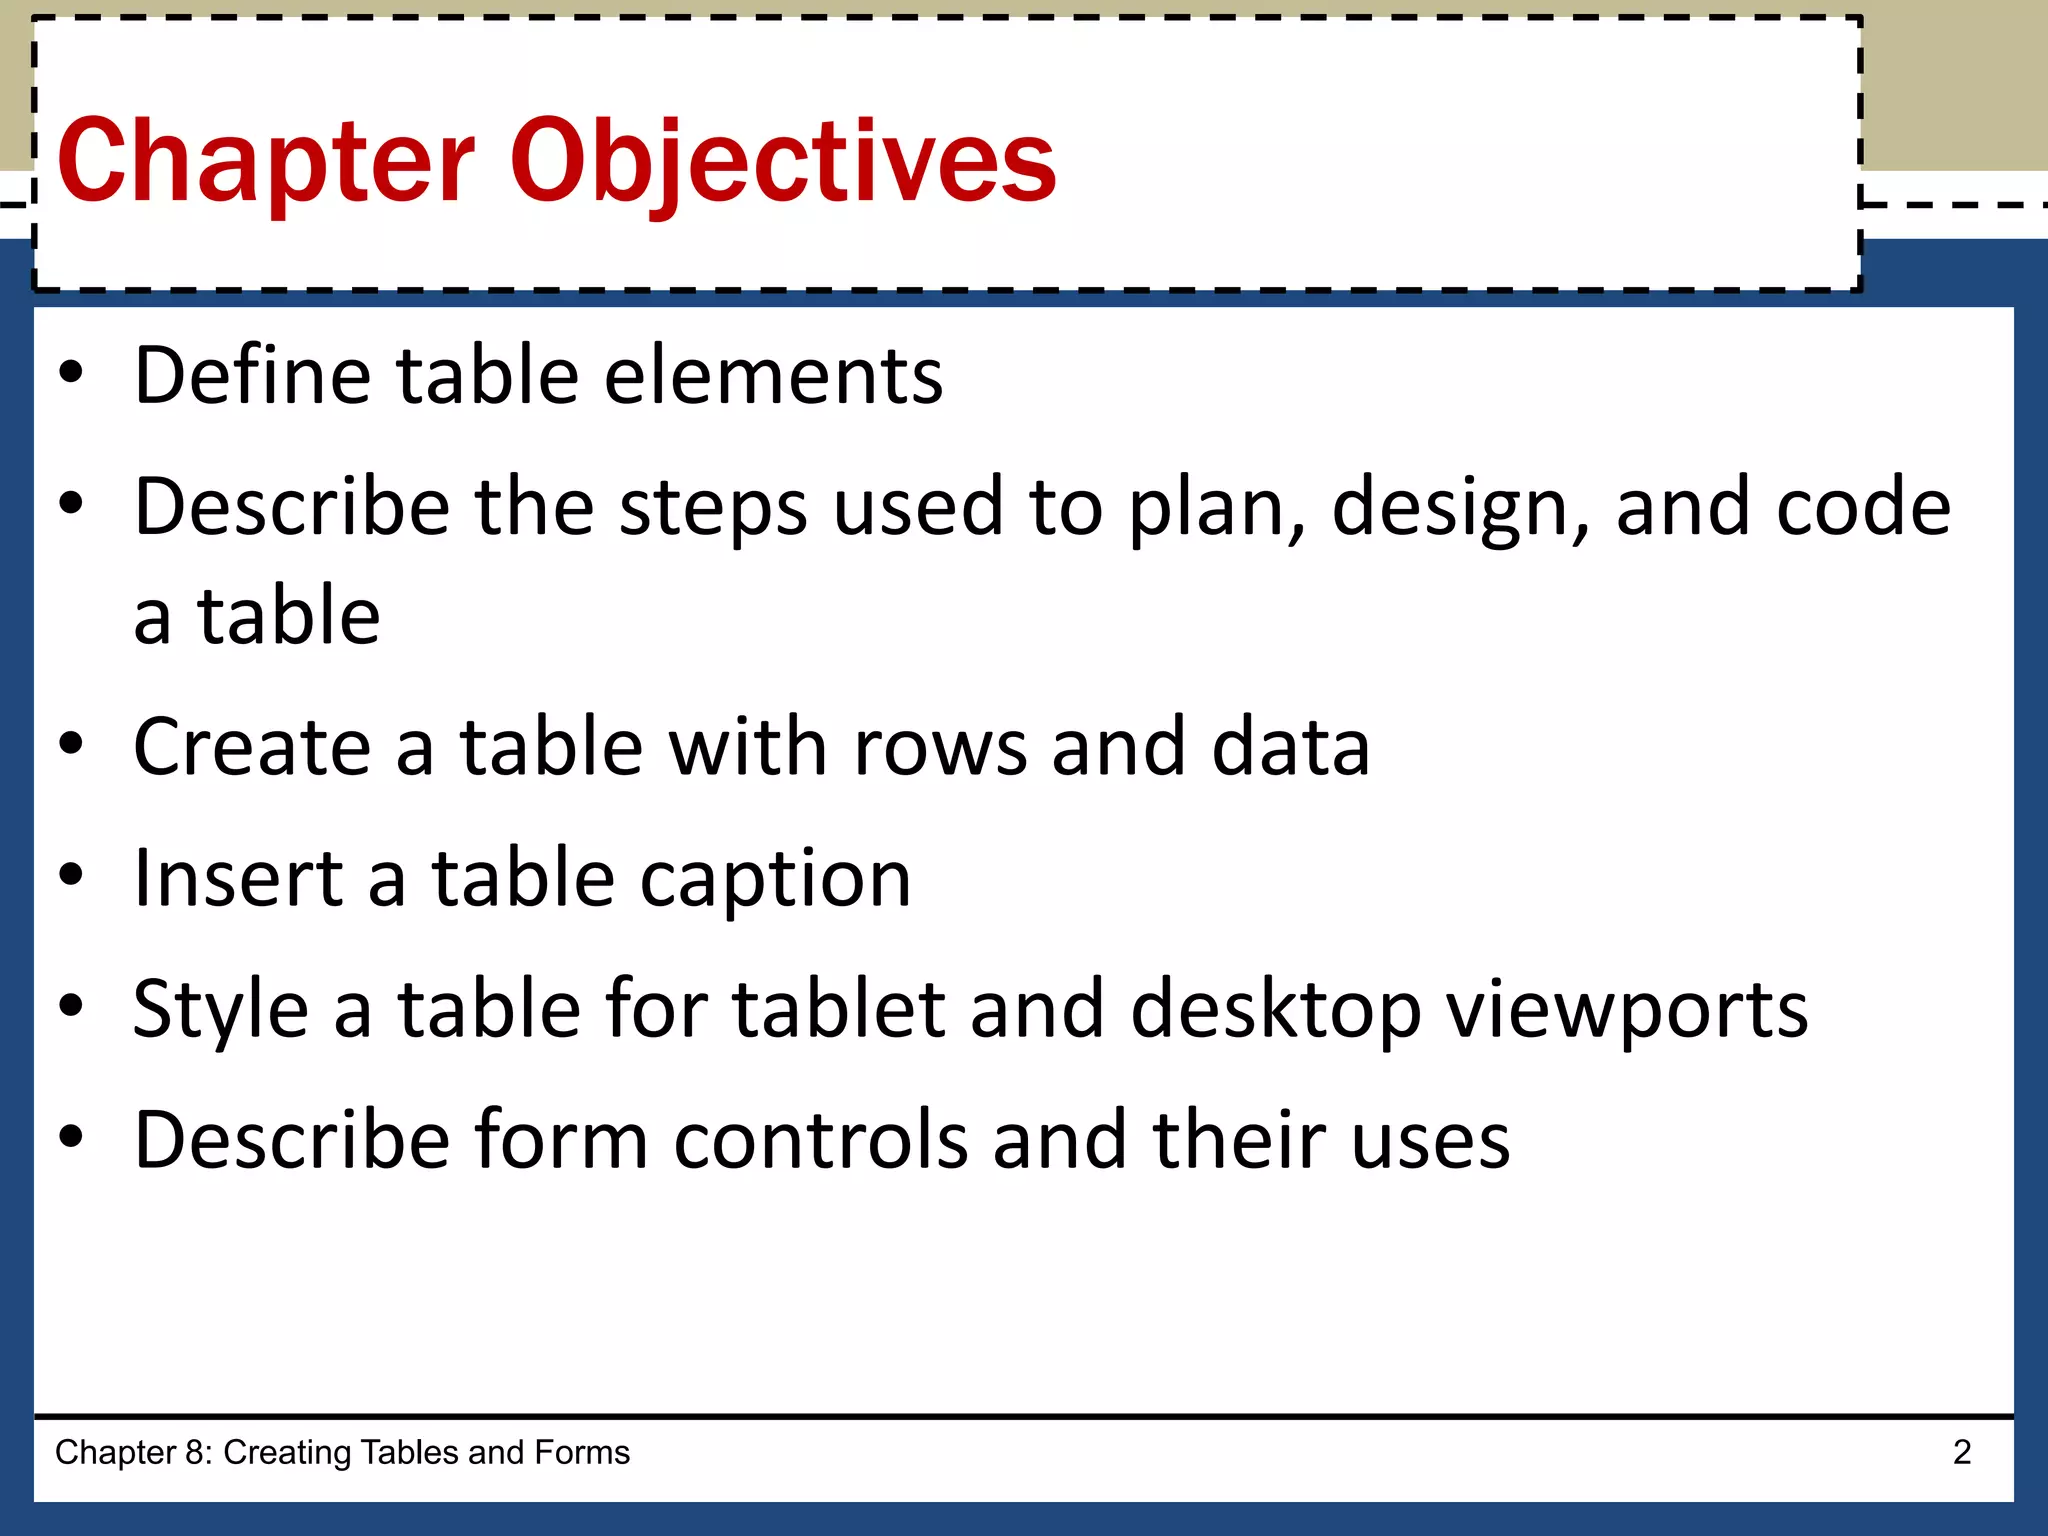
• Define tableelements
• Describe the steps used to plan, design, and code
a table
• Create a table with rows and data
• Insert a table caption
• Style a table for tablet and desktop viewports
• Describe form controls and their uses
Chapter 8: Creating Tables and Forms 2
Chapter Objectives
3.
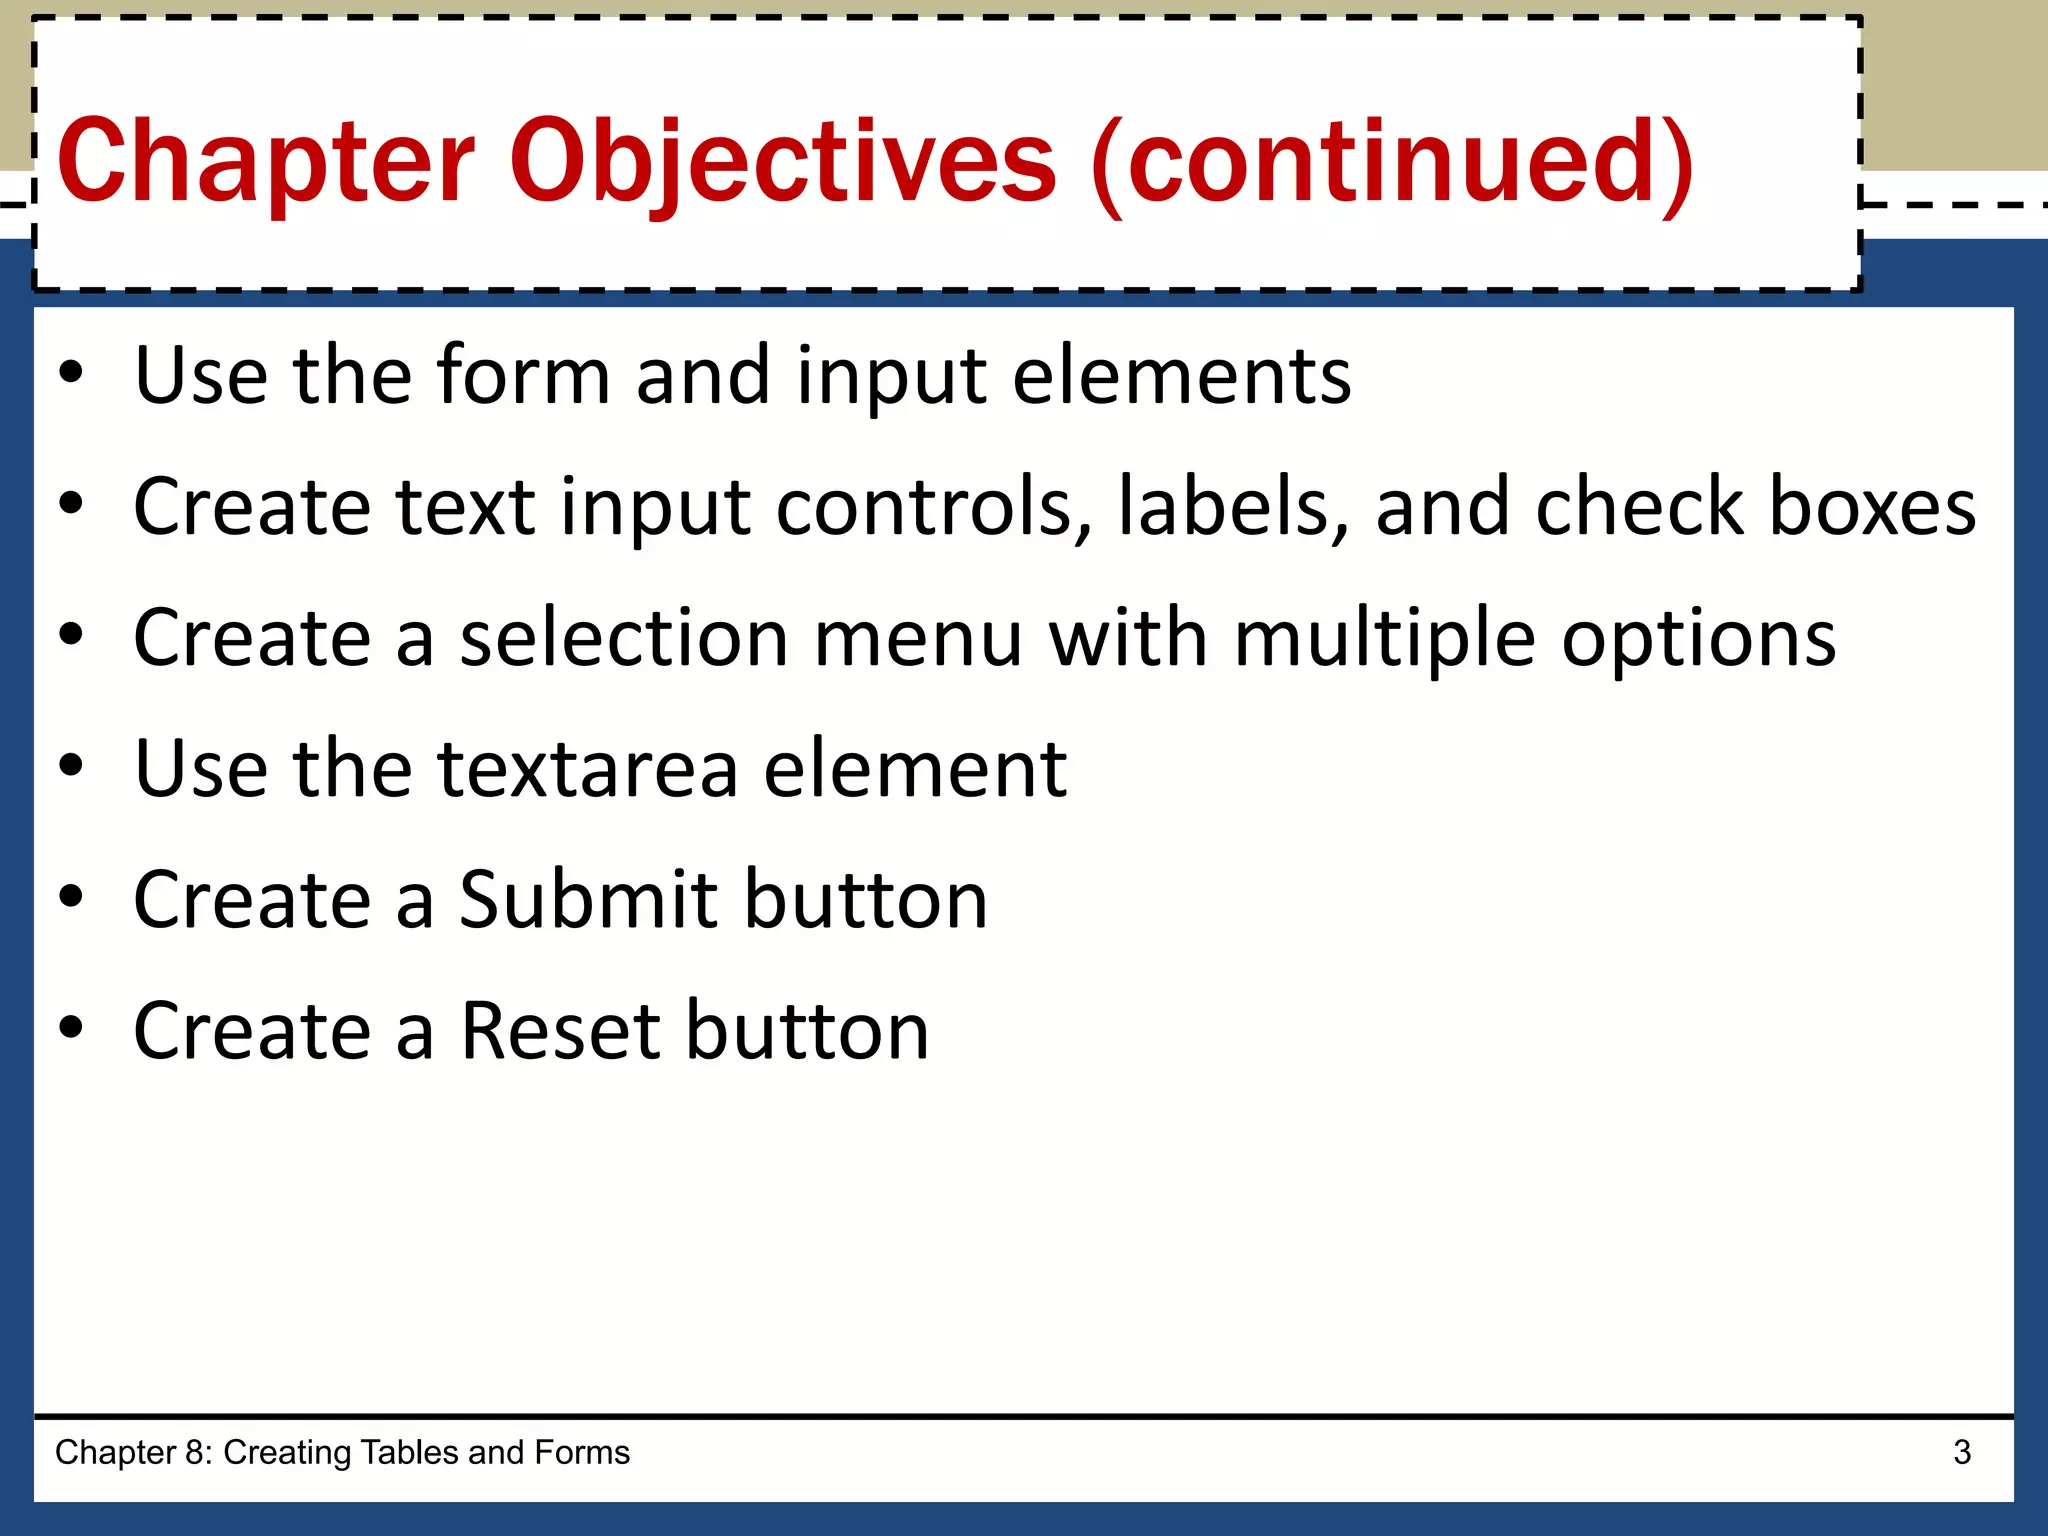
• Use theform and input elements
• Create text input controls, labels, and check boxes
• Create a selection menu with multiple options
• Use the textarea element
• Create a Submit button
• Create a Reset button
Chapter 8: Creating Tables and Forms 3
Chapter Objectives (continued)
4.
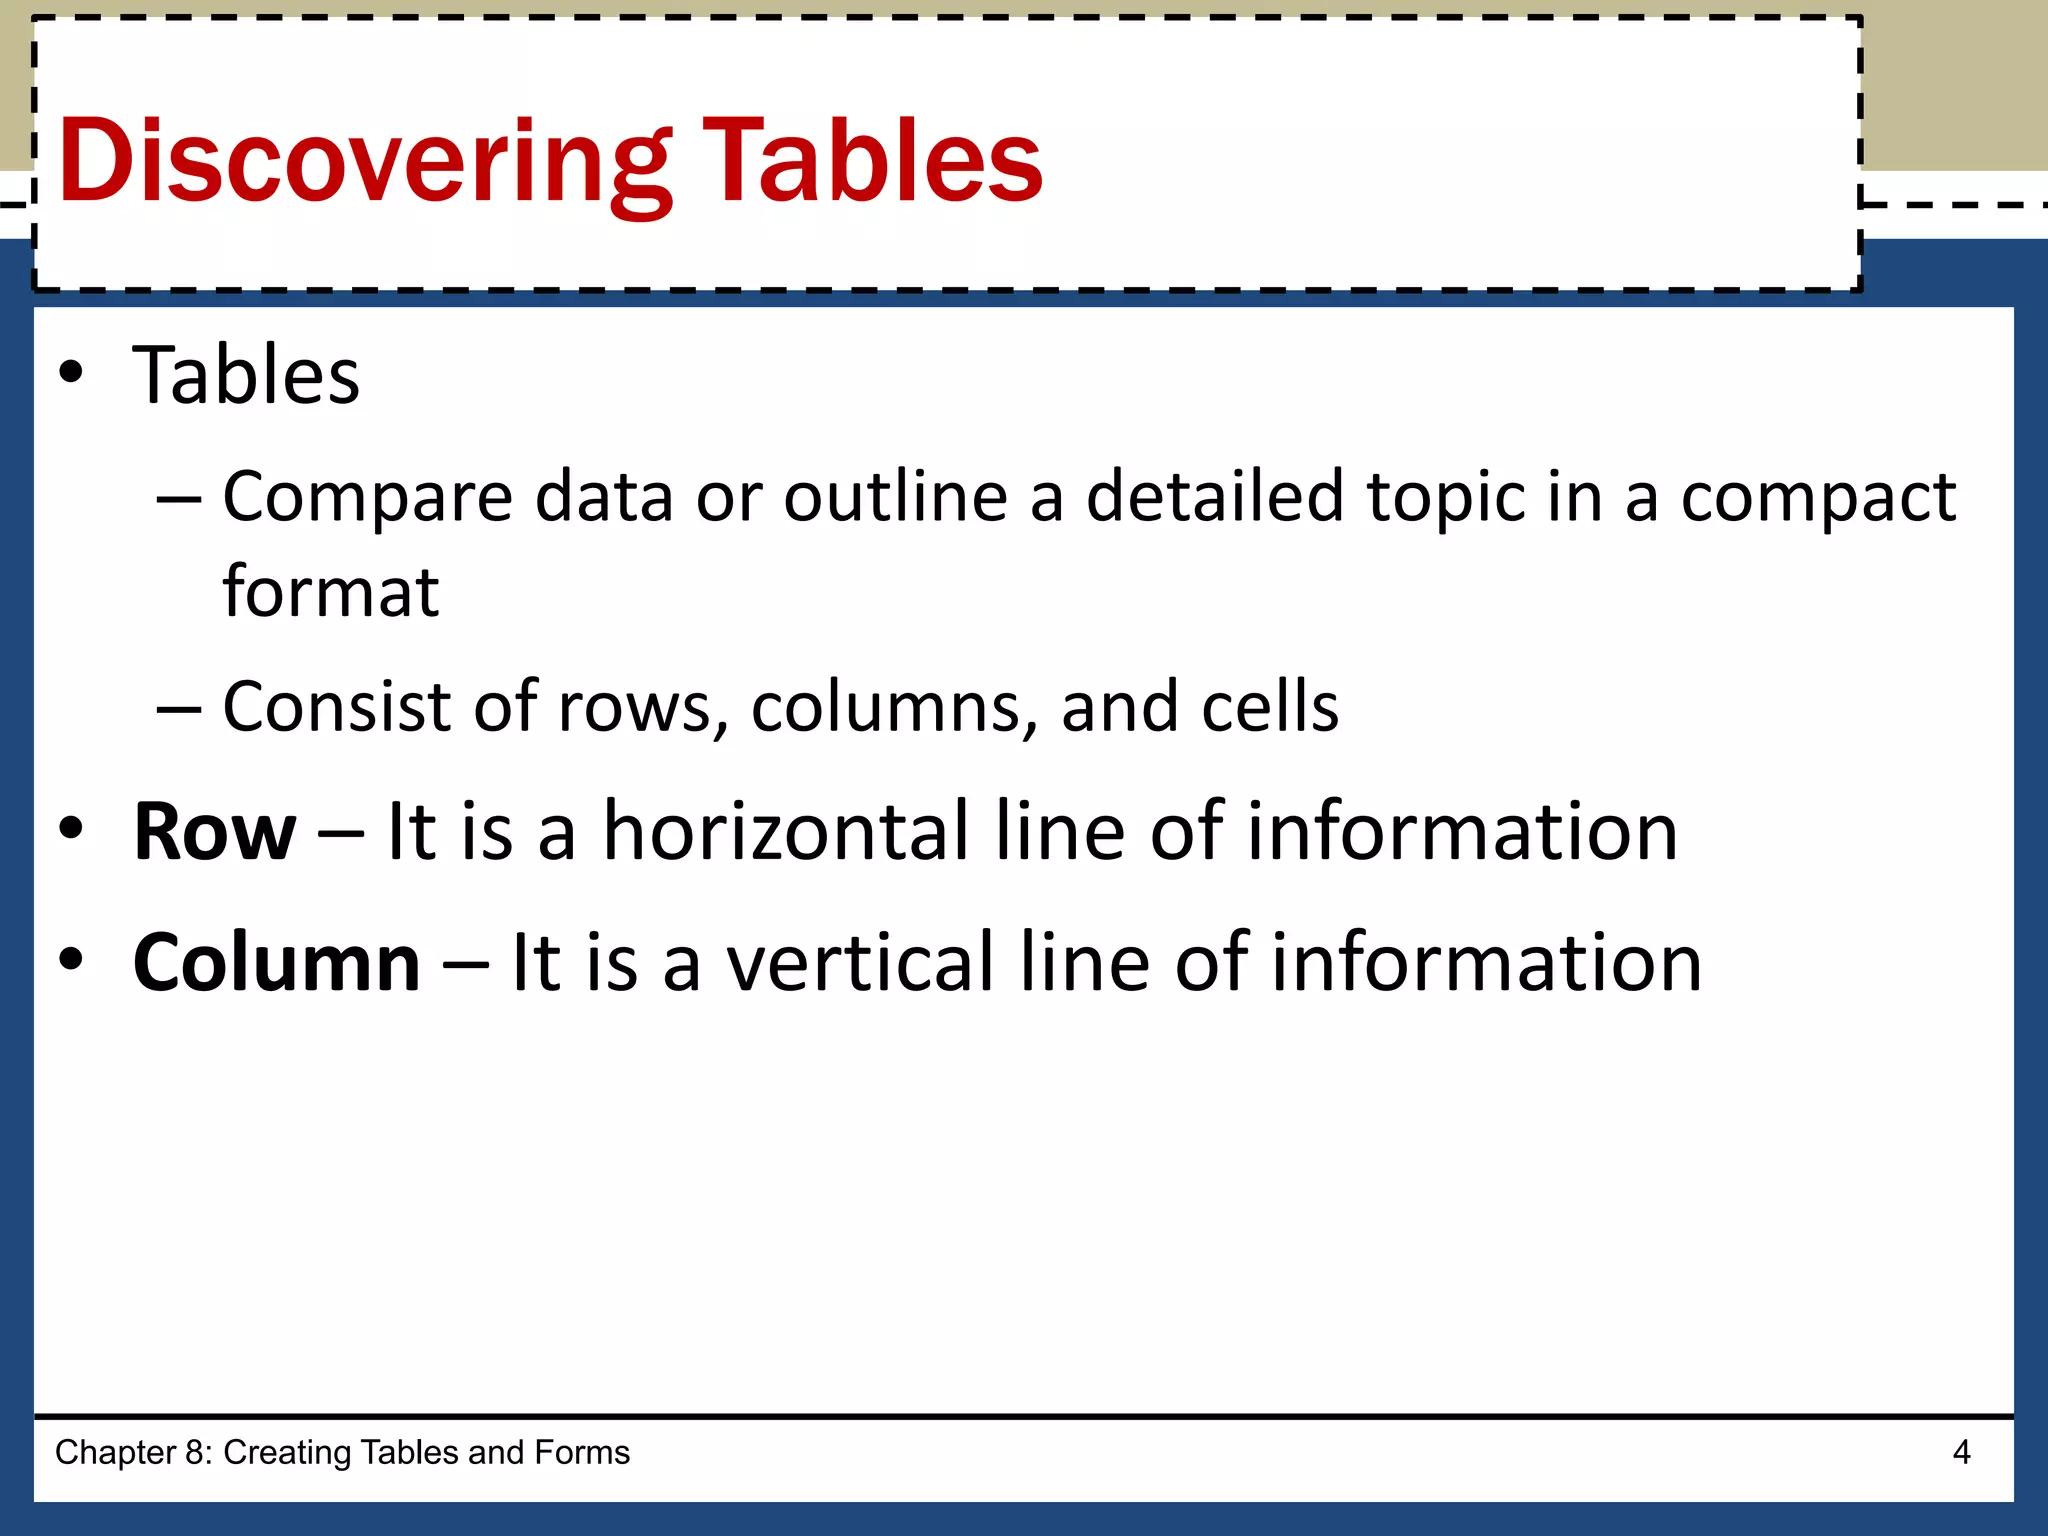
• Tables
– Comparedata or outline a detailed topic in a compact
format
– Consist of rows, columns, and cells
• Row – It is a horizontal line of information
• Column – It is a vertical line of information
Chapter 8: Creating Tables and Forms 4
Discovering Tables
5.
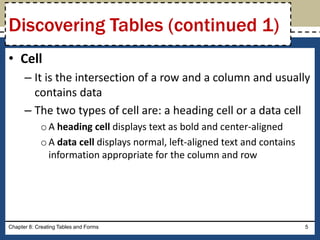
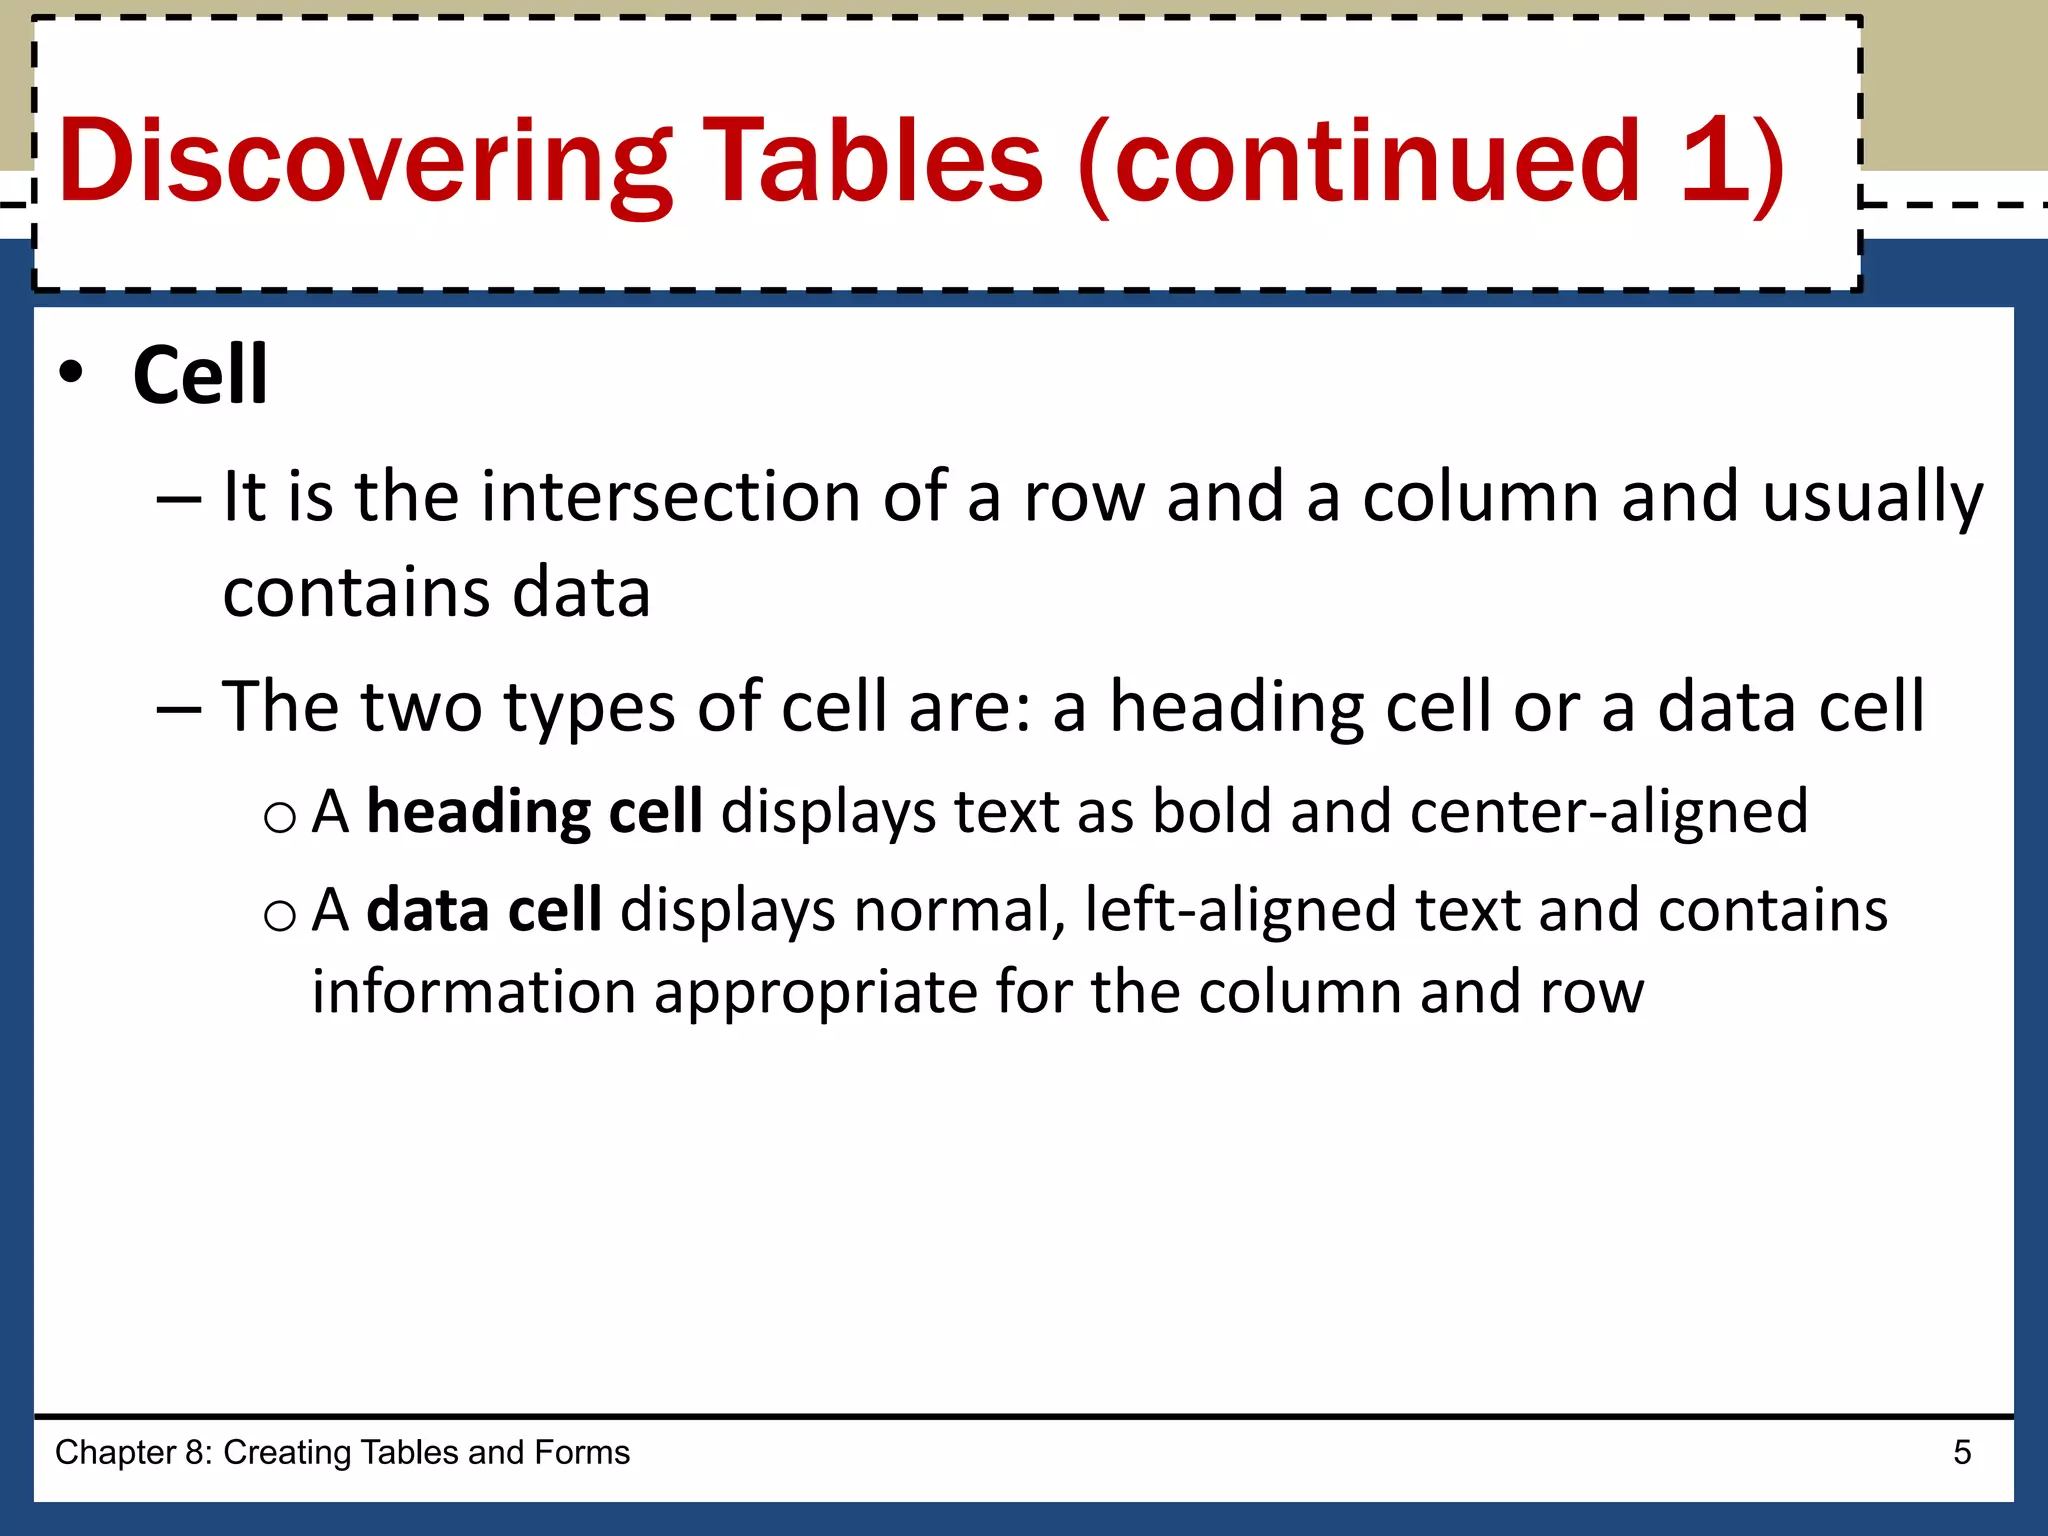
• Cell
– Itis the intersection of a row and a column and usually
contains data
– The two types of cell are: a heading cell or a data cell
oA heading cell displays text as bold and center-aligned
oA data cell displays normal, left-aligned text and contains
information appropriate for the column and row
Chapter 8: Creating Tables and Forms 5
Discovering Tables (continued 1)
6.
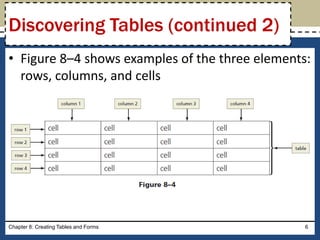
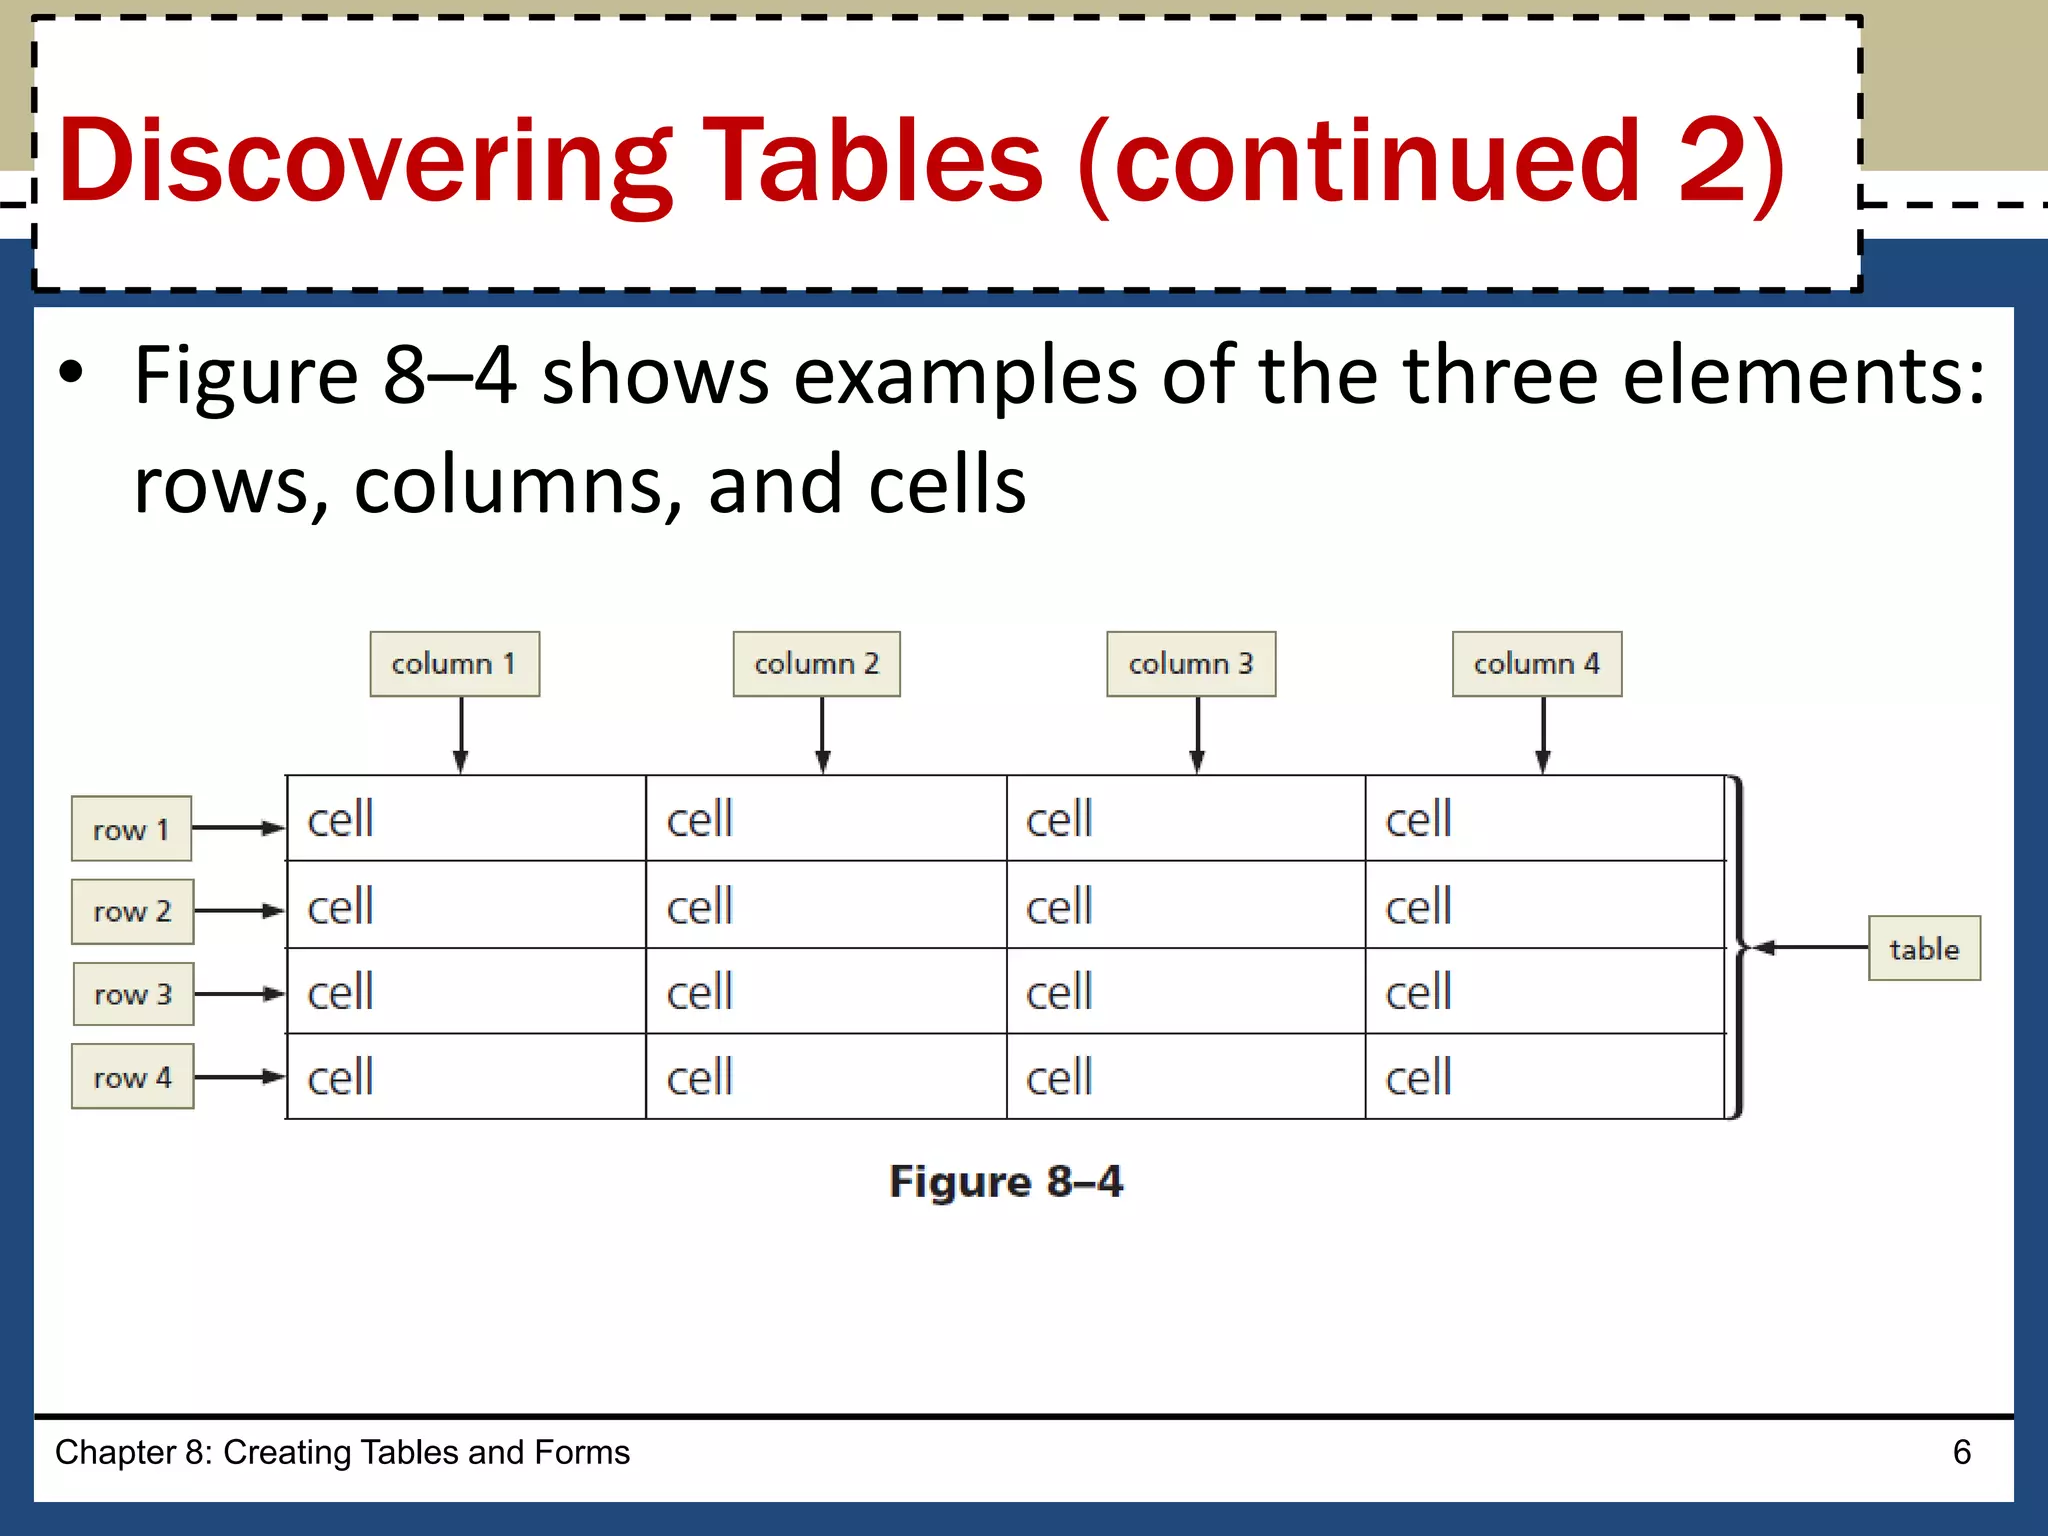
• Figure 8–4shows examples of the three elements:
rows, columns, and cells
Chapter 8: Creating Tables and Forms 6
Discovering Tables (continued 2)
7.
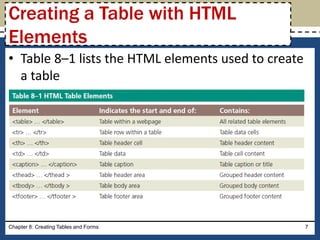
• Table 8–1lists the HTML elements used to create
a table
Chapter 8: Creating Tables and Forms 7
Creating a Table with HTML
Elements
8.
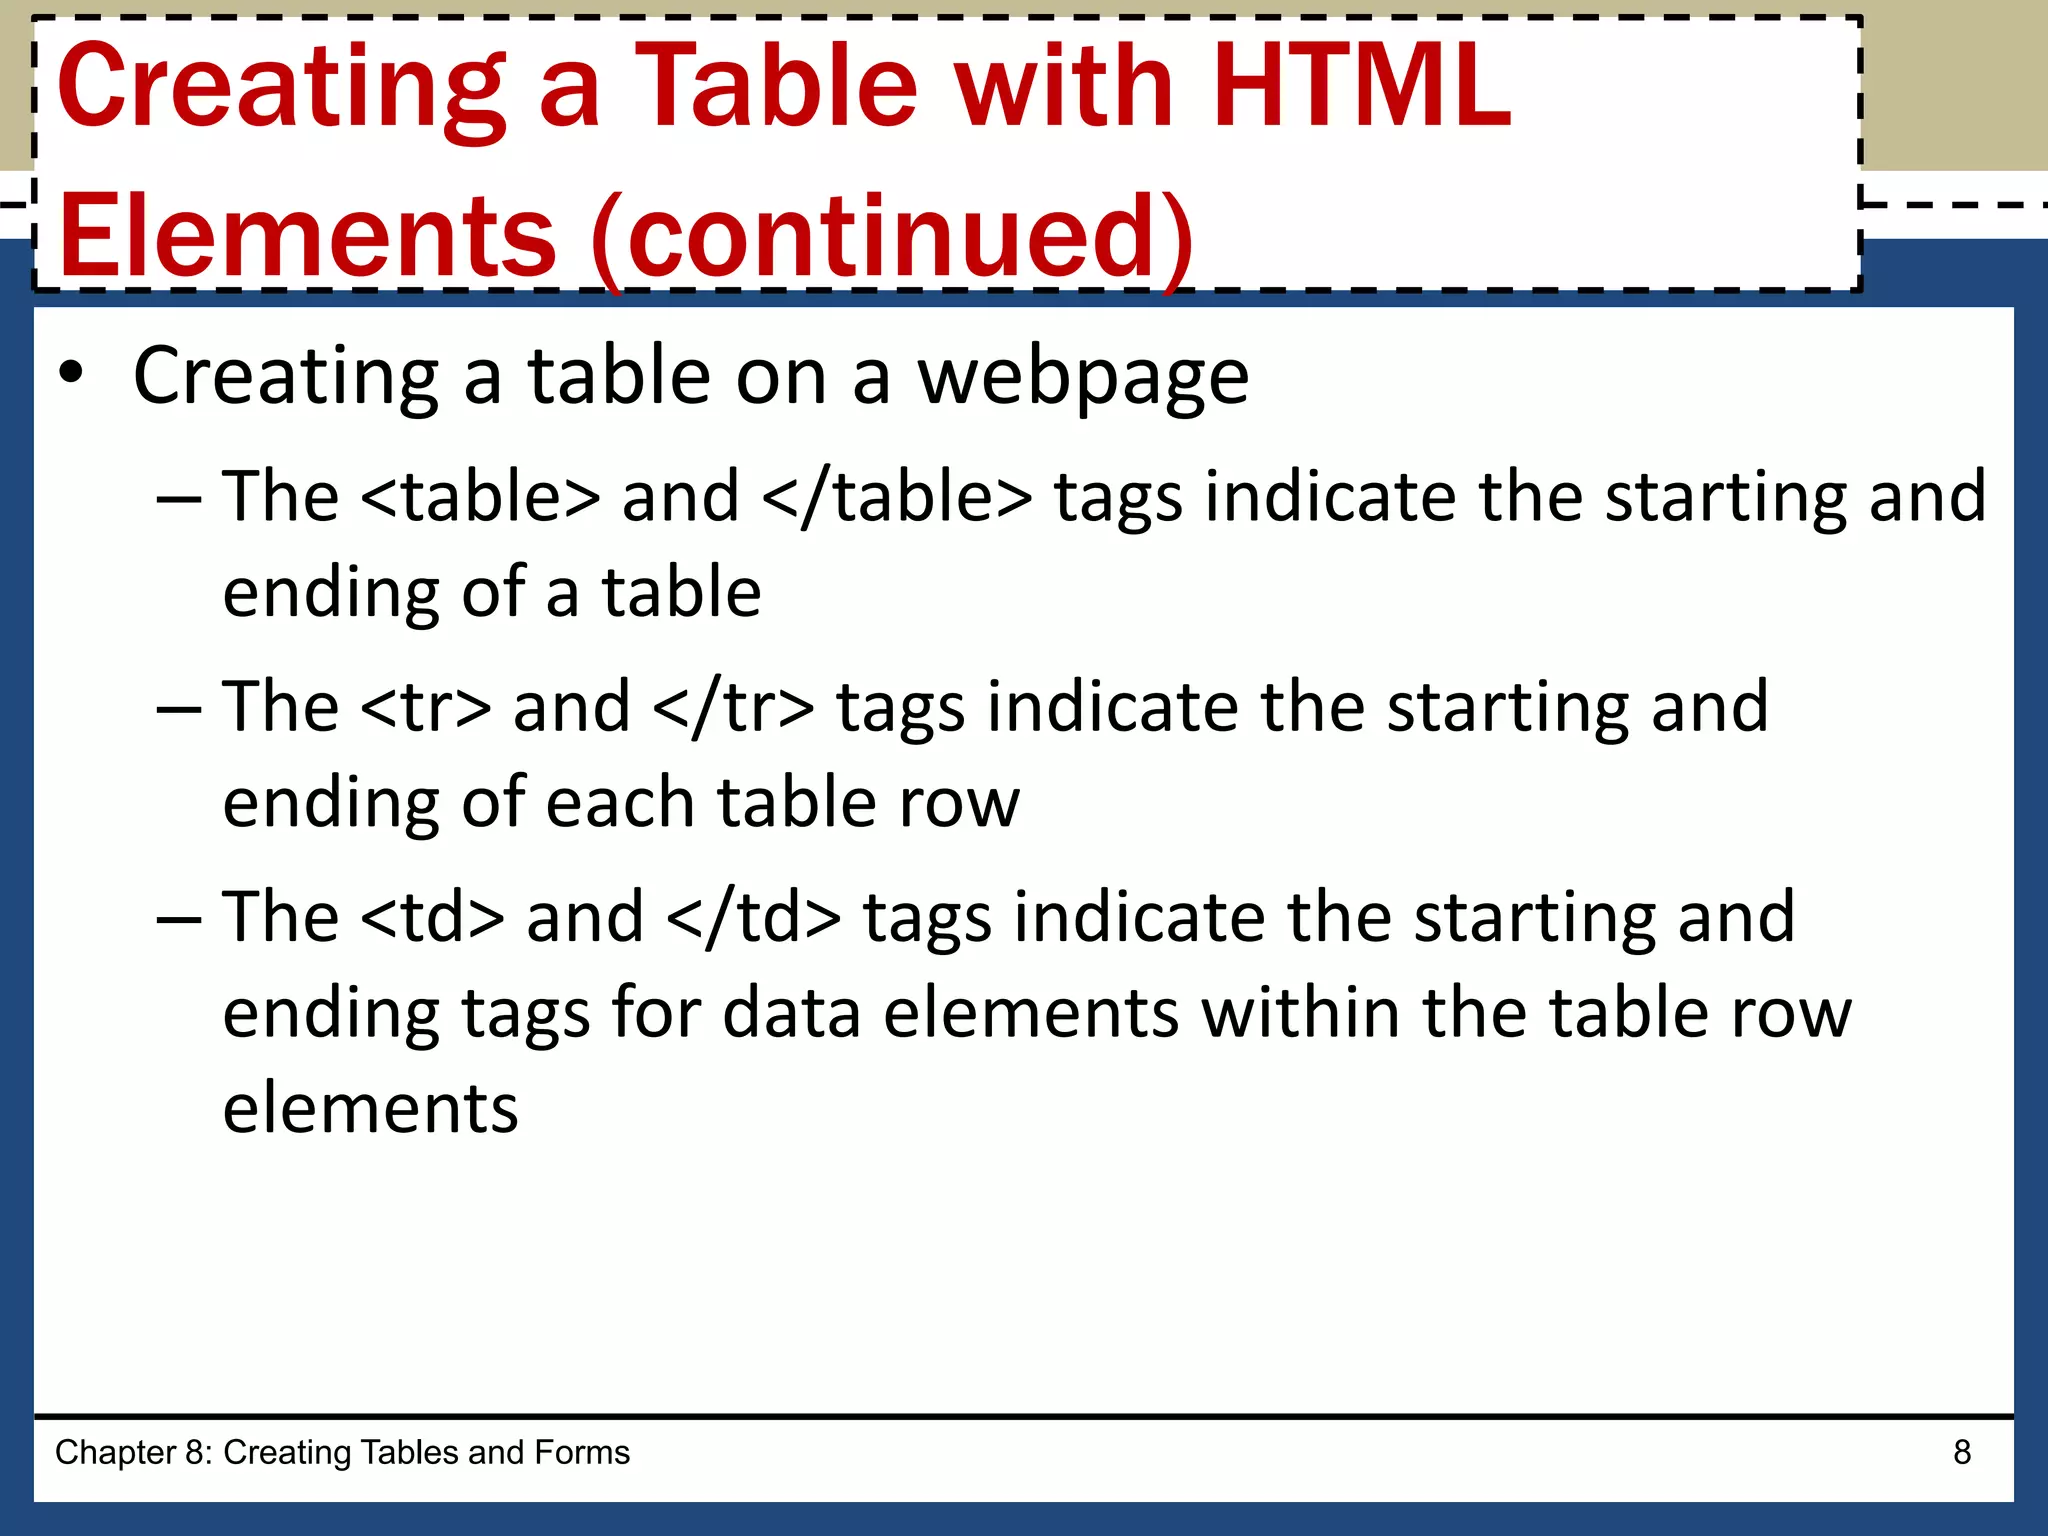
• Creating atable on a webpage
– The <table> and </table> tags indicate the starting and
ending of a table
– The <tr> and </tr> tags indicate the starting and
ending of each table row
– The <td> and </td> tags indicate the starting and
ending tags for data elements within the table row
elements
Chapter 8: Creating Tables and Forms 8
Creating a Table with HTML
Elements (continued)
9.
• Table border– It is the line that defines the
perimeter of the table
• Table header
– It is a heading cell and identifies the row or column
content
– It is defined with a starting <th> tag and an ending
</th> tag
Chapter 8: Creating Tables and Forms 9
Table Borders, Headers, and
Captions
10.
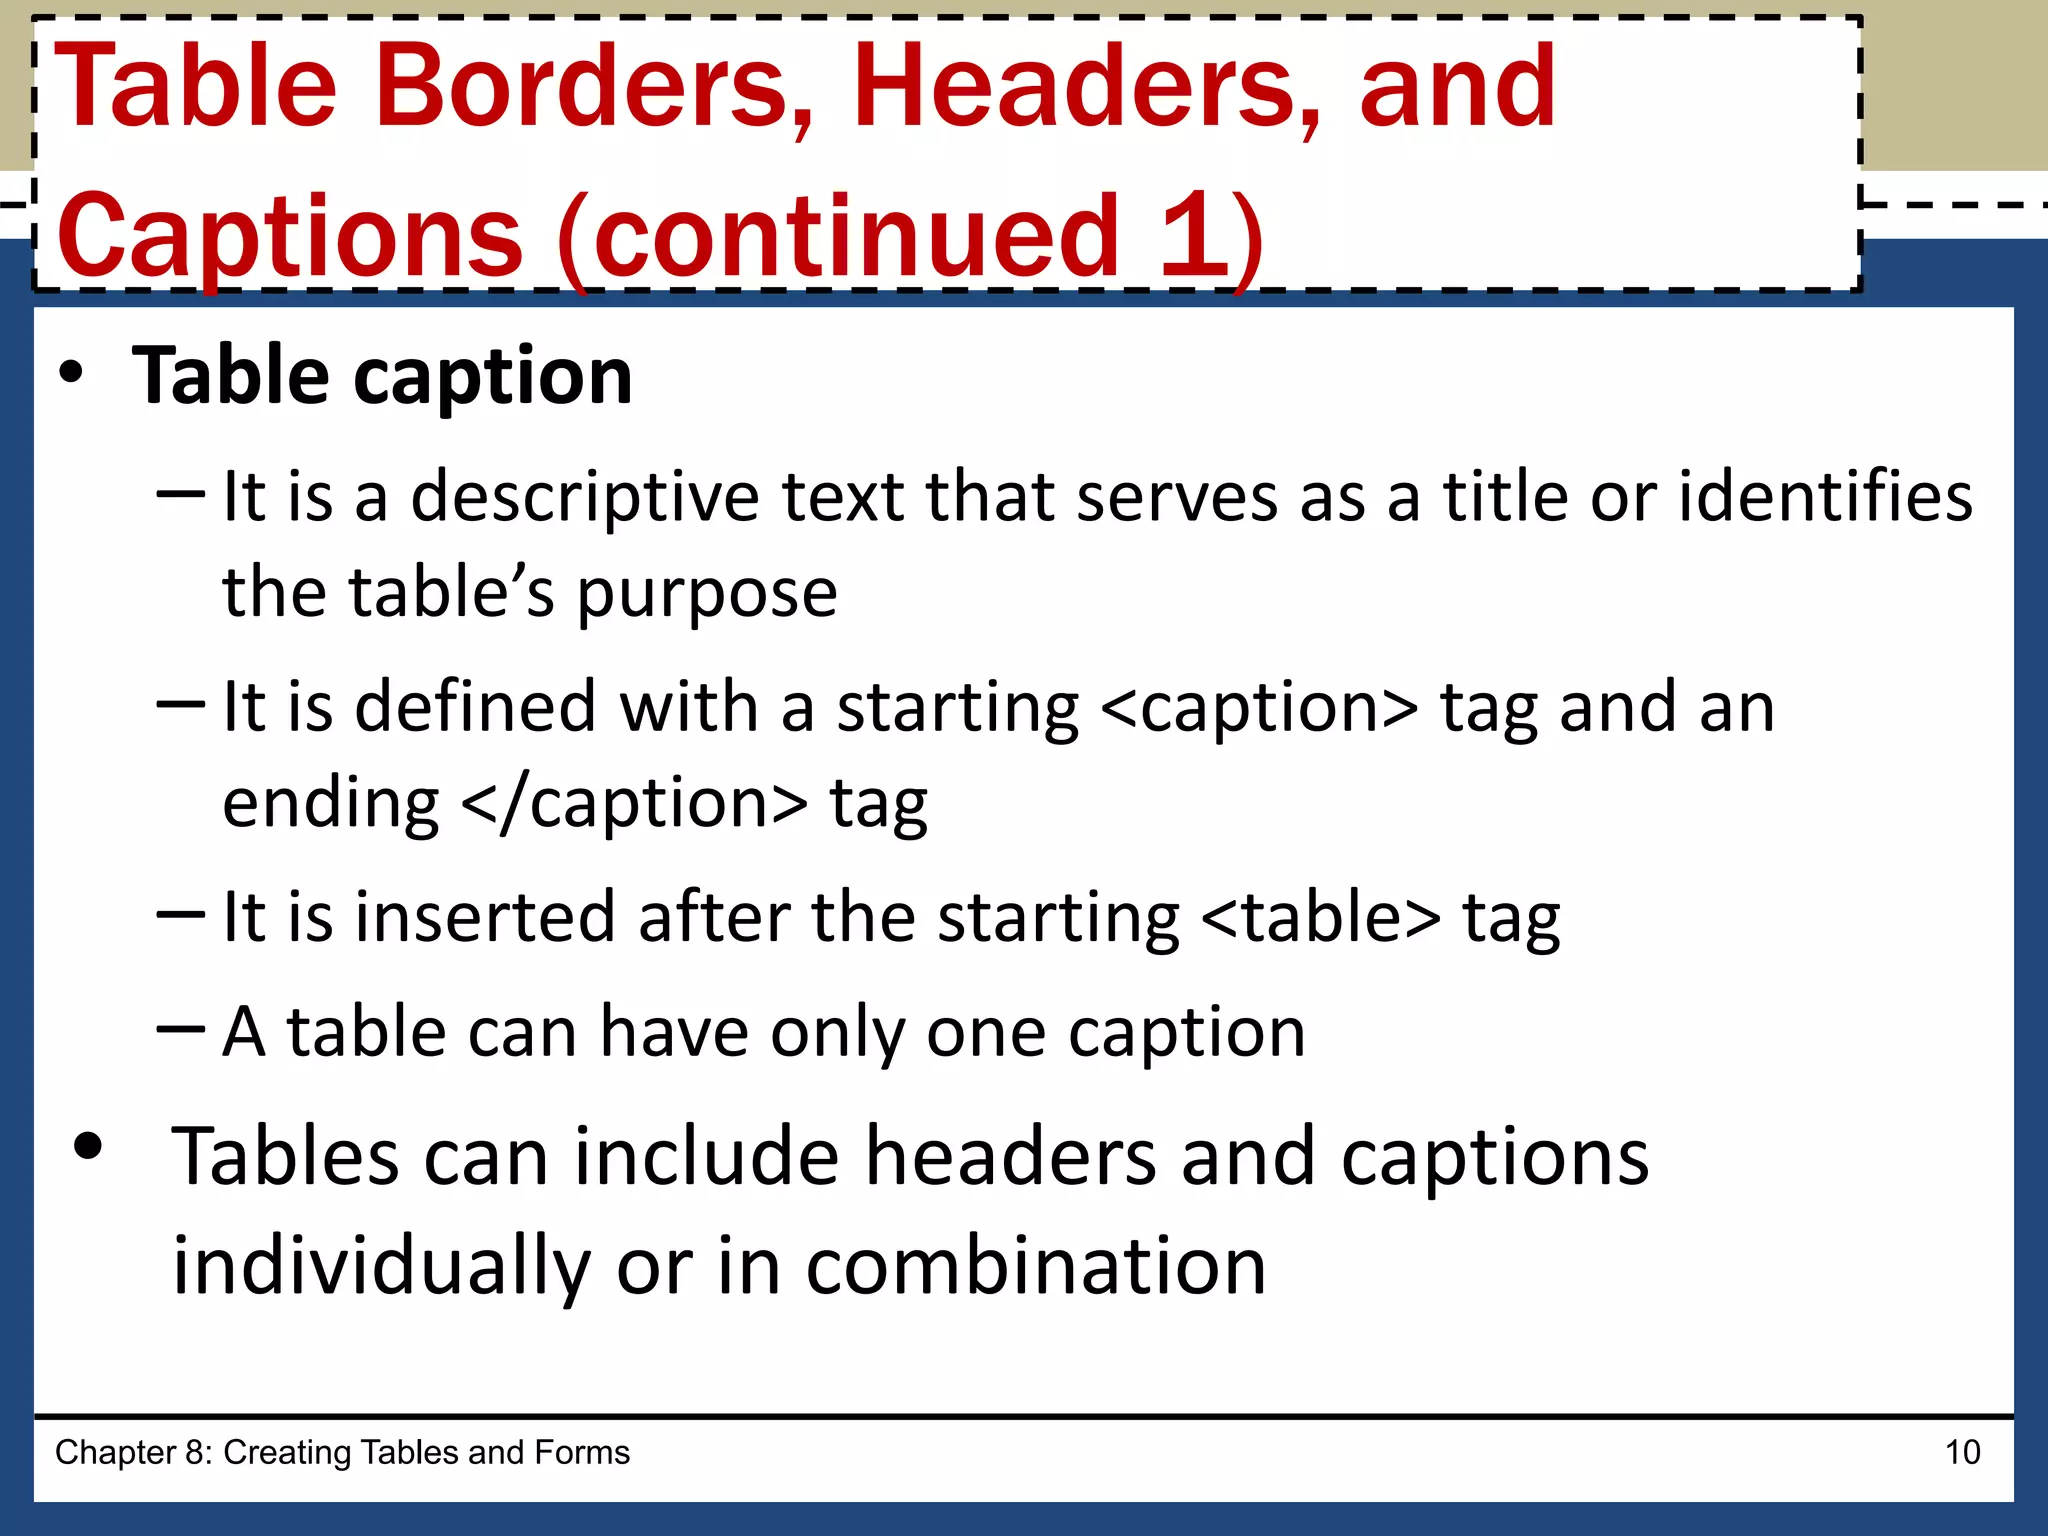
• Table caption
–It is a descriptive text that serves as a title or identifies
the table’s purpose
– It is defined with a starting <caption> tag and an
ending </caption> tag
– It is inserted after the starting <table> tag
– A table can have only one caption
• Tables can include headers and captions
individually or in combination
Chapter 8: Creating Tables and Forms 10
Table Borders, Headers, and
Captions (continued 1)
11.
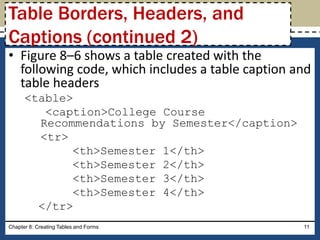
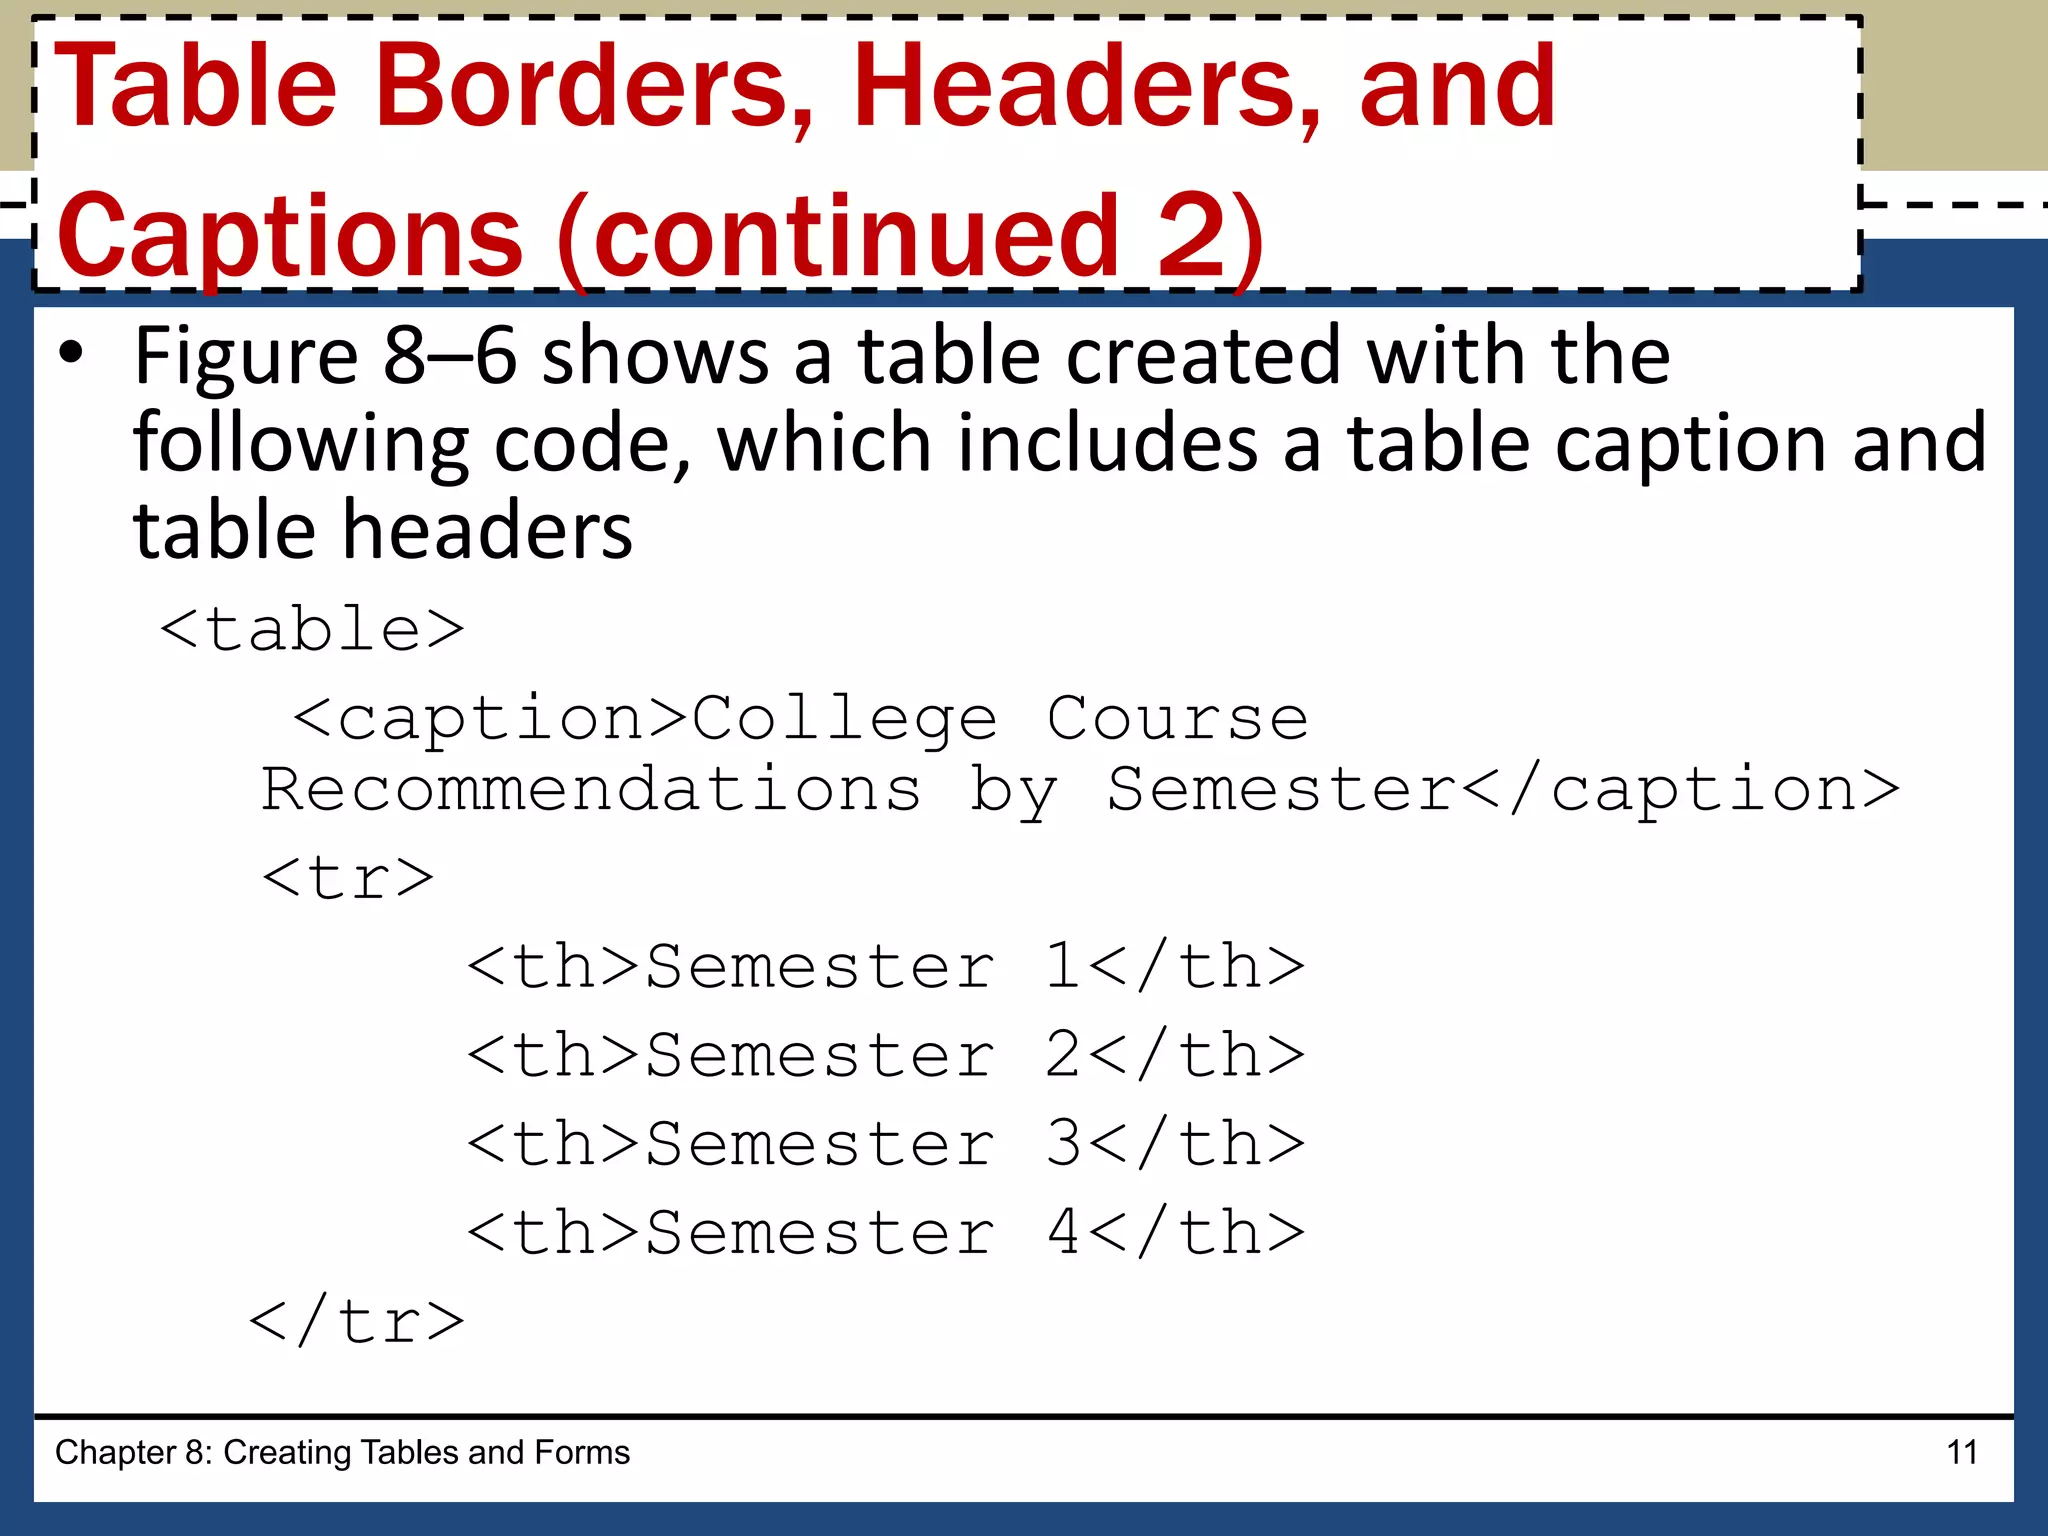
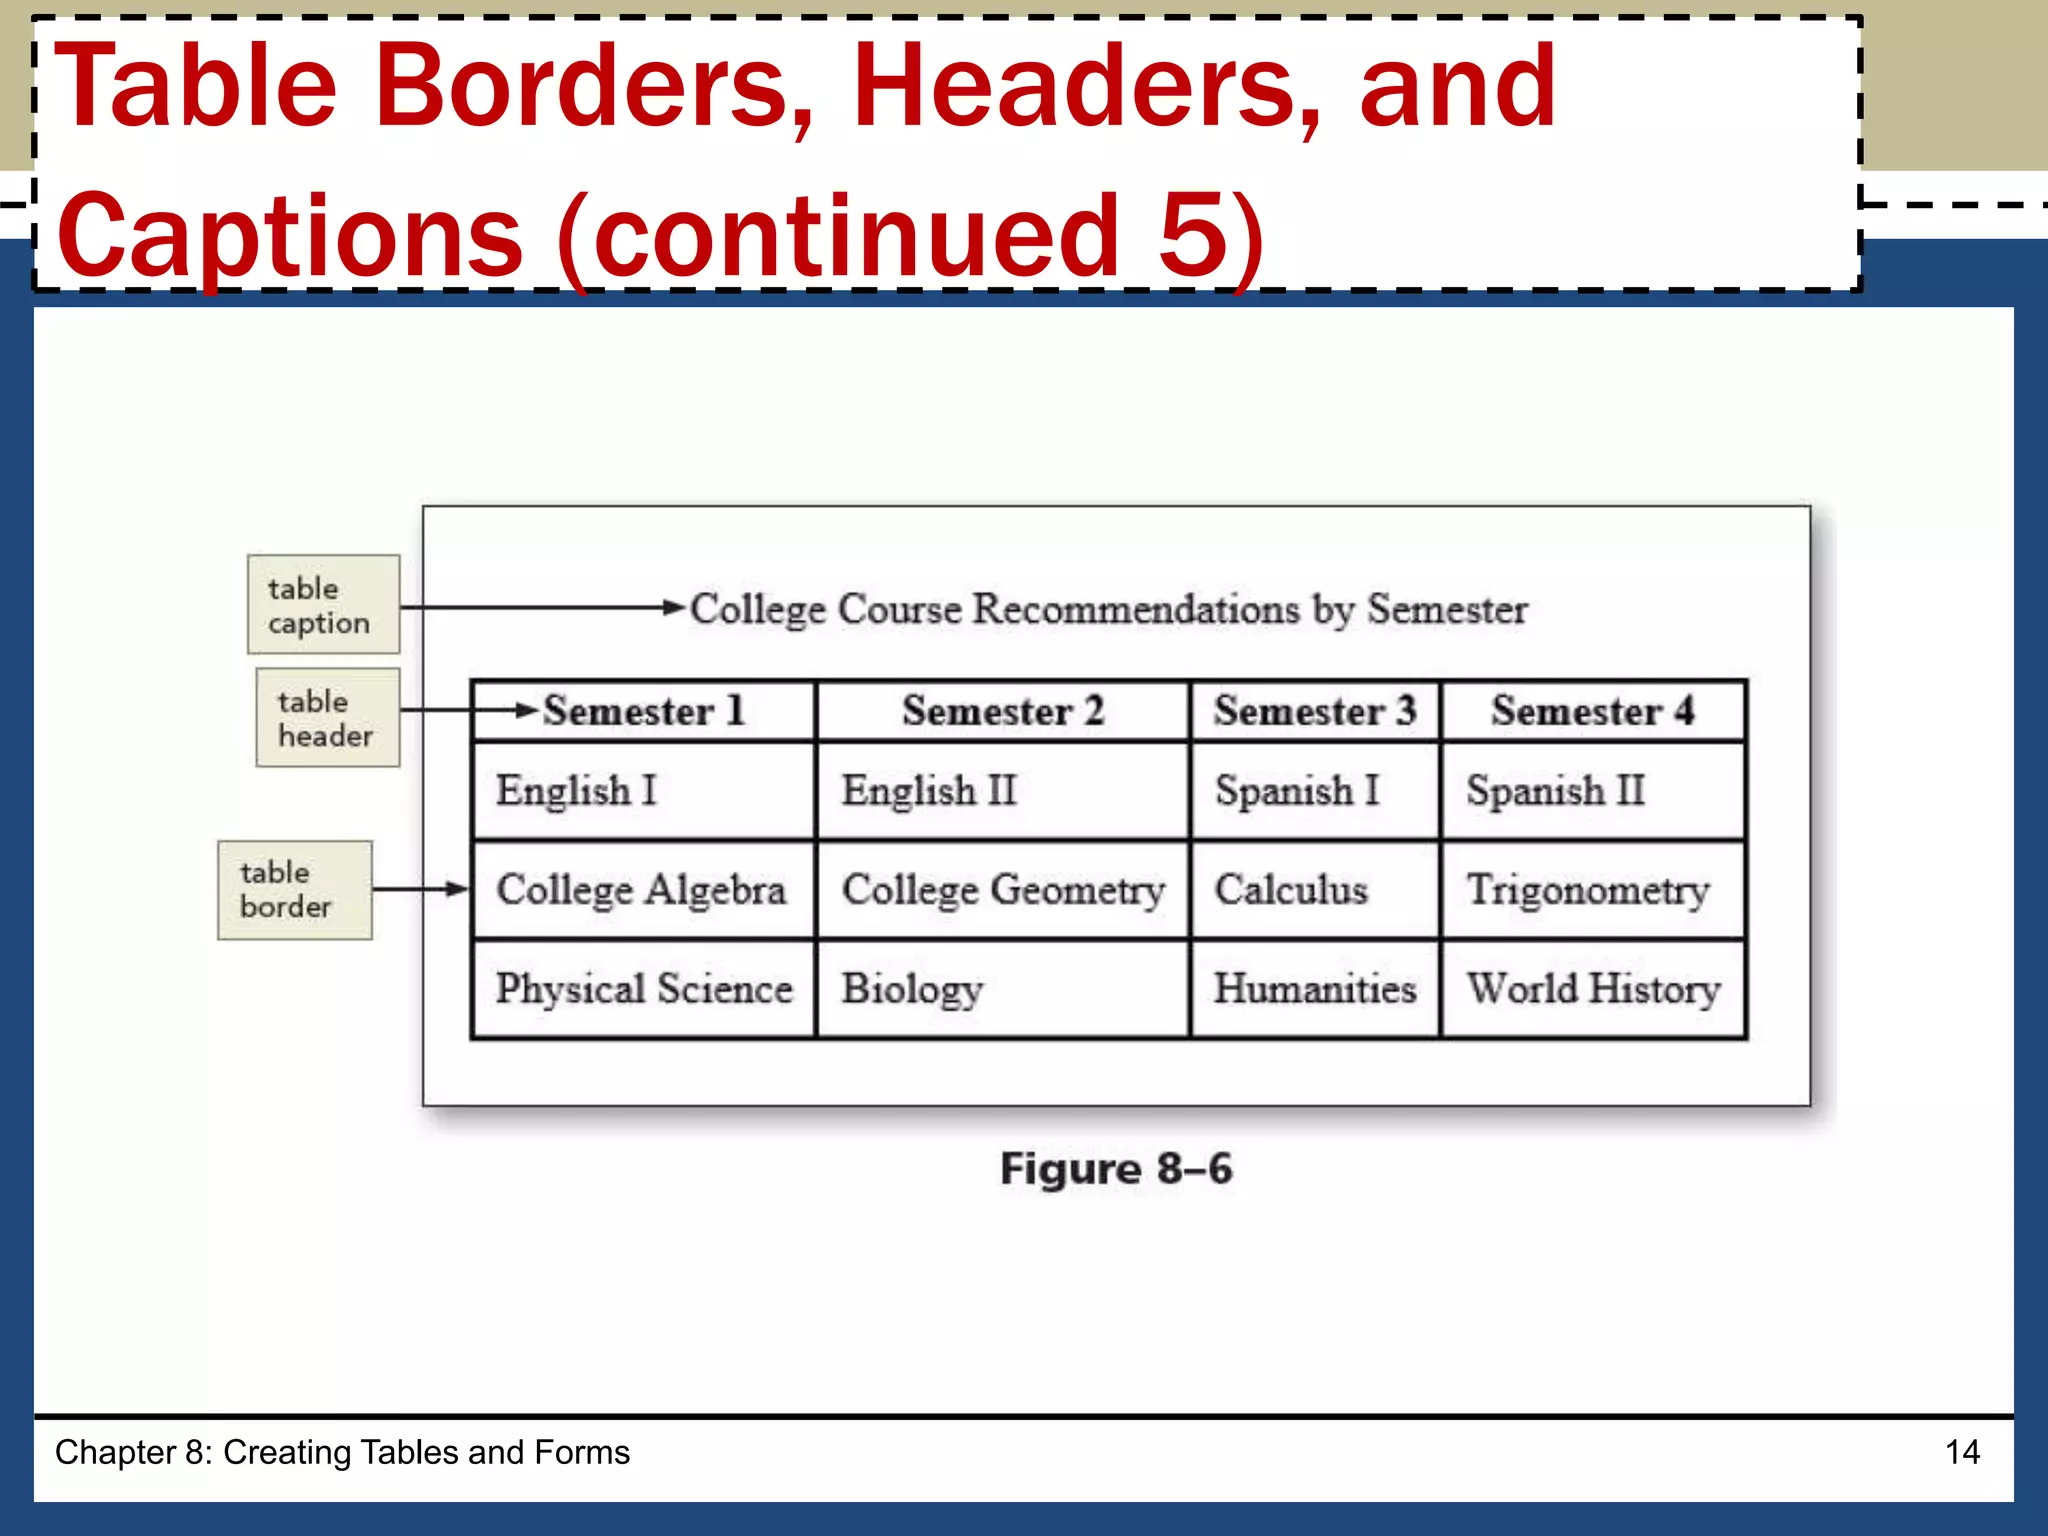
• Figure 8–6shows a table created with the
following code, which includes a table caption and
table headers
<table>
<caption>College Course
Recommendations by Semester</caption>
<tr>
<th>Semester 1</th>
<th>Semester 2</th>
<th>Semester 3</th>
<th>Semester 4</th>
</tr>
Chapter 8: Creating Tables and Forms 11
Table Borders, Headers, and
Captions (continued 2)
12.
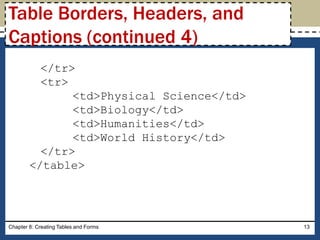
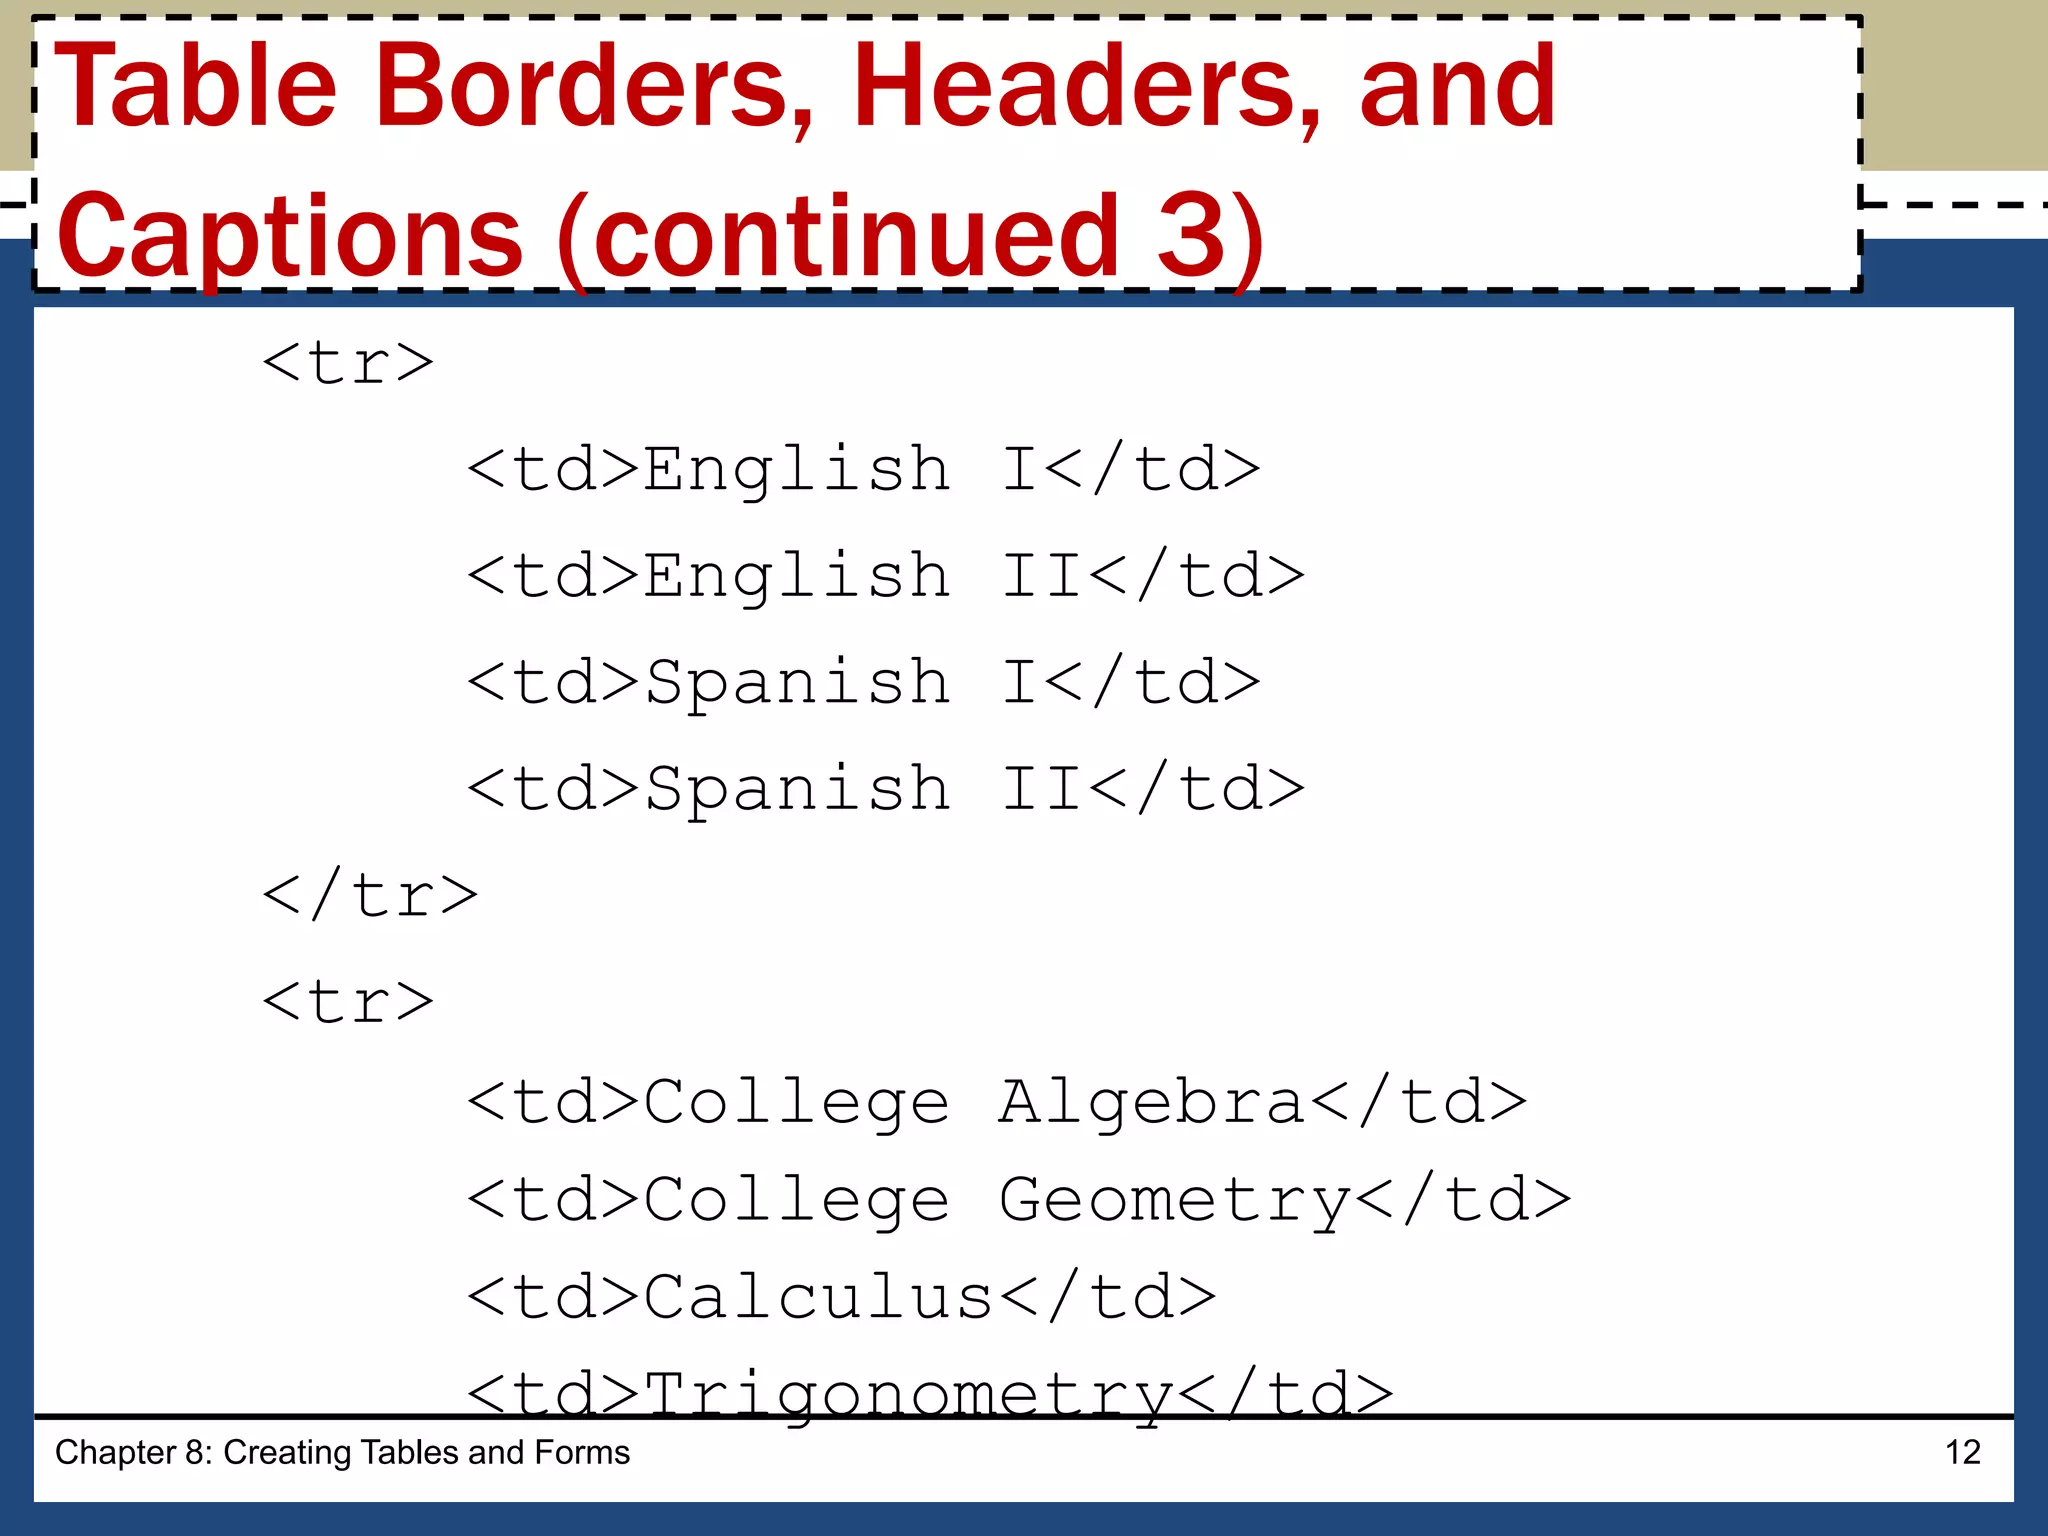
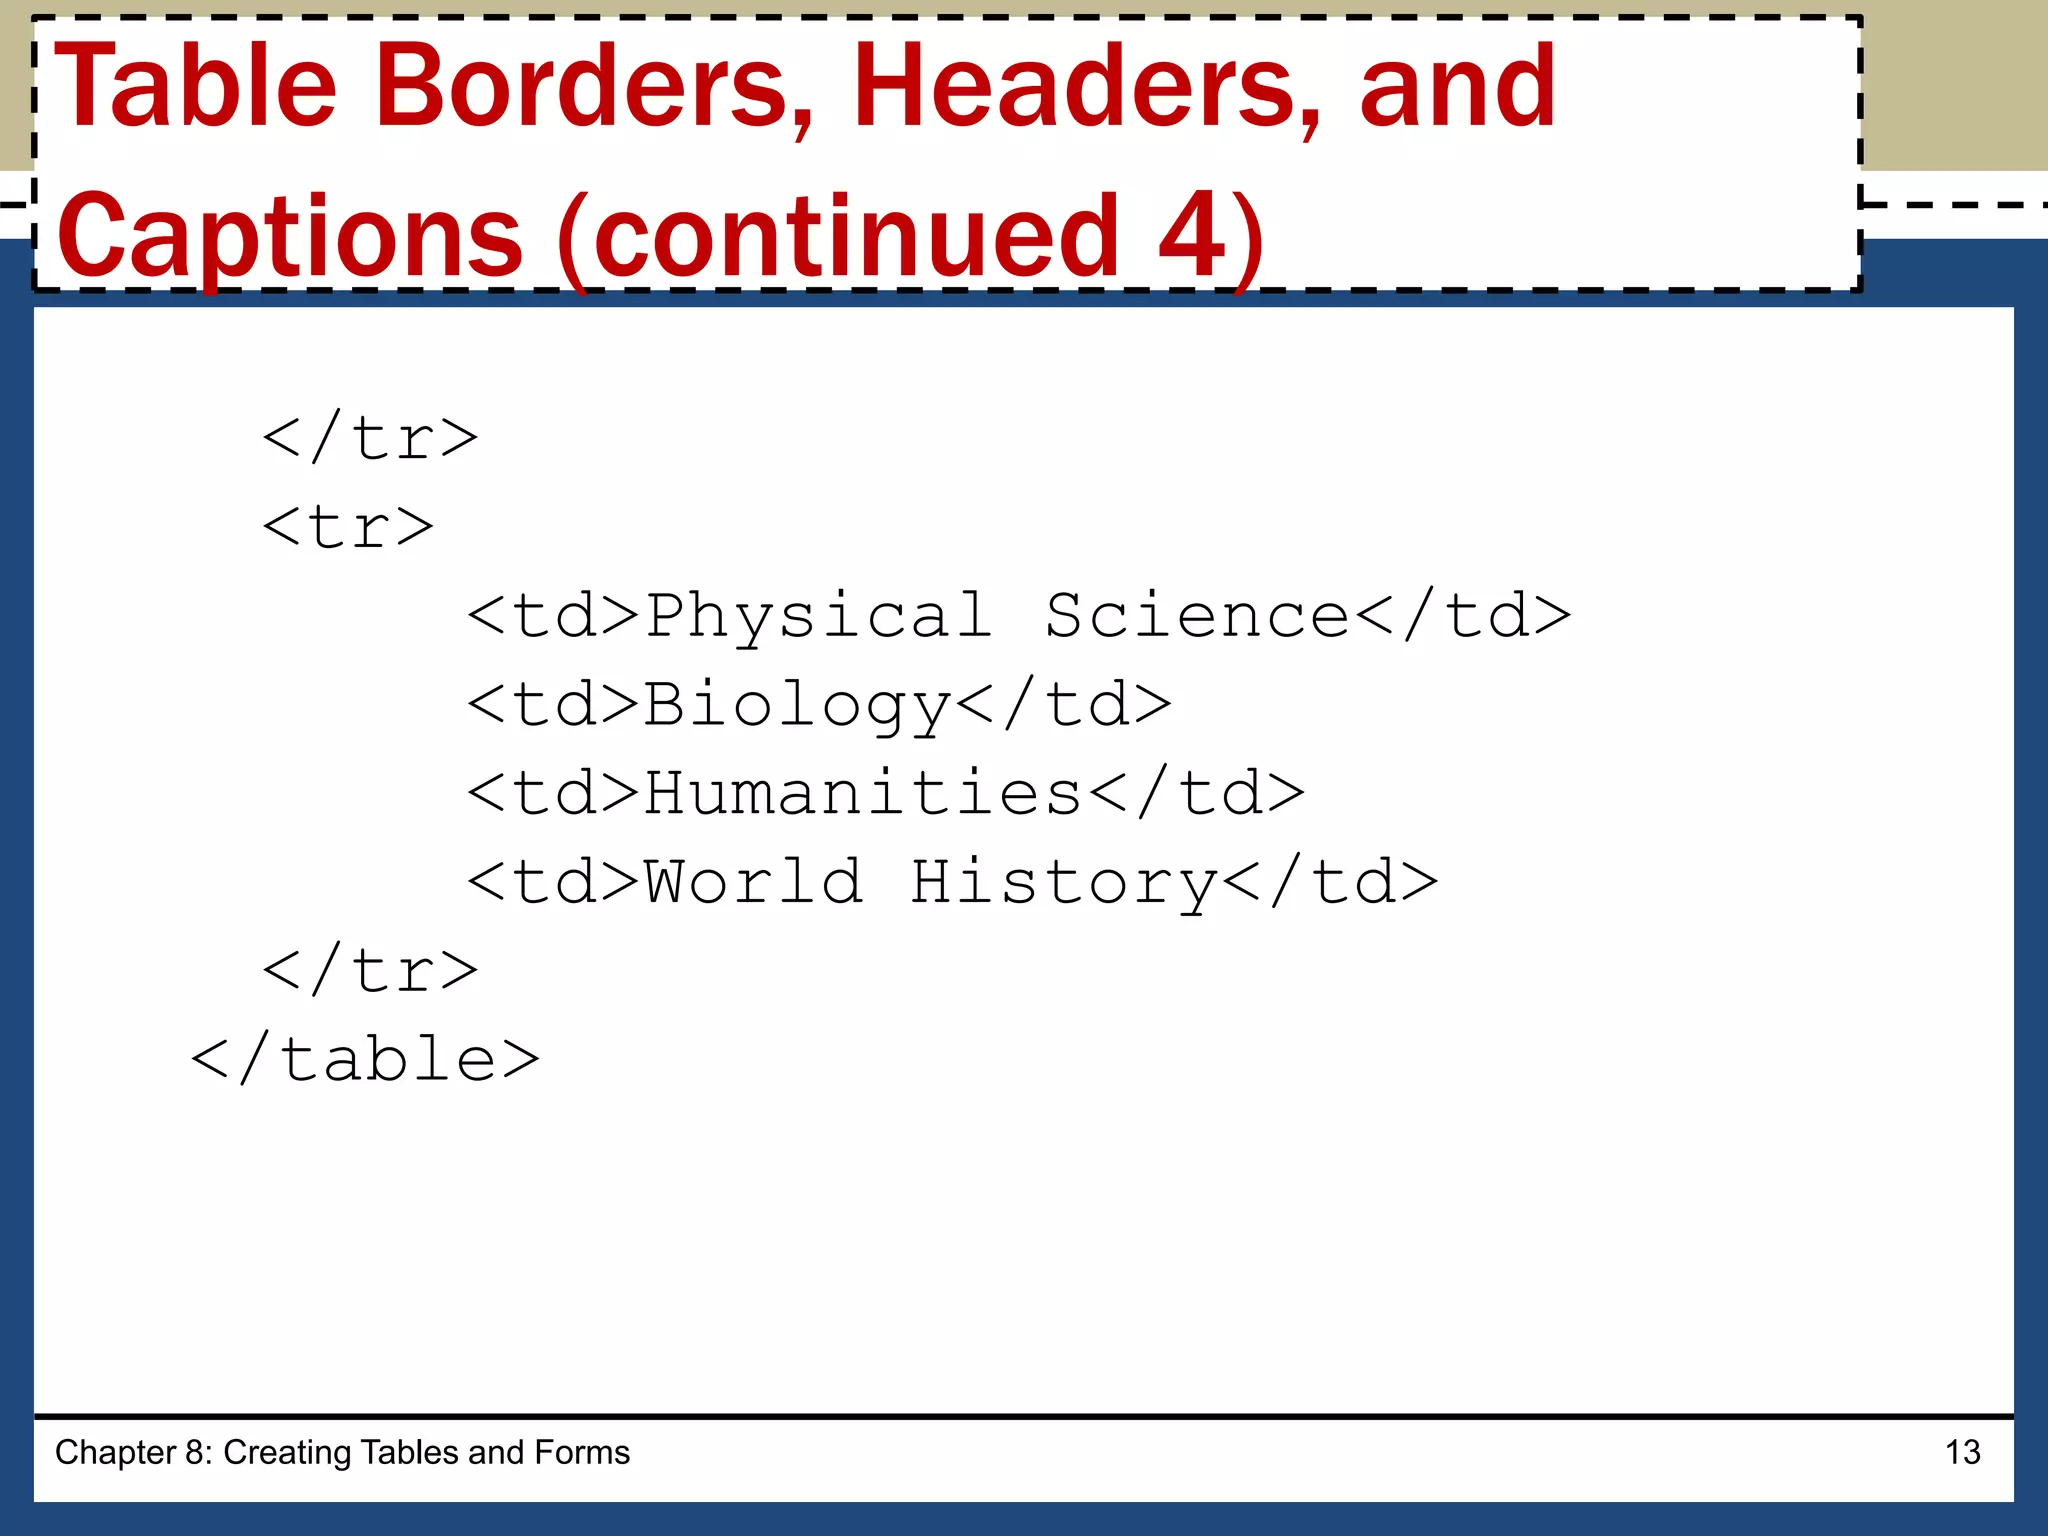
<tr>
<td>English I</td>
<td>English II</td>
<td>SpanishI</td>
<td>Spanish II</td>
</tr>
<tr>
<td>College Algebra</td>
<td>College Geometry</td>
<td>Calculus</td>
<td>Trigonometry</td>
Chapter 8: Creating Tables and Forms 12
Table Borders, Headers, and
Captions (continued 3)
Chapter 8: CreatingTables and Forms 14
Table Borders, Headers, and
Captions (continued 5)
15.
• Tables
– Displaydata in rows and columns
– Should not be used to design a layout for a webpage
– Help organize information so that it is easier for the
user to read
– Useful if the webpage needs to display a structured,
organized list of information
Chapter 8: Creating Tables and Forms 15
Use of Tables
16.
• To createeffective tables
– Plan the information that will appear in columns and
rows
– Create a design that presents the information clearly
• When planning a table for responsive web design,
give careful consideration to the mobile viewport
because of its screen size
Chapter 8: Creating Tables and Forms 16
Planning the Table
17.
Chapter 8: CreatingTables and Forms 17
To Add a Table Element to the
Classes Page
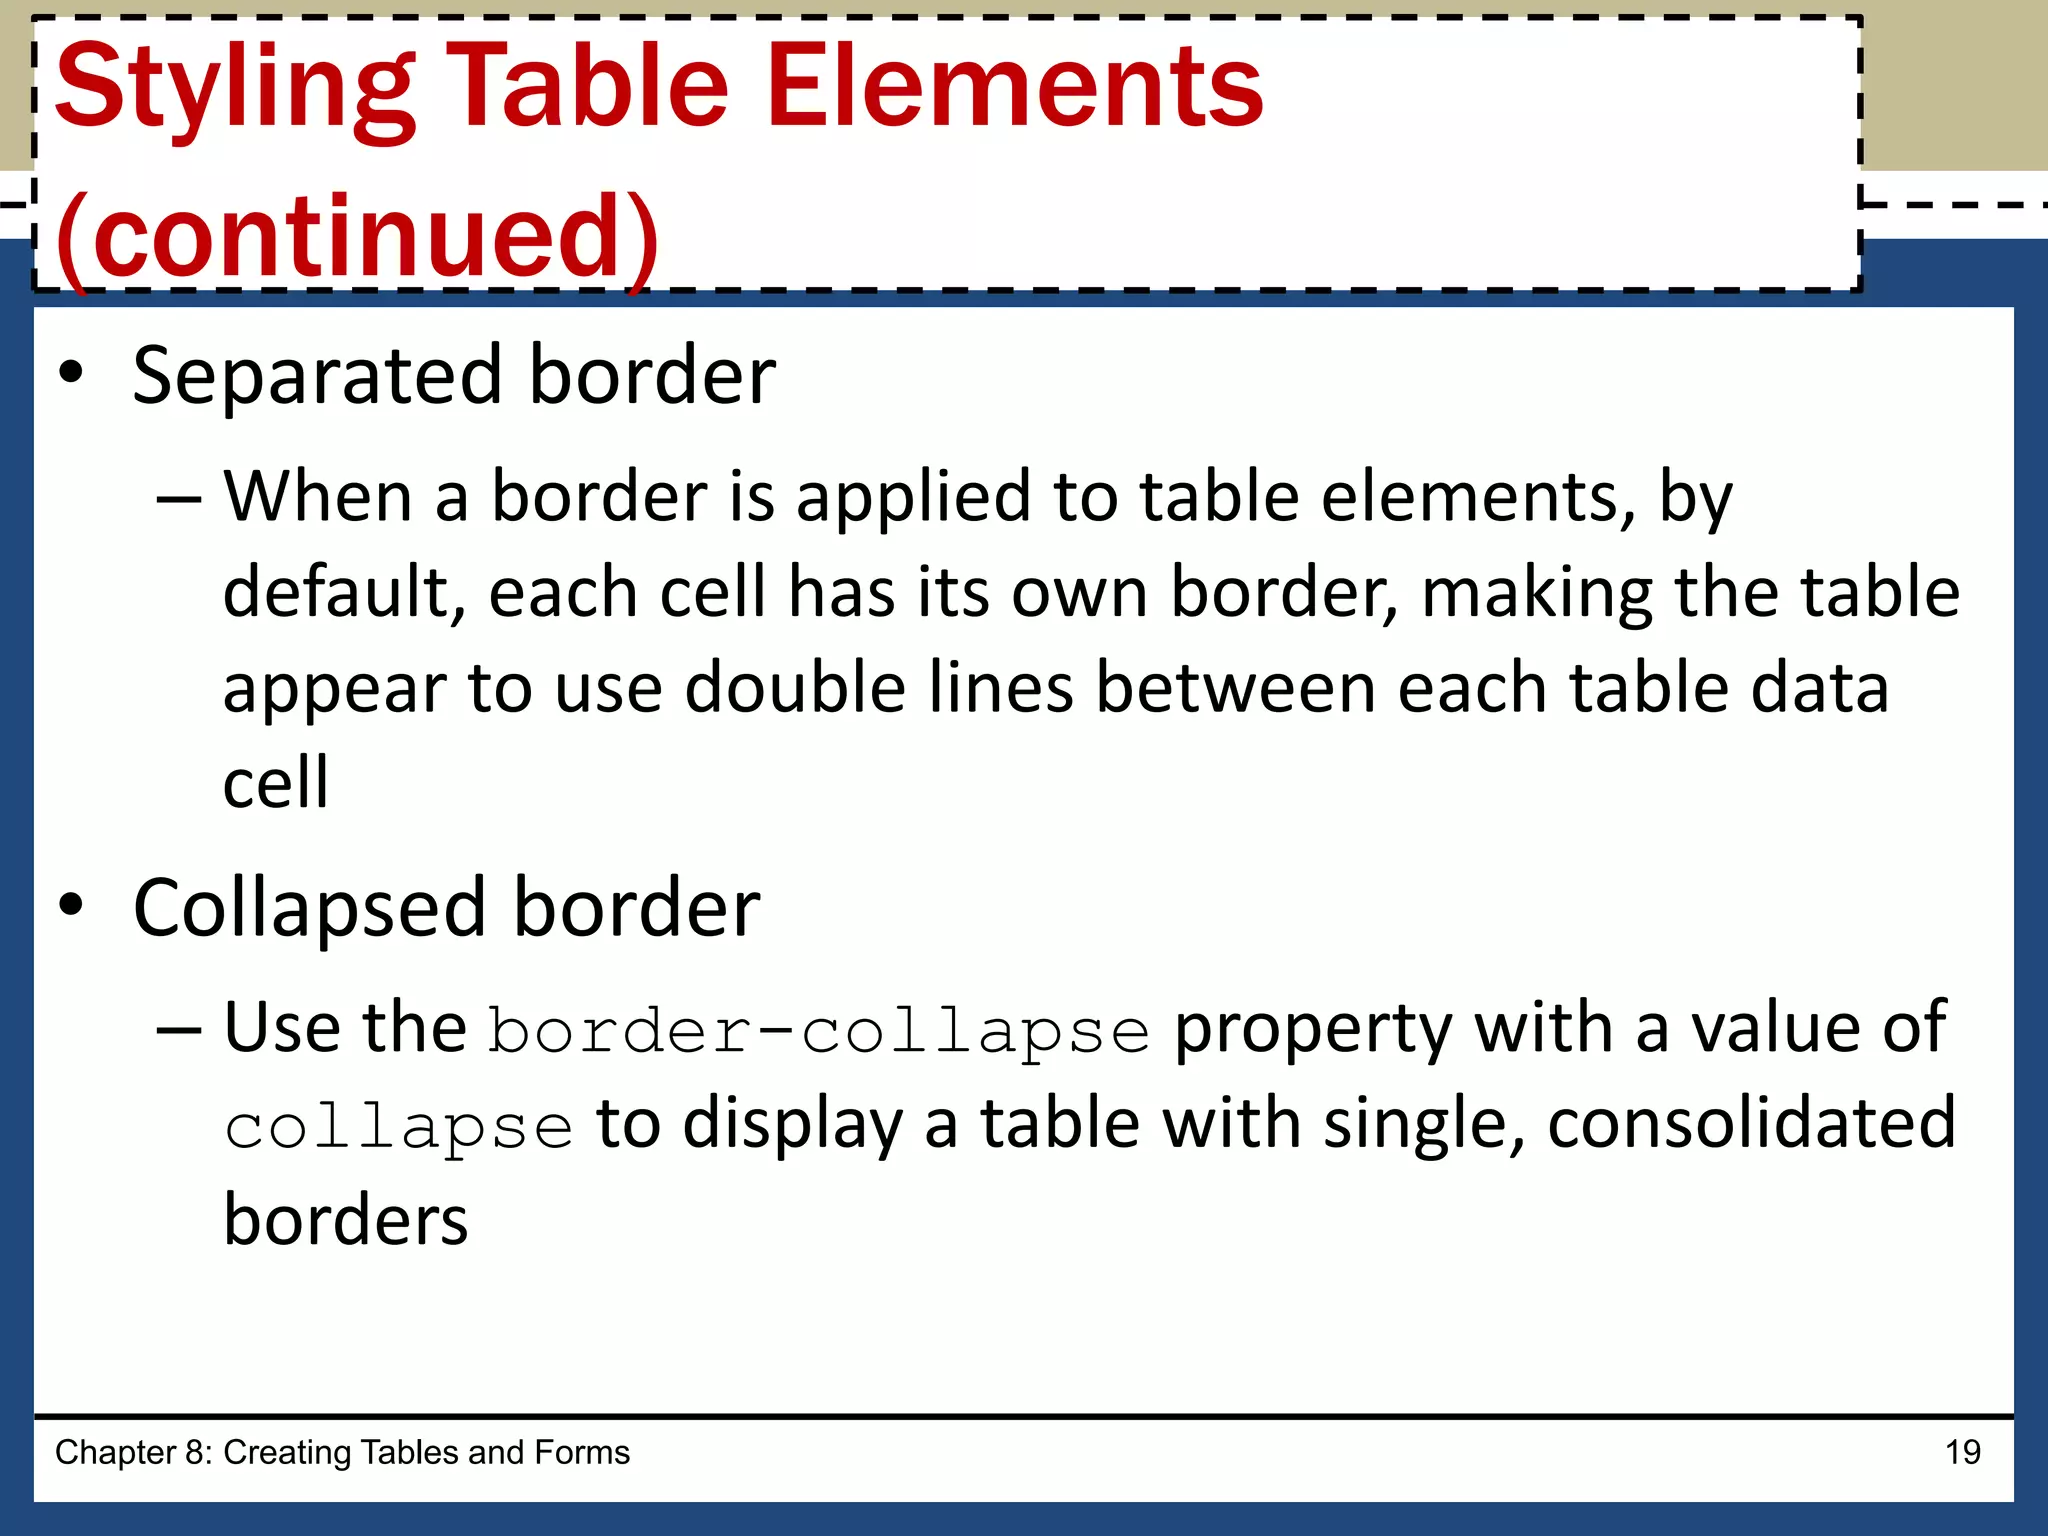
• Separated border
–When a border is applied to table elements, by
default, each cell has its own border, making the table
appear to use double lines between each table data
cell
• Collapsed border
– Use the border-collapse property with a value of
collapse to display a table with single, consolidated
borders
Chapter 8: Creating Tables and Forms 19
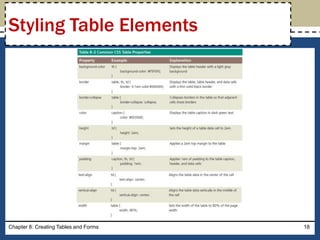
Styling Table Elements
(continued)
20.
Chapter 8: CreatingTables and Forms 20
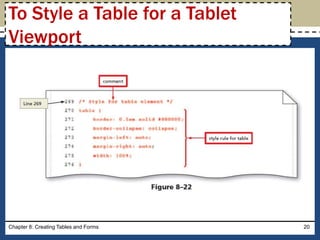
To Style a Table for a Tablet
Viewport
21.
Chapter 8: CreatingTables and Forms 21
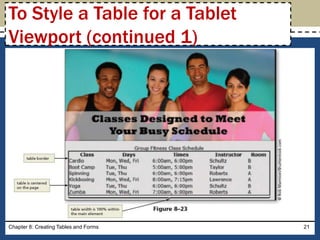
To Style a Table for a Tablet
Viewport (continued 1)
22.
Chapter 8: CreatingTables and Forms 22
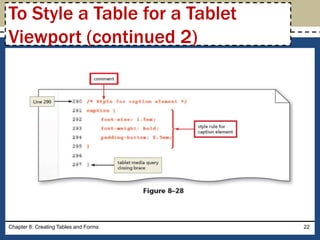
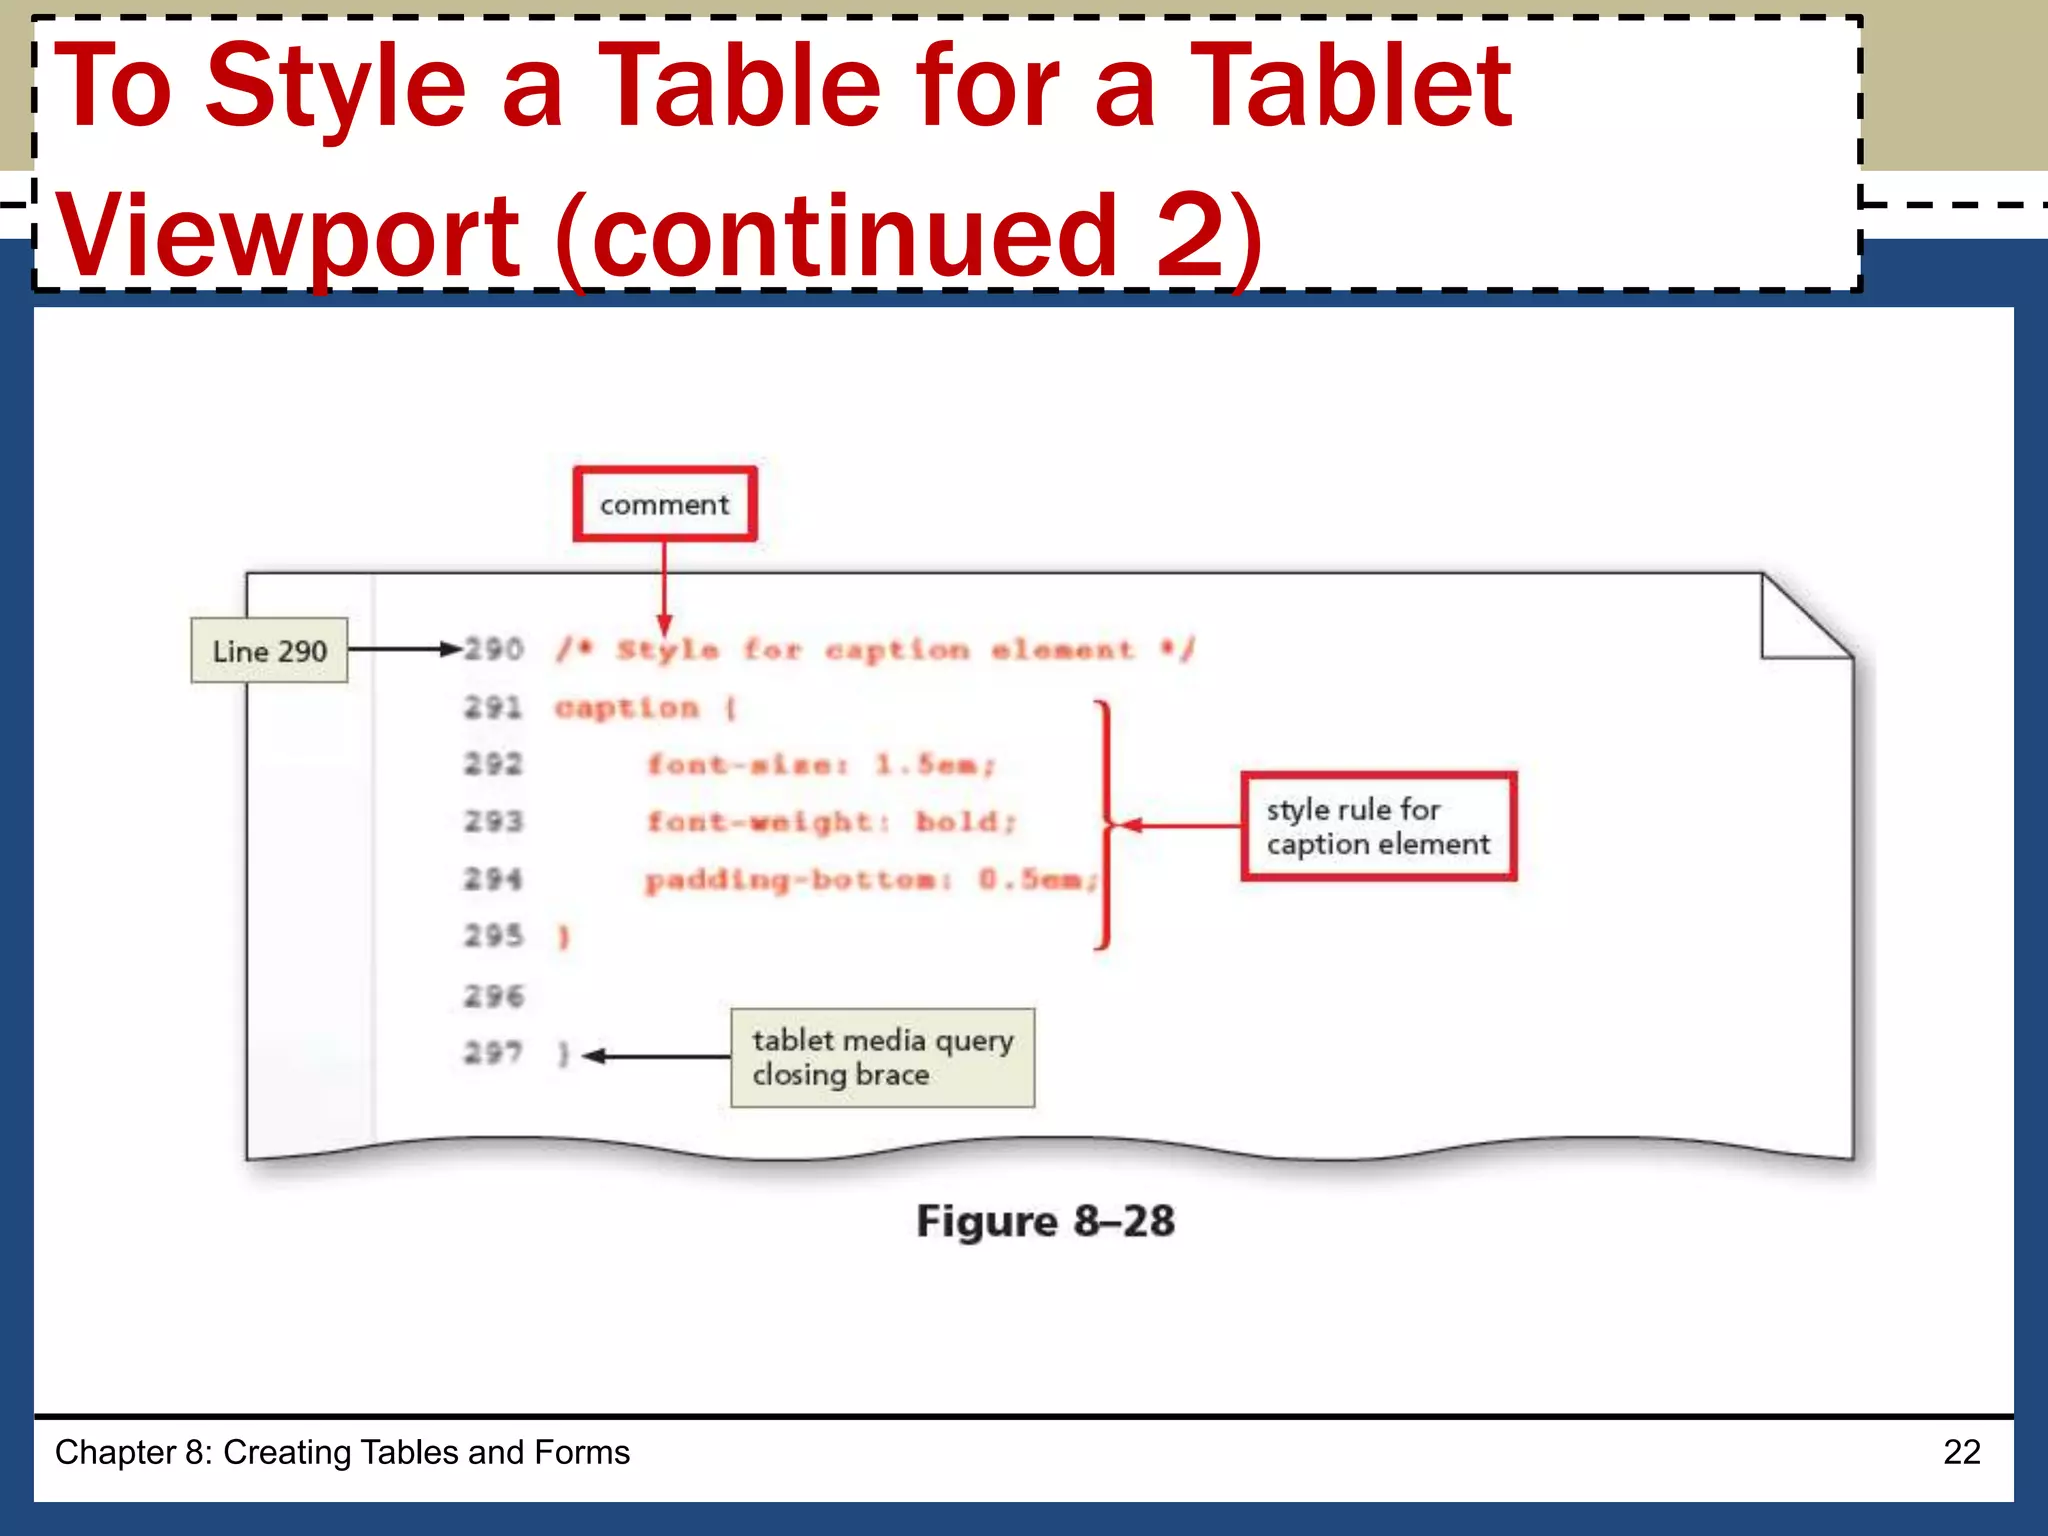
To Style a Table for a Tablet
Viewport (continued 2)
23.
Chapter 8: CreatingTables and Forms 23
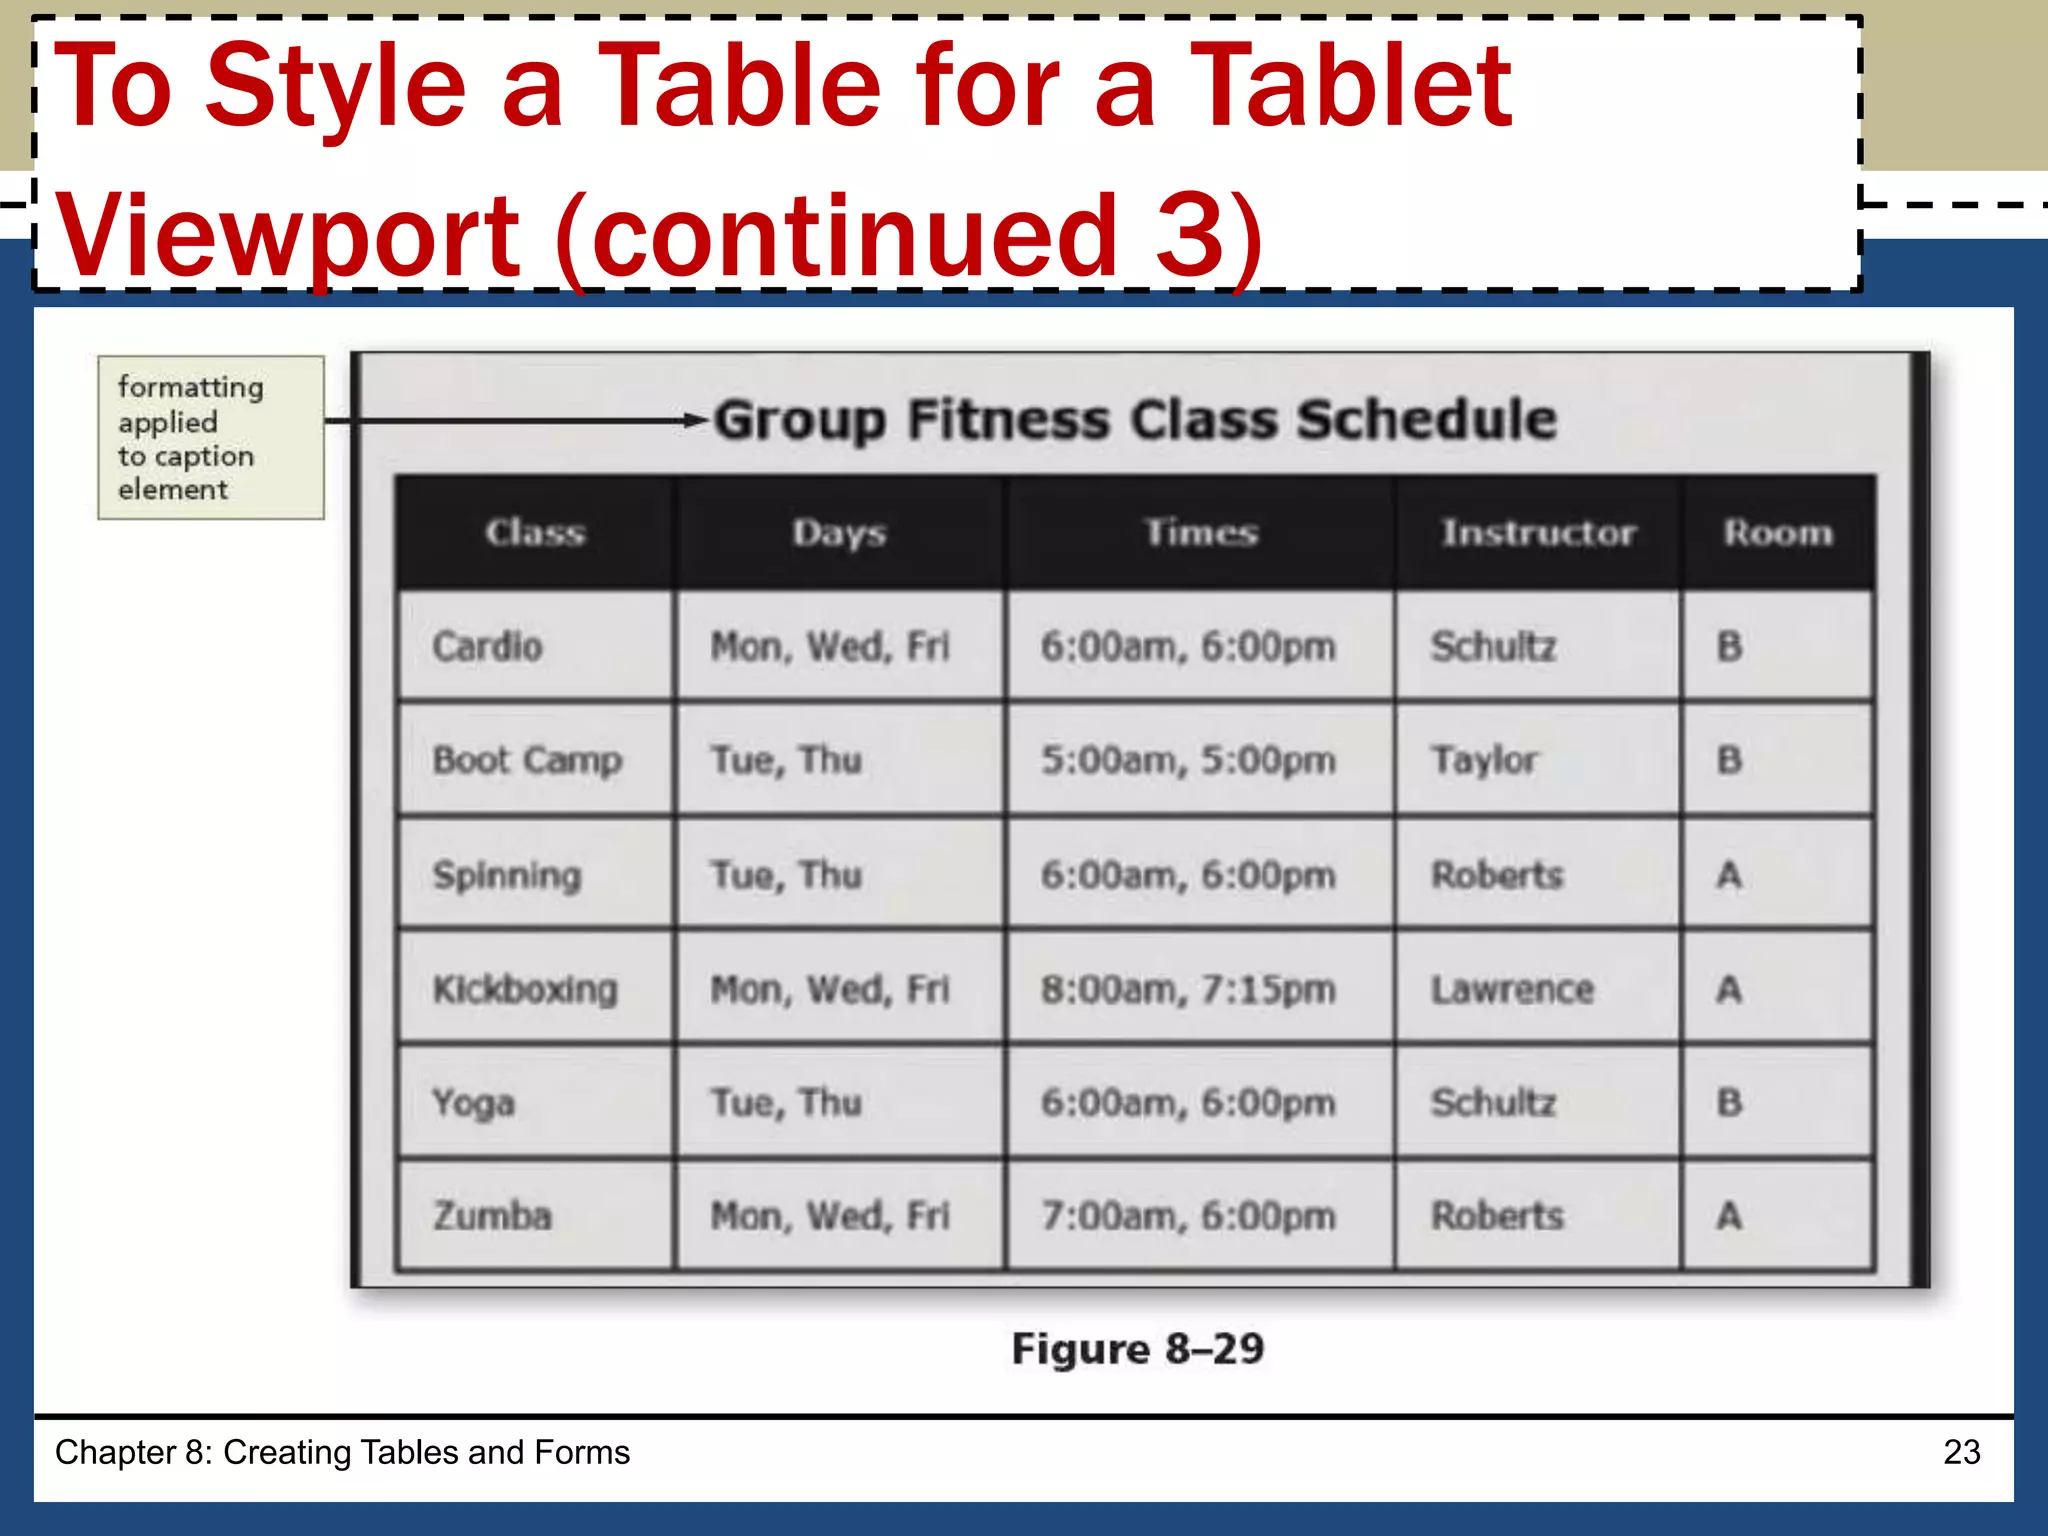
To Style a Table for a Tablet
Viewport (continued 3)
24.
Chapter 8: CreatingTables and Forms 24
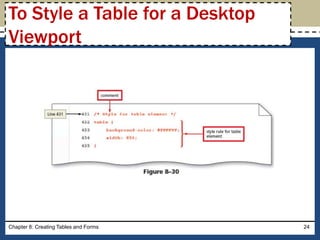
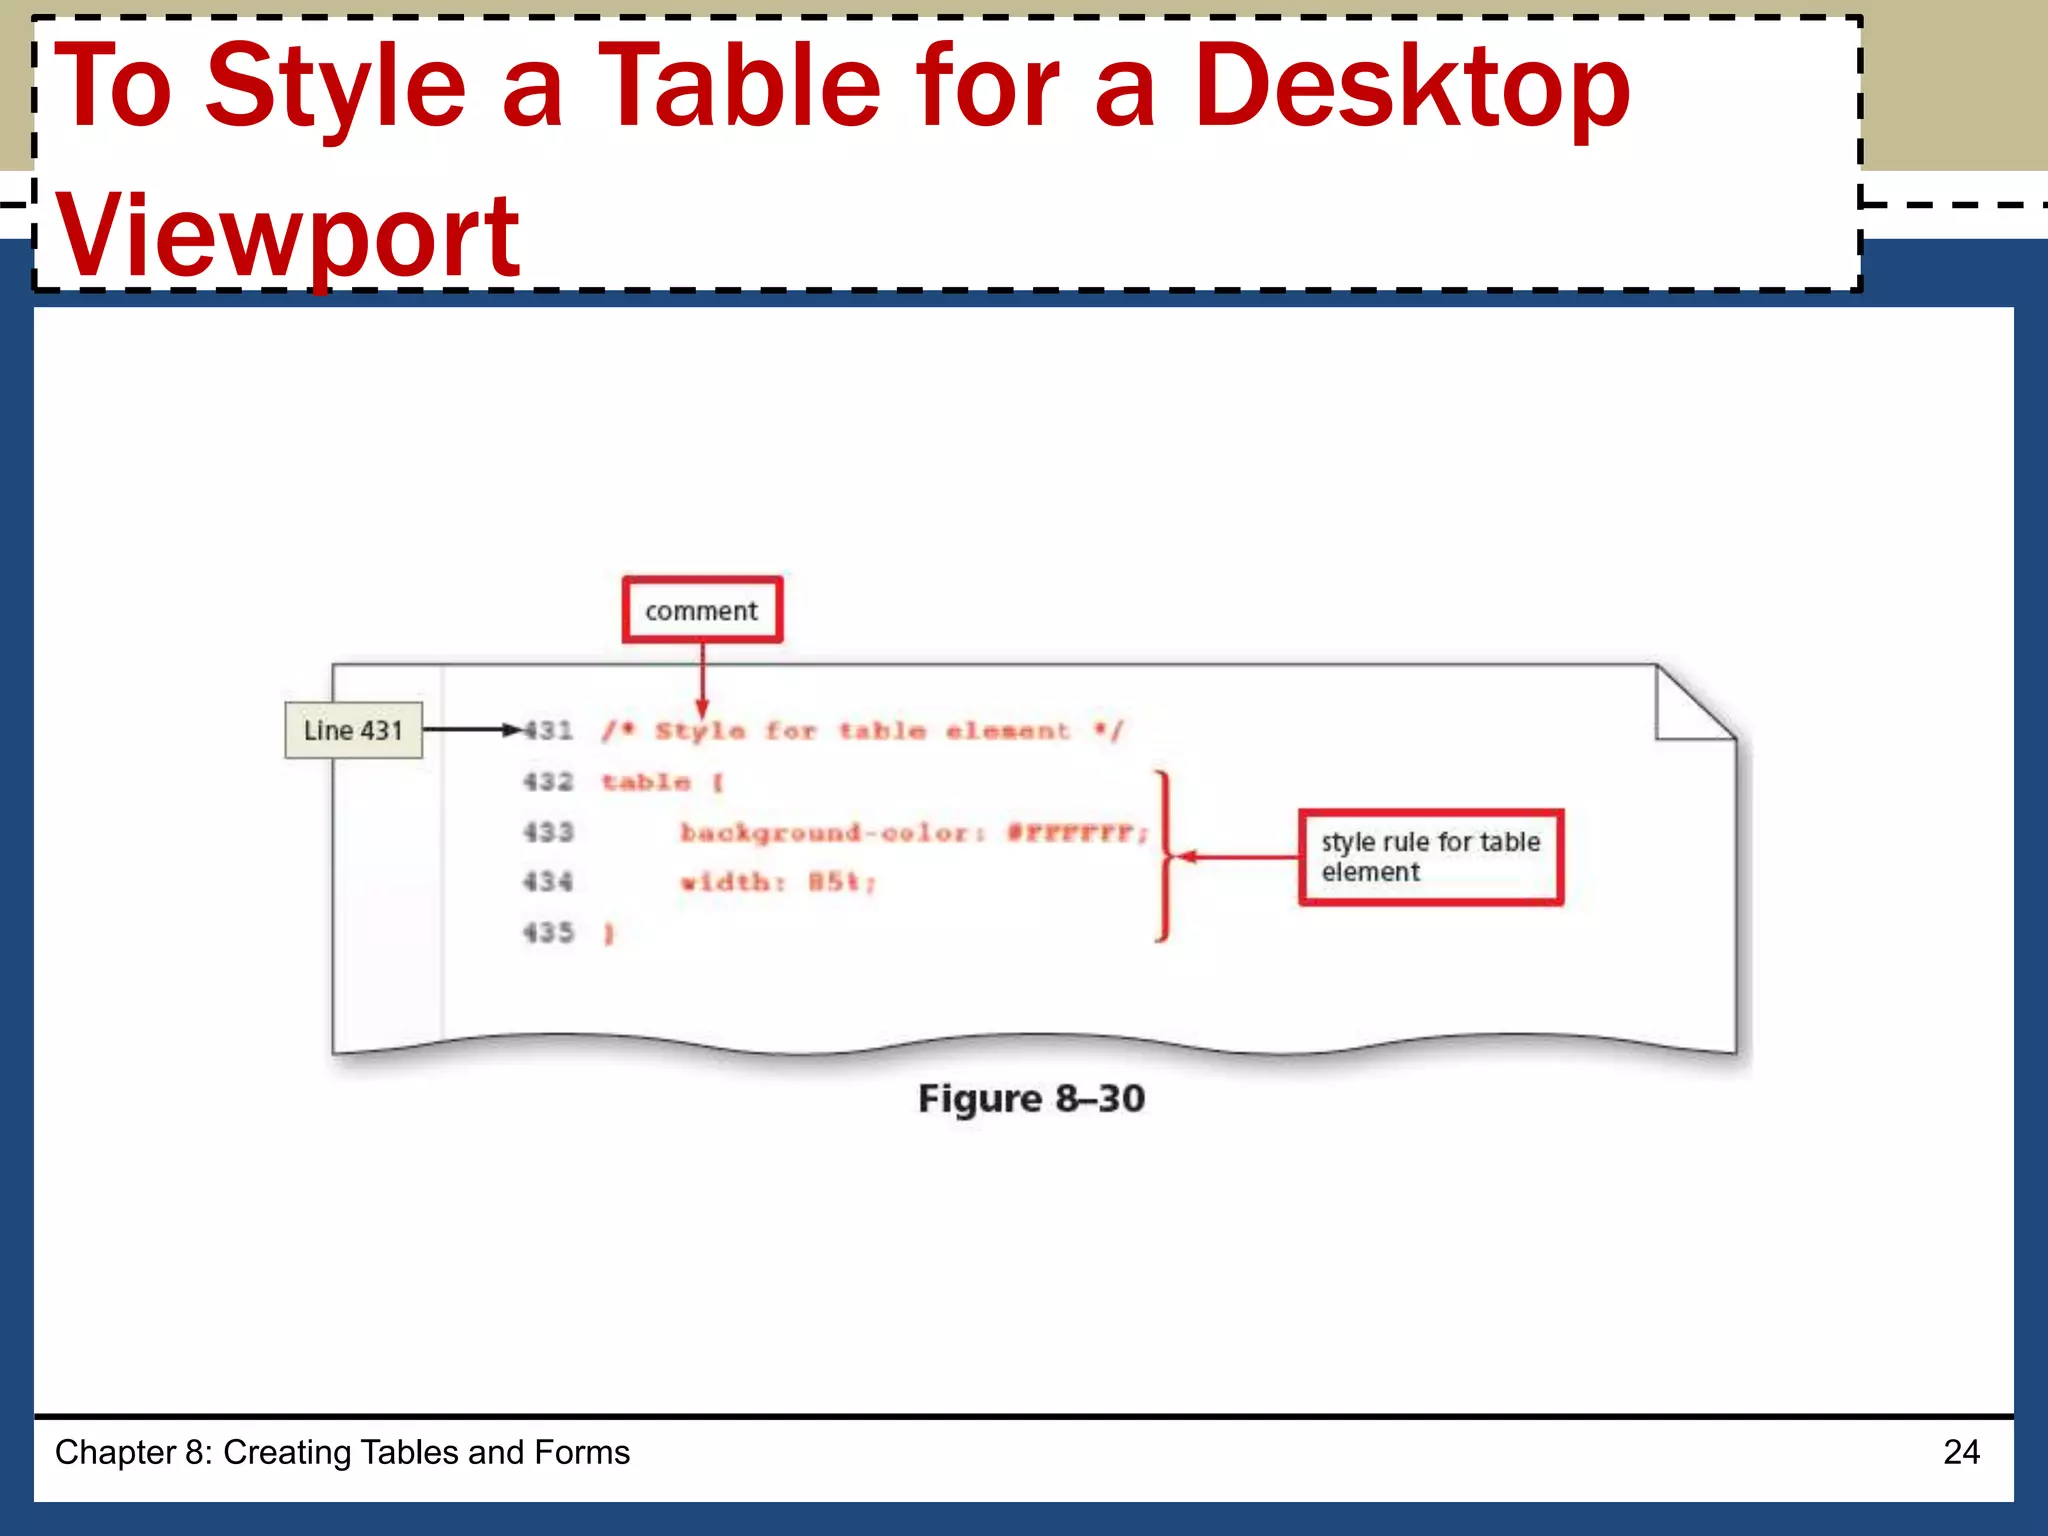
To Style a Table for a Desktop
Viewport
25.
Chapter 8: CreatingTables and Forms 25
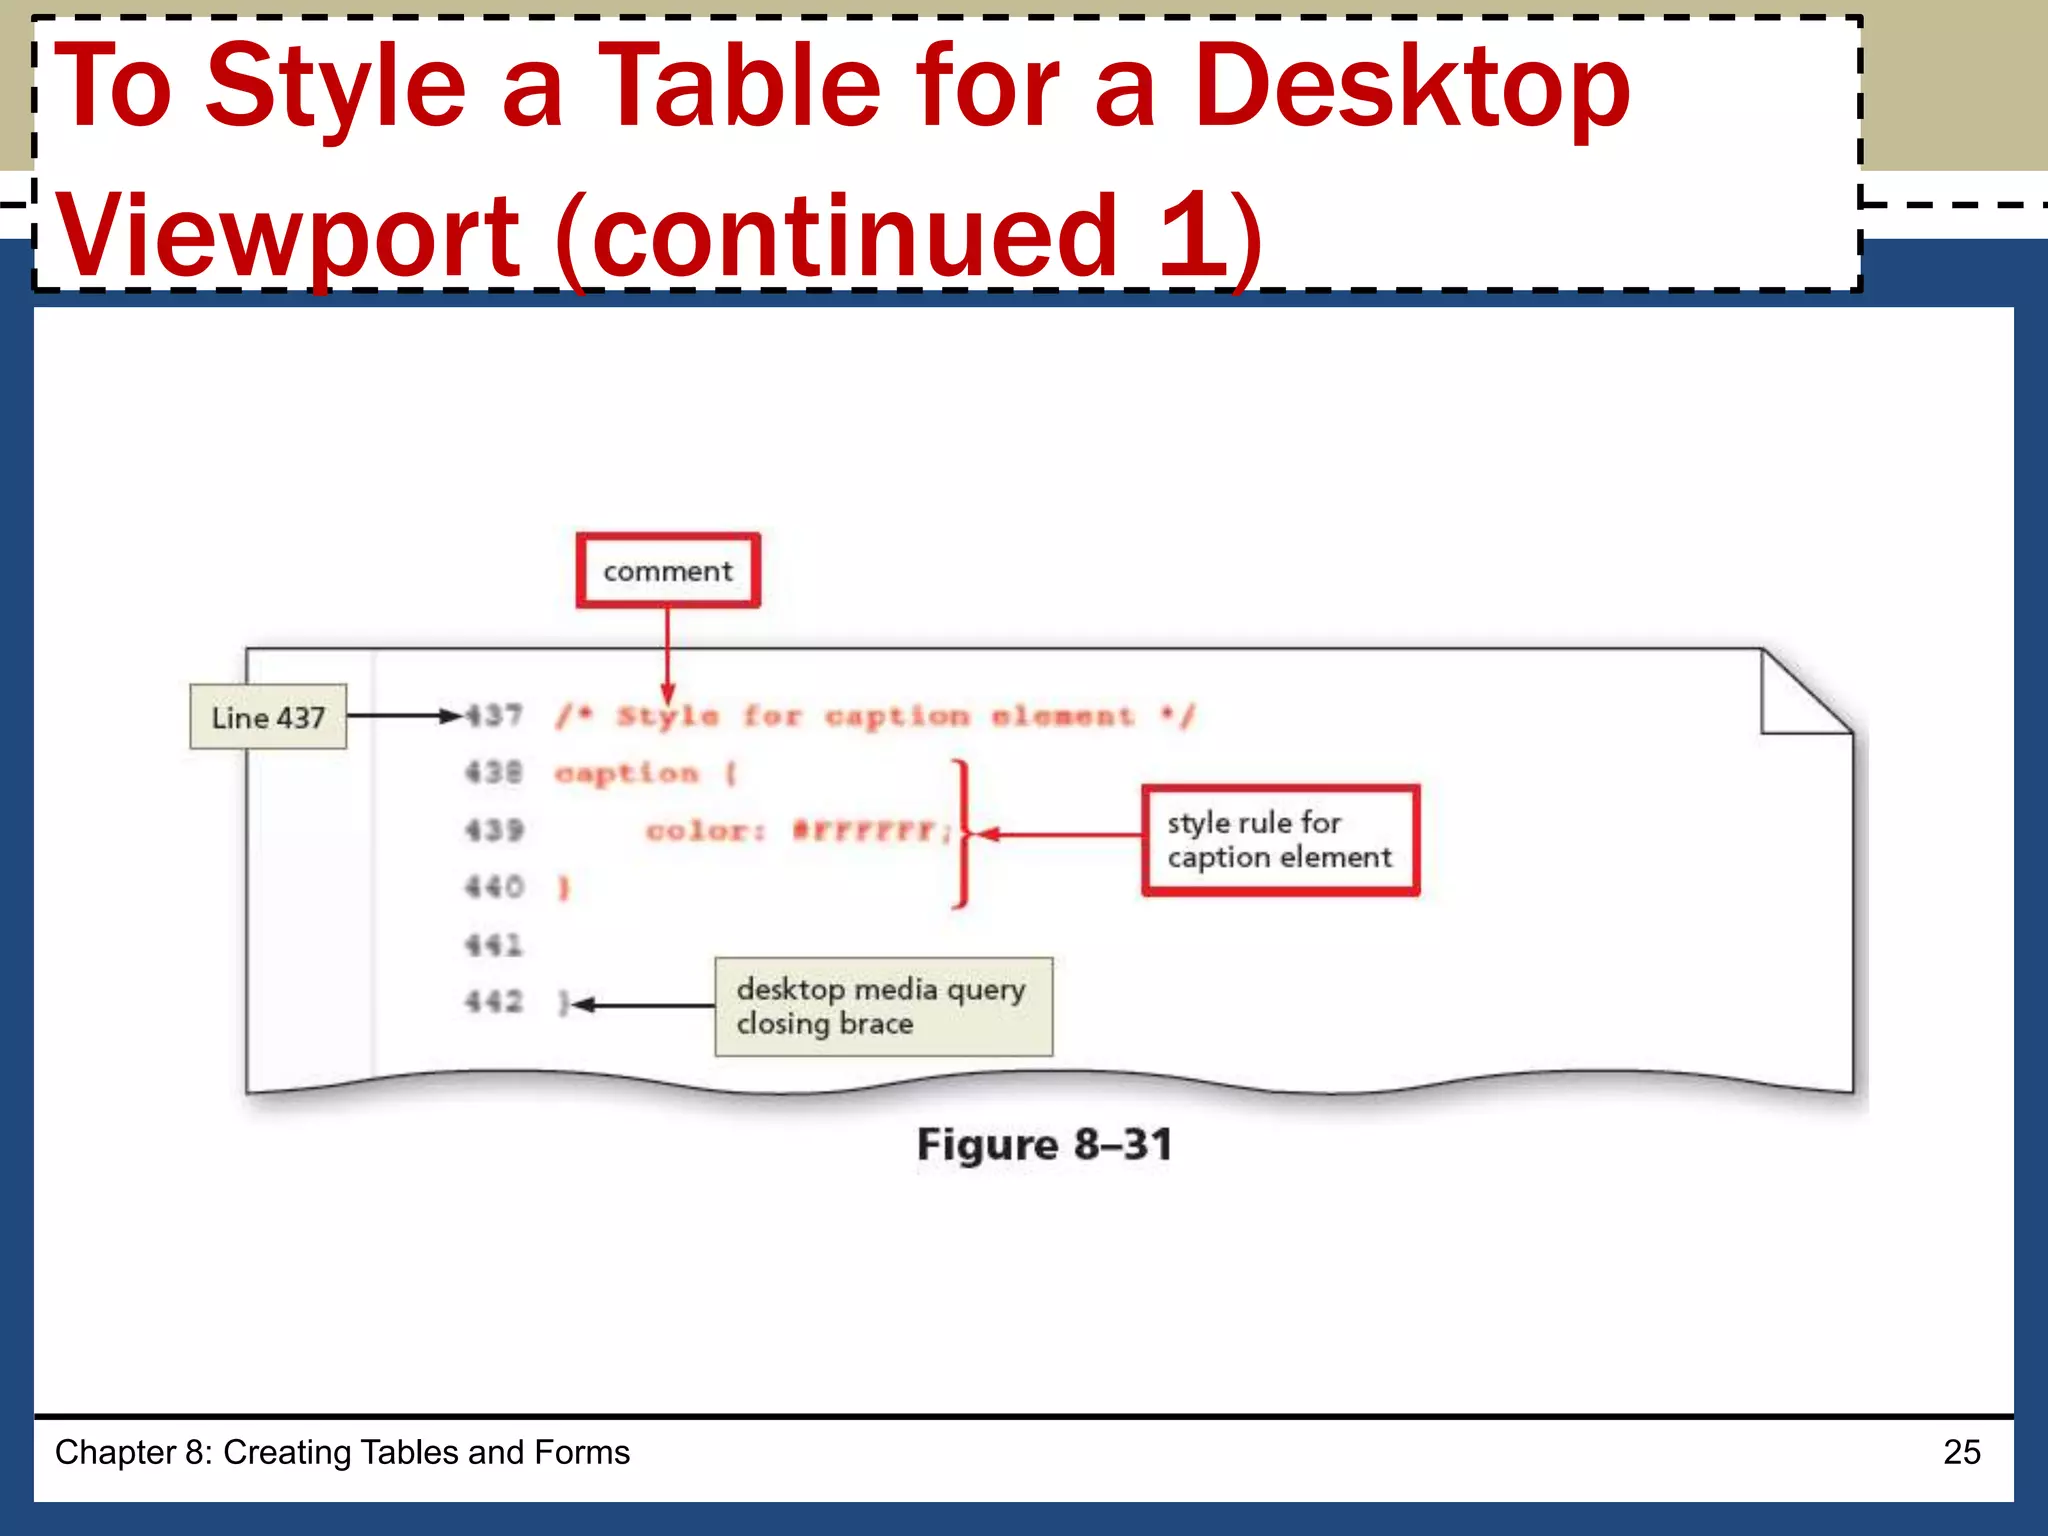
To Style a Table for a Desktop
Viewport (continued 1)
26.
Chapter 8: CreatingTables and Forms 26
To Style a Table for a Desktop
Viewport (continued 2)
27.
• Forms providea structured way to collect
information from webpage visitors
• Visitors complete webpage forms to register for
an account or to make a purchase.
• Businesses use forms to gather visitor or customer
information and store it in a database for future
use
Chapter 8: Creating Tables and Forms 27
Creating Webpage Forms
28.
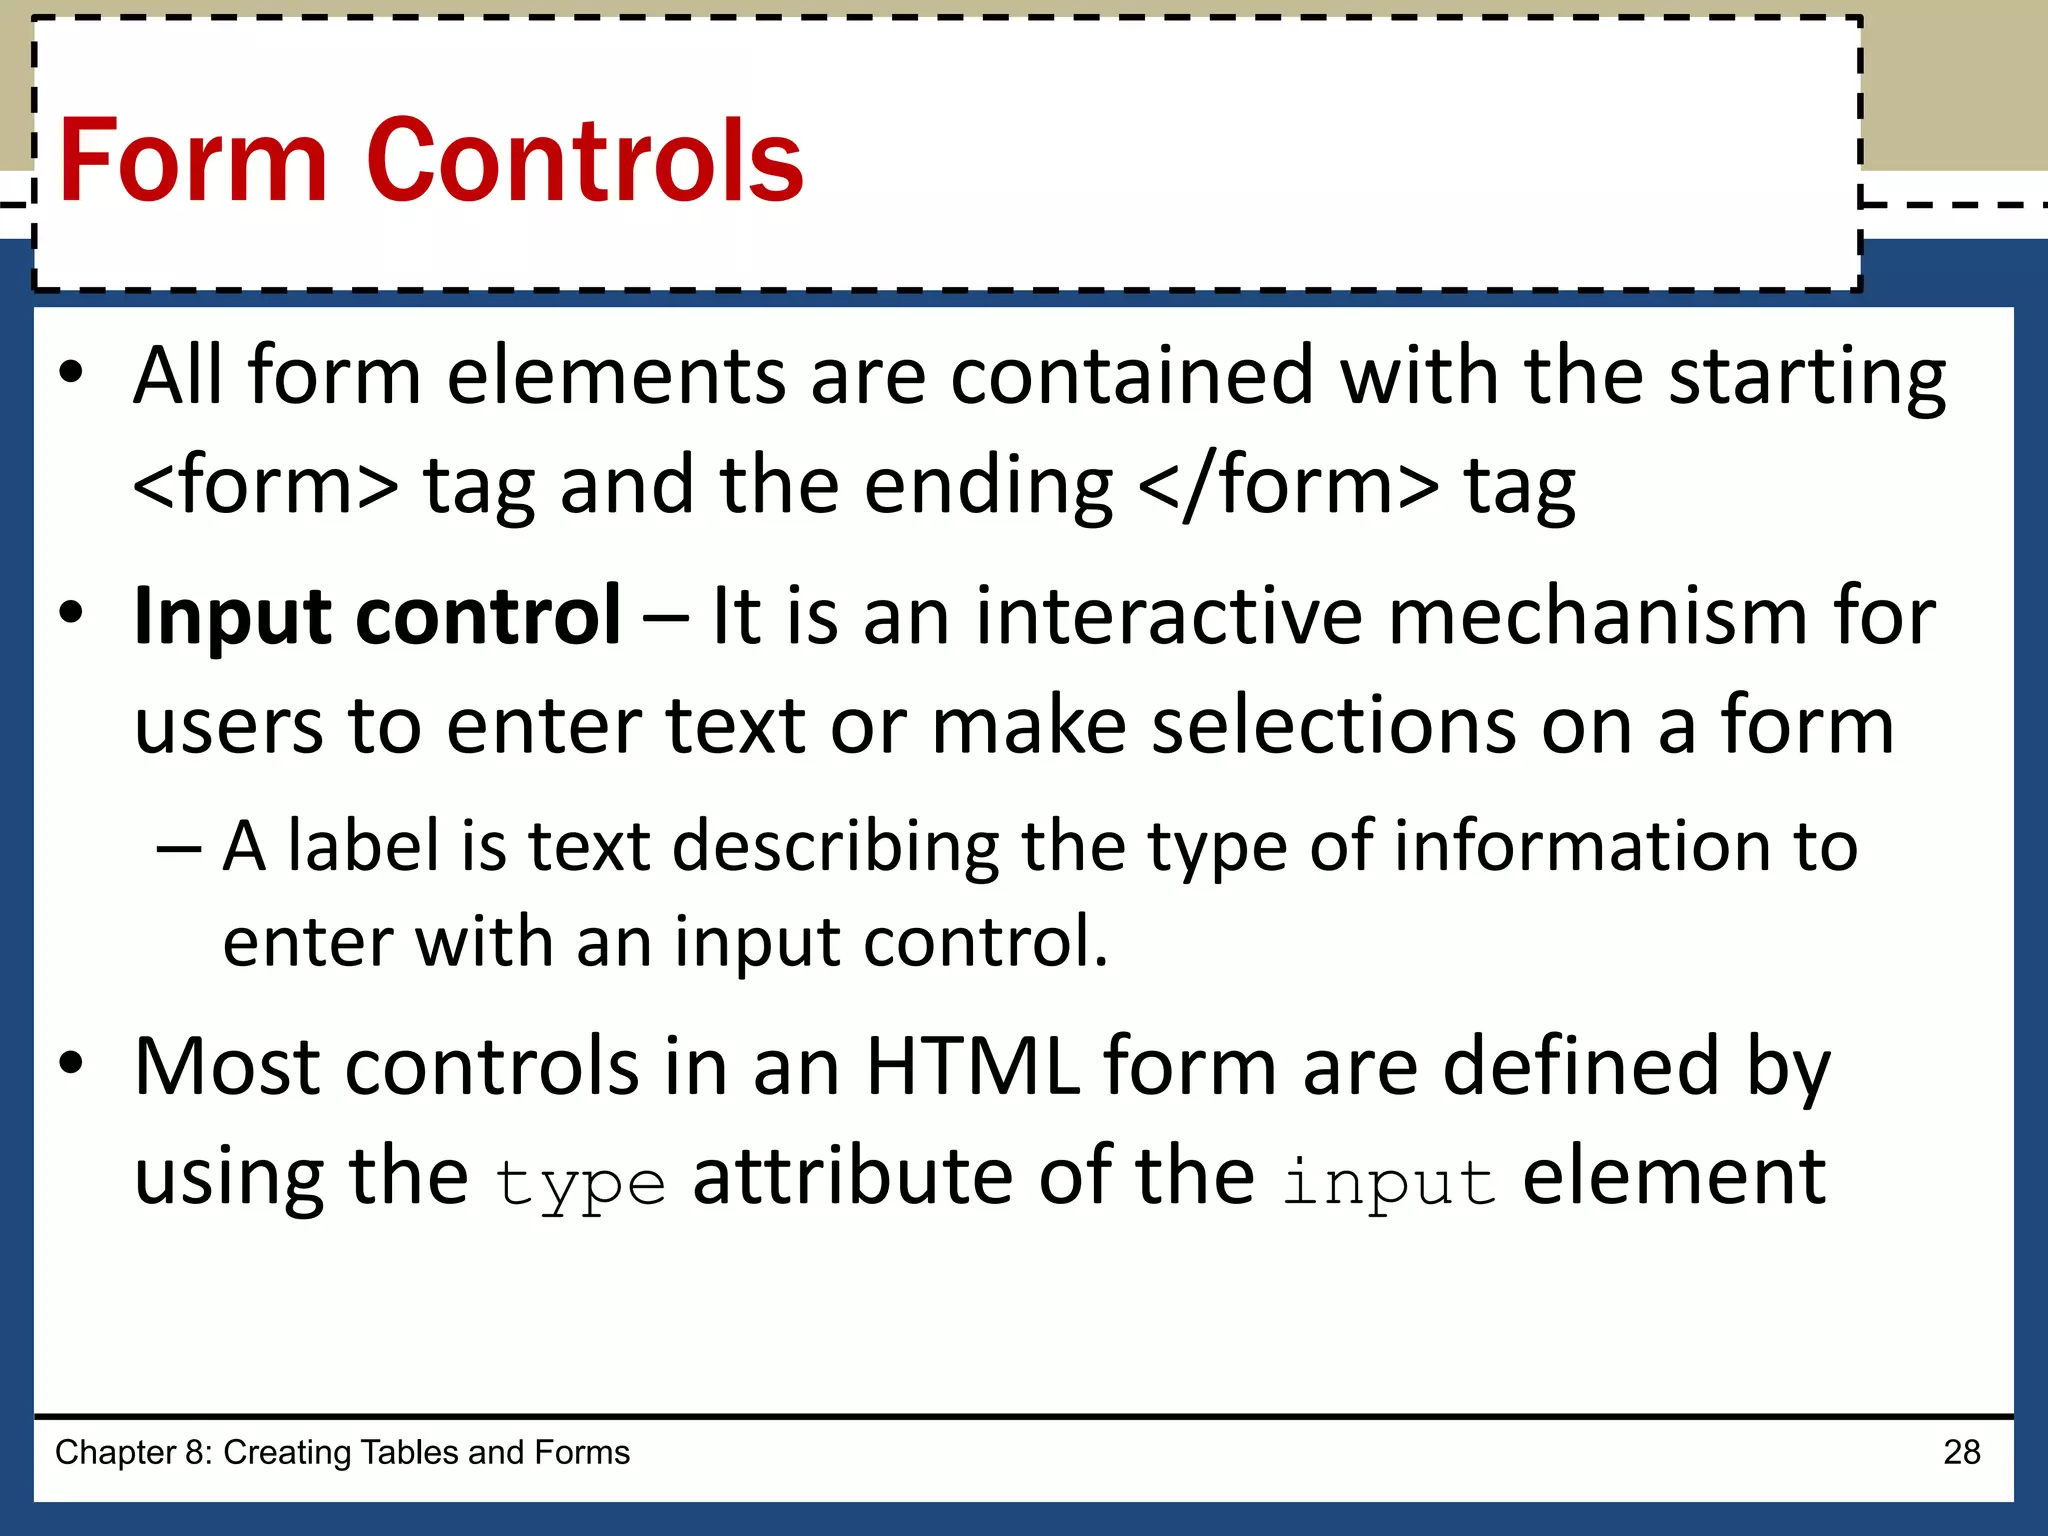
• All formelements are contained with the starting
<form> tag and the ending </form> tag
• Input control – It is an interactive mechanism for
users to enter text or make selections on a form
– A label is text describing the type of information to
enter with an input control.
• Most controls in an HTML form are defined by
using the type attribute of the input element
Chapter 8: Creating Tables and Forms 28
Form Controls
29.
• Define othercontrols using separate elements,
such as the textarea and select elements
• The two input controls are:
– Data input control – It is used to make a selection or
perform a command
– Text input control – It accepts text, such as names,
dates, and passwords, and is called an input field
Chapter 8: Creating Tables and Forms 29
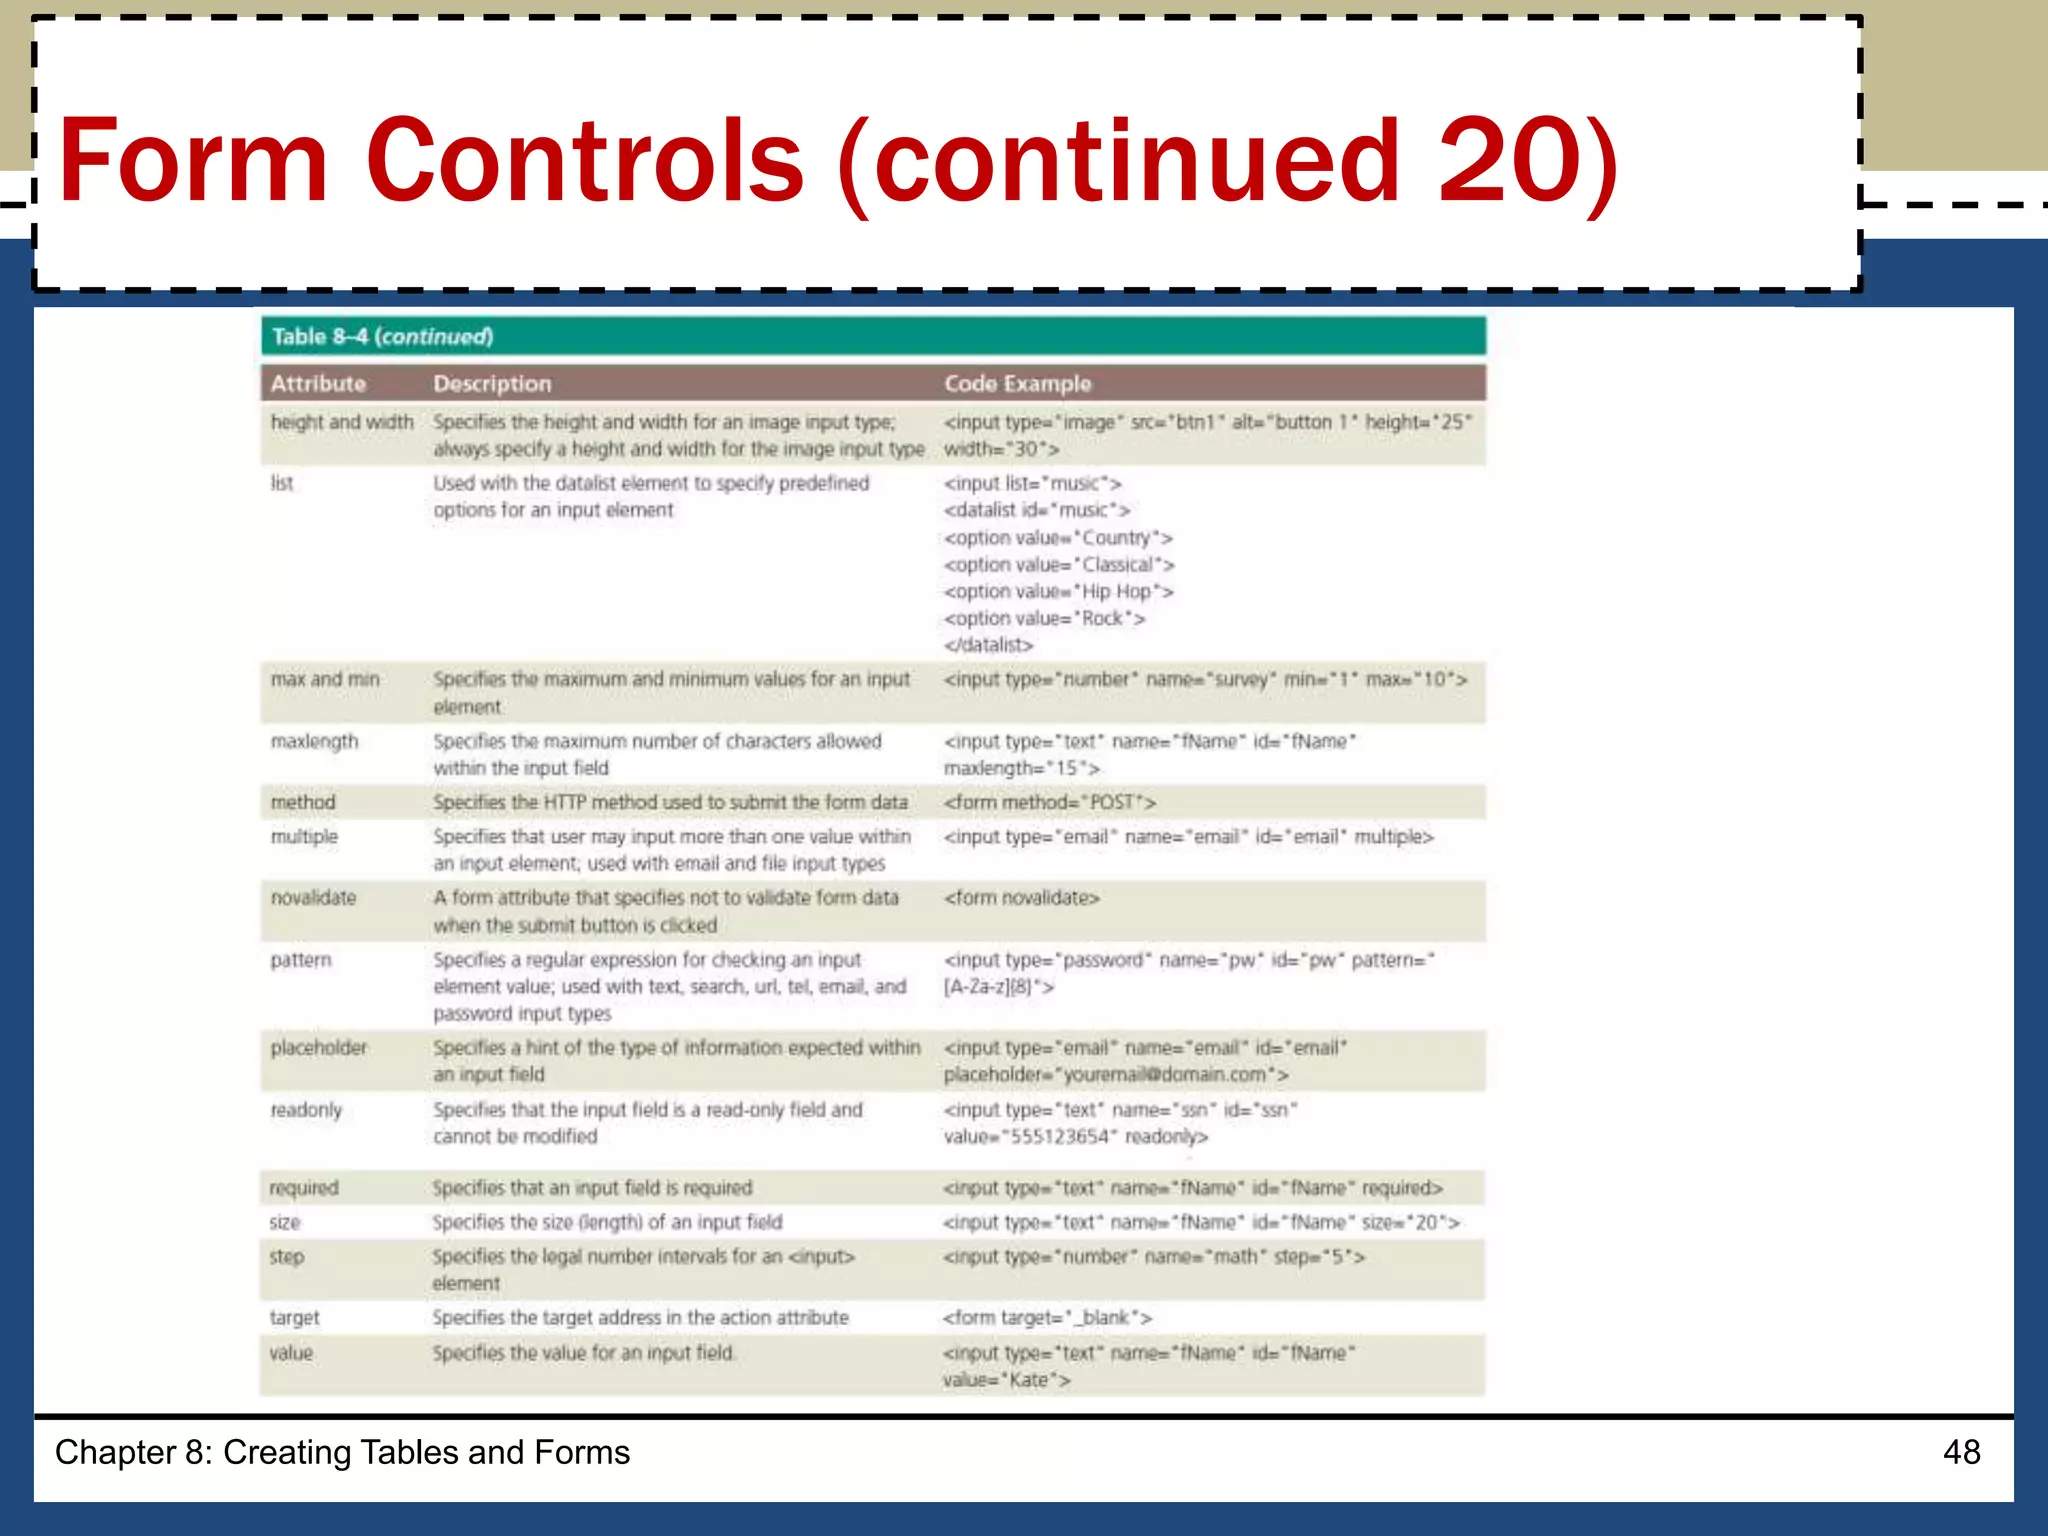
Form Controls (continued 1)
• Each inputcontrol has attributes that are used
more frequently than the others:
– name – It identifies the specific information that is
being sent when the form is submitted for processing.
All controls have a name
– id – It provides a unique ID for the element. Use the
id attribute with input controls
– value – It specifies the value of an input element and
varies depending on input type
Chapter 8: Creating Tables and Forms 31
Form Controls (continued 3)
32.
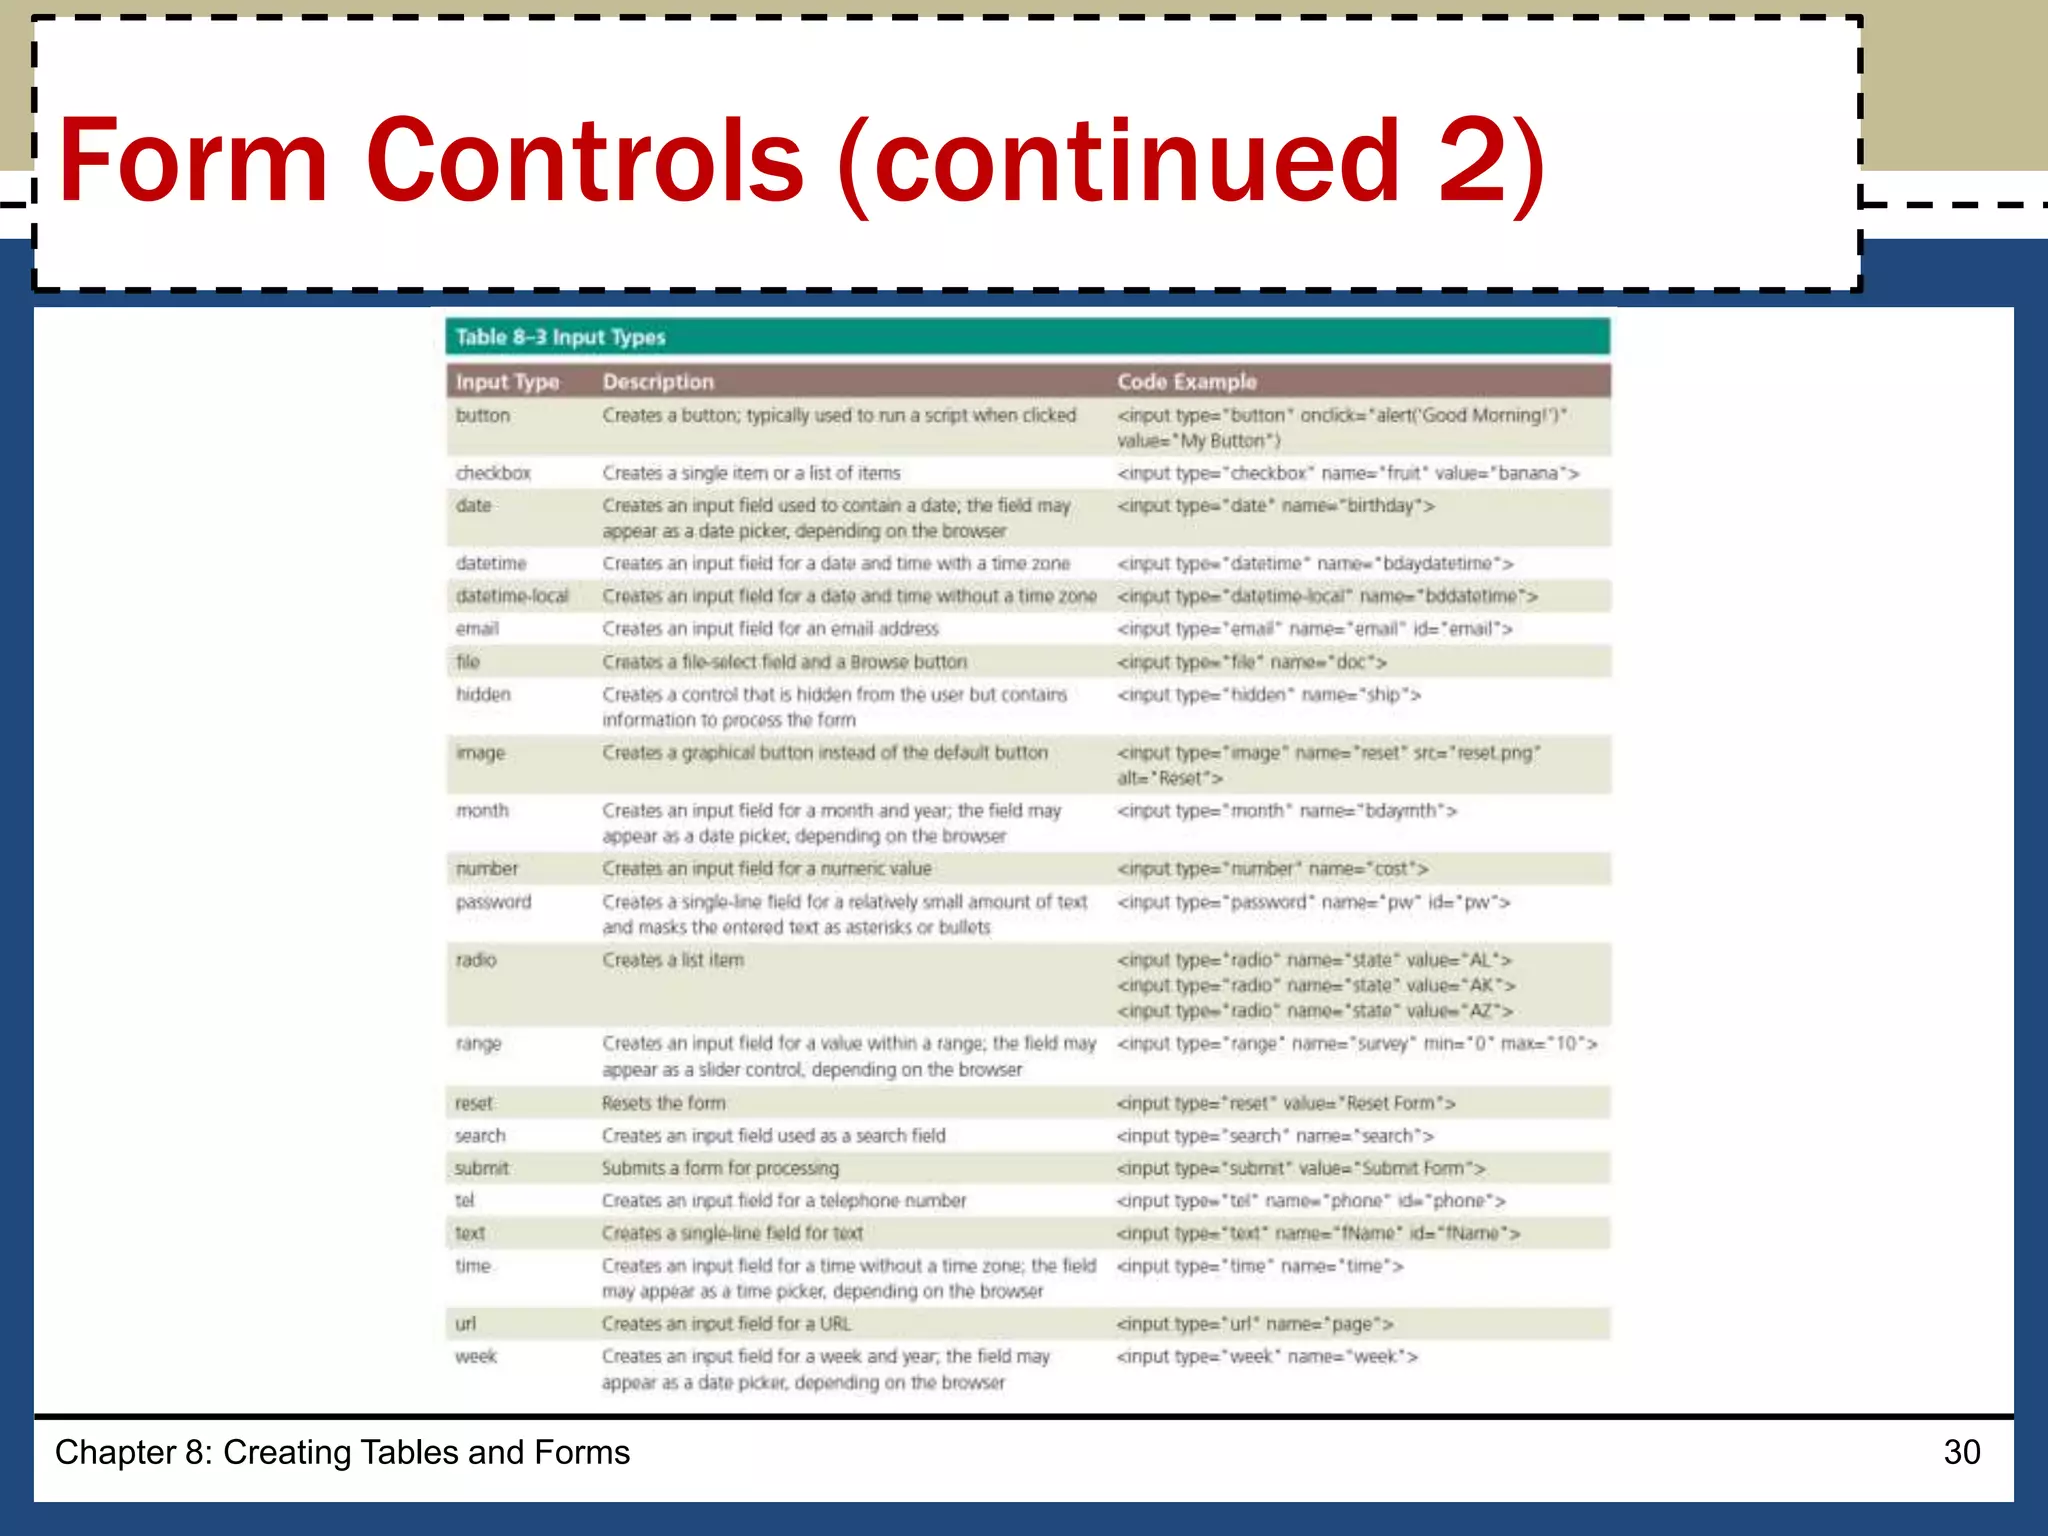
• Common inputcontrols used with a form include
text, password, email, checkbox, select, submit,
reset, etc.
• Text input controls include the following types:
– text box (text control), for small amounts of text
– password text box (password control), for entering a
password
– email text box (email control), for entering an email
address
Chapter 8: Creating Tables and Forms 32
Form Controls (continued 4)
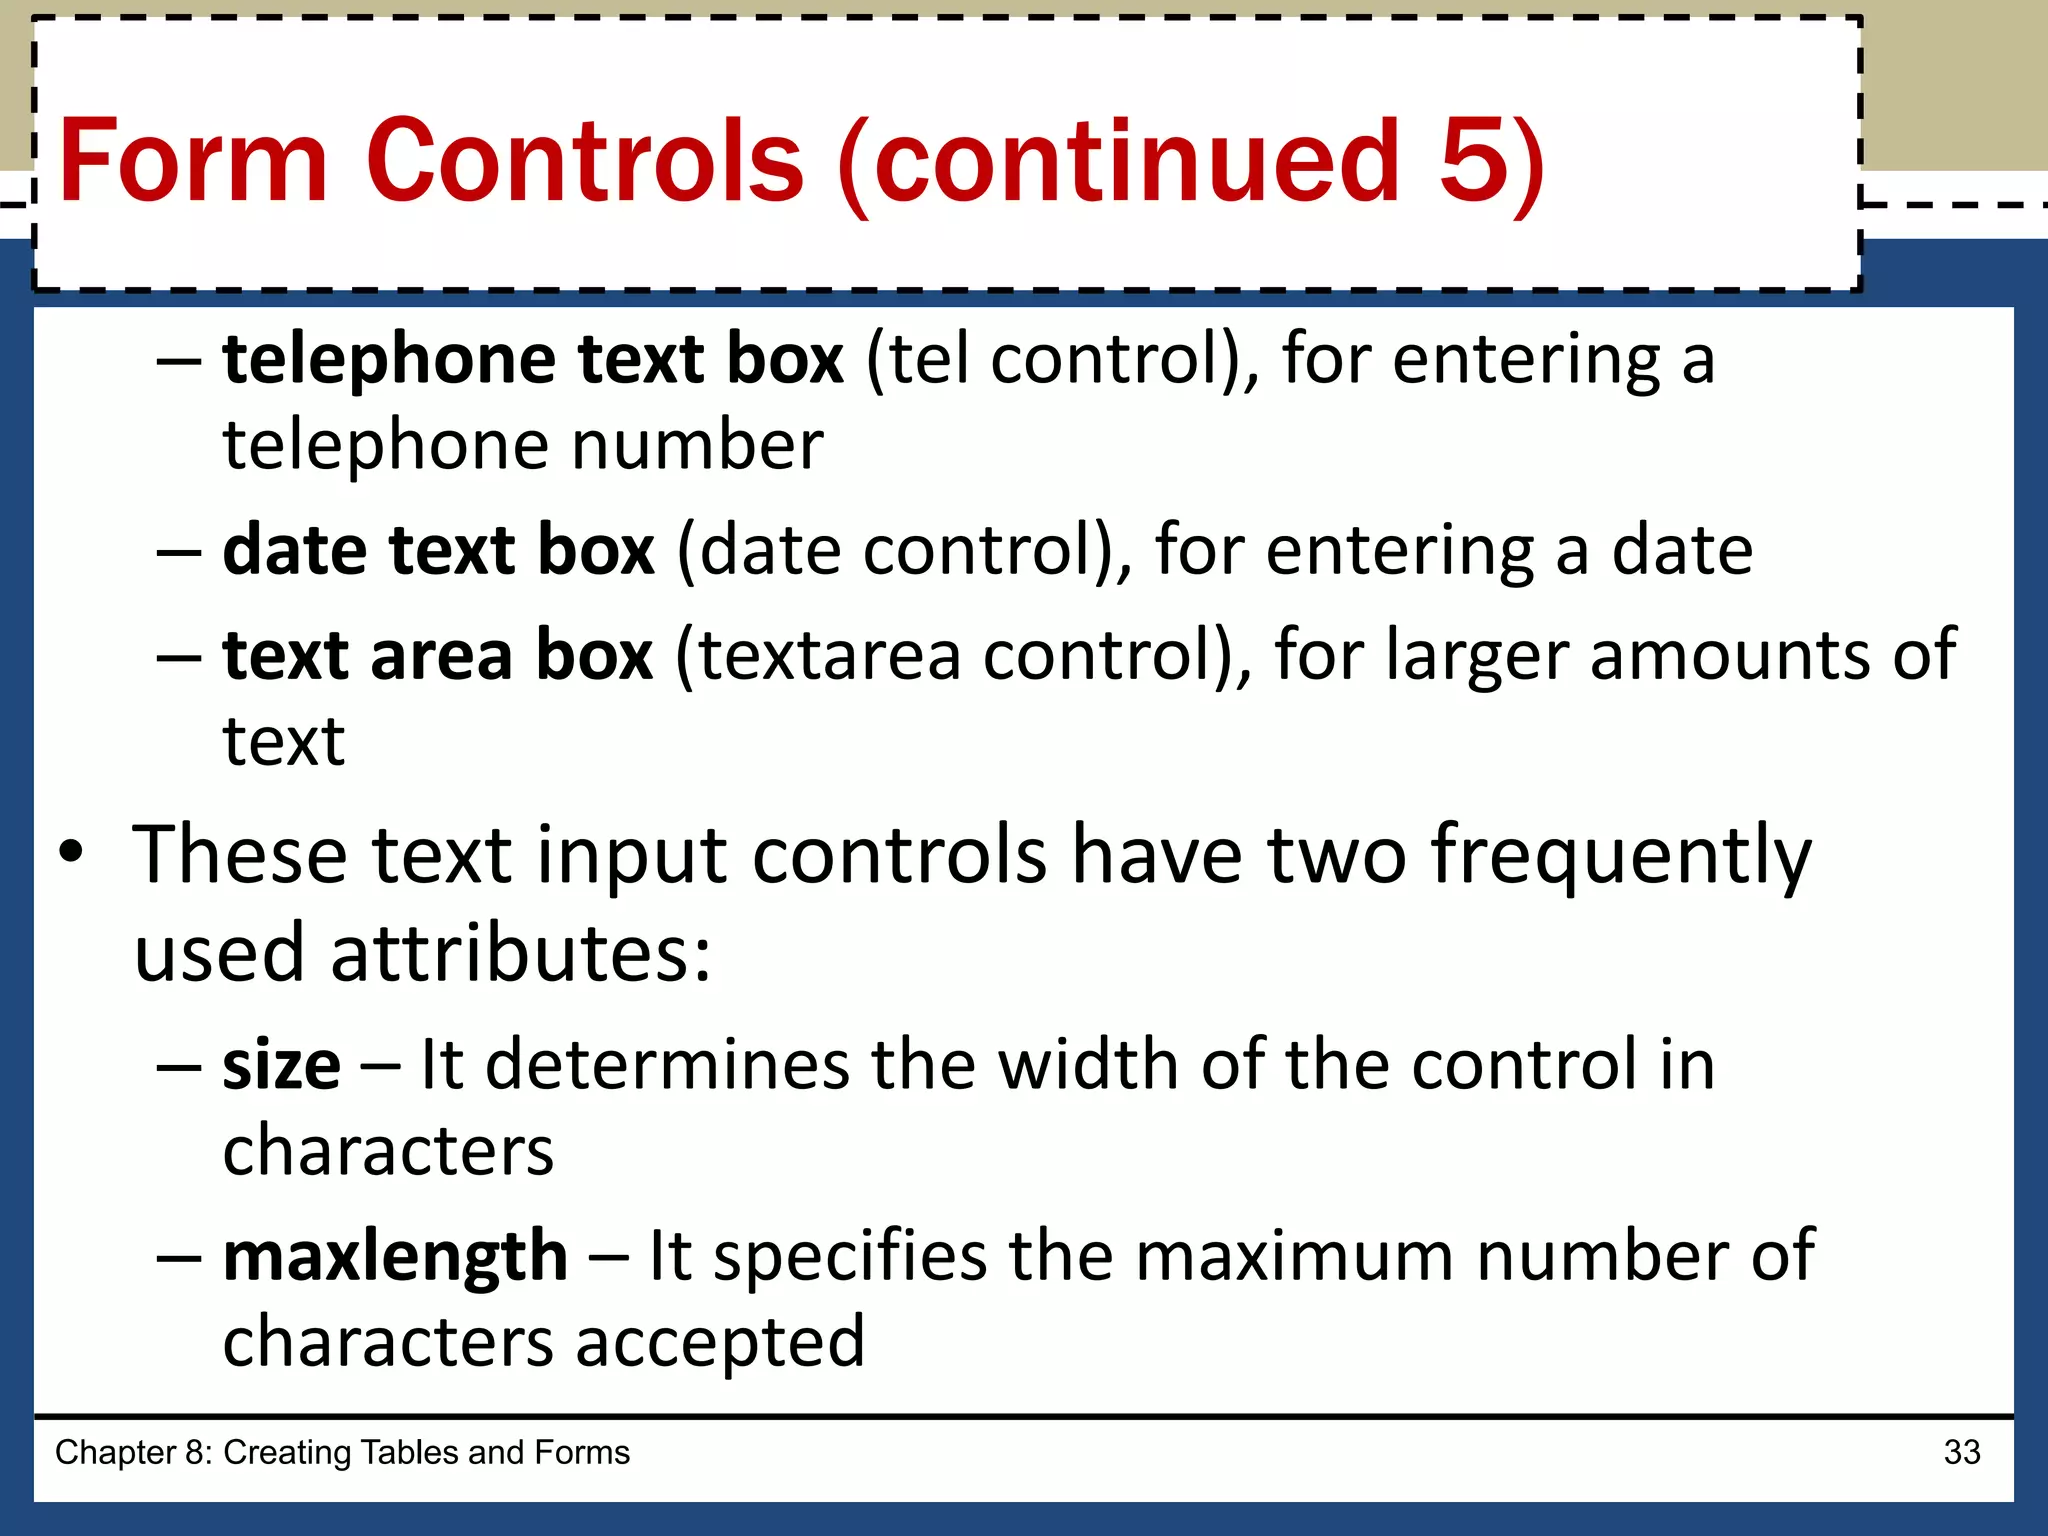
33.
– telephone textbox (tel control), for entering a
telephone number
– date text box (date control), for entering a date
– text area box (textarea control), for larger amounts of
text
• These text input controls have two frequently
used attributes:
– size – It determines the width of the control in
characters
– maxlength – It specifies the maximum number of
characters accepted
Chapter 8: Creating Tables and Forms 33
Form Controls (continued 5)
34.
– Example:
oThe firstline of the following code creates a 25-character
text box for the user’s last name and the second line creates
an eight-character text box for the user’s password:
<p>Last Name: <input
name="lastname" type="text"
size="25"></p>
<p>Password: <input name="password
type="password" size="8"></p>
Chapter 8: Creating Tables and Forms 34
Form Controls (continued 6)
35.
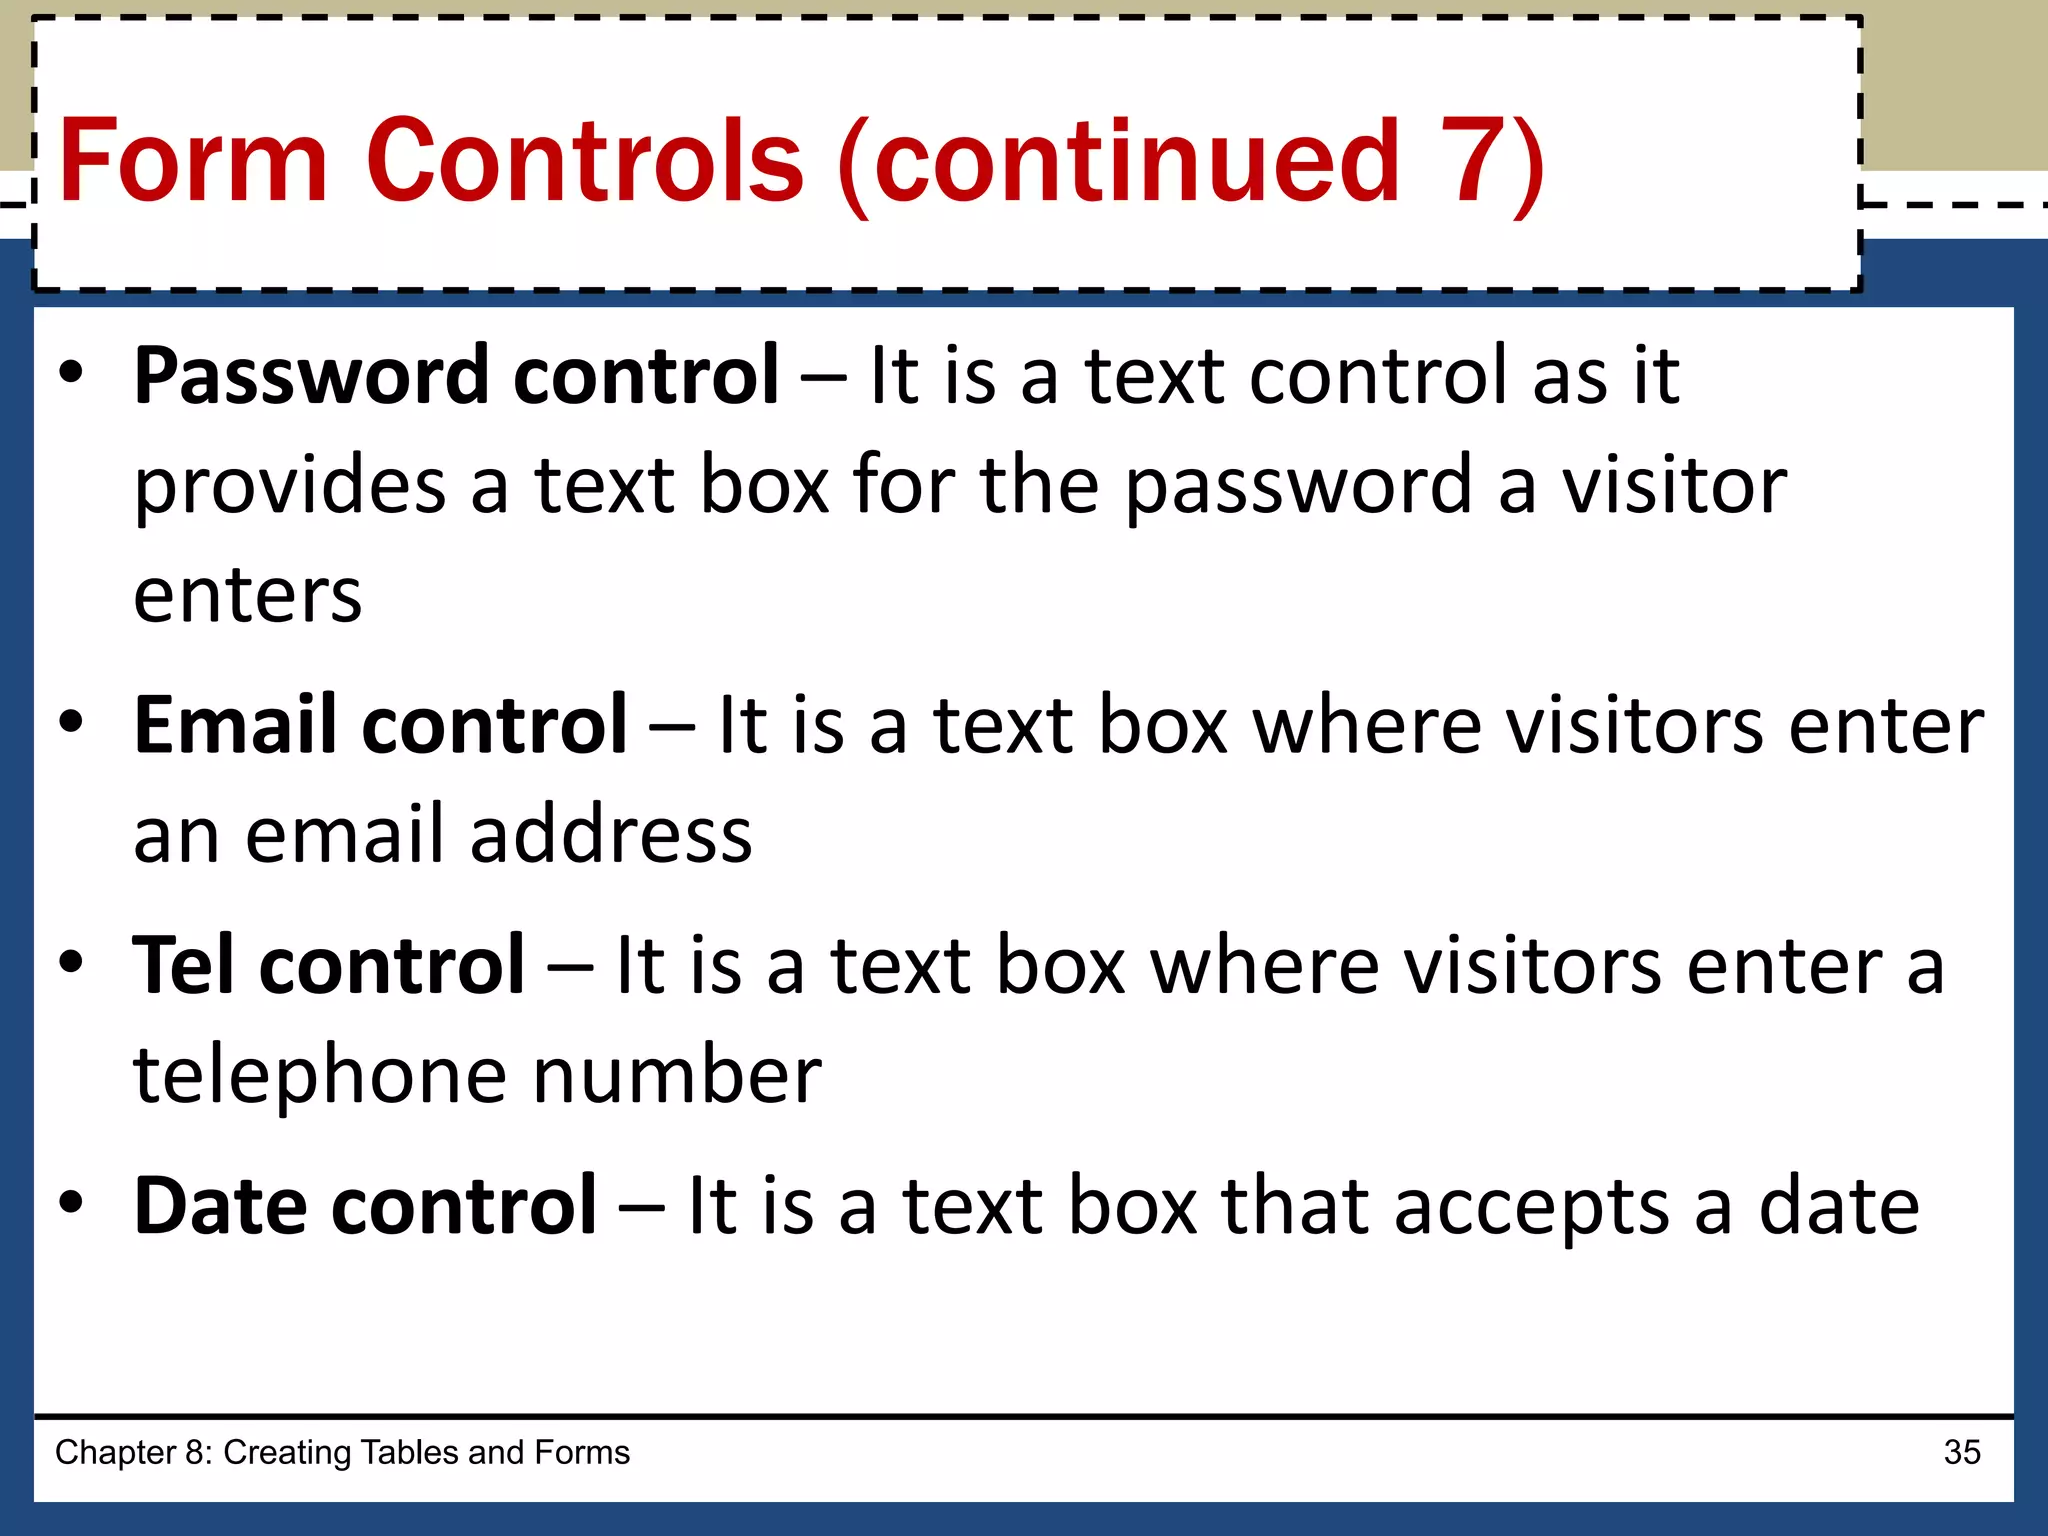
• Password control– It is a text control as it
provides a text box for the password a visitor
enters
• Email control – It is a text box where visitors enter
an email address
• Tel control – It is a text box where visitors enter a
telephone number
• Date control – It is a text box that accepts a date
Chapter 8: Creating Tables and Forms 35
Form Controls (continued 7)
36.
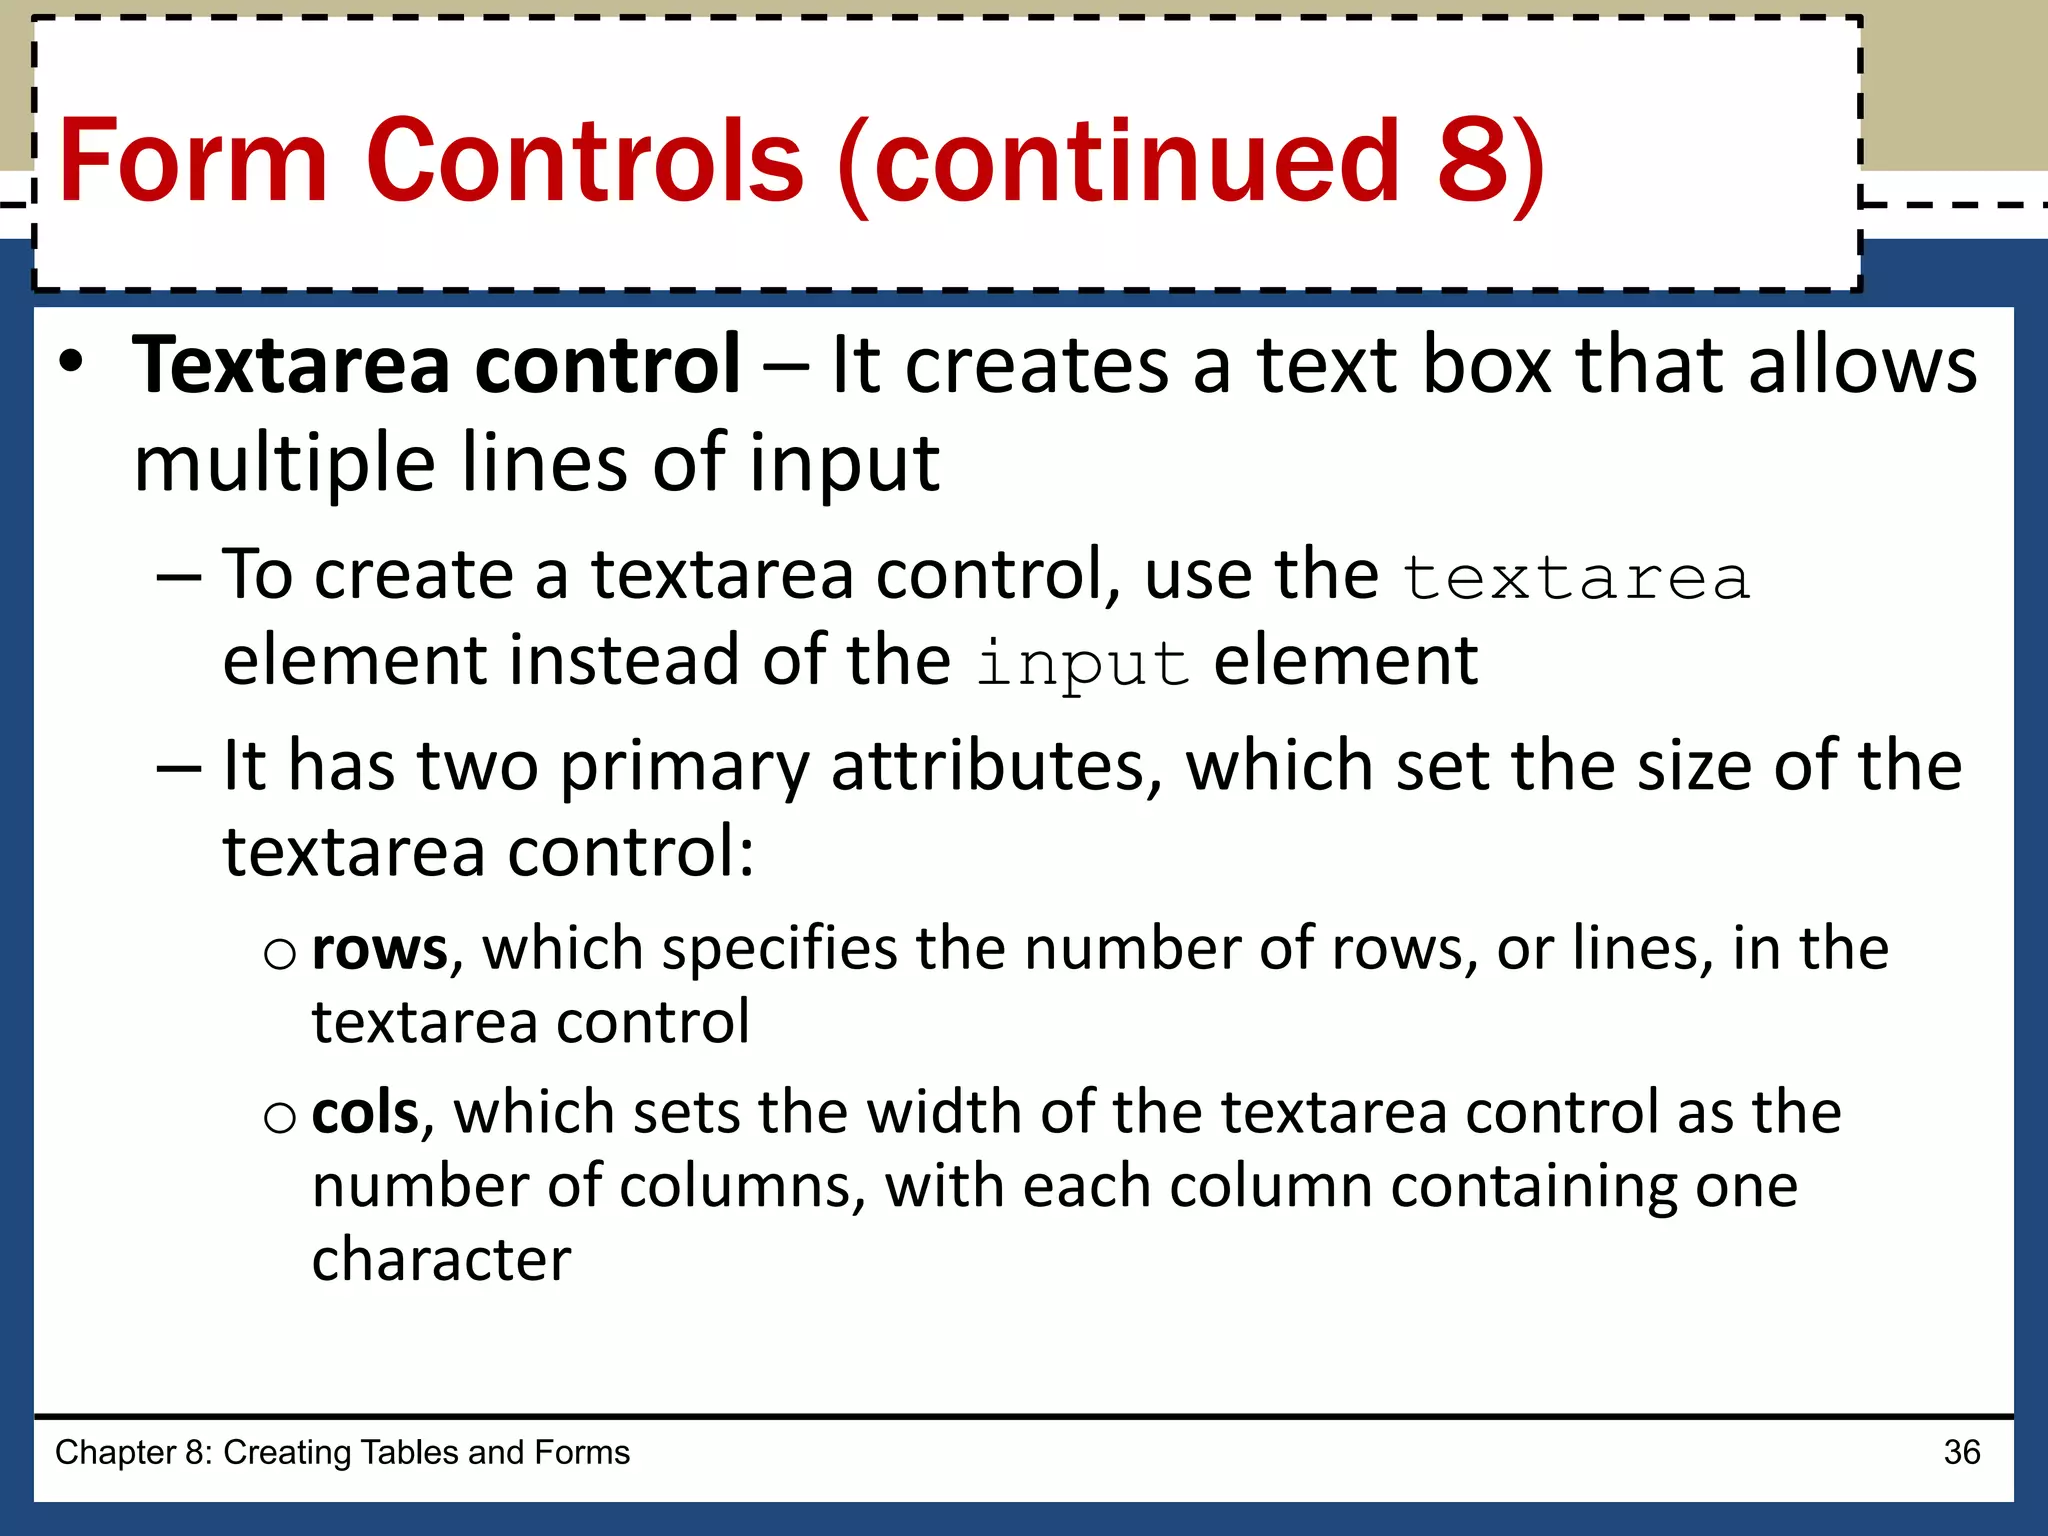
• Textarea control– It creates a text box that allows
multiple lines of input
– To create a textarea control, use the textarea
element instead of the input element
– It has two primary attributes, which set the size of the
textarea control:
orows, which specifies the number of rows, or lines, in the
textarea control
ocols, which sets the width of the textarea control as the
number of columns, with each column containing one
character
Chapter 8: Creating Tables and Forms 36
Form Controls (continued 8)
37.
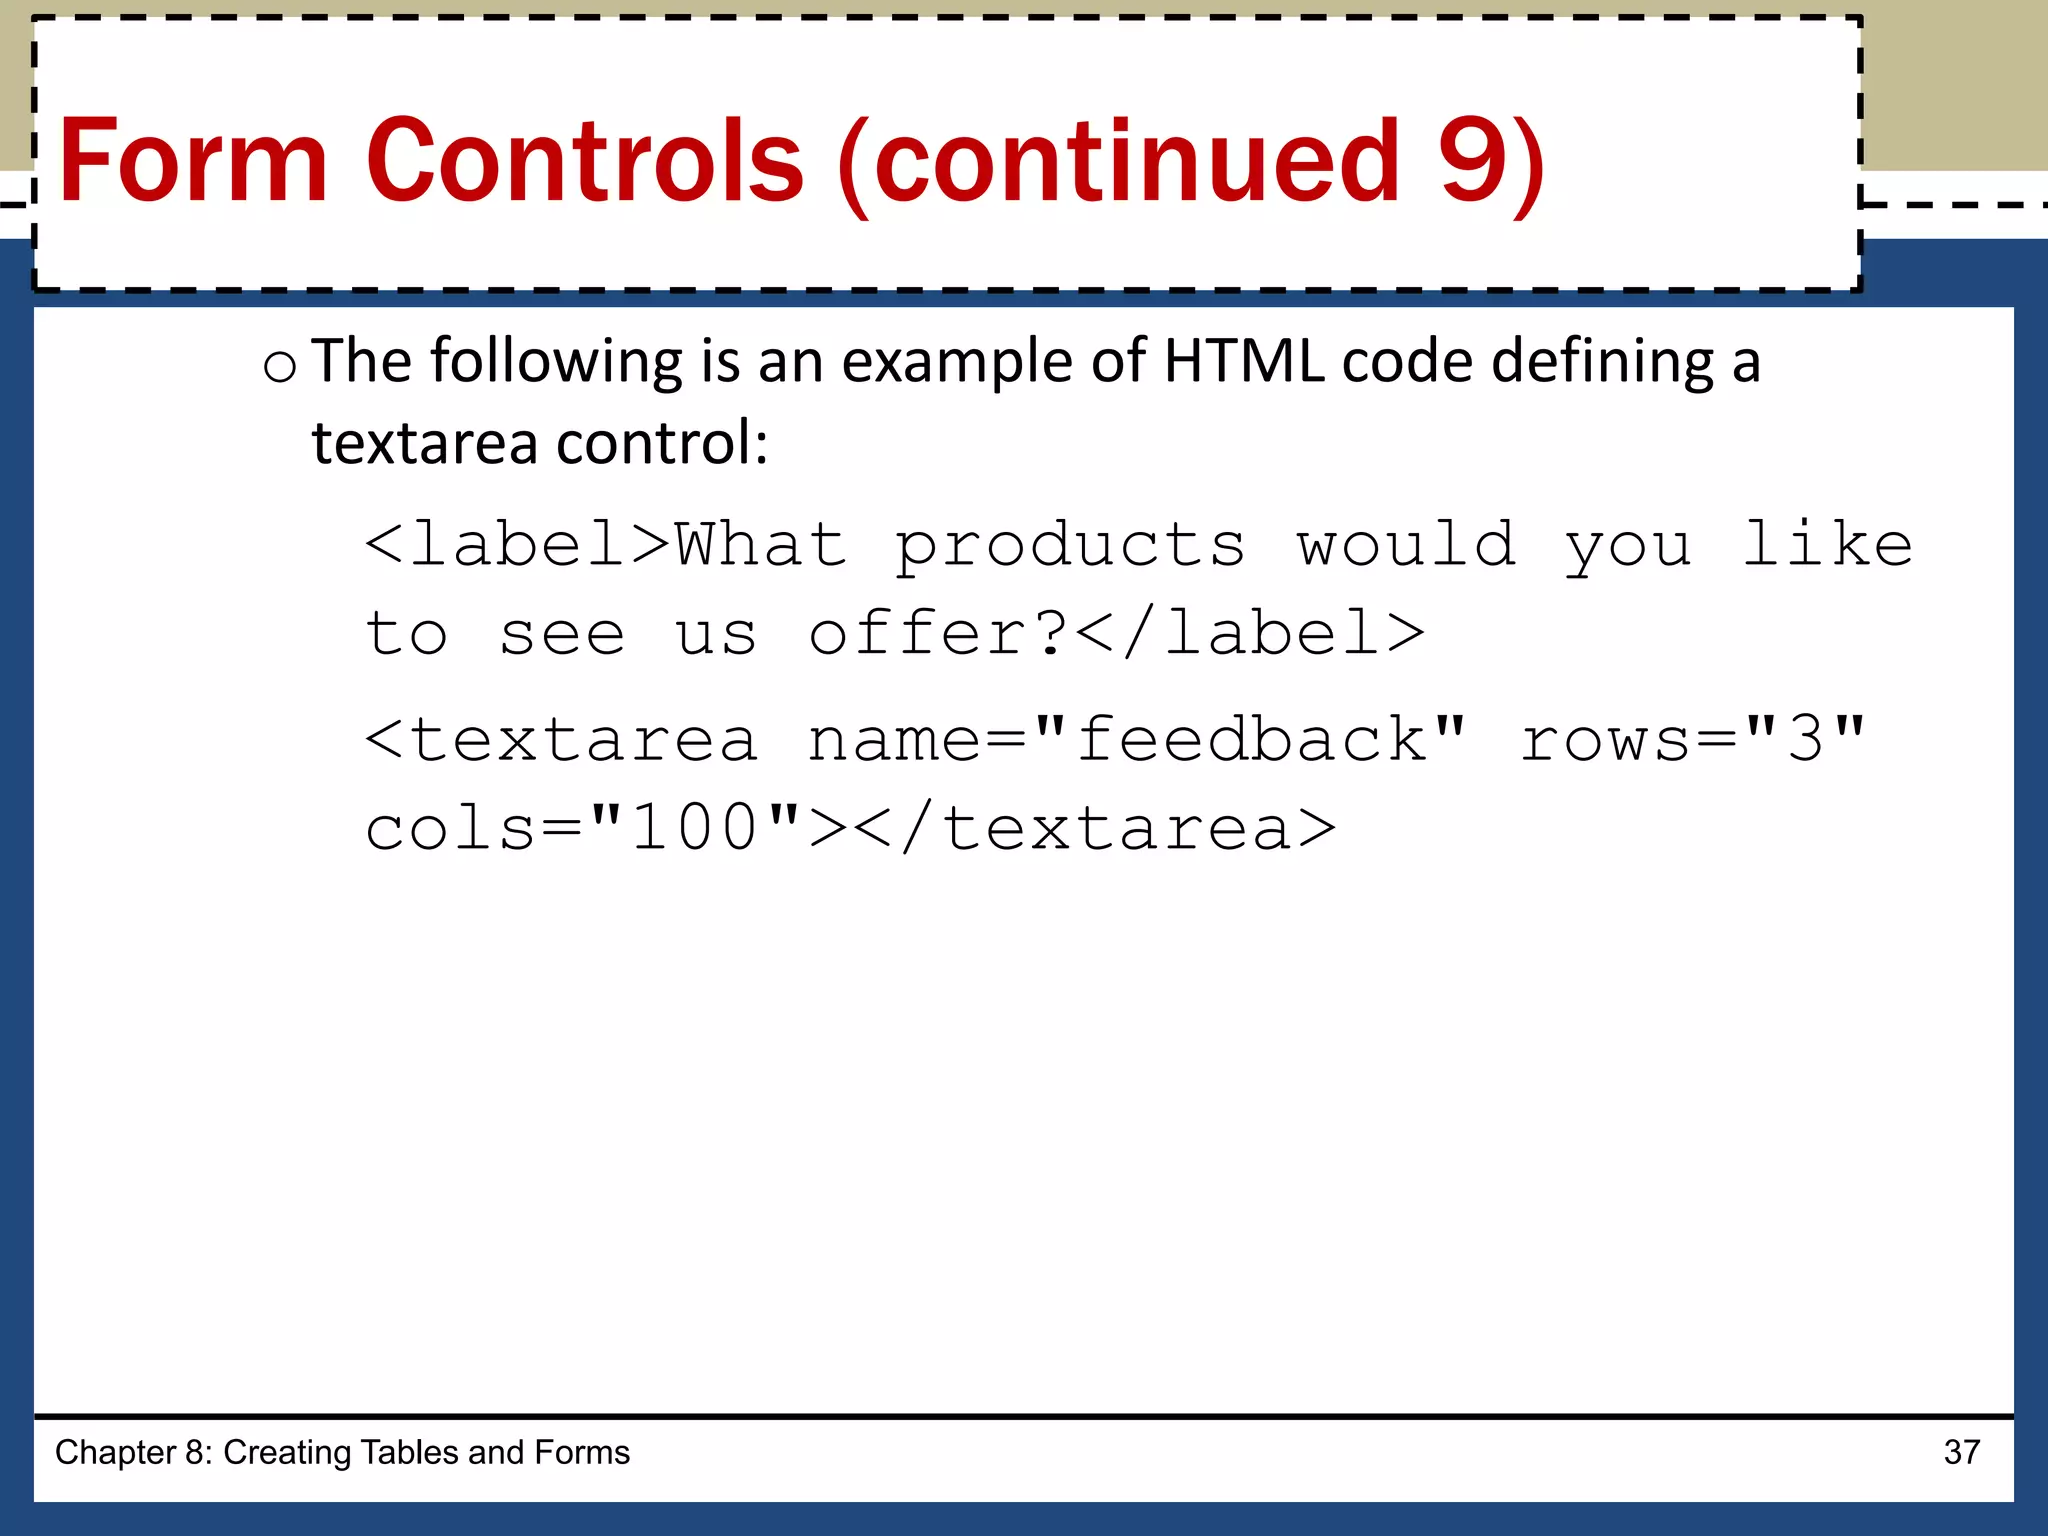
oThe following isan example of HTML code defining a
textarea control:
<label>What products would you like
to see us offer?</label>
<textarea name="feedback" rows="3"
cols="100"></textarea>
Chapter 8: Creating Tables and Forms 37
Form Controls (continued 9)
38.
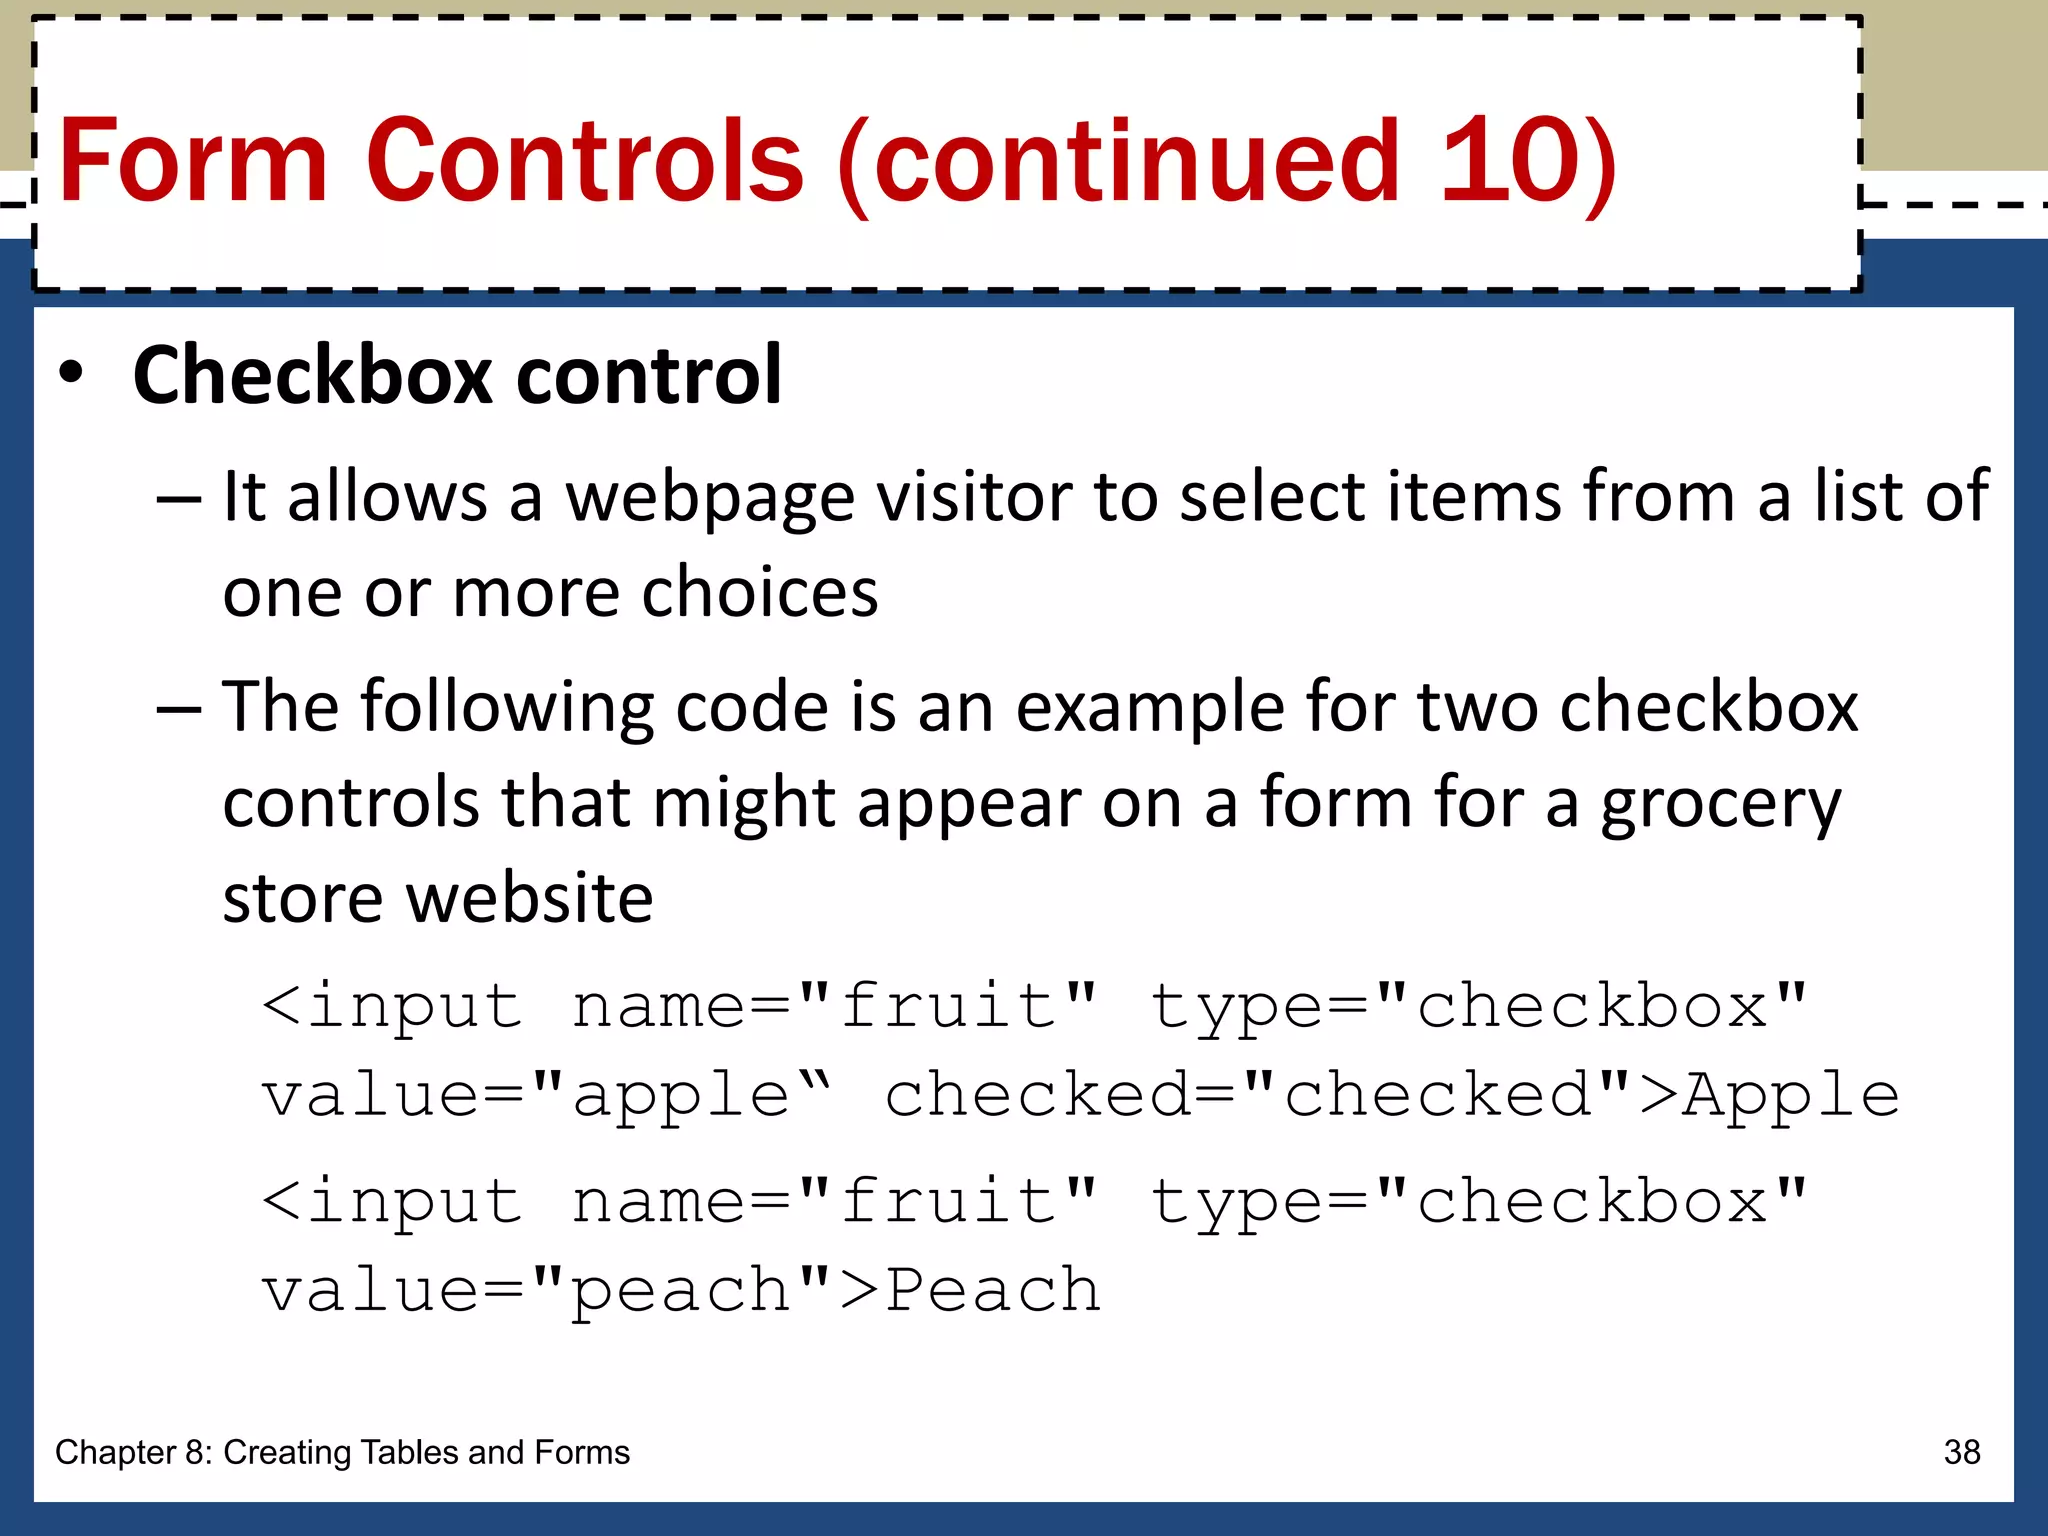
• Checkbox control
–It allows a webpage visitor to select items from a list of
one or more choices
– The following code is an example for two checkbox
controls that might appear on a form for a grocery
store website
<input name="fruit" type="checkbox"
value="apple“ checked="checked">Apple
<input name="fruit" type="checkbox"
value="peach">Peach
Chapter 8: Creating Tables and Forms 38
Form Controls (continued 10)
39.
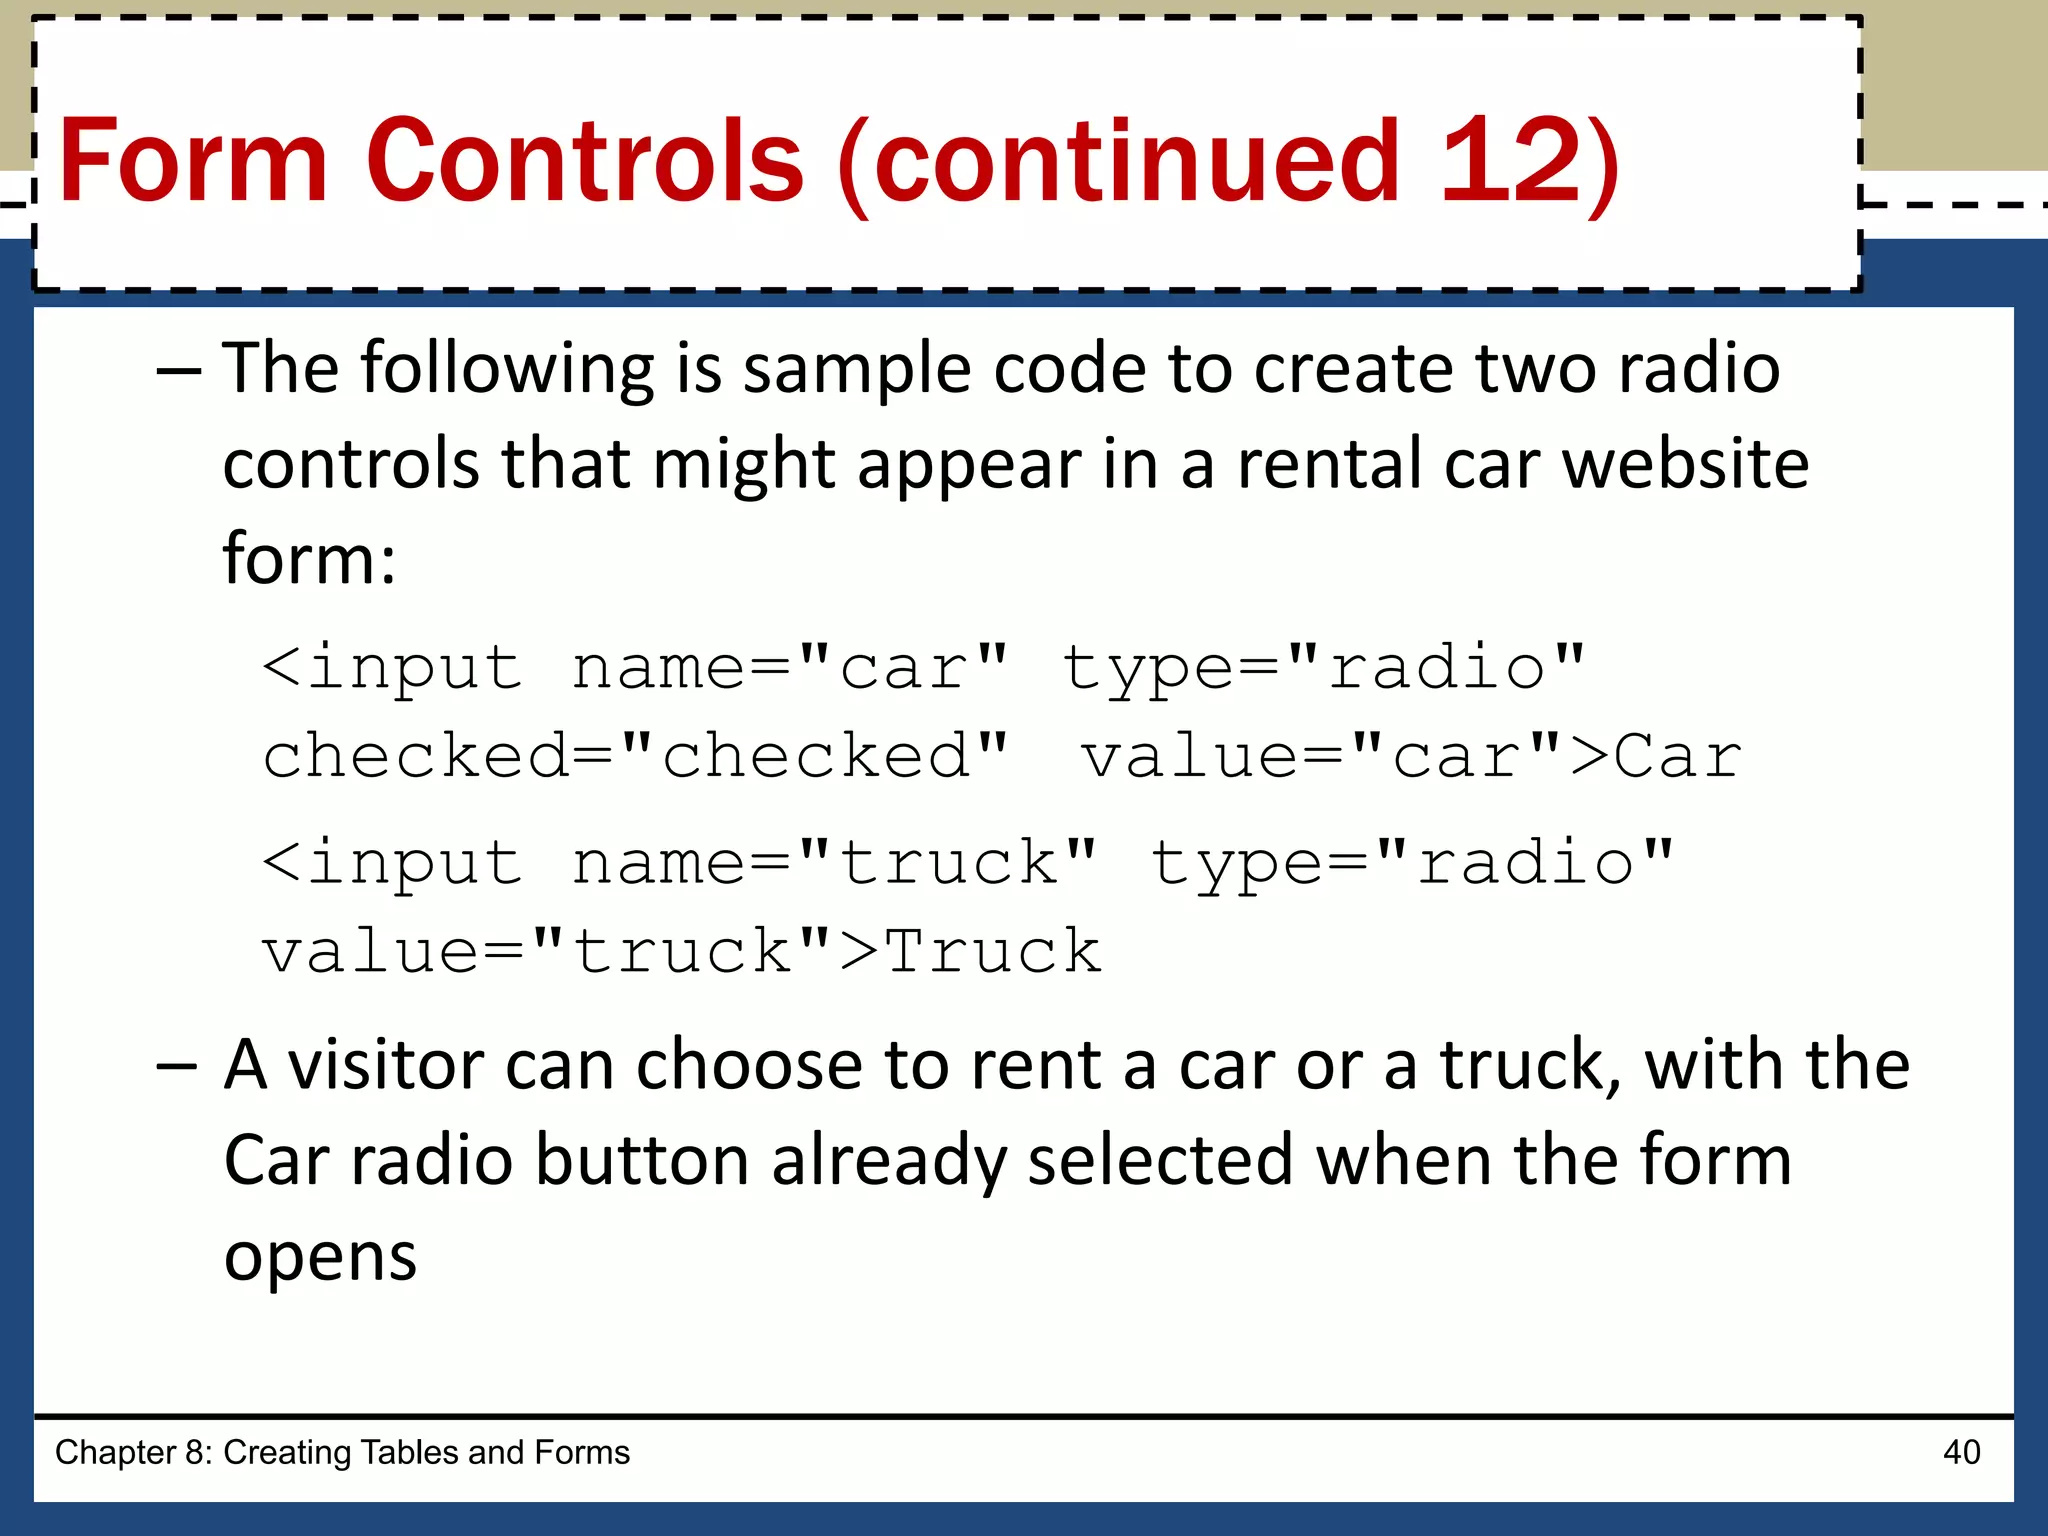
• Radio control
–It limits the webpage visitor to only one choice from a
list of choices
– Each choice has a radio button, or option button,
which appears as an open circle
– By default, all radio buttons are deselected
– To set a particular button as the default, use the
checked attribute and value within the <input> tag
Chapter 8: Creating Tables and Forms 39
Form Controls (continued 11)
40.
– The followingis sample code to create two radio
controls that might appear in a rental car website
form:
<input name="car" type="radio"
checked="checked" value="car">Car
<input name="truck" type="radio"
value="truck">Truck
– A visitor can choose to rent a car or a truck, with the
Car radio button already selected when the form
opens
Chapter 8: Creating Tables and Forms 40
Form Controls (continued 12)
41.
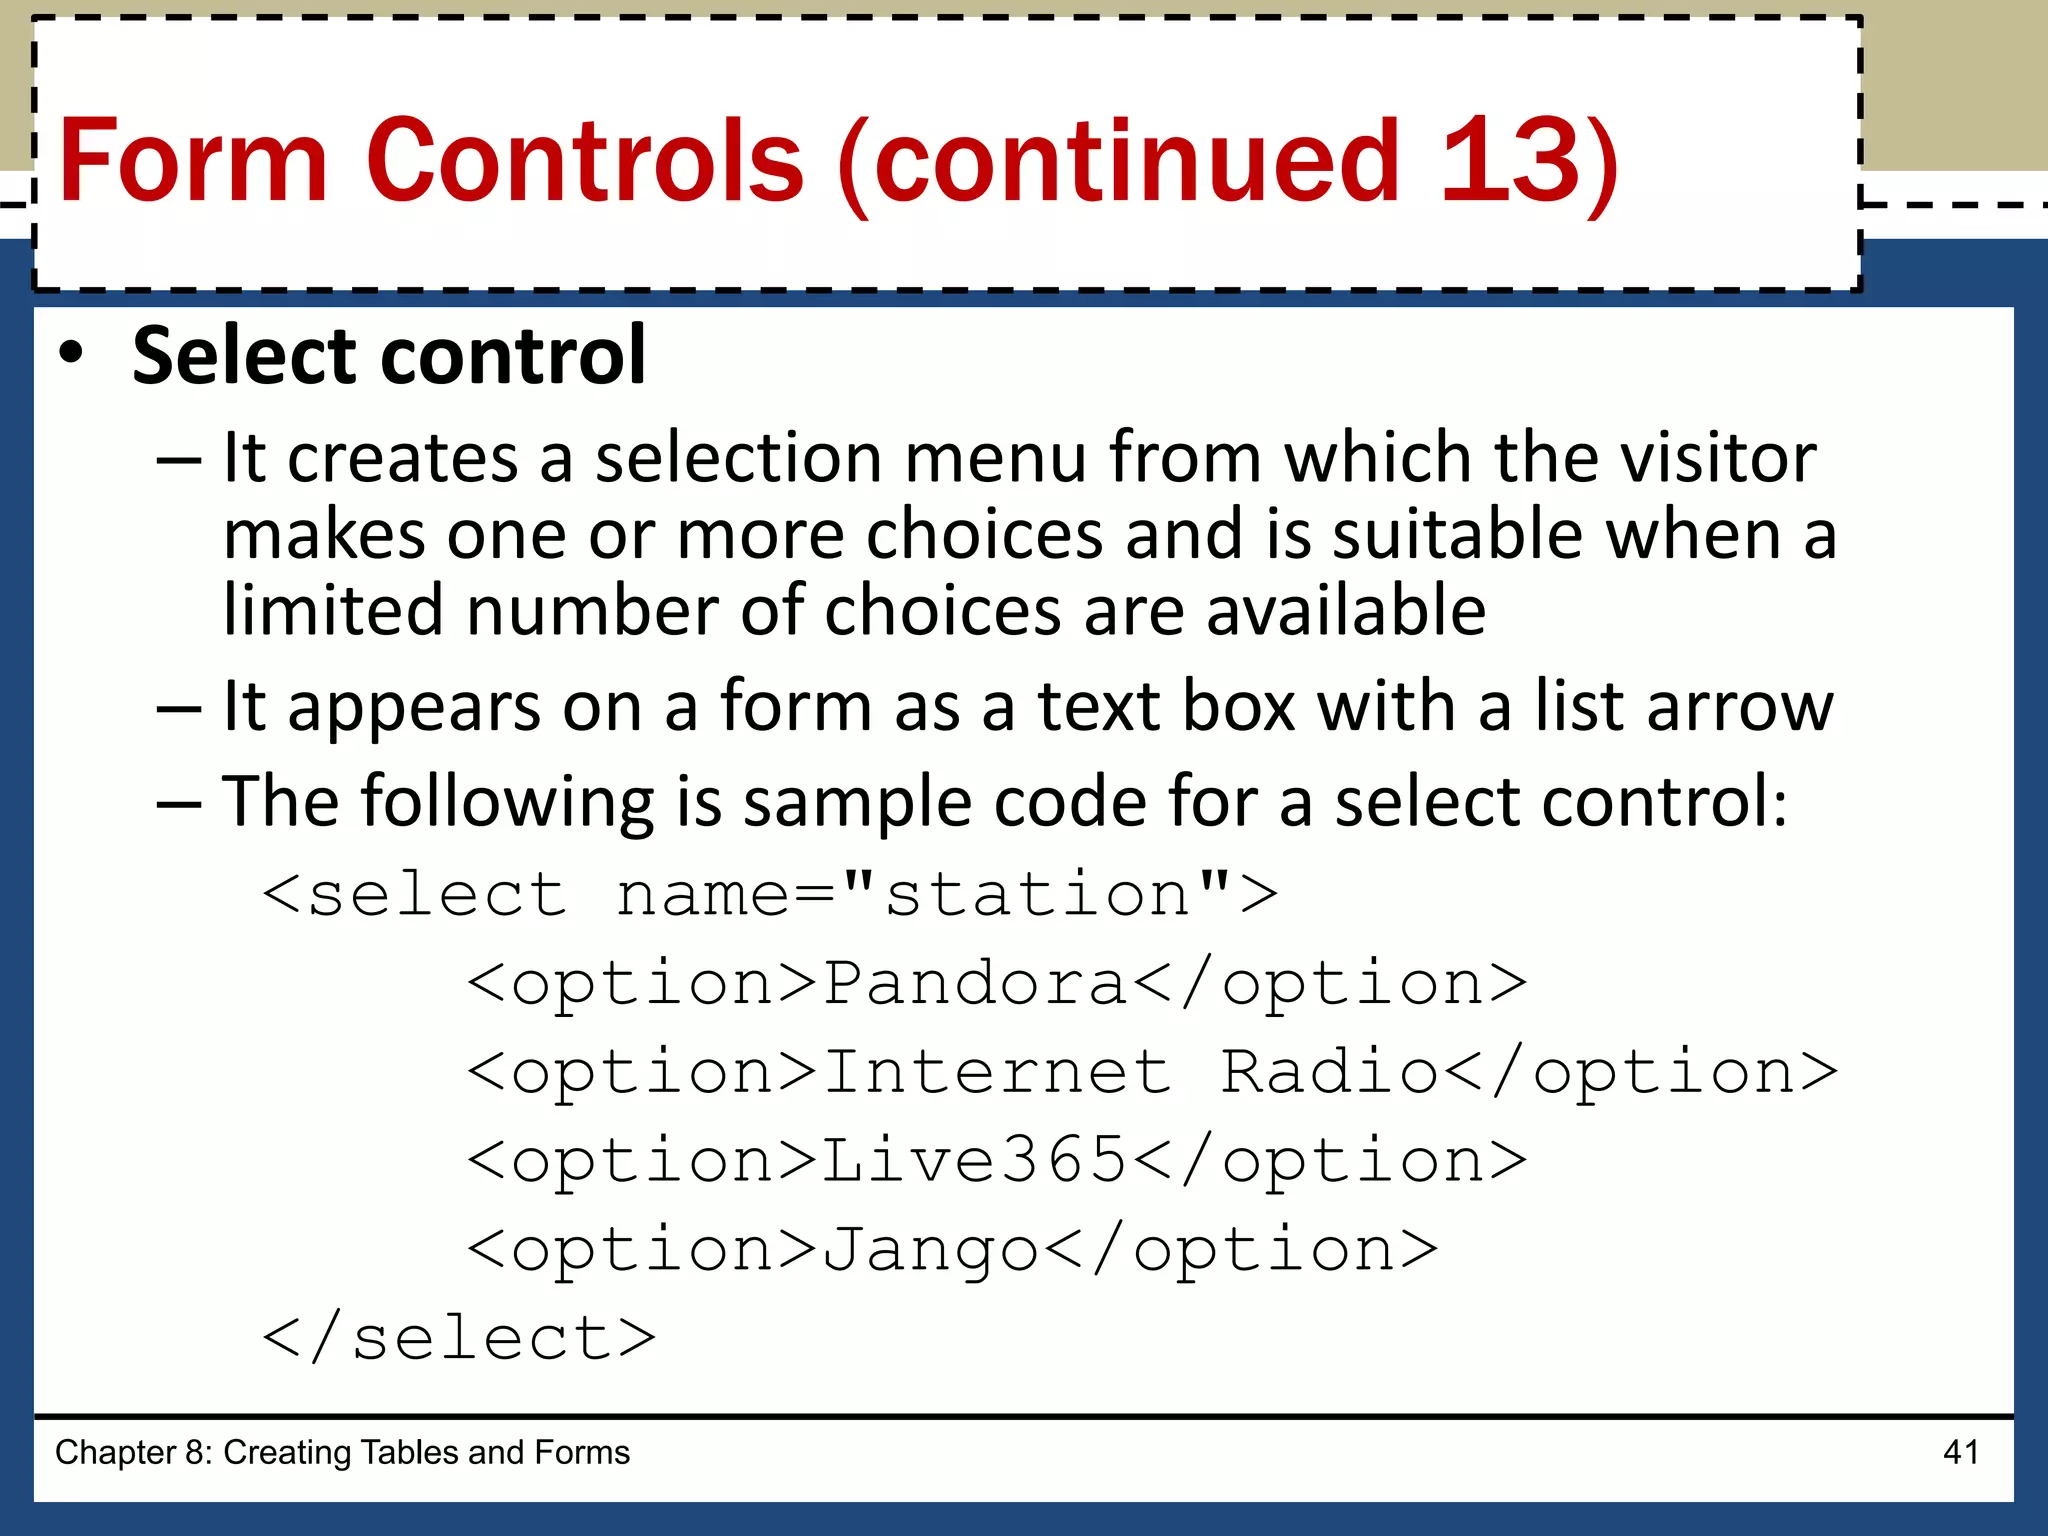
• Select control
–It creates a selection menu from which the visitor
makes one or more choices and is suitable when a
limited number of choices are available
– It appears on a form as a text box with a list arrow
– The following is sample code for a select control:
<select name="station">
<option>Pandora</option>
<option>Internet Radio</option>
<option>Live365</option>
<option>Jango</option>
</select>
Chapter 8: Creating Tables and Forms 41
Form Controls (continued 13)
42.
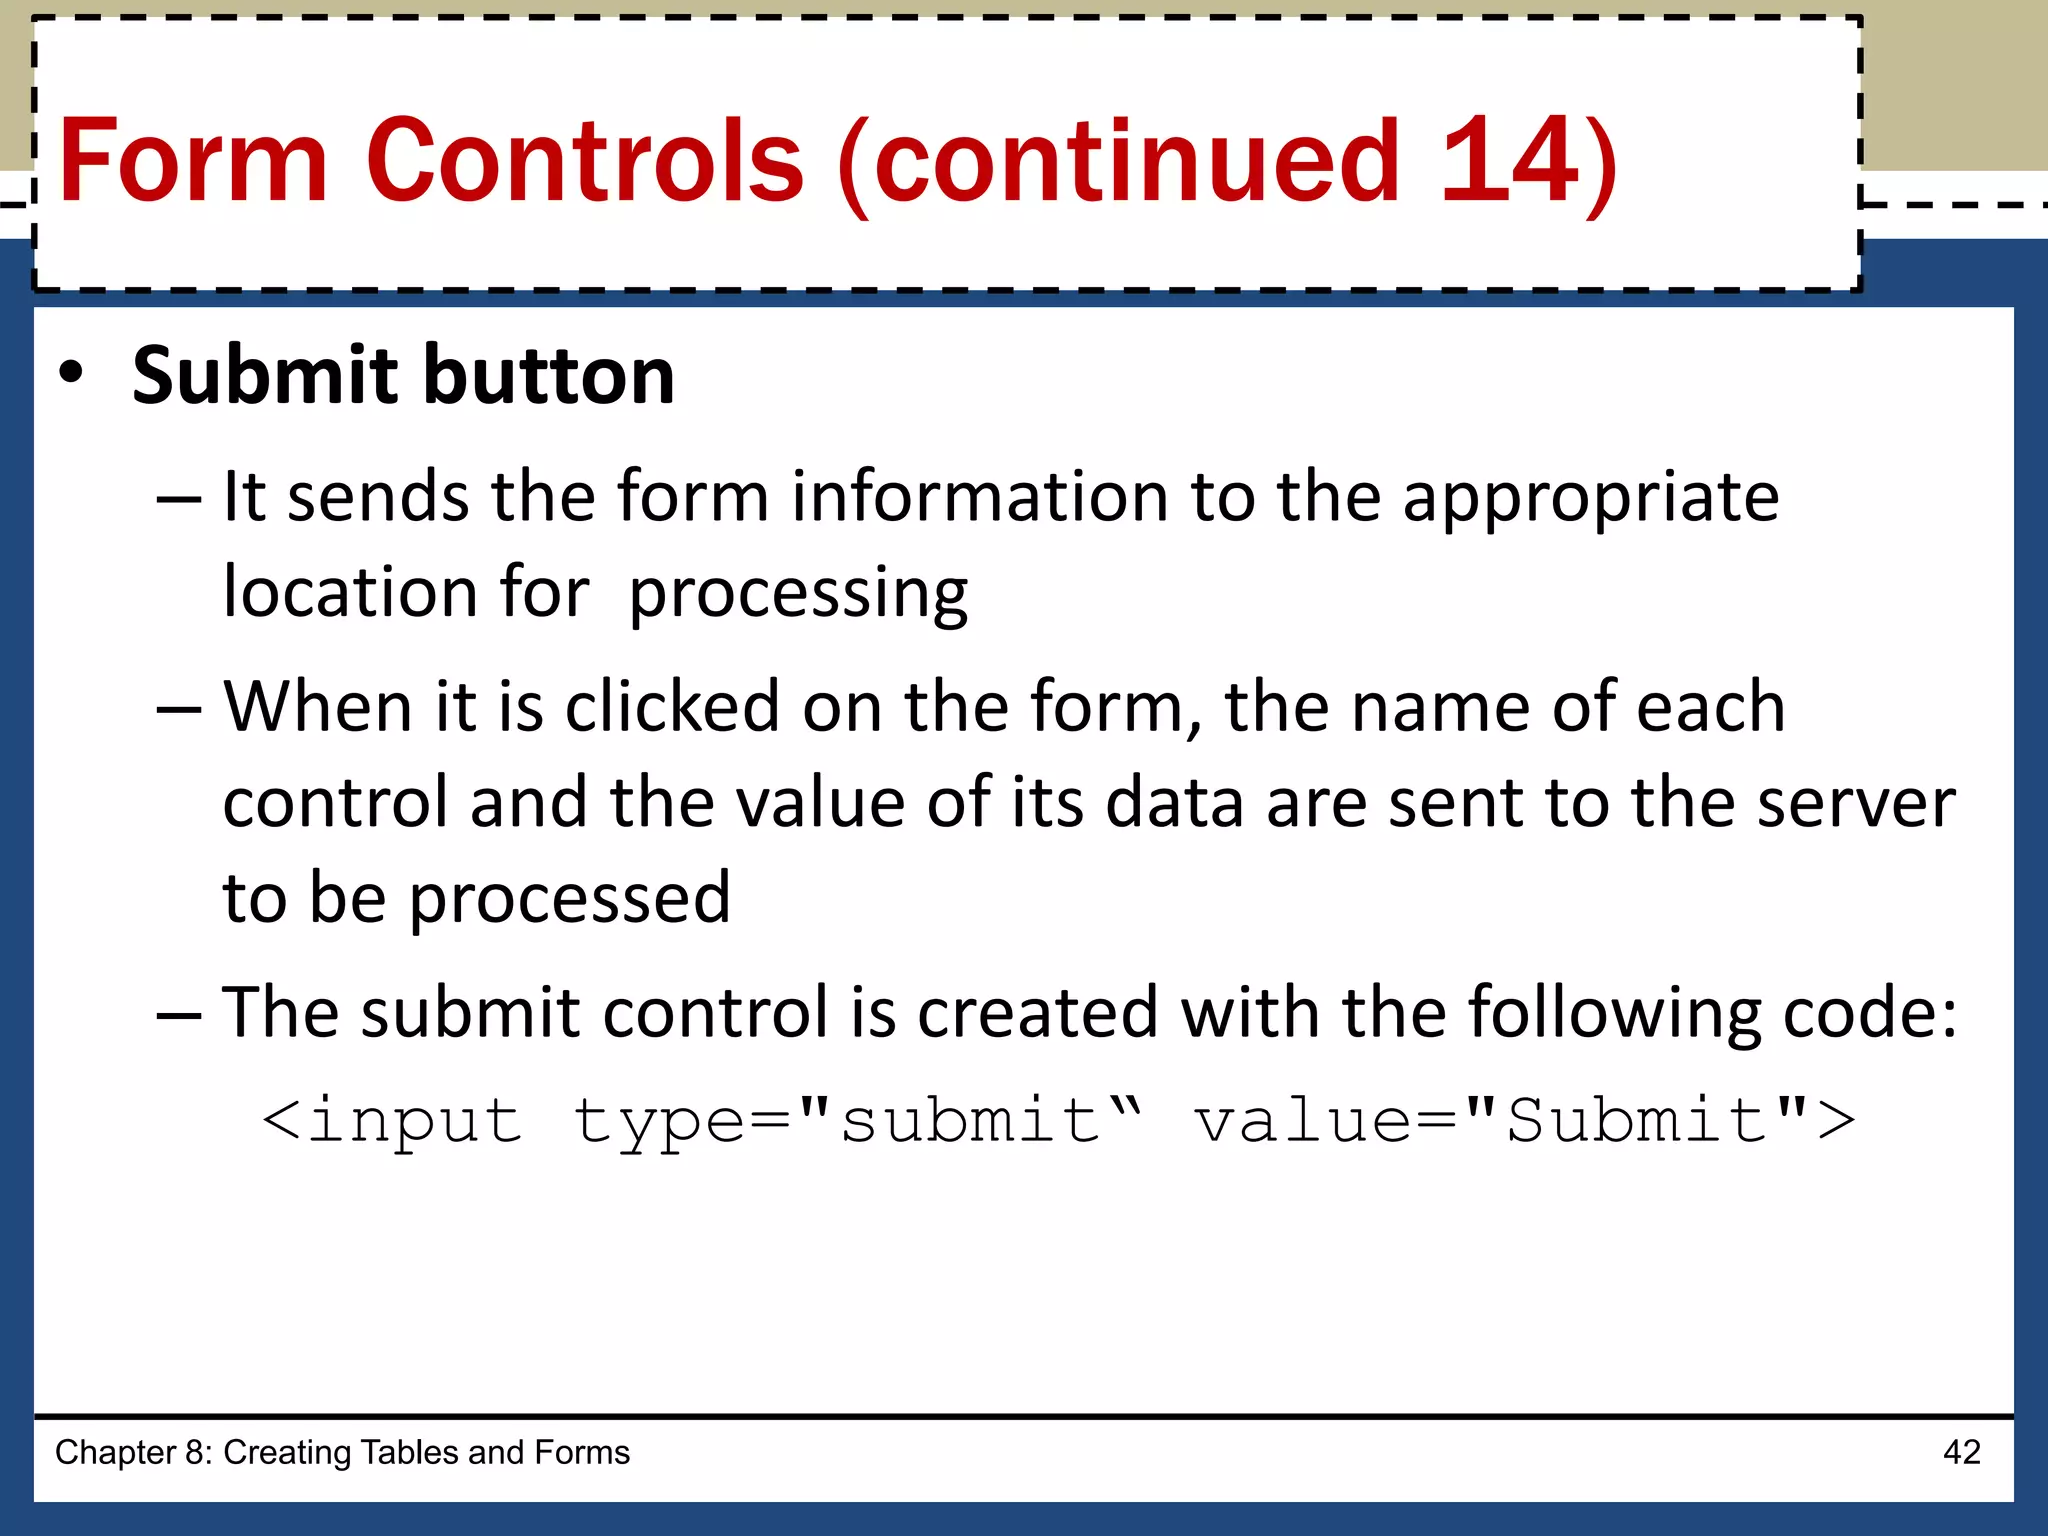
• Submit button
–It sends the form information to the appropriate
location for processing
– When it is clicked on the form, the name of each
control and the value of its data are sent to the server
to be processed
– The submit control is created with the following code:
<input type="submit“ value="Submit">
Chapter 8: Creating Tables and Forms 42
Form Controls (continued 14)
43.
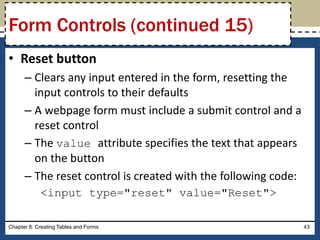
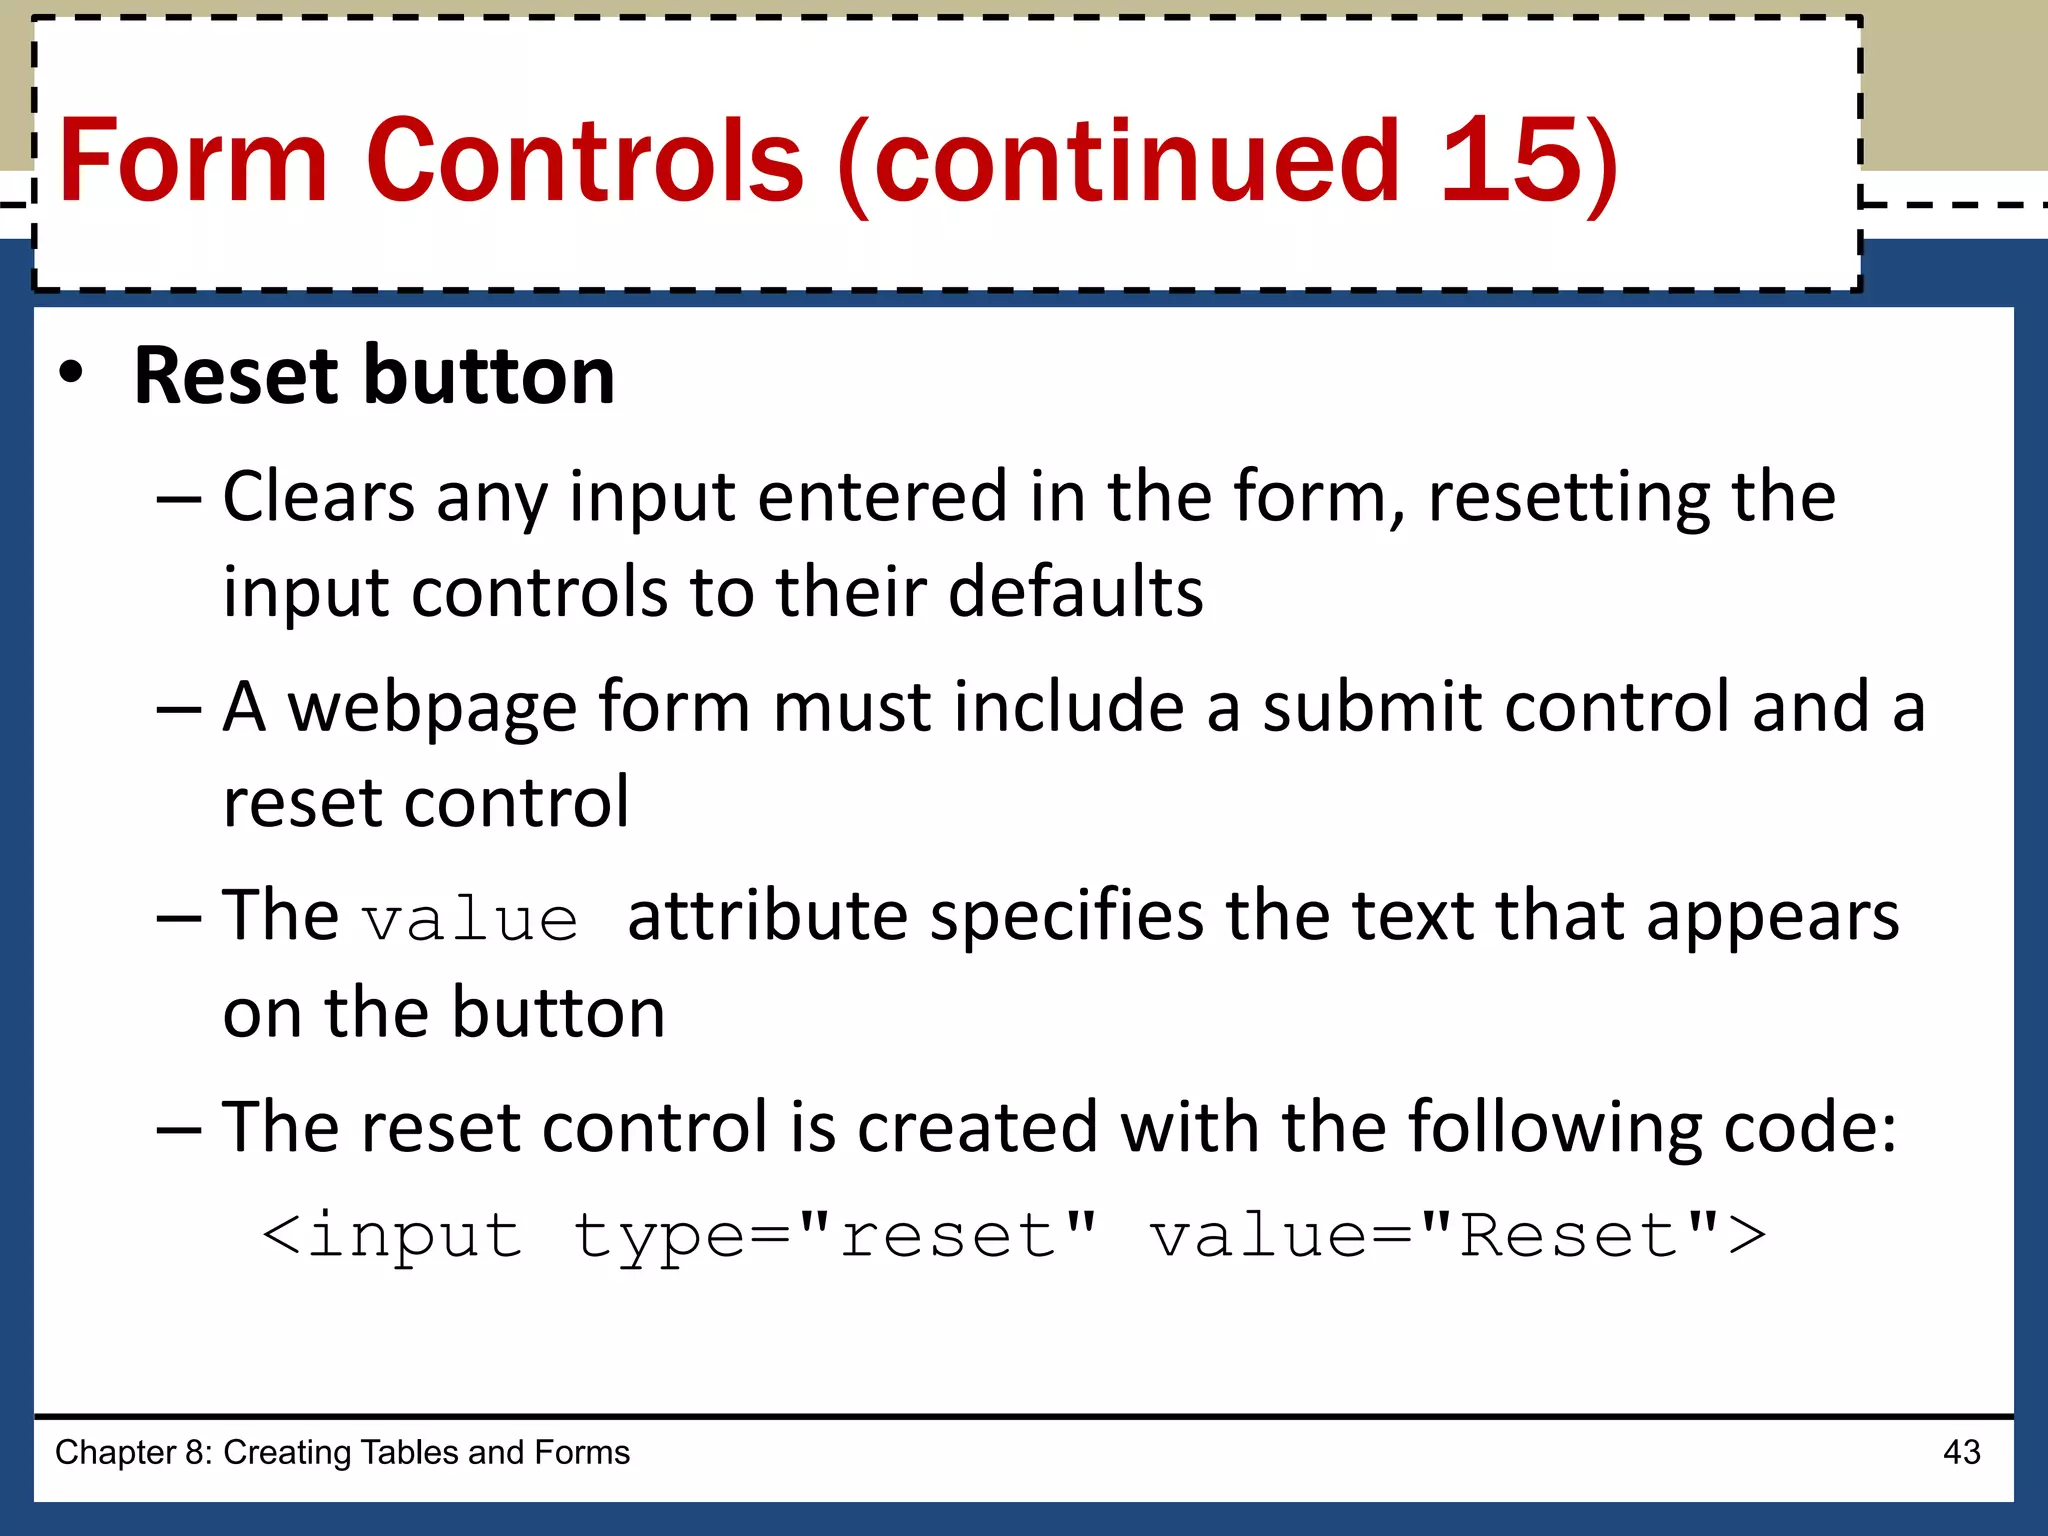
• Reset button
–Clears any input entered in the form, resetting the
input controls to their defaults
– A webpage form must include a submit control and a
reset control
– The value attribute specifies the text that appears
on the button
– The reset control is created with the following code:
<input type="reset" value="Reset">
Chapter 8: Creating Tables and Forms 43
Form Controls (continued 15)
44.
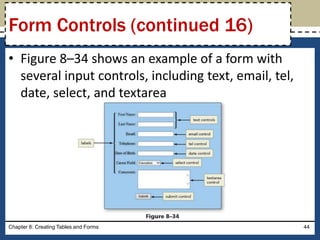
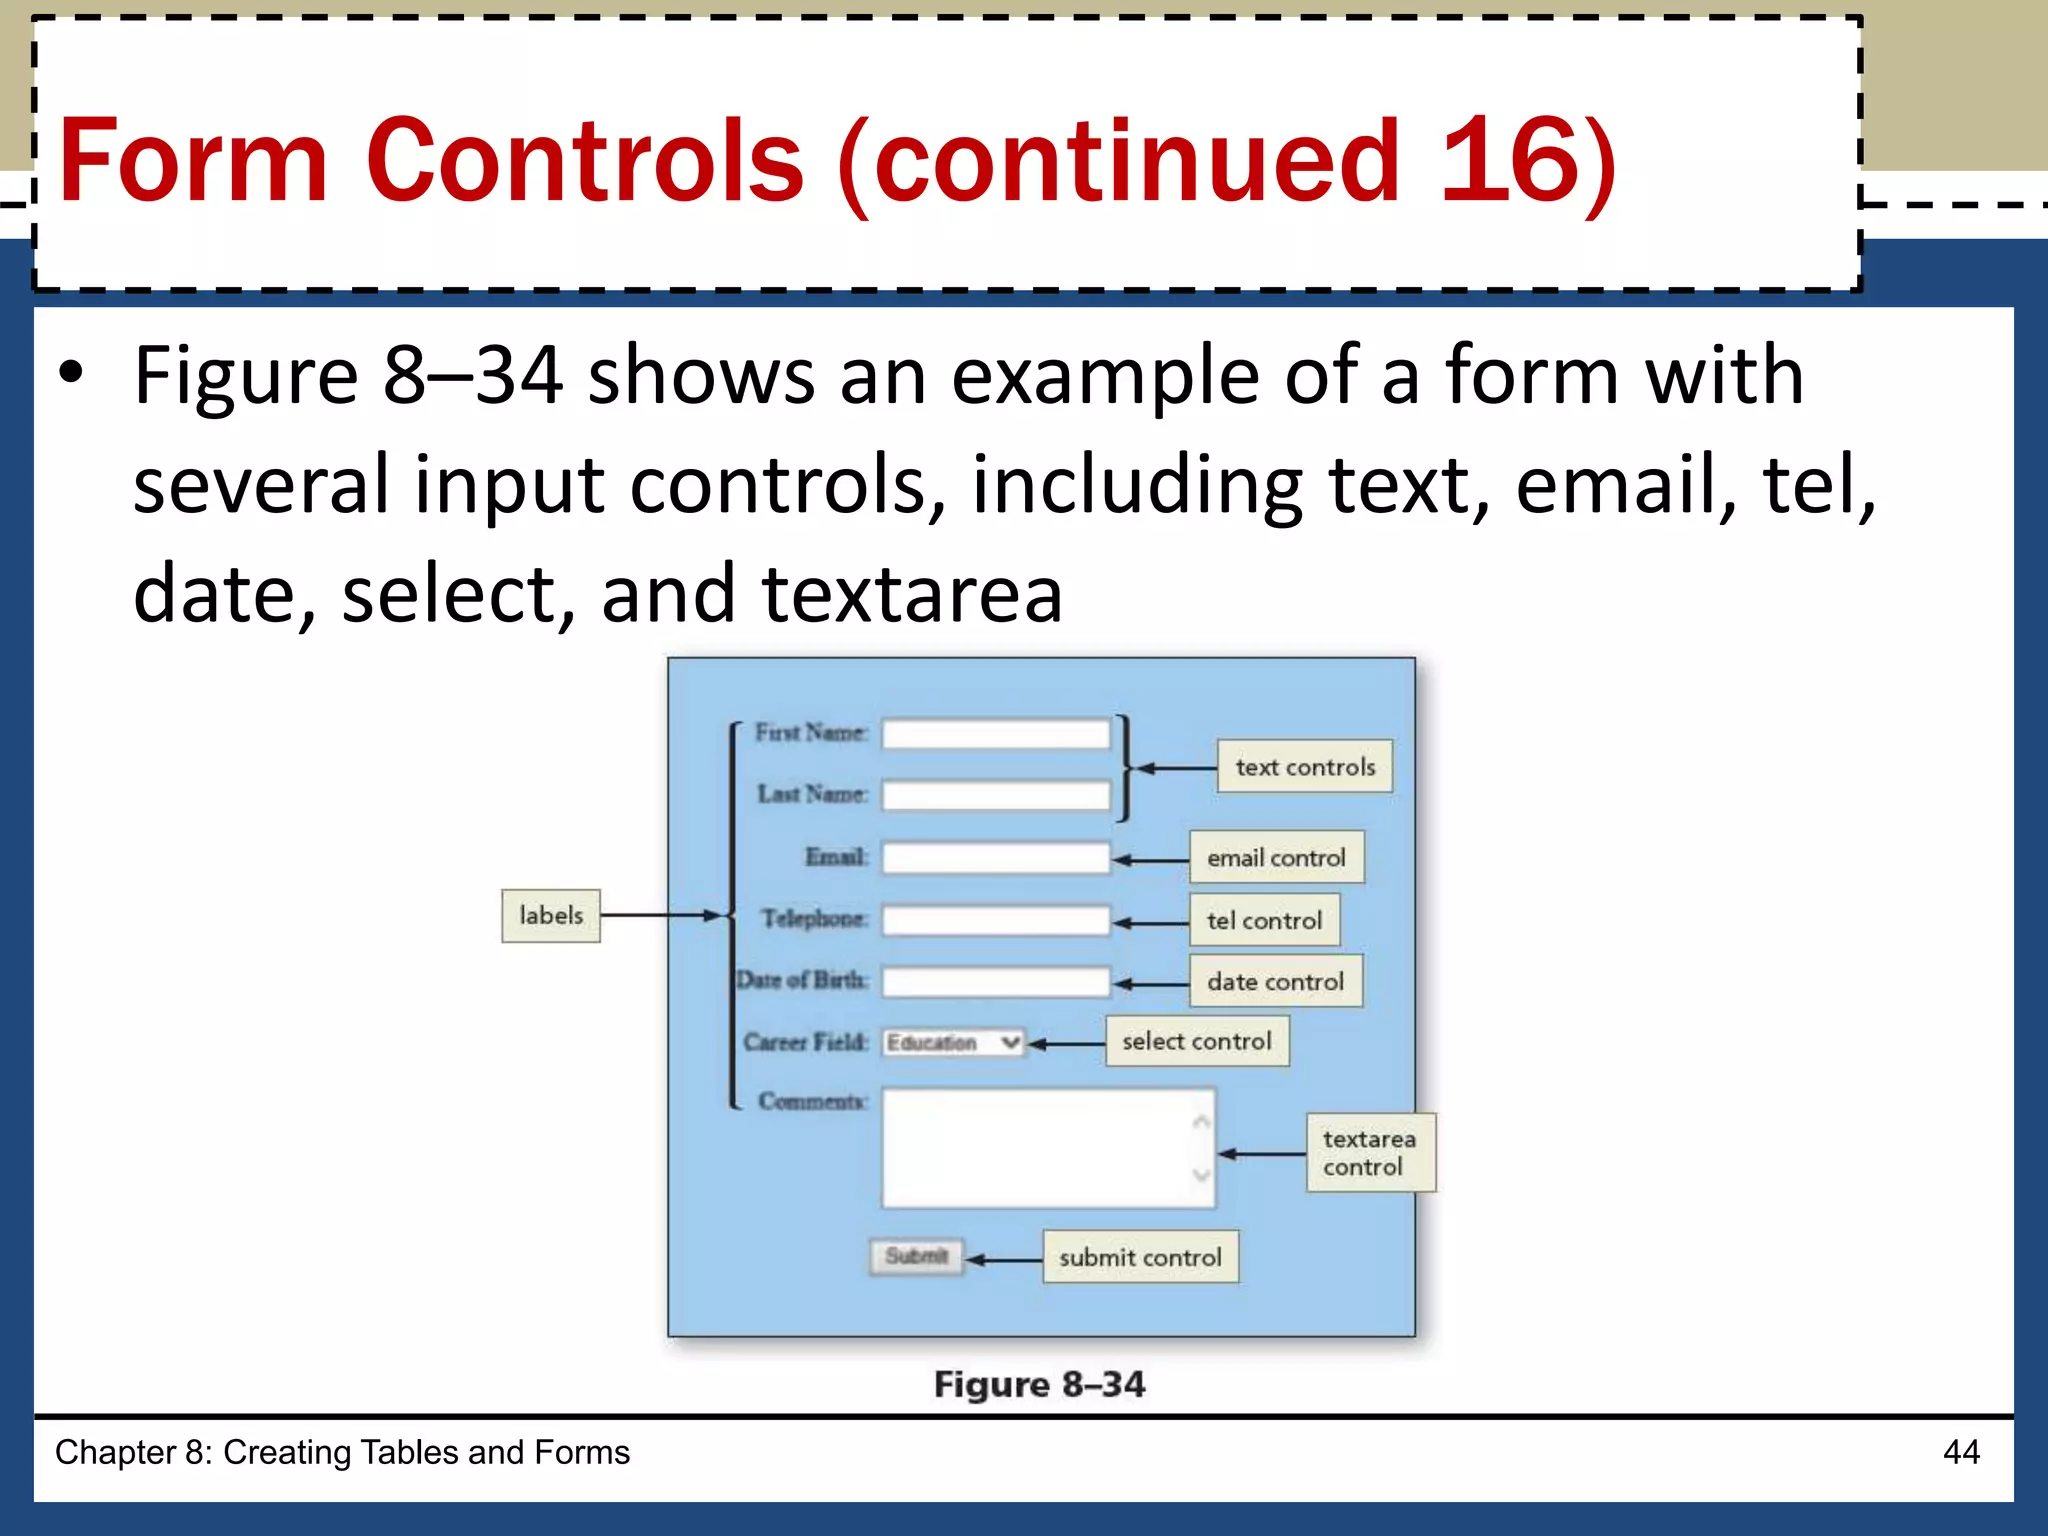
• Figure 8–34shows an example of a form with
several input controls, including text, email, tel,
date, select, and textarea
Chapter 8: Creating Tables and Forms 44
Form Controls (continued 16)
45.
• Form Labels
–They identify the type of information to enter into or
select from an input control
– They are added to a form using the label element
– To connect them to their controls, include the for
attribute with the same value as the input control’s id
value
Chapter 8: Creating Tables and Forms 45
Form Controls (continued 17)
46.
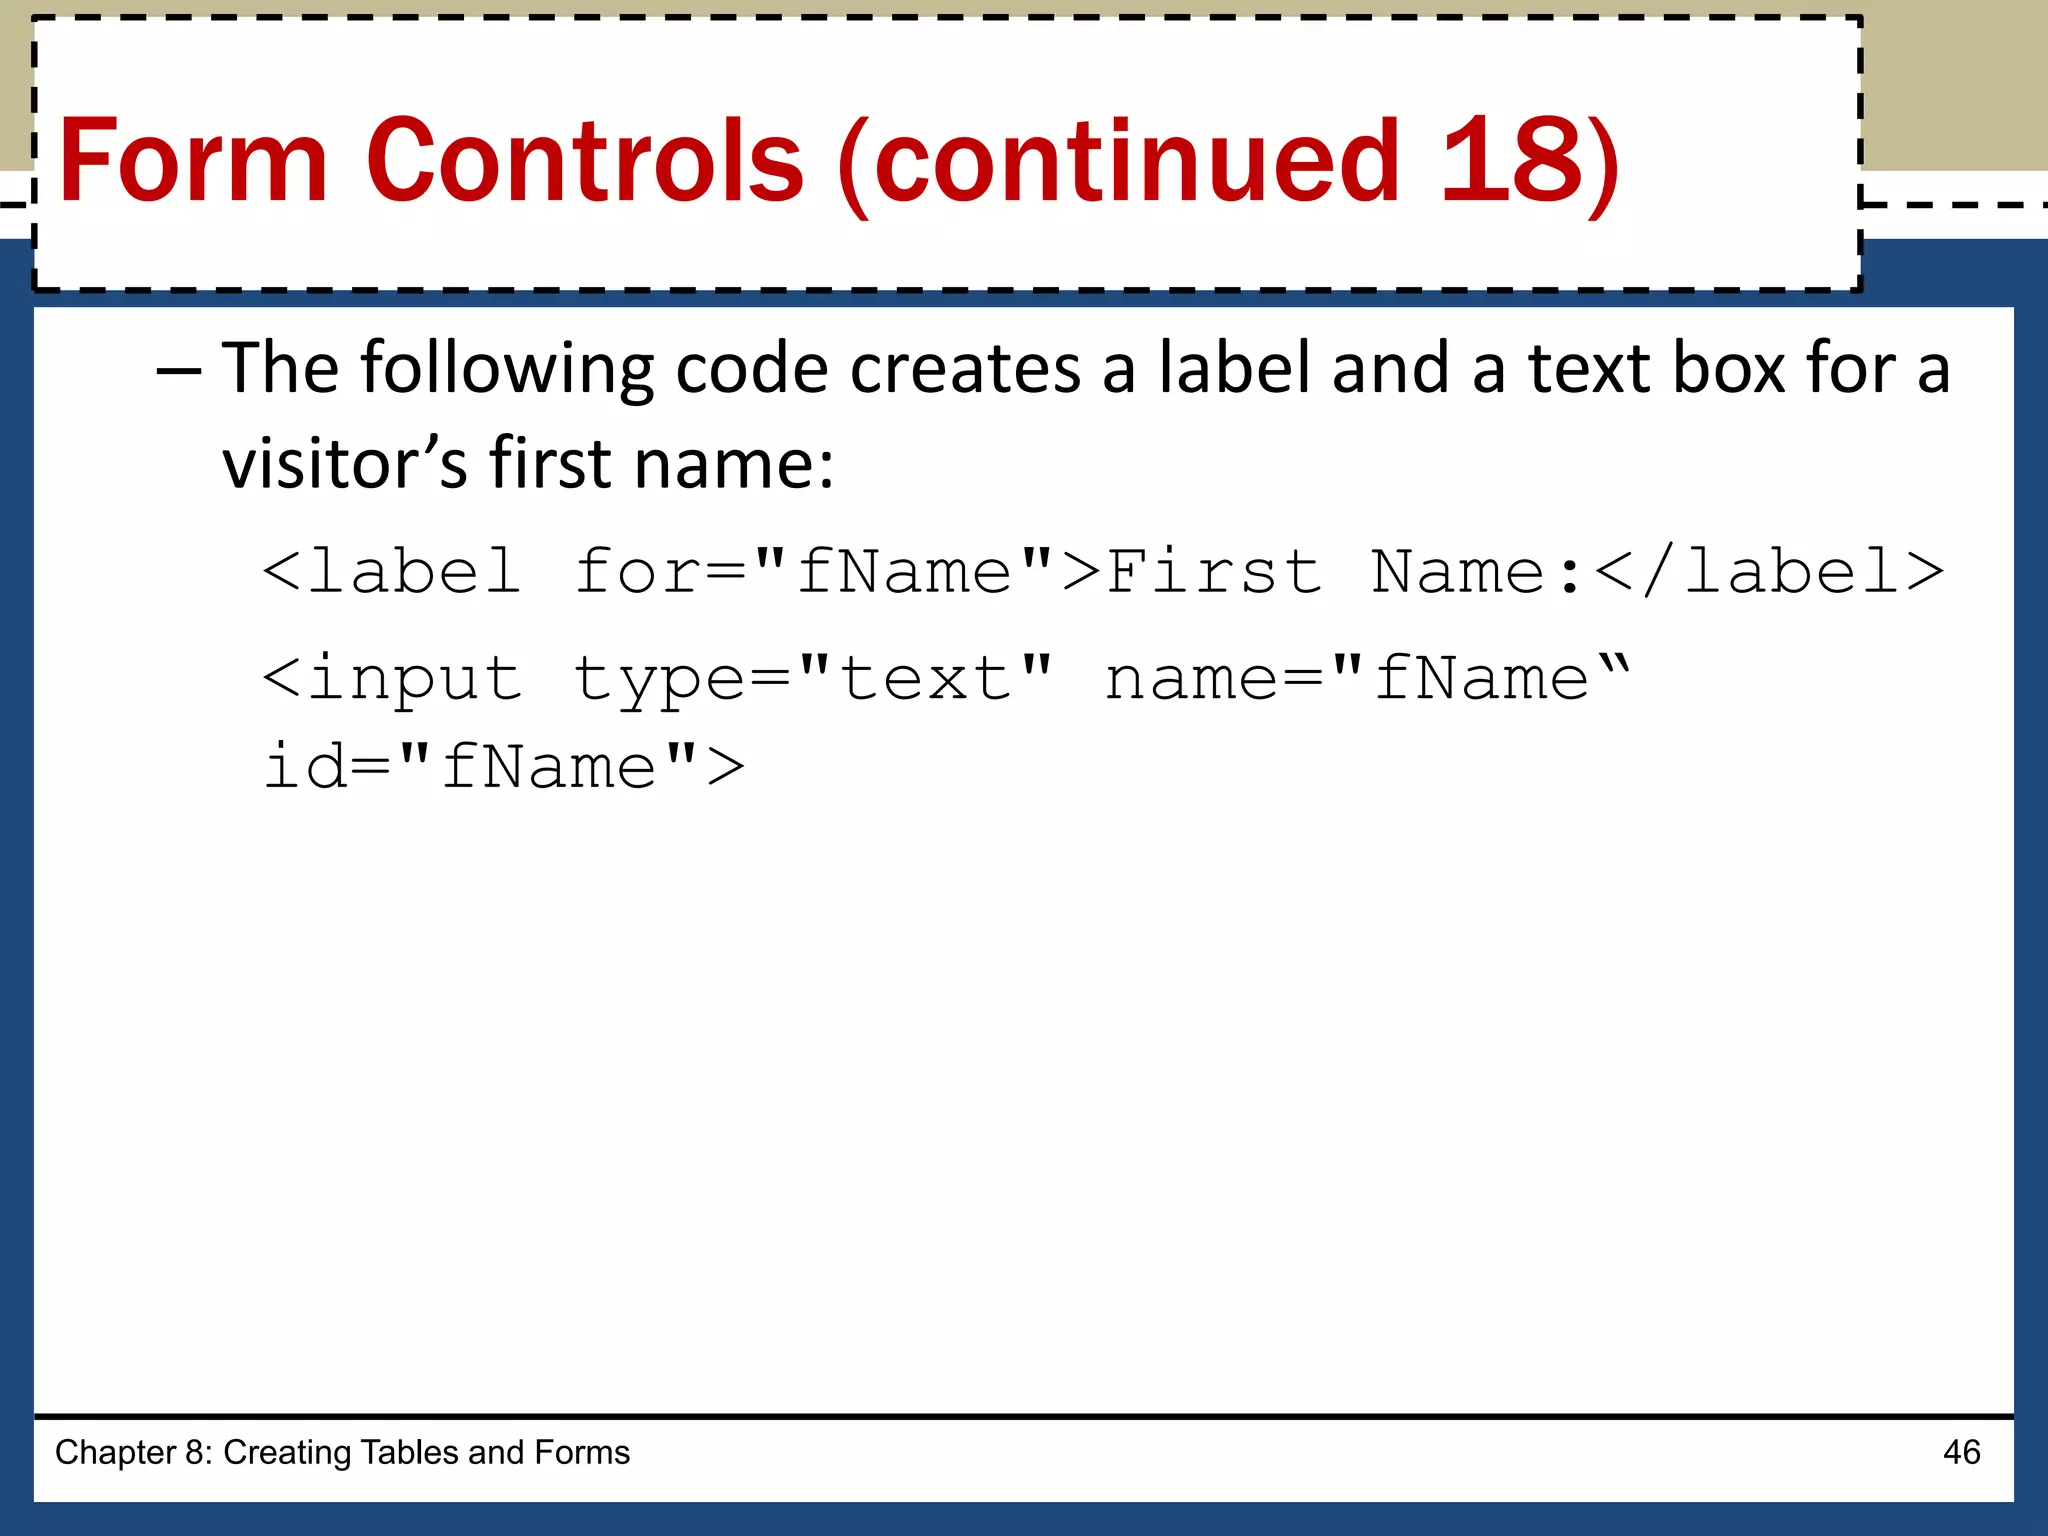
– The followingcode creates a label and a text box for a
visitor’s first name:
<label for="fName">First Name:</label>
<input type="text" name="fName“
id="fName">
Chapter 8: Creating Tables and Forms 46
Form Controls (continued 18)
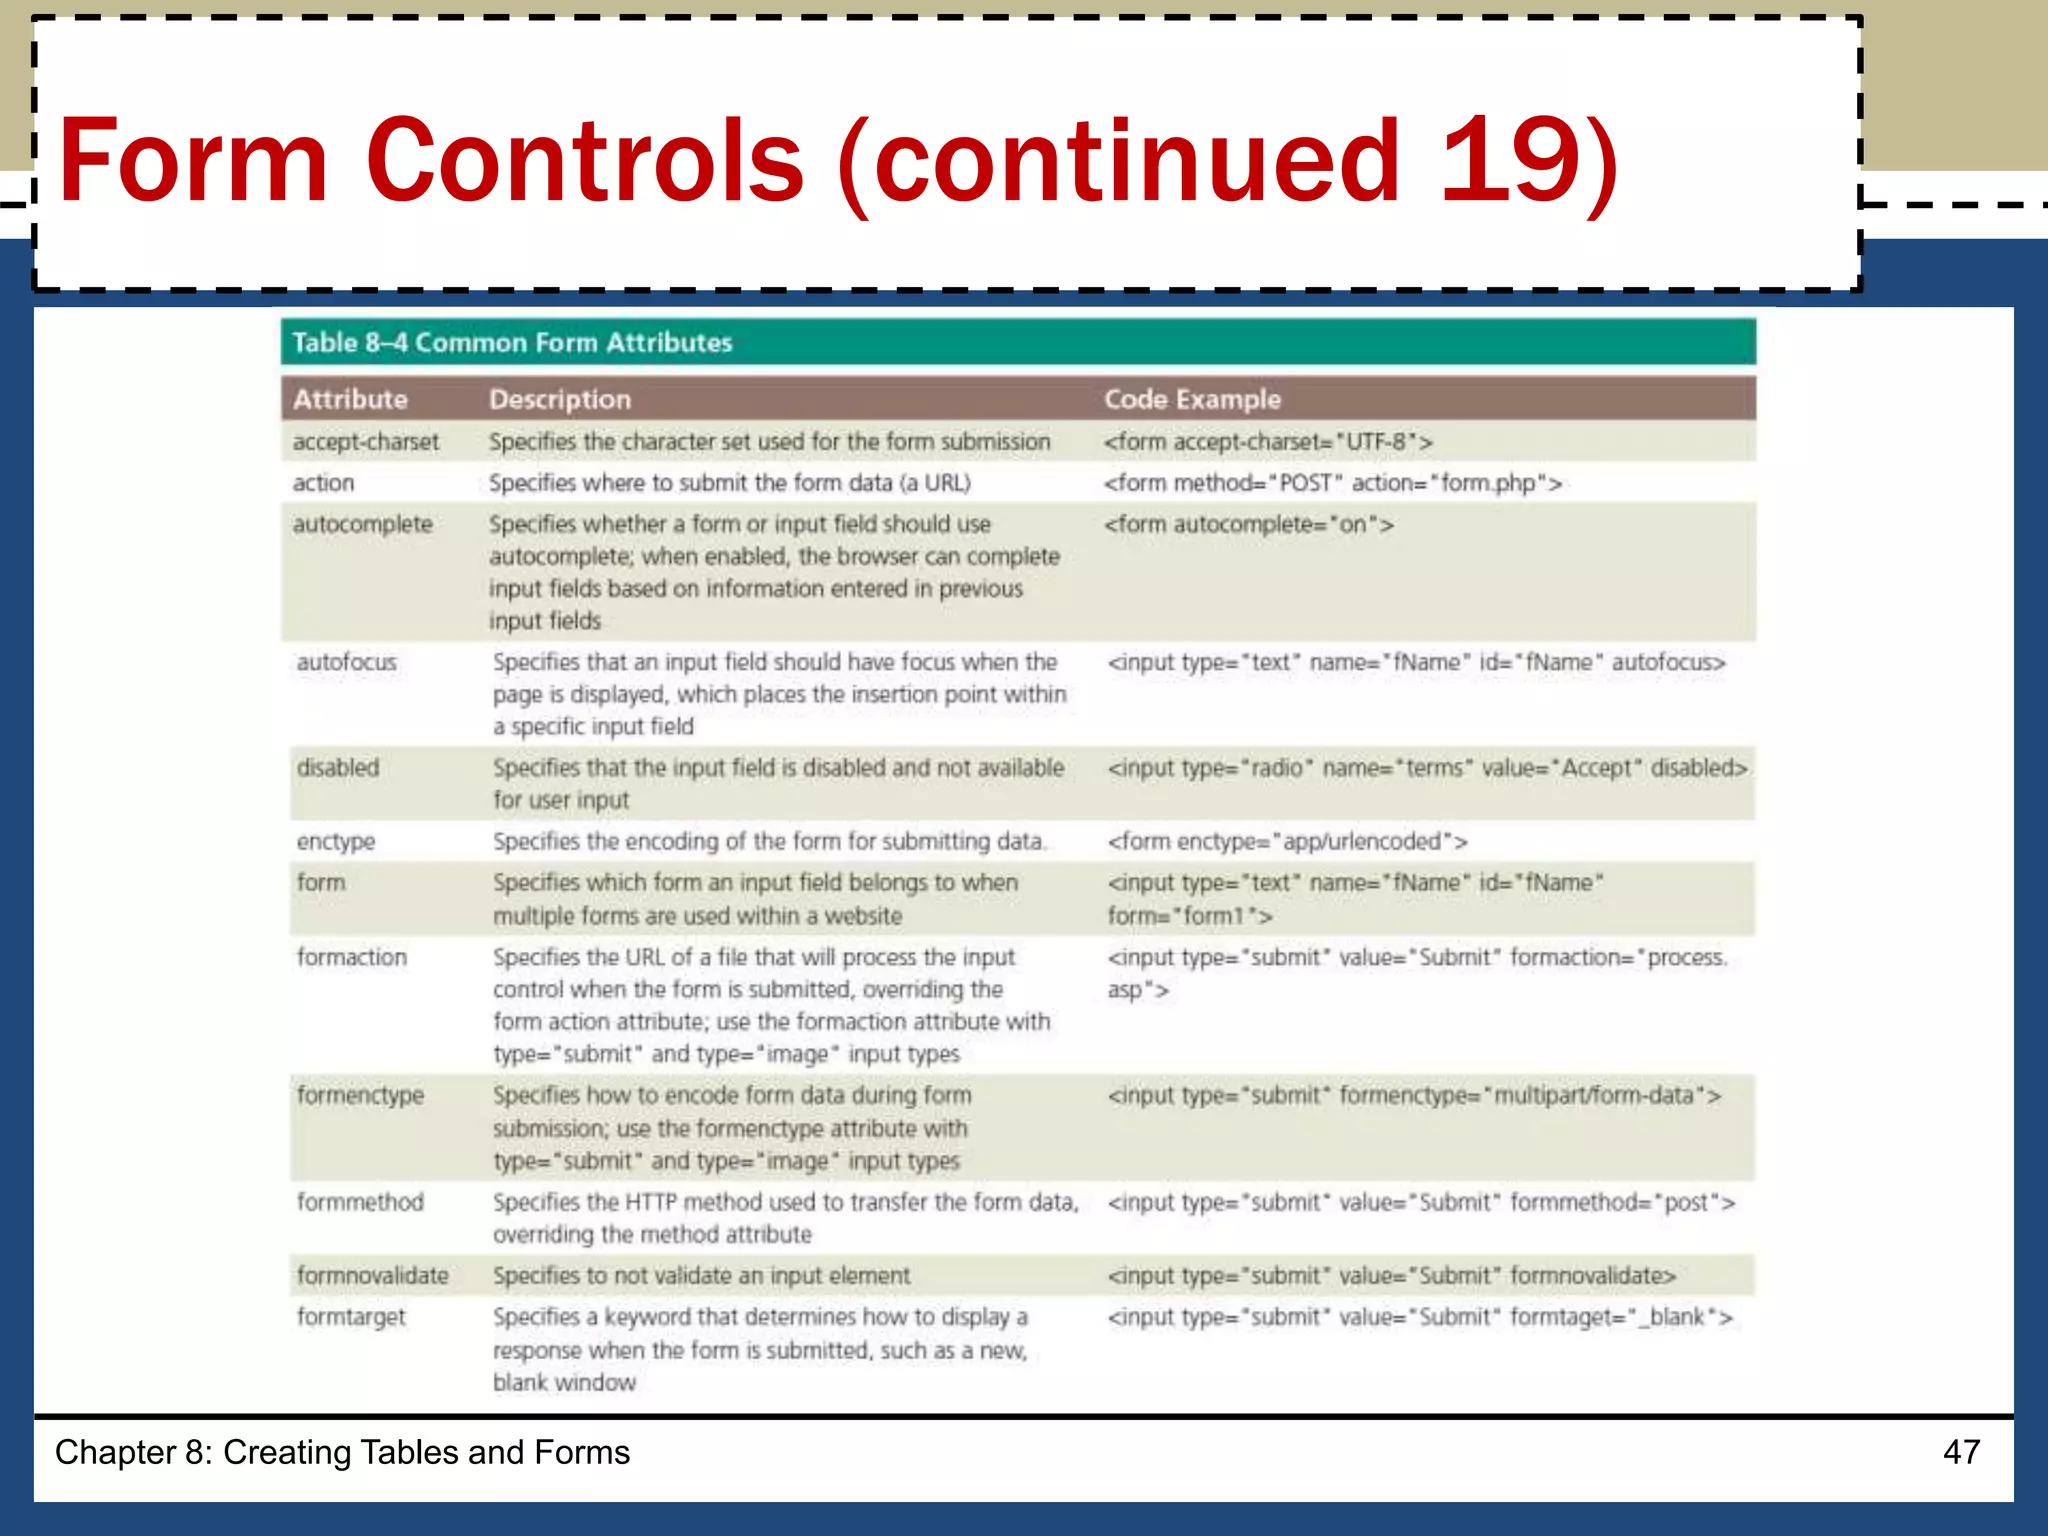
• action
– Itis an attribute of the <form> tag that specifies the
browser’s action when submitting the form
• Common Gateway Interface (CGI) script
– It communicates with the web server and sends the
information on the webpage form to the server for
processing
Chapter 8: Creating Tables and Forms 49
Form Processing
50.
• method
– Itis an attribute of the <form> tag that specifies how
to send the data entered in the form to the server to
be processed
• Get method
– It appends the name-value pairs to the URL indicated
in the action attribute
– Example of a form tag with the get method and
specified action is as follows:
<form method="GET“ action="formInfo.php">
Chapter 8: Creating Tables and Forms 50
Form Processing (continued 1)
51.
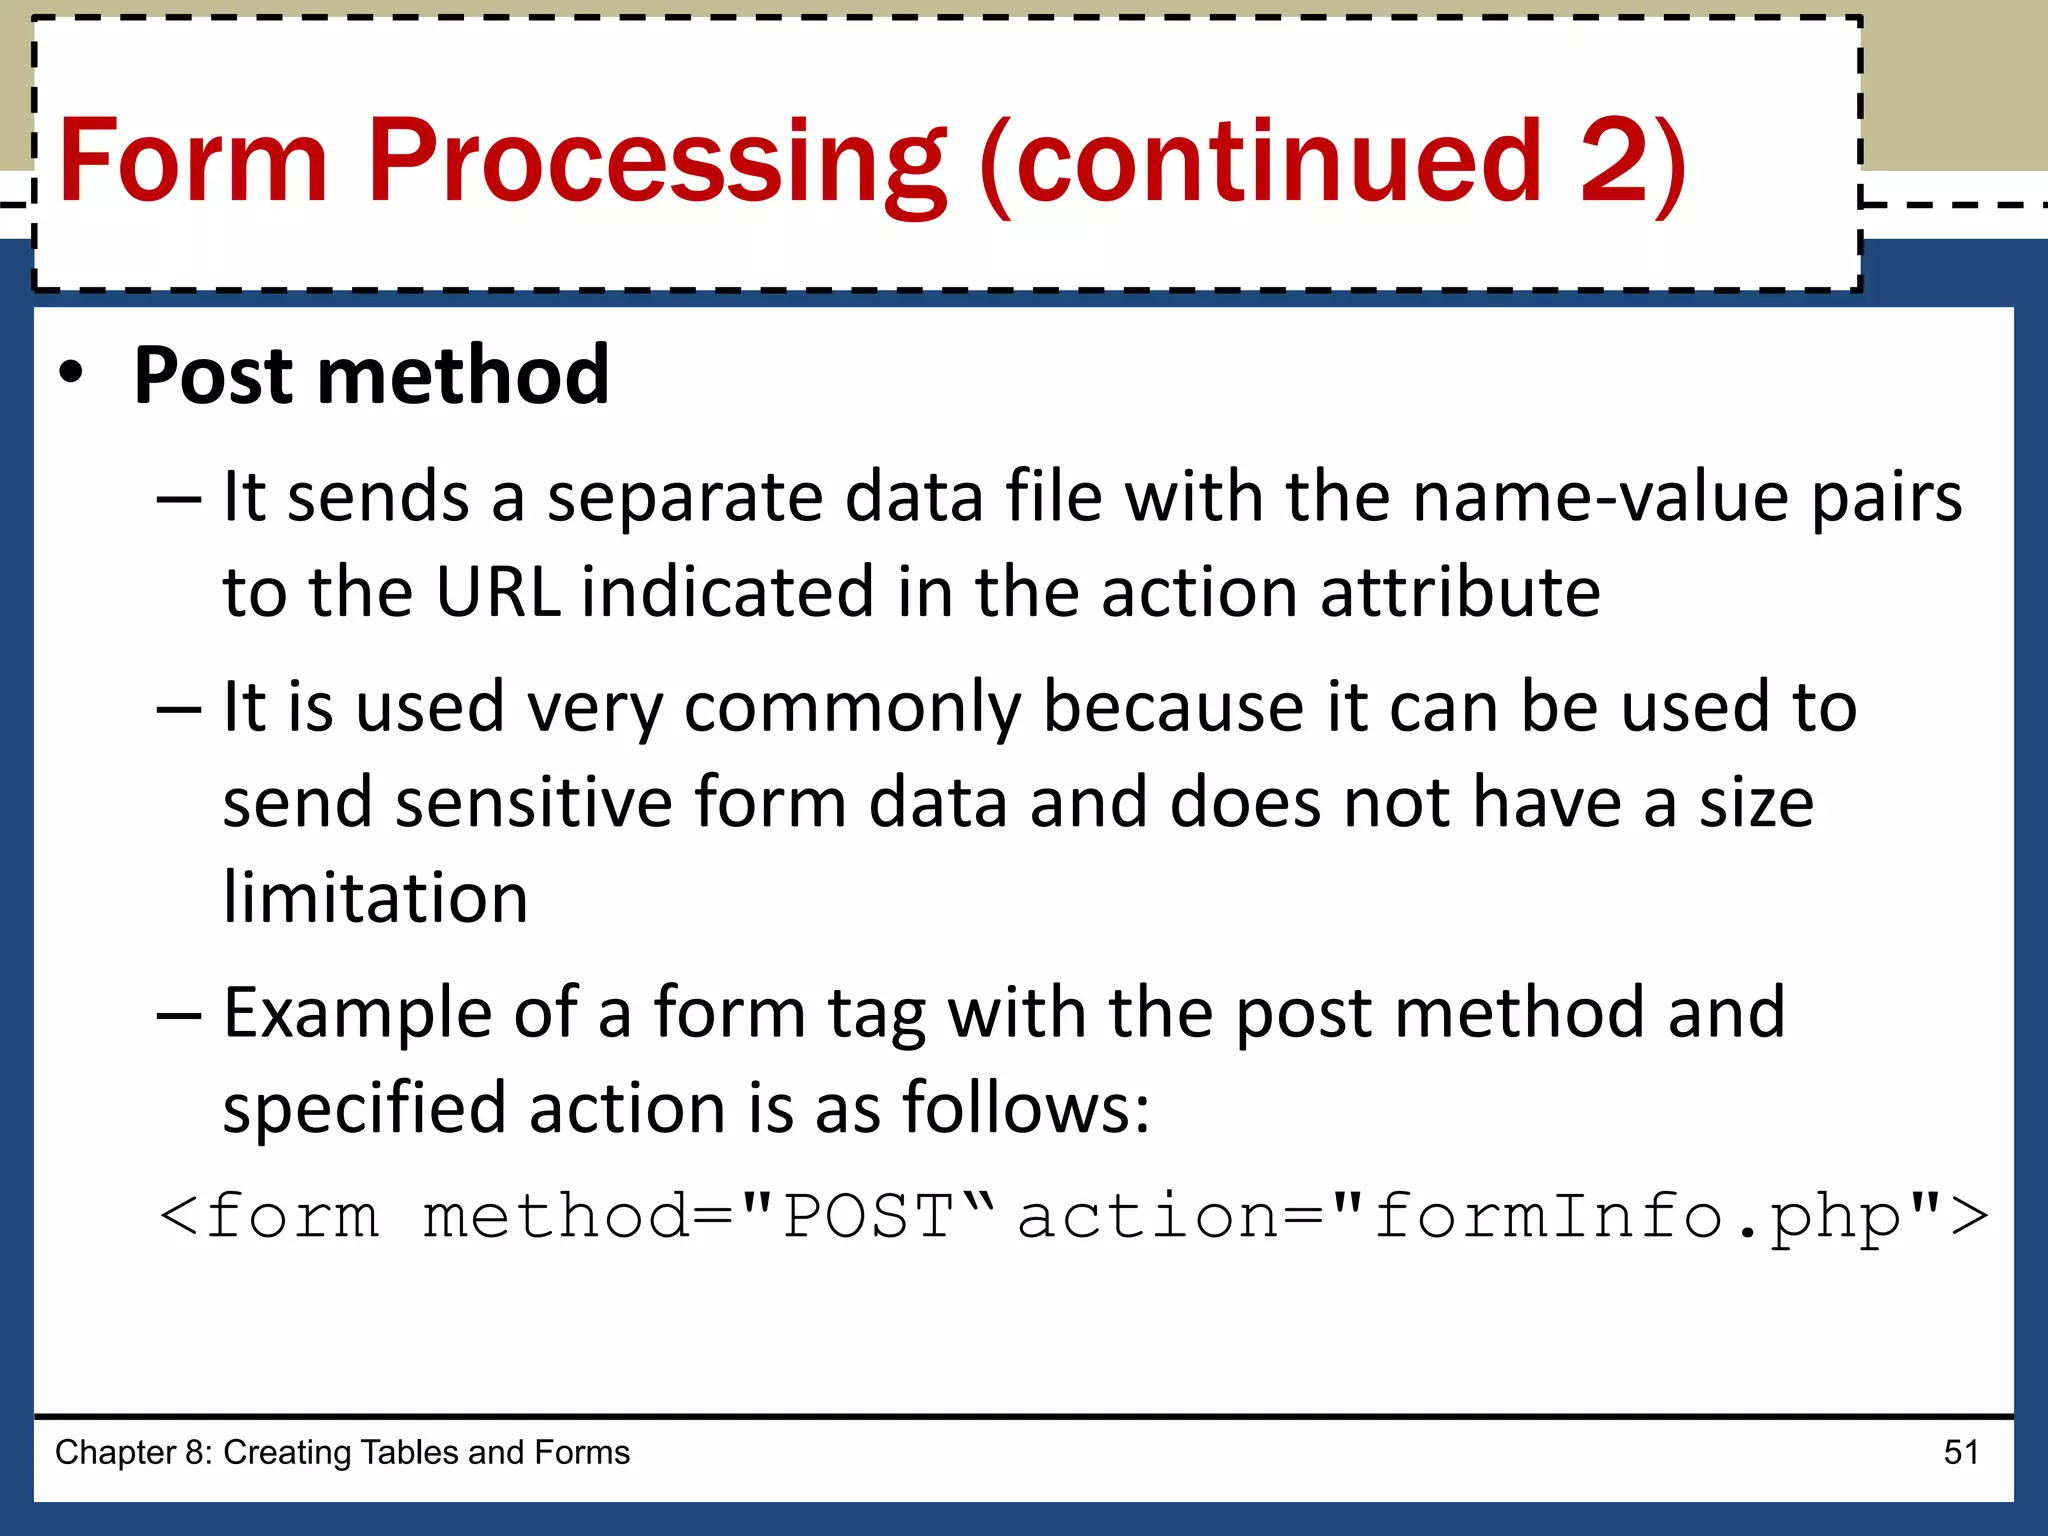
• Post method
–It sends a separate data file with the name-value pairs
to the URL indicated in the action attribute
– It is used very commonly because it can be used to
send sensitive form data and does not have a size
limitation
– Example of a form tag with the post method and
specified action is as follows:
<form method="POST“ action="formInfo.php">
Chapter 8: Creating Tables and Forms 51
Form Processing (continued 2)
52.
• CSS stylesare applied to forms to improve the
appeal and usefulness of the form and its controls
• As with tables, consider forms in the context of
responsive design
• Controls can be included to collect optional
information, such as product feedback, in tablet
and desktop viewports
Chapter 8: Creating Tables and Forms 52
Styling Forms
53.
Chapter 8: CreatingTables and Forms 53
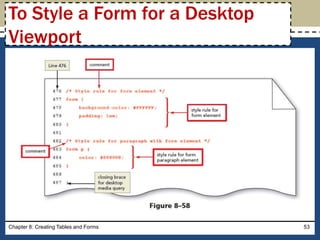
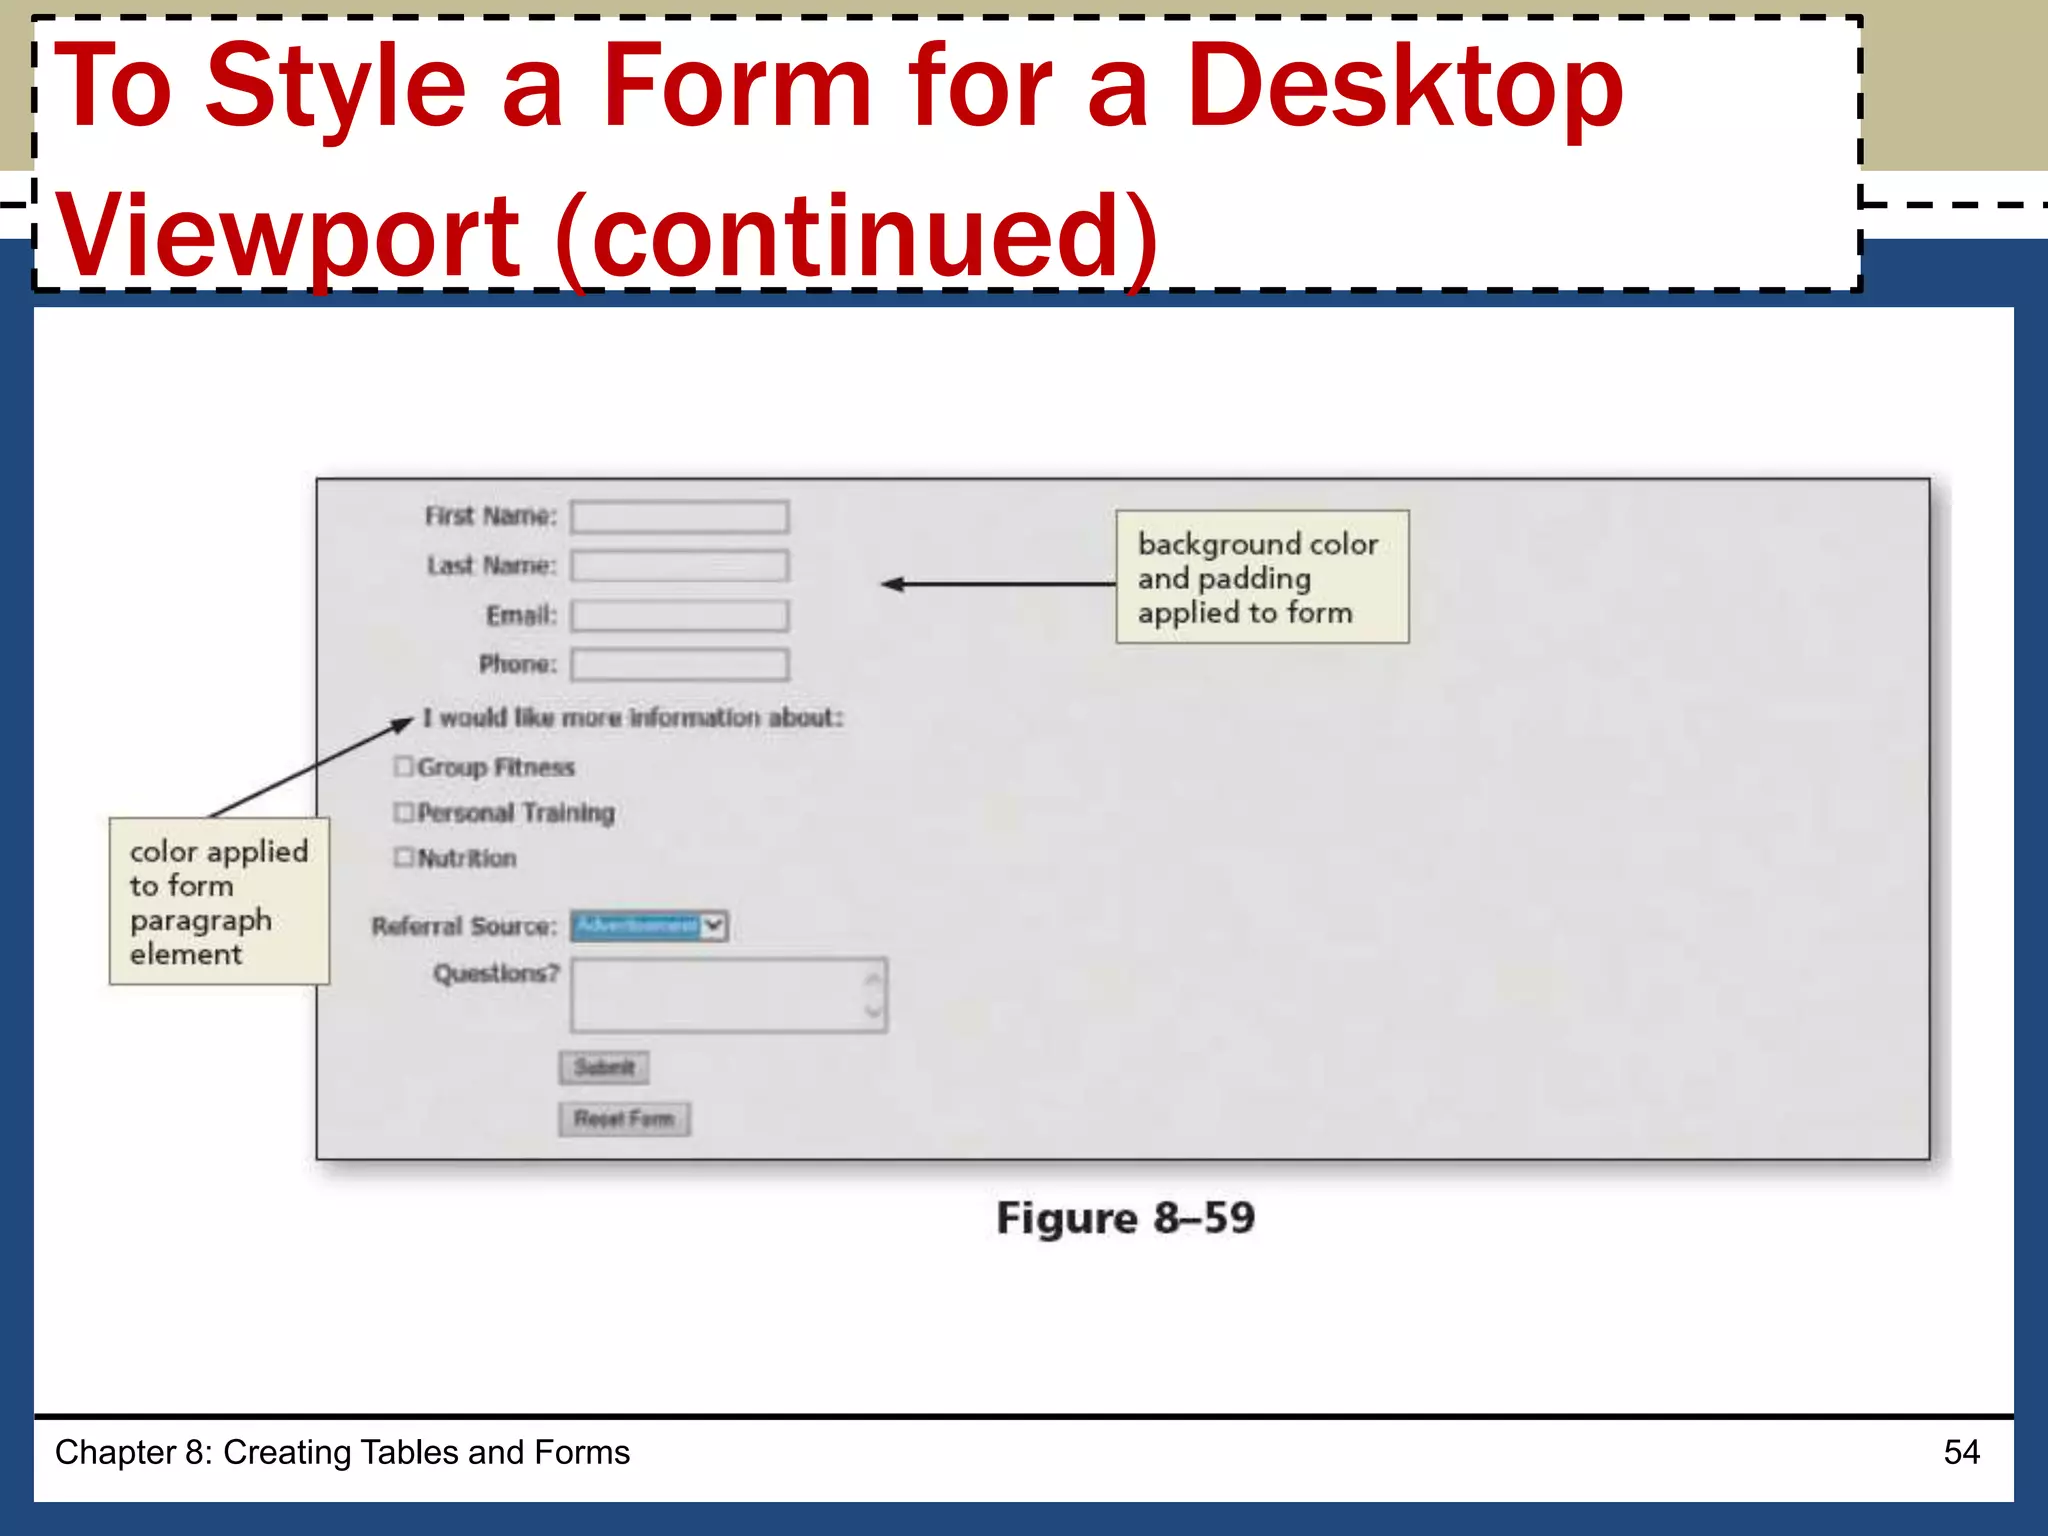
To Style a Form for a Desktop
Viewport
54.
Chapter 8: CreatingTables and Forms 54
To Style a Form for a Desktop
Viewport (continued)


![Introduction_to_HTML_Presentation [Autosaved].pptx](https://cdn.slidesharecdn.com/ss_thumbnails/introductiontohtmlpresentationautosaved-250924135400-629f4929-thumbnail.jpg?width=600ounds&width=560&fit=bounds)


