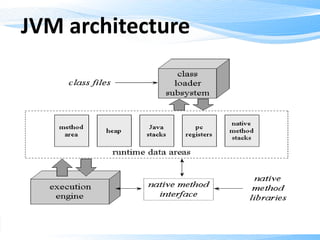
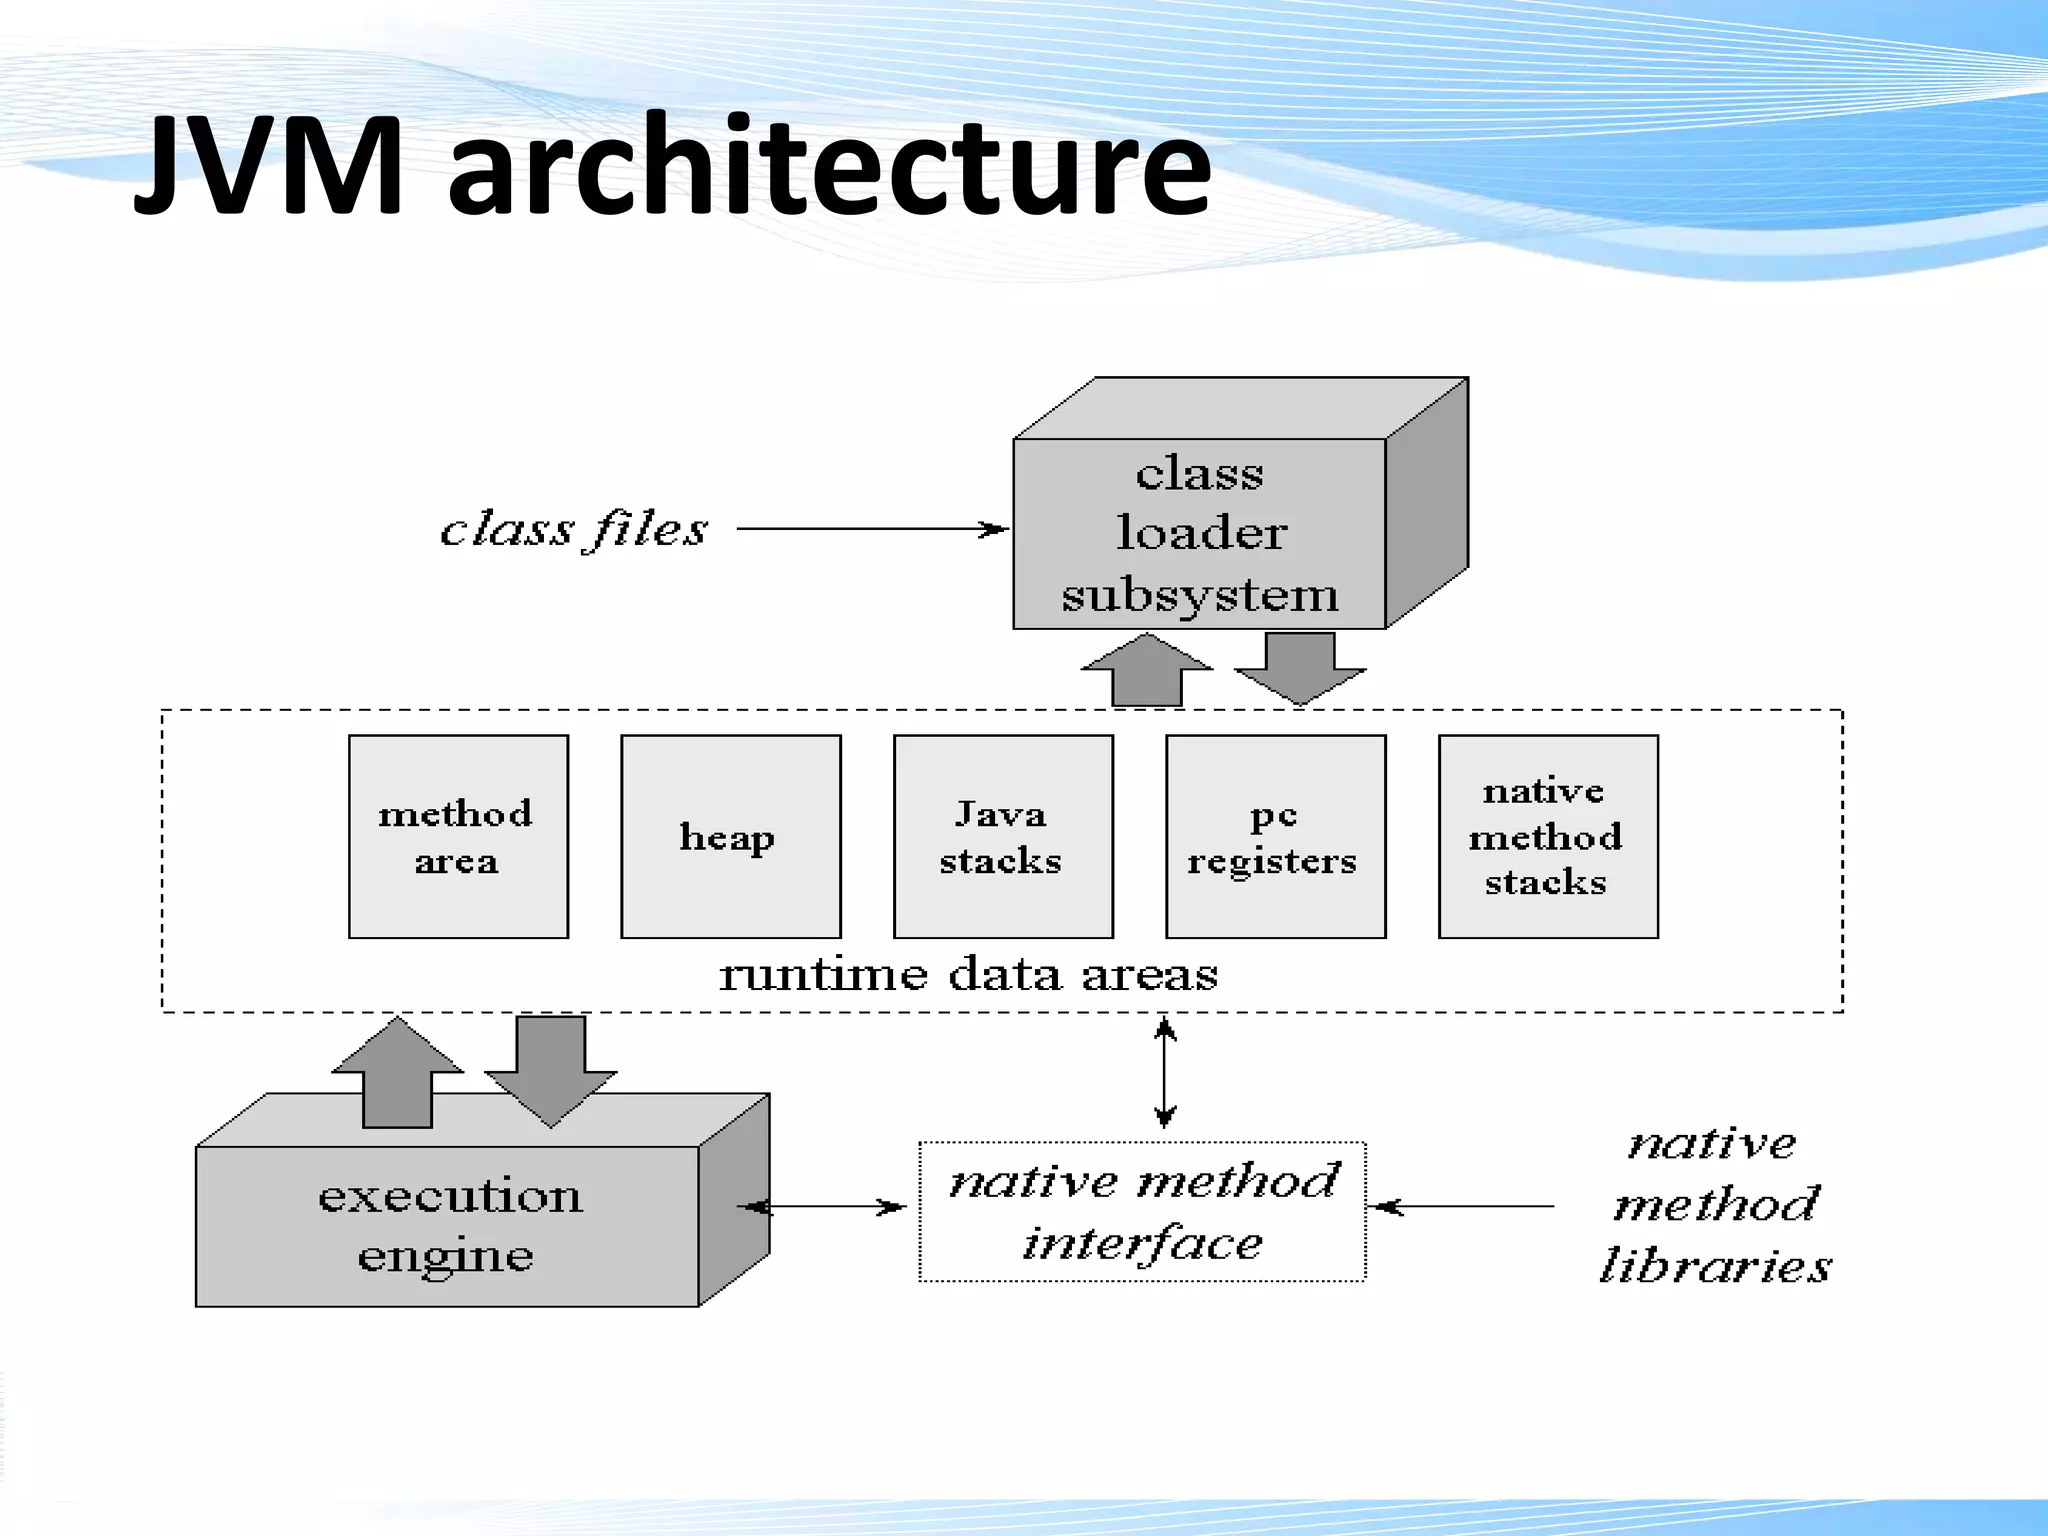
The JVM architecture has four main memory areas:
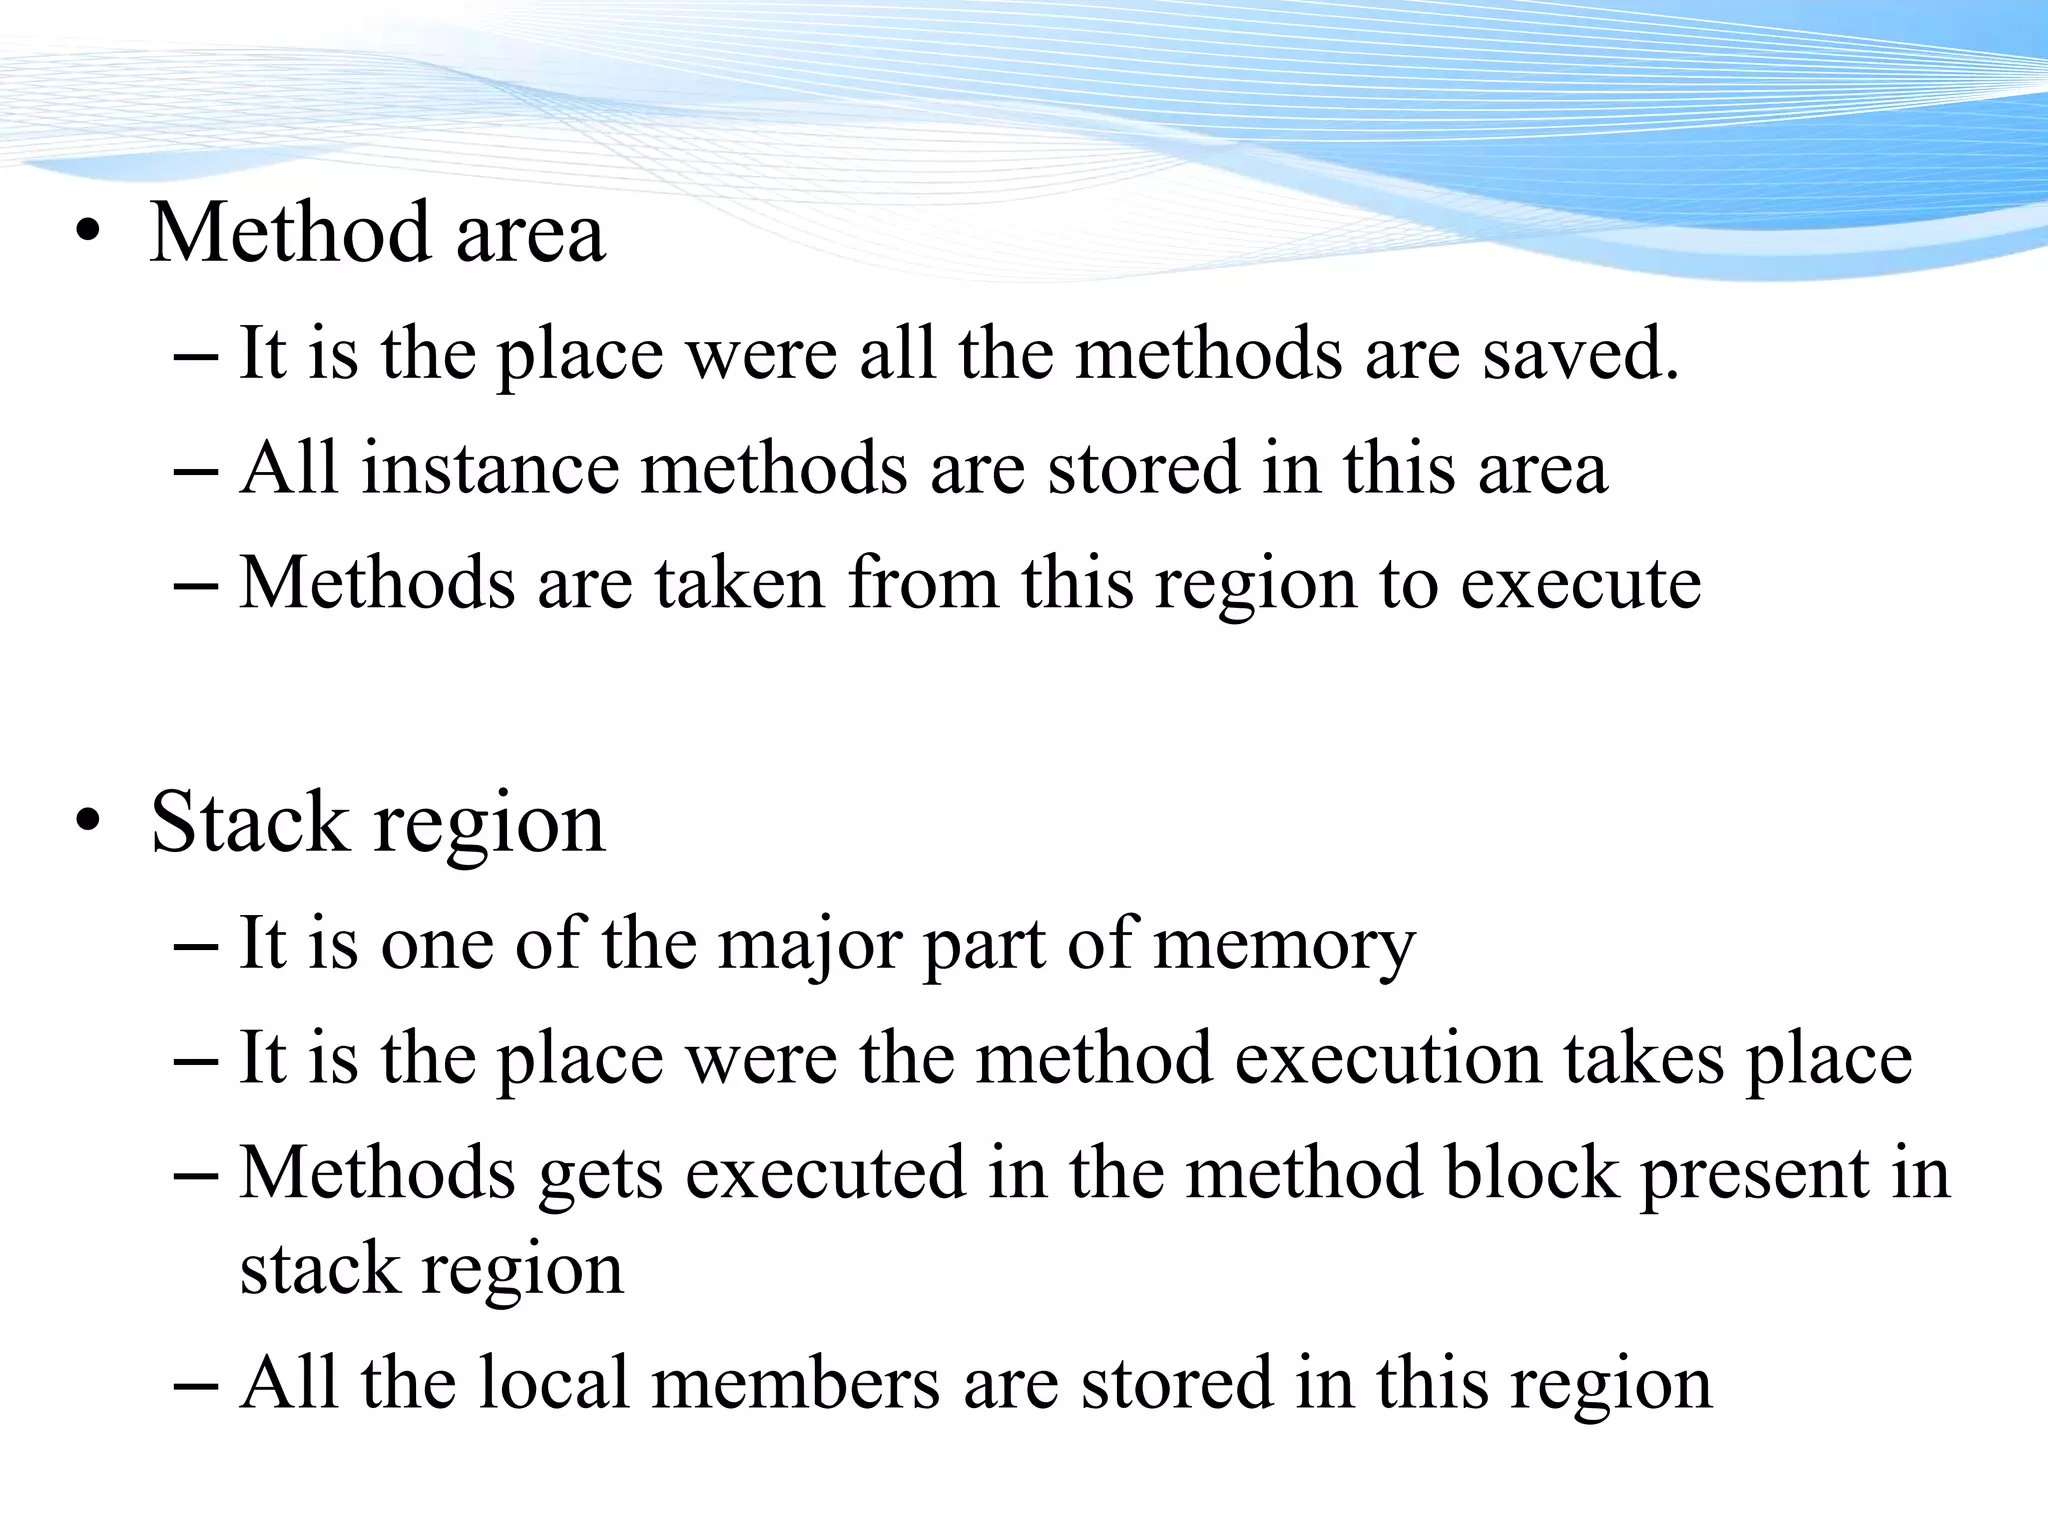
1. The method area stores all class files and instance methods.
2. The stack region executes methods and stores local variables.
3. The heap area stores all objects and static variables.
4. The native method area stores code for native languages like C and C++.
![What is class file……?
• When the .java files are compiled we get .class files, these
are called as class file
• [.class file is also called as byte code]
• Our JVM can understand only .class file (or byte code)
• [Byte-code will also increase the security in java]
• For each class in a file there will be separate .class file
• The class loader loads the .class file into memory](https://image.slidesharecdn.com/memory-160822073947/85/QSpiders-Memory-JVM-architecture-3-320.jpg)
![What class loader does….?
• The class loader loads the class into memory
[.class]
• The classes are loaded into memory when the
call is made to any of his members
• [Class members are - methods(static or instance)
, constructors, variables(static or instance)]](https://image.slidesharecdn.com/memory-160822073947/85/QSpiders-Memory-JVM-architecture-4-320.jpg)
![What is class file……?
• When the .java files are compiled we get .class files, these
are called as class file
• [.class file is also called as byte code]
• Our JVM can understand only .class file (or byte code)
• [Byte-code will also increase the security in java]
• For each class in a file there will be separate .class file
• The class loader loads the .class file into memory](https://image.slidesharecdn.com/memory-160822073947/75/QSpiders-Memory-JVM-architecture-3-2048.jpg)
![What class loader does….?
• The class loader loads the class into memory
[.class]
• The classes are loaded into memory when the
call is made to any of his members
• [Class members are - methods(static or instance)
, constructors, variables(static or instance)]](https://image.slidesharecdn.com/memory-160822073947/75/QSpiders-Memory-JVM-architecture-4-2048.jpg)


![JVMkhushi[1].pptx JVMkhushi[1].pptxJVMkhushi[1].pptx](https://cdn.slidesharecdn.com/ss_thumbnails/jvmkhushi1-250615091540-afc5490c-thumbnail.jpg?width=600ounds&width=560&fit=bounds)


