Download as PDF, PPTX

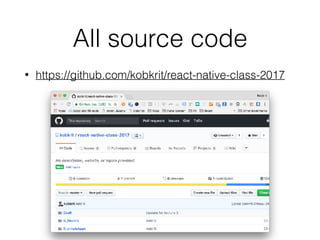


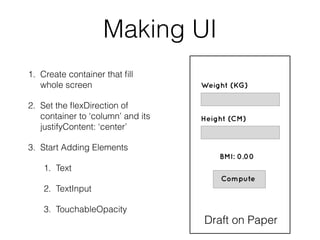
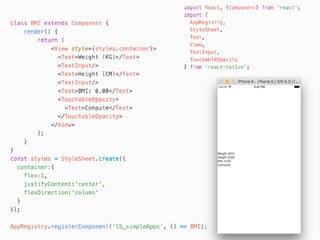
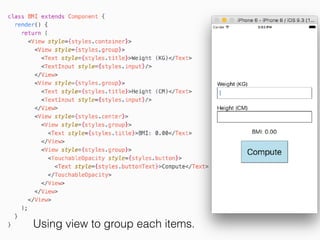
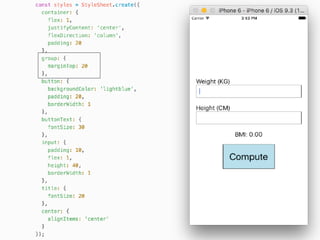
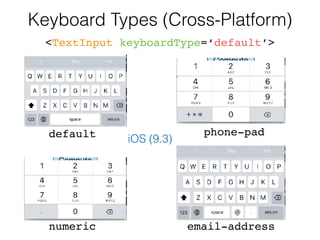
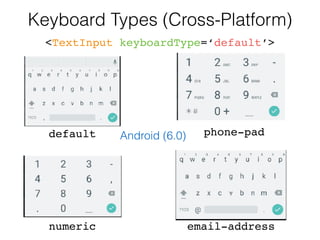
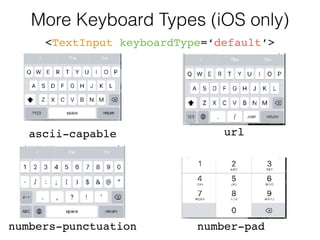


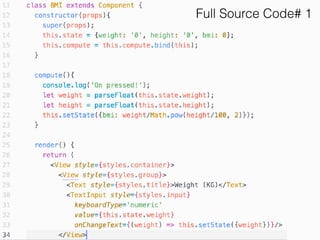
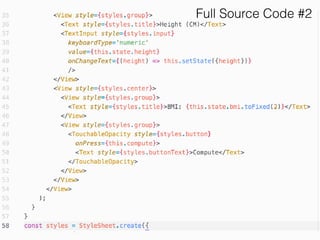
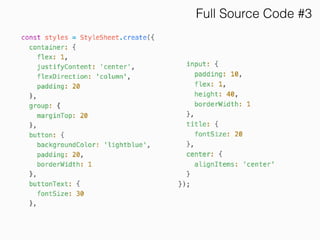
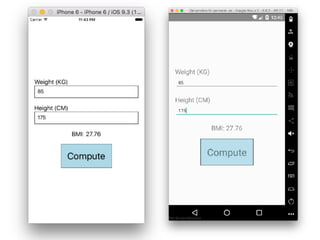


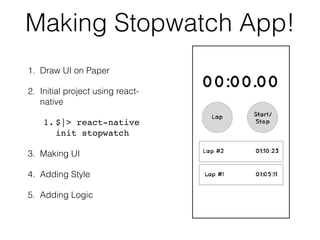
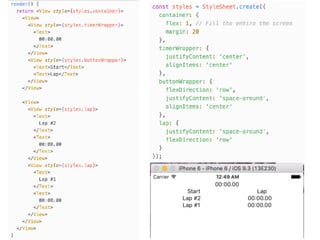
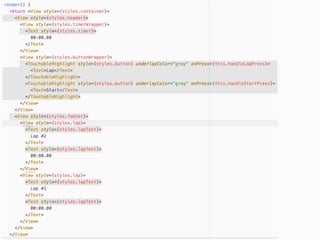
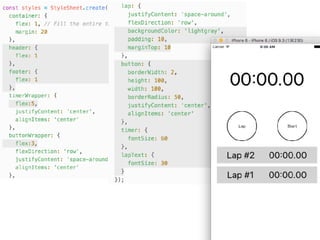
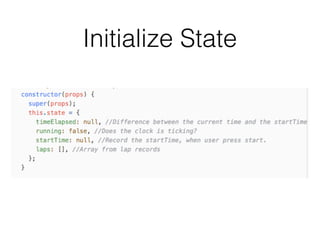
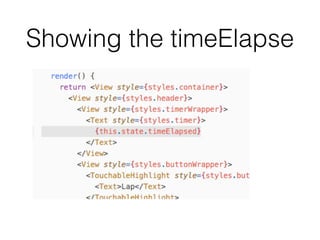
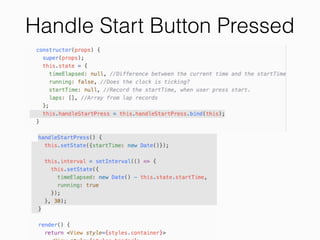
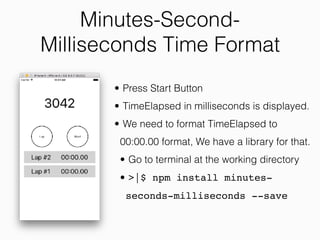
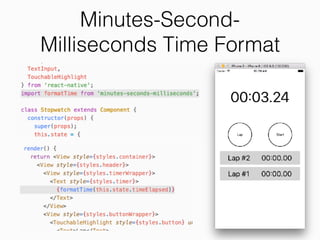

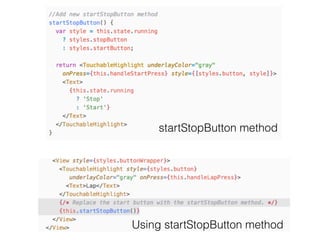
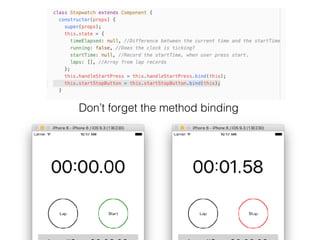
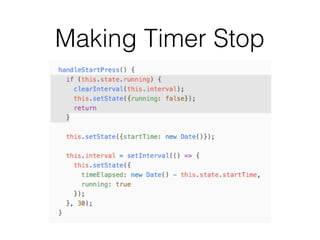


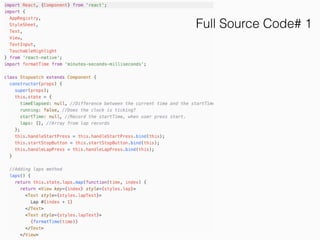

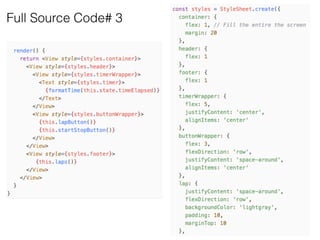
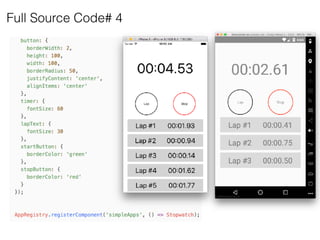
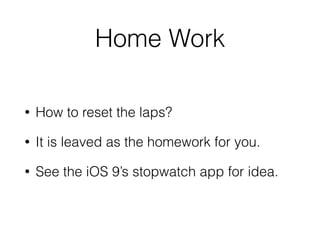

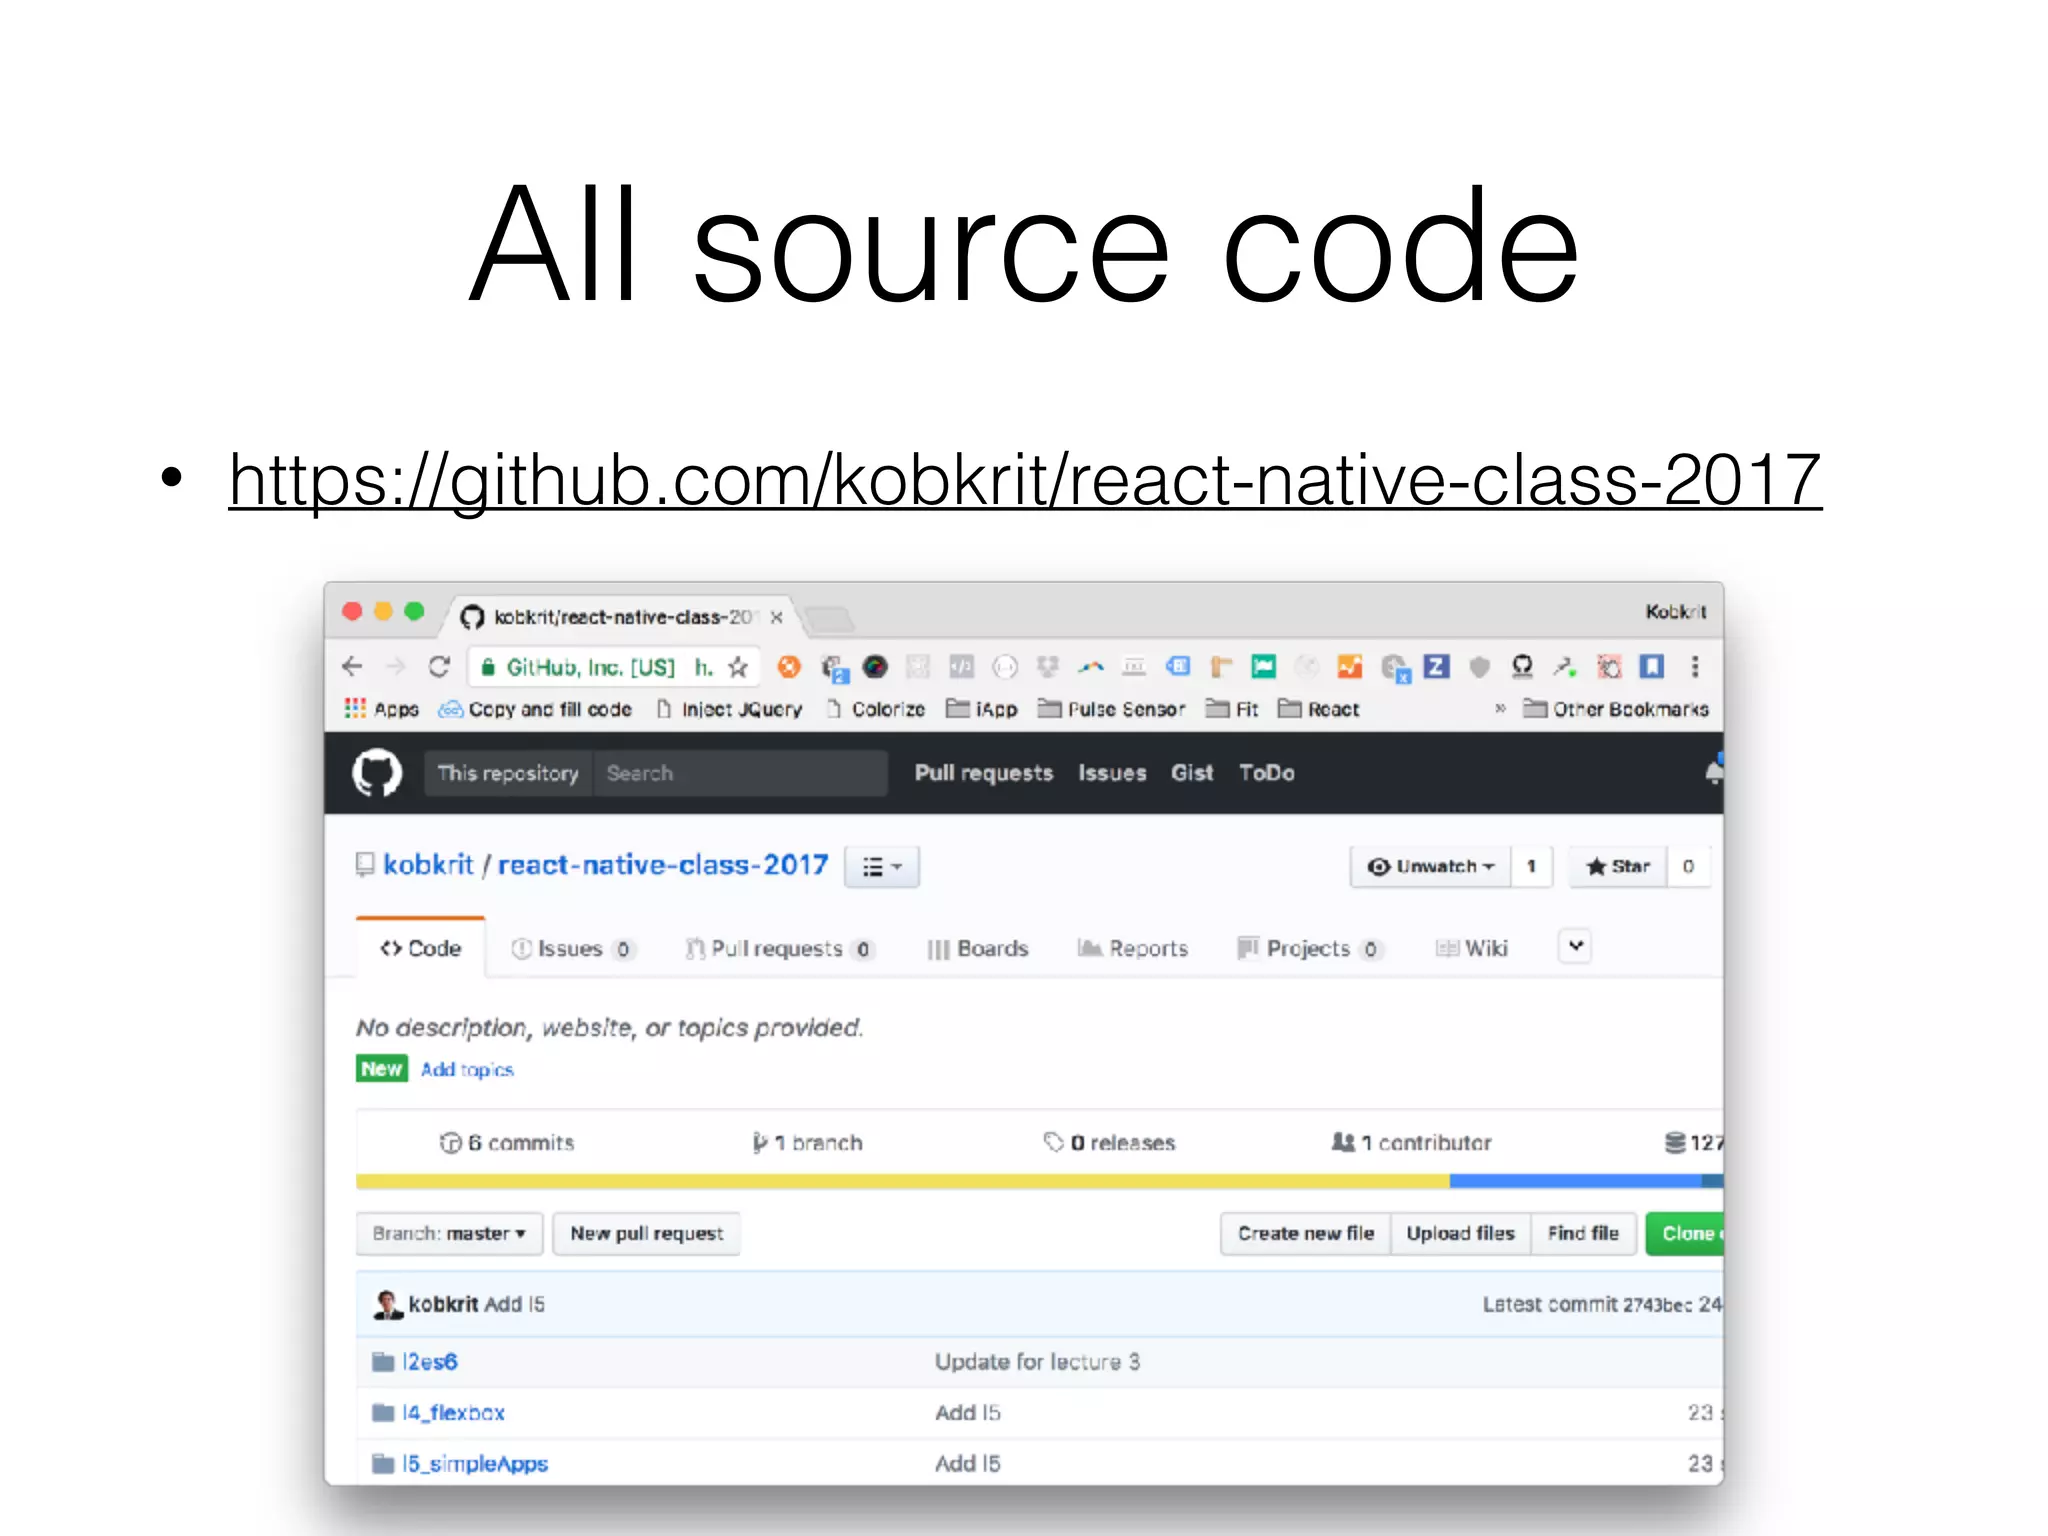
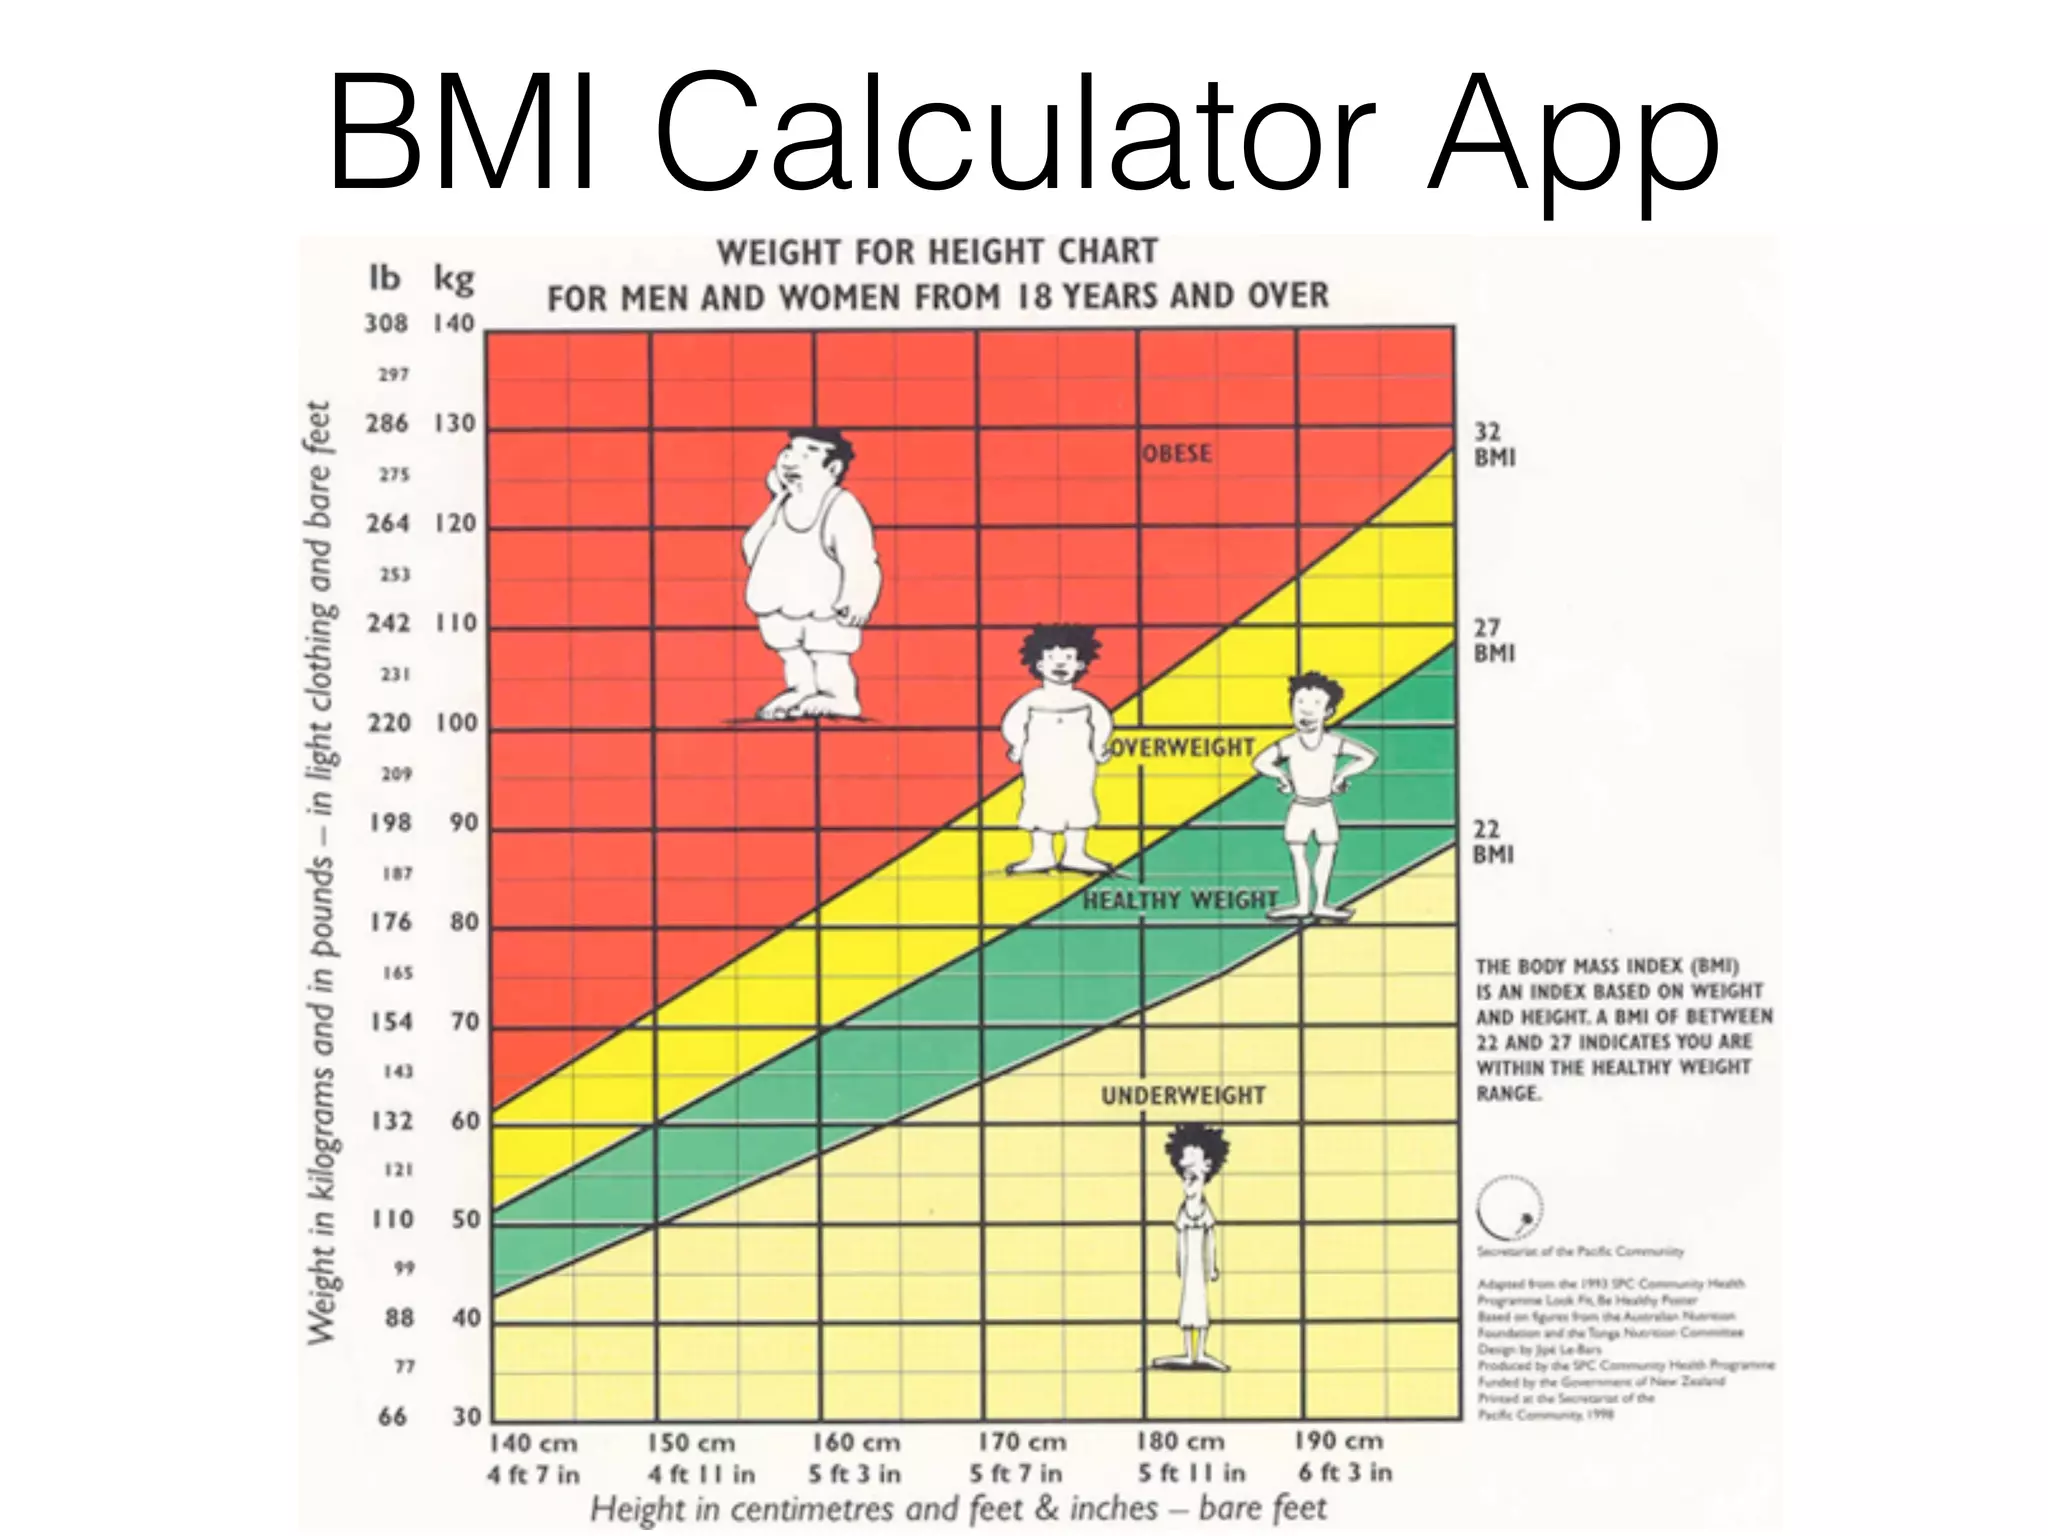
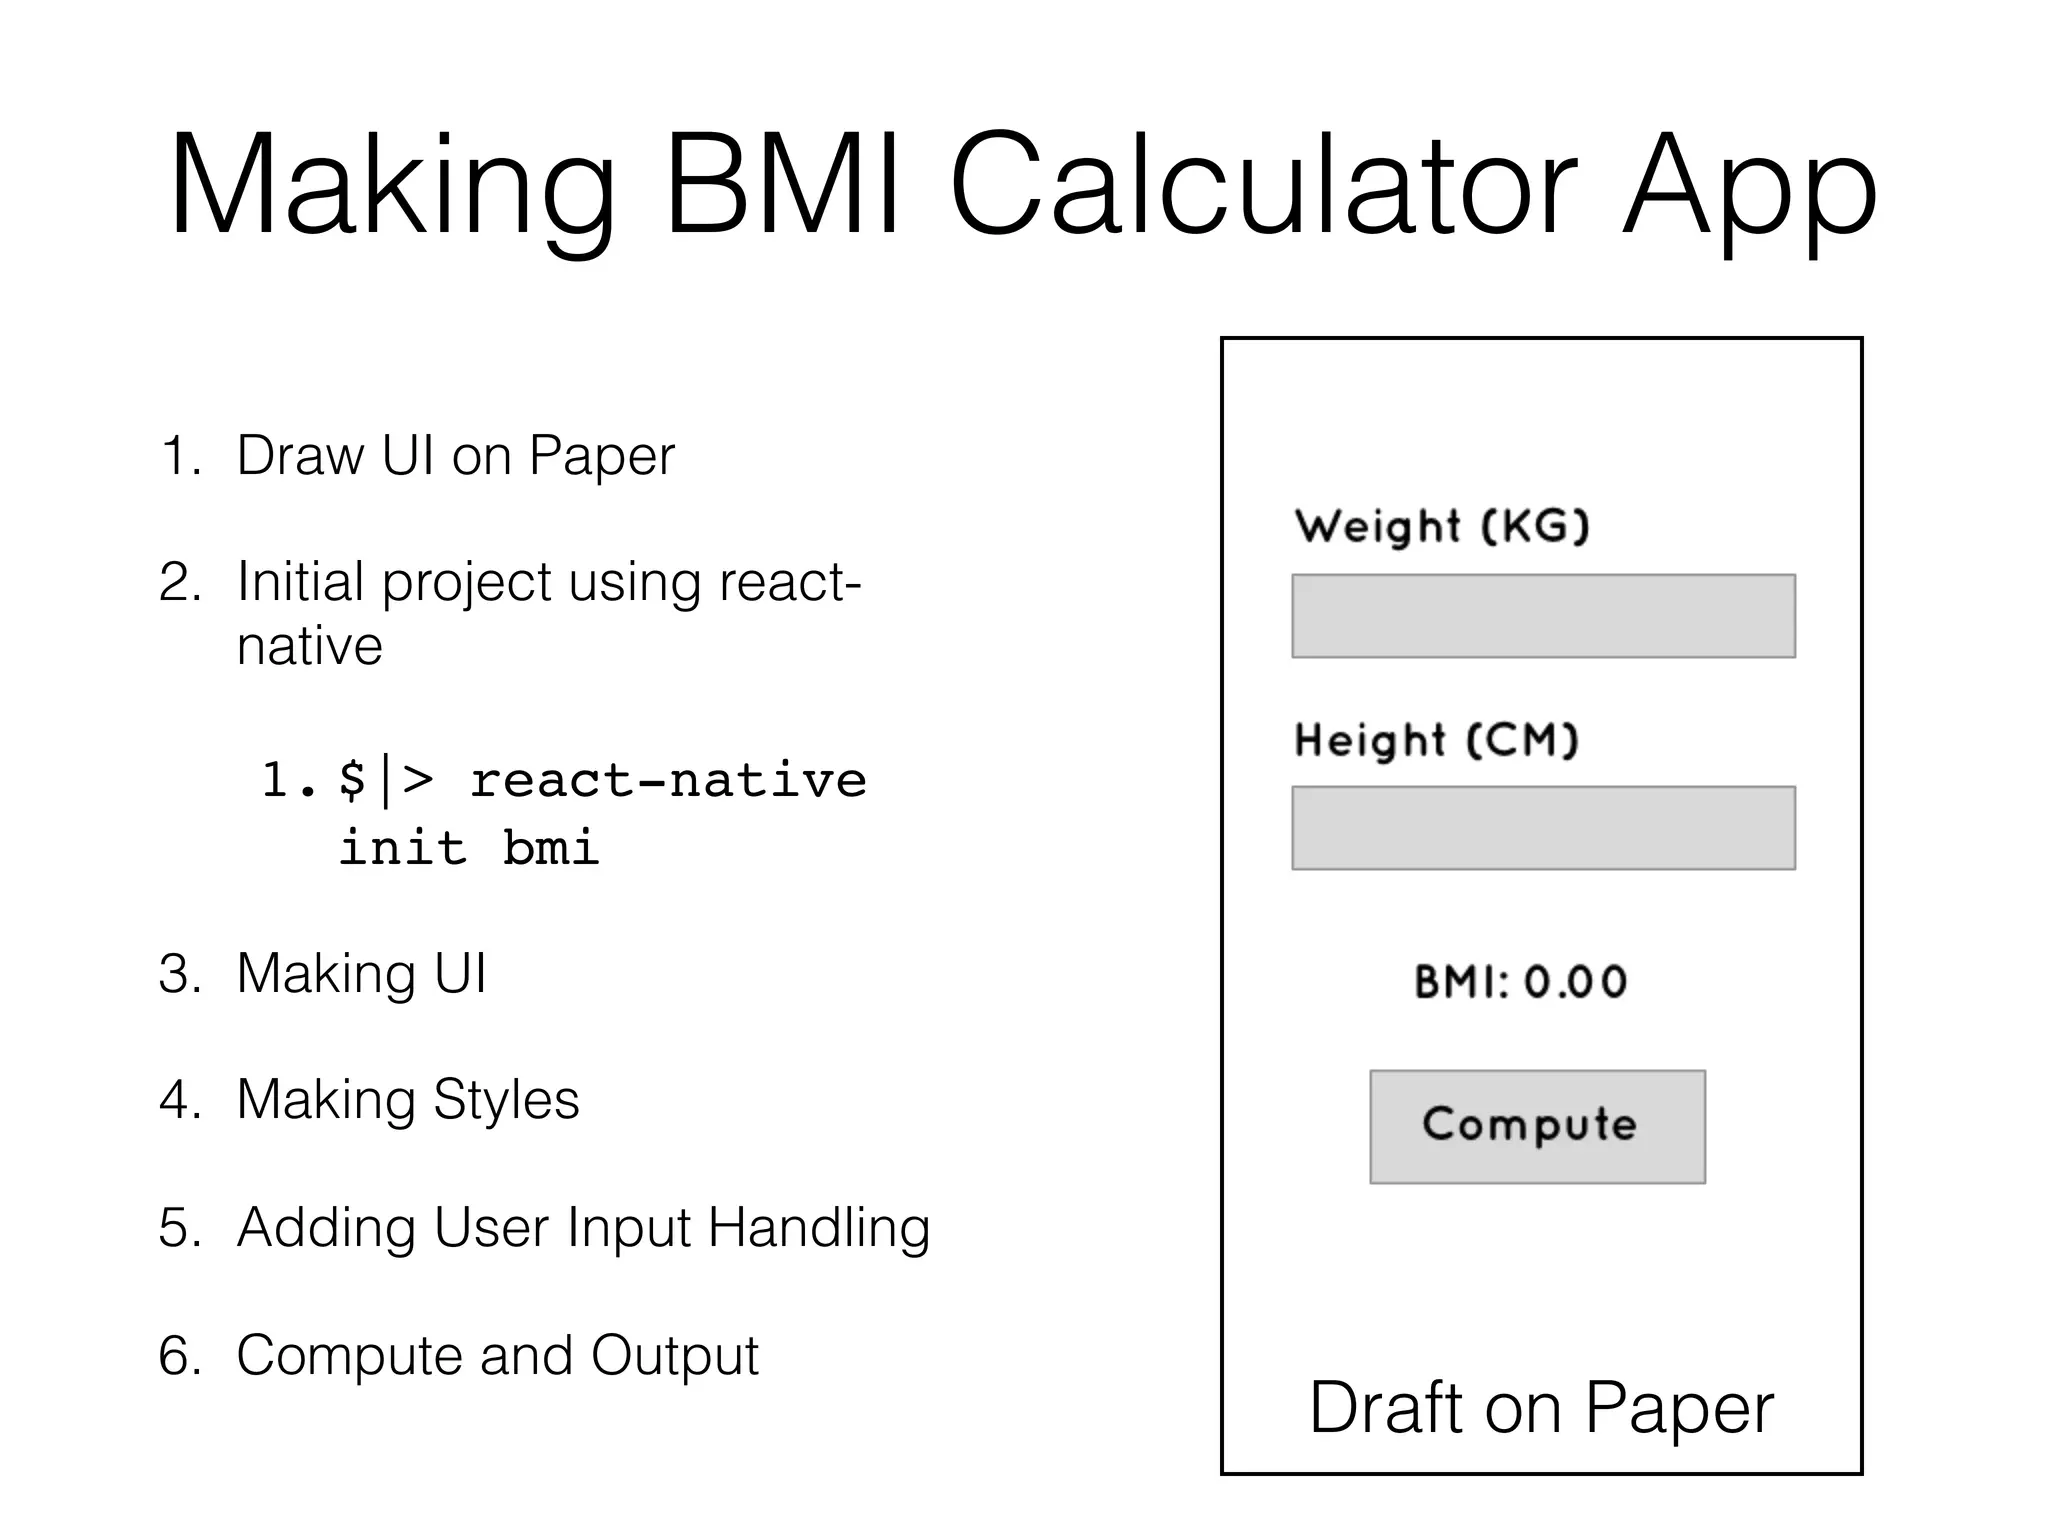

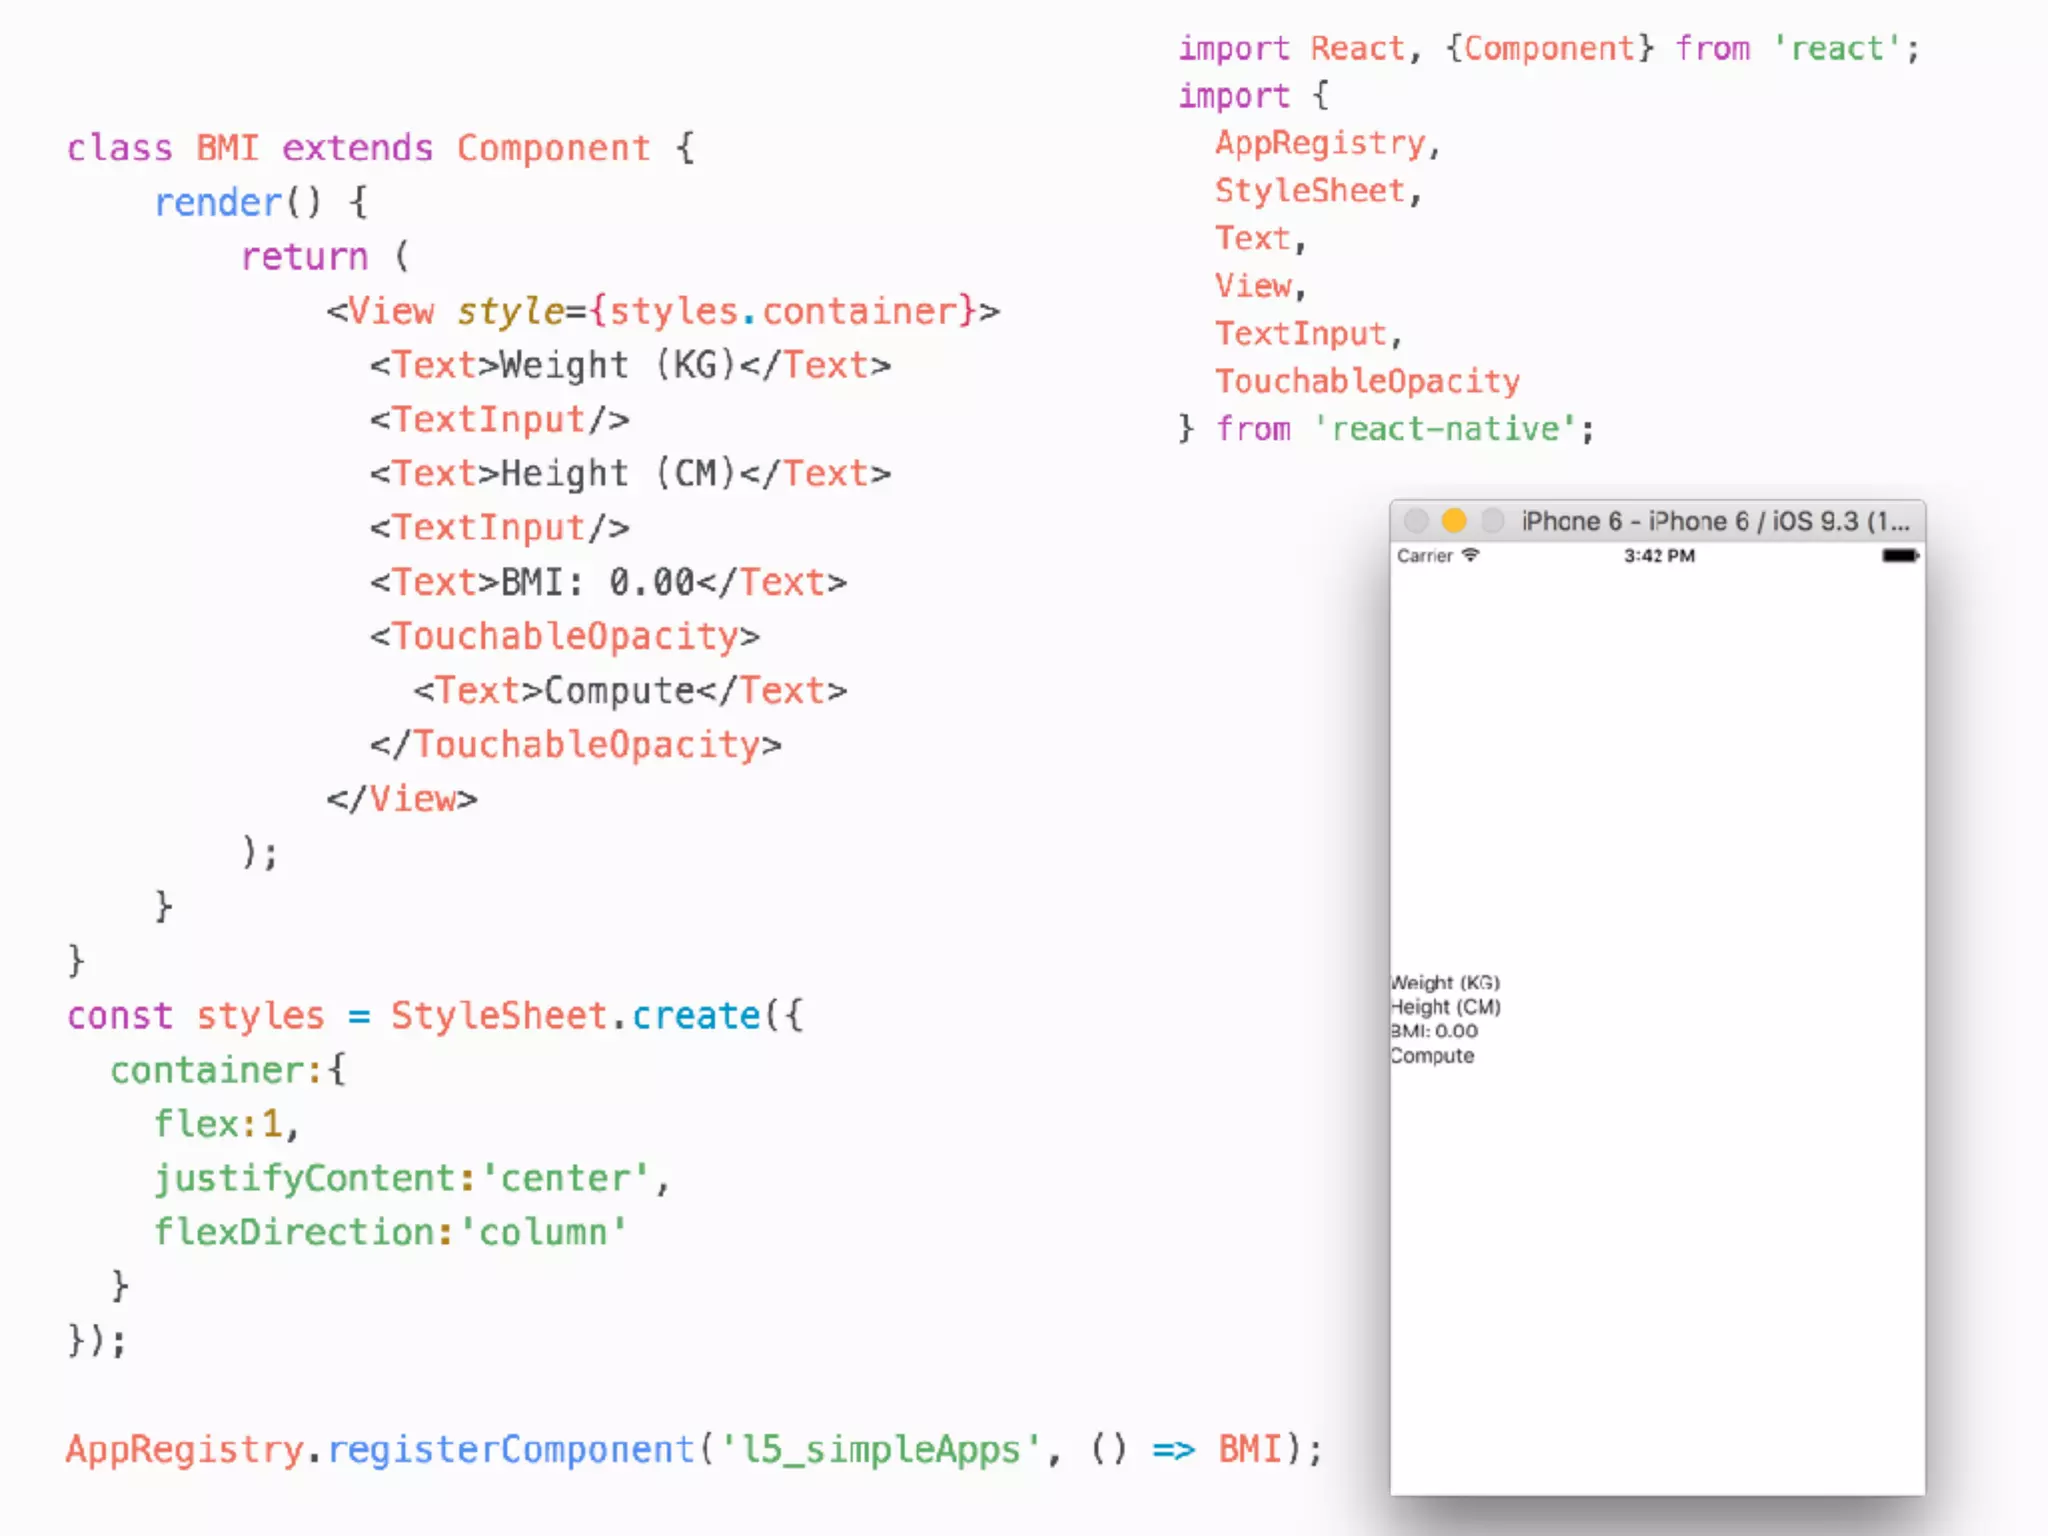
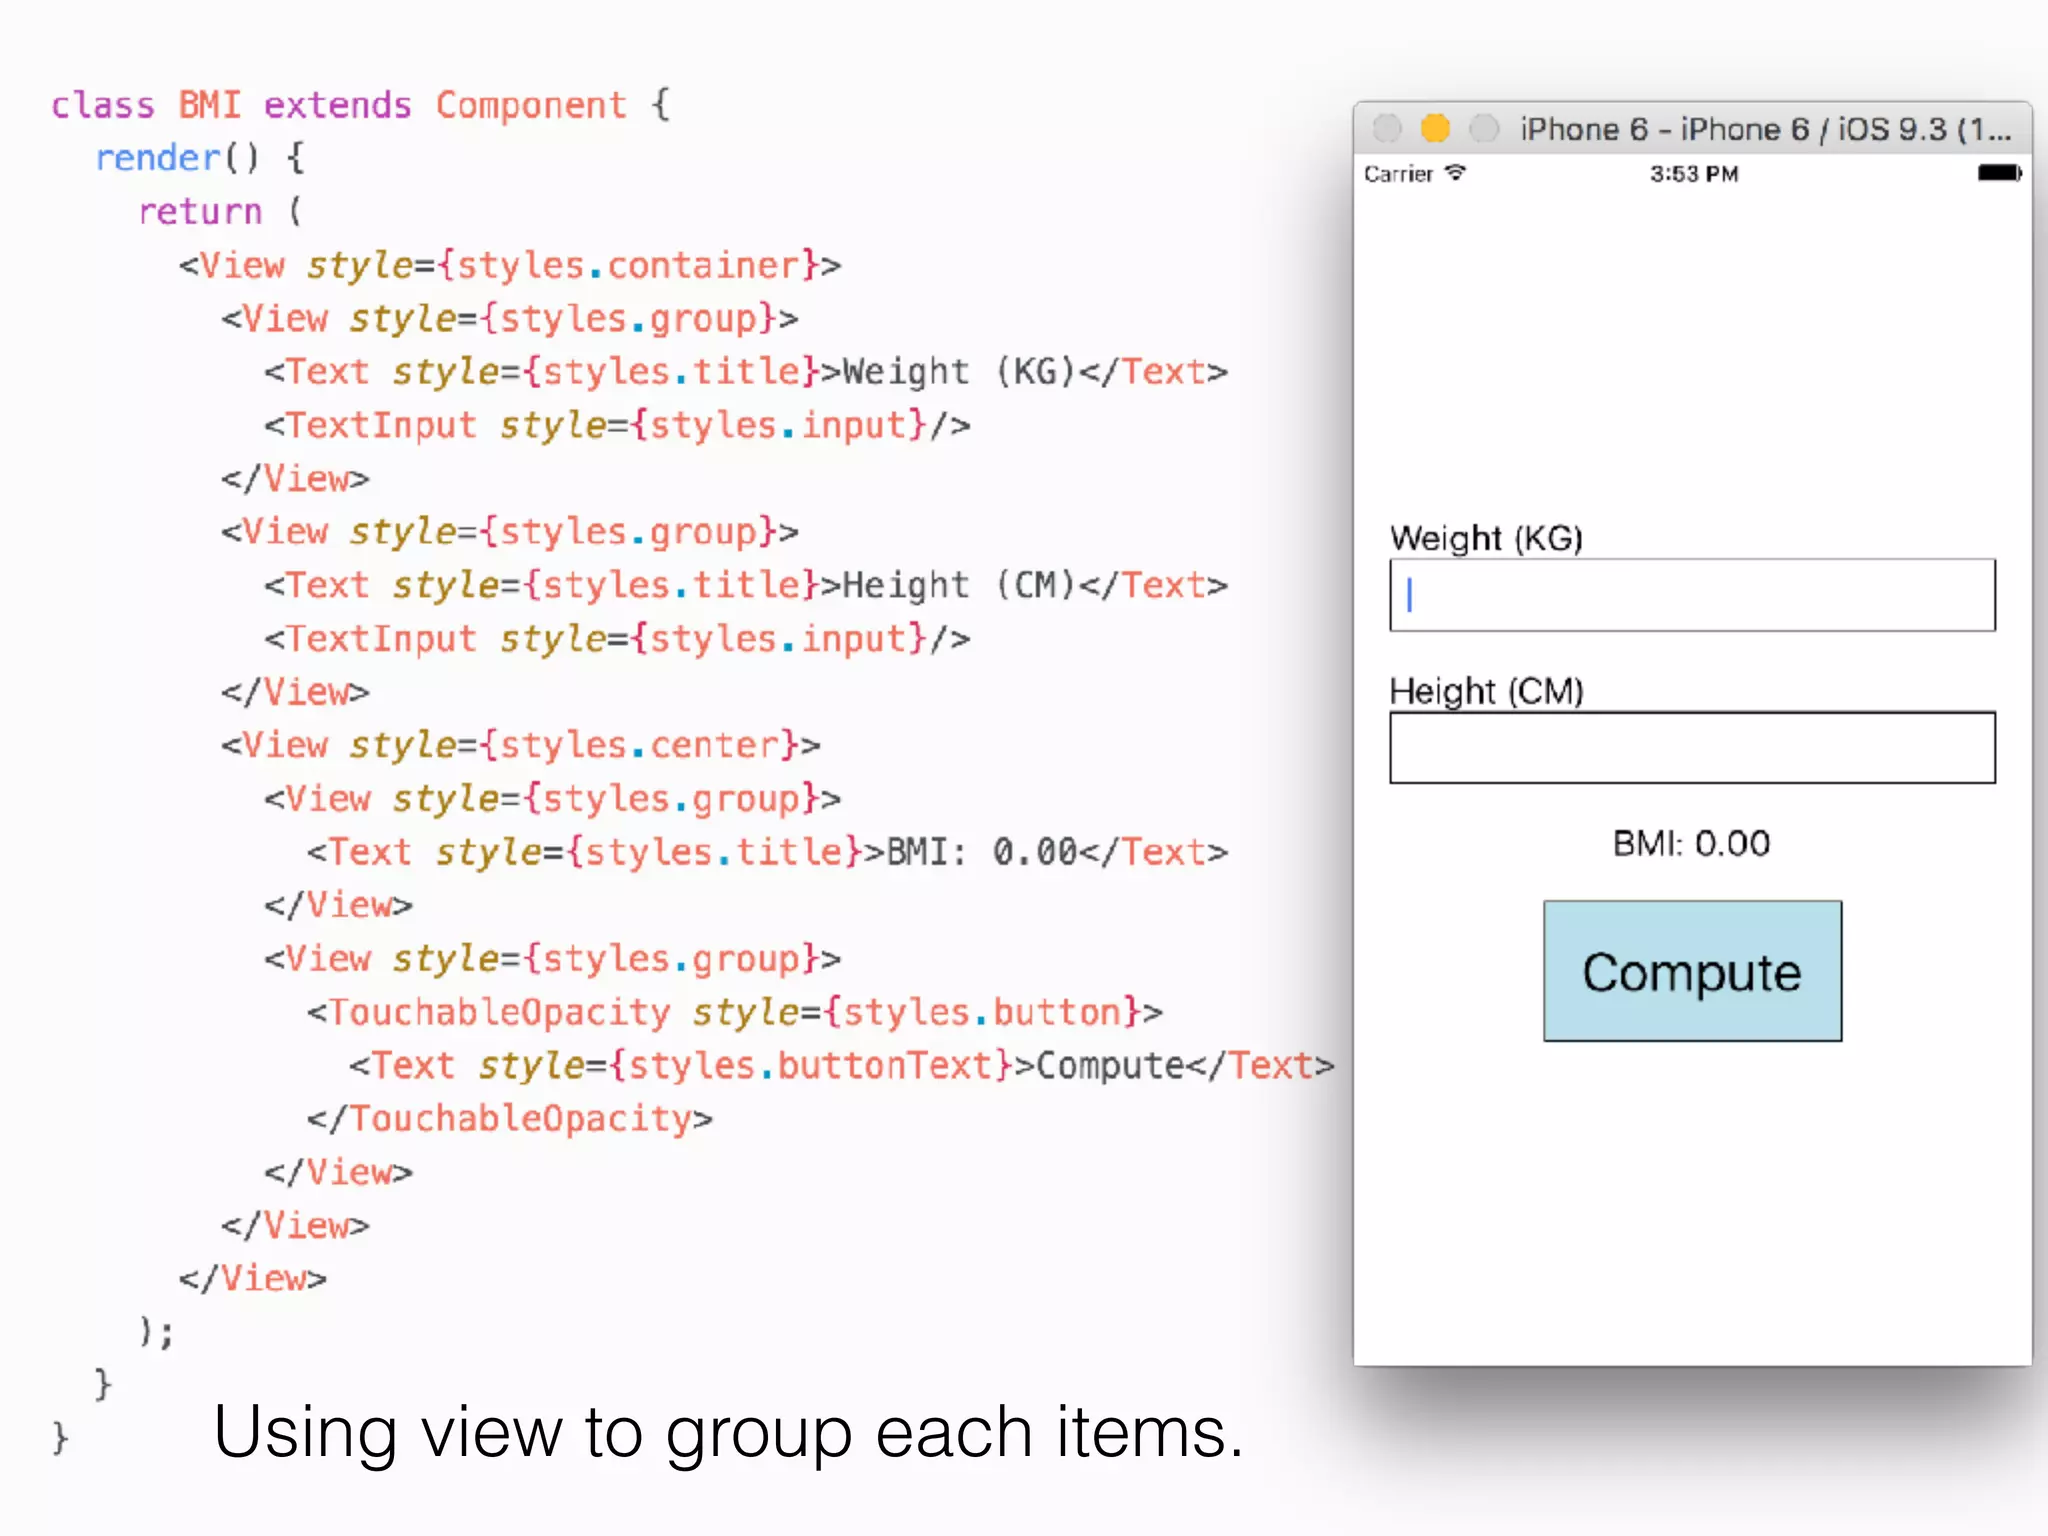
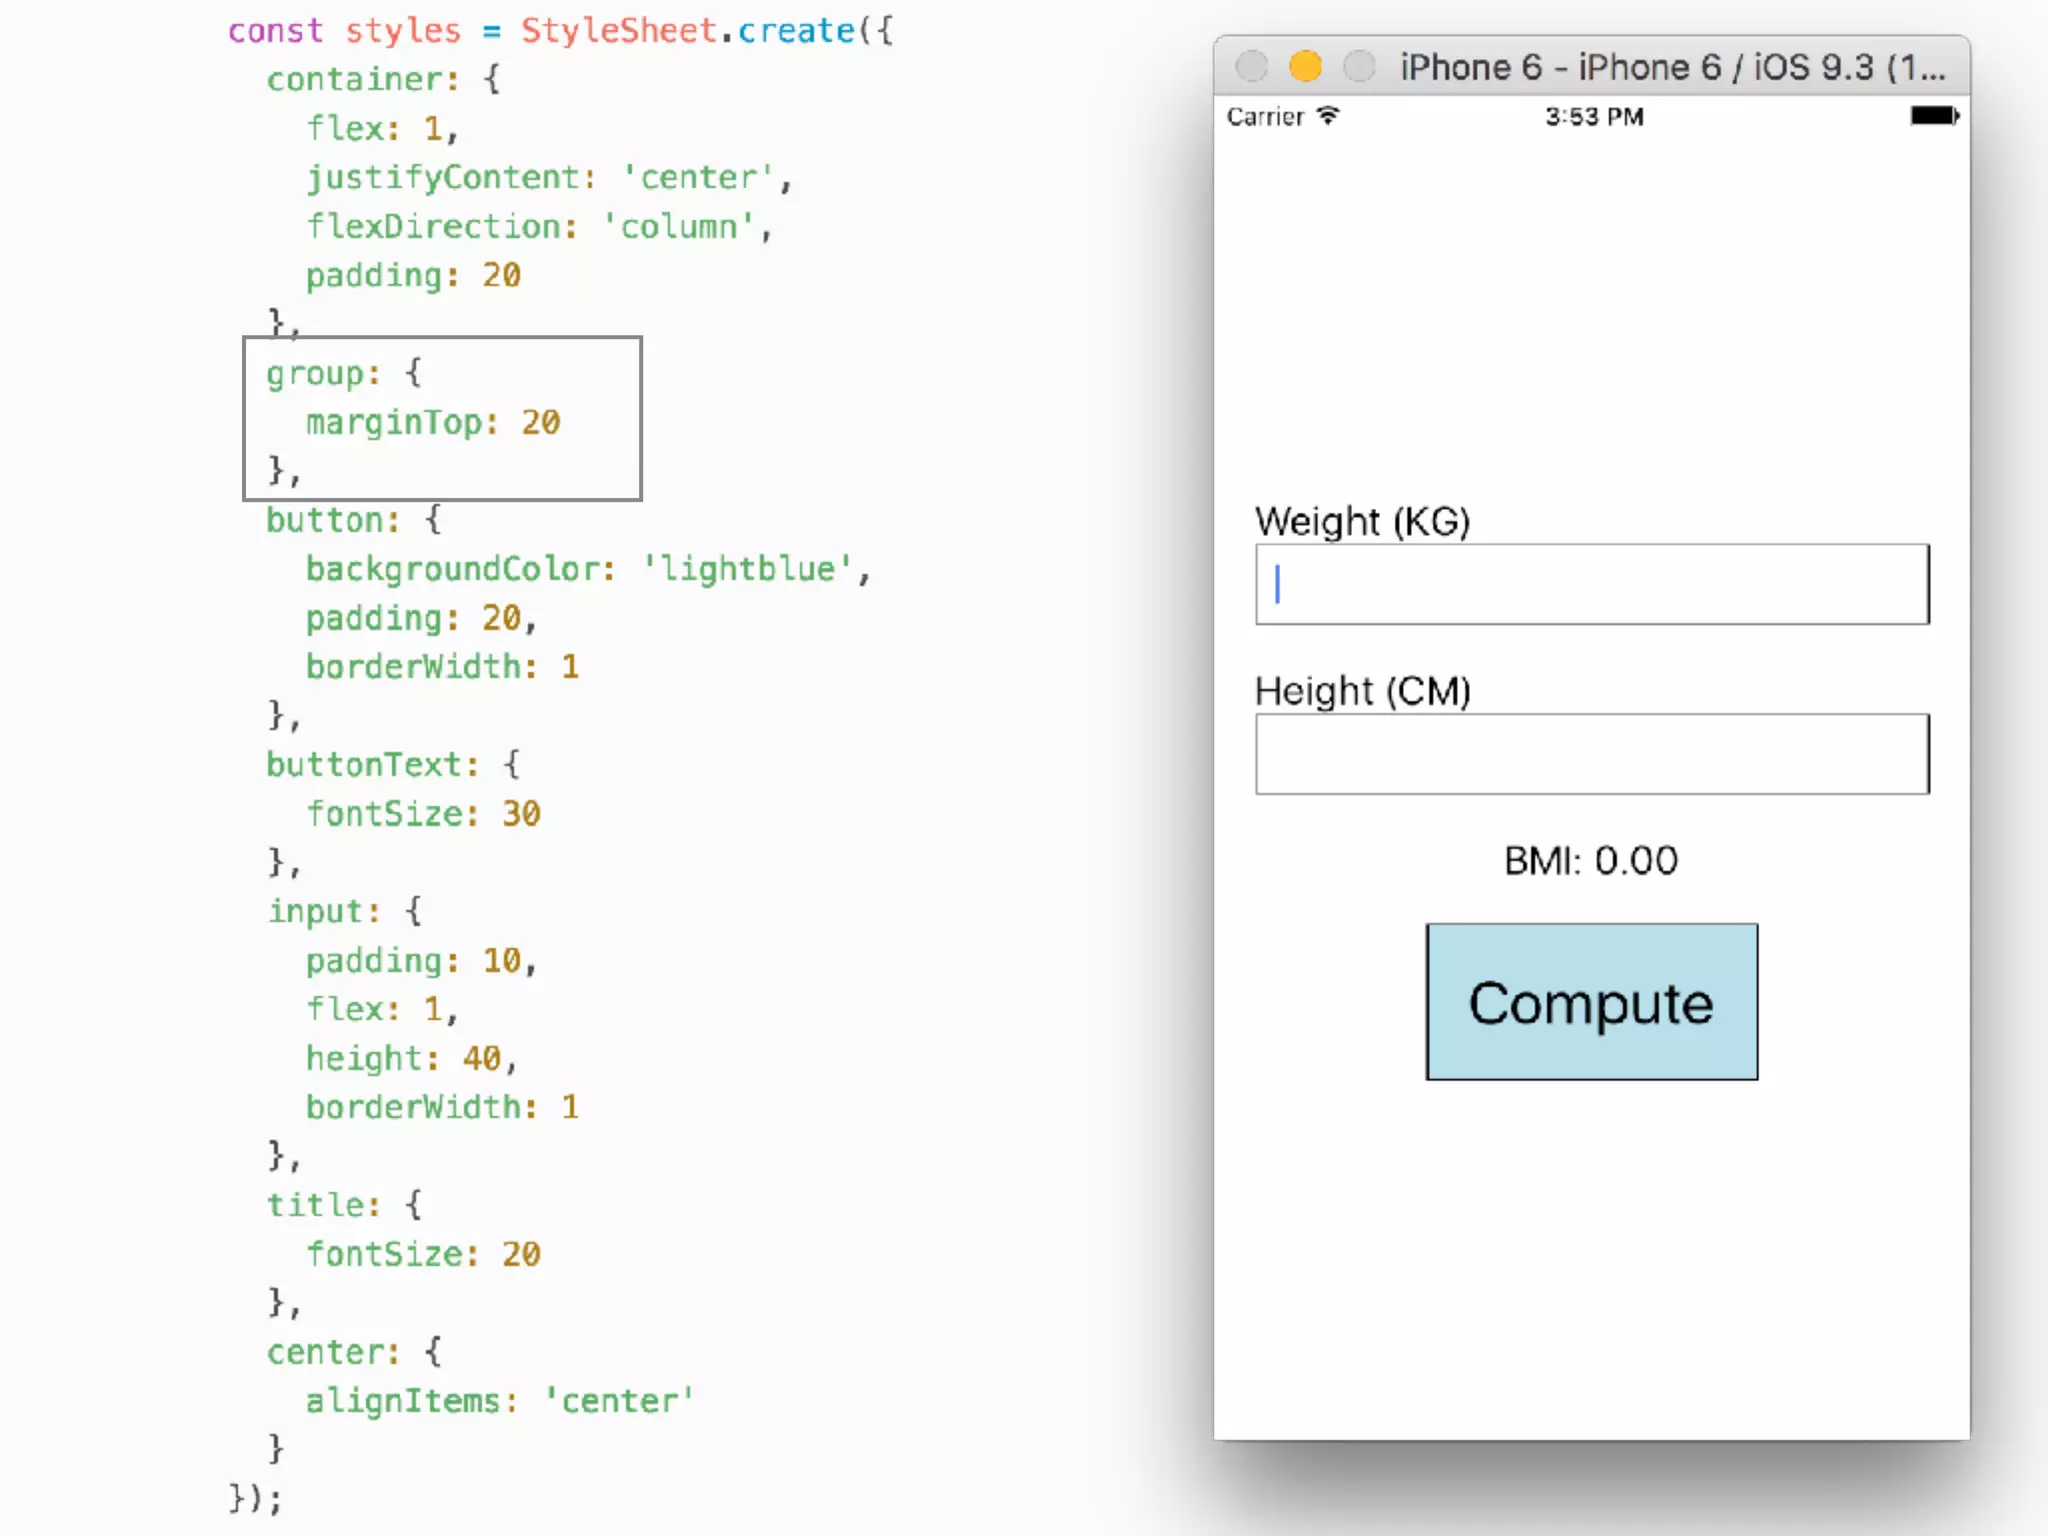

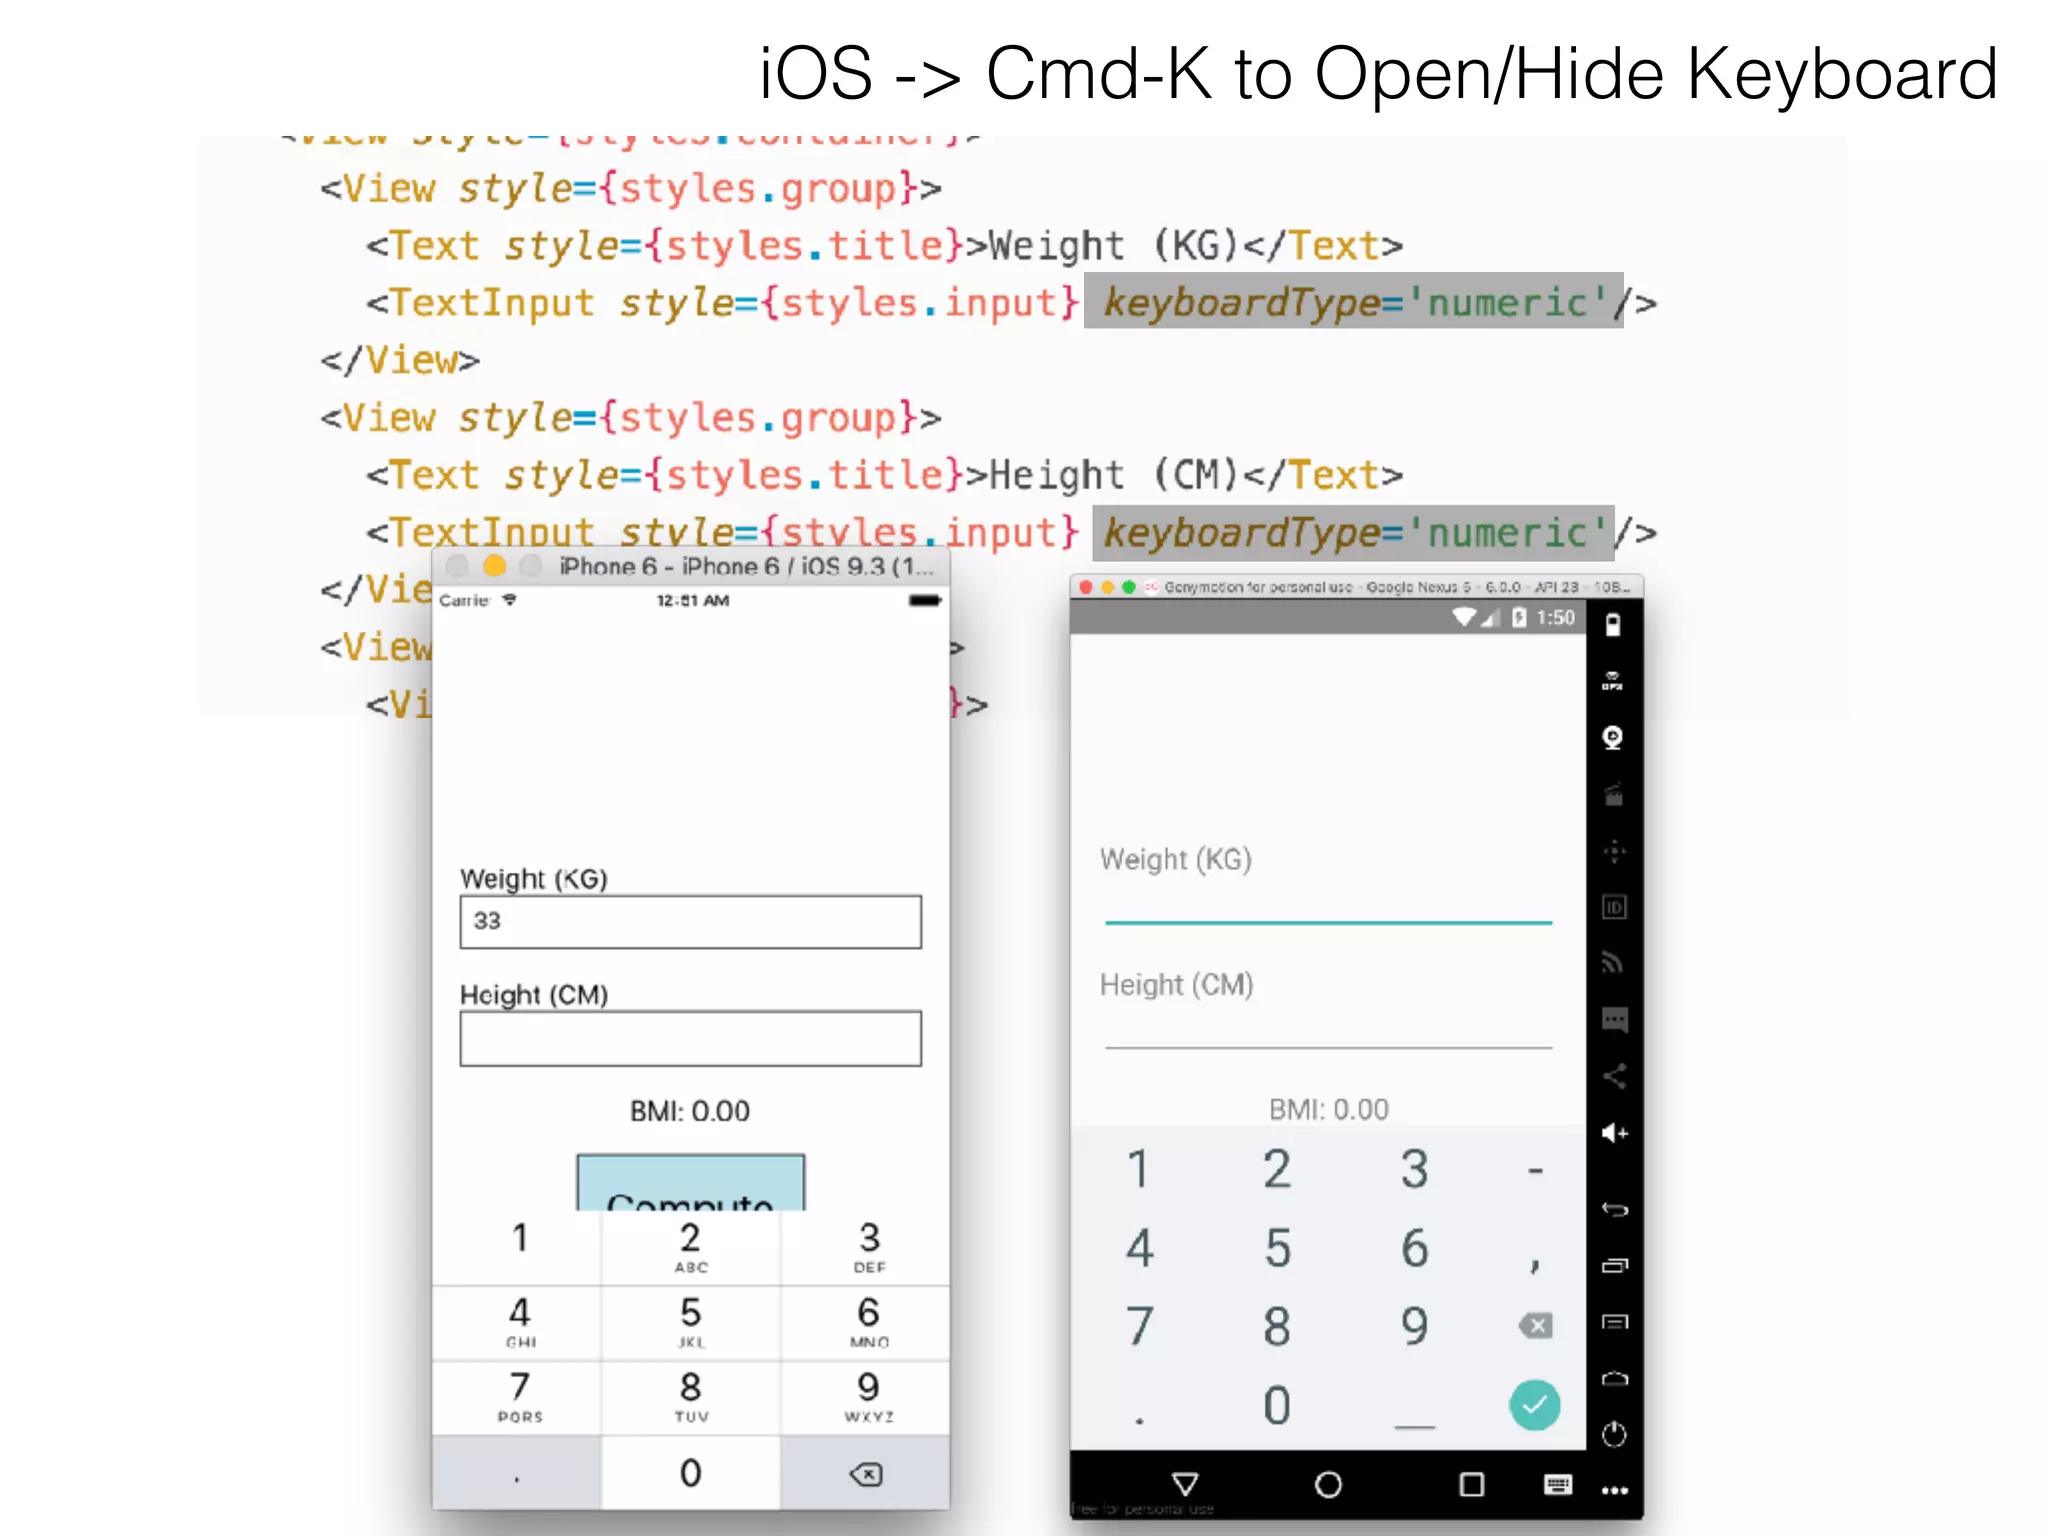
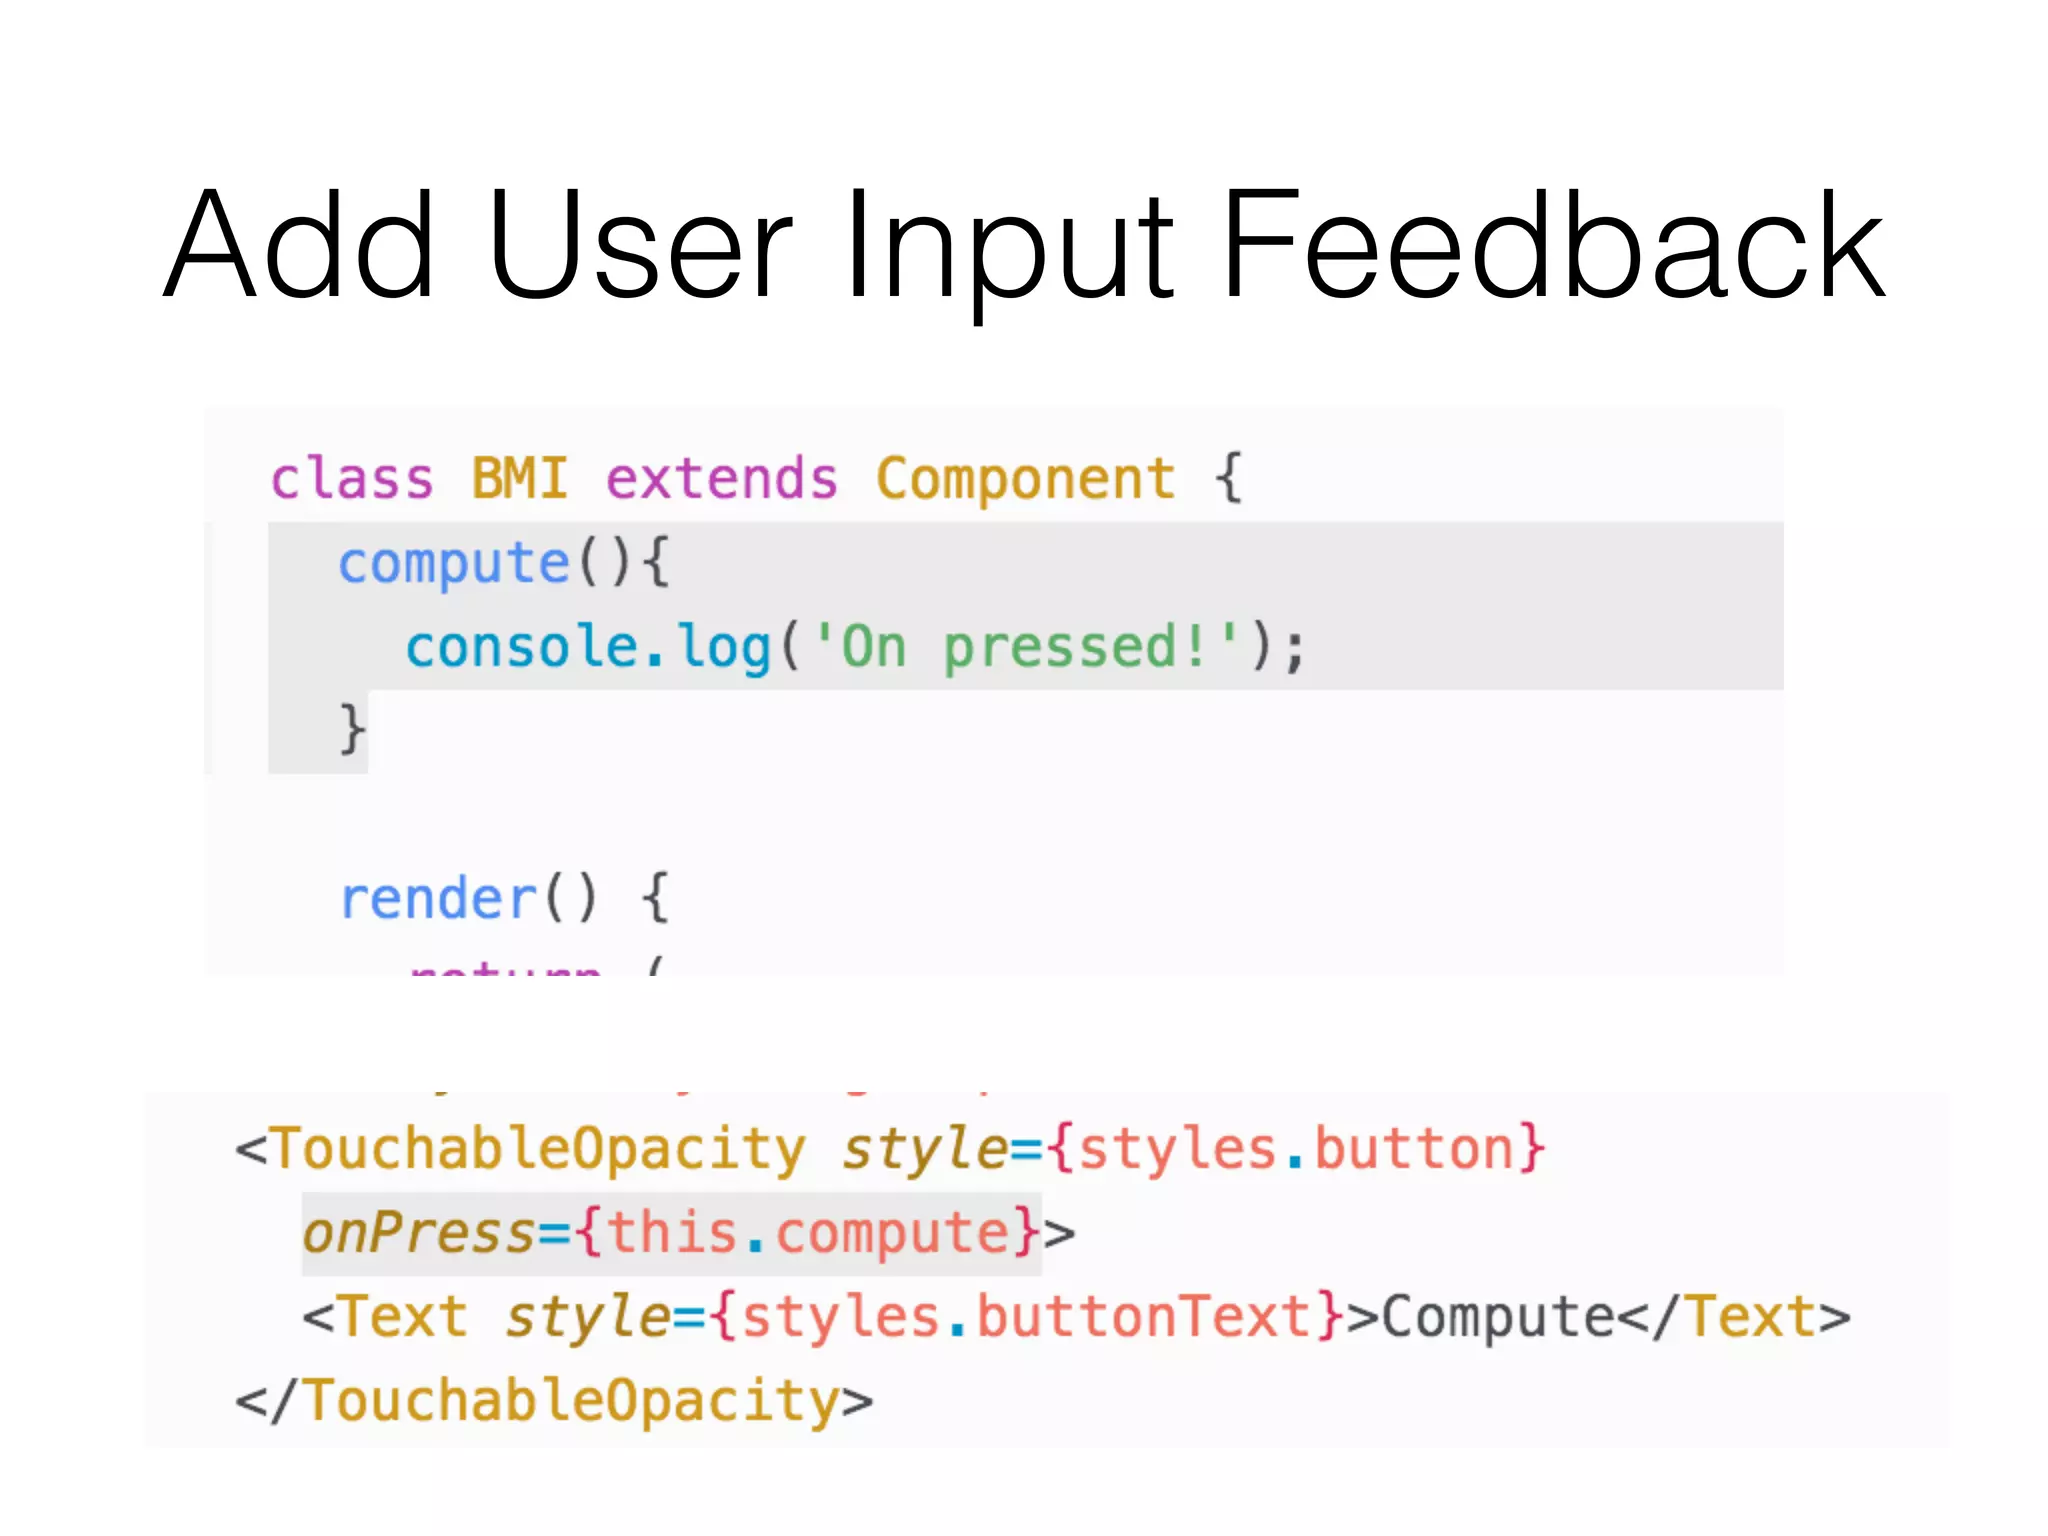


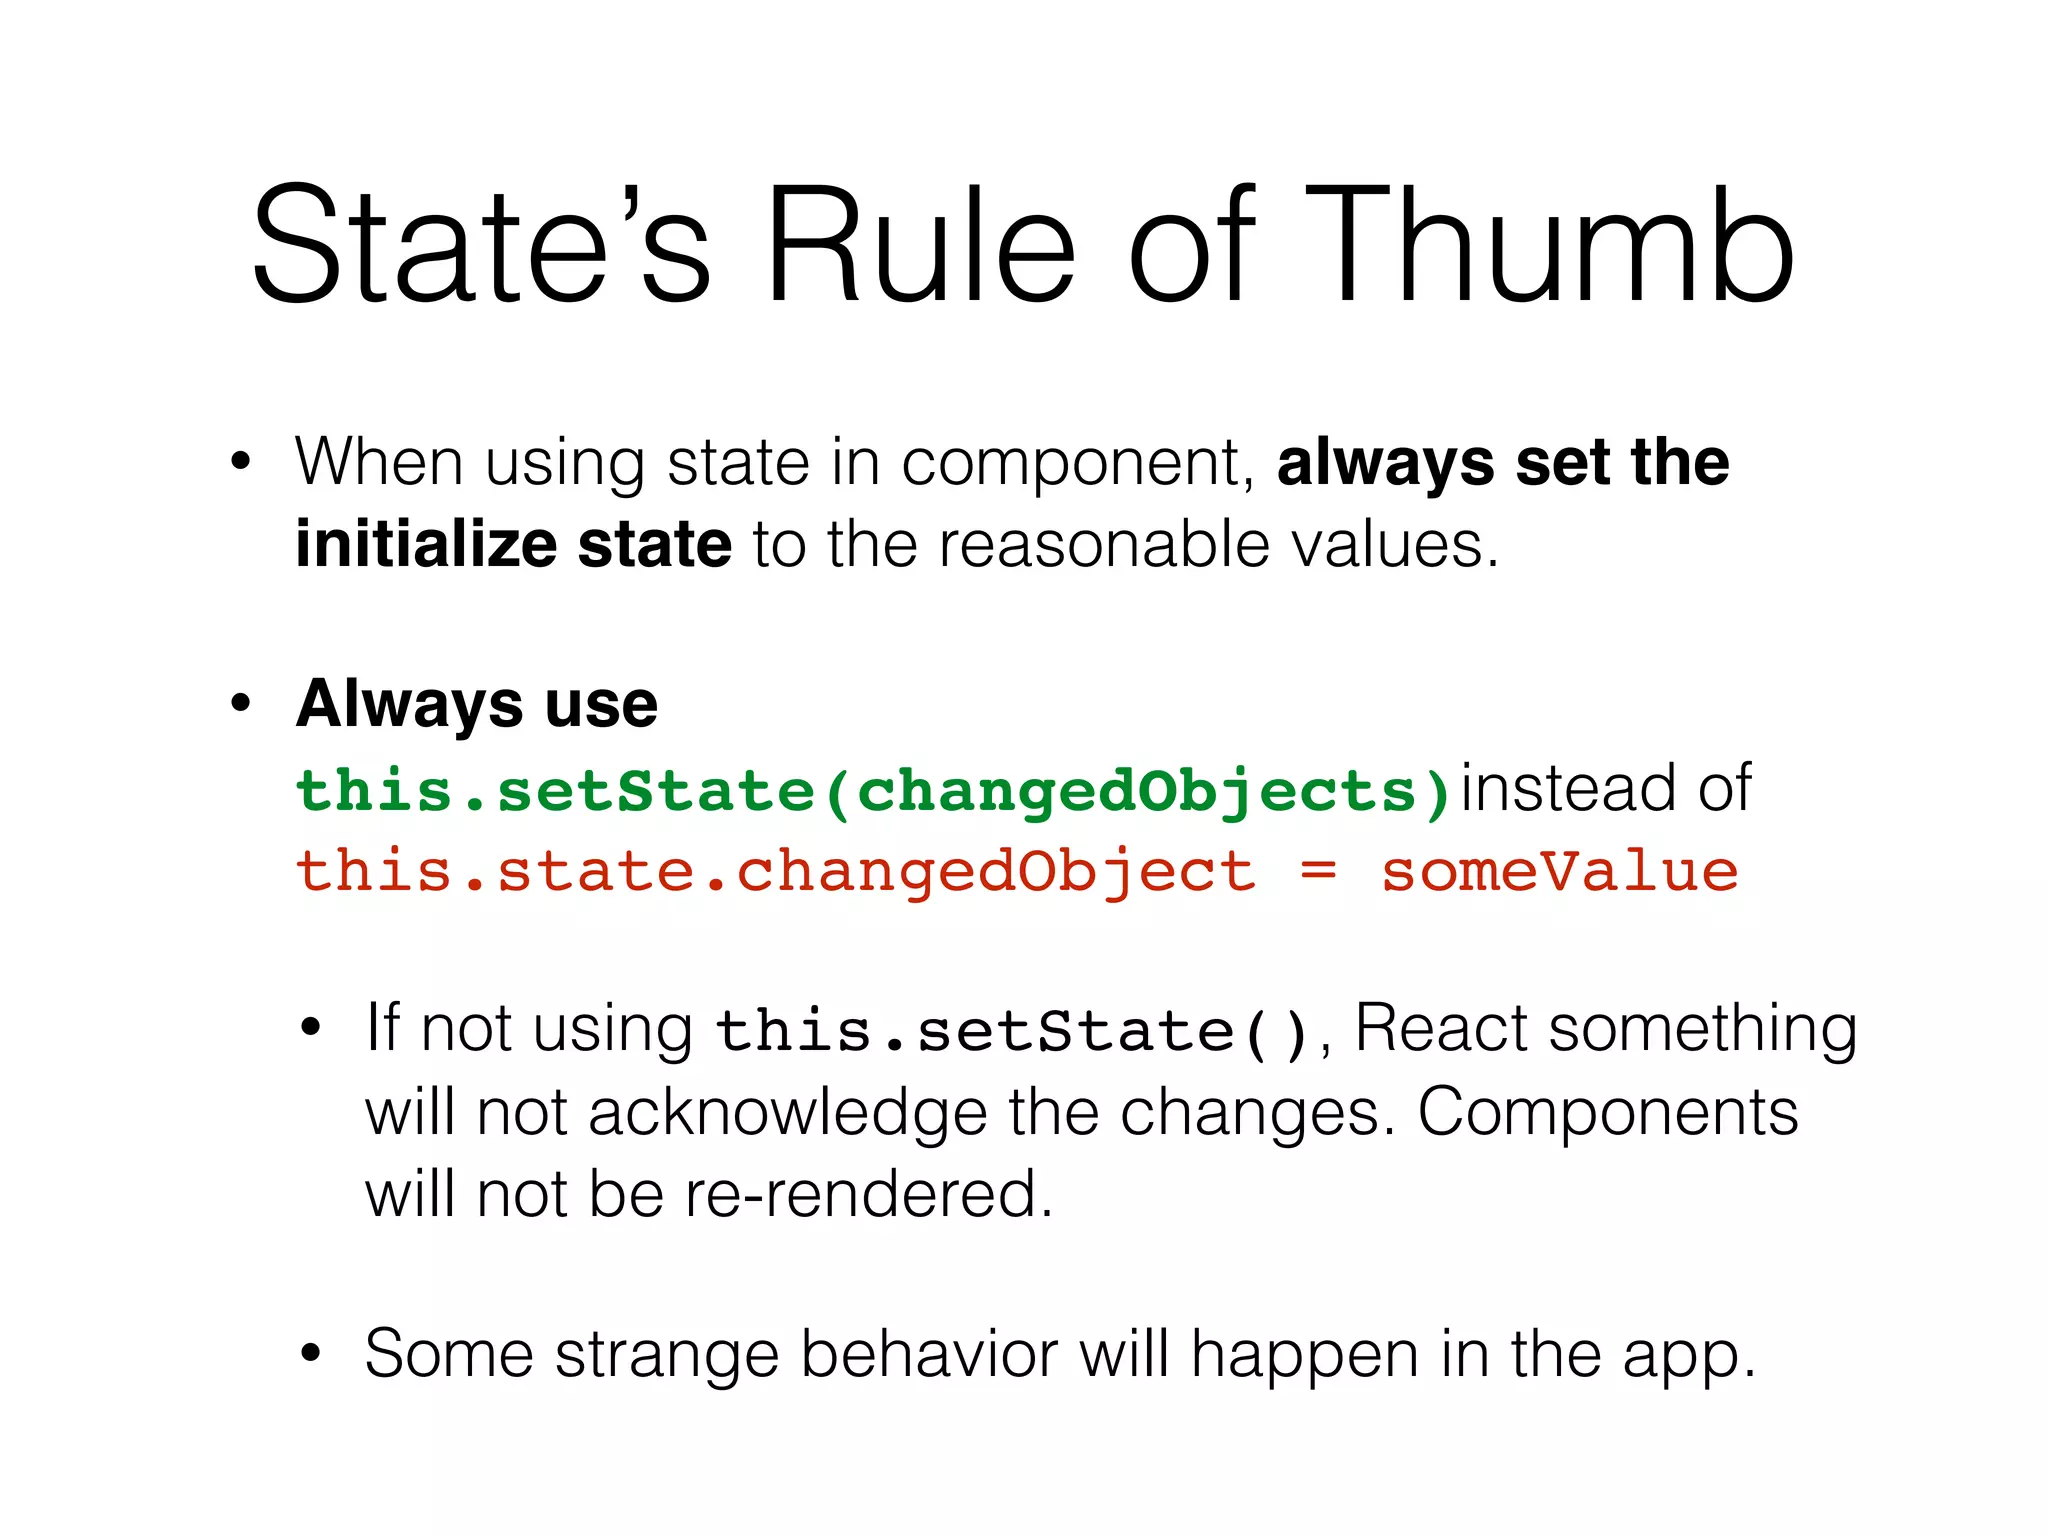
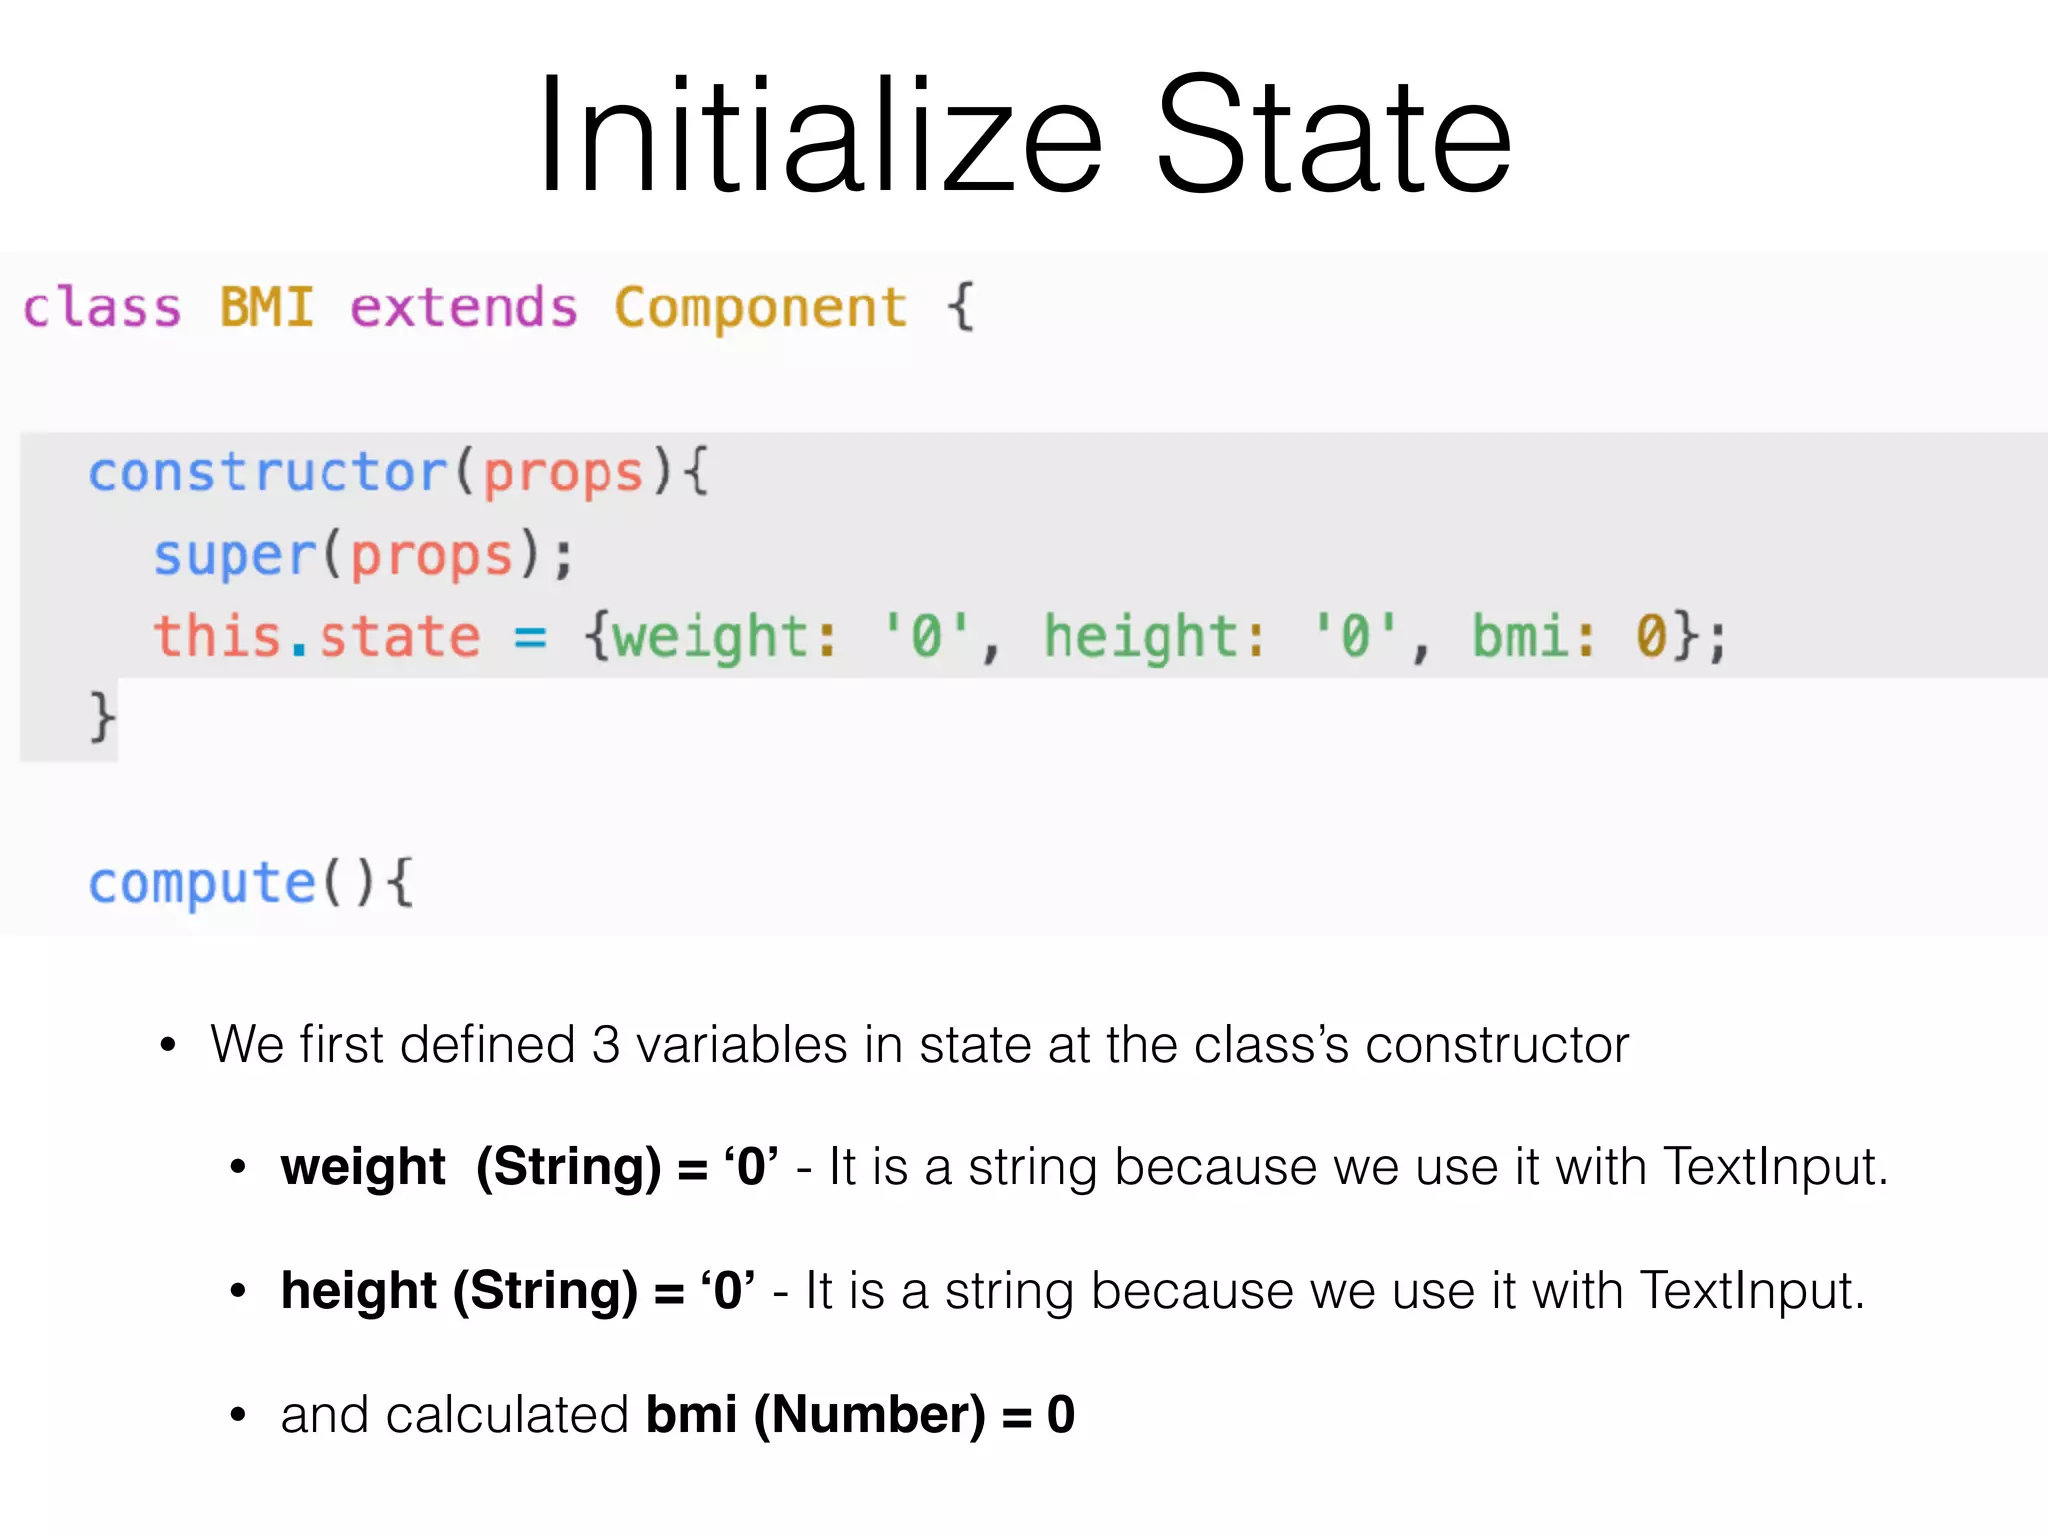

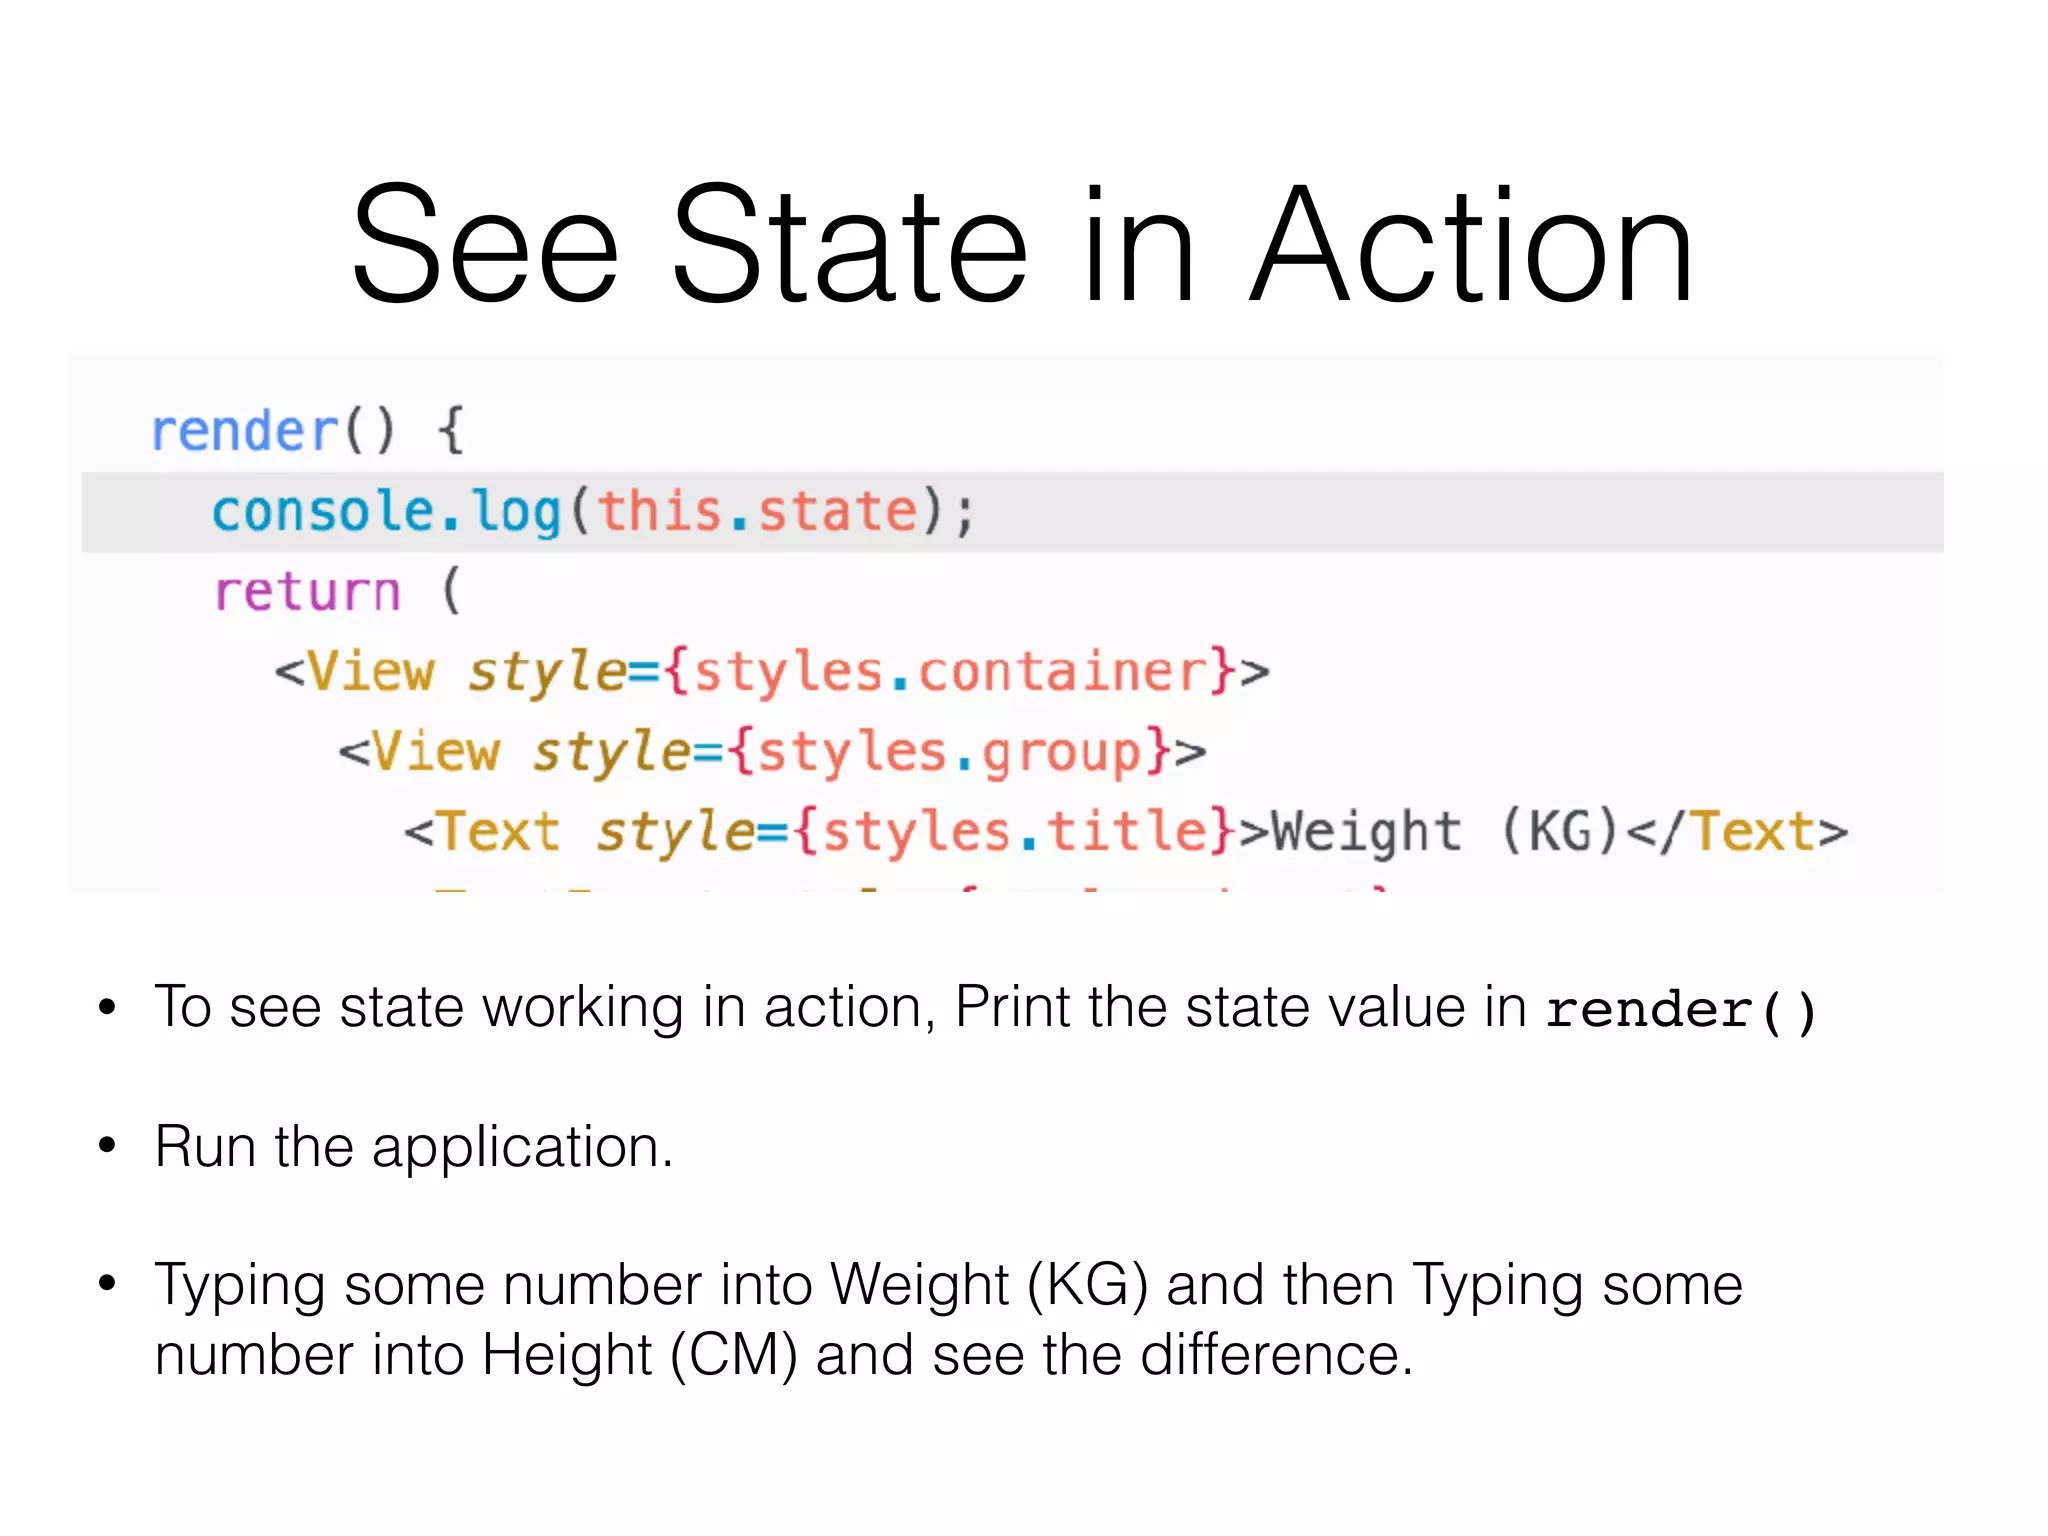
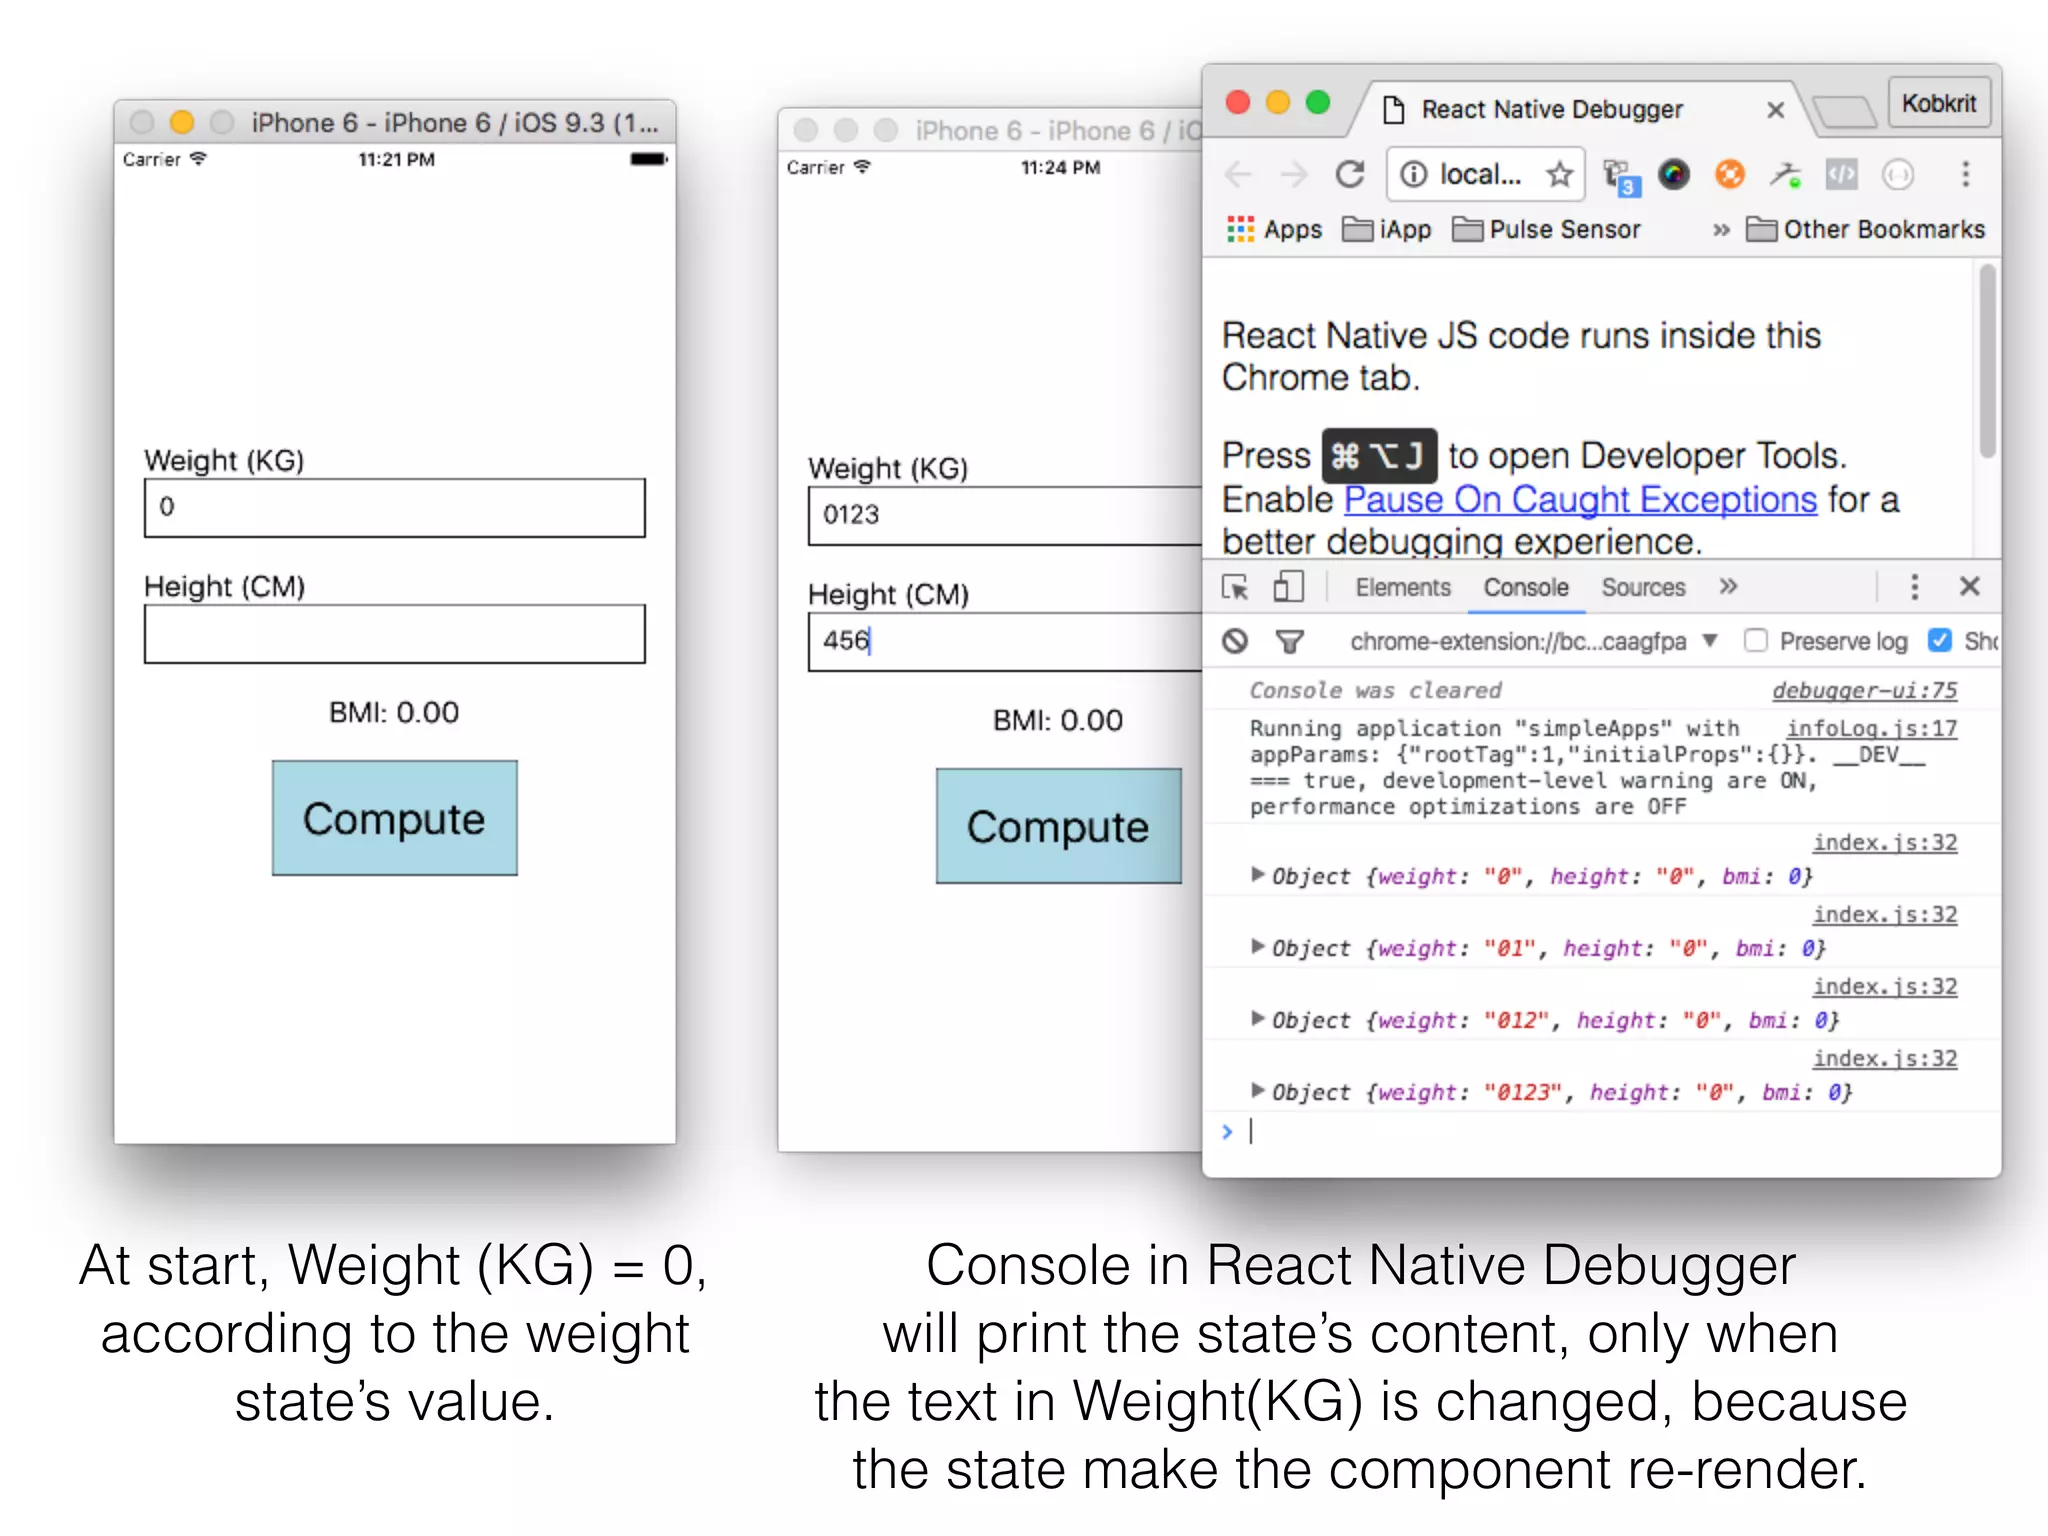
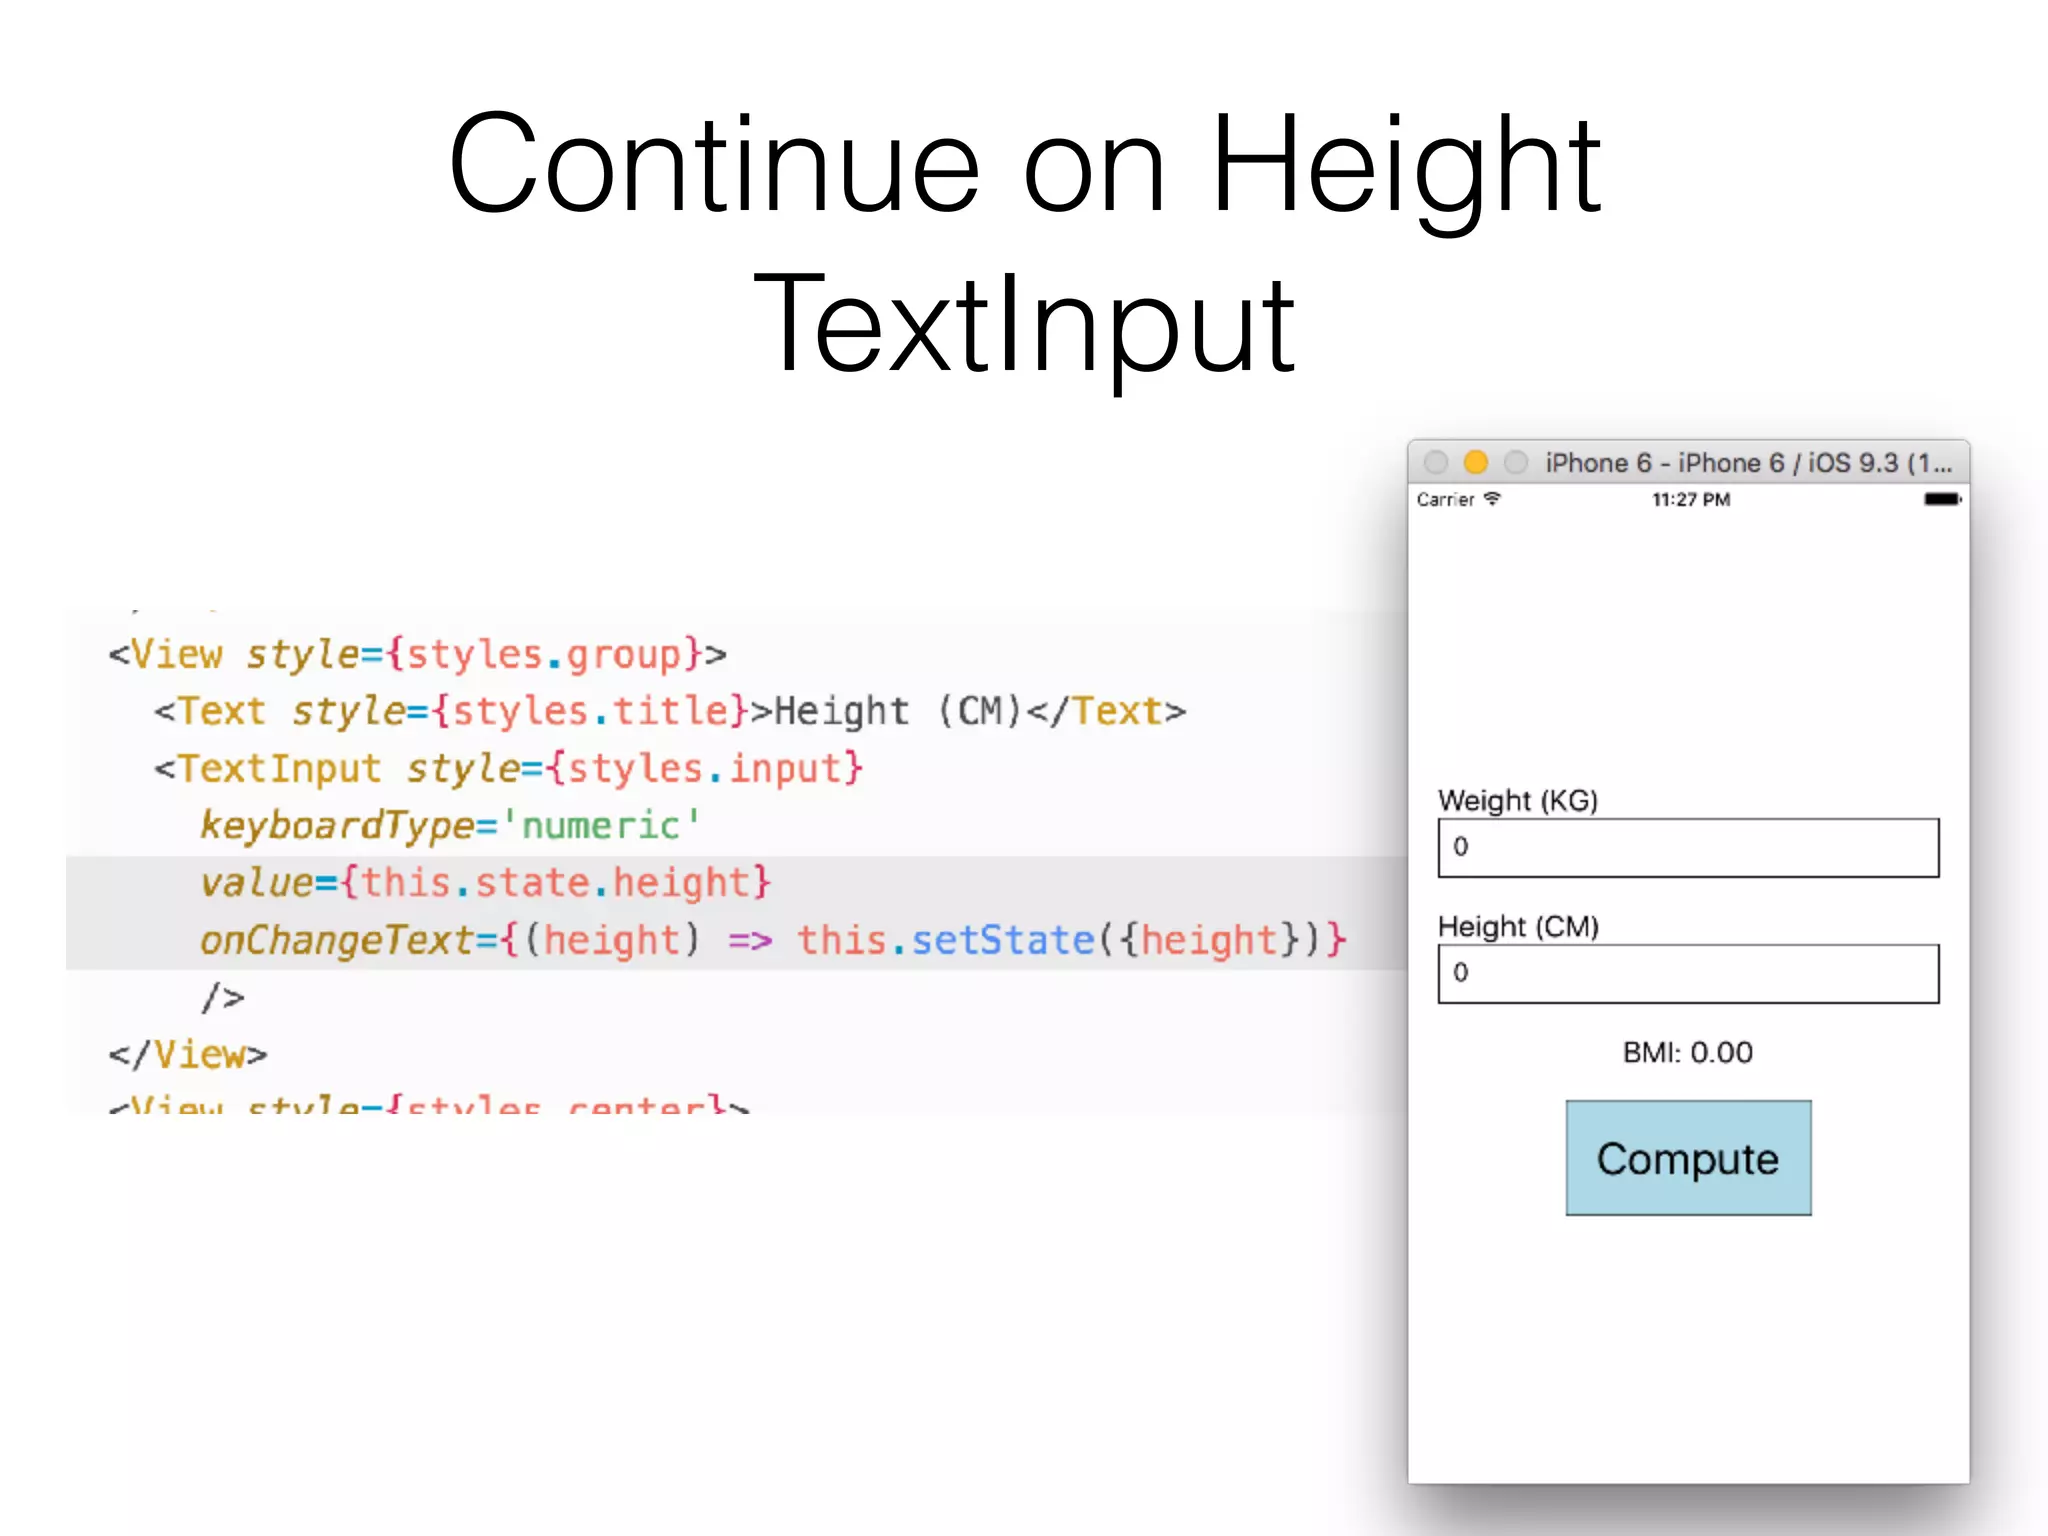
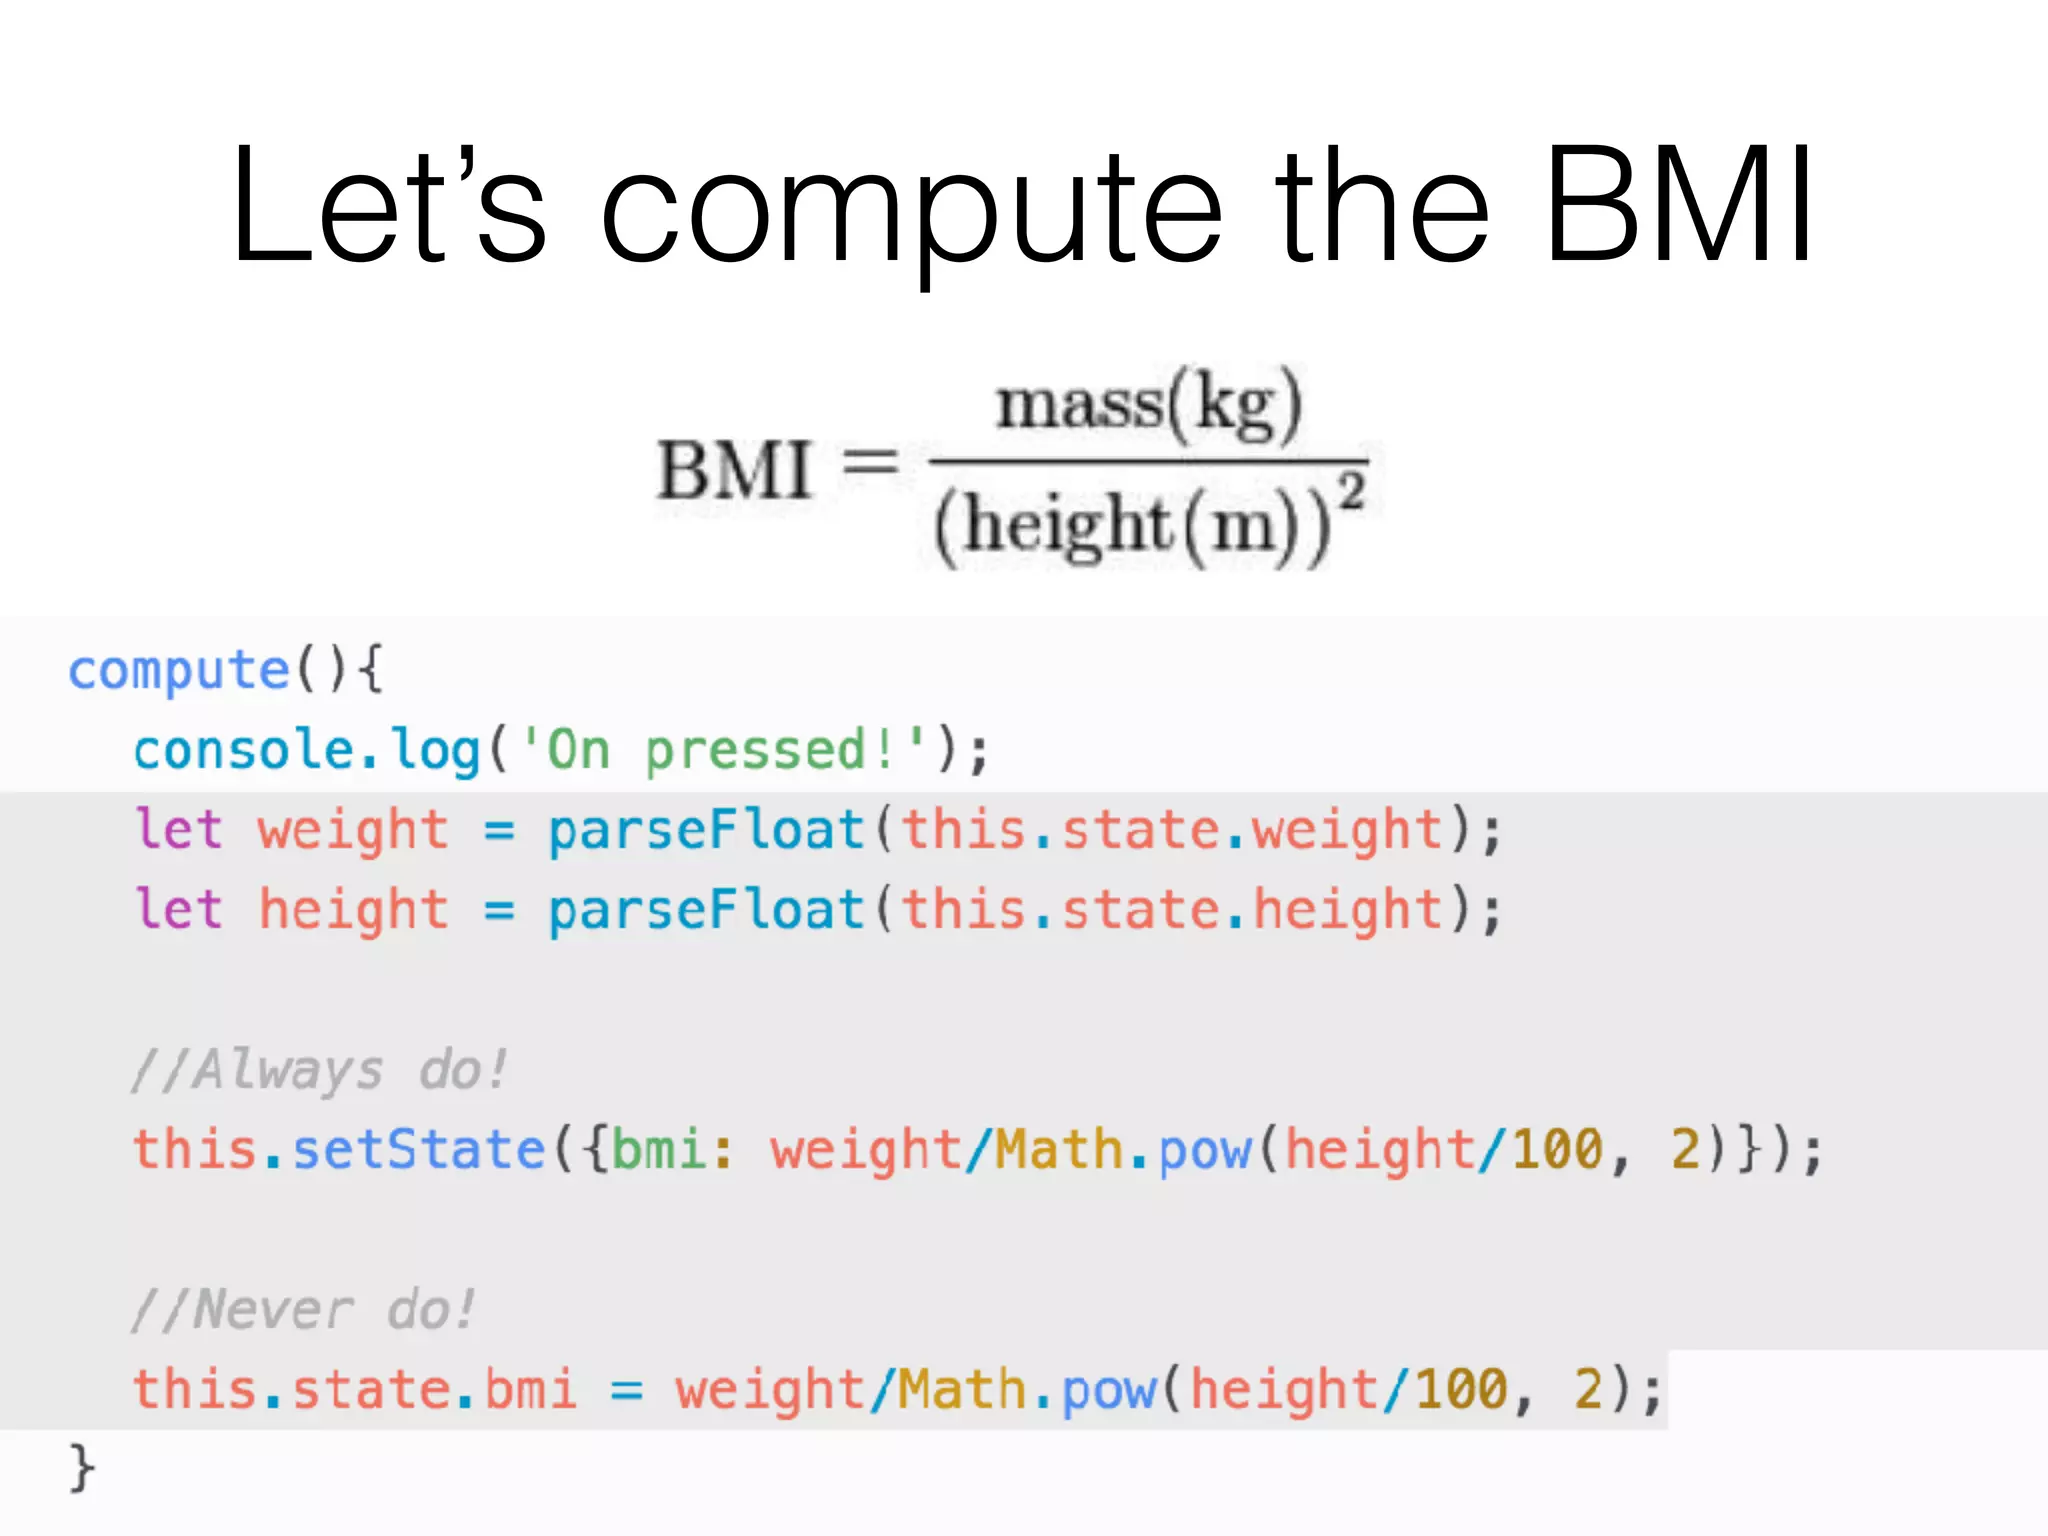
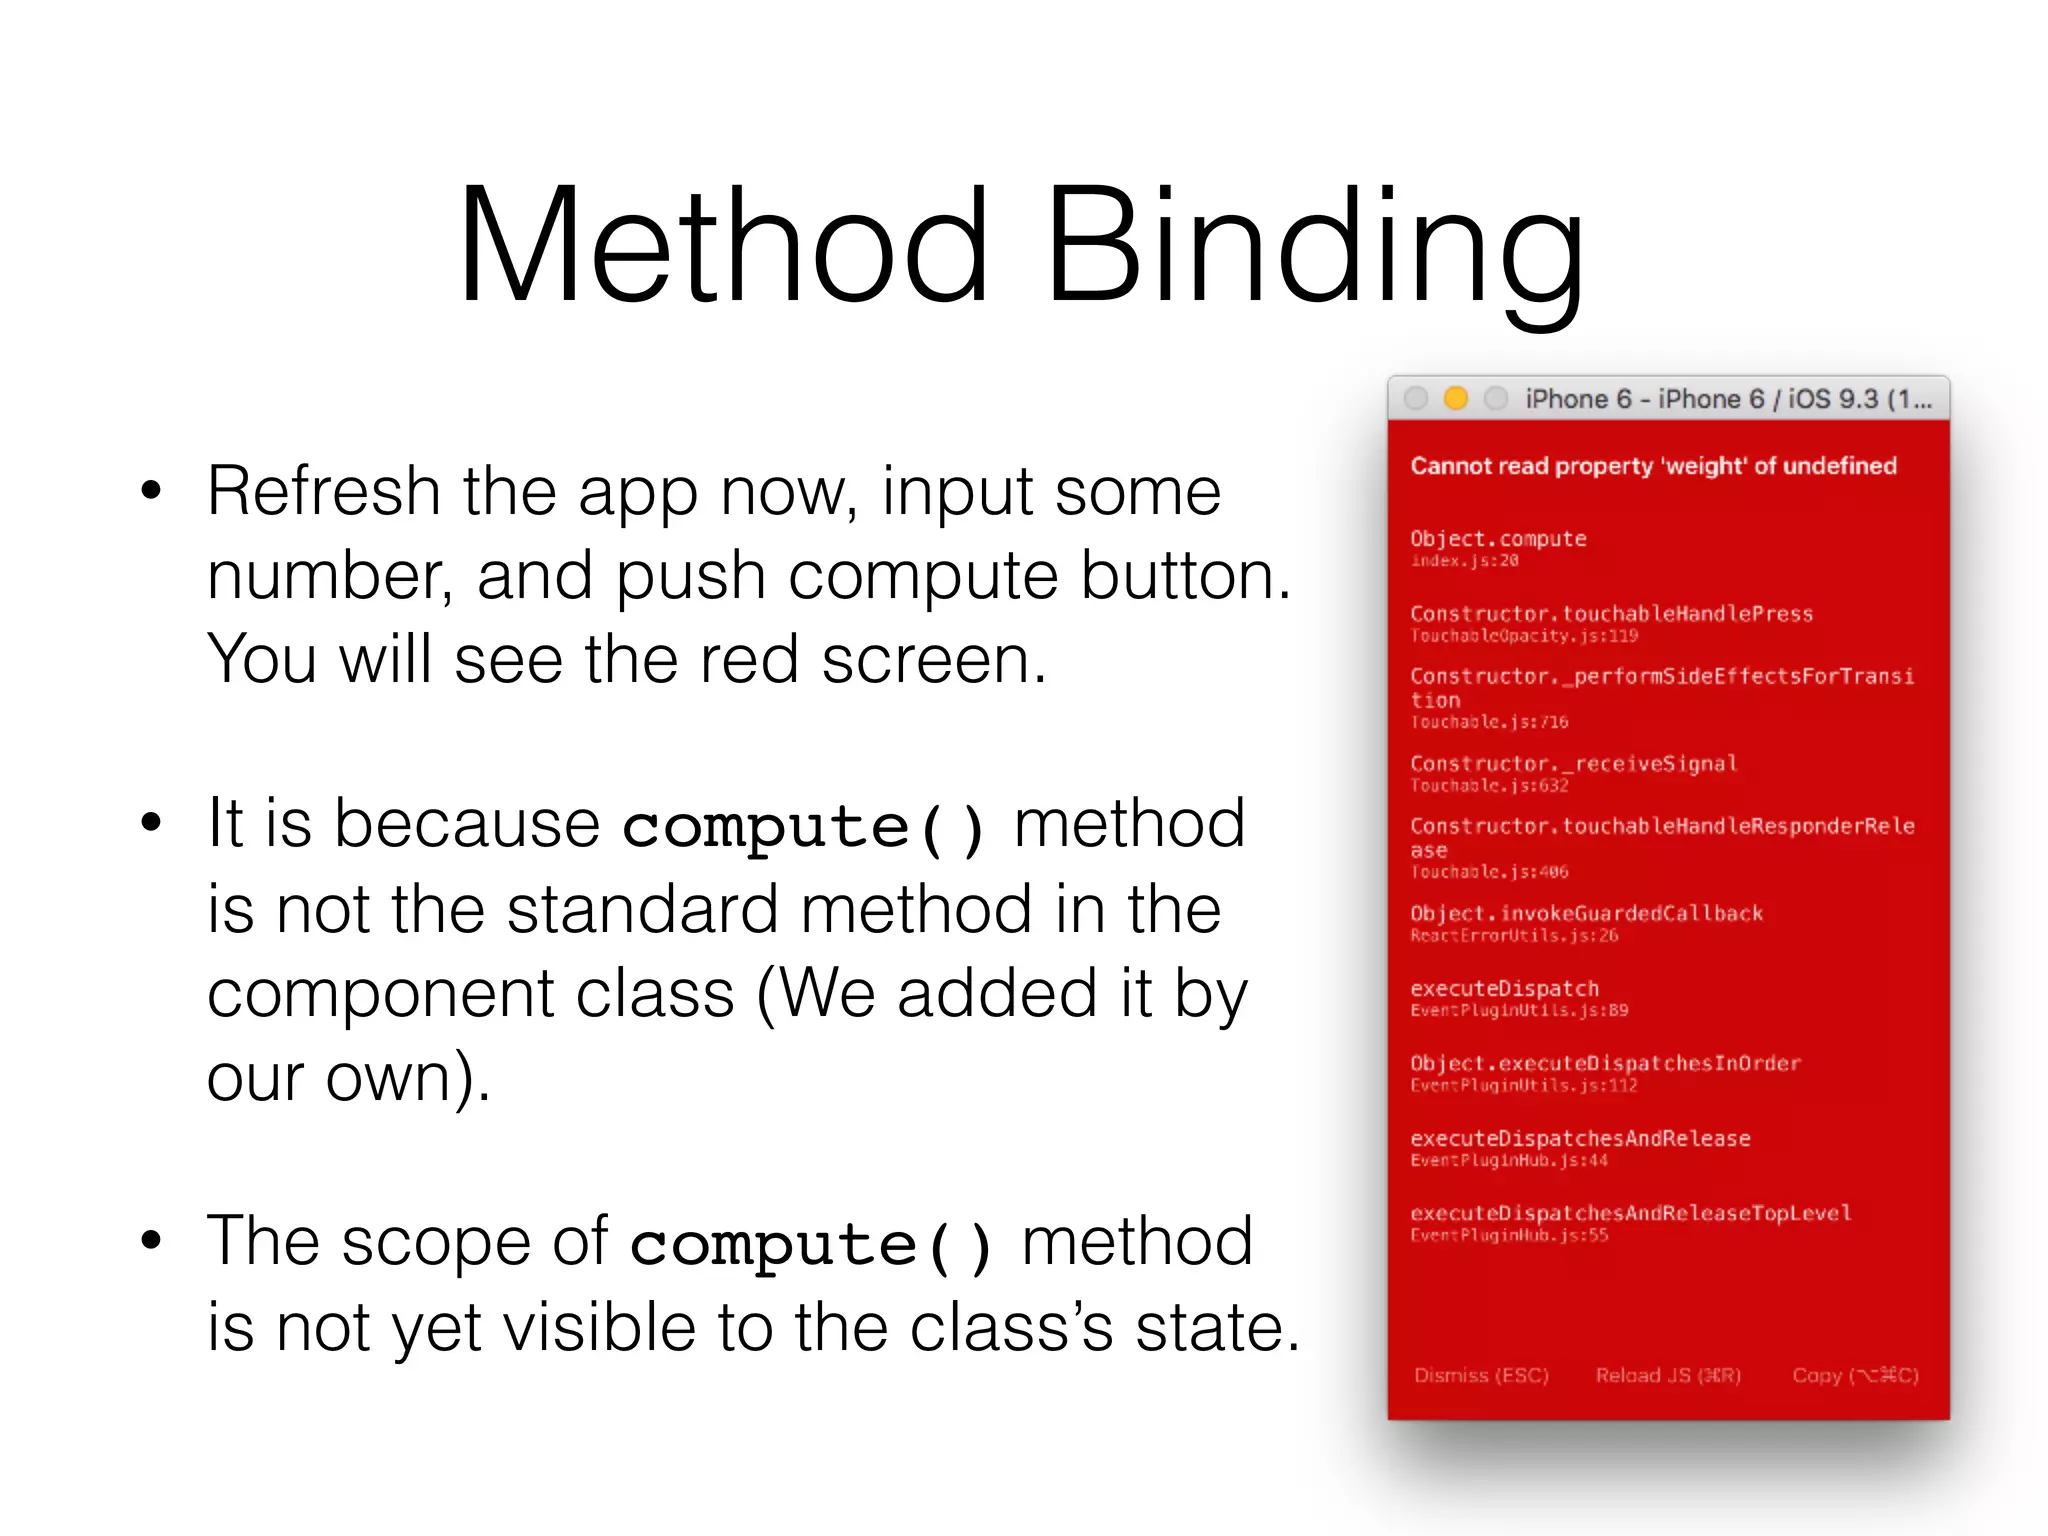
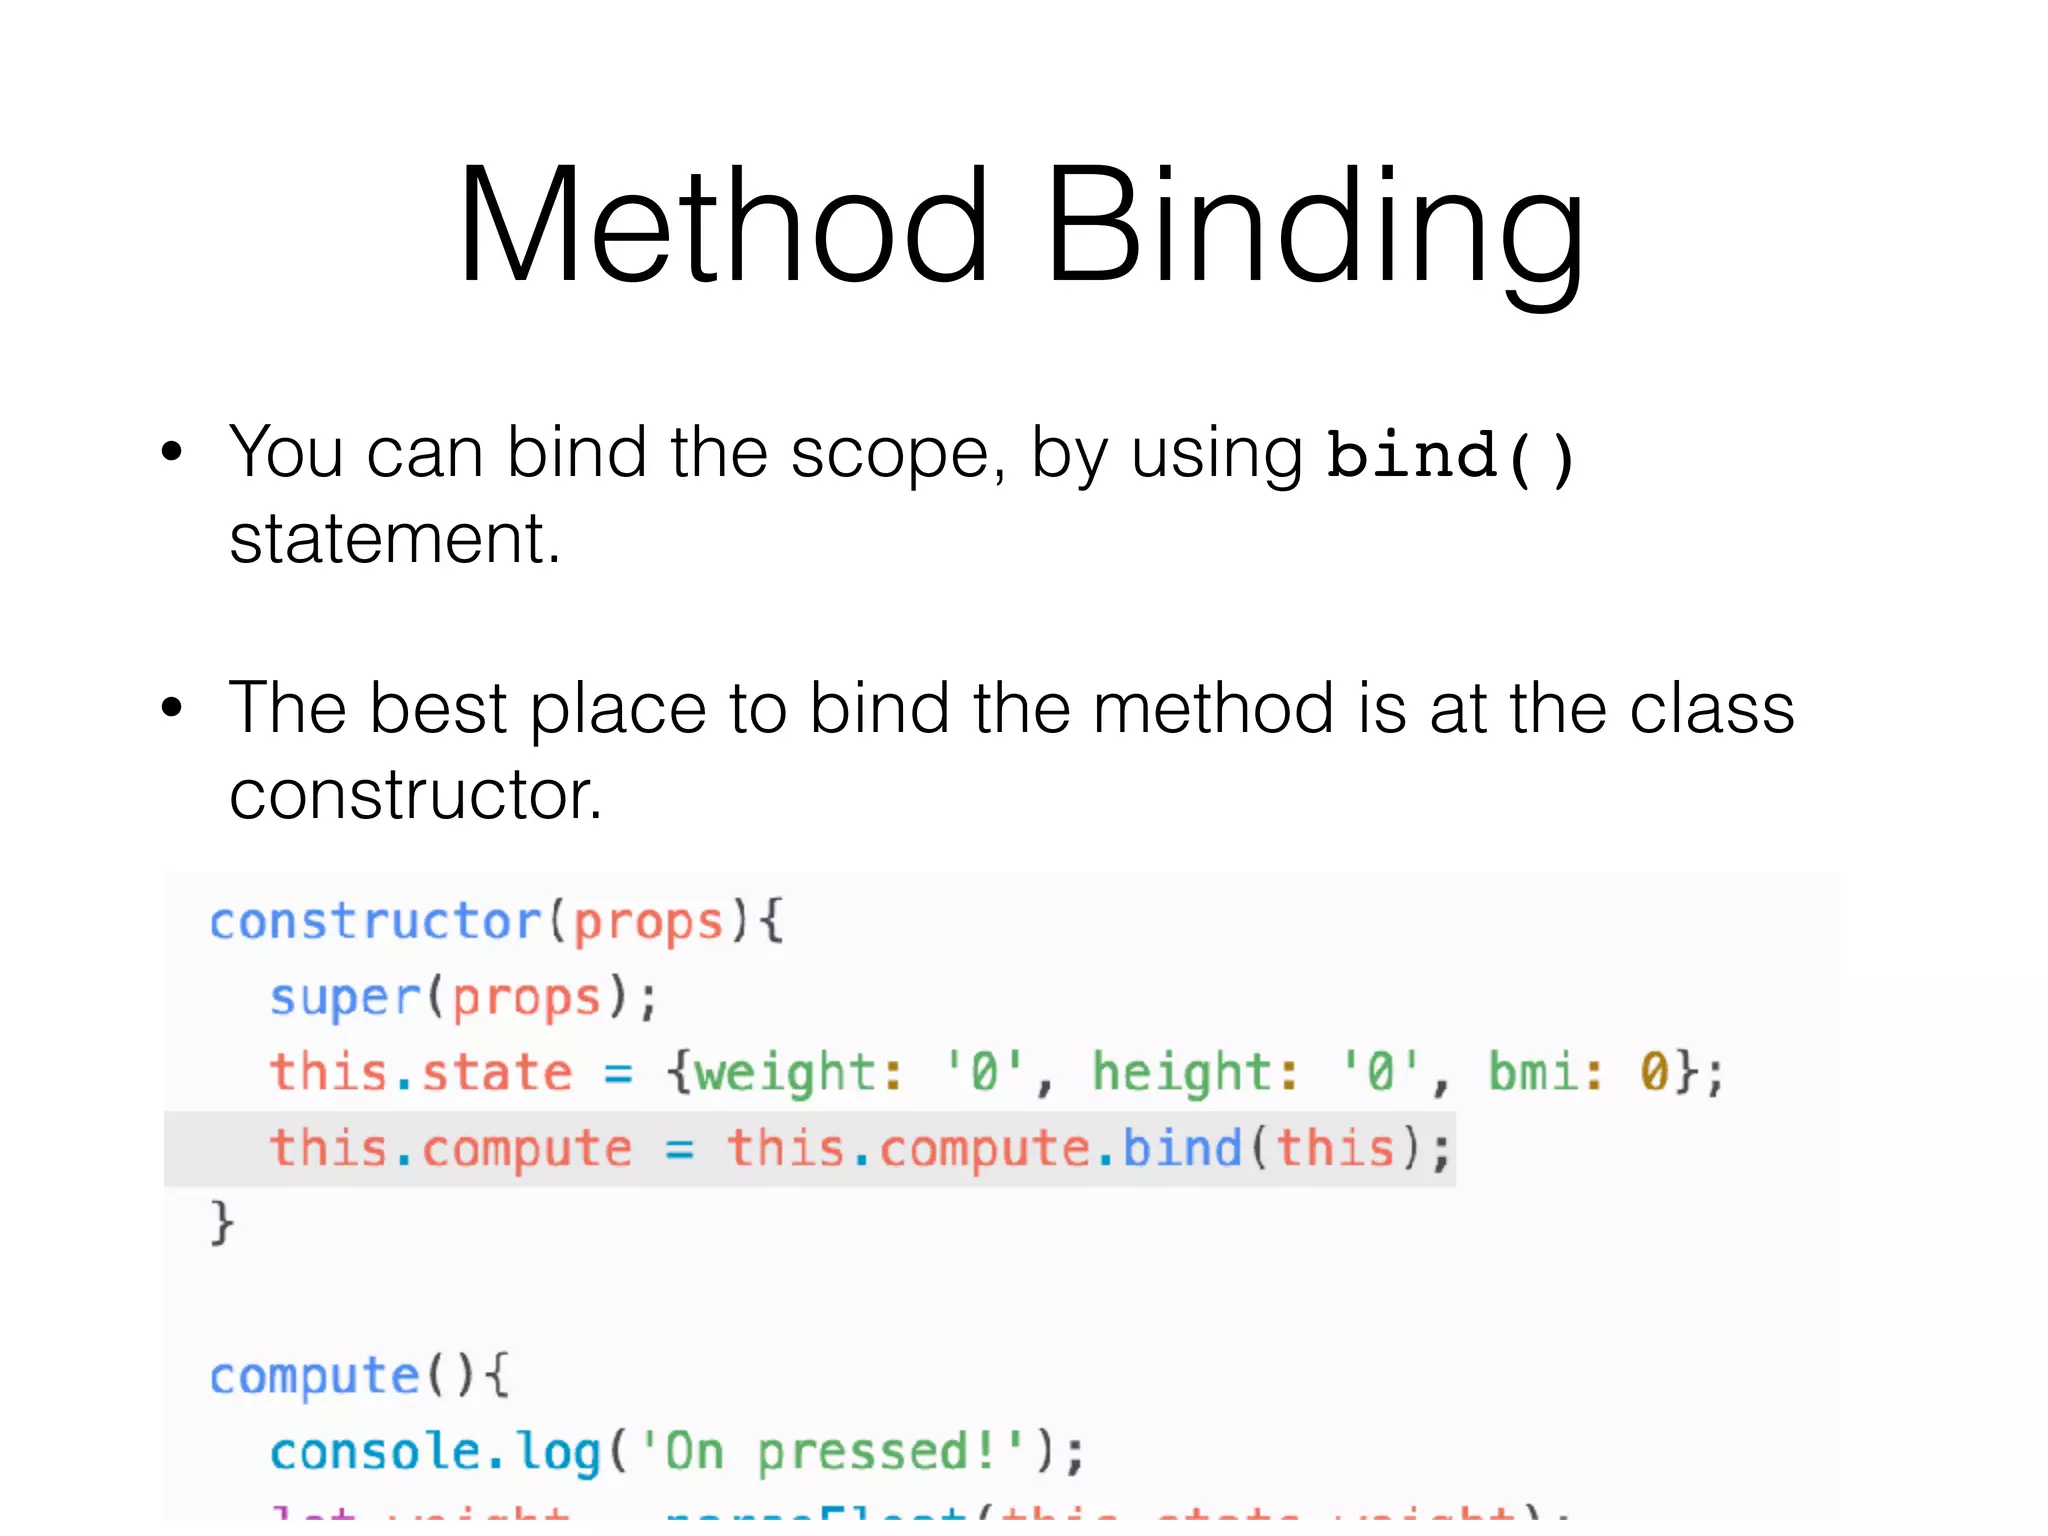
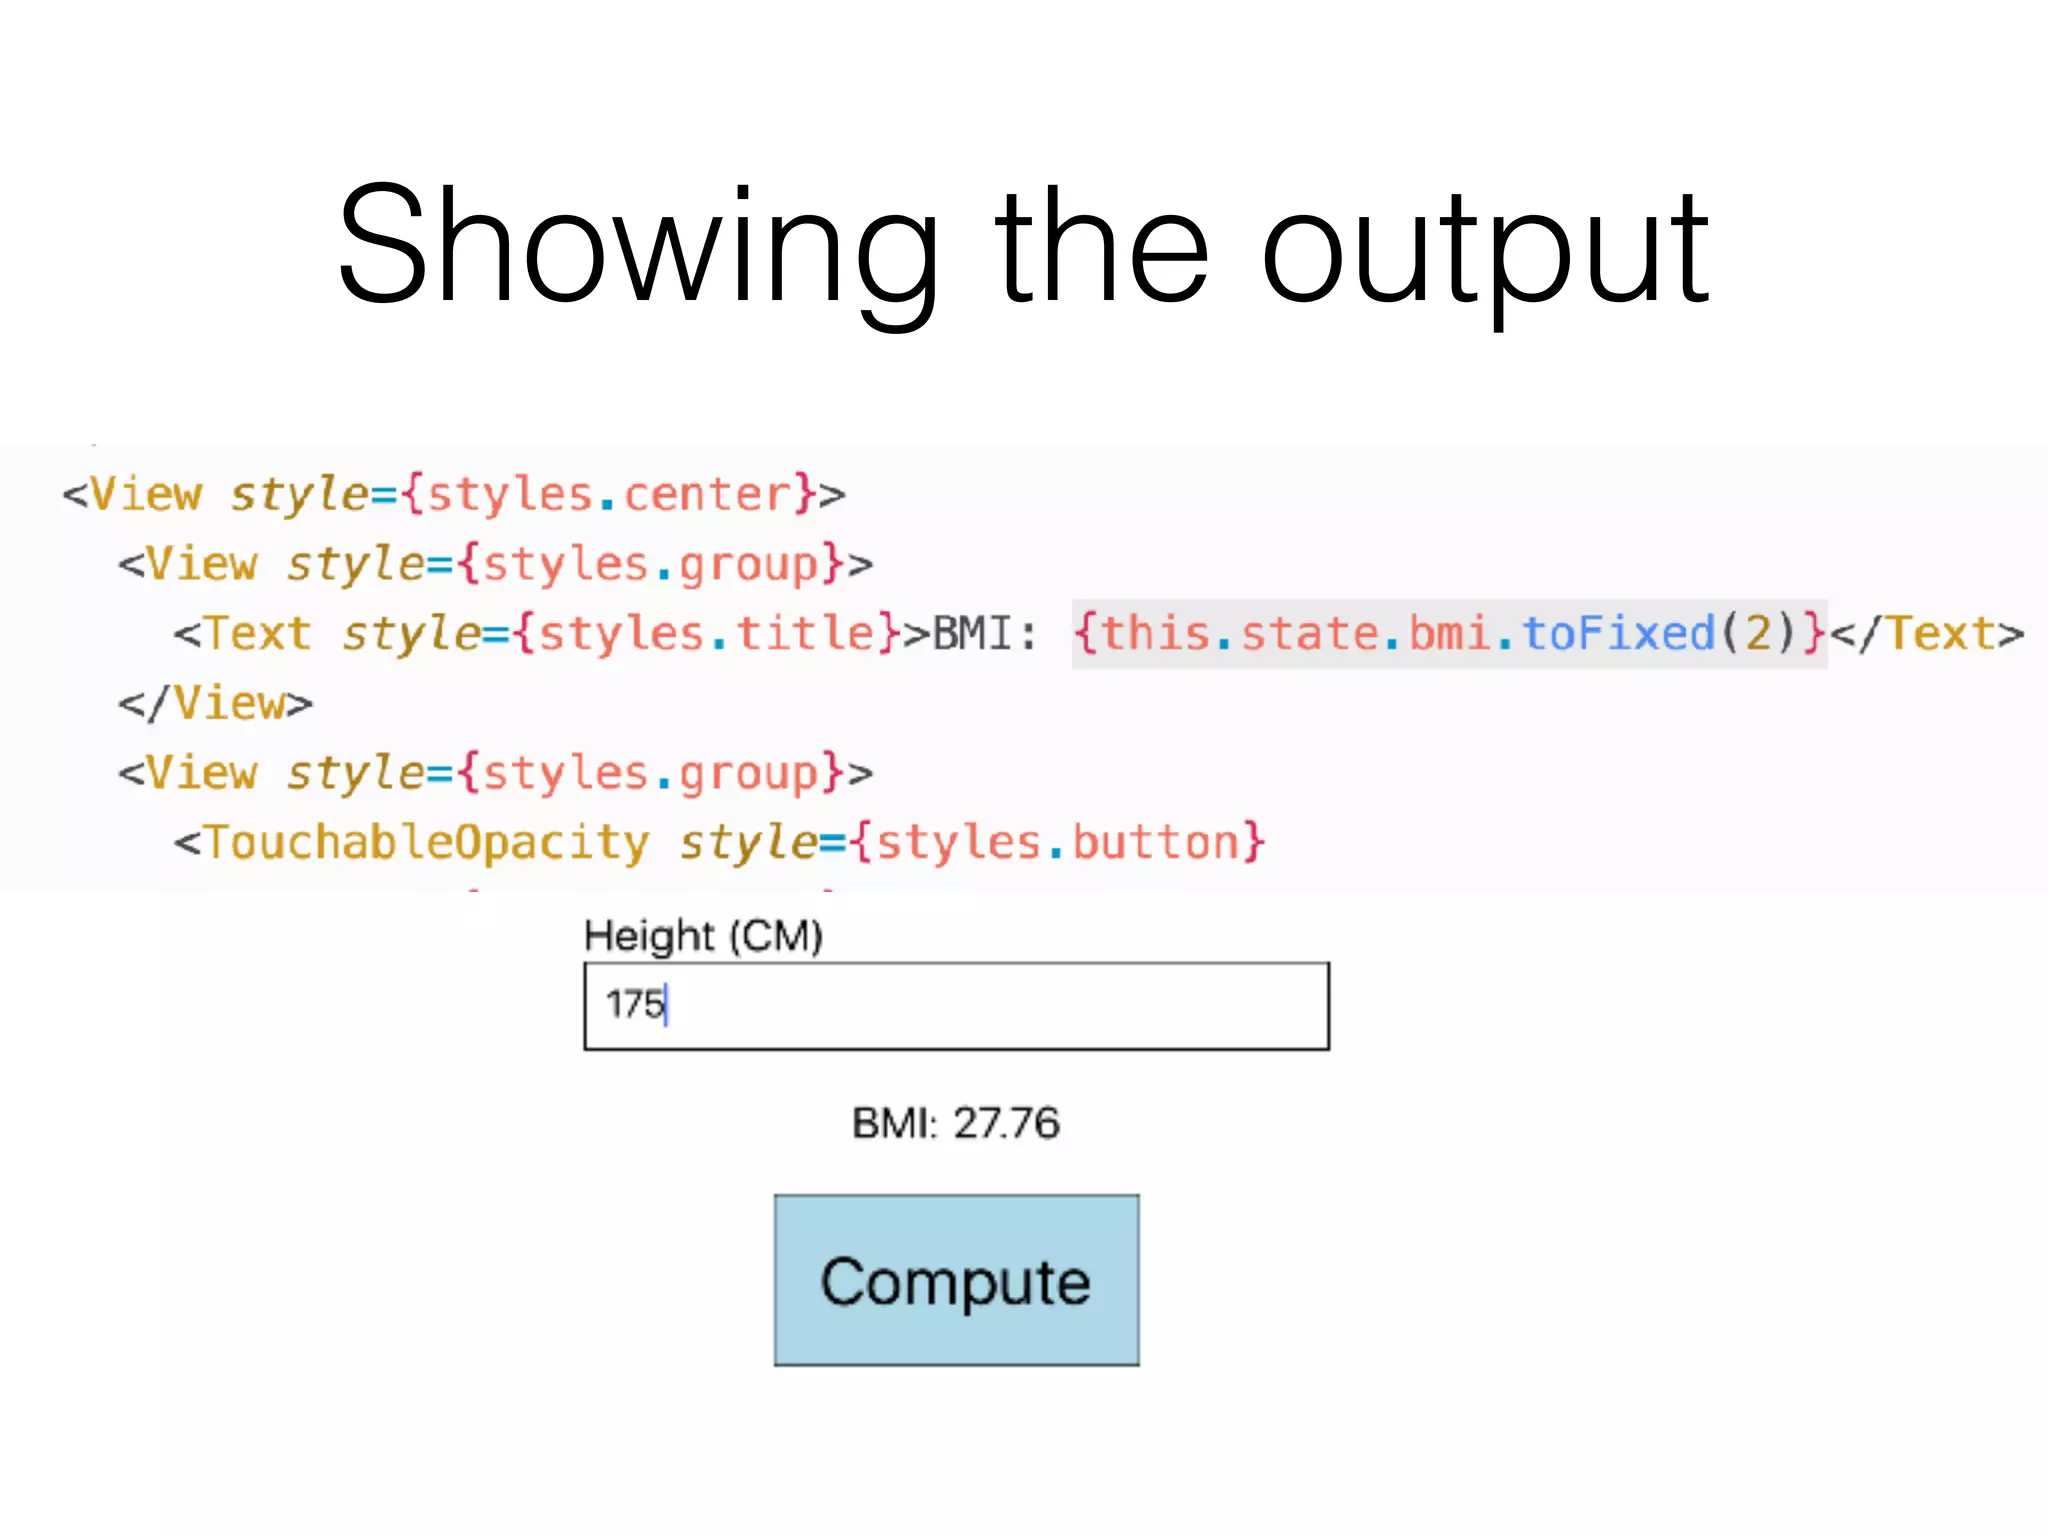
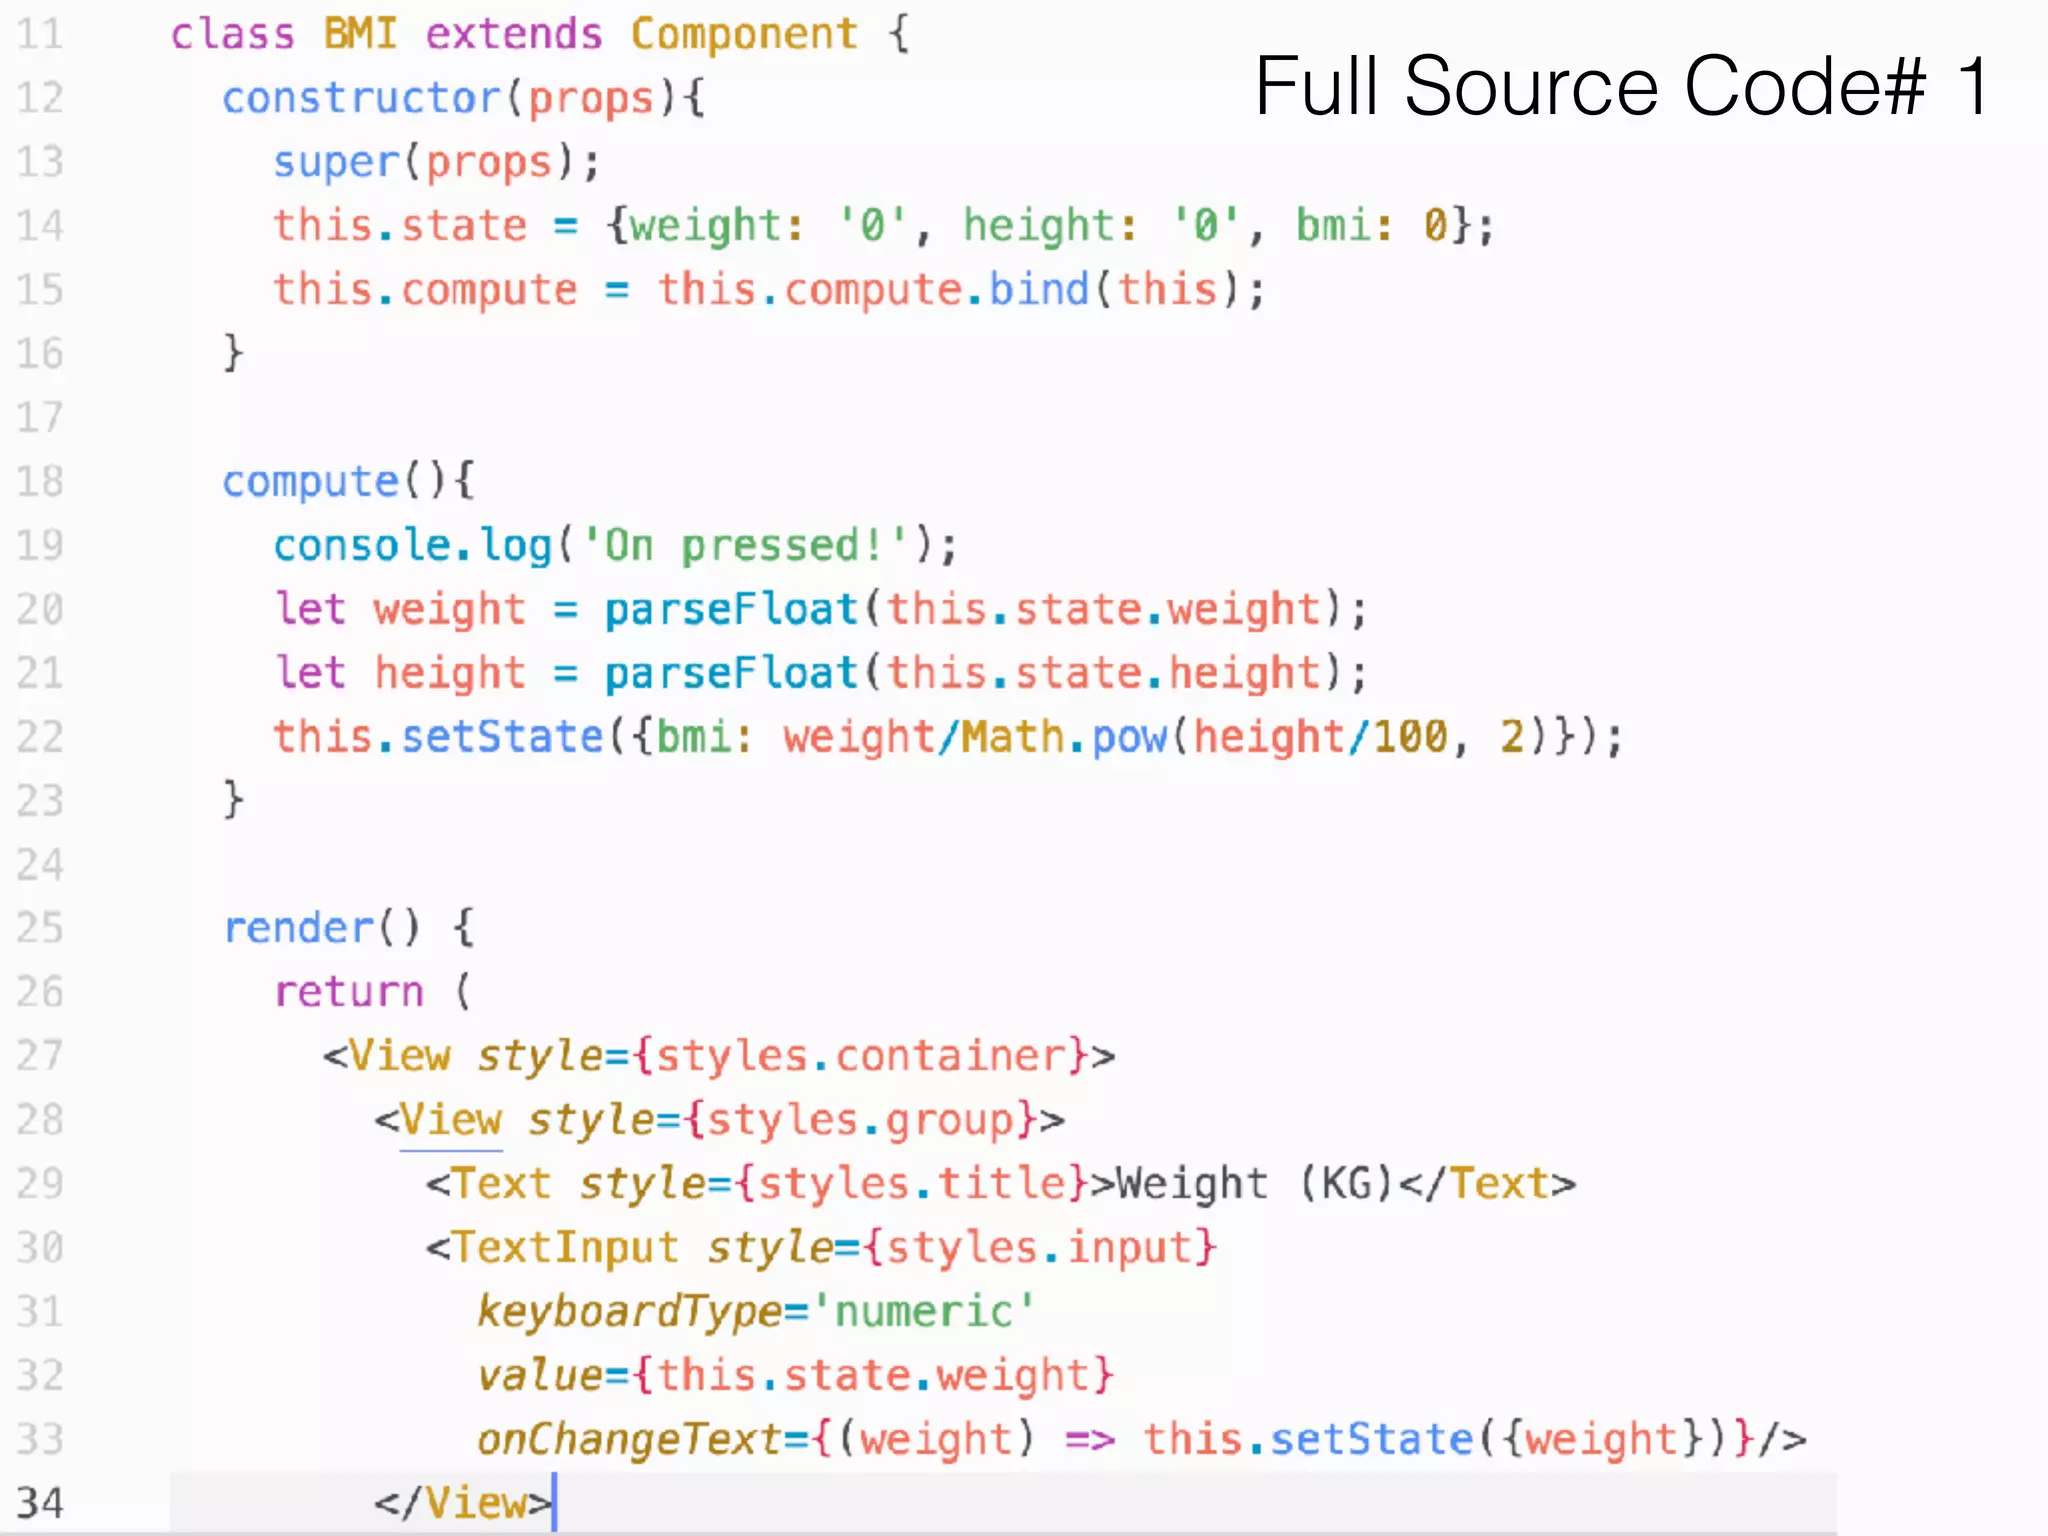
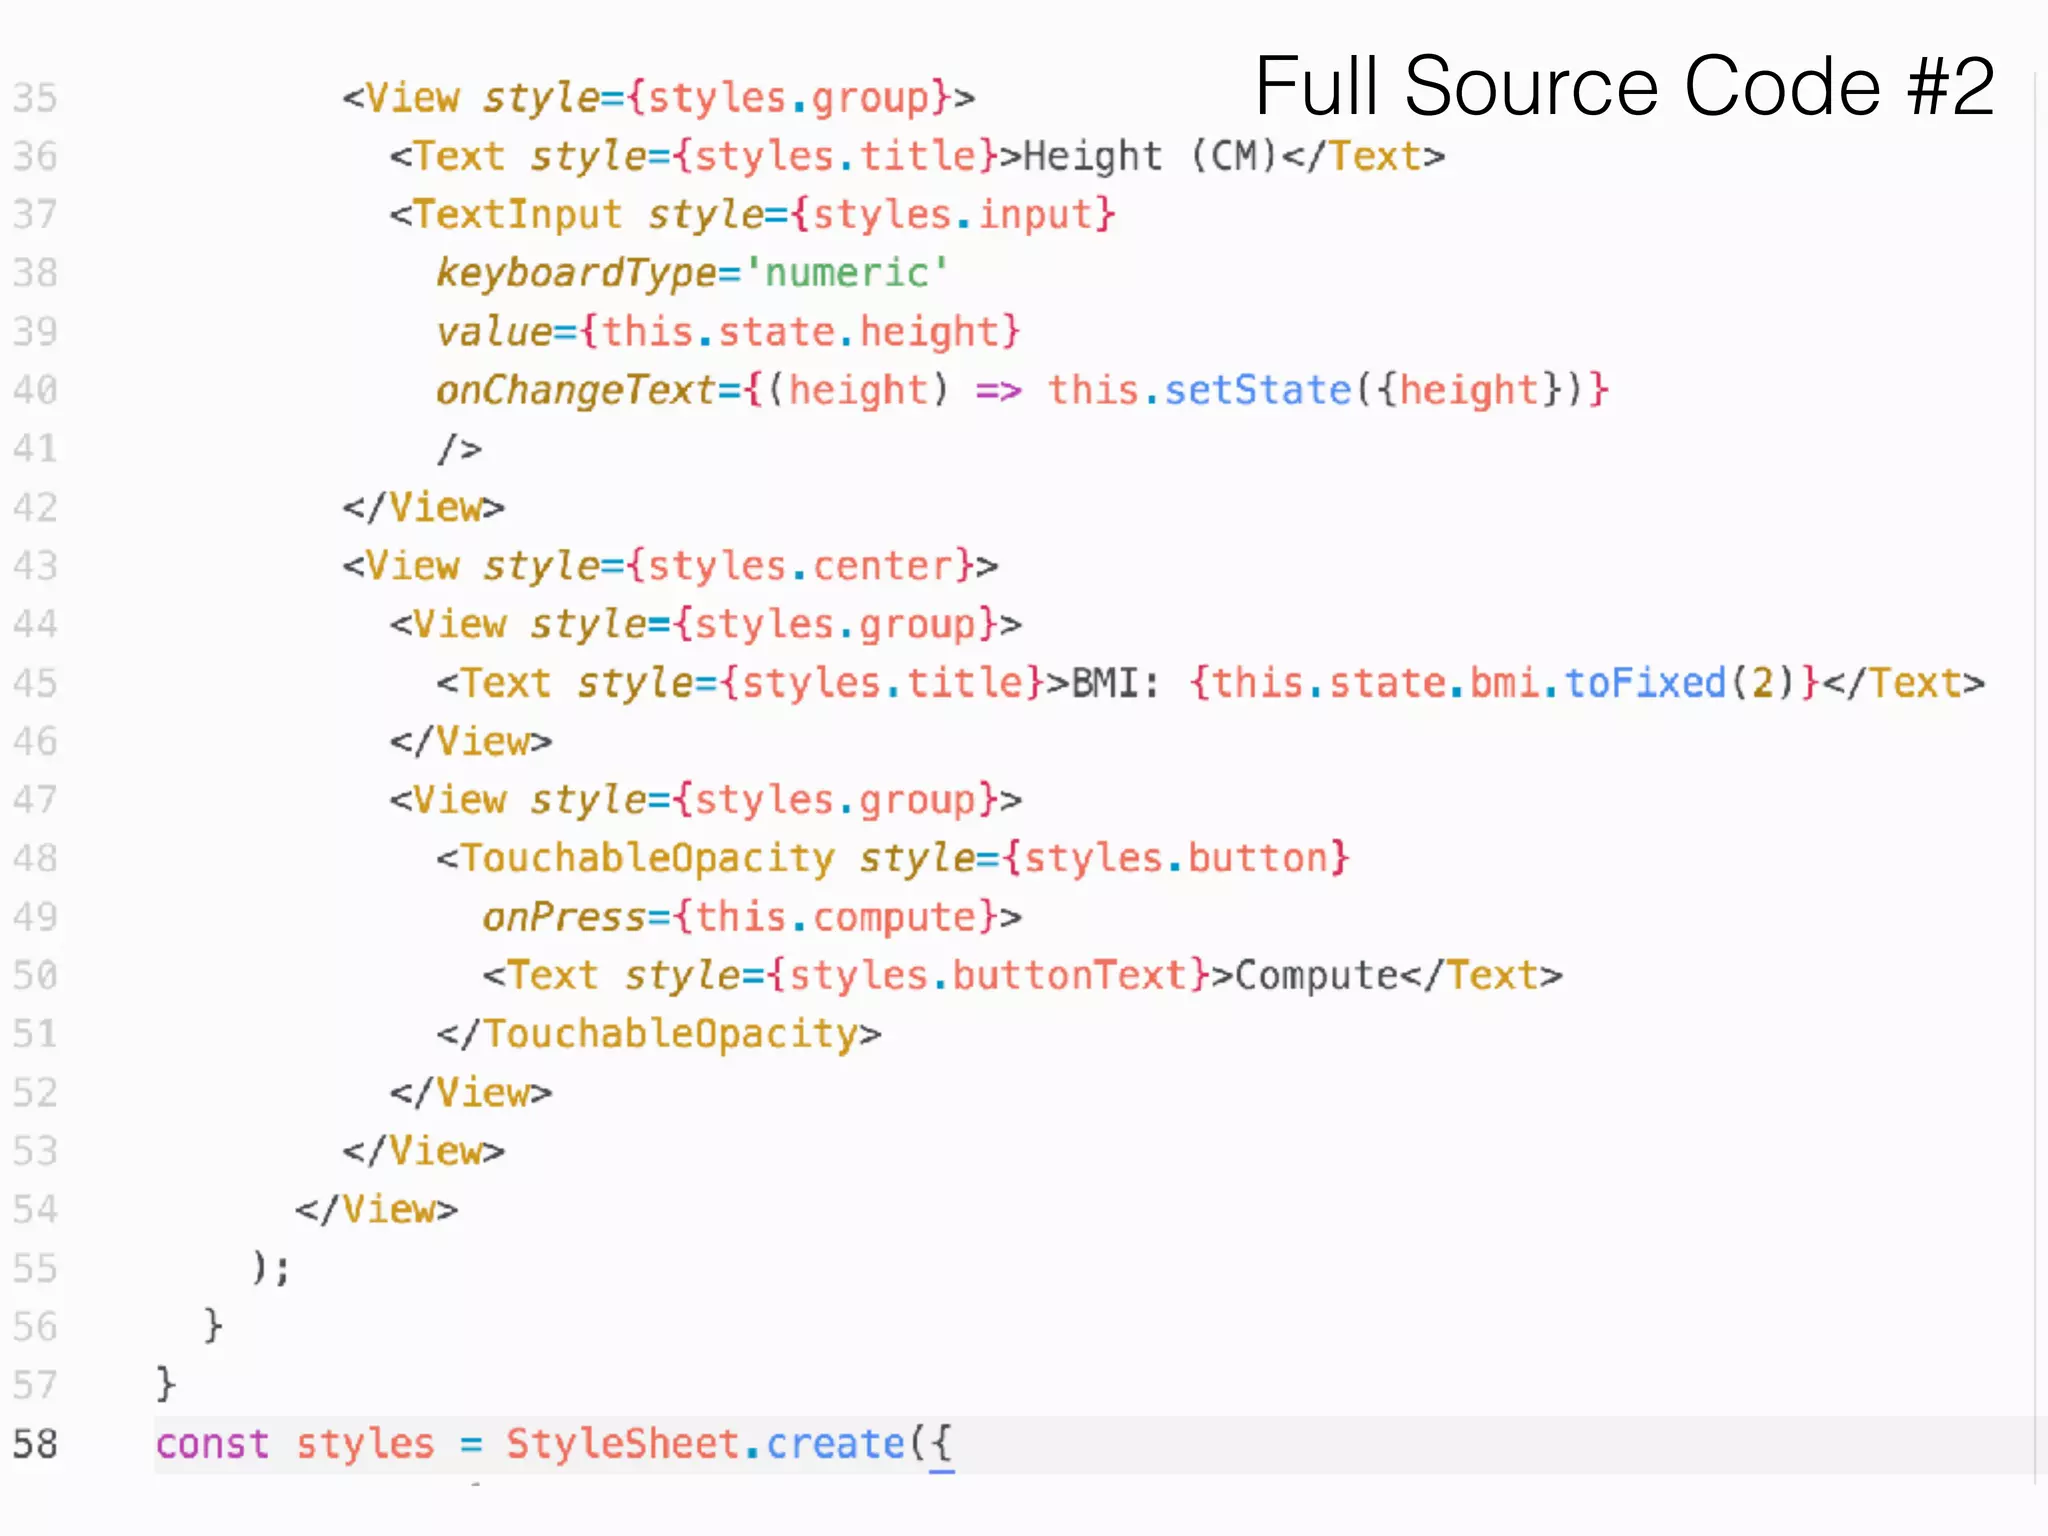
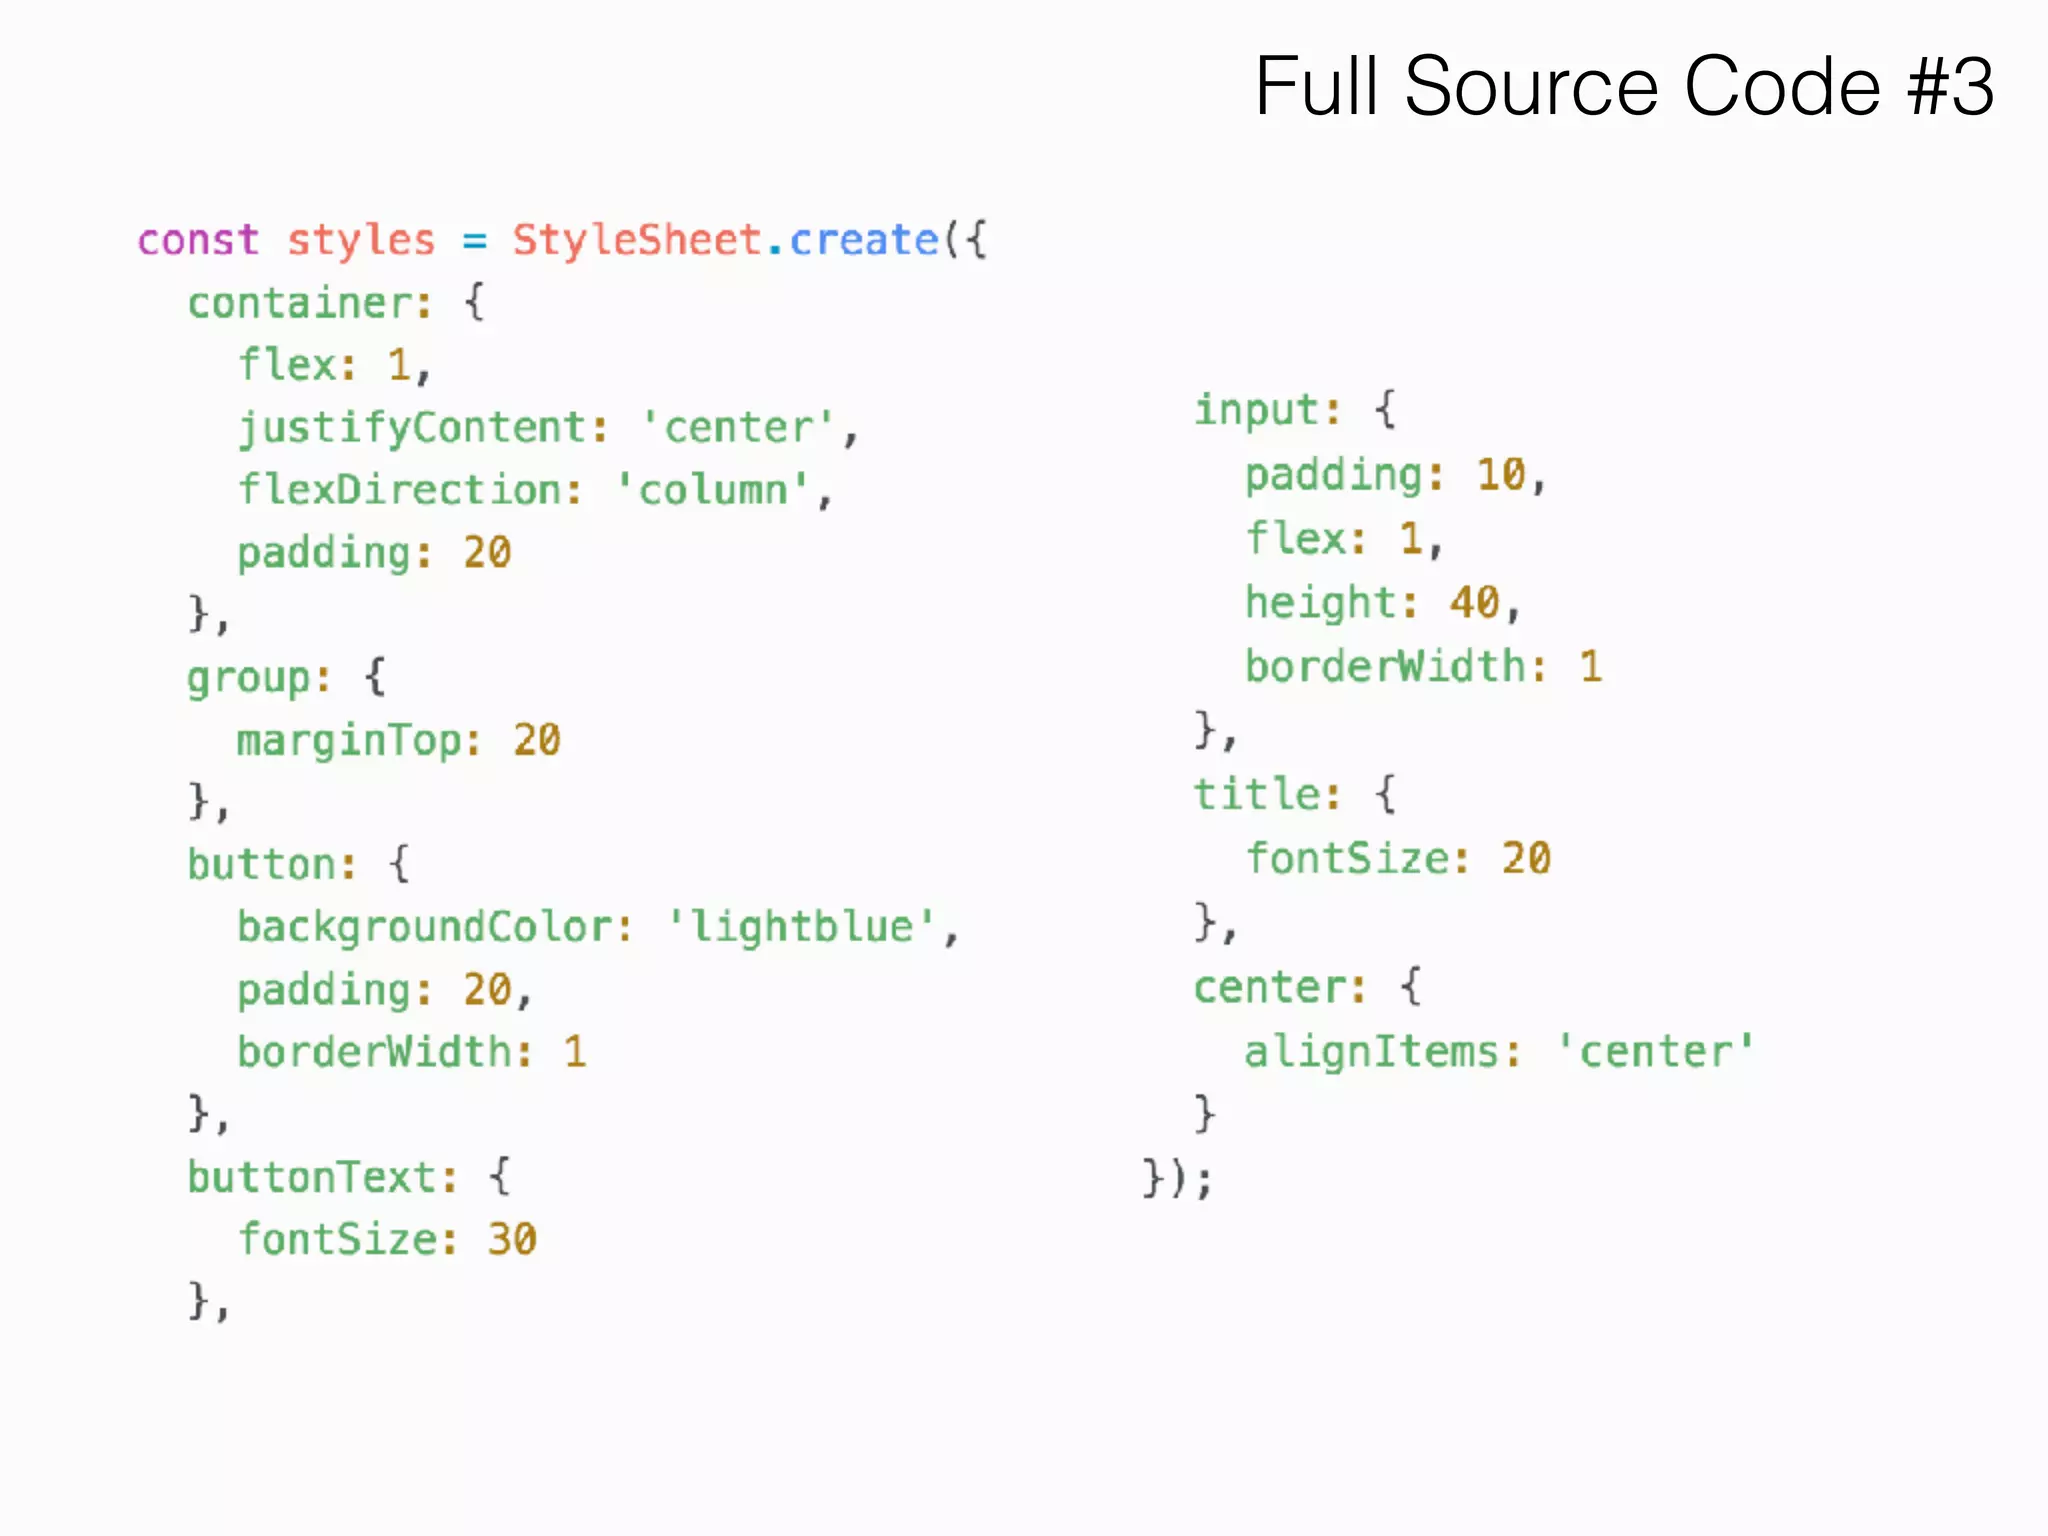
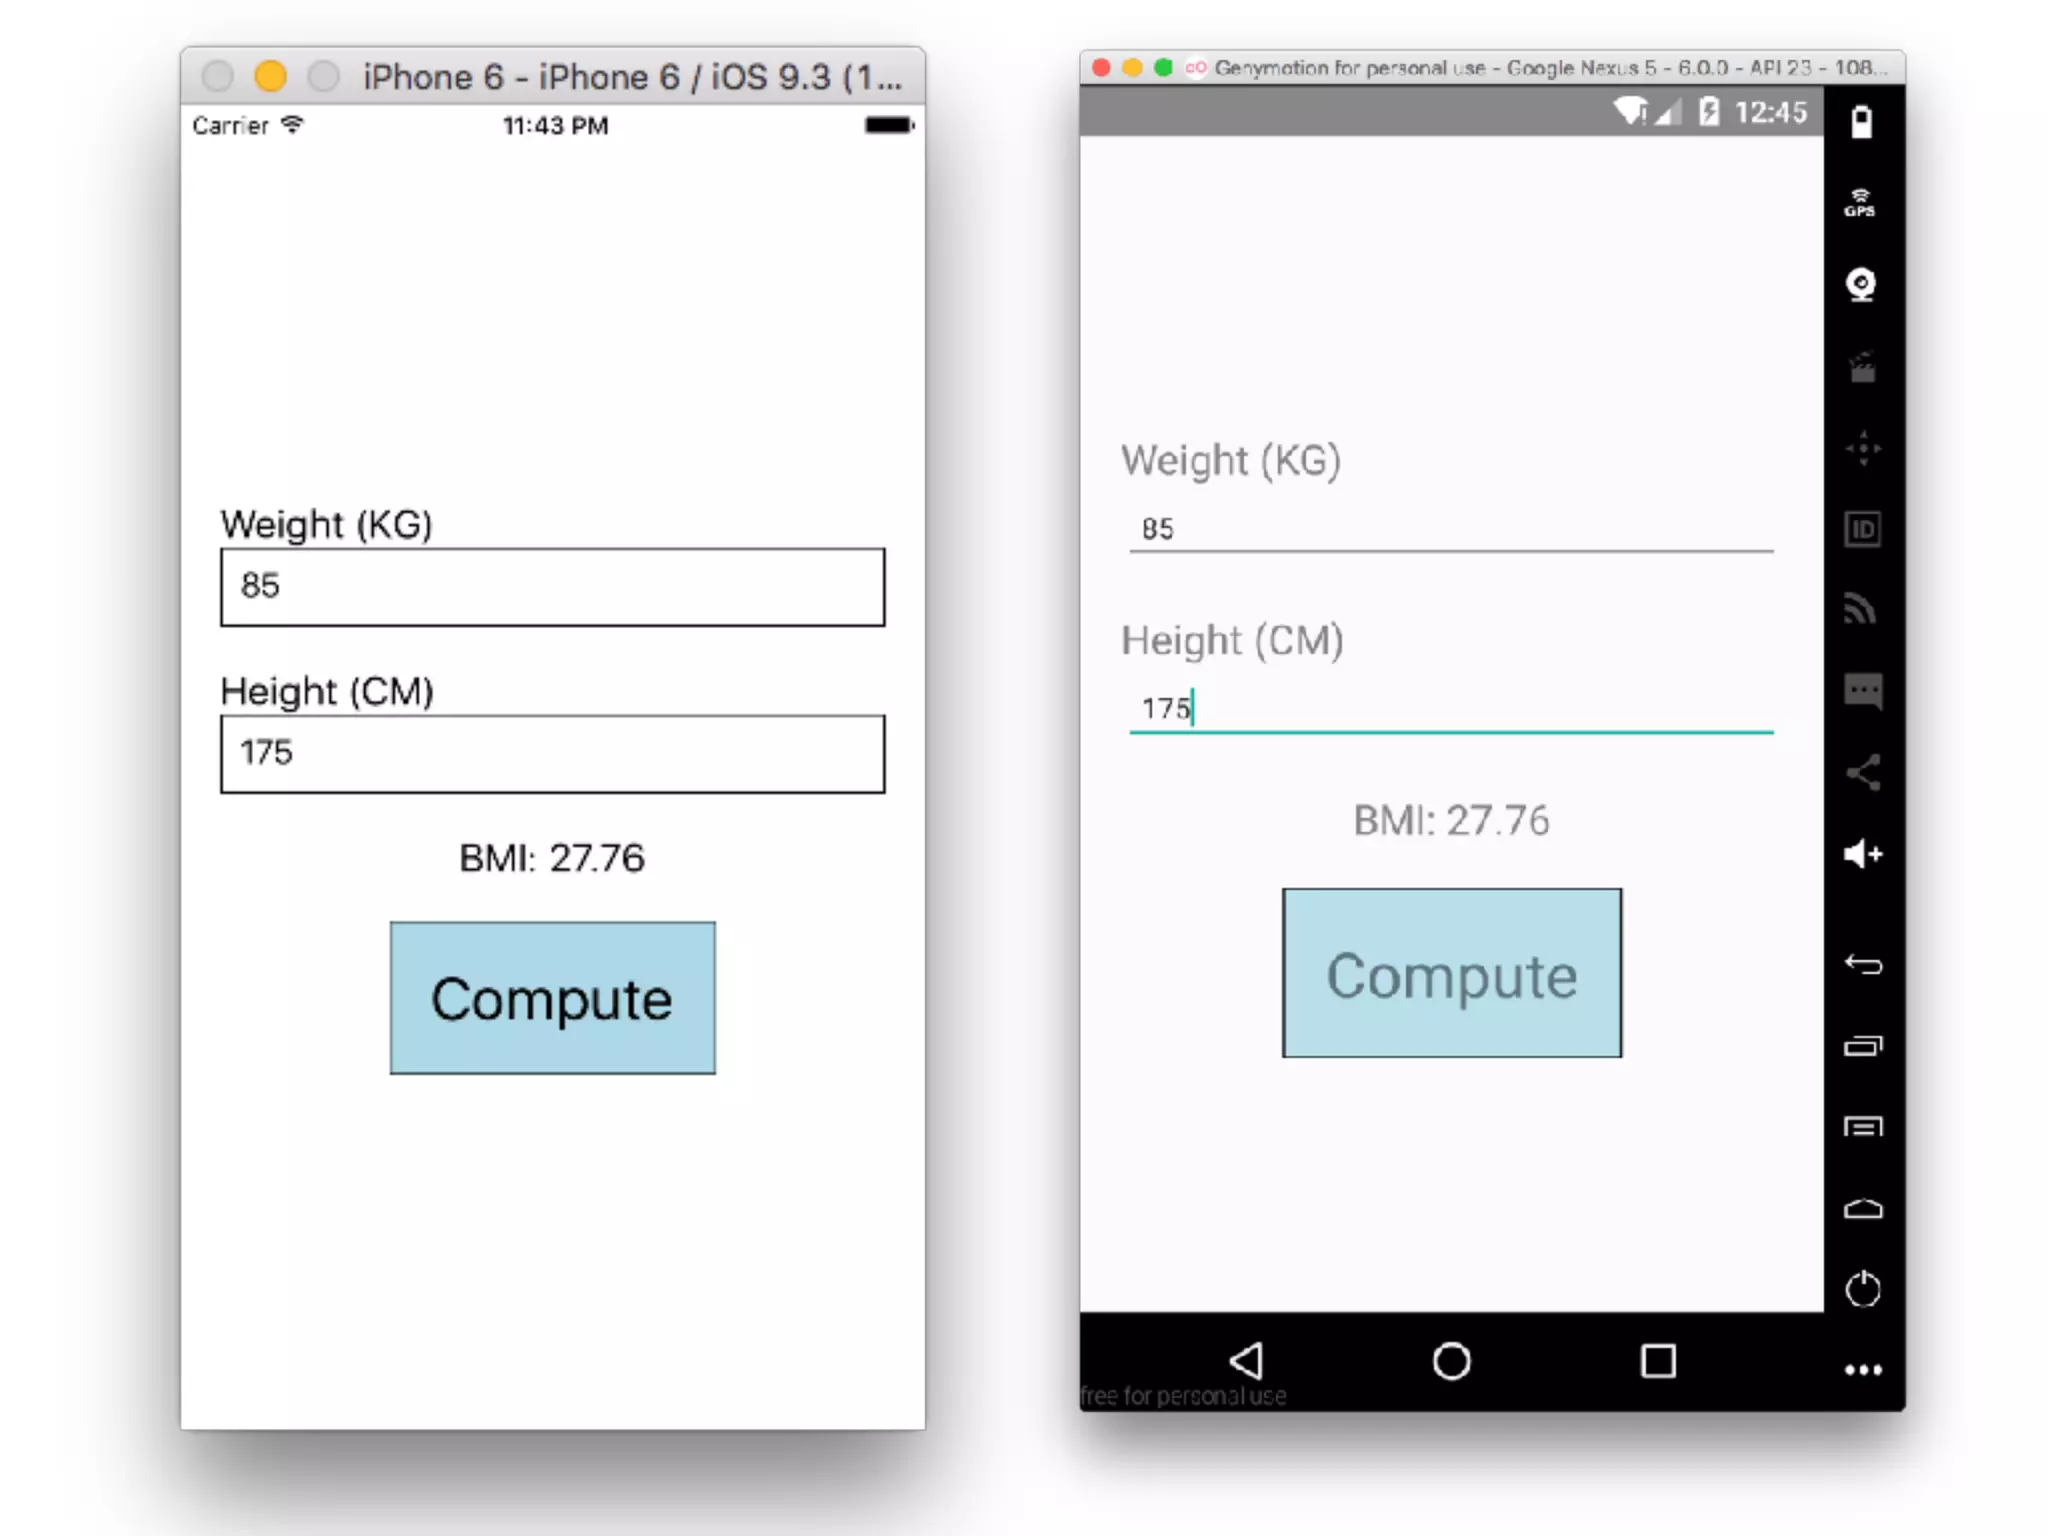
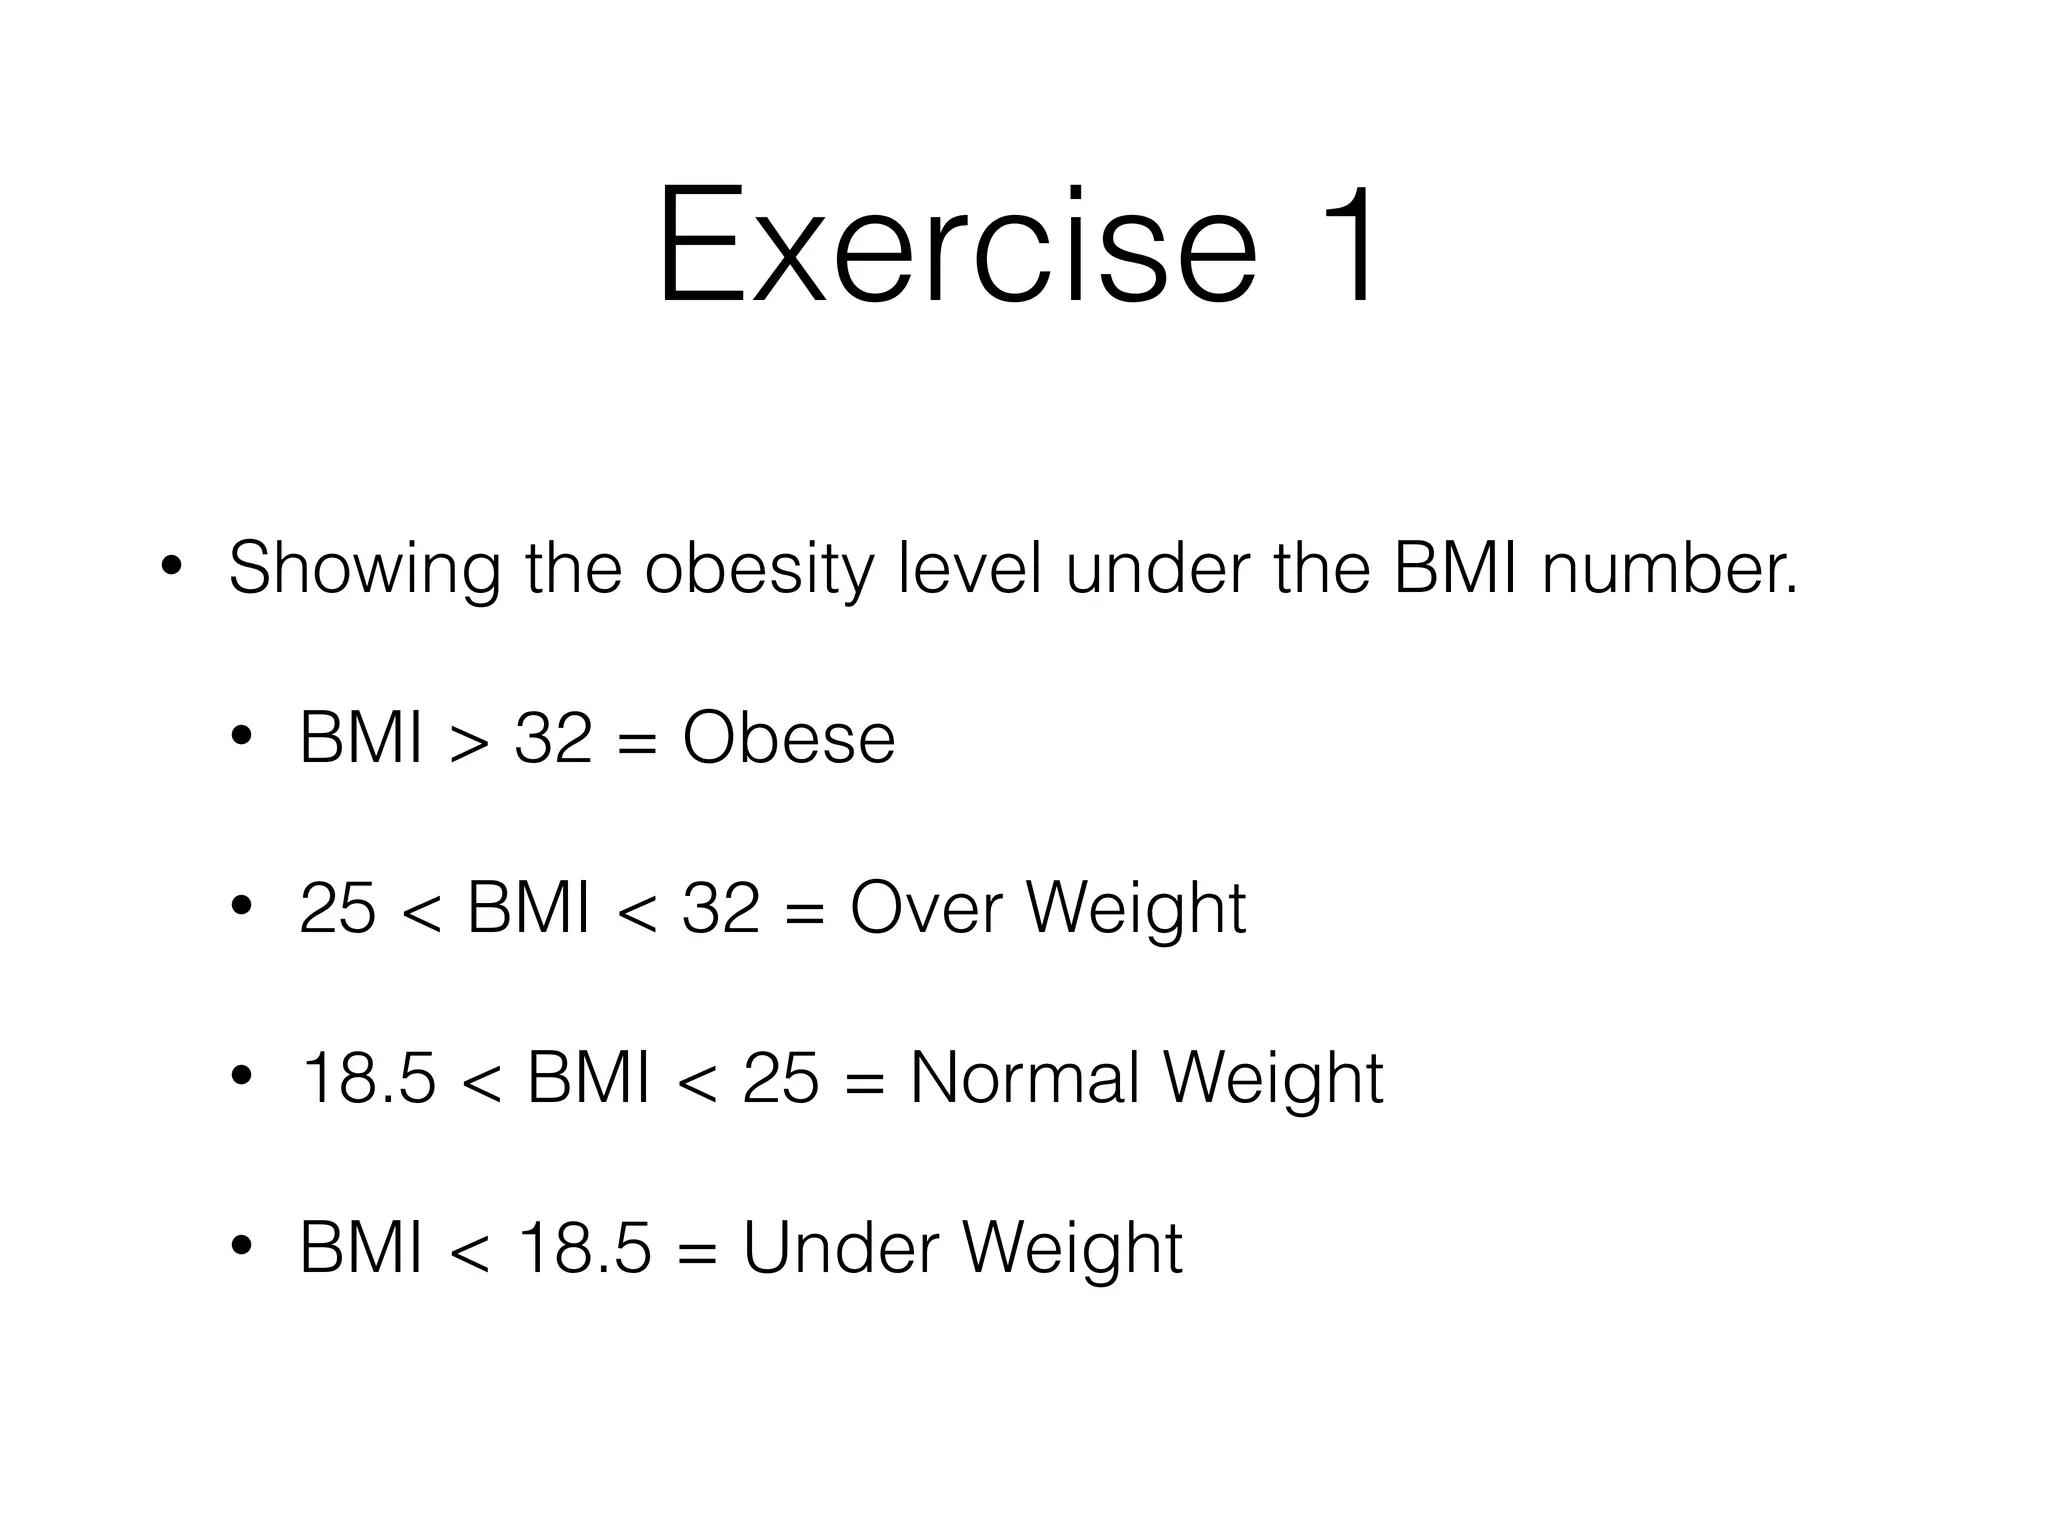


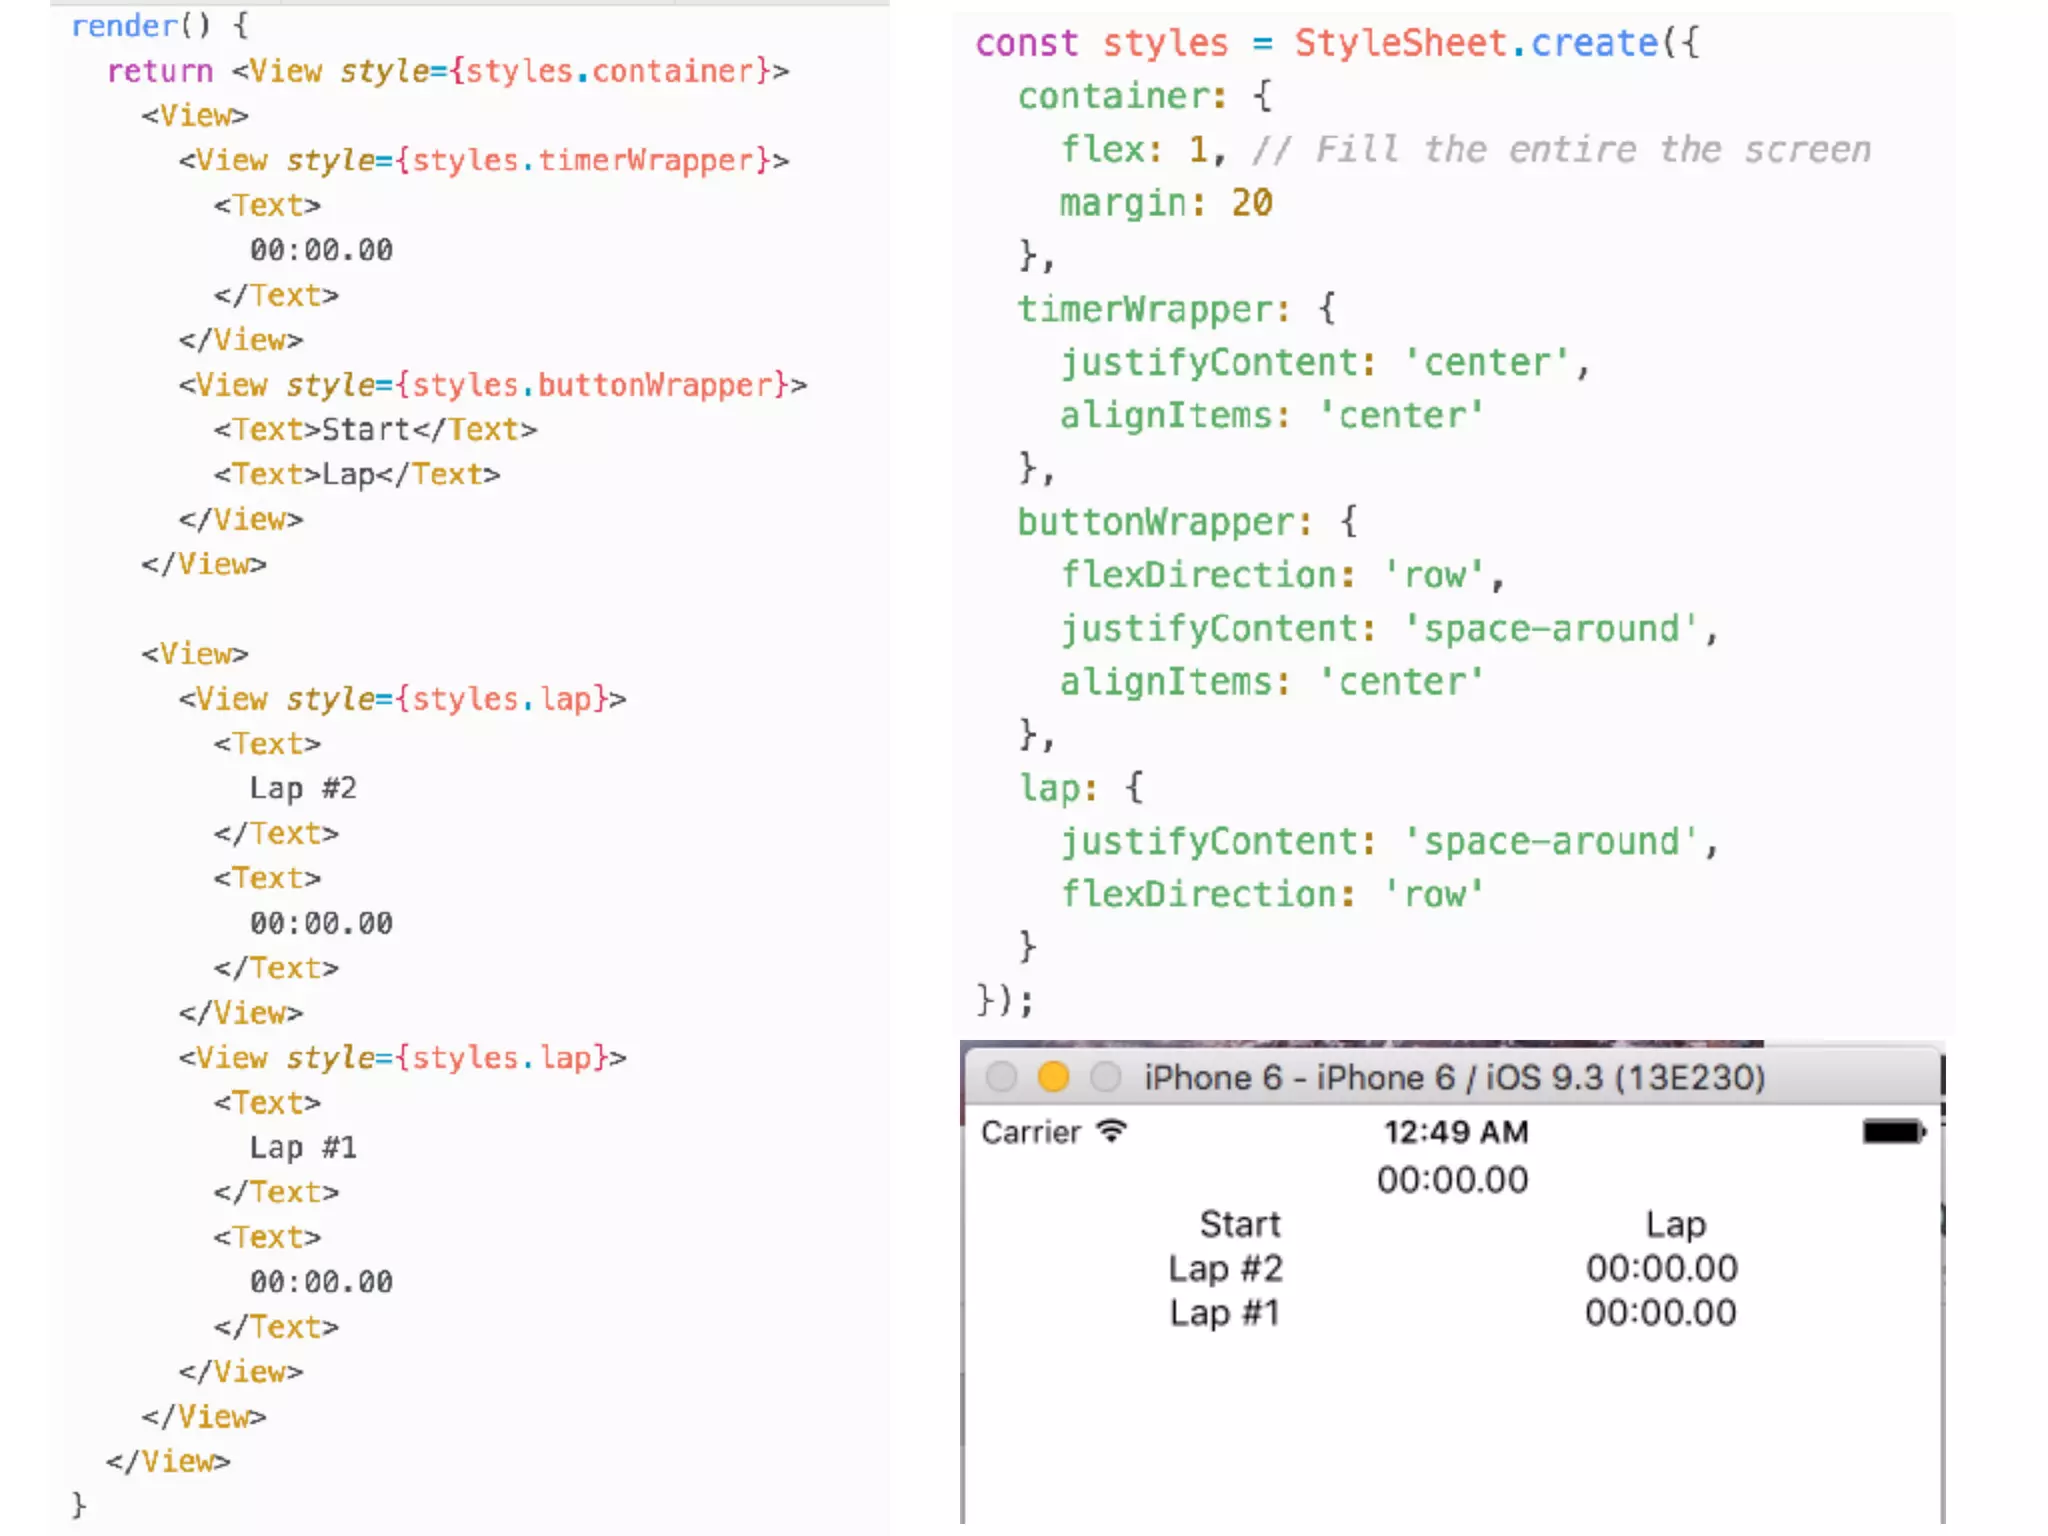
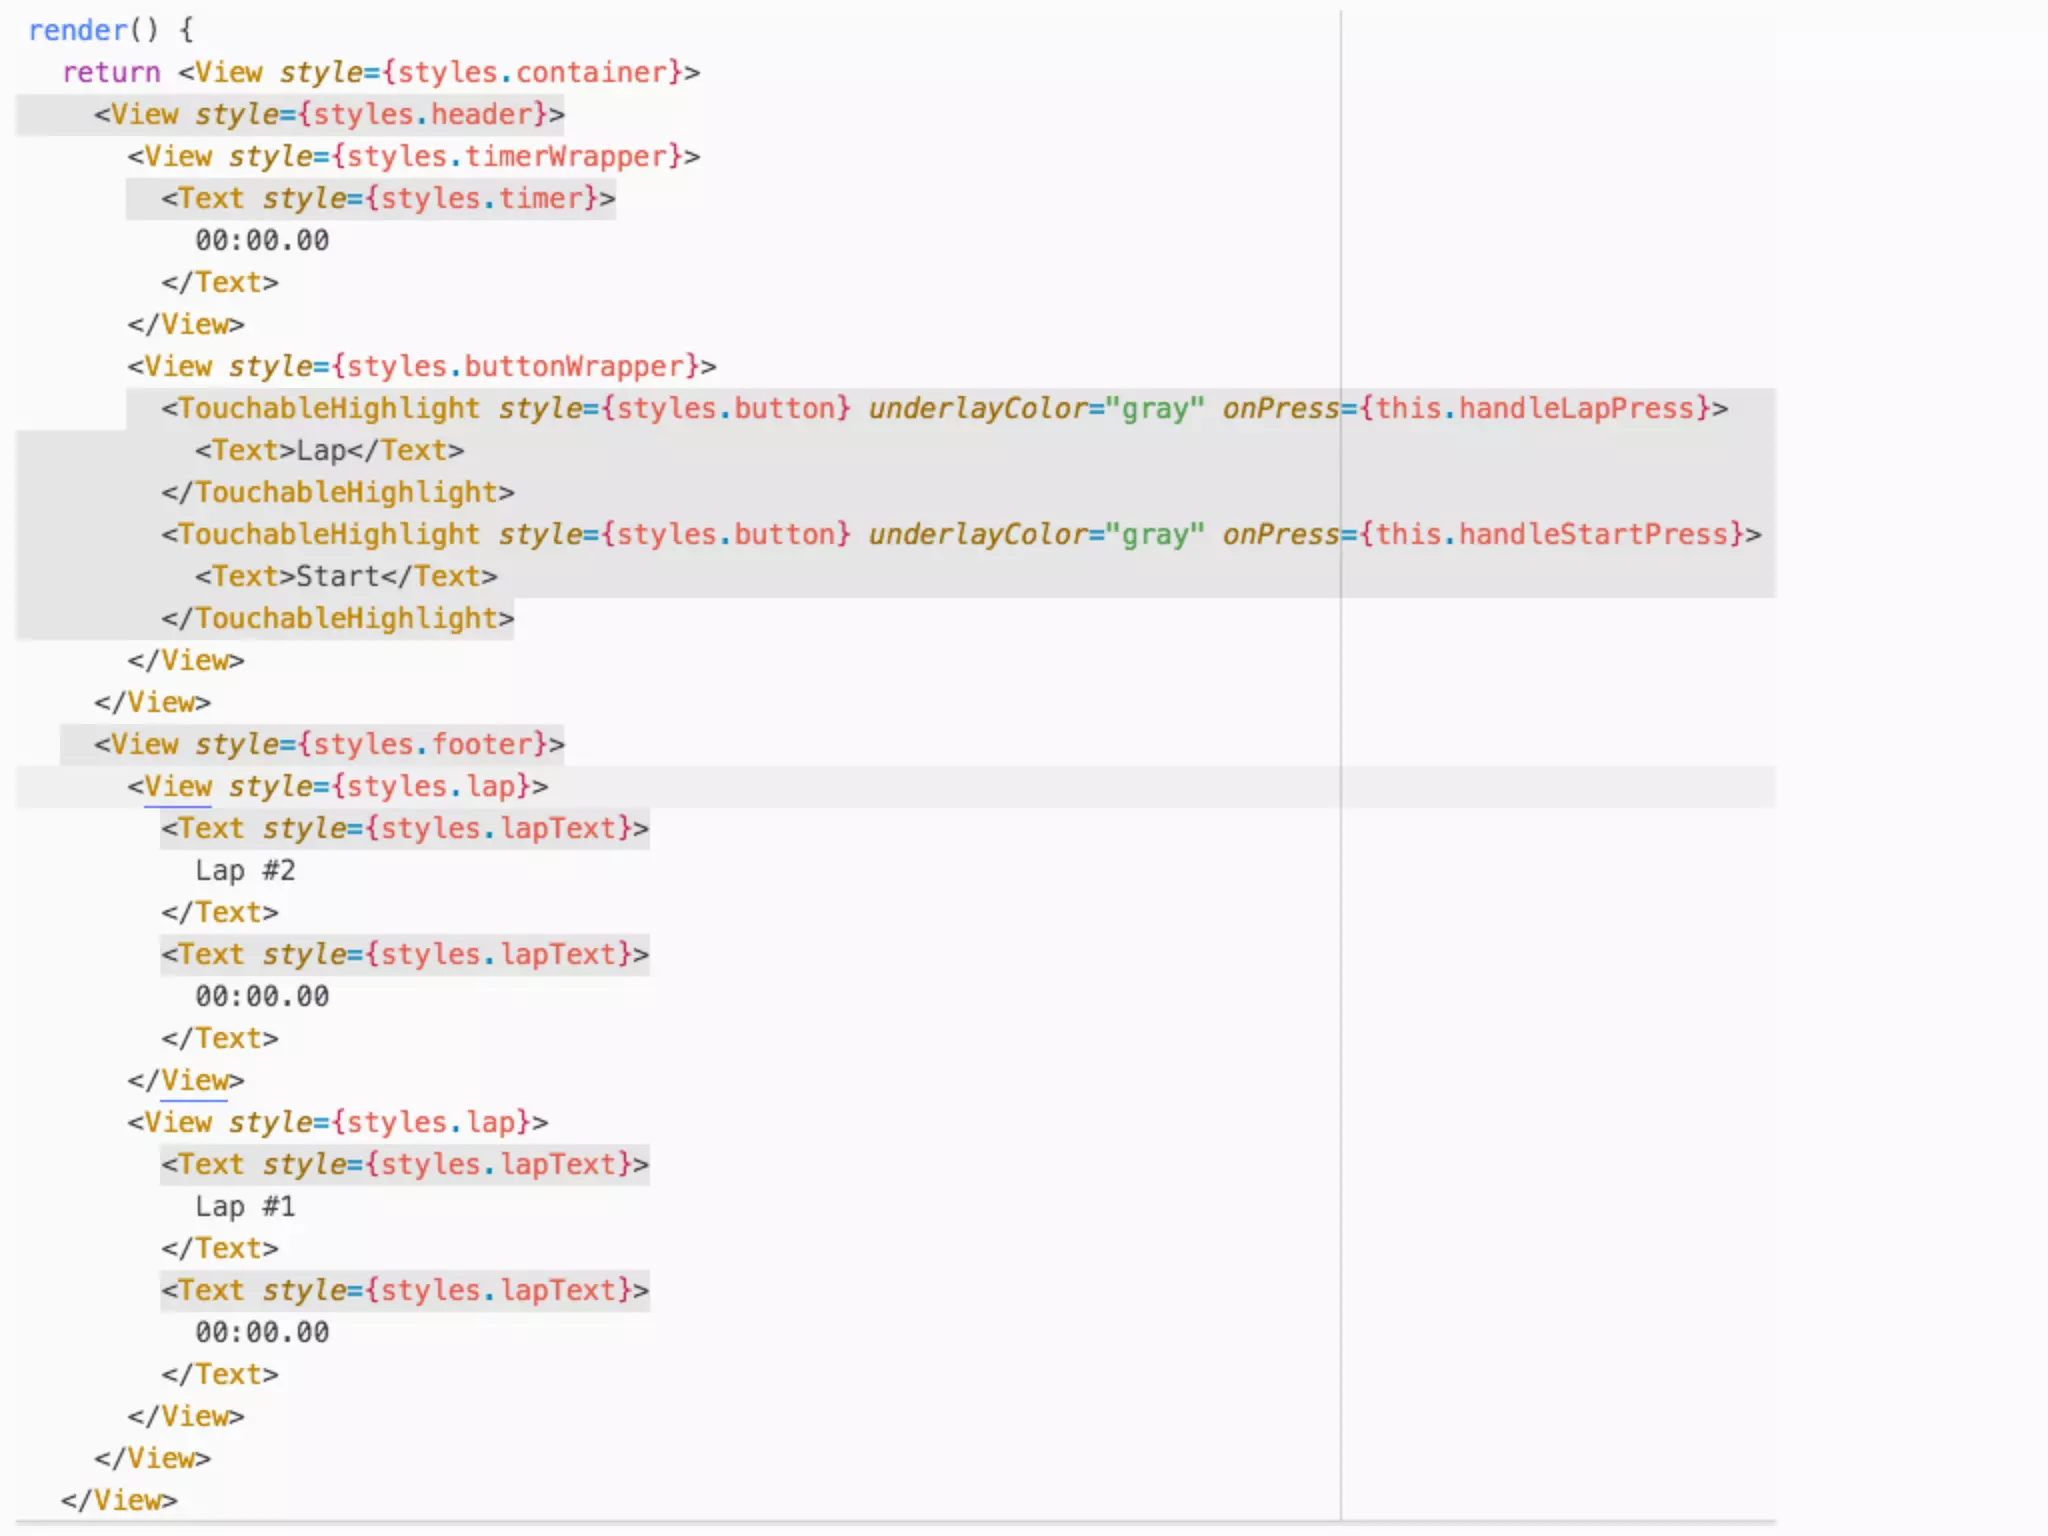
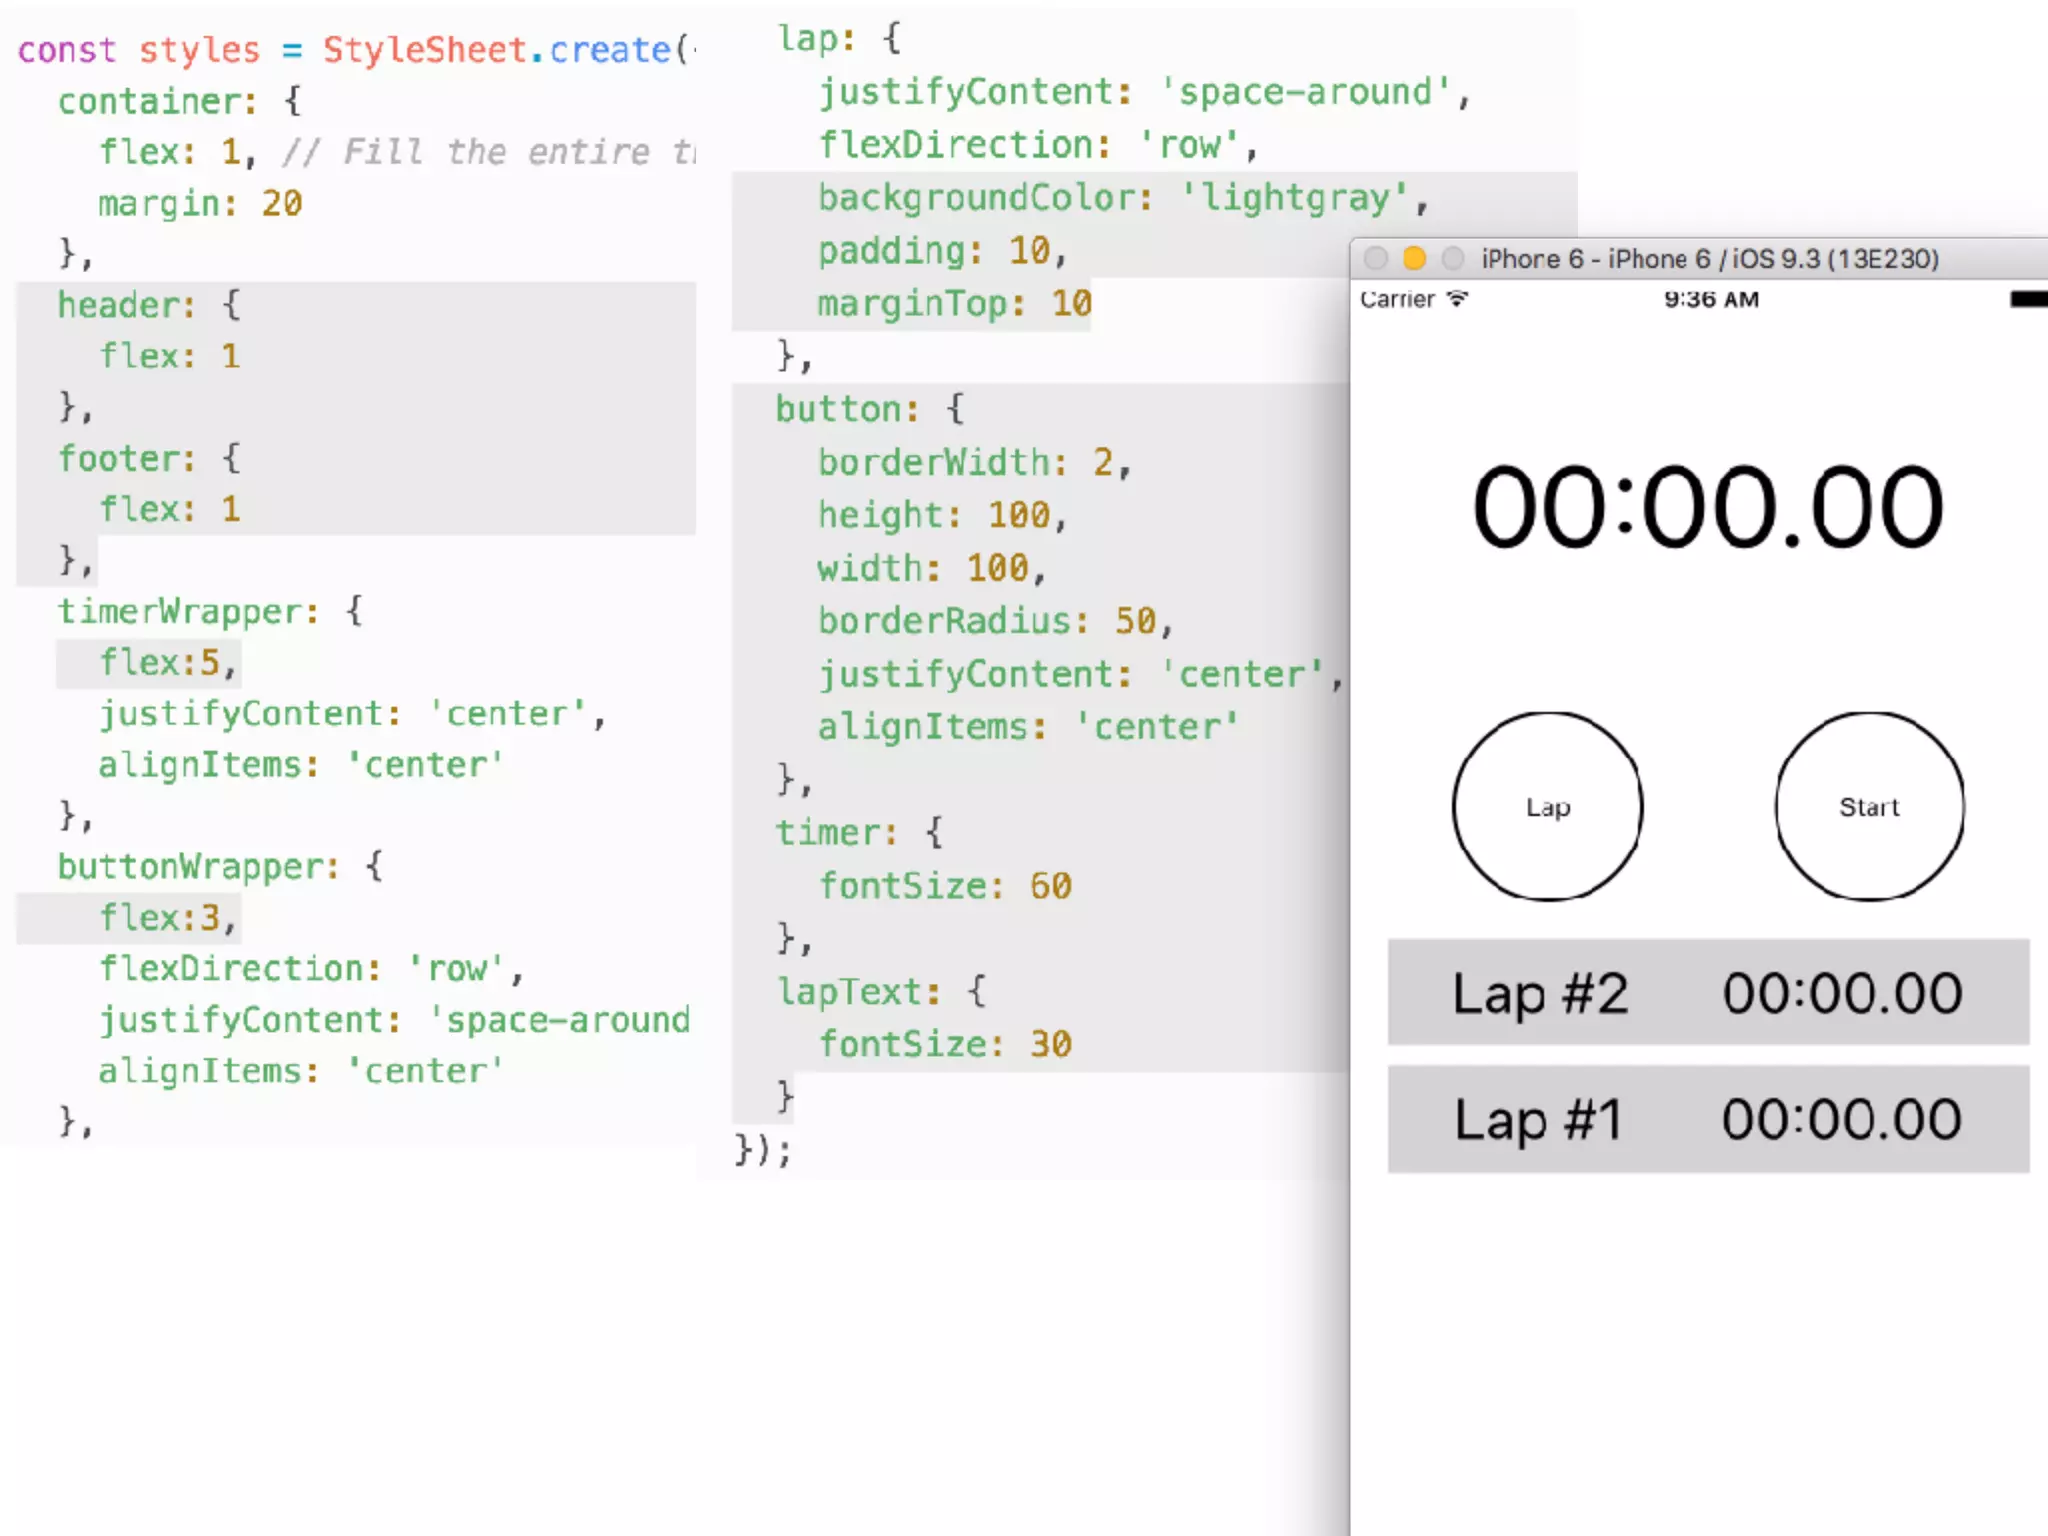

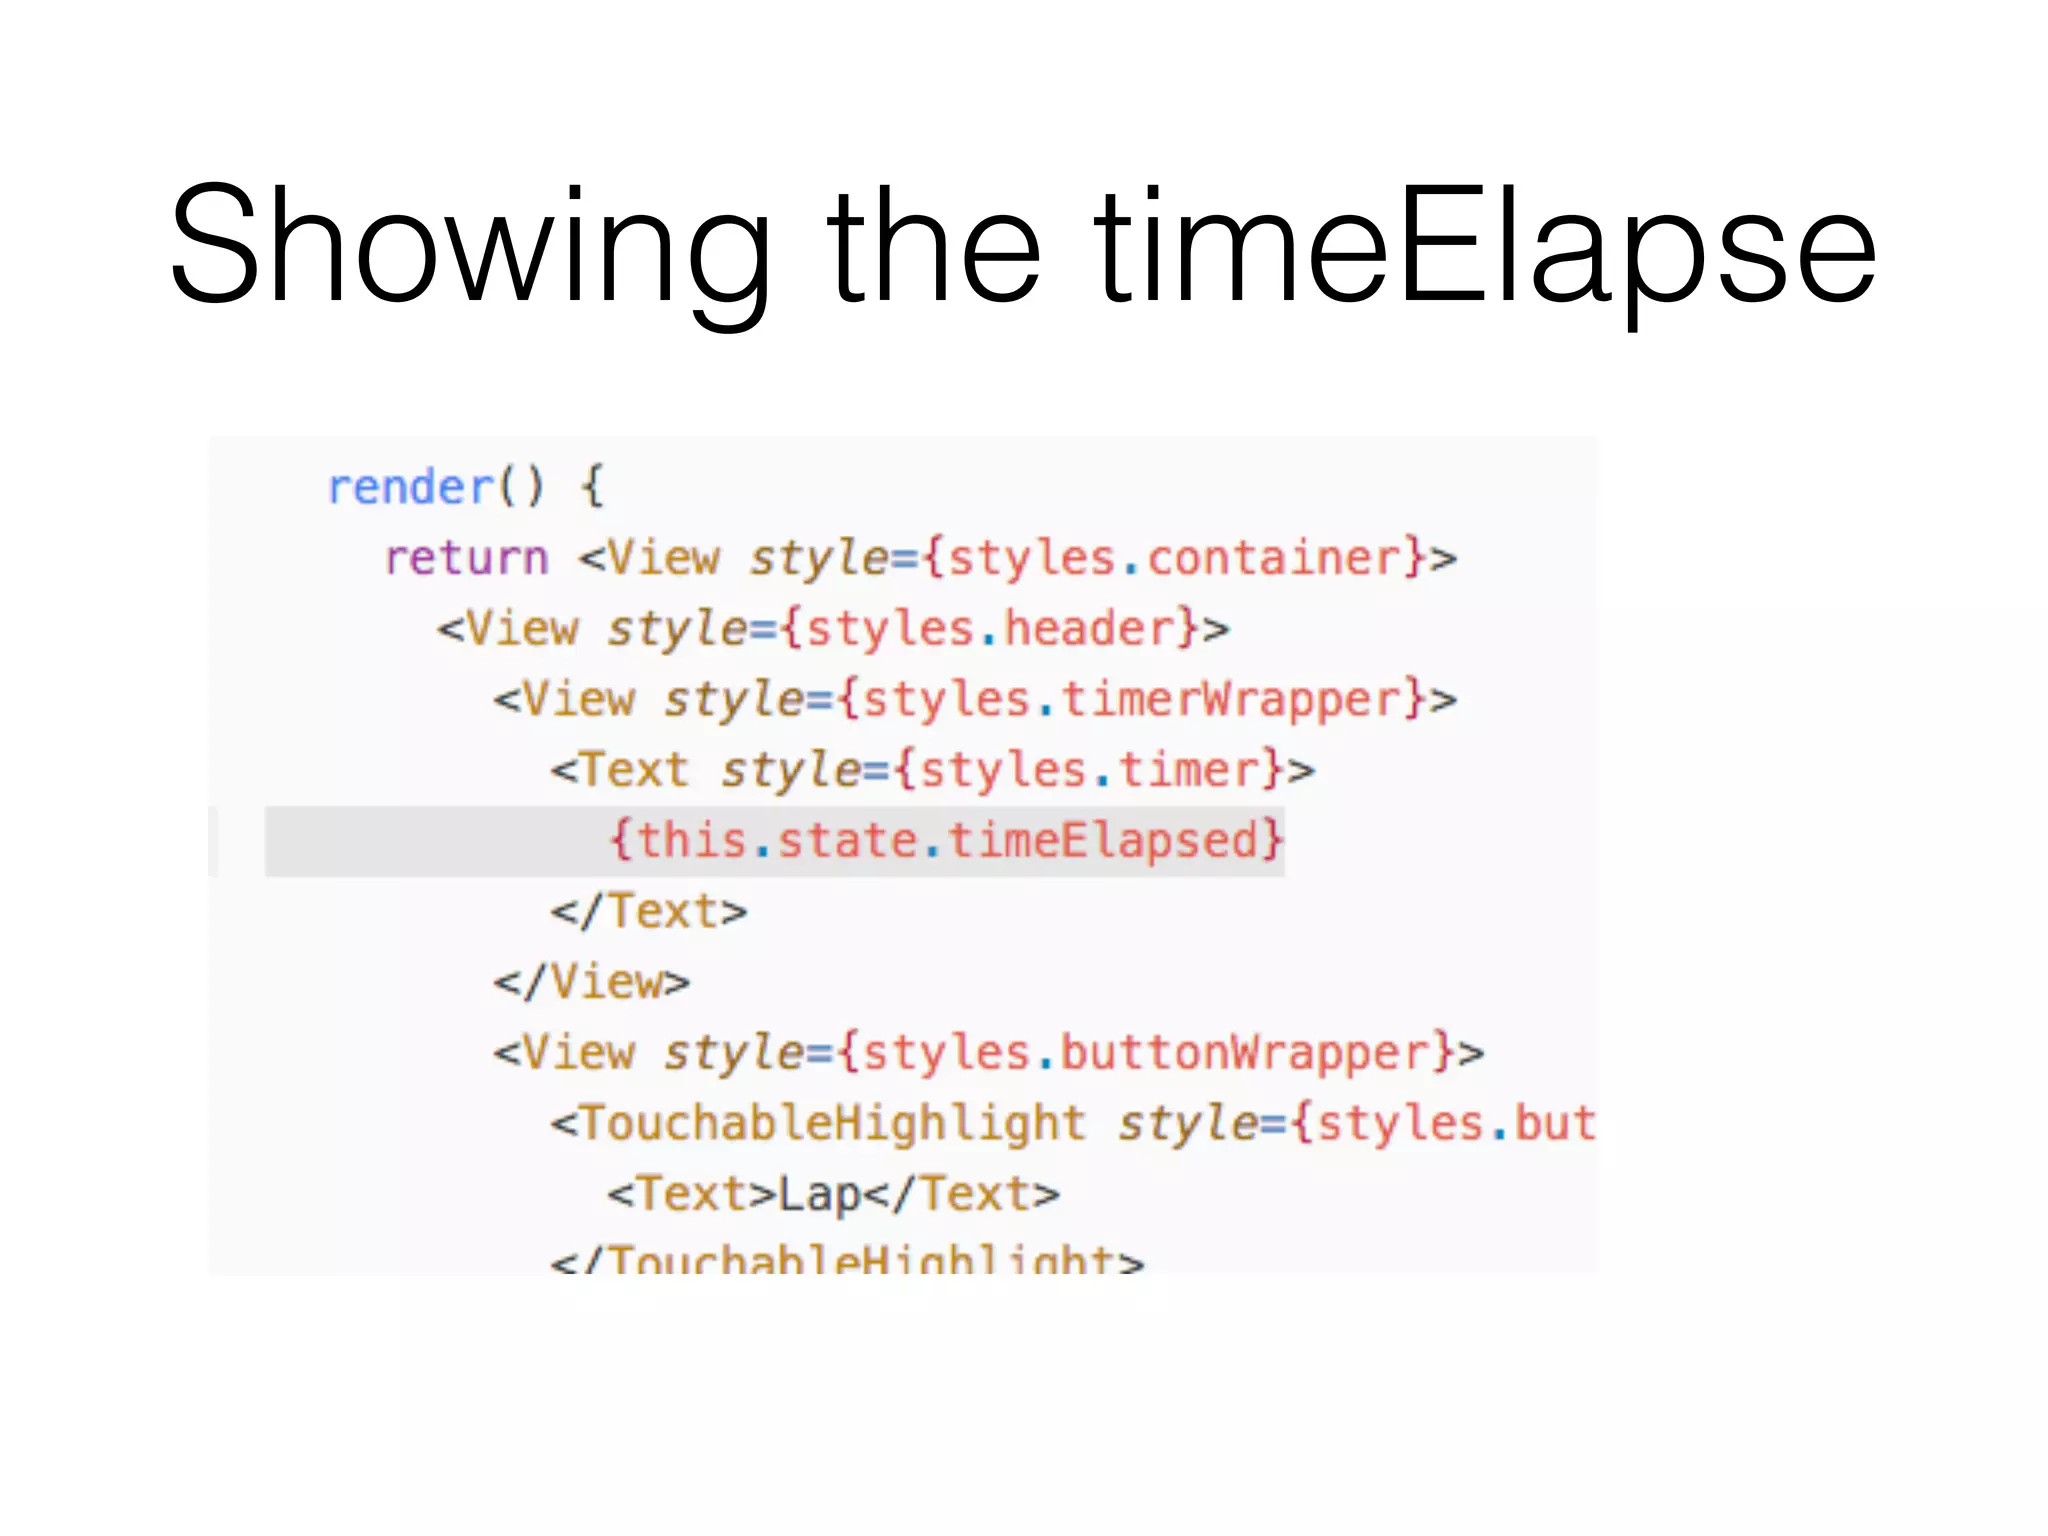
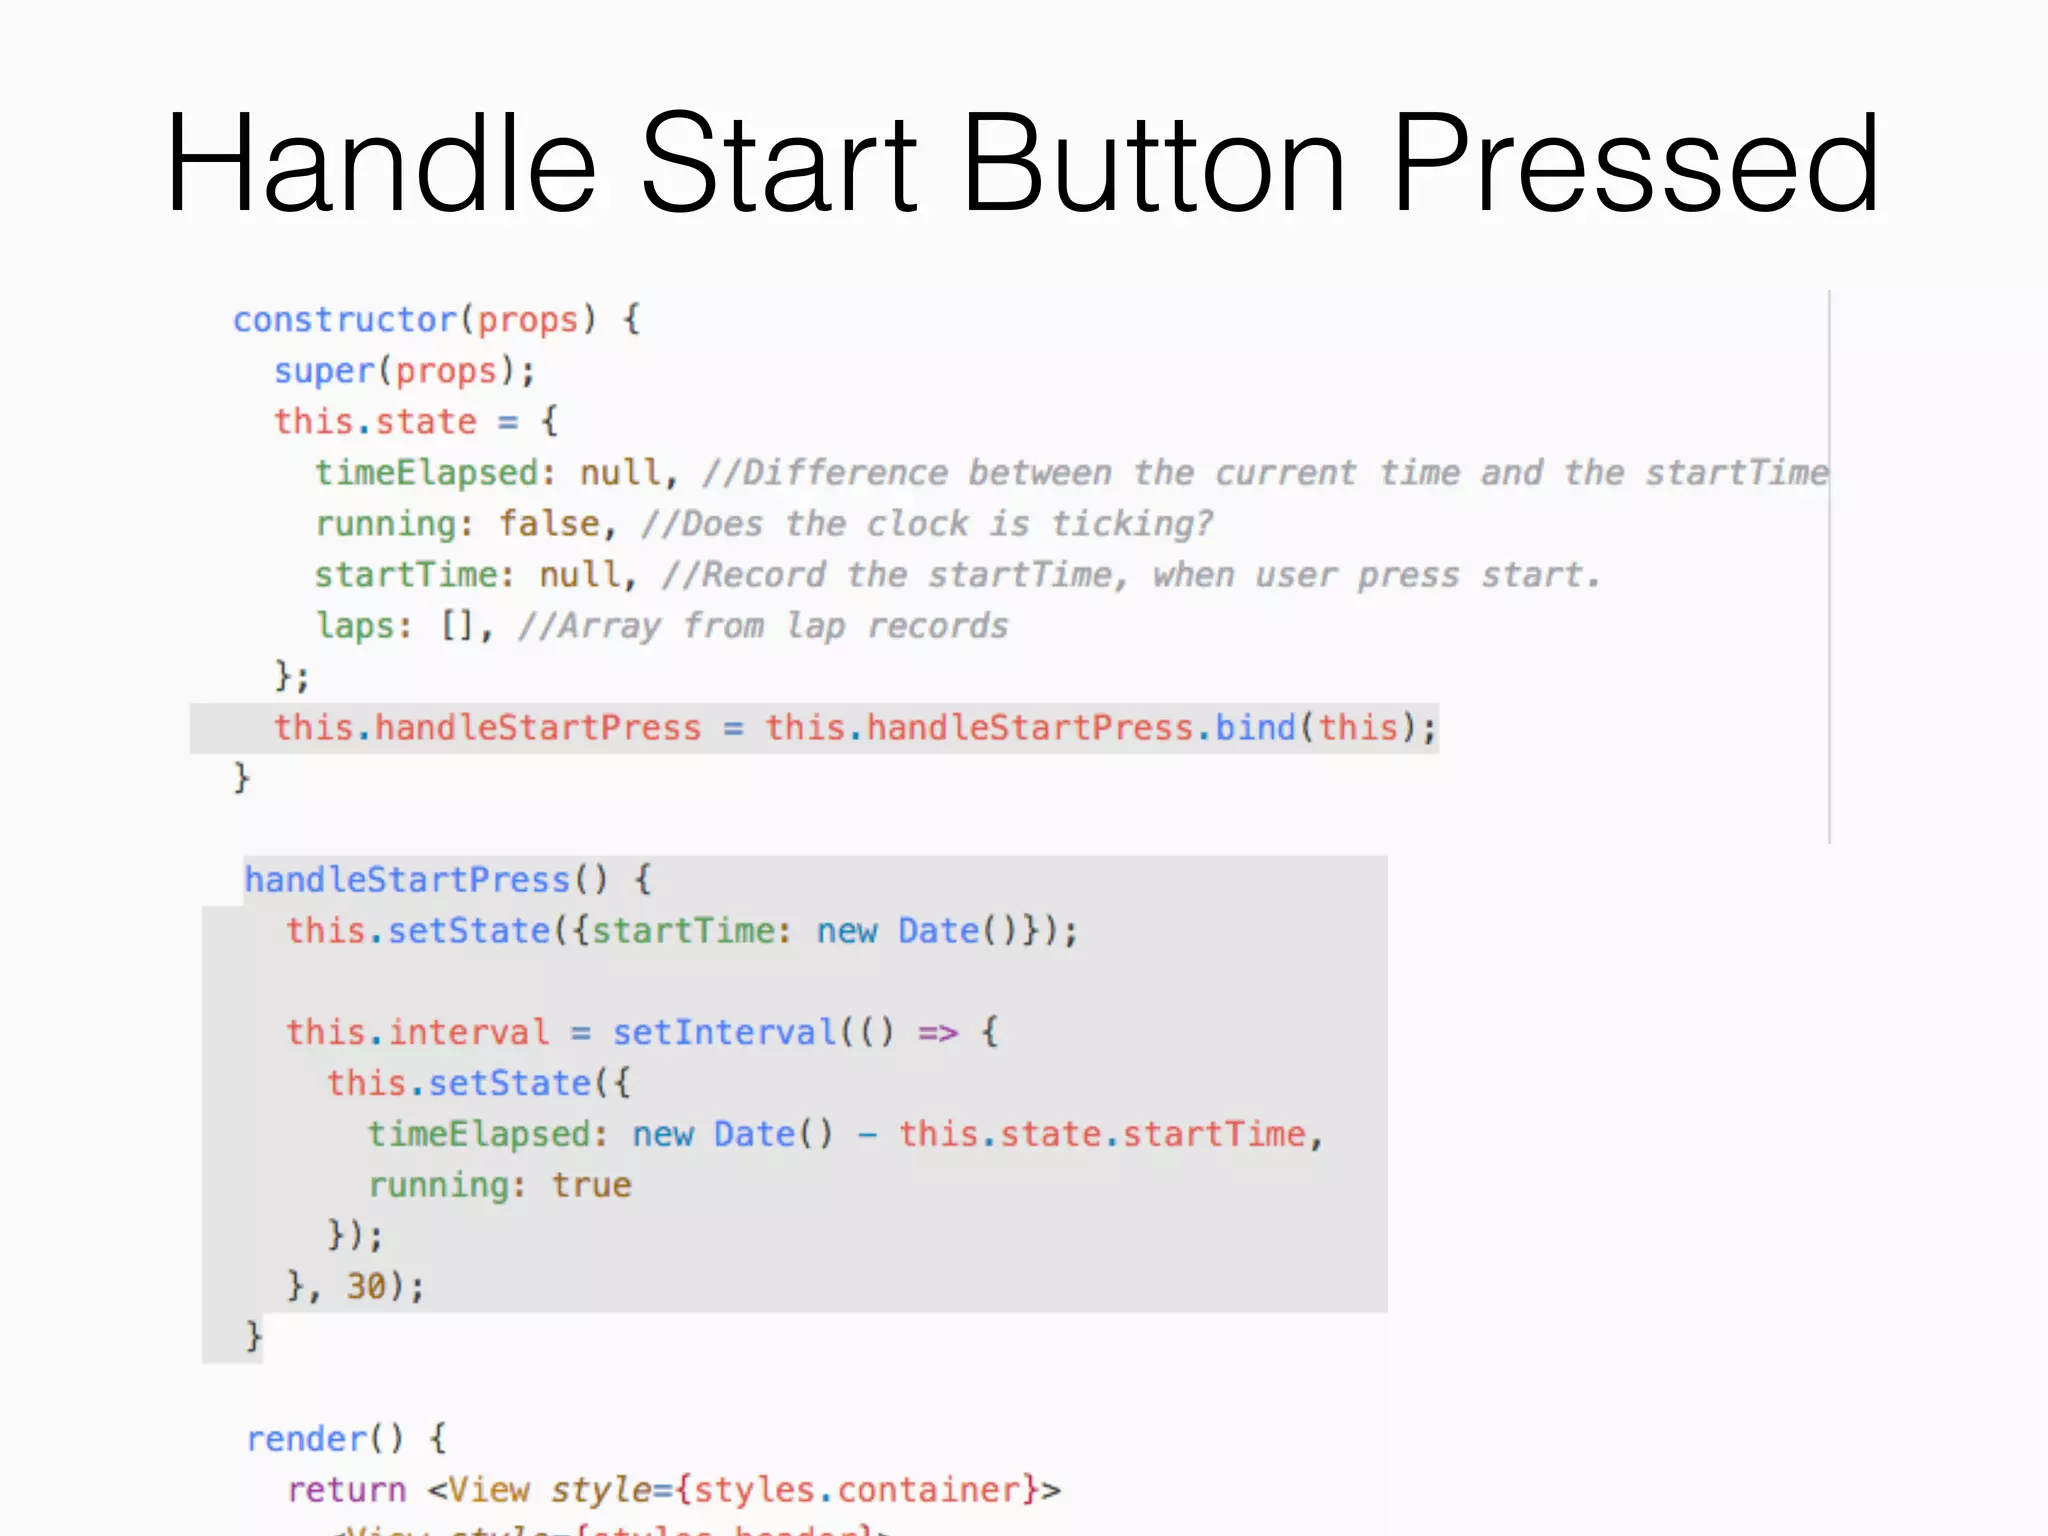
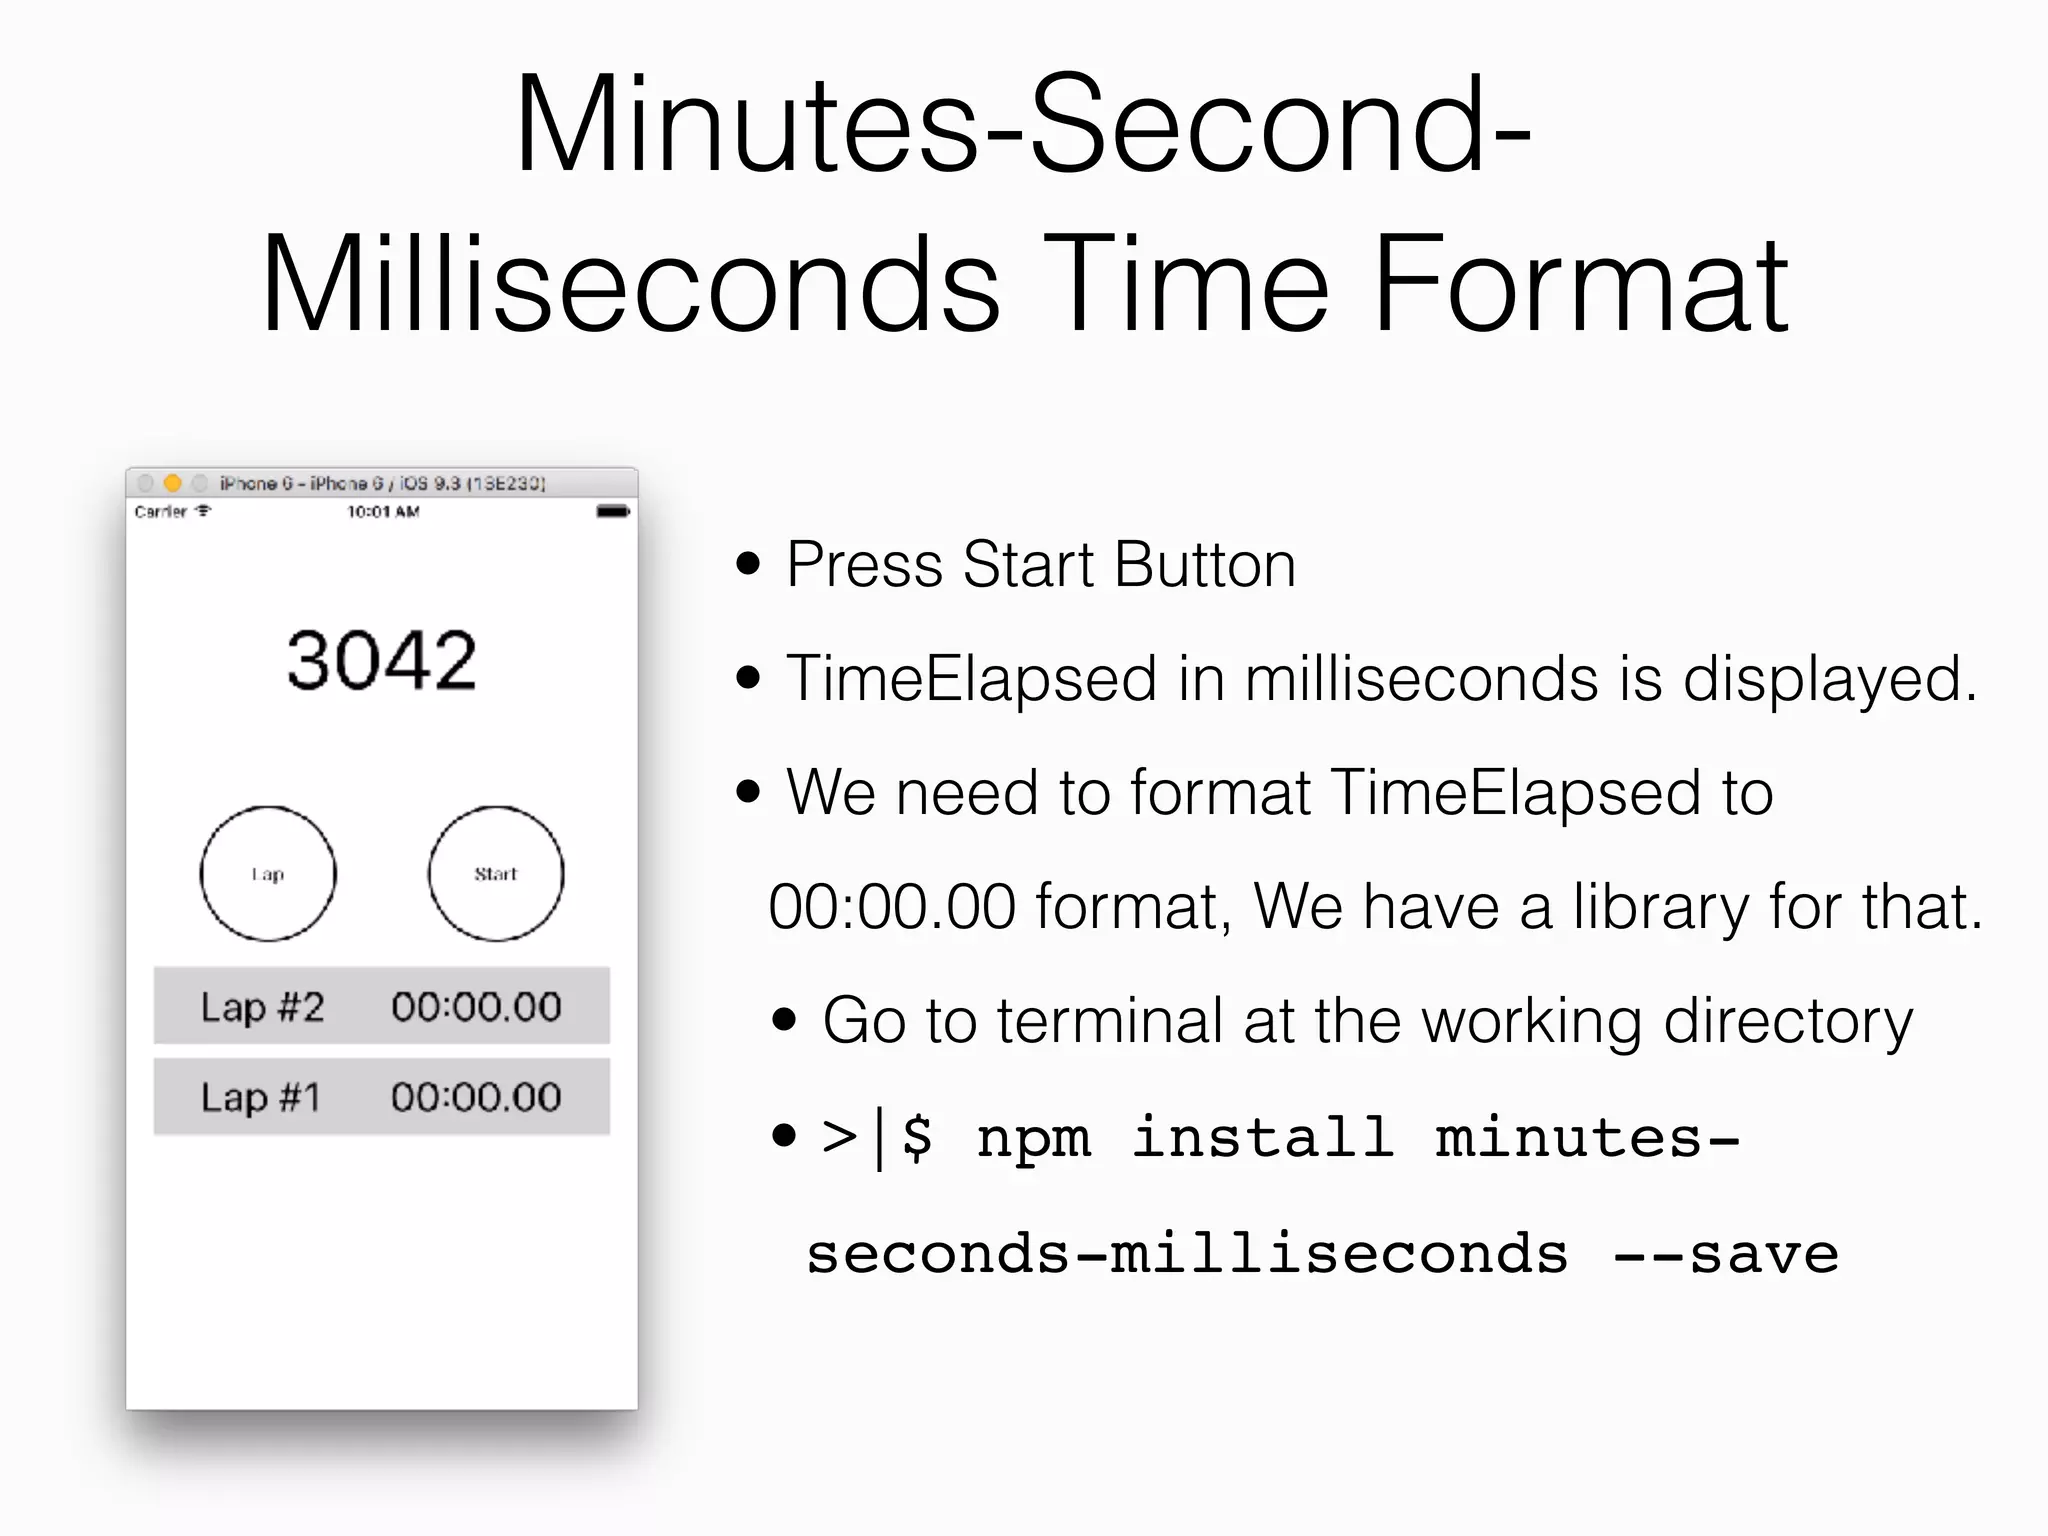
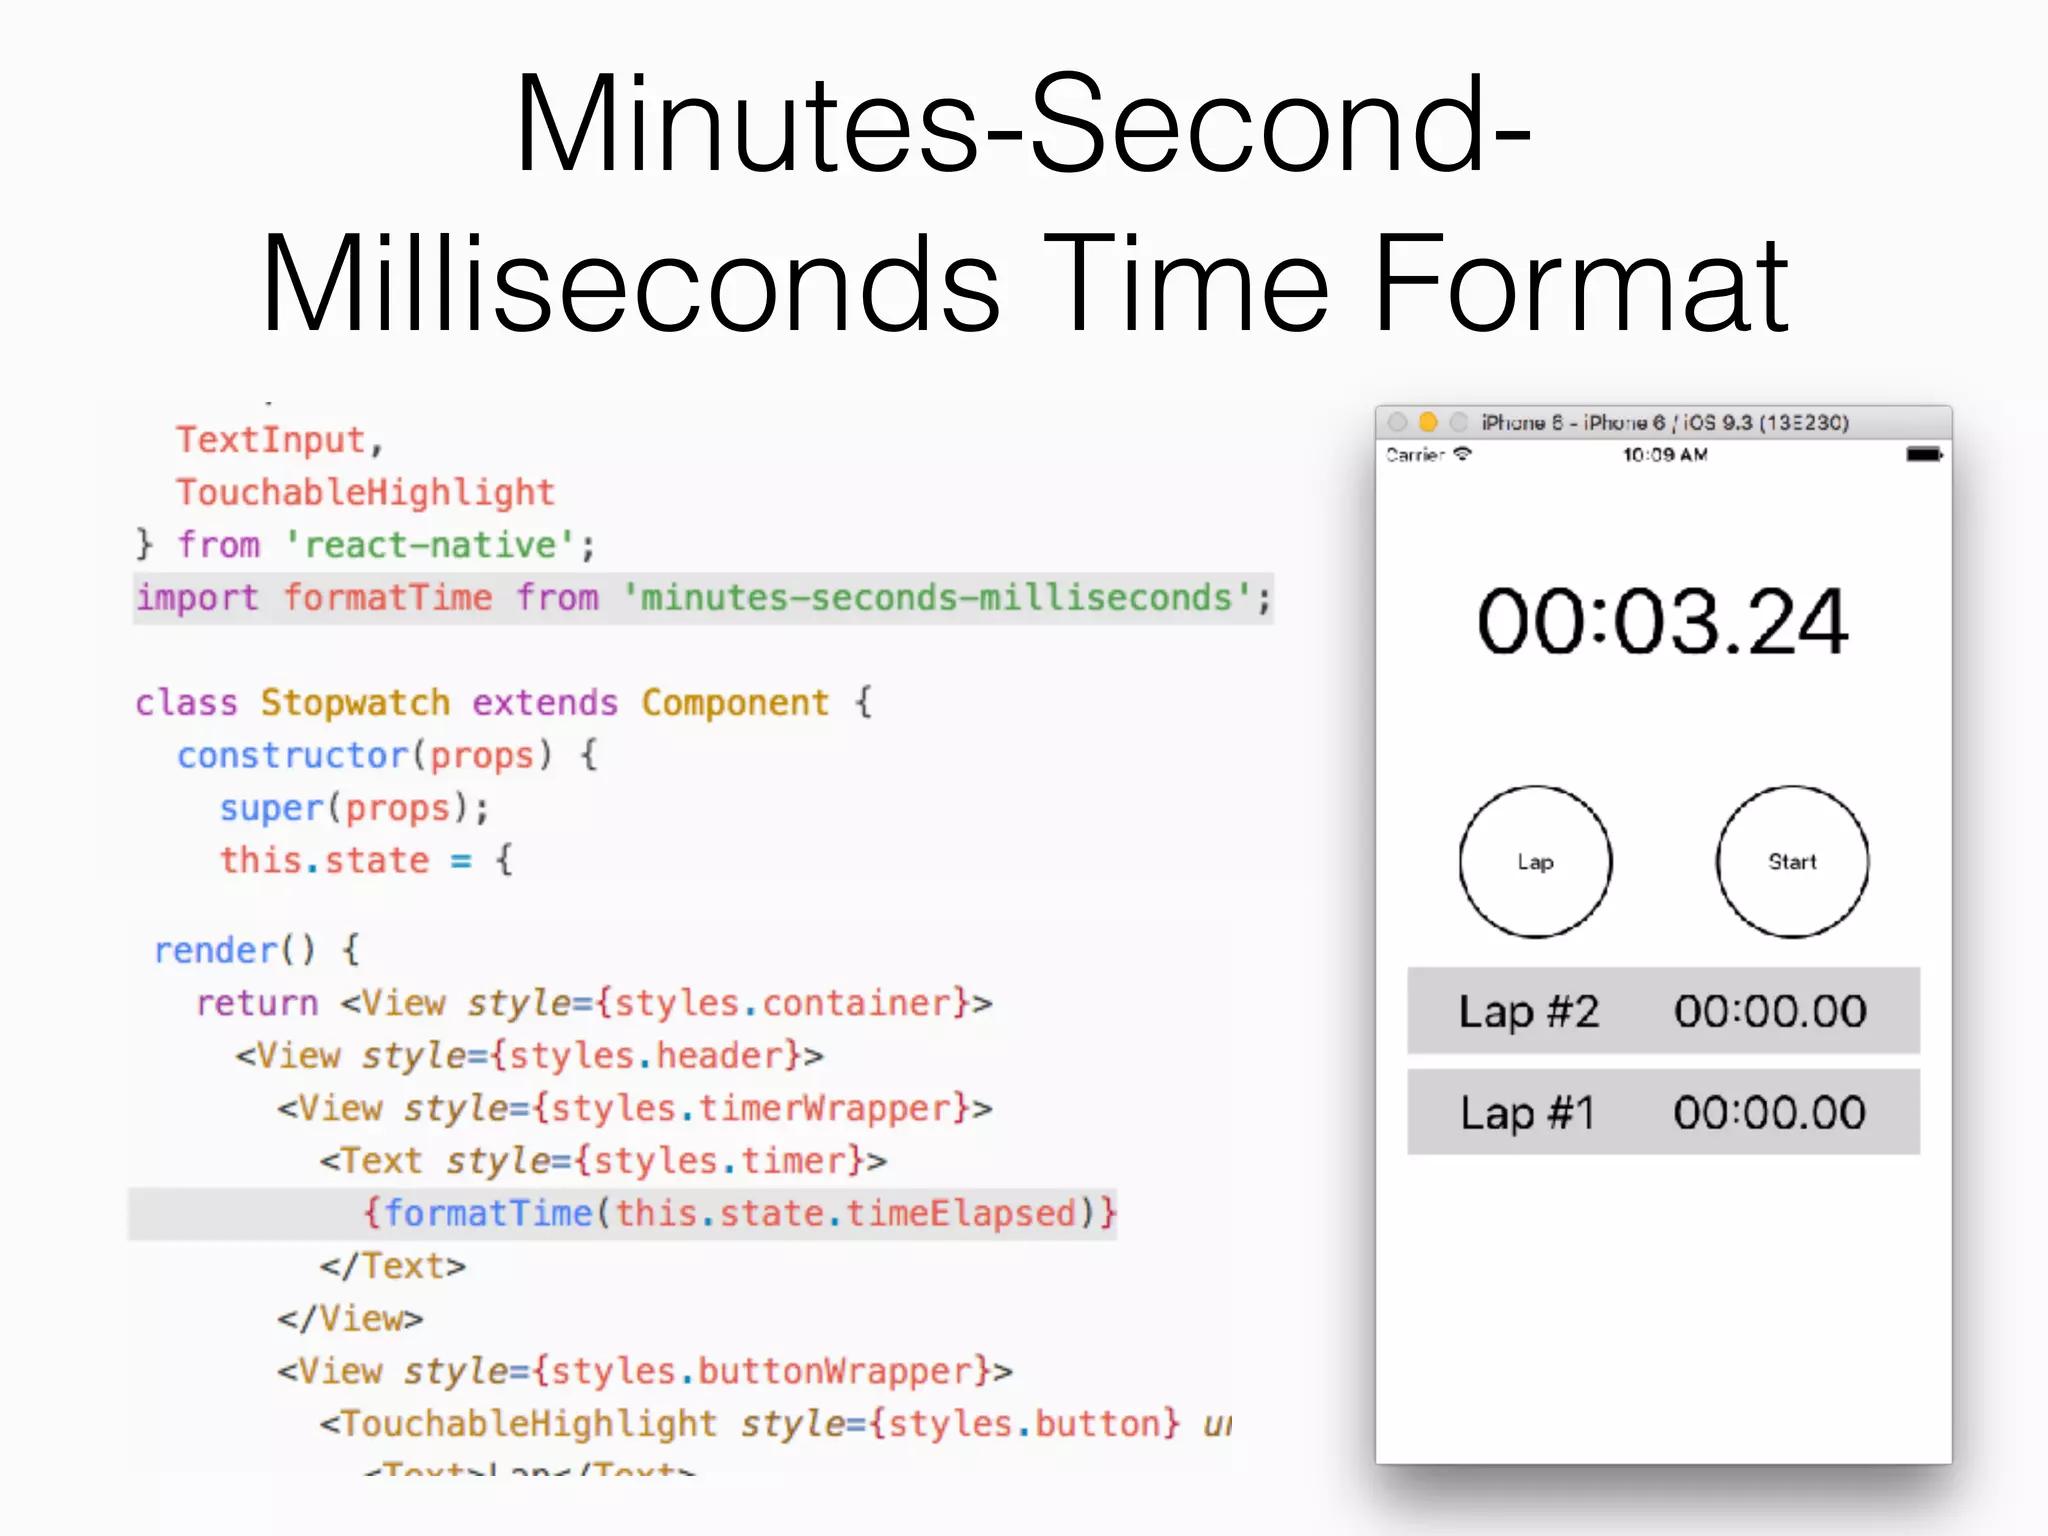

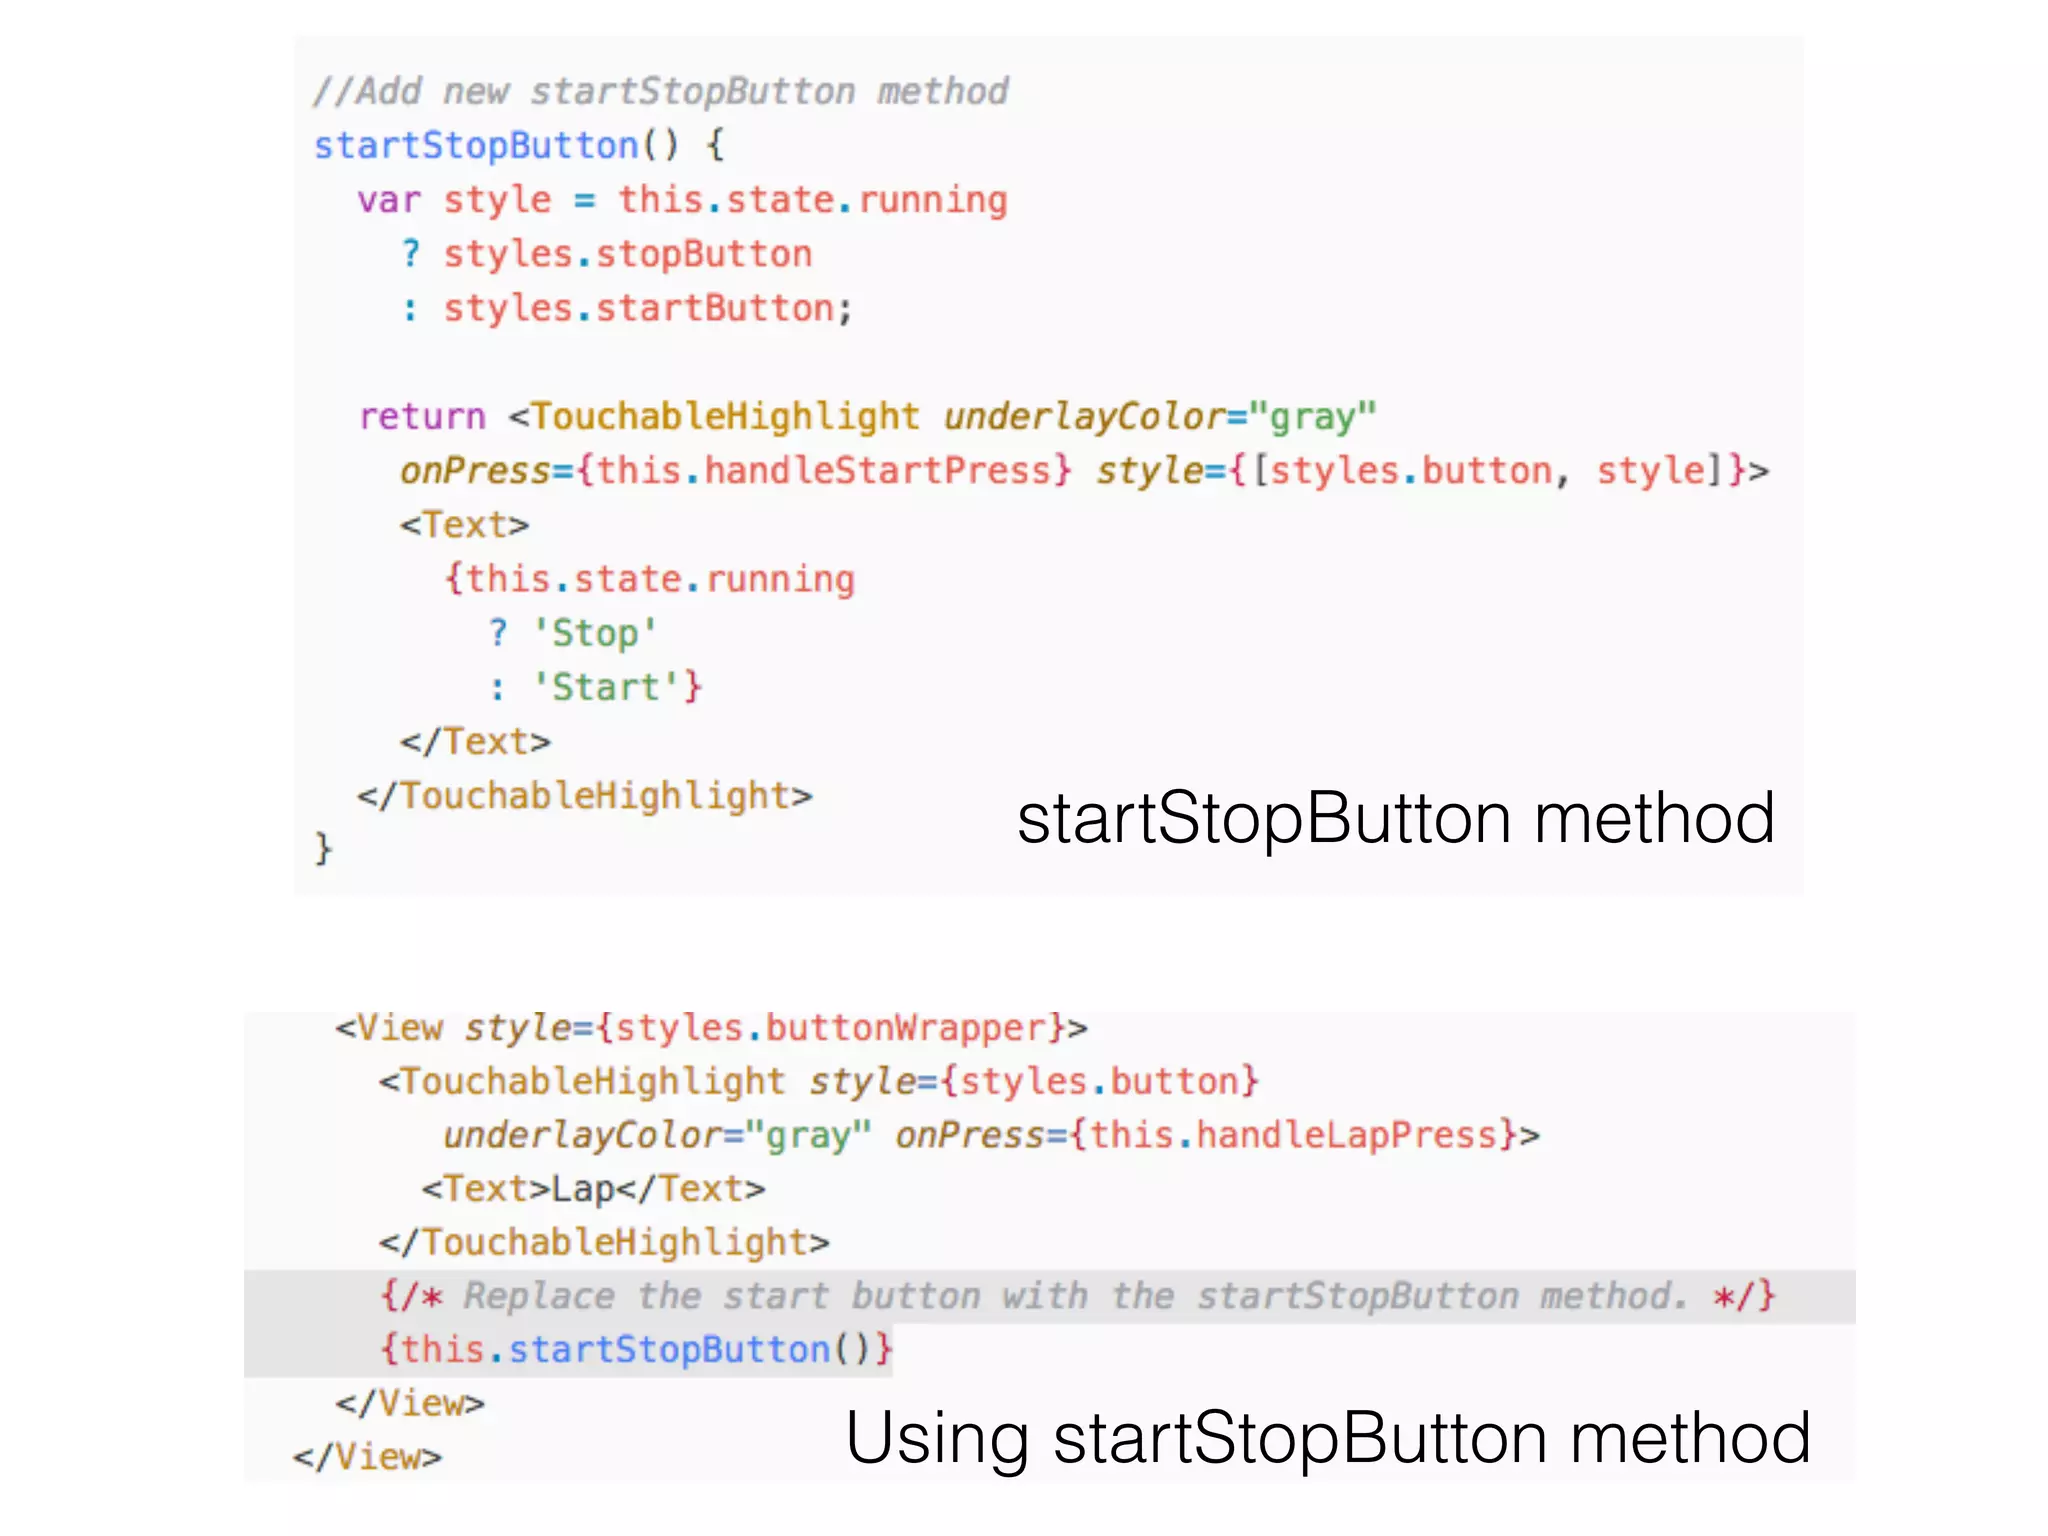
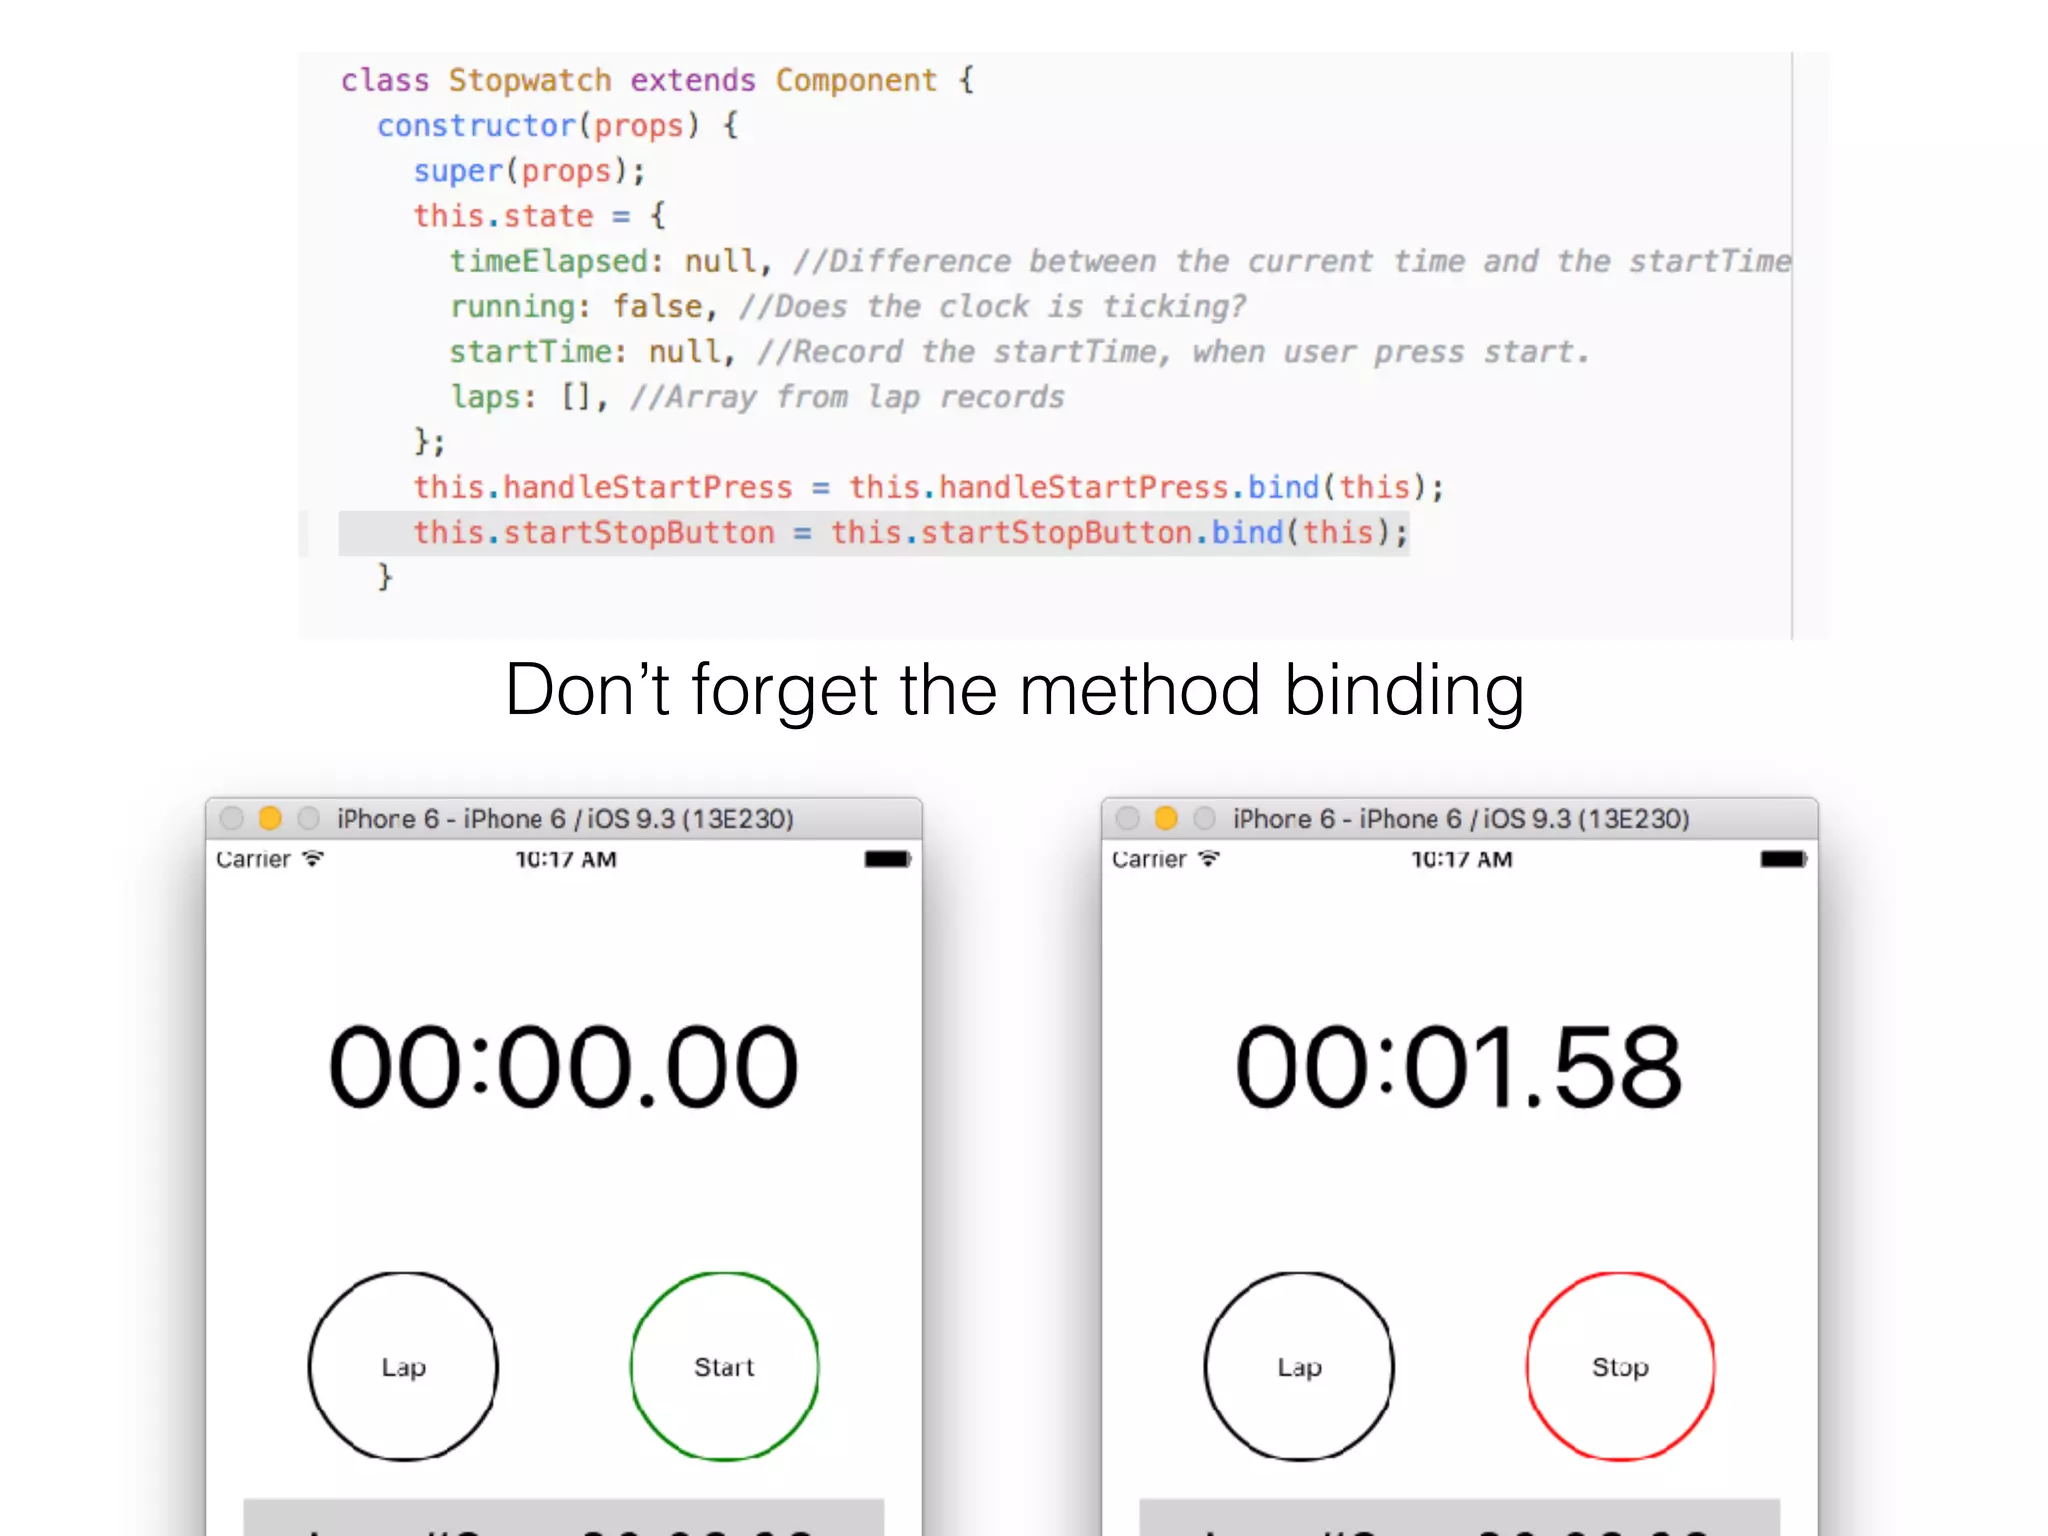
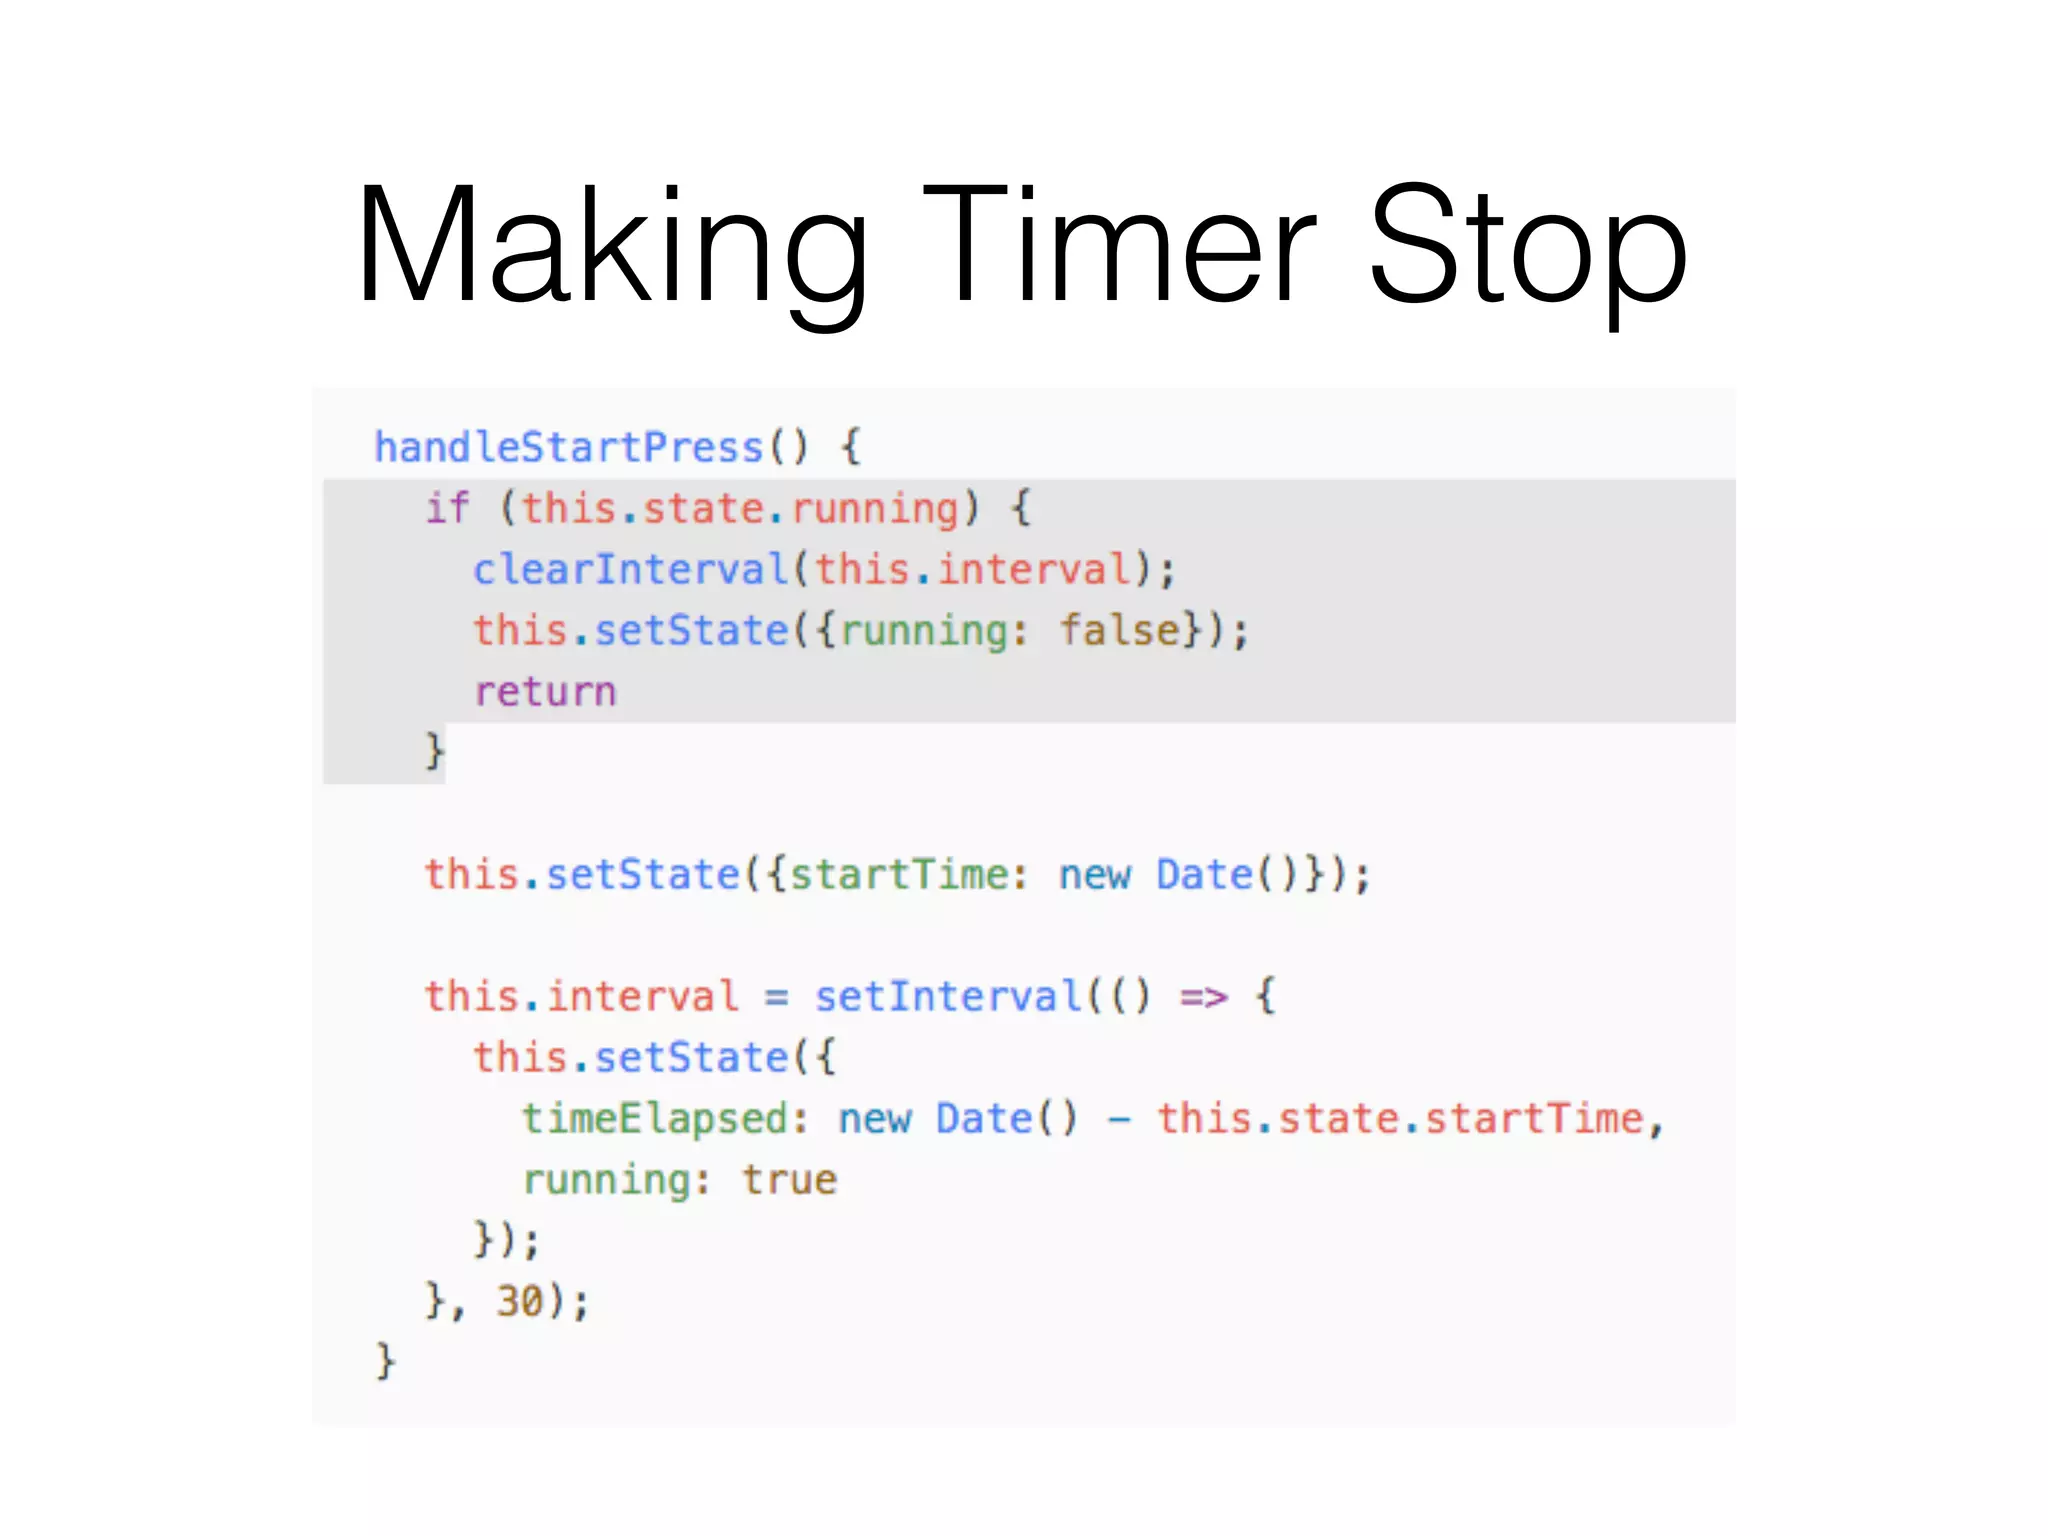
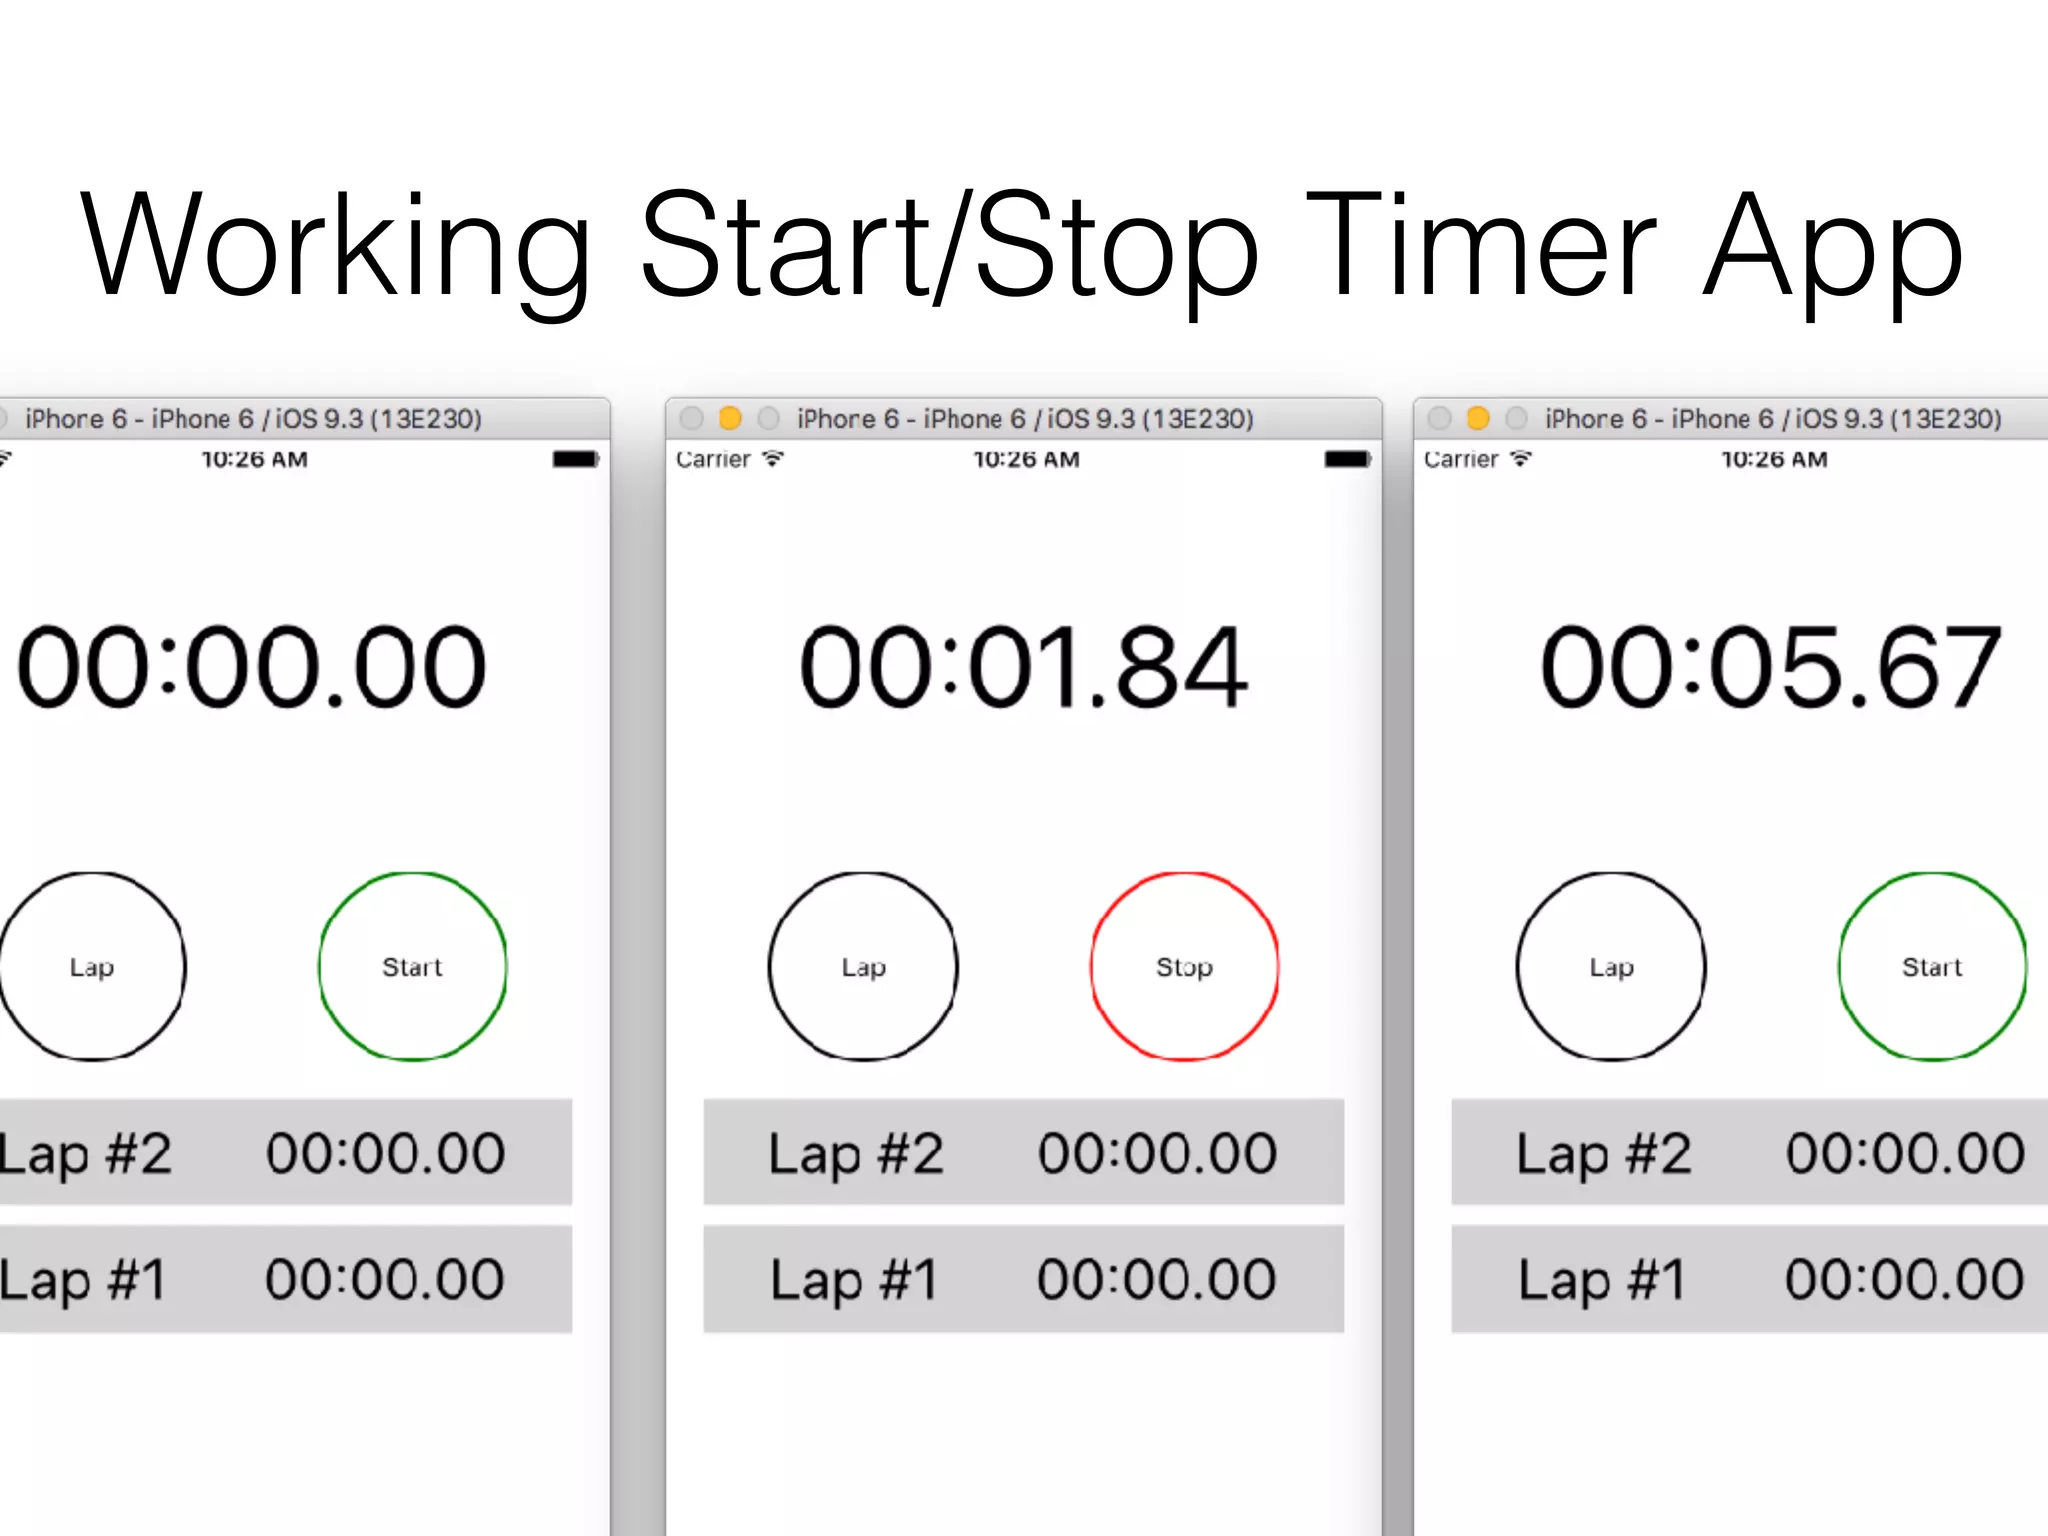
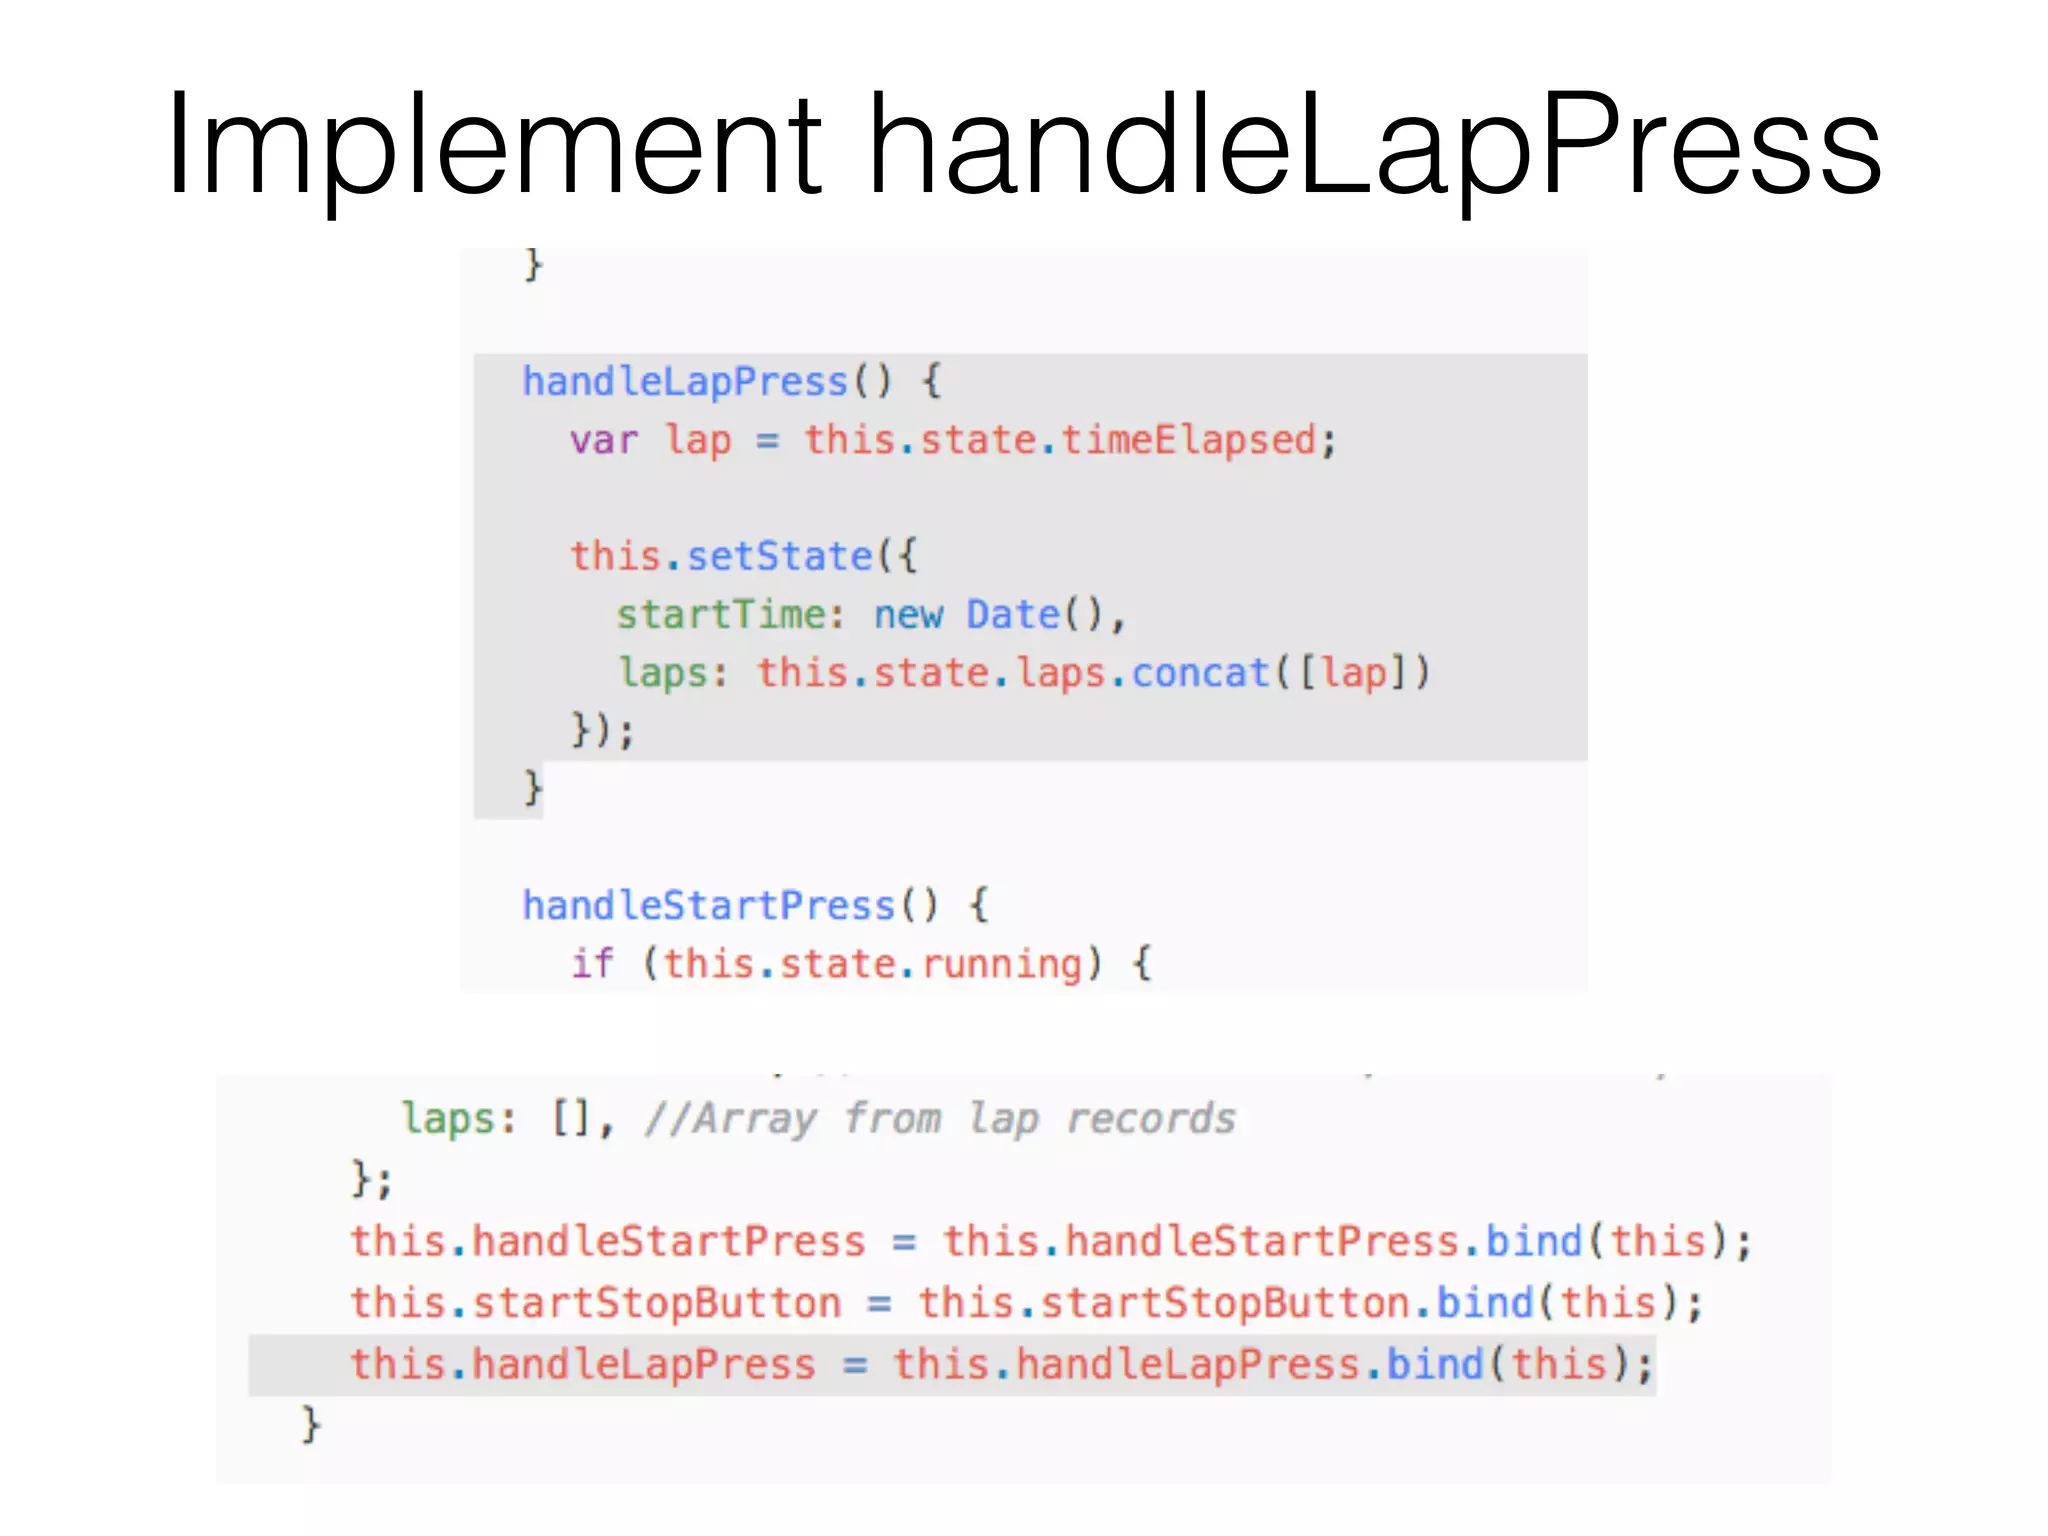
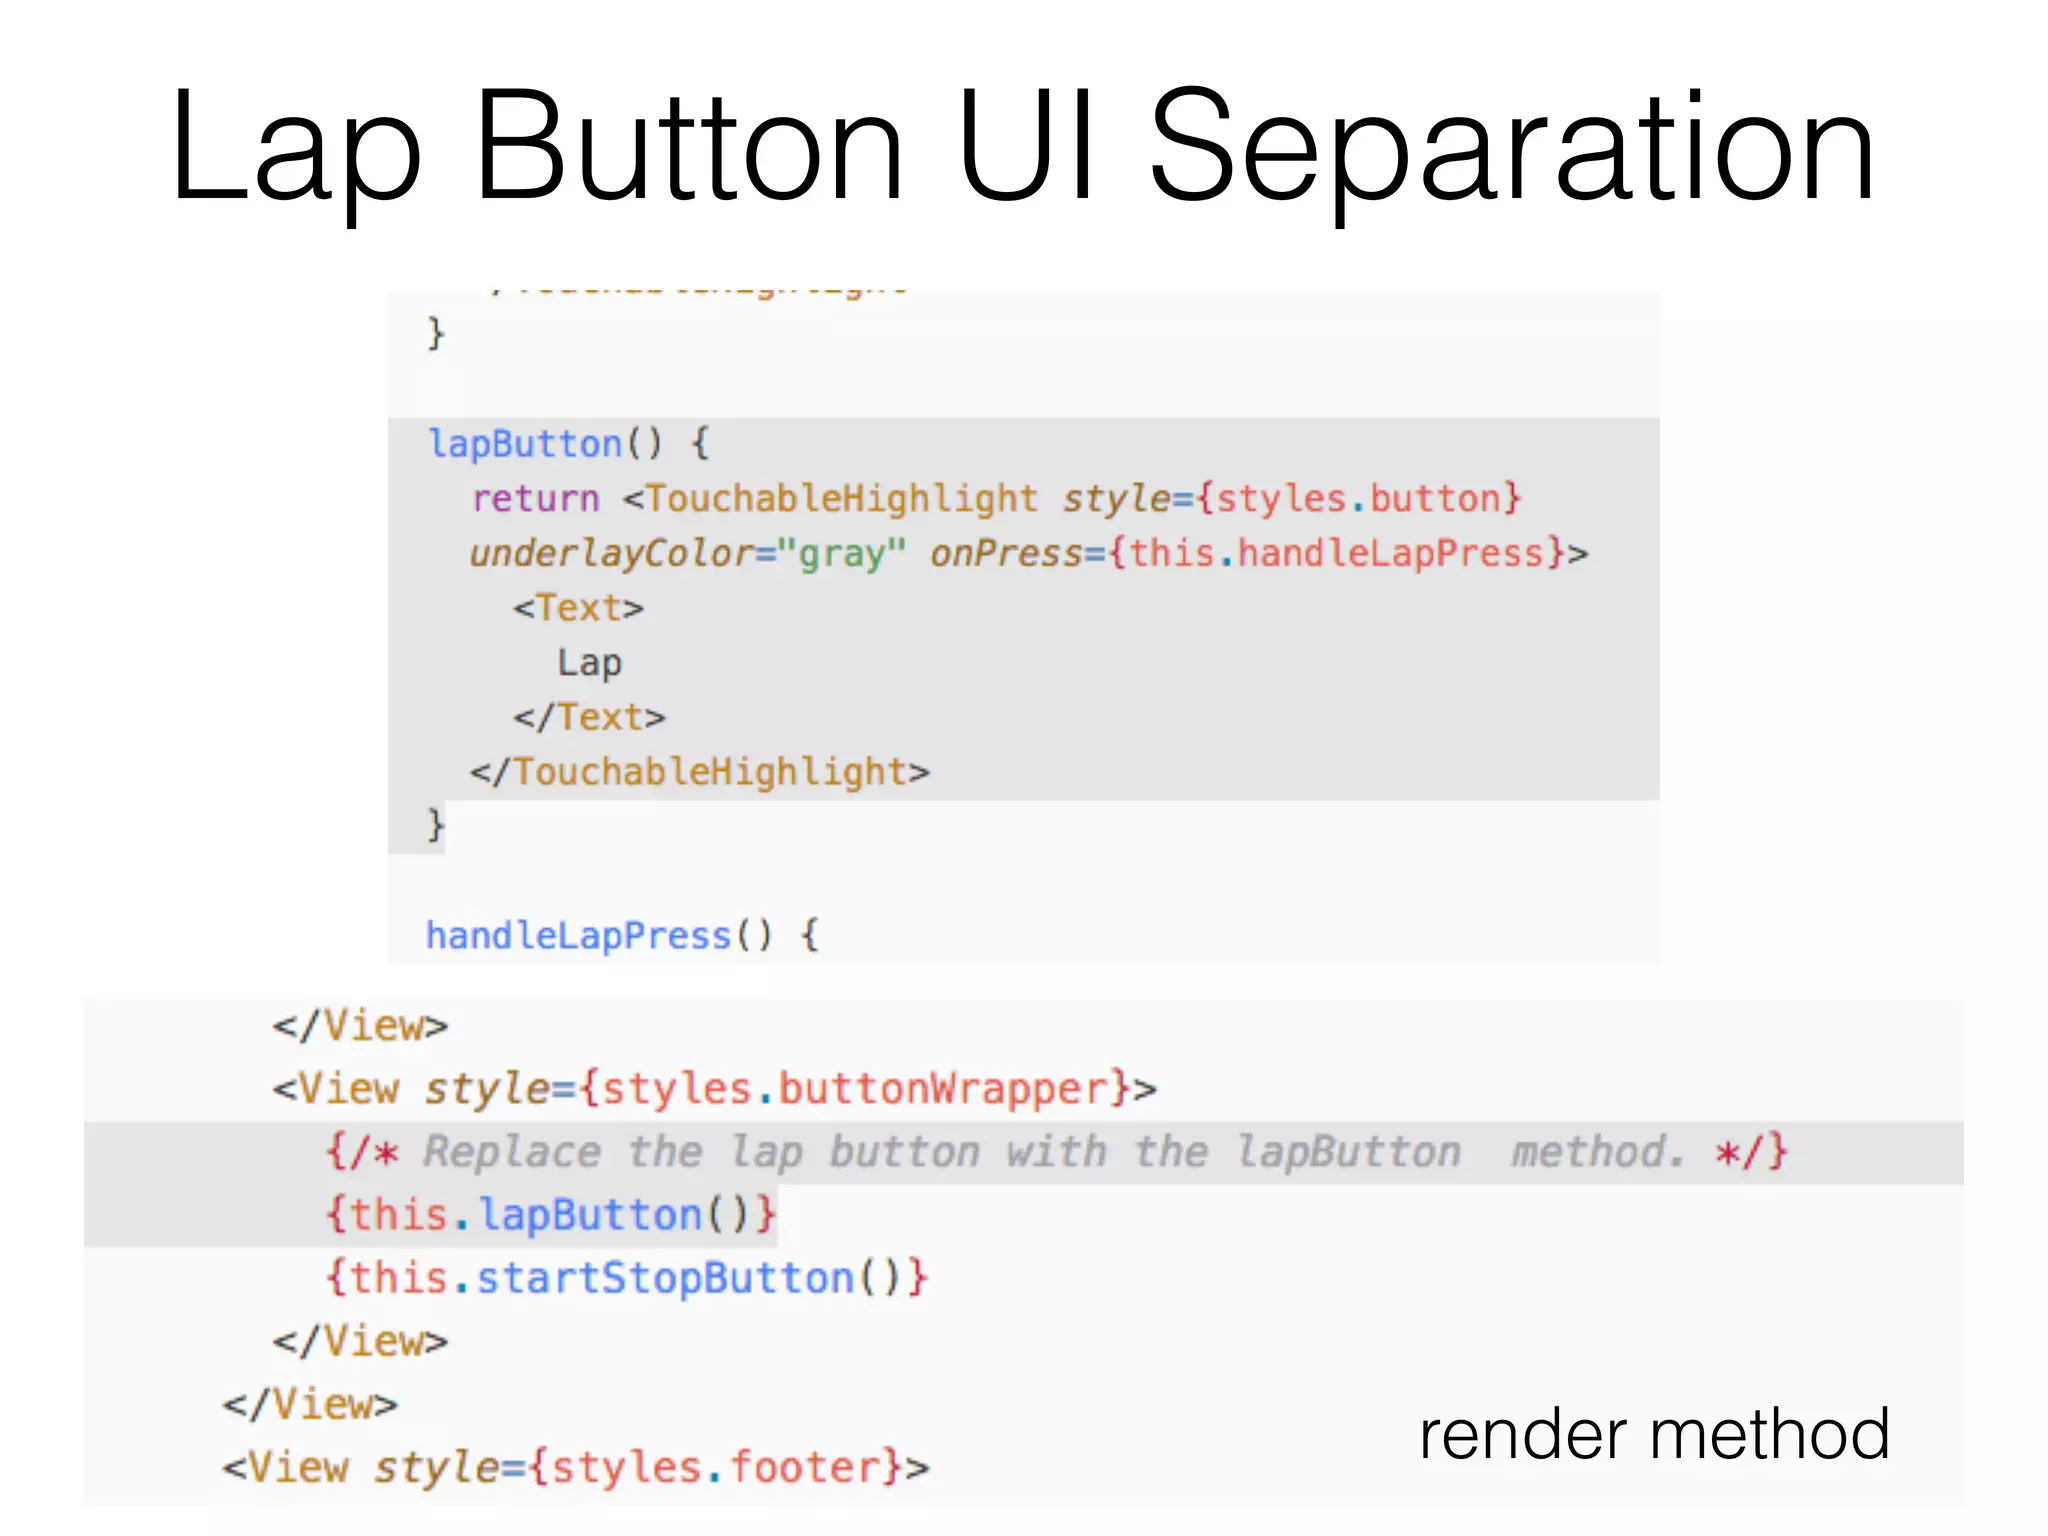

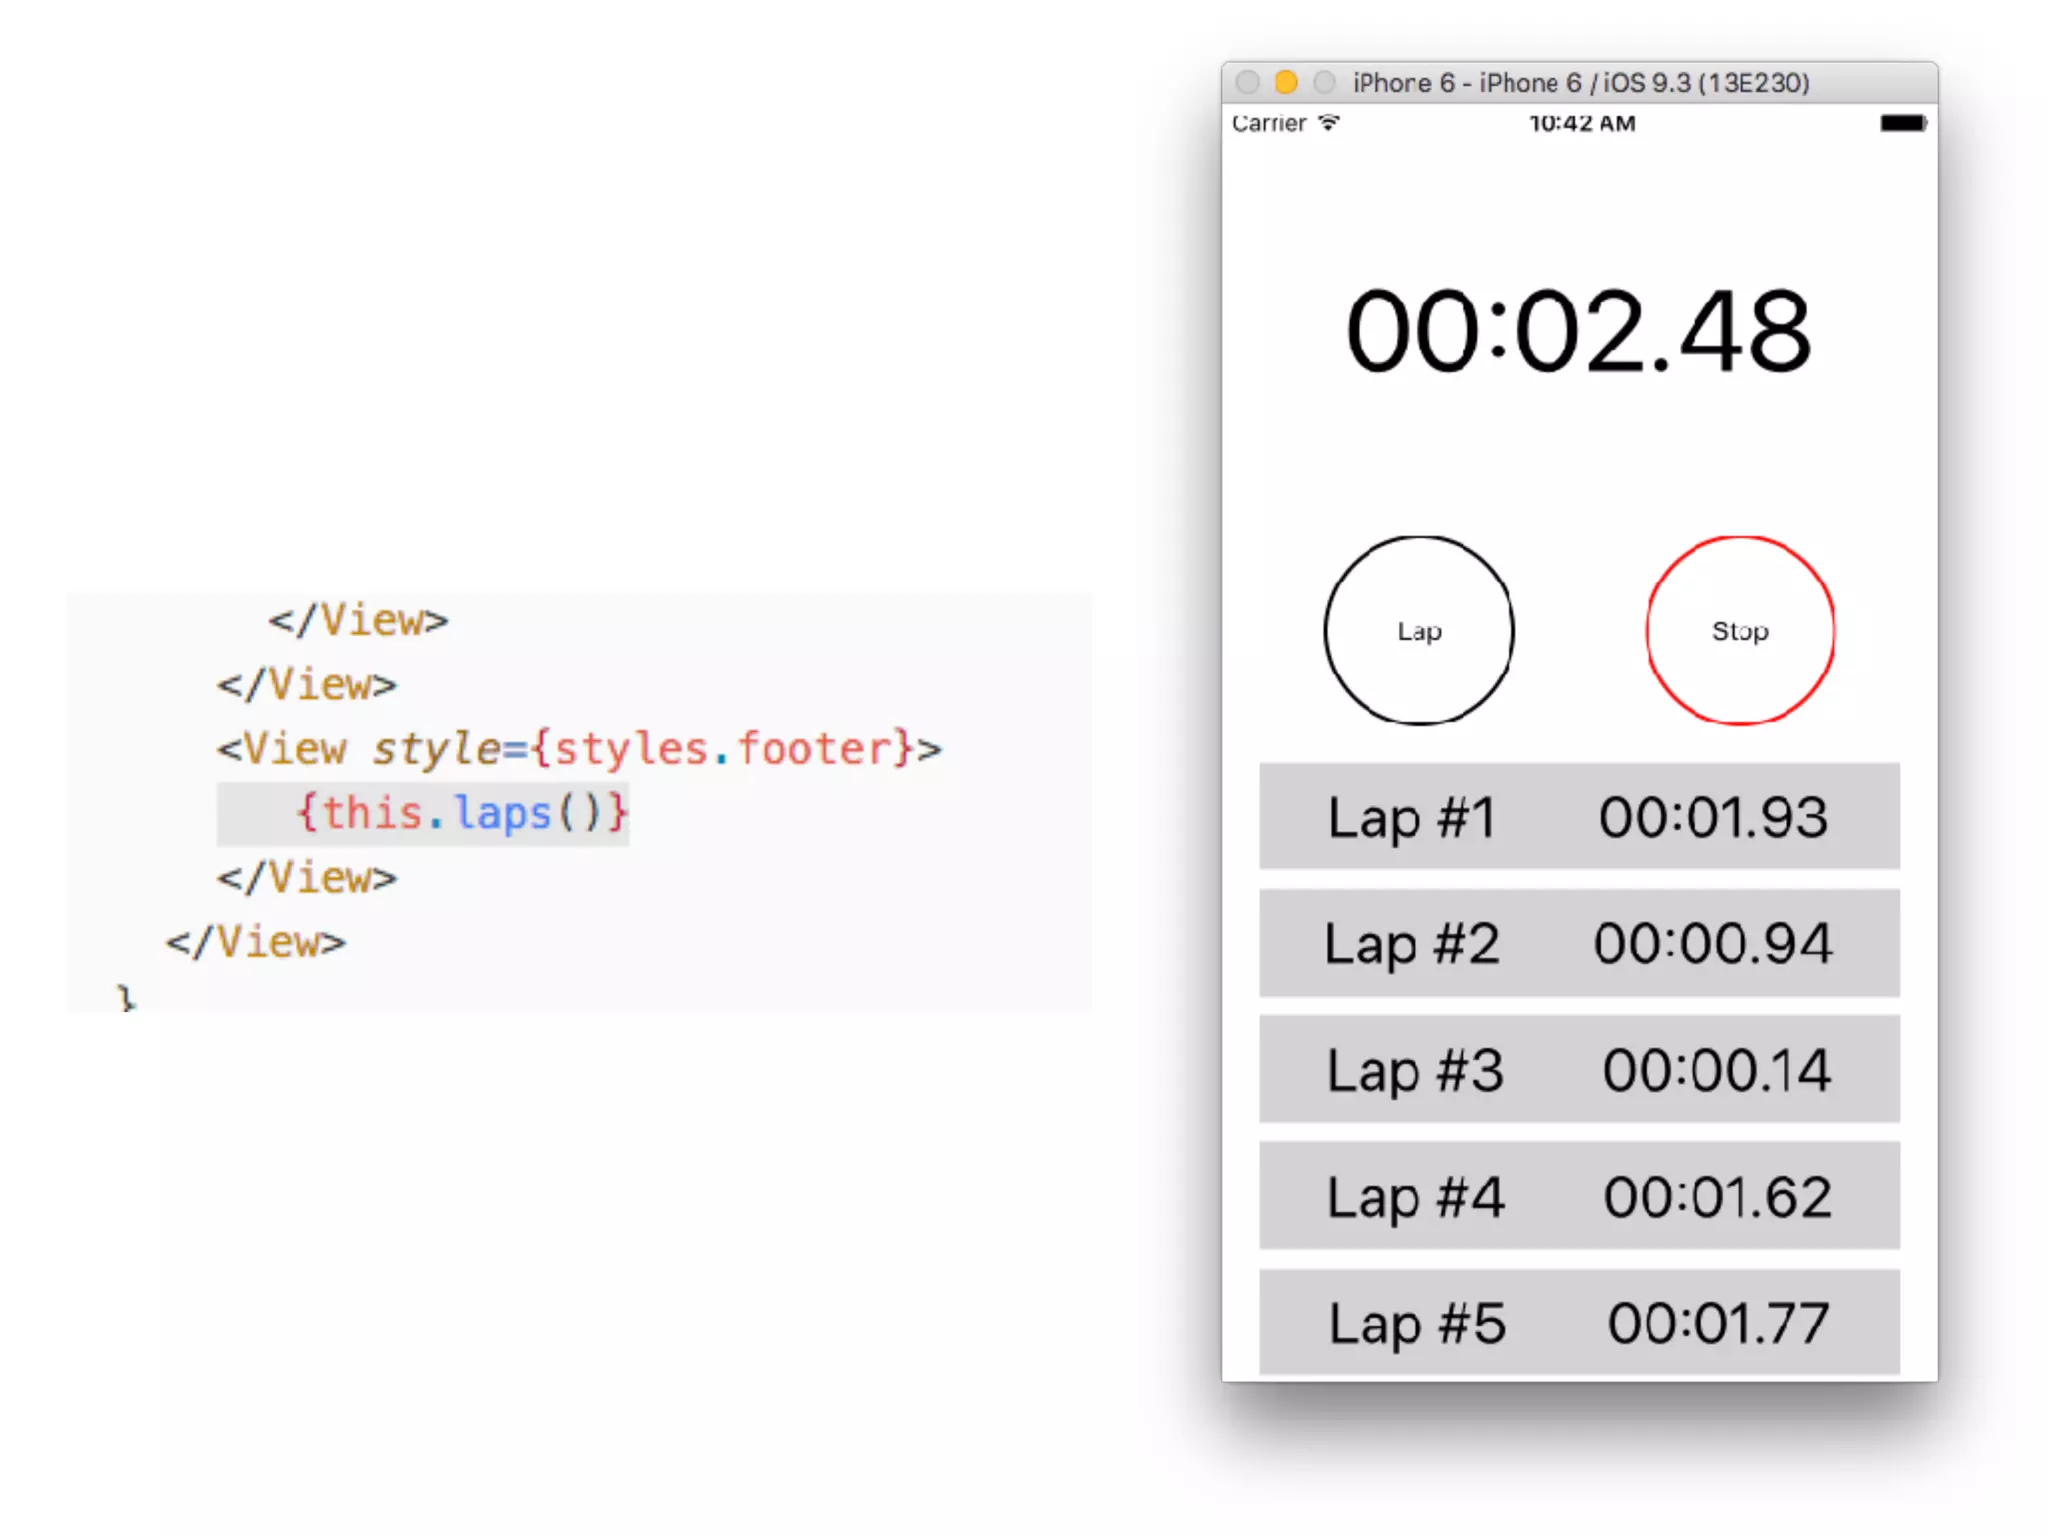
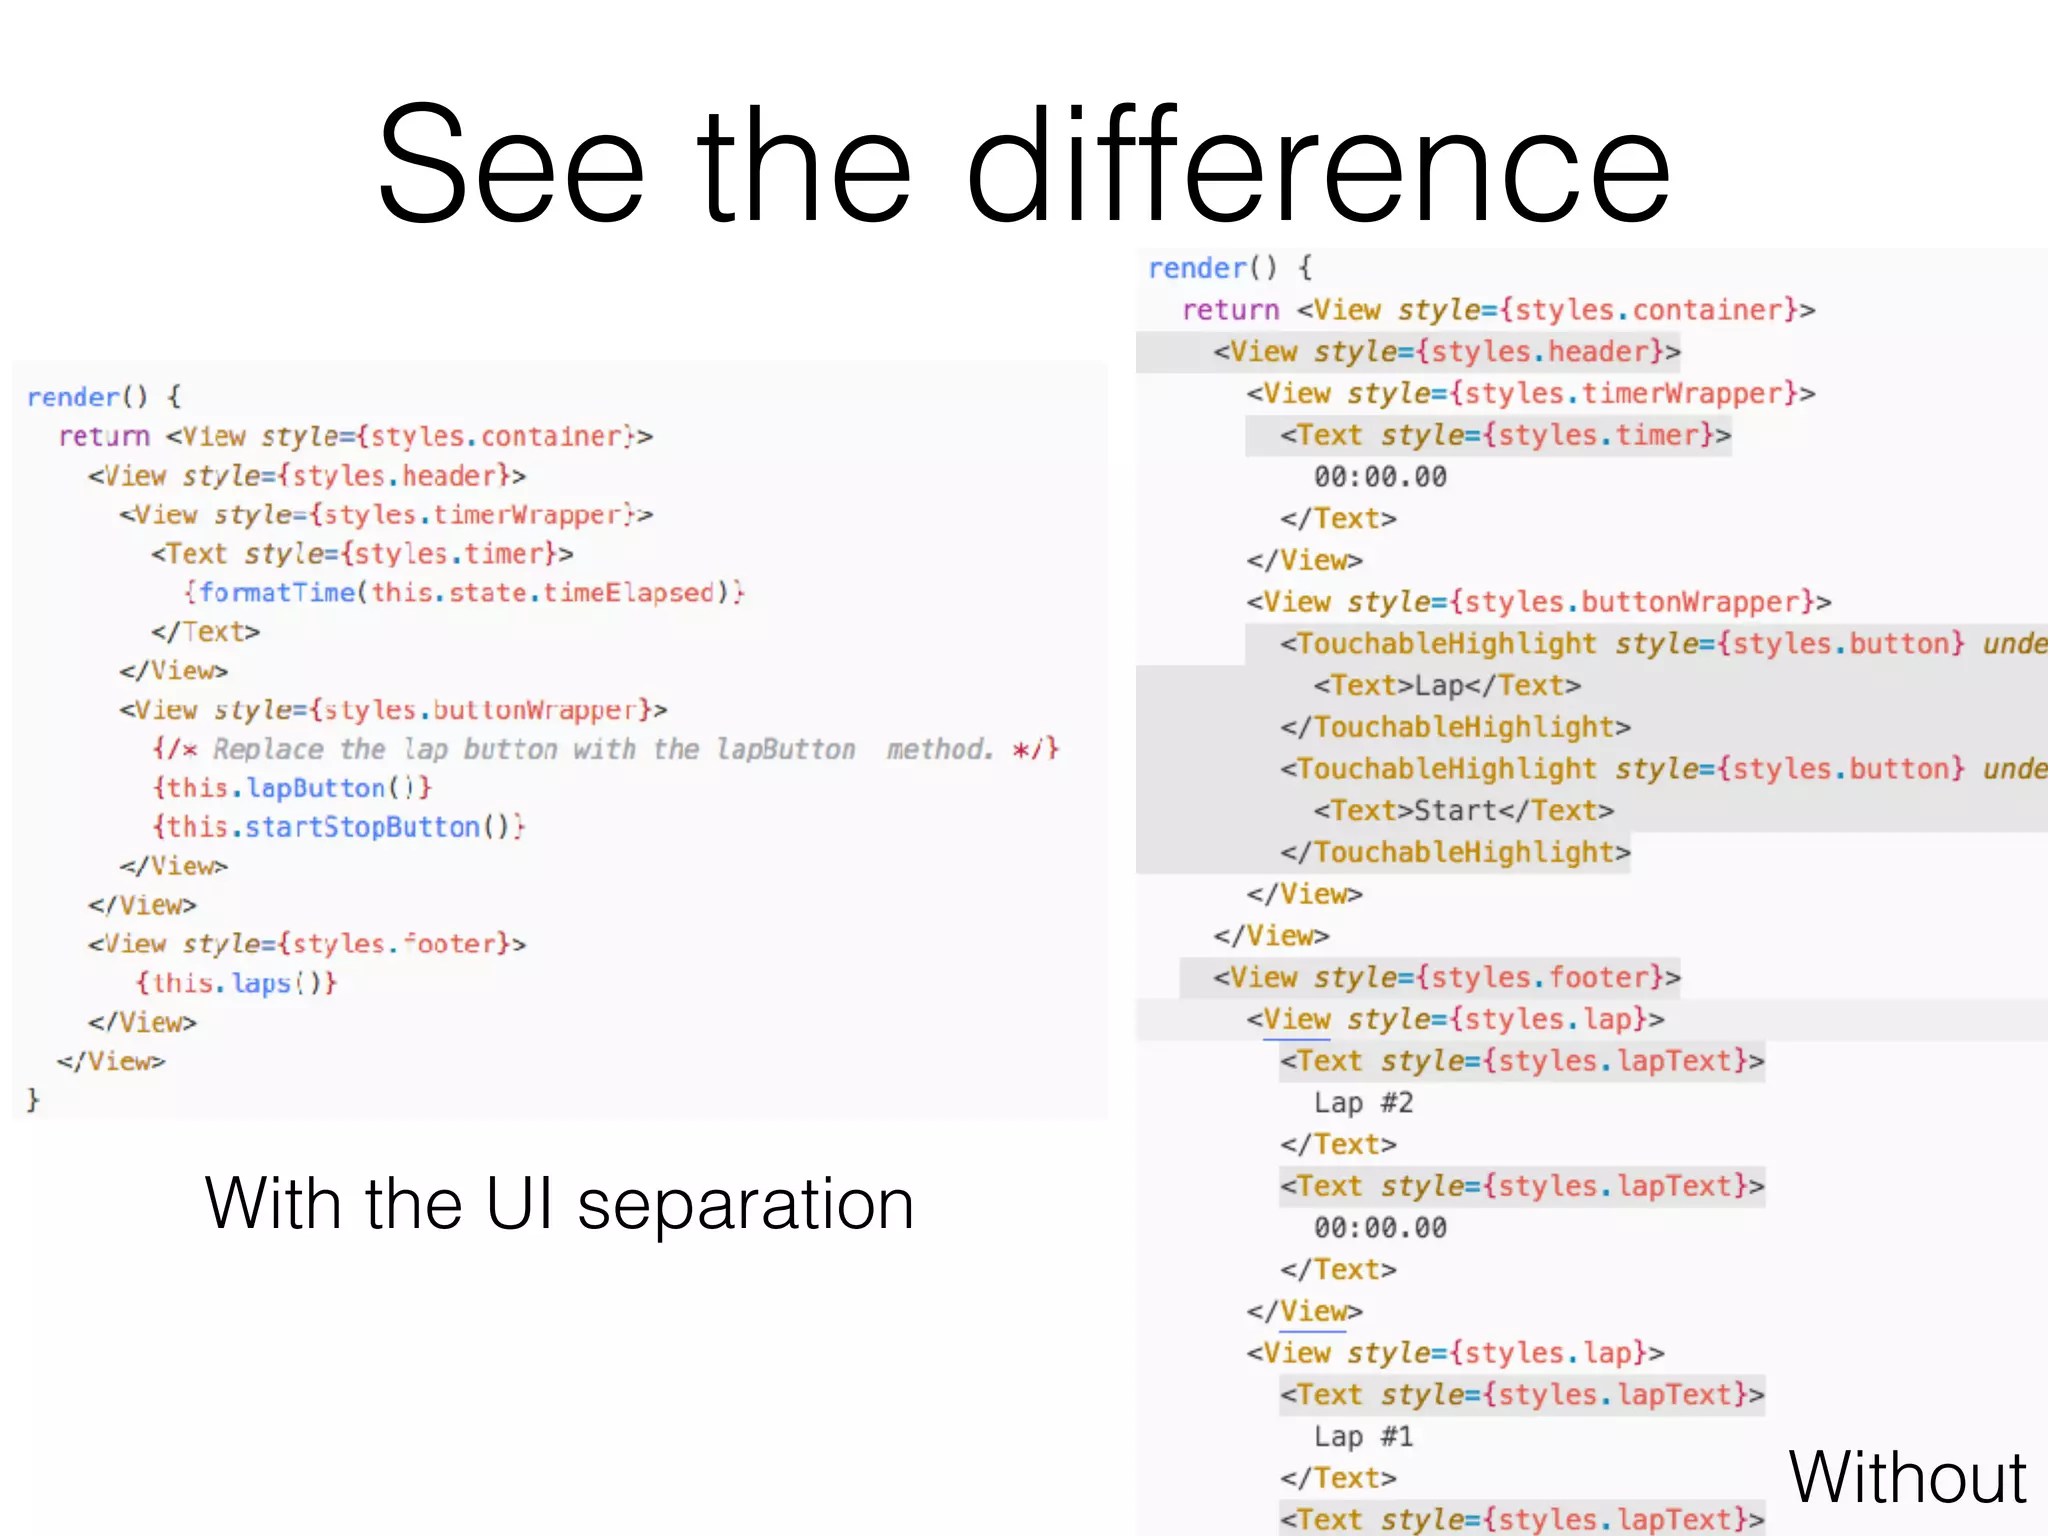
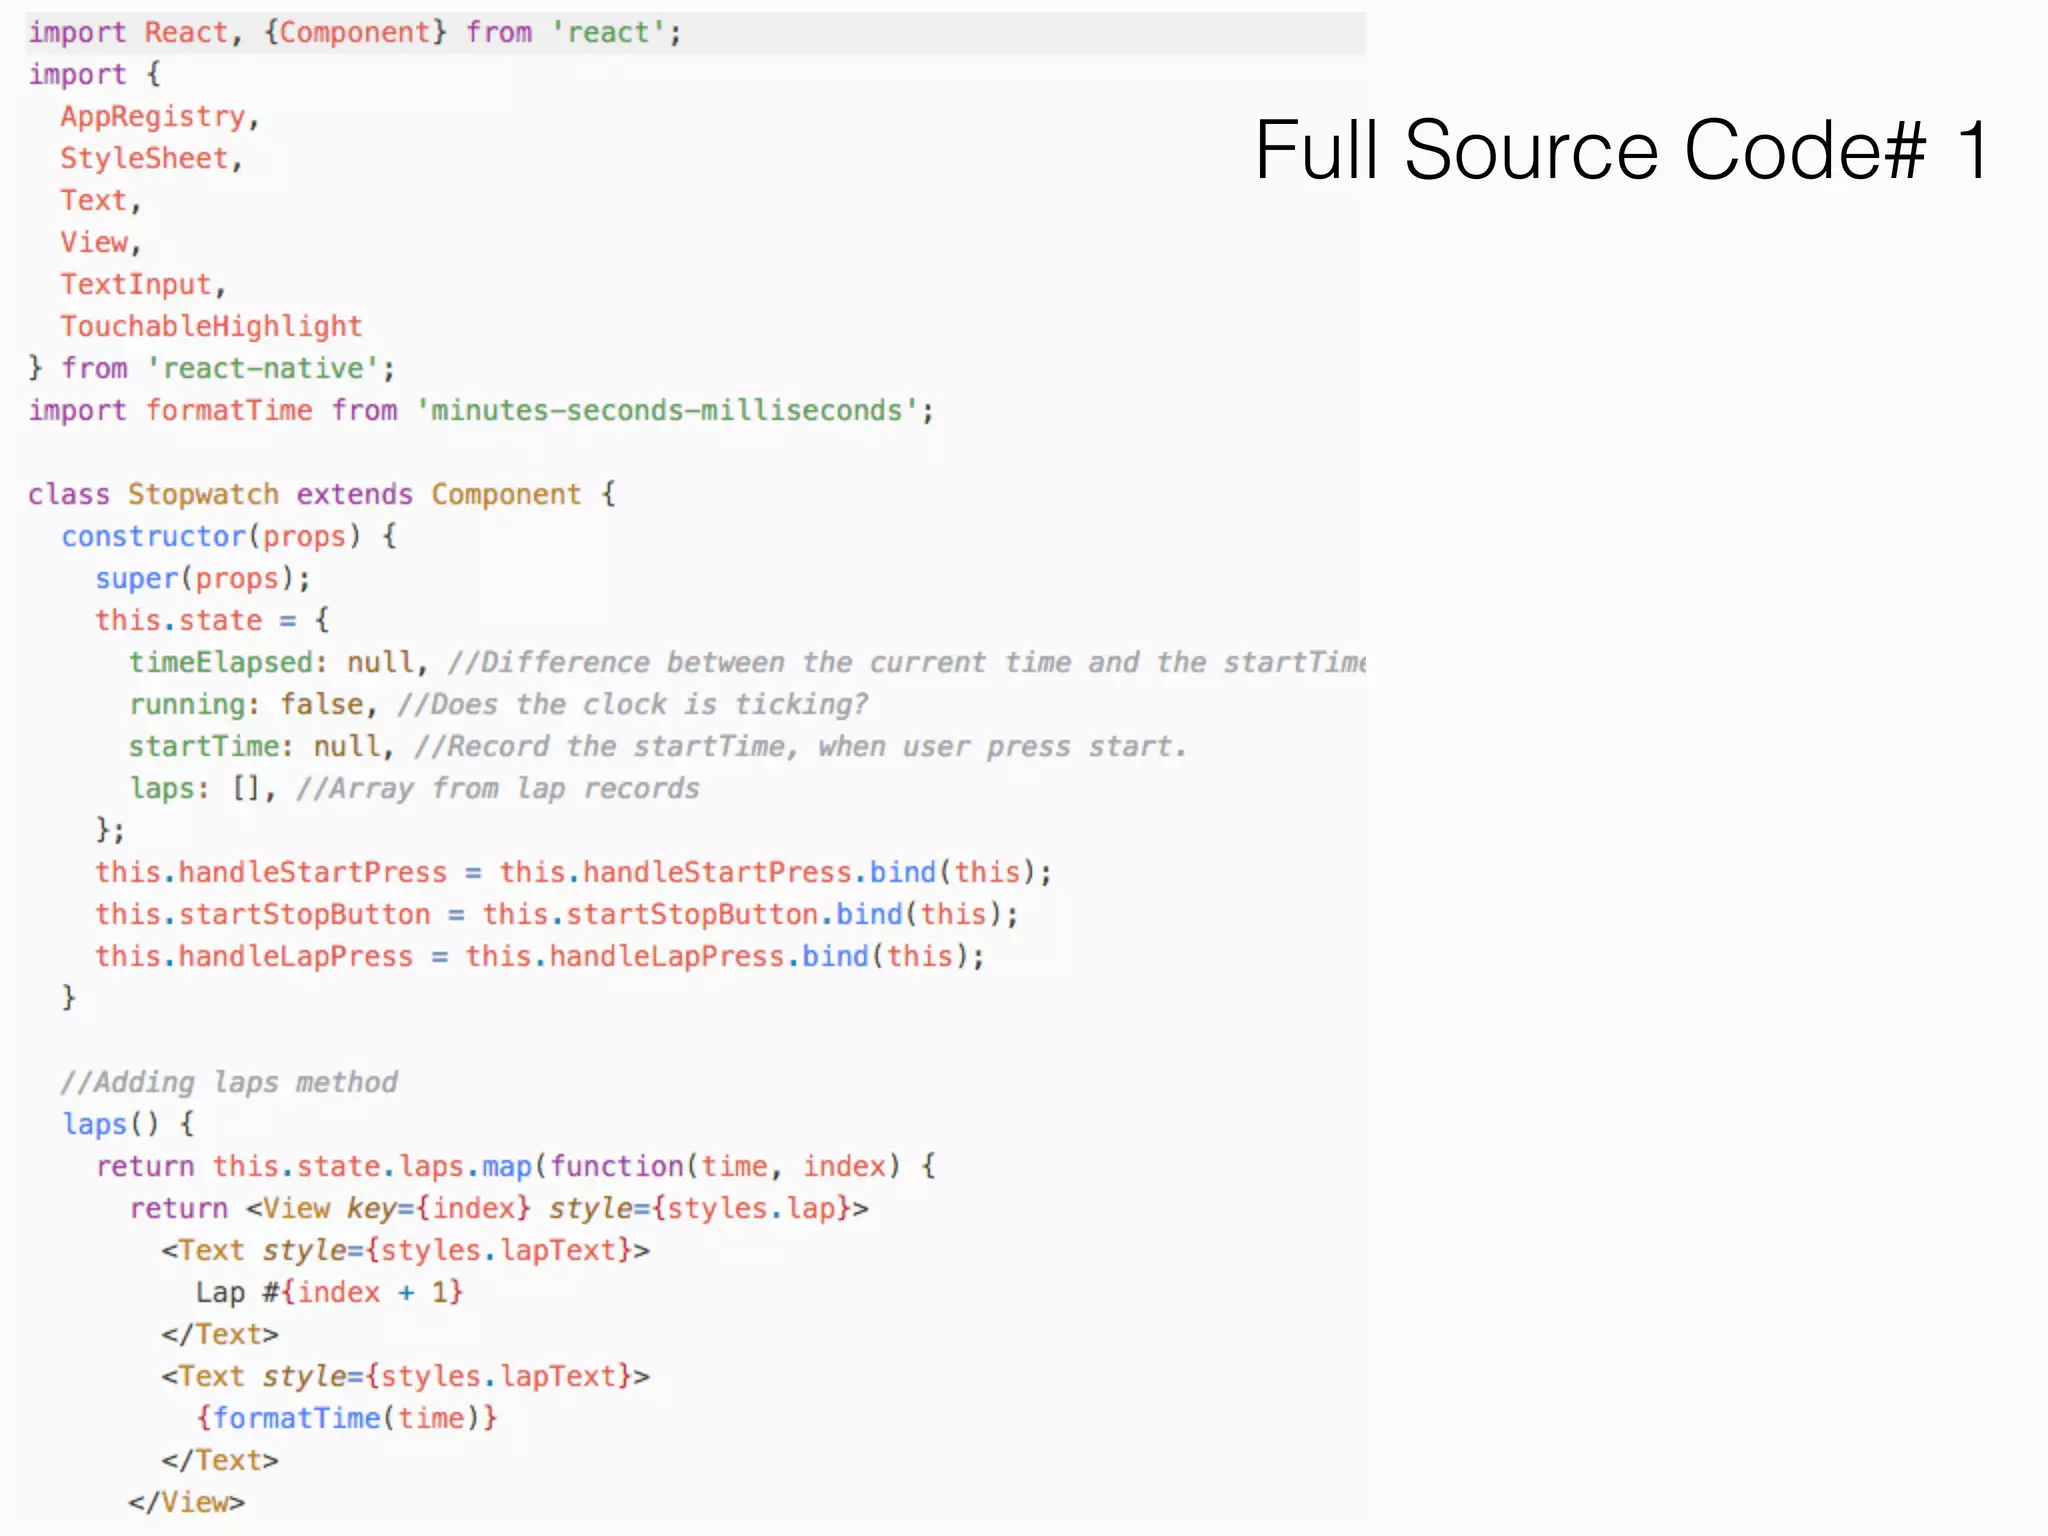

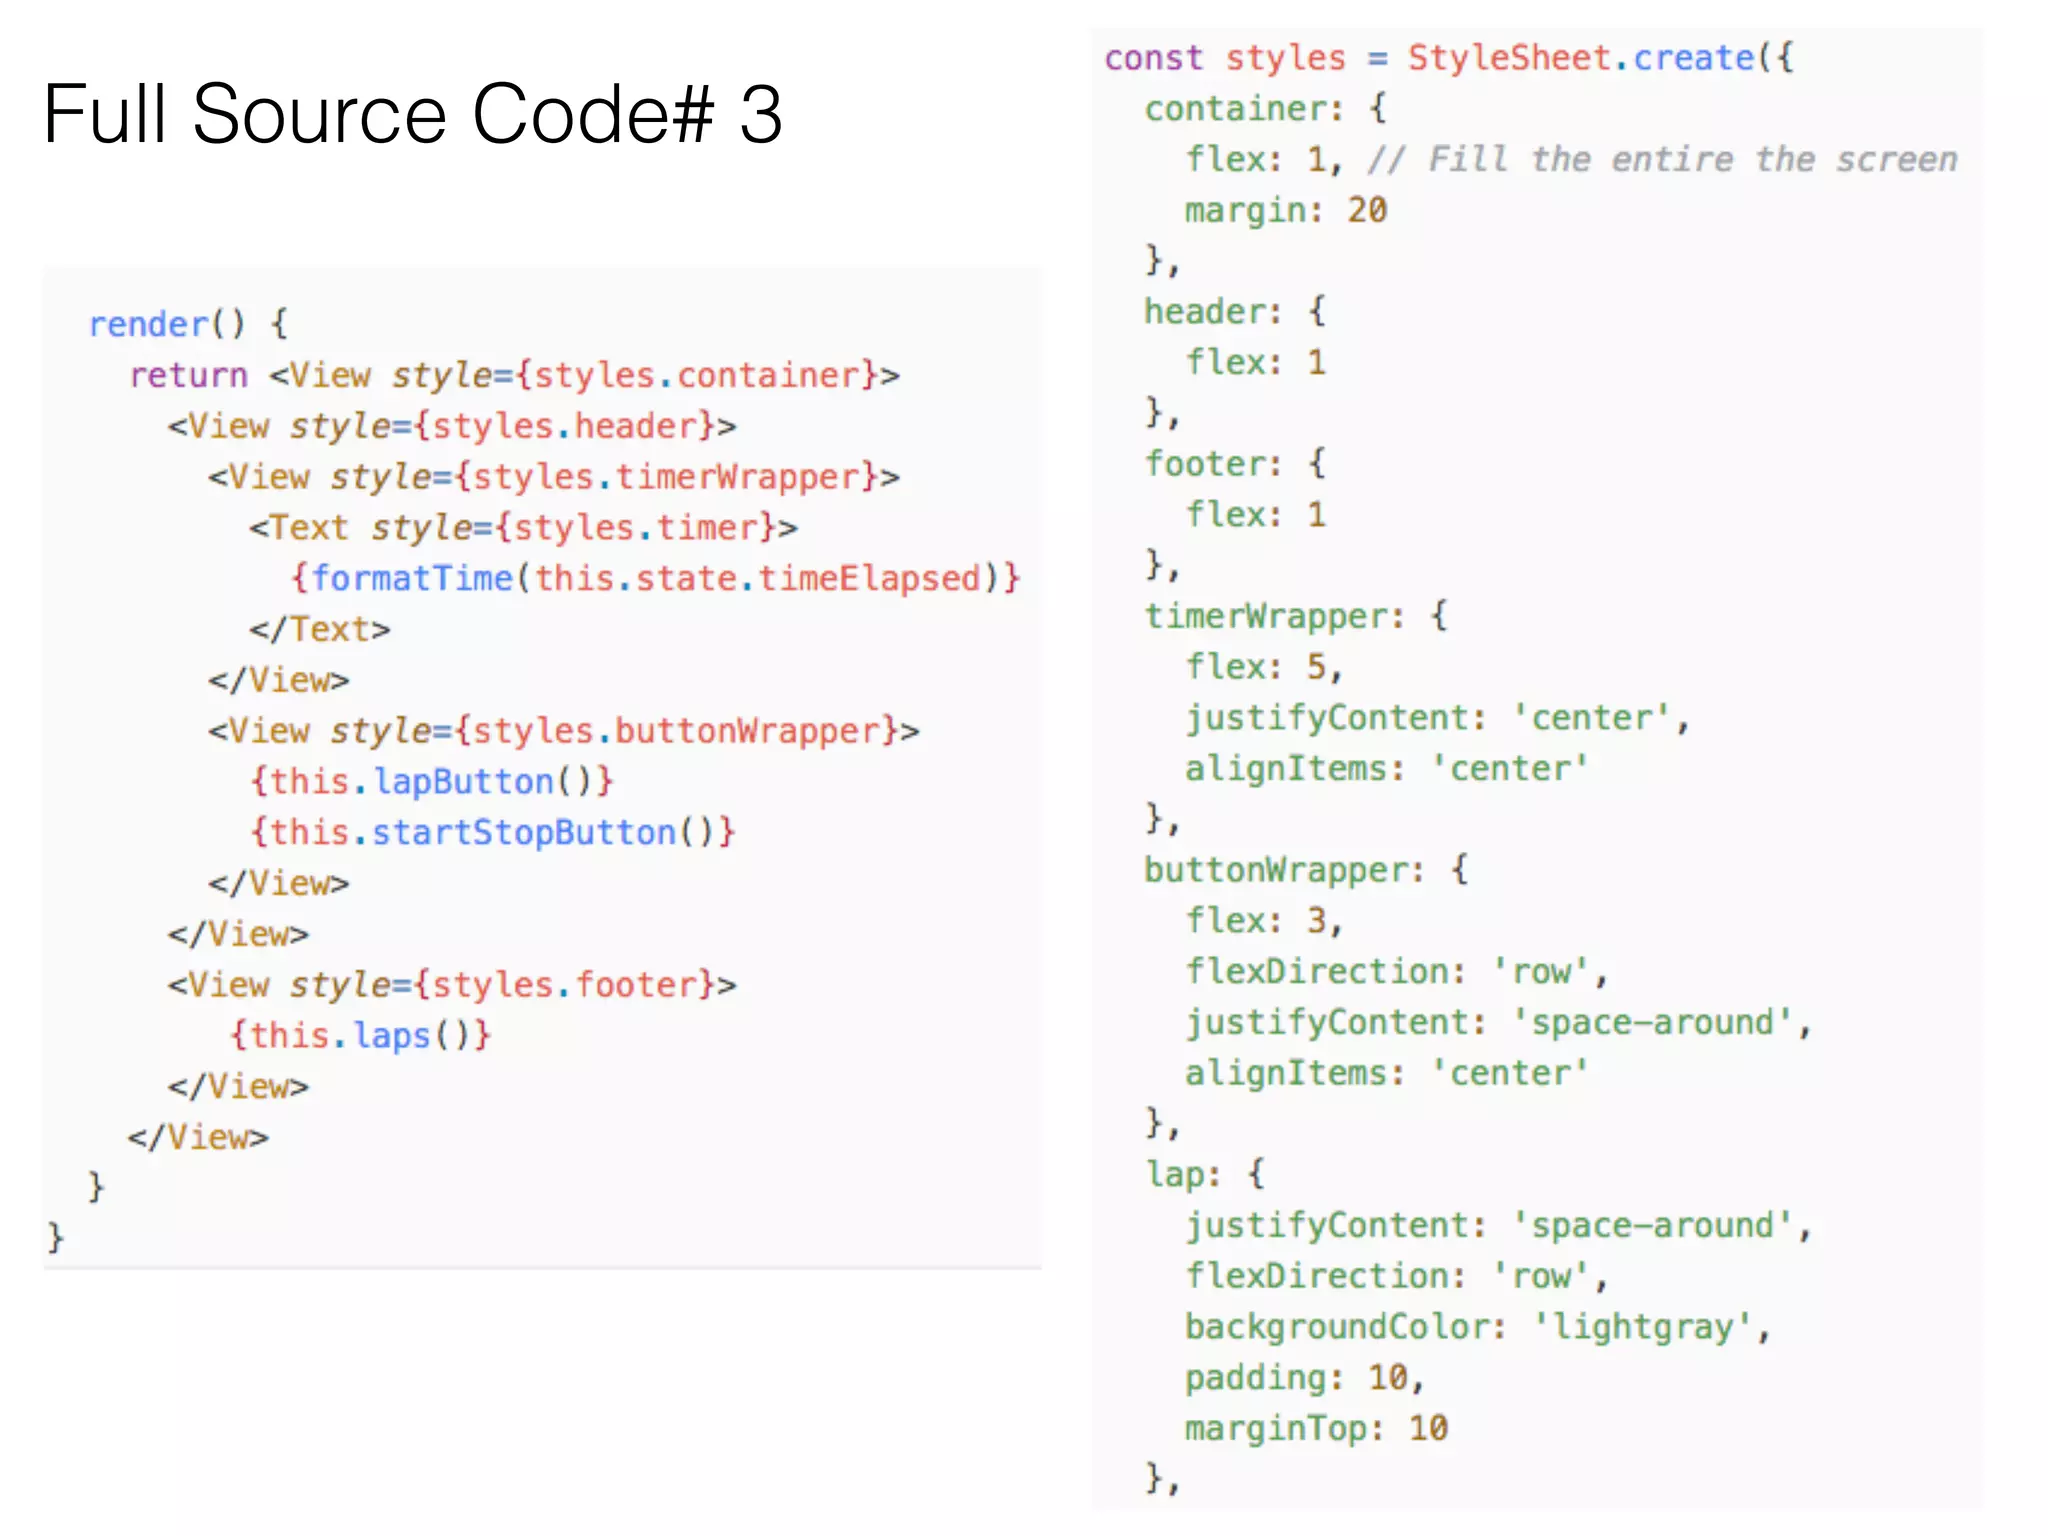
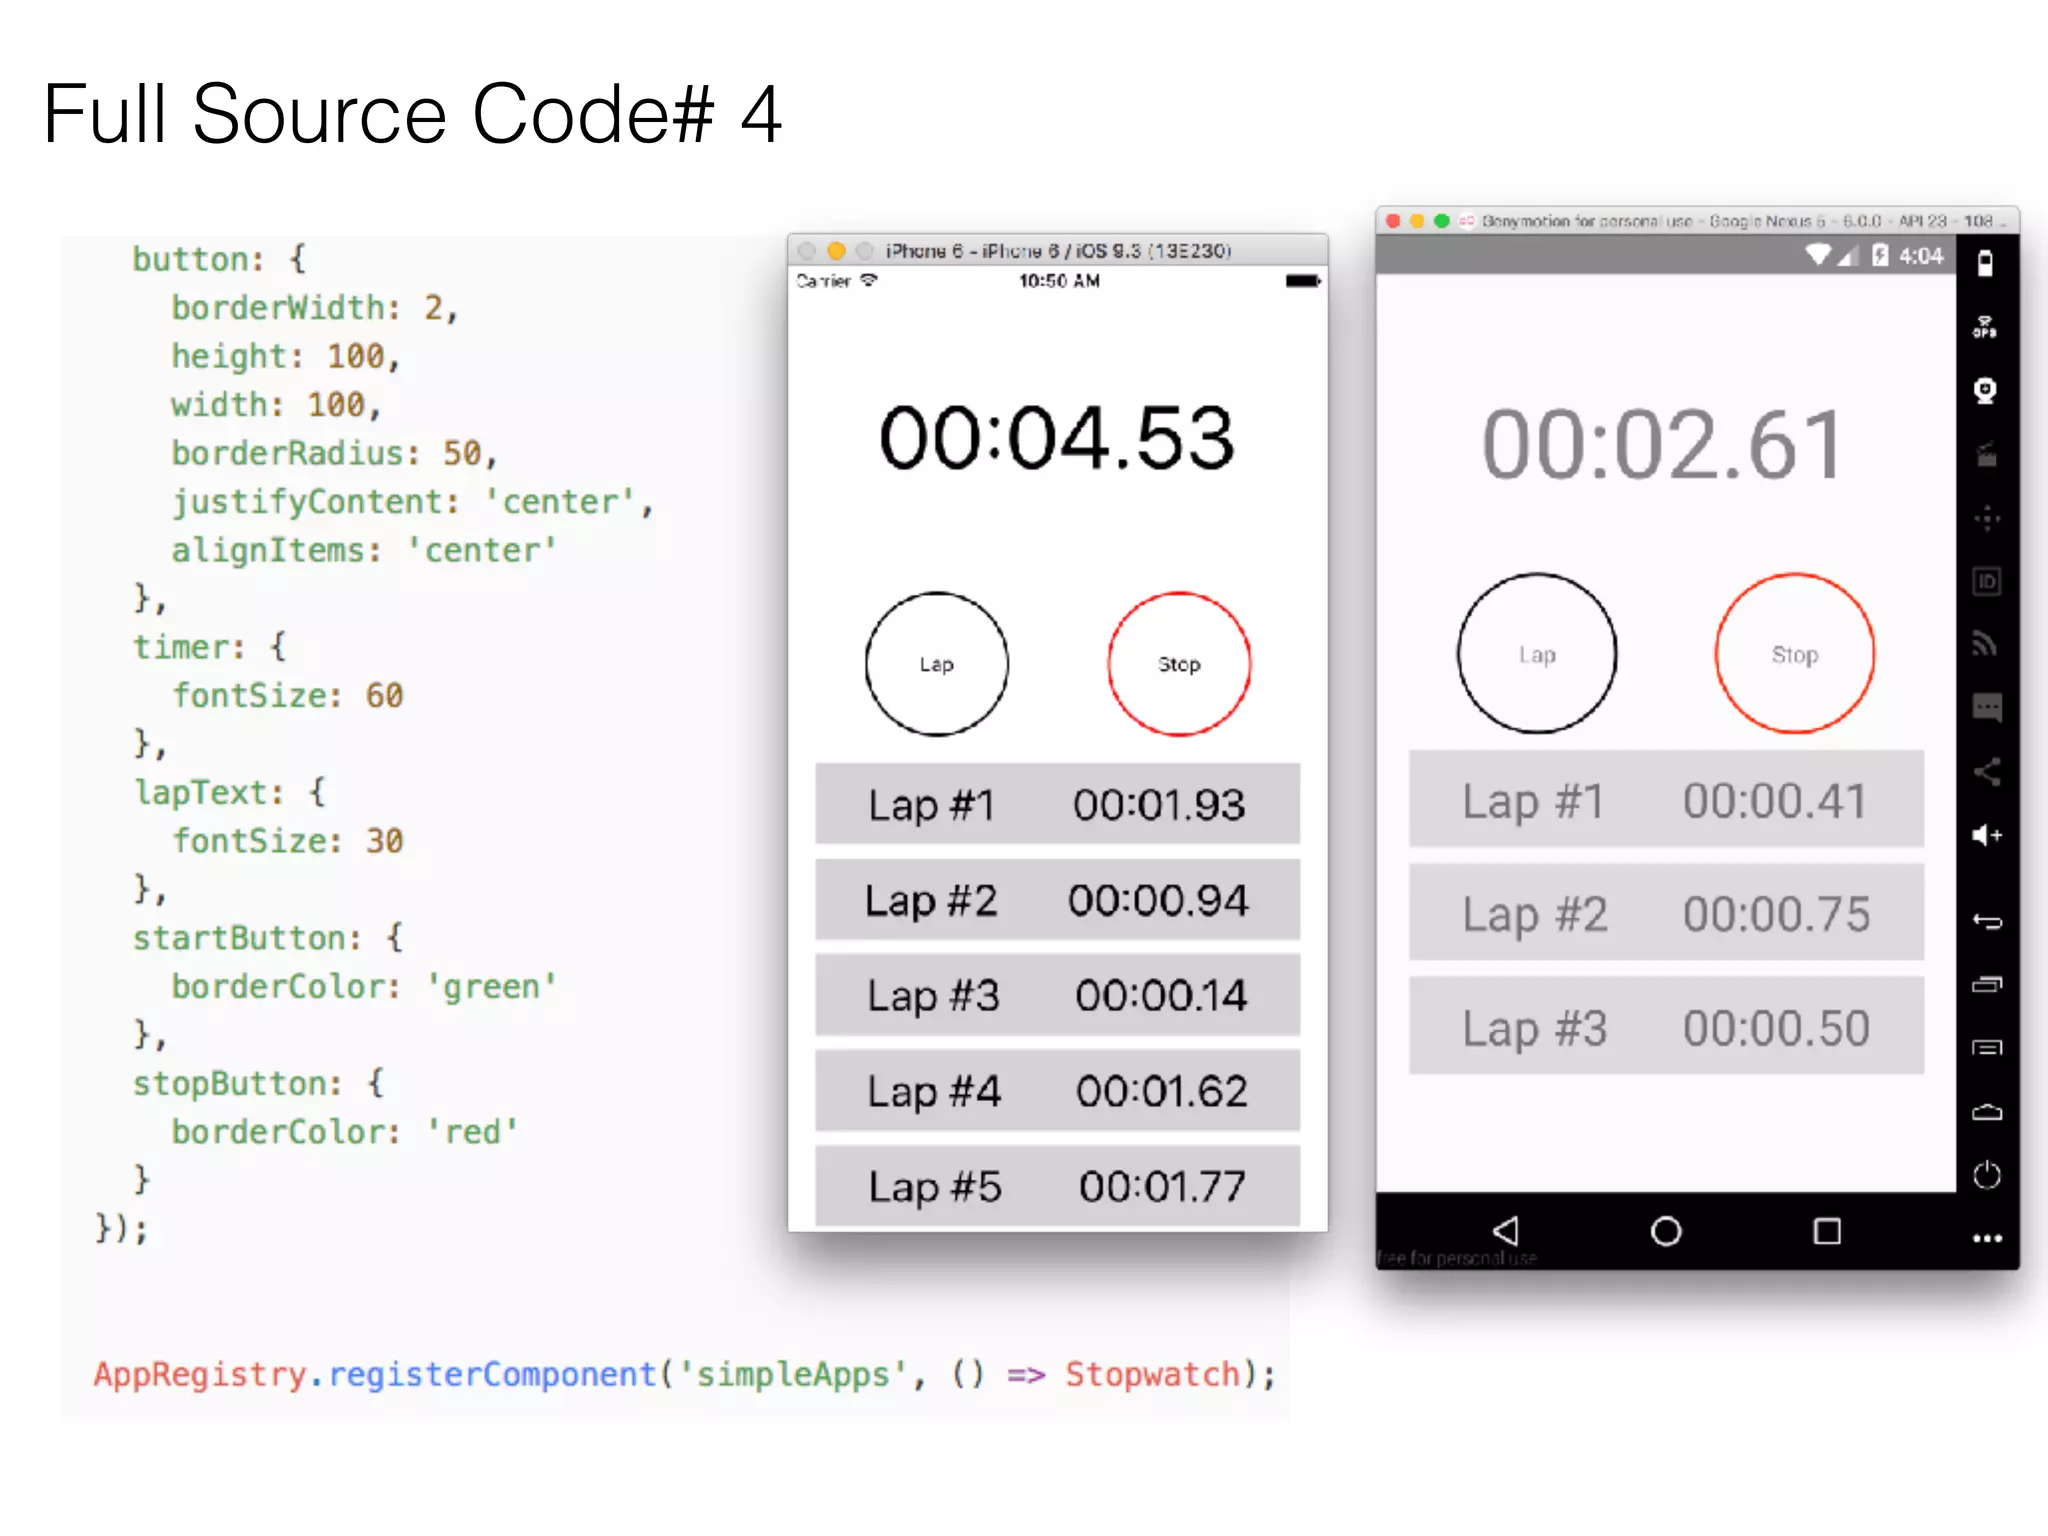

This document provides instructions and code snippets for building mobile apps with React Native. It discusses building a BMI calculator app and stopwatch app to demonstrate React Native features. Key points covered include initializing projects, building the user interface, adding styles, handling user input, using state to update the UI, and separating components. Methods like setState() and binding are explained. The full source code is provided for reference. Exercises are suggested to extend the apps further.


![[Lecture 3] AI and Deep Learning: Logistic Regression (Coding)](https://cdn.slidesharecdn.com/ss_thumbnails/lecture3empty-180216132805-thumbnail.jpg?width=600ounds&width=560&fit=bounds)
![[Lecture 4] AI and Deep Learning: Neural Network (Theory)](https://cdn.slidesharecdn.com/ss_thumbnails/lecture4ink-180216131712-thumbnail.jpg?width=600ounds&width=560&fit=bounds)
![[Lecture 2] AI and Deep Learning: Logistic Regression (Theory)](https://cdn.slidesharecdn.com/ss_thumbnails/lecture2-ink-180216131533-thumbnail.jpg?width=600ounds&width=560&fit=bounds)


