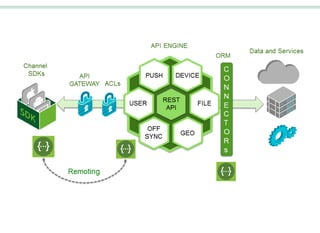
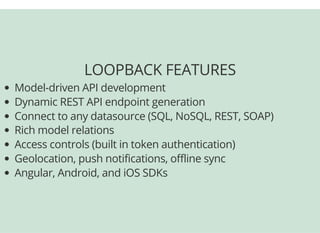
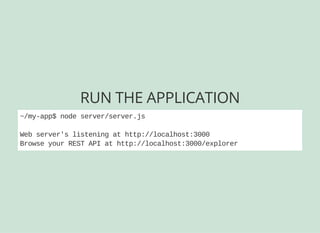
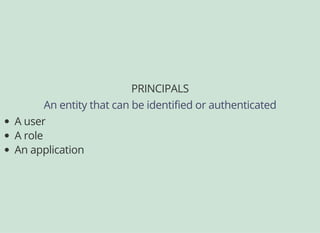
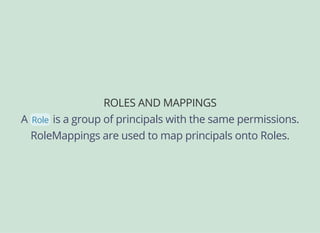
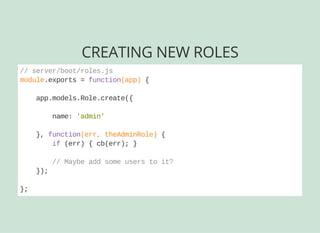
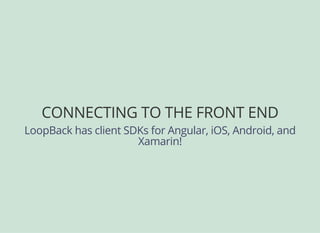
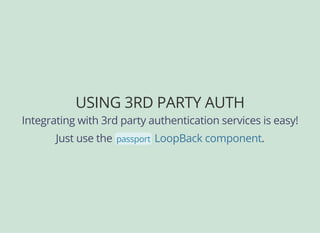
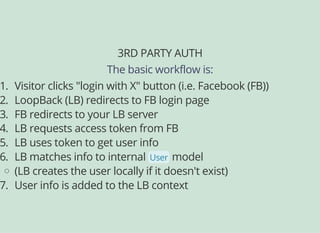
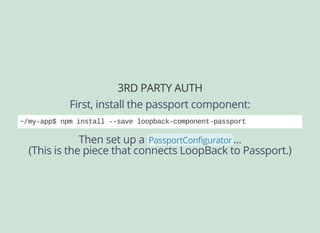
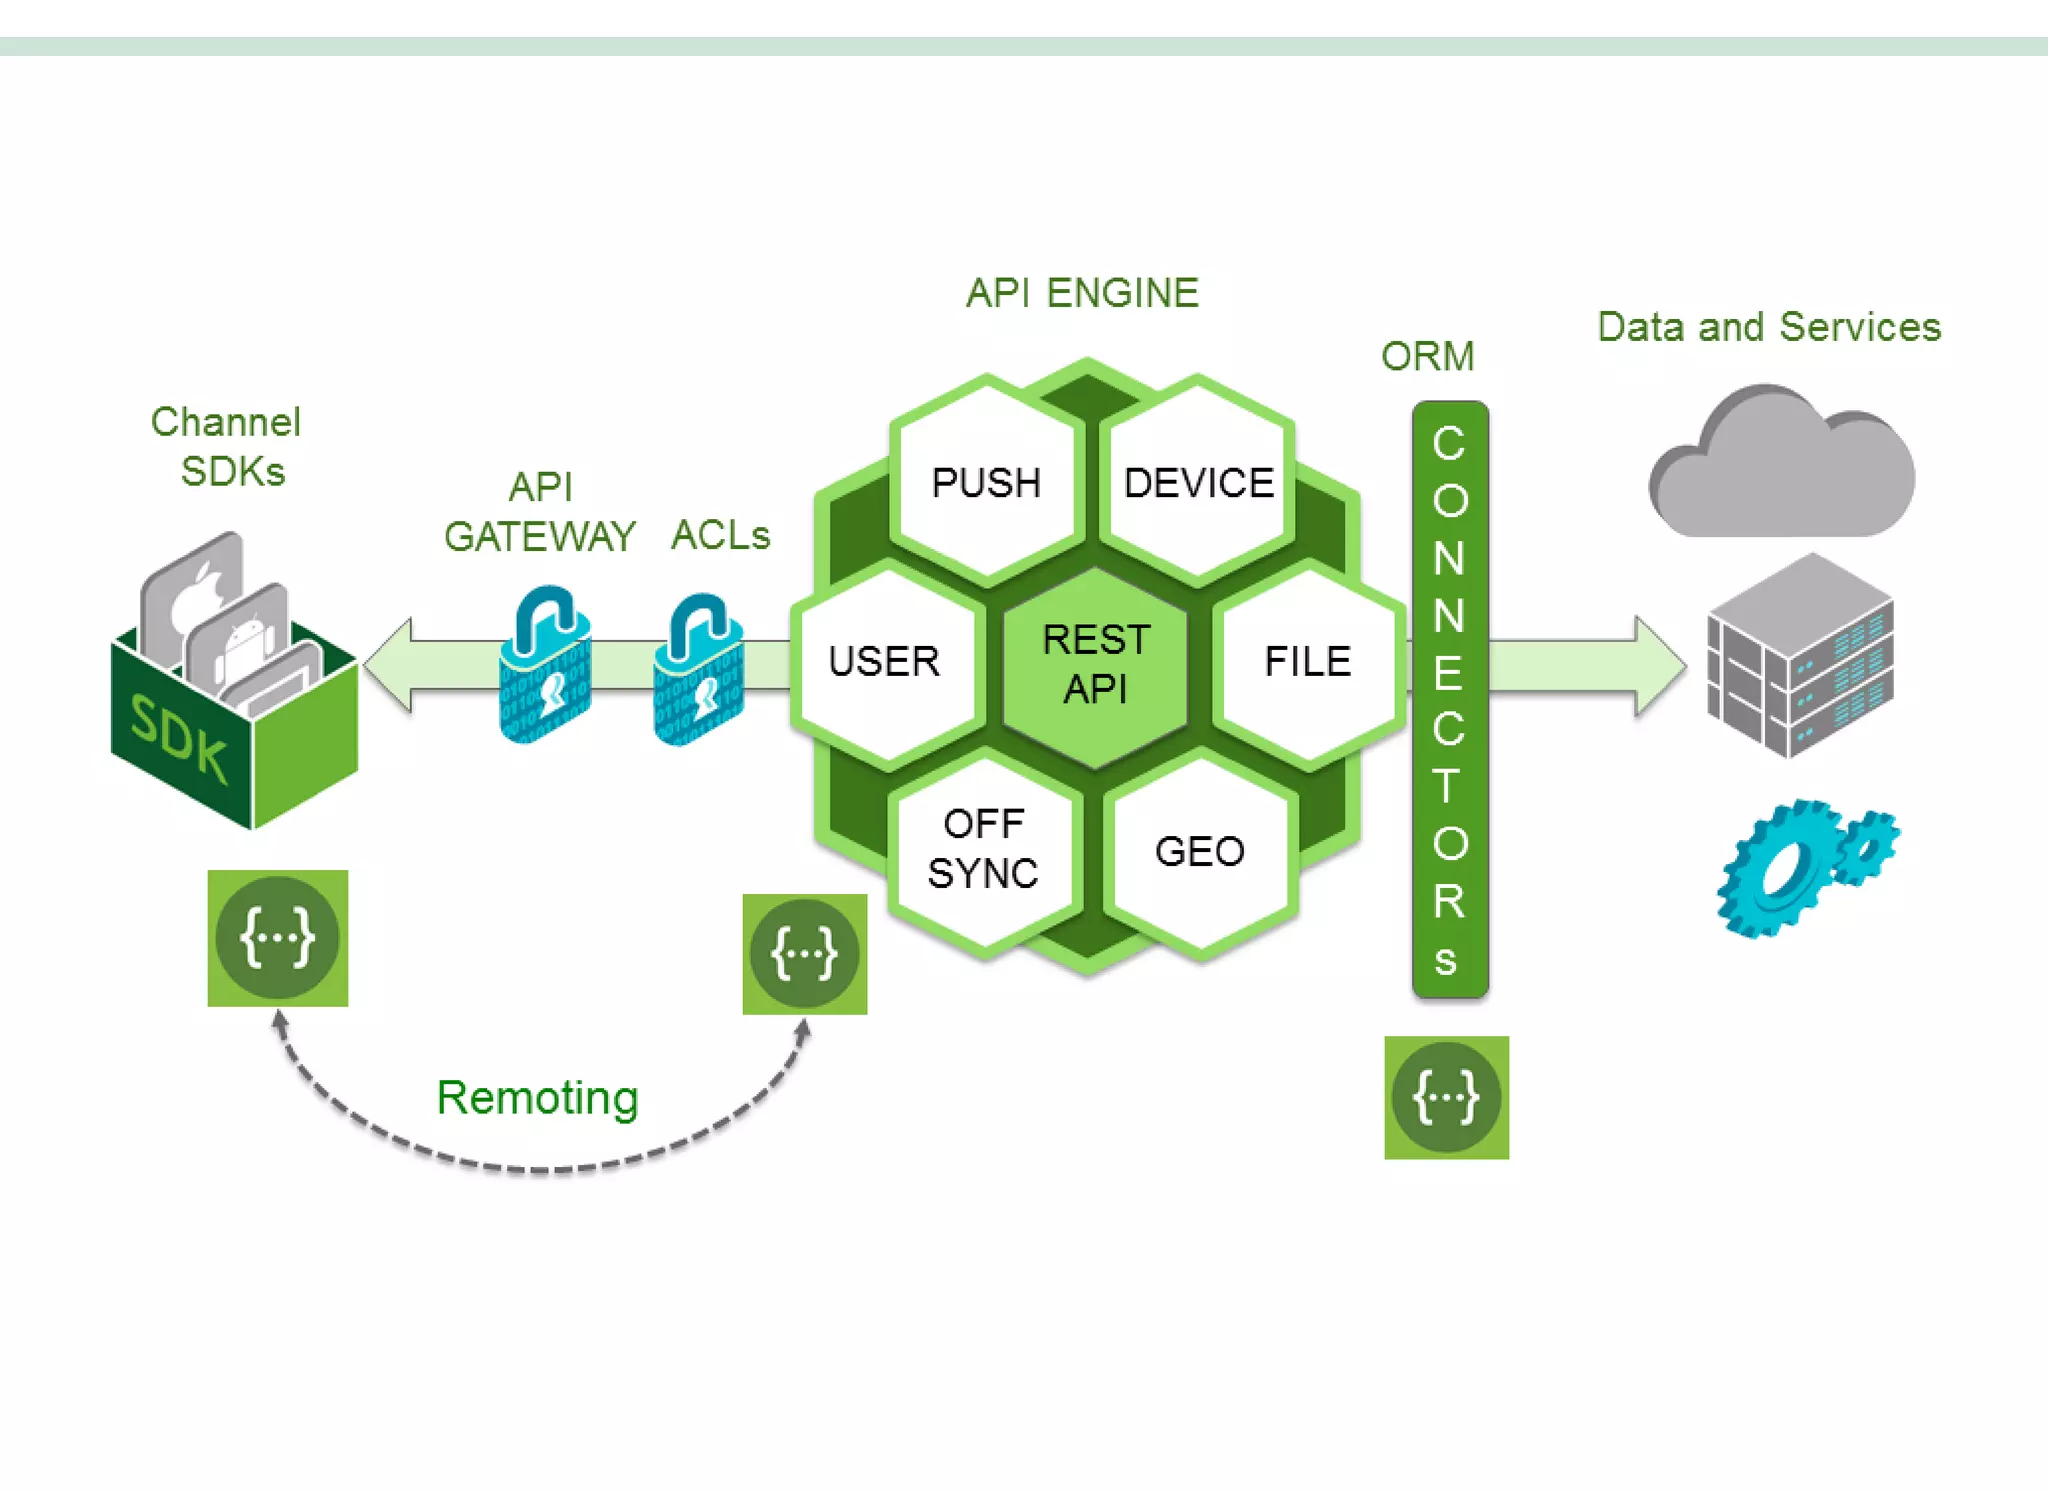
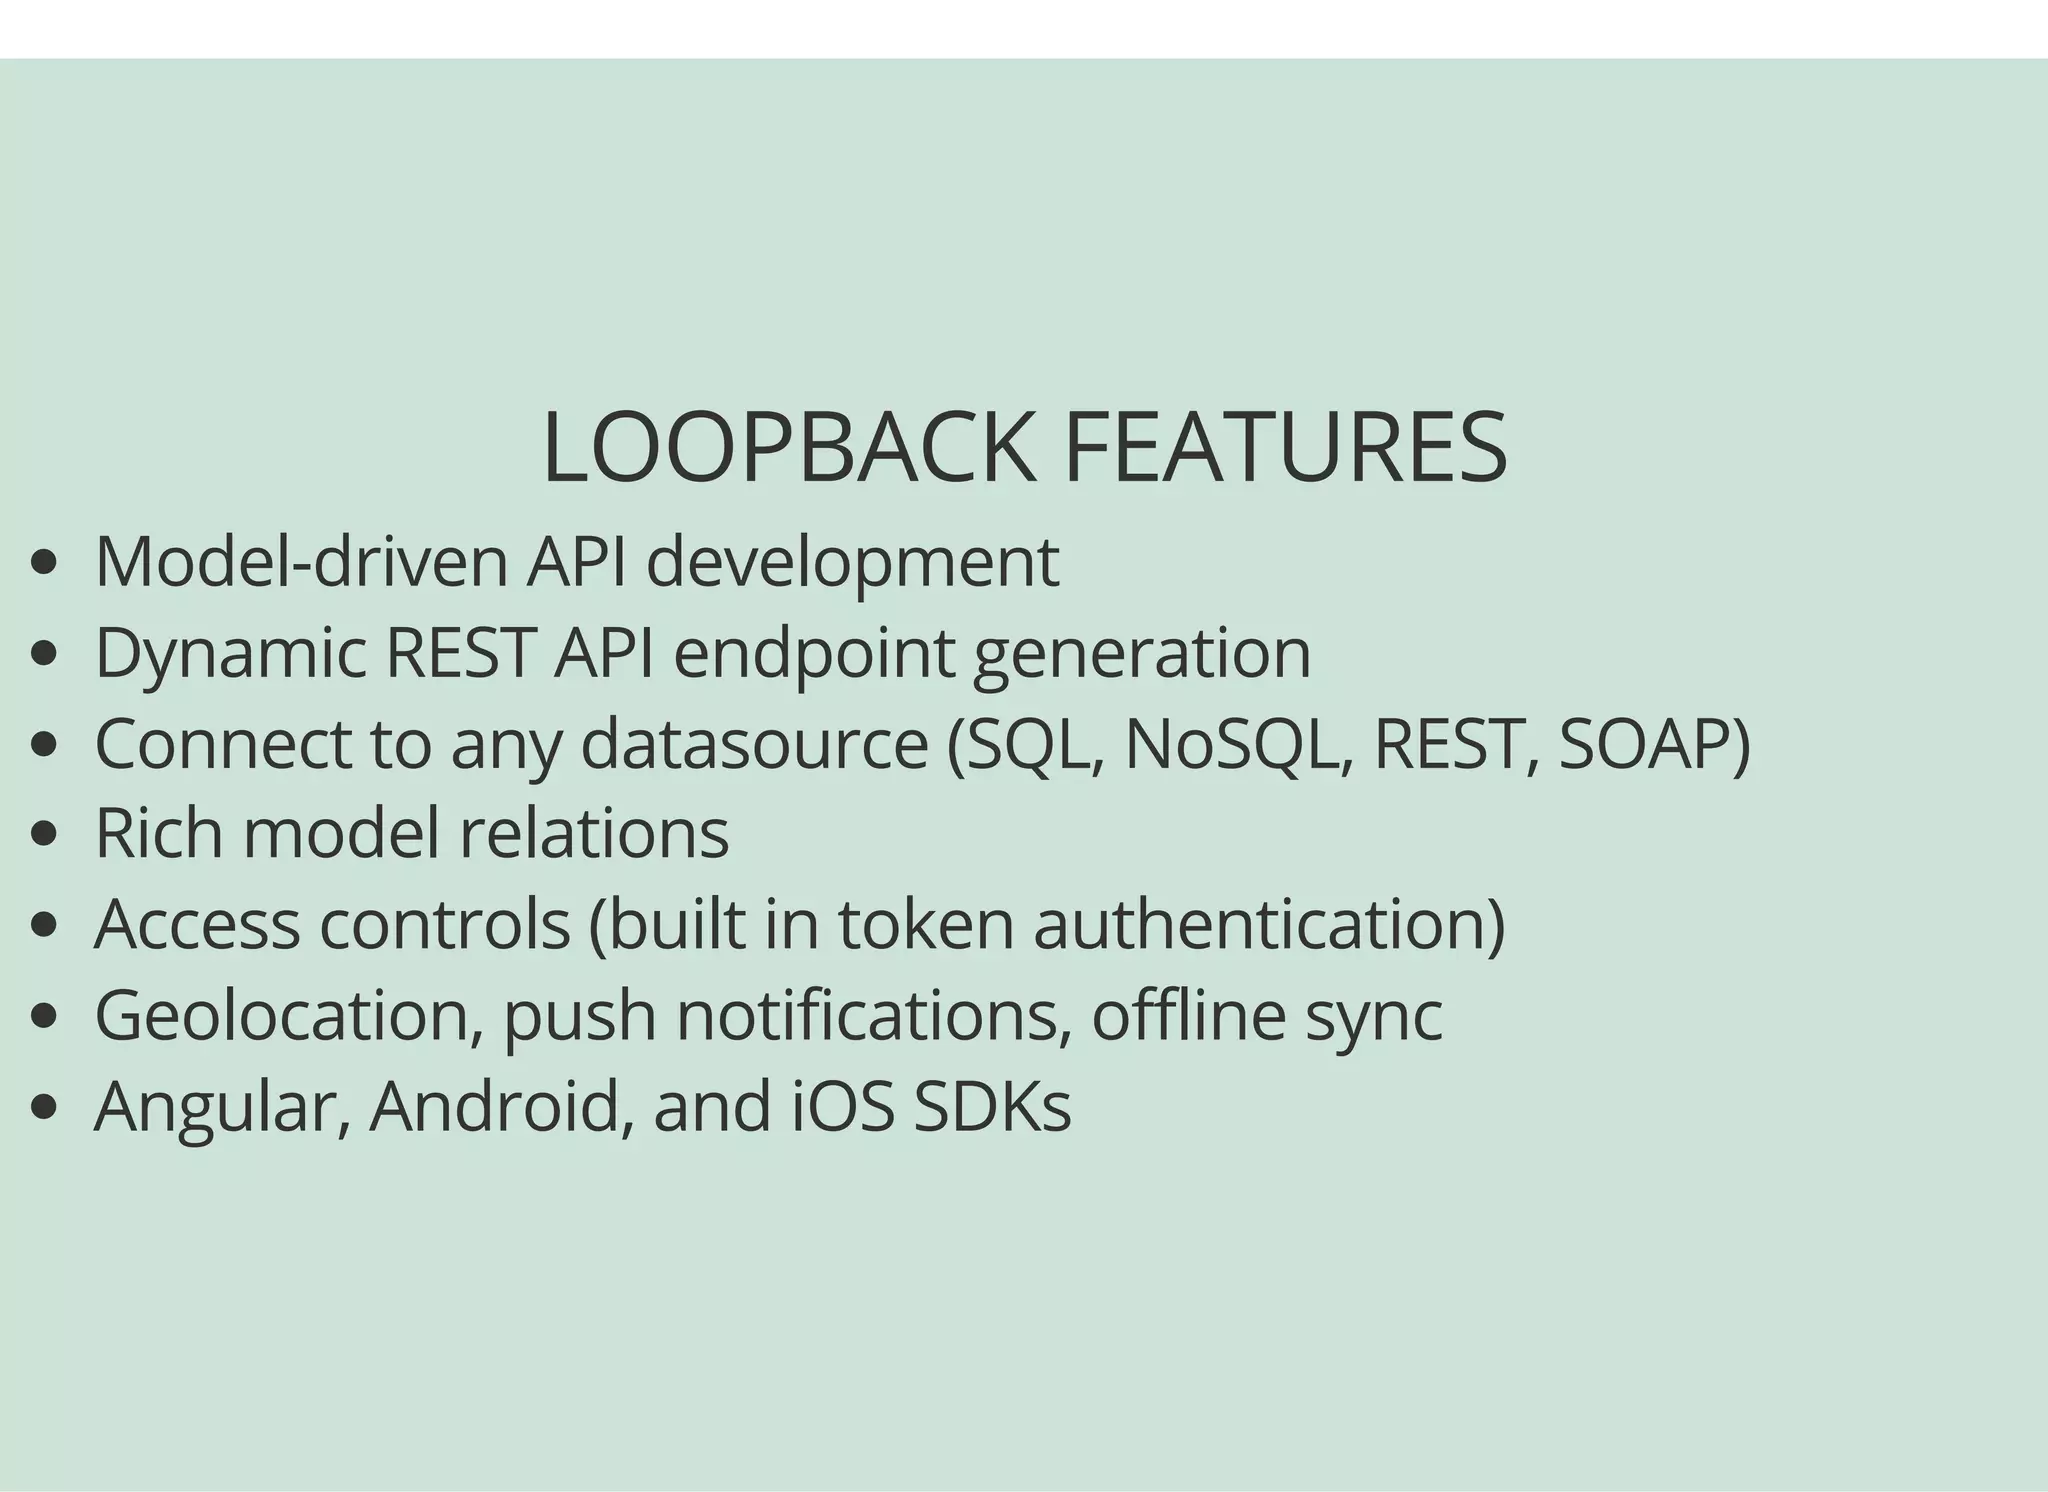
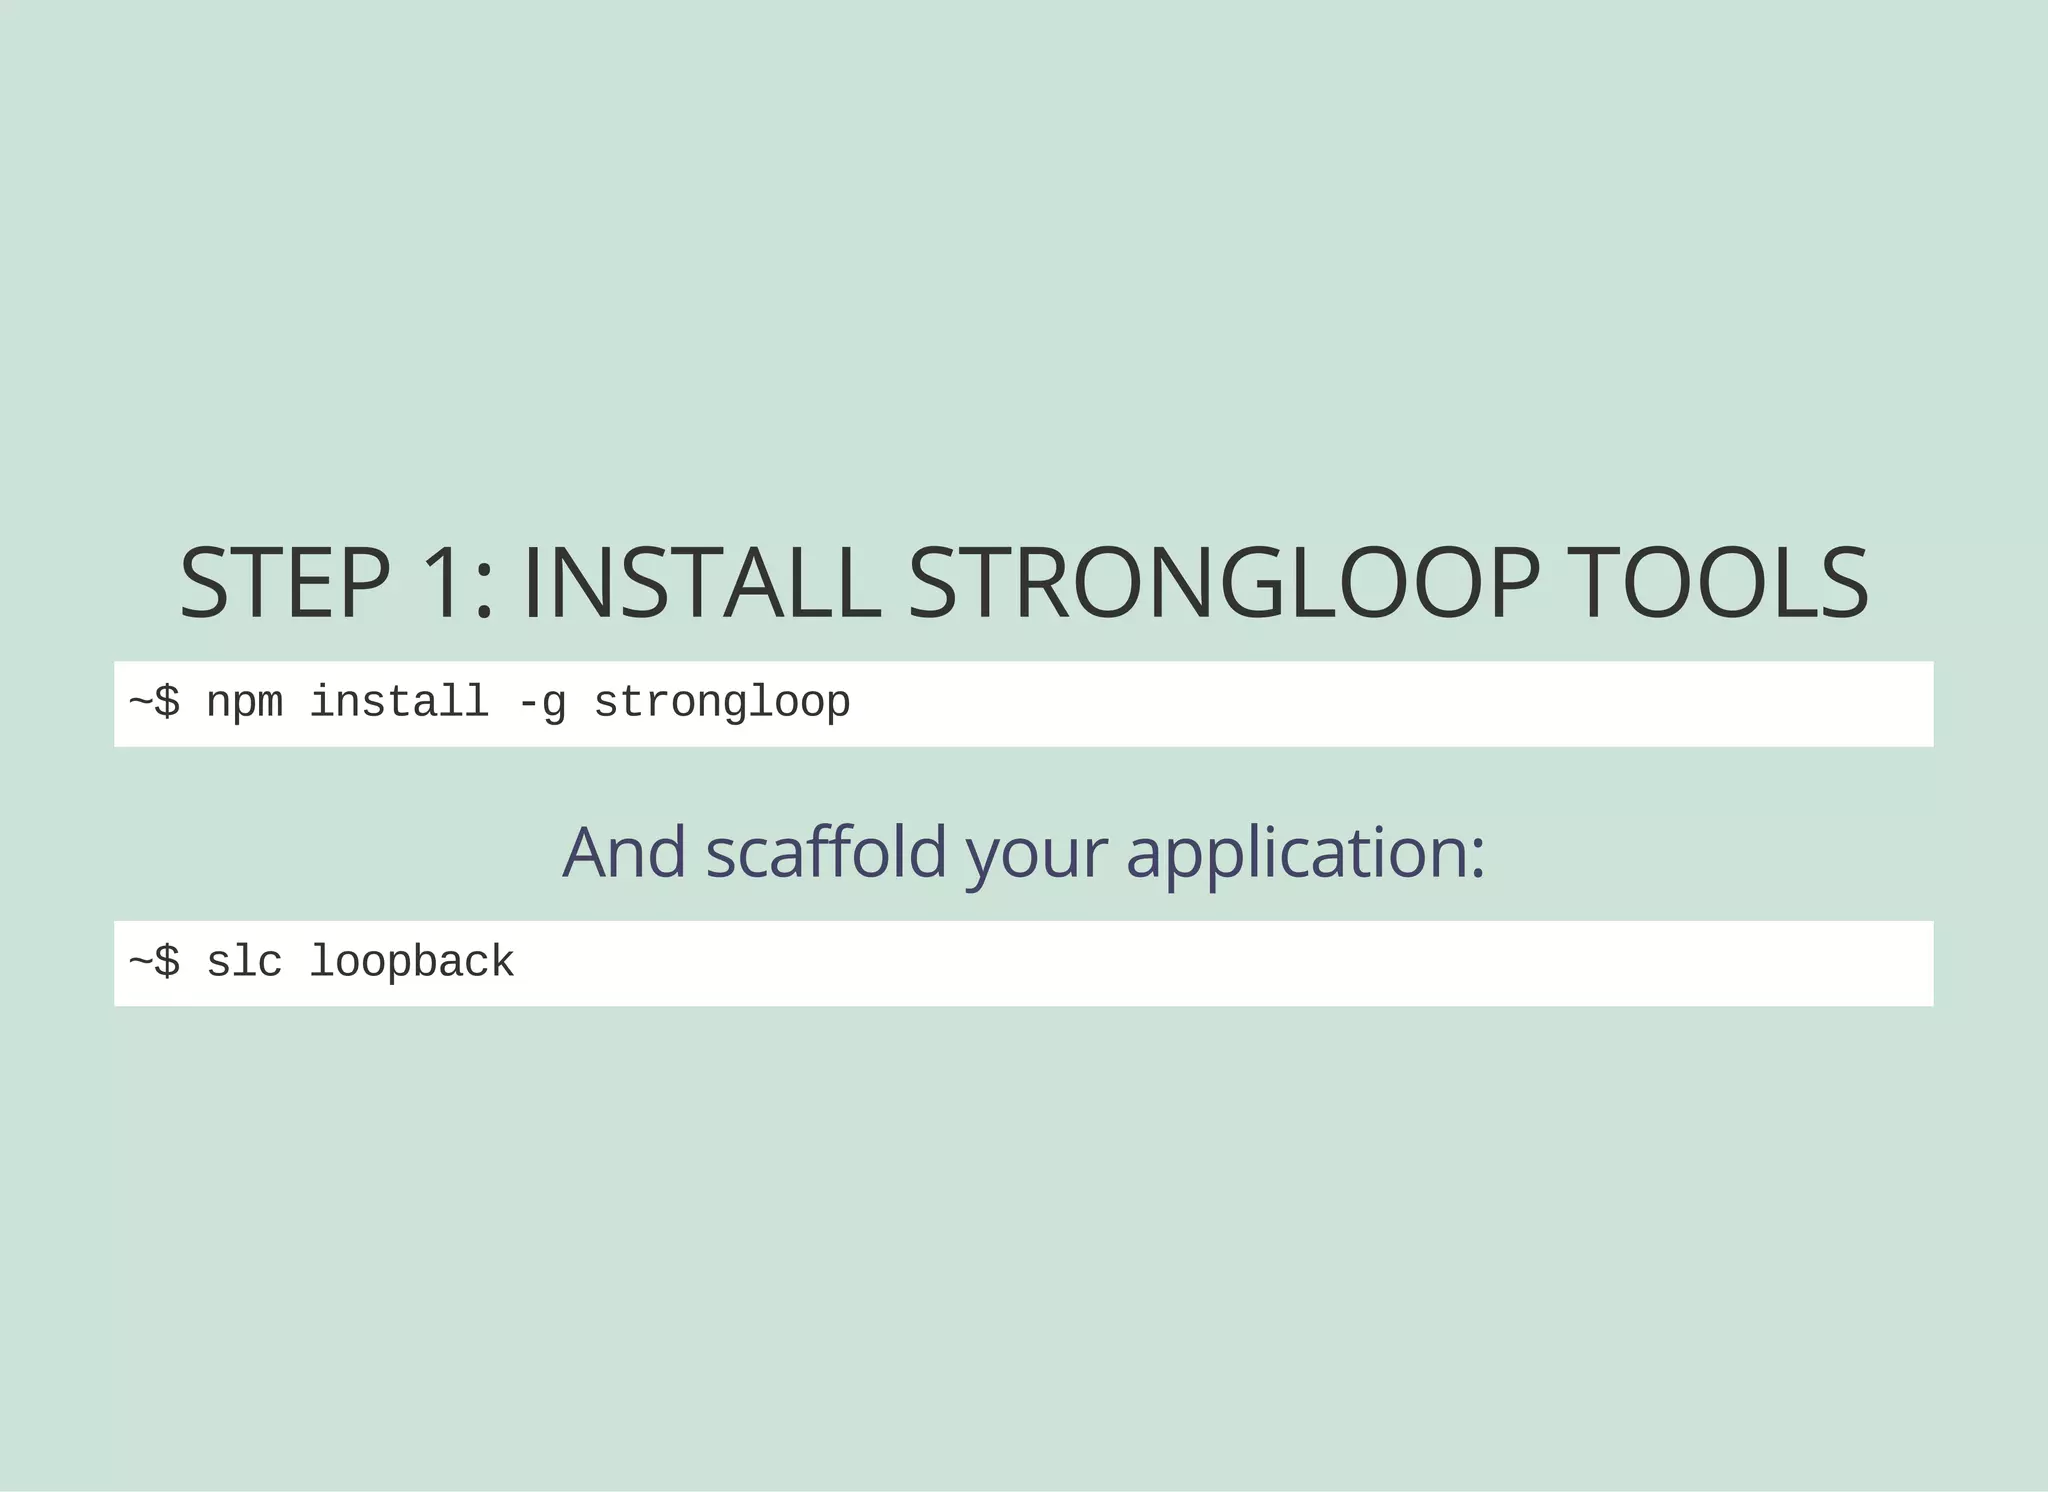
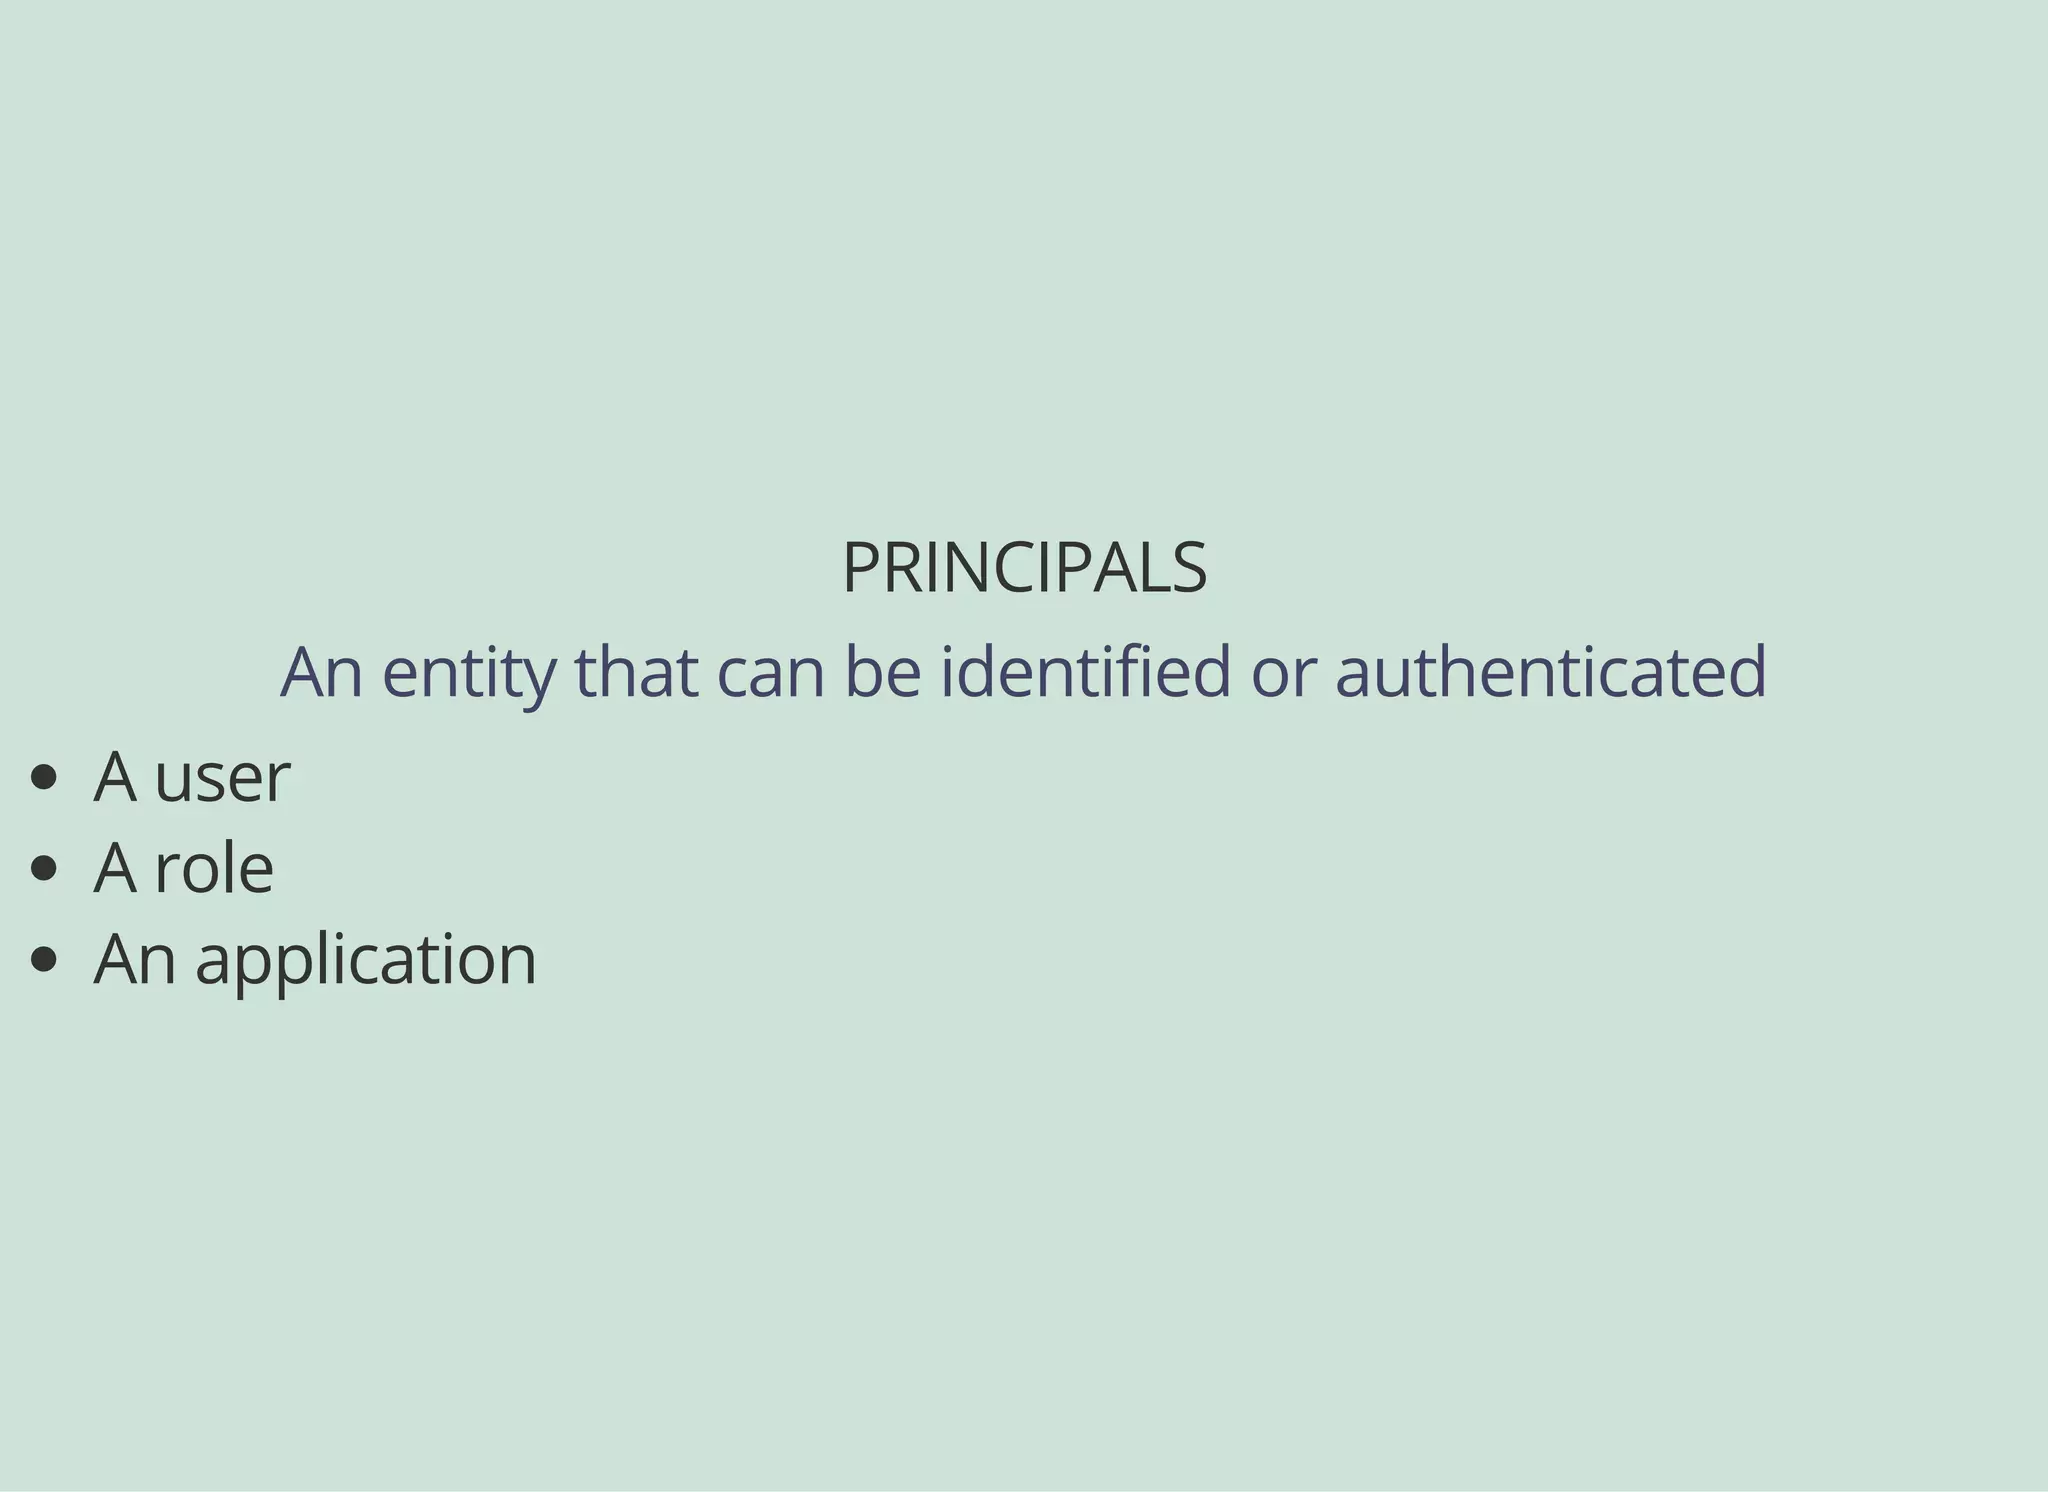
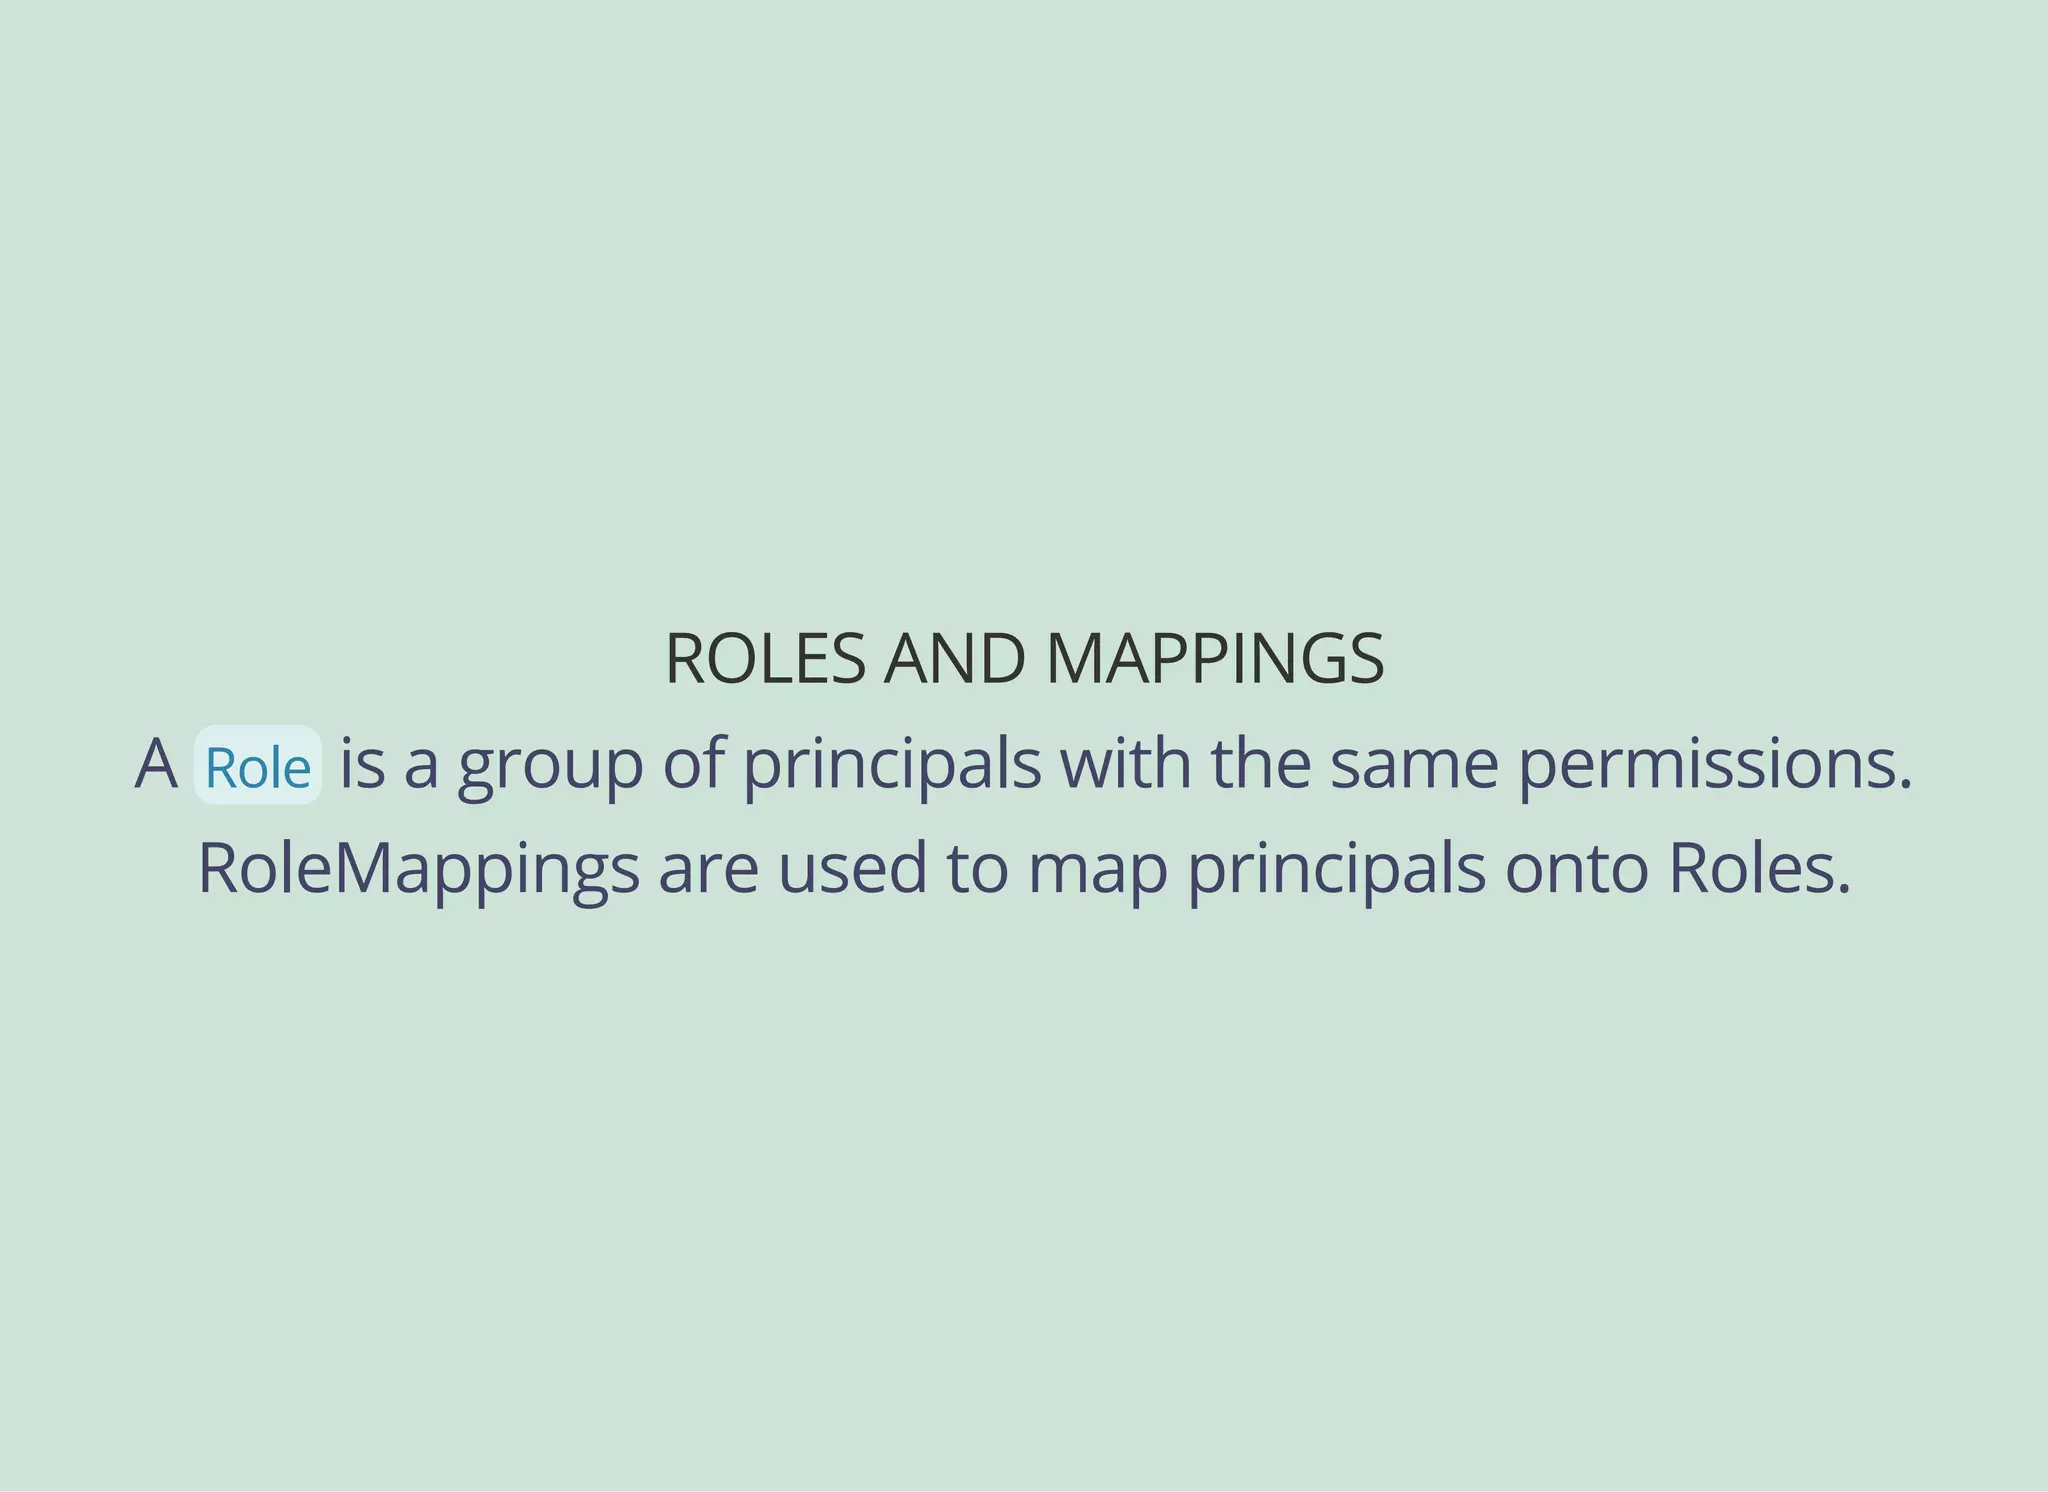
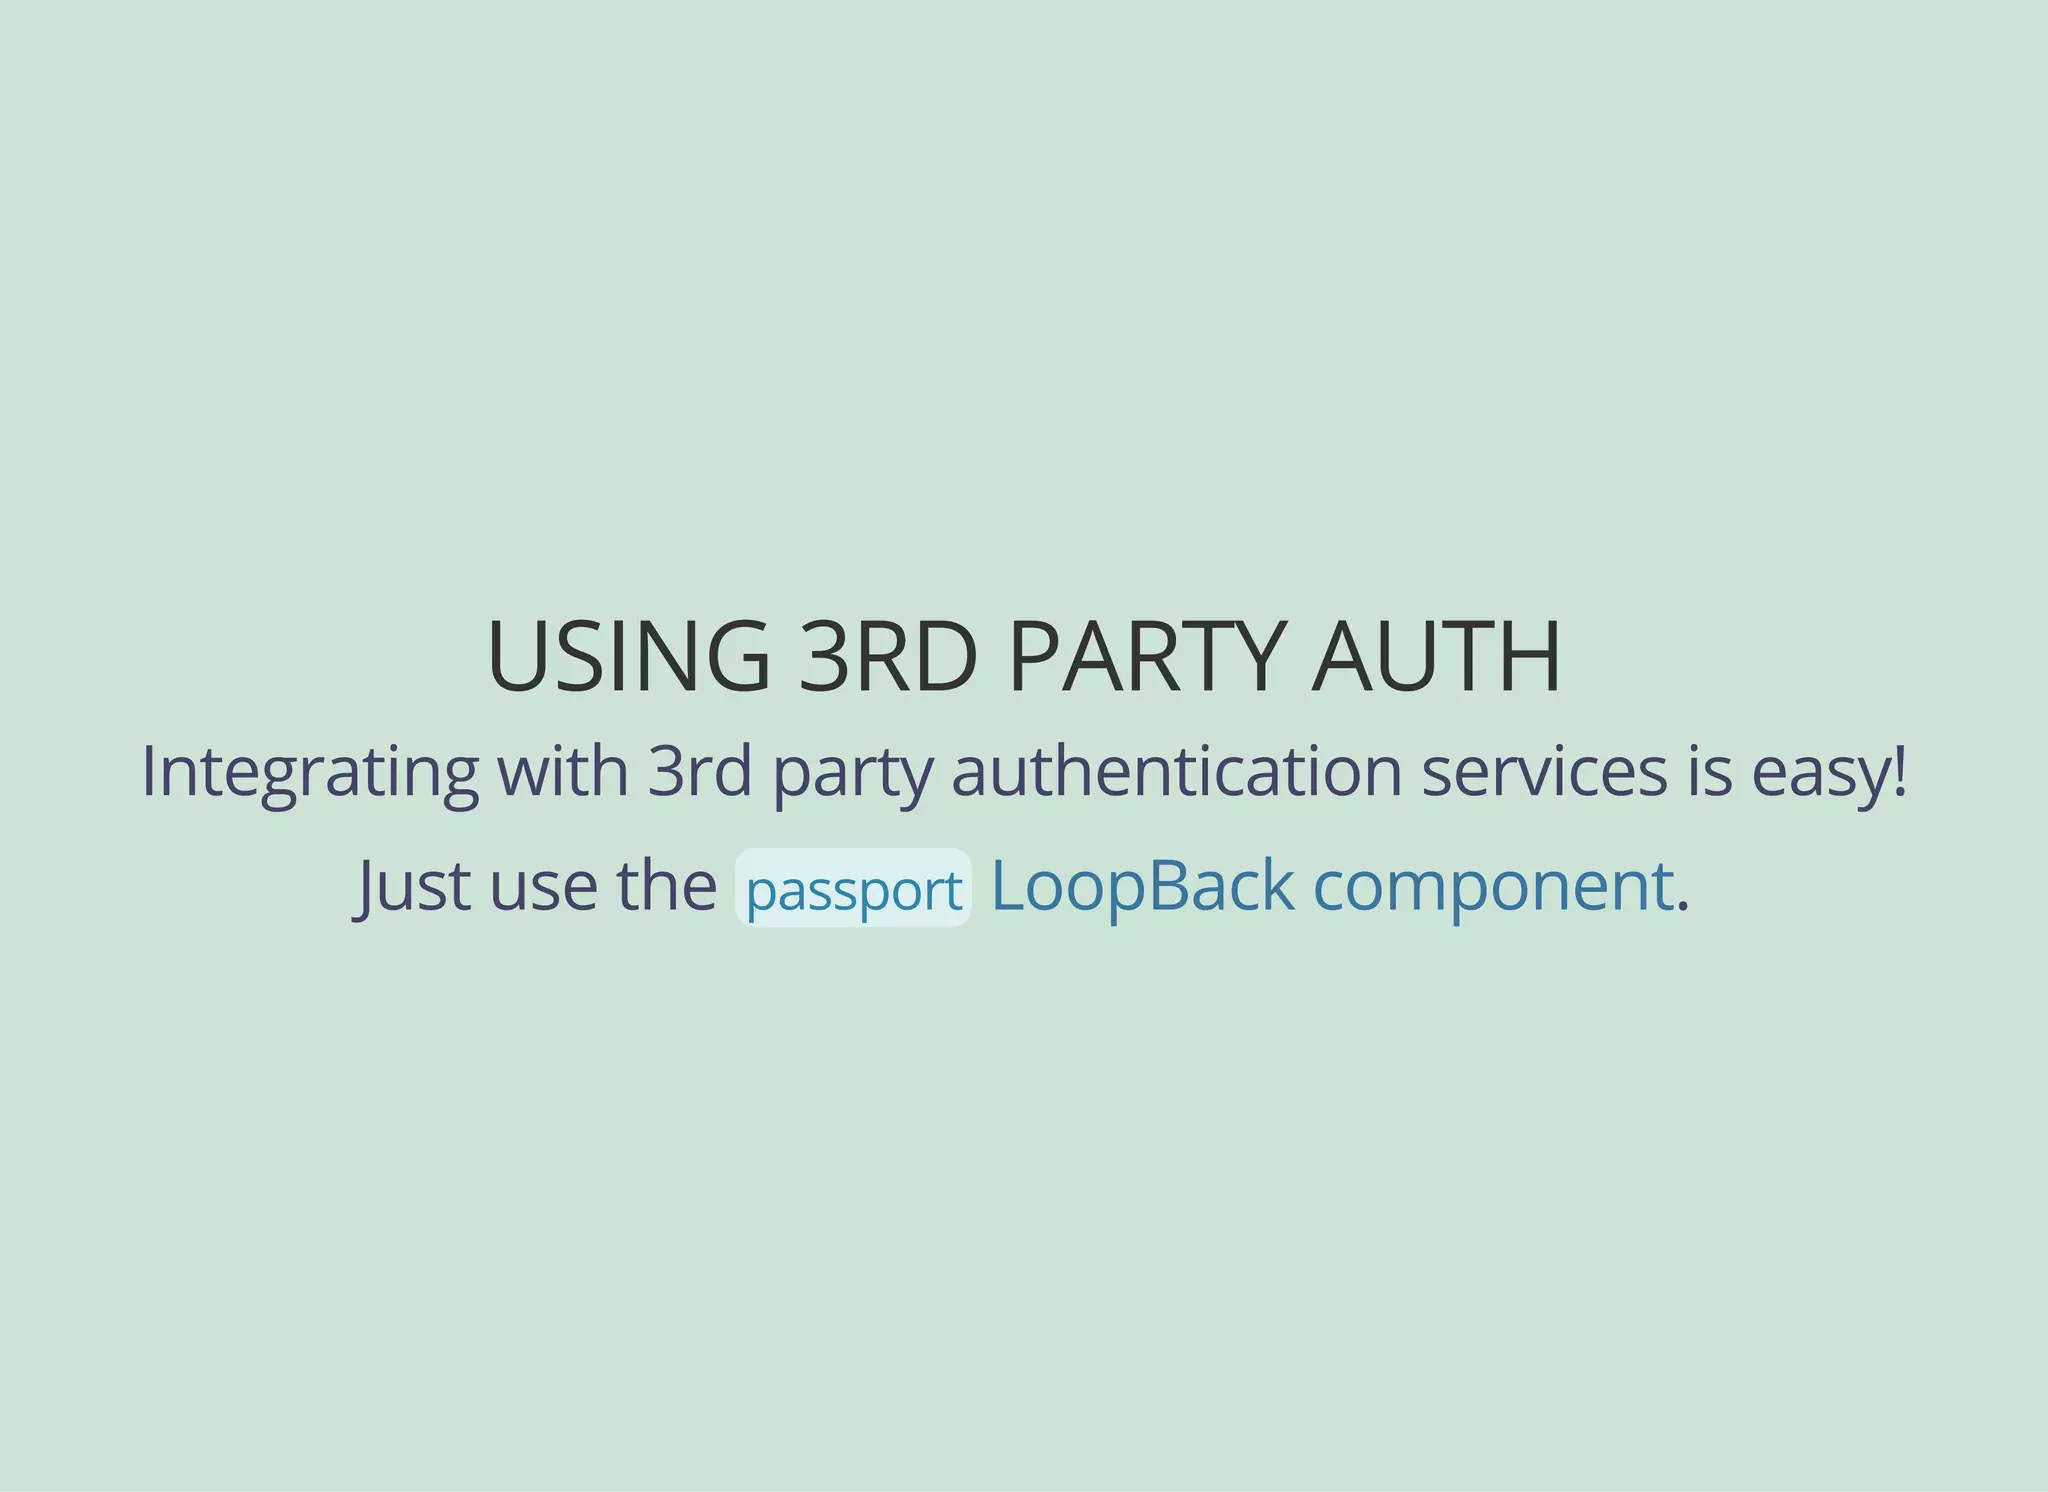
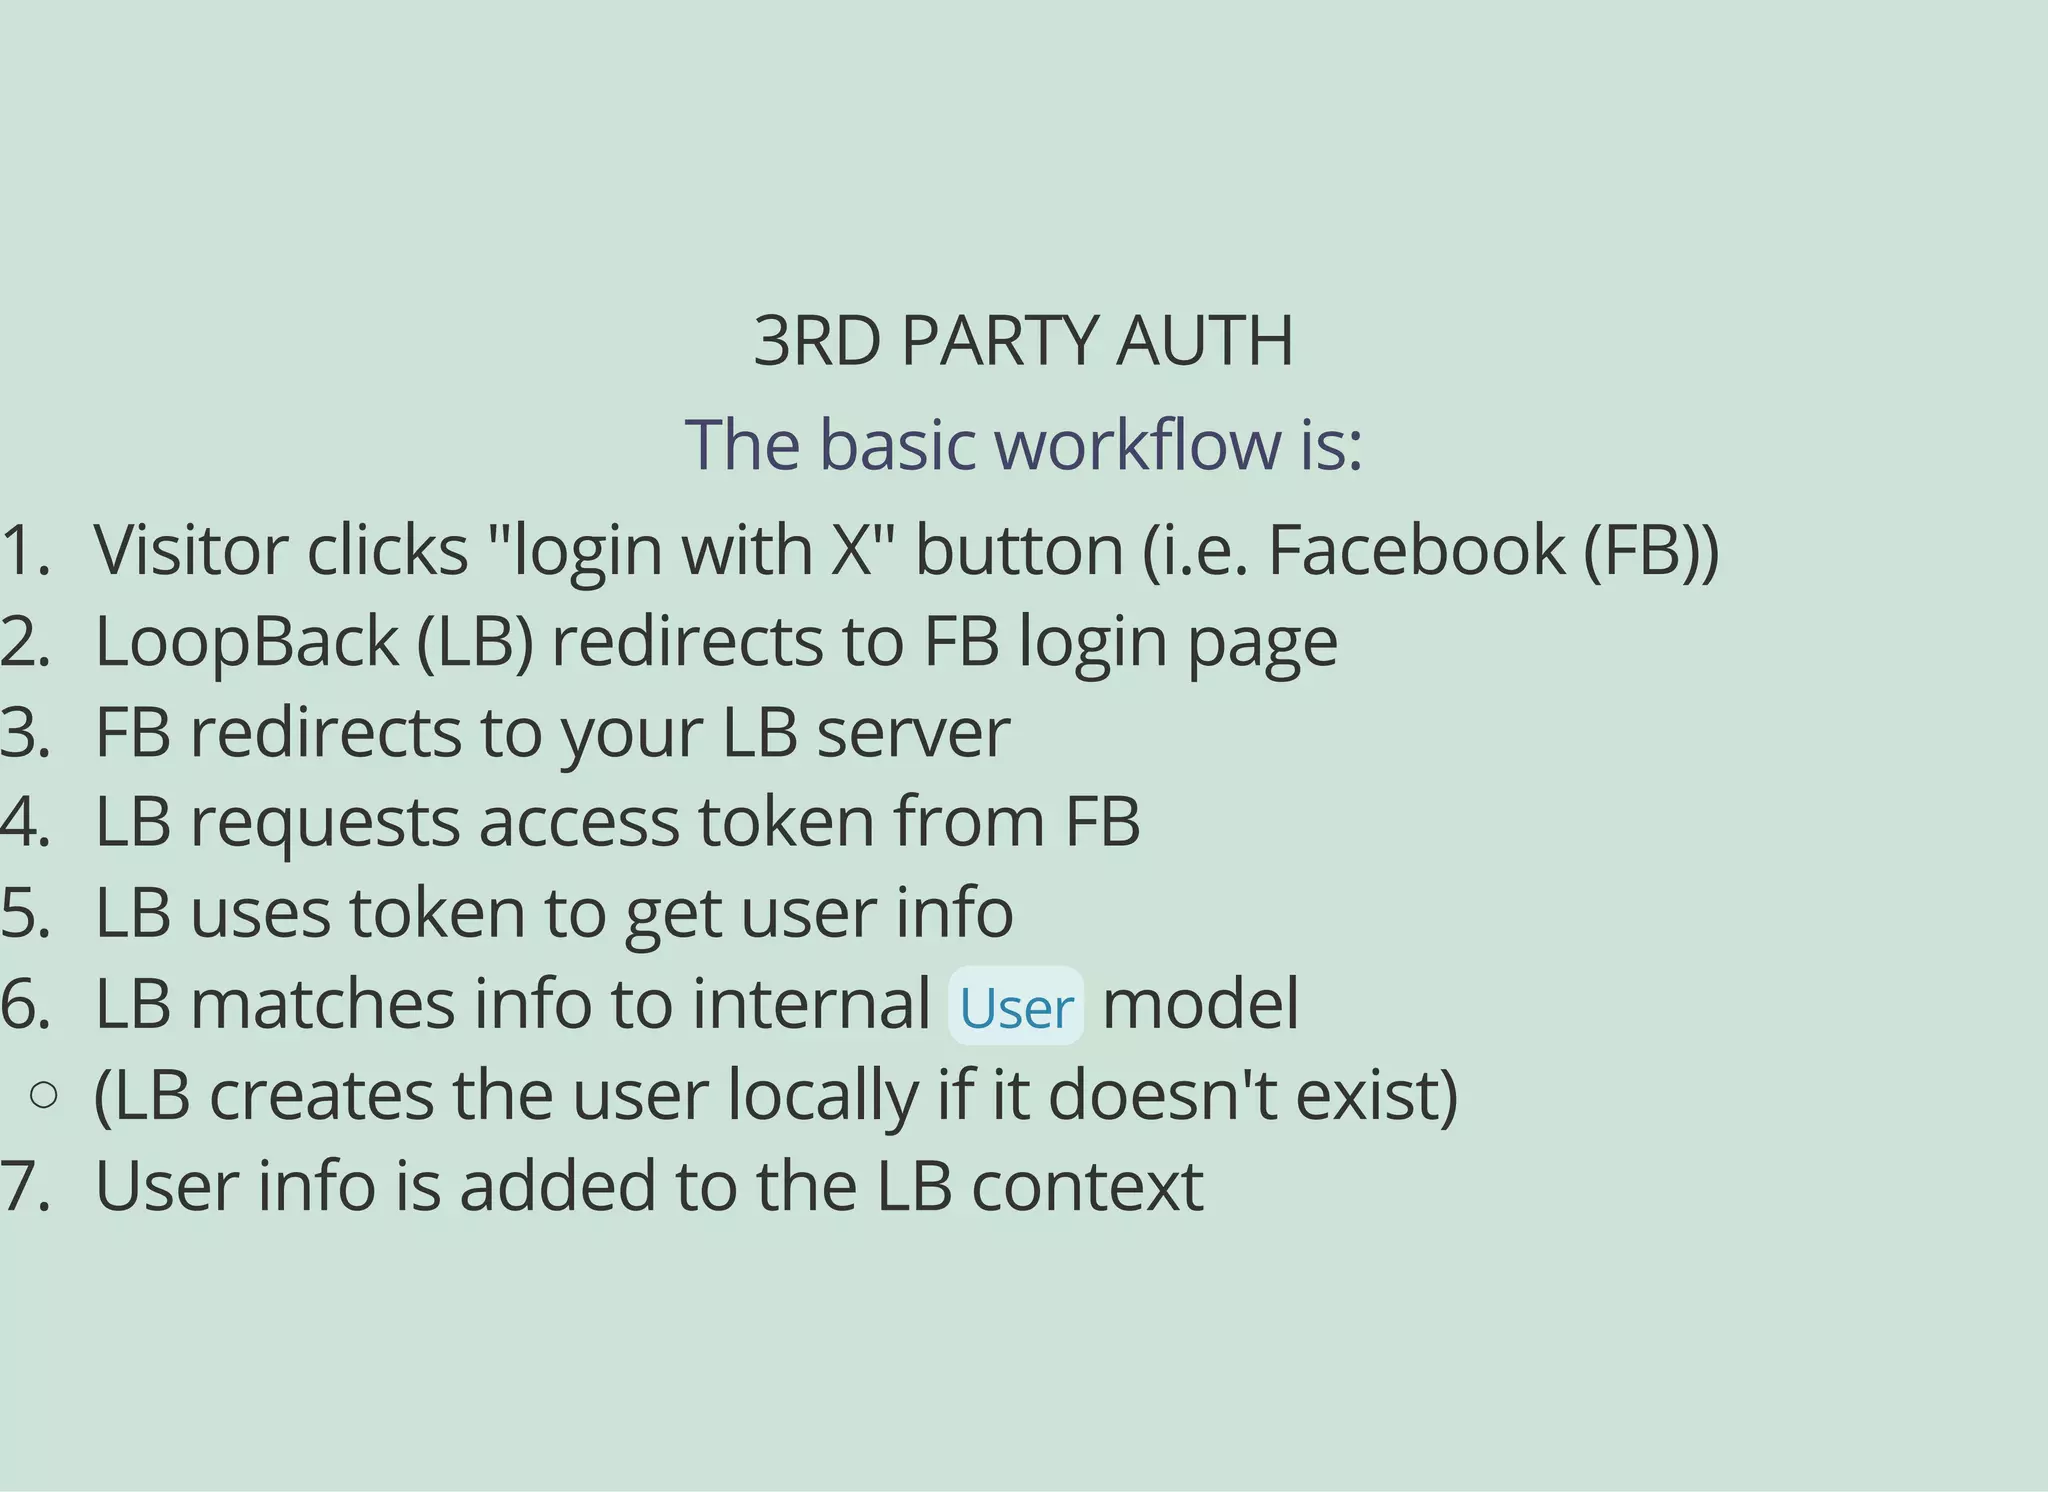
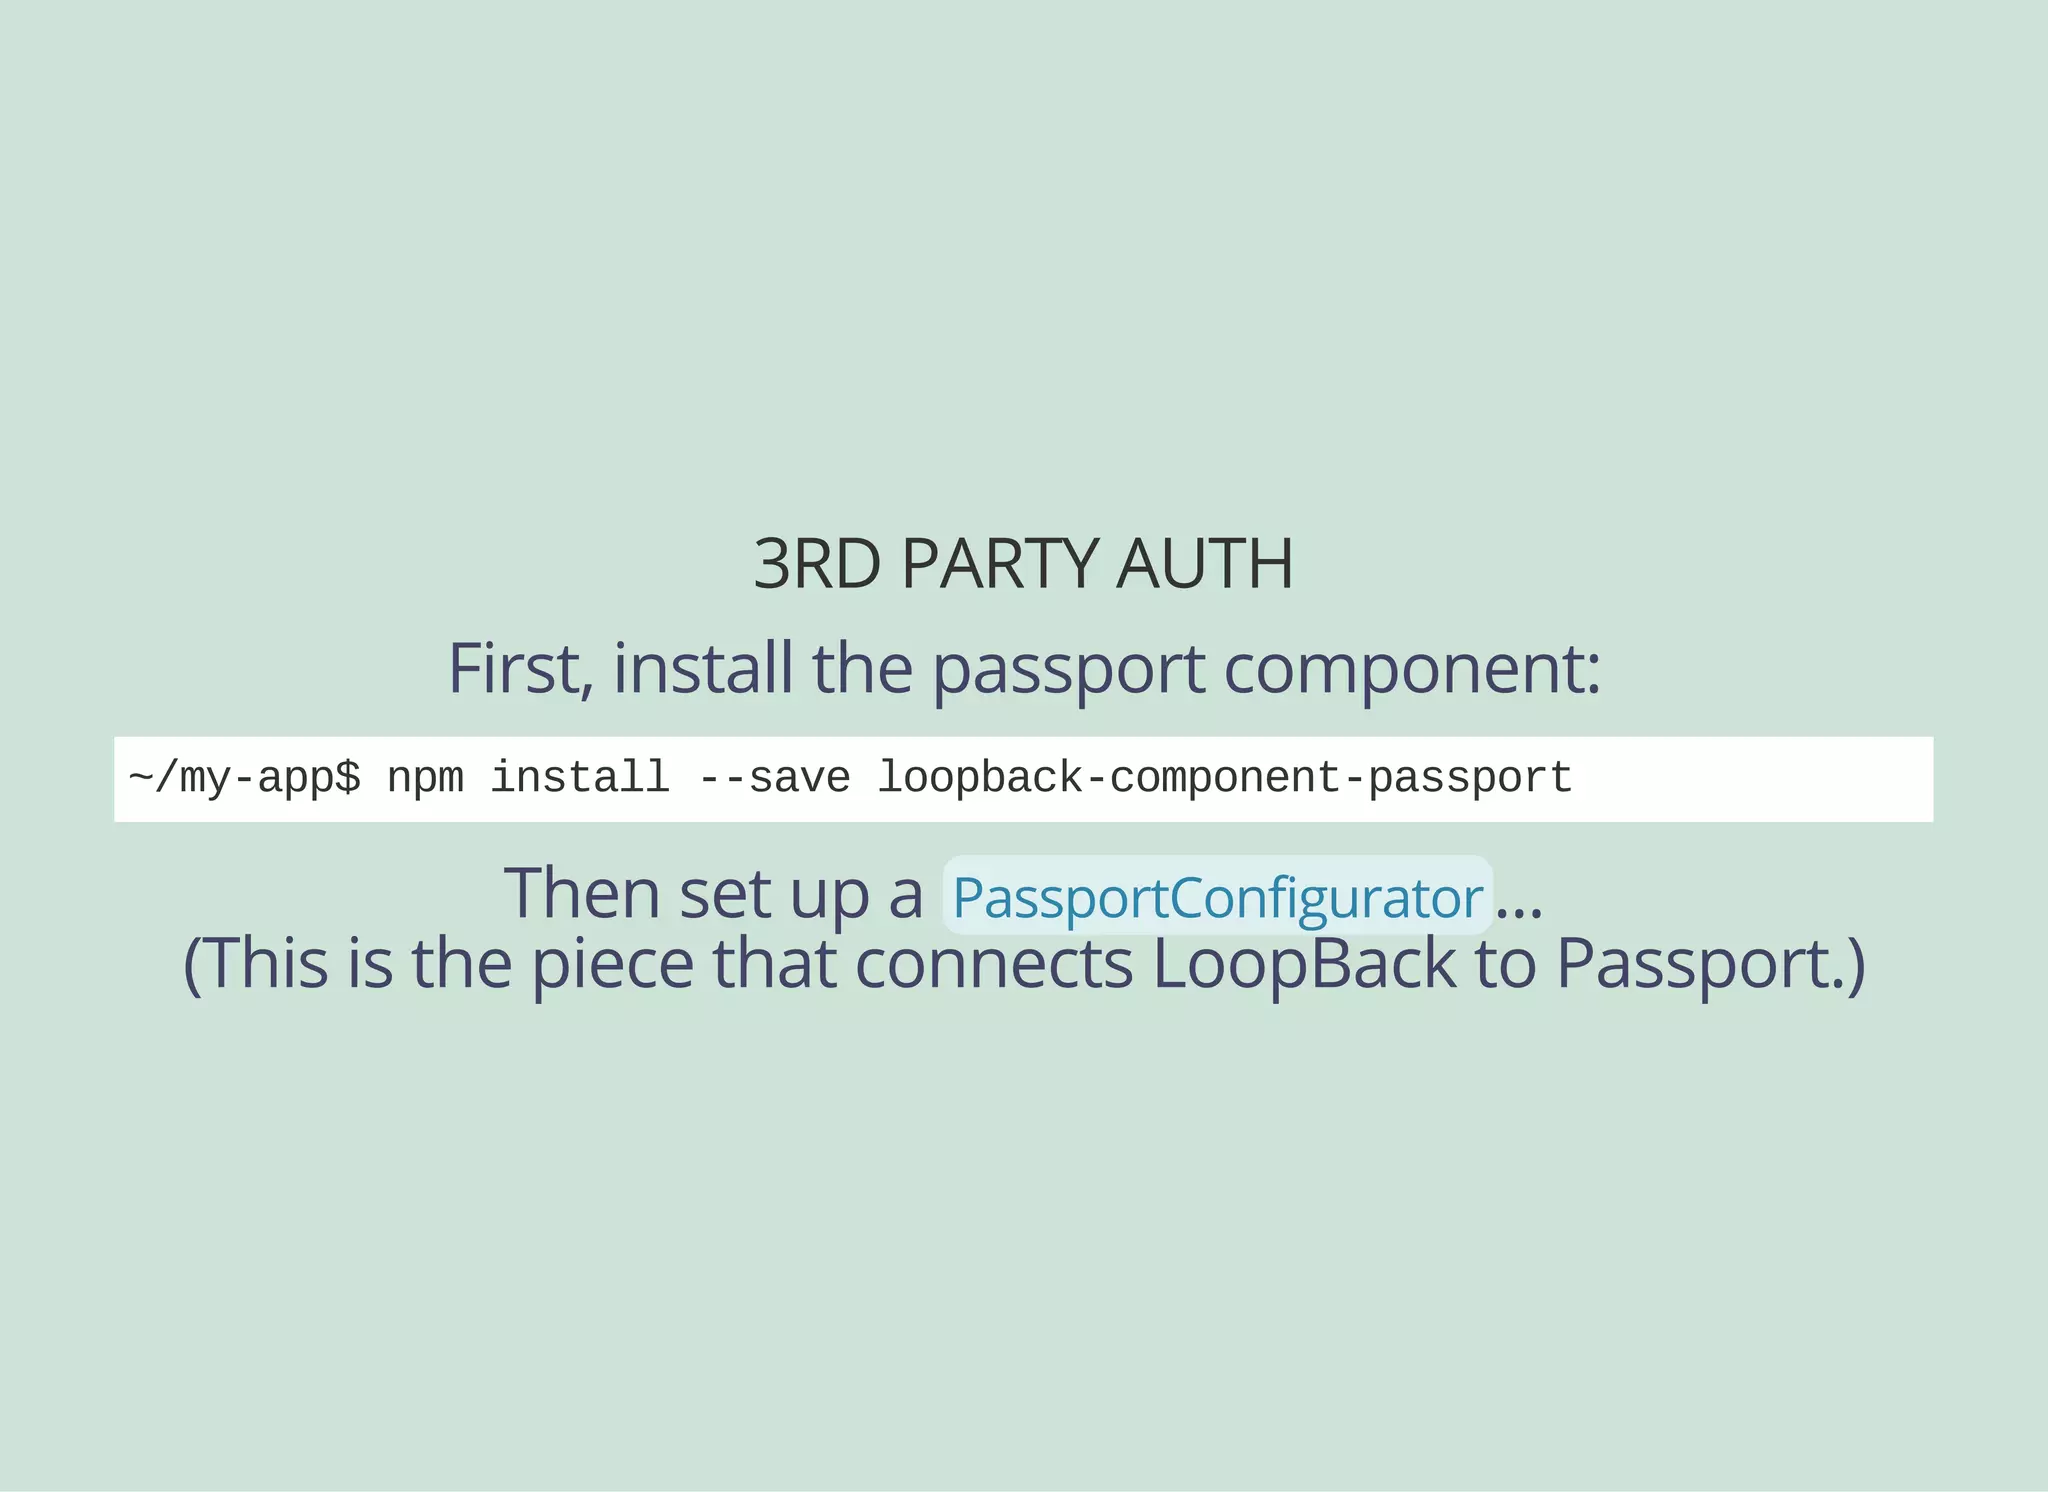
The document outlines the features and functionalities of the LoopBack API framework, emphasizing its model-driven API development capabilities, authentication, and access control. It provides detailed instructions on setting up a LoopBack application, creating data models, defining relationships, implementing custom roles and permissions, and integrating third-party authentication services like Facebook. Additionally, it discusses advanced topics such as rate limiting, request proxies, and offers guidance on creating client-side applications using Angular.


![CREATING A MODEL VIA CLI
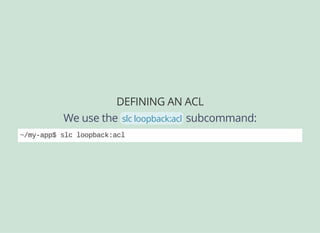
~/myapp$ slc loopback:model
[?] Enter the model name: CoffeeShop
[?] Select the datasource to attach CoffeeShop to: (Use arrow keys)
❯ mdb (mongodb)
[?] Select model's base class: (Use arrow keys)
Model
❯ PersistedModel
ACL
[?] Expose CoffeeShop via the REST API? (Y/n) Y
[?] Custom plural form (used to build REST URL):](https://image.slidesharecdn.com/api-security-slides-150723212436-lva1-app6892/85/StrongLoop-Node-js-API-Security-Customization-7-320.jpg)
![CREATING A MODEL VIA CLI
[?] Property name: name
invoke loopback:property
[?] Property type: (Use arrow keys)
❯ string
number
boolean
object
array
date
...
[?] Required? (y/N)
When complete, simply hit "enter" with a blank property](https://image.slidesharecdn.com/api-security-slides-150723212436-lva1-app6892/85/StrongLoop-Node-js-API-Security-Customization-8-320.jpg)
![MODEL CONFIG
{
"name": "CoffeeShop",
"base": "PersistedModel",
"idInjection": true,
"properties": {
"name": {
"type": "string",
"required": true
}
},
"validations": [],
"relations": {},
"acls": [],
"methods": []
}](https://image.slidesharecdn.com/api-security-slides-150723212436-lva1-app6892/85/StrongLoop-Node-js-API-Security-Customization-9-320.jpg)
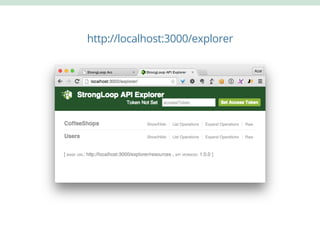
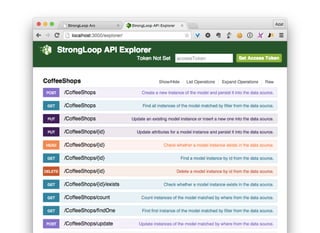
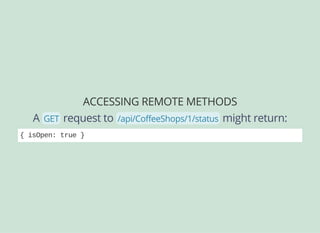
![COFFEESHOP ROUTES
http://localhost:3000/api/CoffeeShops
[]
We don't have any coffee shops yet,
so we get an empty array!](https://image.slidesharecdn.com/api-security-slides-150723212436-lva1-app6892/85/StrongLoop-Node-js-API-Security-Customization-11-320.jpg)
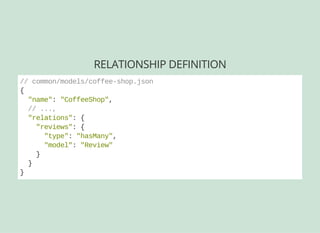

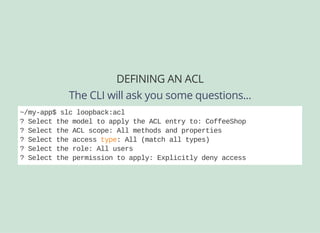
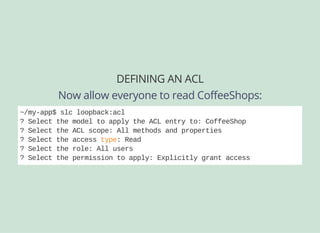
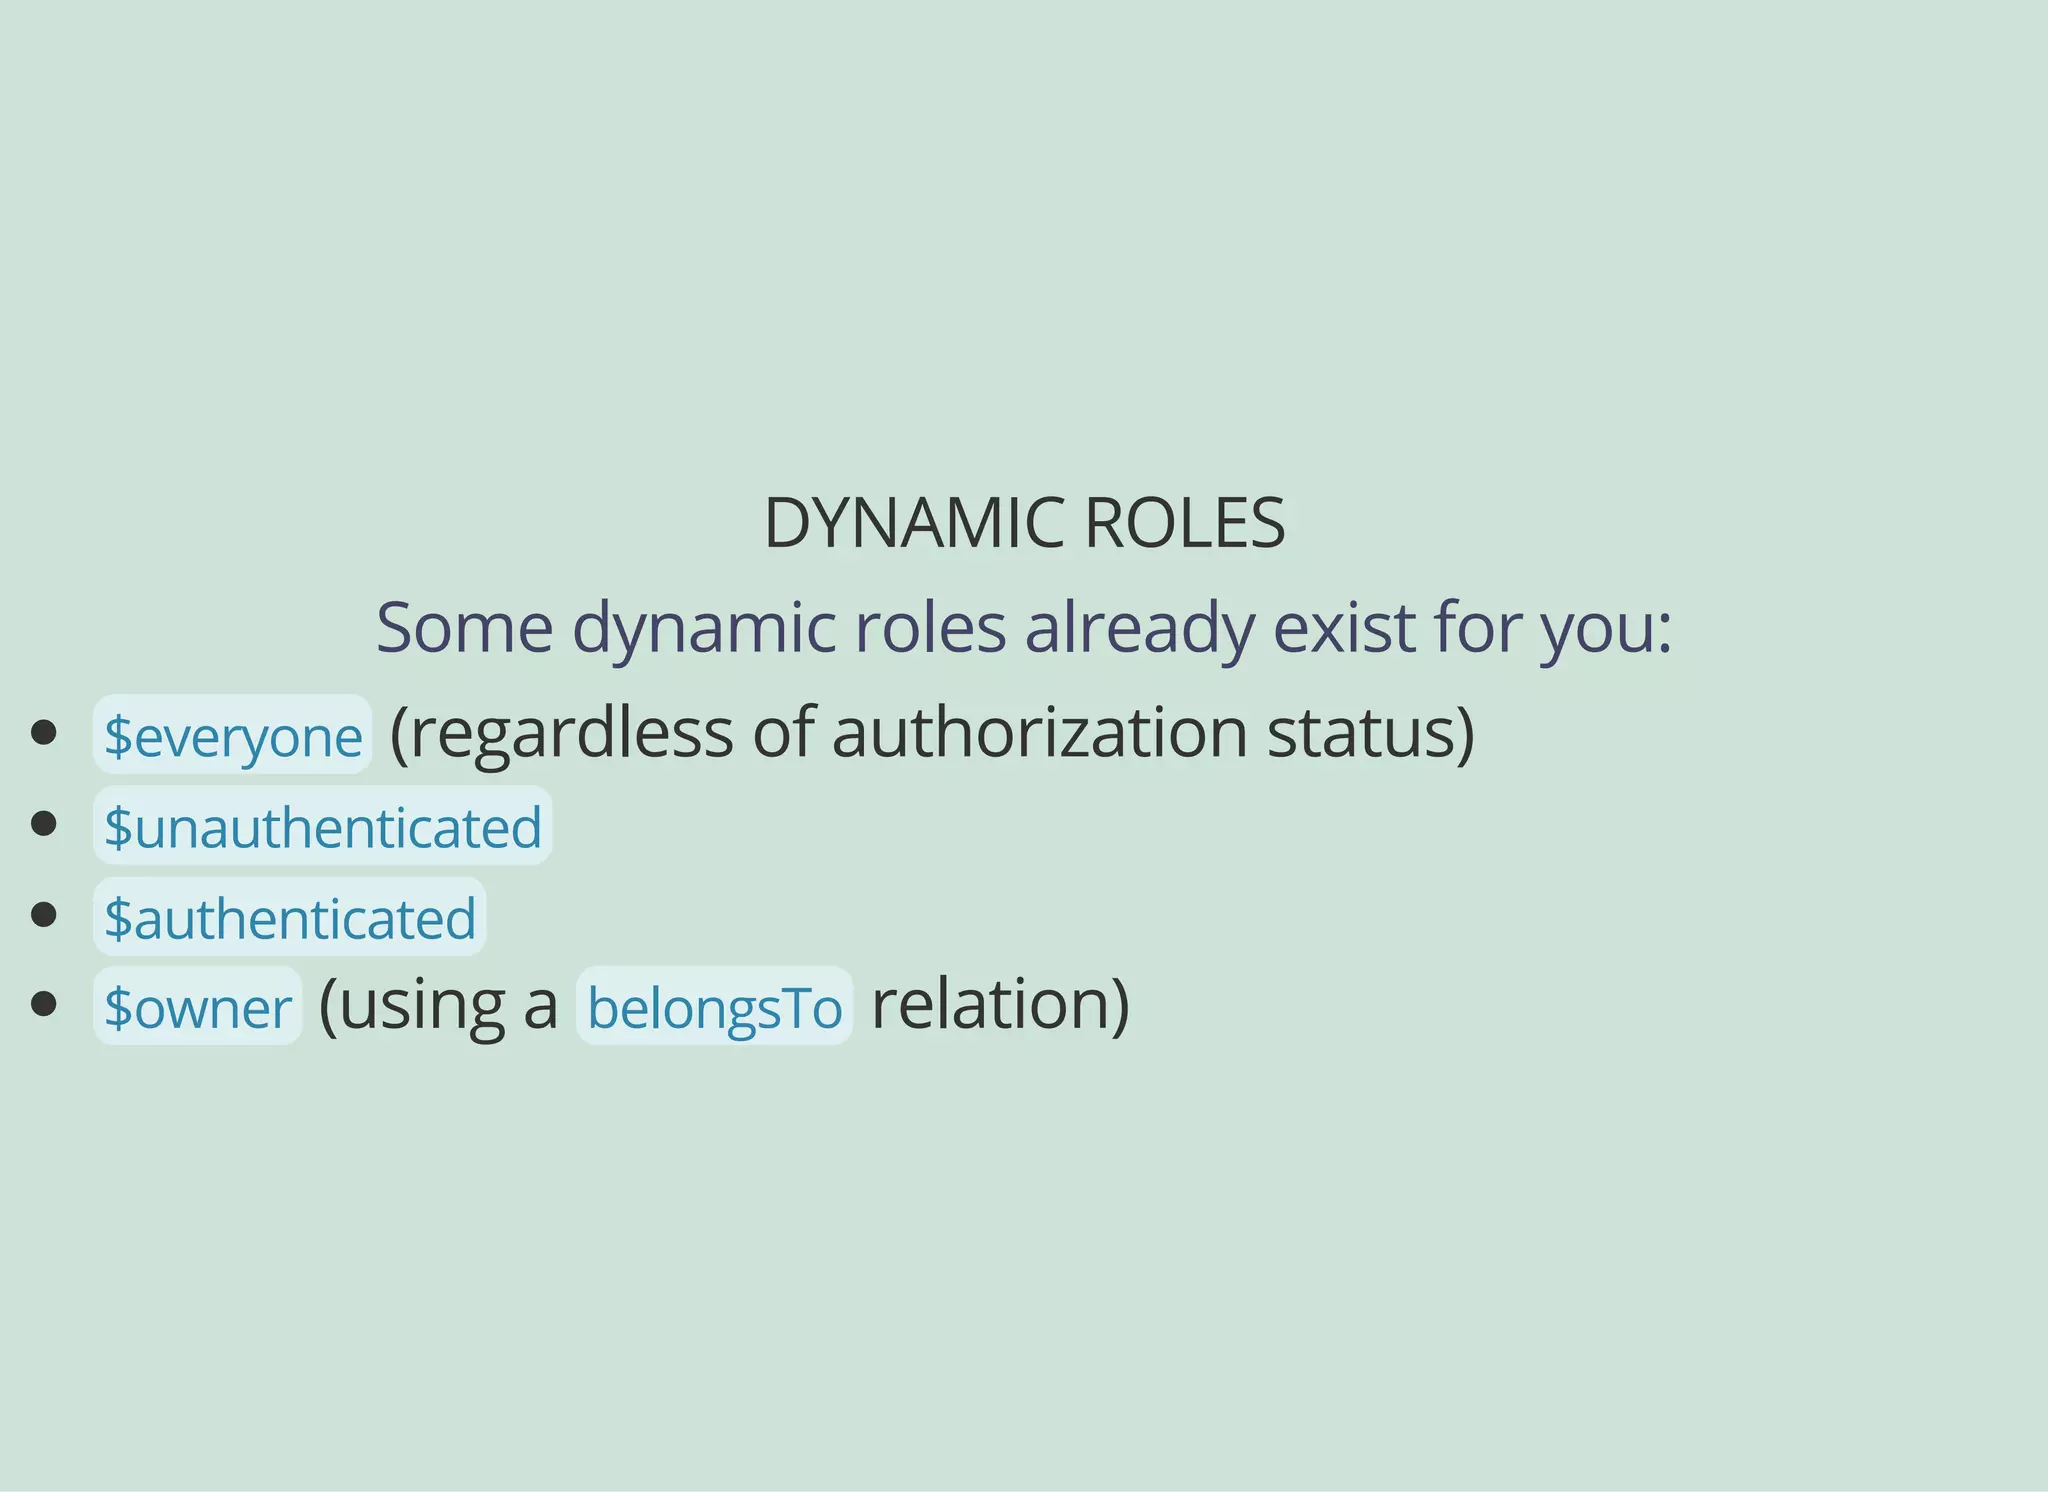
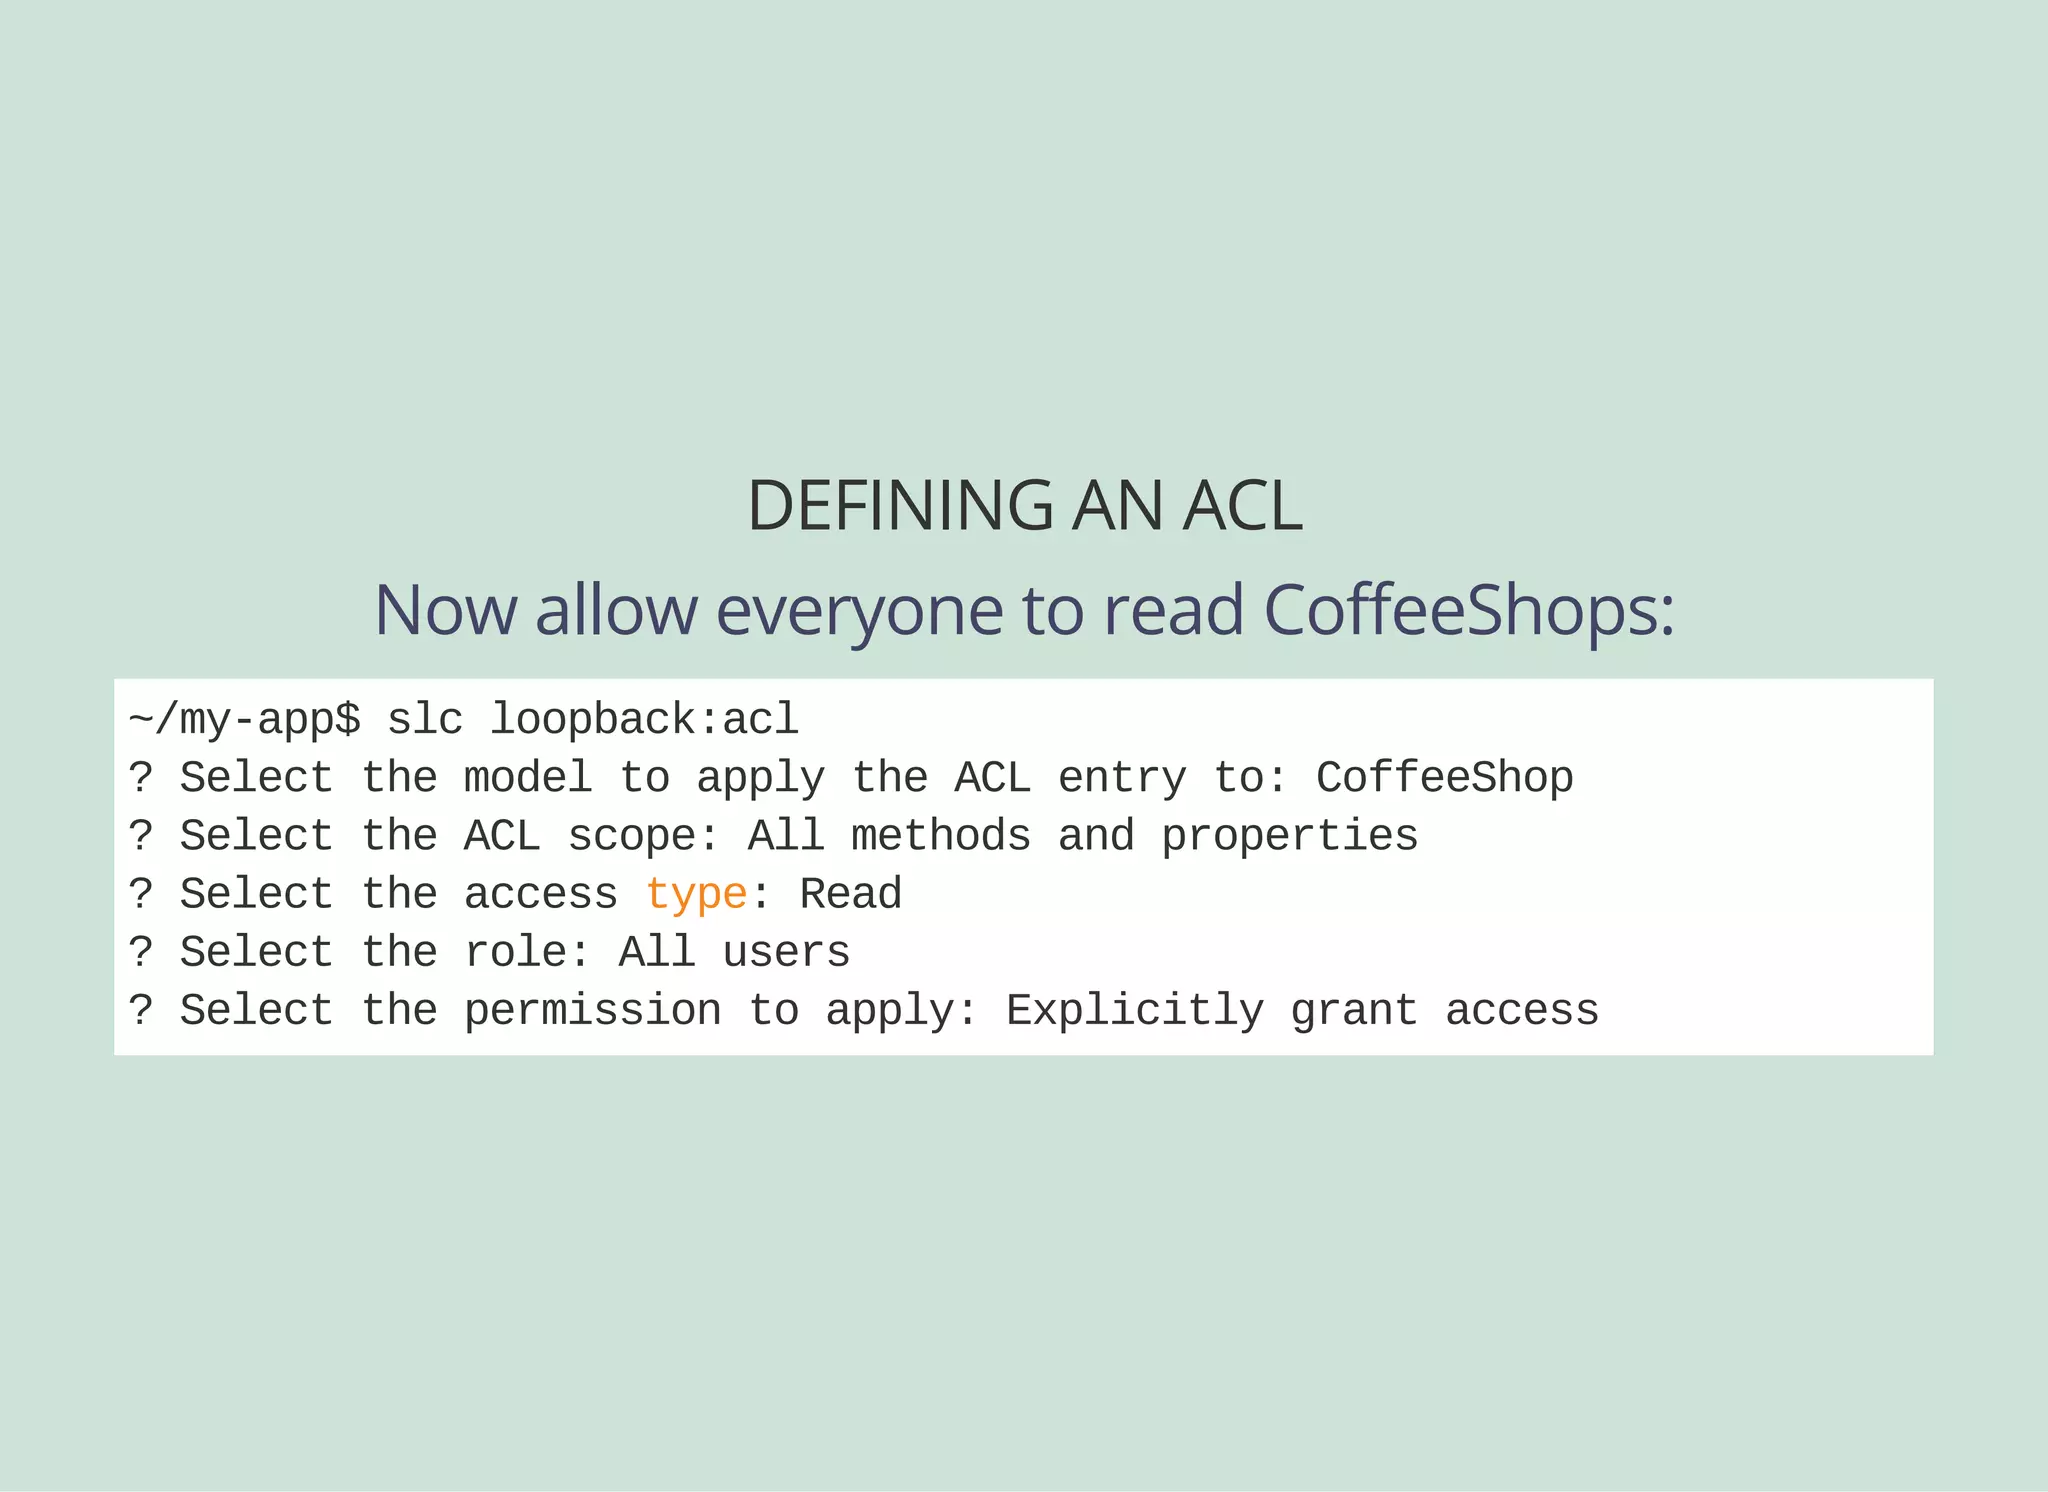
![DEFINING AN ACL
Here's what this looks like in the config file:
// in common/models/coffeeshop.json
"acls": [
{
"accessType": "*",
"principalType": "ROLE",
"principalId": "$everyone",
"permission": "DENY"
},
{
"accessType": "READ",
"principalType": "ROLE",
"principalId": "$everyone",
"permission": "ALLOW"
}
]](https://image.slidesharecdn.com/api-security-slides-150723212436-lva1-app6892/85/StrongLoop-Node-js-API-Security-Customization-32-320.jpg)
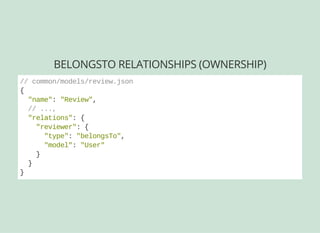
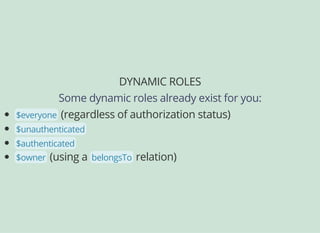
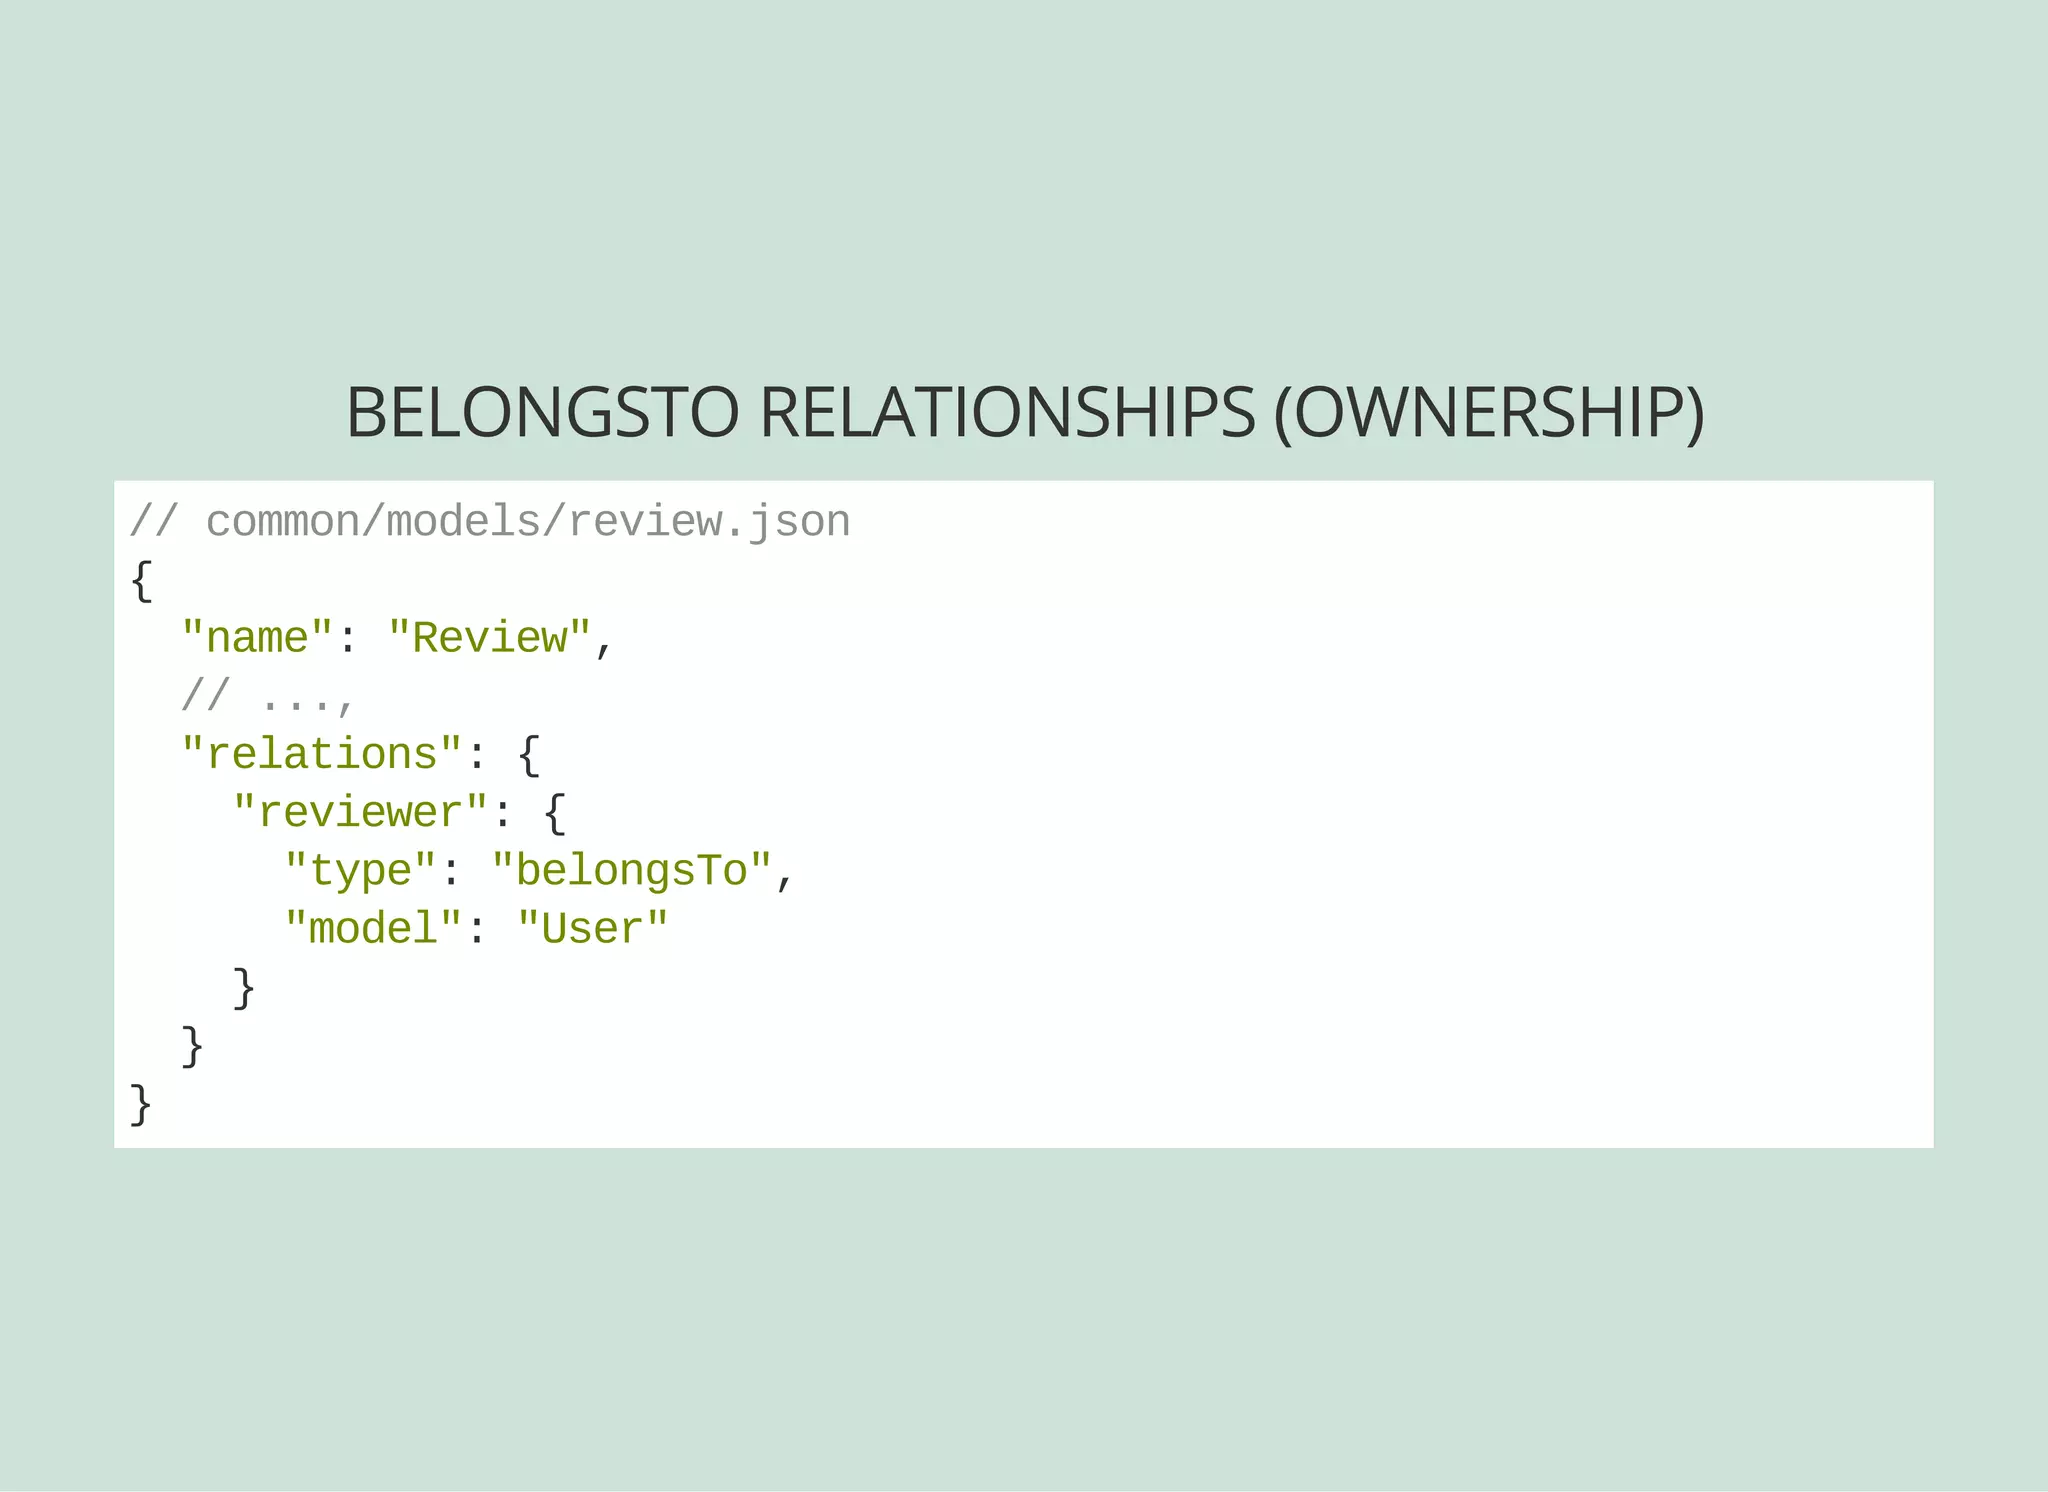
![USING OWNERS
By creating a belongsTo relation, we can use $owner:
"acls": [
// ...,
{
"accessType": "WRITE",
"principalType": "ROLE",
"principalId": "$owner",
"permission": "ALLOW"
}
]](https://image.slidesharecdn.com/api-security-slides-150723212436-lva1-app6892/85/StrongLoop-Node-js-API-Security-Customization-34-320.jpg)
![RESTRICTING SPECIFIC METHODS
We can ALLOW or DENY access to specific remote methods:
"acls": [
// ...,
{
"accessType": "EXECUTE",
"principalType": "ROLE",
"principalId": "admin",
"permission": "ALLOW",
"property": "create"
}
]](https://image.slidesharecdn.com/api-security-slides-150723212436-lva1-app6892/85/StrongLoop-Node-js-API-Security-Customization-35-320.jpg)

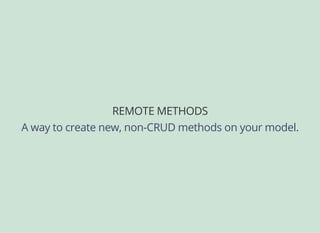
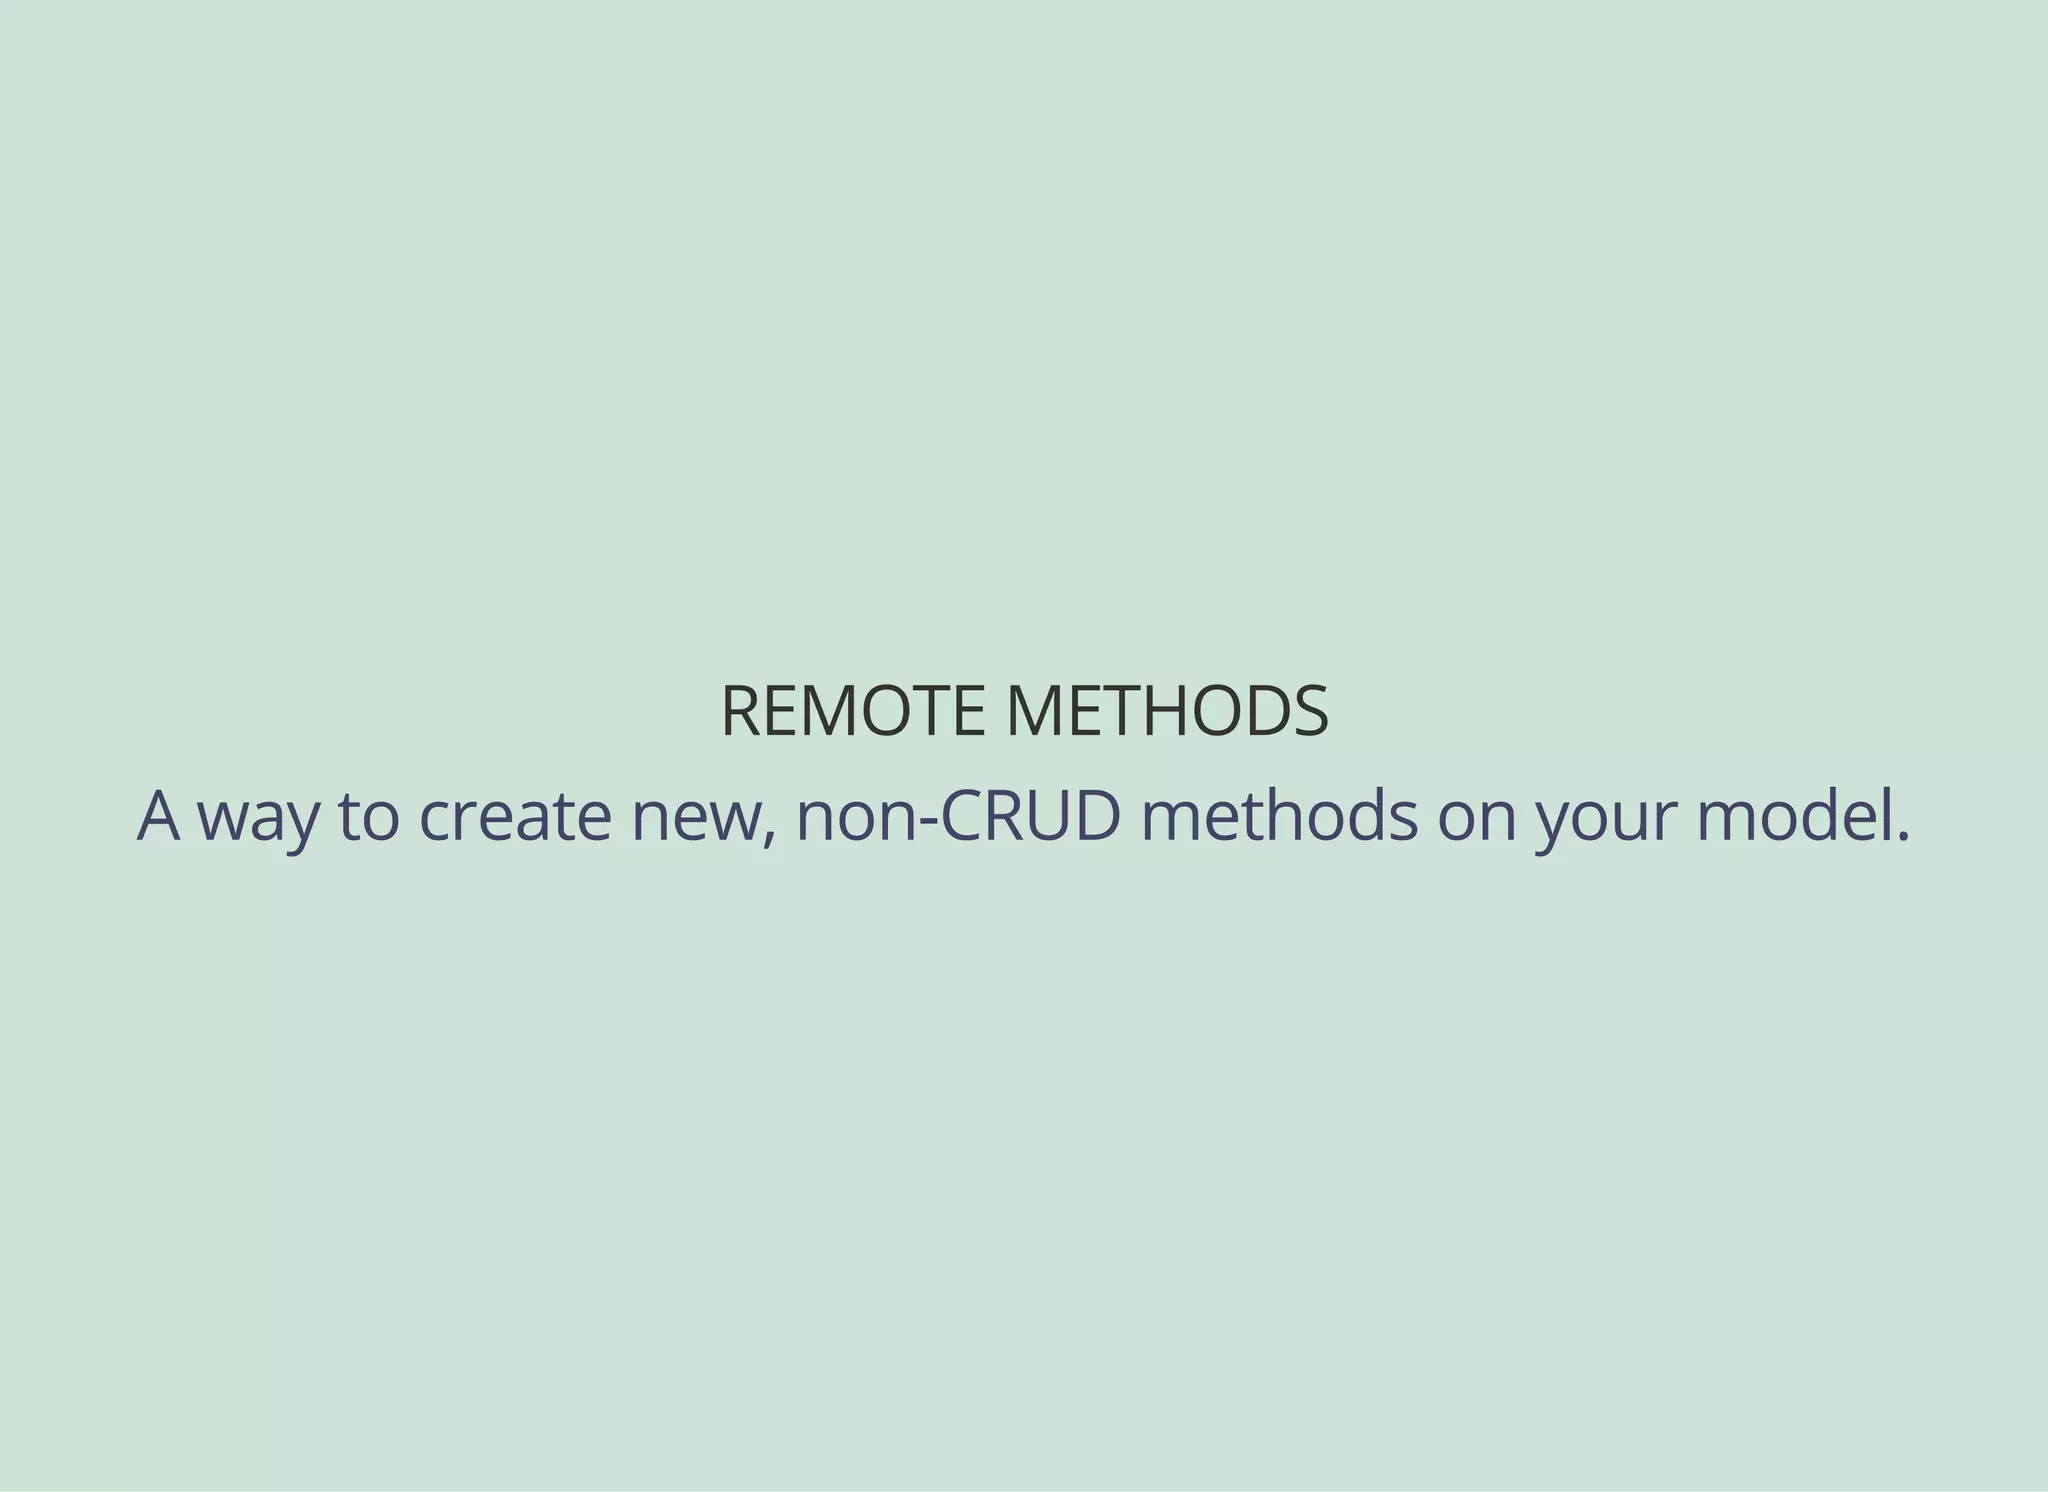
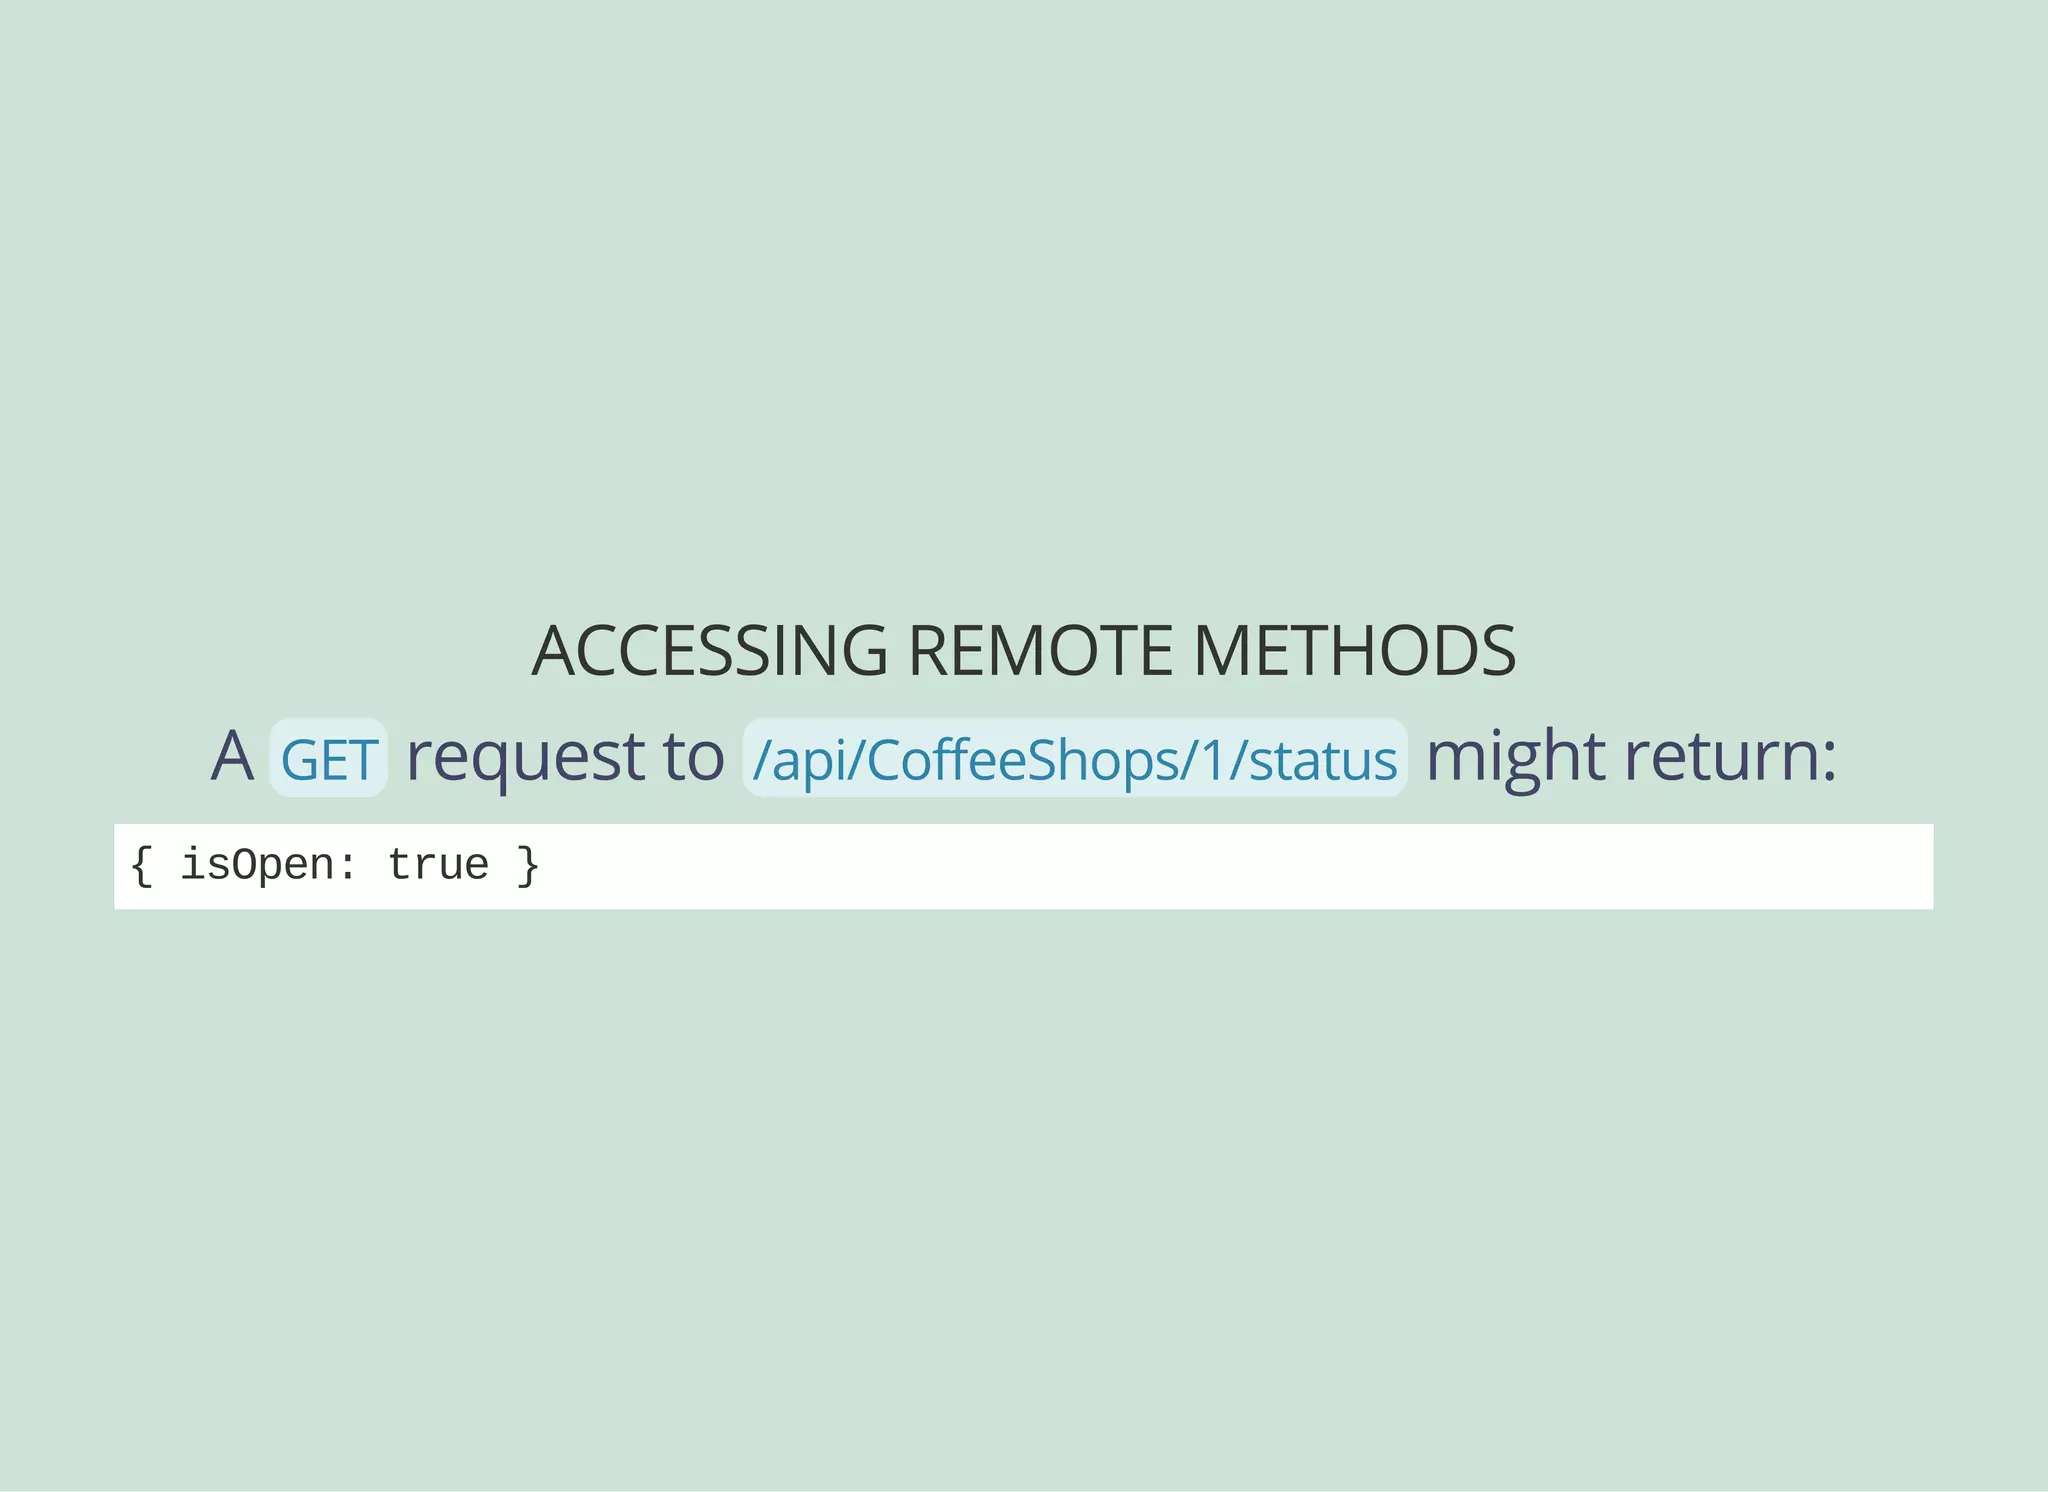
![REMOTE METHODS
Then define the API spec...
// common/models/coffeeshop.js
module.exports = function(CoffeeShop){
CoffeeShop.status = function(id, cb) { /* ... */ }
CoffeeShop.remoteMethod(
'status',
{
accepts: [ {
arg: 'id',
type: 'number',
required: true,
http: { source: 'path' }
} ],
returns: { arg: 'isOpen', type: 'boolean' },
http: [ {verb: 'get', path: '/:id/status'} ]
}
);
};](https://image.slidesharecdn.com/api-security-slides-150723212436-lva1-app6892/85/StrongLoop-Node-js-API-Security-Customization-39-320.jpg)
![RESTRICTING REMOTE METHODS
Remember, we can ALLOW or DENY access to specific
remote methods on a model, including custom ones!
"acls": [
// ...,
{
"accessType": "EXECUTE",
"principalType": "ROLE",
"principalId": "$unauthenticated",
"permission": "DENY",
"property": "status"
}
]](https://image.slidesharecdn.com/api-security-slides-150723212436-lva1-app6892/85/StrongLoop-Node-js-API-Security-Customization-41-320.jpg)
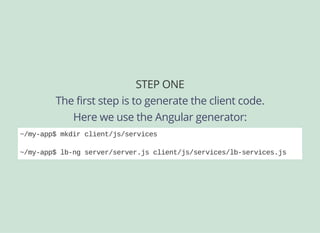

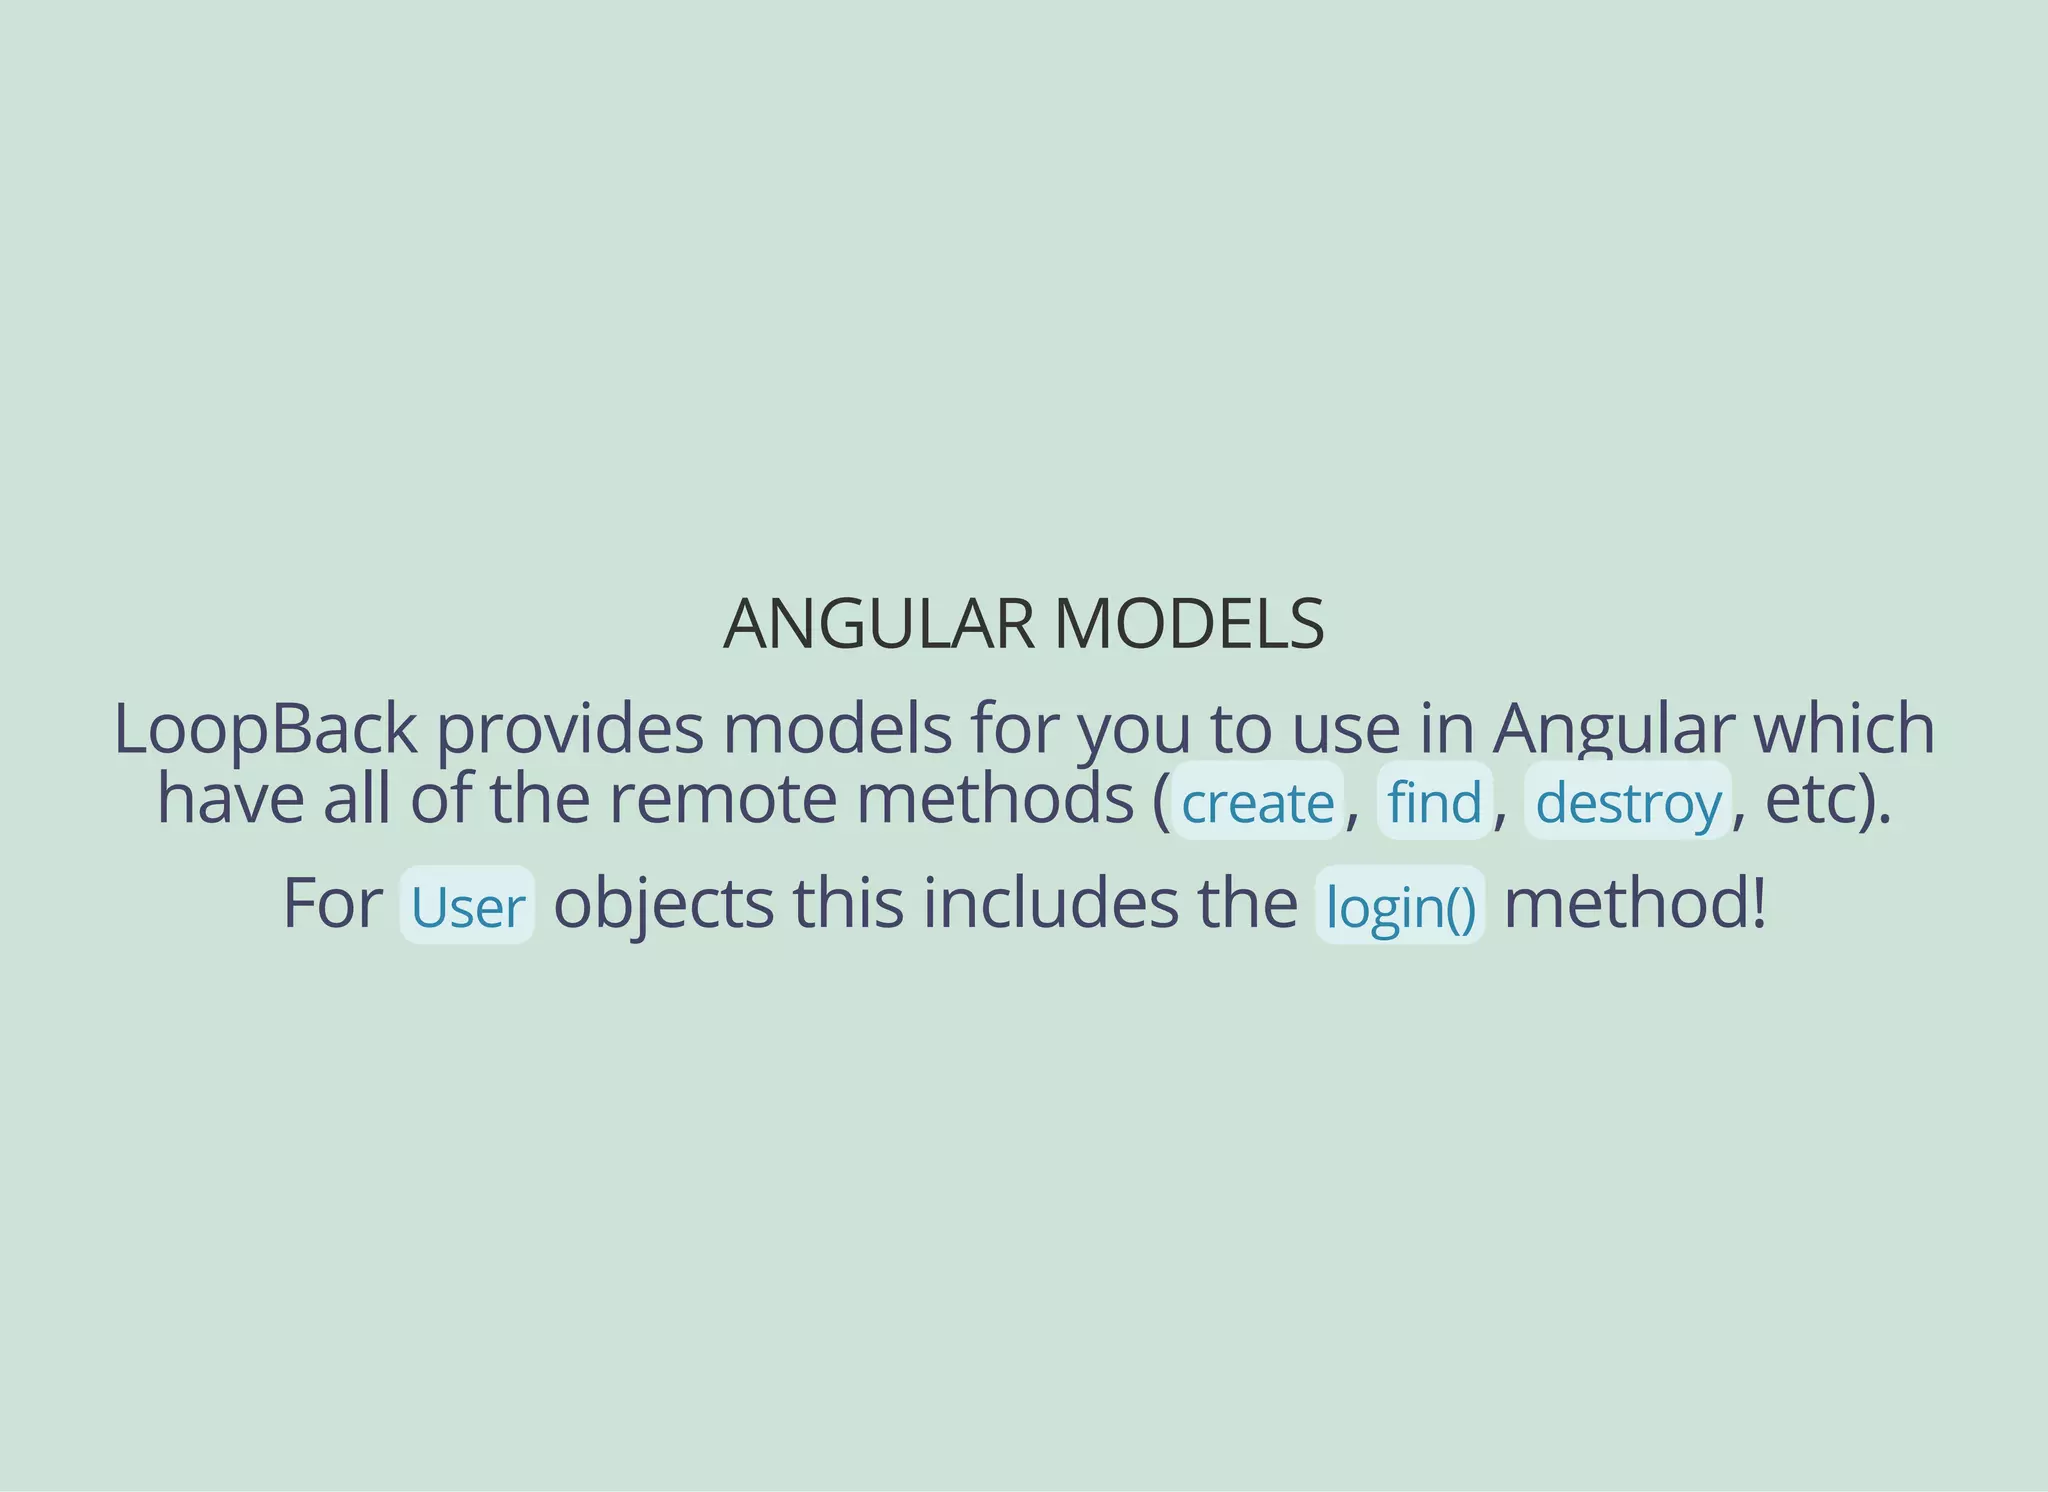
![ANGULAR MODELS
When you create your application modules, just include the
LoopBack Services we created from the CLI:
angular.module('myapp', ['ui.router', 'lbServices'])
.config( ... )
.run( ... );](https://image.slidesharecdn.com/api-security-slides-150723212436-lva1-app6892/85/StrongLoop-Node-js-API-Security-Customization-46-320.jpg)
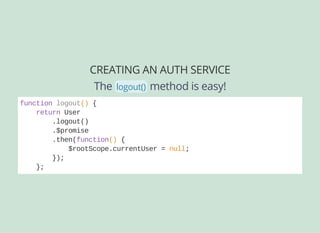
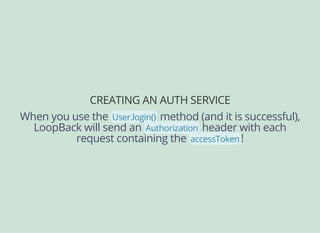
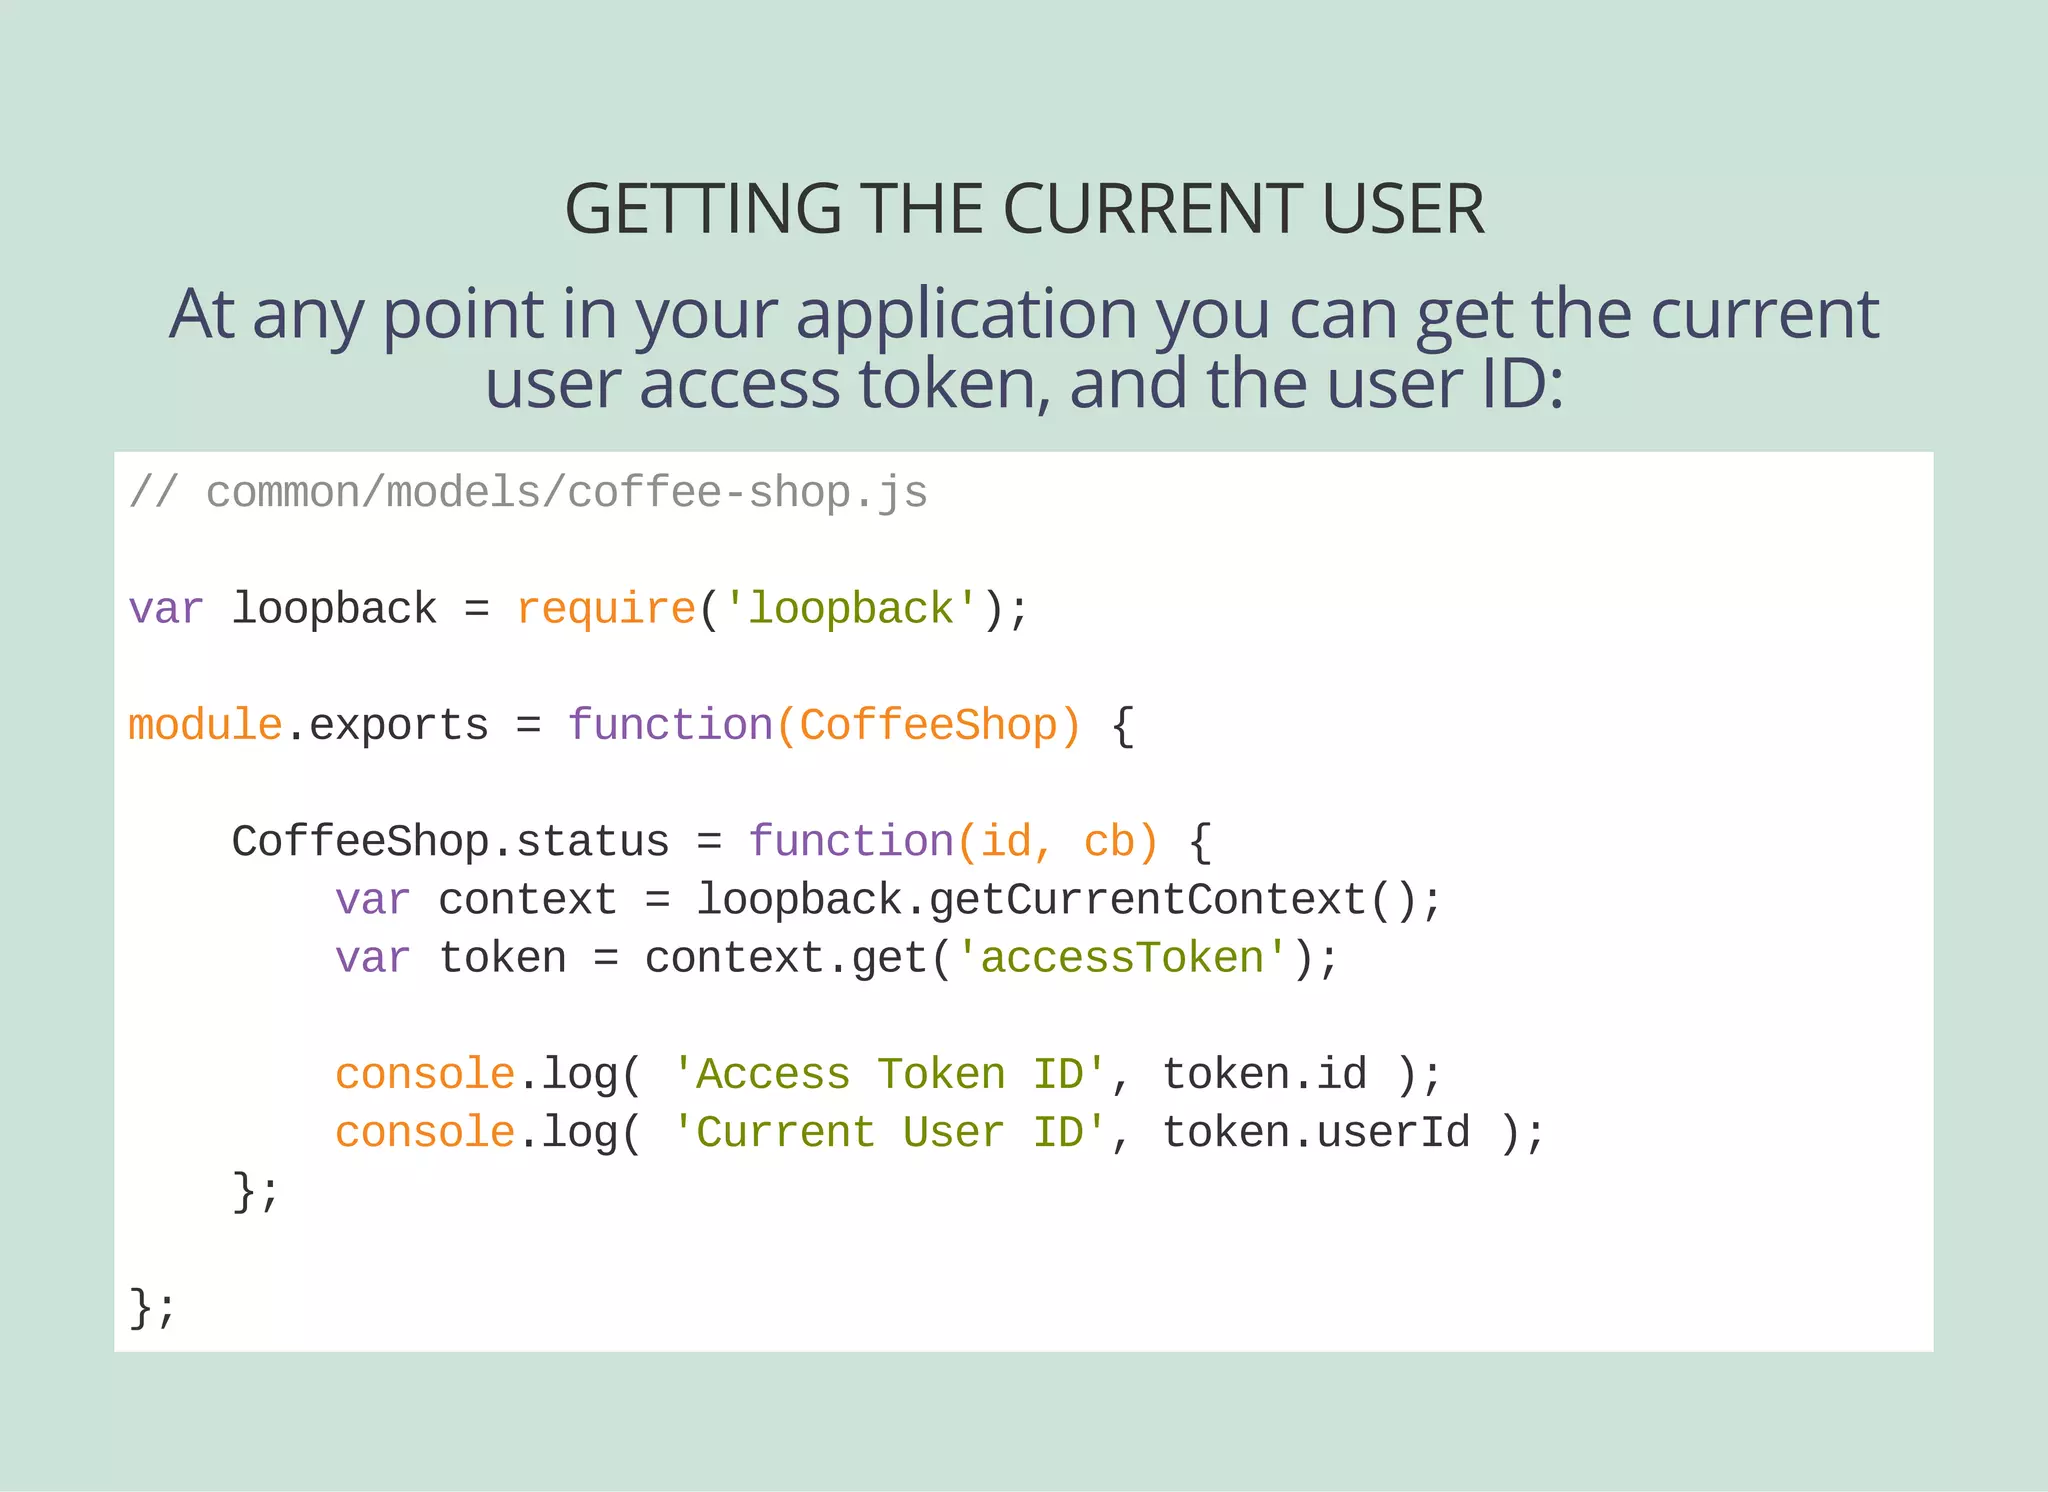
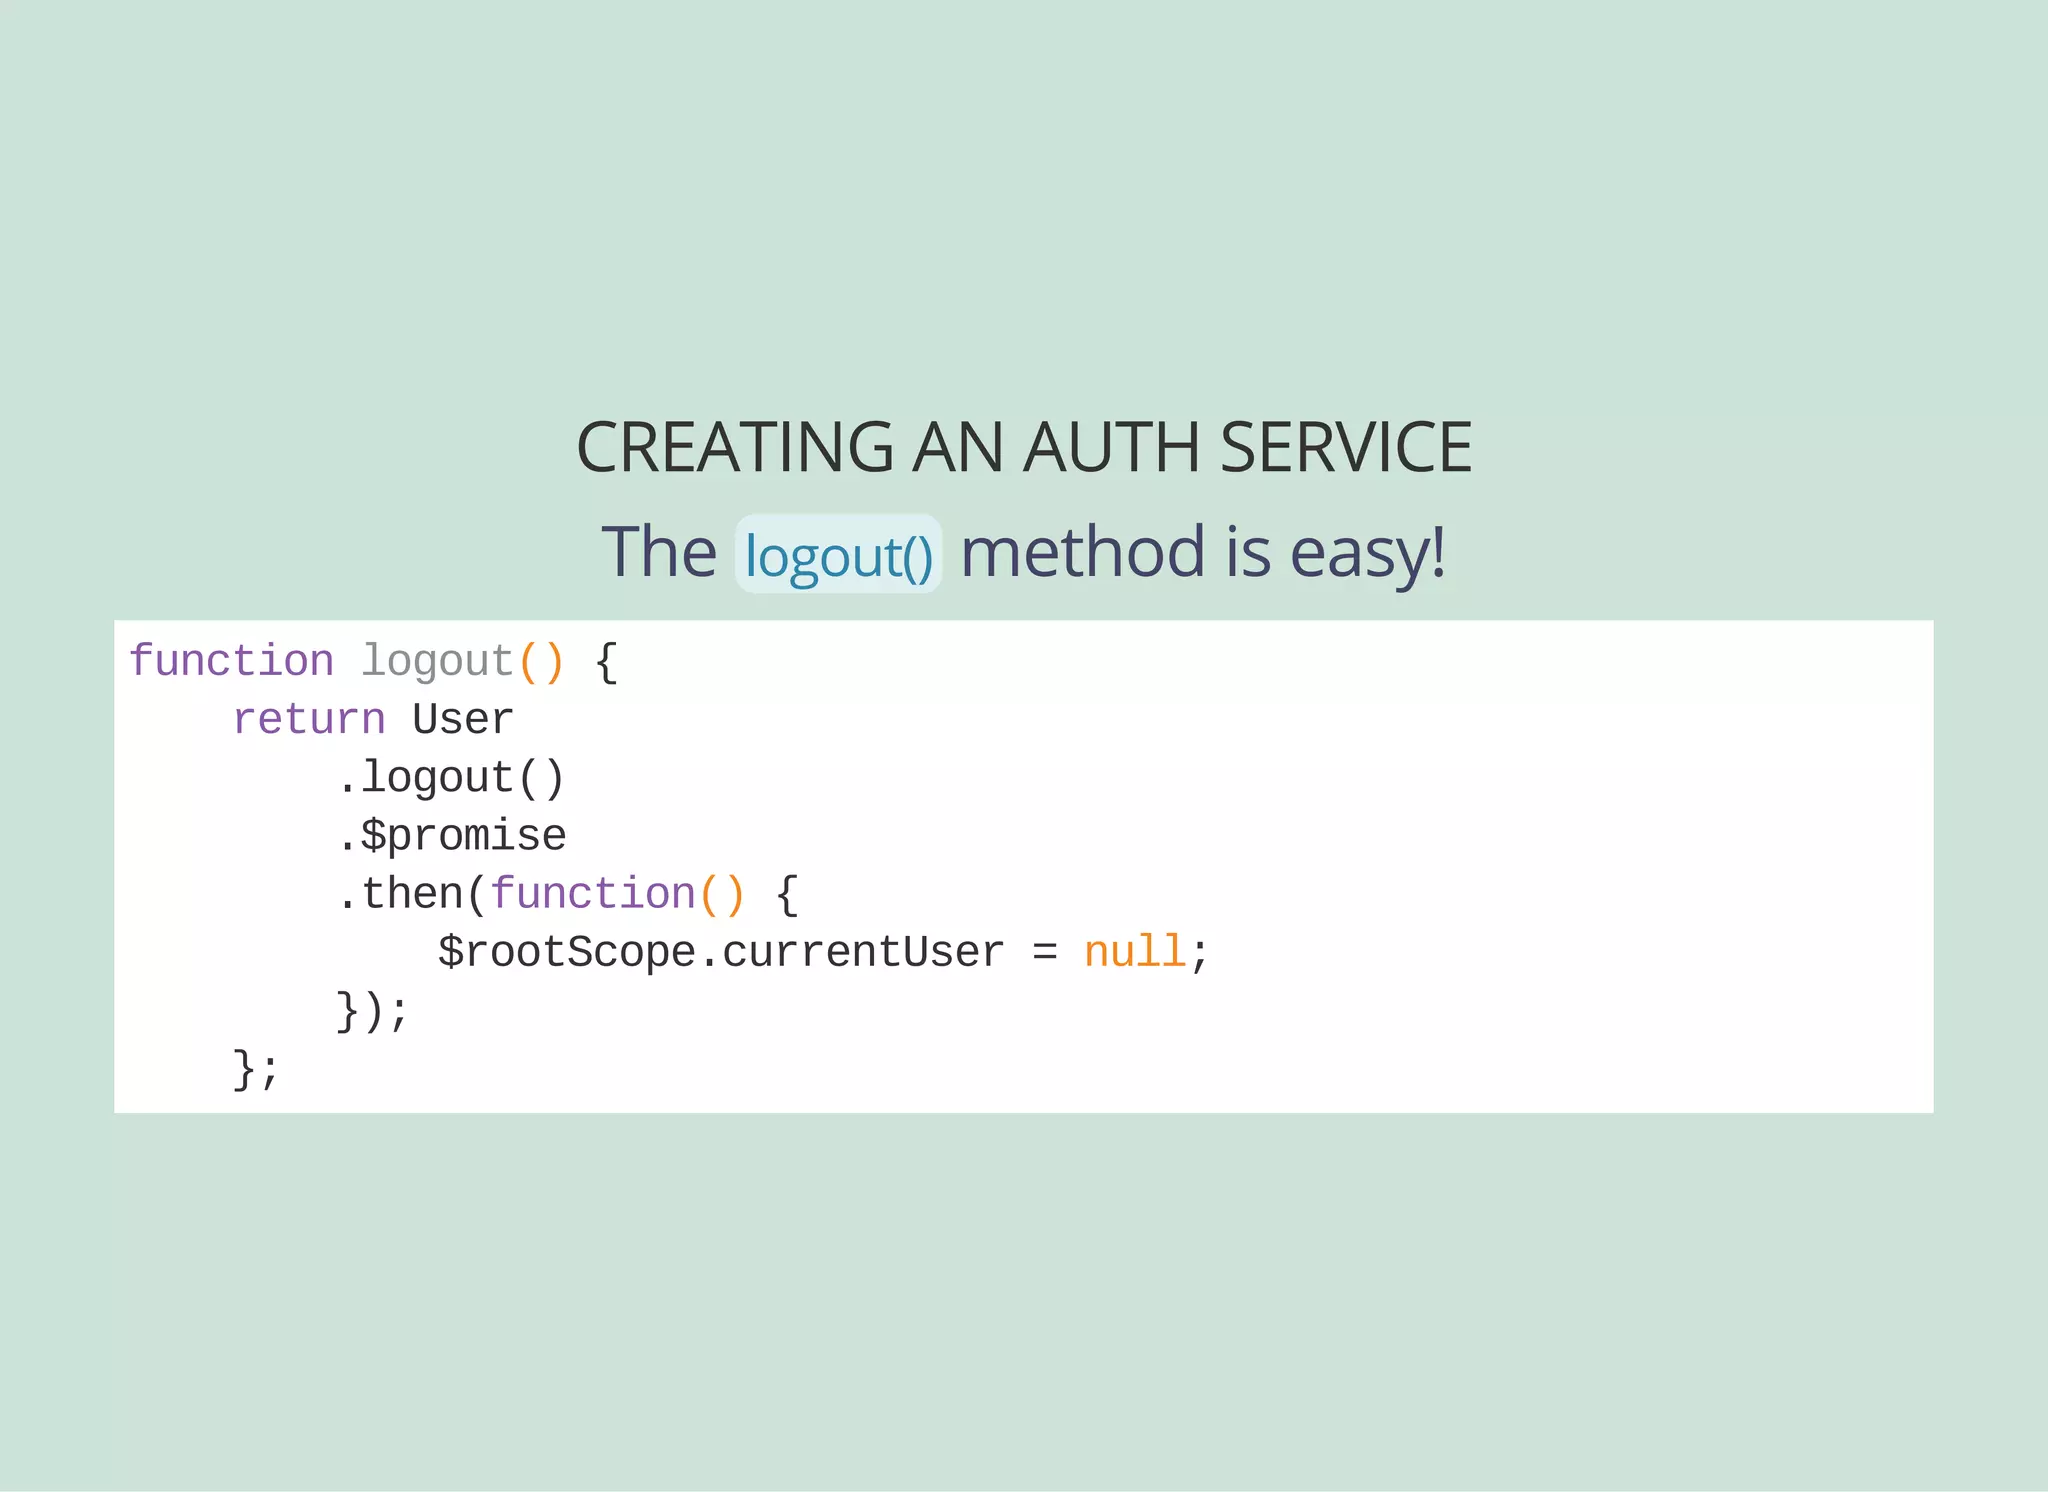
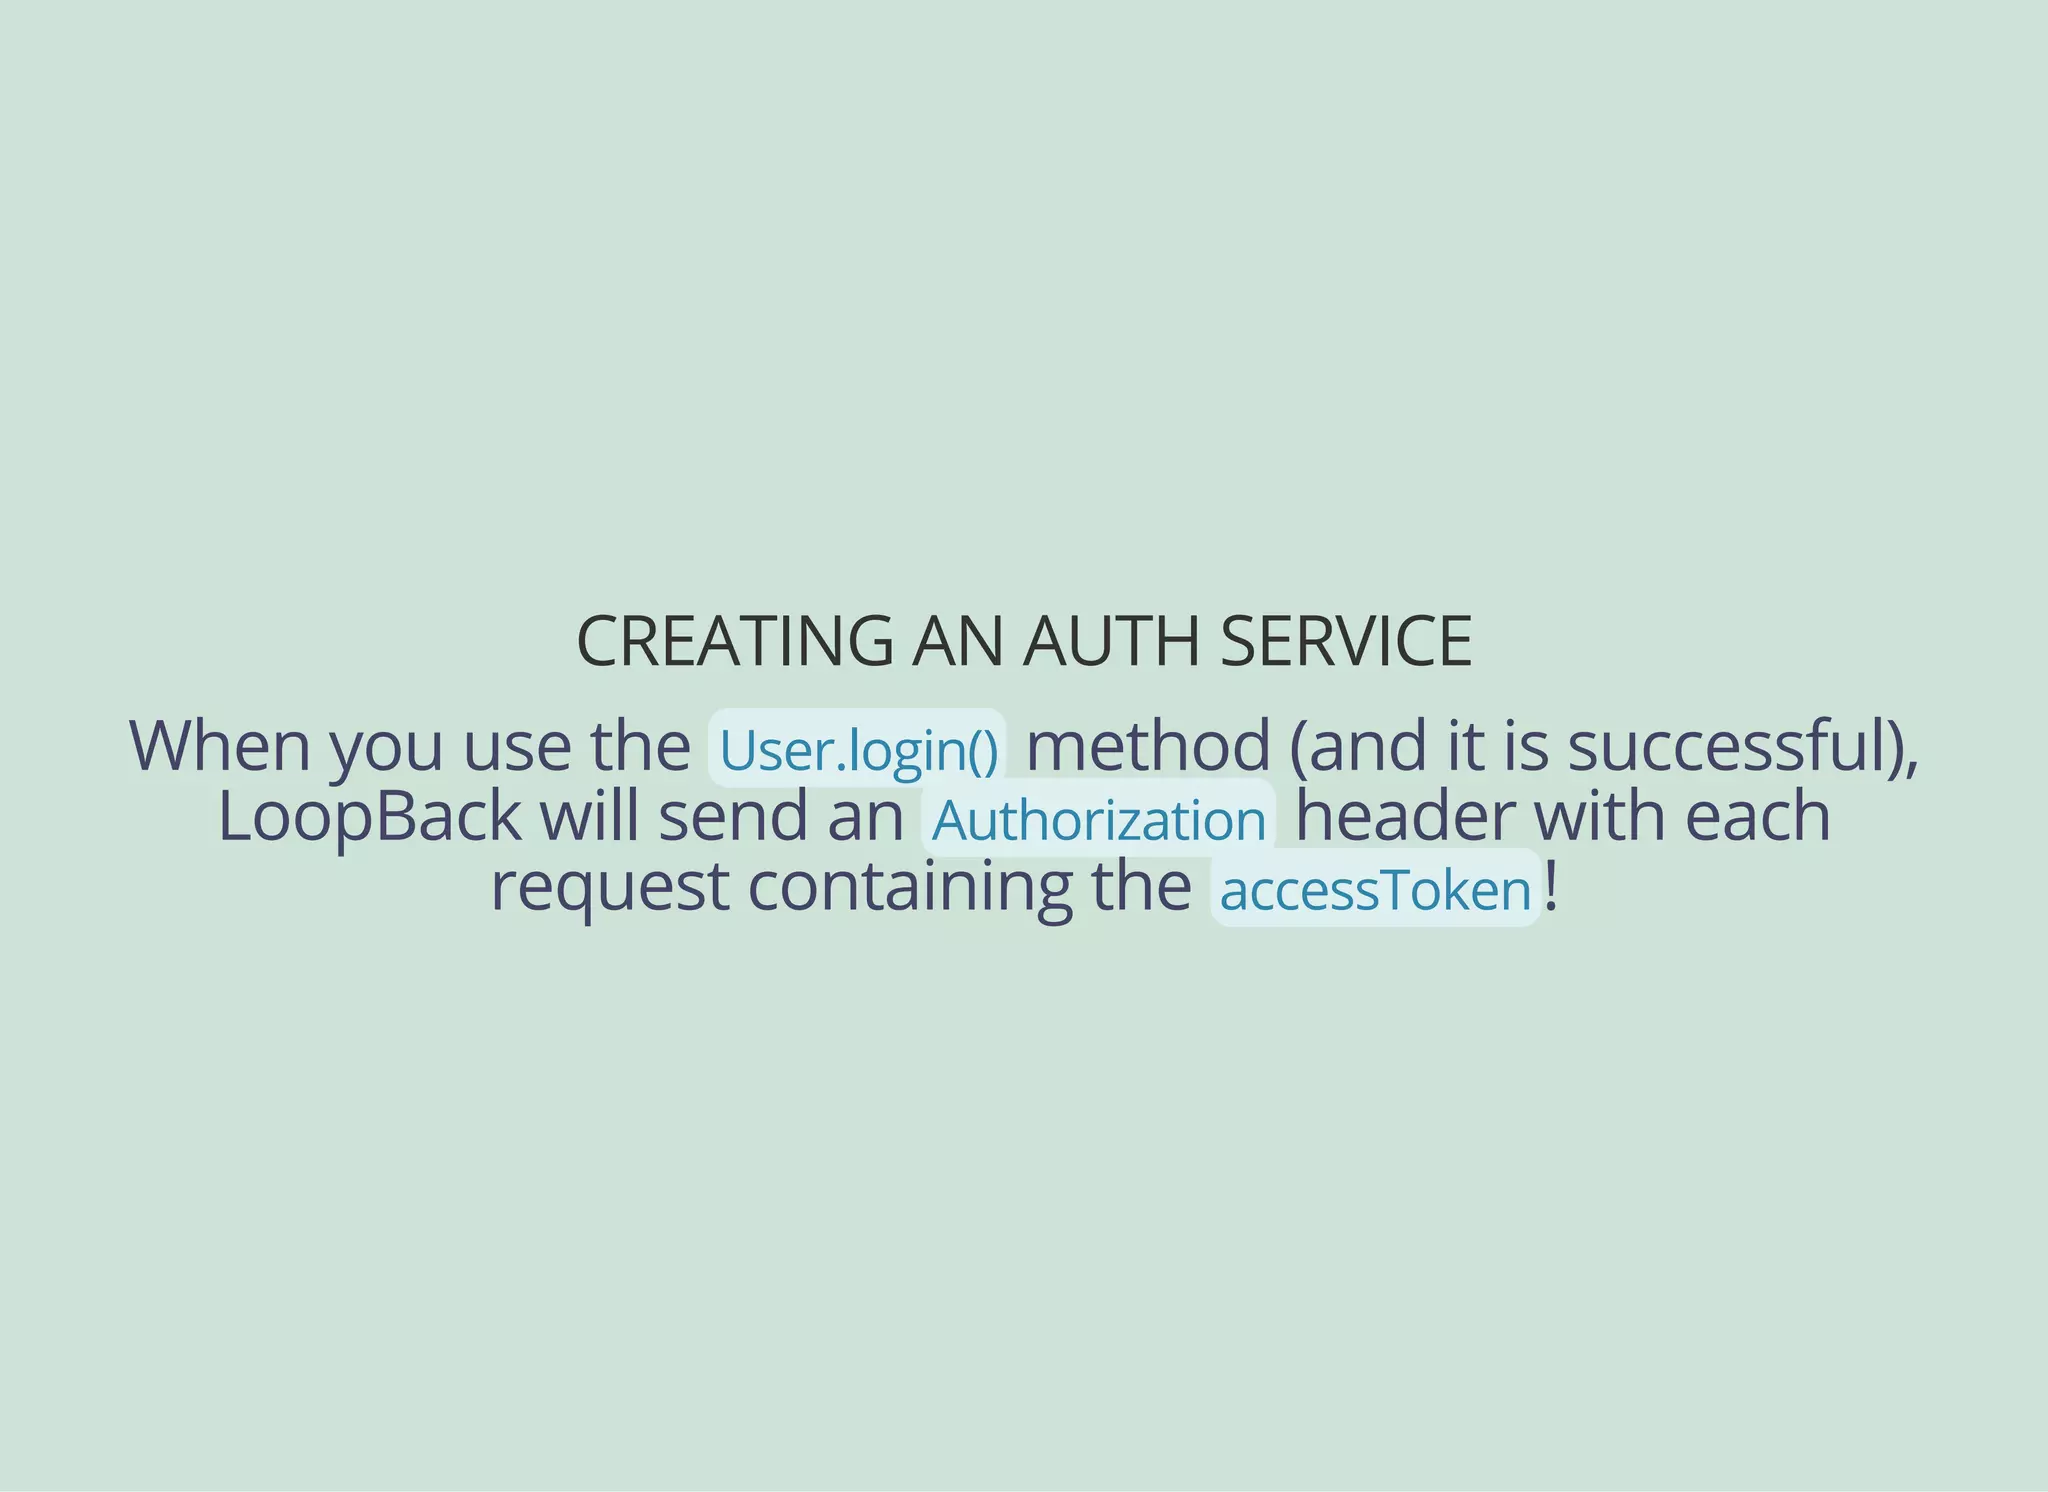
![CREATING AN AUTH SERVICE
Now we can create an Angular service for authentication:
angular.module('myapp').factory(
'AuthService',
['User', '$q', '$rootScope', function(User, $q, $rootScope) {
function login(email, password) {
return User
.login({ email: email, password: password })
.$promise
.then(function(response) {
$rootScope.currentUser = {
id: response.user.id,
tokenId: response.id
};
});
}
return {
login: login
};
}]
);](https://image.slidesharecdn.com/api-security-slides-150723212436-lva1-app6892/85/StrongLoop-Node-js-API-Security-Customization-47-320.jpg)
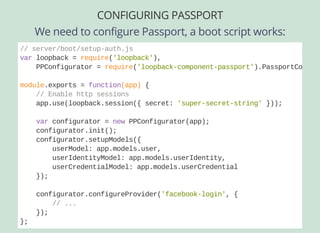
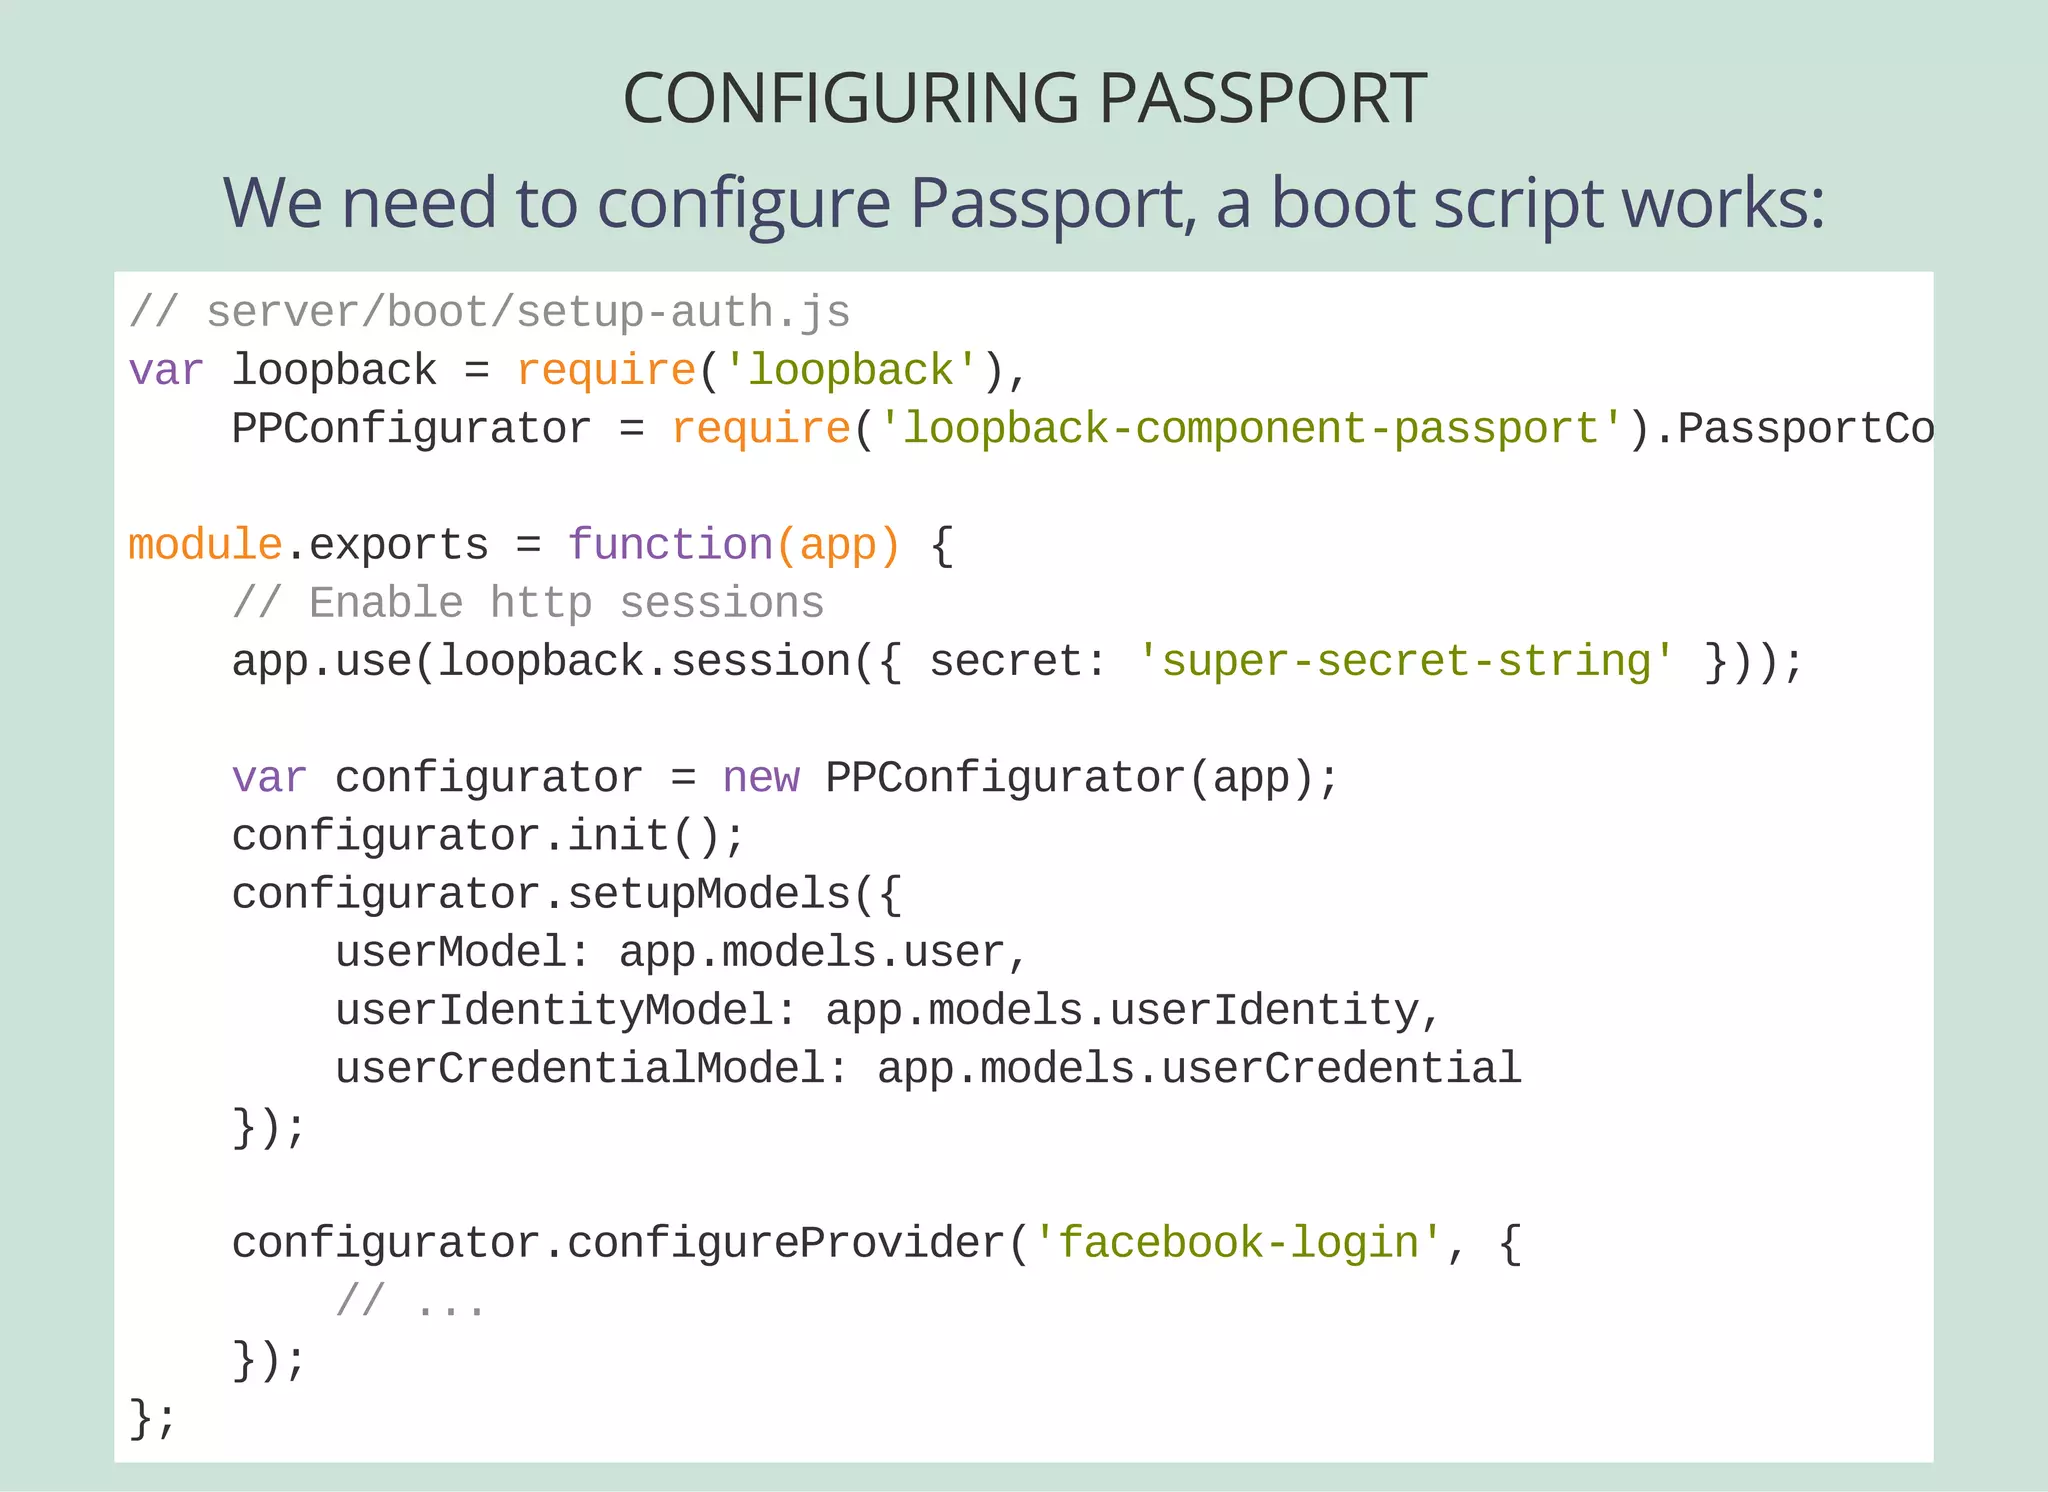
![CONFIGURING PASSPORT
And here is our Facebook-specific config...
// server/boot/setupauth.js
...
module.exports = function(app) {
// ...
configurator.configureProvider('facebooklogin', {
provider: 'facebook',
module: 'passportfacebook',
clientID: '{yourFBclientid}',
clientSecret: '{yourFBclientsecret}',
callbackURL: 'http://localhost:3000/auth/facebook/callback',
authPath: '/auth/facebook',
callbackPath: '/auth/facebook/callback',
successRedirect: '/auth/account',
scope: ['email']
});
};](https://image.slidesharecdn.com/api-security-slides-150723212436-lva1-app6892/85/StrongLoop-Node-js-API-Security-Customization-54-320.jpg)

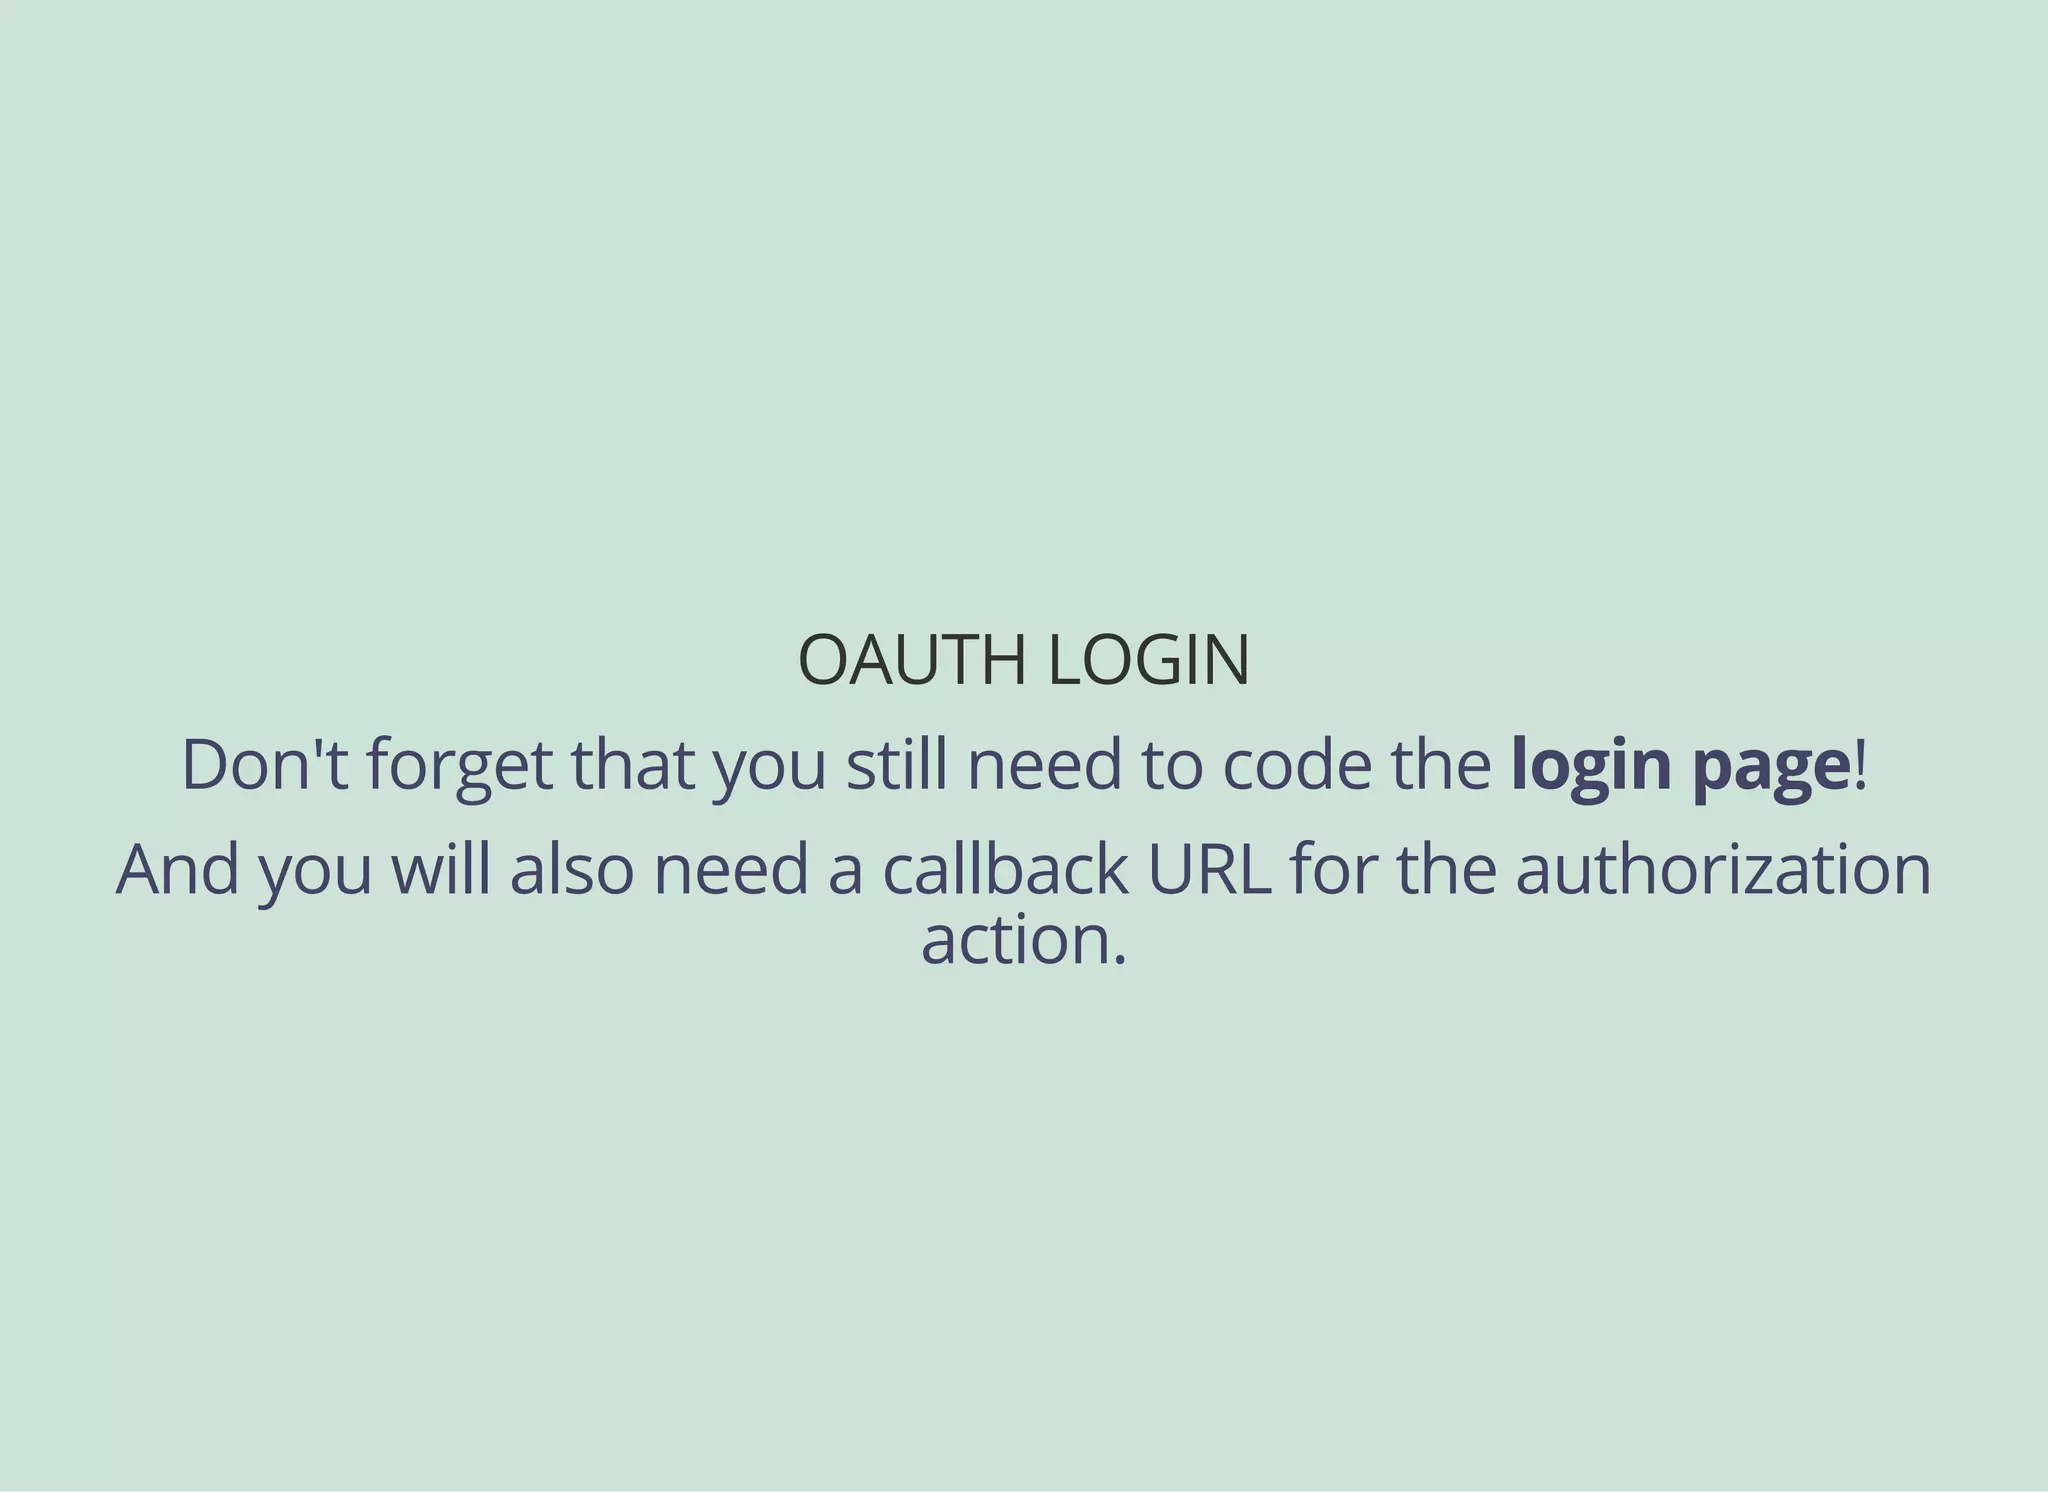
![OAUTH LOCK DOWN
Now we configure the resource endpoints we're locking
down:
// server/middleware.json
"auth": {
"loopbackcomponentoauth2#authenticate": {
"paths": [ "/api" ],
"params": {
"session": false,
"scopes": {
"reviews": [ "/api/Reviews" ],
"user": [
{
"methods": ["find", "findById", "destroy", "save"],
"path": "/api/Users"
}
]
}
}
}
}](https://image.slidesharecdn.com/api-security-slides-150723212436-lva1-app6892/85/StrongLoop-Node-js-API-Security-Customization-60-320.jpg)

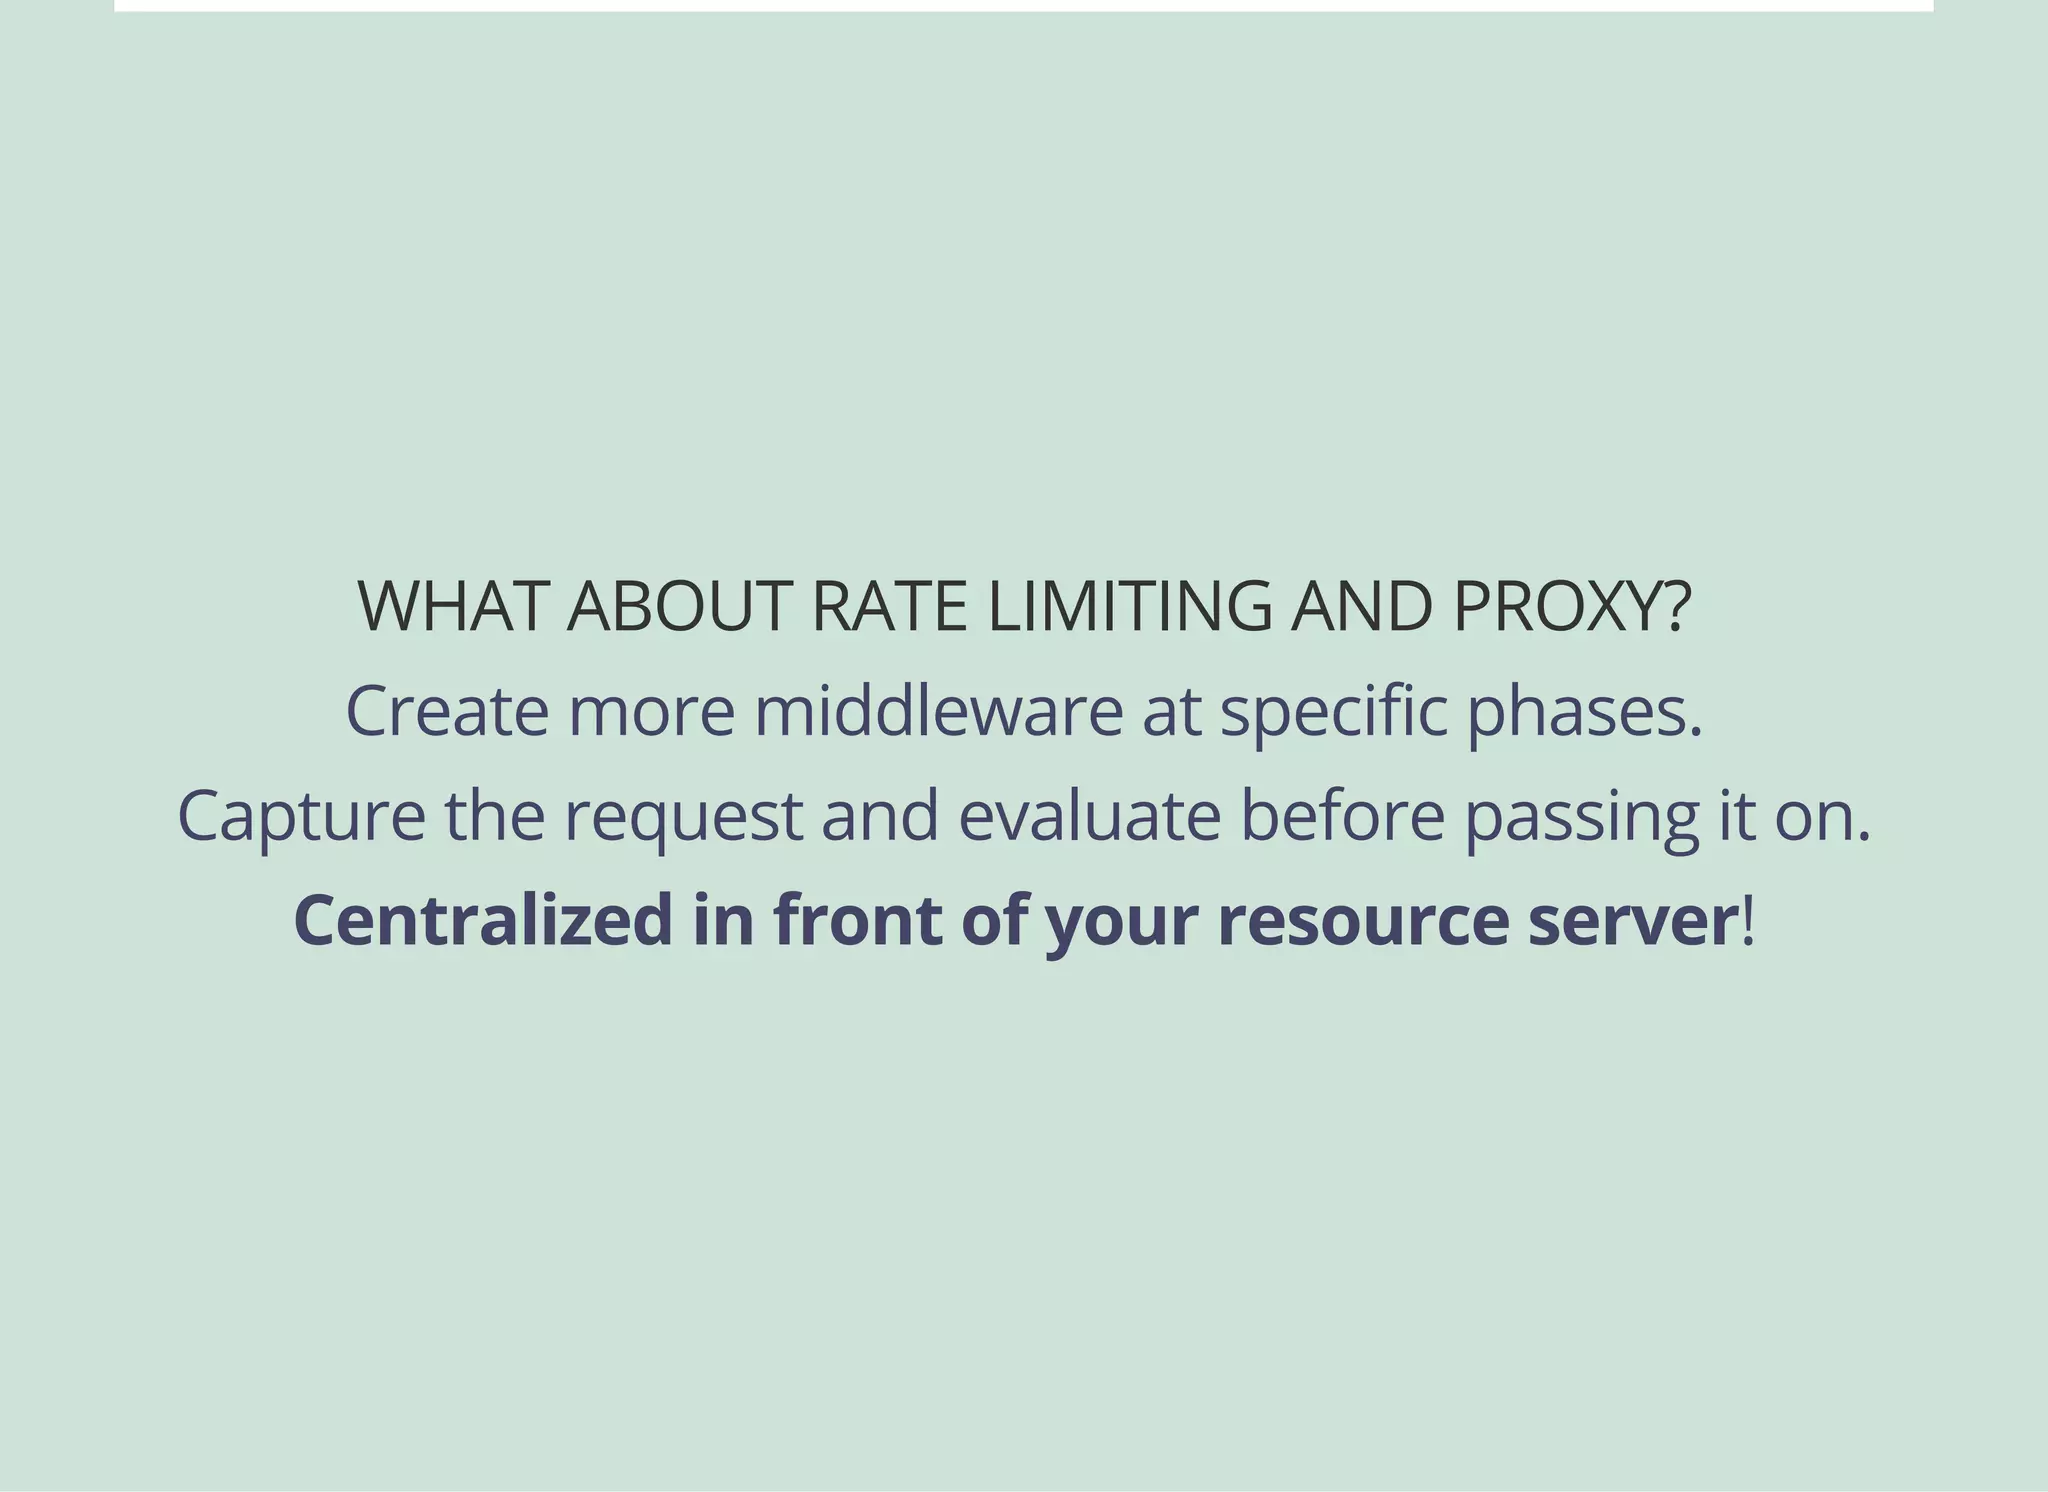
![CONFIGURE RATE LIMITING
"routes:after": {
"./middleware/ratelimiting": {
"params": {
"interval": 60000,
"keys": {
"ip": 100,
"url": {
"template": "url${urlPaths[0]}/${urlPaths[1]}",
"limit": 500
},
"user": {
"template": "user${user.id}",
"limit": 1500
},
"app,user": {
"template": "app${app.id}user${user.id}",
"limit": 2500
}
}
}
}](https://image.slidesharecdn.com/api-security-slides-150723212436-lva1-app6892/85/StrongLoop-Node-js-API-Security-Customization-64-320.jpg)
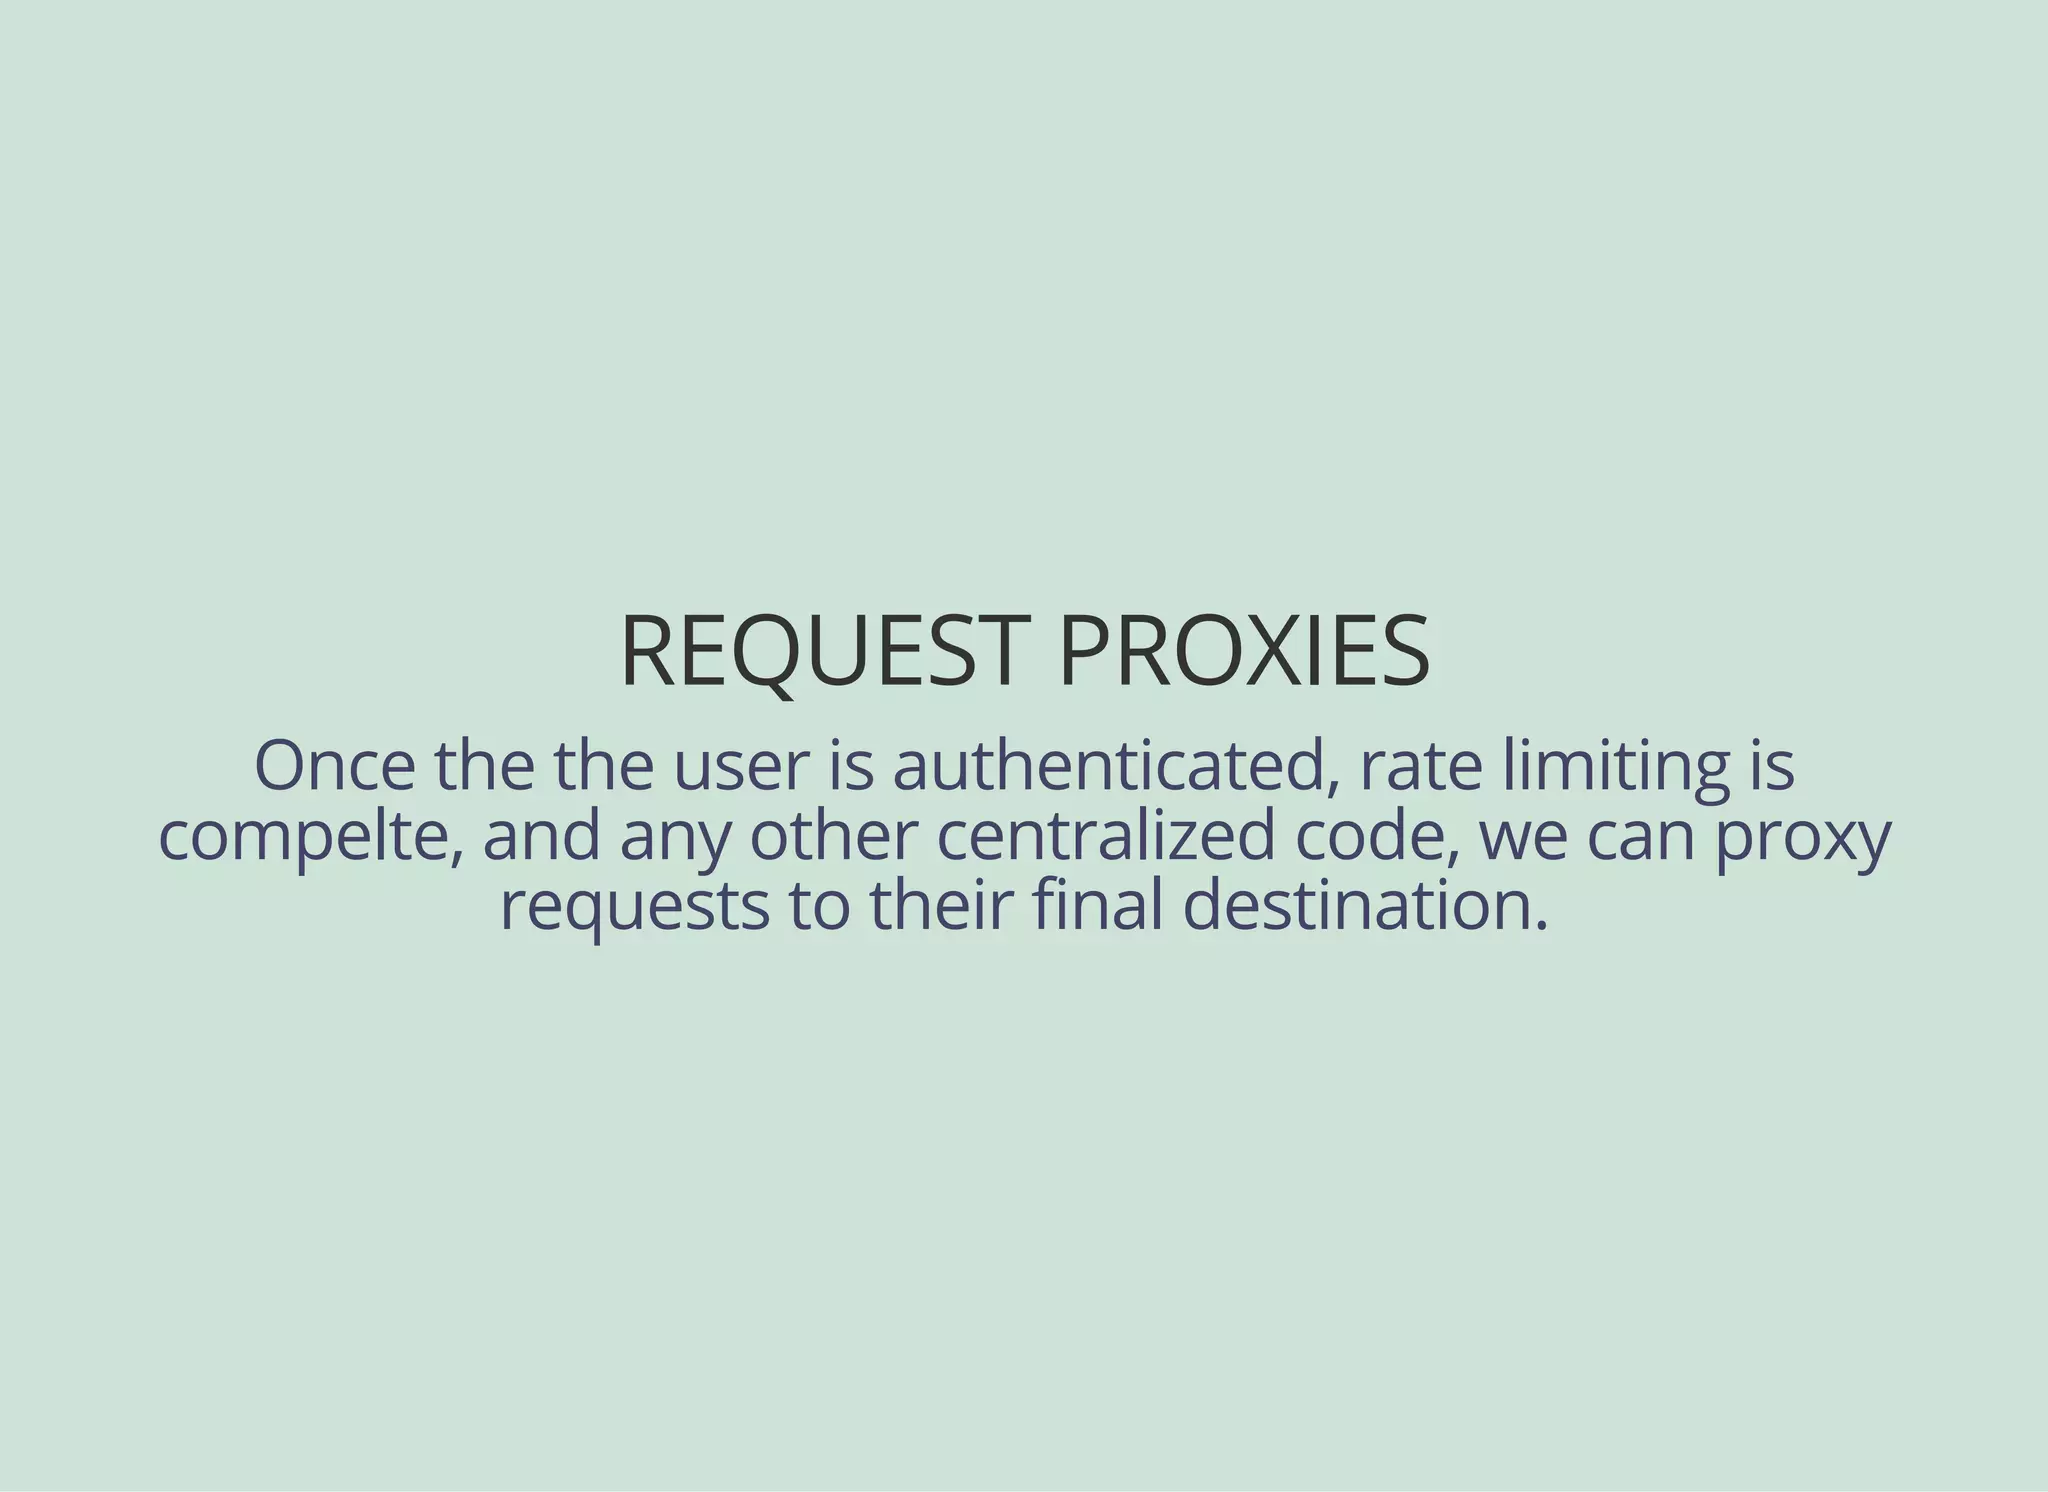
![PROXYING REQUESTS
Send requests from this server to the resource server(s):
// in middleware.json
"routes:after": {
"./middleware/proxy": {
"params": {
"rules": [
"^/api/foo/(.*)$ https://serviceone.com:3007/api/$1 [P]",
"^/api/bar/(.*)$ https://servicetwo.com:3001/api/v2/$1 [P]"
]
}
}
}](https://image.slidesharecdn.com/api-security-slides-150723212436-lva1-app6892/85/StrongLoop-Node-js-API-Security-Customization-66-320.jpg)


![CREATING A MODEL VIA CLI
~/myapp$ slc loopback:model
[?] Enter the model name: CoffeeShop
[?] Select the datasource to attach CoffeeShop to: (Use arrow keys)
❯ mdb (mongodb)
[?] Select model's base class: (Use arrow keys)
Model
❯ PersistedModel
ACL
[?] Expose CoffeeShop via the REST API? (Y/n) Y
[?] Custom plural form (used to build REST URL):](https://image.slidesharecdn.com/api-security-slides-150723212436-lva1-app6892/75/StrongLoop-Node-js-API-Security-Customization-7-2048.jpg)
![CREATING A MODEL VIA CLI
[?] Property name: name
invoke loopback:property
[?] Property type: (Use arrow keys)
❯ string
number
boolean
object
array
date
...
[?] Required? (y/N)
When complete, simply hit "enter" with a blank property](https://image.slidesharecdn.com/api-security-slides-150723212436-lva1-app6892/75/StrongLoop-Node-js-API-Security-Customization-8-2048.jpg)
![MODEL CONFIG
{
"name": "CoffeeShop",
"base": "PersistedModel",
"idInjection": true,
"properties": {
"name": {
"type": "string",
"required": true
}
},
"validations": [],
"relations": {},
"acls": [],
"methods": []
}](https://image.slidesharecdn.com/api-security-slides-150723212436-lva1-app6892/75/StrongLoop-Node-js-API-Security-Customization-9-2048.jpg)
![COFFEESHOP ROUTES
http://localhost:3000/api/CoffeeShops
[]
We don't have any coffee shops yet,
so we get an empty array!](https://image.slidesharecdn.com/api-security-slides-150723212436-lva1-app6892/75/StrongLoop-Node-js-API-Security-Customization-11-2048.jpg)


![DEFINING AN ACL
Here's what this looks like in the config file:
// in common/models/coffeeshop.json
"acls": [
{
"accessType": "*",
"principalType": "ROLE",
"principalId": "$everyone",
"permission": "DENY"
},
{
"accessType": "READ",
"principalType": "ROLE",
"principalId": "$everyone",
"permission": "ALLOW"
}
]](https://image.slidesharecdn.com/api-security-slides-150723212436-lva1-app6892/75/StrongLoop-Node-js-API-Security-Customization-32-2048.jpg)
![USING OWNERS
By creating a belongsTo relation, we can use $owner:
"acls": [
// ...,
{
"accessType": "WRITE",
"principalType": "ROLE",
"principalId": "$owner",
"permission": "ALLOW"
}
]](https://image.slidesharecdn.com/api-security-slides-150723212436-lva1-app6892/75/StrongLoop-Node-js-API-Security-Customization-34-2048.jpg)
![RESTRICTING SPECIFIC METHODS
We can ALLOW or DENY access to specific remote methods:
"acls": [
// ...,
{
"accessType": "EXECUTE",
"principalType": "ROLE",
"principalId": "admin",
"permission": "ALLOW",
"property": "create"
}
]](https://image.slidesharecdn.com/api-security-slides-150723212436-lva1-app6892/75/StrongLoop-Node-js-API-Security-Customization-35-2048.jpg)
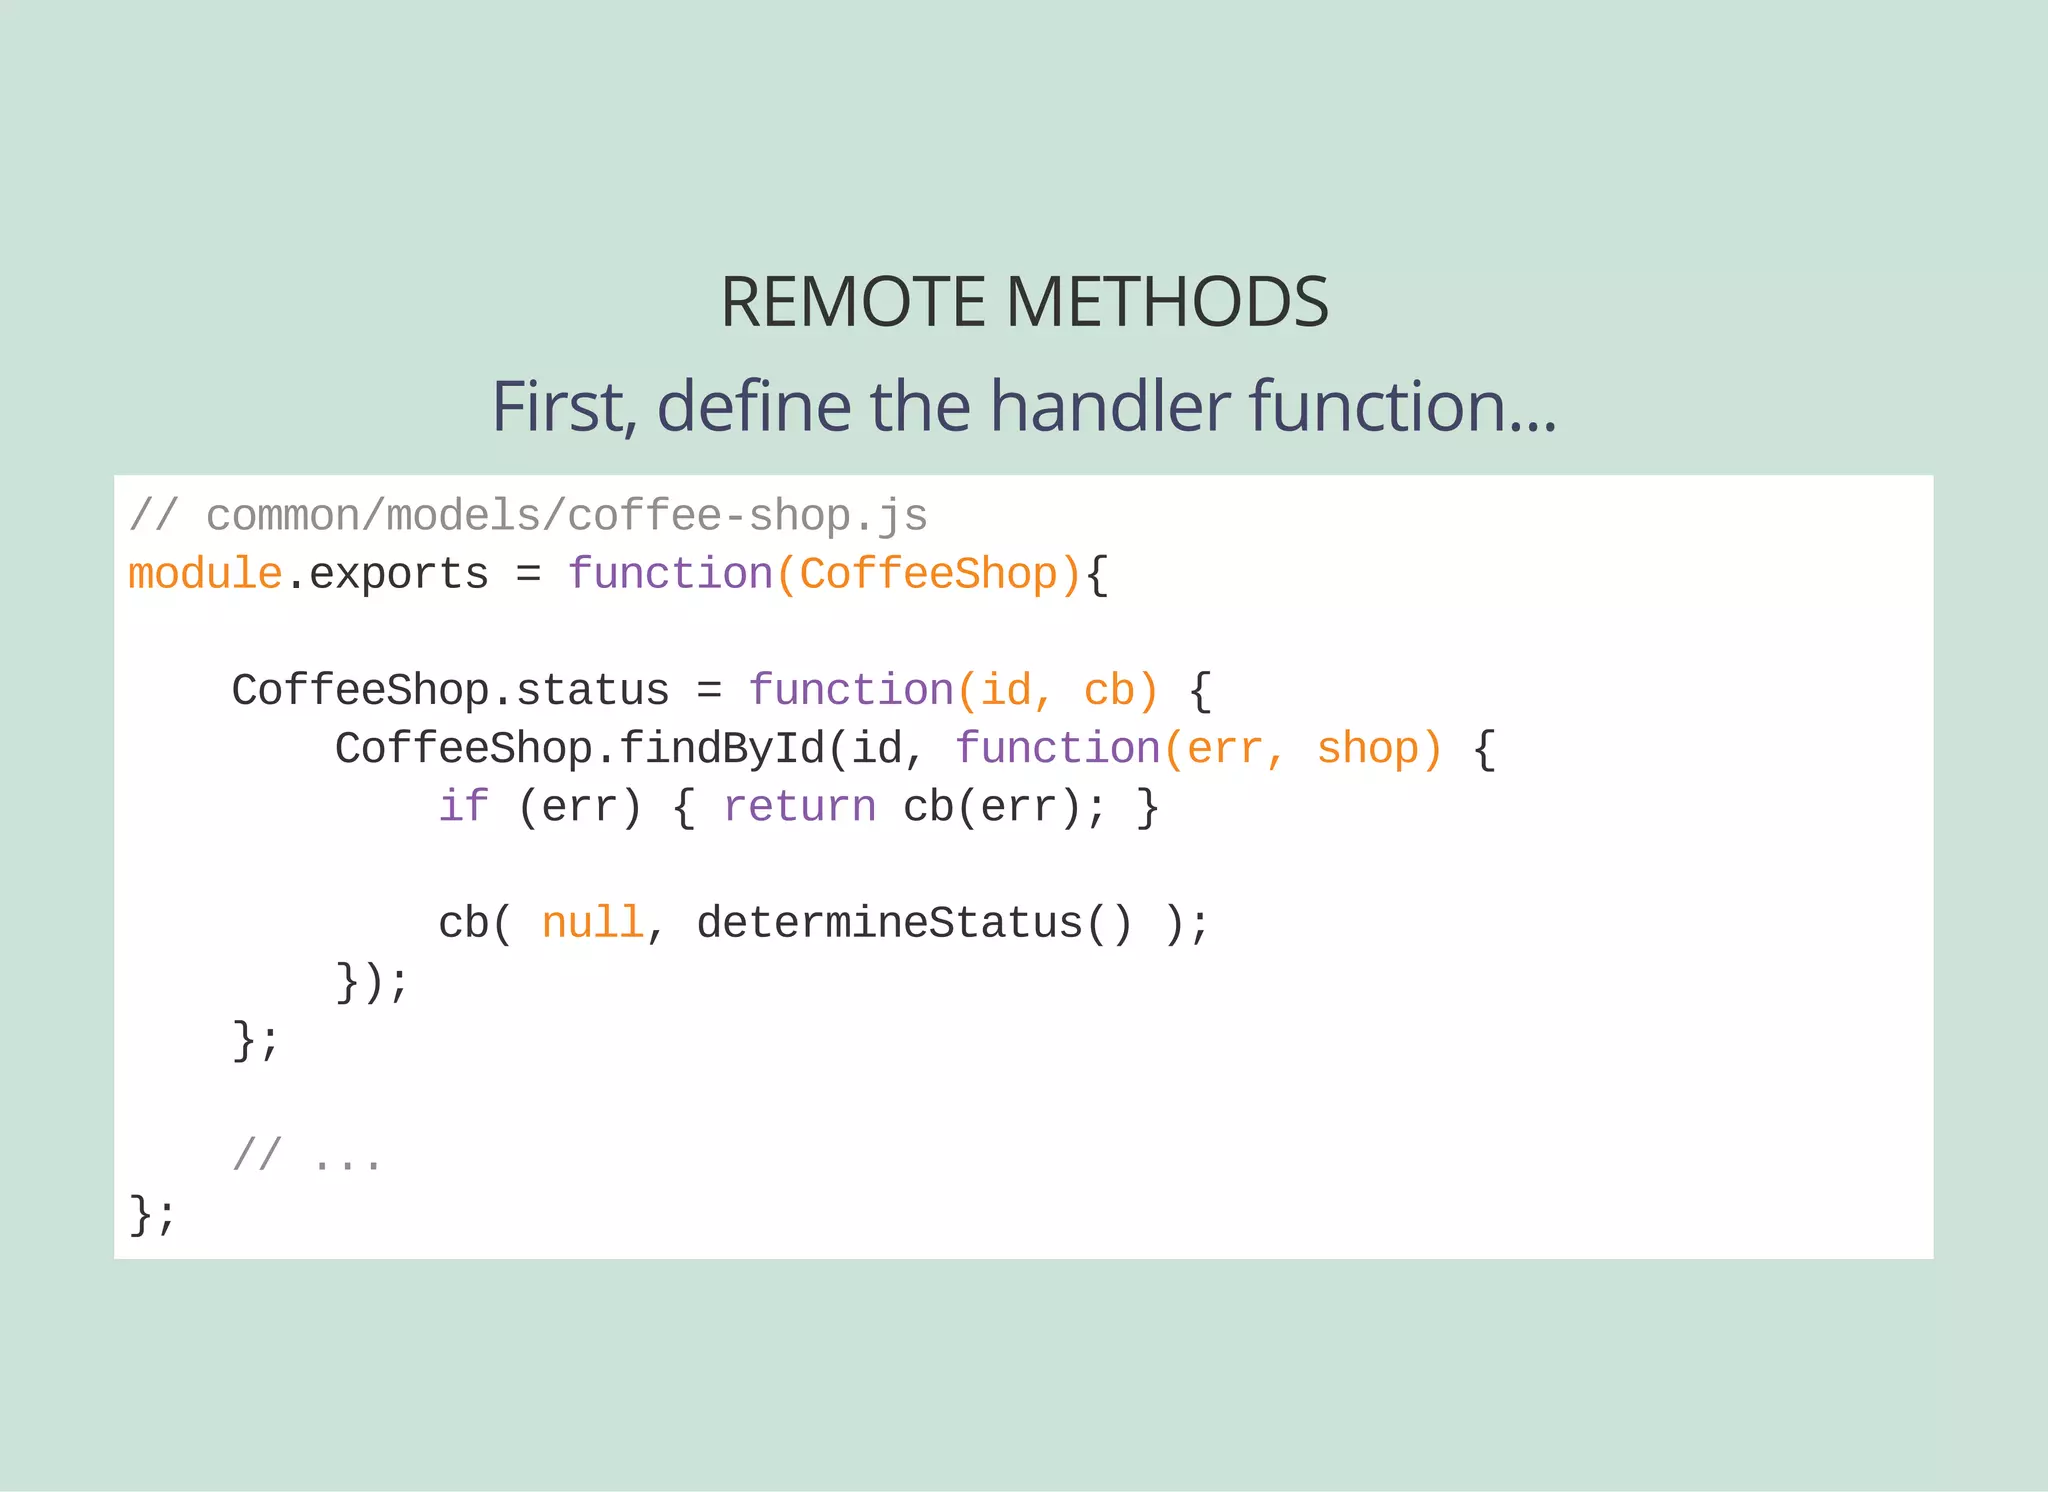
![REMOTE METHODS
Then define the API spec...
// common/models/coffeeshop.js
module.exports = function(CoffeeShop){
CoffeeShop.status = function(id, cb) { /* ... */ }
CoffeeShop.remoteMethod(
'status',
{
accepts: [ {
arg: 'id',
type: 'number',
required: true,
http: { source: 'path' }
} ],
returns: { arg: 'isOpen', type: 'boolean' },
http: [ {verb: 'get', path: '/:id/status'} ]
}
);
};](https://image.slidesharecdn.com/api-security-slides-150723212436-lva1-app6892/75/StrongLoop-Node-js-API-Security-Customization-39-2048.jpg)
![RESTRICTING REMOTE METHODS
Remember, we can ALLOW or DENY access to specific
remote methods on a model, including custom ones!
"acls": [
// ...,
{
"accessType": "EXECUTE",
"principalType": "ROLE",
"principalId": "$unauthenticated",
"permission": "DENY",
"property": "status"
}
]](https://image.slidesharecdn.com/api-security-slides-150723212436-lva1-app6892/75/StrongLoop-Node-js-API-Security-Customization-41-2048.jpg)
![ANGULAR MODELS
When you create your application modules, just include the
LoopBack Services we created from the CLI:
angular.module('myapp', ['ui.router', 'lbServices'])
.config( ... )
.run( ... );](https://image.slidesharecdn.com/api-security-slides-150723212436-lva1-app6892/75/StrongLoop-Node-js-API-Security-Customization-46-2048.jpg)
![CREATING AN AUTH SERVICE
Now we can create an Angular service for authentication:
angular.module('myapp').factory(
'AuthService',
['User', '$q', '$rootScope', function(User, $q, $rootScope) {
function login(email, password) {
return User
.login({ email: email, password: password })
.$promise
.then(function(response) {
$rootScope.currentUser = {
id: response.user.id,
tokenId: response.id
};
});
}
return {
login: login
};
}]
);](https://image.slidesharecdn.com/api-security-slides-150723212436-lva1-app6892/75/StrongLoop-Node-js-API-Security-Customization-47-2048.jpg)
![CONFIGURING PASSPORT
And here is our Facebook-specific config...
// server/boot/setupauth.js
...
module.exports = function(app) {
// ...
configurator.configureProvider('facebooklogin', {
provider: 'facebook',
module: 'passportfacebook',
clientID: '{yourFBclientid}',
clientSecret: '{yourFBclientsecret}',
callbackURL: 'http://localhost:3000/auth/facebook/callback',
authPath: '/auth/facebook',
callbackPath: '/auth/facebook/callback',
successRedirect: '/auth/account',
scope: ['email']
});
};](https://image.slidesharecdn.com/api-security-slides-150723212436-lva1-app6892/75/StrongLoop-Node-js-API-Security-Customization-54-2048.jpg)
![OAUTH LOCK DOWN
Now we configure the resource endpoints we're locking
down:
// server/middleware.json
"auth": {
"loopbackcomponentoauth2#authenticate": {
"paths": [ "/api" ],
"params": {
"session": false,
"scopes": {
"reviews": [ "/api/Reviews" ],
"user": [
{
"methods": ["find", "findById", "destroy", "save"],
"path": "/api/Users"
}
]
}
}
}
}](https://image.slidesharecdn.com/api-security-slides-150723212436-lva1-app6892/75/StrongLoop-Node-js-API-Security-Customization-60-2048.jpg)

![CONFIGURE RATE LIMITING
"routes:after": {
"./middleware/ratelimiting": {
"params": {
"interval": 60000,
"keys": {
"ip": 100,
"url": {
"template": "url${urlPaths[0]}/${urlPaths[1]}",
"limit": 500
},
"user": {
"template": "user${user.id}",
"limit": 1500
},
"app,user": {
"template": "app${app.id}user${user.id}",
"limit": 2500
}
}
}
}](https://image.slidesharecdn.com/api-security-slides-150723212436-lva1-app6892/75/StrongLoop-Node-js-API-Security-Customization-64-2048.jpg)
![PROXYING REQUESTS
Send requests from this server to the resource server(s):
// in middleware.json
"routes:after": {
"./middleware/proxy": {
"params": {
"rules": [
"^/api/foo/(.*)$ https://serviceone.com:3007/api/$1 [P]",
"^/api/bar/(.*)$ https://servicetwo.com:3001/api/v2/$1 [P]"
]
}
}
}](https://image.slidesharecdn.com/api-security-slides-150723212436-lva1-app6892/75/StrongLoop-Node-js-API-Security-Customization-66-2048.jpg)