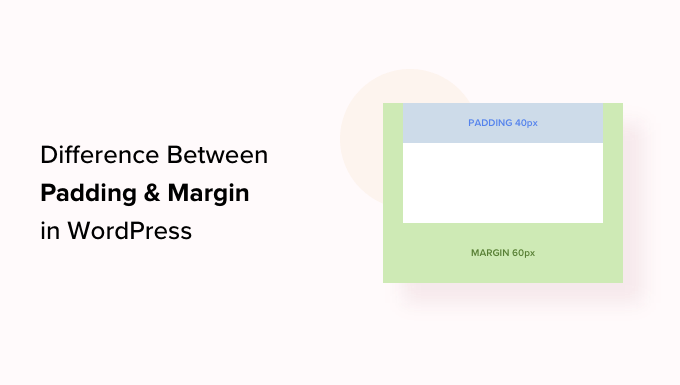
In WordPress, padding is the space between the content and the border within a block, while a margin is the space between two separate blocks.
Understanding the difference between the two is important for anyone looking to refine the layout of their WordPress site.
We’ve helped many users design their websites and one thing we always focus on is spacing. This is where margins and padding really help. When used right, they improve readability and give your site a clean, balanced look.
In this article, we’ll show you the difference between the padding and margin features and how to use them in WordPress.
Here’s a quick overview of what we’ll cover in this guide:
What Is Padding in WordPress?
The padding feature on your WordPress website is used to create space inside a block.
For example, you can add space inside a Text block to make its layout more visually appealing. Plus, it prevents text from appearing too close to the borders of the block.
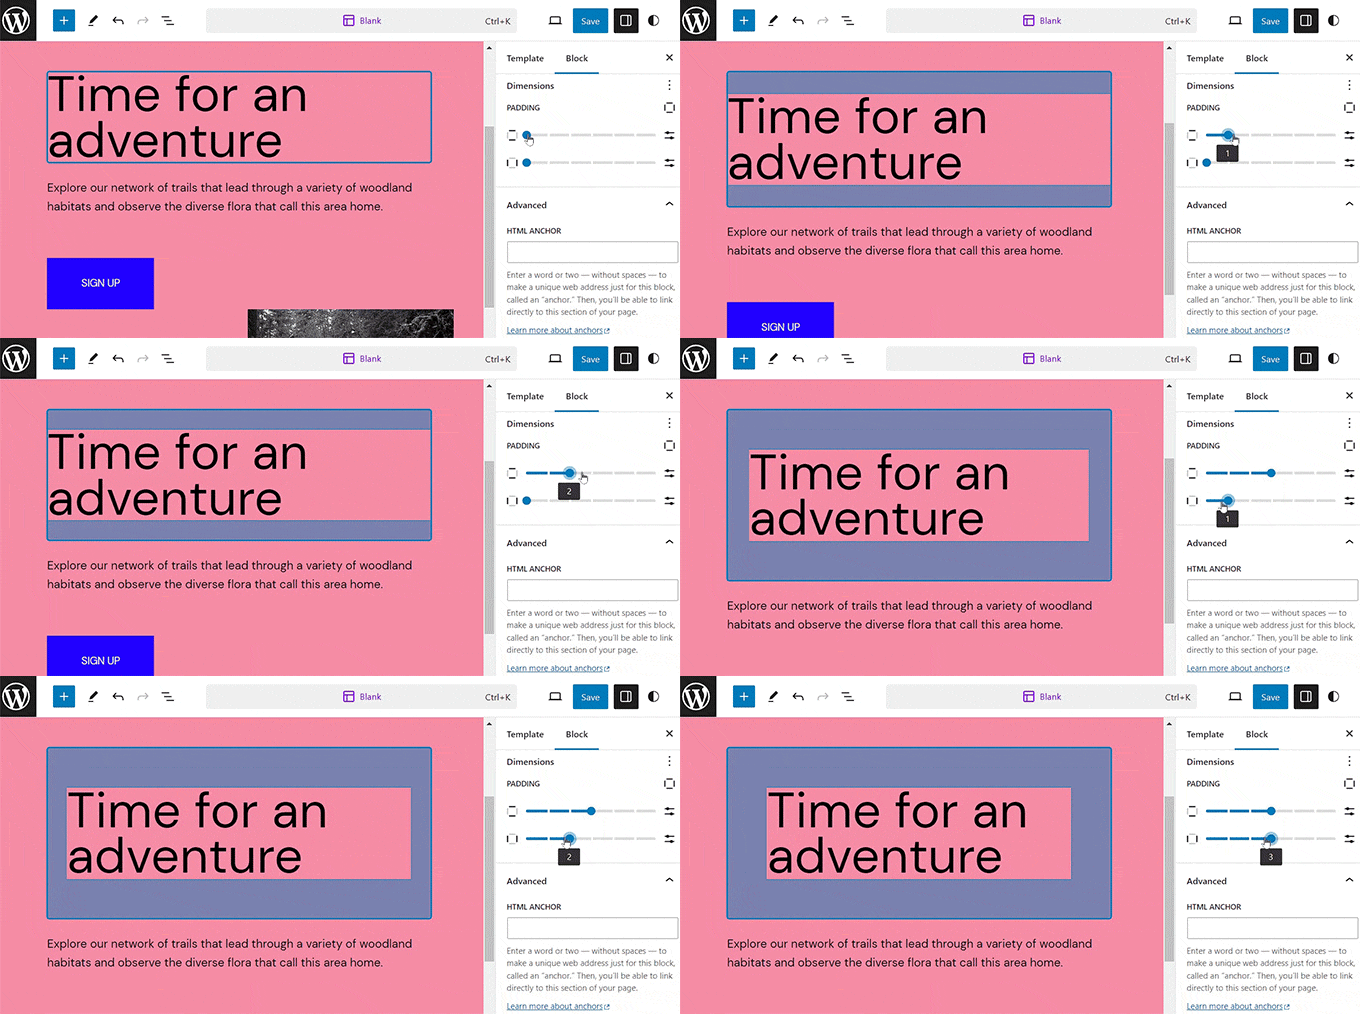
You can also use padding to control how the content flows on your WordPress blog.
For instance, if you add padding to the top and bottom of a Text block, visitors will find it easier to read the content.
What Is a Margin in WordPress?
A margin is a space around the border of a WordPress block and its surrounding elements.
This can help you add space between two different blocks, creating a cleaner and more open website layout.
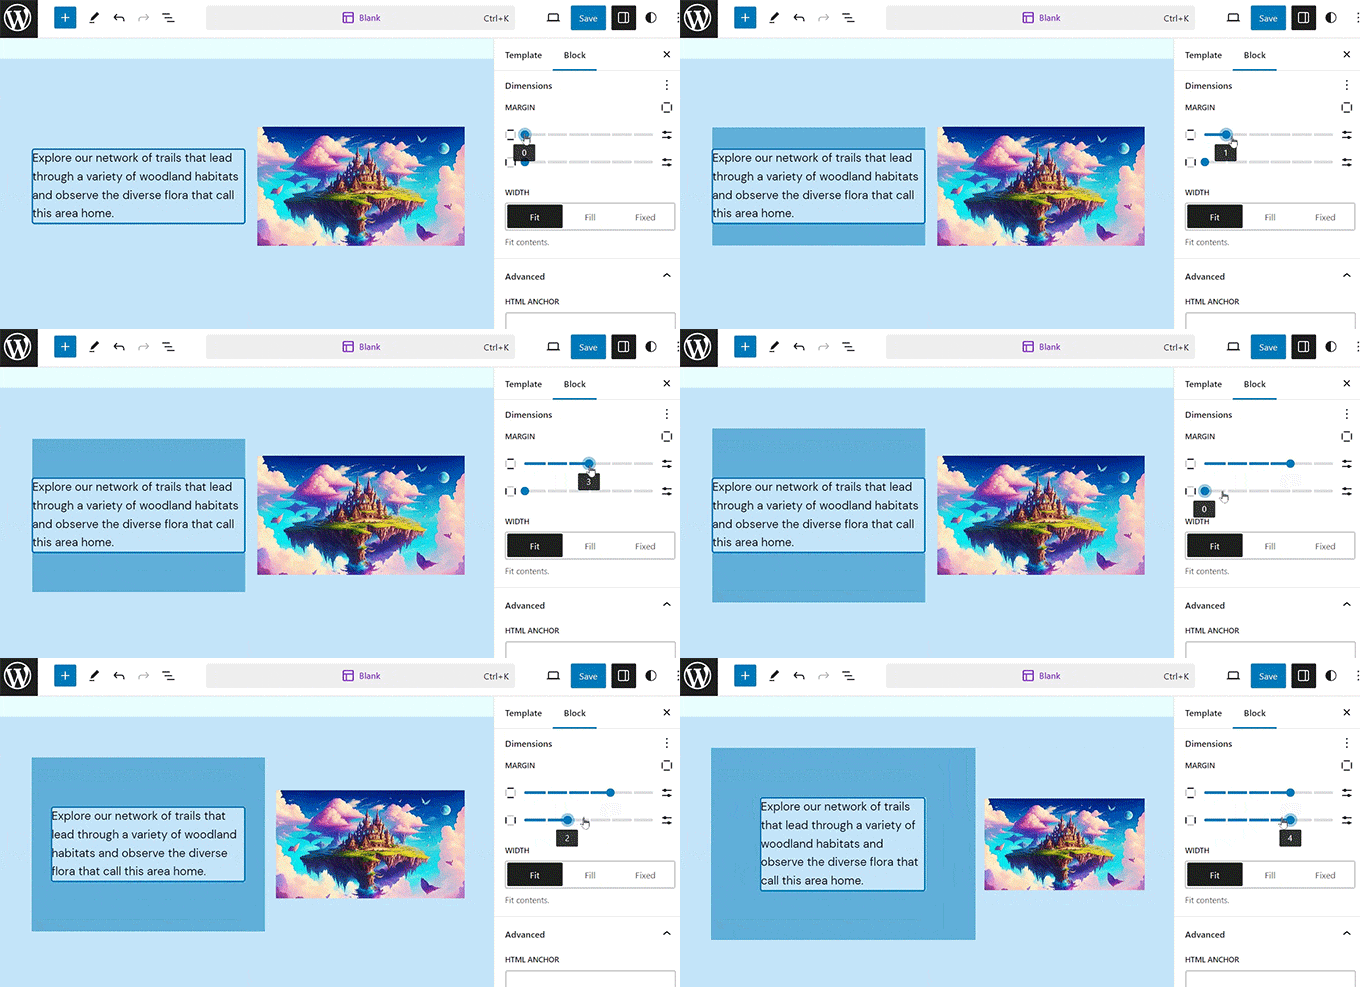
For example, you can add a margin to an Image block to create some breathing room between it and a Text block below it. This helps make your layout look cleaner and more organized.
What Is the Difference Between Padding and Margins in WordPress?
Here is a quick list of the differences between the padding and margin features in WordPress:
| Padding | Margin |
|---|---|
| Padding means adding space between the content and the border of the block. | The margin feature adds space outside the border of the block. |
| Adding padding increases the block’s size. | Using a margin affects other blocks on your website. |
| Padding creates a buffer inside the block, between the content and its border. | Margins can create space between two different blocks. |
How to Use Padding in WordPress
By default, the WordPress full site editor (FSE) comes with the padding feature.
However, keep in mind that if you are not using a block-based theme, then you won’t be able to add padding to your WordPress site unless you use custom CSS.
That said, if you do have a block theme, you can visit the Appearance » Editor page from the WordPress admin sidebar to launch the full site editor.
Once there, choose the page template where you want to add padding to your blocks from the ‘Templates’ sidebar. This sidebar will display all the templates for different pages on your website.
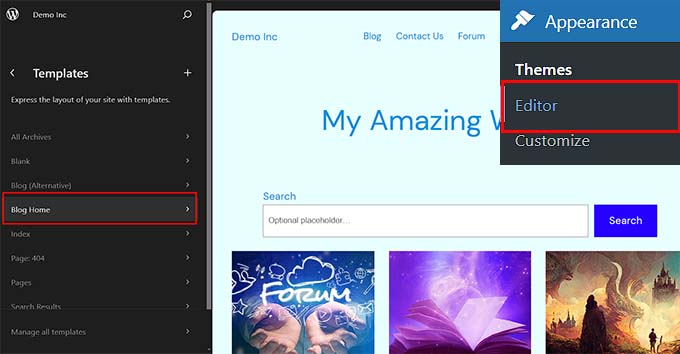
After you have done that, the template that you chose will open up on the screen.
From here, click the ‘Edit’ button to start customizing your page template in the full site editor.

Next, choose the block where you want to add padding. Remember this means that you will be creating space between the content and the border of the block.
This will open the block’s settings in the block panel on the right side of the screen.
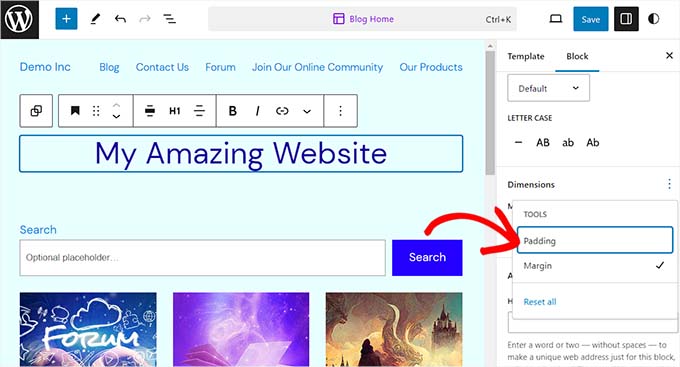
From here, scroll down to the ‘Dimensions’ section and click on the three-dotted menu. This will open a prompt where you must select the ‘Padding’ option.
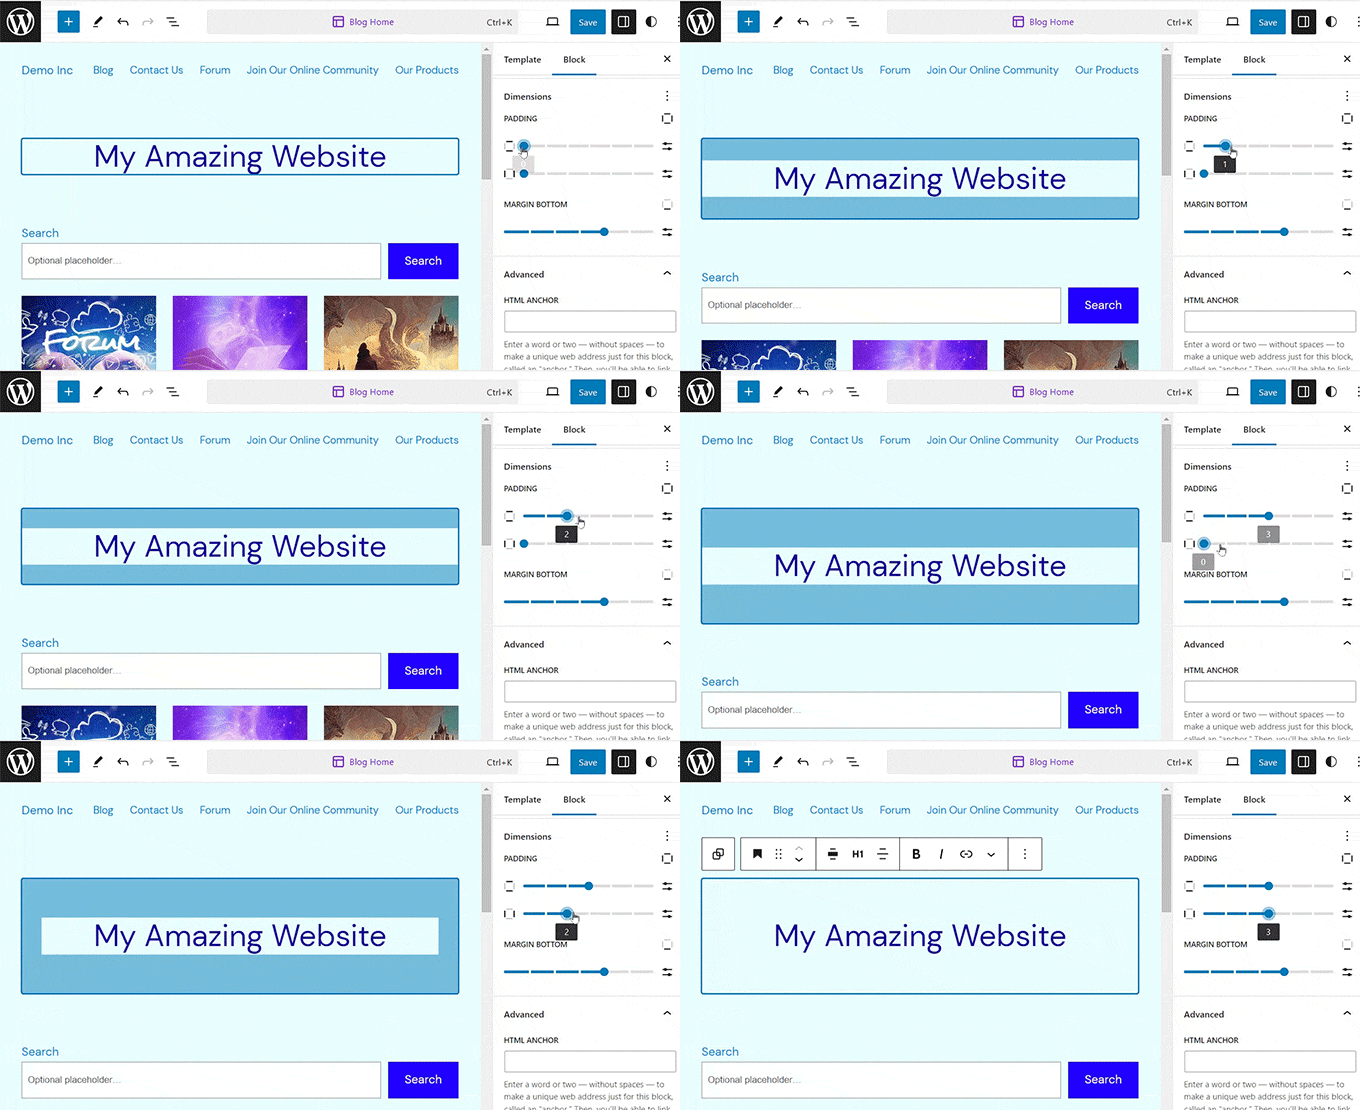
Next, simply use the two sliders to add horizontal and vertical padding to your block.
Keep in mind that these sliders will add padding to all the sides of the block.
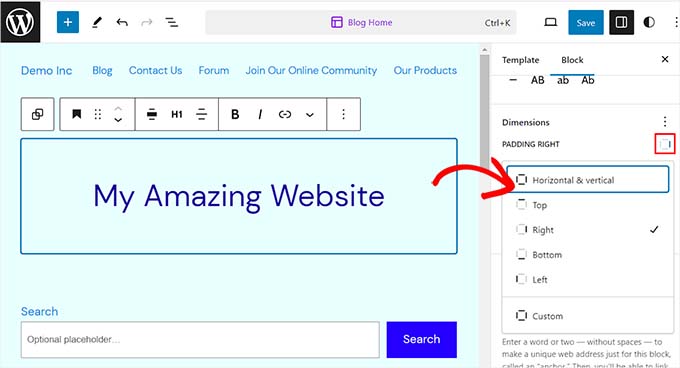
However, if you only want to add padding to the top, bottom, left, or right side of the block, then you can also do that by clicking the ‘Padding Options’ icon in the padding section.
This will open a prompt from where you can select the different sides of the block to which you want to add padding.
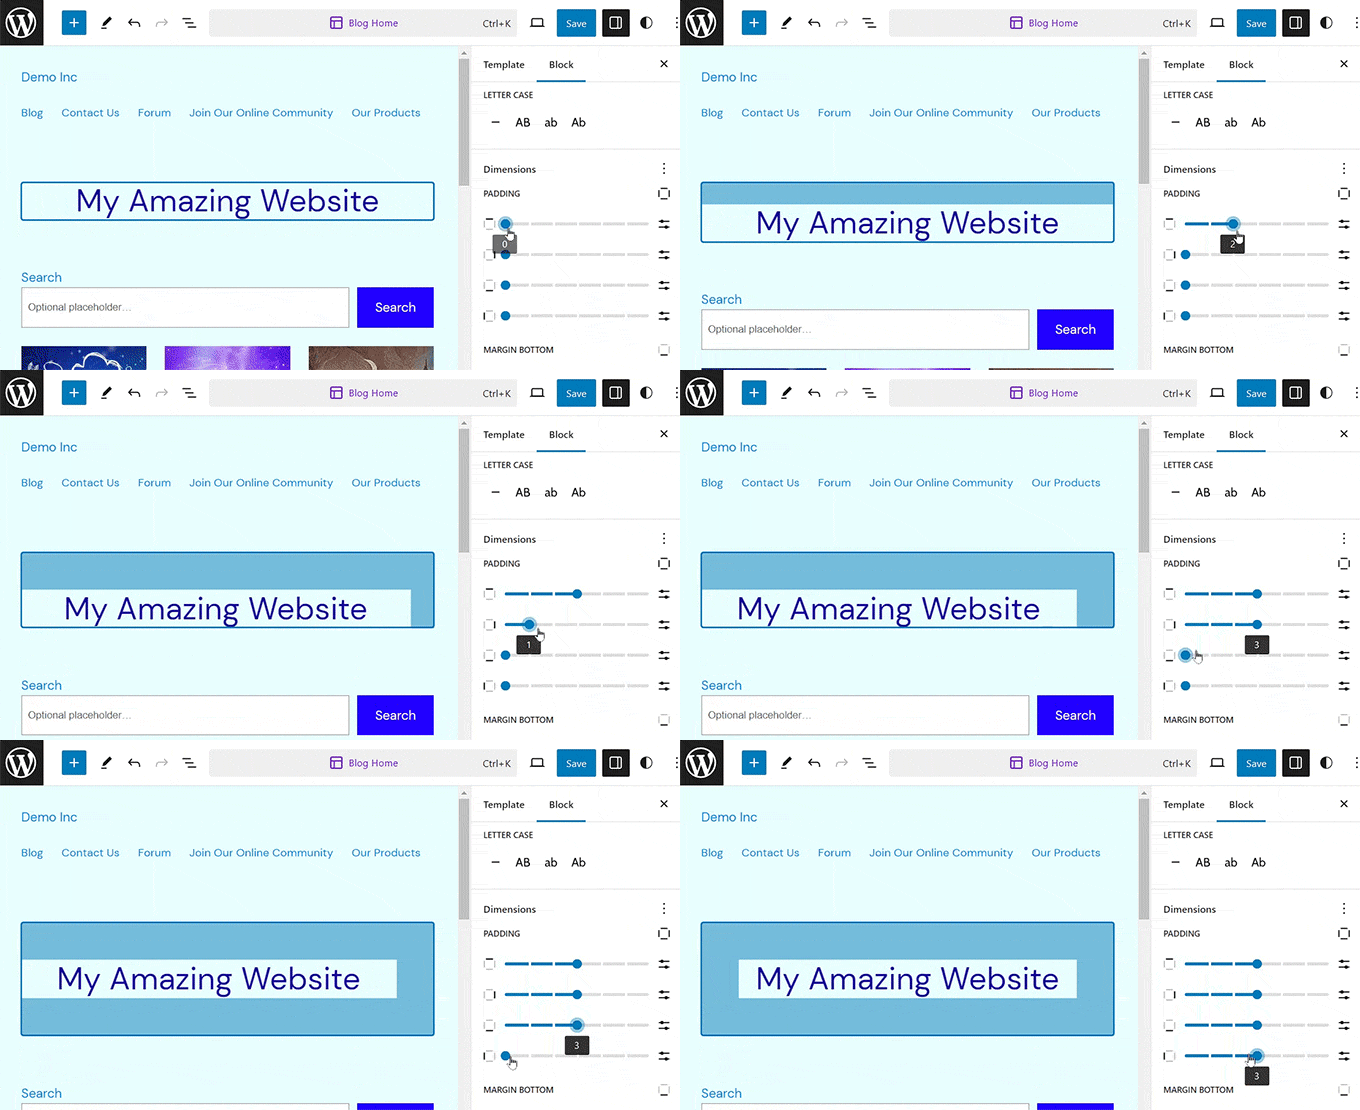
Keep in mind that if you want to add different paddings to more than one side of the block, then you must select the ‘Custom’ option.
This will let you set custom padding for the top, right, bottom, and left sides of the block.
Once you are done, just click the ‘Save’ button to store your settings.
How to Use Margins in WordPress
Just like padding, the margin feature is built into the WordPress full site editor. However, keep in mind that this feature won’t be available if you are not using a block theme.
The process for adding margins is very similar to adding padding.
You can get started by going to Appearance » Editor and opening the template you want to customize, just like we did in the section above.
From here, just select the ‘Edit’ button to start customizing your template in the full site editor.

Next, choose the block that you want to edit and scroll down to the ‘Dimensions’ section in the block panel on the right.
From here, you can use the two sliders to set equal horizontal and vertical margins for all sides of the block. This feature will create space around the block that you chose.
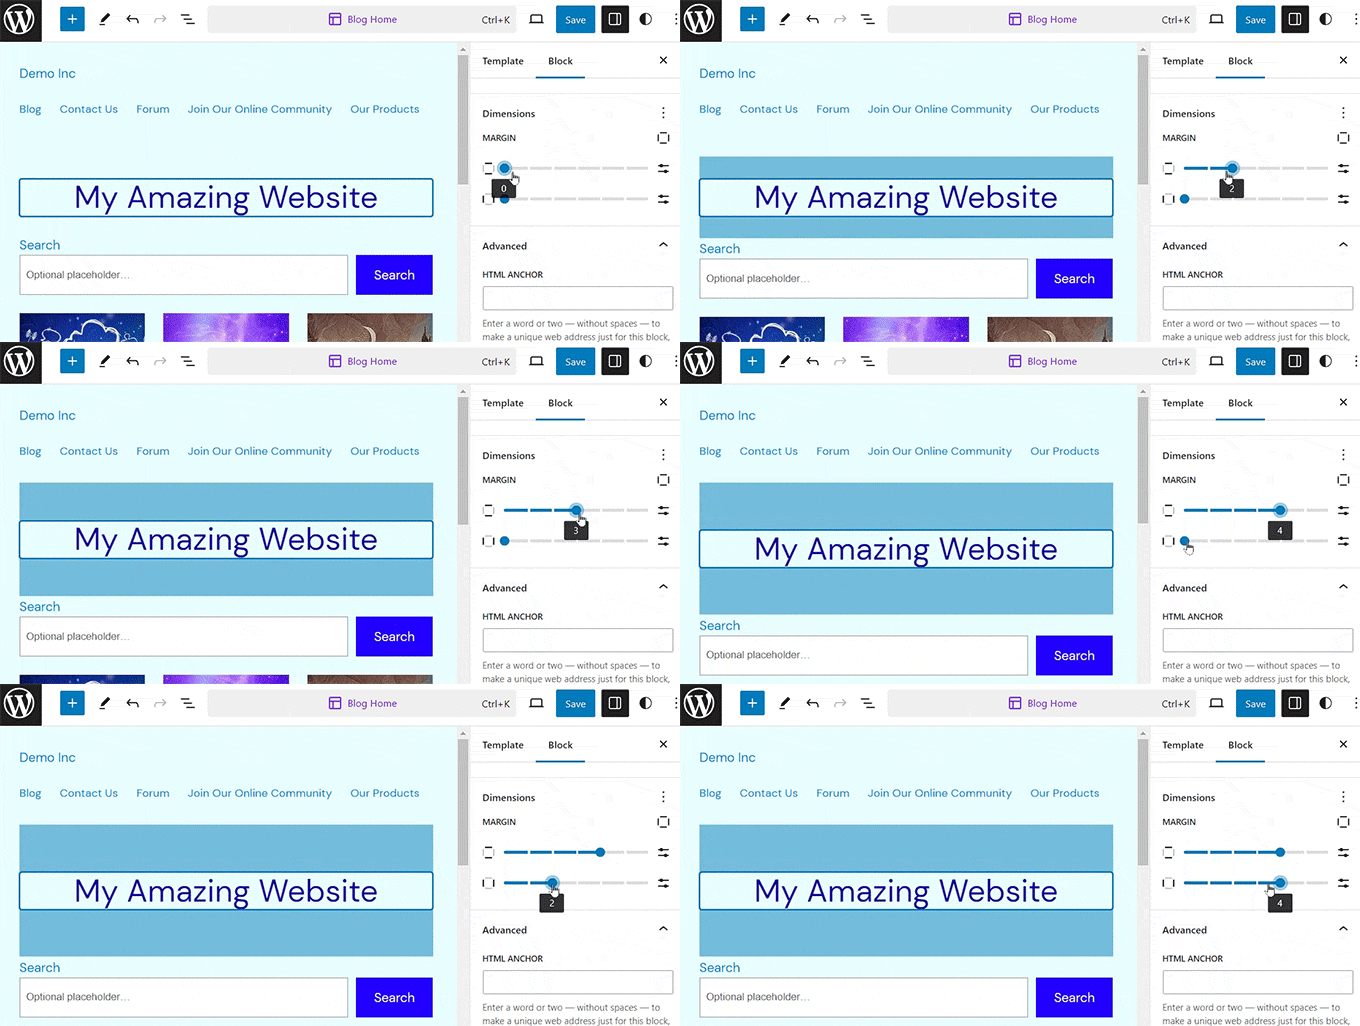
However, you can also use multiple sliders to add different margins around the block. For this, click the ‘Margin Options’ icon in the section.
This will open a new prompt on the screen from where you can select one side of the block to add a margin.
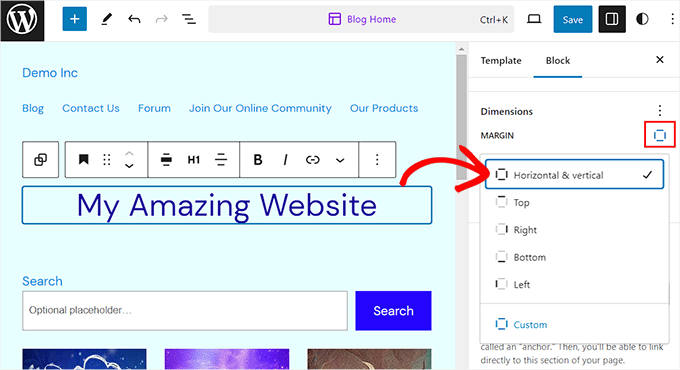
However, if you want to add different margins to multiple sides, then you can select the ‘Custom’ option.
The block panel will now display various sliders on the screen that you can use to set different margins around the block.
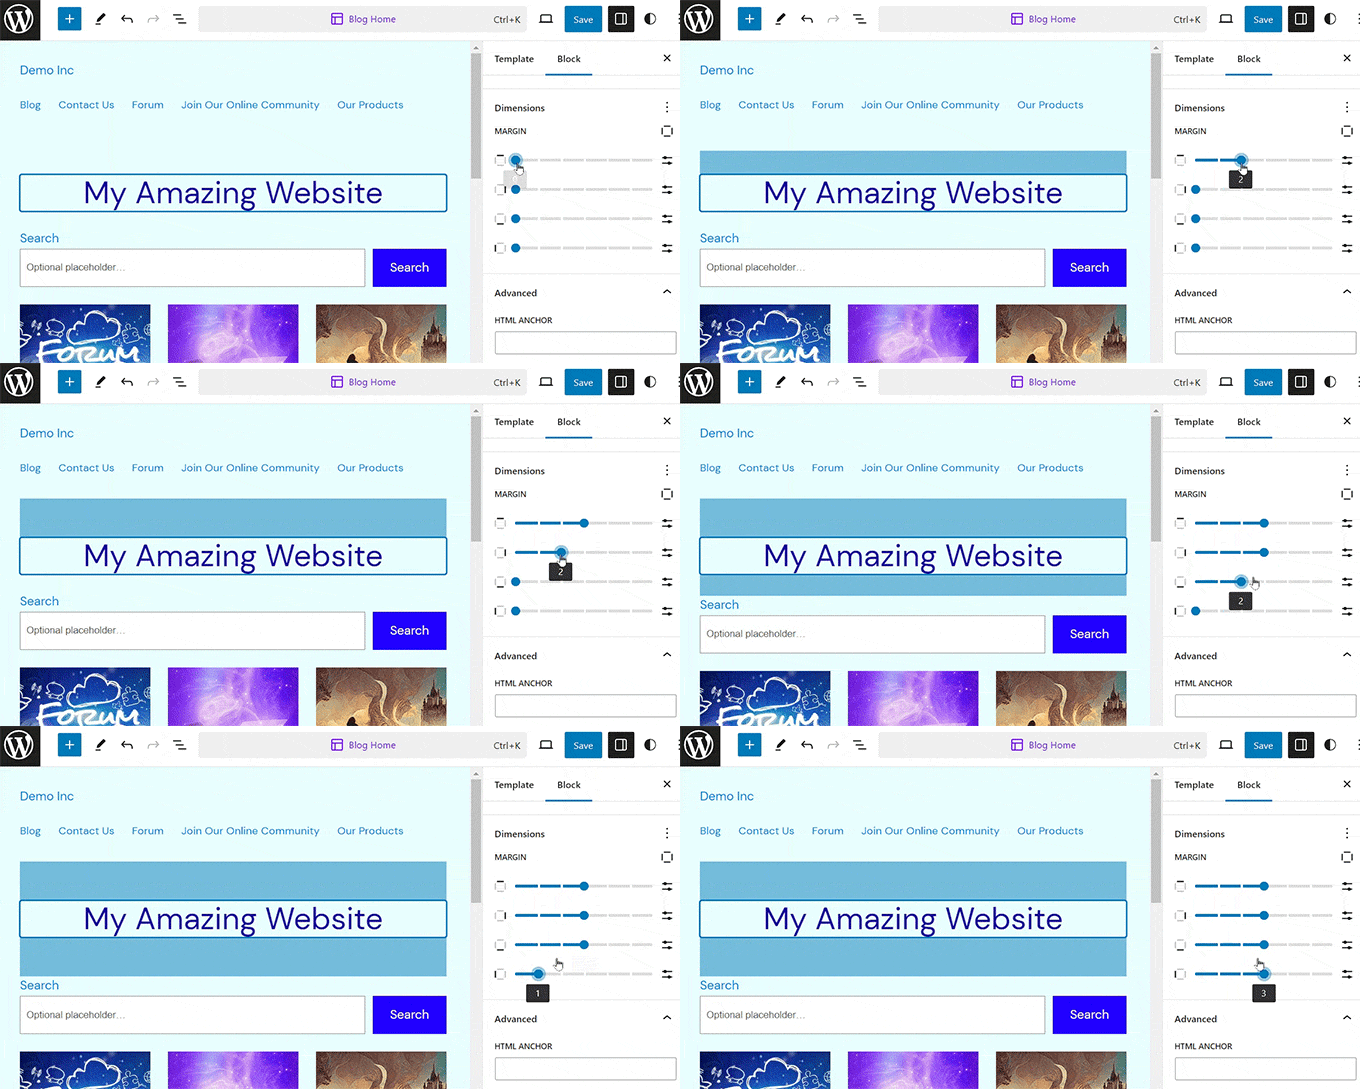
Once you are done, don’t forget to click the ‘Save’ button at the top to store your settings.
More Tips for Full Site Editing in WordPress
Other than adding padding and margins to your blocks, you can also use the full site editor to customize your entire WordPress theme.
For example, you can design all your page templates, add your own custom logo, choose brand colors, change the layout, adjust the font size, add background images, and more.
You can also add patterns and different blocks to your website to further customize it. For details, see our beginner’s guide on how to customize your WordPress theme.
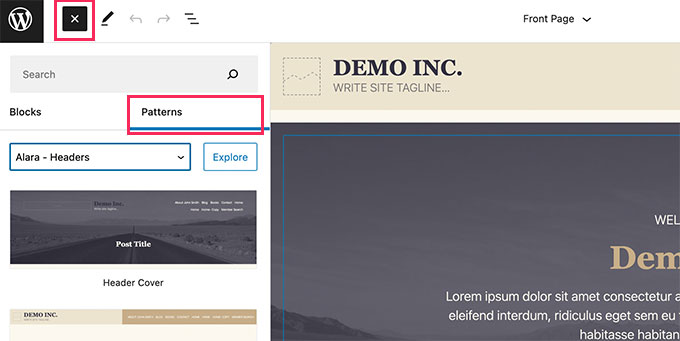
You can also use the FSE to add a header, navigation menu, or custom CSS to your website.
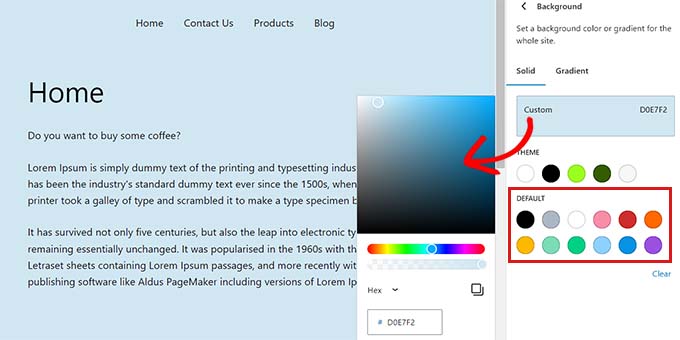
Additionally, you can use Global Styles to ensure consistency across your site. For more instructions, see our guide on how to customize colors on your WordPress website.
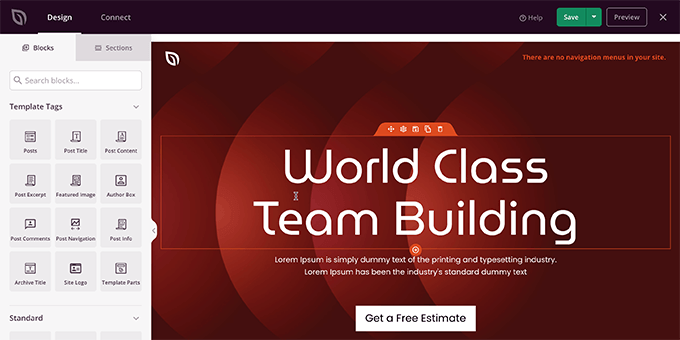
However, if you don’t like using the full site editor and would prefer more control over your website’s appearance, then you can use SeedProd to build pages and even your entire theme.
It comes with a drag-and-drop builder, making it super easy to create an amazing theme for your website.
For more details, you can see our tutorial on how to easily create a custom WordPress theme.
You may also want to check our complete SeedProd review.
Frequently Asked Questions
Here are some questions frequently asked by our readers about using padding and margin in WordPress:
What is the main difference between padding and margin?
The easiest way to remember the difference is that padding is the space inside an element, between the content and its border.
Margin is the space outside an element, creating distance between it and other nearby elements.
When should I use padding instead of a margin?
You should use padding when you need to create more breathing room around the content within a block.
For instance, you could add padding to a group block so the text inside doesn’t touch the edges. Use a margin when you need to push two separate blocks away from each other.
Can I adjust padding and margins with a classic WordPress theme?
The visual controls for padding and margin are part of the Full Site Editor and are only available in block themes.
With a classic theme, you would need to add custom CSS code to adjust the spacing for different elements on your site.
What’s the difference between the margin and block spacing settings?
Block spacing is a global setting that automatically applies a consistent amount of vertical space between all blocks.
A margin is a setting you apply to an individual block to add custom space around it, which can override the global block spacing setting.
We hope this article helped you learn the difference between the padding and margin features in WordPress. You may also be interested in our beginner’s guide on how to change block height and width in WordPress and our top picks for the best Gutenberg block plugins for WordPress.
If you liked this article, then please subscribe to our YouTube Channel for WordPress video tutorials. You can also find us on Twitter and Facebook.


kzain
I liked the visuals that helped to illustrate the concepts. I found it helpful to think of padding as the space inside a box, and margin as the space outside the box. This way, I can easily remember which one to use when I’m styling my content. Thank i can always recommend this to beginners who are just starting with wordpress
Jiří Vaněk
These are exactly those details that a person doesn’t often remember and then tries to figure out what that slider actually does. Thanks to the mentioned GIFs, it’s beautifully explained what padding and margin specifically do. It’s superb. It’s like a mnemonic aid. What you read, you usually forget, but what you see, you tend to remember much better.
A Owadud Bhuiyan
I always just remembered that the margin is from the outside and padding from the inside.
Also, I kept remembering that margin is an important factor regarding the responsive issue on a website.