
When we started testing checkout optimization methods, one thing became crystal clear: the fewer clicks to purchase, the better.
Modern shoppers expect Amazon-like convenience, and adding one-click checkout to your WordPress site can give them exactly that.
We’ve thoroughly tested multiple one-click checkout solutions, comparing everything from WooCommerce extensions to plugins like WPForms. This research has revealed 5 distinct approaches, each with its own advantages for different types of businesses.
And in this guide, we’ll show you these 5 tested methods for adding one-click checkout in WordPress.

💡Quick Answer: For most users looking to sell a single product or service, the easiest way to create a fast checkout page is by using WPForms. For full eCommerce stores, FunnelKit provides the most powerful express checkout features.
This guide will show you 5 tested methods for creating a faster checkout experience in WordPress, so you can choose the best approach for your business.
Why Do You Need to Create a One-Click Checkout in WordPress?
An express or one-click checkout allows customers to buy items online without having to enter their shipping, billing, and payment details every time they make a purchase.
This works like an advanced auto-complete feature. Instead of bypassing the checkout page entirely, it securely pre-fills the user’s saved details, making the process much faster.
Visitors can complete their purchases quickly, which leads to higher conversion rates and reduced cart abandonment rates.
Whether you have an online store, a service business, or a membership site, it’s a simple way to increase sales.
That said, we’ll cover the five methods for adding a one-click checkout in WordPress:
- Create a One-Click Checkout Using WPForms (Easy + Free Option)
- Create a One-Click Checkout Using WP Simple Pay (Multiple Payment Methods)
- Create a One-Click Checkout Using Easy Digital Downloads (Digital Products)
- Create a One-Click Checkout Using FunnelKit (eCommerce Stores)
- Create a One-Click Checkout Using WooCommerce (Free)
- Frequently Asked Questions About One-Click Checkouts
Method 1: Create a Fast Checkout Form Using WPForms (Easy + Free Option)
WPForms is perfect for creating simple payment pages or order forms.
This method is ideal for selling a single product, offering a service, or collecting donations, as it provides a streamlined checkout experience.
It integrates with Stripe Link, which allows you to build a form that securely saves and pre-fills customer payment details for a much faster checkout process.

WPForms is a powerful form builder that lets you create any type of form with an easy drag-and-drop interface. Also, with 2000+ templates to choose from, you can practically find any form type, meaning you never have to start from scratch.
At WPBeginner, we have used the plugin to create contact forms and annual surveys and have found it to be super beginner-friendly. For details, see our WPForms review.
Step 1: Install WPForms And Connect to Stripe
To begin, download and activate the WPForms plugin. For more details, check out our guide on how to install a WordPress plugin.
Upon activation, head over to the WPForms » Settings page from your WordPress admin dashboard. Then go to the Payments tab.
Under Stripe, you’ll need to hit the ‘Connect with Stripe’ button.

This redirects you to the Stripe connection wizard, where you’ll be able to connect to your existing account or create a new account.
Follow the steps in the Stripe connection wizard.

After completing the steps, you’ll be taken back to the WordPress dashboard.
You should see a green checkmark indicating that your Stripe account is now connected to WPForms.

Step 2: Create Your Checkout Form
Now, you can start accepting payments on your website and are ready to create your checkout form.
Go to WPForms » Add New. From here, you can name your form, which will be helpful for reference later.

Then, pick a payment form template that suits your needs.
For this tutorial, we’ll use the Stripe Payment Form template. Under the template, click on ‘Use Template.’

You’ll be taken to the drag-and-drop form editor, where you can easily customize the form to your needs.
Any time you want to add a field, just drag and drop it from the ‘Add Fields’ panel on the left to the right side. To edit the fields, click on the element, and you can make adjustments under ‘Field Options.’

For example, if you were to create a wholesale form, you can edit the multiple-choice field with radio buttons.
Then click on the element, and under ‘Field Options,’ you can add the different products.

Step 3: Enable Express Checkout
You’ll now need to activate Stripe Link. It is a one-click checkout solution that securely stores all the customer details and allows buyers to reuse them on your site.
Because Stripe uses Level 1 PCI-compliant servers, sensitive payment information is handled on their secure servers, not your own website. This significantly reduces your security burden.
To activate the Stripe Link checkout option, head over to the Settings » Payments page in Stripe. Then, go to the Payment Methods tab.

From here, you’ll select the ‘WPForms LLC’ menu for Select Platform.
This connects all available payment methods from your Stripe account to WPForms.

Scroll down the page, and you will see the different payment methods and settings for WPForms.
Make sure that the Link option for express checkout is Active.

After that, go back to WordPress to finish creating your checkout form. Go to the Payments » Stripe tab.
Then turn on the ‘Enable one-time payments’ option so that Stripe is activated on your form.

Step 4: Embed and Publish Your Form
Once you’re done with that, hit the ‘Save’ button.
Then click on ‘Embed.’

You should see a popup message appear. Here, you can choose to embed this form into an existing page or create a new page.
Assuming you already have a checkout page, we’ll hit the ‘Select Existing Page’ button.

The form should automatically be embedded into the page you choose.
From there, just hit the ‘Publish’ or ‘Update’ button up top.

Make sure to preview the checkout form and see if the payments are going through to your Stripe account.
Once activated, it’ll pre-fill their credit card details that are saved on Stripe.

Keep in mind that customers with Stripe accounts will be prompted to enter a one-time passcode authentication to use Link.
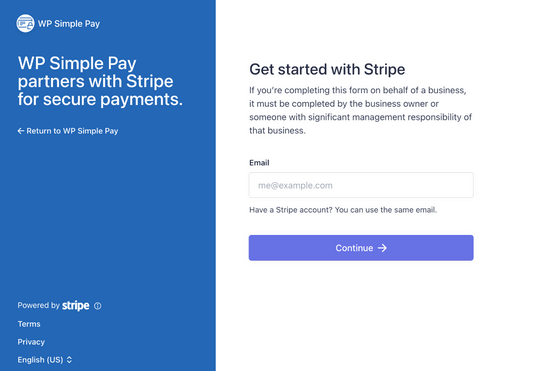
Method 2: Create a Fast Checkout Page with WP Simple Pay (Multiple Payment Methods)
WP Simple Pay is another great choice for creating standalone payment pages.
It’s the best option if you want to offer multiple express checkout methods, not just Stripe Link.

When testing, we found the plugin supports over 13 payment methods, including Google Pay, Apple Pay, and Venmo. This gives your customers the flexibility to pay with their preferred saved option, making the process incredibly fast.
For more information about the tool, you can see our WP Simple Pay review.
Step 1: Install WP Simple Pay and Connect Stripe
To get started, install and activate the WP Simple Pay plugin. Upon activation, you’ll be taken to the setup wizard, which will guide you through the process of accepting payments on your site.

Make sure to follow the steps all the way through.
You would also be asked to connect your Stripe account. If you don’t have a Stripe account, you can create one.
After you’ve completed the setup wizard, you’ll be shown a success page that confirms that the setup is finished.
Next, go to the WP Simple Pay » Settings page. Under the Stripe Tab, make sure that the Stripe account is connected and that you’re in ‘Live Mode.’

Step 2: Enable Express Checkout Options
Before you go into creating your payment form, you also need to ensure that Stripe Link is enabled.
To do that, go to the Settings » General tab. Then, under the Advanced tab, check the ‘New Payment Experience’ box.

From here, you’re ready to start customizing your checkout form.
Step 3: Create and Customize Your Payment Form
Head over to WP Simple Pay » Add New, and you’ll be taken to a library of available templates.
You can choose any template that fits your needs, but we’ll be using the Payment Form template for this tutorial. Under the template name, select ‘Use Template.’

Next, you’ll be taken to a form builder. In the General tab, you can fill out the necessary information.
Give the form a Title and Description. You can also check the CAPTCHA and email verification options to prevent spam submissions.

From there, navigate to the Payment tab so you can start adjusting the pricing and currency options.
You can also set the pricing to a one-time or subscription option.

Below that, you can have a wide range of payment methods to choose from.
Click the checkboxes of the options you wish to accept.

In the Form Fields tab, you can add any fields you want by selecting them from the dropdown menu and clicking on ‘Add Field.’ You can also edit your existing fields.
To enable Stripe Link, expand the Email Address dropdown menu. Then, you’ll have to click on the checkbox under ‘Offer Saved Payment Methods.’

Then, head over to your Stripe account. Go to the Settings » Payments page.
Under the Payment Methods tab, select ‘WP Simple Pay’ from the ‘Select platform’ dropdown menu.

Then, go back to WordPress and finish customizing your payment form.
Step 4: Publish and Add the Form to Your Site
Once your form customization is complete, go ahead and hit ‘Publish.’

Now, you can go to any page you want and add the newly created form.
Hit the ‘+’ icon and then add the WP Simple Pay block.

Then, choose the payment form you’ve just created, and it should appear on the page.
Click on the ‘Publish’ or ‘Update’ button at the top.’

Now, you’ve successfully created a one-click checkout experience with WP Simple Pay.
Make sure to preview the form to ensure it works.

Method 3: Create a One-Click Checkout in WordPress Using Easy Digital Downloads (Digital Products)
If you sell digital products, there’s no better plugin for creating a one-click checkout in WordPress than Easy Digital Downloads.
With over 50,000+ users, this plugin allows you to easily manage and sell digital products like eBooks, PDFs, audio, online courses, templates, and more.

Several of our partner brands are using it to sell their plugins and have had an excellent experience. For more details, see our Easy Digital Downloads review.
Step 1: Install And Activate EDD
To get started, you’ll need to install and activate Easy Digital Downloads. Upon activation, the plugin automatically creates a checkout and cart page for you.
You can create a faster checkout process by adding a ‘Buy Now’ button with EDD. This button streamlines the purchase by bypassing the ‘Add to Cart’ step and taking the customer directly to checkout to complete their payment.
For the sake of this tutorial, we’ll assume you already have a digital product created on EDD. But if you haven’t, you’ll want to read our beginner’s guide on how to sell digital downloads on WordPress.
Step 2: Connect to Your Stripe Account
To connect your Stripe account with EDD, go to the Downloads » Settings page in the WordPress admin panel.
Under the Payments » Stripe tab, you’ll want to click on ‘Connect with Stripe.’

You’ll be taken to the Stripe Connect Wizard.
Simply connect your existing Stripe account or create a new one.

Once connected, you’ll be directed back to WordPress.
You should see that Stripe is one of the payment options checked off in the General tab.

Step 2: Activate the Stripe Link
After that, you have to go back to your Stripe account. Then head over to the Settings » Payments page.
Under the Payment Methods tab, make sure to choose the ‘Easy Digital Downloads’ option from the ‘Select platform’ dropdown menu.

By doing so, every time someone purchases your digital products, Stripe Link will be activated, and their credit card information will be auto-completed into the fields.
Step 3: Add a ‘Buy Now’ Button to Your Product
Next, go to the Downloads » Downloads page. Then, find a digital product to which you want to add the buy now button and click ‘Edit.’

Once you’re in the block editor, click on the black side panel widget at the top.
Scroll down in the panel until you reach Button Options. From there, select ‘Buy Now’ from the dropdown menu.

Then you’ll hit the ‘Publish’ or ‘Update’ button.
From here, you can preview your page, and you should see a ‘Checkout’ button at the bottom of your product page, which takes you straight to the checkout page. Then, you can enter your email, and Stripe will autofill your billing and payment details.

Method 4: Create a One-Click Checkout in WordPress Using FunnelKit (eCommerce Stores)
If you have an eCommerce store, FunnelKit Funnel Builder is the best choice for setting up your express checkout process.

This popular sales funnel builder allows you to easily create a high-converting sales funnel to boost your average order value, reduce cart abandonment rates, and capture more leads.
Upon evaluation, we discovered that you can do everything from creating lead capture pages and order bumps to creating checkout forms and sliding side carts. Best of all, you won’t need to write any code.
To learn more, see our Funnelkit Funnel Builder review.
For this method, you’ll already need to set up your product pages for WooCommerce. If you have not set up your store yet, check out our complete step-by-step WooCommerce tutorial.
Step 1: Install FunnelKit and Connect Stripe
To get started, install and activate the FunnelKit Automation plugin. Upon activation, head over to FunnelKit » Cart. You’ll want to turn on the ‘Enable Cart’ option. Under the ‘Express Checkout’ tab, click on ‘Connect with Stripe.’

After that, you’ll be taken to the Stripe Connect Wizard.
Simply follow the steps to connect your Stripe account to FunnelKit or create a new account.

Once your Stripe account is connected to FunnelKit, you’ll be taken back to WordPress.
You’ll want to activate the ‘Credit Card (Stripe)’ option and then hit ‘Save and Continue.’

Step 2: Set Up Stripe Webhook and Payment Options
Next, you’ll be asked to set up a webhook so that you’re able to automatically process payments with a single click.
Click on ‘Setup Webhook Now.’

From here, you need to enable the express checkout option for Google Pay and Apple Pay.
Then, hit the ‘Confirm’ button.

You should see a confirmation message that says that the Stripe setup is successful.
Feel free to select the ‘Live’ mode if you’re ready to start accepting payments. Otherwise, you can choose the ‘Test’ option for now. Then click on ‘Save and Review Settings.’

Step 3: Enable Express Checkout on Your Cart Page
Next, you’ll want to head back to FunnelKit » Cart. Then, under the Express Checkout tab, simply turn on the ‘Enable Express Checkout on Cart’ option.
Then, hit the ‘Save’ button to save changes.

Once that is enabled, you’re good to go.
Just go to a live product page to see it in action.

When a customer chooses the ‘Pay Now’ option, a window will pop up.
All of the payment details saved to their Google and Apple Pay accounts will automatically appear.

Method 5: Create a One-Click Checkout in WordPress Using WooCommerce (Free)
If you want a free method to add the one-click checkout to your WooCommerce store, then you can download the Direct Checkout for WooCommerce plugin.

It’s a free plugin that adds a one-click buy button to your store. This provides a true one-click purchase experience for logged-in customers who have saved their payment and shipping information. When they click the button, the order is placed instantly.
For new or guest visitors, the button will simply take them directly to the standard checkout page, bypassing the cart.
Step 1: Configure Express Checkout Settings
Upon activation, go to the WooCommerce » Settings page. Then, navigate to Payments » Express Checkout.
From here, click the checkbox that says ‘Enable Express Checkout.’
The plugin offers a wide range of customizations. You can customize where you want the one-click checkout button to appear, as well as the color of the button and the text shown.

Step 2: Check Your Product Page
Now you’re all set.
Simply go to a product page or your storefront to see the one-click checkout button.

Frequently Asked Questions About One-Click Checkouts
Here are some questions that our readers have frequently asked before adding one-click checkouts on their websites:
1. What is the difference between one-click checkout and express checkout?
A true one-click checkout is for returning customers who are logged into your site and have their payment details saved. They click one button, and the purchase is made instantly.
An express checkout (using Apple Pay, Google Pay, or Stripe Link) is for any customer. It speeds up the process by pre-filling their saved payment and shipping info, but they still need to confirm the final purchase.
2. Which checkout method is best if I’m not selling products, but a service?
For selling services, single items, or collecting donations, creating a fast payment form with a plugin like WPForms or WP Simple Pay is the best approach.
These tools let you build a simple, dedicated page for payment without needing a full eCommerce setup like WooCommerce.
3. Do I need an SSL certificate to use these checkout methods?
Yes, an SSL certificate is essential for securely processing any payments on your website. It encrypts the connection between the customer’s browser and your server, protecting their data. Most good WordPress hosting providers offer a free SSL certificate that you can easily enable.
4. Do all these methods require me to have a Stripe account?
Yes, all five methods detailed in this guide rely on Stripe for payment processing.
Stripe is the platform that securely powers the express checkout features like Stripe Link, Google Pay, and Apple Pay. You will need to create a free Stripe account to connect to any of these plugins.
We hope this article helped you learn how to create a one-click checkout in WordPress. You may also want to see our list of the best WooCommerce plugins for your store and our tutorial on how to sell a single product online in WordPress.
If you liked this article, then please subscribe to our YouTube Channel for WordPress video tutorials. You can also find us on Twitter and Facebook.
")


 in 2024")
Moinuddin Waheed
One click checkout process is a must to have to ensure smooth transaction.
I have seen and realised myself that the more complicated the checkout process is, the less chances of getting conversion there.
Having a one click checkout process is good for both the user and the website owners.
It’s good to see how easily one click checkout can be implemented using wpforms.