When you’re running an eCommerce store, you need to be sure that customers will receive their receipts and any order update emails quickly.
However, when WooCommerce fails to send order emails, it can disrupt your business and worry customers. The good news is that this is a common problem with a simple fix.
We run several eCommerce stores where we regularly send emails to customers about orders, payments, and more. And we use plugins like WP Mail SMTP to ensure our emails are delivered straight to our customers’ inboxes.
In this article, we will show you the easy way to fix WooCommerce not sending order emails.
What Stops WooCommerce Emails From Sending?
If you are running an online store, then you rely on email to keep your business running smoothly.
You use email to welcome new customers and build your relationship with them. Emails are sent to confirm orders and follow up on abandoned shopping carts. And email is needed to let customers reset their passwords.
But all too often, we hear that eCommerce sellers have trouble with WooCommerce not sending emails.
Sometimes, this happens because of common issues in your WooCommerce settings. We’ll show you how to check those settings first.
Other times, it’s a deeper issue with the way WordPress sends emails. By default, WordPress sends emails through PHP mail. Unfortunately, not all WordPress hosting servers are correctly configured to use PHP mail.
Even when your emails are sent successfully, they may be incorrectly identified as spam. This means they could be automatically deleted without ever being seen.
The best way to ensure your emails are reliably delivered is to send them through an SMTP service.
We’ll show you how to set up an SMTP server later in this guide. But first, let’s do some troubleshooting to make sure your WooCommerce settings are correct.
Check WooCommerce Email and Order Settings
The first thing to check is your WooCommerce settings for emails and orders. If one of your settings is wrong, then your order emails won’t be sent.
Check WooCommerce Email Settings
We’ll start by checking that your emails haven’t been accidentally deactivated. To do that, navigate to WooCommerce » Settings on the WordPress dashboard and click on the Emails tab.
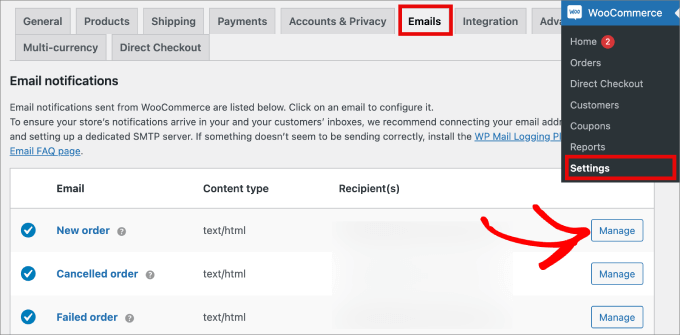
Here, you’ll see a list of all the notification emails that WooCommerce will send. Some are sent to you, and some to your customers. You’ll need to check the settings for each email.
Let’s start at the top and check the ‘New order’ email by clicking on the ‘Manage’ button on the right.
You’ll need to check two settings. First, make sure the email is enabled. Sometimes, it is disabled accidentally, and the email won’t be sent if the box isn’t checked.
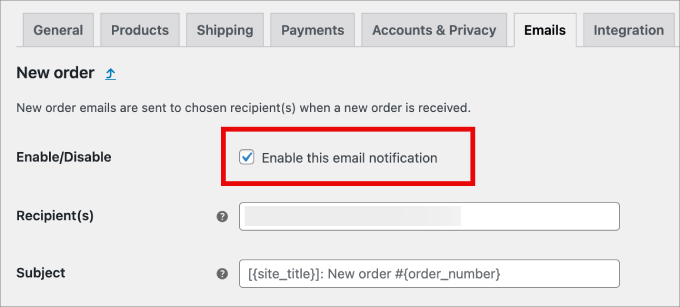
Second, you need to make sure that the recipient’s email address is correct. You’ll only find this setting for emails that will be sent to you.
When an email is sent to the customer, the correct email address will be used automatically.
You can do the same for each type of email in the list. If everything looks good, we need to check the status of each order where WooCommerce did not send an order email.
Check WooCommerce Payment Status
You’ll need to navigate to WooCommerce » Orders to check the status of recent orders. If you don’t yet have any orders, then you’ll want to create a test order and then come back.
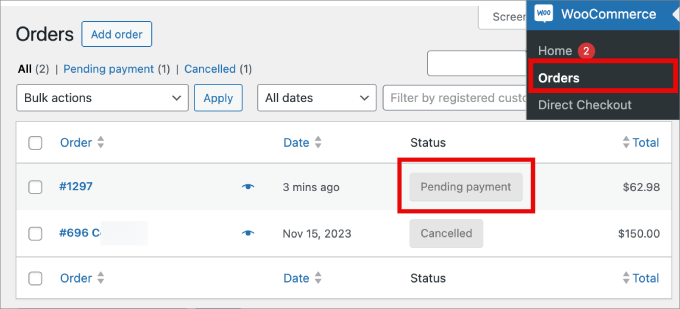
If the order status is ‘Pending payment’ as in this example, then that explains why an email was not sent. By default, WooCommerce doesn’t send an order email for pending sales.
This is intentional because the transaction hasn’t been completed yet. WooCommerce waits until the payment is confirmed before sending a receipt to avoid confusion for the customer.
But if the status is ‘Processing,’ there’s a problem. An email should have been sent to both you and the customer. If it didn’t arrive in the inbox, then most likely, it was treated as spam.
That’s a common problem with WooCommerce and WordPress emails. The best way to solve that problem is to send your email using an SMTP server.
Fix WordPress Email Reliability with an SMTP Server Plugin
SMTP (Simple Mail Transfer Protocol) is the standard for sending emails. To understand why it’s better, think of the default WordPress email function like sending a letter with no return address.
It might get there, but it can easily get lost or be marked as junk mail.
Using an SMTP service is like using a trusted courier like FedEx or UPS. It provides proper authentication, so email providers recognize your messages as legitimate and deliver them right to the inbox.
WP Mail SMTP is the best SMTP plugin for WordPress and WooCommerce. It’s the easiest way to make sure your order emails are delivered to your customer’s inbox.
We use it on our own eCommerce websites, and it has definitely improved our email deliverability rates. To learn more about its features and performance, you can see our complete WP Mail SMTP review.
You can connect it with any popular SMTP service provider like SendLayer using an API key to securely send large numbers of emails without triggering spam filters.
Plus, SendLayer lets you send up to 1,000 emails per month with their Starter plan. All of their plans are affordable, and you get actionable insights on your bounce rates so you can diagnose potential delivery issues.
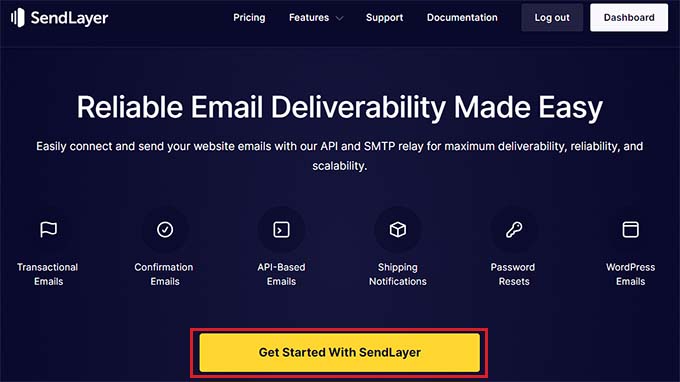
To create an account, visit the SendLayer website and click the ‘Get Started With SendLayer’ button.
Next, choose a plan of your liking on the pricing page and create your account.
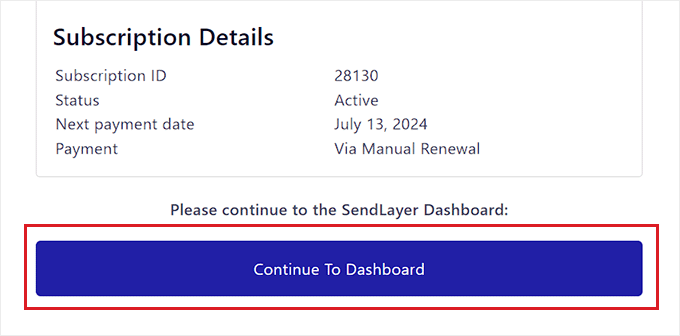
Once your account has been set up, you will see a ‘Continue to Dashboard’ button. Simply click on it to move to the next step.
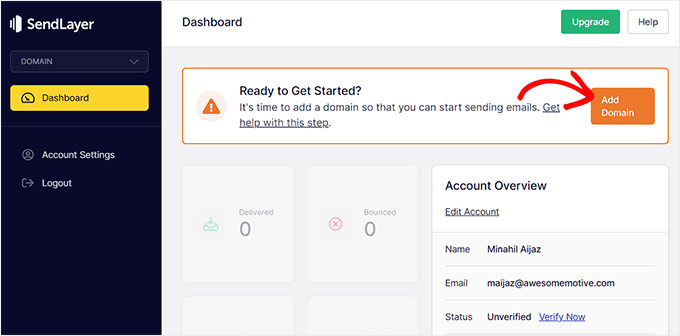
This will direct you to your SendLayer dashboard, where you will need to authorize your domain name to allow email servers to recognize you as a verified sender.
To do this, you must click the ‘Add Domain’ button at the top right corner.
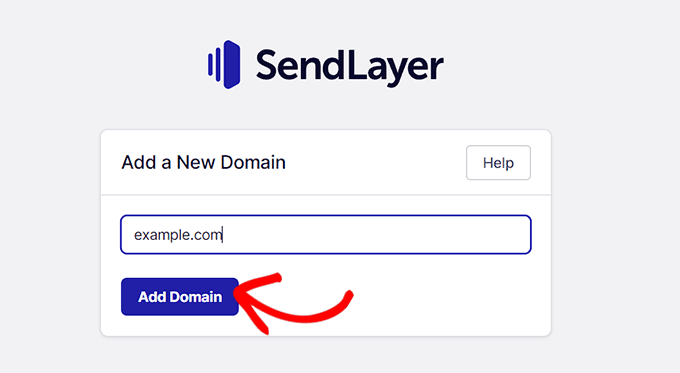
Doing this will open a new page where you can type your website address.
Then, click the ‘Add Domain’ button.
💡Bonus Tip: Before you see the next step, let’s quickly explain what DNS records are.
Think of them as a digital signature for your website. They prove to email services that your emails are really coming from you and not from a spammer.
Adding them is a key step to make sure your emails are trusted and delivered. Don’t worry, this is usually a one-time setup.
Once you do that, SendLayer will generate five types of DNS records for your domain. You will need to add these records to your hosting dashboard.
Keep in mind that the exact location of the DNS settings will depend on your hosting provider, but SendLayer provides documentation to help you out.
After adding these details, go back to your dashboard and check the ‘I have added these DNS records and am ready to proceed’ box. Then, click the ‘Verify DNS Records’ button.
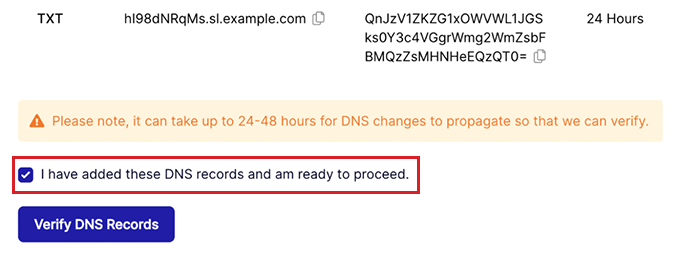
Remember that it can take up to 48 hours for the DNS record changes to take effect. For more details on this, see our tutorial on how to properly configure your WordPress email settings.
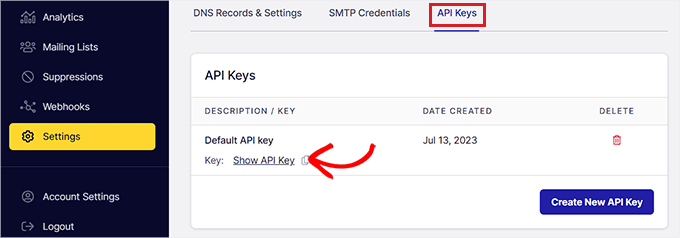
Now it’s time for you to get your SendLayer API key. To do this, click the ‘Settings’ tab from the left column and then switch to the ‘API Keys’ tab.
Here, click the ‘Show API Key’ link and then copy the key into your clipboard.
Next, visit your WordPress dashboard to install and activate the WP Mail SMTP plugin. You can check out our guide on how to install a WordPress plugin for more details.
Note: The free version of WP Mail SMTP is all that’s required for this tutorial. However, the Elite plan includes a White Glove Setup, where an expert will set up the plugin for you.
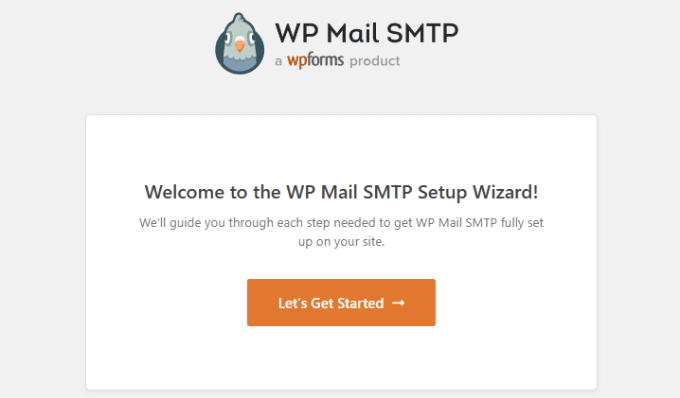
After activation, the WP Mail SMTP setup wizard will start automatically. You’ll need to click on the ‘Let’s Get Started’ button.
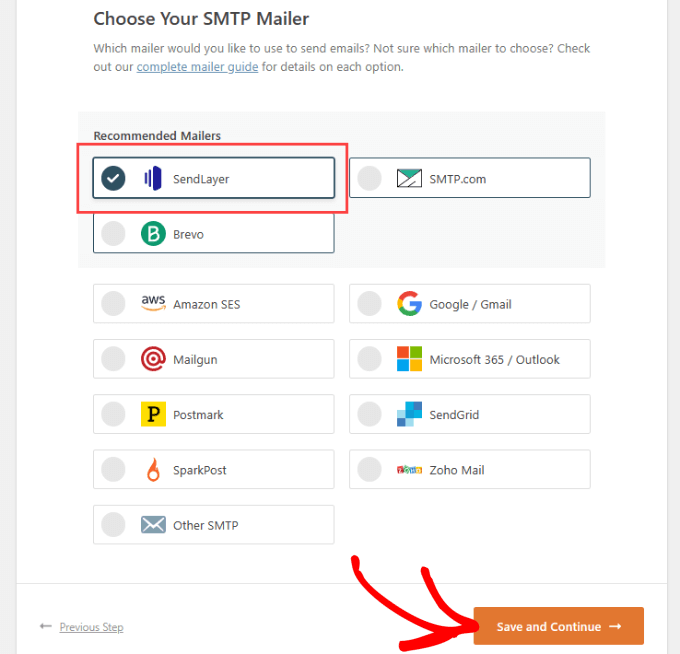
Next, choose SendLayer as the SMTP service you wish to use and click the ‘Save and Continue’ button.
After that, you’ll be asked to configure your mailer settings.
Here, you’ll be asked to add the API Key that you copied earlier into the form.
The exact steps you need to take will depend on the mailer service you have chosen.
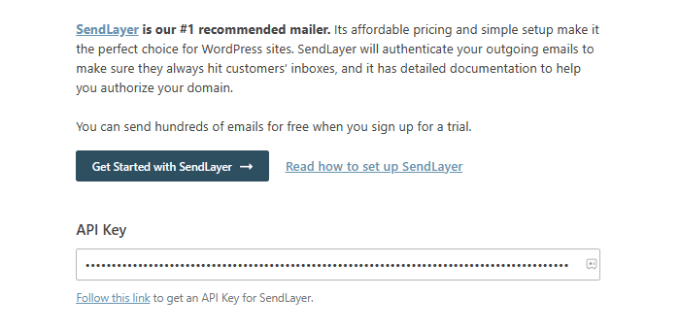
👆 Note: If you’d prefer to bypass the wizard and set up WP Mail SMTP manually, then you’ll find manual step-by-step instructions in our ultimate guide on how to set up WP Mail SMTP with any SMTP service.
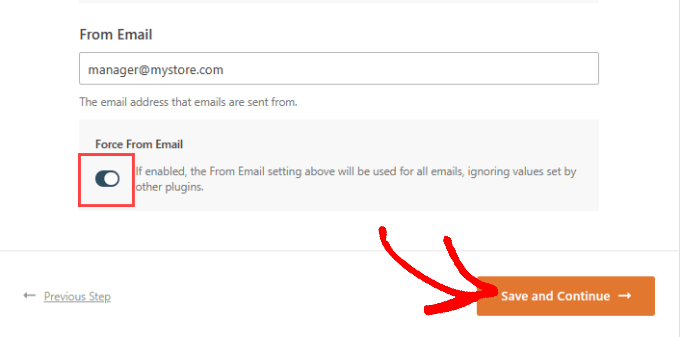
The setup wizard will also ask you to set up a ‘From Email.’ Make sure you use the same business email address you entered when setting up your SMTP mailing service.
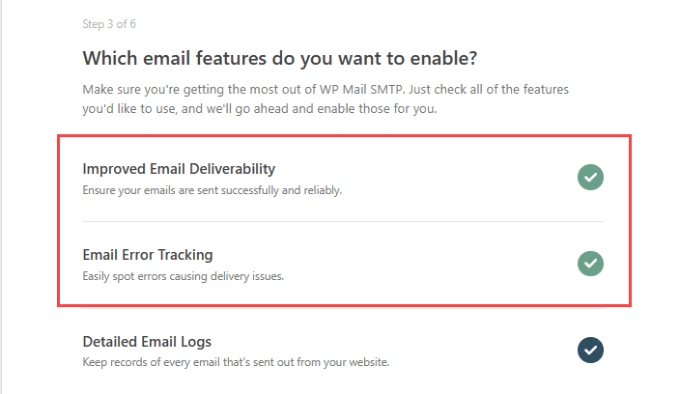
You’ll then be asked which email features you wish to enable.
You need ‘Improved Email Deliverability’ and ‘Email Error Tracking’ to fix WooCommerce not sending emails. They will be selected by default.
If you’ve purchased WP Mail SMTP Pro, then you’ll have access to a few additional features. For example, the ‘Detailed Email Logs’ feature will let you check individual emails to make sure they are being sent.
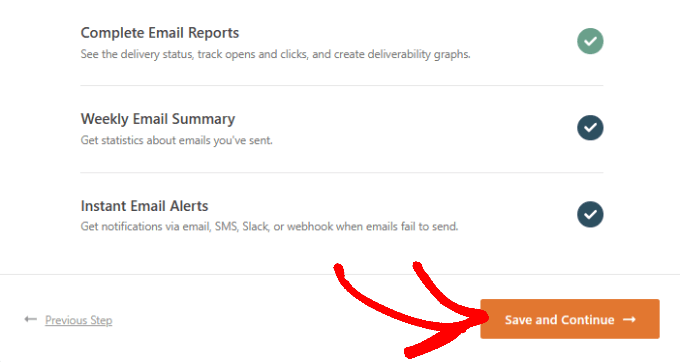
The Pro version will also let you resend a failed email.
That can be really helpful when the customer types in the wrong email address. You’ll also get email reports and a weekly email summary about your deliverability status and statistics.
When you’ve selected your desired email features, hit the ‘Save and Continue’ button.
Next, you’ll be asked about how you want to store the contents of your email. We recommend selecting all of the available options.
When you check the option ‘Store the content for all sent emails,’ you’ll be able to resend emails should they fail to go through.
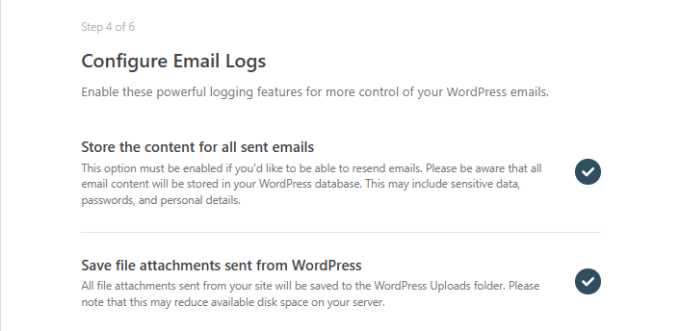
Make sure to check the options ‘Track when an email is opened’ and ‘Track when a link in an email is clicked.’
That way, you can see when your emails and links are open, so you know how your email campaigns are performing.
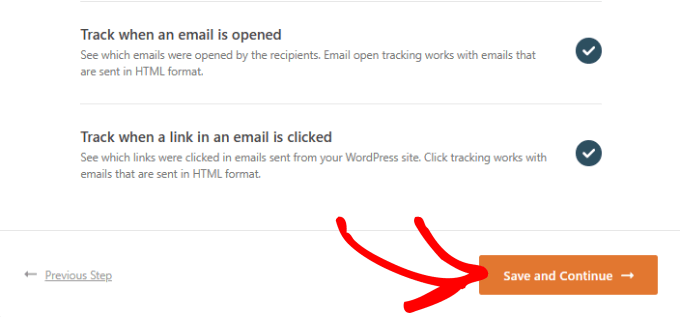
Once you’ve finished configuring the email logs, click ‘Save and Continue.’
Send a Test Email
From there, WP Mail SMTP will automatically run a test to ensure that your email service is connected.
Give it a few seconds for the test to run.
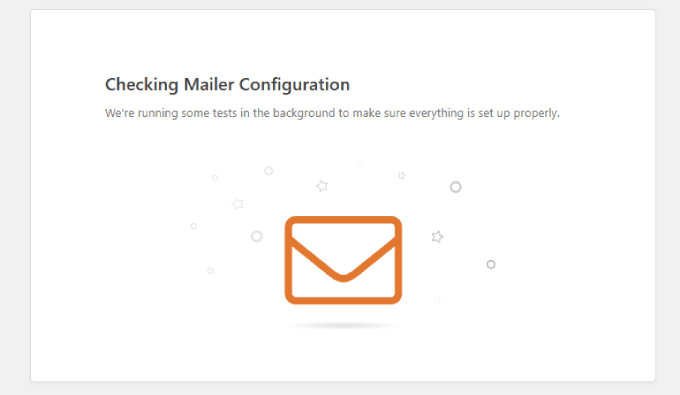
Essentially, WP Mail SMTP will send a test email using your email service.
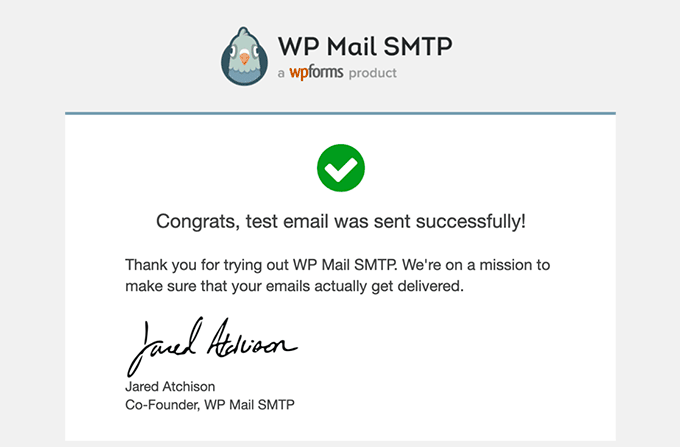
If the API Key is correctly entered, you should see a message that tells you your test email was sent successfully.
Bonus: Improving WooCommerce Order Emails
Now that you can be sure your emails are reaching your customers’ inboxes, you can take the next step: improving the emails themselves.
Customizing your WooCommerce emails can help you build trust and make your brand more memorable.
For that, we recommend FunnelKit Automations. It’s one of the best marketing automation tools for WooCommerce.
With FunnelKit Automations, you can fully customize your WooCommerce emails to match your brand. This helps build trust with your customers and boost brand awareness.
Upon testing, we discovered that it also lets you create automated email and SMS campaigns right from your WordPress dashboard. Plus, it has pre-made workflows for shipment tracking notifications, win-back coupons, cart abandonment reminders, and more.
For details, see our detailed FunnelKit Automations review.
All you have to do is install the plugin. For more details, you can review our guide on how to install a WordPress plugin.
When customizing your order email, FunnelKit Automations offers a visual builder that allows you to add images, texts, product tags, and more.
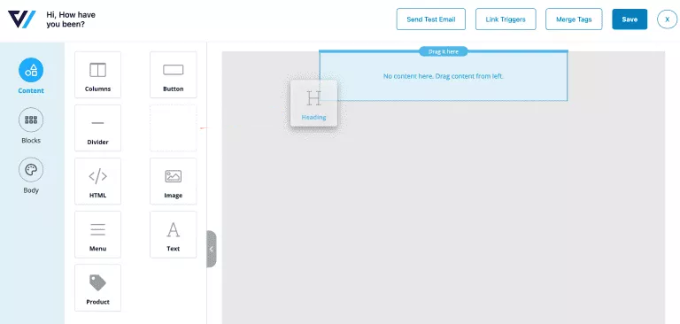
What makes this software so powerful is that you can design email sequences so that once a new customer places their first order, it will nurture leads and guide them to make future purchases.
With each email in the workflow, you’ll see in-line analytics, so you can tweak your order emails for better open and click-through rates.
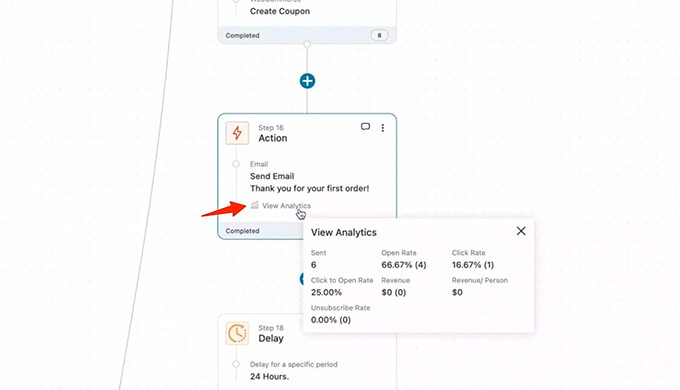
If you want to learn more, please see our tutorial on how to customize WooCommerce emails.
Frequently Asked Questions About WooCommerce Emails
Here are some questions frequently asked by our readers about sending WooCommerce emails:
Why are my WooCommerce emails going to spam?
This often happens because WordPress uses PHP mail by default, which lacks the proper authentication that email providers expect.
As a result, services like Gmail or Outlook may flag these emails as suspicious.
Using an SMTP service adds that layer of authentication, telling email clients that your messages are legitimate and should land in the inbox.
Can I use my Gmail account to send WooCommerce emails?
Yes, you can configure WP Mail SMTP to send emails using your Gmail account. However, there are sending limits, and it’s generally not recommended for stores that send a lot of emails.
A dedicated provider like SendLayer is a more scalable and reliable solution for growing businesses.
How do I know if my WooCommerce emails are actually being sent?
The easiest way is to use a plugin like WP Mail SMTP. The free version has a built-in test email feature to confirm your settings are working.
The Pro version includes detailed email logs, which show you the status of every single email sent from your site, including whether it was delivered, opened, or clicked.
What is the best SMTP provider for a WooCommerce store?
For most small to medium-sized stores, we recommend SendLayer. It’s reliable, affordable, and easy to set up with WP Mail SMTP.
Other great options include Brevo (formerly Sendinblue) and SMTP.com, which are also built to handle large volumes of transactional emails.
We hope this tutorial helped you learn how to fix WooCommerce not sending order emails. You may also want to learn how to limit purchase quantity in WordPress or check out the list of must have WooCommerce plugins to grow your store.
If you liked this article, then please subscribe to our YouTube Channel for WordPress video tutorials. You can also find us on Twitter and Facebook.


Kirstin
123-Reg will not allow use of an external SMTP provider. Is there another workaround? It’s vital that order emails can be sent safely from WooCommerce.
Many thanks
WPBeginner Support
If your provider does not allow you to use a different SMTP provider, WP Mail SMTP should allow you to connect to what your registrar allows for the time being to help improve email delivery in general.
Admin
Jiří Vaněk
I had significant issues with sending emails due to the mail function in PHP. After investigating, I found the cause. The problem is often related to the SPF record, where the IP address of the web server from which emails are sent using the PHP mail function must be included in the domain’s records. That’s why I ultimately switched to WP SMTP Mail, which I configured to use my own email under my domain, where I have SPF, DKIM, and DMARC records set up correctly. Since then, I’ve never had an email fail to send properly. I consider the WP SMTP Mail plugin an absolute necessity, especially since at least Google has implemented stricter anti-spam rules based on SPF checks. Nowadays, this plugin is essential and works great even in the free version.