Download to read offline
![Section 39.1: View preloading 145...................................................................................................................................
Section 39.2: Script optimisation 146..............................................................................................................................
Chapter 40: Grunt tasks 148.......................................................................................................................................
Section 40.1: Run application locally 148.......................................................................................................................
Chapter 41: Lazy loading 151......................................................................................................................................
Section 41.1: Preparing your project for lazy loading 151............................................................................................
Section 41.2: Usage 151...................................................................................................................................................
Section 41.3: Usage with router 151................................................................................................................................
Section 41.4: Using dependency injection 152...............................................................................................................
Section 41.5: Using the directive 152...............................................................................................................................
Chapter 42: HTTP Interceptor 153...........................................................................................................................
Section 42.1: Generic httpInterceptor step by step 153................................................................................................
Section 42.2: Getting Started 154...................................................................................................................................
Section 42.3: Flash message on response using http interceptor 154.......................................................................
Chapter 43: Session storage 156..............................................................................................................................
Section 43.1: Handling session storage through service using angularjs 156............................................................
Chapter 44: Angular MVC 157....................................................................................................................................
Section 44.1: The Static View with controller 157..........................................................................................................
Section 44.2: Controller Function Definition 157...........................................................................................................
Section 44.3: Adding information to the model 157.....................................................................................................
Chapter 45: SignalR with AngularJS 158..............................................................................................................
Section 45.1: SignalR and AngularJS [ ChatProject ] 158............................................................................................
Chapter 46: Migration to Angular 2+ 162.............................................................................................................
Section 46.1: Converting your AngularJS app into a componend-oriented structure 162.......................................
Section 46.2: Introducing Webpack and ES6 modules 164..........................................................................................
Chapter 47: AngularJS with data filter, pagination etc 165.......................................................................
Section 47.1: AngularJS display data with filter, pagination 165.................................................................................
Chapter 48: Profiling and Performance 166.......................................................................................................
Section 48.1: 7 Simple Performance Improvements 166..............................................................................................
Section 48.2: Bind Once 169............................................................................................................................................
Section 48.3: ng-if vs ng-show 170.................................................................................................................................
Section 48.4: Watchers 170.............................................................................................................................................
Section 48.5: Always deregister listeners registered on other scopes other than the current scope 172..............
Section 48.6: Scope functions and filters 173................................................................................................................
Section 48.7: Debounce Your Model 173........................................................................................................................
Chapter 49: Performance Profiling 175.................................................................................................................
Section 49.1: All About Profiling 175................................................................................................................................
Chapter 50: Debugging 177.........................................................................................................................................
Section 50.1: Using ng-inspect chrome extension 177..................................................................................................
Section 50.2: Getting the Scope of element 179...........................................................................................................
Section 50.3: Basic debugging in markup 179..............................................................................................................
Chapter 51: Unit tests 181.............................................................................................................................................
Section 51.1: Unit test a component (1.5+) 181...............................................................................................................
Section 51.2: Unit test a filter 181....................................................................................................................................
Section 51.3: Unit test a service 182................................................................................................................................
Section 51.4: Unit test a controller 183...........................................................................................................................
Section 51.5: Unit test a directive 183.............................................................................................................................
Chapter 52: AngularJS gotchas and traps 185..................................................................................................](https://image.slidesharecdn.com/angularjsnotesforprofessionals-200412131913/85/Angular-js-notes-for-professionals-6-320.jpg)

![GoalKicker.com – AngularJS Notes for Professionals 7
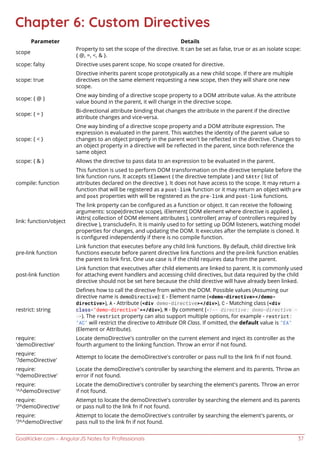
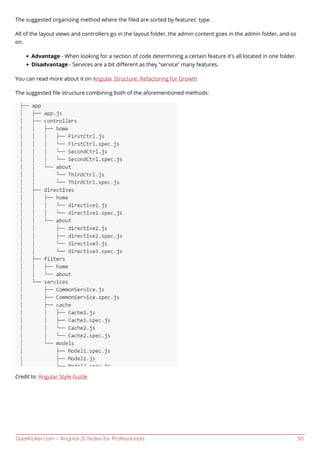
Display content from the model using double braces {{ }}5.
<span>Hello, {{ name }}</span>
Another way of binding the name property is using ng-bind instead of handlebars"{{ }}"6.
<span ng-bind="name"></span>
The last three steps establish the two way data-binding. Changes made to the input update the model, which is
reflected in the view.
There is a difference between using handlebars and ng-bind. If you use handlebars, you might see the actual
Hello, {{name}} as the page loads before the expression is resolved (before the data is loaded) whereas if you use
ng-bind, it will only show the data when the name is resolved. As an alternative the directive ng-cloak can be used
to prevent handlebars to display before it is compiled.
Section 1.2: Showcasing all common Angular constructs
The following example shows common AngularJS constructs in one file:
<!DOCTYPE html>
<html ng-app="myDemoApp">
<head>
<style>.started { background: gold; }</style>
<script src="https://code.angularjs.org/1.5.8/angular.min.js"></script>
<script>
function MyDataService() {
return {
getWorlds: function getWorlds() {
return ["this world", "another world"];
}
};
}
function DemoController(worldsService) {
var vm = this;
vm.messages = worldsService.getWorlds().map(function(w) {
return "Hello, " + w + "!";
});
}
function startup($rootScope, $window) {
$window.alert("Hello, user! Loading worlds...");
$rootScope.hasStarted = true;
}
angular.module("myDemoApp", [/* module dependencies go here */])
.service("worldsService", [MyDataService])
.controller("demoController", ["worldsService", DemoController])
.config(function() {
console.log('configuring application');
})
.run(["$rootScope", "$window", startup]);
</script>
</head>
<body ng-class="{ 'started': hasStarted }" ng-cloak>
<div ng-controller="demoController as vm">](https://image.slidesharecdn.com/angularjsnotesforprofessionals-200412131913/85/Angular-js-notes-for-professionals-14-320.jpg)
![GoalKicker.com – AngularJS Notes for Professionals 9
examples so it is important to have some understanding.
The good news is that it is a simple yet powerful concept.
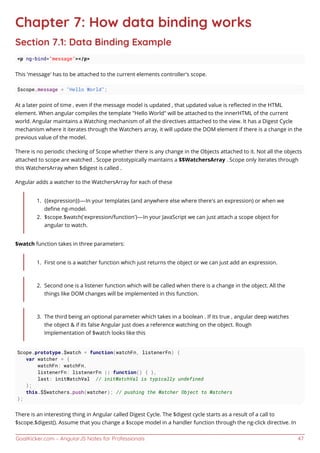
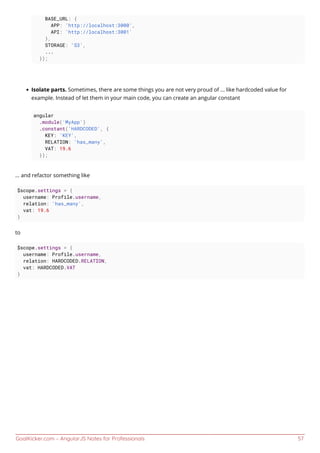
When you create the following:
<div ng-app="myApp">
<h1>Hello {{ name }}</h1>
</div>
Where does name live?
The answer is that Angular creates a $rootScope object. This is simply a regular Javascript object and so name is a
property on the $rootScope object:
angular.module("myApp", [])
.run(function($rootScope) {
$rootScope.name = "World!";
});
And just as with global scope in Javascript, it's usually not such a good idea to add items to the global scope or
$rootScope.
Of course, most of the time, we create a controller and put our required functionality into that controller. But when
we create a controller, Angular does it's magic and creates a $scope object for that controller. This is sometimes
referred to as the local scope.
So, creating the following controller:
<div ng-app="myApp">
<div ng-controller="MyController">
<h1>Hello {{ name }}</h1>
</div>
</div>
would allow the local scope to be accessible via the $scope parameter.
angular.module("myApp", [])
.controller("MyController", function($scope) {
$scope.name = "Mr Local!";
});
A controller without a $scope parameter may simply not need it for some reason. But it is important to realize that,
even with controllerAs syntax, the local scope exists.
As $scope is a JavaScript object, Angular magically sets it up to prototypically inherit from $rootScope. And as you
can imagine, there can be a chain of scopes. For example, you could create a model in a parent controller and
attach to it to the parent controller's scope as $scope.model.
Then via the prototype chain, a child controller could access that same model locally with $scope.model.
None of this is initially evident, as it's just Angular doing its magic in the background. But understanding $scope is
an important step in getting to know how Angular works.](https://image.slidesharecdn.com/angularjsnotesforprofessionals-200412131913/85/Angular-js-notes-for-professionals-16-320.jpg)
![GoalKicker.com – AngularJS Notes for Professionals 10
Section 1.4: Minification in Angular
What is Minification ?
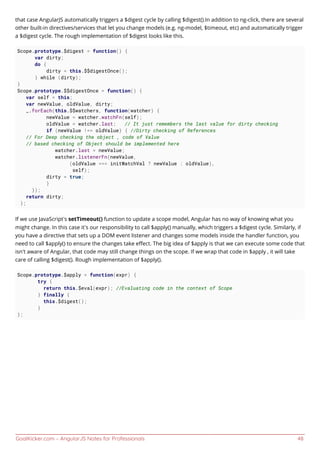
It is the process of removing all unnecessary characters from source code without changing its functionality.
Normal Syntax
If we use normal angular syntax for writing a controller then after minifiying our files it going to break our
functionality.
Controller (Before minification) :
var app = angular.module('mainApp', []);
app.controller('FirstController', function($scope) {
$scope.name= 'Hello World !';
});
After using minification tool, It will be minified as like below.
var app=angular.module("mainApp",[]);app.controller("FirstController",function(e){e.name= 'Hello
World !'})
Here, minification removed unnecessary spaces and the $scope variable from code. So when we use this minified
code then its not going to print anything on view. Because $scope is a crucial part between controller and view,
which is now replaced by the small 'e' variable. So when you run the application it is going to give Unknown
Provider 'e' dependency error.
There are two ways of annotating your code with service name information which are minification safe:
Inline Annotation Syntax
var app = angular.module('mainApp', []);
app.controller('FirstController', ['$scope', function($scope) {
$scope.message = 'Hello World !';
}]);
$inject Property Annotation Syntax
FirstController.$inject = ['$scope'];
var FirstController = function($scope) {
$scope.message = 'Hello World !';
}
var app = angular.module('mainApp', []);
app.controller('FirstController', FirstController);
After minification, this code will be
var
app=angular.module("mainApp",[]);app.controller("FirstController",["$scope",function(a){a.message="
Hello World !"}]);
Here, angular will consider variable 'a' to be treated as $scope, and It will display output as 'Hello World !'.](https://image.slidesharecdn.com/angularjsnotesforprofessionals-200412131913/85/Angular-js-notes-for-professionals-17-320.jpg)
![GoalKicker.com – AngularJS Notes for Professionals 13
Chapter 2: Modules
Section 2.1: Modules
Module serves as a container of different parts of your app such as controllers, services, filters, directives, etc.
Modules can be referenced by other modules through Angular's dependency injection mechanism.
Creating a module:
angular
.module('app', []);
Array [] passed in above example is the list of modules app depends on, if there are no dependencies then we pass
Empty Array i.e. [].
Injecting a module as a dependency of another module:
angular.module('app', [
'app.auth',
'app.dashboard'
]);
Referencing a module:
angular
.module('app');
Section 2.2: Modules
Module is a container for various parts of your applications - controller, services, filters, directive, etc.
Why to use Modules
Most applications have a main method that instantiates and wires together the different parts of the application.
Angular apps don't have main method.
But in AngularJS the declarative process is easy to understand and one can package code as reusable modules.
Modules can be loaded in any order because modules delay execution.
declare a module
var app = angular.module('myApp', []);
// Empty array is list of modules myApp is depends on.
// if there are any required dependancies,
// then you can add in module, Like ['ngAnimate']
app.controller('myController', function() {
// write your business logic here
});
Module Loading and Dependencies
Configuration Blocks: get executed during provider and configuration phase.1.
angular.module('myModule', []).](https://image.slidesharecdn.com/angularjsnotesforprofessionals-200412131913/85/Angular-js-notes-for-professionals-20-320.jpg)
![GoalKicker.com – AngularJS Notes for Professionals 14
config(function(injectables) {
// here you can only inject providers in to config blocks.
});
Run Blocks: get executed after the injector is created and are used to start the application.2.
angular.module('myModule', []).
run(function(injectables) {
// here you can only inject instances in to config blocks.
});](https://image.slidesharecdn.com/angularjsnotesforprofessionals-200412131913/85/Angular-js-notes-for-professionals-21-320.jpg)
![GoalKicker.com – AngularJS Notes for Professionals 15
Chapter 3: Components
Parameter Details
=
For using two-way data binding. This means that if you update that variable in your
component scope, the change will be reflected on the parent scope.
<
One-way bindings when we just want to read a value from a parent scope and not
update it.
@ String parameters.
& For callbacks in case your component needs to output something to its parent scope.
- -
LifeCycle Hooks Details (requires angular.version >= 1.5.3 )
$onInit()
Called on each controller after all the controllers on an element have been constructed
and had their bindings initialized. This is a good place to put initialization code for your
controller.
$onChanges(changesObj)
Called whenever one-way bindings are updated. The changesObj is a hash whose keys
are the names of the bound properties that have changed, and the values are an object
of the form { currentValue, previousValue, isFirstChange() } .
$onDestroy()
Called on a controller when its containing scope is destroyed. Use this hook for
releasing external resources, watches and event handlers.
$postLink()
Called after this controller’s element and its children have been linked. This hook can
be considered analogous to the ngAfterViewInit and ngAfterContentInit hooks in
Angular 2.
$doCheck()
Called on each turn of the digest cycle. Provides an opportunity to detect and act on
changes. Any actions that you wish to take in response to the changes that you detect
must be invoked from this hook; implementing this has no effect on when $onChanges
is called.
Section 3.1: Basic Components and LifeCycle Hooks
What’s a component?
A component is basically a directive that uses a simpler configuration and that is suitable for a component-
based architecture, which is what Angular 2 is all about. Think of a component as a widget: A piece of HTML
code that you can reuse in several different places in your web application.
Component
angular.module('myApp', [])
.component('helloWorld', {
template: '<span>Hello World!</span>'
});
Markup
<div ng-app="myApp">
<hello-world> </hello-world>
</div>
Live Demo
Using External data in Component:
We could add a parameter to pass a name to our component, which would be used as follows:](https://image.slidesharecdn.com/angularjsnotesforprofessionals-200412131913/85/Angular-js-notes-for-professionals-22-320.jpg)
![GoalKicker.com – AngularJS Notes for Professionals 16
angular.module("myApp", [])
.component("helloWorld",{
template: '<span>Hello {{$ctrl.name}}!</span>',
bindings: { name: '@' }
});
Markup
<div ng-app="myApp">
<hello-world name="'John'" > </hello-world>
</div>
Live Demo
Using Controllers in Components
Let’s take a look at how to add a controller to it.
angular.module("myApp", [])
.component("helloWorld",{
template: "Hello {{$ctrl.name}}, I'm {{$ctrl.myName}}!",
bindings: { name: '@' },
controller: function(){
this.myName = 'Alain';
}
});
Markup
<div ng-app="myApp">
<hello-world name="John"> </hello-world>
</div>
CodePen Demo
Parameters passed to the component are available in the controller's scope just before its $onInit function gets
called by Angular. Consider this example:
angular.module("myApp", [])
.component("helloWorld",{
template: "Hello {{$ctrl.name}}, I'm {{$ctrl.myName}}!",
bindings: { name: '@' },
controller: function(){
this.$onInit = function() {
this.myName = "Mac" + this.name;
}
}
});
In the template from above, this would render "Hello John, I'm MacJohn!".
Note that $ctrl is the Angular default value for controllerAs if one is not specified.
Live Demo](https://image.slidesharecdn.com/angularjsnotesforprofessionals-200412131913/85/Angular-js-notes-for-professionals-23-320.jpg)
![GoalKicker.com – AngularJS Notes for Professionals 17
Using “require” as an Object
In some instances you may need to access data from a parent component inside your component.
This can be achieved by specifying that our component requires that parent component, the require will give us
reference to the required component controller, which can then be used in our controller as shown in the example
below:
Notice that required controllers are guaranteed to be ready only after the $onInit hook.
angular.module("myApp", [])
.component("helloWorld",{
template: "Hello {{$ctrl.name}}, I'm {{$ctrl.myName}}!",
bindings: { name: '@' },
require: {
parent: '^parentComponent'
},
controller: function () {
// here this.parent might not be initiated yet
this.$onInit = function() {
// after $onInit, use this.parent to access required controller
this.parent.foo();
}
}
});
Keep in mind, though, that this creates a tight coupling between the child and the parent.
Section 3.2: Components In angular JS
The components in angularJS can be visualised as a custom directive (< html > this in an HTML directive, and
something like this will be a custom directive < ANYTHING >). A component contains a view and a controller.
Controller contains the business logic which is binded with an view , which the user sees. The component differs
from a angular directive because it contains less configuration. An angular component can be defined like this.
angular.module("myApp",[]).component("customer", {})
Components are defined on the angular modules. They contains two arguments, One is the name of the
component and second one is a object which contains key value pair, which defines which view and which
controller it is going to use like this .
angular.module("myApp",[]).component("customer", {
templateUrl : "customer.html", // your view here
controller: customerController, //your controller here
controllerAs: "cust" //alternate name for your controller
})
"myApp" is the name of the app we are building and customer is the name of our component. Now for calling it in
main html file we will just put it like this
<customer></customer>
Now this directive will be replaced by the view you have specified and the business logic you have written in your](https://image.slidesharecdn.com/angularjsnotesforprofessionals-200412131913/85/Angular-js-notes-for-professionals-24-320.jpg)
![GoalKicker.com – AngularJS Notes for Professionals 19
Chapter 4: Built-in directives
Section 4.1: Angular expressions - Text vs. Number
This example demonstrates how Angular expressions are evaluated when using type="text" and type="number"
for the input element. Consider the following controller and view:
Controller
var app = angular.module('app', []);
app.controller('ctrl', function($scope) {
$scope.textInput = {
value: '5'
};
$scope.numberInput = {
value: 5
};
});
View
<div ng-app="app" ng-controller="ctrl">
<input type="text" ng-model="textInput.value">
{{ textInput.value + 5 }}
<input type="number" ng-model="numberInput.value">
{{ numberInput.value + 5 }}
</div>
When using + in an expression bound to text input, the operator will concatenate the strings (first example),
displaying 55 on the screen*.
When using + in an expression bound to number input, the operator return the sum of the numbers (second
example), displaying 10 on the screen*.
* - That is until the user changes the value in the input field, afterward the display will change accordingly.
Working Example
Section 4.2: ngIf
ng-if is a directive similar to ng-show but inserts or removes the element from the DOM instead of simply hiding it.
Angular 1.1.5 introduced ng-If directive. You can Use ng-if directive above 1.1.5 versions. This is useful because
Angular will not process digests for elements inside a removed ng-if reducing the workload of Angular especially
for complex data bindings.
Unlike ng-show, the ng-if directive creates a child scope which uses prototypal inheritance. This means that setting
a primitive value on the child scope will not apply to the parent. To set a primitive on the parent scope the $parent
property on the child scope will have to be used.
JavaScript
angular.module('MyApp', []);
angular.module('MyApp').controller('myController', ['$scope', '$window', function
myController($scope, $window) {
$scope.currentUser= $window.localStorage.getItem('userName');](https://image.slidesharecdn.com/angularjsnotesforprofessionals-200412131913/85/Angular-js-notes-for-professionals-26-320.jpg)
![GoalKicker.com – AngularJS Notes for Professionals 20
}]);
View
<div ng-controller="myController">
<div ng-if="currentUser">
Hello, {{currentUser}}
</div>
<div ng-if="!currentUser">
<a href="/login">Log In</a>
<a href="/register">Register</a>
</div>
</div>
DOM If currentUser Is Not Undefined
<div ng-controller="myController">
<div ng-if="currentUser">
Hello, {{currentUser}}
</div>
<!-- ng-if: !currentUser -->
</div>
DOM If currentUser Is Undefined
<div ng-controller="myController">
<!-- ng-if: currentUser -->
<div ng-if="!currentUser">
<a href="/login">Log In</a>
<a href="/register">Register</a>
</div>
</div>
Working Example
Function Promise
The ngIf directive accepts functions as well, which logically require to return true or false.
<div ng-if="myFunction()">
<span>Span text</span>
</div>
The span text will only appear if the function returns true.
$scope.myFunction = function() {
var result = false;
// Code to determine the boolean value of result
return result;
};
As any Angular expression the function accepts any kind of variables.
Section 4.3: ngCloak
The ngCloak directive is used to prevent the Angular html template from being briefly displayed by the
browser in its raw (uncompiled) form while your application is loading. - View source
HTML](https://image.slidesharecdn.com/angularjsnotesforprofessionals-200412131913/85/Angular-js-notes-for-professionals-27-320.jpg)
![GoalKicker.com – AngularJS Notes for Professionals 21
<div ng-cloak>
<h1>Hello {{ name }}</h1>
</div>
ngCloak can be applied to the body element, but the preferred usage is to apply multiple ngCloak directives to
small portions of the page to permit progressive rendering of the browser view.
The ngCloak directive has no parameters.
See also: Preventing flickering
Section 4.4: ngRepeat
ng-repeat is a built in directive in Angular which lets you iterate an array or an object and gives you the ability to
repeat an element once for each item in the collection.
ng-repeat an array
<ul>
<li ng-repeat="item in itemCollection">
{{item.Name}}
</li>
</ul>
Where:
item = individual item in the collection
itemCollection = The array you are iterating
ng-repeat an object
<ul>
<li ng-repeat="(key, value) in myObject">
{{key}} : {{value}}
</li>
</ul>
Where:
key = the property name
value = the value of the property
myObject = the object you are iterating
filter your ng-repeat by user input
<input type="text" ng-model="searchText">
<ul>
<li ng-repeat="string in stringArray | filter:searchText">
{{string}}
</li>
</ul>
Where:
searchText = the text that the user wants to filter the list by
stringArray = an array of strings, e.g. ['string', 'array']
You can also display or reference the filtered items elsewhere by assigning the filter output an alias with as](https://image.slidesharecdn.com/angularjsnotesforprofessionals-200412131913/85/Angular-js-notes-for-professionals-28-320.jpg)
![GoalKicker.com – AngularJS Notes for Professionals 22
aliasName, like so:
<input type="text" ng-model="searchText">
<ul>
<li ng-repeat="string in stringArray | filter:searchText as filteredStrings">
{{string}}
</li>
</ul>
<p>There are {{filteredStrings.length}} matching results</p>
ng-repeat-start and ng-repeat-end
To repeat multiple DOM elements by defining a start and an end point you can use the ng-repeat-start and ng-
repeat-end directives.
<ul>
<li ng-repeat-start="item in [{a: 1, b: 2}, {a: 3, b:4}]">
{{item.a}}
</li>
<li ng-repeat-end>
{{item.b}}
</li>
</ul>
Output:
1
2
3
4
It is important to always close ng-repeat-start with ng-repeat-end.
Variables
ng-repeat also exposes these variables inside the expression
Variable Type Details
$index Number
Equals to the index of the current iteration ($index===0 will evaluate to true at the first iterated
element; see $first)
$first Boolean Evaluates to true at the first iterated element
$last Boolean Evaluates to true at the last iterated element
$middle Boolean Evaluates to true if the element is between the $first and $last
$even Boolean Evaluates to true at an even numbered iteration (equivalent to $index%2===0)
$odd Boolean Evaluates to true at an odd numbered iteration (equivalent to $index%2===1)
Performance considerations
Rendering ngRepeat can become slow, especially when using large collections.
If the objects in the collection have an identifier property, you should always track by the identifier instead of the
whole object, which is the default functionality. If no identifier is present, you can always use the built-in $index.
<div ng-repeat="item in itemCollection track by item.id">
<div ng-repeat="item in itemCollection track by $index">](https://image.slidesharecdn.com/angularjsnotesforprofessionals-200412131913/85/Angular-js-notes-for-professionals-29-320.jpg)
![GoalKicker.com – AngularJS Notes for Professionals 23
Scope of ngRepeat
ngRepeat will always create an isolated child scope so care must be taken if the parent scope needs to be accessed
inside the repeat.
Here is a simple example showing how you can set a value in your parent scope from a click event inside of
ngRepeat.
scope val: {{val}}<br/>
ctrlAs val: {{ctrl.val}}
<ul>
<li ng-repeat="item in itemCollection">
<a href="#" ng-click="$parent.val=item.value; ctrl.val=item.value;">
{{item.label}} {{item.value}}
</a>
</li>
</ul>
$scope.val = 0;
this.val = 0;
$scope.itemCollection = [{
id: 0,
value: 4.99,
label: 'Football'
},
{
id: 1,
value: 6.99,
label: 'Baseball'
},
{
id: 2,
value: 9.99,
label: 'Basketball'
}];
If there was only val = item.value at ng-click it won't update the val in the parent scope because of the isolated
scope. That's why the parent scope is accessed with $parent reference or with the controllerAs syntax (e.g. ng-
controller="mainController as ctrl").
Nested ng-repeat
You can also use nested ng-repeat.
<div ng-repeat="values in test">
<div ng-repeat="i in values">
[{{$parent.$index}},{{$index}}] {{i}}
</div>
</div>
var app = angular.module("myApp", []);
app.controller("ctrl", function($scope) {
$scope.test = [
['a', 'b', 'c'],
['d', 'e', 'f']
];
});](https://image.slidesharecdn.com/angularjsnotesforprofessionals-200412131913/85/Angular-js-notes-for-professionals-30-320.jpg)

![GoalKicker.com – AngularJS Notes for Professionals 28
The ng-list directive uses a default delimiter of ", " (comma space).
You can set the delimiter manually by assigning ng-list a delimeter like this ng-list="; ".
In this case the delimiter is set to a semi colon followed by a space.
By default ng-list has an attribute ng-trim which is set to true. ng-trim when false, will respect white space in
your delimiter. By default, ng-list does not take white space into account unless you set ng-trim="false".
Example:
angular.module('test', [])
.controller('ngListExample', ['$scope', function($scope) {
$scope.list = ['angular', 'is', 'cool!'];
}]);
A customer delimiter is set to be ;. And the model of the input box is set to the array that was created on the scope.
<body ng-app="test" ng-controller="ngListExample">
<input ng-model="list" ng-list="; " ng-trim="false">
</body>
The input box will display with the content: angular; is; cool!
Section 4.12: ngOptions
ngOptions is a directive that simplifies the creation of a html dropdown box for the selection of an item from an
array that will be stored in a model. The ngOptions attribute is used to dynamically generate a list of <option>
elements for the <select> element using the array or object obtained by evaluating the ngOptions comprehension
expression.
With ng-options the markup can be reduced to just a select tag and the directive will create the same select:
<select ng-model="selectedFruitNgOptions"
ng-options="curFruit as curFruit.label for curFruit in fruit">
</select>
There is anther way of creating SELECT options using ng-repeat, but it is not recommended to use ng-repeat as it is
mostly used for general purpose like, the forEach just to loop. Whereas ng-options is specifically for creating
SELECT tag options.
Above example using ng-repeat would be
<select ng-model="selectedFruit">
<option ng-repeat="curFruit in fruit" value="{{curFruit}}">
{{curFruit.label}}
</option>
</select>
FULL EXAMPLE
Lets see the above example in detail also with some variations in it.
Data model for the example:
$scope.fruit = [](https://image.slidesharecdn.com/angularjsnotesforprofessionals-200412131913/85/Angular-js-notes-for-professionals-35-320.jpg)
![GoalKicker.com – AngularJS Notes for Professionals 29
{ label: "Apples", value: 4, id: 2 },
{ label: "Oranges", value: 2, id: 1 },
{ label: "Limes", value: 4, id: 4 },
{ label: "Lemons", value: 5, id: 3 }
];
<!-- label for value in array -->
<select ng-options="f.label for f in fruit" ng-model="selectedFruit"></select>
Option tag generated on selection:
<option value="{ label: "Apples", value: 4, id: 2 }"> Apples </option>
Effects:
f.label will be the label of the <option> and the value will contain the entire object.
FULL EXAMPLE
<!-- select as label for value in array -->
<select ng-options="f.value as f.label for f in fruit" ng-model="selectedFruit"></select>
Option tag generated on selection:
<option value="4"> Apples </option>
Effects:
f.value (4) will be the value in this case while the label is still the same.
FULL EXAMPLE
<!-- label group by group for value in array -->
<select ng-options="f.label group by f.value for f in fruit" ng-model="selectedFruit"></select>
Option tag generated on selection:
<option value="{ label: "Apples", value: 4, id: 2 }"> Apples </option>
Effects:
Options will be grouped based on there value. Options with same value will fall under one category
FULL EXAMPLE
<!-- label disable when disable for value in array -->
<select ng-options="f.label disable when f.value == 4 for f in fruit" ng-
model="selectedFruit"></select>
Option tag generated on selection:
<option disabled="" value="{ label: "Apples", value: 4, id: 2 }"> Apples </option>](https://image.slidesharecdn.com/angularjsnotesforprofessionals-200412131913/85/Angular-js-notes-for-professionals-36-320.jpg)
![GoalKicker.com – AngularJS Notes for Professionals 32
<button ng-dblclick="num++">Double click me</button>
In the above example, the value held at the input will be incremented when the button is double clicked.
Section 4.17: ngHref
ngHref is used instead of href attribute, if we have a angular expressions inside href value. The ngHref directive
overrides the original href attribute of an html tag using href attribute such as tag, tag etc.
The ngHref directive makes sure the link is not broken even if the user clicks the link before AngularJS has evaluated
the code.
Example 1
<div ng-init="linkValue = 'http://stackoverflow.com'">
<p>Go to <a ng-href="{{linkValue}}">{{linkValue}}</a>!</p>
</div>
Example 2 This example dynamically gets the href value from input box and load it as href value.
<input ng-model="value" />
<a id="link" ng-href="{{value}}">link</a>
Example 3
<script>
angular.module('angularDoc', [])
.controller('myController', function($scope) {
// Set some scope value.
// Here we set bootstrap version.
$scope.bootstrap_version = '3.3.7';
// Set the default layout value
$scope.layout = 'normal';
});
</script>
<!-- Insert it into Angular Code -->
<link rel="stylesheet" ng-href="//maxcdn.bootstrapcdn.com/bootstrap/{{ bootstrap_version
}}/css/bootstrap.min.css">
<link rel="stylesheet" ng-href="layout-{{ layout }}.css">
Section 4.18: ngPattern
The ng-pattern directive accepts an expression that evaluates to a regular expression pattern and uses that
pattern to validate a textual input.
Example:
Lets say we want an <input> element to become valid when it's value (ng-model) is a valid IP address.
Template:
<input type="text" ng-model="ipAddr" ng-pattern="ipRegex" name="ip" required>
Controller:](https://image.slidesharecdn.com/angularjsnotesforprofessionals-200412131913/85/Angular-js-notes-for-professionals-39-320.jpg)
![GoalKicker.com – AngularJS Notes for Professionals 33
$scope.ipRegex =
/b(?:(?:25[0-5]|2[0-4][0-9]|[01]?[0-9][0-9]?).){3}(?:25[0-5]|2[0-4][0-9]|[01]?[0-9][0-9]?)b/;
Section 4.19: ngShow and ngHide
The ng-show directive shows or hides the HTML element based on if the expression passed to it is true or false. If
the value of the expression is falsy then it will hide. If it is truthy then it will show.
The ng-hide directive is similar. However, if the value is falsy it will show the HTML element. When the expression is
truthy it will hide it.
Working JSBin Example
Controller:
var app = angular.module('app', []);
angular.module('app')
.controller('ExampleController', ExampleController);
function ExampleController() {
var vm = this;
//Binding the username to HTML element
vm.username = '';
//A taken username
vm.taken_username = 'StackOverflow';
}
View
<section ng-controller="ExampleController as main">
<p>Enter Password</p>
<input ng-model="main.username" type="text">
<hr>
<!-- Will always show as long as StackOverflow is not typed in -->
<!-- The expression is always true when it is not StackOverflow -->
<div style="color:green;" ng-show="main.username != main.taken_username">
Your username is free to use!
</div>
<!-- Will only show when StackOverflow is typed in -->
<!-- The expression value becomes falsy -->
<div style="color:red;" ng-hide="main.username != main.taken_username">
Your username is taken!
</div>
<p>Enter 'StackOverflow' in username field to show ngHide directive.</p>
</section>](https://image.slidesharecdn.com/angularjsnotesforprofessionals-200412131913/85/Angular-js-notes-for-professionals-40-320.jpg)
![GoalKicker.com – AngularJS Notes for Professionals 35
user to fire the click event of ng-click
Section 4.23: ngValue
Mostly used under ng-repeat ngValue is useful when dynamically generating lists of radio buttons using ngRepeat
<script>
angular.module('valueExample', [])
.controller('ExampleController', ['$scope', function($scope) {
$scope.names = ['pizza', 'unicorns', 'robots'];
$scope.my = { favorite: 'unicorns' };
}]);
</script>
<form ng-controller="ExampleController">
<h2>Which is your favorite?</h2>
<label ng-repeat="name in names" for="{{name}}">
{{name}}
<input type="radio"
ng-model="my.favorite"
ng-value="name"
id="{{name}}"
name="favorite">
</label>
<div>You chose {{my.favorite}}</div>
</form>
Working plnkr](https://image.slidesharecdn.com/angularjsnotesforprofessionals-200412131913/85/Angular-js-notes-for-professionals-42-320.jpg)
![GoalKicker.com – AngularJS Notes for Professionals 36
Chapter 5: Use of in-built directives
Section 5.1: Hide/Show HTML Elements
This example hide show html elements.
<!DOCTYPE html>
<html ng-app="myDemoApp">
<head>
<script src="https://code.angularjs.org/1.5.8/angular.min.js"></script>
<script>
function HideShowController() {
var vm = this;
vm.show=false;
vm.toggle= function() {
vm.show=!vm.show;
}
}
angular.module("myDemoApp", [/* module dependencies go here */])
.controller("hideShowController", [HideShowController]);
</script>
</head>
<body ng-cloak>
<div ng-controller="hideShowController as vm">
<a style="cursor: pointer;" ng-show="vm.show" ng-click="vm.toggle()">Show Me!</a>
<a style="cursor: pointer;" ng-hide="vm.show" ng-click="vm.toggle()">Hide Me!</a>
</div>
</body>
</html>
Live Demo
Step by step explanation:
ng-app="myDemoApp", the ngApp directive tells angular that a DOM element is controlled by a specific1.
angular.module named "myDemoApp".
<script src="[//angular include]"> include angular js.2.
HideShowController function is defined containing another function named toggle which help to hide show3.
the element.
angular.module(...) creates a new module.4.
.controller(...) Angular Controller and returns the module for chaining;5.
ng-controller directive is key aspect of how angular supports the principles behind the Model-View-6.
Controller design pattern.
ng-show directive shows the given HTML element if expression provided is true.7.
ng-hide directive hides the given HTML element if expression provided is true.8.
ng-click directive fires a toggle function inside controller9.](https://image.slidesharecdn.com/angularjsnotesforprofessionals-200412131913/85/Angular-js-notes-for-professionals-43-320.jpg)
![GoalKicker.com – AngularJS Notes for Professionals 38
Here you will learn about the Directives feature of AngularJS. Below you will find information on what Directives are,
as well as Basic and Advanced examples of how to use them.
Section 6.1: Creating and consuming custom directives
Directives are one of the most powerful features of angularjs. Custom angularjs directives are used to extend
functionality of html by creating new html elements or custom attributes to provide certain behavior to an html tag.
directive.js
// Create the App module if you haven't created it yet
var demoApp= angular.module("demoApp", []);
// If you already have the app module created, comment the above line and create a reference of the
app module
var demoApp = angular.module("demoApp");
// Create a directive using the below syntax
// Directives are used to extend the capabilities of html element
// You can either create it as an Element/Attribute/class
// We are creating a directive named demoDirective. Notice it is in CamelCase when we are defining
the directive just like ngModel
// This directive will be activated as soon as any this element is encountered in html
demoApp.directive('demoDirective', function () {
// This returns a directive definition object
// A directive definition object is a simple JavaScript object used for configuring the directive’s
behaviour,template..etc
return {
// restrict: 'AE', signifies that directive is Element/Attribute directive,
// "E" is for element, "A" is for attribute, "C" is for class, and "M" is for comment.
// Attributes are going to be the main ones as far as adding behaviors that get used the most.
// If you don't specify the restrict property it will default to "A"
restrict :'AE',
// The values of scope property decides how the actual scope is created and used inside a
directive. These values can be either “false”, “true” or “{}”. This creates an isolate scope for the
directive.
// '@' binding is for passing strings. These strings support {{}} expressions for interpolated
values.
// '=' binding is for two-way model binding. The model in parent scope is linked to the model in
the directive's isolated scope.
// '&' binding is for passing a method into your directive's scope so that it can be called
within your directive.
// The method is pre-bound to the directive's parent scope, and supports arguments.
scope: {
name: "@", // Always use small casing here even if it's a mix of 2-3 words
},
// template replaces the complete element with its text.
template: "<div>Hello {{name}}!</div>",
// compile is called during application initialization. AngularJS calls it once when html page is
loaded.
compile: function(element, attributes) {
element.css("border", "1px solid #cccccc");
// linkFunction is linked with each element with scope to get the element specific data.](https://image.slidesharecdn.com/angularjsnotesforprofessionals-200412131913/85/Angular-js-notes-for-professionals-45-320.jpg)

![GoalKicker.com – AngularJS Notes for Professionals 40
require - require another directive and inject its controller as the fourth argument to the linking function7.
controllerAs - name reference to the controller in the directive scope to allow the controller to be8.
referenced from the directive template.
restrict - restrict directive to Element, Attribute, Class, or Comment9.
templateNameSpace - sets document type used by directive template: html, svg, or math. html is the default10.
template - html markup that defaults to replacing the content of the directive's element, or wraps the11.
contents of the directive element if transclude is true
templateUrl - url provided asynchronously for the template12.
transclude - Extract the contents of the element where the directive appears and make it available to the13.
directive. The contents are compiled and provided to the directive as a transclusion function.
compile - function to transform the template DOM14.
link - only used if the compile property is not defined. The link function is responsible for registering DOM15.
listeners as well as updating the DOM. It is executed after the template has been cloned.
Section 6.3: How to create resuable component using
directive
AngularJS directives are what controls the rendering of the HTML inside an AngularJS application. They can be an
Html element, attribute, class or a comment. Directives are used to manipulate the DOM, attaching new behavior to
HTML elements, data binding and many more. Some of examples of directives which angular provides are ng-
model, ng-hide, ng-if.
Similarly one can create his own custom directive and make them resuable. For creating Custom directives
Reference. The sense behind creating reusable directives is to make a set of directives/components written by you
just like angularjs provides us using angular.js . These reusable directives can be particularly very helpful when you
have suite of applications/application which requires a consistent behavior, look and feel. An example of such
reusable component can be a simple toolbar which you may want to use across your application or different
applications but you want them to behave the same or look the same.
Firstly , Make a folder named resuableComponents in your app Folder and make reusableModuleApp.js
reusableModuleApp.js:
(function(){
var reusableModuleApp = angular.module('resuableModuleApp', ['ngSanitize']);
//Remember whatever dependencies you have in here should be injected in the app module where it is
intended to be used or it's scripts should be included in your main app
//We will be injecting ng-sanitize
resubaleModuleApp.directive('toolbar', toolbar)
toolbar.$inject=['$sce'];
function toolbar($sce){
return{
restrict :'AE',
//Defining below isolate scope actually provides window for the directive to take data from
app that will be using this.
scope : {
value1: '=',
value2: '=',
},](https://image.slidesharecdn.com/angularjsnotesforprofessionals-200412131913/85/Angular-js-notes-for-professionals-47-320.jpg)
![GoalKicker.com – AngularJS Notes for Professionals 41
}
template : '<ul> <li><a ng-click="Add()" href="">{{value1}}</a></li> <li><a ng-
click="Edit()" href="#">{{value2}}</a></li> </ul> ',
link : function(scope, element, attrs){
//Handle's Add function
scope.Add = function(){
};
//Handle's Edit function
scope.Edit = function(){
};
}
}
});
mainApp.js:
(function(){
var mainApp = angular.module('mainApp', ['reusableModuleApp']); //Inject resuableModuleApp in
your application where you want to use toolbar component
mainApp.controller('mainAppController', function($scope){
$scope.value1 = "Add";
$scope.value2 = "Edit";
});
});
index.html:
<!doctype html>
<html ng-app="mainApp">
<head>
<title> Demo Making a reusable component
<head>
<body ng-controller="mainAppController">
<!-- We are providing data to toolbar directive using mainApp'controller -->
<toolbar value1="value1" value2="value2"></toolbar>
<!-- We need to add the dependent js files on both apps here -->
<script src="js/angular.js"></script>
<script src="js/angular-sanitize.js"></script>
<!-- your mainApp.js should be added afterwards --->
<script src="mainApp.js"></script>
<!-- Add your reusable component js files here -->
<script src="resuableComponents/reusableModuleApp.js"></script>
</body>
</html>
Directive are reusable components by default. When you make directives in separate angular module, It actually](https://image.slidesharecdn.com/angularjsnotesforprofessionals-200412131913/85/Angular-js-notes-for-professionals-48-320.jpg)
![GoalKicker.com – AngularJS Notes for Professionals 42
makes it exportable and reusable across different angularJs applications. New directives can simply be added inside
reusableModuleApp.js and reusableModuleApp can have it's own controller, services, DDO object inside directive to
define the behavior.
Section 6.4: Basic Directive example
superman-directive.js
angular.module('myApp', [])
.directive('superman', function() {
return {
// restricts how the directive can be used
restrict: 'E',
templateUrl: 'superman-template.html',
controller: function() {
this.message = "I'm superman!"
},
controllerAs: 'supermanCtrl',
// Executed after Angular's initialization. Use commonly
// for adding event handlers and DOM manipulation
link: function(scope, element, attributes) {
element.on('click', function() {
alert('I am superman!')
});
}
}
});
superman-template.html
<h2>{{supermanCtrl.message}}</h2>
index.html
<!DOCTYPE html>
<html lang="en">
<head>
<meta charset="UTF-8">
<title>Document</title>
<script src="https://ajax.googleapis.com/ajax/libs/angularjs/1.5.0/angular.js"></script>
<script src="superman-directive.js"><script/>
</head>
<body>
<div ng-app="myApp">
<superman></superman>
</div>
</body>
</html>
You can check out more about directive's restrict and link functions on AngularJS's official documentation on
Directives
Section 6.5: Directive decorator
Sometimes you may need additional features from a directive. Instead of rewriting (copy) the directive, you can
modify how the directive behaves.](https://image.slidesharecdn.com/angularjsnotesforprofessionals-200412131913/85/Angular-js-notes-for-professionals-49-320.jpg)
![GoalKicker.com – AngularJS Notes for Professionals 43
The decorator will be executed during $inject phase.
To do so, provde a .config to your module. The directive is called myDirective, so you have to config
myDirectiveDirective. (this in an angular convention [read about providers] ).
This example will change the templateUrl of the directive:
angular.module('myApp').config(function($provide){
$provide.decorator('myDirectiveDirective', function($delegate){
var directive = $delegate[0]; // this is the actual delegated, your directive
directive.templateUrl = 'newTemplate.html'; // you change the directive template
return $delegate;
})
});
This example add an onClick event to the directive element when clicked, this happens during compile phase.
angular.module('myApp').config(function ($provide) {
$provide.decorator('myDirectiveTwoDirective', function ($delegate) {
var directive = $delegate[0];
var link = directive.link; // this is directive link phase
directive.compile = function () { // change the compile of that directive
return function (scope, element, attrs) {
link.apply(this, arguments); // apply this at the link phase
element.on('click', function(){ // when add an onclick that log hello when the
directive is clicked.
console.log('hello!');
});
};
};
return $delegate;
});
});
Similar approach can be used for both Providers and Services.
Section 6.6: Basic directive with template and an isolated
scope
Creating a custom directive with isolated scope will separate the scope inside the directive from the outside scope,
in order to prevent our directive from accidentally change the data in the parent scope and restricting it from
reading private data from the parent scope.
To create an isolated scope and still allow our custom directive to communicate with the outside scope, we can use
the scope option that describe how to map the bindings of the directive's inner scope with the outside scope.
The actual bindings are made with extra attributes attached to the directive. The binding settings are defined with
the scope option and an object with key-value pairs:
A key, which is corresponded to our directive's isolated scope property
A value, which tells Angular how do bind the directive inner scope to a matching attribute
Simple example of a directive with an isolated scope:
var ProgressBar = function() {](https://image.slidesharecdn.com/angularjsnotesforprofessionals-200412131913/85/Angular-js-notes-for-professionals-50-320.jpg)
![GoalKicker.com – AngularJS Notes for Professionals 44
return {
scope: { // This is how we define an isolated scope
current: '=', // Create a REQUIRED bidirectional binding by using the 'current' attribute
full: '=?maxValue' // Create an OPTIONAL (Note the '?'): bidirectional binding using 'max-
value' attribute to the `full` property in our directive isolated scope
}
template: '<div class="progress-back">' +
' <div class="progress-bar"' +
' ng-style="{width: getProgress()}">' +
' </div>' +
'</div>',
link: function(scope, el, attrs) {
if (scope.full === undefined) {
scope.full = 100;
}
scope.getProgress = function() {
return (scope.current / scope.size * 100) + '%';
}
}
}
}
ProgressBar.$inject = [];
angular.module('app').directive('progressBar', ProgressBar);
Example how to use this directive and bind data from the controller's scope to the directive's inner scope:
Controller:
angular.module('app').controller('myCtrl', function($scope) {
$scope.currentProgressValue = 39;
$scope.maxProgressBarValue = 50;
});
View:
<div ng-controller="myCtrl">
<progress-bar current="currentProgressValue"></progress-bar>
<progress-bar current="currentProgressValue" max-value="maxProgressBarValue"></progress-bar>
</div>
Section 6.7: Building a reusable component
Directives can be used to build reusable components. Here is an example of a "user box" component:
userBox.js
angular.module('simpleDirective', []).directive('userBox', function() {
return {
scope: {
username: '=username',
reputation: '=reputation'
},
templateUrl: '/path/to/app/directives/user-box.html'
};
});
Controller.js](https://image.slidesharecdn.com/angularjsnotesforprofessionals-200412131913/85/Angular-js-notes-for-professionals-51-320.jpg)
![GoalKicker.com – AngularJS Notes for Professionals 45
var myApp = angular.module('myApp', ['simpleDirective']);
myApp.controller('Controller', function($scope) {
$scope.user = "John Doe";
$scope.rep = 1250;
$scope.user2 = "Andrew";
$scope.rep2 = 2850;
});
myPage.js
<html lang="en" ng-app="myApp">
<head>
<script src="/path/to/app/angular.min.js"></script>
<script src="/path/to/app/js/controllers/Controller.js"></script>
<script src="/path/to/app/js/directives/userBox.js"></script>
</head>
<body>
<div ng-controller="Controller">
<user-box username="user" reputation="rep"></user-box>
<user-box username="user2" reputation="rep2"></user-box>
</div>
</body>
</html>
user-box.html
<div>{{username}}</div>
<div>{{reputation}} reputation</div>
The result will be:
John Doe
1250 reputation
Andrew
2850 reputation
Section 6.8: Directive inheritance and interoperability
Angular js directives can be nested or be made interoperable.
In this example, directive Adir exposes to directive Bdir it's controller $scope, since Bdir requires Adir.
angular.module('myApp',[]).directive('Adir', function () {
return {
restrict: 'AE',
controller: ['$scope', function ($scope) {
$scope.logFn = function (val) {
console.log(val);
}
}]
}](https://image.slidesharecdn.com/angularjsnotesforprofessionals-200412131913/85/Angular-js-notes-for-professionals-52-320.jpg)
![GoalKicker.com – AngularJS Notes for Professionals 46
})
Make sure to set require: '^Adir' (look at the angular documentation, some versions doesn't require ^ character).
.directive('Bdir', function () {
return {
restrict: 'AE',
require: '^Adir', // Bdir require Adir
link: function (scope, elem, attr, Parent) {
// Parent is Adir but can be an array of required directives.
elem.on('click', function ($event) {
Parent.logFn("Hello!"); // will log "Hello! at parent dir scope
scope.$apply(); // apply to parent scope.
});
}
}
}]);
You can nest your directive in this way:
<div a-dir><span b-dir></span></div>
<a-dir><b-dir></b-dir> </a-dir>
Is not required that directives are nested in your HTML.](https://image.slidesharecdn.com/angularjsnotesforprofessionals-200412131913/85/Angular-js-notes-for-professionals-53-320.jpg)
![GoalKicker.com – AngularJS Notes for Professionals 51
Chapter 9: Filters
Section 9.1: Accessing a filtered list from outside an ng-repeat
Occasionally you will want to access the result of your filters from outside the ng-repeat, perhaps to indicate the
number of items that have been filtered out. You can do this using as [variablename] syntax on the ng-repeat.
<ul>
<li ng-repeat="item in vm.listItems | filter:vm.myFilter as filtered">
{{item.name}}
</li>
</ul>
<span>Showing {{filtered.length}} of {{vm.listItems.length}}</span>
Section 9.2: Custom filter to remove values
A typical use case for a filter is to remove values from an array. In this example we pass in an array and remove any
nulls found in it, returning the array.
function removeNulls() {
return function(list) {
for (var i = list.length - 1; i >= 0; i--) {
if (typeof list[i] === 'undefined' ||
list[i] === null) {
list.splice(i, 1);
}
}
return list;
};
}
That would be used in the HTML like
{{listOfItems | removeNulls}}
or in a controller like
listOfItems = removeNullsFilter(listOfItems);
Section 9.3: Custom filter to format values
Another use case for filters is to format a single value. In this example, we pass in a value and we are returned an
appropriate true boolean value.
function convertToBooleanValue() {
return function(input) {
if (typeof input !== 'undefined' &&
input !== null &&
(input === true || input === 1 || input === '1' || input
.toString().toLowerCase() === 'true')) {
return true;
}
return false;
};
}](https://image.slidesharecdn.com/angularjsnotesforprofessionals-200412131913/85/Angular-js-notes-for-professionals-58-320.jpg)
![GoalKicker.com – AngularJS Notes for Professionals 52
Which in the HTML would be used like this:
{{isAvailable | convertToBooleanValue}}
Or in a controller like:
var available = convertToBooleanValueFilter(isAvailable);
Section 9.4: Using filters in a controller or service
By injecting $filter, any defined filter in your Angular module may be used in controllers, services, directives or
even other filters.
angular.module("app")
.service("users", usersService)
.controller("UsersController", UsersController);
function usersService () {
this.getAll = function () {
return [{
id: 1,
username: "john"
}, {
id: 2,
username: "will"
}, {
id: 3,
username: "jack"
}];
};
}
function UsersController ($filter, users) {
var orderByFilter = $filter("orderBy");
this.users = orderByFilter(users.getAll(), "username");
// Now the users are ordered by their usernames: jack, john, will
this.users = orderByFilter(users.getAll(), "username", true);
// Now the users are ordered by their usernames, in reverse order: will, john, jack
}
Section 9.5: Performing filter in a child array
This example was done in order to demonstrate how you can perform a deep filter in a child array without the
necessity of a custom filter.
Controller:
(function() {
"use strict";
angular
.module('app', [])
.controller('mainCtrl', mainCtrl);
function mainCtrl() {
var vm = this;](https://image.slidesharecdn.com/angularjsnotesforprofessionals-200412131913/85/Angular-js-notes-for-professionals-59-320.jpg)
![GoalKicker.com – AngularJS Notes for Professionals 53
vm.classifications = ["Saloons", "Sedans", "Commercial vehicle", "Sport car"];
vm.cars = [
{
"name":"car1",
"classifications":[
{
"name":"Saloons"
},
{
"name":"Sedans"
}
]
},
{
"name":"car2",
"classifications":[
{
"name":"Saloons"
},
{
"name":"Commercial vehicle"
}
]
},
{
"name":"car3",
"classifications":[
{
"name":"Sport car"
},
{
"name":"Sedans"
}
]
}
];
}
})();
View:
<body ng-app="app" ng-controller="mainCtrl as main">
Filter car by classification:
<select ng-model="classificationName"
ng-options="classification for classification in main.classifications"></select>
<br>
<ul>
<li ng-repeat="car in main.cars |
filter: { classifications: { name: classificationName } } track by $index"
ng-bind-template="{{car.name}} - {{car.classifications | json}}">
</li>
</ul>
</body>
Check the complete DEMO .](https://image.slidesharecdn.com/angularjsnotesforprofessionals-200412131913/85/Angular-js-notes-for-professionals-60-320.jpg)
![GoalKicker.com – AngularJS Notes for Professionals 54
Chapter 10: Custom filters
Section 10.1: Use a filter in a controller, a service or a filter
You will have to inject $filter:
angular
.module('filters', [])
.filter('percentage', function($filter) {
return function (input) {
return $filter('number')(input * 100) + ' %';
};
});
Section 10.2: Create a filter with parameters
By default, a filter has a single parameter: the variable it is applied on. But you can pass more parameter to the
function:
angular
.module('app', [])
.controller('MyController', function($scope) {
$scope.example = 0.098152;
})
.filter('percentage', function($filter) {
return function (input, decimals) {
return $filter('number')(input * 100, decimals) + ' %';
};
});
Now, you can give a precision to the percentage filter:
<span ng-controller="MyController">{{ example | percentage: 2 }}</span>
=> "9.81 %"
... but other parameters are optional, you can still use the default filter:
<span ng-controller="MyController">{{ example | percentage }}</span>
=> "9.8152 %"
Section 10.3: Simple filter example
Filters format the value of an expression for display to the user. They can be used in view templates, controllers or
services. This example creates a filter (addZ) then uses it in a view. All this filter does is add a capital 'Z' to the end of
the string.
example.js
angular.module('main', [])
.filter('addZ', function() {
return function(value) {
return value + "Z";
}
})
.controller('MyController', ['$scope', function($scope) {
$scope.sample = "hello";](https://image.slidesharecdn.com/angularjsnotesforprofessionals-200412131913/85/Angular-js-notes-for-professionals-61-320.jpg)
![GoalKicker.com – AngularJS Notes for Professionals 55
}])
example.html
Inside the view, the filter is applied with the following syntax: { variable | filter}. In this case, the variable we
defined in the controller, sample, is being filtered by the filter we created, addZ.
<div ng-controller="MyController">
<span>{{sample | addZ}}</span>
</div>
Expected output
helloZ](https://image.slidesharecdn.com/angularjsnotesforprofessionals-200412131913/85/Angular-js-notes-for-professionals-62-320.jpg)
![GoalKicker.com – AngularJS Notes for Professionals 56
Chapter 11: Constants
Section 11.1: Create your first constant
angular
.module('MyApp', [])
.constant('VERSION', 1.0);
Your constant is now declared and can be injected in a controller, a service, a factory, a provider, and even in a
config method:
angular
.module('MyApp')
.controller('FooterController', function(VERSION) {
this.version = VERSION;
});
<footer ng-controller="FooterController as Footer">{{ Footer.version }}</footer>
Section 11.2: Use cases
There is no revolution here, but angular constant can be useful specially when your application and/or team starts
to grow ... or if you simply love writing beautiful code!
Refactor code. Example with event's names. If you use a lot of events in your application, you have event's
names a little every where. A when a new developer join your team, he names his events with a different
syntax, ... You can easily prevent this by grouping your event's names in a constant:
angular
.module('MyApp')
.constant('EVENTS', {
LOGIN_VALIDATE_FORM: 'login::click-validate',
LOGIN_FORGOT_PASSWORD: 'login::click-forgot',
LOGIN_ERROR: 'login::notify-error',
...
});
angular
.module('MyApp')
.controller('LoginController', function($scope, EVENT) {
$scope.$on(EVENT.LOGIN_VALIDATE_FORM, function() {
...
});
})
... and now, your event's names can take benefits from autocompletion !
Define configuration. Locate all your configuration in a same place:
angular
.module('MyApp')
.constant('CONFIG', {](https://image.slidesharecdn.com/angularjsnotesforprofessionals-200412131913/85/Angular-js-notes-for-professionals-63-320.jpg)
![GoalKicker.com – AngularJS Notes for Professionals 58
Chapter 12: Custom filters with ES6
Section 12.1: FileSize Filter using ES6
We have here a file Size filter to describe how to add costum filter to an existing module :
let fileSize=function (size,unit,fixedDigit) {
return size.toFixed(fixedDigit) + ' '+unit;
};
let fileSizeFilter=function () {
return function (size) {
if (isNaN(size))
size = 0;
if (size < 1024)
return size + ' octets';
size /= 1024;
if (size < 1024)
return fileSize(size,'Ko',2);
size /= 1024;
if (size < 1024)
return fileSize(size,'Mo',2);
size /= 1024;
if (size < 1024)
return fileSize(size,'Go',2);
size /= 1024;
return fileSize(size,'To',2);
};
};
export default fileSizeFilter;
The filter call into the module :
import fileSizeFilter from 'path...';
let myMainModule =
angular.module('mainApp', [])
.filter('fileSize', fileSizeFilter);
The html code where we call the filter :
<div ng-app="mainApp">
<div>
<input type="text" ng-model="size" />
</div>
<div>
<h3>Output:</h3>
<p>{{size| Filesize}}</p>
</div>
</div>](https://image.slidesharecdn.com/angularjsnotesforprofessionals-200412131913/85/Angular-js-notes-for-professionals-65-320.jpg)
![GoalKicker.com – AngularJS Notes for Professionals 59
Chapter 13: Directives using
ngModelController
Section 13.1: A simple control: rating
Let us build a simple control, a rating widget, intended to be used as:
<rating min="0" max="5" nullifier="true" ng-model="data.rating"></rating>
No fancy CSS for now; this would render as:
0 1 2 3 4 5 x
Clicking on a number selects that rating; and clicking the "x" sets the rating to null.
app.directive('rating', function() {
function RatingController() {
this._ngModel = null;
this.rating = null;
this.options = null;
this.min = typeof this.min === 'number' ? this.min : 1;
this.max = typeof this.max === 'number' ? this.max : 5;
}
RatingController.prototype.setNgModel = function(ngModel) {
this._ngModel = ngModel;
if( ngModel ) {
// KEY POINT 1
ngModel.$render = this._render.bind(this);
}
};
RatingController.prototype._render = function() {
this.rating = this._ngModel.$viewValue != null ? this._ngModel.$viewValue : -
Number.MAX_VALUE;
};
RatingController.prototype._calculateOptions = function() {
if( this.min == null || this.max == null ) {
this.options = [];
}
else {
this.options = new Array(this.max - this.min + 1);
for( var i=0; i < this.options.length; i++ ) {
this.options[i] = this.min + i;
}
}
};
RatingController.prototype.setValue = function(val) {
this.rating = val;
// KEY POINT 2
this._ngModel.$setViewValue(val);
};
// KEY POINT 3](https://image.slidesharecdn.com/angularjsnotesforprofessionals-200412131913/85/Angular-js-notes-for-professionals-66-320.jpg)
![GoalKicker.com – AngularJS Notes for Professionals 60
Object.defineProperty(RatingController.prototype, 'min', {
get: function() {
return this._min;
},
set: function(val) {
this._min = val;
this._calculateOptions();
}
});
Object.defineProperty(RatingController.prototype, 'max', {
get: function() {
return this._max;
},
set: function(val) {
this._max = val;
this._calculateOptions();
}
});
return {
restrict: 'E',
scope: {
// KEY POINT 3
min: '<?',
max: '<?',
nullifier: '<?'
},
bindToController: true,
controllerAs: 'ctrl',
controller: RatingController,
require: ['rating', 'ngModel'],
link: function(scope, elem, attrs, ctrls) {
ctrls[0].setNgModel(ctrls[1]);
},
template:
'<span ng-repeat="o in ctrl.options" href="#" class="rating-option" ng-
class="{'rating-option-active': o <= ctrl.rating}" ng-click="ctrl.setValue(o)">{{ o }}</span>' +
'<span ng-if="ctrl.nullifier" ng-click="ctrl.setValue(null)" class="rating-
nullifier">✖</span>'
};
});
Key points:
Implement ngModel.$render to transfer the model's view value to your view.1.
Call ngModel.$setViewValue() whenever you feel the view value should be updated.2.
The control can of course be parameterized; use '<' scope bindings for parameters, if in Angular >= 1.5 to3.
clearly indicate input - one way binding. If you have to take action whenever a parameter changes, you can
use a JavaScript property (see Object.defineProperty()) to save a few watches.
Note 1: In order not to overcomplicate the implementation, the rating values are inserted in an array - the
ctrl.options. This is not needed; a more efficient, but also more complex, implementation could use DOM
manipulation to insert/remove ratings when min/max change.
Note 2: With the exception of the '<' scope bindings, this example can be used in Angular < 1.5. If you are on
Angular >= 1.5, it would be a good idea to transform this to a component and use the $onInit() lifecycle hook to
initialize min and max, instead of doing so in the controller's constructor.](https://image.slidesharecdn.com/angularjsnotesforprofessionals-200412131913/85/Angular-js-notes-for-professionals-67-320.jpg)
![GoalKicker.com – AngularJS Notes for Professionals 61
And a necessary fiddle: https://jsfiddle.net/h81mgxma/
Section 13.2: A couple of complex controls: edit a full object
A custom control does not have to limit itself to trivial things like primitives; it can edit more interesting things. Here
we present two types of custom controls, one for editing persons and one for editing addresses. The address
control is used to edit the person's address. An example of usage would be:
<input-person ng-model="data.thePerson"></input-person>
<input-address ng-model="data.thePerson.address"></input-address>
The model for this example is deliberately simplistic:
function Person(data) {
data = data || {};
this.name = data.name;
this.address = data.address ? new Address(data.address) : null;
}
function Address(data) {
data = data || {};
this.street = data.street;
this.number = data.number;
}
The address editor:
app.directive('inputAddress', function() {
InputAddressController.$inject = ['$scope'];
function InputAddressController($scope) {
this.$scope = $scope;
this._ngModel = null;
this.value = null;
this._unwatch = angular.noop;
}
InputAddressController.prototype.setNgModel = function(ngModel) {
this._ngModel = ngModel;
if( ngModel ) {
// KEY POINT 3
ngModel.$render = this._render.bind(this);
}
};
InputAddressController.prototype._makeWatch = function() {
// KEY POINT 1
this._unwatch = this.$scope.$watchCollection(
(function() {
return this.value;
}).bind(this),
(function(newval, oldval) {
if( newval !== oldval ) { // skip the initial trigger
this._ngModel.$setViewValue(newval !== null ? new Address(newval) : null);
}
}).bind(this)
);
};](https://image.slidesharecdn.com/angularjsnotesforprofessionals-200412131913/85/Angular-js-notes-for-professionals-68-320.jpg)
![GoalKicker.com – AngularJS Notes for Professionals 62
InputAddressController.prototype._render = function() {
// KEY POINT 2
this._unwatch();
this.value = this._ngModel.$viewValue ? new Address(this._ngModel.$viewValue) : null;
this._makeWatch();
};
return {
restrict: 'E',
scope: {},
bindToController: true,
controllerAs: 'ctrl',
controller: InputAddressController,
require: ['inputAddress', 'ngModel'],
link: function(scope, elem, attrs, ctrls) {
ctrls[0].setNgModel(ctrls[1]);
},
template:
'<div>' +
'<label><span>Street:</span><input type="text" ng-model="ctrl.value.street"
/></label>' +
'<label><span>Number:</span><input type="text" ng-model="ctrl.value.number"
/></label>' +
'</div>'
};
});
Key points:
We are editing an object; we do not want to change directly the object given to us from our parent (we want1.
our model to be compatible with the immutability principle). So we create a shallow watch on the object
being edited and update the model with $setViewValue() whenever a property changes. We pass a copy to
our parent.
Whenever the model changes from the outside, we copy it and save the copy to our scope. Immutability2.
principles again, though the internal copy is not immutable, the external could very well be. Additionally we
rebuild the watch (this_unwatch();this._makeWatch();), to avoid triggering the watcher for changes
pushed to us by the model. (We only want the watch to trigger for changes made in the UI.)
Other that the points above, we implement ngModel.$render() and call ngModel.$setViewValue() as we3.
would for a simple control (see the rating example).
The code for the person custom control is almost identical. The template is using the <input-address>. In a more
advanced implementation we could extract the controllers in a reusable module.
app.directive('inputPerson', function() {
InputPersonController.$inject = ['$scope'];
function InputPersonController($scope) {
this.$scope = $scope;
this._ngModel = null;
this.value = null;
this._unwatch = angular.noop;
}
InputPersonController.prototype.setNgModel = function(ngModel) {
this._ngModel = ngModel;
if( ngModel ) {
ngModel.$render = this._render.bind(this);](https://image.slidesharecdn.com/angularjsnotesforprofessionals-200412131913/85/Angular-js-notes-for-professionals-69-320.jpg)
![GoalKicker.com – AngularJS Notes for Professionals 63
}
};
InputPersonController.prototype._makeWatch = function() {
this._unwatch = this.$scope.$watchCollection(
(function() {
return this.value;
}).bind(this),
(function(newval, oldval) {
if( newval !== oldval ) { // skip the initial trigger
this._ngModel.$setViewValue(newval !== null ? new Person(newval) : null);
}
}).bind(this)
);
};
InputPersonController.prototype._render = function() {
this._unwatch();
this.value = this._ngModel.$viewValue ? new Person(this._ngModel.$viewValue) : null;
this._makeWatch();
};
return {
restrict: 'E',
scope: {},
bindToController: true,
controllerAs: 'ctrl',
controller: InputPersonController,
require: ['inputPerson', 'ngModel'],
link: function(scope, elem, attrs, ctrls) {
ctrls[0].setNgModel(ctrls[1]);
},
template:
'<div>' +
'<label><span>Name:</span><input type="text" ng-model="ctrl.value.name" /></label>'
+
'<input-address ng-model="ctrl.value.address"></input-address>' +
'</div>'
};
});
Note: Here the objects are typed, i.e. they have proper constructors. This is not obligatory; the model can be plain
JSON objects. In this case just use angular.copy() instead of the constructors. An added advantage is that the
controller becomes identical for the two controls and can easily be extracted into some common module.
The fiddle: https://jsfiddle.net/3tzyqfko/2/
Two versions of the fiddle having extracted the common code of the controllers: https://jsfiddle.net/agj4cp0e/ and
https://jsfiddle.net/ugb6Lw8b/](https://image.slidesharecdn.com/angularjsnotesforprofessionals-200412131913/85/Angular-js-notes-for-professionals-70-320.jpg)
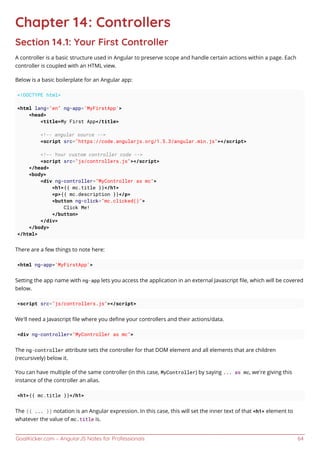
![GoalKicker.com – AngularJS Notes for Professionals 65
Note: Angular employs dual-way data binding, meaning that regardless of how you update the mc.title value, it
will be reflected in both the controller and the page.
Also note that Angular expressions do not have to reference a controller. An Angular expression can be as simple as
{{ 1 + 2 }} or {{ "Hello " + "World" }}.
<button ng-click="mc.clicked()">
ng-click is an Angular directive, in this case binding the click event for the button to trigger the clicked() function
of the MyController instance.
With those things in mind, let's write an implementation of the MyController controller. With the example above,
you would write this code in js/controller.js.
First, you'll need to instantiate the Angular app in your Javascript.
var app = angular.module("MyFirstApp", []);
Note that the name we pass here is the same as the name you set in your HTML with the ng-app directive.
Now that we have the app object, we can use that to create controllers.
app.controller('MyController', function(){
var ctrl = this;
ctrl.title = "My First Angular App";
ctrl.description = "This is my first Angular app!";
ctrl.clicked = function(){
alert("MyController.clicked()");
};
});
Note: For anything that we want to be a part of the controller instance, we use the this keyword.
This is all that is required to build a simple controller.
Section 14.2: Creating Controllers, Minification safe
There are a couple different ways to protect your controller creation from minification.
The first is called inline array annotation. It looks like the following:
var app = angular.module('app');
app.controller('sampleController', ['$scope', '$http', function(a, b){
//logic here
}]);
The second parameter of the controller method can accept an array of dependencies. As you can see I've defined
$scope and $http which should correspond to the parameters of the controller function in which a will be the
$scope, and b would be $http. Take note that the last item in the array should be your controller function.
The second option is using the $inject property. It looks like the following:
var app = angular.module('app');
app.controller('sampleController', sampleController);](https://image.slidesharecdn.com/angularjsnotesforprofessionals-200412131913/85/Angular-js-notes-for-professionals-72-320.jpg)
![GoalKicker.com – AngularJS Notes for Professionals 66
sampleController.$inject = ['$scope', '$http'];
function sampleController(a, b) {
//logic here
}
This does the same thing as inline array annotation but provides a different styling for those that prefer one option
over the other.
The order of injected dependencies is important
When injecting dependencies using the array form, be sure that the list of the dependencies match its
corresponding list of arguments passed to the controller function.
Note that in the following example, $scope and $http are reversed. This will cause a problem in the code.
// Intentional Bug: injected dependencies are reversed which will cause a problem
app.controller('sampleController', ['$scope', '$http',function($http, $scope) {
$http.get('sample.json');
}]);
Section 14.3: Using ControllerAs in Angular JS
In Angular $scope is the glue between the Controller and the View that helps with all of our data binding needs.
Controller As is another way of binding controller and view and is mostly recommended to use. Basically these are
the two controller constructs in Angular (i.e $scope and Controller As).
Different ways of using Controller As are -
controllerAs View Syntax
<div ng-controller="CustomerController as customer">
{{ customer.name }}
</div>
controllerAs Controller Syntax
function CustomerController() {
this.name = {};
this.sendMessage = function() { };
}
controllerAs with vm
function CustomerController() {
/*jshint validthis: true */
var vm = this;
vm.name = {};
vm.sendMessage = function() { };
}
controllerAs is syntactic sugar over $scope. You can still bind to the View and still access $scope methods. Using
controllerAs, is one of the best practices suggested by the angular core team. There are many reason for this, few
of them are -
$scope is exposing the members from the controller to the view via an intermediary object. By setting
this.*, we can expose just what we want to expose from the controller to the view. It also follow the](https://image.slidesharecdn.com/angularjsnotesforprofessionals-200412131913/85/Angular-js-notes-for-professionals-73-320.jpg)
![GoalKicker.com – AngularJS Notes for Professionals 67
standard JavaScript way of using this.
using controllerAs syntax, we have more readable code and the parent property can be accessed using the
alias name of the parent controller instead of using the $parent syntax.
It promotes the use of binding to a "dotted" object in the View (e.g. customer.name instead of name), which
is more contextual, easier to read, and avoids any reference issues that may occur without "dotting".
Helps avoid using $parent calls in Views with nested controllers.
Use a capture variable for this when using the controllerAs syntax. Choose a consistent variable name such
as vm, which stands for ViewModel. Because, this keyword is contextual and when used within a function
inside a controller may change its context. Capturing the context of this avoids encountering this problem.
NOTE: using controllerAs syntax add to current scope reference to current controller, so it available as field
<div ng-controller="Controller as vm>...</div>
vm is available as $scope.vm.
Section 14.4: Creating Minification-Safe Angular Controllers
To create minification-safe angular controllers, you will change the controller function parameters.
The second argument in the module.controller function should be passed an array, where the last parameter is
the controller function, and every parameter before that is the name of each injected value.
This is different from the normal paradigm; that takes the controller function with the injected arguments.
Given:
var app = angular.module('myApp');
The controller should look like this:
app.controller('ctrlInject',
[
/* Injected Parameters */
'$Injectable1',
'$Injectable2',
/* Controller Function */
function($injectable1Instance, $injectable2Instance) {
/* Controller Content */
}
]
);
Note: The names of injected parameters are not required to match, but they will be bound in order.
This will minify to something similar to this:
var
a=angular.module('myApp');a.controller('ctrlInject',['$Injectable1','$Injectable2',function(b,c){/*
Controller Content */}]);
The minification process will replace every instance of app with a, every instance of $Injectable1Instance with b,
and every instance of $Injectable2Instance with c.](https://image.slidesharecdn.com/angularjsnotesforprofessionals-200412131913/85/Angular-js-notes-for-professionals-74-320.jpg)
![GoalKicker.com – AngularJS Notes for Professionals 68
Section 14.5: Creating Controllers
angular
.module('app')
.controller('SampleController', SampleController)
SampleController.$inject = ['$log', '$scope'];
function SampleController($log, $scope){
$log.debug('*****SampleController******');
/* Your code below */
}
Note: The .$inject will make sure your dependencies doesn't get scrambled after minification. Also, make sure it's
in order with the named function.
Section 14.6: Nested Controllers
Nesting controllers chains the $scope as well. Changing a $scope variable in the nested controller changes the same
$scope variable in the parent controller.
.controller('parentController', function ($scope) {
$scope.parentVariable = "I'm the parent";
});
.controller('childController', function ($scope) {
$scope.childVariable = "I'm the child";
$scope.childFunction = function () {
$scope.parentVariable = "I'm overriding you";
};
});
Now let's try to handle both of them, nested.
<body ng-controller="parentController">
What controller am I? {{parentVariable}}
<div ng-controller="childController">
What controller am I? {{childVariable}}
<button ng-click="childFunction()"> Click me to override! </button>
</div>
</body>
Nesting controllers may have it's benefits, but one thing must be kept in mind when doing so. Calling the
ngController directive creates a new instance of the controller - which can often create confusion and unexpected
results.](https://image.slidesharecdn.com/angularjsnotesforprofessionals-200412131913/85/Angular-js-notes-for-professionals-75-320.jpg)
![GoalKicker.com – AngularJS Notes for Professionals 69
Chapter 15: Controllers with ES6
Section 15.1: Controller
it is very easy to write an angularJS controller with ES6 if your are familiarized with the Object Oriented
Programming :
class exampleContoller{
constructor(service1,service2,...serviceN){
let ctrl=this;
ctrl.service1=service1;
ctrl.service2=service2;
.
.
.
ctrl.service1=service1;
ctrl.controllerName = 'Example Controller';
ctrl.method1(controllerName)
}
method1(param){
let ctrl=this;
ctrl.service1.serviceFunction();
.
.
ctrl.scopeName=param;
}
.
.
.
methodN(param){
let ctrl=this;
ctrl.service1.serviceFunction();
.
.
}
}
exampleContoller.$inject = ['service1','service2',...,'serviceN'];
export default exampleContoller;](https://image.slidesharecdn.com/angularjsnotesforprofessionals-200412131913/85/Angular-js-notes-for-professionals-76-320.jpg)
![GoalKicker.com – AngularJS Notes for Professionals 75
angular.module('myapp').factory('StudentDetailsService', StudentDetailsService);
Usage inside a controller
function StudentController(StudentDetailsService) {
var newStudent = new StudentDetailsService();
//Now the instance has been created. Its properties can be accessed.
newStudent.age();
newStudent.address();
};
angular.module('app').controller('StudentController', StudentController);
Section 17.3: $sce - sanitize and render content and resources
in templates
$sce ("Strict Contextual Escaping") is a built-in angular service that automatically sanitize content and
internal sources in templates.
injecting external sources and raw HTML into the template requires manual wrapping of$sce.
In this example we'll create a simple $sce sanitation filter :`.
Demo
.filter('sanitizer', ['$sce', [function($sce) {
return function(content) {
return $sce.trustAsResourceUrl(content);
};
}]);
Usage in template
<div ng-repeat="item in items">
// Sanitize external sources
<ifrmae ng-src="{{item.youtube_url | sanitizer}}">
// Sanitaize and render HTML
<div ng-bind-html="{{item.raw_html_content| sanitizer}}"></div>
</div>
Section 17.4: How to create a Service
angular.module("app")
.service("counterService", function(){
var service = {
number: 0
};
return service;](https://image.slidesharecdn.com/angularjsnotesforprofessionals-200412131913/85/Angular-js-notes-for-professionals-82-320.jpg)
![GoalKicker.com – AngularJS Notes for Professionals 76
});
Section 17.5: How to use a service
angular.module("app")
// Custom services are injected just like Angular's built-in services
.controller("step1Controller", ['counterService', '$scope', function(counterService,
$scope) {
counterService.number++;
// bind to object (by reference), not to value, for automatic sync
$scope.counter = counterService;
})
In the template using this controller you'd then write:
// editable
<input ng-model="counter.number" />
or
// read-only
<span ng-bind="counter.number"></span>
Of course, in real code you would interact with the service using methods on the controller, which in turn delegate
to the service. The example above simply increments the counter value each time the controller is used in a
template.
Services in Angularjs are singletons:
Services are singleton objects that are instantiated only once per app (by the $injector) and lazy loaded (created
only when necessary).
A singleton is a class which only allows one instance of itself to be created - and gives simple, easy access
to said instance. As stated here
Section 17.6: How to create a Service with dependencies using
'array syntax'
angular.module("app")
.service("counterService", ["fooService", "barService", function(anotherService, barService){
var service = {
number: 0,
foo: function () {
return fooService.bazMethod(); // Use of 'fooService'
},
bar: function () {
return barService.bazMethod(); // Use of 'barService'
}
};
return service;
}]);](https://image.slidesharecdn.com/angularjsnotesforprofessionals-200412131913/85/Angular-js-notes-for-professionals-83-320.jpg)
![GoalKicker.com – AngularJS Notes for Professionals 77
Section 17.7: Registering a Service
The most common and flexible way to create a service uses the angular.module API factory:
angular.module('myApp.services', []).factory('githubService', function() {
var serviceInstance = {};
// Our first service
return serviceInstance;
});
The service factory function can be either a function or an array, just like the way we create controllers:
// Creating the factory through using the
// bracket notation
angular.module('myApp.services', [])
.factory('githubService', [function($http) {
}]);
To expose a method on our service, we can place it as an attribute on the service object.
angular.module('myApp.services', [])
.factory('githubService', function($http) {
var githubUrl = 'https://api.github.com';
var runUserRequest = function(username, path) {
// Return the promise from the $http service
// that calls the Github API using JSONP
return $http({
method: 'JSONP',
url: githubUrl + '/users/' +
username + '/' +
path + '?callback=JSON_CALLBACK'
});
}
// Return the service object with a single function
// events
return {
events: function(username) {
return runUserRequest(username, 'events');
}
};](https://image.slidesharecdn.com/angularjsnotesforprofessionals-200412131913/85/Angular-js-notes-for-professionals-84-320.jpg)
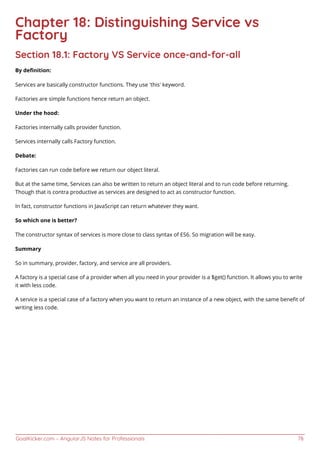
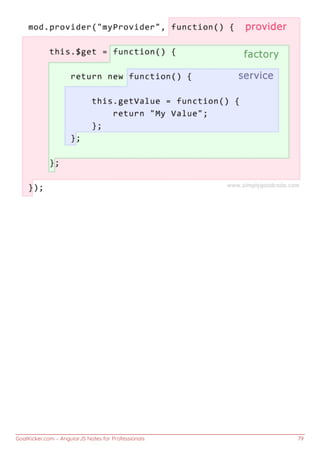
![GoalKicker.com – AngularJS Notes for Professionals 80
Chapter 19: Angular promises with $q
service
Section 19.1: Wrap simple value into a promise using $q.when()
If all you need is to wrap the value into a promise, you don't need to use the long syntax like here:
//OVERLY VERBOSE
var defer;
defer = $q.defer();
defer.resolve(['one', 'two']);
return defer.promise;
In this case you can just write:
//BETTER
return $q.when(['one', 'two']);
$q.when and its alias $q.resolve
Wraps an object that might be a value or a (3rd party) then-able promise into a $q promise. This is useful
when you are dealing with an object that might or might not be a promise, or if the promise comes from
a source that can't be trusted.
— AngularJS $q Service API Reference - $q.when
With the release of AngularJS v1.4.1
You can also use an ES6-consistent alias resolve
//ABSOLUTELY THE SAME AS when
return $q.resolve(['one', 'two'])
Section 19.2: Using angular promises with $q service
$q is a built-in service which helps in executing asynchronous functions and using their return values(or exception)
when they are finished with processing.
$q is integrated with the $rootScope.Scope model observation mechanism, which means faster propagation of
resolution or rejection into your models and avoiding unnecessary browser repaints, which would result in
flickering UI.
In our example, we call our factory getMyData, which return a promise object. If the object is resolved, it returns a
random number. If it is rejected, it return a rejection with an error message after 2 seconds.
In Angular factory
function getMyData($timeout, $q) {
return function() {
// simulated async function
var promise = $timeout(function() {
if(Math.round(Math.random())) {
return 'data received!'](https://image.slidesharecdn.com/angularjsnotesforprofessionals-200412131913/85/Angular-js-notes-for-professionals-87-320.jpg)
![GoalKicker.com – AngularJS Notes for Professionals 81
} else {
return $q.reject('oh no an error! try again')
}
}, 2000);
return promise;
}
}
Using Promises on call
angular.module('app', [])
.factory('getMyData', getMyData)
.run(function(getData) {
var promise = getData()
.then(function(string) {
console.log(string)
}, function(error) {
console.error(error)
})
.finally(function() {
console.log('Finished at:', new Date())
})
})
To use promises, inject $q as dependency. Here we injected $q in getMyData factory.
var defer = $q.defer();
A new instance of deferred is constructed by calling $q.defer()
A deferred object is simply an object that exposes a promise as well as the associated methods for resolving that
promise. It is constructed using the $q.deferred() function and exposes three main methods: resolve(),
reject(), and notify().
resolve(value) – resolves the derived promise with the value.
reject(reason) – rejects the derived promise with the reason.
notify(value) - provides updates on the status of the promise's execution. This may be called multiple
times before the promise is either resolved or rejected.
Properties
The associated promise object is accessed via the promise property. promise – {Promise} – promise object
associated with this deferred.
A new promise instance is created when a deferred instance is created and can be retrieved by calling
deferred.promise.
The purpose of the promise object is to allow for interested parties to get access to the result of the deferred task
when it completes.
Promise Methods -
then(successCallback, [errorCallback], [notifyCallback]) – Regardless of when the promise was or
will be resolved or rejected, then calls one of the success or error callbacks asynchronously as soon as the
result is available. The callbacks are called with a single argument: the result or rejection reason. Additionally,
the notify callback may be called zero or more times to provide a progress indication, before the promise is
resolved or rejected.](https://image.slidesharecdn.com/angularjsnotesforprofessionals-200412131913/85/Angular-js-notes-for-professionals-88-320.jpg)
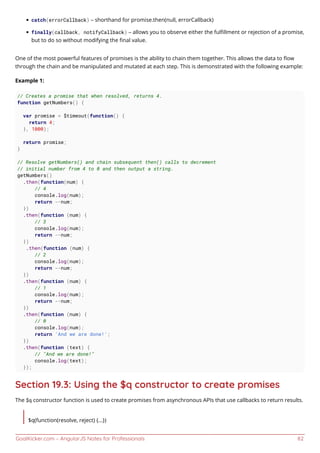

![GoalKicker.com – AngularJS Notes for Professionals 84
myDeferred.resolve(res);
}, function(error) {
myDeferred.reject(error);
});
return myDeferred.promise;
There is no need to manufacture a promise with $q.defer as the $http service already returns a promise.
//INSTEAD
return $http(config);
Simply return the promise created by the $http service.
Section 19.5: Using $q.all to handle multiple promises
You can use the $q.all function to call a .then method after an array of promises has been successfully resolved
and fetch the data they resolved with.
Example:
JS:
$scope.data = []
$q.all([
$http.get("data.json"),
$http.get("more-data.json"),
]).then(function(responses) {
$scope.data = responses.map((resp) => resp.data);
});
The above code runs $http.get 2 times for data in local json files, when both get method complete they resolve
their associated promises, when all the promises in the array are resolved, the .then method starts with both
promises data inside the responses array argument.
The data is then mapped so it could be shown on the template, we can then show
HTML:
<ul>
<li ng-repeat="d in data">
<ul>
<li ng-repeat="item in d">{{item.name}}: {{item.occupation}}</li>
</ul>
</li>
</ul>
JSON:
[{
"name": "alice",
"occupation": "manager"
}, {
"name": "bob",
"occupation": "developer"
}]](https://image.slidesharecdn.com/angularjsnotesforprofessionals-200412131913/85/Angular-js-notes-for-professionals-91-320.jpg)
![GoalKicker.com – AngularJS Notes for Professionals 86
Chapter 20: Dependency Injection
Section 20.1: Dynamic Injections
There is also an option to dynamically request components. You can do it using the $injector service:
myModule.controller('myController', ['$injector', function($injector) {
var myService = $injector.get('myService');
}]);
Note: while this method could be used to prevent the circular dependency issue that might break your app, it is not
considered best practice to bypass the problem by using it. Circular dependency usually indicates there is a flaw in
your application's architecture, and you should address that instead.
Section 20.2: Dynamically load AngularJS service in vanilla
JavaScript
You can load AngularJS services in vanilla JavaScript using AngularJS injector() method. Every jqLite element
retrieved calling angular.element() has a method injector() that can be used to retrieve the injector.
var service;
var serviceName = 'myService';
var ngAppElement = angular.element(document.querySelector('[ng-app],[data-ng-app]') || document);
var injector = ngAppElement.injector();
if(injector && injector.has(serviceNameToInject)) {
service = injector.get(serviceNameToInject);
}
In the above example we try to retrieve the jqLite element containing the root of the AngularJS application
(ngAppElement). To do that, we use angular.element() method, searching for a DOM element containing ng-app or
data-ng-app attribute or, if it does not exists, we fall back to document element. We use ngAppElement to retrieve
injector instance (with ngAppElement.injector()). The injector instance is used to check if the service to inject
exists (with injector.has()) and then to load the service (with injector.get()) inside service variable.](https://image.slidesharecdn.com/angularjsnotesforprofessionals-200412131913/85/Angular-js-notes-for-professionals-93-320.jpg)
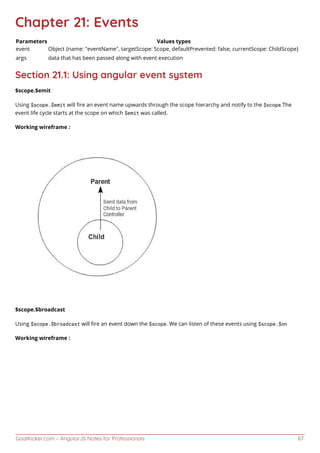
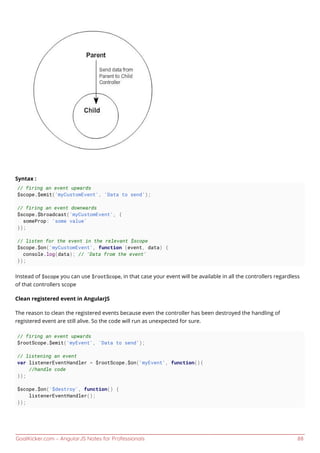
![GoalKicker.com – AngularJS Notes for Professionals 89
Section 21.2: Always deregister $rootScope.$on listeners on
the scope $destory event
$rootScope.$on listeners will remain in memory if you navigate to another controller. This will create a memory
leak if the controller falls out of scope.
Don't
angular.module('app').controller('badExampleController', badExample);
badExample.$inject = ['$scope', '$rootScope'];
function badExample($scope, $rootScope) {
$rootScope.$on('post:created', function postCreated(event, data) {});
}
Do
angular.module('app').controller('goodExampleController', goodExample);
goodExample.$inject = ['$scope', '$rootScope'];
function goodExample($scope, $rootScope) {
var deregister = $rootScope.$on('post:created', function postCreated(event, data) {});
$scope.$on('$destroy', function destroyScope() {
deregister();
});
}
Section 21.3: Uses and significance
These events can be used to communicate between 2 or more controllers.
$emit dispatches an event upwards through the scope hierarchy, while $broadcast dispatches an event downwards
to all child scopes.This has been beautifully explained here.
There can be basically two types of scenario while communicating among controllers:
When controllers have Parent-Child relationship. (we can mostly use $scope in such scenarios)1.
When controllers are not independent to each other and are needed to be informed about each others2.
activity. (we can use $rootScope in such scenarios)
eg: For any ecommerce website, suppose we have ProductListController(which controls the product listing page
when any product brand is clicked ) and CartController (to manage cart items) . Now, when we click on Add to
Cart button , it has to be informed to CartController as well, so that it can reflect new cart item count/details in
the navigation bar of the website. This can be achieved using $rootScope.
With $scope.$emit](https://image.slidesharecdn.com/angularjsnotesforprofessionals-200412131913/85/Angular-js-notes-for-professionals-96-320.jpg)
![GoalKicker.com – AngularJS Notes for Professionals 90
<html>
<head>
<script src="https://ajax.googleapis.com/ajax/libs/angularjs/1.4.4/angular.js"></script>
<script>
var app = angular.module('app', []);
app.controller("FirstController", function ($scope) {
$scope.$on('eventName', function (event, args) {
$scope.message = args.message;
});
});
app.controller("SecondController", function ($scope) {
$scope.handleClick = function (msg) {
$scope.$emit('eventName', {message: msg});
};
});
</script>
</head>
<body ng-app="app">
<div ng-controller="FirstController" style="border:2px ;padding:5px;">
<h1>Parent Controller</h1>
<p>Emit Message : {{message}}</p>
<br />
<div ng-controller="SecondController" style="border:2px;padding:5px;">
<h1>Child Controller</h1>
<input ng-model="msg">
<button ng-click="handleClick(msg);">Emit</button>
</div>
</div>
</body>
</html>
With $scope.$broadcast:
<html>
<head>
<title>Broadcasting</title>
<script src="https://ajax.googleapis.com/ajax/libs/angularjs/1.4.4/angular.js"></script>
<script>
var app = angular.module('app', []);
app.controller("FirstController", function ($scope) {
$scope.handleClick = function (msg) {
$scope.$broadcast('eventName', {message: msg});
};
});
app.controller("SecondController", function ($scope) {
$scope.$on('eventName', function (event, args) {
$scope.message = args.message;
});
});
</script>
</head>
<body ng-app="app">
<div ng-controller="FirstController" style="border:2px solid ; padding:5px;">
<h1>Parent Controller</h1>](https://image.slidesharecdn.com/angularjsnotesforprofessionals-200412131913/85/Angular-js-notes-for-professionals-97-320.jpg)
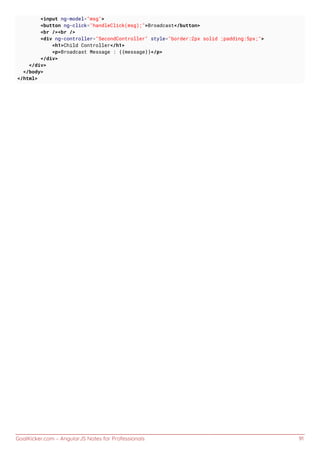
![GoalKicker.com – AngularJS Notes for Professionals 92
Chapter 22: Sharing Data
Section 22.1: Using ngStorage to share data
Firstly, include the ngStorage source in your index.html.
An example injecting ngStorage src would be:
<head>
<title>Angular JS ngStorage</title>
<script src = "http://ajax.googleapis.com/ajax/libs/angularjs/1.3.14/angular.min.js"></script>
<script src="https://rawgithub.com/gsklee/ngStorage/master/ngStorage.js"></script>
</head>
ngStorage gives you 2 storage namely: $localStorage and $sessionStorage. You need to require ngStorage and
Inject the services.
Suppose if ng-app="myApp", then you would be injecting ngStorage as following:
var app = angular.module('myApp', ['ngStorage']);
app.controller('controllerOne', function($localStorage,$sessionStorage) {
// an object to share
var sampleObject = {
name: 'angularjs',
value: 1
};
$localStorage.valueToShare = sampleObject;
$sessionStorage.valueToShare = sampleObject;
})
.controller('controllerTwo', function($localStorage,$sessionStorage) {
console.log('localStorage: '+ $localStorage +'sessionStorage: '+$sessionStorage);
})
$localStorage and $sessionStorage is globally accessible through any controllers as long as you inject those
services in the controllers.
You can also use the localStorage and sessionStorage of HTML5. However, using HTML5 localStorage would
require you to serialize and deserialize your objects before using or saving them.
For example:
var myObj = {
firstname: "Nic",
lastname: "Raboy",
website: "https://www.google.com"
}
//if you wanted to save into localStorage, serialize it
window.localStorage.set("saved", JSON.stringify(myObj));
//unserialize to get object
var myObj = JSON.parse(window.localStorage.get("saved"));
Section 22.2: Sharing data from one controller to another
using service
We can create a service to set and get the data between the controllers and then inject that service in the](https://image.slidesharecdn.com/angularjsnotesforprofessionals-200412131913/85/Angular-js-notes-for-professionals-99-320.jpg)
![GoalKicker.com – AngularJS Notes for Professionals 93
controller function where we want to use it.
Service :
app.service('setGetData', function() {
var data = '';
getData: function() { return data; },
setData: function(requestData) { data = requestData; }
});
Controllers :
app.controller('myCtrl1', ['setGetData',function(setGetData) {
// To set the data from the one controller
var data = 'Hello World !!';
setGetData.setData(data);
}]);
app.controller('myCtrl2', ['setGetData',function(setGetData) {
// To get the data from the another controller
var res = setGetData.getData();
console.log(res); // Hello World !!
}]);
Here, we can see that myCtrl1 is used for setting the data and myCtrl2 is used for getting the data. So, we can
share the data from one controller to another contrller like this.](https://image.slidesharecdn.com/angularjsnotesforprofessionals-200412131913/85/Angular-js-notes-for-professionals-100-320.jpg)

![GoalKicker.com – AngularJS Notes for Professionals 95
Dealing with traditional form inputs and having to use interrogative jQuery-style processing can be time-consuming
and finicky. Angular allows you to produce professional interactive forms relatively easily.
The ng-model directive provides two-way binding with input fields and usually the novalidate attribute is also
placed on the form element to prevent the browser from doing native validation.
Thus, a simple form would look like:
<form name="form" novalidate>
<label name="email"> Your email </label>
<input type="email" name="email" ng-model="email" />
</form>
For Angular to validate inputs, use exactly the same syntax as a regular input element, except for the addition of the
ng-model attribute to specify which variable to bind to on the scope. Email is shown in the prior example. To
validate a number, the syntax would be:
<input type="number" name="postalcode" ng-model="zipcode" />
The final steps to basic form validation are connecting to a form submit function on the controller using ng-submit,
rather than allowing the default form submit to occur. This is not mandatory but it is usually used, as the input
variables are already available on the scope and so available to your submit function. It is also usually good practice
to give the form a name. These changes would result in the following syntax:
<form name="signup_form" ng-submit="submitFunc()" novalidate>
<label name="email"> Your email </label>
<input type="email" name="email" ng-model="email" />
<button type="submit">Signup</button>
</form>
This above code is functional but there is other functionality that Angular provides.
The next step is to understand that Angular attaches class attributes using ng-pristine, ng-dirty, ng-valid and ng-
invalid for form processing. Using these classes in your css will allow you to style valid/invalid and pristine/dirty
input fields and so alter the presentation as the user is entering data into the form.
Section 23.4: Custom Form Validation
In some cases basic validation is not enough. Angular support custom validation adding validator functions to the
$validators object on the ngModelController:
angular.module('app', [])
.directive('myValidator', function() {
return {
// element must have ng-model attribute
// or $validators does not work
require: 'ngModel',
link: function(scope, elm, attrs, ctrl) {
ctrl.$validators.myValidator = function(modelValue, viewValue) {
// validate viewValue with your custom logic
var valid = (viewValue && viewValue.length > 0) || false;
return valid;
};
}
};](https://image.slidesharecdn.com/angularjsnotesforprofessionals-200412131913/85/Angular-js-notes-for-professionals-102-320.jpg)
![GoalKicker.com – AngularJS Notes for Professionals 97
Example
HTML:
<form name="ngMessagesDemo">
<input name="firstname" type="text" ng-model="firstname" required>
<div ng-messages="ngMessagesDemo.firstname.$error">
<div ng-message="required">Firstname is required.</div>
</div>
</form>
<script src="https://cdnjs.cloudflare.com/ajax/libs/angular.js/1.3.16/angular.min.js"></script>
<script src="https://cdnjs.cloudflare.com/ajax/libs/angular.js/1.3.16/angular-
messages.min.js"></script>
JS:
var app = angular.module('app', ['ngMessages']);
app.controller('mainCtrl', function ($scope) {
$scope.firstname = "Rohit";
});
Section 23.7: Nested Forms
Sometimes it is desirable to nest forms for the purpose of grouping controls and inputs logically on the page.
However, HTML5 forms should not be nested. Angular supplies ng-form instead.
<form name="myForm" noValidate>
<!-- nested form can be referenced via 'myForm.myNestedForm' -->
<ng-form name="myNestedForm" noValidate>
<input name="myInput1" ng-minlength="1" ng-model="input1" required />
<input name="myInput2" ng-minlength="1" ng-model="input2" required />
</ng-form>
<!-- show errors for the nested subform here -->
<div ng-messages="myForm.myNestedForm.$error">
<!-- note that this will show if either input does not meet the minimum -->
<div ng-message="minlength">Length is not at least 1</div>
</div>
</form>
<!-- status of the form -->
<p>Has any field on my form been edited? {{myForm.$dirty}}</p>
<p>Is my nested form valid? {{myForm.myNestedForm.$valid}}</p>
<p>Is myInput1 valid? {{myForm.myNestedForm.myInput1.$valid}}</p>
Each part of the form contributes to the overall form's state. Therefore, if one of the inputs myInput1 has been
edited and is $dirty, its containing form will also be $dirty. This cascades to each containing form, so both
myNestedForm and myForm will be $dirty.](https://image.slidesharecdn.com/angularjsnotesforprofessionals-200412131913/85/Angular-js-notes-for-professionals-104-320.jpg)
![GoalKicker.com – AngularJS Notes for Professionals 98
Chapter 24: Routing using ngRoute
Section 24.1: Basic example
This example shows setting up a small application with 3 routes, each with it's own view and controller, using the
controllerAs syntax.
We configure our router at the angular .config function
We inject $routeProvider into .config1.
We define our route names at the .when method with a route definition object.2.
We supply the .when method with an object specifying our template or templateUrl, controller and3.
controllerAs
app.js
angular.module('myApp', ['ngRoute'])
.controller('controllerOne', function() {
this.message = 'Hello world from Controller One!';
})
.controller('controllerTwo', function() {
this.message = 'Hello world from Controller Two!';
})
.controller('controllerThree', function() {
this.message = 'Hello world from Controller Three!';
})
.config(function($routeProvider) {
$routeProvider
.when('/one', {
templateUrl: 'view-one.html',
controller: 'controllerOne',
controllerAs: 'ctrlOne'
})
.when('/two', {
templateUrl: 'view-two.html',
controller: 'controllerTwo',
controllerAs: 'ctrlTwo'
})
.when('/three', {
templateUrl: 'view-three.html',
controller: 'controllerThree',
controllerAs: 'ctrlThree'
})
// redirect to here if no other routes match
.otherwise({
redirectTo: '/one'
});
});
Then in our HTML we define our navigation using <a> elements with href, for a route name of helloRoute we will
route as <a href="#/helloRoute">My route</a>
We also provide our view with a container and the directive ng-view to inject our routes.
index.html
<div ng-app="myApp">
<nav>](https://image.slidesharecdn.com/angularjsnotesforprofessionals-200412131913/85/Angular-js-notes-for-professionals-105-320.jpg)
![GoalKicker.com – AngularJS Notes for Professionals 99
<!-- links to switch routes -->
<a href="#/one">View One</a>
<a href="#/two">View Two</a>
<a href="#/three">View Three</a>
</nav>
<!-- views will be injected here -->
<div ng-view></div>
<!-- templates can live in normal html files -->
<script type="text/ng-template" id="view-one.html">
<h1>{{ctrlOne.message}}</h1>
</script>
<script type="text/ng-template" id="view-two.html">
<h1>{{ctrlTwo.message}}</h1>
</script>
<script type="text/ng-template" id="view-three.html">
<h1>{{ctrlThree.message}}</h1>
</script>
</div>
Section 24.2: Defining custom behavior for individual routes
The simplest manner of defining custom behavior for individual routes would be fairly easy.
In this example we use it to authenticate a user :
1) routes.js: create a new property (like requireAuth) for any desired route
angular.module('yourApp').config(['$routeProvider', function($routeProvider) {
$routeProvider
.when('/home', {
templateUrl: 'templates/home.html',
requireAuth: true
})
.when('/login', {
templateUrl: 'templates/login.html',
})
.otherwise({
redirectTo: '/home'
});
}])
2) In a top-tier controller that isn't bound to an element inside the ng-view (to avoid conflict with angular
$routeProvider), check if the newUrl has the requireAuth property and act accordingly
angular.module('YourApp').controller('YourController', ['$scope', 'session', '$location',
function($scope, session, $location) {
$scope.$on('$routeChangeStart', function(angularEvent, newUrl) {
if (newUrl.requireAuth && !session.user) {
// User isn’t authenticated
$location.path("/login");
}
});
}
]);](https://image.slidesharecdn.com/angularjsnotesforprofessionals-200412131913/85/Angular-js-notes-for-professionals-106-320.jpg)
![GoalKicker.com – AngularJS Notes for Professionals 100
Section 24.3: Route parameters example
This example extends the basic example passing parameters in the route in order to use them in the controller
To do so we need to:
Configure the parameter position and name in the route name1.
Inject $routeParams service in our Controller2.
app.js
angular.module('myApp', ['ngRoute'])
.controller('controllerOne', function() {
this.message = 'Hello world from Controller One!';
})
.controller('controllerTwo', function() {
this.message = 'Hello world from Controller Two!';
})
.controller('controllerThree', ['$routeParams', function($routeParams) {
var routeParam = $routeParams.paramName
if ($routeParams.message) {
// If a param called 'message' exists, we show it's value as the message
this.message = $routeParams.message;
} else {
// If it doesn't exist, we show a default message
this.message = 'Hello world from Controller Three!';
}
}])
.config(function($routeProvider) {
$routeProvider
.when('/one', {
templateUrl: 'view-one.html',
controller: 'controllerOne',
controllerAs: 'ctrlOne'
})
.when('/two', {
templateUrl: 'view-two.html',
controller: 'controllerTwo',
controllerAs: 'ctrlTwo'
})
.when('/three', {
templateUrl: 'view-three.html',
controller: 'controllerThree',
controllerAs: 'ctrlThree'
})
.when('/three/:message', { // We will pass a param called 'message' with this route
templateUrl: 'view-three.html',
controller: 'controllerThree',
controllerAs: 'ctrlThree'
})
// redirect to here if no other routes match
.otherwise({
redirectTo: '/one'
});
});
Then, withoud making any changes in our templates, only adding a new link with custom message, we can see the
new custom message in our view.](https://image.slidesharecdn.com/angularjsnotesforprofessionals-200412131913/85/Angular-js-notes-for-professionals-107-320.jpg)
![GoalKicker.com – AngularJS Notes for Professionals 103
<style>
.bold { font-weight: bold; }
.strike { text-decoration: line-through; }
.orange { color: orange; }
</style>
<p ng-class="[ UserStyle, {orange: warning} ]">Array of Both Expression Types</p>
<input ng-model="UserStyle" placeholder="Type 'bold' and/or 'strike'"><br>
<label><input type="checkbox" ng-model="warning"> warning (apply "orange" class)</label>
This creates a text input field bound to the scope variable UserStyle which lets the user type in any class name(s).
These will be dynamically applied to the <p> element as the user types. Also, the user can click on the checkbox that
is data-bound to the warning scope variable. This will also be dynamically applied to the <p> element.](https://image.slidesharecdn.com/angularjsnotesforprofessionals-200412131913/85/Angular-js-notes-for-professionals-110-320.jpg)
![GoalKicker.com – AngularJS Notes for Professionals 104
Chapter 26: ng-repeat
Variable Details
$index number iterator offset of the repeated element (0..length-1)
$first boolean true if the repeated element is first in the iterator.
$middle boolean true if the repeated element is between the first and last in the iterator.
$last boolean true if the repeated element is last in the iterator.
$even boolean true if the iterator position $index is even (otherwise false).
$odd boolean true if the iterator position $index is odd (otherwise false).
The ngRepeat directive instantiates a template once per item from a collection. The collection must be an array or
an object. Each template instance gets its own scope, where the given loop variable is set to the current collection
item, and $index is set to the item index or key.
Section 26.1: ng-repeat-start + ng-repeat-end
AngularJS 1.2 ng-repeat handle multiple elements with ng-repeat-start and ng-repeat-end:
// table items
$scope.tableItems = [
{
row1: 'Item 1: Row 1',
row2: 'Item 1: Row 2'
},
{
row1: 'Item 2: Row 1',
row2: 'Item 2: Row 2'
}
];
// template
<table>
<th>
<td>Items</td>
</th>
<tr ng-repeat-start="item in tableItems">
<td ng-bind="item.row1"></td>
</tr>
<tr ng-repeat-end>
<td ng-bind="item.row2"></td>
</tr>
</table>
Output:
Items
Item 1: Row 1
Item 1: Row 2
Item 2: Row 1
Item 2: Row 2
Section 26.2: Iterating over object properties
<div ng-repeat="(key, value) in myObj"> ... </div>](https://image.slidesharecdn.com/angularjsnotesforprofessionals-200412131913/85/Angular-js-notes-for-professionals-111-320.jpg)
![GoalKicker.com – AngularJS Notes for Professionals 105
For example
<div ng-repeat="n in [42, 42, 43, 43]">
{{n}}
</div>
Section 26.3: Tracking and Duplicates
ngRepeat uses $watchCollection to detect changes in the collection. When a change happens, ngRepeat then makes
the corresponding changes to the DOM:
When an item is added, a new instance of the template is added to the DOM.
When an item is removed, its template instance is removed from the DOM.
When items are reordered, their respective templates are reordered in the DOM.
Duplicates
track by for any list that may include duplicate values.
track by also speeds up list changes significantly.
If you don't use track by in this case, you get the error: [ngRepeat:dupes]
$scope.numbers = ['1','1','2','3','4'];
<ul>
<li ng-repeat="n in numbers track by $index">
{{n}}
</li>
</ul>](https://image.slidesharecdn.com/angularjsnotesforprofessionals-200412131913/85/Angular-js-notes-for-professionals-112-320.jpg)
![GoalKicker.com – AngularJS Notes for Professionals 107
Chapter 28: ng-view
ng-view is one of in-build directive that angular uses as a container to switch between views. {info} ngRoute is no
longer a part of the base angular.js file, so you'll need to include the angular-route.js file after your the base angular
javascript file. We can configure a route by using the “when” function of the $routeProvider. We need to first specify
the route, then in a second parameter provide an object with a templateUrl property and a controller property.
Section 28.1: Registration navigation
We injecting the module in the application1.
var Registration=angular.module("myApp",["ngRoute"]);
now we use $routeProvider from "ngRoute"2.
Registration.config(function($routeProvider) {
});
finally we integrating the route, we define "/add" routing to the application in case application get "/add" it3.
divert to regi.htm
Registration.config(function($routeProvider) {
$routeProvider
.when("/add", {
templateUrl : "regi.htm"
})
});
Section 28.2: ng-view
ng-view is a directive used with $route to render a partial view in the main page layout. Here in this example,
Index.html is our main file and when user lands on "/" route the templateURL home.html will be rendered in
Index.html where ng-view is mentioned.
angular.module('ngApp', ['ngRoute'])
.config(function($routeProvider){
$routeProvider.when("/",
{
templateUrl: "home.html",
controller: "homeCtrl"
}
);
});
angular.module('ngApp').controller('homeCtrl',['$scope', function($scope) {
$scope.welcome= "Welcome to stackoverflow!";
}]);
//Index.html
<body ng-app="ngApp">
<div ng-view></div>
</body>
//Home Template URL or home.html](https://image.slidesharecdn.com/angularjsnotesforprofessionals-200412131913/85/Angular-js-notes-for-professionals-114-320.jpg)

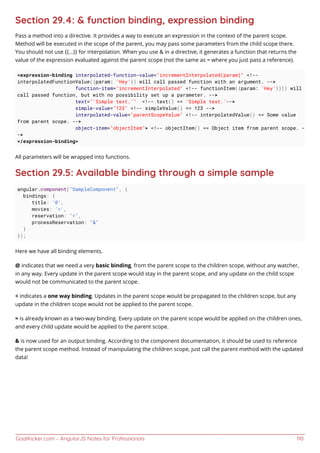
![GoalKicker.com – AngularJS Notes for Professionals 111
Chapter 30: Providers
Section 30.1: Provider
Provider is available both in configuration and run phases.
The Provider recipe is syntactically defined as a custom type that implements a $get method.
You should use the Provider recipe only when you want to expose an API for application-wide
configuration that must be made before the application starts. This is usually interesting only for reusable
services whose behavior might need to vary slightly between applications.
angular.module('app',[])
.provider('endpointProvider', function() {
var uri = 'n/a';
this.set = function(value) {
uri = value;
};
this.$get = function() {
return {
get: function() {
return uri;
}
};
};
})
.config(function(endpointProviderProvider) {
endpointProviderProvider.set('http://some.rest.endpoint');
})
.controller('MainCtrl', function(endpointProvider) {
var vm = this;
vm.endpoint = endpointProvider.get();
});
<body ng-controller="MainCtrl as vm">
<div>endpoint = {{::vm.endpoint }}</div>
</body>
endpoint = http://some.rest.endpoint
Without config phase result would be
endpoint = n/a
Section 30.2: Factory
Factory is available in run phase.](https://image.slidesharecdn.com/angularjsnotesforprofessionals-200412131913/85/Angular-js-notes-for-professionals-118-320.jpg)
![GoalKicker.com – AngularJS Notes for Professionals 112
The Factory recipe constructs a new service using a function with zero or more arguments (these are
dependencies on other services). The return value of this function is the service instance created by this
recipe.
Factory can create a service of any type, whether it be a primitive, object literal, function, or even an
instance of a custom type.
angular.module('app',[])
.factory('endpointFactory', function() {
return {
get: function() {
return 'http://some.rest.endpoint';
}
};
})
.controller('MainCtrl', function(endpointFactory) {
var vm = this;
vm.endpoint = endpointFactory.get();
});
<body ng-controller="MainCtrl as vm">
<div>endpoint = {{::vm.endpoint }}</div>
</body>
endpoint = http://some.rest.endpoint
Section 30.3: Constant
Constant is available both in configuration and run phases.
angular.module('app',[])
.constant('endpoint', 'http://some.rest.endpoint') // define
.config(function(endpoint) {
// do something with endpoint
// available in both config- and run phases
})
.controller('MainCtrl', function(endpoint) { // inject
var vm = this;
vm.endpoint = endpoint; // usage
});
<body ng-controller="MainCtrl as vm">
<div>endpoint = {{ ::vm.endpoint }}</div>
</body>
endpoint = http://some.rest.endpoint
Section 30.4: Service
Service is available in run phase.](https://image.slidesharecdn.com/angularjsnotesforprofessionals-200412131913/85/Angular-js-notes-for-professionals-119-320.jpg)
![GoalKicker.com – AngularJS Notes for Professionals 113
The Service recipe produces a service just like the Value or Factory recipes, but it does so by invoking a
constructor with the new operator. The constructor can take zero or more arguments, which represent
dependencies needed by the instance of this type.
angular.module('app',[])
.service('endpointService', function() {
this.get = function() {
return 'http://some.rest.endpoint';
};
})
.controller('MainCtrl', function(endpointService) {
var vm = this;
vm.endpoint = endpointService.get();
});
<body ng-controller="MainCtrl as vm">
<div>endpoint = {{::vm.endpoint }}</div>
</body>
endpoint = http://some.rest.endpoint
Section 30.5: Value
Value is available both in configuration and run phases.
angular.module('app',[])
.value('endpoint', 'http://some.rest.endpoint') // define
.run(function(endpoint) {
// do something with endpoint
// only available in run phase
})
.controller('MainCtrl', function(endpoint) { // inject
var vm = this;
vm.endpoint = endpoint; // usage
});
<body ng-controller="MainCtrl as vm">
<div>endpoint = {{ ::vm.endpoint }}</div>
</body>
endpoint = http://some.rest.endpoint](https://image.slidesharecdn.com/angularjsnotesforprofessionals-200412131913/85/Angular-js-notes-for-professionals-120-320.jpg)
![GoalKicker.com – AngularJS Notes for Professionals 114
Chapter 31: Decorators
Section 31.1: Decorate service, factory
Below is example of service decorator, overriding null date returned by service.
angular.module('app', [])
.config(function($provide) {
$provide.decorator('myService', function($delegate) {
$delegate.getDate = function() { // override with actual date object
return new Date();
};
return $delegate;
});
})
.service('myService', function() {
this.getDate = function() {
return null; // w/o decoration we'll be returning null
};
})
.controller('myController', function(myService) {
var vm = this;
vm.date = myService.getDate();
});
<body ng-controller="myController as vm">
<div ng-bind="vm.date | date:'fullDate'"></div>
</body>
Section 31.2: Decorate directive
Directives can be decorated just like services and we can modify or replace any of it's functionality. Note that
directive itself is accessed at position 0 in $delegate array and name parameter in decorator must include
Directive suffix (case sensitive).
So, if directive is called myDate, it can be accessed using myDateDirective using $delegate[0].
Below is simple example where directive shows current time. We'll decorate it to update current time in one second
intervals. Without decoration it will always show same time.
<body>
<my-date></my-date>
</body>
angular.module('app', [])
.config(function($provide) {
$provide.decorator('myDateDirective', function($delegate, $interval) {
var directive = $delegate[0]; // access directive
directive.compile = function() { // modify compile fn
return function(scope) {
directive.link.apply(this, arguments);](https://image.slidesharecdn.com/angularjsnotesforprofessionals-200412131913/85/Angular-js-notes-for-professionals-121-320.jpg)
![GoalKicker.com – AngularJS Notes for Professionals 115
$interval(function() {
scope.date = new Date(); // update date every second
}, 1000);
};
};
return $delegate;
});
})
.directive('myDate', function() {
return {
restrict: 'E',
template: '<span>Current time is {{ date | date:'MM:ss' }}</span>',
link: function(scope) {
scope.date = new Date(); // get current date
}
};
});
Section 31.3: Decorate filter
When decorating filters, name parameter must include Filter suffix (case sensitive). If filter is called repeat,
decorator parameter is repeatFilter. Below we'll decorate custom filter that repeats any given string n times so
that result is reversed. You can also decorate angular's build-in filters the same way, although not recommended as
it can affect the functionality of the framework.
<body>
<div ng-bind="'i can haz cheeseburger ' | repeat:2"></div>
</body>
angular.module('app', [])
.config(function($provide) {
$provide.decorator('repeatFilter', function($delegate) {
return function reverse(input, count) {
// reverse repeated string
return ($delegate(input, count)).split('').reverse().join('');
};
});
})
.filter('repeat', function() {
return function(input, count) {
// repeat string n times
return (input || '').repeat(count || 1);
};
});](https://image.slidesharecdn.com/angularjsnotesforprofessionals-200412131913/85/Angular-js-notes-for-professionals-122-320.jpg)
![GoalKicker.com – AngularJS Notes for Professionals 116
Chapter 32: Print
Section 32.1: Print Service
Service:
angular.module('core').factory('print_service', ['$rootScope', '$compile', '$http',
'$timeout','$q',
function($rootScope, $compile, $http, $timeout,$q) {
var printHtml = function (html) {
var deferred = $q.defer();
var hiddenFrame = $('<iframe style="display: none"></iframe>').appendTo('body')[0];
hiddenFrame.contentWindow.printAndRemove = function() {
hiddenFrame.contentWindow.print();
$(hiddenFrame).remove();
deferred.resolve();
};
var htmlContent = "<!doctype html>"+
"<html>"+
'<head><link rel="stylesheet" type="text/css"
href="/style/css/print.css"/></head>'+
'<body onload="printAndRemove();">' +
html +
'</body>'+
"</html>";
var doc = hiddenFrame.contentWindow.document.open("text/html", "replace");
doc.write(htmlContent);
doc.close();
return deferred.promise;
};
var openNewWindow = function (html) {
var newWindow = window.open("debugPrint.html");
newWindow.addEventListener('load', function(){
$(newWindow.document.body).html(html);
}, false);
};
var print = function (templateUrl, data) {
$rootScope.isBeingPrinted = true;
$http.get(templateUrl).success(function(template){
var printScope = $rootScope.$new()
angular.extend(printScope, data);
var element = $compile($('<div>' + template + '</div>'))(printScope);
var waitForRenderAndPrint = function() {
if(printScope.$$phase || $http.pendingRequests.length) {
$timeout(waitForRenderAndPrint, 1000);
} else {
// Replace printHtml with openNewWindow for debugging
printHtml(element.html());
printScope.$destroy();
}
};
waitForRenderAndPrint();](https://image.slidesharecdn.com/angularjsnotesforprofessionals-200412131913/85/Angular-js-notes-for-professionals-123-320.jpg)
![GoalKicker.com – AngularJS Notes for Professionals 117
});
};
var printFromScope = function (templateUrl, scope, afterPrint) {
$rootScope.isBeingPrinted = true;
$http.get(templateUrl).then(function(response){
var template = response.data;
var printScope = scope;
var element = $compile($('<div>' + template + '</div>'))(printScope);
var waitForRenderAndPrint = function() {
if (printScope.$$phase || $http.pendingRequests.length) {
$timeout(waitForRenderAndPrint);
} else {
// Replace printHtml with openNewWindow for debugging
printHtml(element.html()).then(function() {
$rootScope.isBeingPrinted = false;
if (afterPrint) {
afterPrint();
}
});
}
};
waitForRenderAndPrint();
});
};
return {
print : print,
printFromScope : printFromScope
}
}
]);
Controller :
var template_url = '/views/print.client.view.html';
print_service.printFromScope(template_url,$scope,function(){
// Print Completed
});](https://image.slidesharecdn.com/angularjsnotesforprofessionals-200412131913/85/Angular-js-notes-for-professionals-124-320.jpg)
![GoalKicker.com – AngularJS Notes for Professionals 118
Chapter 33: ui-router
Section 33.1: Basic Example
app.js
angular.module('myApp', ['ui.router'])
.controller('controllerOne', function() {
this.message = 'Hello world from Controller One!';
})
.controller('controllerTwo', function() {
this.message = 'Hello world from Controller Two!';
})
.controller('controllerThree', function() {
this.message = 'Hello world from Controller Three!';
})
.config(function($stateProvider, $urlRouterProvider) {
$stateProvider
.state('one', {
url: "/one",
templateUrl: "view-one.html",
controller: 'controllerOne',
controllerAs: 'ctrlOne'
})
.state('two', {
url: "/two",
templateUrl: "view-two.html",
controller: 'controllerTwo',
controllerAs: 'ctrlTwo'
})
.state('three', {
url: "/three",
templateUrl: "view-three.html",
controller: 'controllerThree',
controllerAs: 'ctrlThree'
});
$urlRouterProvider.otherwise('/one');
});
index.html
<div ng-app="myApp">
<nav>
<!-- links to switch routes -->
<a ui-sref="one">View One</a>
<a ui-sref="two">View Two</a>
<a ui-sref="three">View Three</a>
</nav>
<!-- views will be injected here -->
<div ui-view></div>
<!-- templates can live in normal html files -->
<script type="text/ng-template" id="view-one.html">
<h1>{{ctrlOne.message}}</h1>
</script>
<script type="text/ng-template" id="view-two.html">
<h1>{{ctrlTwo.message}}</h1>
</script>](https://image.slidesharecdn.com/angularjsnotesforprofessionals-200412131913/85/Angular-js-notes-for-professionals-125-320.jpg)
![GoalKicker.com – AngularJS Notes for Professionals 119
<script type="text/ng-template" id="view-three.html">
<h1>{{ctrlThree.message}}</h1>
</script>
</div>
Section 33.2: Multiple Views
app.js
angular.module('myApp', ['ui.router'])
.controller('controllerOne', function() {
this.message = 'Hello world from Controller One!';
})
.controller('controllerTwo', function() {
this.message = 'Hello world from Controller Two!';
})
.controller('controllerThree', function() {
this.message = 'Hello world from Controller Three!';
})
.controller('controllerFour', function() {
this.message = 'Hello world from Controller Four!';
})
.config(function($stateProvider, $urlRouterProvider) {
$stateProvider
.state('one', {
url: "/one",
views: {
"viewA": {
templateUrl: "view-one.html",
controller: 'controllerOne',
controllerAs: 'ctrlOne'
},
"viewB": {
templateUrl: "view-two.html",
controller: 'controllerTwo',
controllerAs: 'ctrlTwo'
}
}
})
.state('two', {
url: "/two",
views: {
"viewA": {
templateUrl: "view-three.html",
controller: 'controllerThree',
controllerAs: 'ctrlThree'
},
"viewB": {
templateUrl: "view-four.html",
controller: 'controllerFour',
controllerAs: 'ctrlFour'
}
}
});
$urlRouterProvider.otherwise('/one');
});
index.html](https://image.slidesharecdn.com/angularjsnotesforprofessionals-200412131913/85/Angular-js-notes-for-professionals-126-320.jpg)
![GoalKicker.com – AngularJS Notes for Professionals 120
<div ng-app="myApp">
<nav>
<!-- links to switch routes -->
<a ui-sref="one">Route One</a>
<a ui-sref="two">Route Two</a>
</nav>
<!-- views will be injected here -->
<div ui-view="viewA"></div>
<div ui-view="viewB"></div>
<!-- templates can live in normal html files -->
<script type="text/ng-template" id="view-one.html">
<h1>{{ctrlOne.message}}</h1>
</script>
<script type="text/ng-template" id="view-two.html">
<h1>{{ctrlTwo.message}}</h1>
</script>
<script type="text/ng-template" id="view-three.html">
<h1>{{ctrlThree.message}}</h1>
</script>
<script type="text/ng-template" id="view-four.html">
<h1>{{ctrlFour.message}}</h1>
</script>
</div>
Section 33.3: Using resolve functions to load data
app.js
angular.module('myApp', ['ui.router'])
.service('User', ['$http', function User ($http) {
this.getProfile = function (id) {
return $http.get(...) // method to load data from API
};
}])
.controller('profileCtrl', ['profile', function profileCtrl (profile) {
// inject resolved data under the name of the resolve function
// data will already be returned and processed
this.profile = profile;
}])
.config(['$stateProvider', '$urlRouterProvider', function ($stateProvider, $urlRouterProvider) {
$stateProvider
.state('profile', {
url: "/profile/:userId",
templateUrl: "profile.html",
controller: 'profileCtrl',
controllerAs: 'vm',
resolve: {
profile: ['$stateParams', 'User', function ($stateParams, User) {
// $stateParams will contain any parameter defined in your url
return User.getProfile($stateParams.userId)
// .then is only necessary if you need to process returned data
.then(function (data) {
return doSomeProcessing(data);
});
}]
}
}]);](https://image.slidesharecdn.com/angularjsnotesforprofessionals-200412131913/85/Angular-js-notes-for-professionals-127-320.jpg)
![GoalKicker.com – AngularJS Notes for Professionals 121
$urlRouterProvider.otherwise('/');
});
profile.html
<ul>
<li>Name: {{vm.profile.name}}</li>
<li>Age: {{vm.profile.age}}</li>
<li>Sex: {{vm.profile.sex}}</li>
</ul>
View UI-Router Wiki entry on resolves here.
Resolve functions must be resolved before the $stateChangeSuccess event is fired, which means that the UI will
not load until all resolve functions on the state have finished. This is a great way to ensure that data will be
available to your controller and UI. However, you can see that a resolve function should be fast in order to avoid
hanging the UI.
Section 33.4: Nested Views / States
app.js
var app = angular.module('myApp',['ui.router']);
app.config(function($stateProvider,$urlRouterProvider) {
$stateProvider
.state('home', {
url: '/home',
templateUrl: 'home.html',
controller: function($scope){
$scope.text = 'This is the Home'
}
})
.state('home.nested1',{
url: '/nested1',
templateUrl:'nested1.html',
controller: function($scope){
$scope.text1 = 'This is the nested view 1'
}
})
.state('home.nested2',{
url: '/nested2',
templateUrl:'nested2.html',
controller: function($scope){
$scope.fruits = ['apple','mango','oranges'];
}
});
$urlRouterProvider.otherwise('/home');
});
index.html
<div ui-view></div>](https://image.slidesharecdn.com/angularjsnotesforprofessionals-200412131913/85/Angular-js-notes-for-professionals-128-320.jpg)
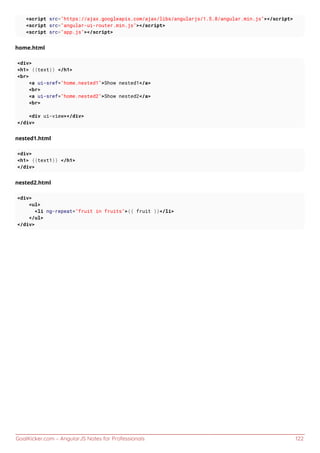
![GoalKicker.com – AngularJS Notes for Professionals 123
Chapter 34: Built-in helper Functions
Section 34.1: angular.equals
The angular.equals function compares and determines if 2 objects or values are equal, angular.equals performs
a deep comparison and returns true if and only if at least 1 of the following conditions is met.
angular.equals(value1, value2)
If the objects or values pass the === comparison1.
If both objects or values are of the same type, and all of their properties are also equal by using2.
angular.equals
Both values are equal to NaN3.
Both values represent the same regular expression's result.4.
This function is helpful when you need to deep compare objects or arrays by their values or results rather than just
references.
Examples
angular.equals(1, 1) // true
angular.equals(1, 2) // false
angular.equals({}, {}) // true, note that {}==={} is false
angular.equals({a: 1}, {a: 1}) // true
angular.equals({a: 1}, {a: 2}) // false
angular.equals(NaN, NaN) // true
Section 34.2: angular.toJson
The function angular.toJson will take an object and serialize it into a JSON formatted string.
Unlike the native function JSON.stringify, This function will remove all properties beginning with $$ (as angular
usually prefixes internal properties with $$)
angular.toJson(object)
As data needs to be serialized before passing through a network, this function is useful to turn any data you wish to
transmit into JSON.
This function is also useful for debugging as it works similarly to a .toString method would act.
Examples:
angular.toJson({name: "barf", occupation: "mog", $$somebizzareproperty: 42})
// "{"name":"barf","occupation":"mog"}"
angular.toJson(42)
// "42"
angular.toJson([1, "2", 3, "4"])
// "[1,"2",3,"4"]"
var fn = function(value) {return value}
angular.toJson(fn)
// undefined, functions have no representation in JSON](https://image.slidesharecdn.com/angularjsnotesforprofessionals-200412131913/85/Angular-js-notes-for-professionals-130-320.jpg)
![GoalKicker.com – AngularJS Notes for Professionals 124
Section 34.3: angular.copy
The angular.copy function takes an object, array or a value and creates a deep copy of it.
angular.copy()
Example:
Objects:
let obj = {name: "vespa", occupation: "princess"};
let cpy = angular.copy(obj);
cpy.name = "yogurt"
// obj = {name: "vespa", occupation: "princess"}
// cpy = {name: "yogurt", occupation: "princess"}
Arrays:
var w = [a, [b, [c, [d]]]];
var q = angular.copy(w);
// q = [a, [b, [c, [d]]]]
At the above example angular.equals(w, q) will evaluate to true because .equals tests equality by value.
however w === q will evaluate to false because strict comparison between objects and arrays is done by reference.
Section 34.4: angular.isString
The function angular.isString returns true if the object or value given to it is of the type string
angular.isString(value1)
Examples
angular.isString("hello") // true
angular.isString([1, 2]) // false
angular.isString(42) // false
This is the equivalent of performing
typeof someValue === "string"
Section 34.5: angular.isArray
The angular.isArray function returns true if and only if the object or value passed to it is of the type Array.
angular.isArray(value)
Examples
angular.isArray([]) // true
angular.isArray([2, 3]) // true](https://image.slidesharecdn.com/angularjsnotesforprofessionals-200412131913/85/Angular-js-notes-for-professionals-131-320.jpg)
![GoalKicker.com – AngularJS Notes for Professionals 125
angular.isArray({}) // false
angular.isArray(17) // false
It is the equivalent of
Array.isArray(someValue)
Section 34.6: angular.merge
The function angular.merge takes all the enumerable properties from the source object to deeply extend the
destination object.
The function returns a reference to the now extended destination object
angular.merge(destination, source)
Examples
angular.merge({}, {}) // {}
angular.merge({name: "king roland"}, {password: "12345"})
// {name: "king roland", password: "12345"}
angular.merge({a: 1}, [4, 5, 6]) // {0: 4, 1: 5, 2: 6, a: 1}
angular.merge({a: 1}, {b: {c: {d: 2}}}) // {"a":1,"b":{"c":{"d":2}}}
Section 34.7: angular.isDefined and angular.isUndefined
The function angular.isDefined tests a value if it is defined
angular.isDefined(someValue)
This is the equivalent of performing
value !== undefined; // will evaluate to true is value is defined
Examples
angular.isDefined(42) // true
angular.isDefined([1, 2]) // true
angular.isDefined(undefined) // false
angular.isDefined(null) // true
The function angular.isUndefined tests if a value is undefined (it is effectively the opposite of angular.isDefined)
angular.isUndefined(someValue)
This is the equivalent of performing
value === undefined; // will evaluate to true is value is undefined
Or just](https://image.slidesharecdn.com/angularjsnotesforprofessionals-200412131913/85/Angular-js-notes-for-professionals-132-320.jpg)
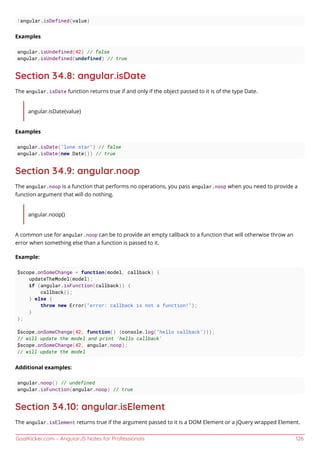
![GoalKicker.com – AngularJS Notes for Professionals 127
angular.isElement(elem)
This function is useful to type check if a passed argument is an element before being processed as such.
Examples:
angular.isElement(document.querySelector("body"))
// true
angular.isElement(document.querySelector("#some_id"))
// false if "some_id" is not using as an id inside the selected DOM
angular.isElement("<div></div>")
// false
Section 34.11: angular.isFunction
The function angular.isFunction determines and returns true if and only if the value passed to is a reference to a
function.
The function returns a reference to the now extended destination object
angular.isFunction(fn)
Examples
var onClick = function(e) {return e};
angular.isFunction(onClick); // true
var someArray = ["pizza", "the", "hut"];
angular.isFunction(someArray ); // false
Section 34.12: angular.identity
The angular.identity function returns the first argument passed to it.
angular.identity(argument)
This function is useful for functional programming, you can provide this function as a default in case an expected
function was not passed.
Examples:
angular.identity(42) // 42
var mutate = function(fn, num) {
return angular.isFunction(fn) ? fn(num) : angular.identity(num)
}
mutate(function(value) {return value-7}, 42) // 35
mutate(null, 42) // 42
mutate("mount. rushmore", 42) // 42](https://image.slidesharecdn.com/angularjsnotesforprofessionals-200412131913/85/Angular-js-notes-for-professionals-134-320.jpg)
![GoalKicker.com – AngularJS Notes for Professionals 128
Section 34.13: angular.forEach
The angular.forEach accepts an object and an iterator function. It then runs the iterator function over each
enumerable property/value of the object. This function also works on arrays.
Like the JS version of Array.prototype.forEach The function does not iterate over inherited properties (prototype
properties), however the function will not attempt to process a null or an undefined value and will just return it.
angular.forEach(object, function(value, key) { // function});
Examples:
angular.forEach({"a": 12, "b": 34}, (value, key) => console.log("key: " + key + ", value: " +
value))
// key: a, value: 12
// key: b, value: 34
angular.forEach([2, 4, 6, 8, 10], (value, key) => console.log(key))
// will print the array indices: 1, 2, 3, 4, 5
angular.forEach([2, 4, 6, 8, 10], (value, key) => console.log(value))
// will print the array values: 2, 4, 6, 7, 10
angular.forEach(undefined, (value, key) => console.log("key: " + key + ", value: " + value))
// undefined
Section 34.14: angular.isNumber
The angular.isNumber function returns true if and only if the object or value passed to it is of the type Number, this
includes +Infinity, -Infinity and NaN
angular.isNumber(value)
This function will not cause a type coercion such as
"23" == 23 // true
Examples
angular.isNumber("23") // false
angular.isNumber(23) // true
angular.isNumber(NaN) // true
angular.isNumber(Infinity) // true
This function will not cause a type coercion such as
"23" == 23 // true
Section 34.15: angular.isObject
The angular.isObject return true if and only if the argument passed to it is an object, this function will also return
true for an Array and will return false for null even though typeof null is object .
angular.isObject(value)](https://image.slidesharecdn.com/angularjsnotesforprofessionals-200412131913/85/Angular-js-notes-for-professionals-135-320.jpg)
![GoalKicker.com – AngularJS Notes for Professionals 129
This function is useful for type checking when you need a defined object to process.
Examples:
angular.isObject({name: "skroob", job: "president"})
// true
angular.isObject(null)
// false
angular.isObject([null])
// true
angular.isObject(new Date())
// true
angular.isObject(undefined)
// false
Section 34.16: angular.fromJson
The function angular.fromJson will deserialize a valid JSON string and return an Object or an Array.
angular.fromJson(string|object)
Note that this function is not limited to only strings, it will output a representation of any object passed to it.
Examples:
angular.fromJson("{"yogurt": "strawberries"}")
// Object {yogurt: "strawberries"}
angular.fromJson('{jam: "raspberries"}')
// will throw an exception as the string is not a valid JSON
angular.fromJson(this)
// Window {external: Object, chrome: Object, _gaq: Y, angular: Object, ng339: 3…}
angular.fromJson([1, 2])
// [1, 2]
typeof angular.fromJson(new Date())
// "object"](https://image.slidesharecdn.com/angularjsnotesforprofessionals-200412131913/85/Angular-js-notes-for-professionals-136-320.jpg)
![GoalKicker.com – AngularJS Notes for Professionals 130
Chapter 35: digest loop walkthrough
Section 35.1: $digest and $watch
Implementing two-way-data-binding, to achieve the result from the previous example, could be done with two core
functions:
$digest is called after a user interaction (binding DOM=>variable)
$watch sets a callback to be called after variable changes (binding variable=>DOM)
note: this is example is a demonstration, not the actual angular code
<input id="input"/>
<span id="span"></span>
The two functions we need:
var $watches = [];
function $digest(){
$watches.forEach(function($w){
var val = $w.val();
if($w.prevVal !== val){
$w.callback(val, $w.prevVal);
$w.prevVal = val;
}
})
}
function $watch(val, callback){
$watches.push({val:val, callback:callback, prevVal: val() })
}
Now we could now use these functions to hook up a variable to the DOM (angular comes with built-in directives
which will do this for you):
var realVar;
//this is usually done by ng-model directive
input1.addEventListener('keyup',function(e){
realVar=e.target.value;
$digest()
}, true);
//this is usually done with {{expressions}} or ng-bind directive
$watch(function(){return realVar},function(val){
span1.innerHTML = val;
});
Off-course, the real implementations are more complex, and support parameters such as which element to bind
to, and what variable to use
A running example could be found here: https://jsfiddle.net/azofxd4j/
Section 35.2: the $scope tree
The previous example is good enough when we need to bind a single html element, to a single variable.](https://image.slidesharecdn.com/angularjsnotesforprofessionals-200412131913/85/Angular-js-notes-for-professionals-137-320.jpg)
![GoalKicker.com – AngularJS Notes for Professionals 131
In reality - we need to bind many elements to many variables:
<span ng-repeat="number in [1,2,3,4,5]">{{number}}</span>
This ng-repeat binds 5 elements to 5 variables called number, with a different value for each of them!
The way angular achieves this behavior is using a separate context for each element which needs separate
variables. This context is called a scope.
Each scope contains properties, which are the variables bound to the DOM, and the $digest and $watch functions
are implemented as methods of the scope.
The DOM is a tree, and variables need to be used in different levels of the tree:
<div>
<input ng-model="person.name" />
<span ng-repeat="number in [1,2,3,4,5]">{{number}} {{person.name}}</span>
</div>
But as we saw, the context(or scope) of variables inside ng-repeat is different to the context above it. To solve this -
angular implements scopes as a tree.
Each scope has an array of children, and calling its $digest method will run all of its children's $digest method.
This way - after changing the input - $digest is called for the div's scope, which then runs the $digest for its 5
children - which will update its content.
A simple implementation for a scope, could look like this:
function $scope(){
this.$children = [];
this.$watches = [];
}
$scope.prototype.$digest = function(){
this.$watches.forEach(function($w){
var val = $w.val();
if($w.prevVal !== val){
$w.callback(val, $w.prevVal);
$w.prevVal = val;
}
});
this.$children.forEach(function(c){
c.$digest();
});
}
$scope.prototype.$watch = function(val, callback){
this.$watches.push({val:val, callback:callback, prevVal: val() })
}
note: this is example is a demonstration, not the actual angular code
Section 35.3: two way data binding
Angular has some magic under its hood. it enables binding DOM to real js variables.](https://image.slidesharecdn.com/angularjsnotesforprofessionals-200412131913/85/Angular-js-notes-for-professionals-138-320.jpg)
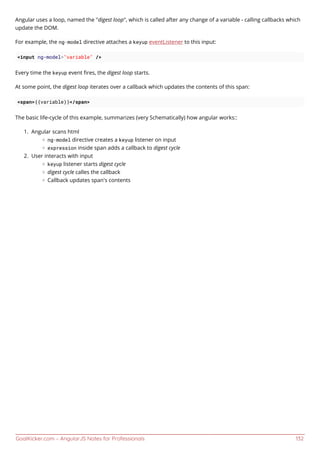
![GoalKicker.com – AngularJS Notes for Professionals 133
Chapter 36: Angular $scopes
Section 36.1: A function available in the entire app
Be careful, this approach might be considered as a bad design for angular apps, since it requires programmers to
remember both where functions are placed in the scope tree, and to be aware of scope inheritance. In many cases
it would be preferred to inject a service (Angular practice - using scope inheritance vs injection.
This example only show how scope inheritance could be used for our needs, and the how you could take advantage
of it, and not the best practices of designing an entire app.
In some cases, we could take advantage of scope inheritance, and set a function as a property of the rootScope.
This way - all of the scopes in the app (except for isolated scopes) will inherit this function, and it could be called
from anywhere in the app.
angular.module('app', [])
.run(['$rootScope', function($rootScope){
var messages = []
$rootScope.addMessage = function(msg){
messages.push(msg);
}
}]);
<div ng-app="app">
<a ng-click="addMessage('hello world!')">it could be accsessed from here</a>
<div ng-include="inner.html"></div>
</div>
inner.html:
<div>
<button ng-click="addMessage('page')">and from here to!</button>
</div>
Section 36.2: Avoid inheriting primitive values
In javascript, assigning a non-primitive value (Such as Object, Array, Function, and many more), keeps a reference
(an address in the memory) to the assigned value.
Assigning a primitive value (String, Number, Boolean, or Symbol) to two different variables, and changing one, won't
change both:
var x = 5;
var y = x;
y = 6;
console.log(y === x, x, y); //false, 5, 6
But with a non-primitive value, since both variables are simply keeping references to the same object, changing one
variable will change the other:
var x = { name : 'John Doe' };
var y = x;
y.name = 'Jhon';
console.log(x.name === y.name, x.name, y.name); //true, John, John](https://image.slidesharecdn.com/angularjsnotesforprofessionals-200412131913/85/Angular-js-notes-for-professionals-140-320.jpg)
![GoalKicker.com – AngularJS Notes for Professionals 134
In angular, when a scope is created, it is assigned all of its parent's properties However, changing properties
afterwards will only affect the parent scope if it is a non-primitive value:
angular.module('app', [])
.controller('myController', ['$scope', function($scope){
$scope.person = { name: 'John Doe' }; //non-primitive
$scope.name = 'Jhon Doe'; //primitive
}])
.controller('myController1', ['$scope', function($scope){}]);
<div ng-app="app" ng-controller="myController">
binding to input works: {{person.name}}<br/>
binding to input does not work: {{name}}<br/>
<div ng-controller="myController1">
<input ng-model="person.name" />
<input ng-model="name" />
</div>
</div>
Remember: in Angular scopes can be created in many ways (such as built-in or custom directives, or the
$scope.$new() function), and keeping track of the scope tree is probably impossible.
Using only non-primitive values as scope properties will keep you on the safe side (unless you need a property to
not inherit, or other cases where you are aware of scope inheritance).
Section 36.3: Basic Example of $scope inheritance
angular.module('app', [])
.controller('myController', ['$scope', function($scope){
$scope.person = { name: 'John Doe' };
}]);
<div ng-app="app" ng-conroller="myController">
<input ng-model="person.name" />
<div ng-repeat="number in [0,1,2,3]">
{{person.name}} {{number}}
</div>
</div>
In this example, the ng-repeat directive creates a new scope for each of its newly created children.
These created scopes are children of their parent scope (in this case the scope created by myController), and
therfore, they inherit all of its proporties, such as person.
Section 36.4: How can you limit the scope on a directive and
why would you do this?
Scope is used as the "glue" that we use to communicate between the parent controller, the directive, and the
directive template. Whenever the AngularJS application is bootstrapped, a rootScope object is created. Each scope
created by controllers, directives and services are prototypically inherited from rootScope.
Yes, we can limit the scope on a directive . We can do so by creating an isolated scope for directive.
There are 3 types of directive scopes:
Scope : False ( Directive uses its parent scope )1.](https://image.slidesharecdn.com/angularjsnotesforprofessionals-200412131913/85/Angular-js-notes-for-professionals-141-320.jpg)
![GoalKicker.com – AngularJS Notes for Professionals 135
Scope : True ( Directive gets a new scope )2.
Scope : { } ( Directive gets a new isolated scope )3.
Directives with the new isolated scope: When we create a new isolated scope then it will not be inherited from
the parent scope. This new scope is called Isolated scope because it is completely detached from its parent scope.
Why? should we use isolated scope: We should use isolated scope when we want to create a custom directive
because it will make sure that our directive is generic, and placed anywhere inside the application. Parent scope is
not going to interfere with the directive scope.
Example of isolated scope:
var app = angular.module("test",[]);
app.controller("Ctrl1",function($scope){
$scope.name = "Prateek";
$scope.reverseName = function(){
$scope.name = $scope.name.split('').reverse().join('');
};
});
app.directive("myDirective", function(){
return {
restrict: "EA",
scope: {},
template: "<div>Your name is : {{name}}</div>"+
"Change your name : <input type='text' ng-model='name'/>"
};
});
There’re 3 types of prefixes AngularJS provides for isolated scope these are :
"@" ( Text binding / one-way binding )1.
"=" ( Direct model binding / two-way binding )2.
"&" ( Behaviour binding / Method binding )3.
All these prefixes receives data from the attributes of the directive element like :
<div my-directive
class="directive"
name="{{name}}"
reverse="reverseName()"
color="color" >
</div>
Section 36.5: Using $scope functions
While declaring a function in the $rootscope has it's advantages, we can also declare a $scope function any part of
the code that is injected by the $scope service. Controller, for instance.
Controller
myApp.controller('myController', ['$scope', function($scope){
$scope.myFunction = function () {
alert("You are in myFunction!");
};
}]);](https://image.slidesharecdn.com/angularjsnotesforprofessionals-200412131913/85/Angular-js-notes-for-professionals-142-320.jpg)
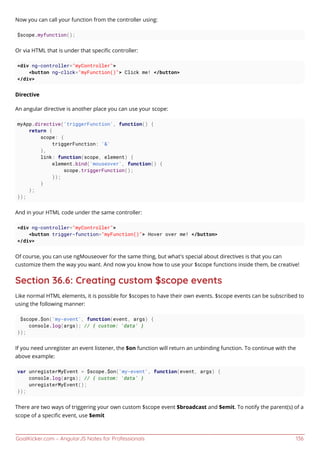
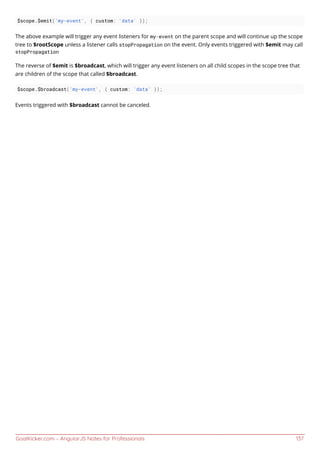
![GoalKicker.com – AngularJS Notes for Professionals 138
Chapter 37: Using AngularJS with
TypeScript
Section 37.1: Using Bundling / Minification
The way the $scope is injected in the controller's constructor functions is a way to demonstrate and use the basic
option of angular dependency injection but is not production ready as it cannot be minified. Thats because the
minification system changes the variable names and anguar's dependency injection uses the parameter names to
know what has to be injected. So for an example the ExampleController's constructor function is minified to the
following code.
function n(n){this.setUpWatches(n)
and $scope is changed to n!
to overcome this we can add an $inject array(string[]). So that angular's DI knows what to inject at what position
is the controllers constructor function.
So the above typescript changes to
module App.Controllers {
class Address {
line1: string;
line2: string;
city: string;
state: string;
}
export class SampleController {
firstName: string;
lastName: string;
age: number;
address: Address;
setUpWatches($scope: ng.IScope): void {
$scope.$watch(() => this.firstName, (n, o) => {
//n is string and so is o
});
};
static $inject : string[] = ['$scope'];
constructor($scope: ng.IScope) {
this.setUpWatches($scope);
}
}
}
Section 37.2: Angular Controllers in Typescript
As defined in the AngularJS Documentation
When a Controller is attached to the DOM via the ng-controller directive, Angular will instantiate a new
Controller object, using the specified Controller's constructor function. A new child scope will be created
and made available as an injectable parameter to the Controller's constructor function as $scope.
Controllers can be very easily made using the typescript classes.
module App.Controllers {](https://image.slidesharecdn.com/angularjsnotesforprofessionals-200412131913/85/Angular-js-notes-for-professionals-145-320.jpg)
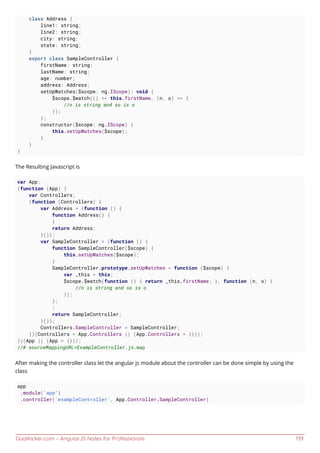
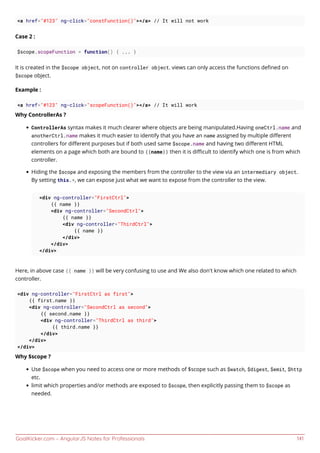
![GoalKicker.com – AngularJS Notes for Professionals 142
Chapter 38: $http request
Section 38.1: Timing of an $http request
The $http requests require time which varies depending on the server, some may take a few milliseconds, and
some may take up to a few seconds. Often the time required to retrieve the data from a request is critical.
Assuming the response value is an array of names, consider the following example:
Incorrect
$scope.names = [];
$http({
method: 'GET',
url: '/someURL'
}).then(function successCallback(response) {
$scope.names = response.data;
},
function errorCallback(response) {
alert(response.status);
});
alert("The first name is: " + $scope.names[0]);
Accessing $scope.names[0] right below the $http request will often throw an error - this line of code executes
before the response is received from the server.
Correct
$scope.names = [];
$scope.$watch('names', function(newVal, oldVal) {
if(!(newVal.length == 0)) {
alert("The first name is: " + $scope.names[0]);
}
});
$http({
method: 'GET',
url: '/someURL'
}).then(function successCallback(response) {
$scope.names = response.data;
},
function errorCallback(response) {
alert(response.status);
});
Using the $watch service we access the $scope.names array only when the response is received. During
initialization, the function is called even though $scope.names was initialized before, therefore checking if the
newVal.length is different than 0 is necessary. Be aware - any changes made to $scope.names will trigger the watch
function.
Section 38.2: Using $http inside a controller
The $http service is a function which generates an HTTP request and returns a promise.](https://image.slidesharecdn.com/angularjsnotesforprofessionals-200412131913/85/Angular-js-notes-for-professionals-149-320.jpg)
![GoalKicker.com – AngularJS Notes for Professionals 143
General Usage
// Simple GET request example:
$http({
method: 'GET',
url: '/someUrl'
}).then(function successCallback(response) {
// this callback will be called asynchronously
// when the response is available
}, function errorCallback(response) {
// called asynchronously if an error occurs
// or server returns response with an error status.
});
Usage inside controller
appName.controller('controllerName',
['$http', function($http){
// Simple GET request example:
$http({
method: 'GET',
url: '/someUrl'
}).then(function successCallback(response) {
// this callback will be called asynchronously
// when the response is available
}, function errorCallback(response) {
// called asynchronously if an error occurs
// or server returns response with an error status.
});
}])
Shortcut Methods
$http service also has shortcut methods. Read about http methods here
Syntax
$http.get('/someUrl', config).then(successCallback, errorCallback);
$http.post('/someUrl', data, config).then(successCallback, errorCallback);
Shortcut Methods
$http.get
$http.head
$http.post
$http.put
$http.delete
$http.jsonp
$http.patch
Section 38.3: Using $http request in a service
HTTP requests are widely used repeatedly across every web app, so it is wise to write a method for each common
request, and then use it in multiple places throughout the app.
Create a httpRequestsService.js](https://image.slidesharecdn.com/angularjsnotesforprofessionals-200412131913/85/Angular-js-notes-for-professionals-150-320.jpg)
![GoalKicker.com – AngularJS Notes for Professionals 144
httpRequestsService.js
appName.service('httpRequestsService', function($q, $http){
return {
// function that performs a basic get request
getName: function(){
// make sure $http is injected
return $http.get("/someAPI/names")
.then(function(response) {
// return the result as a promise
return response;
}, function(response) {
// defer the promise
return $q.reject(response.data);
});
},
// add functions for other requests made by your app
addName: function(){
// some code...
}
}
})
The service above will perform a get request inside the service. This will be available to any controller where the
service has been injected.
Sample usage
appName.controller('controllerName',
['httpRequestsService', function(httpRequestsService){
// we injected httpRequestsService service on this controller
// that made the getName() function available to use.
httpRequestsService.getName()
.then(function(response){
// success
}, function(error){
// do something with the error
})
}])
Using this approach we can now use httpRequestsService.js anytime and in any controller.](https://image.slidesharecdn.com/angularjsnotesforprofessionals-200412131913/85/Angular-js-notes-for-professionals-151-320.jpg)
![GoalKicker.com – AngularJS Notes for Professionals 145
Chapter 39: Prepare for Production - Grunt
Section 39.1: View preloading
When the first time view is requested, normally Angular makes XHR request to get that view. For mid-size projects,
the view count can be significant and it can slow down the application responsiveness.
The good practice is to pre-load all the views at once for small and mid size projects. For larger projects it is good
to aggregate them in some meaningful bulks as well, but some other methods can be handy to split the load. To
automate this task it is handy to use Grunt or Gulp tasks.
To pre-load the views, we can use $templateCache object. That is an object, where angular stores every received
view from the server.
It is possible to use html2js module, that will convert all our views to one module - js file. Then we will need to
inject that module into our application and that's it.
To create concatenated file of all the views we can use this task
module.exports = function (grunt) {
//set up the location of your views here
var viewLocation = ['app/views/**.html'];
grunt.initConfig({
pkg: require('./package.json'),
//section that sets up the settings for concatenation of the html files into one file
html2js: {
options: {
base: '',
module: 'app.templates', //new module name
singleModule: true,
useStrict: true,
htmlmin: {
collapseBooleanAttributes: true,
collapseWhitespace: true
}
},
main: {
src: viewLocation,
dest: 'build/app.templates.js'
}
},
//this section is watching for changes in view files, and if there was a change, it will
regenerate the production file. This task can be handy during development.
watch: {
views:{
files: viewLocation,
tasks: ['buildHTML']
},
}
});
//to automatically generate one view file
grunt.loadNpmTasks('grunt-html2js');
//to watch for changes and if the file has been changed, regenerate the file
grunt.loadNpmTasks('grunt-contrib-watch');](https://image.slidesharecdn.com/angularjsnotesforprofessionals-200412131913/85/Angular-js-notes-for-professionals-152-320.jpg)
![GoalKicker.com – AngularJS Notes for Professionals 146
//just a task with friendly name to reference in watch
grunt.registerTask('buildHTML', ['html2js']);
};
To use this way of concatination, you need to make 2 changes: In your index.html file you need to reference the
concatenated view file
<script src="build/app.templates.js"></script>
In the file, where you are declaring your app, you need to inject the dependency
angular.module('app', ['app.templates'])
If you are using popular routers like ui-router, there are no changes in the way, how you are referencing
templates
.state('home', {
url: '/home',
views: {
"@": {
controller: 'homeController',
//this will be picked up from $templateCache
templateUrl: 'app/views/home.html'
},
}
})
Section 39.2: Script optimisation
It is good practice to combine JS files together and minify them. For larger project there could be hundreds of JS
files and it adds unnecessary latency to load each file separately from the server.
For angular minification it is required to to have all functions annotated. That in necessary for Angular dependency
injection proper minificaiton. (During minification, function names and variables will be renamed and it will break
dependency injection if no extra actions will be taken.)
During minificaiton $scope and myService variables will be replaced by some other values. Angular dependency
injection works based on the name, as a result, these names shouldn't change
.controller('myController', function($scope, myService){
})
Angular will understand the array notation, because minification won't replace string literals.
.controller('myController', ['$scope','myService', function($scope, myService){
}])
Firstly we will concatinate all files end to end.
Secondly we will use ng-annotate module, that will prepare code for minification
Finally we will apply uglify module.
module.exports = function (grunt) { //set up the location of your scripts here for reusing it in code var scriptLocation
= ['app/scripts/*.js'];](https://image.slidesharecdn.com/angularjsnotesforprofessionals-200412131913/85/Angular-js-notes-for-professionals-153-320.jpg)
![GoalKicker.com – AngularJS Notes for Professionals 147
grunt.initConfig({
pkg: require('./package.json'),
//add necessary annotations for safe minification
ngAnnotate: {
angular: {
src: ['staging/concatenated.js'],
dest: 'staging/anotated.js'
}
},
//combines all the files into one file
concat: {
js: {
src: scriptLocation,
dest: 'staging/concatenated.js'
}
},
//final uglifying
uglify: {
options: {
report: 'min',
mangle: false,
sourceMap:true
},
my_target: {
files: {
'build/app.min.js': ['staging/anotated.js']
}
}
},
//this section is watching for changes in JS files, and if there was a change, it will
regenerate the production file. You can choose not to do it, but I like to keep concatenated version
up to date
watch: {
scripts: {
files: scriptLocation,
tasks: ['buildJS']
}
}
});
//module to make files less readable
grunt.loadNpmTasks('grunt-contrib-uglify');
//mdule to concatenate files together
grunt.loadNpmTasks('grunt-contrib-concat');
//module to make angularJS files ready for minification
grunt.loadNpmTasks('grunt-ng-annotate');
//to watch for changes and if the file has been changed, regenerate the file
grunt.loadNpmTasks('grunt-contrib-watch');
//task that sequentially executes all steps to prepare JS file for production
//concatinate all JS files
//annotate JS file (prepare for minification
//uglify file
grunt.registerTask('buildJS', ['concat:js', 'ngAnnotate', 'uglify']);
};](https://image.slidesharecdn.com/angularjsnotesforprofessionals-200412131913/85/Angular-js-notes-for-professionals-154-320.jpg)
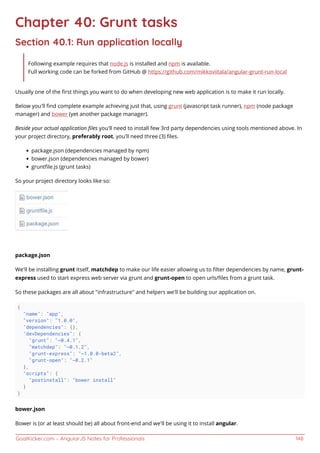
![GoalKicker.com – AngularJS Notes for Professionals 149
{
"name": "app",
"version": "1.0.0",
"dependencies": {
"angular": "~1.3.x"
},
"devDependencies": {}
}
gruntfile.js
Inside gruntfile.js we'll have the actual "running application locally" magic, which opens our application in new
browser window, running on http://localhost:9000/
'use strict';
// see http://rhumaric.com/2013/07/renewing-the-grunt-livereload-magic/
module.exports = function(grunt) {
require('matchdep').filterDev('grunt-*').forEach(grunt.loadNpmTasks);
grunt.initConfig({
express: {
all: {
options: {
port: 9000,
hostname: 'localhost',
bases: [__dirname]
}
}
},
open: {
all: {
path: 'http://localhost:<%= express.all.options.port%>'
}
}
});
grunt.registerTask('app', [
'express',
'open',
'express-keepalive'
]);
};
Usage
To get your application up & running from scratch, save above files to your project's root directory (any empty
folder will do). Then fire up console/command line and type in the following to install all required dependencies.
npm install -g grunt-cli bower
npm install
And then run your application using
grunt app](https://image.slidesharecdn.com/angularjsnotesforprofessionals-200412131913/85/Angular-js-notes-for-professionals-156-320.jpg)
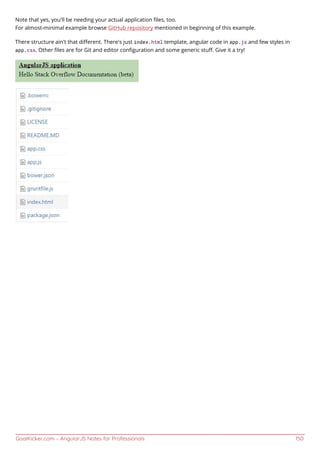
![GoalKicker.com – AngularJS Notes for Professionals 151
Chapter 41: Lazy loading
Section 41.1: Preparing your project for lazy loading
After including oclazyload.js in your index file, declare ocLazyLoad as a dependency in app.js
//Make sure you put the correct dependency! it is spelled different than the service!
angular.module('app', [
'oc.lazyLoad',
'ui-router'
])
Section 41.2: Usage
In order to lazily load files inject the $ocLazyLoad service into a controller or another service
.controller('someCtrl', function($ocLazyLoad) {
$ocLazyLoad.load('path/to/file.js').then(...);
});
Angular modules will be automatically loaded into angular.
Other variation:
$ocLazyLoad.load([
'bower_components/bootstrap/dist/js/bootstrap.js',
'bower_components/bootstrap/dist/css/bootstrap.css',
'partials/template1.html'
]);
For a complete list of variations visit the official documentation
Section 41.3: Usage with router
UI-Router:
.state('profile', {
url: '/profile',
controller: 'profileCtrl as vm'
resolve: {
module: function($ocLazyLoad) {
return $ocLazyLoad.load([
'path/to/profile/module.js',
'path/to/profile/style.css'
]);
}
}
});
ngRoute:
.when('/profile', {
controller: 'profileCtrl as vm'
resolve: {
module: function($ocLazyLoad) {
return $ocLazyLoad.load([
'path/to/profile/module.js',](https://image.slidesharecdn.com/angularjsnotesforprofessionals-200412131913/85/Angular-js-notes-for-professionals-158-320.jpg)
![GoalKicker.com – AngularJS Notes for Professionals 152
'path/to/profile/style.css'
]);
}
}
});
Section 41.4: Using dependency injection
The following syntax allows you to specify dependencies in your module.js instead of explicit specification when
using the service
//lazy_module.js
angular.module('lazy', [
'alreadyLoadedDependency1',
'alreadyLoadedDependency2',
...
[
'path/to/lazily/loaded/dependency.js',
'path/to/lazily/loaded/dependency.css'
]
]);
Note: this syntax will only work for lazily loaded modules!
Section 41.5: Using the directive
<div oc-lazy-load="['path/to/lazy/loaded/directive.js', 'path/to/lazy/loaded/directive.html']">
<!-- myDirective available here -->
<my-directive></my-directive>
</div>](https://image.slidesharecdn.com/angularjsnotesforprofessionals-200412131913/85/Angular-js-notes-for-professionals-159-320.jpg)
![GoalKicker.com – AngularJS Notes for Professionals 153
Chapter 42: HTTP Interceptor
The $http service of AngularJS allows us to communicate with a backend and make HTTP requests. There are cases
where we want to capture every request and manipulate it before sending it to the server. Other times we would
like to capture the response and process it before completing the call. Global http error handling can be also a good
example of such need. Interceptors are created exactly for such cases.
Section 42.1: Generic httpInterceptor step by step
Create an HTML file with the following content:
<!DOCTYPE html>
<html>
<head>
<title>Angular Interceptor Sample</title>
<script src="https://code.angularjs.org/1.5.8/angular.min.js"></script>
<script src="app.js"></script>
<script src="appController.js"></script>
<script src="genericInterceptor.js"></script>
</head>
<body ng-app="interceptorApp">
<div ng-controller="appController as vm">
<button ng-click="vm.sendRequest()">Send a request</button>
</div>
</body>
</html>
Add a JavaScript file called 'app.js':
var interceptorApp = angular.module('interceptorApp', []);
interceptorApp.config(function($httpProvider) {
$httpProvider.interceptors.push('genericInterceptor');
});
Add another one called 'appController.js':
(function() {
'use strict';
function appController($http) {
var vm = this;
vm.sendRequest = function(){
$http.get('http://google.com').then(function(response){
console.log(response);
});
};
}
angular.module('interceptorApp').controller('appController',['$http', appController]);
})();
And finally the file containing the interceptor itself 'genericInterceptor.js':
(function() {
"use strict";](https://image.slidesharecdn.com/angularjsnotesforprofessionals-200412131913/85/Angular-js-notes-for-professionals-160-320.jpg)
![GoalKicker.com – AngularJS Notes for Professionals 154
function genericInterceptor($q) {
this.responseError = function (response) {
return $q.reject(response);
};
this.requestError = function(request){
if (canRecover(rejection)) {
return responseOrNewPromise
}
return $q.reject(rejection);
};
this.response = function(response){
return response;
};
this.request = function(config){
return config;
}
}
angular.module('interceptorApp').service('genericInterceptor', genericInterceptor);
})();
The 'genericInterceptor' cover the possible functions which we can override adding extra behavior to our
application.
Section 42.2: Getting Started
Angular's builtin $http service allows us to send HTTP requests. Oftentime, the need arise to do things before or
after a request, for example adding to each request an authentication token or creating a generic error handling
logic.
Section 42.3: Flash message on response using http
interceptor
In the view file
In the base html (index.html) where we usually include the angular scripts or the html that is shared across the app,
leave an empty div element, the flash messages will be appearing inside this div element
<div class="flashmessage" ng-if="isVisible">
{{flashMessage}}
</div>
Script File
In the config method of angular module, inject the httpProvider, the httpProvider has an interceptor array property,
push the custom interceptor, In the current example the custom interceptor intercepts only the response and calls
a method attached to rootScope.
var interceptorTest = angular.module('interceptorTest', []);
interceptorTest.config(['$httpProvider',function ($httpProvider) {
$httpProvider.interceptors.push(["$rootScope",function ($rootScope) {
return { //intercept only the response](https://image.slidesharecdn.com/angularjsnotesforprofessionals-200412131913/85/Angular-js-notes-for-professionals-161-320.jpg)
![GoalKicker.com – AngularJS Notes for Professionals 155
'response': function (response)
{
$rootScope.showFeedBack(response.status,response.data.message);
return response;
}
};
}]);
}])
Since only providers can be injected into the config method of an angular module (that is httpProvider and not the
rootscope), declare the method attached to rootscope inside the run method of angular module.
Also display the message inside $timeout so that the message will have the flash property, that is disappearing
after a threshold time. In our example its 3000 ms.
interceptorTest.run(["$rootScope","$timeout",function($rootScope,$timeout){
$rootScope.showFeedBack = function(status,message){
$rootScope.isVisible = true;
$rootScope.flashMessage = message;
$timeout(function(){$rootScope.isVisible = false },3000)
}
}]);
Common pitfalls
Trying to inject $rootScope or any other services inside config method of angular module, the lifecycle of angular
app doesn't allow that and unknown provider error will be thrown. Only providers can be injected in config
method of the angular module](https://image.slidesharecdn.com/angularjsnotesforprofessionals-200412131913/85/Angular-js-notes-for-professionals-162-320.jpg)
![GoalKicker.com – AngularJS Notes for Professionals 156
Chapter 43: Session storage
Section 43.1: Handling session storage through service using
angularjs
Session storage service :
Common factory service that will save and return the saved session data based on the key.
'use strict';
/**
* @ngdoc factory
* @name app.factory:storageService
* @description This function will communicate with HTML5 sessionStorage via Factory Service.
*/
app.factory('storageService', ['$rootScope', function($rootScope) {
return {
get: function(key) {
return sessionStorage.getItem(key);
},
save: function(key, data) {
sessionStorage.setItem(key, data);
}
};
}]);
In controller :
Inject the storageService dependency in the controller to set and get the data from the session storage.
app.controller('myCtrl',['storageService',function(storageService) {
// Save session data to storageService
storageService.save('key', 'value');
// Get saved session data from storageService
var sessionData = storageService.get('key');
});](https://image.slidesharecdn.com/angularjsnotesforprofessionals-200412131913/85/Angular-js-notes-for-professionals-163-320.jpg)
![GoalKicker.com – AngularJS Notes for Professionals 158
Chapter 45: SignalR with AngularJS
In this article we focus on "How to create a simple project using AngularJS And SignalR", in this training you need to
know about "how create app with angularjs", "how to create/use service on angular" And basic knowledge about
SignalR" for this we recommend https://www.codeproject.com/Tips/590660/Introduction-to-SignalR).
Section 45.1: SignalR and AngularJS [ ChatProject ]
step 1: Create Project
- Application
- app.js
- Controllers
- appController.js
- Factories
- SignalR-factory.js
- index.html
- Scripts
- angular.js
- jquery.js
- jquery.signalR.min.js
- Hubs
SignalR version use: signalR-2.2.1
Step 2: Startup.cs And ChatHub.cs
Go to your "/Hubs" directory and Add 2 files [Startup.cs, ChatHub.cs]
Startup.cs
using Microsoft.Owin;
using Owin;
[assembly: OwinStartup(typeof(SignalR.Hubs.Startup))]
namespace SignalR.Hubs
{
public class Startup
{
public void Configuration(IAppBuilder app)
{
app.MapSignalR();
}
}
}
ChatHub.cs
using Microsoft.AspNet.SignalR;
namespace SignalR.Hubs
{
public class ChatHub : Hub
{
public void Send(string name, string message, string time)
{](https://image.slidesharecdn.com/angularjsnotesforprofessionals-200412131913/85/Angular-js-notes-for-professionals-165-320.jpg)
![GoalKicker.com – AngularJS Notes for Professionals 159
Clients.All.broadcastMessage(name, message, time);
}
}
}
step 3: create angular app
Go to your "/Application" directory and Add [app.js] file
app.js
var app = angular.module("app", []);
step 4: create SignalR Factory
Go to your "/Application/Factories" directory and Add [SignalR-factory.js] file
SignalR-factory.js
app.factory("signalR", function () {
var factory = {};
factory.url = function (url) {
$.connection.hub.url = url;
}
factory.setHubName = function (hubName) {
factory.hub = hubName;
}
factory.connectToHub = function () {
return $.connection[factory.hub];
}
factory.client = function () {
var hub = factory.connectToHub();
return hub.client;
}
factory.server = function () {
var hub = factory.connectToHub();
return hub.server;
}
factory.start = function (fn) {
return $.connection.hub.start().done(fn);
}
return factory;
});
step 5: update app.js
var app = angular.module("app", []);
app.run(function(signalR) {
signalR.url("http://localhost:21991/signalr");
});](https://image.slidesharecdn.com/angularjsnotesforprofessionals-200412131913/85/Angular-js-notes-for-professionals-166-320.jpg)
![GoalKicker.com – AngularJS Notes for Professionals 160
localhost:21991/signalr | this is your SignalR Hubs Urls
step 6: add controller
Go to your "/Application/Controllers" directory and Add [appController.js] file
app.controller("ctrl", function ($scope, signalR) {
$scope.messages = [];
$scope.user = {};
signalR.setHubName("chatHub");
signalR.client().broadcastMessage = function (name, message, time) {
var newChat = { name: name, message: message, time: time };
$scope.$apply(function() {
$scope.messages.push(newChat);
});
};
signalR.start(function () {
$scope.send = function () {
var dt = new Date();
var time = dt.getHours() + ":" + dt.getMinutes() + ":" + dt.getSeconds();
signalR.server().send($scope.user.name, $scope.user.message, time);
}
});
});
signalR.setHubName("chatHub") | [ChatHub] (public class) > ChatHub.cs
Note: do not insert HubName with upper Case, first letter is lower Case.
signalR.client() | this method try to connect to your hubs and get all functions in the Hubs, in this
sample we have "chatHub", to get "broadcastMessage()" function;
step 7: add index.html in route of directory
index.html
<!DOCTYPE html>
<html ng-app="app" ng-controller="ctrl">
<head>
<meta charset="utf-8" />
<title>SignalR Simple Chat</title>
</head>
<body>
<form>
<input type="text" placeholder="name" ng-model="user.name" />
<input type="text" placeholder="message" ng-model="user.message" />
<button ng-click="send()">send</button>](https://image.slidesharecdn.com/angularjsnotesforprofessionals-200412131913/85/Angular-js-notes-for-professionals-167-320.jpg)
![GoalKicker.com – AngularJS Notes for Professionals 162
Chapter 46: Migration to Angular 2+
AngularJS has been totally rewritten using the TypeScript language and renamed to just Angular.
There is a lot that can be done to an AngularJS app to ease the migration process. As the official upgrade guide
says, several "preparation steps" can be performed to refactor your app, making it better and closer to the new
Angular style.
Section 46.1: Converting your AngularJS app into a
componend-oriented structure
In the new Angular framework, Components are the main building blocks that compose the user interface. So one
of the first steps that helps an AngularJS app to be migrated to the new Angular is to refactor it into a more
component-oriented structure.
Components were also introduced in the old AngularJS starting from version 1.5+. Using Components in an
AngularJS app will not only make its structure closer to the new Angular 2+, but it will also make it more modular
and easier to maintain.
Before going further I recommend to look at the official AngularJS documentation page about Components, where
their advantages and usage are well explained.
I would rather mention some tips about how to convert the old ng-controller oriented code to the new component
oriented style.
Start breaking your your app into components
All the component-oriented apps have typically one or few components that include other sub-components. So why
not creating the first component which simply will contain your app (or a big piece of it).
Assume that we have a piece of code assigned to a controller, named UserListController, and we want to make a
component of it, which we'll name UserListComponent.
current HTML:
<div ng-controller="UserListController as listctrl">
<ul>
<li ng-repeat="user in myUserList">
{{ user }}
</li>
</ul>
</div>
current JavaScript:
app.controller("UserListController", function($scope, SomeService) {
$scope.myUserList = ['Shin', 'Helias', 'Kalhac'];
this.someFunction = function() {
// ...
}
// ...](https://image.slidesharecdn.com/angularjsnotesforprofessionals-200412131913/85/Angular-js-notes-for-professionals-169-320.jpg)
![GoalKicker.com – AngularJS Notes for Professionals 163
}
new HTML:
<user-list></user-list>
new JavaScript:
app.component("UserList", {
templateUrl: 'user-list.html',
controller: UserListController
});
function UserListController(SomeService) {
this.myUserList = ['Shin', 'Helias', 'Kalhac'];
this.someFunction = function() {
// ...
}
// ...
}
Note how we are no longer injecting $scope into the controller function and we are now declaring this.myUserList
instead of $scope.myUserList;
new template file user-list.component.html:
<ul>
<li ng-repeat="user in $ctrl.myUserList">
{{ user }}
</li>
</ul>
Note how we are now referring to the variable myUserList, which belongs to the controller, using
$ctrl.myUserList from the html instead of $scope.myUserList.
That is because, as you probably figured out after reading the documentation, $ctrl in the template now refers to
the controller function.
What about controllers and routes?
In case your controller was bound to the template using the routing system instead of ng-controller, so if you
have something like this:
$stateProvider
.state('users', {
url: '/users',
templateUrl: 'user-list.html',
controller: 'UserListController'
})
// ..
you can just change your state declaration to:](https://image.slidesharecdn.com/angularjsnotesforprofessionals-200412131913/85/Angular-js-notes-for-professionals-170-320.jpg)
![GoalKicker.com – AngularJS Notes for Professionals 165
Chapter 47: AngularJS with data filter,
pagination etc
Provider example and query about display data with filter, pagination etc in Angularjs.
Section 47.1: AngularJS display data with filter, pagination
<div ng-app="MainApp" ng-controller="SampleController">
<input ng-model="dishName" id="search" class="form-control" placeholder="Filter text">
<ul>
<li dir-paginate="dish in dishes | filter : dishName | itemsPerPage: pageSize" pagination-
id="flights">{{dish}}</li>
</ul>
<dir-pagination-controls boundary-links="true" on-page-change="changeHandler(newPageNumber)"
pagination-id="flights"></dir-pagination-controls>
</div>
<script type="text/javascript" src="angular.min.js"></script>
<script type="text/javascript" src="pagination.js"></script>
<script type="text/javascript">
var MainApp = angular.module('MainApp', ['angularUtils.directives.dirPagination'])
MainApp.controller('SampleController', ['$scope', '$filter', function ($scope, $filter) {
$scope.pageSize = 5;
$scope.dishes = [
'noodles',
'sausage',
'beans on toast',
'cheeseburger',
'battered mars bar',
'crisp butty',
'yorkshire pudding',
'wiener schnitzel',
'sauerkraut mit ei',
'salad',
'onion soup',
'bak choi',
'avacado maki'
];
$scope.changeHandler = function (newPage) { };
}]);
</script>](https://image.slidesharecdn.com/angularjsnotesforprofessionals-200412131913/85/Angular-js-notes-for-professionals-172-320.jpg)
![GoalKicker.com – AngularJS Notes for Professionals 168
creating a watch, especially in loops.
As a result you need to track how many watchers you are using. You can count the watchers with this script (credit
to @Words Like Jared Number of watchers)
(function() {
var root = angular.element(document.getElementsByTagName('body')),
watchers = [],
f = function(element) {
angular.forEach(['$scope', '$isolateScope'], function(scopeProperty) {
if(element.data() && element.data().hasOwnProperty(scopeProperty)) {
angular.forEach(element.data()[scopeProperty].$$watchers, function(watcher) {
watchers.push(watcher);
});
}
});
angular.forEach(element.children(), function(childElement) {
f(angular.element(childElement));
});
};
f(root);
// Remove duplicate watchers
var watchersWithoutDuplicates = [];
angular.forEach(watchers, function(item) {
if(watchersWithoutDuplicates.indexOf(item) < 0) {
watchersWithoutDuplicates.push(item);
}
});
console.log(watchersWithoutDuplicates.length);
})();
5) ng-if / ng-show
These functions are very similar in behavior. ng-if removes elements from the DOM while ng-show only hides the
elements but keeps all handlers. If you have parts of the code you do not want to show, use ng-if.
It depends on the type of usage, but often one is more suitable than the other.
If the element is not needed, use ng-if
To quickly toggle on/off, use ng-show/ng-hide
<div ng-repeat="user in userCollection">
<p ng-if="user.hasTreeLegs">I am special<!-- some complicated DOM --></p>
<p ng-show="user.hasSubscribed">I am awesome<!-- switch this setting on and off --></p>
</div>
If in doubt - use ng-if and test!
6) Disable debugging
By default, bind directives and scopes leave extra classes and markup in the code to assist with various debugging
tools. Disabling this option means that you no longer render these various elements during the digest cycle.](https://image.slidesharecdn.com/angularjsnotesforprofessionals-200412131913/85/Angular-js-notes-for-professionals-175-320.jpg)
![GoalKicker.com – AngularJS Notes for Professionals 169
angular.module('exampleApp', []).config(['$compileProvider', function ($compileProvider) {
$compileProvider.debugInfoEnabled(false);
}]);
7) Use dependency injection to expose your resources
Dependency Injection is a software design pattern in which an object is given its dependencies, rather than the
object creating them itself. It is about removing the hard-coded dependencies and making it possible to change
them whenever needed.
You might wonder about the performance cost associated with such string parsing of all injectable functions.
Angular takes care of this by caching the $inject property after the first time. So this doesn’t happen every time a
function needs to be invoked.
PRO TIP: If you are looking for the approach with the best performance, go with the $inject property annotation
approach. This approach entirely avoids the function definition parsing because this logic is wrapped within the
following check in the annotate function: if (!($inject = fn.$inject)). If $inject is already available, no parsing required!
var app = angular.module('DemoApp', []);
var DemoController = function (s, h) {
h.get('https://api.github.com/users/angular/repos').success(function (repos) {
s.repos = repos;
});
}
// $inject property annotation
DemoController['$inject'] = ['$scope', '$http'];
app.controller('DemoController', DemoController);
PRO TIP 2: You can add an ng-strict-di directive on the same element as ng-app to opt into strict DI mode which
will throw an error whenever a service tries to use implicit annotations. Example:
<html ng-app="DemoApp" ng-strict-di>
Or if you use manual bootstrapping:
angular.bootstrap(document, ['DemoApp'], {
strictDi: true
});
Section 48.2: Bind Once
Angular has reputation for having awesome bidirectional data binding. By default, Angular continuously
synchronizes values bound between model and view components any time data changes in either the model or
view component.
This comes with a cost of being a bit slow if used too much. This will have a larger performance hit:
Bad performance: {{my.data}}
Add two colons :: before the variable name to use one-time binding. In this case, the value only gets updated once
my.data is defined. You are explicitly pointing not to watch for data changes. Angular won't perform any value
checks, resulting with fewer expressions being evaluated on each digest cycle.](https://image.slidesharecdn.com/angularjsnotesforprofessionals-200412131913/85/Angular-js-notes-for-professionals-176-320.jpg)
![GoalKicker.com – AngularJS Notes for Professionals 171
Watcher is a simple function, which is called on every digest cycle, and returns some value. Angular checks the
returned value, if it is not the same as it was on the previous call - a callback that was passed in second parameter
to function $watch() or $watchCollection will be executed.
(function() {
angular.module("app", []).controller("ctrl", function($scope) {
$scope.value = 10;
$scope.$watch(
function() { return $scope.value; },
function() { console.log("value changed"); }
);
}
})();
Watchers are performance killers. The more watchers you have, the longer they take to make a digest loop, the
slower UI. If a watcher detects changes, it will kick off the digest loop (recalculation on all screen)
There are three ways to do manual watch for variable changes in Angular.
$watch() - just watches for value changes
$watchCollection() - watches for changes in collection (watches more than regular $watch)
$watch(..., true) - Avoid this as much as possible, it will perform "deep watch" and will kill the performance
(watches more than watchCollection)
Note that if you are binding variables in the view, you are creating new watchers - use {{::variable}} not to create
watcher, especially in loops
As a result you need to track how many watchers are you using. You can count the watchers with this script (credit
to @Words Like Jared - How to count total number of watches on a page?
(function() {
var root = angular.element(document.getElementsByTagName("body")),
watchers = [];
var f = function(element) {
angular.forEach(["$scope", "$isolateScope"], function(scopeProperty) {
if(element.data() && element.data().hasOwnProperty(scopeProperty)) {
angular.forEach(element.data()[scopeProperty].$$watchers, function(watcher) {
watchers.push(watcher);
});
}
});
angular.forEach(element.children(), function(childElement) {
f(angular.element(childElement));
});
};
f(root);
// Remove duplicate watchers
var watchersWithoutDuplicates = [];
angular.forEach(watchers, function(item) {
if(watchersWithoutDuplicates.indexOf(item) < 0) {
watchersWithoutDuplicates.push(item);](https://image.slidesharecdn.com/angularjsnotesforprofessionals-200412131913/85/Angular-js-notes-for-professionals-178-320.jpg)
![GoalKicker.com – AngularJS Notes for Professionals 172
}
});
console.log(watchersWithoutDuplicates.length);
})();
If you don't want to create your own script, there is an open source utility called ng-stats that uses a real-time chart
embedded into the page to give you insight into the number of watches Angular is managing, as well as the
frequency and duration of digest cycles over time. The utility exposes a global function named showAngularStats
that you can call to configure how you want the chart to work.
showAngularStats({
"position": "topleft",
"digestTimeThreshold": 16,
"autoload": true,
"logDigest": true,
"logWatches": true
});
The example code above displays the following chart on the page automatically (interactive demo).
Section 48.5: Always deregister listeners registered on other
scopes other than the current scope
You must always unregister scopes other then your current scope as shown below:
//always deregister these
$rootScope.$on(...);
$scope.$parent.$on(...);
You don't have to deregister listners on current scope as angular would take care of it:
//no need to deregister this
$scope.$on(...);
$rootScope.$on listeners will remain in memory if you navigate to another controller. This will create a memory
leak if the controller falls out of scope.
Don't
angular.module('app').controller('badExampleController', badExample);
badExample.$inject = ['$scope', '$rootScope'];
function badExample($scope, $rootScope) {
$rootScope.$on('post:created', function postCreated(event, data) {});
}
Do
angular.module('app').controller('goodExampleController', goodExample);
goodExample.$inject = ['$scope', '$rootScope'];](https://image.slidesharecdn.com/angularjsnotesforprofessionals-200412131913/85/Angular-js-notes-for-professionals-179-320.jpg)
![GoalKicker.com – AngularJS Notes for Professionals 175
Chapter 49: Performance Profiling
Section 49.1: All About Profiling
What is Profiling?
By definition Profiling is a form of dynamic program analysis that measures, for example, the space (memory) or
time complexity of a program, the usage of particular instructions, or the frequency and duration of function calls.
Why is it necessary?
Profiling is important because you can’t optimise effectively until you know what your program is spending most of
its time doing. Without measuring your program execution time (profiling), you won’t know if you’ve actually
improved it.
Tools and Techniques :
Chrome's in-built dev tools1.
This includes a comprehensive set of tools to be used for profiling.You can go deep to find out bottlenecks in
your javascript file, css files, animations, cpu consumption, memory leaks, network, security etc.
Make a Timeline recording and look for suspiciously long Evaluate Script events. If you find any, you can
enable the JS Profiler and re-do your recording to get more detailed information about exactly which JS
functions were called and how long each took. Read more...
FireBug (use with Firefox)2.
Dynatrace (use with IE)3.
Batarang (use with Chrome)4.
It's an outdated add-on for chrome browser though it's stable and can be used to monitor models,
performance, dependencies for an angular application. It works fine for small scale application and can give
you an insight of what does scope variable holds at various levels. It tells you about active watchers, watch
expressions, watch collections in the app.
Watcher (use with Chrome)5.
Nice and simplistic UI to count the number of watchers in a Angular app.
Use the following code to manually find out the number of watchers in your angular app (credit to @Words6.
Like Jared Number of watchers)
(function() {
var root = angular.element(document.getElementsByTagName('body')),
watchers = [],
f = function(element) {
angular.forEach(['$scope', '$isolateScope'], function(scopeProperty) {
if(element.data() && element.data().hasOwnProperty(scopeProperty)) {
angular.forEach(element.data()[scopeProperty].$$watchers, function(watcher) {](https://image.slidesharecdn.com/angularjsnotesforprofessionals-200412131913/85/Angular-js-notes-for-professionals-182-320.jpg)
![GoalKicker.com – AngularJS Notes for Professionals 176
watchers.push(watcher);
});
}
});
angular.forEach(element.children(), function(childElement) {
f(angular.element(childElement));
});
};
f(root);
// Remove duplicate watchers
var watchersWithoutDuplicates = [];
angular.forEach(watchers, function(item) {
if(watchersWithoutDuplicates.indexOf(item) < 0) {
watchersWithoutDuplicates.push(item);
}
});
console.log(watchersWithoutDuplicates.length);
})();
There are several online tools/websites available which facilitates wide range of functionalities to create a7.
profile of your application.
One such site is : https://www.webpagetest.org/
With this you can run a free website speed test from multiple locations around the globe using real browsers
(IE and Chrome) and at real consumer connection speeds. You can run simple tests or perform advanced
testing including multi-step transactions, video capture, content blocking and much more.
Next Steps:
Done with Profiling. It only brings you half way down the road. The very next task is to actually turn your findings
into action items to optimise your application. See this documentation on how you can improve the performance of
your angular app with simple tricks.
Happy Coding :)](https://image.slidesharecdn.com/angularjsnotesforprofessionals-200412131913/85/Angular-js-notes-for-professionals-183-320.jpg)
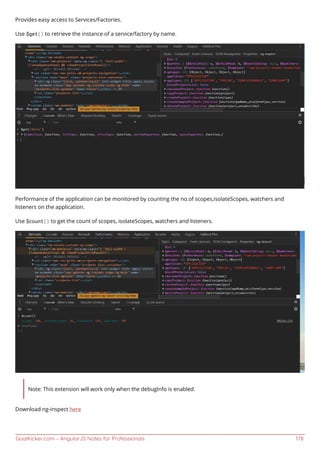
![GoalKicker.com – AngularJS Notes for Professionals 179
Section 50.2: Getting the Scope of element
In an angular app everything goes around scope, if we could get an elements scope then it is easy to debug the
angular app. How to access the scope of element:
angular.element(myDomElement).scope();
e.g.
angular.element(document.getElementById('yourElementId')).scope() //accessing by ID
Getting the scope of the controller:
angular.element('[ng-controller=ctrl]').scope()
Another easy way to access a DOM element from the console (as jm mentioned) is to click on it in the 'elements'
tab, and it automatically gets stored as $0.
angular.element($0).scope();
Section 50.3: Basic debugging in markup
Scope testing & output of model
<div ng-app="demoApp" ng-controller="mainController as ctrl">
{{$id}}
<ul>
<li ng-repeat="item in ctrl.items">
{{$id}}<br/>
{{item.text}}
</li>
</ul>
{{$id}}
<pre>
{{ctrl.items | json : 2}}
</pre>
</div>
angular.module('demoApp', [])
.controller('mainController', MainController);
function MainController() {
var vm = this;
vm.items = [{
id: 0,
text: 'first'
},
{
id: 1,
text: 'second'
},
{
id: 2,
text: 'third'
}];
}
Sometimes it can help to see if there is a new scope to fix scoping issues. $scope.$id can be used in an expression
everywhere in your markup to see if there is a new $scope.](https://image.slidesharecdn.com/angularjsnotesforprofessionals-200412131913/85/Angular-js-notes-for-professionals-186-320.jpg)
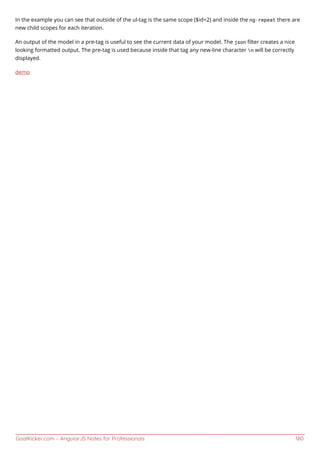
![GoalKicker.com – AngularJS Notes for Professionals 181
Chapter 51: Unit tests
Section 51.1: Unit test a component (1.5+)
Component code:
angular.module('myModule', []).component('myComponent', {
bindings: {
myValue: '<'
},
controller: function(MyService) {
this.service = MyService;
this.componentMethod = function() {
return 2;
};
}
});
The test:
describe('myComponent', function() {
var component;
var MyServiceFake = jasmine.createSpyObj(['serviceMethod']);
beforeEach(function() {
module('myModule');
inject(function($componentController) {
// 1st - component name, 2nd - controller injections, 3rd - bindings
component = $componentController('myComponent', {
MyService: MyServiceFake
}, {
myValue: 3
});
});
});
/** Here you test the injector. Useless. */
it('injects the binding', function() {
expect(component.myValue).toBe(3);
});
it('has some cool behavior', function() {
expect(component.componentMethod()).toBe(2);
});
});
Run!
Section 51.2: Unit test a filter
Filter code:
angular.module('myModule', []).filter('multiplier', function() {
return function(number, multiplier) {
if (!angular.isNumber(number)) {
throw new Error(number + " is not a number!");](https://image.slidesharecdn.com/angularjsnotesforprofessionals-200412131913/85/Angular-js-notes-for-professionals-188-320.jpg)
![GoalKicker.com – AngularJS Notes for Professionals 182
}
if (!multiplier) {
multiplier = 2;
}
return number * multiplier;
}
});
The test:
describe('multiplierFilter', function() {
var filter;
beforeEach(function() {
module('myModule');
inject(function(multiplierFilter) {
filter = multiplierFilter;
});
});
it('multiply by 2 by default', function() {
expect(filter(2)).toBe(4);
expect(filter(3)).toBe(6);
});
it('allow to specify custom multiplier', function() {
expect(filter(2, 4)).toBe(8);
});
it('throws error on invalid input', function() {
expect(function() {
filter(null);
}).toThrow();
});
});
Run!
Remark: In the inject call in the test, your filter needs to be specified by its name + Filter. The cause for this is that
whenever you register a filter for your module, Angular register it with a Filter appended to its name.
Section 51.3: Unit test a service
Service Code
angular.module('myModule', [])
.service('myService', function() {
this.doSomething = function(someNumber) {
return someNumber + 2;
}
});
The test
describe('myService', function() {
var myService;
beforeEach(function() {
module('myModule');
inject(function(_myService_) {](https://image.slidesharecdn.com/angularjsnotesforprofessionals-200412131913/85/Angular-js-notes-for-professionals-189-320.jpg)
![GoalKicker.com – AngularJS Notes for Professionals 183
myService = _myService_;
});
});
it('should increment `num` by 2', function() {
var result = myService.doSomething(4);
expect(result).toEqual(6);
});
});
Run!
Section 51.4: Unit test a controller
Controller code:
angular.module('myModule', [])
.controller('myController', function($scope) {
$scope.num = 2;
$scope.doSomething = function() {
$scope.num += 2;
}
});
The test:
describe('myController', function() {
var $scope;
beforeEach(function() {
module('myModule');
inject(function($controller, $rootScope) {
$scope = $rootScope.$new();
$controller('myController', {
'$scope': $scope
})
});
});
it('should increment `num` by 2', function() {
expect($scope.num).toEqual(2);
$scope.doSomething();
expect($scope.num).toEqual(4);
});
});
Run!
Section 51.5: Unit test a directive
Directive code
angular.module('myModule', [])
.directive('myDirective', function() {
return {
template: '<div>{{greeting}} {{name}}!</div>',
scope: {
name: '=',
greeting: '@'
}
};](https://image.slidesharecdn.com/angularjsnotesforprofessionals-200412131913/85/Angular-js-notes-for-professionals-190-320.jpg)
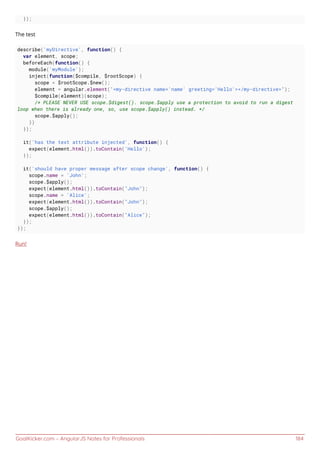
![GoalKicker.com – AngularJS Notes for Professionals 185
Chapter 52: AngularJS gotchas and traps
Section 52.1: Things to do when using html5Mode
When using html5Mode([mode]) it is necessary that:
You specify the base URL for the application with a <base href=""> in the head of your index.html.1.
It is important that the base tag comes before any tags with url requests. Otherwise, this might result in this2.
error - "Resource interpreted as stylesheet but transferred with MIME type text/html". For
example:
<head>
<meta charset="utf-8">
<title>Job Seeker</title>
<base href="/">
<link rel="stylesheet" href="bower_components/bootstrap/dist/css/bootstrap.css" />
<link rel="stylesheet" href="/styles/main.css">
</head>
If you do no want to specify a base tag, configure $locationProvider to not require a base tag by passing a3.
definition object with requireBase:false to $locationProvider.html5Mode() like this:
$locationProvider.html5Mode({
enabled: true,
requireBase: false
});
In order to support direct loading of HTML5 URLs, you need to enabler server-side URL rewriting. From4.
AngularJS / Developer Guide / Using $location
Using this mode requires URL rewriting on server side, basically you have to rewrite all your links to
entry point of your application (e.g. index.html). Requiring a <base> tag is also important for this
case, as it allows Angular to differentiate between the part of the url that is the application base
and the path that should be handled by the application.
An excellent resource for request rewriting examples for various HTTP server implementations can be found
in the ui-router FAQ - How to: Configure your server to work with html5Mode. For example, Apache
RewriteEngine on
# Don't rewrite files or directories
RewriteCond %{REQUEST_FILENAME} -f [OR]
RewriteCond %{REQUEST_FILENAME} -d
RewriteRule ^ - [L]
# Rewrite everything else to index.html to allow html5 state links
RewriteRule ^ index.html [L]
nginx](https://image.slidesharecdn.com/angularjsnotesforprofessionals-200412131913/85/Angular-js-notes-for-professionals-192-320.jpg)
![GoalKicker.com – AngularJS Notes for Professionals 187
<div ng-app="myApp" ng-controller="MainCtrl">
<input type="text" ng-model="foo" ng-model-options="{ getterSetter: true }">
<div ng-if="truthyValue">
<!-- I'm a child scope (inside ng-if), but i'm synced with changes from the outside scope -->
<input type="text" ng-model="foo">
</div>
<div>$scope.foo: {{ foo() }}</div>
</div>
Controller:
angular.module('myApp', []).controller('MainCtrl', ['$scope', function($scope) {
$scope.truthyValue = true;
var _foo = 'hello'; // this will be used to cache/represent the value of the 'foo' model
$scope.foo = function(val) {
// the function return the the internal '_foo' varibale when called with zero arguments,
// and update the internal `_foo` when called with an argument
return arguments.length ? (_foo = val) : _foo;
};
}]);
Best Practice: It's best to keep getters fast because Angular is likely to call them more frequently than other parts
of your code (reference).
Section 52.3: 7 Deadly Sins of AngularJS
Below is the list of some mistakes that developers often make during the use of AngularJS functionalities, some
learned lessons and solutions to them.
1. Manipulating DOM through the controller
It's legal, but must be avoided. Controllers are the places where you define your dependencies, bind your data to
the view and make further business logic. You can technically manipulate the DOM in a controller, but whenever
you need same or similar manipulation in another part of your app, another controller will be needed. So the best
practice of this approach is creating a directive that includes all manipulations and use the directive throughout
your app. Hence, the controller leaves the view intact and does it's job. In a directive, linking function is the best
place to manipulate the DOM. It has full access to the scope and element, so using a directive, you can also take the
advantage of reusability.
link: function($scope, element, attrs) {
//The best place to manipulate DOM
}
You can access DOM elements in linking function through several ways, such as the element parameter,
angular.element() method, or pure Javascript.
2. Data binding in transclusion
AngularJS is famous with its two-way data binding. However you may encounter sometimes that your data is only
one-way bound inside directives. Stop there, AngularJS is not wrong but probably you. Directives are a little
dangerous places since child scopes and isolated scopes are involved. Assume you have the following directive with
one transclusion
<my-dir>](https://image.slidesharecdn.com/angularjsnotesforprofessionals-200412131913/85/Angular-js-notes-for-professionals-194-320.jpg)


![Section 39.1: View preloading 145...................................................................................................................................
Section 39.2: Script optimisation 146..............................................................................................................................
Chapter 40: Grunt tasks 148.......................................................................................................................................
Section 40.1: Run application locally 148.......................................................................................................................
Chapter 41: Lazy loading 151......................................................................................................................................
Section 41.1: Preparing your project for lazy loading 151............................................................................................
Section 41.2: Usage 151...................................................................................................................................................
Section 41.3: Usage with router 151................................................................................................................................
Section 41.4: Using dependency injection 152...............................................................................................................
Section 41.5: Using the directive 152...............................................................................................................................
Chapter 42: HTTP Interceptor 153...........................................................................................................................
Section 42.1: Generic httpInterceptor step by step 153................................................................................................
Section 42.2: Getting Started 154...................................................................................................................................
Section 42.3: Flash message on response using http interceptor 154.......................................................................
Chapter 43: Session storage 156..............................................................................................................................
Section 43.1: Handling session storage through service using angularjs 156............................................................
Chapter 44: Angular MVC 157....................................................................................................................................
Section 44.1: The Static View with controller 157..........................................................................................................
Section 44.2: Controller Function Definition 157...........................................................................................................
Section 44.3: Adding information to the model 157.....................................................................................................
Chapter 45: SignalR with AngularJS 158..............................................................................................................
Section 45.1: SignalR and AngularJS [ ChatProject ] 158............................................................................................
Chapter 46: Migration to Angular 2+ 162.............................................................................................................
Section 46.1: Converting your AngularJS app into a componend-oriented structure 162.......................................
Section 46.2: Introducing Webpack and ES6 modules 164..........................................................................................
Chapter 47: AngularJS with data filter, pagination etc 165.......................................................................
Section 47.1: AngularJS display data with filter, pagination 165.................................................................................
Chapter 48: Profiling and Performance 166.......................................................................................................
Section 48.1: 7 Simple Performance Improvements 166..............................................................................................
Section 48.2: Bind Once 169............................................................................................................................................
Section 48.3: ng-if vs ng-show 170.................................................................................................................................
Section 48.4: Watchers 170.............................................................................................................................................
Section 48.5: Always deregister listeners registered on other scopes other than the current scope 172..............
Section 48.6: Scope functions and filters 173................................................................................................................
Section 48.7: Debounce Your Model 173........................................................................................................................
Chapter 49: Performance Profiling 175.................................................................................................................
Section 49.1: All About Profiling 175................................................................................................................................
Chapter 50: Debugging 177.........................................................................................................................................
Section 50.1: Using ng-inspect chrome extension 177..................................................................................................
Section 50.2: Getting the Scope of element 179...........................................................................................................
Section 50.3: Basic debugging in markup 179..............................................................................................................
Chapter 51: Unit tests 181.............................................................................................................................................
Section 51.1: Unit test a component (1.5+) 181...............................................................................................................
Section 51.2: Unit test a filter 181....................................................................................................................................
Section 51.3: Unit test a service 182................................................................................................................................
Section 51.4: Unit test a controller 183...........................................................................................................................
Section 51.5: Unit test a directive 183.............................................................................................................................
Chapter 52: AngularJS gotchas and traps 185..................................................................................................](https://image.slidesharecdn.com/angularjsnotesforprofessionals-200412131913/75/Angular-js-notes-for-professionals-6-2048.jpg)


![GoalKicker.com – AngularJS Notes for Professionals 7
Display content from the model using double braces {{ }}5.
<span>Hello, {{ name }}</span>
Another way of binding the name property is using ng-bind instead of handlebars"{{ }}"6.
<span ng-bind="name"></span>
The last three steps establish the two way data-binding. Changes made to the input update the model, which is
reflected in the view.
There is a difference between using handlebars and ng-bind. If you use handlebars, you might see the actual
Hello, {{name}} as the page loads before the expression is resolved (before the data is loaded) whereas if you use
ng-bind, it will only show the data when the name is resolved. As an alternative the directive ng-cloak can be used
to prevent handlebars to display before it is compiled.
Section 1.2: Showcasing all common Angular constructs
The following example shows common AngularJS constructs in one file:
<!DOCTYPE html>
<html ng-app="myDemoApp">
<head>
<style>.started { background: gold; }</style>
<script src="https://code.angularjs.org/1.5.8/angular.min.js"></script>
<script>
function MyDataService() {
return {
getWorlds: function getWorlds() {
return ["this world", "another world"];
}
};
}
function DemoController(worldsService) {
var vm = this;
vm.messages = worldsService.getWorlds().map(function(w) {
return "Hello, " + w + "!";
});
}
function startup($rootScope, $window) {
$window.alert("Hello, user! Loading worlds...");
$rootScope.hasStarted = true;
}
angular.module("myDemoApp", [/* module dependencies go here */])
.service("worldsService", [MyDataService])
.controller("demoController", ["worldsService", DemoController])
.config(function() {
console.log('configuring application');
})
.run(["$rootScope", "$window", startup]);
</script>
</head>
<body ng-class="{ 'started': hasStarted }" ng-cloak>
<div ng-controller="demoController as vm">](https://image.slidesharecdn.com/angularjsnotesforprofessionals-200412131913/75/Angular-js-notes-for-professionals-14-2048.jpg)

![GoalKicker.com – AngularJS Notes for Professionals 9
examples so it is important to have some understanding.
The good news is that it is a simple yet powerful concept.
When you create the following:
<div ng-app="myApp">
<h1>Hello {{ name }}</h1>
</div>
Where does name live?
The answer is that Angular creates a $rootScope object. This is simply a regular Javascript object and so name is a
property on the $rootScope object:
angular.module("myApp", [])
.run(function($rootScope) {
$rootScope.name = "World!";
});
And just as with global scope in Javascript, it's usually not such a good idea to add items to the global scope or
$rootScope.
Of course, most of the time, we create a controller and put our required functionality into that controller. But when
we create a controller, Angular does it's magic and creates a $scope object for that controller. This is sometimes
referred to as the local scope.
So, creating the following controller:
<div ng-app="myApp">
<div ng-controller="MyController">
<h1>Hello {{ name }}</h1>
</div>
</div>
would allow the local scope to be accessible via the $scope parameter.
angular.module("myApp", [])
.controller("MyController", function($scope) {
$scope.name = "Mr Local!";
});
A controller without a $scope parameter may simply not need it for some reason. But it is important to realize that,
even with controllerAs syntax, the local scope exists.
As $scope is a JavaScript object, Angular magically sets it up to prototypically inherit from $rootScope. And as you
can imagine, there can be a chain of scopes. For example, you could create a model in a parent controller and
attach to it to the parent controller's scope as $scope.model.
Then via the prototype chain, a child controller could access that same model locally with $scope.model.
None of this is initially evident, as it's just Angular doing its magic in the background. But understanding $scope is
an important step in getting to know how Angular works.](https://image.slidesharecdn.com/angularjsnotesforprofessionals-200412131913/75/Angular-js-notes-for-professionals-16-2048.jpg)
![GoalKicker.com – AngularJS Notes for Professionals 10
Section 1.4: Minification in Angular
What is Minification ?
It is the process of removing all unnecessary characters from source code without changing its functionality.
Normal Syntax
If we use normal angular syntax for writing a controller then after minifiying our files it going to break our
functionality.
Controller (Before minification) :
var app = angular.module('mainApp', []);
app.controller('FirstController', function($scope) {
$scope.name= 'Hello World !';
});
After using minification tool, It will be minified as like below.
var app=angular.module("mainApp",[]);app.controller("FirstController",function(e){e.name= 'Hello
World !'})
Here, minification removed unnecessary spaces and the $scope variable from code. So when we use this minified
code then its not going to print anything on view. Because $scope is a crucial part between controller and view,
which is now replaced by the small 'e' variable. So when you run the application it is going to give Unknown
Provider 'e' dependency error.
There are two ways of annotating your code with service name information which are minification safe:
Inline Annotation Syntax
var app = angular.module('mainApp', []);
app.controller('FirstController', ['$scope', function($scope) {
$scope.message = 'Hello World !';
}]);
$inject Property Annotation Syntax
FirstController.$inject = ['$scope'];
var FirstController = function($scope) {
$scope.message = 'Hello World !';
}
var app = angular.module('mainApp', []);
app.controller('FirstController', FirstController);
After minification, this code will be
var
app=angular.module("mainApp",[]);app.controller("FirstController",["$scope",function(a){a.message="
Hello World !"}]);
Here, angular will consider variable 'a' to be treated as $scope, and It will display output as 'Hello World !'.](https://image.slidesharecdn.com/angularjsnotesforprofessionals-200412131913/75/Angular-js-notes-for-professionals-17-2048.jpg)
![GoalKicker.com – AngularJS Notes for Professionals 13
Chapter 2: Modules
Section 2.1: Modules
Module serves as a container of different parts of your app such as controllers, services, filters, directives, etc.
Modules can be referenced by other modules through Angular's dependency injection mechanism.
Creating a module:
angular
.module('app', []);
Array [] passed in above example is the list of modules app depends on, if there are no dependencies then we pass
Empty Array i.e. [].
Injecting a module as a dependency of another module:
angular.module('app', [
'app.auth',
'app.dashboard'
]);
Referencing a module:
angular
.module('app');
Section 2.2: Modules
Module is a container for various parts of your applications - controller, services, filters, directive, etc.
Why to use Modules
Most applications have a main method that instantiates and wires together the different parts of the application.
Angular apps don't have main method.
But in AngularJS the declarative process is easy to understand and one can package code as reusable modules.
Modules can be loaded in any order because modules delay execution.
declare a module
var app = angular.module('myApp', []);
// Empty array is list of modules myApp is depends on.
// if there are any required dependancies,
// then you can add in module, Like ['ngAnimate']
app.controller('myController', function() {
// write your business logic here
});
Module Loading and Dependencies
Configuration Blocks: get executed during provider and configuration phase.1.
angular.module('myModule', []).](https://image.slidesharecdn.com/angularjsnotesforprofessionals-200412131913/75/Angular-js-notes-for-professionals-20-2048.jpg)
![GoalKicker.com – AngularJS Notes for Professionals 14
config(function(injectables) {
// here you can only inject providers in to config blocks.
});
Run Blocks: get executed after the injector is created and are used to start the application.2.
angular.module('myModule', []).
run(function(injectables) {
// here you can only inject instances in to config blocks.
});](https://image.slidesharecdn.com/angularjsnotesforprofessionals-200412131913/75/Angular-js-notes-for-professionals-21-2048.jpg)
![GoalKicker.com – AngularJS Notes for Professionals 15
Chapter 3: Components
Parameter Details
=
For using two-way data binding. This means that if you update that variable in your
component scope, the change will be reflected on the parent scope.
<
One-way bindings when we just want to read a value from a parent scope and not
update it.
@ String parameters.
& For callbacks in case your component needs to output something to its parent scope.
- -
LifeCycle Hooks Details (requires angular.version >= 1.5.3 )
$onInit()
Called on each controller after all the controllers on an element have been constructed
and had their bindings initialized. This is a good place to put initialization code for your
controller.
$onChanges(changesObj)
Called whenever one-way bindings are updated. The changesObj is a hash whose keys
are the names of the bound properties that have changed, and the values are an object
of the form { currentValue, previousValue, isFirstChange() } .
$onDestroy()
Called on a controller when its containing scope is destroyed. Use this hook for
releasing external resources, watches and event handlers.
$postLink()
Called after this controller’s element and its children have been linked. This hook can
be considered analogous to the ngAfterViewInit and ngAfterContentInit hooks in
Angular 2.
$doCheck()
Called on each turn of the digest cycle. Provides an opportunity to detect and act on
changes. Any actions that you wish to take in response to the changes that you detect
must be invoked from this hook; implementing this has no effect on when $onChanges
is called.
Section 3.1: Basic Components and LifeCycle Hooks
What’s a component?
A component is basically a directive that uses a simpler configuration and that is suitable for a component-
based architecture, which is what Angular 2 is all about. Think of a component as a widget: A piece of HTML
code that you can reuse in several different places in your web application.
Component
angular.module('myApp', [])
.component('helloWorld', {
template: '<span>Hello World!</span>'
});
Markup
<div ng-app="myApp">
<hello-world> </hello-world>
</div>
Live Demo
Using External data in Component:
We could add a parameter to pass a name to our component, which would be used as follows:](https://image.slidesharecdn.com/angularjsnotesforprofessionals-200412131913/75/Angular-js-notes-for-professionals-22-2048.jpg)
![GoalKicker.com – AngularJS Notes for Professionals 16
angular.module("myApp", [])
.component("helloWorld",{
template: '<span>Hello {{$ctrl.name}}!</span>',
bindings: { name: '@' }
});
Markup
<div ng-app="myApp">
<hello-world name="'John'" > </hello-world>
</div>
Live Demo
Using Controllers in Components
Let’s take a look at how to add a controller to it.
angular.module("myApp", [])
.component("helloWorld",{
template: "Hello {{$ctrl.name}}, I'm {{$ctrl.myName}}!",
bindings: { name: '@' },
controller: function(){
this.myName = 'Alain';
}
});
Markup
<div ng-app="myApp">
<hello-world name="John"> </hello-world>
</div>
CodePen Demo
Parameters passed to the component are available in the controller's scope just before its $onInit function gets
called by Angular. Consider this example:
angular.module("myApp", [])
.component("helloWorld",{
template: "Hello {{$ctrl.name}}, I'm {{$ctrl.myName}}!",
bindings: { name: '@' },
controller: function(){
this.$onInit = function() {
this.myName = "Mac" + this.name;
}
}
});
In the template from above, this would render "Hello John, I'm MacJohn!".
Note that $ctrl is the Angular default value for controllerAs if one is not specified.
Live Demo](https://image.slidesharecdn.com/angularjsnotesforprofessionals-200412131913/75/Angular-js-notes-for-professionals-23-2048.jpg)
![GoalKicker.com – AngularJS Notes for Professionals 17
Using “require” as an Object
In some instances you may need to access data from a parent component inside your component.
This can be achieved by specifying that our component requires that parent component, the require will give us
reference to the required component controller, which can then be used in our controller as shown in the example
below:
Notice that required controllers are guaranteed to be ready only after the $onInit hook.
angular.module("myApp", [])
.component("helloWorld",{
template: "Hello {{$ctrl.name}}, I'm {{$ctrl.myName}}!",
bindings: { name: '@' },
require: {
parent: '^parentComponent'
},
controller: function () {
// here this.parent might not be initiated yet
this.$onInit = function() {
// after $onInit, use this.parent to access required controller
this.parent.foo();
}
}
});
Keep in mind, though, that this creates a tight coupling between the child and the parent.
Section 3.2: Components In angular JS
The components in angularJS can be visualised as a custom directive (< html > this in an HTML directive, and
something like this will be a custom directive < ANYTHING >). A component contains a view and a controller.
Controller contains the business logic which is binded with an view , which the user sees. The component differs
from a angular directive because it contains less configuration. An angular component can be defined like this.
angular.module("myApp",[]).component("customer", {})
Components are defined on the angular modules. They contains two arguments, One is the name of the
component and second one is a object which contains key value pair, which defines which view and which
controller it is going to use like this .
angular.module("myApp",[]).component("customer", {
templateUrl : "customer.html", // your view here
controller: customerController, //your controller here
controllerAs: "cust" //alternate name for your controller
})
"myApp" is the name of the app we are building and customer is the name of our component. Now for calling it in
main html file we will just put it like this
<customer></customer>
Now this directive will be replaced by the view you have specified and the business logic you have written in your](https://image.slidesharecdn.com/angularjsnotesforprofessionals-200412131913/75/Angular-js-notes-for-professionals-24-2048.jpg)

![GoalKicker.com – AngularJS Notes for Professionals 19
Chapter 4: Built-in directives
Section 4.1: Angular expressions - Text vs. Number
This example demonstrates how Angular expressions are evaluated when using type="text" and type="number"
for the input element. Consider the following controller and view:
Controller
var app = angular.module('app', []);
app.controller('ctrl', function($scope) {
$scope.textInput = {
value: '5'
};
$scope.numberInput = {
value: 5
};
});
View
<div ng-app="app" ng-controller="ctrl">
<input type="text" ng-model="textInput.value">
{{ textInput.value + 5 }}
<input type="number" ng-model="numberInput.value">
{{ numberInput.value + 5 }}
</div>
When using + in an expression bound to text input, the operator will concatenate the strings (first example),
displaying 55 on the screen*.
When using + in an expression bound to number input, the operator return the sum of the numbers (second
example), displaying 10 on the screen*.
* - That is until the user changes the value in the input field, afterward the display will change accordingly.
Working Example
Section 4.2: ngIf
ng-if is a directive similar to ng-show but inserts or removes the element from the DOM instead of simply hiding it.
Angular 1.1.5 introduced ng-If directive. You can Use ng-if directive above 1.1.5 versions. This is useful because
Angular will not process digests for elements inside a removed ng-if reducing the workload of Angular especially
for complex data bindings.
Unlike ng-show, the ng-if directive creates a child scope which uses prototypal inheritance. This means that setting
a primitive value on the child scope will not apply to the parent. To set a primitive on the parent scope the $parent
property on the child scope will have to be used.
JavaScript
angular.module('MyApp', []);
angular.module('MyApp').controller('myController', ['$scope', '$window', function
myController($scope, $window) {
$scope.currentUser= $window.localStorage.getItem('userName');](https://image.slidesharecdn.com/angularjsnotesforprofessionals-200412131913/75/Angular-js-notes-for-professionals-26-2048.jpg)
![GoalKicker.com – AngularJS Notes for Professionals 20
}]);
View
<div ng-controller="myController">
<div ng-if="currentUser">
Hello, {{currentUser}}
</div>
<div ng-if="!currentUser">
<a href="/login">Log In</a>
<a href="/register">Register</a>
</div>
</div>
DOM If currentUser Is Not Undefined
<div ng-controller="myController">
<div ng-if="currentUser">
Hello, {{currentUser}}
</div>
<!-- ng-if: !currentUser -->
</div>
DOM If currentUser Is Undefined
<div ng-controller="myController">
<!-- ng-if: currentUser -->
<div ng-if="!currentUser">
<a href="/login">Log In</a>
<a href="/register">Register</a>
</div>
</div>
Working Example
Function Promise
The ngIf directive accepts functions as well, which logically require to return true or false.
<div ng-if="myFunction()">
<span>Span text</span>
</div>
The span text will only appear if the function returns true.
$scope.myFunction = function() {
var result = false;
// Code to determine the boolean value of result
return result;
};
As any Angular expression the function accepts any kind of variables.
Section 4.3: ngCloak
The ngCloak directive is used to prevent the Angular html template from being briefly displayed by the
browser in its raw (uncompiled) form while your application is loading. - View source
HTML](https://image.slidesharecdn.com/angularjsnotesforprofessionals-200412131913/75/Angular-js-notes-for-professionals-27-2048.jpg)
![GoalKicker.com – AngularJS Notes for Professionals 21
<div ng-cloak>
<h1>Hello {{ name }}</h1>
</div>
ngCloak can be applied to the body element, but the preferred usage is to apply multiple ngCloak directives to
small portions of the page to permit progressive rendering of the browser view.
The ngCloak directive has no parameters.
See also: Preventing flickering
Section 4.4: ngRepeat
ng-repeat is a built in directive in Angular which lets you iterate an array or an object and gives you the ability to
repeat an element once for each item in the collection.
ng-repeat an array
<ul>
<li ng-repeat="item in itemCollection">
{{item.Name}}
</li>
</ul>
Where:
item = individual item in the collection
itemCollection = The array you are iterating
ng-repeat an object
<ul>
<li ng-repeat="(key, value) in myObject">
{{key}} : {{value}}
</li>
</ul>
Where:
key = the property name
value = the value of the property
myObject = the object you are iterating
filter your ng-repeat by user input
<input type="text" ng-model="searchText">
<ul>
<li ng-repeat="string in stringArray | filter:searchText">
{{string}}
</li>
</ul>
Where:
searchText = the text that the user wants to filter the list by
stringArray = an array of strings, e.g. ['string', 'array']
You can also display or reference the filtered items elsewhere by assigning the filter output an alias with as](https://image.slidesharecdn.com/angularjsnotesforprofessionals-200412131913/75/Angular-js-notes-for-professionals-28-2048.jpg)
![GoalKicker.com – AngularJS Notes for Professionals 22
aliasName, like so:
<input type="text" ng-model="searchText">
<ul>
<li ng-repeat="string in stringArray | filter:searchText as filteredStrings">
{{string}}
</li>
</ul>
<p>There are {{filteredStrings.length}} matching results</p>
ng-repeat-start and ng-repeat-end
To repeat multiple DOM elements by defining a start and an end point you can use the ng-repeat-start and ng-
repeat-end directives.
<ul>
<li ng-repeat-start="item in [{a: 1, b: 2}, {a: 3, b:4}]">
{{item.a}}
</li>
<li ng-repeat-end>
{{item.b}}
</li>
</ul>
Output:
1
2
3
4
It is important to always close ng-repeat-start with ng-repeat-end.
Variables
ng-repeat also exposes these variables inside the expression
Variable Type Details
$index Number
Equals to the index of the current iteration ($index===0 will evaluate to true at the first iterated
element; see $first)
$first Boolean Evaluates to true at the first iterated element
$last Boolean Evaluates to true at the last iterated element
$middle Boolean Evaluates to true if the element is between the $first and $last
$even Boolean Evaluates to true at an even numbered iteration (equivalent to $index%2===0)
$odd Boolean Evaluates to true at an odd numbered iteration (equivalent to $index%2===1)
Performance considerations
Rendering ngRepeat can become slow, especially when using large collections.
If the objects in the collection have an identifier property, you should always track by the identifier instead of the
whole object, which is the default functionality. If no identifier is present, you can always use the built-in $index.
<div ng-repeat="item in itemCollection track by item.id">
<div ng-repeat="item in itemCollection track by $index">](https://image.slidesharecdn.com/angularjsnotesforprofessionals-200412131913/75/Angular-js-notes-for-professionals-29-2048.jpg)
![GoalKicker.com – AngularJS Notes for Professionals 23
Scope of ngRepeat
ngRepeat will always create an isolated child scope so care must be taken if the parent scope needs to be accessed
inside the repeat.
Here is a simple example showing how you can set a value in your parent scope from a click event inside of
ngRepeat.
scope val: {{val}}<br/>
ctrlAs val: {{ctrl.val}}
<ul>
<li ng-repeat="item in itemCollection">
<a href="#" ng-click="$parent.val=item.value; ctrl.val=item.value;">
{{item.label}} {{item.value}}
</a>
</li>
</ul>
$scope.val = 0;
this.val = 0;
$scope.itemCollection = [{
id: 0,
value: 4.99,
label: 'Football'
},
{
id: 1,
value: 6.99,
label: 'Baseball'
},
{
id: 2,
value: 9.99,
label: 'Basketball'
}];
If there was only val = item.value at ng-click it won't update the val in the parent scope because of the isolated
scope. That's why the parent scope is accessed with $parent reference or with the controllerAs syntax (e.g. ng-
controller="mainController as ctrl").
Nested ng-repeat
You can also use nested ng-repeat.
<div ng-repeat="values in test">
<div ng-repeat="i in values">
[{{$parent.$index}},{{$index}}] {{i}}
</div>
</div>
var app = angular.module("myApp", []);
app.controller("ctrl", function($scope) {
$scope.test = [
['a', 'b', 'c'],
['d', 'e', 'f']
];
});](https://image.slidesharecdn.com/angularjsnotesforprofessionals-200412131913/75/Angular-js-notes-for-professionals-30-2048.jpg)
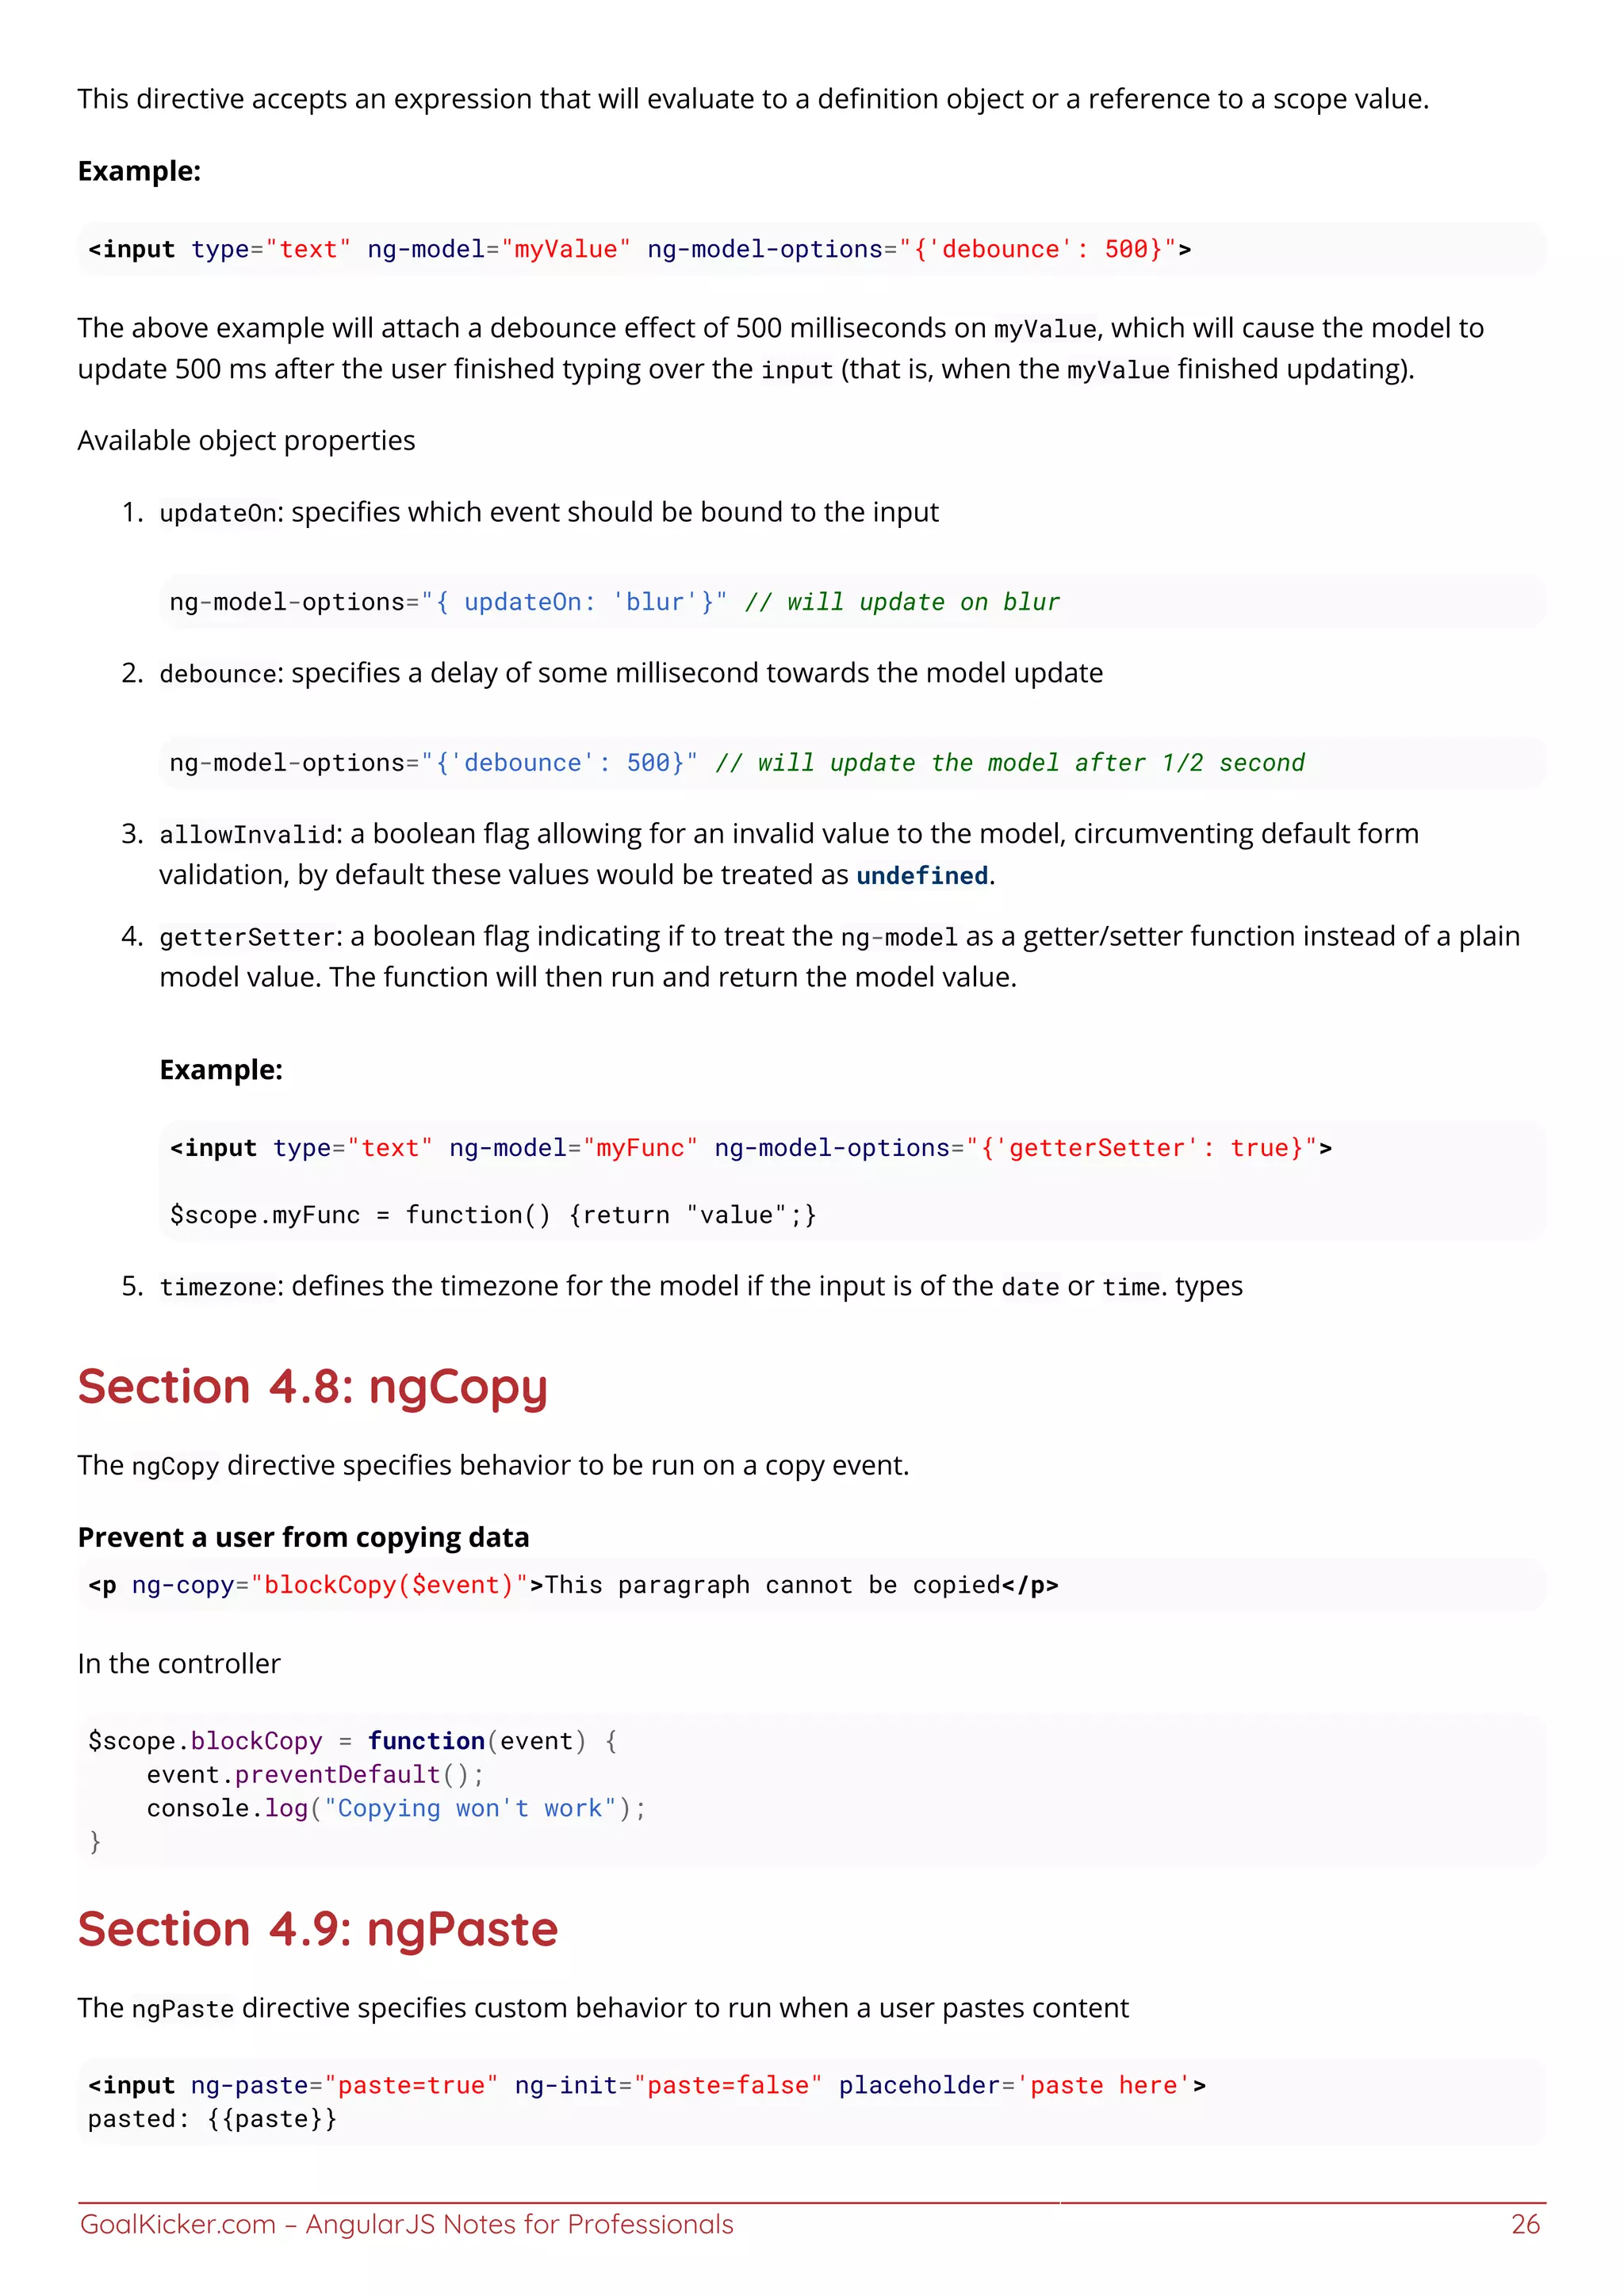

![GoalKicker.com – AngularJS Notes for Professionals 28
The ng-list directive uses a default delimiter of ", " (comma space).
You can set the delimiter manually by assigning ng-list a delimeter like this ng-list="; ".
In this case the delimiter is set to a semi colon followed by a space.
By default ng-list has an attribute ng-trim which is set to true. ng-trim when false, will respect white space in
your delimiter. By default, ng-list does not take white space into account unless you set ng-trim="false".
Example:
angular.module('test', [])
.controller('ngListExample', ['$scope', function($scope) {
$scope.list = ['angular', 'is', 'cool!'];
}]);
A customer delimiter is set to be ;. And the model of the input box is set to the array that was created on the scope.
<body ng-app="test" ng-controller="ngListExample">
<input ng-model="list" ng-list="; " ng-trim="false">
</body>
The input box will display with the content: angular; is; cool!
Section 4.12: ngOptions
ngOptions is a directive that simplifies the creation of a html dropdown box for the selection of an item from an
array that will be stored in a model. The ngOptions attribute is used to dynamically generate a list of <option>
elements for the <select> element using the array or object obtained by evaluating the ngOptions comprehension
expression.
With ng-options the markup can be reduced to just a select tag and the directive will create the same select:
<select ng-model="selectedFruitNgOptions"
ng-options="curFruit as curFruit.label for curFruit in fruit">
</select>
There is anther way of creating SELECT options using ng-repeat, but it is not recommended to use ng-repeat as it is
mostly used for general purpose like, the forEach just to loop. Whereas ng-options is specifically for creating
SELECT tag options.
Above example using ng-repeat would be
<select ng-model="selectedFruit">
<option ng-repeat="curFruit in fruit" value="{{curFruit}}">
{{curFruit.label}}
</option>
</select>
FULL EXAMPLE
Lets see the above example in detail also with some variations in it.
Data model for the example:
$scope.fruit = [](https://image.slidesharecdn.com/angularjsnotesforprofessionals-200412131913/75/Angular-js-notes-for-professionals-35-2048.jpg)
![GoalKicker.com – AngularJS Notes for Professionals 29
{ label: "Apples", value: 4, id: 2 },
{ label: "Oranges", value: 2, id: 1 },
{ label: "Limes", value: 4, id: 4 },
{ label: "Lemons", value: 5, id: 3 }
];
<!-- label for value in array -->
<select ng-options="f.label for f in fruit" ng-model="selectedFruit"></select>
Option tag generated on selection:
<option value="{ label: "Apples", value: 4, id: 2 }"> Apples </option>
Effects:
f.label will be the label of the <option> and the value will contain the entire object.
FULL EXAMPLE
<!-- select as label for value in array -->
<select ng-options="f.value as f.label for f in fruit" ng-model="selectedFruit"></select>
Option tag generated on selection:
<option value="4"> Apples </option>
Effects:
f.value (4) will be the value in this case while the label is still the same.
FULL EXAMPLE
<!-- label group by group for value in array -->
<select ng-options="f.label group by f.value for f in fruit" ng-model="selectedFruit"></select>
Option tag generated on selection:
<option value="{ label: "Apples", value: 4, id: 2 }"> Apples </option>
Effects:
Options will be grouped based on there value. Options with same value will fall under one category
FULL EXAMPLE
<!-- label disable when disable for value in array -->
<select ng-options="f.label disable when f.value == 4 for f in fruit" ng-
model="selectedFruit"></select>
Option tag generated on selection:
<option disabled="" value="{ label: "Apples", value: 4, id: 2 }"> Apples </option>](https://image.slidesharecdn.com/angularjsnotesforprofessionals-200412131913/75/Angular-js-notes-for-professionals-36-2048.jpg)
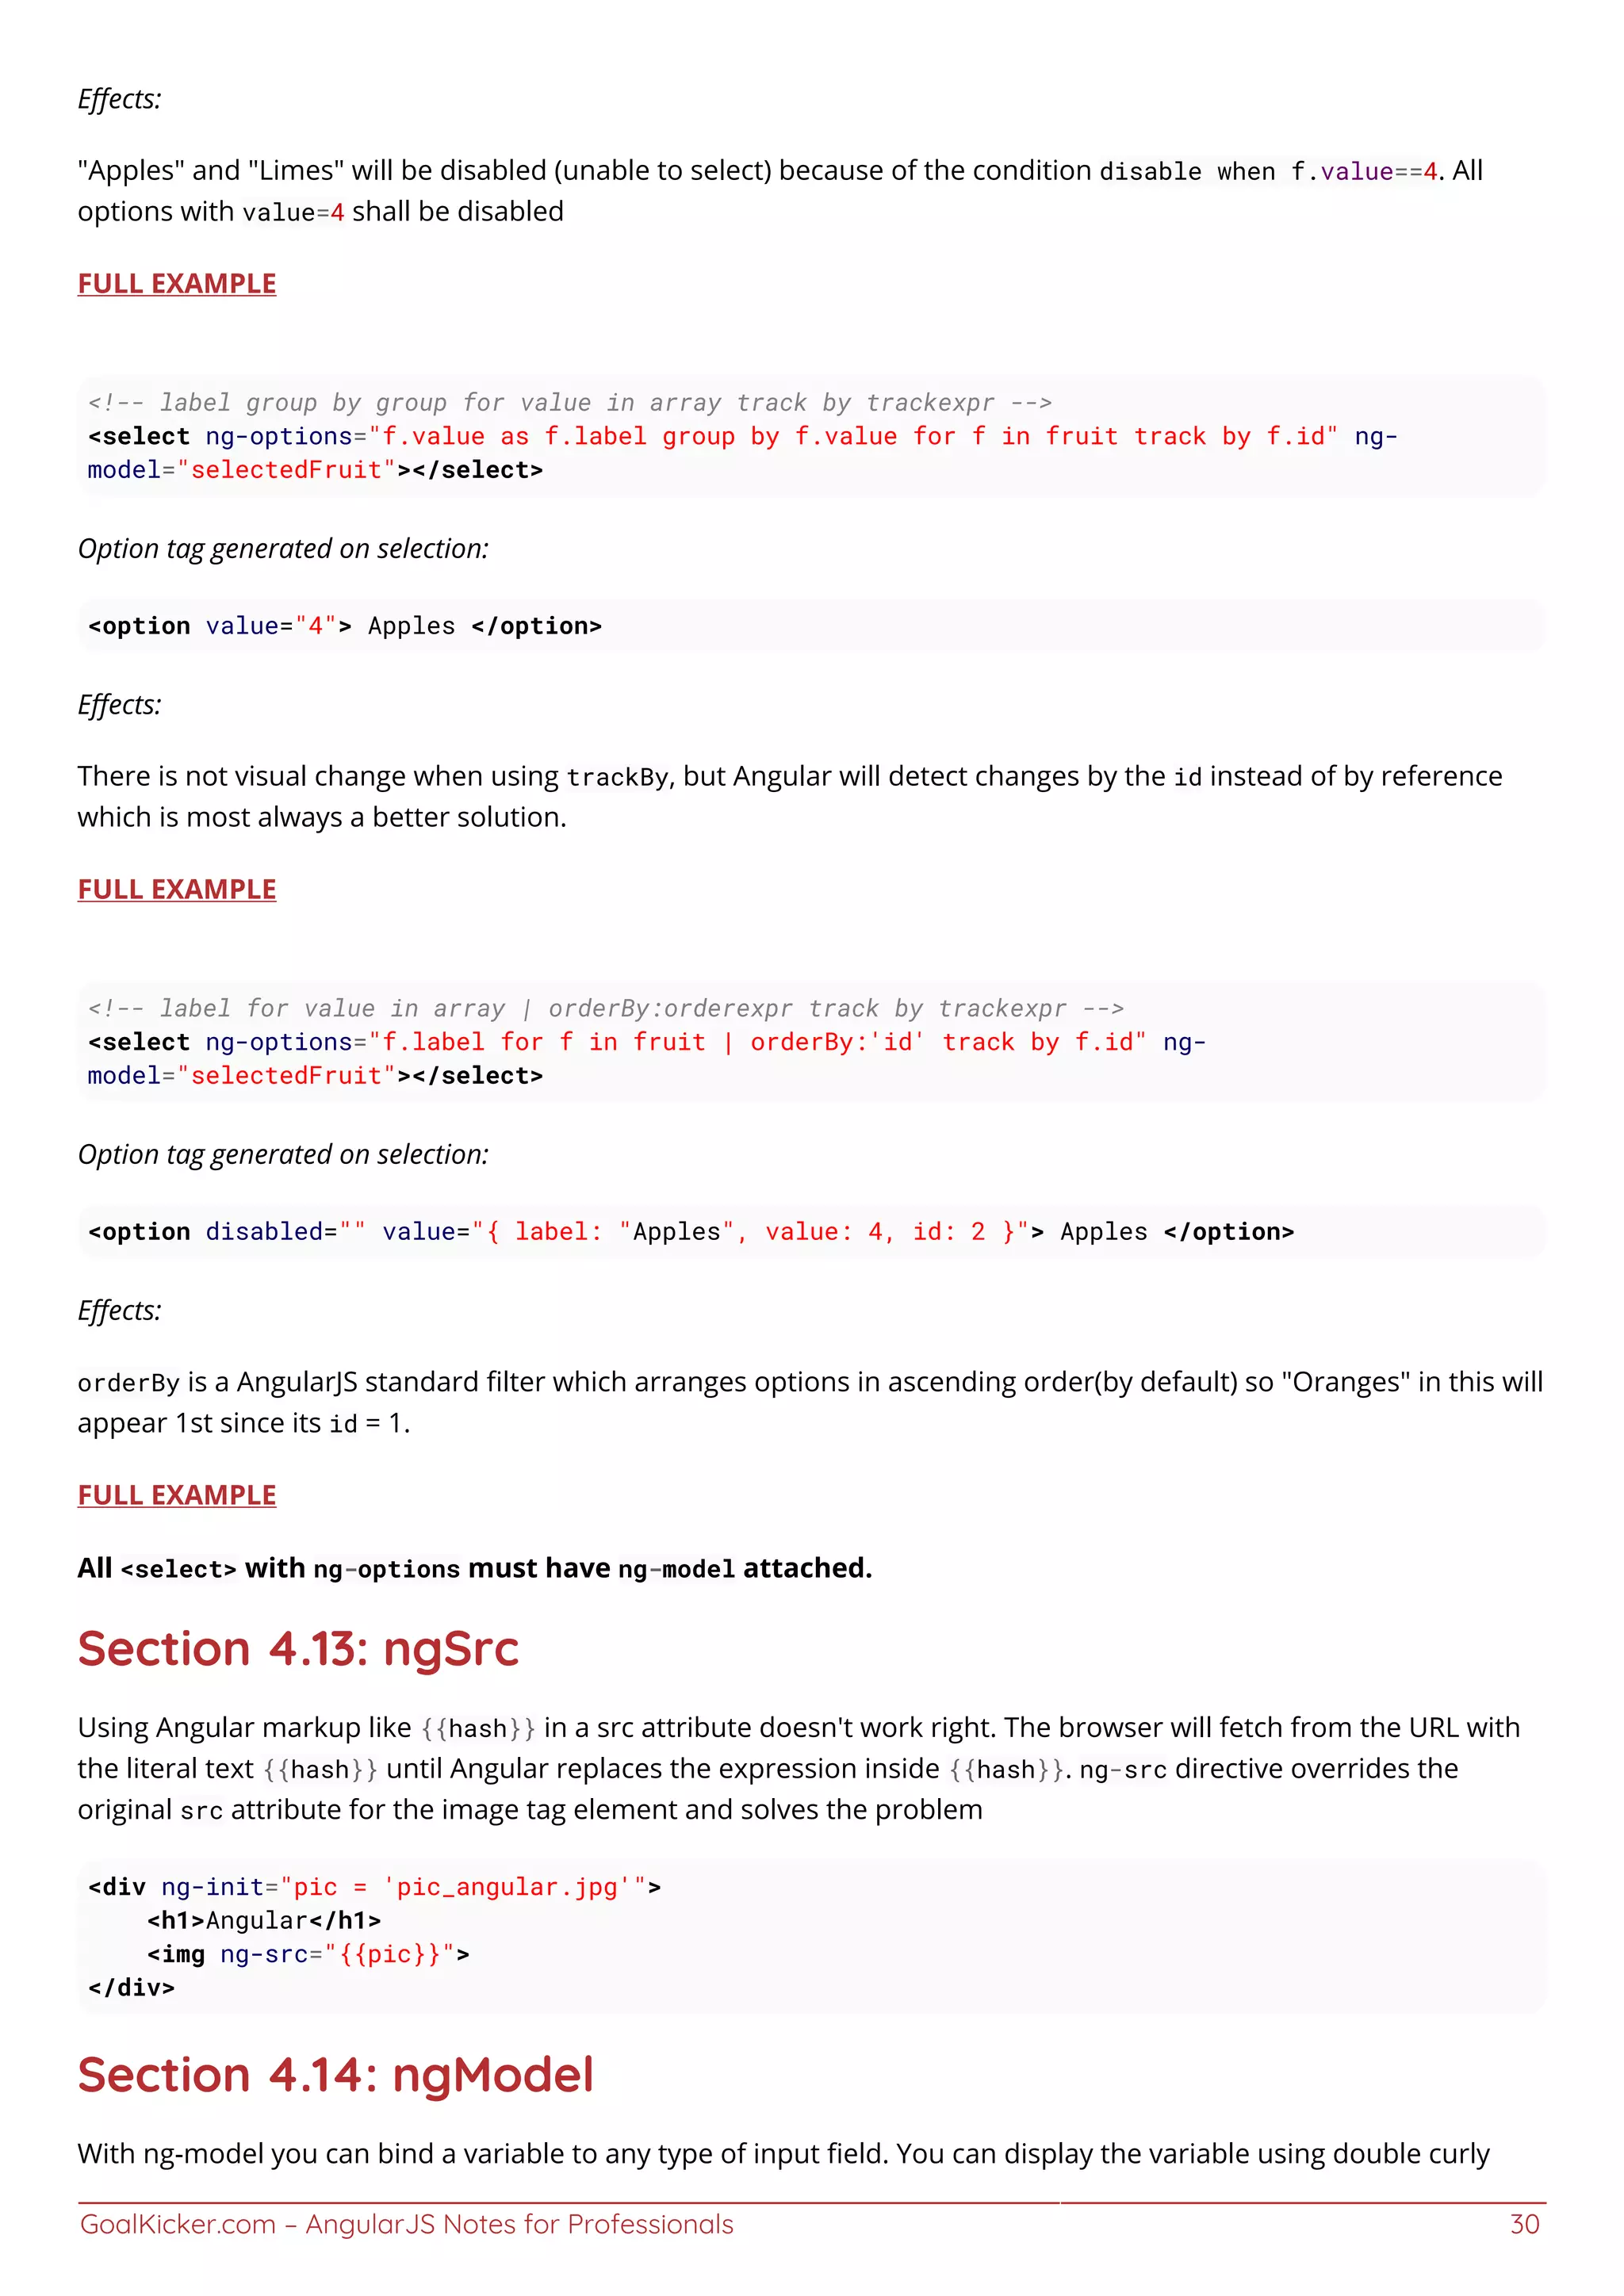
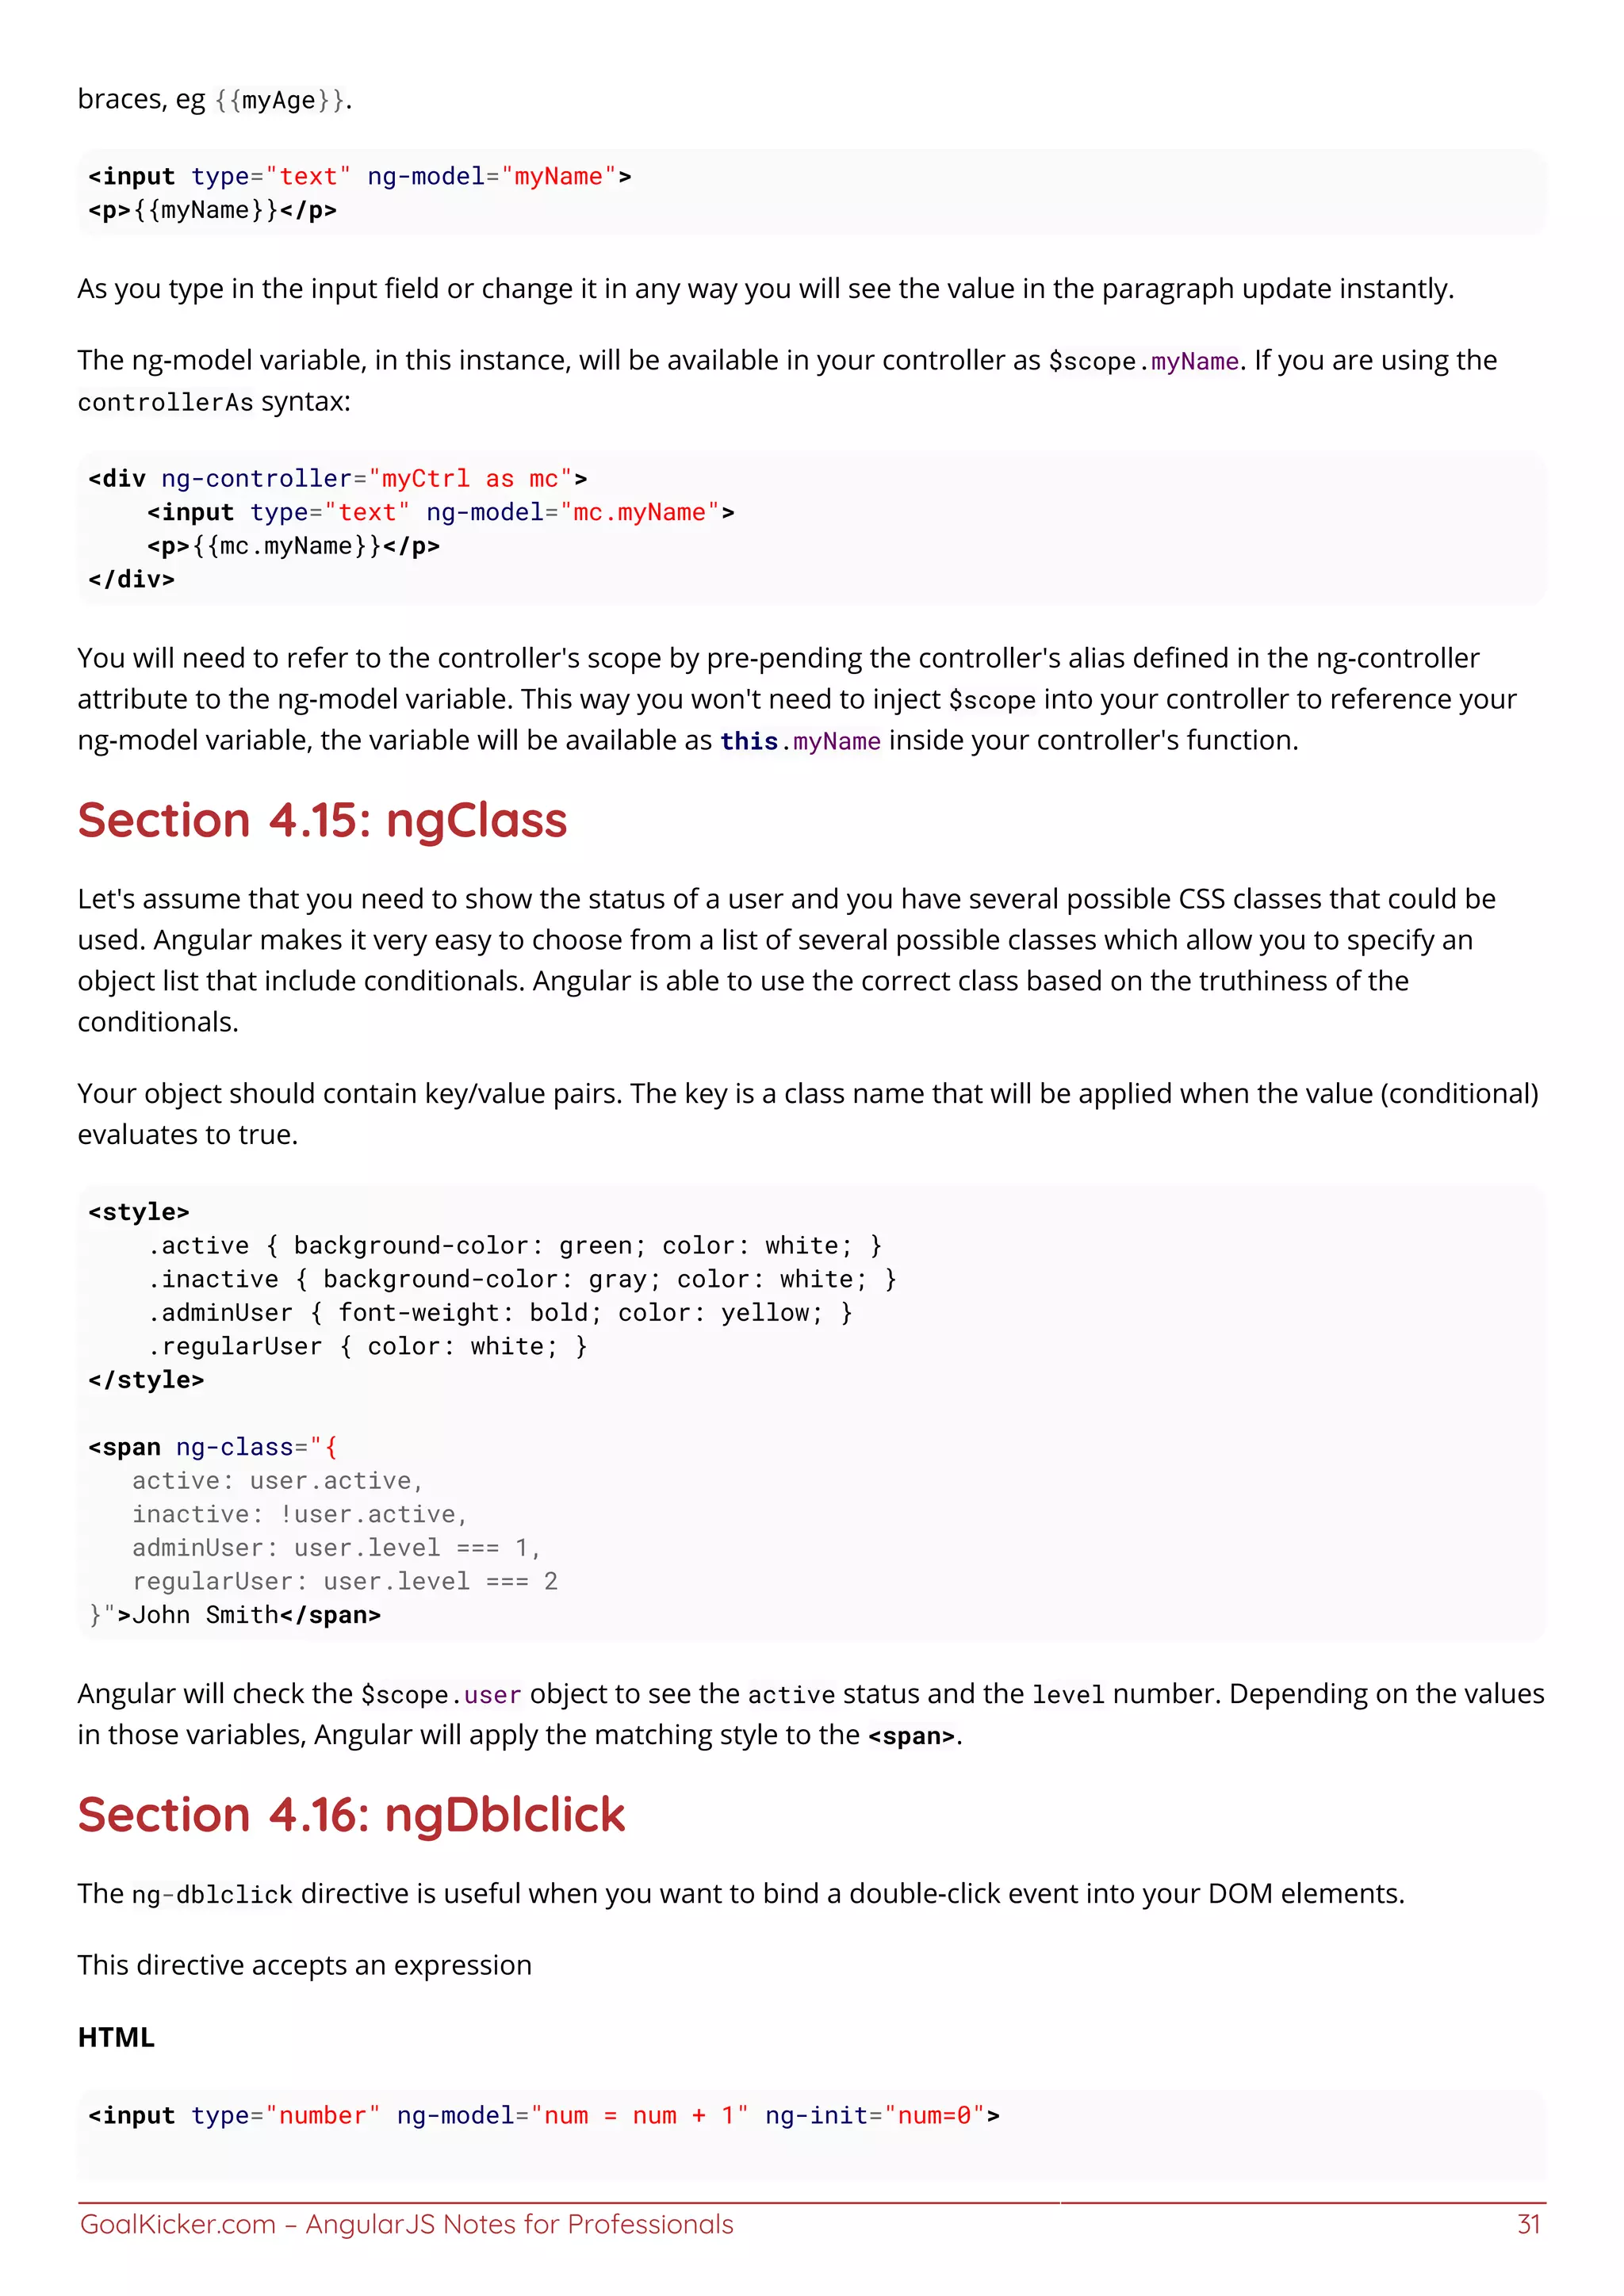
![GoalKicker.com – AngularJS Notes for Professionals 32
<button ng-dblclick="num++">Double click me</button>
In the above example, the value held at the input will be incremented when the button is double clicked.
Section 4.17: ngHref
ngHref is used instead of href attribute, if we have a angular expressions inside href value. The ngHref directive
overrides the original href attribute of an html tag using href attribute such as tag, tag etc.
The ngHref directive makes sure the link is not broken even if the user clicks the link before AngularJS has evaluated
the code.
Example 1
<div ng-init="linkValue = 'http://stackoverflow.com'">
<p>Go to <a ng-href="{{linkValue}}">{{linkValue}}</a>!</p>
</div>
Example 2 This example dynamically gets the href value from input box and load it as href value.
<input ng-model="value" />
<a id="link" ng-href="{{value}}">link</a>
Example 3
<script>
angular.module('angularDoc', [])
.controller('myController', function($scope) {
// Set some scope value.
// Here we set bootstrap version.
$scope.bootstrap_version = '3.3.7';
// Set the default layout value
$scope.layout = 'normal';
});
</script>
<!-- Insert it into Angular Code -->
<link rel="stylesheet" ng-href="//maxcdn.bootstrapcdn.com/bootstrap/{{ bootstrap_version
}}/css/bootstrap.min.css">
<link rel="stylesheet" ng-href="layout-{{ layout }}.css">
Section 4.18: ngPattern
The ng-pattern directive accepts an expression that evaluates to a regular expression pattern and uses that
pattern to validate a textual input.
Example:
Lets say we want an <input> element to become valid when it's value (ng-model) is a valid IP address.
Template:
<input type="text" ng-model="ipAddr" ng-pattern="ipRegex" name="ip" required>
Controller:](https://image.slidesharecdn.com/angularjsnotesforprofessionals-200412131913/75/Angular-js-notes-for-professionals-39-2048.jpg)
![GoalKicker.com – AngularJS Notes for Professionals 33
$scope.ipRegex =
/b(?:(?:25[0-5]|2[0-4][0-9]|[01]?[0-9][0-9]?).){3}(?:25[0-5]|2[0-4][0-9]|[01]?[0-9][0-9]?)b/;
Section 4.19: ngShow and ngHide
The ng-show directive shows or hides the HTML element based on if the expression passed to it is true or false. If
the value of the expression is falsy then it will hide. If it is truthy then it will show.
The ng-hide directive is similar. However, if the value is falsy it will show the HTML element. When the expression is
truthy it will hide it.
Working JSBin Example
Controller:
var app = angular.module('app', []);
angular.module('app')
.controller('ExampleController', ExampleController);
function ExampleController() {
var vm = this;
//Binding the username to HTML element
vm.username = '';
//A taken username
vm.taken_username = 'StackOverflow';
}
View
<section ng-controller="ExampleController as main">
<p>Enter Password</p>
<input ng-model="main.username" type="text">
<hr>
<!-- Will always show as long as StackOverflow is not typed in -->
<!-- The expression is always true when it is not StackOverflow -->
<div style="color:green;" ng-show="main.username != main.taken_username">
Your username is free to use!
</div>
<!-- Will only show when StackOverflow is typed in -->
<!-- The expression value becomes falsy -->
<div style="color:red;" ng-hide="main.username != main.taken_username">
Your username is taken!
</div>
<p>Enter 'StackOverflow' in username field to show ngHide directive.</p>
</section>](https://image.slidesharecdn.com/angularjsnotesforprofessionals-200412131913/75/Angular-js-notes-for-professionals-40-2048.jpg)
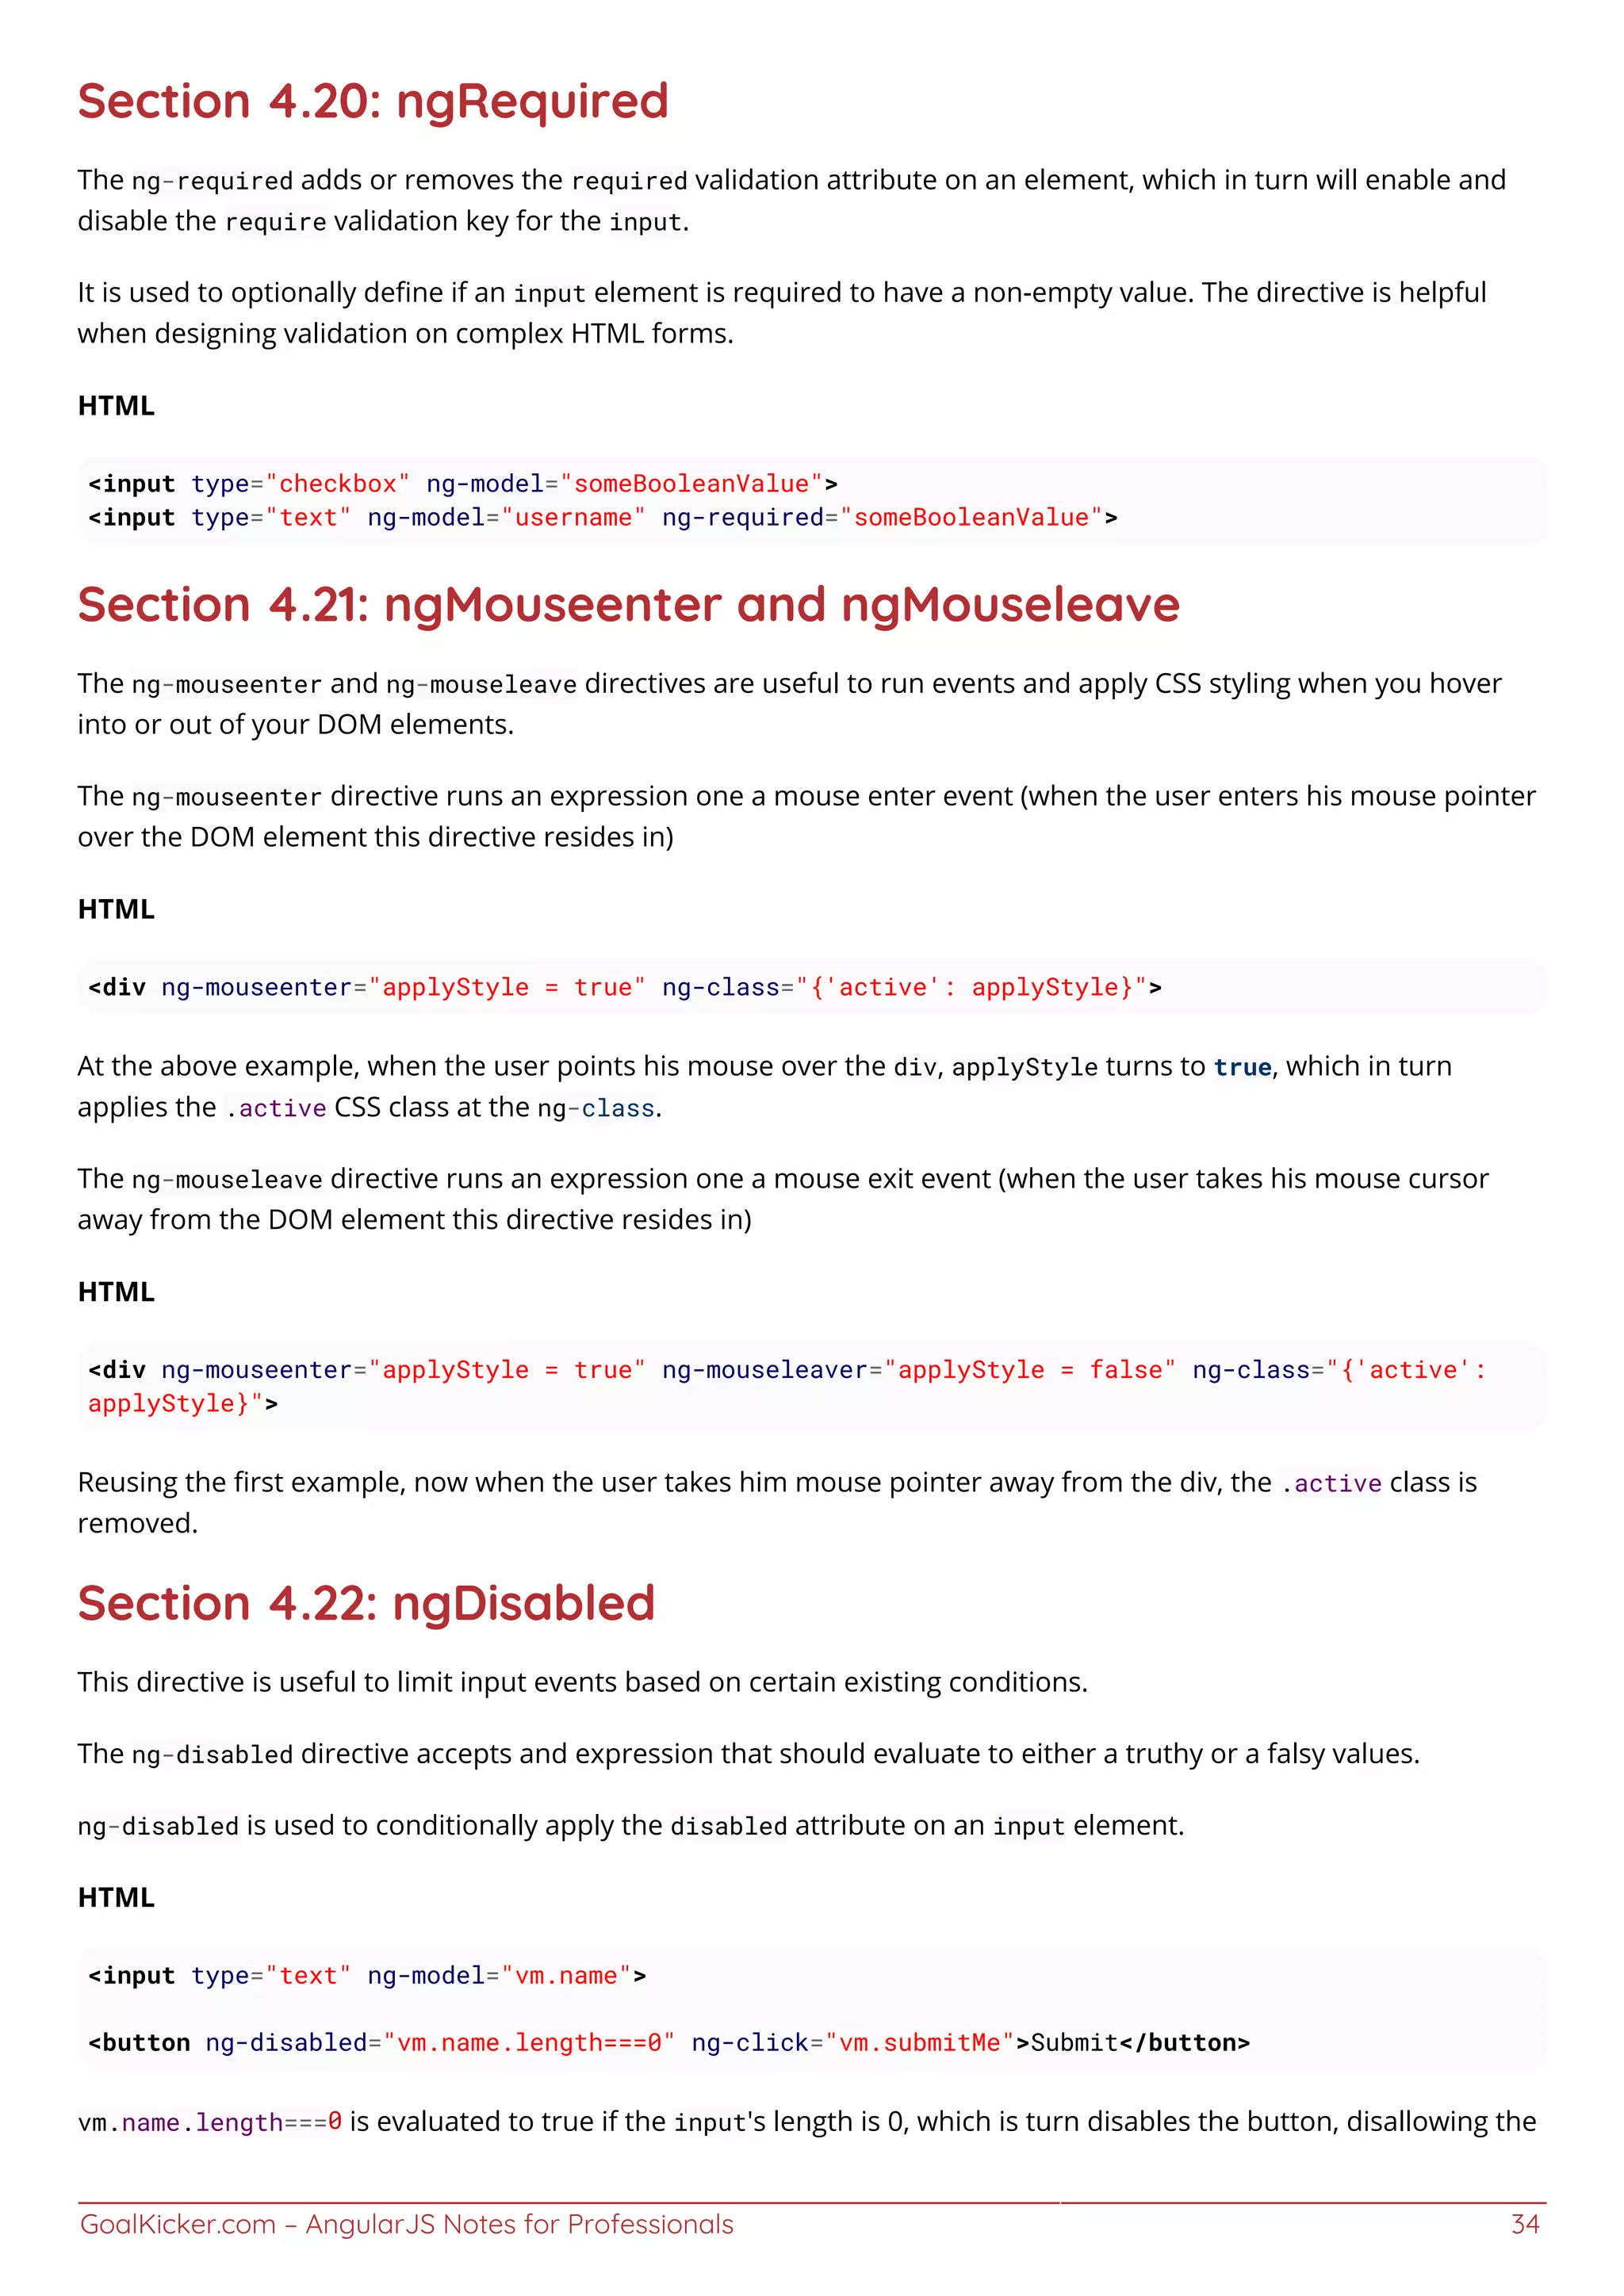
![GoalKicker.com – AngularJS Notes for Professionals 35
user to fire the click event of ng-click
Section 4.23: ngValue
Mostly used under ng-repeat ngValue is useful when dynamically generating lists of radio buttons using ngRepeat
<script>
angular.module('valueExample', [])
.controller('ExampleController', ['$scope', function($scope) {
$scope.names = ['pizza', 'unicorns', 'robots'];
$scope.my = { favorite: 'unicorns' };
}]);
</script>
<form ng-controller="ExampleController">
<h2>Which is your favorite?</h2>
<label ng-repeat="name in names" for="{{name}}">
{{name}}
<input type="radio"
ng-model="my.favorite"
ng-value="name"
id="{{name}}"
name="favorite">
</label>
<div>You chose {{my.favorite}}</div>
</form>
Working plnkr](https://image.slidesharecdn.com/angularjsnotesforprofessionals-200412131913/75/Angular-js-notes-for-professionals-42-2048.jpg)
![GoalKicker.com – AngularJS Notes for Professionals 36
Chapter 5: Use of in-built directives
Section 5.1: Hide/Show HTML Elements
This example hide show html elements.
<!DOCTYPE html>
<html ng-app="myDemoApp">
<head>
<script src="https://code.angularjs.org/1.5.8/angular.min.js"></script>
<script>
function HideShowController() {
var vm = this;
vm.show=false;
vm.toggle= function() {
vm.show=!vm.show;
}
}
angular.module("myDemoApp", [/* module dependencies go here */])
.controller("hideShowController", [HideShowController]);
</script>
</head>
<body ng-cloak>
<div ng-controller="hideShowController as vm">
<a style="cursor: pointer;" ng-show="vm.show" ng-click="vm.toggle()">Show Me!</a>
<a style="cursor: pointer;" ng-hide="vm.show" ng-click="vm.toggle()">Hide Me!</a>
</div>
</body>
</html>
Live Demo
Step by step explanation:
ng-app="myDemoApp", the ngApp directive tells angular that a DOM element is controlled by a specific1.
angular.module named "myDemoApp".
<script src="[//angular include]"> include angular js.2.
HideShowController function is defined containing another function named toggle which help to hide show3.
the element.
angular.module(...) creates a new module.4.
.controller(...) Angular Controller and returns the module for chaining;5.
ng-controller directive is key aspect of how angular supports the principles behind the Model-View-6.
Controller design pattern.
ng-show directive shows the given HTML element if expression provided is true.7.
ng-hide directive hides the given HTML element if expression provided is true.8.
ng-click directive fires a toggle function inside controller9.](https://image.slidesharecdn.com/angularjsnotesforprofessionals-200412131913/75/Angular-js-notes-for-professionals-43-2048.jpg)
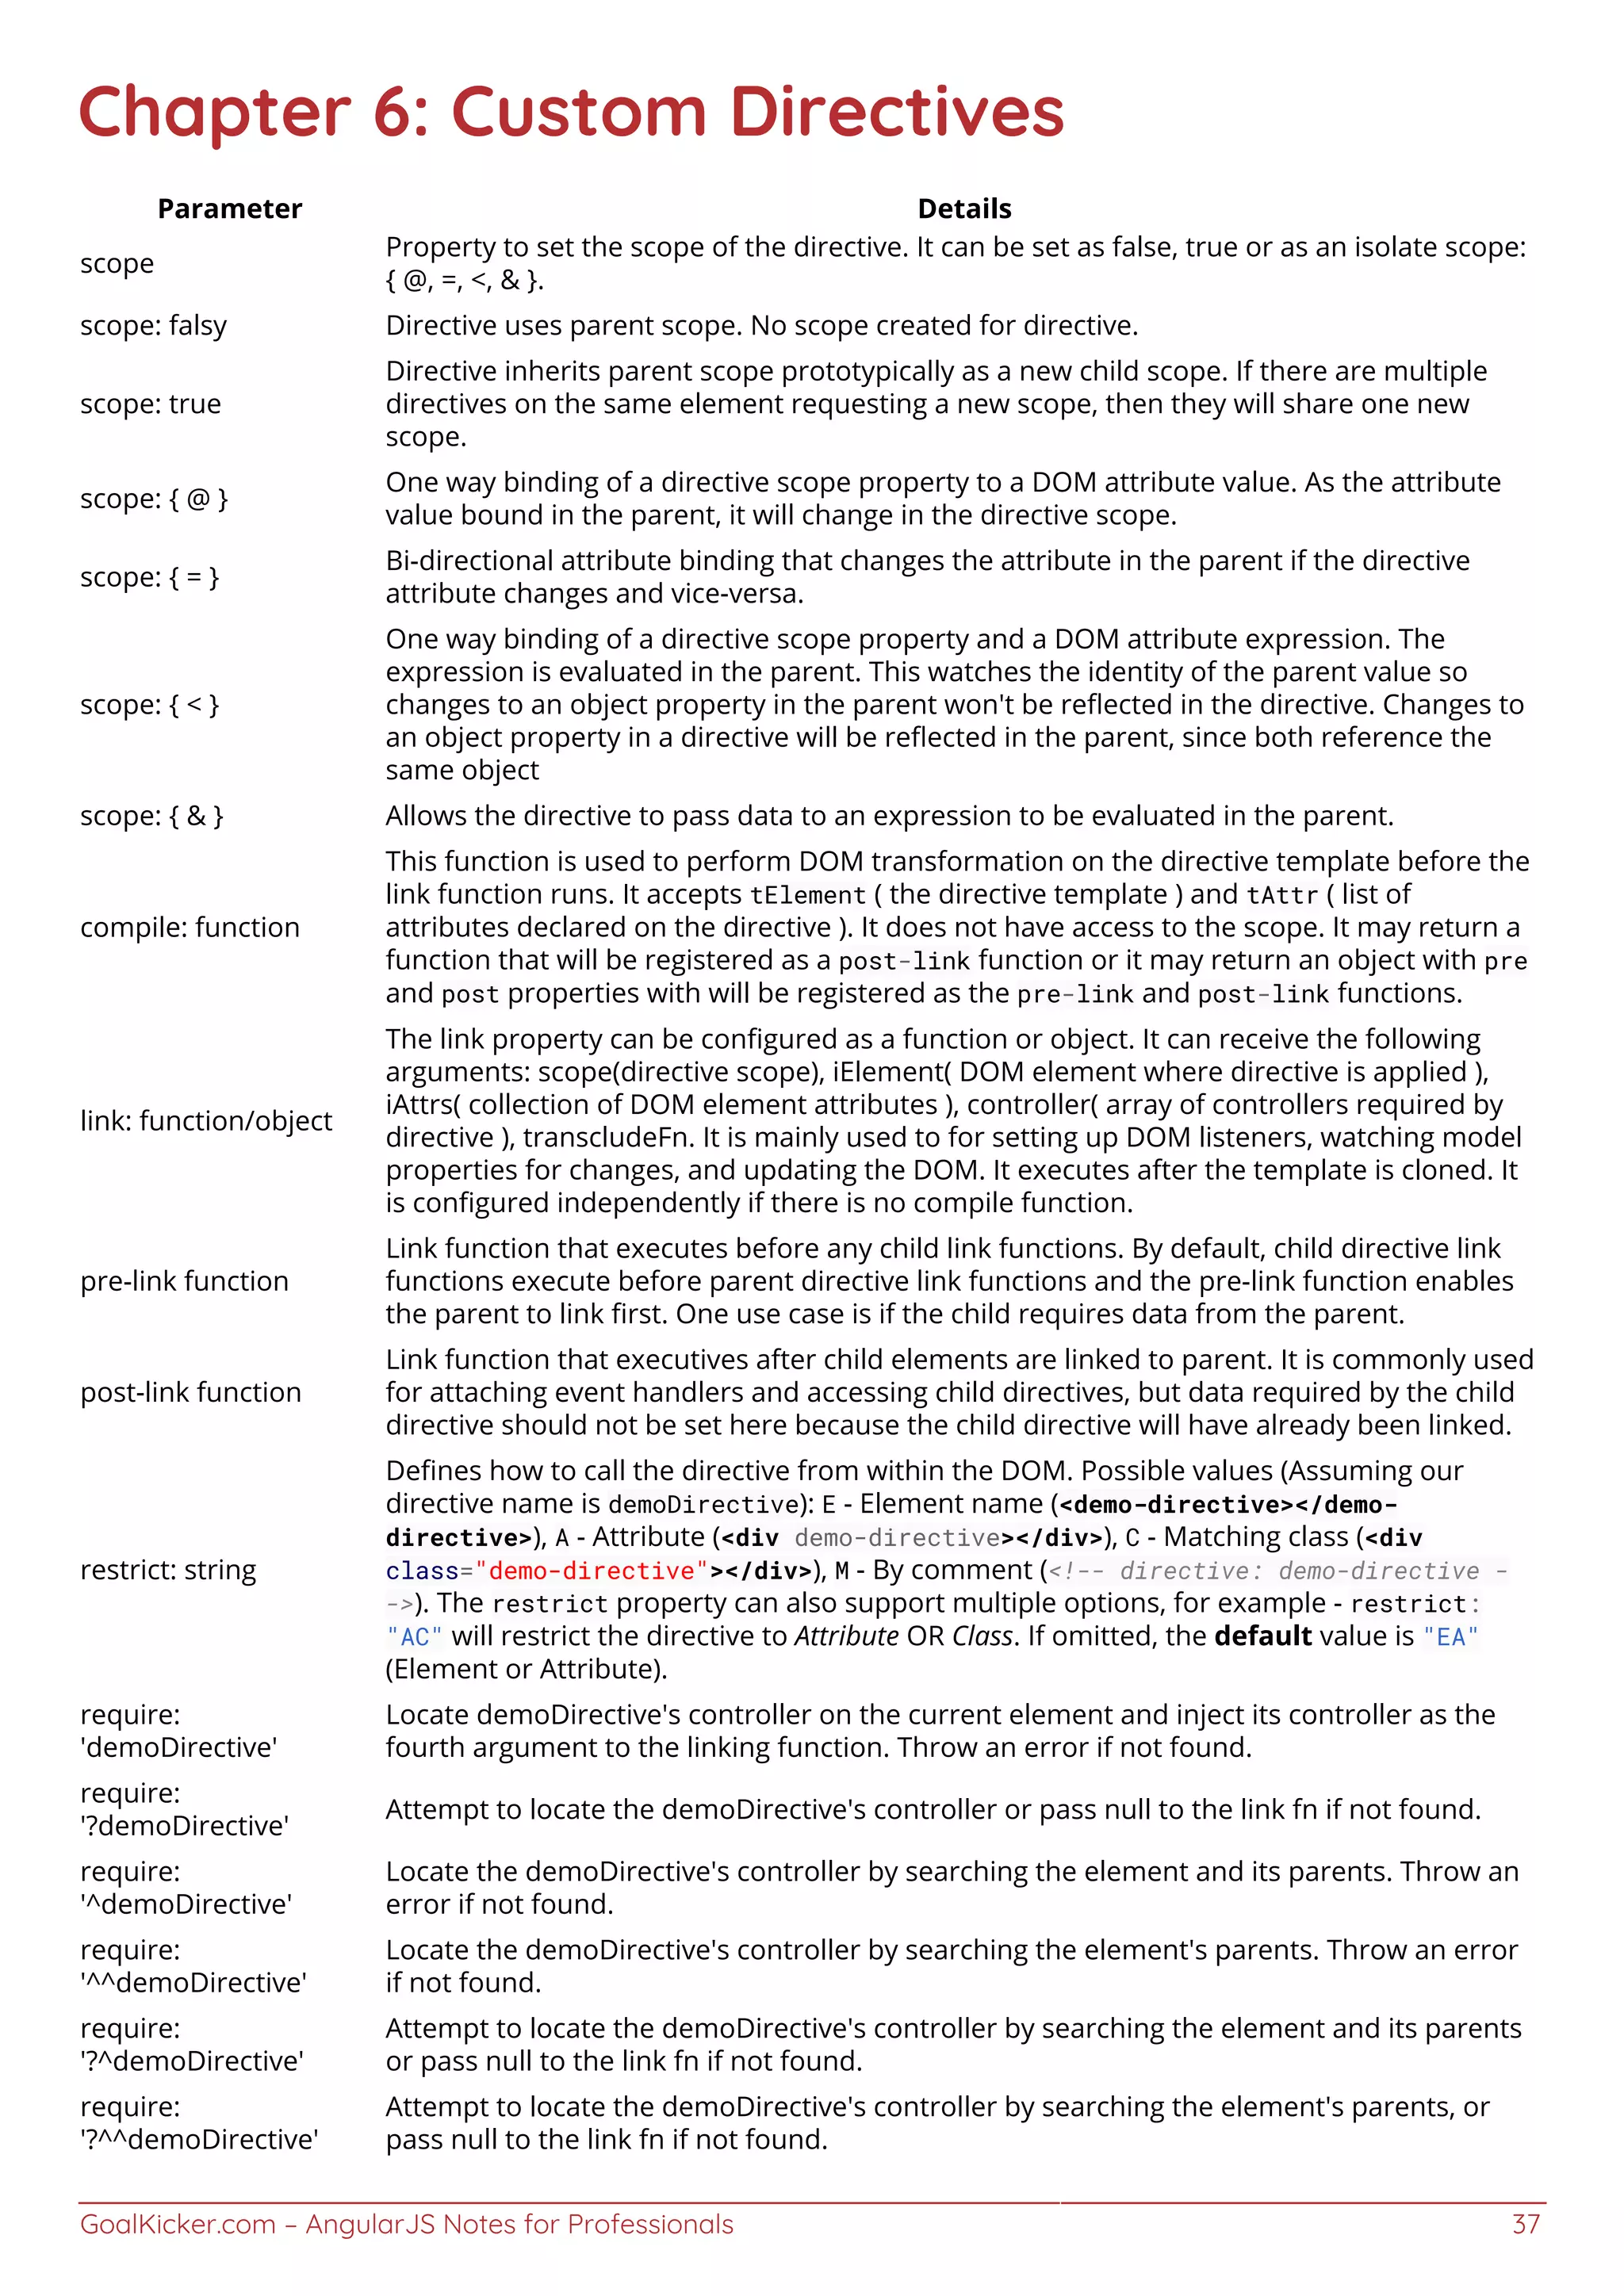
![GoalKicker.com – AngularJS Notes for Professionals 38
Here you will learn about the Directives feature of AngularJS. Below you will find information on what Directives are,
as well as Basic and Advanced examples of how to use them.
Section 6.1: Creating and consuming custom directives
Directives are one of the most powerful features of angularjs. Custom angularjs directives are used to extend
functionality of html by creating new html elements or custom attributes to provide certain behavior to an html tag.
directive.js
// Create the App module if you haven't created it yet
var demoApp= angular.module("demoApp", []);
// If you already have the app module created, comment the above line and create a reference of the
app module
var demoApp = angular.module("demoApp");
// Create a directive using the below syntax
// Directives are used to extend the capabilities of html element
// You can either create it as an Element/Attribute/class
// We are creating a directive named demoDirective. Notice it is in CamelCase when we are defining
the directive just like ngModel
// This directive will be activated as soon as any this element is encountered in html
demoApp.directive('demoDirective', function () {
// This returns a directive definition object
// A directive definition object is a simple JavaScript object used for configuring the directive’s
behaviour,template..etc
return {
// restrict: 'AE', signifies that directive is Element/Attribute directive,
// "E" is for element, "A" is for attribute, "C" is for class, and "M" is for comment.
// Attributes are going to be the main ones as far as adding behaviors that get used the most.
// If you don't specify the restrict property it will default to "A"
restrict :'AE',
// The values of scope property decides how the actual scope is created and used inside a
directive. These values can be either “false”, “true” or “{}”. This creates an isolate scope for the
directive.
// '@' binding is for passing strings. These strings support {{}} expressions for interpolated
values.
// '=' binding is for two-way model binding. The model in parent scope is linked to the model in
the directive's isolated scope.
// '&' binding is for passing a method into your directive's scope so that it can be called
within your directive.
// The method is pre-bound to the directive's parent scope, and supports arguments.
scope: {
name: "@", // Always use small casing here even if it's a mix of 2-3 words
},
// template replaces the complete element with its text.
template: "<div>Hello {{name}}!</div>",
// compile is called during application initialization. AngularJS calls it once when html page is
loaded.
compile: function(element, attributes) {
element.css("border", "1px solid #cccccc");
// linkFunction is linked with each element with scope to get the element specific data.](https://image.slidesharecdn.com/angularjsnotesforprofessionals-200412131913/75/Angular-js-notes-for-professionals-45-2048.jpg)
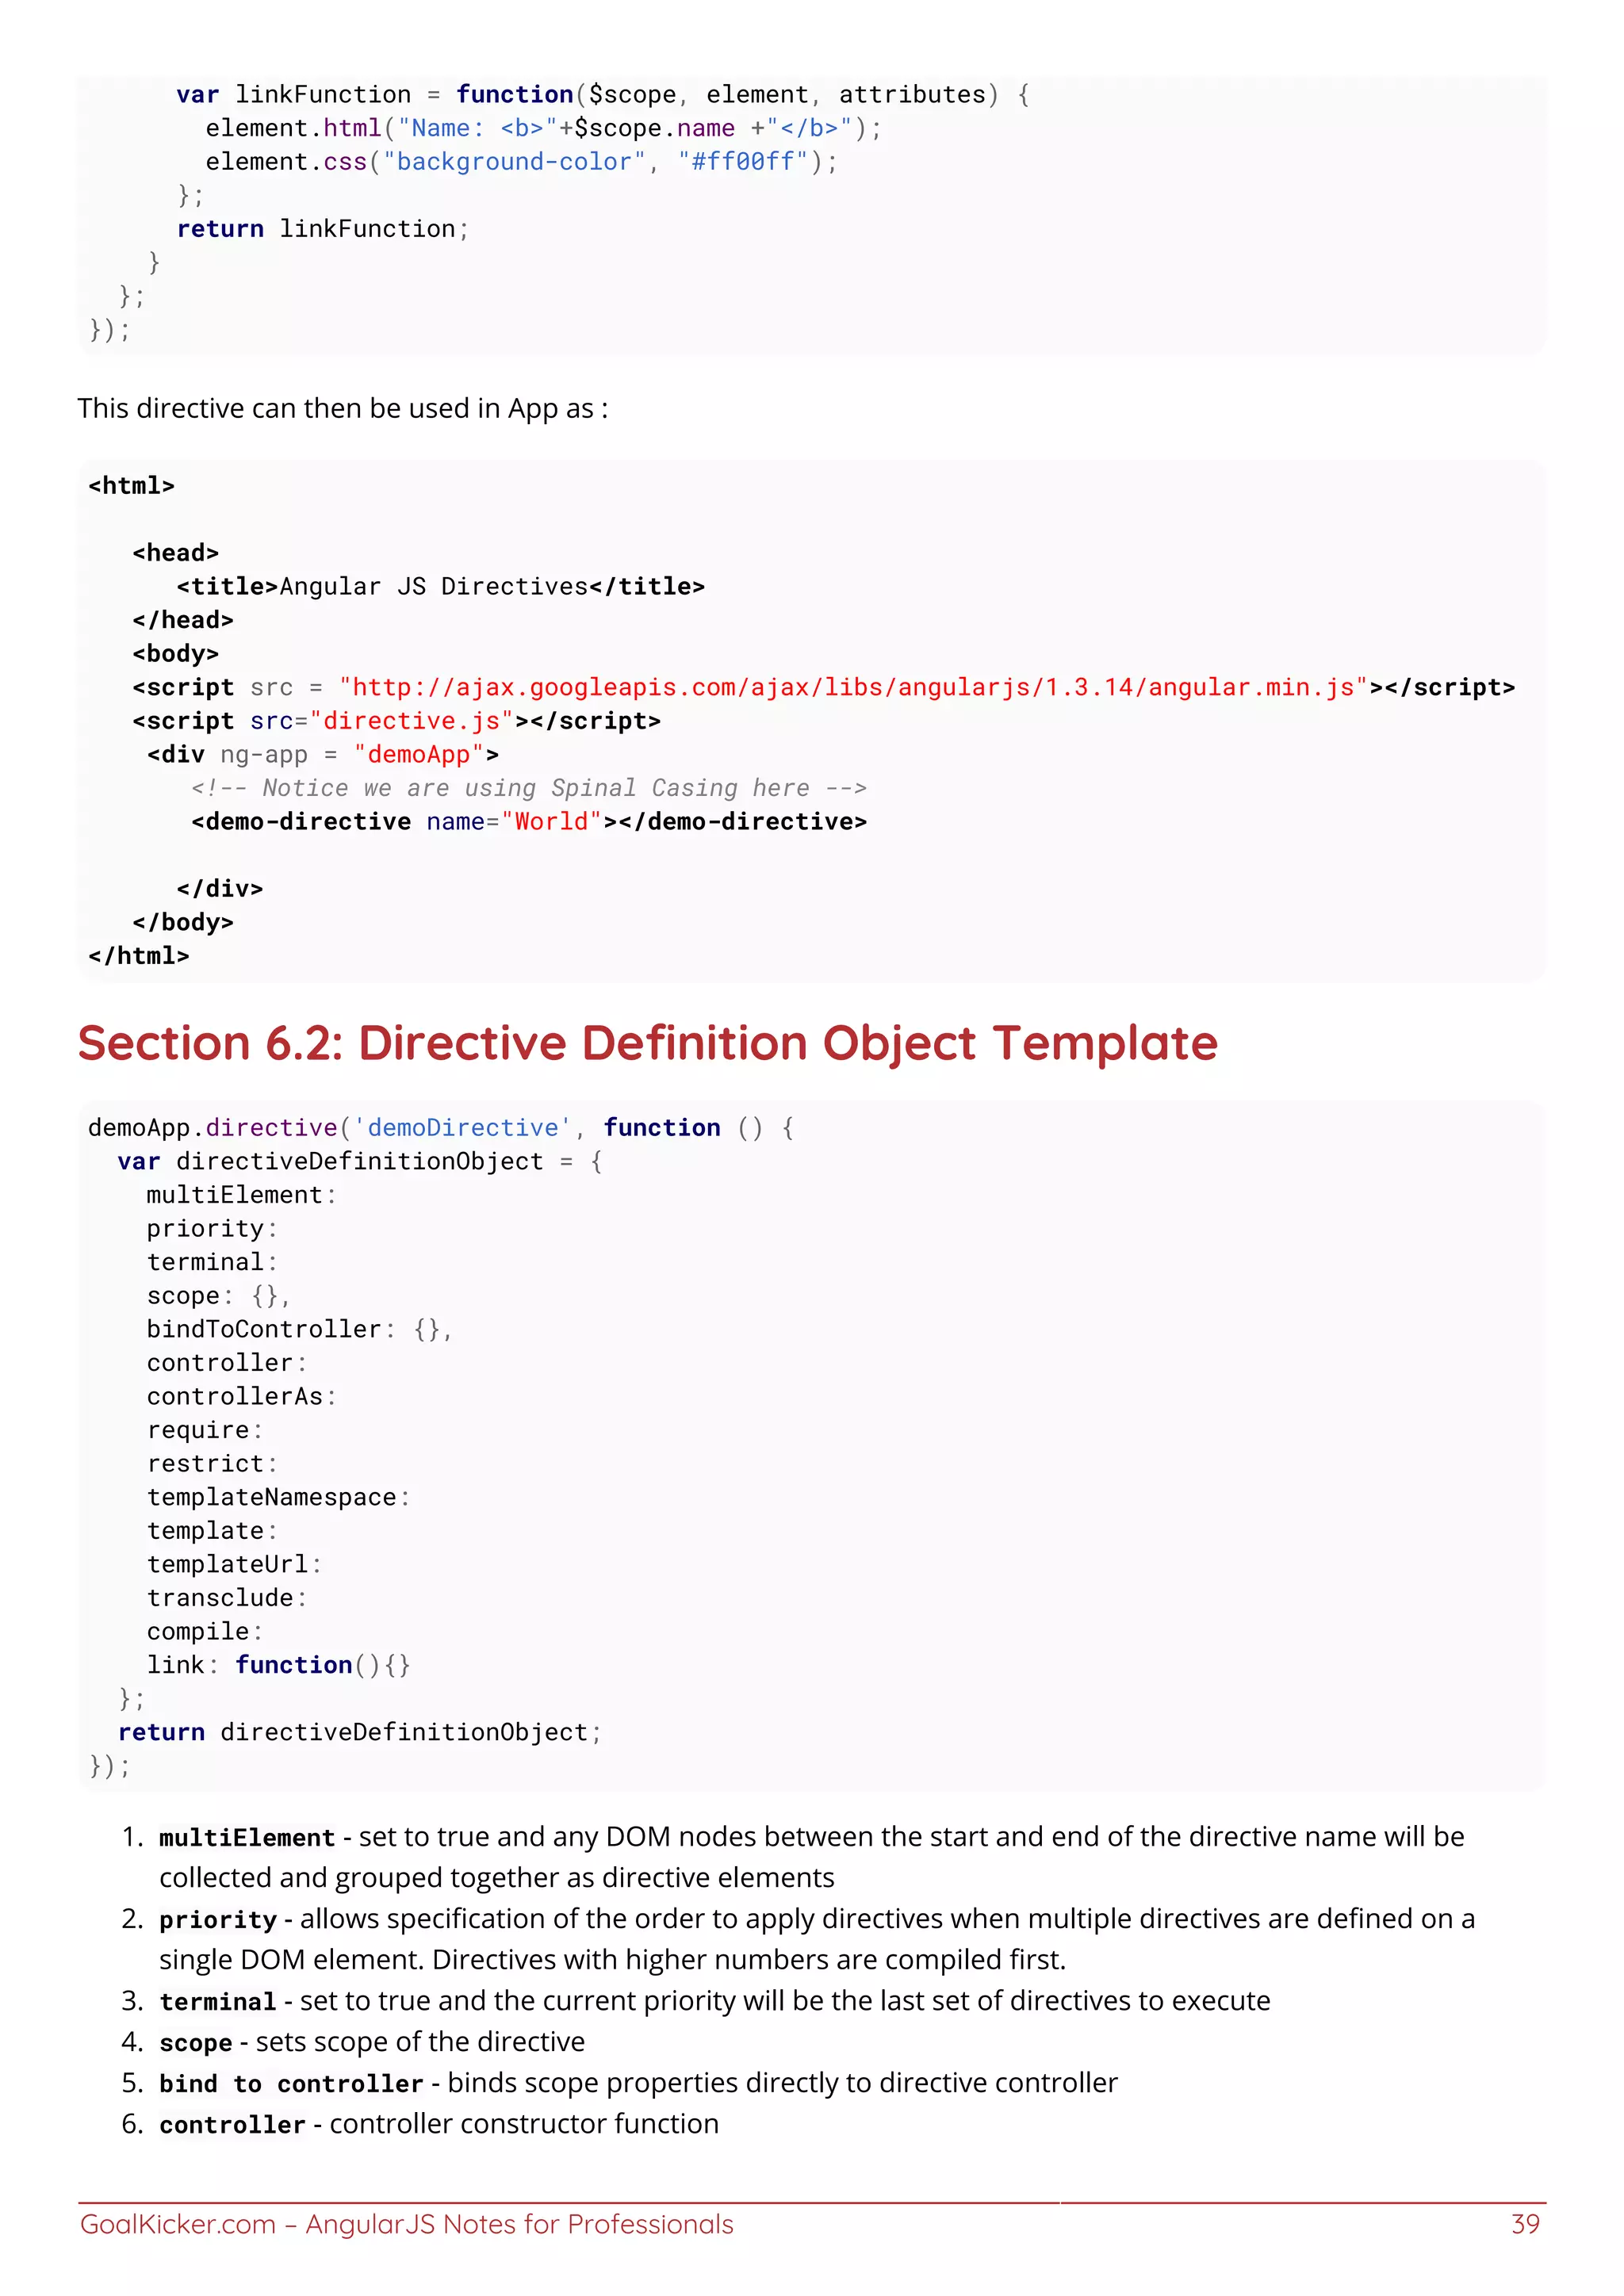
![GoalKicker.com – AngularJS Notes for Professionals 40
require - require another directive and inject its controller as the fourth argument to the linking function7.
controllerAs - name reference to the controller in the directive scope to allow the controller to be8.
referenced from the directive template.
restrict - restrict directive to Element, Attribute, Class, or Comment9.
templateNameSpace - sets document type used by directive template: html, svg, or math. html is the default10.
template - html markup that defaults to replacing the content of the directive's element, or wraps the11.
contents of the directive element if transclude is true
templateUrl - url provided asynchronously for the template12.
transclude - Extract the contents of the element where the directive appears and make it available to the13.
directive. The contents are compiled and provided to the directive as a transclusion function.
compile - function to transform the template DOM14.
link - only used if the compile property is not defined. The link function is responsible for registering DOM15.
listeners as well as updating the DOM. It is executed after the template has been cloned.
Section 6.3: How to create resuable component using
directive
AngularJS directives are what controls the rendering of the HTML inside an AngularJS application. They can be an
Html element, attribute, class or a comment. Directives are used to manipulate the DOM, attaching new behavior to
HTML elements, data binding and many more. Some of examples of directives which angular provides are ng-
model, ng-hide, ng-if.
Similarly one can create his own custom directive and make them resuable. For creating Custom directives
Reference. The sense behind creating reusable directives is to make a set of directives/components written by you
just like angularjs provides us using angular.js . These reusable directives can be particularly very helpful when you
have suite of applications/application which requires a consistent behavior, look and feel. An example of such
reusable component can be a simple toolbar which you may want to use across your application or different
applications but you want them to behave the same or look the same.
Firstly , Make a folder named resuableComponents in your app Folder and make reusableModuleApp.js
reusableModuleApp.js:
(function(){
var reusableModuleApp = angular.module('resuableModuleApp', ['ngSanitize']);
//Remember whatever dependencies you have in here should be injected in the app module where it is
intended to be used or it's scripts should be included in your main app
//We will be injecting ng-sanitize
resubaleModuleApp.directive('toolbar', toolbar)
toolbar.$inject=['$sce'];
function toolbar($sce){
return{
restrict :'AE',
//Defining below isolate scope actually provides window for the directive to take data from
app that will be using this.
scope : {
value1: '=',
value2: '=',
},](https://image.slidesharecdn.com/angularjsnotesforprofessionals-200412131913/75/Angular-js-notes-for-professionals-47-2048.jpg)
![GoalKicker.com – AngularJS Notes for Professionals 41
}
template : '<ul> <li><a ng-click="Add()" href="">{{value1}}</a></li> <li><a ng-
click="Edit()" href="#">{{value2}}</a></li> </ul> ',
link : function(scope, element, attrs){
//Handle's Add function
scope.Add = function(){
};
//Handle's Edit function
scope.Edit = function(){
};
}
}
});
mainApp.js:
(function(){
var mainApp = angular.module('mainApp', ['reusableModuleApp']); //Inject resuableModuleApp in
your application where you want to use toolbar component
mainApp.controller('mainAppController', function($scope){
$scope.value1 = "Add";
$scope.value2 = "Edit";
});
});
index.html:
<!doctype html>
<html ng-app="mainApp">
<head>
<title> Demo Making a reusable component
<head>
<body ng-controller="mainAppController">
<!-- We are providing data to toolbar directive using mainApp'controller -->
<toolbar value1="value1" value2="value2"></toolbar>
<!-- We need to add the dependent js files on both apps here -->
<script src="js/angular.js"></script>
<script src="js/angular-sanitize.js"></script>
<!-- your mainApp.js should be added afterwards --->
<script src="mainApp.js"></script>
<!-- Add your reusable component js files here -->
<script src="resuableComponents/reusableModuleApp.js"></script>
</body>
</html>
Directive are reusable components by default. When you make directives in separate angular module, It actually](https://image.slidesharecdn.com/angularjsnotesforprofessionals-200412131913/75/Angular-js-notes-for-professionals-48-2048.jpg)
![GoalKicker.com – AngularJS Notes for Professionals 42
makes it exportable and reusable across different angularJs applications. New directives can simply be added inside
reusableModuleApp.js and reusableModuleApp can have it's own controller, services, DDO object inside directive to
define the behavior.
Section 6.4: Basic Directive example
superman-directive.js
angular.module('myApp', [])
.directive('superman', function() {
return {
// restricts how the directive can be used
restrict: 'E',
templateUrl: 'superman-template.html',
controller: function() {
this.message = "I'm superman!"
},
controllerAs: 'supermanCtrl',
// Executed after Angular's initialization. Use commonly
// for adding event handlers and DOM manipulation
link: function(scope, element, attributes) {
element.on('click', function() {
alert('I am superman!')
});
}
}
});
superman-template.html
<h2>{{supermanCtrl.message}}</h2>
index.html
<!DOCTYPE html>
<html lang="en">
<head>
<meta charset="UTF-8">
<title>Document</title>
<script src="https://ajax.googleapis.com/ajax/libs/angularjs/1.5.0/angular.js"></script>
<script src="superman-directive.js"><script/>
</head>
<body>
<div ng-app="myApp">
<superman></superman>
</div>
</body>
</html>
You can check out more about directive's restrict and link functions on AngularJS's official documentation on
Directives
Section 6.5: Directive decorator
Sometimes you may need additional features from a directive. Instead of rewriting (copy) the directive, you can
modify how the directive behaves.](https://image.slidesharecdn.com/angularjsnotesforprofessionals-200412131913/75/Angular-js-notes-for-professionals-49-2048.jpg)
![GoalKicker.com – AngularJS Notes for Professionals 43
The decorator will be executed during $inject phase.
To do so, provde a .config to your module. The directive is called myDirective, so you have to config
myDirectiveDirective. (this in an angular convention [read about providers] ).
This example will change the templateUrl of the directive:
angular.module('myApp').config(function($provide){
$provide.decorator('myDirectiveDirective', function($delegate){
var directive = $delegate[0]; // this is the actual delegated, your directive
directive.templateUrl = 'newTemplate.html'; // you change the directive template
return $delegate;
})
});
This example add an onClick event to the directive element when clicked, this happens during compile phase.
angular.module('myApp').config(function ($provide) {
$provide.decorator('myDirectiveTwoDirective', function ($delegate) {
var directive = $delegate[0];
var link = directive.link; // this is directive link phase
directive.compile = function () { // change the compile of that directive
return function (scope, element, attrs) {
link.apply(this, arguments); // apply this at the link phase
element.on('click', function(){ // when add an onclick that log hello when the
directive is clicked.
console.log('hello!');
});
};
};
return $delegate;
});
});
Similar approach can be used for both Providers and Services.
Section 6.6: Basic directive with template and an isolated
scope
Creating a custom directive with isolated scope will separate the scope inside the directive from the outside scope,
in order to prevent our directive from accidentally change the data in the parent scope and restricting it from
reading private data from the parent scope.
To create an isolated scope and still allow our custom directive to communicate with the outside scope, we can use
the scope option that describe how to map the bindings of the directive's inner scope with the outside scope.
The actual bindings are made with extra attributes attached to the directive. The binding settings are defined with
the scope option and an object with key-value pairs:
A key, which is corresponded to our directive's isolated scope property
A value, which tells Angular how do bind the directive inner scope to a matching attribute
Simple example of a directive with an isolated scope:
var ProgressBar = function() {](https://image.slidesharecdn.com/angularjsnotesforprofessionals-200412131913/75/Angular-js-notes-for-professionals-50-2048.jpg)
![GoalKicker.com – AngularJS Notes for Professionals 44
return {
scope: { // This is how we define an isolated scope
current: '=', // Create a REQUIRED bidirectional binding by using the 'current' attribute
full: '=?maxValue' // Create an OPTIONAL (Note the '?'): bidirectional binding using 'max-
value' attribute to the `full` property in our directive isolated scope
}
template: '<div class="progress-back">' +
' <div class="progress-bar"' +
' ng-style="{width: getProgress()}">' +
' </div>' +
'</div>',
link: function(scope, el, attrs) {
if (scope.full === undefined) {
scope.full = 100;
}
scope.getProgress = function() {
return (scope.current / scope.size * 100) + '%';
}
}
}
}
ProgressBar.$inject = [];
angular.module('app').directive('progressBar', ProgressBar);
Example how to use this directive and bind data from the controller's scope to the directive's inner scope:
Controller:
angular.module('app').controller('myCtrl', function($scope) {
$scope.currentProgressValue = 39;
$scope.maxProgressBarValue = 50;
});
View:
<div ng-controller="myCtrl">
<progress-bar current="currentProgressValue"></progress-bar>
<progress-bar current="currentProgressValue" max-value="maxProgressBarValue"></progress-bar>
</div>
Section 6.7: Building a reusable component
Directives can be used to build reusable components. Here is an example of a "user box" component:
userBox.js
angular.module('simpleDirective', []).directive('userBox', function() {
return {
scope: {
username: '=username',
reputation: '=reputation'
},
templateUrl: '/path/to/app/directives/user-box.html'
};
});
Controller.js](https://image.slidesharecdn.com/angularjsnotesforprofessionals-200412131913/75/Angular-js-notes-for-professionals-51-2048.jpg)
![GoalKicker.com – AngularJS Notes for Professionals 45
var myApp = angular.module('myApp', ['simpleDirective']);
myApp.controller('Controller', function($scope) {
$scope.user = "John Doe";
$scope.rep = 1250;
$scope.user2 = "Andrew";
$scope.rep2 = 2850;
});
myPage.js
<html lang="en" ng-app="myApp">
<head>
<script src="/path/to/app/angular.min.js"></script>
<script src="/path/to/app/js/controllers/Controller.js"></script>
<script src="/path/to/app/js/directives/userBox.js"></script>
</head>
<body>
<div ng-controller="Controller">
<user-box username="user" reputation="rep"></user-box>
<user-box username="user2" reputation="rep2"></user-box>
</div>
</body>
</html>
user-box.html
<div>{{username}}</div>
<div>{{reputation}} reputation</div>
The result will be:
John Doe
1250 reputation
Andrew
2850 reputation
Section 6.8: Directive inheritance and interoperability
Angular js directives can be nested or be made interoperable.
In this example, directive Adir exposes to directive Bdir it's controller $scope, since Bdir requires Adir.
angular.module('myApp',[]).directive('Adir', function () {
return {
restrict: 'AE',
controller: ['$scope', function ($scope) {
$scope.logFn = function (val) {
console.log(val);
}
}]
}](https://image.slidesharecdn.com/angularjsnotesforprofessionals-200412131913/75/Angular-js-notes-for-professionals-52-2048.jpg)
![GoalKicker.com – AngularJS Notes for Professionals 46
})
Make sure to set require: '^Adir' (look at the angular documentation, some versions doesn't require ^ character).
.directive('Bdir', function () {
return {
restrict: 'AE',
require: '^Adir', // Bdir require Adir
link: function (scope, elem, attr, Parent) {
// Parent is Adir but can be an array of required directives.
elem.on('click', function ($event) {
Parent.logFn("Hello!"); // will log "Hello! at parent dir scope
scope.$apply(); // apply to parent scope.
});
}
}
}]);
You can nest your directive in this way:
<div a-dir><span b-dir></span></div>
<a-dir><b-dir></b-dir> </a-dir>
Is not required that directives are nested in your HTML.](https://image.slidesharecdn.com/angularjsnotesforprofessionals-200412131913/75/Angular-js-notes-for-professionals-53-2048.jpg)
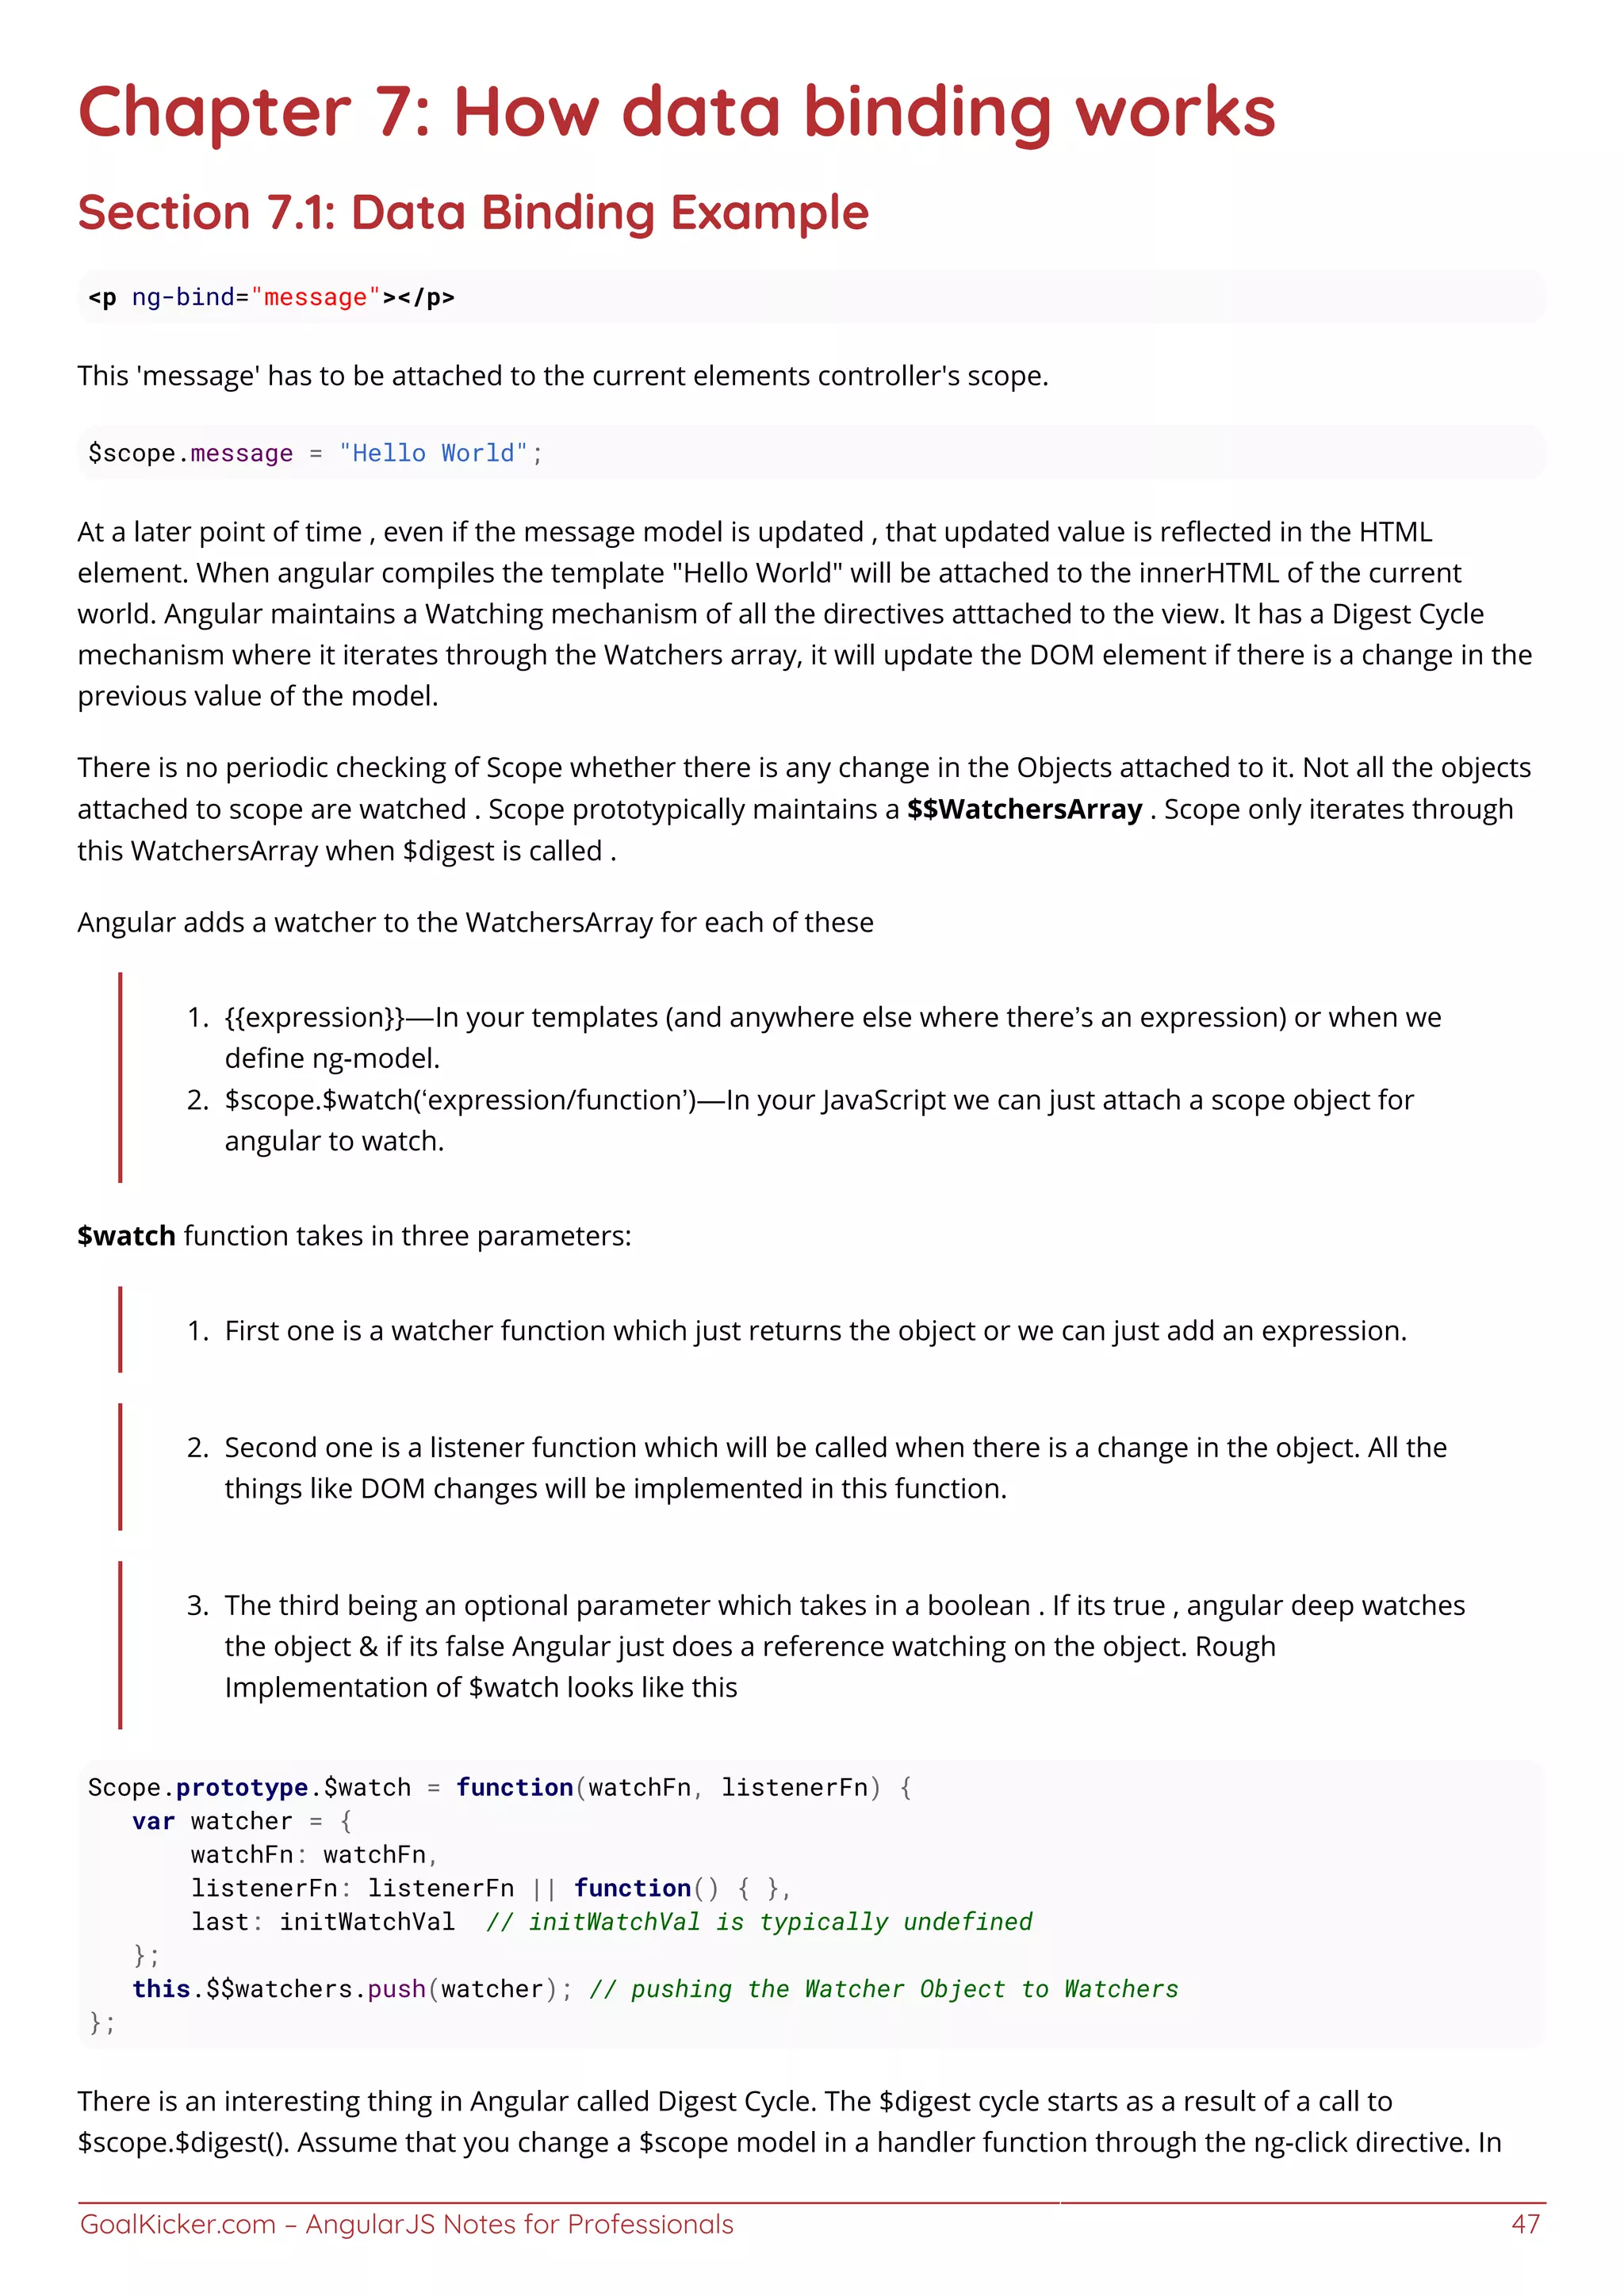
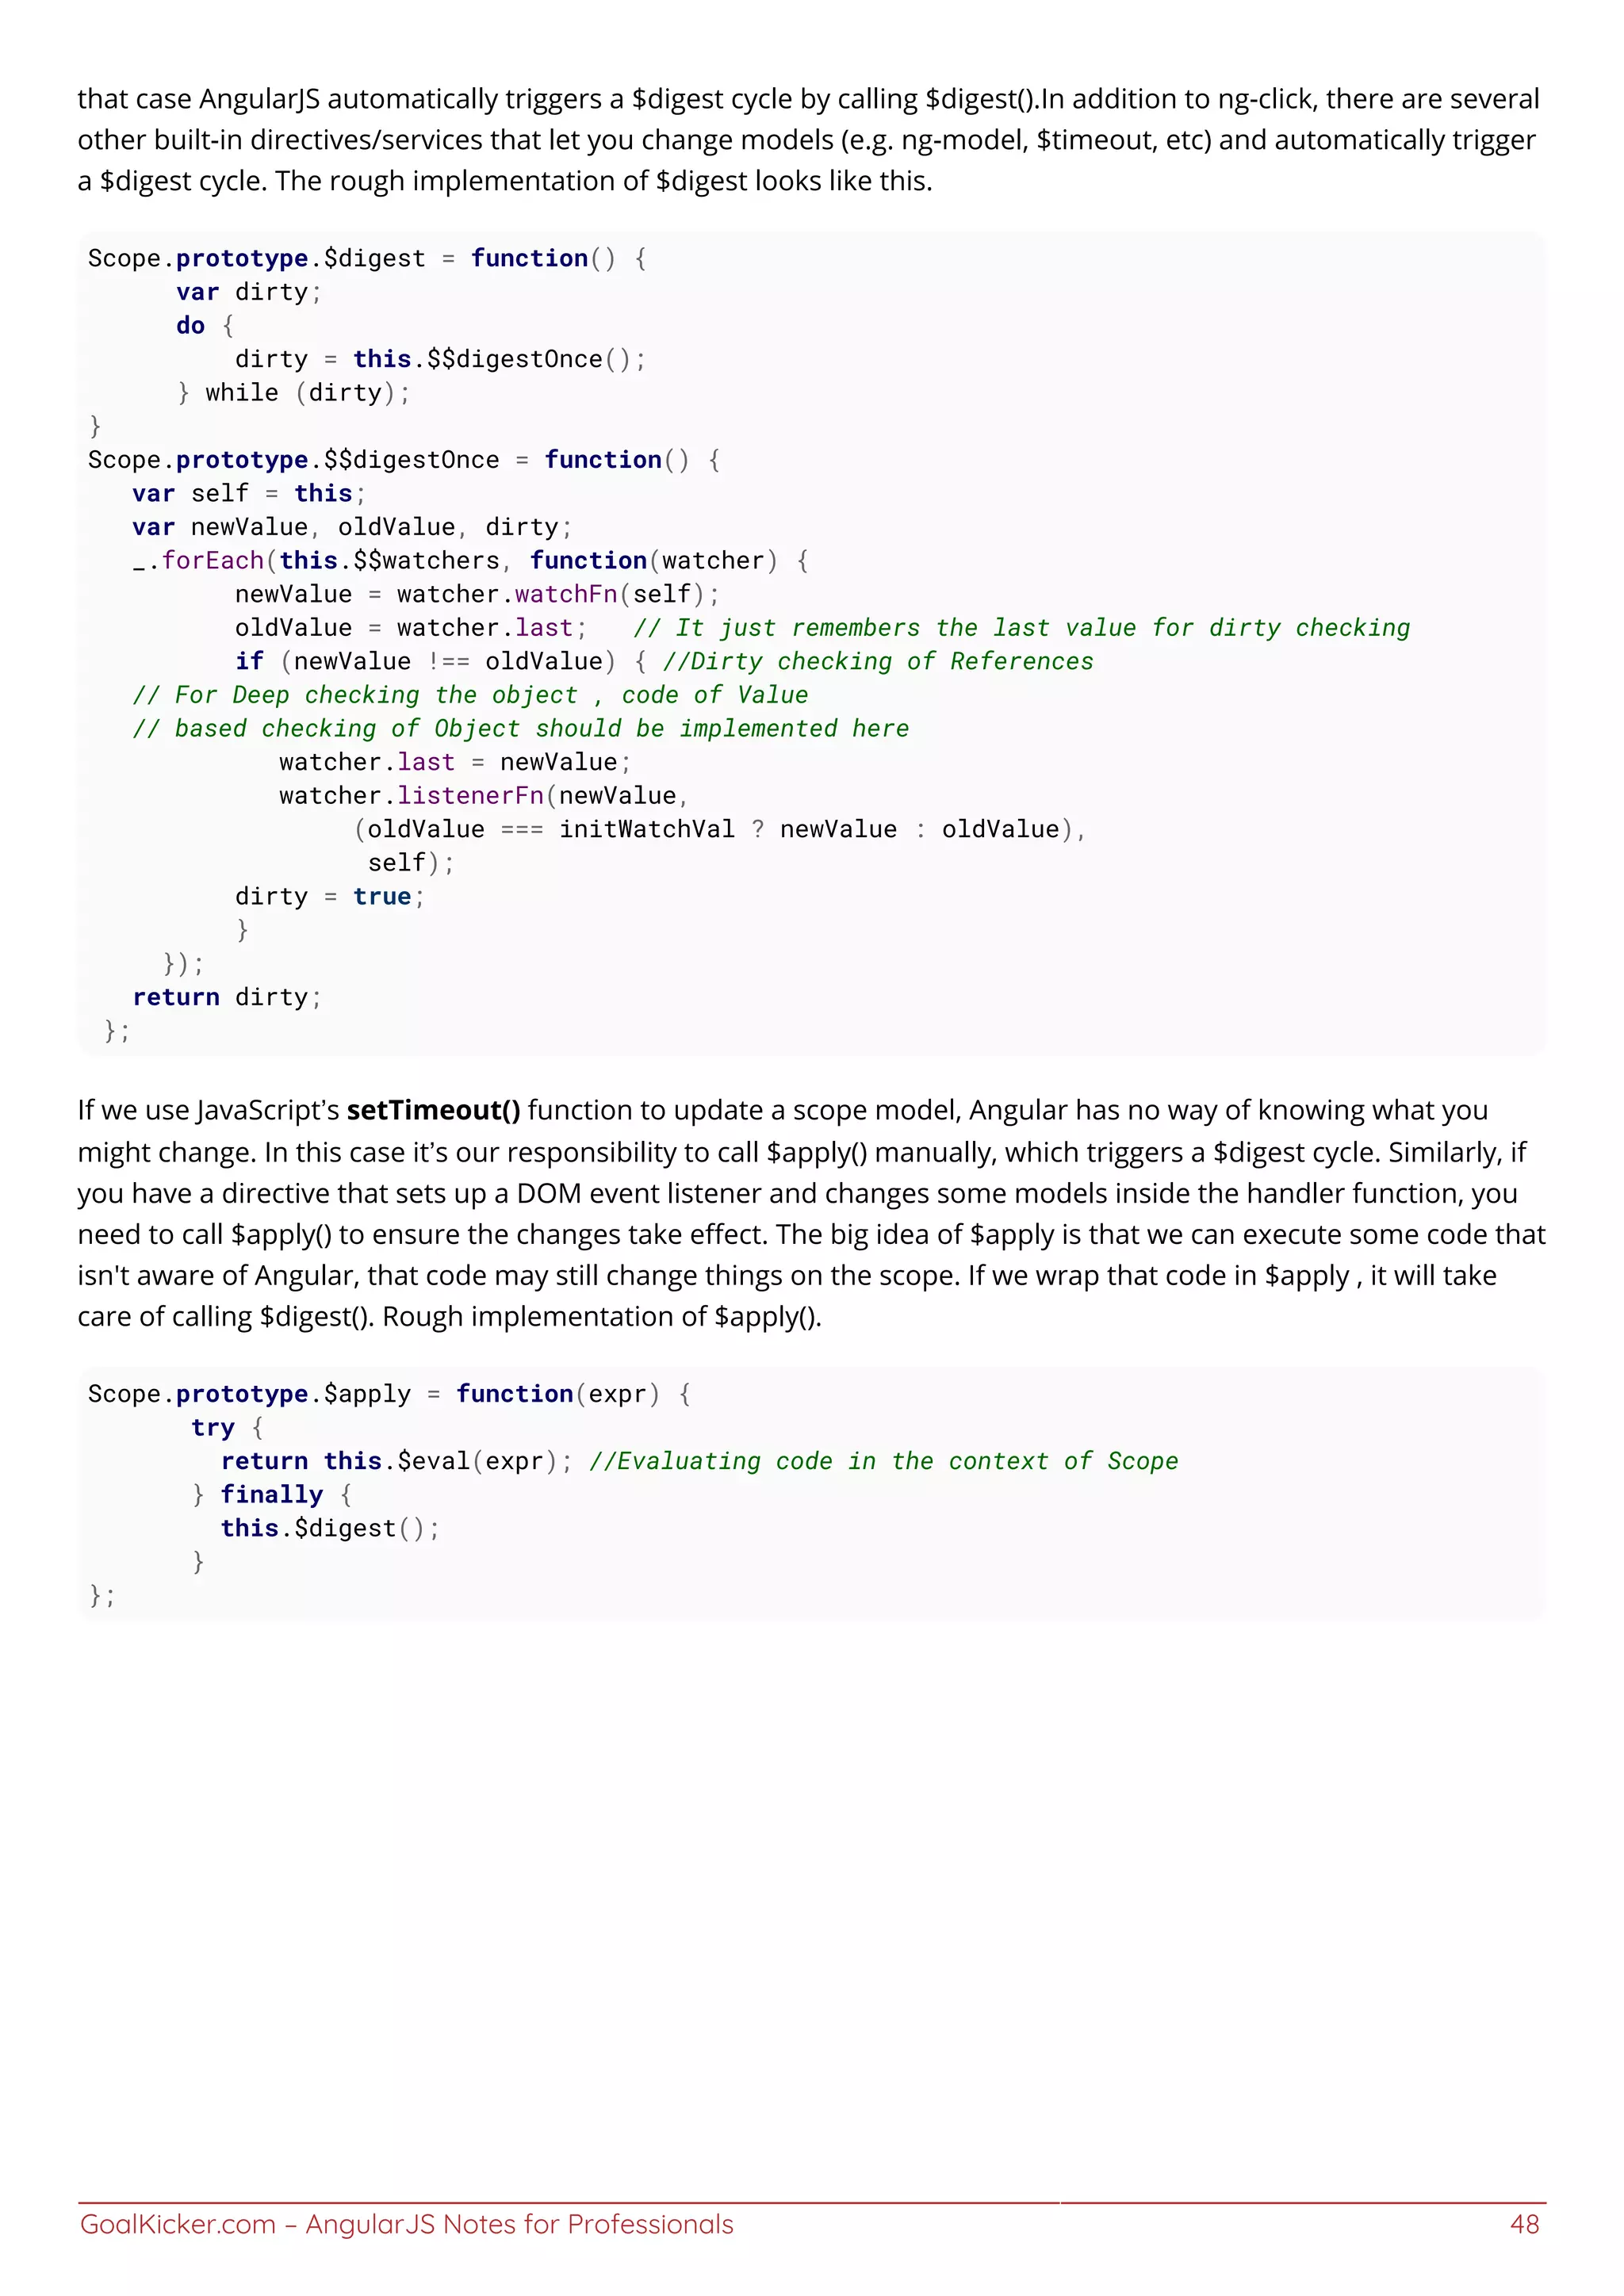
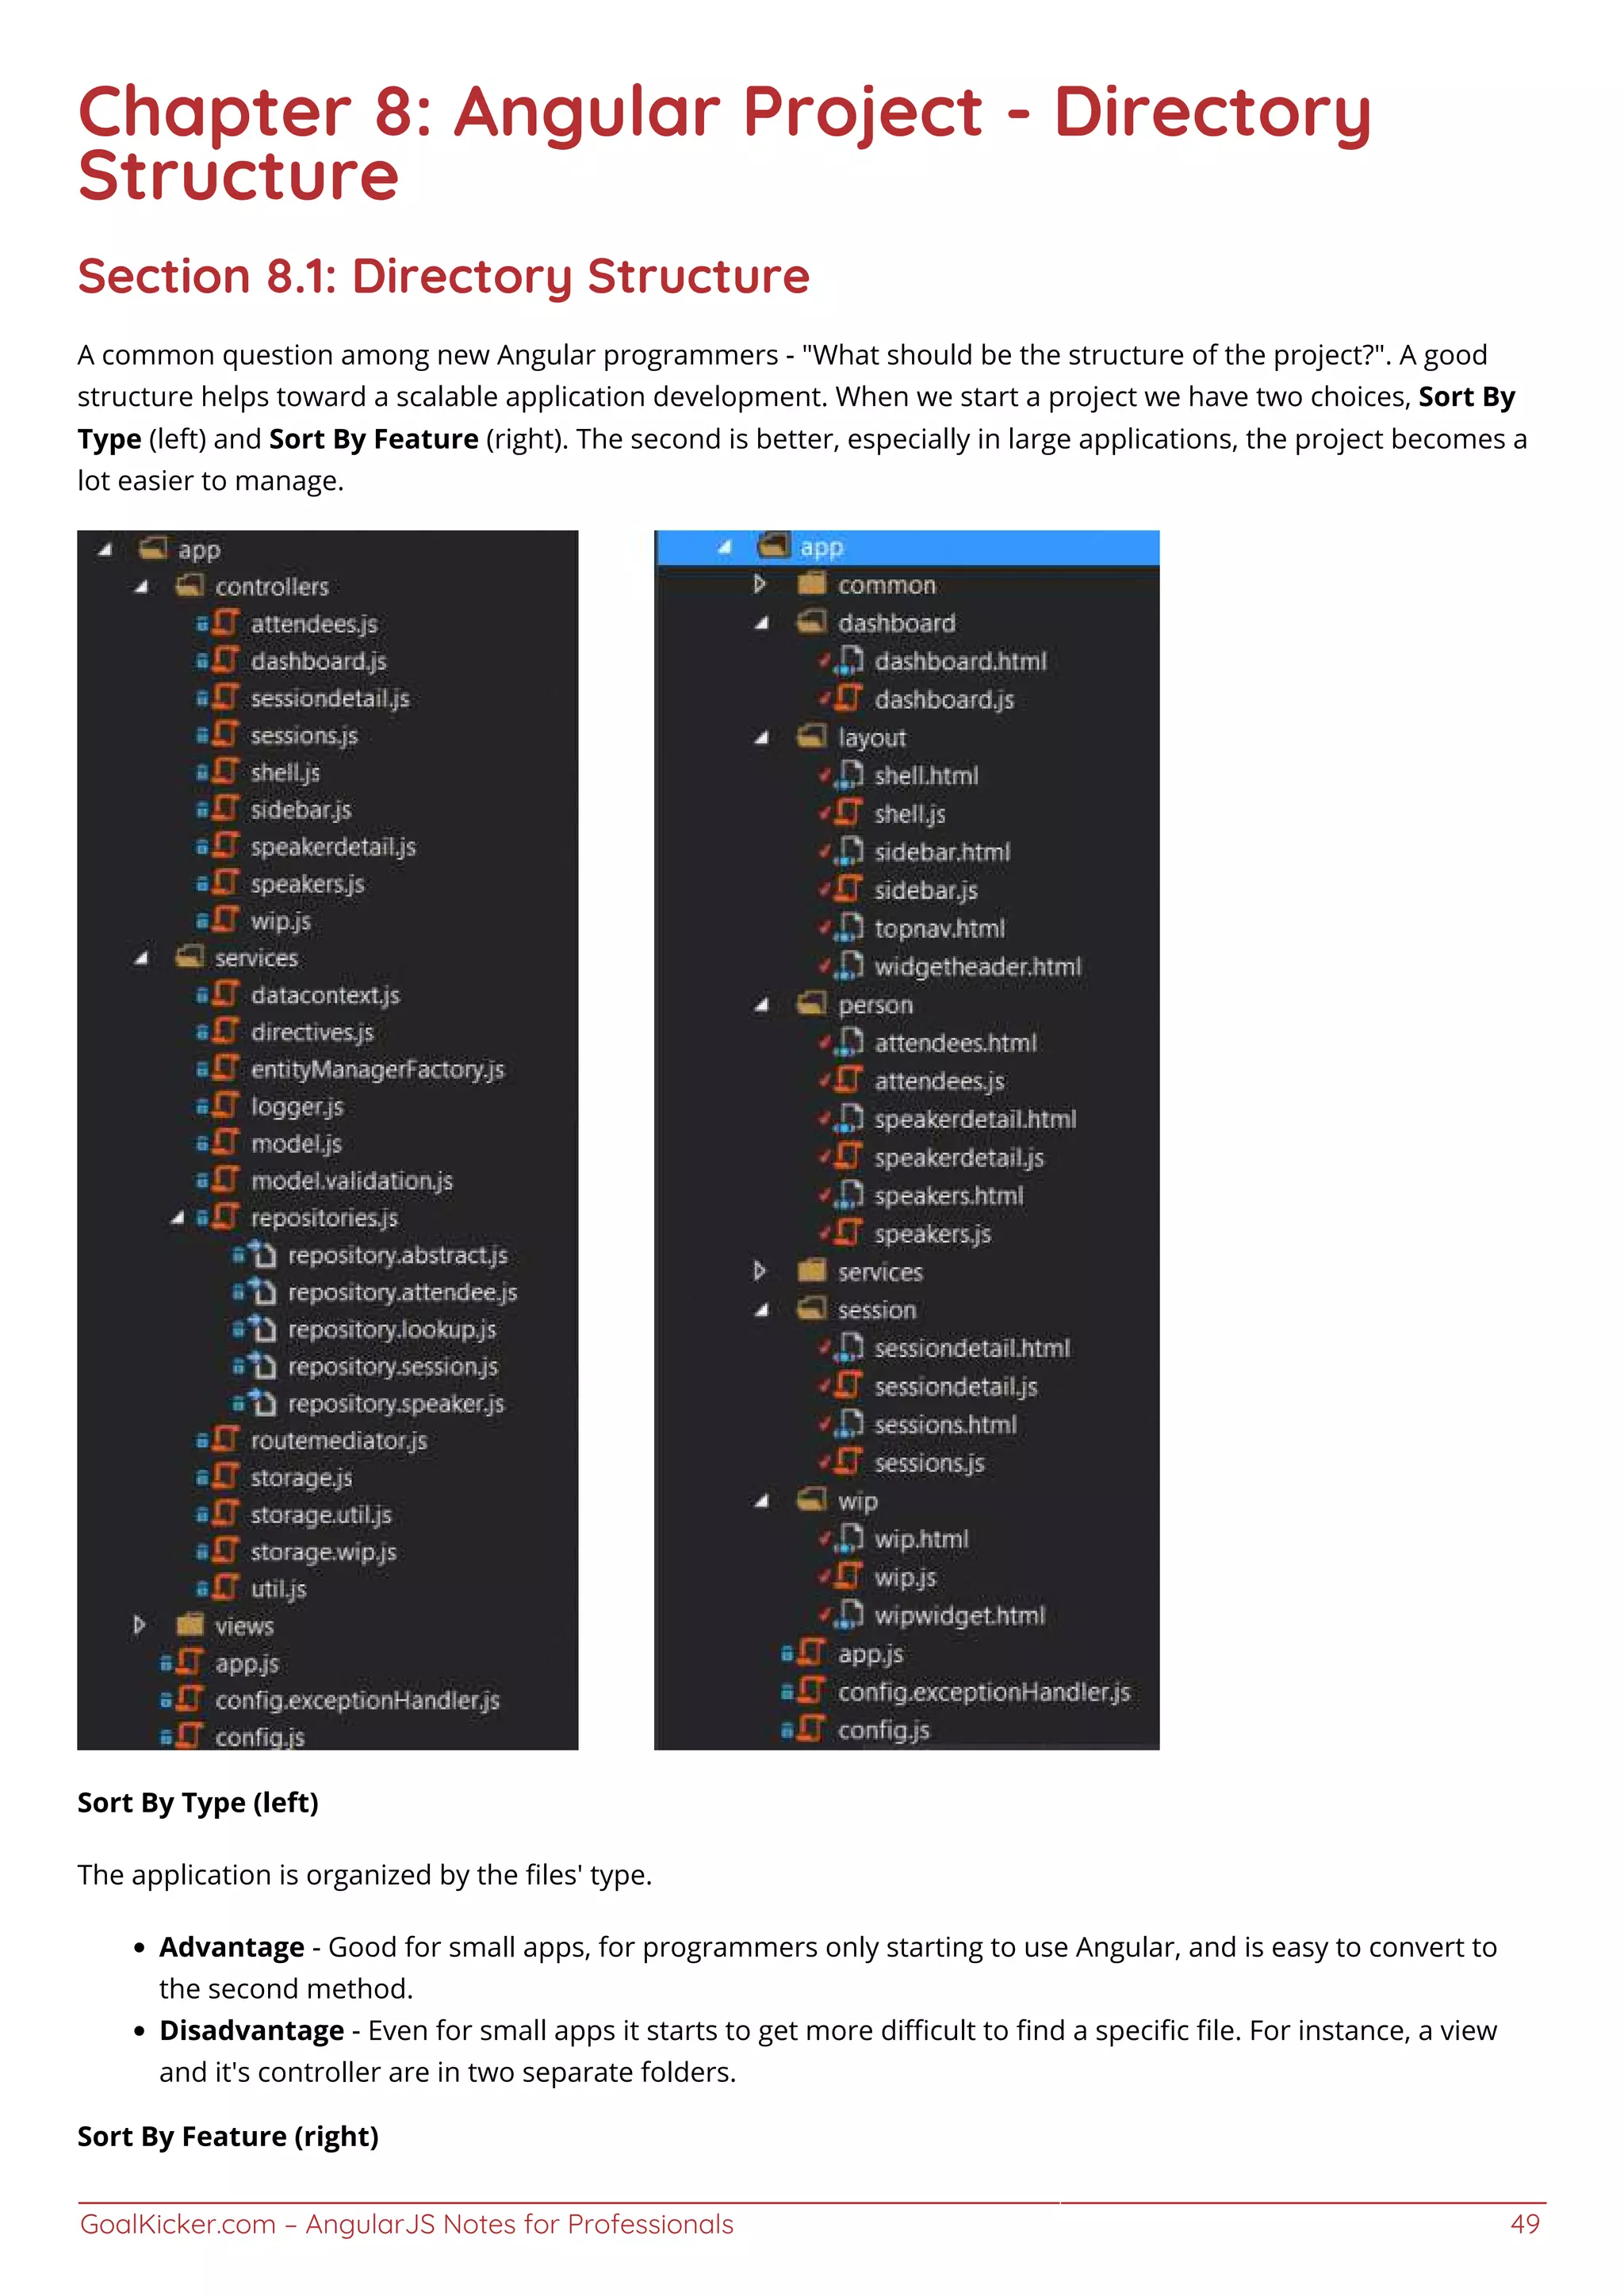
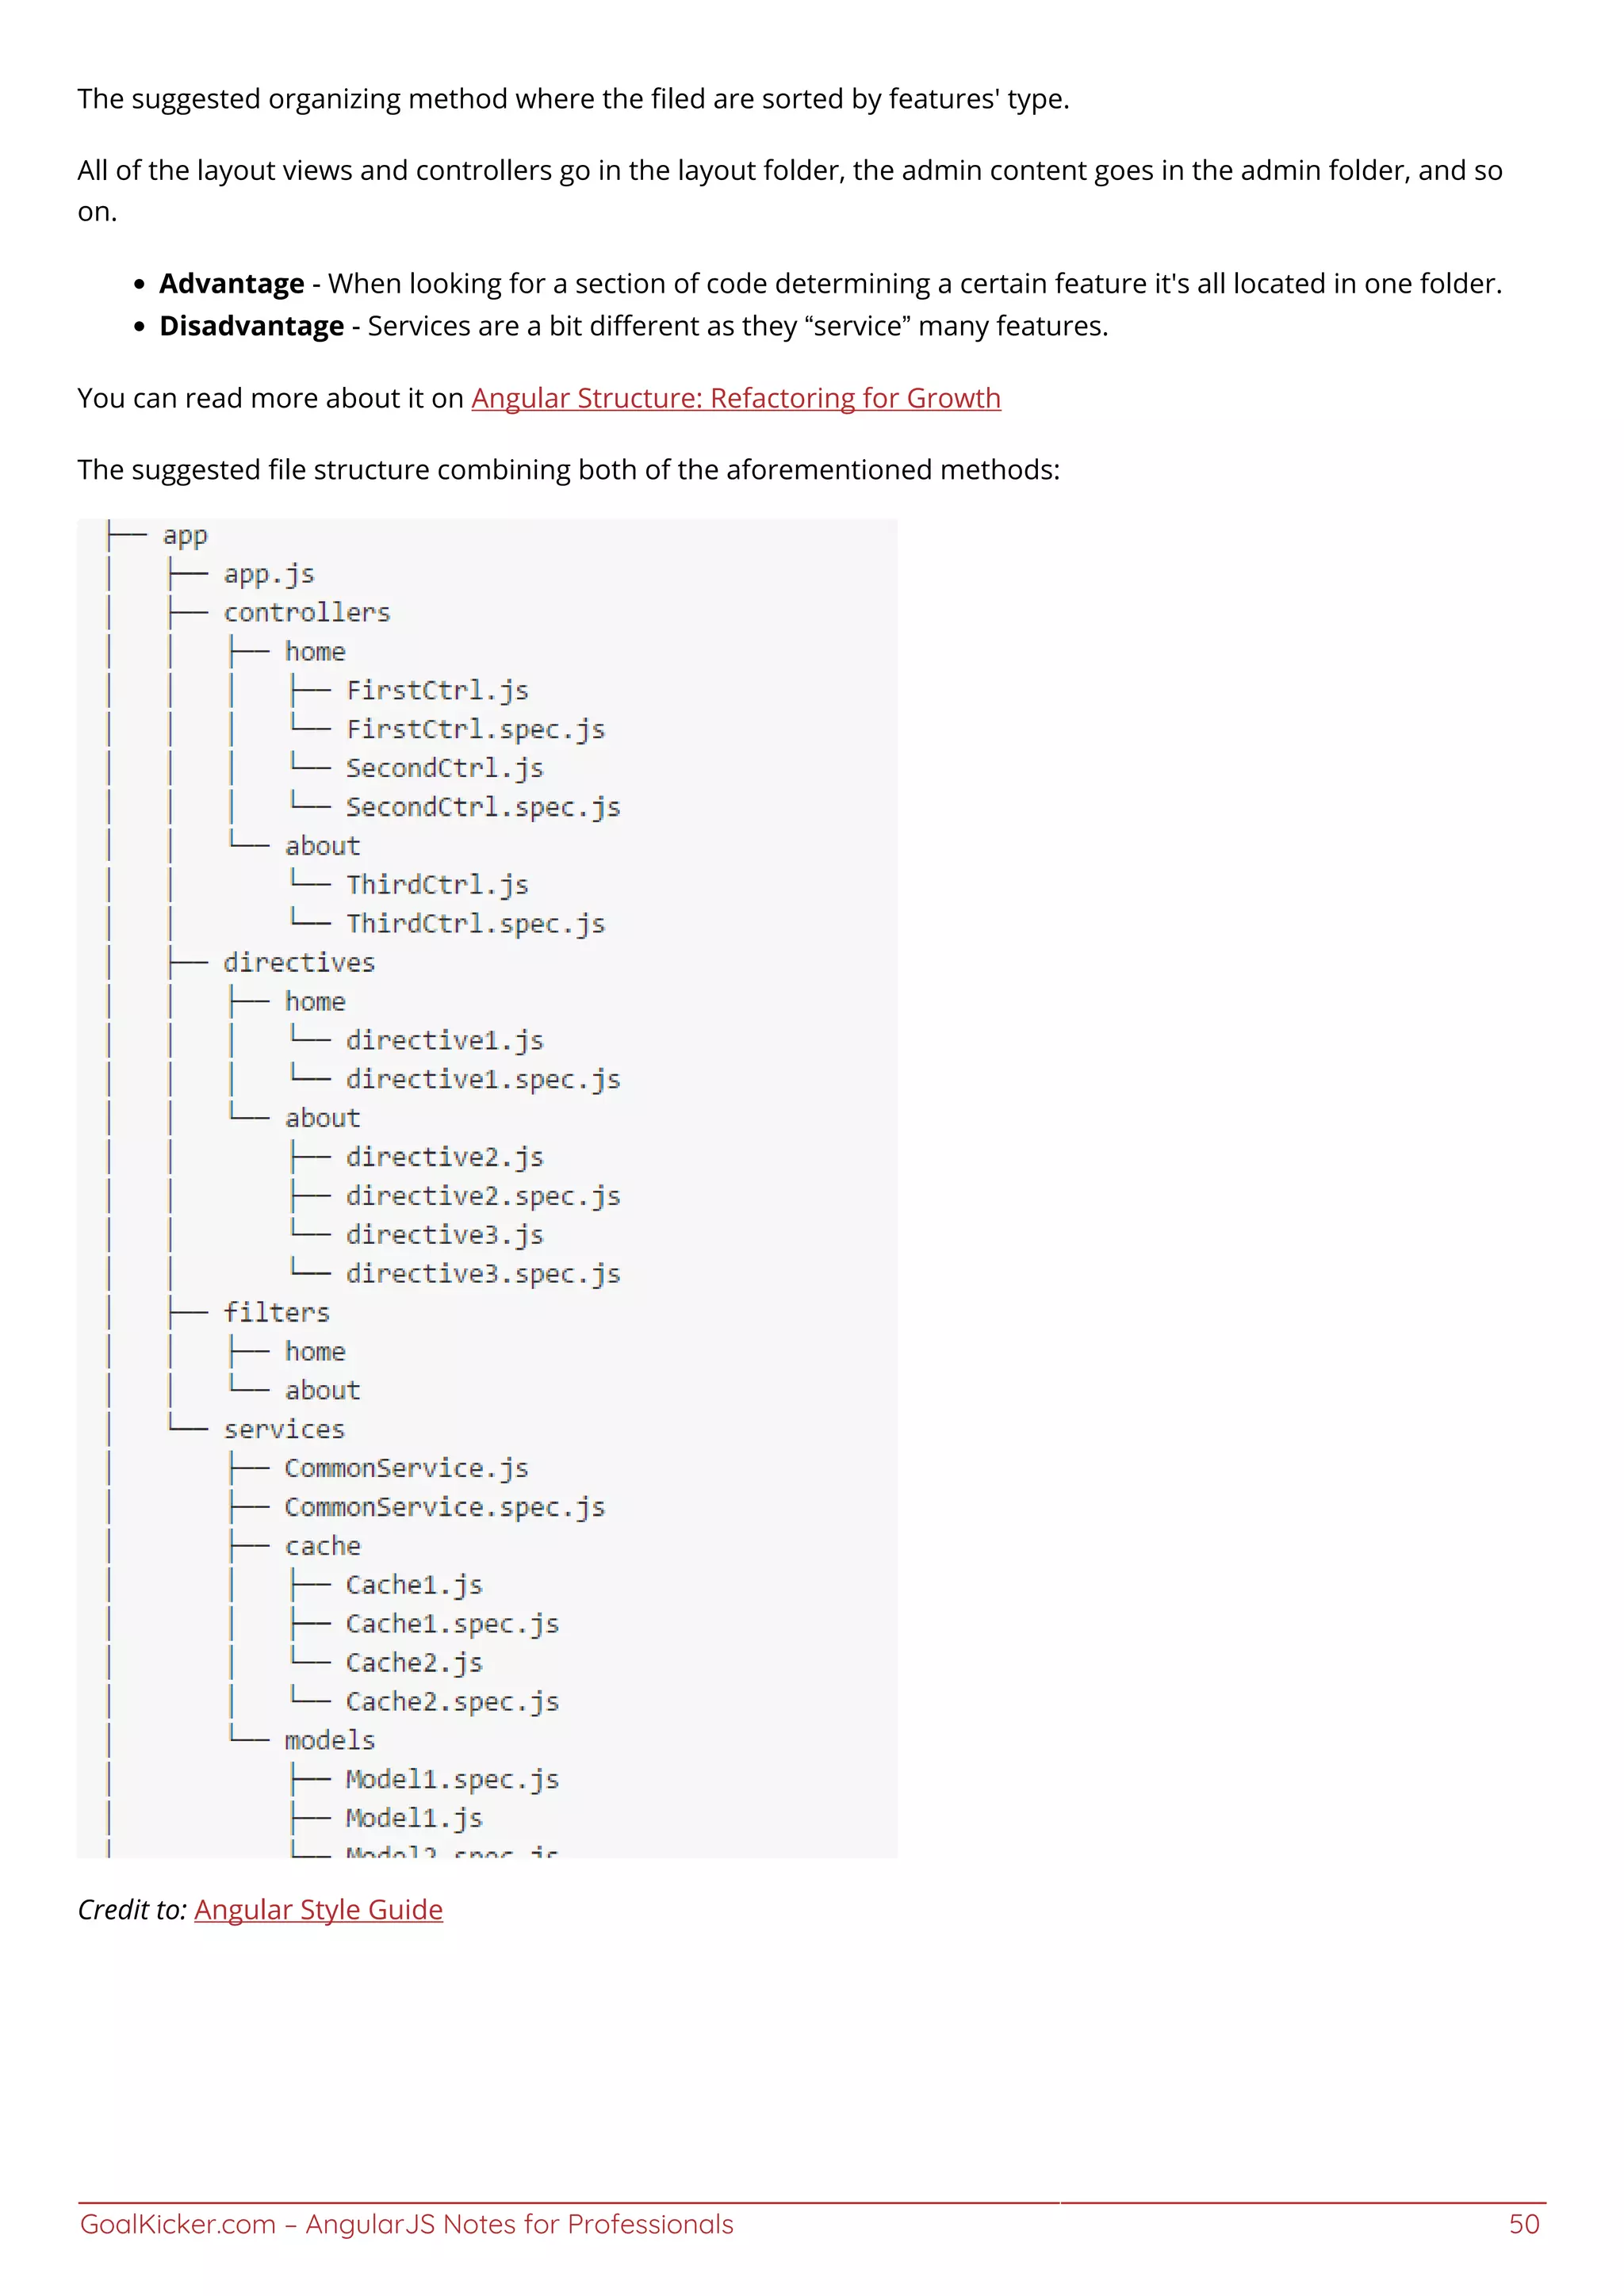
![GoalKicker.com – AngularJS Notes for Professionals 51
Chapter 9: Filters
Section 9.1: Accessing a filtered list from outside an ng-repeat
Occasionally you will want to access the result of your filters from outside the ng-repeat, perhaps to indicate the
number of items that have been filtered out. You can do this using as [variablename] syntax on the ng-repeat.
<ul>
<li ng-repeat="item in vm.listItems | filter:vm.myFilter as filtered">
{{item.name}}
</li>
</ul>
<span>Showing {{filtered.length}} of {{vm.listItems.length}}</span>
Section 9.2: Custom filter to remove values
A typical use case for a filter is to remove values from an array. In this example we pass in an array and remove any
nulls found in it, returning the array.
function removeNulls() {
return function(list) {
for (var i = list.length - 1; i >= 0; i--) {
if (typeof list[i] === 'undefined' ||
list[i] === null) {
list.splice(i, 1);
}
}
return list;
};
}
That would be used in the HTML like
{{listOfItems | removeNulls}}
or in a controller like
listOfItems = removeNullsFilter(listOfItems);
Section 9.3: Custom filter to format values
Another use case for filters is to format a single value. In this example, we pass in a value and we are returned an
appropriate true boolean value.
function convertToBooleanValue() {
return function(input) {
if (typeof input !== 'undefined' &&
input !== null &&
(input === true || input === 1 || input === '1' || input
.toString().toLowerCase() === 'true')) {
return true;
}
return false;
};
}](https://image.slidesharecdn.com/angularjsnotesforprofessionals-200412131913/75/Angular-js-notes-for-professionals-58-2048.jpg)
![GoalKicker.com – AngularJS Notes for Professionals 52
Which in the HTML would be used like this:
{{isAvailable | convertToBooleanValue}}
Or in a controller like:
var available = convertToBooleanValueFilter(isAvailable);
Section 9.4: Using filters in a controller or service
By injecting $filter, any defined filter in your Angular module may be used in controllers, services, directives or
even other filters.
angular.module("app")
.service("users", usersService)
.controller("UsersController", UsersController);
function usersService () {
this.getAll = function () {
return [{
id: 1,
username: "john"
}, {
id: 2,
username: "will"
}, {
id: 3,
username: "jack"
}];
};
}
function UsersController ($filter, users) {
var orderByFilter = $filter("orderBy");
this.users = orderByFilter(users.getAll(), "username");
// Now the users are ordered by their usernames: jack, john, will
this.users = orderByFilter(users.getAll(), "username", true);
// Now the users are ordered by their usernames, in reverse order: will, john, jack
}
Section 9.5: Performing filter in a child array
This example was done in order to demonstrate how you can perform a deep filter in a child array without the
necessity of a custom filter.
Controller:
(function() {
"use strict";
angular
.module('app', [])
.controller('mainCtrl', mainCtrl);
function mainCtrl() {
var vm = this;](https://image.slidesharecdn.com/angularjsnotesforprofessionals-200412131913/75/Angular-js-notes-for-professionals-59-2048.jpg)
![GoalKicker.com – AngularJS Notes for Professionals 53
vm.classifications = ["Saloons", "Sedans", "Commercial vehicle", "Sport car"];
vm.cars = [
{
"name":"car1",
"classifications":[
{
"name":"Saloons"
},
{
"name":"Sedans"
}
]
},
{
"name":"car2",
"classifications":[
{
"name":"Saloons"
},
{
"name":"Commercial vehicle"
}
]
},
{
"name":"car3",
"classifications":[
{
"name":"Sport car"
},
{
"name":"Sedans"
}
]
}
];
}
})();
View:
<body ng-app="app" ng-controller="mainCtrl as main">
Filter car by classification:
<select ng-model="classificationName"
ng-options="classification for classification in main.classifications"></select>
<br>
<ul>
<li ng-repeat="car in main.cars |
filter: { classifications: { name: classificationName } } track by $index"
ng-bind-template="{{car.name}} - {{car.classifications | json}}">
</li>
</ul>
</body>
Check the complete DEMO .](https://image.slidesharecdn.com/angularjsnotesforprofessionals-200412131913/75/Angular-js-notes-for-professionals-60-2048.jpg)
![GoalKicker.com – AngularJS Notes for Professionals 54
Chapter 10: Custom filters
Section 10.1: Use a filter in a controller, a service or a filter
You will have to inject $filter:
angular
.module('filters', [])
.filter('percentage', function($filter) {
return function (input) {
return $filter('number')(input * 100) + ' %';
};
});
Section 10.2: Create a filter with parameters
By default, a filter has a single parameter: the variable it is applied on. But you can pass more parameter to the
function:
angular
.module('app', [])
.controller('MyController', function($scope) {
$scope.example = 0.098152;
})
.filter('percentage', function($filter) {
return function (input, decimals) {
return $filter('number')(input * 100, decimals) + ' %';
};
});
Now, you can give a precision to the percentage filter:
<span ng-controller="MyController">{{ example | percentage: 2 }}</span>
=> "9.81 %"
... but other parameters are optional, you can still use the default filter:
<span ng-controller="MyController">{{ example | percentage }}</span>
=> "9.8152 %"
Section 10.3: Simple filter example
Filters format the value of an expression for display to the user. They can be used in view templates, controllers or
services. This example creates a filter (addZ) then uses it in a view. All this filter does is add a capital 'Z' to the end of
the string.
example.js
angular.module('main', [])
.filter('addZ', function() {
return function(value) {
return value + "Z";
}
})
.controller('MyController', ['$scope', function($scope) {
$scope.sample = "hello";](https://image.slidesharecdn.com/angularjsnotesforprofessionals-200412131913/75/Angular-js-notes-for-professionals-61-2048.jpg)
![GoalKicker.com – AngularJS Notes for Professionals 55
}])
example.html
Inside the view, the filter is applied with the following syntax: { variable | filter}. In this case, the variable we
defined in the controller, sample, is being filtered by the filter we created, addZ.
<div ng-controller="MyController">
<span>{{sample | addZ}}</span>
</div>
Expected output
helloZ](https://image.slidesharecdn.com/angularjsnotesforprofessionals-200412131913/75/Angular-js-notes-for-professionals-62-2048.jpg)
![GoalKicker.com – AngularJS Notes for Professionals 56
Chapter 11: Constants
Section 11.1: Create your first constant
angular
.module('MyApp', [])
.constant('VERSION', 1.0);
Your constant is now declared and can be injected in a controller, a service, a factory, a provider, and even in a
config method:
angular
.module('MyApp')
.controller('FooterController', function(VERSION) {
this.version = VERSION;
});
<footer ng-controller="FooterController as Footer">{{ Footer.version }}</footer>
Section 11.2: Use cases
There is no revolution here, but angular constant can be useful specially when your application and/or team starts
to grow ... or if you simply love writing beautiful code!
Refactor code. Example with event's names. If you use a lot of events in your application, you have event's
names a little every where. A when a new developer join your team, he names his events with a different
syntax, ... You can easily prevent this by grouping your event's names in a constant:
angular
.module('MyApp')
.constant('EVENTS', {
LOGIN_VALIDATE_FORM: 'login::click-validate',
LOGIN_FORGOT_PASSWORD: 'login::click-forgot',
LOGIN_ERROR: 'login::notify-error',
...
});
angular
.module('MyApp')
.controller('LoginController', function($scope, EVENT) {
$scope.$on(EVENT.LOGIN_VALIDATE_FORM, function() {
...
});
})
... and now, your event's names can take benefits from autocompletion !
Define configuration. Locate all your configuration in a same place:
angular
.module('MyApp')
.constant('CONFIG', {](https://image.slidesharecdn.com/angularjsnotesforprofessionals-200412131913/75/Angular-js-notes-for-professionals-63-2048.jpg)
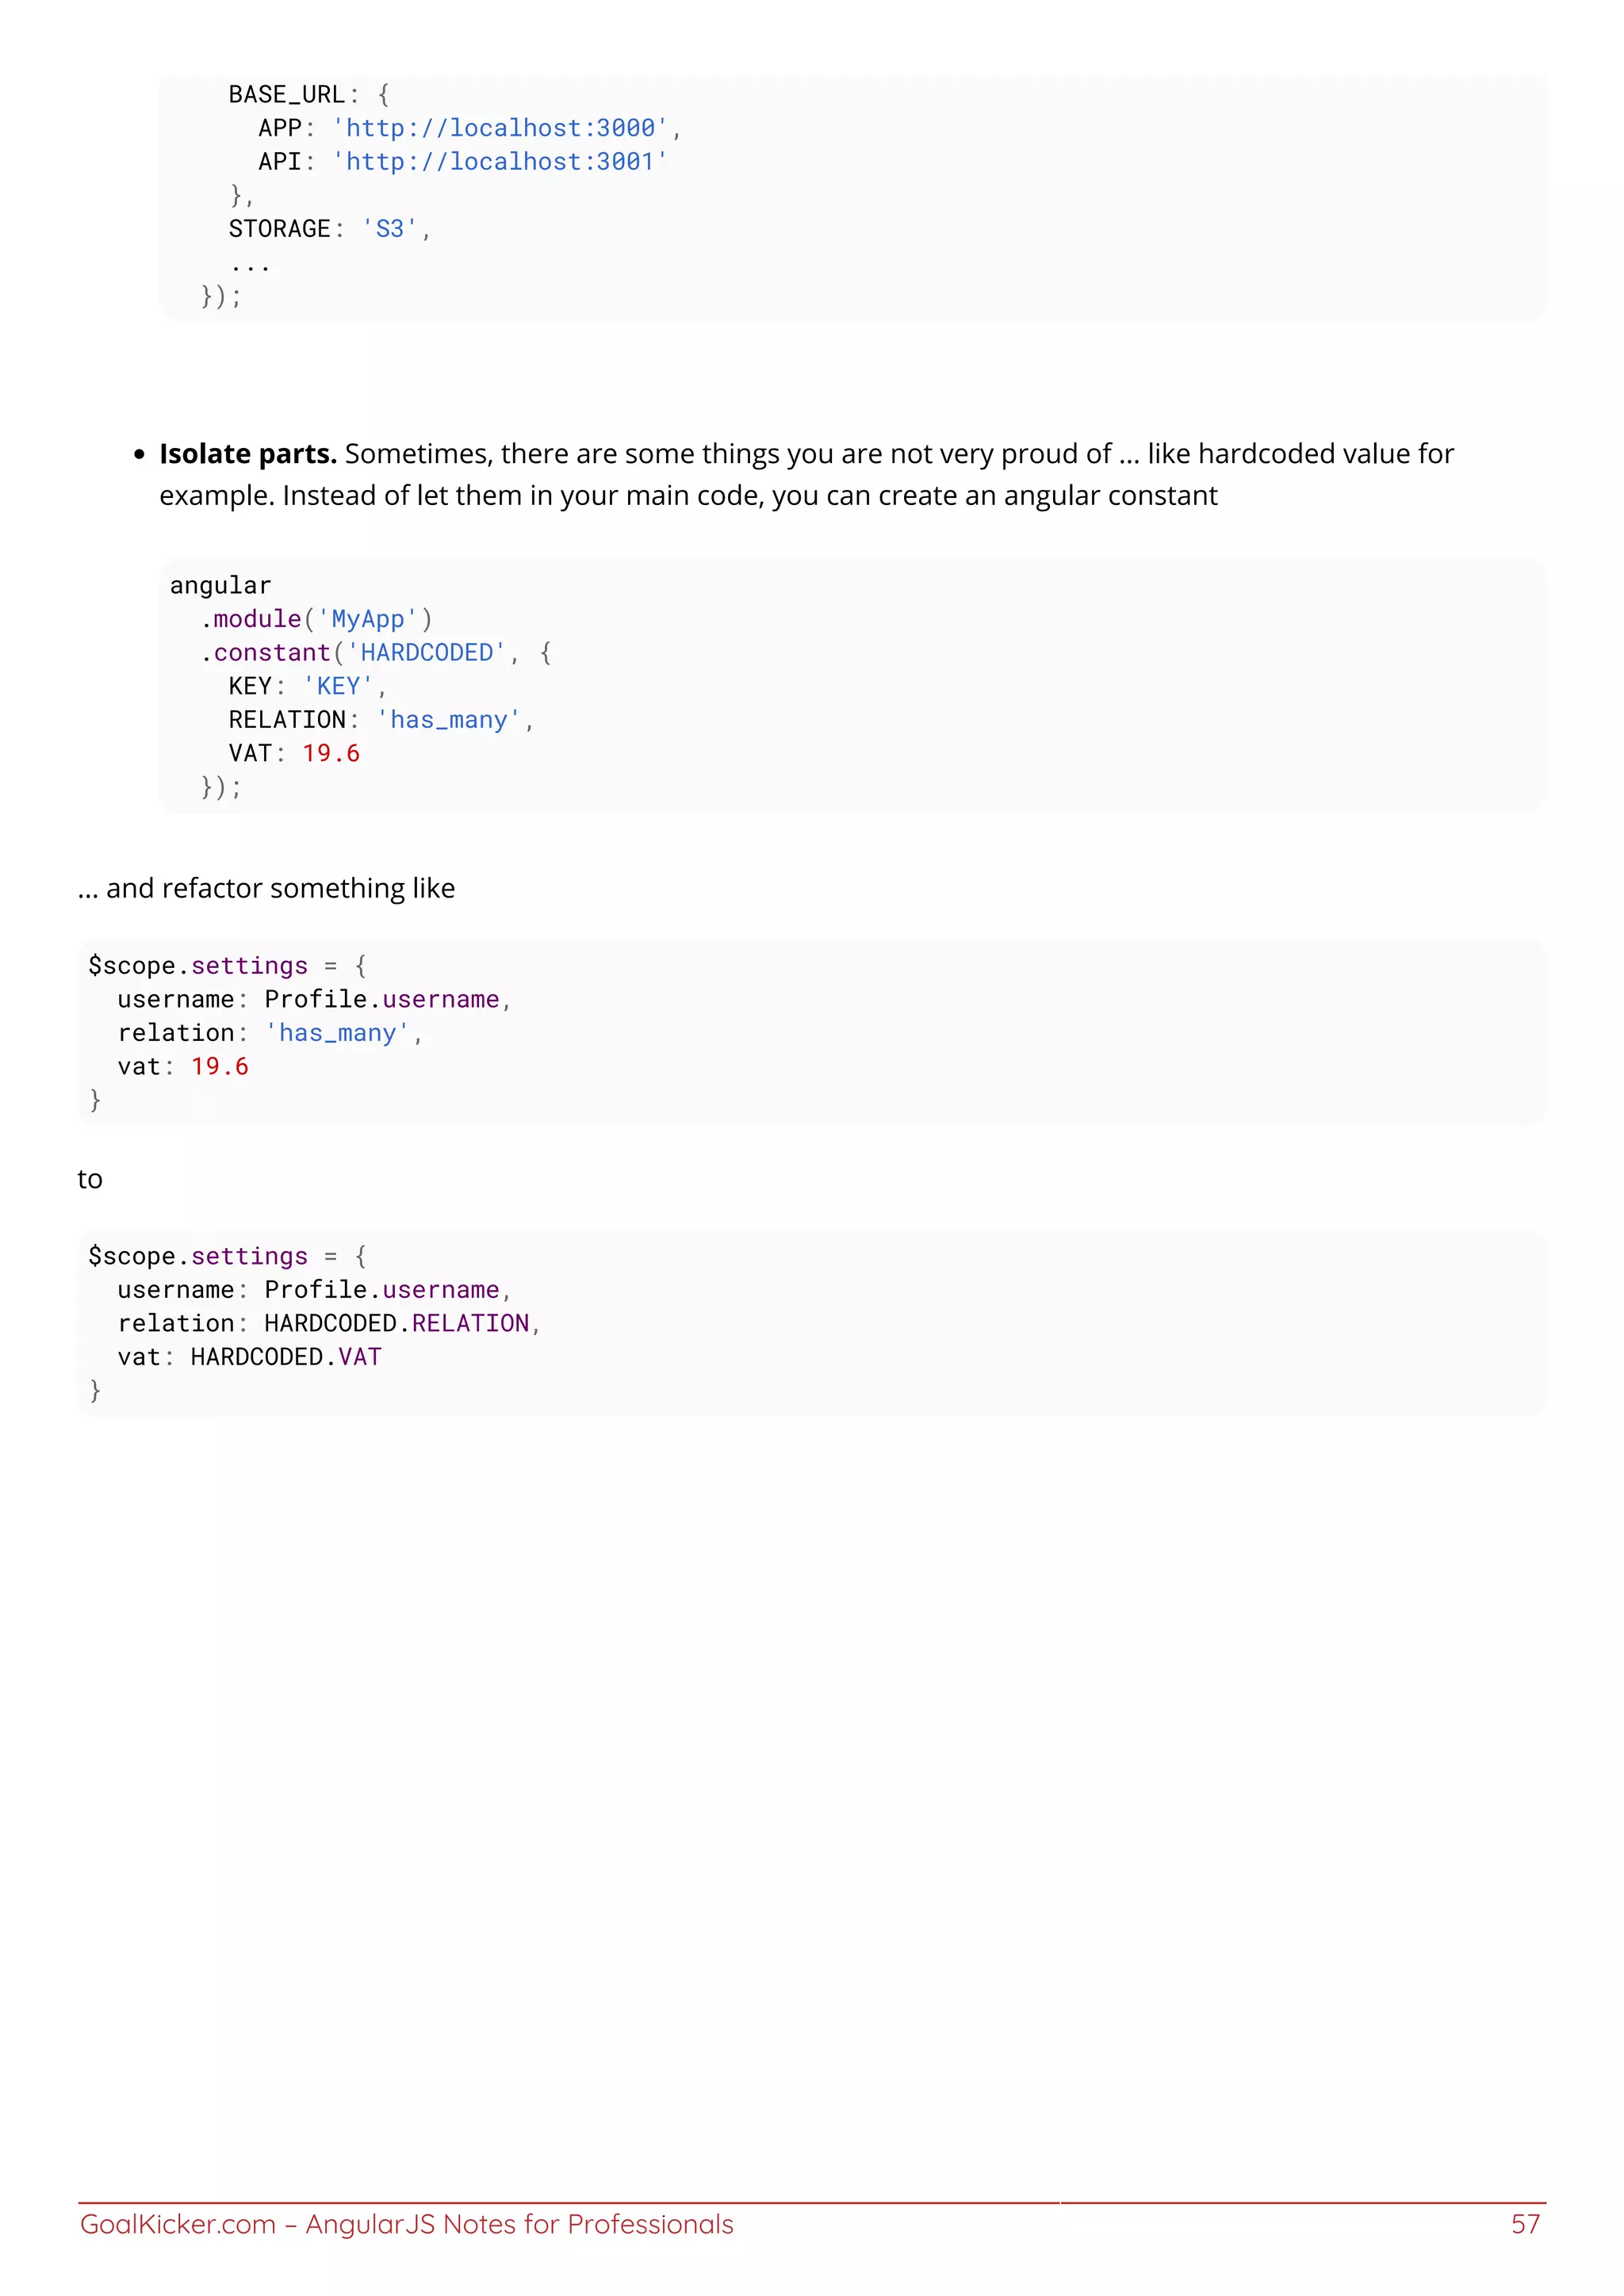
![GoalKicker.com – AngularJS Notes for Professionals 58
Chapter 12: Custom filters with ES6
Section 12.1: FileSize Filter using ES6
We have here a file Size filter to describe how to add costum filter to an existing module :
let fileSize=function (size,unit,fixedDigit) {
return size.toFixed(fixedDigit) + ' '+unit;
};
let fileSizeFilter=function () {
return function (size) {
if (isNaN(size))
size = 0;
if (size < 1024)
return size + ' octets';
size /= 1024;
if (size < 1024)
return fileSize(size,'Ko',2);
size /= 1024;
if (size < 1024)
return fileSize(size,'Mo',2);
size /= 1024;
if (size < 1024)
return fileSize(size,'Go',2);
size /= 1024;
return fileSize(size,'To',2);
};
};
export default fileSizeFilter;
The filter call into the module :
import fileSizeFilter from 'path...';
let myMainModule =
angular.module('mainApp', [])
.filter('fileSize', fileSizeFilter);
The html code where we call the filter :
<div ng-app="mainApp">
<div>
<input type="text" ng-model="size" />
</div>
<div>
<h3>Output:</h3>
<p>{{size| Filesize}}</p>
</div>
</div>](https://image.slidesharecdn.com/angularjsnotesforprofessionals-200412131913/75/Angular-js-notes-for-professionals-65-2048.jpg)
![GoalKicker.com – AngularJS Notes for Professionals 59
Chapter 13: Directives using
ngModelController
Section 13.1: A simple control: rating
Let us build a simple control, a rating widget, intended to be used as:
<rating min="0" max="5" nullifier="true" ng-model="data.rating"></rating>
No fancy CSS for now; this would render as:
0 1 2 3 4 5 x
Clicking on a number selects that rating; and clicking the "x" sets the rating to null.
app.directive('rating', function() {
function RatingController() {
this._ngModel = null;
this.rating = null;
this.options = null;
this.min = typeof this.min === 'number' ? this.min : 1;
this.max = typeof this.max === 'number' ? this.max : 5;
}
RatingController.prototype.setNgModel = function(ngModel) {
this._ngModel = ngModel;
if( ngModel ) {
// KEY POINT 1
ngModel.$render = this._render.bind(this);
}
};
RatingController.prototype._render = function() {
this.rating = this._ngModel.$viewValue != null ? this._ngModel.$viewValue : -
Number.MAX_VALUE;
};
RatingController.prototype._calculateOptions = function() {
if( this.min == null || this.max == null ) {
this.options = [];
}
else {
this.options = new Array(this.max - this.min + 1);
for( var i=0; i < this.options.length; i++ ) {
this.options[i] = this.min + i;
}
}
};
RatingController.prototype.setValue = function(val) {
this.rating = val;
// KEY POINT 2
this._ngModel.$setViewValue(val);
};
// KEY POINT 3](https://image.slidesharecdn.com/angularjsnotesforprofessionals-200412131913/75/Angular-js-notes-for-professionals-66-2048.jpg)
![GoalKicker.com – AngularJS Notes for Professionals 60
Object.defineProperty(RatingController.prototype, 'min', {
get: function() {
return this._min;
},
set: function(val) {
this._min = val;
this._calculateOptions();
}
});
Object.defineProperty(RatingController.prototype, 'max', {
get: function() {
return this._max;
},
set: function(val) {
this._max = val;
this._calculateOptions();
}
});
return {
restrict: 'E',
scope: {
// KEY POINT 3
min: '<?',
max: '<?',
nullifier: '<?'
},
bindToController: true,
controllerAs: 'ctrl',
controller: RatingController,
require: ['rating', 'ngModel'],
link: function(scope, elem, attrs, ctrls) {
ctrls[0].setNgModel(ctrls[1]);
},
template:
'<span ng-repeat="o in ctrl.options" href="#" class="rating-option" ng-
class="{'rating-option-active': o <= ctrl.rating}" ng-click="ctrl.setValue(o)">{{ o }}</span>' +
'<span ng-if="ctrl.nullifier" ng-click="ctrl.setValue(null)" class="rating-
nullifier">✖</span>'
};
});
Key points:
Implement ngModel.$render to transfer the model's view value to your view.1.
Call ngModel.$setViewValue() whenever you feel the view value should be updated.2.
The control can of course be parameterized; use '<' scope bindings for parameters, if in Angular >= 1.5 to3.
clearly indicate input - one way binding. If you have to take action whenever a parameter changes, you can
use a JavaScript property (see Object.defineProperty()) to save a few watches.
Note 1: In order not to overcomplicate the implementation, the rating values are inserted in an array - the
ctrl.options. This is not needed; a more efficient, but also more complex, implementation could use DOM
manipulation to insert/remove ratings when min/max change.
Note 2: With the exception of the '<' scope bindings, this example can be used in Angular < 1.5. If you are on
Angular >= 1.5, it would be a good idea to transform this to a component and use the $onInit() lifecycle hook to
initialize min and max, instead of doing so in the controller's constructor.](https://image.slidesharecdn.com/angularjsnotesforprofessionals-200412131913/75/Angular-js-notes-for-professionals-67-2048.jpg)
![GoalKicker.com – AngularJS Notes for Professionals 61
And a necessary fiddle: https://jsfiddle.net/h81mgxma/
Section 13.2: A couple of complex controls: edit a full object
A custom control does not have to limit itself to trivial things like primitives; it can edit more interesting things. Here
we present two types of custom controls, one for editing persons and one for editing addresses. The address
control is used to edit the person's address. An example of usage would be:
<input-person ng-model="data.thePerson"></input-person>
<input-address ng-model="data.thePerson.address"></input-address>
The model for this example is deliberately simplistic:
function Person(data) {
data = data || {};
this.name = data.name;
this.address = data.address ? new Address(data.address) : null;
}
function Address(data) {
data = data || {};
this.street = data.street;
this.number = data.number;
}
The address editor:
app.directive('inputAddress', function() {
InputAddressController.$inject = ['$scope'];
function InputAddressController($scope) {
this.$scope = $scope;
this._ngModel = null;
this.value = null;
this._unwatch = angular.noop;
}
InputAddressController.prototype.setNgModel = function(ngModel) {
this._ngModel = ngModel;
if( ngModel ) {
// KEY POINT 3
ngModel.$render = this._render.bind(this);
}
};
InputAddressController.prototype._makeWatch = function() {
// KEY POINT 1
this._unwatch = this.$scope.$watchCollection(
(function() {
return this.value;
}).bind(this),
(function(newval, oldval) {
if( newval !== oldval ) { // skip the initial trigger
this._ngModel.$setViewValue(newval !== null ? new Address(newval) : null);
}
}).bind(this)
);
};](https://image.slidesharecdn.com/angularjsnotesforprofessionals-200412131913/75/Angular-js-notes-for-professionals-68-2048.jpg)
![GoalKicker.com – AngularJS Notes for Professionals 62
InputAddressController.prototype._render = function() {
// KEY POINT 2
this._unwatch();
this.value = this._ngModel.$viewValue ? new Address(this._ngModel.$viewValue) : null;
this._makeWatch();
};
return {
restrict: 'E',
scope: {},
bindToController: true,
controllerAs: 'ctrl',
controller: InputAddressController,
require: ['inputAddress', 'ngModel'],
link: function(scope, elem, attrs, ctrls) {
ctrls[0].setNgModel(ctrls[1]);
},
template:
'<div>' +
'<label><span>Street:</span><input type="text" ng-model="ctrl.value.street"
/></label>' +
'<label><span>Number:</span><input type="text" ng-model="ctrl.value.number"
/></label>' +
'</div>'
};
});
Key points:
We are editing an object; we do not want to change directly the object given to us from our parent (we want1.
our model to be compatible with the immutability principle). So we create a shallow watch on the object
being edited and update the model with $setViewValue() whenever a property changes. We pass a copy to
our parent.
Whenever the model changes from the outside, we copy it and save the copy to our scope. Immutability2.
principles again, though the internal copy is not immutable, the external could very well be. Additionally we
rebuild the watch (this_unwatch();this._makeWatch();), to avoid triggering the watcher for changes
pushed to us by the model. (We only want the watch to trigger for changes made in the UI.)
Other that the points above, we implement ngModel.$render() and call ngModel.$setViewValue() as we3.
would for a simple control (see the rating example).
The code for the person custom control is almost identical. The template is using the <input-address>. In a more
advanced implementation we could extract the controllers in a reusable module.
app.directive('inputPerson', function() {
InputPersonController.$inject = ['$scope'];
function InputPersonController($scope) {
this.$scope = $scope;
this._ngModel = null;
this.value = null;
this._unwatch = angular.noop;
}
InputPersonController.prototype.setNgModel = function(ngModel) {
this._ngModel = ngModel;
if( ngModel ) {
ngModel.$render = this._render.bind(this);](https://image.slidesharecdn.com/angularjsnotesforprofessionals-200412131913/75/Angular-js-notes-for-professionals-69-2048.jpg)
![GoalKicker.com – AngularJS Notes for Professionals 63
}
};
InputPersonController.prototype._makeWatch = function() {
this._unwatch = this.$scope.$watchCollection(
(function() {
return this.value;
}).bind(this),
(function(newval, oldval) {
if( newval !== oldval ) { // skip the initial trigger
this._ngModel.$setViewValue(newval !== null ? new Person(newval) : null);
}
}).bind(this)
);
};
InputPersonController.prototype._render = function() {
this._unwatch();
this.value = this._ngModel.$viewValue ? new Person(this._ngModel.$viewValue) : null;
this._makeWatch();
};
return {
restrict: 'E',
scope: {},
bindToController: true,
controllerAs: 'ctrl',
controller: InputPersonController,
require: ['inputPerson', 'ngModel'],
link: function(scope, elem, attrs, ctrls) {
ctrls[0].setNgModel(ctrls[1]);
},
template:
'<div>' +
'<label><span>Name:</span><input type="text" ng-model="ctrl.value.name" /></label>'
+
'<input-address ng-model="ctrl.value.address"></input-address>' +
'</div>'
};
});
Note: Here the objects are typed, i.e. they have proper constructors. This is not obligatory; the model can be plain
JSON objects. In this case just use angular.copy() instead of the constructors. An added advantage is that the
controller becomes identical for the two controls and can easily be extracted into some common module.
The fiddle: https://jsfiddle.net/3tzyqfko/2/
Two versions of the fiddle having extracted the common code of the controllers: https://jsfiddle.net/agj4cp0e/ and
https://jsfiddle.net/ugb6Lw8b/](https://image.slidesharecdn.com/angularjsnotesforprofessionals-200412131913/75/Angular-js-notes-for-professionals-70-2048.jpg)
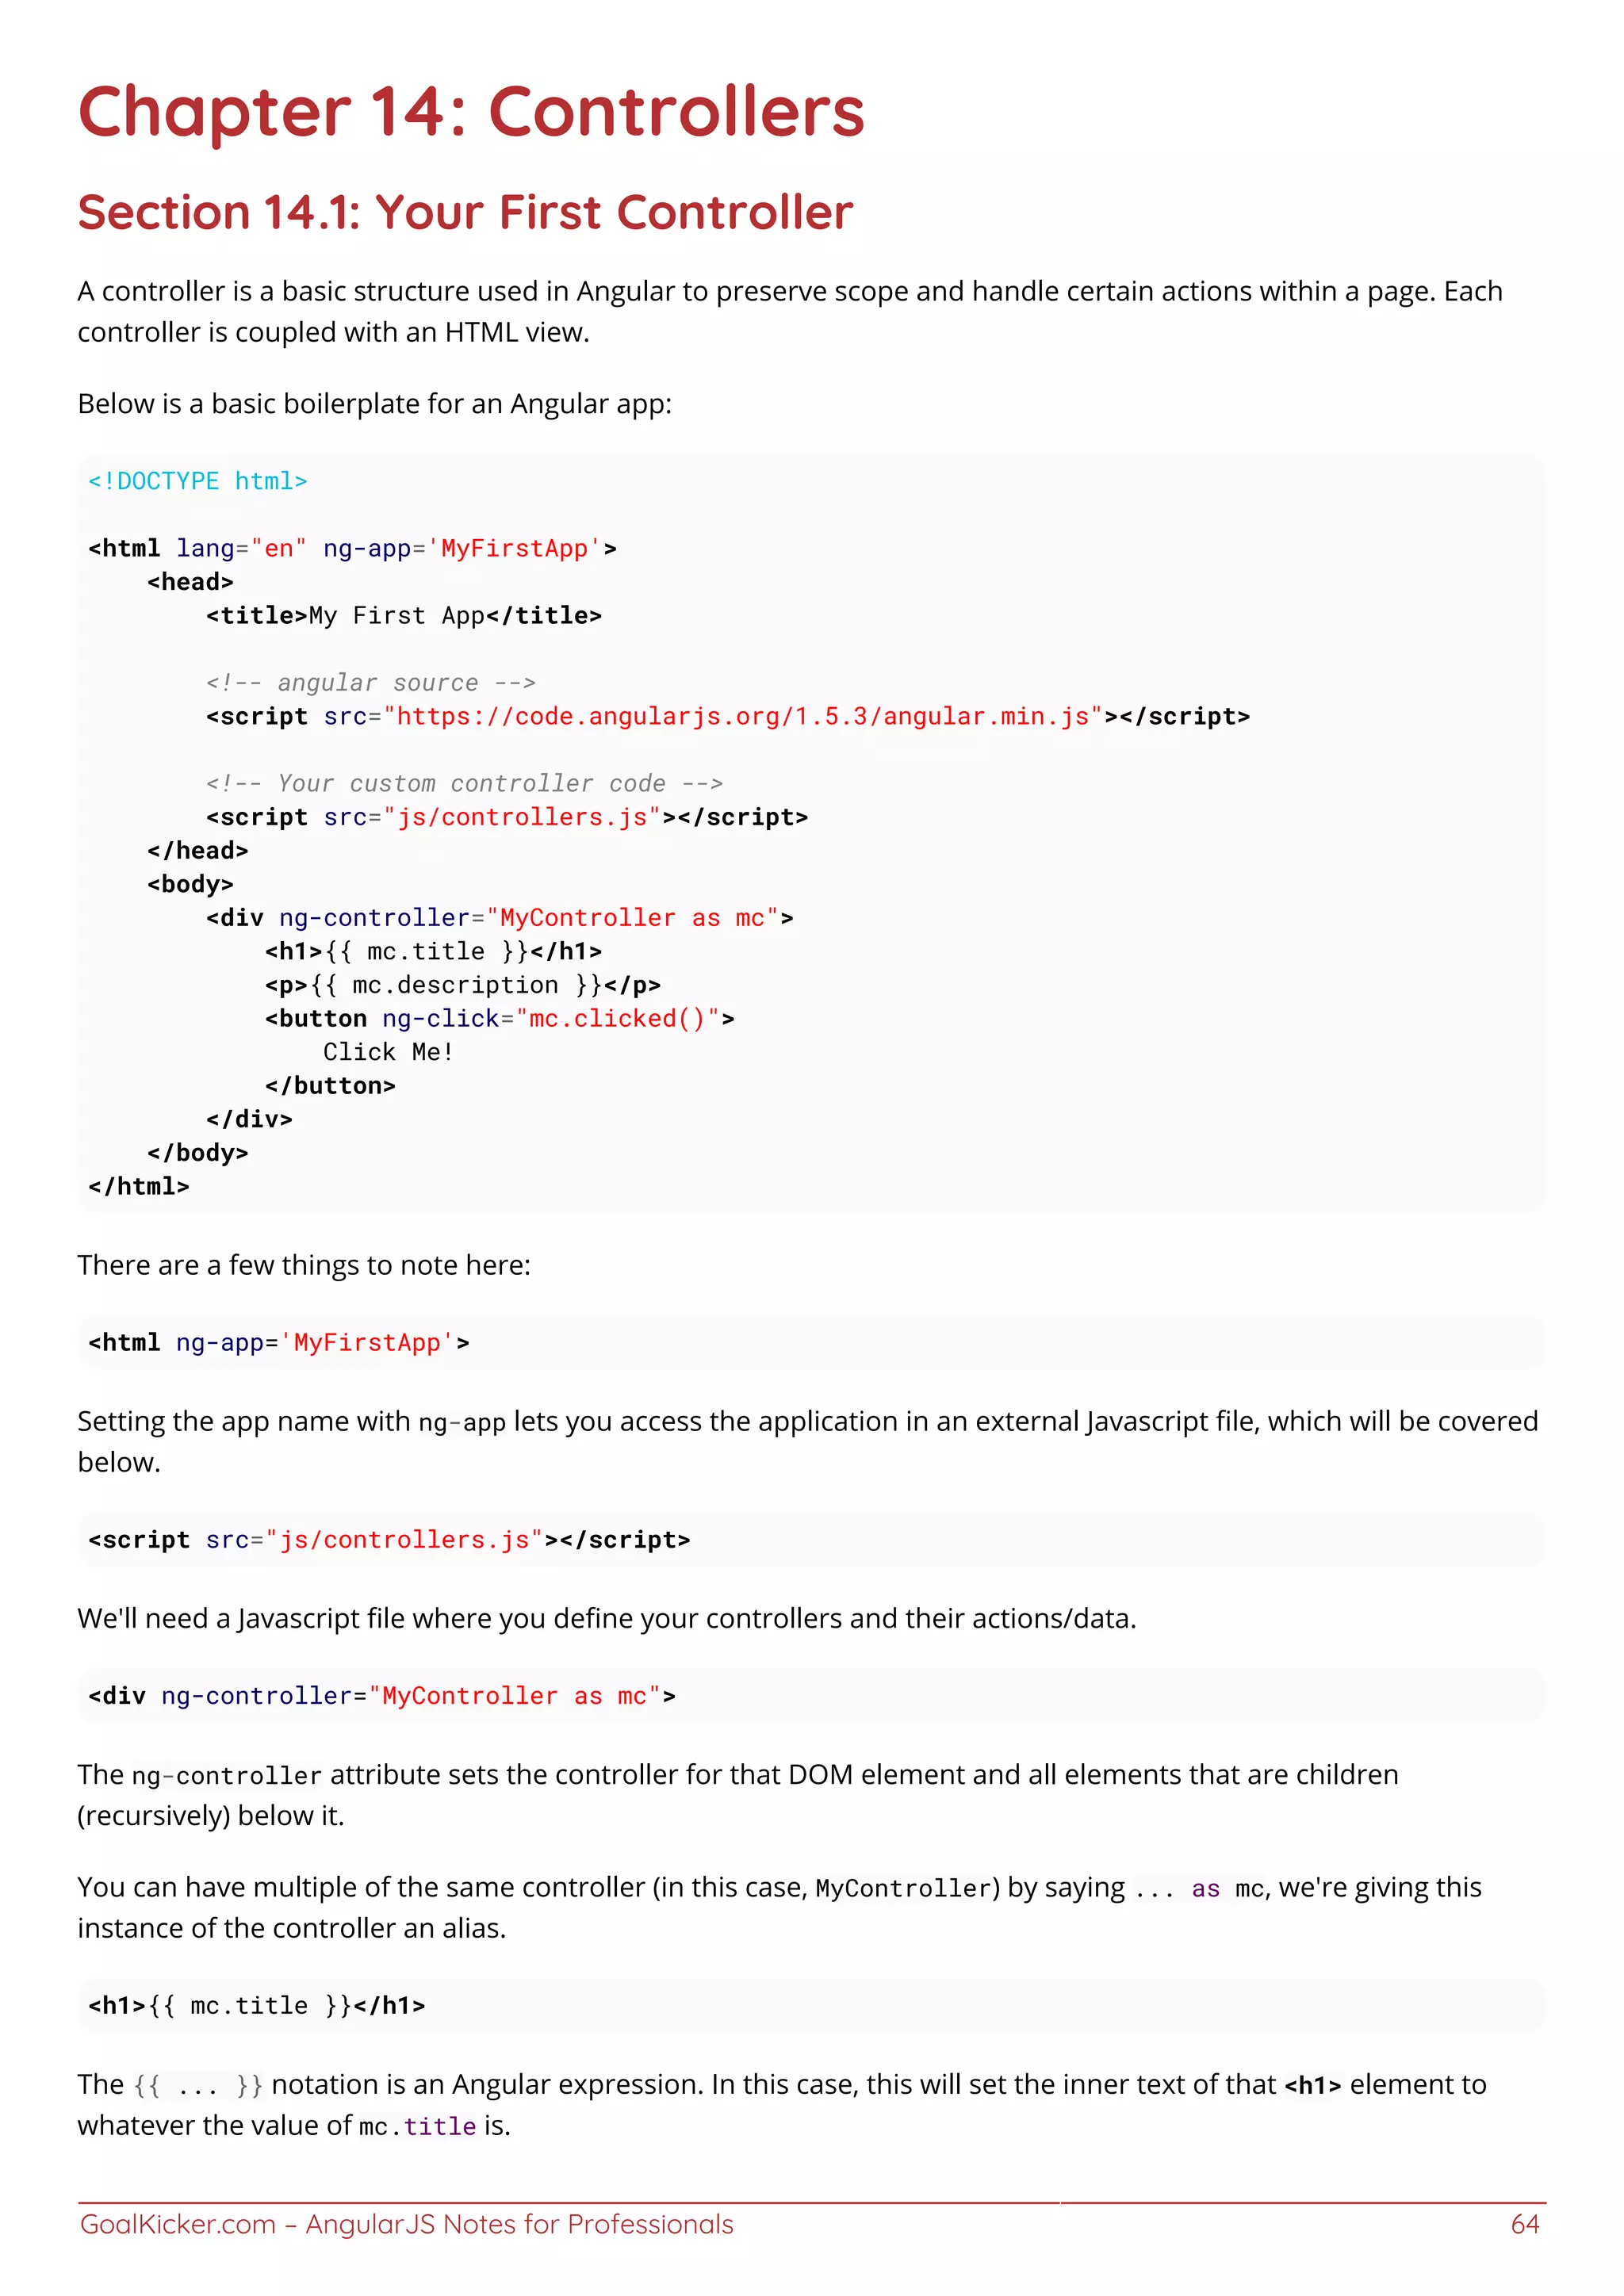
![GoalKicker.com – AngularJS Notes for Professionals 65
Note: Angular employs dual-way data binding, meaning that regardless of how you update the mc.title value, it
will be reflected in both the controller and the page.
Also note that Angular expressions do not have to reference a controller. An Angular expression can be as simple as
{{ 1 + 2 }} or {{ "Hello " + "World" }}.
<button ng-click="mc.clicked()">
ng-click is an Angular directive, in this case binding the click event for the button to trigger the clicked() function
of the MyController instance.
With those things in mind, let's write an implementation of the MyController controller. With the example above,
you would write this code in js/controller.js.
First, you'll need to instantiate the Angular app in your Javascript.
var app = angular.module("MyFirstApp", []);
Note that the name we pass here is the same as the name you set in your HTML with the ng-app directive.
Now that we have the app object, we can use that to create controllers.
app.controller('MyController', function(){
var ctrl = this;
ctrl.title = "My First Angular App";
ctrl.description = "This is my first Angular app!";
ctrl.clicked = function(){
alert("MyController.clicked()");
};
});
Note: For anything that we want to be a part of the controller instance, we use the this keyword.
This is all that is required to build a simple controller.
Section 14.2: Creating Controllers, Minification safe
There are a couple different ways to protect your controller creation from minification.
The first is called inline array annotation. It looks like the following:
var app = angular.module('app');
app.controller('sampleController', ['$scope', '$http', function(a, b){
//logic here
}]);
The second parameter of the controller method can accept an array of dependencies. As you can see I've defined
$scope and $http which should correspond to the parameters of the controller function in which a will be the
$scope, and b would be $http. Take note that the last item in the array should be your controller function.
The second option is using the $inject property. It looks like the following:
var app = angular.module('app');
app.controller('sampleController', sampleController);](https://image.slidesharecdn.com/angularjsnotesforprofessionals-200412131913/75/Angular-js-notes-for-professionals-72-2048.jpg)
![GoalKicker.com – AngularJS Notes for Professionals 66
sampleController.$inject = ['$scope', '$http'];
function sampleController(a, b) {
//logic here
}
This does the same thing as inline array annotation but provides a different styling for those that prefer one option
over the other.
The order of injected dependencies is important
When injecting dependencies using the array form, be sure that the list of the dependencies match its
corresponding list of arguments passed to the controller function.
Note that in the following example, $scope and $http are reversed. This will cause a problem in the code.
// Intentional Bug: injected dependencies are reversed which will cause a problem
app.controller('sampleController', ['$scope', '$http',function($http, $scope) {
$http.get('sample.json');
}]);
Section 14.3: Using ControllerAs in Angular JS
In Angular $scope is the glue between the Controller and the View that helps with all of our data binding needs.
Controller As is another way of binding controller and view and is mostly recommended to use. Basically these are
the two controller constructs in Angular (i.e $scope and Controller As).
Different ways of using Controller As are -
controllerAs View Syntax
<div ng-controller="CustomerController as customer">
{{ customer.name }}
</div>
controllerAs Controller Syntax
function CustomerController() {
this.name = {};
this.sendMessage = function() { };
}
controllerAs with vm
function CustomerController() {
/*jshint validthis: true */
var vm = this;
vm.name = {};
vm.sendMessage = function() { };
}
controllerAs is syntactic sugar over $scope. You can still bind to the View and still access $scope methods. Using
controllerAs, is one of the best practices suggested by the angular core team. There are many reason for this, few
of them are -
$scope is exposing the members from the controller to the view via an intermediary object. By setting
this.*, we can expose just what we want to expose from the controller to the view. It also follow the](https://image.slidesharecdn.com/angularjsnotesforprofessionals-200412131913/75/Angular-js-notes-for-professionals-73-2048.jpg)
![GoalKicker.com – AngularJS Notes for Professionals 67
standard JavaScript way of using this.
using controllerAs syntax, we have more readable code and the parent property can be accessed using the
alias name of the parent controller instead of using the $parent syntax.
It promotes the use of binding to a "dotted" object in the View (e.g. customer.name instead of name), which
is more contextual, easier to read, and avoids any reference issues that may occur without "dotting".
Helps avoid using $parent calls in Views with nested controllers.
Use a capture variable for this when using the controllerAs syntax. Choose a consistent variable name such
as vm, which stands for ViewModel. Because, this keyword is contextual and when used within a function
inside a controller may change its context. Capturing the context of this avoids encountering this problem.
NOTE: using controllerAs syntax add to current scope reference to current controller, so it available as field
<div ng-controller="Controller as vm>...</div>
vm is available as $scope.vm.
Section 14.4: Creating Minification-Safe Angular Controllers
To create minification-safe angular controllers, you will change the controller function parameters.
The second argument in the module.controller function should be passed an array, where the last parameter is
the controller function, and every parameter before that is the name of each injected value.
This is different from the normal paradigm; that takes the controller function with the injected arguments.
Given:
var app = angular.module('myApp');
The controller should look like this:
app.controller('ctrlInject',
[
/* Injected Parameters */
'$Injectable1',
'$Injectable2',
/* Controller Function */
function($injectable1Instance, $injectable2Instance) {
/* Controller Content */
}
]
);
Note: The names of injected parameters are not required to match, but they will be bound in order.
This will minify to something similar to this:
var
a=angular.module('myApp');a.controller('ctrlInject',['$Injectable1','$Injectable2',function(b,c){/*
Controller Content */}]);
The minification process will replace every instance of app with a, every instance of $Injectable1Instance with b,
and every instance of $Injectable2Instance with c.](https://image.slidesharecdn.com/angularjsnotesforprofessionals-200412131913/75/Angular-js-notes-for-professionals-74-2048.jpg)
![GoalKicker.com – AngularJS Notes for Professionals 68
Section 14.5: Creating Controllers
angular
.module('app')
.controller('SampleController', SampleController)
SampleController.$inject = ['$log', '$scope'];
function SampleController($log, $scope){
$log.debug('*****SampleController******');
/* Your code below */
}
Note: The .$inject will make sure your dependencies doesn't get scrambled after minification. Also, make sure it's
in order with the named function.
Section 14.6: Nested Controllers
Nesting controllers chains the $scope as well. Changing a $scope variable in the nested controller changes the same
$scope variable in the parent controller.
.controller('parentController', function ($scope) {
$scope.parentVariable = "I'm the parent";
});
.controller('childController', function ($scope) {
$scope.childVariable = "I'm the child";
$scope.childFunction = function () {
$scope.parentVariable = "I'm overriding you";
};
});
Now let's try to handle both of them, nested.
<body ng-controller="parentController">
What controller am I? {{parentVariable}}
<div ng-controller="childController">
What controller am I? {{childVariable}}
<button ng-click="childFunction()"> Click me to override! </button>
</div>
</body>
Nesting controllers may have it's benefits, but one thing must be kept in mind when doing so. Calling the
ngController directive creates a new instance of the controller - which can often create confusion and unexpected
results.](https://image.slidesharecdn.com/angularjsnotesforprofessionals-200412131913/75/Angular-js-notes-for-professionals-75-2048.jpg)
![GoalKicker.com – AngularJS Notes for Professionals 69
Chapter 15: Controllers with ES6
Section 15.1: Controller
it is very easy to write an angularJS controller with ES6 if your are familiarized with the Object Oriented
Programming :
class exampleContoller{
constructor(service1,service2,...serviceN){
let ctrl=this;
ctrl.service1=service1;
ctrl.service2=service2;
.
.
.
ctrl.service1=service1;
ctrl.controllerName = 'Example Controller';
ctrl.method1(controllerName)
}
method1(param){
let ctrl=this;
ctrl.service1.serviceFunction();
.
.
ctrl.scopeName=param;
}
.
.
.
methodN(param){
let ctrl=this;
ctrl.service1.serviceFunction();
.
.
}
}
exampleContoller.$inject = ['service1','service2',...,'serviceN'];
export default exampleContoller;](https://image.slidesharecdn.com/angularjsnotesforprofessionals-200412131913/75/Angular-js-notes-for-professionals-76-2048.jpg)
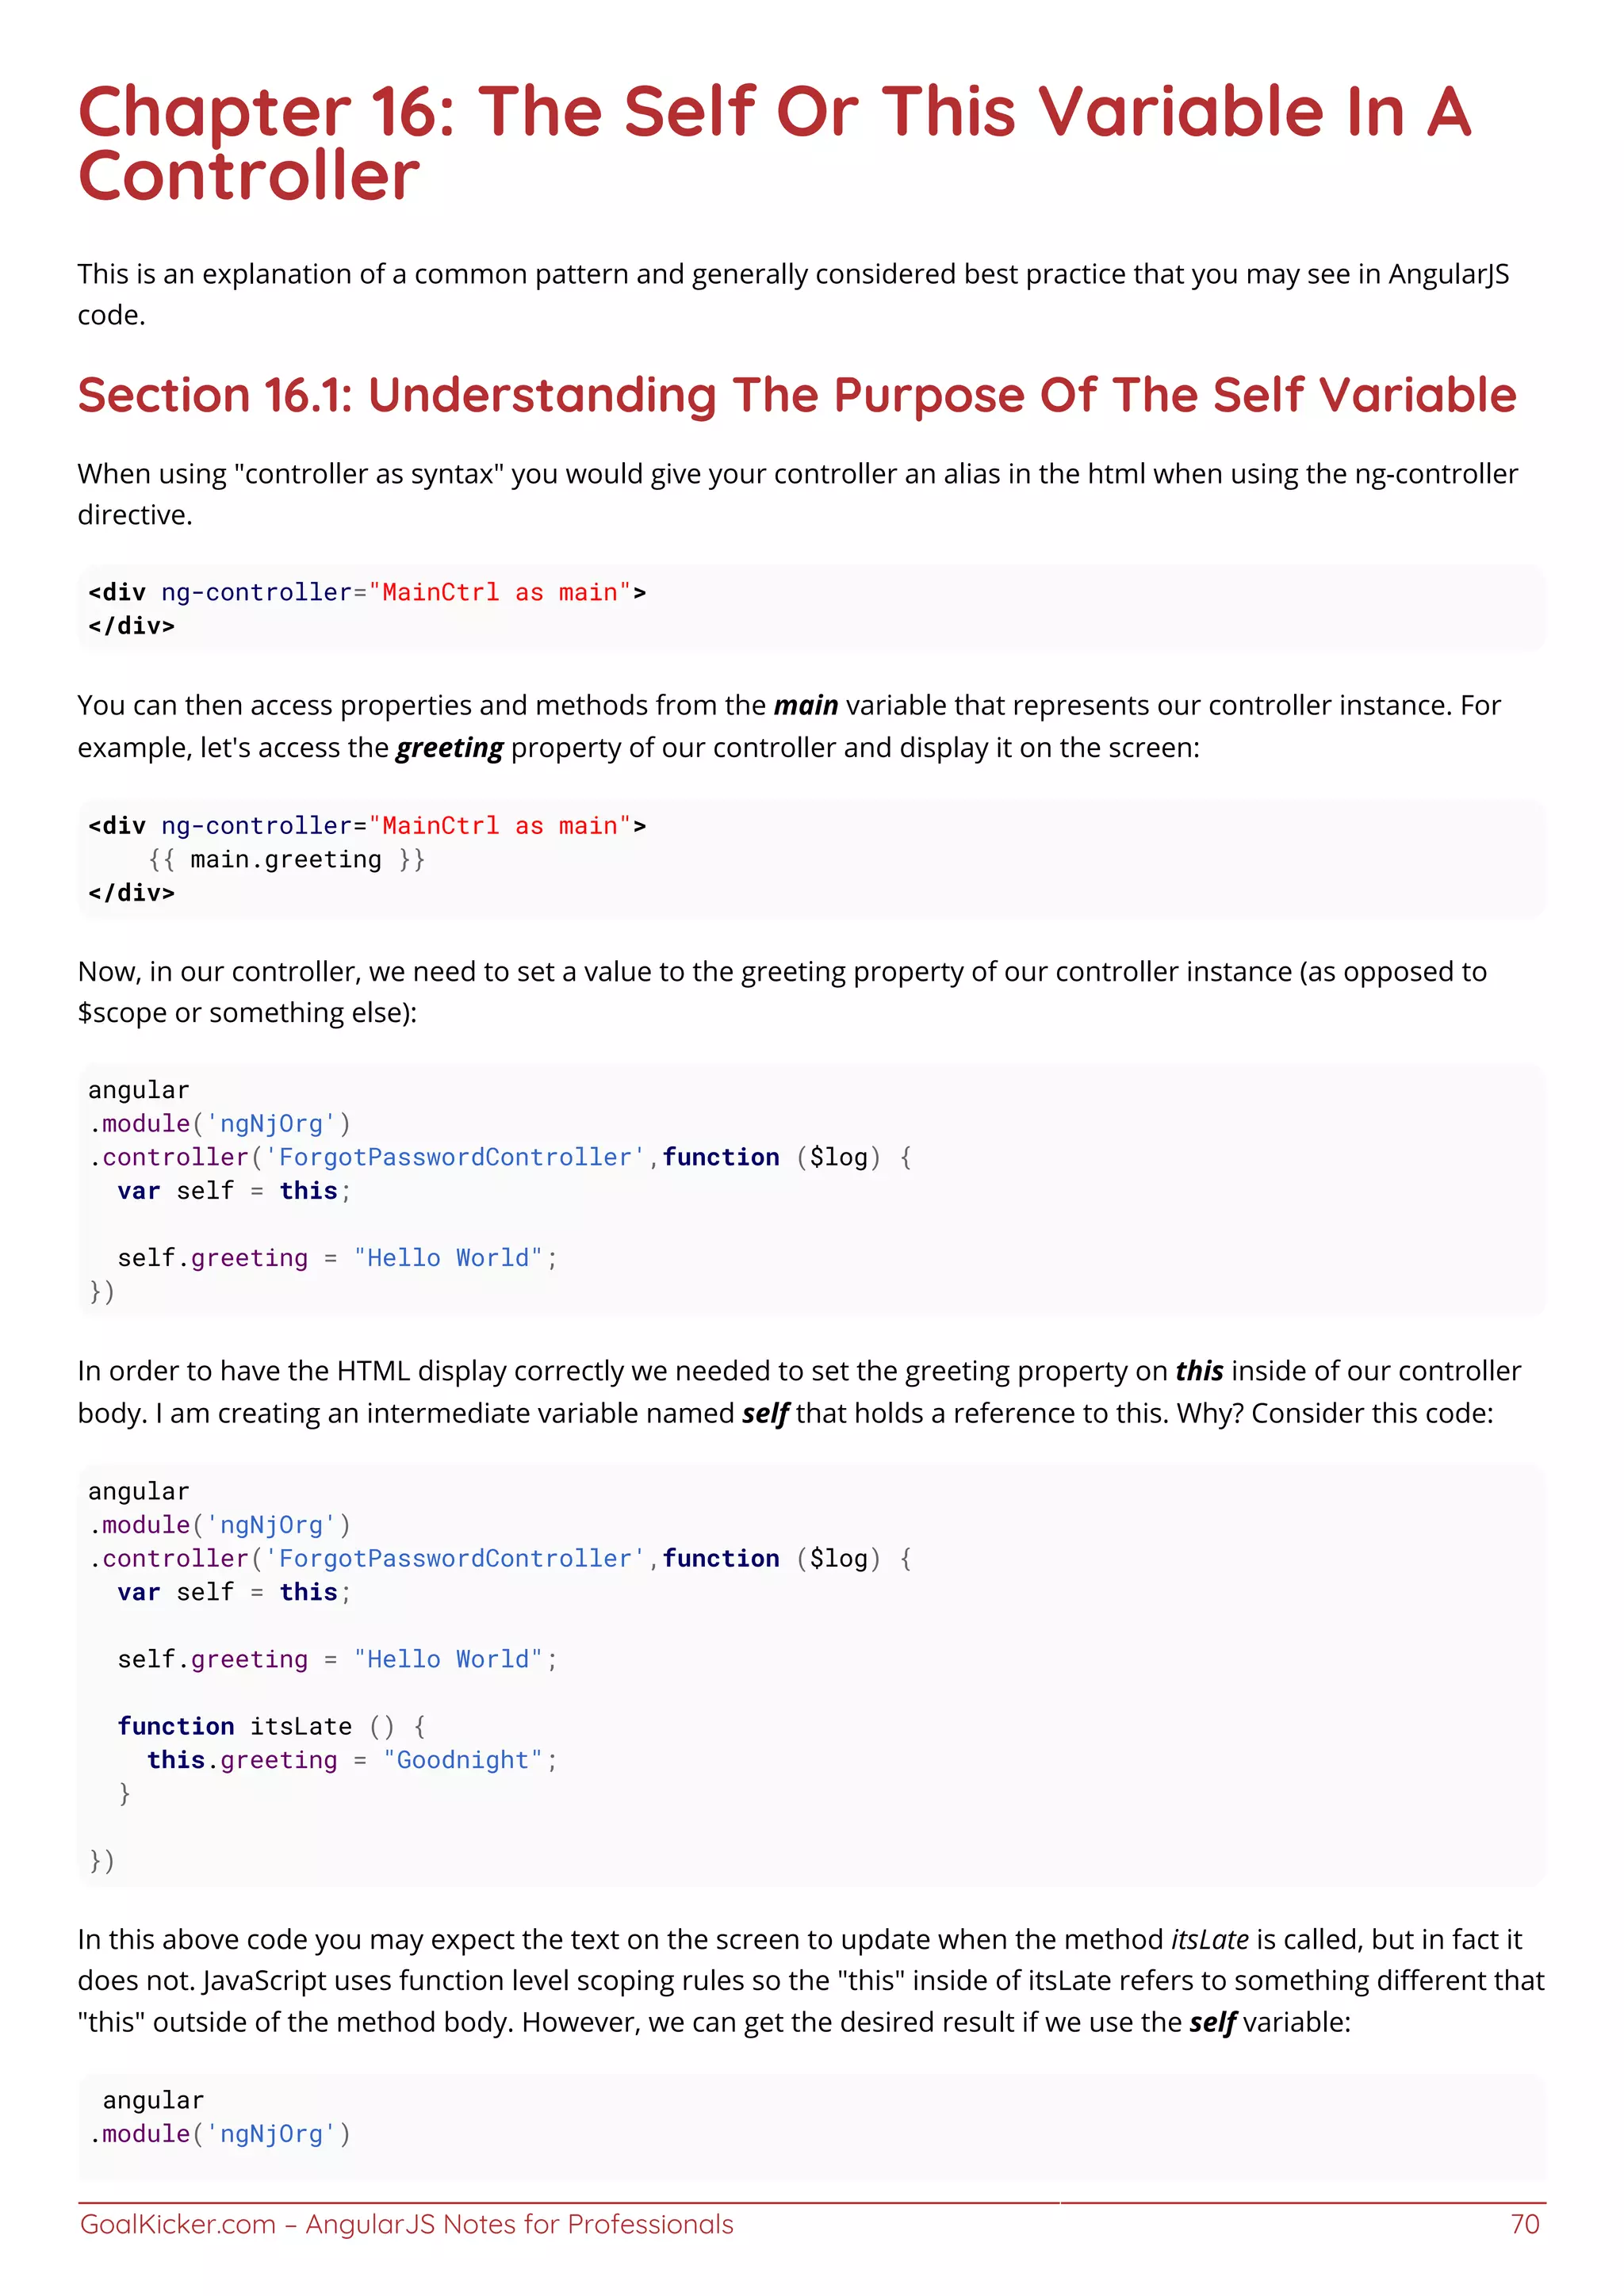
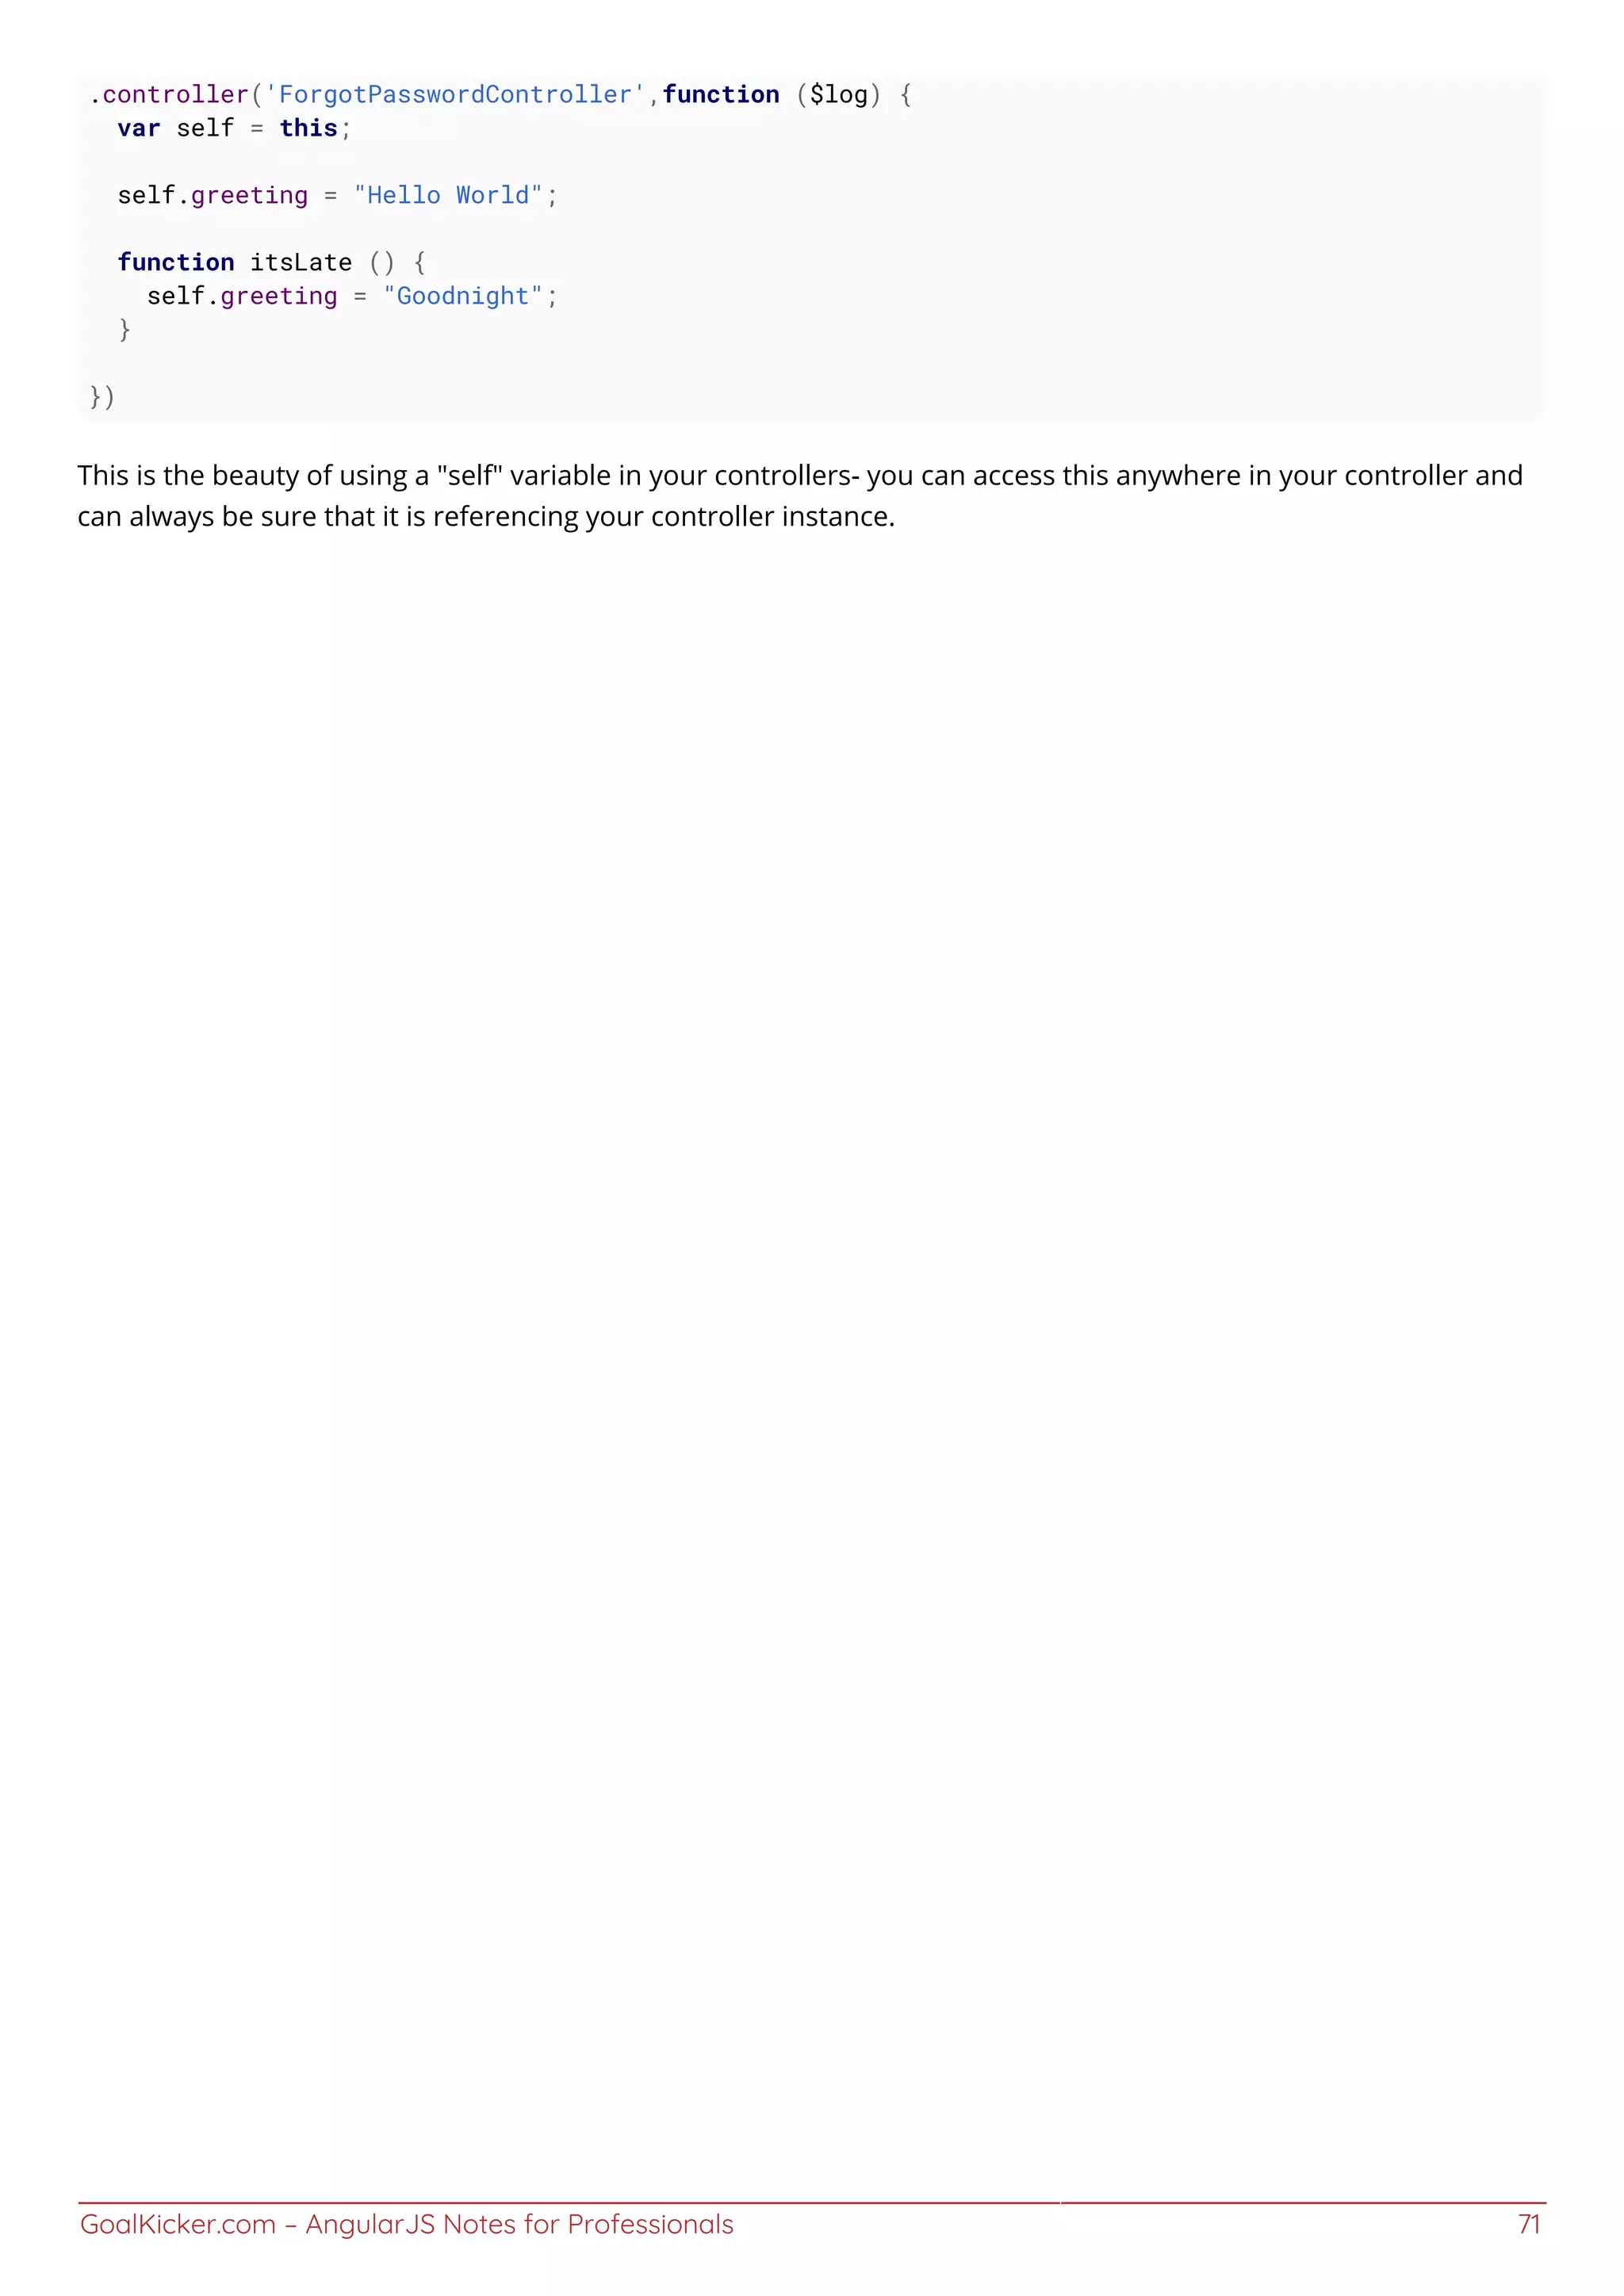
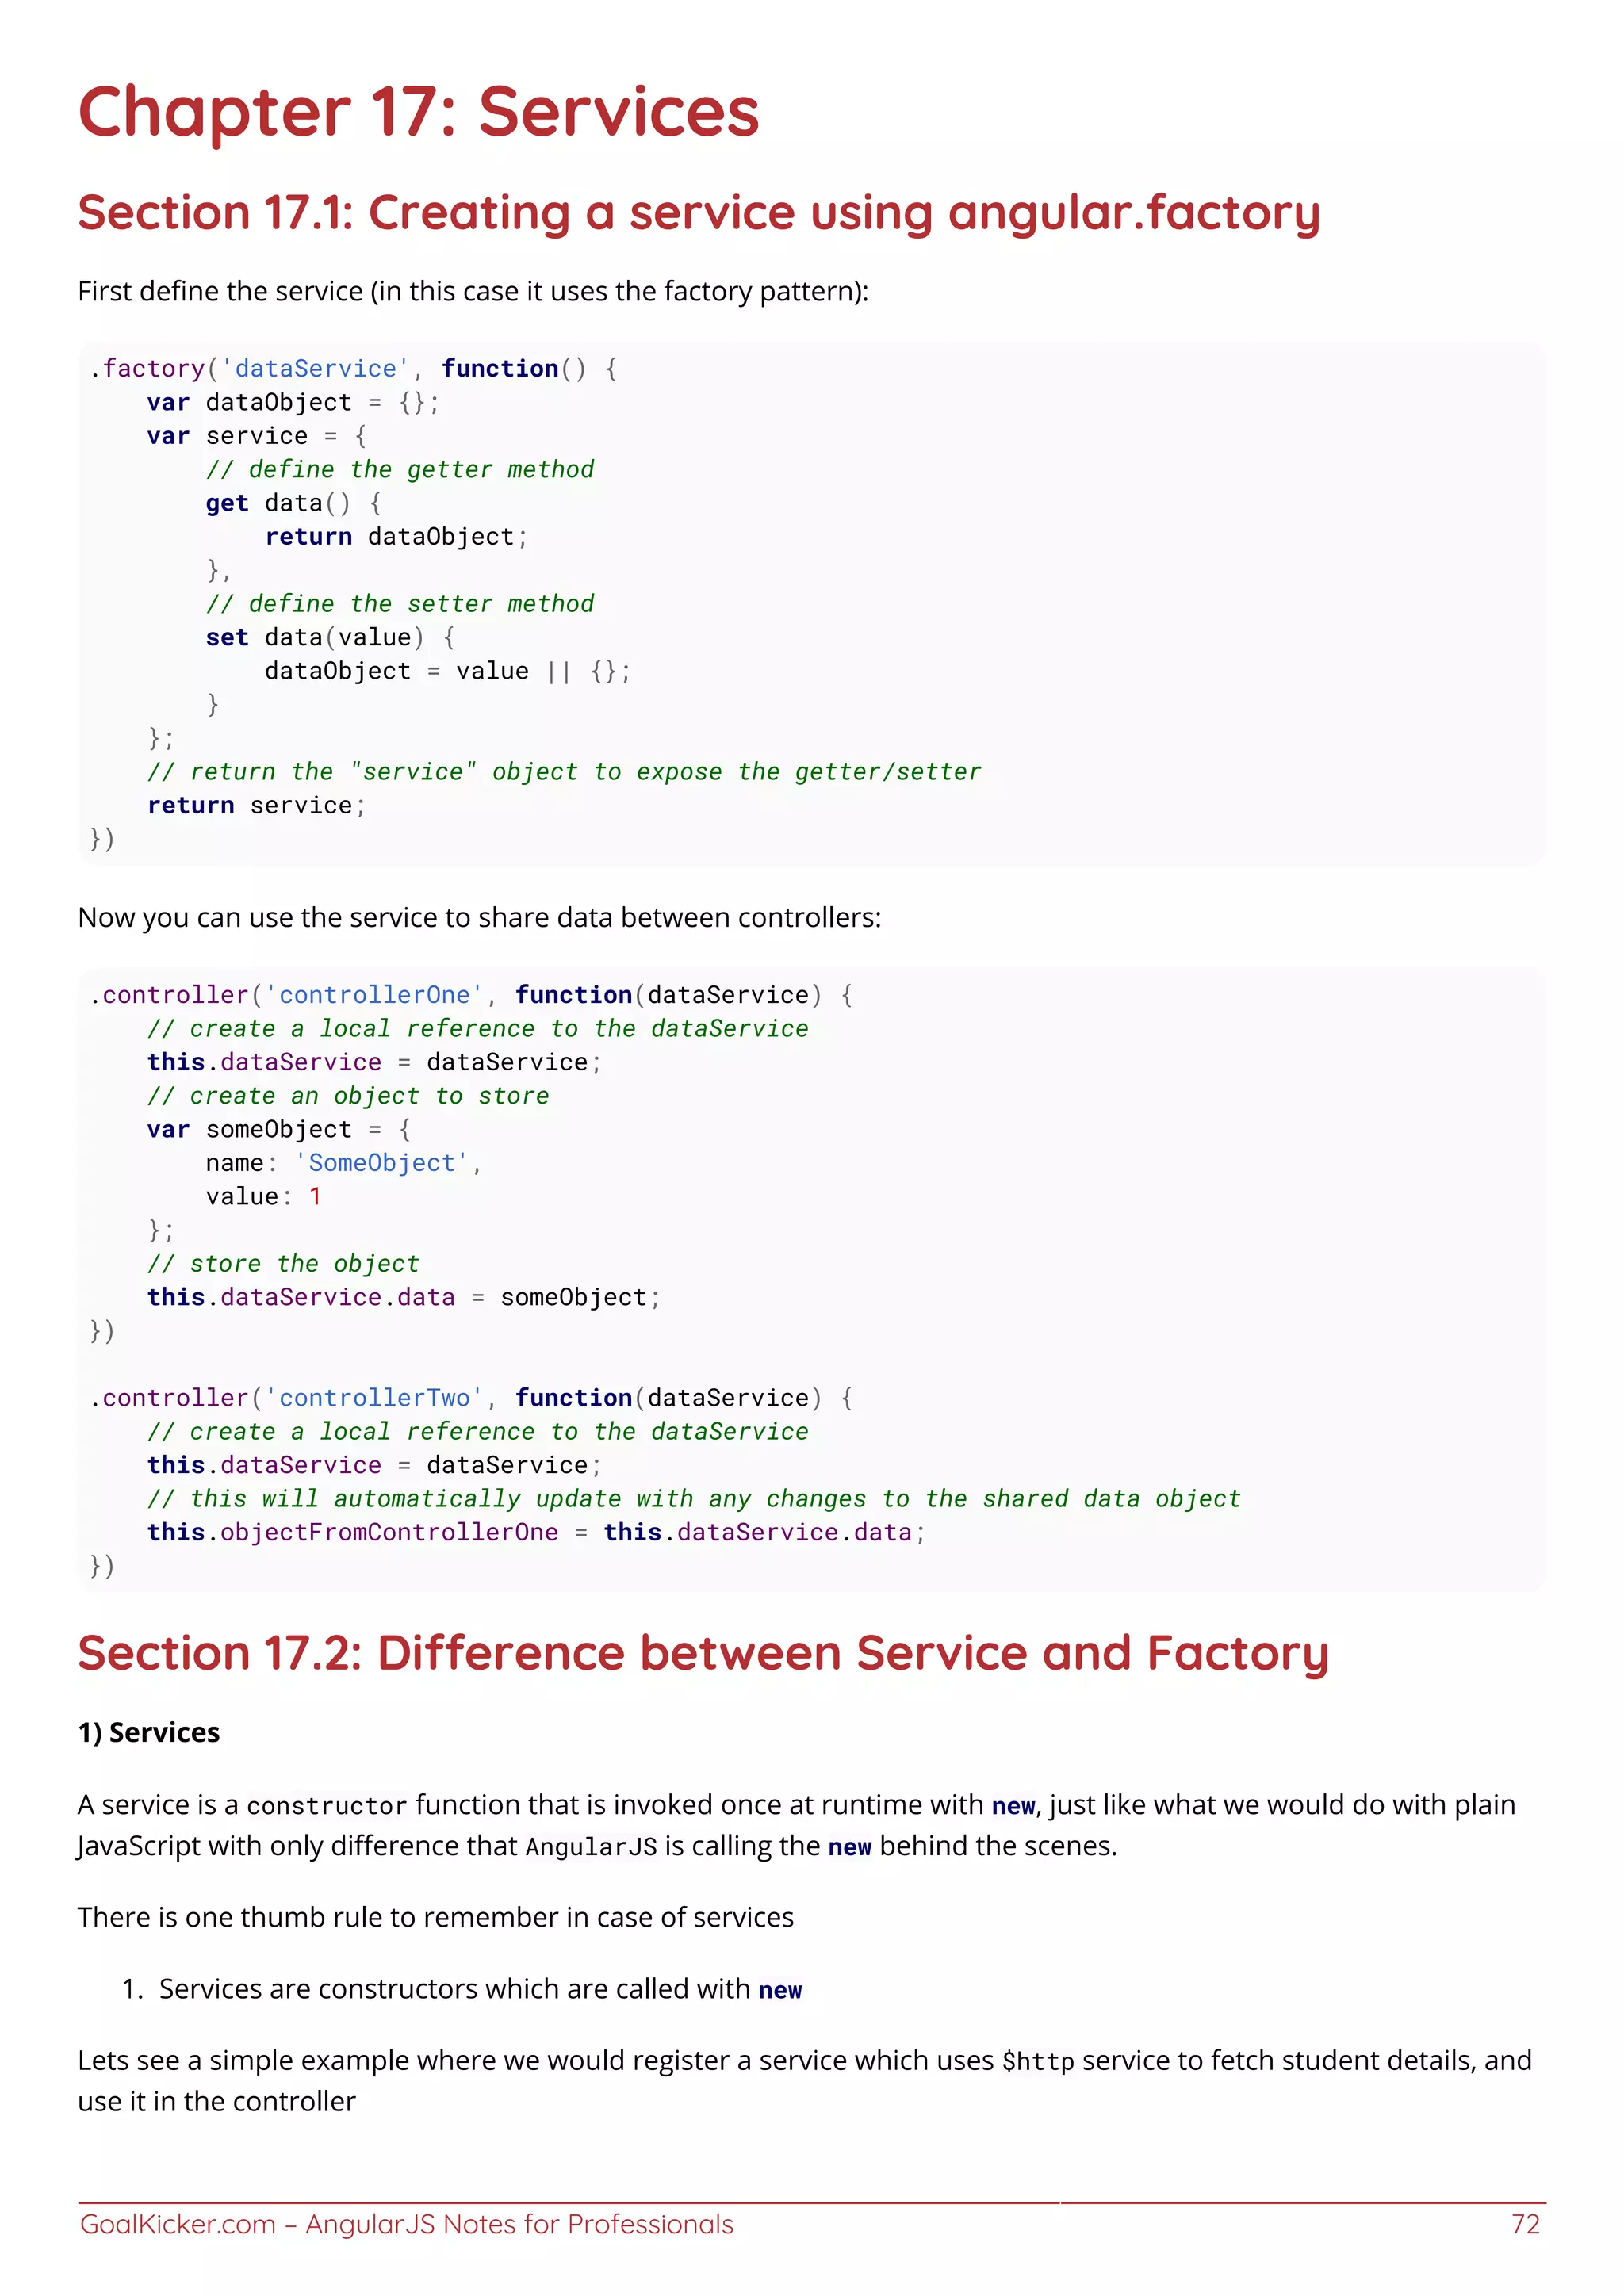


![GoalKicker.com – AngularJS Notes for Professionals 75
angular.module('myapp').factory('StudentDetailsService', StudentDetailsService);
Usage inside a controller
function StudentController(StudentDetailsService) {
var newStudent = new StudentDetailsService();
//Now the instance has been created. Its properties can be accessed.
newStudent.age();
newStudent.address();
};
angular.module('app').controller('StudentController', StudentController);
Section 17.3: $sce - sanitize and render content and resources
in templates
$sce ("Strict Contextual Escaping") is a built-in angular service that automatically sanitize content and
internal sources in templates.
injecting external sources and raw HTML into the template requires manual wrapping of$sce.
In this example we'll create a simple $sce sanitation filter :`.
Demo
.filter('sanitizer', ['$sce', [function($sce) {
return function(content) {
return $sce.trustAsResourceUrl(content);
};
}]);
Usage in template
<div ng-repeat="item in items">
// Sanitize external sources
<ifrmae ng-src="{{item.youtube_url | sanitizer}}">
// Sanitaize and render HTML
<div ng-bind-html="{{item.raw_html_content| sanitizer}}"></div>
</div>
Section 17.4: How to create a Service
angular.module("app")
.service("counterService", function(){
var service = {
number: 0
};
return service;](https://image.slidesharecdn.com/angularjsnotesforprofessionals-200412131913/75/Angular-js-notes-for-professionals-82-2048.jpg)
![GoalKicker.com – AngularJS Notes for Professionals 76
});
Section 17.5: How to use a service
angular.module("app")
// Custom services are injected just like Angular's built-in services
.controller("step1Controller", ['counterService', '$scope', function(counterService,
$scope) {
counterService.number++;
// bind to object (by reference), not to value, for automatic sync
$scope.counter = counterService;
})
In the template using this controller you'd then write:
// editable
<input ng-model="counter.number" />
or
// read-only
<span ng-bind="counter.number"></span>
Of course, in real code you would interact with the service using methods on the controller, which in turn delegate
to the service. The example above simply increments the counter value each time the controller is used in a
template.
Services in Angularjs are singletons:
Services are singleton objects that are instantiated only once per app (by the $injector) and lazy loaded (created
only when necessary).
A singleton is a class which only allows one instance of itself to be created - and gives simple, easy access
to said instance. As stated here
Section 17.6: How to create a Service with dependencies using
'array syntax'
angular.module("app")
.service("counterService", ["fooService", "barService", function(anotherService, barService){
var service = {
number: 0,
foo: function () {
return fooService.bazMethod(); // Use of 'fooService'
},
bar: function () {
return barService.bazMethod(); // Use of 'barService'
}
};
return service;
}]);](https://image.slidesharecdn.com/angularjsnotesforprofessionals-200412131913/75/Angular-js-notes-for-professionals-83-2048.jpg)
![GoalKicker.com – AngularJS Notes for Professionals 77
Section 17.7: Registering a Service
The most common and flexible way to create a service uses the angular.module API factory:
angular.module('myApp.services', []).factory('githubService', function() {
var serviceInstance = {};
// Our first service
return serviceInstance;
});
The service factory function can be either a function or an array, just like the way we create controllers:
// Creating the factory through using the
// bracket notation
angular.module('myApp.services', [])
.factory('githubService', [function($http) {
}]);
To expose a method on our service, we can place it as an attribute on the service object.
angular.module('myApp.services', [])
.factory('githubService', function($http) {
var githubUrl = 'https://api.github.com';
var runUserRequest = function(username, path) {
// Return the promise from the $http service
// that calls the Github API using JSONP
return $http({
method: 'JSONP',
url: githubUrl + '/users/' +
username + '/' +
path + '?callback=JSON_CALLBACK'
});
}
// Return the service object with a single function
// events
return {
events: function(username) {
return runUserRequest(username, 'events');
}
};](https://image.slidesharecdn.com/angularjsnotesforprofessionals-200412131913/75/Angular-js-notes-for-professionals-84-2048.jpg)
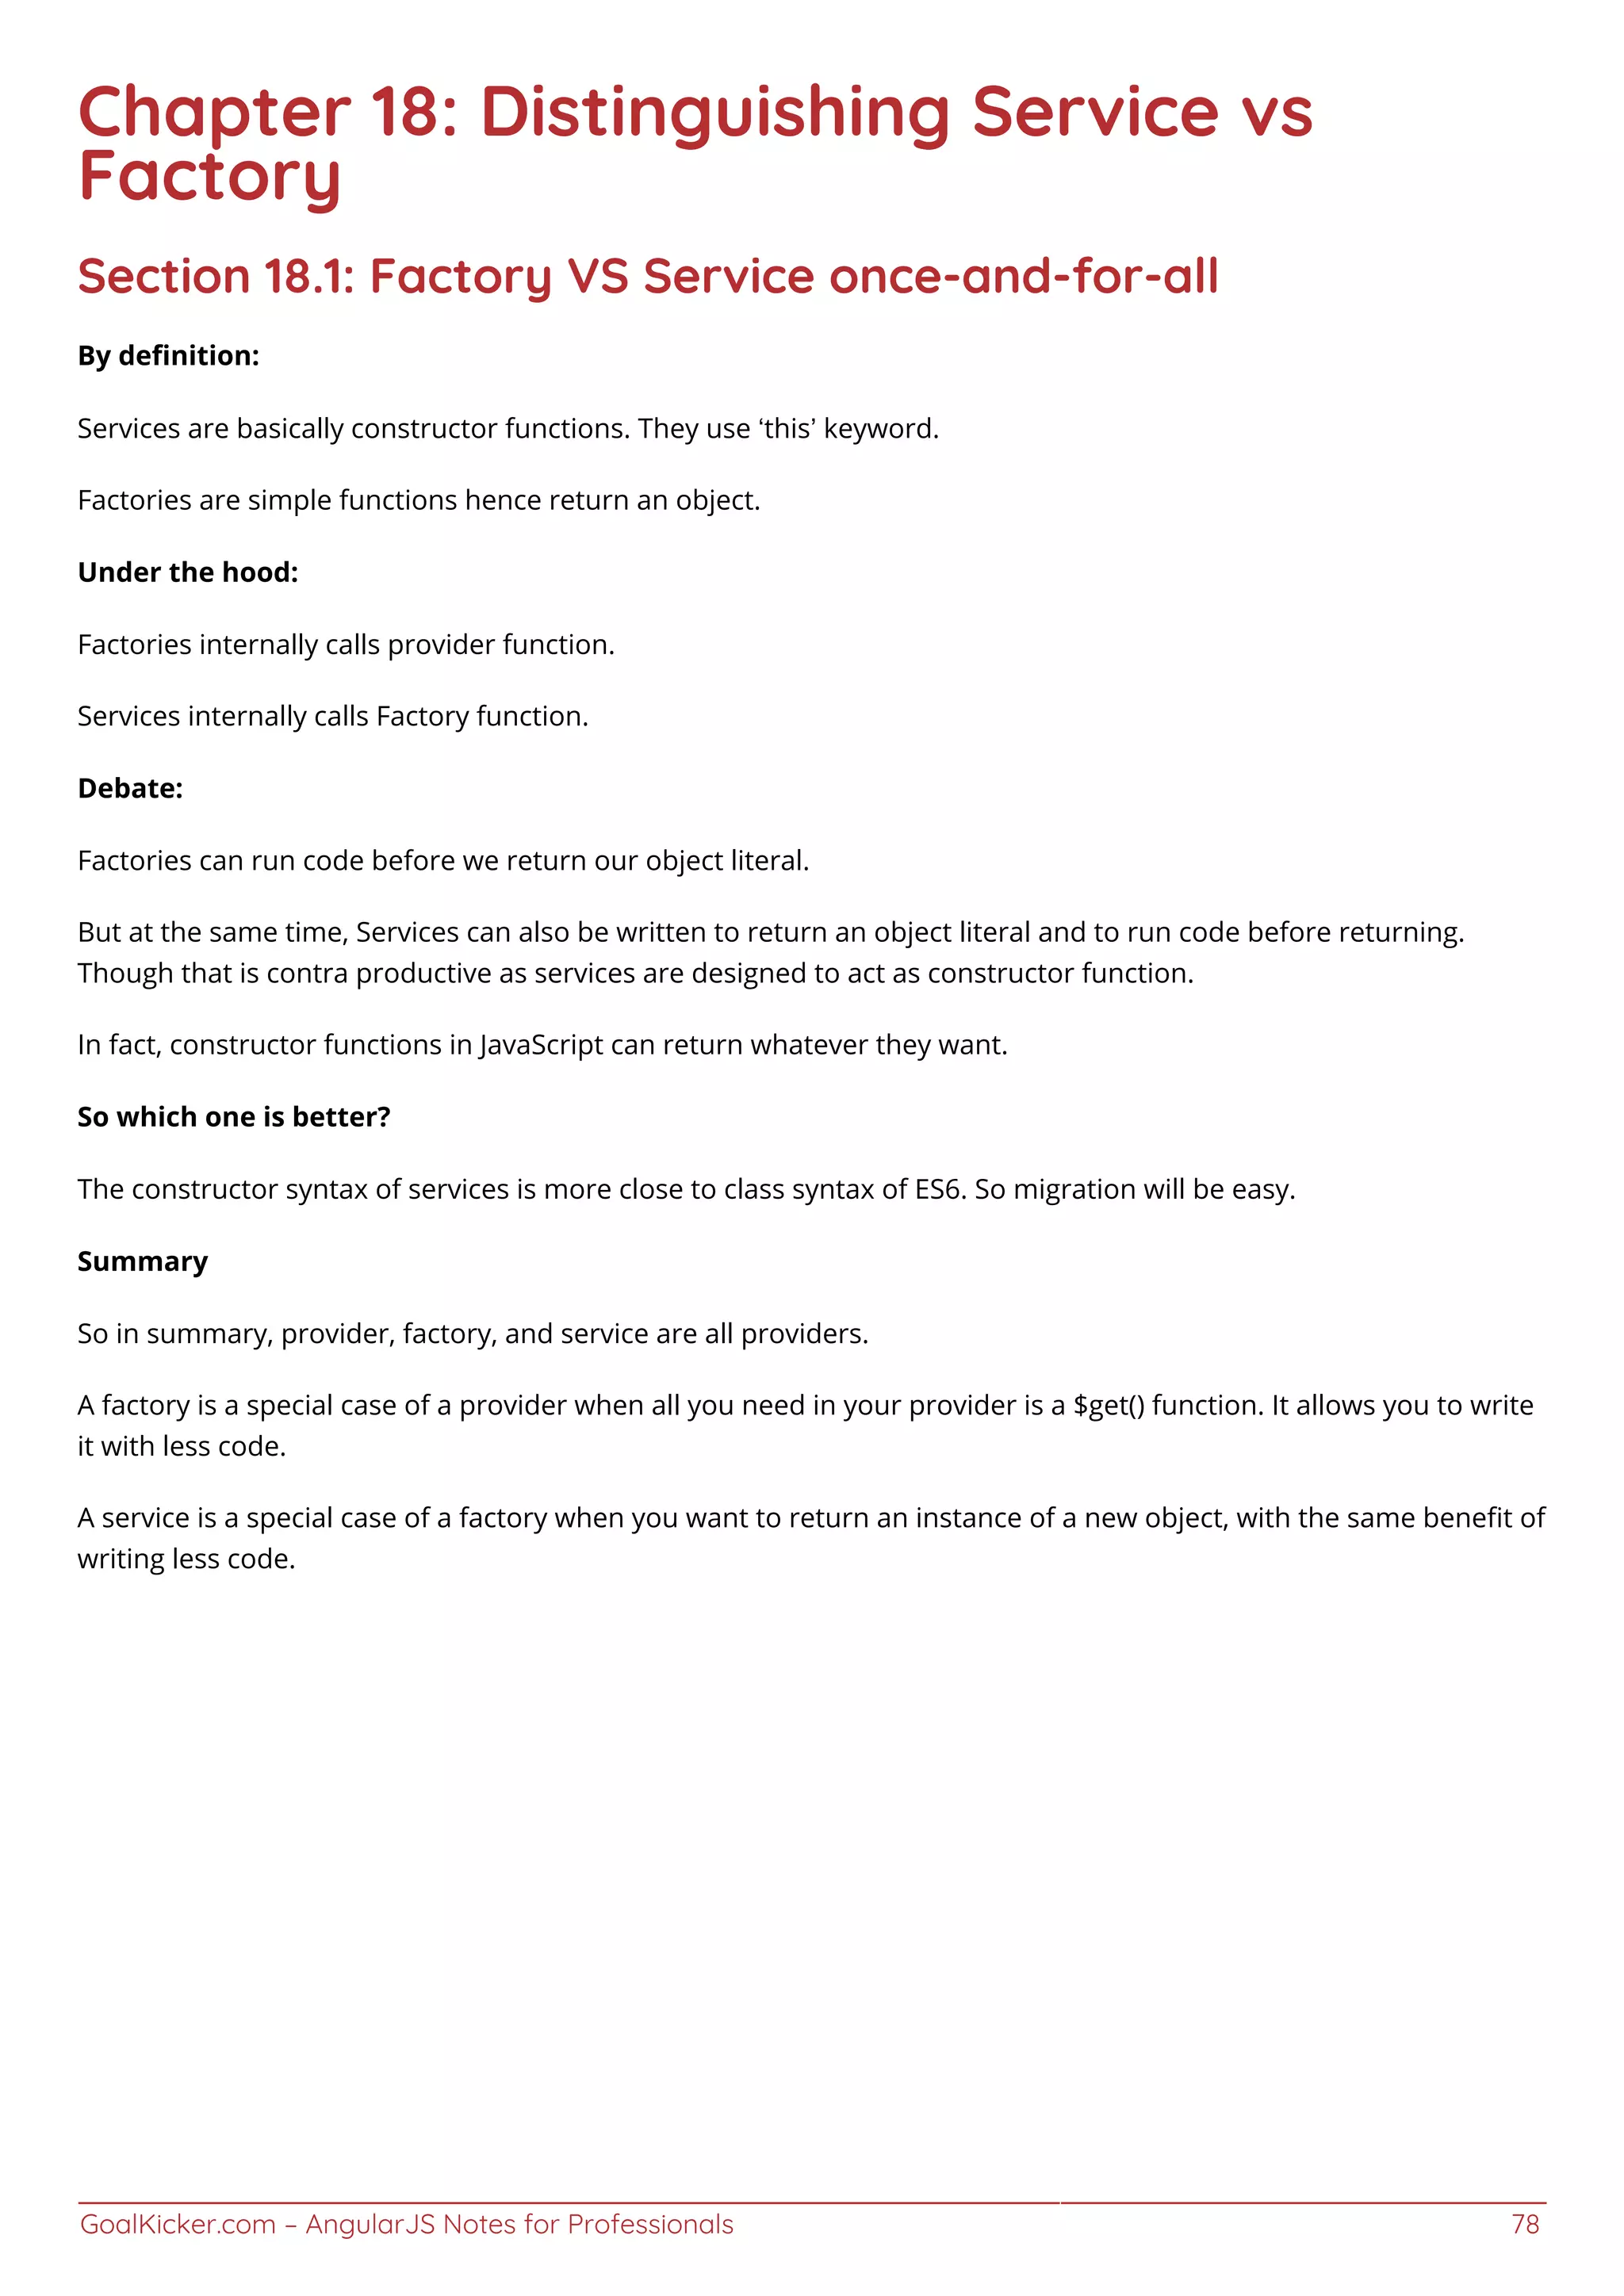
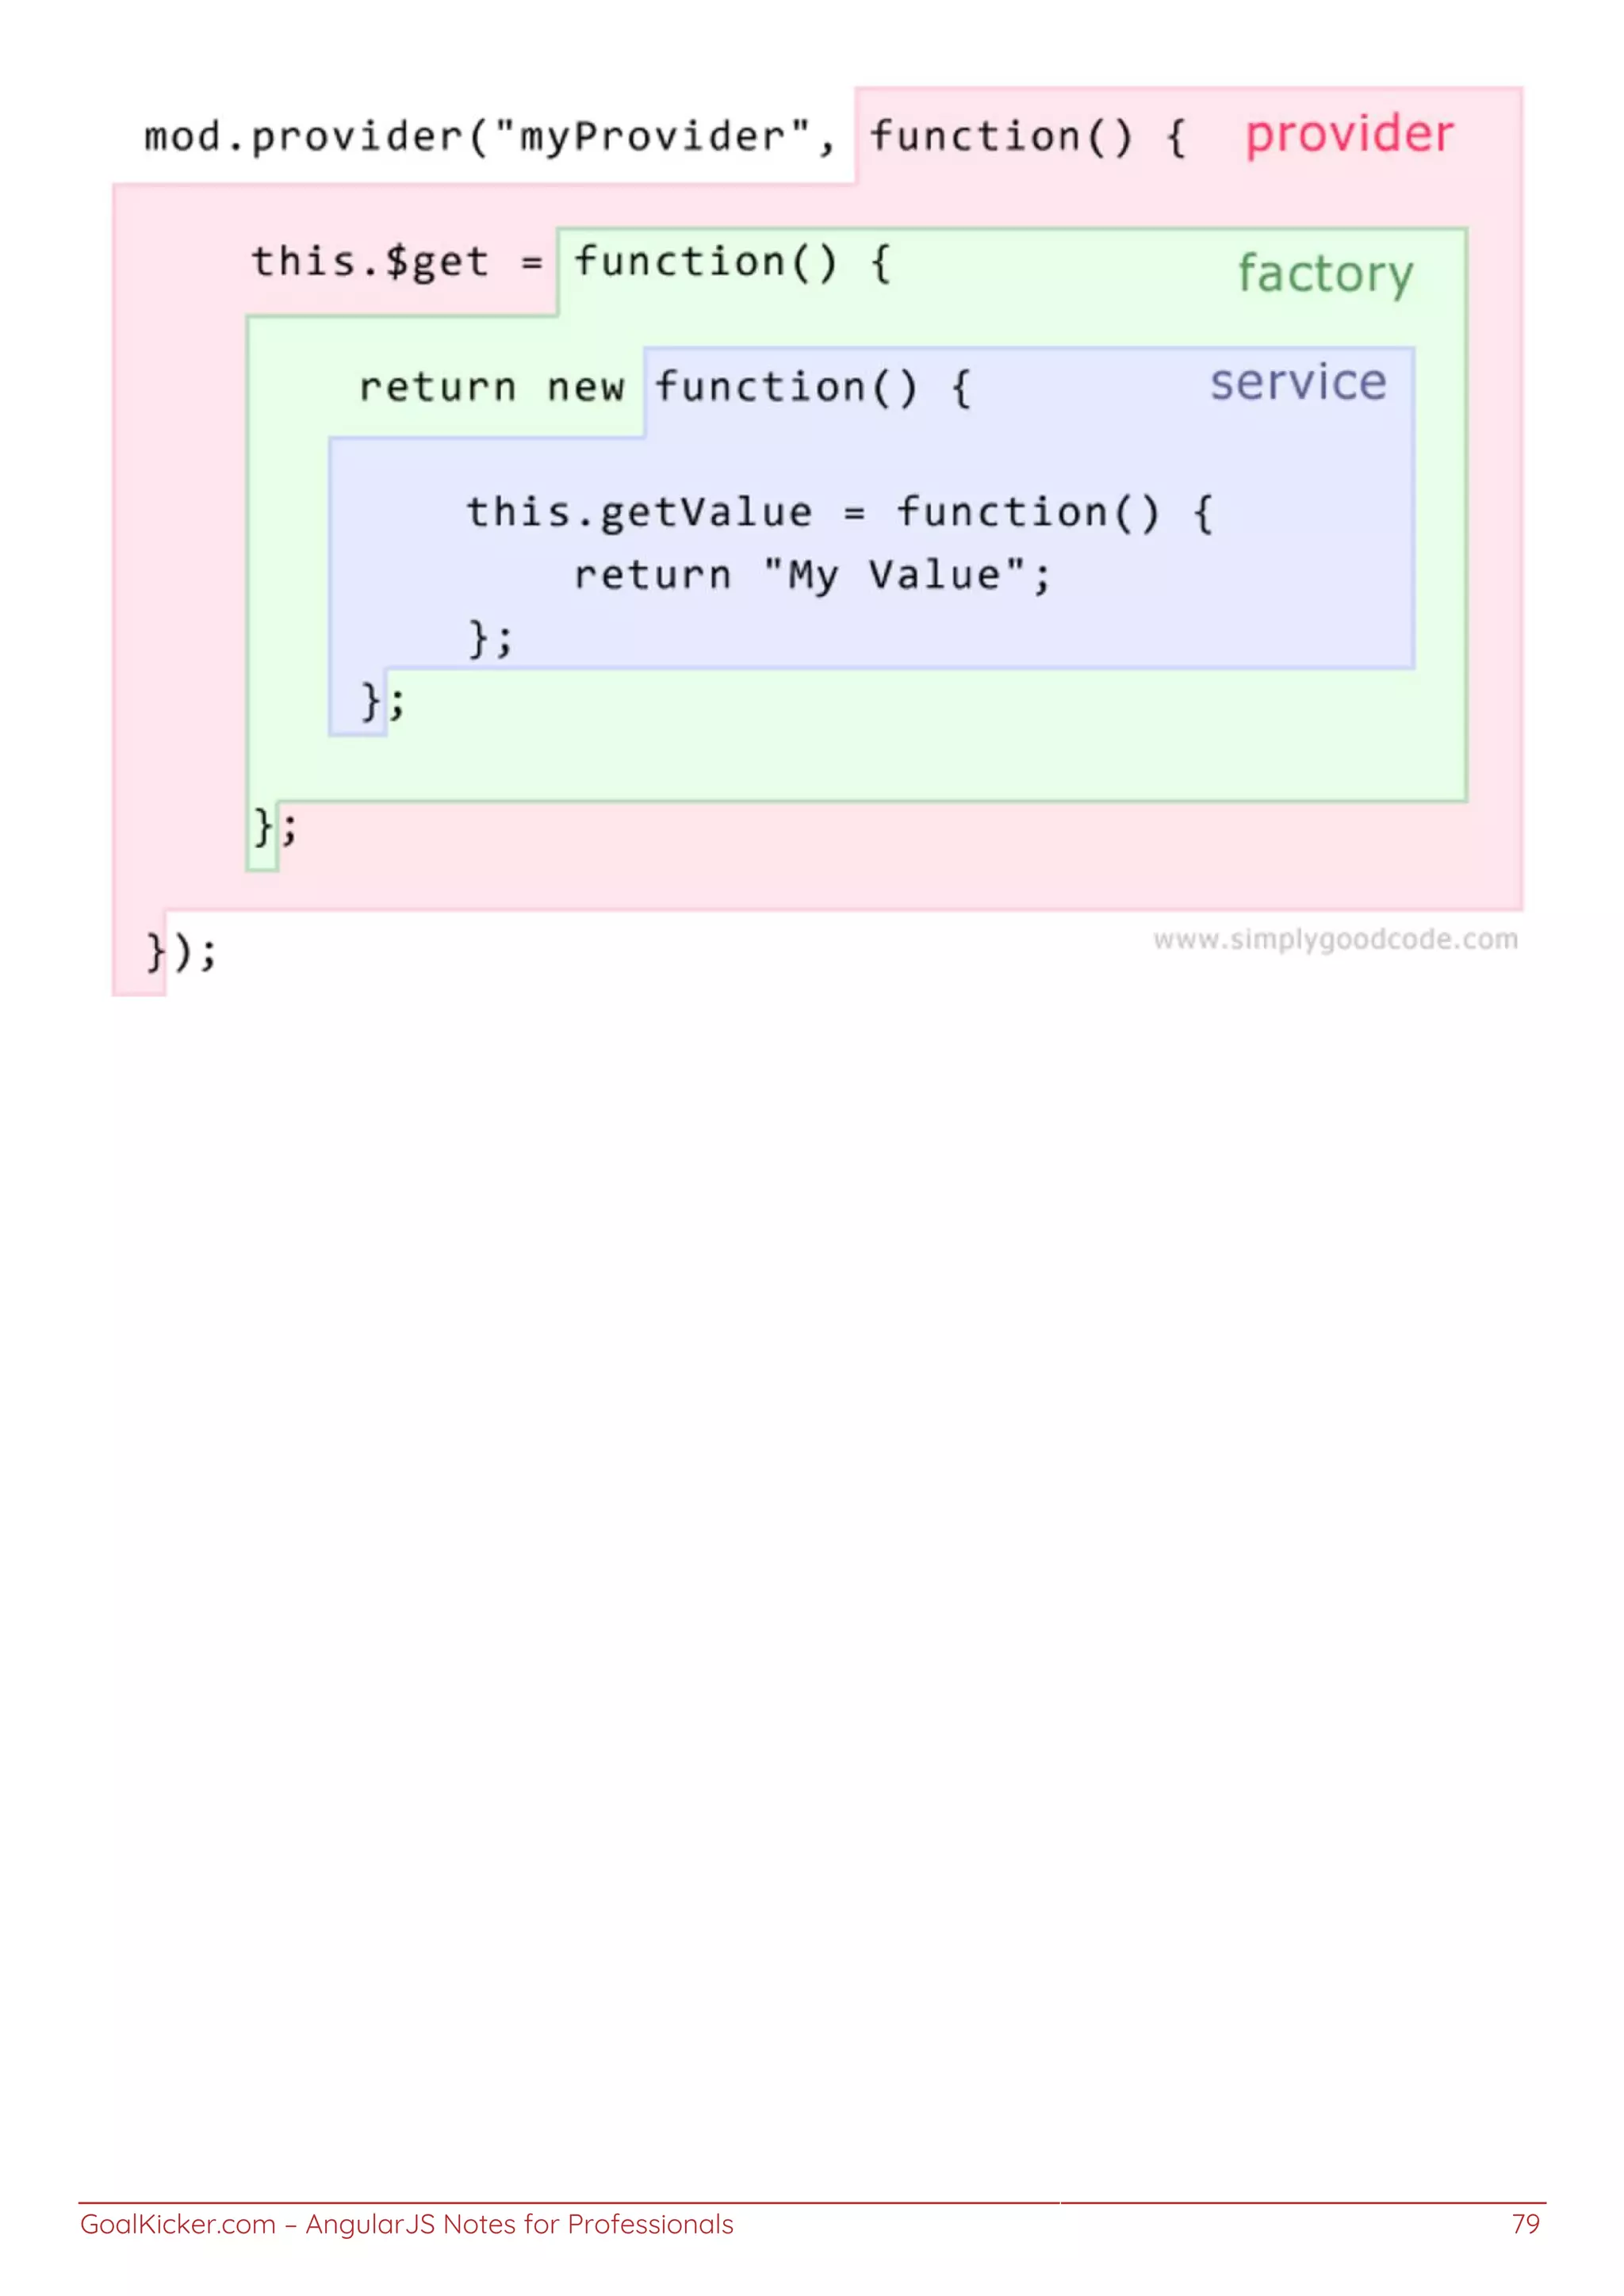
![GoalKicker.com – AngularJS Notes for Professionals 80
Chapter 19: Angular promises with $q
service
Section 19.1: Wrap simple value into a promise using $q.when()
If all you need is to wrap the value into a promise, you don't need to use the long syntax like here:
//OVERLY VERBOSE
var defer;
defer = $q.defer();
defer.resolve(['one', 'two']);
return defer.promise;
In this case you can just write:
//BETTER
return $q.when(['one', 'two']);
$q.when and its alias $q.resolve
Wraps an object that might be a value or a (3rd party) then-able promise into a $q promise. This is useful
when you are dealing with an object that might or might not be a promise, or if the promise comes from
a source that can't be trusted.
— AngularJS $q Service API Reference - $q.when
With the release of AngularJS v1.4.1
You can also use an ES6-consistent alias resolve
//ABSOLUTELY THE SAME AS when
return $q.resolve(['one', 'two'])
Section 19.2: Using angular promises with $q service
$q is a built-in service which helps in executing asynchronous functions and using their return values(or exception)
when they are finished with processing.
$q is integrated with the $rootScope.Scope model observation mechanism, which means faster propagation of
resolution or rejection into your models and avoiding unnecessary browser repaints, which would result in
flickering UI.
In our example, we call our factory getMyData, which return a promise object. If the object is resolved, it returns a
random number. If it is rejected, it return a rejection with an error message after 2 seconds.
In Angular factory
function getMyData($timeout, $q) {
return function() {
// simulated async function
var promise = $timeout(function() {
if(Math.round(Math.random())) {
return 'data received!'](https://image.slidesharecdn.com/angularjsnotesforprofessionals-200412131913/75/Angular-js-notes-for-professionals-87-2048.jpg)
![GoalKicker.com – AngularJS Notes for Professionals 81
} else {
return $q.reject('oh no an error! try again')
}
}, 2000);
return promise;
}
}
Using Promises on call
angular.module('app', [])
.factory('getMyData', getMyData)
.run(function(getData) {
var promise = getData()
.then(function(string) {
console.log(string)
}, function(error) {
console.error(error)
})
.finally(function() {
console.log('Finished at:', new Date())
})
})
To use promises, inject $q as dependency. Here we injected $q in getMyData factory.
var defer = $q.defer();
A new instance of deferred is constructed by calling $q.defer()
A deferred object is simply an object that exposes a promise as well as the associated methods for resolving that
promise. It is constructed using the $q.deferred() function and exposes three main methods: resolve(),
reject(), and notify().
resolve(value) – resolves the derived promise with the value.
reject(reason) – rejects the derived promise with the reason.
notify(value) - provides updates on the status of the promise's execution. This may be called multiple
times before the promise is either resolved or rejected.
Properties
The associated promise object is accessed via the promise property. promise – {Promise} – promise object
associated with this deferred.
A new promise instance is created when a deferred instance is created and can be retrieved by calling
deferred.promise.
The purpose of the promise object is to allow for interested parties to get access to the result of the deferred task
when it completes.
Promise Methods -
then(successCallback, [errorCallback], [notifyCallback]) – Regardless of when the promise was or
will be resolved or rejected, then calls one of the success or error callbacks asynchronously as soon as the
result is available. The callbacks are called with a single argument: the result or rejection reason. Additionally,
the notify callback may be called zero or more times to provide a progress indication, before the promise is
resolved or rejected.](https://image.slidesharecdn.com/angularjsnotesforprofessionals-200412131913/75/Angular-js-notes-for-professionals-88-2048.jpg)

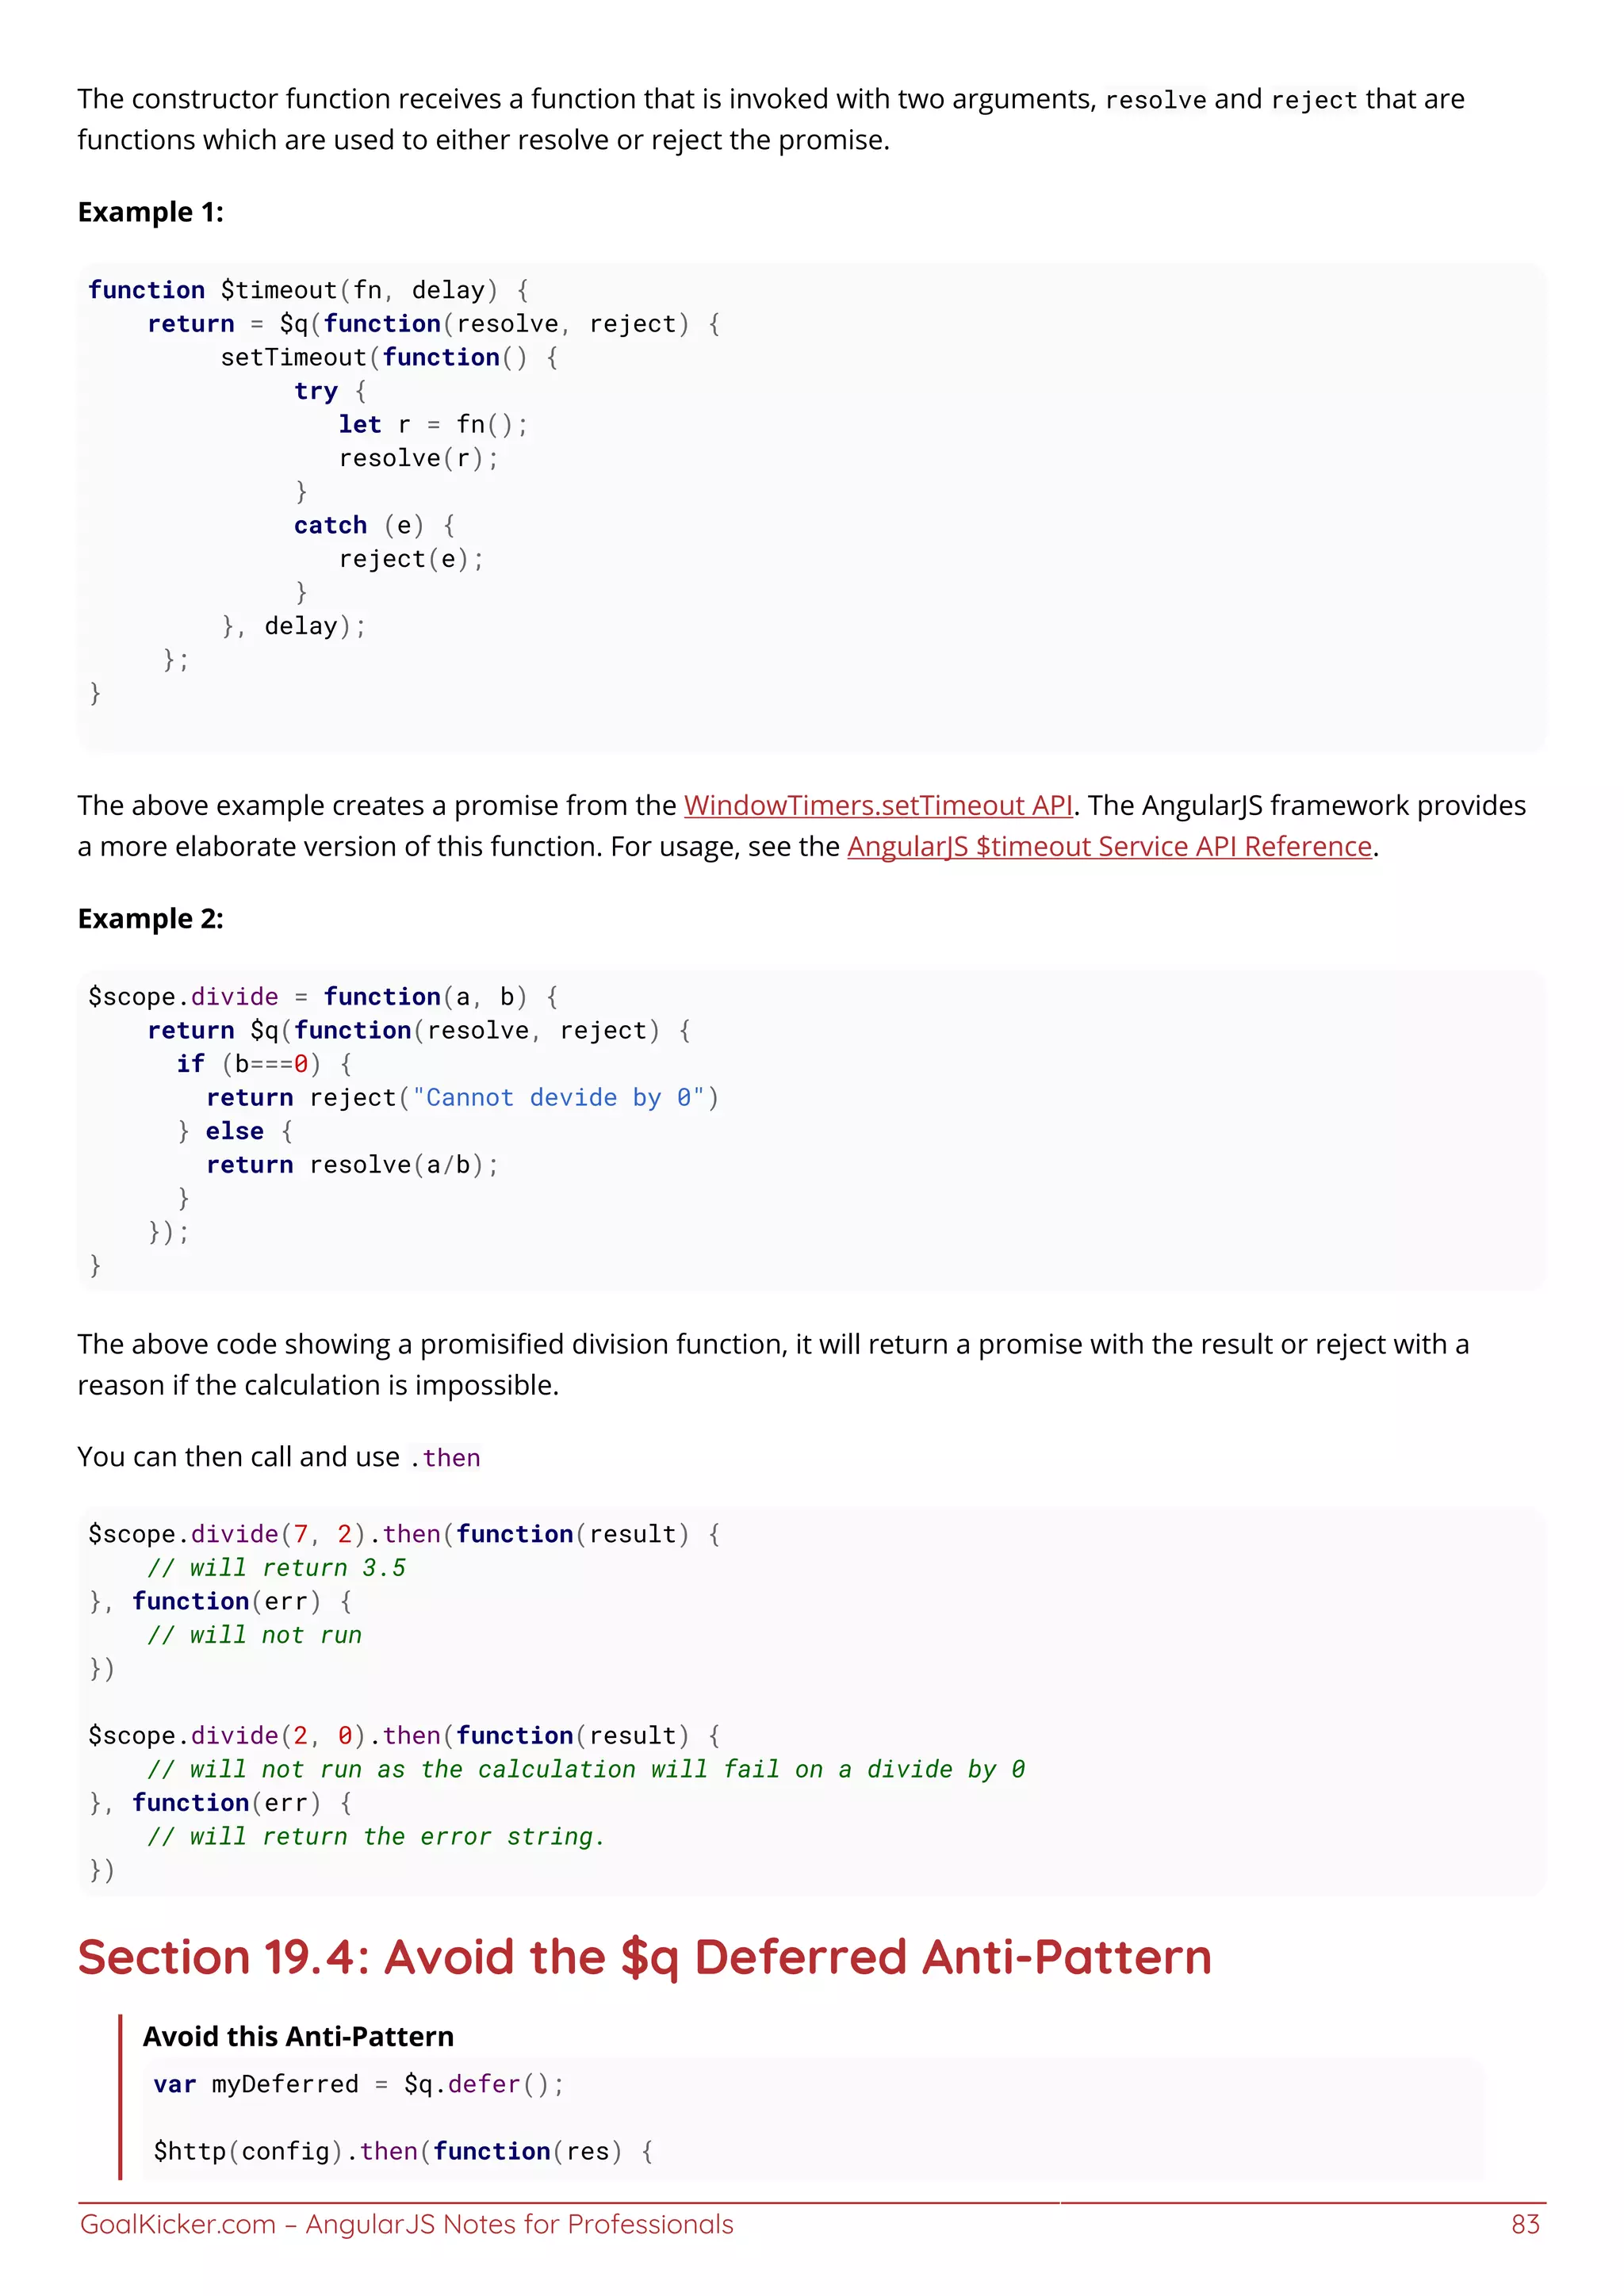
![GoalKicker.com – AngularJS Notes for Professionals 84
myDeferred.resolve(res);
}, function(error) {
myDeferred.reject(error);
});
return myDeferred.promise;
There is no need to manufacture a promise with $q.defer as the $http service already returns a promise.
//INSTEAD
return $http(config);
Simply return the promise created by the $http service.
Section 19.5: Using $q.all to handle multiple promises
You can use the $q.all function to call a .then method after an array of promises has been successfully resolved
and fetch the data they resolved with.
Example:
JS:
$scope.data = []
$q.all([
$http.get("data.json"),
$http.get("more-data.json"),
]).then(function(responses) {
$scope.data = responses.map((resp) => resp.data);
});
The above code runs $http.get 2 times for data in local json files, when both get method complete they resolve
their associated promises, when all the promises in the array are resolved, the .then method starts with both
promises data inside the responses array argument.
The data is then mapped so it could be shown on the template, we can then show
HTML:
<ul>
<li ng-repeat="d in data">
<ul>
<li ng-repeat="item in d">{{item.name}}: {{item.occupation}}</li>
</ul>
</li>
</ul>
JSON:
[{
"name": "alice",
"occupation": "manager"
}, {
"name": "bob",
"occupation": "developer"
}]](https://image.slidesharecdn.com/angularjsnotesforprofessionals-200412131913/75/Angular-js-notes-for-professionals-91-2048.jpg)
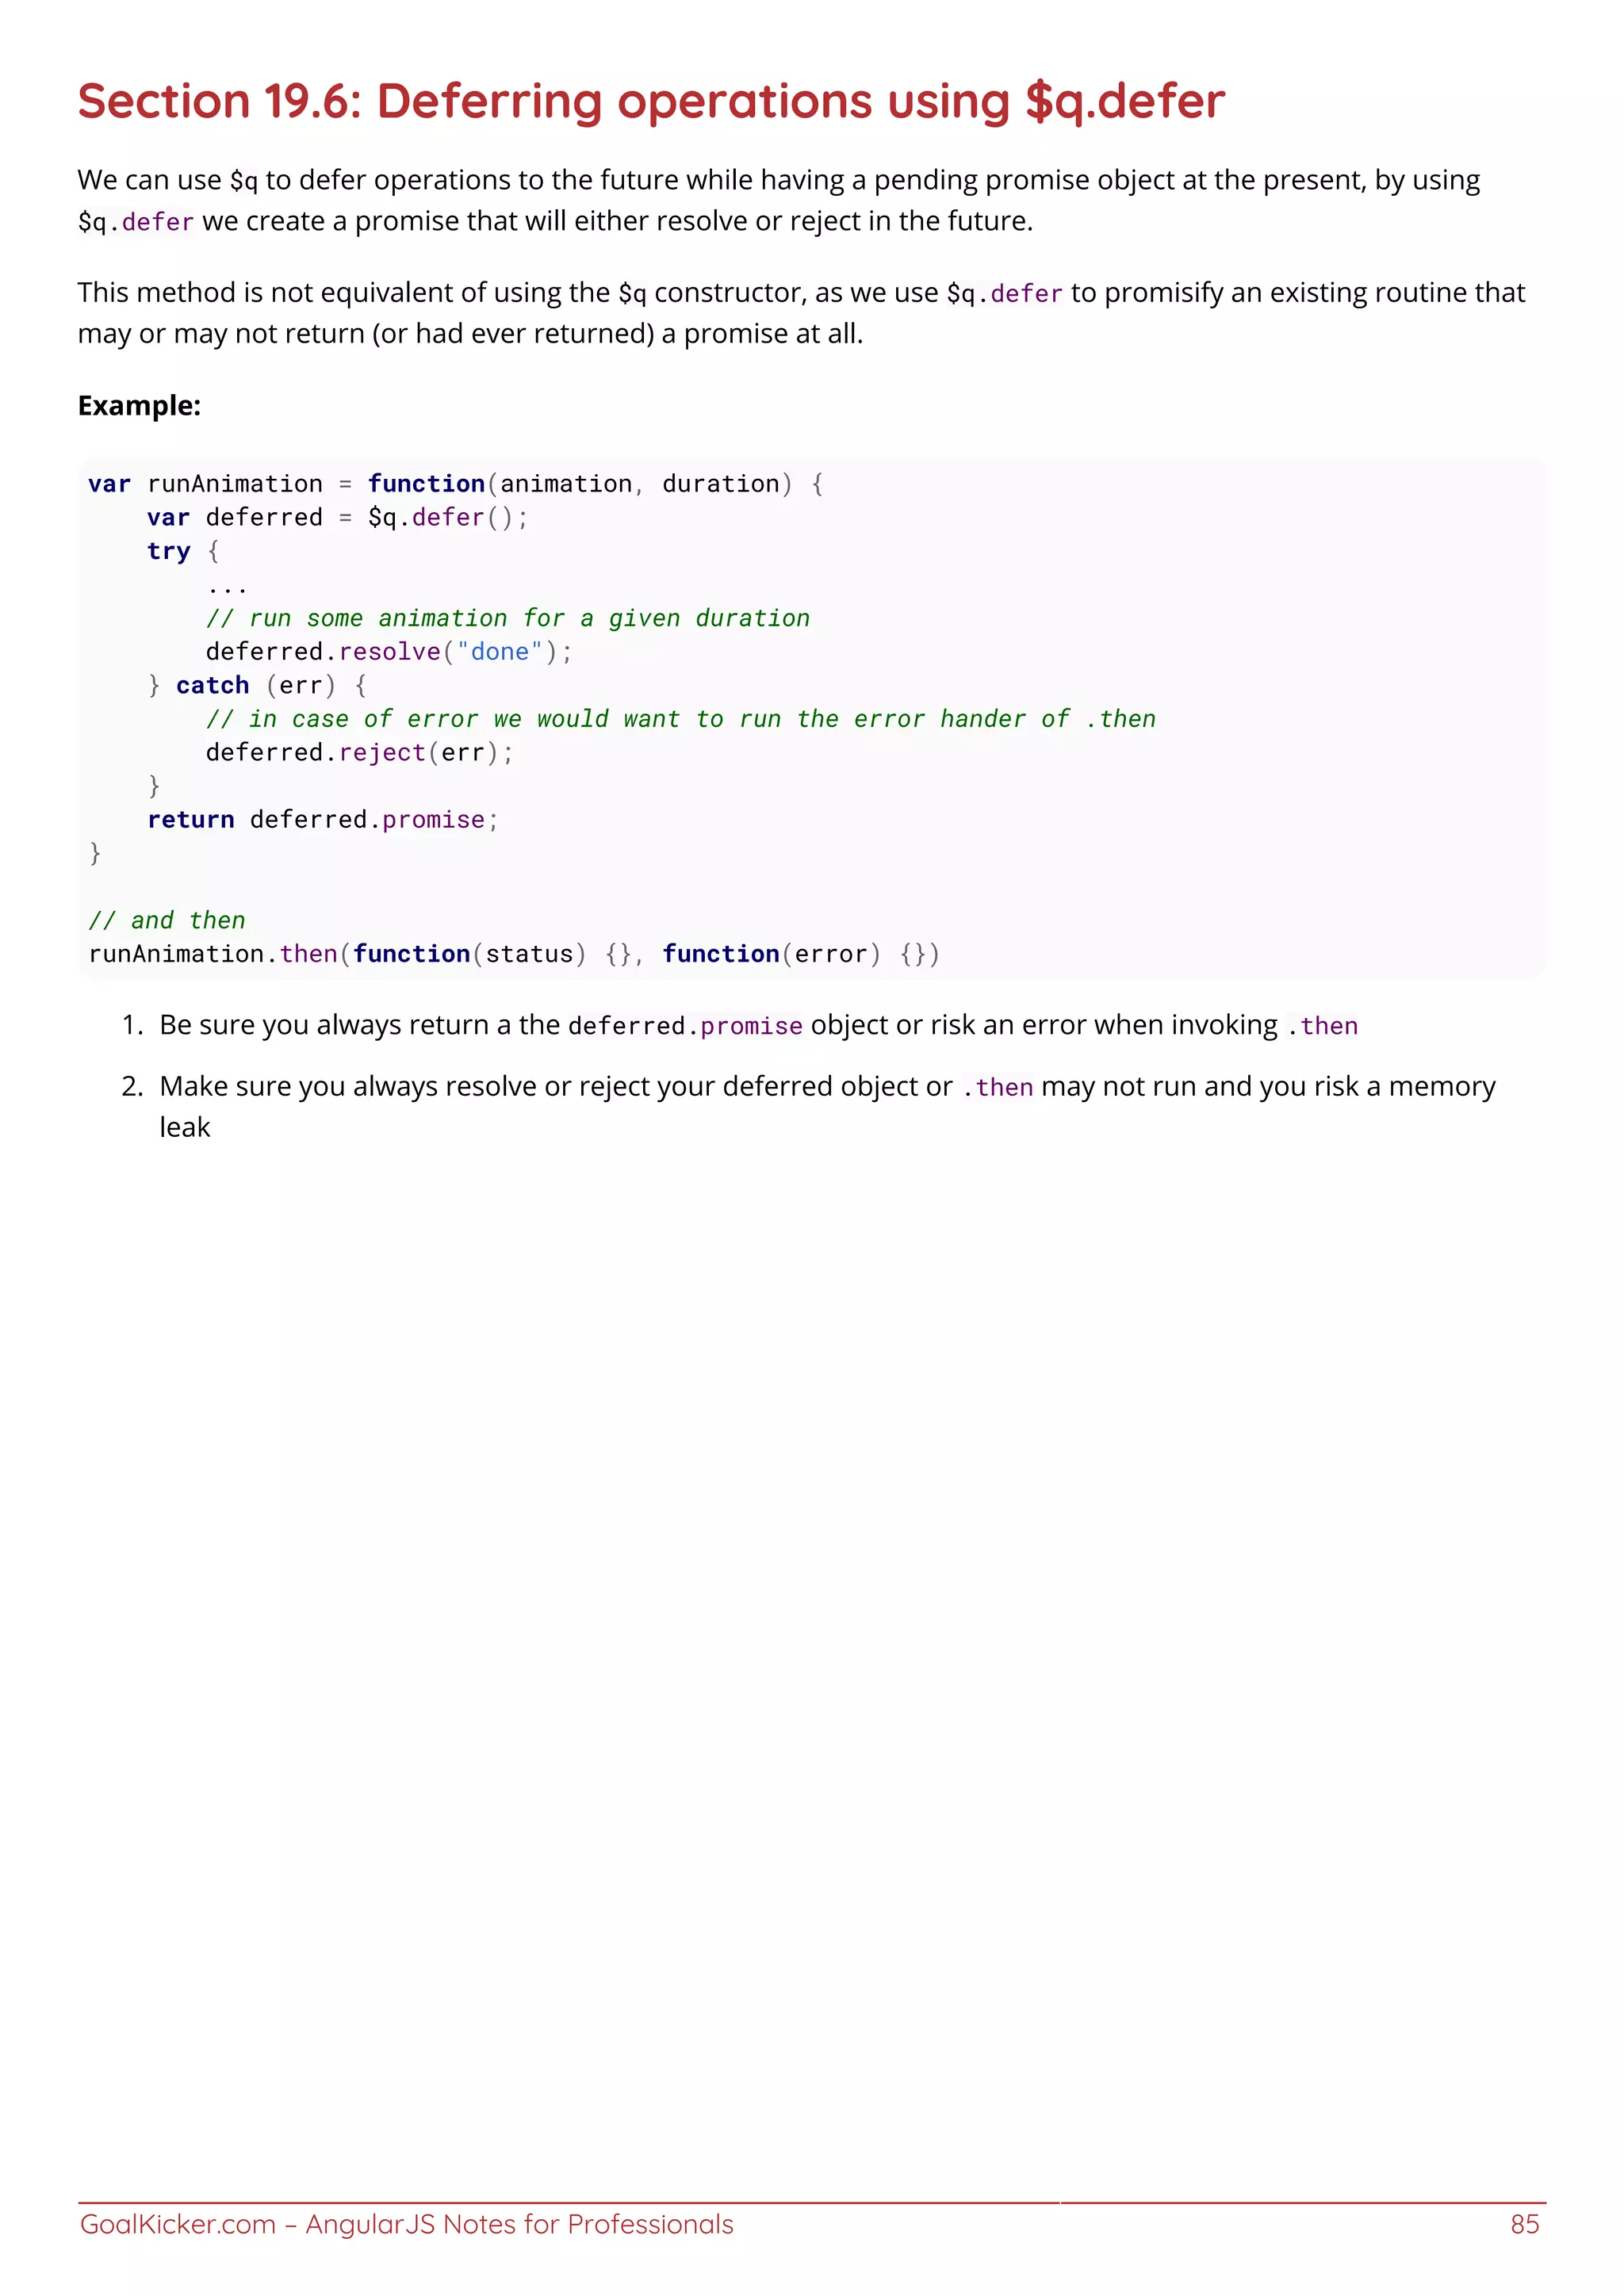
![GoalKicker.com – AngularJS Notes for Professionals 86
Chapter 20: Dependency Injection
Section 20.1: Dynamic Injections
There is also an option to dynamically request components. You can do it using the $injector service:
myModule.controller('myController', ['$injector', function($injector) {
var myService = $injector.get('myService');
}]);
Note: while this method could be used to prevent the circular dependency issue that might break your app, it is not
considered best practice to bypass the problem by using it. Circular dependency usually indicates there is a flaw in
your application's architecture, and you should address that instead.
Section 20.2: Dynamically load AngularJS service in vanilla
JavaScript
You can load AngularJS services in vanilla JavaScript using AngularJS injector() method. Every jqLite element
retrieved calling angular.element() has a method injector() that can be used to retrieve the injector.
var service;
var serviceName = 'myService';
var ngAppElement = angular.element(document.querySelector('[ng-app],[data-ng-app]') || document);
var injector = ngAppElement.injector();
if(injector && injector.has(serviceNameToInject)) {
service = injector.get(serviceNameToInject);
}
In the above example we try to retrieve the jqLite element containing the root of the AngularJS application
(ngAppElement). To do that, we use angular.element() method, searching for a DOM element containing ng-app or
data-ng-app attribute or, if it does not exists, we fall back to document element. We use ngAppElement to retrieve
injector instance (with ngAppElement.injector()). The injector instance is used to check if the service to inject
exists (with injector.has()) and then to load the service (with injector.get()) inside service variable.](https://image.slidesharecdn.com/angularjsnotesforprofessionals-200412131913/75/Angular-js-notes-for-professionals-93-2048.jpg)
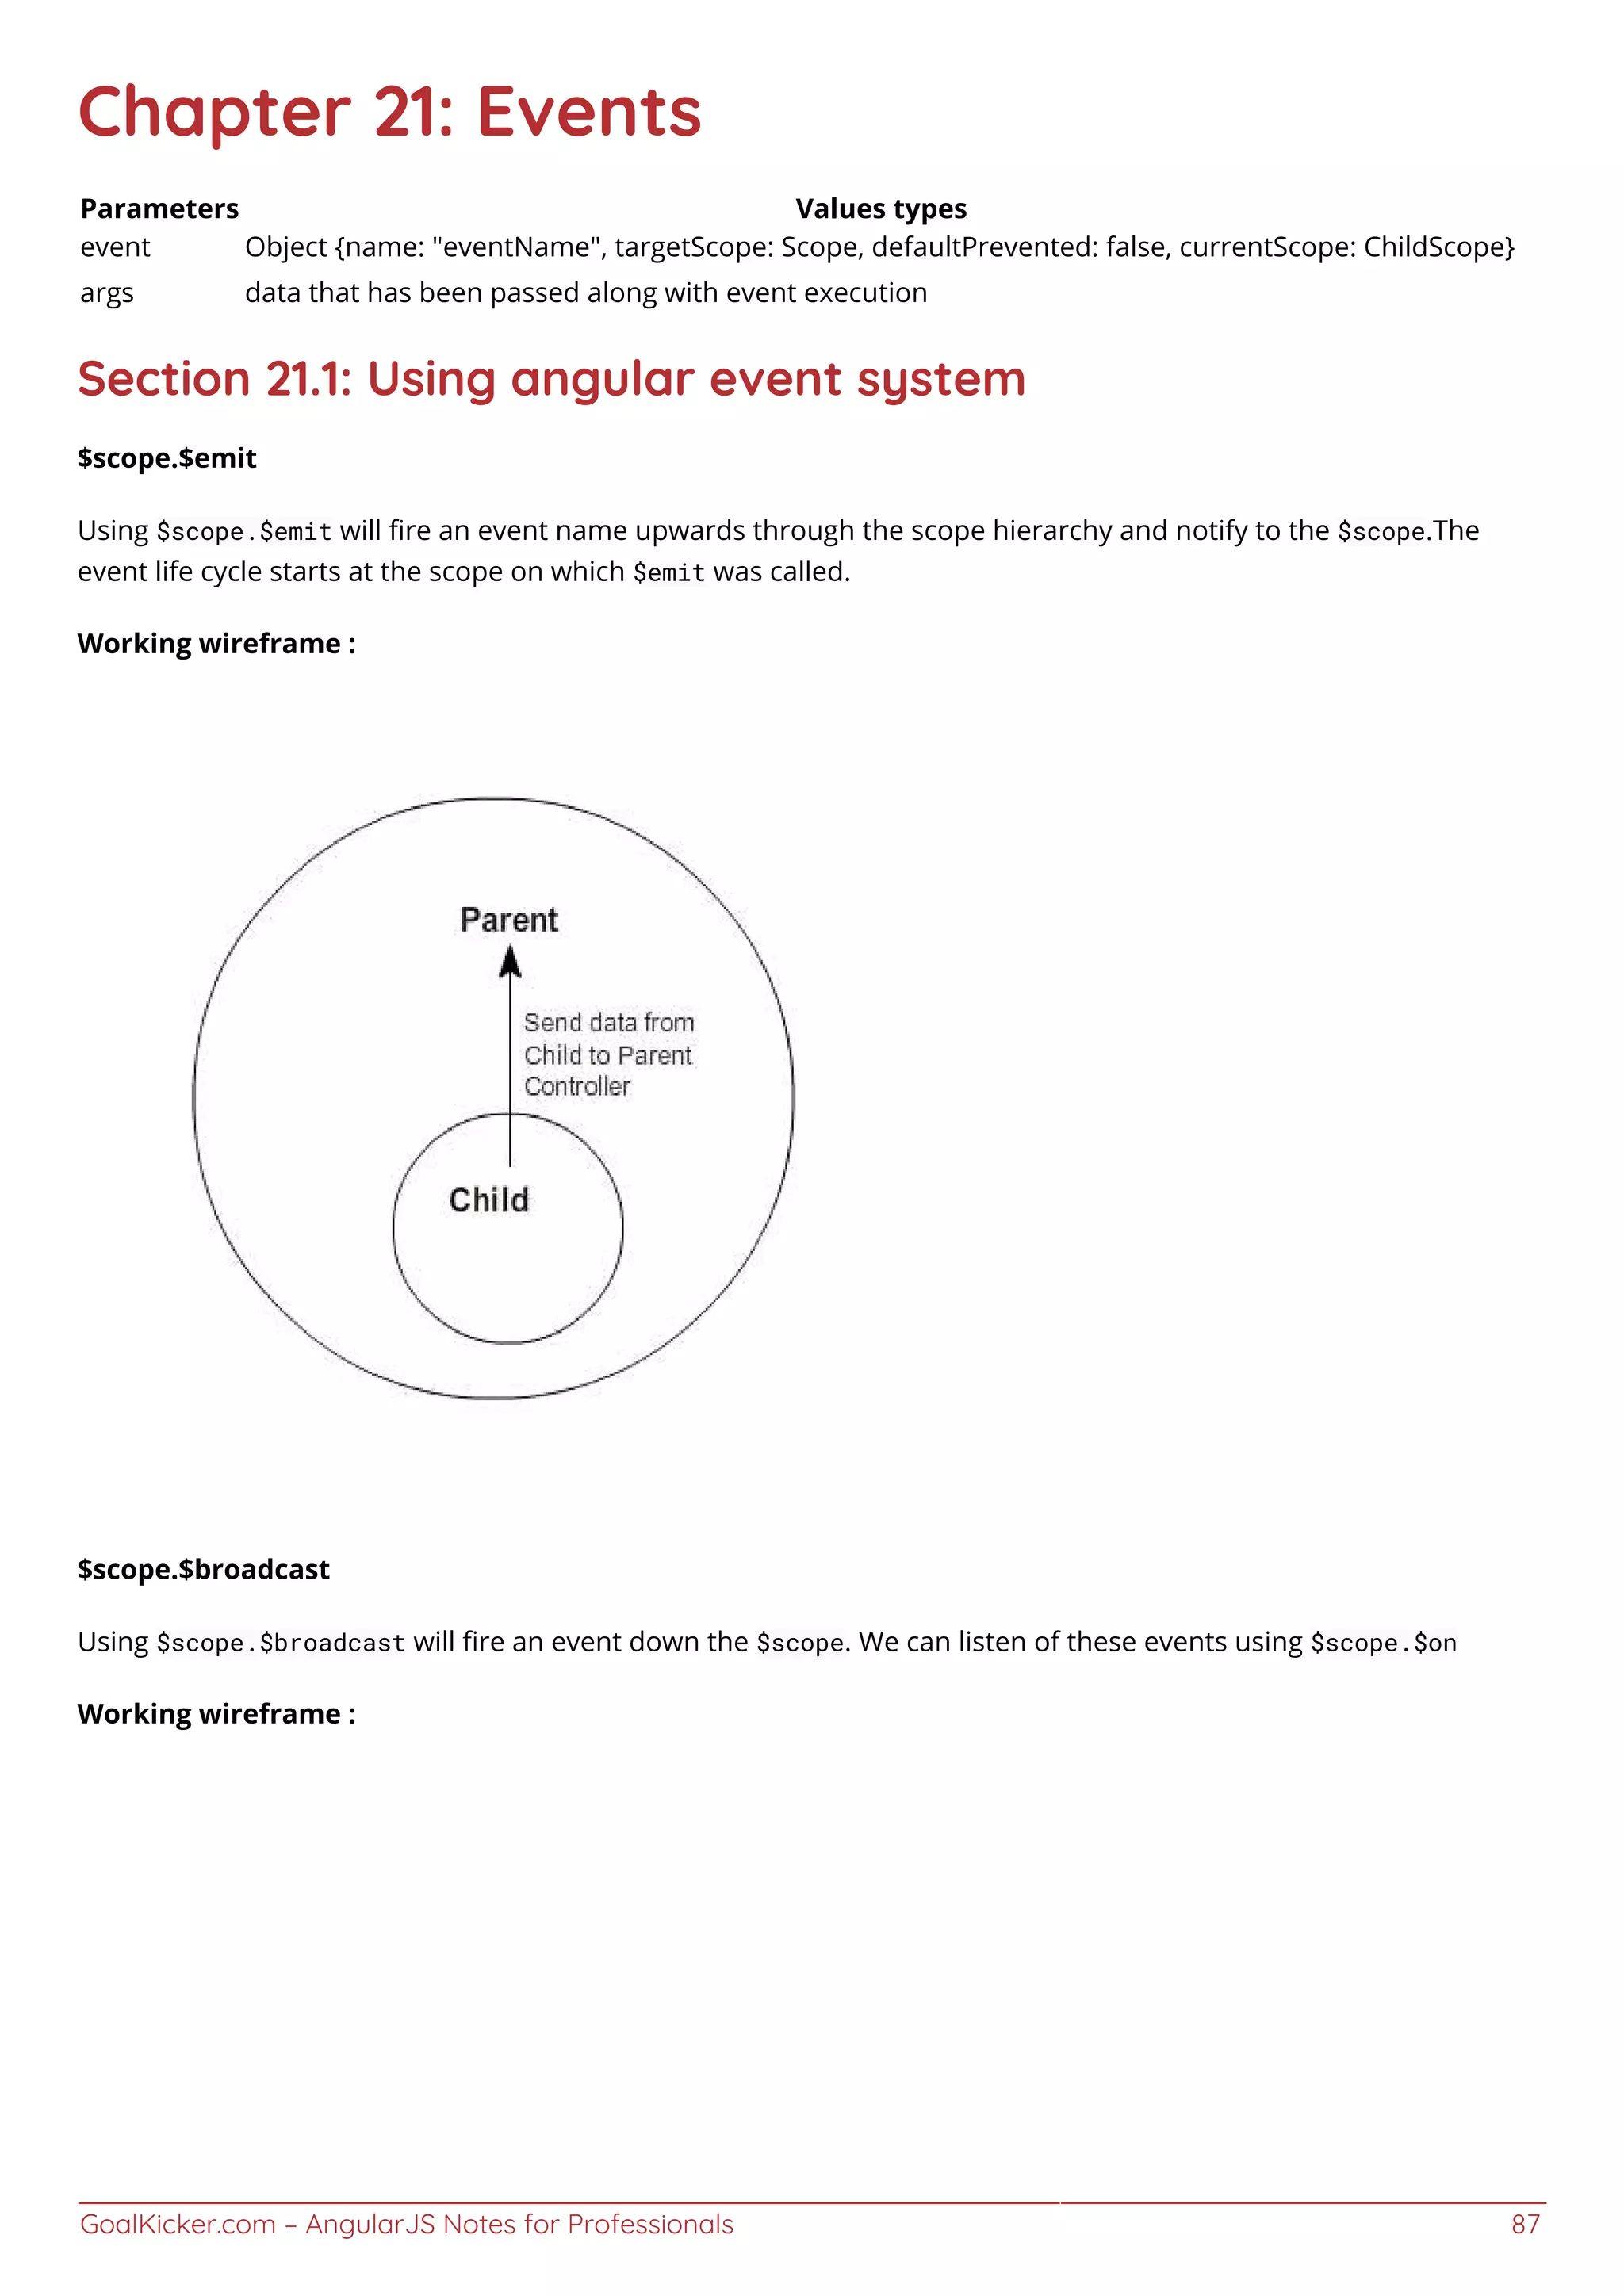
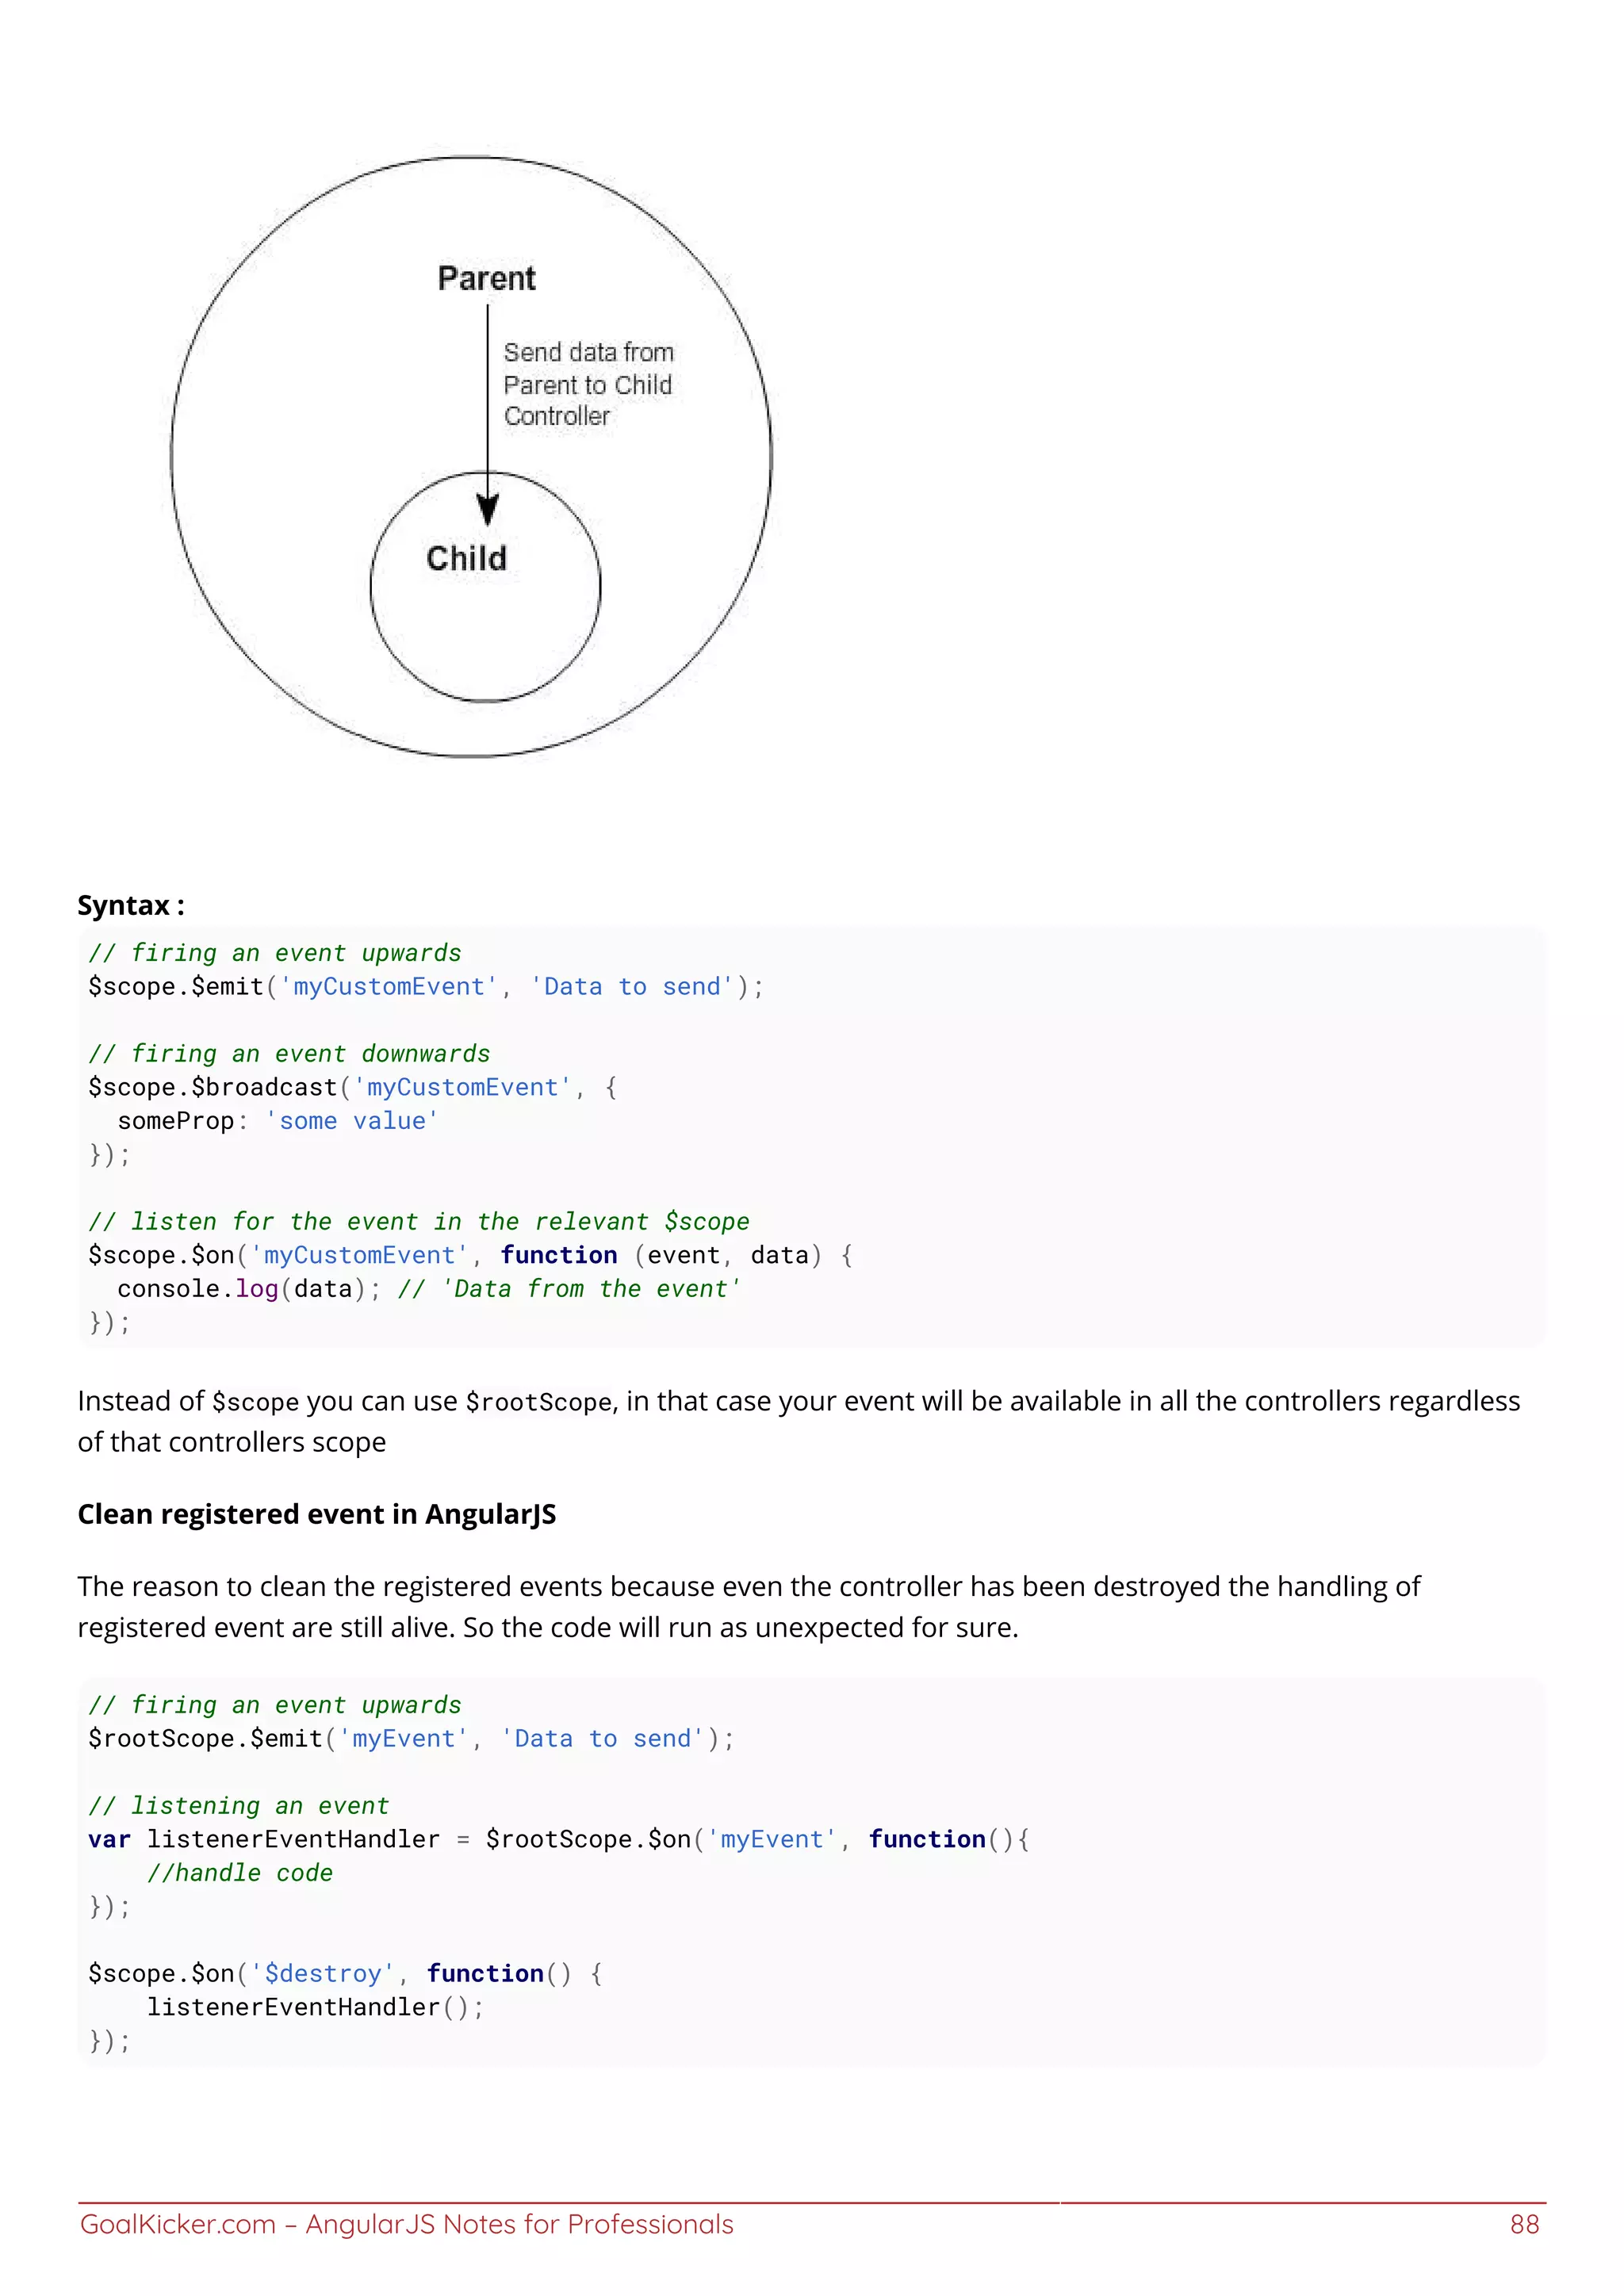
![GoalKicker.com – AngularJS Notes for Professionals 89
Section 21.2: Always deregister $rootScope.$on listeners on
the scope $destory event
$rootScope.$on listeners will remain in memory if you navigate to another controller. This will create a memory
leak if the controller falls out of scope.
Don't
angular.module('app').controller('badExampleController', badExample);
badExample.$inject = ['$scope', '$rootScope'];
function badExample($scope, $rootScope) {
$rootScope.$on('post:created', function postCreated(event, data) {});
}
Do
angular.module('app').controller('goodExampleController', goodExample);
goodExample.$inject = ['$scope', '$rootScope'];
function goodExample($scope, $rootScope) {
var deregister = $rootScope.$on('post:created', function postCreated(event, data) {});
$scope.$on('$destroy', function destroyScope() {
deregister();
});
}
Section 21.3: Uses and significance
These events can be used to communicate between 2 or more controllers.
$emit dispatches an event upwards through the scope hierarchy, while $broadcast dispatches an event downwards
to all child scopes.This has been beautifully explained here.
There can be basically two types of scenario while communicating among controllers:
When controllers have Parent-Child relationship. (we can mostly use $scope in such scenarios)1.
When controllers are not independent to each other and are needed to be informed about each others2.
activity. (we can use $rootScope in such scenarios)
eg: For any ecommerce website, suppose we have ProductListController(which controls the product listing page
when any product brand is clicked ) and CartController (to manage cart items) . Now, when we click on Add to
Cart button , it has to be informed to CartController as well, so that it can reflect new cart item count/details in
the navigation bar of the website. This can be achieved using $rootScope.
With $scope.$emit](https://image.slidesharecdn.com/angularjsnotesforprofessionals-200412131913/75/Angular-js-notes-for-professionals-96-2048.jpg)
![GoalKicker.com – AngularJS Notes for Professionals 90
<html>
<head>
<script src="https://ajax.googleapis.com/ajax/libs/angularjs/1.4.4/angular.js"></script>
<script>
var app = angular.module('app', []);
app.controller("FirstController", function ($scope) {
$scope.$on('eventName', function (event, args) {
$scope.message = args.message;
});
});
app.controller("SecondController", function ($scope) {
$scope.handleClick = function (msg) {
$scope.$emit('eventName', {message: msg});
};
});
</script>
</head>
<body ng-app="app">
<div ng-controller="FirstController" style="border:2px ;padding:5px;">
<h1>Parent Controller</h1>
<p>Emit Message : {{message}}</p>
<br />
<div ng-controller="SecondController" style="border:2px;padding:5px;">
<h1>Child Controller</h1>
<input ng-model="msg">
<button ng-click="handleClick(msg);">Emit</button>
</div>
</div>
</body>
</html>
With $scope.$broadcast:
<html>
<head>
<title>Broadcasting</title>
<script src="https://ajax.googleapis.com/ajax/libs/angularjs/1.4.4/angular.js"></script>
<script>
var app = angular.module('app', []);
app.controller("FirstController", function ($scope) {
$scope.handleClick = function (msg) {
$scope.$broadcast('eventName', {message: msg});
};
});
app.controller("SecondController", function ($scope) {
$scope.$on('eventName', function (event, args) {
$scope.message = args.message;
});
});
</script>
</head>
<body ng-app="app">
<div ng-controller="FirstController" style="border:2px solid ; padding:5px;">
<h1>Parent Controller</h1>](https://image.slidesharecdn.com/angularjsnotesforprofessionals-200412131913/75/Angular-js-notes-for-professionals-97-2048.jpg)
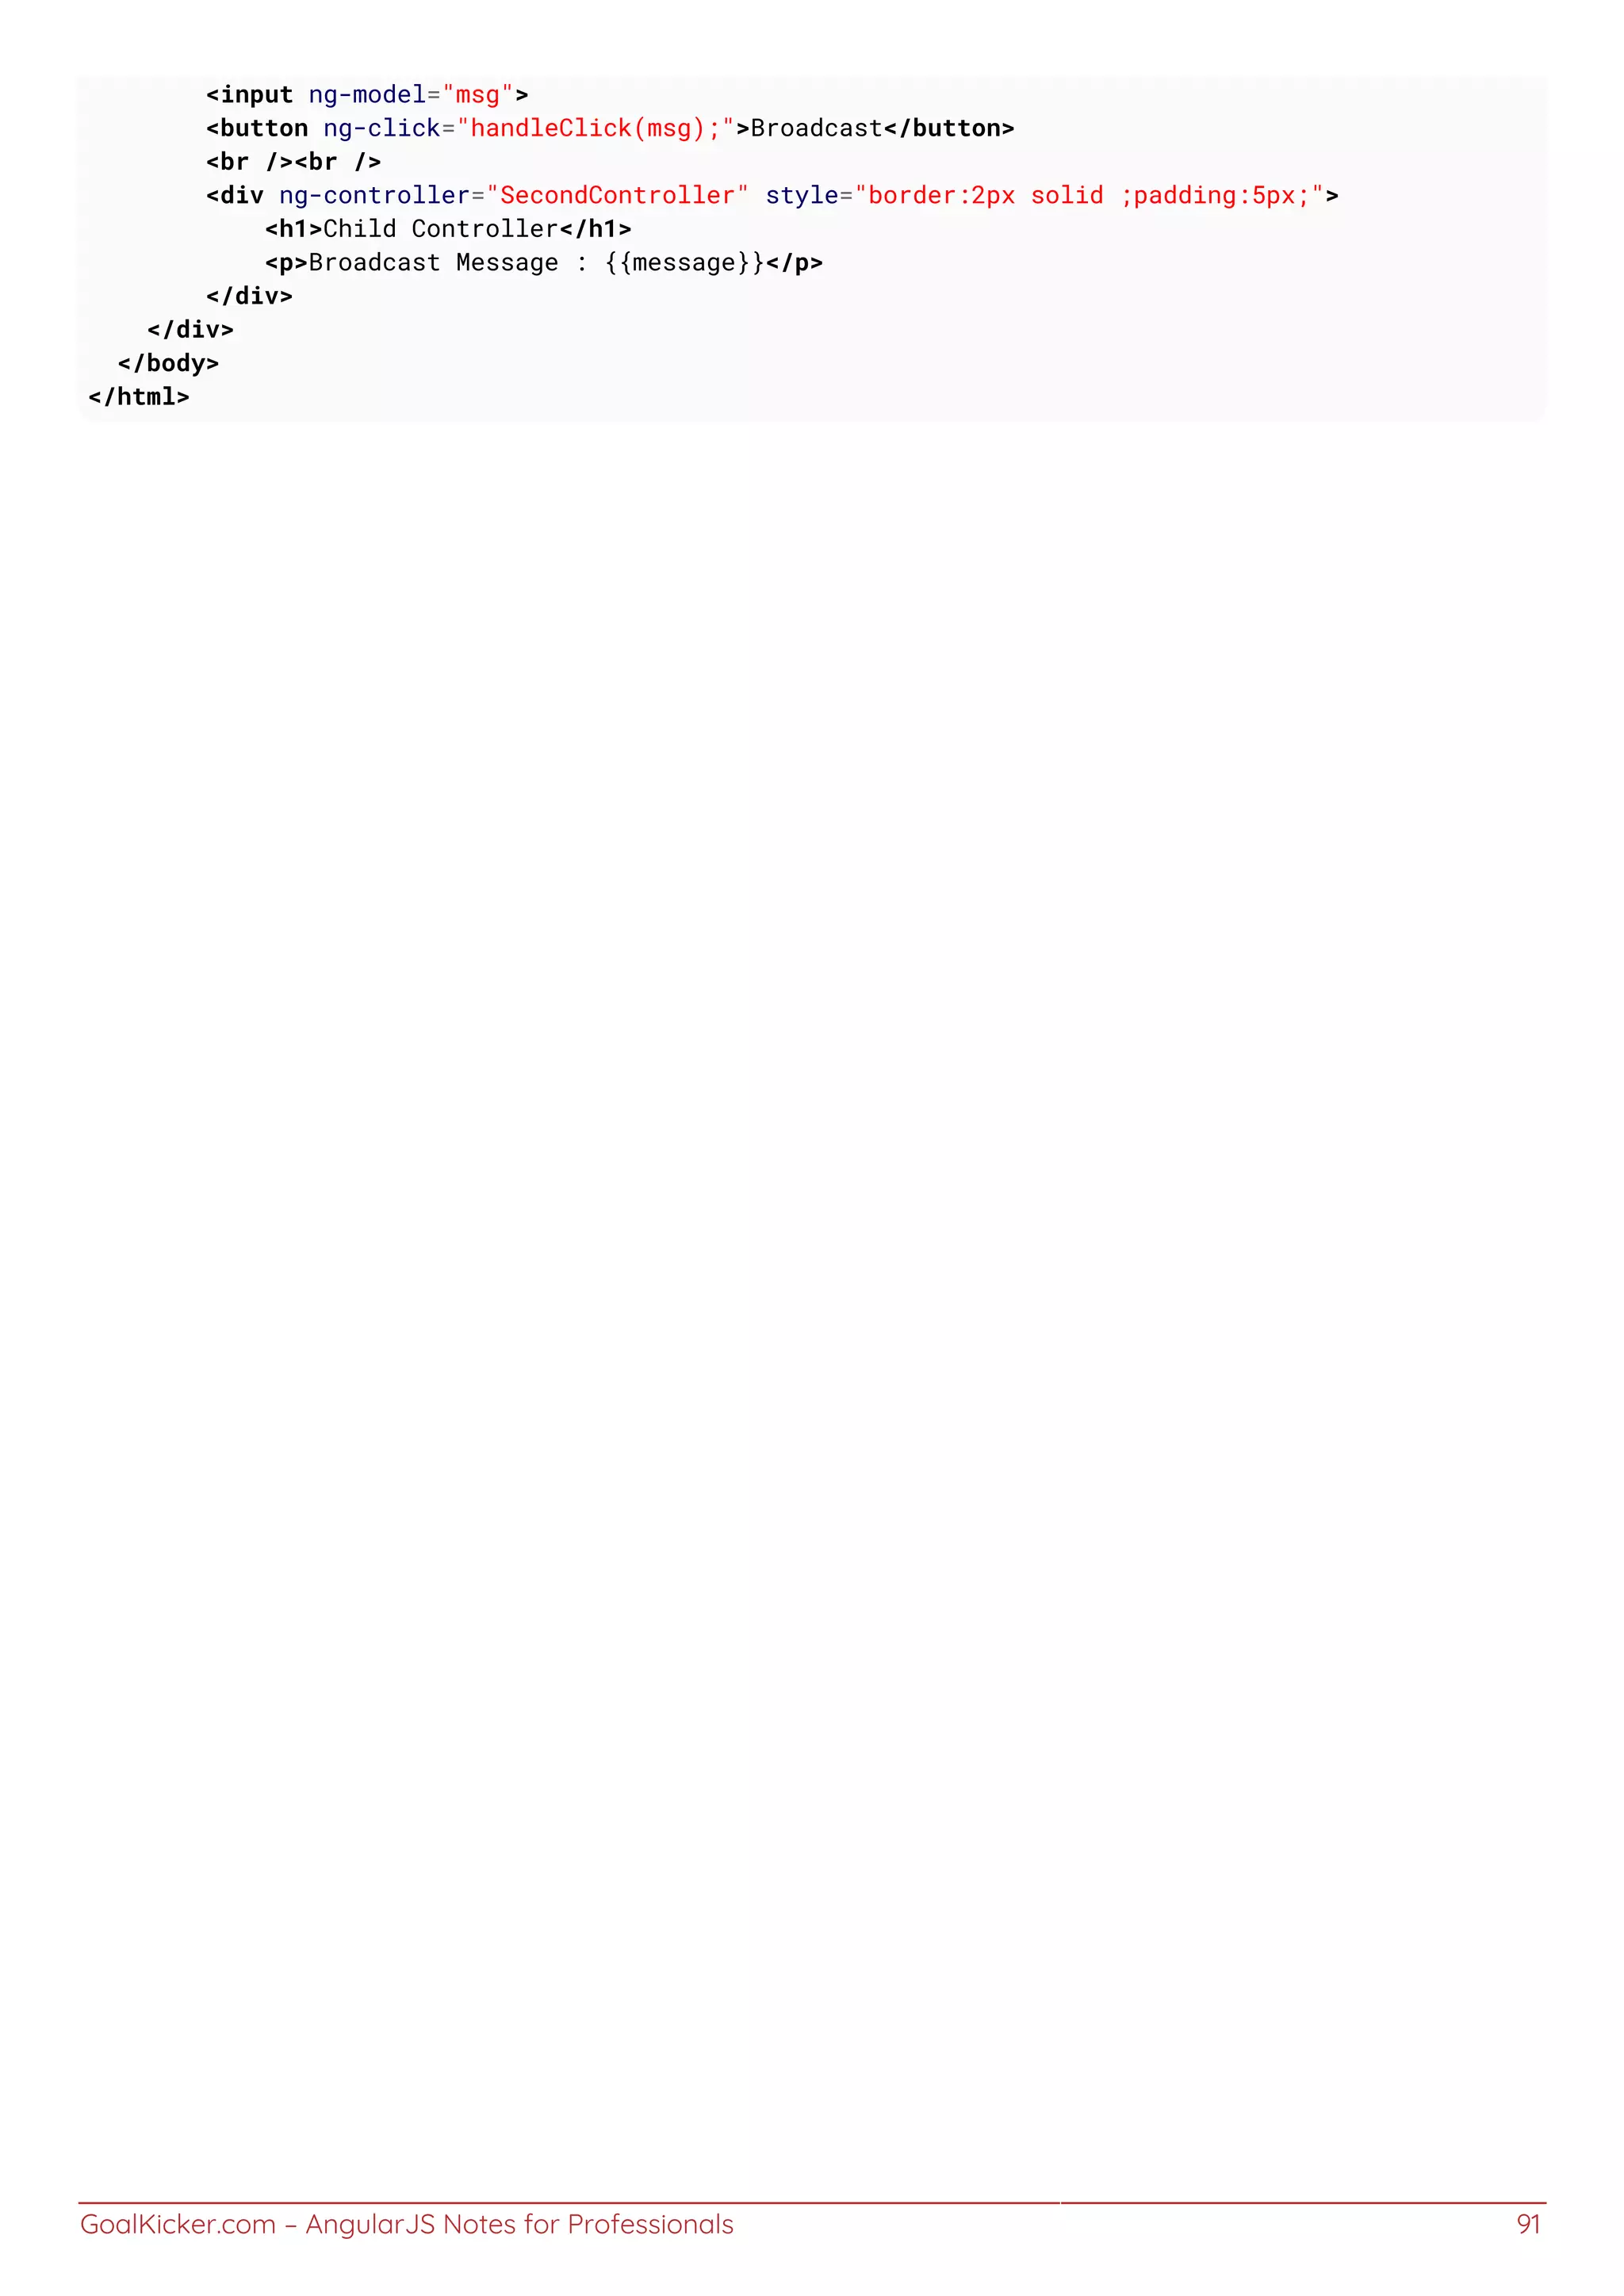
![GoalKicker.com – AngularJS Notes for Professionals 92
Chapter 22: Sharing Data
Section 22.1: Using ngStorage to share data
Firstly, include the ngStorage source in your index.html.
An example injecting ngStorage src would be:
<head>
<title>Angular JS ngStorage</title>
<script src = "http://ajax.googleapis.com/ajax/libs/angularjs/1.3.14/angular.min.js"></script>
<script src="https://rawgithub.com/gsklee/ngStorage/master/ngStorage.js"></script>
</head>
ngStorage gives you 2 storage namely: $localStorage and $sessionStorage. You need to require ngStorage and
Inject the services.
Suppose if ng-app="myApp", then you would be injecting ngStorage as following:
var app = angular.module('myApp', ['ngStorage']);
app.controller('controllerOne', function($localStorage,$sessionStorage) {
// an object to share
var sampleObject = {
name: 'angularjs',
value: 1
};
$localStorage.valueToShare = sampleObject;
$sessionStorage.valueToShare = sampleObject;
})
.controller('controllerTwo', function($localStorage,$sessionStorage) {
console.log('localStorage: '+ $localStorage +'sessionStorage: '+$sessionStorage);
})
$localStorage and $sessionStorage is globally accessible through any controllers as long as you inject those
services in the controllers.
You can also use the localStorage and sessionStorage of HTML5. However, using HTML5 localStorage would
require you to serialize and deserialize your objects before using or saving them.
For example:
var myObj = {
firstname: "Nic",
lastname: "Raboy",
website: "https://www.google.com"
}
//if you wanted to save into localStorage, serialize it
window.localStorage.set("saved", JSON.stringify(myObj));
//unserialize to get object
var myObj = JSON.parse(window.localStorage.get("saved"));
Section 22.2: Sharing data from one controller to another
using service
We can create a service to set and get the data between the controllers and then inject that service in the](https://image.slidesharecdn.com/angularjsnotesforprofessionals-200412131913/75/Angular-js-notes-for-professionals-99-2048.jpg)
![GoalKicker.com – AngularJS Notes for Professionals 93
controller function where we want to use it.
Service :
app.service('setGetData', function() {
var data = '';
getData: function() { return data; },
setData: function(requestData) { data = requestData; }
});
Controllers :
app.controller('myCtrl1', ['setGetData',function(setGetData) {
// To set the data from the one controller
var data = 'Hello World !!';
setGetData.setData(data);
}]);
app.controller('myCtrl2', ['setGetData',function(setGetData) {
// To get the data from the another controller
var res = setGetData.getData();
console.log(res); // Hello World !!
}]);
Here, we can see that myCtrl1 is used for setting the data and myCtrl2 is used for getting the data. So, we can
share the data from one controller to another contrller like this.](https://image.slidesharecdn.com/angularjsnotesforprofessionals-200412131913/75/Angular-js-notes-for-professionals-100-2048.jpg)

![GoalKicker.com – AngularJS Notes for Professionals 95
Dealing with traditional form inputs and having to use interrogative jQuery-style processing can be time-consuming
and finicky. Angular allows you to produce professional interactive forms relatively easily.
The ng-model directive provides two-way binding with input fields and usually the novalidate attribute is also
placed on the form element to prevent the browser from doing native validation.
Thus, a simple form would look like:
<form name="form" novalidate>
<label name="email"> Your email </label>
<input type="email" name="email" ng-model="email" />
</form>
For Angular to validate inputs, use exactly the same syntax as a regular input element, except for the addition of the
ng-model attribute to specify which variable to bind to on the scope. Email is shown in the prior example. To
validate a number, the syntax would be:
<input type="number" name="postalcode" ng-model="zipcode" />
The final steps to basic form validation are connecting to a form submit function on the controller using ng-submit,
rather than allowing the default form submit to occur. This is not mandatory but it is usually used, as the input
variables are already available on the scope and so available to your submit function. It is also usually good practice
to give the form a name. These changes would result in the following syntax:
<form name="signup_form" ng-submit="submitFunc()" novalidate>
<label name="email"> Your email </label>
<input type="email" name="email" ng-model="email" />
<button type="submit">Signup</button>
</form>
This above code is functional but there is other functionality that Angular provides.
The next step is to understand that Angular attaches class attributes using ng-pristine, ng-dirty, ng-valid and ng-
invalid for form processing. Using these classes in your css will allow you to style valid/invalid and pristine/dirty
input fields and so alter the presentation as the user is entering data into the form.
Section 23.4: Custom Form Validation
In some cases basic validation is not enough. Angular support custom validation adding validator functions to the
$validators object on the ngModelController:
angular.module('app', [])
.directive('myValidator', function() {
return {
// element must have ng-model attribute
// or $validators does not work
require: 'ngModel',
link: function(scope, elm, attrs, ctrl) {
ctrl.$validators.myValidator = function(modelValue, viewValue) {
// validate viewValue with your custom logic
var valid = (viewValue && viewValue.length > 0) || false;
return valid;
};
}
};](https://image.slidesharecdn.com/angularjsnotesforprofessionals-200412131913/75/Angular-js-notes-for-professionals-102-2048.jpg)
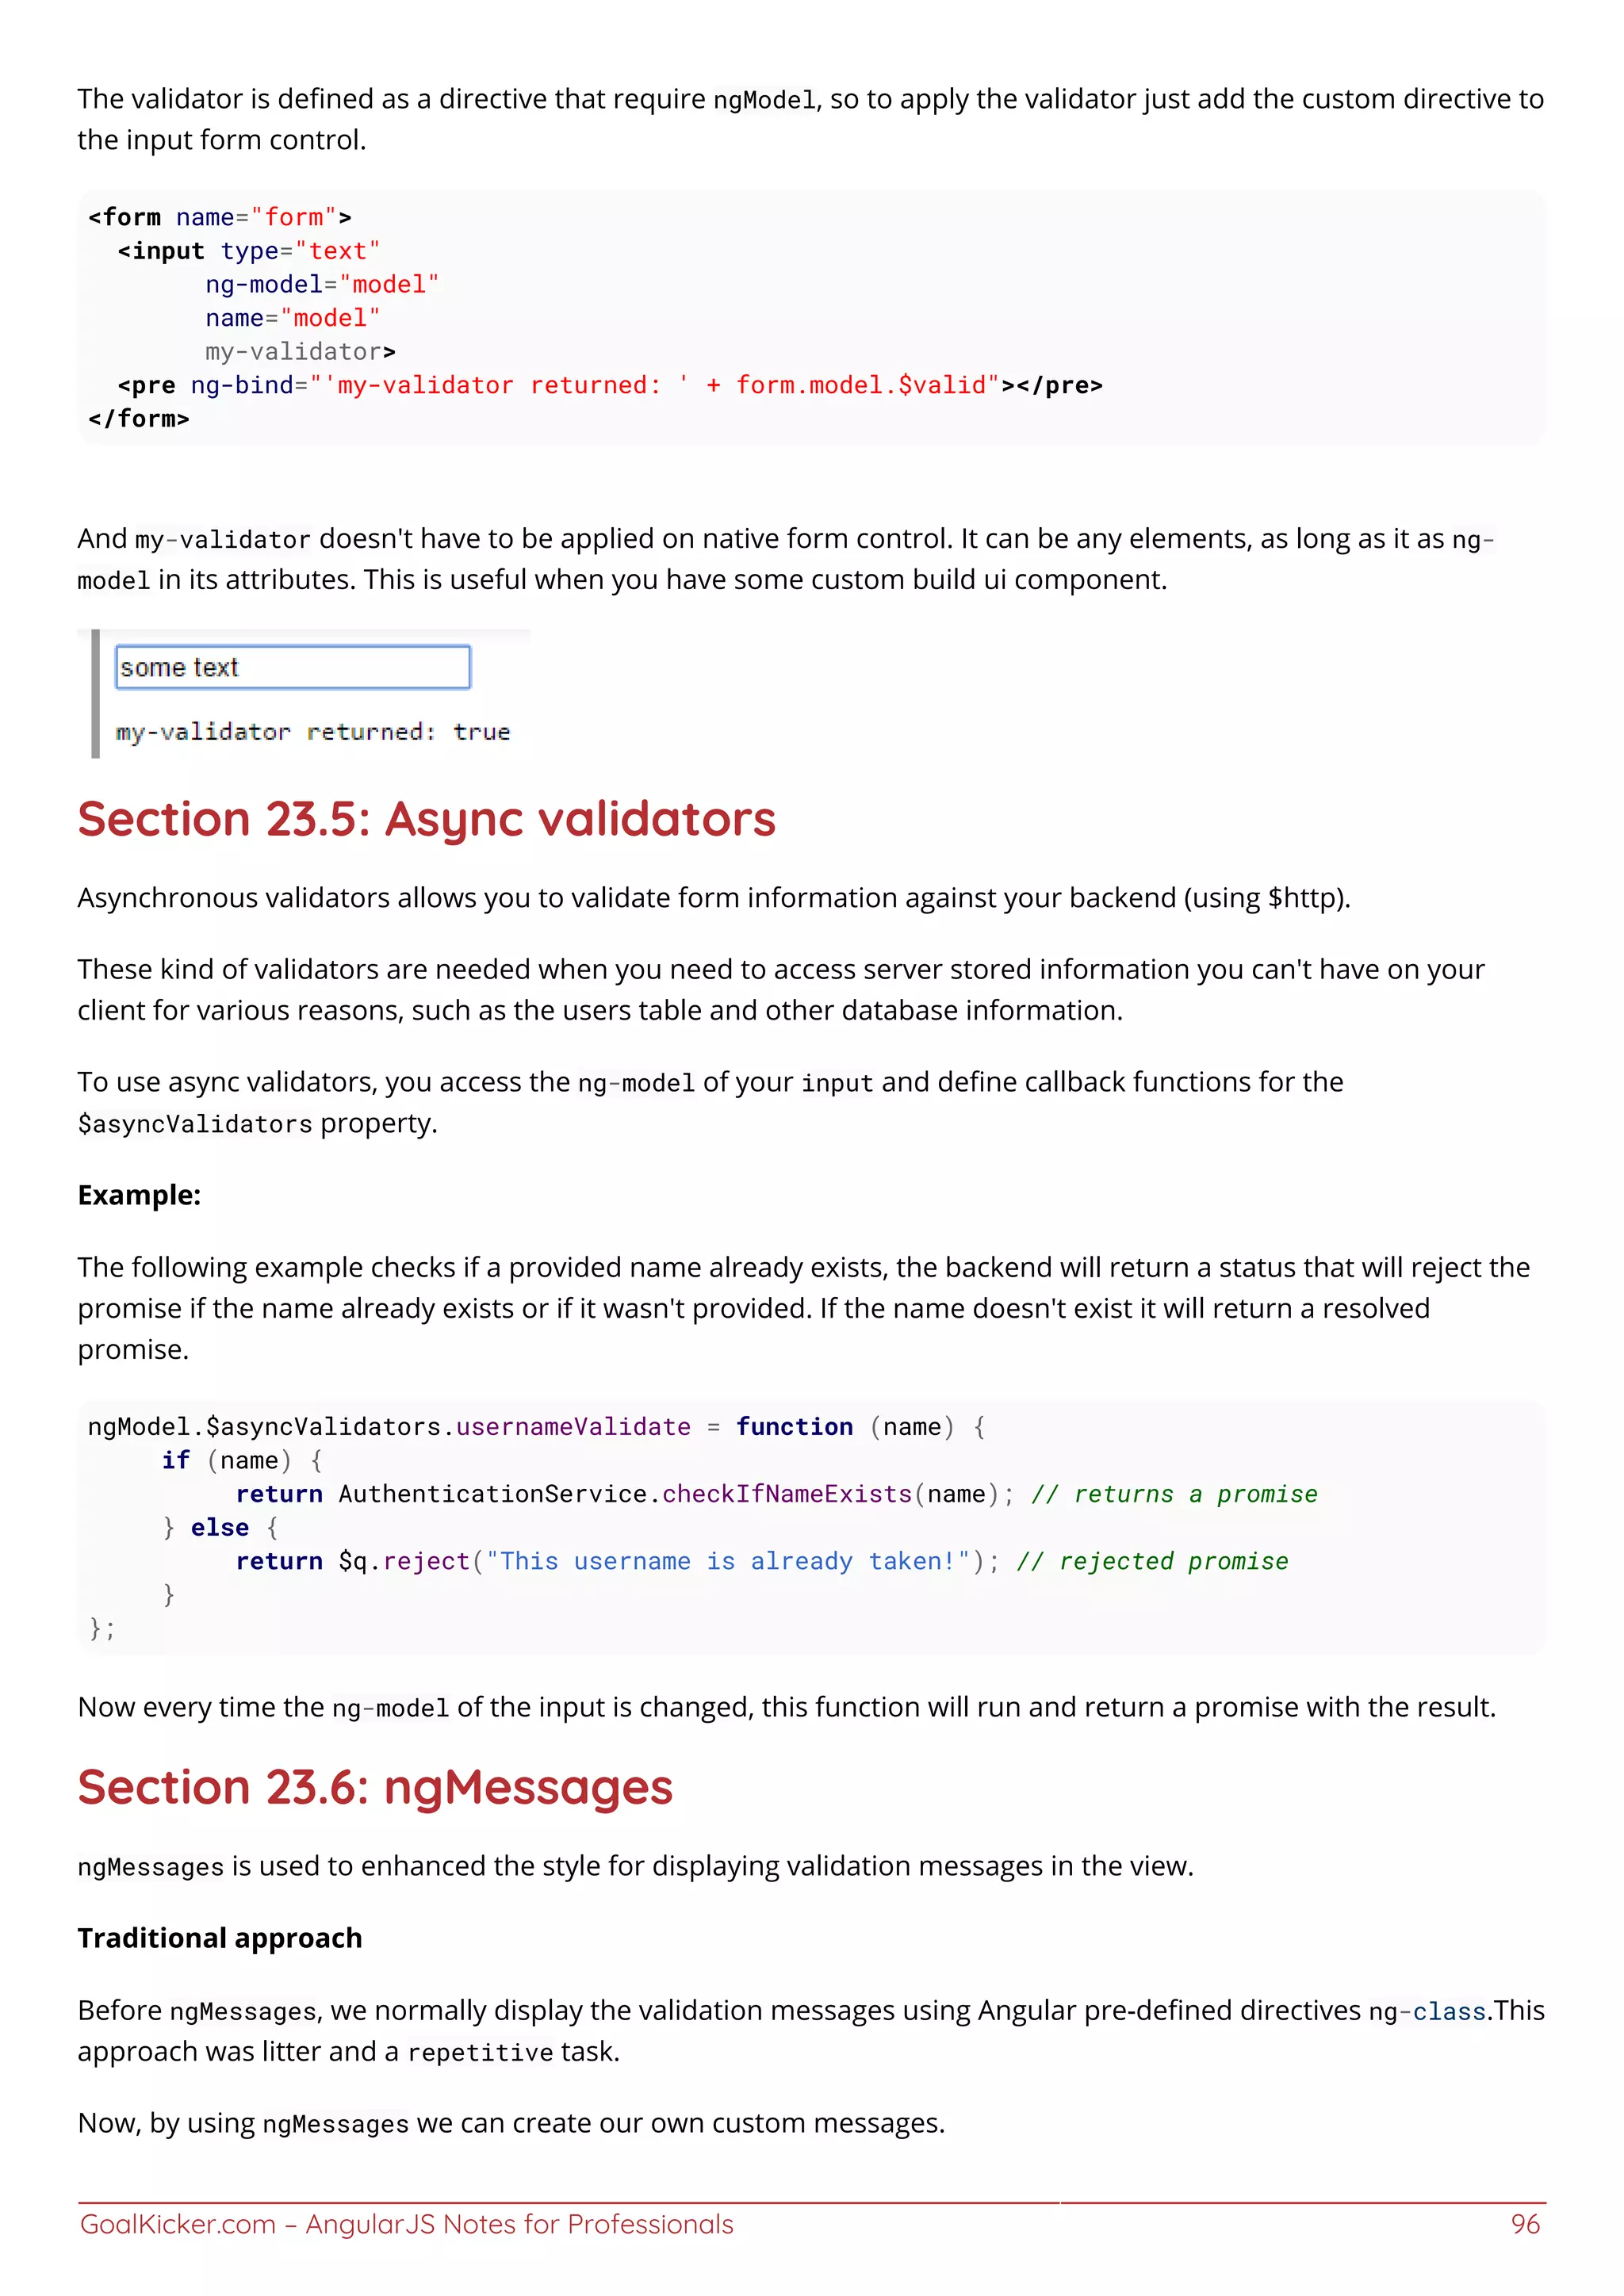
![GoalKicker.com – AngularJS Notes for Professionals 97
Example
HTML:
<form name="ngMessagesDemo">
<input name="firstname" type="text" ng-model="firstname" required>
<div ng-messages="ngMessagesDemo.firstname.$error">
<div ng-message="required">Firstname is required.</div>
</div>
</form>
<script src="https://cdnjs.cloudflare.com/ajax/libs/angular.js/1.3.16/angular.min.js"></script>
<script src="https://cdnjs.cloudflare.com/ajax/libs/angular.js/1.3.16/angular-
messages.min.js"></script>
JS:
var app = angular.module('app', ['ngMessages']);
app.controller('mainCtrl', function ($scope) {
$scope.firstname = "Rohit";
});
Section 23.7: Nested Forms
Sometimes it is desirable to nest forms for the purpose of grouping controls and inputs logically on the page.
However, HTML5 forms should not be nested. Angular supplies ng-form instead.
<form name="myForm" noValidate>
<!-- nested form can be referenced via 'myForm.myNestedForm' -->
<ng-form name="myNestedForm" noValidate>
<input name="myInput1" ng-minlength="1" ng-model="input1" required />
<input name="myInput2" ng-minlength="1" ng-model="input2" required />
</ng-form>
<!-- show errors for the nested subform here -->
<div ng-messages="myForm.myNestedForm.$error">
<!-- note that this will show if either input does not meet the minimum -->
<div ng-message="minlength">Length is not at least 1</div>
</div>
</form>
<!-- status of the form -->
<p>Has any field on my form been edited? {{myForm.$dirty}}</p>
<p>Is my nested form valid? {{myForm.myNestedForm.$valid}}</p>
<p>Is myInput1 valid? {{myForm.myNestedForm.myInput1.$valid}}</p>
Each part of the form contributes to the overall form's state. Therefore, if one of the inputs myInput1 has been
edited and is $dirty, its containing form will also be $dirty. This cascades to each containing form, so both
myNestedForm and myForm will be $dirty.](https://image.slidesharecdn.com/angularjsnotesforprofessionals-200412131913/75/Angular-js-notes-for-professionals-104-2048.jpg)
![GoalKicker.com – AngularJS Notes for Professionals 98
Chapter 24: Routing using ngRoute
Section 24.1: Basic example
This example shows setting up a small application with 3 routes, each with it's own view and controller, using the
controllerAs syntax.
We configure our router at the angular .config function
We inject $routeProvider into .config1.
We define our route names at the .when method with a route definition object.2.
We supply the .when method with an object specifying our template or templateUrl, controller and3.
controllerAs
app.js
angular.module('myApp', ['ngRoute'])
.controller('controllerOne', function() {
this.message = 'Hello world from Controller One!';
})
.controller('controllerTwo', function() {
this.message = 'Hello world from Controller Two!';
})
.controller('controllerThree', function() {
this.message = 'Hello world from Controller Three!';
})
.config(function($routeProvider) {
$routeProvider
.when('/one', {
templateUrl: 'view-one.html',
controller: 'controllerOne',
controllerAs: 'ctrlOne'
})
.when('/two', {
templateUrl: 'view-two.html',
controller: 'controllerTwo',
controllerAs: 'ctrlTwo'
})
.when('/three', {
templateUrl: 'view-three.html',
controller: 'controllerThree',
controllerAs: 'ctrlThree'
})
// redirect to here if no other routes match
.otherwise({
redirectTo: '/one'
});
});
Then in our HTML we define our navigation using <a> elements with href, for a route name of helloRoute we will
route as <a href="#/helloRoute">My route</a>
We also provide our view with a container and the directive ng-view to inject our routes.
index.html
<div ng-app="myApp">
<nav>](https://image.slidesharecdn.com/angularjsnotesforprofessionals-200412131913/75/Angular-js-notes-for-professionals-105-2048.jpg)
![GoalKicker.com – AngularJS Notes for Professionals 99
<!-- links to switch routes -->
<a href="#/one">View One</a>
<a href="#/two">View Two</a>
<a href="#/three">View Three</a>
</nav>
<!-- views will be injected here -->
<div ng-view></div>
<!-- templates can live in normal html files -->
<script type="text/ng-template" id="view-one.html">
<h1>{{ctrlOne.message}}</h1>
</script>
<script type="text/ng-template" id="view-two.html">
<h1>{{ctrlTwo.message}}</h1>
</script>
<script type="text/ng-template" id="view-three.html">
<h1>{{ctrlThree.message}}</h1>
</script>
</div>
Section 24.2: Defining custom behavior for individual routes
The simplest manner of defining custom behavior for individual routes would be fairly easy.
In this example we use it to authenticate a user :
1) routes.js: create a new property (like requireAuth) for any desired route
angular.module('yourApp').config(['$routeProvider', function($routeProvider) {
$routeProvider
.when('/home', {
templateUrl: 'templates/home.html',
requireAuth: true
})
.when('/login', {
templateUrl: 'templates/login.html',
})
.otherwise({
redirectTo: '/home'
});
}])
2) In a top-tier controller that isn't bound to an element inside the ng-view (to avoid conflict with angular
$routeProvider), check if the newUrl has the requireAuth property and act accordingly
angular.module('YourApp').controller('YourController', ['$scope', 'session', '$location',
function($scope, session, $location) {
$scope.$on('$routeChangeStart', function(angularEvent, newUrl) {
if (newUrl.requireAuth && !session.user) {
// User isn’t authenticated
$location.path("/login");
}
});
}
]);](https://image.slidesharecdn.com/angularjsnotesforprofessionals-200412131913/75/Angular-js-notes-for-professionals-106-2048.jpg)
![GoalKicker.com – AngularJS Notes for Professionals 100
Section 24.3: Route parameters example
This example extends the basic example passing parameters in the route in order to use them in the controller
To do so we need to:
Configure the parameter position and name in the route name1.
Inject $routeParams service in our Controller2.
app.js
angular.module('myApp', ['ngRoute'])
.controller('controllerOne', function() {
this.message = 'Hello world from Controller One!';
})
.controller('controllerTwo', function() {
this.message = 'Hello world from Controller Two!';
})
.controller('controllerThree', ['$routeParams', function($routeParams) {
var routeParam = $routeParams.paramName
if ($routeParams.message) {
// If a param called 'message' exists, we show it's value as the message
this.message = $routeParams.message;
} else {
// If it doesn't exist, we show a default message
this.message = 'Hello world from Controller Three!';
}
}])
.config(function($routeProvider) {
$routeProvider
.when('/one', {
templateUrl: 'view-one.html',
controller: 'controllerOne',
controllerAs: 'ctrlOne'
})
.when('/two', {
templateUrl: 'view-two.html',
controller: 'controllerTwo',
controllerAs: 'ctrlTwo'
})
.when('/three', {
templateUrl: 'view-three.html',
controller: 'controllerThree',
controllerAs: 'ctrlThree'
})
.when('/three/:message', { // We will pass a param called 'message' with this route
templateUrl: 'view-three.html',
controller: 'controllerThree',
controllerAs: 'ctrlThree'
})
// redirect to here if no other routes match
.otherwise({
redirectTo: '/one'
});
});
Then, withoud making any changes in our templates, only adding a new link with custom message, we can see the
new custom message in our view.](https://image.slidesharecdn.com/angularjsnotesforprofessionals-200412131913/75/Angular-js-notes-for-professionals-107-2048.jpg)
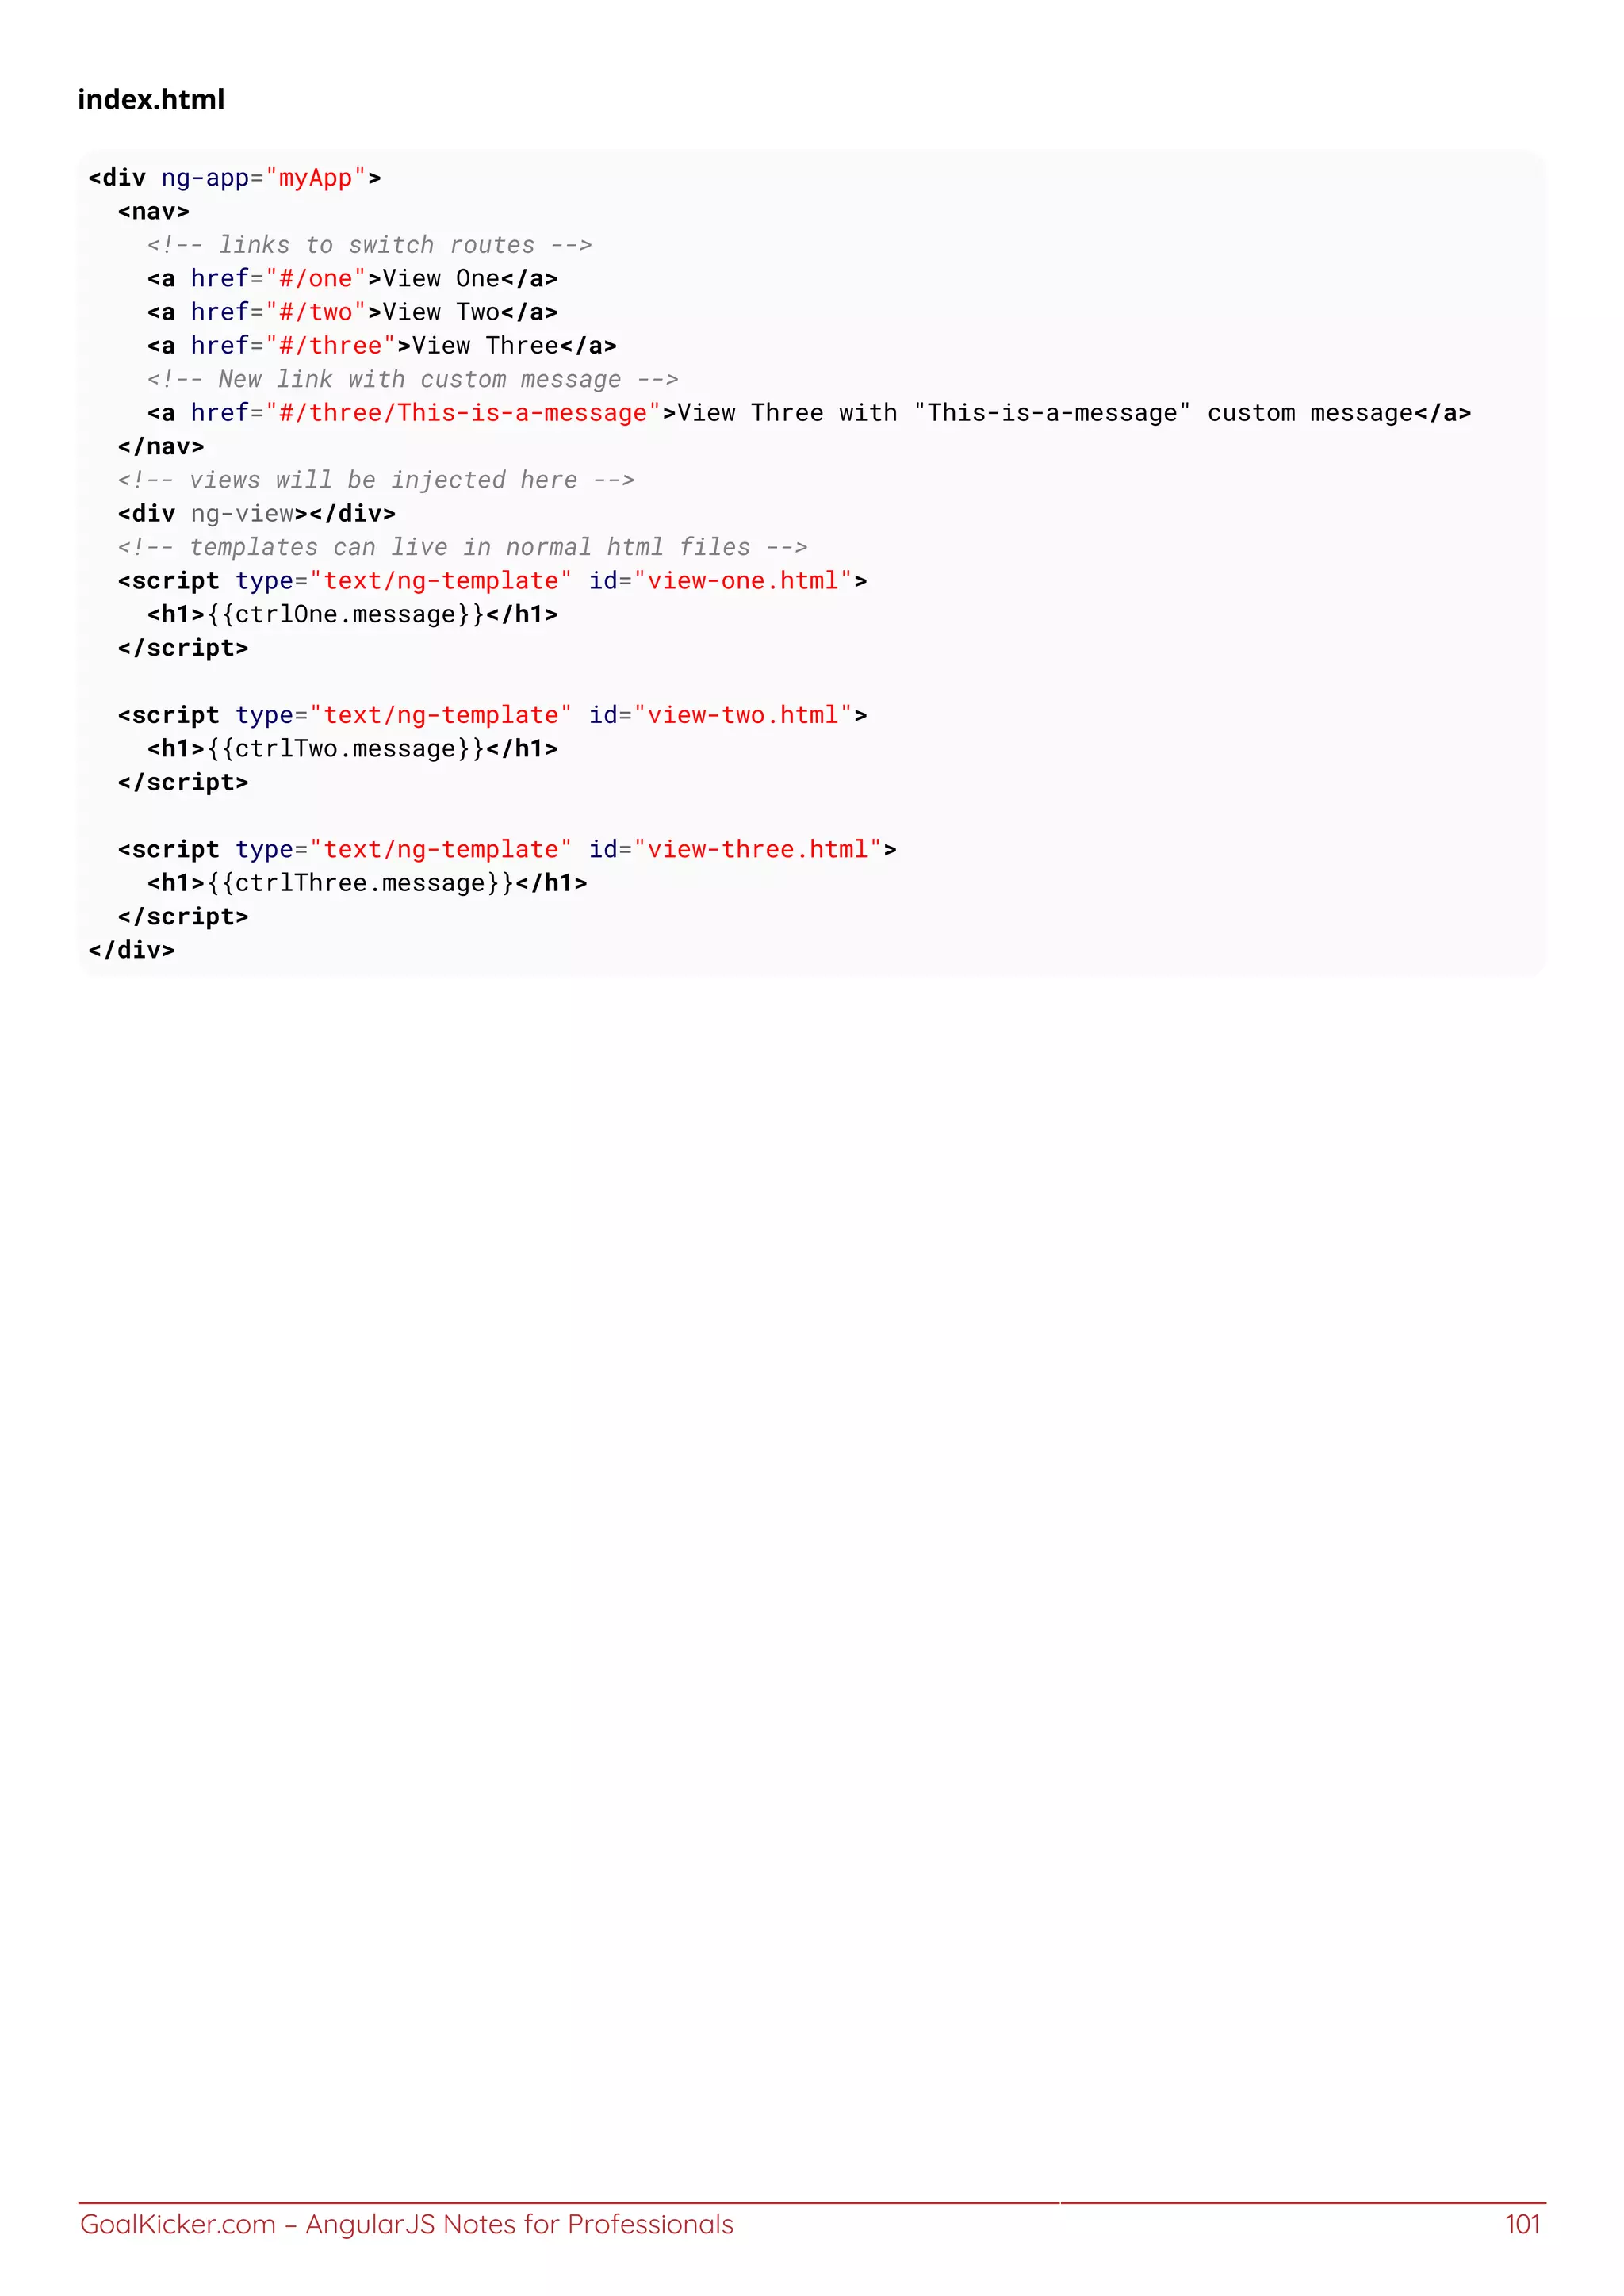
![GoalKicker.com – AngularJS Notes for Professionals 103
<style>
.bold { font-weight: bold; }
.strike { text-decoration: line-through; }
.orange { color: orange; }
</style>
<p ng-class="[ UserStyle, {orange: warning} ]">Array of Both Expression Types</p>
<input ng-model="UserStyle" placeholder="Type 'bold' and/or 'strike'"><br>
<label><input type="checkbox" ng-model="warning"> warning (apply "orange" class)</label>
This creates a text input field bound to the scope variable UserStyle which lets the user type in any class name(s).
These will be dynamically applied to the <p> element as the user types. Also, the user can click on the checkbox that
is data-bound to the warning scope variable. This will also be dynamically applied to the <p> element.](https://image.slidesharecdn.com/angularjsnotesforprofessionals-200412131913/75/Angular-js-notes-for-professionals-110-2048.jpg)
![GoalKicker.com – AngularJS Notes for Professionals 104
Chapter 26: ng-repeat
Variable Details
$index number iterator offset of the repeated element (0..length-1)
$first boolean true if the repeated element is first in the iterator.
$middle boolean true if the repeated element is between the first and last in the iterator.
$last boolean true if the repeated element is last in the iterator.
$even boolean true if the iterator position $index is even (otherwise false).
$odd boolean true if the iterator position $index is odd (otherwise false).
The ngRepeat directive instantiates a template once per item from a collection. The collection must be an array or
an object. Each template instance gets its own scope, where the given loop variable is set to the current collection
item, and $index is set to the item index or key.
Section 26.1: ng-repeat-start + ng-repeat-end
AngularJS 1.2 ng-repeat handle multiple elements with ng-repeat-start and ng-repeat-end:
// table items
$scope.tableItems = [
{
row1: 'Item 1: Row 1',
row2: 'Item 1: Row 2'
},
{
row1: 'Item 2: Row 1',
row2: 'Item 2: Row 2'
}
];
// template
<table>
<th>
<td>Items</td>
</th>
<tr ng-repeat-start="item in tableItems">
<td ng-bind="item.row1"></td>
</tr>
<tr ng-repeat-end>
<td ng-bind="item.row2"></td>
</tr>
</table>
Output:
Items
Item 1: Row 1
Item 1: Row 2
Item 2: Row 1
Item 2: Row 2
Section 26.2: Iterating over object properties
<div ng-repeat="(key, value) in myObj"> ... </div>](https://image.slidesharecdn.com/angularjsnotesforprofessionals-200412131913/75/Angular-js-notes-for-professionals-111-2048.jpg)
![GoalKicker.com – AngularJS Notes for Professionals 105
For example
<div ng-repeat="n in [42, 42, 43, 43]">
{{n}}
</div>
Section 26.3: Tracking and Duplicates
ngRepeat uses $watchCollection to detect changes in the collection. When a change happens, ngRepeat then makes
the corresponding changes to the DOM:
When an item is added, a new instance of the template is added to the DOM.
When an item is removed, its template instance is removed from the DOM.
When items are reordered, their respective templates are reordered in the DOM.
Duplicates
track by for any list that may include duplicate values.
track by also speeds up list changes significantly.
If you don't use track by in this case, you get the error: [ngRepeat:dupes]
$scope.numbers = ['1','1','2','3','4'];
<ul>
<li ng-repeat="n in numbers track by $index">
{{n}}
</li>
</ul>](https://image.slidesharecdn.com/angularjsnotesforprofessionals-200412131913/75/Angular-js-notes-for-professionals-112-2048.jpg)

![GoalKicker.com – AngularJS Notes for Professionals 107
Chapter 28: ng-view
ng-view is one of in-build directive that angular uses as a container to switch between views. {info} ngRoute is no
longer a part of the base angular.js file, so you'll need to include the angular-route.js file after your the base angular
javascript file. We can configure a route by using the “when” function of the $routeProvider. We need to first specify
the route, then in a second parameter provide an object with a templateUrl property and a controller property.
Section 28.1: Registration navigation
We injecting the module in the application1.
var Registration=angular.module("myApp",["ngRoute"]);
now we use $routeProvider from "ngRoute"2.
Registration.config(function($routeProvider) {
});
finally we integrating the route, we define "/add" routing to the application in case application get "/add" it3.
divert to regi.htm
Registration.config(function($routeProvider) {
$routeProvider
.when("/add", {
templateUrl : "regi.htm"
})
});
Section 28.2: ng-view
ng-view is a directive used with $route to render a partial view in the main page layout. Here in this example,
Index.html is our main file and when user lands on "/" route the templateURL home.html will be rendered in
Index.html where ng-view is mentioned.
angular.module('ngApp', ['ngRoute'])
.config(function($routeProvider){
$routeProvider.when("/",
{
templateUrl: "home.html",
controller: "homeCtrl"
}
);
});
angular.module('ngApp').controller('homeCtrl',['$scope', function($scope) {
$scope.welcome= "Welcome to stackoverflow!";
}]);
//Index.html
<body ng-app="ngApp">
<div ng-view></div>
</body>
//Home Template URL or home.html](https://image.slidesharecdn.com/angularjsnotesforprofessionals-200412131913/75/Angular-js-notes-for-professionals-114-2048.jpg)


![GoalKicker.com – AngularJS Notes for Professionals 111
Chapter 30: Providers
Section 30.1: Provider
Provider is available both in configuration and run phases.
The Provider recipe is syntactically defined as a custom type that implements a $get method.
You should use the Provider recipe only when you want to expose an API for application-wide
configuration that must be made before the application starts. This is usually interesting only for reusable
services whose behavior might need to vary slightly between applications.
angular.module('app',[])
.provider('endpointProvider', function() {
var uri = 'n/a';
this.set = function(value) {
uri = value;
};
this.$get = function() {
return {
get: function() {
return uri;
}
};
};
})
.config(function(endpointProviderProvider) {
endpointProviderProvider.set('http://some.rest.endpoint');
})
.controller('MainCtrl', function(endpointProvider) {
var vm = this;
vm.endpoint = endpointProvider.get();
});
<body ng-controller="MainCtrl as vm">
<div>endpoint = {{::vm.endpoint }}</div>
</body>
endpoint = http://some.rest.endpoint
Without config phase result would be
endpoint = n/a
Section 30.2: Factory
Factory is available in run phase.](https://image.slidesharecdn.com/angularjsnotesforprofessionals-200412131913/75/Angular-js-notes-for-professionals-118-2048.jpg)
![GoalKicker.com – AngularJS Notes for Professionals 112
The Factory recipe constructs a new service using a function with zero or more arguments (these are
dependencies on other services). The return value of this function is the service instance created by this
recipe.
Factory can create a service of any type, whether it be a primitive, object literal, function, or even an
instance of a custom type.
angular.module('app',[])
.factory('endpointFactory', function() {
return {
get: function() {
return 'http://some.rest.endpoint';
}
};
})
.controller('MainCtrl', function(endpointFactory) {
var vm = this;
vm.endpoint = endpointFactory.get();
});
<body ng-controller="MainCtrl as vm">
<div>endpoint = {{::vm.endpoint }}</div>
</body>
endpoint = http://some.rest.endpoint
Section 30.3: Constant
Constant is available both in configuration and run phases.
angular.module('app',[])
.constant('endpoint', 'http://some.rest.endpoint') // define
.config(function(endpoint) {
// do something with endpoint
// available in both config- and run phases
})
.controller('MainCtrl', function(endpoint) { // inject
var vm = this;
vm.endpoint = endpoint; // usage
});
<body ng-controller="MainCtrl as vm">
<div>endpoint = {{ ::vm.endpoint }}</div>
</body>
endpoint = http://some.rest.endpoint
Section 30.4: Service
Service is available in run phase.](https://image.slidesharecdn.com/angularjsnotesforprofessionals-200412131913/75/Angular-js-notes-for-professionals-119-2048.jpg)
![GoalKicker.com – AngularJS Notes for Professionals 113
The Service recipe produces a service just like the Value or Factory recipes, but it does so by invoking a
constructor with the new operator. The constructor can take zero or more arguments, which represent
dependencies needed by the instance of this type.
angular.module('app',[])
.service('endpointService', function() {
this.get = function() {
return 'http://some.rest.endpoint';
};
})
.controller('MainCtrl', function(endpointService) {
var vm = this;
vm.endpoint = endpointService.get();
});
<body ng-controller="MainCtrl as vm">
<div>endpoint = {{::vm.endpoint }}</div>
</body>
endpoint = http://some.rest.endpoint
Section 30.5: Value
Value is available both in configuration and run phases.
angular.module('app',[])
.value('endpoint', 'http://some.rest.endpoint') // define
.run(function(endpoint) {
// do something with endpoint
// only available in run phase
})
.controller('MainCtrl', function(endpoint) { // inject
var vm = this;
vm.endpoint = endpoint; // usage
});
<body ng-controller="MainCtrl as vm">
<div>endpoint = {{ ::vm.endpoint }}</div>
</body>
endpoint = http://some.rest.endpoint](https://image.slidesharecdn.com/angularjsnotesforprofessionals-200412131913/75/Angular-js-notes-for-professionals-120-2048.jpg)
![GoalKicker.com – AngularJS Notes for Professionals 114
Chapter 31: Decorators
Section 31.1: Decorate service, factory
Below is example of service decorator, overriding null date returned by service.
angular.module('app', [])
.config(function($provide) {
$provide.decorator('myService', function($delegate) {
$delegate.getDate = function() { // override with actual date object
return new Date();
};
return $delegate;
});
})
.service('myService', function() {
this.getDate = function() {
return null; // w/o decoration we'll be returning null
};
})
.controller('myController', function(myService) {
var vm = this;
vm.date = myService.getDate();
});
<body ng-controller="myController as vm">
<div ng-bind="vm.date | date:'fullDate'"></div>
</body>
Section 31.2: Decorate directive
Directives can be decorated just like services and we can modify or replace any of it's functionality. Note that
directive itself is accessed at position 0 in $delegate array and name parameter in decorator must include
Directive suffix (case sensitive).
So, if directive is called myDate, it can be accessed using myDateDirective using $delegate[0].
Below is simple example where directive shows current time. We'll decorate it to update current time in one second
intervals. Without decoration it will always show same time.
<body>
<my-date></my-date>
</body>
angular.module('app', [])
.config(function($provide) {
$provide.decorator('myDateDirective', function($delegate, $interval) {
var directive = $delegate[0]; // access directive
directive.compile = function() { // modify compile fn
return function(scope) {
directive.link.apply(this, arguments);](https://image.slidesharecdn.com/angularjsnotesforprofessionals-200412131913/75/Angular-js-notes-for-professionals-121-2048.jpg)
![GoalKicker.com – AngularJS Notes for Professionals 115
$interval(function() {
scope.date = new Date(); // update date every second
}, 1000);
};
};
return $delegate;
});
})
.directive('myDate', function() {
return {
restrict: 'E',
template: '<span>Current time is {{ date | date:'MM:ss' }}</span>',
link: function(scope) {
scope.date = new Date(); // get current date
}
};
});
Section 31.3: Decorate filter
When decorating filters, name parameter must include Filter suffix (case sensitive). If filter is called repeat,
decorator parameter is repeatFilter. Below we'll decorate custom filter that repeats any given string n times so
that result is reversed. You can also decorate angular's build-in filters the same way, although not recommended as
it can affect the functionality of the framework.
<body>
<div ng-bind="'i can haz cheeseburger ' | repeat:2"></div>
</body>
angular.module('app', [])
.config(function($provide) {
$provide.decorator('repeatFilter', function($delegate) {
return function reverse(input, count) {
// reverse repeated string
return ($delegate(input, count)).split('').reverse().join('');
};
});
})
.filter('repeat', function() {
return function(input, count) {
// repeat string n times
return (input || '').repeat(count || 1);
};
});](https://image.slidesharecdn.com/angularjsnotesforprofessionals-200412131913/75/Angular-js-notes-for-professionals-122-2048.jpg)
![GoalKicker.com – AngularJS Notes for Professionals 116
Chapter 32: Print
Section 32.1: Print Service
Service:
angular.module('core').factory('print_service', ['$rootScope', '$compile', '$http',
'$timeout','$q',
function($rootScope, $compile, $http, $timeout,$q) {
var printHtml = function (html) {
var deferred = $q.defer();
var hiddenFrame = $('<iframe style="display: none"></iframe>').appendTo('body')[0];
hiddenFrame.contentWindow.printAndRemove = function() {
hiddenFrame.contentWindow.print();
$(hiddenFrame).remove();
deferred.resolve();
};
var htmlContent = "<!doctype html>"+
"<html>"+
'<head><link rel="stylesheet" type="text/css"
href="/style/css/print.css"/></head>'+
'<body onload="printAndRemove();">' +
html +
'</body>'+
"</html>";
var doc = hiddenFrame.contentWindow.document.open("text/html", "replace");
doc.write(htmlContent);
doc.close();
return deferred.promise;
};
var openNewWindow = function (html) {
var newWindow = window.open("debugPrint.html");
newWindow.addEventListener('load', function(){
$(newWindow.document.body).html(html);
}, false);
};
var print = function (templateUrl, data) {
$rootScope.isBeingPrinted = true;
$http.get(templateUrl).success(function(template){
var printScope = $rootScope.$new()
angular.extend(printScope, data);
var element = $compile($('<div>' + template + '</div>'))(printScope);
var waitForRenderAndPrint = function() {
if(printScope.$$phase || $http.pendingRequests.length) {
$timeout(waitForRenderAndPrint, 1000);
} else {
// Replace printHtml with openNewWindow for debugging
printHtml(element.html());
printScope.$destroy();
}
};
waitForRenderAndPrint();](https://image.slidesharecdn.com/angularjsnotesforprofessionals-200412131913/75/Angular-js-notes-for-professionals-123-2048.jpg)
![GoalKicker.com – AngularJS Notes for Professionals 117
});
};
var printFromScope = function (templateUrl, scope, afterPrint) {
$rootScope.isBeingPrinted = true;
$http.get(templateUrl).then(function(response){
var template = response.data;
var printScope = scope;
var element = $compile($('<div>' + template + '</div>'))(printScope);
var waitForRenderAndPrint = function() {
if (printScope.$$phase || $http.pendingRequests.length) {
$timeout(waitForRenderAndPrint);
} else {
// Replace printHtml with openNewWindow for debugging
printHtml(element.html()).then(function() {
$rootScope.isBeingPrinted = false;
if (afterPrint) {
afterPrint();
}
});
}
};
waitForRenderAndPrint();
});
};
return {
print : print,
printFromScope : printFromScope
}
}
]);
Controller :
var template_url = '/views/print.client.view.html';
print_service.printFromScope(template_url,$scope,function(){
// Print Completed
});](https://image.slidesharecdn.com/angularjsnotesforprofessionals-200412131913/75/Angular-js-notes-for-professionals-124-2048.jpg)
![GoalKicker.com – AngularJS Notes for Professionals 118
Chapter 33: ui-router
Section 33.1: Basic Example
app.js
angular.module('myApp', ['ui.router'])
.controller('controllerOne', function() {
this.message = 'Hello world from Controller One!';
})
.controller('controllerTwo', function() {
this.message = 'Hello world from Controller Two!';
})
.controller('controllerThree', function() {
this.message = 'Hello world from Controller Three!';
})
.config(function($stateProvider, $urlRouterProvider) {
$stateProvider
.state('one', {
url: "/one",
templateUrl: "view-one.html",
controller: 'controllerOne',
controllerAs: 'ctrlOne'
})
.state('two', {
url: "/two",
templateUrl: "view-two.html",
controller: 'controllerTwo',
controllerAs: 'ctrlTwo'
})
.state('three', {
url: "/three",
templateUrl: "view-three.html",
controller: 'controllerThree',
controllerAs: 'ctrlThree'
});
$urlRouterProvider.otherwise('/one');
});
index.html
<div ng-app="myApp">
<nav>
<!-- links to switch routes -->
<a ui-sref="one">View One</a>
<a ui-sref="two">View Two</a>
<a ui-sref="three">View Three</a>
</nav>
<!-- views will be injected here -->
<div ui-view></div>
<!-- templates can live in normal html files -->
<script type="text/ng-template" id="view-one.html">
<h1>{{ctrlOne.message}}</h1>
</script>
<script type="text/ng-template" id="view-two.html">
<h1>{{ctrlTwo.message}}</h1>
</script>](https://image.slidesharecdn.com/angularjsnotesforprofessionals-200412131913/75/Angular-js-notes-for-professionals-125-2048.jpg)
![GoalKicker.com – AngularJS Notes for Professionals 119
<script type="text/ng-template" id="view-three.html">
<h1>{{ctrlThree.message}}</h1>
</script>
</div>
Section 33.2: Multiple Views
app.js
angular.module('myApp', ['ui.router'])
.controller('controllerOne', function() {
this.message = 'Hello world from Controller One!';
})
.controller('controllerTwo', function() {
this.message = 'Hello world from Controller Two!';
})
.controller('controllerThree', function() {
this.message = 'Hello world from Controller Three!';
})
.controller('controllerFour', function() {
this.message = 'Hello world from Controller Four!';
})
.config(function($stateProvider, $urlRouterProvider) {
$stateProvider
.state('one', {
url: "/one",
views: {
"viewA": {
templateUrl: "view-one.html",
controller: 'controllerOne',
controllerAs: 'ctrlOne'
},
"viewB": {
templateUrl: "view-two.html",
controller: 'controllerTwo',
controllerAs: 'ctrlTwo'
}
}
})
.state('two', {
url: "/two",
views: {
"viewA": {
templateUrl: "view-three.html",
controller: 'controllerThree',
controllerAs: 'ctrlThree'
},
"viewB": {
templateUrl: "view-four.html",
controller: 'controllerFour',
controllerAs: 'ctrlFour'
}
}
});
$urlRouterProvider.otherwise('/one');
});
index.html](https://image.slidesharecdn.com/angularjsnotesforprofessionals-200412131913/75/Angular-js-notes-for-professionals-126-2048.jpg)
![GoalKicker.com – AngularJS Notes for Professionals 120
<div ng-app="myApp">
<nav>
<!-- links to switch routes -->
<a ui-sref="one">Route One</a>
<a ui-sref="two">Route Two</a>
</nav>
<!-- views will be injected here -->
<div ui-view="viewA"></div>
<div ui-view="viewB"></div>
<!-- templates can live in normal html files -->
<script type="text/ng-template" id="view-one.html">
<h1>{{ctrlOne.message}}</h1>
</script>
<script type="text/ng-template" id="view-two.html">
<h1>{{ctrlTwo.message}}</h1>
</script>
<script type="text/ng-template" id="view-three.html">
<h1>{{ctrlThree.message}}</h1>
</script>
<script type="text/ng-template" id="view-four.html">
<h1>{{ctrlFour.message}}</h1>
</script>
</div>
Section 33.3: Using resolve functions to load data
app.js
angular.module('myApp', ['ui.router'])
.service('User', ['$http', function User ($http) {
this.getProfile = function (id) {
return $http.get(...) // method to load data from API
};
}])
.controller('profileCtrl', ['profile', function profileCtrl (profile) {
// inject resolved data under the name of the resolve function
// data will already be returned and processed
this.profile = profile;
}])
.config(['$stateProvider', '$urlRouterProvider', function ($stateProvider, $urlRouterProvider) {
$stateProvider
.state('profile', {
url: "/profile/:userId",
templateUrl: "profile.html",
controller: 'profileCtrl',
controllerAs: 'vm',
resolve: {
profile: ['$stateParams', 'User', function ($stateParams, User) {
// $stateParams will contain any parameter defined in your url
return User.getProfile($stateParams.userId)
// .then is only necessary if you need to process returned data
.then(function (data) {
return doSomeProcessing(data);
});
}]
}
}]);](https://image.slidesharecdn.com/angularjsnotesforprofessionals-200412131913/75/Angular-js-notes-for-professionals-127-2048.jpg)
![GoalKicker.com – AngularJS Notes for Professionals 121
$urlRouterProvider.otherwise('/');
});
profile.html
<ul>
<li>Name: {{vm.profile.name}}</li>
<li>Age: {{vm.profile.age}}</li>
<li>Sex: {{vm.profile.sex}}</li>
</ul>
View UI-Router Wiki entry on resolves here.
Resolve functions must be resolved before the $stateChangeSuccess event is fired, which means that the UI will
not load until all resolve functions on the state have finished. This is a great way to ensure that data will be
available to your controller and UI. However, you can see that a resolve function should be fast in order to avoid
hanging the UI.
Section 33.4: Nested Views / States
app.js
var app = angular.module('myApp',['ui.router']);
app.config(function($stateProvider,$urlRouterProvider) {
$stateProvider
.state('home', {
url: '/home',
templateUrl: 'home.html',
controller: function($scope){
$scope.text = 'This is the Home'
}
})
.state('home.nested1',{
url: '/nested1',
templateUrl:'nested1.html',
controller: function($scope){
$scope.text1 = 'This is the nested view 1'
}
})
.state('home.nested2',{
url: '/nested2',
templateUrl:'nested2.html',
controller: function($scope){
$scope.fruits = ['apple','mango','oranges'];
}
});
$urlRouterProvider.otherwise('/home');
});
index.html
<div ui-view></div>](https://image.slidesharecdn.com/angularjsnotesforprofessionals-200412131913/75/Angular-js-notes-for-professionals-128-2048.jpg)

![GoalKicker.com – AngularJS Notes for Professionals 123
Chapter 34: Built-in helper Functions
Section 34.1: angular.equals
The angular.equals function compares and determines if 2 objects or values are equal, angular.equals performs
a deep comparison and returns true if and only if at least 1 of the following conditions is met.
angular.equals(value1, value2)
If the objects or values pass the === comparison1.
If both objects or values are of the same type, and all of their properties are also equal by using2.
angular.equals
Both values are equal to NaN3.
Both values represent the same regular expression's result.4.
This function is helpful when you need to deep compare objects or arrays by their values or results rather than just
references.
Examples
angular.equals(1, 1) // true
angular.equals(1, 2) // false
angular.equals({}, {}) // true, note that {}==={} is false
angular.equals({a: 1}, {a: 1}) // true
angular.equals({a: 1}, {a: 2}) // false
angular.equals(NaN, NaN) // true
Section 34.2: angular.toJson
The function angular.toJson will take an object and serialize it into a JSON formatted string.
Unlike the native function JSON.stringify, This function will remove all properties beginning with $$ (as angular
usually prefixes internal properties with $$)
angular.toJson(object)
As data needs to be serialized before passing through a network, this function is useful to turn any data you wish to
transmit into JSON.
This function is also useful for debugging as it works similarly to a .toString method would act.
Examples:
angular.toJson({name: "barf", occupation: "mog", $$somebizzareproperty: 42})
// "{"name":"barf","occupation":"mog"}"
angular.toJson(42)
// "42"
angular.toJson([1, "2", 3, "4"])
// "[1,"2",3,"4"]"
var fn = function(value) {return value}
angular.toJson(fn)
// undefined, functions have no representation in JSON](https://image.slidesharecdn.com/angularjsnotesforprofessionals-200412131913/75/Angular-js-notes-for-professionals-130-2048.jpg)
![GoalKicker.com – AngularJS Notes for Professionals 124
Section 34.3: angular.copy
The angular.copy function takes an object, array or a value and creates a deep copy of it.
angular.copy()
Example:
Objects:
let obj = {name: "vespa", occupation: "princess"};
let cpy = angular.copy(obj);
cpy.name = "yogurt"
// obj = {name: "vespa", occupation: "princess"}
// cpy = {name: "yogurt", occupation: "princess"}
Arrays:
var w = [a, [b, [c, [d]]]];
var q = angular.copy(w);
// q = [a, [b, [c, [d]]]]
At the above example angular.equals(w, q) will evaluate to true because .equals tests equality by value.
however w === q will evaluate to false because strict comparison between objects and arrays is done by reference.
Section 34.4: angular.isString
The function angular.isString returns true if the object or value given to it is of the type string
angular.isString(value1)
Examples
angular.isString("hello") // true
angular.isString([1, 2]) // false
angular.isString(42) // false
This is the equivalent of performing
typeof someValue === "string"
Section 34.5: angular.isArray
The angular.isArray function returns true if and only if the object or value passed to it is of the type Array.
angular.isArray(value)
Examples
angular.isArray([]) // true
angular.isArray([2, 3]) // true](https://image.slidesharecdn.com/angularjsnotesforprofessionals-200412131913/75/Angular-js-notes-for-professionals-131-2048.jpg)
![GoalKicker.com – AngularJS Notes for Professionals 125
angular.isArray({}) // false
angular.isArray(17) // false
It is the equivalent of
Array.isArray(someValue)
Section 34.6: angular.merge
The function angular.merge takes all the enumerable properties from the source object to deeply extend the
destination object.
The function returns a reference to the now extended destination object
angular.merge(destination, source)
Examples
angular.merge({}, {}) // {}
angular.merge({name: "king roland"}, {password: "12345"})
// {name: "king roland", password: "12345"}
angular.merge({a: 1}, [4, 5, 6]) // {0: 4, 1: 5, 2: 6, a: 1}
angular.merge({a: 1}, {b: {c: {d: 2}}}) // {"a":1,"b":{"c":{"d":2}}}
Section 34.7: angular.isDefined and angular.isUndefined
The function angular.isDefined tests a value if it is defined
angular.isDefined(someValue)
This is the equivalent of performing
value !== undefined; // will evaluate to true is value is defined
Examples
angular.isDefined(42) // true
angular.isDefined([1, 2]) // true
angular.isDefined(undefined) // false
angular.isDefined(null) // true
The function angular.isUndefined tests if a value is undefined (it is effectively the opposite of angular.isDefined)
angular.isUndefined(someValue)
This is the equivalent of performing
value === undefined; // will evaluate to true is value is undefined
Or just](https://image.slidesharecdn.com/angularjsnotesforprofessionals-200412131913/75/Angular-js-notes-for-professionals-132-2048.jpg)
![GoalKicker.com – AngularJS Notes for Professionals 127
angular.isElement(elem)
This function is useful to type check if a passed argument is an element before being processed as such.
Examples:
angular.isElement(document.querySelector("body"))
// true
angular.isElement(document.querySelector("#some_id"))
// false if "some_id" is not using as an id inside the selected DOM
angular.isElement("<div></div>")
// false
Section 34.11: angular.isFunction
The function angular.isFunction determines and returns true if and only if the value passed to is a reference to a
function.
The function returns a reference to the now extended destination object
angular.isFunction(fn)
Examples
var onClick = function(e) {return e};
angular.isFunction(onClick); // true
var someArray = ["pizza", "the", "hut"];
angular.isFunction(someArray ); // false
Section 34.12: angular.identity
The angular.identity function returns the first argument passed to it.
angular.identity(argument)
This function is useful for functional programming, you can provide this function as a default in case an expected
function was not passed.
Examples:
angular.identity(42) // 42
var mutate = function(fn, num) {
return angular.isFunction(fn) ? fn(num) : angular.identity(num)
}
mutate(function(value) {return value-7}, 42) // 35
mutate(null, 42) // 42
mutate("mount. rushmore", 42) // 42](https://image.slidesharecdn.com/angularjsnotesforprofessionals-200412131913/75/Angular-js-notes-for-professionals-134-2048.jpg)
![GoalKicker.com – AngularJS Notes for Professionals 128
Section 34.13: angular.forEach
The angular.forEach accepts an object and an iterator function. It then runs the iterator function over each
enumerable property/value of the object. This function also works on arrays.
Like the JS version of Array.prototype.forEach The function does not iterate over inherited properties (prototype
properties), however the function will not attempt to process a null or an undefined value and will just return it.
angular.forEach(object, function(value, key) { // function});
Examples:
angular.forEach({"a": 12, "b": 34}, (value, key) => console.log("key: " + key + ", value: " +
value))
// key: a, value: 12
// key: b, value: 34
angular.forEach([2, 4, 6, 8, 10], (value, key) => console.log(key))
// will print the array indices: 1, 2, 3, 4, 5
angular.forEach([2, 4, 6, 8, 10], (value, key) => console.log(value))
// will print the array values: 2, 4, 6, 7, 10
angular.forEach(undefined, (value, key) => console.log("key: " + key + ", value: " + value))
// undefined
Section 34.14: angular.isNumber
The angular.isNumber function returns true if and only if the object or value passed to it is of the type Number, this
includes +Infinity, -Infinity and NaN
angular.isNumber(value)
This function will not cause a type coercion such as
"23" == 23 // true
Examples
angular.isNumber("23") // false
angular.isNumber(23) // true
angular.isNumber(NaN) // true
angular.isNumber(Infinity) // true
This function will not cause a type coercion such as
"23" == 23 // true
Section 34.15: angular.isObject
The angular.isObject return true if and only if the argument passed to it is an object, this function will also return
true for an Array and will return false for null even though typeof null is object .
angular.isObject(value)](https://image.slidesharecdn.com/angularjsnotesforprofessionals-200412131913/75/Angular-js-notes-for-professionals-135-2048.jpg)
![GoalKicker.com – AngularJS Notes for Professionals 129
This function is useful for type checking when you need a defined object to process.
Examples:
angular.isObject({name: "skroob", job: "president"})
// true
angular.isObject(null)
// false
angular.isObject([null])
// true
angular.isObject(new Date())
// true
angular.isObject(undefined)
// false
Section 34.16: angular.fromJson
The function angular.fromJson will deserialize a valid JSON string and return an Object or an Array.
angular.fromJson(string|object)
Note that this function is not limited to only strings, it will output a representation of any object passed to it.
Examples:
angular.fromJson("{"yogurt": "strawberries"}")
// Object {yogurt: "strawberries"}
angular.fromJson('{jam: "raspberries"}')
// will throw an exception as the string is not a valid JSON
angular.fromJson(this)
// Window {external: Object, chrome: Object, _gaq: Y, angular: Object, ng339: 3…}
angular.fromJson([1, 2])
// [1, 2]
typeof angular.fromJson(new Date())
// "object"](https://image.slidesharecdn.com/angularjsnotesforprofessionals-200412131913/75/Angular-js-notes-for-professionals-136-2048.jpg)
![GoalKicker.com – AngularJS Notes for Professionals 130
Chapter 35: digest loop walkthrough
Section 35.1: $digest and $watch
Implementing two-way-data-binding, to achieve the result from the previous example, could be done with two core
functions:
$digest is called after a user interaction (binding DOM=>variable)
$watch sets a callback to be called after variable changes (binding variable=>DOM)
note: this is example is a demonstration, not the actual angular code
<input id="input"/>
<span id="span"></span>
The two functions we need:
var $watches = [];
function $digest(){
$watches.forEach(function($w){
var val = $w.val();
if($w.prevVal !== val){
$w.callback(val, $w.prevVal);
$w.prevVal = val;
}
})
}
function $watch(val, callback){
$watches.push({val:val, callback:callback, prevVal: val() })
}
Now we could now use these functions to hook up a variable to the DOM (angular comes with built-in directives
which will do this for you):
var realVar;
//this is usually done by ng-model directive
input1.addEventListener('keyup',function(e){
realVar=e.target.value;
$digest()
}, true);
//this is usually done with {{expressions}} or ng-bind directive
$watch(function(){return realVar},function(val){
span1.innerHTML = val;
});
Off-course, the real implementations are more complex, and support parameters such as which element to bind
to, and what variable to use
A running example could be found here: https://jsfiddle.net/azofxd4j/
Section 35.2: the $scope tree
The previous example is good enough when we need to bind a single html element, to a single variable.](https://image.slidesharecdn.com/angularjsnotesforprofessionals-200412131913/75/Angular-js-notes-for-professionals-137-2048.jpg)
![GoalKicker.com – AngularJS Notes for Professionals 131
In reality - we need to bind many elements to many variables:
<span ng-repeat="number in [1,2,3,4,5]">{{number}}</span>
This ng-repeat binds 5 elements to 5 variables called number, with a different value for each of them!
The way angular achieves this behavior is using a separate context for each element which needs separate
variables. This context is called a scope.
Each scope contains properties, which are the variables bound to the DOM, and the $digest and $watch functions
are implemented as methods of the scope.
The DOM is a tree, and variables need to be used in different levels of the tree:
<div>
<input ng-model="person.name" />
<span ng-repeat="number in [1,2,3,4,5]">{{number}} {{person.name}}</span>
</div>
But as we saw, the context(or scope) of variables inside ng-repeat is different to the context above it. To solve this -
angular implements scopes as a tree.
Each scope has an array of children, and calling its $digest method will run all of its children's $digest method.
This way - after changing the input - $digest is called for the div's scope, which then runs the $digest for its 5
children - which will update its content.
A simple implementation for a scope, could look like this:
function $scope(){
this.$children = [];
this.$watches = [];
}
$scope.prototype.$digest = function(){
this.$watches.forEach(function($w){
var val = $w.val();
if($w.prevVal !== val){
$w.callback(val, $w.prevVal);
$w.prevVal = val;
}
});
this.$children.forEach(function(c){
c.$digest();
});
}
$scope.prototype.$watch = function(val, callback){
this.$watches.push({val:val, callback:callback, prevVal: val() })
}
note: this is example is a demonstration, not the actual angular code
Section 35.3: two way data binding
Angular has some magic under its hood. it enables binding DOM to real js variables.](https://image.slidesharecdn.com/angularjsnotesforprofessionals-200412131913/75/Angular-js-notes-for-professionals-138-2048.jpg)
![GoalKicker.com – AngularJS Notes for Professionals 133
Chapter 36: Angular $scopes
Section 36.1: A function available in the entire app
Be careful, this approach might be considered as a bad design for angular apps, since it requires programmers to
remember both where functions are placed in the scope tree, and to be aware of scope inheritance. In many cases
it would be preferred to inject a service (Angular practice - using scope inheritance vs injection.
This example only show how scope inheritance could be used for our needs, and the how you could take advantage
of it, and not the best practices of designing an entire app.
In some cases, we could take advantage of scope inheritance, and set a function as a property of the rootScope.
This way - all of the scopes in the app (except for isolated scopes) will inherit this function, and it could be called
from anywhere in the app.
angular.module('app', [])
.run(['$rootScope', function($rootScope){
var messages = []
$rootScope.addMessage = function(msg){
messages.push(msg);
}
}]);
<div ng-app="app">
<a ng-click="addMessage('hello world!')">it could be accsessed from here</a>
<div ng-include="inner.html"></div>
</div>
inner.html:
<div>
<button ng-click="addMessage('page')">and from here to!</button>
</div>
Section 36.2: Avoid inheriting primitive values
In javascript, assigning a non-primitive value (Such as Object, Array, Function, and many more), keeps a reference
(an address in the memory) to the assigned value.
Assigning a primitive value (String, Number, Boolean, or Symbol) to two different variables, and changing one, won't
change both:
var x = 5;
var y = x;
y = 6;
console.log(y === x, x, y); //false, 5, 6
But with a non-primitive value, since both variables are simply keeping references to the same object, changing one
variable will change the other:
var x = { name : 'John Doe' };
var y = x;
y.name = 'Jhon';
console.log(x.name === y.name, x.name, y.name); //true, John, John](https://image.slidesharecdn.com/angularjsnotesforprofessionals-200412131913/75/Angular-js-notes-for-professionals-140-2048.jpg)
![GoalKicker.com – AngularJS Notes for Professionals 134
In angular, when a scope is created, it is assigned all of its parent's properties However, changing properties
afterwards will only affect the parent scope if it is a non-primitive value:
angular.module('app', [])
.controller('myController', ['$scope', function($scope){
$scope.person = { name: 'John Doe' }; //non-primitive
$scope.name = 'Jhon Doe'; //primitive
}])
.controller('myController1', ['$scope', function($scope){}]);
<div ng-app="app" ng-controller="myController">
binding to input works: {{person.name}}<br/>
binding to input does not work: {{name}}<br/>
<div ng-controller="myController1">
<input ng-model="person.name" />
<input ng-model="name" />
</div>
</div>
Remember: in Angular scopes can be created in many ways (such as built-in or custom directives, or the
$scope.$new() function), and keeping track of the scope tree is probably impossible.
Using only non-primitive values as scope properties will keep you on the safe side (unless you need a property to
not inherit, or other cases where you are aware of scope inheritance).
Section 36.3: Basic Example of $scope inheritance
angular.module('app', [])
.controller('myController', ['$scope', function($scope){
$scope.person = { name: 'John Doe' };
}]);
<div ng-app="app" ng-conroller="myController">
<input ng-model="person.name" />
<div ng-repeat="number in [0,1,2,3]">
{{person.name}} {{number}}
</div>
</div>
In this example, the ng-repeat directive creates a new scope for each of its newly created children.
These created scopes are children of their parent scope (in this case the scope created by myController), and
therfore, they inherit all of its proporties, such as person.
Section 36.4: How can you limit the scope on a directive and
why would you do this?
Scope is used as the "glue" that we use to communicate between the parent controller, the directive, and the
directive template. Whenever the AngularJS application is bootstrapped, a rootScope object is created. Each scope
created by controllers, directives and services are prototypically inherited from rootScope.
Yes, we can limit the scope on a directive . We can do so by creating an isolated scope for directive.
There are 3 types of directive scopes:
Scope : False ( Directive uses its parent scope )1.](https://image.slidesharecdn.com/angularjsnotesforprofessionals-200412131913/75/Angular-js-notes-for-professionals-141-2048.jpg)
![GoalKicker.com – AngularJS Notes for Professionals 135
Scope : True ( Directive gets a new scope )2.
Scope : { } ( Directive gets a new isolated scope )3.
Directives with the new isolated scope: When we create a new isolated scope then it will not be inherited from
the parent scope. This new scope is called Isolated scope because it is completely detached from its parent scope.
Why? should we use isolated scope: We should use isolated scope when we want to create a custom directive
because it will make sure that our directive is generic, and placed anywhere inside the application. Parent scope is
not going to interfere with the directive scope.
Example of isolated scope:
var app = angular.module("test",[]);
app.controller("Ctrl1",function($scope){
$scope.name = "Prateek";
$scope.reverseName = function(){
$scope.name = $scope.name.split('').reverse().join('');
};
});
app.directive("myDirective", function(){
return {
restrict: "EA",
scope: {},
template: "<div>Your name is : {{name}}</div>"+
"Change your name : <input type='text' ng-model='name'/>"
};
});
There’re 3 types of prefixes AngularJS provides for isolated scope these are :
"@" ( Text binding / one-way binding )1.
"=" ( Direct model binding / two-way binding )2.
"&" ( Behaviour binding / Method binding )3.
All these prefixes receives data from the attributes of the directive element like :
<div my-directive
class="directive"
name="{{name}}"
reverse="reverseName()"
color="color" >
</div>
Section 36.5: Using $scope functions
While declaring a function in the $rootscope has it's advantages, we can also declare a $scope function any part of
the code that is injected by the $scope service. Controller, for instance.
Controller
myApp.controller('myController', ['$scope', function($scope){
$scope.myFunction = function () {
alert("You are in myFunction!");
};
}]);](https://image.slidesharecdn.com/angularjsnotesforprofessionals-200412131913/75/Angular-js-notes-for-professionals-142-2048.jpg)
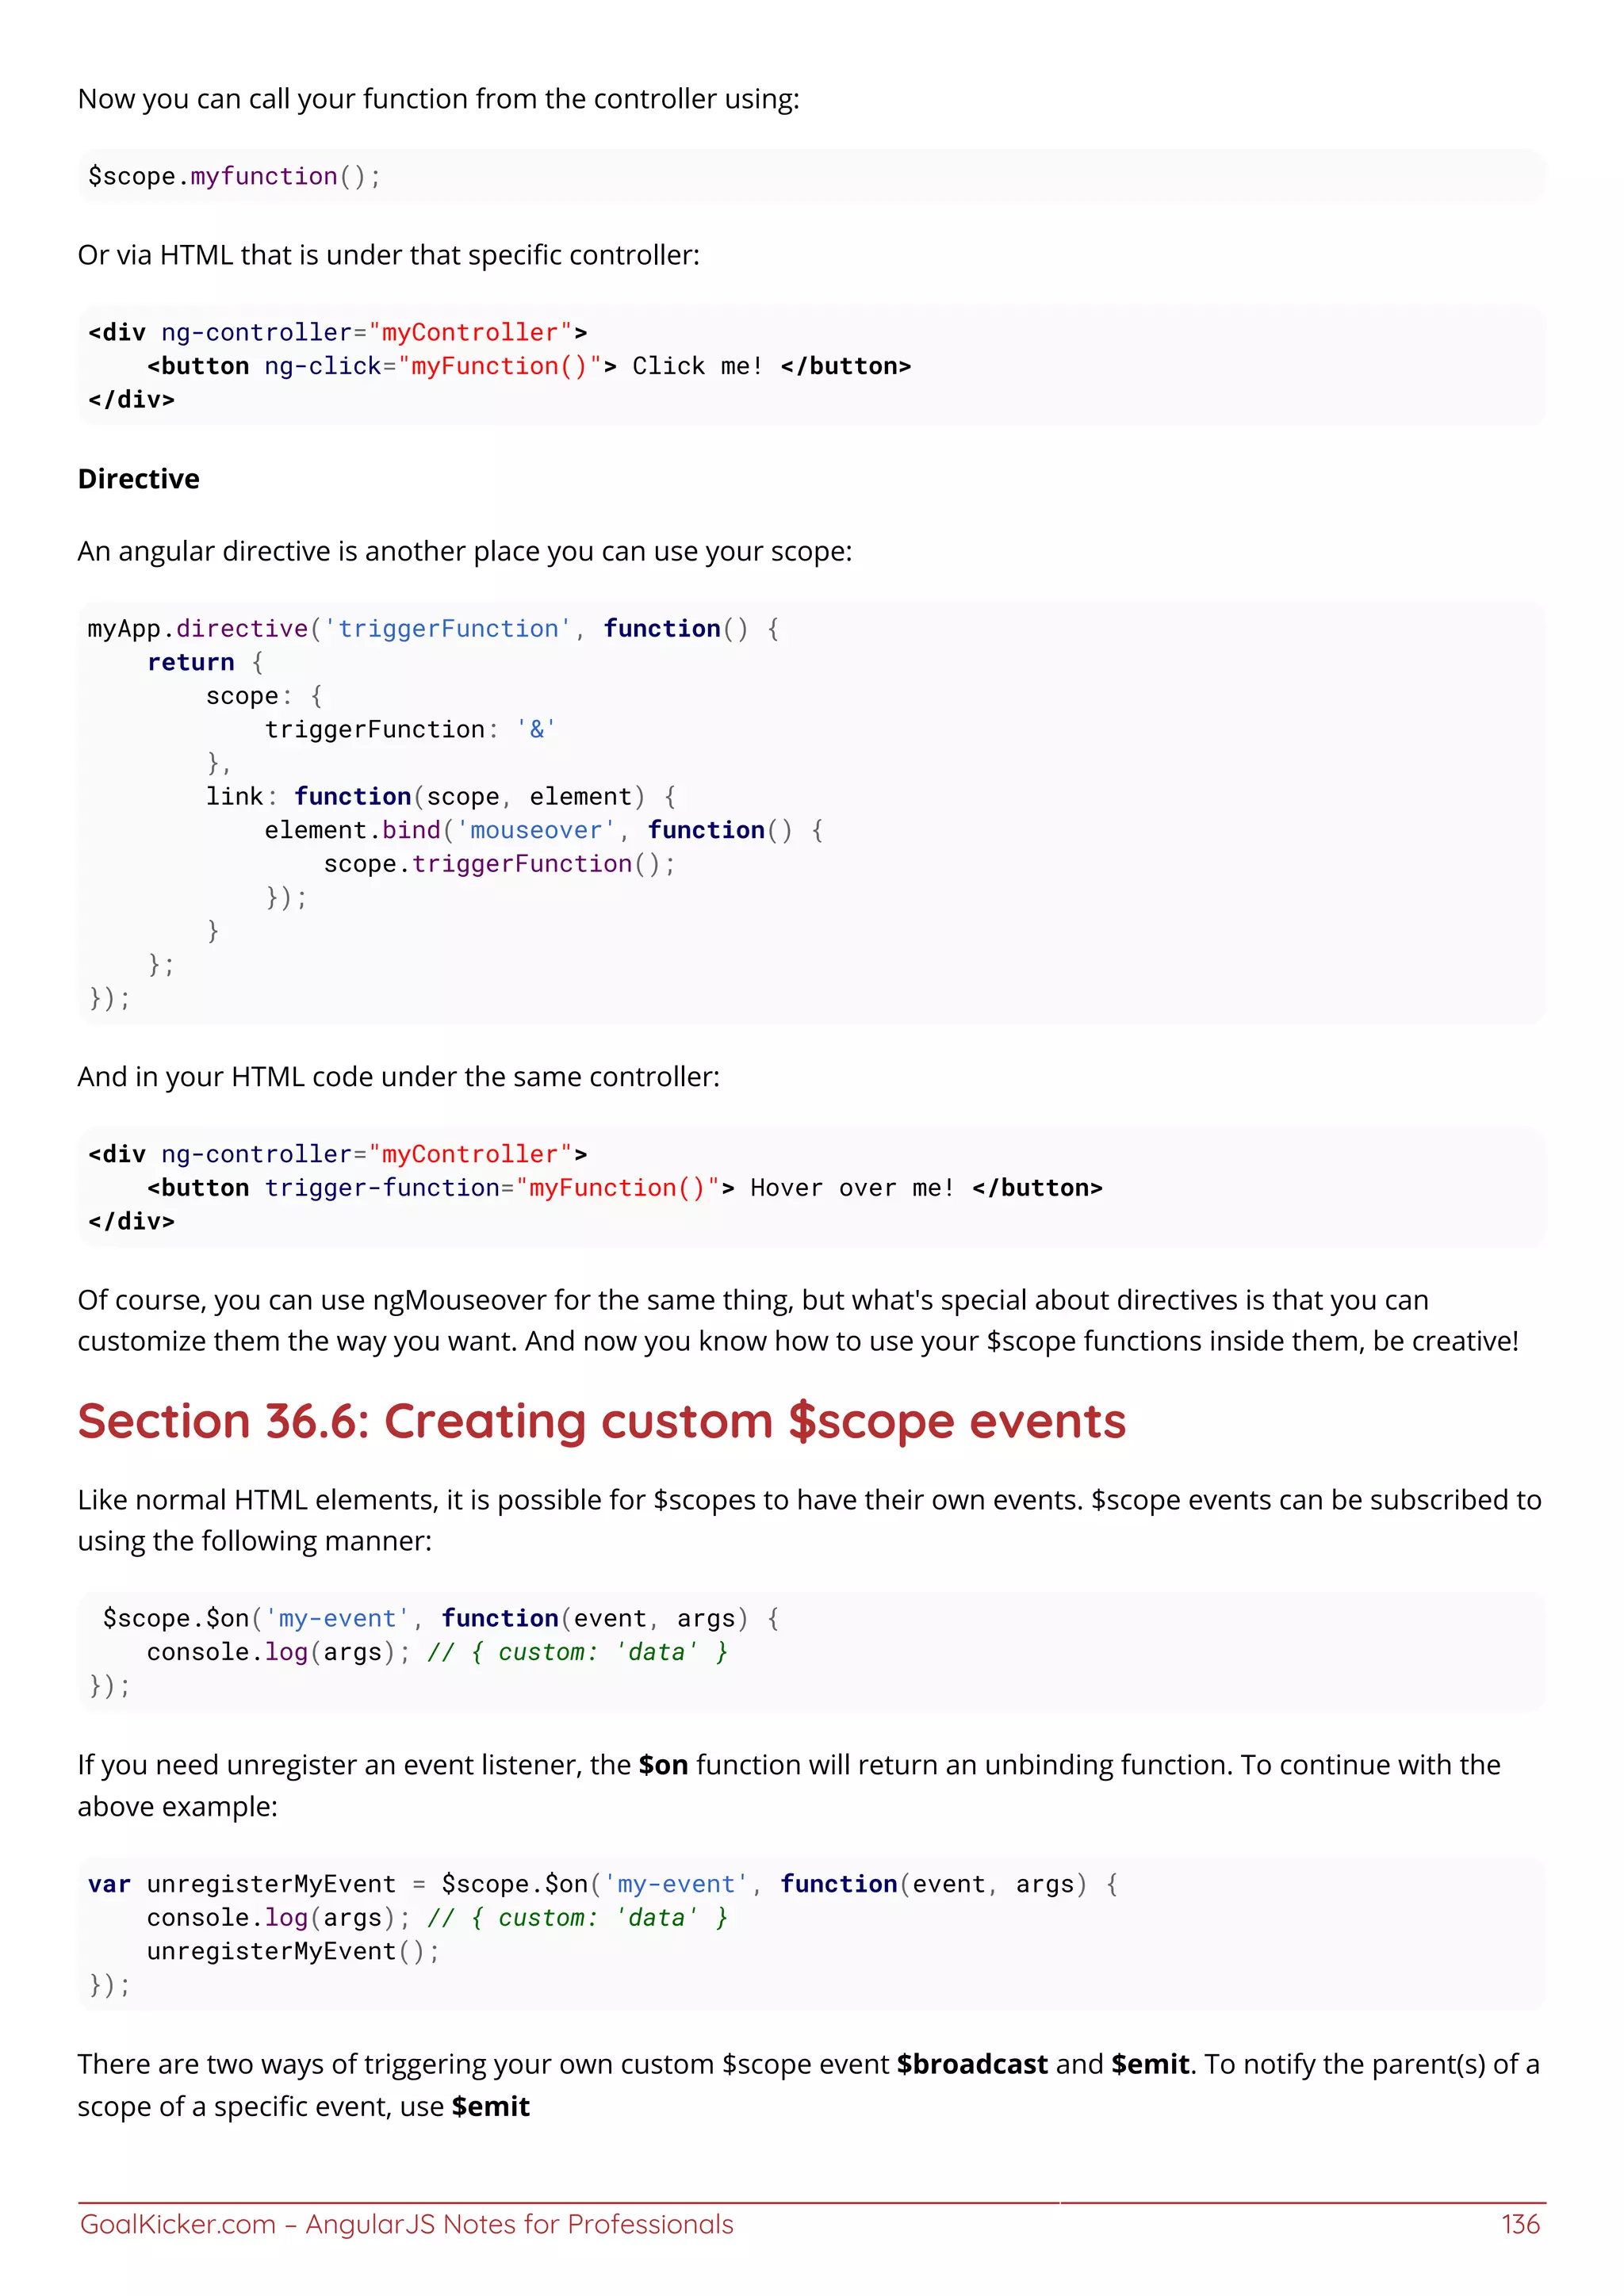
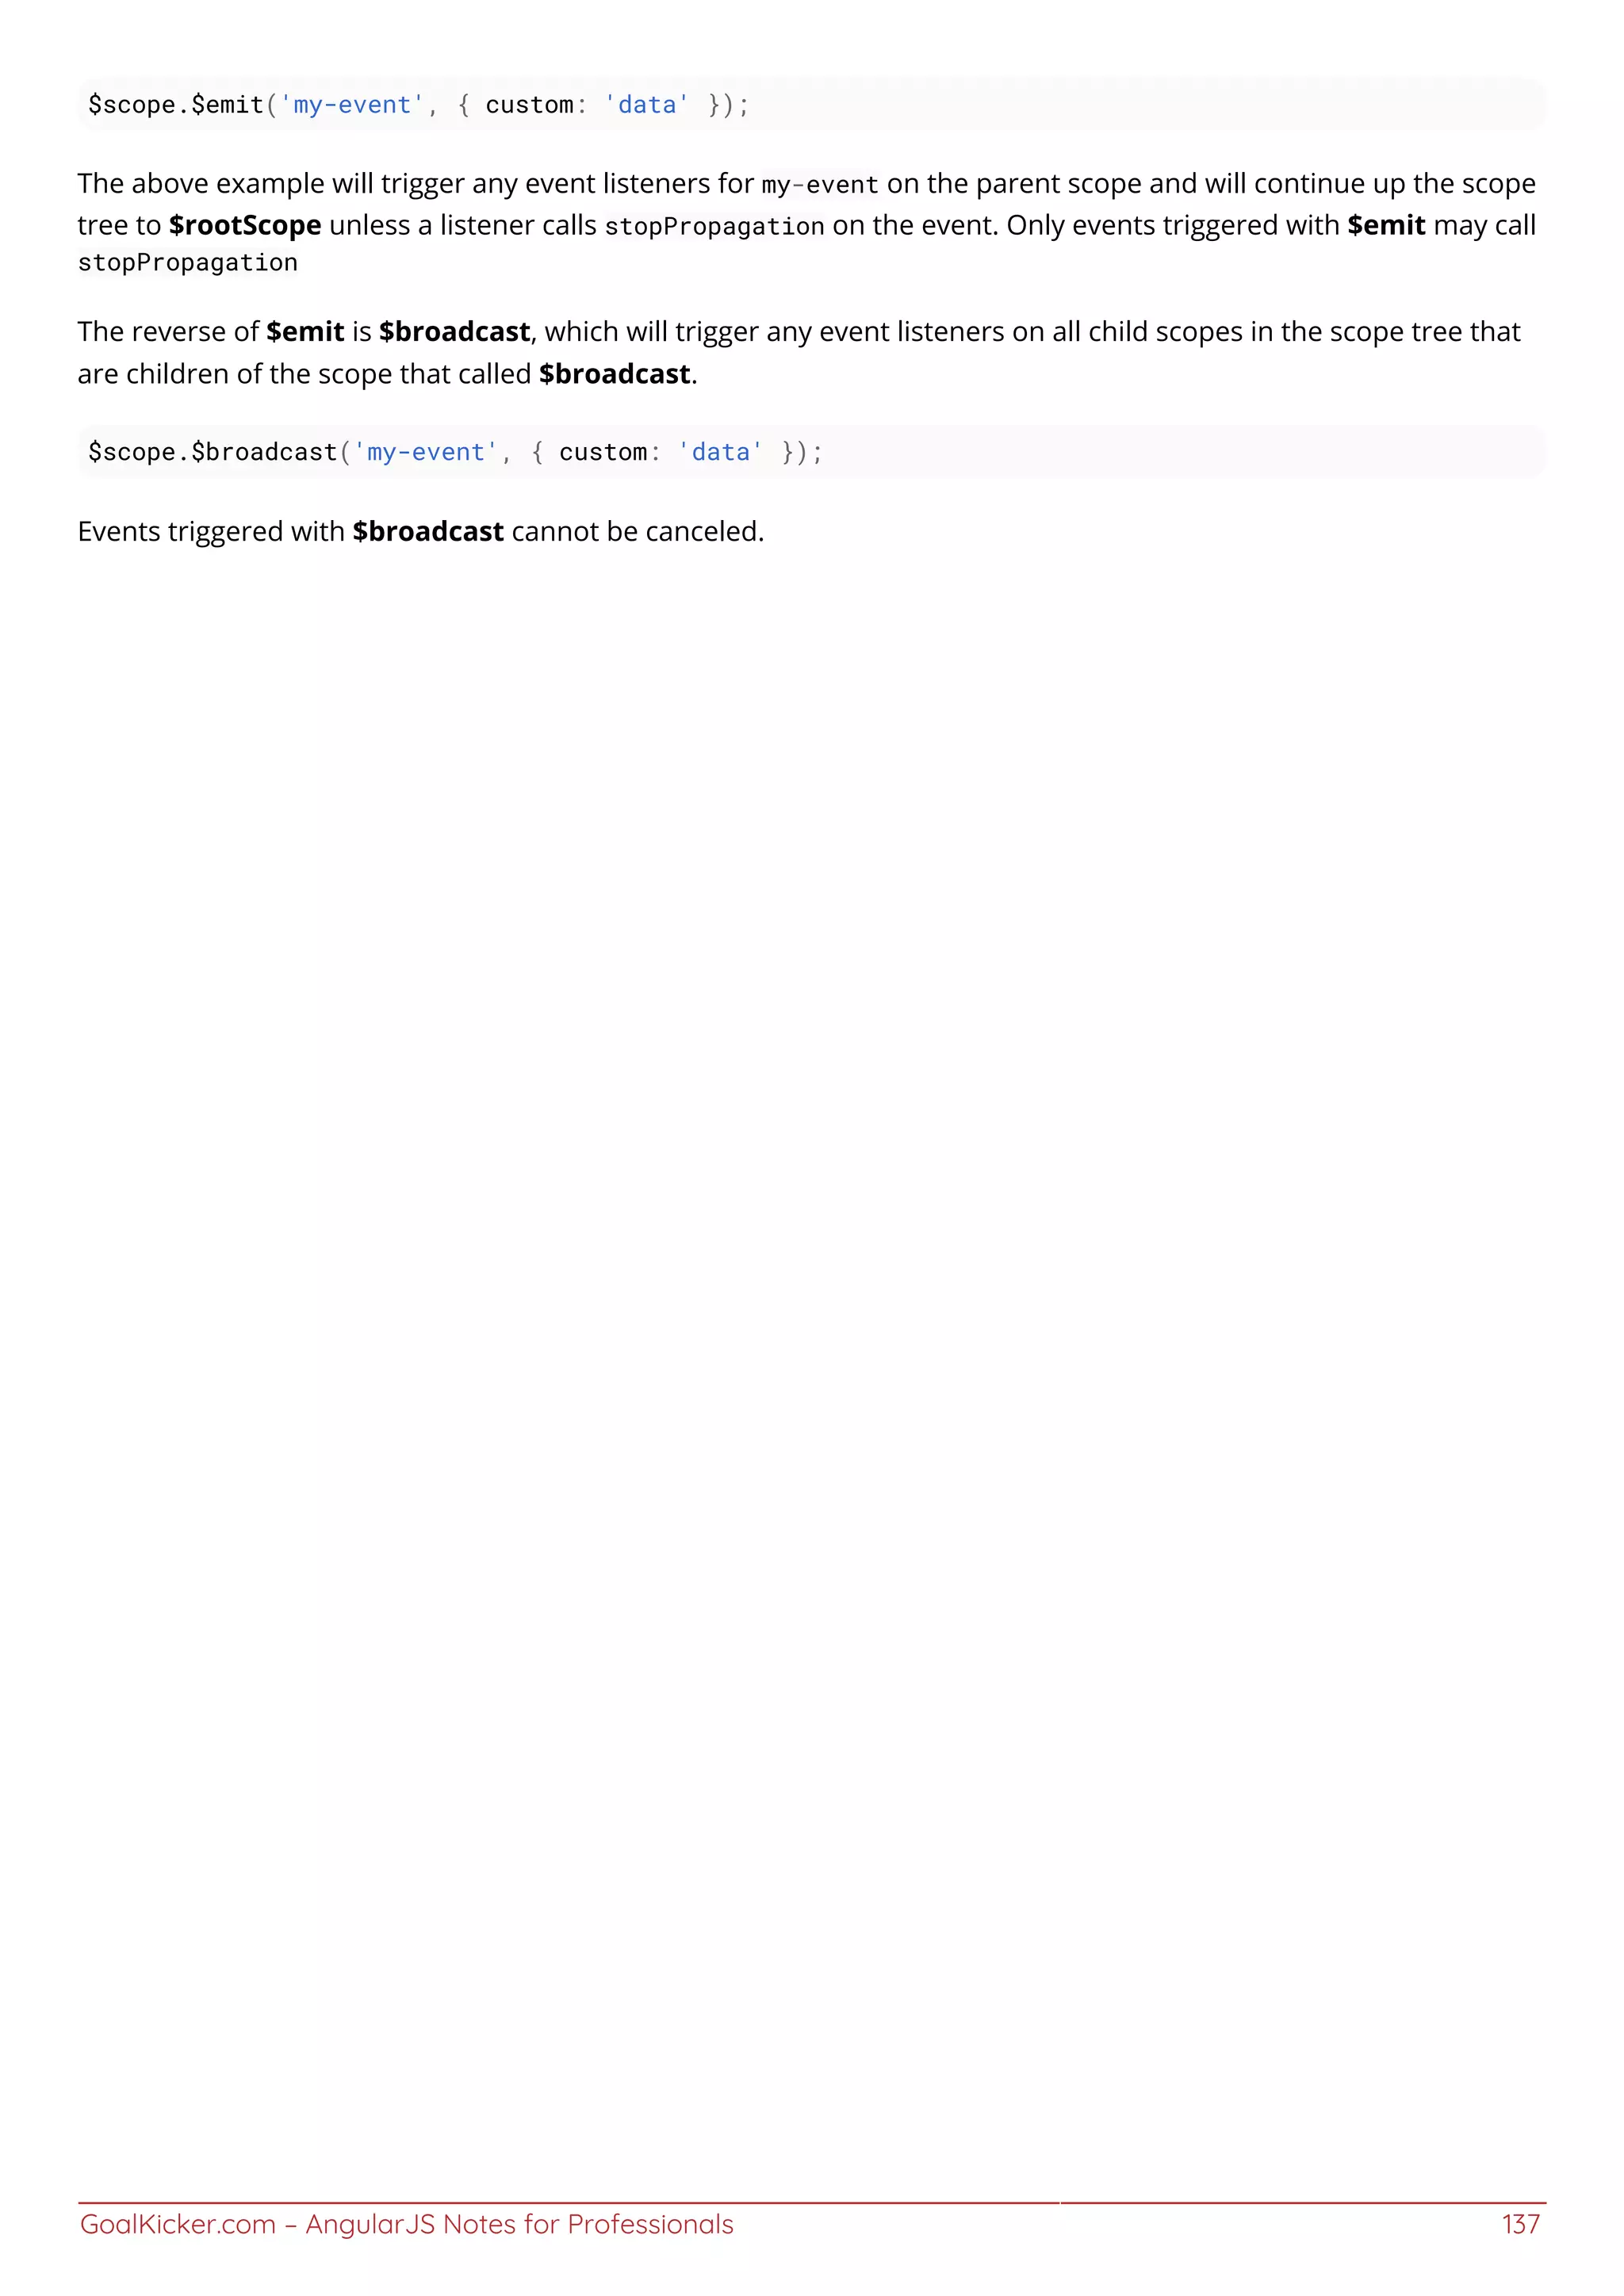
![GoalKicker.com – AngularJS Notes for Professionals 138
Chapter 37: Using AngularJS with
TypeScript
Section 37.1: Using Bundling / Minification
The way the $scope is injected in the controller's constructor functions is a way to demonstrate and use the basic
option of angular dependency injection but is not production ready as it cannot be minified. Thats because the
minification system changes the variable names and anguar's dependency injection uses the parameter names to
know what has to be injected. So for an example the ExampleController's constructor function is minified to the
following code.
function n(n){this.setUpWatches(n)
and $scope is changed to n!
to overcome this we can add an $inject array(string[]). So that angular's DI knows what to inject at what position
is the controllers constructor function.
So the above typescript changes to
module App.Controllers {
class Address {
line1: string;
line2: string;
city: string;
state: string;
}
export class SampleController {
firstName: string;
lastName: string;
age: number;
address: Address;
setUpWatches($scope: ng.IScope): void {
$scope.$watch(() => this.firstName, (n, o) => {
//n is string and so is o
});
};
static $inject : string[] = ['$scope'];
constructor($scope: ng.IScope) {
this.setUpWatches($scope);
}
}
}
Section 37.2: Angular Controllers in Typescript
As defined in the AngularJS Documentation
When a Controller is attached to the DOM via the ng-controller directive, Angular will instantiate a new
Controller object, using the specified Controller's constructor function. A new child scope will be created
and made available as an injectable parameter to the Controller's constructor function as $scope.
Controllers can be very easily made using the typescript classes.
module App.Controllers {](https://image.slidesharecdn.com/angularjsnotesforprofessionals-200412131913/75/Angular-js-notes-for-professionals-145-2048.jpg)

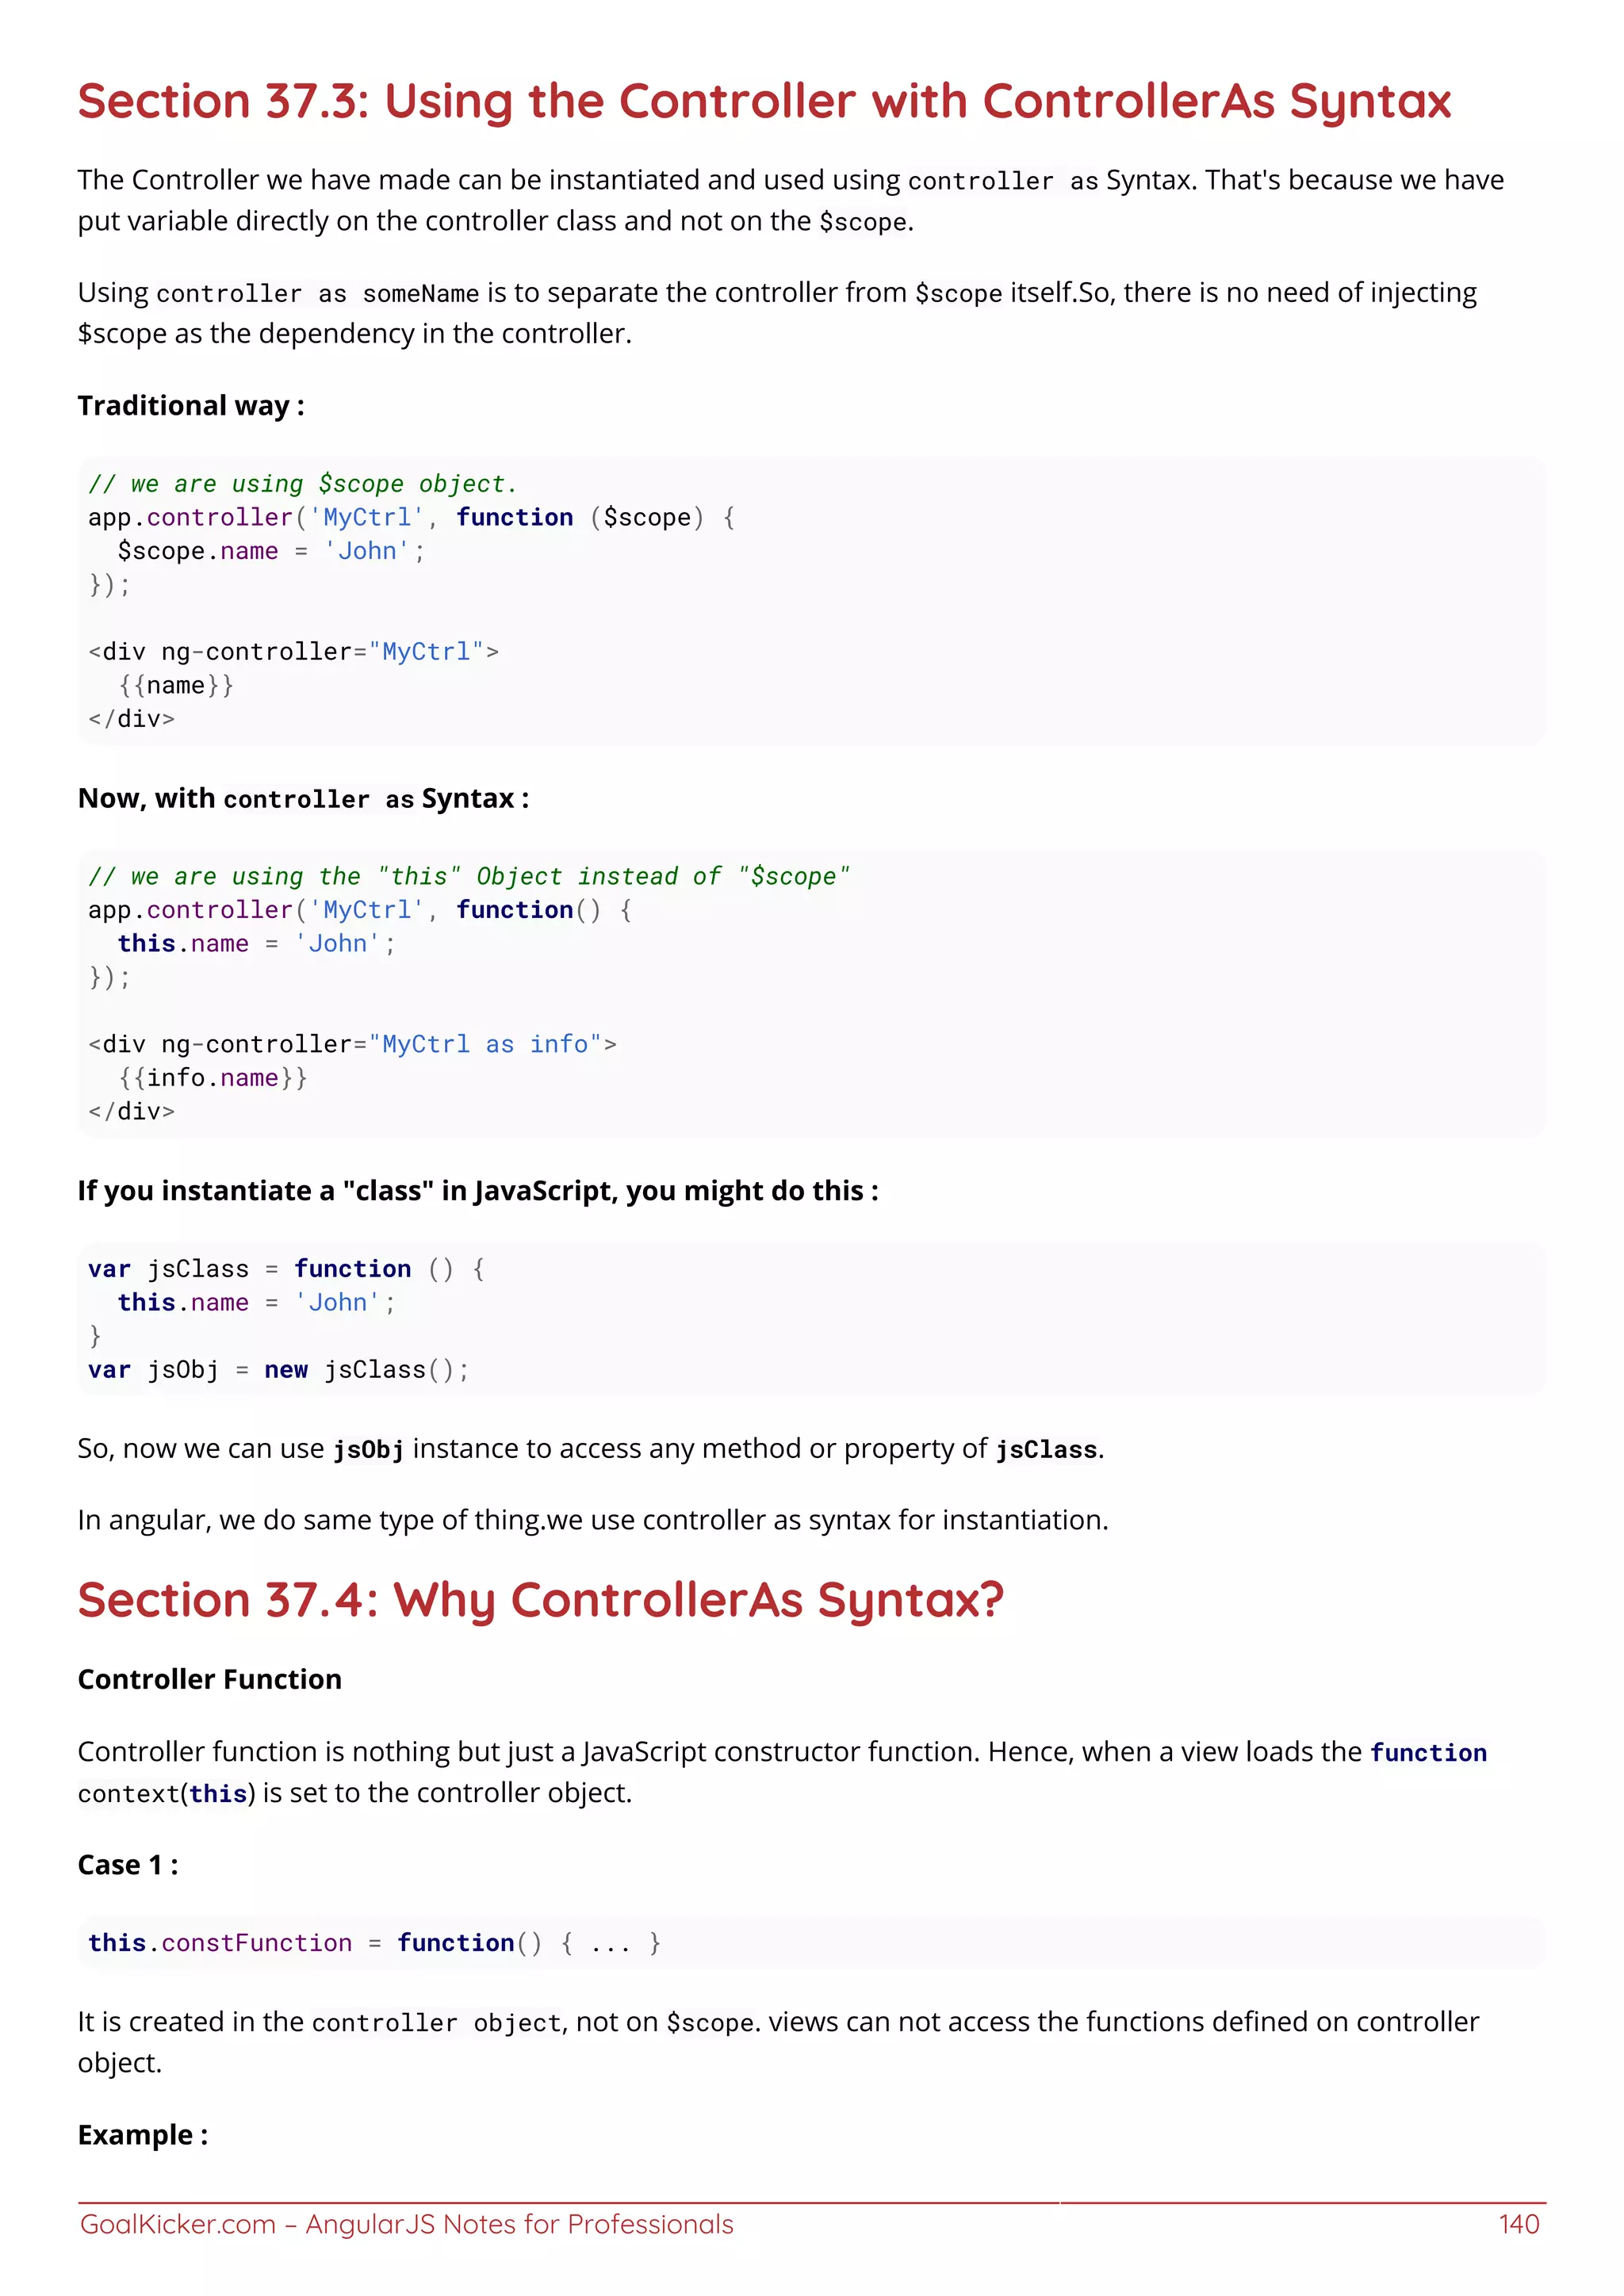
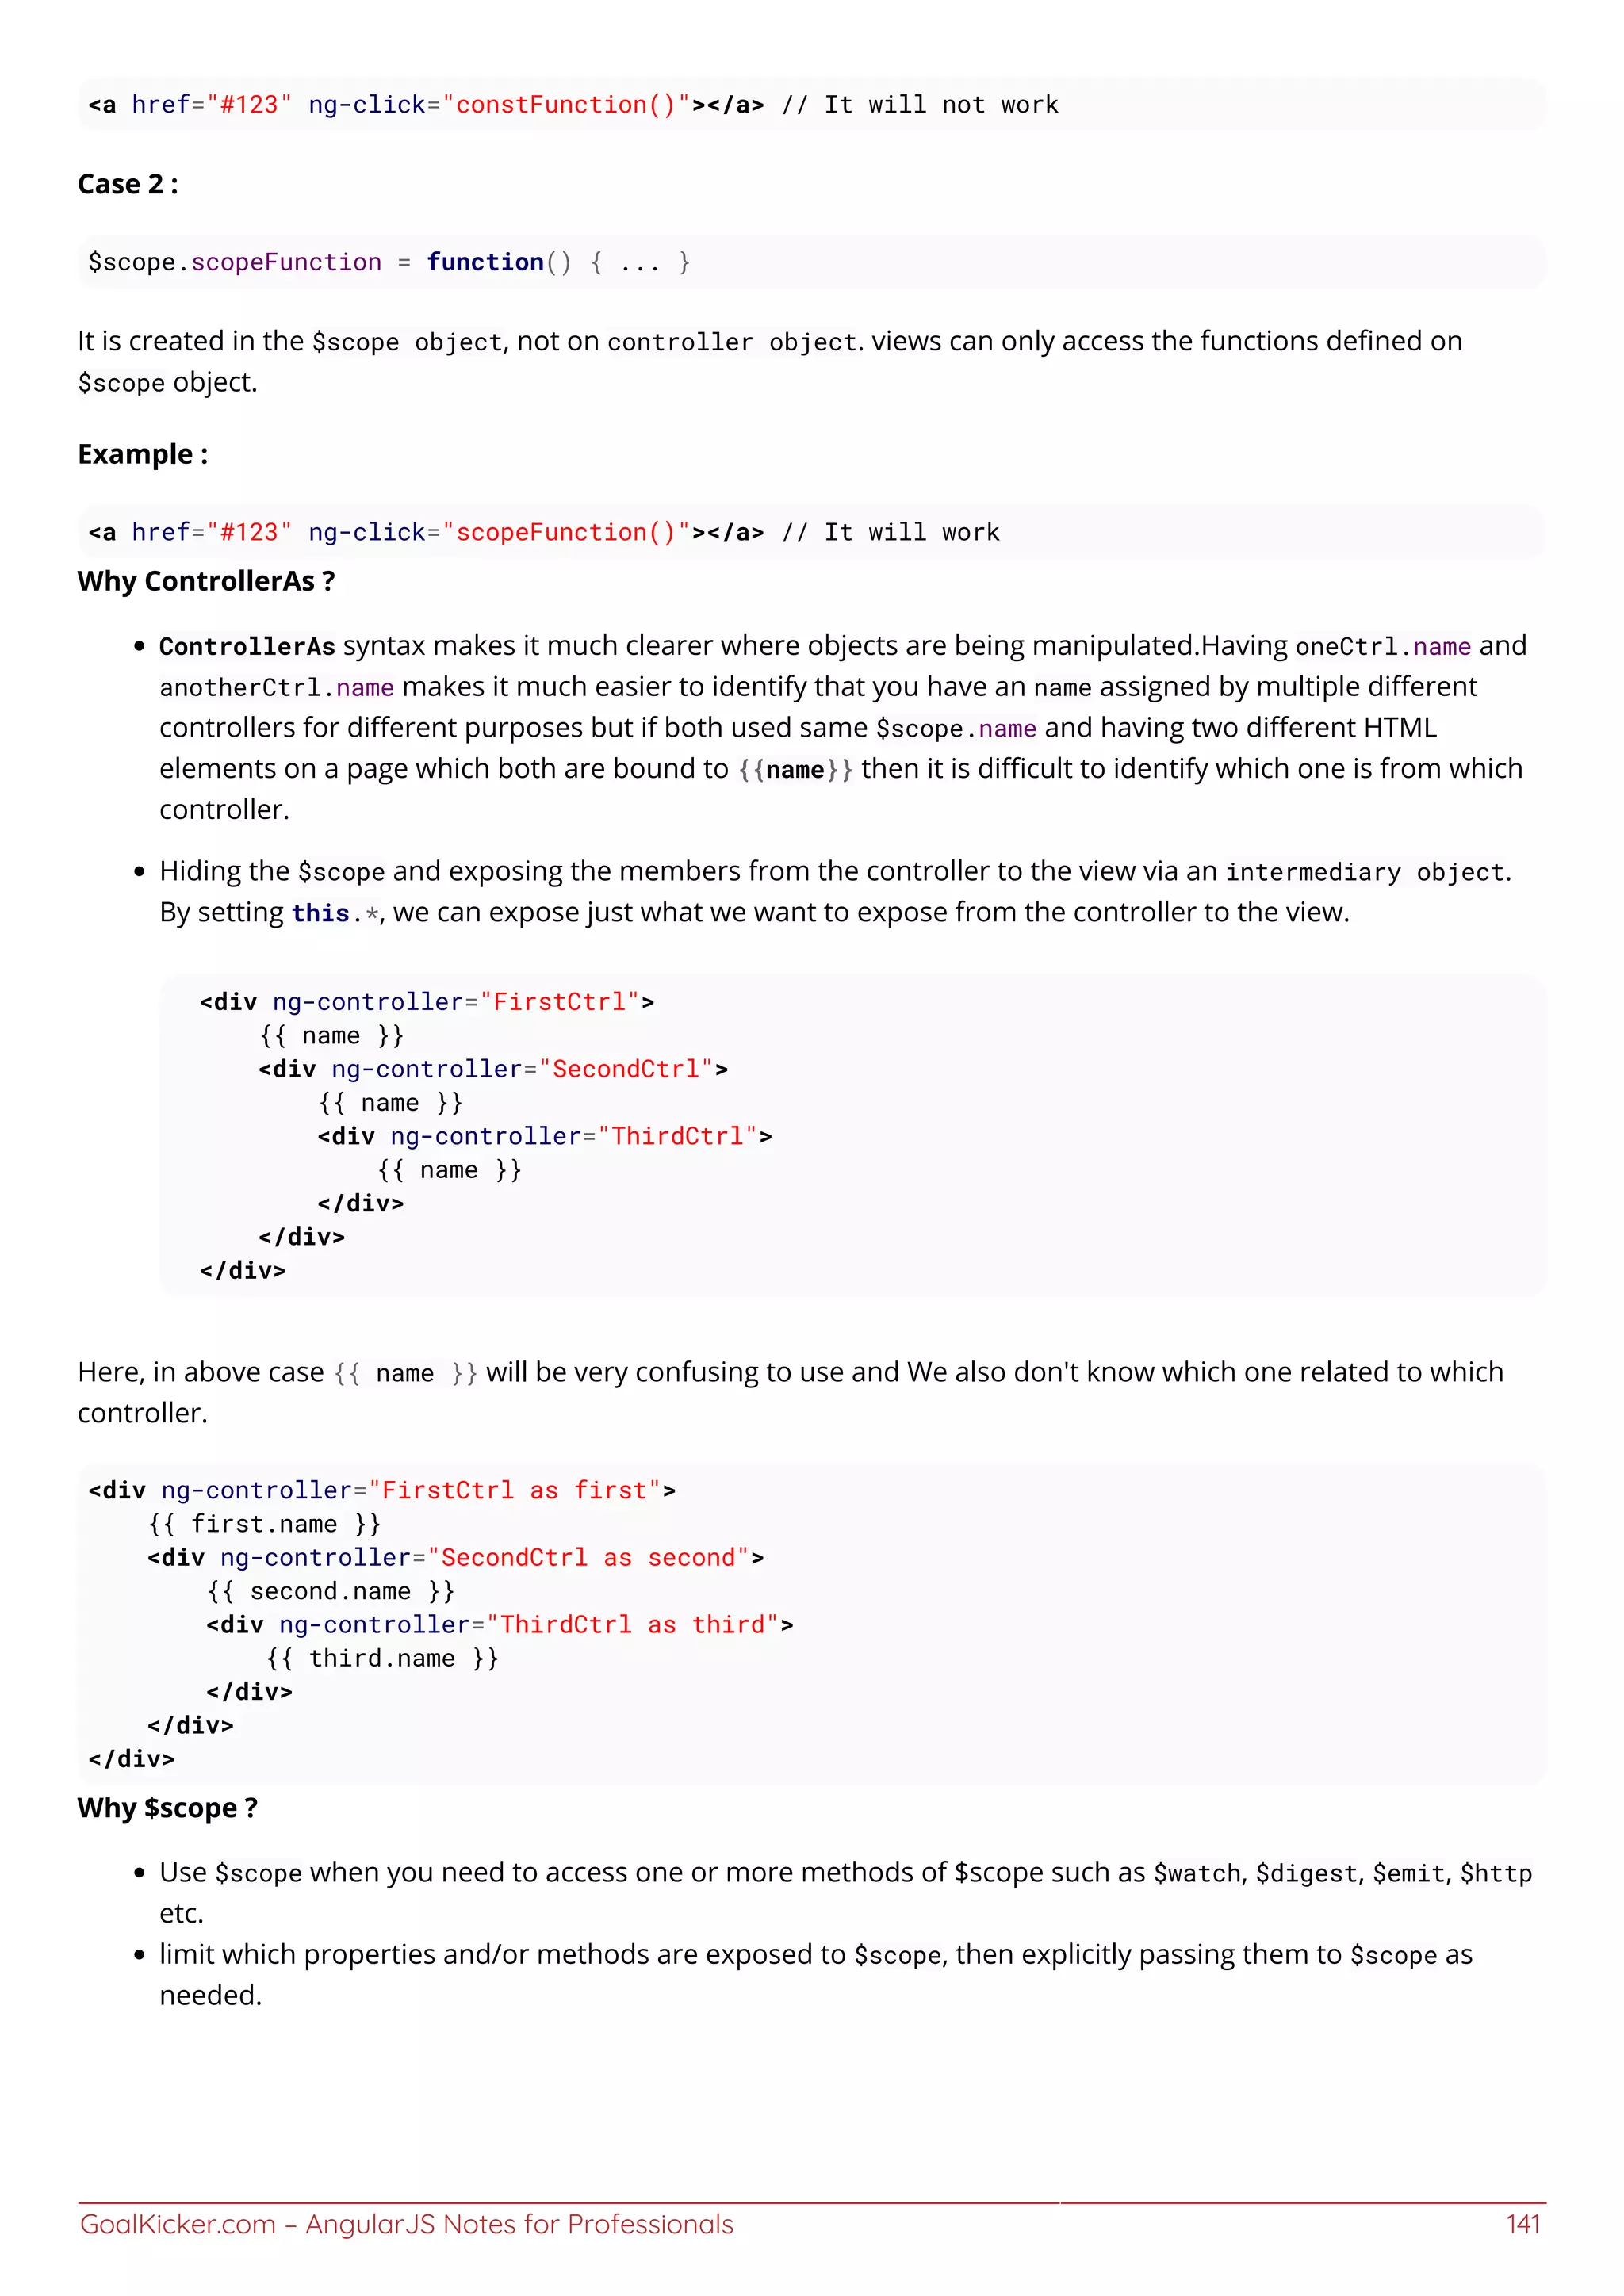
![GoalKicker.com – AngularJS Notes for Professionals 142
Chapter 38: $http request
Section 38.1: Timing of an $http request
The $http requests require time which varies depending on the server, some may take a few milliseconds, and
some may take up to a few seconds. Often the time required to retrieve the data from a request is critical.
Assuming the response value is an array of names, consider the following example:
Incorrect
$scope.names = [];
$http({
method: 'GET',
url: '/someURL'
}).then(function successCallback(response) {
$scope.names = response.data;
},
function errorCallback(response) {
alert(response.status);
});
alert("The first name is: " + $scope.names[0]);
Accessing $scope.names[0] right below the $http request will often throw an error - this line of code executes
before the response is received from the server.
Correct
$scope.names = [];
$scope.$watch('names', function(newVal, oldVal) {
if(!(newVal.length == 0)) {
alert("The first name is: " + $scope.names[0]);
}
});
$http({
method: 'GET',
url: '/someURL'
}).then(function successCallback(response) {
$scope.names = response.data;
},
function errorCallback(response) {
alert(response.status);
});
Using the $watch service we access the $scope.names array only when the response is received. During
initialization, the function is called even though $scope.names was initialized before, therefore checking if the
newVal.length is different than 0 is necessary. Be aware - any changes made to $scope.names will trigger the watch
function.
Section 38.2: Using $http inside a controller
The $http service is a function which generates an HTTP request and returns a promise.](https://image.slidesharecdn.com/angularjsnotesforprofessionals-200412131913/75/Angular-js-notes-for-professionals-149-2048.jpg)
![GoalKicker.com – AngularJS Notes for Professionals 143
General Usage
// Simple GET request example:
$http({
method: 'GET',
url: '/someUrl'
}).then(function successCallback(response) {
// this callback will be called asynchronously
// when the response is available
}, function errorCallback(response) {
// called asynchronously if an error occurs
// or server returns response with an error status.
});
Usage inside controller
appName.controller('controllerName',
['$http', function($http){
// Simple GET request example:
$http({
method: 'GET',
url: '/someUrl'
}).then(function successCallback(response) {
// this callback will be called asynchronously
// when the response is available
}, function errorCallback(response) {
// called asynchronously if an error occurs
// or server returns response with an error status.
});
}])
Shortcut Methods
$http service also has shortcut methods. Read about http methods here
Syntax
$http.get('/someUrl', config).then(successCallback, errorCallback);
$http.post('/someUrl', data, config).then(successCallback, errorCallback);
Shortcut Methods
$http.get
$http.head
$http.post
$http.put
$http.delete
$http.jsonp
$http.patch
Section 38.3: Using $http request in a service
HTTP requests are widely used repeatedly across every web app, so it is wise to write a method for each common
request, and then use it in multiple places throughout the app.
Create a httpRequestsService.js](https://image.slidesharecdn.com/angularjsnotesforprofessionals-200412131913/75/Angular-js-notes-for-professionals-150-2048.jpg)
![GoalKicker.com – AngularJS Notes for Professionals 144
httpRequestsService.js
appName.service('httpRequestsService', function($q, $http){
return {
// function that performs a basic get request
getName: function(){
// make sure $http is injected
return $http.get("/someAPI/names")
.then(function(response) {
// return the result as a promise
return response;
}, function(response) {
// defer the promise
return $q.reject(response.data);
});
},
// add functions for other requests made by your app
addName: function(){
// some code...
}
}
})
The service above will perform a get request inside the service. This will be available to any controller where the
service has been injected.
Sample usage
appName.controller('controllerName',
['httpRequestsService', function(httpRequestsService){
// we injected httpRequestsService service on this controller
// that made the getName() function available to use.
httpRequestsService.getName()
.then(function(response){
// success
}, function(error){
// do something with the error
})
}])
Using this approach we can now use httpRequestsService.js anytime and in any controller.](https://image.slidesharecdn.com/angularjsnotesforprofessionals-200412131913/75/Angular-js-notes-for-professionals-151-2048.jpg)
![GoalKicker.com – AngularJS Notes for Professionals 145
Chapter 39: Prepare for Production - Grunt
Section 39.1: View preloading
When the first time view is requested, normally Angular makes XHR request to get that view. For mid-size projects,
the view count can be significant and it can slow down the application responsiveness.
The good practice is to pre-load all the views at once for small and mid size projects. For larger projects it is good
to aggregate them in some meaningful bulks as well, but some other methods can be handy to split the load. To
automate this task it is handy to use Grunt or Gulp tasks.
To pre-load the views, we can use $templateCache object. That is an object, where angular stores every received
view from the server.
It is possible to use html2js module, that will convert all our views to one module - js file. Then we will need to
inject that module into our application and that's it.
To create concatenated file of all the views we can use this task
module.exports = function (grunt) {
//set up the location of your views here
var viewLocation = ['app/views/**.html'];
grunt.initConfig({
pkg: require('./package.json'),
//section that sets up the settings for concatenation of the html files into one file
html2js: {
options: {
base: '',
module: 'app.templates', //new module name
singleModule: true,
useStrict: true,
htmlmin: {
collapseBooleanAttributes: true,
collapseWhitespace: true
}
},
main: {
src: viewLocation,
dest: 'build/app.templates.js'
}
},
//this section is watching for changes in view files, and if there was a change, it will
regenerate the production file. This task can be handy during development.
watch: {
views:{
files: viewLocation,
tasks: ['buildHTML']
},
}
});
//to automatically generate one view file
grunt.loadNpmTasks('grunt-html2js');
//to watch for changes and if the file has been changed, regenerate the file
grunt.loadNpmTasks('grunt-contrib-watch');](https://image.slidesharecdn.com/angularjsnotesforprofessionals-200412131913/75/Angular-js-notes-for-professionals-152-2048.jpg)
![GoalKicker.com – AngularJS Notes for Professionals 146
//just a task with friendly name to reference in watch
grunt.registerTask('buildHTML', ['html2js']);
};
To use this way of concatination, you need to make 2 changes: In your index.html file you need to reference the
concatenated view file
<script src="build/app.templates.js"></script>
In the file, where you are declaring your app, you need to inject the dependency
angular.module('app', ['app.templates'])
If you are using popular routers like ui-router, there are no changes in the way, how you are referencing
templates
.state('home', {
url: '/home',
views: {
"@": {
controller: 'homeController',
//this will be picked up from $templateCache
templateUrl: 'app/views/home.html'
},
}
})
Section 39.2: Script optimisation
It is good practice to combine JS files together and minify them. For larger project there could be hundreds of JS
files and it adds unnecessary latency to load each file separately from the server.
For angular minification it is required to to have all functions annotated. That in necessary for Angular dependency
injection proper minificaiton. (During minification, function names and variables will be renamed and it will break
dependency injection if no extra actions will be taken.)
During minificaiton $scope and myService variables will be replaced by some other values. Angular dependency
injection works based on the name, as a result, these names shouldn't change
.controller('myController', function($scope, myService){
})
Angular will understand the array notation, because minification won't replace string literals.
.controller('myController', ['$scope','myService', function($scope, myService){
}])
Firstly we will concatinate all files end to end.
Secondly we will use ng-annotate module, that will prepare code for minification
Finally we will apply uglify module.
module.exports = function (grunt) { //set up the location of your scripts here for reusing it in code var scriptLocation
= ['app/scripts/*.js'];](https://image.slidesharecdn.com/angularjsnotesforprofessionals-200412131913/75/Angular-js-notes-for-professionals-153-2048.jpg)
![GoalKicker.com – AngularJS Notes for Professionals 147
grunt.initConfig({
pkg: require('./package.json'),
//add necessary annotations for safe minification
ngAnnotate: {
angular: {
src: ['staging/concatenated.js'],
dest: 'staging/anotated.js'
}
},
//combines all the files into one file
concat: {
js: {
src: scriptLocation,
dest: 'staging/concatenated.js'
}
},
//final uglifying
uglify: {
options: {
report: 'min',
mangle: false,
sourceMap:true
},
my_target: {
files: {
'build/app.min.js': ['staging/anotated.js']
}
}
},
//this section is watching for changes in JS files, and if there was a change, it will
regenerate the production file. You can choose not to do it, but I like to keep concatenated version
up to date
watch: {
scripts: {
files: scriptLocation,
tasks: ['buildJS']
}
}
});
//module to make files less readable
grunt.loadNpmTasks('grunt-contrib-uglify');
//mdule to concatenate files together
grunt.loadNpmTasks('grunt-contrib-concat');
//module to make angularJS files ready for minification
grunt.loadNpmTasks('grunt-ng-annotate');
//to watch for changes and if the file has been changed, regenerate the file
grunt.loadNpmTasks('grunt-contrib-watch');
//task that sequentially executes all steps to prepare JS file for production
//concatinate all JS files
//annotate JS file (prepare for minification
//uglify file
grunt.registerTask('buildJS', ['concat:js', 'ngAnnotate', 'uglify']);
};](https://image.slidesharecdn.com/angularjsnotesforprofessionals-200412131913/75/Angular-js-notes-for-professionals-154-2048.jpg)
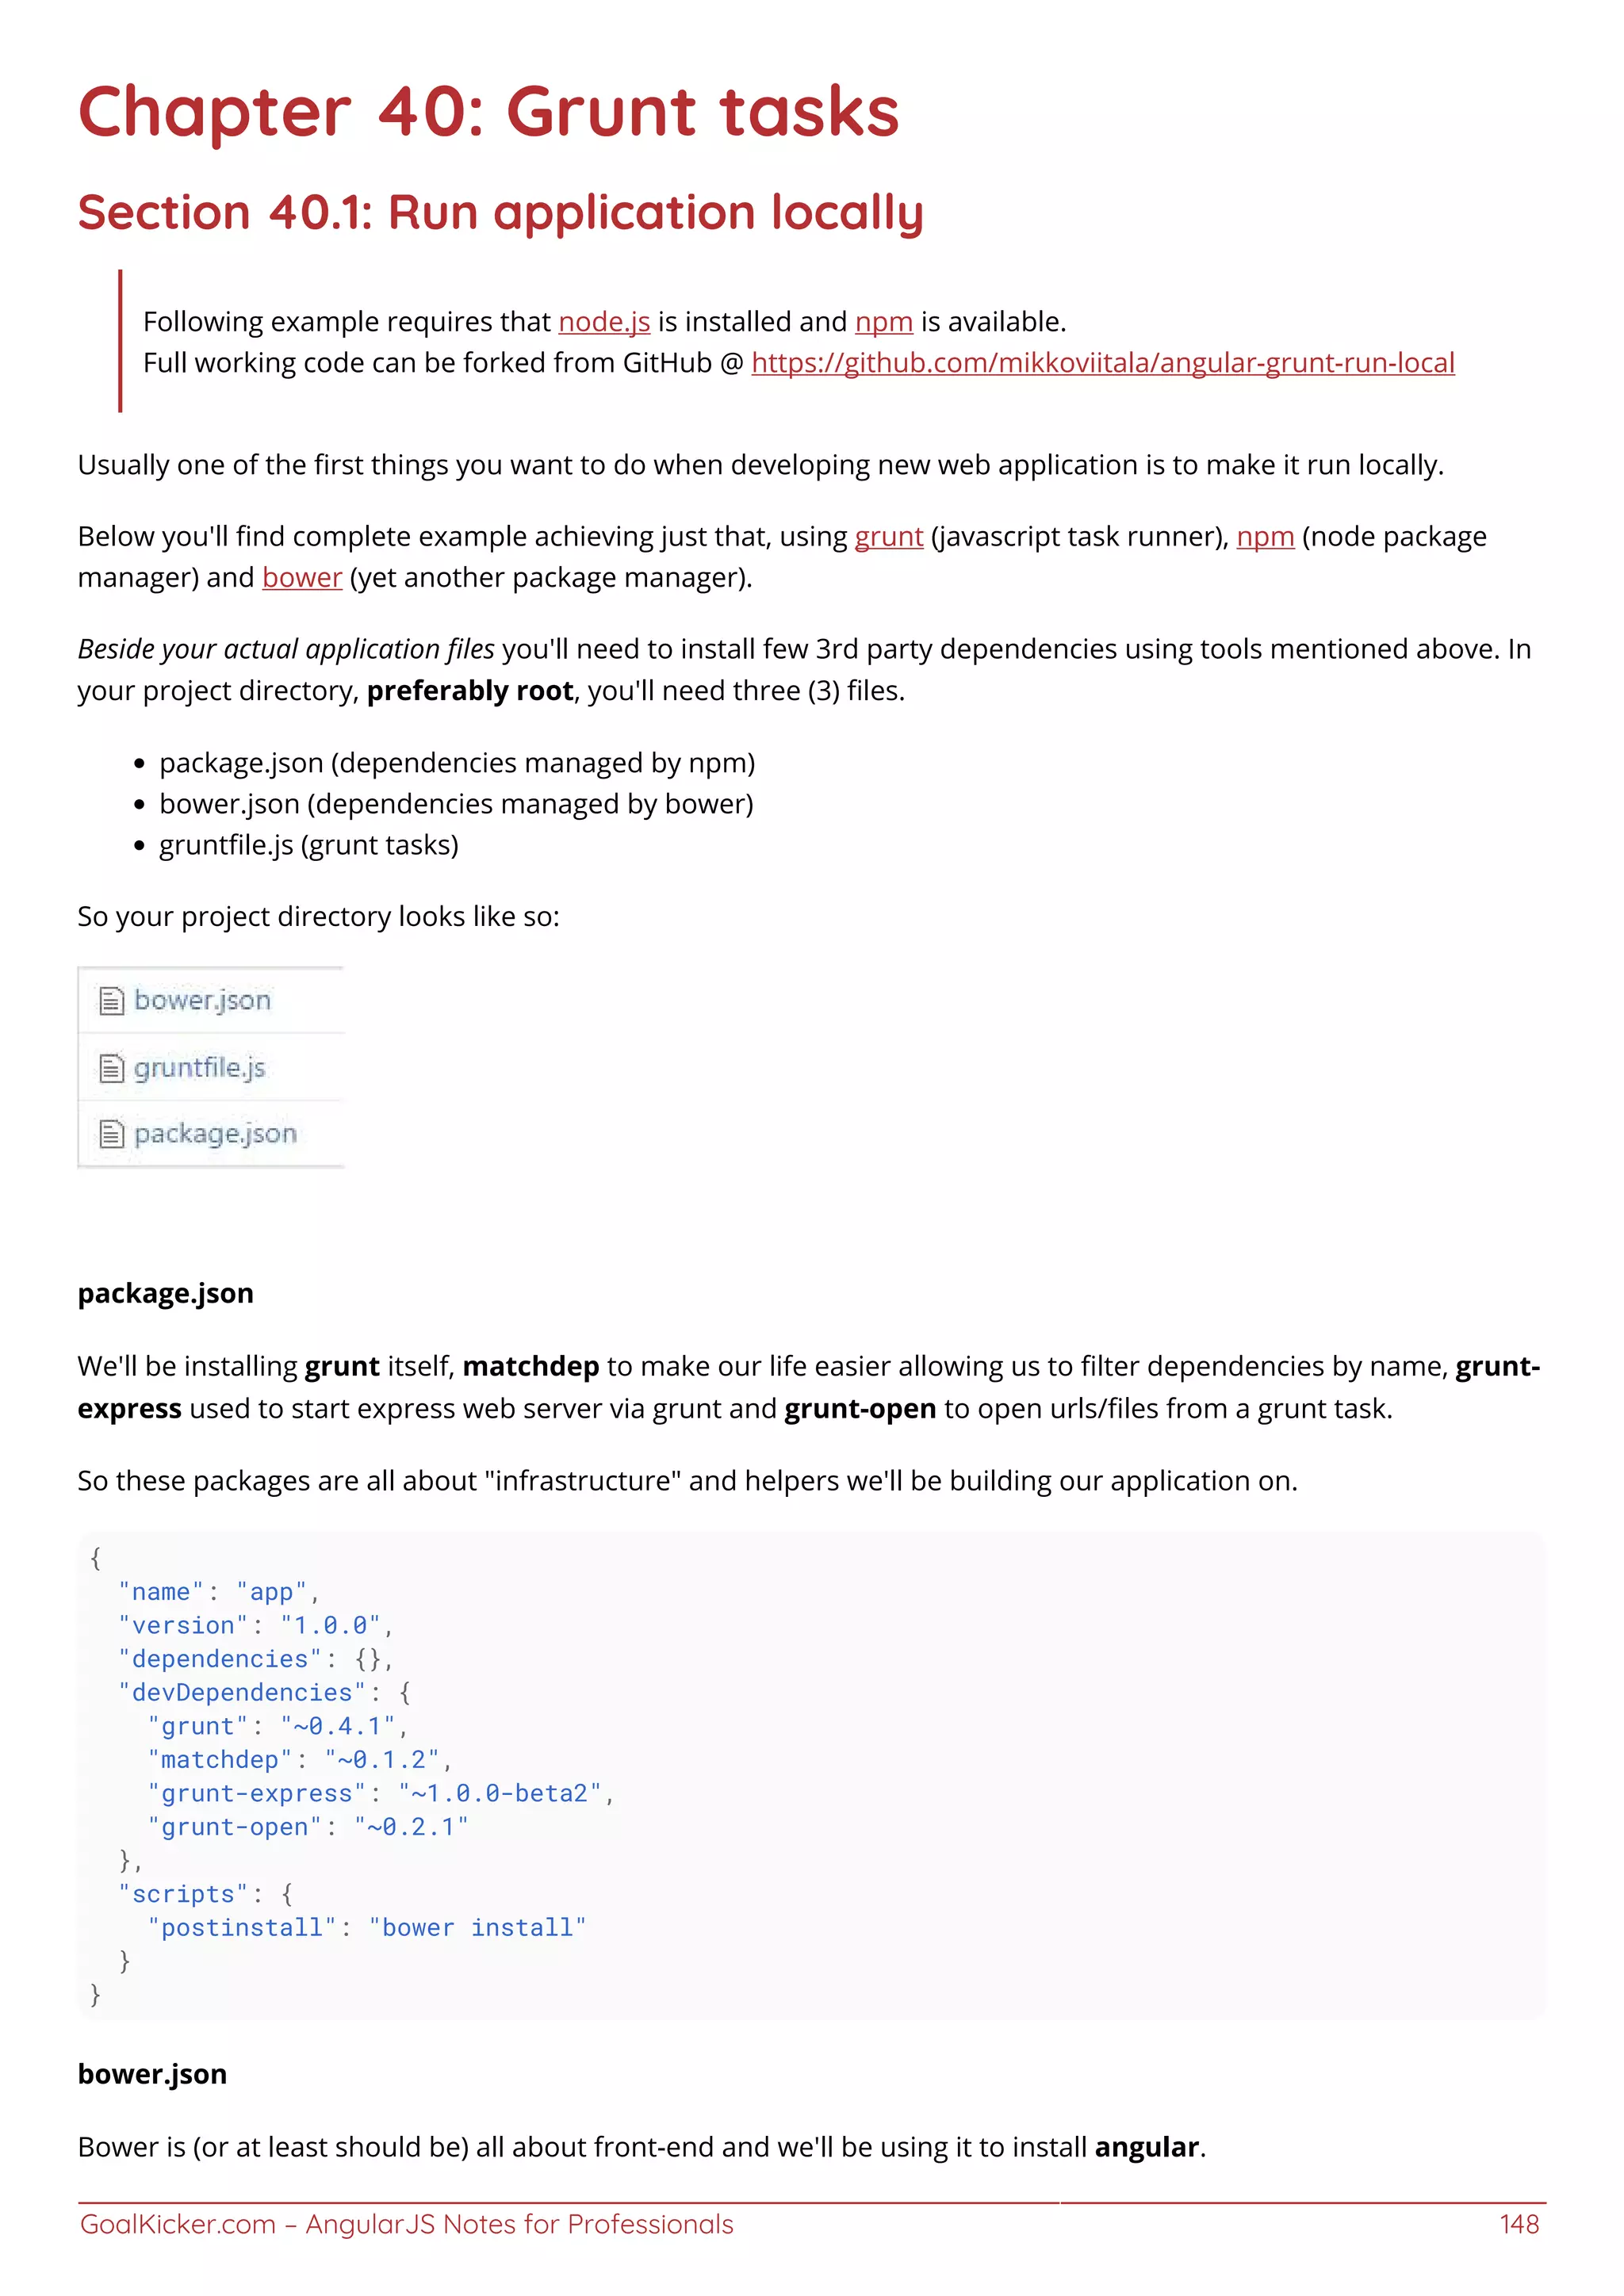
![GoalKicker.com – AngularJS Notes for Professionals 149
{
"name": "app",
"version": "1.0.0",
"dependencies": {
"angular": "~1.3.x"
},
"devDependencies": {}
}
gruntfile.js
Inside gruntfile.js we'll have the actual "running application locally" magic, which opens our application in new
browser window, running on http://localhost:9000/
'use strict';
// see http://rhumaric.com/2013/07/renewing-the-grunt-livereload-magic/
module.exports = function(grunt) {
require('matchdep').filterDev('grunt-*').forEach(grunt.loadNpmTasks);
grunt.initConfig({
express: {
all: {
options: {
port: 9000,
hostname: 'localhost',
bases: [__dirname]
}
}
},
open: {
all: {
path: 'http://localhost:<%= express.all.options.port%>'
}
}
});
grunt.registerTask('app', [
'express',
'open',
'express-keepalive'
]);
};
Usage
To get your application up & running from scratch, save above files to your project's root directory (any empty
folder will do). Then fire up console/command line and type in the following to install all required dependencies.
npm install -g grunt-cli bower
npm install
And then run your application using
grunt app](https://image.slidesharecdn.com/angularjsnotesforprofessionals-200412131913/75/Angular-js-notes-for-professionals-156-2048.jpg)
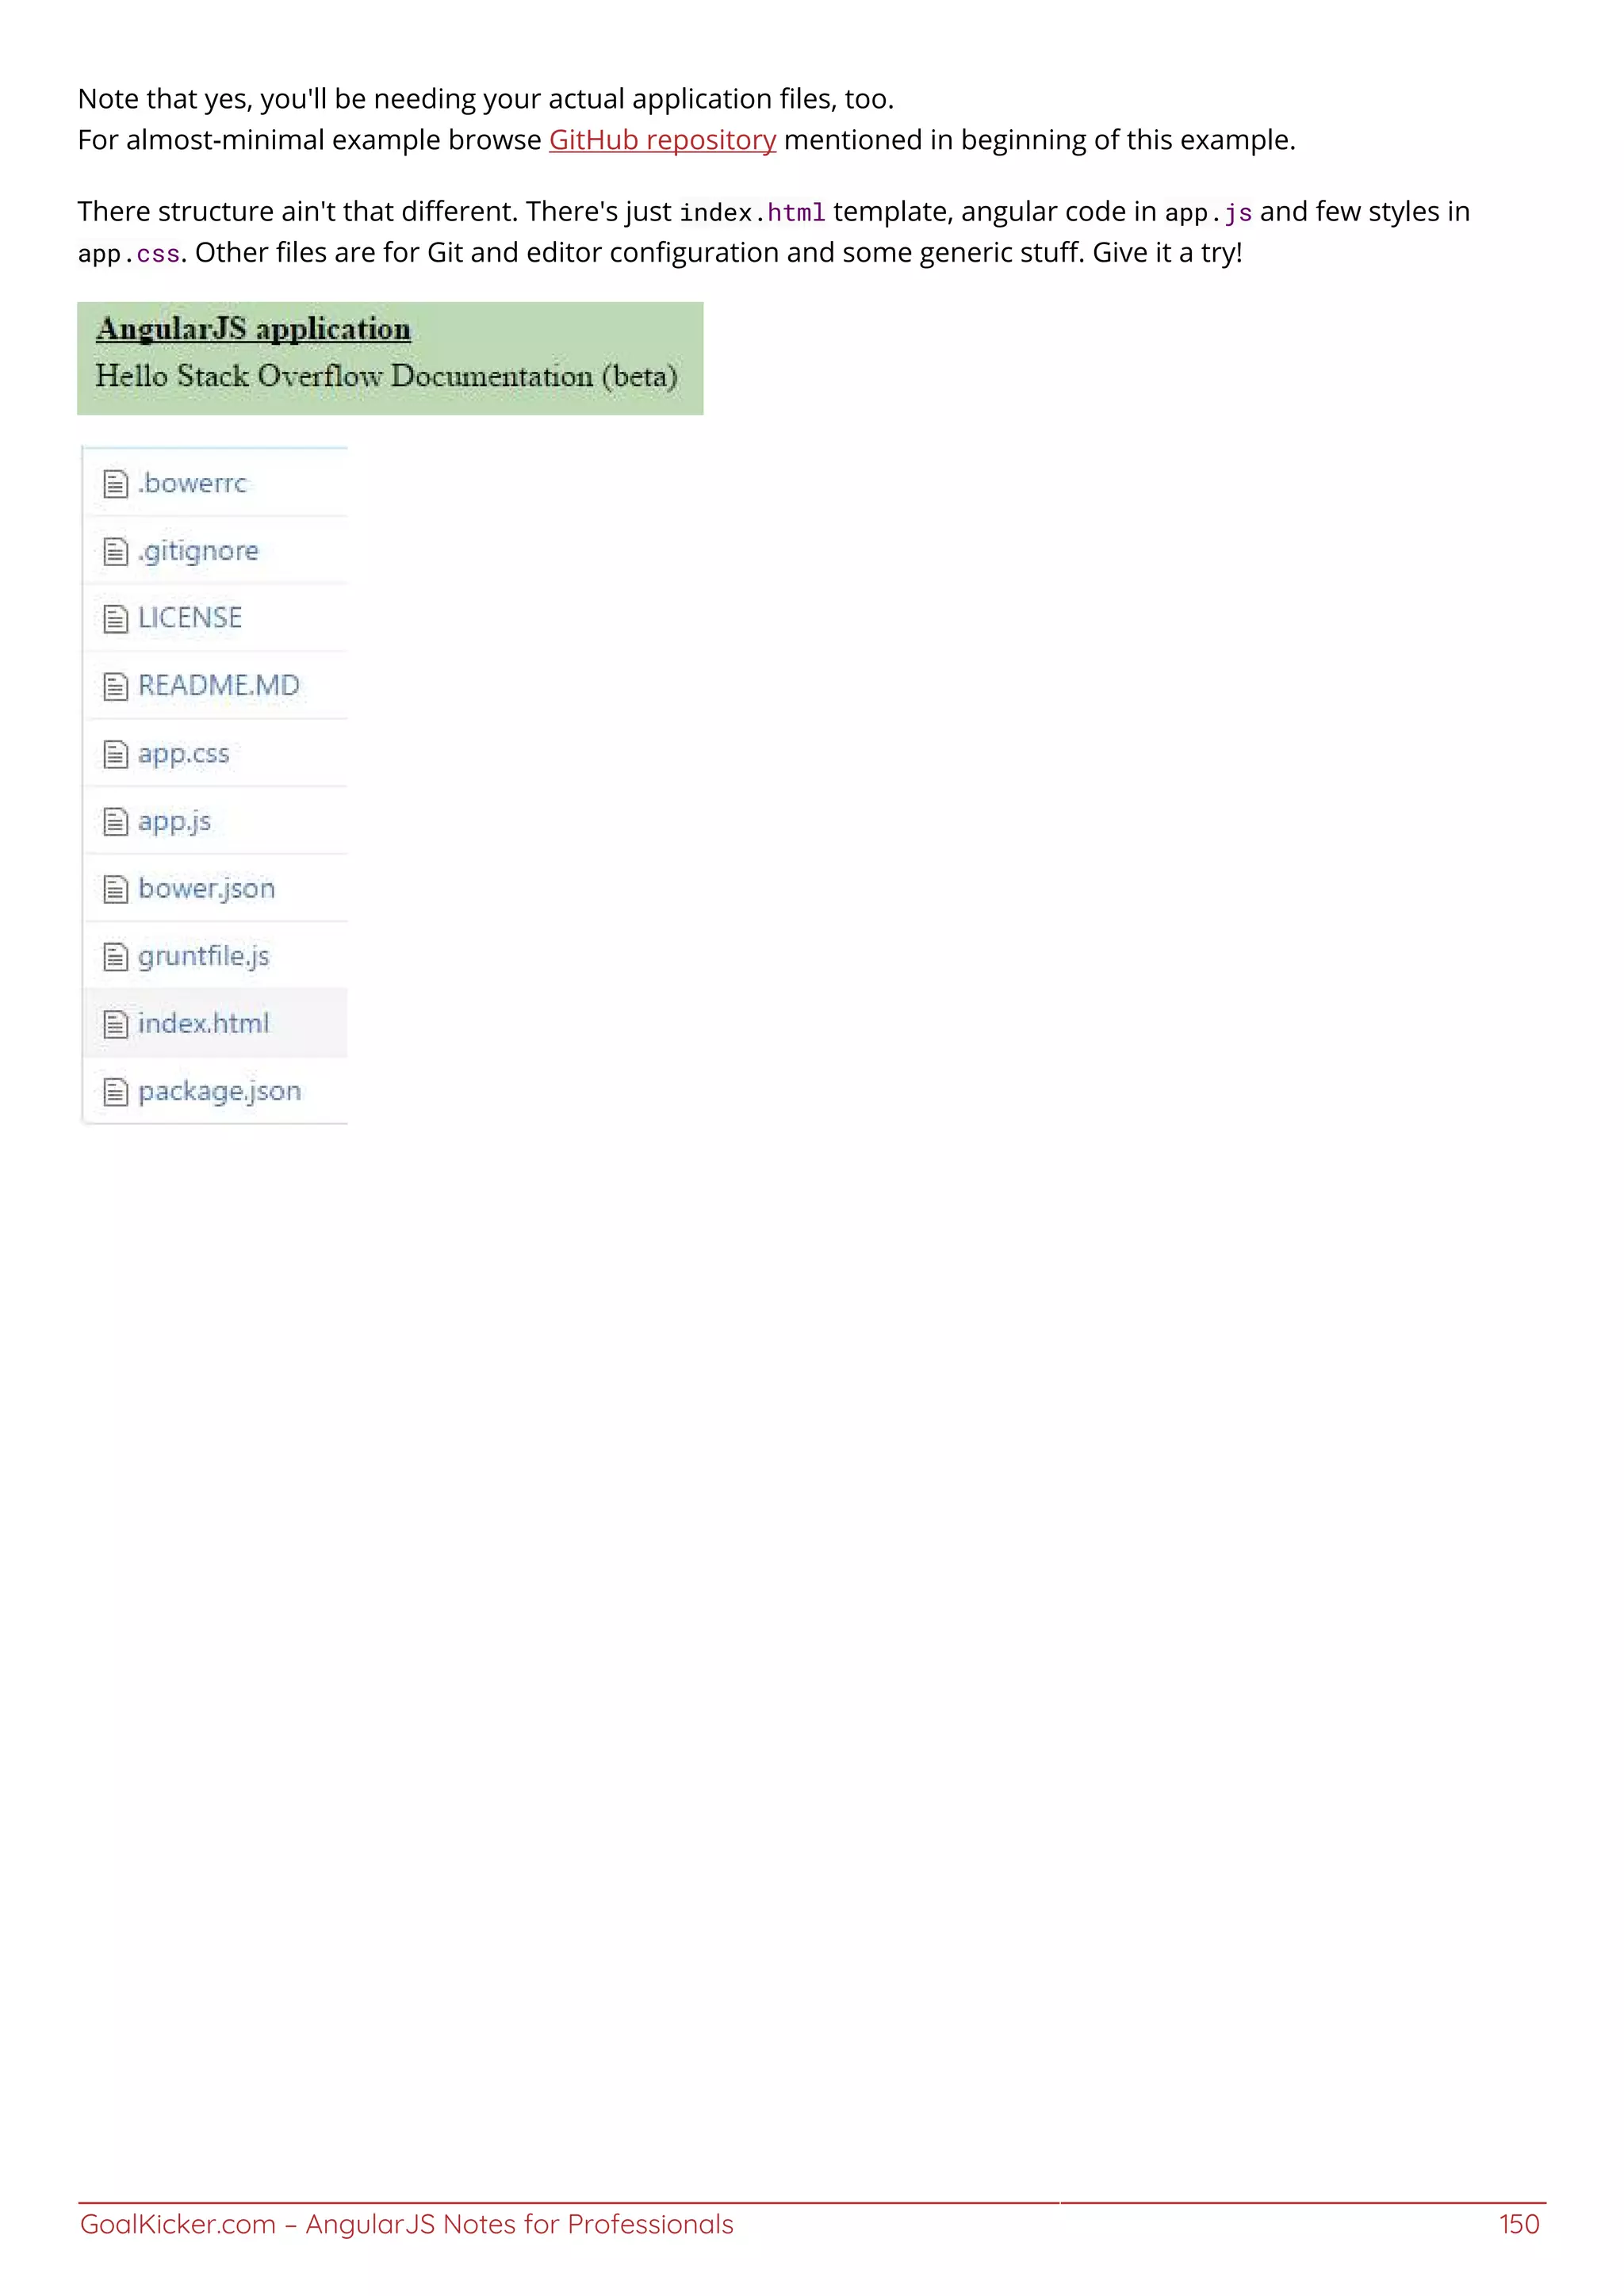
![GoalKicker.com – AngularJS Notes for Professionals 151
Chapter 41: Lazy loading
Section 41.1: Preparing your project for lazy loading
After including oclazyload.js in your index file, declare ocLazyLoad as a dependency in app.js
//Make sure you put the correct dependency! it is spelled different than the service!
angular.module('app', [
'oc.lazyLoad',
'ui-router'
])
Section 41.2: Usage
In order to lazily load files inject the $ocLazyLoad service into a controller or another service
.controller('someCtrl', function($ocLazyLoad) {
$ocLazyLoad.load('path/to/file.js').then(...);
});
Angular modules will be automatically loaded into angular.
Other variation:
$ocLazyLoad.load([
'bower_components/bootstrap/dist/js/bootstrap.js',
'bower_components/bootstrap/dist/css/bootstrap.css',
'partials/template1.html'
]);
For a complete list of variations visit the official documentation
Section 41.3: Usage with router
UI-Router:
.state('profile', {
url: '/profile',
controller: 'profileCtrl as vm'
resolve: {
module: function($ocLazyLoad) {
return $ocLazyLoad.load([
'path/to/profile/module.js',
'path/to/profile/style.css'
]);
}
}
});
ngRoute:
.when('/profile', {
controller: 'profileCtrl as vm'
resolve: {
module: function($ocLazyLoad) {
return $ocLazyLoad.load([
'path/to/profile/module.js',](https://image.slidesharecdn.com/angularjsnotesforprofessionals-200412131913/75/Angular-js-notes-for-professionals-158-2048.jpg)
![GoalKicker.com – AngularJS Notes for Professionals 152
'path/to/profile/style.css'
]);
}
}
});
Section 41.4: Using dependency injection
The following syntax allows you to specify dependencies in your module.js instead of explicit specification when
using the service
//lazy_module.js
angular.module('lazy', [
'alreadyLoadedDependency1',
'alreadyLoadedDependency2',
...
[
'path/to/lazily/loaded/dependency.js',
'path/to/lazily/loaded/dependency.css'
]
]);
Note: this syntax will only work for lazily loaded modules!
Section 41.5: Using the directive
<div oc-lazy-load="['path/to/lazy/loaded/directive.js', 'path/to/lazy/loaded/directive.html']">
<!-- myDirective available here -->
<my-directive></my-directive>
</div>](https://image.slidesharecdn.com/angularjsnotesforprofessionals-200412131913/75/Angular-js-notes-for-professionals-159-2048.jpg)
![GoalKicker.com – AngularJS Notes for Professionals 153
Chapter 42: HTTP Interceptor
The $http service of AngularJS allows us to communicate with a backend and make HTTP requests. There are cases
where we want to capture every request and manipulate it before sending it to the server. Other times we would
like to capture the response and process it before completing the call. Global http error handling can be also a good
example of such need. Interceptors are created exactly for such cases.
Section 42.1: Generic httpInterceptor step by step
Create an HTML file with the following content:
<!DOCTYPE html>
<html>
<head>
<title>Angular Interceptor Sample</title>
<script src="https://code.angularjs.org/1.5.8/angular.min.js"></script>
<script src="app.js"></script>
<script src="appController.js"></script>
<script src="genericInterceptor.js"></script>
</head>
<body ng-app="interceptorApp">
<div ng-controller="appController as vm">
<button ng-click="vm.sendRequest()">Send a request</button>
</div>
</body>
</html>
Add a JavaScript file called 'app.js':
var interceptorApp = angular.module('interceptorApp', []);
interceptorApp.config(function($httpProvider) {
$httpProvider.interceptors.push('genericInterceptor');
});
Add another one called 'appController.js':
(function() {
'use strict';
function appController($http) {
var vm = this;
vm.sendRequest = function(){
$http.get('http://google.com').then(function(response){
console.log(response);
});
};
}
angular.module('interceptorApp').controller('appController',['$http', appController]);
})();
And finally the file containing the interceptor itself 'genericInterceptor.js':
(function() {
"use strict";](https://image.slidesharecdn.com/angularjsnotesforprofessionals-200412131913/75/Angular-js-notes-for-professionals-160-2048.jpg)
![GoalKicker.com – AngularJS Notes for Professionals 154
function genericInterceptor($q) {
this.responseError = function (response) {
return $q.reject(response);
};
this.requestError = function(request){
if (canRecover(rejection)) {
return responseOrNewPromise
}
return $q.reject(rejection);
};
this.response = function(response){
return response;
};
this.request = function(config){
return config;
}
}
angular.module('interceptorApp').service('genericInterceptor', genericInterceptor);
})();
The 'genericInterceptor' cover the possible functions which we can override adding extra behavior to our
application.
Section 42.2: Getting Started
Angular's builtin $http service allows us to send HTTP requests. Oftentime, the need arise to do things before or
after a request, for example adding to each request an authentication token or creating a generic error handling
logic.
Section 42.3: Flash message on response using http
interceptor
In the view file
In the base html (index.html) where we usually include the angular scripts or the html that is shared across the app,
leave an empty div element, the flash messages will be appearing inside this div element
<div class="flashmessage" ng-if="isVisible">
{{flashMessage}}
</div>
Script File
In the config method of angular module, inject the httpProvider, the httpProvider has an interceptor array property,
push the custom interceptor, In the current example the custom interceptor intercepts only the response and calls
a method attached to rootScope.
var interceptorTest = angular.module('interceptorTest', []);
interceptorTest.config(['$httpProvider',function ($httpProvider) {
$httpProvider.interceptors.push(["$rootScope",function ($rootScope) {
return { //intercept only the response](https://image.slidesharecdn.com/angularjsnotesforprofessionals-200412131913/75/Angular-js-notes-for-professionals-161-2048.jpg)
![GoalKicker.com – AngularJS Notes for Professionals 155
'response': function (response)
{
$rootScope.showFeedBack(response.status,response.data.message);
return response;
}
};
}]);
}])
Since only providers can be injected into the config method of an angular module (that is httpProvider and not the
rootscope), declare the method attached to rootscope inside the run method of angular module.
Also display the message inside $timeout so that the message will have the flash property, that is disappearing
after a threshold time. In our example its 3000 ms.
interceptorTest.run(["$rootScope","$timeout",function($rootScope,$timeout){
$rootScope.showFeedBack = function(status,message){
$rootScope.isVisible = true;
$rootScope.flashMessage = message;
$timeout(function(){$rootScope.isVisible = false },3000)
}
}]);
Common pitfalls
Trying to inject $rootScope or any other services inside config method of angular module, the lifecycle of angular
app doesn't allow that and unknown provider error will be thrown. Only providers can be injected in config
method of the angular module](https://image.slidesharecdn.com/angularjsnotesforprofessionals-200412131913/75/Angular-js-notes-for-professionals-162-2048.jpg)
![GoalKicker.com – AngularJS Notes for Professionals 156
Chapter 43: Session storage
Section 43.1: Handling session storage through service using
angularjs
Session storage service :
Common factory service that will save and return the saved session data based on the key.
'use strict';
/**
* @ngdoc factory
* @name app.factory:storageService
* @description This function will communicate with HTML5 sessionStorage via Factory Service.
*/
app.factory('storageService', ['$rootScope', function($rootScope) {
return {
get: function(key) {
return sessionStorage.getItem(key);
},
save: function(key, data) {
sessionStorage.setItem(key, data);
}
};
}]);
In controller :
Inject the storageService dependency in the controller to set and get the data from the session storage.
app.controller('myCtrl',['storageService',function(storageService) {
// Save session data to storageService
storageService.save('key', 'value');
// Get saved session data from storageService
var sessionData = storageService.get('key');
});](https://image.slidesharecdn.com/angularjsnotesforprofessionals-200412131913/75/Angular-js-notes-for-professionals-163-2048.jpg)
![GoalKicker.com – AngularJS Notes for Professionals 158
Chapter 45: SignalR with AngularJS
In this article we focus on "How to create a simple project using AngularJS And SignalR", in this training you need to
know about "how create app with angularjs", "how to create/use service on angular" And basic knowledge about
SignalR" for this we recommend https://www.codeproject.com/Tips/590660/Introduction-to-SignalR).
Section 45.1: SignalR and AngularJS [ ChatProject ]
step 1: Create Project
- Application
- app.js
- Controllers
- appController.js
- Factories
- SignalR-factory.js
- index.html
- Scripts
- angular.js
- jquery.js
- jquery.signalR.min.js
- Hubs
SignalR version use: signalR-2.2.1
Step 2: Startup.cs And ChatHub.cs
Go to your "/Hubs" directory and Add 2 files [Startup.cs, ChatHub.cs]
Startup.cs
using Microsoft.Owin;
using Owin;
[assembly: OwinStartup(typeof(SignalR.Hubs.Startup))]
namespace SignalR.Hubs
{
public class Startup
{
public void Configuration(IAppBuilder app)
{
app.MapSignalR();
}
}
}
ChatHub.cs
using Microsoft.AspNet.SignalR;
namespace SignalR.Hubs
{
public class ChatHub : Hub
{
public void Send(string name, string message, string time)
{](https://image.slidesharecdn.com/angularjsnotesforprofessionals-200412131913/75/Angular-js-notes-for-professionals-165-2048.jpg)
![GoalKicker.com – AngularJS Notes for Professionals 159
Clients.All.broadcastMessage(name, message, time);
}
}
}
step 3: create angular app
Go to your "/Application" directory and Add [app.js] file
app.js
var app = angular.module("app", []);
step 4: create SignalR Factory
Go to your "/Application/Factories" directory and Add [SignalR-factory.js] file
SignalR-factory.js
app.factory("signalR", function () {
var factory = {};
factory.url = function (url) {
$.connection.hub.url = url;
}
factory.setHubName = function (hubName) {
factory.hub = hubName;
}
factory.connectToHub = function () {
return $.connection[factory.hub];
}
factory.client = function () {
var hub = factory.connectToHub();
return hub.client;
}
factory.server = function () {
var hub = factory.connectToHub();
return hub.server;
}
factory.start = function (fn) {
return $.connection.hub.start().done(fn);
}
return factory;
});
step 5: update app.js
var app = angular.module("app", []);
app.run(function(signalR) {
signalR.url("http://localhost:21991/signalr");
});](https://image.slidesharecdn.com/angularjsnotesforprofessionals-200412131913/75/Angular-js-notes-for-professionals-166-2048.jpg)
![GoalKicker.com – AngularJS Notes for Professionals 160
localhost:21991/signalr | this is your SignalR Hubs Urls
step 6: add controller
Go to your "/Application/Controllers" directory and Add [appController.js] file
app.controller("ctrl", function ($scope, signalR) {
$scope.messages = [];
$scope.user = {};
signalR.setHubName("chatHub");
signalR.client().broadcastMessage = function (name, message, time) {
var newChat = { name: name, message: message, time: time };
$scope.$apply(function() {
$scope.messages.push(newChat);
});
};
signalR.start(function () {
$scope.send = function () {
var dt = new Date();
var time = dt.getHours() + ":" + dt.getMinutes() + ":" + dt.getSeconds();
signalR.server().send($scope.user.name, $scope.user.message, time);
}
});
});
signalR.setHubName("chatHub") | [ChatHub] (public class) > ChatHub.cs
Note: do not insert HubName with upper Case, first letter is lower Case.
signalR.client() | this method try to connect to your hubs and get all functions in the Hubs, in this
sample we have "chatHub", to get "broadcastMessage()" function;
step 7: add index.html in route of directory
index.html
<!DOCTYPE html>
<html ng-app="app" ng-controller="ctrl">
<head>
<meta charset="utf-8" />
<title>SignalR Simple Chat</title>
</head>
<body>
<form>
<input type="text" placeholder="name" ng-model="user.name" />
<input type="text" placeholder="message" ng-model="user.message" />
<button ng-click="send()">send</button>](https://image.slidesharecdn.com/angularjsnotesforprofessionals-200412131913/75/Angular-js-notes-for-professionals-167-2048.jpg)
![GoalKicker.com – AngularJS Notes for Professionals 162
Chapter 46: Migration to Angular 2+
AngularJS has been totally rewritten using the TypeScript language and renamed to just Angular.
There is a lot that can be done to an AngularJS app to ease the migration process. As the official upgrade guide
says, several "preparation steps" can be performed to refactor your app, making it better and closer to the new
Angular style.
Section 46.1: Converting your AngularJS app into a
componend-oriented structure
In the new Angular framework, Components are the main building blocks that compose the user interface. So one
of the first steps that helps an AngularJS app to be migrated to the new Angular is to refactor it into a more
component-oriented structure.
Components were also introduced in the old AngularJS starting from version 1.5+. Using Components in an
AngularJS app will not only make its structure closer to the new Angular 2+, but it will also make it more modular
and easier to maintain.
Before going further I recommend to look at the official AngularJS documentation page about Components, where
their advantages and usage are well explained.
I would rather mention some tips about how to convert the old ng-controller oriented code to the new component
oriented style.
Start breaking your your app into components
All the component-oriented apps have typically one or few components that include other sub-components. So why
not creating the first component which simply will contain your app (or a big piece of it).
Assume that we have a piece of code assigned to a controller, named UserListController, and we want to make a
component of it, which we'll name UserListComponent.
current HTML:
<div ng-controller="UserListController as listctrl">
<ul>
<li ng-repeat="user in myUserList">
{{ user }}
</li>
</ul>
</div>
current JavaScript:
app.controller("UserListController", function($scope, SomeService) {
$scope.myUserList = ['Shin', 'Helias', 'Kalhac'];
this.someFunction = function() {
// ...
}
// ...](https://image.slidesharecdn.com/angularjsnotesforprofessionals-200412131913/75/Angular-js-notes-for-professionals-169-2048.jpg)
![GoalKicker.com – AngularJS Notes for Professionals 163
}
new HTML:
<user-list></user-list>
new JavaScript:
app.component("UserList", {
templateUrl: 'user-list.html',
controller: UserListController
});
function UserListController(SomeService) {
this.myUserList = ['Shin', 'Helias', 'Kalhac'];
this.someFunction = function() {
// ...
}
// ...
}
Note how we are no longer injecting $scope into the controller function and we are now declaring this.myUserList
instead of $scope.myUserList;
new template file user-list.component.html:
<ul>
<li ng-repeat="user in $ctrl.myUserList">
{{ user }}
</li>
</ul>
Note how we are now referring to the variable myUserList, which belongs to the controller, using
$ctrl.myUserList from the html instead of $scope.myUserList.
That is because, as you probably figured out after reading the documentation, $ctrl in the template now refers to
the controller function.
What about controllers and routes?
In case your controller was bound to the template using the routing system instead of ng-controller, so if you
have something like this:
$stateProvider
.state('users', {
url: '/users',
templateUrl: 'user-list.html',
controller: 'UserListController'
})
// ..
you can just change your state declaration to:](https://image.slidesharecdn.com/angularjsnotesforprofessionals-200412131913/75/Angular-js-notes-for-professionals-170-2048.jpg)
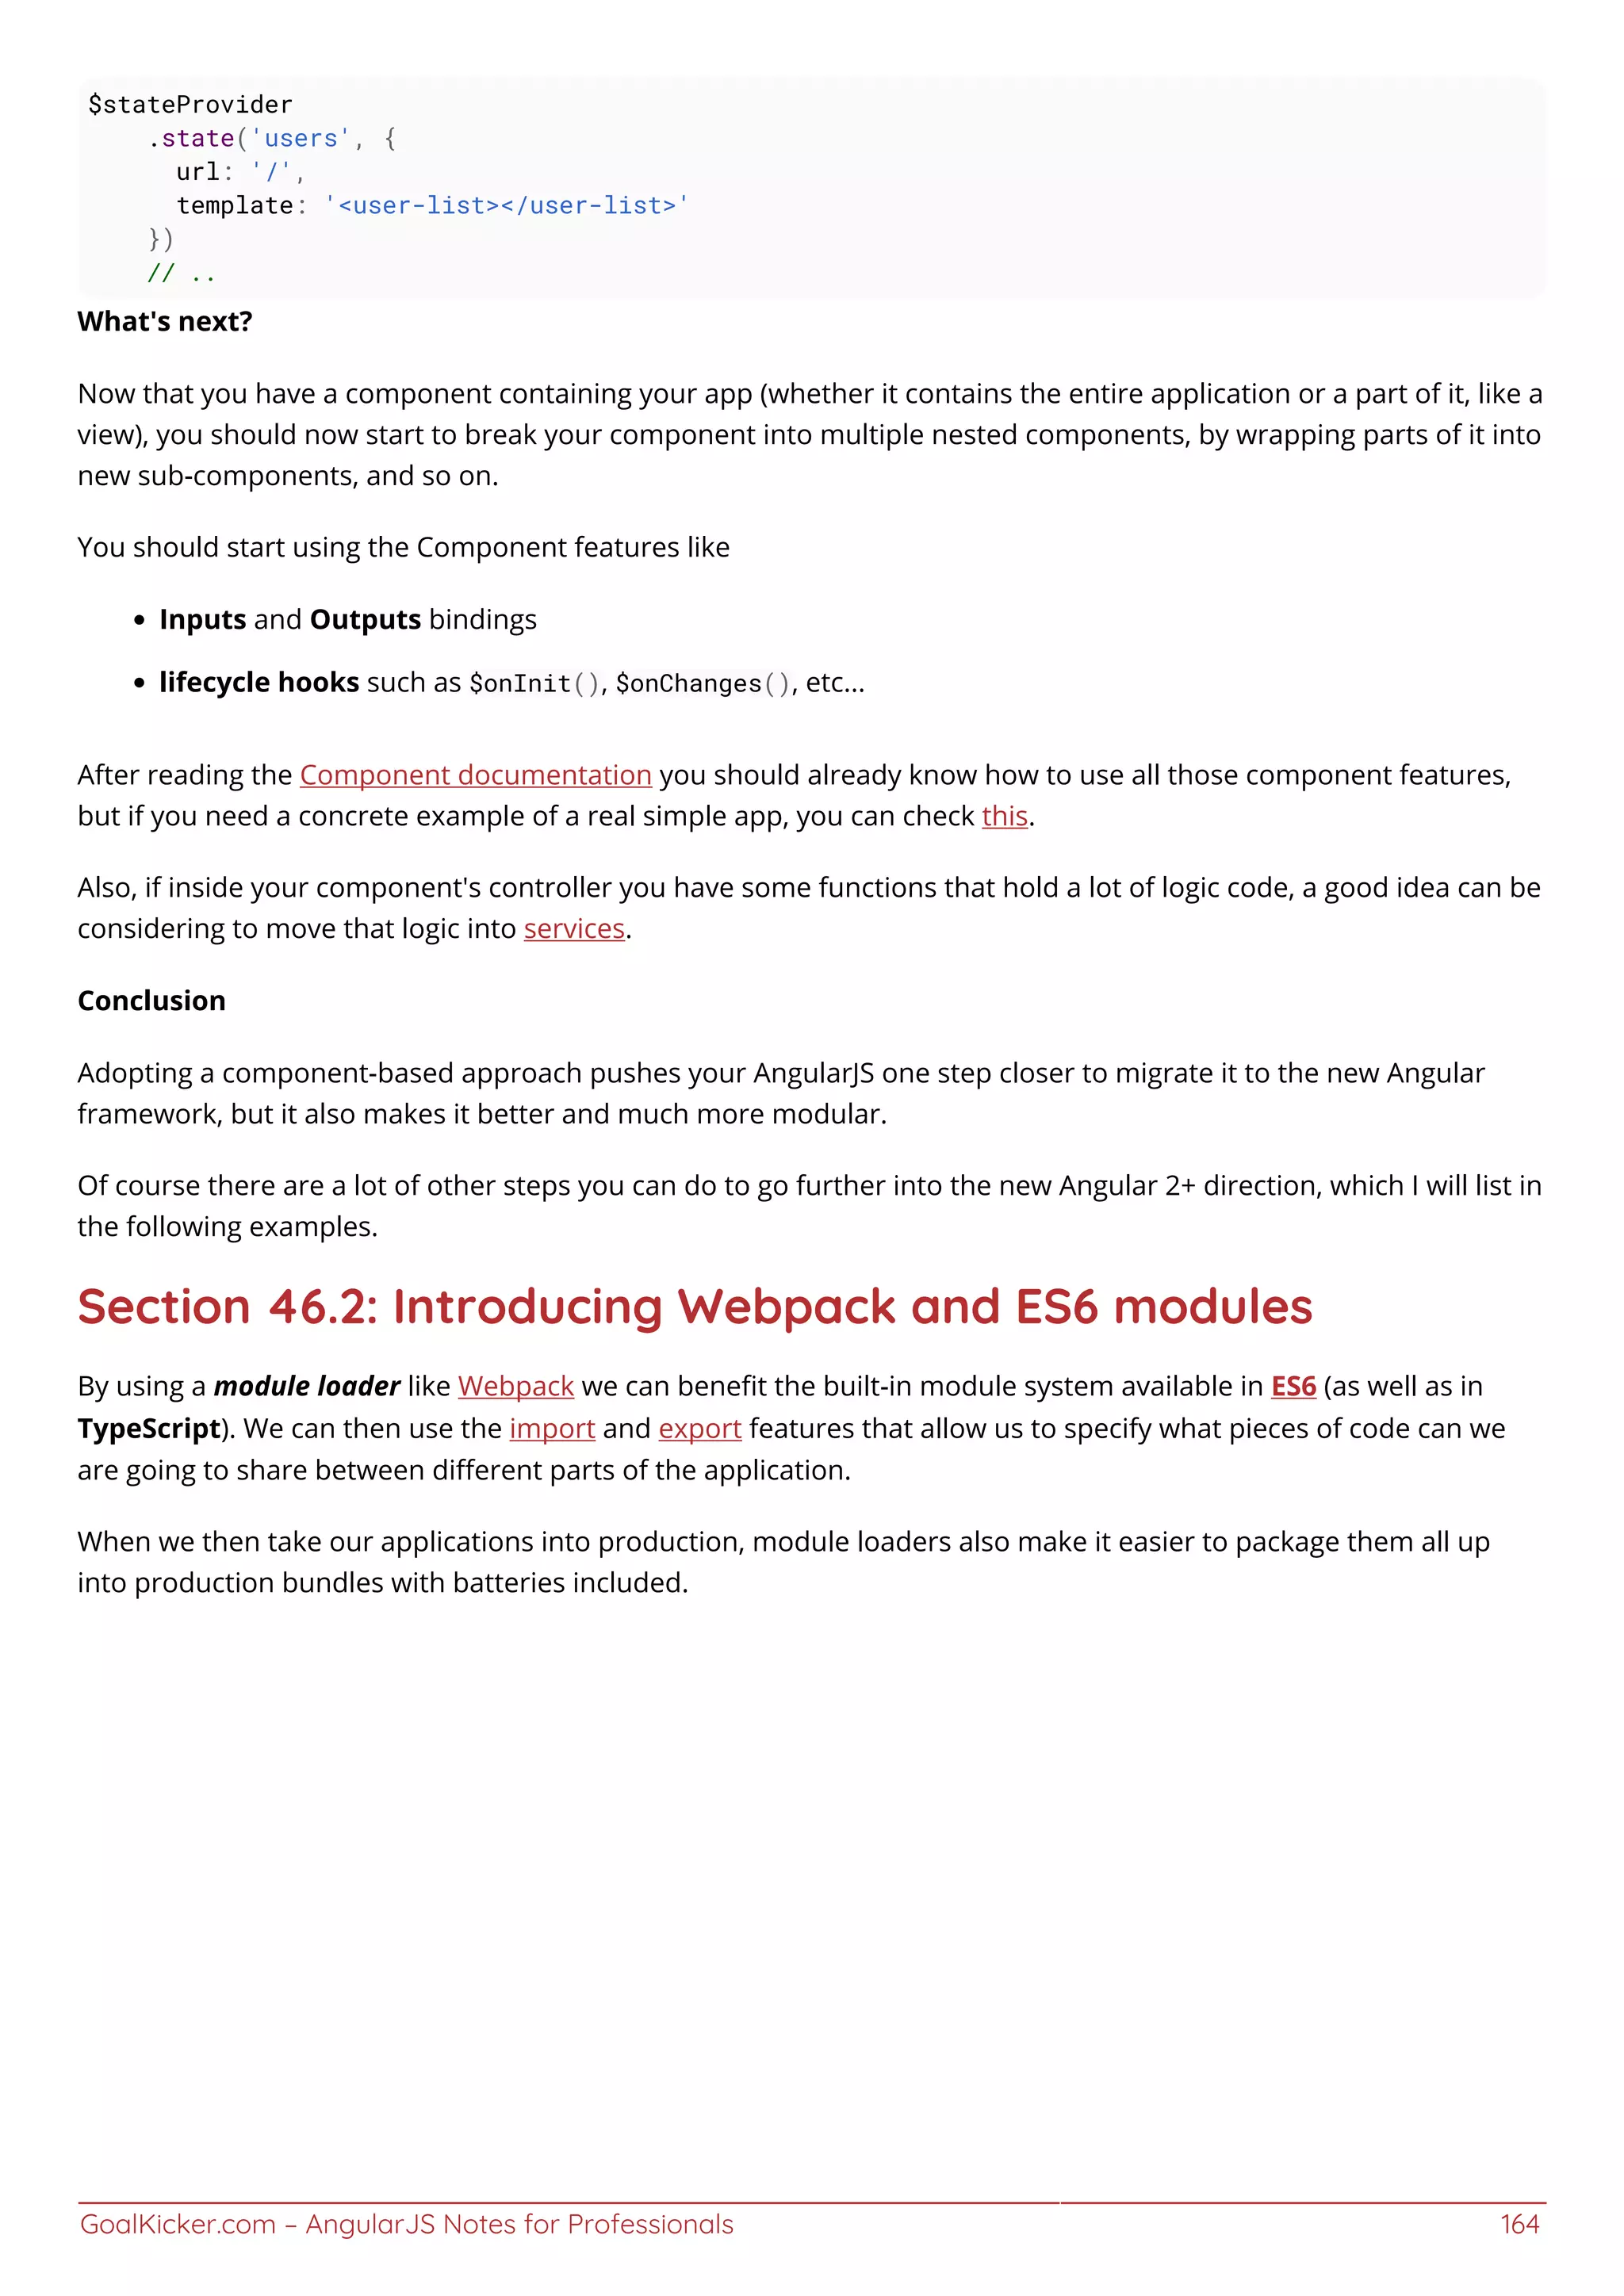
![GoalKicker.com – AngularJS Notes for Professionals 165
Chapter 47: AngularJS with data filter,
pagination etc
Provider example and query about display data with filter, pagination etc in Angularjs.
Section 47.1: AngularJS display data with filter, pagination
<div ng-app="MainApp" ng-controller="SampleController">
<input ng-model="dishName" id="search" class="form-control" placeholder="Filter text">
<ul>
<li dir-paginate="dish in dishes | filter : dishName | itemsPerPage: pageSize" pagination-
id="flights">{{dish}}</li>
</ul>
<dir-pagination-controls boundary-links="true" on-page-change="changeHandler(newPageNumber)"
pagination-id="flights"></dir-pagination-controls>
</div>
<script type="text/javascript" src="angular.min.js"></script>
<script type="text/javascript" src="pagination.js"></script>
<script type="text/javascript">
var MainApp = angular.module('MainApp', ['angularUtils.directives.dirPagination'])
MainApp.controller('SampleController', ['$scope', '$filter', function ($scope, $filter) {
$scope.pageSize = 5;
$scope.dishes = [
'noodles',
'sausage',
'beans on toast',
'cheeseburger',
'battered mars bar',
'crisp butty',
'yorkshire pudding',
'wiener schnitzel',
'sauerkraut mit ei',
'salad',
'onion soup',
'bak choi',
'avacado maki'
];
$scope.changeHandler = function (newPage) { };
}]);
</script>](https://image.slidesharecdn.com/angularjsnotesforprofessionals-200412131913/75/Angular-js-notes-for-professionals-172-2048.jpg)
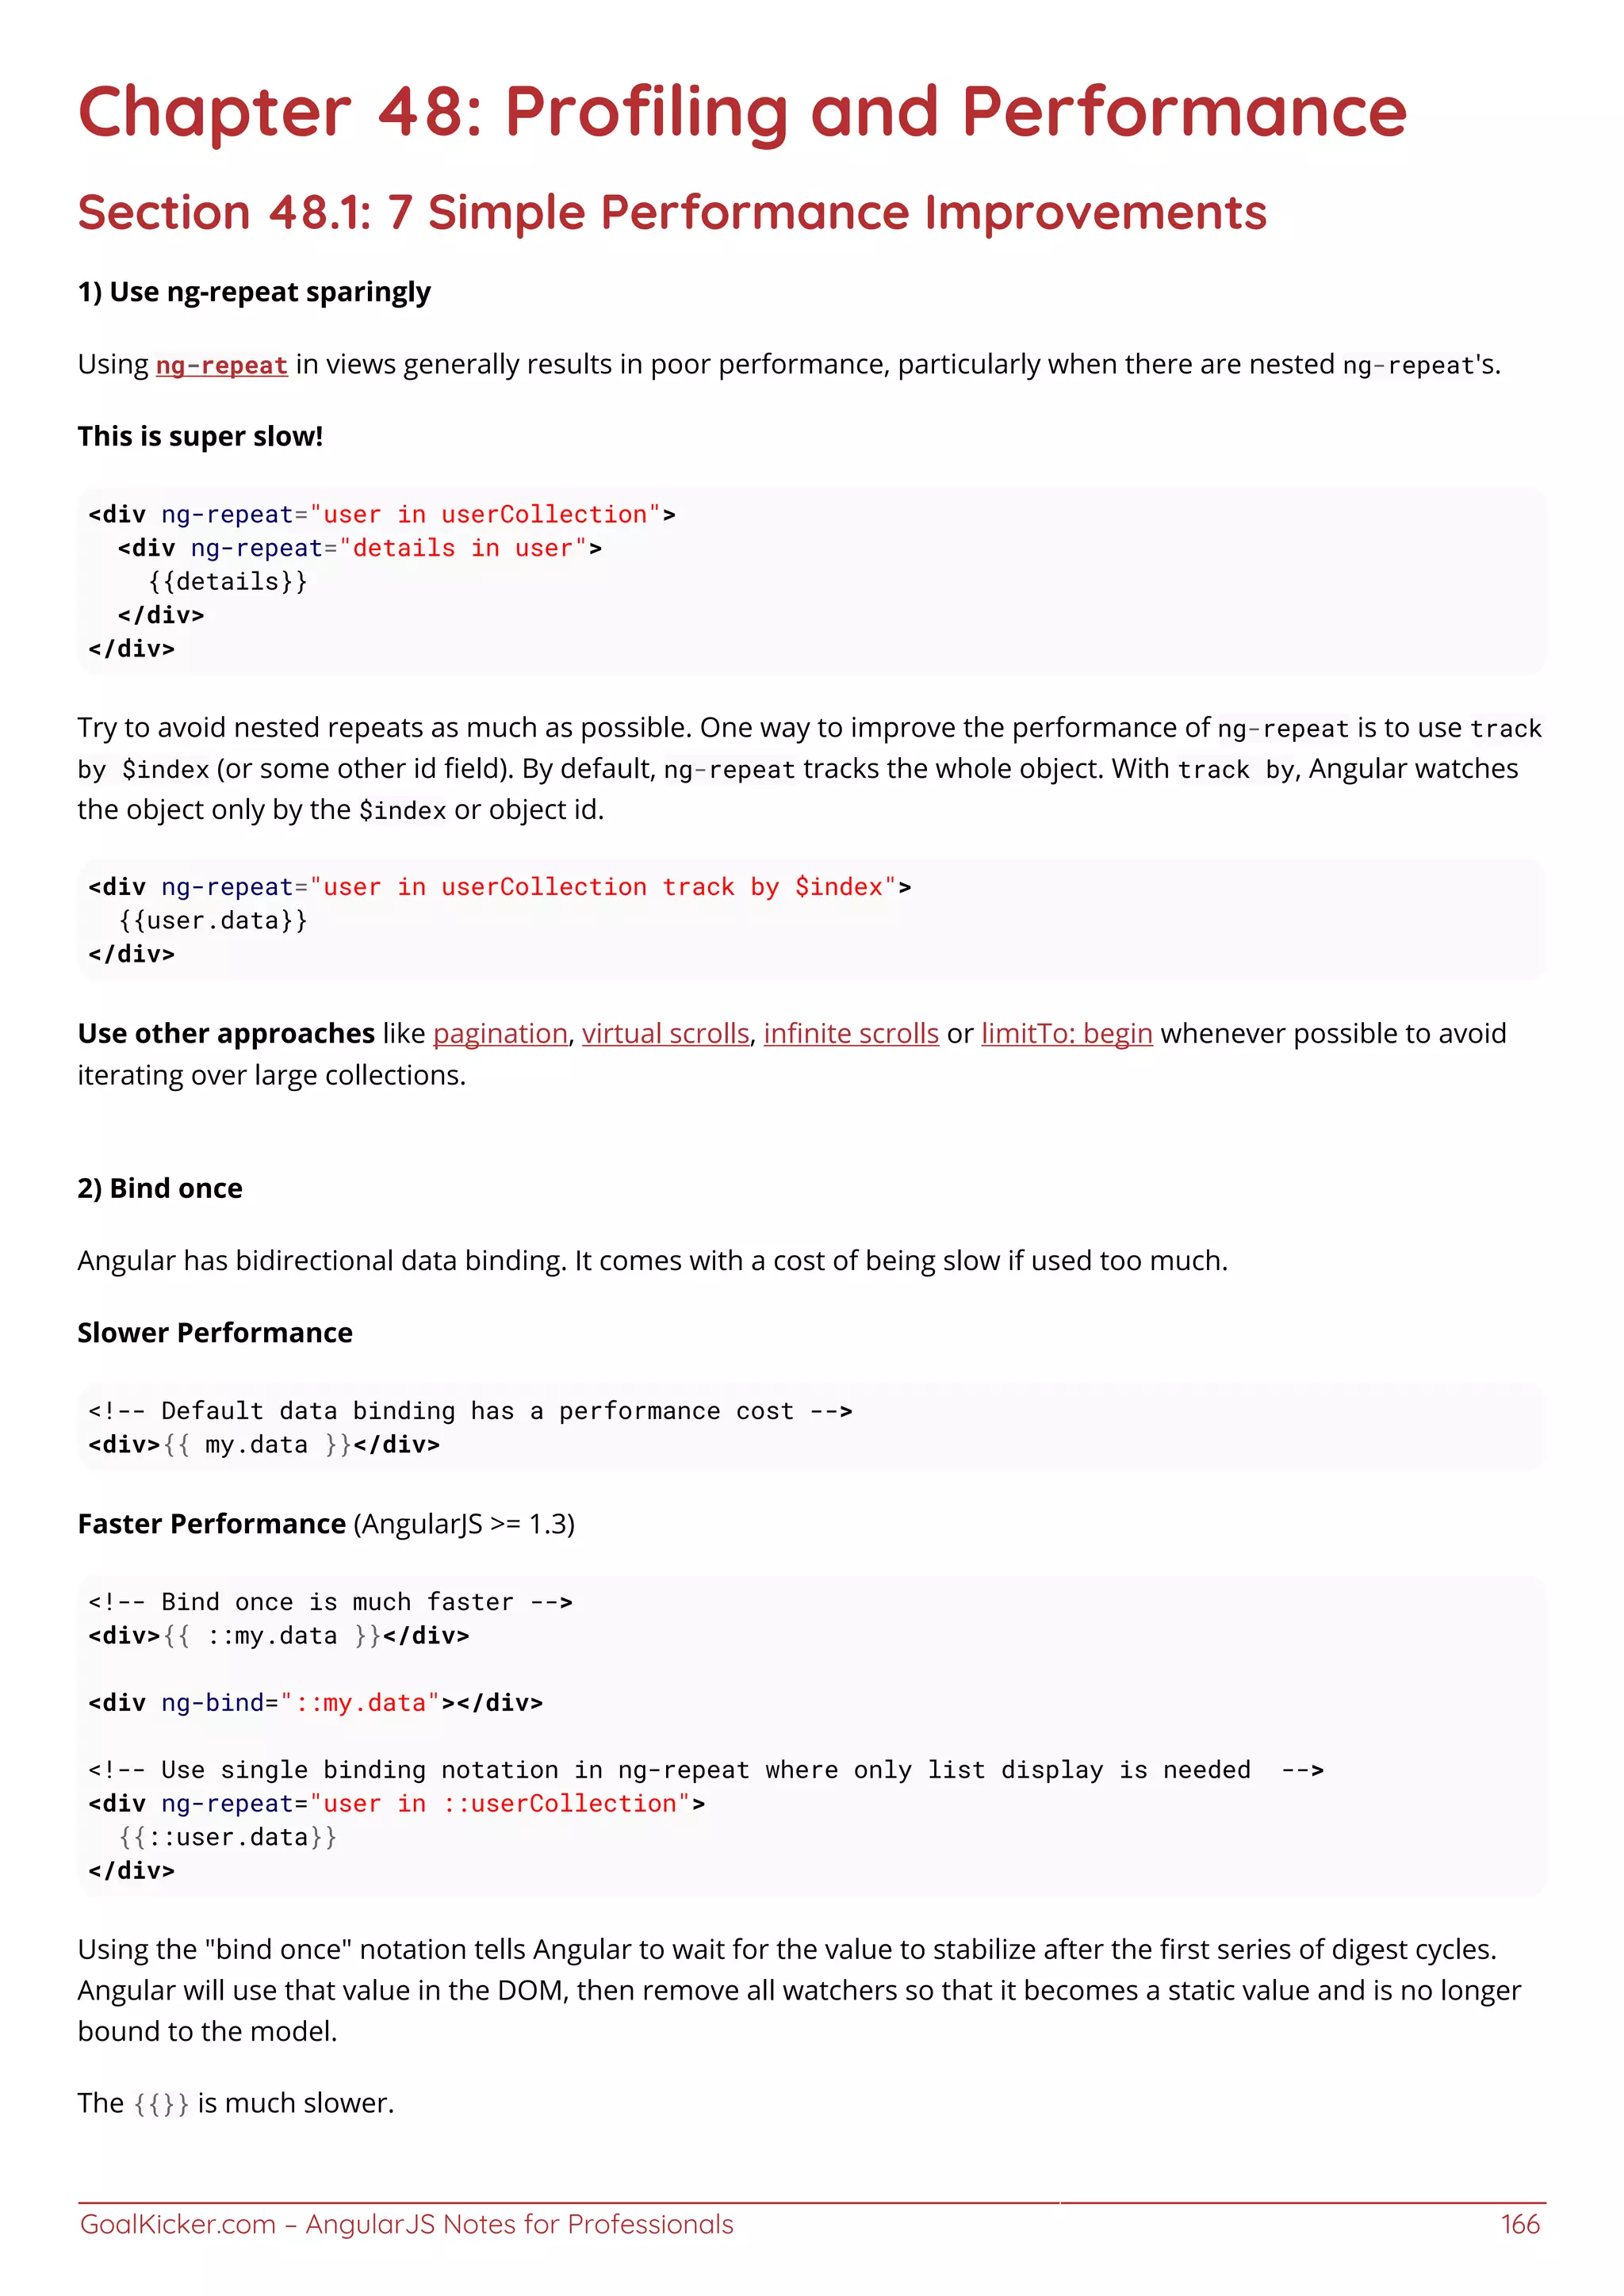
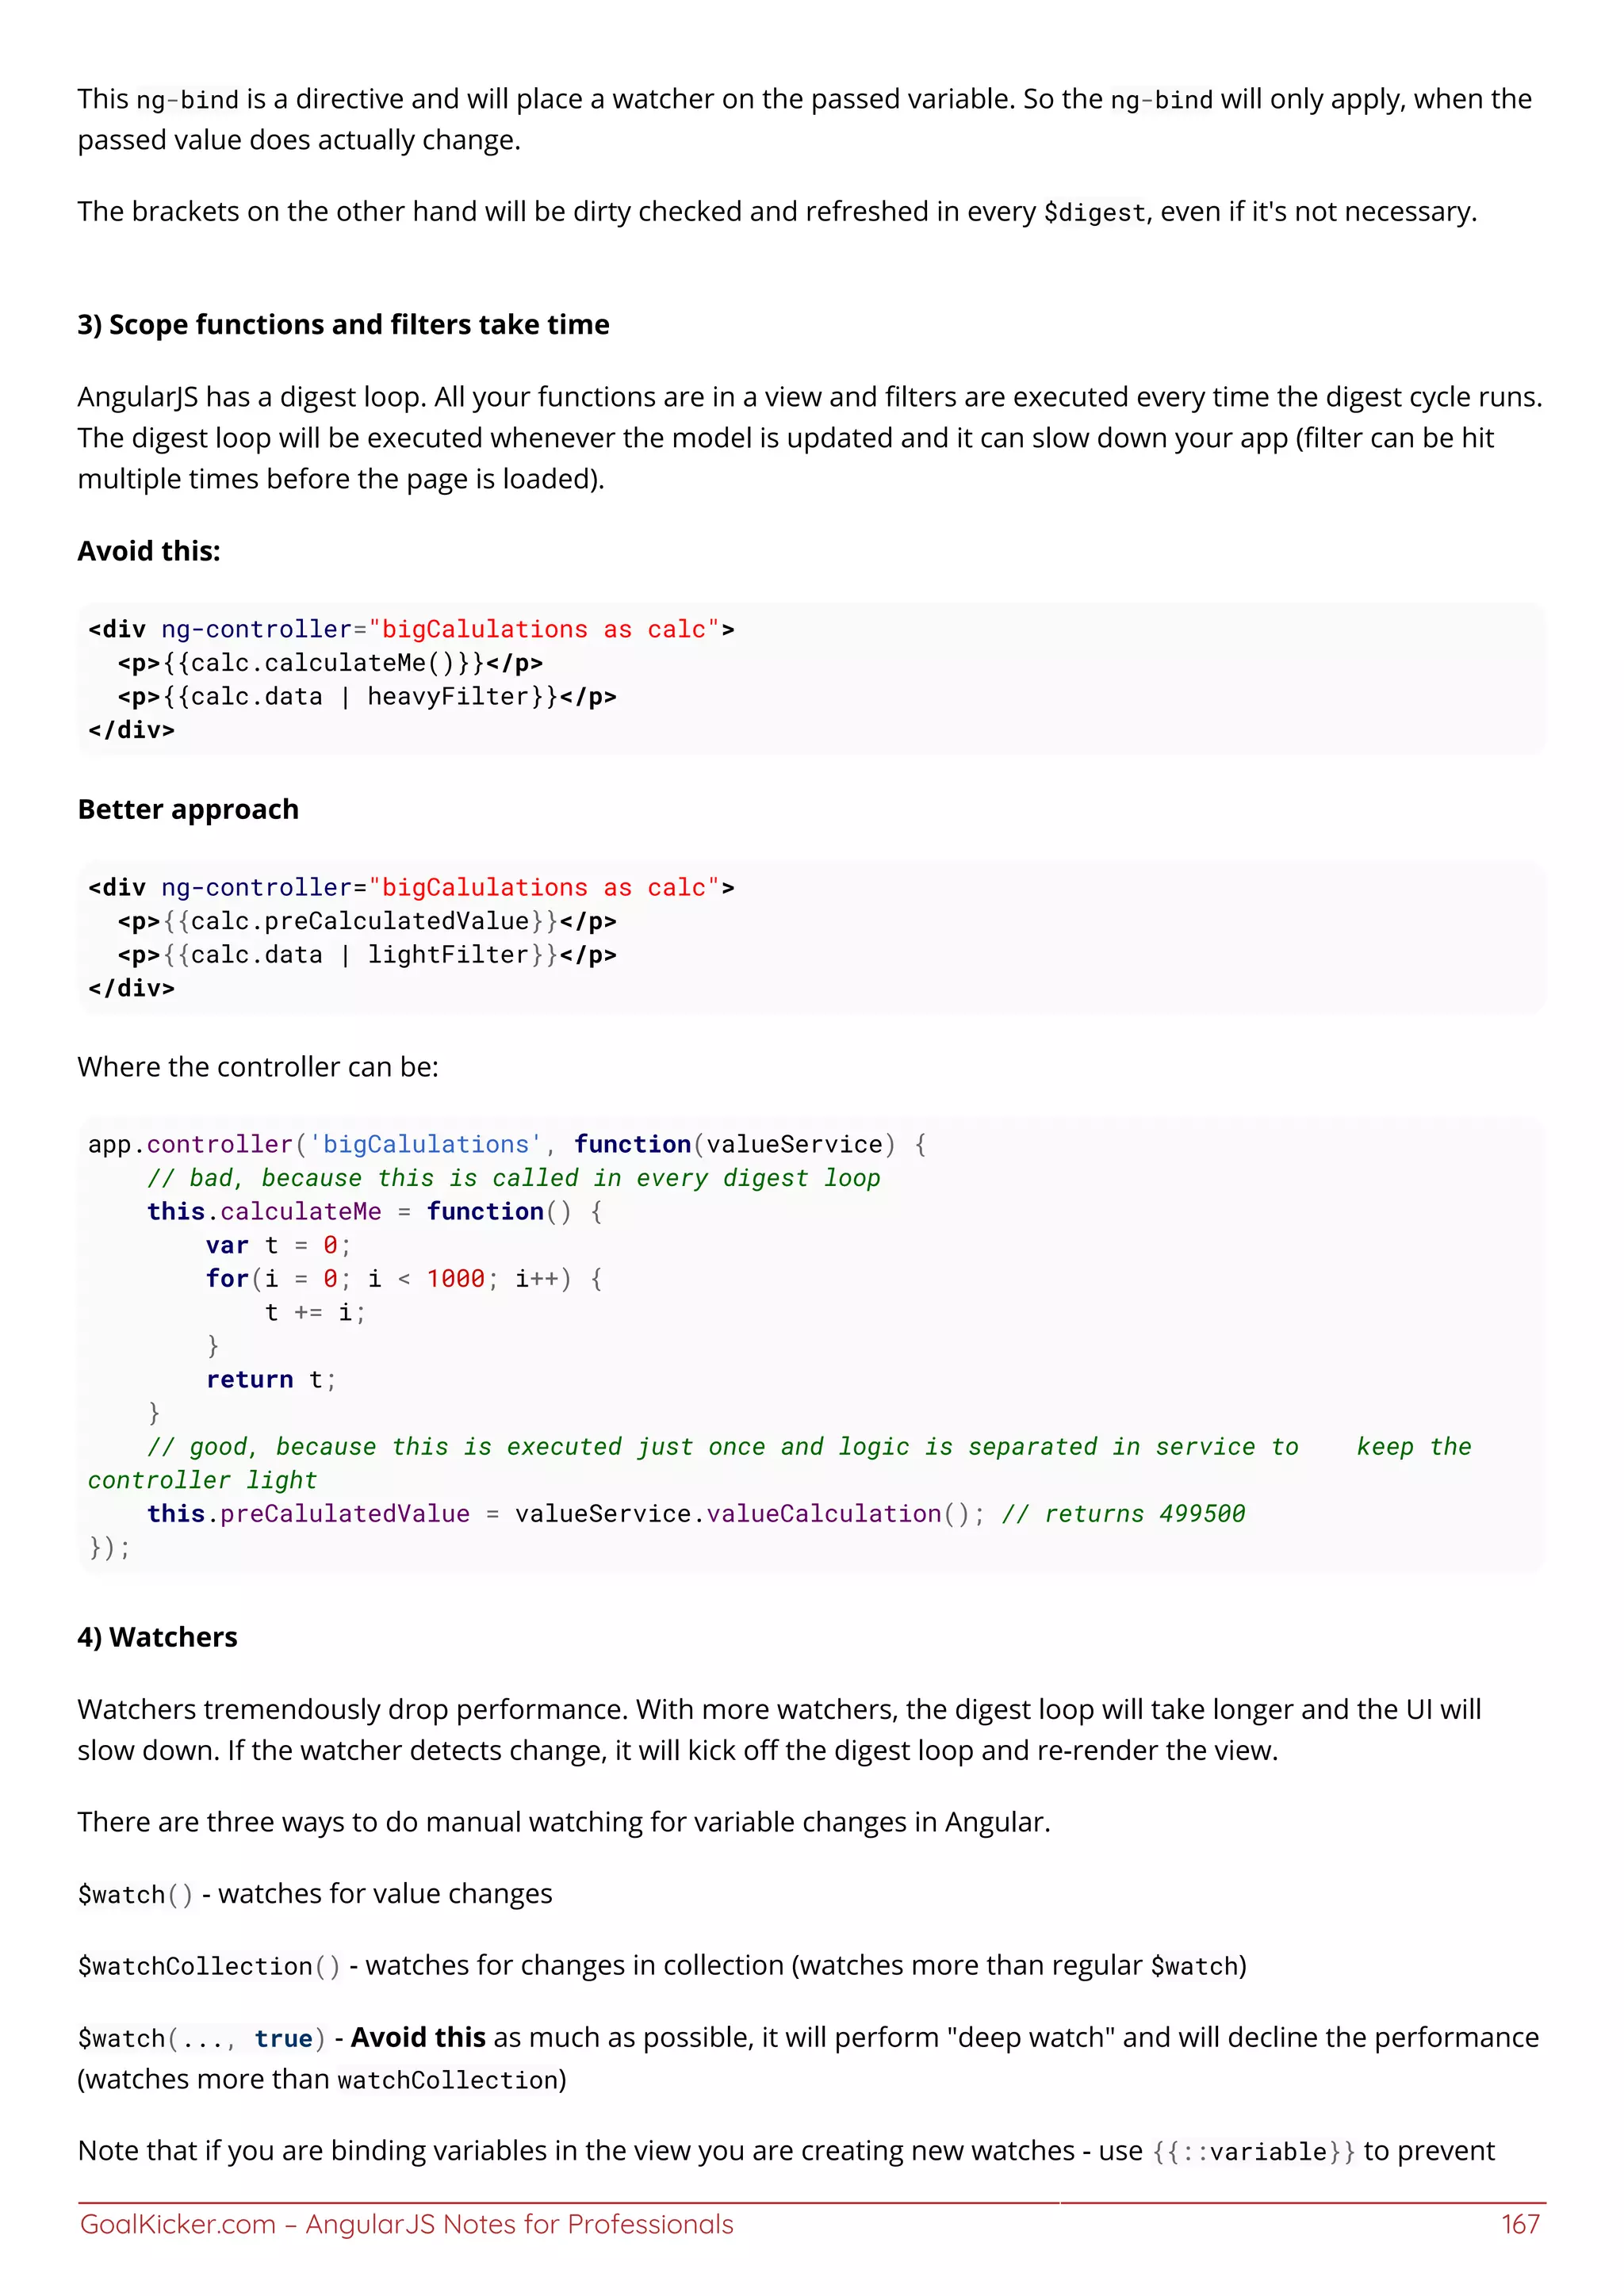
![GoalKicker.com – AngularJS Notes for Professionals 168
creating a watch, especially in loops.
As a result you need to track how many watchers you are using. You can count the watchers with this script (credit
to @Words Like Jared Number of watchers)
(function() {
var root = angular.element(document.getElementsByTagName('body')),
watchers = [],
f = function(element) {
angular.forEach(['$scope', '$isolateScope'], function(scopeProperty) {
if(element.data() && element.data().hasOwnProperty(scopeProperty)) {
angular.forEach(element.data()[scopeProperty].$$watchers, function(watcher) {
watchers.push(watcher);
});
}
});
angular.forEach(element.children(), function(childElement) {
f(angular.element(childElement));
});
};
f(root);
// Remove duplicate watchers
var watchersWithoutDuplicates = [];
angular.forEach(watchers, function(item) {
if(watchersWithoutDuplicates.indexOf(item) < 0) {
watchersWithoutDuplicates.push(item);
}
});
console.log(watchersWithoutDuplicates.length);
})();
5) ng-if / ng-show
These functions are very similar in behavior. ng-if removes elements from the DOM while ng-show only hides the
elements but keeps all handlers. If you have parts of the code you do not want to show, use ng-if.
It depends on the type of usage, but often one is more suitable than the other.
If the element is not needed, use ng-if
To quickly toggle on/off, use ng-show/ng-hide
<div ng-repeat="user in userCollection">
<p ng-if="user.hasTreeLegs">I am special<!-- some complicated DOM --></p>
<p ng-show="user.hasSubscribed">I am awesome<!-- switch this setting on and off --></p>
</div>
If in doubt - use ng-if and test!
6) Disable debugging
By default, bind directives and scopes leave extra classes and markup in the code to assist with various debugging
tools. Disabling this option means that you no longer render these various elements during the digest cycle.](https://image.slidesharecdn.com/angularjsnotesforprofessionals-200412131913/75/Angular-js-notes-for-professionals-175-2048.jpg)
![GoalKicker.com – AngularJS Notes for Professionals 169
angular.module('exampleApp', []).config(['$compileProvider', function ($compileProvider) {
$compileProvider.debugInfoEnabled(false);
}]);
7) Use dependency injection to expose your resources
Dependency Injection is a software design pattern in which an object is given its dependencies, rather than the
object creating them itself. It is about removing the hard-coded dependencies and making it possible to change
them whenever needed.
You might wonder about the performance cost associated with such string parsing of all injectable functions.
Angular takes care of this by caching the $inject property after the first time. So this doesn’t happen every time a
function needs to be invoked.
PRO TIP: If you are looking for the approach with the best performance, go with the $inject property annotation
approach. This approach entirely avoids the function definition parsing because this logic is wrapped within the
following check in the annotate function: if (!($inject = fn.$inject)). If $inject is already available, no parsing required!
var app = angular.module('DemoApp', []);
var DemoController = function (s, h) {
h.get('https://api.github.com/users/angular/repos').success(function (repos) {
s.repos = repos;
});
}
// $inject property annotation
DemoController['$inject'] = ['$scope', '$http'];
app.controller('DemoController', DemoController);
PRO TIP 2: You can add an ng-strict-di directive on the same element as ng-app to opt into strict DI mode which
will throw an error whenever a service tries to use implicit annotations. Example:
<html ng-app="DemoApp" ng-strict-di>
Or if you use manual bootstrapping:
angular.bootstrap(document, ['DemoApp'], {
strictDi: true
});
Section 48.2: Bind Once
Angular has reputation for having awesome bidirectional data binding. By default, Angular continuously
synchronizes values bound between model and view components any time data changes in either the model or
view component.
This comes with a cost of being a bit slow if used too much. This will have a larger performance hit:
Bad performance: {{my.data}}
Add two colons :: before the variable name to use one-time binding. In this case, the value only gets updated once
my.data is defined. You are explicitly pointing not to watch for data changes. Angular won't perform any value
checks, resulting with fewer expressions being evaluated on each digest cycle.](https://image.slidesharecdn.com/angularjsnotesforprofessionals-200412131913/75/Angular-js-notes-for-professionals-176-2048.jpg)
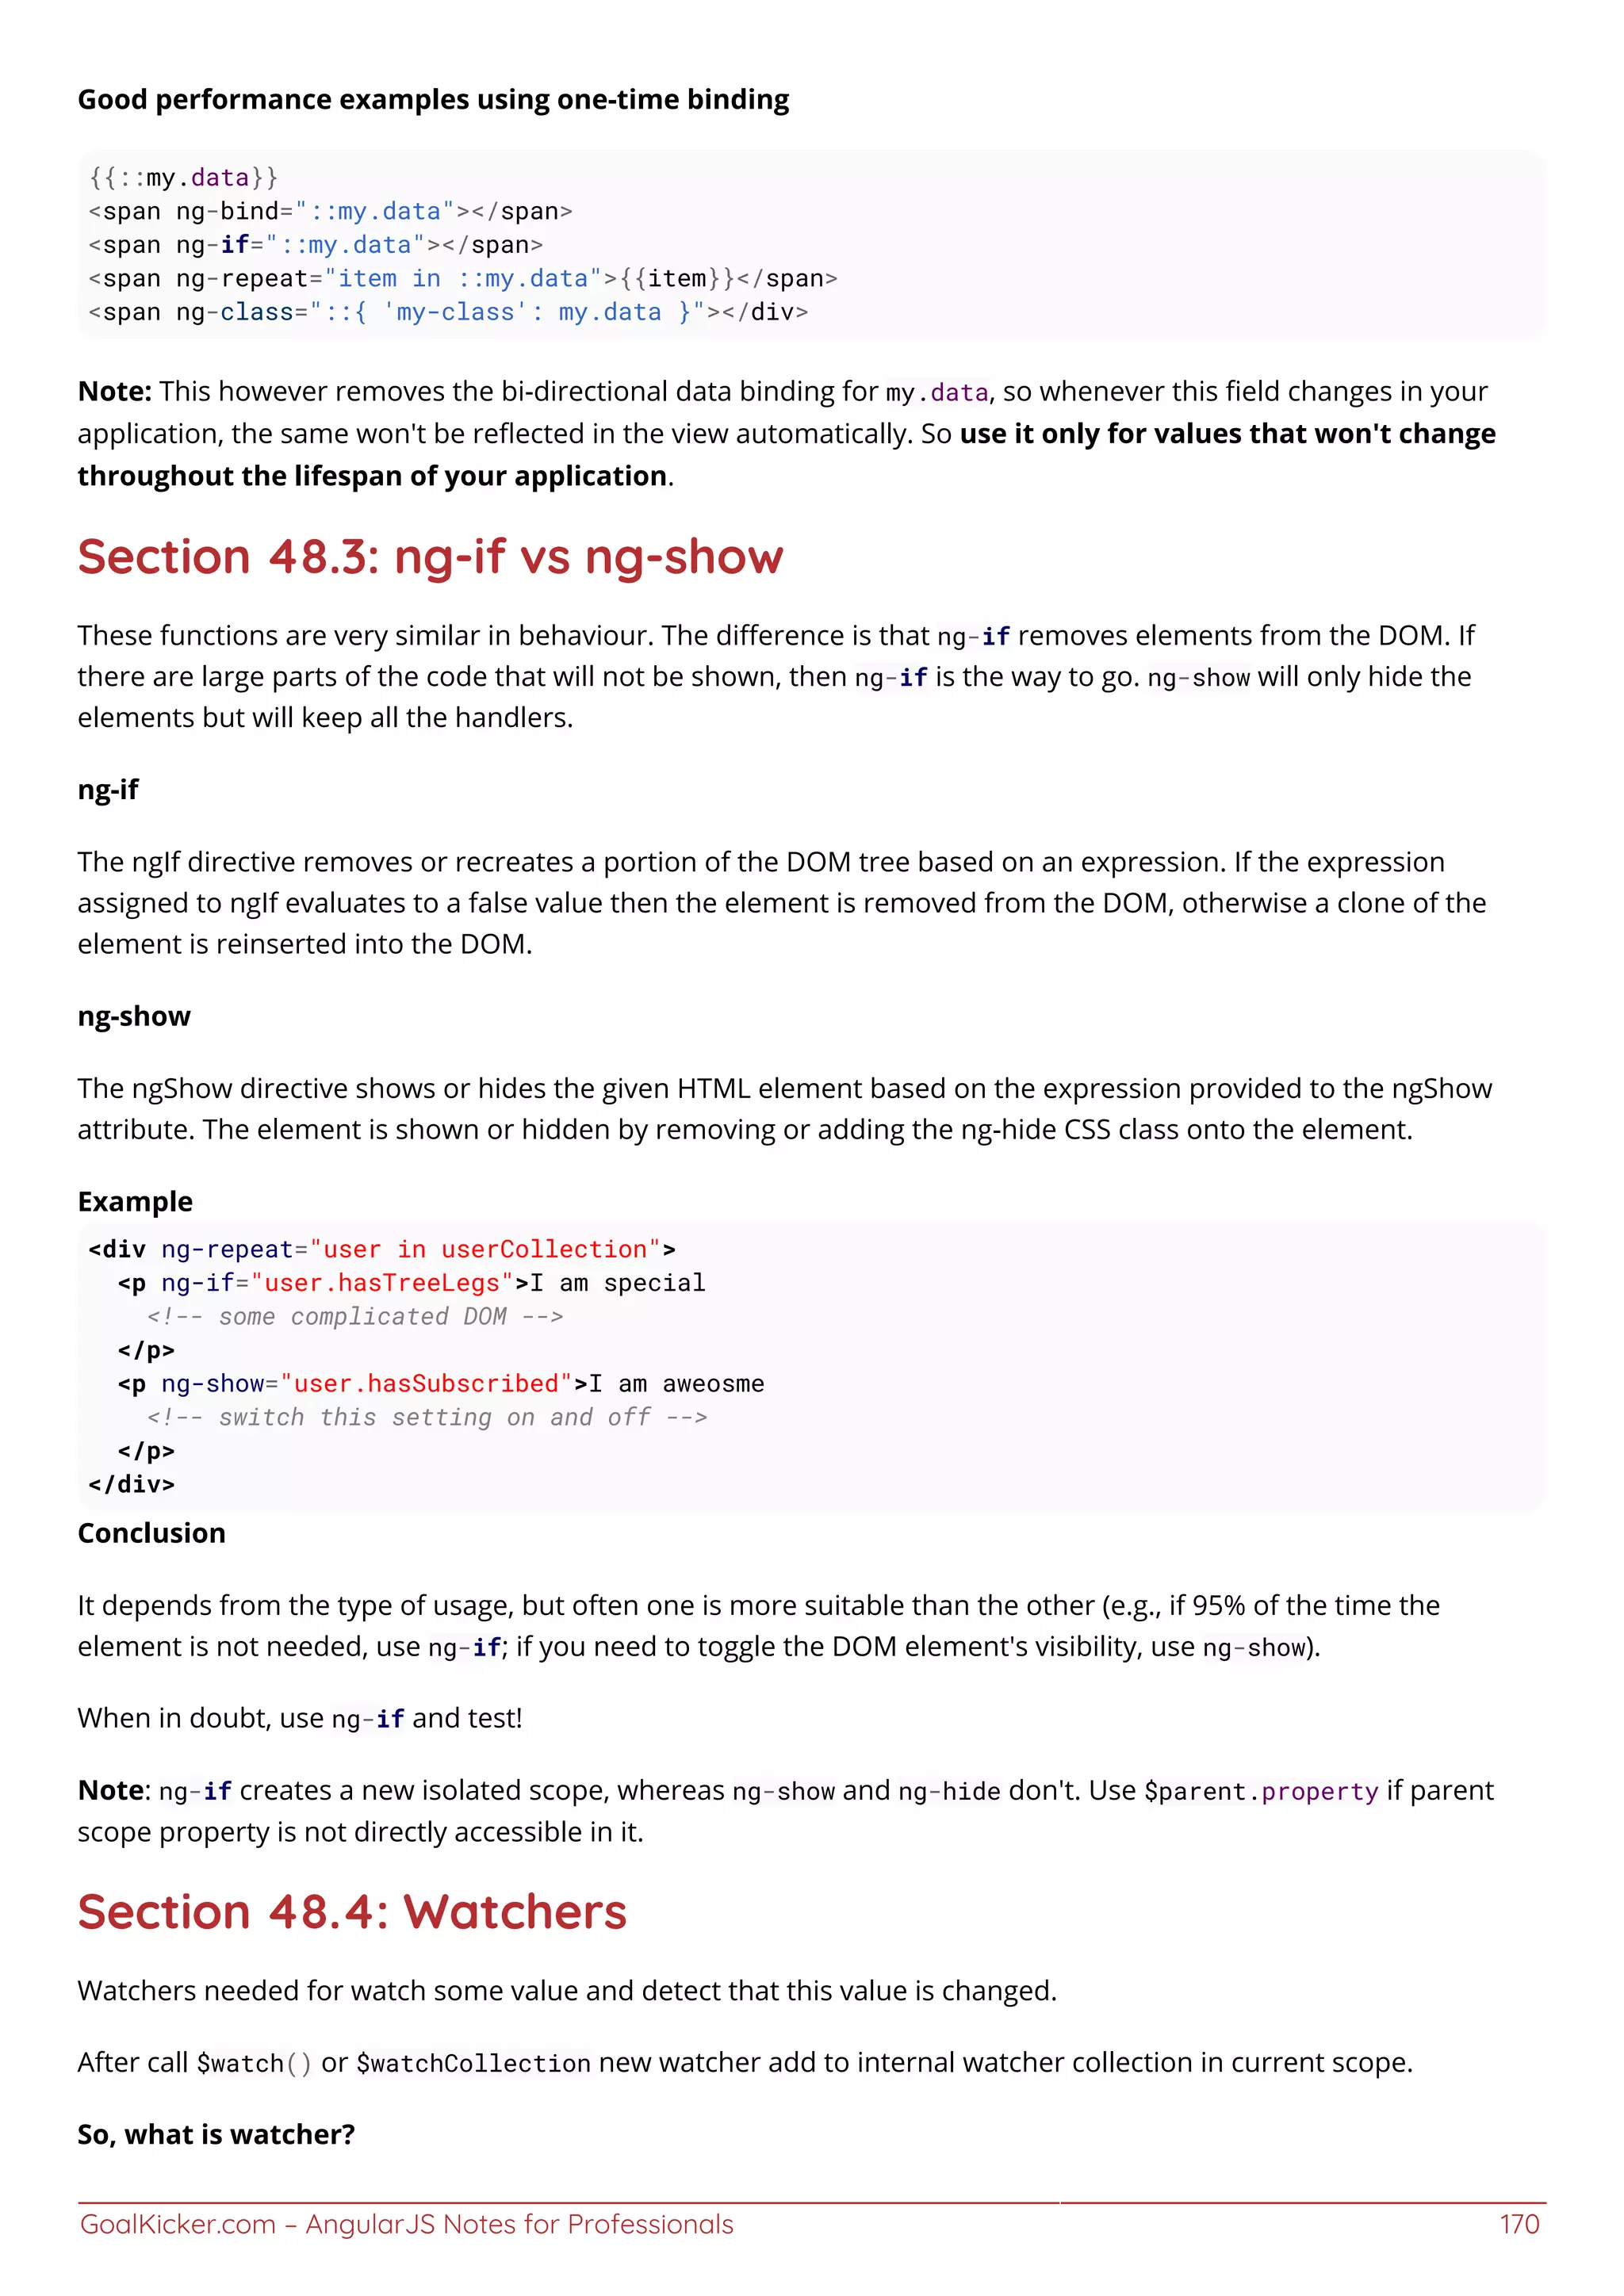
![GoalKicker.com – AngularJS Notes for Professionals 171
Watcher is a simple function, which is called on every digest cycle, and returns some value. Angular checks the
returned value, if it is not the same as it was on the previous call - a callback that was passed in second parameter
to function $watch() or $watchCollection will be executed.
(function() {
angular.module("app", []).controller("ctrl", function($scope) {
$scope.value = 10;
$scope.$watch(
function() { return $scope.value; },
function() { console.log("value changed"); }
);
}
})();
Watchers are performance killers. The more watchers you have, the longer they take to make a digest loop, the
slower UI. If a watcher detects changes, it will kick off the digest loop (recalculation on all screen)
There are three ways to do manual watch for variable changes in Angular.
$watch() - just watches for value changes
$watchCollection() - watches for changes in collection (watches more than regular $watch)
$watch(..., true) - Avoid this as much as possible, it will perform "deep watch" and will kill the performance
(watches more than watchCollection)
Note that if you are binding variables in the view, you are creating new watchers - use {{::variable}} not to create
watcher, especially in loops
As a result you need to track how many watchers are you using. You can count the watchers with this script (credit
to @Words Like Jared - How to count total number of watches on a page?
(function() {
var root = angular.element(document.getElementsByTagName("body")),
watchers = [];
var f = function(element) {
angular.forEach(["$scope", "$isolateScope"], function(scopeProperty) {
if(element.data() && element.data().hasOwnProperty(scopeProperty)) {
angular.forEach(element.data()[scopeProperty].$$watchers, function(watcher) {
watchers.push(watcher);
});
}
});
angular.forEach(element.children(), function(childElement) {
f(angular.element(childElement));
});
};
f(root);
// Remove duplicate watchers
var watchersWithoutDuplicates = [];
angular.forEach(watchers, function(item) {
if(watchersWithoutDuplicates.indexOf(item) < 0) {
watchersWithoutDuplicates.push(item);](https://image.slidesharecdn.com/angularjsnotesforprofessionals-200412131913/75/Angular-js-notes-for-professionals-178-2048.jpg)
![GoalKicker.com – AngularJS Notes for Professionals 172
}
});
console.log(watchersWithoutDuplicates.length);
})();
If you don't want to create your own script, there is an open source utility called ng-stats that uses a real-time chart
embedded into the page to give you insight into the number of watches Angular is managing, as well as the
frequency and duration of digest cycles over time. The utility exposes a global function named showAngularStats
that you can call to configure how you want the chart to work.
showAngularStats({
"position": "topleft",
"digestTimeThreshold": 16,
"autoload": true,
"logDigest": true,
"logWatches": true
});
The example code above displays the following chart on the page automatically (interactive demo).
Section 48.5: Always deregister listeners registered on other
scopes other than the current scope
You must always unregister scopes other then your current scope as shown below:
//always deregister these
$rootScope.$on(...);
$scope.$parent.$on(...);
You don't have to deregister listners on current scope as angular would take care of it:
//no need to deregister this
$scope.$on(...);
$rootScope.$on listeners will remain in memory if you navigate to another controller. This will create a memory
leak if the controller falls out of scope.
Don't
angular.module('app').controller('badExampleController', badExample);
badExample.$inject = ['$scope', '$rootScope'];
function badExample($scope, $rootScope) {
$rootScope.$on('post:created', function postCreated(event, data) {});
}
Do
angular.module('app').controller('goodExampleController', goodExample);
goodExample.$inject = ['$scope', '$rootScope'];](https://image.slidesharecdn.com/angularjsnotesforprofessionals-200412131913/75/Angular-js-notes-for-professionals-179-2048.jpg)
![GoalKicker.com – AngularJS Notes for Professionals 175
Chapter 49: Performance Profiling
Section 49.1: All About Profiling
What is Profiling?
By definition Profiling is a form of dynamic program analysis that measures, for example, the space (memory) or
time complexity of a program, the usage of particular instructions, or the frequency and duration of function calls.
Why is it necessary?
Profiling is important because you can’t optimise effectively until you know what your program is spending most of
its time doing. Without measuring your program execution time (profiling), you won’t know if you’ve actually
improved it.
Tools and Techniques :
Chrome's in-built dev tools1.
This includes a comprehensive set of tools to be used for profiling.You can go deep to find out bottlenecks in
your javascript file, css files, animations, cpu consumption, memory leaks, network, security etc.
Make a Timeline recording and look for suspiciously long Evaluate Script events. If you find any, you can
enable the JS Profiler and re-do your recording to get more detailed information about exactly which JS
functions were called and how long each took. Read more...
FireBug (use with Firefox)2.
Dynatrace (use with IE)3.
Batarang (use with Chrome)4.
It's an outdated add-on for chrome browser though it's stable and can be used to monitor models,
performance, dependencies for an angular application. It works fine for small scale application and can give
you an insight of what does scope variable holds at various levels. It tells you about active watchers, watch
expressions, watch collections in the app.
Watcher (use with Chrome)5.
Nice and simplistic UI to count the number of watchers in a Angular app.
Use the following code to manually find out the number of watchers in your angular app (credit to @Words6.
Like Jared Number of watchers)
(function() {
var root = angular.element(document.getElementsByTagName('body')),
watchers = [],
f = function(element) {
angular.forEach(['$scope', '$isolateScope'], function(scopeProperty) {
if(element.data() && element.data().hasOwnProperty(scopeProperty)) {
angular.forEach(element.data()[scopeProperty].$$watchers, function(watcher) {](https://image.slidesharecdn.com/angularjsnotesforprofessionals-200412131913/75/Angular-js-notes-for-professionals-182-2048.jpg)
![GoalKicker.com – AngularJS Notes for Professionals 176
watchers.push(watcher);
});
}
});
angular.forEach(element.children(), function(childElement) {
f(angular.element(childElement));
});
};
f(root);
// Remove duplicate watchers
var watchersWithoutDuplicates = [];
angular.forEach(watchers, function(item) {
if(watchersWithoutDuplicates.indexOf(item) < 0) {
watchersWithoutDuplicates.push(item);
}
});
console.log(watchersWithoutDuplicates.length);
})();
There are several online tools/websites available which facilitates wide range of functionalities to create a7.
profile of your application.
One such site is : https://www.webpagetest.org/
With this you can run a free website speed test from multiple locations around the globe using real browsers
(IE and Chrome) and at real consumer connection speeds. You can run simple tests or perform advanced
testing including multi-step transactions, video capture, content blocking and much more.
Next Steps:
Done with Profiling. It only brings you half way down the road. The very next task is to actually turn your findings
into action items to optimise your application. See this documentation on how you can improve the performance of
your angular app with simple tricks.
Happy Coding :)](https://image.slidesharecdn.com/angularjsnotesforprofessionals-200412131913/75/Angular-js-notes-for-professionals-183-2048.jpg)
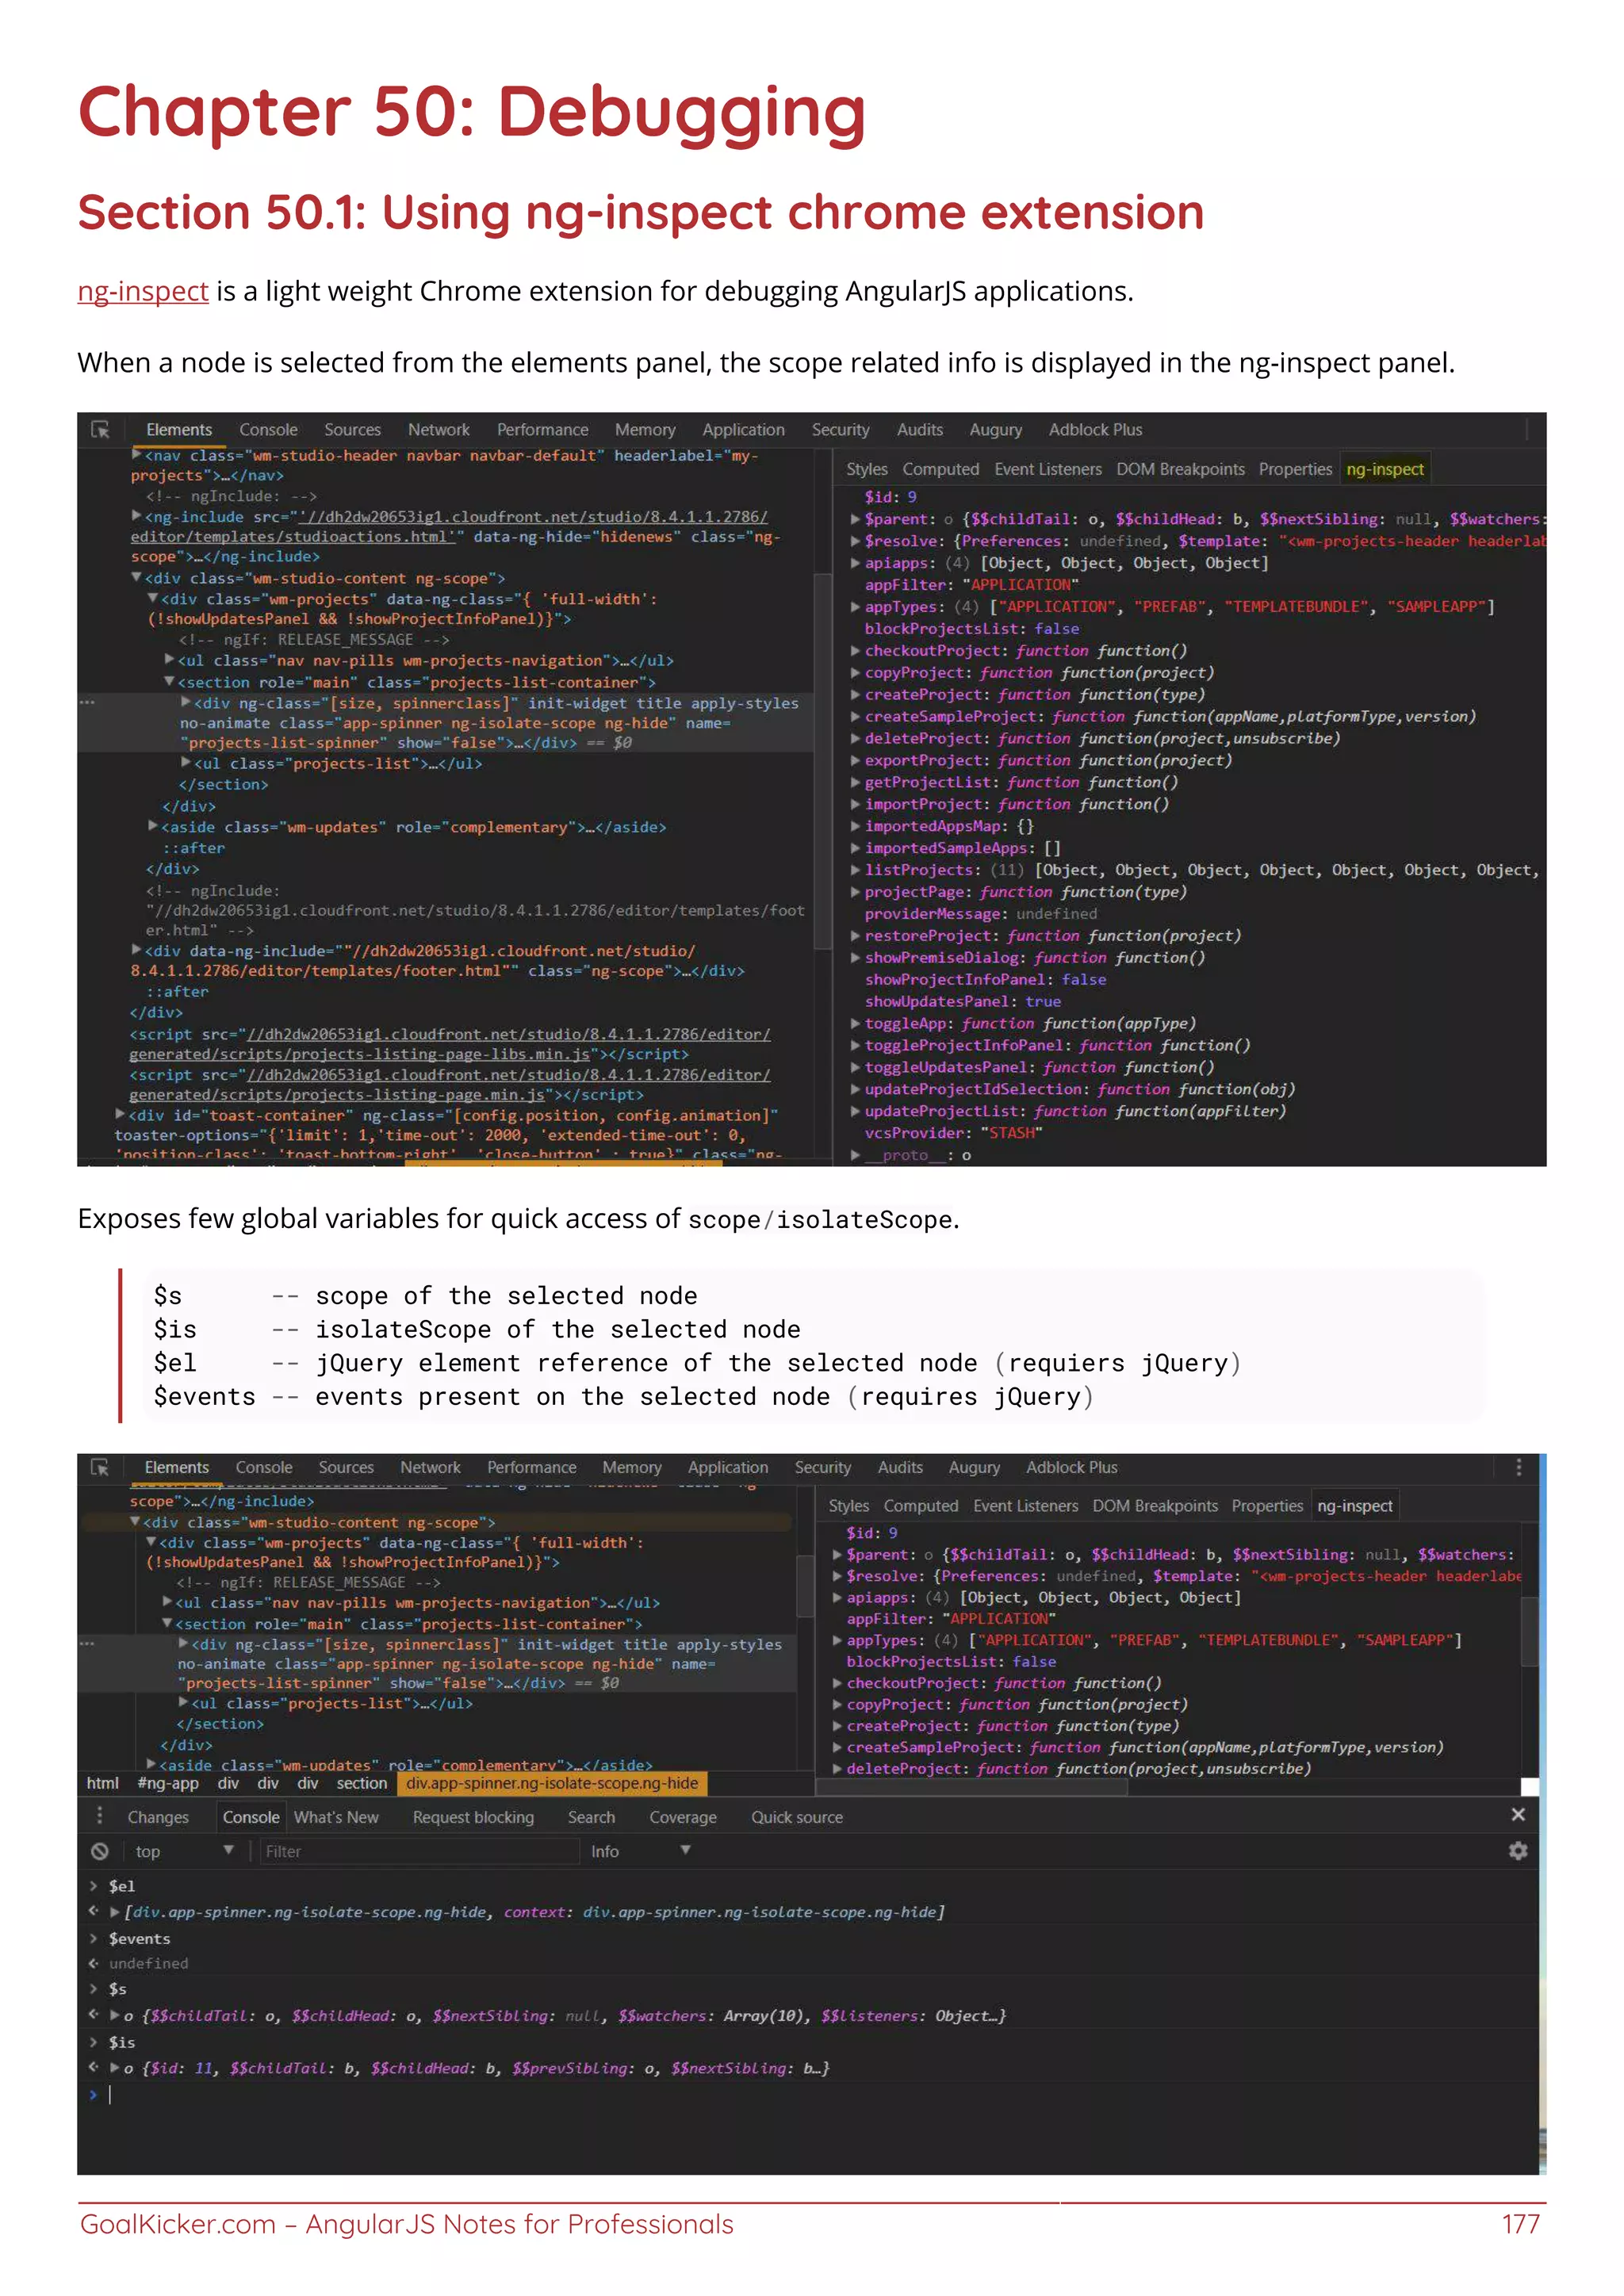
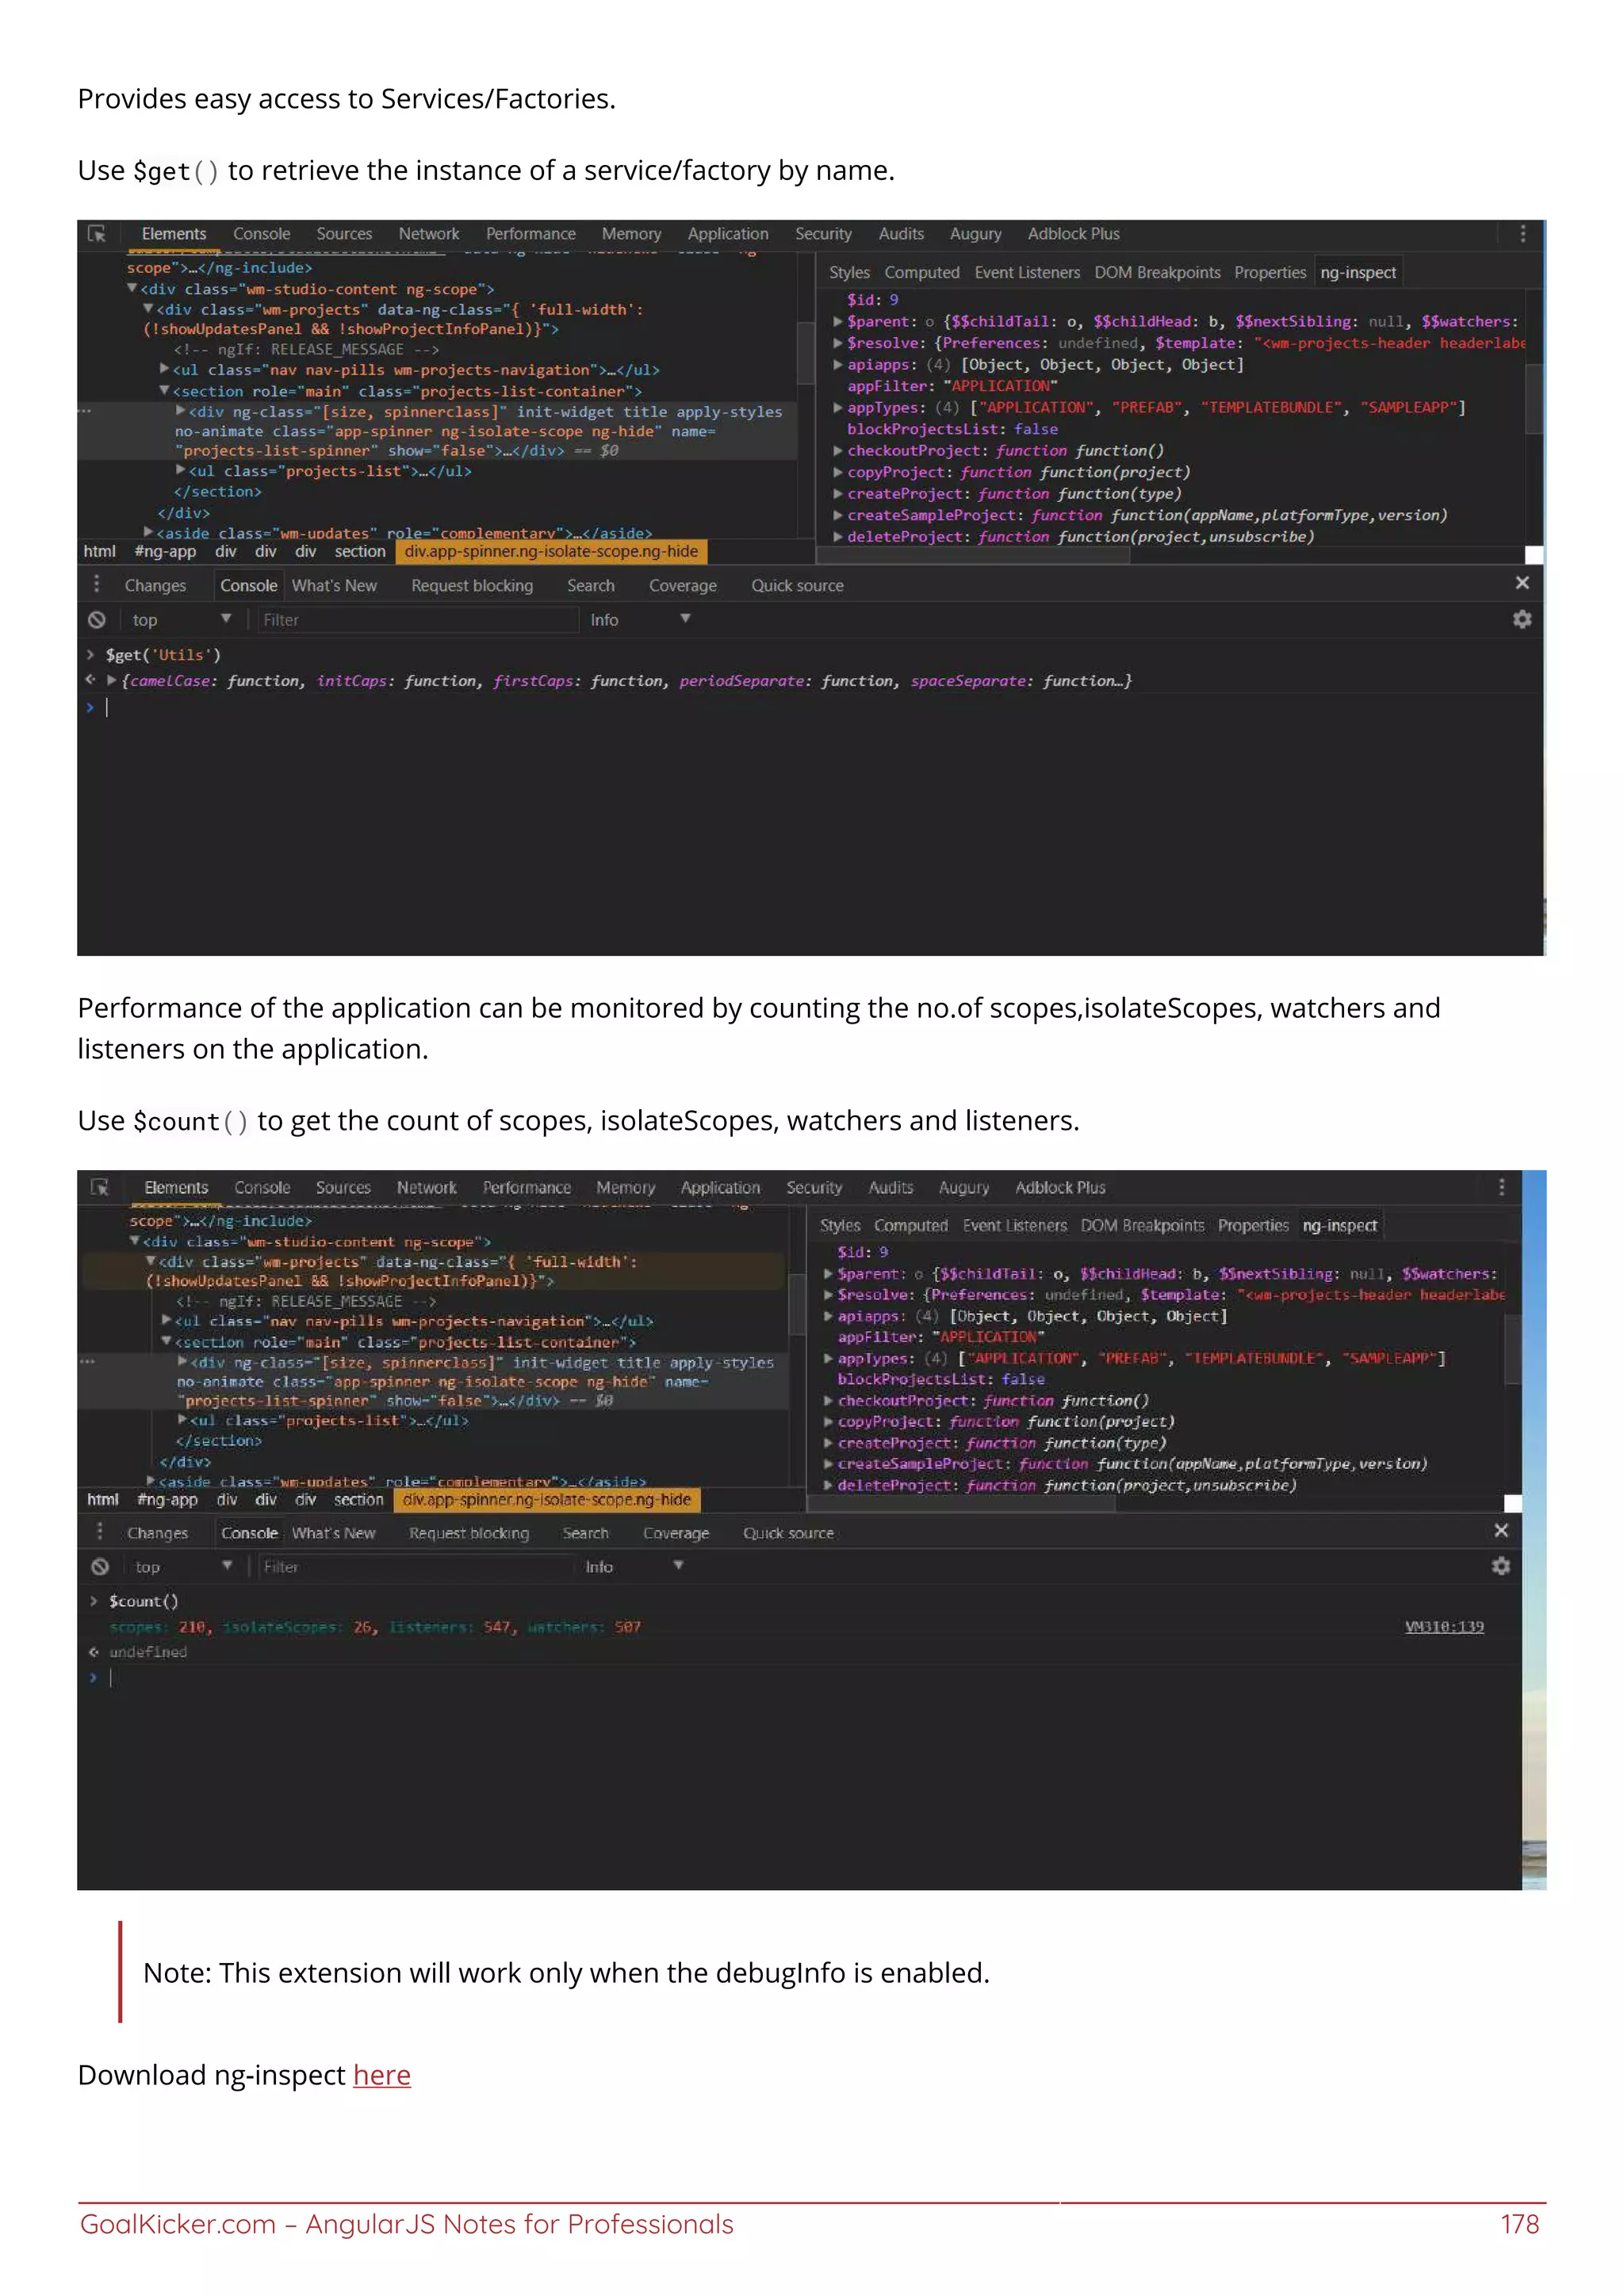
![GoalKicker.com – AngularJS Notes for Professionals 179
Section 50.2: Getting the Scope of element
In an angular app everything goes around scope, if we could get an elements scope then it is easy to debug the
angular app. How to access the scope of element:
angular.element(myDomElement).scope();
e.g.
angular.element(document.getElementById('yourElementId')).scope() //accessing by ID
Getting the scope of the controller:
angular.element('[ng-controller=ctrl]').scope()
Another easy way to access a DOM element from the console (as jm mentioned) is to click on it in the 'elements'
tab, and it automatically gets stored as $0.
angular.element($0).scope();
Section 50.3: Basic debugging in markup
Scope testing & output of model
<div ng-app="demoApp" ng-controller="mainController as ctrl">
{{$id}}
<ul>
<li ng-repeat="item in ctrl.items">
{{$id}}<br/>
{{item.text}}
</li>
</ul>
{{$id}}
<pre>
{{ctrl.items | json : 2}}
</pre>
</div>
angular.module('demoApp', [])
.controller('mainController', MainController);
function MainController() {
var vm = this;
vm.items = [{
id: 0,
text: 'first'
},
{
id: 1,
text: 'second'
},
{
id: 2,
text: 'third'
}];
}
Sometimes it can help to see if there is a new scope to fix scoping issues. $scope.$id can be used in an expression
everywhere in your markup to see if there is a new $scope.](https://image.slidesharecdn.com/angularjsnotesforprofessionals-200412131913/75/Angular-js-notes-for-professionals-186-2048.jpg)
![GoalKicker.com – AngularJS Notes for Professionals 181
Chapter 51: Unit tests
Section 51.1: Unit test a component (1.5+)
Component code:
angular.module('myModule', []).component('myComponent', {
bindings: {
myValue: '<'
},
controller: function(MyService) {
this.service = MyService;
this.componentMethod = function() {
return 2;
};
}
});
The test:
describe('myComponent', function() {
var component;
var MyServiceFake = jasmine.createSpyObj(['serviceMethod']);
beforeEach(function() {
module('myModule');
inject(function($componentController) {
// 1st - component name, 2nd - controller injections, 3rd - bindings
component = $componentController('myComponent', {
MyService: MyServiceFake
}, {
myValue: 3
});
});
});
/** Here you test the injector. Useless. */
it('injects the binding', function() {
expect(component.myValue).toBe(3);
});
it('has some cool behavior', function() {
expect(component.componentMethod()).toBe(2);
});
});
Run!
Section 51.2: Unit test a filter
Filter code:
angular.module('myModule', []).filter('multiplier', function() {
return function(number, multiplier) {
if (!angular.isNumber(number)) {
throw new Error(number + " is not a number!");](https://image.slidesharecdn.com/angularjsnotesforprofessionals-200412131913/75/Angular-js-notes-for-professionals-188-2048.jpg)
![GoalKicker.com – AngularJS Notes for Professionals 182
}
if (!multiplier) {
multiplier = 2;
}
return number * multiplier;
}
});
The test:
describe('multiplierFilter', function() {
var filter;
beforeEach(function() {
module('myModule');
inject(function(multiplierFilter) {
filter = multiplierFilter;
});
});
it('multiply by 2 by default', function() {
expect(filter(2)).toBe(4);
expect(filter(3)).toBe(6);
});
it('allow to specify custom multiplier', function() {
expect(filter(2, 4)).toBe(8);
});
it('throws error on invalid input', function() {
expect(function() {
filter(null);
}).toThrow();
});
});
Run!
Remark: In the inject call in the test, your filter needs to be specified by its name + Filter. The cause for this is that
whenever you register a filter for your module, Angular register it with a Filter appended to its name.
Section 51.3: Unit test a service
Service Code
angular.module('myModule', [])
.service('myService', function() {
this.doSomething = function(someNumber) {
return someNumber + 2;
}
});
The test
describe('myService', function() {
var myService;
beforeEach(function() {
module('myModule');
inject(function(_myService_) {](https://image.slidesharecdn.com/angularjsnotesforprofessionals-200412131913/75/Angular-js-notes-for-professionals-189-2048.jpg)
![GoalKicker.com – AngularJS Notes for Professionals 183
myService = _myService_;
});
});
it('should increment `num` by 2', function() {
var result = myService.doSomething(4);
expect(result).toEqual(6);
});
});
Run!
Section 51.4: Unit test a controller
Controller code:
angular.module('myModule', [])
.controller('myController', function($scope) {
$scope.num = 2;
$scope.doSomething = function() {
$scope.num += 2;
}
});
The test:
describe('myController', function() {
var $scope;
beforeEach(function() {
module('myModule');
inject(function($controller, $rootScope) {
$scope = $rootScope.$new();
$controller('myController', {
'$scope': $scope
})
});
});
it('should increment `num` by 2', function() {
expect($scope.num).toEqual(2);
$scope.doSomething();
expect($scope.num).toEqual(4);
});
});
Run!
Section 51.5: Unit test a directive
Directive code
angular.module('myModule', [])
.directive('myDirective', function() {
return {
template: '<div>{{greeting}} {{name}}!</div>',
scope: {
name: '=',
greeting: '@'
}
};](https://image.slidesharecdn.com/angularjsnotesforprofessionals-200412131913/75/Angular-js-notes-for-professionals-190-2048.jpg)
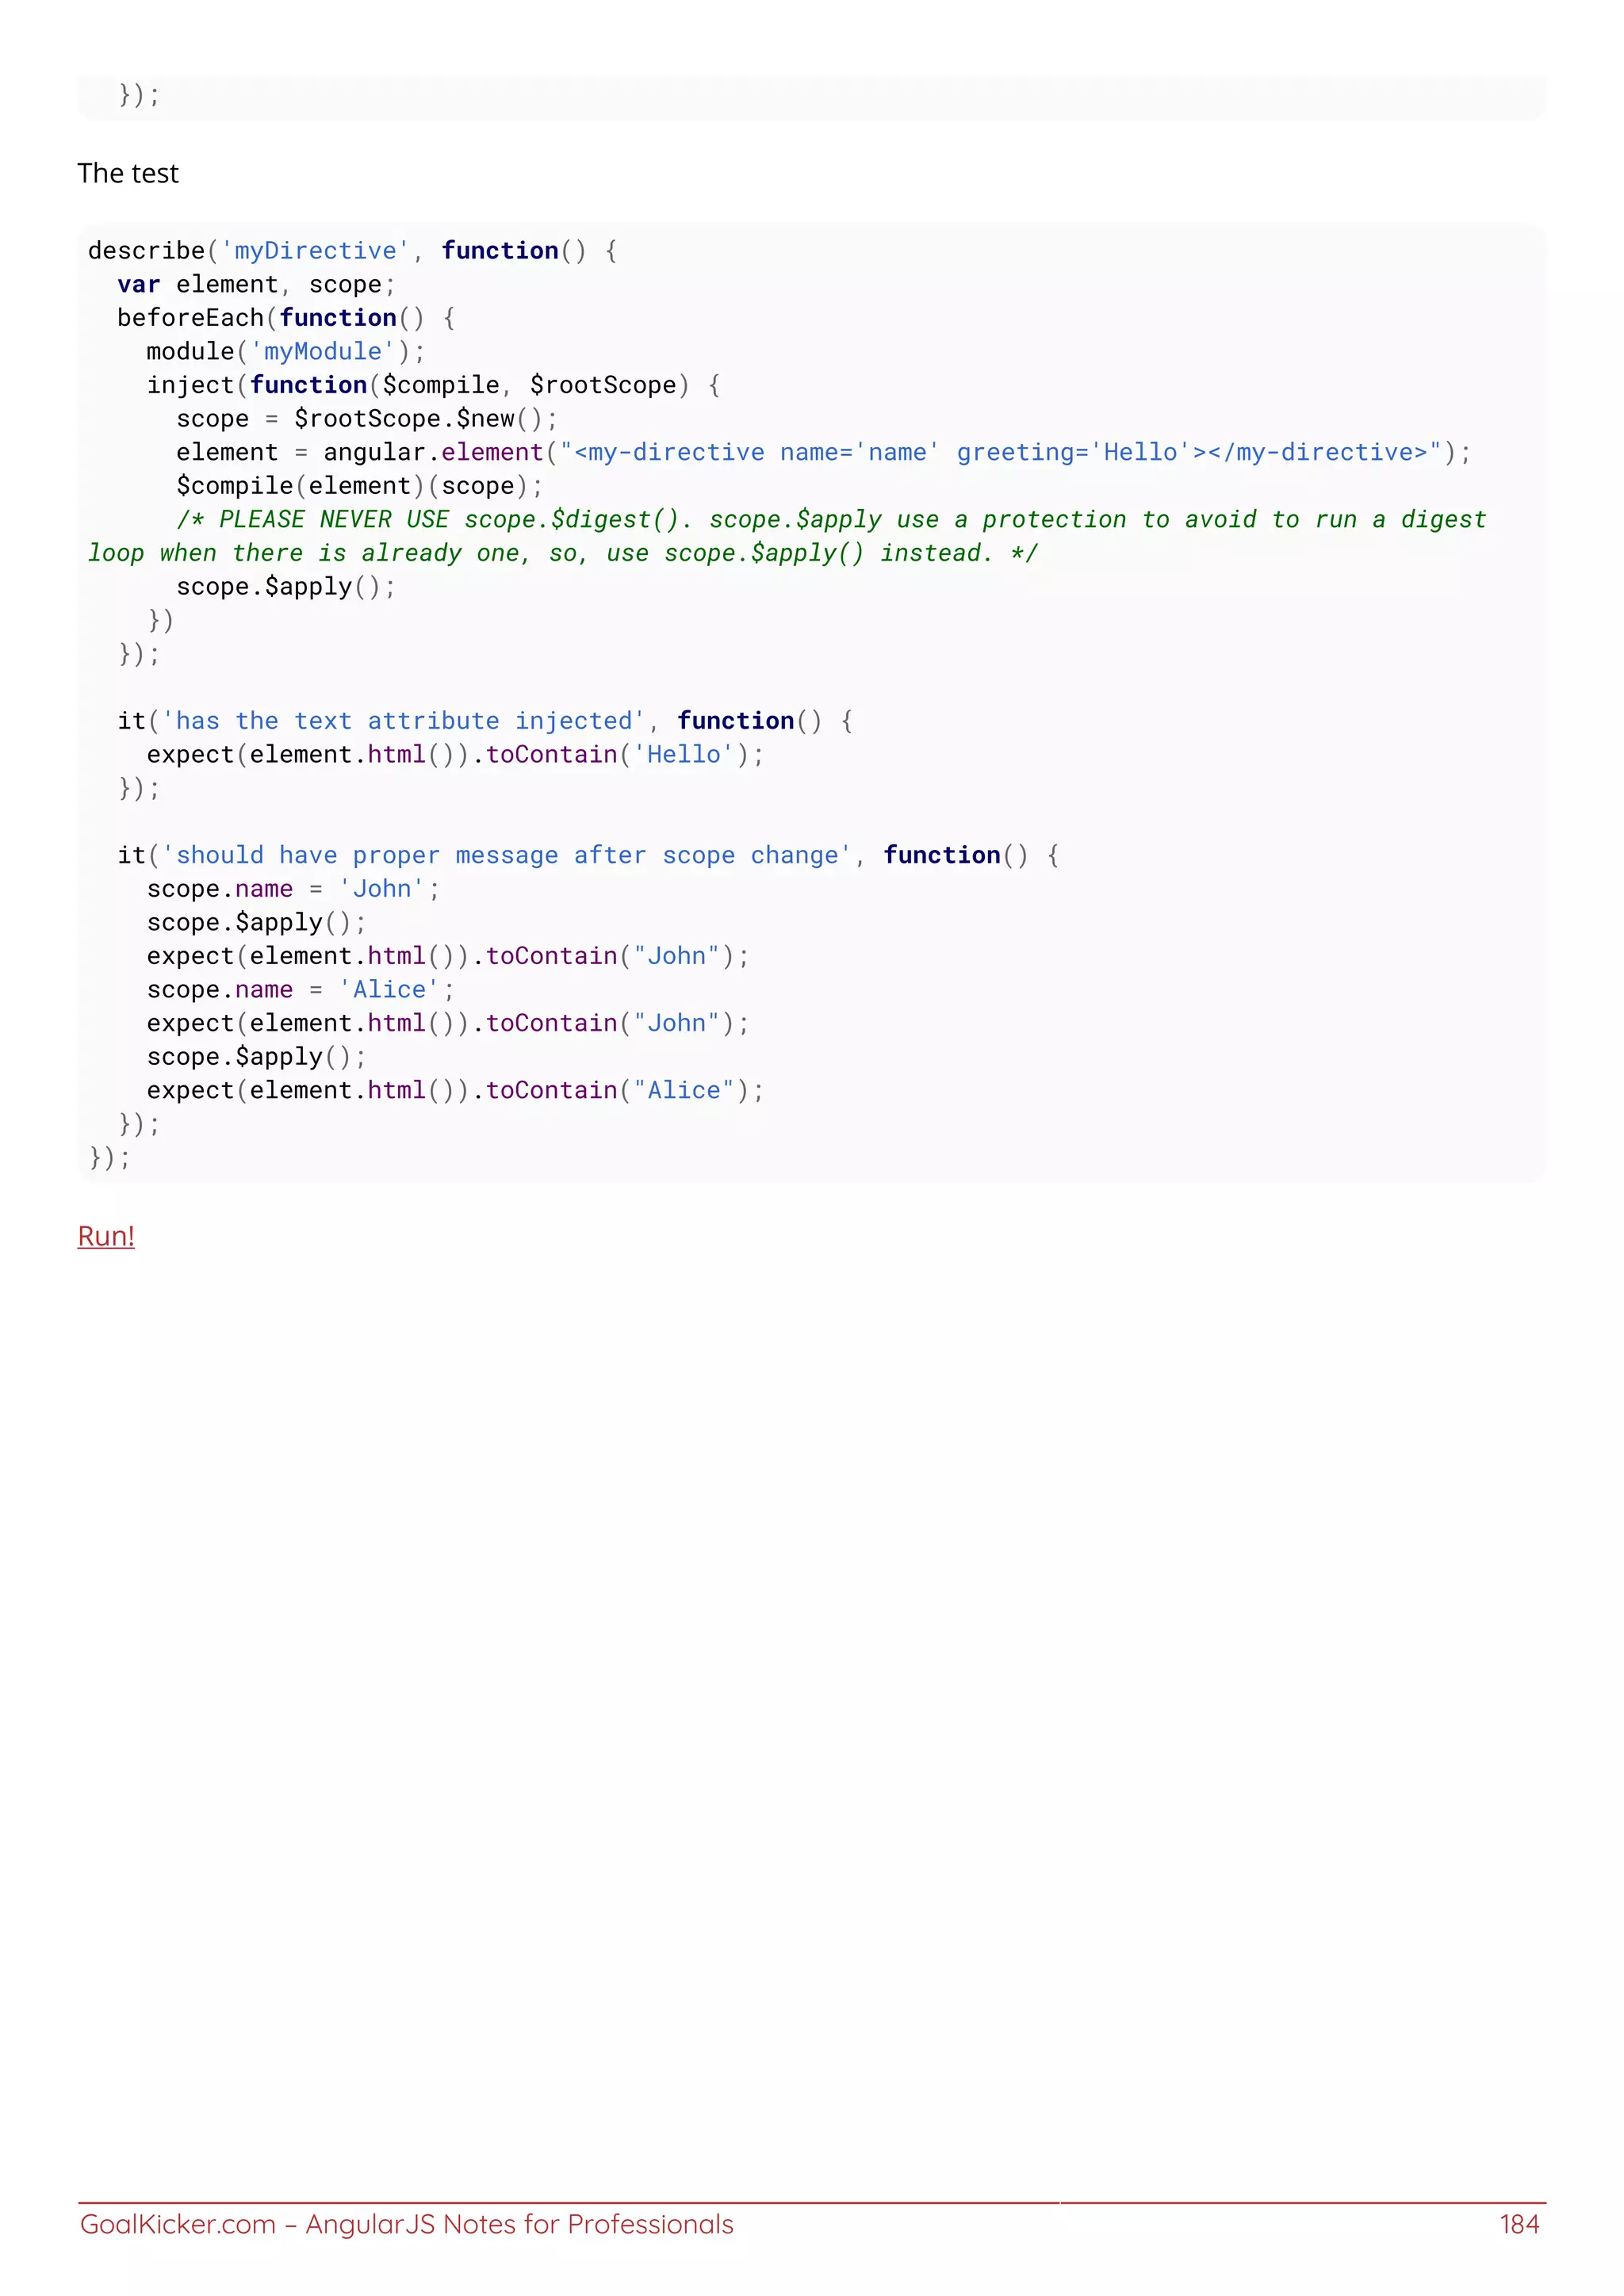
![GoalKicker.com – AngularJS Notes for Professionals 185
Chapter 52: AngularJS gotchas and traps
Section 52.1: Things to do when using html5Mode
When using html5Mode([mode]) it is necessary that:
You specify the base URL for the application with a <base href=""> in the head of your index.html.1.
It is important that the base tag comes before any tags with url requests. Otherwise, this might result in this2.
error - "Resource interpreted as stylesheet but transferred with MIME type text/html". For
example:
<head>
<meta charset="utf-8">
<title>Job Seeker</title>
<base href="/">
<link rel="stylesheet" href="bower_components/bootstrap/dist/css/bootstrap.css" />
<link rel="stylesheet" href="/styles/main.css">
</head>
If you do no want to specify a base tag, configure $locationProvider to not require a base tag by passing a3.
definition object with requireBase:false to $locationProvider.html5Mode() like this:
$locationProvider.html5Mode({
enabled: true,
requireBase: false
});
In order to support direct loading of HTML5 URLs, you need to enabler server-side URL rewriting. From4.
AngularJS / Developer Guide / Using $location
Using this mode requires URL rewriting on server side, basically you have to rewrite all your links to
entry point of your application (e.g. index.html). Requiring a <base> tag is also important for this
case, as it allows Angular to differentiate between the part of the url that is the application base
and the path that should be handled by the application.
An excellent resource for request rewriting examples for various HTTP server implementations can be found
in the ui-router FAQ - How to: Configure your server to work with html5Mode. For example, Apache
RewriteEngine on
# Don't rewrite files or directories
RewriteCond %{REQUEST_FILENAME} -f [OR]
RewriteCond %{REQUEST_FILENAME} -d
RewriteRule ^ - [L]
# Rewrite everything else to index.html to allow html5 state links
RewriteRule ^ index.html [L]
nginx](https://image.slidesharecdn.com/angularjsnotesforprofessionals-200412131913/75/Angular-js-notes-for-professionals-192-2048.jpg)
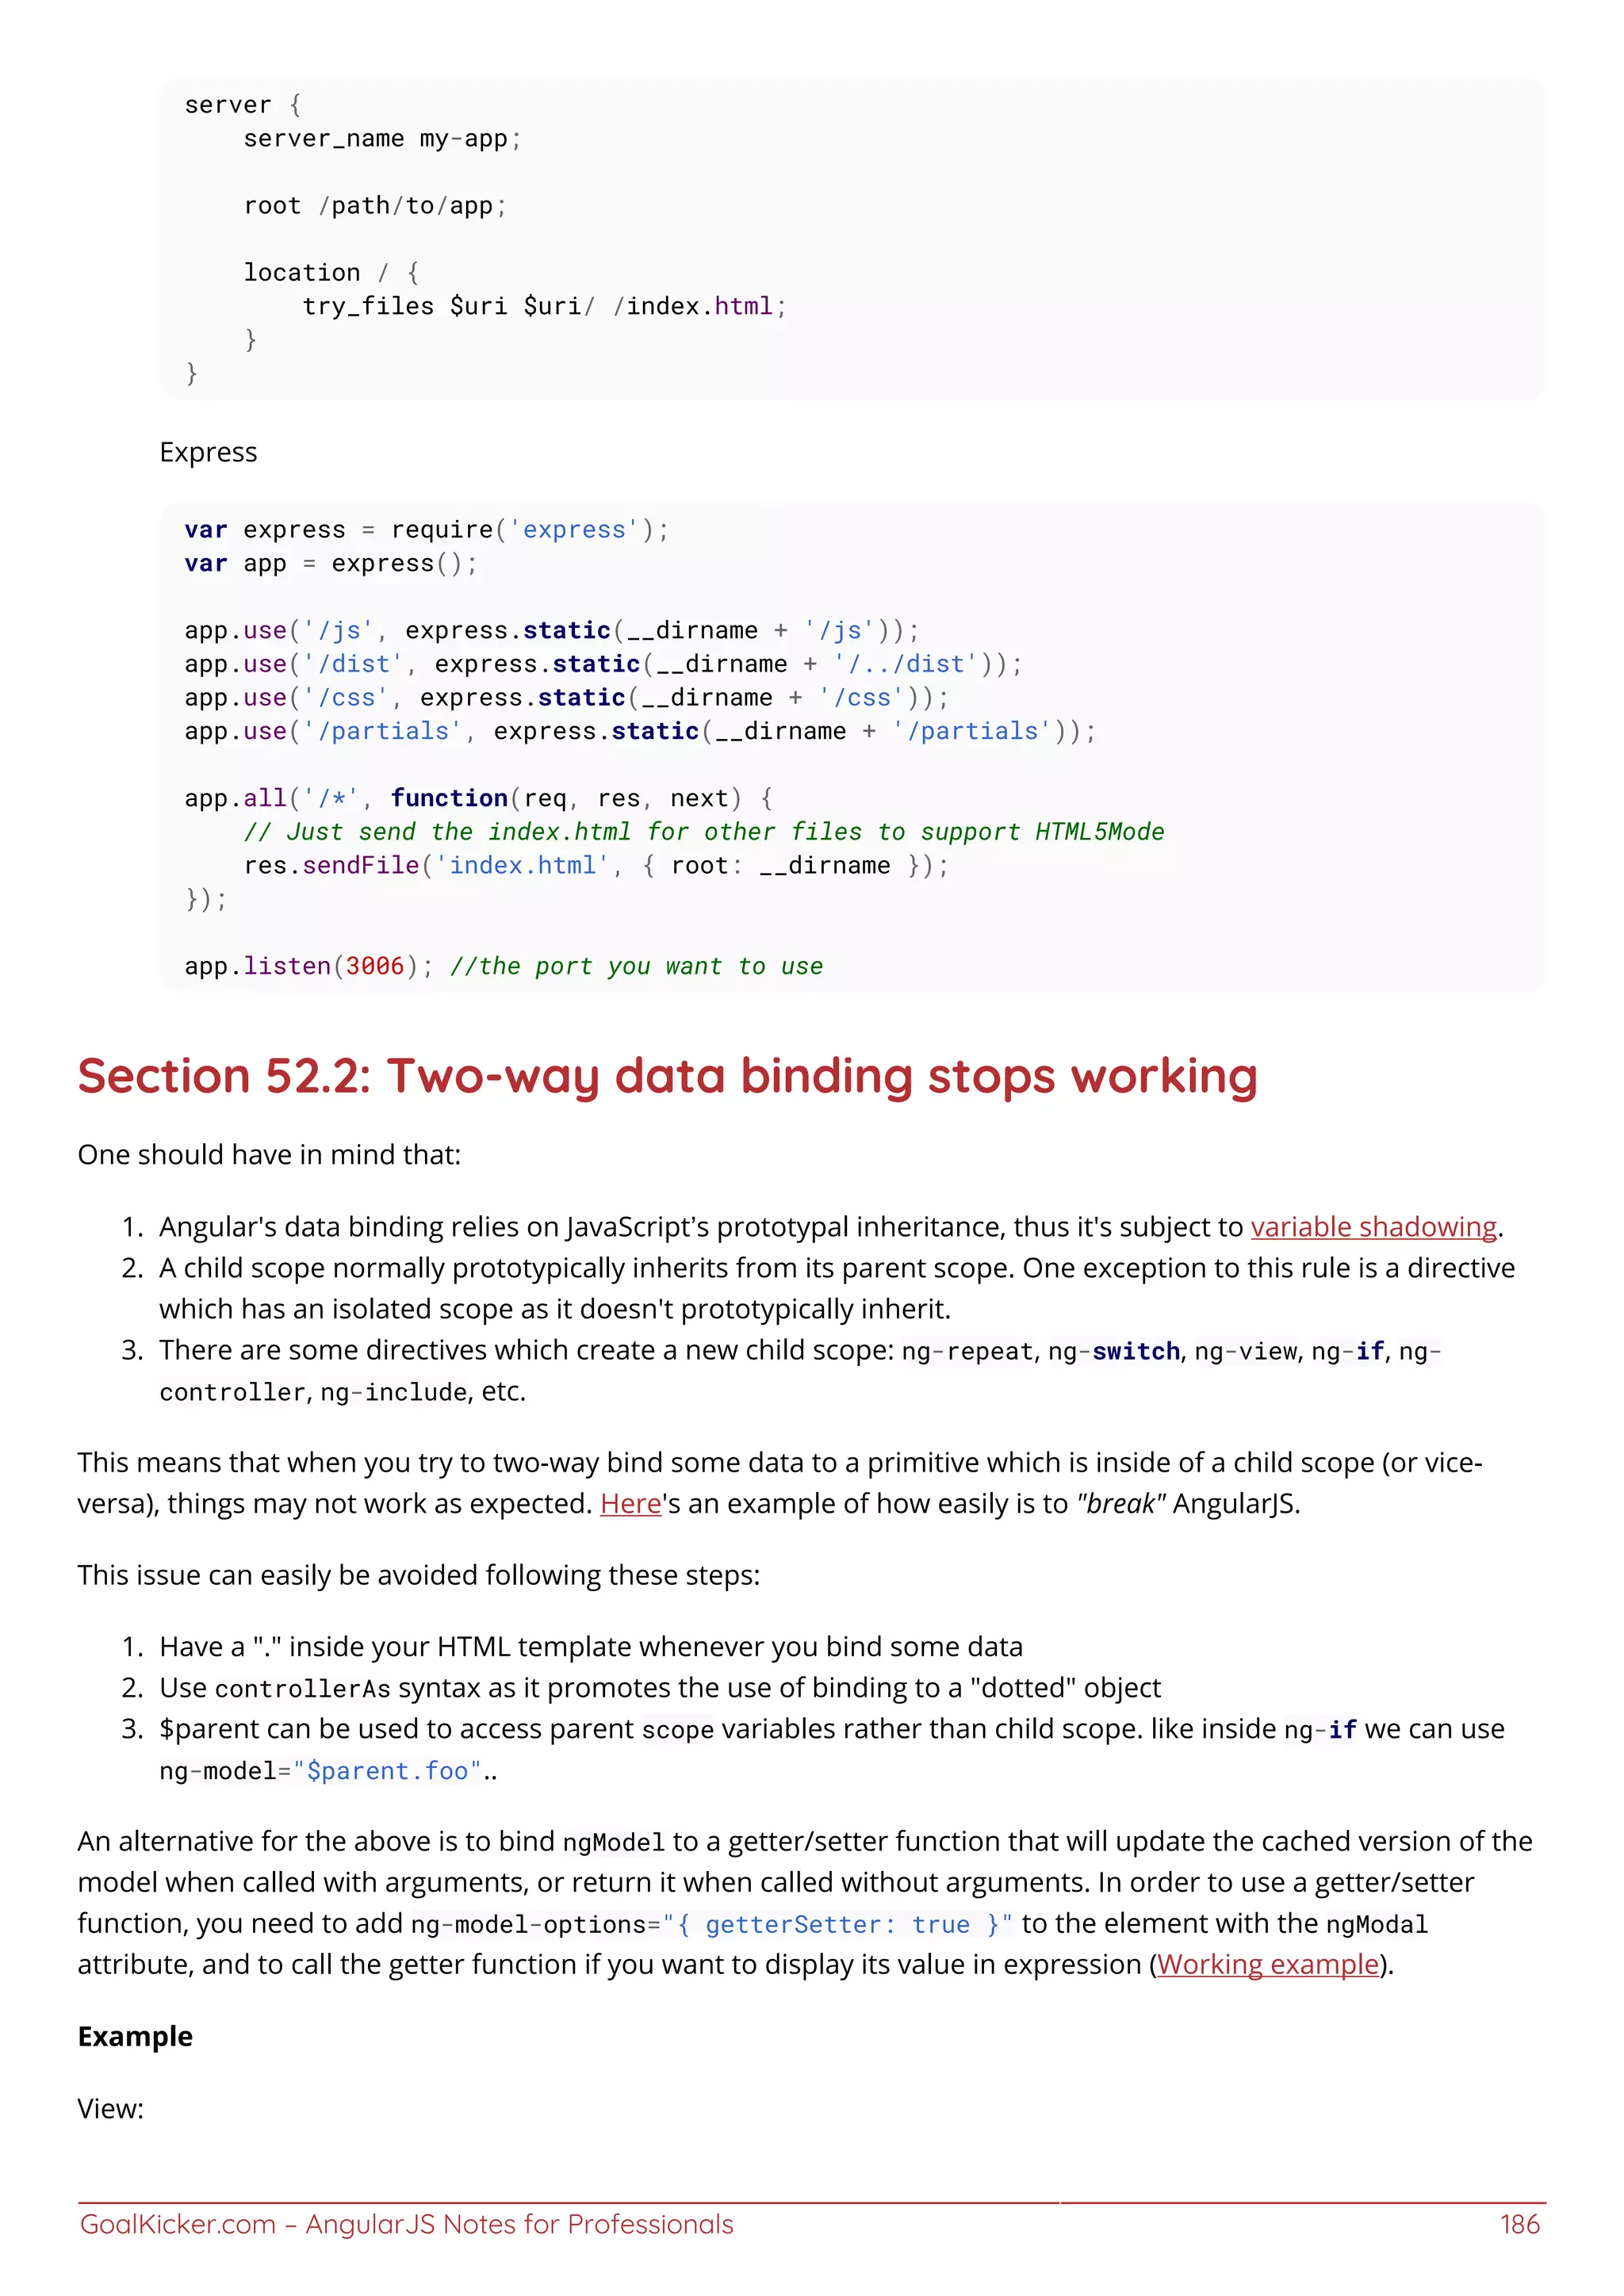
![GoalKicker.com – AngularJS Notes for Professionals 187
<div ng-app="myApp" ng-controller="MainCtrl">
<input type="text" ng-model="foo" ng-model-options="{ getterSetter: true }">
<div ng-if="truthyValue">
<!-- I'm a child scope (inside ng-if), but i'm synced with changes from the outside scope -->
<input type="text" ng-model="foo">
</div>
<div>$scope.foo: {{ foo() }}</div>
</div>
Controller:
angular.module('myApp', []).controller('MainCtrl', ['$scope', function($scope) {
$scope.truthyValue = true;
var _foo = 'hello'; // this will be used to cache/represent the value of the 'foo' model
$scope.foo = function(val) {
// the function return the the internal '_foo' varibale when called with zero arguments,
// and update the internal `_foo` when called with an argument
return arguments.length ? (_foo = val) : _foo;
};
}]);
Best Practice: It's best to keep getters fast because Angular is likely to call them more frequently than other parts
of your code (reference).
Section 52.3: 7 Deadly Sins of AngularJS
Below is the list of some mistakes that developers often make during the use of AngularJS functionalities, some
learned lessons and solutions to them.
1. Manipulating DOM through the controller
It's legal, but must be avoided. Controllers are the places where you define your dependencies, bind your data to
the view and make further business logic. You can technically manipulate the DOM in a controller, but whenever
you need same or similar manipulation in another part of your app, another controller will be needed. So the best
practice of this approach is creating a directive that includes all manipulations and use the directive throughout
your app. Hence, the controller leaves the view intact and does it's job. In a directive, linking function is the best
place to manipulate the DOM. It has full access to the scope and element, so using a directive, you can also take the
advantage of reusability.
link: function($scope, element, attrs) {
//The best place to manipulate DOM
}
You can access DOM elements in linking function through several ways, such as the element parameter,
angular.element() method, or pure Javascript.
2. Data binding in transclusion
AngularJS is famous with its two-way data binding. However you may encounter sometimes that your data is only
one-way bound inside directives. Stop there, AngularJS is not wrong but probably you. Directives are a little
dangerous places since child scopes and isolated scopes are involved. Assume you have the following directive with
one transclusion
<my-dir>](https://image.slidesharecdn.com/angularjsnotesforprofessionals-200412131913/75/Angular-js-notes-for-professionals-194-2048.jpg)

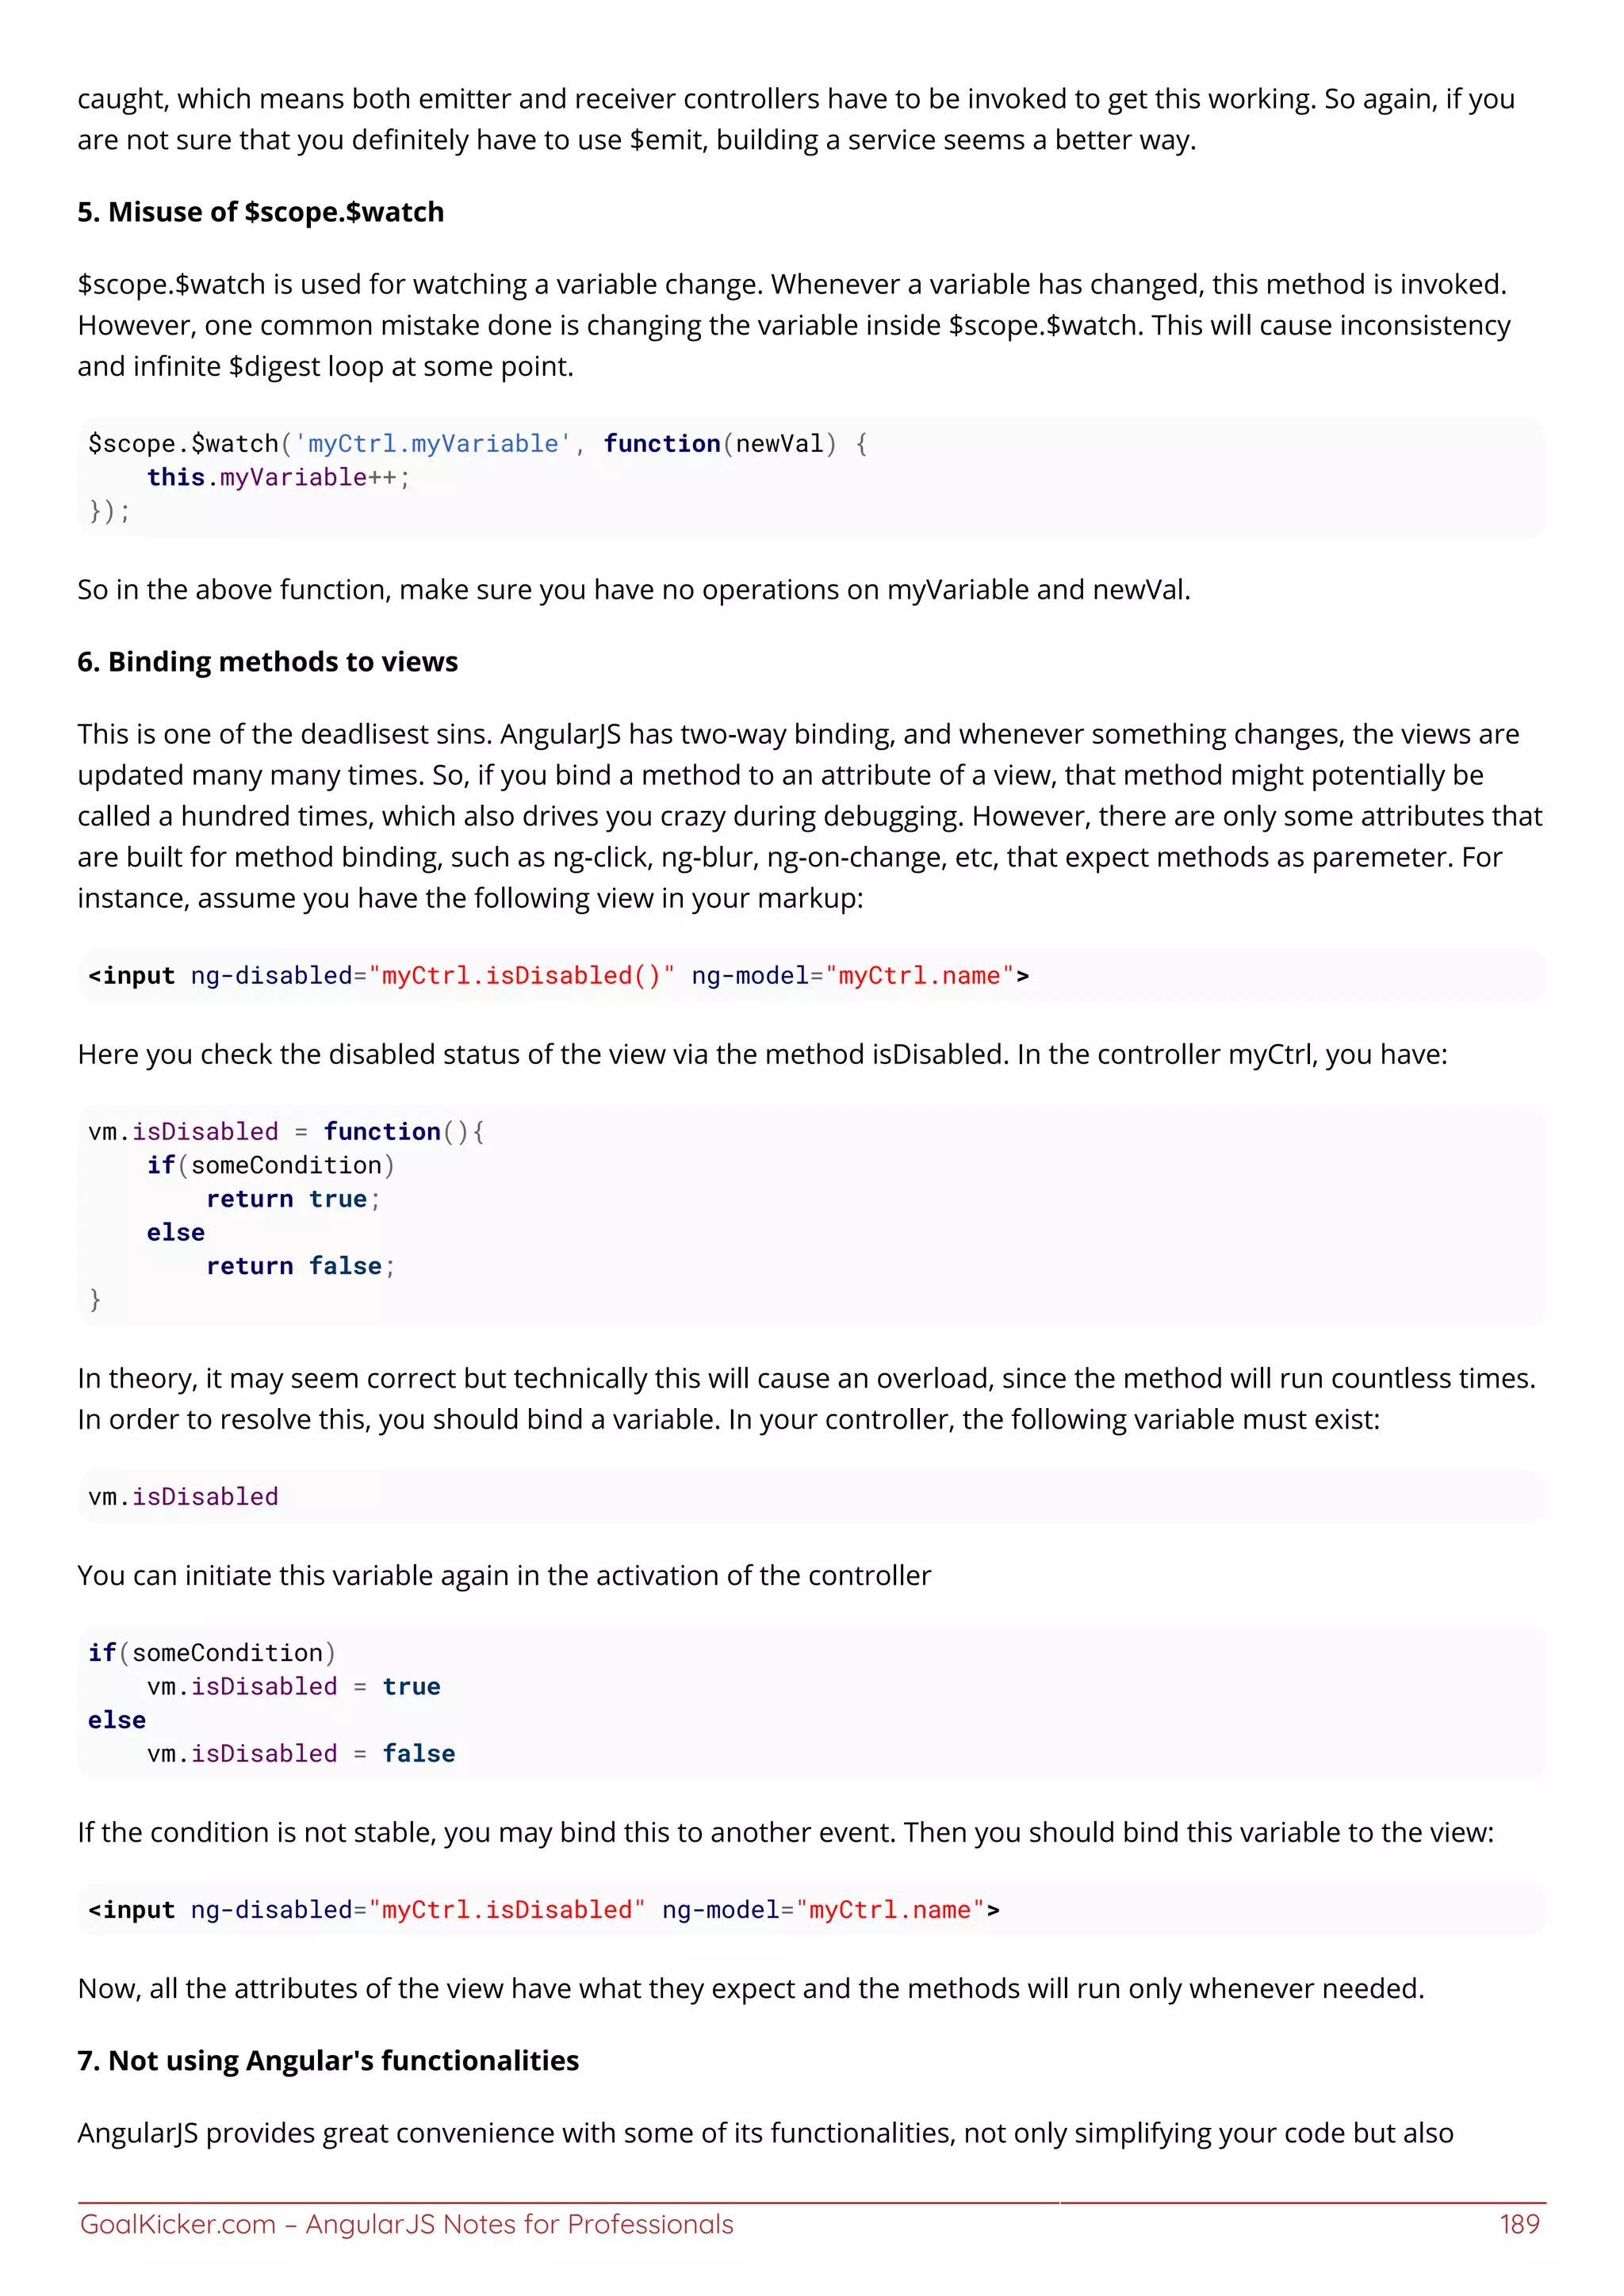

This document provides an overview and introduction to AngularJS, including getting started tutorials and examples of key concepts like modules, components, directives, data binding, dependency injection, and services. It covers topics such as creating controllers, using built-in and custom directives, routing, forms, and improving performance. The document aims to equip developers with professional hints and tricks for working with AngularJS.


![[Ebooks PDF] download AngularJS 1st Edition Brad Green full chapters](https://cdn.slidesharecdn.com/ss_thumbnails/18713-241217213105-de1012ed-thumbnail.jpg?width=600ounds&width=560&fit=bounds)


