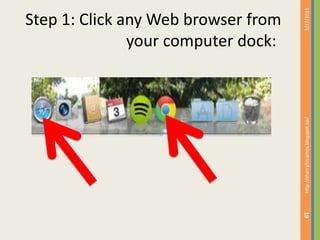
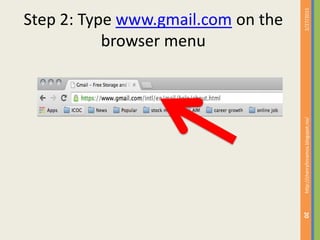
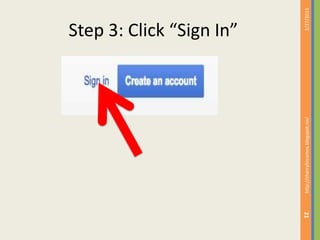
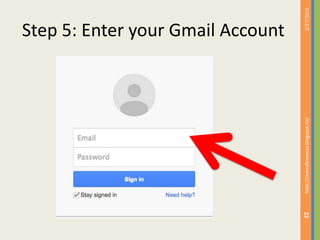
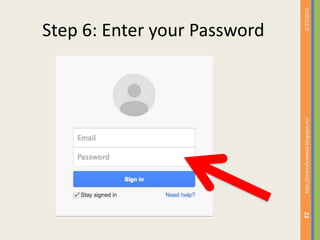
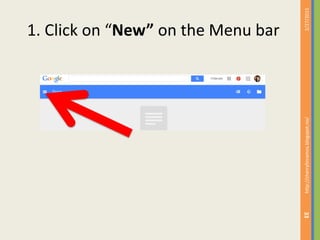
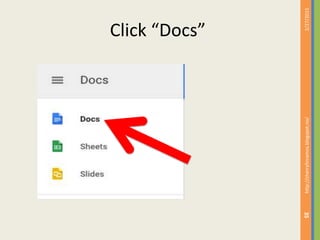
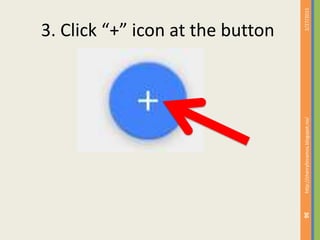
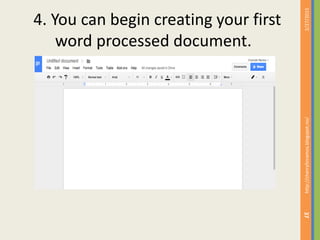
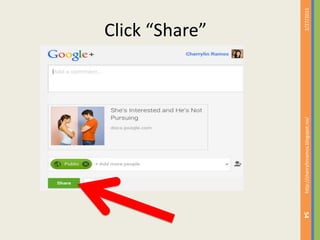
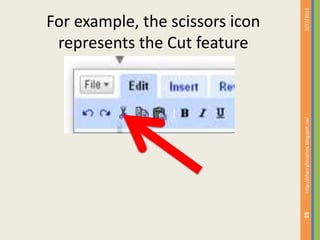
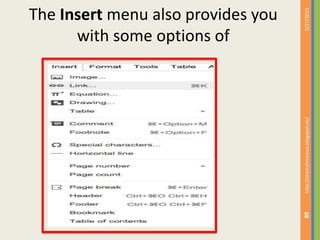
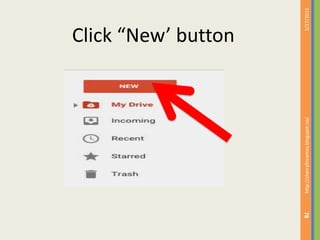
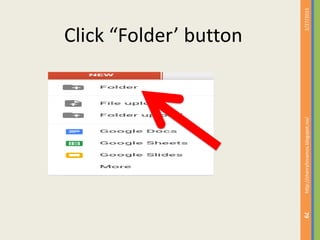
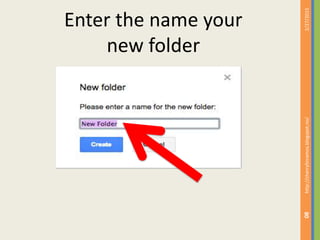
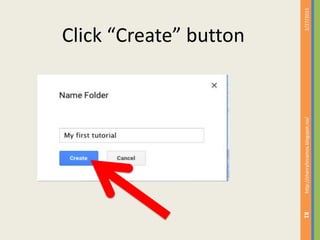
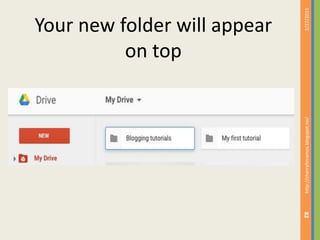
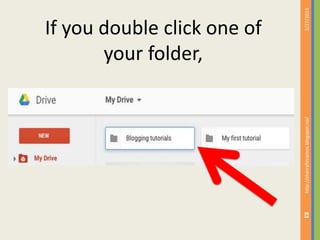
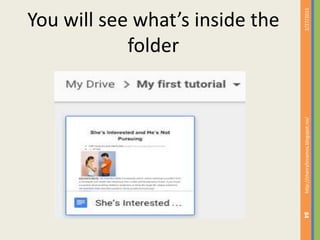
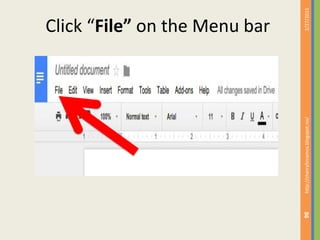
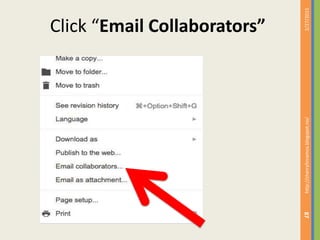
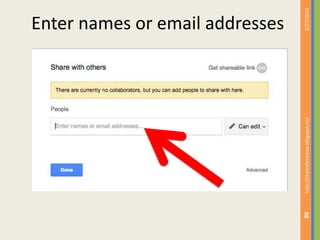
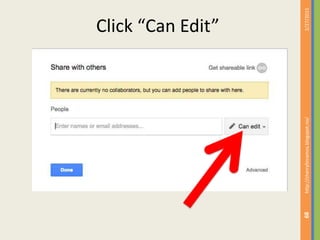
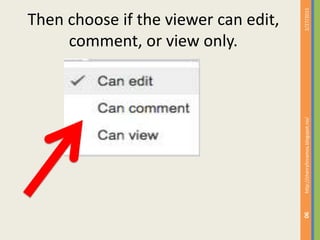
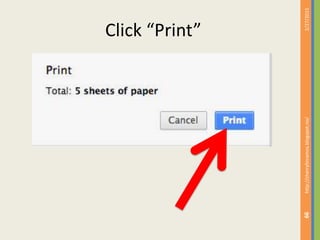
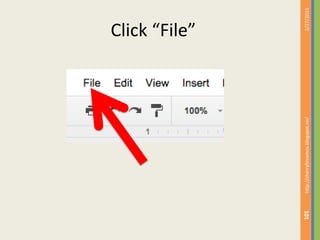
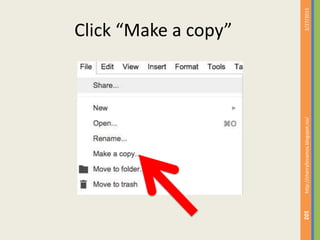
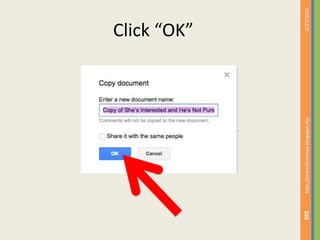
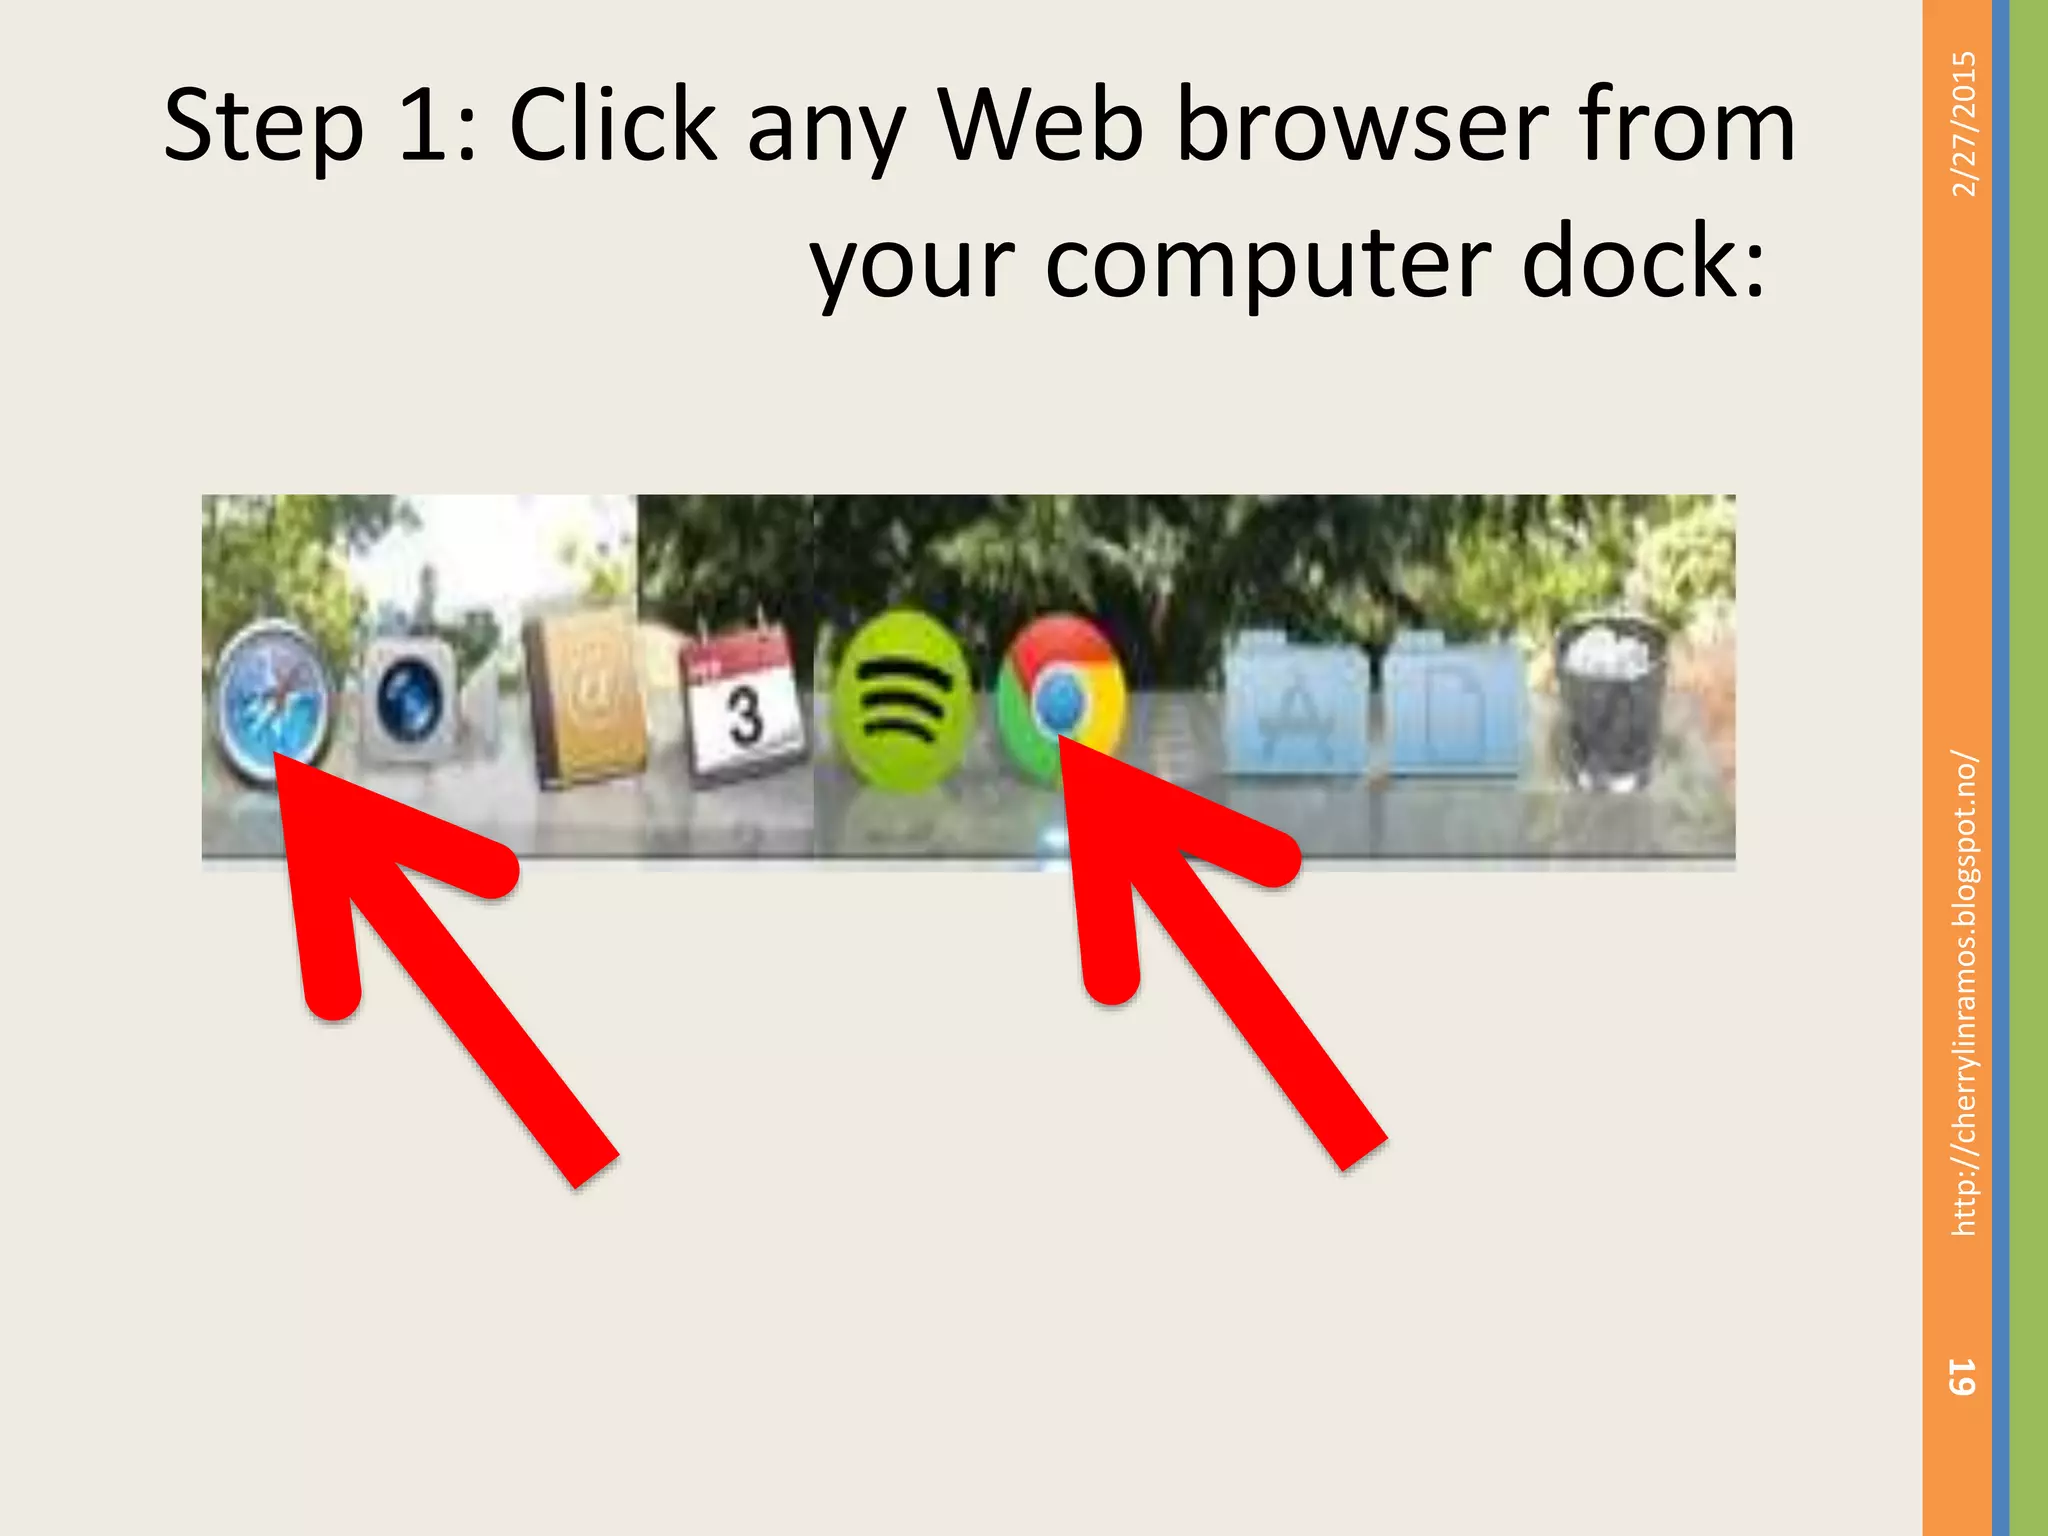
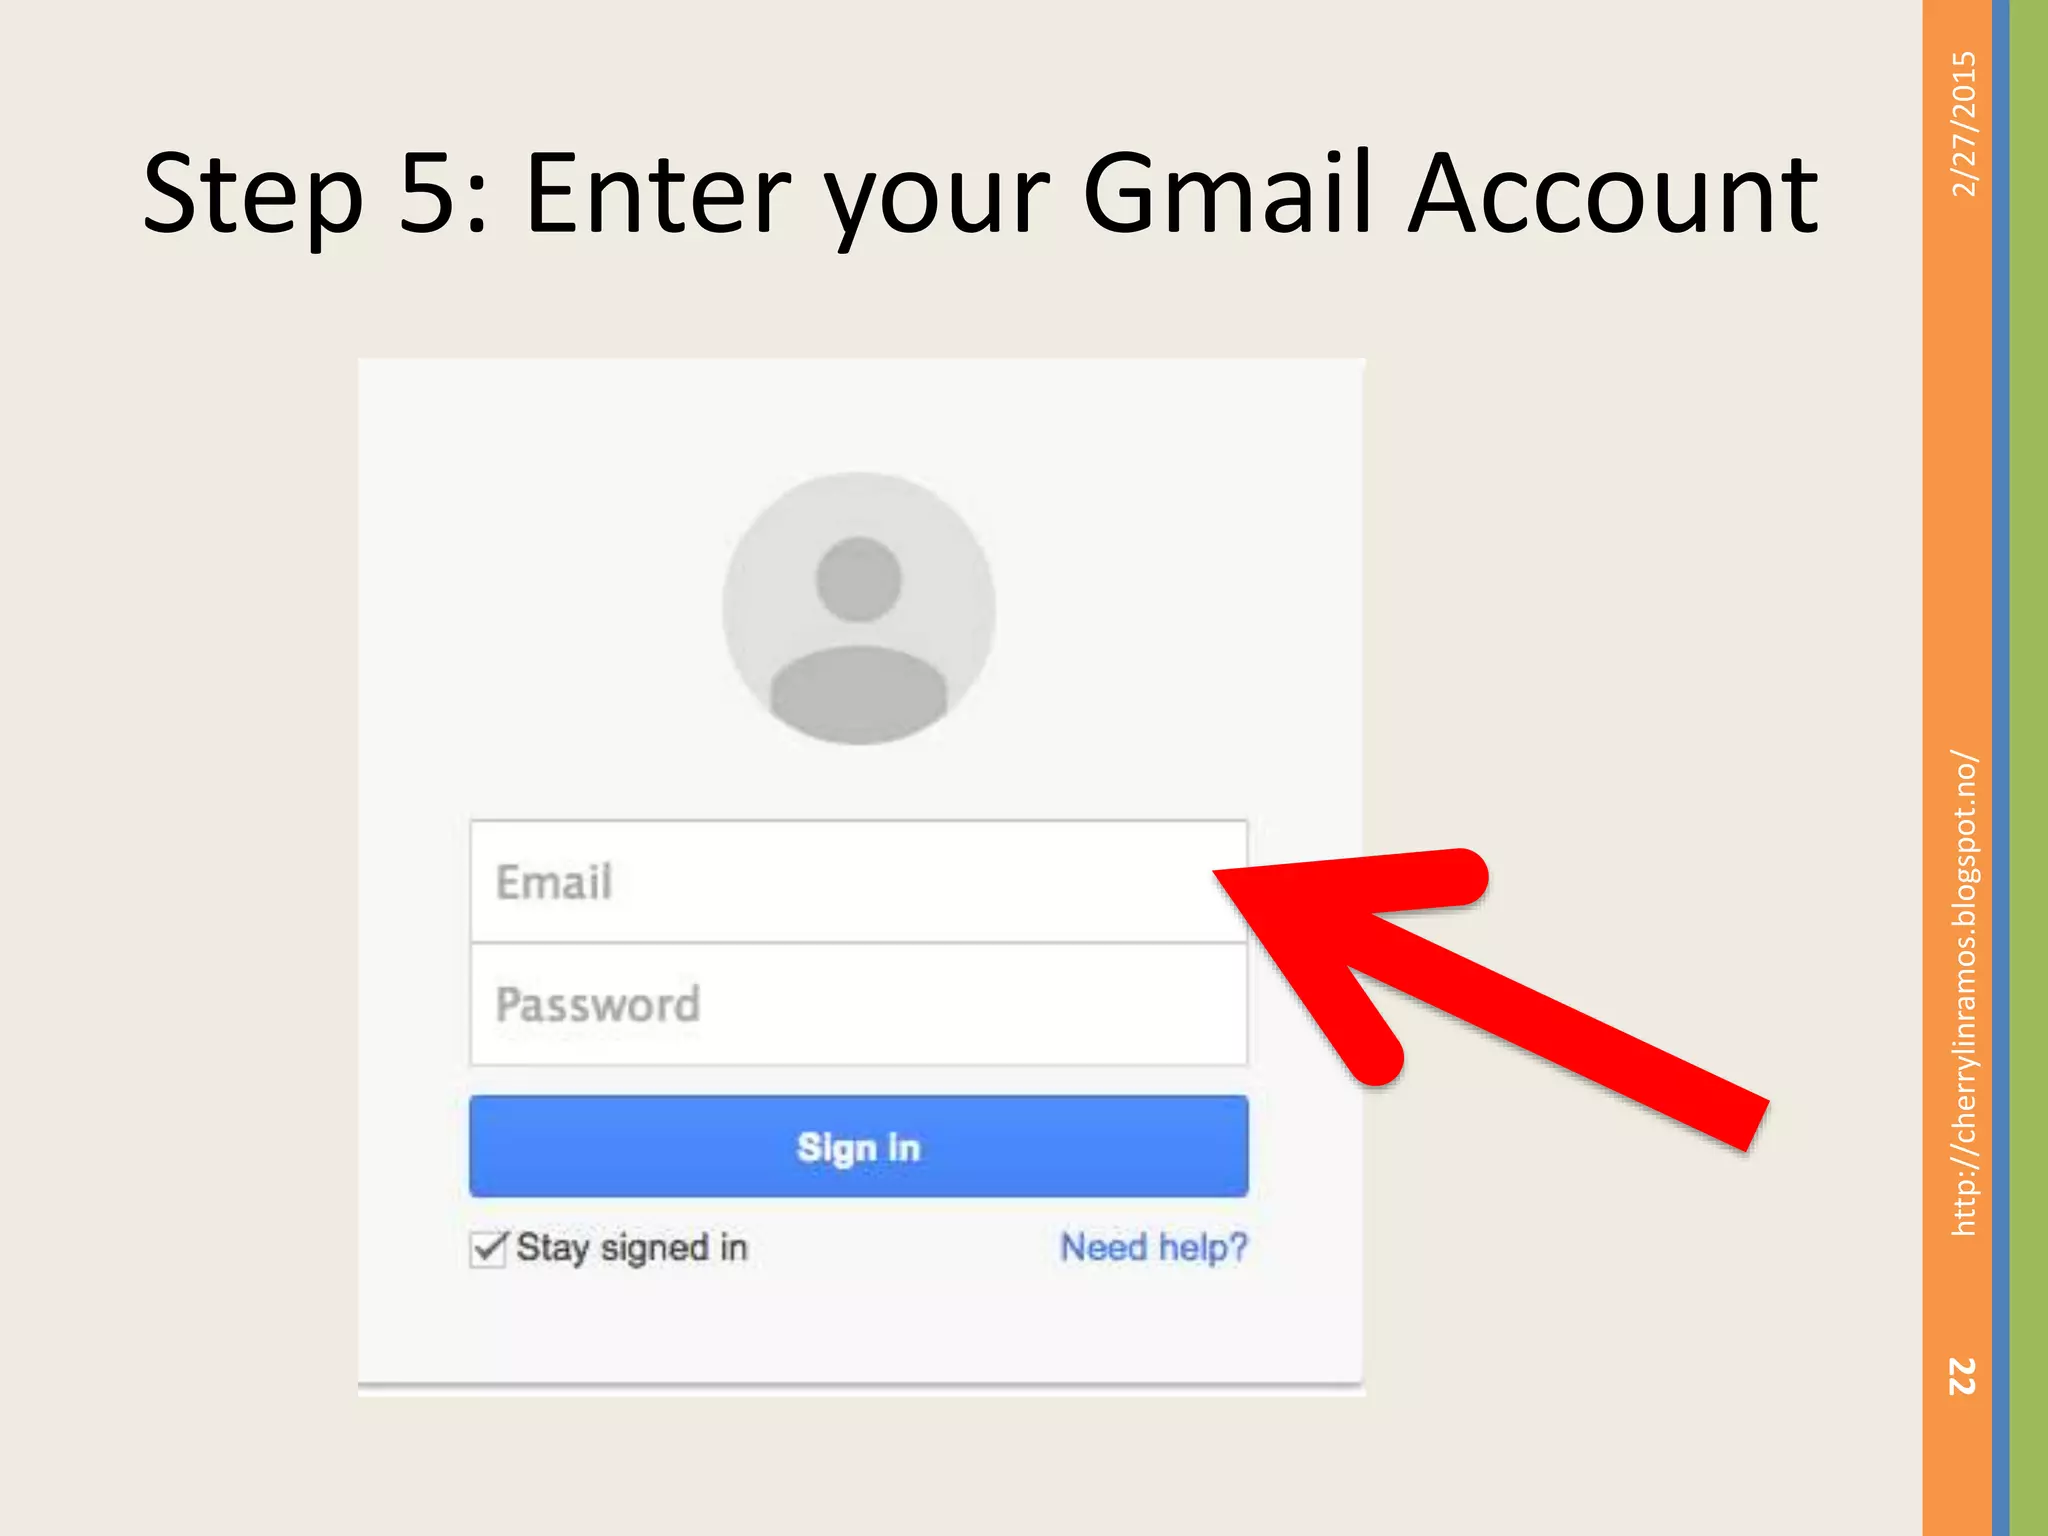
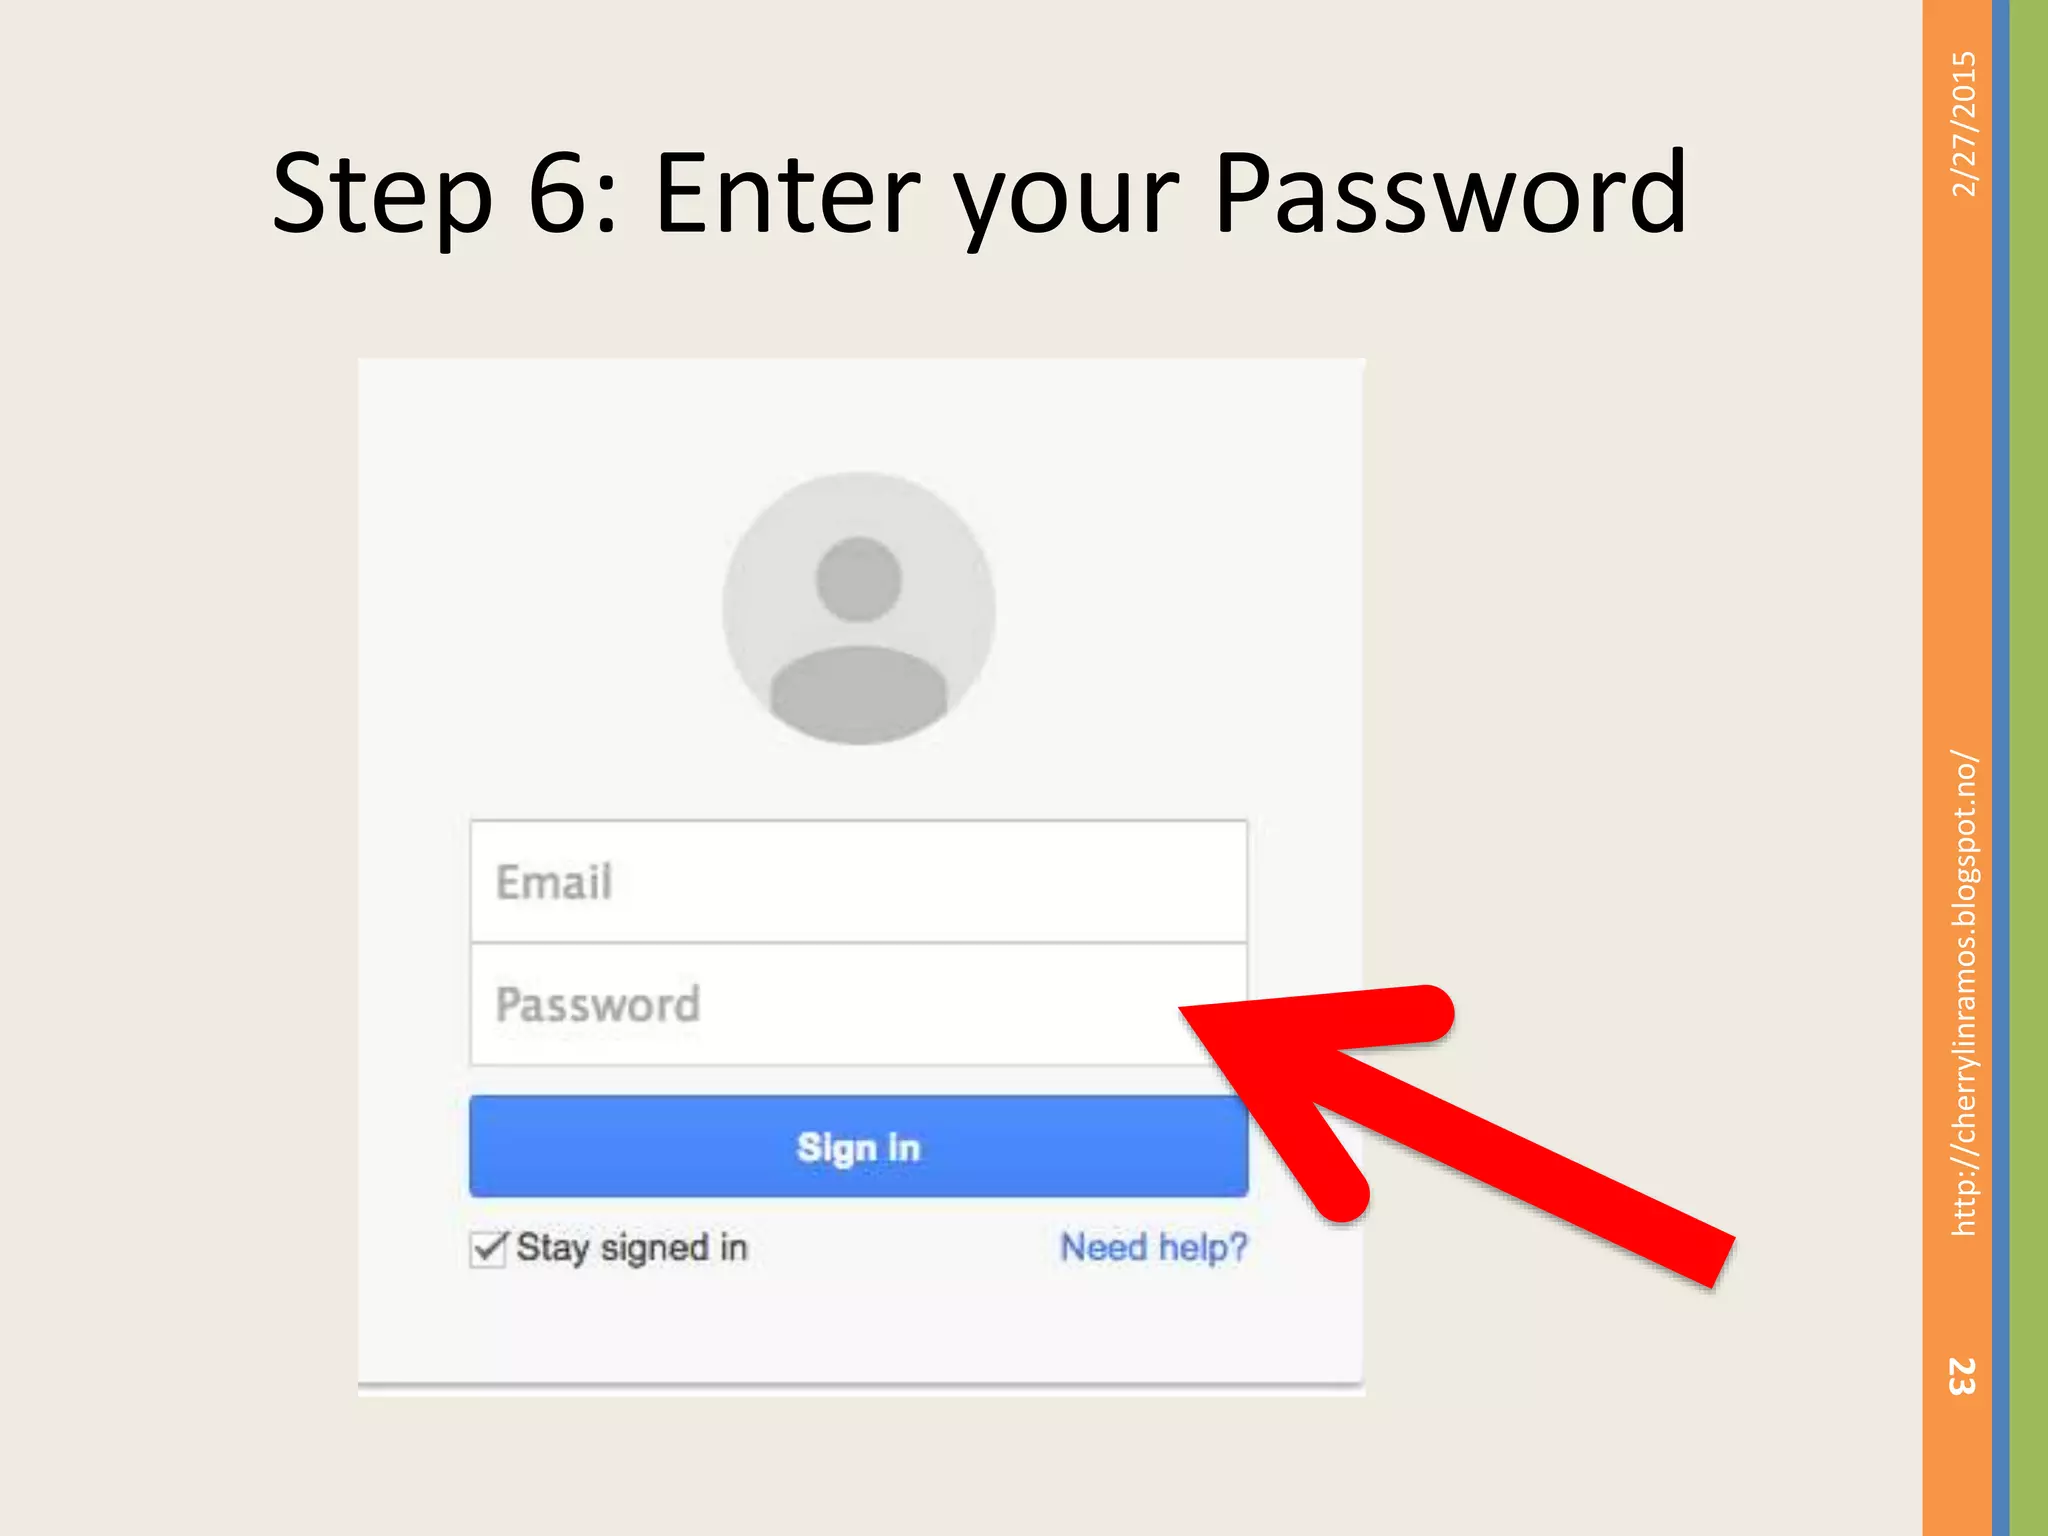
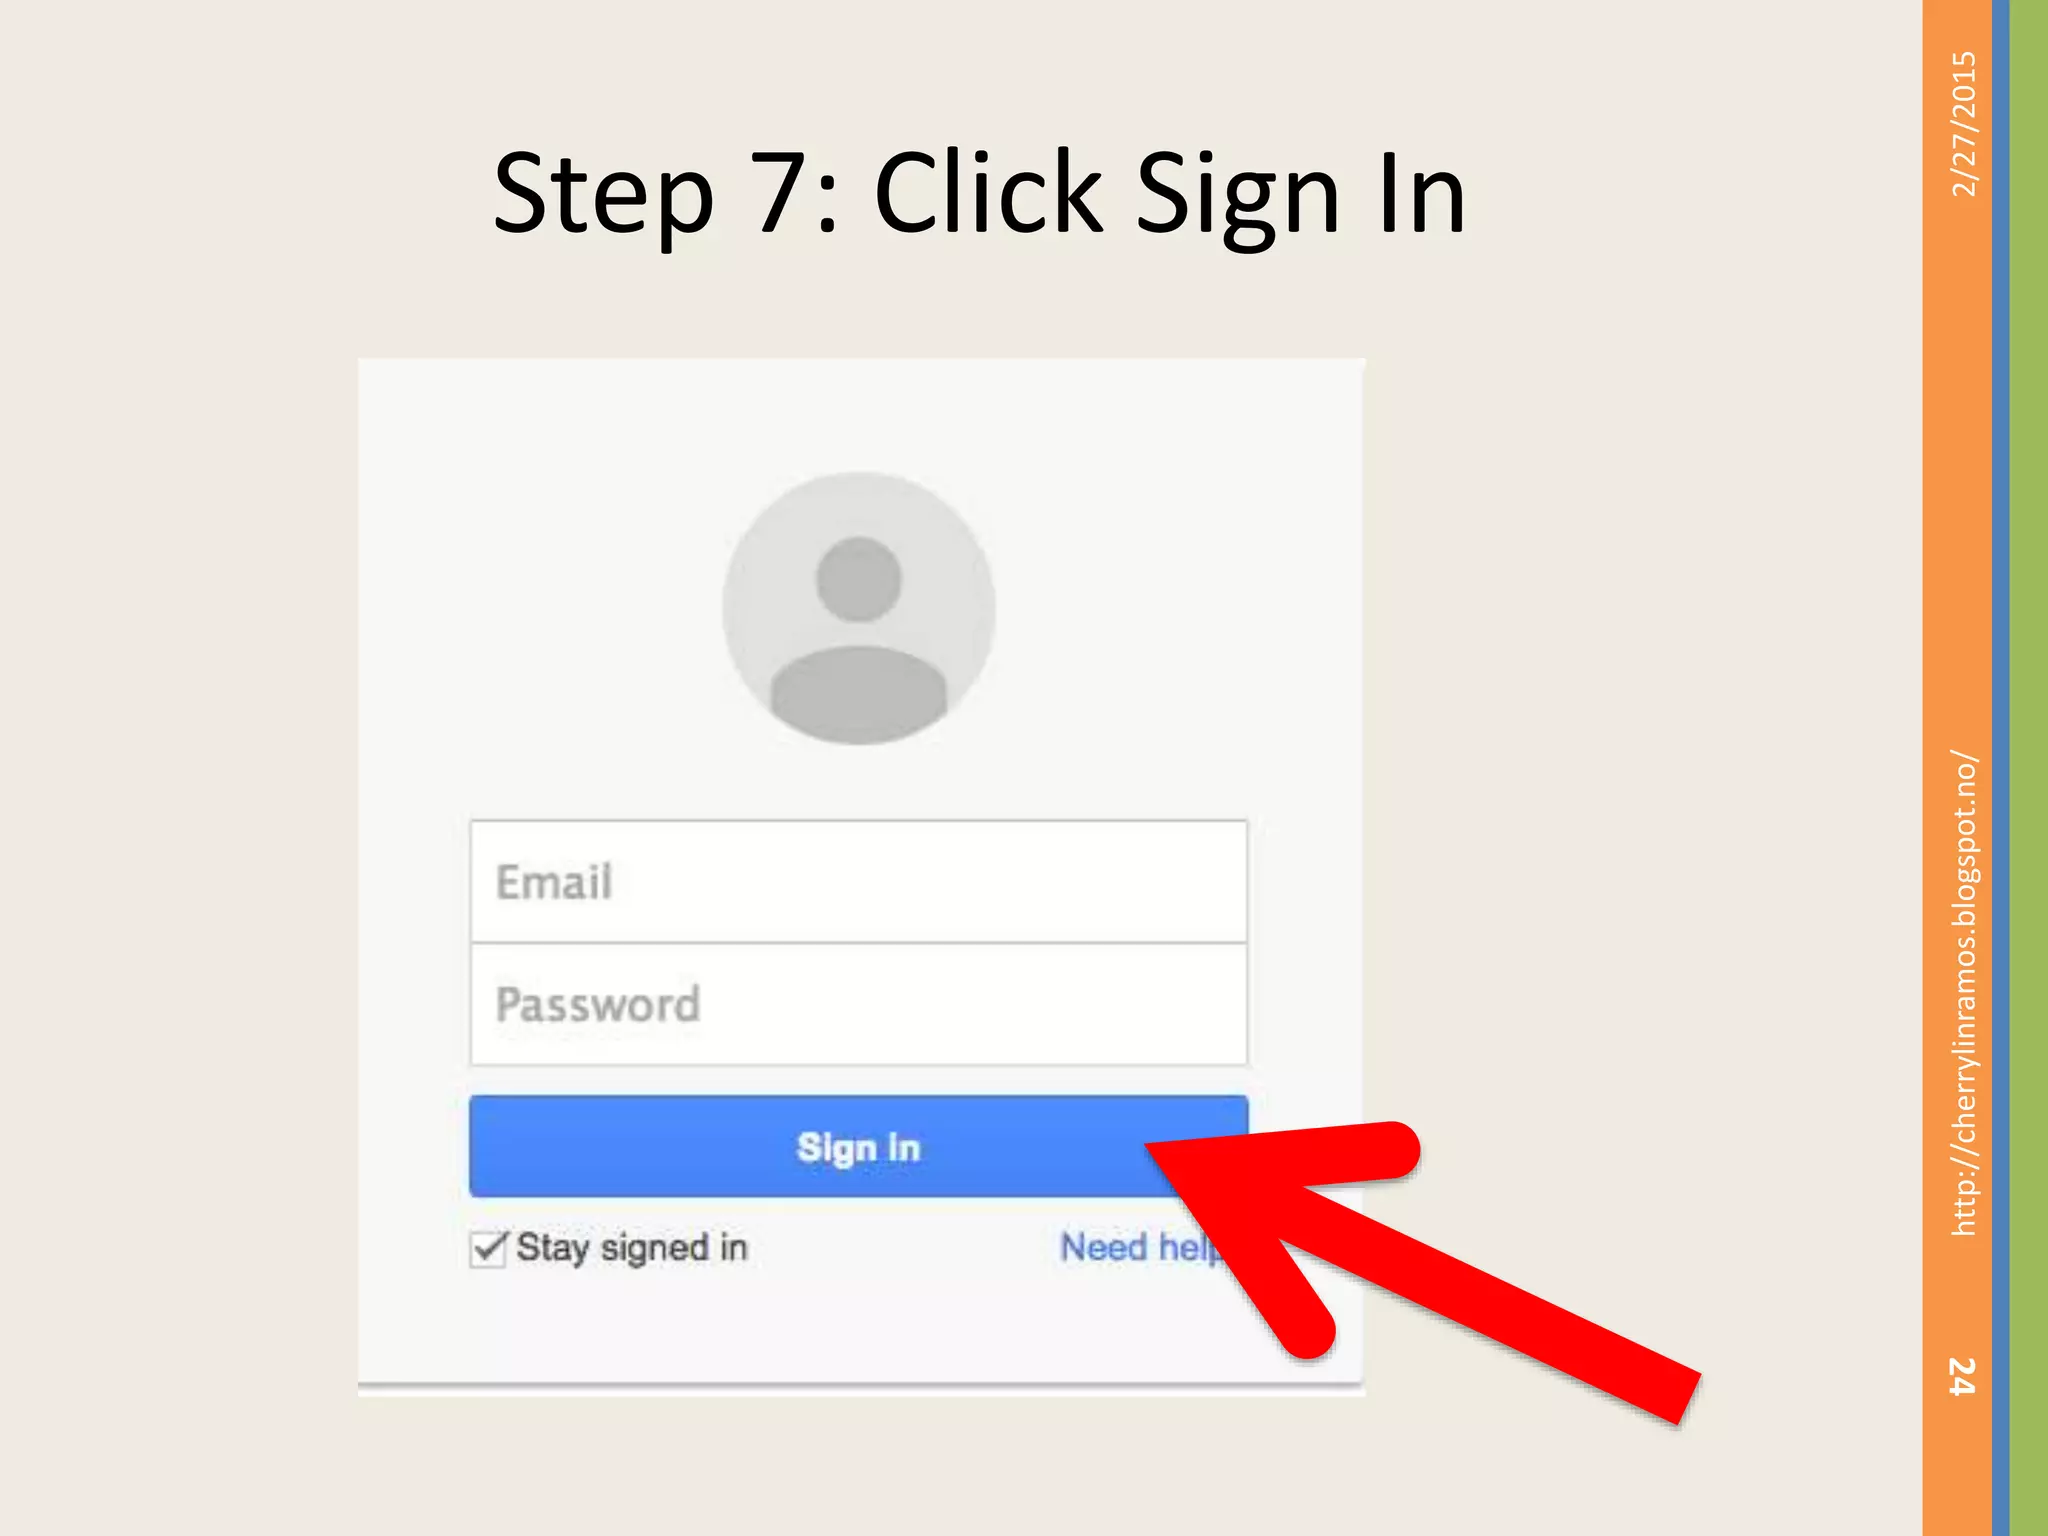
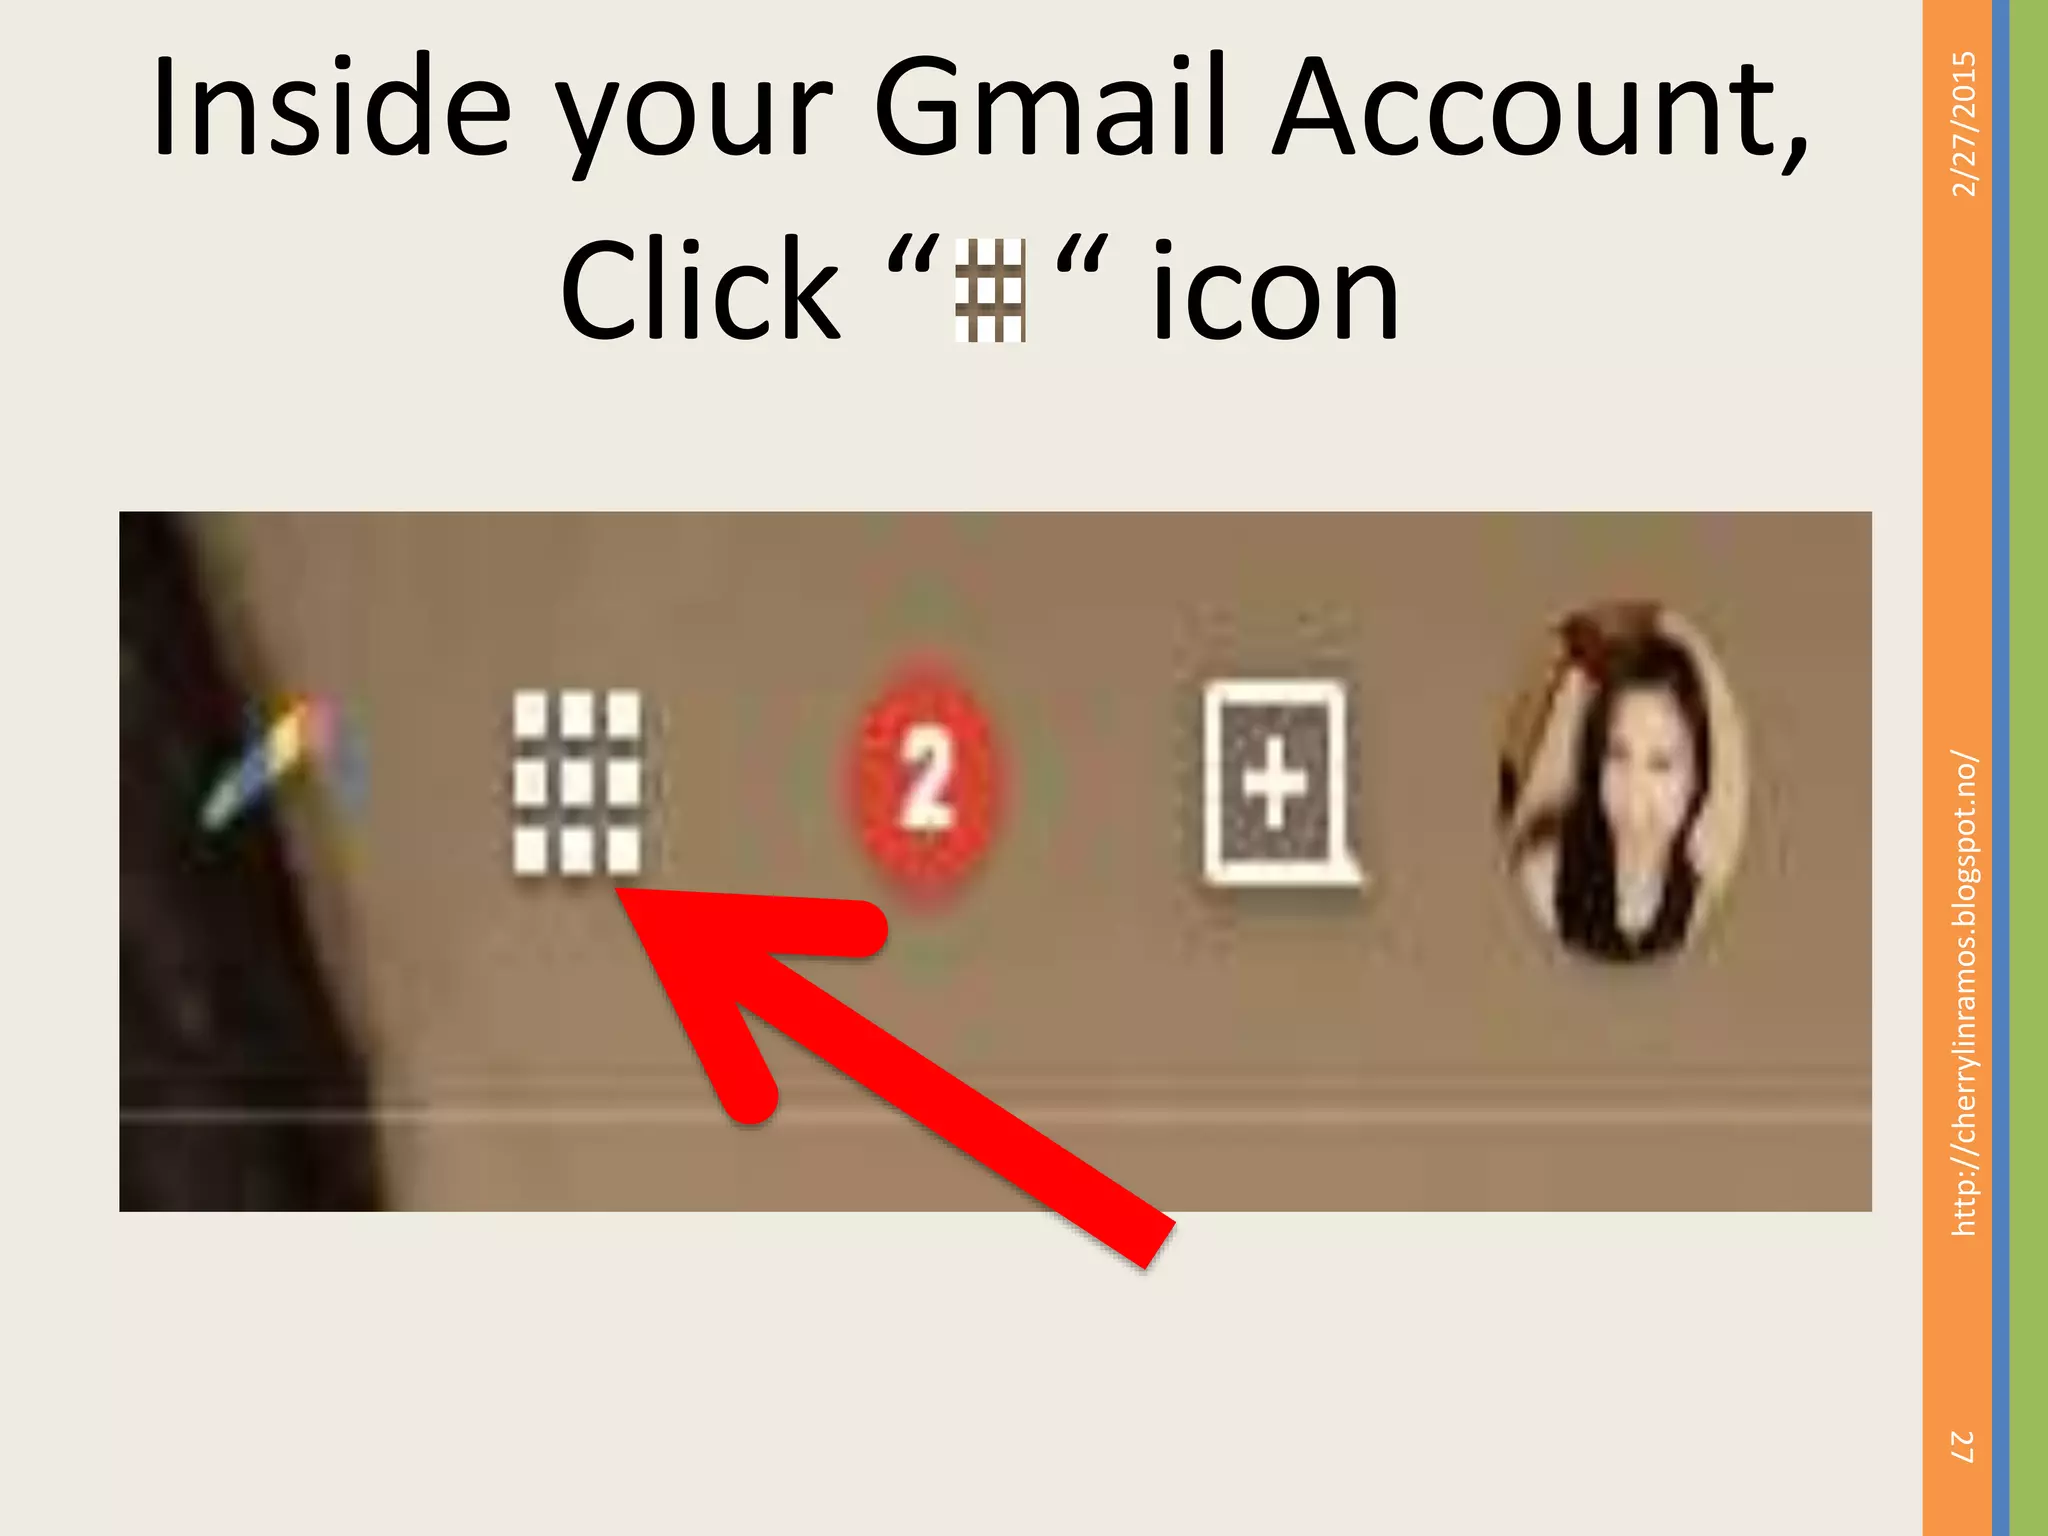
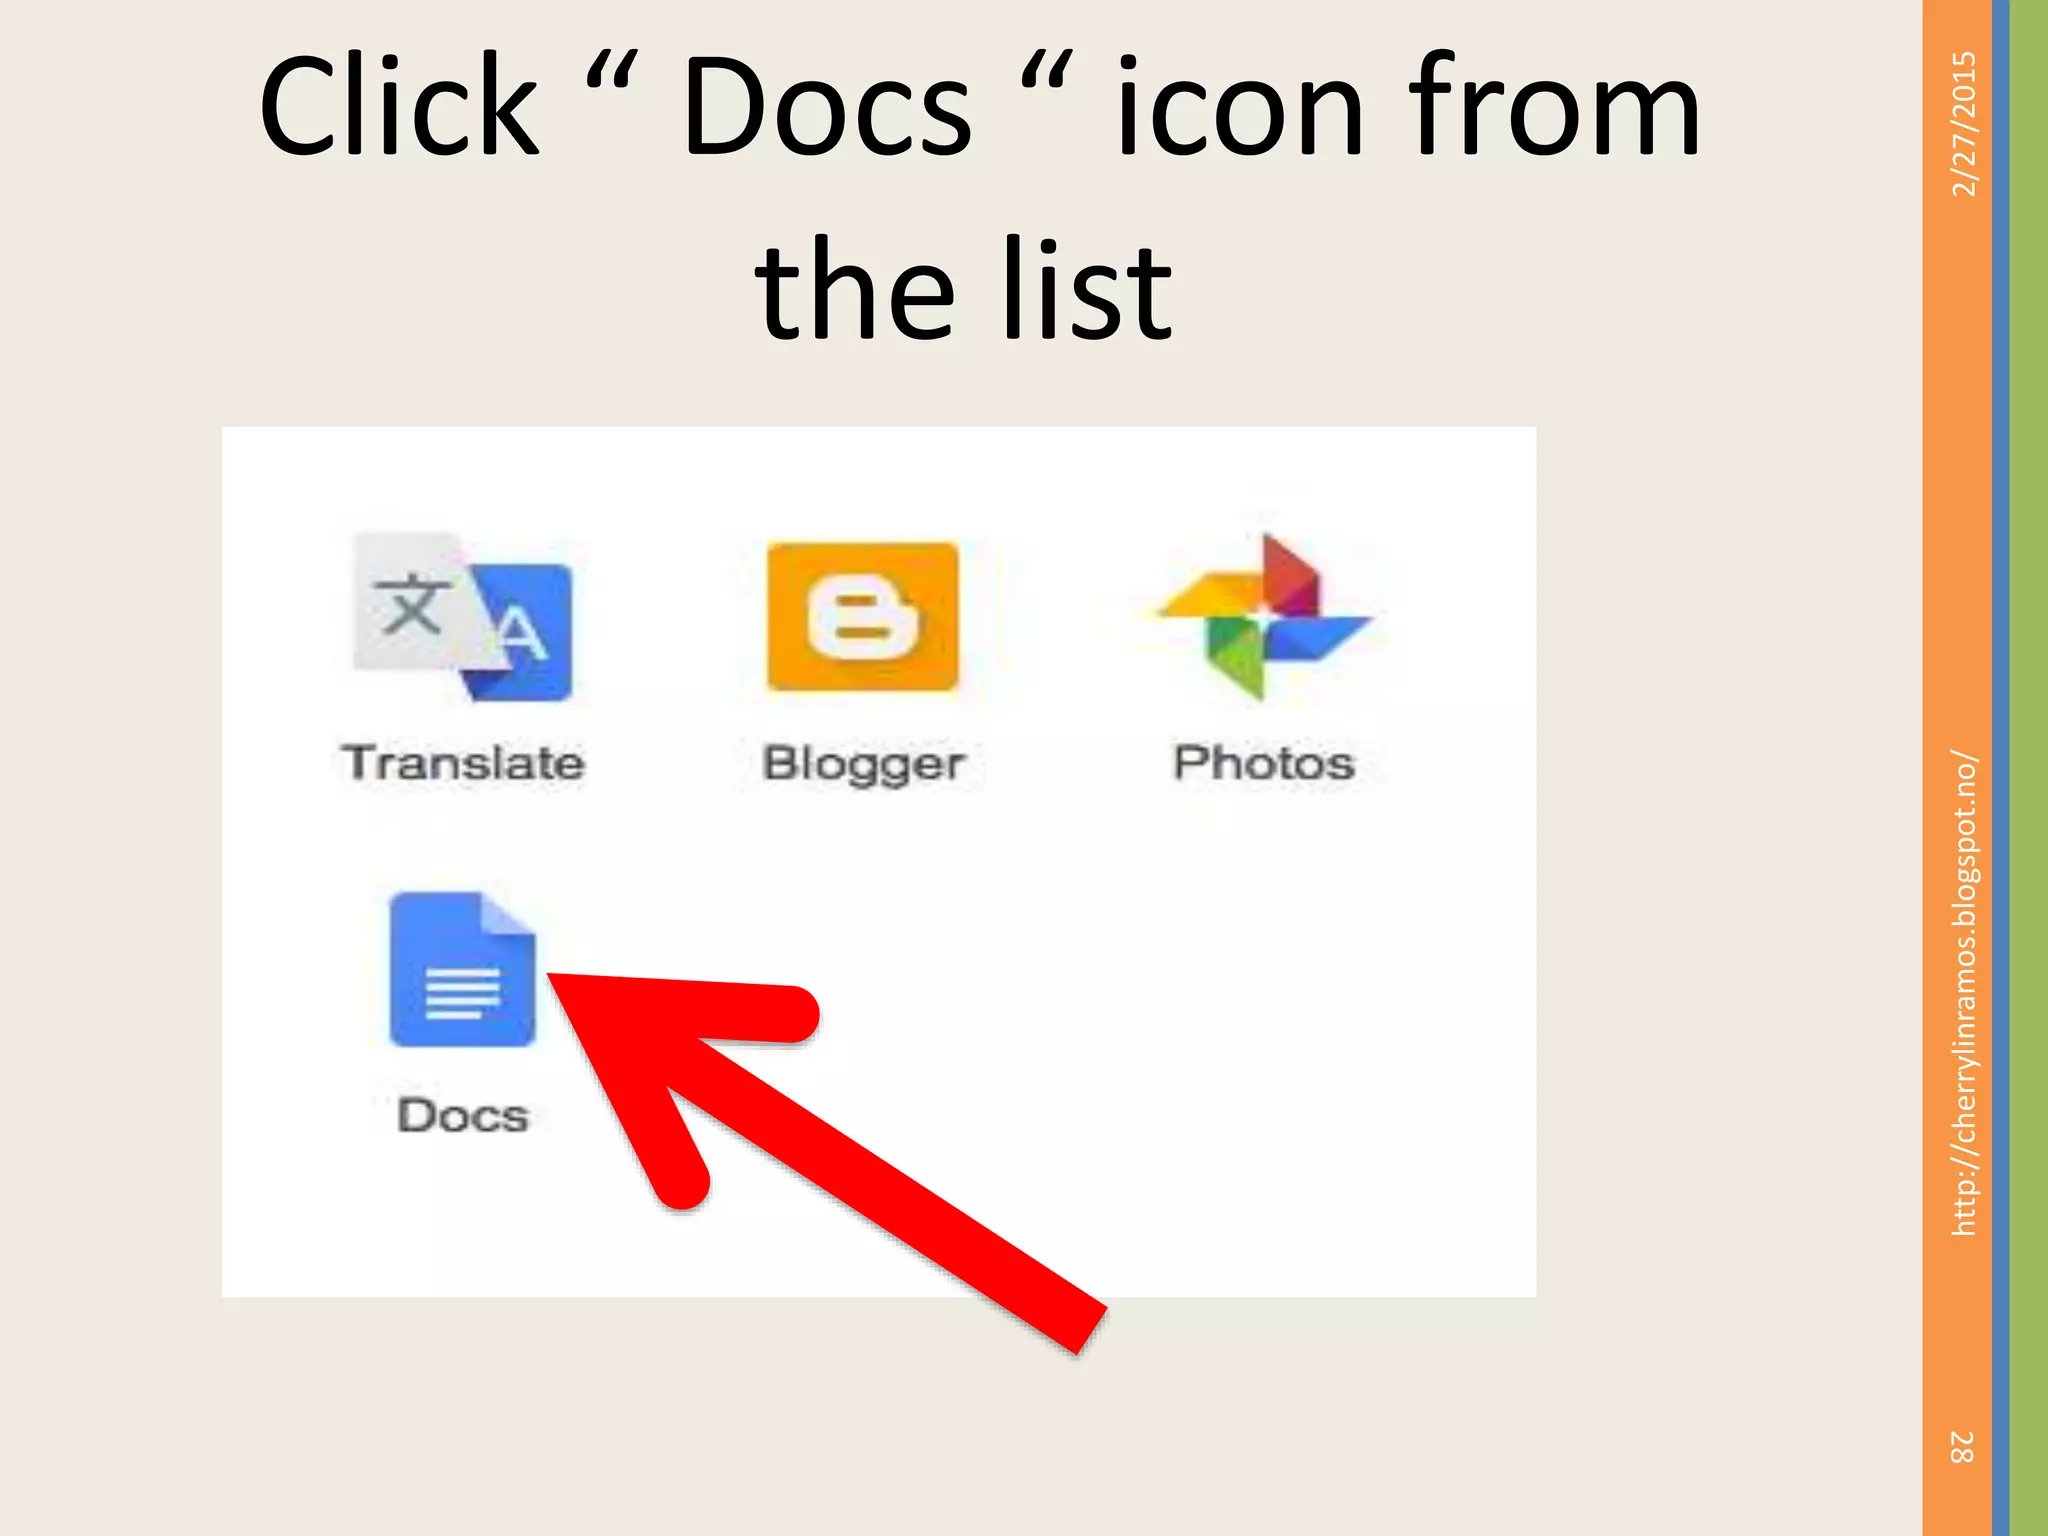
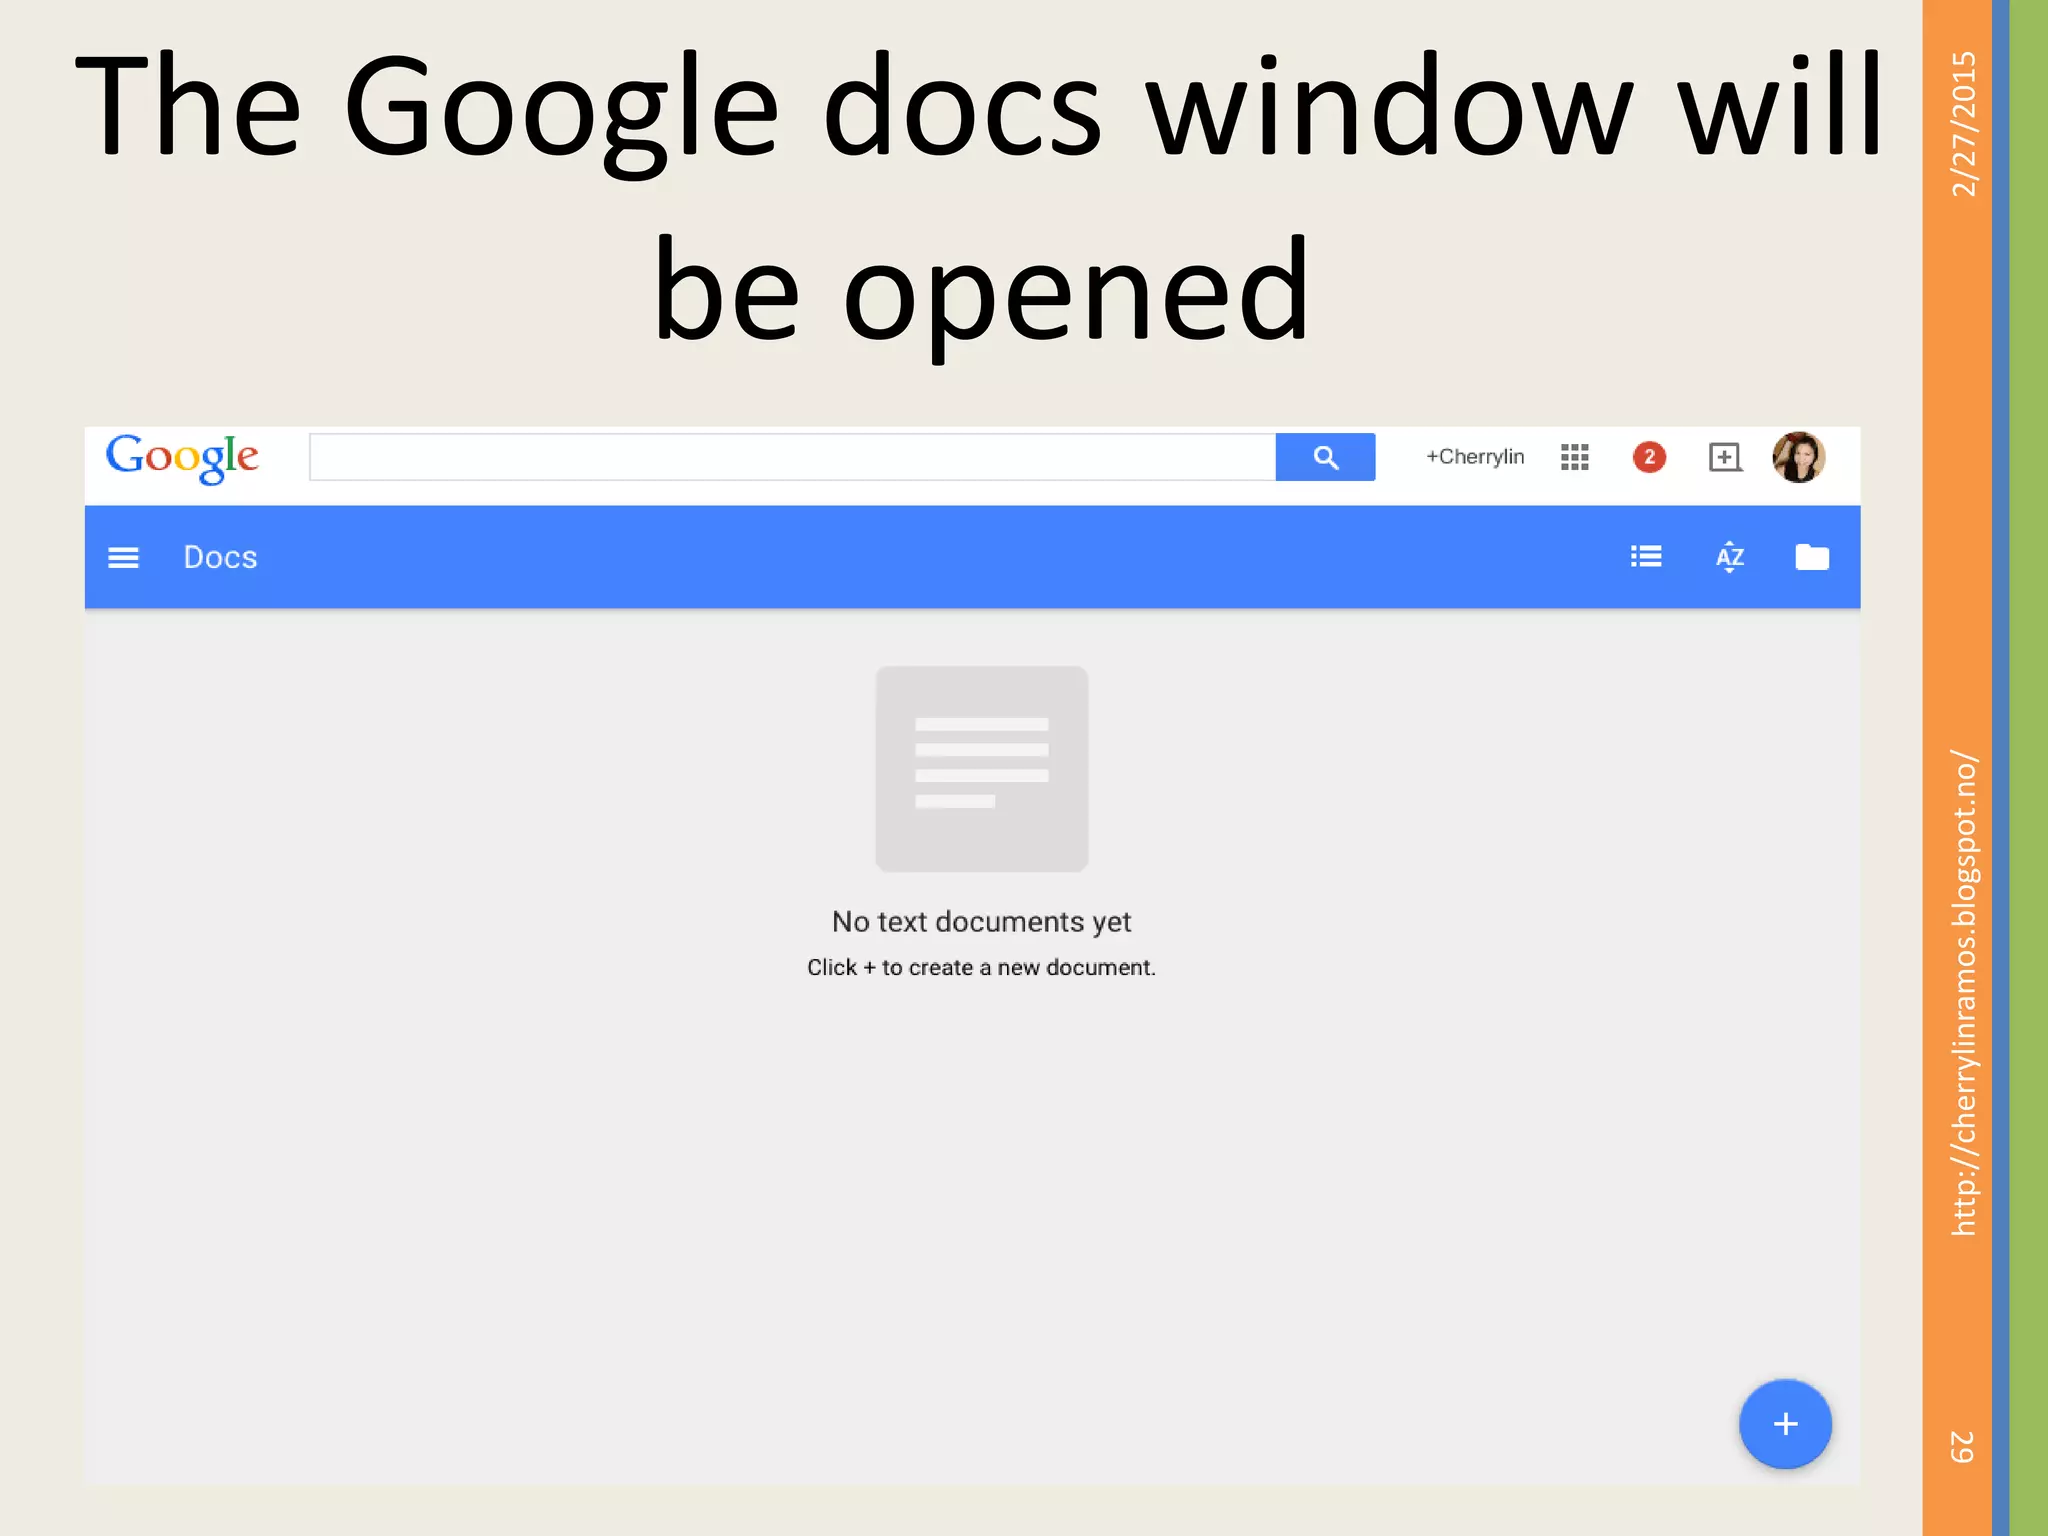
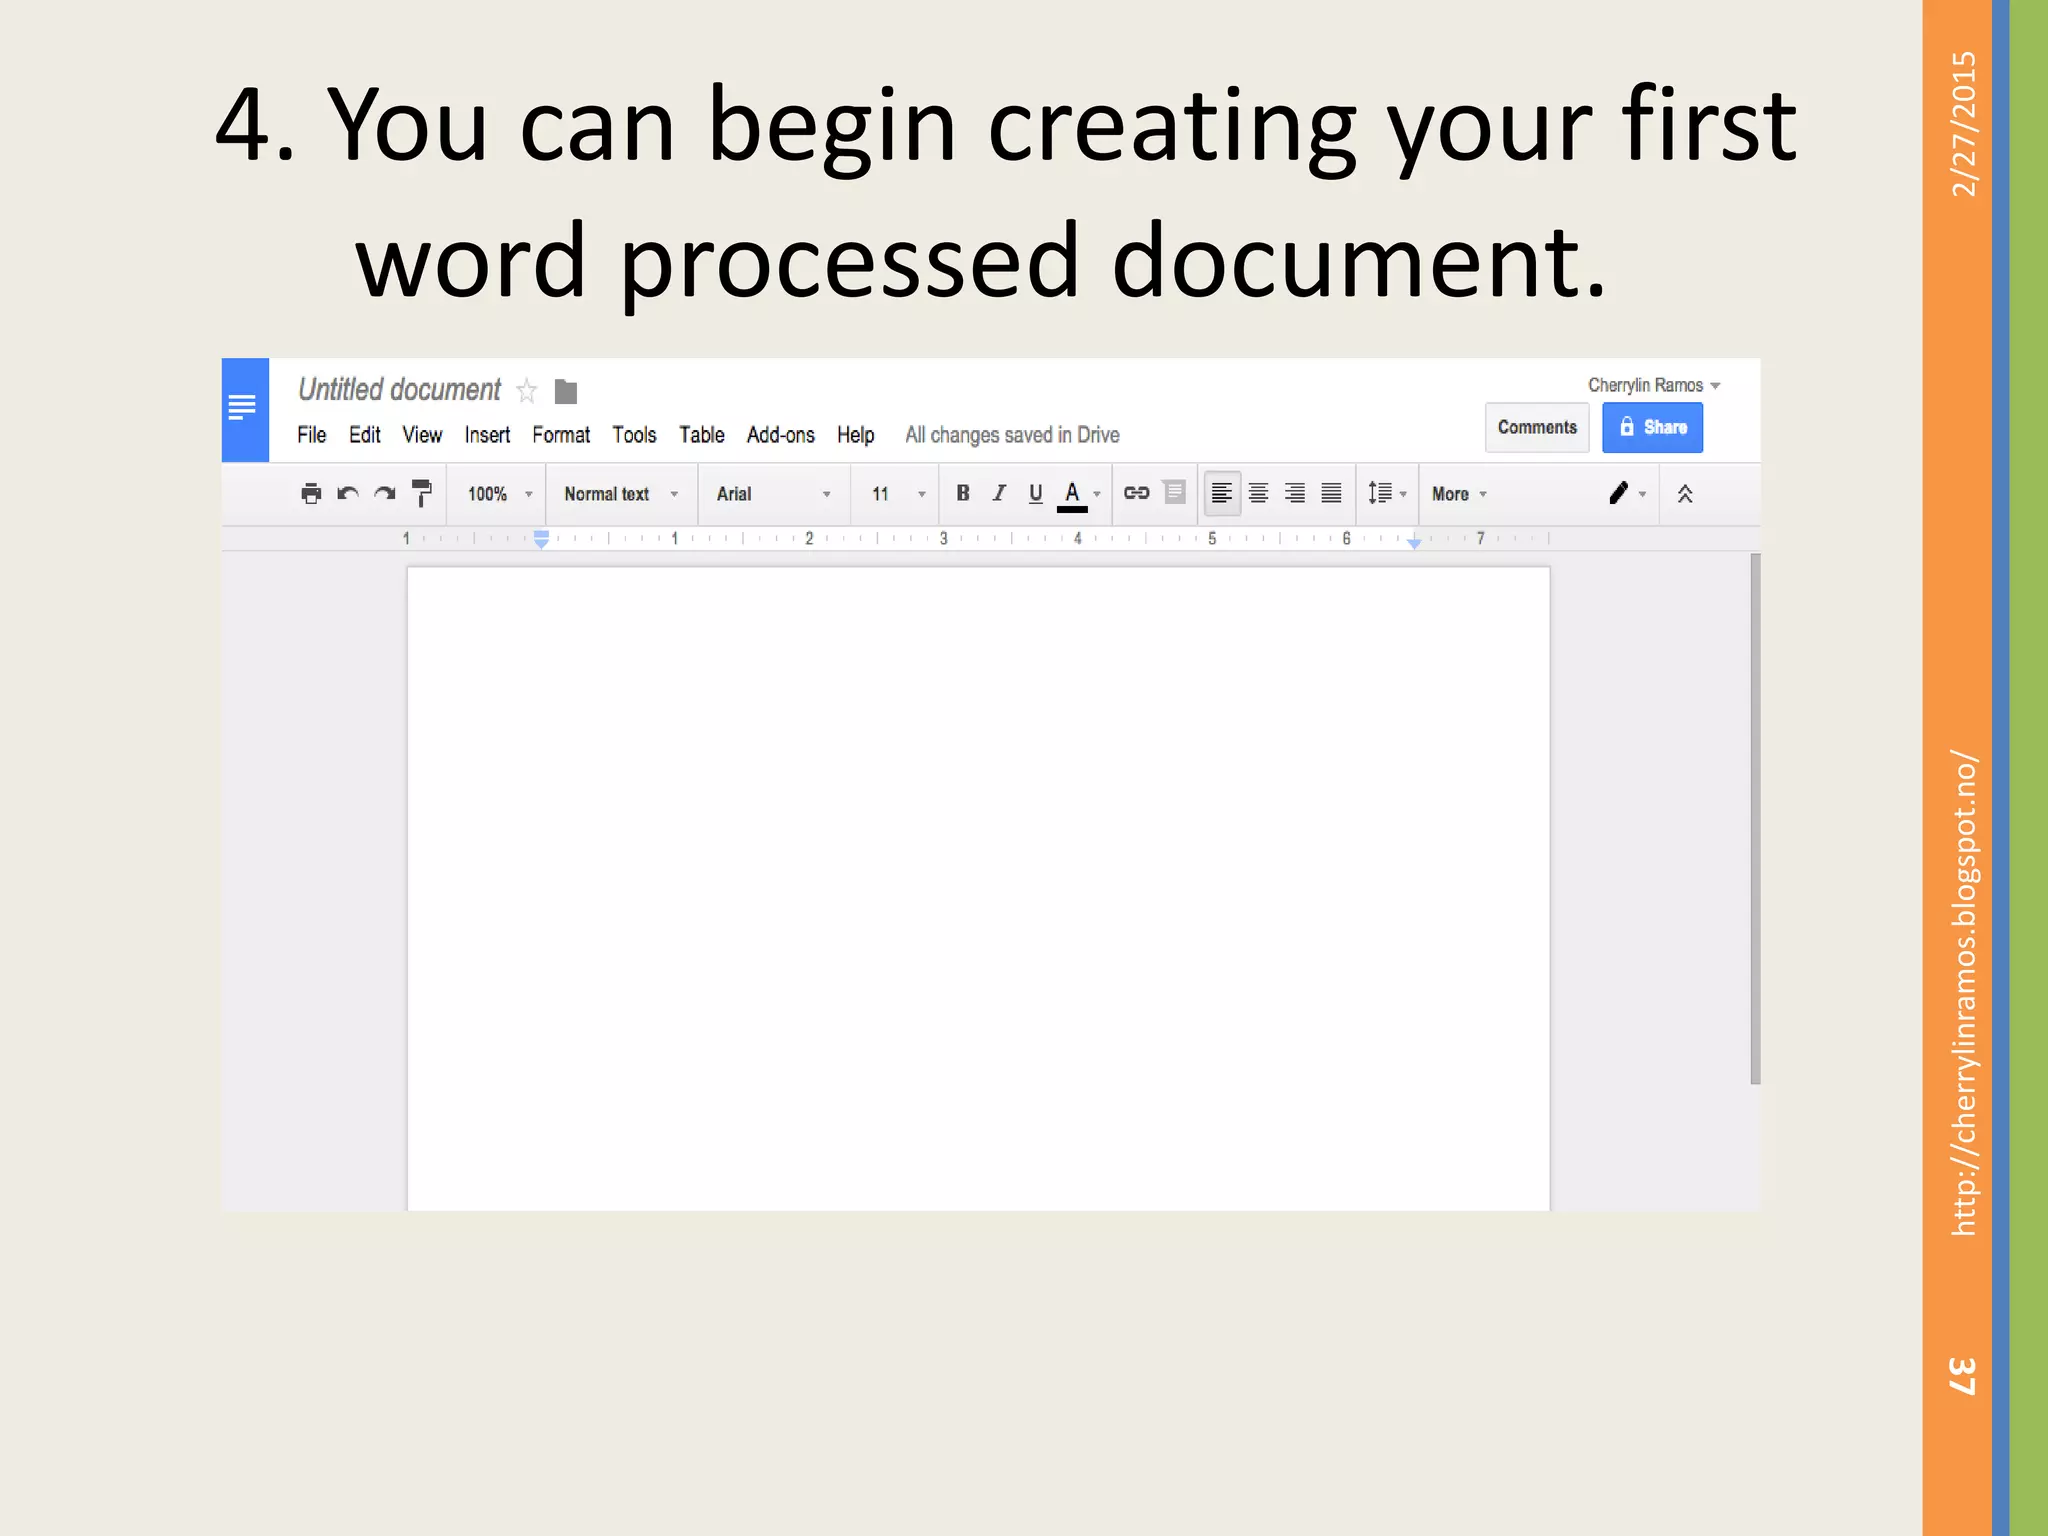
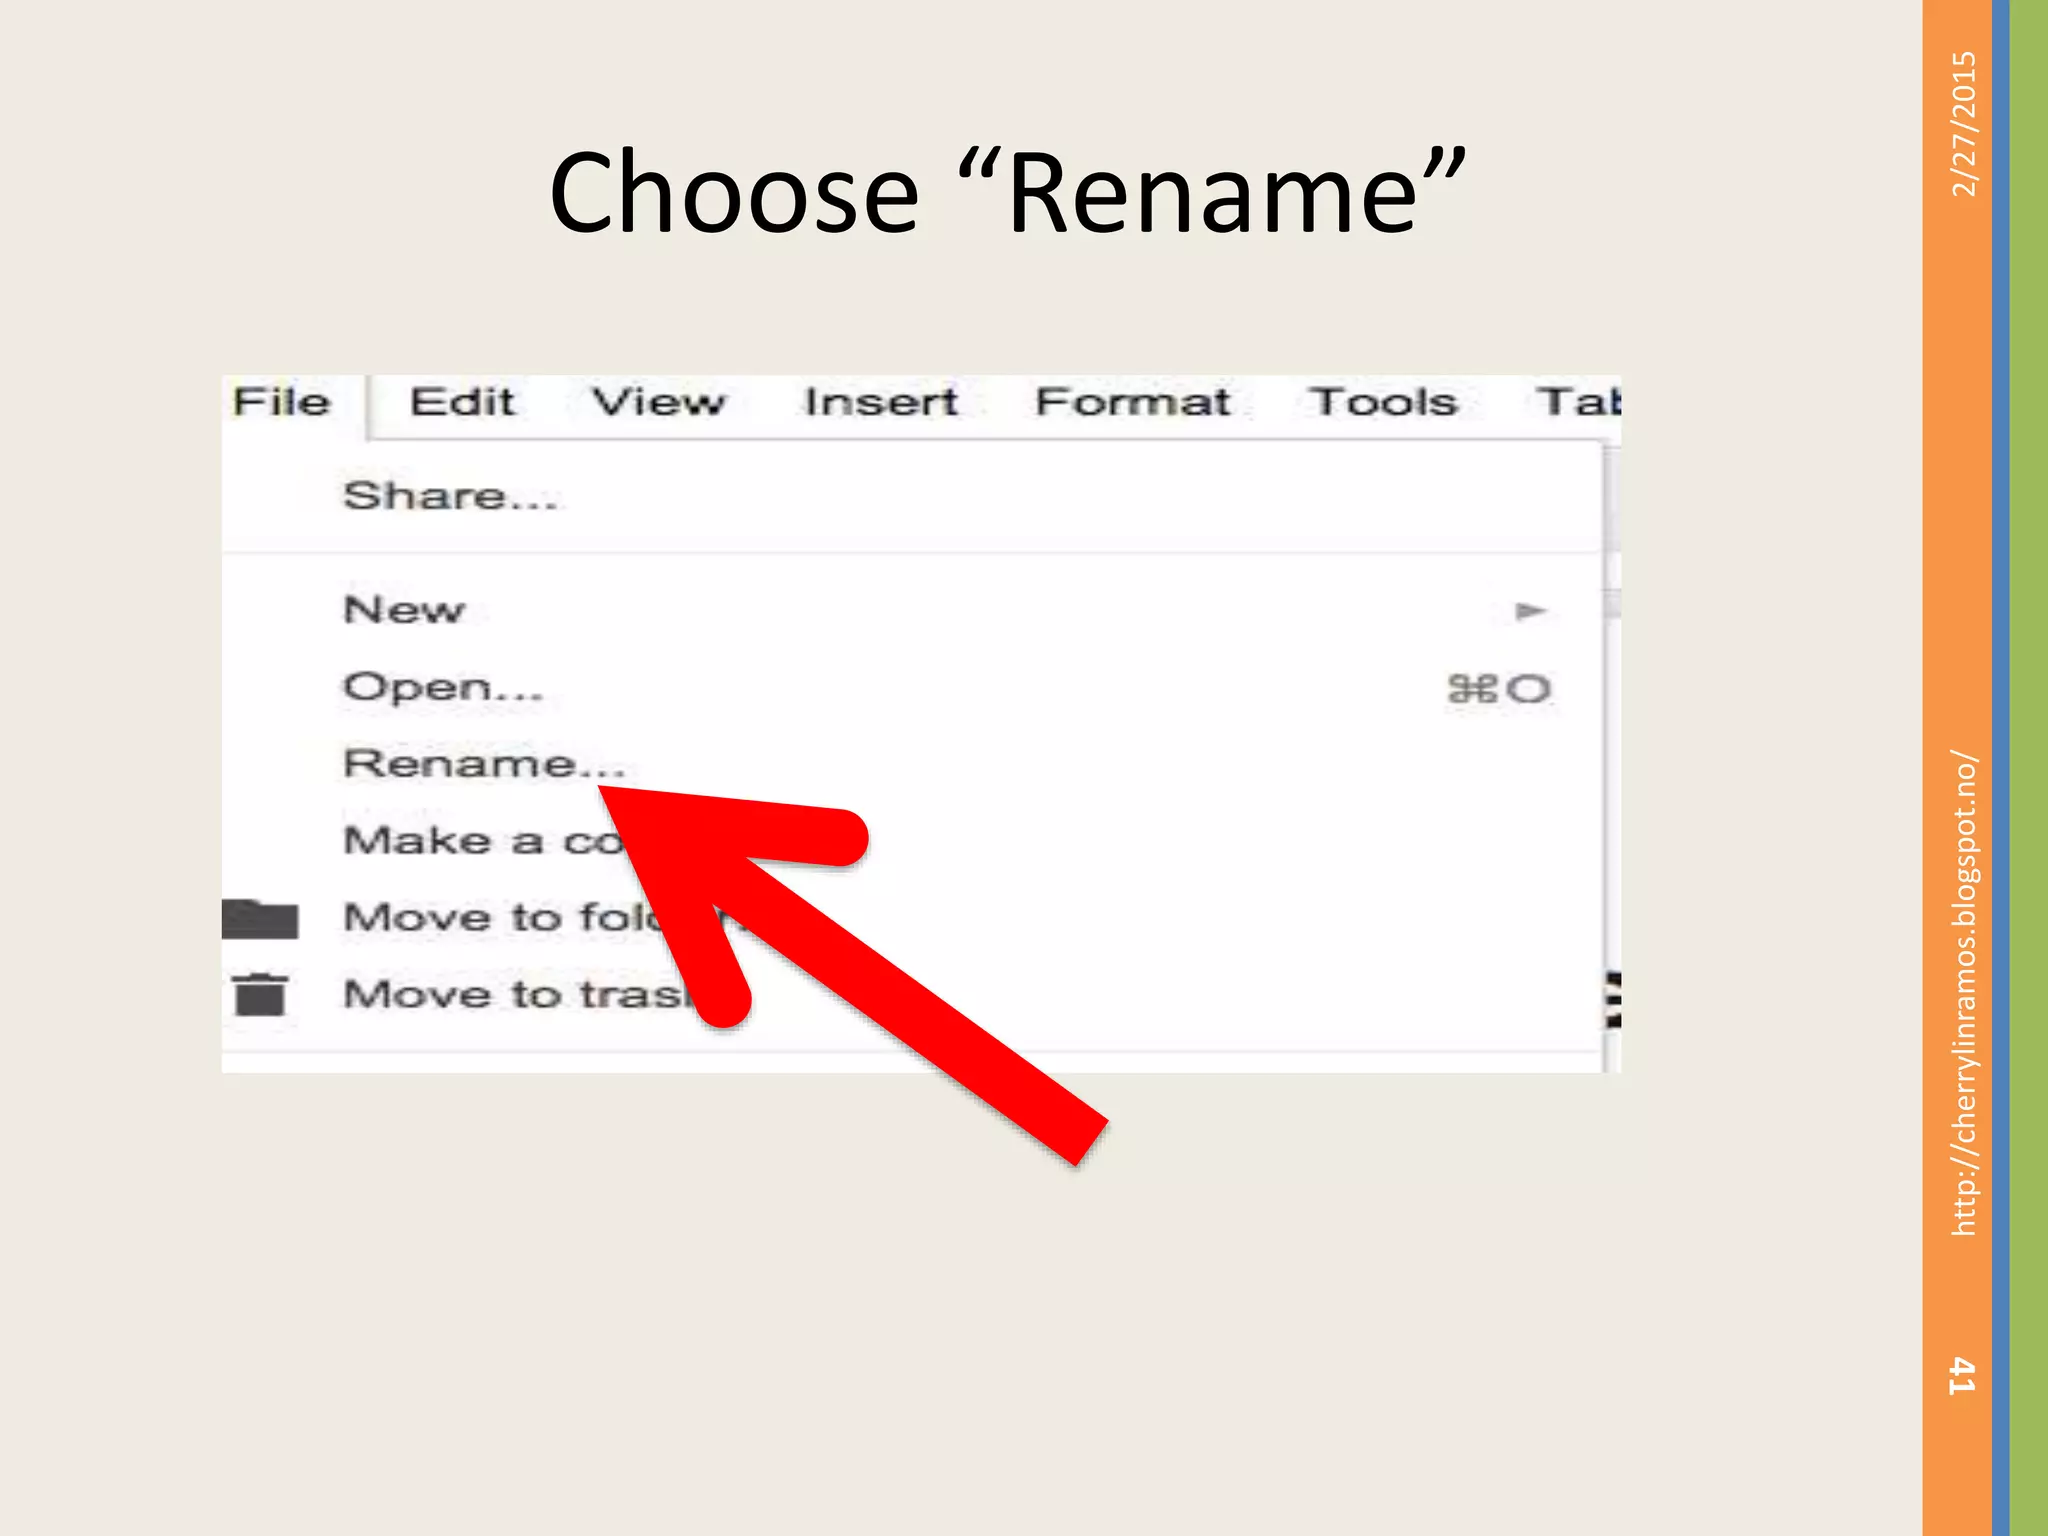
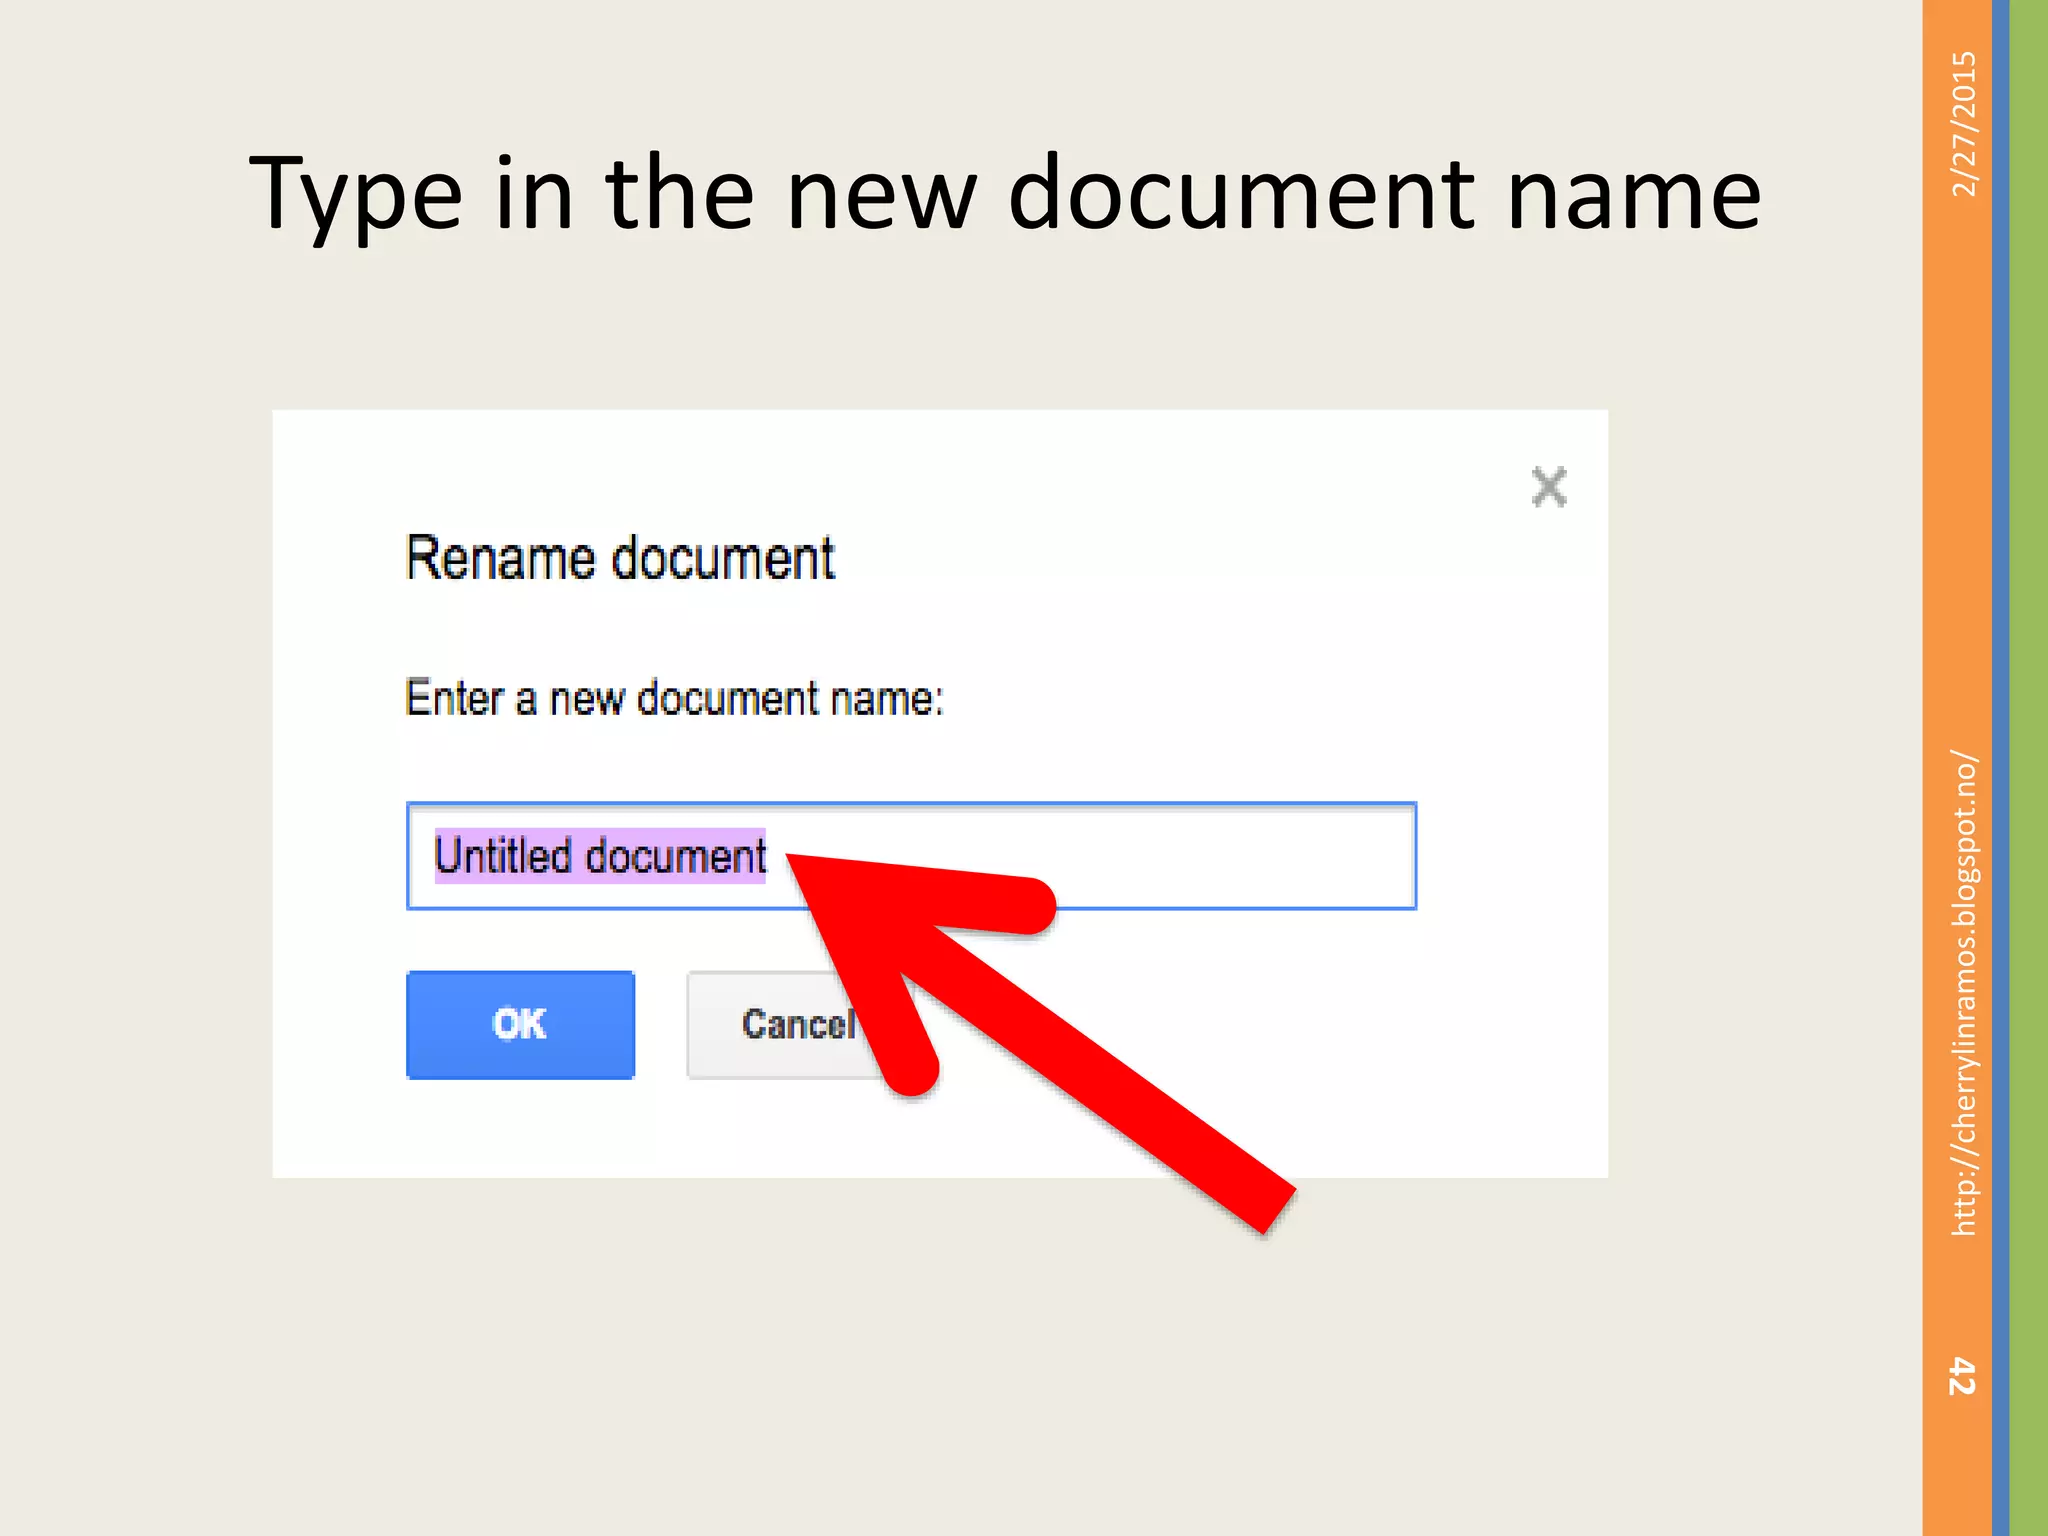
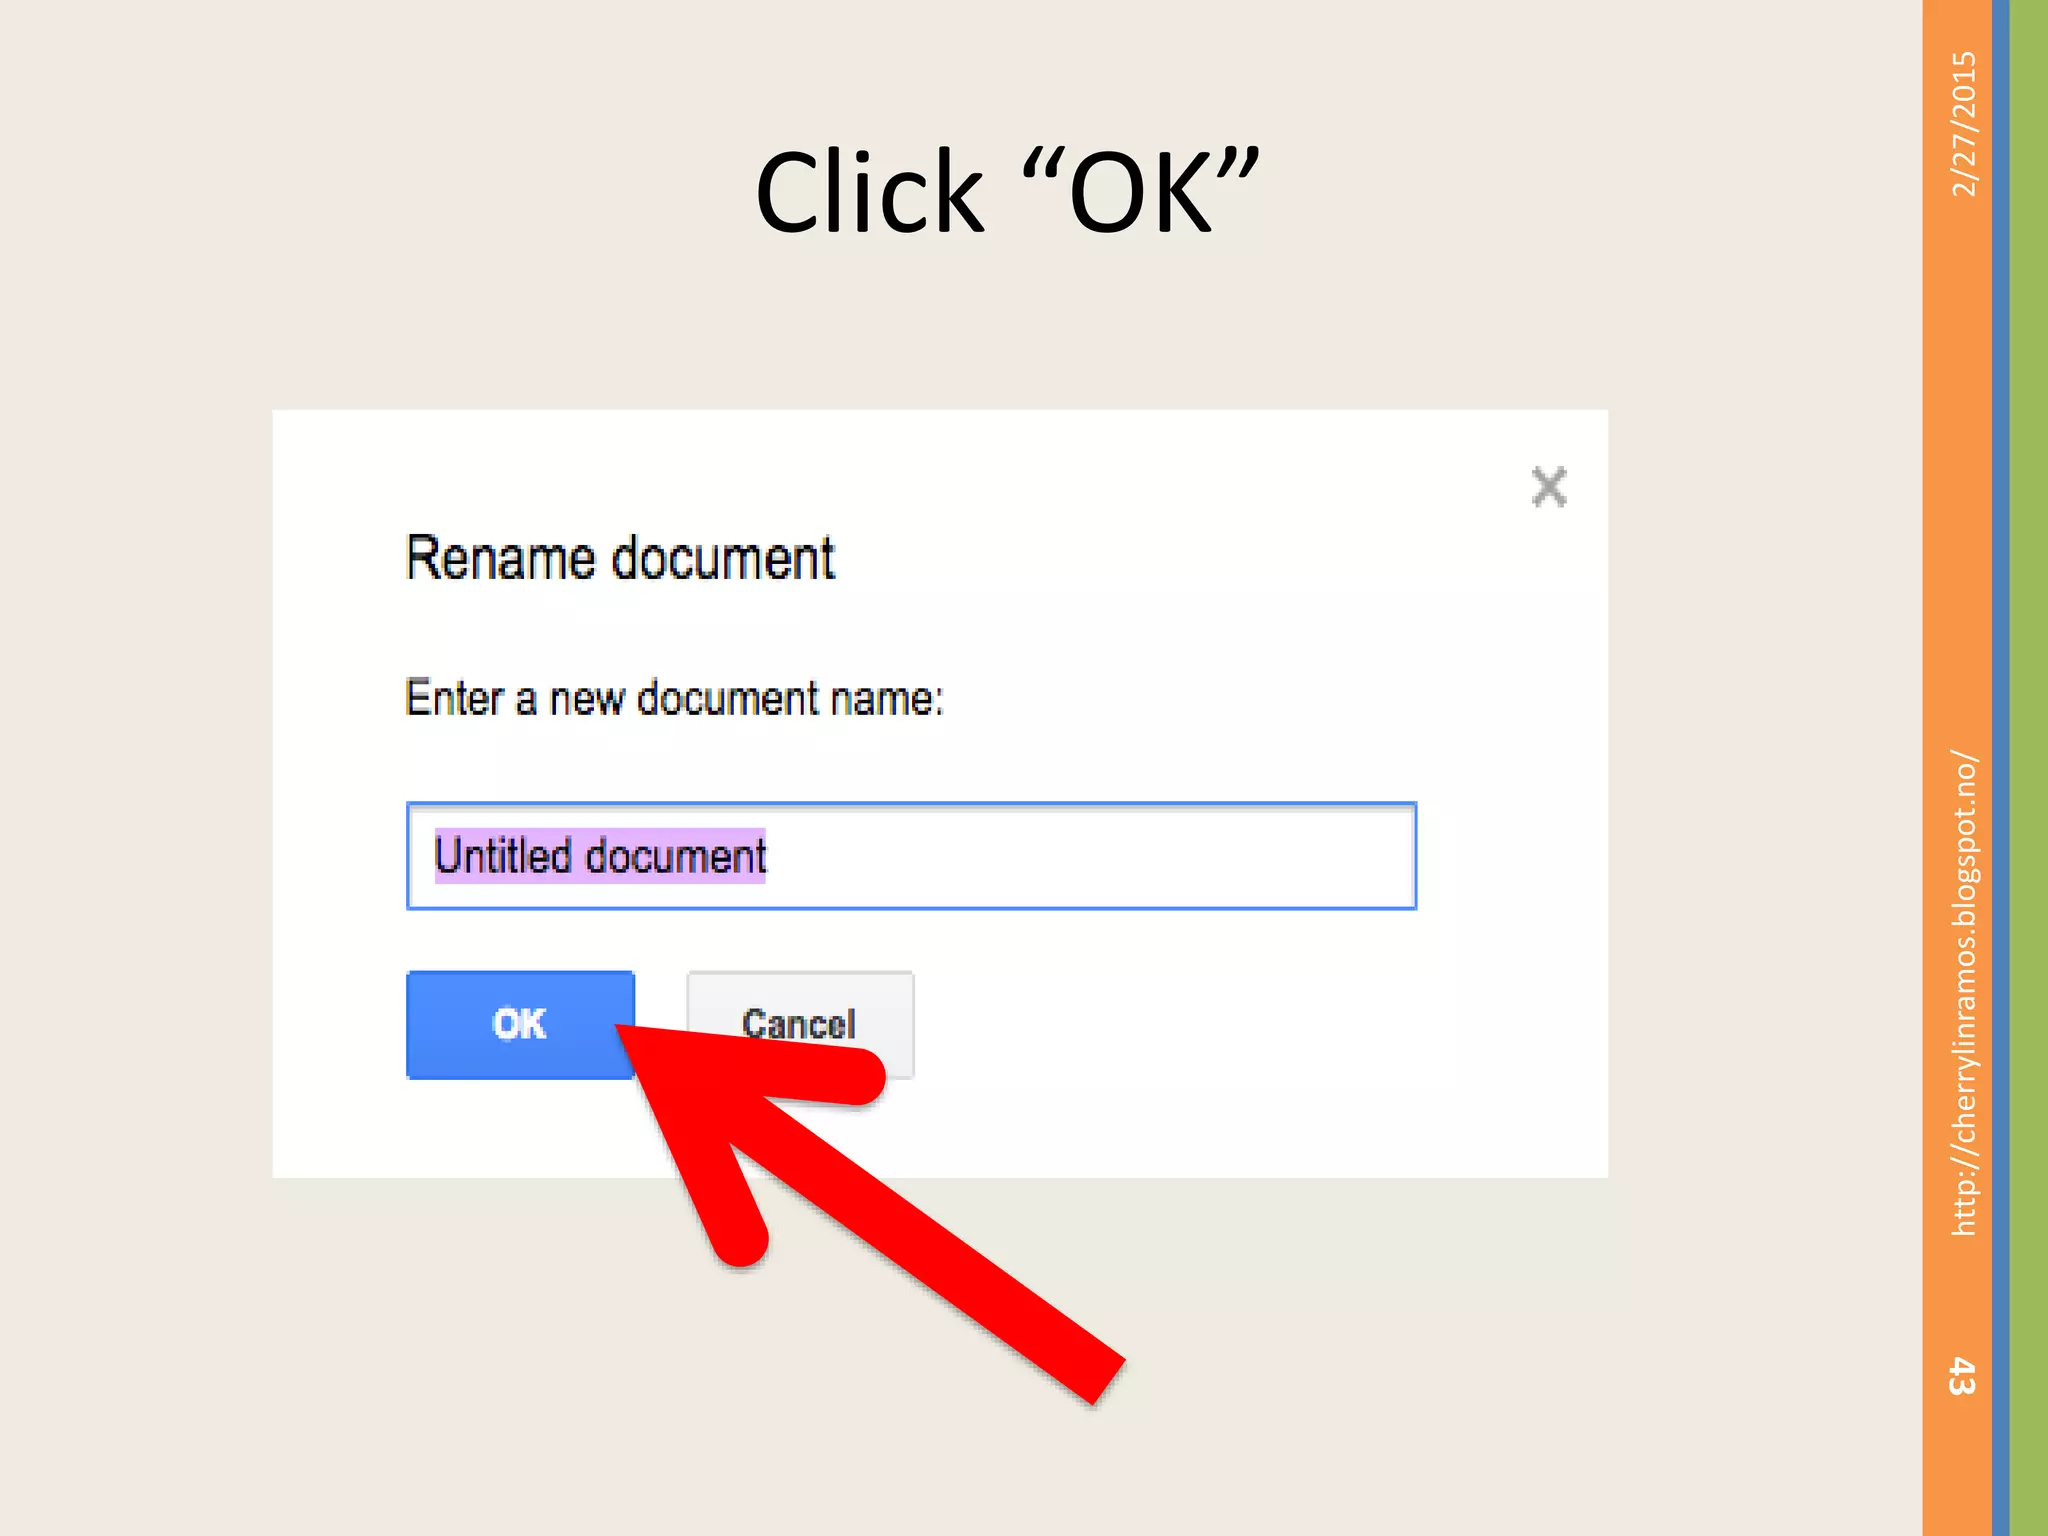
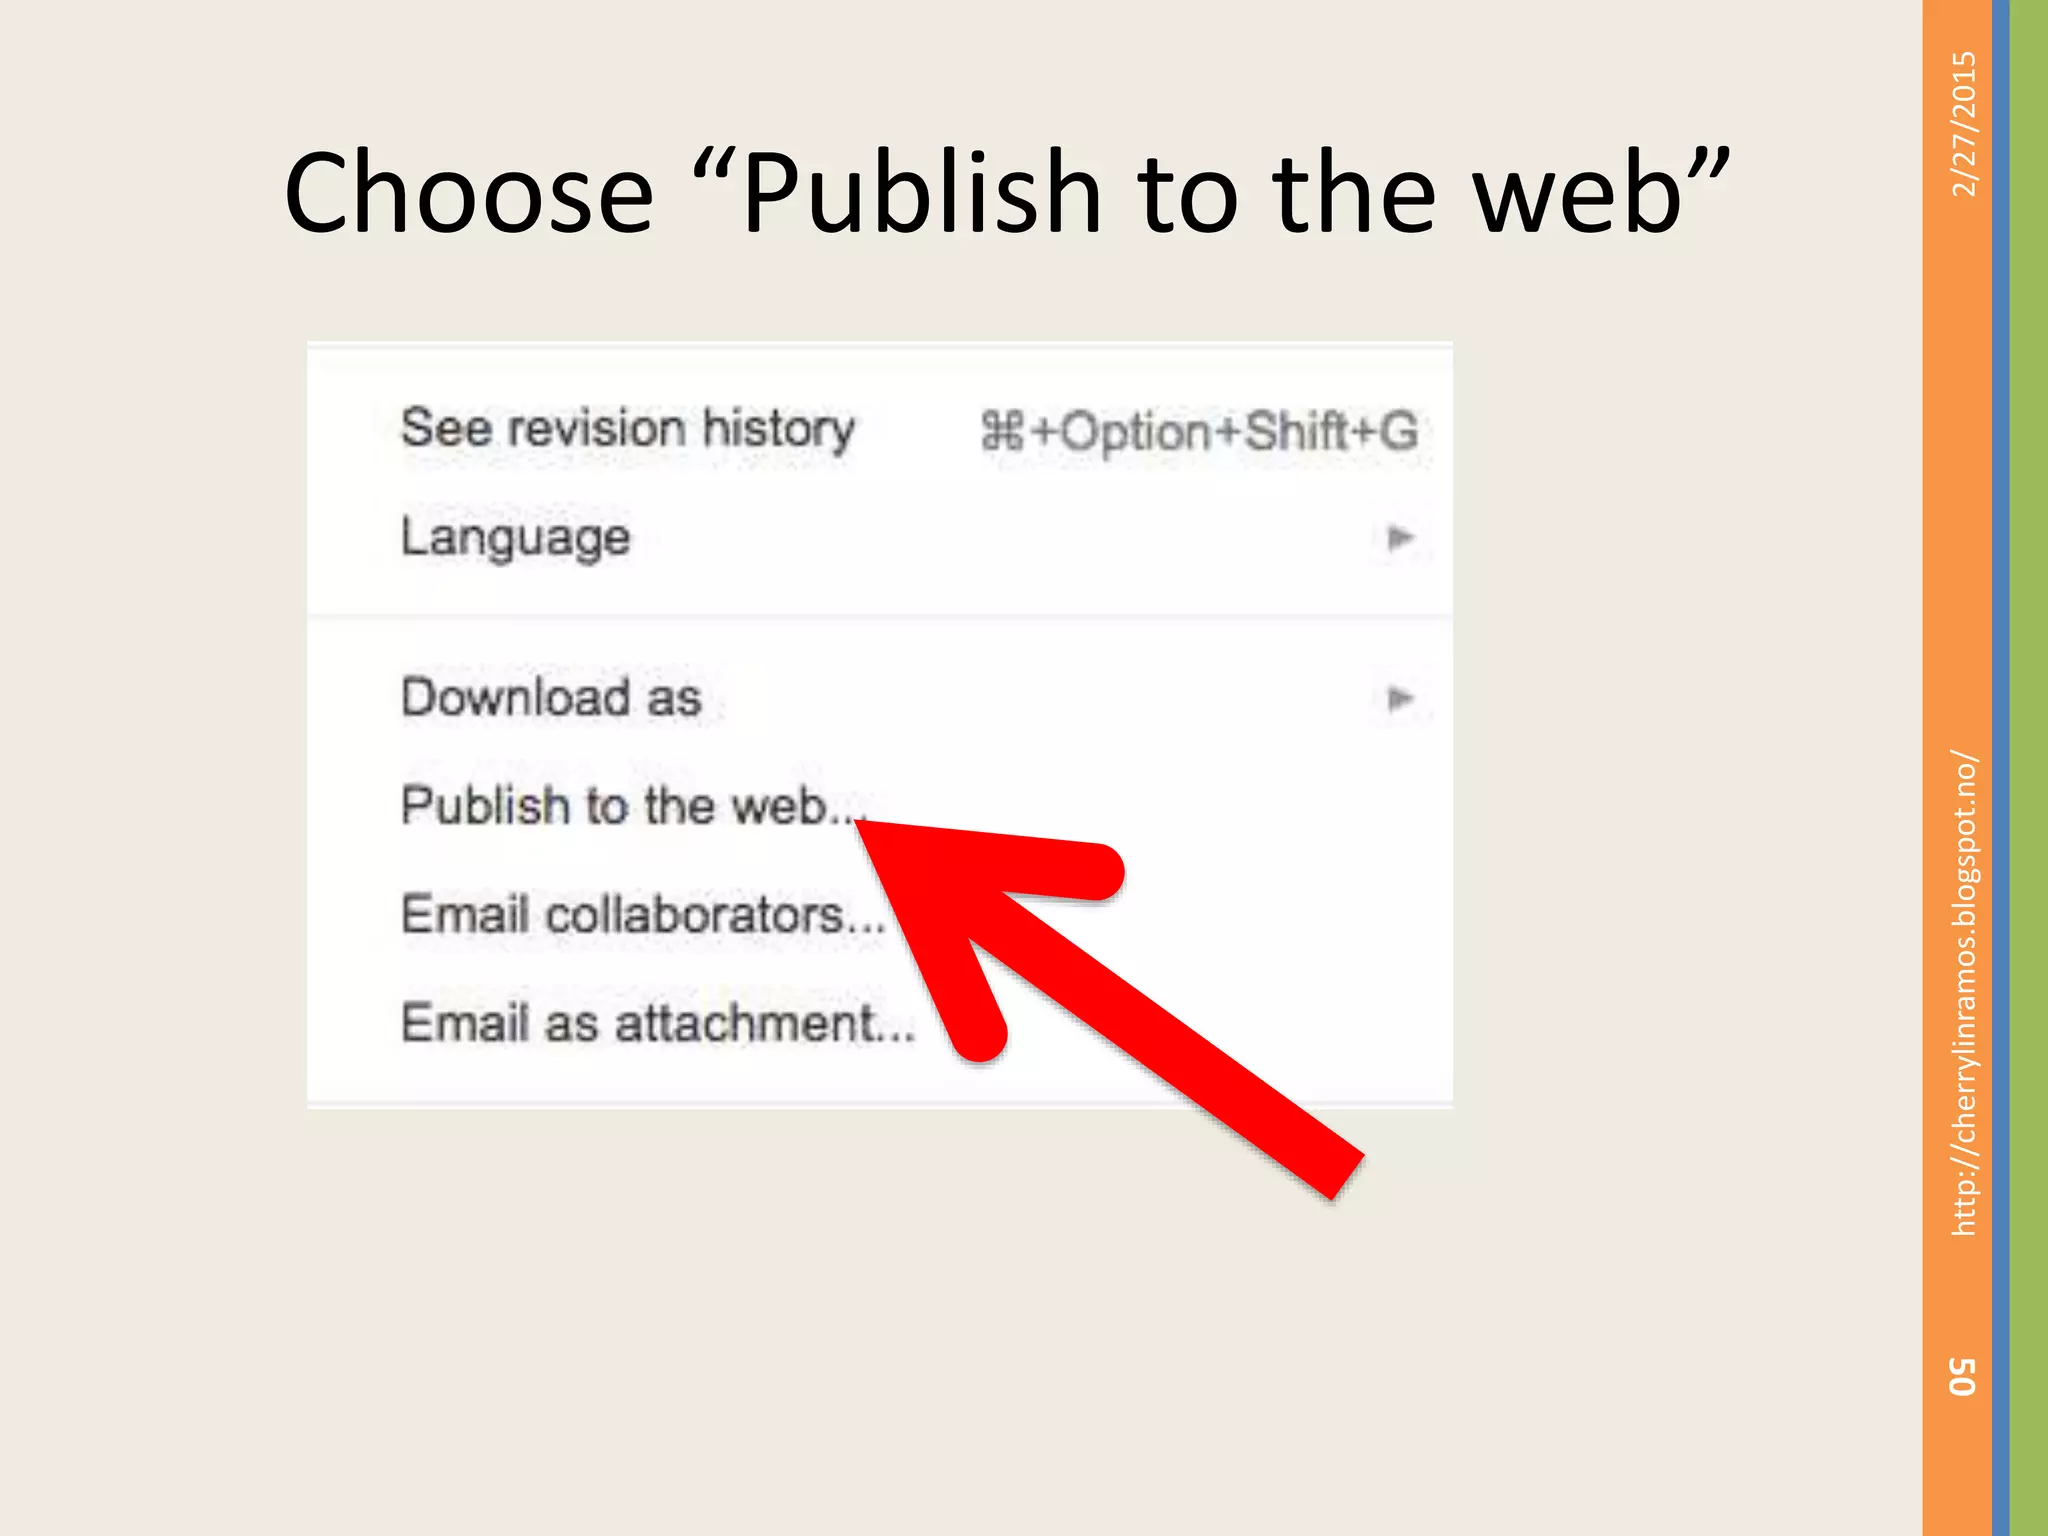
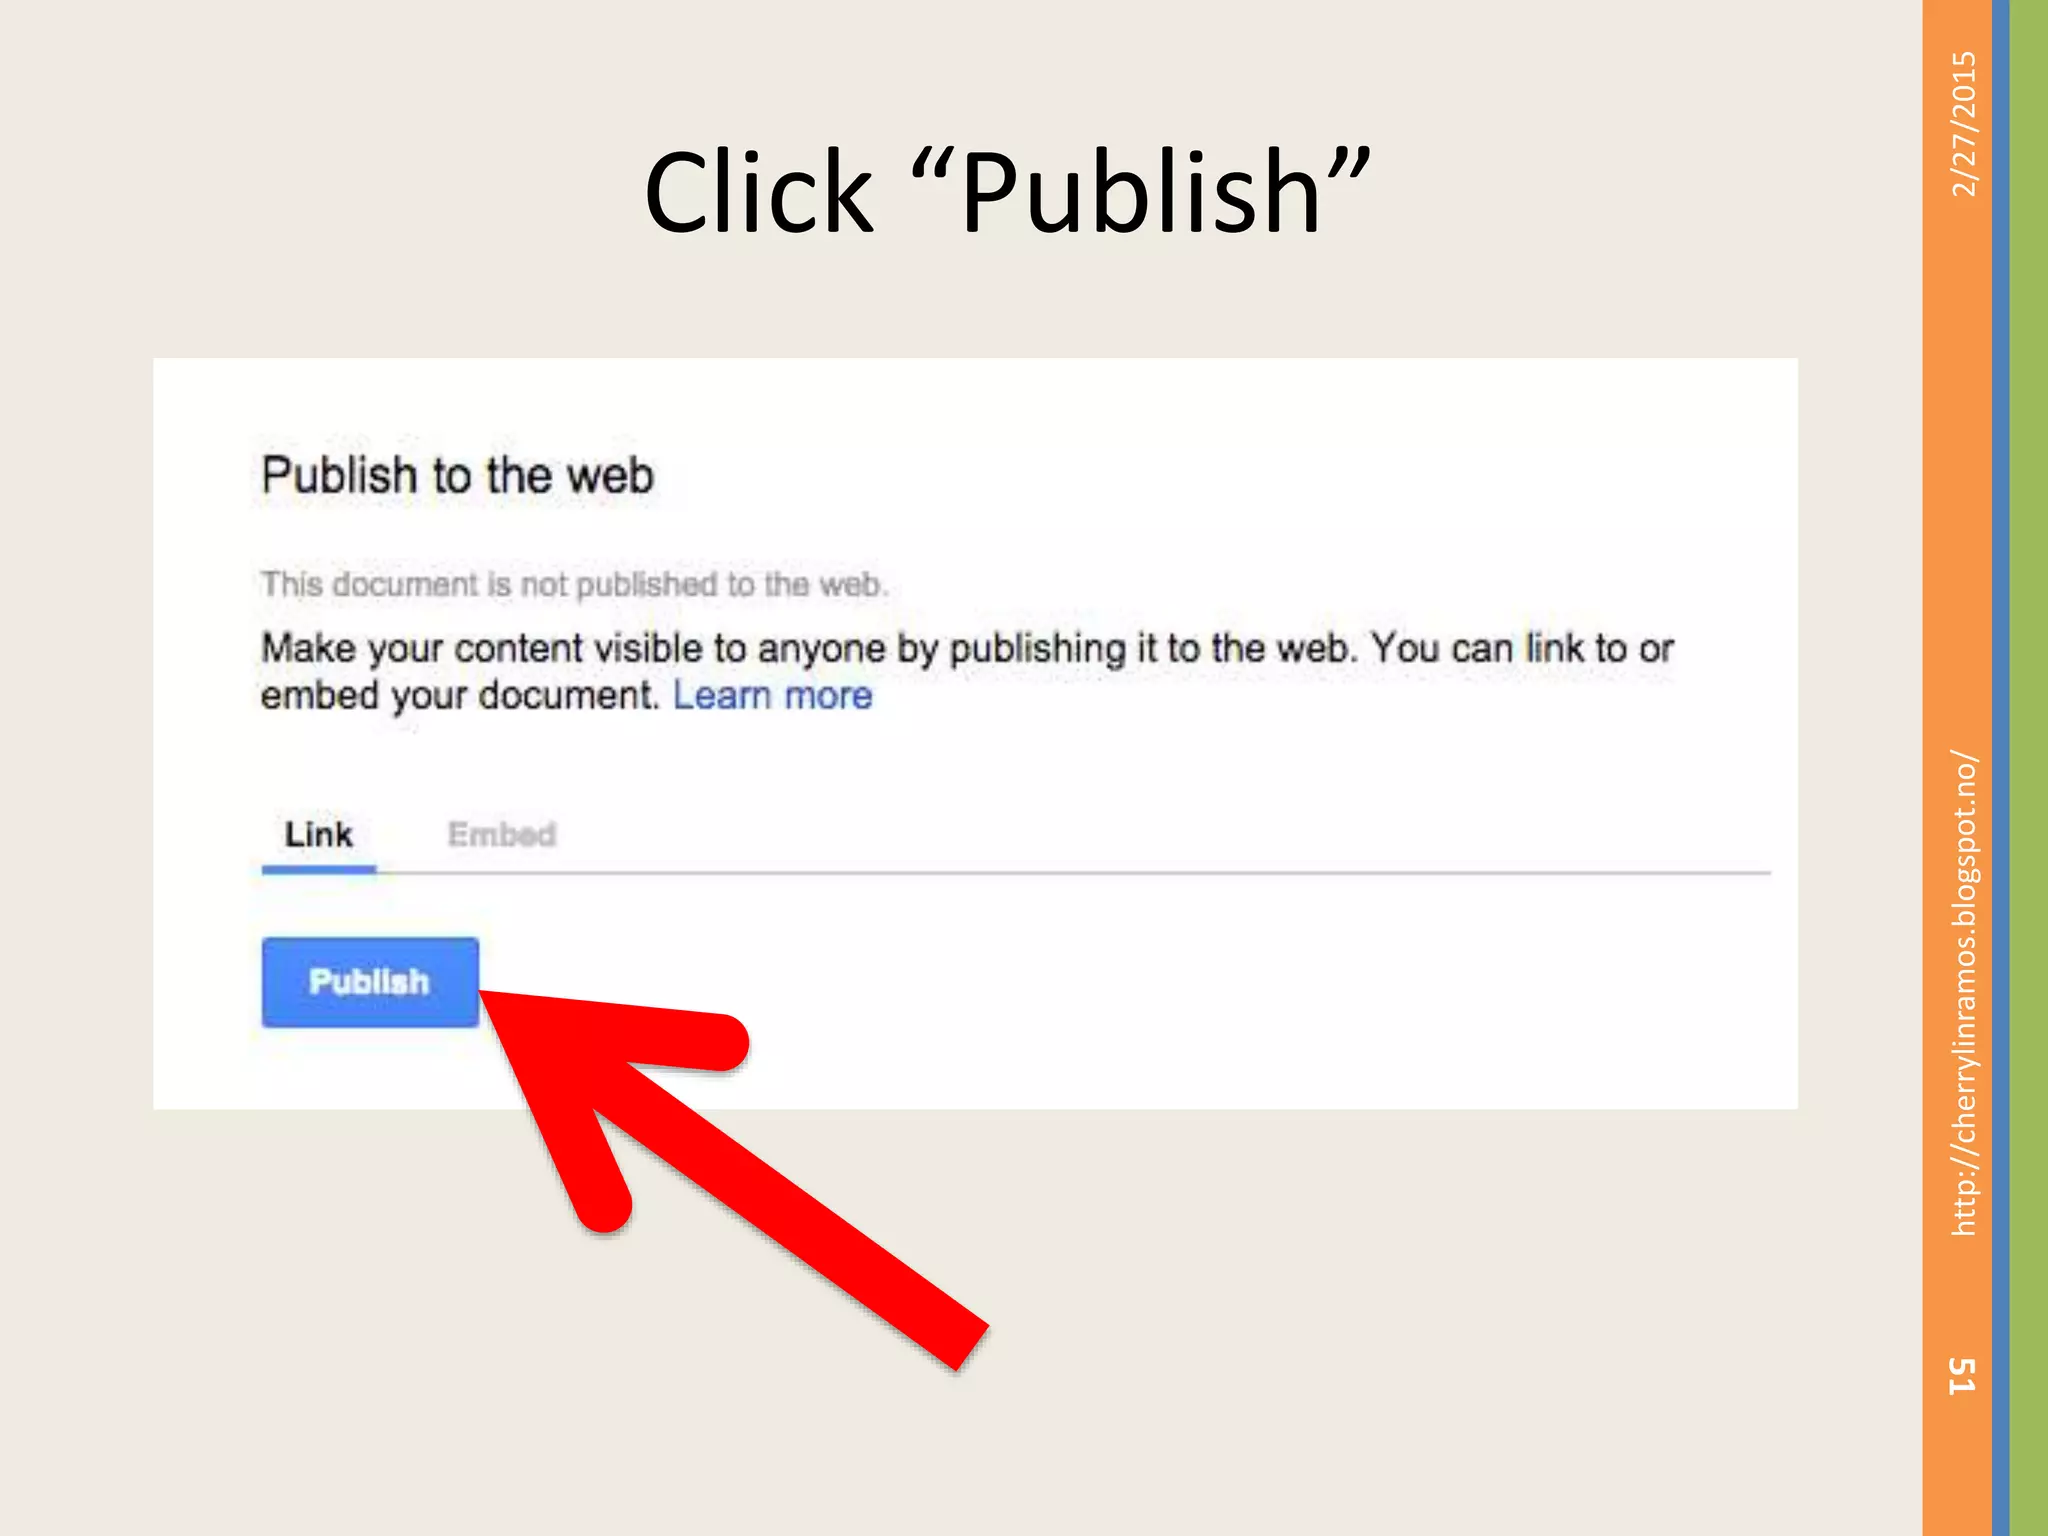
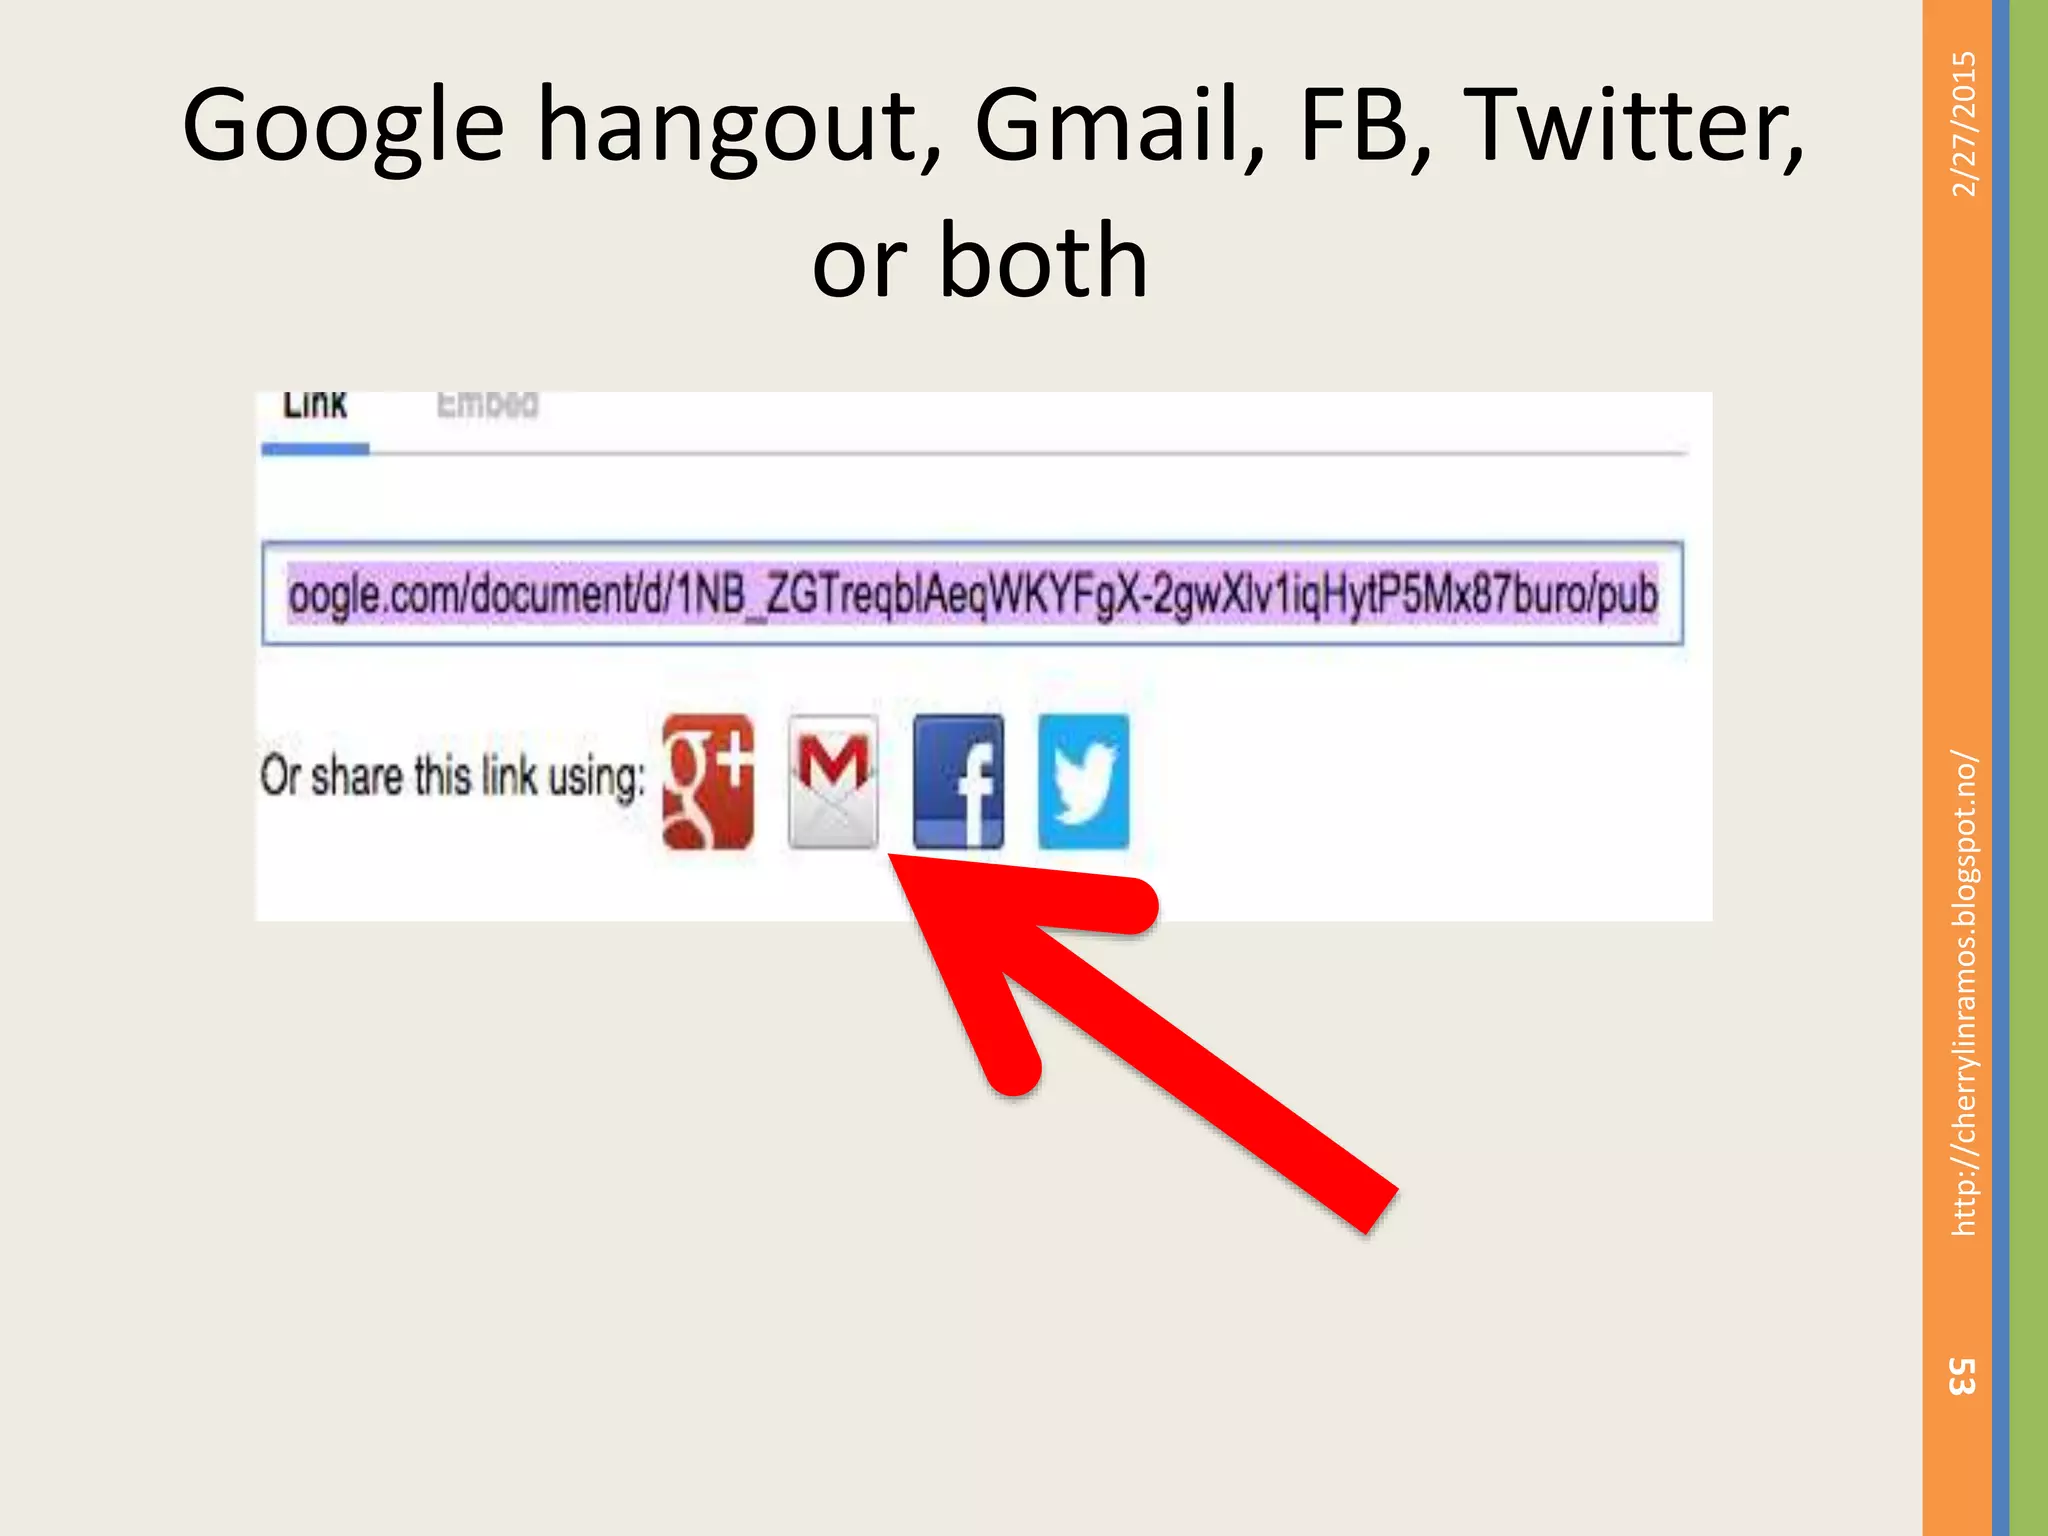
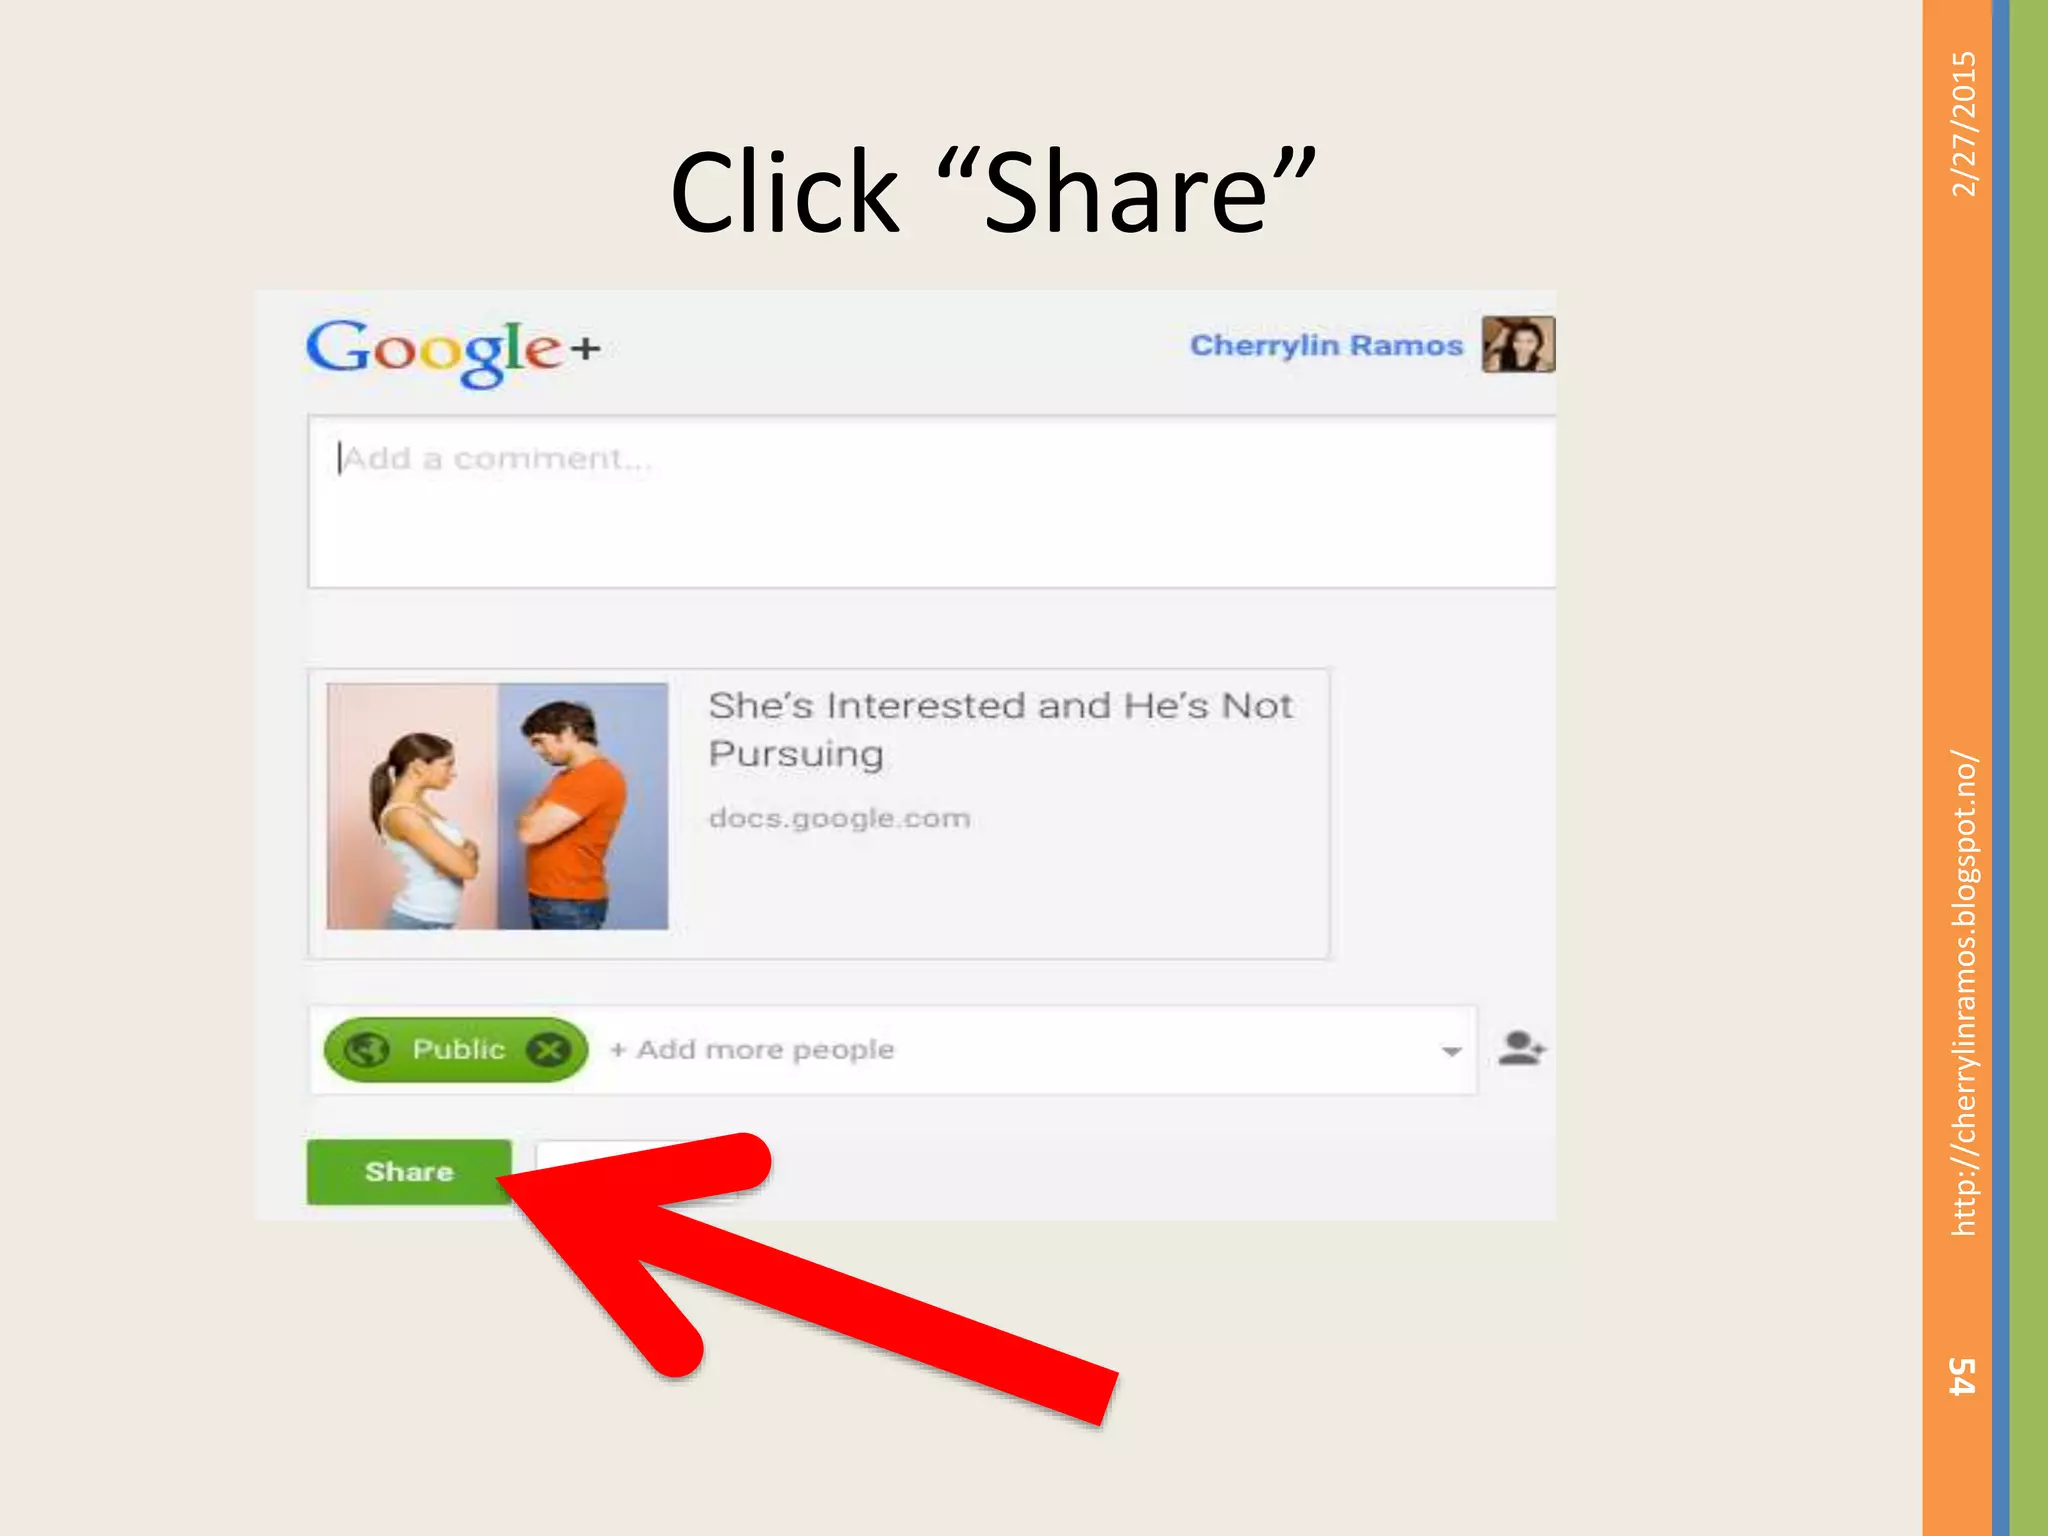
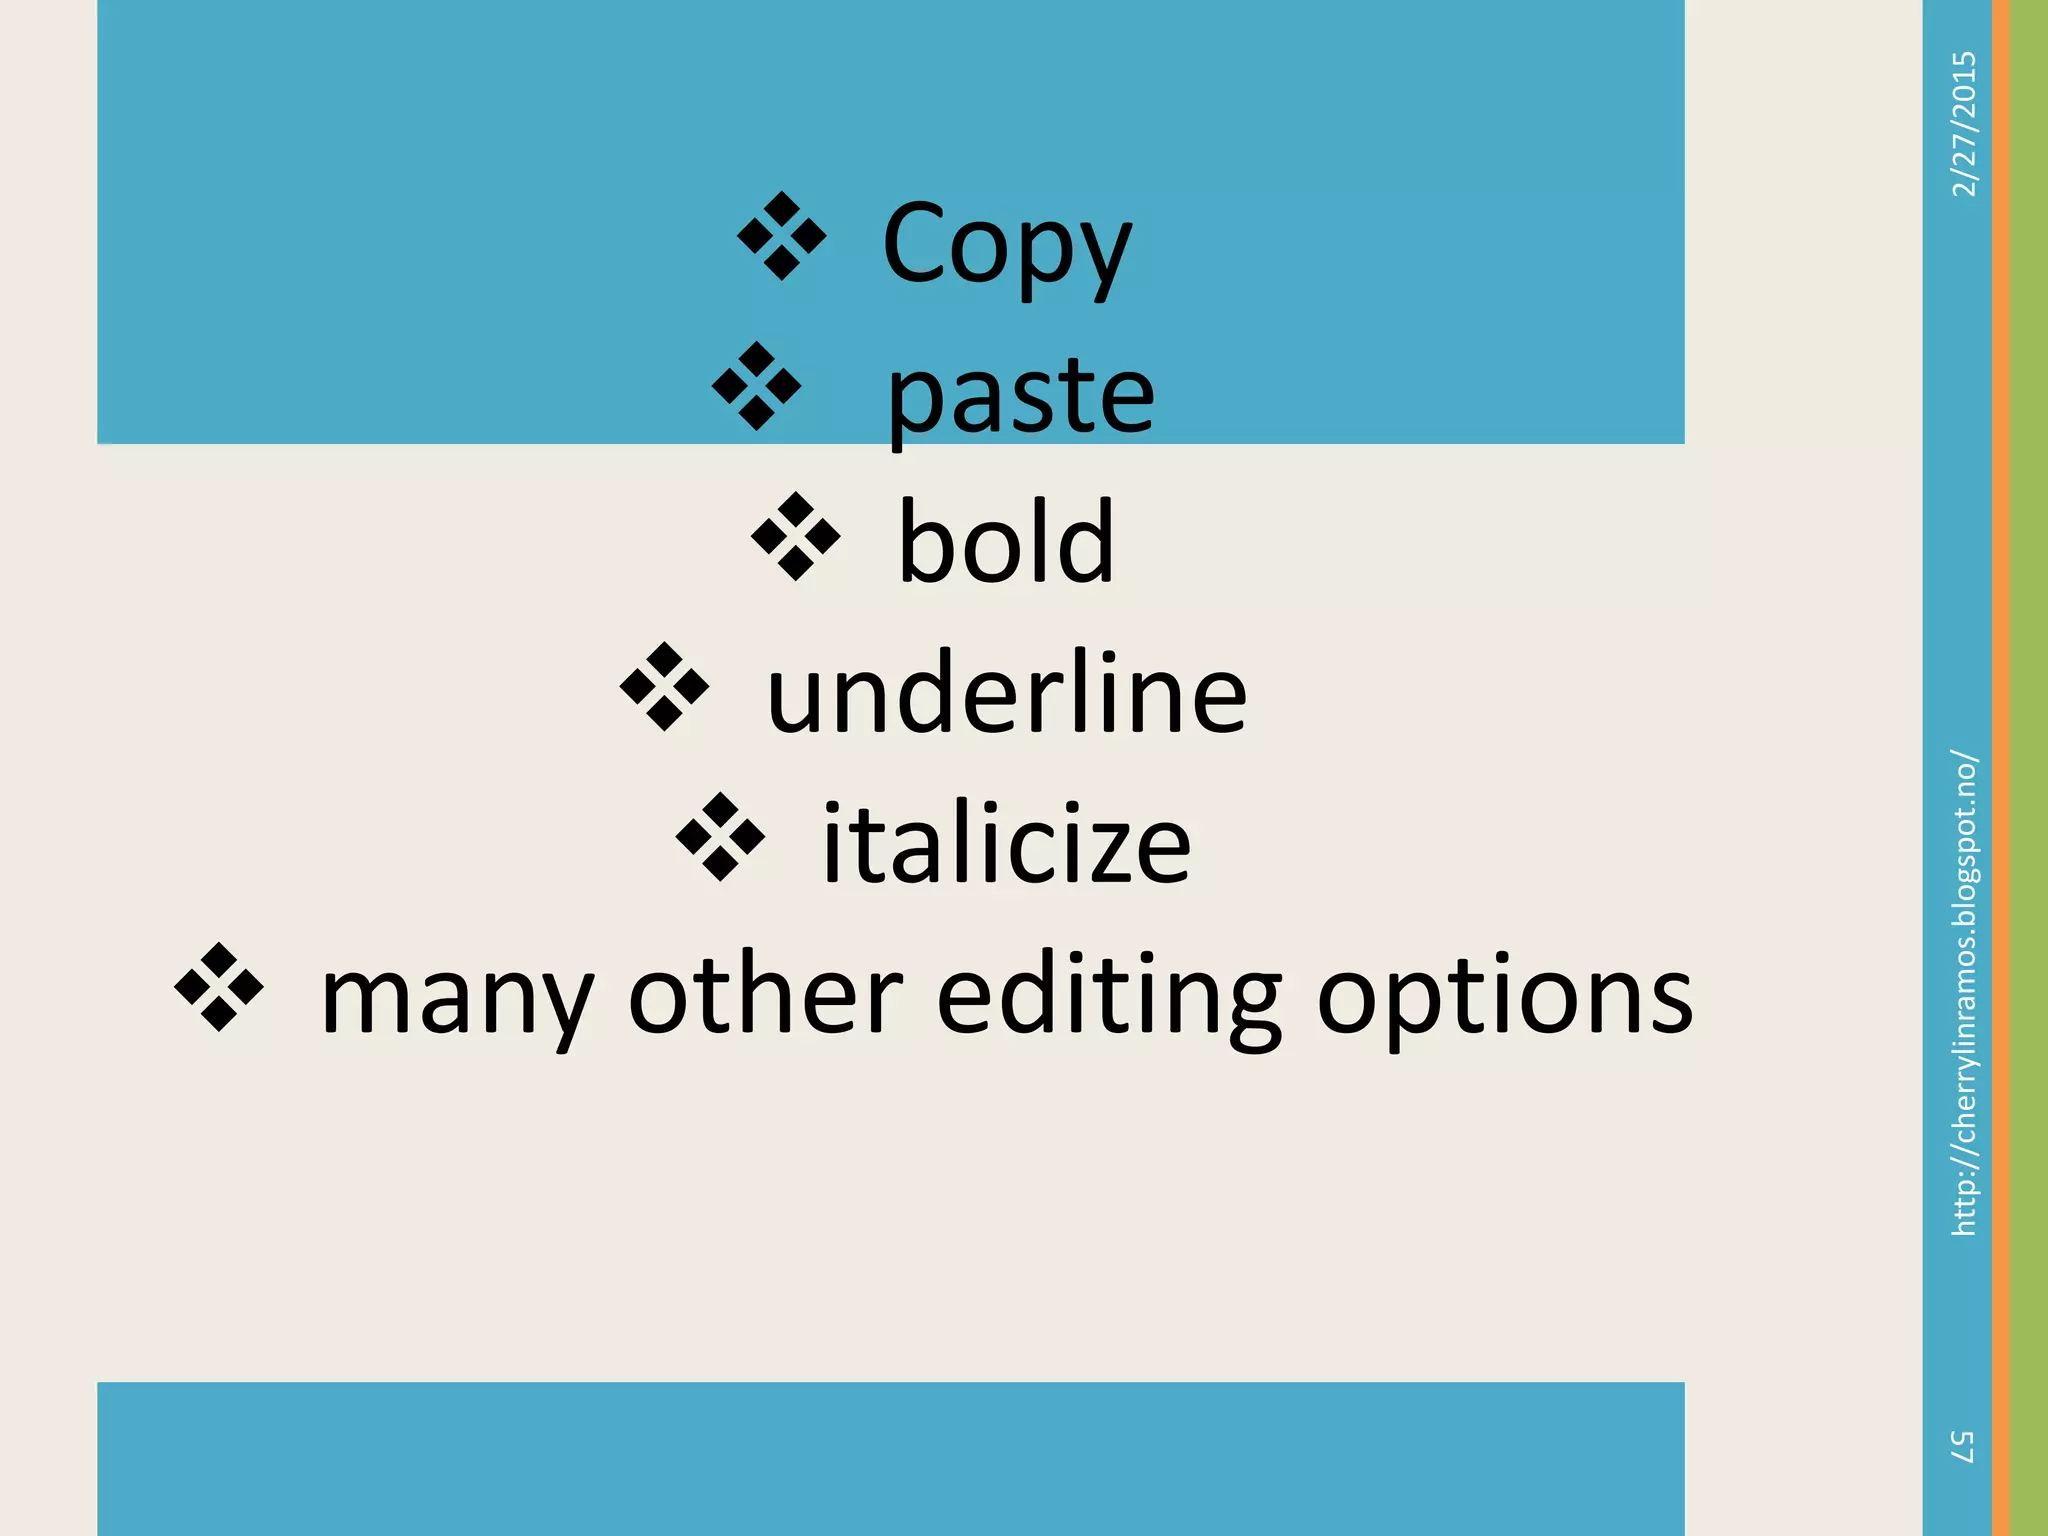
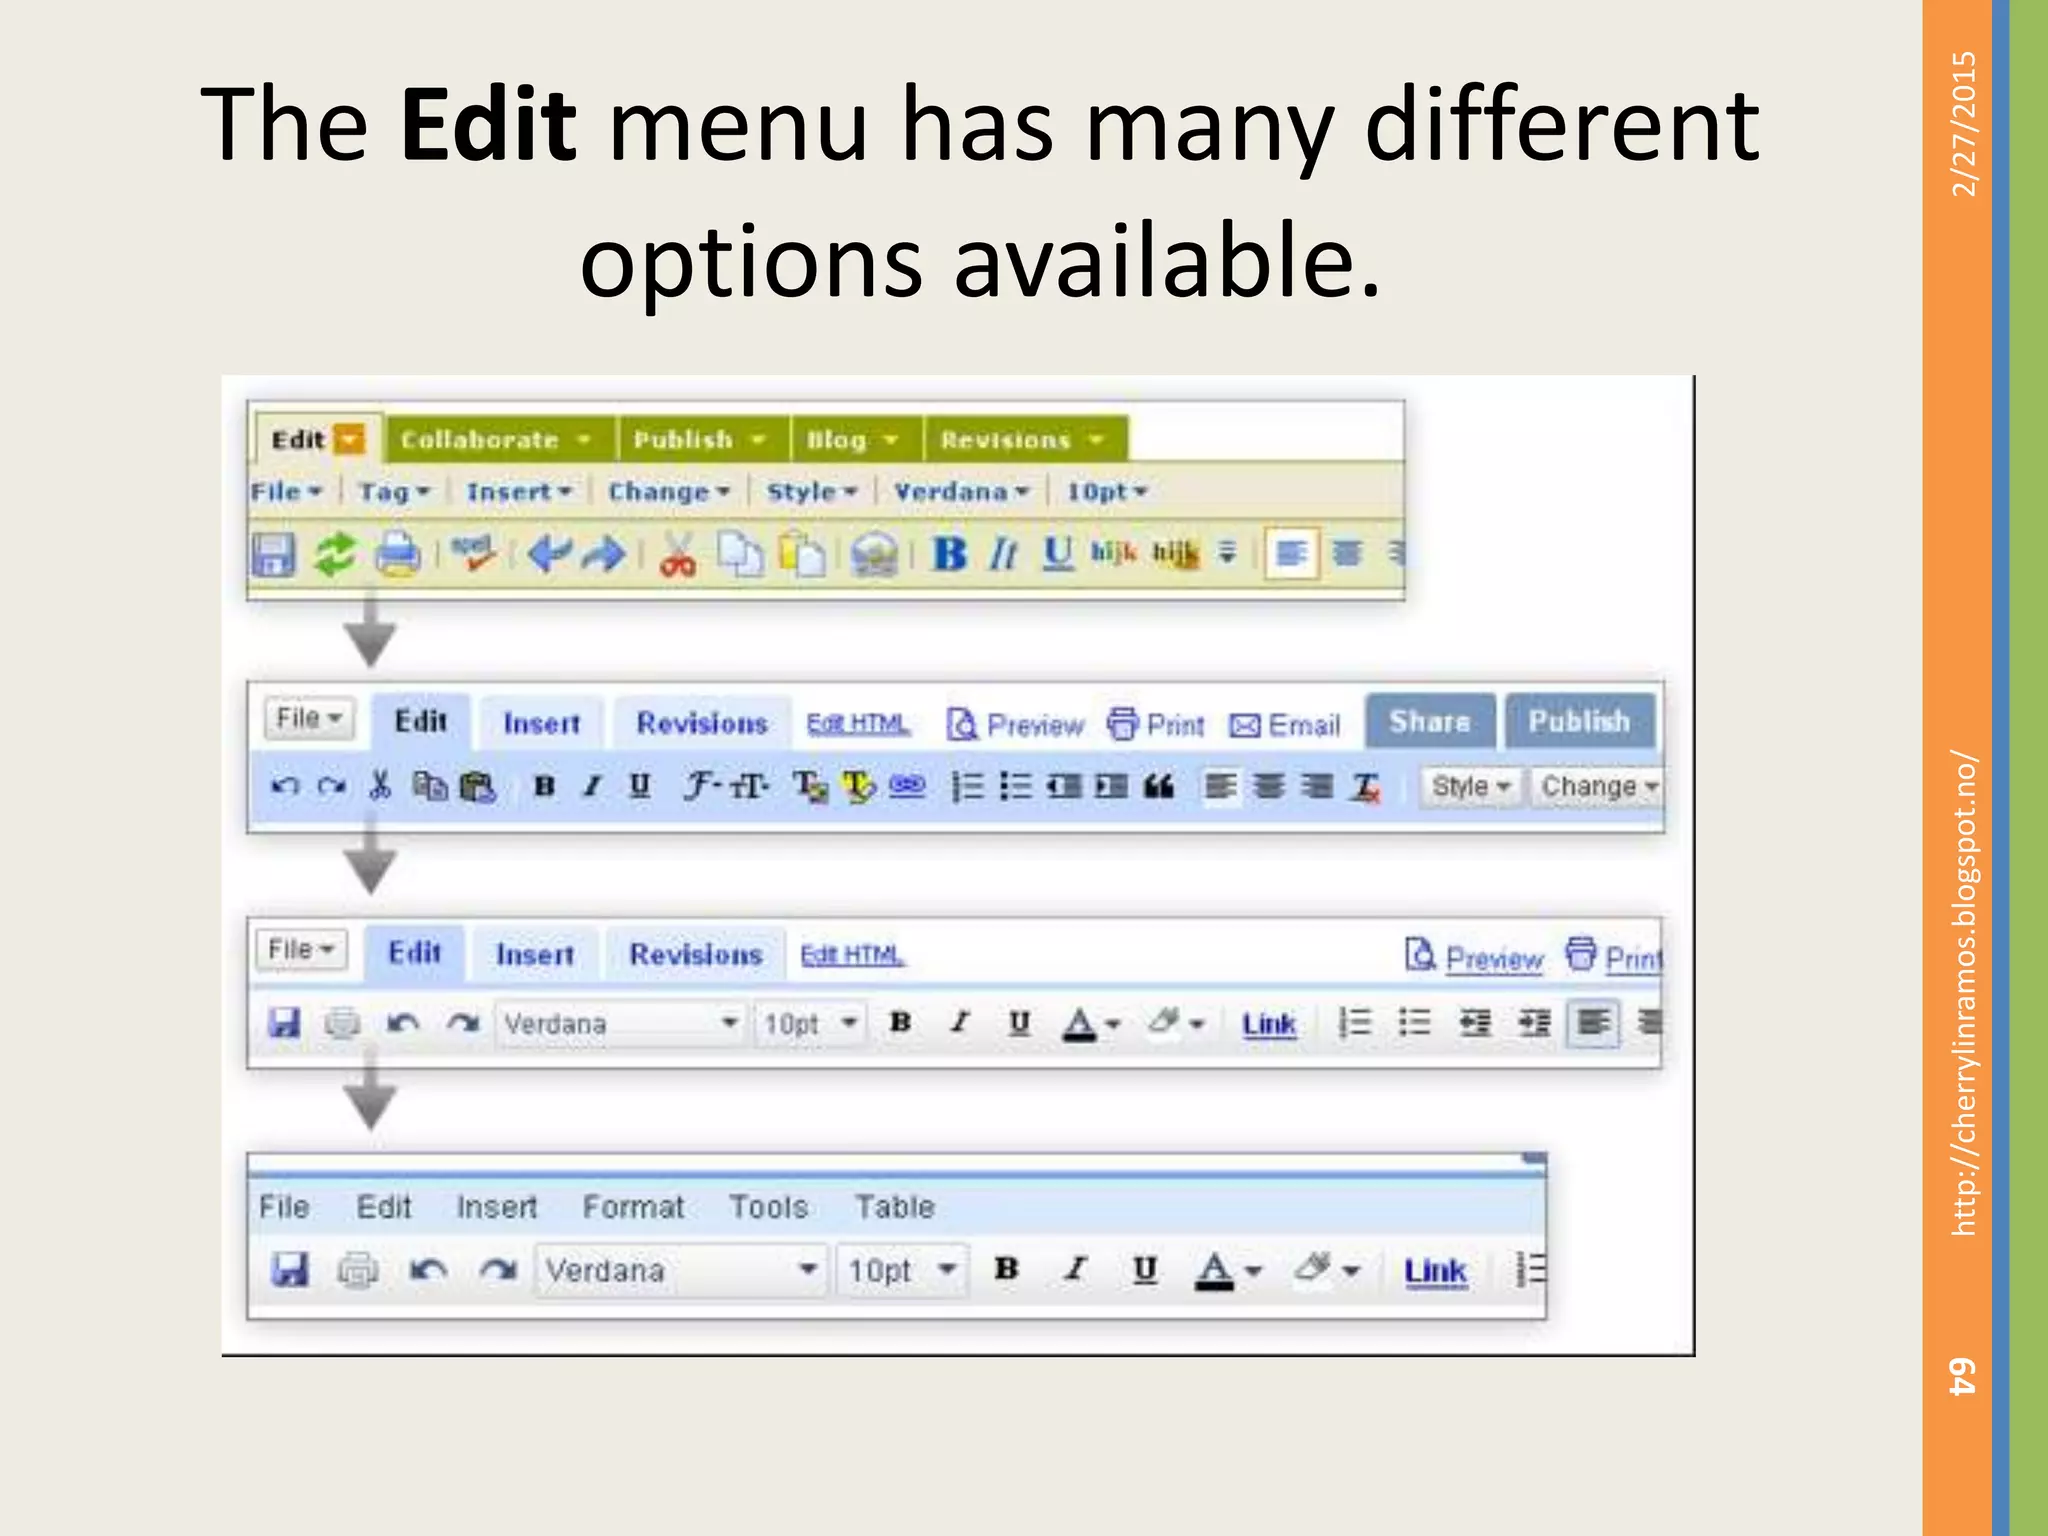
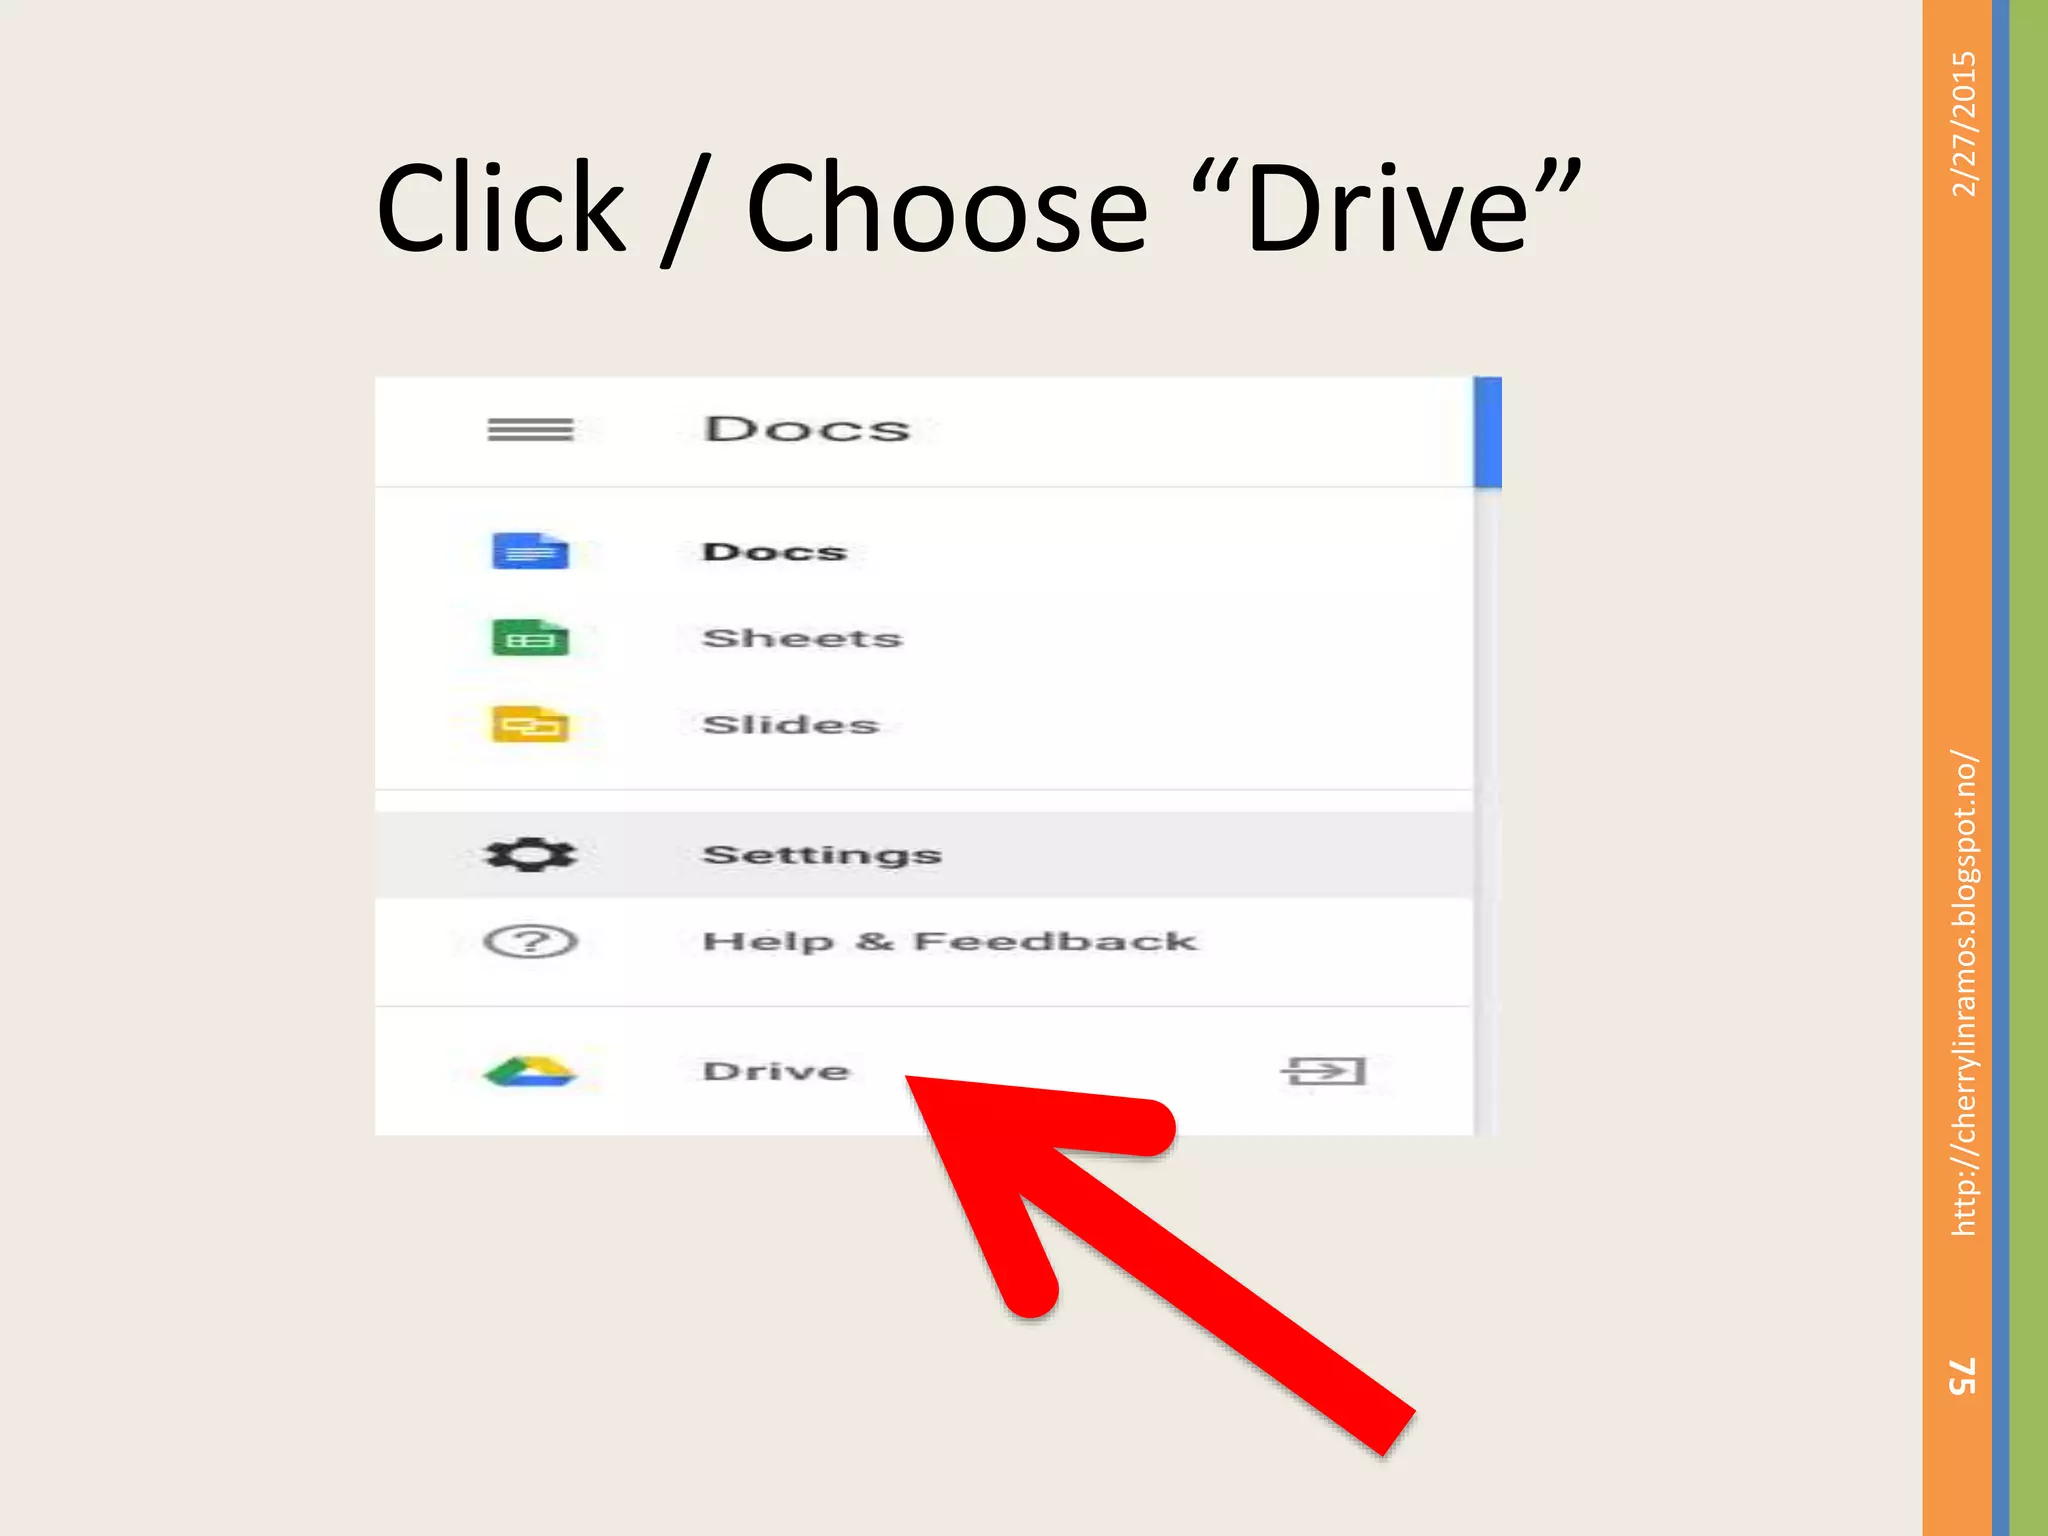
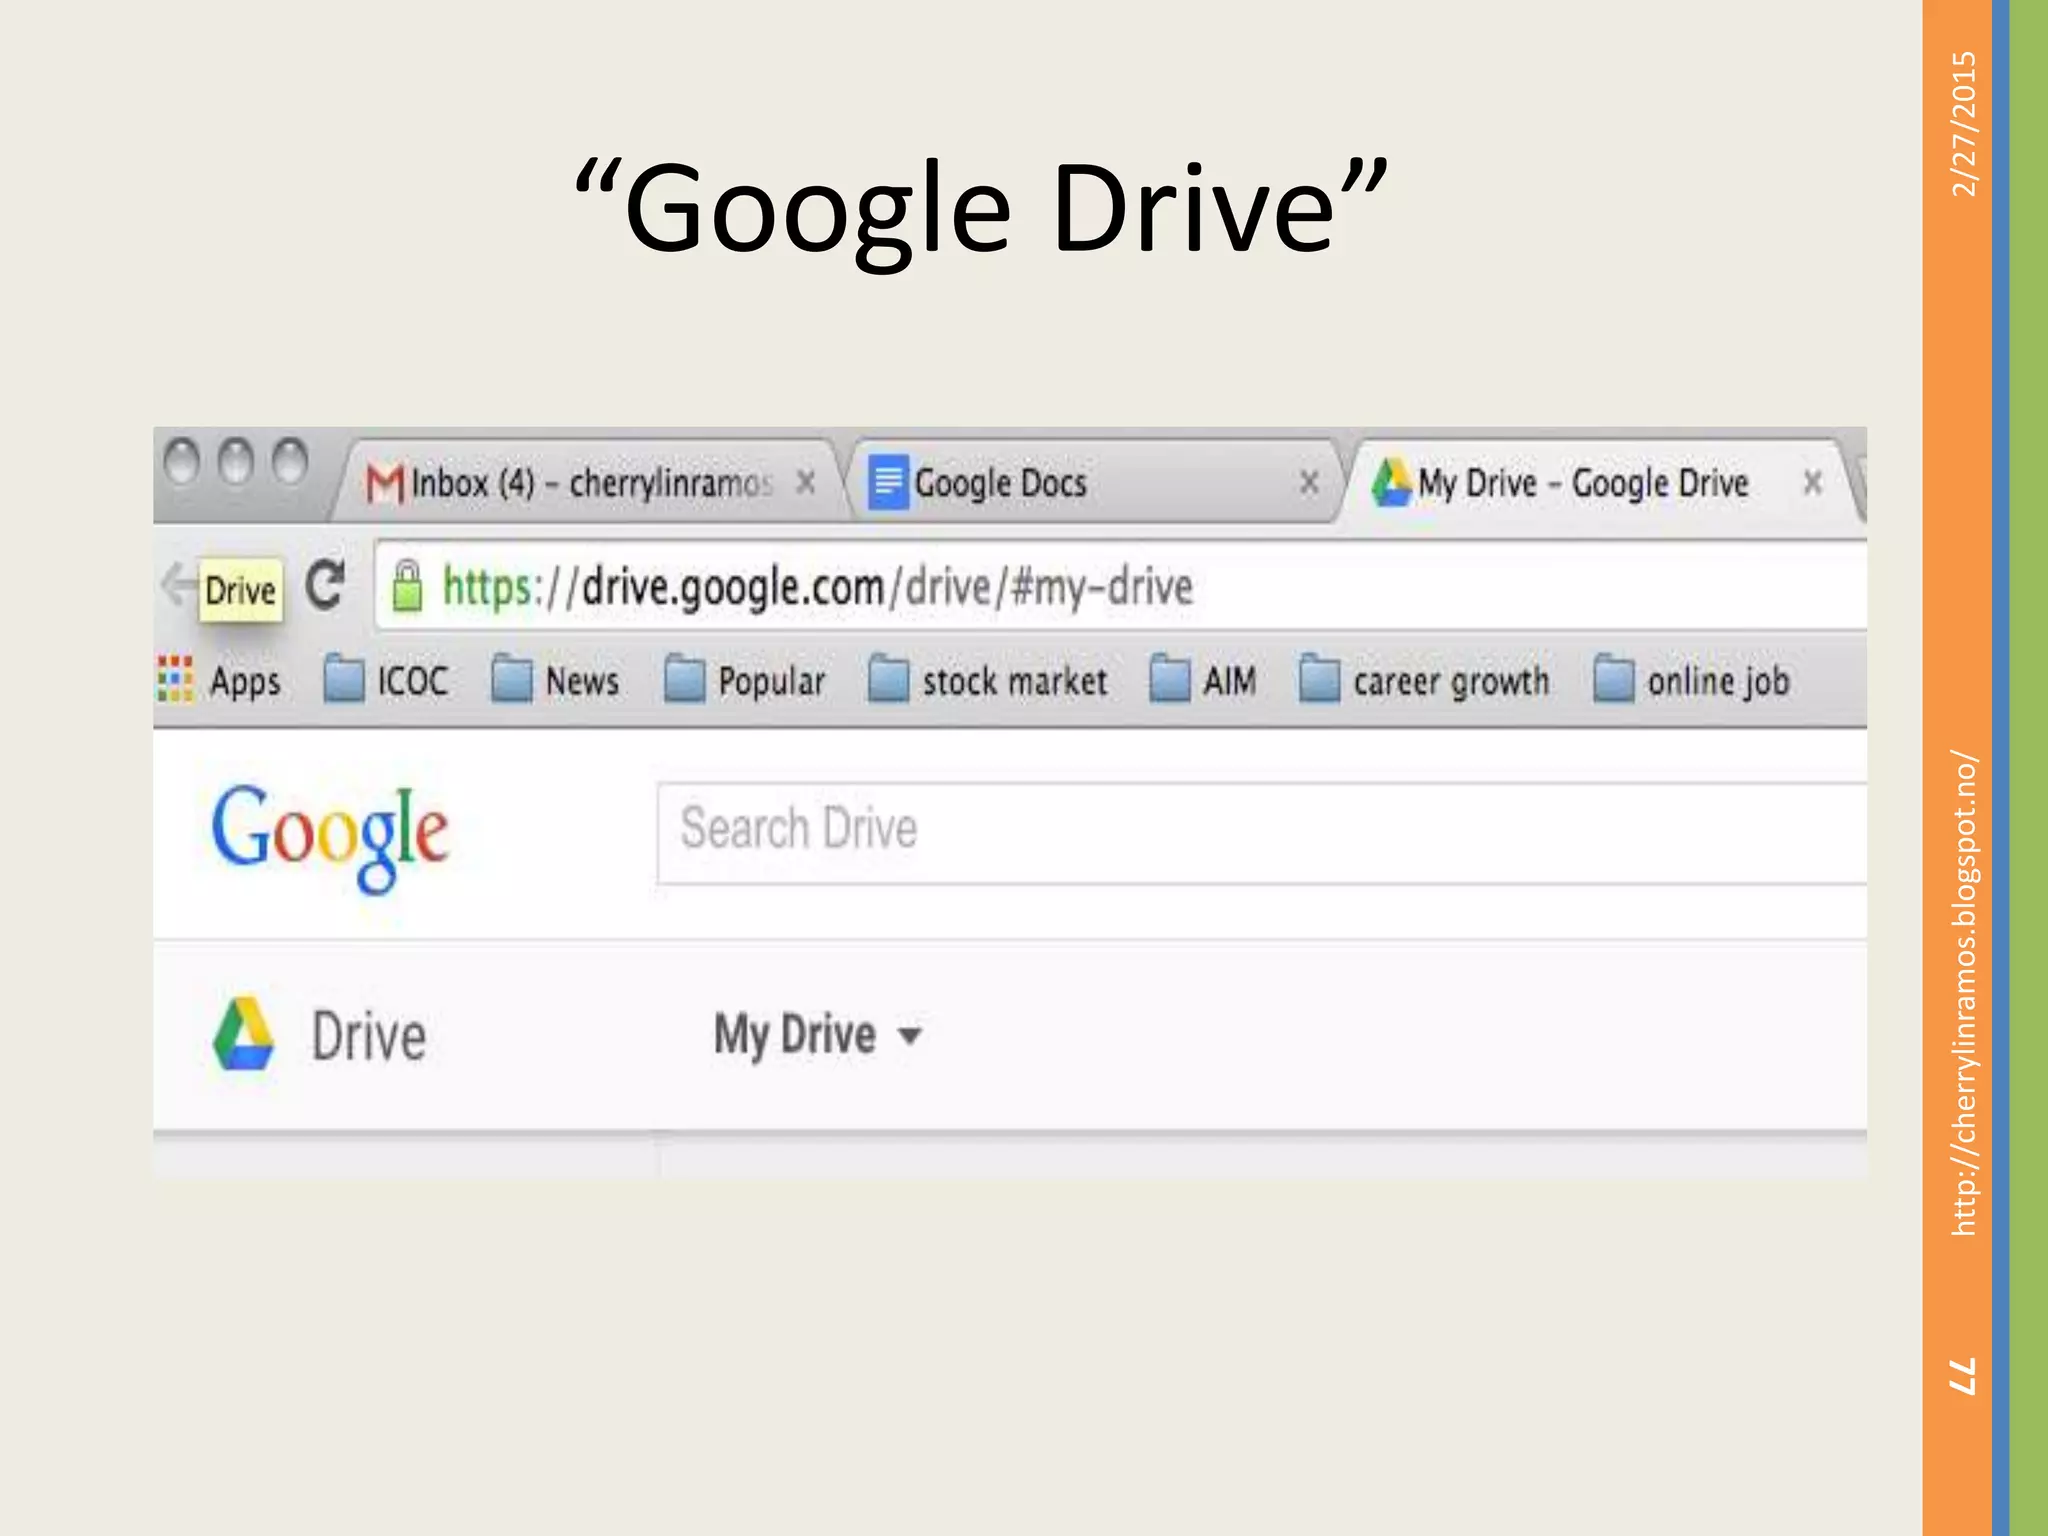
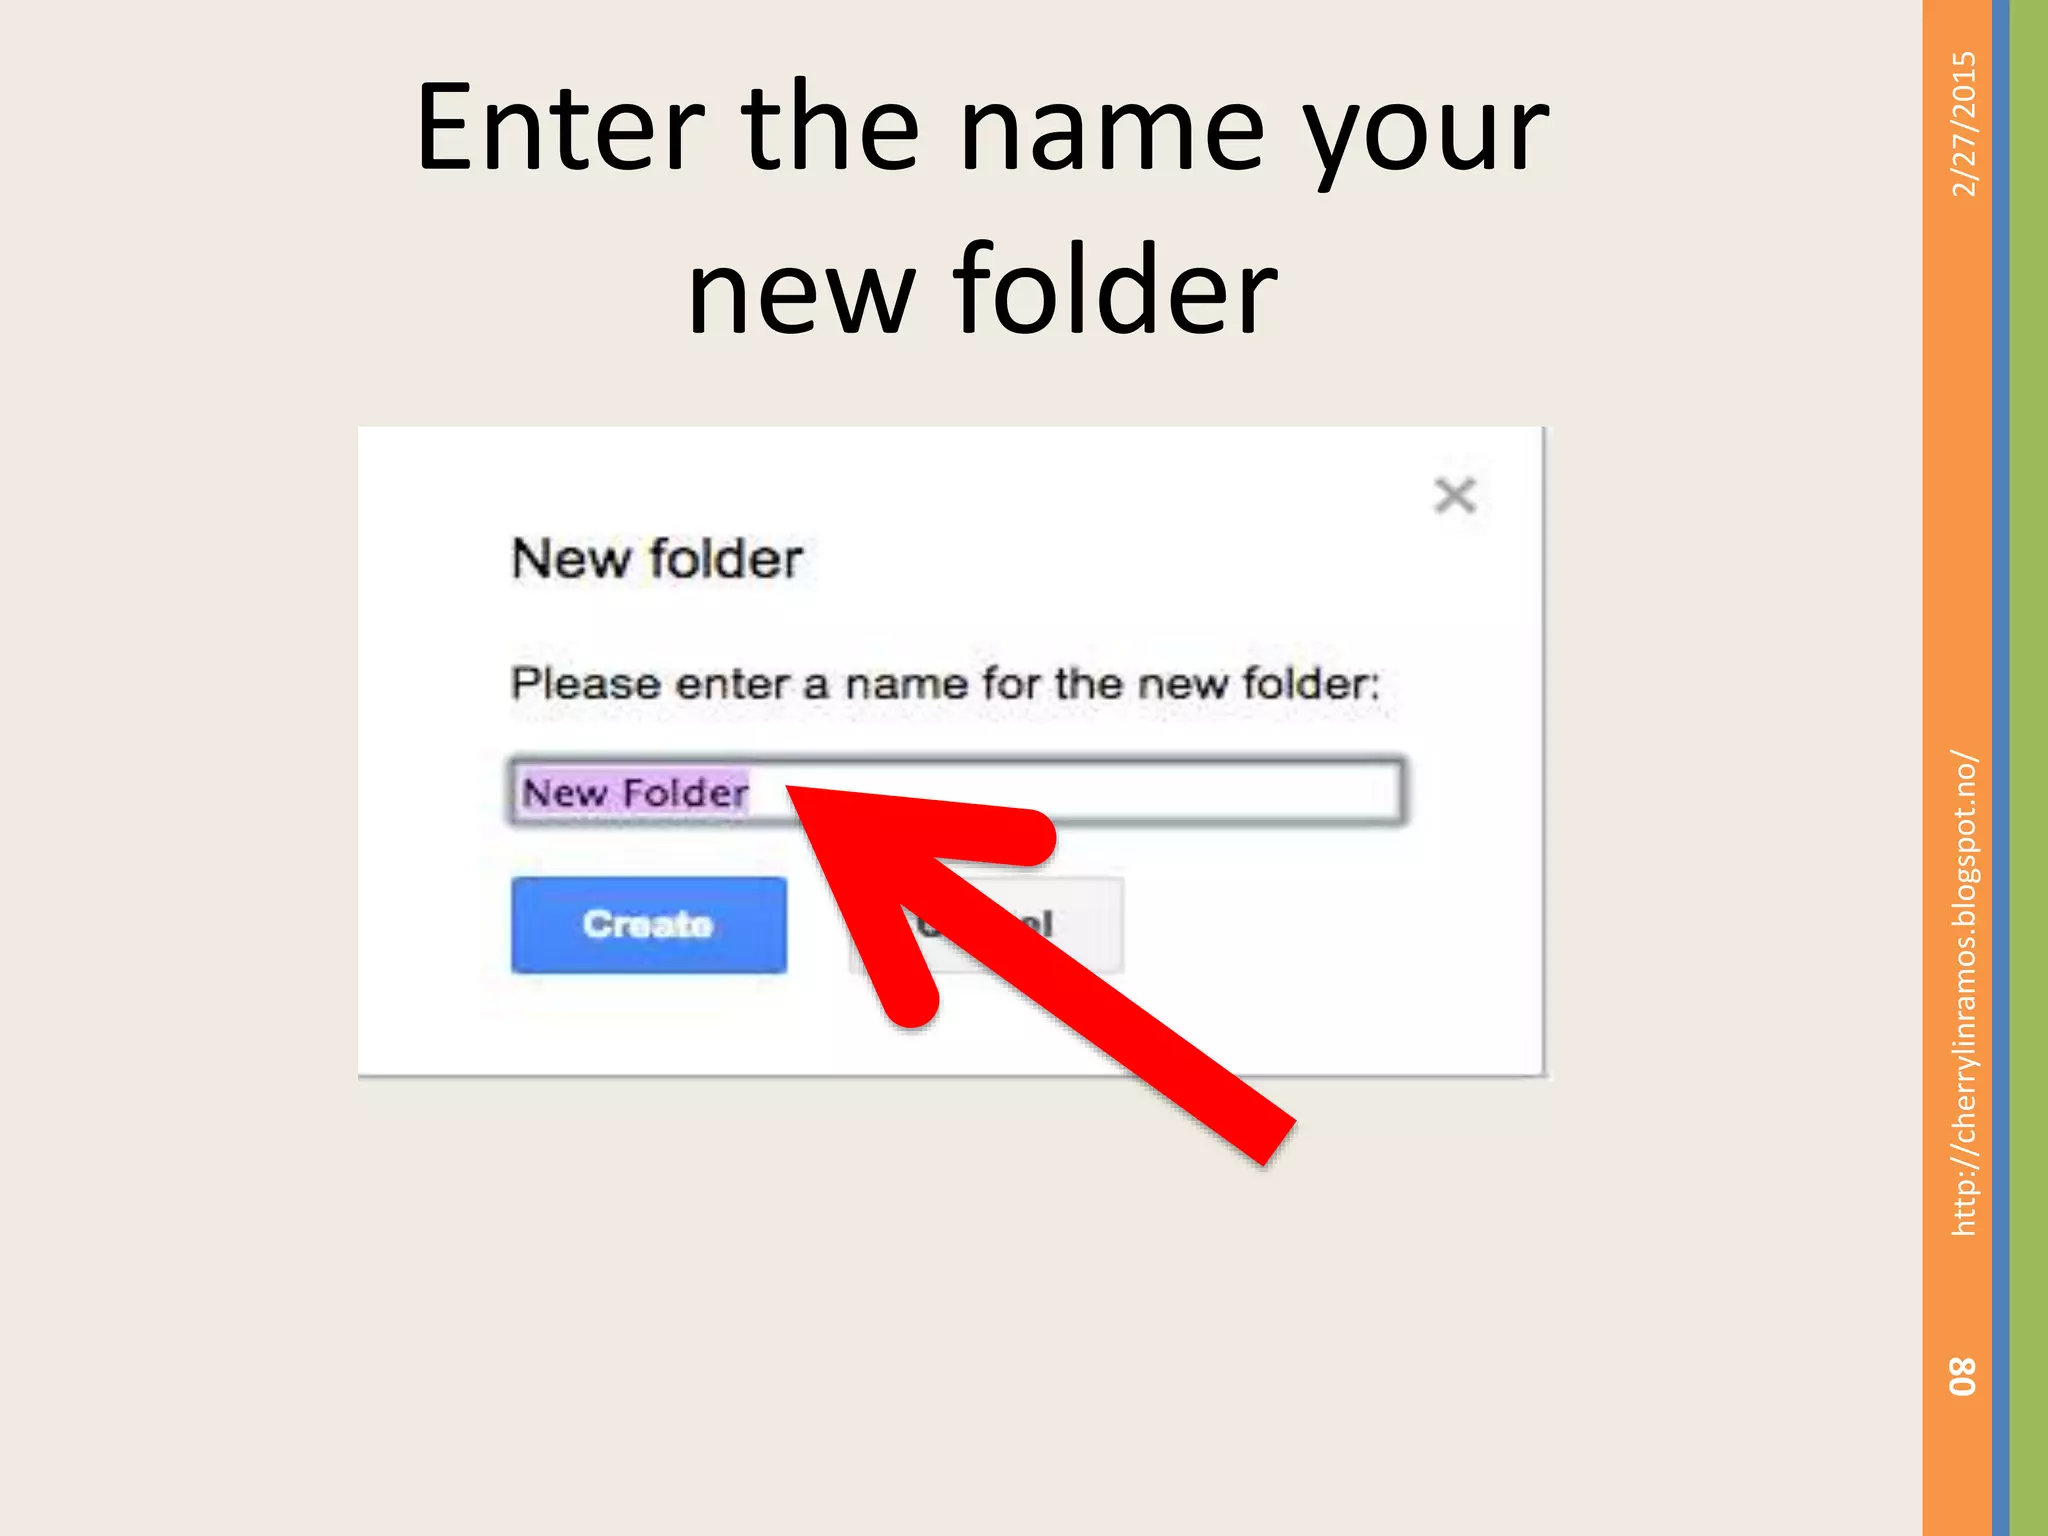
KEMBAR78
Basic tutorial how to use google docs | PPTX
GOOGLE DOCS TUTORIAL
What is Google Docs?
2/27/2015http://cherrylinramos.blogspot.no/
2
2/27/2015http://cherrylinramos.blogspot.no/
3
Google Docs is a free online
program that allows users
2/27/2015http://cherrylinramos.blogspot.no/
4
to create documents,
spreadsheets and
presentations online and
share them
2/27/2015http://cherrylinramos.blogspot.no/
5
with others for collaboration.
This allows educators and
students to
2/27/2015http://cherrylinramos.blogspot.no/
6
share their work with others,
collaborate on assignments,
and
2/27/2015http://cherrylinramos.blogspot.no/
7
save documents online for
access at school or at home.
Why used Google Docs?
2/27/2015http://cherrylinramos.blogspot.no/
8
2/27/2015http://cherrylinramos.blogspot.no/
9
You can use Google Docs
to:
2/27/2015http://cherrylinramos.blogspot.no/
10
 Work on files anywhere,
anytime
2/27/2015http://cherrylinramos.blogspot.no/
11
 Get quick feedback from
multiple people –
simultaneously and
asynchronously
2/27/2015http://cherrylinramos.blogspot.no/
12
 Make the full writing
process visible –
including revisions
2/27/2015http://cherrylinramos.blogspot.no/
13
 Quickly analyze and
organize data
2/27/2015http://cherrylinramos.blogspot.no/
14
 Easily share data sets
2/27/2015http://cherrylinramos.blogspot.no/
15
 Publish documents for
invitation viewing
2/27/2015http://cherrylinramos.blogspot.no/
16
and editing or full public
viewing
2/27/2015http://cherrylinramos.blogspot.no/
17
 Upload and download
documents in various file
formats
2/27/2015http://cherrylinramos.blogspot.no/
18
Step 1: Click any Web browser from
your computer dock:
2/27/2015http://cherrylinramos.blogspot.no/
19
Step 2: Type www.gmail.com on the
browser menu
2/27/2015http://cherrylinramos.blogspot.no/
20
Step 3: Click “Sign In”
2/27/2015http://cherrylinramos.blogspot.no/
21
Step 5: Enter your Gmail Account
2/27/2015http://cherrylinramos.blogspot.no/
22
Step 6: Enter your Password
2/27/2015http://cherrylinramos.blogspot.no/
23
Step 7: Click Sign In
2/27/2015http://cherrylinramos.blogspot.no/
24
2/27/2015http://cherrylinramos.blogspot.no/
25
Now that you have signed
in to your Gmail account,
2/27/2015http://cherrylinramos.blogspot.no/
26
you can begin creating or
adding documents to your
account.
2/27/2015
27
http://cherrylinramos.blogspot.no/
Inside your Gmail Account,
Click “ “ icon
2/27/2015
28
http://cherrylinramos.blogspot.no/
Click “ Docs “ icon from
the list
2/27/2015
29
http://cherrylinramos.blogspot.no/
The Google docs window will
be opened
2/27/2015http://cherrylinramos.blogspot.no/
30
For the basic functions, we
will be
2/27/2015http://cherrylinramos.blogspot.no/
31
using the Document
option.
2/27/2015http://cherrylinramos.blogspot.no/
32
1. Click on “New” on the Menu bar
2/27/2015http://cherrylinramos.blogspot.no/
33
2. Select which type of file you
would like to create
2/27/2015http://cherrylinramos.blogspot.no/
34
Click “Docs”
2/27/2015http://cherrylinramos.blogspot.no/
35
3. Click “+” icon at the button
2/27/2015http://cherrylinramos.blogspot.no/
36
4. You can begin creating your first
word processed document.
2/27/2015http://cherrylinramos.blogspot.no/
37
Note: All your documents
are automatically save in
your drive.
2/27/2015
38
http://cherrylinramos.blogspot.no/
2/27/2015http://cherrylinramos.blogspot.no/
39
Click “File” on the Menu bar
2/27/2015http://cherrylinramos.blogspot.no/
40
Choose “Rename”
2/27/2015http://cherrylinramos.blogspot.no/
41
Type in the new document name
2/27/2015http://cherrylinramos.blogspot.no/
42
Click “OK”
2/27/2015http://cherrylinramos.blogspot.no/
43
2/27/2015http://cherrylinramos.blogspot.no/
44
Publishing a document means that
you will be making it
2/27/2015
45
http://cherrylinramos.blogspot.no/
available to anyone via the
Internet. Google adds your
document
2/27/2015
46
http://cherrylinramos.blogspot.no/
to the Google Index so that if
someone does a
2/27/2015
47
http://cherrylinramos.blogspot.no/
search on the topic of your
document it may be accessed.
2/27/2015
48
http://cherrylinramos.blogspot.no/
Click “File” on the Menu bar
2/27/2015http://cherrylinramos.blogspot.no/
49
Choose “Publish to the web”
2/27/2015http://cherrylinramos.blogspot.no/
50
Click “Publish”
2/27/2015http://cherrylinramos.blogspot.no/
51
Click where you want to
publish , either in
2/27/2015http://cherrylinramos.blogspot.no/
52
Google hangout, Gmail, FB, Twitter,
or both
2/27/2015http://cherrylinramos.blogspot.no/
53
Click “Share”
2/27/2015http://cherrylinramos.blogspot.no/
54
2/27/2015http://cherrylinramos.blogspot.no/
55
2/27/2015http://cherrylinramos.blogspot.no/
56
Just like in Microsoft Word
you can:
2/27/2015http://cherrylinramos.blogspot.no/
57
 Copy
 paste
 bold
 underline
 italicize
 many other editing options
2/27/2015http://cherrylinramos.blogspot.no/
58
Although your editing
options are not as
comprehensive as a
2/27/2015http://cherrylinramos.blogspot.no/
59
paid for program such as
MS Word, you should find
2/27/2015http://cherrylinramos.blogspot.no/
60
most of what you will need
to create and edit
2/27/2015http://cherrylinramos.blogspot.no/
61
your documents. This
section will take you through
some of
2/27/2015http://cherrylinramos.blogspot.no/
62
the features that are
available.
2/27/2015http://cherrylinramos.blogspot.no/
63
Part 1: Edit Menu
2/27/2015http://cherrylinramos.blogspot.no/
64
The Edit menu has many different
options available.
2/27/2015http://cherrylinramos.blogspot.no/
65
For example, the scissors icon
represents the Cut feature
2/27/2015http://cherrylinramos.blogspot.no/
66
The clipboard icon represents the
Paste feature.
2/27/2015http://cherrylinramos.blogspot.no/
67
Part 2: Insert Menu
2/27/2015http://cherrylinramos.blogspot.no/
68
The Insert menu also provides you
with some options of
2/27/2015http://cherrylinramos.blogspot.no/
69
Inserting types of objects
such as
Images
Links
 Comments
 Tables
2/27/2015http://cherrylinramos.blogspot.no/
70
Take some time to familiarize
yourself with
these different options.
2/27/2015http://cherrylinramos.blogspot.no/
71
2/27/2015http://cherrylinramos.blogspot.no/
72
In Google Docs you have
the same option for
organizing
2/27/2015http://cherrylinramos.blogspot.no/
73
your files as on your
computer to store your files.
2/27/2015http://cherrylinramos.blogspot.no/
74
Click “Menu” icon on left side
2/27/2015http://cherrylinramos.blogspot.no/
75
Click / Choose “Drive”
2/27/2015http://cherrylinramos.blogspot.no/
76
It will redirect you to a
new tab called
2/27/2015http://cherrylinramos.blogspot.no/
77
“Google Drive”
2/27/2015http://cherrylinramos.blogspot.no/
78
Click “New’ button
2/27/2015http://cherrylinramos.blogspot.no/
79
Click “Folder’ button
2/27/2015http://cherrylinramos.blogspot.no/
80
Enter the name your
new folder
2/27/2015http://cherrylinramos.blogspot.no/
81
Click “Create” button
2/27/2015http://cherrylinramos.blogspot.no/
82
Your new folder will appear
on top
2/27/2015http://cherrylinramos.blogspot.no/
83
If you double click one of
your folder,
2/27/2015http://cherrylinramos.blogspot.no/
84
You will see what’s inside the
folder
2/27/2015http://cherrylinramos.blogspot.no/
85
Click “File” on the Menu bar
2/27/2015http://cherrylinramos.blogspot.no/
86
Click “Email Collaborators”
2/27/2015http://cherrylinramos.blogspot.no/
87
Enter names or email addresses
2/27/2015http://cherrylinramos.blogspot.no/
88
Click “Can Edit”
2/27/2015http://cherrylinramos.blogspot.no/
89
Then choose if the viewer can edit,
comment, or view only.
2/27/2015http://cherrylinramos.blogspot.no/
90
Add your “note” about the
document you share
2/27/2015http://cherrylinramos.blogspot.no/
91
Click “Send”
2/27/2015http://cherrylinramos.blogspot.no/
92
2/27/2015http://cherrylinramos.blogspot.no/
93
Click the document you want
to print
2/27/2015http://cherrylinramos.blogspot.no/
94
Click the “Printer” Icon
(Shortcut)
2/27/2015http://cherrylinramos.blogspot.no/
95
Or Click “File” (Long method)
2/27/2015http://cherrylinramos.blogspot.no/
96
Or Click “Print”
2/27/2015http://cherrylinramos.blogspot.no/
97
Or Click Ctrl/Cmd + P on your
keyboard
2/27/2015http://cherrylinramos.blogspot.no/
98
1
2
Click “Print”
2/27/2015http://cherrylinramos.blogspot.no/
99
2/27/2015http://cherrylinramos.blogspot.no/
100
Click “File”
2/27/2015http://cherrylinramos.blogspot.no/
101
Click “Make a copy”
2/27/2015http://cherrylinramos.blogspot.no/
102
Click “OK”
2/27/2015http://cherrylinramos.blogspot.no/
103
2/27/2015http://cherrylinramos.blogspot.no/
104
You have learned the
basic functions of
Google Docs.
2/27/2015http://cherrylinramos.blogspot.no/
105
2/27/2015http://cherrylinramos.blogspot.no/
106

Basic tutorial how to use google docs