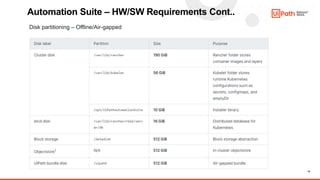
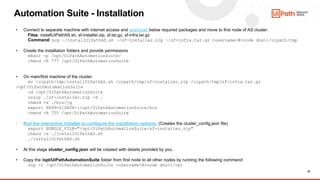
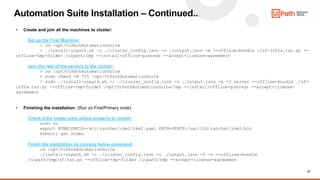
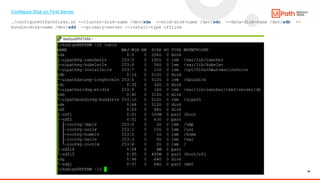
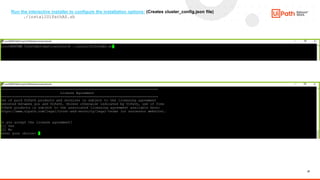
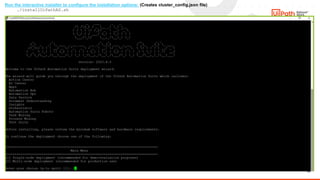
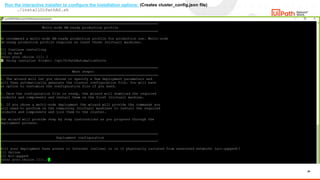
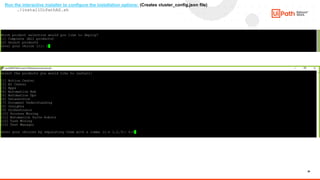
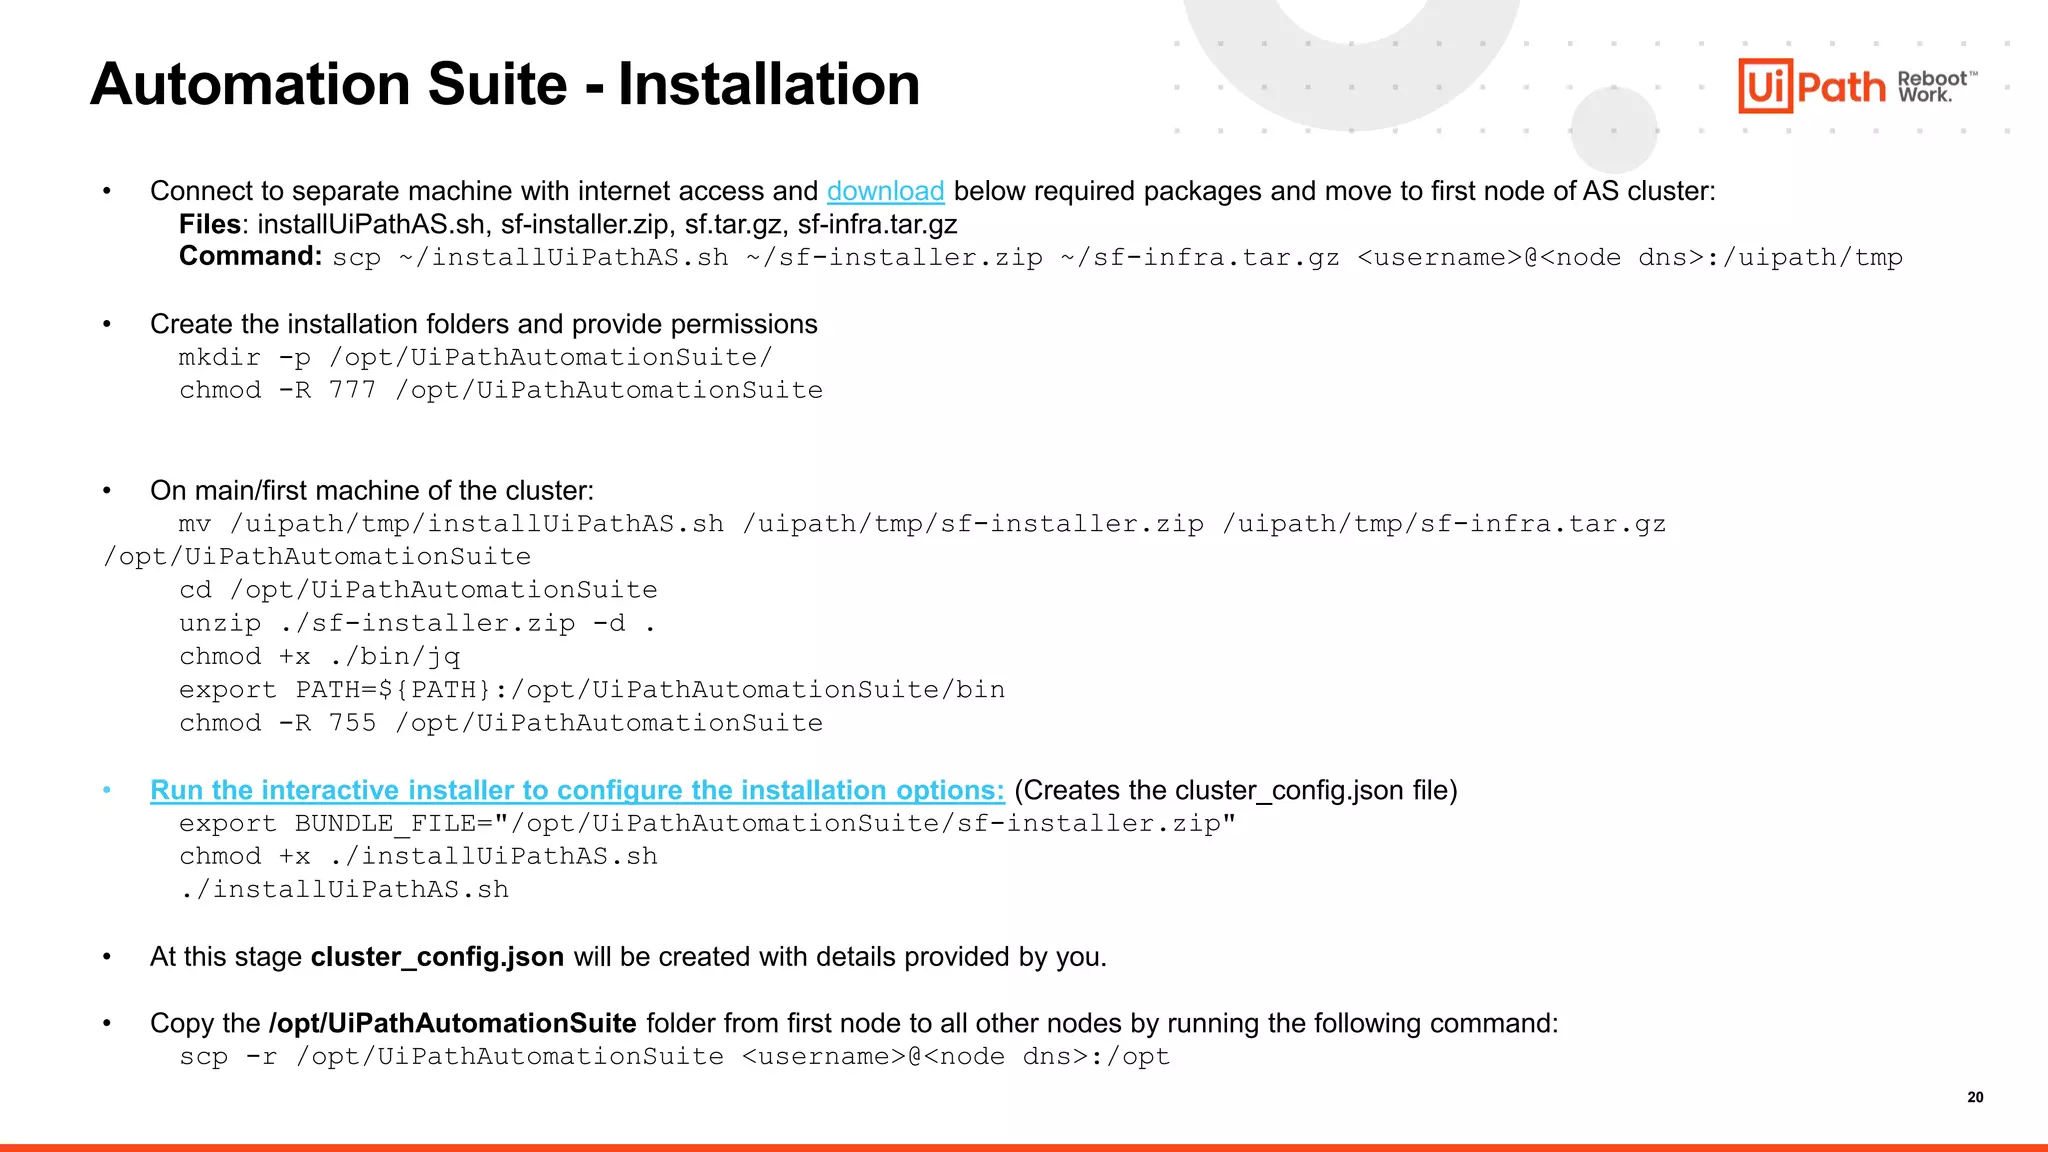
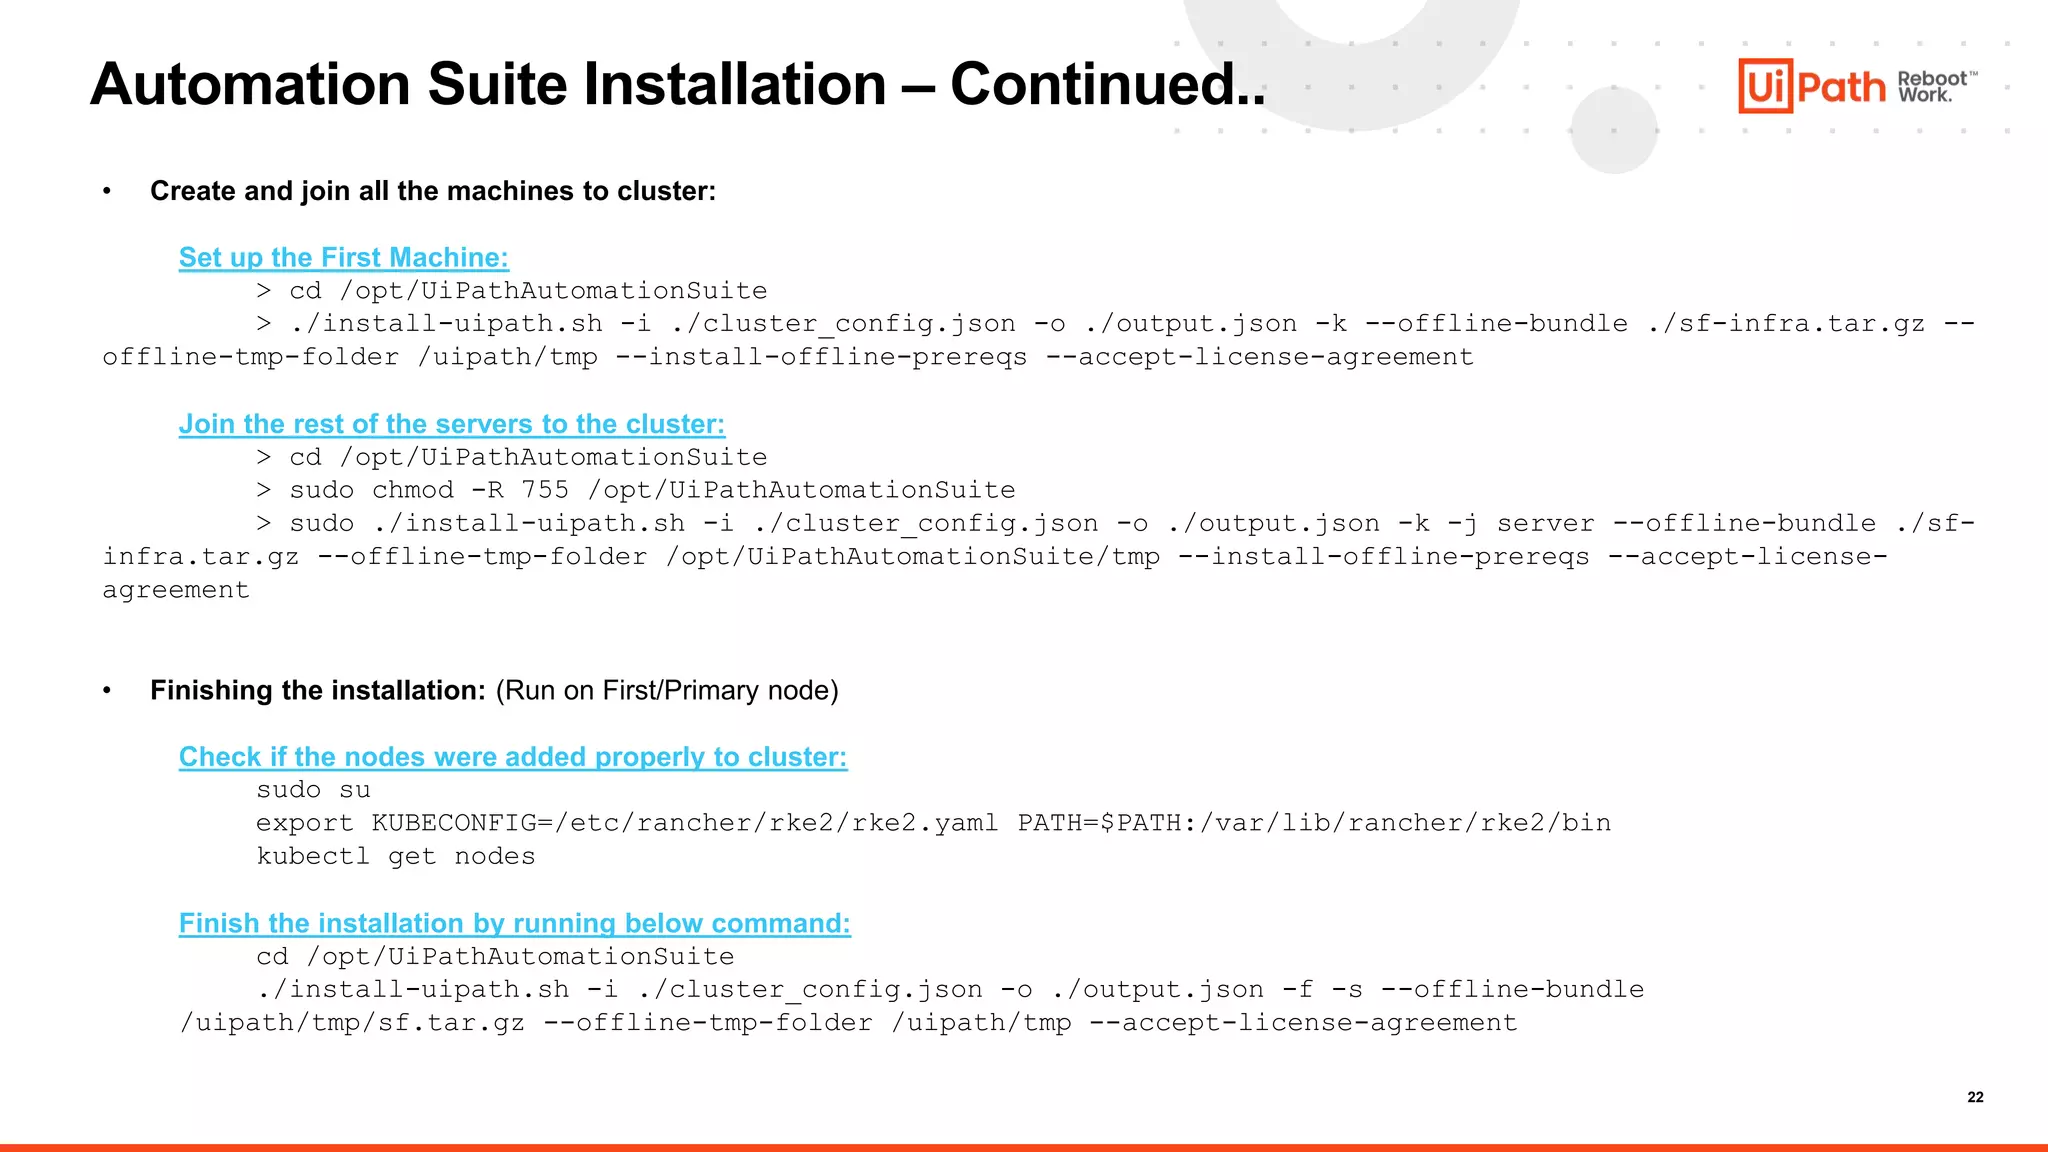
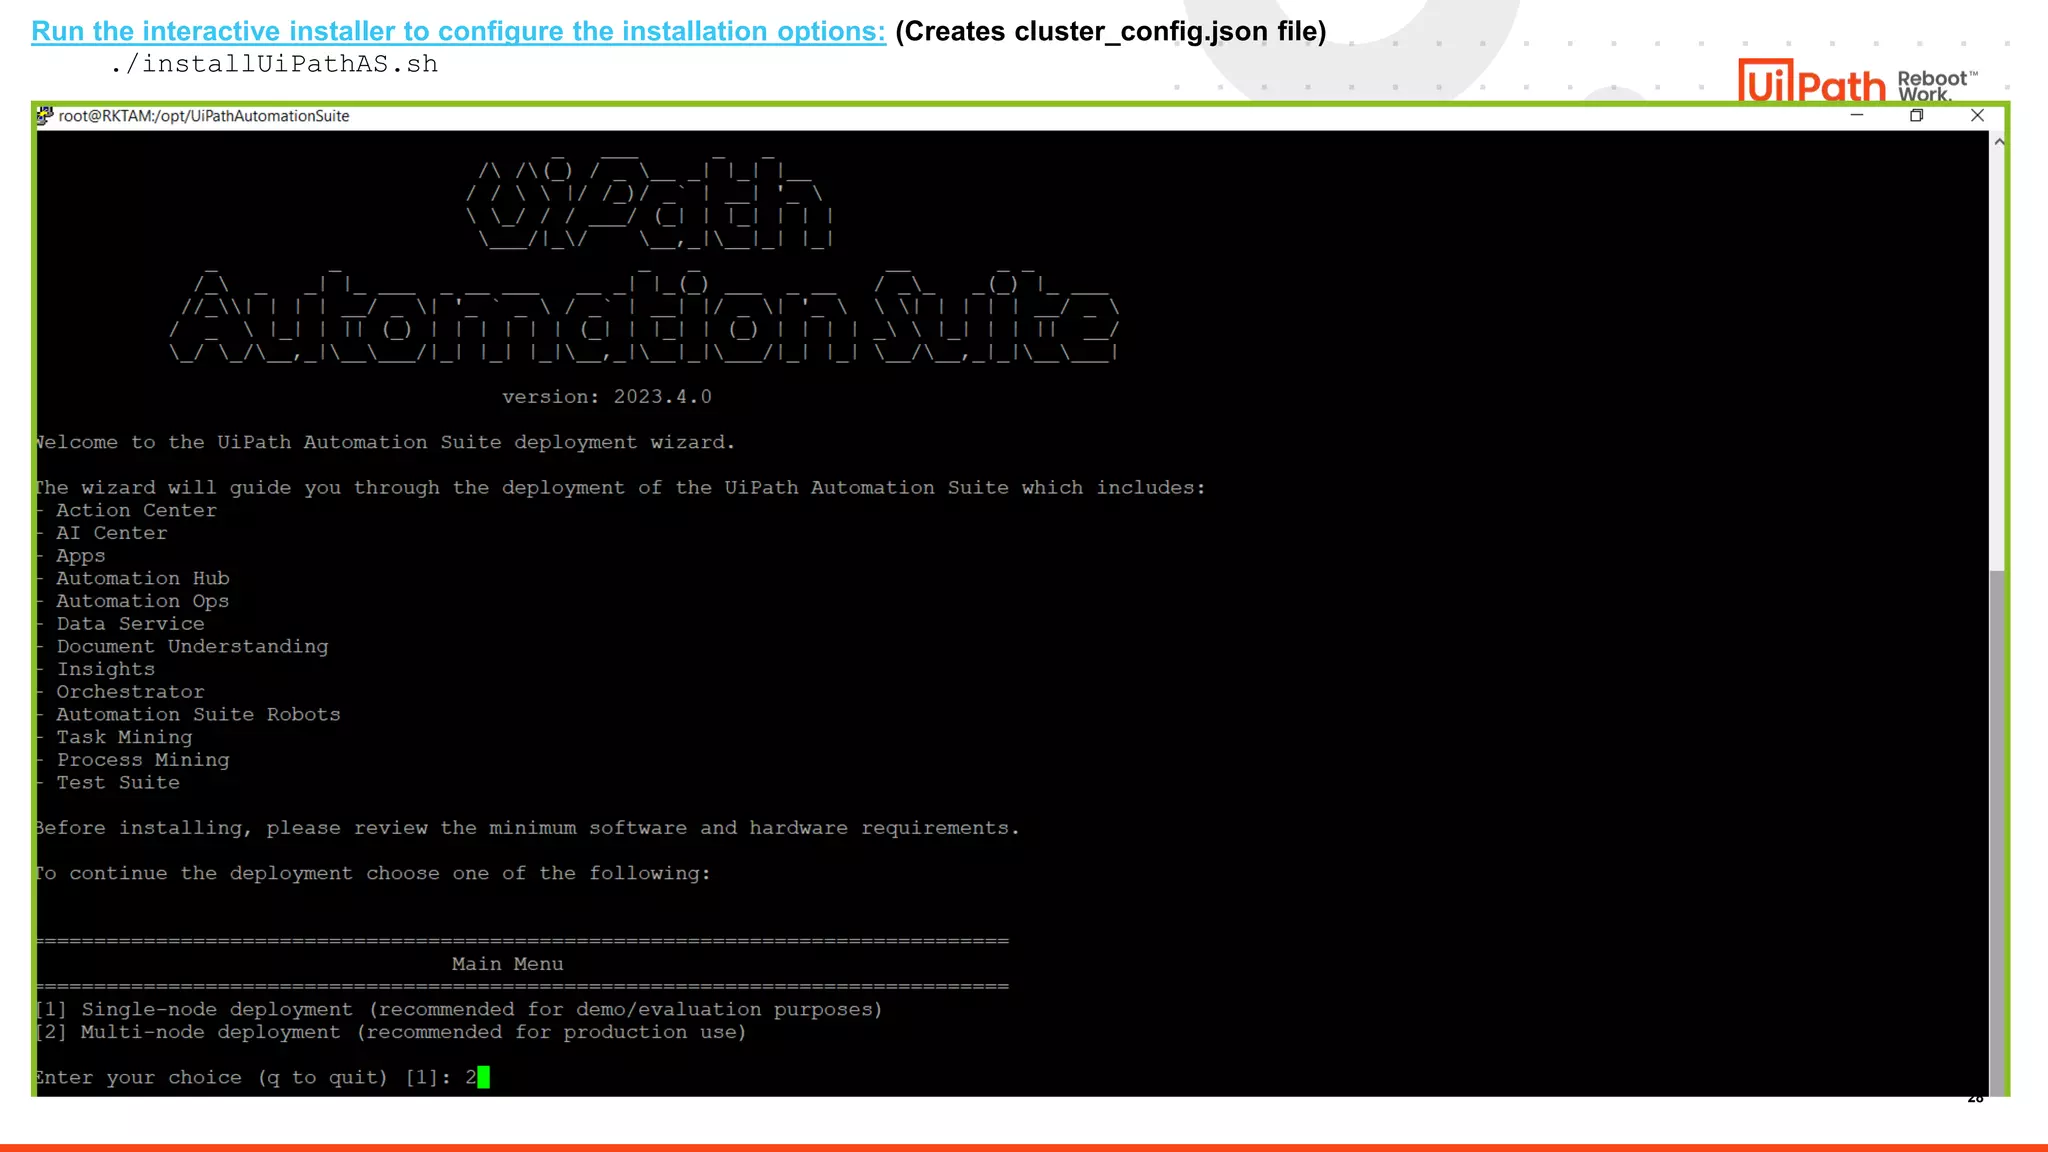
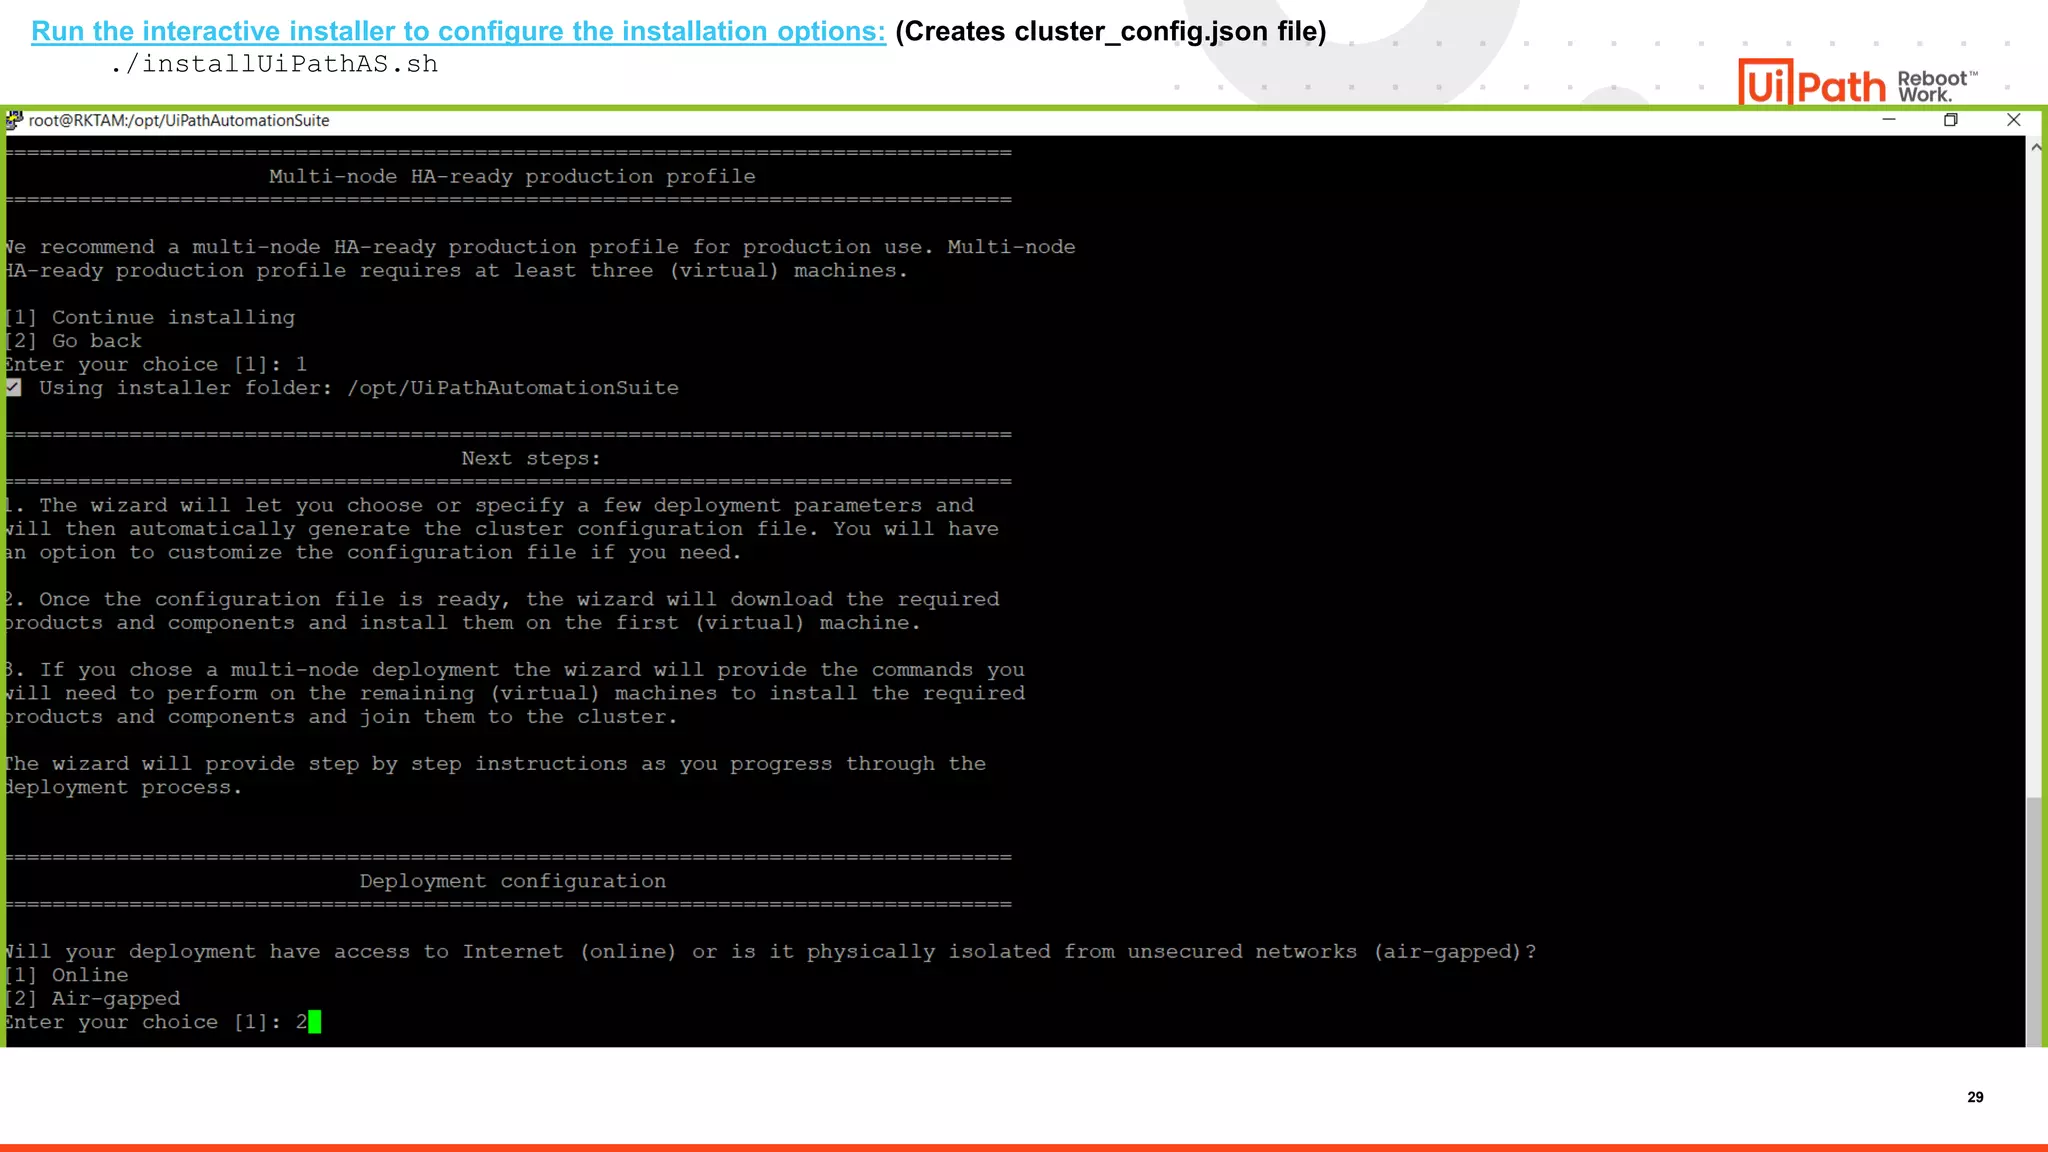
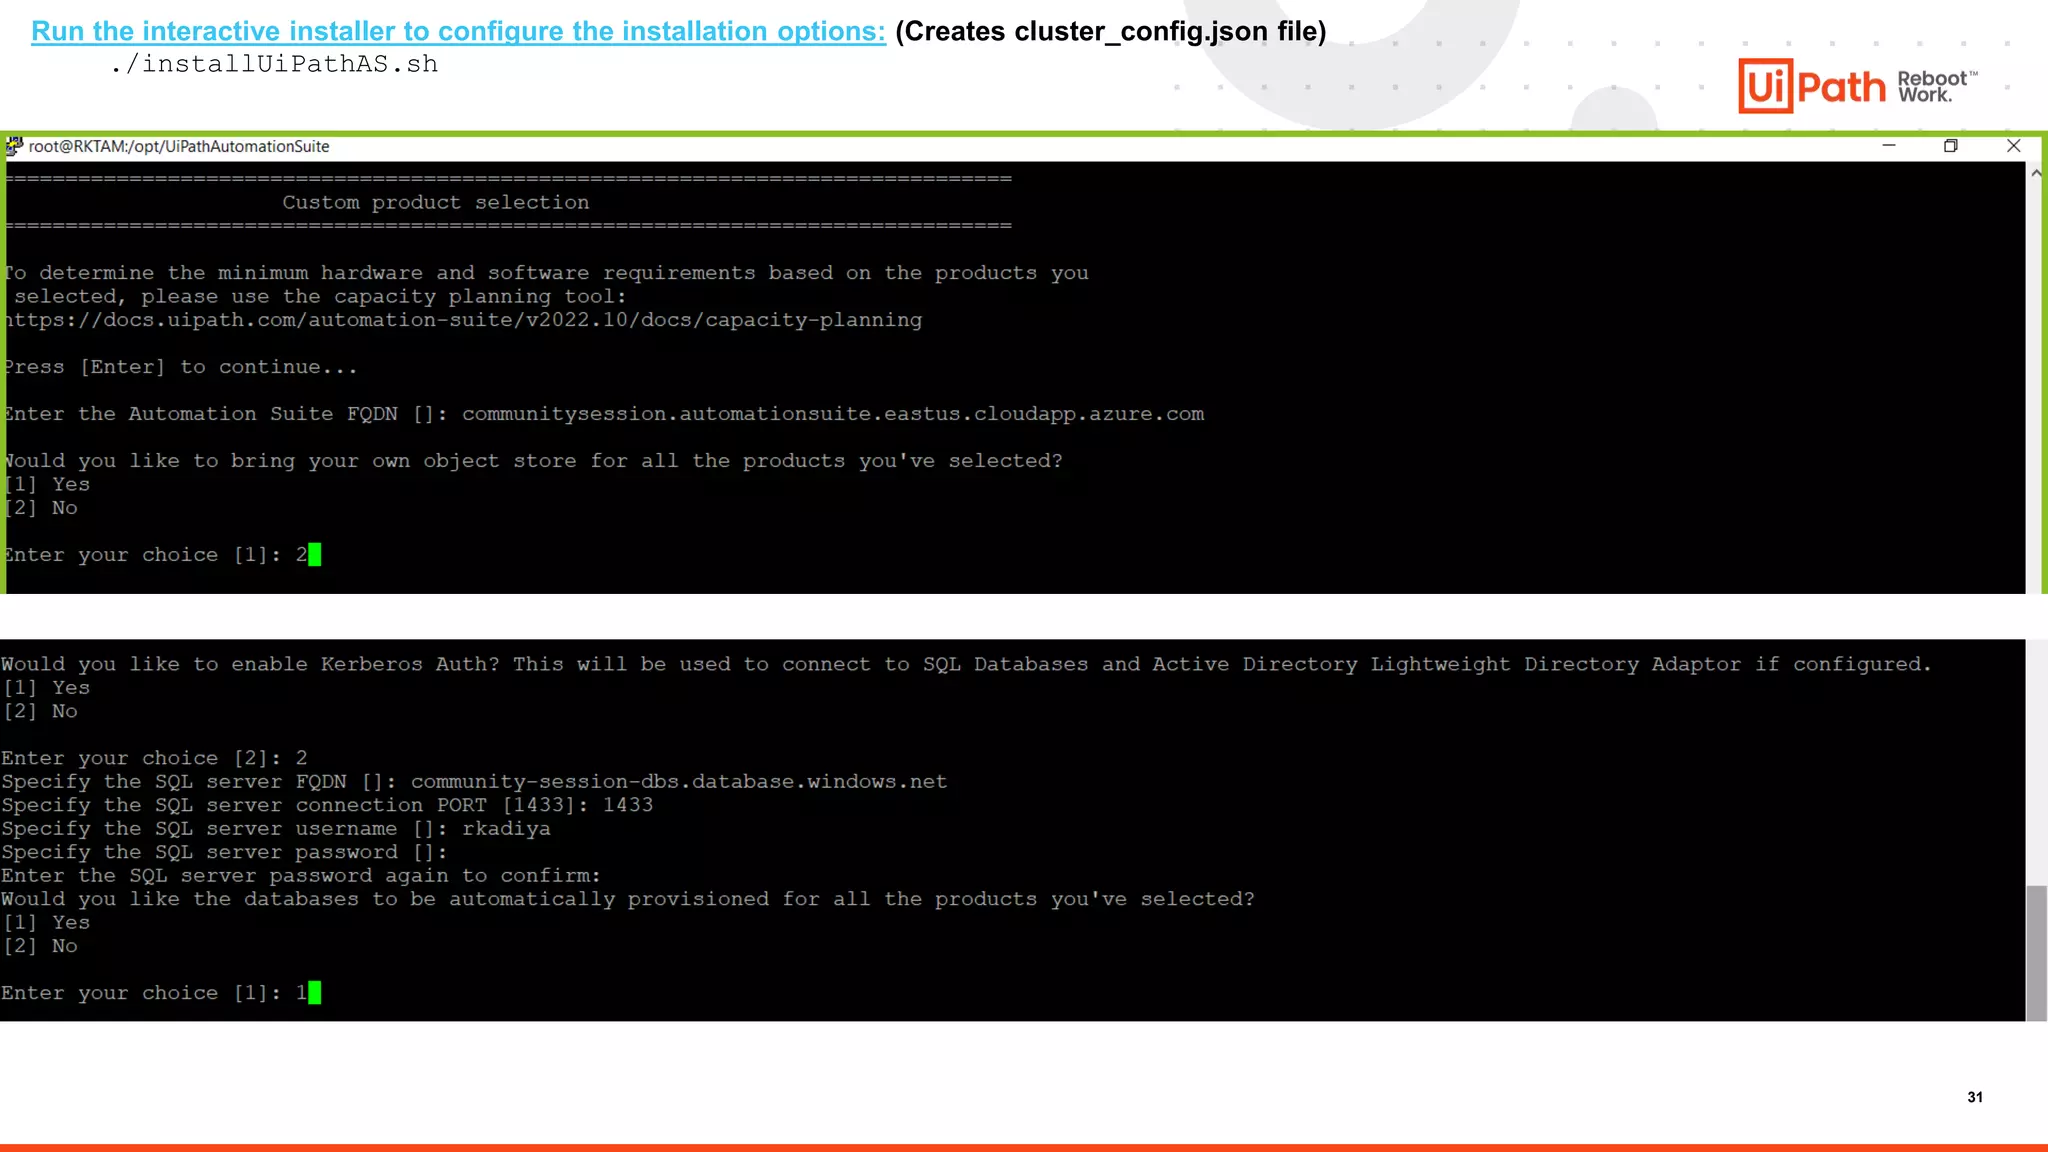
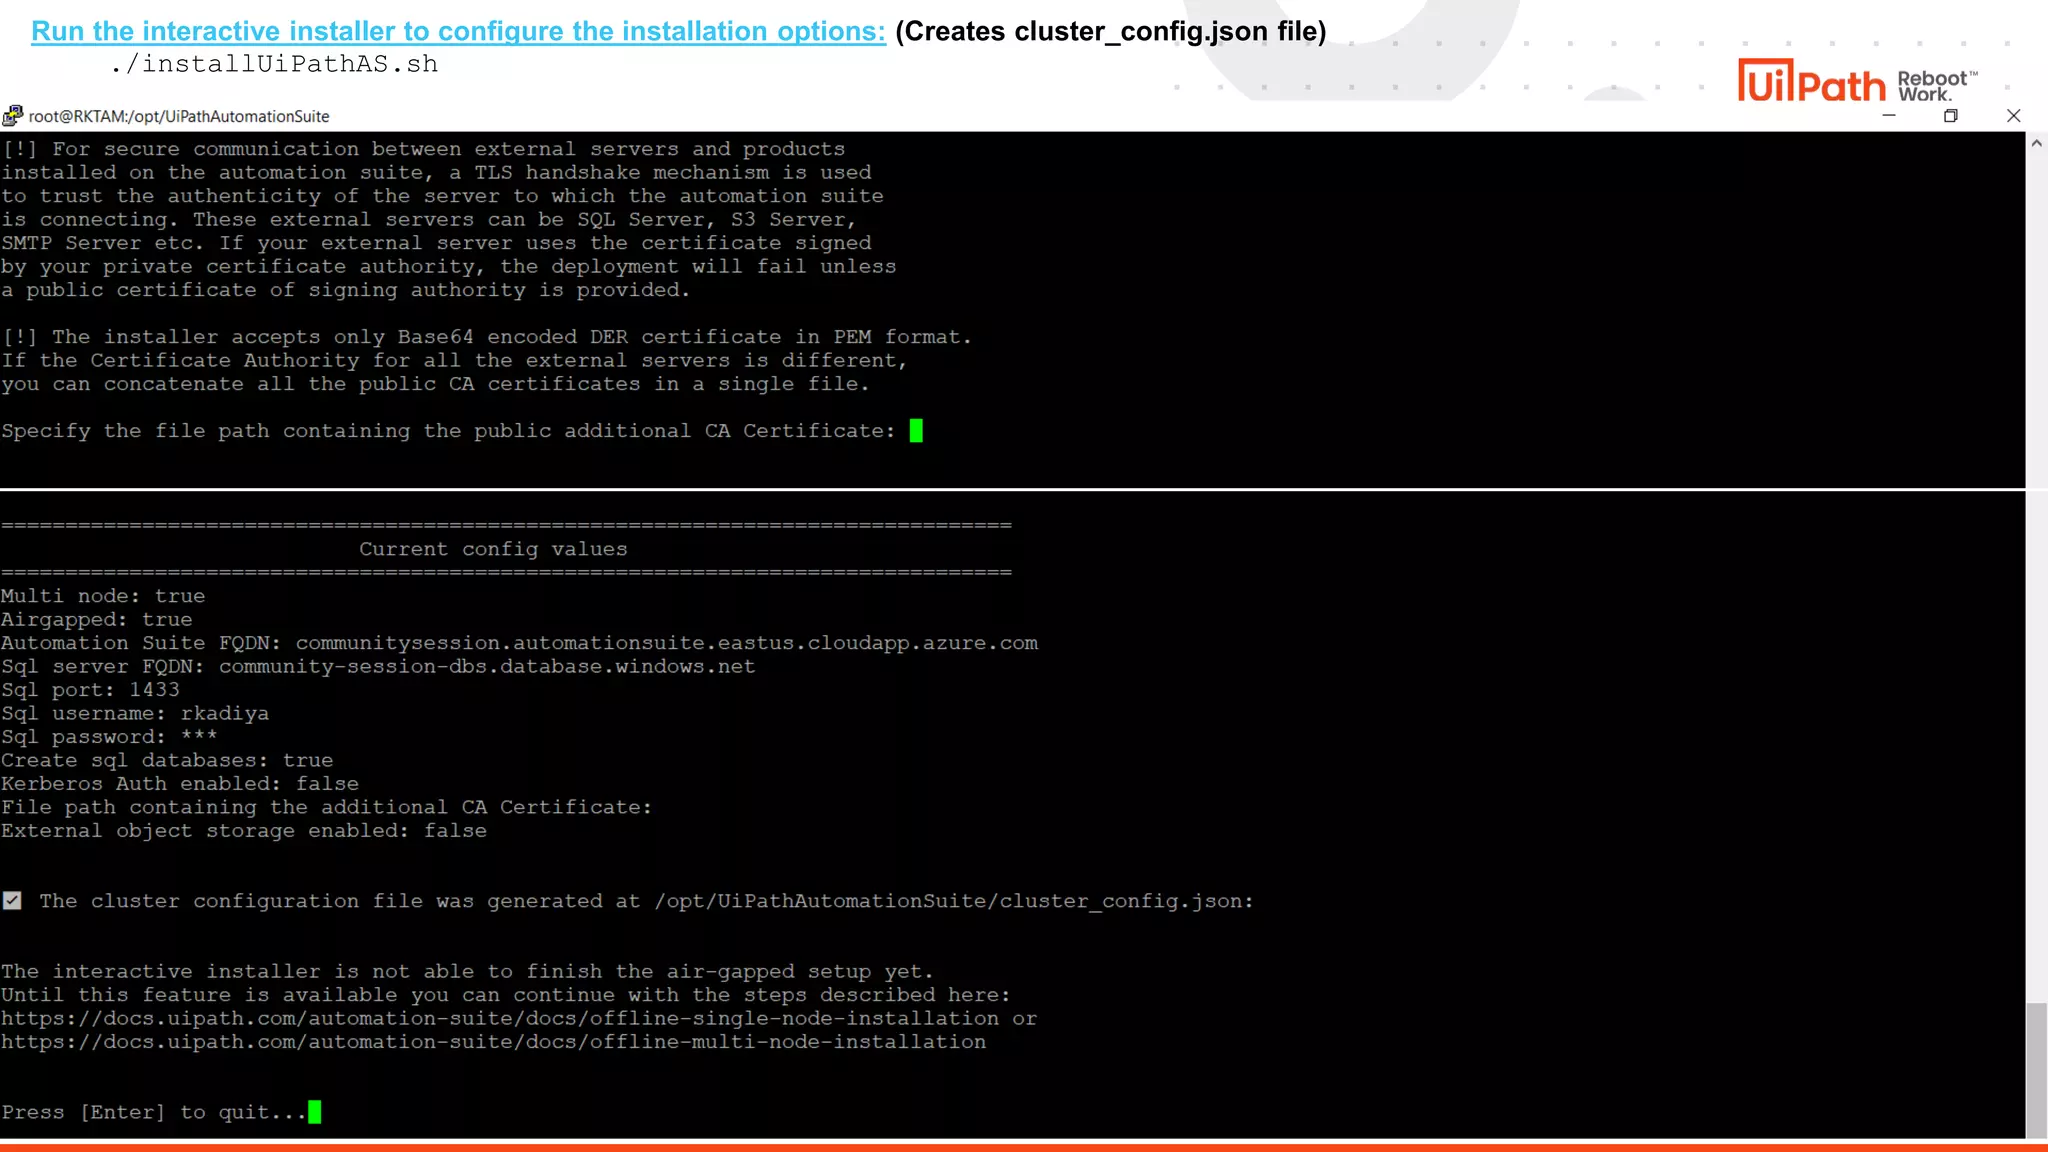
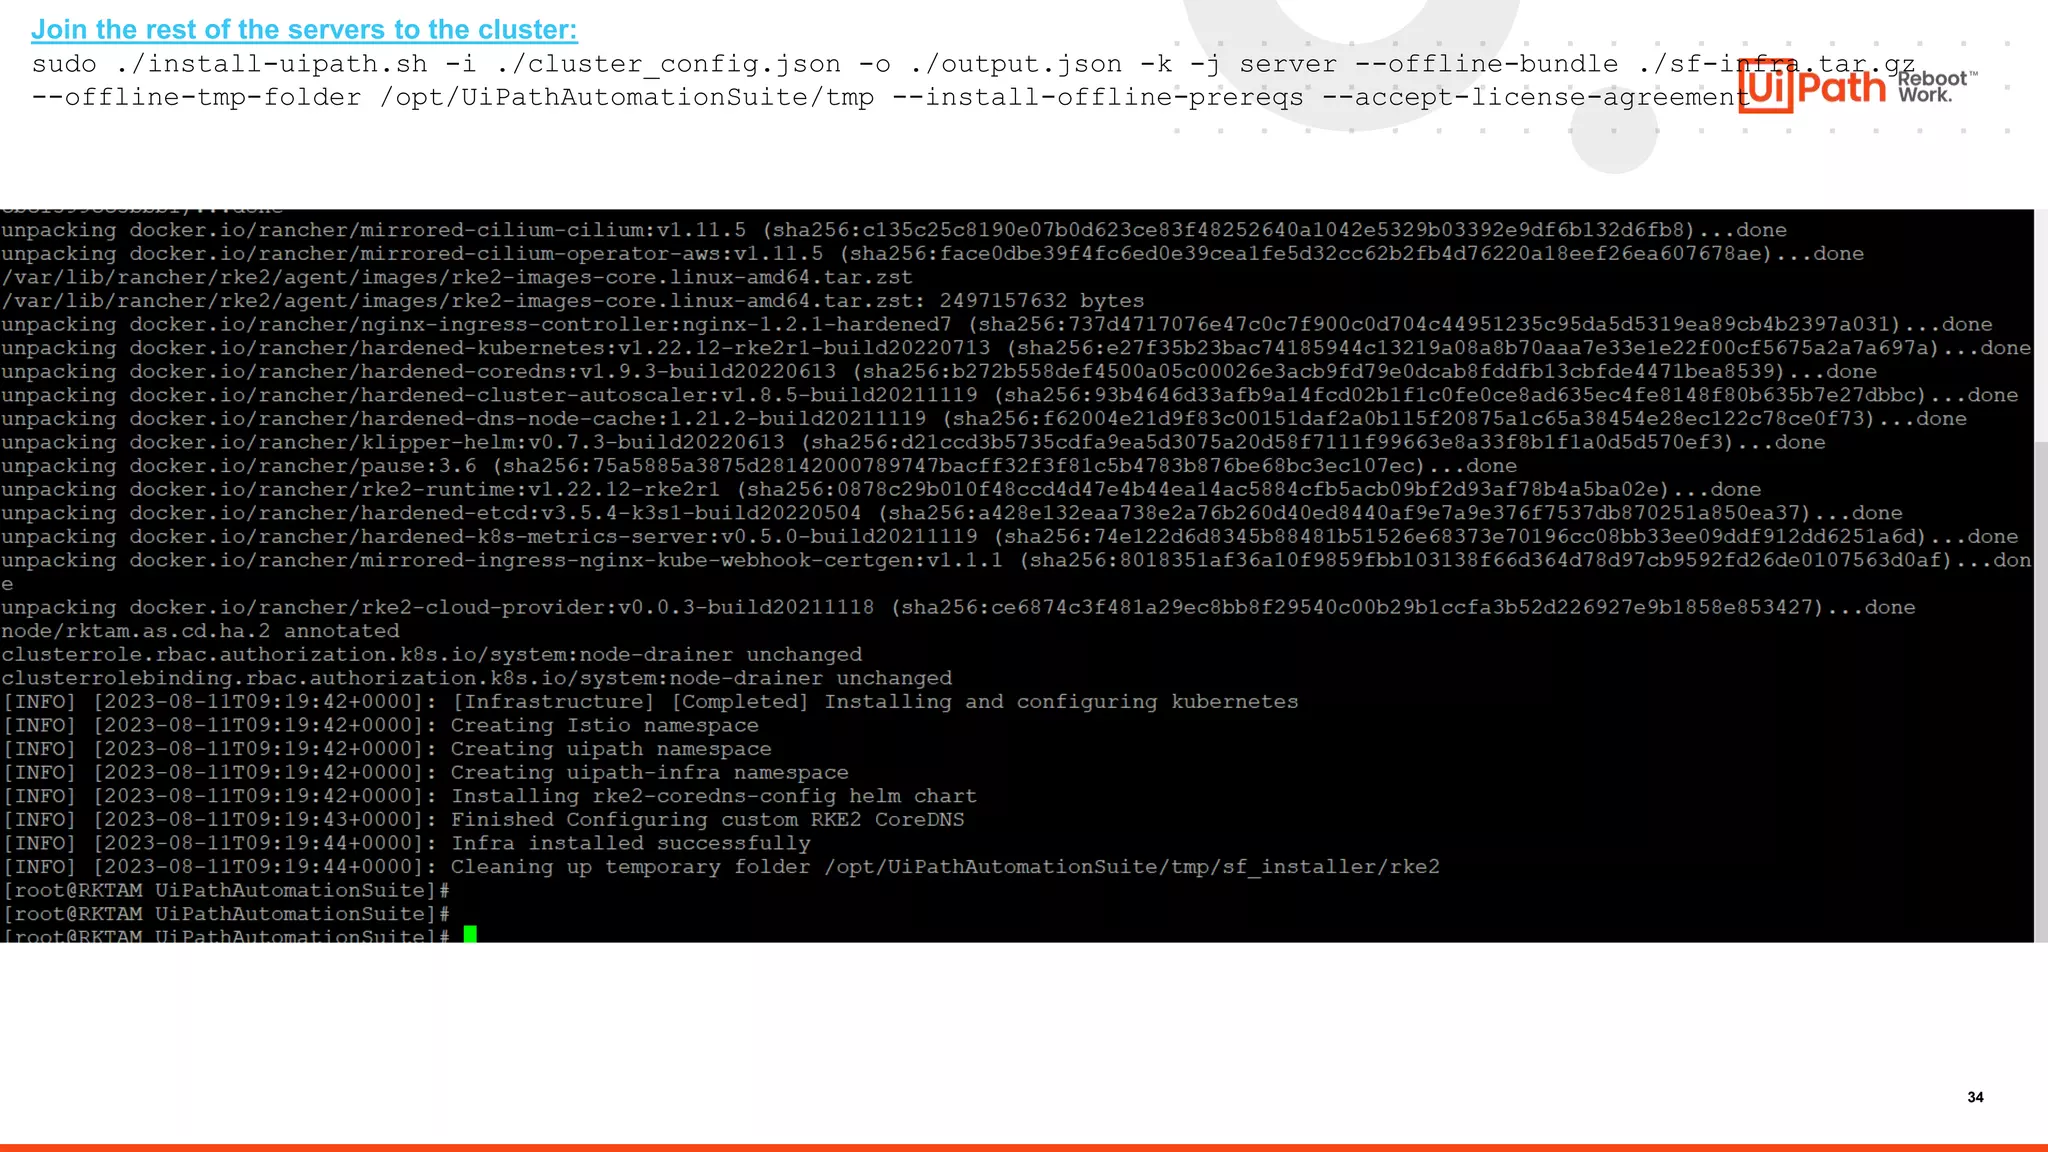
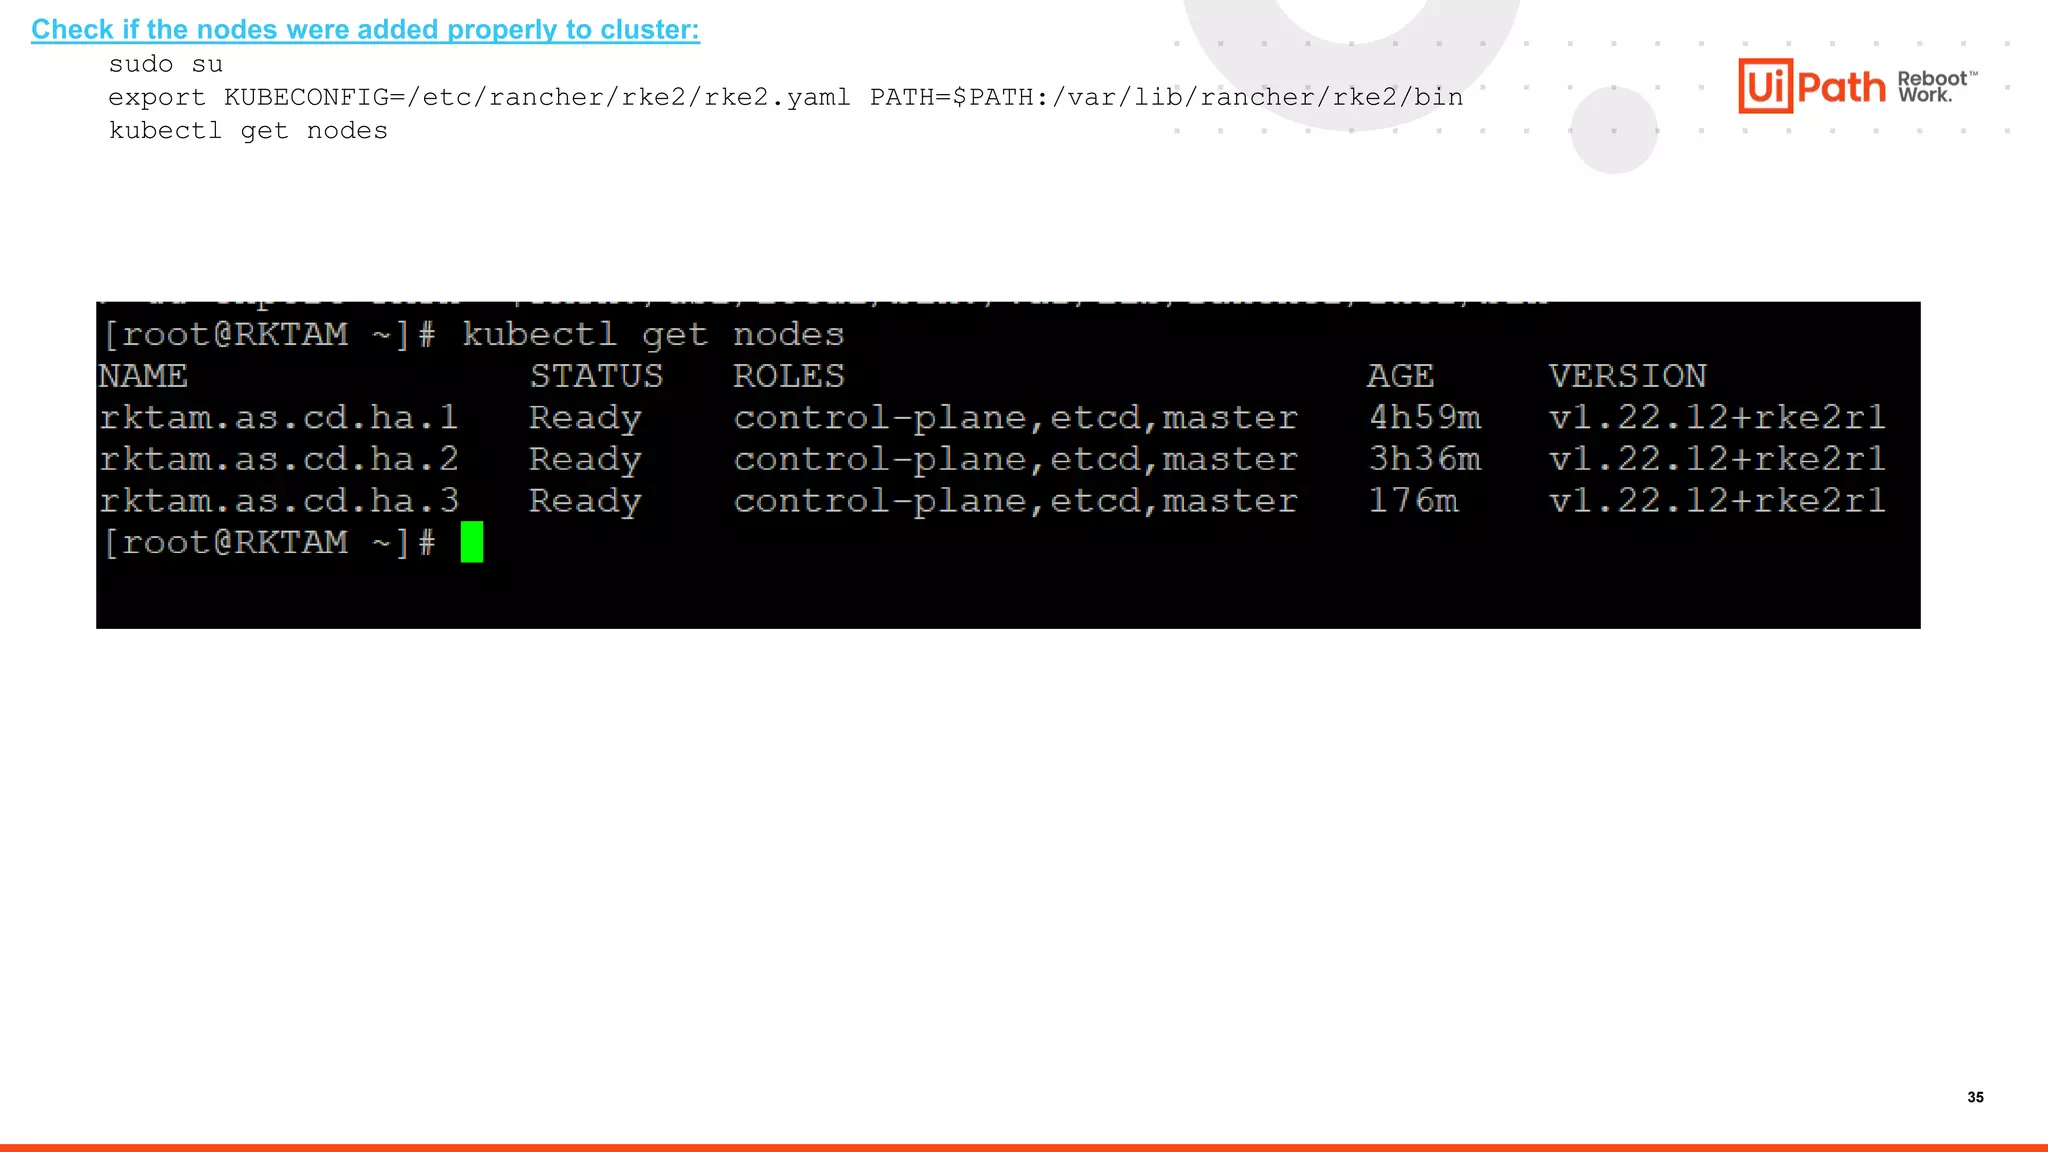
The document provides instructions for installing the UiPath Automation Suite in a multi-node air-gapped environment. It discusses prerequisites like hardware sizing, disk partitioning, DNS and SQL database configuration, and generating certificates. It then demonstrates downloading required files, creating installation folders, running the installer interactive script to generate a cluster configuration file, and using that file to set up the first machine and join additional nodes to complete the cluster installation.

![4
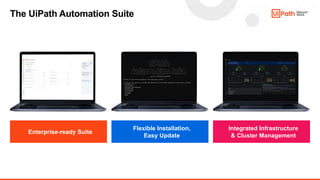
Events in the Series
❍ Standalone UiPath Orchestrator Upgrade (IaaS/PaaS) [2022.4 to 2023.4]
❍ UiPath Insights (Looker) Upgrade
❍ Test Manager and Action Center Upgrade
☞ Automation Suite (Installation)
❍ Automation Suite (Upgrade)](https://image.slidesharecdn.com/automationsuiteppt2-230823063622-baa82b2e/85/Automation-Suite-PPT-2-pptx-4-320.jpg)


![23
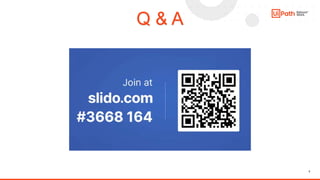
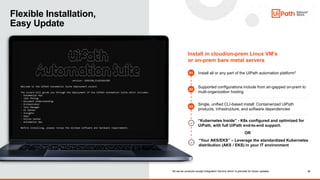
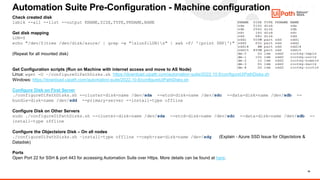
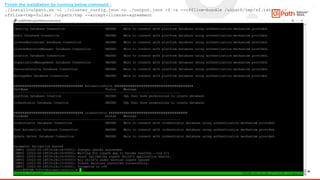
Automation Suite – Post Installation Activities
Enable kubectl
sudo su
export KUBECONFIG=/etc/rancher/rke2/rke2.yaml PATH=$PATH:/var/lib/rancher/rke2/bin
Accessing host administration: https://{CONFIG_CLUSTER_FQDN}
Organization: Host
Username: admin
Password: [Run the below command]
kubectl get secret platform-service-secrets -n uipath -o jsonpath='{.data.identity.hostAdminPassword}' |
base64 -d
Accessing Automation Suite: https://{CONFIG_CLUSTER_FQDN}
Organization: Default
Username: orgadmin
Password: [Run the below command]
kubectl get secret platform-service-secrets -n uipath -o jsonpath='{.data.identity.hostAdminPassword}' |
base64 -d
Accessing ArgoCD: https://alm.{CONFIG_CLUSTER_FQDN}
Username: admin
Password: [Run the below command]
kubectl get secrets/argocd-admin-password -n argocd -o "jsonpath={.data['password']}" | echo $(base64 -d)](https://image.slidesharecdn.com/automationsuiteppt2-230823063622-baa82b2e/85/Automation-Suite-PPT-2-pptx-23-320.jpg)
![24
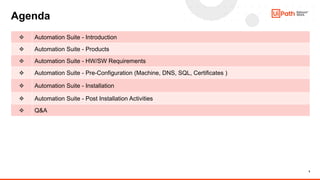
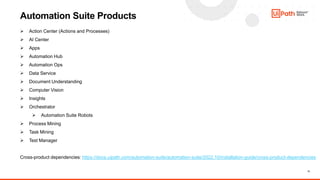
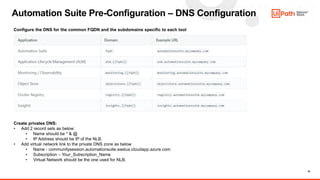
Automation Suite – Post Installation Activities
Accessing Rancher: https://monitoring.{CONFIG_CLUSTER_FQDN}
Username: admin
Password: [Run the below command]
kubectl get secrets/rancher-admin-password -n cattle-system -o "jsonpath={.data['password']}" | echo $(base64 -d)
Accessing service database connection strings
• kubectl -n uipath get secret aicenter-secrets -o jsonpath='{.data.sqlConnectionString}' | base64 --decode
• kubectl -n uipath get secret orchestrator-secrets -o jsonpath='{.data.sqlConnectionString}' | base64 --decode
• kubectl -n uipath get secret automation-hub-secrets -o jsonpath='{.data.sqlConnectionString}' | base64 --decode
• kubectl -n uipath get secret automation-ops-secrets -o jsonpath='{.data.sqlConnectionString}' | base64 --decode
• kubectl -n uipath get secret insights-secrets -o jsonpath='{.data.sqlConnectionString}' | base64 --decode
• kubectl -n uipath get secret platform-service-secrets -o jsonpath='{.data.sqlConnectionString}' | base64 --decode
• kubectl -n uipath get secret test-manager-secrets -o jsonpath='{.data.sqlConnectionString}' | base64 --decode
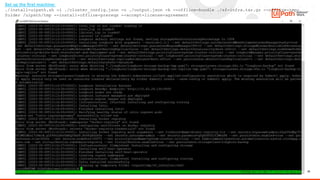
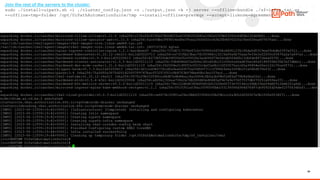
Configuring a client machine to access the cluster: This is mandatory to perform for all deployments, both evaluation/test and production.
Windows:
Add-Content -Path $env:windirSystem32driversetchosts -Value "`n20.232.37.49 communitysession.automationsuite.eastus.cloudapp.azure.com" -Force
Add-Content -Path $env:windirSystem32driversetchosts -Value "`n20.232.37.49 alm.communitysession.automationsuite.eastus.cloudapp.azure.com" -Force
Add-Content -Path $env:windirSystem32driversetchosts -Value "`n20.232.37.49 objectstore.communitysession.automationsuite.eastus.cloudapp.azure.com" -Force
Add-Content -Path $env:windirSystem32driversetchosts -Value "`n20.232.37.49 registry.communitysession.automationsuite.eastus.cloudapp.azure.com" -Force
Add-Content -Path $env:windirSystem32driversetchosts -Value "`n20.232.37.49 monitoring.communitysession.automationsuite.eastus.cloudapp.azure.com" -Force
Add-Content -Path $env:windirSystem32driversetchosts -Value "`n20.232.37.49 insights.communitysession.automationsuite.eastus.cloudapp.azure.com" –Force
MacOS or Linux:
sudo bash -c "echo "20.232.37.49 {FQDN}" >> /etc/hosts“
sudo bash -c "echo "20.232.37.49 alm.{FQDN}" >> /etc/hosts"
Similar to other sub-domains like objectstore, registry, monitoring & insights.](https://image.slidesharecdn.com/automationsuiteppt2-230823063622-baa82b2e/85/Automation-Suite-PPT-2-pptx-24-320.jpg)


![4
Events in the Series
❍ Standalone UiPath Orchestrator Upgrade (IaaS/PaaS) [2022.4 to 2023.4]
❍ UiPath Insights (Looker) Upgrade
❍ Test Manager and Action Center Upgrade
☞ Automation Suite (Installation)
❍ Automation Suite (Upgrade)](https://image.slidesharecdn.com/automationsuiteppt2-230823063622-baa82b2e/75/Automation-Suite-PPT-2-pptx-4-2048.jpg)


![23
Automation Suite – Post Installation Activities
Enable kubectl
sudo su
export KUBECONFIG=/etc/rancher/rke2/rke2.yaml PATH=$PATH:/var/lib/rancher/rke2/bin
Accessing host administration: https://{CONFIG_CLUSTER_FQDN}
Organization: Host
Username: admin
Password: [Run the below command]
kubectl get secret platform-service-secrets -n uipath -o jsonpath='{.data.identity.hostAdminPassword}' |
base64 -d
Accessing Automation Suite: https://{CONFIG_CLUSTER_FQDN}
Organization: Default
Username: orgadmin
Password: [Run the below command]
kubectl get secret platform-service-secrets -n uipath -o jsonpath='{.data.identity.hostAdminPassword}' |
base64 -d
Accessing ArgoCD: https://alm.{CONFIG_CLUSTER_FQDN}
Username: admin
Password: [Run the below command]
kubectl get secrets/argocd-admin-password -n argocd -o "jsonpath={.data['password']}" | echo $(base64 -d)](https://image.slidesharecdn.com/automationsuiteppt2-230823063622-baa82b2e/75/Automation-Suite-PPT-2-pptx-23-2048.jpg)
![24
Automation Suite – Post Installation Activities
Accessing Rancher: https://monitoring.{CONFIG_CLUSTER_FQDN}
Username: admin
Password: [Run the below command]
kubectl get secrets/rancher-admin-password -n cattle-system -o "jsonpath={.data['password']}" | echo $(base64 -d)
Accessing service database connection strings
• kubectl -n uipath get secret aicenter-secrets -o jsonpath='{.data.sqlConnectionString}' | base64 --decode
• kubectl -n uipath get secret orchestrator-secrets -o jsonpath='{.data.sqlConnectionString}' | base64 --decode
• kubectl -n uipath get secret automation-hub-secrets -o jsonpath='{.data.sqlConnectionString}' | base64 --decode
• kubectl -n uipath get secret automation-ops-secrets -o jsonpath='{.data.sqlConnectionString}' | base64 --decode
• kubectl -n uipath get secret insights-secrets -o jsonpath='{.data.sqlConnectionString}' | base64 --decode
• kubectl -n uipath get secret platform-service-secrets -o jsonpath='{.data.sqlConnectionString}' | base64 --decode
• kubectl -n uipath get secret test-manager-secrets -o jsonpath='{.data.sqlConnectionString}' | base64 --decode
Configuring a client machine to access the cluster: This is mandatory to perform for all deployments, both evaluation/test and production.
Windows:
Add-Content -Path $env:windirSystem32driversetchosts -Value "`n20.232.37.49 communitysession.automationsuite.eastus.cloudapp.azure.com" -Force
Add-Content -Path $env:windirSystem32driversetchosts -Value "`n20.232.37.49 alm.communitysession.automationsuite.eastus.cloudapp.azure.com" -Force
Add-Content -Path $env:windirSystem32driversetchosts -Value "`n20.232.37.49 objectstore.communitysession.automationsuite.eastus.cloudapp.azure.com" -Force
Add-Content -Path $env:windirSystem32driversetchosts -Value "`n20.232.37.49 registry.communitysession.automationsuite.eastus.cloudapp.azure.com" -Force
Add-Content -Path $env:windirSystem32driversetchosts -Value "`n20.232.37.49 monitoring.communitysession.automationsuite.eastus.cloudapp.azure.com" -Force
Add-Content -Path $env:windirSystem32driversetchosts -Value "`n20.232.37.49 insights.communitysession.automationsuite.eastus.cloudapp.azure.com" –Force
MacOS or Linux:
sudo bash -c "echo "20.232.37.49 {FQDN}" >> /etc/hosts“
sudo bash -c "echo "20.232.37.49 alm.{FQDN}" >> /etc/hosts"
Similar to other sub-domains like objectstore, registry, monitoring & insights.](https://image.slidesharecdn.com/automationsuiteppt2-230823063622-baa82b2e/75/Automation-Suite-PPT-2-pptx-24-2048.jpg)


![UiPath Automation Suite Installation (Hands-On) [2/3]](https://cdn.slidesharecdn.com/ss_thumbnails/automationsuitecommunitysession2-251015095633-a6d862f1-thumbnail.jpg?width=600ounds&width=560&fit=bounds)


