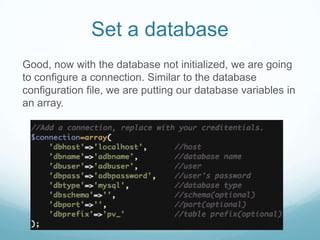
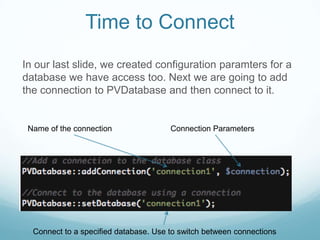
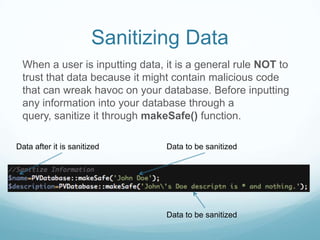
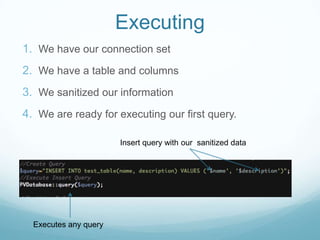
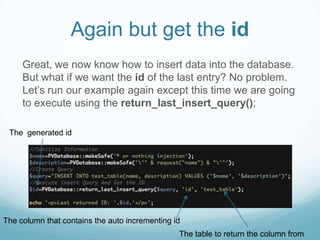
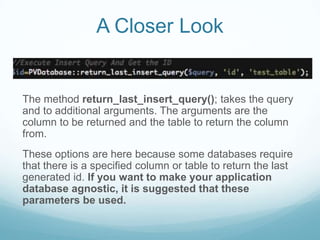
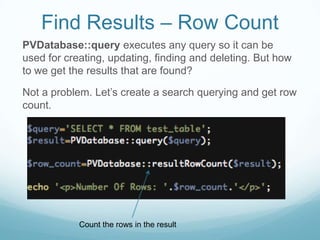
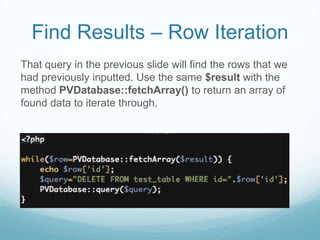
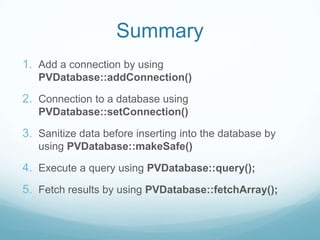
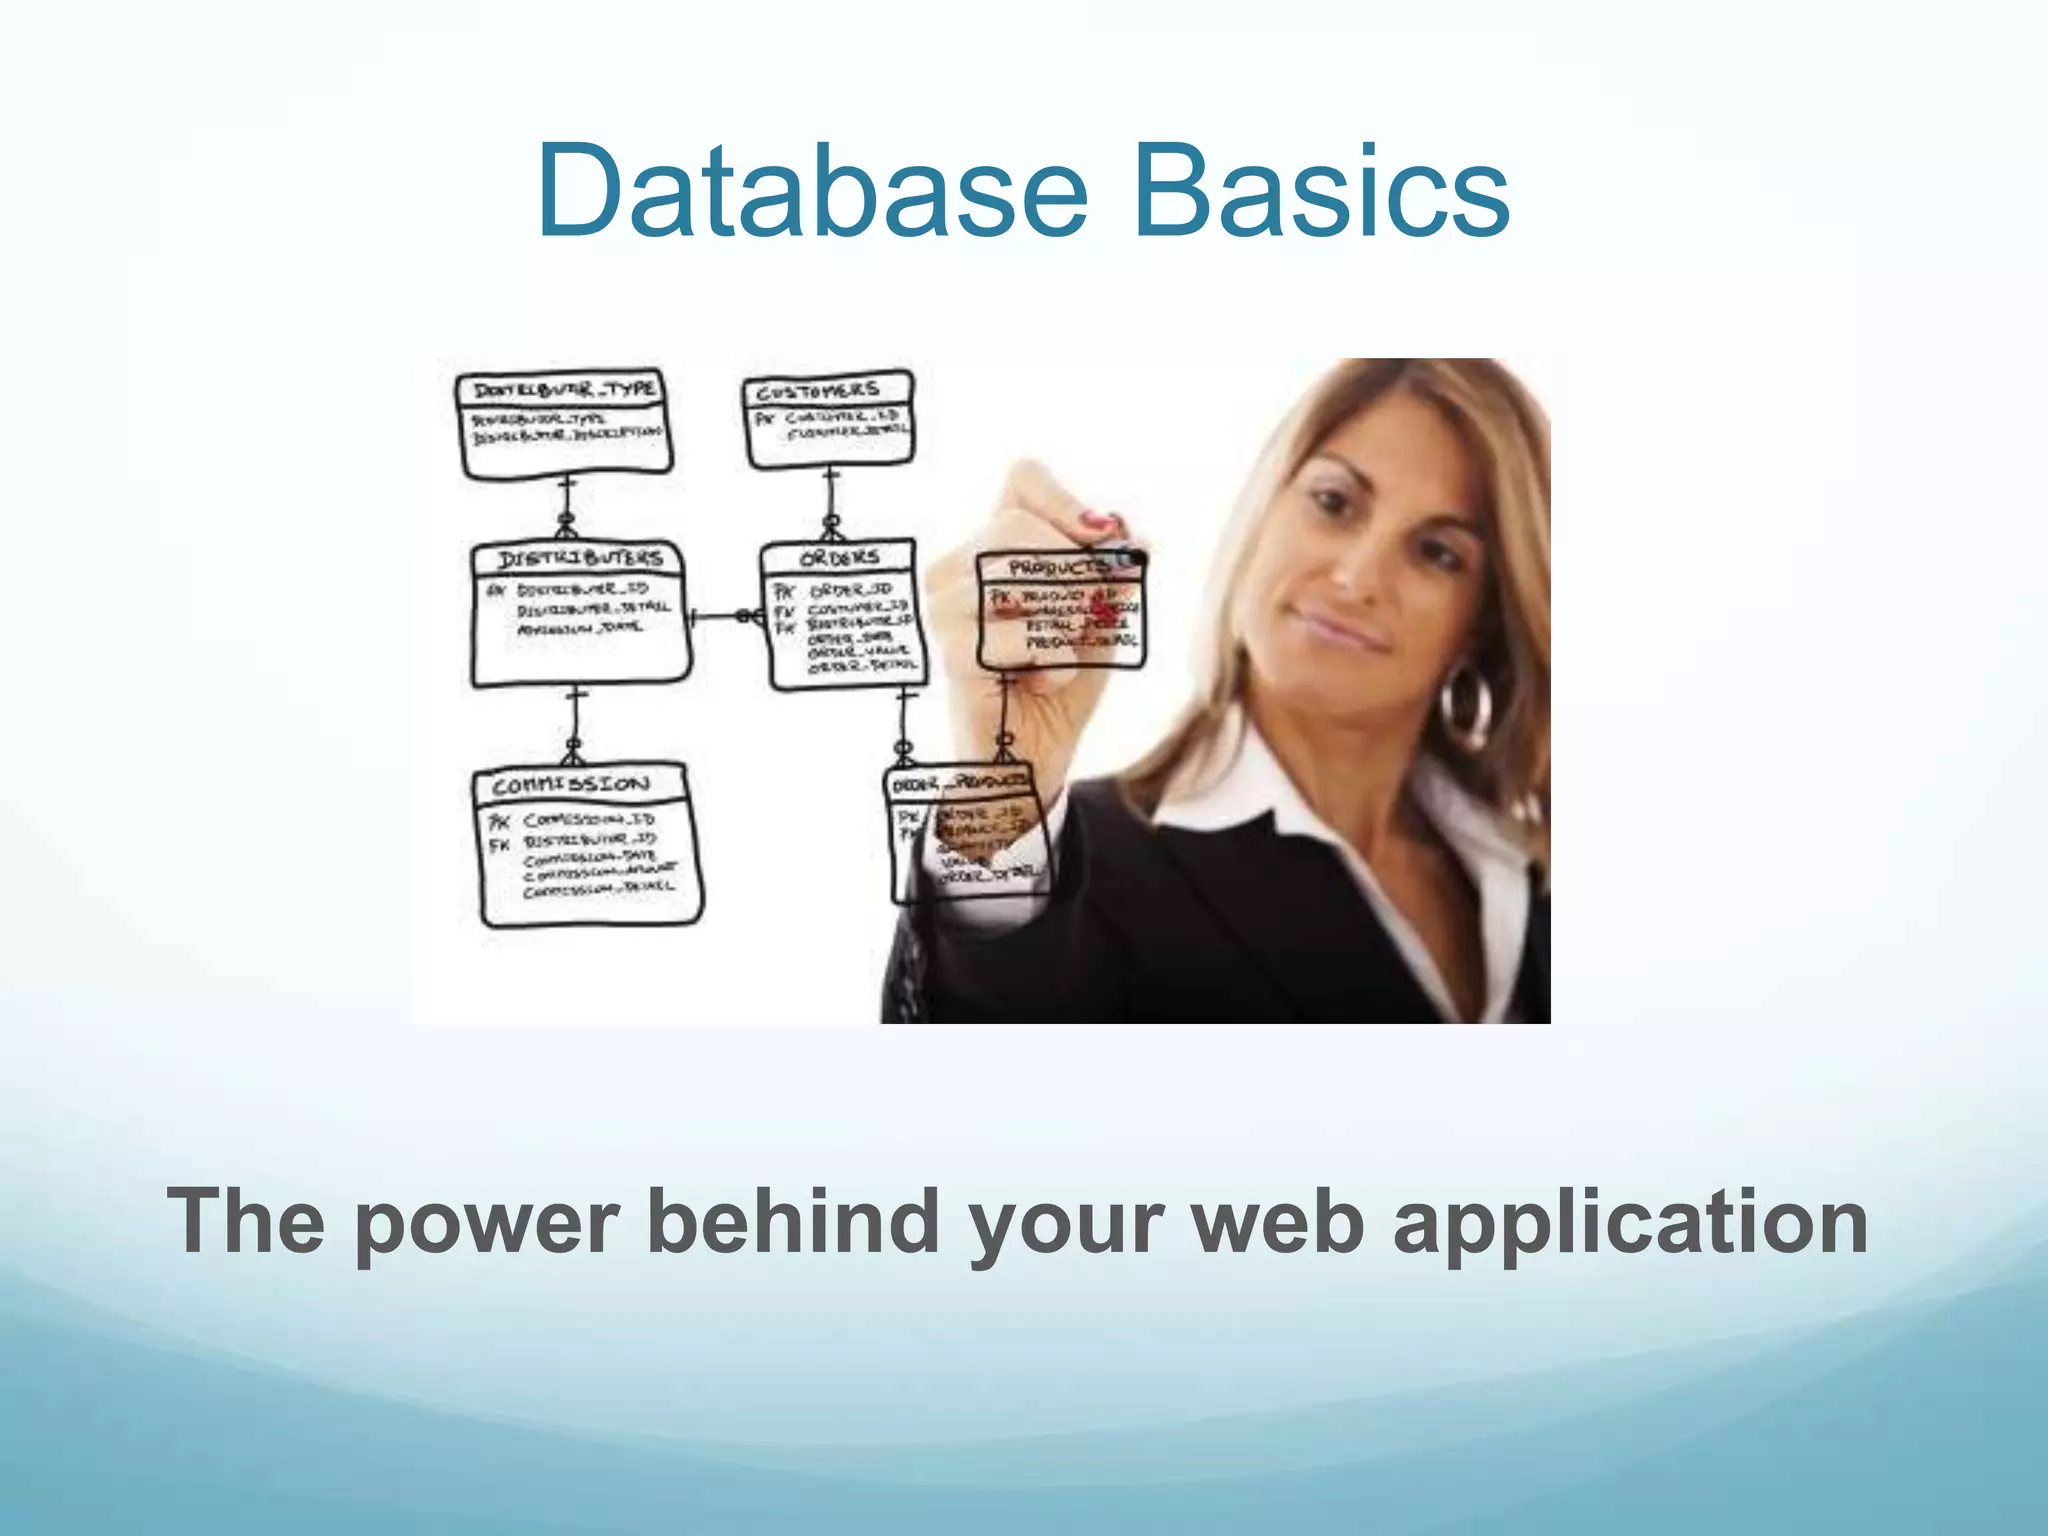
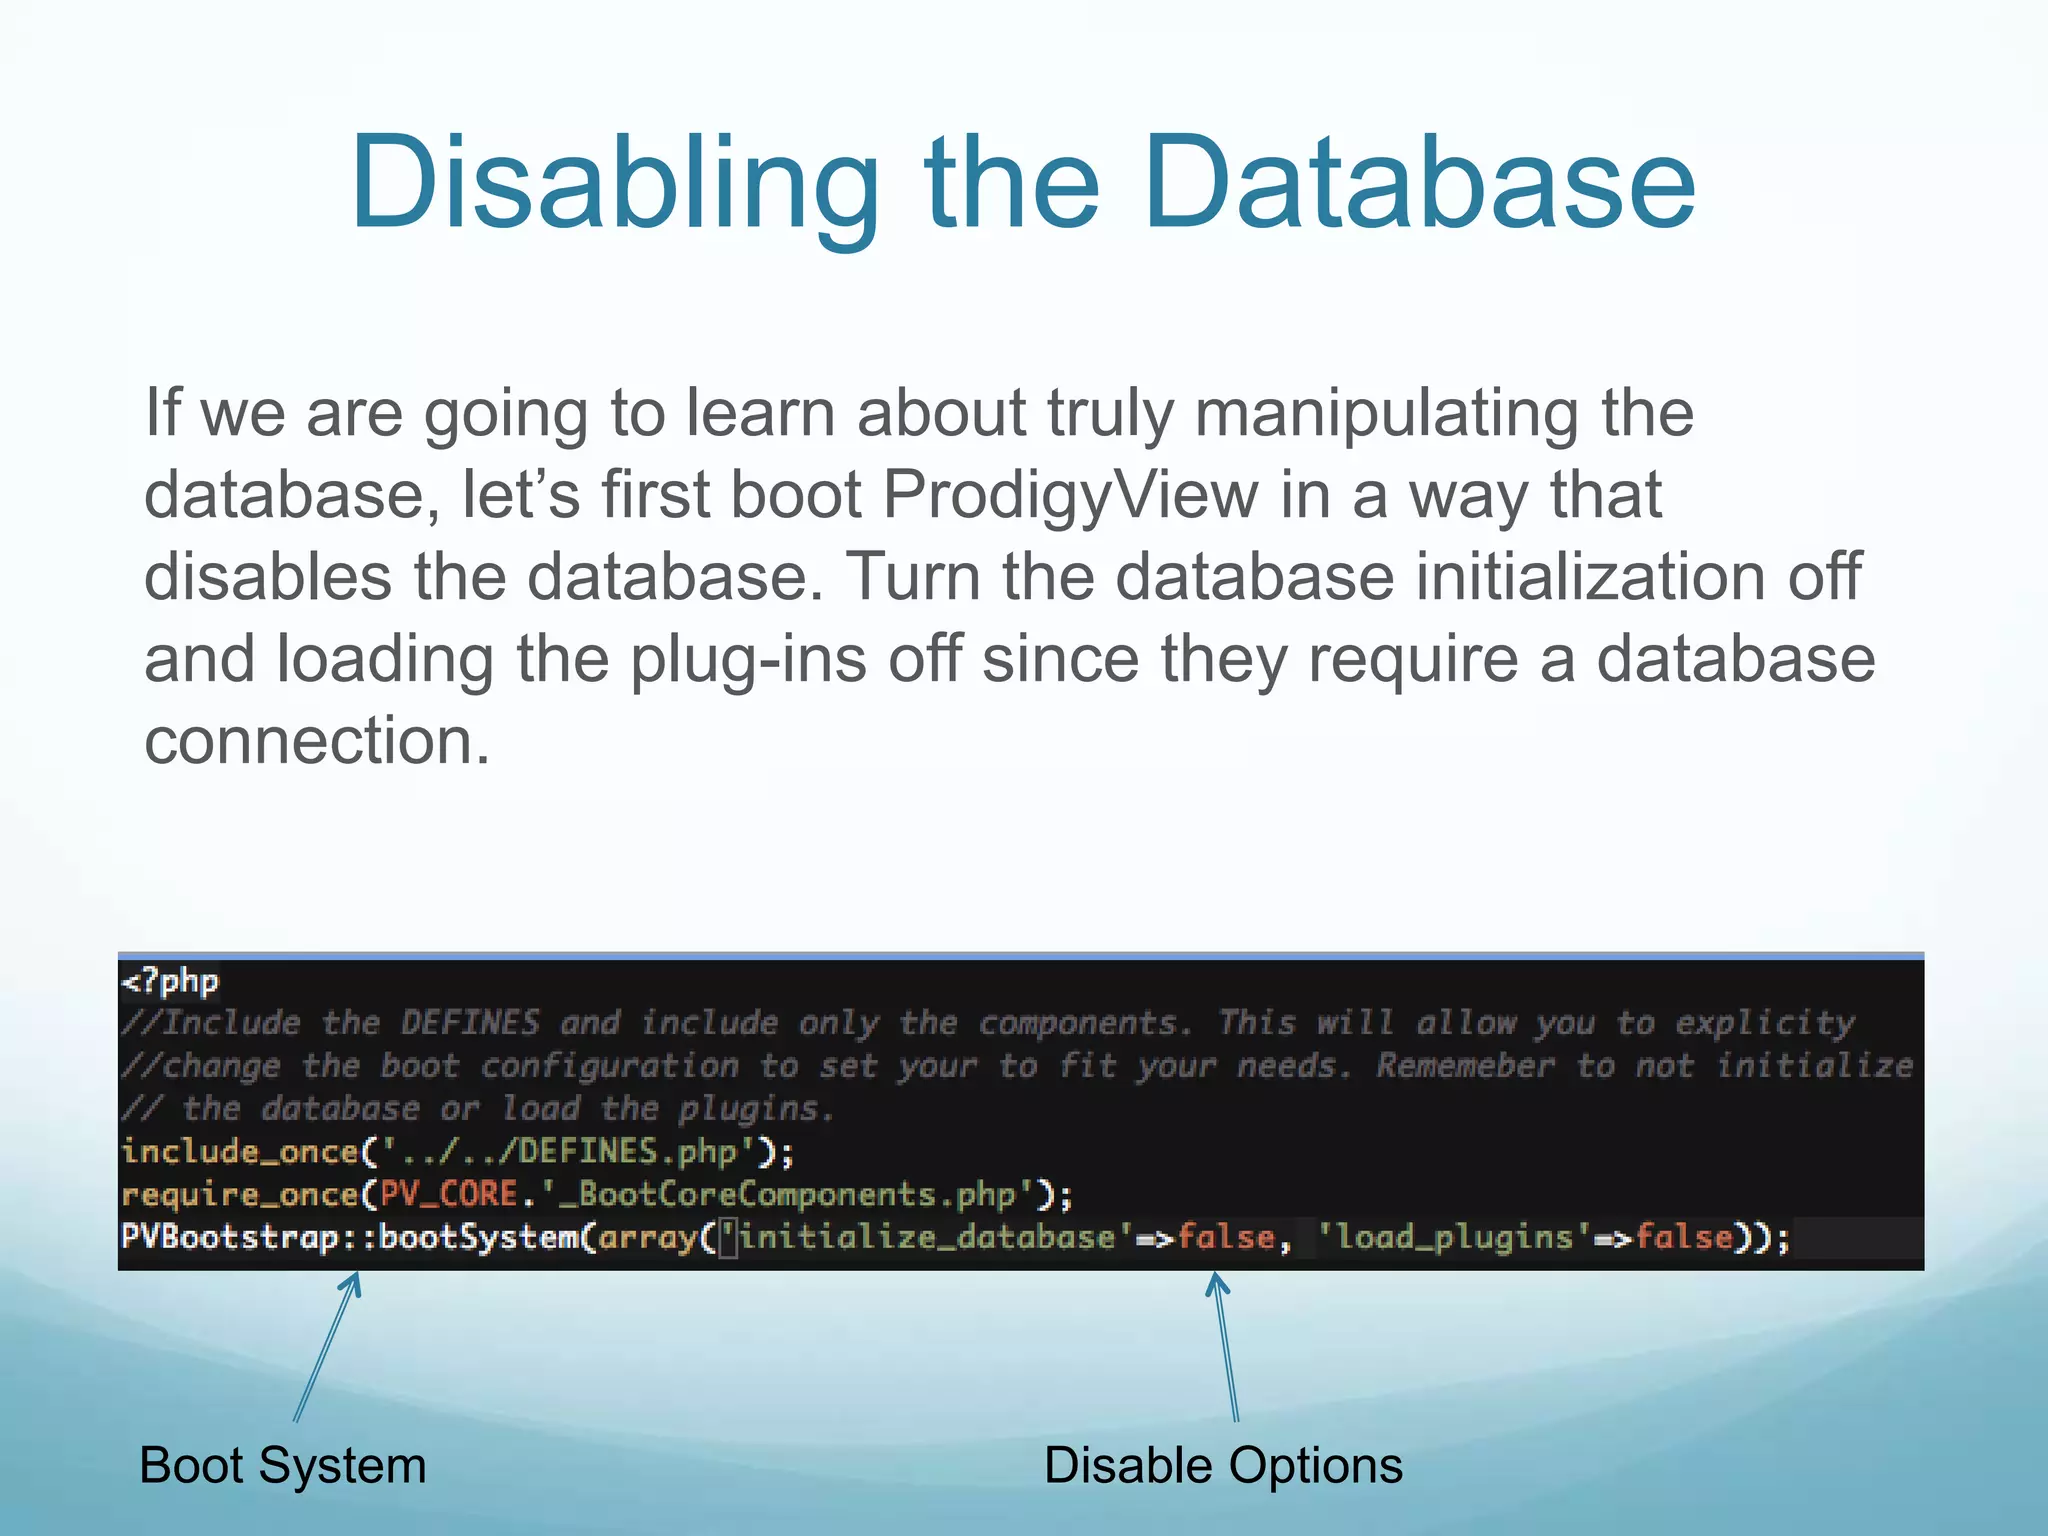
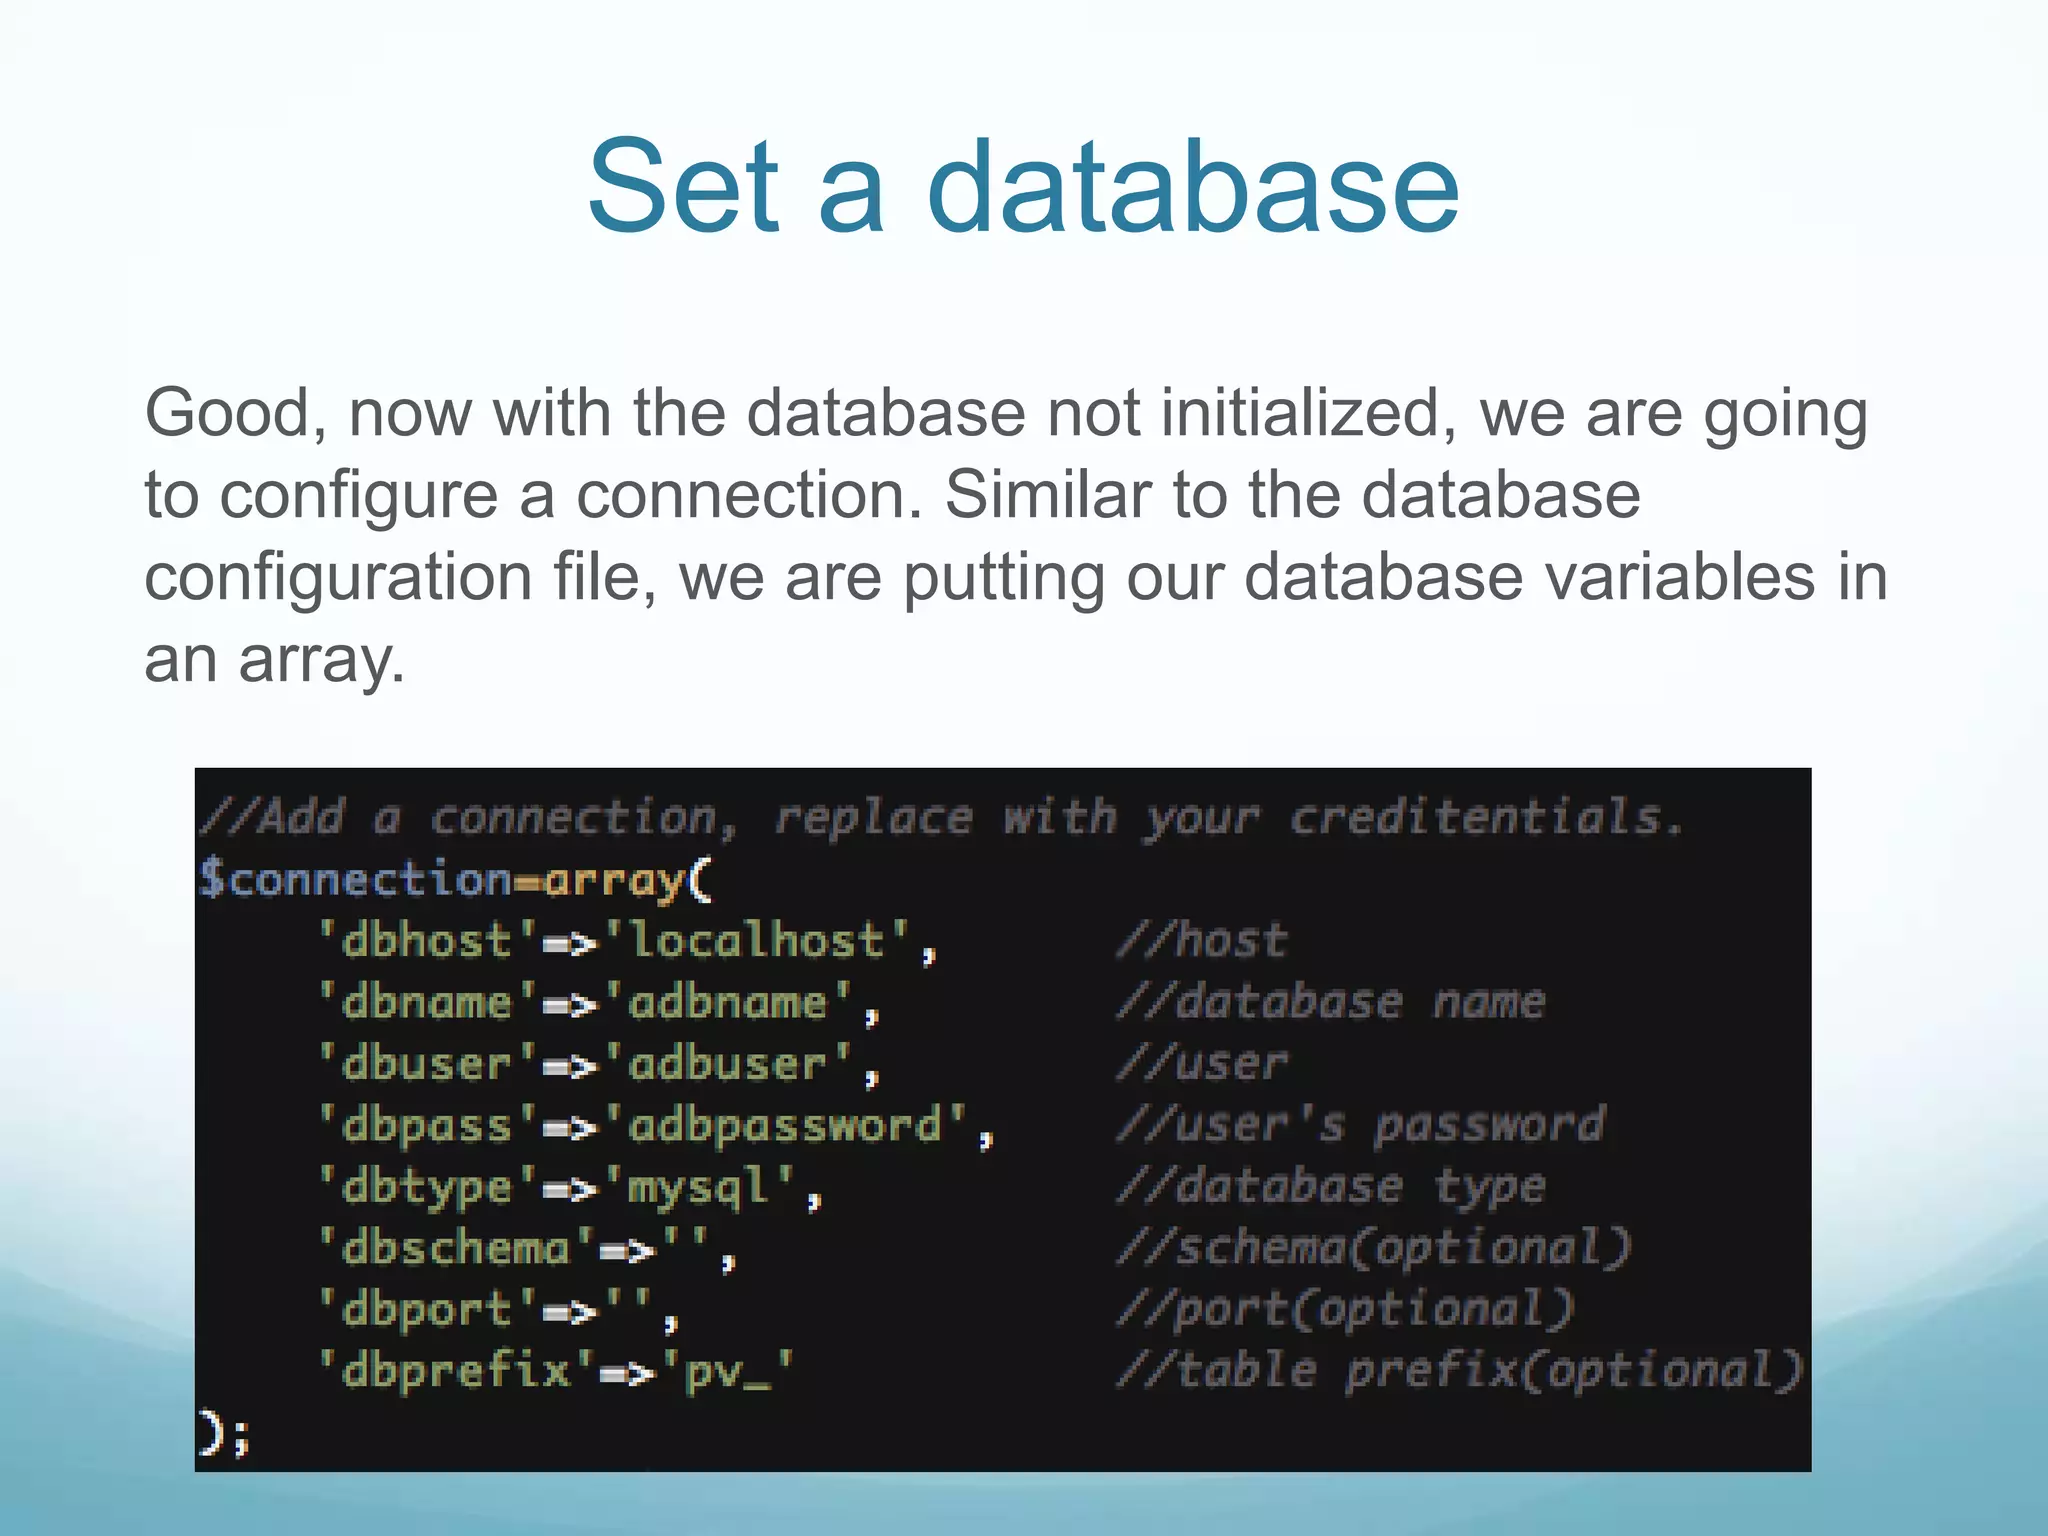
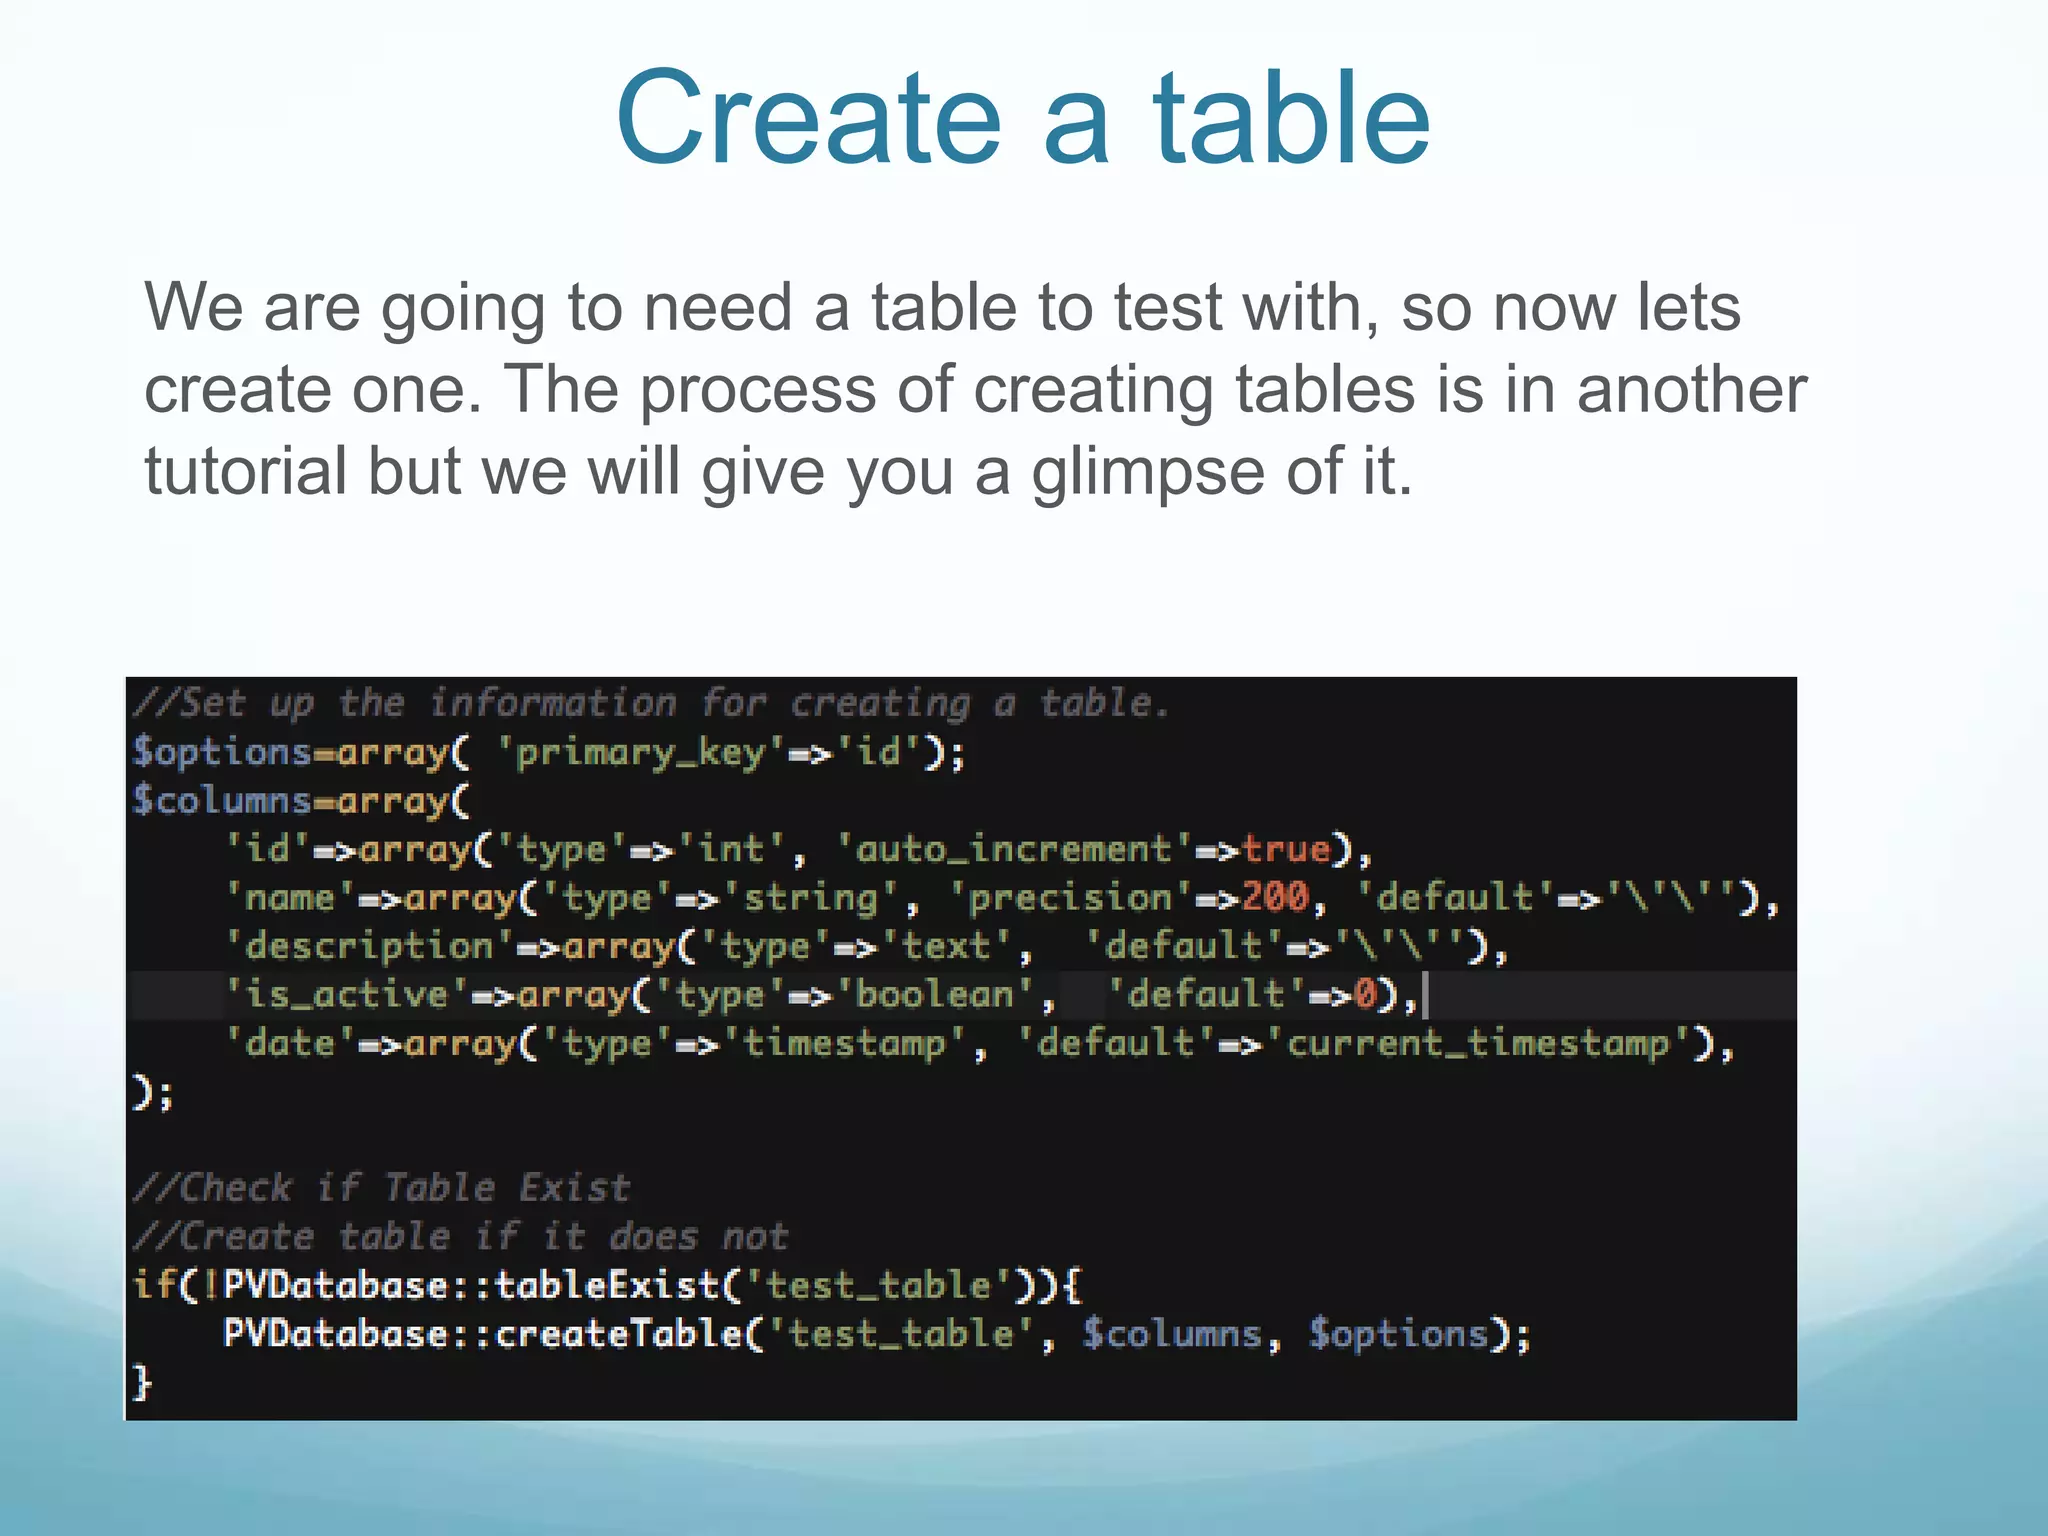
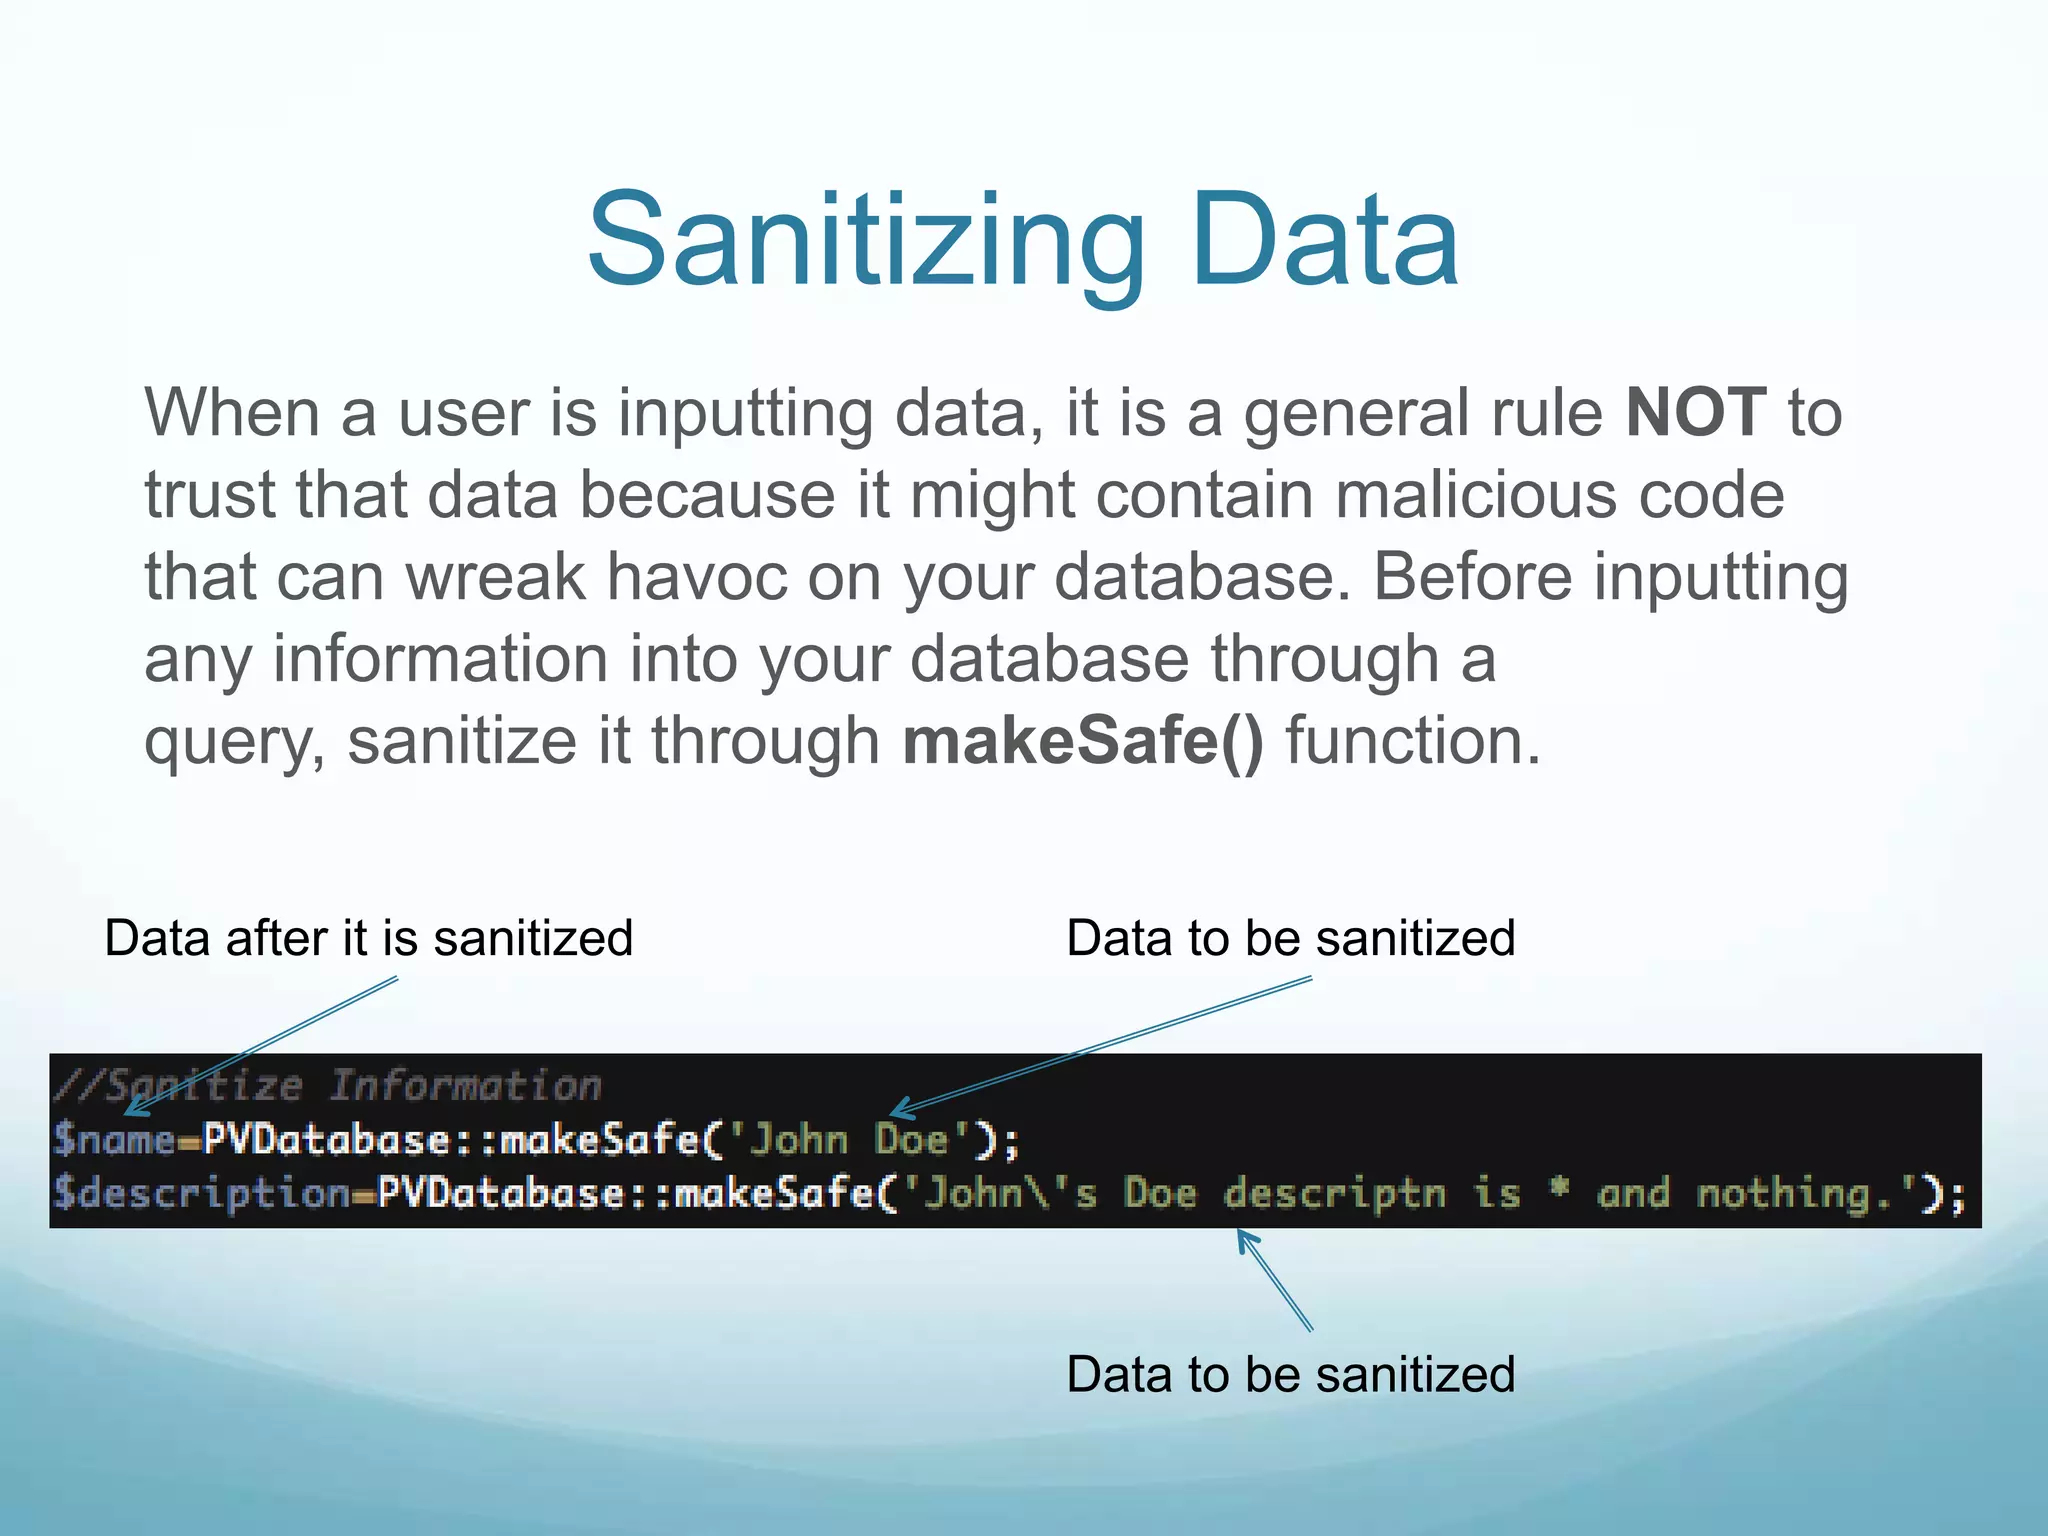
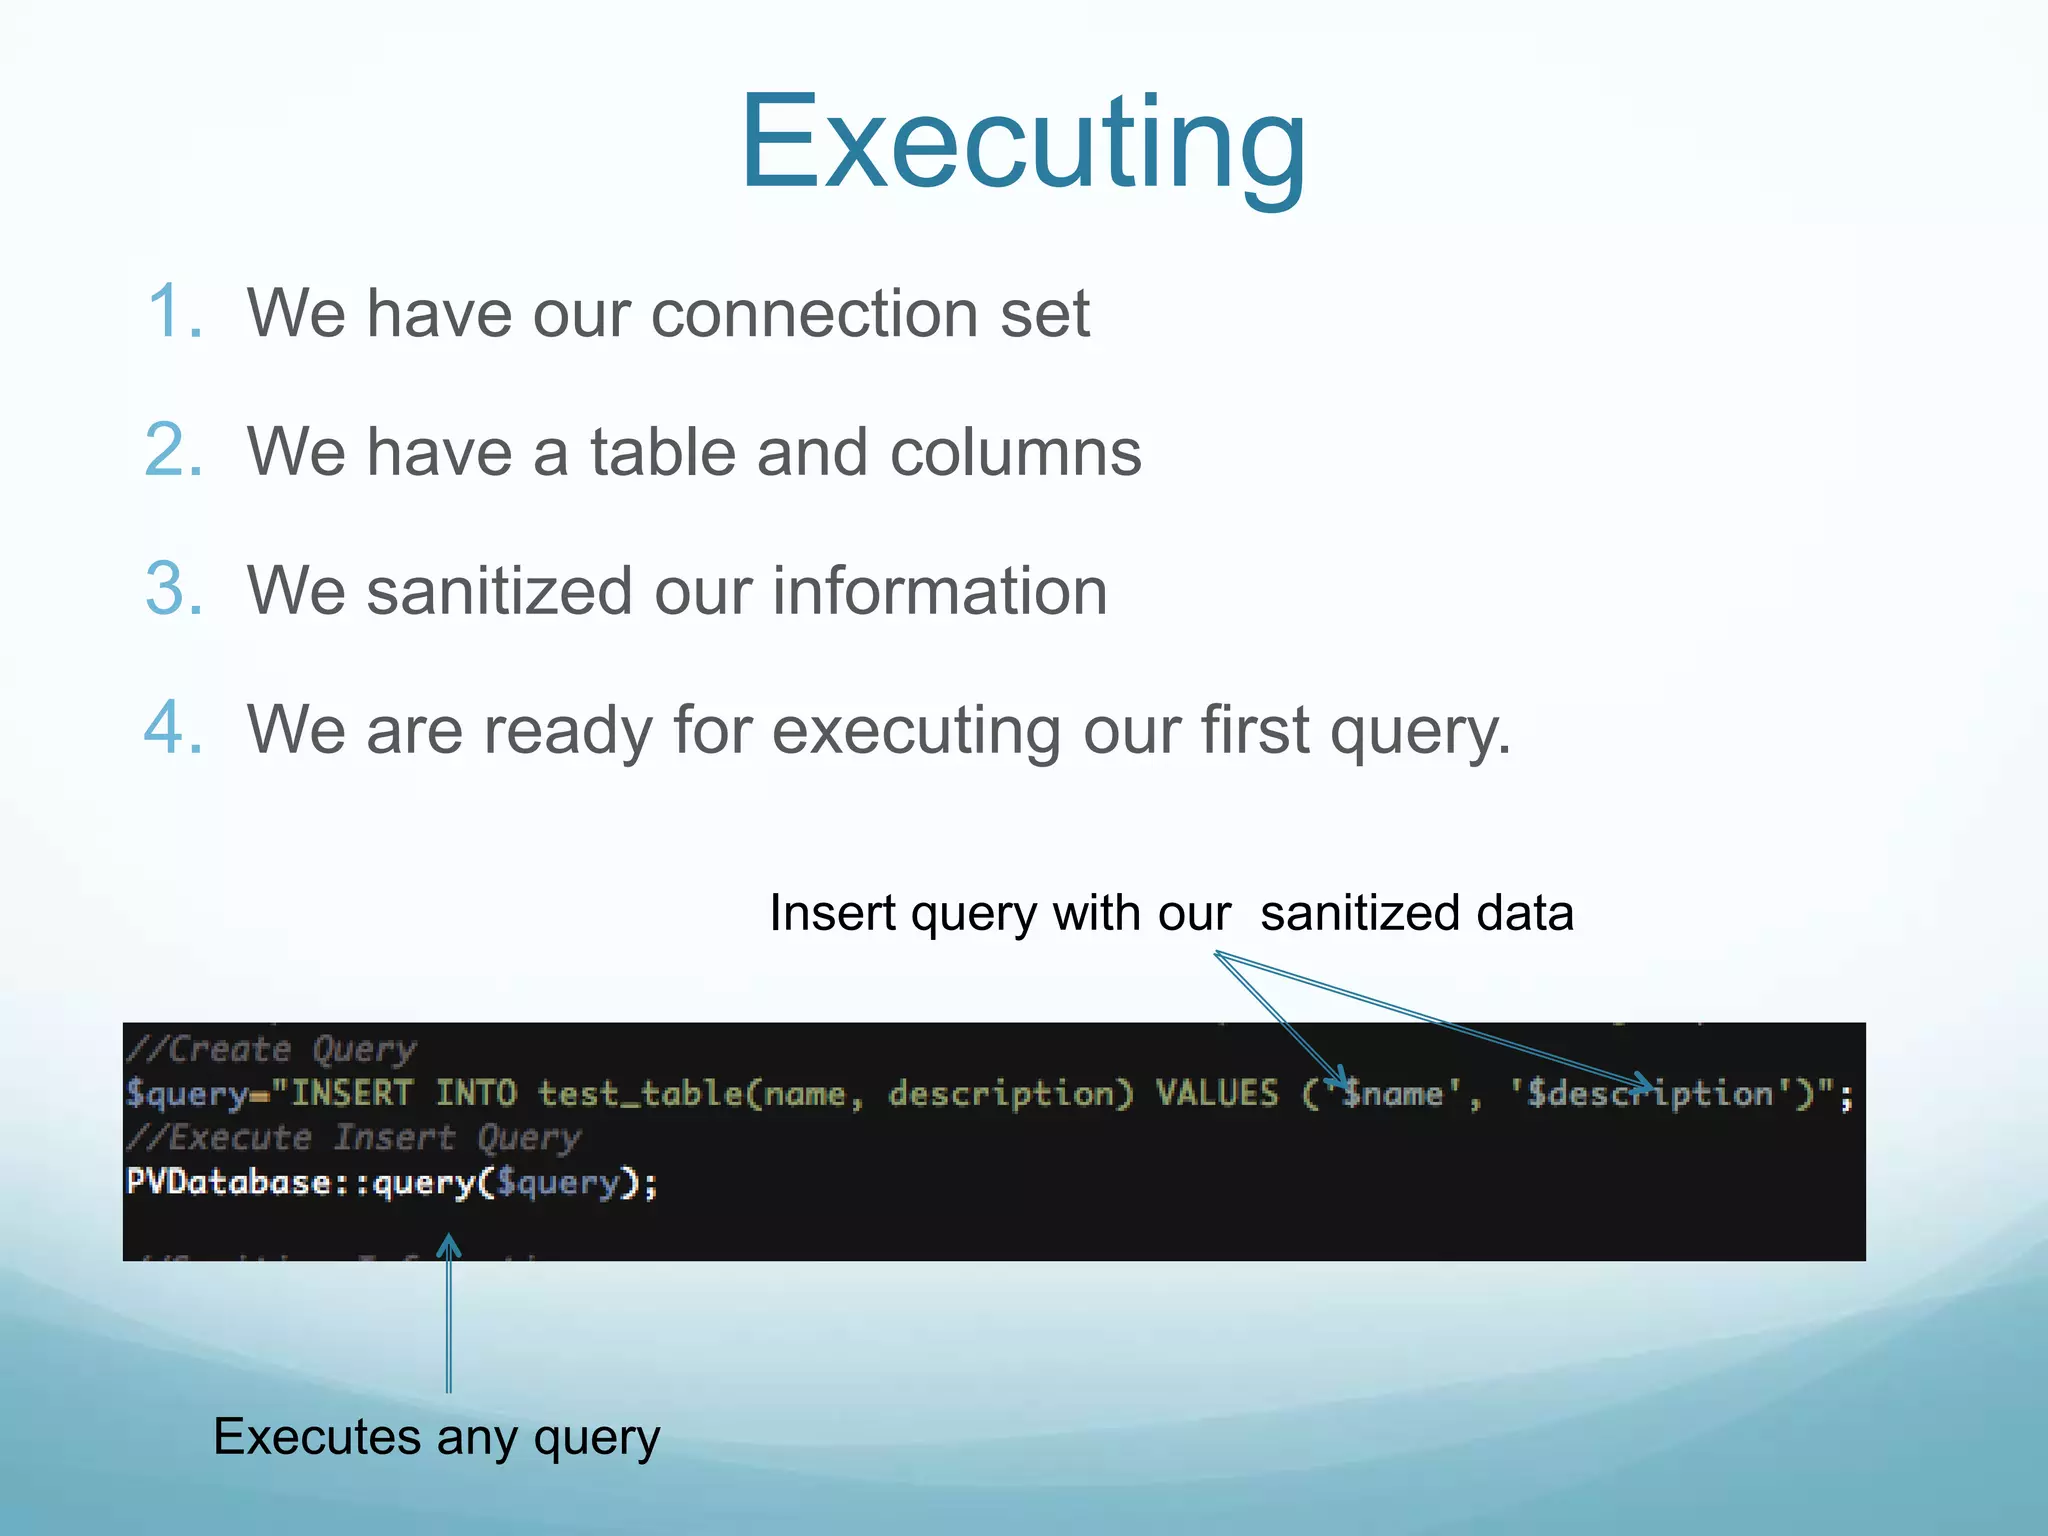
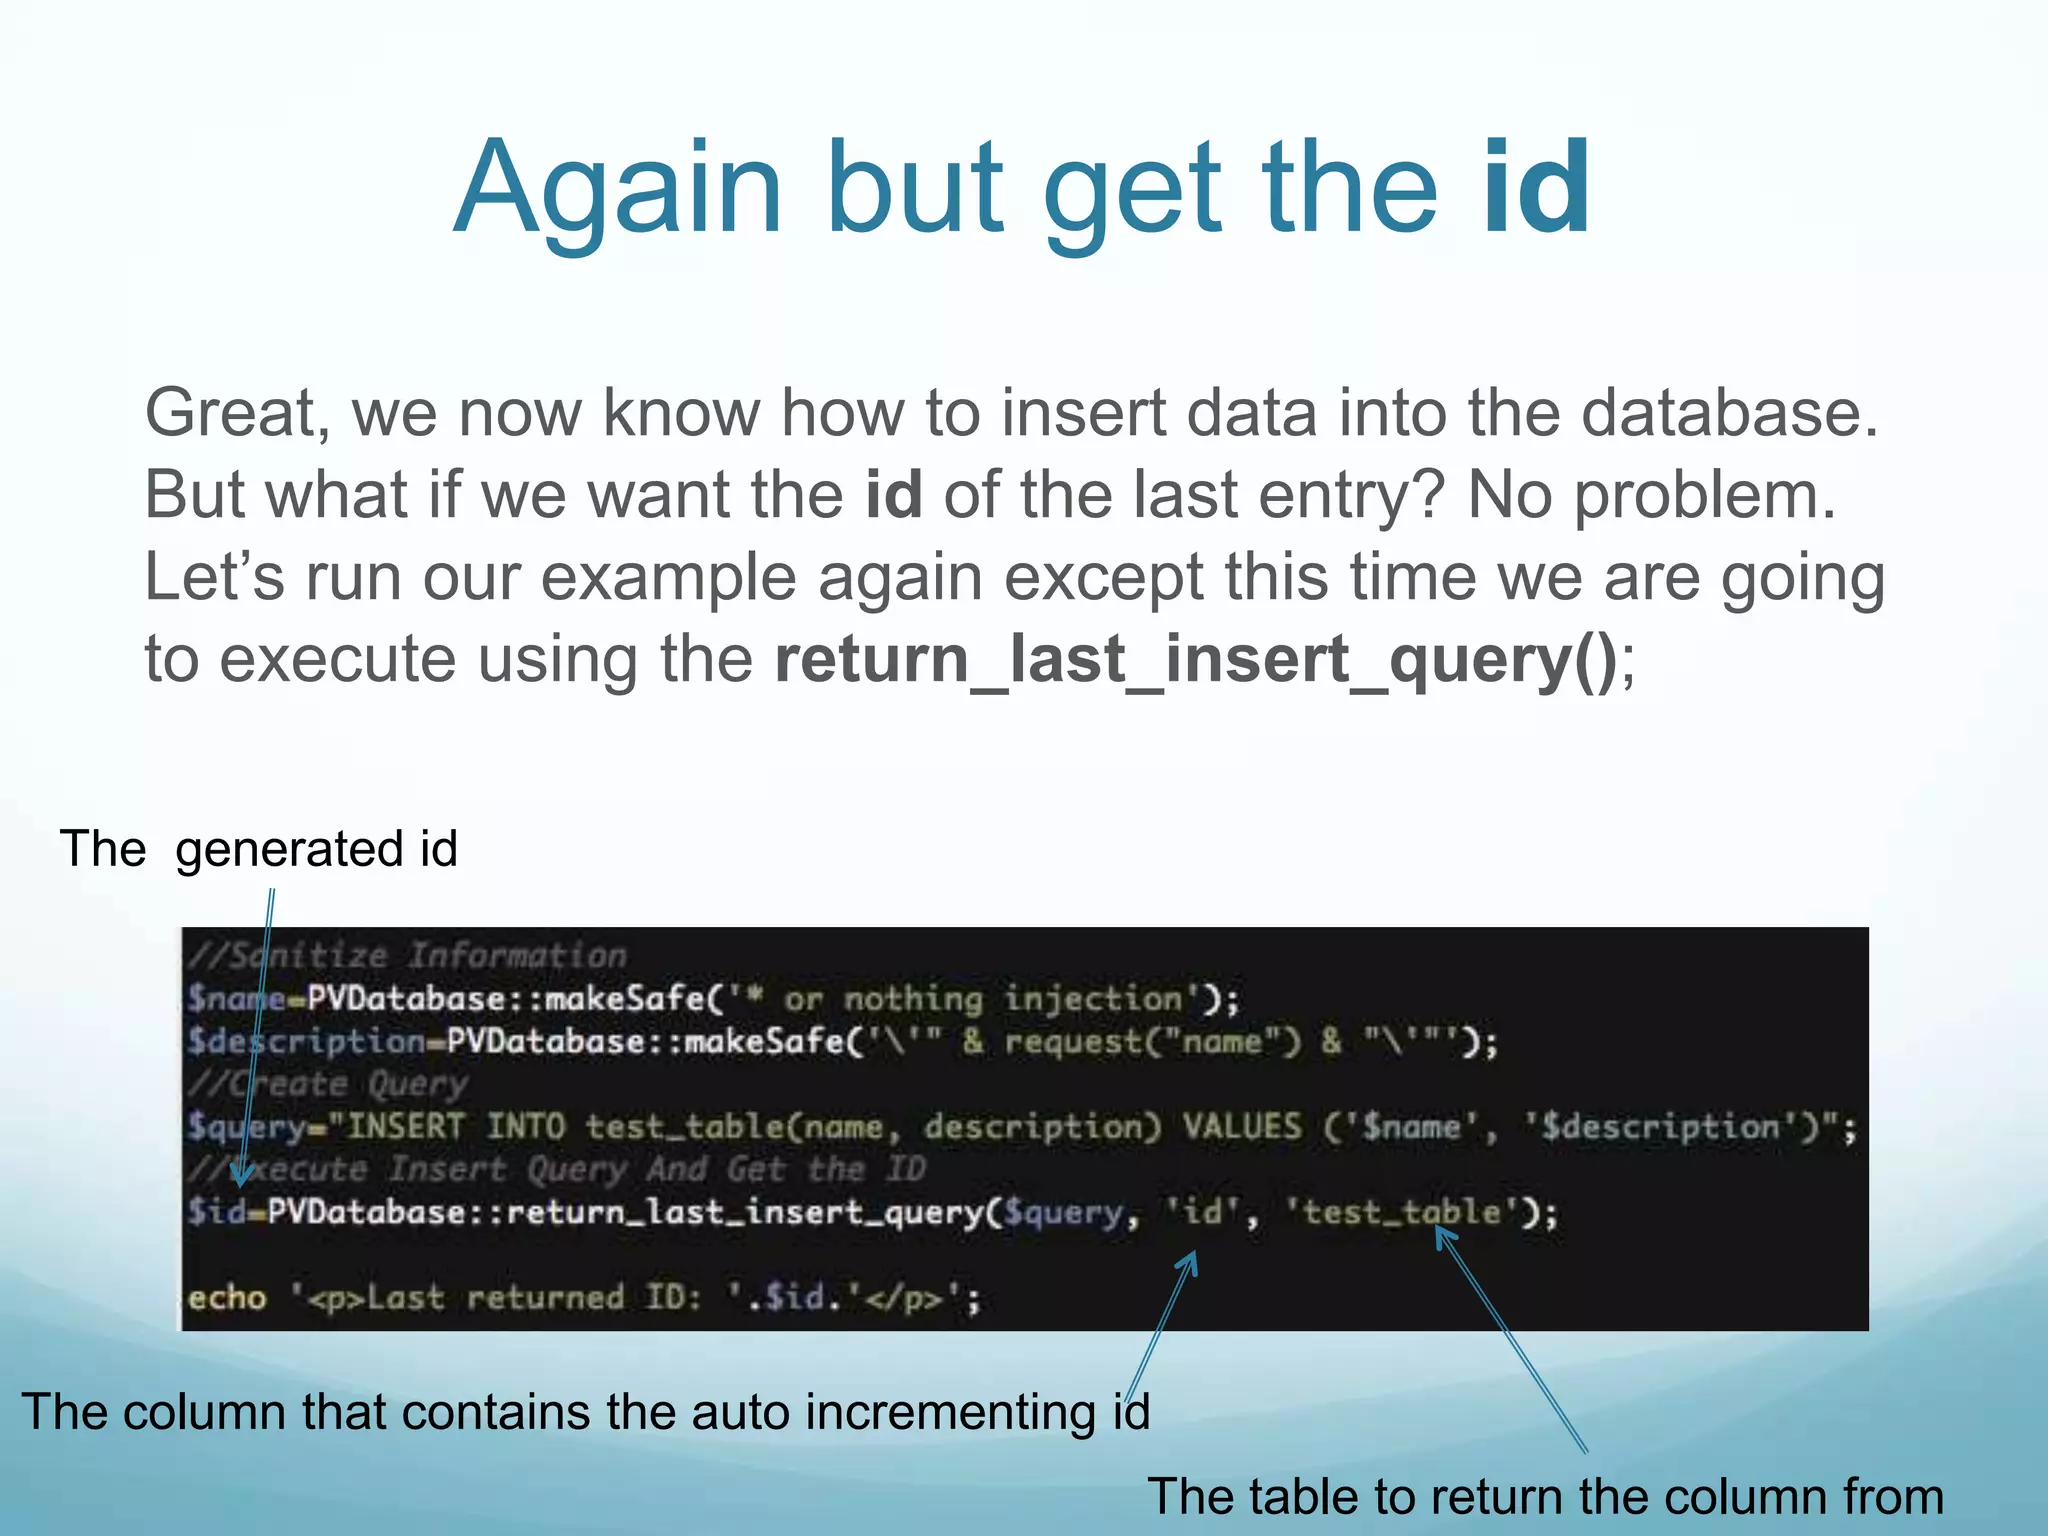
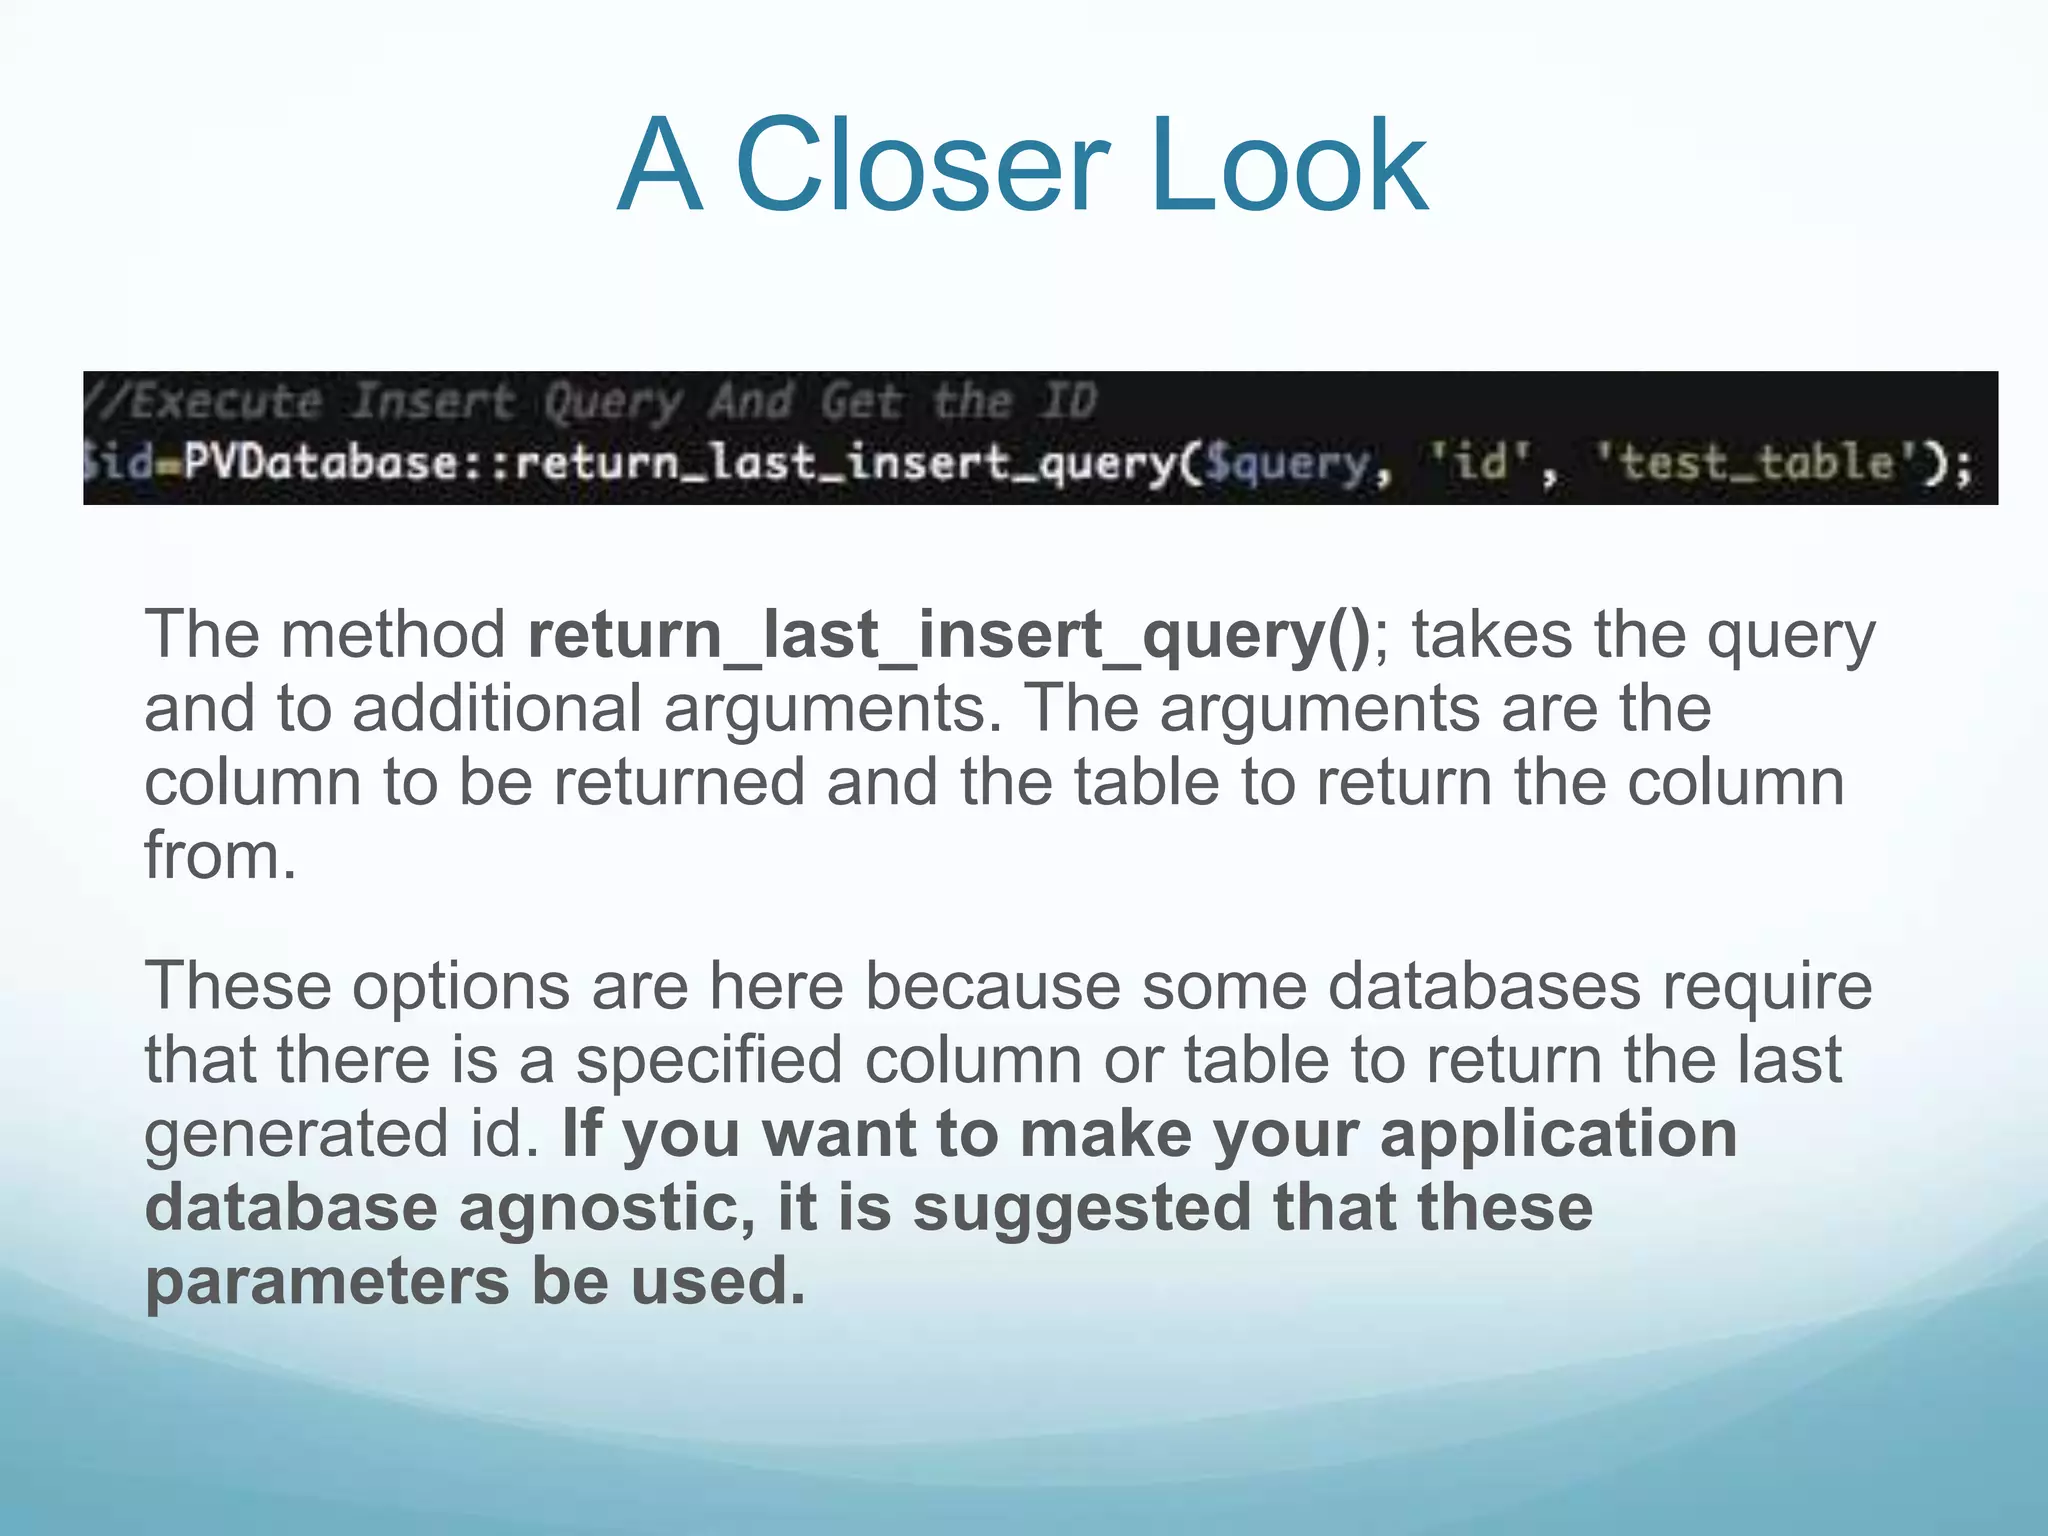
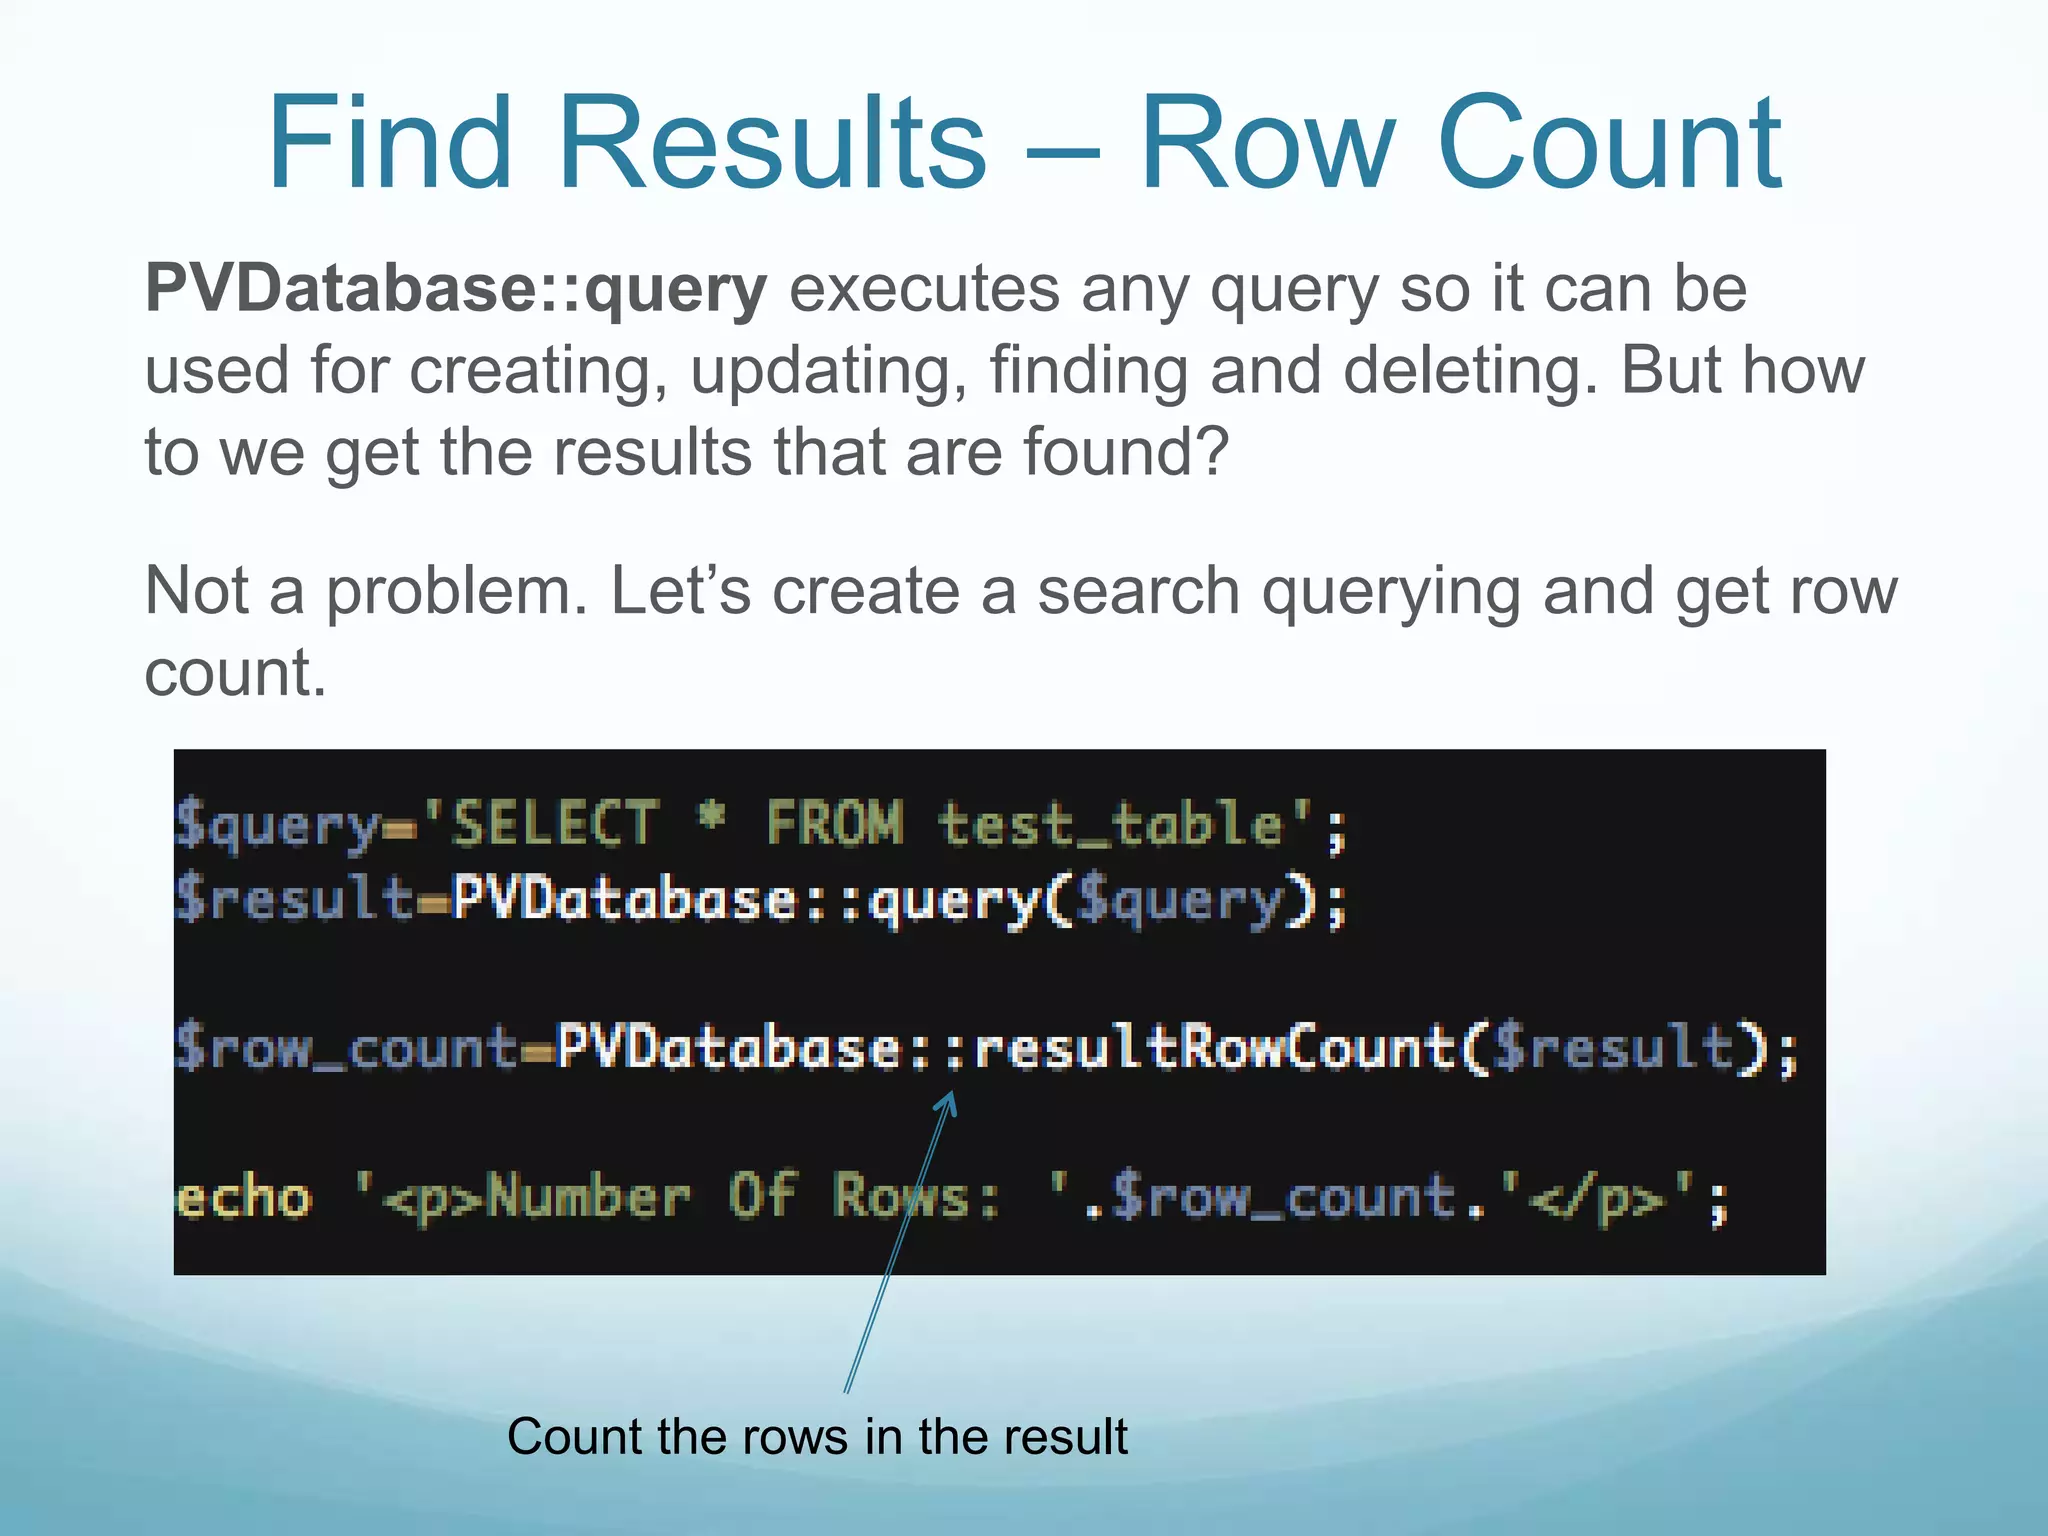
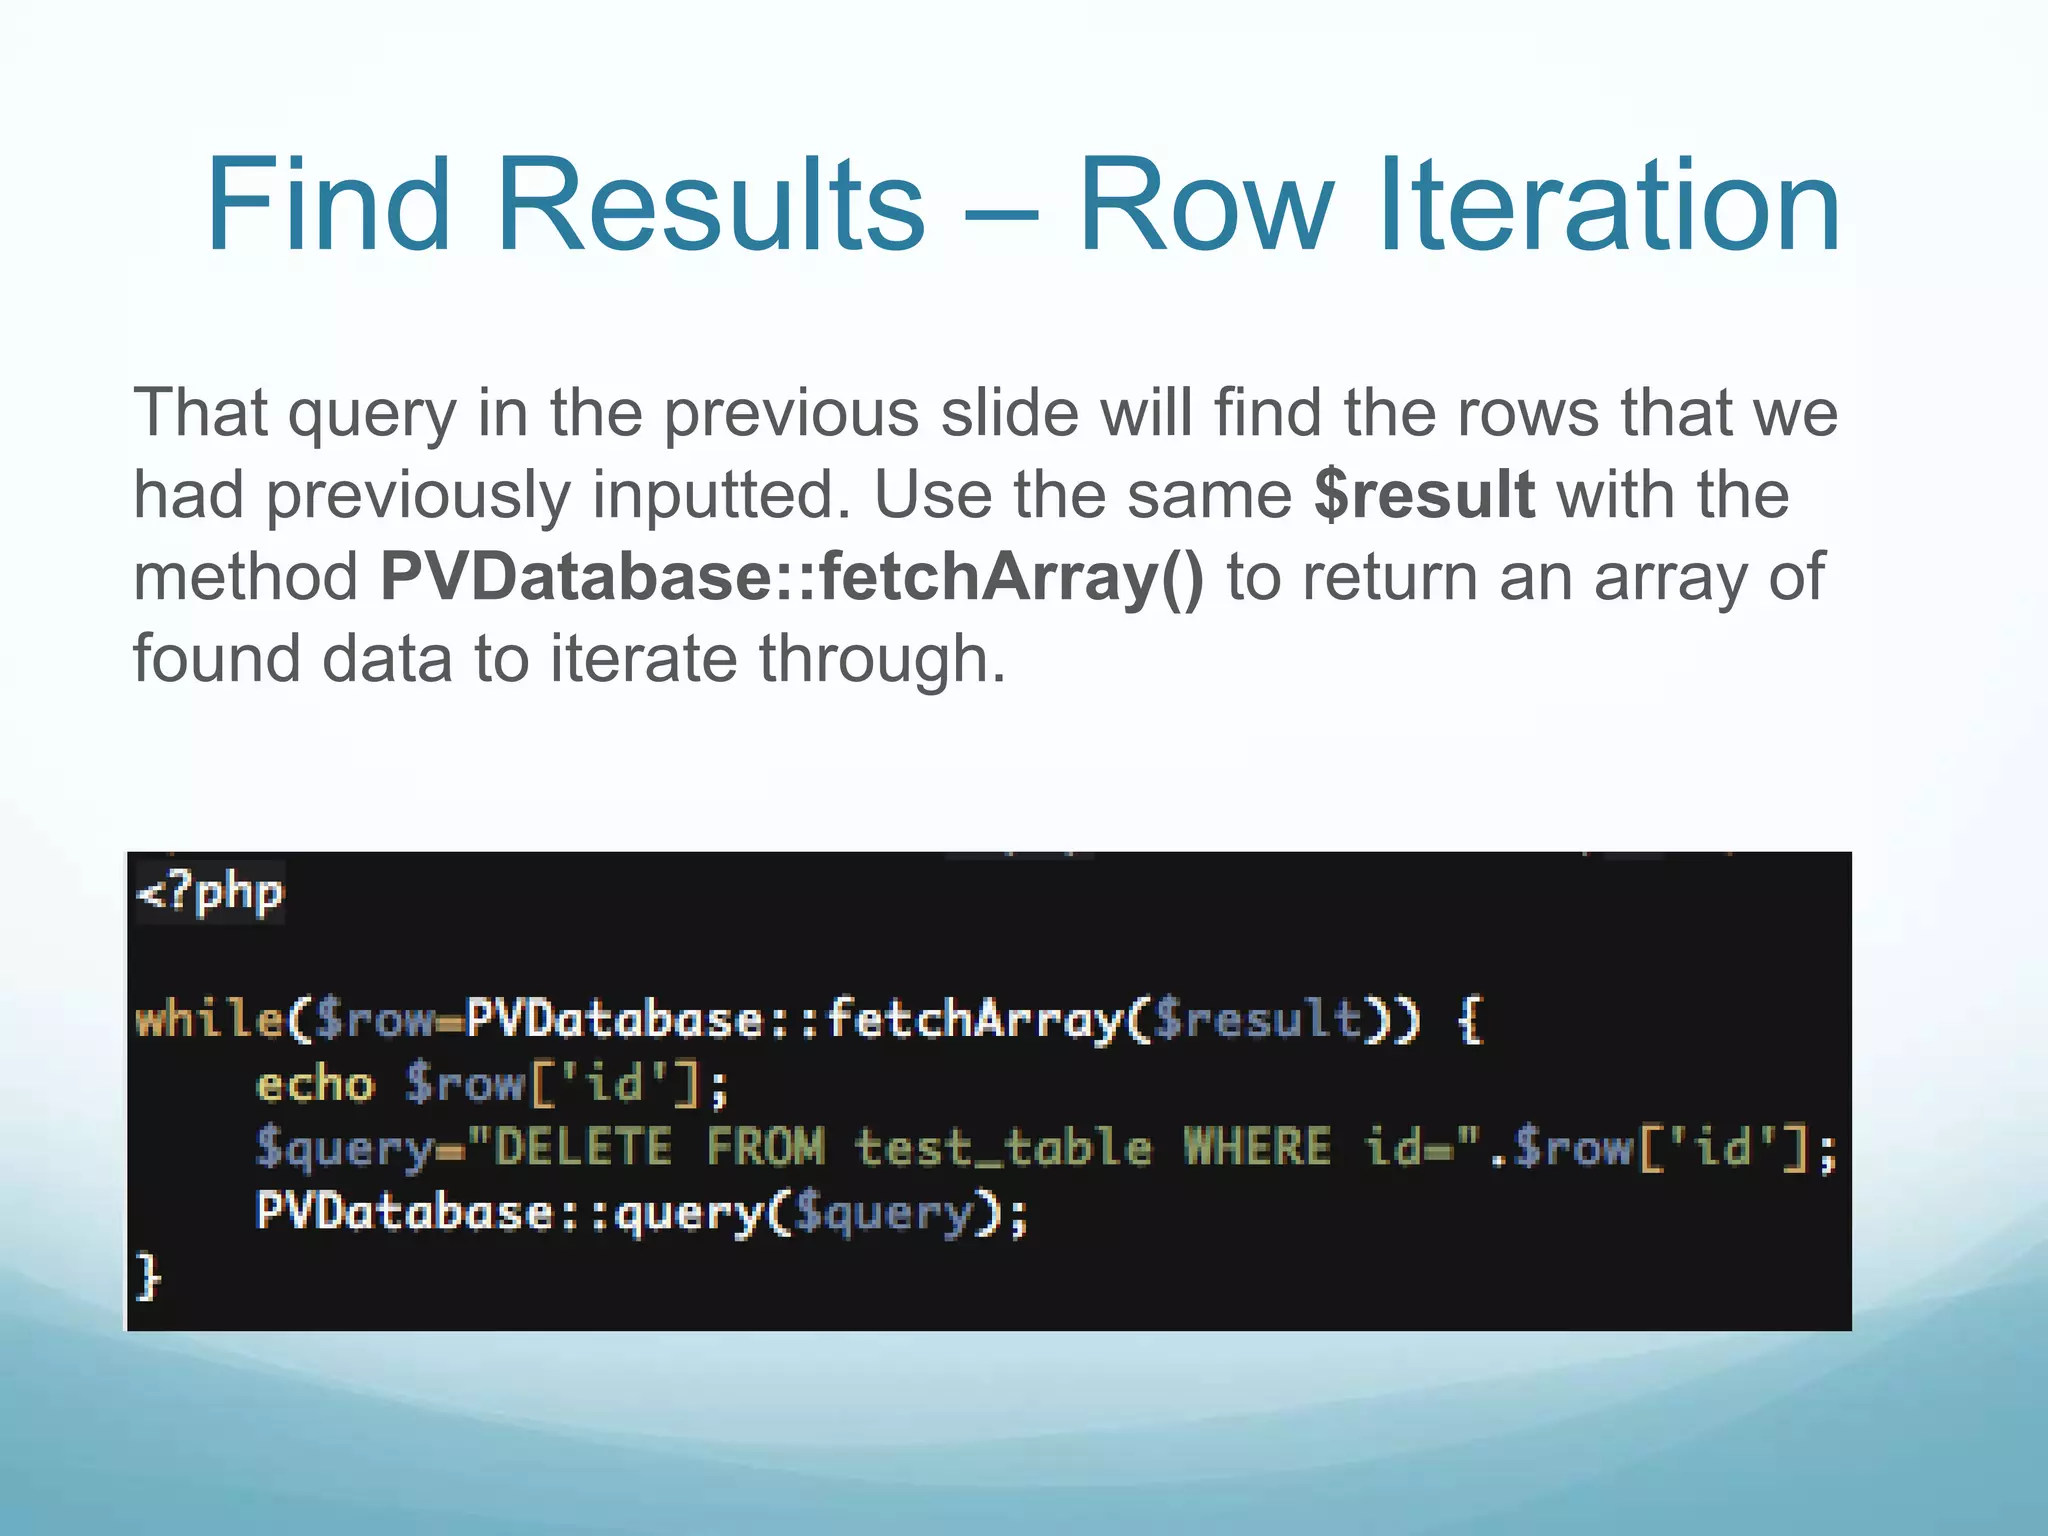
KEMBAR78
Database Basics | PPTX
Database Basics


The power behind your web application
Overview
Objective

Learn the basics of connecting to a database and
executing sql queries ProdigyView.

Requirements

 A Mysql, Postrgesql or MSSQL database
Estimated Time

10 Minutes
Follow Along With Code
           Example
1. Download a copy of the example code at
  www.prodigyview.com/source.

2. Install the system in an environment you feel
  comfortable testing in.

3. Proceed to examples/database/Database.php
A Brief Note About The
               Database
Even though you can write a complete application in
ProdigyView without using the database, it is more than likely
that you are going to need the database at some point. The
great feature that PVDatabase has is that it can connect to
MySQL, PostgreSQL and MSSQL. In this tutorial we are
going to learn:
 Connecting to a database
 Executing A Query
 Iterating Through Results
Current development is being done for MongoDB and
SQLITE
Disabling the Database
If we are going to learn about truly manipulating the
database, let’s first boot ProdigyView in a way that
disables the database. Turn the database initialization off
and loading the plug-ins off since they require a database
connection.


Boot System                   Disable Options
Set a database
Good, now with the database not initialized, we are going
to configure a connection. Similar to the database
configuration file, we are putting our database variables in
an array.
Time to Connect
In our last slide, we created configuration paramters for a
database we have access too. Next we are going to add
the connection to PVDatabase and then connect to it.


 Name of the connection                Connection Parameters


  Connect to a specified database. Use to switch between connections
Create a table
We are going to need a table to test with, so now lets
create one. The process of creating tables is in another
tutorial but we will give you a glimpse of it.
Sanitizing Data
 When a user is inputting data, it is a general rule NOT to
 trust that data because it might contain malicious code
 that can wreak havoc on your database. Before inputting
 any information into your database through a
 query, sanitize it through makeSafe() function.

Data after it is sanitized      Data to be sanitized


                                Data to be sanitized
Executing
1. We have our connection set
2. We have a table and columns
3. We sanitized our information
4. We are ready for executing our first query.

                       Insert query with our sanitized data


  Executes any query
Again but get the id
     Great, we now know how to insert data into the database.
     But what if we want the id of the last entry? No problem.
     Let’s run our example again except this time we are going
     to execute using the return_last_insert_query();

 The generated id


The column that contains the auto incrementing id
                                                The table to return the column from
A Closer Look


The method return_last_insert_query(); takes the query
and to additional arguments. The arguments are the
column to be returned and the table to return the column
from.
These options are here because some databases require
that there is a specified column or table to return the last
generated id. If you want to make your application
database agnostic, it is suggested that these
parameters be used.
Find Results – Row Count
PVDatabase::query executes any query so it can be
used for creating, updating, finding and deleting. But how
to we get the results that are found?

Not a problem. Let’s create a search querying and get row
count.


            Count the rows in the result
Find Results – Row Iteration
That query in the previous slide will find the rows that we
had previously inputted. Use the same $result with the
method PVDatabase::fetchArray() to return an array of
found data to iterate through.
Challenge!
Ok so we have the database basics down. So here is your
challenge, it two parts

1. Add connections to multiple database and switch
   between those connections

2. Execute a select query on a database but use
   fetchFields() instead of fetchArray.
The Not So Obvious
1. The function setConnection will close the connection
   to the current database and open a connection to a
   new one.

2. All the database methods are designed to
   automatically work with the set database

3. Other methods in ProdigyView, such as when creating
   content, will automatically sanitize data for you.

4. PVDatabase::makeSafe can also sanitize arrays
Summary
1. Add a connection by using
   PVDatabase::addConnection()

2. Connection to a database using
   PVDatabase::setConnection()

3. Sanitize data before inserting into the database by
   using PVDatabase::makeSafe()

4. Execute a query using PVDatabase::query();
5. Fetch results by using PVDatabase::fetchArray();
API Reference
For a better understanding of the database, visit the api
by clicking on the link below.

PVDatabase


                 More Tutorials
For more tutorials, please visit:

http://www.prodigyview.com/tutorials


                       www.prodigyview.com

Database Basics

  • 1.
    Database Basics The powerbehind your web application
  • 2.
    Overview Objective Learn the basicsof connecting to a database and executing sql queries ProdigyView. Requirements  A Mysql, Postrgesql or MSSQL database Estimated Time 10 Minutes
  • 3.
    Follow Along WithCode Example 1. Download a copy of the example code at www.prodigyview.com/source. 2. Install the system in an environment you feel comfortable testing in. 3. Proceed to examples/database/Database.php
  • 4.
    A Brief NoteAbout The Database Even though you can write a complete application in ProdigyView without using the database, it is more than likely that you are going to need the database at some point. The great feature that PVDatabase has is that it can connect to MySQL, PostgreSQL and MSSQL. In this tutorial we are going to learn:  Connecting to a database  Executing A Query  Iterating Through Results Current development is being done for MongoDB and SQLITE
  • 5.
    Disabling the Database Ifwe are going to learn about truly manipulating the database, let’s first boot ProdigyView in a way that disables the database. Turn the database initialization off and loading the plug-ins off since they require a database connection. Boot System Disable Options
  • 6.
    Set a database Good,now with the database not initialized, we are going to configure a connection. Similar to the database configuration file, we are putting our database variables in an array.
  • 7.
    Time to Connect Inour last slide, we created configuration paramters for a database we have access too. Next we are going to add the connection to PVDatabase and then connect to it. Name of the connection Connection Parameters Connect to a specified database. Use to switch between connections
  • 8.
    Create a table Weare going to need a table to test with, so now lets create one. The process of creating tables is in another tutorial but we will give you a glimpse of it.
  • 9.
    Sanitizing Data Whena user is inputting data, it is a general rule NOT to trust that data because it might contain malicious code that can wreak havoc on your database. Before inputting any information into your database through a query, sanitize it through makeSafe() function. Data after it is sanitized Data to be sanitized Data to be sanitized
  • 10.
    Executing 1. We haveour connection set 2. We have a table and columns 3. We sanitized our information 4. We are ready for executing our first query. Insert query with our sanitized data Executes any query
  • 11.
    Again but getthe id Great, we now know how to insert data into the database. But what if we want the id of the last entry? No problem. Let’s run our example again except this time we are going to execute using the return_last_insert_query(); The generated id The column that contains the auto incrementing id The table to return the column from
  • 12.
    A Closer Look Themethod return_last_insert_query(); takes the query and to additional arguments. The arguments are the column to be returned and the table to return the column from. These options are here because some databases require that there is a specified column or table to return the last generated id. If you want to make your application database agnostic, it is suggested that these parameters be used.
  • 13.
    Find Results –Row Count PVDatabase::query executes any query so it can be used for creating, updating, finding and deleting. But how to we get the results that are found? Not a problem. Let’s create a search querying and get row count. Count the rows in the result
  • 14.
    Find Results –Row Iteration That query in the previous slide will find the rows that we had previously inputted. Use the same $result with the method PVDatabase::fetchArray() to return an array of found data to iterate through.
  • 15.
    Challenge! Ok so wehave the database basics down. So here is your challenge, it two parts 1. Add connections to multiple database and switch between those connections 2. Execute a select query on a database but use fetchFields() instead of fetchArray.
  • 16.
    The Not SoObvious 1. The function setConnection will close the connection to the current database and open a connection to a new one. 2. All the database methods are designed to automatically work with the set database 3. Other methods in ProdigyView, such as when creating content, will automatically sanitize data for you. 4. PVDatabase::makeSafe can also sanitize arrays
  • 17.
    Summary 1. Add aconnection by using PVDatabase::addConnection() 2. Connection to a database using PVDatabase::setConnection() 3. Sanitize data before inserting into the database by using PVDatabase::makeSafe() 4. Execute a query using PVDatabase::query(); 5. Fetch results by using PVDatabase::fetchArray();
  • 18.
    API Reference For abetter understanding of the database, visit the api by clicking on the link below. PVDatabase More Tutorials For more tutorials, please visit: http://www.prodigyview.com/tutorials www.prodigyview.com