Download as PDF, PPTX


![INTERNAL FILESYSTEM
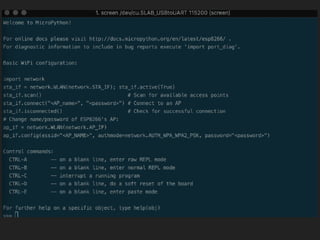
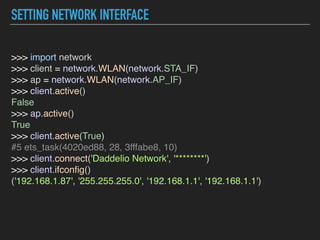
# internal filesystem
>>> import os
>>> os.listdir()
['boot.py', 'webrepl_cfg.py']
>>>
the boot.py is executed when device boot up. Insert in
boot.py the code that you want to execute when the board
start up.
After boot.py your board runs main.py.](https://image.slidesharecdn.com/pycon9iot-180426130520/85/IoT-Internet-of-Things-with-Python-23-320.jpg)


![INTERNAL FILESYSTEM
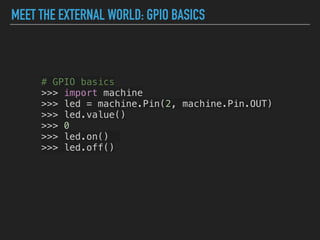
# internal filesystem
>>> import os
>>> os.listdir()
['boot.py', 'webrepl_cfg.py']
>>>
the boot.py is executed when device boot up. Insert in
boot.py the code that you want to execute when the board
start up.
After boot.py your board runs main.py.](https://image.slidesharecdn.com/pycon9iot-180426130520/75/IoT-Internet-of-Things-with-Python-23-2048.jpg)

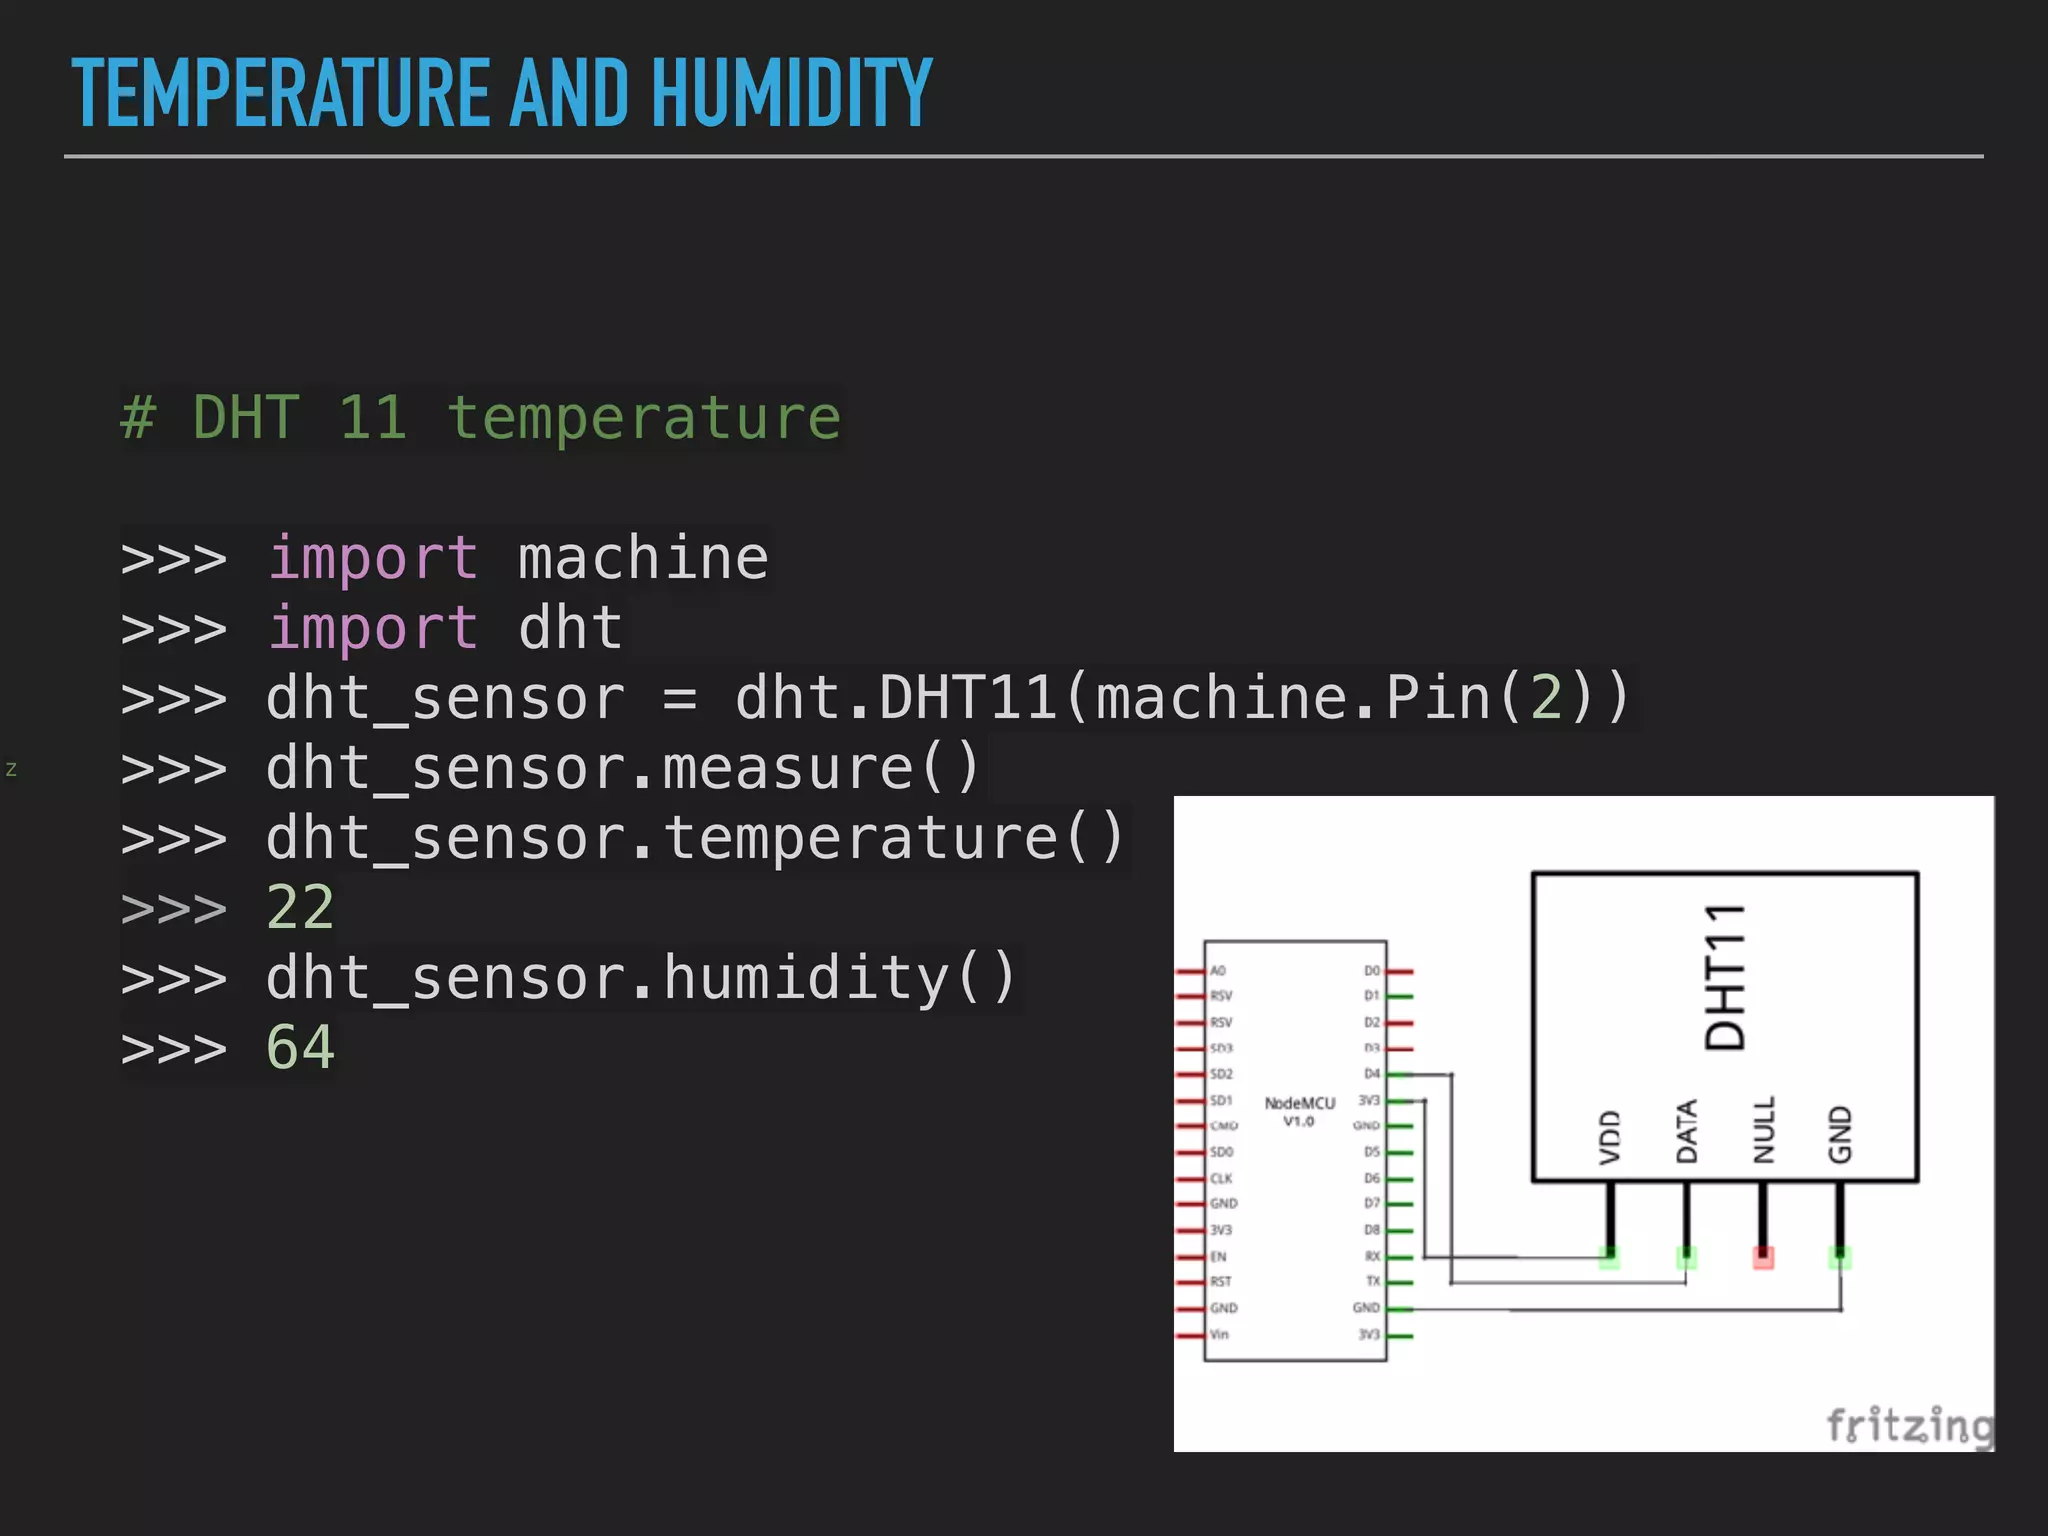


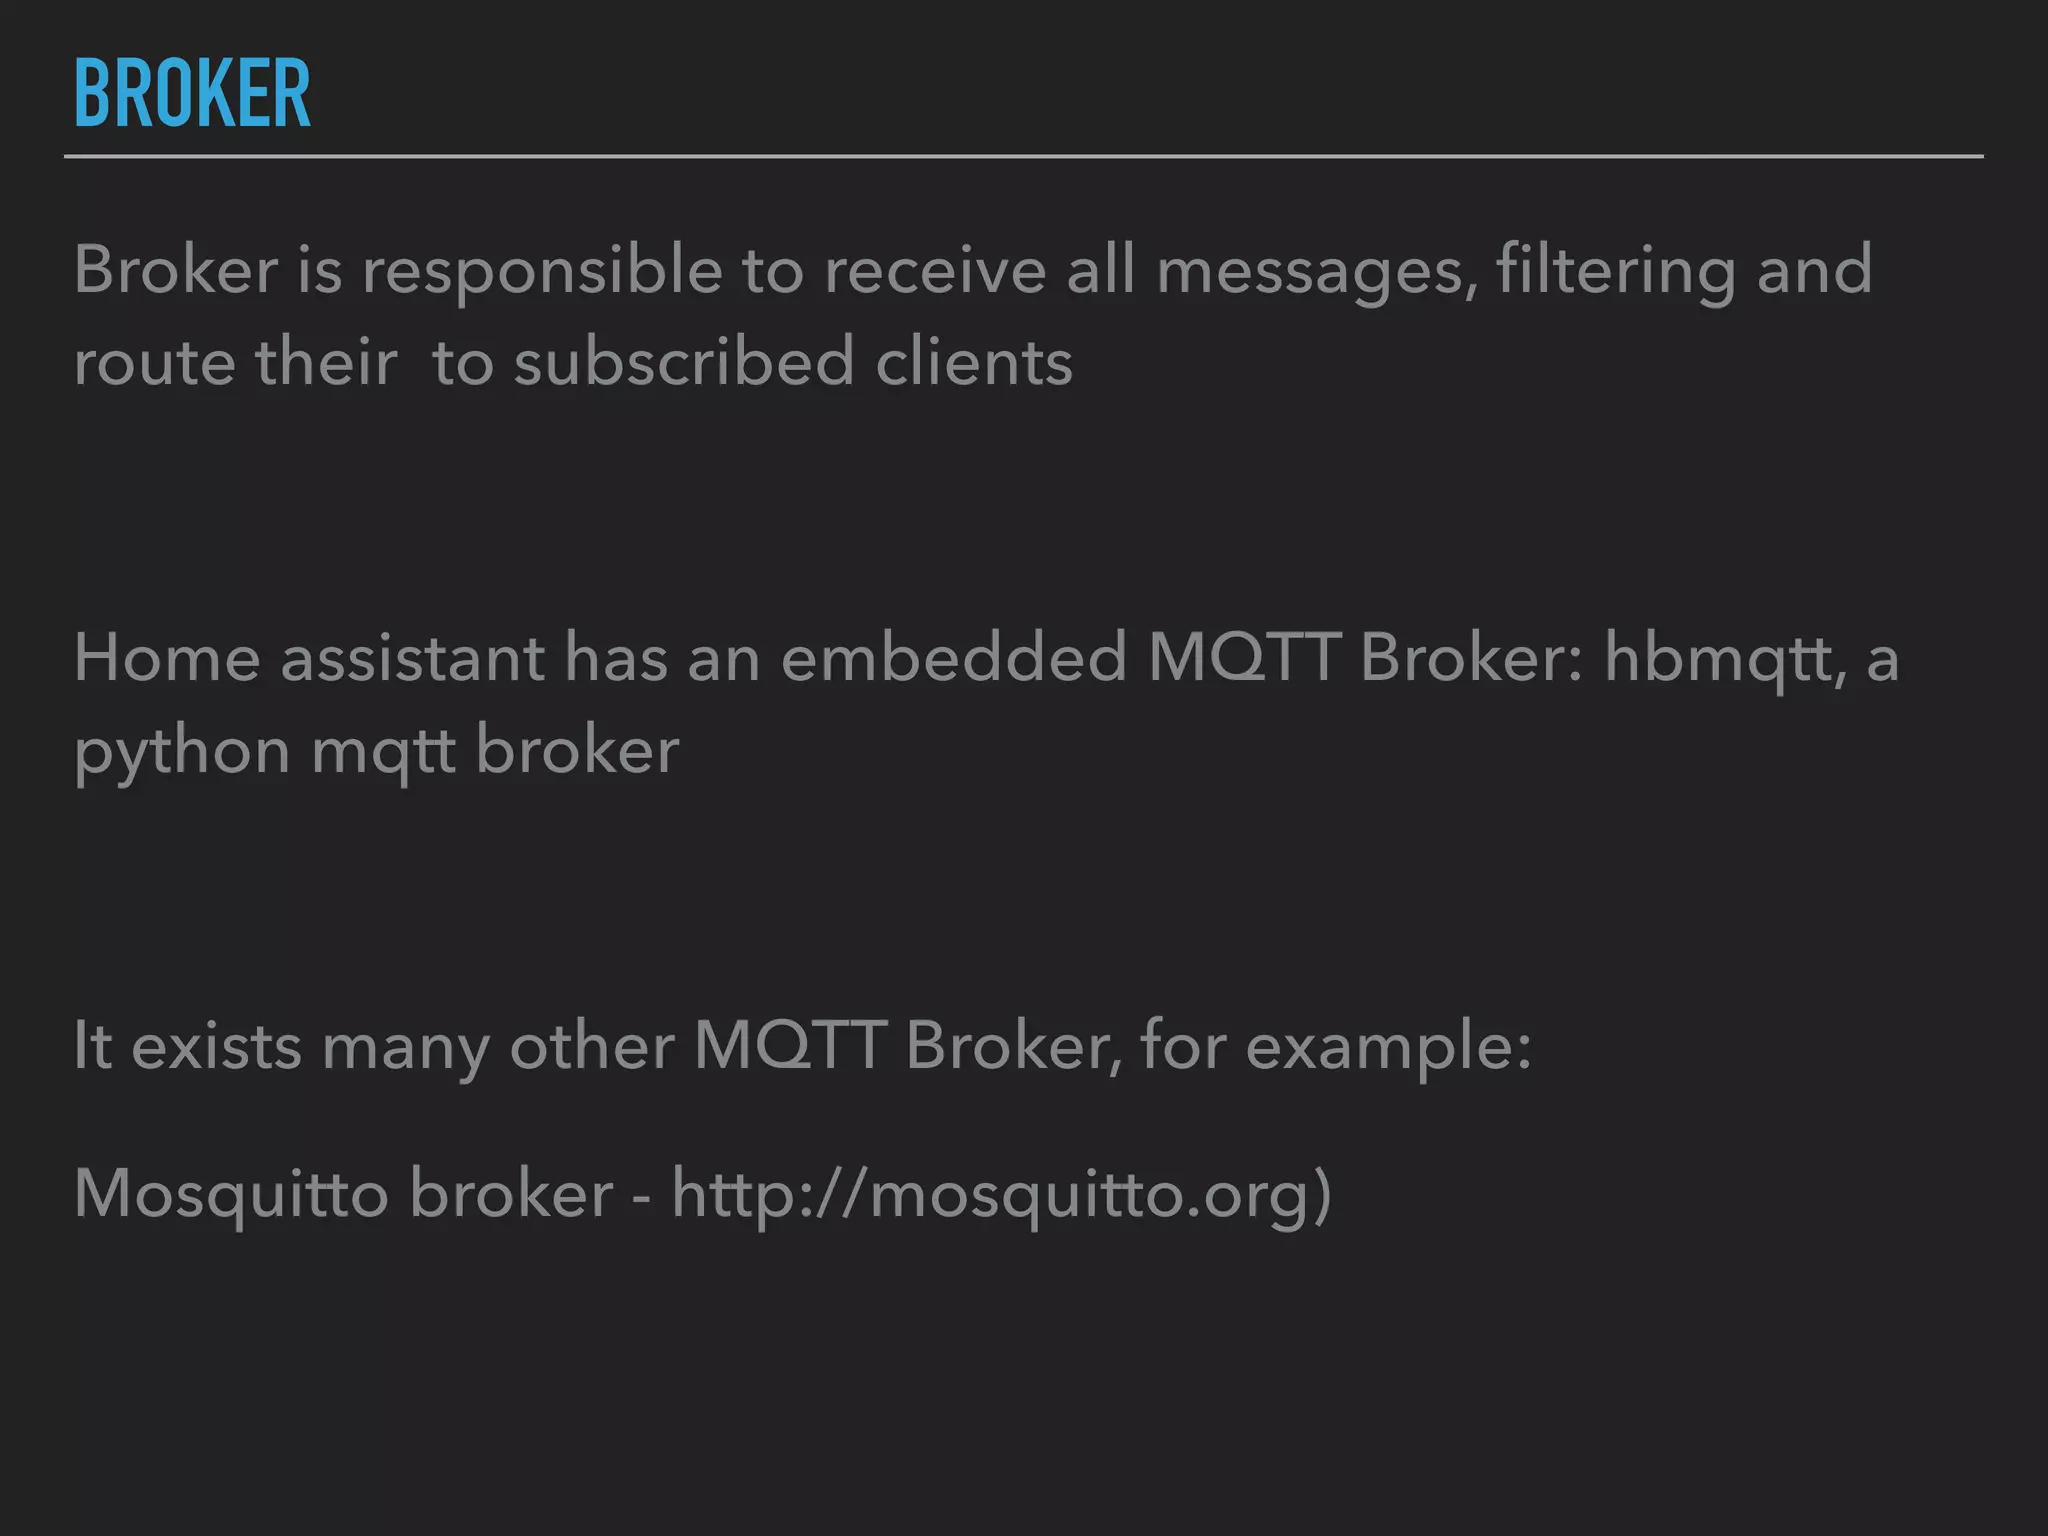
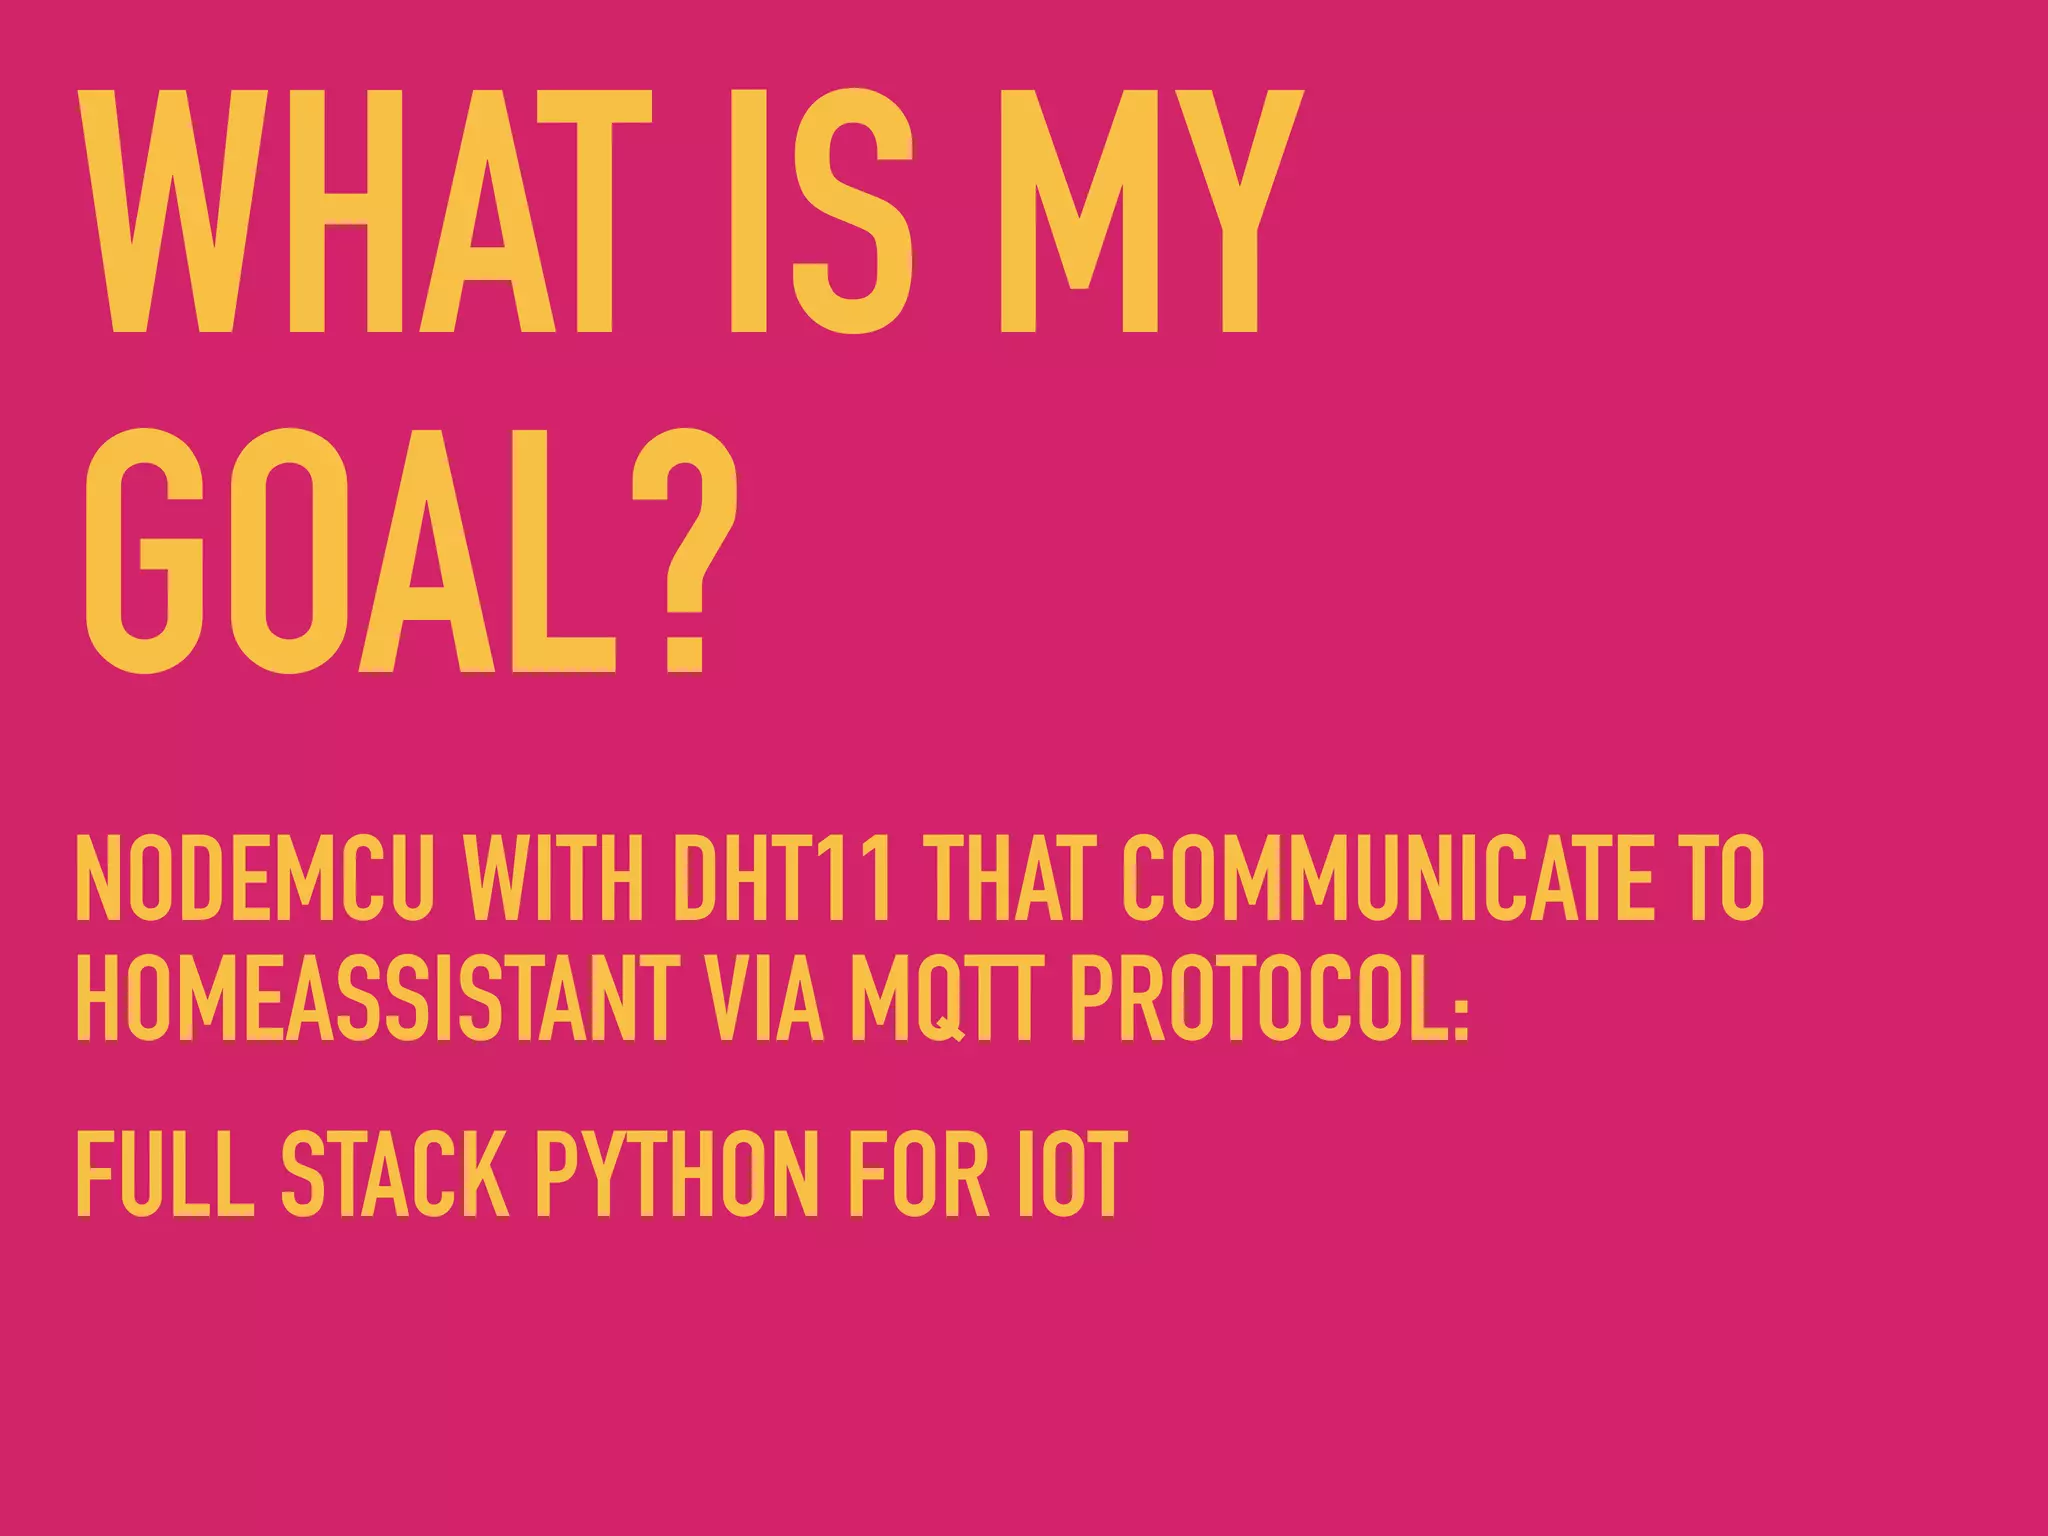
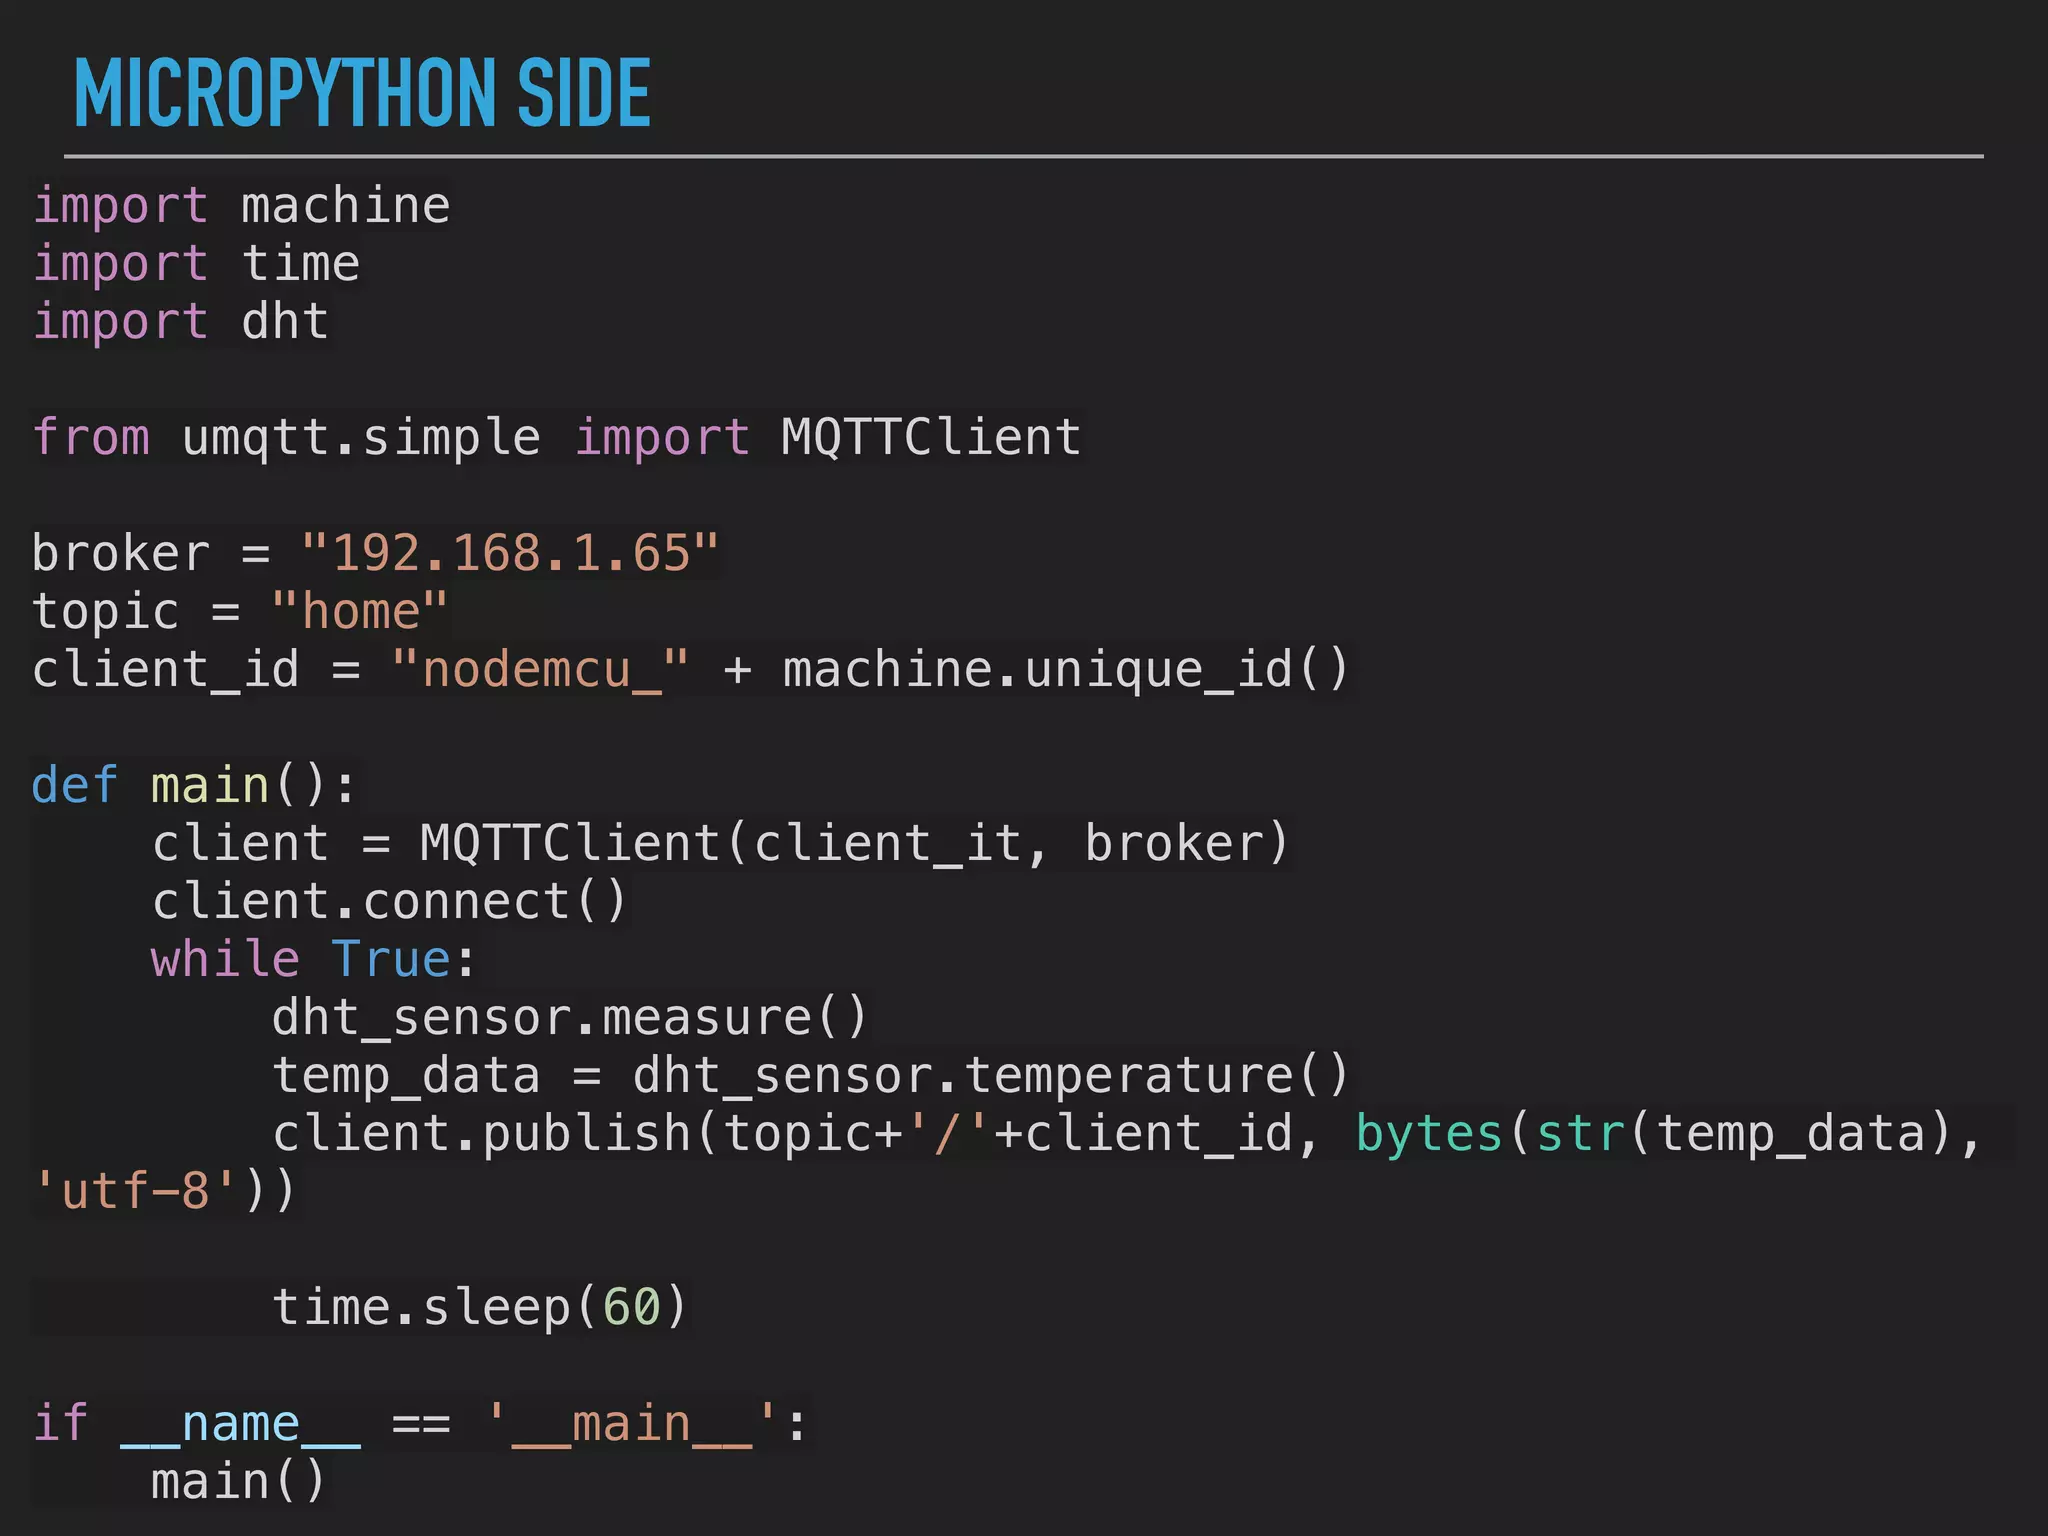
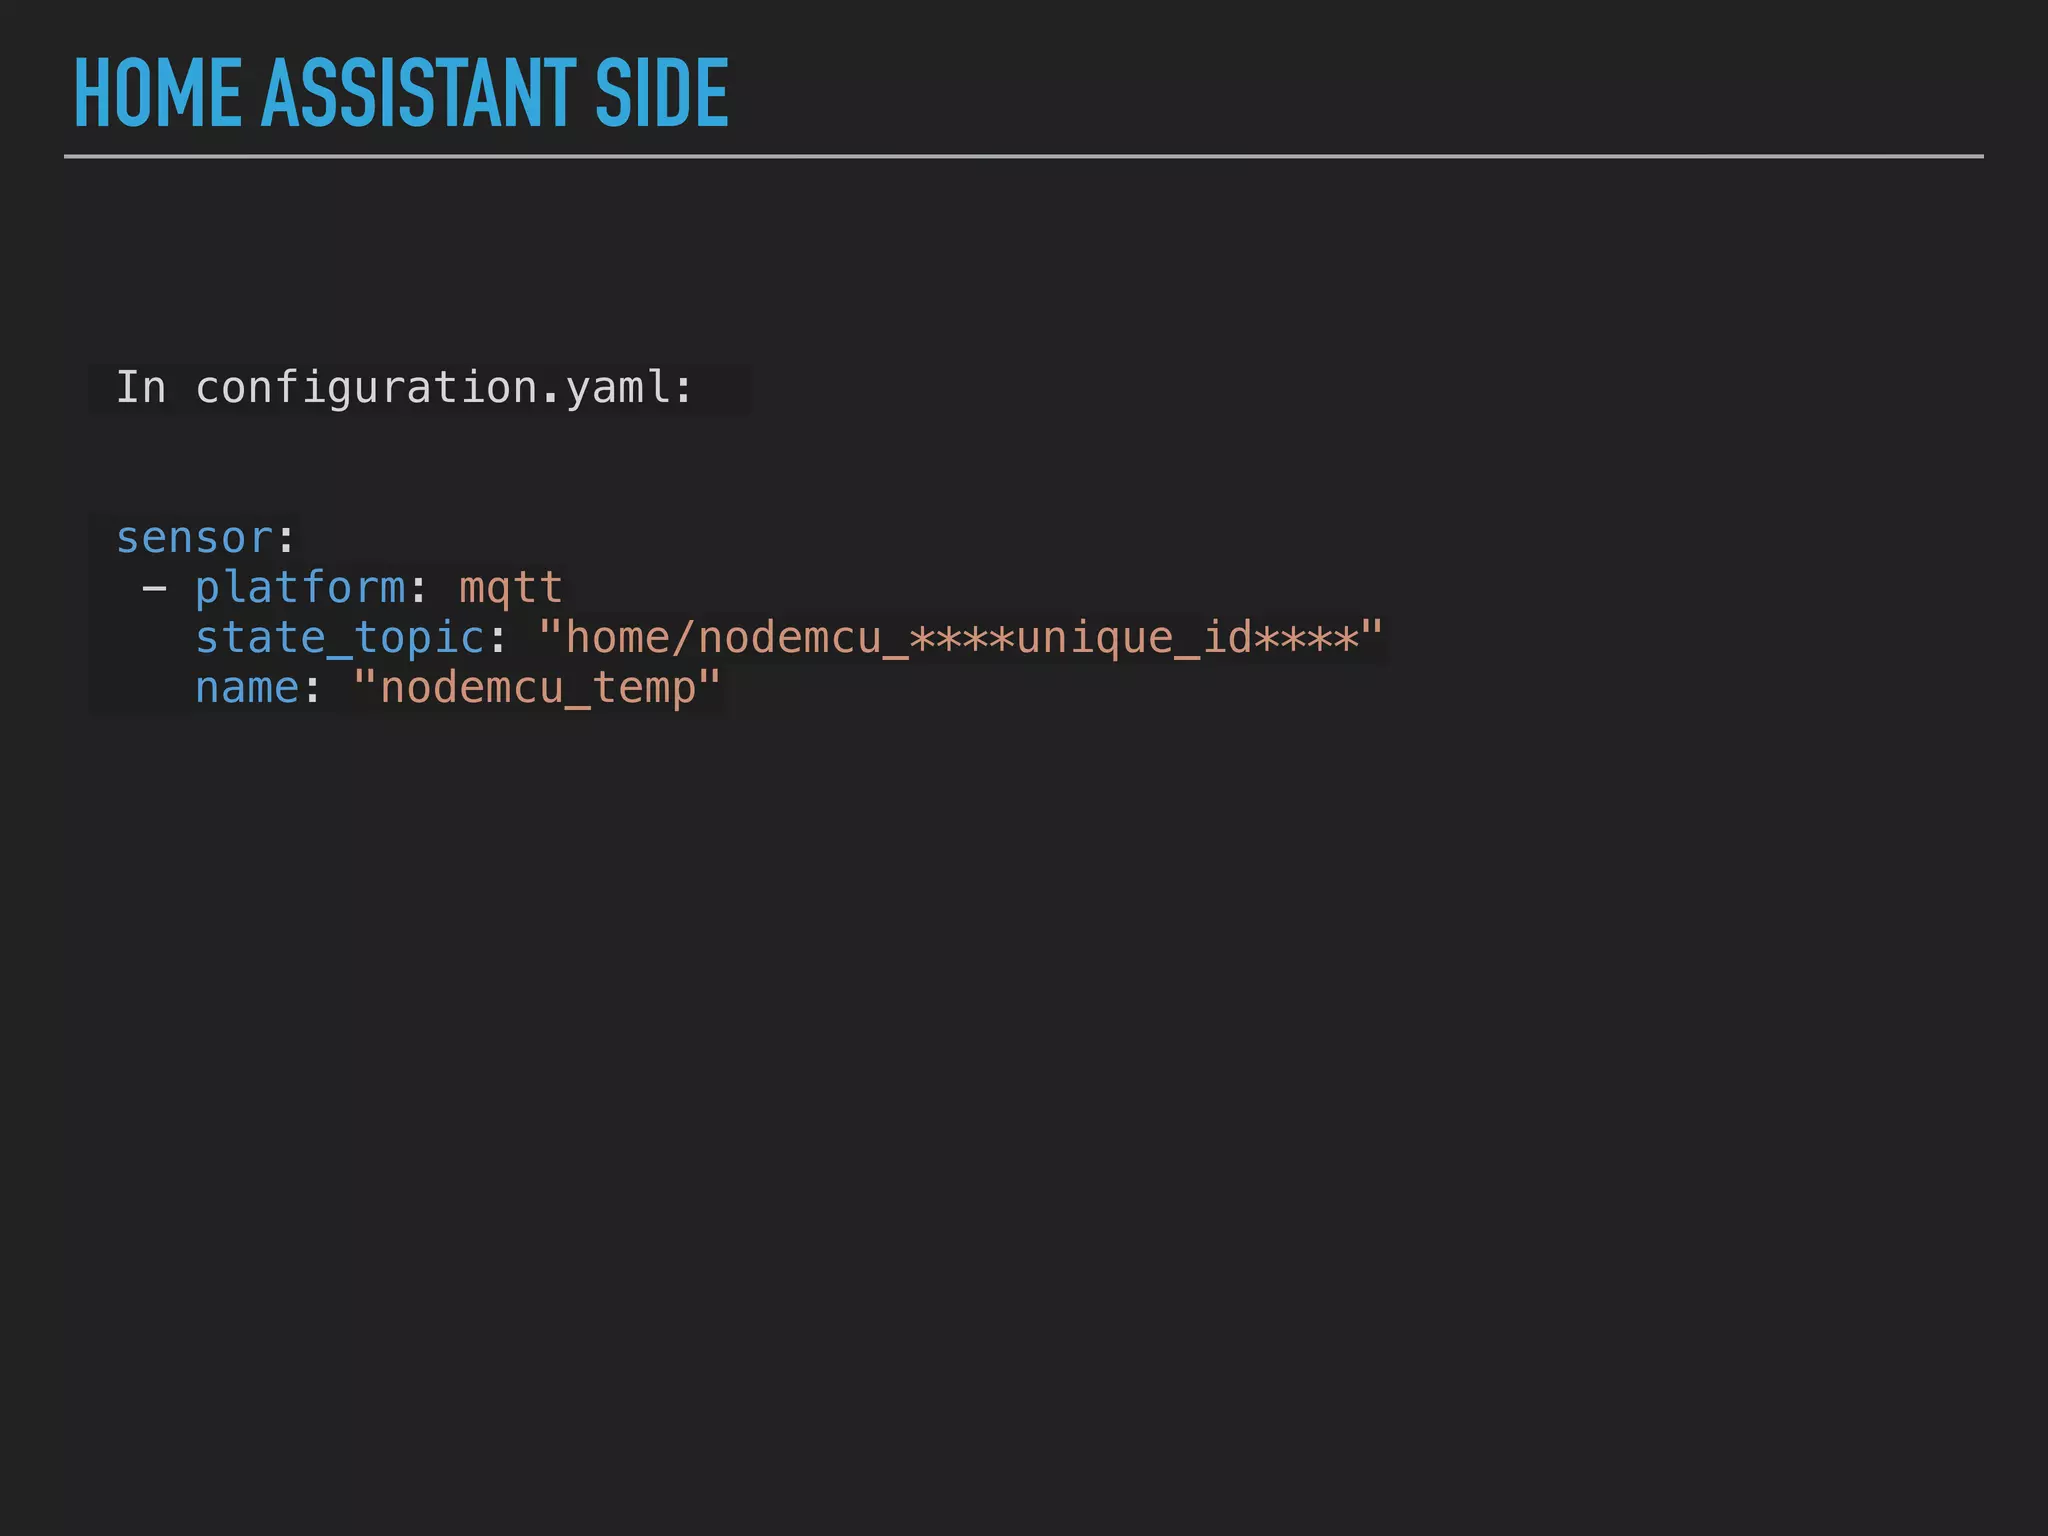


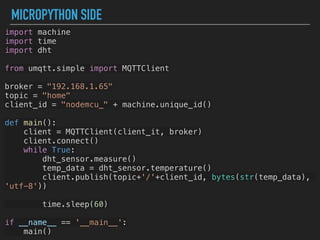
MicroPython is a lean and efficient implementation of Python 3 that runs on microcontrollers and embedded systems. The document discusses installing MicroPython on an ESP8266 board, connecting sensors like a DHT11 temperature and humidity sensor to the board, and communicating sensor data to a Home Assistant server using MQTT messaging to build an IoT system with end-to-end Python code.


![Introduction to ESP32 Programming [Road to RIoT 2017]](https://cdn.slidesharecdn.com/ss_thumbnails/roadtoriotsurabayagettingstartedesp32-170726155154-thumbnail.jpg?width=600ounds&width=560&fit=bounds)


![UiPath Automation Suite Installation (Hands-On) [2/3]](https://cdn.slidesharecdn.com/ss_thumbnails/automationsuitecommunitysession2-251015095633-a6d862f1-thumbnail.jpg?width=600ounds&width=560&fit=bounds)


