Kotlin Basics & Introduction to Jetpack Compose.pptx
The document provides information about an upcoming Compose Camp on September 27th, 2022 that will introduce participants to Kotlin and Jetpack Compose. The camp will be facilitated by Takshil Kunadia and Apoorva Rumale and will focus on building Android apps using Kotlin and Jetpack Compose. Participants will learn how to set up Android Studio, the basics of Kotlin, Jetpack Compose, and find additional resources for continued learning. The document also outlines the camp's learning objectives and includes sections on the history of Android and Android architecture.
The event is about building Android apps using Kotlin and Jetpack Compose, with objectives including setting up Android Studio and learning Kotlin basics.
Overview of Android's history, Android architecture layers including applications, application framework, runtime environment, native libraries, and Linux kernel.
An introduction to Android Studio including different views such as project view, code view, and design view for app development.
Information on Android emulator for testing apps on various devices, creating emulators, and running apps.
Explanation of the structure of an Android project including directories for source files, resources, and build configurations.
Benefits of using Kotlin over Java in Android development, covering coding speed, data types, learning curves, and popularity.
Introduction to Kotlin code structure, variables, and output with examples to understand basic programming concepts.
Different data types in Kotlin, how to define variables, variable naming conventions, and output methods.
Overview of arrays in Kotlin, including how to declare them and their mutability.
Use of conditional statements like if-else, else if, and when for control flow in Kotlin.
For and while loops in Kotlin to execute repetitive tasks with examples.
The definition, creation, and purpose of functions in Kotlin, focusing on the main function and function definitions.
Understanding key components in Android apps including views, activities, and intents that interact with user actions.
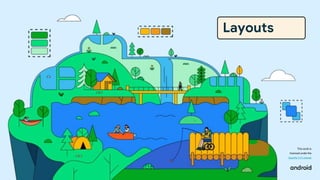
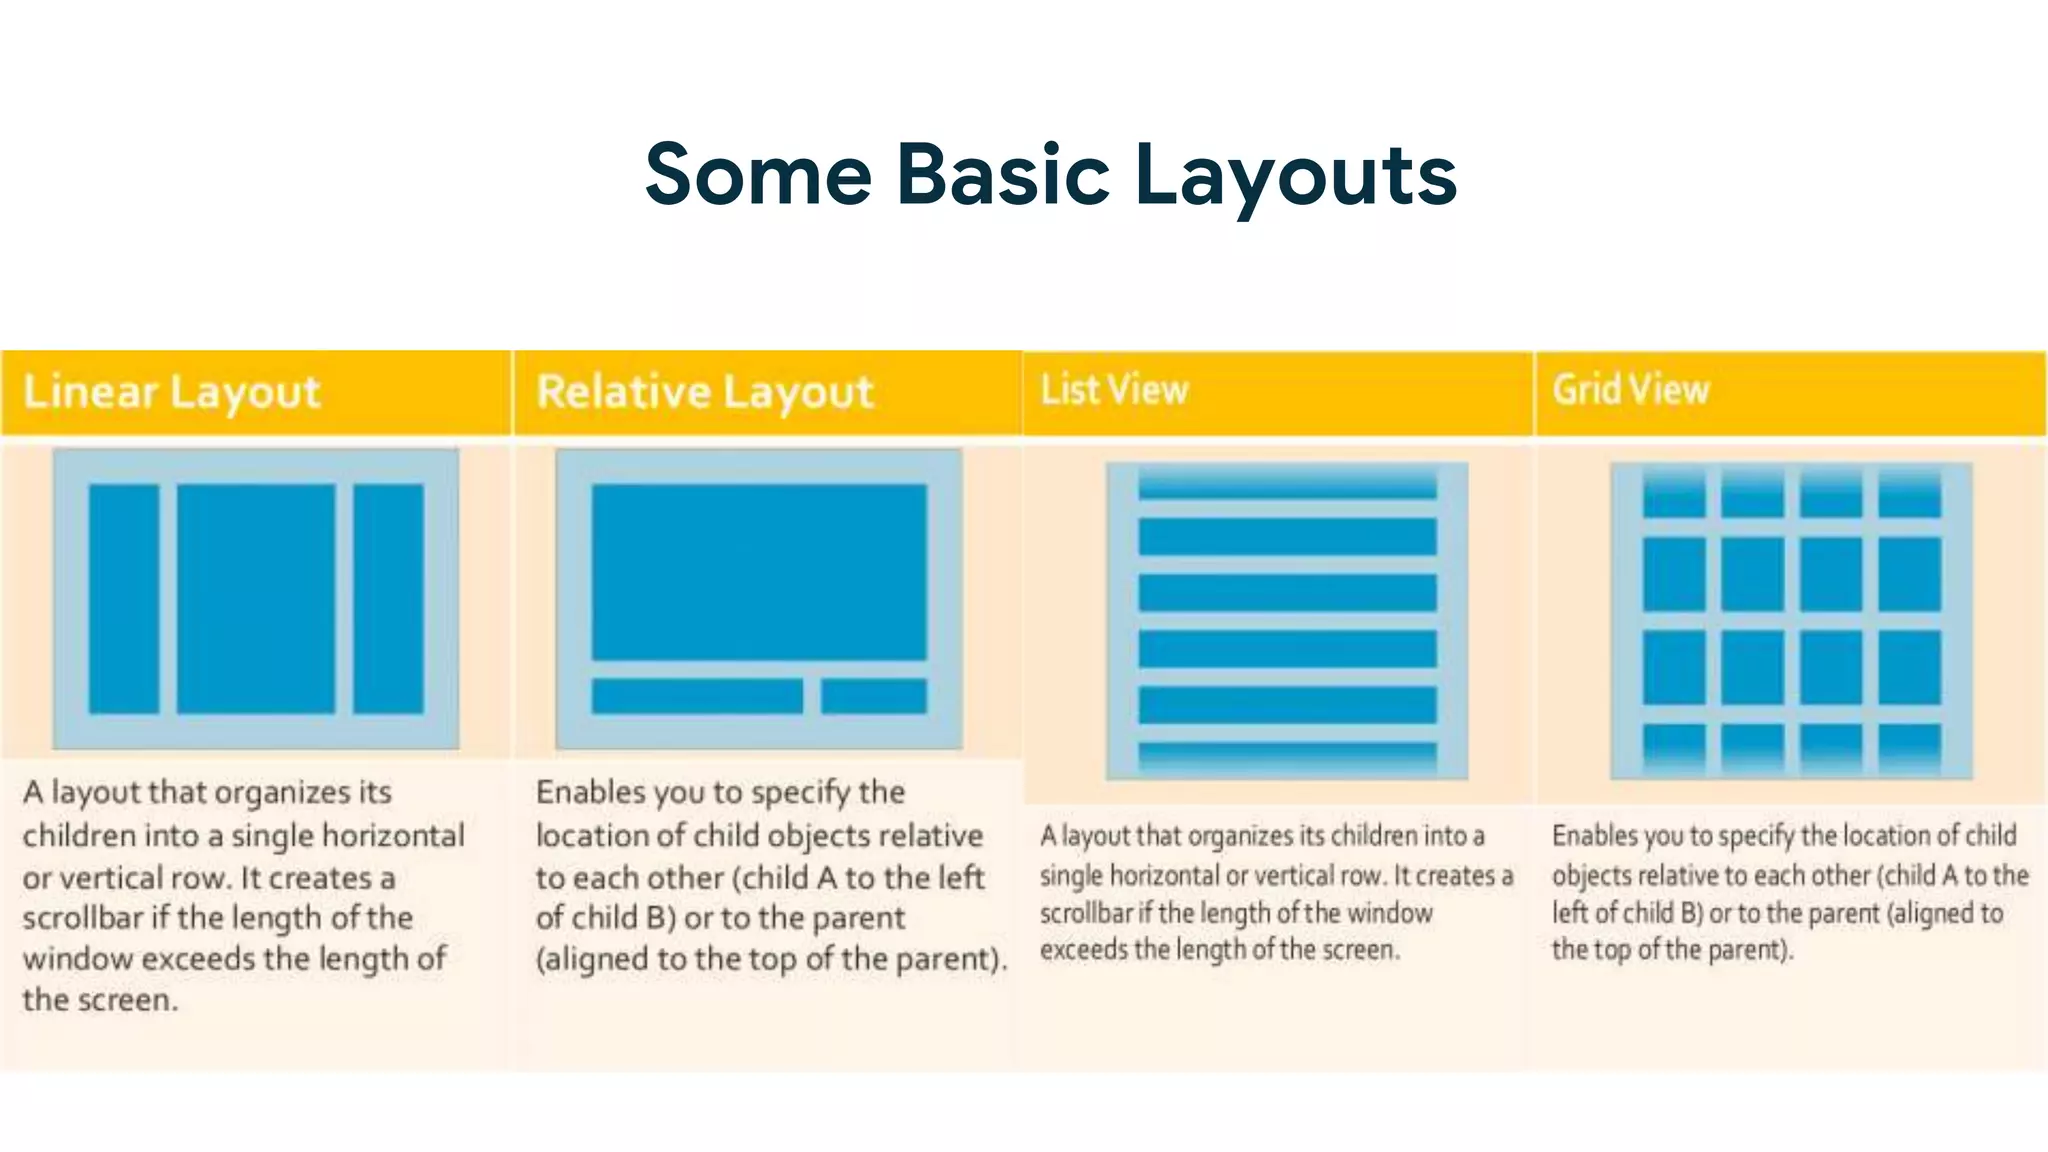
Basic layouts in Android with XML example code illustrating the structure of a layout.
Jetpack Compose is introduced as a modern toolkit for building native UI for Android apps.
Various resources available for learning Android development including links to courses, blogs, and official sites.
Invitation to share learning experiences, follow social media for updates, and concluding message thanking participants.
This work islicensed under the Apache 2.0 License
Compose Camp
27th September 2022
Introduction to Kotlin
& Jetpack compose
3.
This work islicensed under the Apache 2.0 License
TAKSHIL KUNADIA
Facilitator
Camp Facilitators
APOORVA RUMALE
Co-facilitator
4.
This work islicensed under the Apache 2.0 License
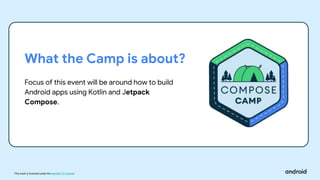
What the Camp is about?
Focus of this event will be around how to build
Android apps using Kotlin and Jetpack
Compose.
5.
This work islicensed under the Apache 2.0 License
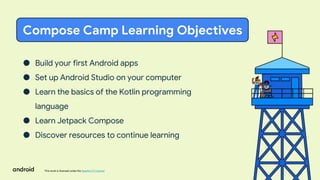
● Build your first Android apps
● Set up Android Studio on your computer
● Learn the basics of the Kotlin programming
language
● Learn Jetpack Compose
● Discover resources to continue learning
Compose Camp Learning Objectives
6.
This work islicensed under the Apache 2.0 License
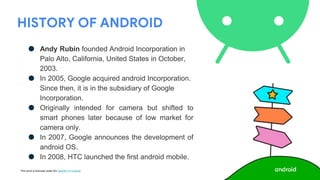
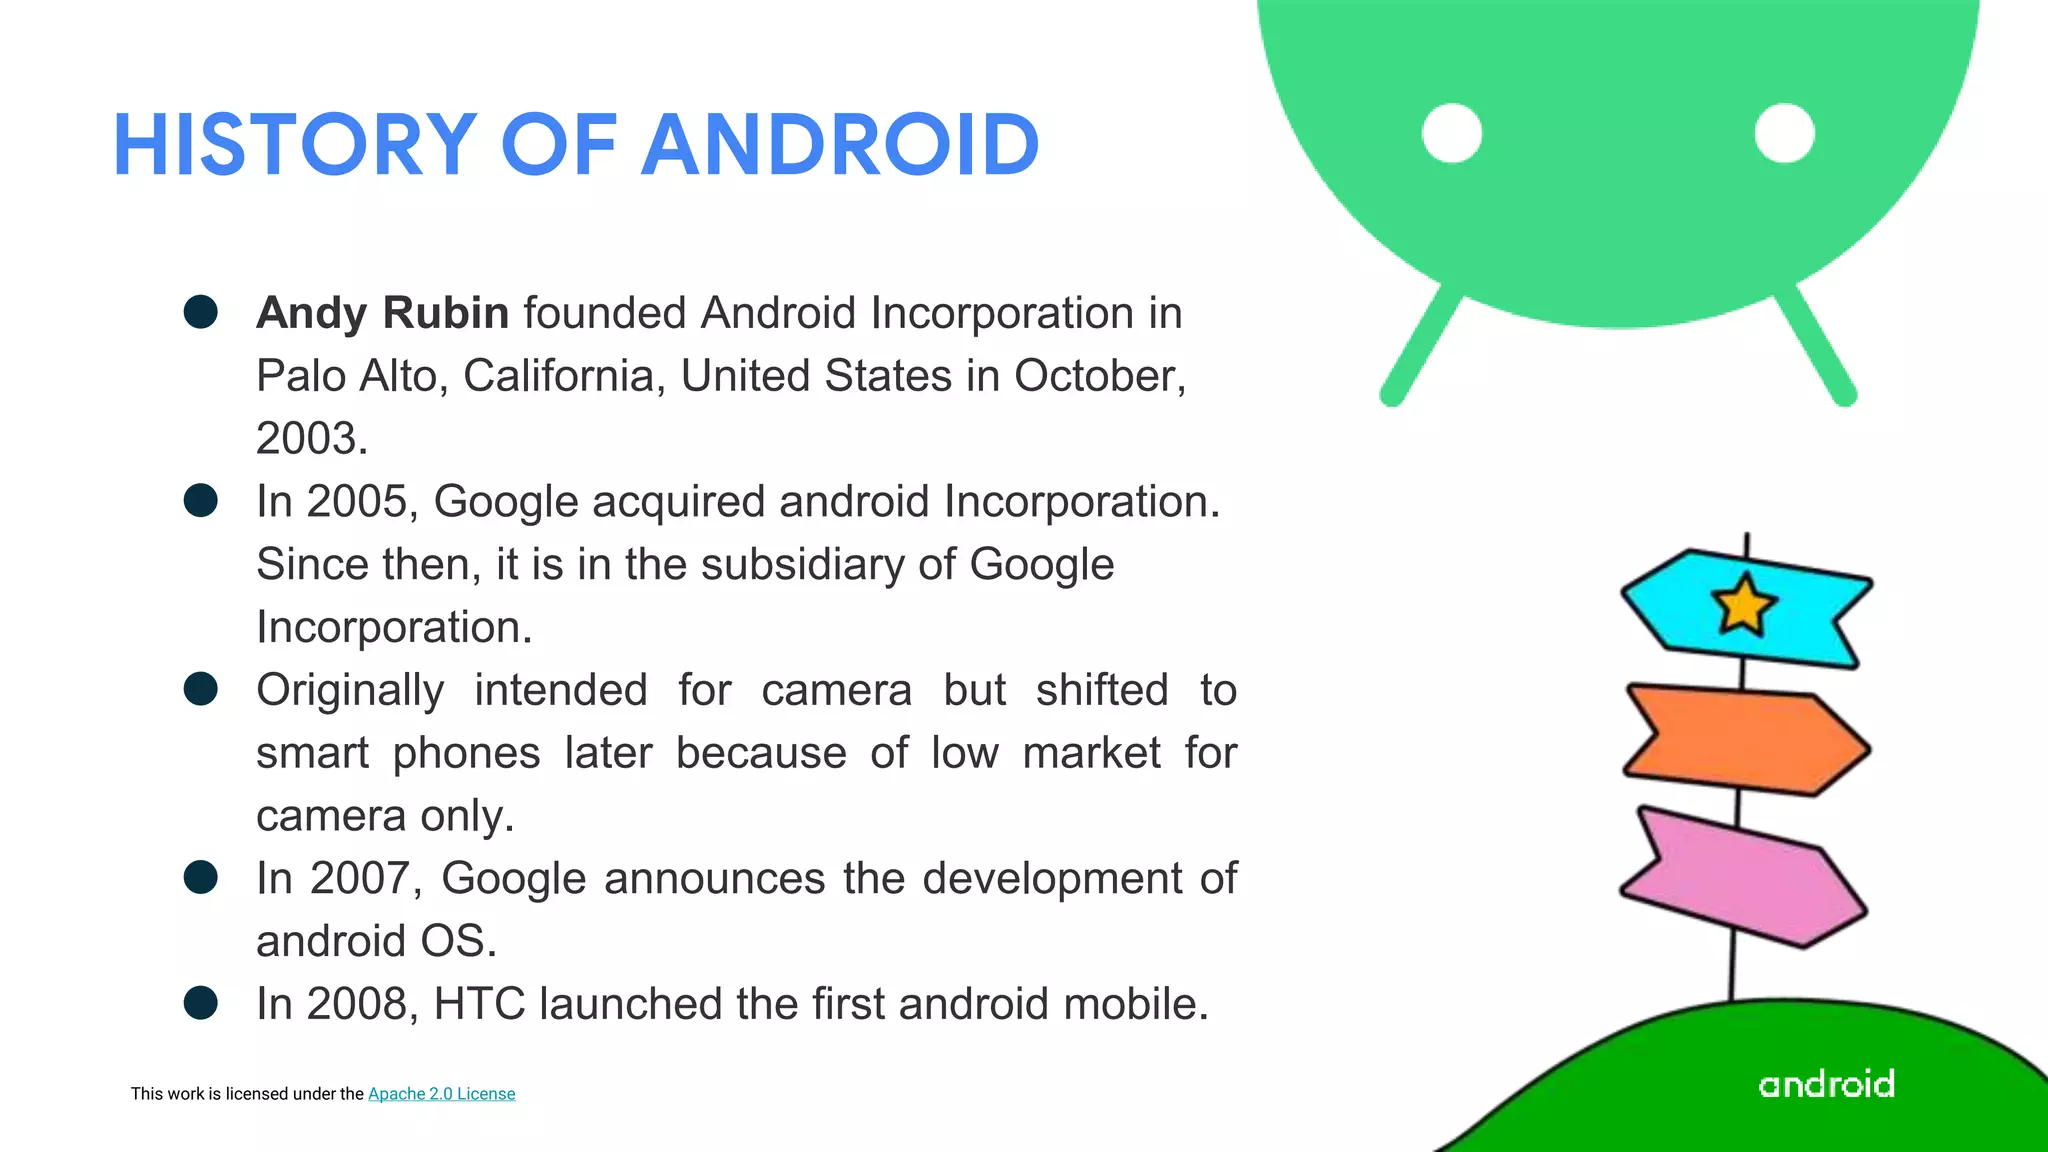
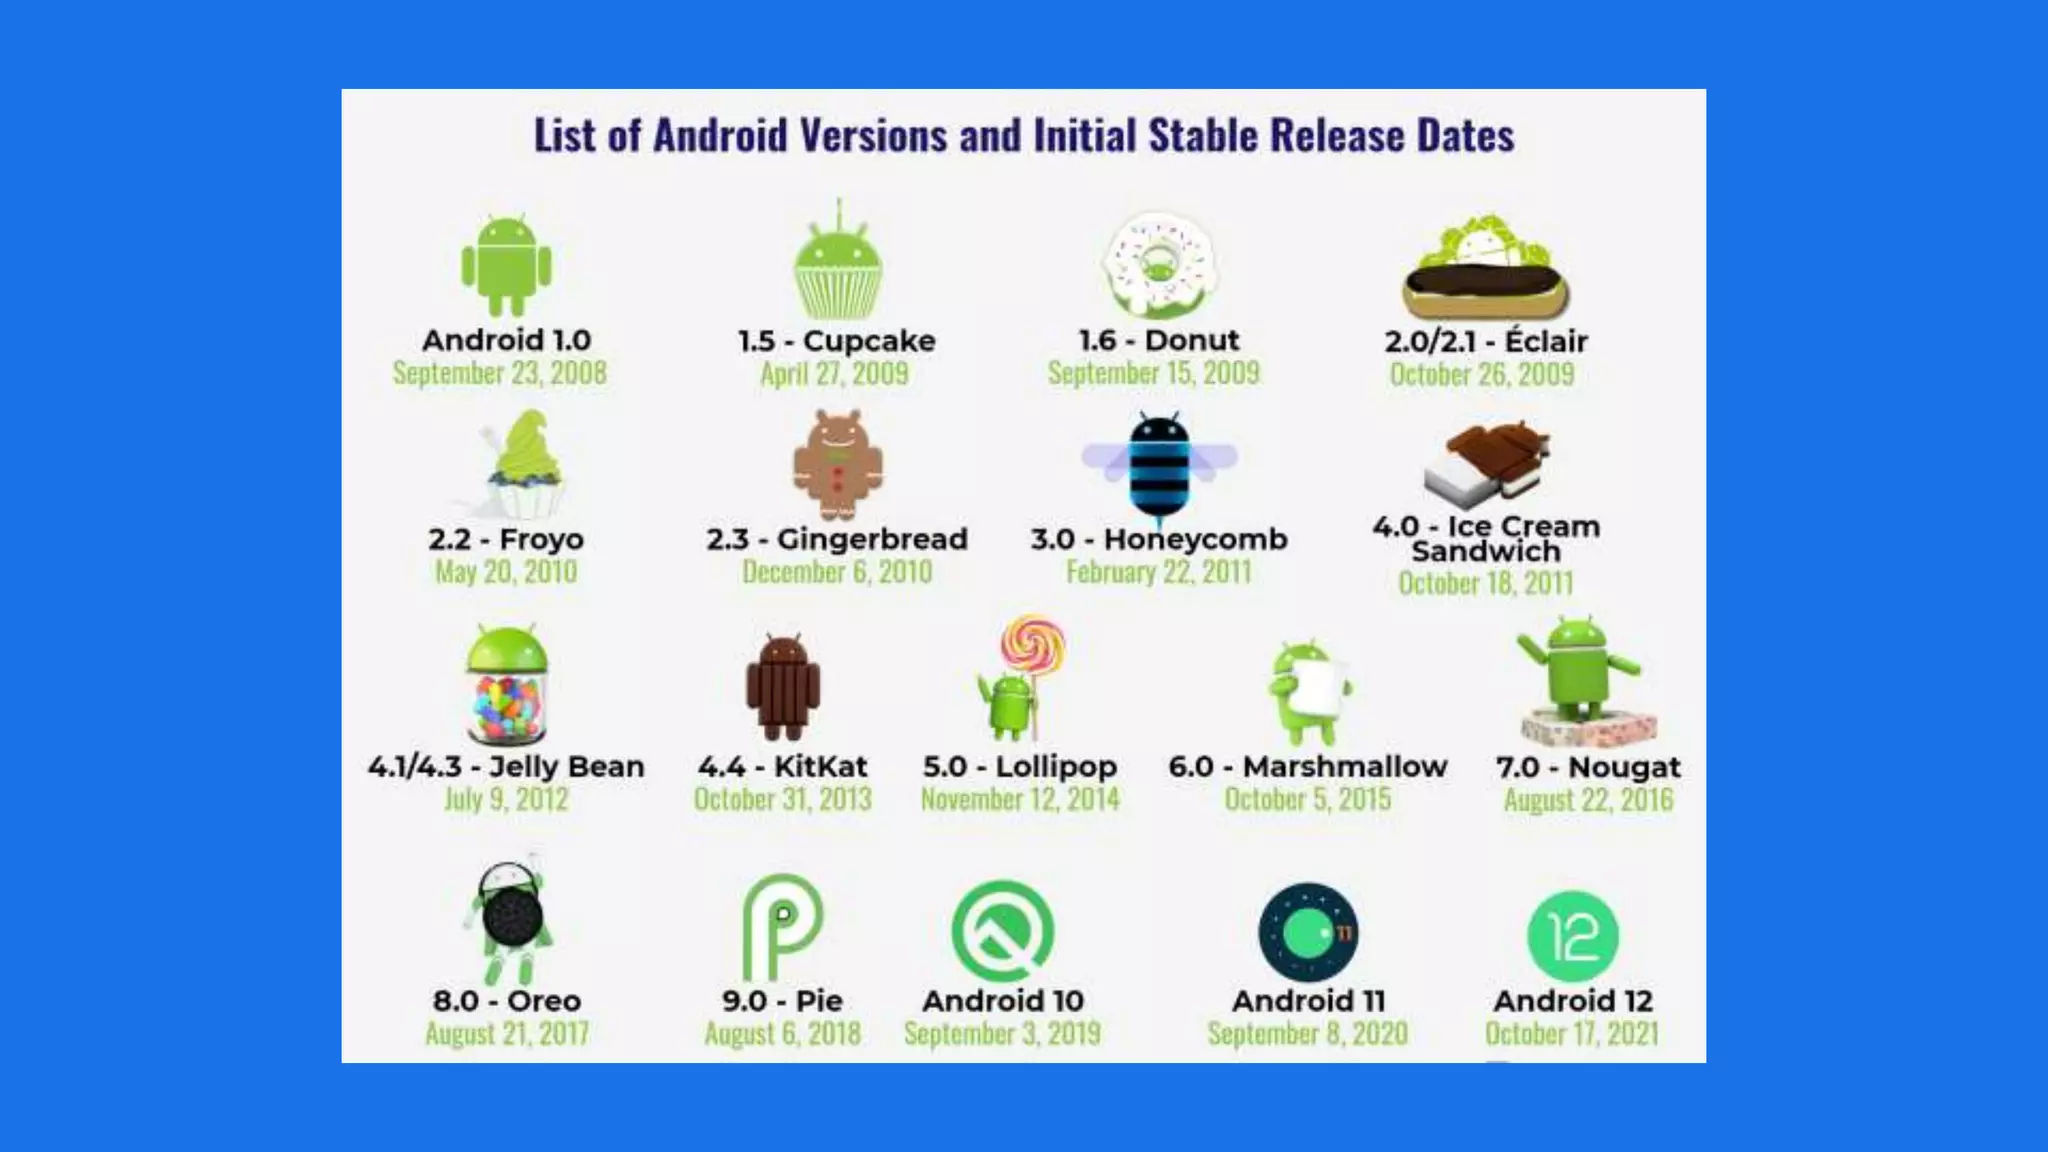
HISTORY OF ANDROID
● Andy Rubin founded Android Incorporation in
Palo Alto, California, United States in October,
2003.
● In 2005, Google acquired android Incorporation.
Since then, it is in the subsidiary of Google
Incorporation.
● Originally intended for camera but shifted to
smart phones later because of low market for
camera only.
● In 2007, Google announces the development of
android OS.
● In 2008, HTC launched the first android mobile.
This work islicensed under the Apache 2.0 License
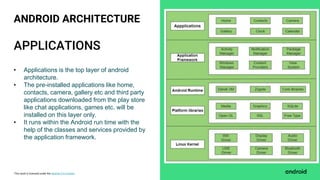
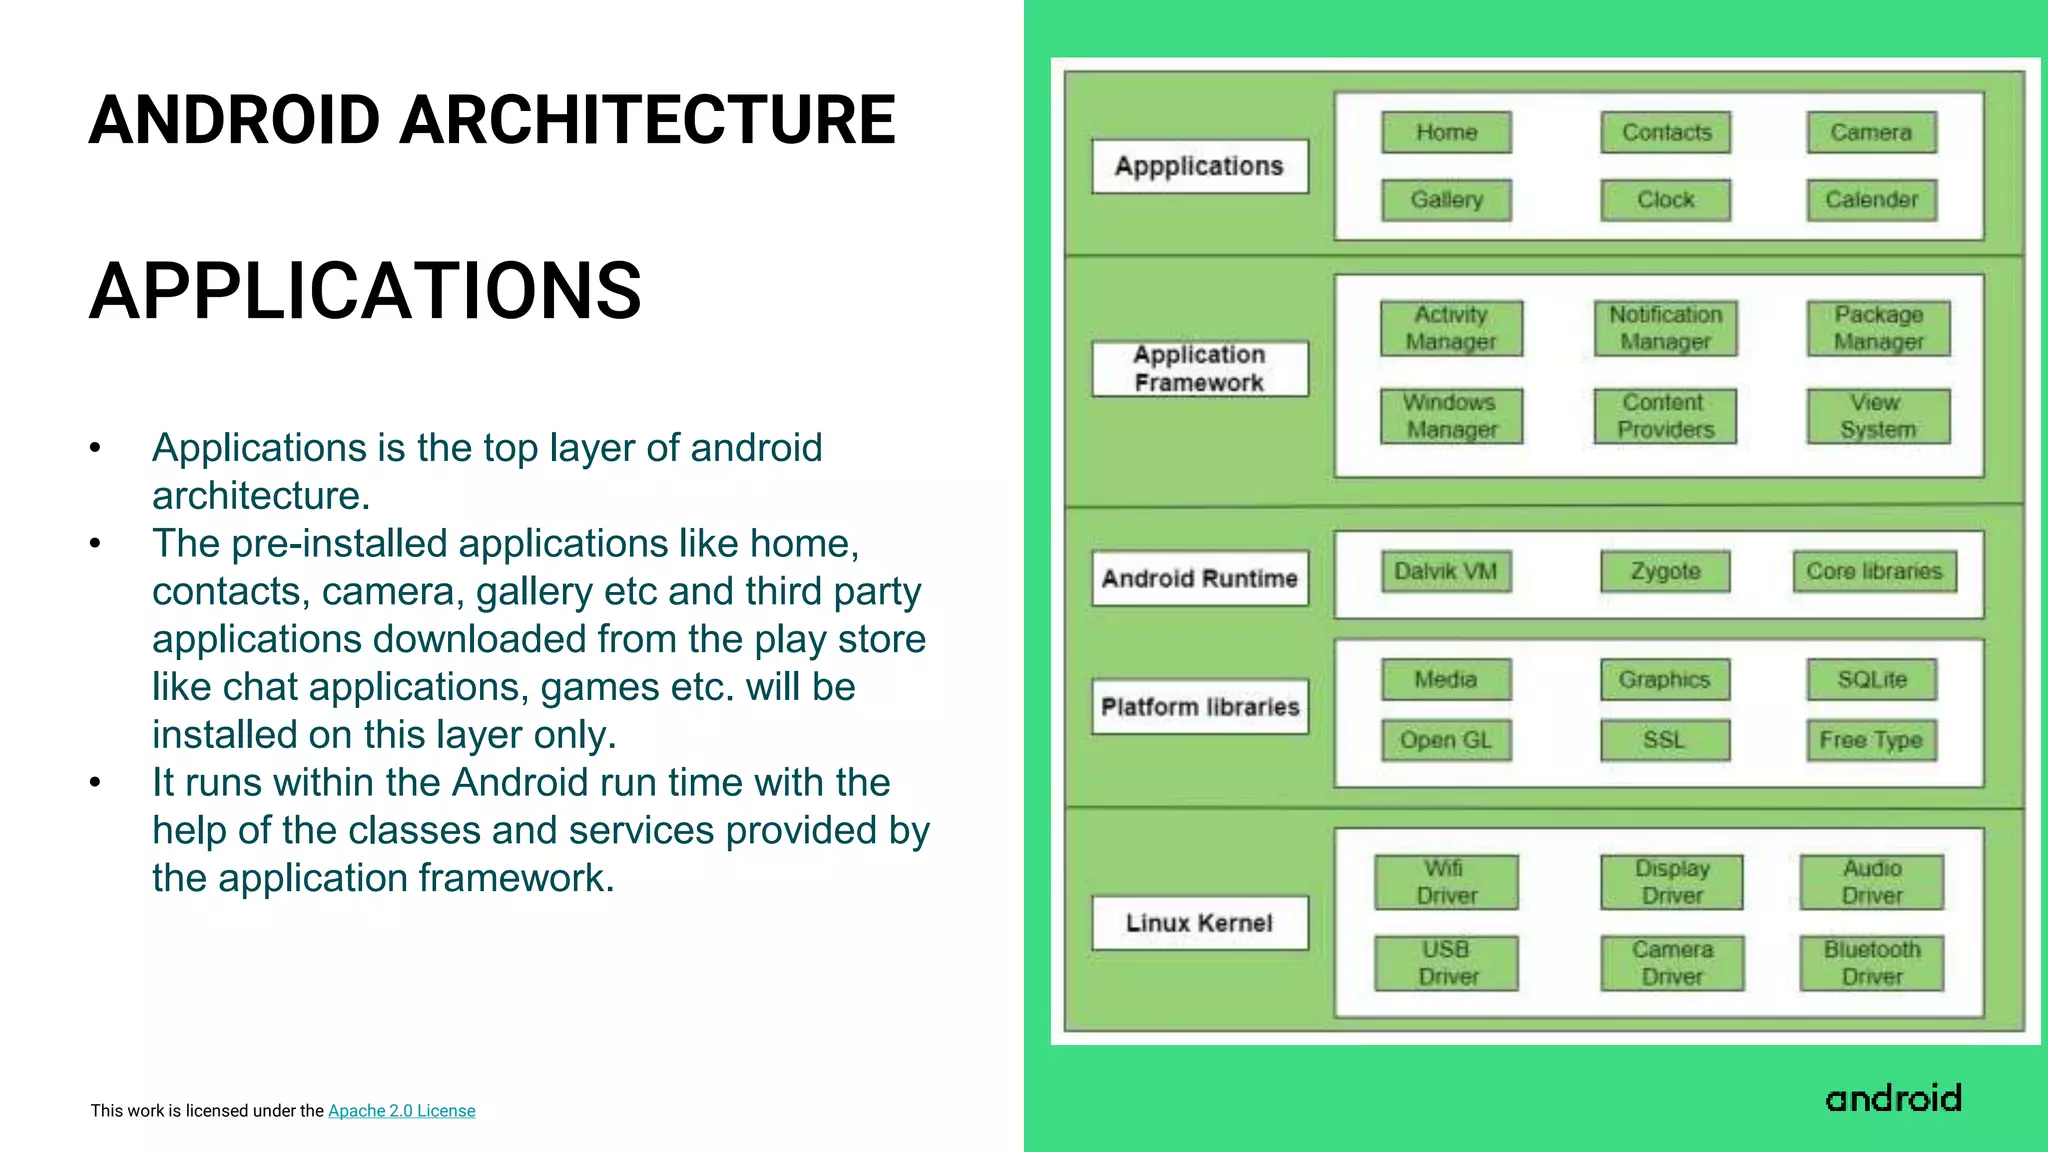
APPLICATIONS
ANDROID ARCHITECTURE
• Applications is the top layer of android
architecture.
• The pre-installed applications like home,
contacts, camera, gallery etc and third party
applications downloaded from the play store
like chat applications, games etc. will be
installed on this layer only.
• It runs within the Android run time with the
help of the classes and services provided by
the application framework.
10.
This work islicensed under the Apache 2.0 License
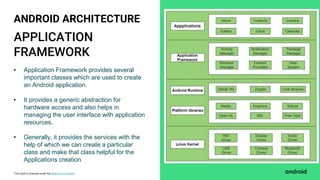
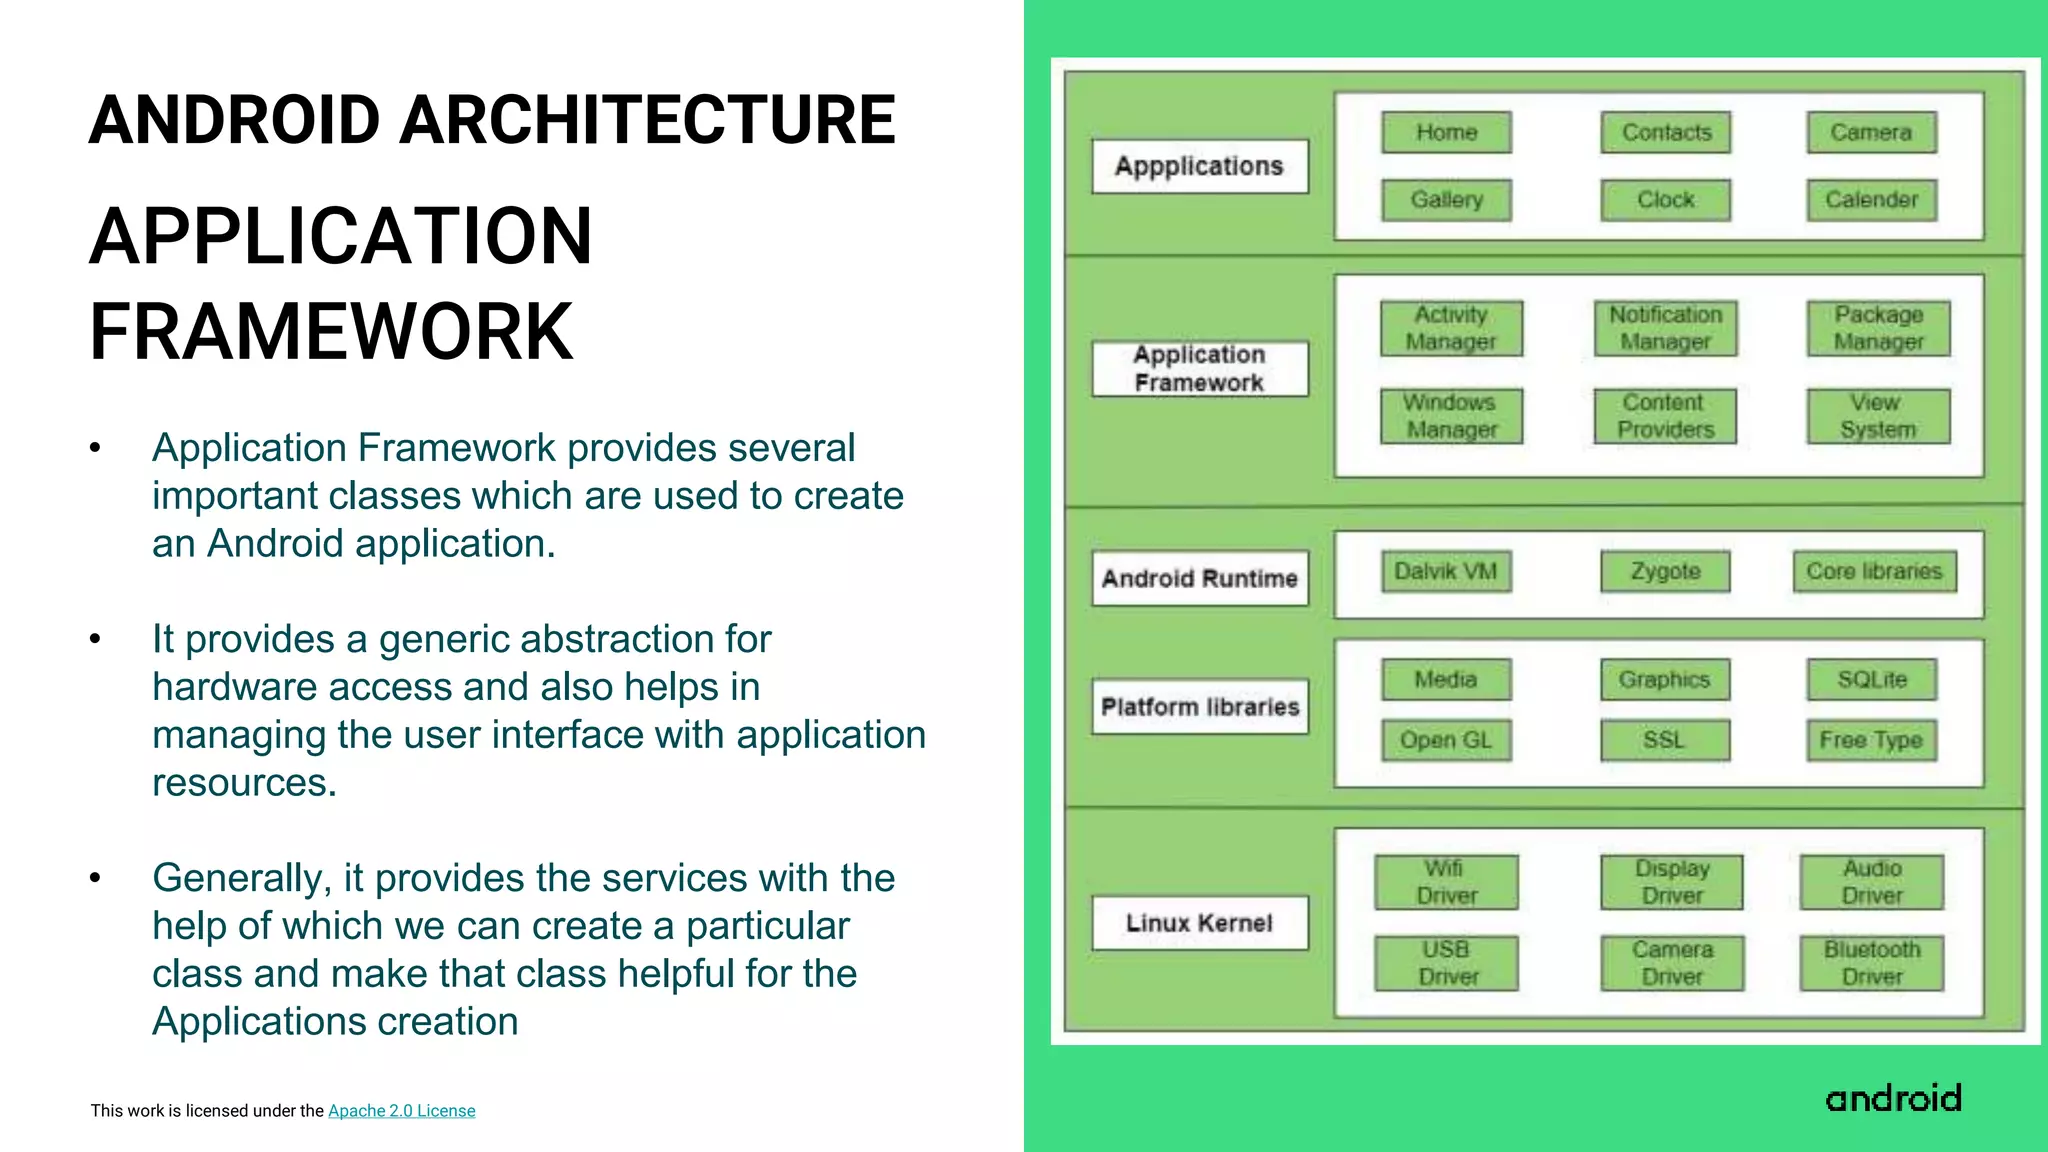
APPLICATION
FRAMEWORK
ANDROID ARCHITECTURE
• Application Framework provides several
important classes which are used to create
an Android application.
• It provides a generic abstraction for
hardware access and also helps in
managing the user interface with application
resources.
• Generally, it provides the services with the
help of which we can create a particular
class and make that class helpful for the
Applications creation
11.
This work islicensed under the Apache 2.0 License
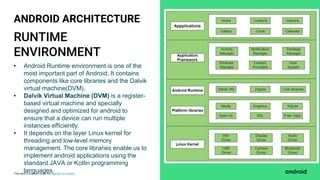
RUNTIME
ENVIRONMENT
ANDROID ARCHITECTURE
• Android Runtime environment is one of the
most important part of Android. It contains
components like core libraries and the Dalvik
virtual machine(DVM).
• Dalvik Virtual Machine (DVM) is a register-
based virtual machine and specially
designed and optimized for android to
ensure that a device can run multiple
instances efficiently.
• It depends on the layer Linux kernel for
threading and low-level memory
management. The core libraries enable us to
implement android applications using the
standard JAVA or Kotlin programming
languages.
12.
This work islicensed under the Apache 2.0 License
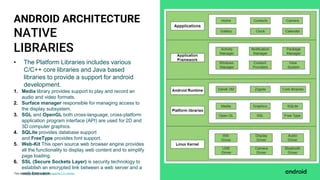
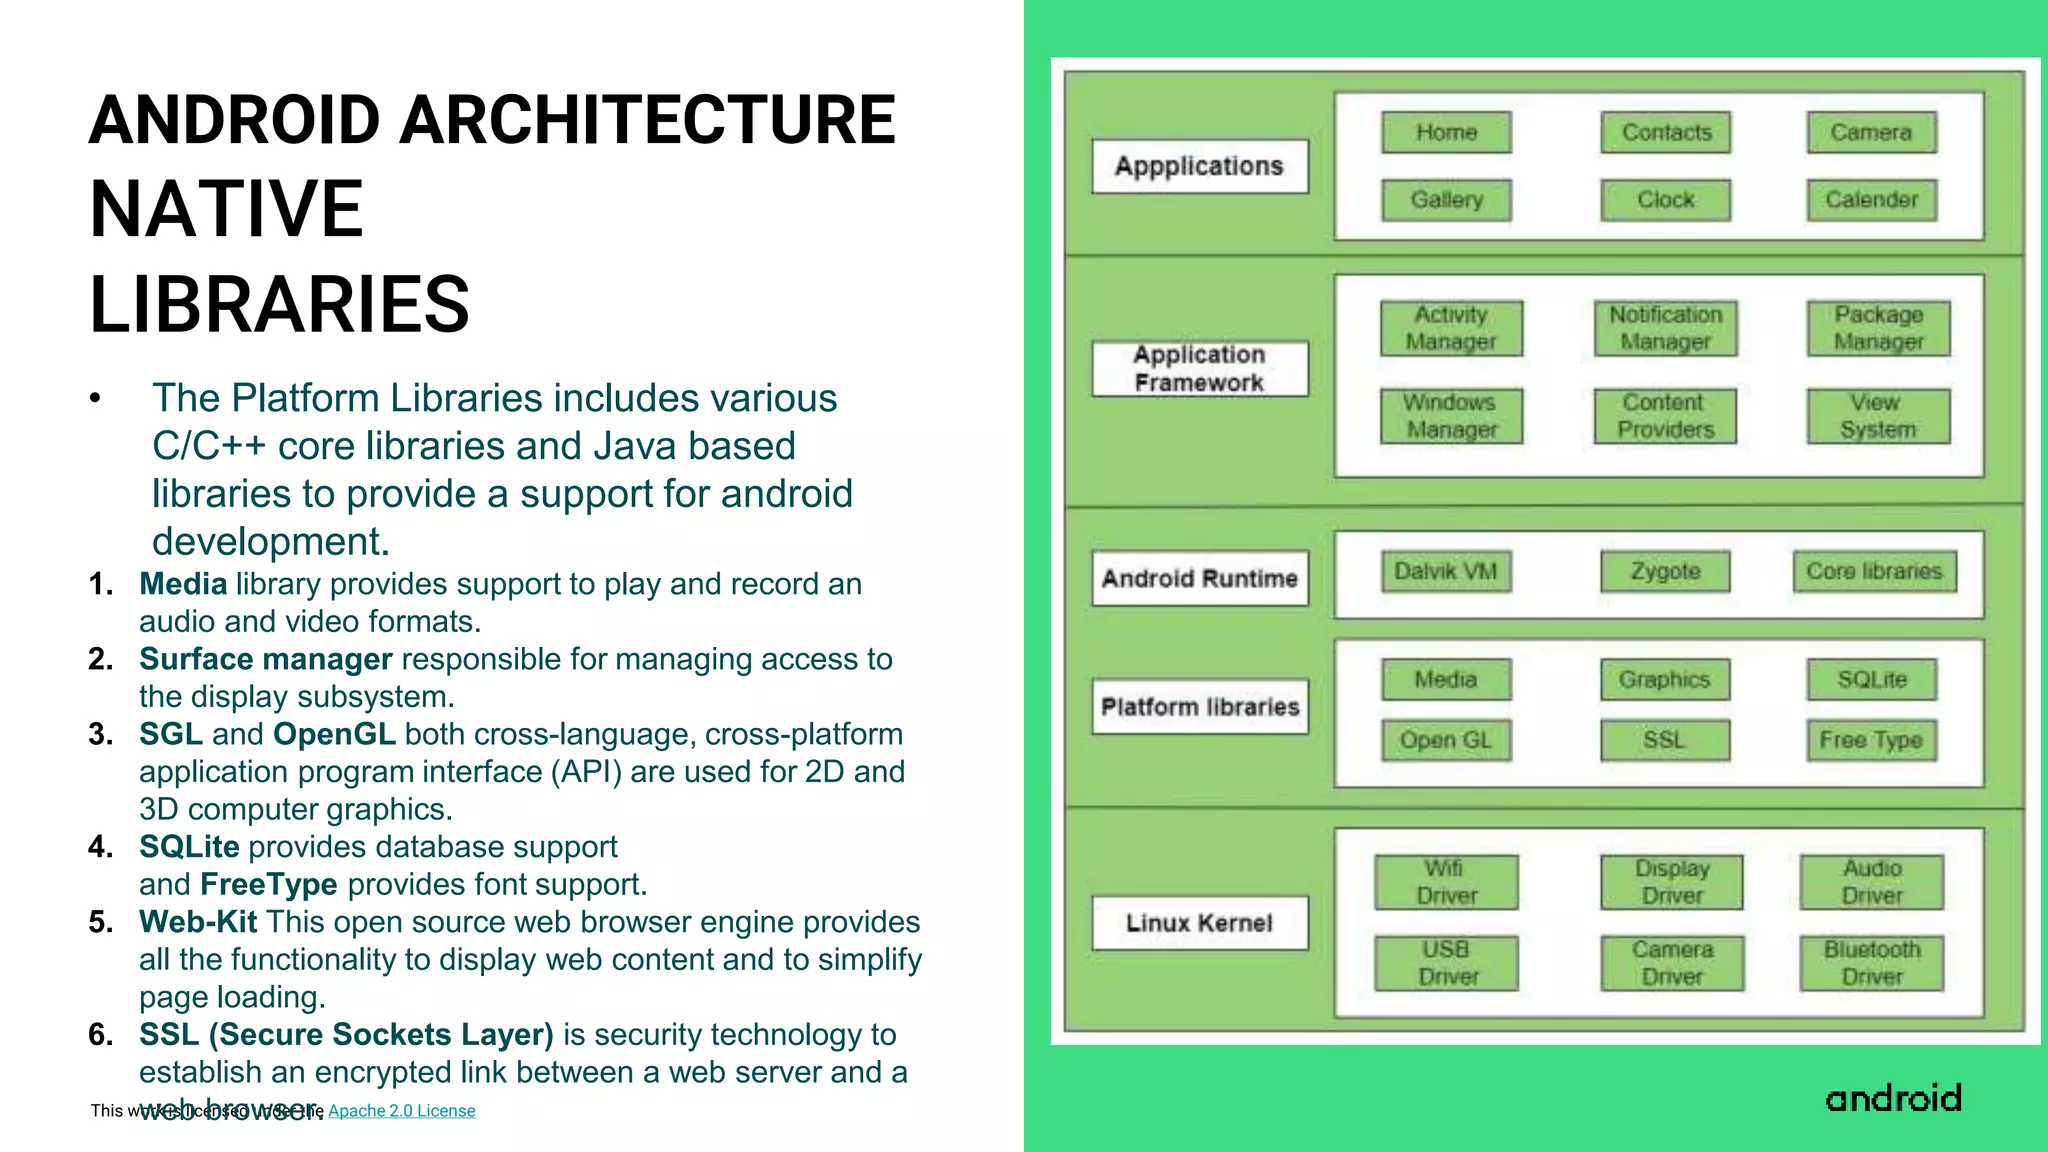
NATIVE
LIBRARIES
ANDROID ARCHITECTURE
• The Platform Libraries includes various
C/C++ core libraries and Java based
libraries to provide a support for android
development.
1. Media library provides support to play and record an
audio and video formats.
2. Surface manager responsible for managing access to
the display subsystem.
3. SGL and OpenGL both cross-language, cross-platform
application program interface (API) are used for 2D and
3D computer graphics.
4. SQLite provides database support
and FreeType provides font support.
5. Web-Kit This open source web browser engine provides
all the functionality to display web content and to simplify
page loading.
6. SSL (Secure Sockets Layer) is security technology to
establish an encrypted link between a web server and a
web browser.
13.
This work islicensed under the Apache 2.0 License
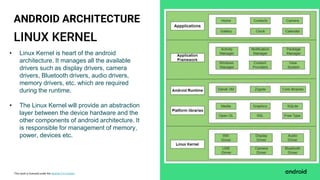
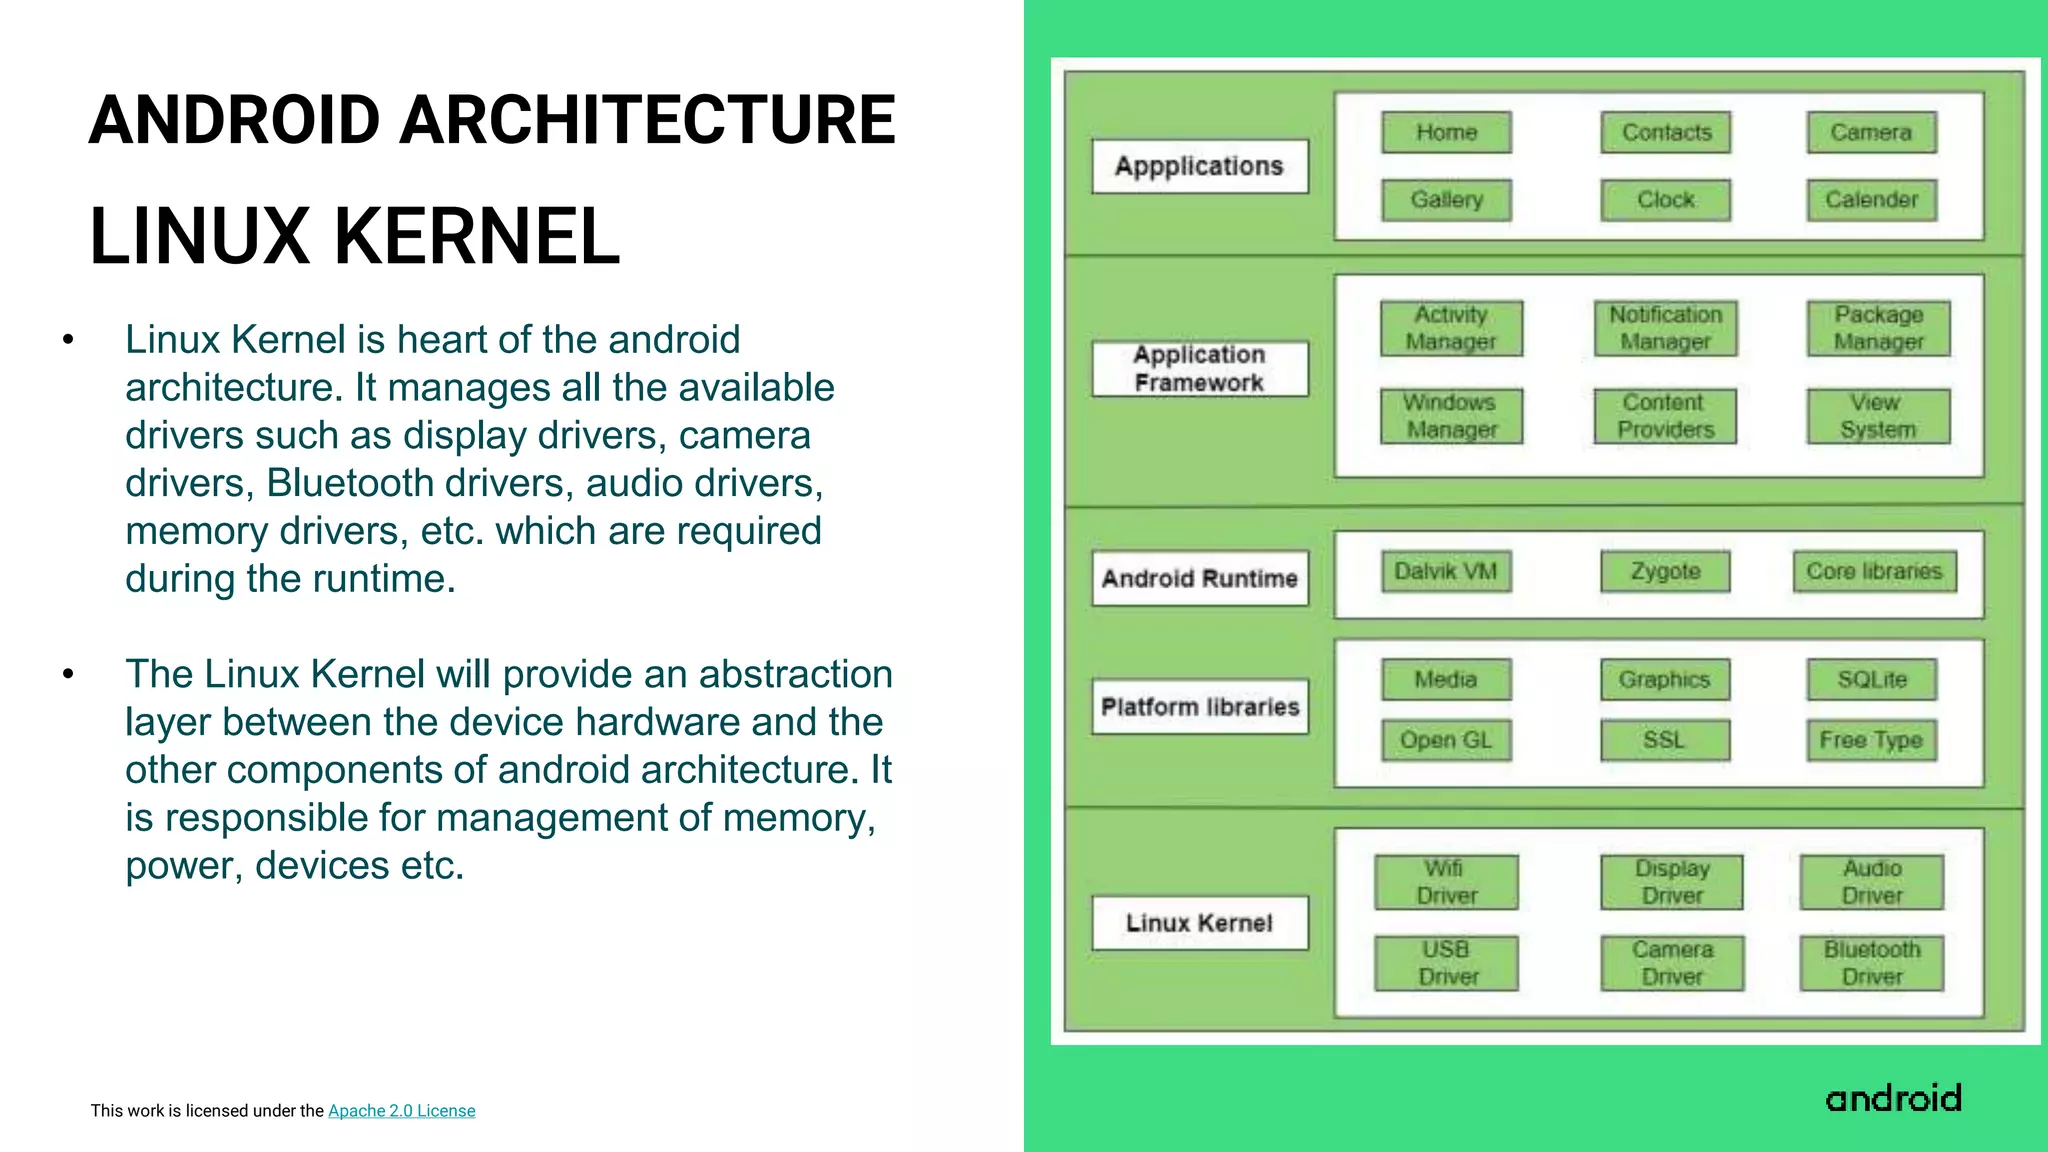
LINUX KERNEL
ANDROID ARCHITECTURE
• Linux Kernel is heart of the android
architecture. It manages all the available
drivers such as display drivers, camera
drivers, Bluetooth drivers, audio drivers,
memory drivers, etc. which are required
during the runtime.
• The Linux Kernel will provide an abstraction
layer between the device hardware and the
other components of android architecture. It
is responsible for management of memory,
power, devices etc.
14.
This work islicensed under the Apache 2.0 License
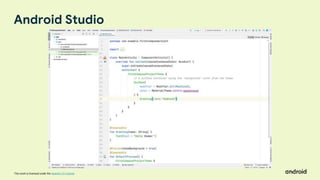
Android Studio
15.
This work islicensed under the Apache 2.0 License
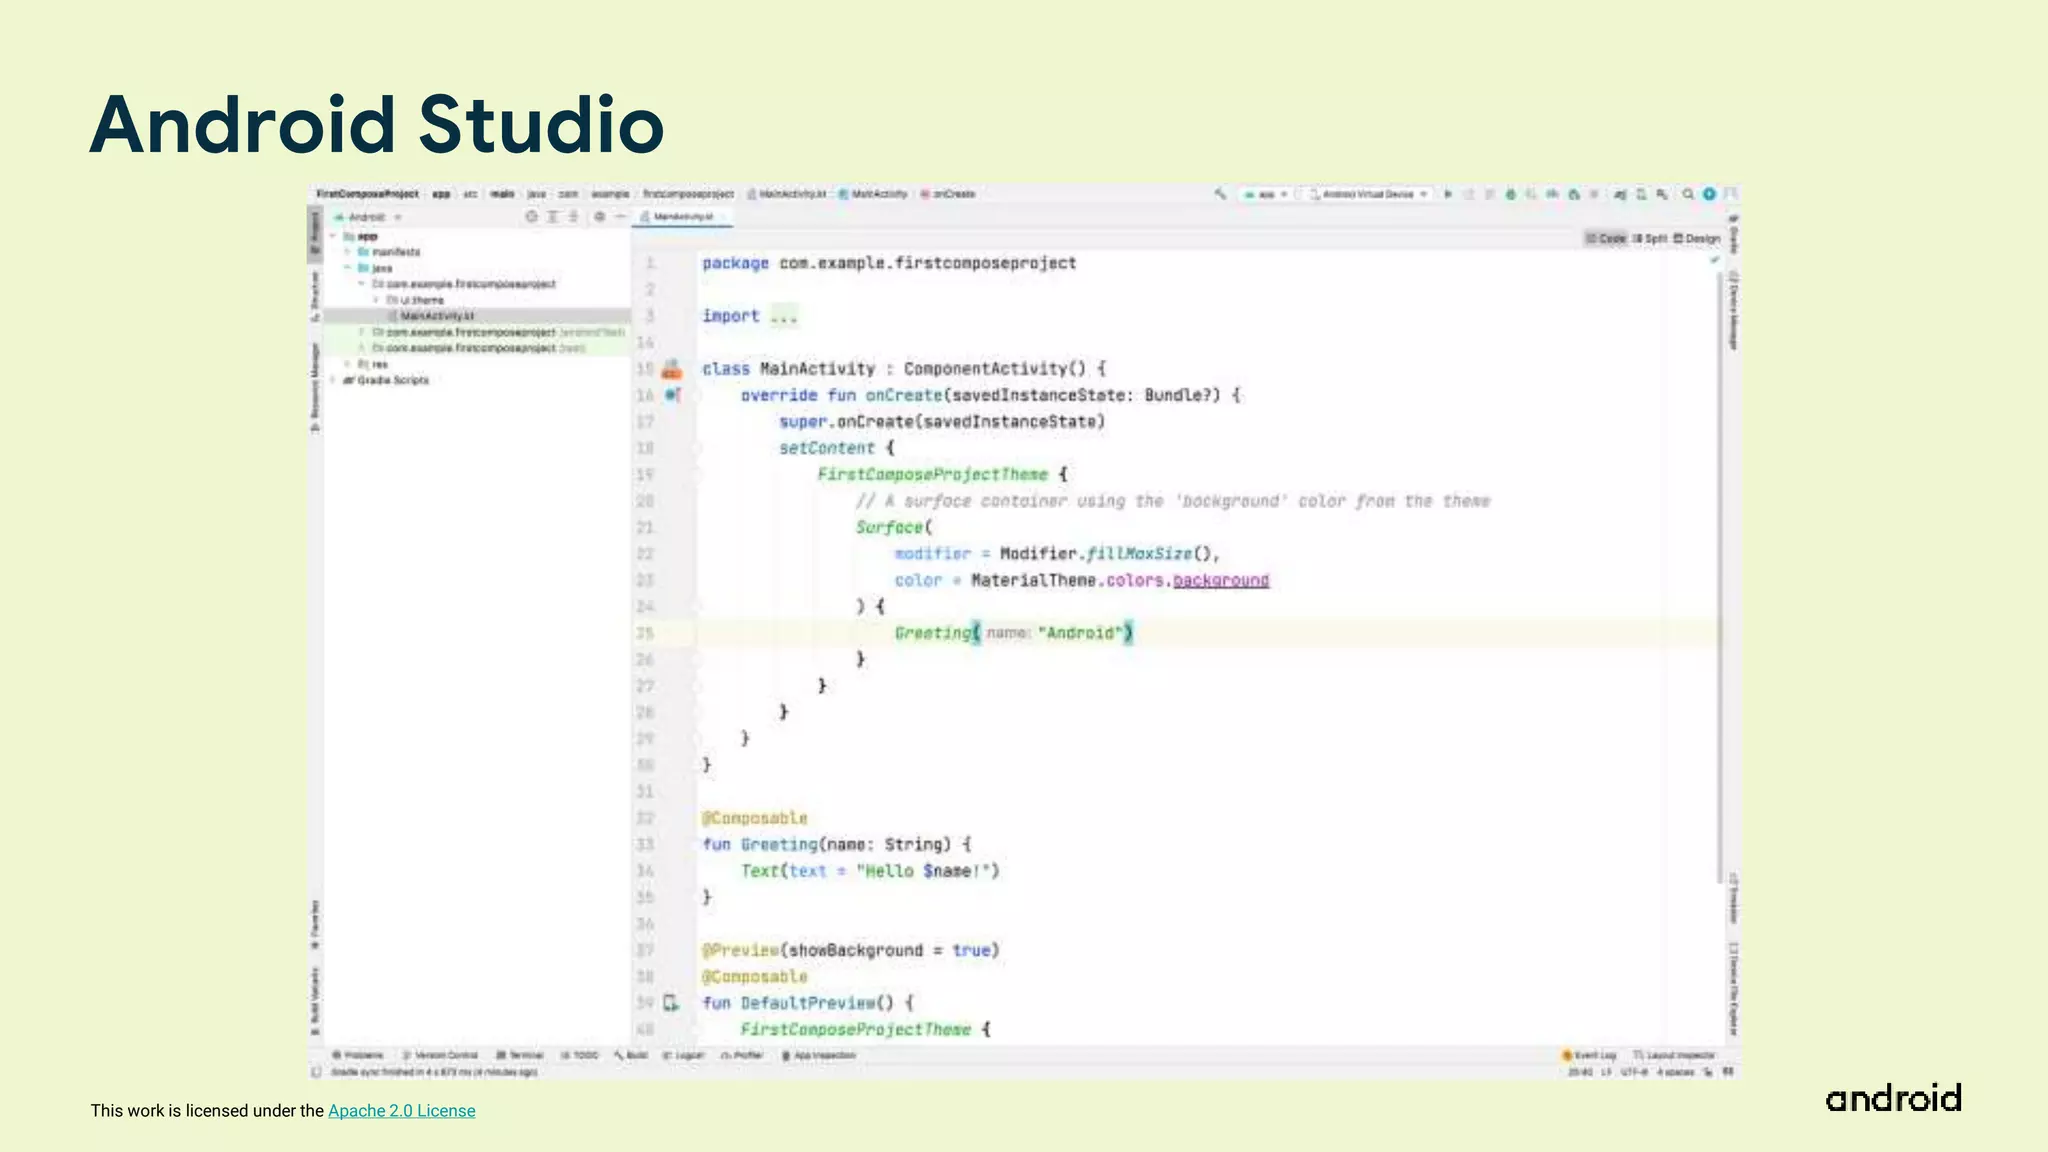
Android Studio
16.
This work islicensed under the Apache 2.0 License
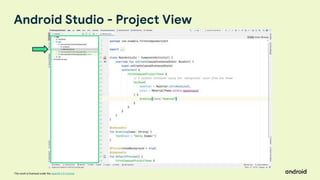
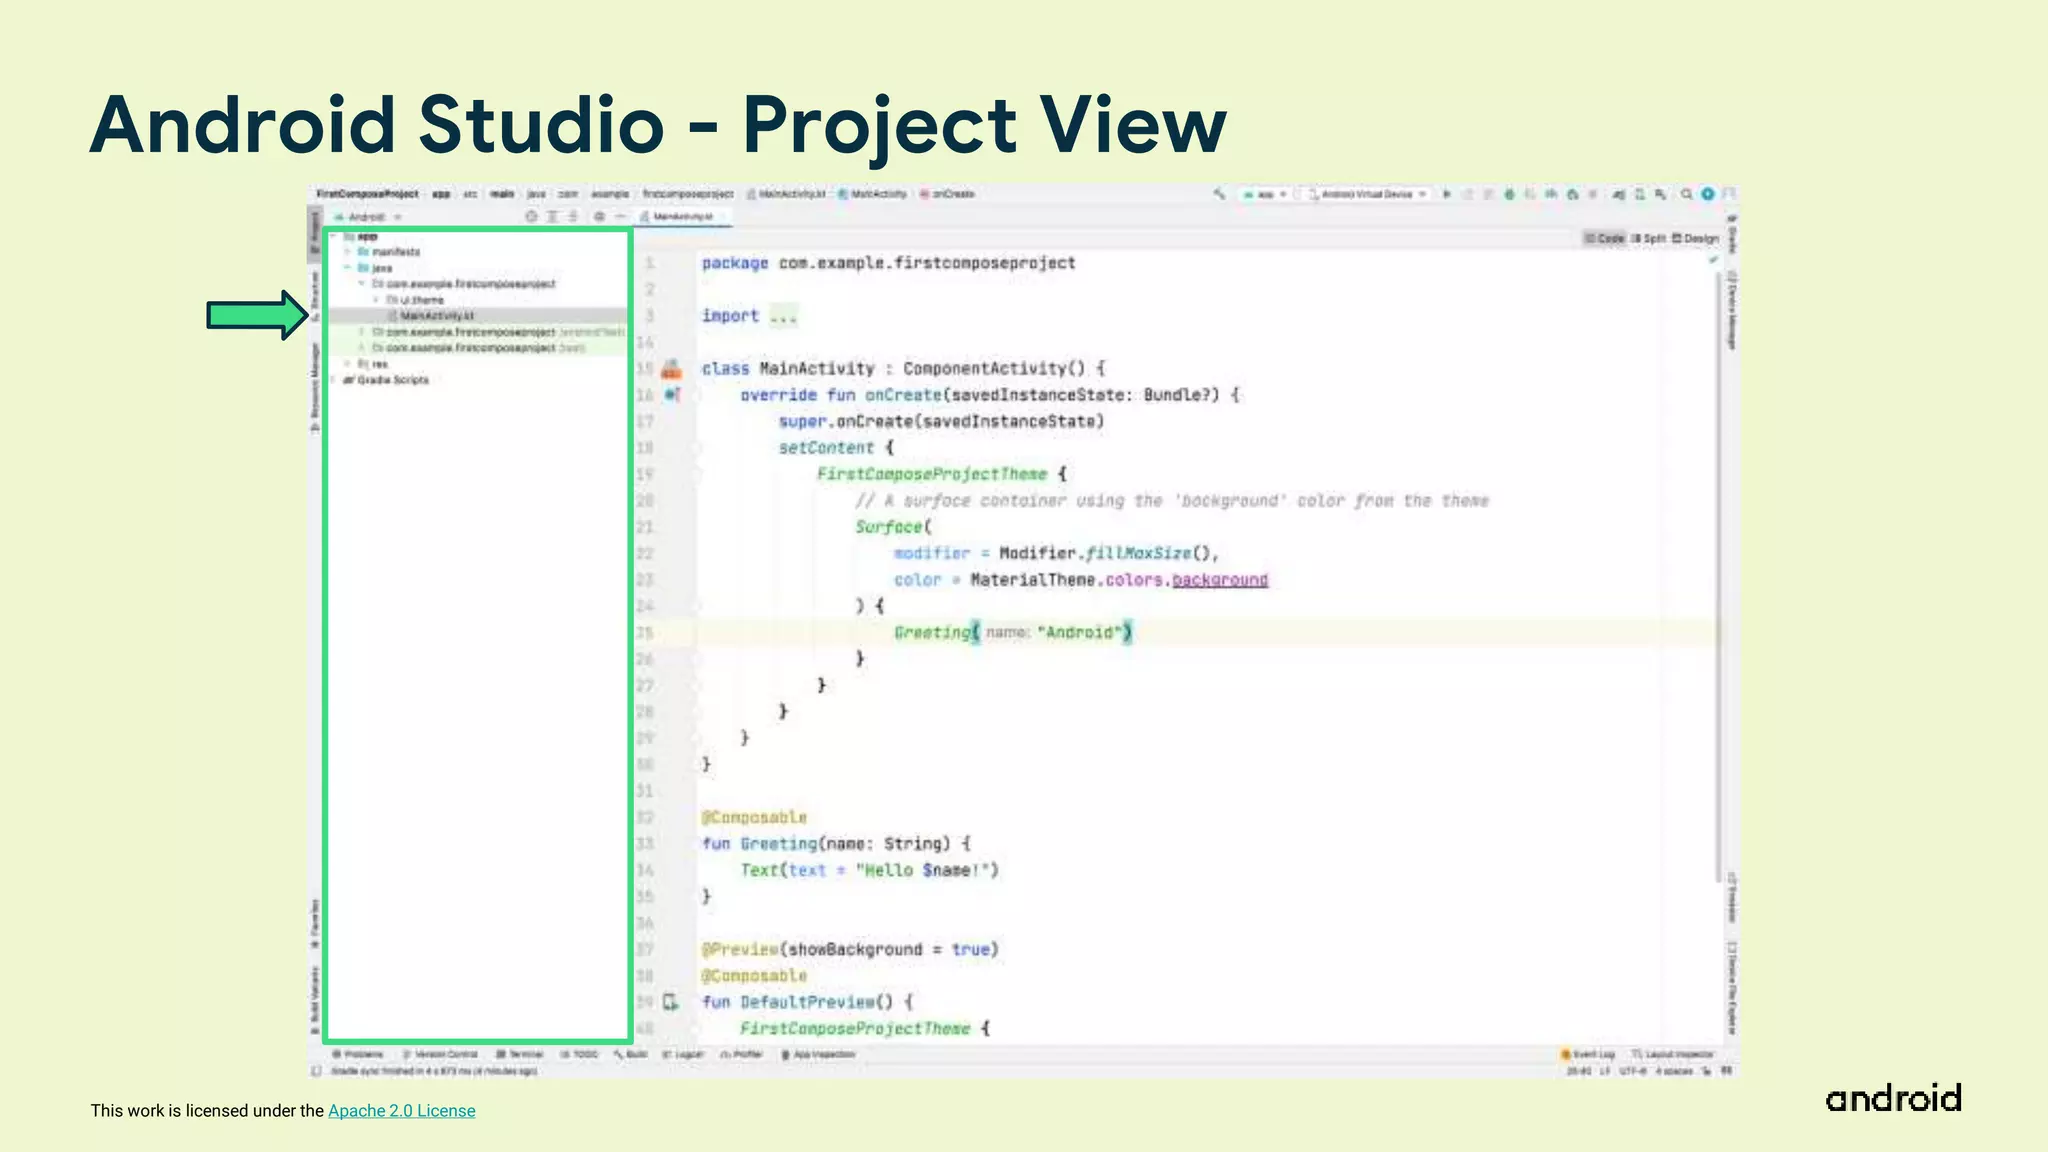
Android Studio - Project View
17.
This work islicensed under the Apache 2.0 License
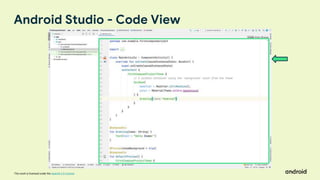
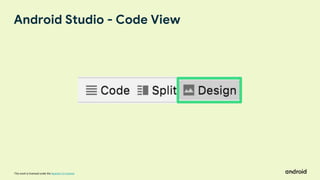
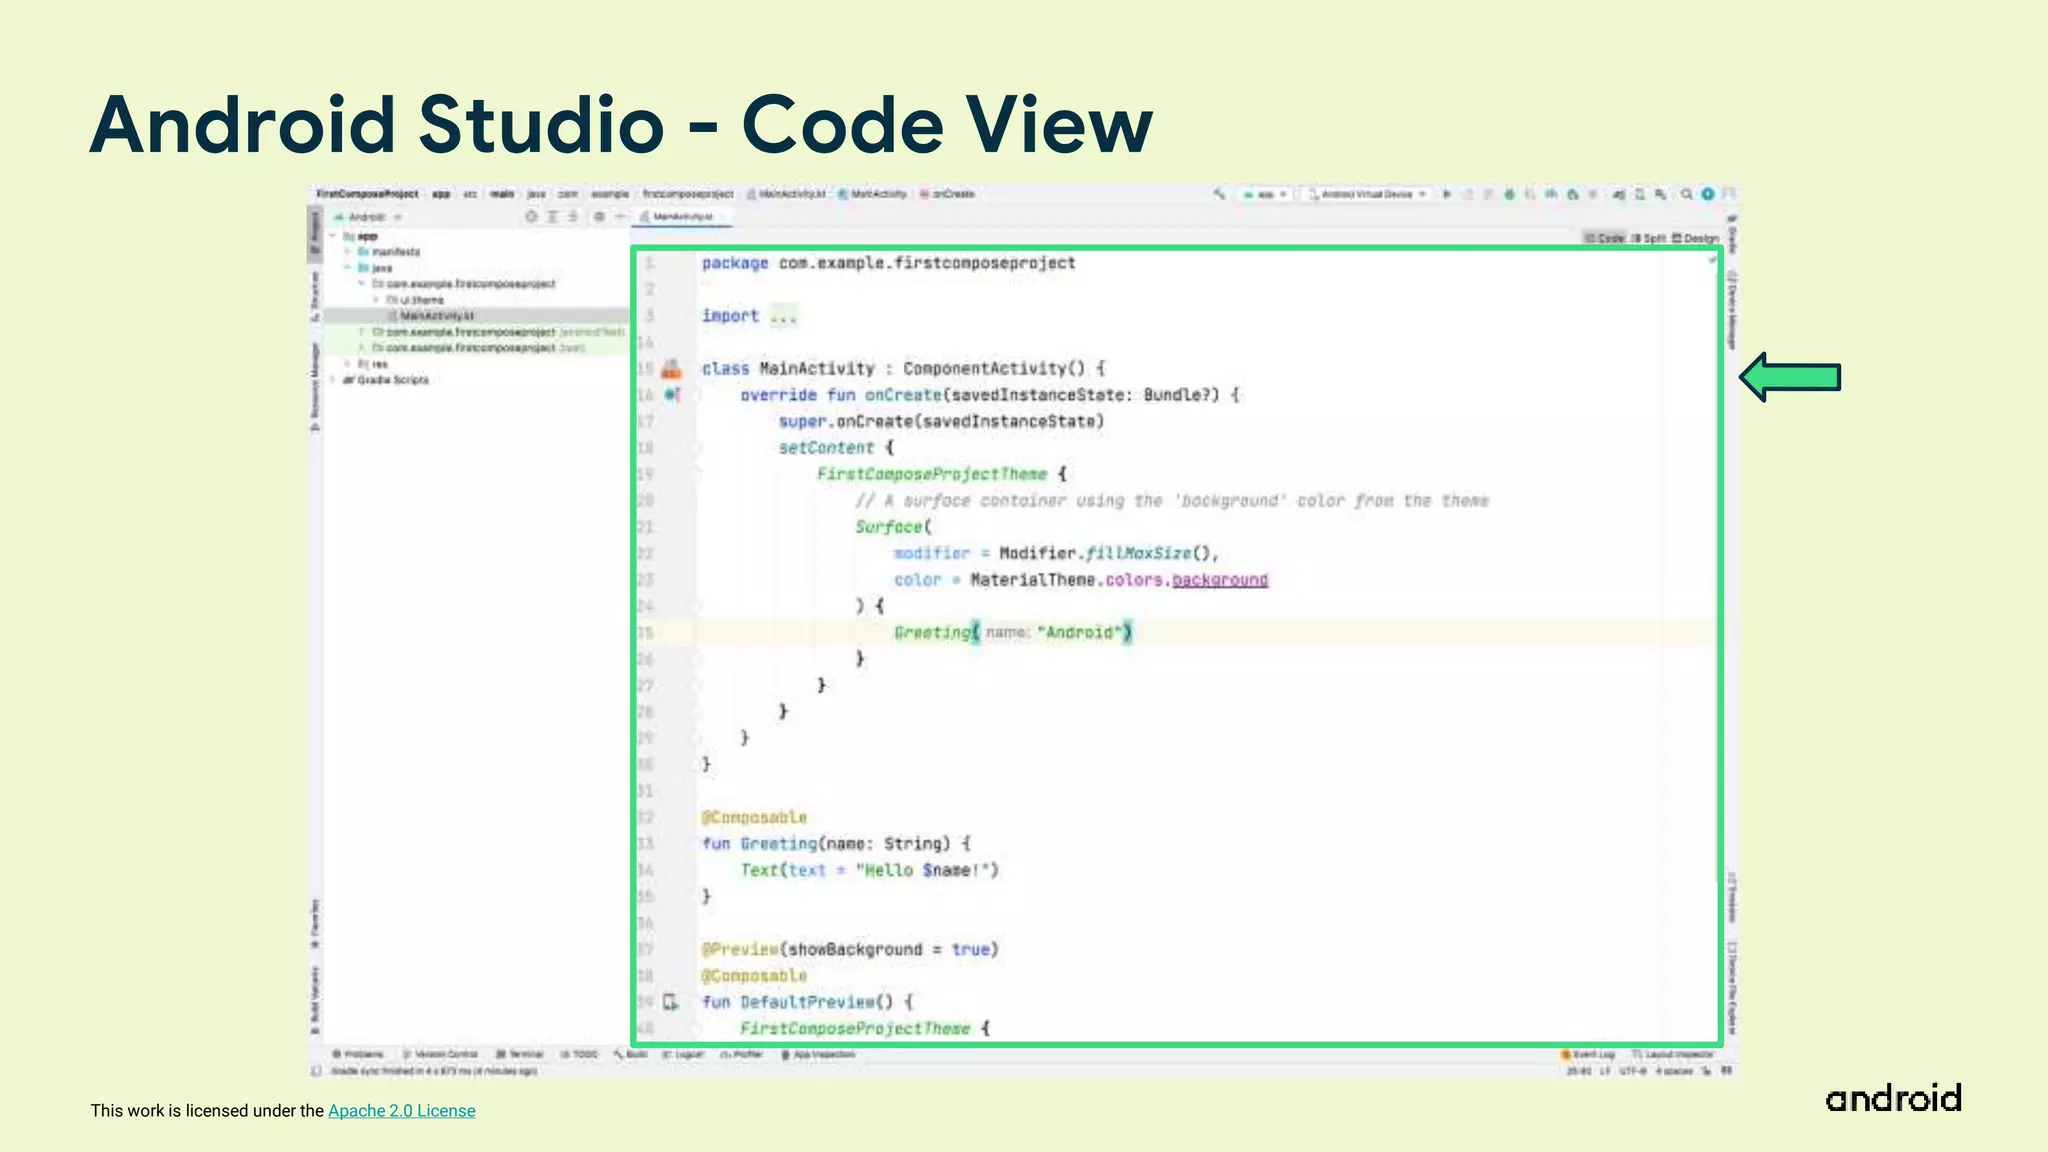
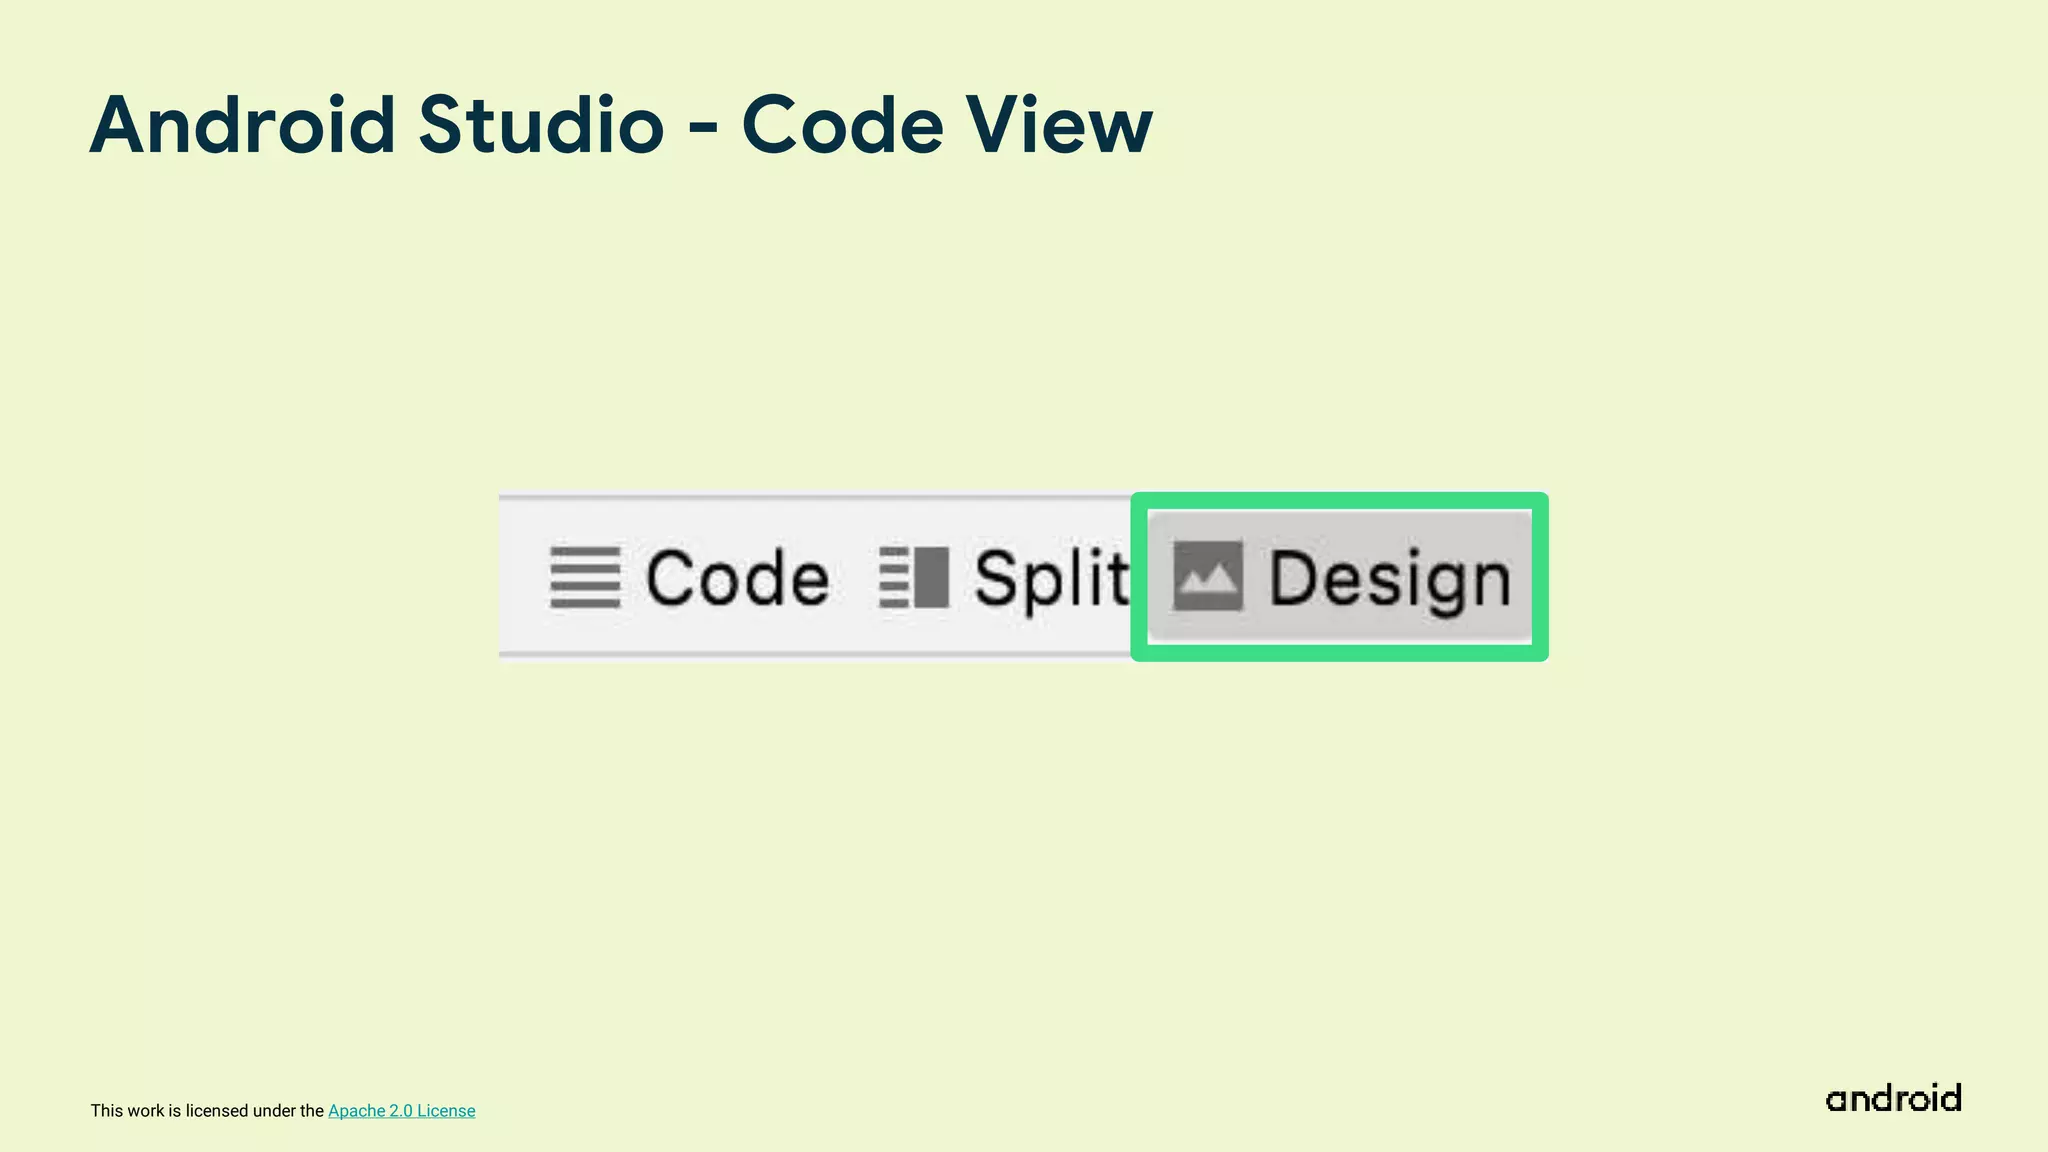
Android Studio - Code View
18.
This work islicensed under the Apache 2.0 License
Android Studio - Code View
19.
This work islicensed under the Apache 2.0 License
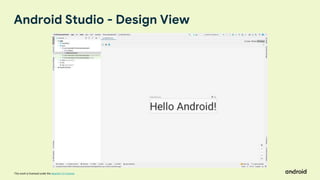
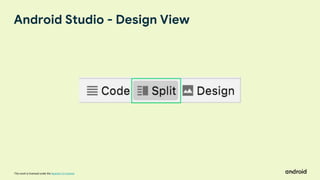
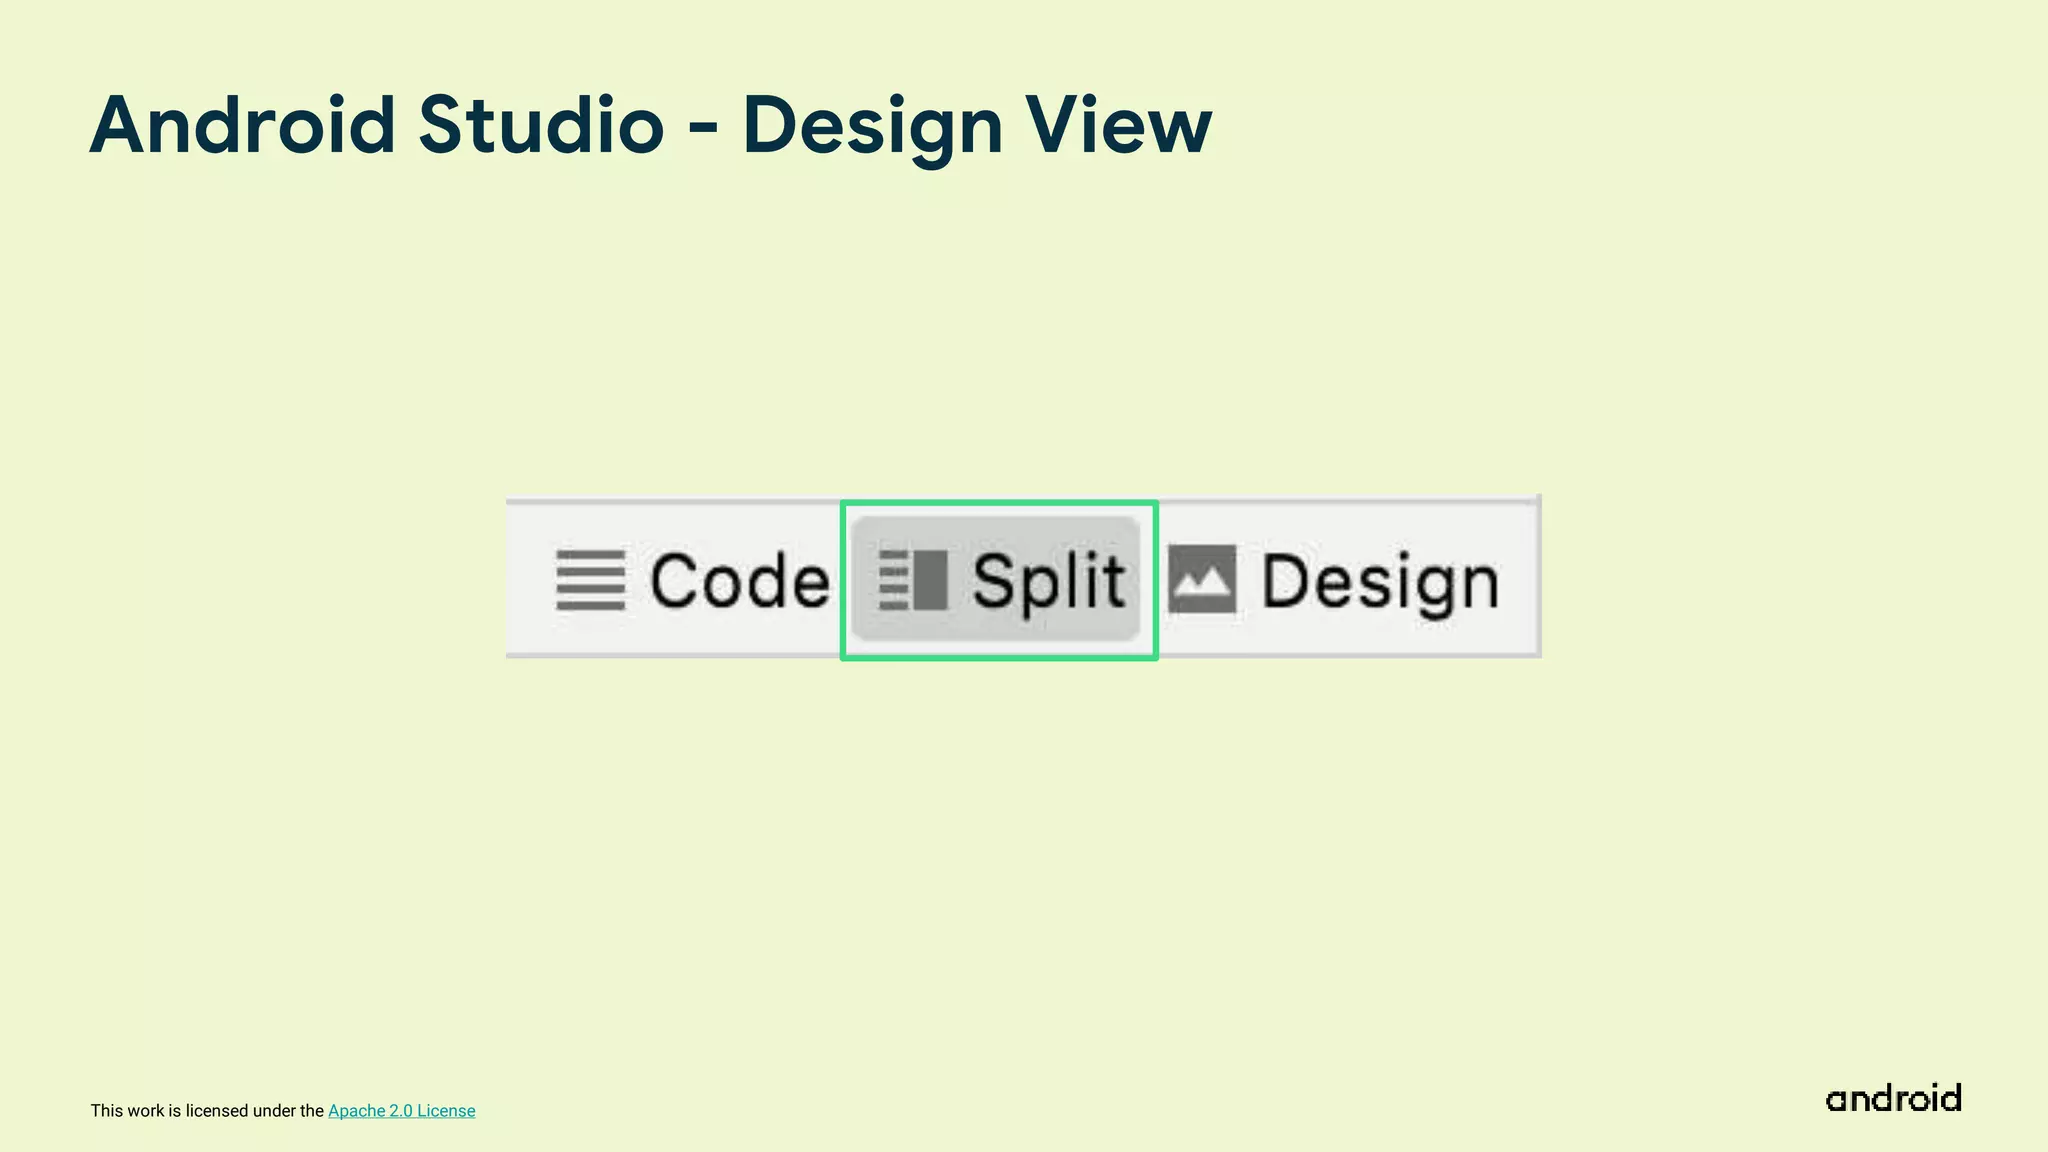
Android Studio - Design View
20.
This work islicensed under the Apache 2.0 License
Android Studio - Design View
21.
This work islicensed under the Apache 2.0 License
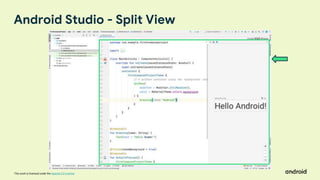
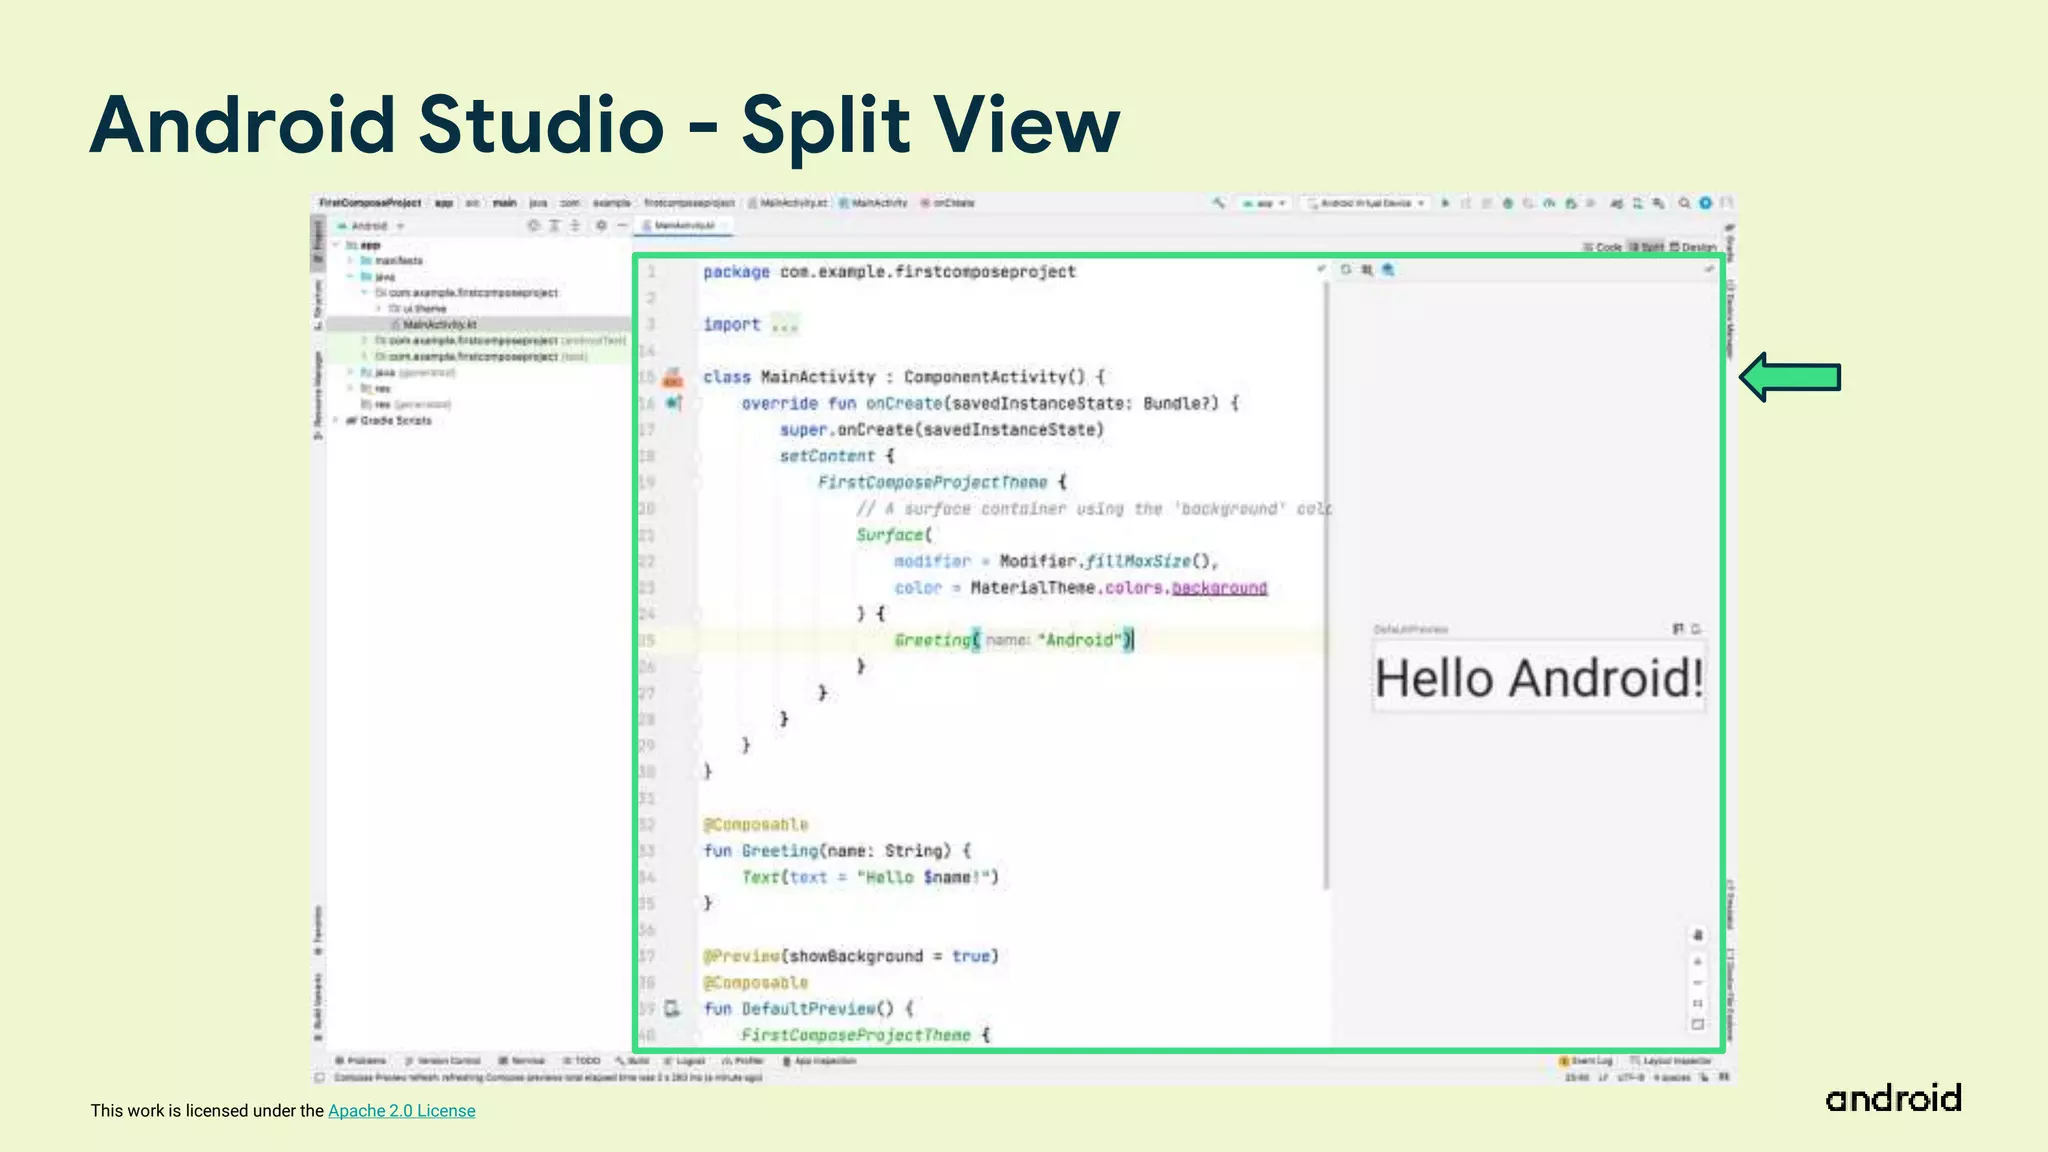
Android Studio - Split View
22.
This work islicensed under the Apache 2.0 License
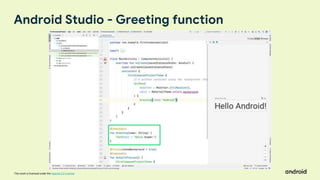
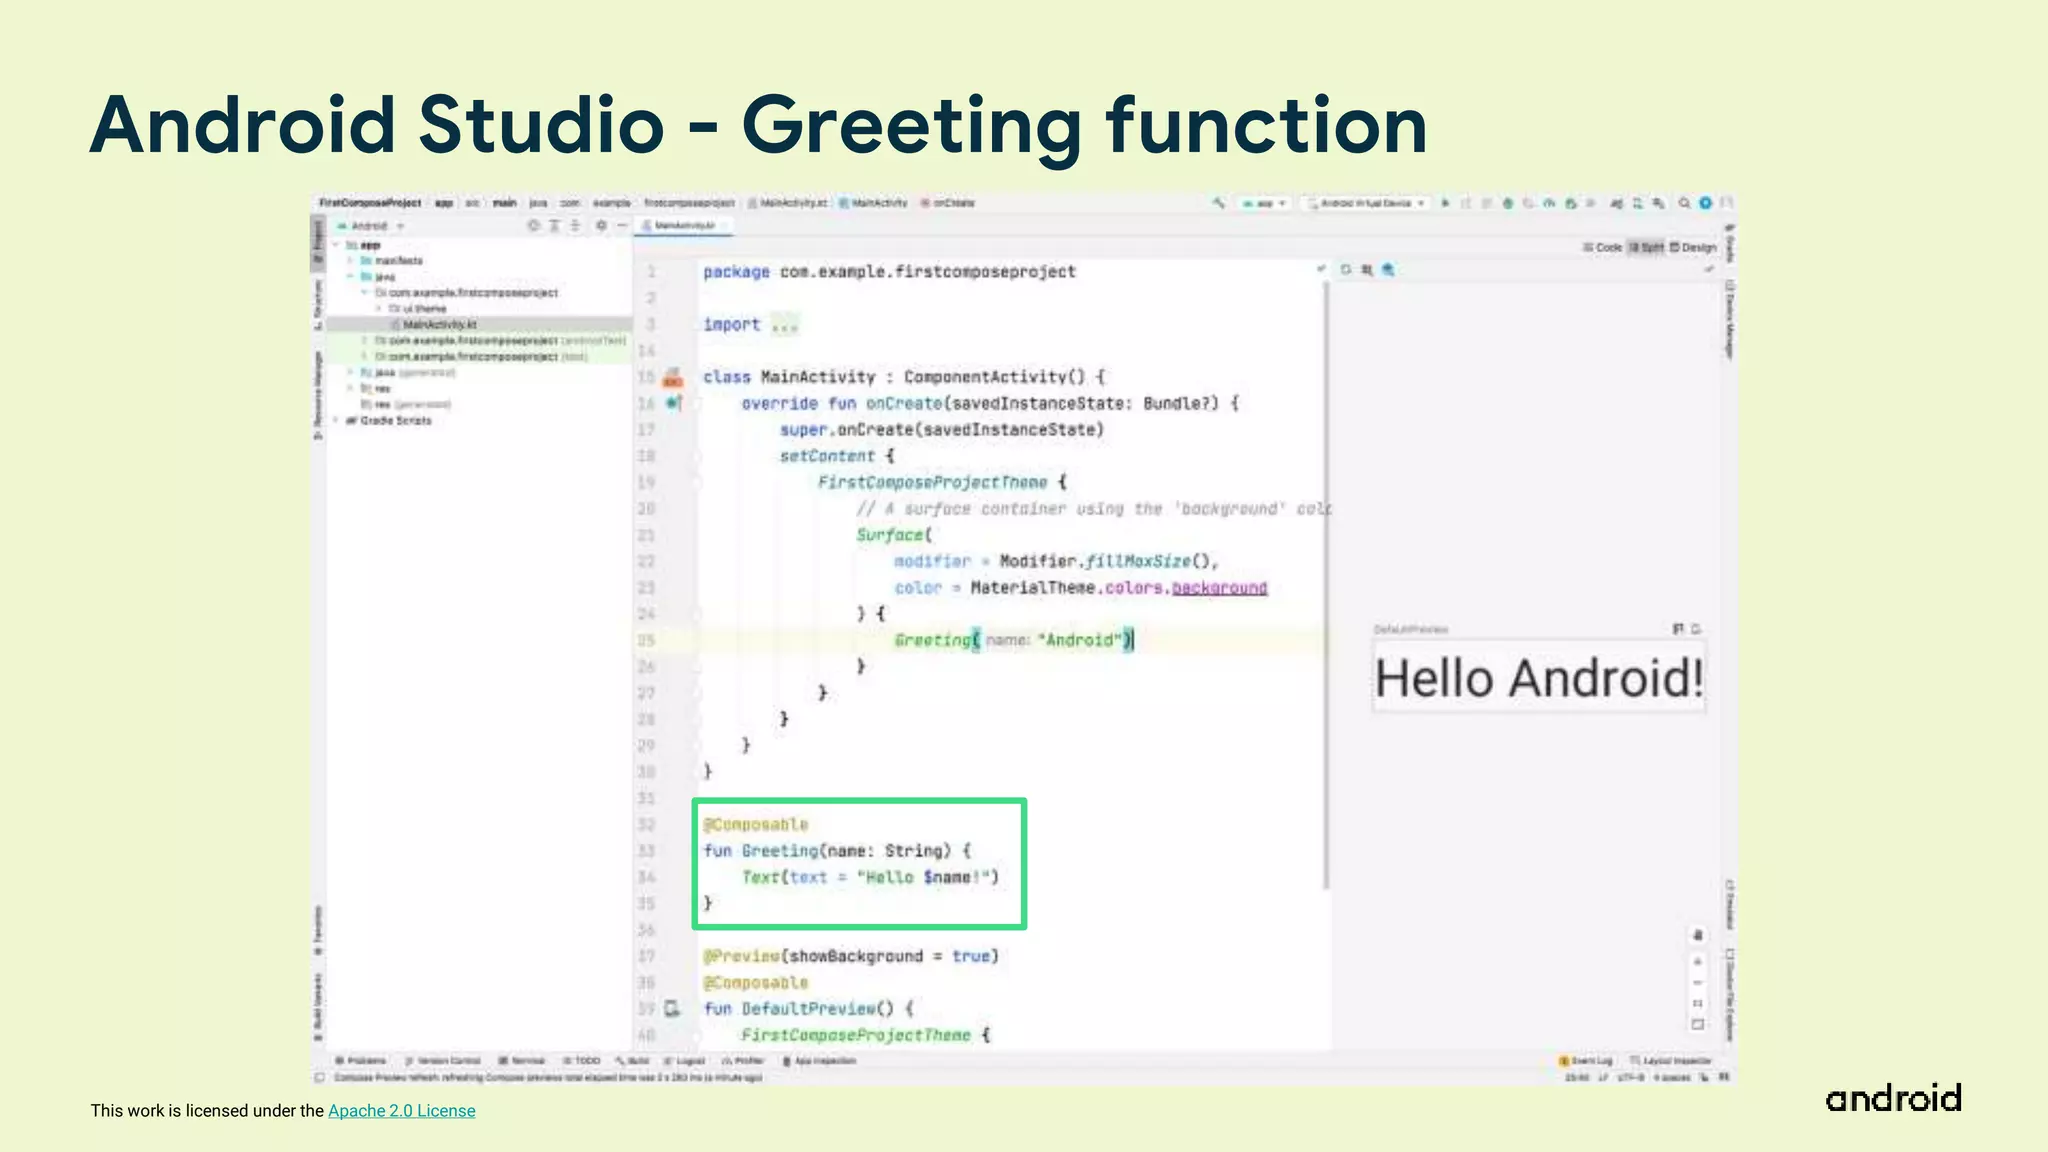
Android Studio - Greeting function
23.
This work islicensed under the Apache 2.0 License
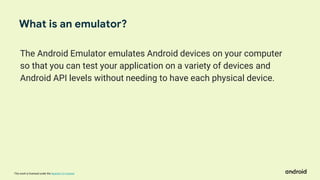
The Android Emulator emulates Android devices on your computer
so that you can test your application on a variety of devices and
Android API levels without needing to have each physical device.
What is an emulator?
24.
This work islicensed under the Apache 2.0 License
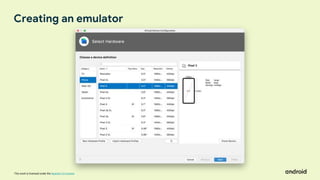
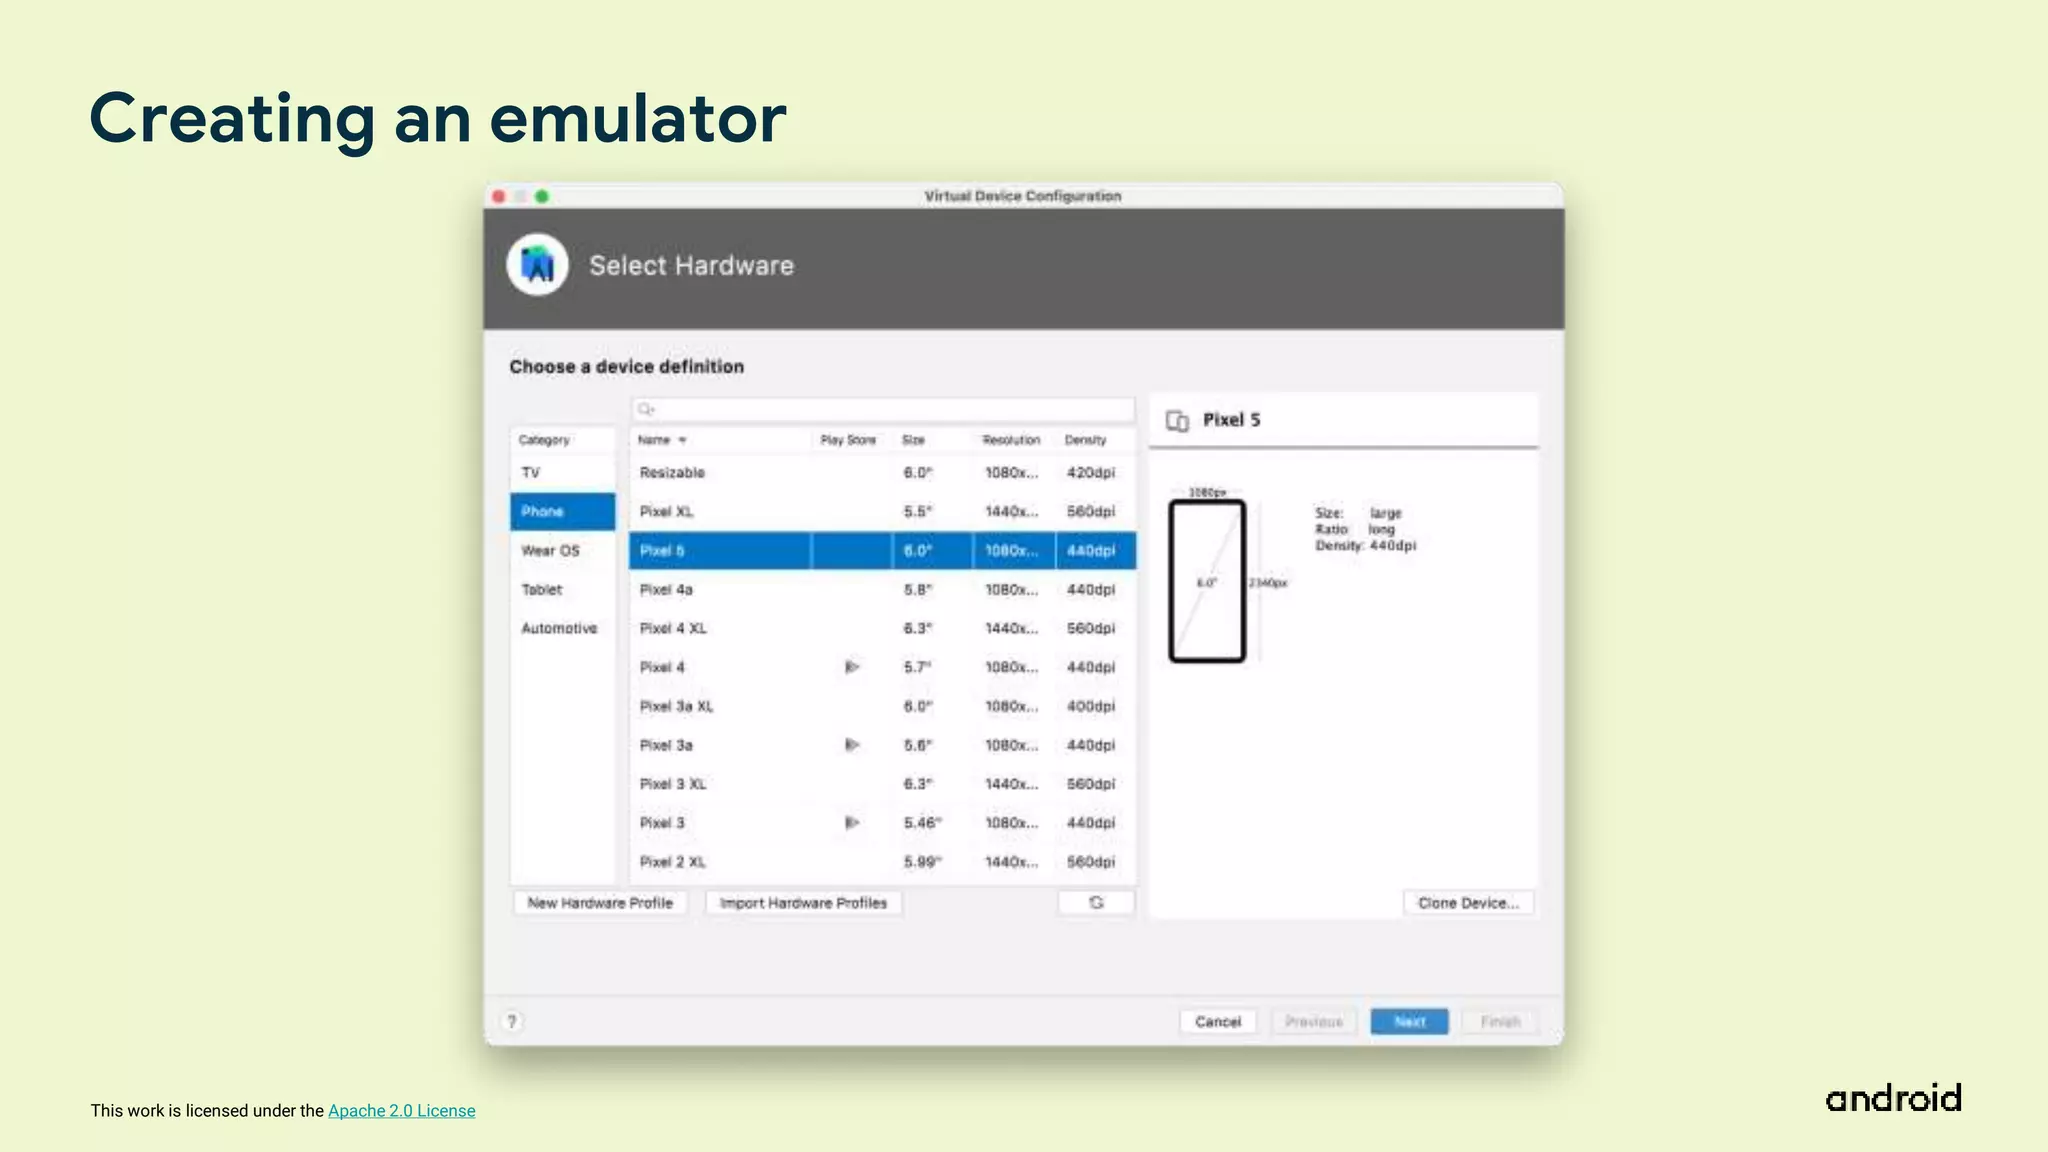
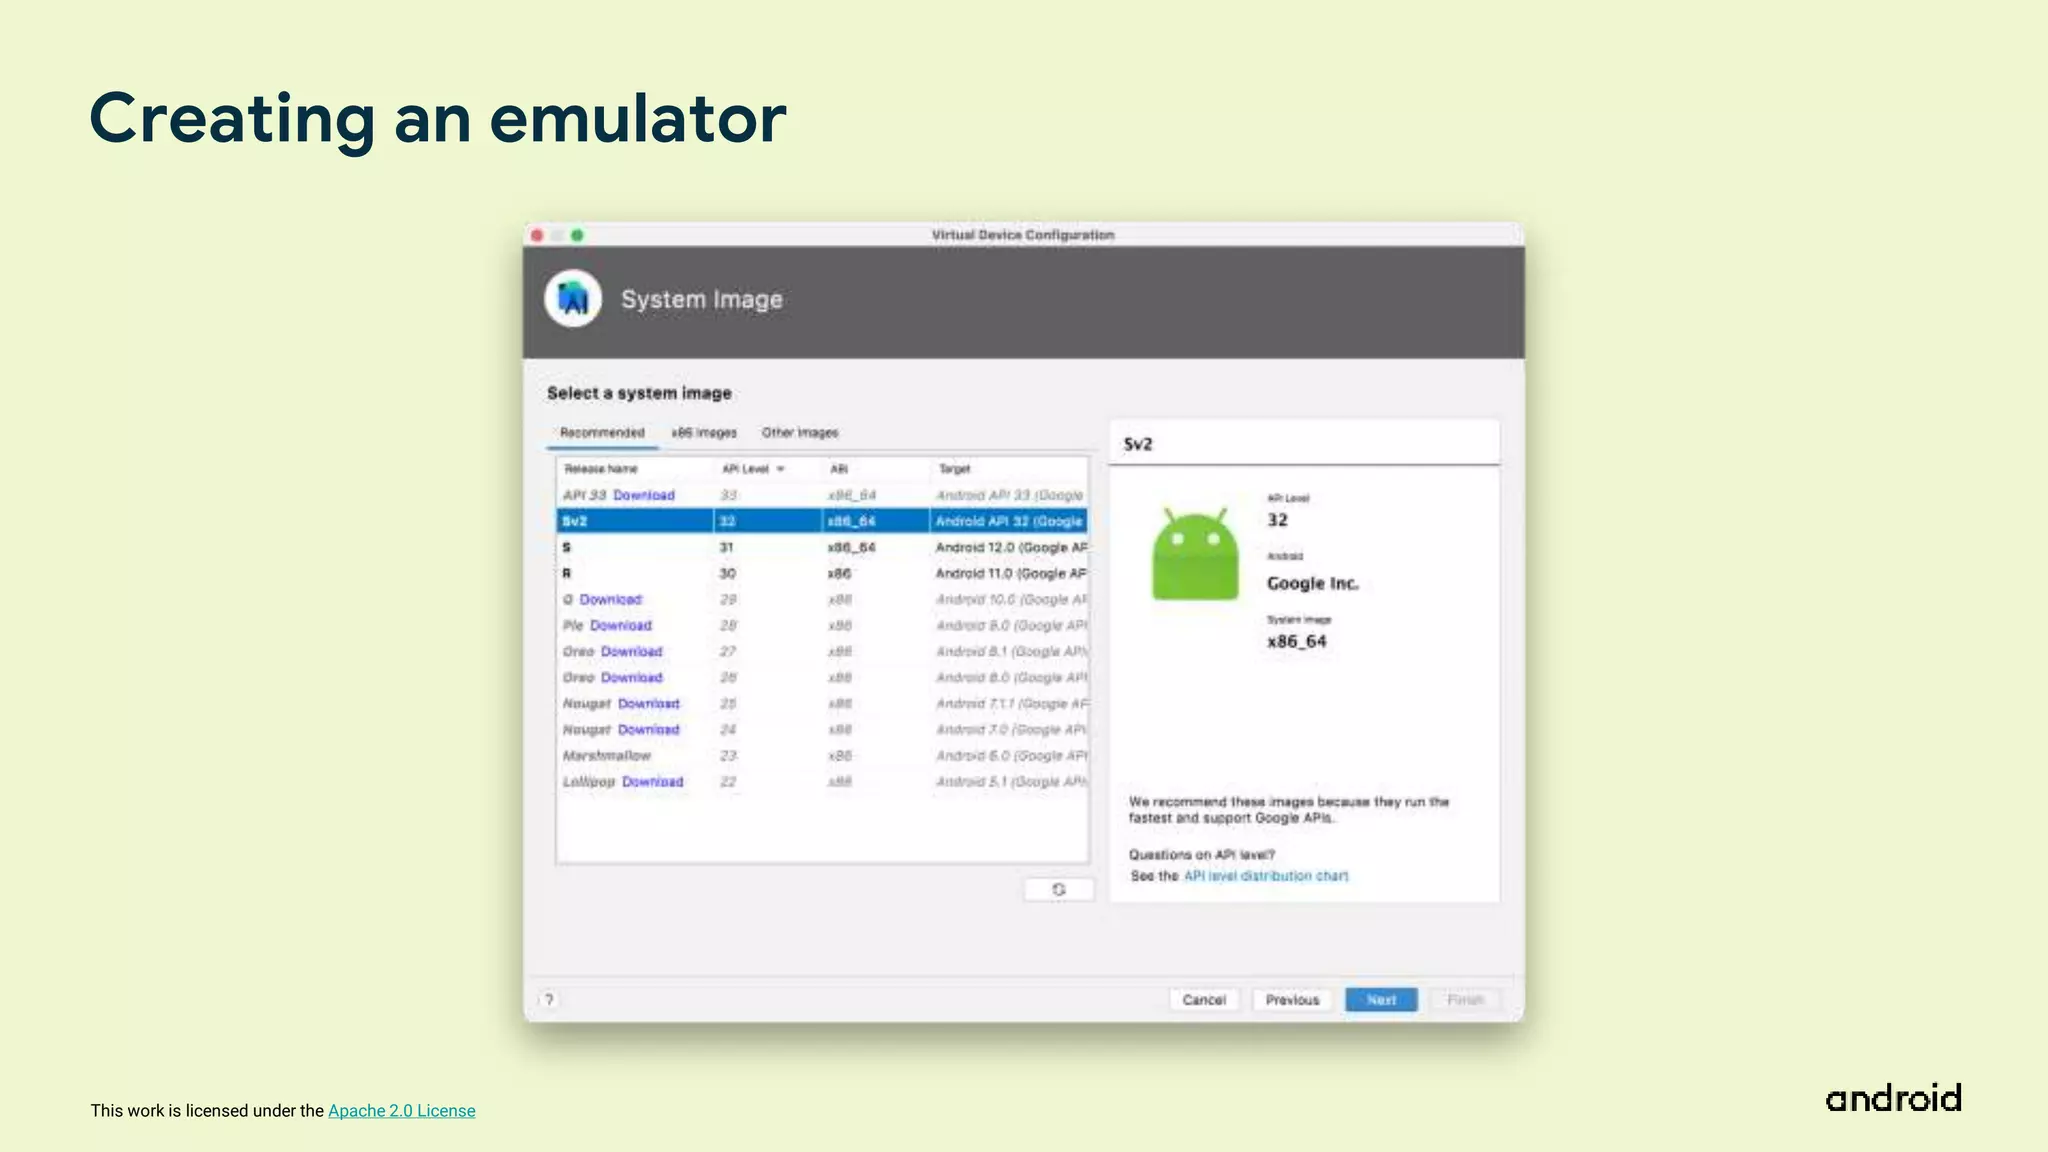
Creating an emulator
25.
This work islicensed under the Apache 2.0 License
Creating an emulator
26.
This work islicensed under the Apache 2.0 License
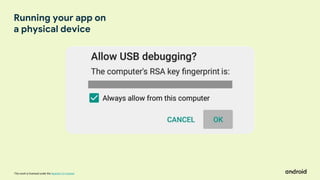
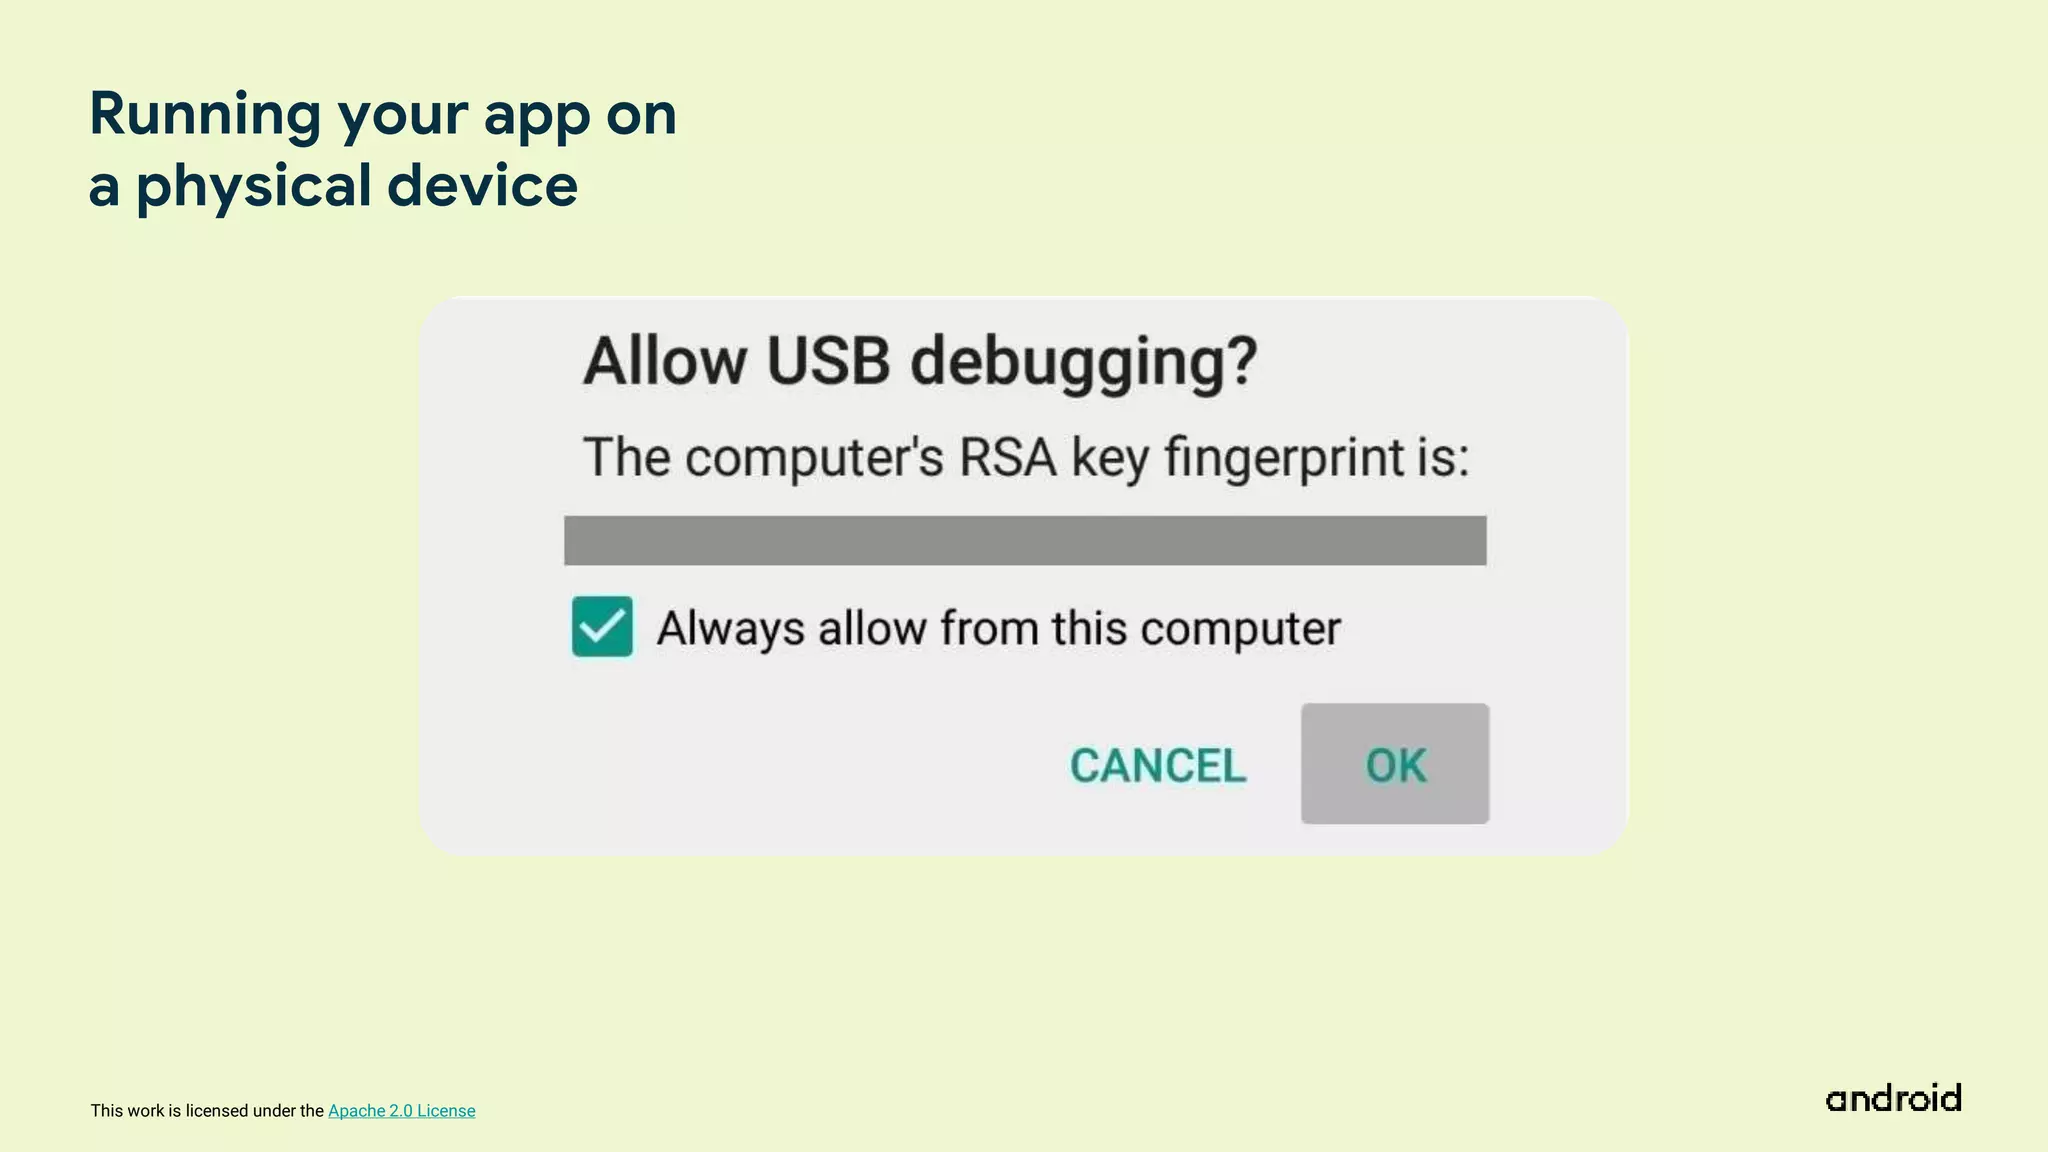
Running your app on
a physical device
27.
This work islicensed under the Apache 2.0 License
Android Project Structure
28.
This work islicensed under the Apache 2.0 License
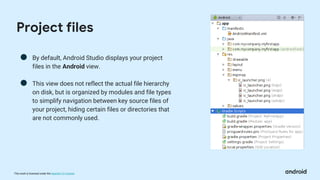
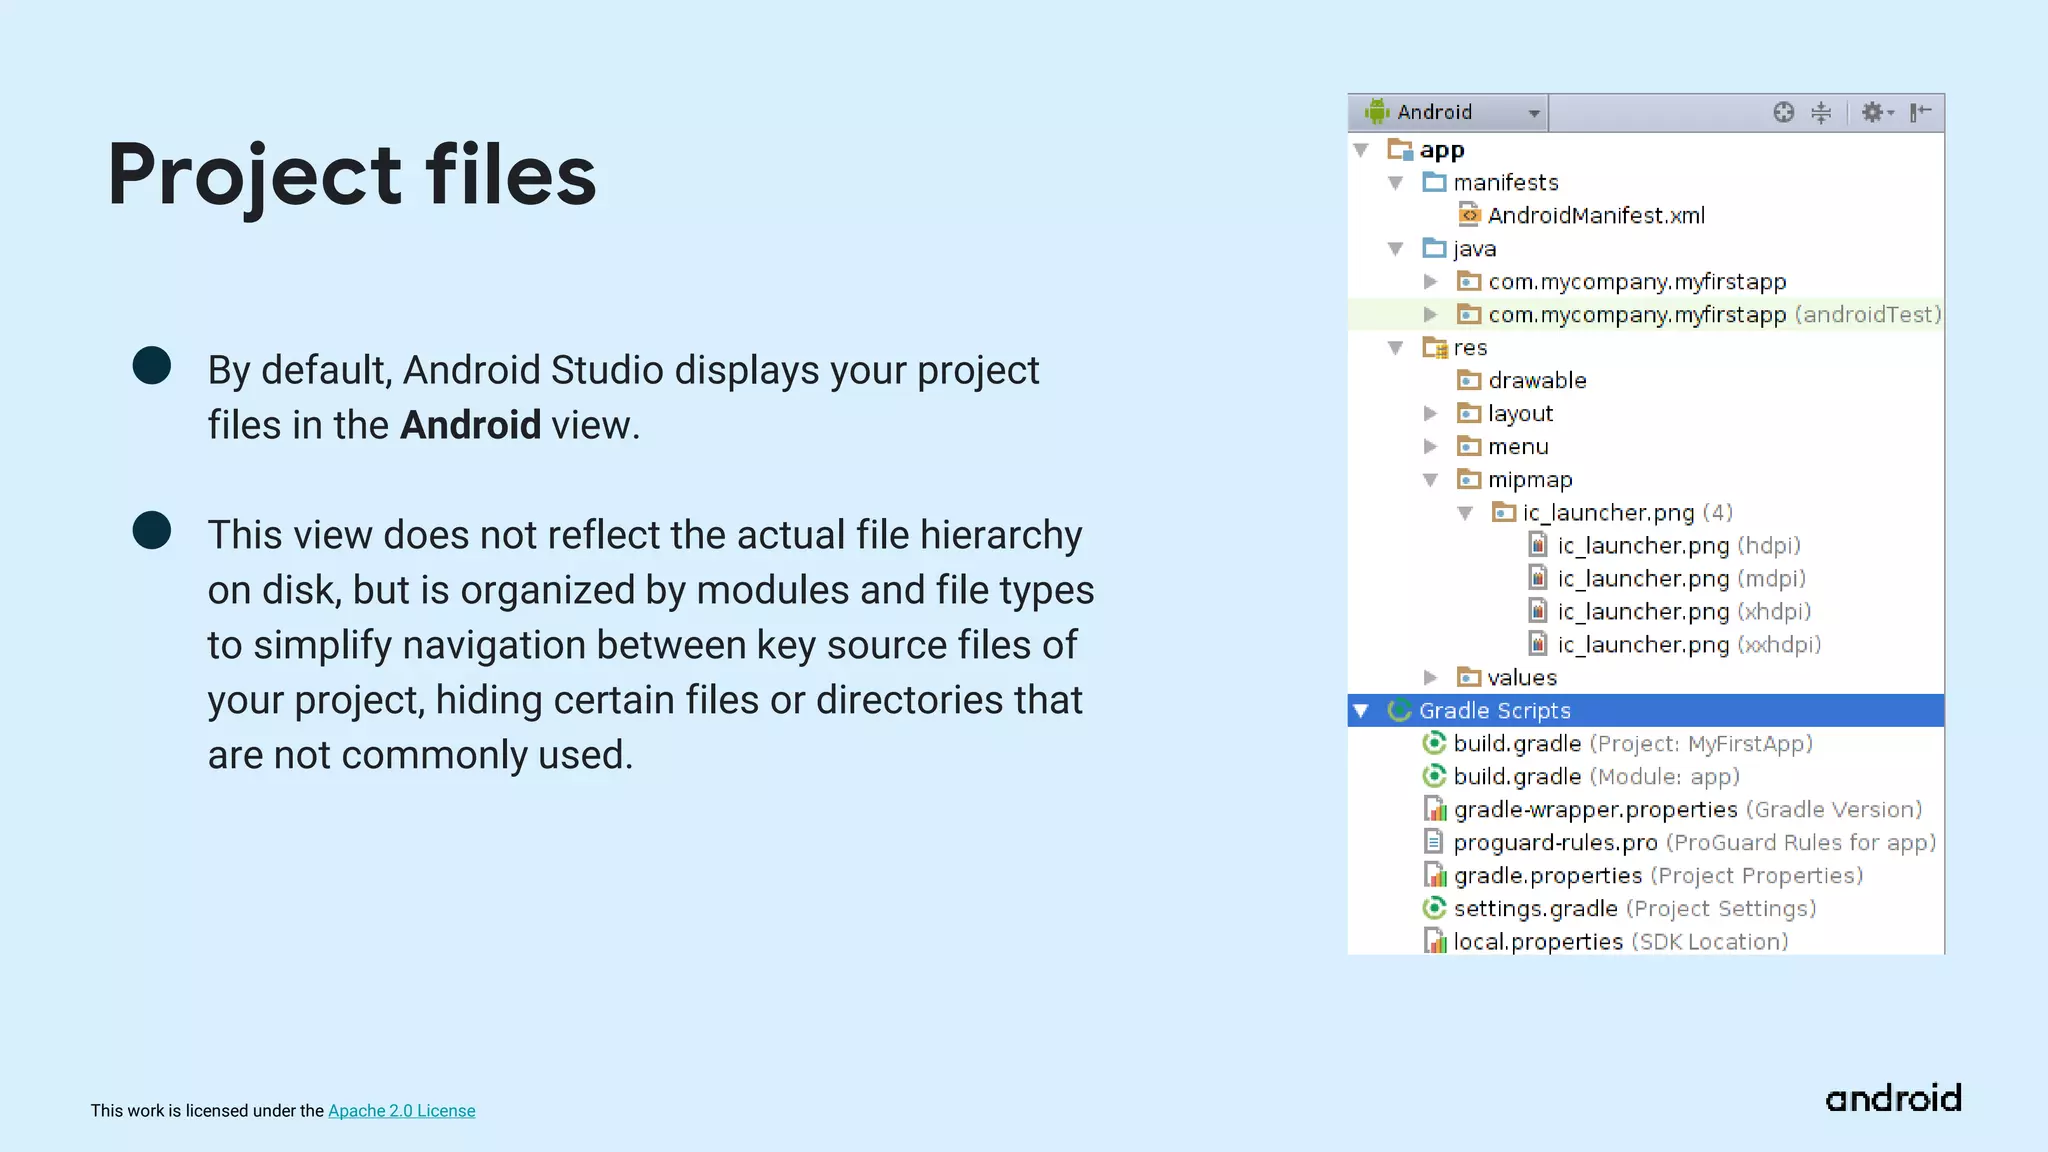
● By default, Android Studio displays your project
files in the Android view.
● This view does not reflect the actual file hierarchy
on disk, but is organized by modules and file types
to simplify navigation between key source files of
your project, hiding certain files or directories that
are not commonly used.
Project files
29.
This work islicensed under the Apache 2.0 License
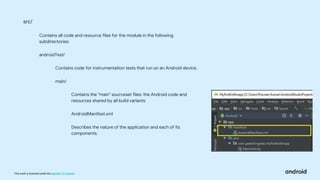
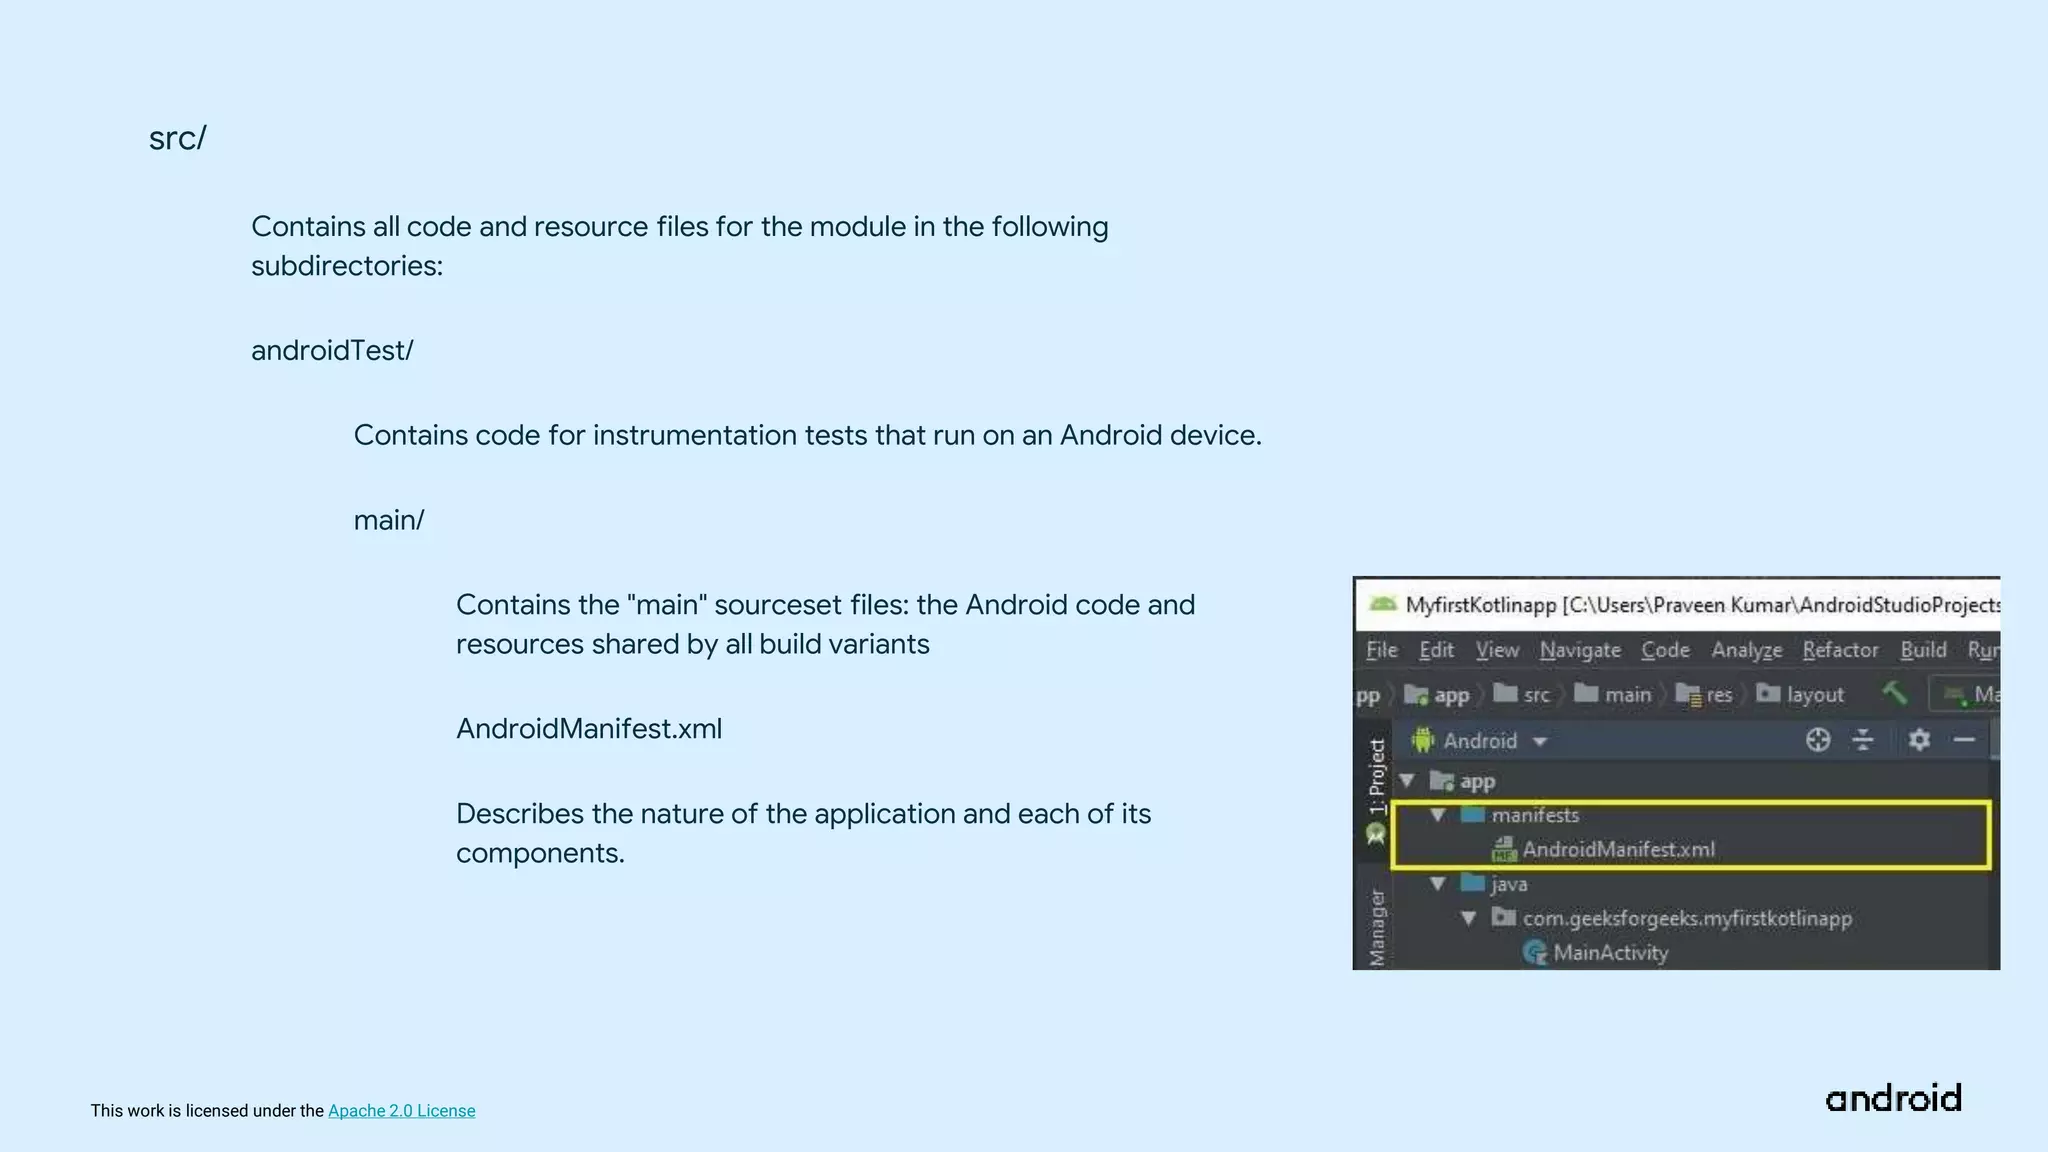
src/
Contains all code and resource files for the module in the following
subdirectories:
androidTest/
Contains code for instrumentation tests that run on an Android device.
main/
Contains the "main" sourceset files: the Android code and
resources shared by all build variants
AndroidManifest.xml
Describes the nature of the application and each of its
components.
30.
This work islicensed under the Apache 2.0 License
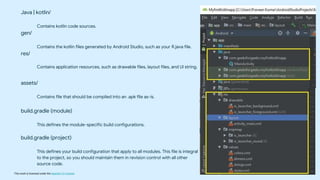
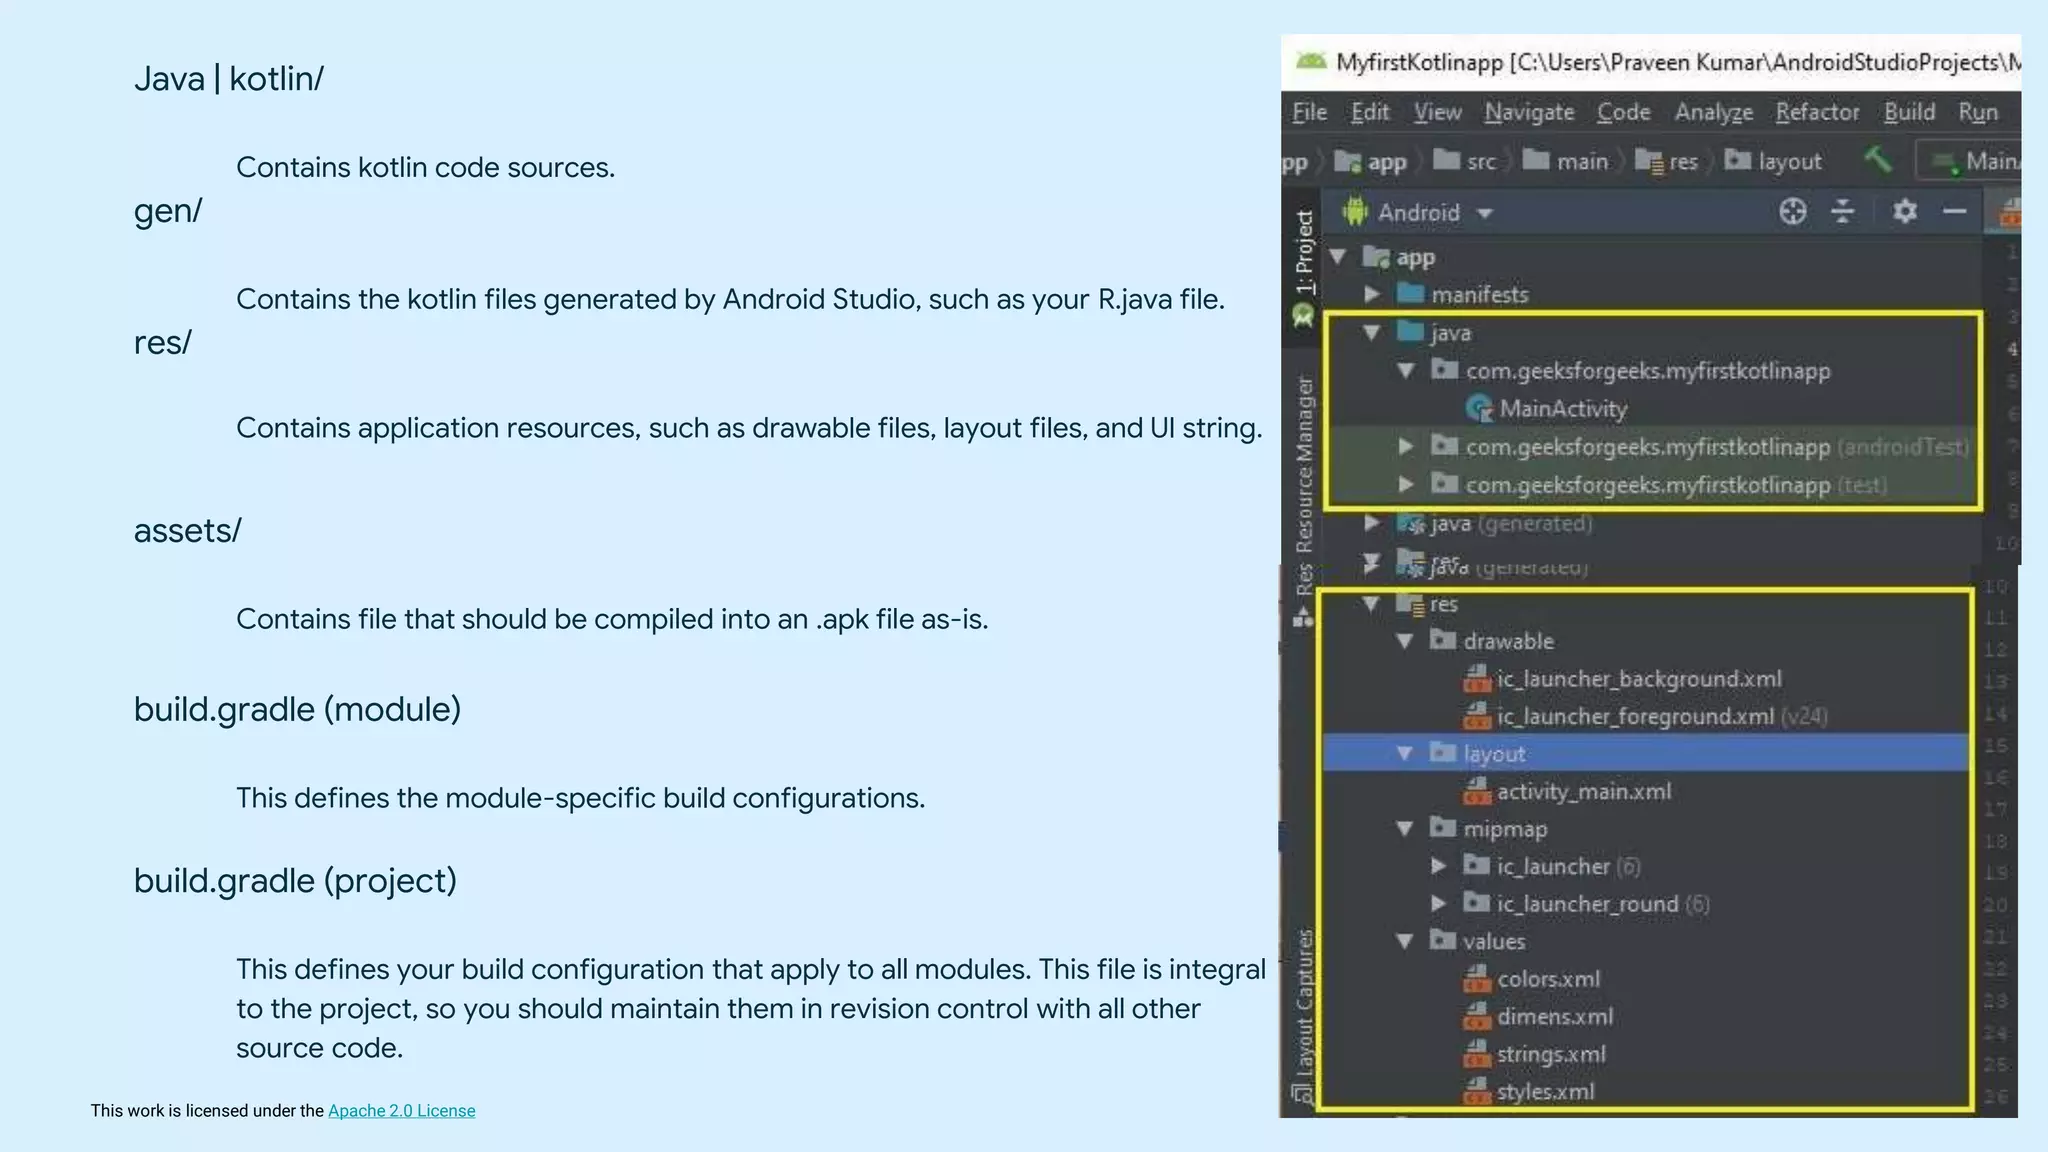
Java | kotlin/
Contains kotlin code sources.
gen/
Contains the kotlin files generated by Android Studio, such as your R.java file.
res/
Contains application resources, such as drawable files, layout files, and UI string.
assets/
Contains file that should be compiled into an .apk file as-is.
build.gradle (module)
This defines the module-specific build configurations.
build.gradle (project)
This defines your build configuration that apply to all modules. This file is integral
to the project, so you should maintain them in revision control with all other
source code.
This work islicensed under the Apache 2.0 License
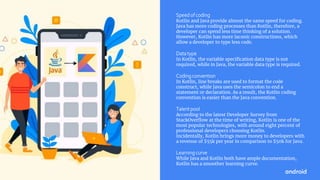
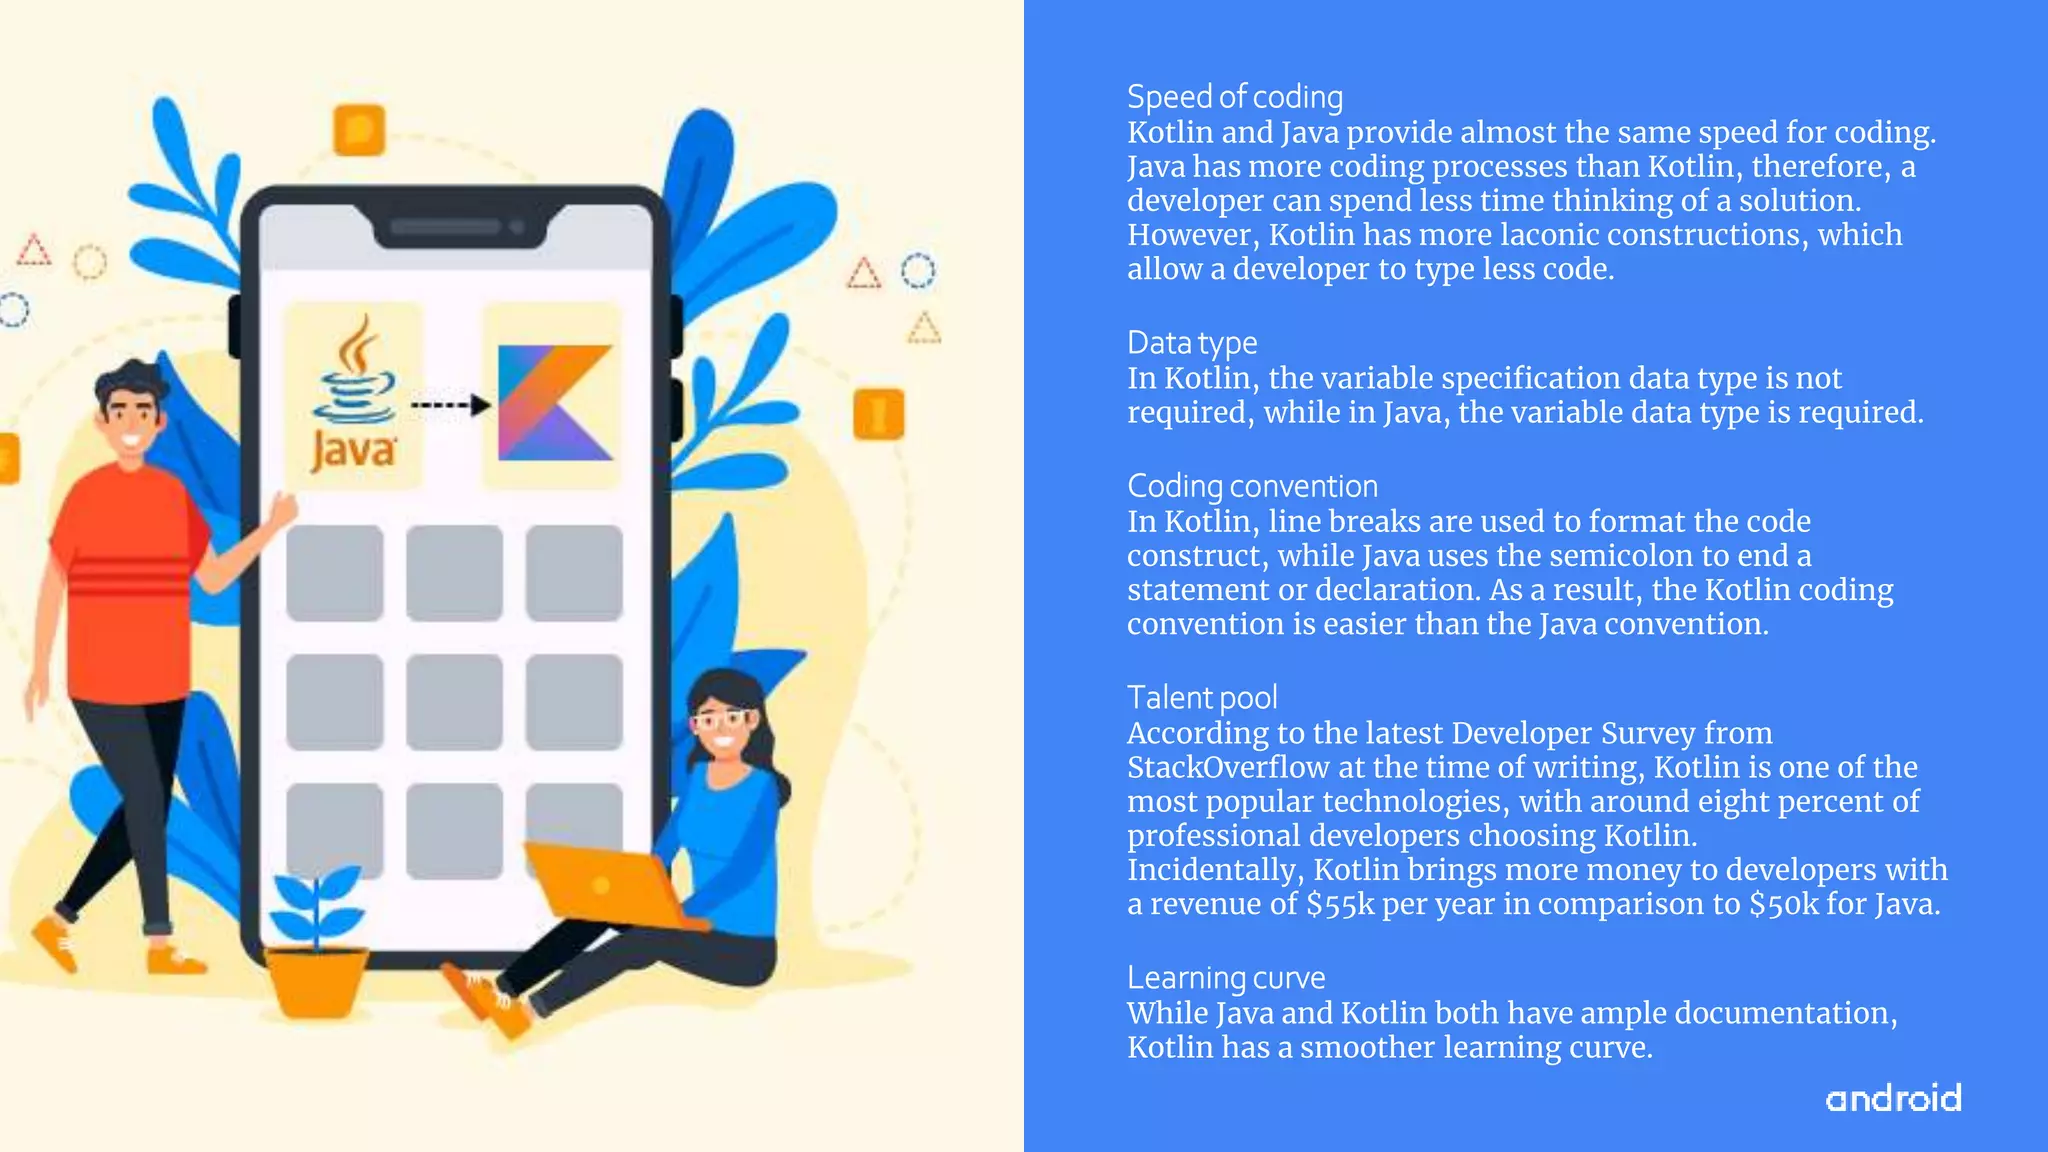
Speed of coding
Kotlin and Java provide almost the same speed for coding.
Java has more coding processes than Kotlin, therefore, a
developer can spend less time thinking of a solution.
However, Kotlin has more laconic constructions, which
allow a developer to type less code.
Datatype
In Kotlin, the variable specification data type is not
required, while in Java, the variable data type is required.
Coding convention
In Kotlin, line breaks are used to format the code
construct, while Java uses the semicolon to end a
statement or declaration. As a result, the Kotlin coding
convention is easier than the Java convention.
Talent pool
According to the latest Developer Survey from
StackOverflow at the time of writing, Kotlin is one of the
most popular technologies, with around eight percent of
professional developers choosing Kotlin.
Incidentally, Kotlin brings more money to developers with
a revenue of $55k per year in comparison to $50k for Java.
Learning curve
While Java and Kotlin both have ample documentation,
Kotlin has a smoother learning curve.
34.
This work islicensed under the Apache 2.0 License
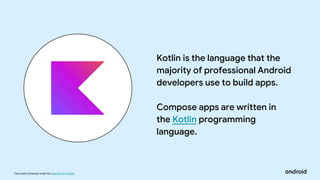
Kotlin is the language that the
majority of professional Android
developers use to build apps.
Compose apps are written in
the Kotlin programming
language.
35.
This work islicensed under the Apache 2.0 License
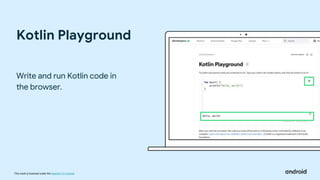
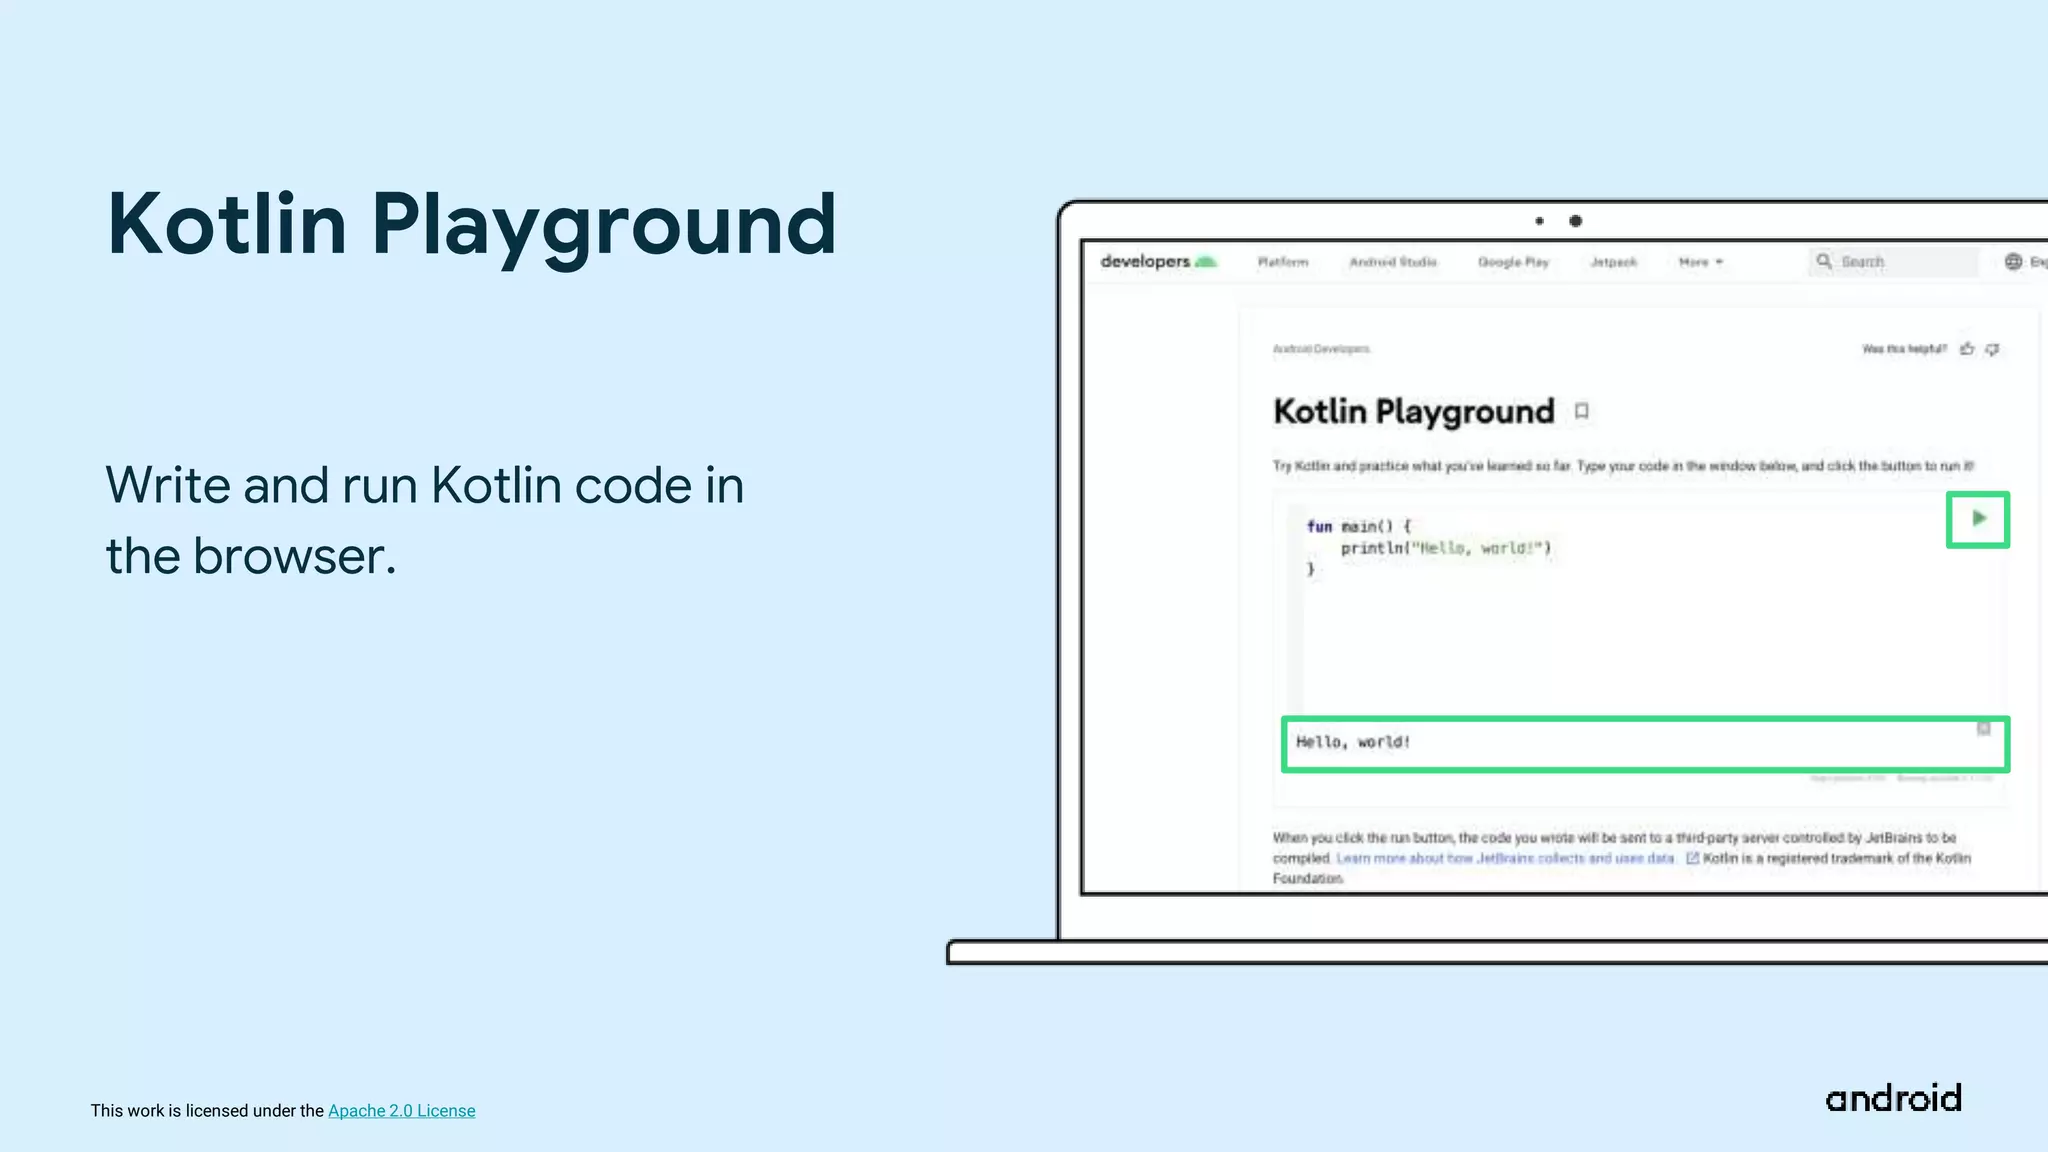
Kotlin Playground
Write and run Kotlin code in
the browser.
36.
This work islicensed under the Apache 2.0 License
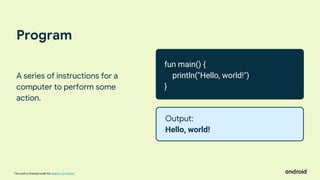
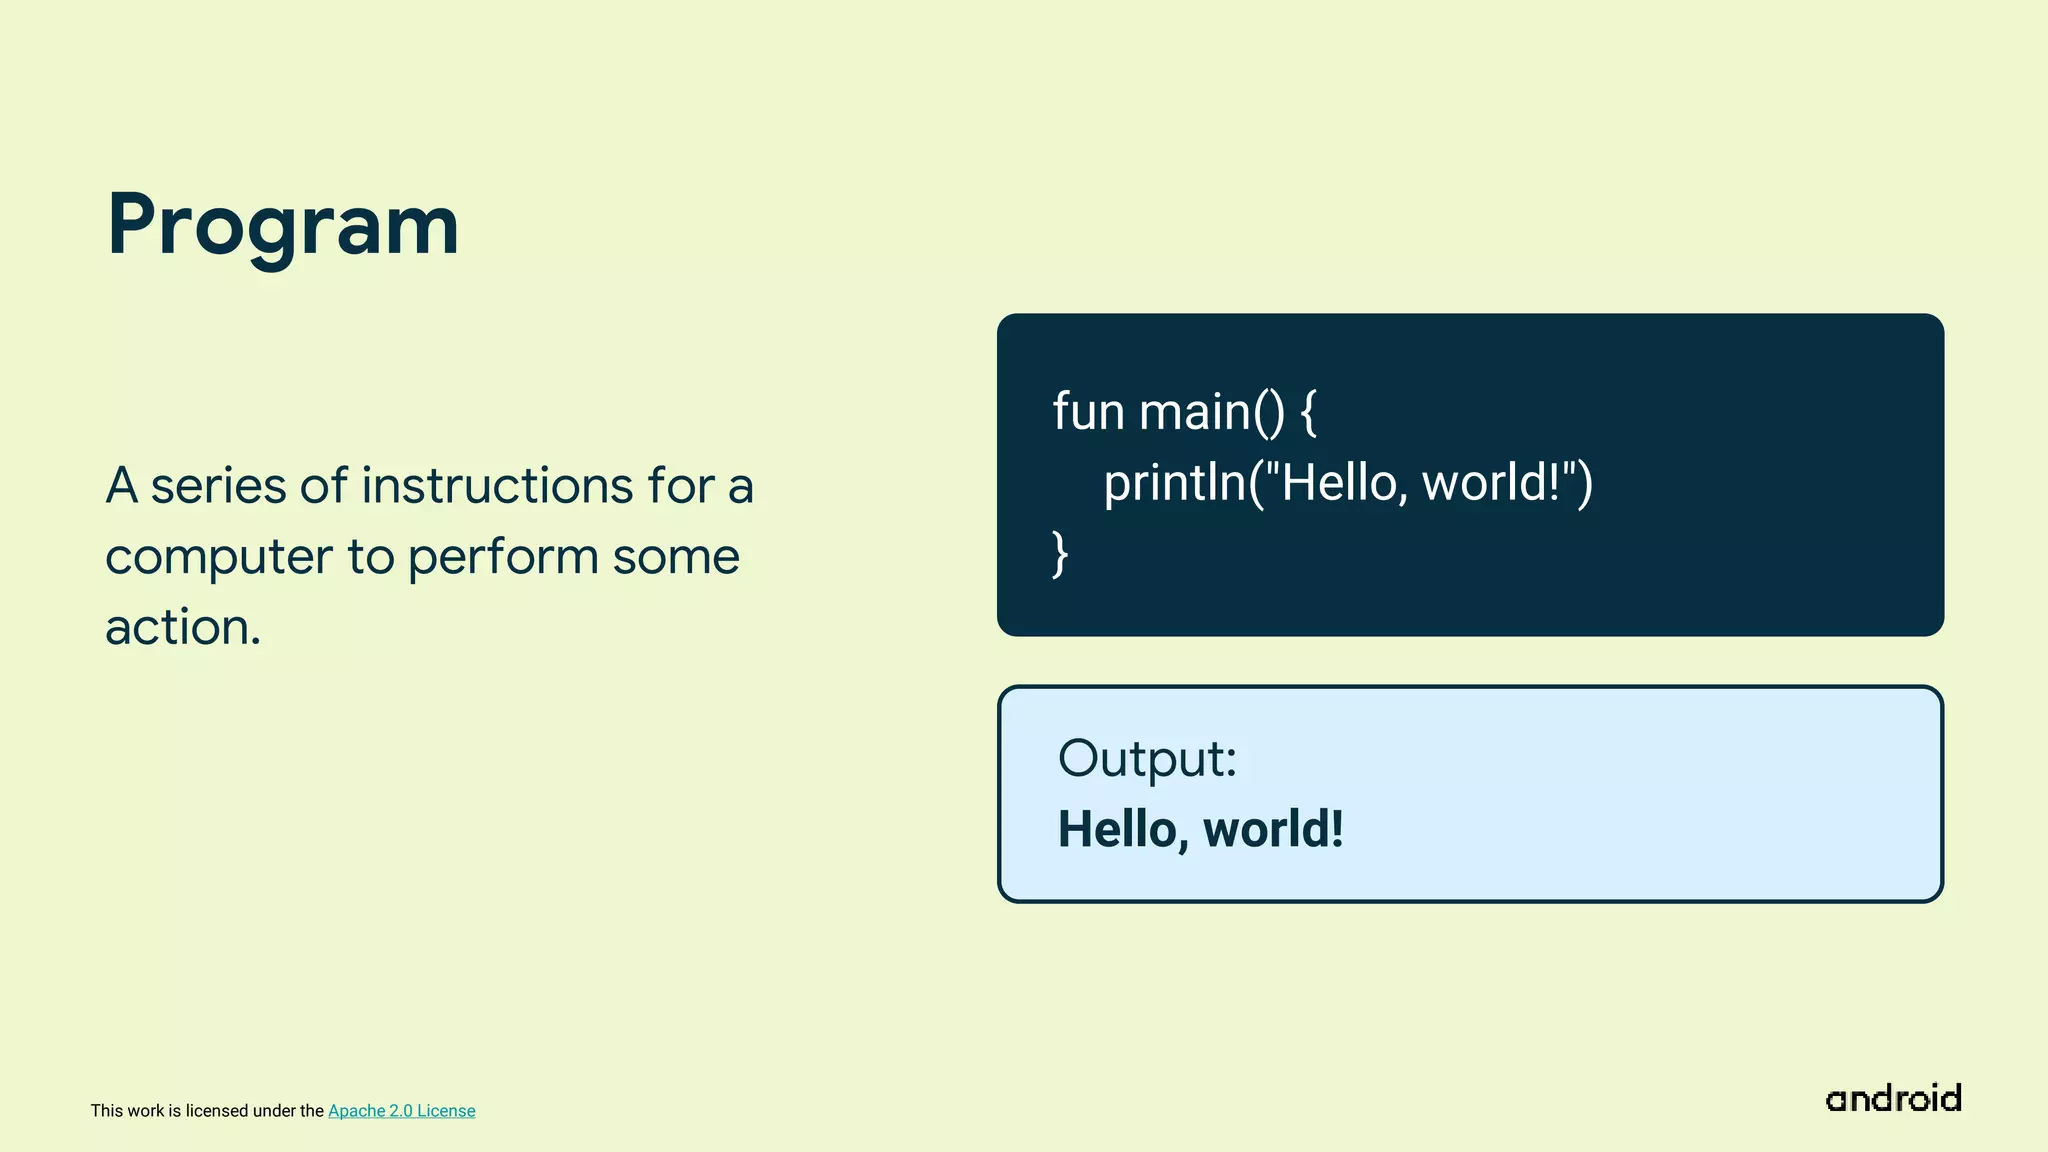
Program
A series of instructions for a
computer to perform some
action.
fun main() {
println("Hello, world!")
}
Output:
Hello, world!
37.
This work islicensed under the Apache 2.0 License
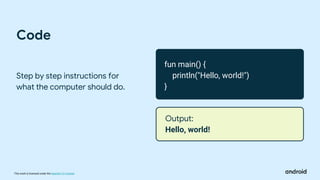
Code
Step by step instructions for
what the computer should do.
fun main() {
println("Hello, world!")
}
Output:
Hello, world!
38.
This work islicensed under the Apache 2.0 License
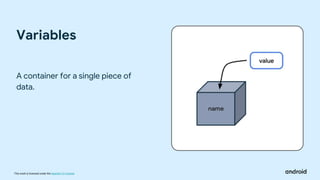
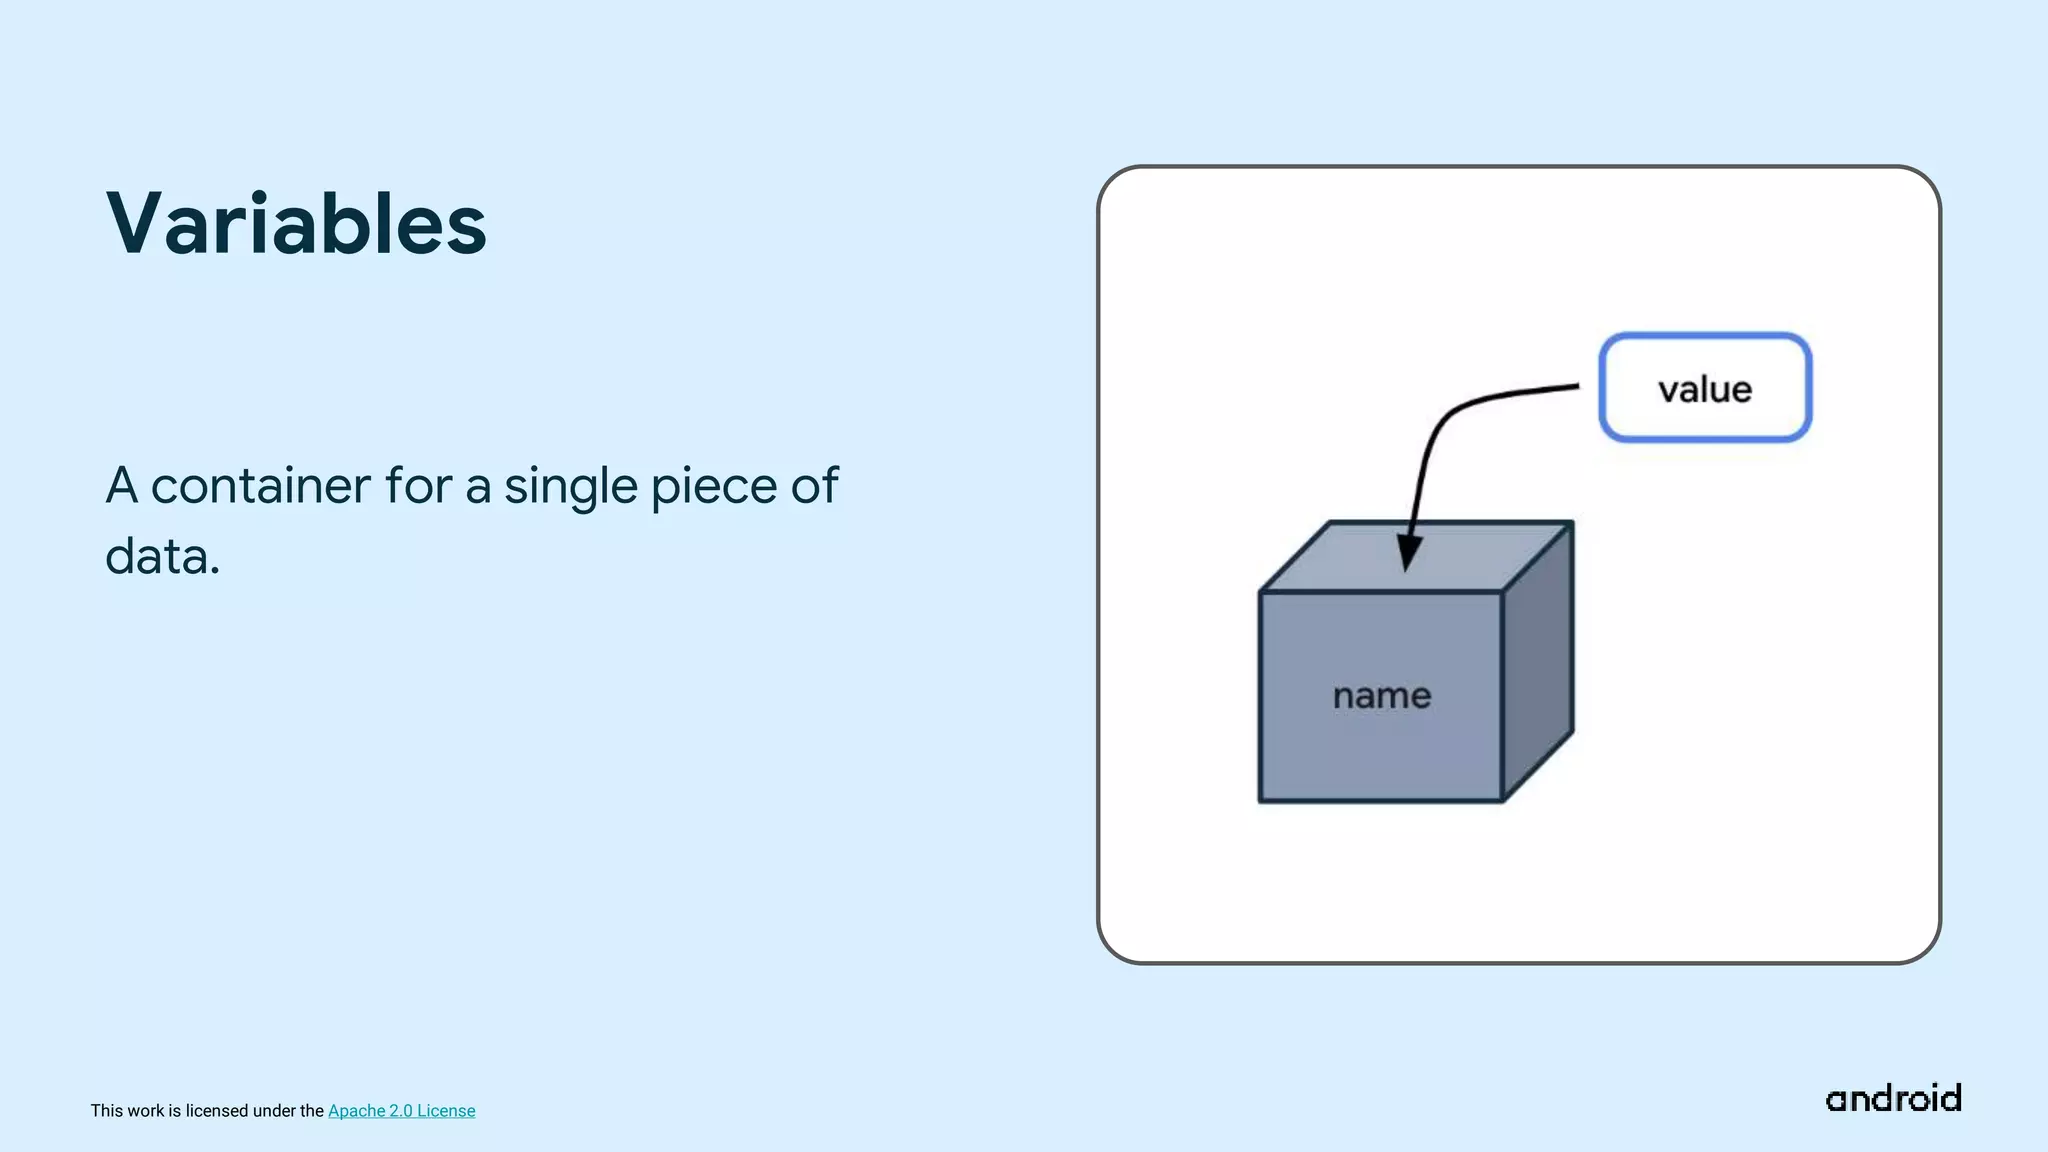
A container for a single piece of
data.
Variables
39.
This work islicensed under the Apache 2.0 License
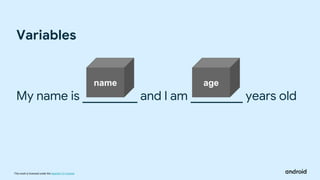
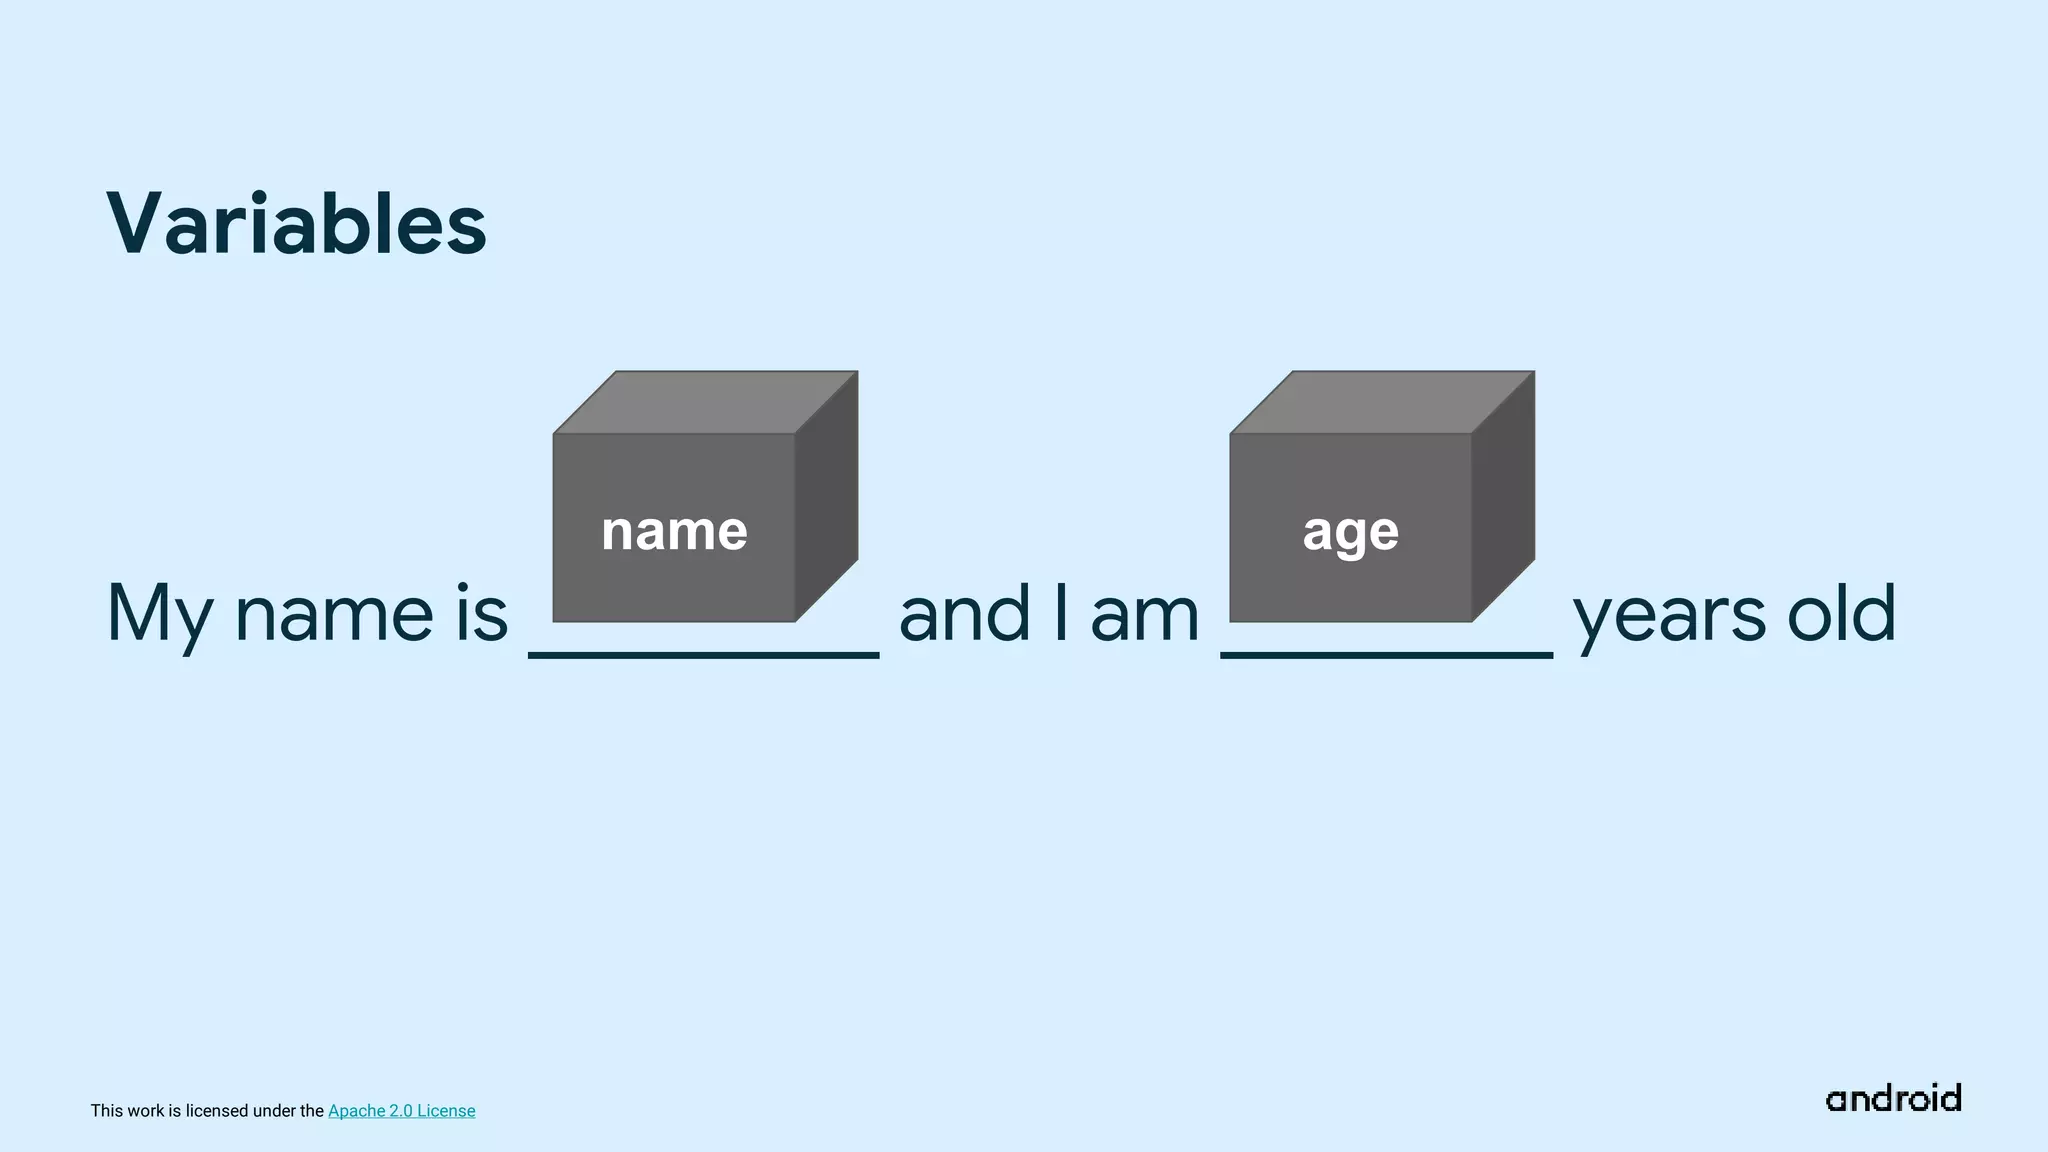
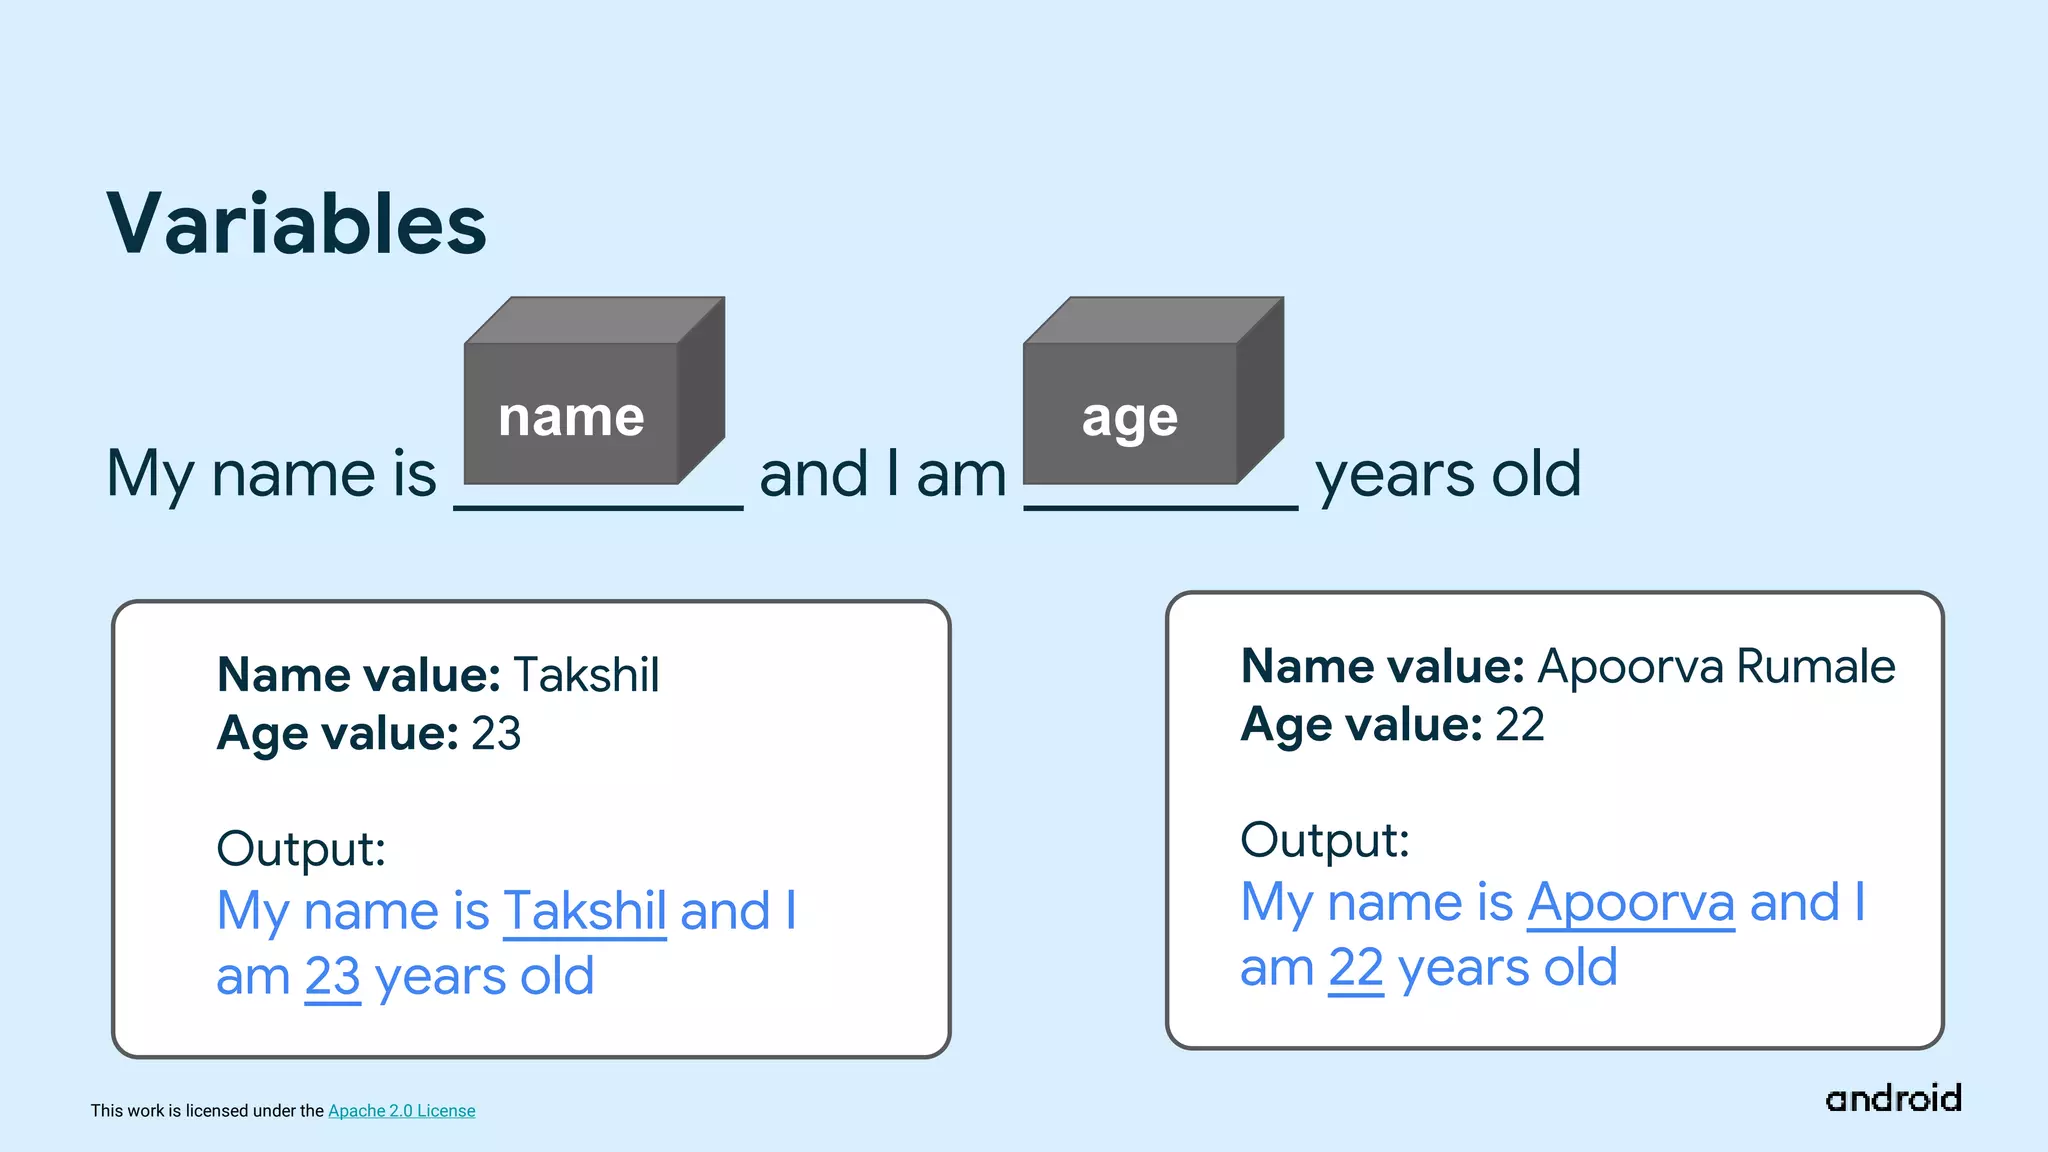
My name is and I am years old
Variables
name age
40.
This work islicensed under the Apache 2.0 License
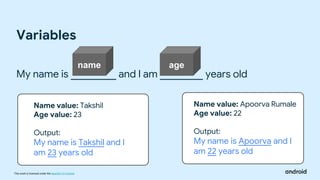
My name is and I am years old
Variables
Name value: Takshil
Age value: 23
Output:
My name is Takshil and I
am 23 years old
Name value: Apoorva Rumale
Age value: 22
Output:
My name is Apoorva and I
am 22 years old
name age
41.
This work islicensed under the Apache 2.0 License
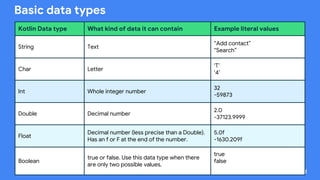
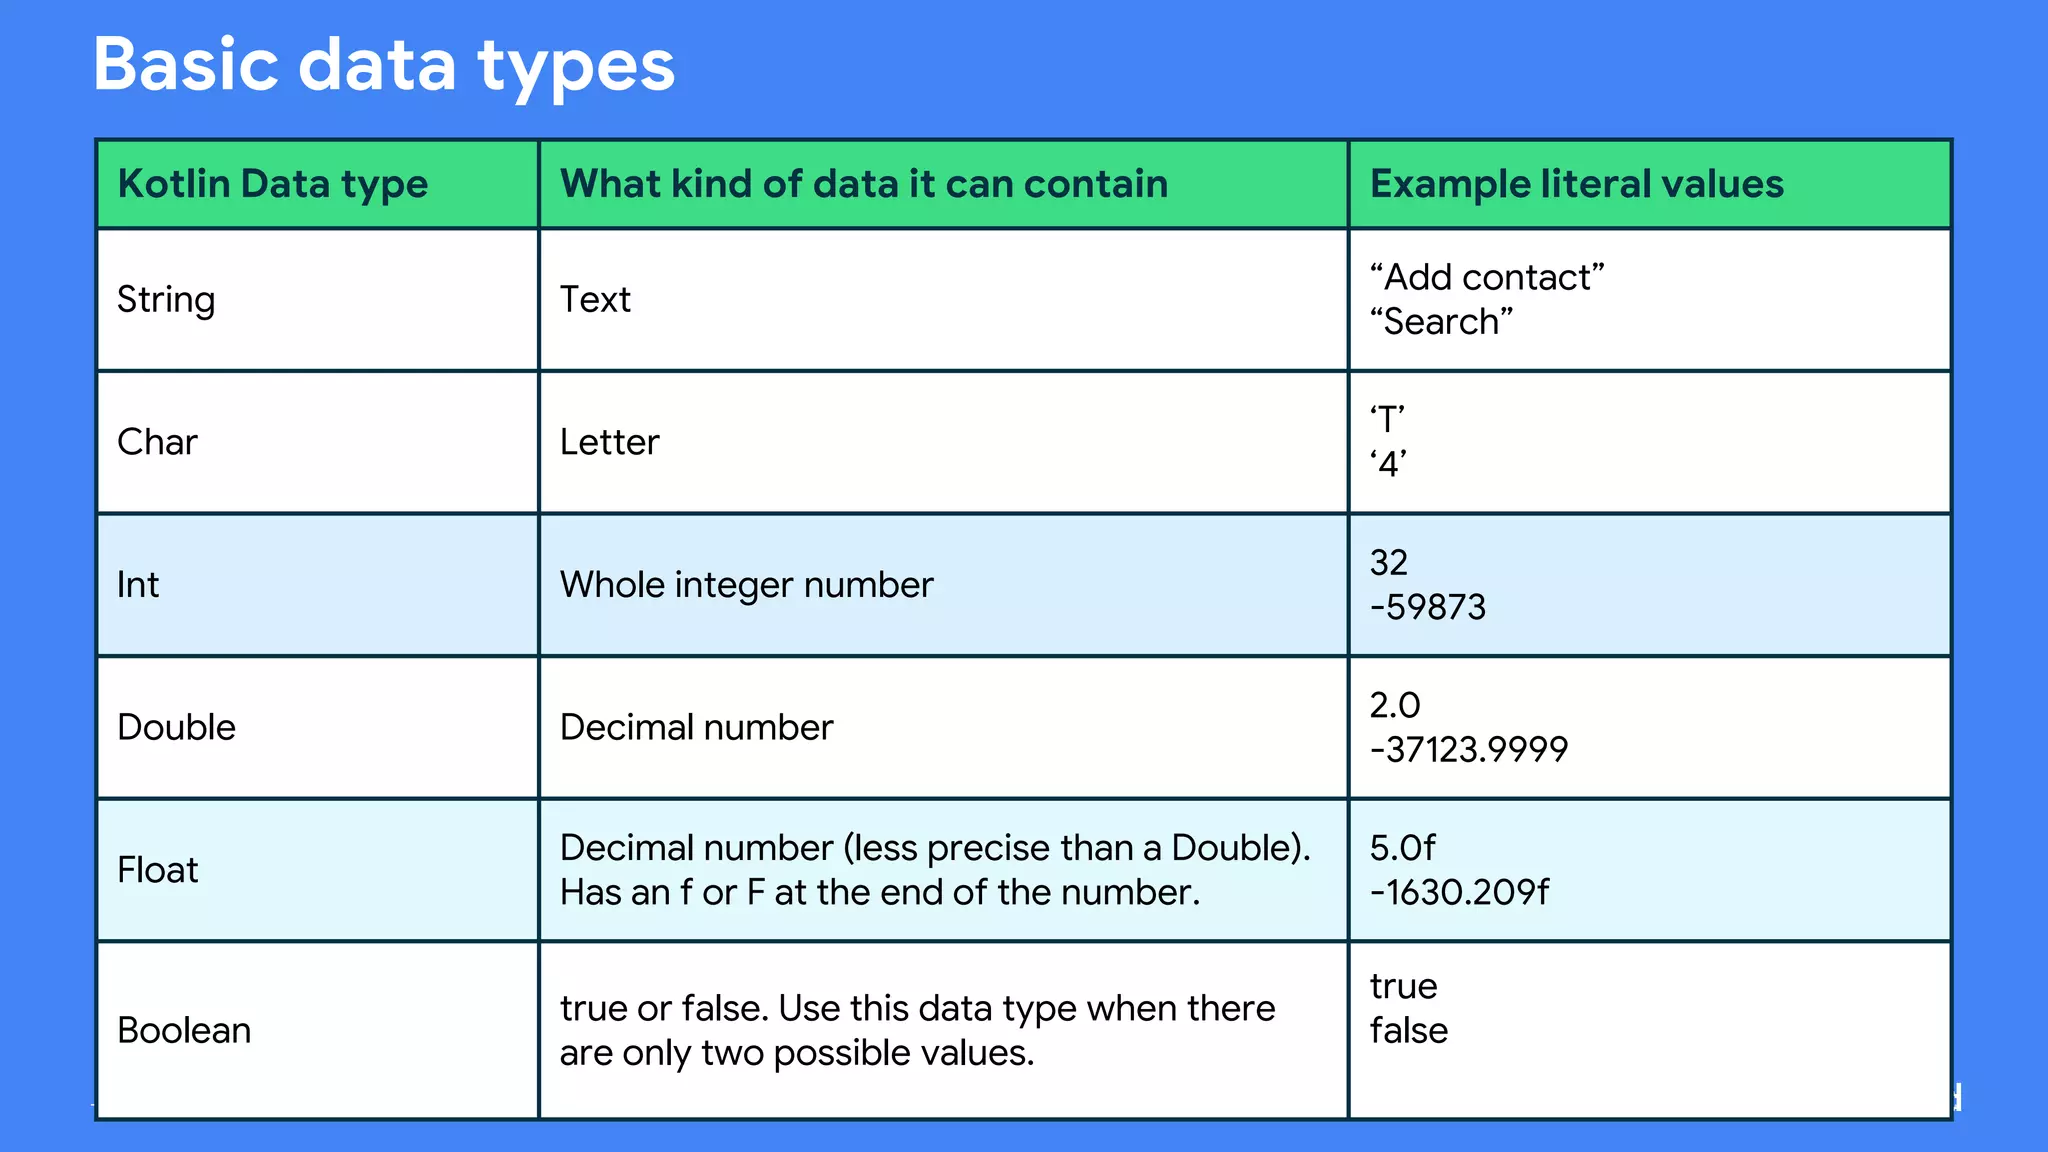
Basic data types
Kotlin Data type What kind of data it can contain Example literal values
String Text
“Add contact”
“Search”
Char Letter
‘T’
‘4’
Int Whole integer number
32
-59873
Double Decimal number
2.0
-37123.9999
Float
Decimal number (less precise than a Double).
Has an f or F at the end of the number.
5.0f
-1630.209f
Boolean
true or false. Use this data type when there
are only two possible values.
true
false
42.
This work islicensed under the Apache 2.0 License
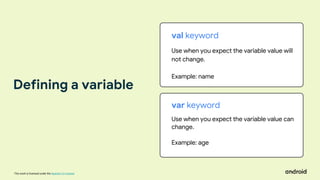
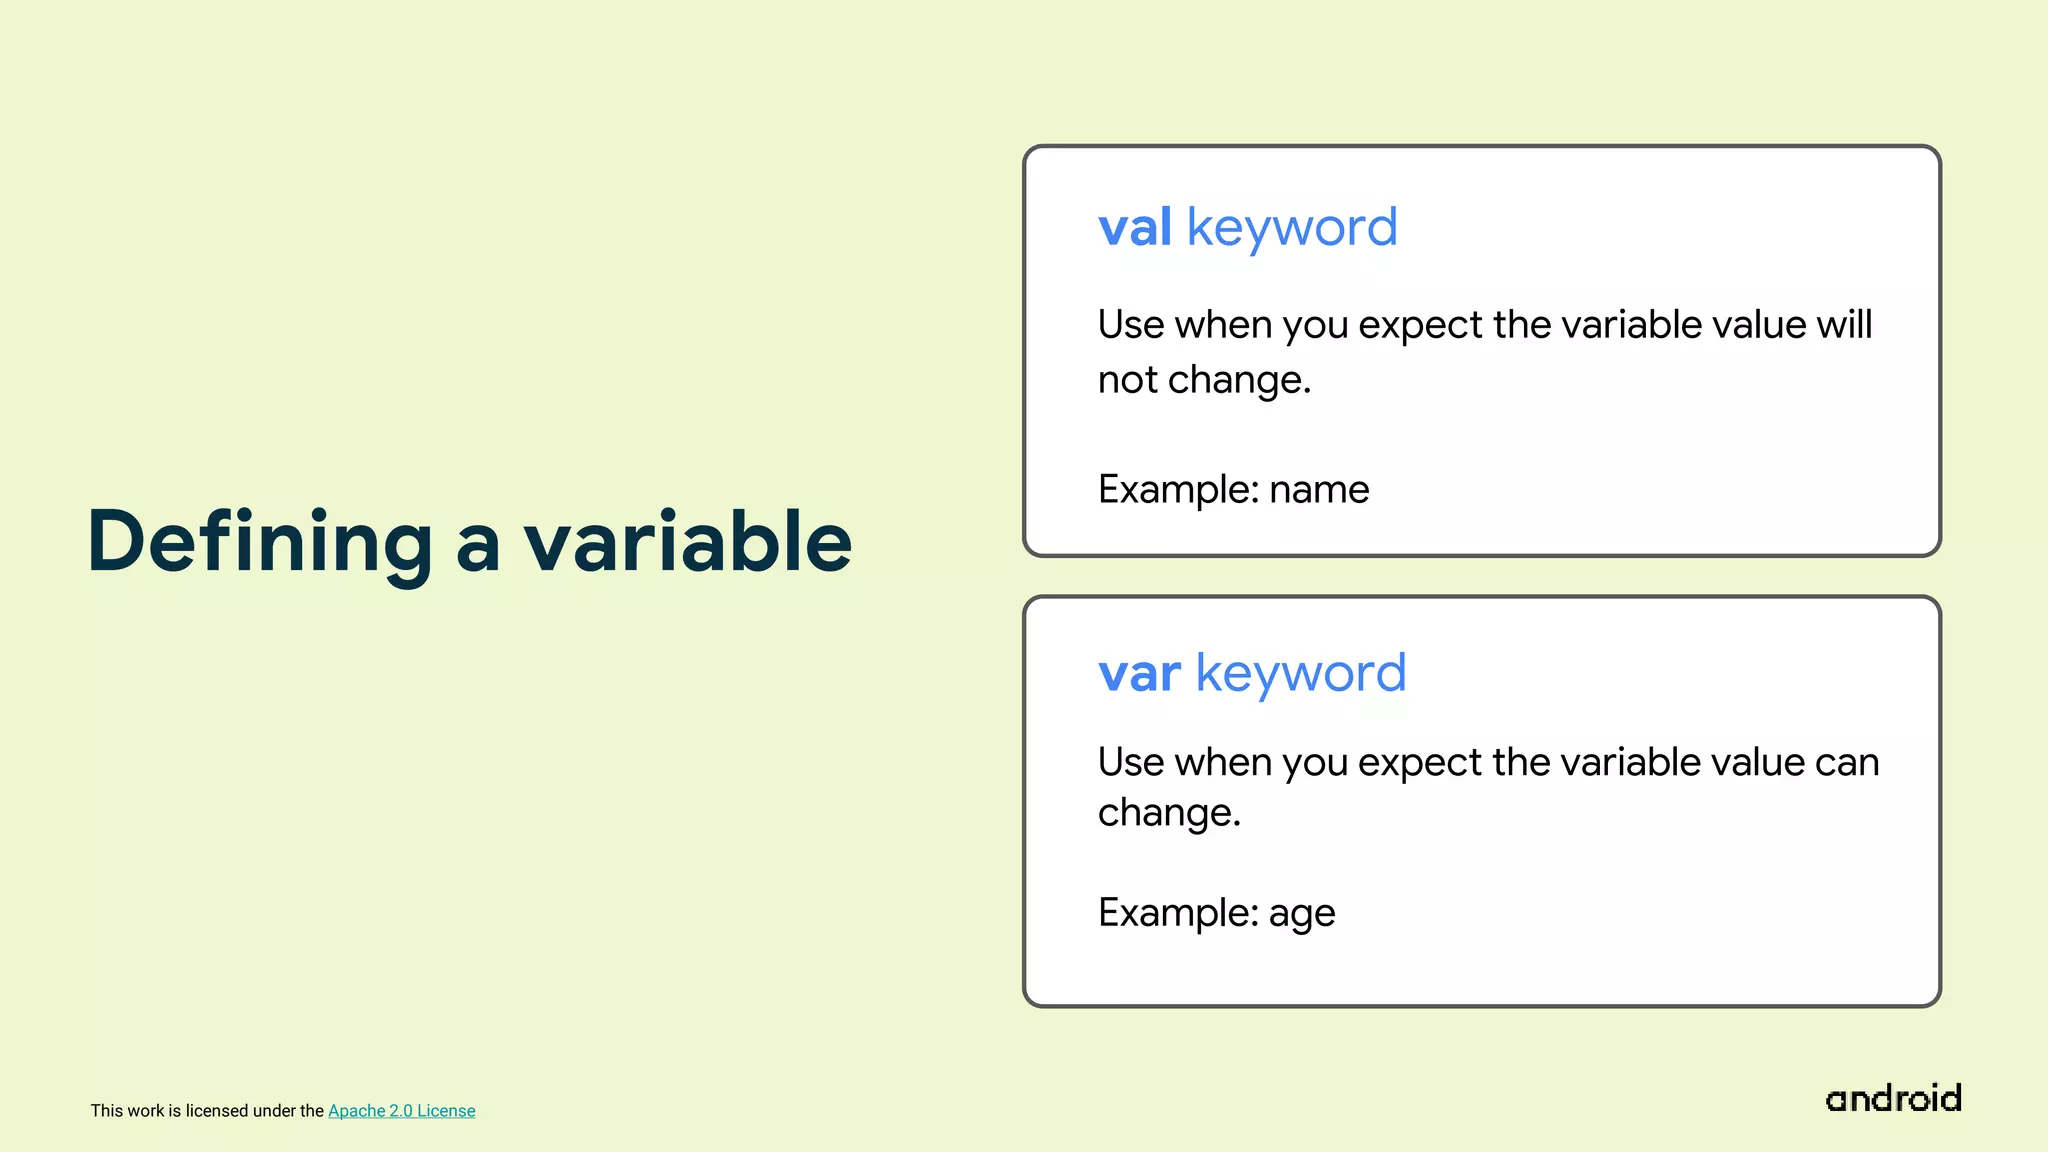
val keyword
Use when you expect the variable value will
not change.
Example: name
var keyword
Use when you expect the variable value can
change.
Example: age
Defining a variable
43.
This work islicensed under the Apache 2.0 License
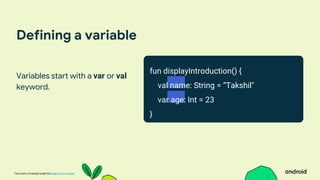
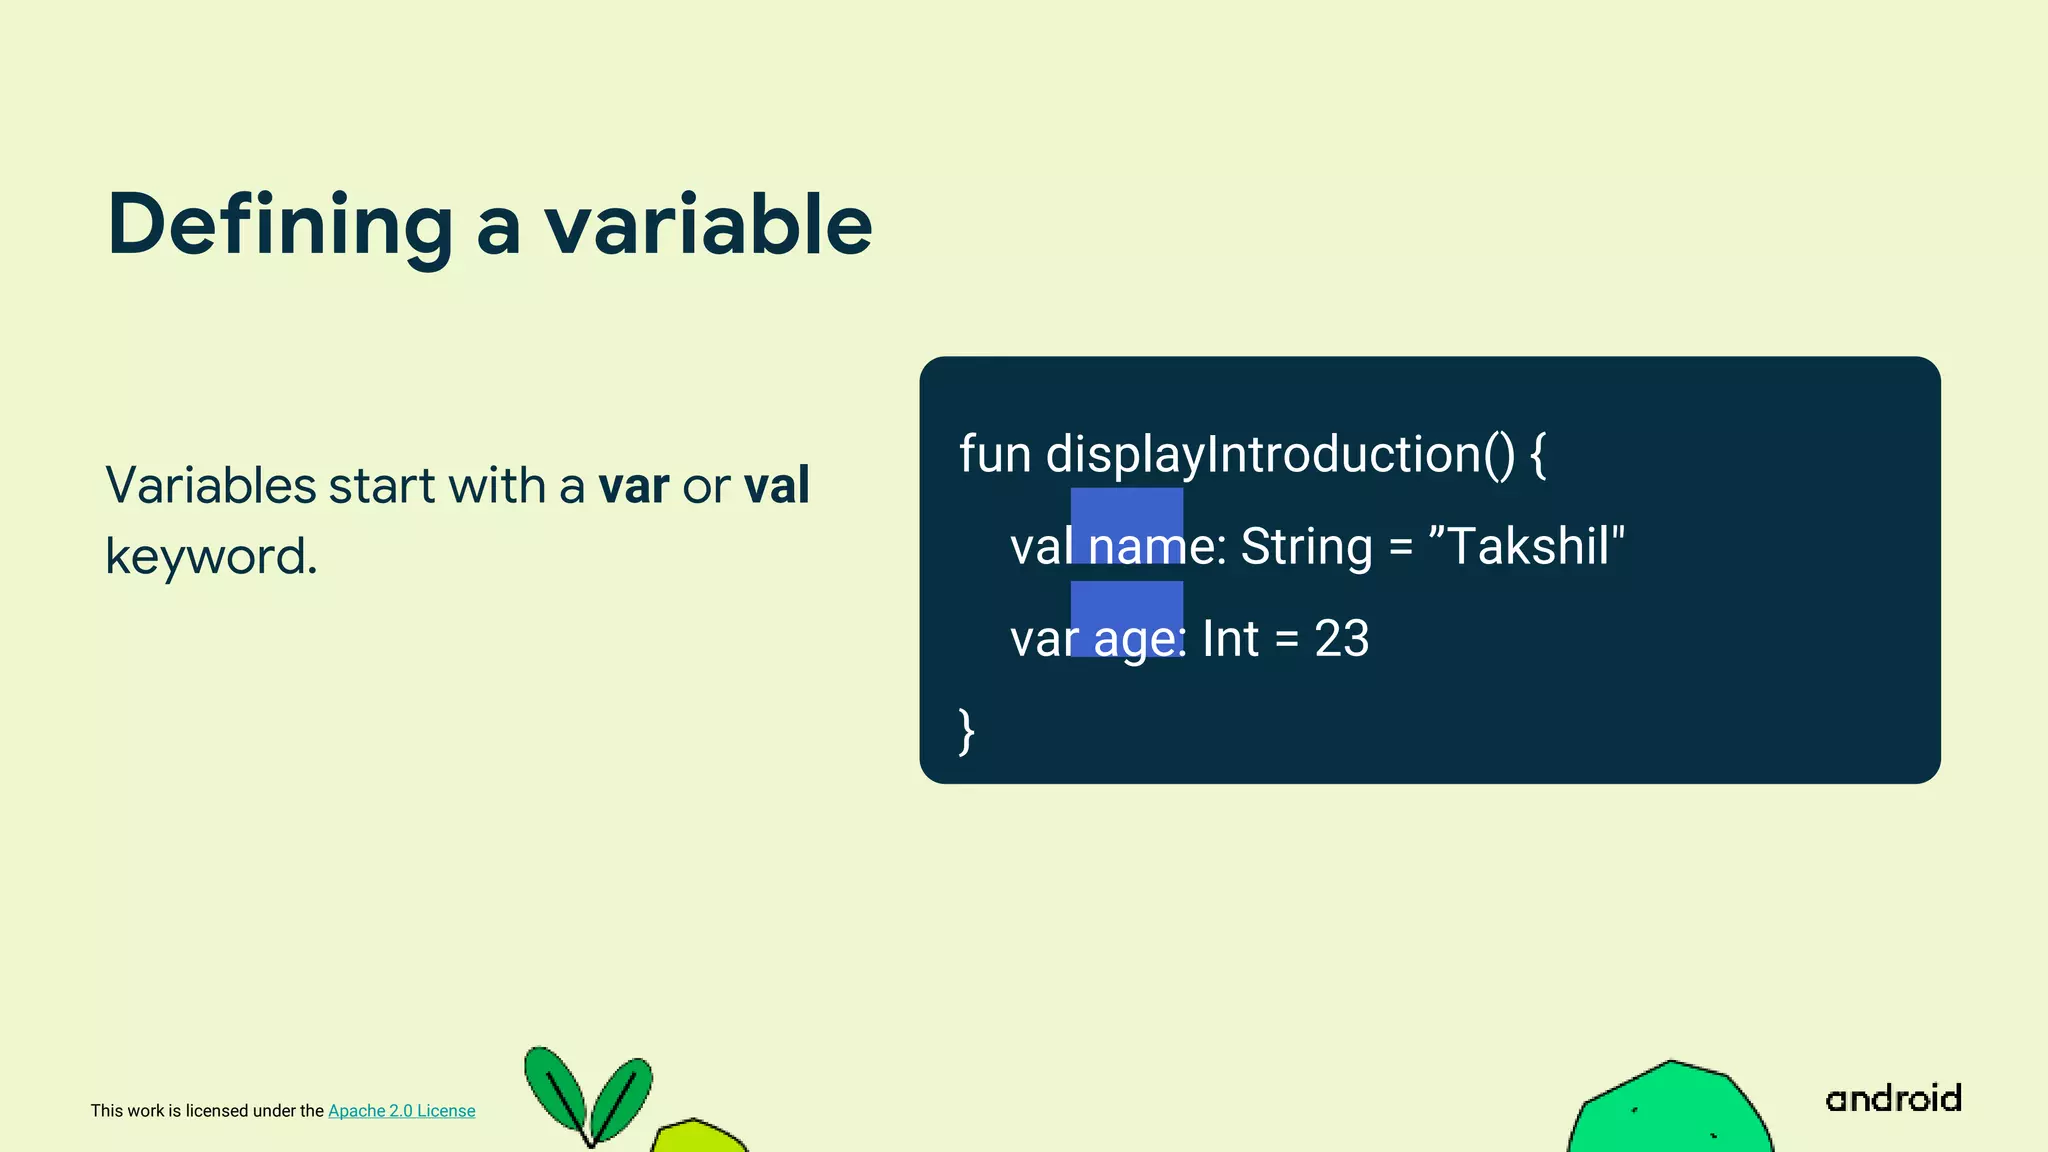
Defining a variable
Variables start with a var or val
keyword.
fun displayIntroduction() {
val name: String = ”Takshil"
var age: Int = 23
}
44.
This work islicensed under the Apache 2.0 License
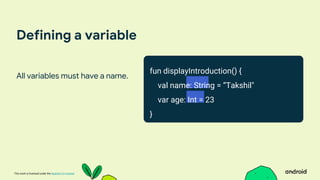
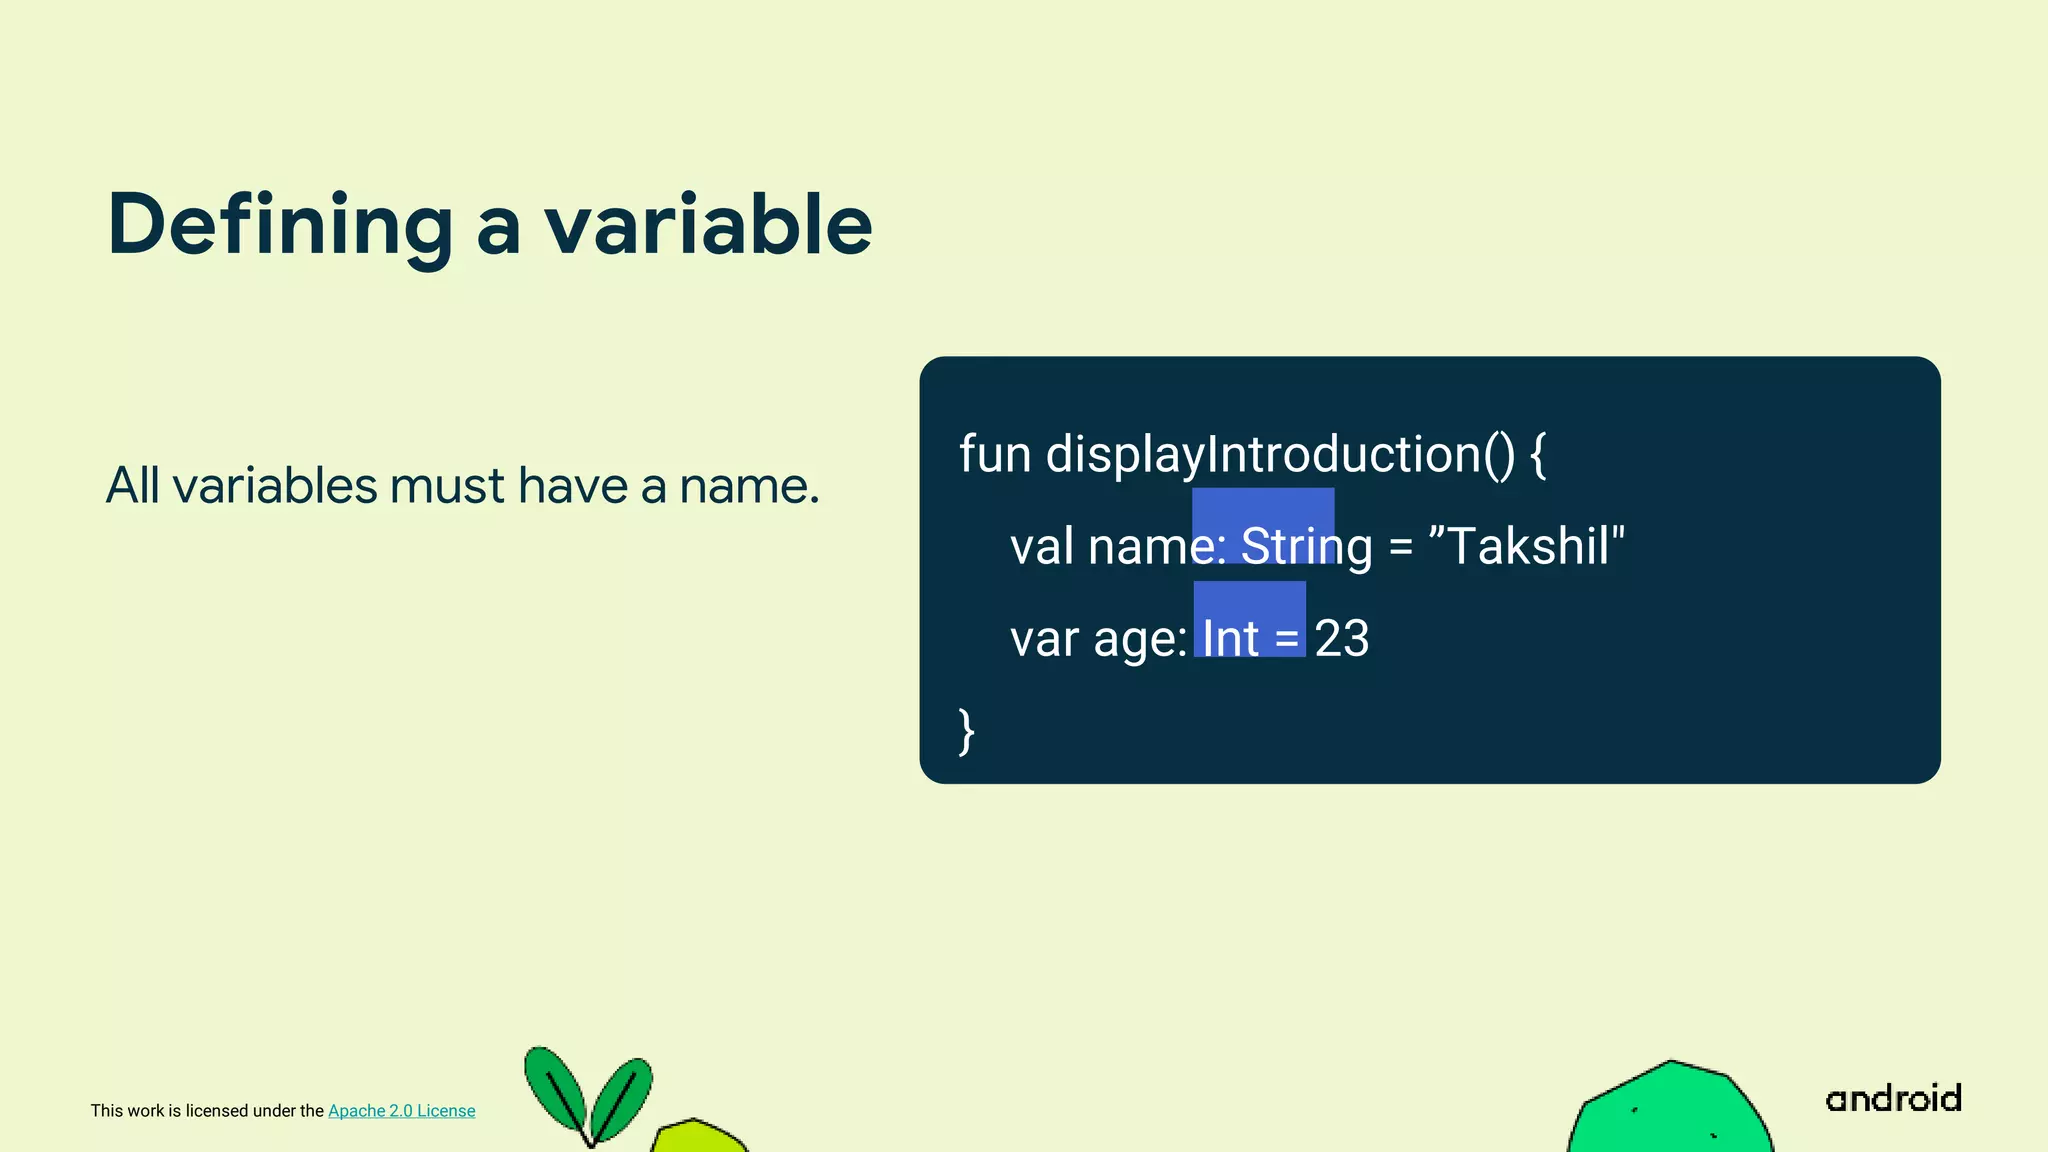
Defining a variable
All variables must have a name.
fun displayIntroduction() {
val name: String = ”Takshil"
var age: Int = 23
}
45.
This work islicensed under the Apache 2.0 License
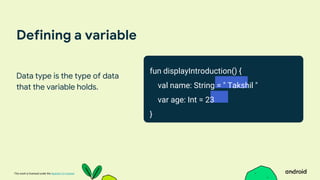
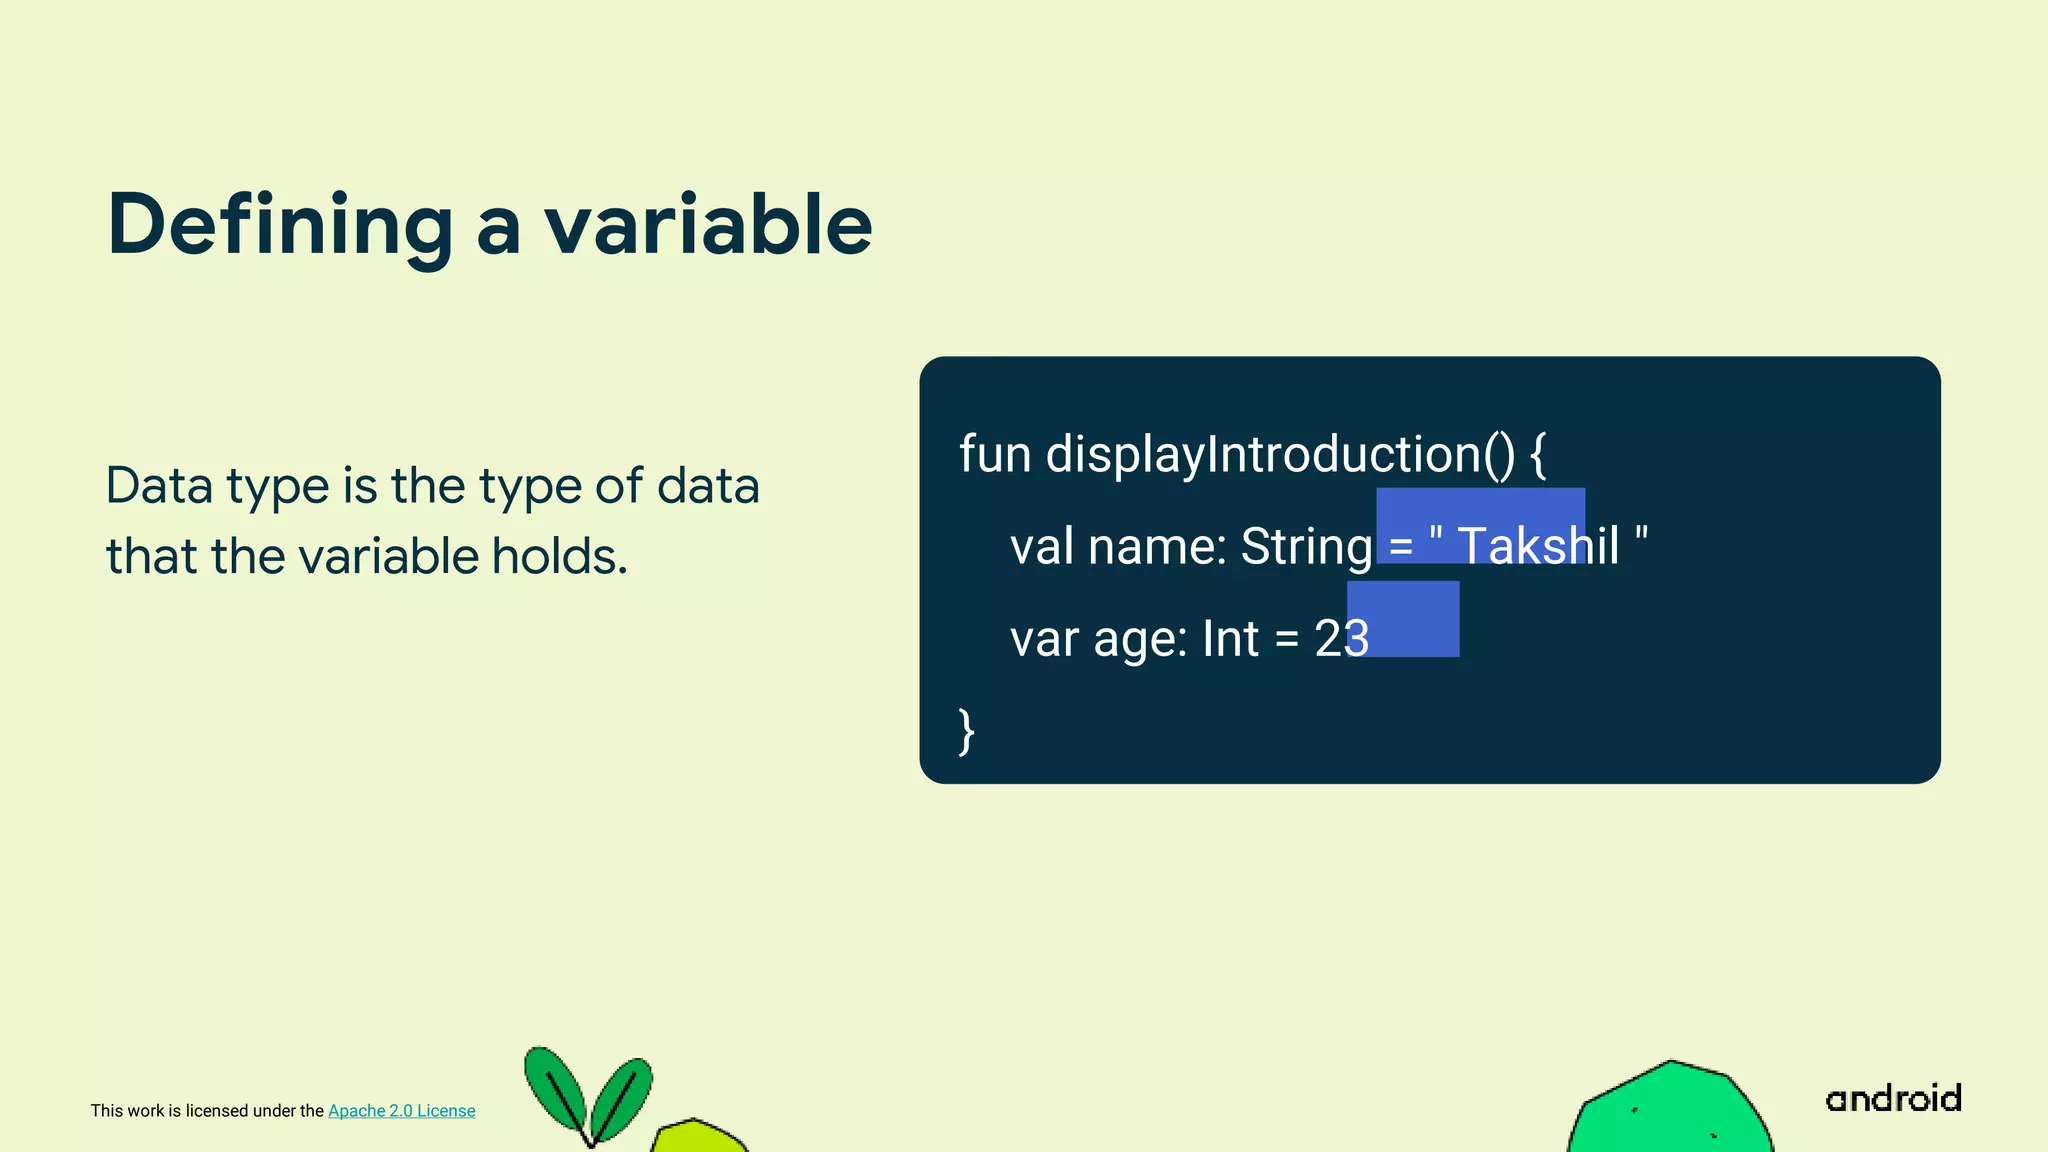
Defining a variable
Data type is the type of data
that the variable holds.
fun displayIntroduction() {
val name: String = " Takshil "
var age: Int = 23
}
46.
This work islicensed under the Apache 2.0 License
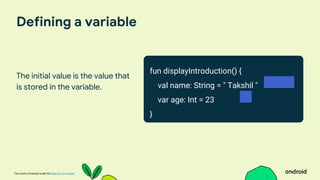
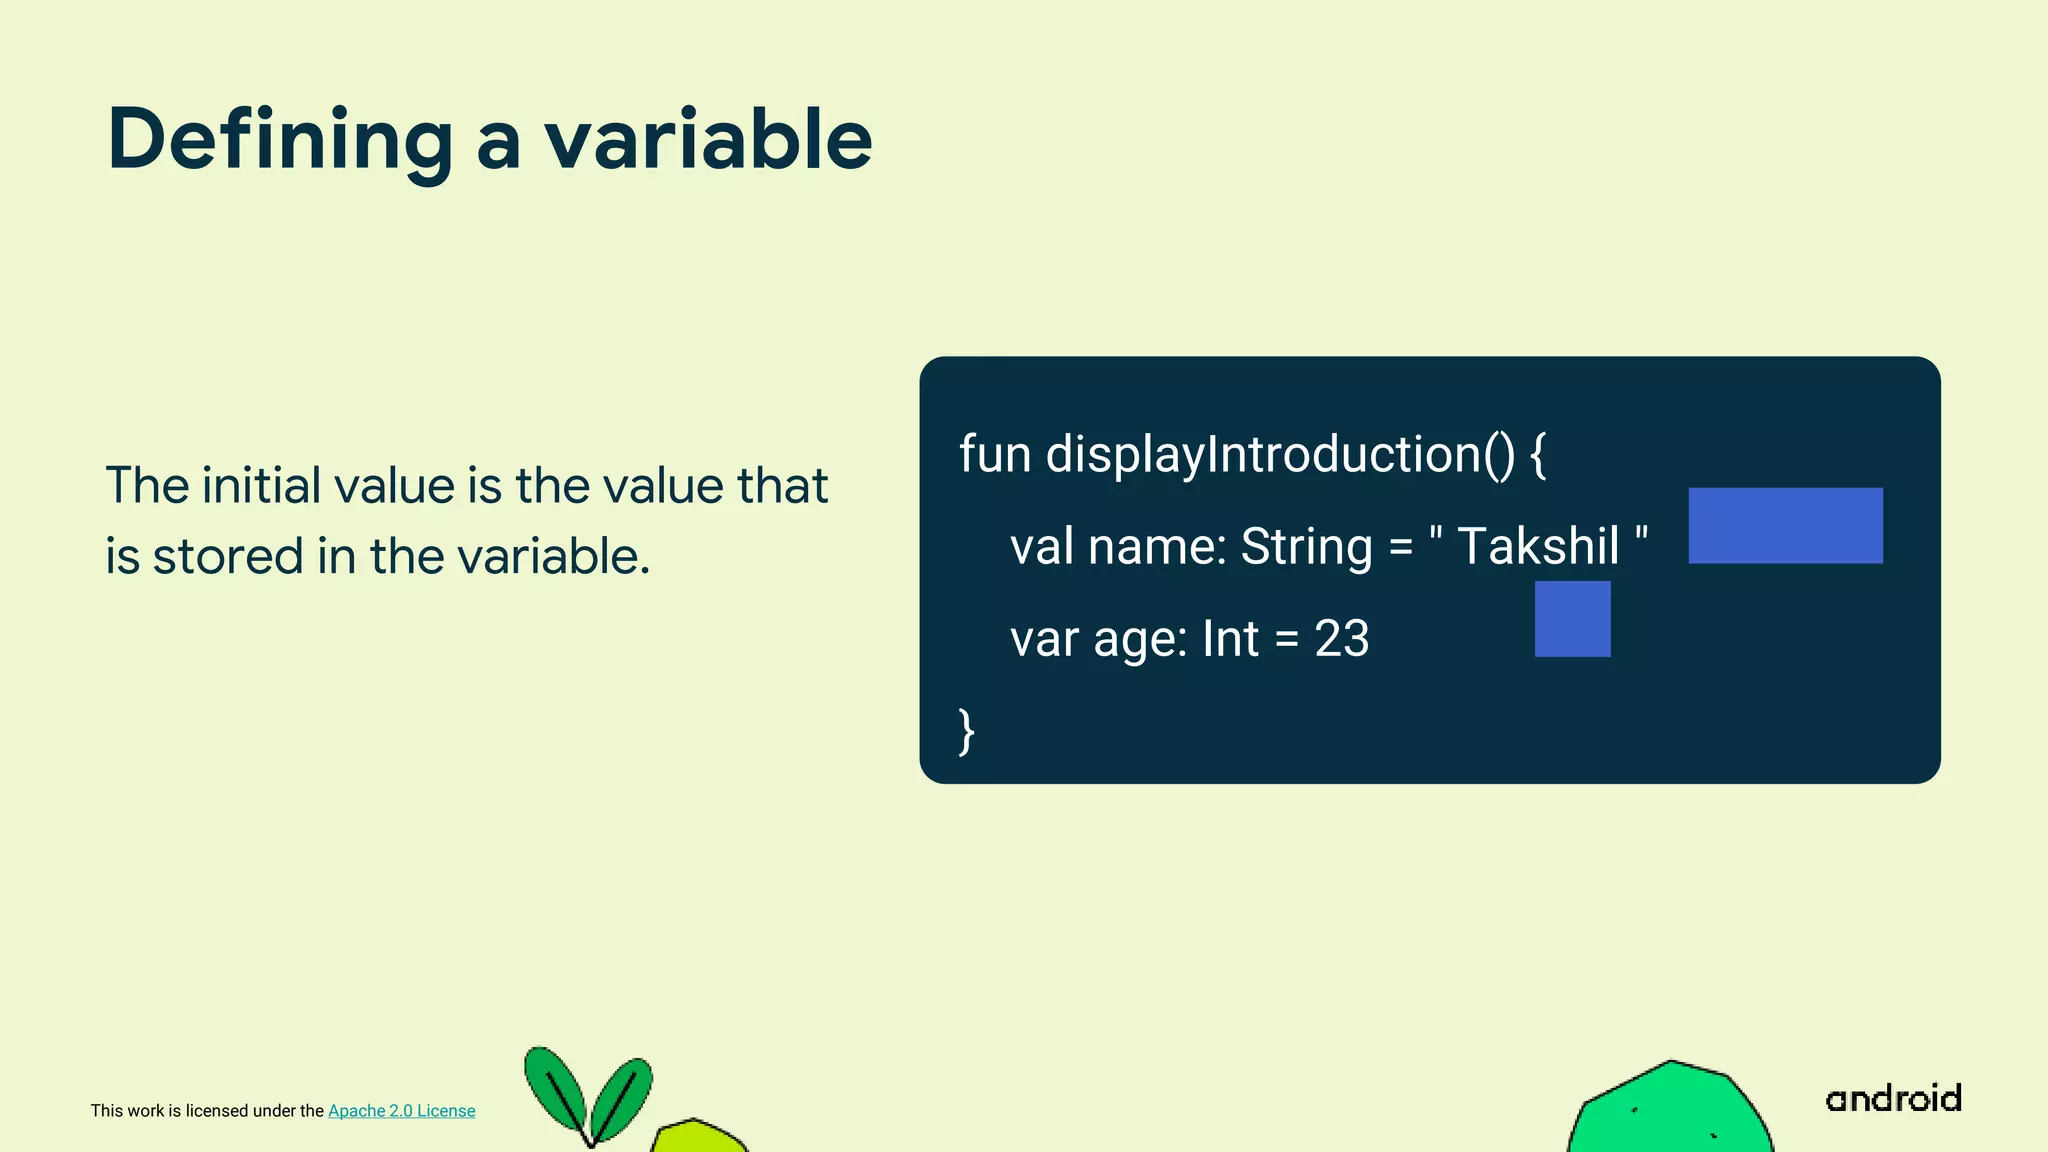
Defining a variable
The initial value is the value that
is stored in the variable.
fun displayIntroduction() {
val name: String = " Takshil "
var age: Int = 23
}
47.
This work islicensed under the Apache 2.0 License
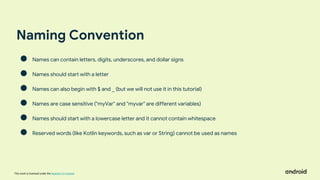
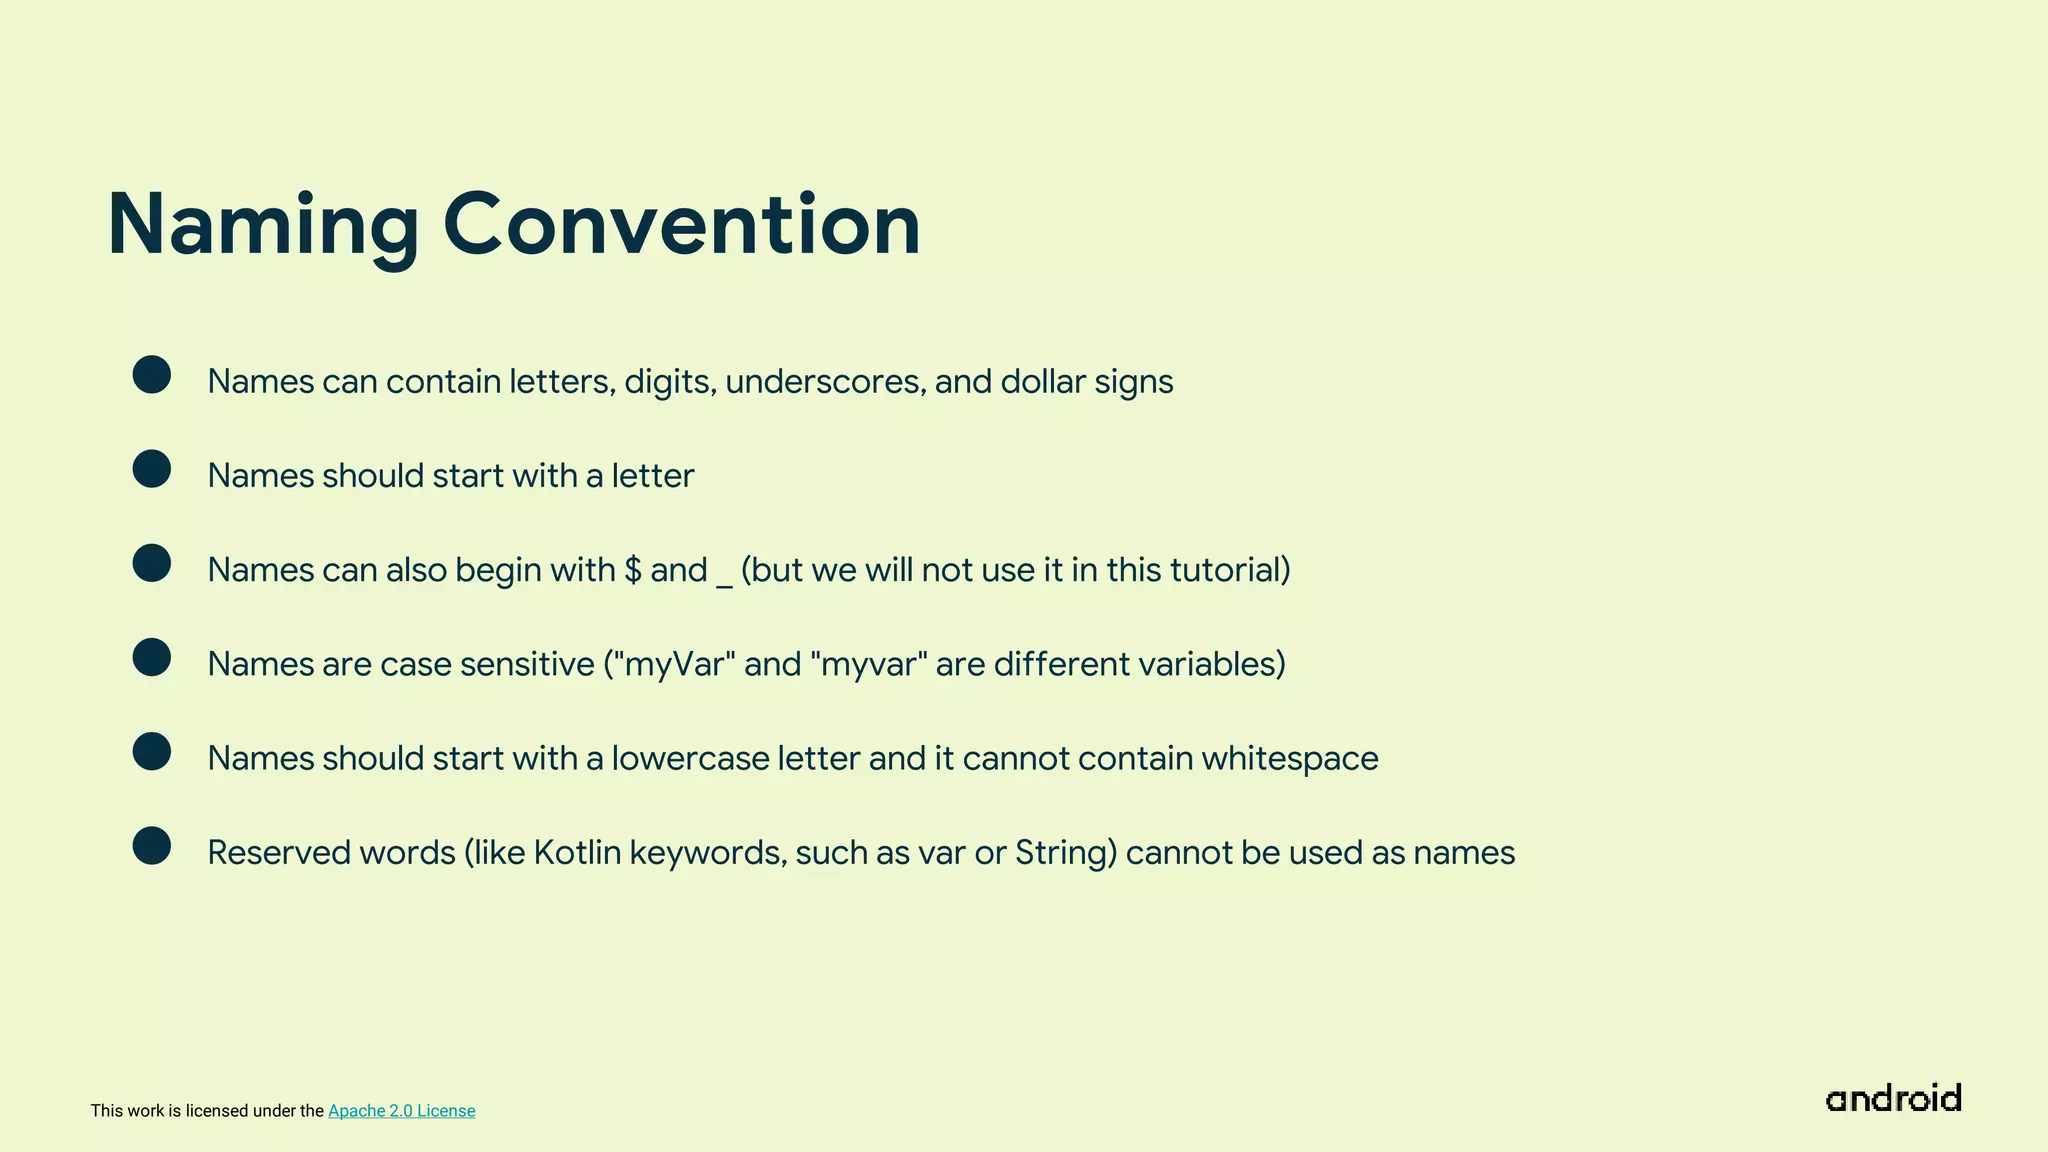
Naming Convention
● Names can contain letters, digits, underscores, and dollar signs
● Names should start with a letter
● Names can also begin with $ and _ (but we will not use it in this tutorial)
● Names are case sensitive ("myVar" and "myvar" are different variables)
● Names should start with a lowercase letter and it cannot contain whitespace
● Reserved words (like Kotlin keywords, such as var or String) cannot be used as names
48.
This work islicensed under the Apache 2.0 License
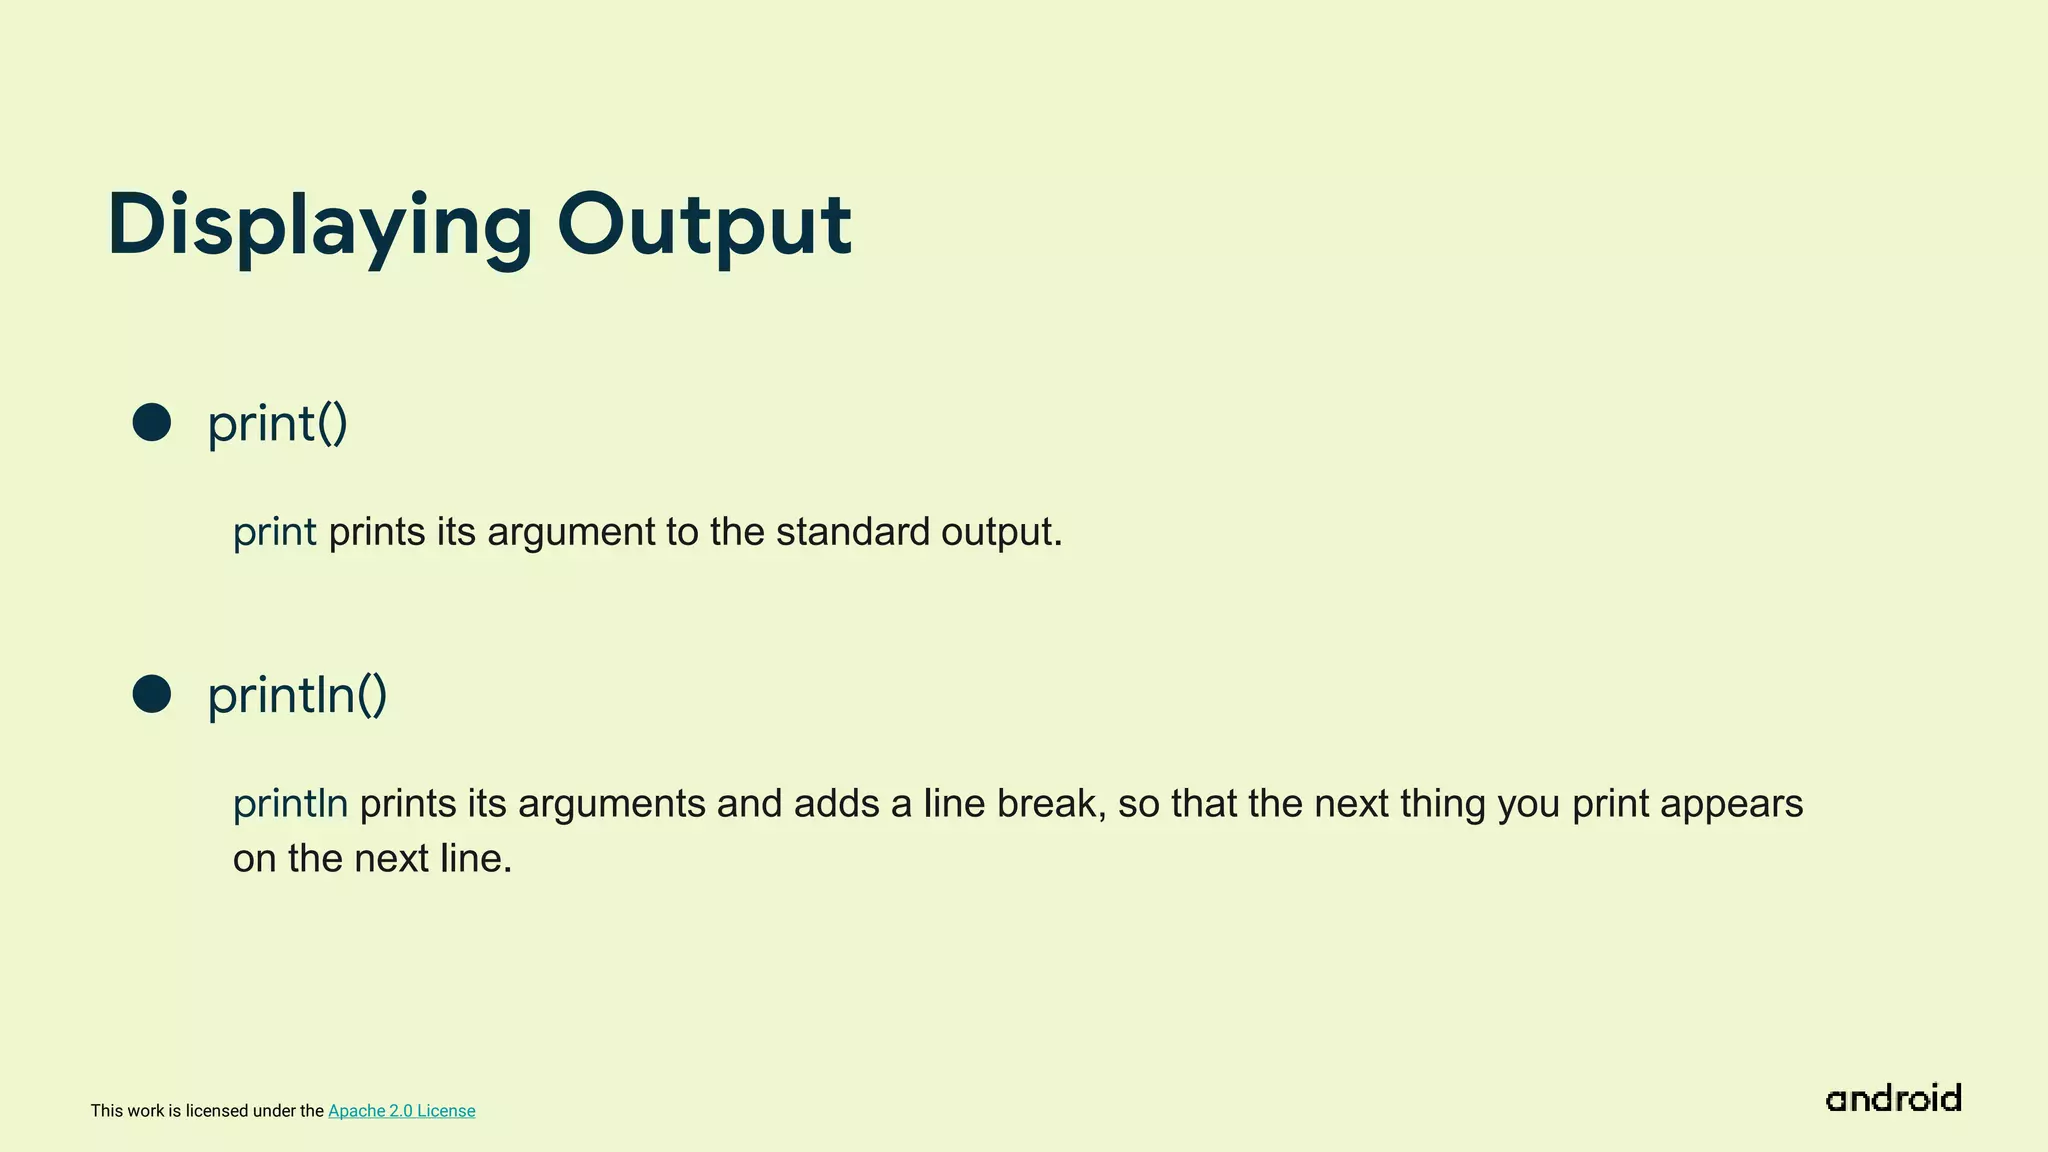
Displaying Output
● print()
print prints its argument to the standard output.
● println()
println prints its arguments and adds a line break, so that the next thing you print appears
on the next line.
49.
This work islicensed under the Apache 2.0 License
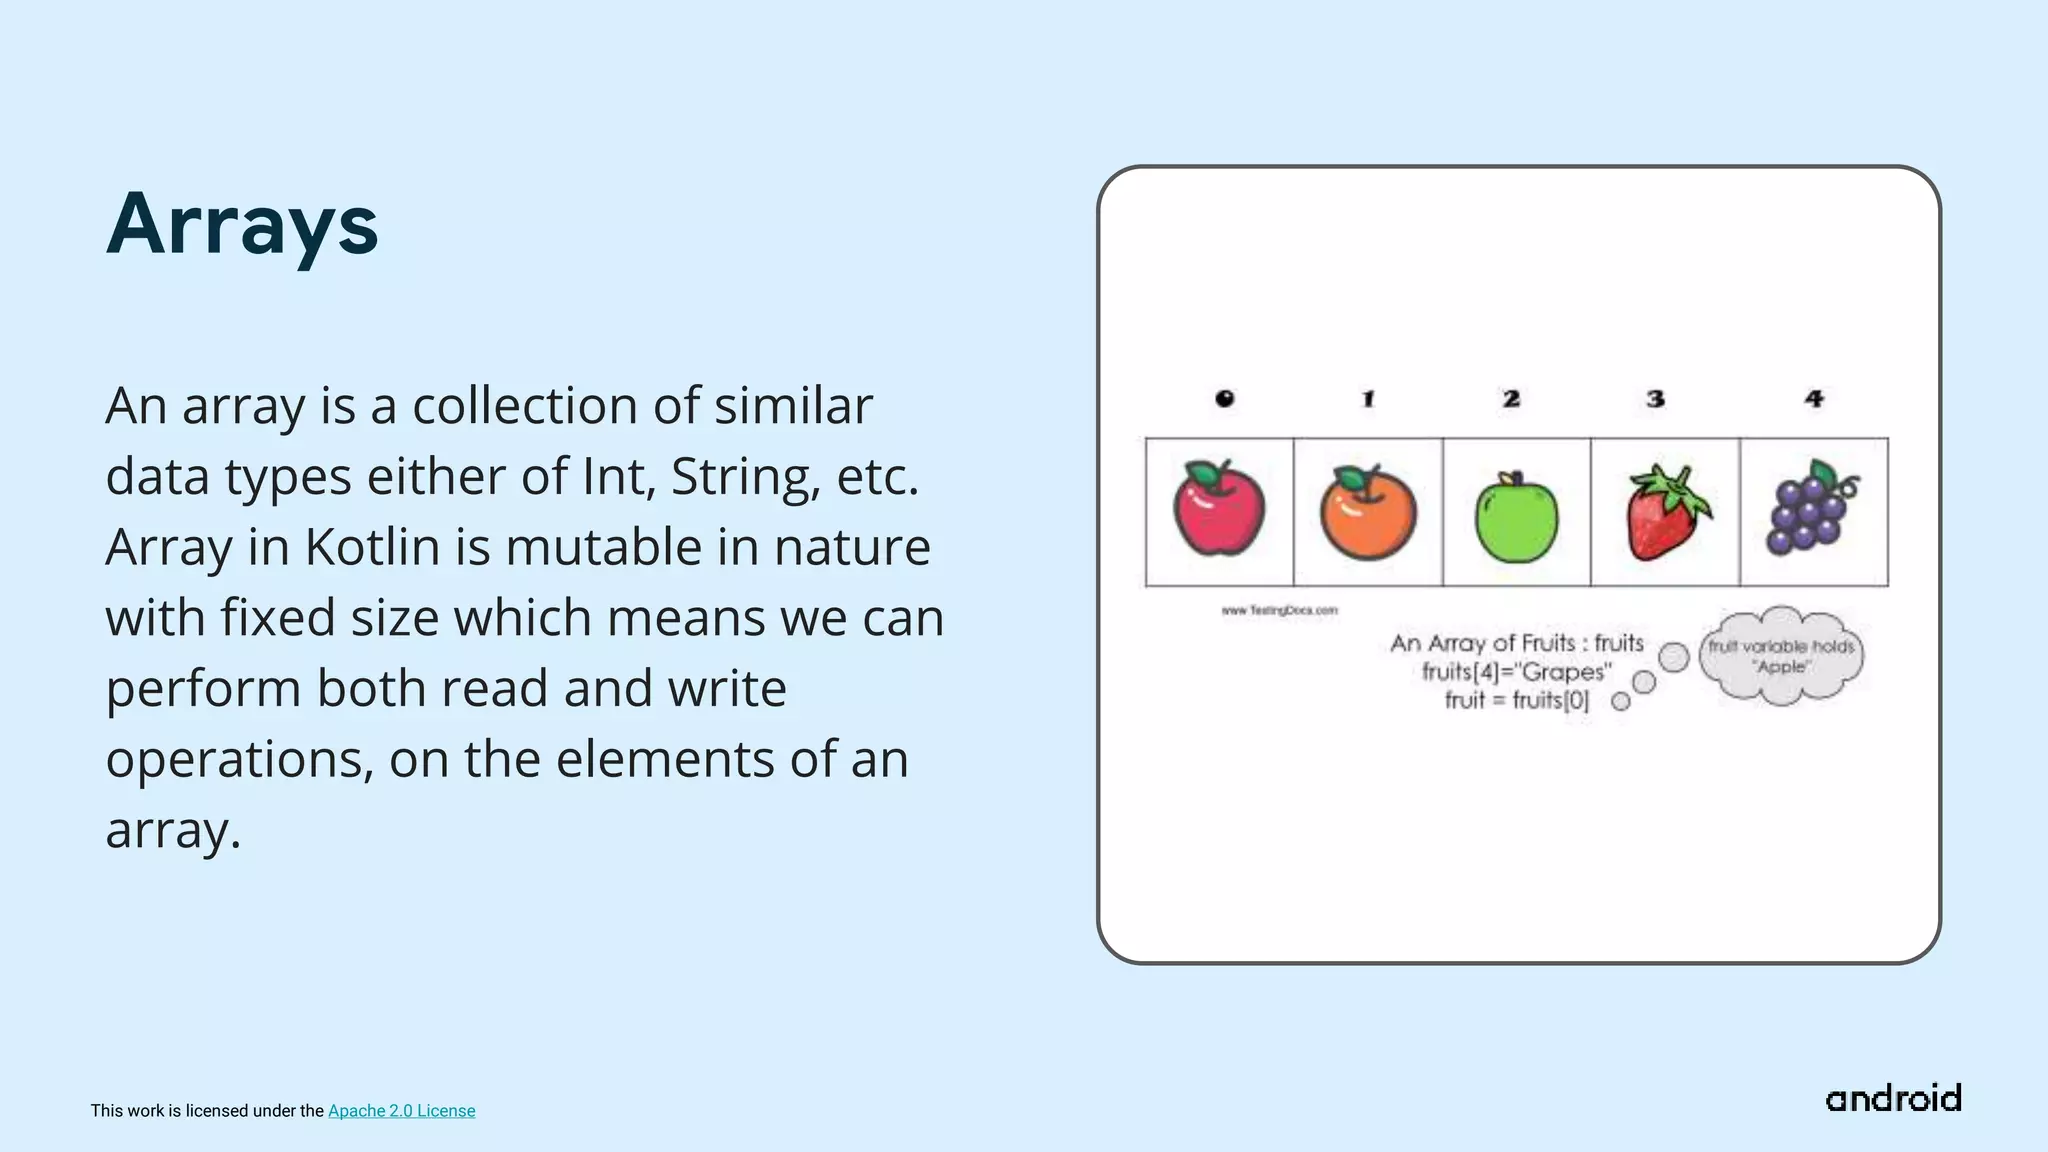
An array is a collection of similar
data types either of Int, String, etc.
Array in Kotlin is mutable in nature
with fixed size which means we can
perform both read and write
operations, on the elements of an
array.
Arrays
50.
This work islicensed under the Apache 2.0 License
90
Kotlin arrays can be created using
arrayOf<dataType>()
Example – arrayof<int>()
arrayof<float>()
Kotlin Array
Declaration
90 77 36 50 86
Marks[]
0 1 2 3 4
51.
This work islicensed under the Apache 2.0 License
CONDITIONALS
53.
This work islicensed under the Apache 2.0 License
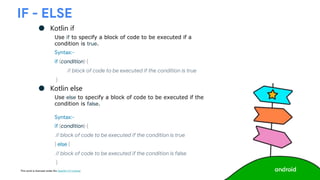
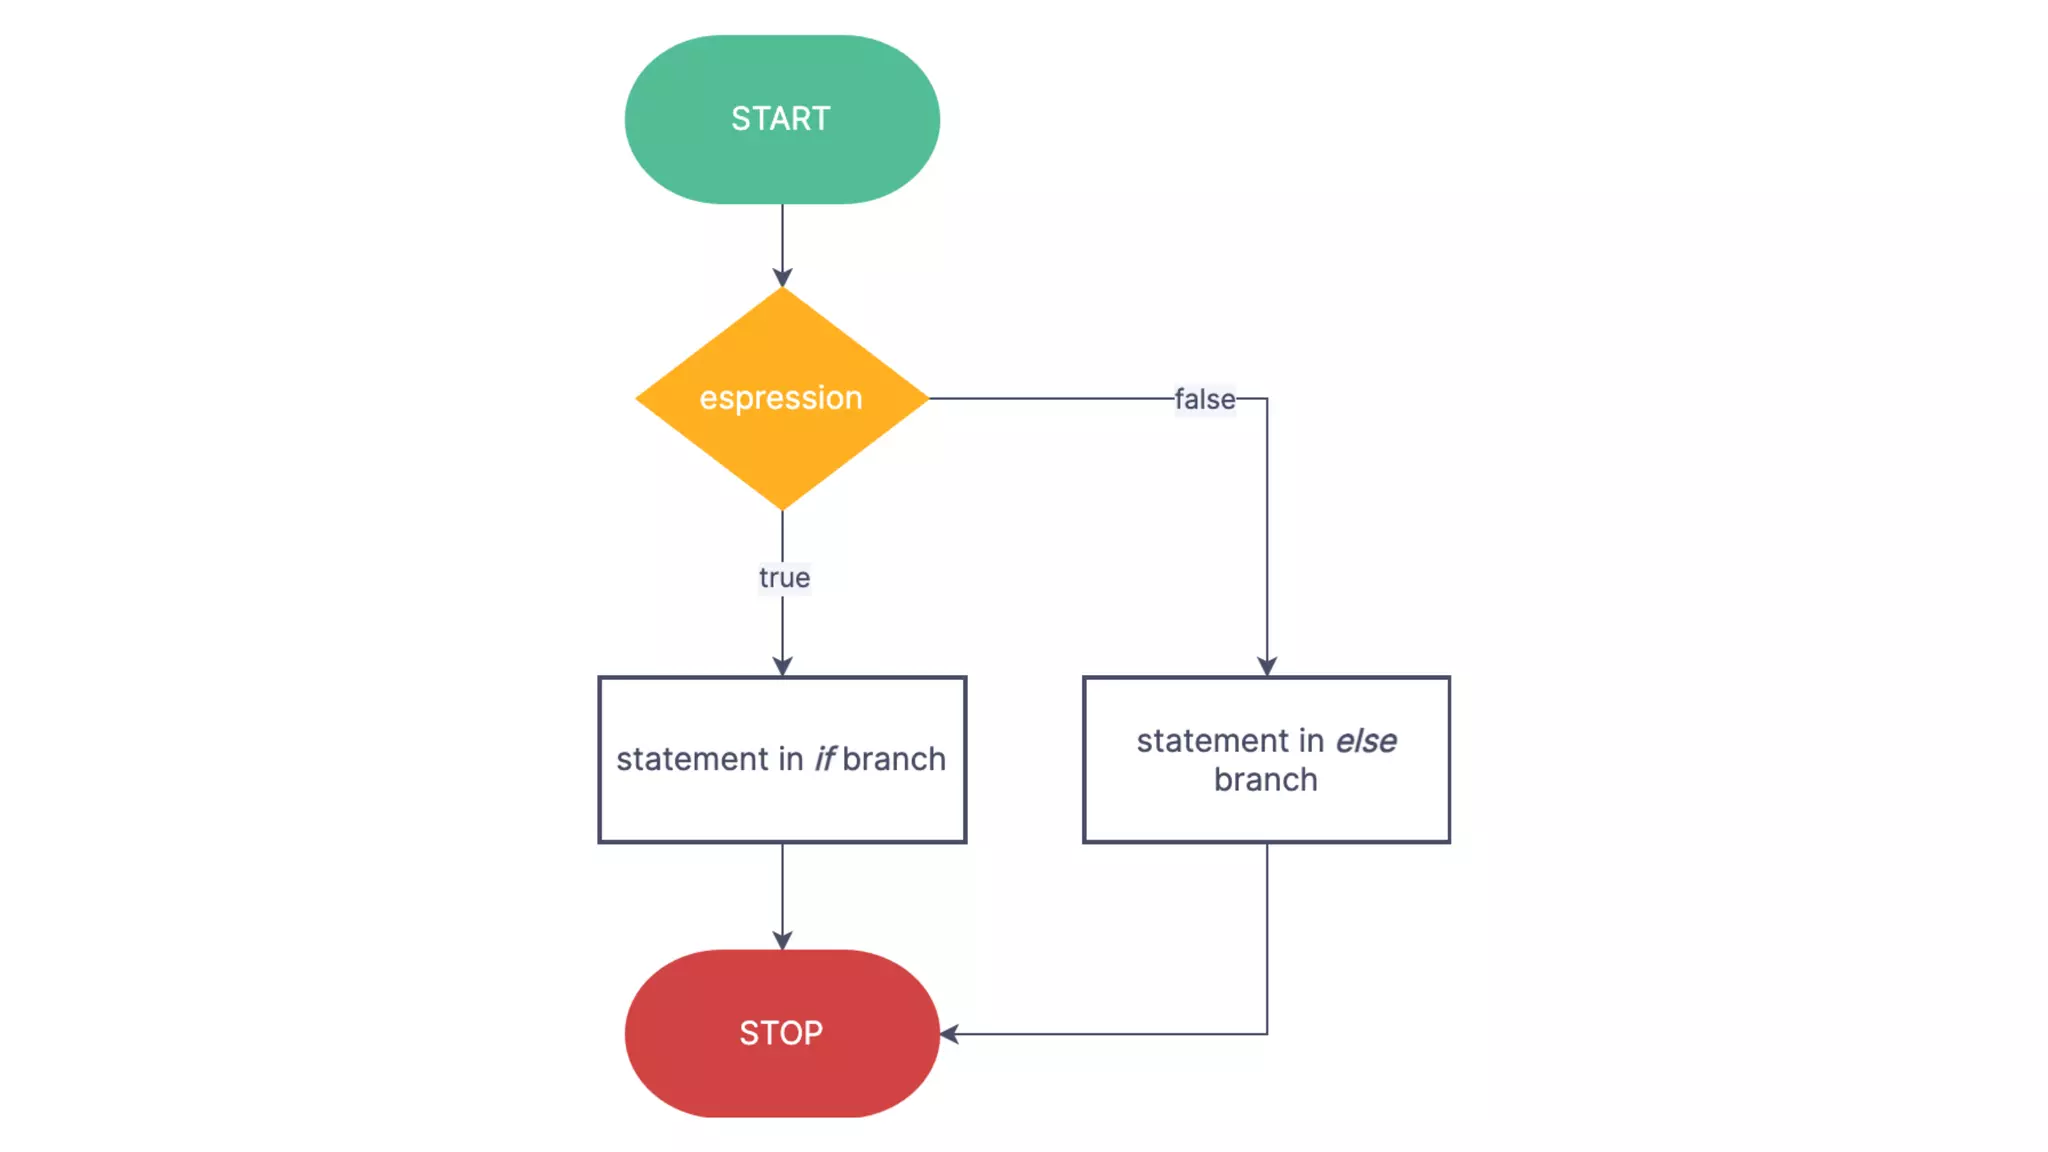
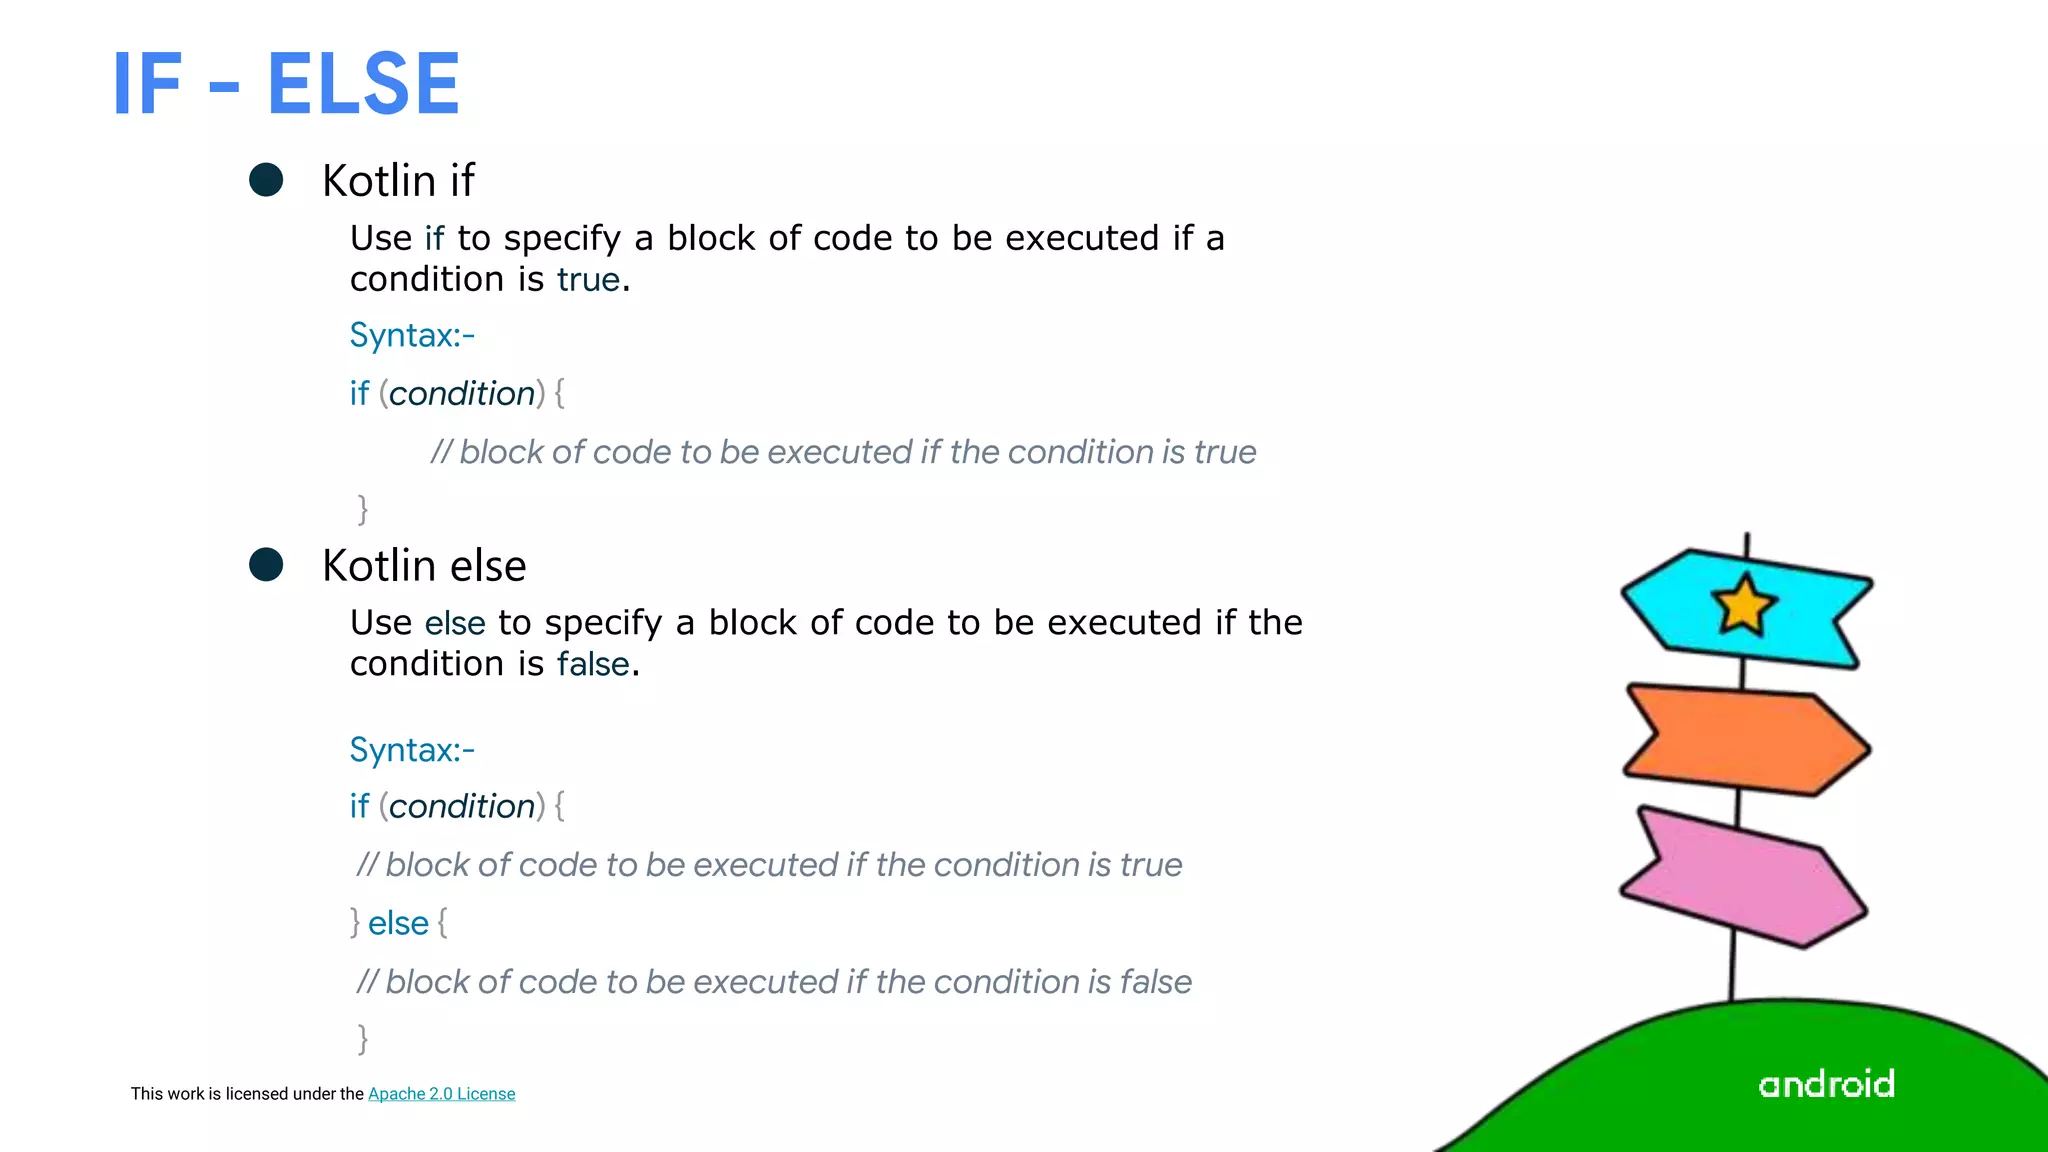
IF - ELSE
● Kotlin if
Use if to specify a block of code to be executed if a
condition is true.
Syntax:-
if (condition) {
// block of code to be executed if the condition is true
}
● Kotlin else
Use else to specify a block of code to be executed if the
condition is false.
Syntax:-
if (condition) {
// block of code to be executed if the condition is true
} else {
// block of code to be executed if the condition is false
}
54.
This work islicensed under the Apache 2.0 License
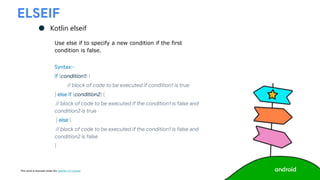
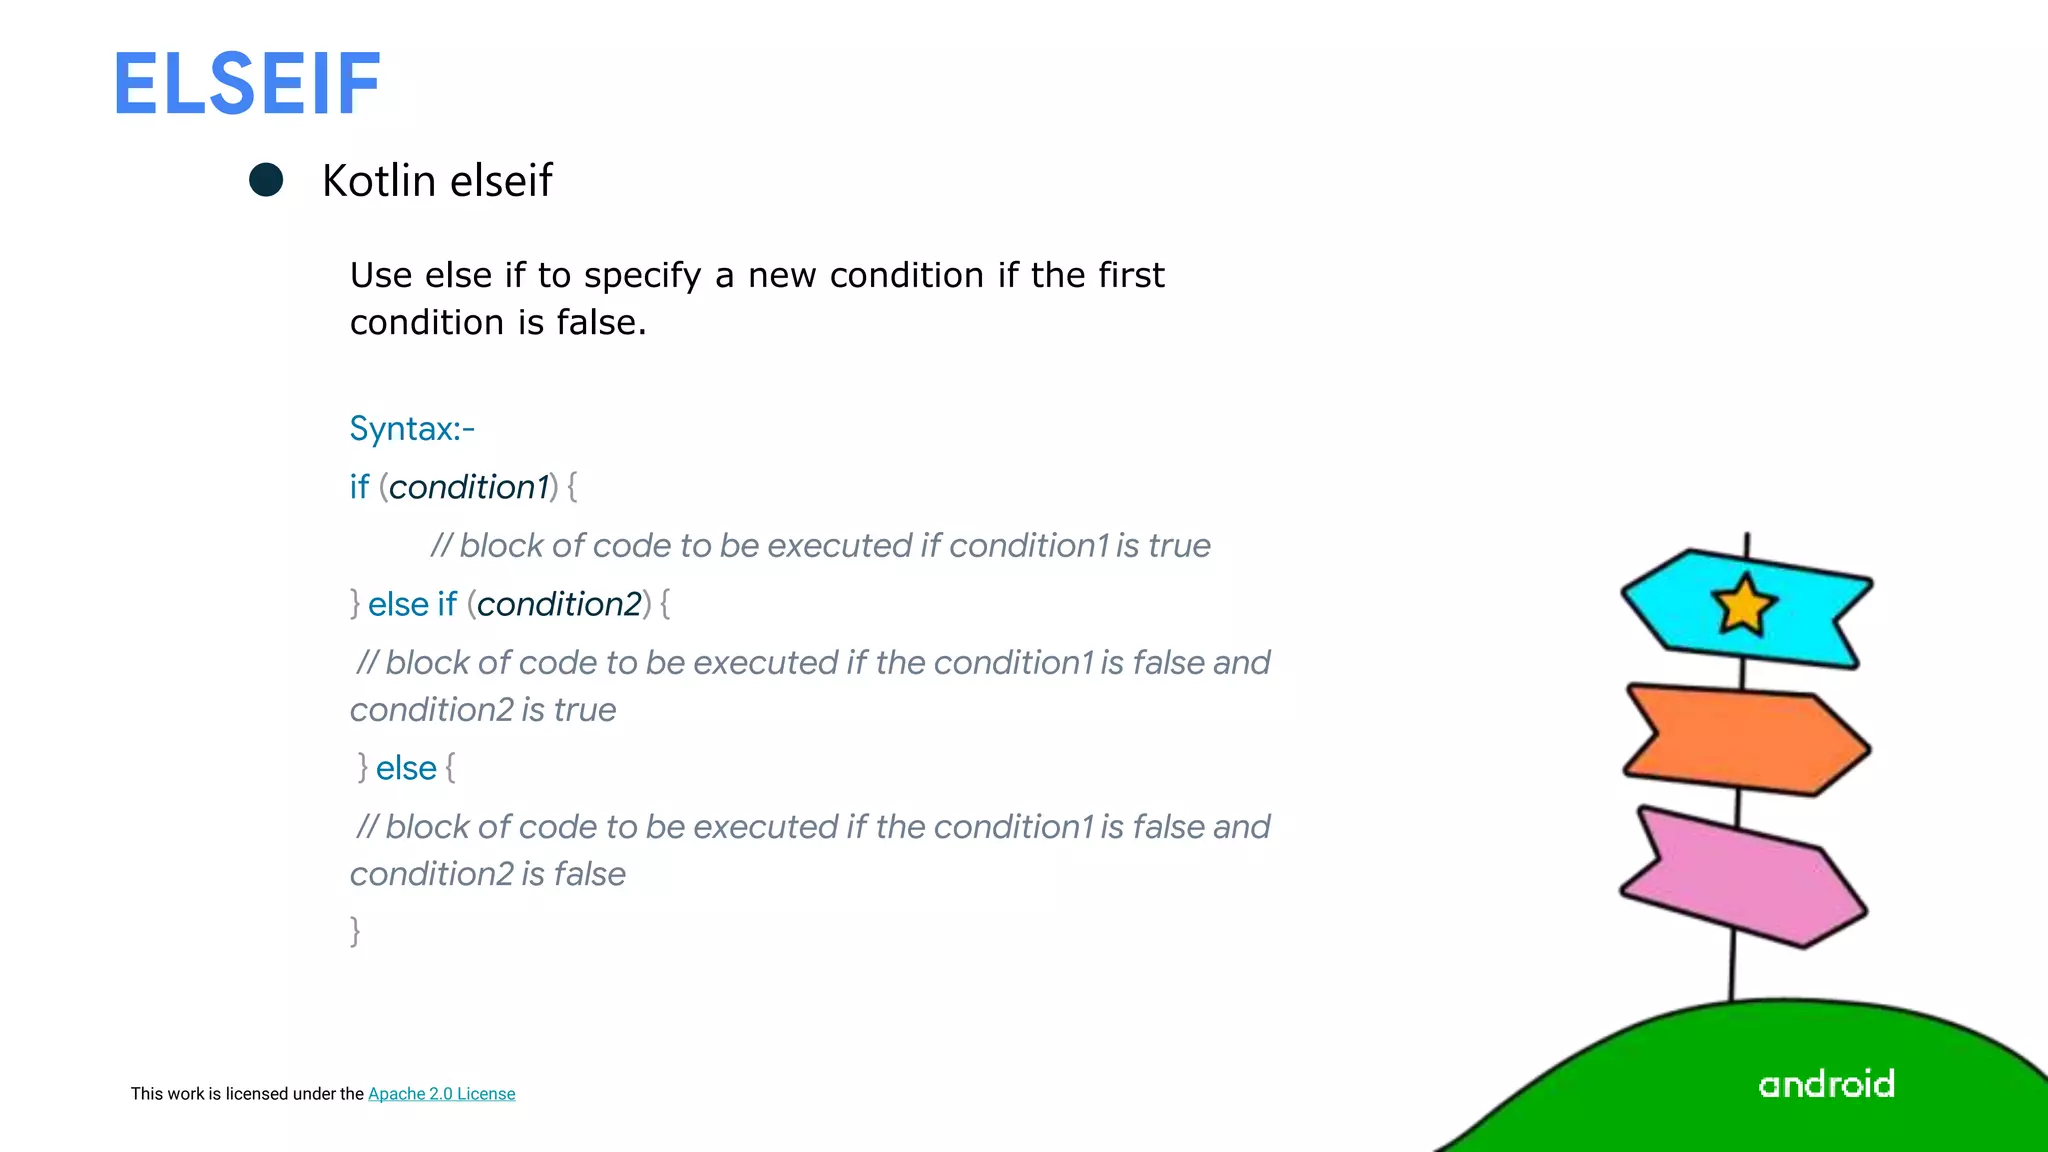
ELSEIF
● Kotlin elseif
Use else if to specify a new condition if the first
condition is false.
Syntax:-
if (condition1) {
// block of code to be executed if condition1 is true
} else if (condition2) {
// block of code to be executed if the condition1 is false and
condition2 is true
} else {
// block of code to be executed if the condition1 is false and
condition2 is false
}
55.
This work islicensed under the Apache 2.0 License
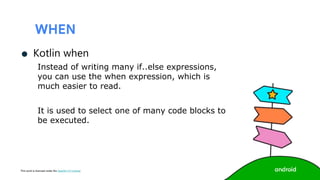
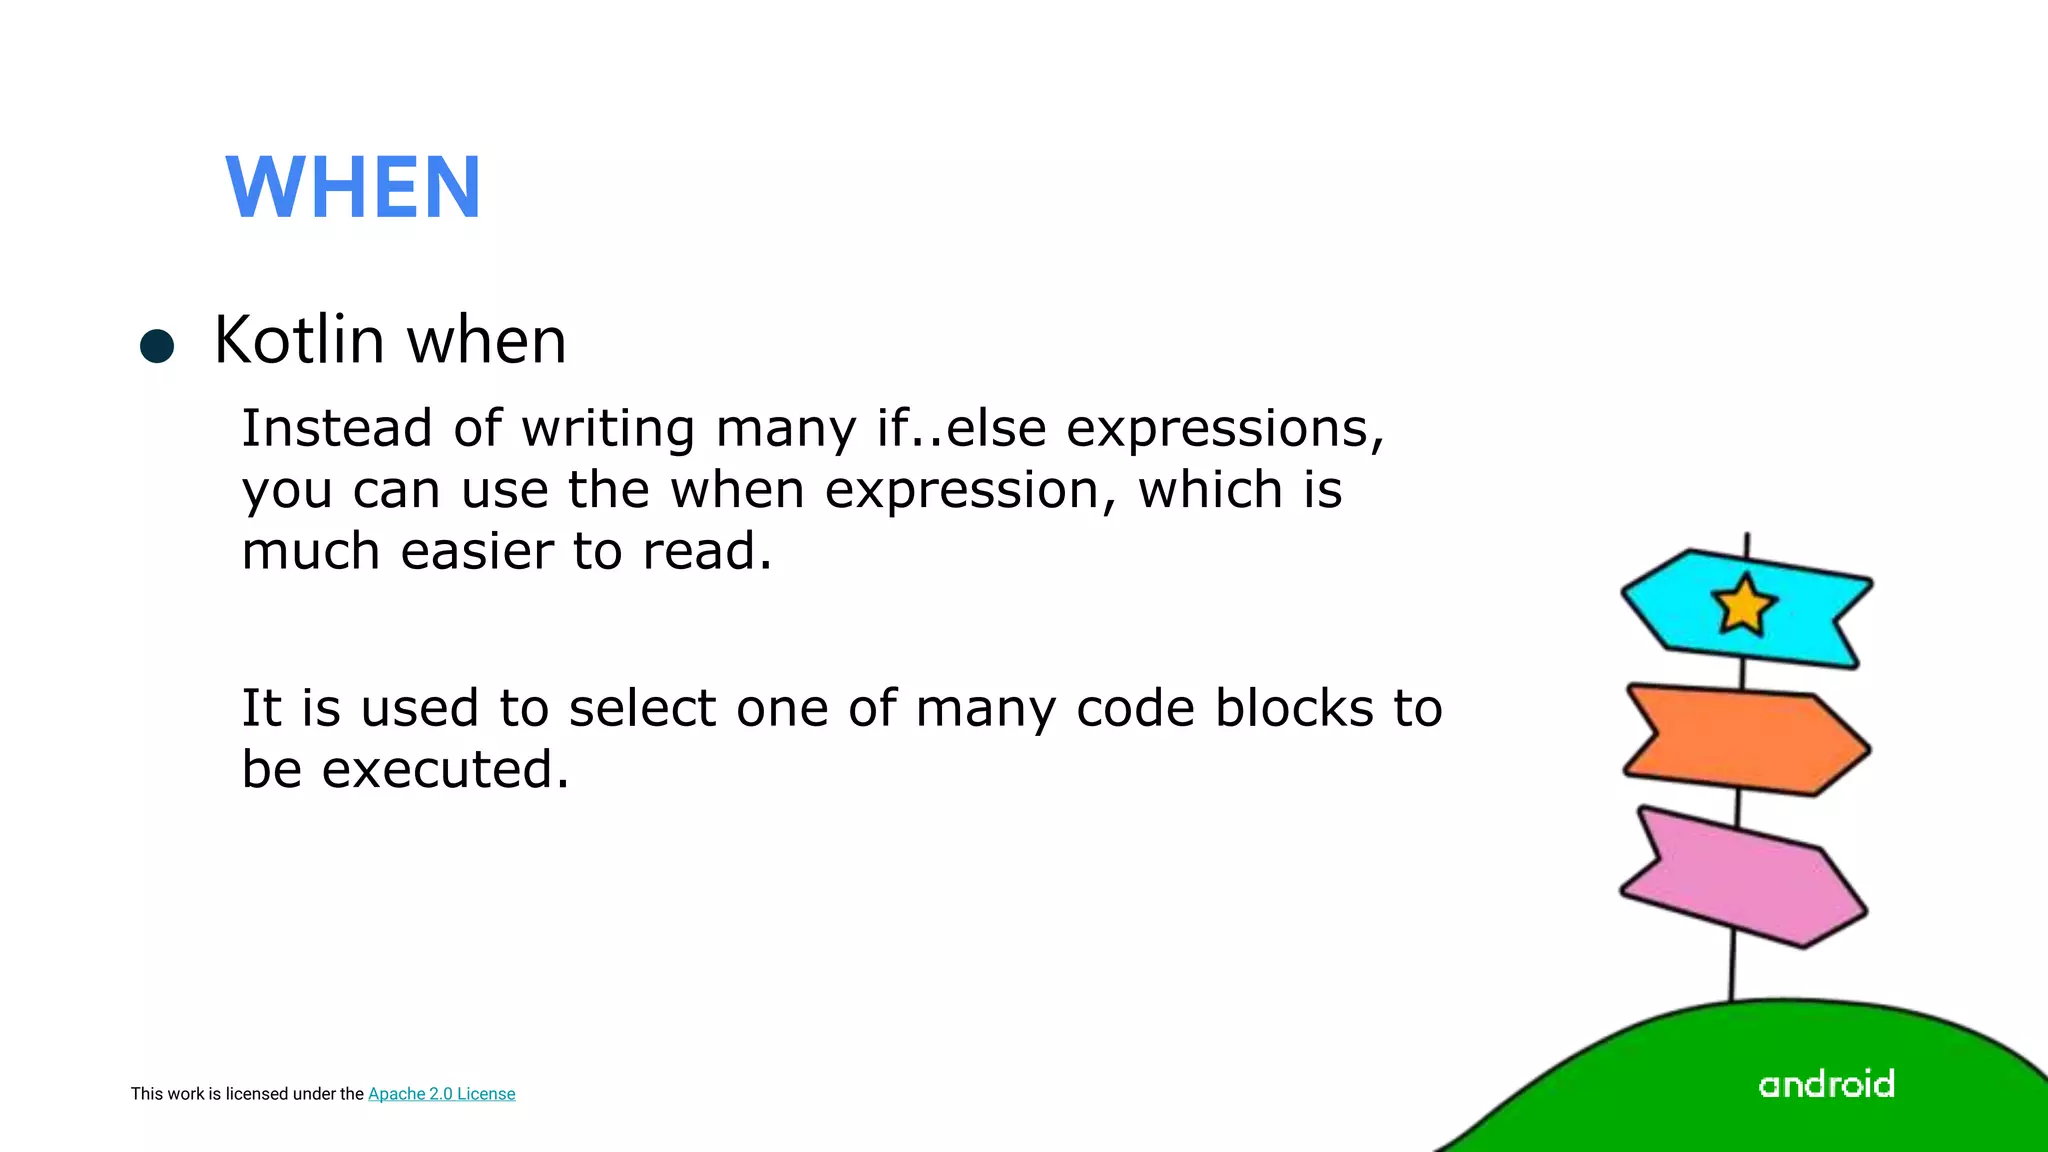
WHEN
● Kotlin when
Instead of writing many if..else expressions,
you can use the when expression, which is
much easier to read.
It is used to select one of many code blocks to
be executed.
58.
This work islicensed under the Apache 2.0 License
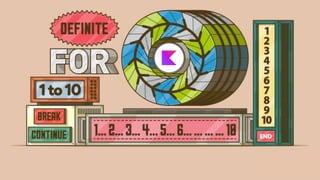
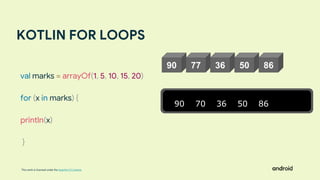
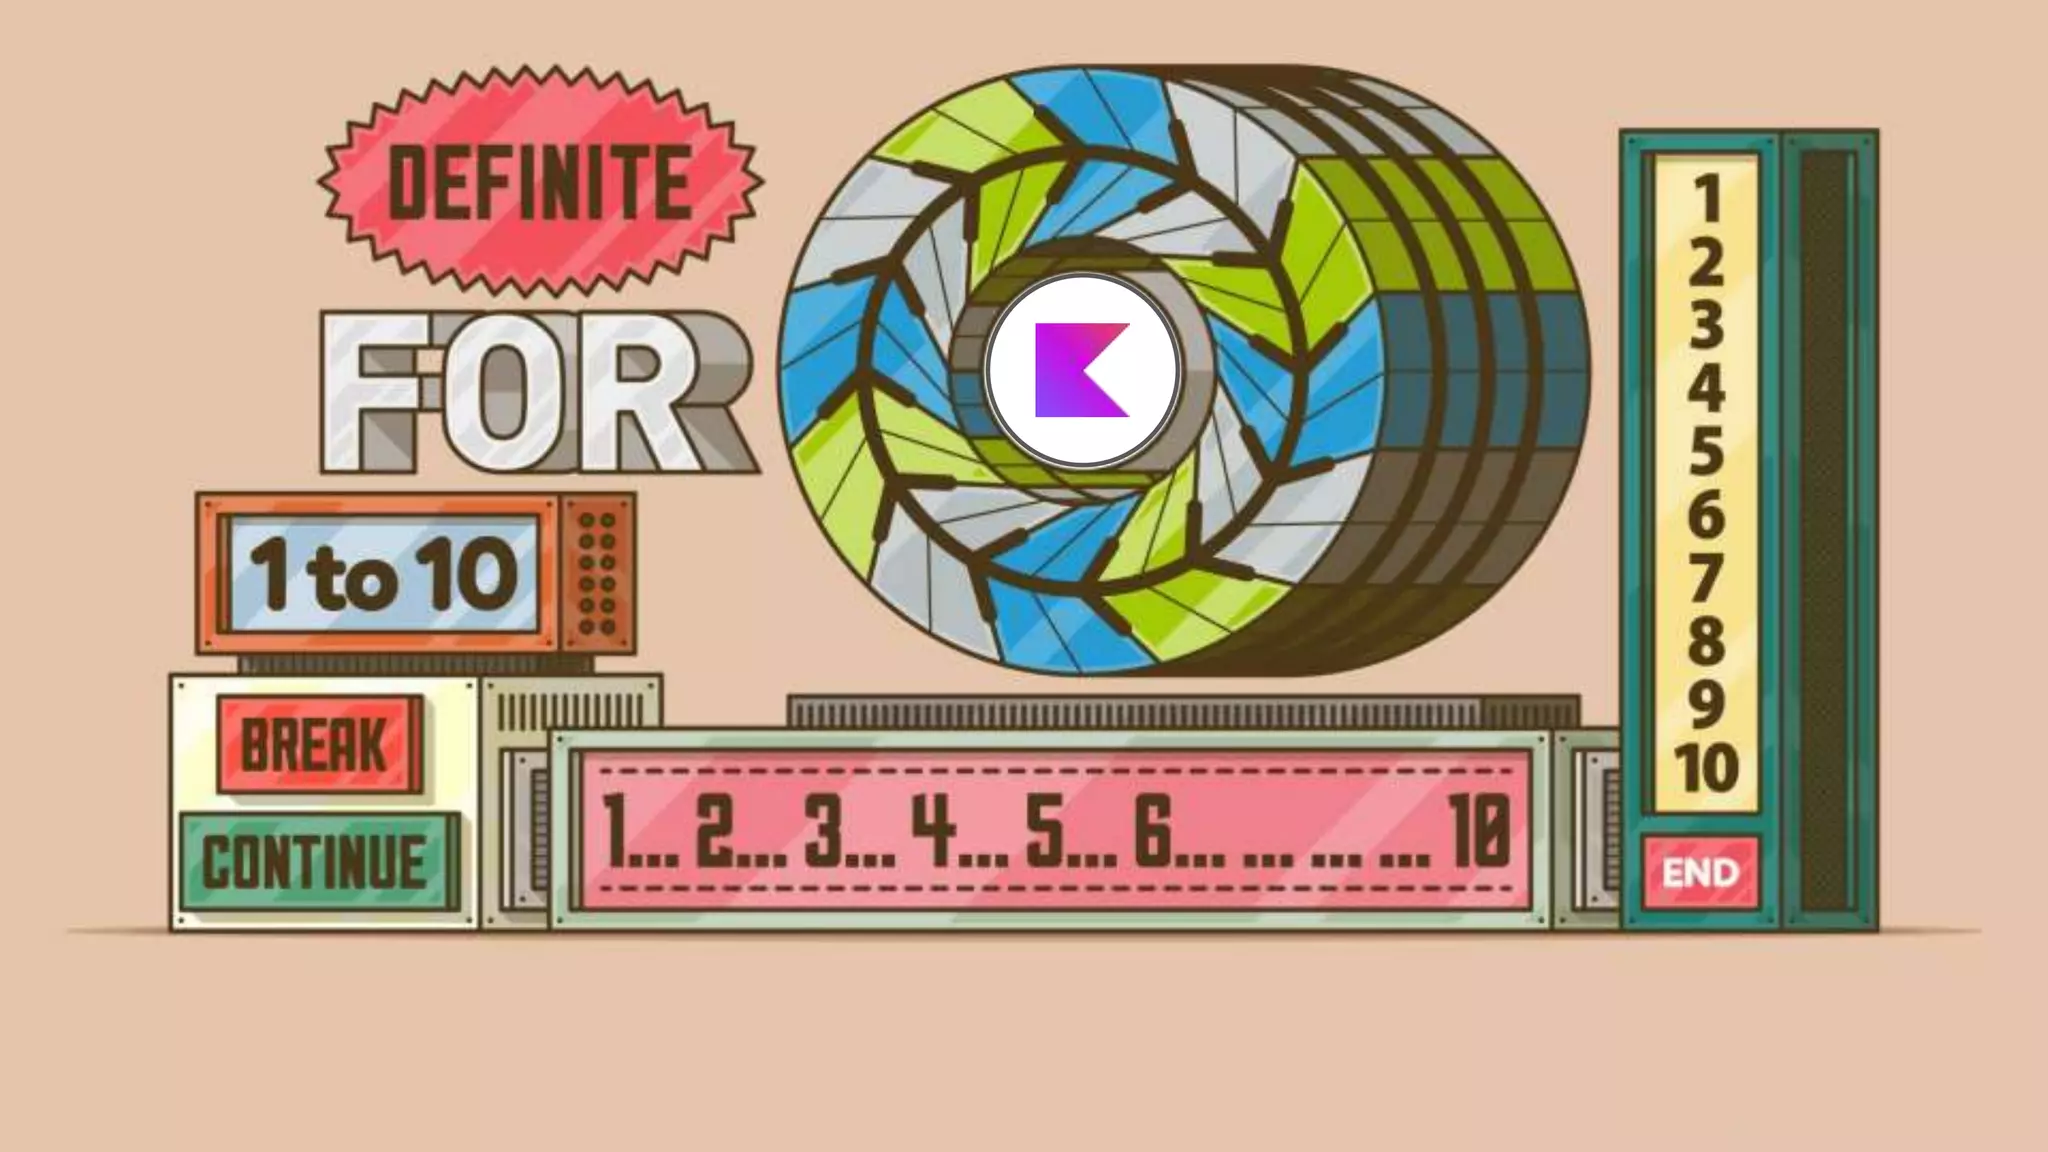
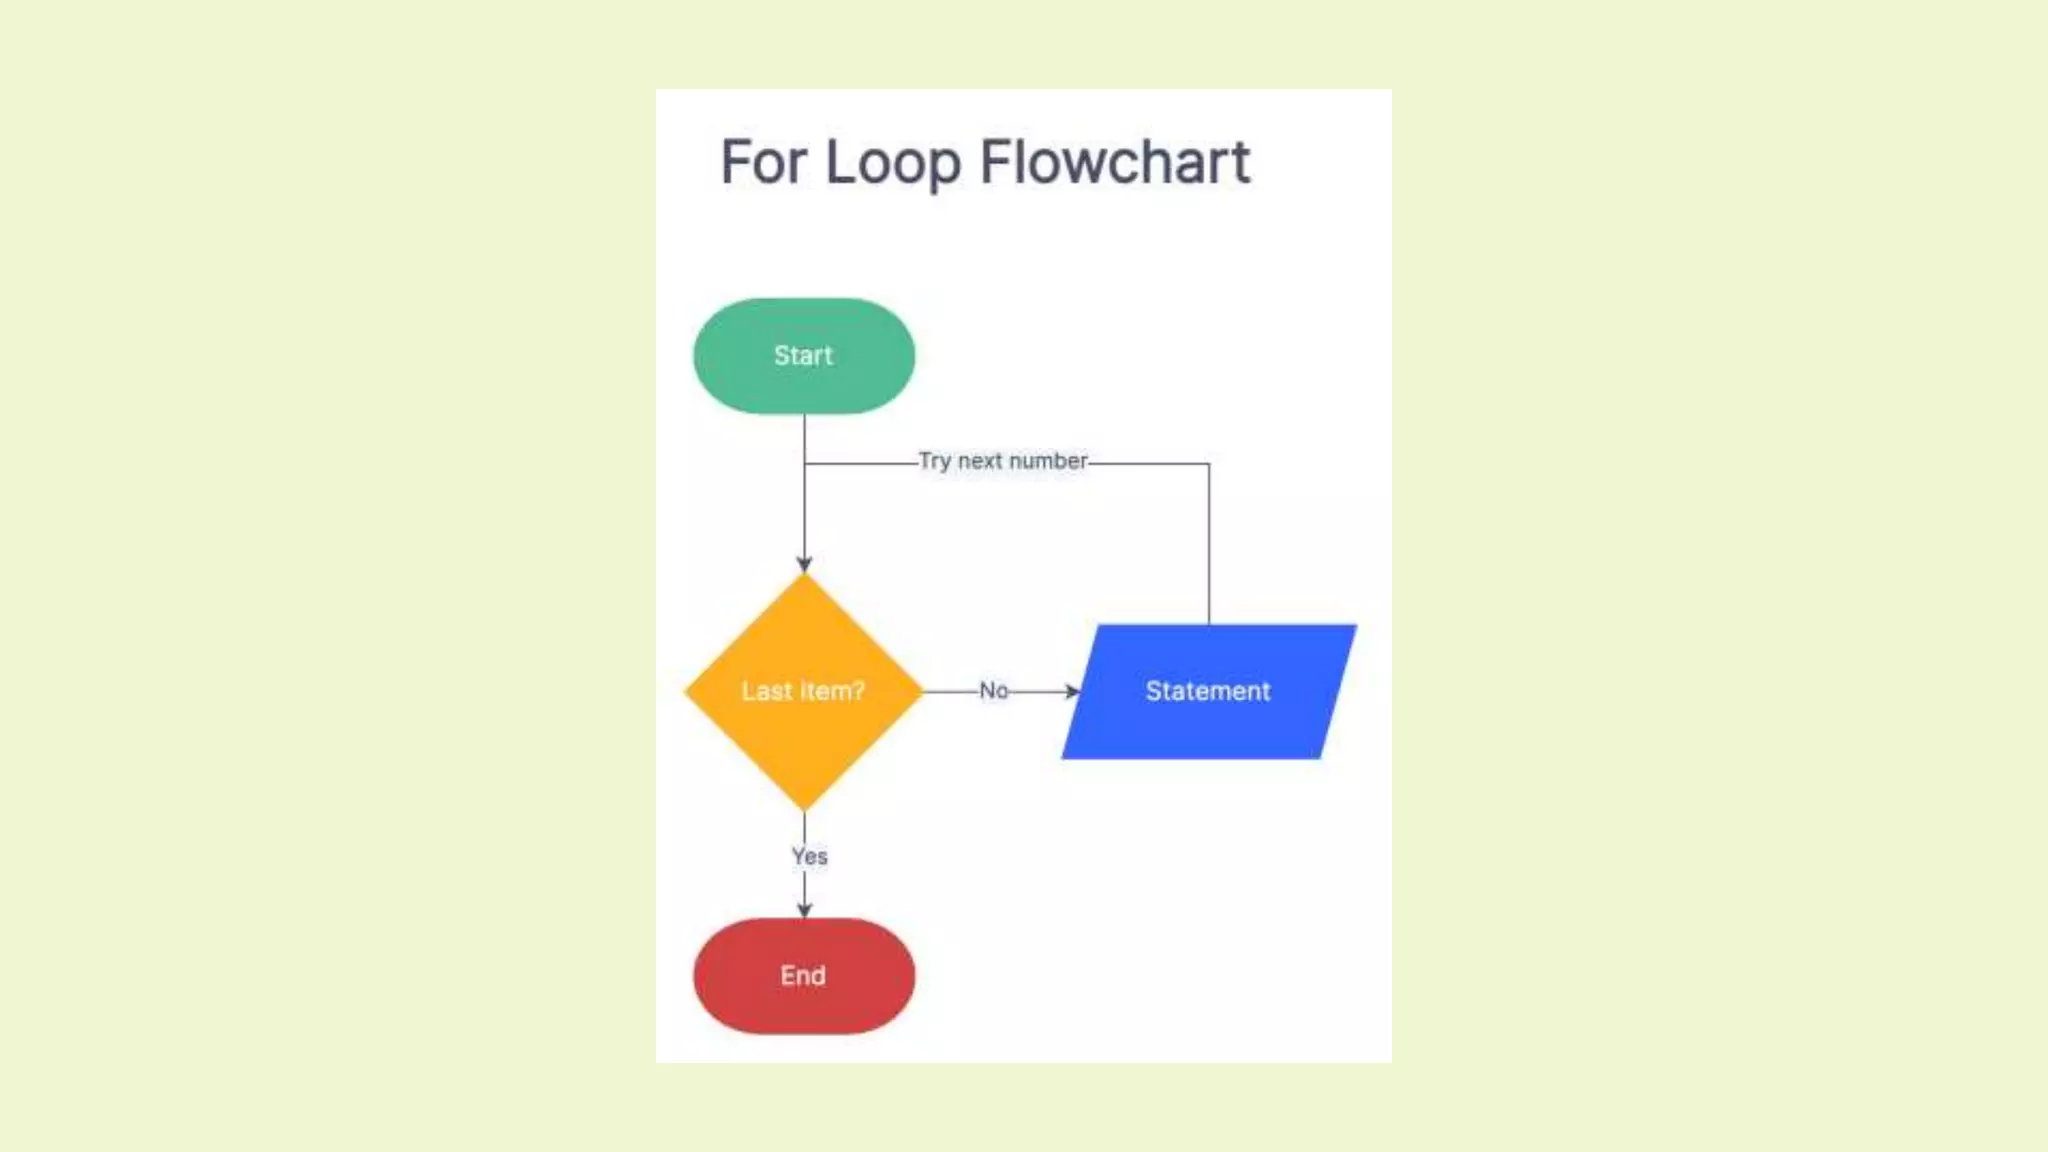
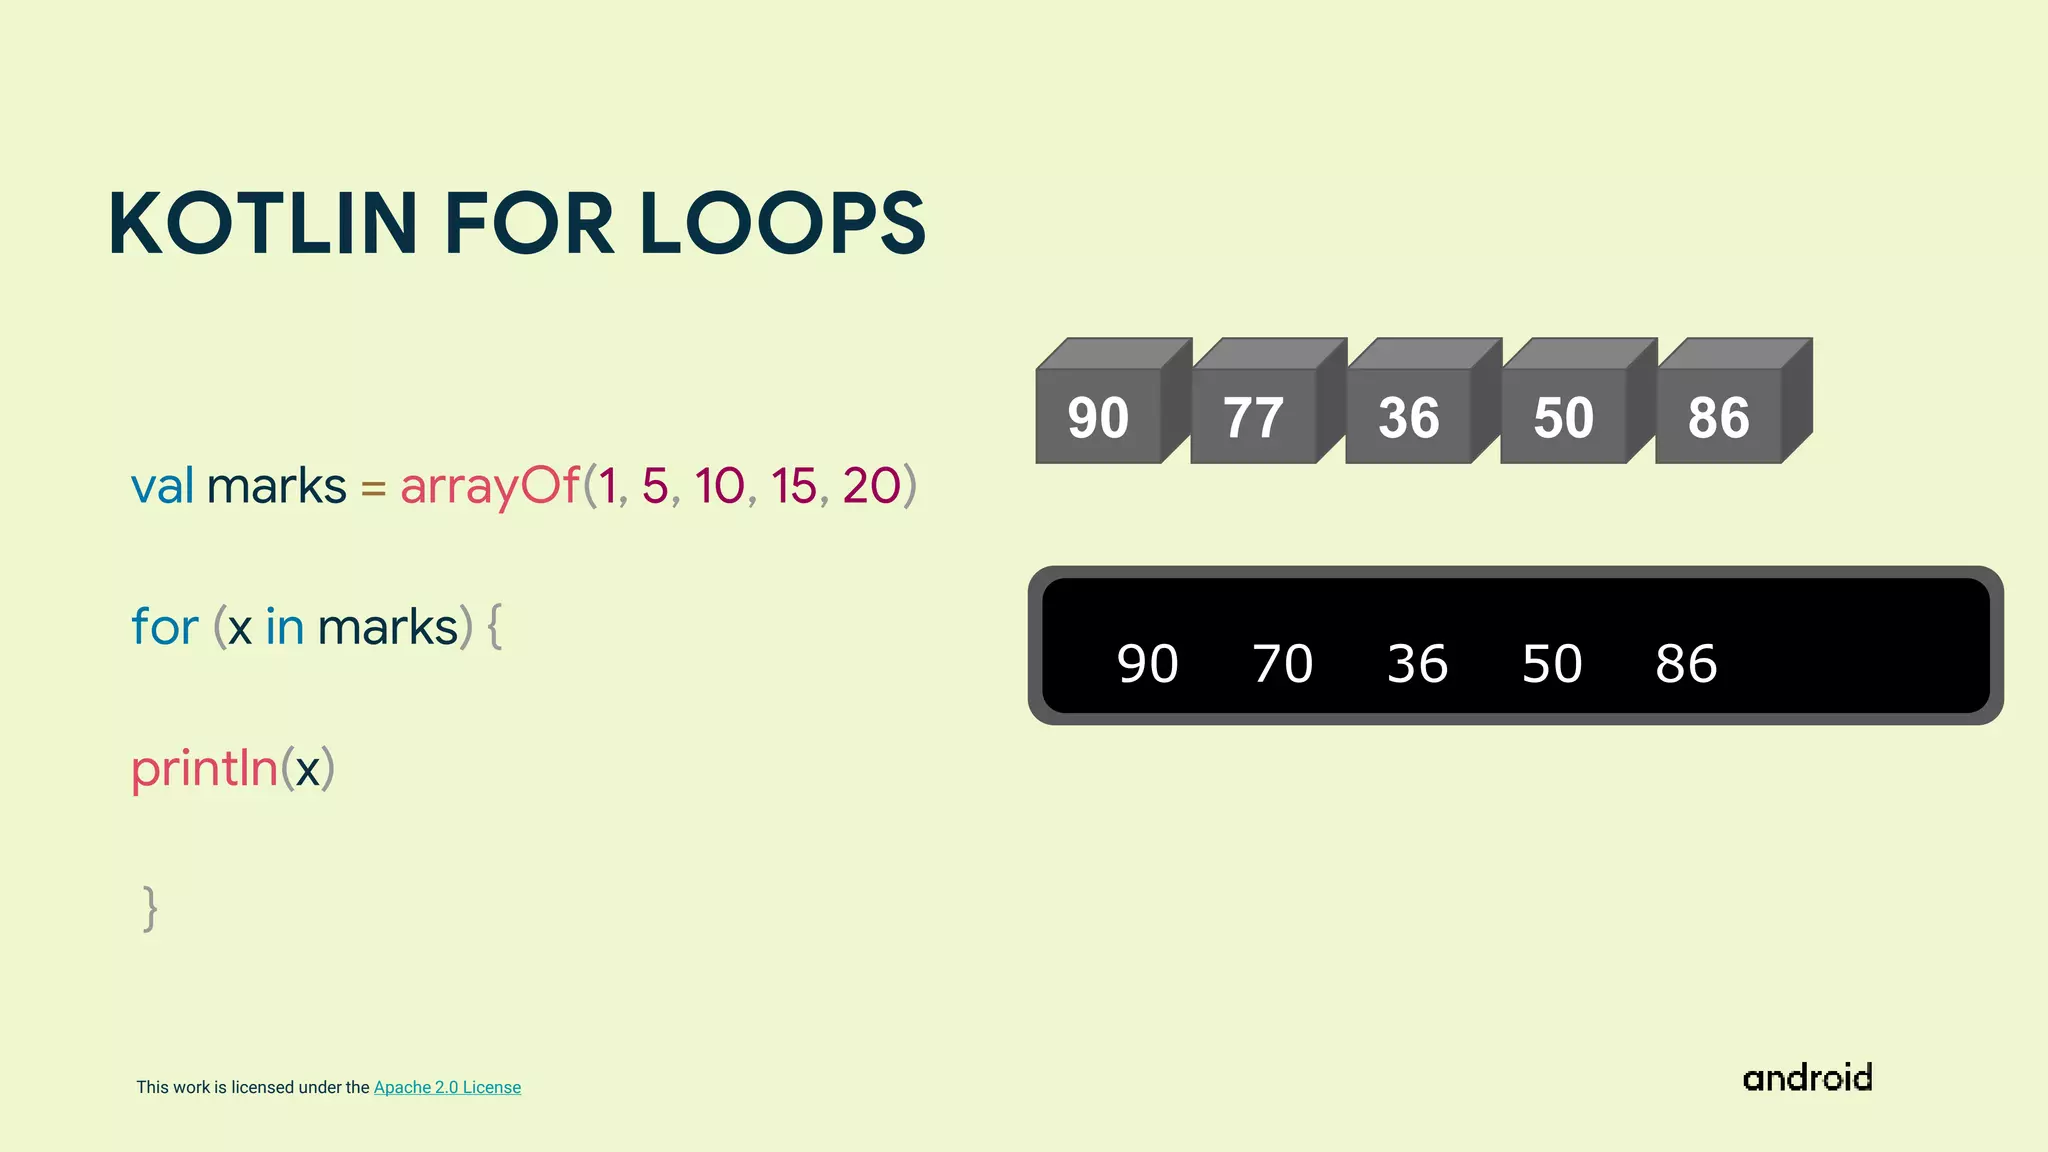
KOTLIN FOR LOOPS
90 77 36 50 86
90 70 36 50 86
val marks = arrayOf(1, 5, 10, 15, 20)
for (x in marks) {
println(x)
}
59.
This work islicensed under the Apache 2.0 License
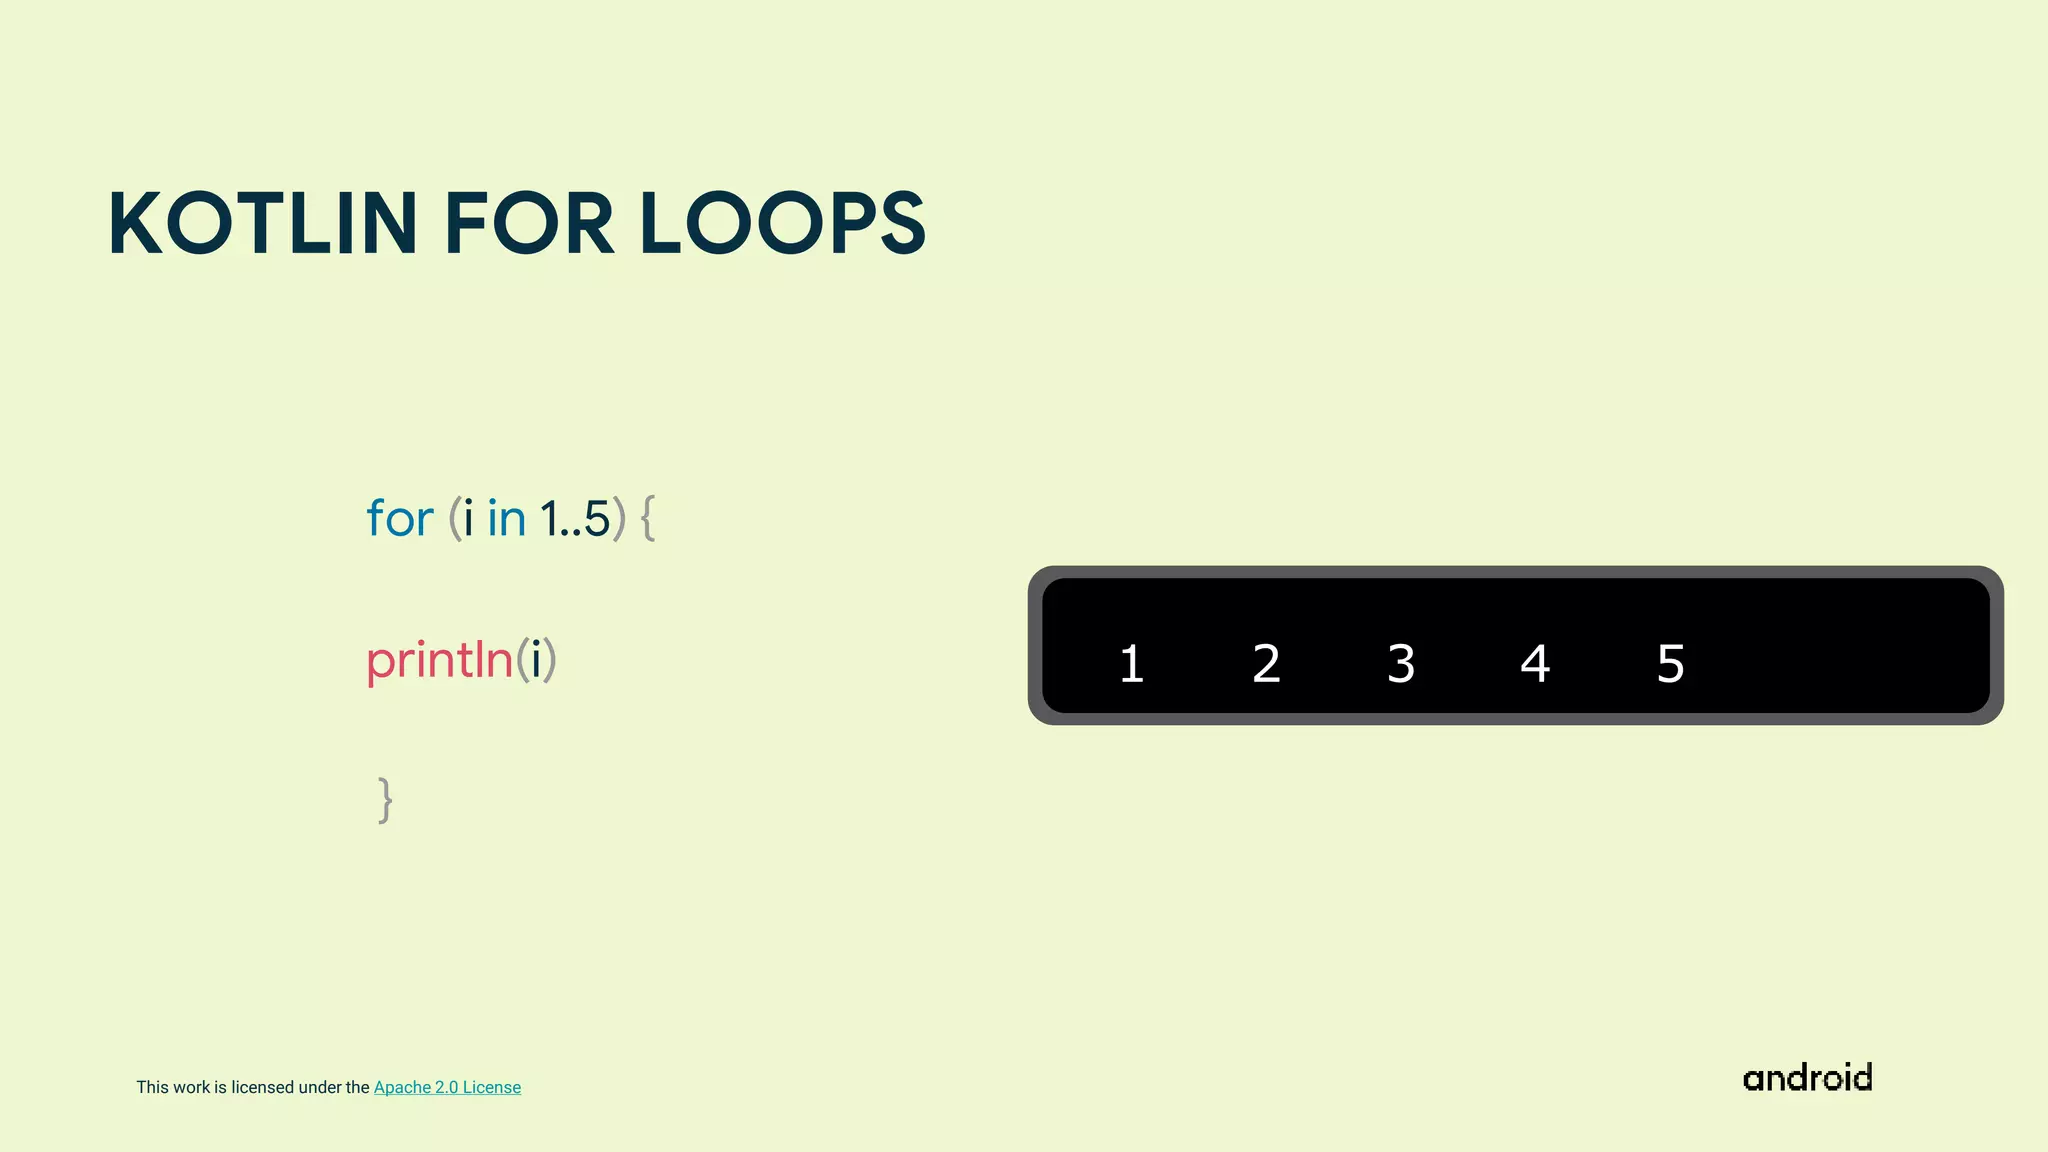
KOTLIN FOR LOOPS
1 2 3 4 5
for (i in 1..5) {
println(i)
}
62.
This work islicensed under the Apache 2.0 License
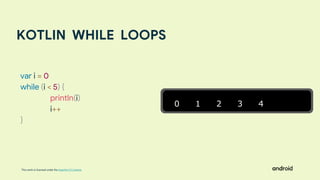
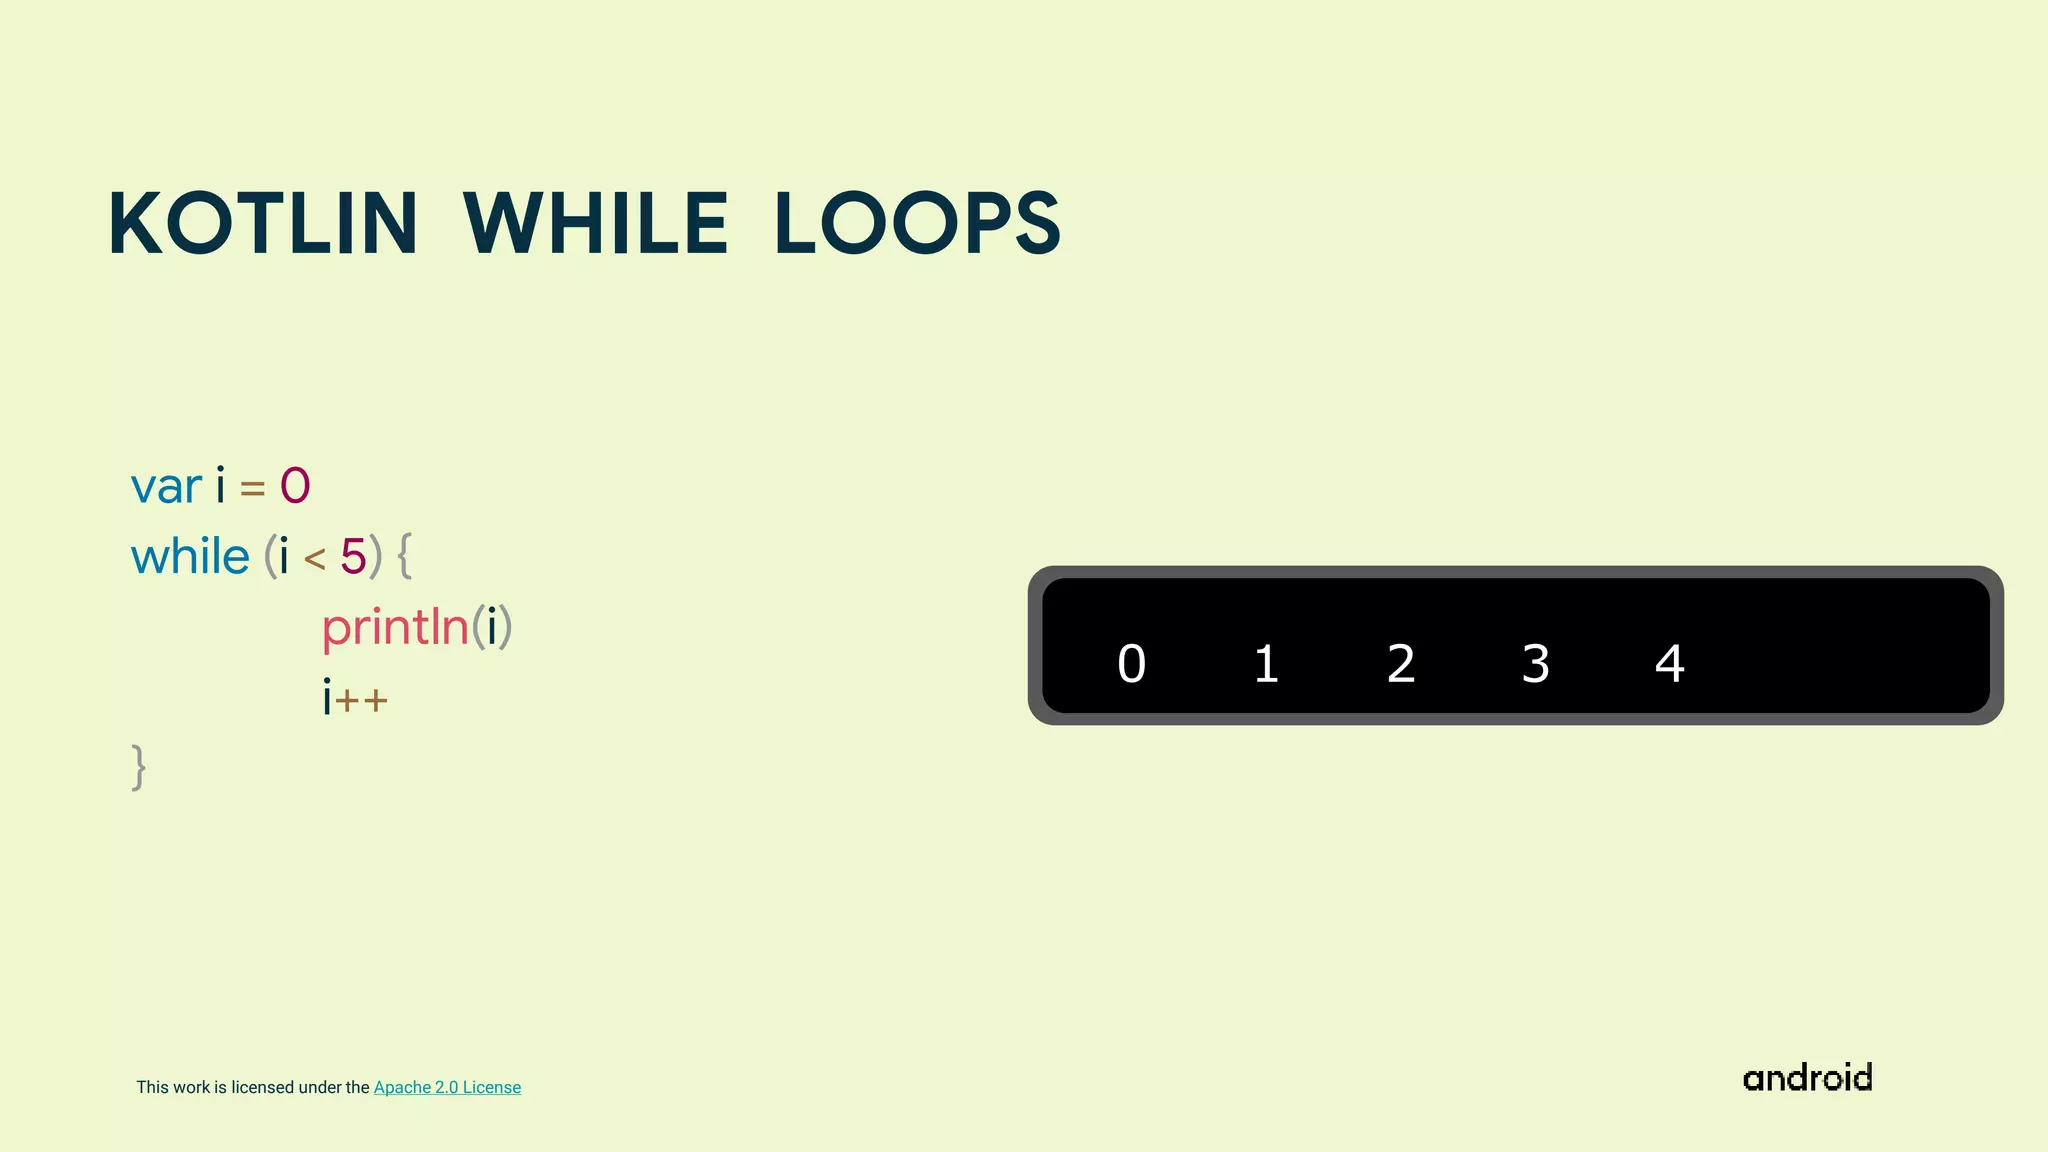
KOTLIN WHILE LOOPS
0 1 2 3 4
var i = 0
while (i < 5) {
println(i)
i++
}
63.
This work islicensed under the Apache 2.0 License
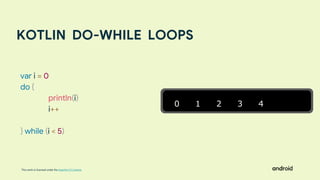
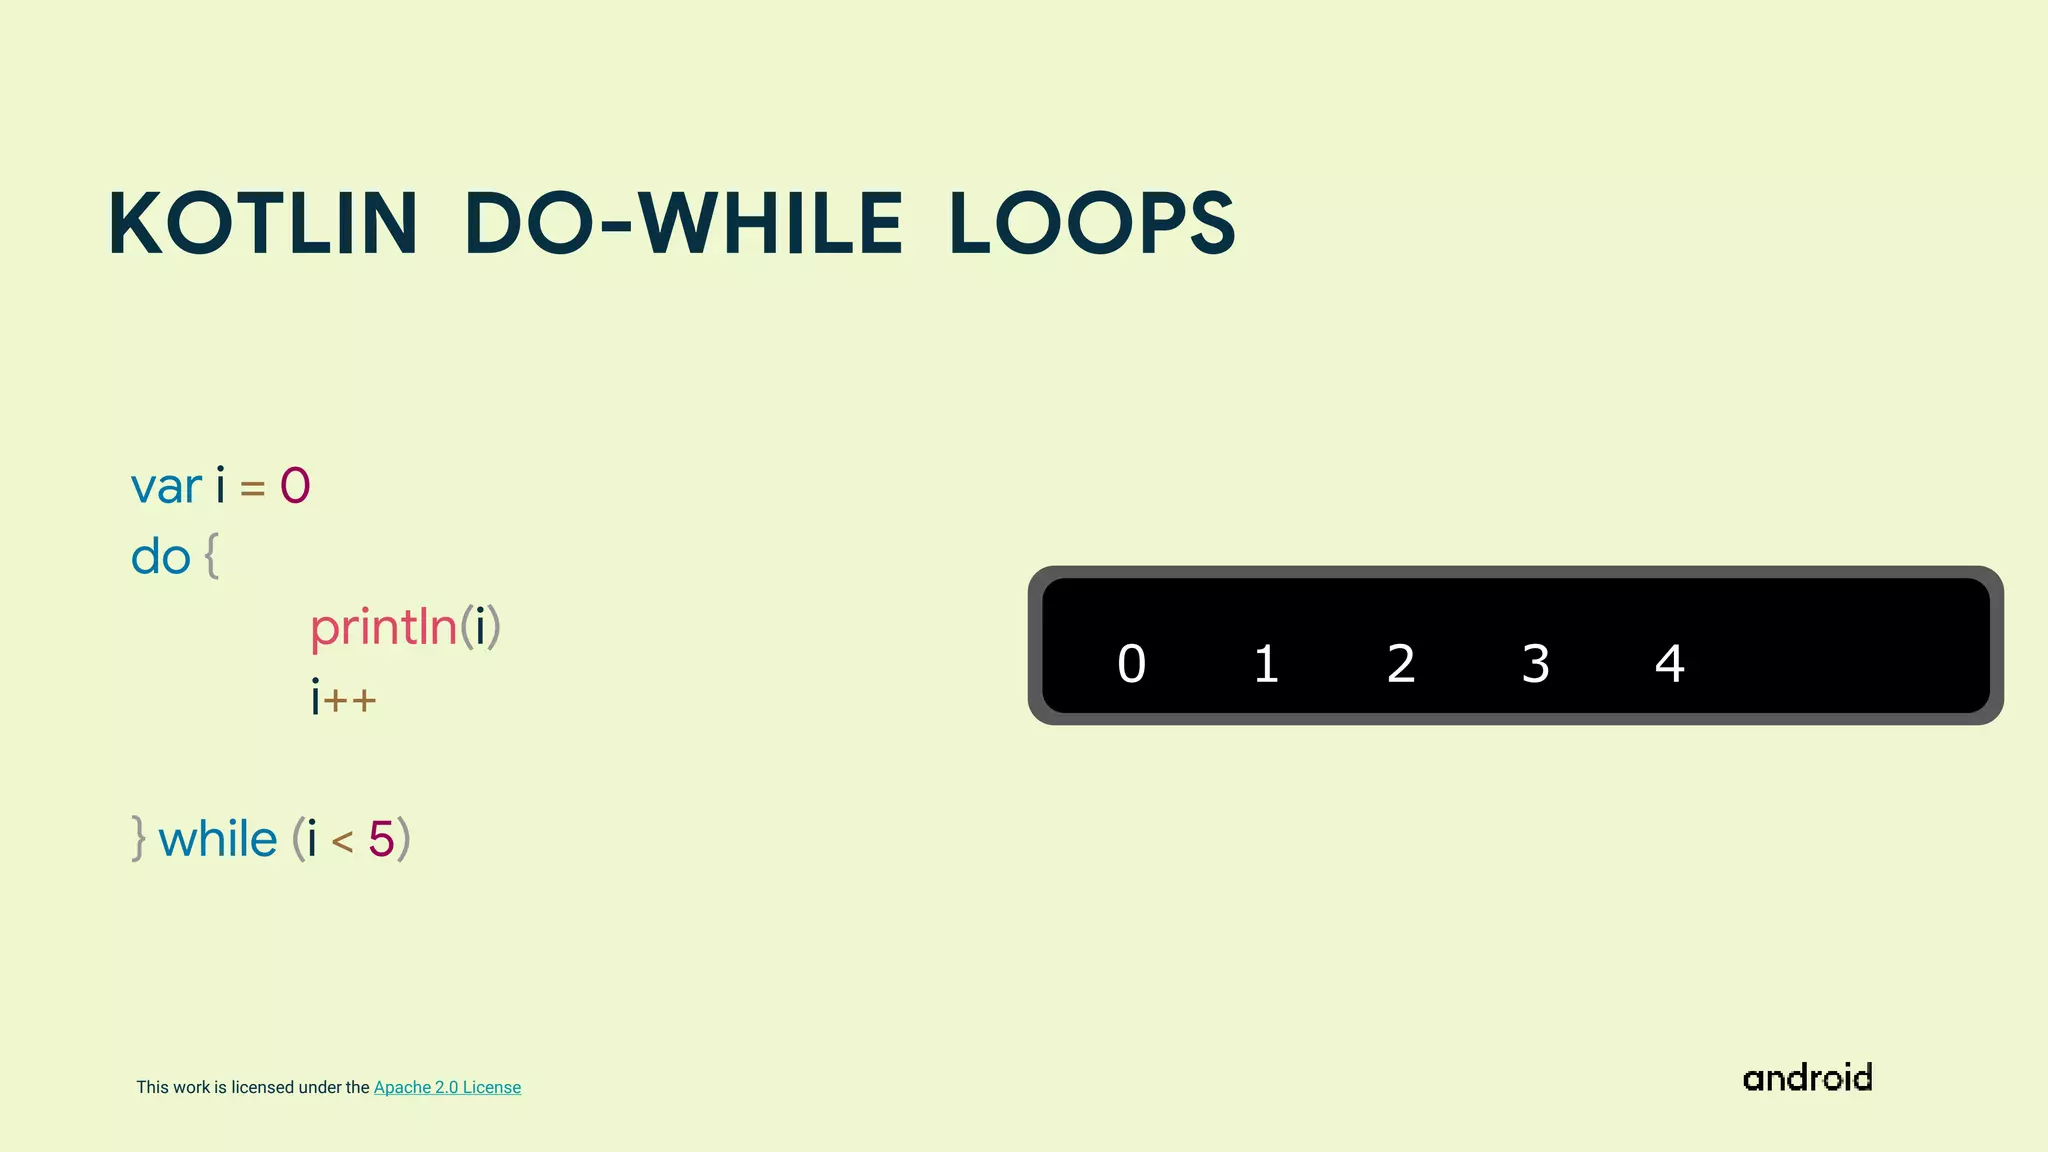
KOTLIN DO-WHILE LOOPS
0 1 2 3 4
var i = 0
do {
println(i)
i++
} while (i < 5)
This work islicensed under the Apache 2.0 License
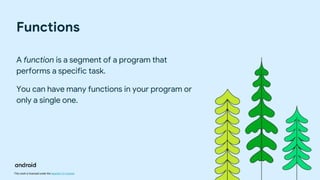
Functions
A function is a segment of a program that
performs a specific task.
You can have many functions in your program or
only a single one.
66.
This work islicensed under the Apache 2.0 License
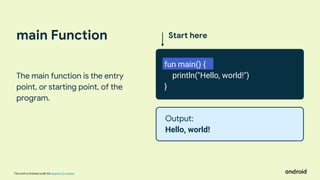
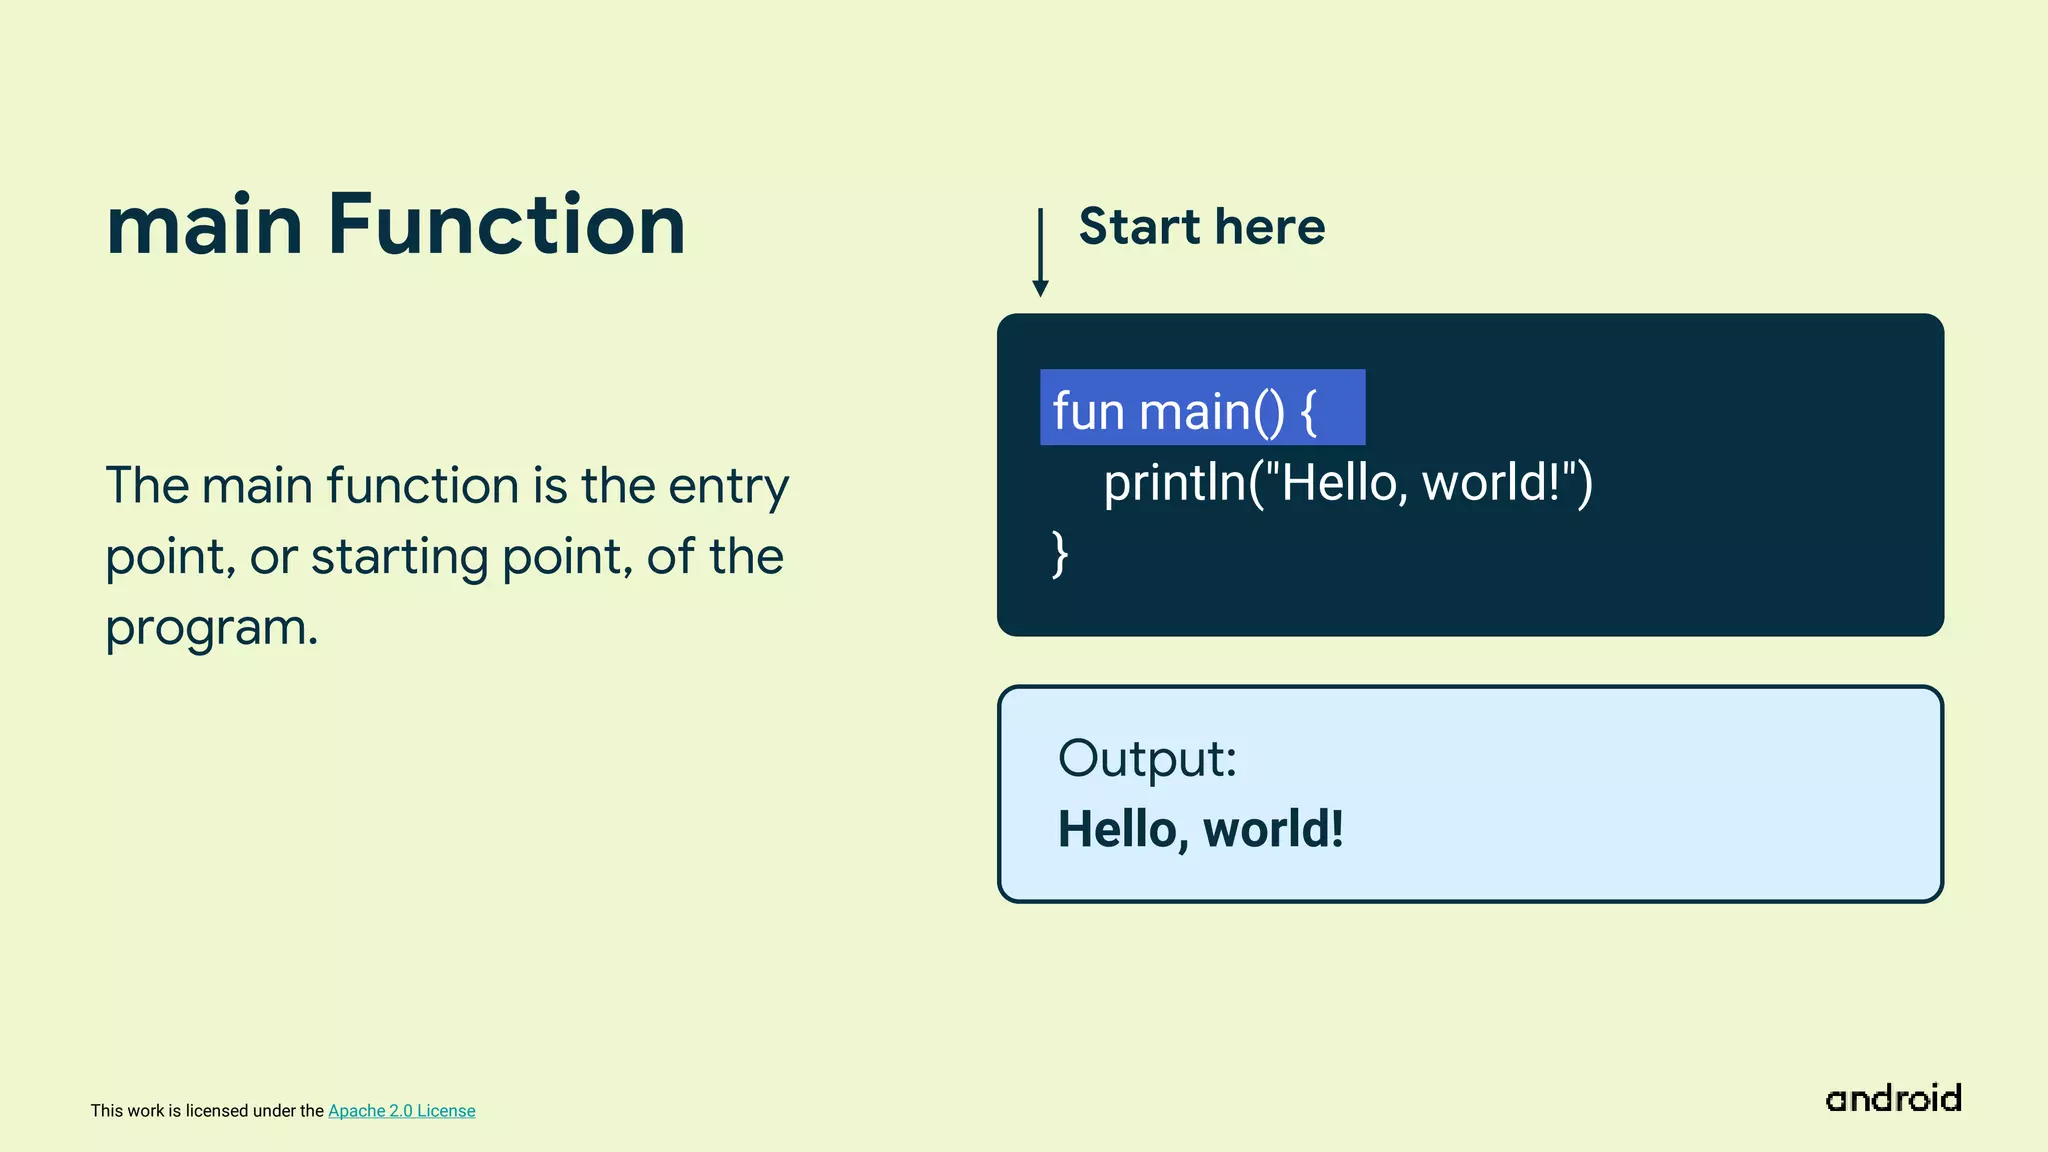
main Function
The main function is the entry
point, or starting point, of the
program.
Start here
fun main() {
println("Hello, world!")
}
Output:
Hello, world!
67.
This work islicensed under the Apache 2.0 License
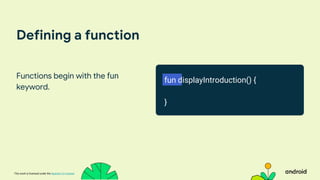
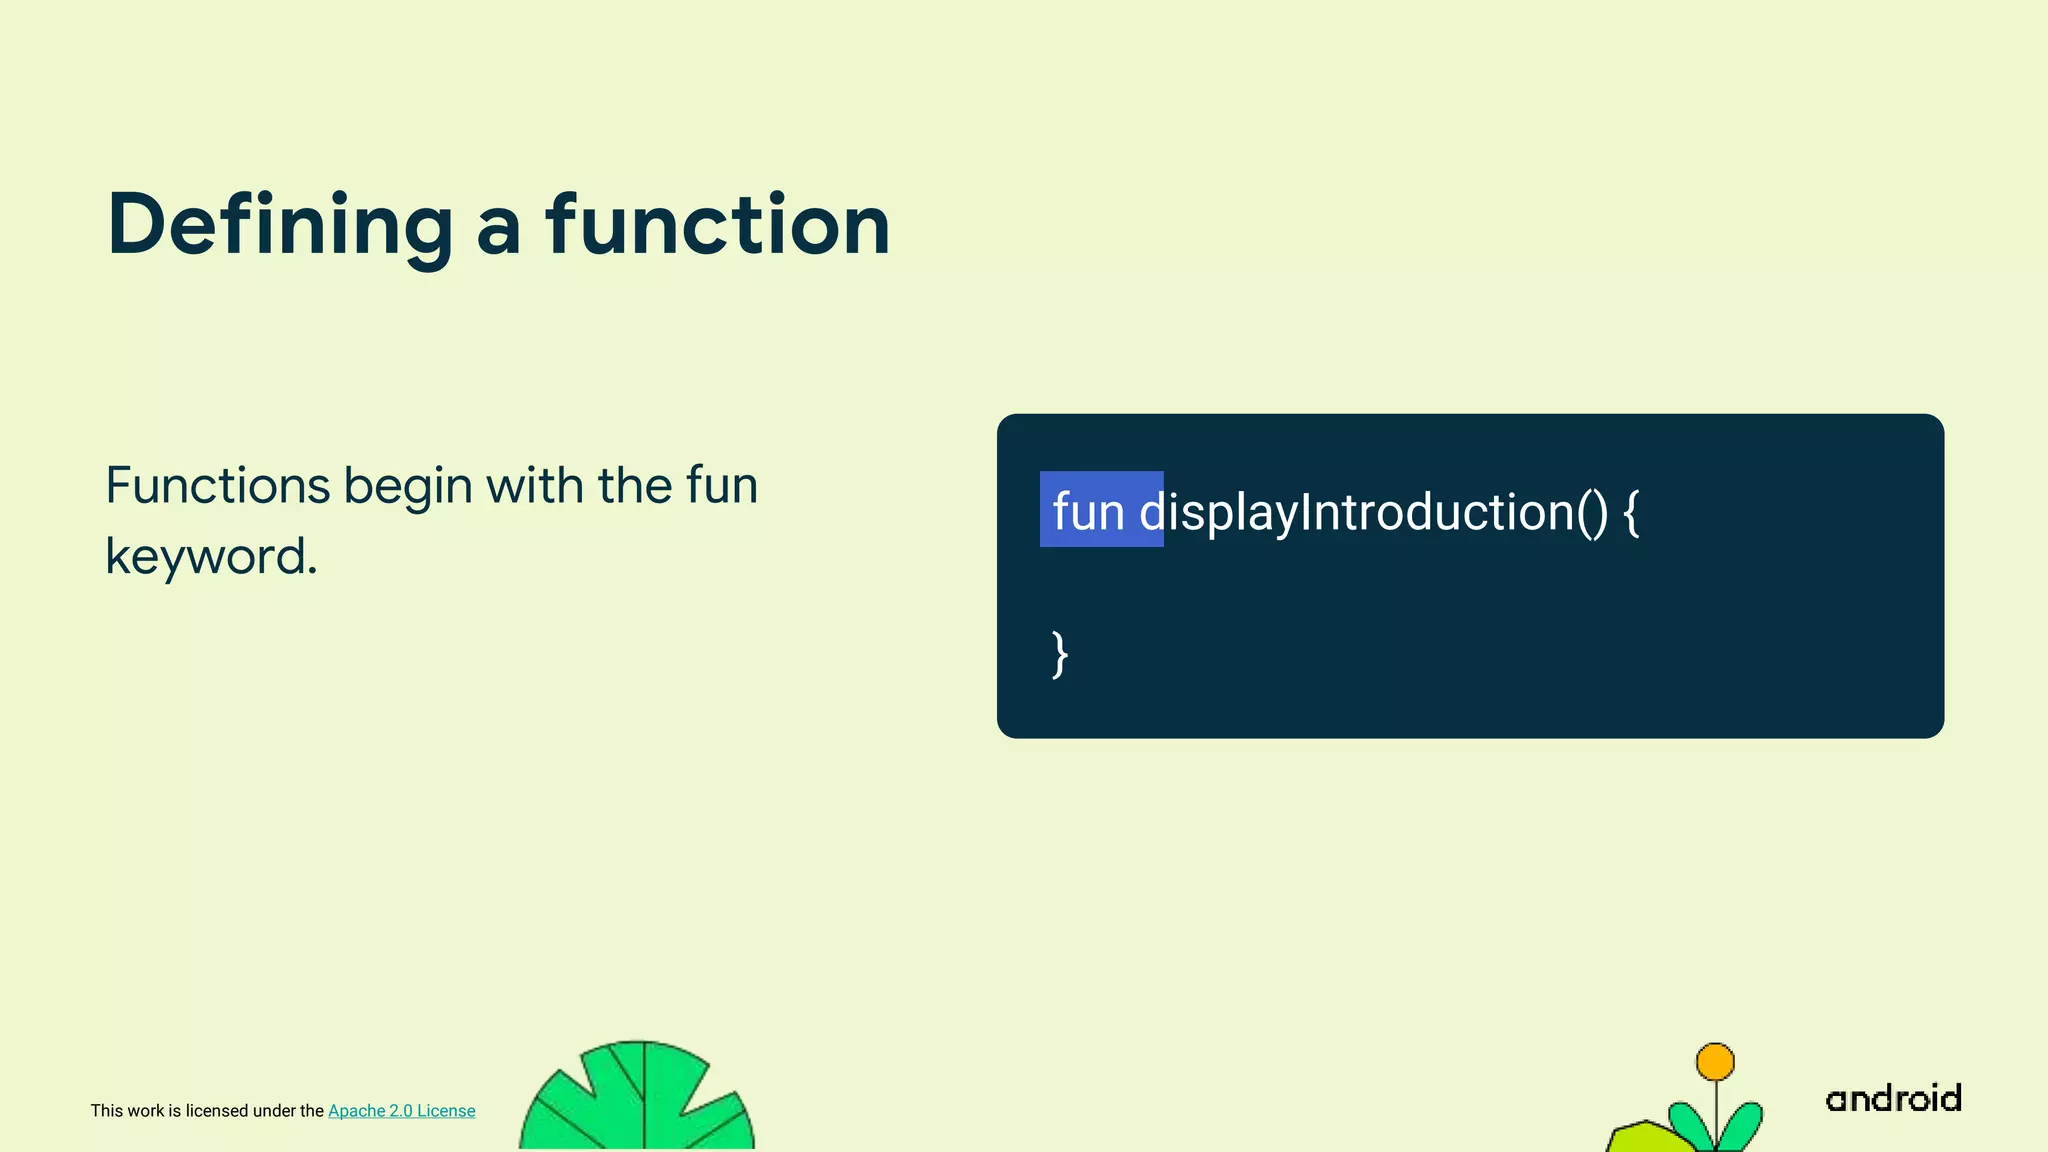
Defining a function
Functions begin with the fun
keyword.
fun displayIntroduction() {
}
68.
This work islicensed under the Apache 2.0 License
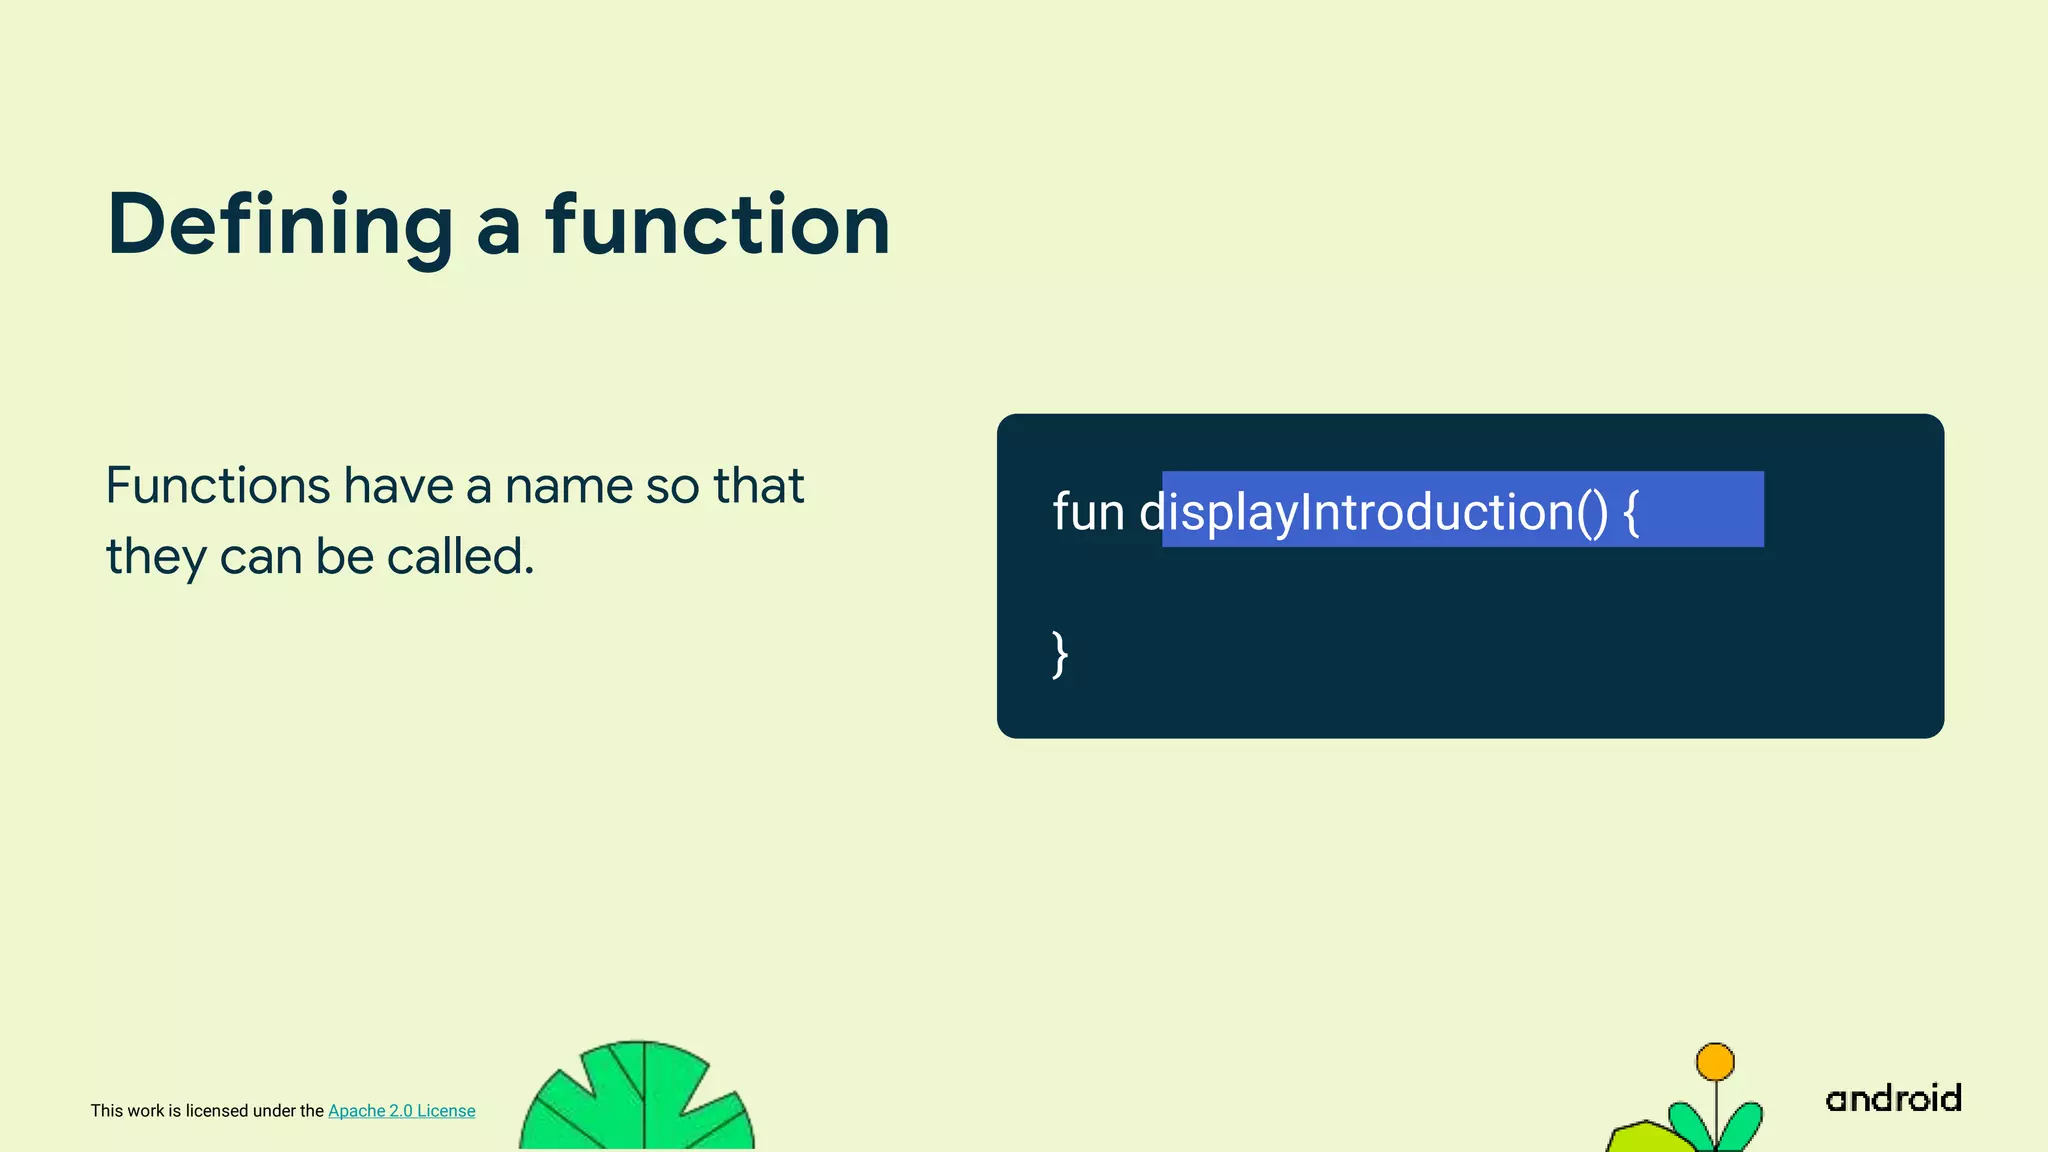
Defining a function
Functions have a name so that
they can be called.
fun displayIntroduction() {
}
69.
This work islicensed under the Apache 2.0 License
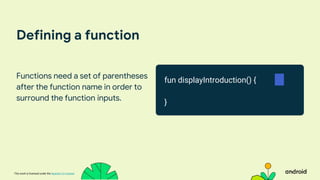
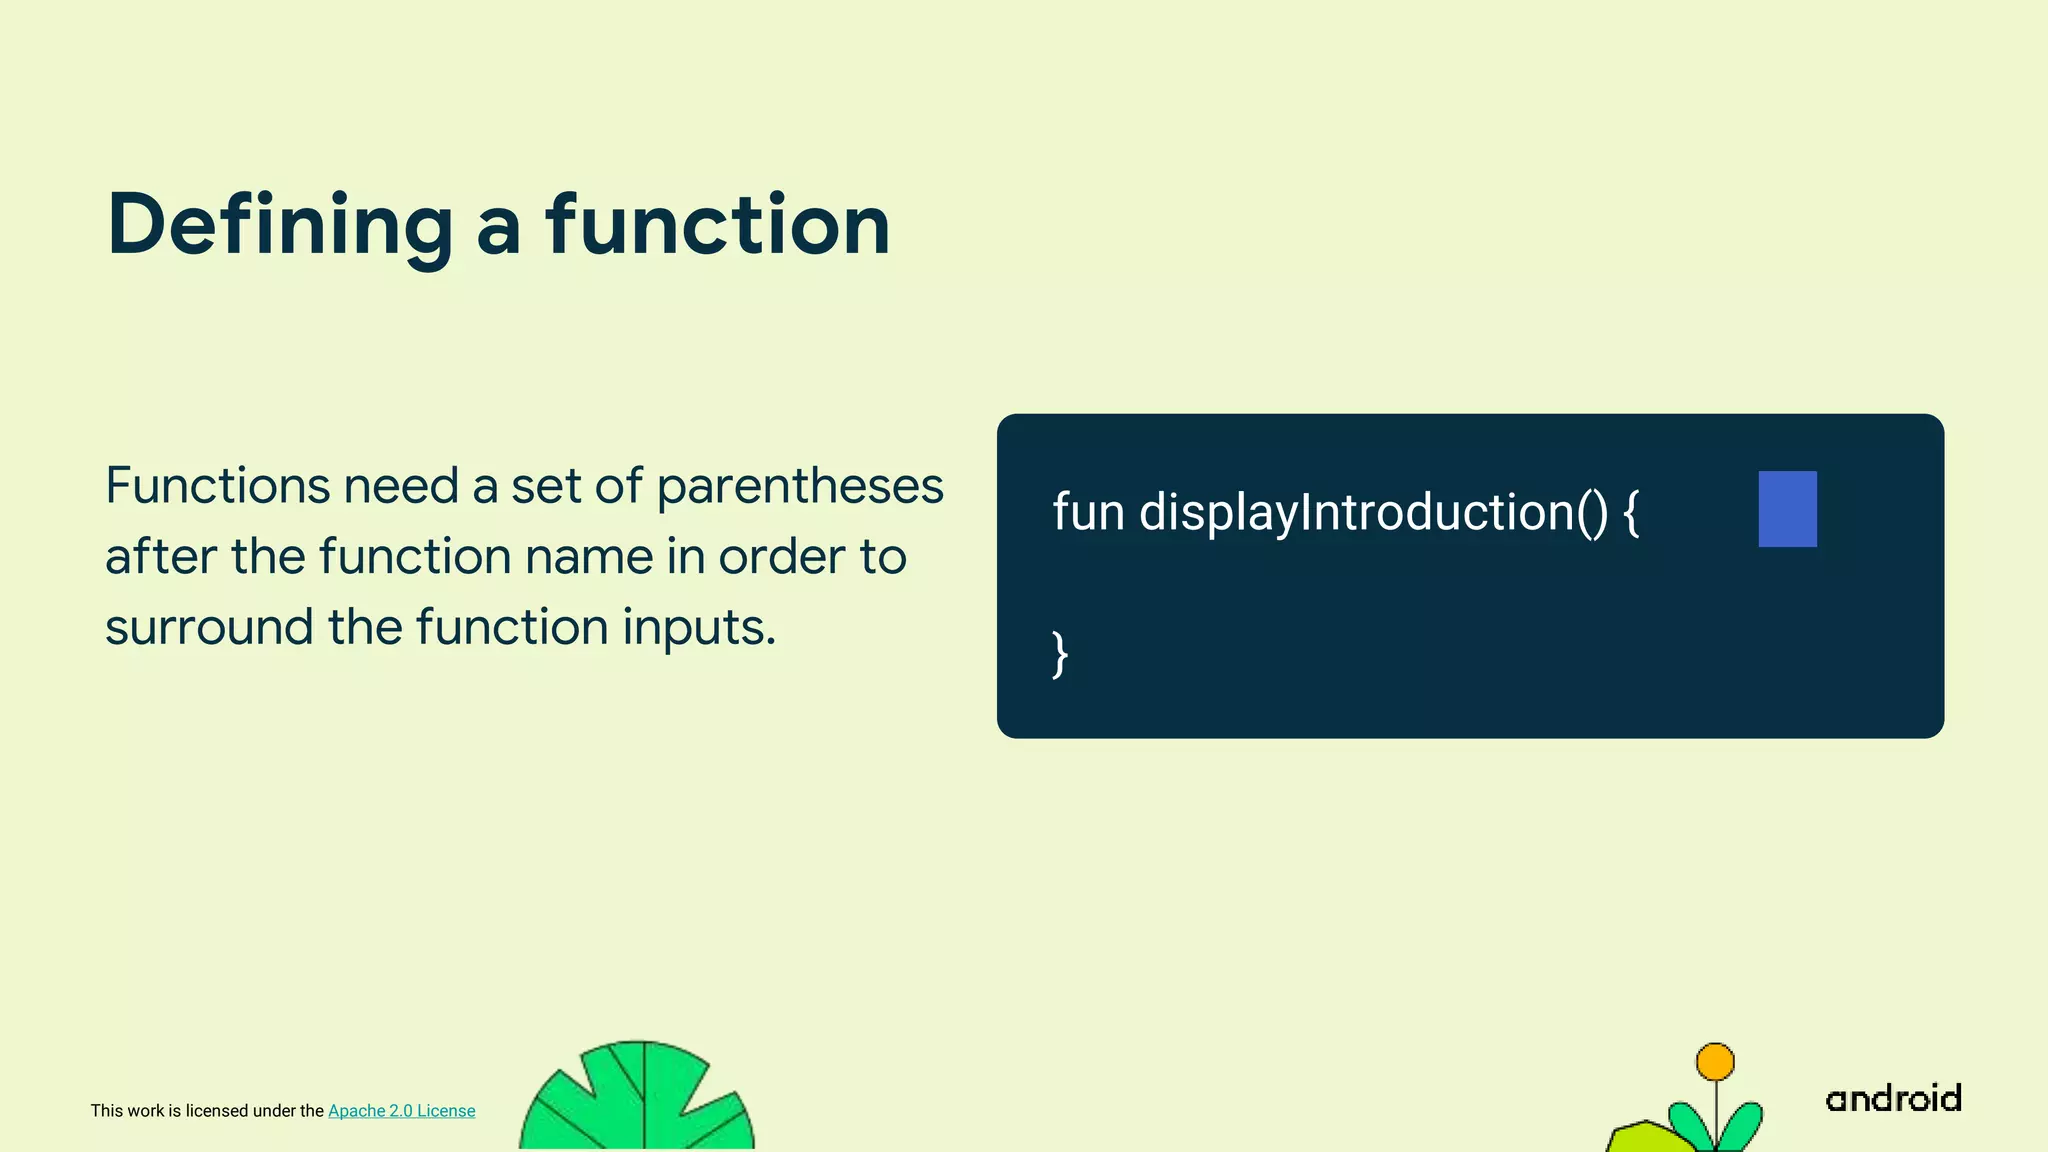
Defining a function
Functions need a set of parentheses
after the function name in order to
surround the function inputs.
fun displayIntroduction() {
}
70.
This work islicensed under the Apache 2.0 License
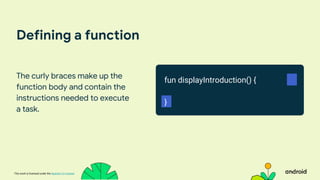
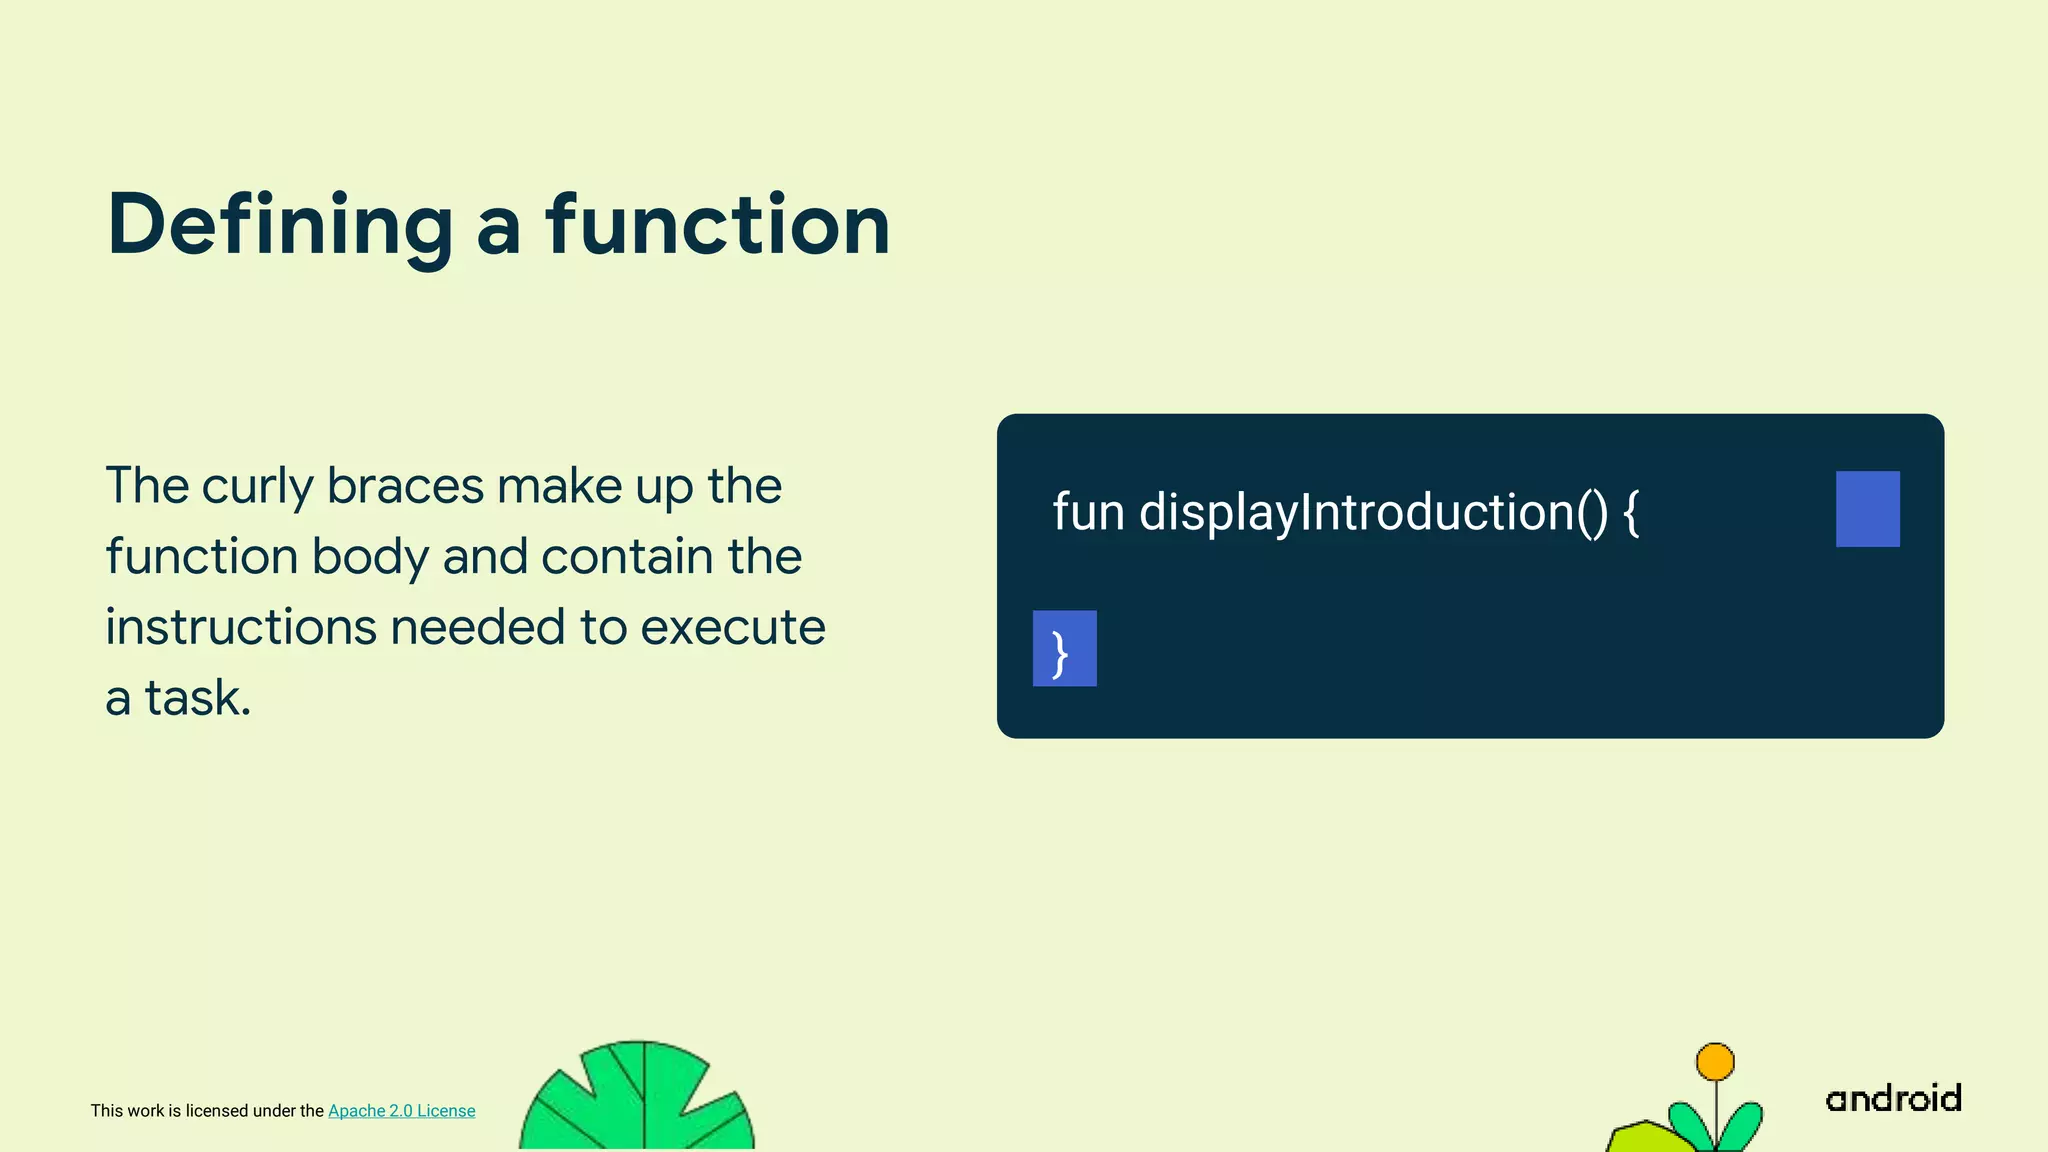
Defining a function
The curly braces make up the
function body and contain the
instructions needed to execute
a task.
fun displayIntroduction() {
}
71.
This work islicensed under the Apache 2.0 License
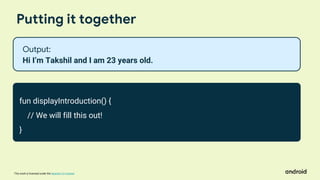
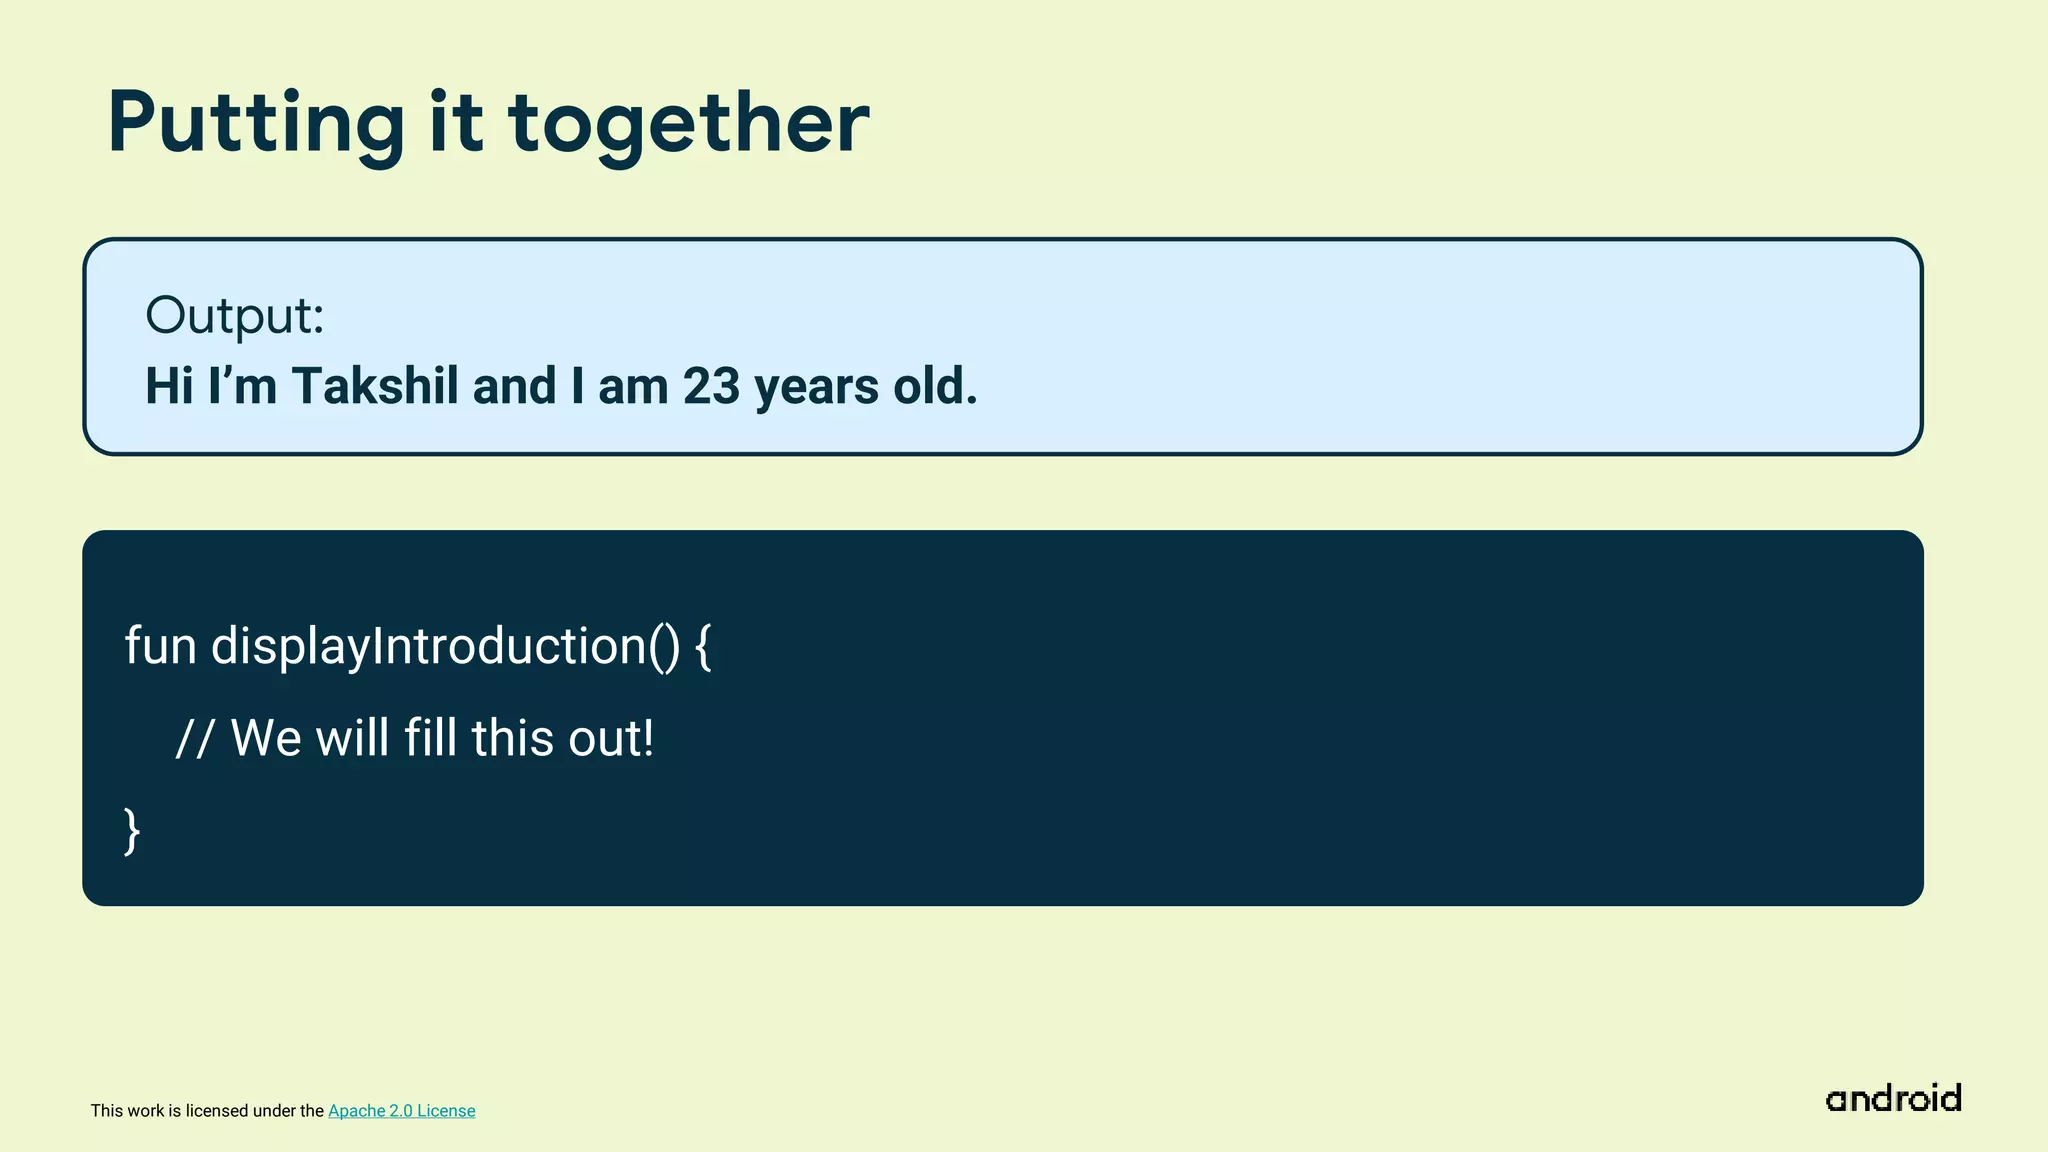
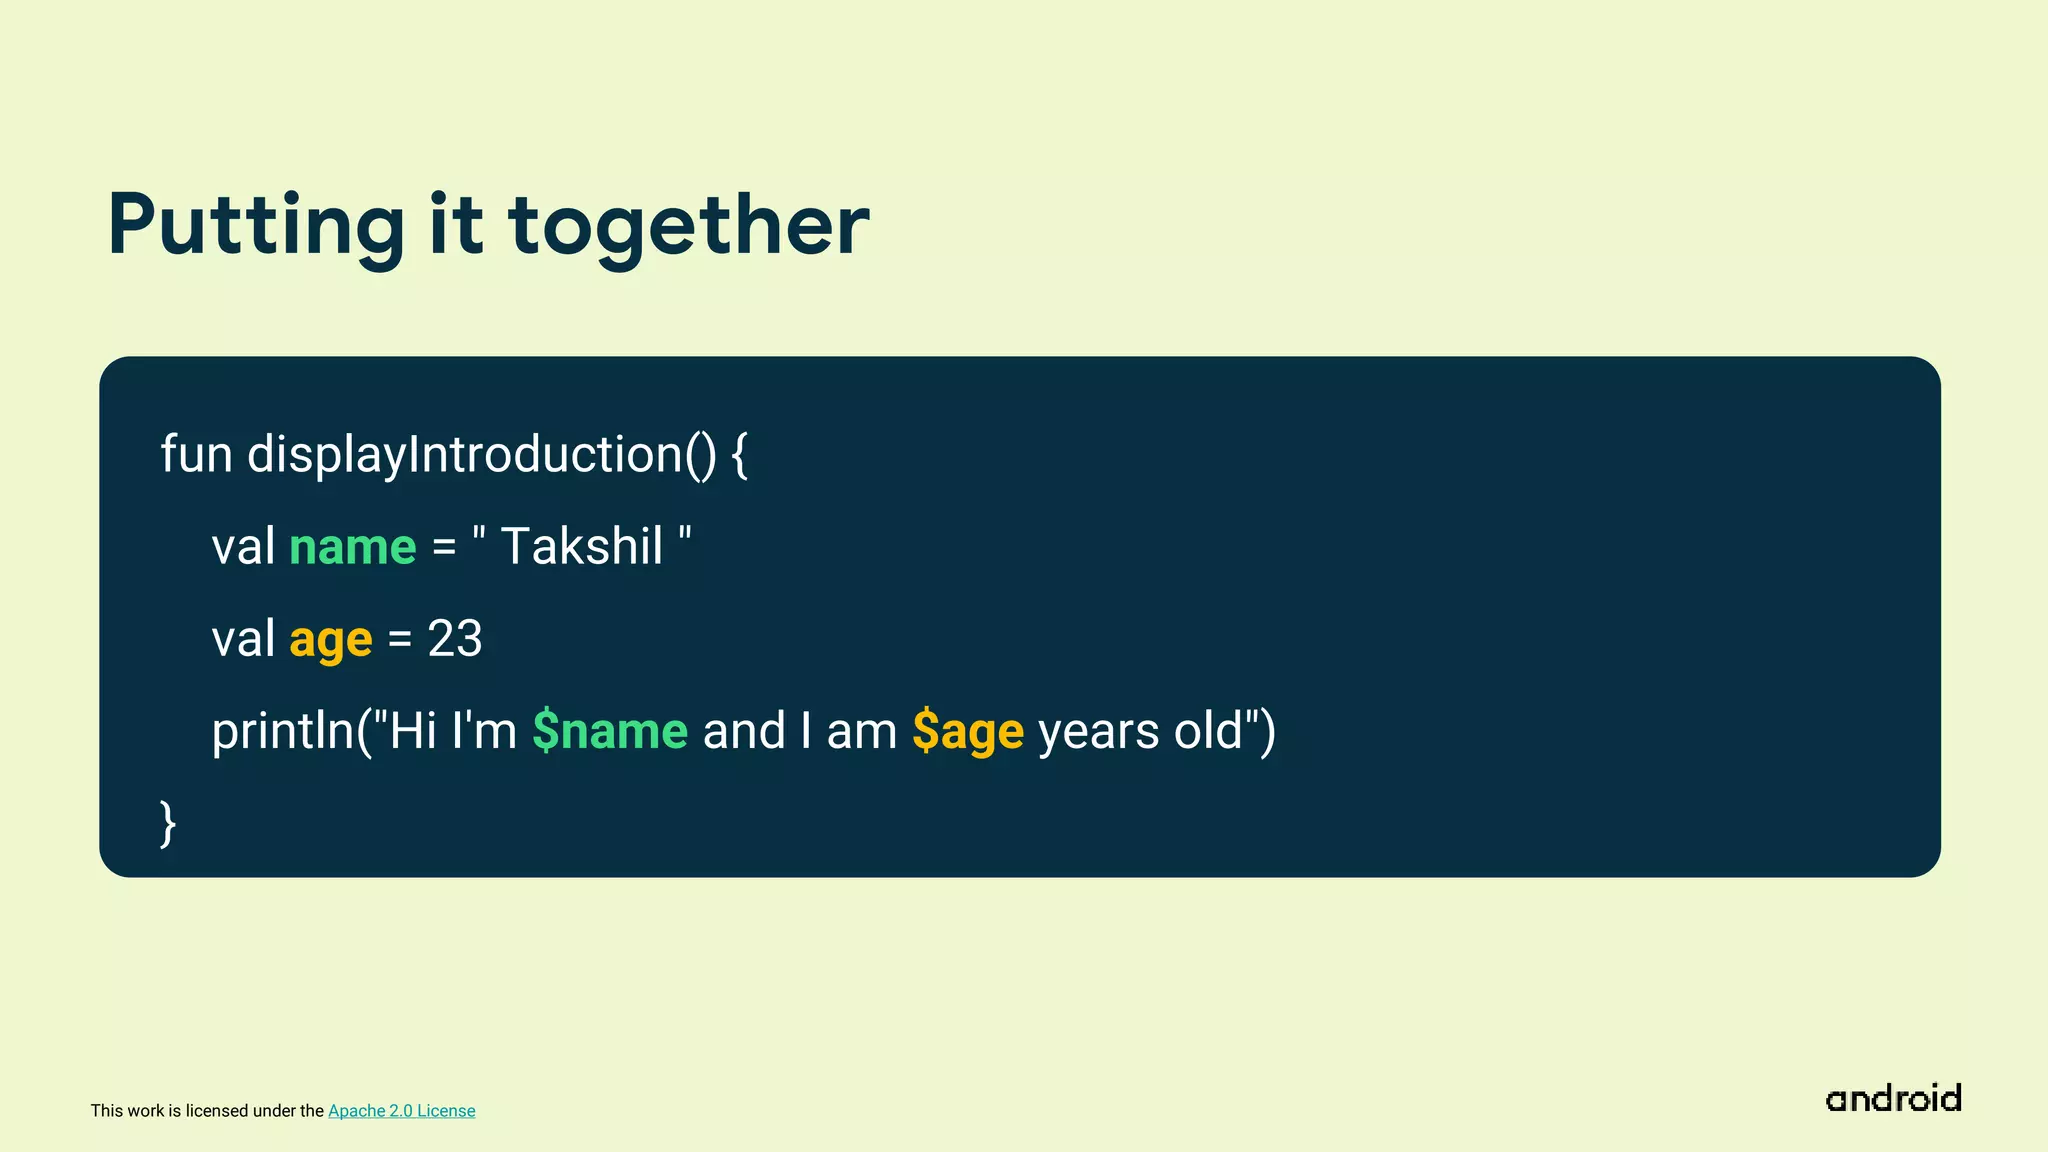
Putting it together
fun displayIntroduction() {
// We will fill this out!
}
Output:
Hi I’m Takshil and I am 23 years old.
72.
This work islicensed under the Apache 2.0 License
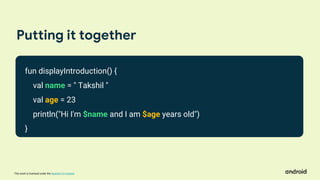
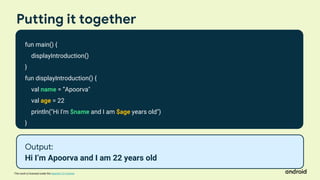
Putting it together
fun displayIntroduction() {
val name = " Takshil "
val age = 23
println("Hi I'm $name and I am $age years old")
}
73.
This work islicensed under the Apache 2.0 License
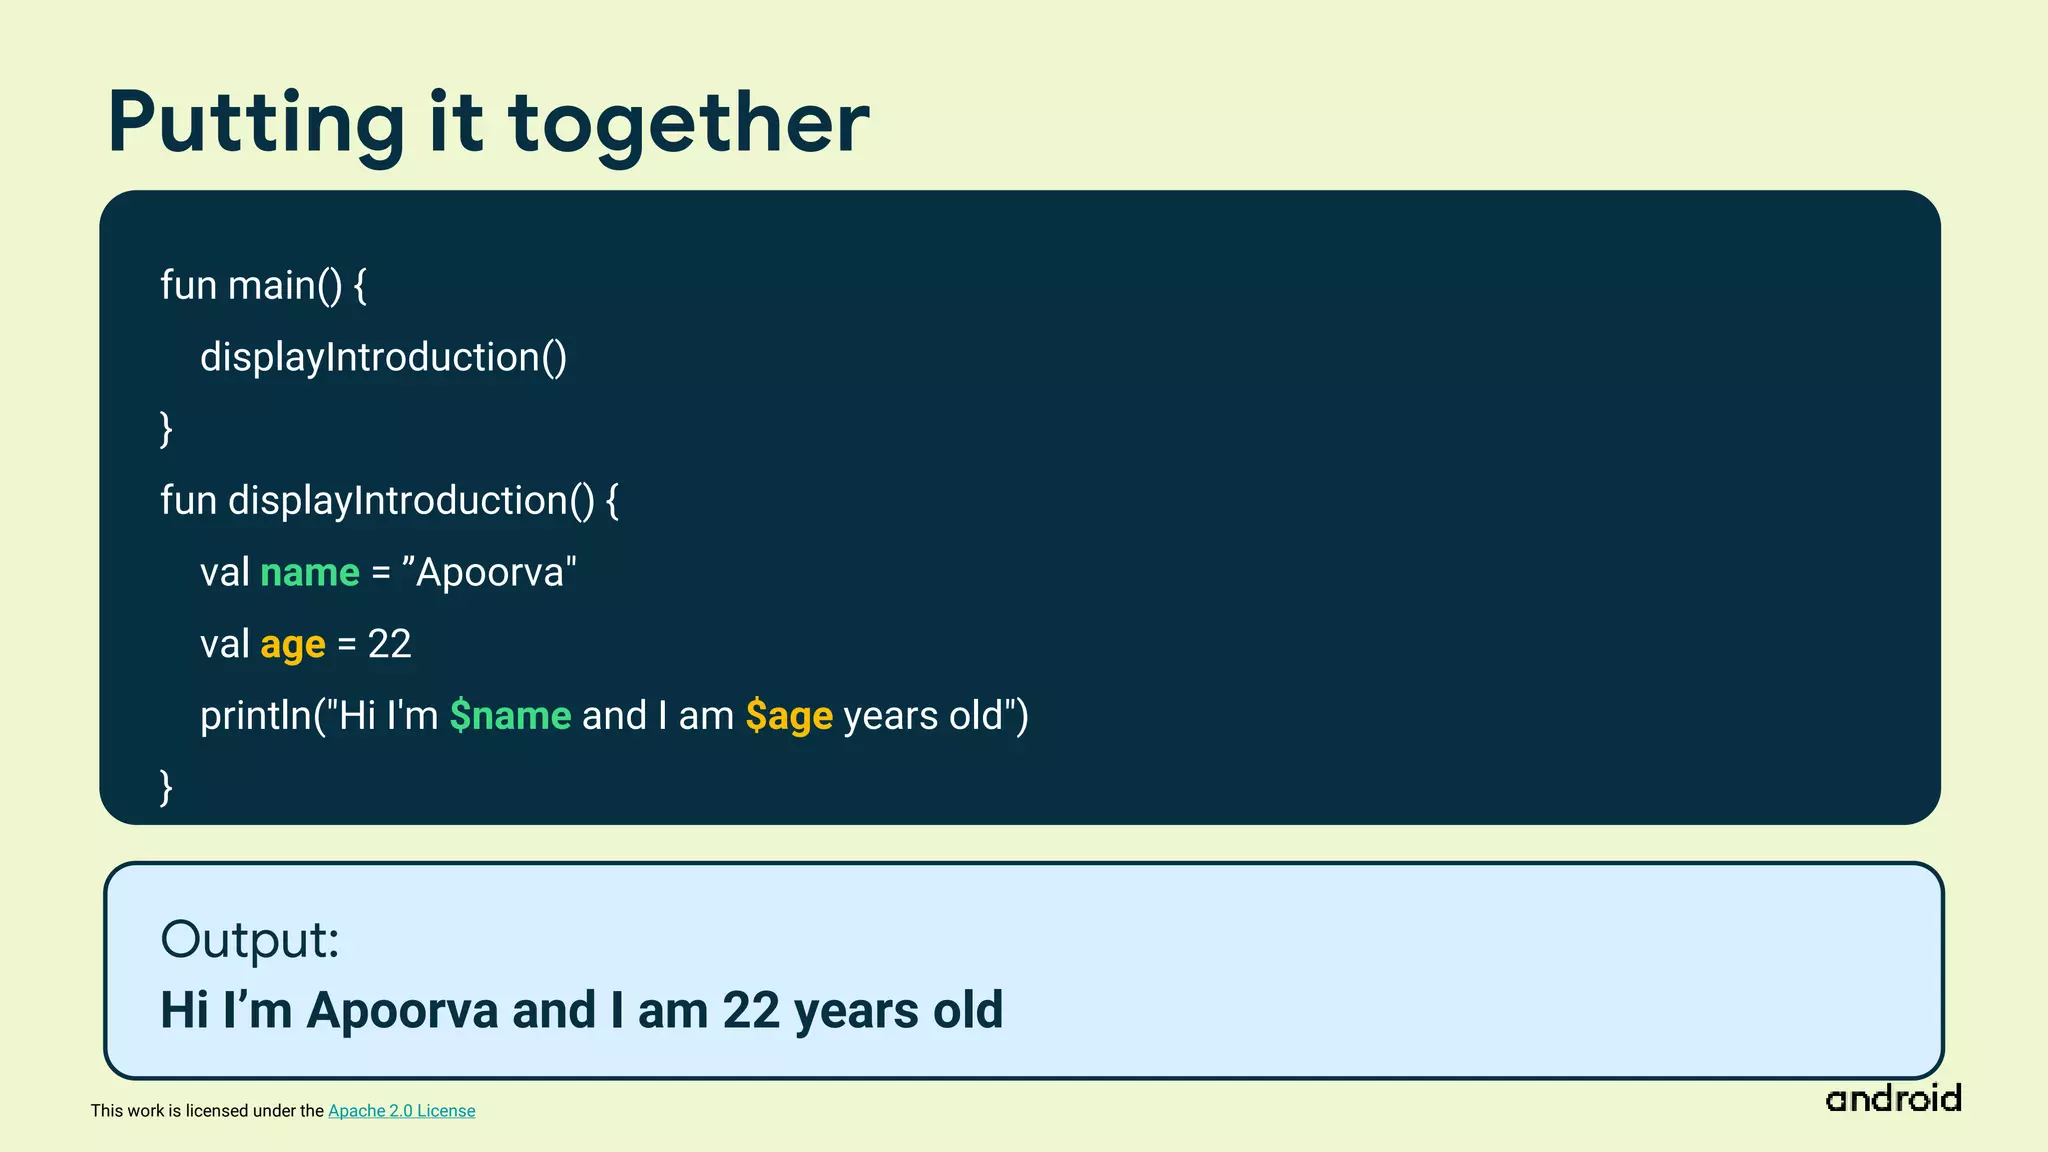
Putting it together
fun main() {
displayIntroduction()
}
fun displayIntroduction() {
val name = ”Apoorva"
val age = 22
println("Hi I'm $name and I am $age years old")
}
Output:
Hi I’m Apoorva and I am 22 years old
74.
This work islicensed under the Apache 2.0 License
Working of an Android App
75.
This work islicensed under the Apache 2.0 License
Views in Android
76.
This work islicensed under the Apache 2.0 License
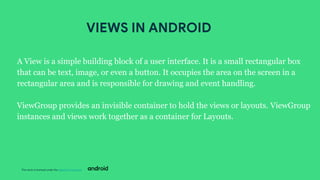
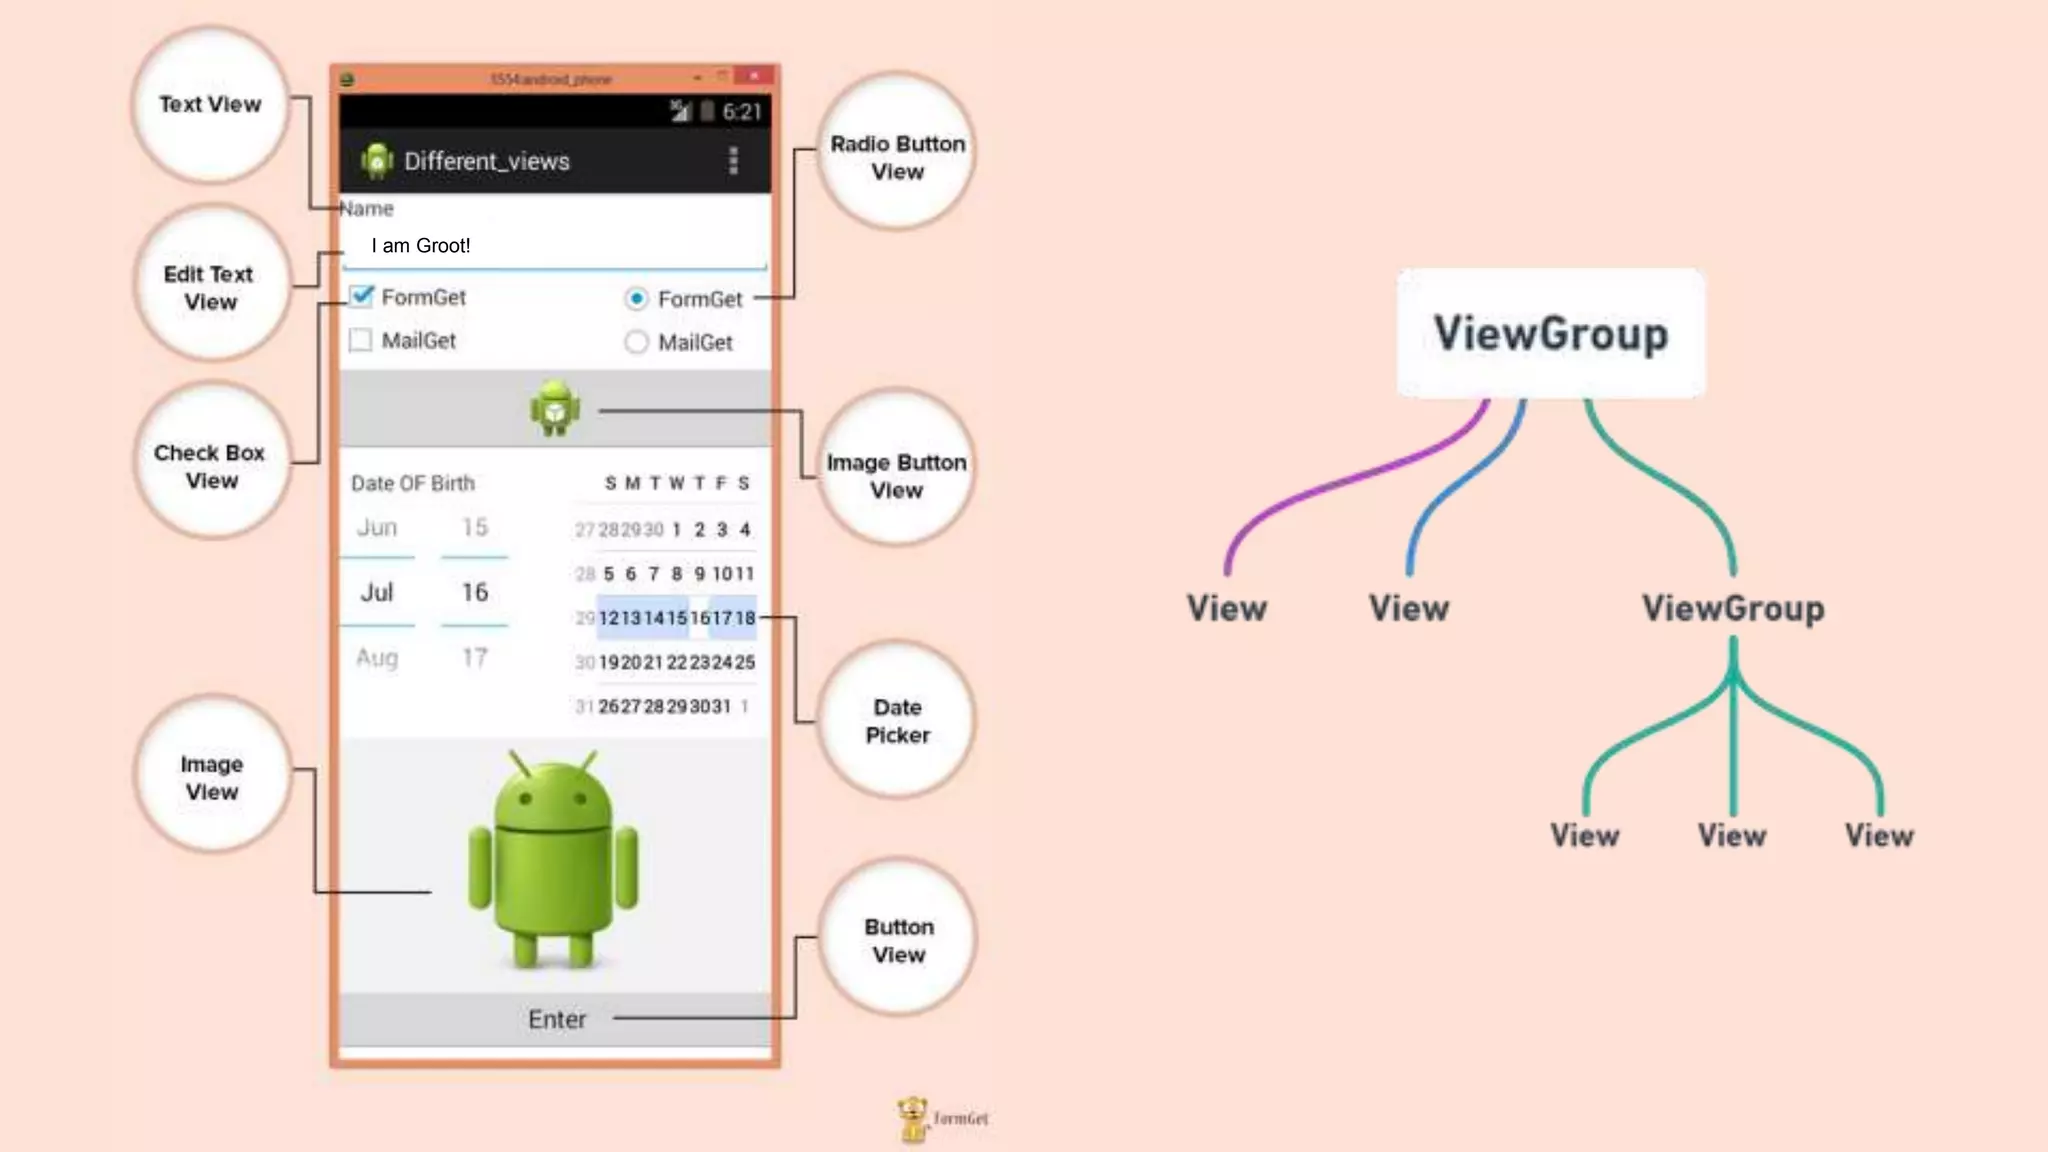
A View is a simple building block of a user interface. It is a small rectangular box
that can be text, image, or even a button. It occupies the area on the screen in a
rectangular area and is responsible for drawing and event handling.
ViewGroup provides an invisible container to hold the views or layouts. ViewGroup
instances and views work together as a container for Layouts.
VIEWS IN ANDROID
77.
This work islicensed under the Apache 2.0 License
I am Groot!
78.
This work islicensed under the Apache 2.0 License
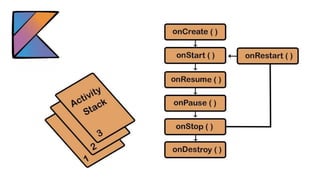
Activity Life Cycle
80.
This work islicensed under the Apache 2.0 License
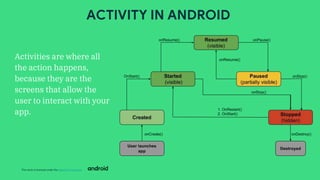
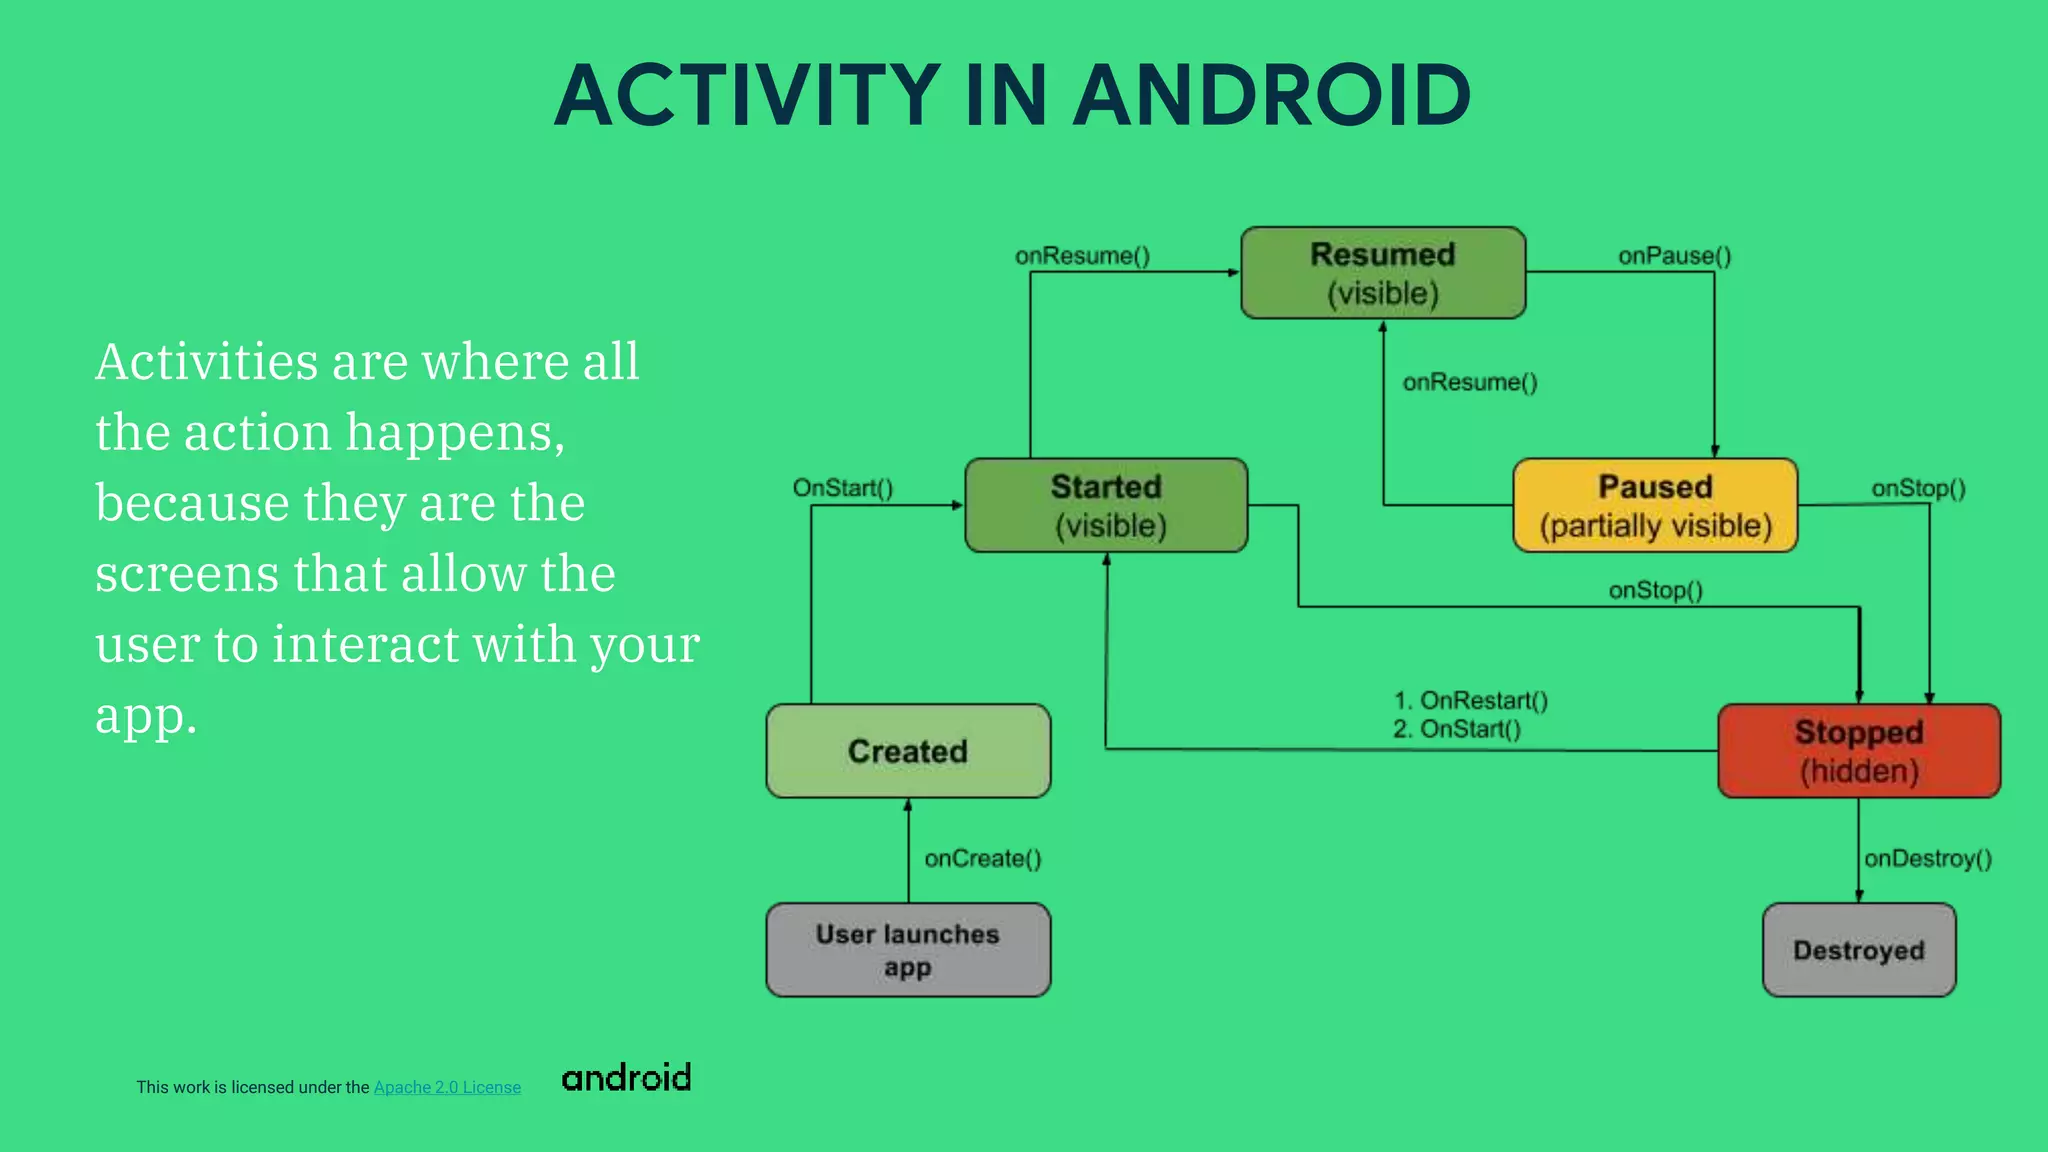
Activities are where all
the action happens,
because they are the
screens that allow the
user to interact with your
app.
ACTIVITY IN ANDROID
81.
This work islicensed under the Apache 2.0 License
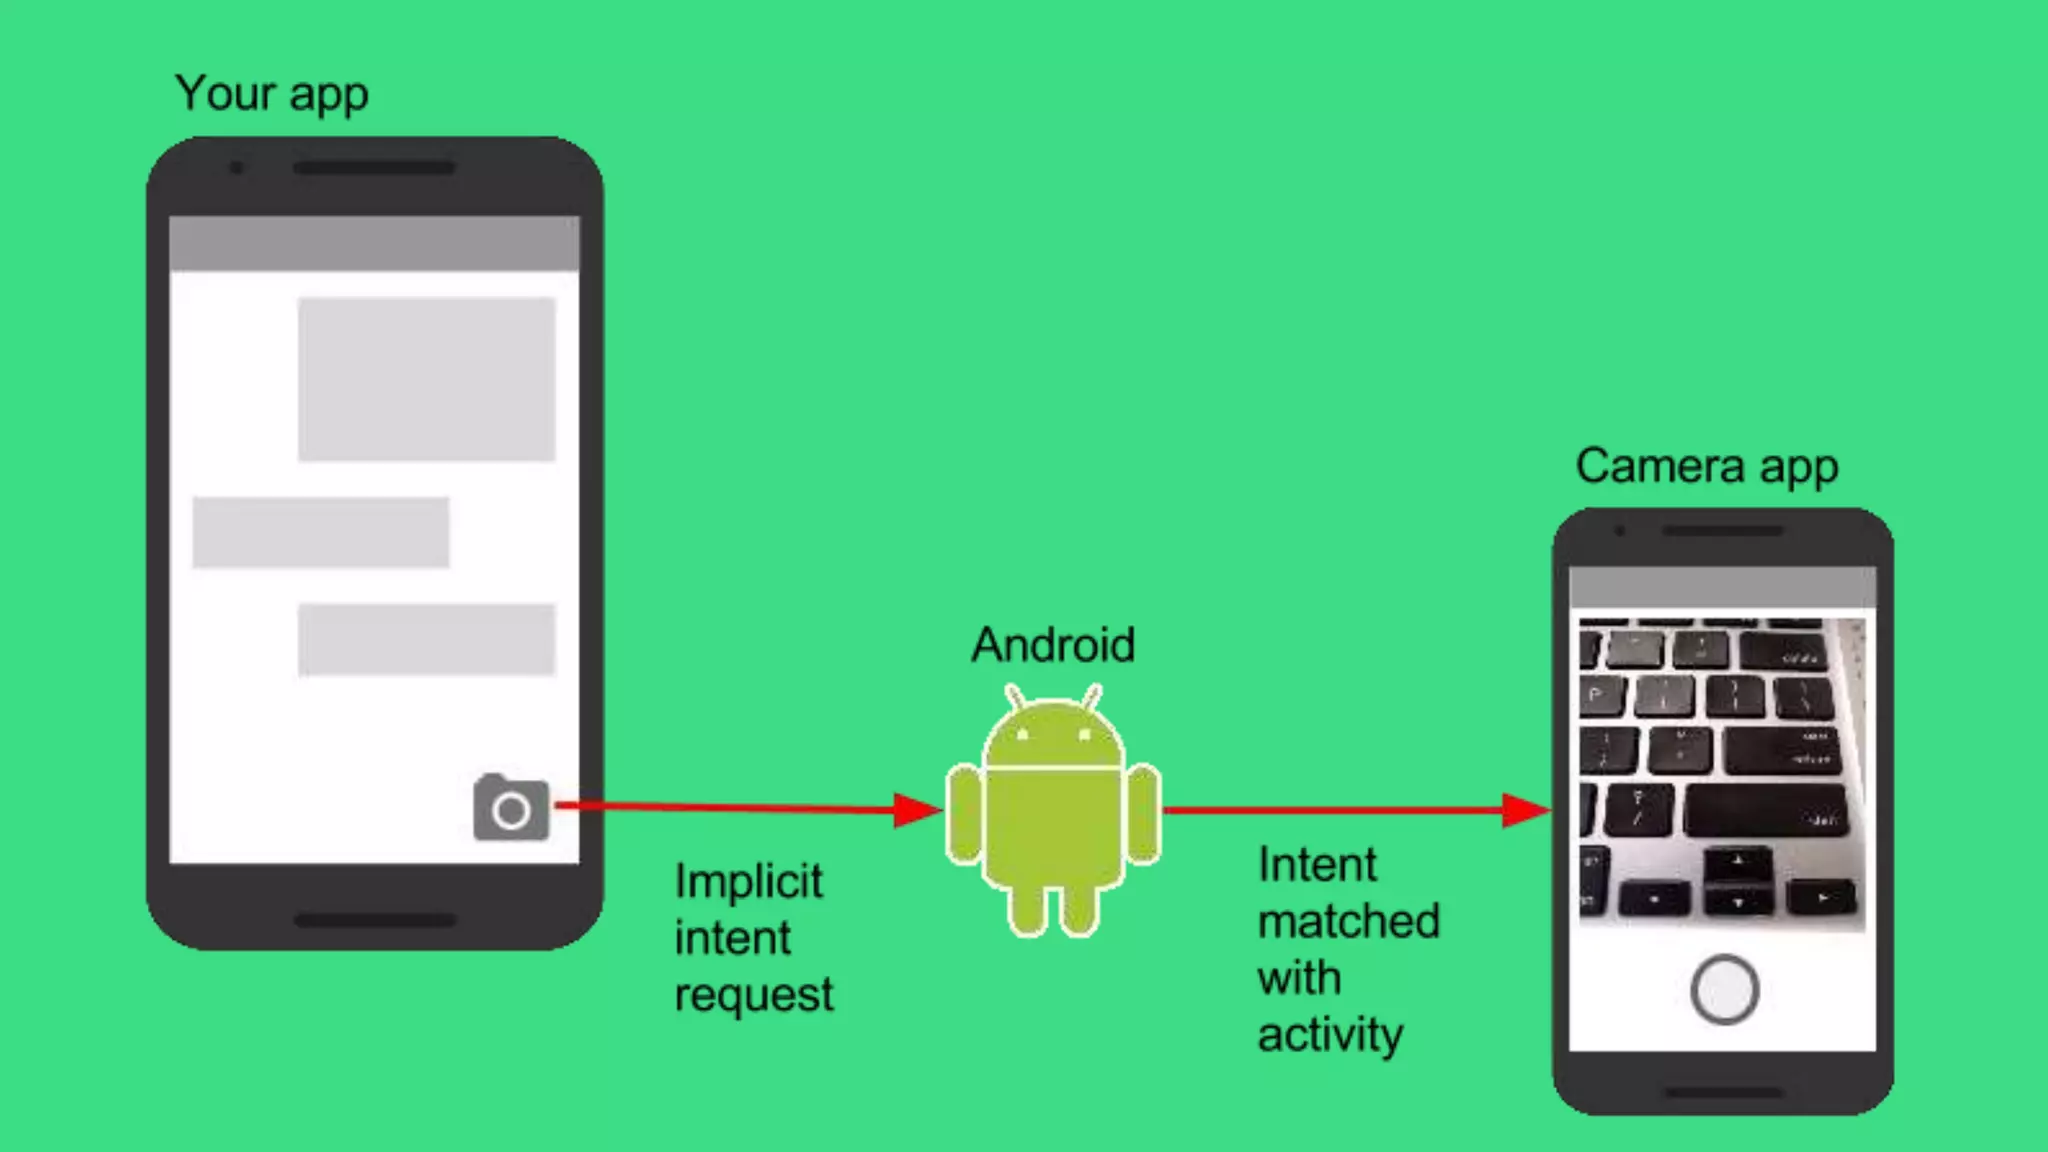
Intents in Android
82.
This work islicensed under the Apache 2.0 License
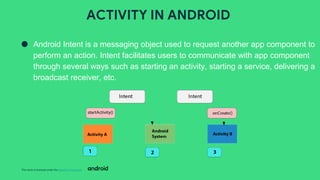
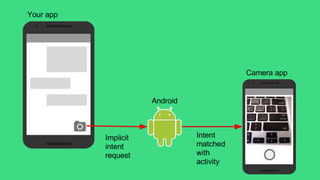
● Android Intent is a messaging object used to request another app component to
perform an action. Intent facilitates users to communicate with app component
through several ways such as starting an activity, starting a service, delivering a
broadcast receiver, etc.
ACTIVITY IN ANDROID
This work islicensed under the Apache 2.0 License
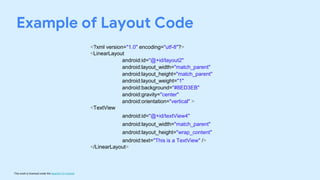
<?xml version="1.0" encoding="utf-8"?>
<LinearLayout
android:id="@+id/layout2"
android:layout_width="match_parent"
android:layout_height="match_parent"
android:layout_weight="1"
android:background="#8ED3EB"
android:gravity="center"
android:orientation="vertical" >
<TextView
android:id="@+id/textView4"
android:layout_width="match_parent"
android:layout_height="wrap_content"
android:text="This is a TextView" />
</LinearLayout>
Example of Layout Code
87.
This work islicensed under the Apache 2.0 License
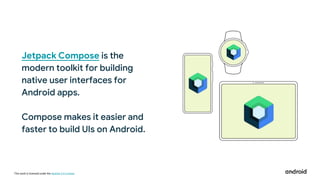
Jetpack Compose is the
modern toolkit for building
native user interfaces for
Android apps.
Compose makes it easier and
faster to build UIs on Android.
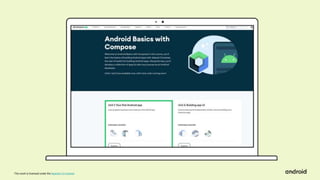
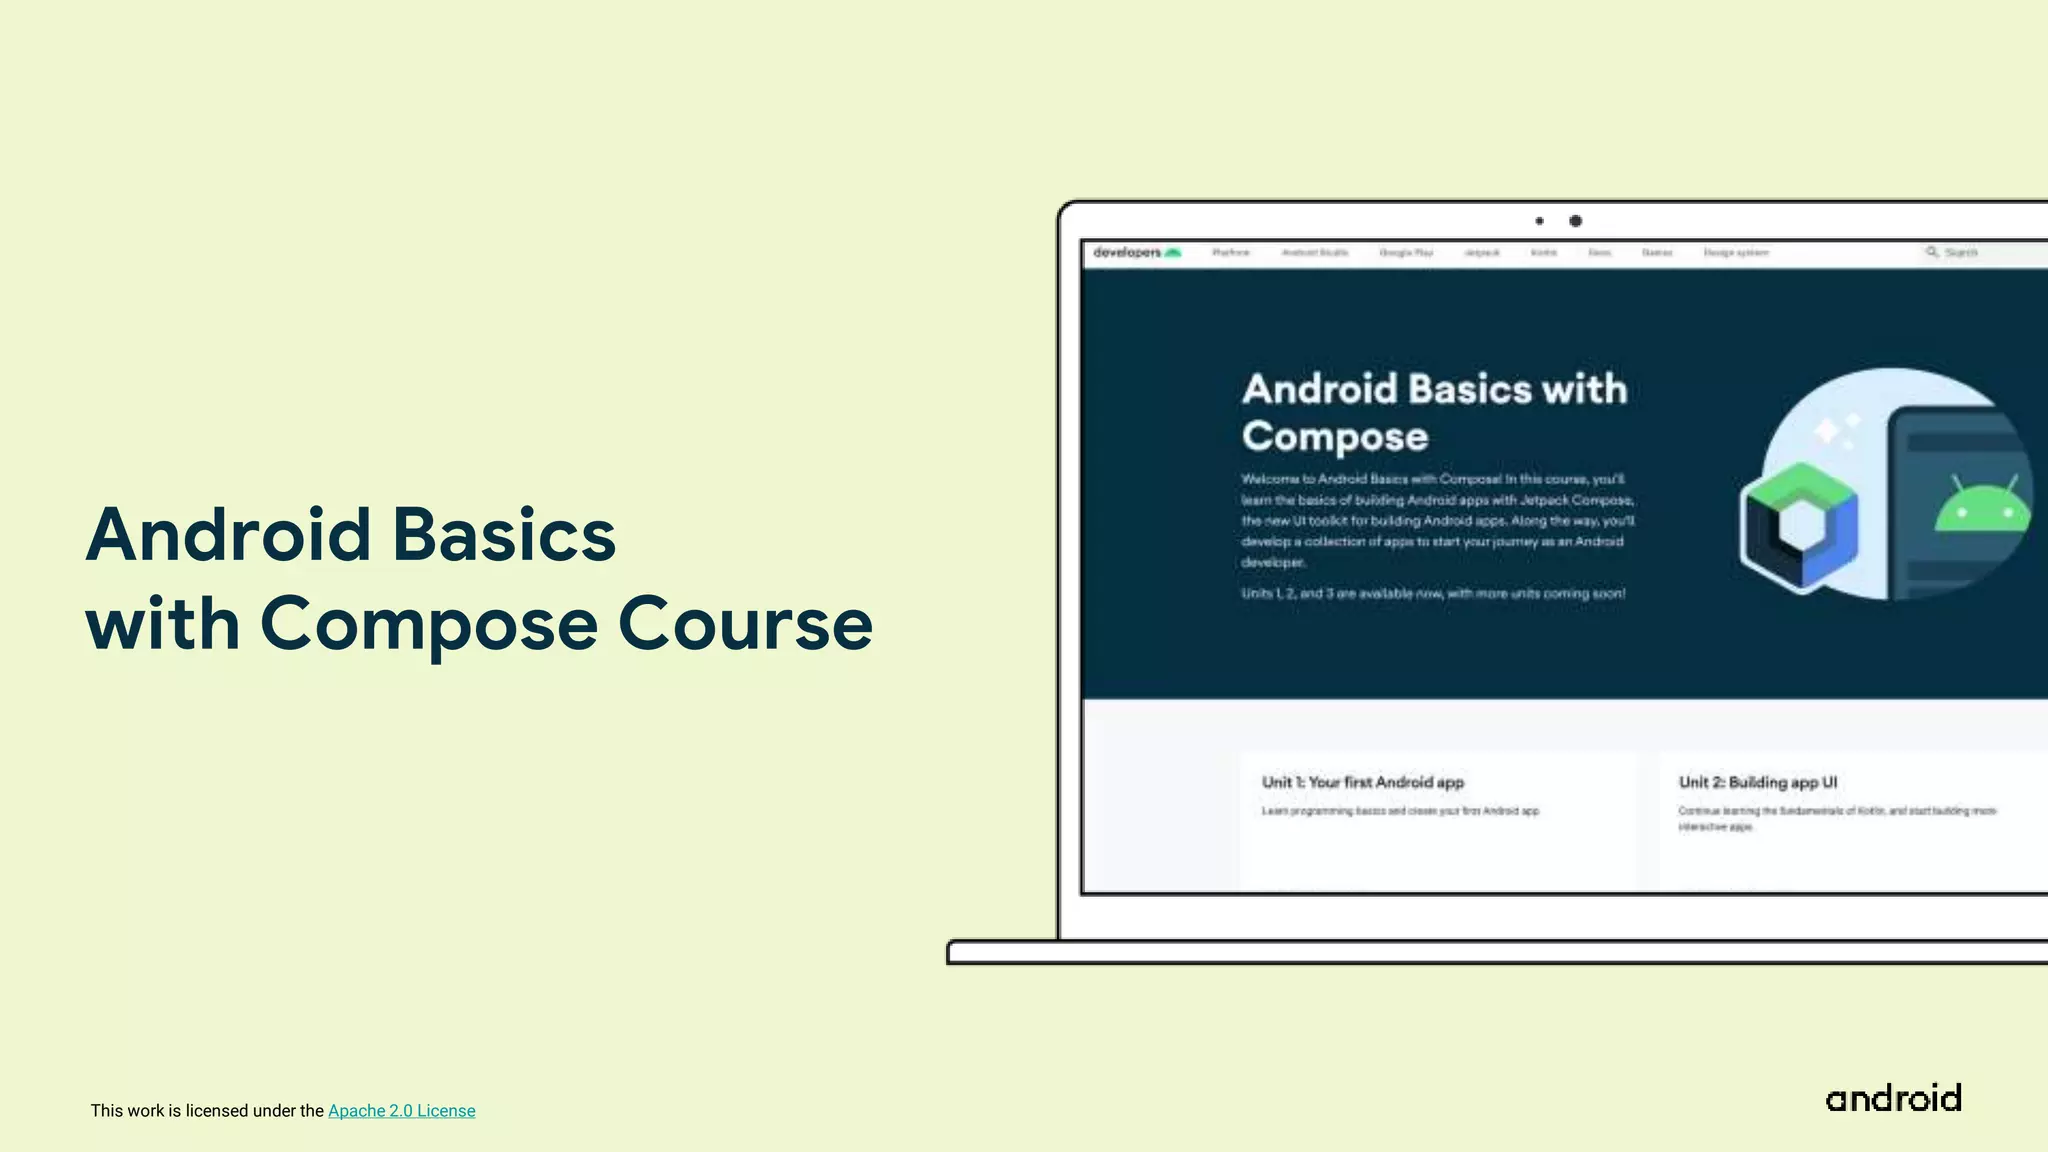
This work islicensed under the Apache 2.0 License
Unit 1: Your first
Android App
96.
This work islicensed under the Apache 2.0 License
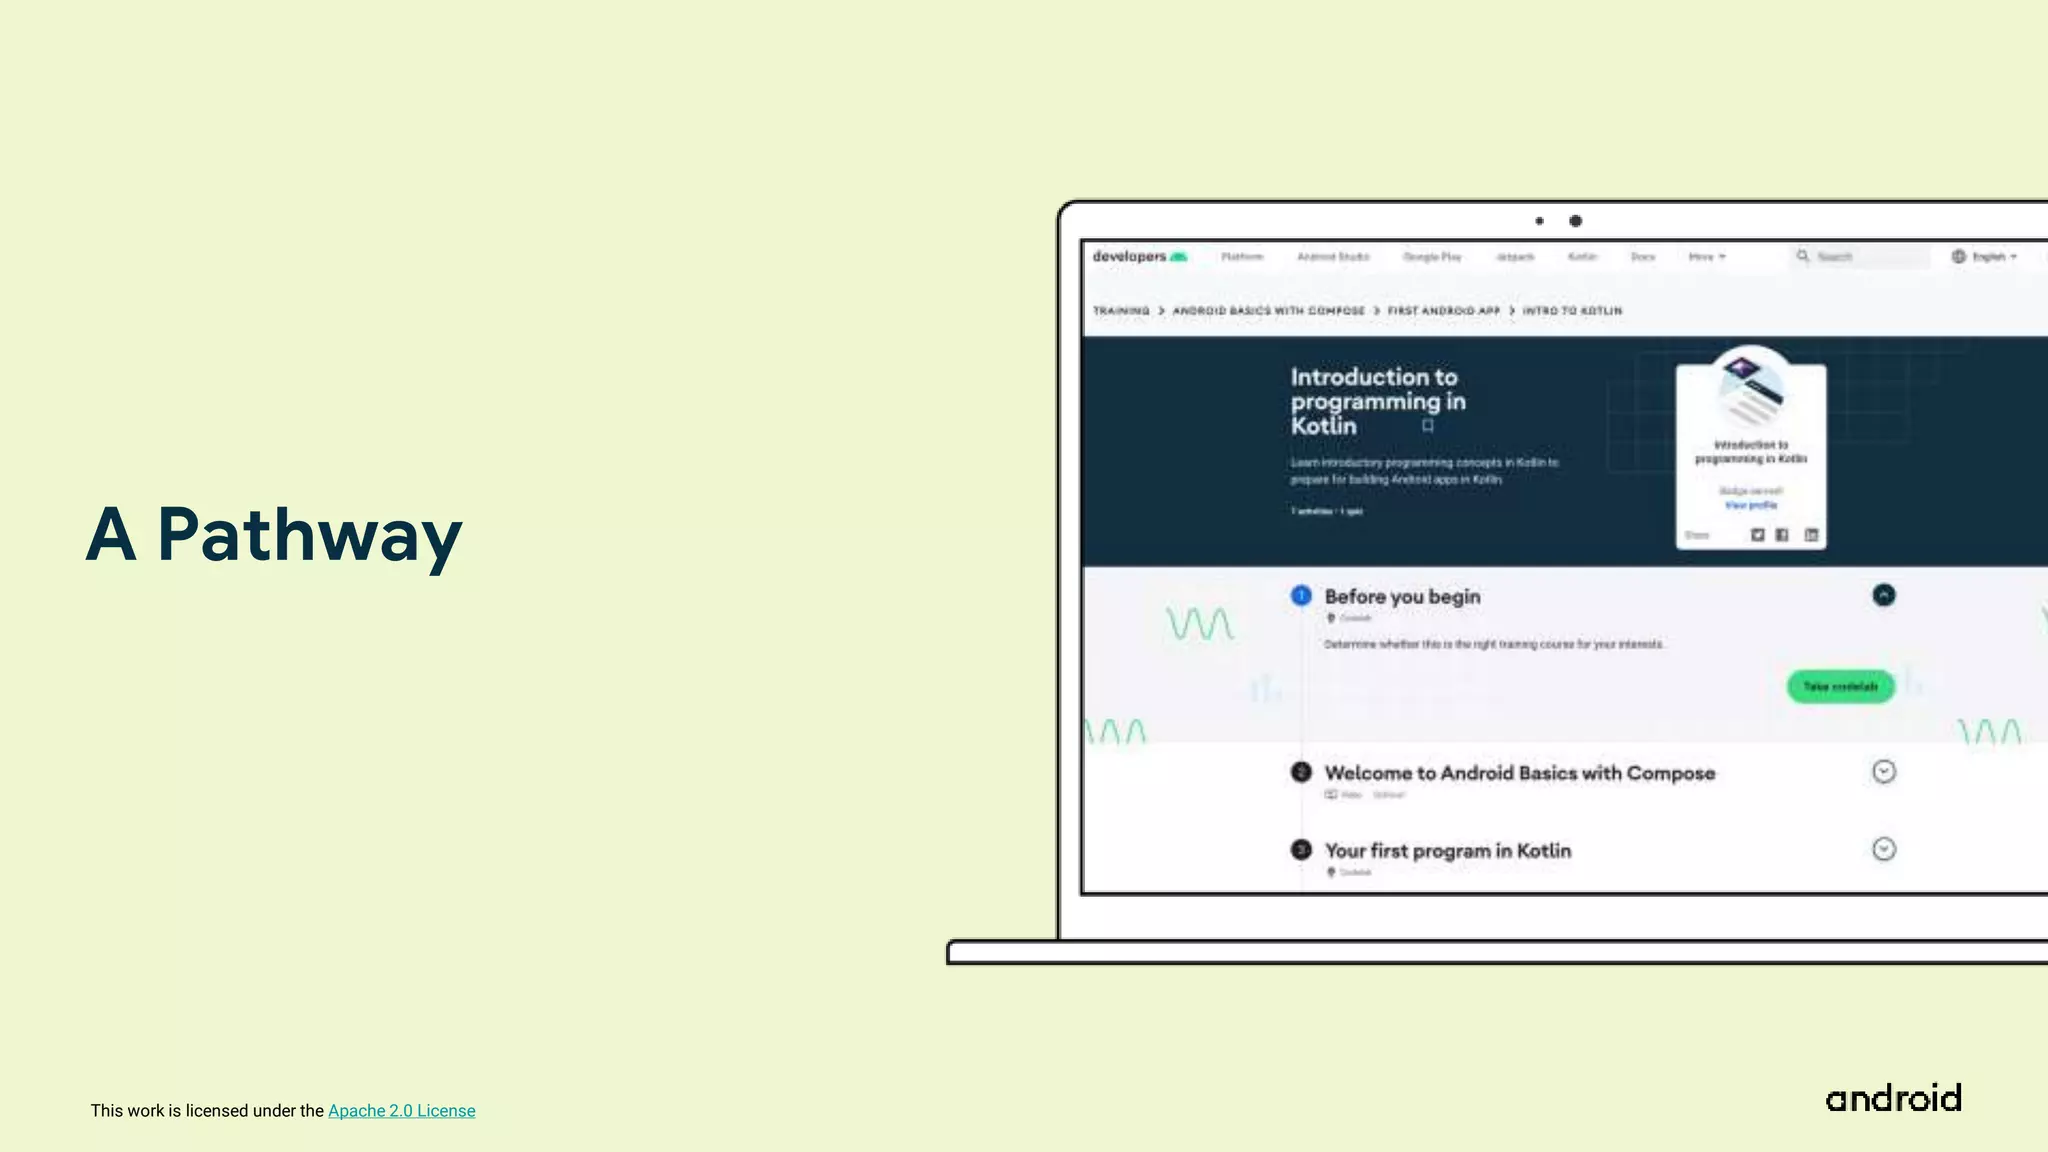
A Pathway
97.
This work islicensed under the Apache 2.0 License
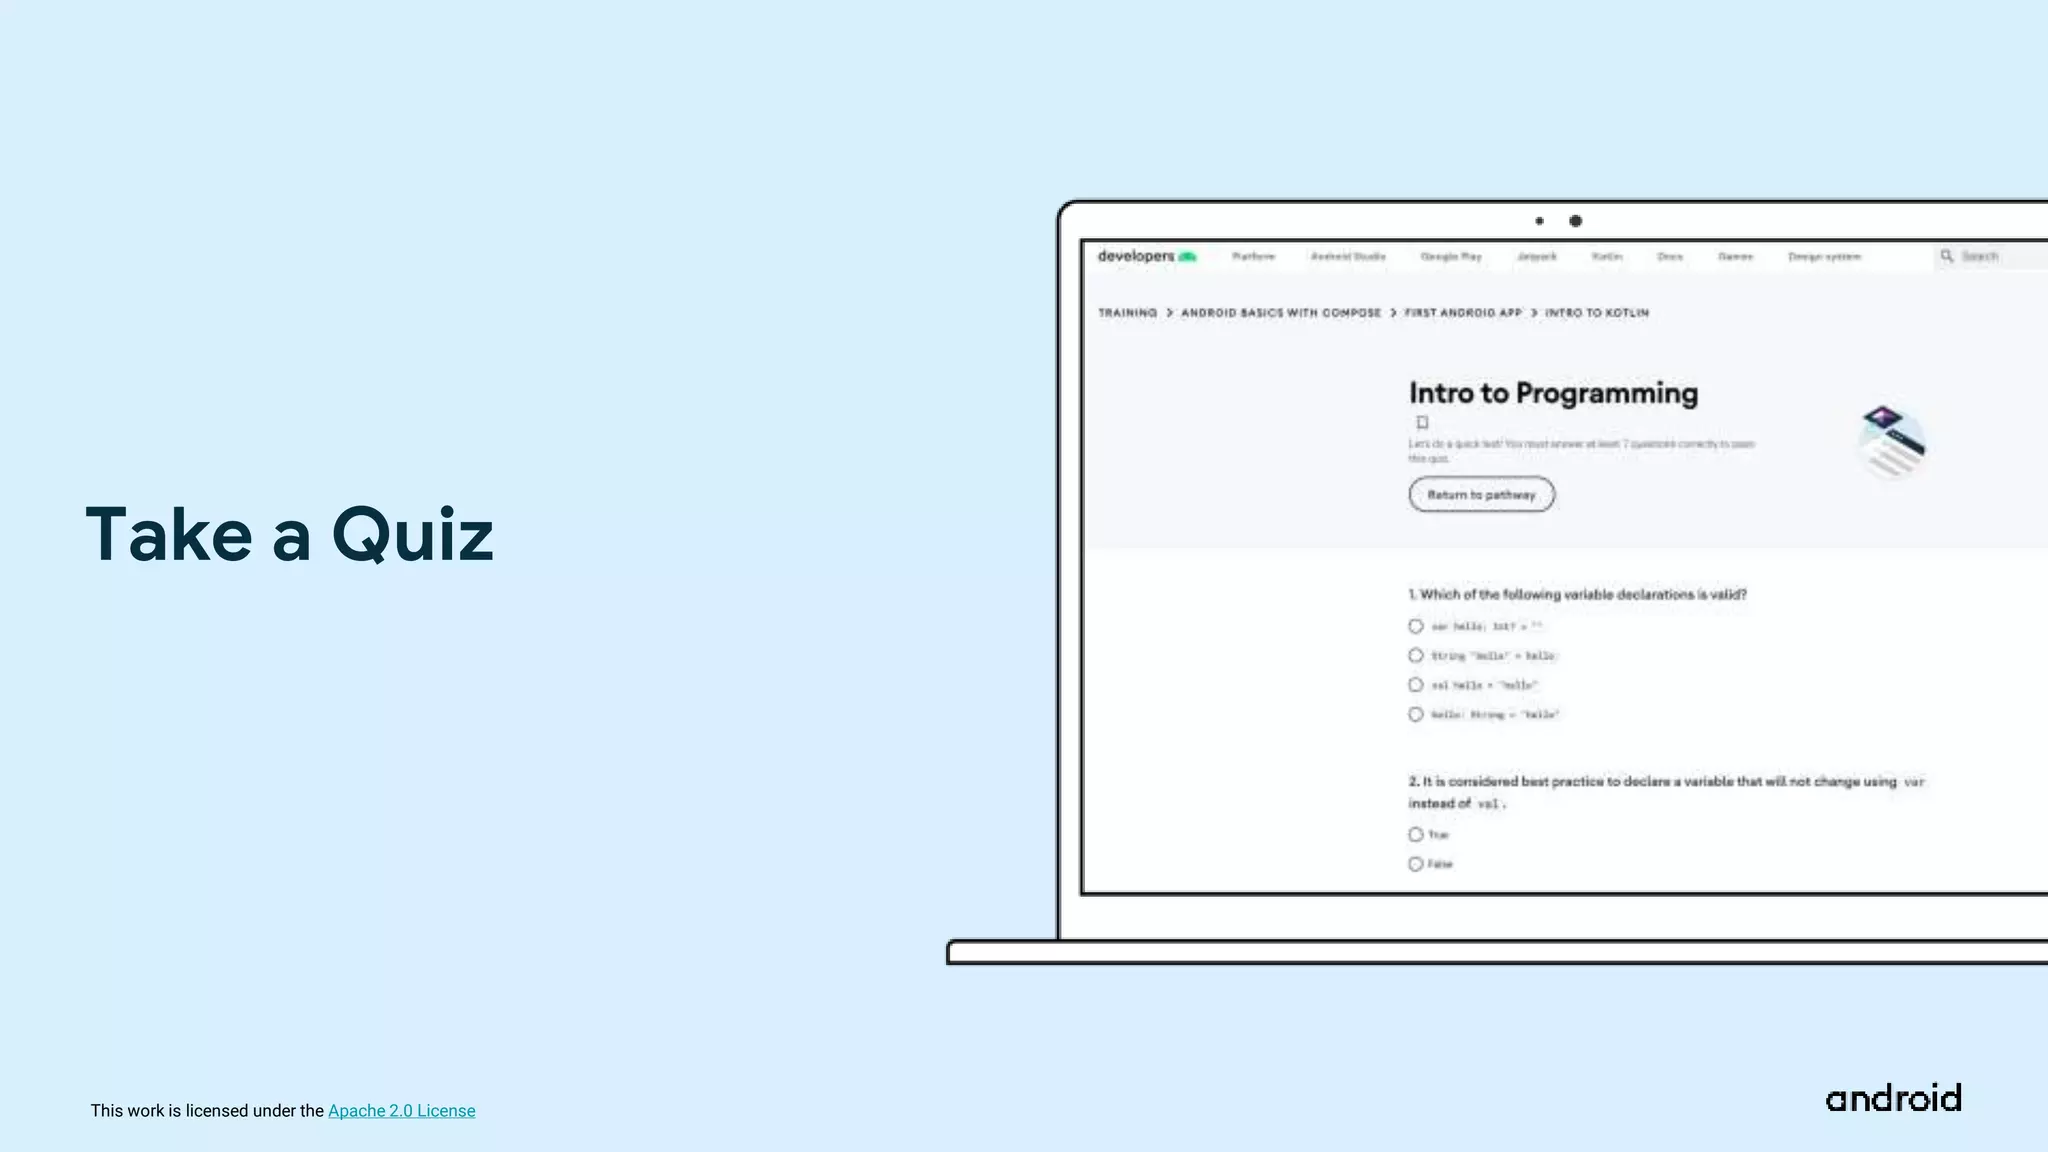
Take a Quiz
98.
This work islicensed under the Apache 2.0 License
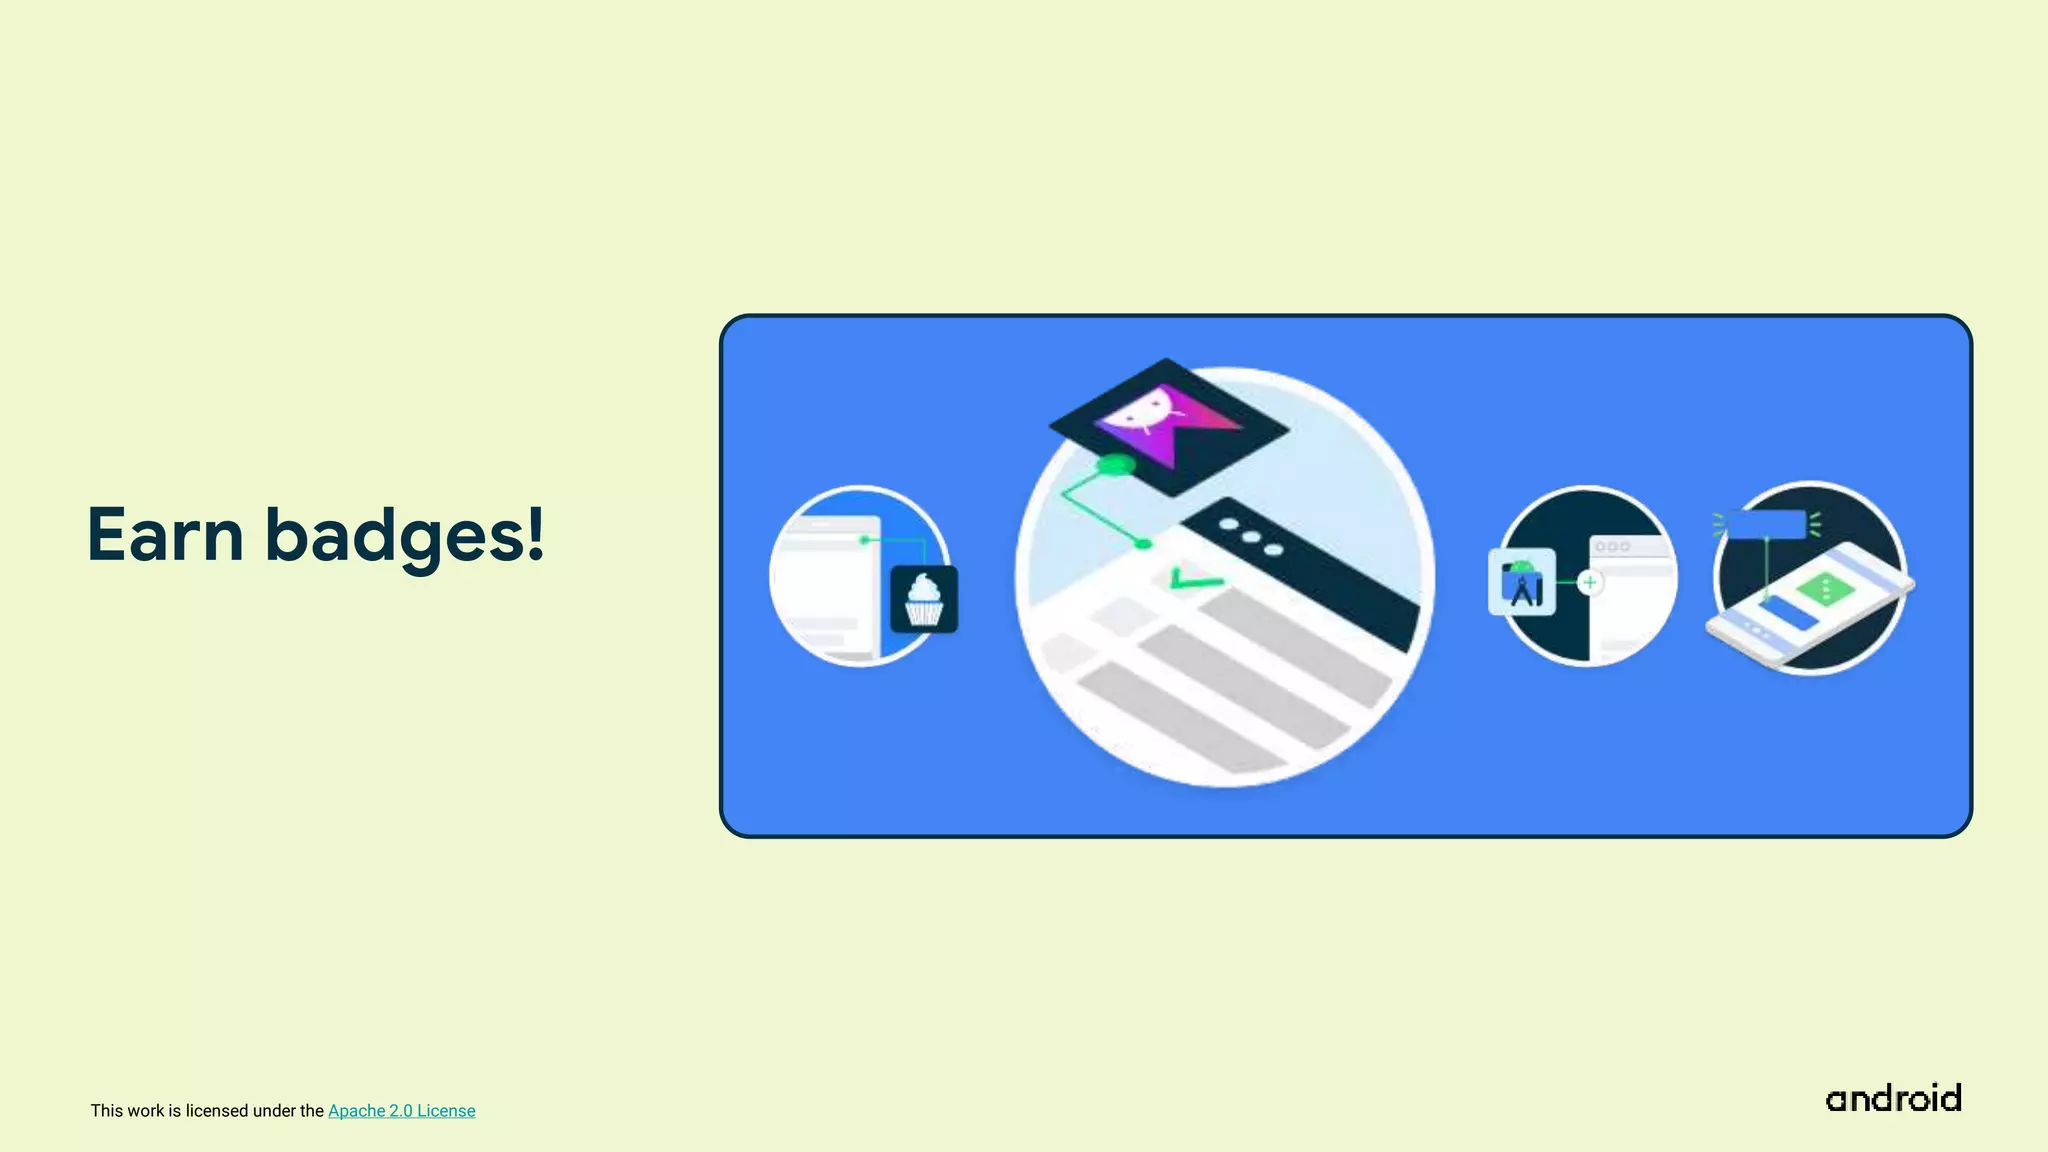
Earn badges!
99.
This work islicensed under the Apache 2.0 License
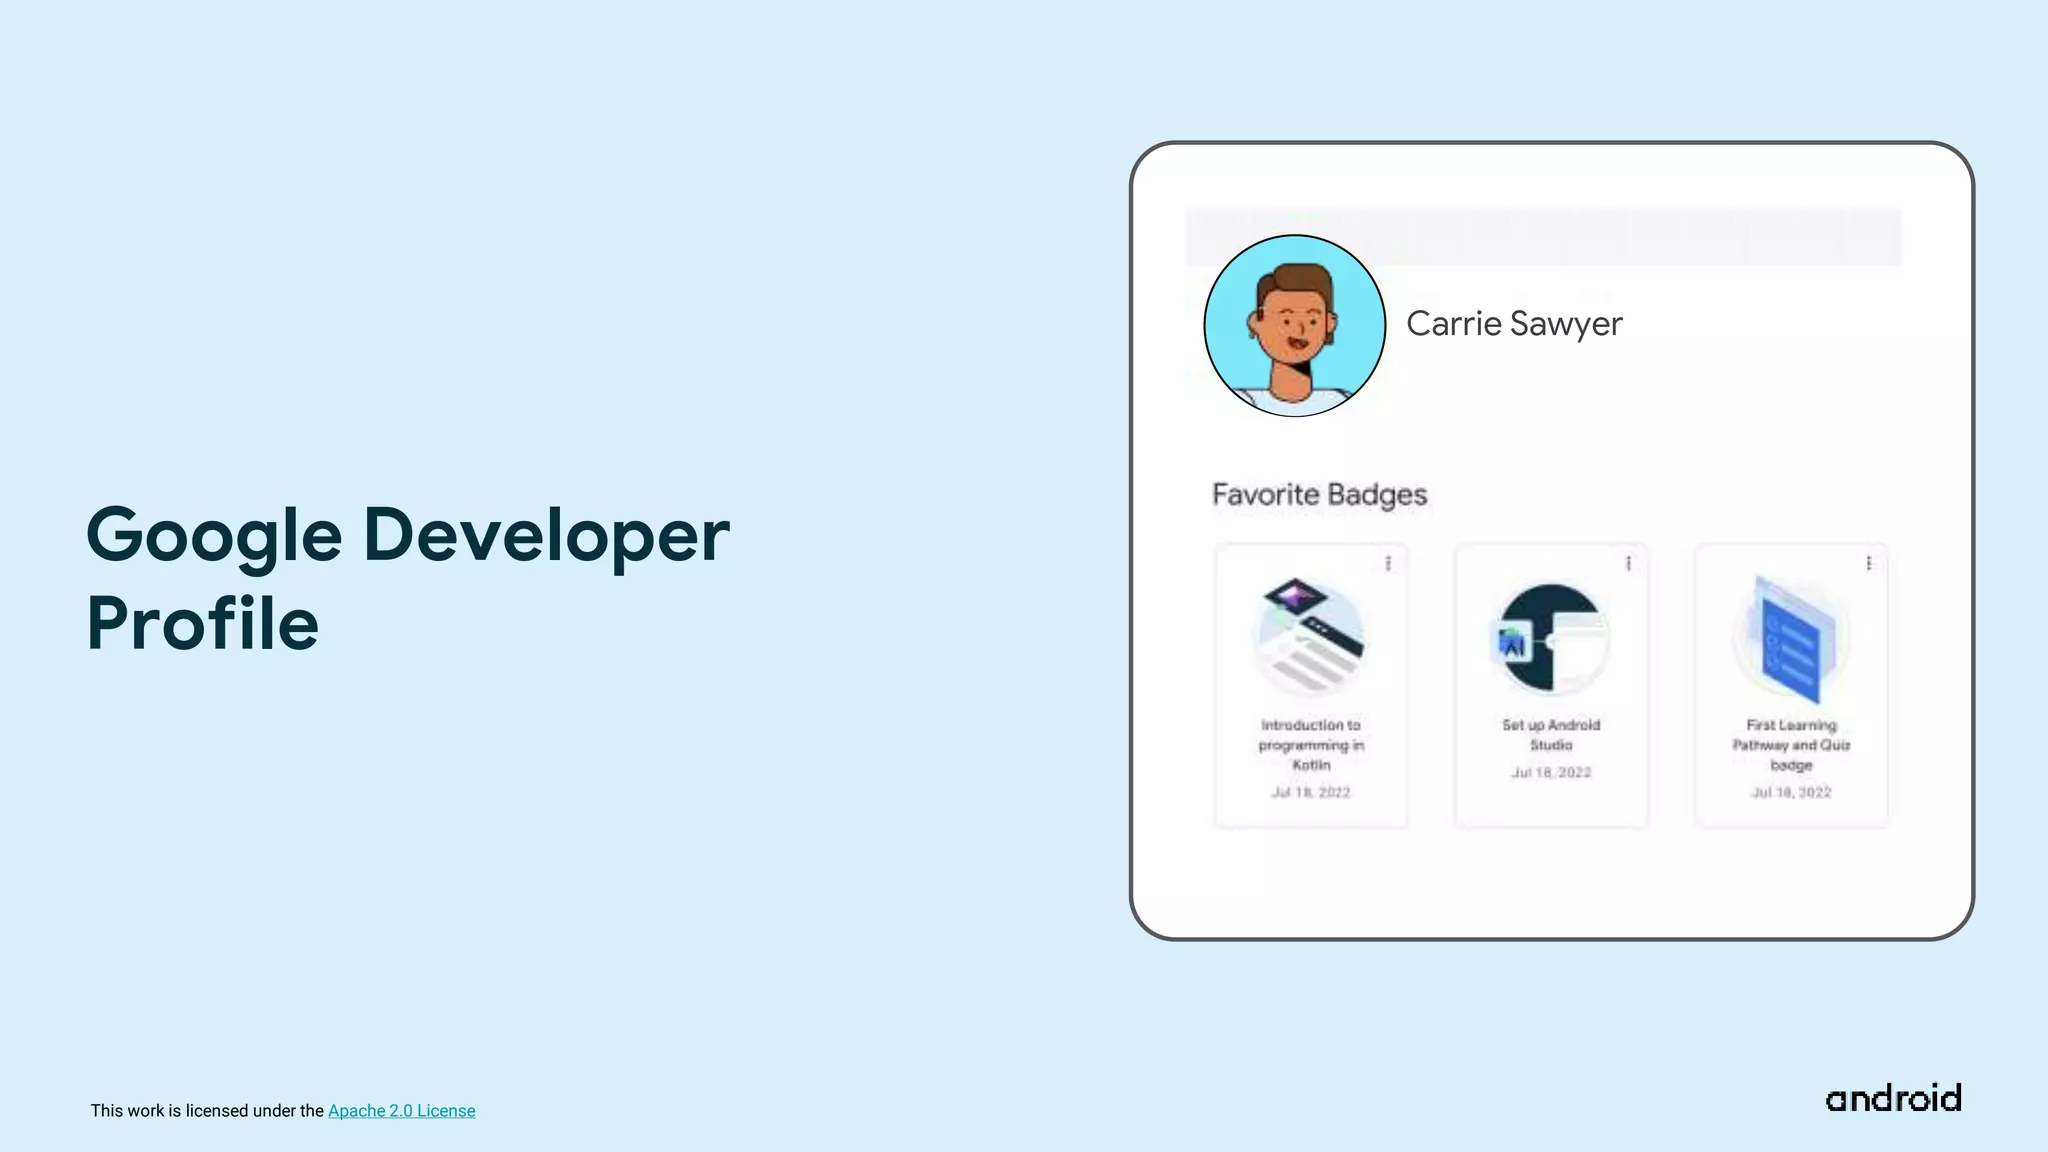
Google Developer
Profile
Carrie Sawyer
100.
This work islicensed under the Apache 2.0 License
See you at the next Compose Camp Session!
Optional resources to check out:
● Official Android Developers Site: developer.android.com
● Official Android Developers Blog (for announcements)
● Android Developers Medium Blog (for more technical
articles)
● Android Developers YouTube channel
● Follow @AndroidDev on Twitter
● Follow @AndroidDev on LinkedIn
● Subscribe to the Android Developer Newsletter
● Kotlin 101 course
101.
This work islicensed under the Apache 2.0 License
Learn More
102.
This work islicensed under the Apache 2.0 License
Share what you’ve
learned using
.#ComposeCamp
on social media
For a chance to be
featured by Android,
submit your tips on
learning Compose to
goo.gle/compose-tips
103.
This work islicensed under the Apache 2.0 License
THANK YOU
for participating Compose Camp Day 1
Do participate tomorrow as well
Editor's Notes
#6 Let’s talk about what you will learn as part of this series of Compose Camp events. First and foremost, the goal is for you to build your first Android apps with Jetpack Compose. To do this, you will learn the Kotlin Programming Language and install Android Studio on your computer, which is an application to build Android apps.
At the end, we’ll also talk about resources on how you can continue learning and building apps.
#15 Android Studio is the official integrated development environment (IDE) for Android app development built and distributed by Google. An IDE contains tools that make it easy for software developers to design, build, run, and test software, in this case, apps for the Android platform.
[If students have already downloaded Android Studio, skip the text below.]
You will be downloading Android Studio in today’s session. Note that you will need to verify that your computer meets the Android Studio system requirements. If your computer doesn’t meet the requirements Android Studio may not run or may run suboptimally. Android Studio may also take a while to install.
[Android Studio can be downloaded here]
#16 This is what Android Studio looks like: let’s talk about the different components of it.
#17 The Project view displays the files and folders of our project.
#18 The Code view is where we will view and edit code.
#19 To see the Design tab, we click Design at the top right of the window.
#20 The Design tab is where we can preview what our app looks like. Currently, the Design tab shows the default app that displays the text “Hello Android!”.
#21 To see the Split view, we click Split at the top right of the window.
#22 This is the Split view where you can see both the Code and Design tabs. You’ll be working in split view during Compose Camp. This is helpful because you are able to see how your code updates are reflected in the apps UI.
#23 In the code view, let’s take a look at the Greeting() function.
#24 The Android Emulator emulates Android devices on your computer so that you can test your application on a variety of devices and Android API levels without needing to have each physical device.
The emulator is a great option to be familiar with even if you do have a physical device because it allows you to simulate your app on a variety of mobile devices without having to own any of them. The emulator allows you to test on multiple devices to make sure that your app runs as expected on different phones, sizes, API levels and more.
#25 You can create your own emulator in Android Studio using the Device Manager. As you can see, you are able to choose from a variety of devices.
#26 You can also choose from a variety API levels.
#27 [Ideally demoing running an app on a physical device will be better than showing this video as the students will be able to see it come together in real time. It could be fun to change the colors and rerun so that they see the changes.]
You can also run an app on your physical device. You will be trying it out yourself in the session.
Connect your Android device to your computer with a USB cable.
This dialog should appear on your device, which asks you to allow USB debugging. Select the Always allow from this computer checkbox and then tap OK.
In Android Studio on your computer, make sure your device is selected in the dropdown. Click the Run button.
Android Studio installs the app on your device and runs it.
#36 To make it easier for you to learn, you’ll be writing your code in the Kotlin Playground which you can access via the web browser. The site looks something like this. You can write your code in this window and run it by hitting the green Run button. The result of your code (known as the output) will show up at the bottom of the window (where it says “Hello, world!”).
To illustrate a few important concepts that you’ll learn in this pathway, we will go through a short code demo to create a program in Kotlin.
#37 In Kotlin Playground, you will learn to explore and modify simple programs in Kotlin. You can think of a program as a series of instructions for a computer or mobile device to perform some action. In this program, the action is printing “Hello, world!”.
#38 The step-by-step instructions for what the computer should do is called code. When you modify the code in a program, the output can change.
#39 In computer programming, a variable is a container for a single piece of data. You can envision it as a box that contains a value. The box has a label, which is the name of the variable. By referring to the box by its name, you have access to the value it holds.
#40 You may be thinking, why store your name and age in variables when you can use them directly? The problem is that when your code uses values directly in all the instructions, your program will only work for that specific case. In this example, there are boxes in the sentence that contain values for both name and age.
#41 If you change the values of the variables the output will change.
In the first example, the value of the name variable is “Meghan” and the value of the age variable is 28. The corresponding output prints “My name is Meghan and I am 28 years old”.
In the second example, the value of the name variable is “Janet” and the value of the age variable is 49. The corresponding output prints “My name is Janet and I am 49 years old”.
#42 When you decide what aspects of your app can be variables, it's important to specify what type of data can be stored in those variables. In Kotlin, there are some common basic data types. This table shows a different data type in each row. For each data type, there's a description of what kind of data it can hold and example values.
A String holds text so you will use it to store your name, and an Int holds an integer number so you will use it to store your age.
#43 Now, let’s jump into how you define a variable.
You can declare a variable using either val or var.
With val, the variable is read-only, which means you can only read, or access, the value of the variable. Once the value is set, you cannot edit or modify its value.
With var, the variable is mutable, which means the value can be changed or modified. The value can be mutated.
In Kotlin, it's preferred to use val over var when possible.
We will store your name as a val because that will not change.
We will store your age as a var because it changes every year.
#44 To demonstrate how to define a variable we will define both name and age variables.
Before you use a variable, you must declare it. To declare a variable, start with the val or var keyword.
#45 All variables must have a name that they can be referenced by.
#46 The data type specifies the type of data that the variable holds. Note that a colon separates the name and data type.
#47 In the variable declaration, the equal sign symbol (=) follows the data type. The equal sign symbol is called the assignment operator. The assignment operator assigns a value to the variable. The variable’s initial value is the data stored in the variable.
#50 In computer programming, a variable is a container for a single piece of data. You can envision it as a box that contains a value. The box has a label, which is the name of the variable. By referring to the box by its name, you have access to the value it holds.
#51 In computer programming, a variable is a container for a single piece of data. You can envision it as a box that contains a value. The box has a label, which is the name of the variable. By referring to the box by its name, you have access to the value it holds.
#66 A function is a segment of a program that performs a specific task. You can have many functions in your program or only a single one.
Creating separate functions for specific tasks has a number of benefits.
Reusable code: Rather than copying and pasting code that you need to use more than once, you can simply call a function wherever needed.
Readability: Ensuring functions do one and only one specific task helps other developers and teammates, as well as your future self to know exactly what a piece of code does.
#67 A Kotlin program is required to have a main function, which is the entry point, or starting point, of the program.
You may be asking what a function is…
#68 We will demonstrate how to define a function with a function called displayIntroduction() that we will use to print our name and age.
A function definition starts with the fun keyword. A keyword is a reserved word that has a special meaning in Kotlin, in this case the fun keyword tells Kotlin that you are going to make a function.
#69 Functions need to have a descriptive name so that they can be called from other parts of the program.
#70 Functions need a set of parentheses which you can use to optionally pass information into the function. displayIntroduction() won’t need information passed in. You will learn more about passing in inputs into functions later in the course.
#71 Functions need curly braces that contain the instructions needed to execute a task.
#72 The task of the displayIntroduction() function, is to print your name and age. In order to do that you will save both your name and age into variables.
#73 Let’s finish putting the displayIntroduction() function together. We have our variables but they don’t do anything yet.
Let’s add a print statement to print out your introduction using println to print to the output in Kotlin Playground.
In order to print your variables, you will use String templates which allow you to include variable references in a string by using the $ sign before the variable name.
[You can learn more about String Templates here]
#74 Finally, we will replace the contents of the main() function with a call to the displayIntroduction() function when we run it, “Hi I’m Meghan and I am 28 years old” will print to the output.
In this lecture we went over functions and variables and how to put them together to create a function that introduces you. Soon you will go deeper into these concepts and try them out for yourself in the codelabs.
#75 In the next session, you will apply your new Kotlin knowledge to build your first Android app!
#92 Okay that’s it! In a moment, I’ll let you get started on the course. Work at your own pace. If you get stuck, you can ask me or the other facilitators who will be available. [Introduce facilitators if applicable.]
We’re here to answer whatever questions you have. Also feel free to ask each other for help and work together to find solutions.
#94 You’ll be working through the Android Basics with Compose course. This is an online training course developed by Google for people who want to learn how to build basic Android apps.
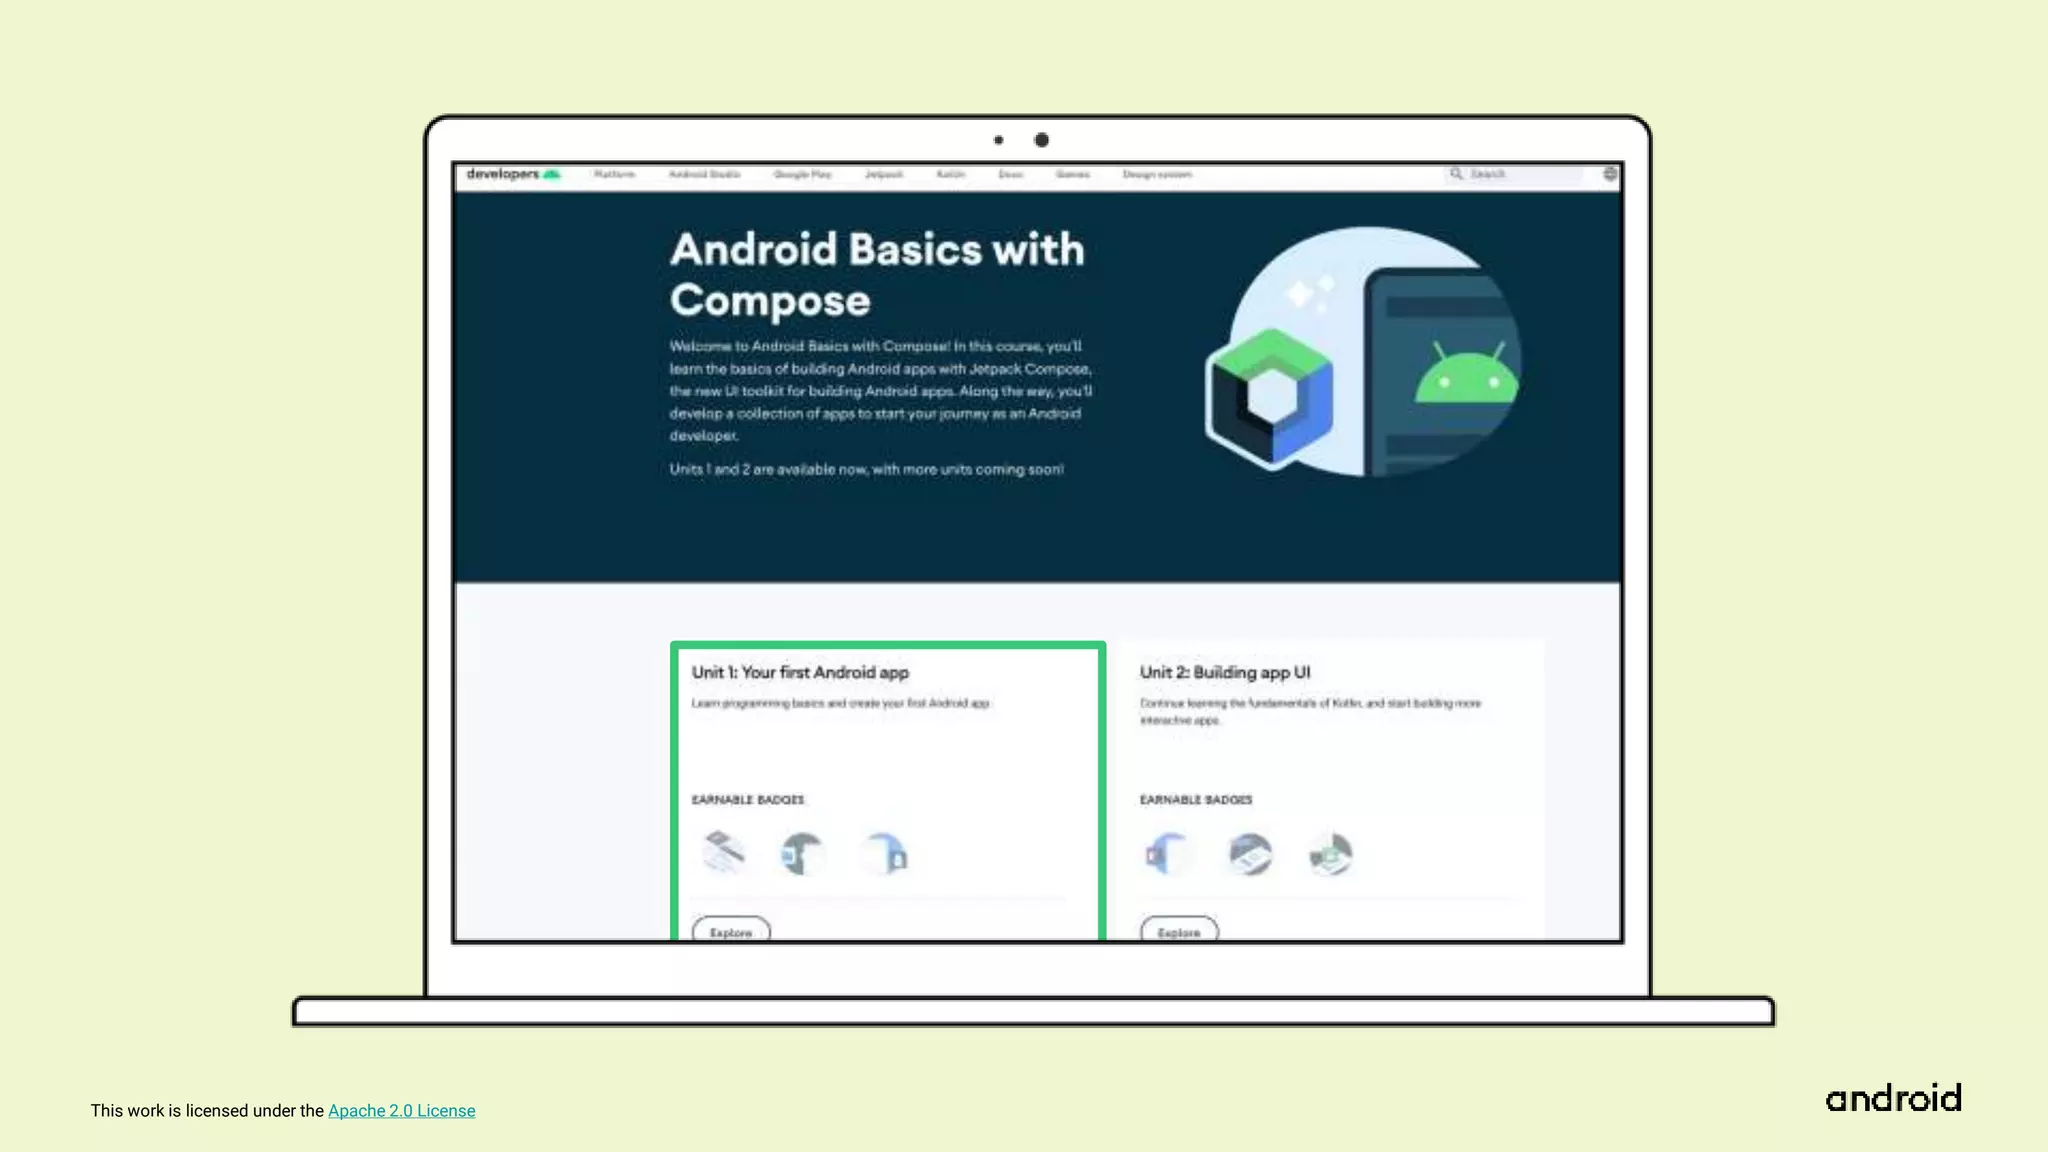
#95 Then, click Unit 1 to start the Android Basics course.
#96 The course is made up of units, and units are composed of pathways.
Today we’ll be focused on the first unit, which is shown here. It is made up of 3 pathways. In this session, you’ll work on pathway 1.
#97 You may be wondering, what is a pathway? A pathway is an ordered sequence of activities to learn a specific skill. An activity can be a video, hands-on coding tutorial (known as a codelab), an article, or quiz. There are 7 activities in this first pathway. All these activities are meant to help you reach specific learning objectives by the end of this pathway. If you are already familiar with the skill that the pathway teaches, you can skip that pathway and move on to the next one.
#98 There’s a quiz at the end of each pathway to check your understanding of what you just learned. Here’s what a sample quiz looks like. There are no limits to the number of retries for a quiz. But if you get a question wrong, try to understand what the concept is (even if you need to look back at the source material), before answering again.
#99 After you pass a quiz, you will earn a badge like these!
#100 The badges you earn can be saved to your Google Developer Profile. When you are taking the course, be sure to sign in (in the top right corner) and create a Google Developer Profile if you haven’t already. It’s very quick to create. As you earn more badges, you can see them on your Google Developer Profile and favorite them. You can make your profile public so you can share it and show off your badges to friends and colleagues via social media!
[Read more on the Google Developer Profile]
#101 We are excited to see you at the next Compose Camp session!
Before the next session, it is strongly recommended that you download Android Studio.
In the meantime you can check out these additional resources, which professional developers use to stay up to date on Android. As you get into more advanced features, you will likely need to learn more programming concepts. You can check out the Learn Kotlin By Example or the Kotlin language website resources for that.
Thank you so much for being a part of Compose Camp! Good luck on the beginning of your Android developer journey!
#102 If you want to continue learning more on your own, here are some resources.
#103 Great job everyone on your progress!
You can post photos or highlights from today’s session on social media using #ComposeCamp. [Include your own developer community and chapter hashtags (i.e. #developerstudentclubs #dsccmu)]
Submit any tips you have about learning Compose to goo.gle/compose-tips for a chance to be featured.


![This work is licensed under the Apache 2.0 License
90
Kotlin arrays can be created using
arrayOf<dataType>()
Example – arrayof<int>()
arrayof<float>()
Kotlin Array
Declaration
90 77 36 50 86
Marks[]
0 1 2 3 4](https://image.slidesharecdn.com/session1welcometokotlin-221005133719-83ae65c2/85/Kotlin-Basics-Introduction-to-Jetpack-Compose-pptx-50-320.jpg)


![This work is licensed under the Apache 2.0 License
90
Kotlin arrays can be created using
arrayOf<dataType>()
Example – arrayof<int>()
arrayof<float>()
Kotlin Array
Declaration
90 77 36 50 86
Marks[]
0 1 2 3 4](https://image.slidesharecdn.com/session1welcometokotlin-221005133719-83ae65c2/75/Kotlin-Basics-Introduction-to-Jetpack-Compose-pptx-50-2048.jpg)


![[EXTERNAL] Android Basics Sessions 1 _ 2 - Android Study Jams.pptx](https://cdn.slidesharecdn.com/ss_thumbnails/externalandroidbasicssessions12-androidstudyjams-221110040929-be3a385a-thumbnail.jpg?width=600ounds&width=560&fit=bounds)


