Downloaded 36 times


This document provides an overview of how to create forms in HTML. It discusses the main components of forms, including common form controls like text fields, checkboxes, radio buttons, selection menus, file uploads, and buttons. It explains how to set attributes like name, value, size for each form control. The document also covers how form data is passed via the GET and POST methods, and how hidden fields can be used to pass additional data without the user seeing it. The overall purpose is to teach the fundamentals of creating HTML forms for collecting user input.
This slide introduces the fundamentals of web designing, presented by Mustafa Kamel Mohammadi from Bamyan University.
This slide outlines the learning objectives, focusing on how to create forms in HTML.
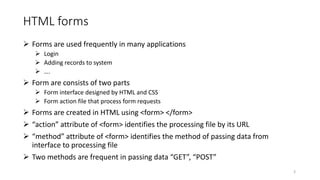
Defines HTML forms, their importance in applications like login and data entry, and introduces form components and attributes such as action and method.
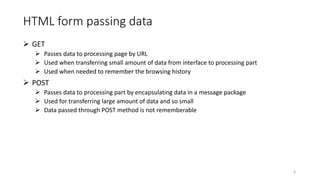
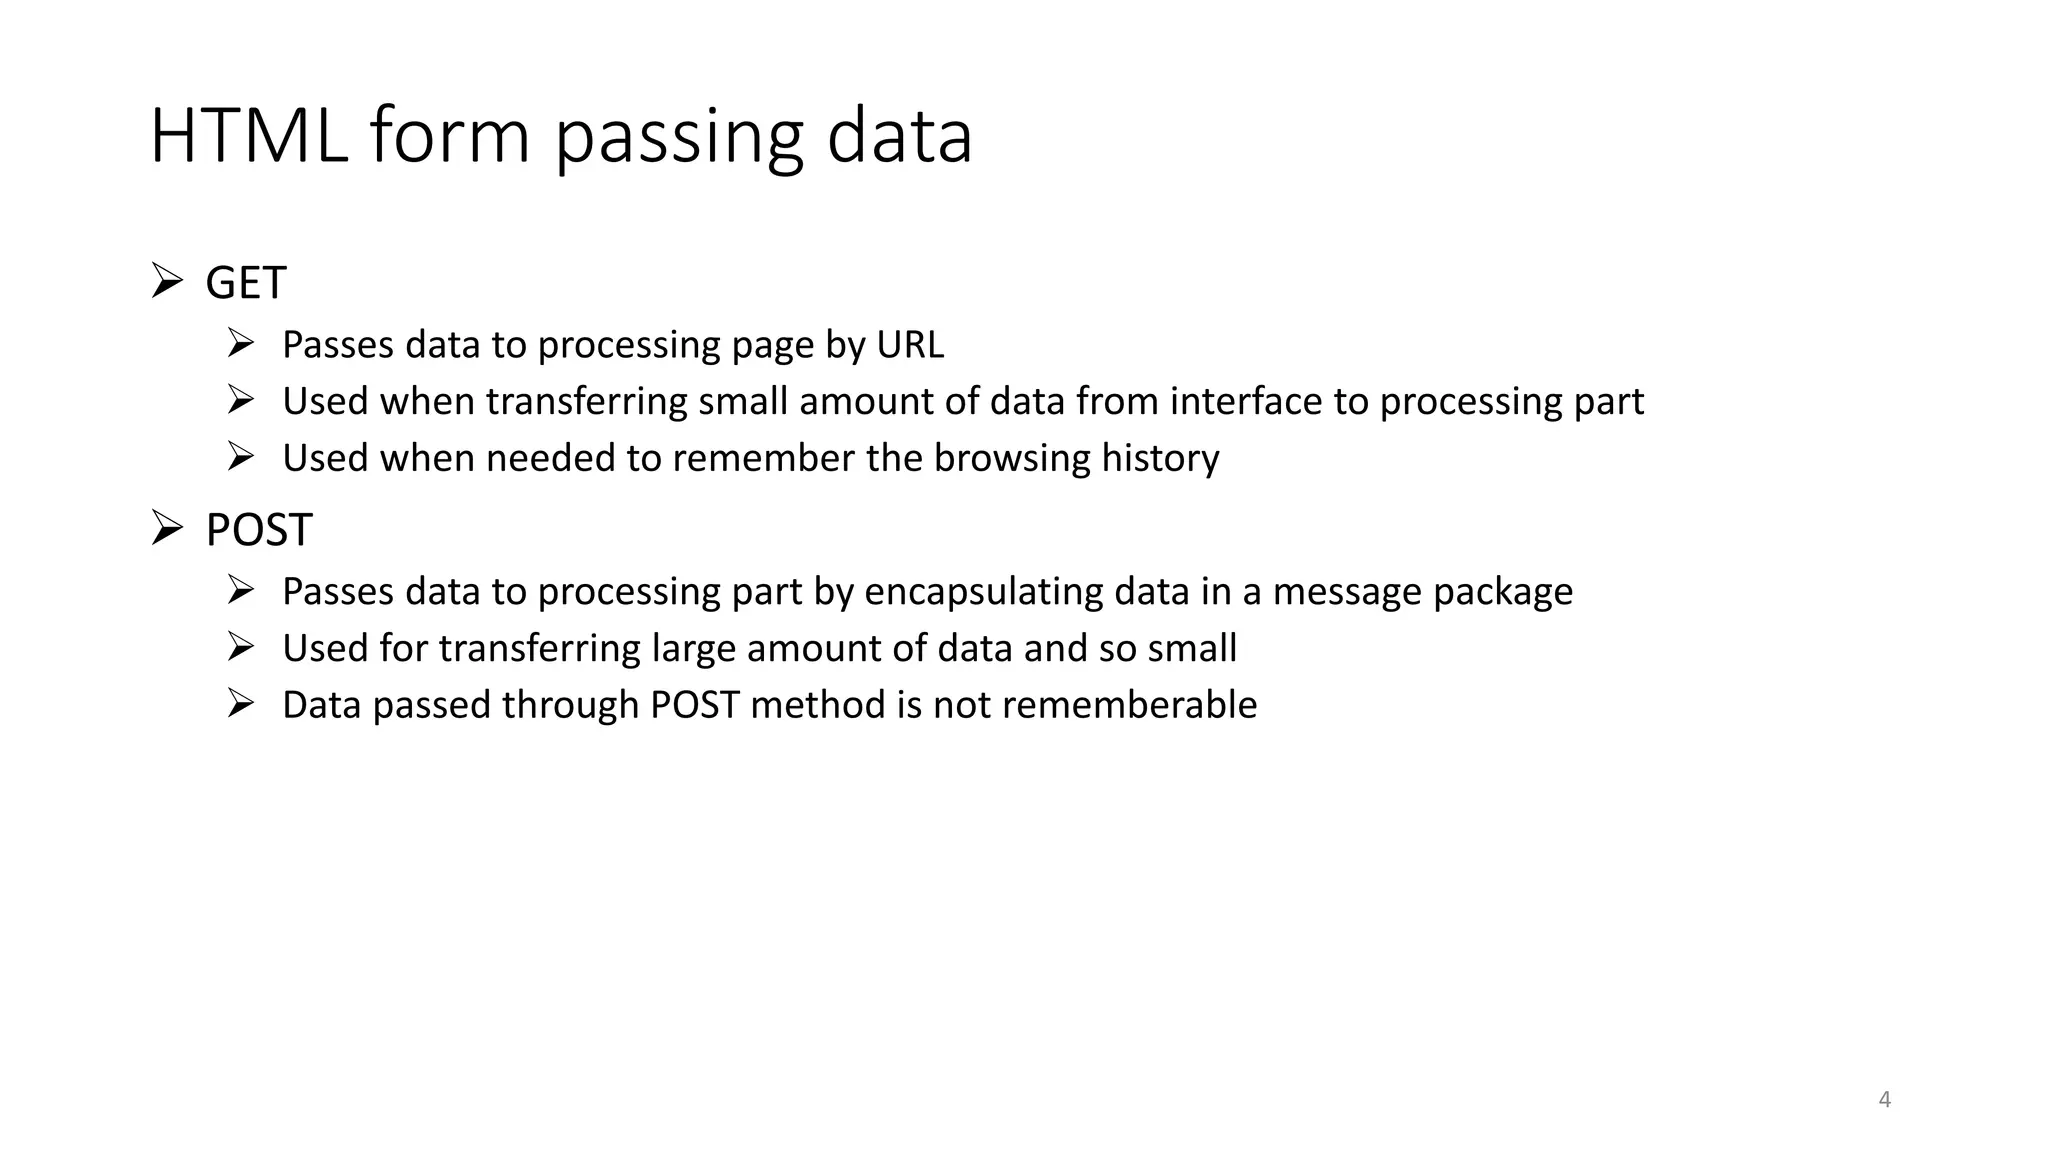
Explains two methods for passing data in HTML forms: GET (for small data, URI-based) and POST (for larger data, encapsulation).
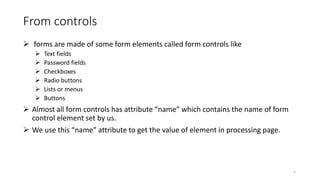
Describes the various HTML form controls such as text fields, password fields, checkboxes, and buttons, explaining the 'name' attribute.
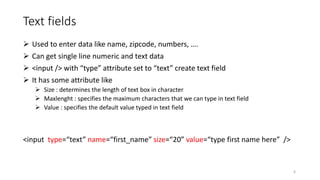
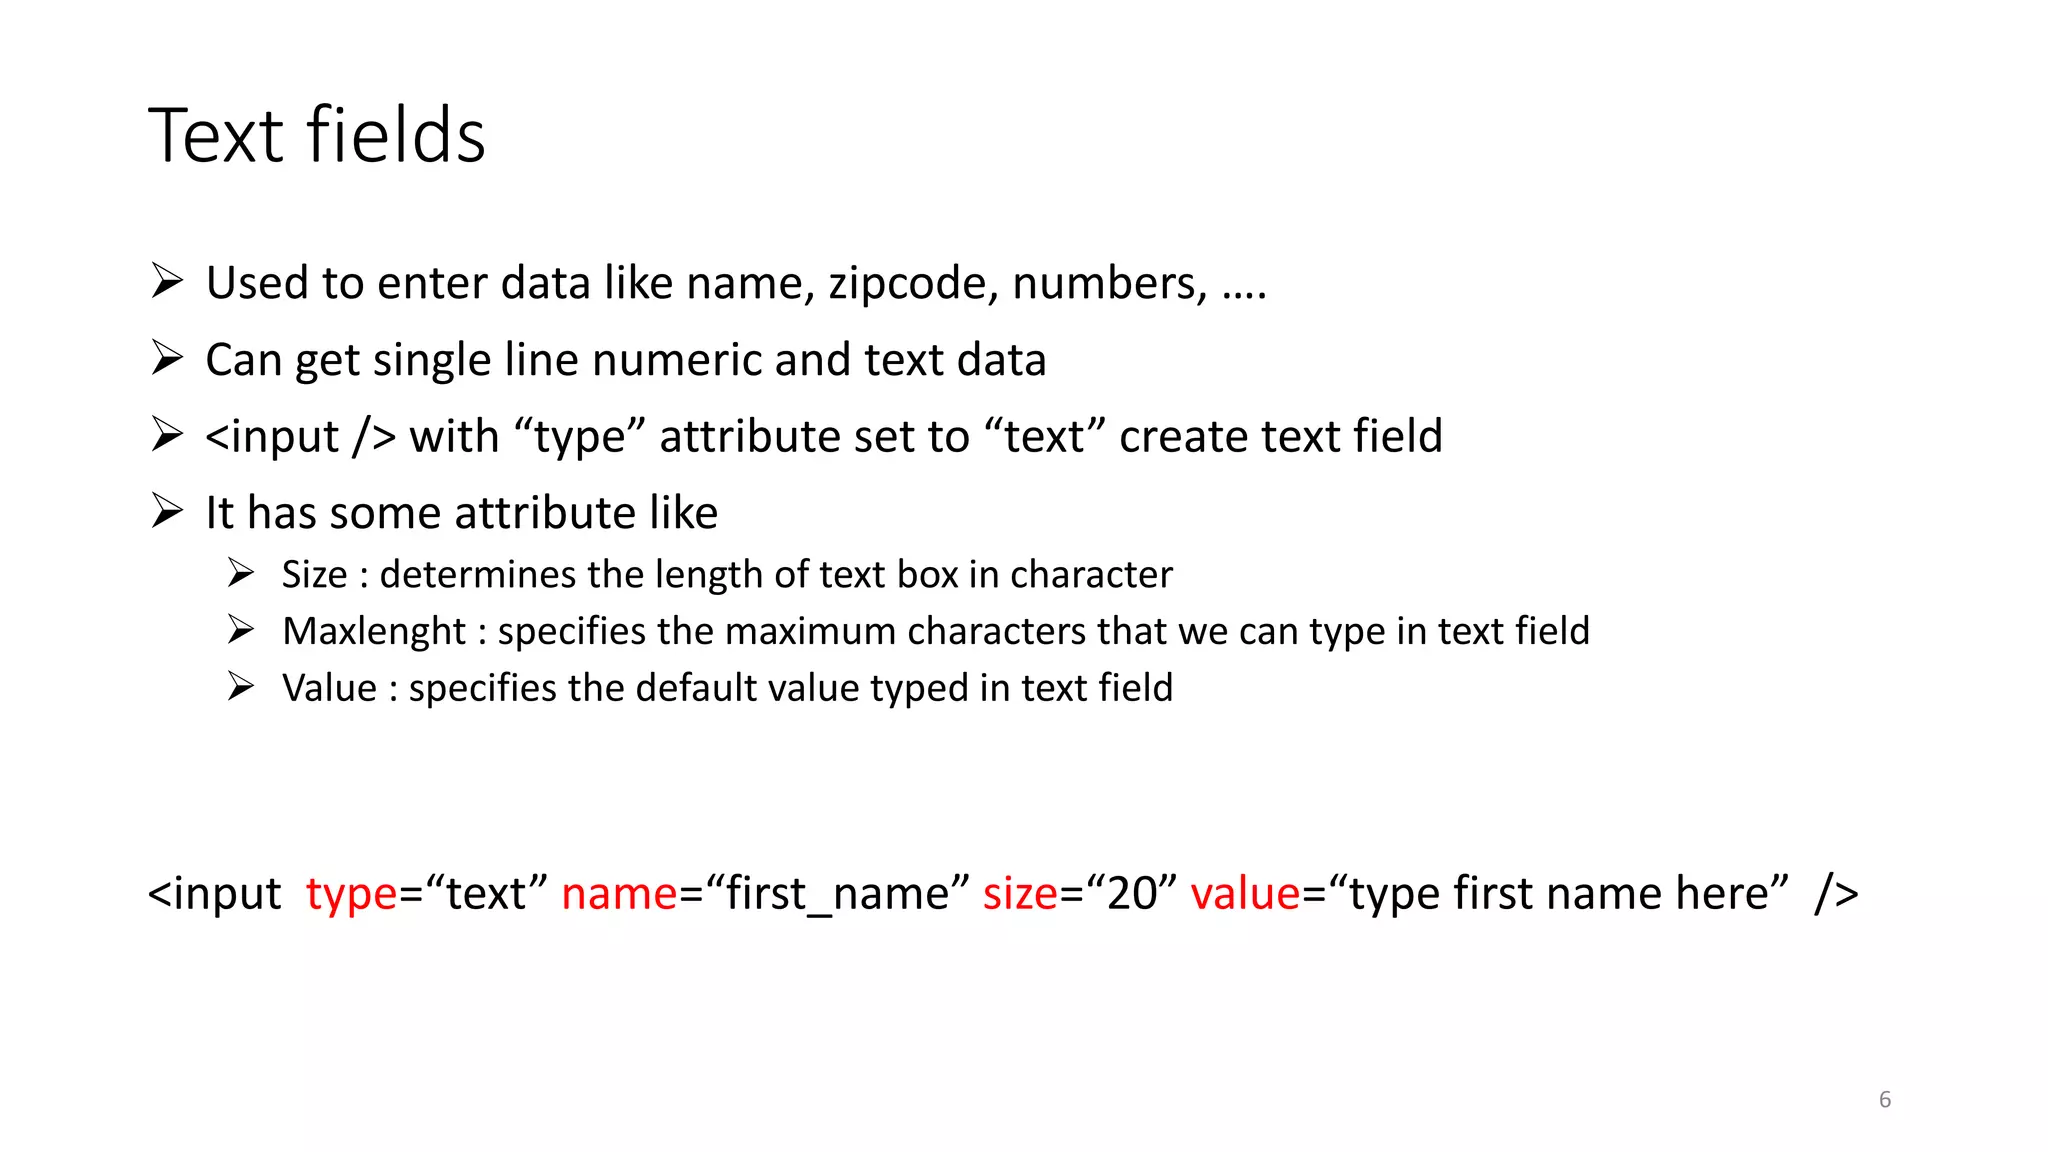
Discusses text fields, their use for data entry, and the attributes like size, maxlength, and default value.
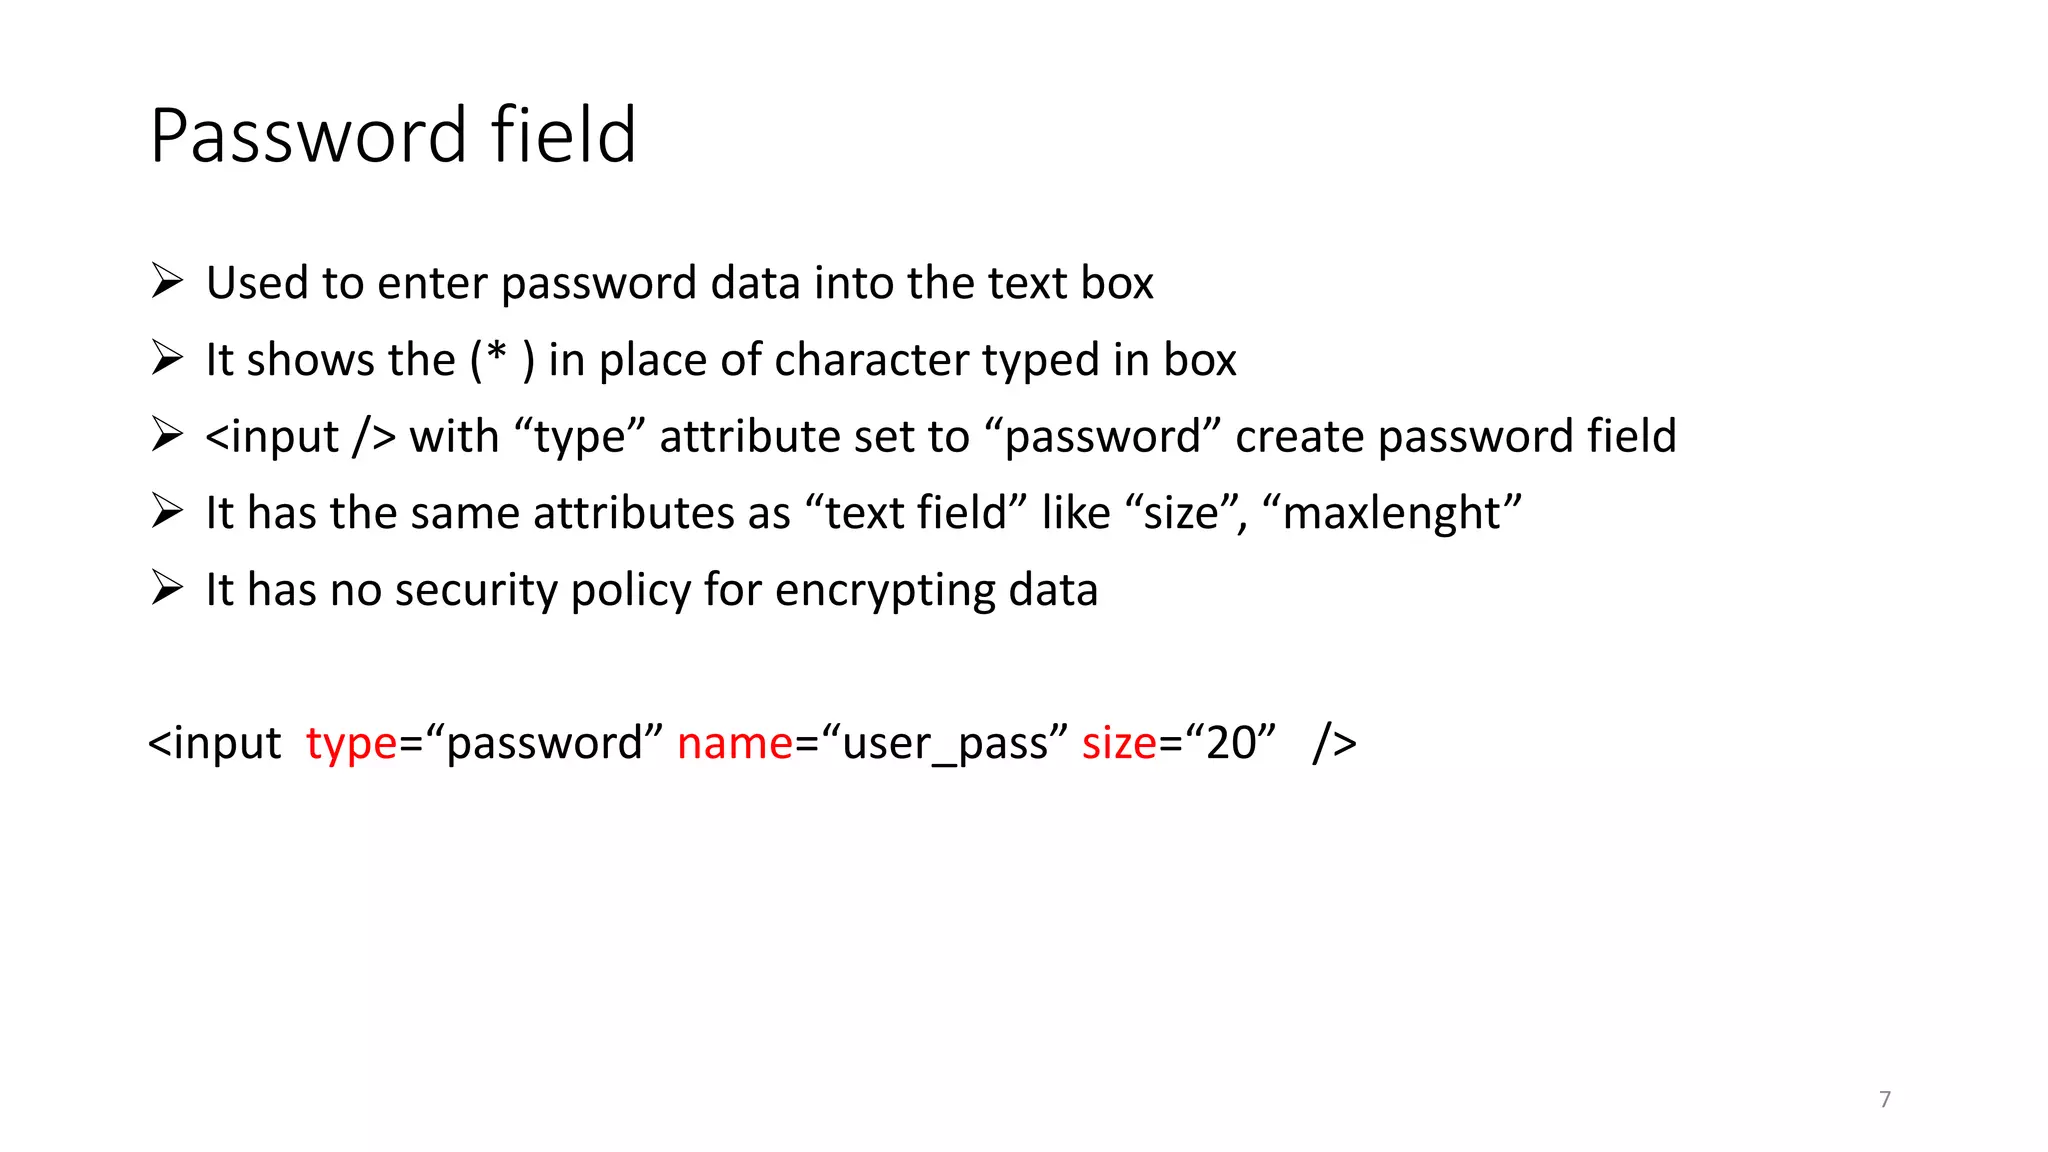
Explains password fields, their display characteristics, and lack of encryption policies in HTML.
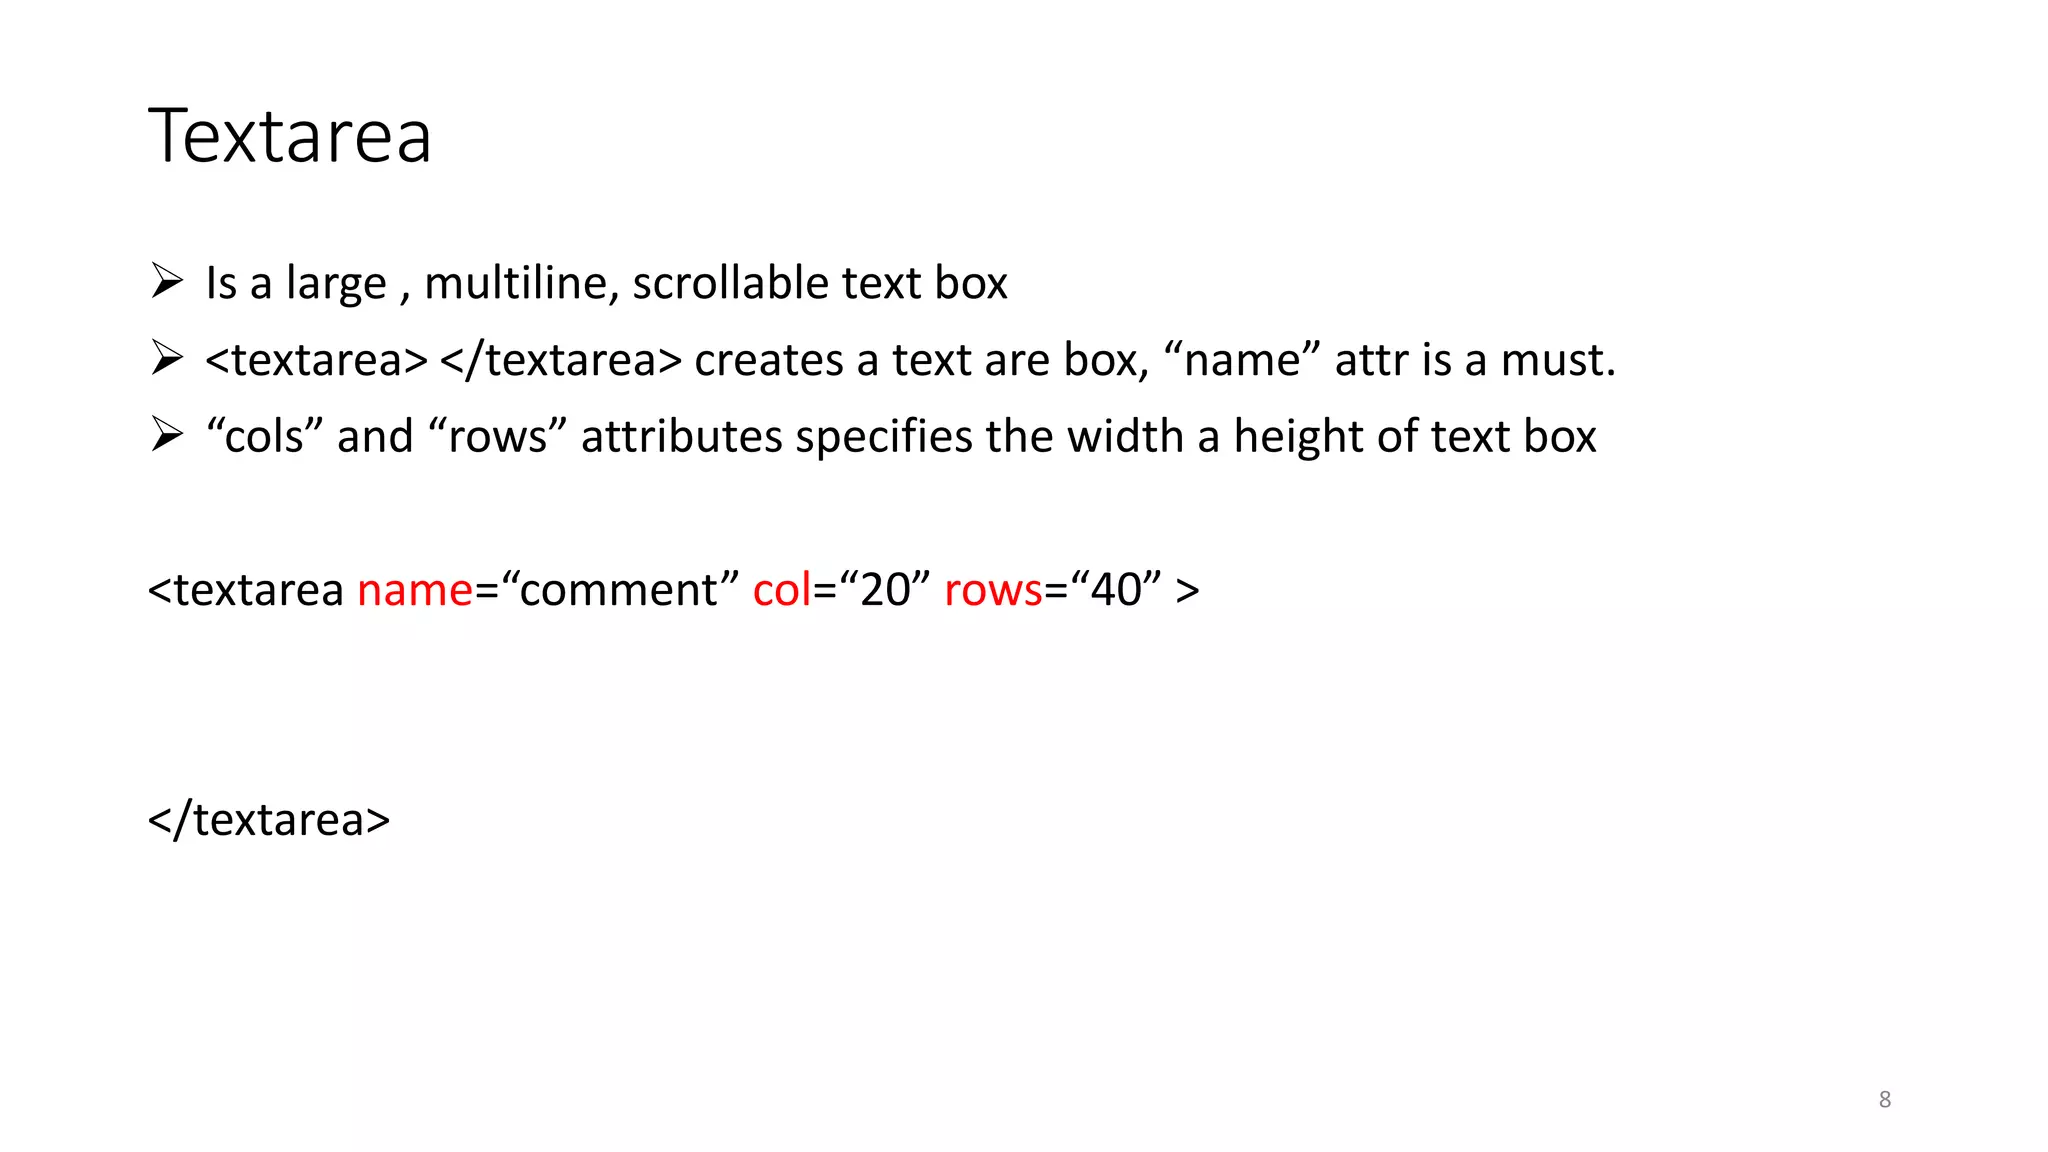
Describes textarea elements for multiline text input, including attributes such as name, cols, and rows.
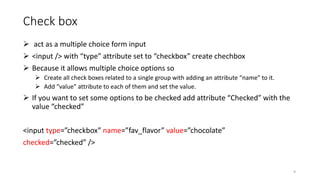
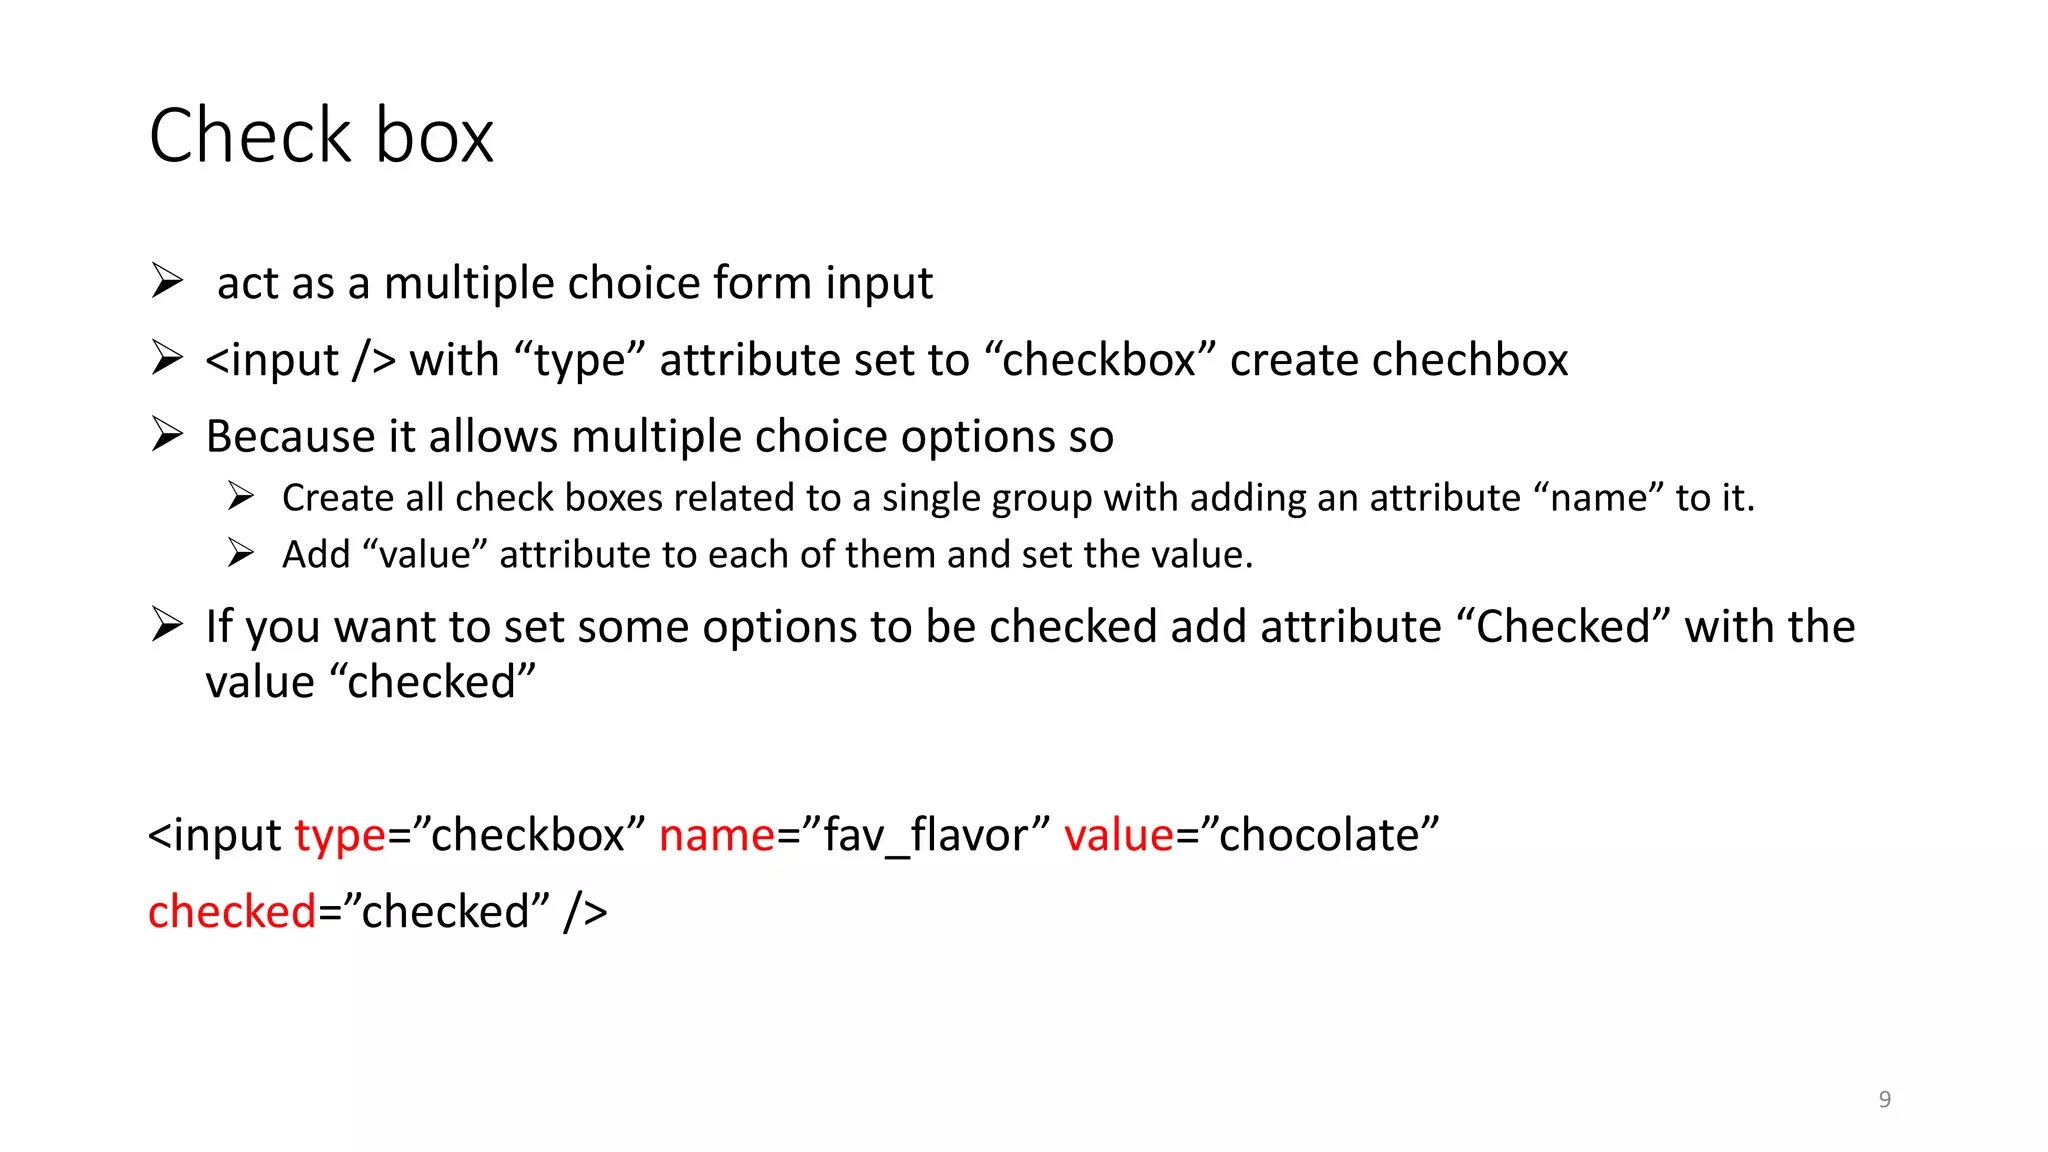
Details checkboxes as multiple-choice inputs, with usage examples and attributes like name and value.
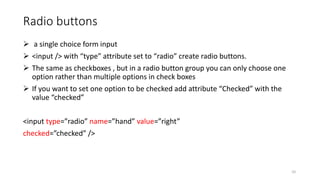
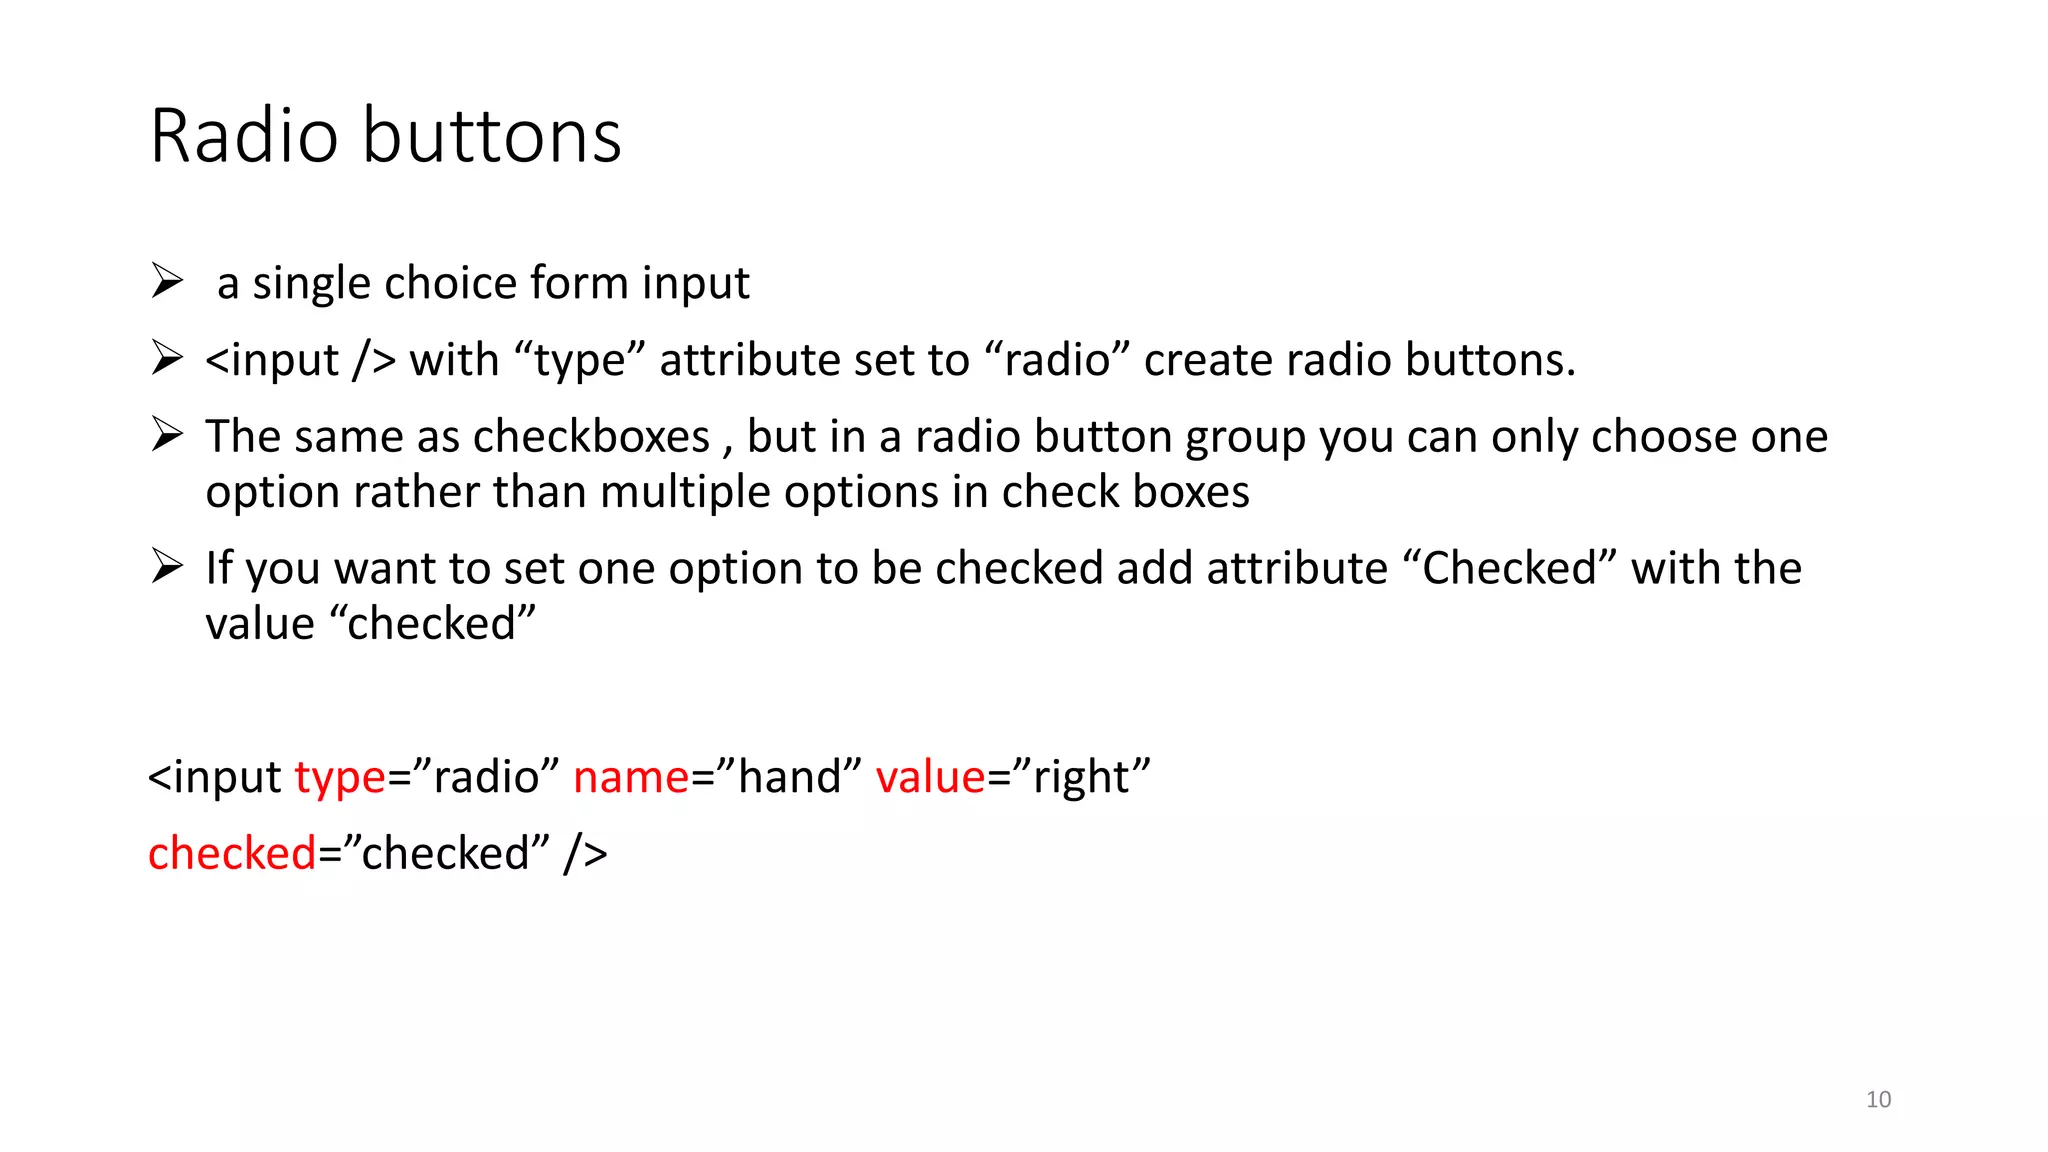
Describes radio buttons for single-choice inputs, including how to define groups and set default selections.
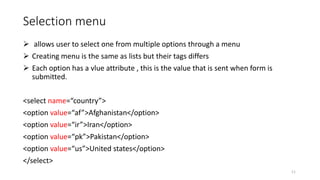
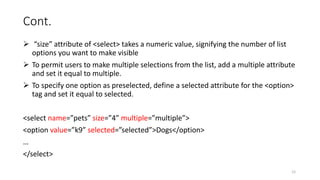
Introduces selection menus for choosing options, detailing attributes like value and the structuring of options.
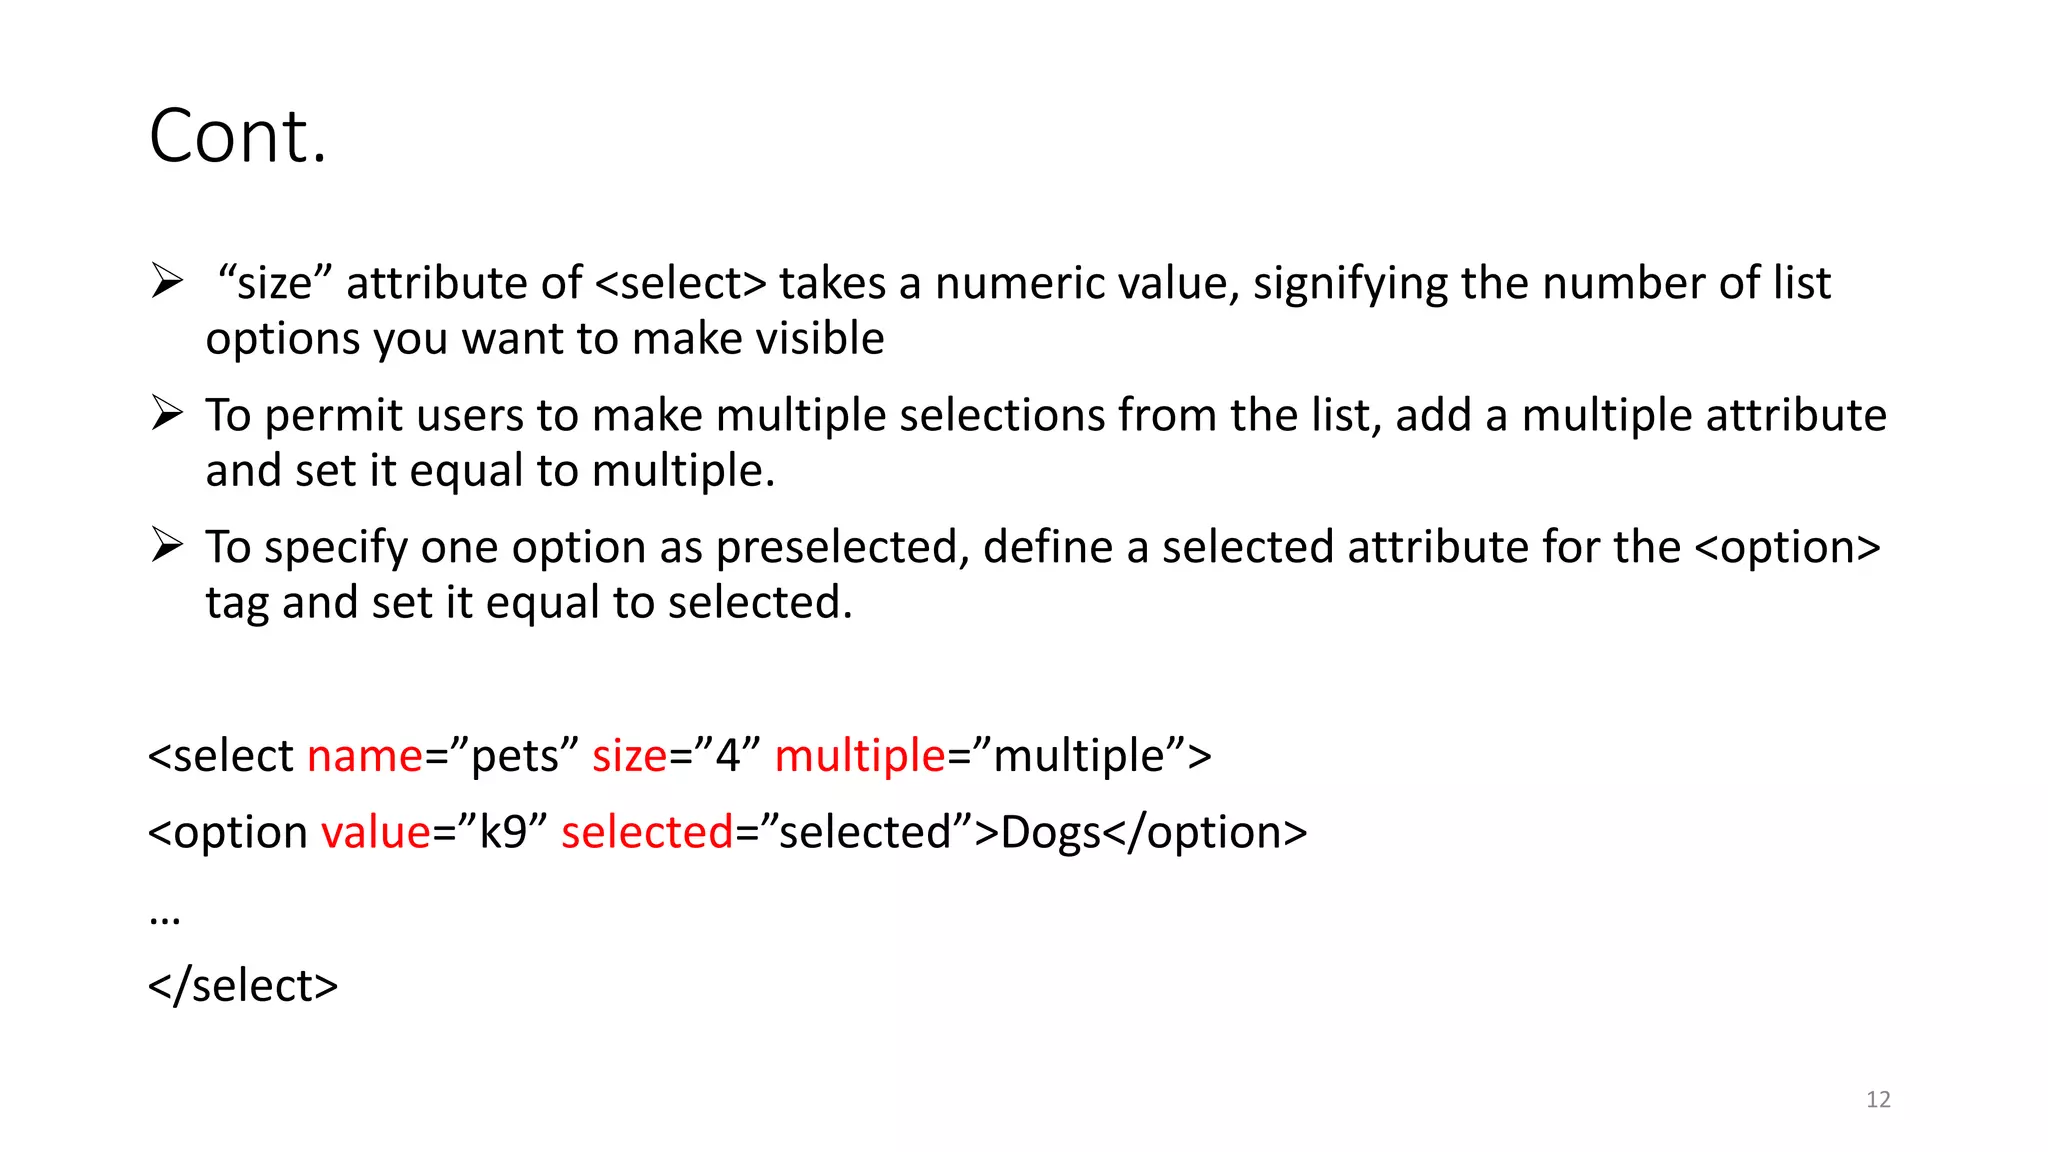
Continues discussing selection menus by explaining attributes for multiple selections and preselected values.
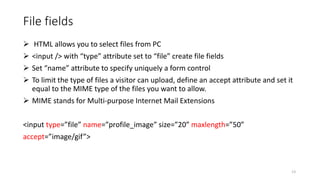
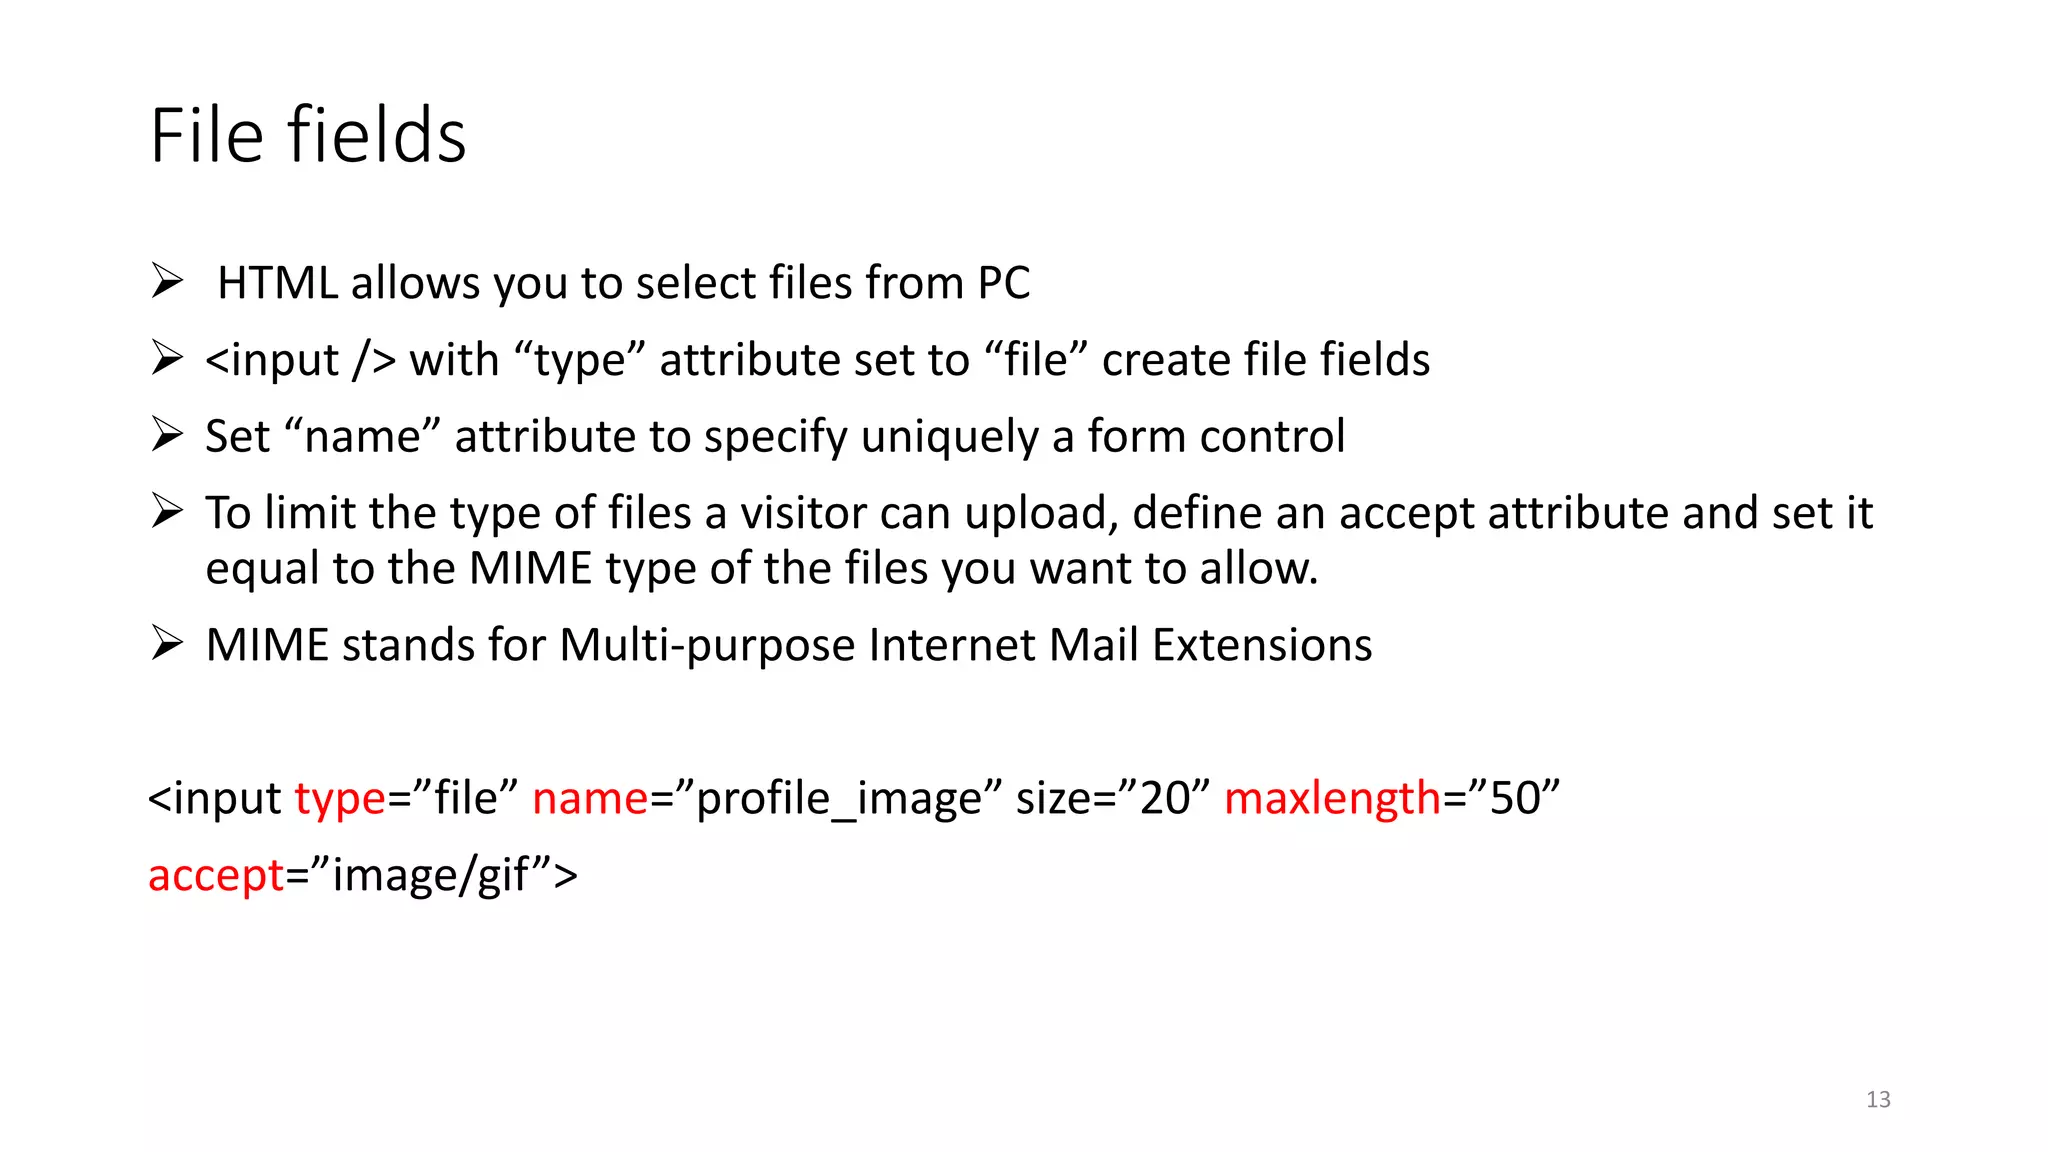
Explains file fields for uploading files, including name and accept attributes to restrict file types.
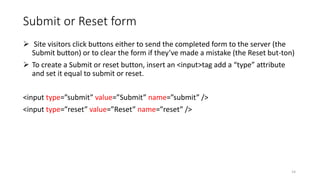
Describes submit and reset buttons for forms, including their creation using input tags.
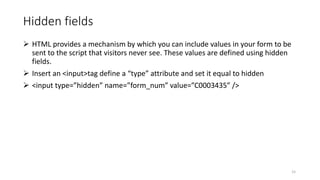
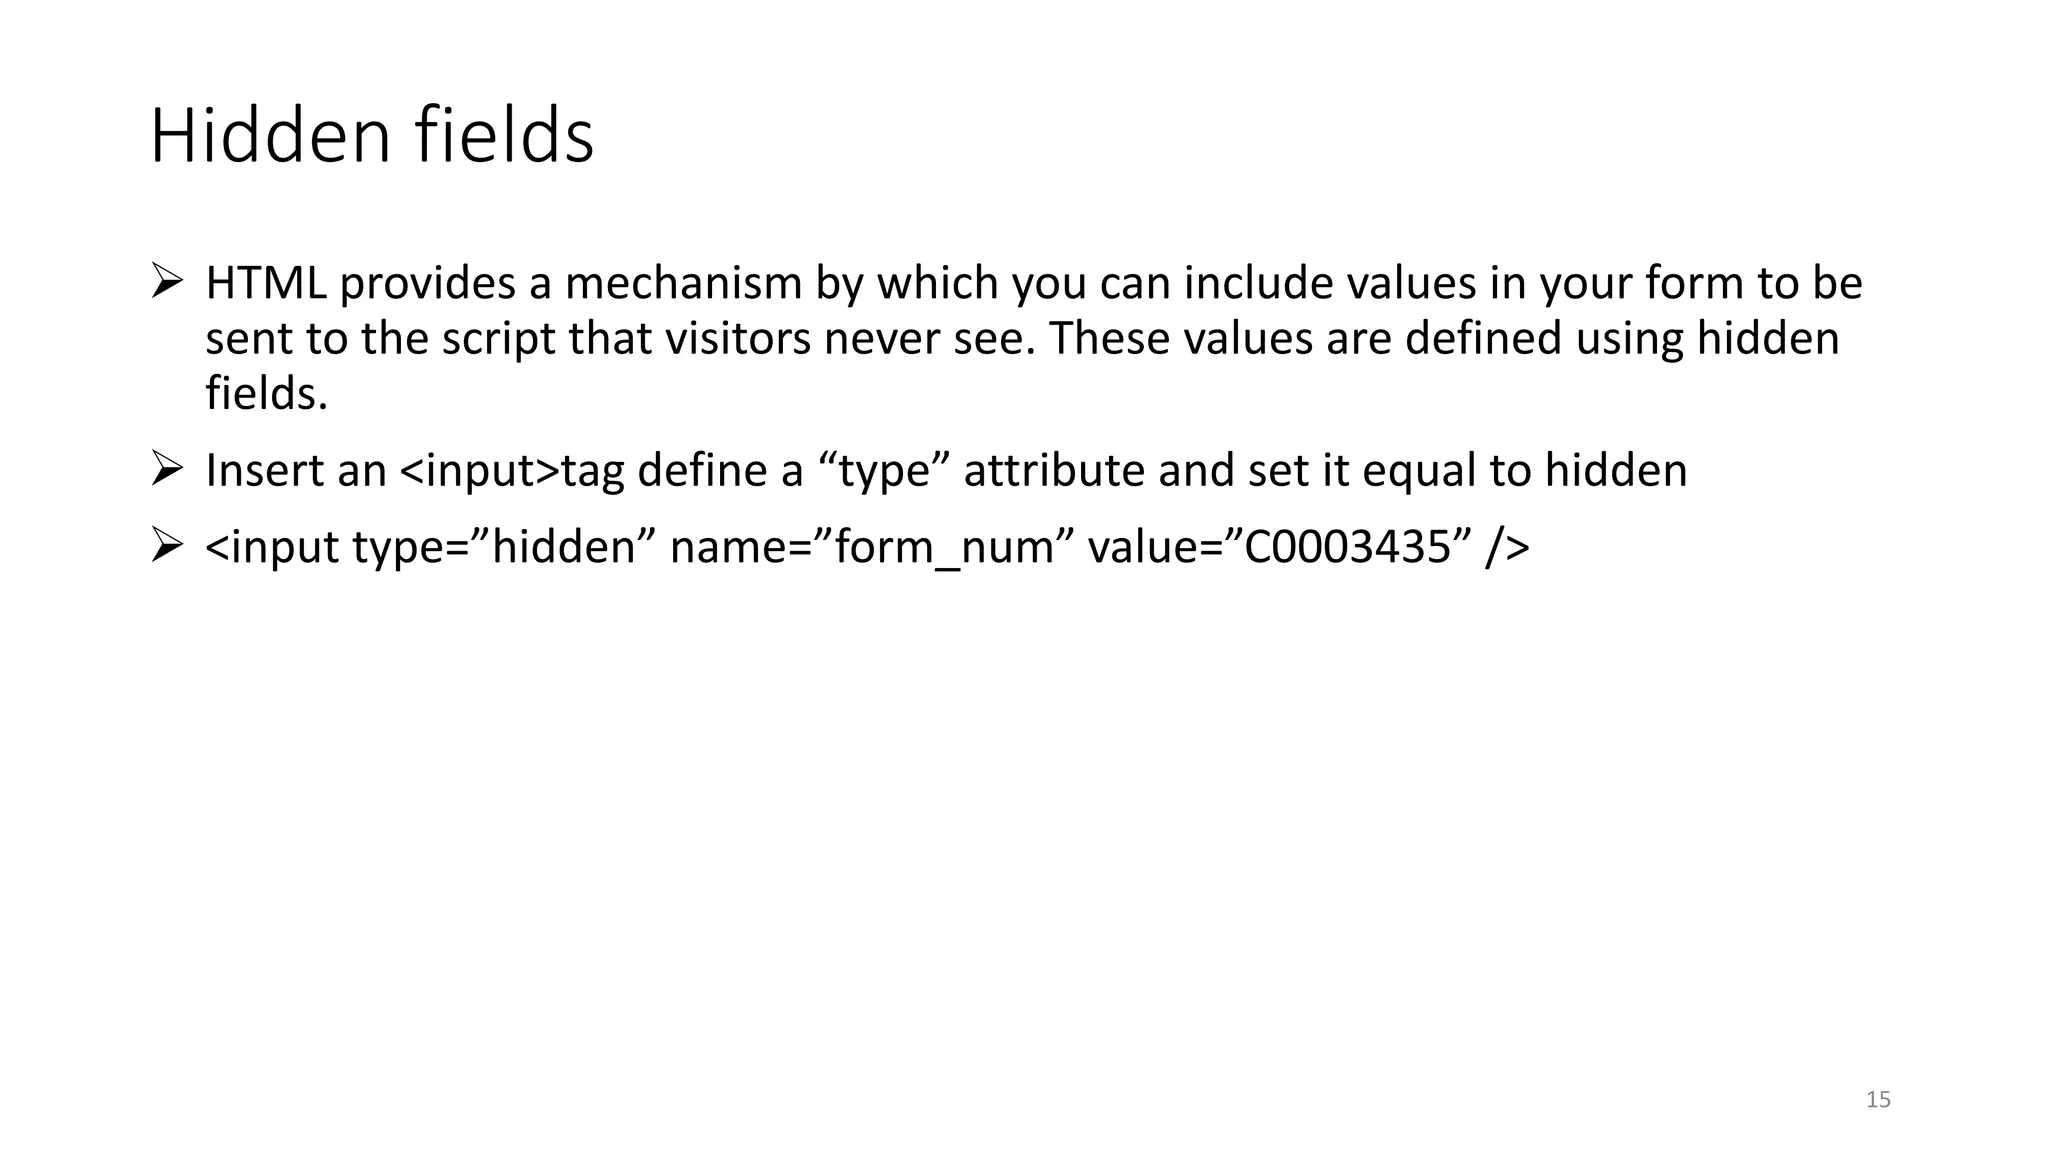
Outlines the purpose and creation of hidden fields in forms, providing unseen data to processing scripts.
Lists resources for further reading on HTML and web design as references for the presentation.


