Download to read offline


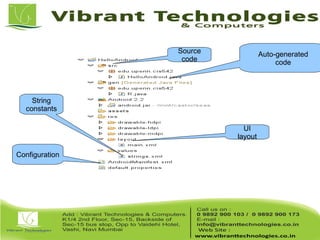
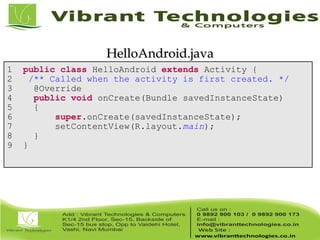
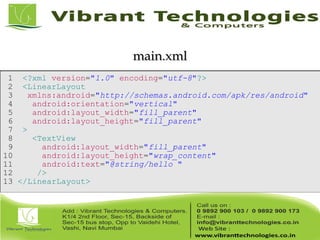
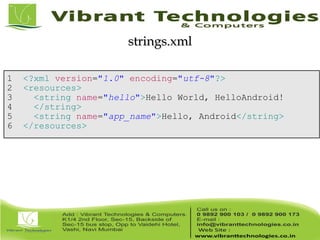


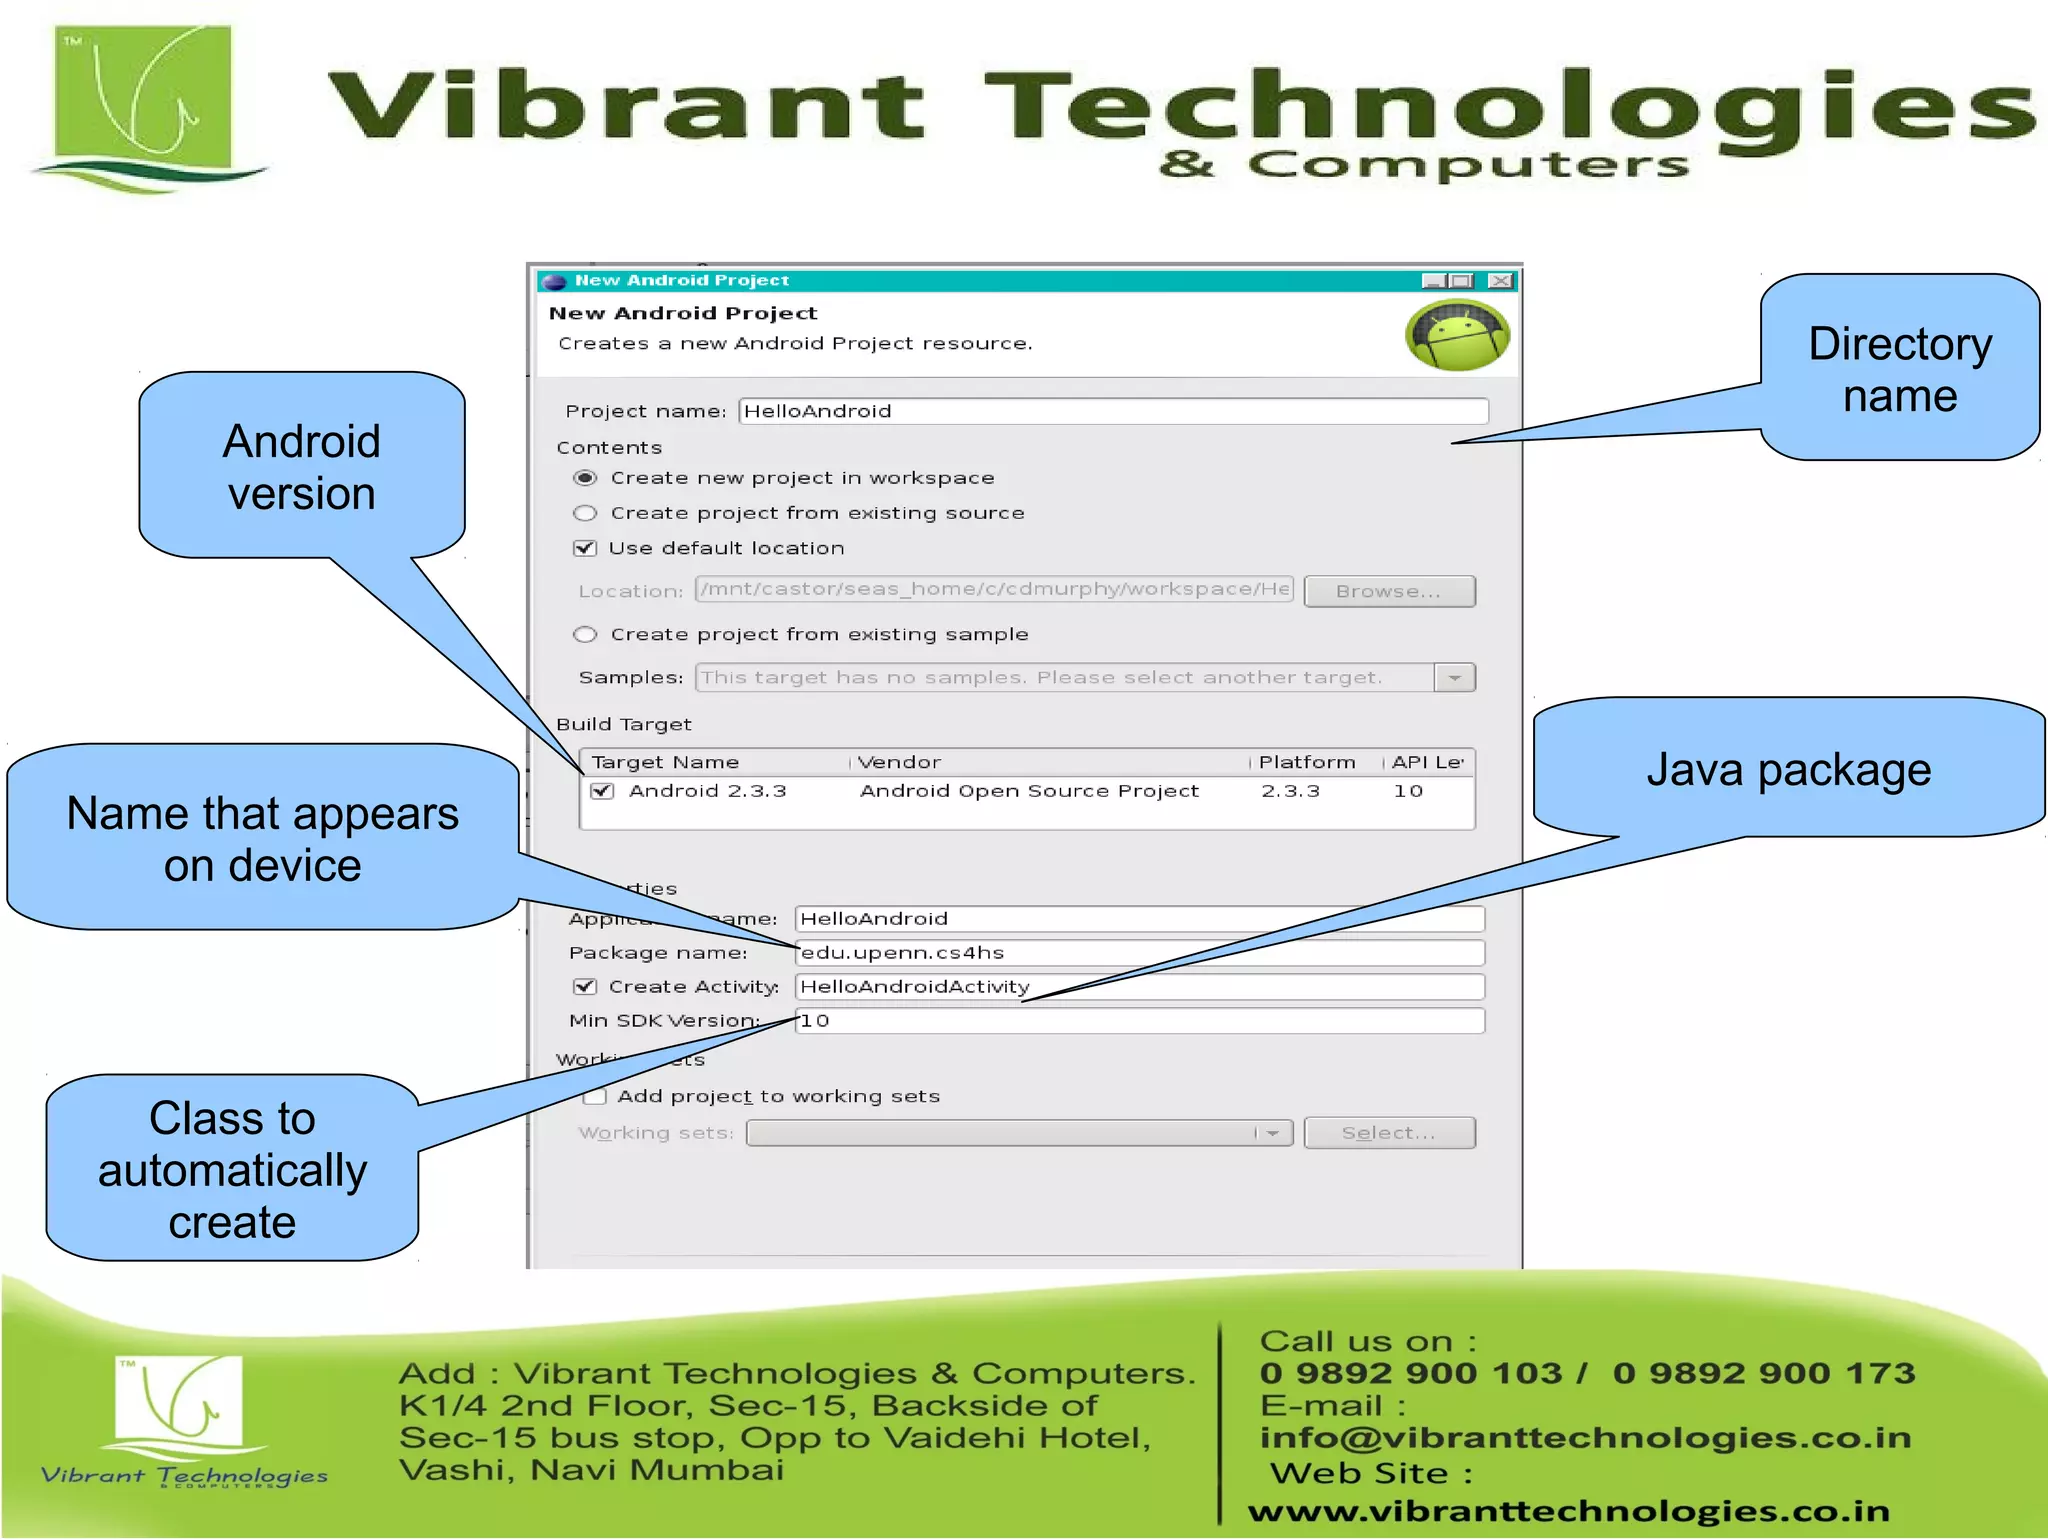

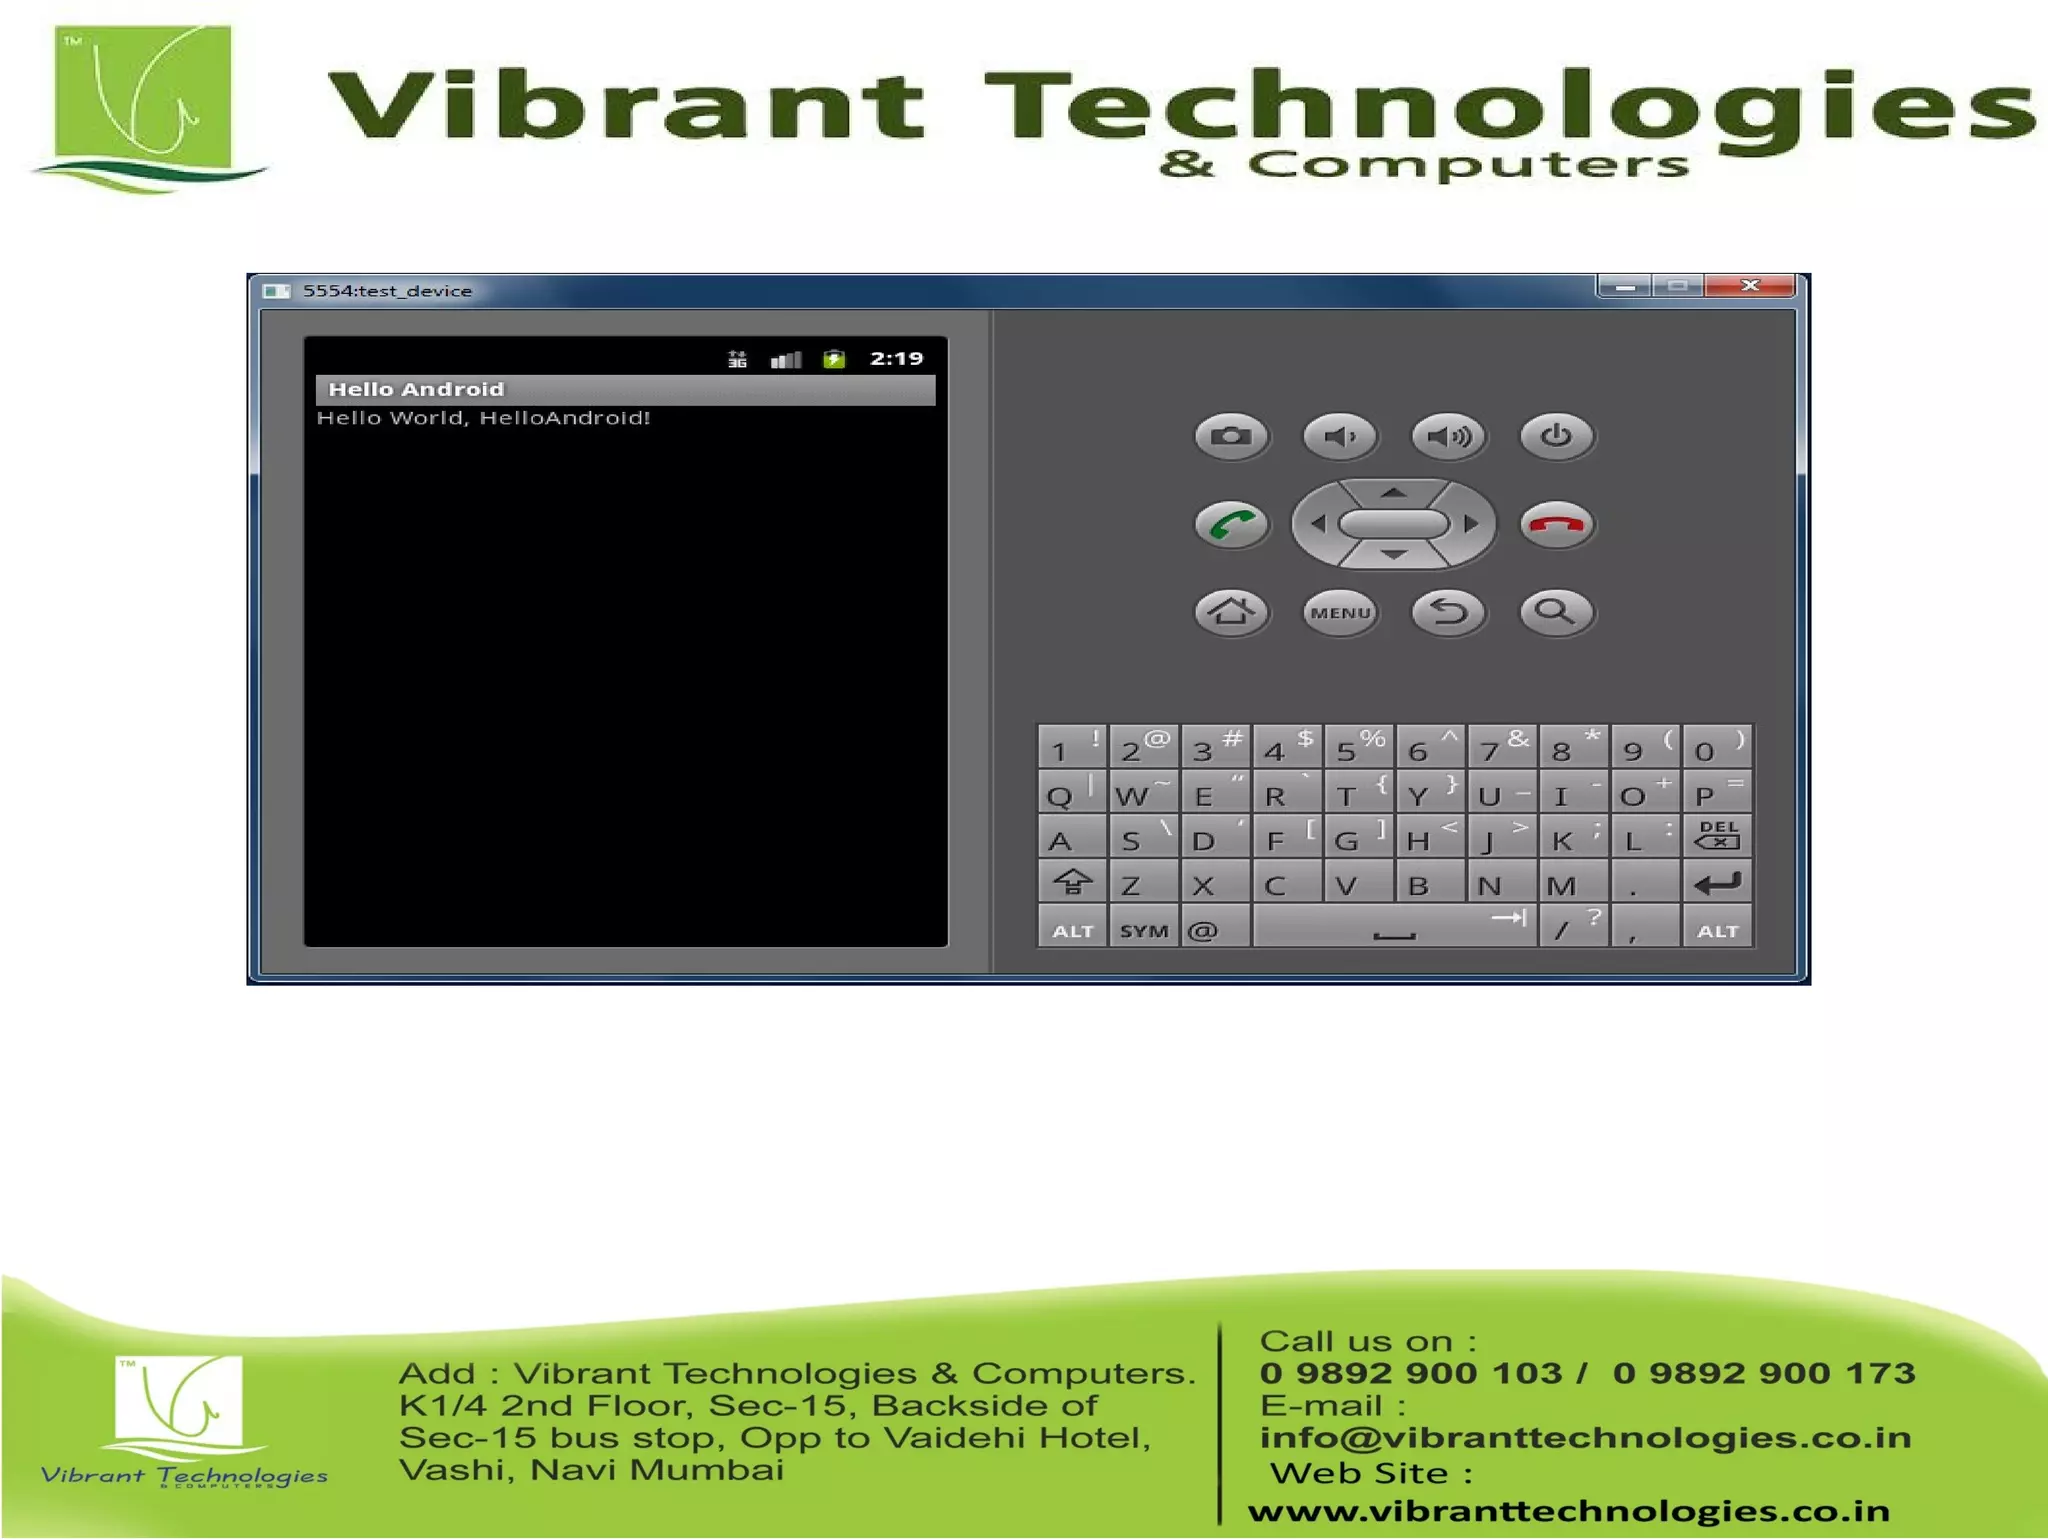
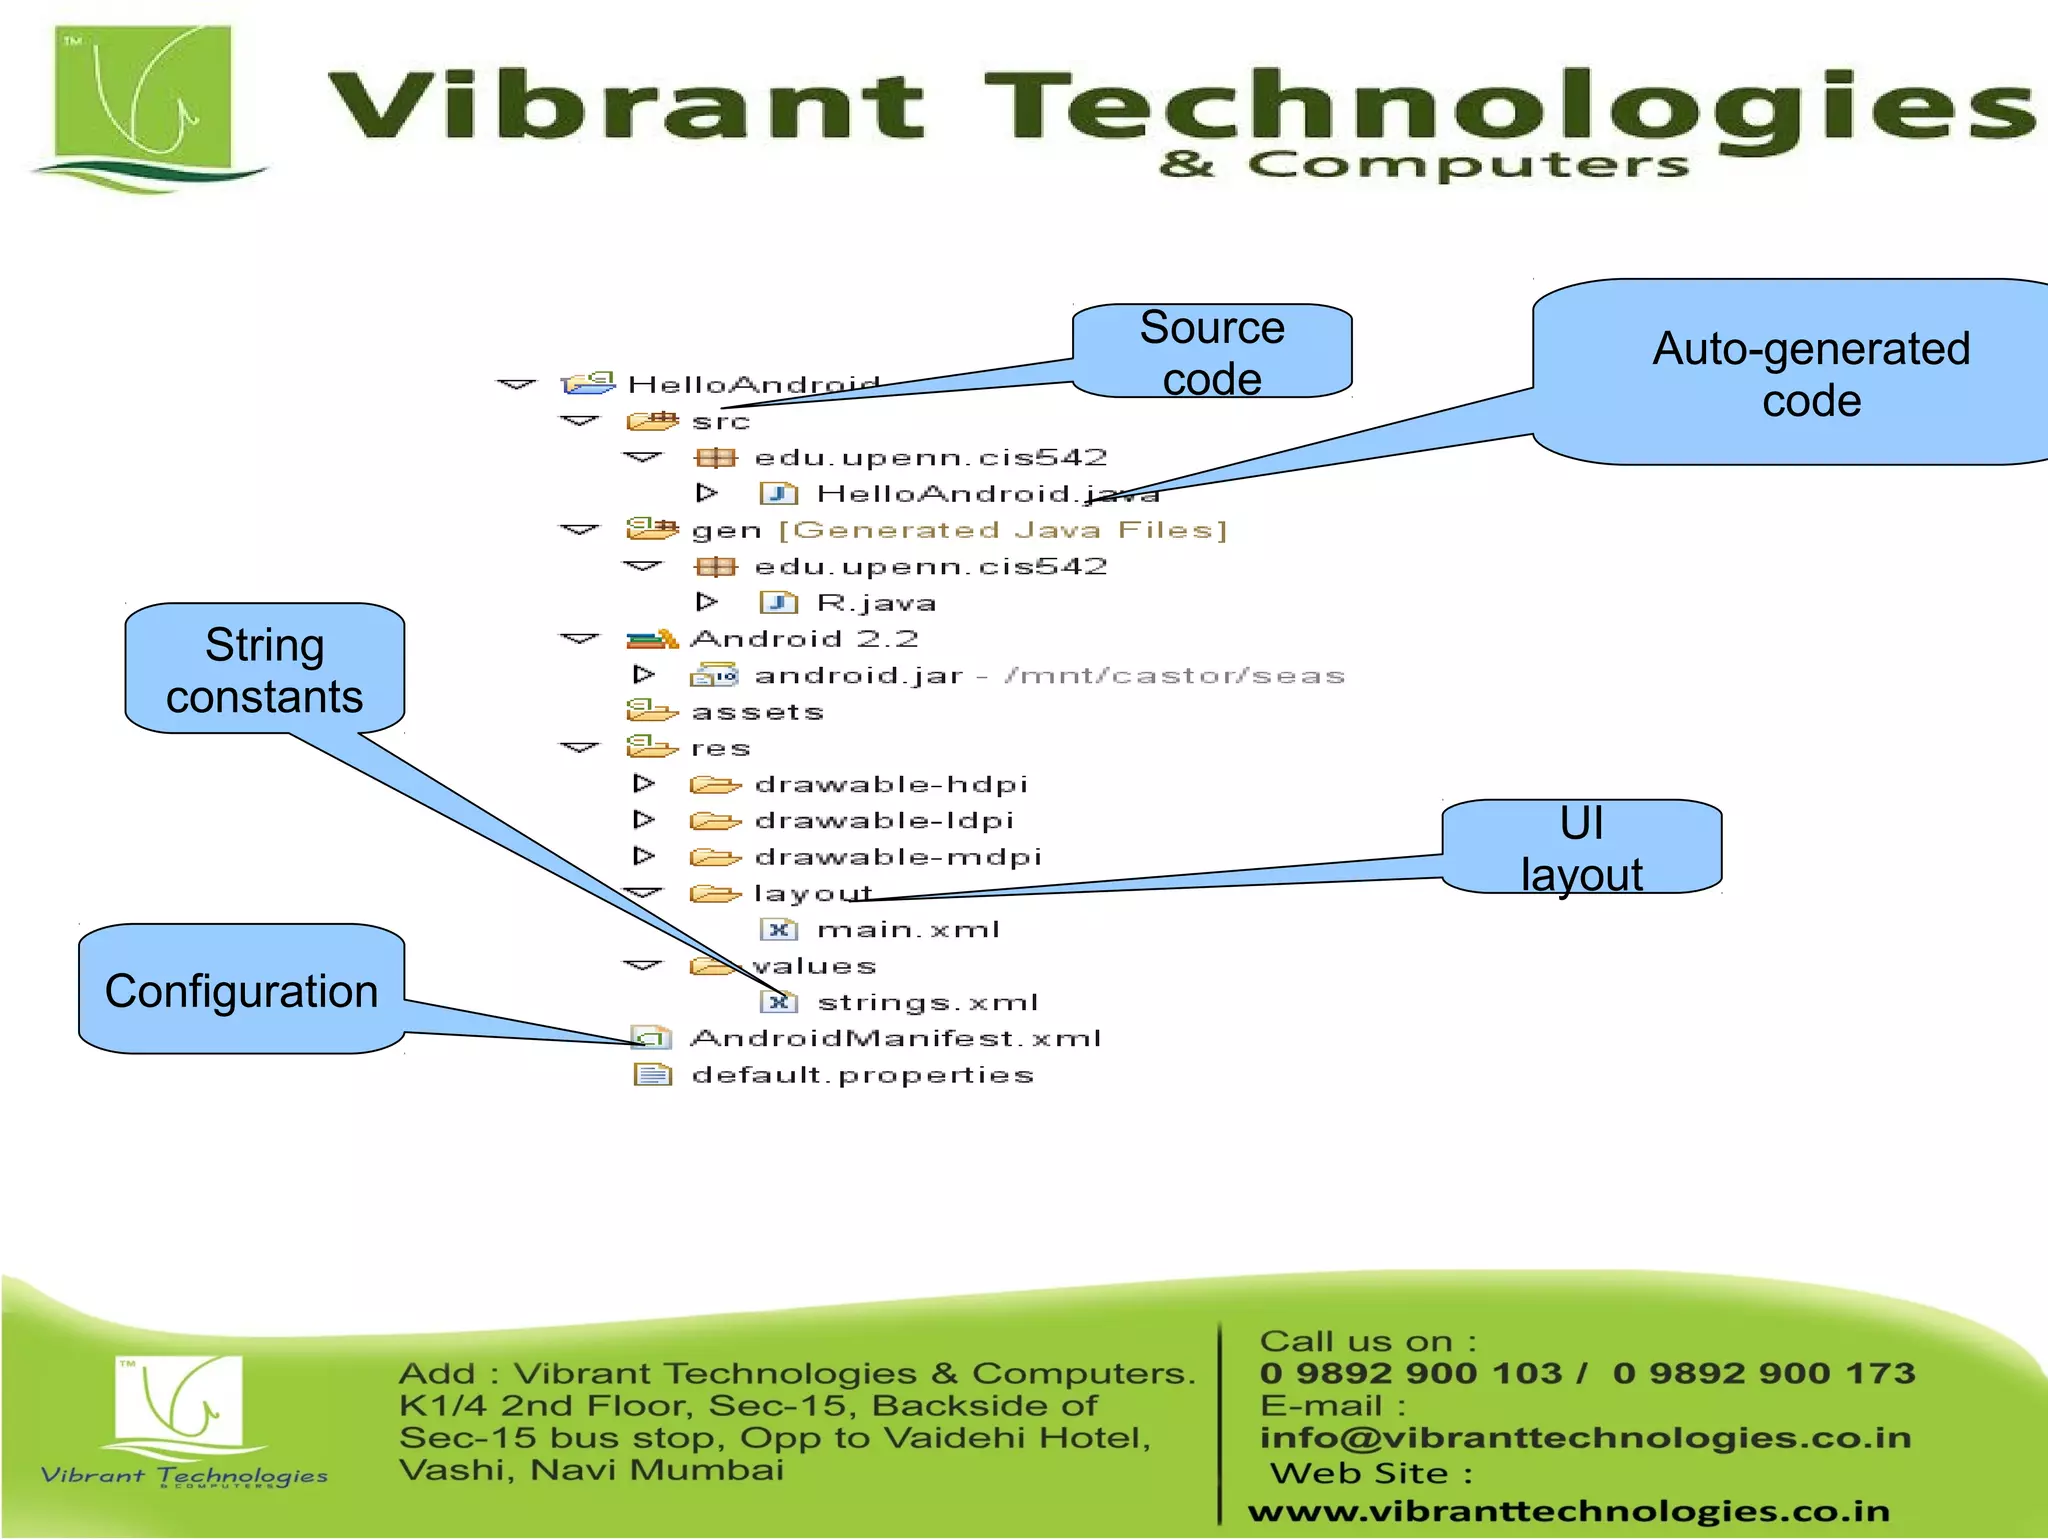
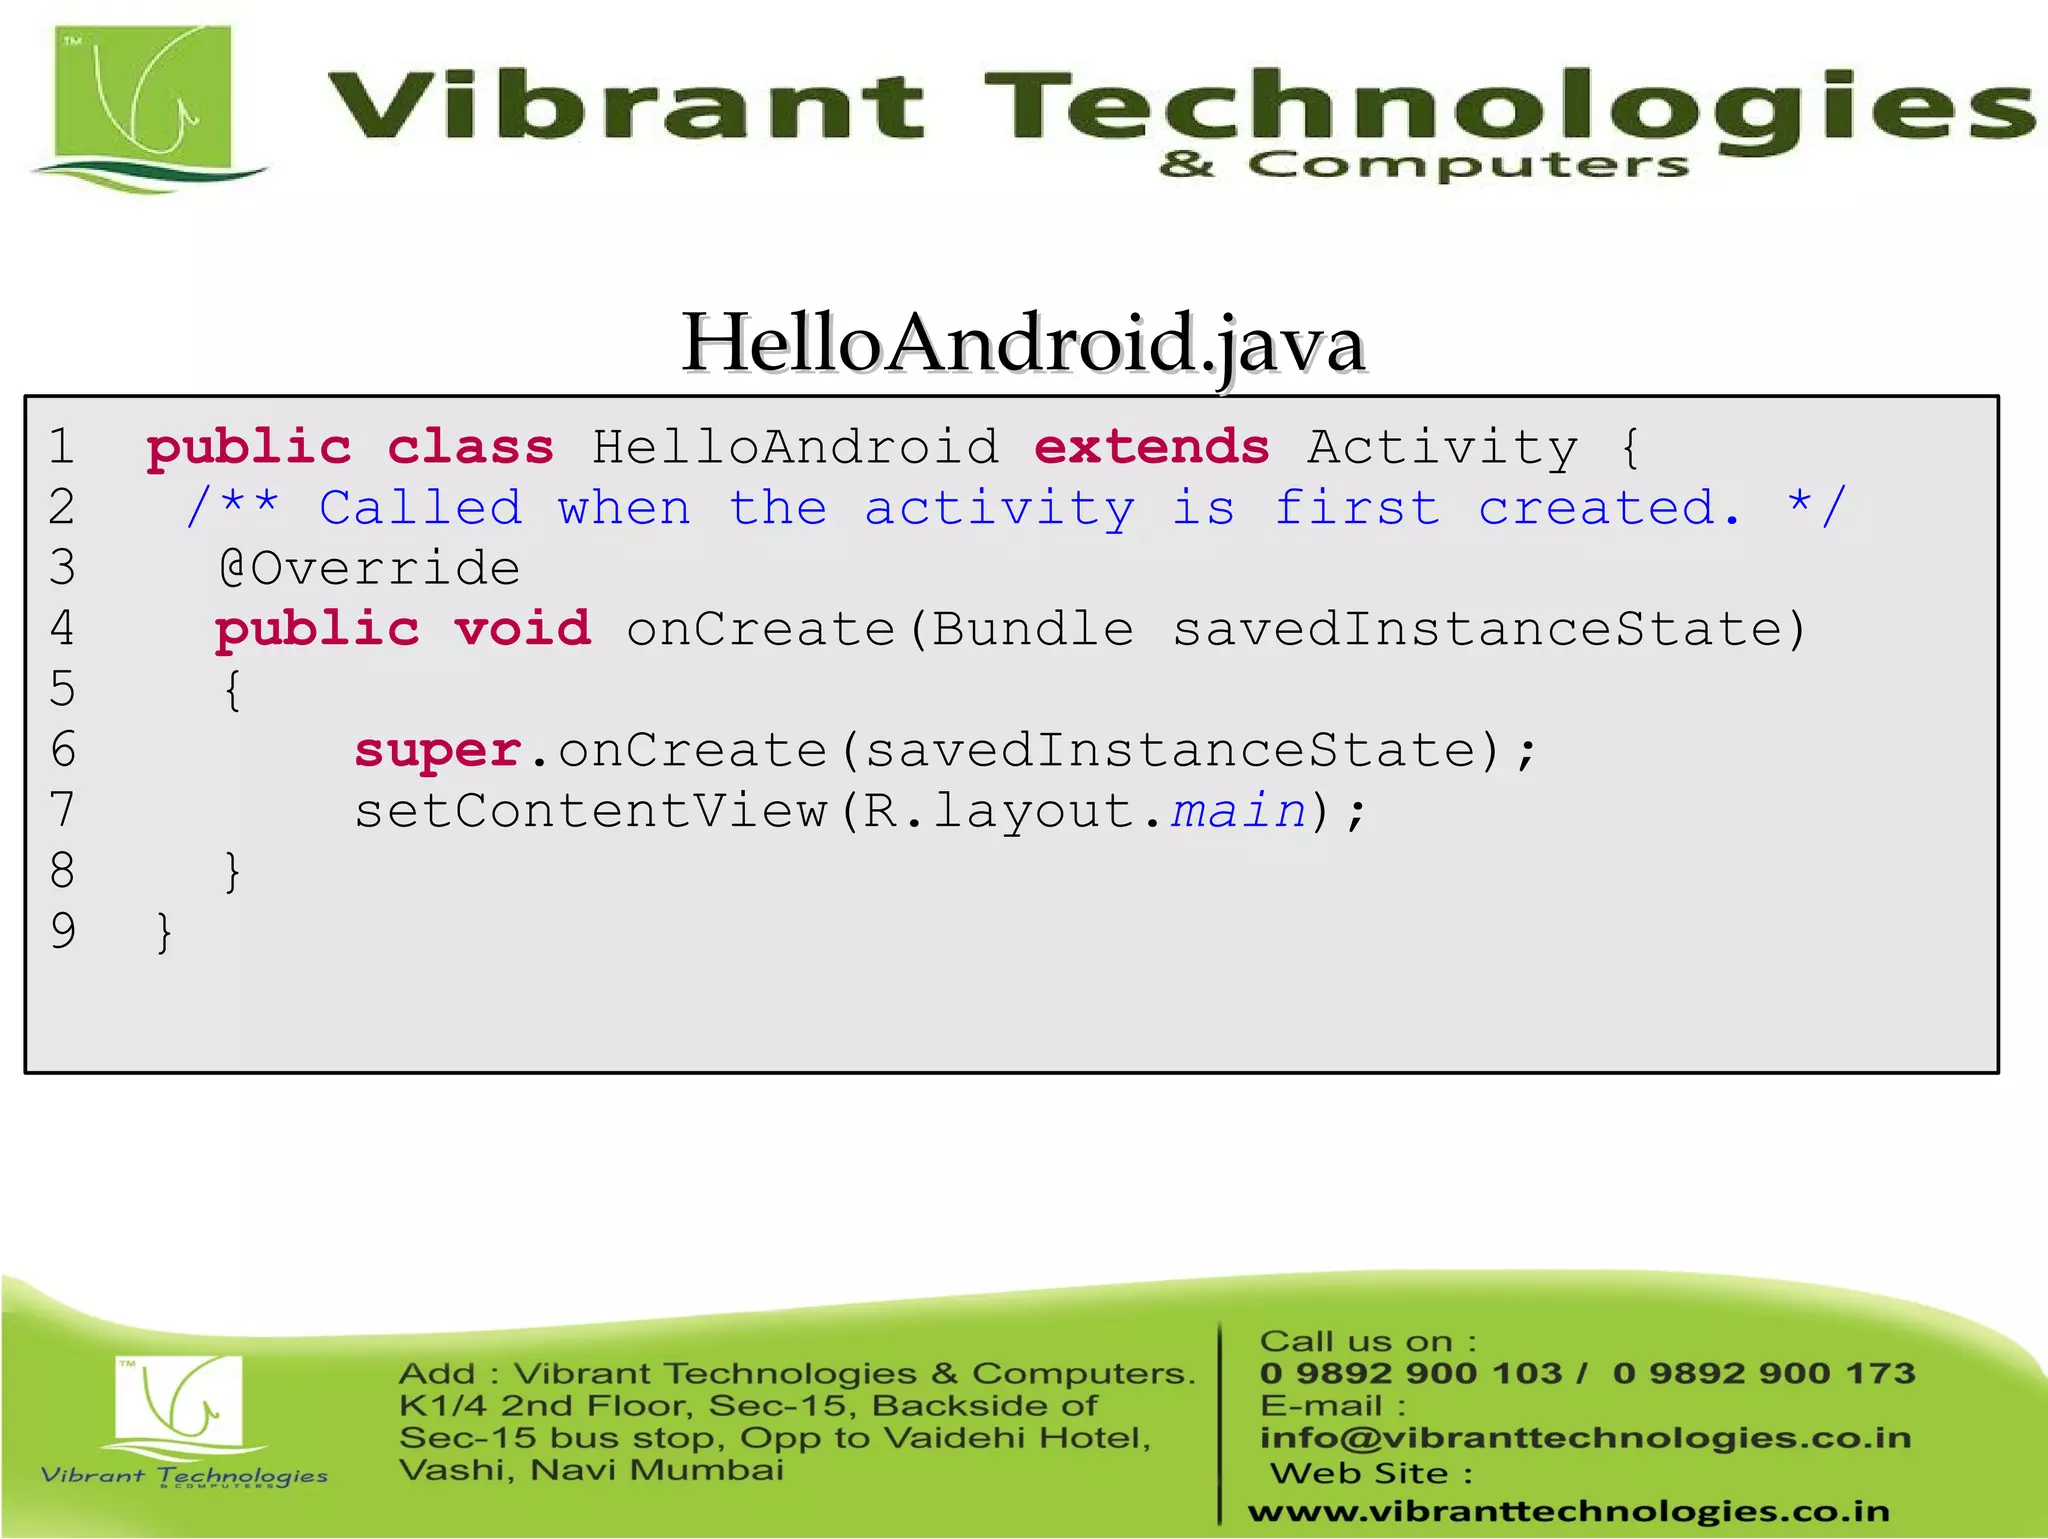
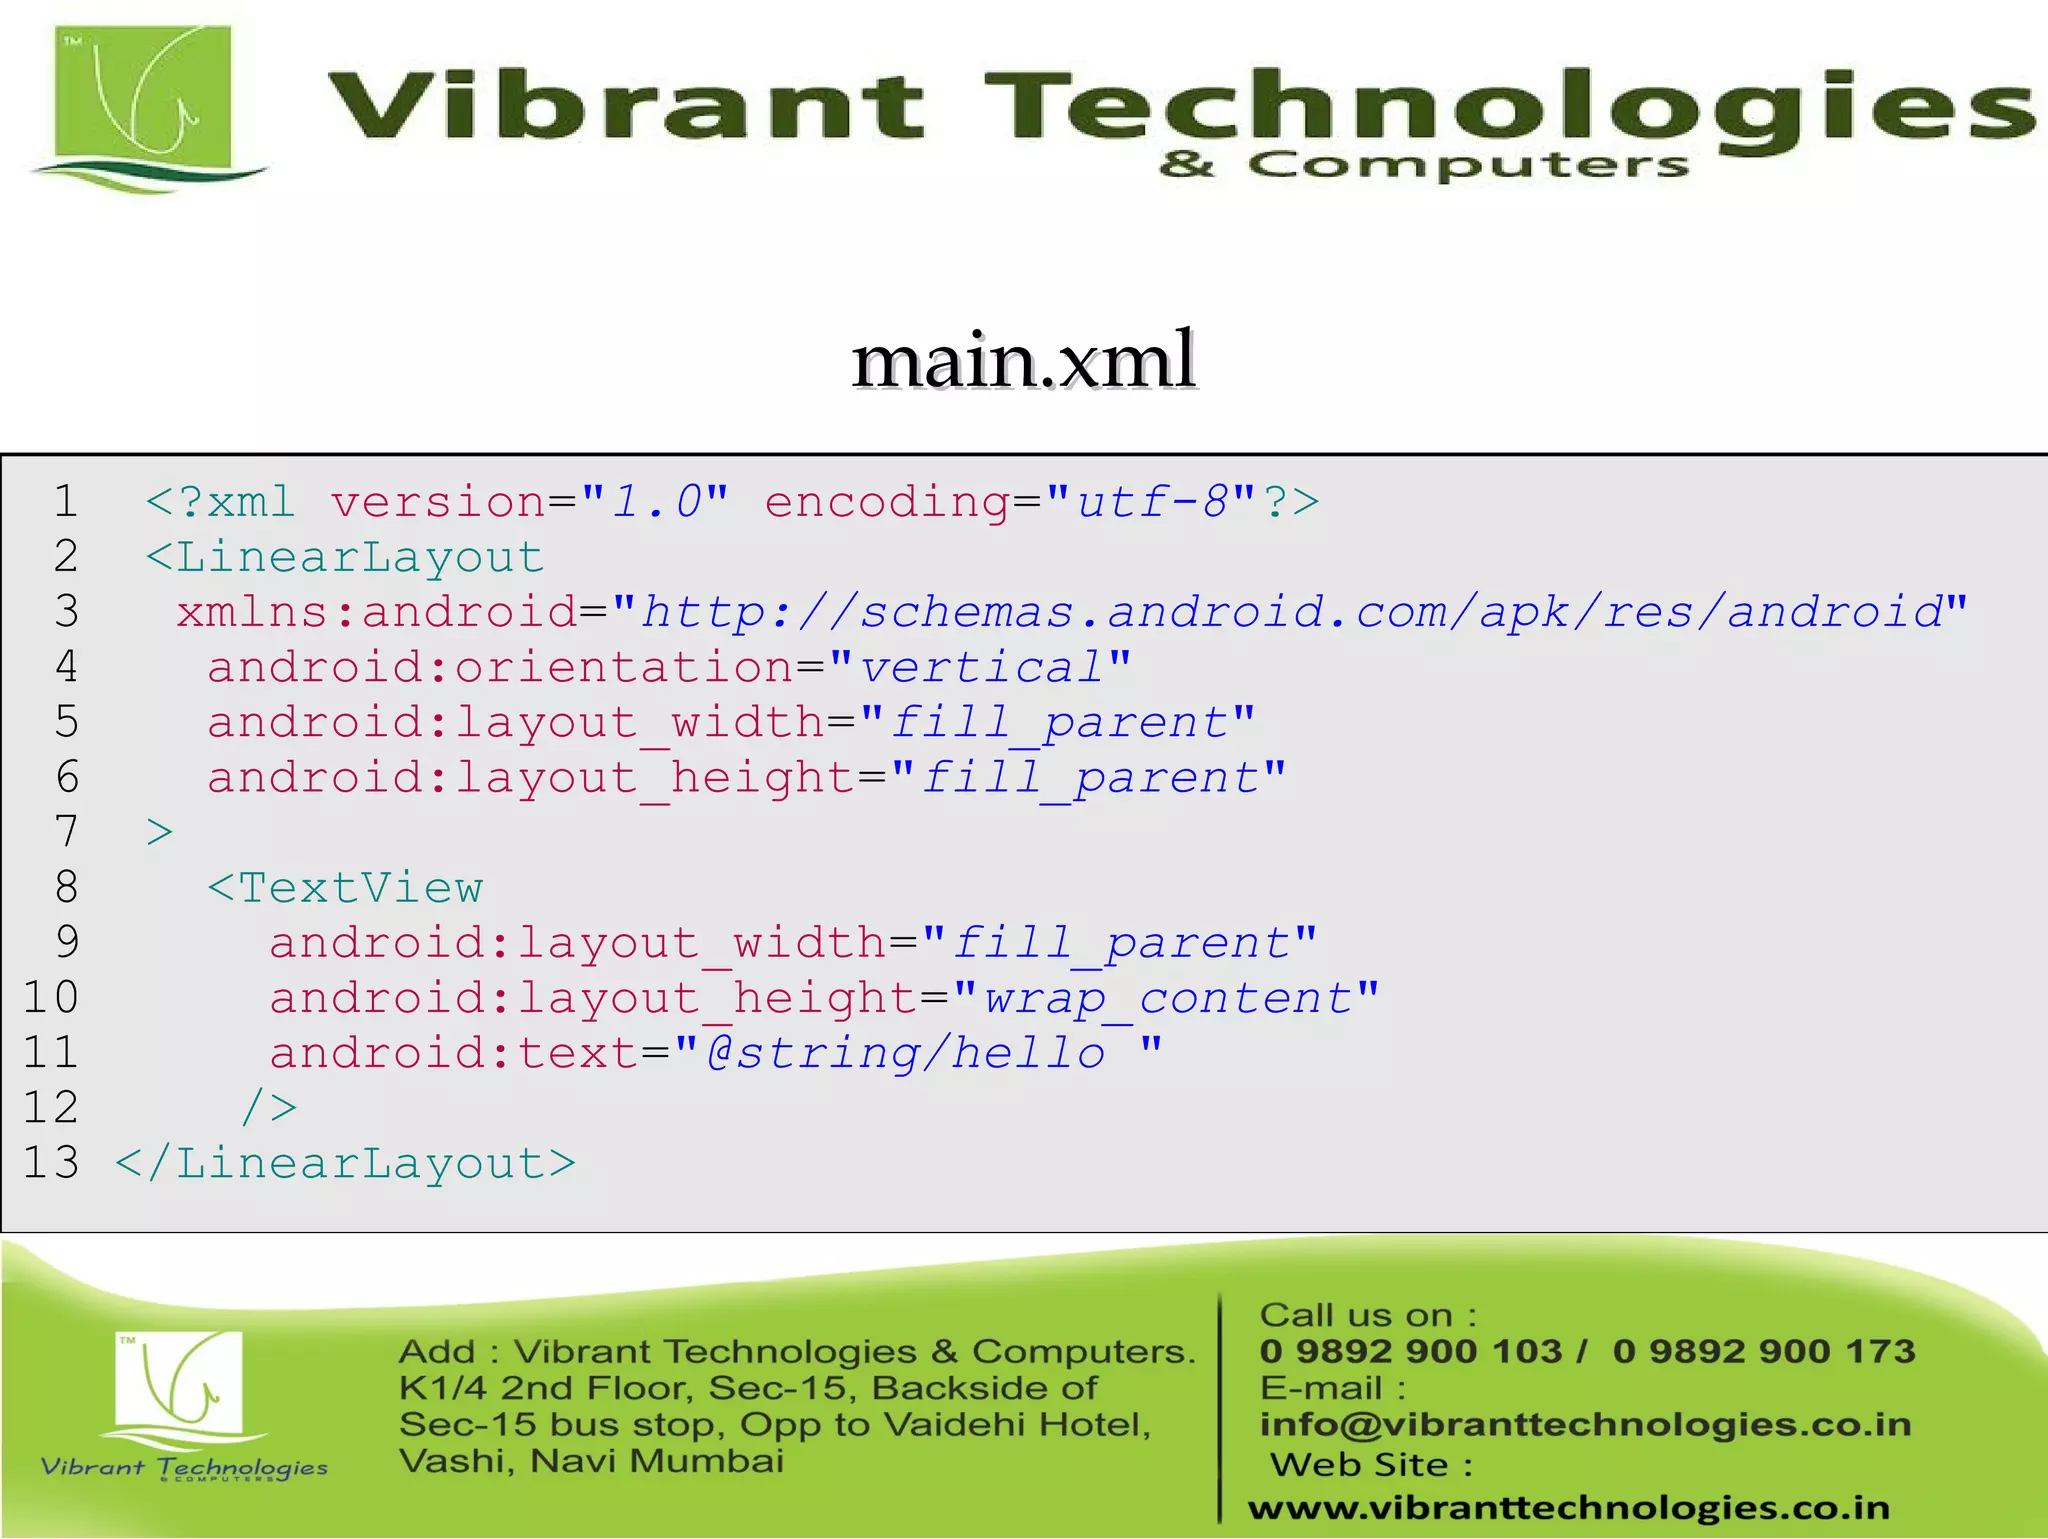

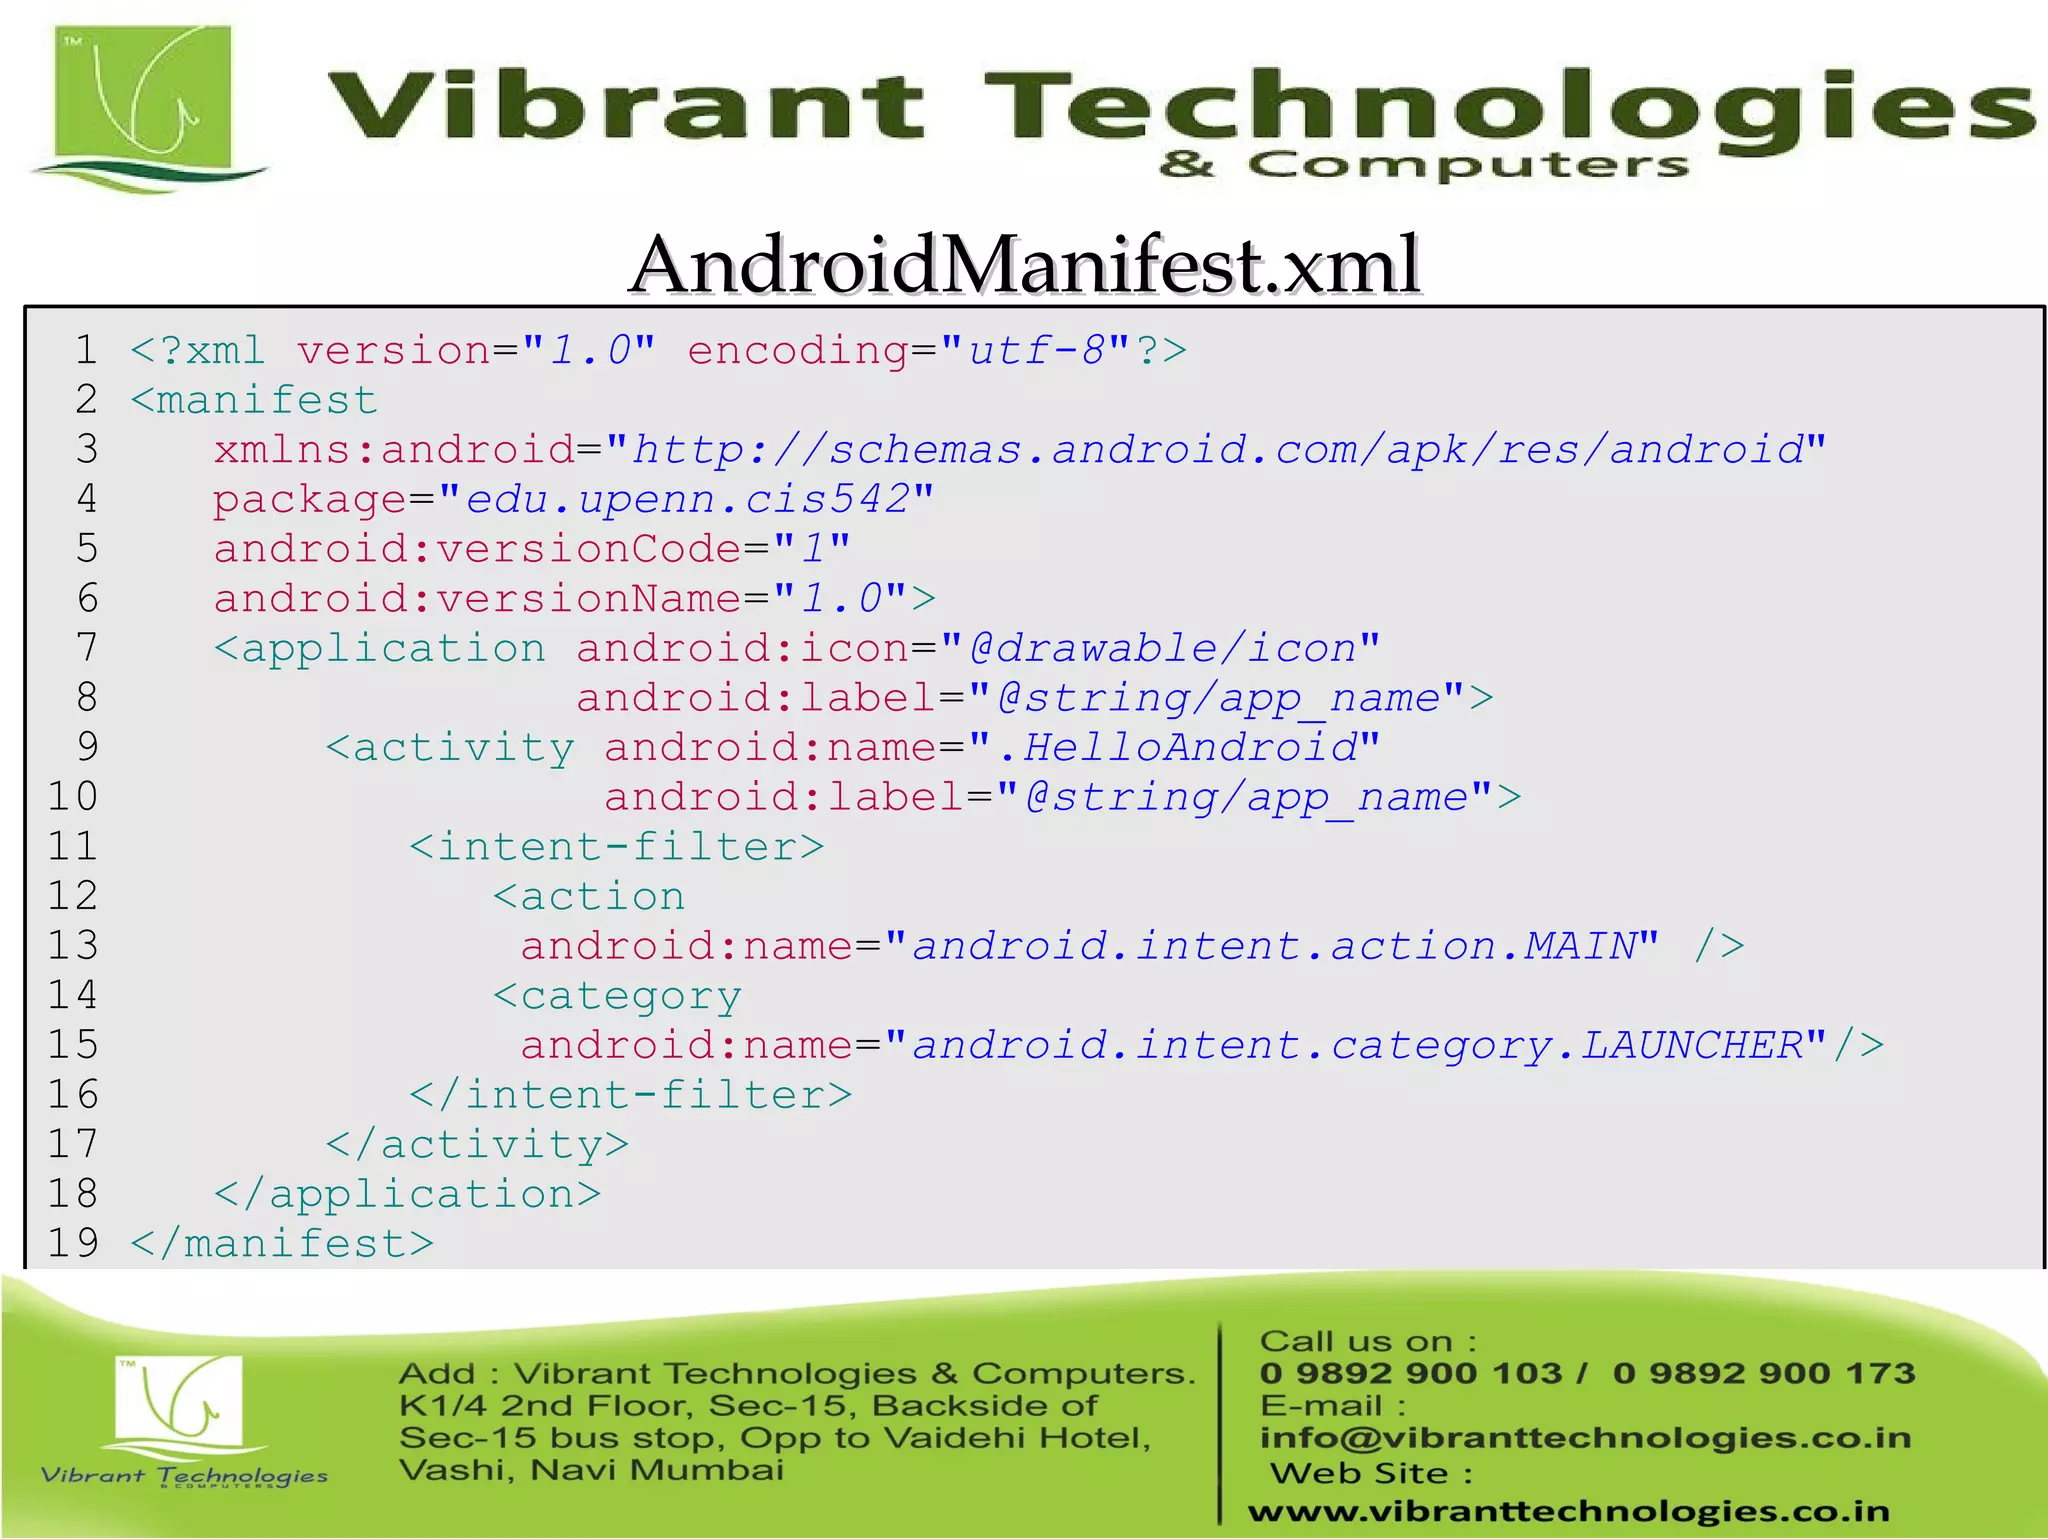


This document provides an overview of teaching Android application development with Java. It discusses what Android is, why it is engaging for students, and what skills students will learn. It also outlines the requirements for teaching Android, including that students should already know Java, and describes setting up the development environment with Eclipse and the Android SDK. Finally, it walks through creating a simple "Hello World" Android app as a first project, covering generating the project files, layout, code, and running the app in the emulator.


![UiPath Automation Suite Installation (Hands-On) [2/3]](https://cdn.slidesharecdn.com/ss_thumbnails/automationsuitecommunitysession2-251015095633-a6d862f1-thumbnail.jpg?width=600ounds&width=560&fit=bounds)


