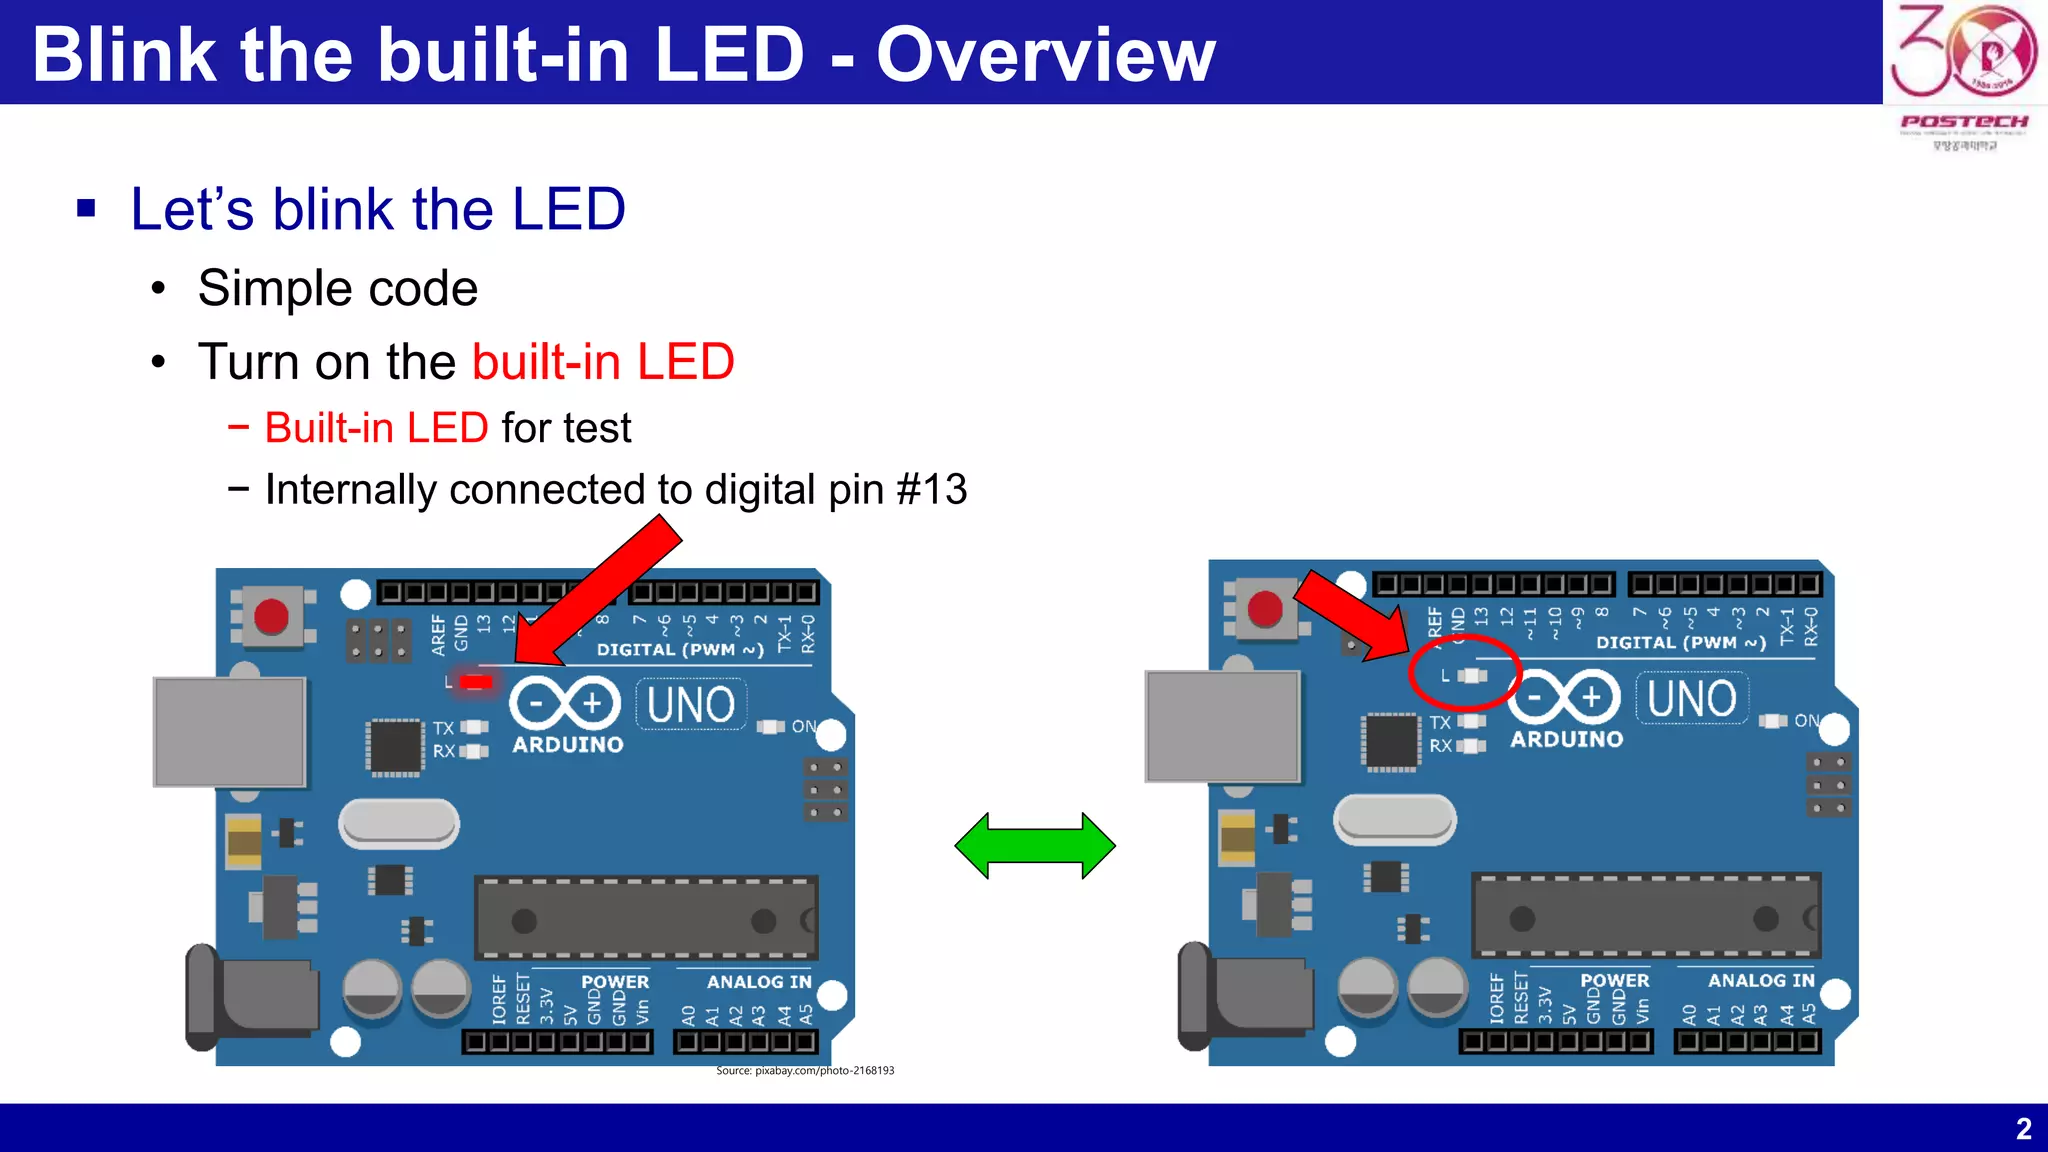
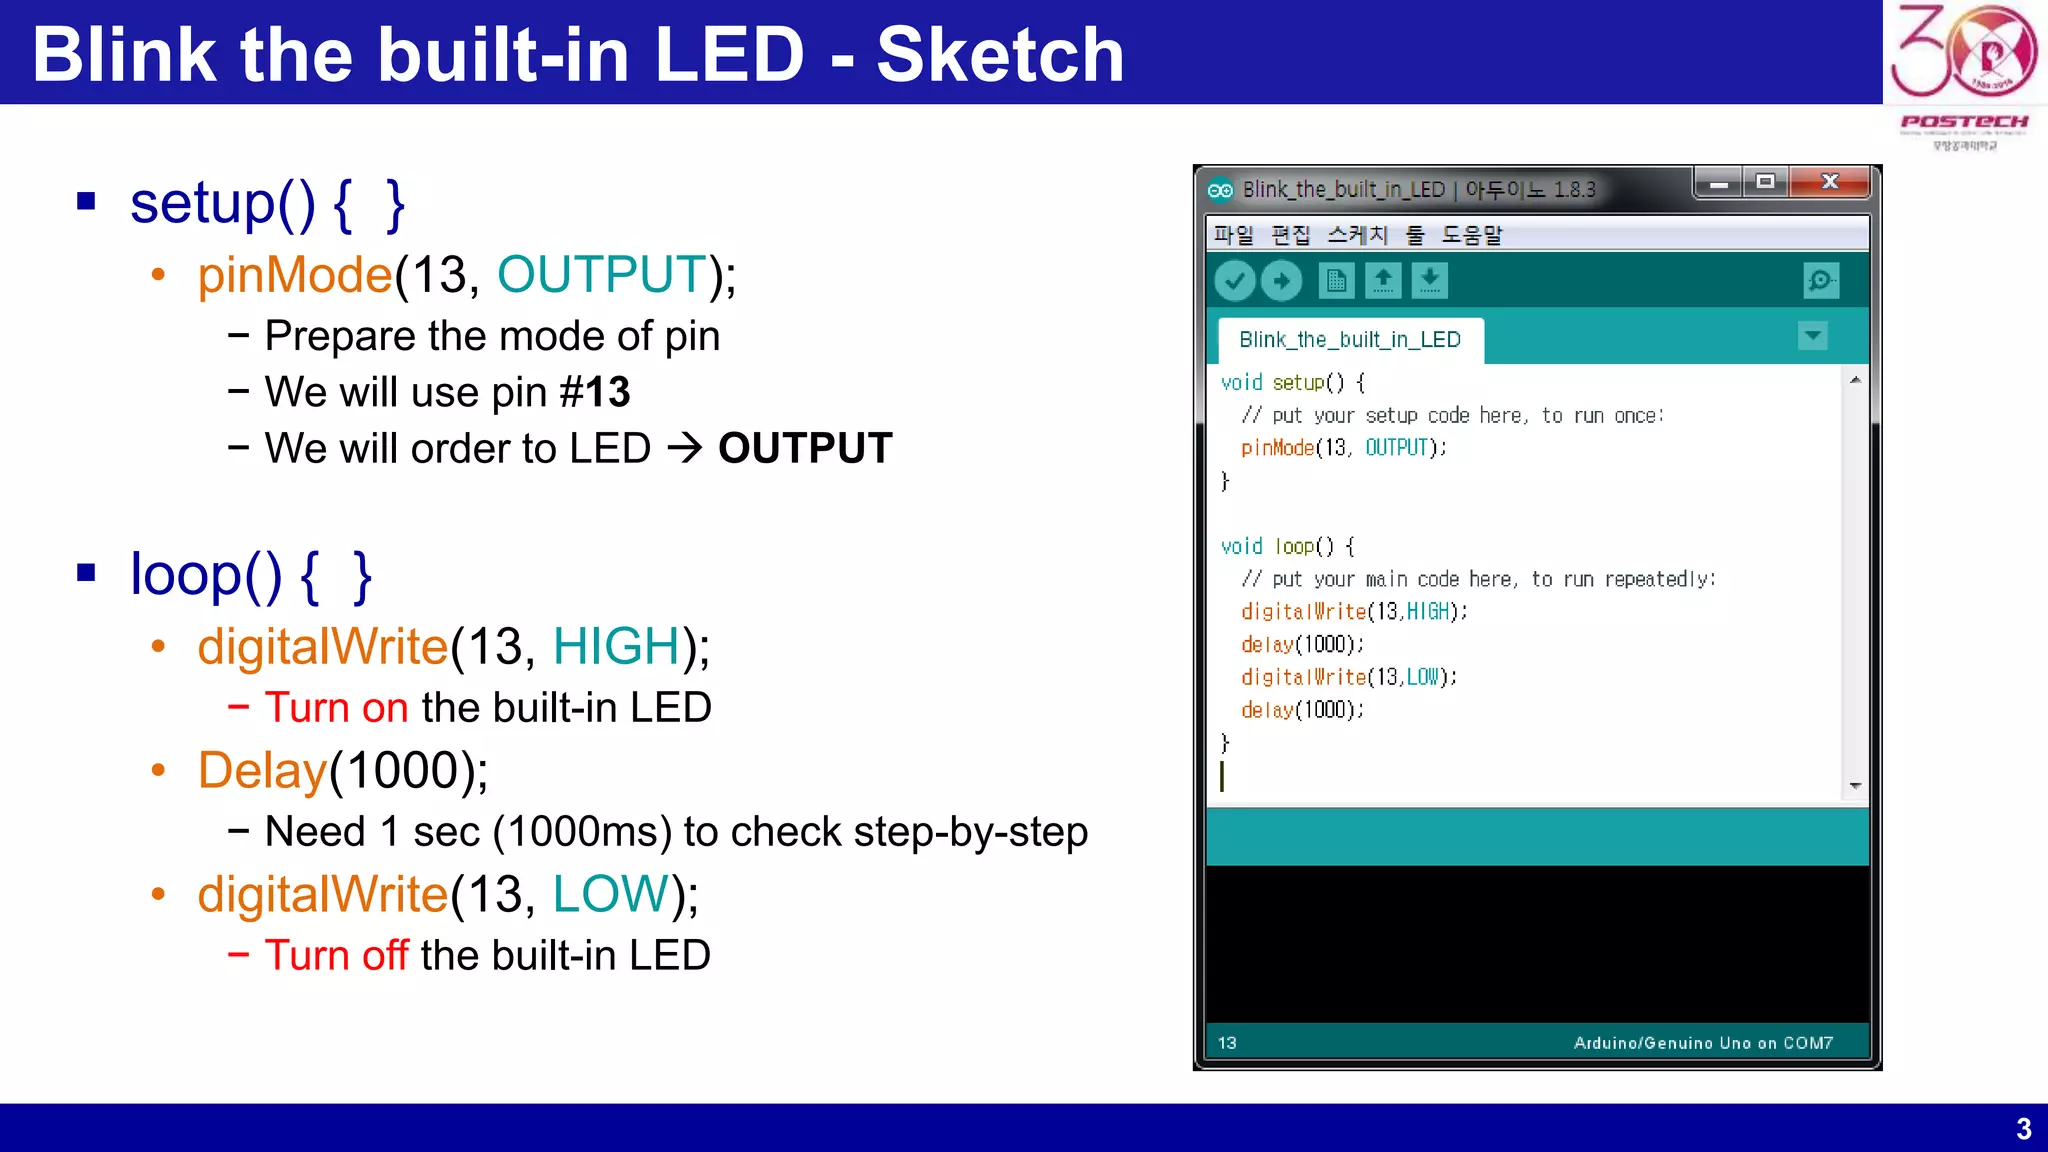
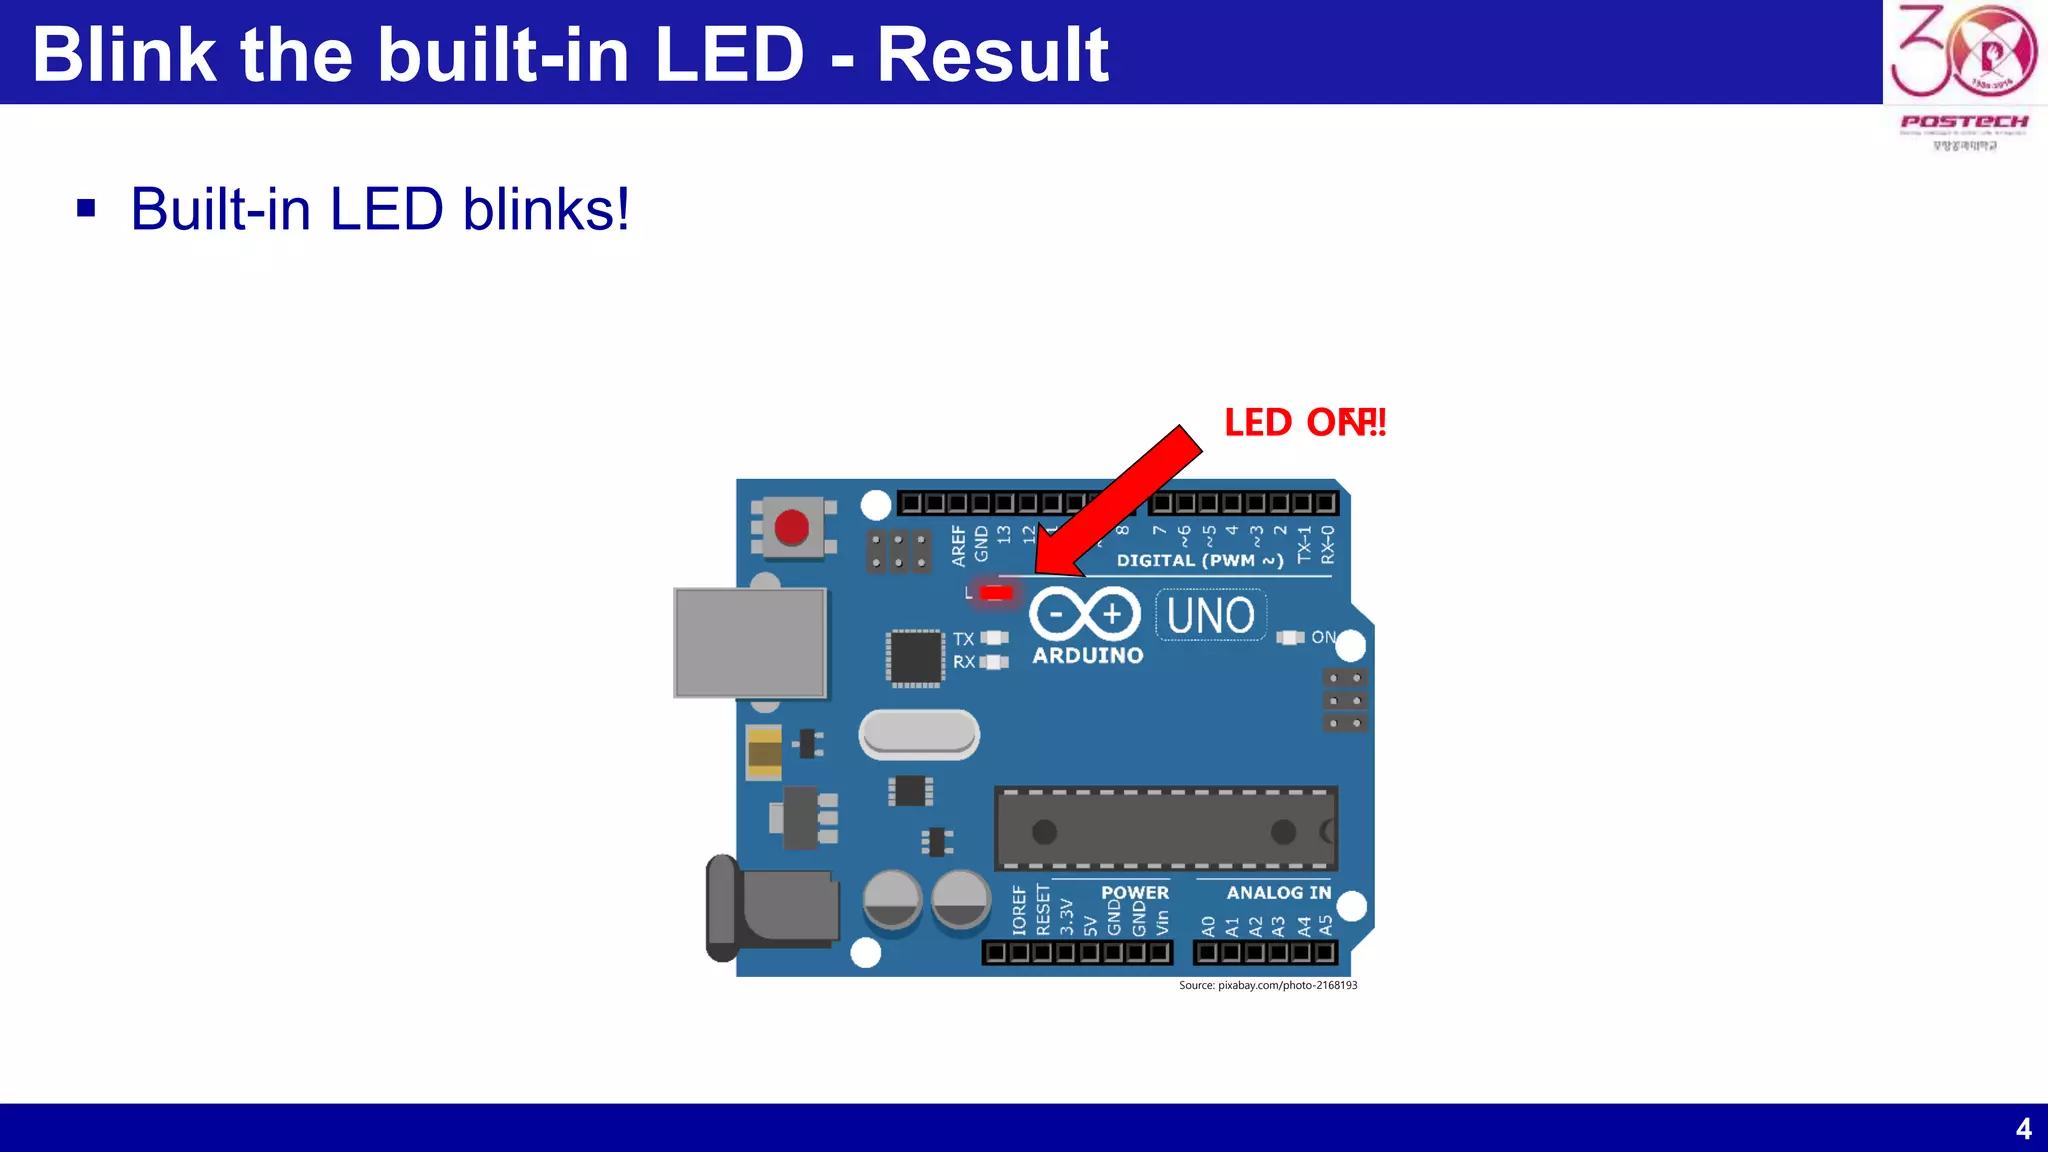
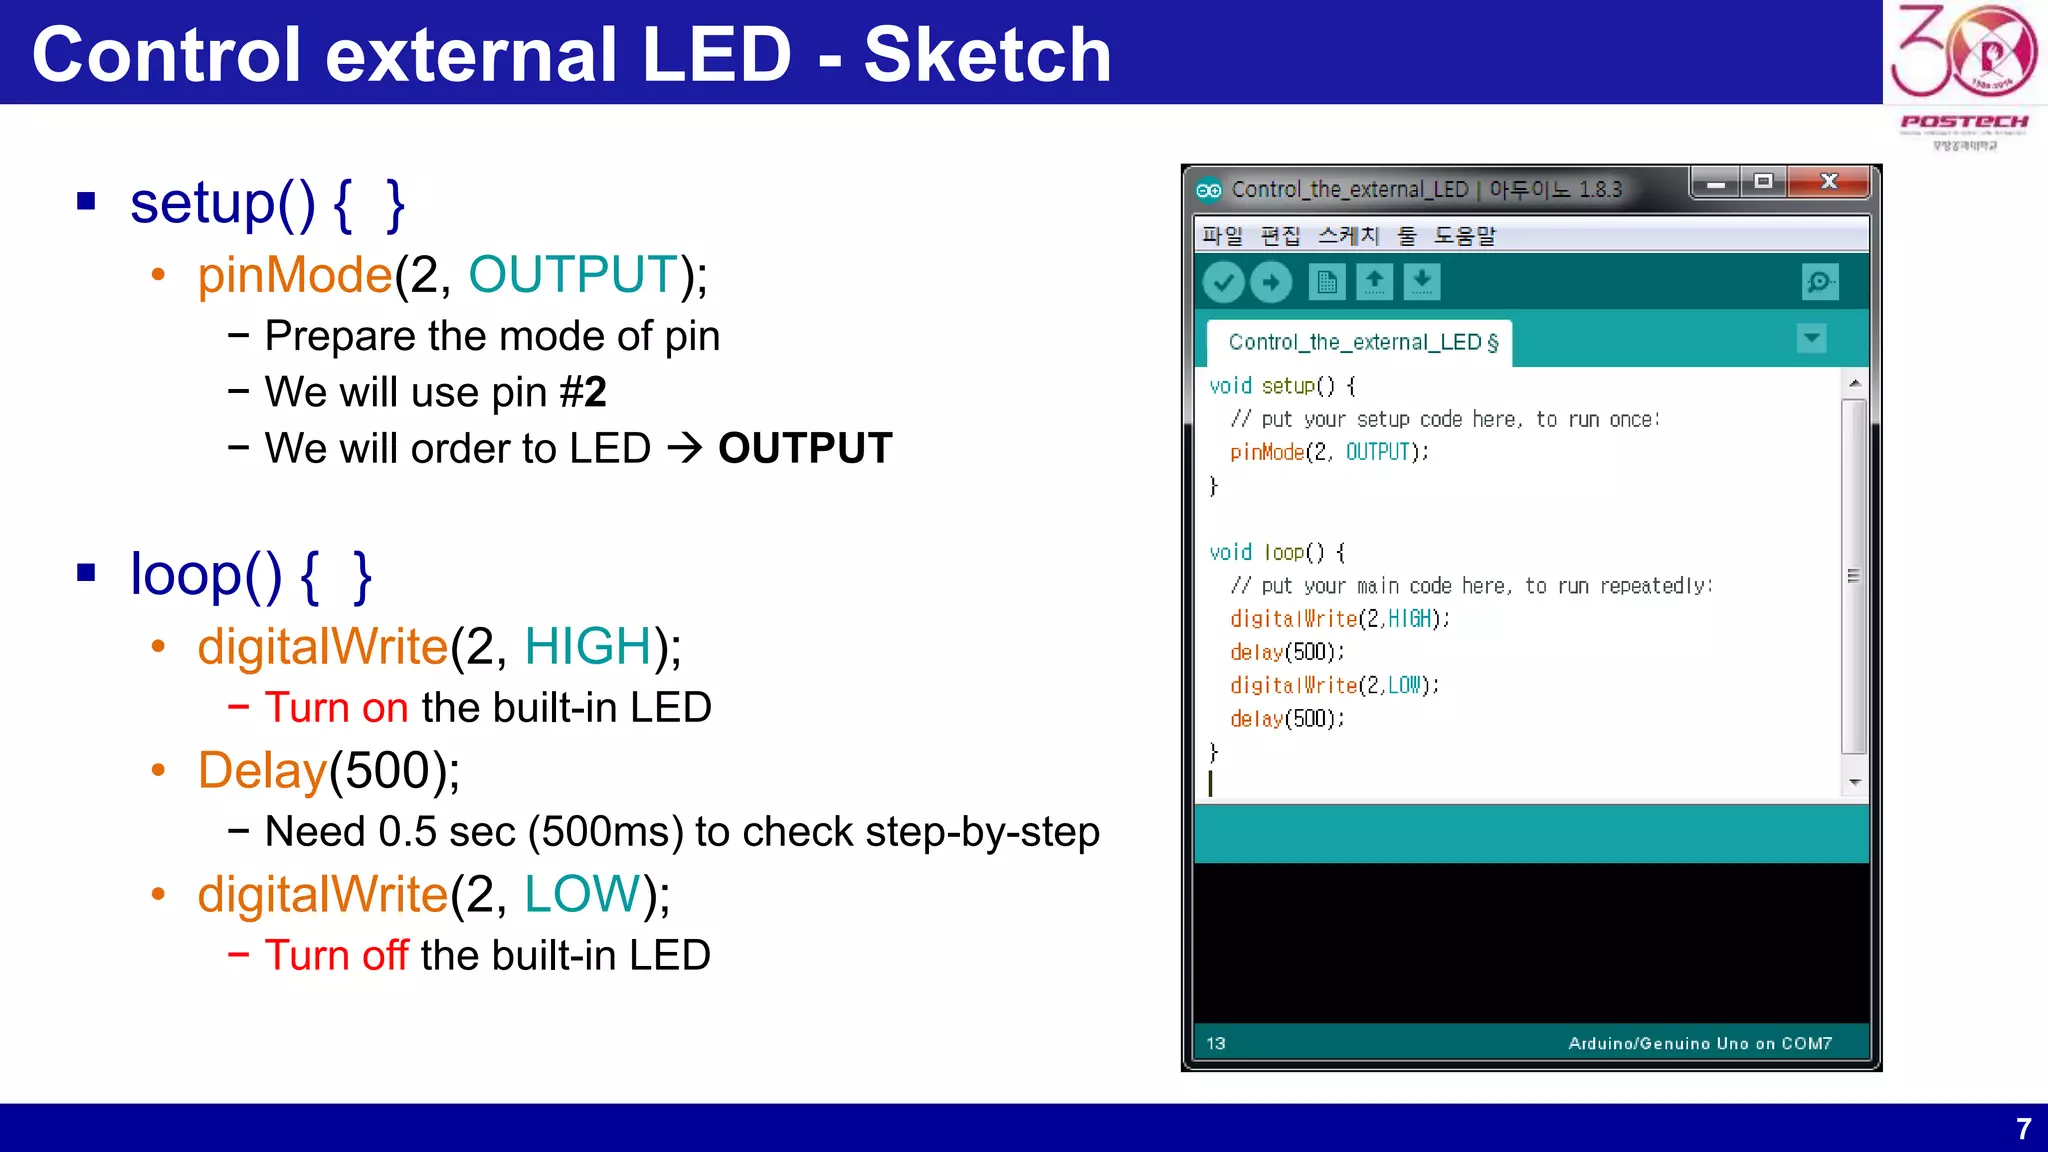
KEMBAR78
Arduino tutorial #2 | PPTX
1
Arduino Tutorial #2
- Blink the built-in LED &
Control the external LED -
Dong Ho Son
POSTECH
Pohang, Korea
donghoson@postech.ac.kr
2
Blink the built-in LED - Overview
 Let’s blink the LED
• Simple code
• Turn on the built-in LED
− Built-in LED for test
− Internally connected to digital pin #13
Source: pixabay.com/photo-2168193
3
Blink the built-in LED - Sketch
 setup() { }
• pinMode(13, OUTPUT);
− Prepare the mode of pin
− We will use pin #13
− We will order to LED  OUTPUT
 loop() { }
• digitalWrite(13, HIGH);
− Turn on the built-in LED
• Delay(1000);
− Need 1 sec (1000ms) to check step-by-step
• digitalWrite(13, LOW);
− Turn off the built-in LED
4
Blink the built-in LED - Result
 Built-in LED blinks!
LED OFF!LED ON!
Source: pixabay.com/photo-2168193
5
Control external LED - Overview
 Jumper cables
• Pin #2  Breadboard
• Breadboard  GND (Ground)
 LED
• Longer lead (Positive)  Pin #2
• Shorter lead (Negative)  Resistor
 Resistor
• Necessary to protect the LED
 Breadboard
• Power rails
− The top and bottom rows of holes are connected horizontally
• Terminal strips
− Remaining holes are connected vertically
Positive
Negative
Power rails
Terminal strips
Source: pixabay
6
Control external LED – Circuit
 Configure the circuit
• Jumper cables
• LED
• Resistor (220 Ohm)
• Breadboard
+-
Source: pixabay.com/photo-2168193
7
Control external LED - Sketch
 setup() { }
• pinMode(2, OUTPUT);
− Prepare the mode of pin
− We will use pin #2
− We will order to LED  OUTPUT
 loop() { }
• digitalWrite(2, HIGH);
− Turn on the built-in LED
• Delay(500);
− Need 0.5 sec (500ms) to check step-by-step
• digitalWrite(2, LOW);
− Turn off the built-in LED
8
Control the external LED - Result
 External LED blinks!
+-
Source: pixabay.com/photo-2168193
9
How to Use a Breadboard
 If you are not familiar with how to use a breadboard, please take a
look at the following tutorial on how to use a breadboard
https://www.sciencebuddies.org/science-fair-projects/references/how-
to-use-a-breadboard
 Watch the video first

Arduino tutorial #2

  • 1.
    1 Arduino Tutorial #2 -Blink the built-in LED & Control the external LED - Dong Ho Son POSTECH Pohang, Korea donghoson@postech.ac.kr
  • 2.
    2 Blink the built-inLED - Overview  Let’s blink the LED • Simple code • Turn on the built-in LED − Built-in LED for test − Internally connected to digital pin #13 Source: pixabay.com/photo-2168193
  • 3.
    3 Blink the built-inLED - Sketch  setup() { } • pinMode(13, OUTPUT); − Prepare the mode of pin − We will use pin #13 − We will order to LED  OUTPUT  loop() { } • digitalWrite(13, HIGH); − Turn on the built-in LED • Delay(1000); − Need 1 sec (1000ms) to check step-by-step • digitalWrite(13, LOW); − Turn off the built-in LED
  • 4.
    4 Blink the built-inLED - Result  Built-in LED blinks! LED OFF!LED ON! Source: pixabay.com/photo-2168193
  • 5.
    5 Control external LED- Overview  Jumper cables • Pin #2  Breadboard • Breadboard  GND (Ground)  LED • Longer lead (Positive)  Pin #2 • Shorter lead (Negative)  Resistor  Resistor • Necessary to protect the LED  Breadboard • Power rails − The top and bottom rows of holes are connected horizontally • Terminal strips − Remaining holes are connected vertically Positive Negative Power rails Terminal strips Source: pixabay
  • 6.
    6 Control external LED– Circuit  Configure the circuit • Jumper cables • LED • Resistor (220 Ohm) • Breadboard +- Source: pixabay.com/photo-2168193
  • 7.
    7 Control external LED- Sketch  setup() { } • pinMode(2, OUTPUT); − Prepare the mode of pin − We will use pin #2 − We will order to LED  OUTPUT  loop() { } • digitalWrite(2, HIGH); − Turn on the built-in LED • Delay(500); − Need 0.5 sec (500ms) to check step-by-step • digitalWrite(2, LOW); − Turn off the built-in LED
  • 8.
    8 Control the externalLED - Result  External LED blinks! +- Source: pixabay.com/photo-2168193
  • 9.
    9 How to Usea Breadboard  If you are not familiar with how to use a breadboard, please take a look at the following tutorial on how to use a breadboard https://www.sciencebuddies.org/science-fair-projects/references/how- to-use-a-breadboard  Watch the video first