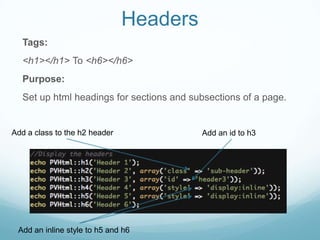
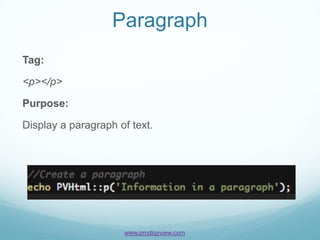
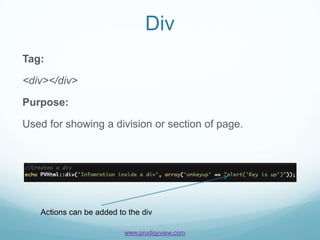
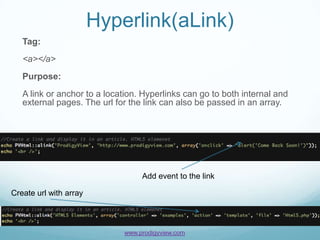
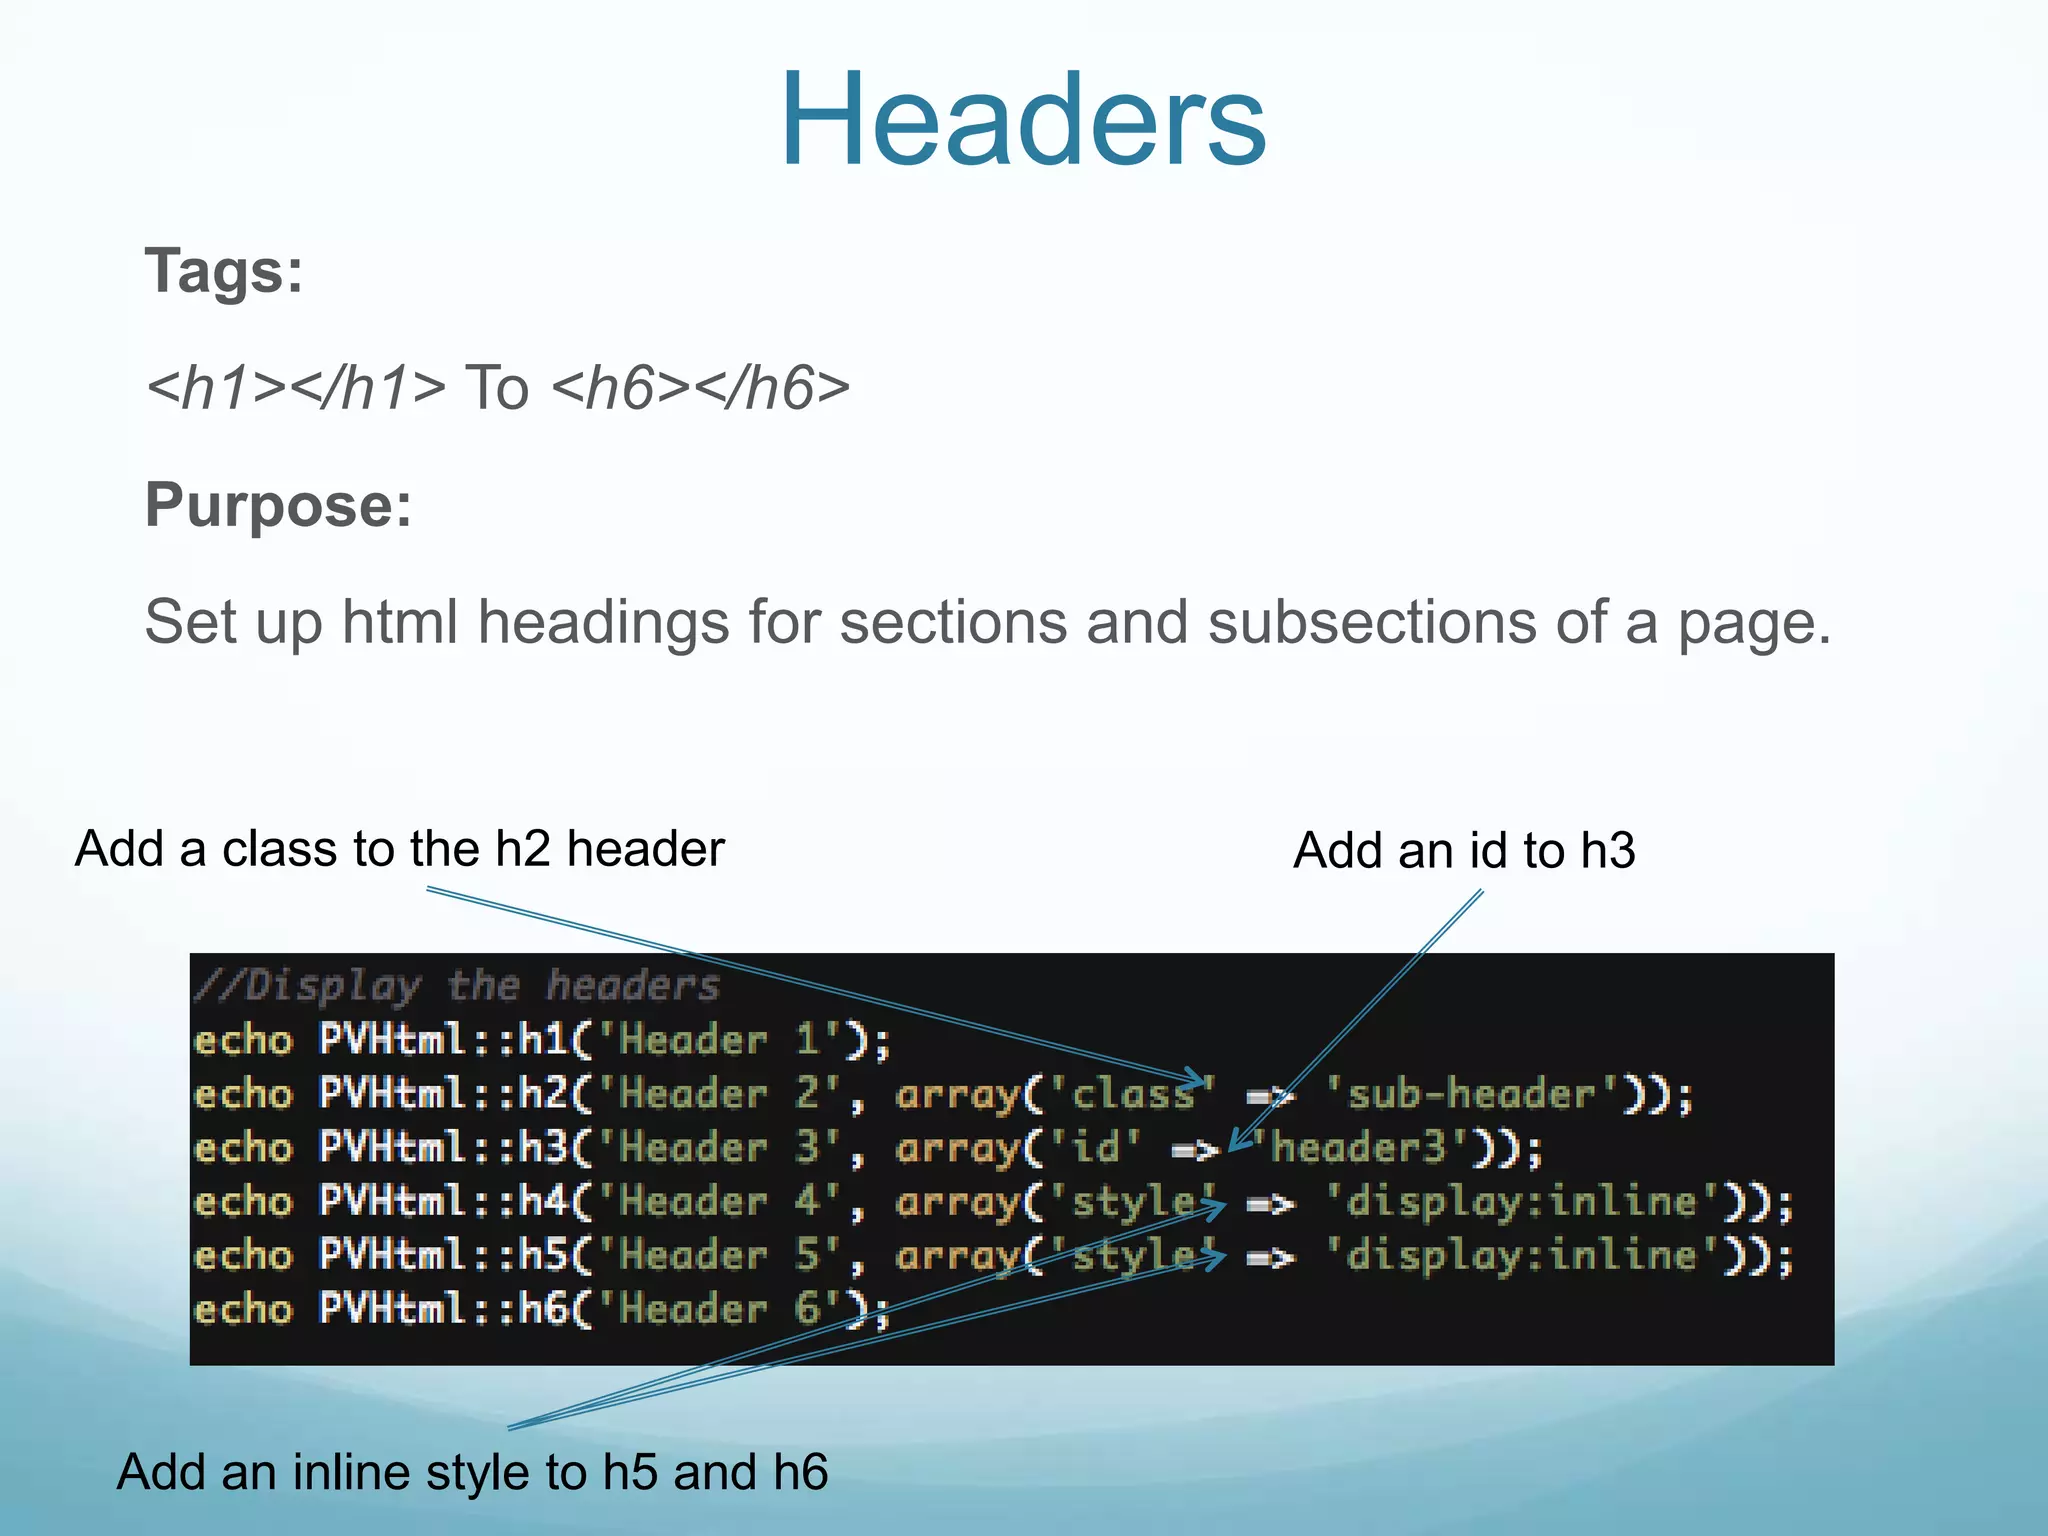
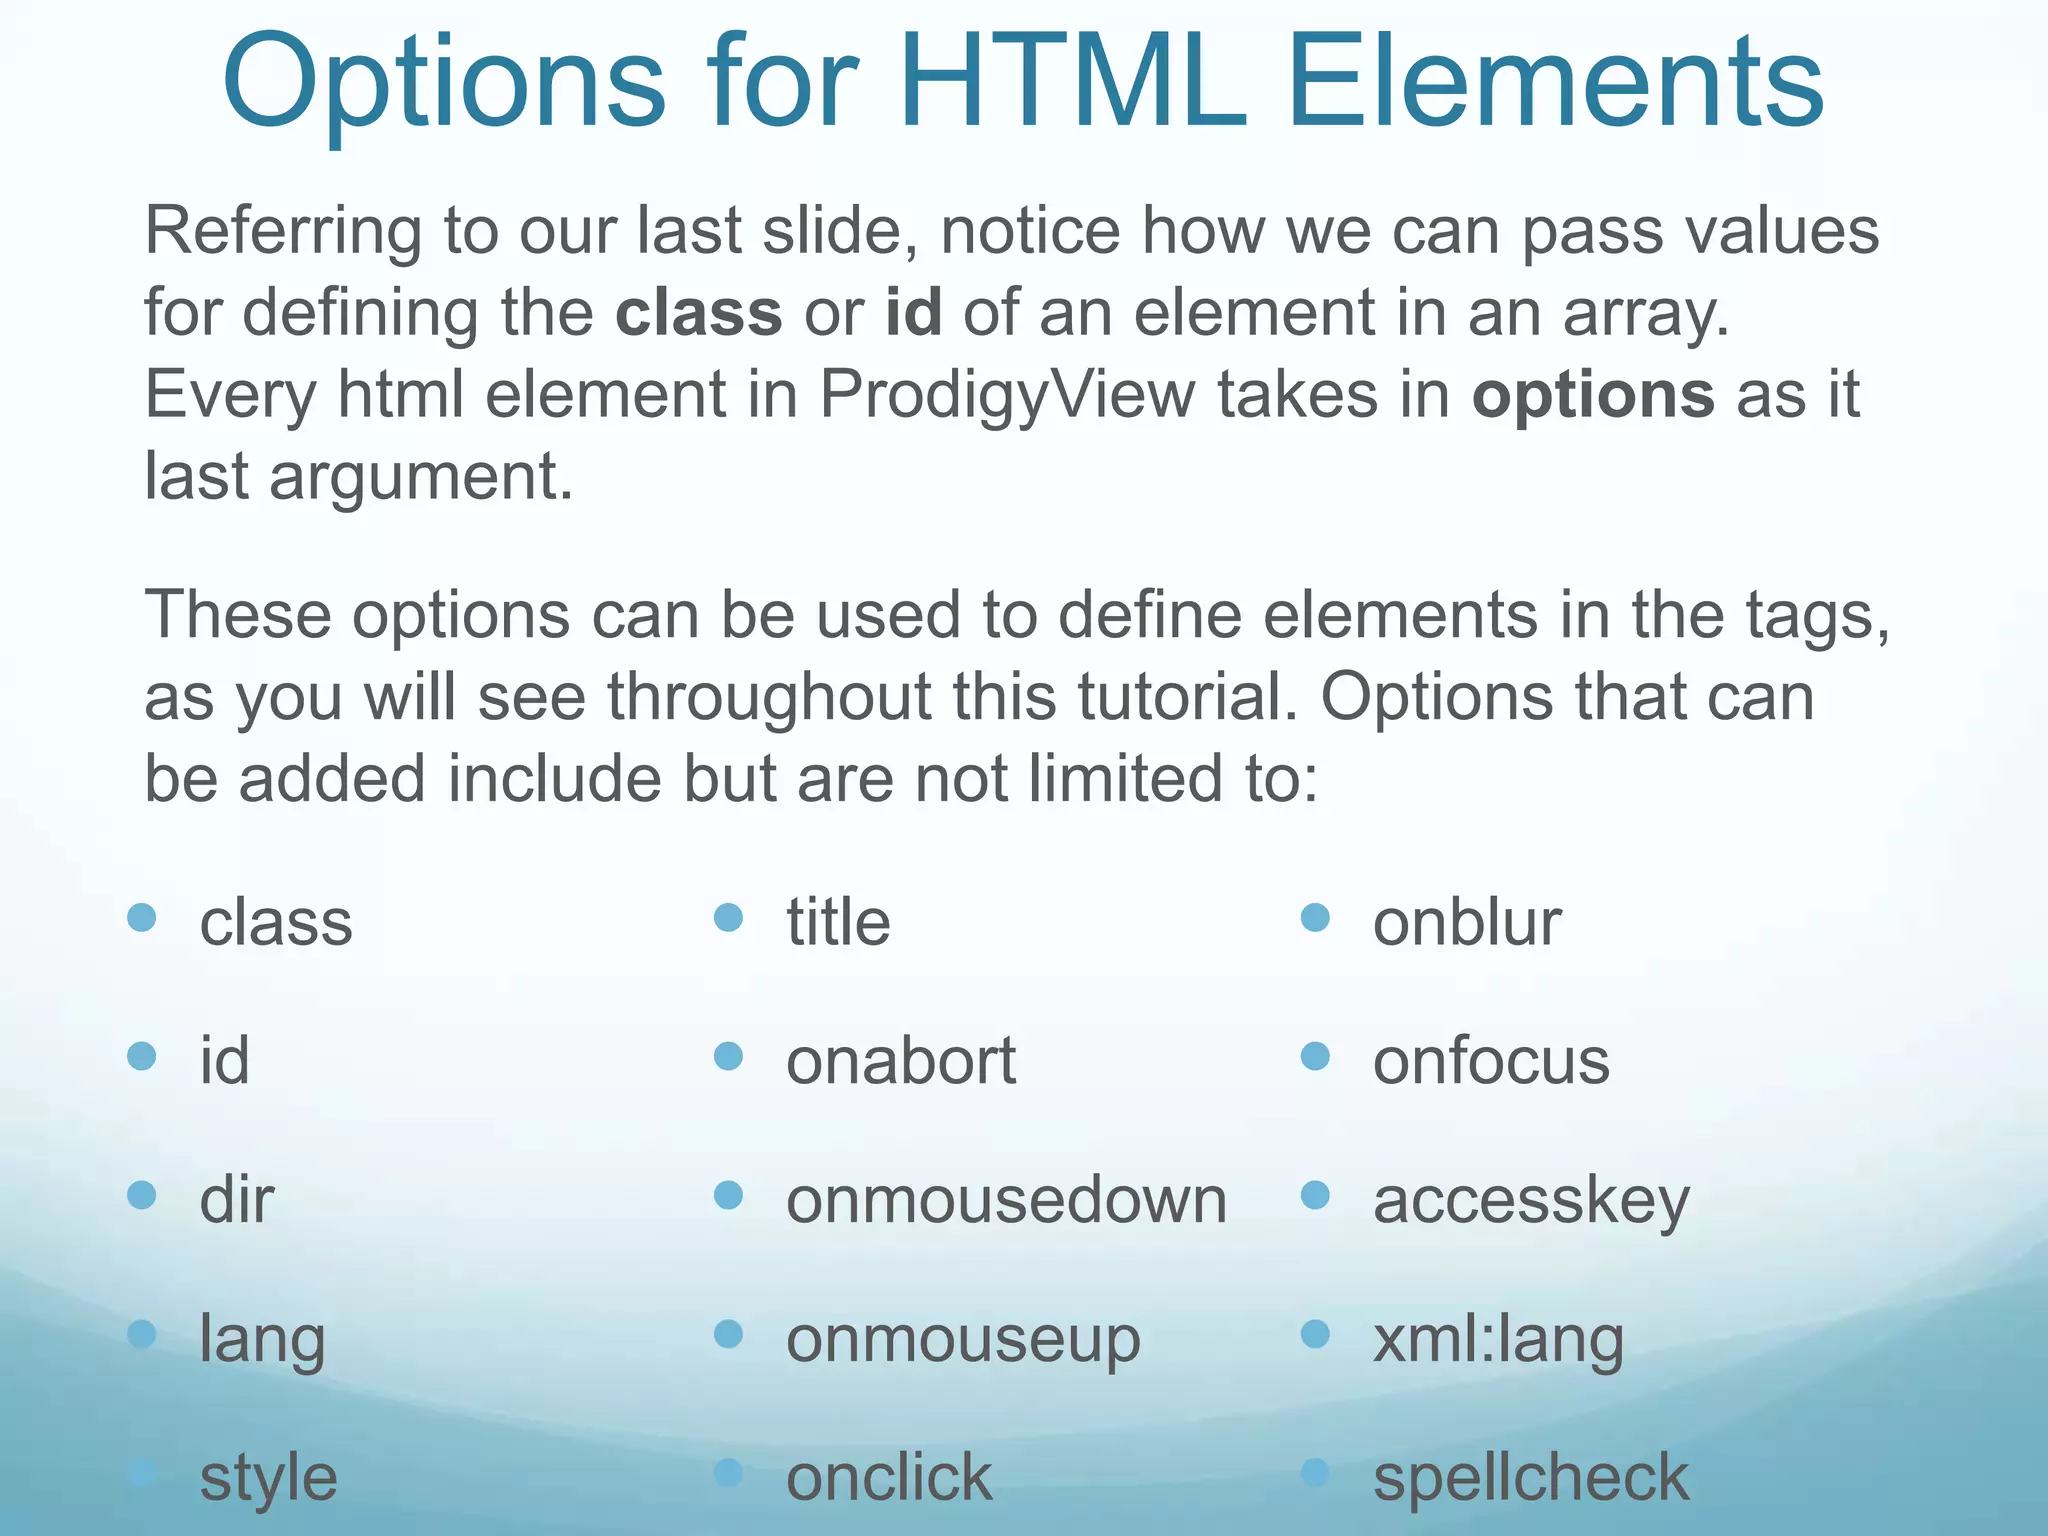
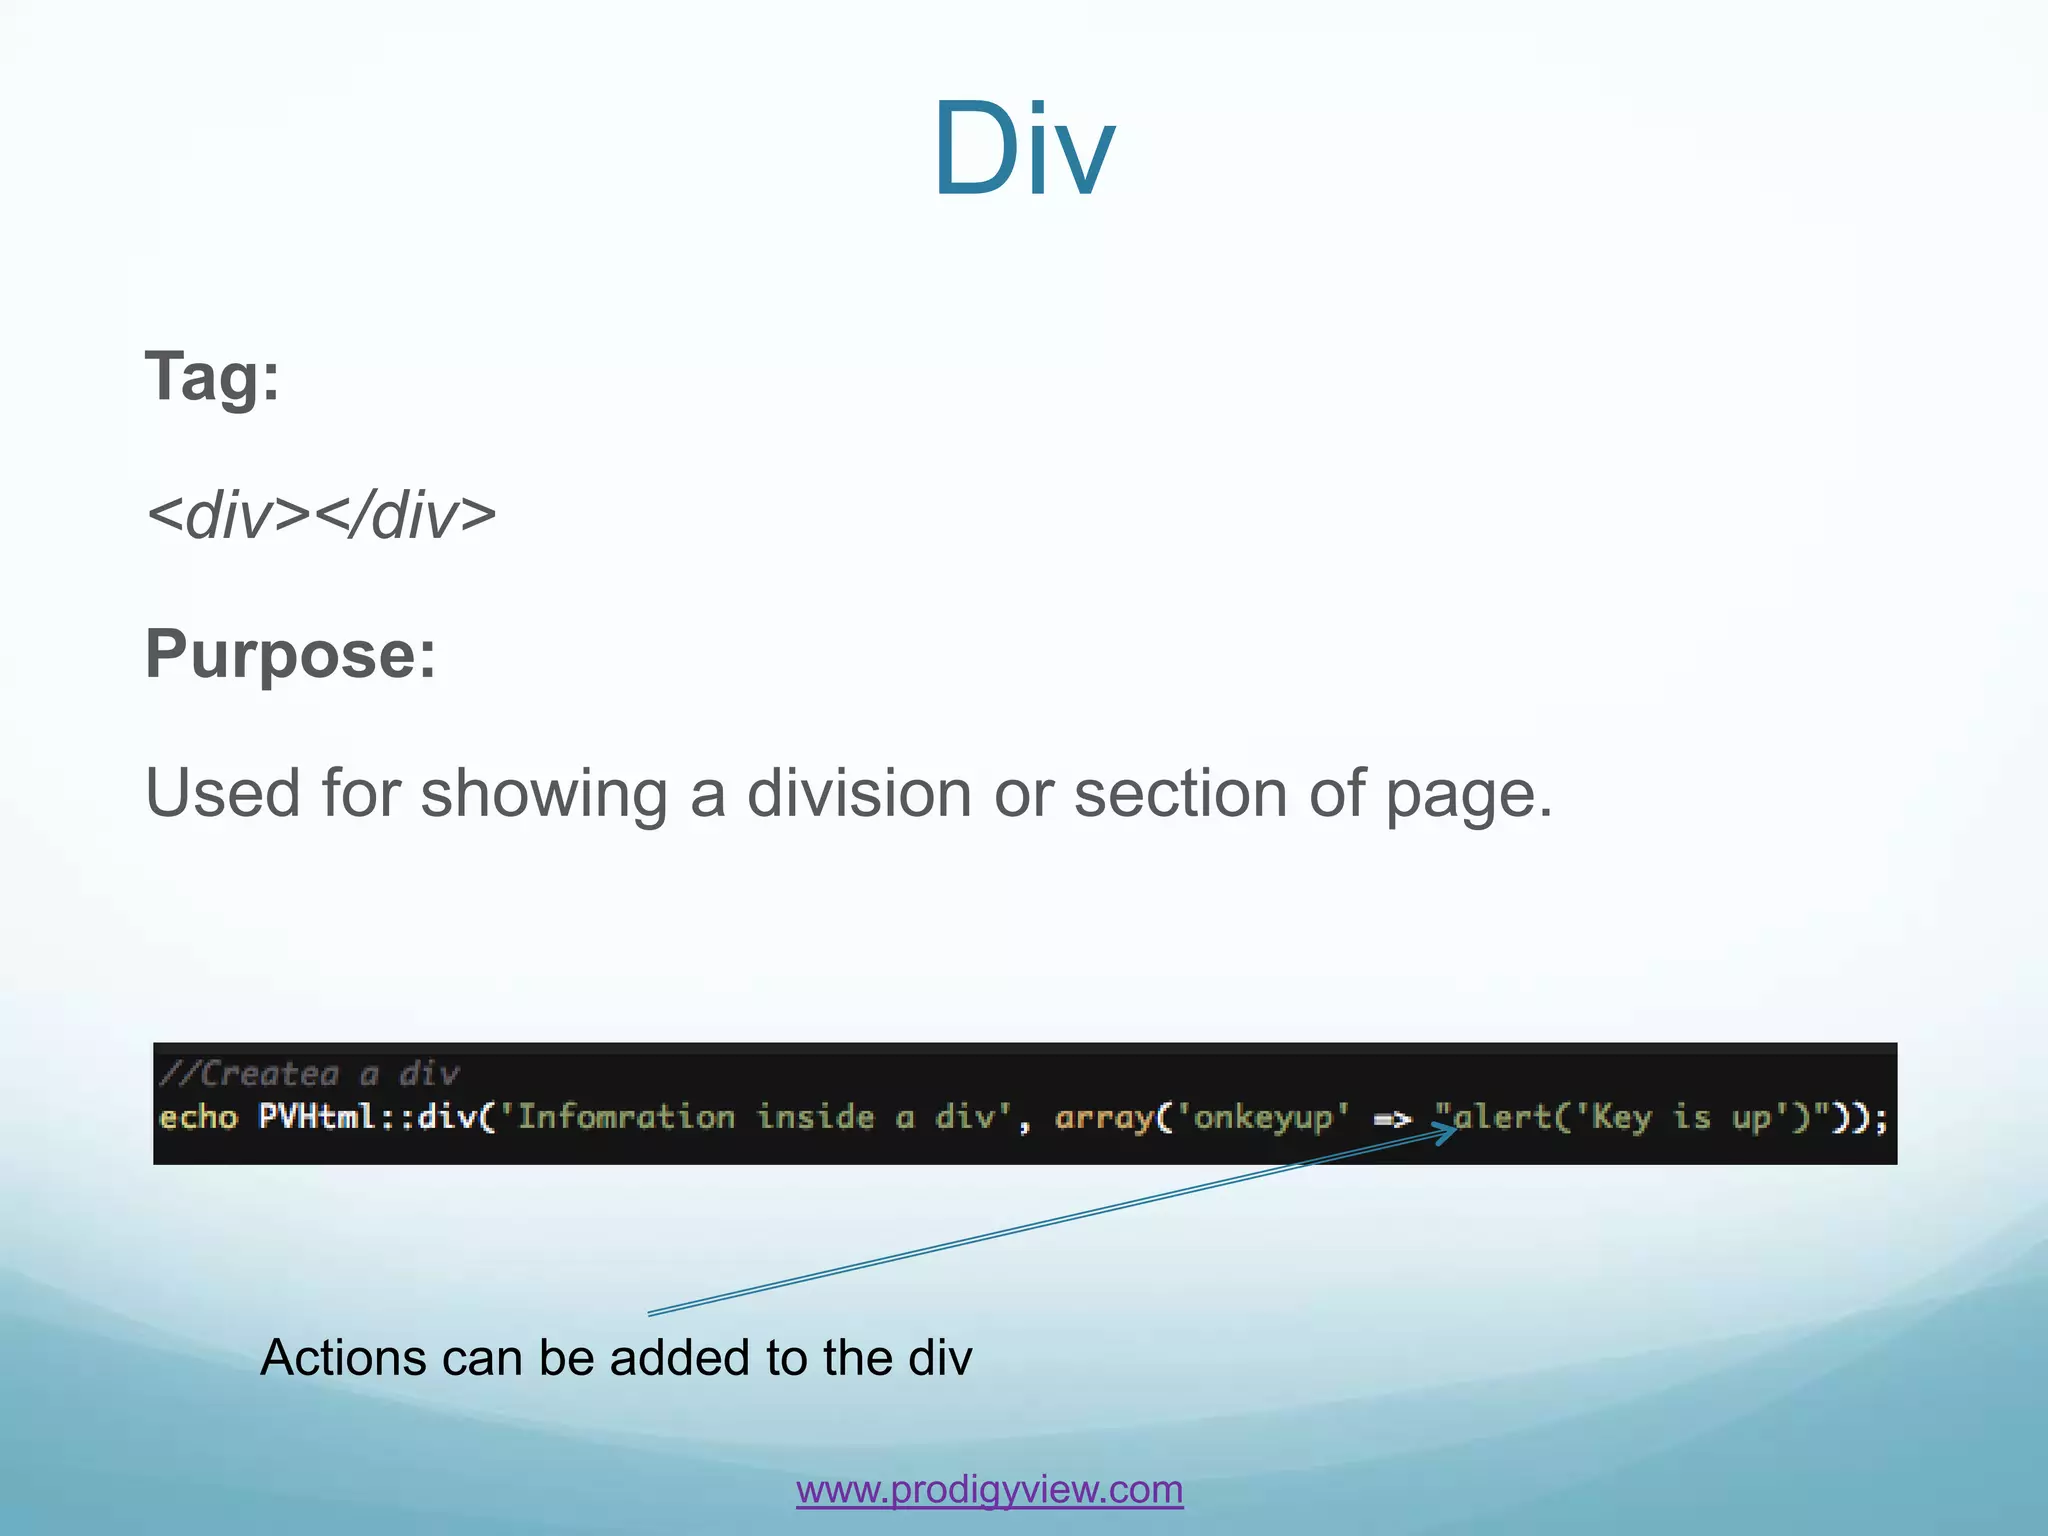
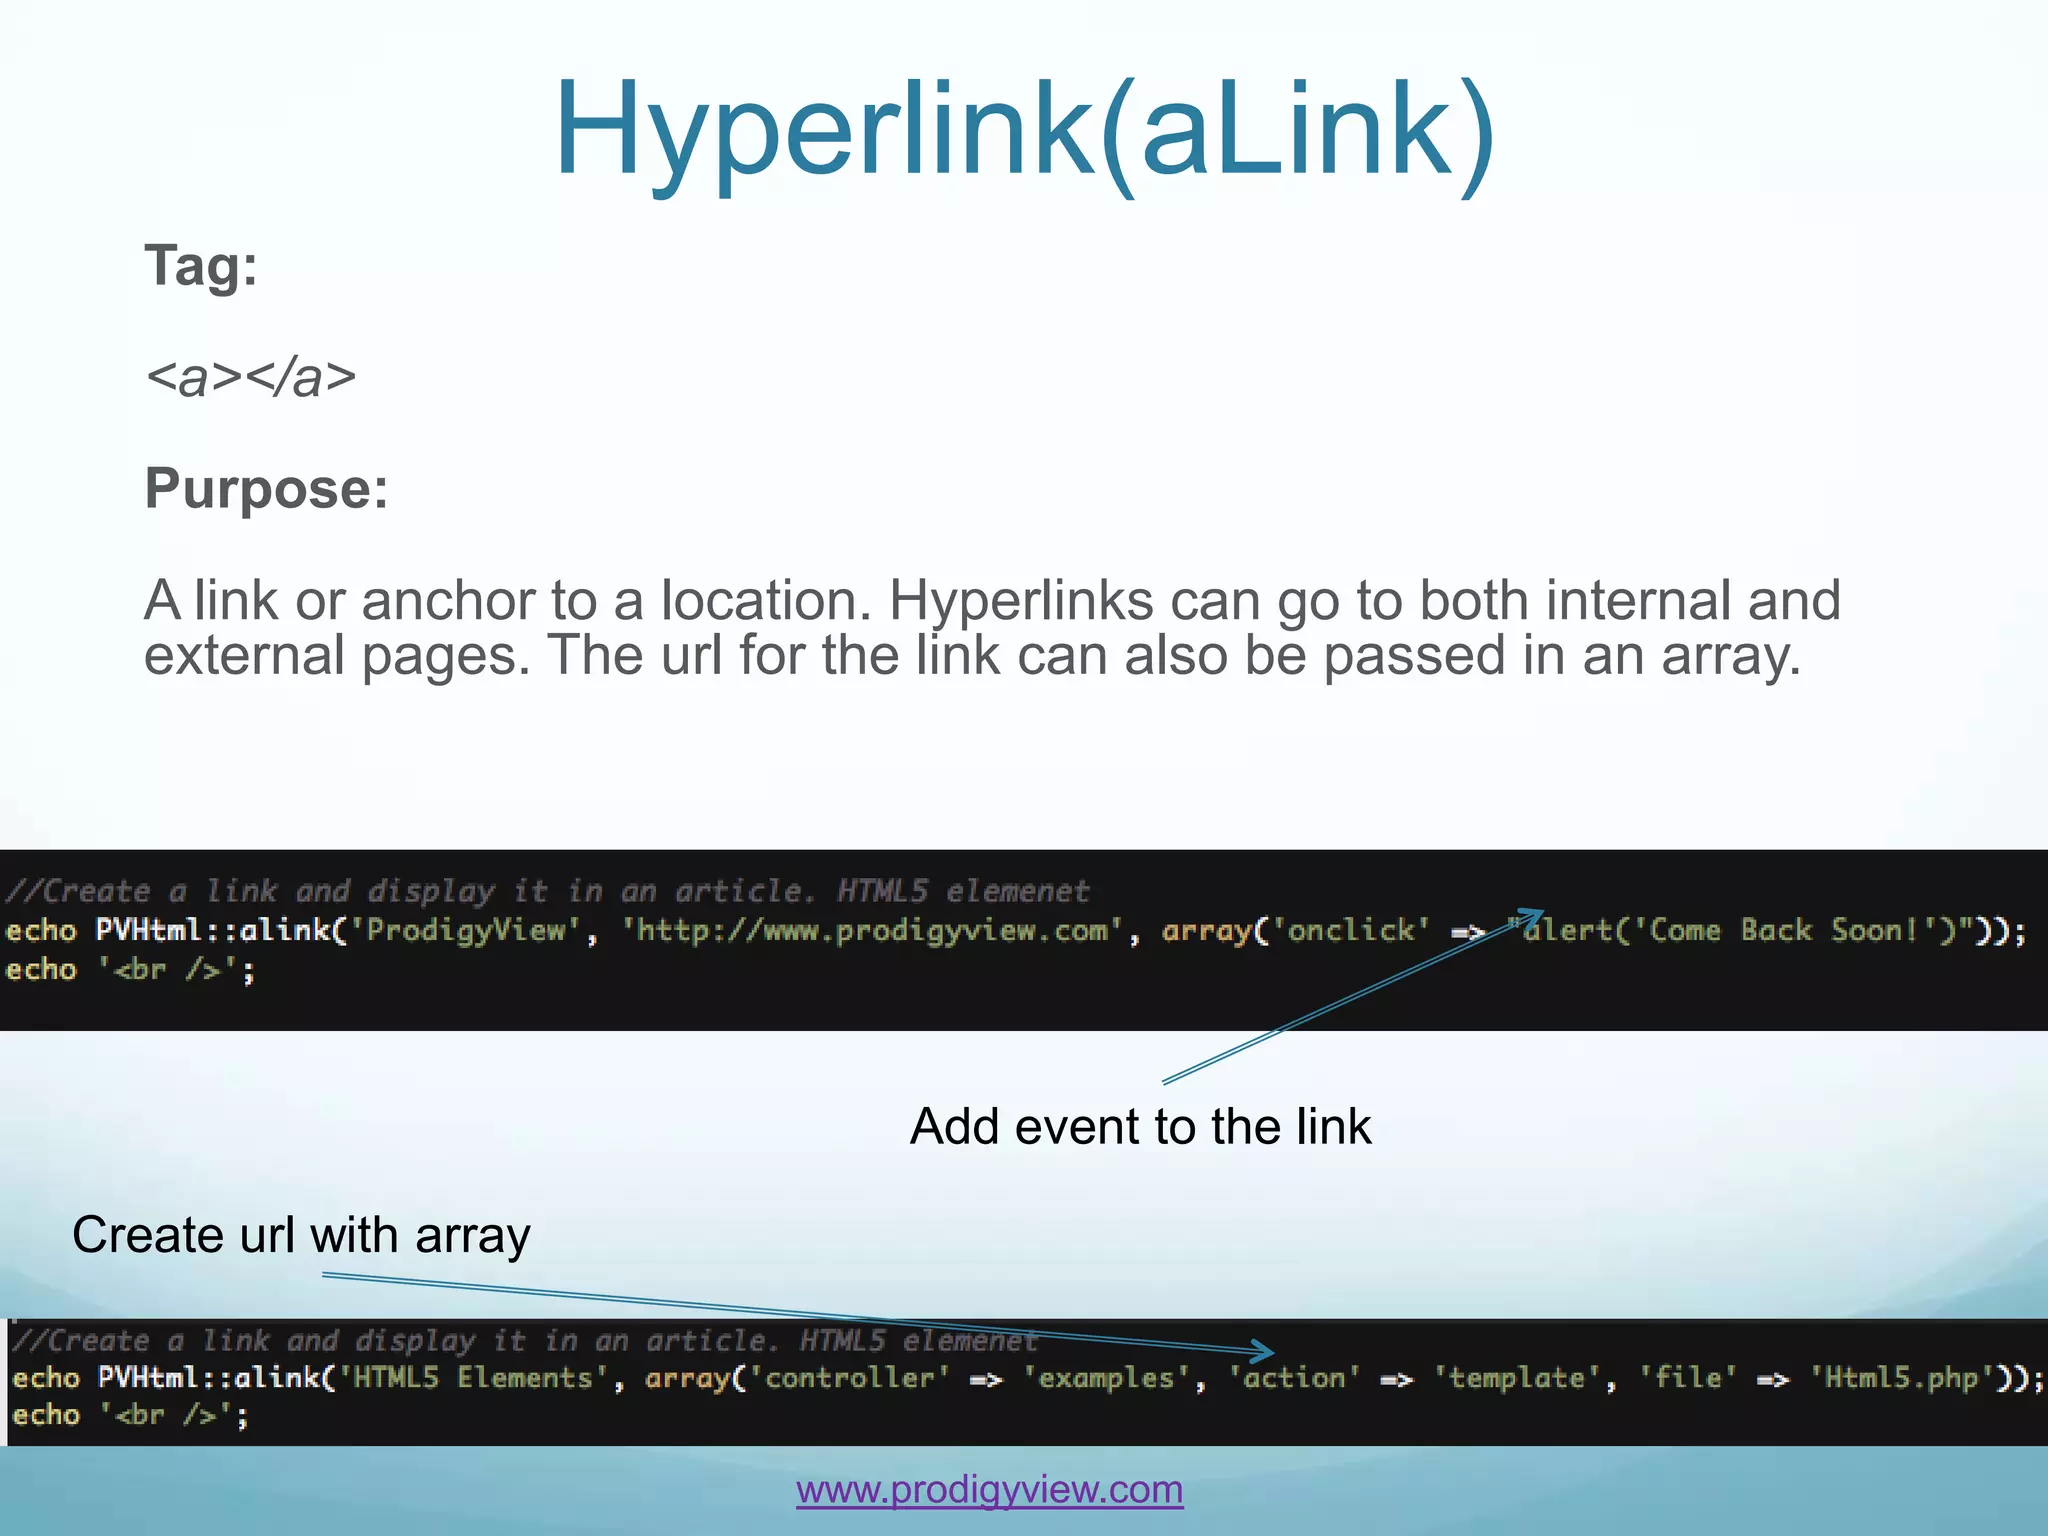
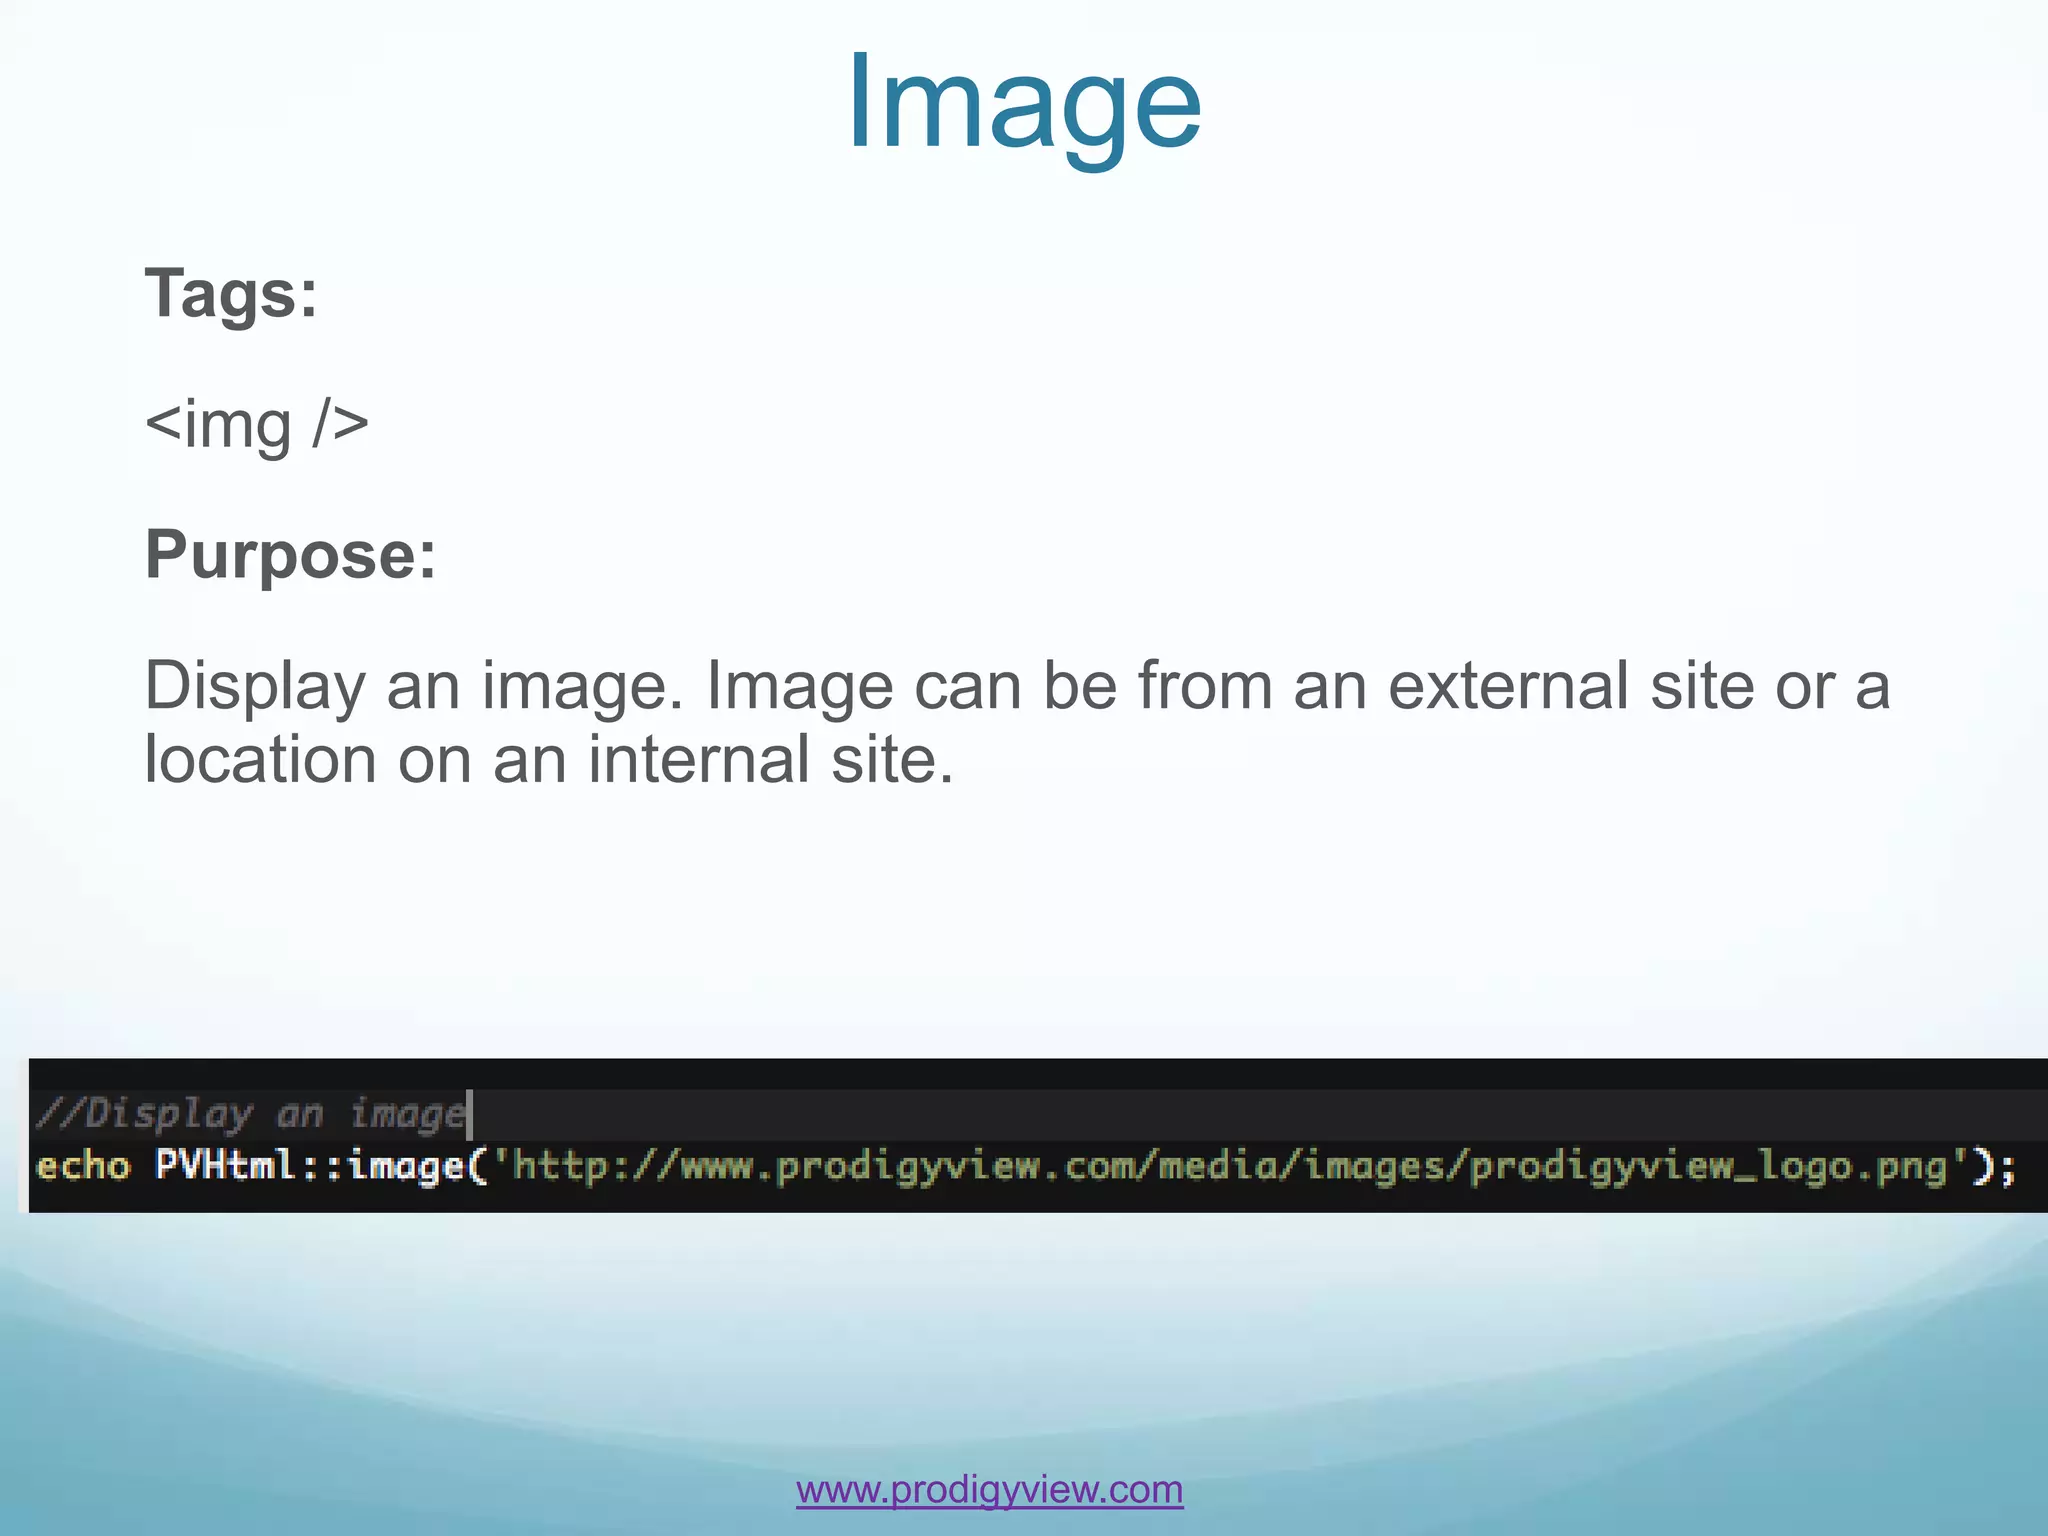
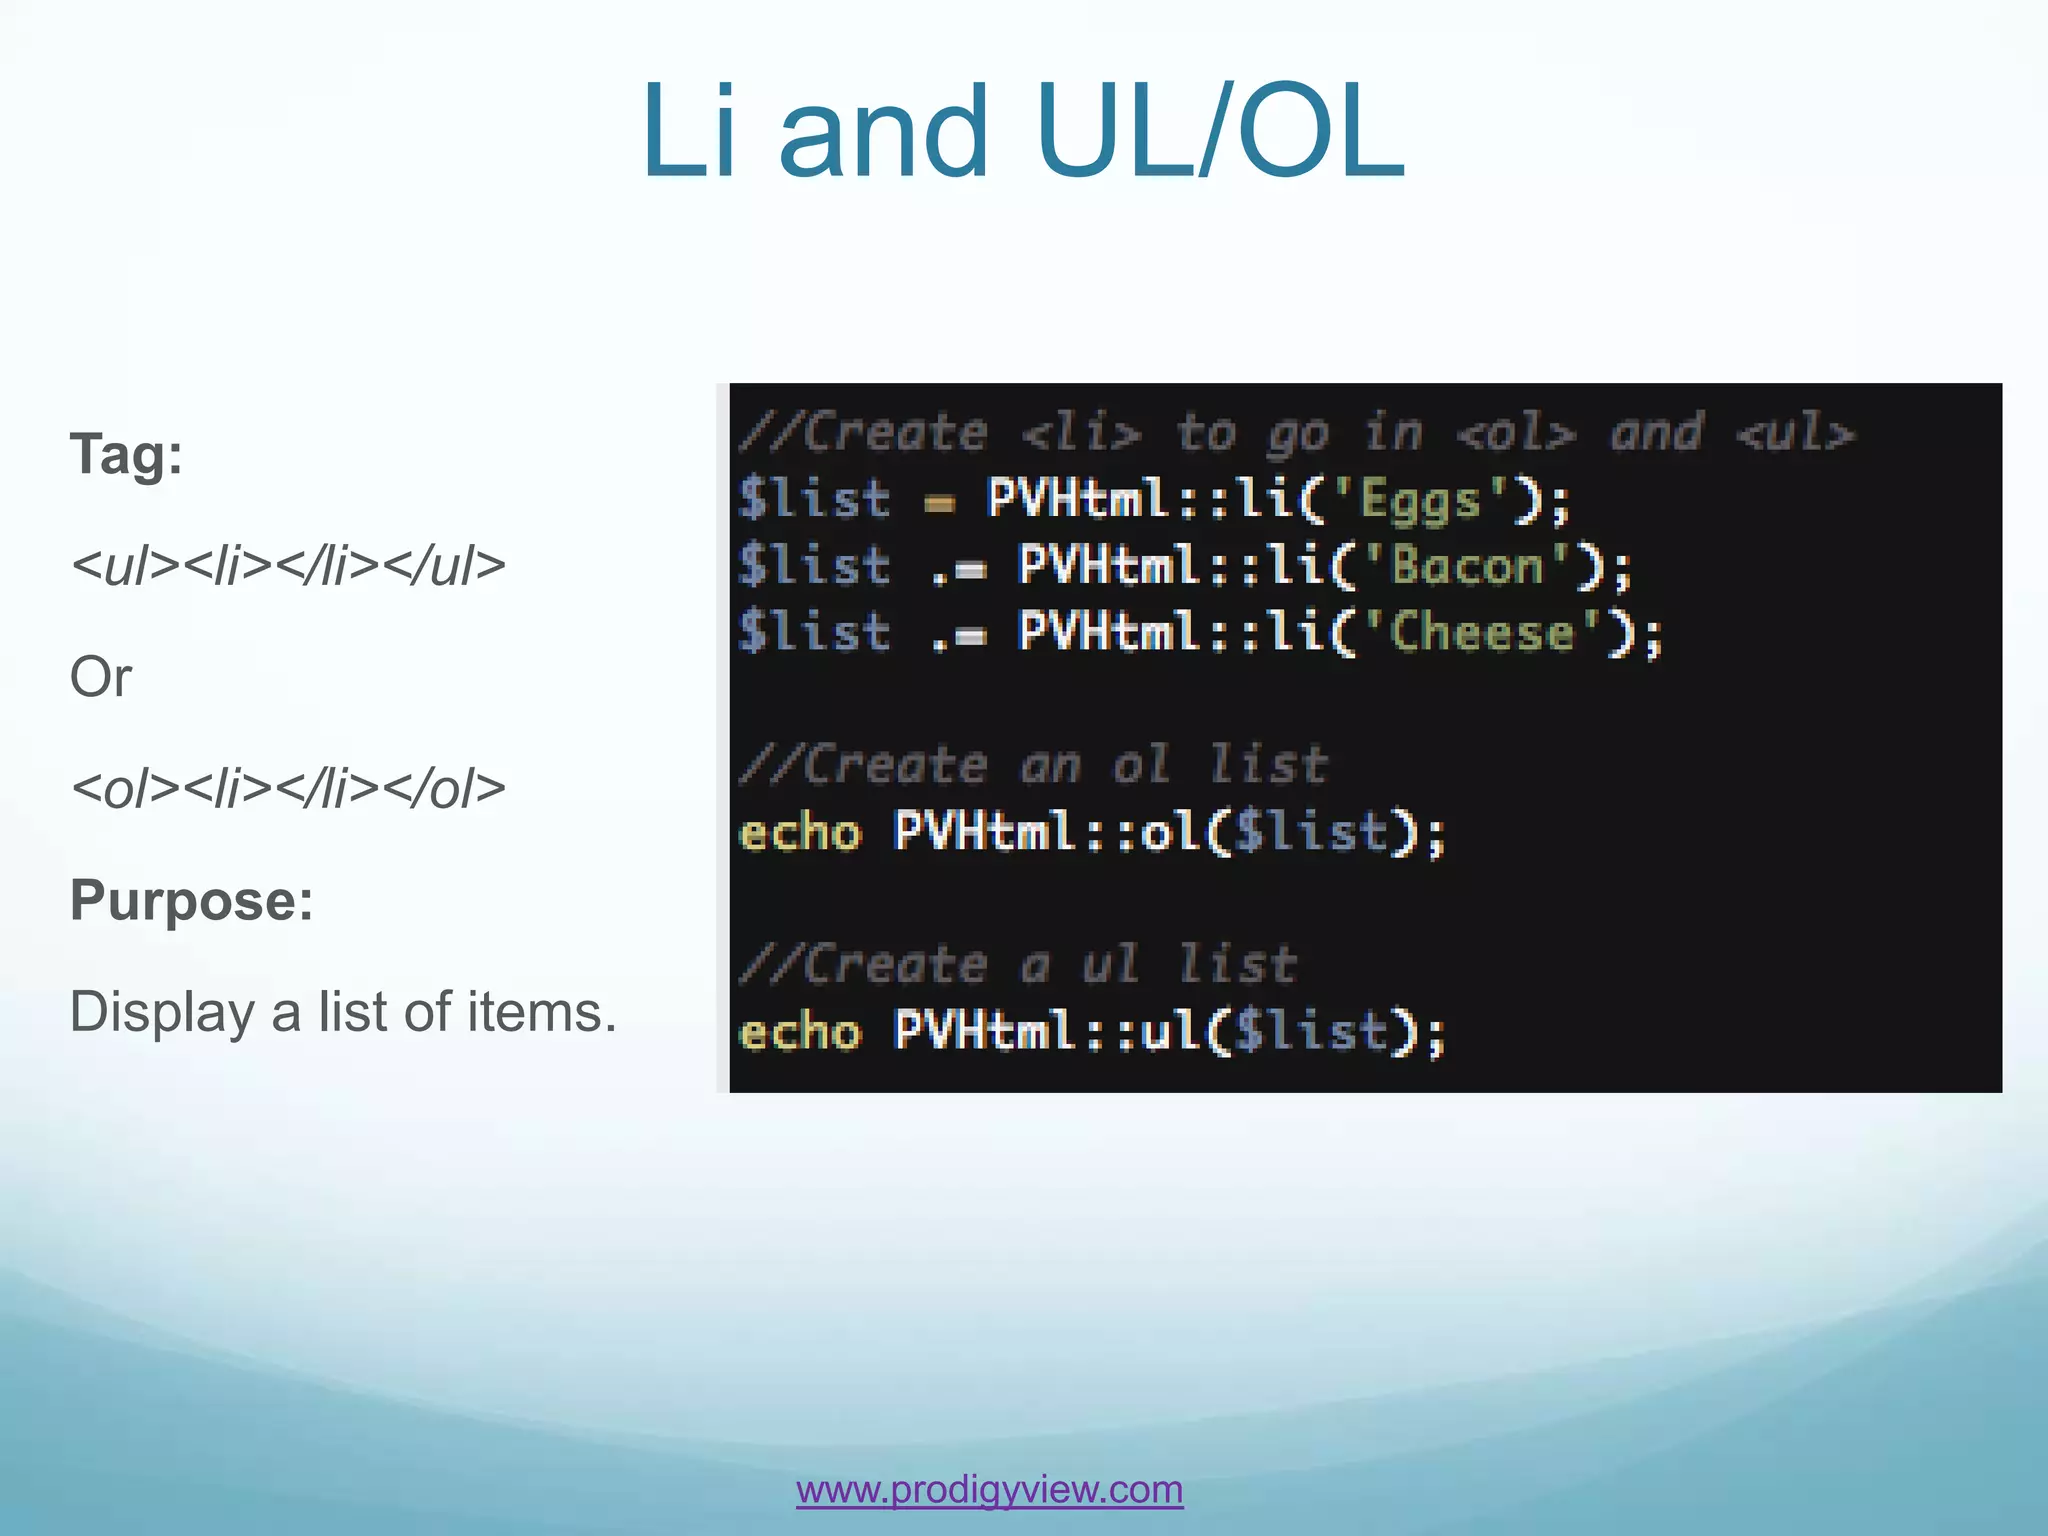
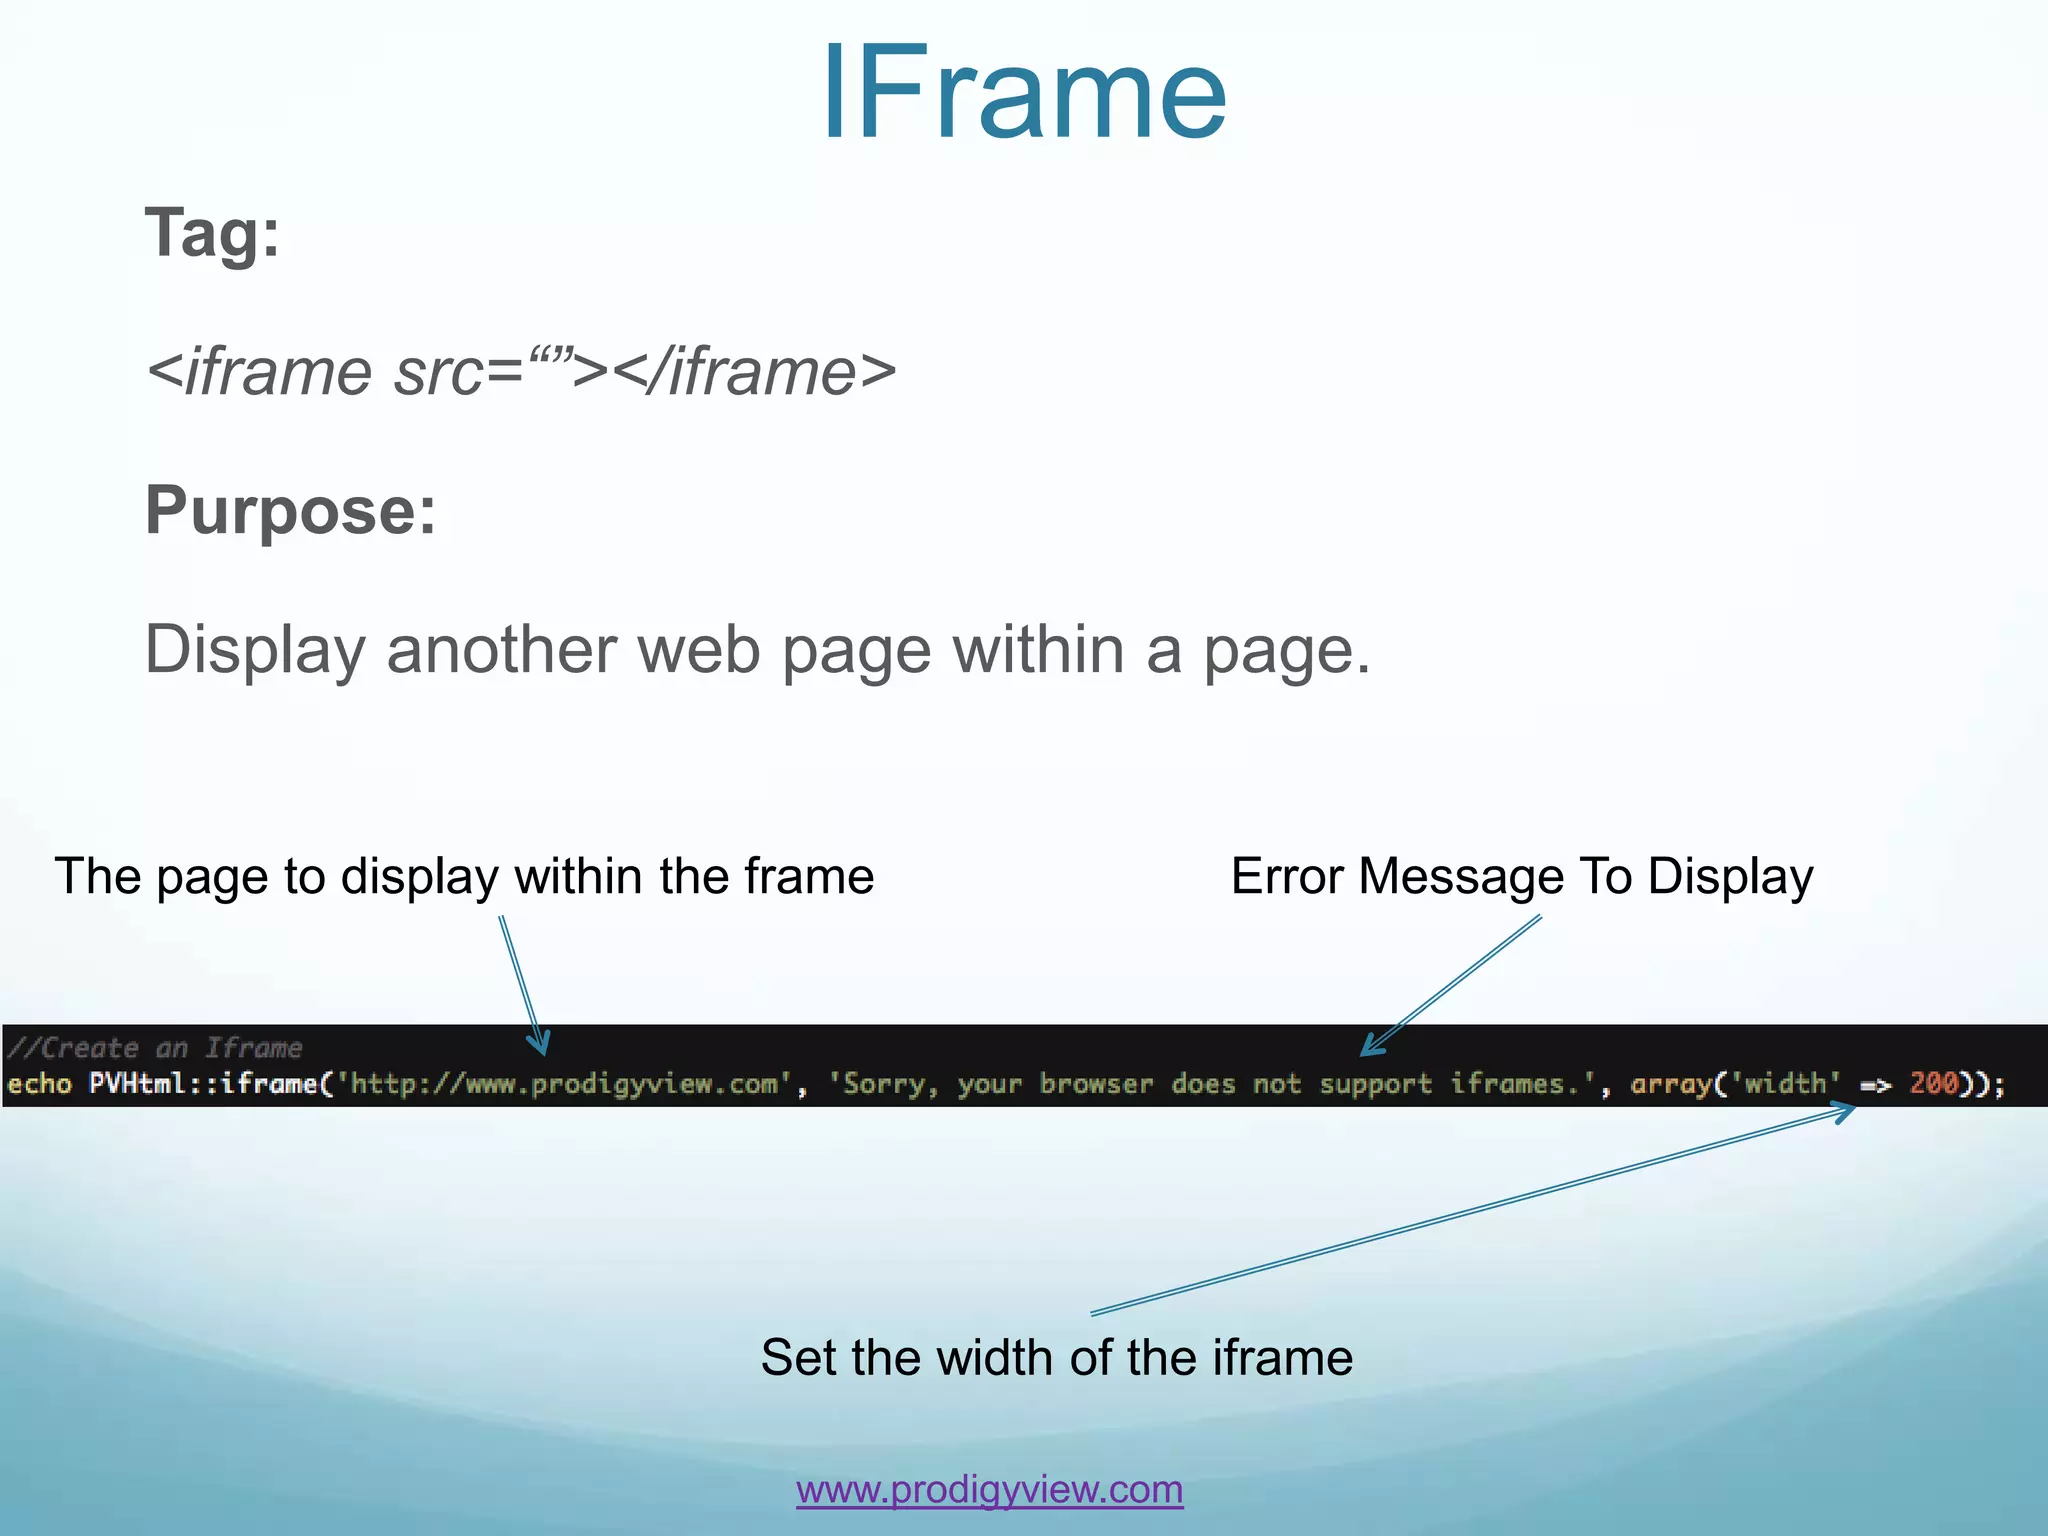
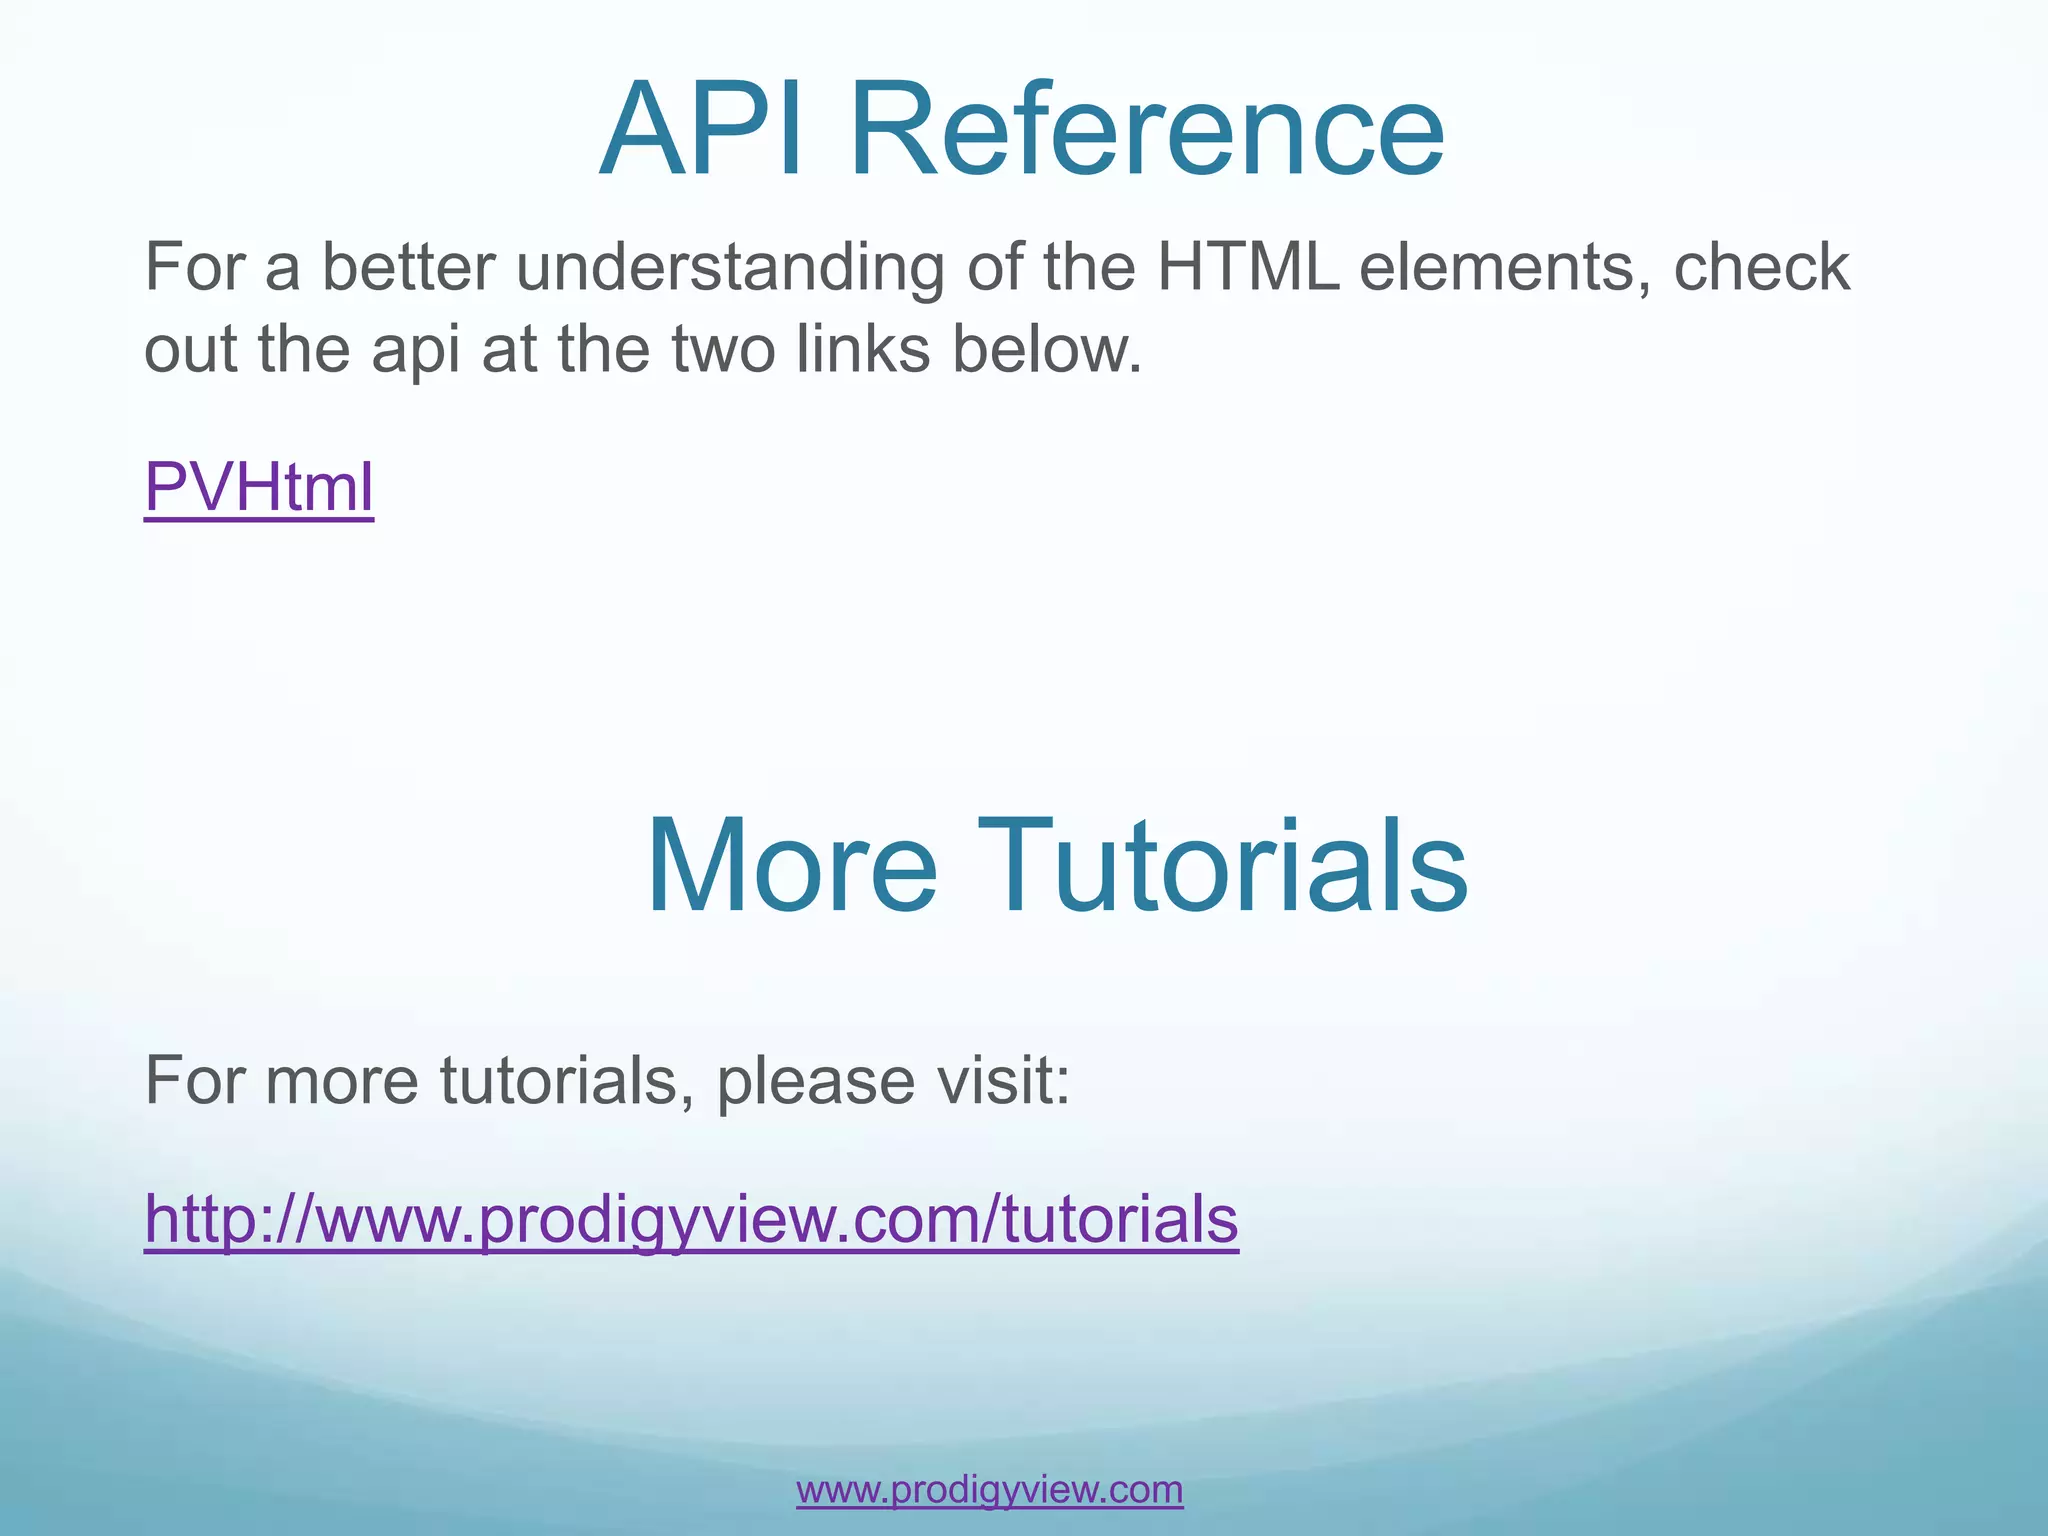
KEMBAR78
Html Tags Tutorial | PPTX
HTML Tags


 www.prodigyview.com
Overview
Objective

Learn how to use html elements in ProdigyView.

Requirements

 Understand of HTML tags
Estimated Time

9 minutes


                    www.prodigyview.com
Follow Along With A Code
               Example
1. Download a copy of the example code at
  www.prodigyview.com/source.
2. Install the system in an environment you feel comfortable testing in.
3. Proceed to examples/template/Html.php
Learning the Elements
The purpose of this tutorial is to learn to use the html
elements in ProdigyView.

The elements provide a way to quickly display html with a
decreased chance of syntax errors.

Because elements are stored in variables, they can be
accumulated and displayed when needed. Methods can
also be used to created a template engine.
Headers
  Tags:
  <h1></h1> To <h6></h6>
  Purpose:
  Set up html headings for sections and subsections of a page.


Add a class to the h2 header              Add an id to h3


 Add an inline style to h5 and h6
Options for HTML Elements
Referring to our last slide, notice how we can pass values
for defining the class or id of an element in an array.
Every html element in ProdigyView takes in options as it
last argument.

These options can be used to define elements in the tags,
as you will see throughout this tutorial. Options that can
be added include but are not limited to:

 class            title              onblur
 id               onabort            onfocus
 dir              onmousedown  accesskey
 lang             onmouseup          xml:lang
 style            onclick            spellcheck
Paragraph
Tag:

<p></p>

Purpose:

Display a paragraph of text.


                     www.prodigyview.com
Div
Tag:

<div></div>

Purpose:

Used for showing a division or section of page.


   Actions can be added to the div

                          www.prodigyview.com
Hyperlink(aLink)
   Tag:
   <a></a>
   Purpose:
   A link or anchor to a location. Hyperlinks can go to both internal and
   external pages. The url for the link can also be passed in an array.


                                  Add event to the link

Create url with array


                             www.prodigyview.com
Link
Tag:

<link></link>

Purpose:

Link to an external document.


Location of external file   Set the type to css


                               Set the media to print
Meta
Tag:
<meta></meta>
Purpose:
Meta tags are used to place meta information about the
page. Meta tags are not displayed.


The name of the tag


       Set the charset          Set the content
Span
Tags:

<span></span>

Purpose:

Group inline elements and style elements.


        Set the class for the span
Strong
Tag:

<strong></strong>

Purpose:

Emphasizes text or defines important text.


Test to be placed inside the strong tag


                                  Inline styling of the font size
Image
Tags:
<img />
Purpose:
Display an image. Image can be from an external site or a
location on an internal site.


                     www.prodigyview.com
Li and UL/OL

Tag:
<ul><li></li></ul>
Or
<ol><li></li></ol>
Purpose:
Display a list of items.


                             www.prodigyview.com
IFrame
   Tag:

   <iframe src=“”></iframe>

   Purpose:

   Display another web page within a page.


The page to display within the frame                  Error Message To Display


                              Set the width of the iframe

                                www.prodigyview.com
API Reference
For a better understanding of the HTML elements, check
out the api at the two links below.

PVHtml


                 More Tutorials
For more tutorials, please visit:

http://www.prodigyview.com/tutorials


                       www.prodigyview.com

Html Tags Tutorial

  • 1.
  • 2.
    Overview Objective Learn how touse html elements in ProdigyView. Requirements  Understand of HTML tags Estimated Time 9 minutes www.prodigyview.com
  • 3.
    Follow Along WithA Code Example 1. Download a copy of the example code at www.prodigyview.com/source. 2. Install the system in an environment you feel comfortable testing in. 3. Proceed to examples/template/Html.php
  • 4.
    Learning the Elements Thepurpose of this tutorial is to learn to use the html elements in ProdigyView. The elements provide a way to quickly display html with a decreased chance of syntax errors. Because elements are stored in variables, they can be accumulated and displayed when needed. Methods can also be used to created a template engine.
  • 5.
    Headers Tags: <h1></h1> To <h6></h6> Purpose: Set up html headings for sections and subsections of a page. Add a class to the h2 header Add an id to h3 Add an inline style to h5 and h6
  • 6.
    Options for HTMLElements Referring to our last slide, notice how we can pass values for defining the class or id of an element in an array. Every html element in ProdigyView takes in options as it last argument. These options can be used to define elements in the tags, as you will see throughout this tutorial. Options that can be added include but are not limited to:  class  title  onblur  id  onabort  onfocus  dir  onmousedown  accesskey  lang  onmouseup  xml:lang  style  onclick  spellcheck
  • 7.
  • 8.
    Div Tag: <div></div> Purpose: Used for showinga division or section of page. Actions can be added to the div www.prodigyview.com
  • 9.
    Hyperlink(aLink) Tag: <a></a> Purpose: A link or anchor to a location. Hyperlinks can go to both internal and external pages. The url for the link can also be passed in an array. Add event to the link Create url with array www.prodigyview.com
  • 10.
    Link Tag: <link></link> Purpose: Link to anexternal document. Location of external file Set the type to css Set the media to print
  • 11.
    Meta Tag: <meta></meta> Purpose: Meta tags areused to place meta information about the page. Meta tags are not displayed. The name of the tag Set the charset Set the content
  • 12.
    Span Tags: <span></span> Purpose: Group inline elementsand style elements. Set the class for the span
  • 13.
    Strong Tag: <strong></strong> Purpose: Emphasizes text ordefines important text. Test to be placed inside the strong tag Inline styling of the font size
  • 14.
    Image Tags: <img /> Purpose: Display animage. Image can be from an external site or a location on an internal site. www.prodigyview.com
  • 15.
  • 16.
    IFrame Tag: <iframe src=“”></iframe> Purpose: Display another web page within a page. The page to display within the frame Error Message To Display Set the width of the iframe www.prodigyview.com
  • 17.
    API Reference For abetter understanding of the HTML elements, check out the api at the two links below. PVHtml More Tutorials For more tutorials, please visit: http://www.prodigyview.com/tutorials www.prodigyview.com