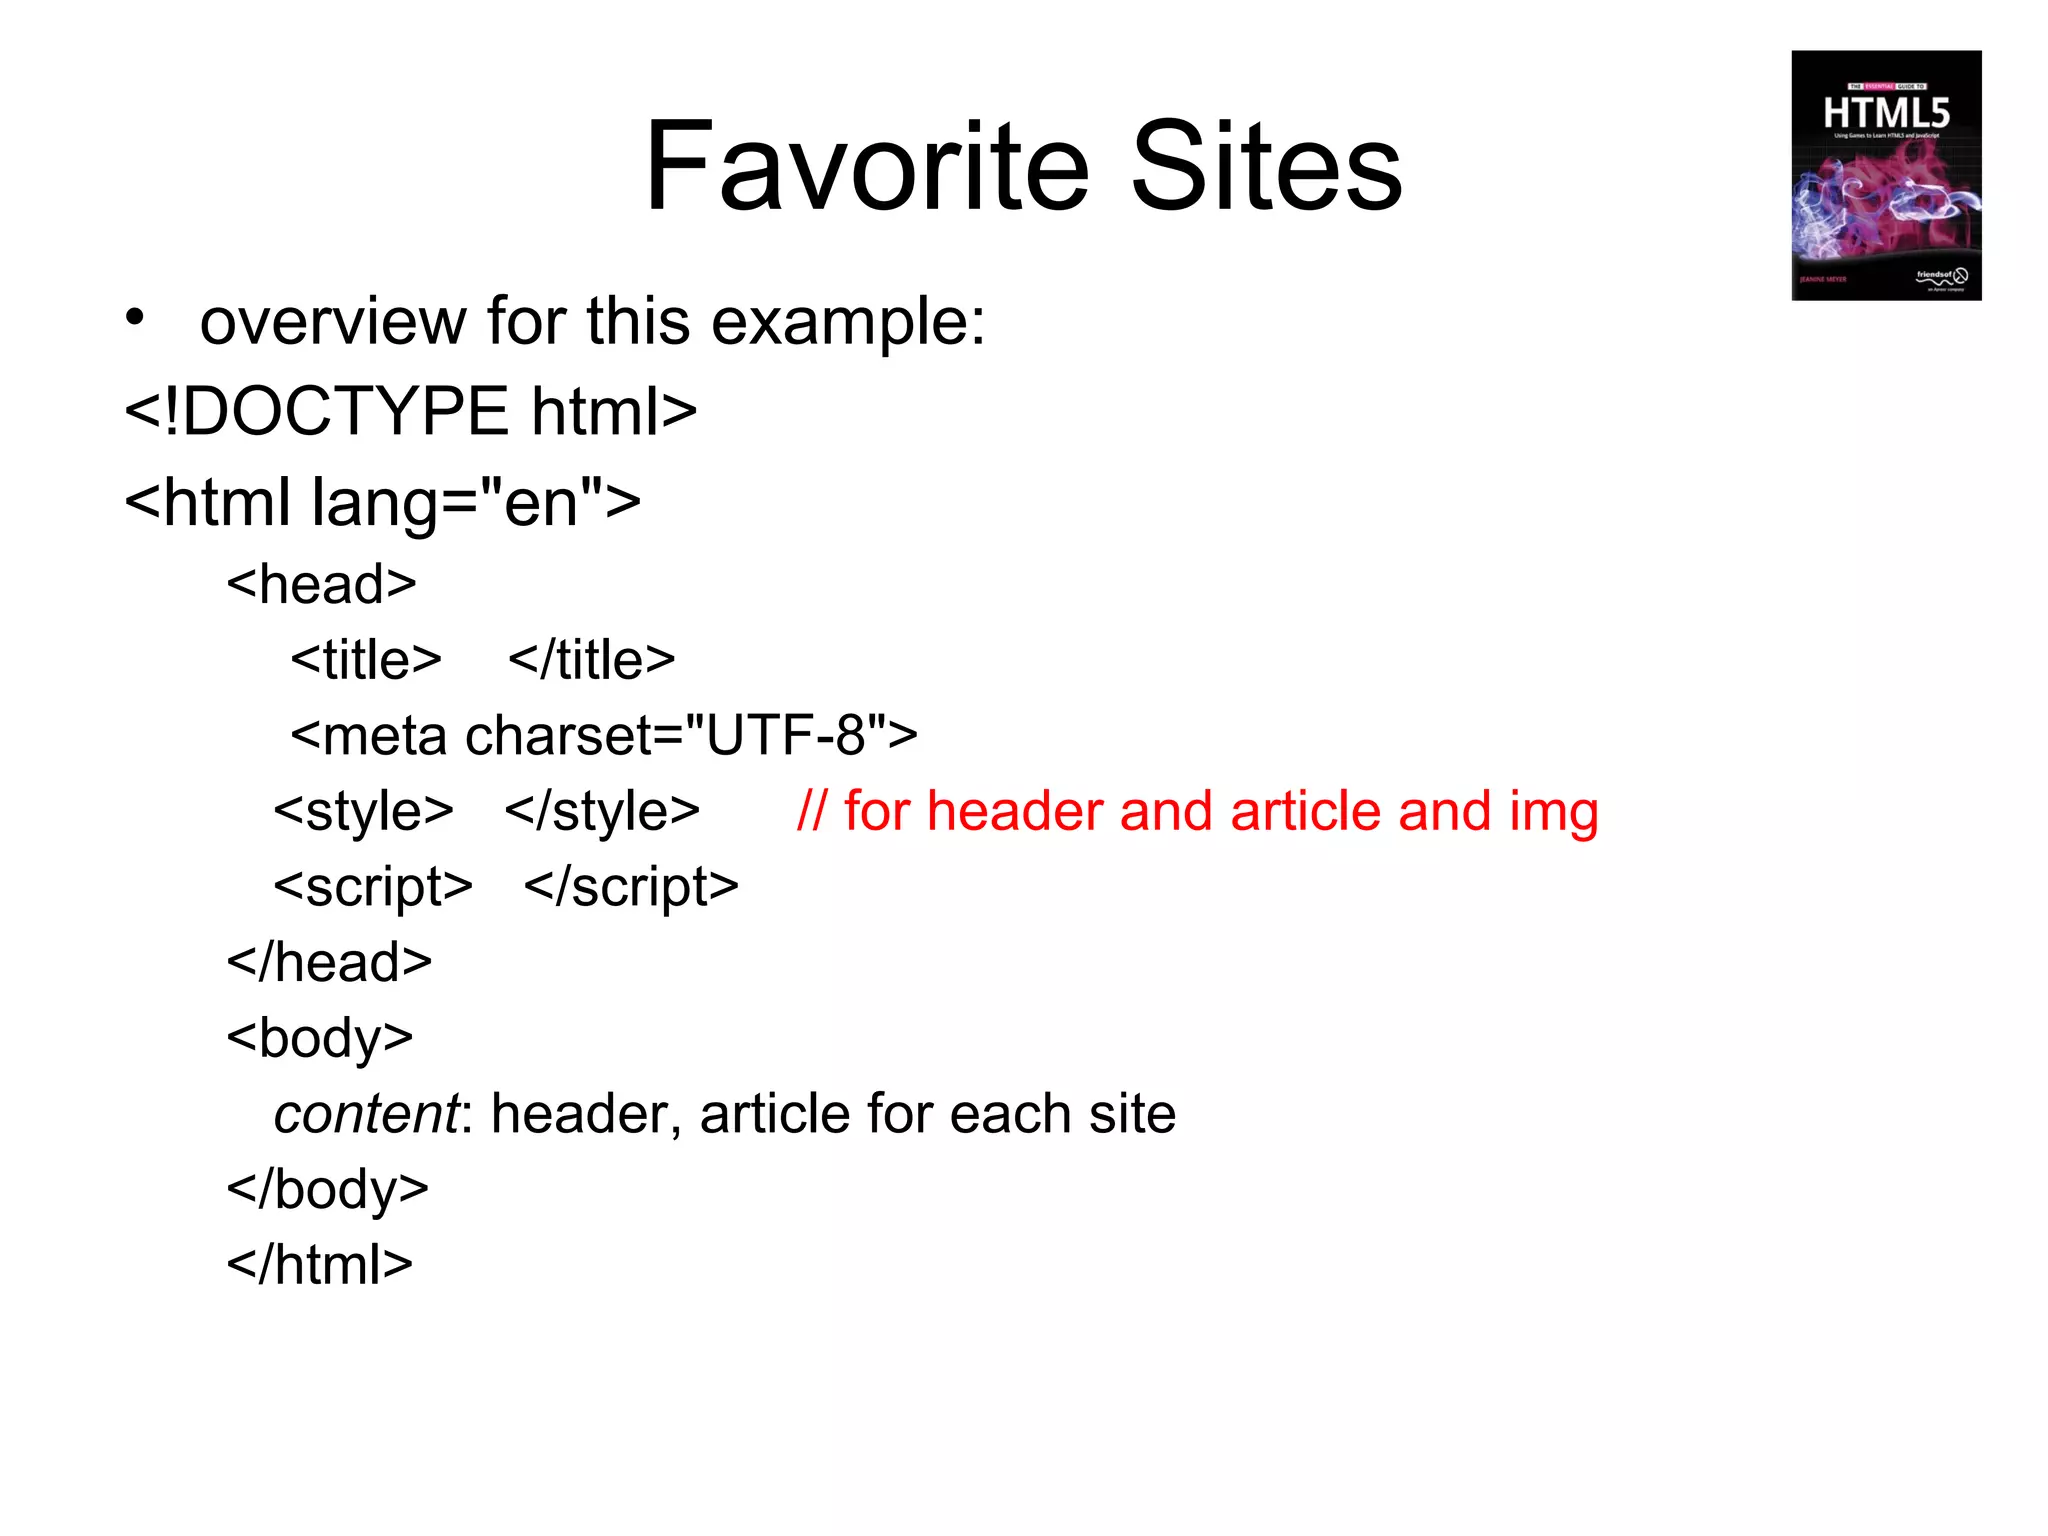
This document provides an introduction to HTML5 and outlines several HTML5 projects that will be covered, including:
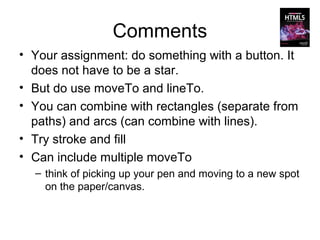
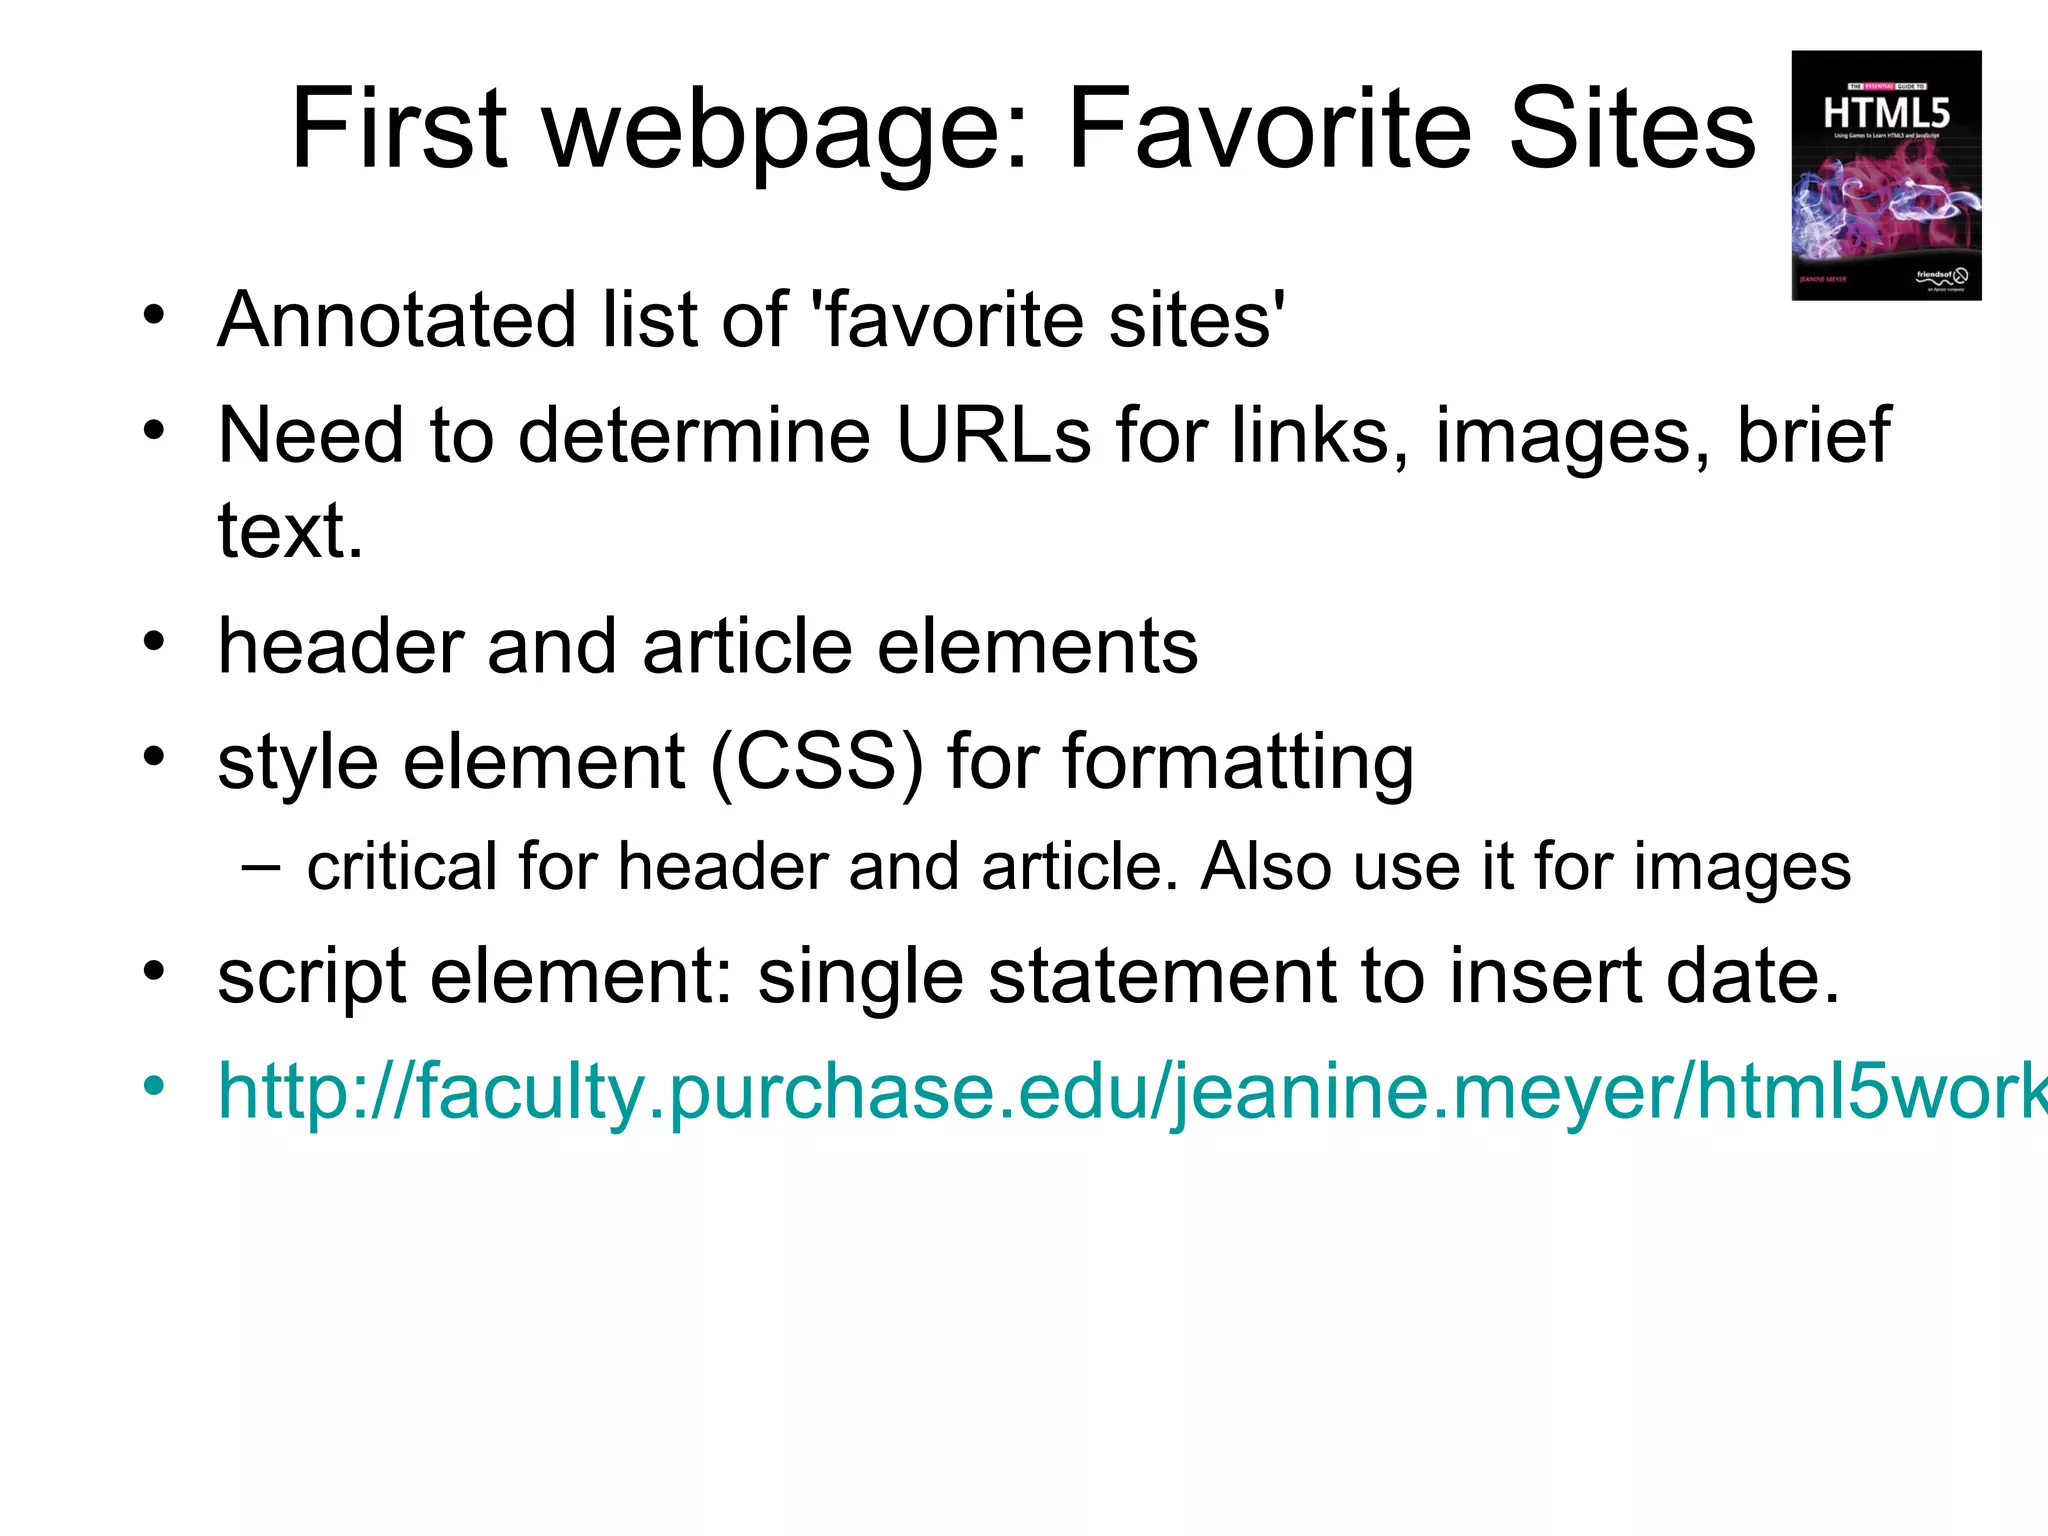
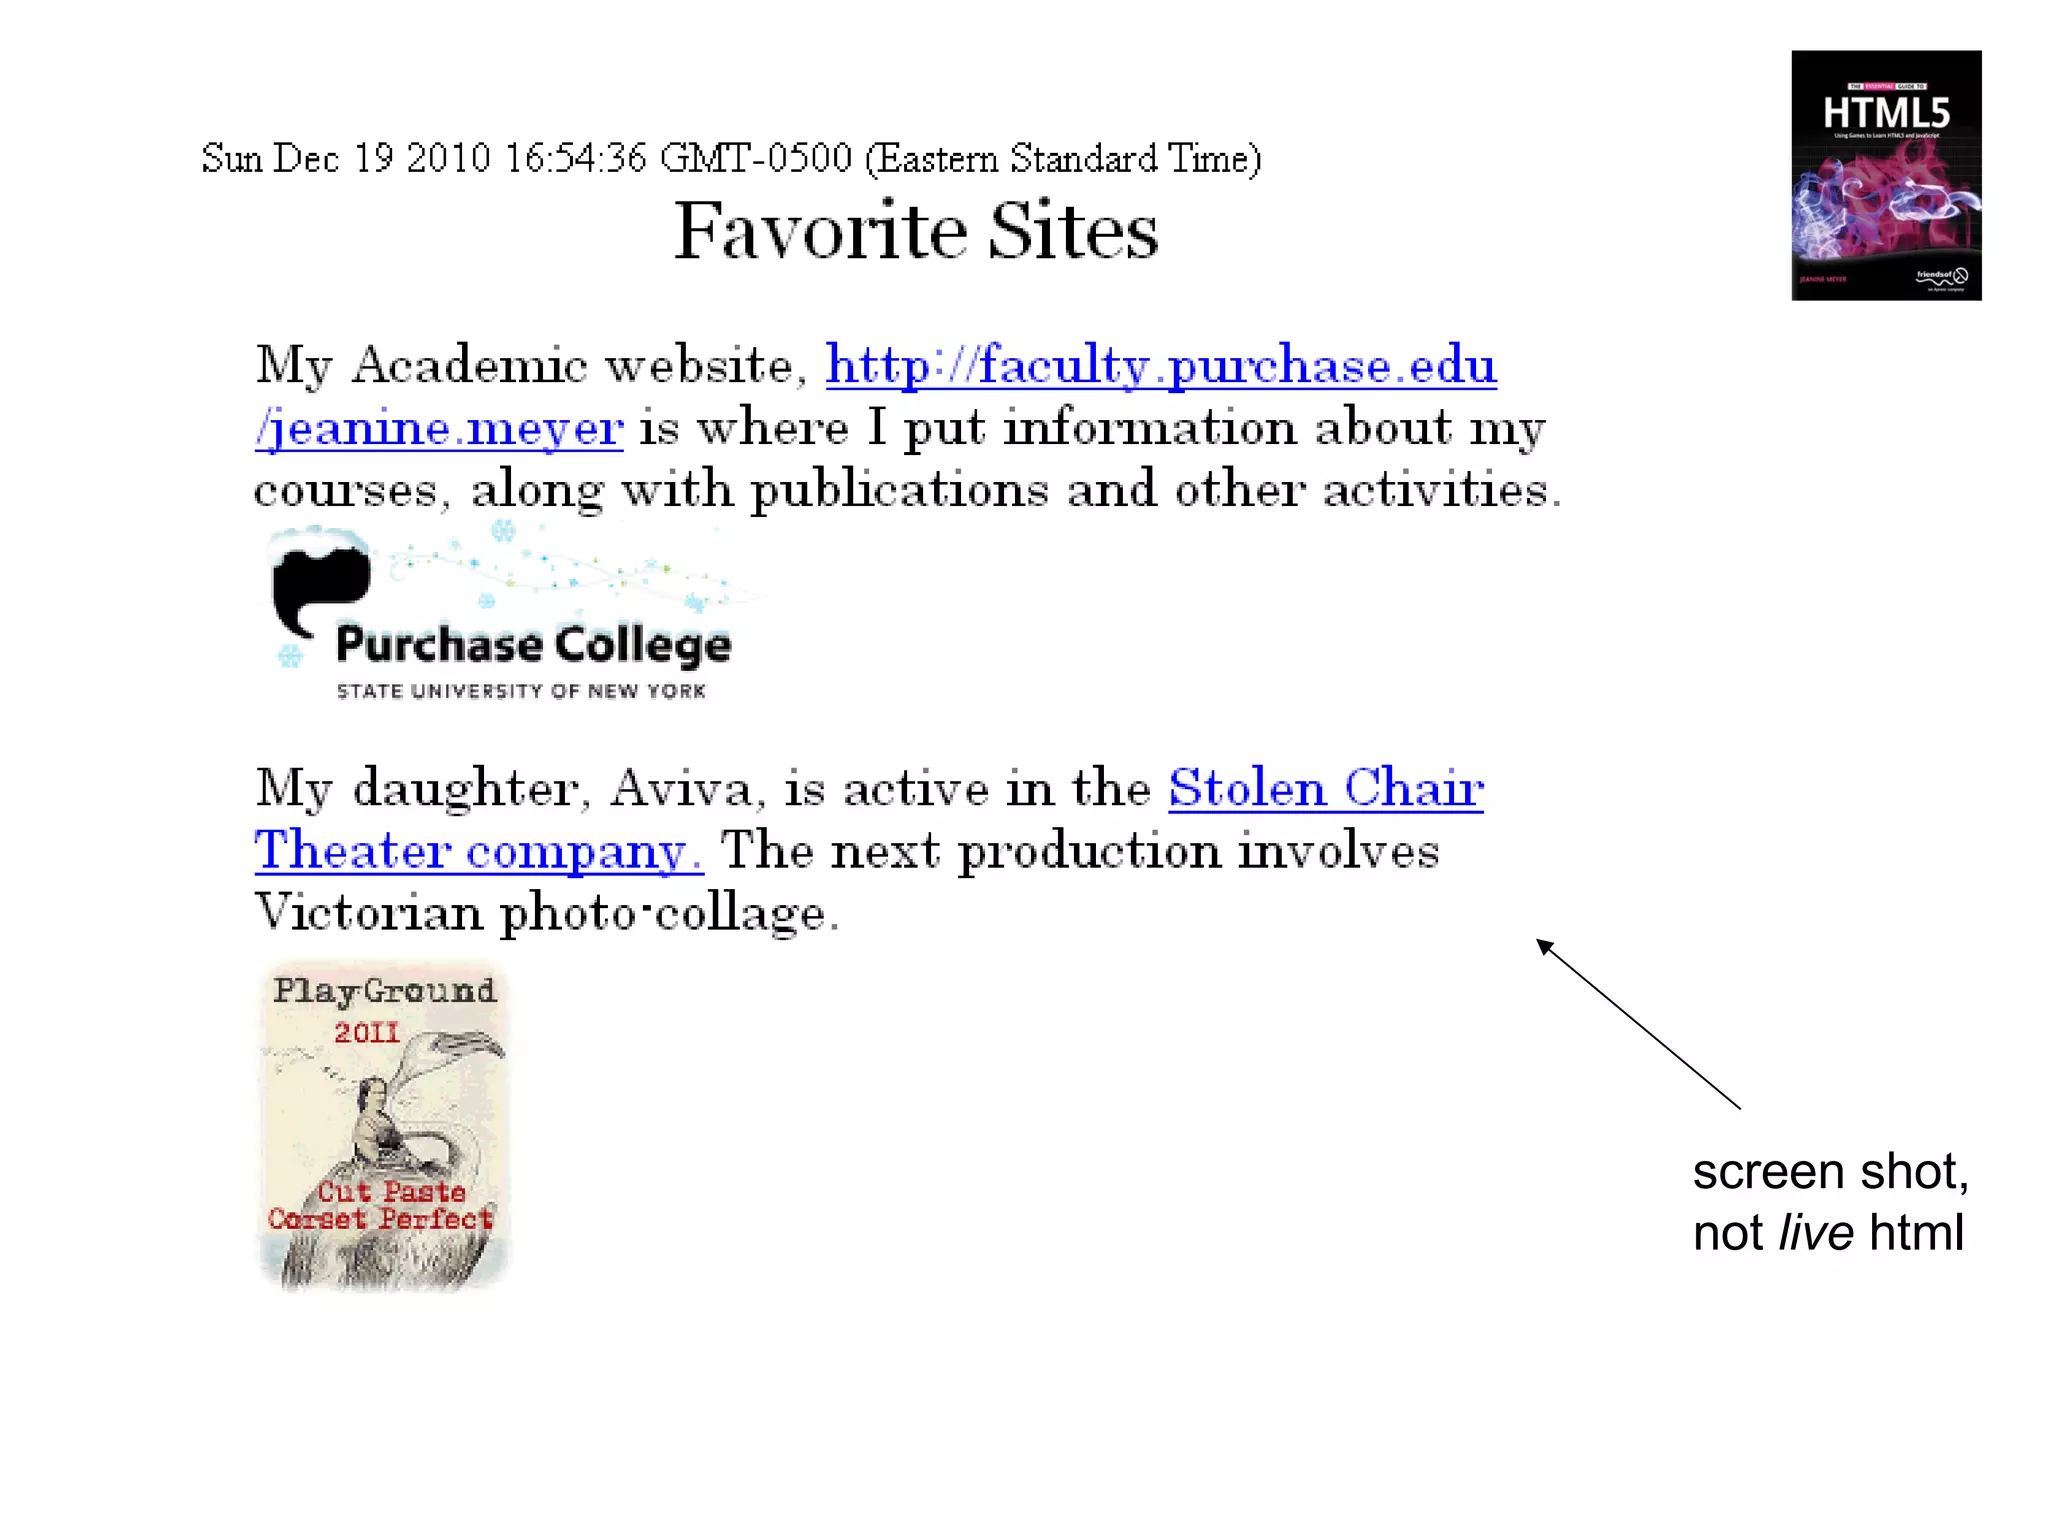
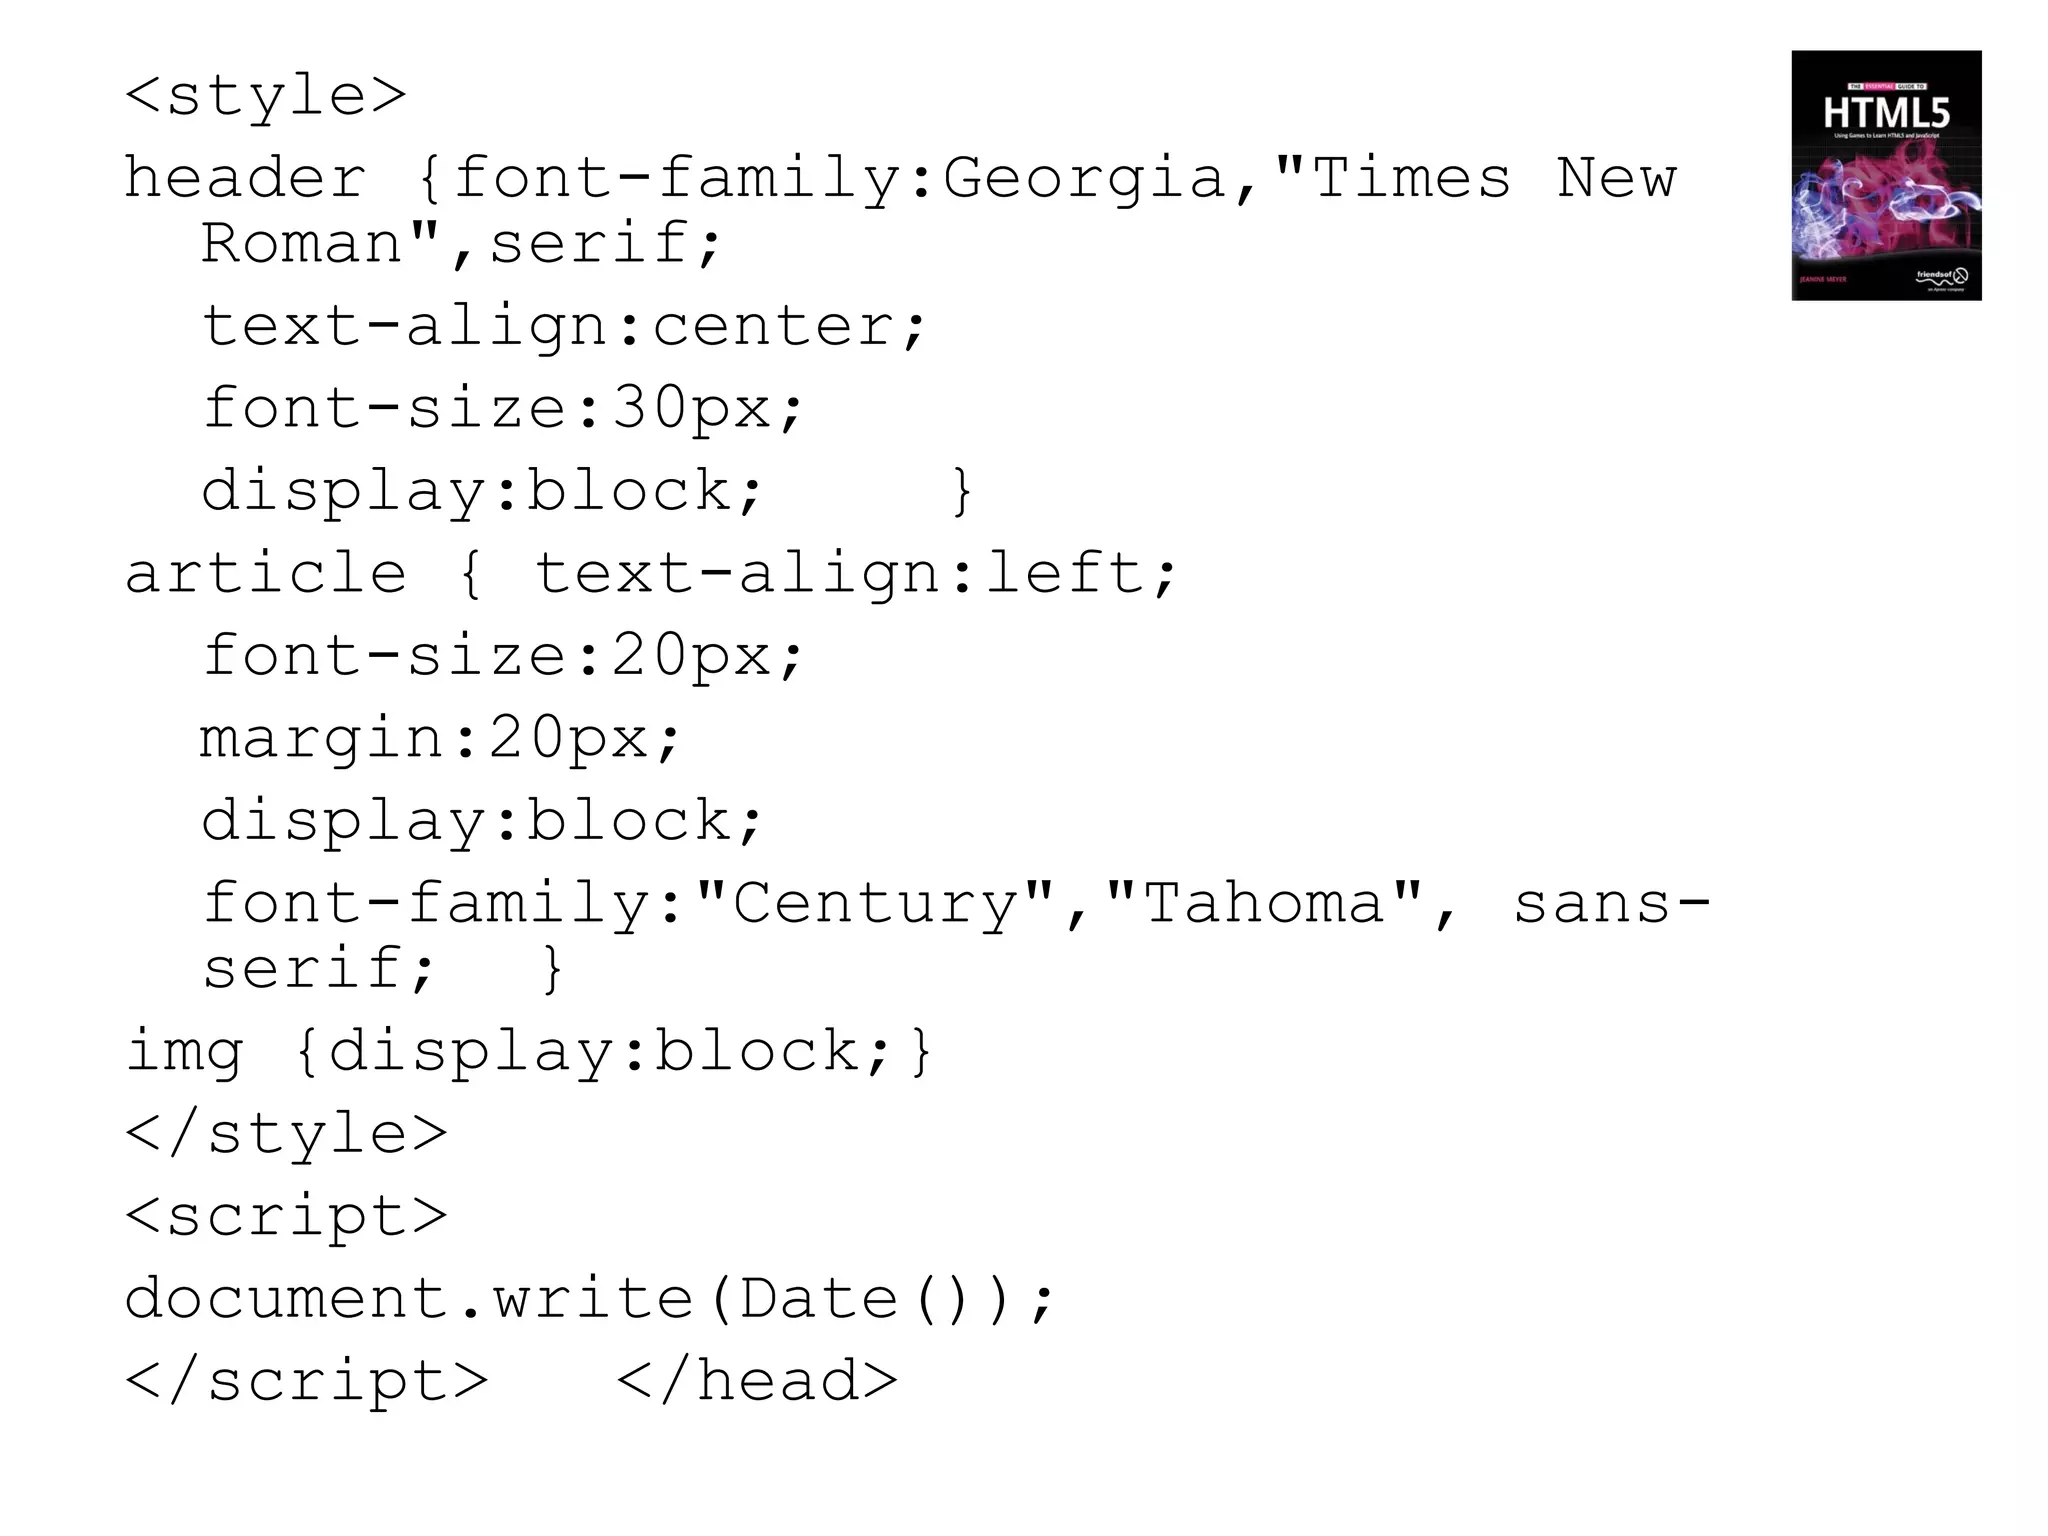
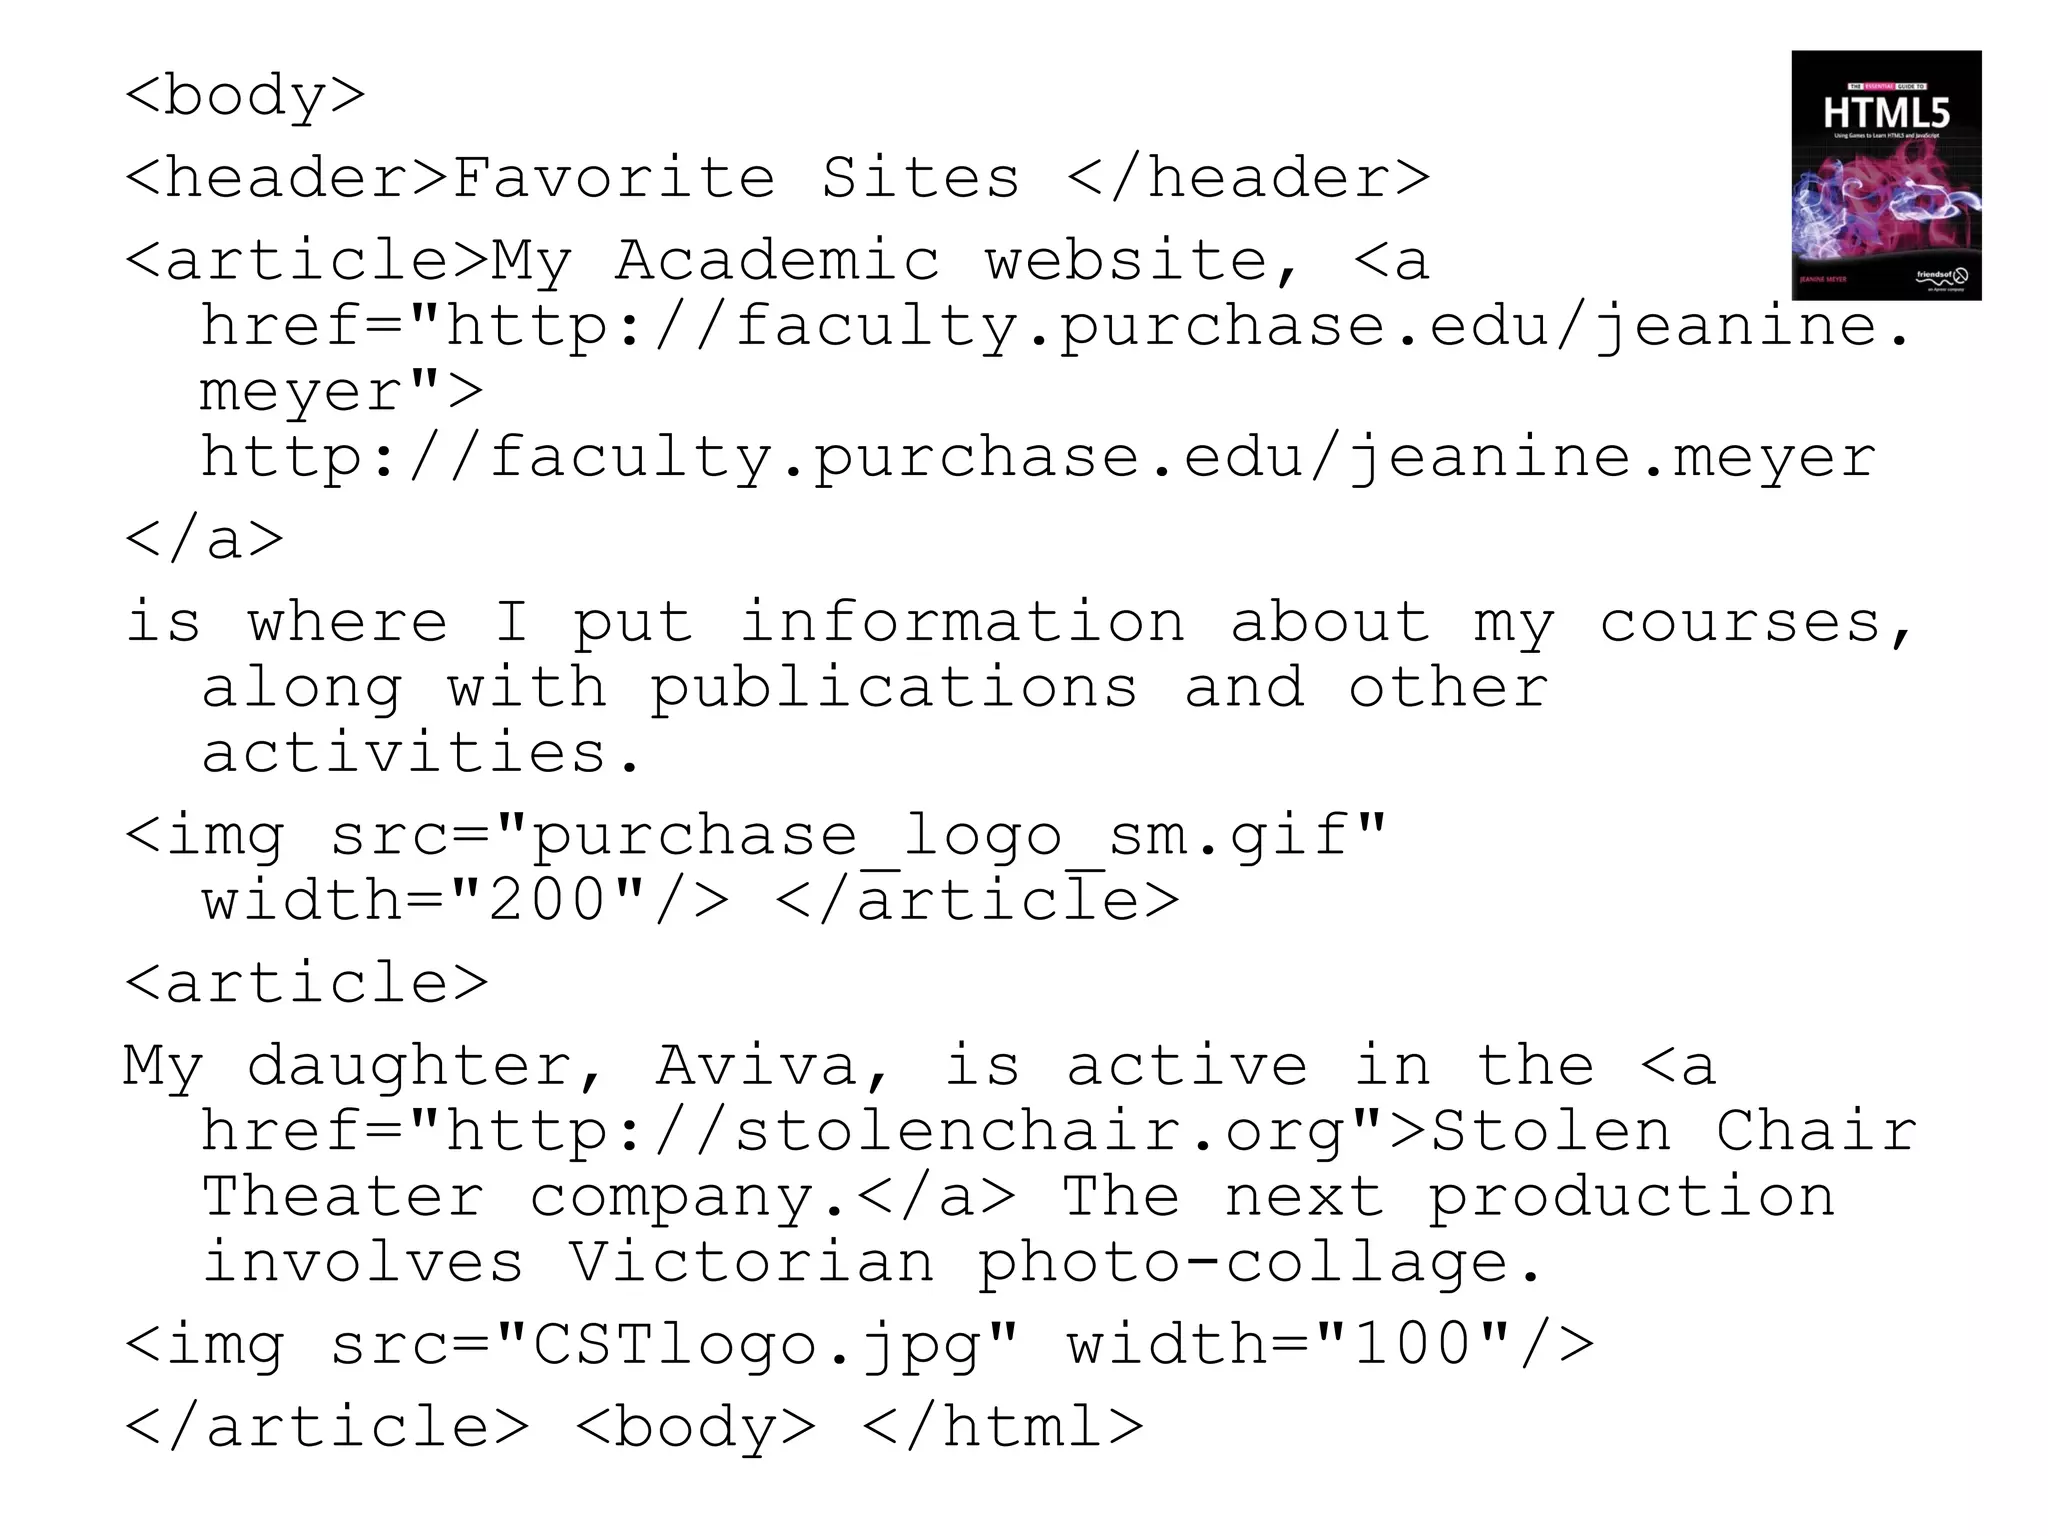
1. Building a "Favorite Sites" webpage to review HTML structure and new semantic elements.
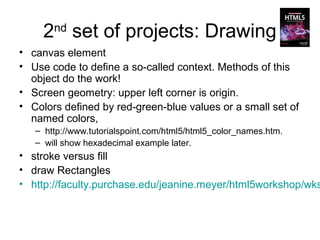
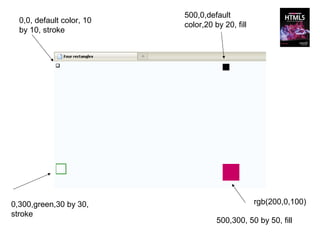
2. Creating drawings on a canvas element using paths, rectangles, arcs, and lines.
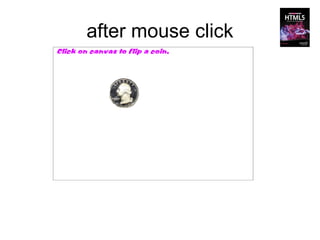
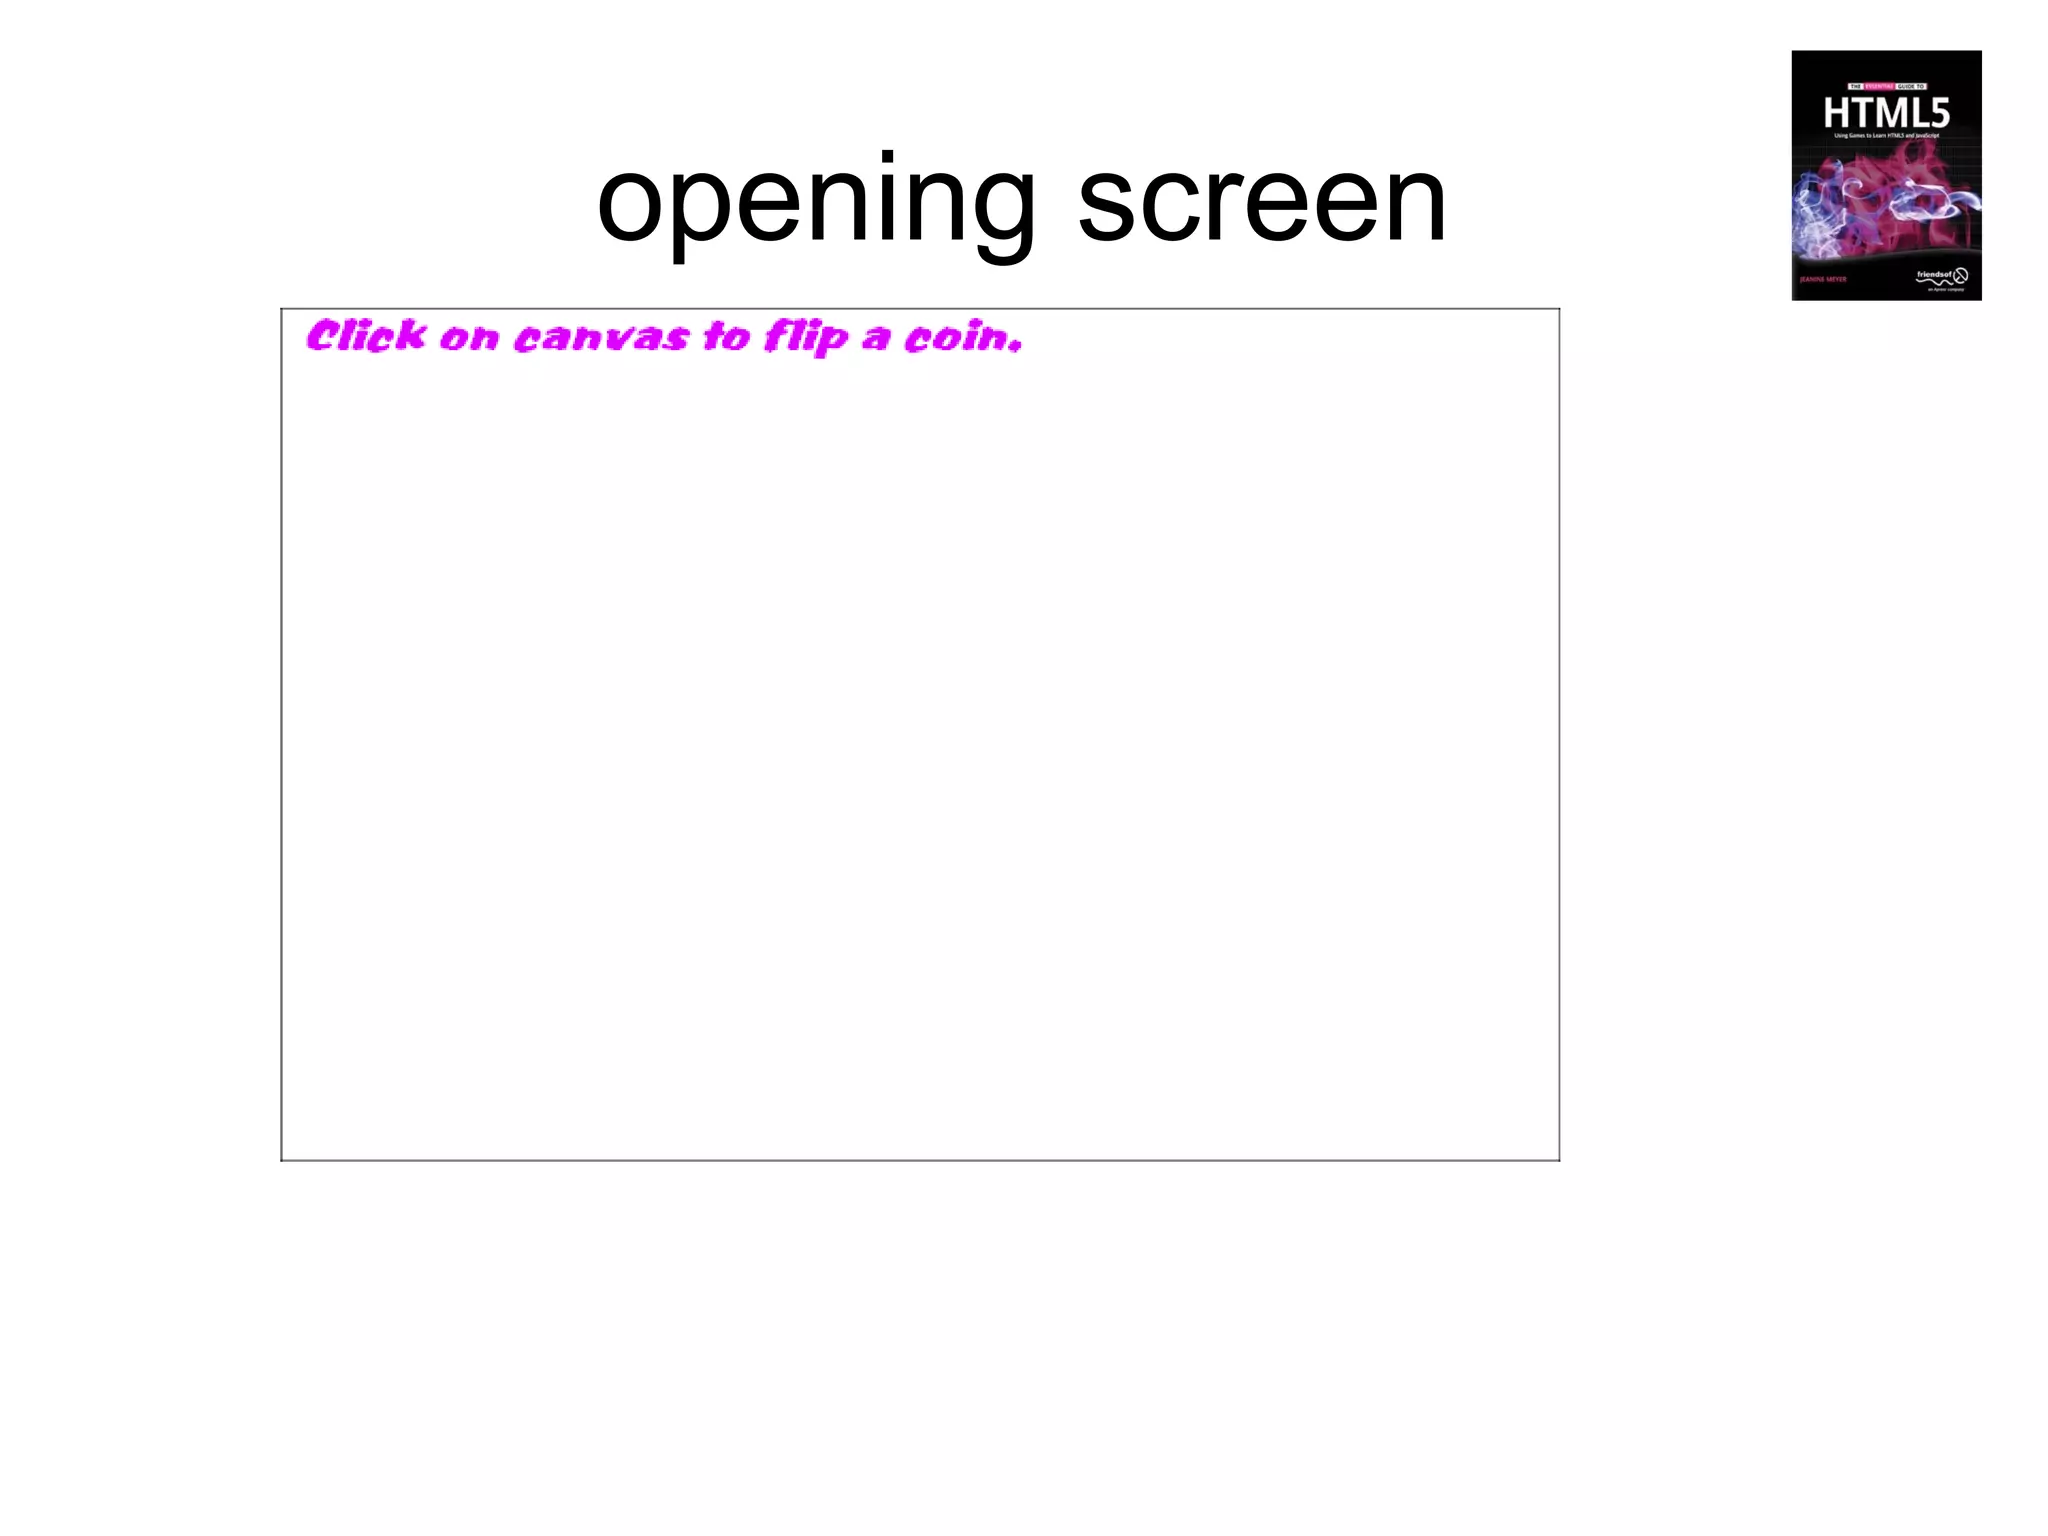
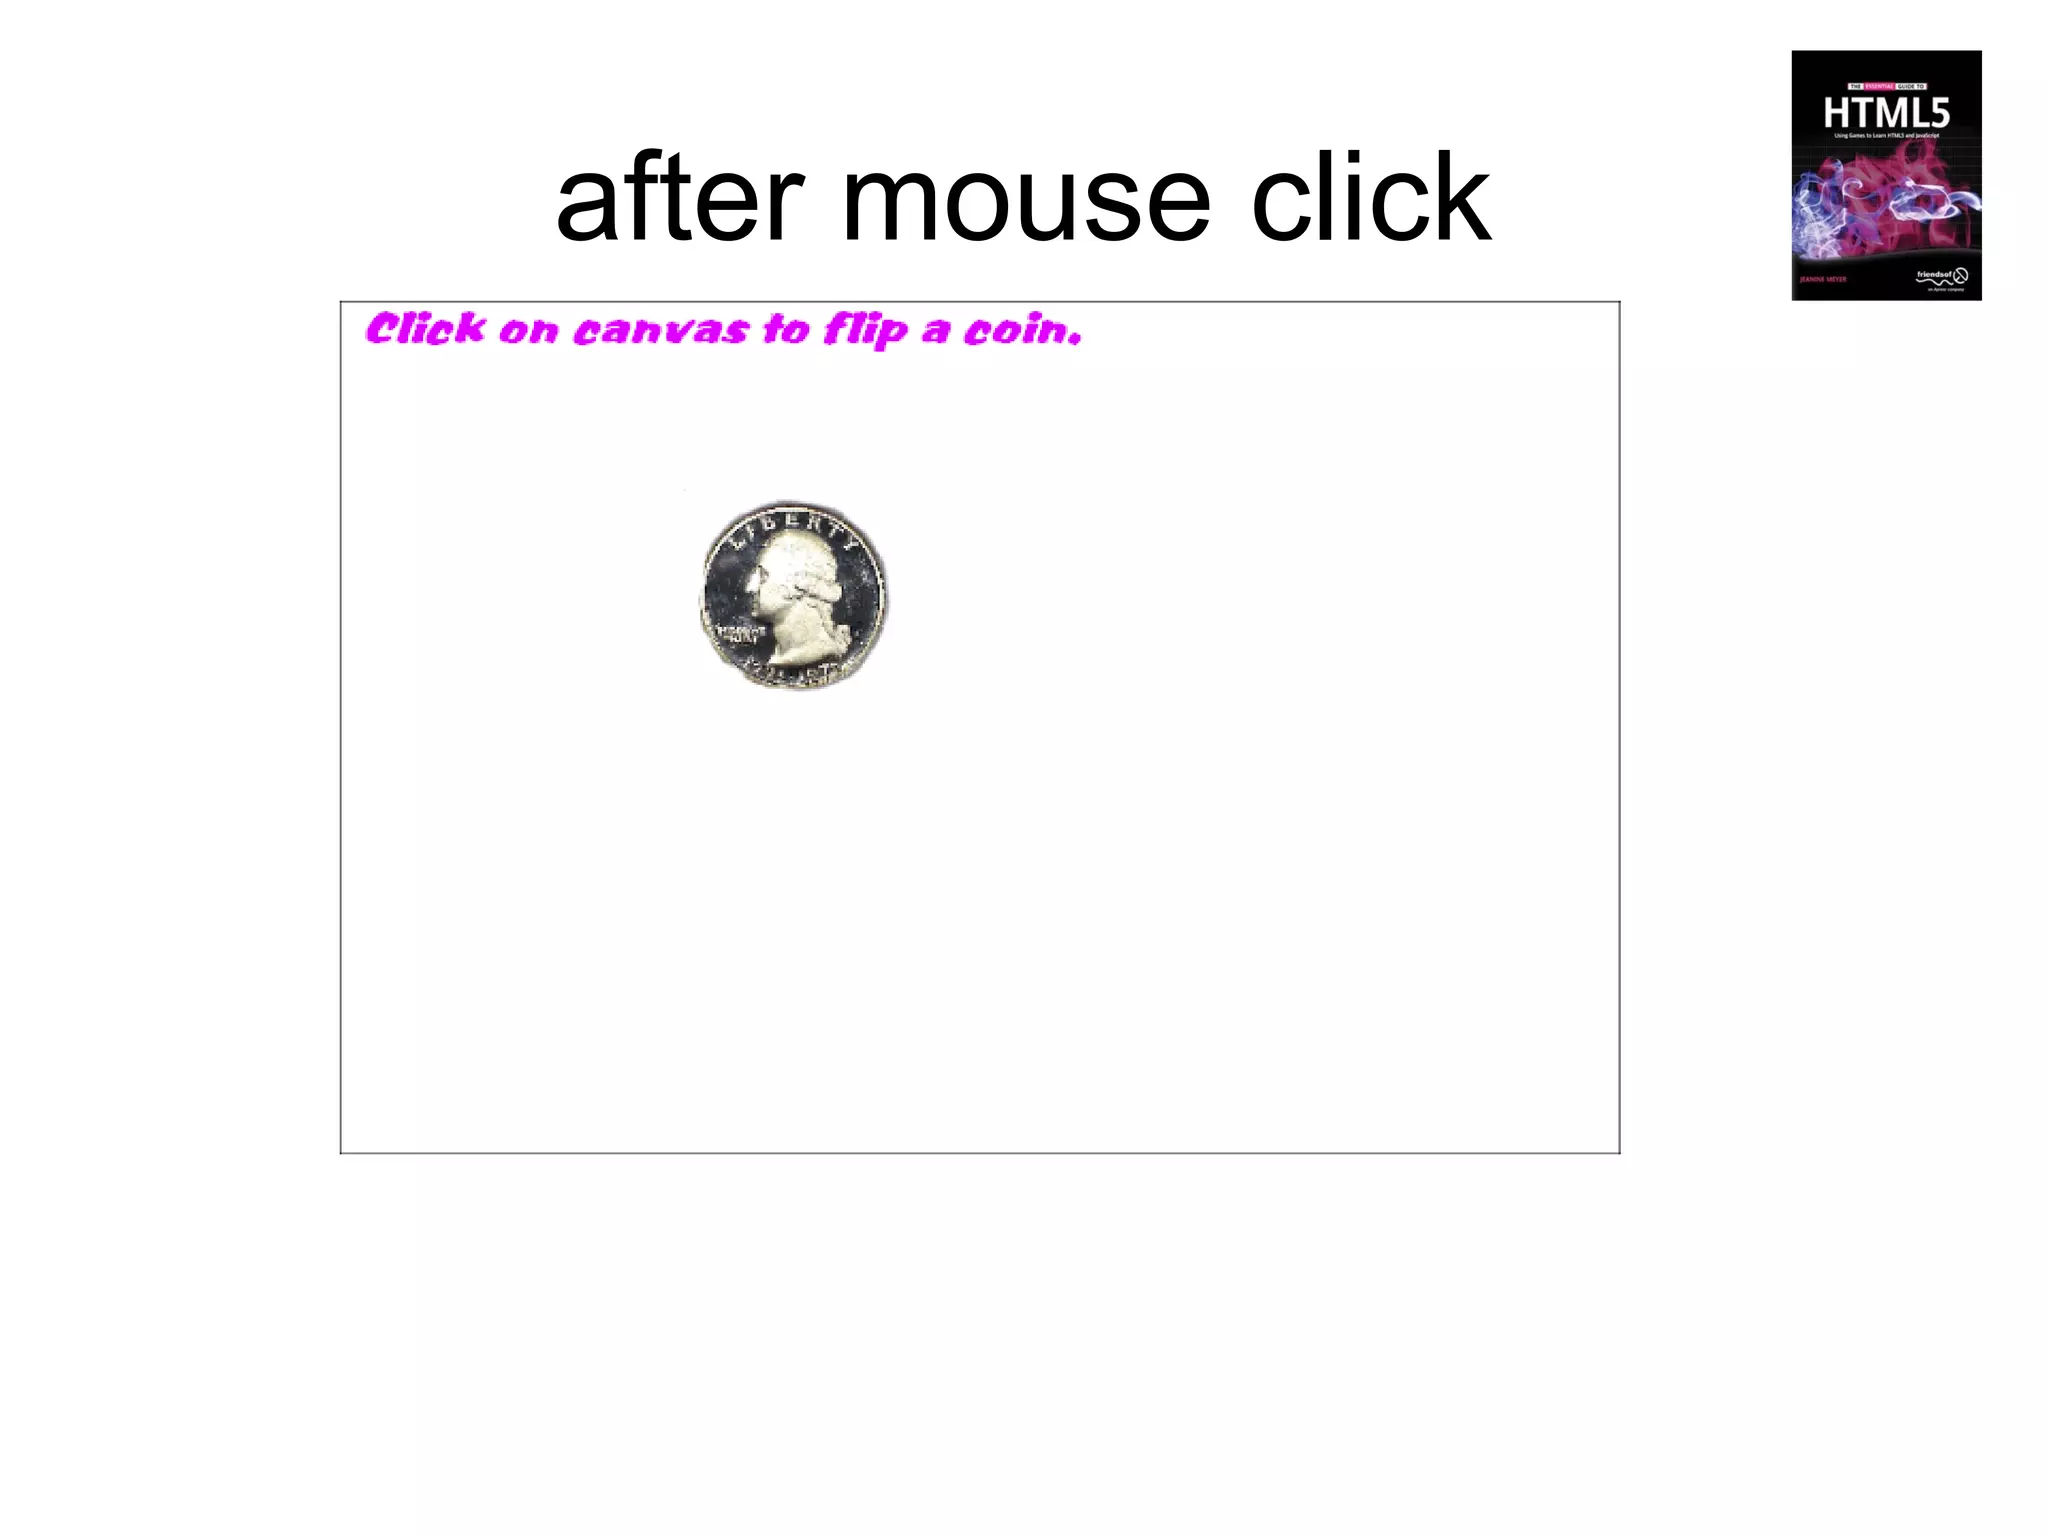
3. Developing an interactive coin toss app using event handling and drawing on the canvas.
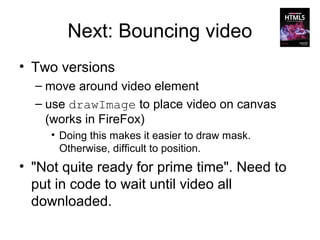
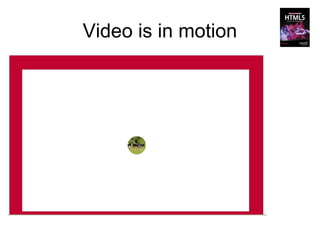
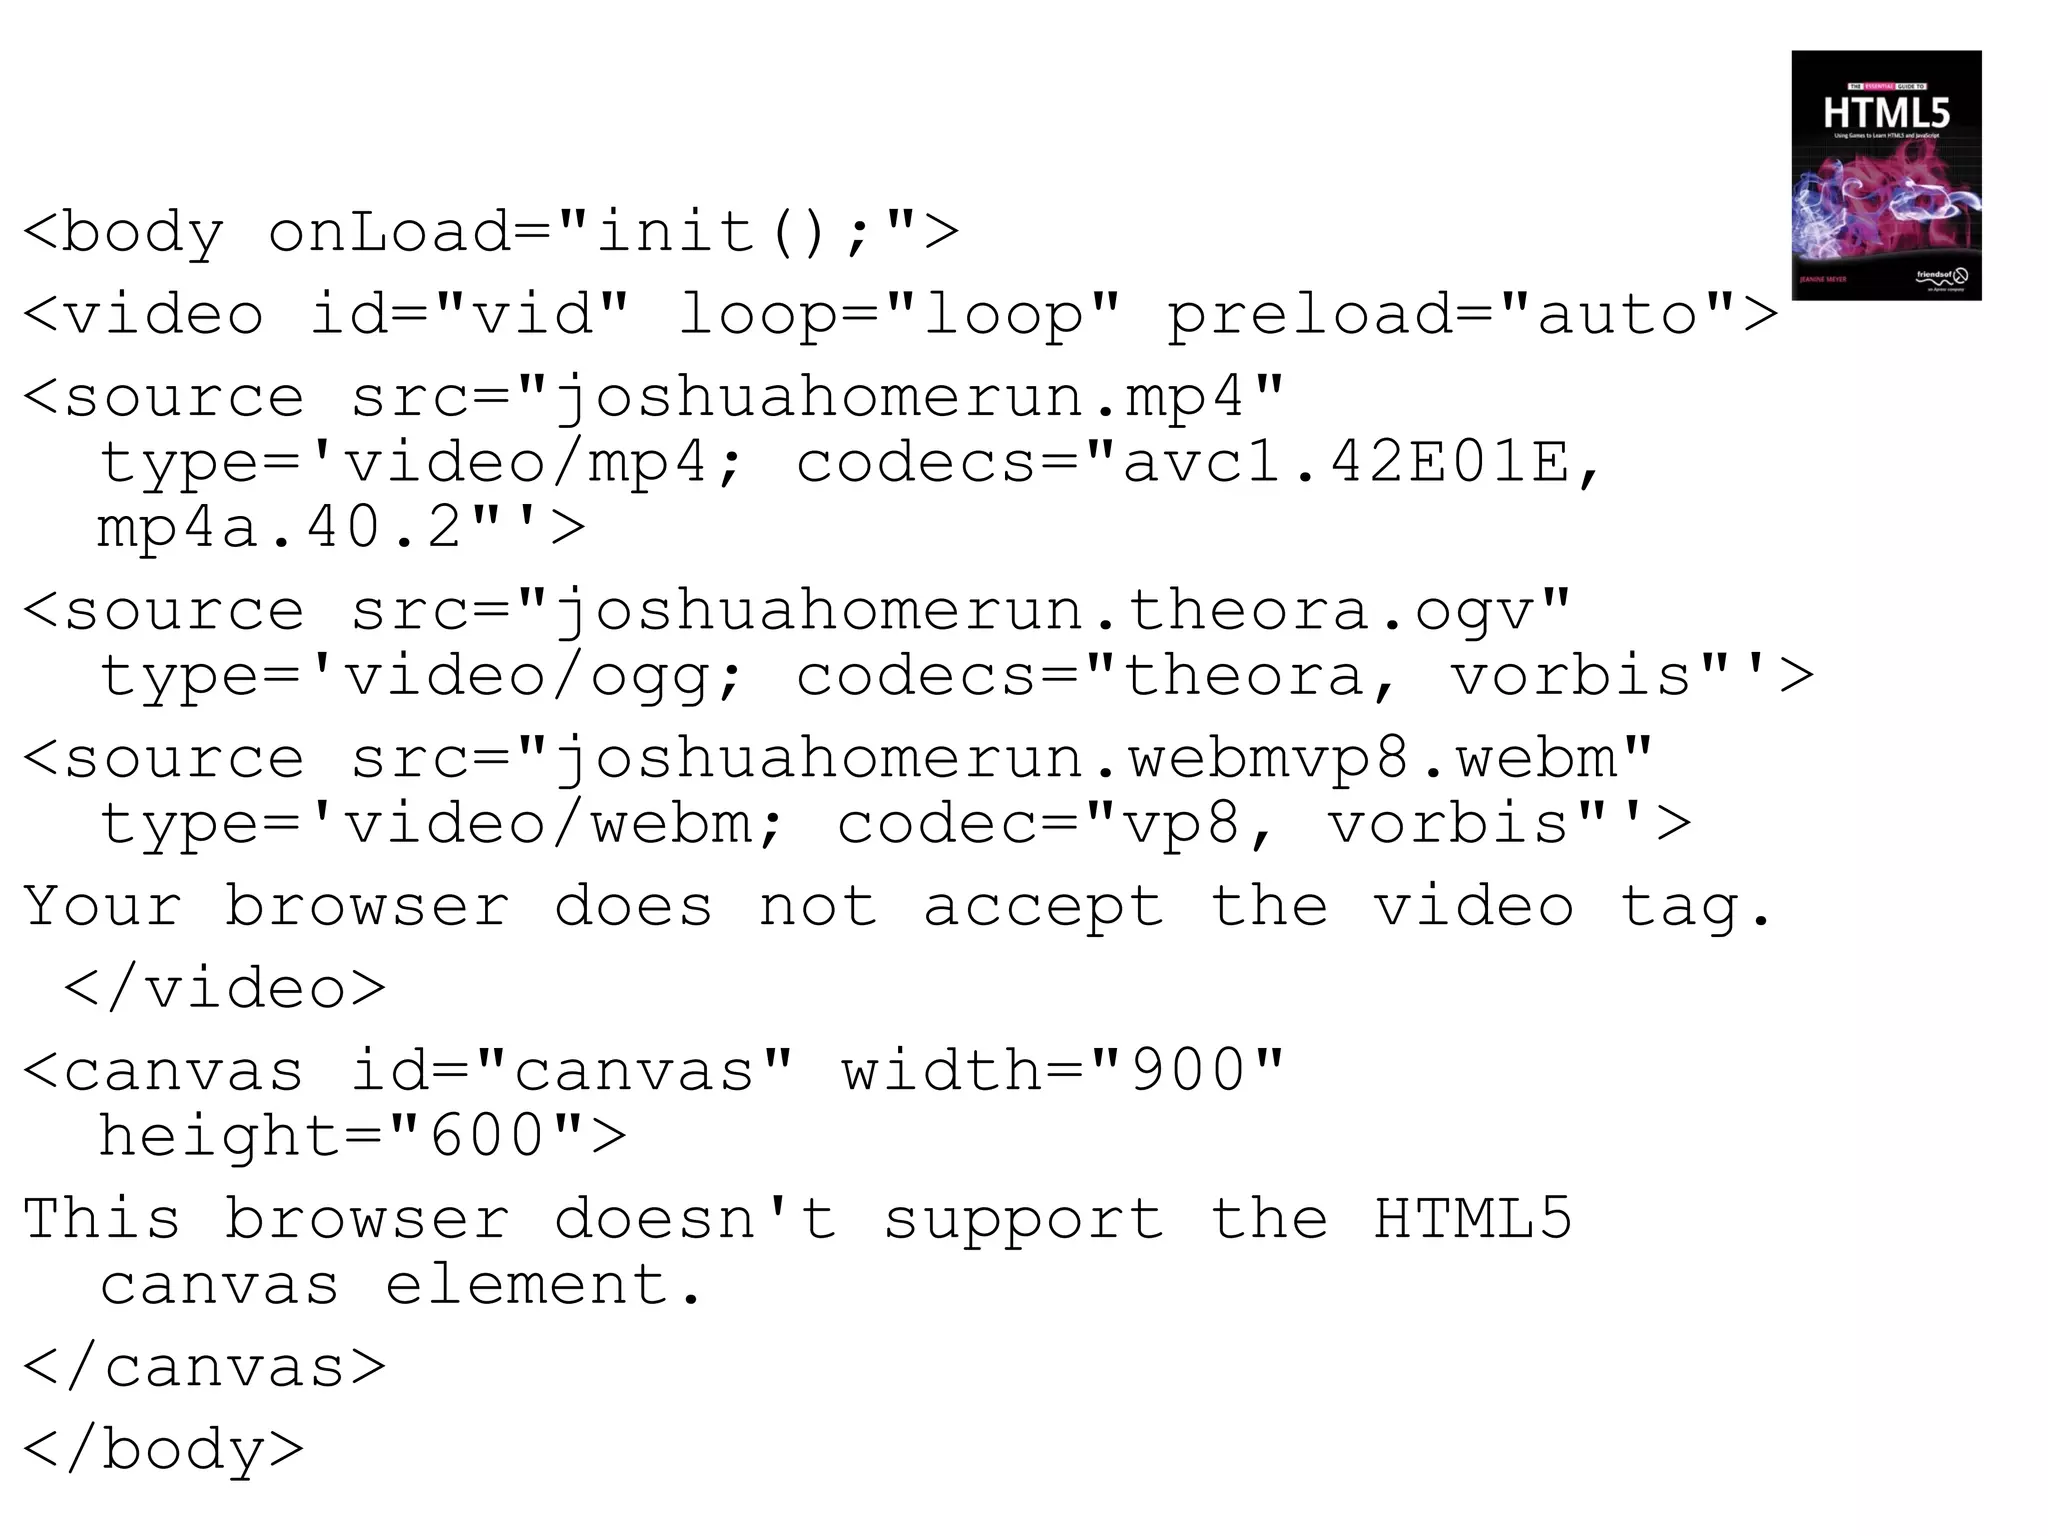
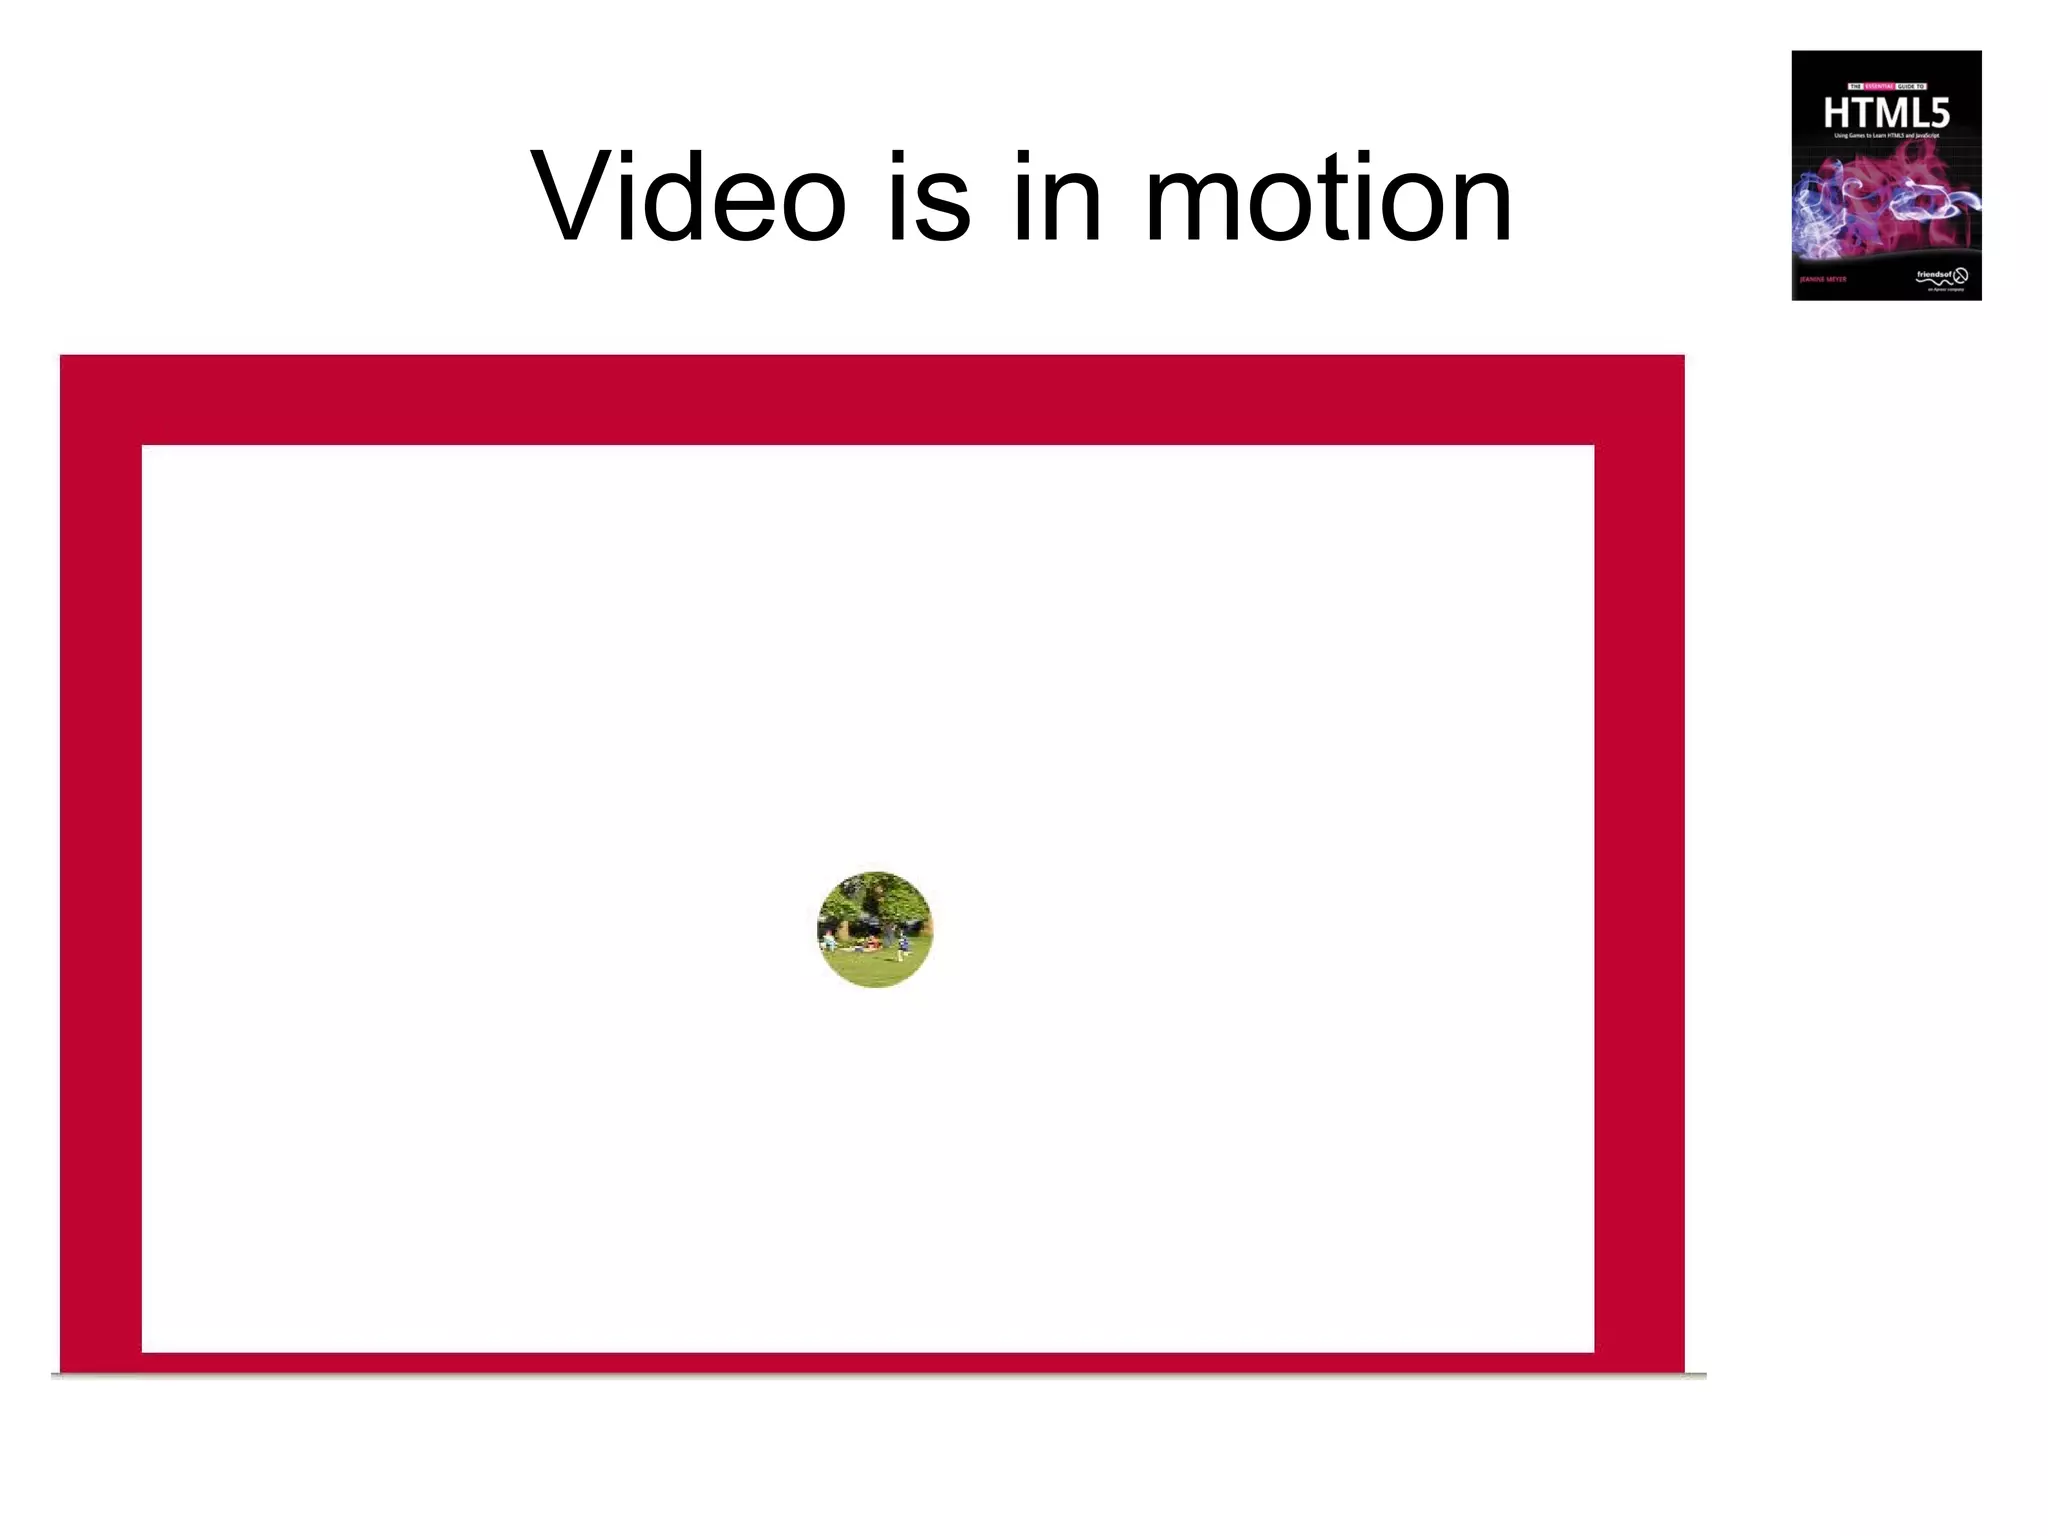
4. Adding video clips and manipulating video on the canvas, such as drawing and masking video.
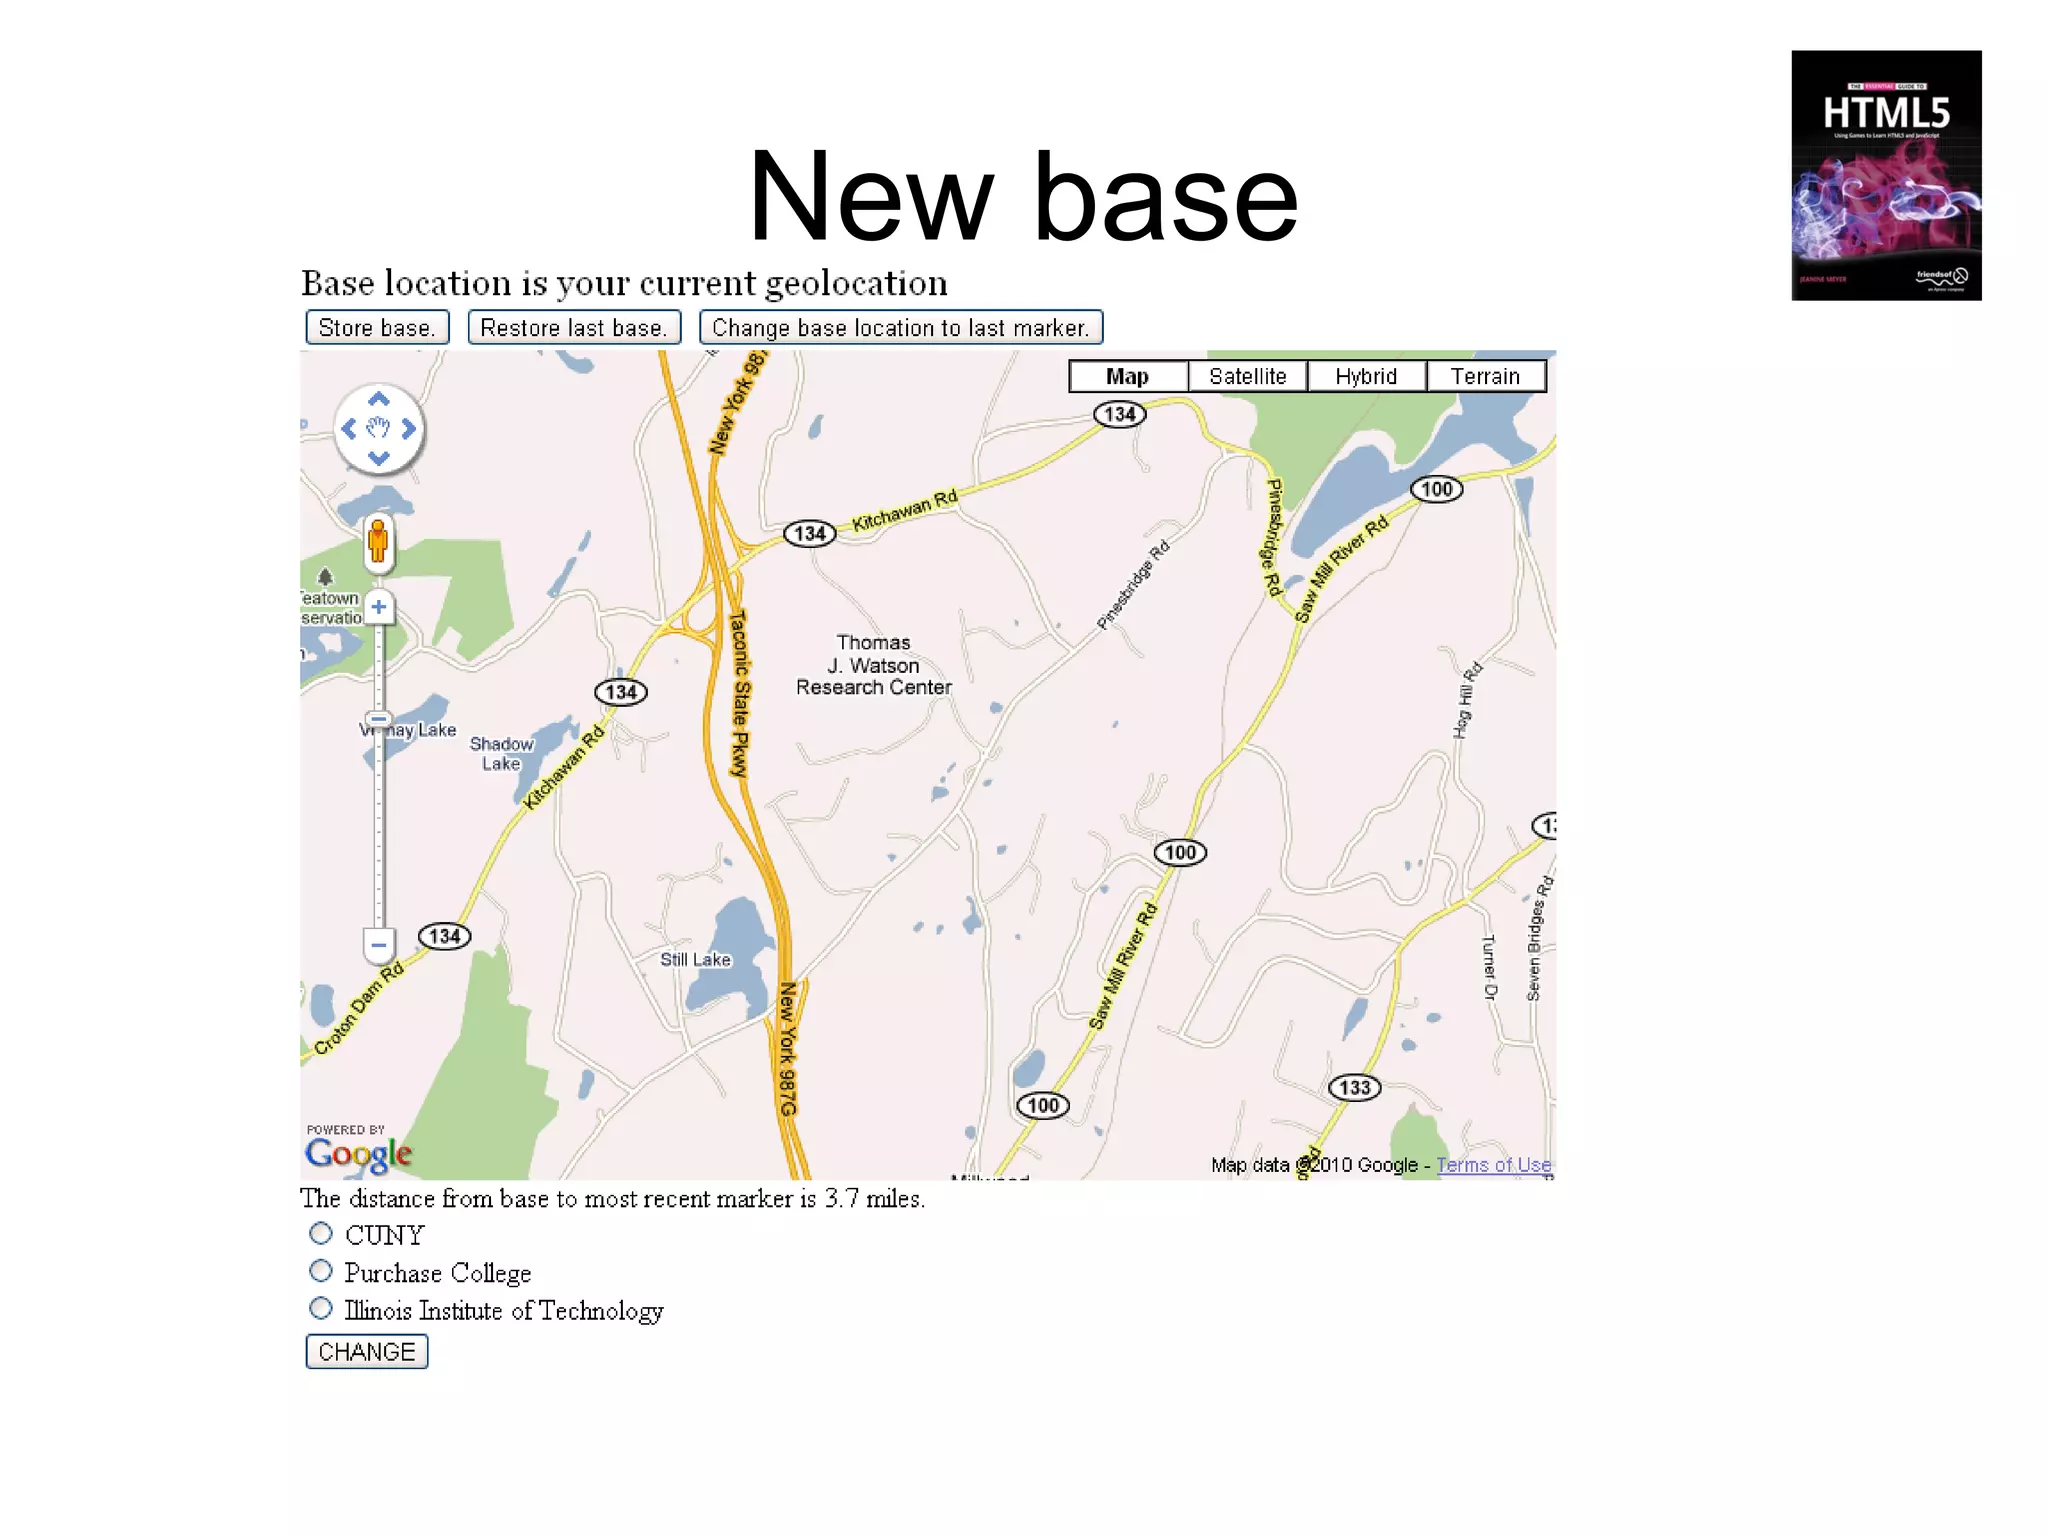
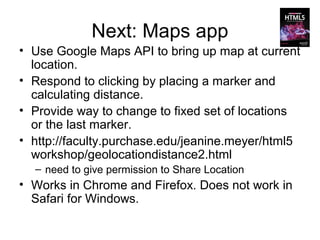
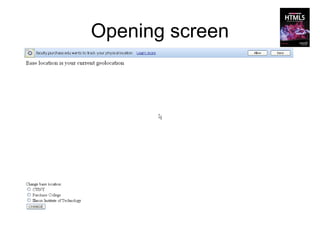
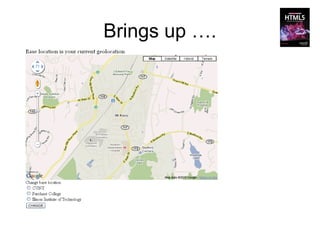
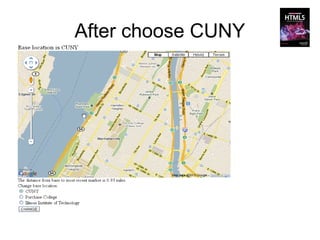
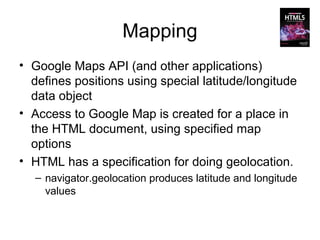
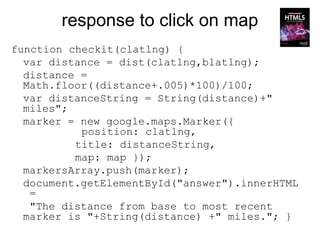
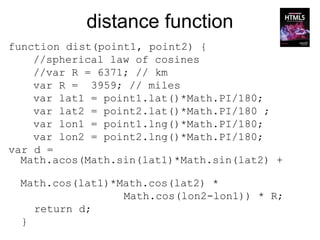
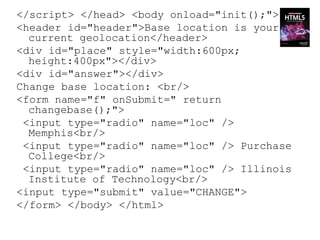
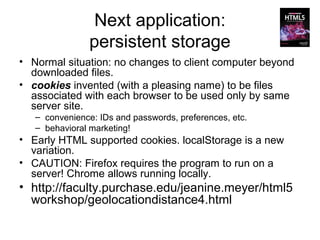
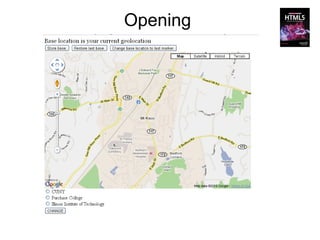
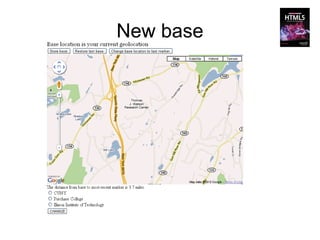
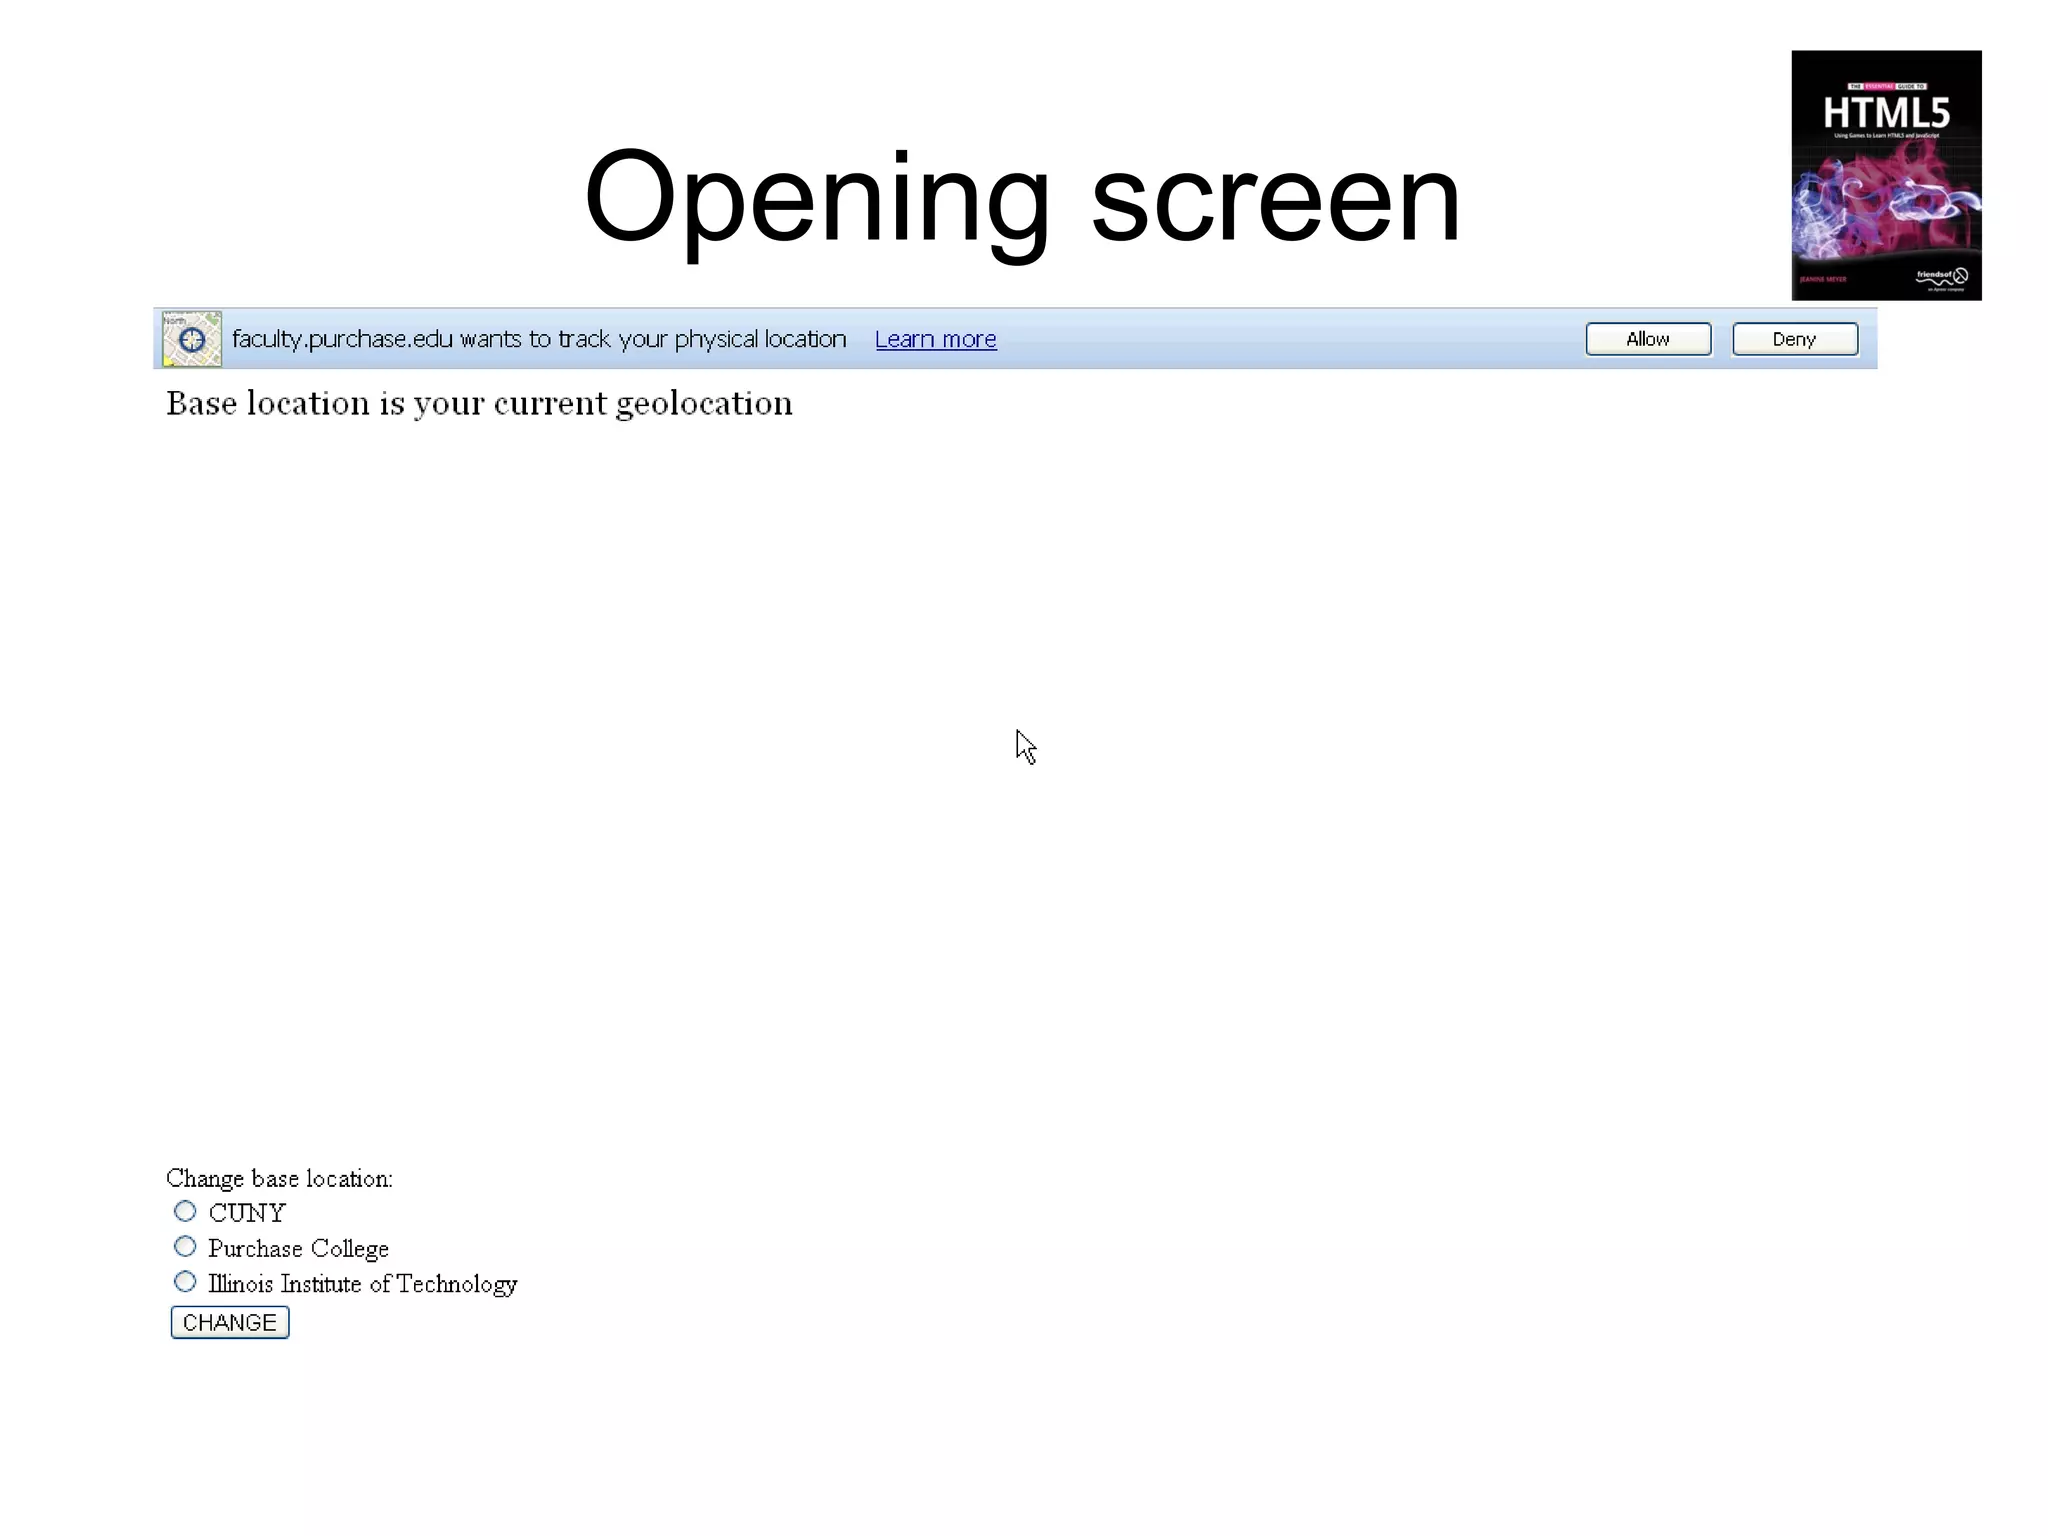
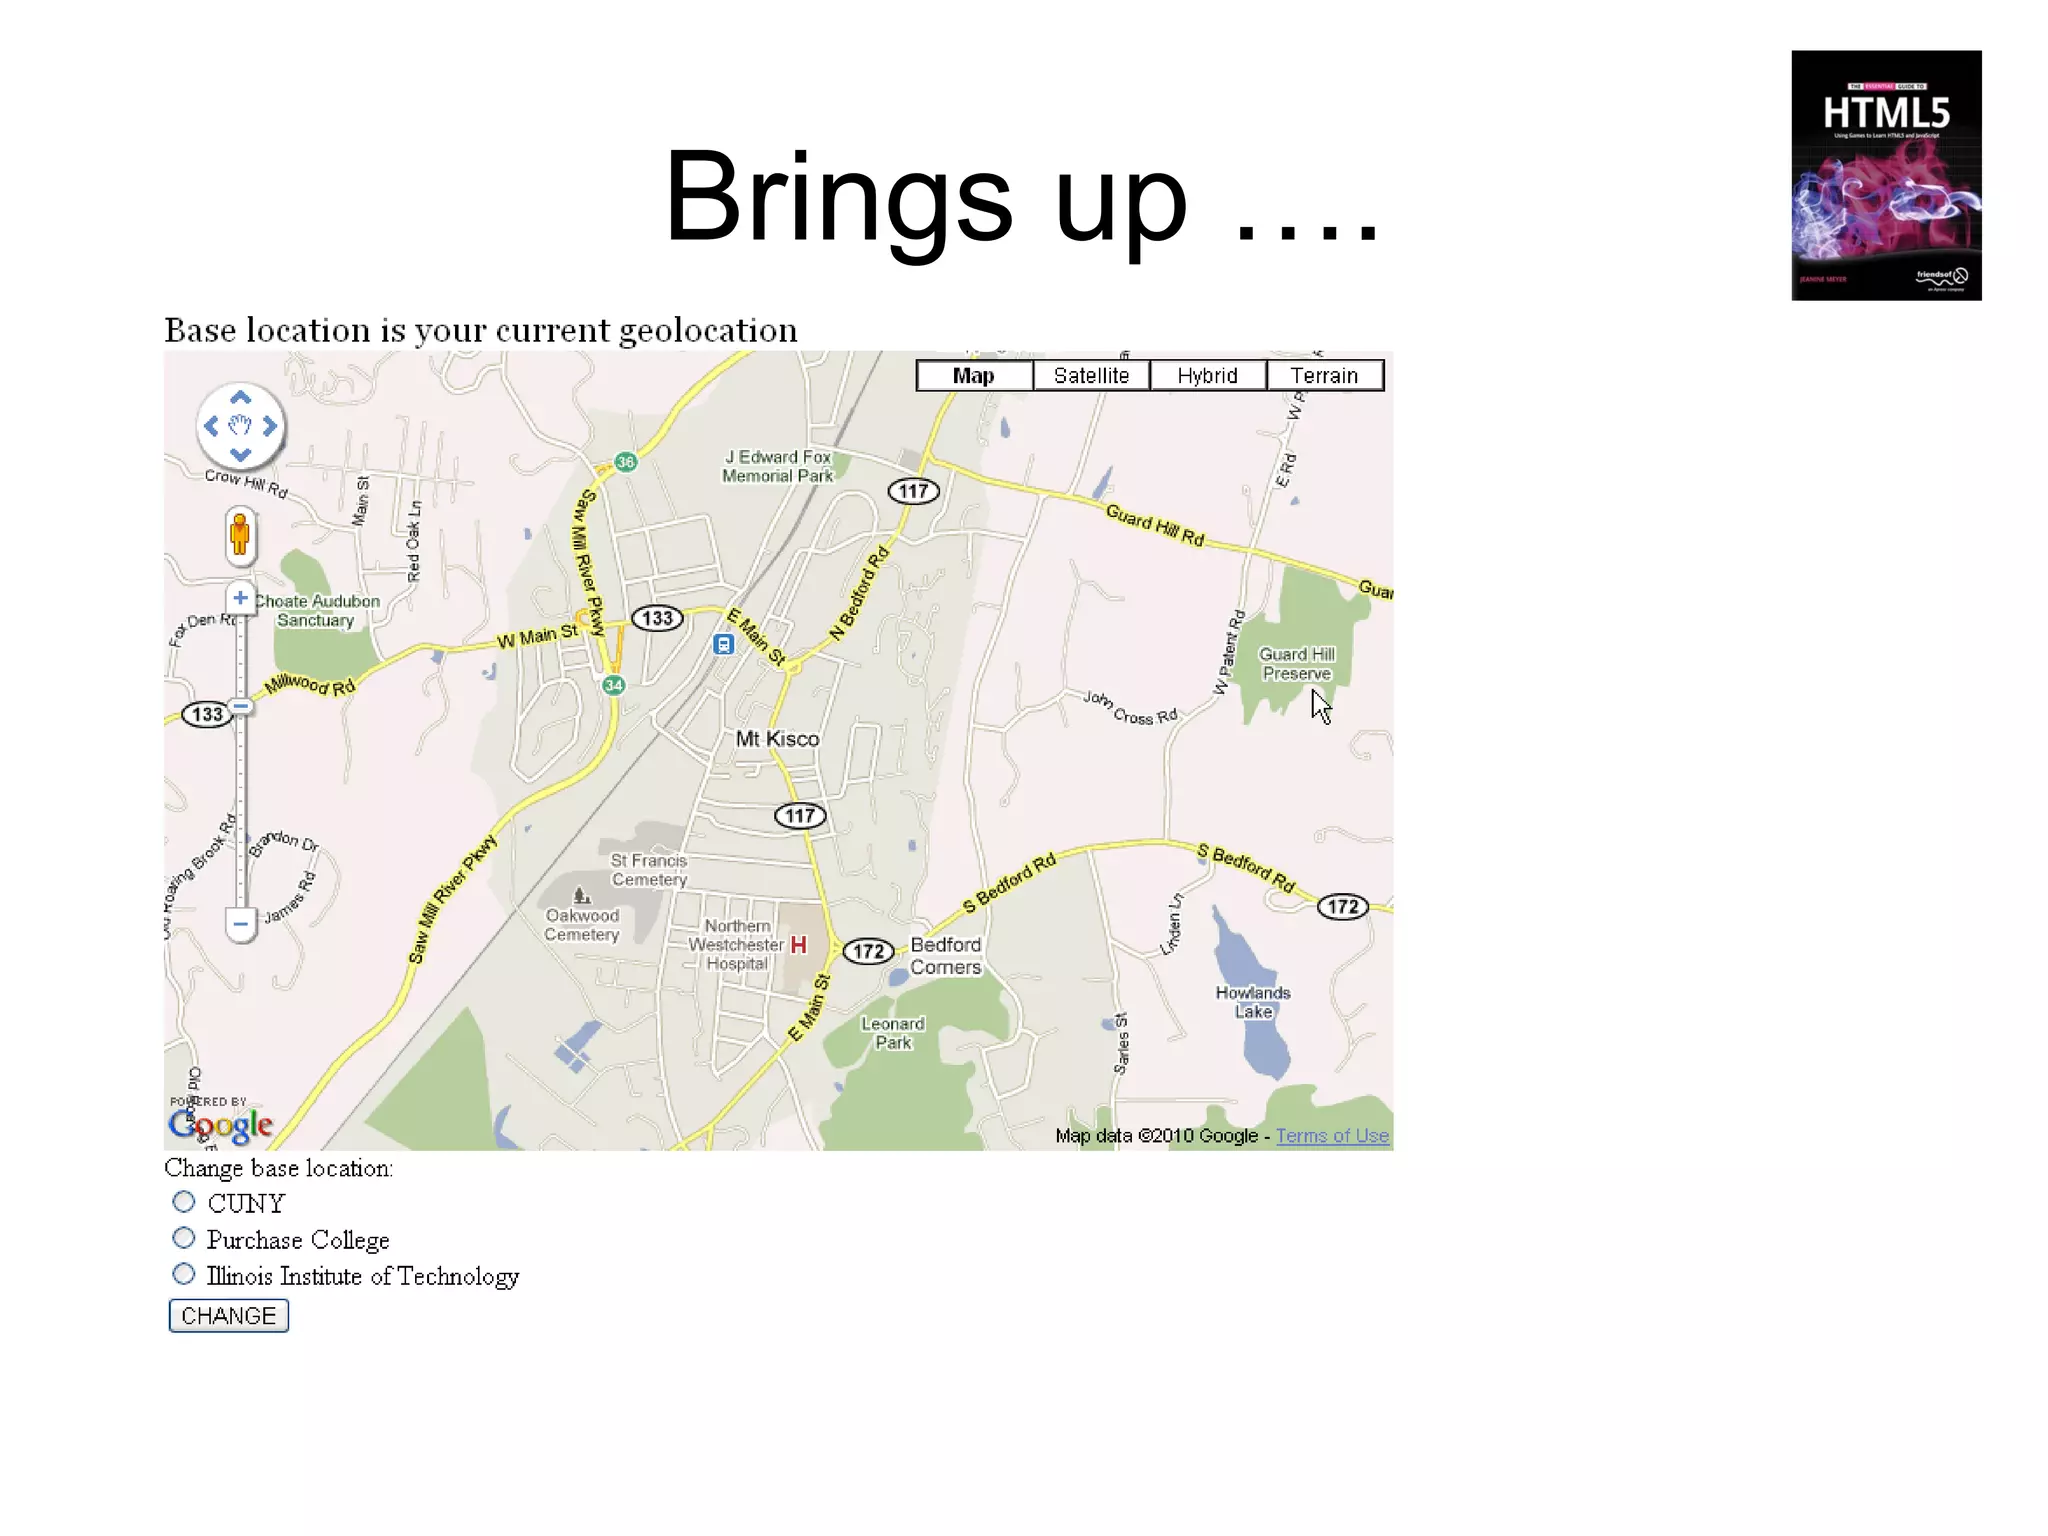
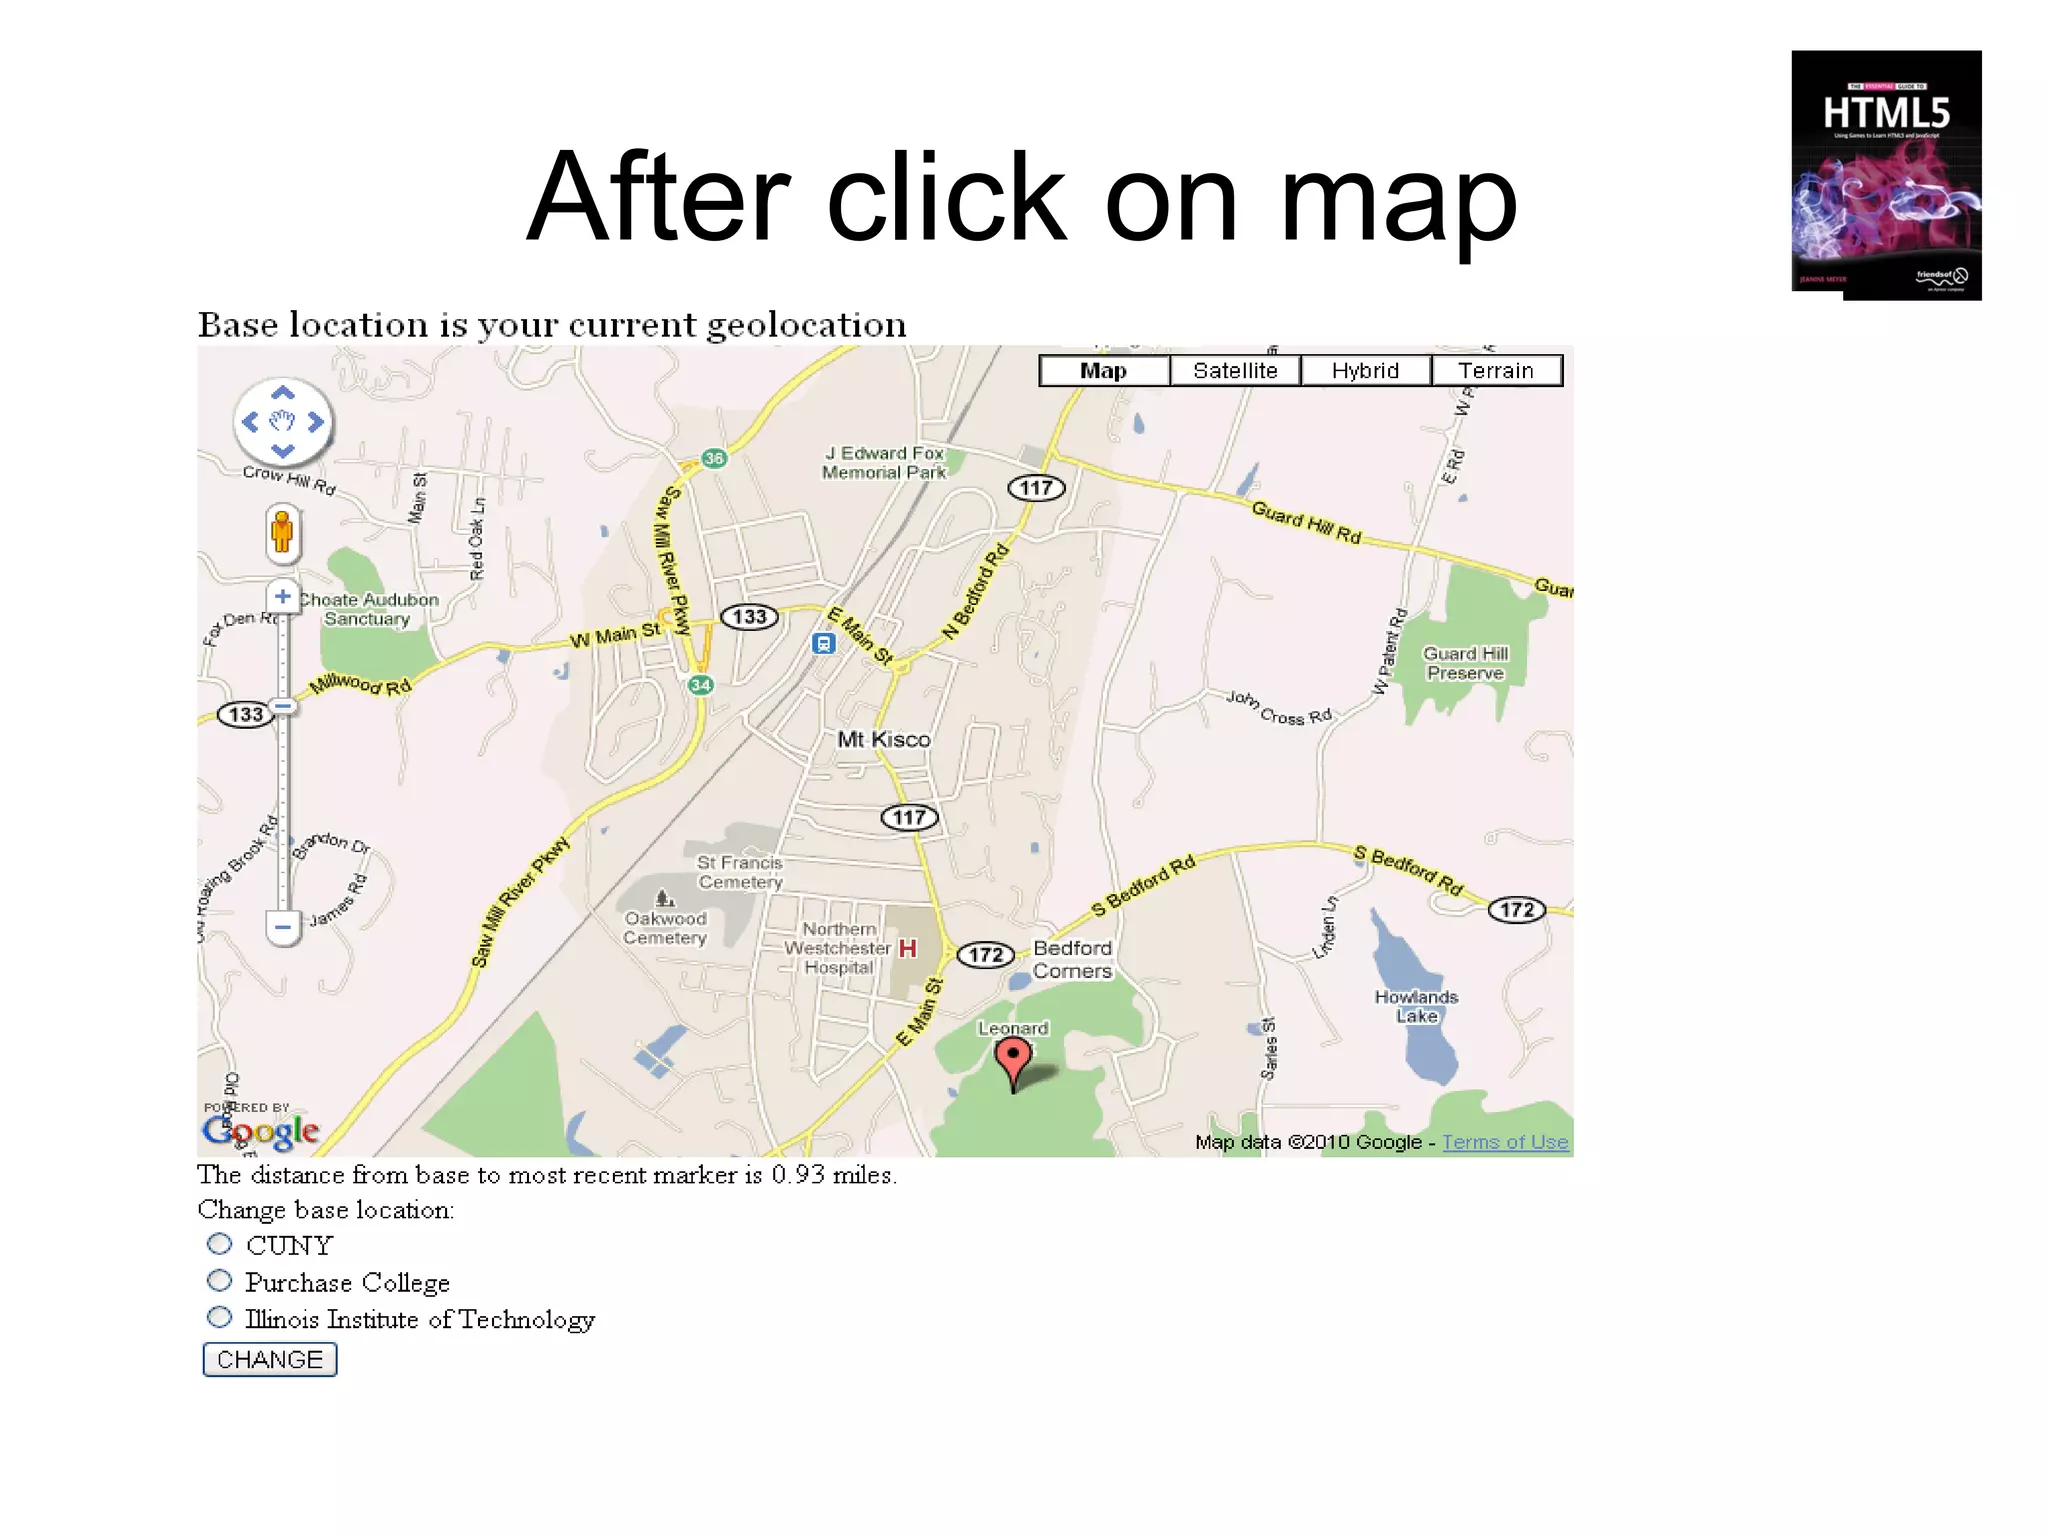
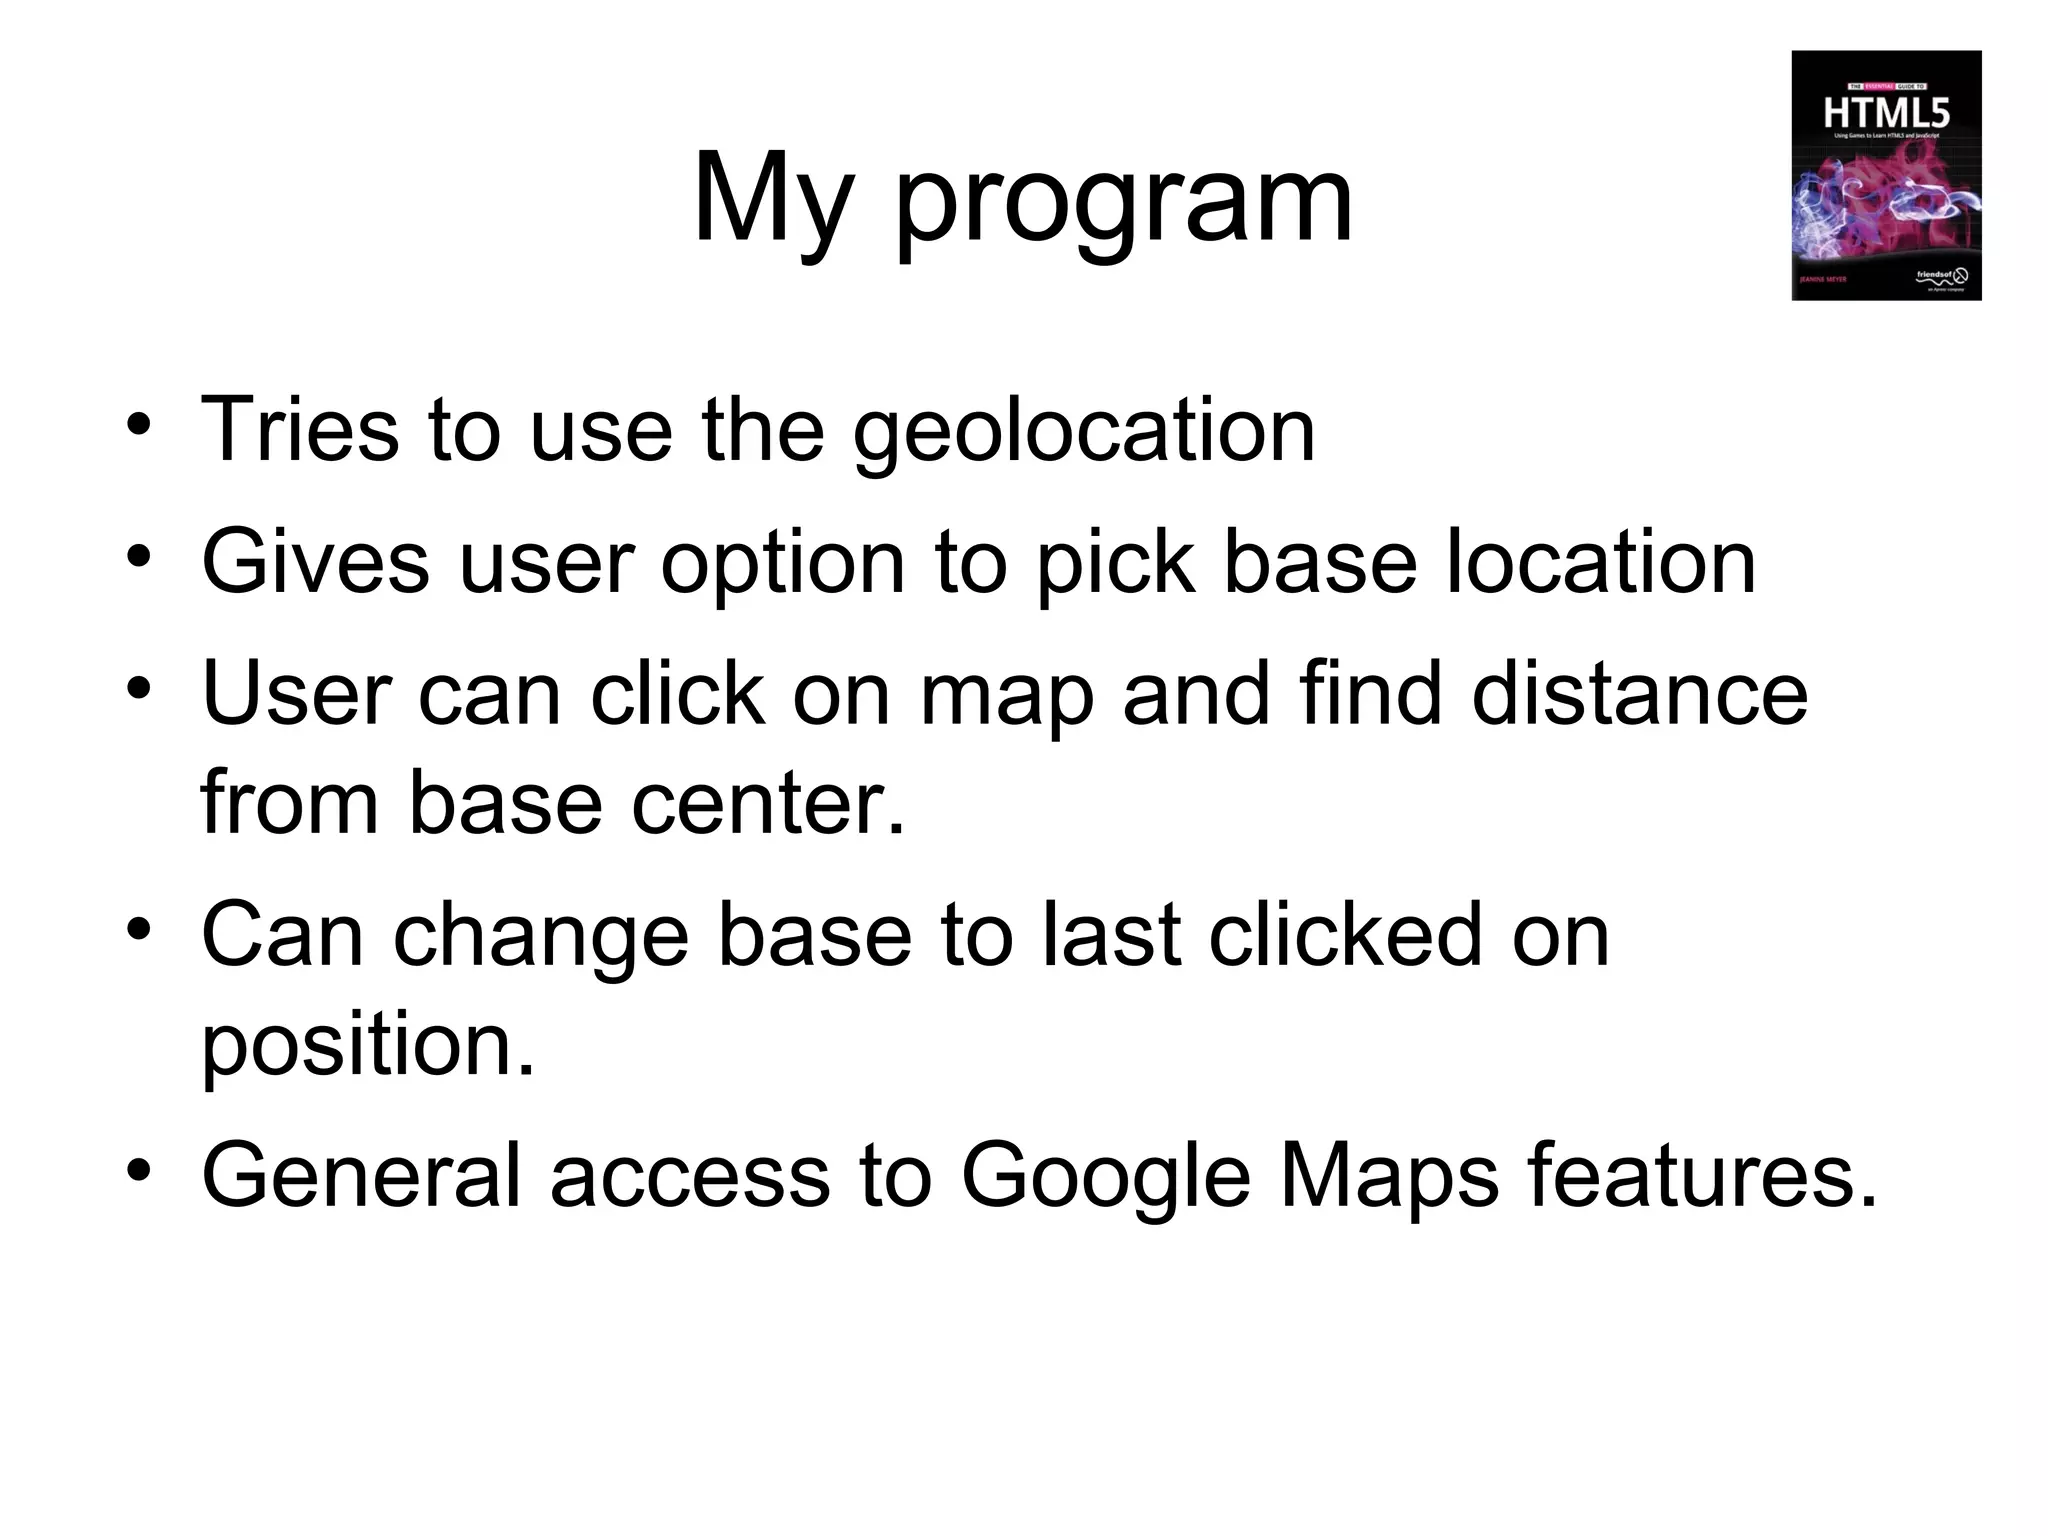
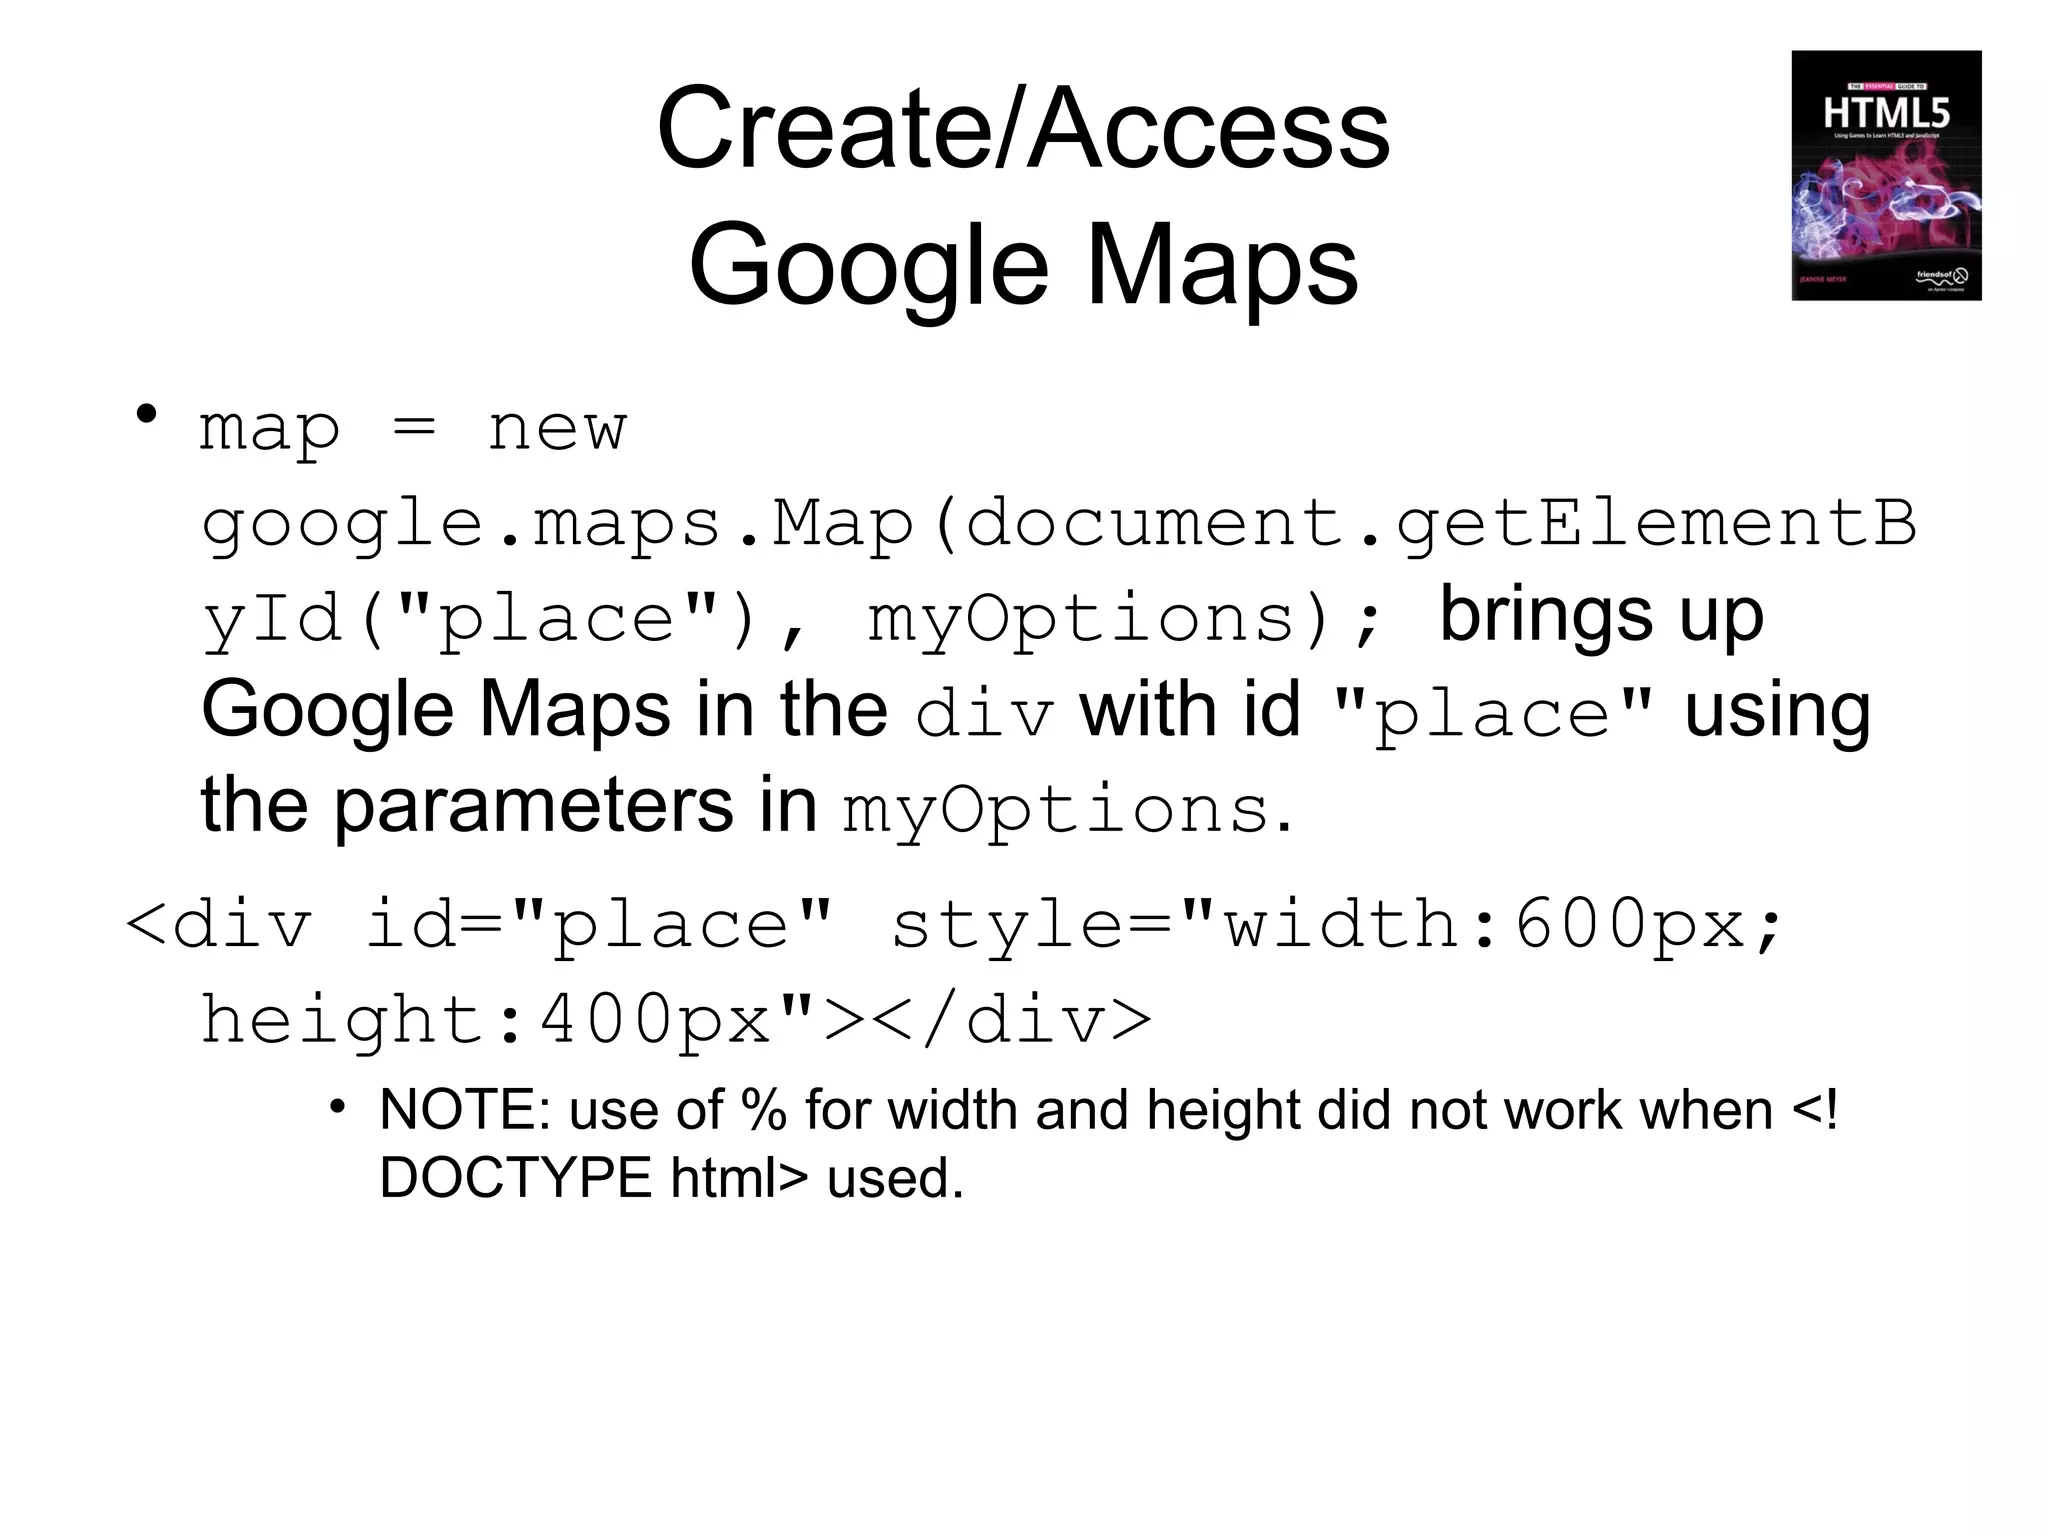
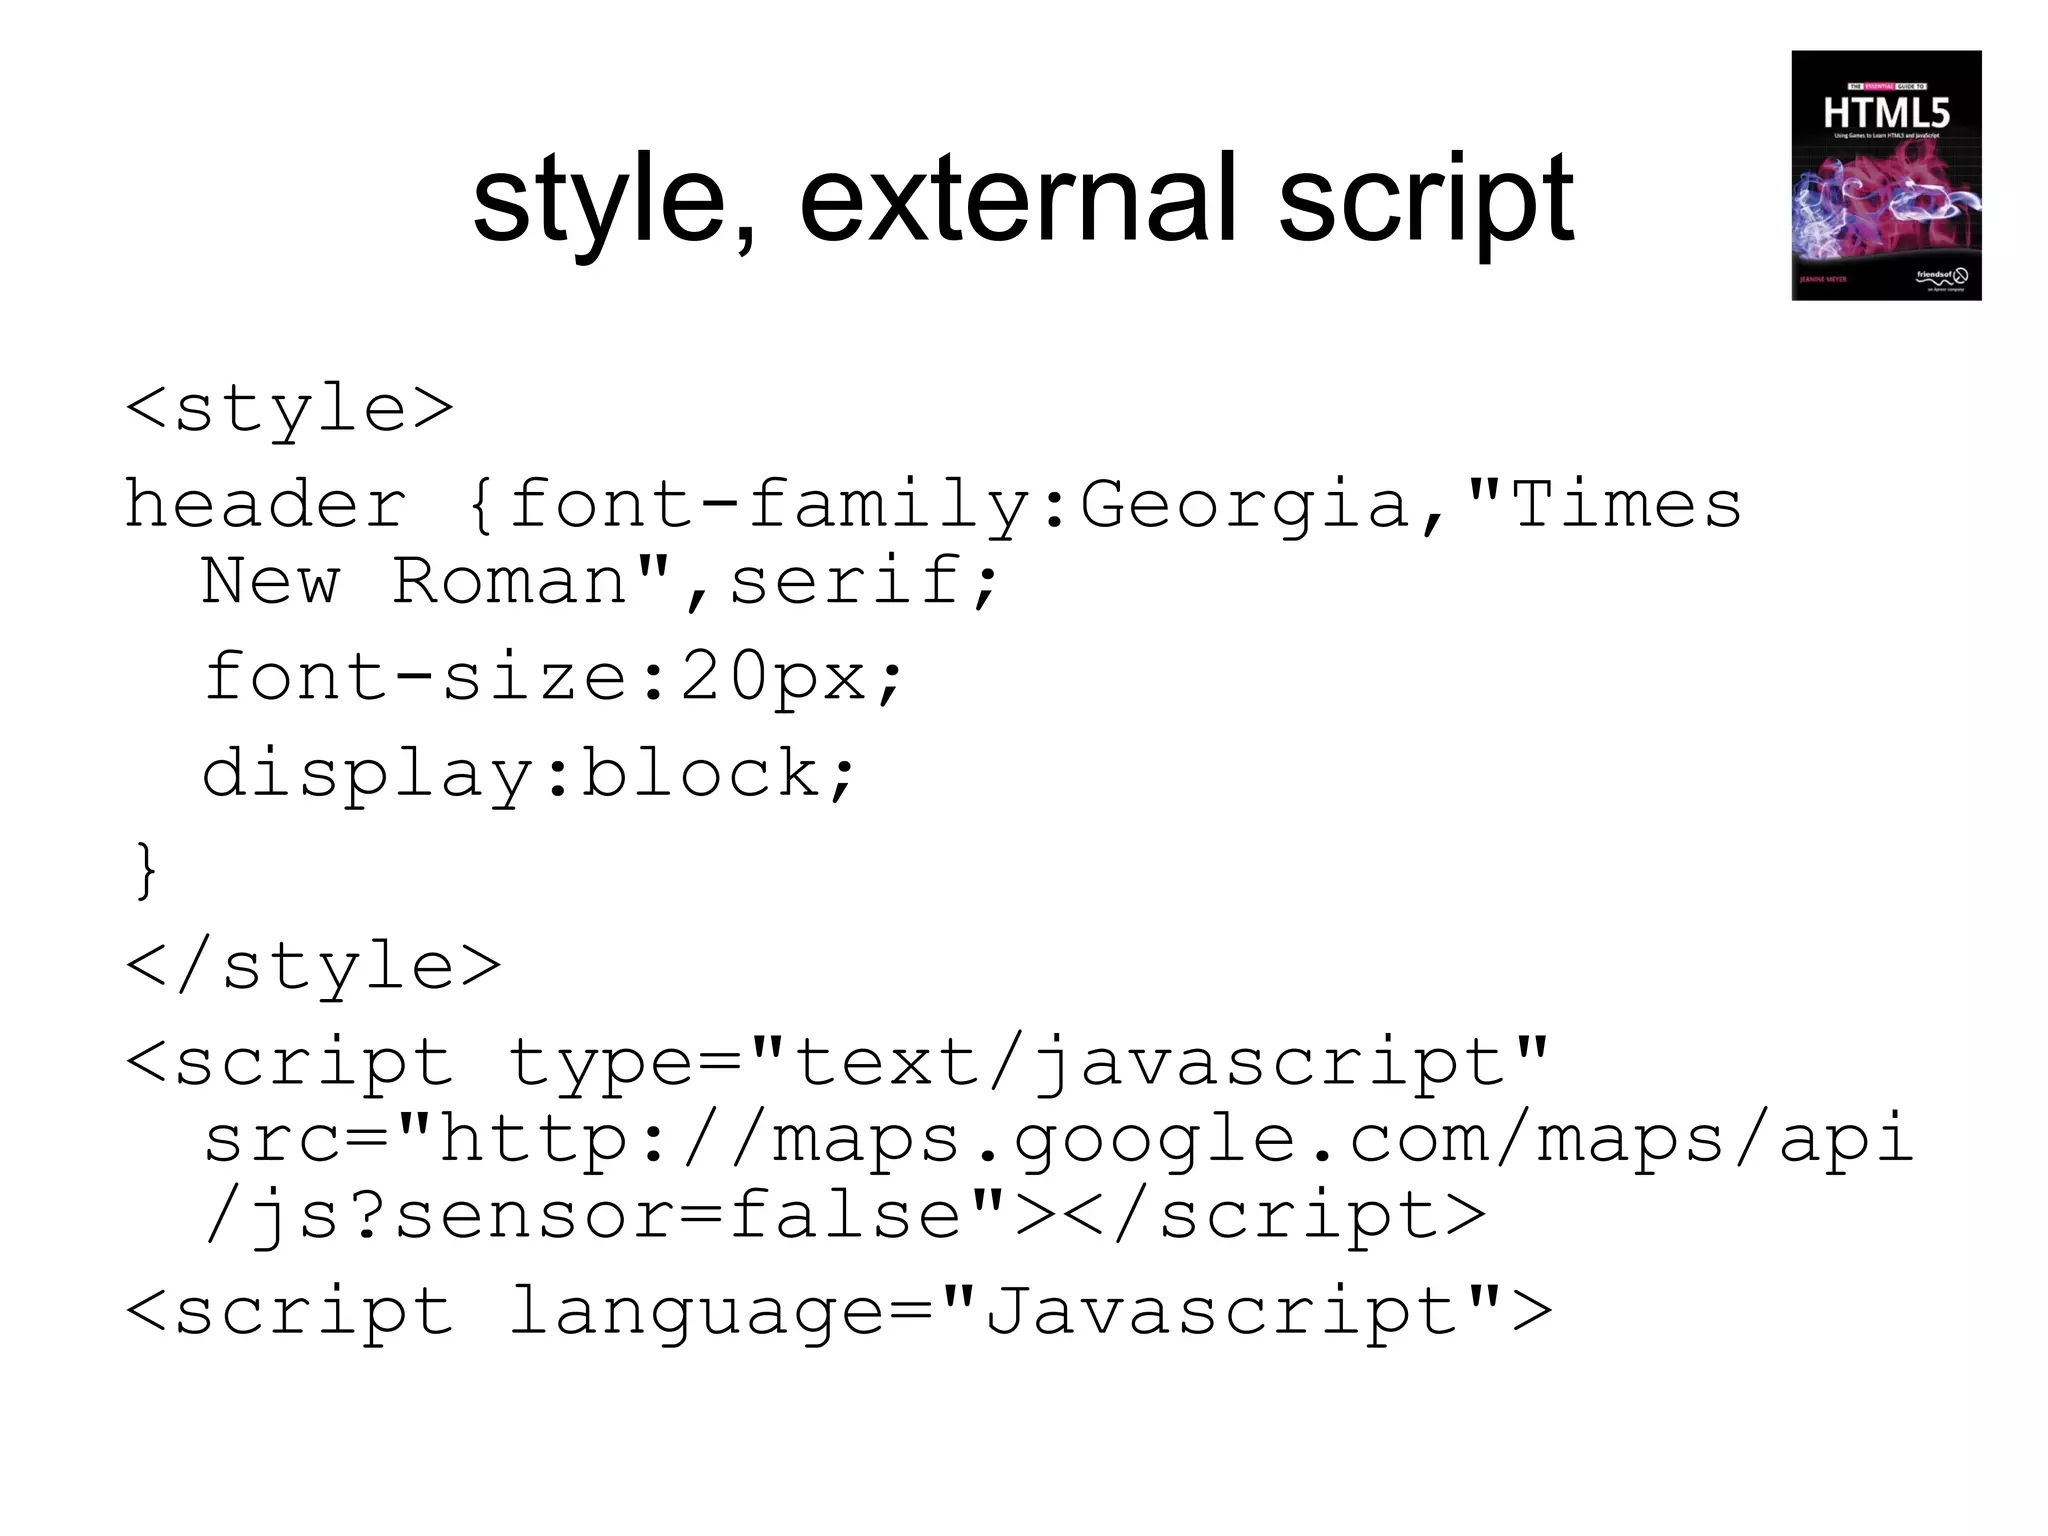
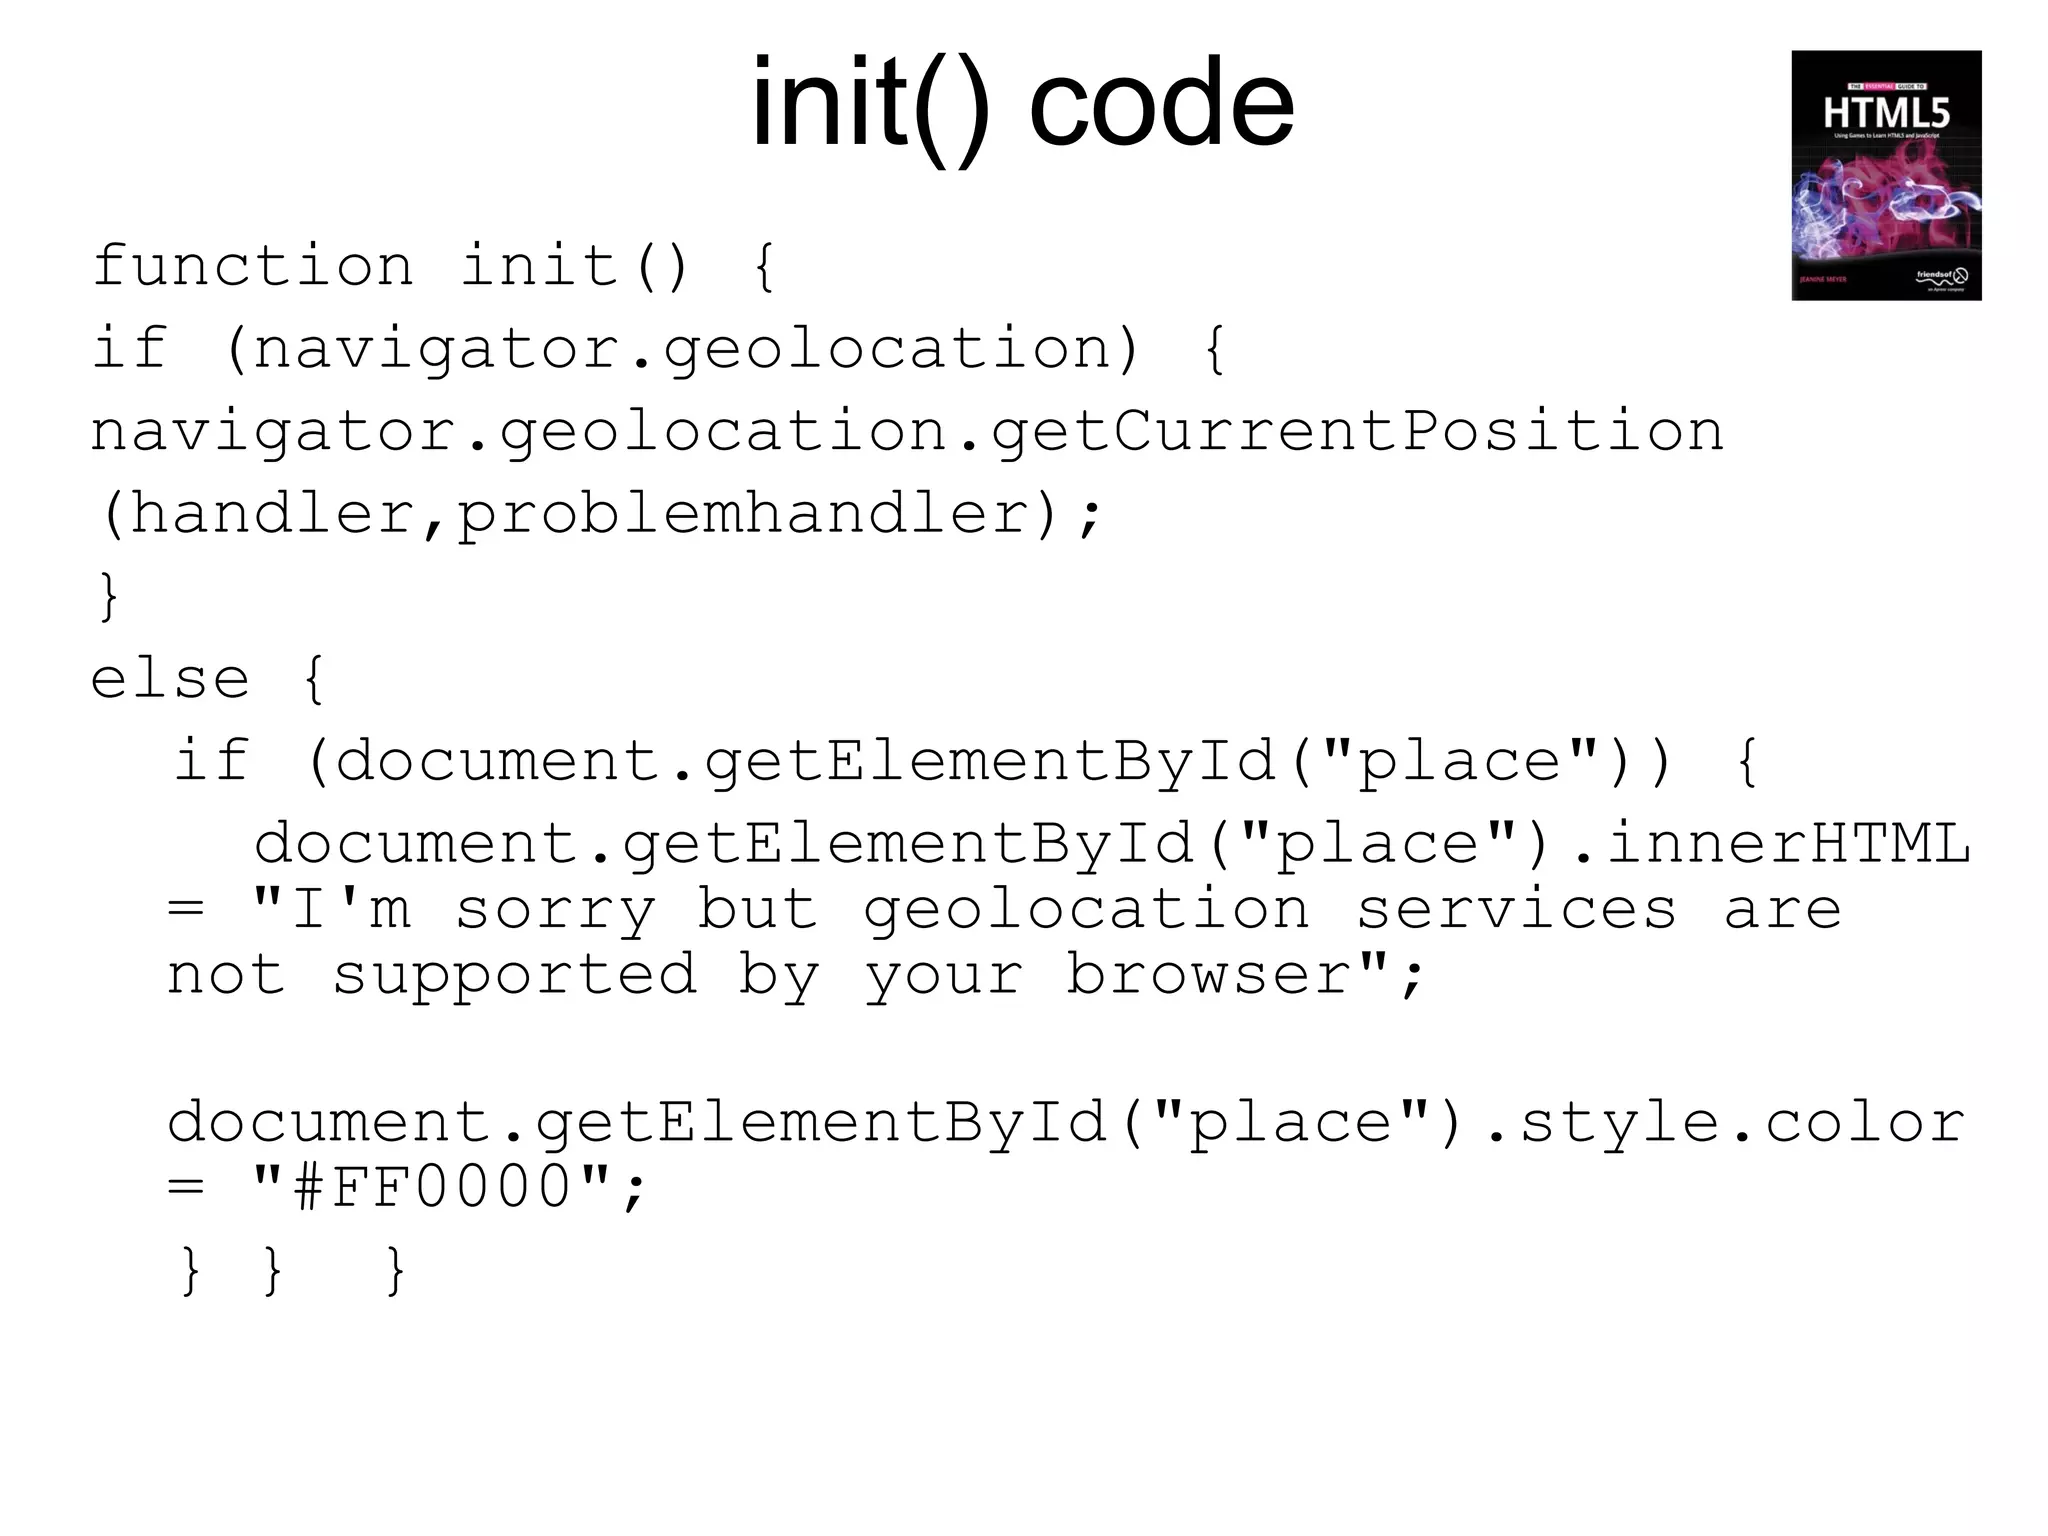
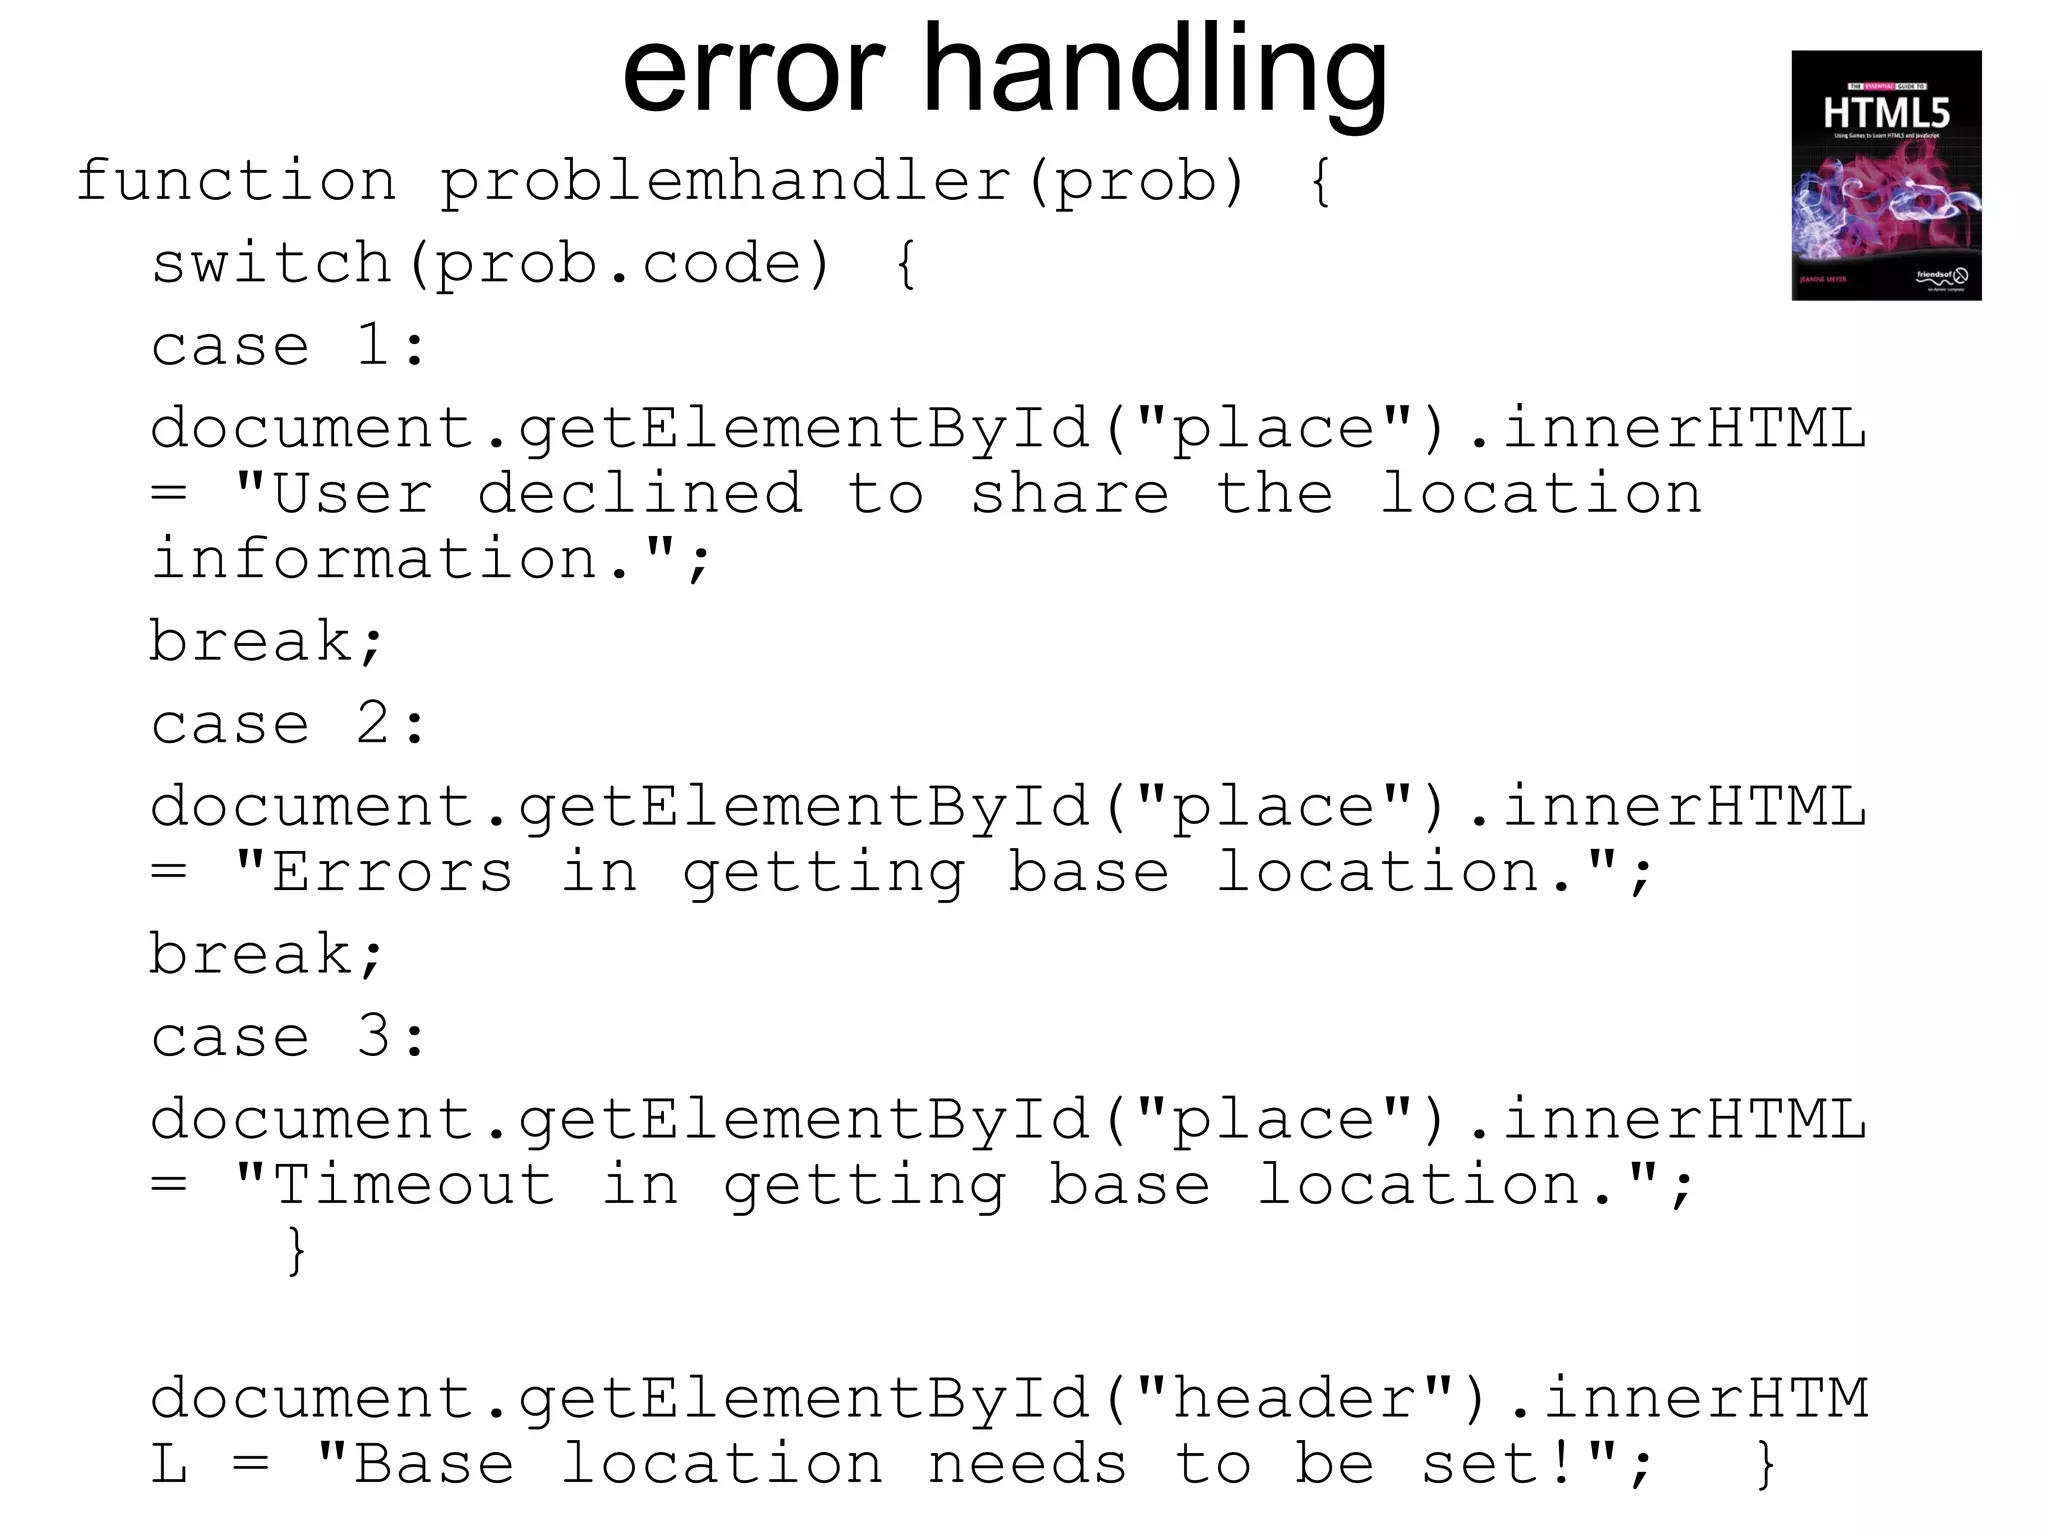
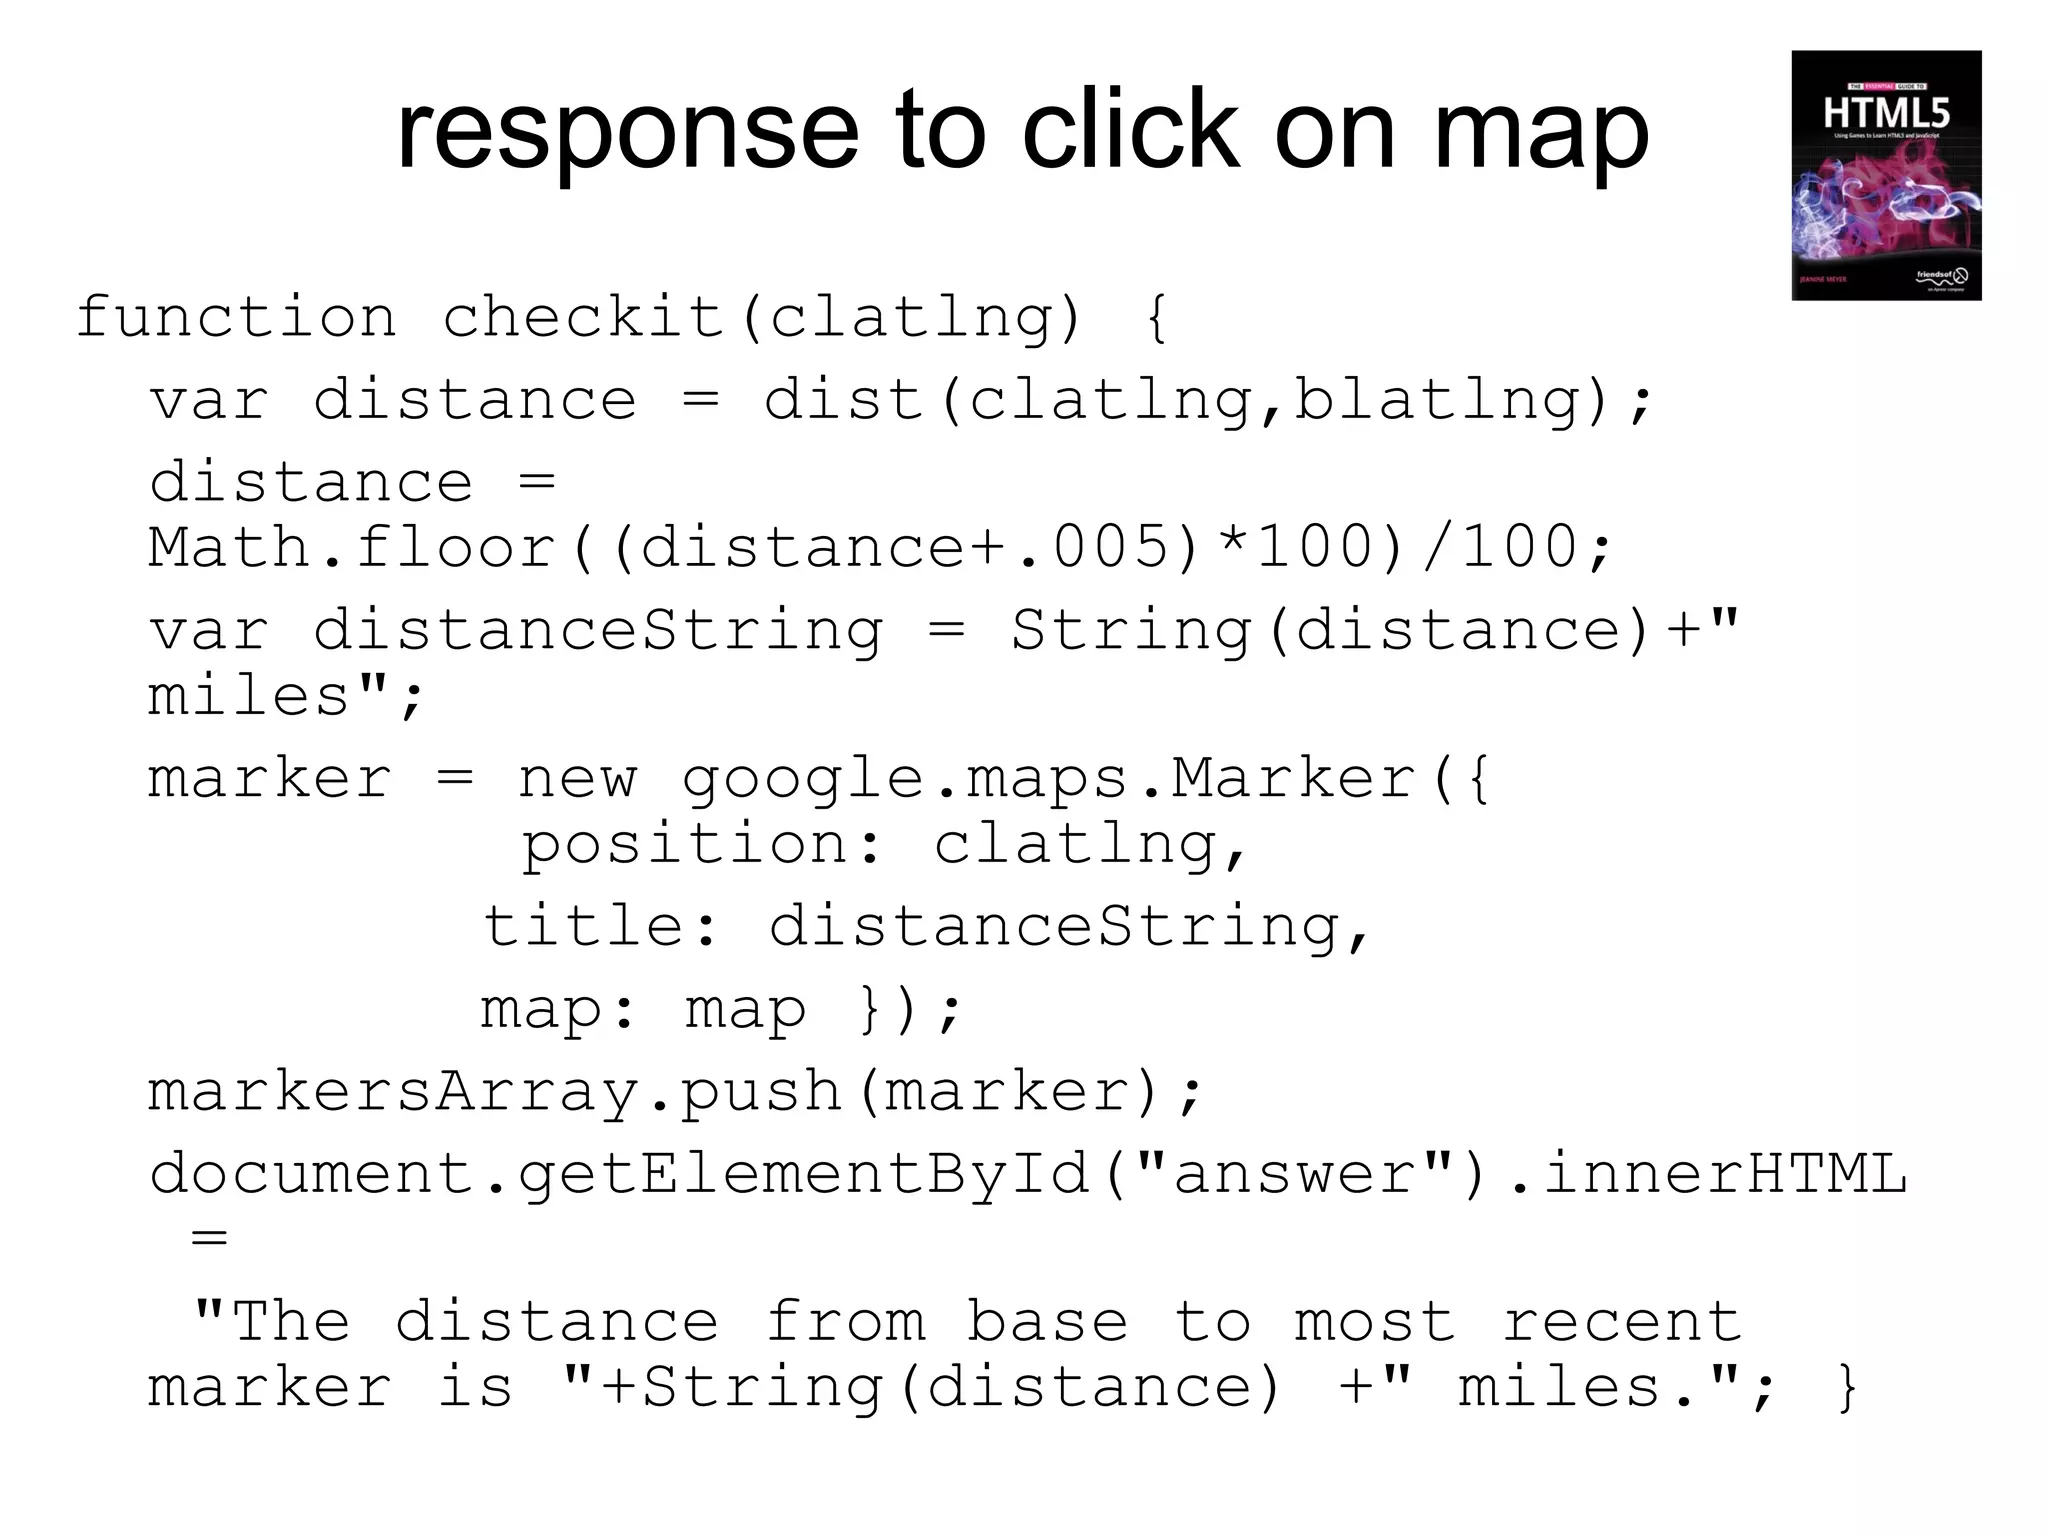
5. Constructing a geolocation application using the Google Maps API.
The document discusses new HTML5 features, provides an overview of the tools and browsers that will be used, and gives advice for


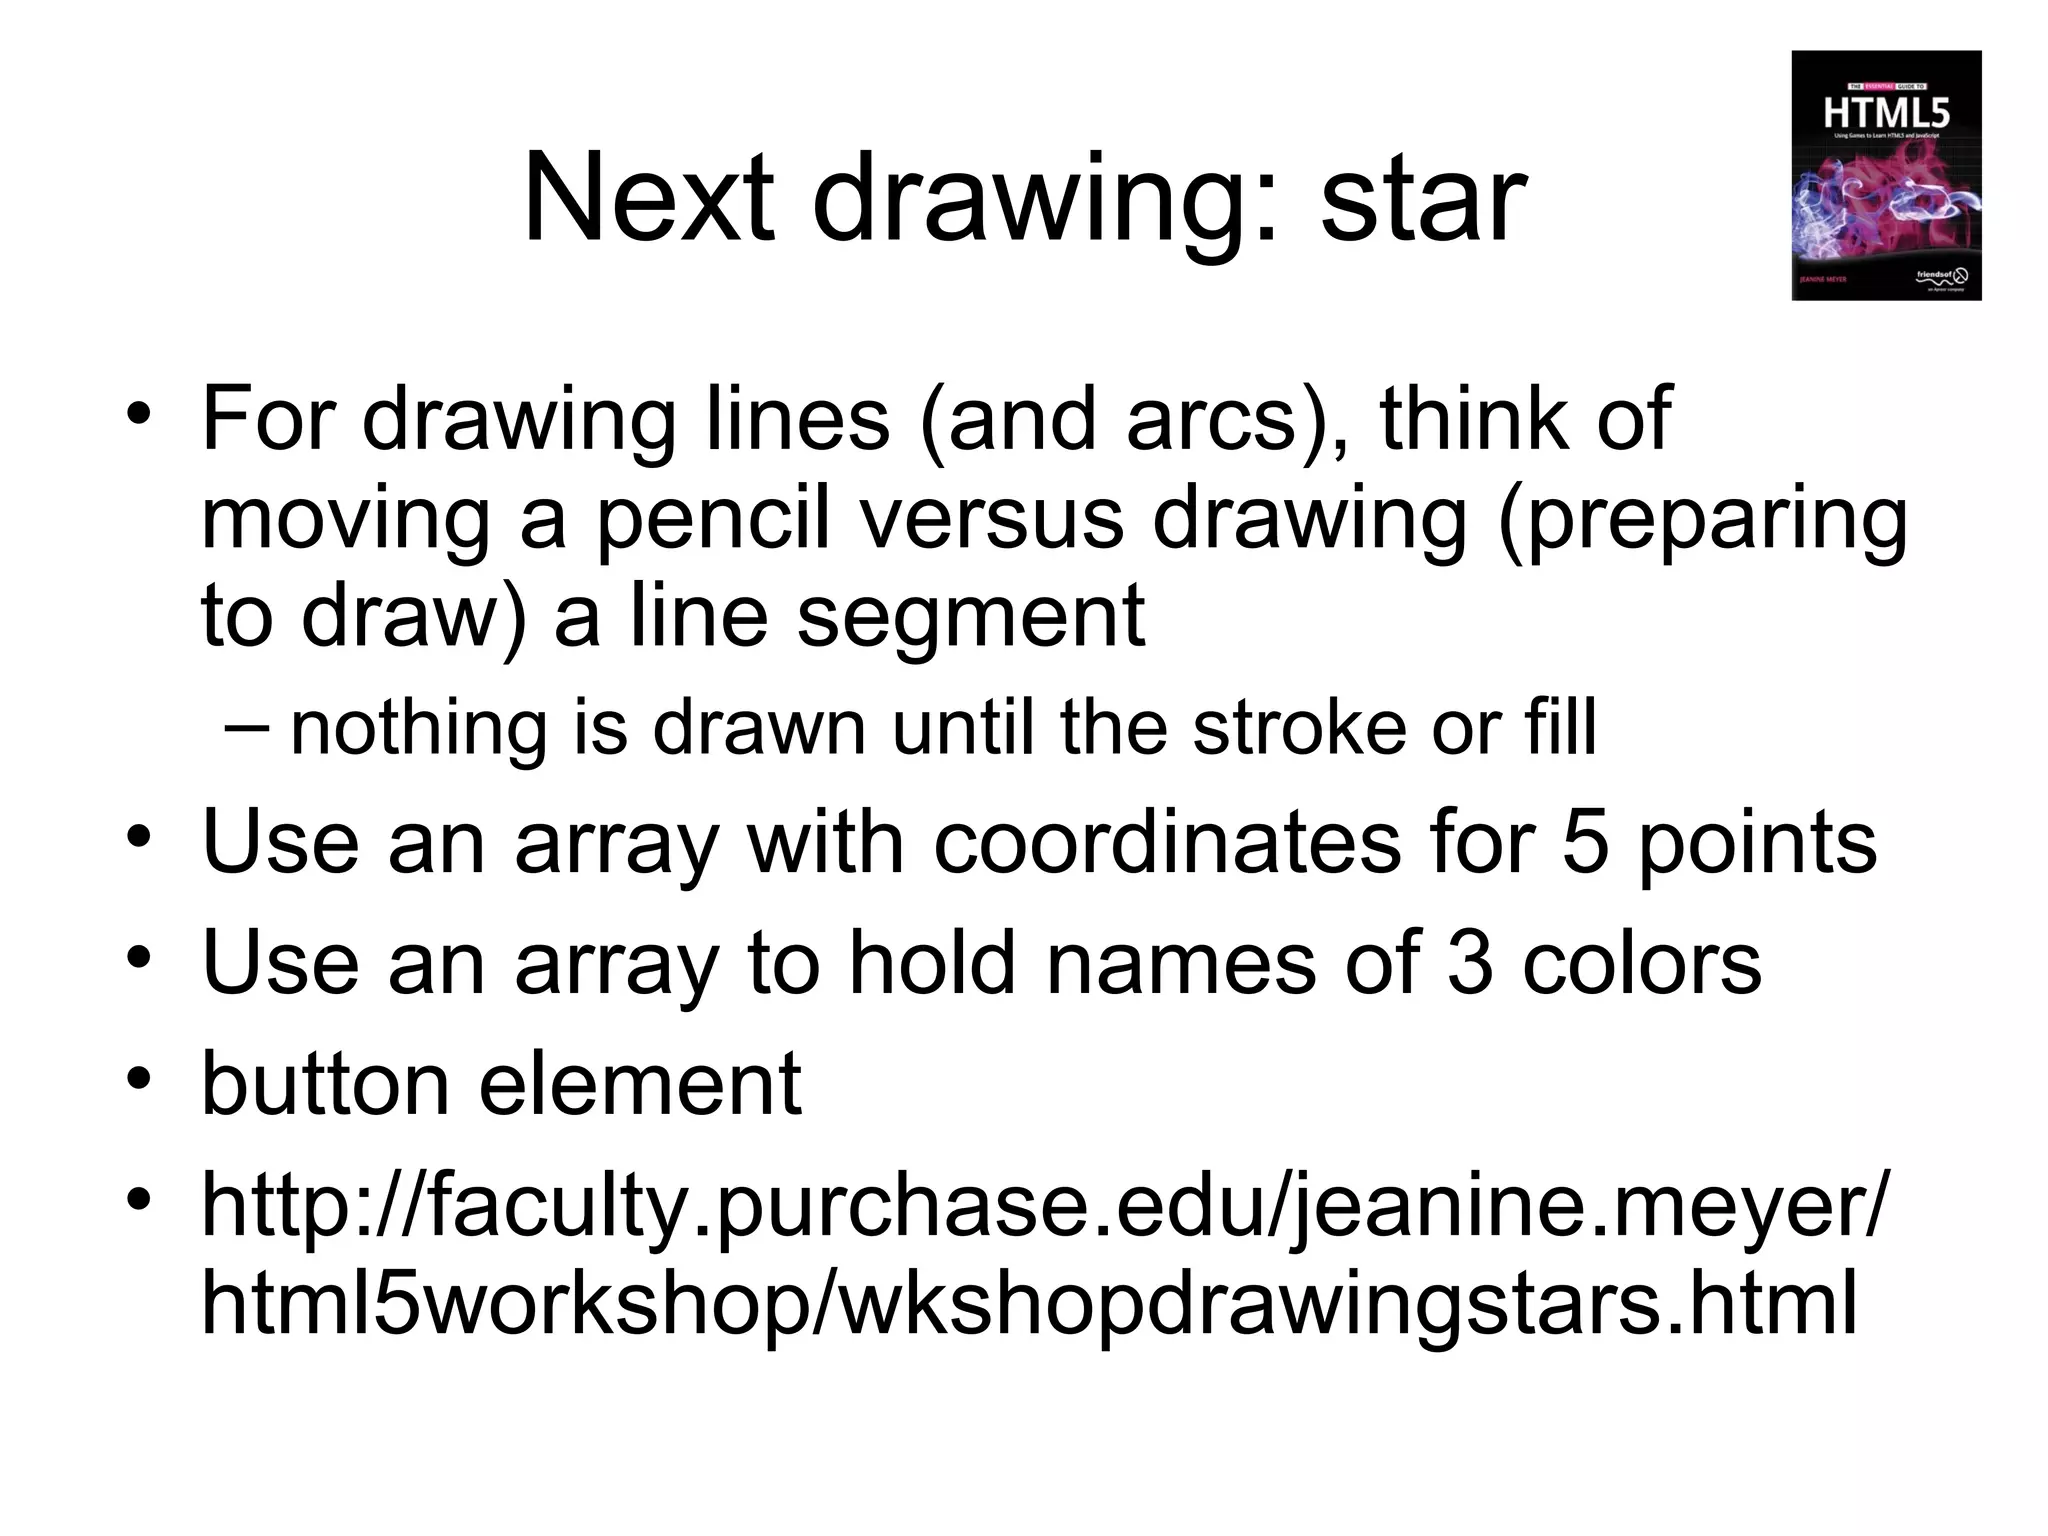
![variables
(in script element)
var ctx;
var pts=[
//5 points for star: rough drawing
[100,35],
[60,10],
[20,35],
[35,100],
[85,100]
];
var colors=["red","white","blue"];
//used in succession
var c=0; // points to next color](https://image.slidesharecdn.com/html5workshop-130116061307-phpapp01/85/Html5workshop-38-320.jpg)
![variables
(in script element)
var ctx;
var pts=[ //5 points for star: rough drawing
[100,35],
[60,10],
[20,35],
[35,100],
[85,100]
];
var colors=["red","white","blue"];
//used in succession
var c=0; // points to next color](https://image.slidesharecdn.com/html5workshop-130116061307-phpapp01/85/Html5workshop-39-320.jpg)
![variables
(in script element)
var ctx;
var pts=[ //5 points for star: rough drawing
[100,35],
[60,10],
[20,35],
[35,100],
[85,100]
];
var colors=["red","white","blue"];
//used in succession
var c=0; // points to next color](https://image.slidesharecdn.com/html5workshop-130116061307-phpapp01/85/Html5workshop-40-320.jpg)
![variables
(in script element)
var ctx;
var pts=[ //5 points for star: rough drawing
[100,35],
[60,10],
[20,35],
[35,100],
[85,100]
];
var colors=["red","white","blue"];
//used in succession
var c=0; // points to next color](https://image.slidesharecdn.com/html5workshop-130116061307-phpapp01/85/Html5workshop-41-320.jpg)
![variables
(in script element)
var ctx;
var pts=[ //5 points for star: rough
drawing
[100,35],
[60,10],
[20,35],
[35,100],
[85,100]
];
var colors=["red","white","blue"];
//used in succession
var c=0; // points to next color](https://image.slidesharecdn.com/html5workshop-130116061307-phpapp01/85/Html5workshop-42-320.jpg)
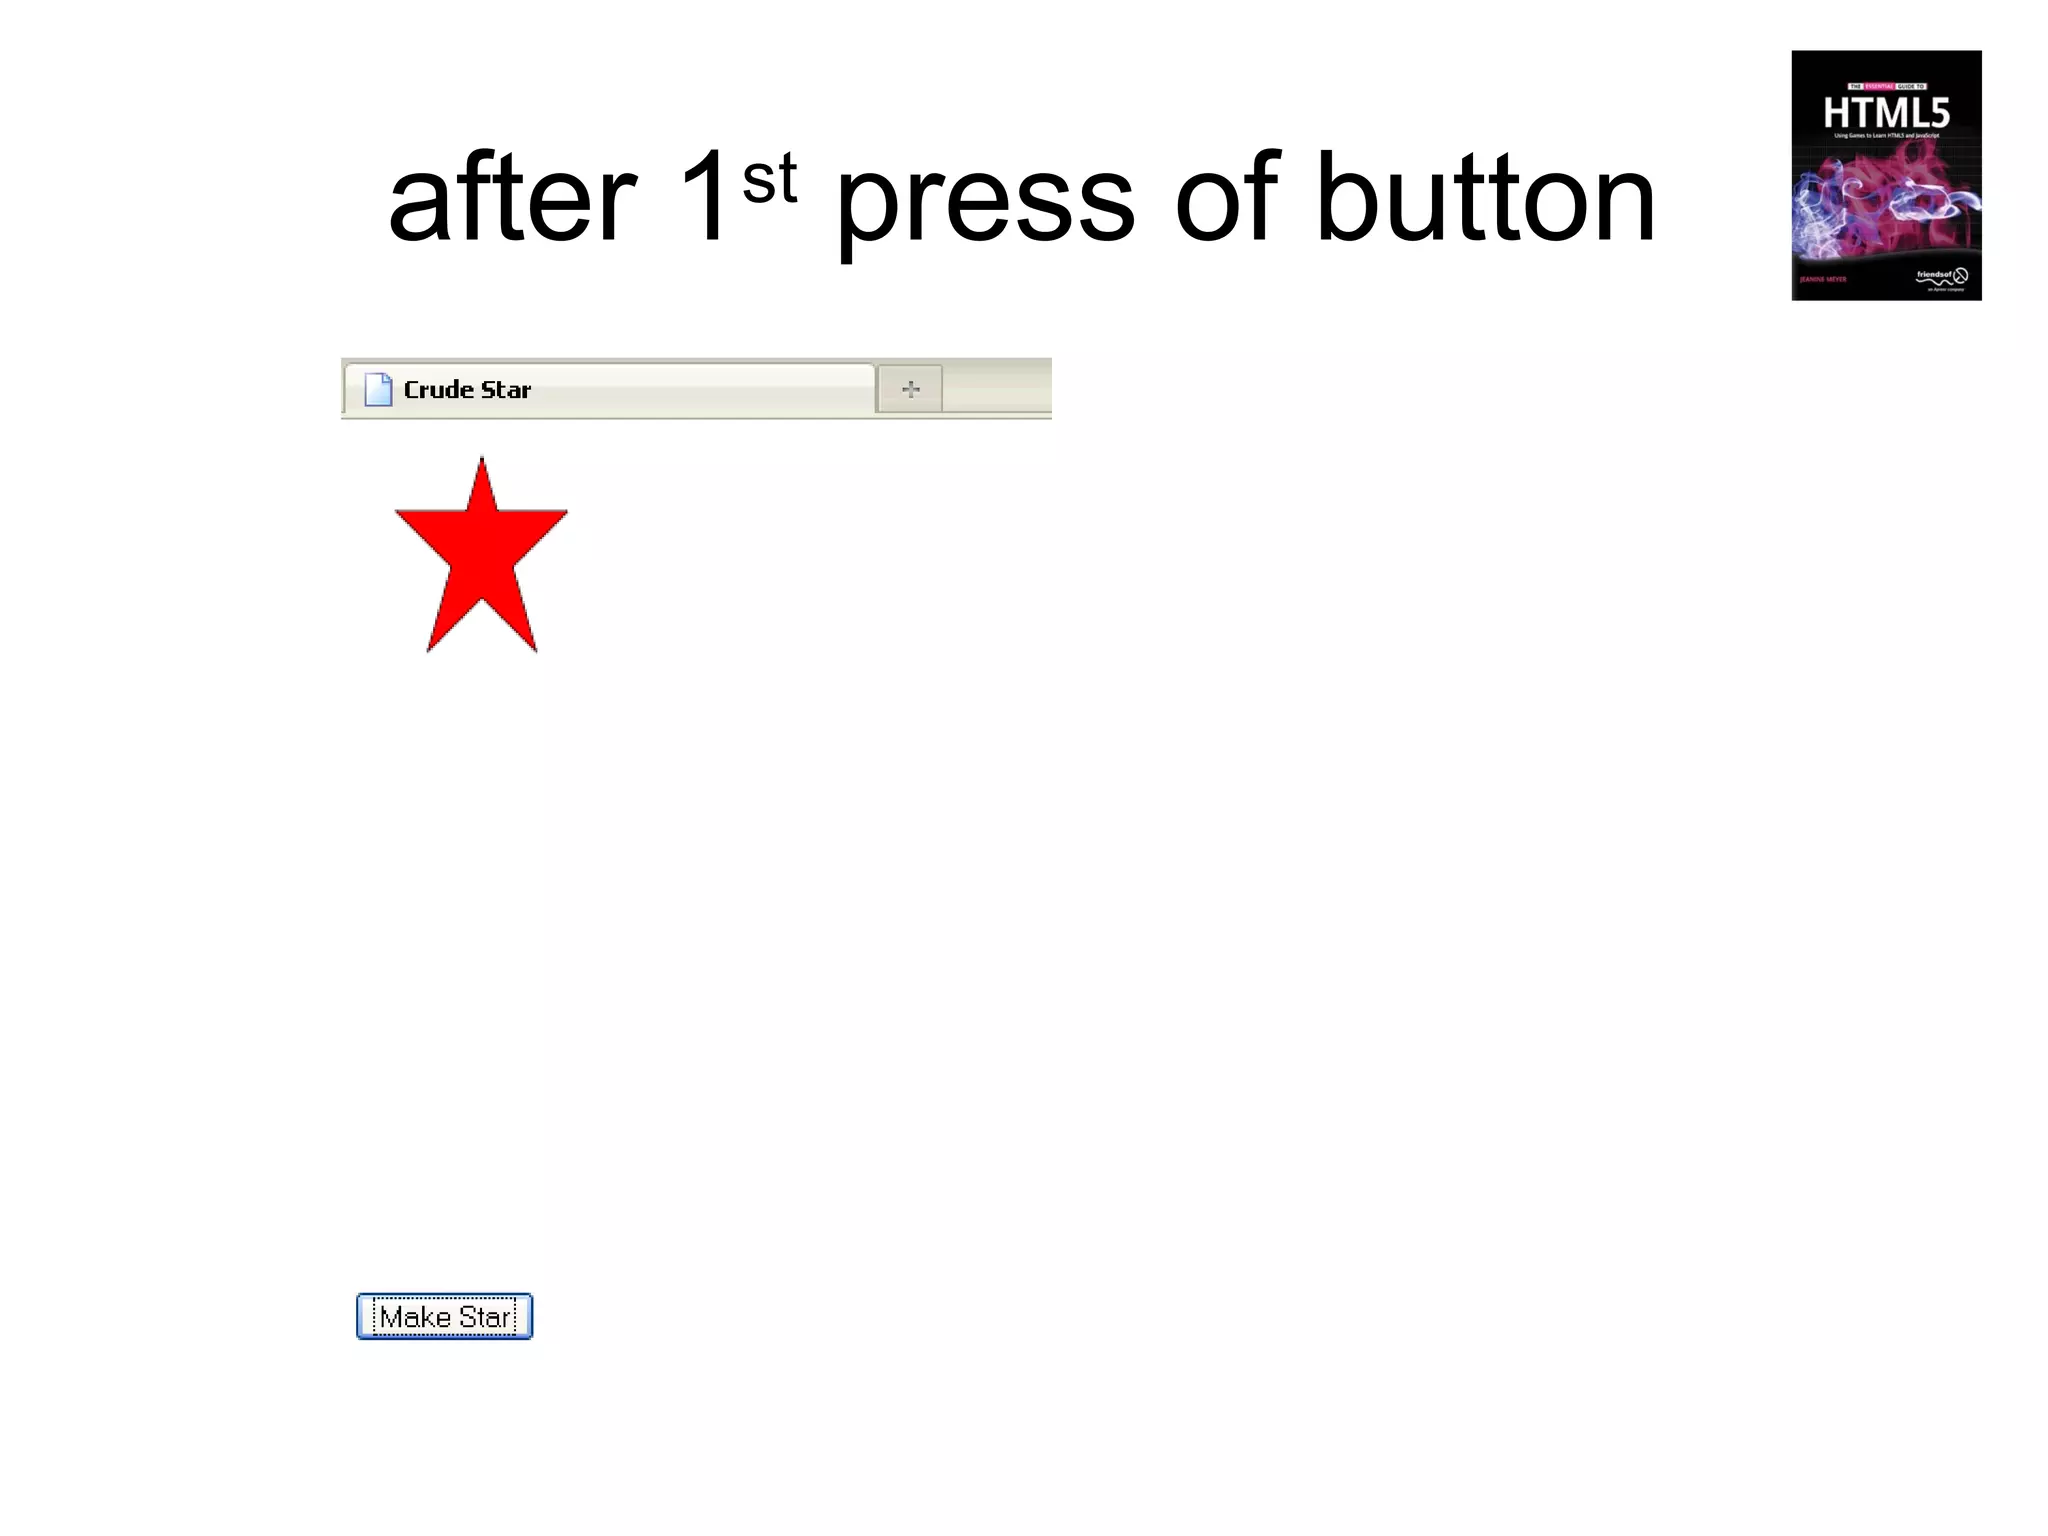
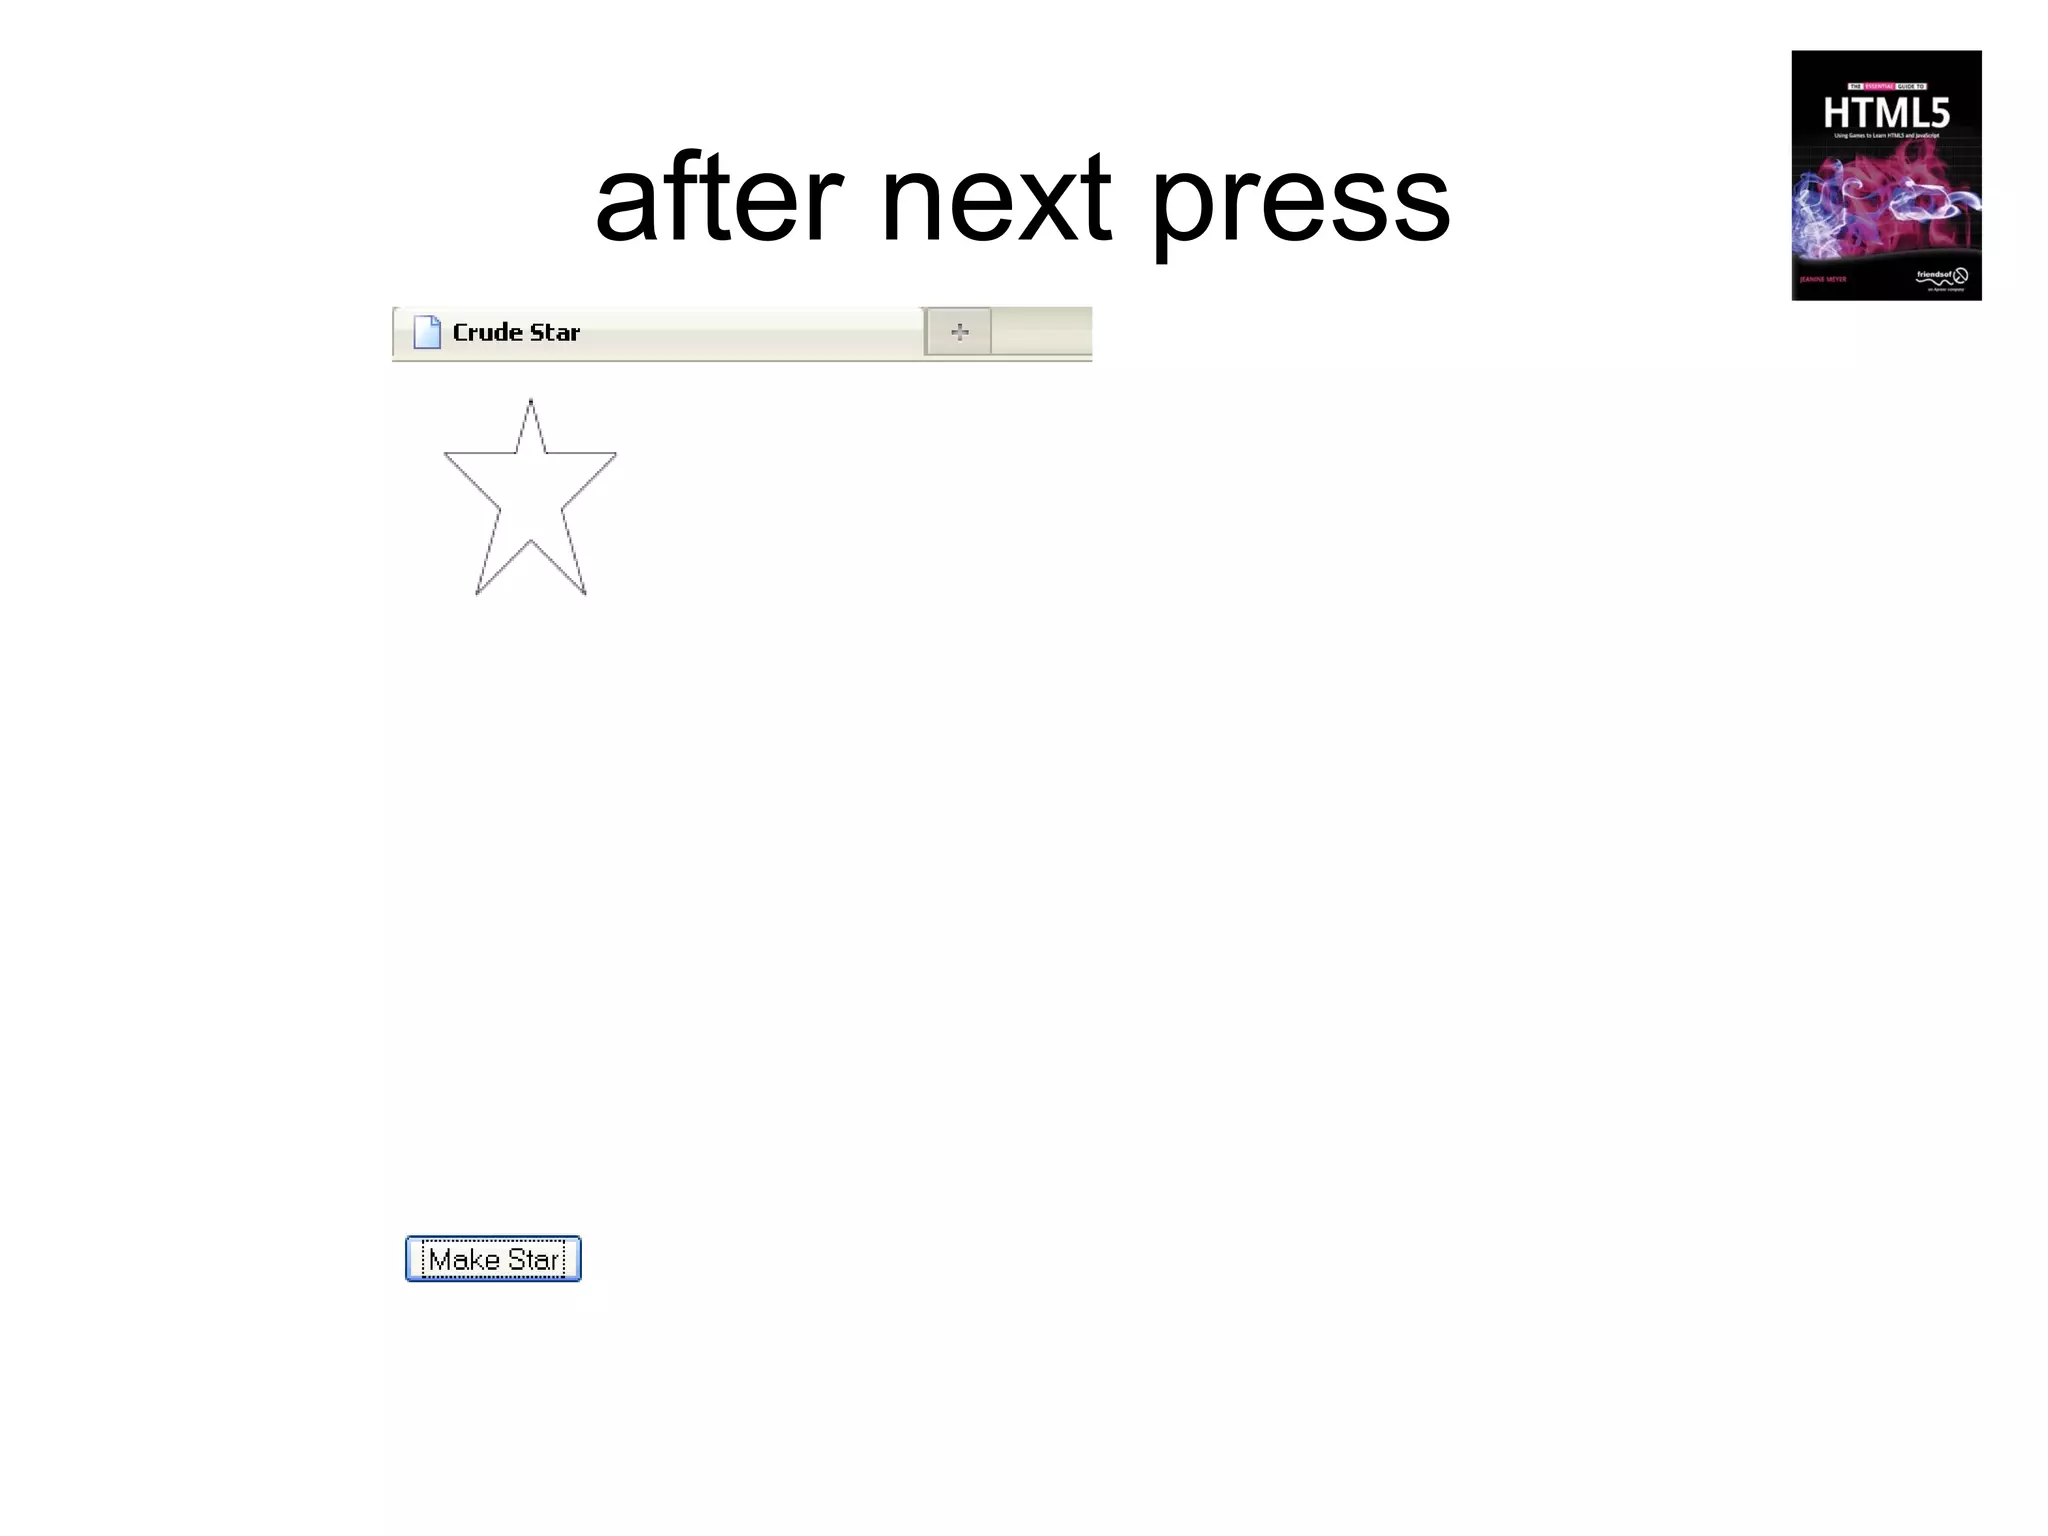
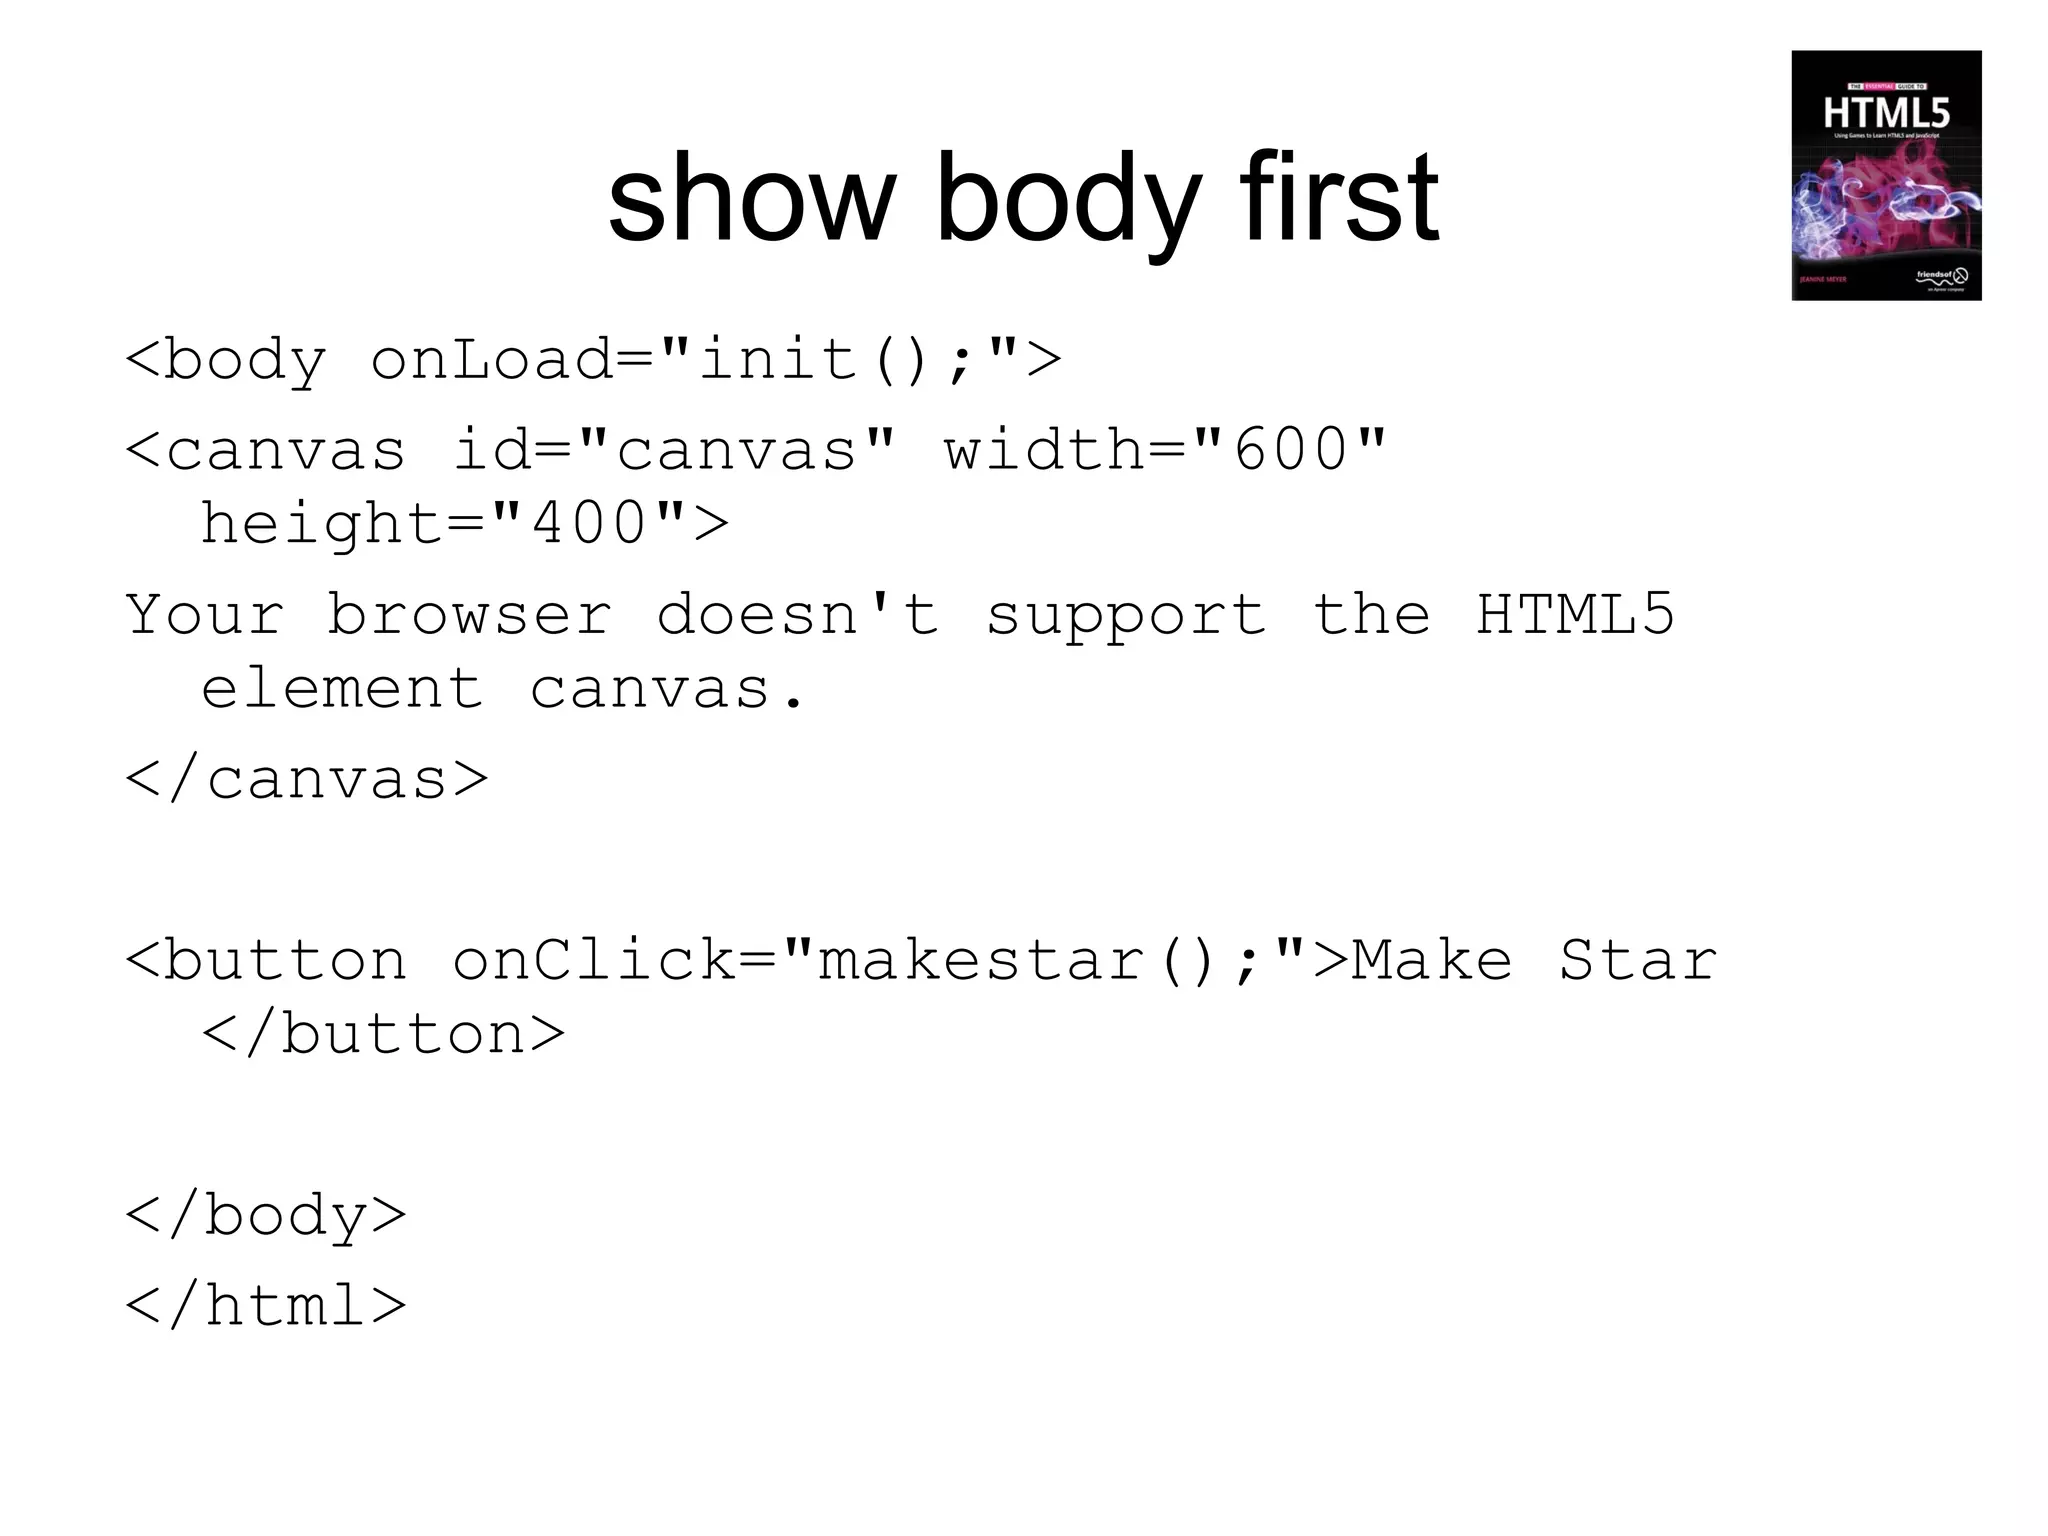
![function init() {
ctx =
document.getElementById('canvas').getContext('2d'); }
function makestar() {
ctx.clearRect(0,0,600,400);
ctx.fillStyle=colors[c];
c = c +1;
// can reduce to one line using colors[c++]
c = (c<3)?c:0;
ctx.beginPath();
ctx.moveTo(pts[0][0],pts[0][1]);
ctx.lineTo(pts[3][0],pts[3][1]);
ctx.lineTo(pts[1][0],pts[1][1]);
ctx.lineTo(pts[4][0],pts[4][1]);
ctx.lineTo(pts[2][0],pts[2][1]);
ctx.lineTo(pts[0][0],pts[0][1]);
ctx.stroke();
//outline (necessary for white star!
ctx.fill(); }](https://image.slidesharecdn.com/html5workshop-130116061307-phpapp01/85/Html5workshop-43-320.jpg)
![variables
var ctx;
var angle = 2*Math.PI/5;
var pts=[ ];
var
colors=["red","white","blue","p
urple","yellow","teal"];
var c=0;](https://image.slidesharecdn.com/html5workshop-130116061307-phpapp01/85/Html5workshop-48-320.jpg)
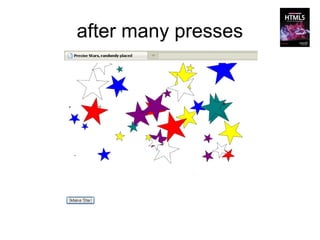
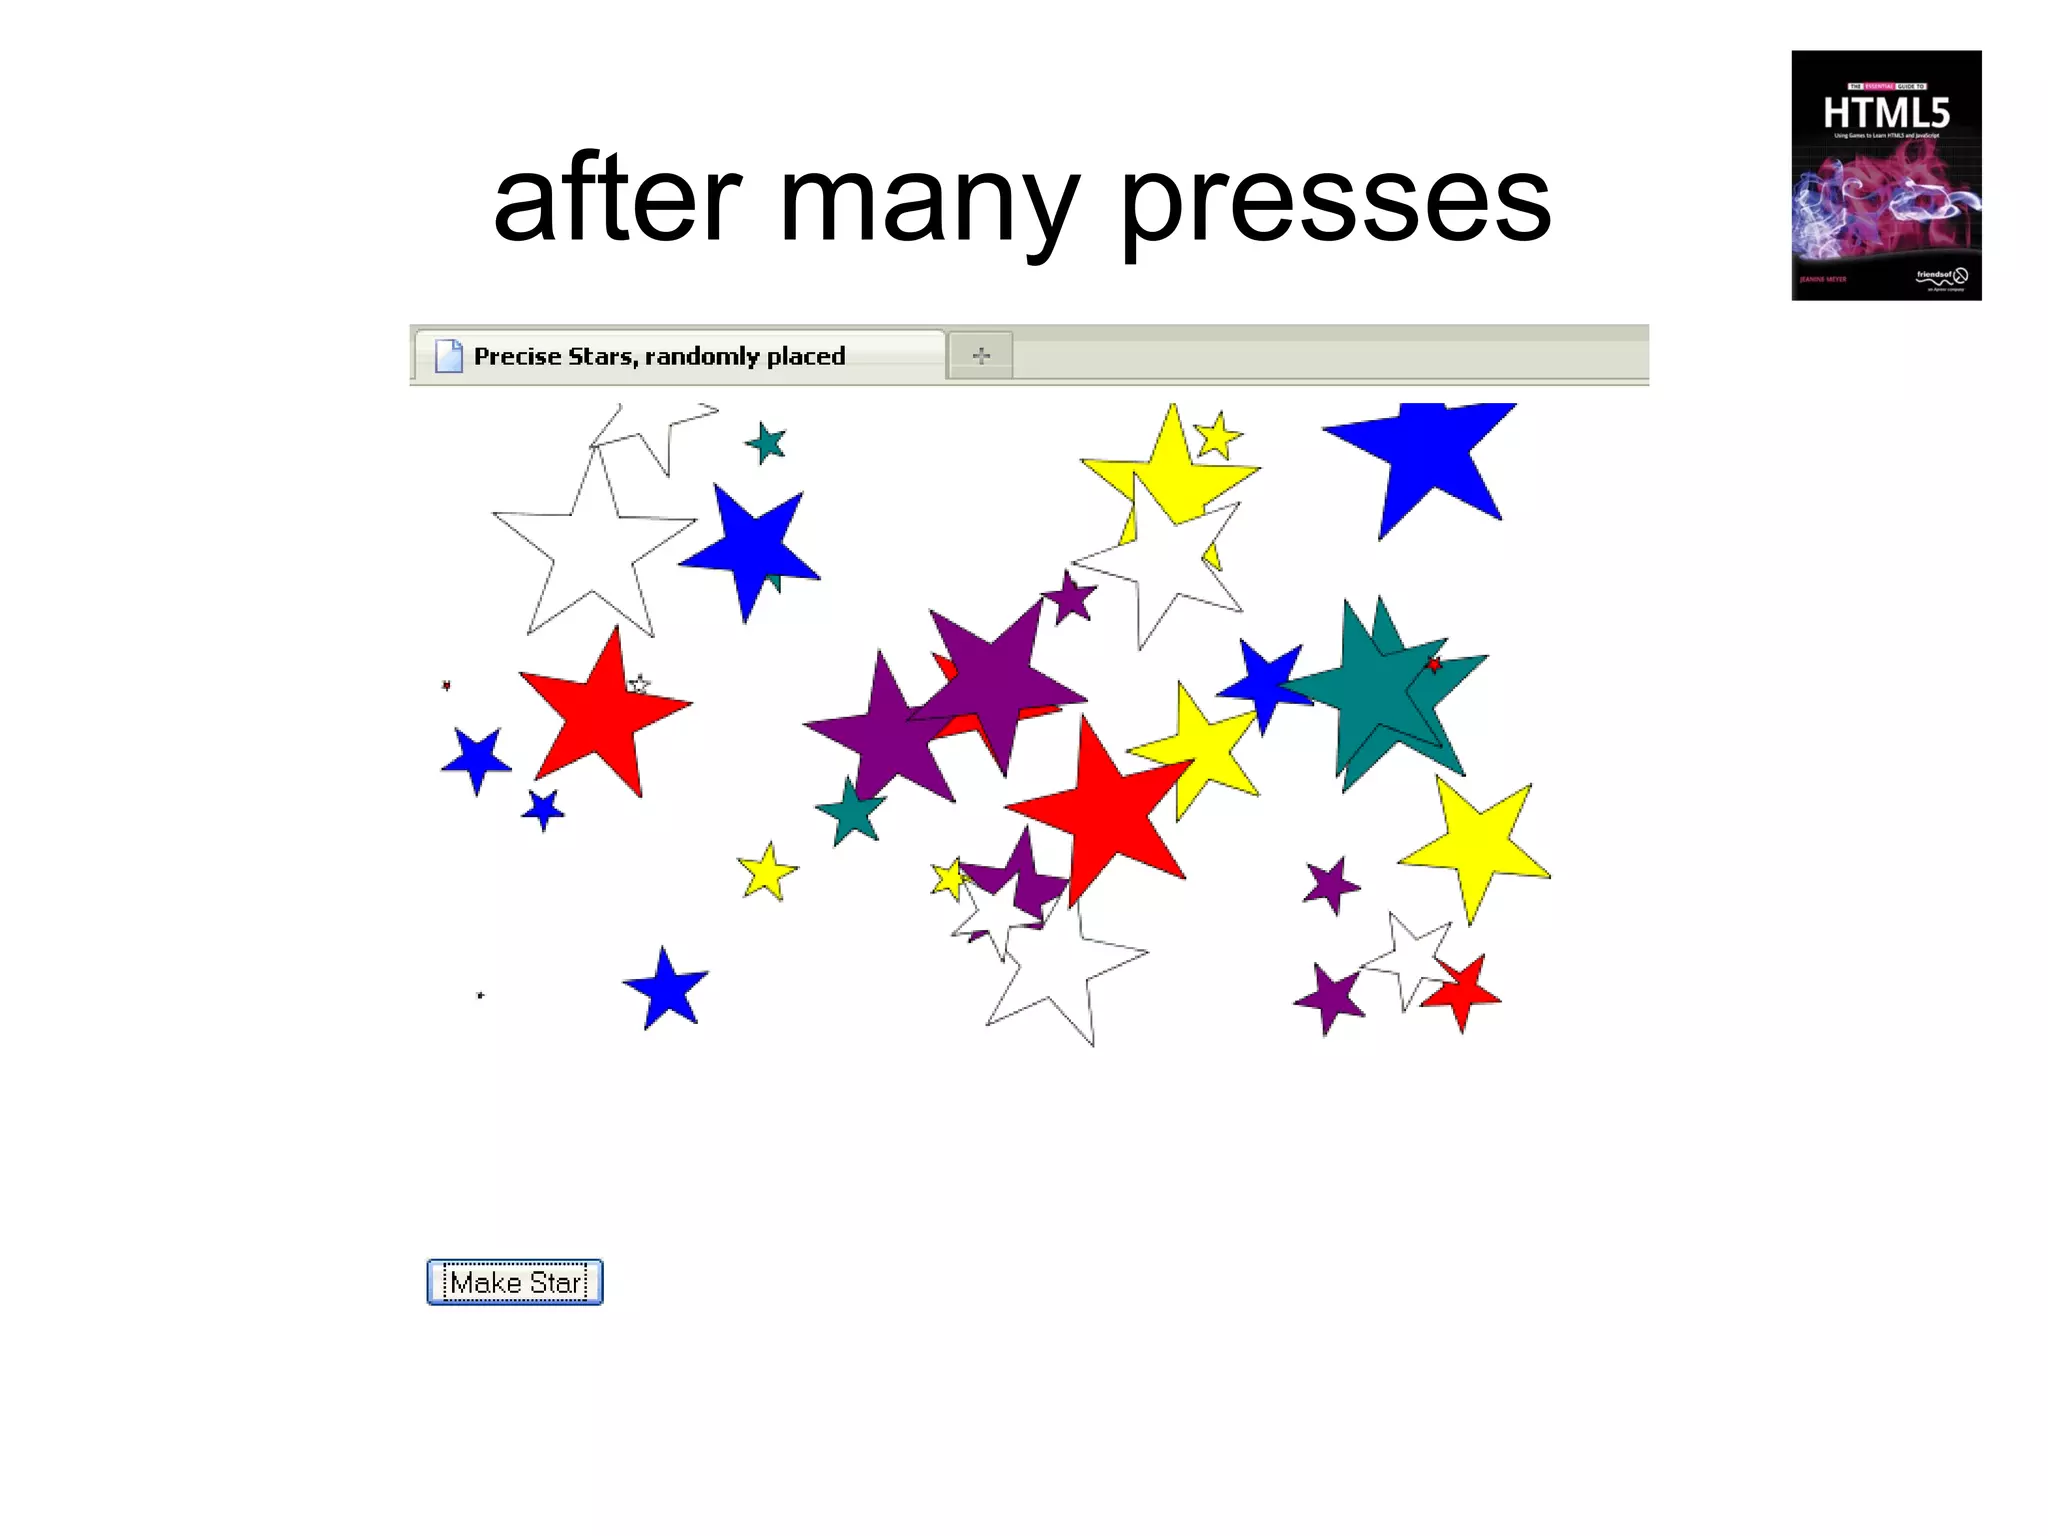
![function makestar() {
buildstar();
ctx.fillStyle=colors[c++];
c = (c<colors.length)?c:0;
ctx.beginPath();
ctx.moveTo(pts[0][0],pts[0][1]);
ctx.lineTo(pts[3][0],pts[3][1]);
ctx.lineTo(pts[1][0],pts[1][1]);
ctx.lineTo(pts[4][0],pts[4][1]);
ctx.lineTo(pts[2][0],pts[2][1]);
ctx.lineTo(pts[0][0],pts[0][1]);
ctx.stroke();
ctx.fill();
}](https://image.slidesharecdn.com/html5workshop-130116061307-phpapp01/85/Html5workshop-49-320.jpg)
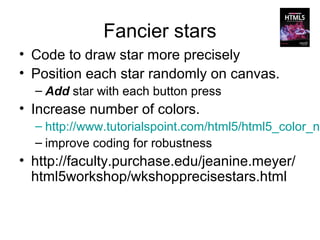
![function buildstar() {
pts = [];
var x=500*Math.random(); //all these
arbitrary
var y = 300*Math.random();
var r=50*Math.random();
var sangle = Math.random()*angle;
for(var i=0;i<5;i++) {
var a = i*angle + sangle;
var px = x+r*Math.cos(a);
var py = y-r*Math.sin(a);
pts.push([px,py]);
}
}](https://image.slidesharecdn.com/html5workshop-130116061307-phpapp01/85/Html5workshop-50-320.jpg)


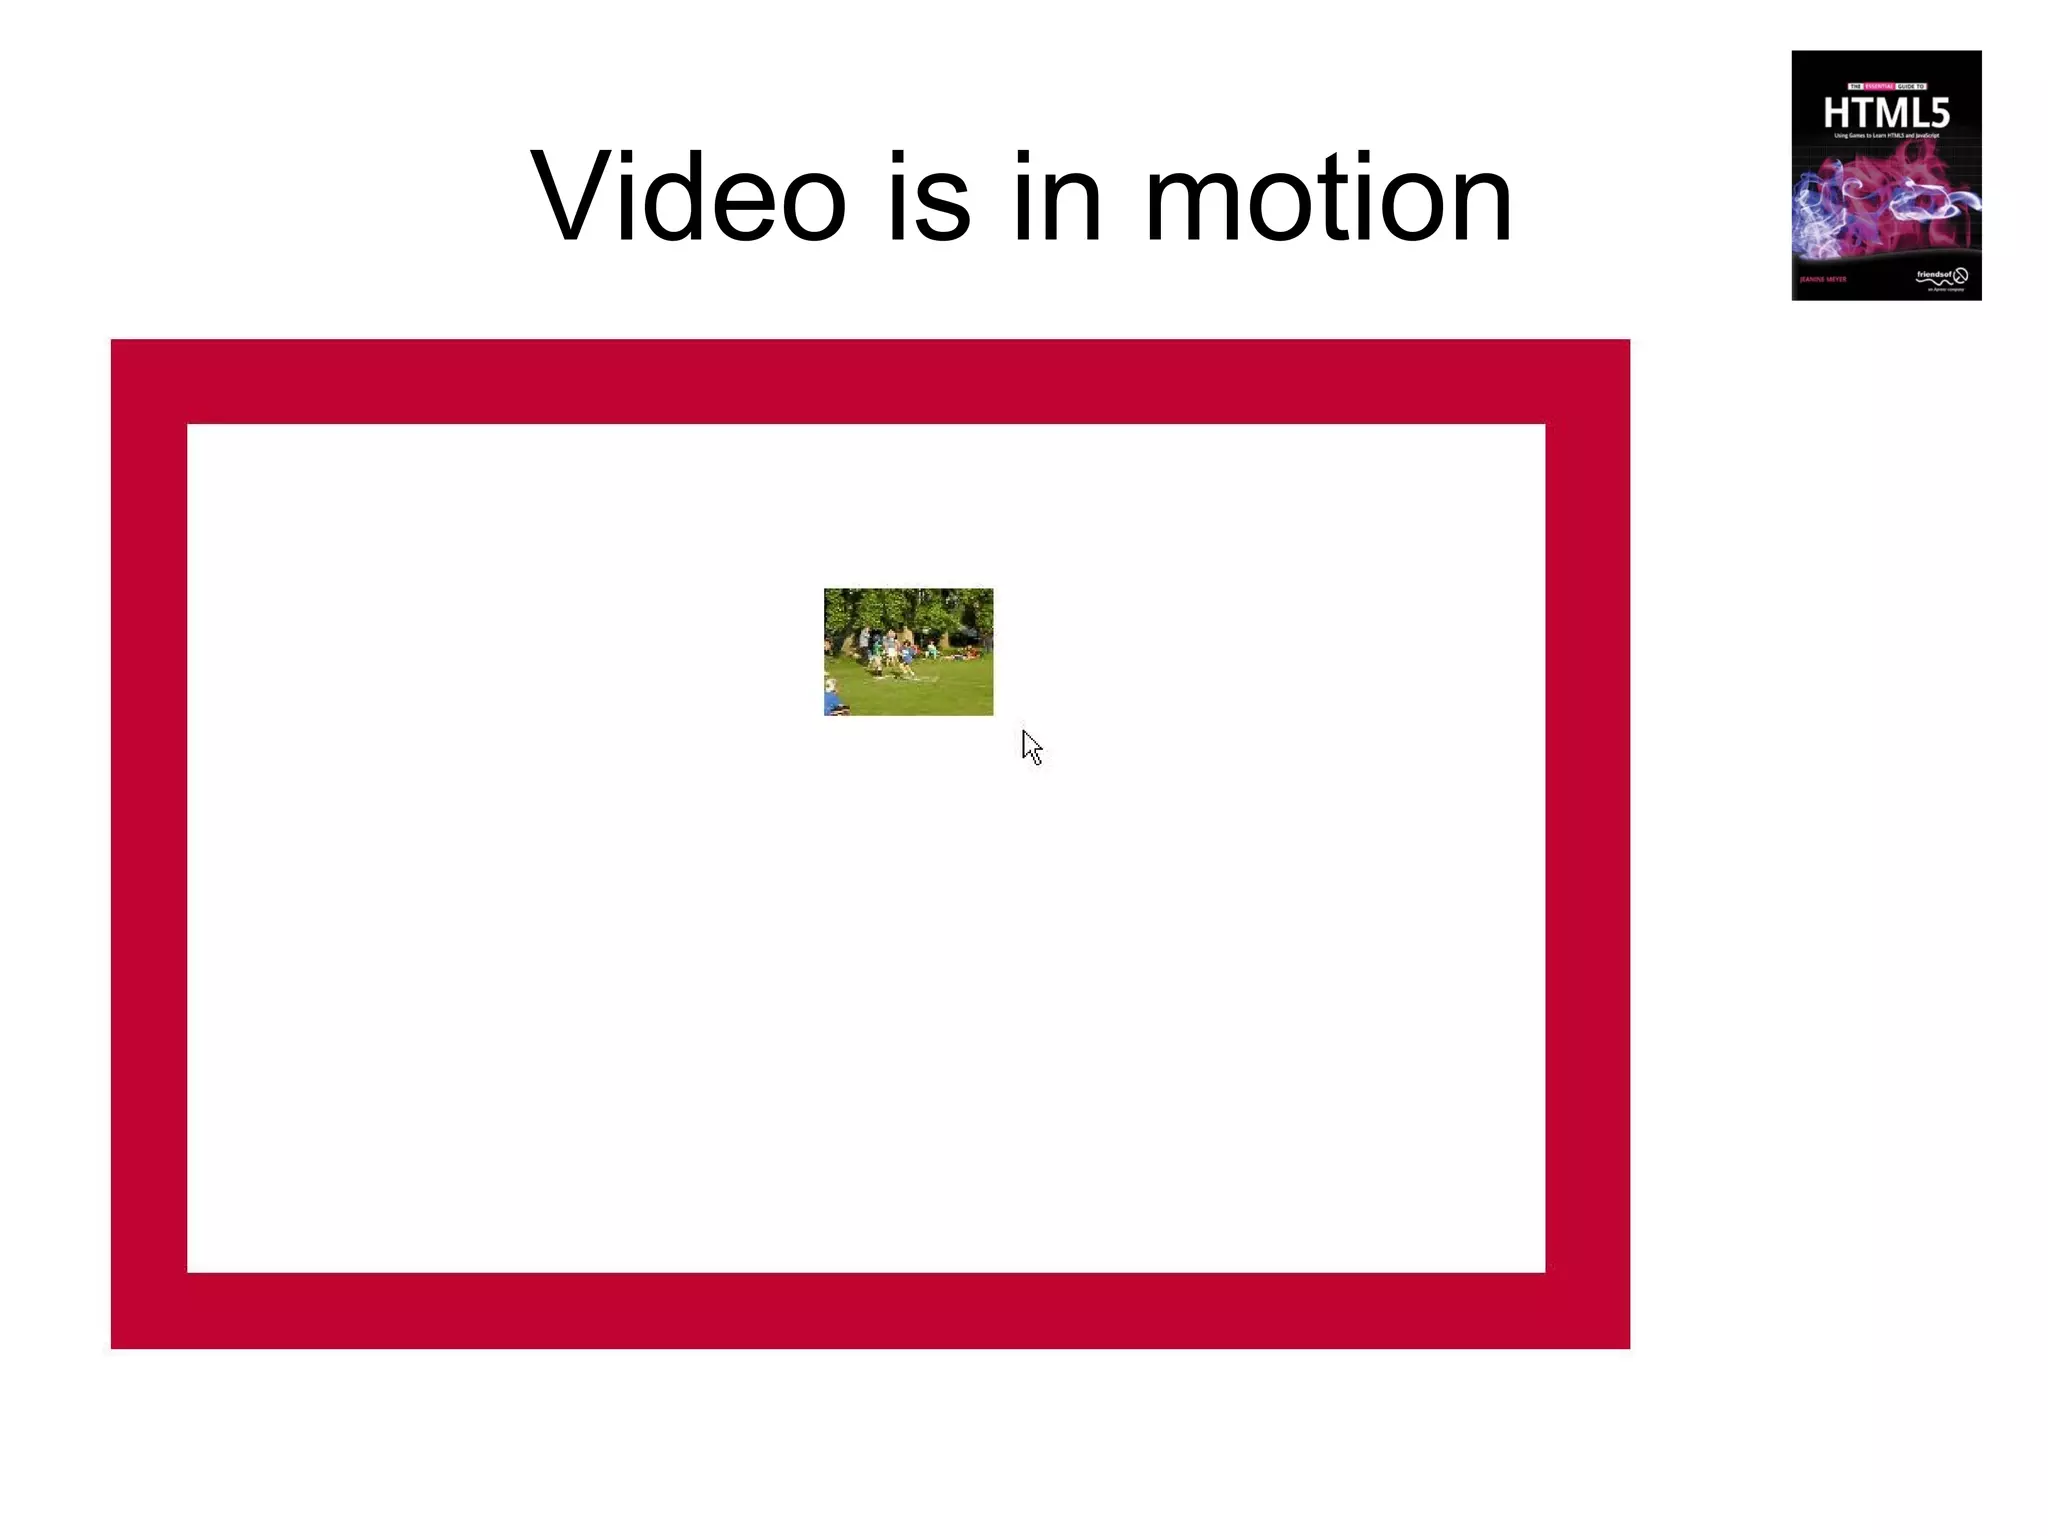
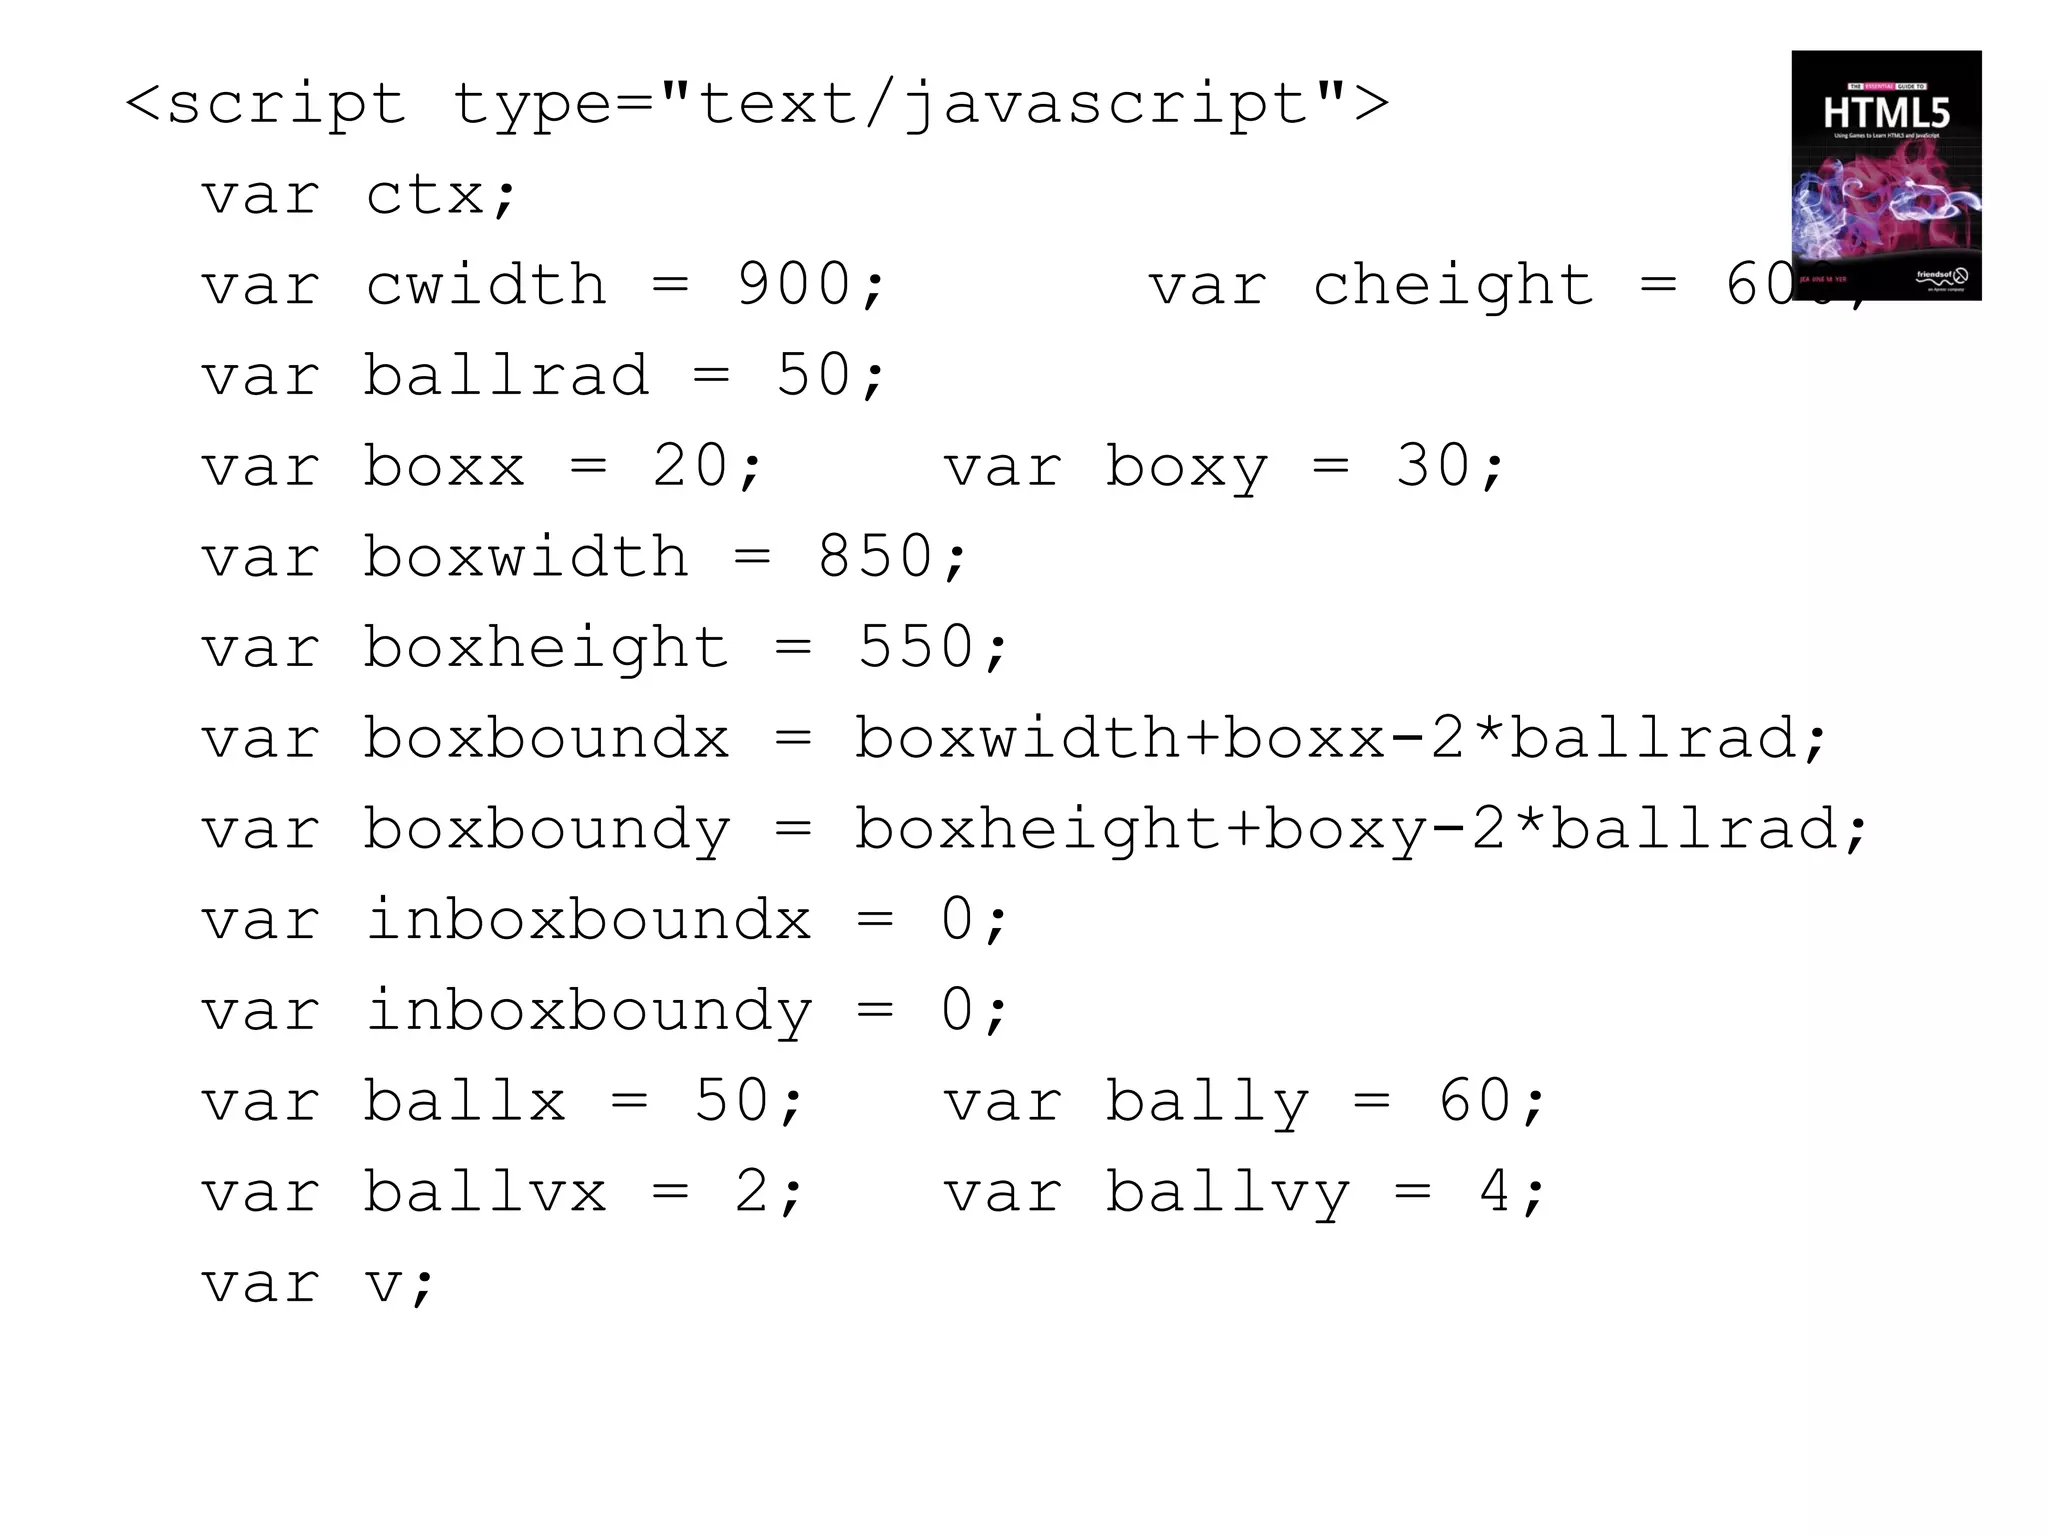
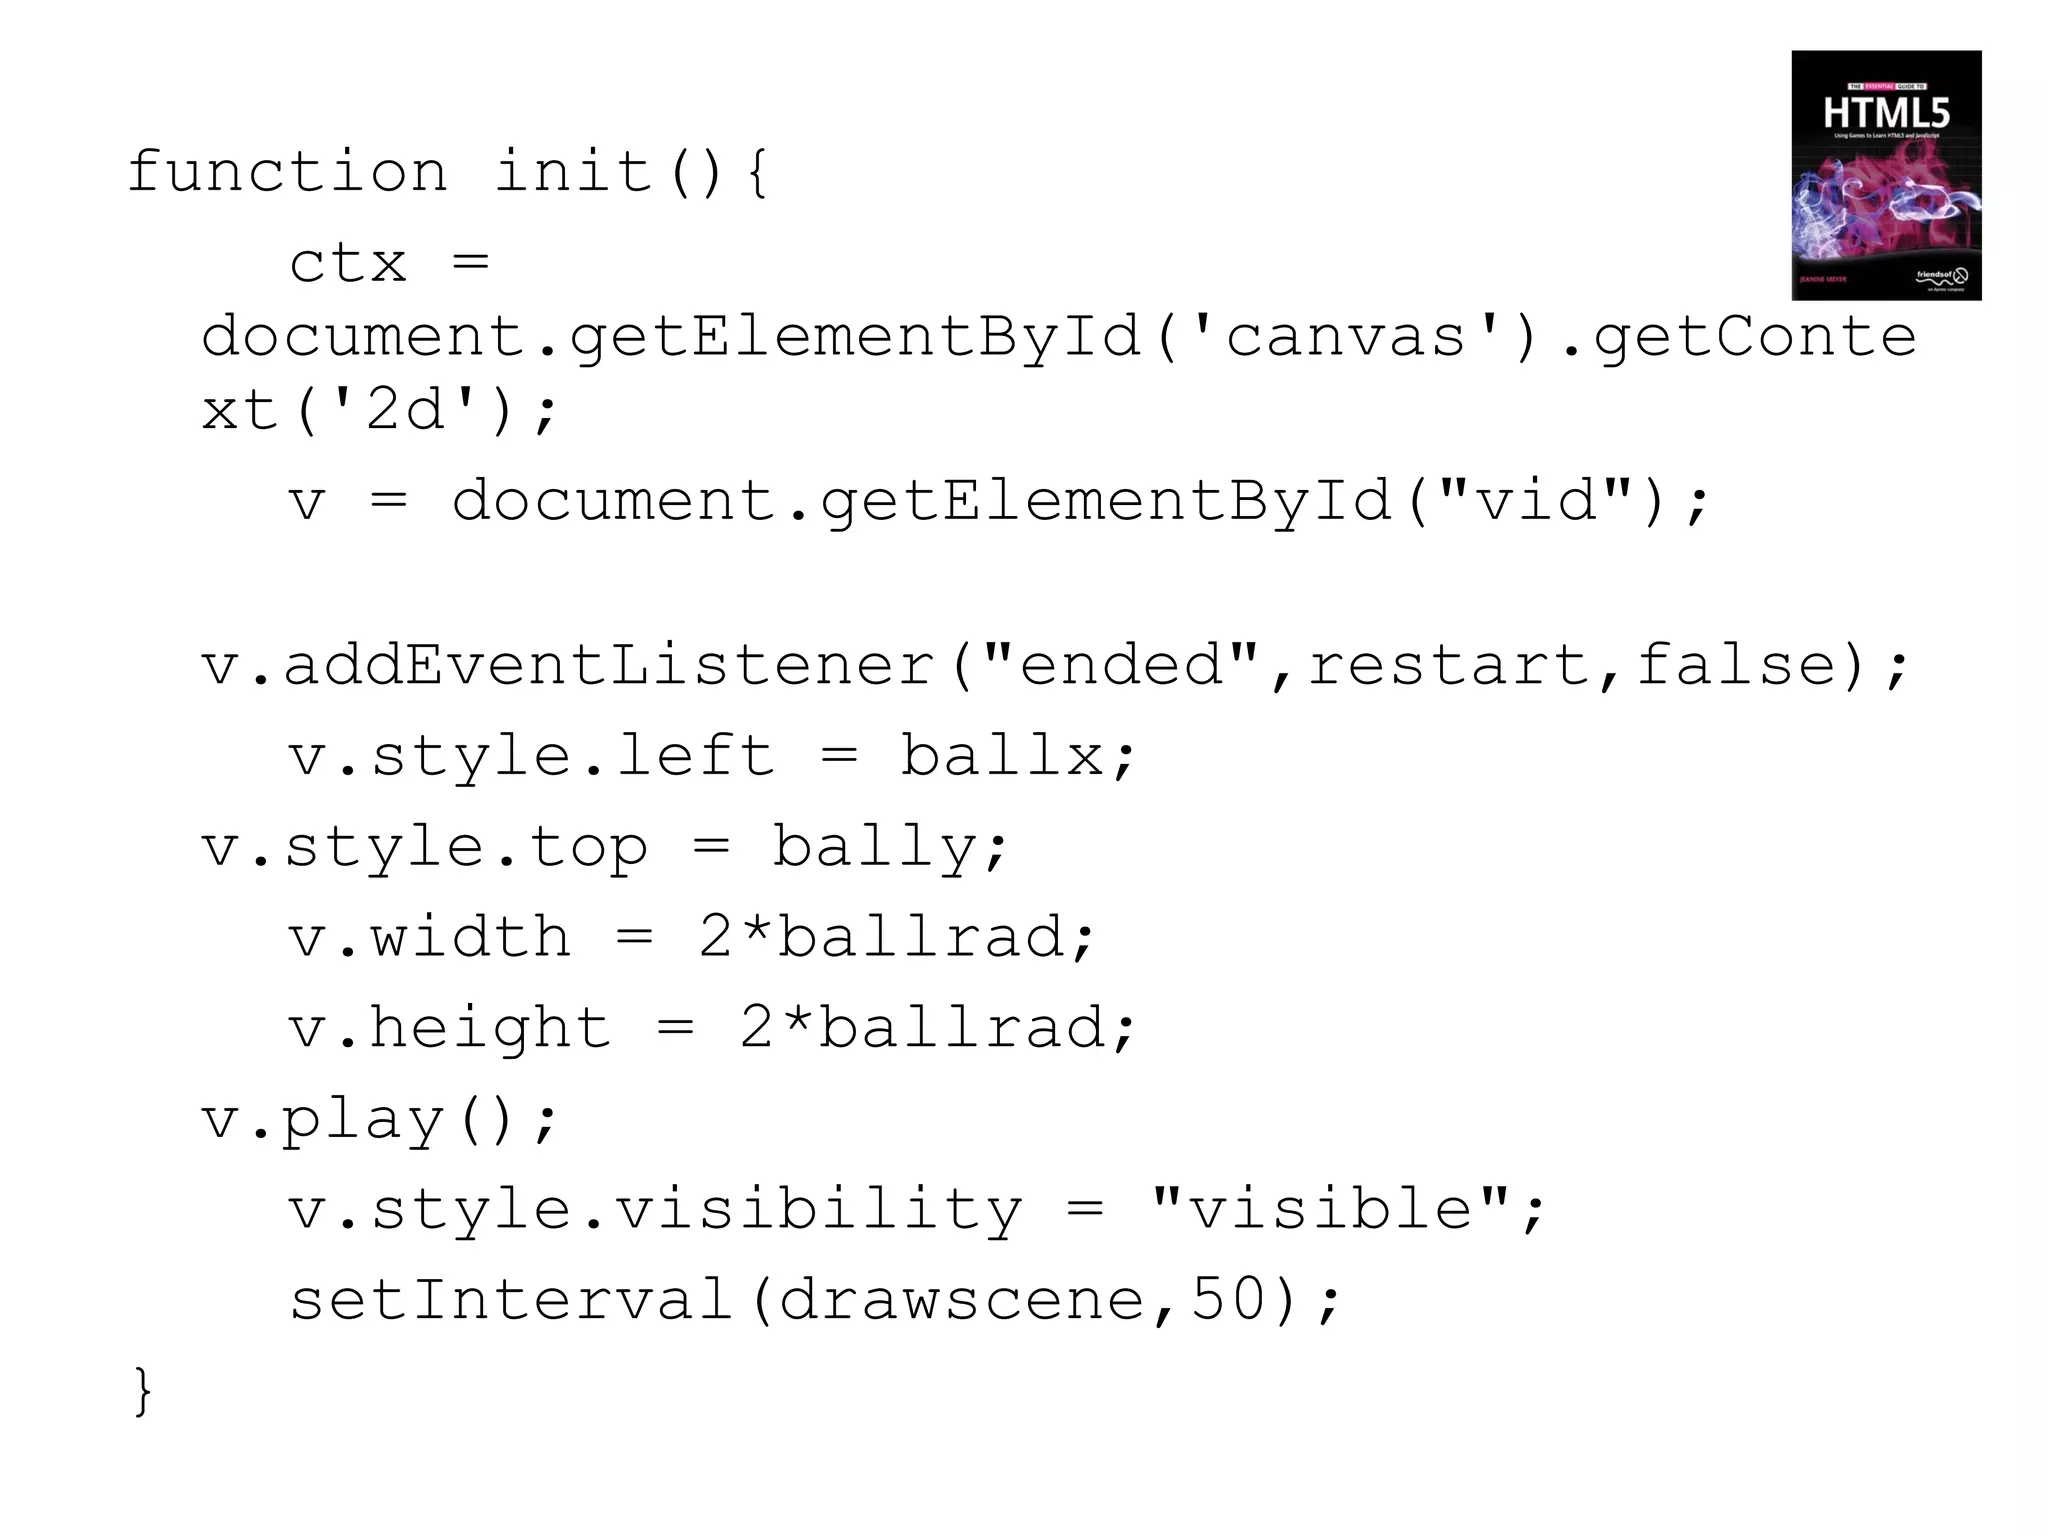
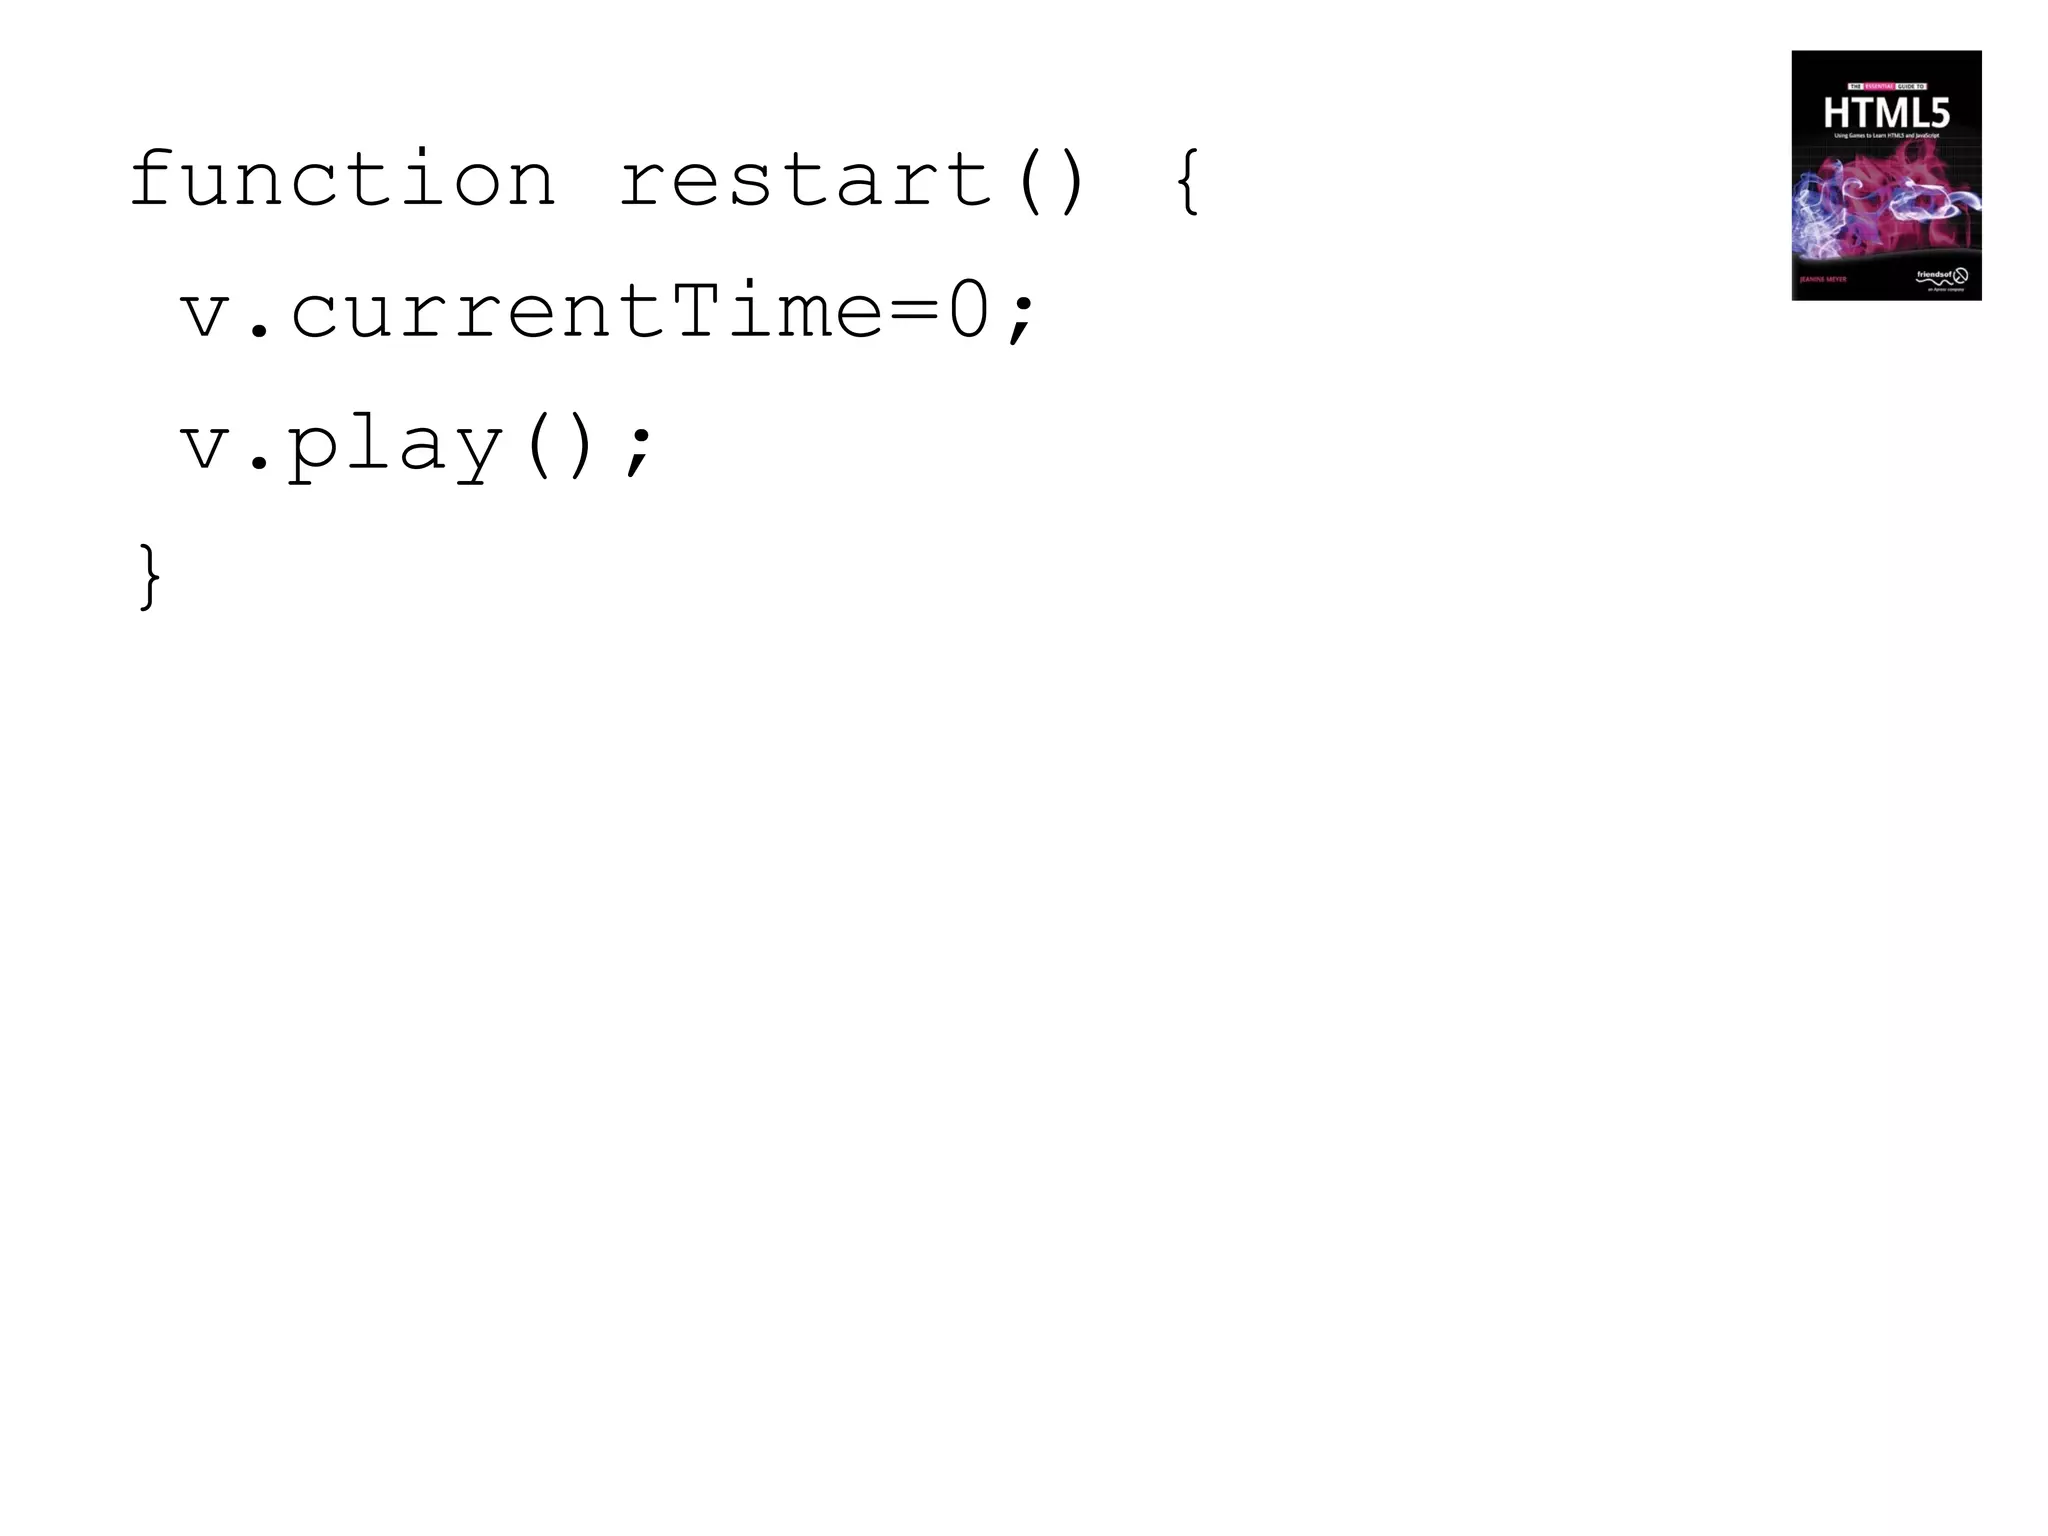
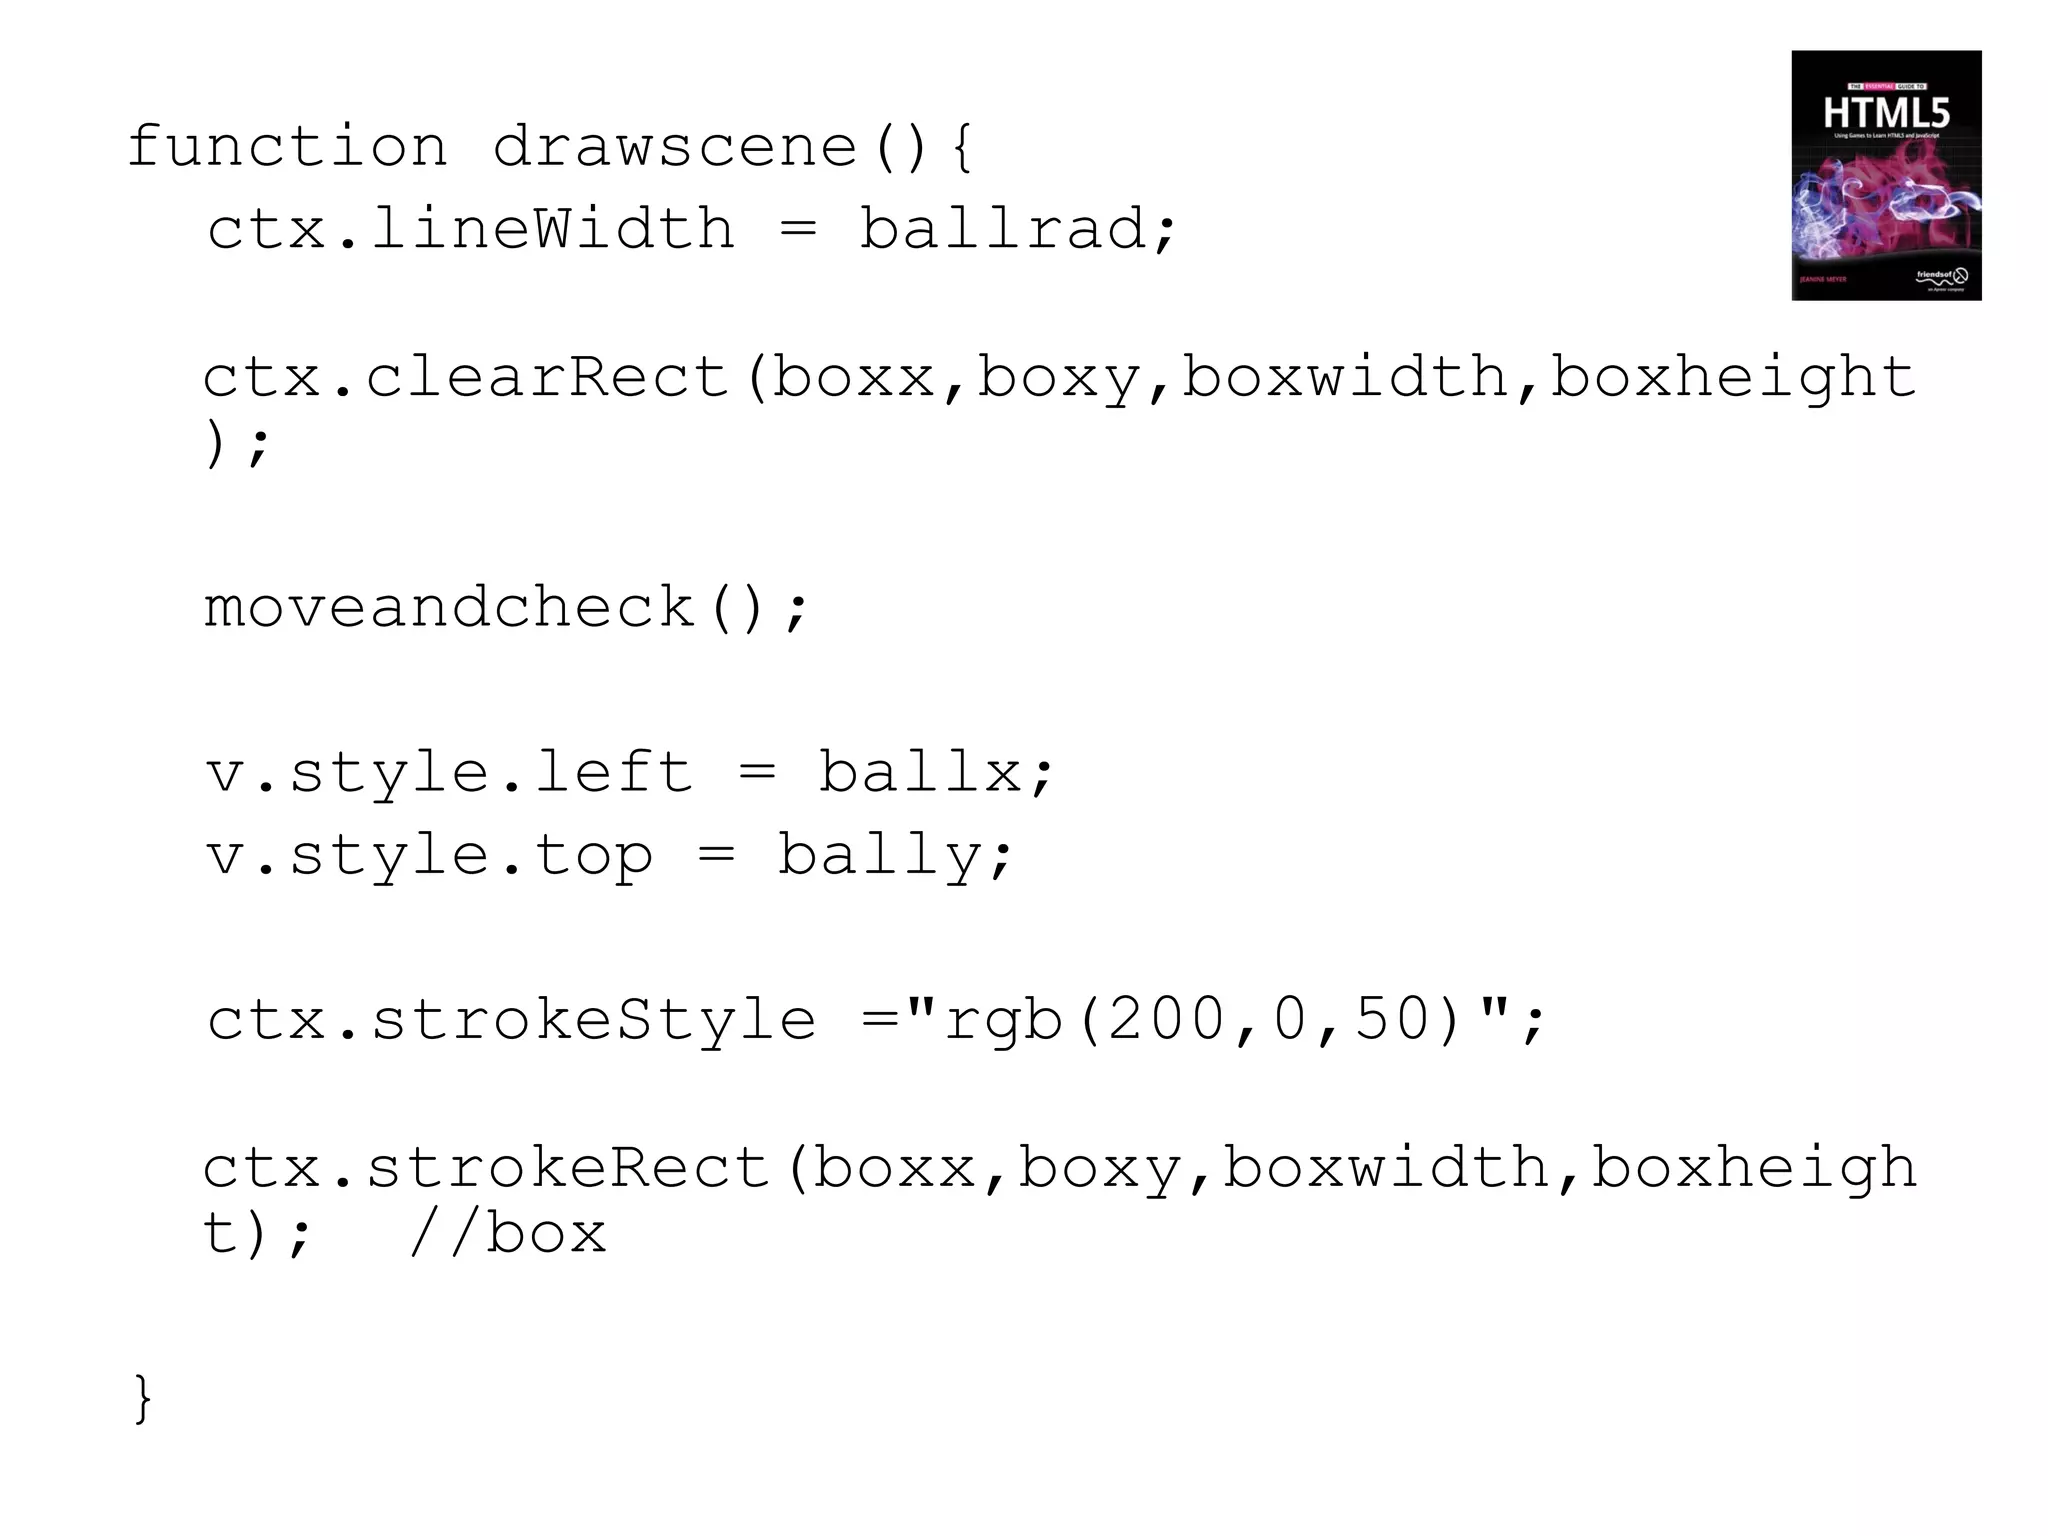
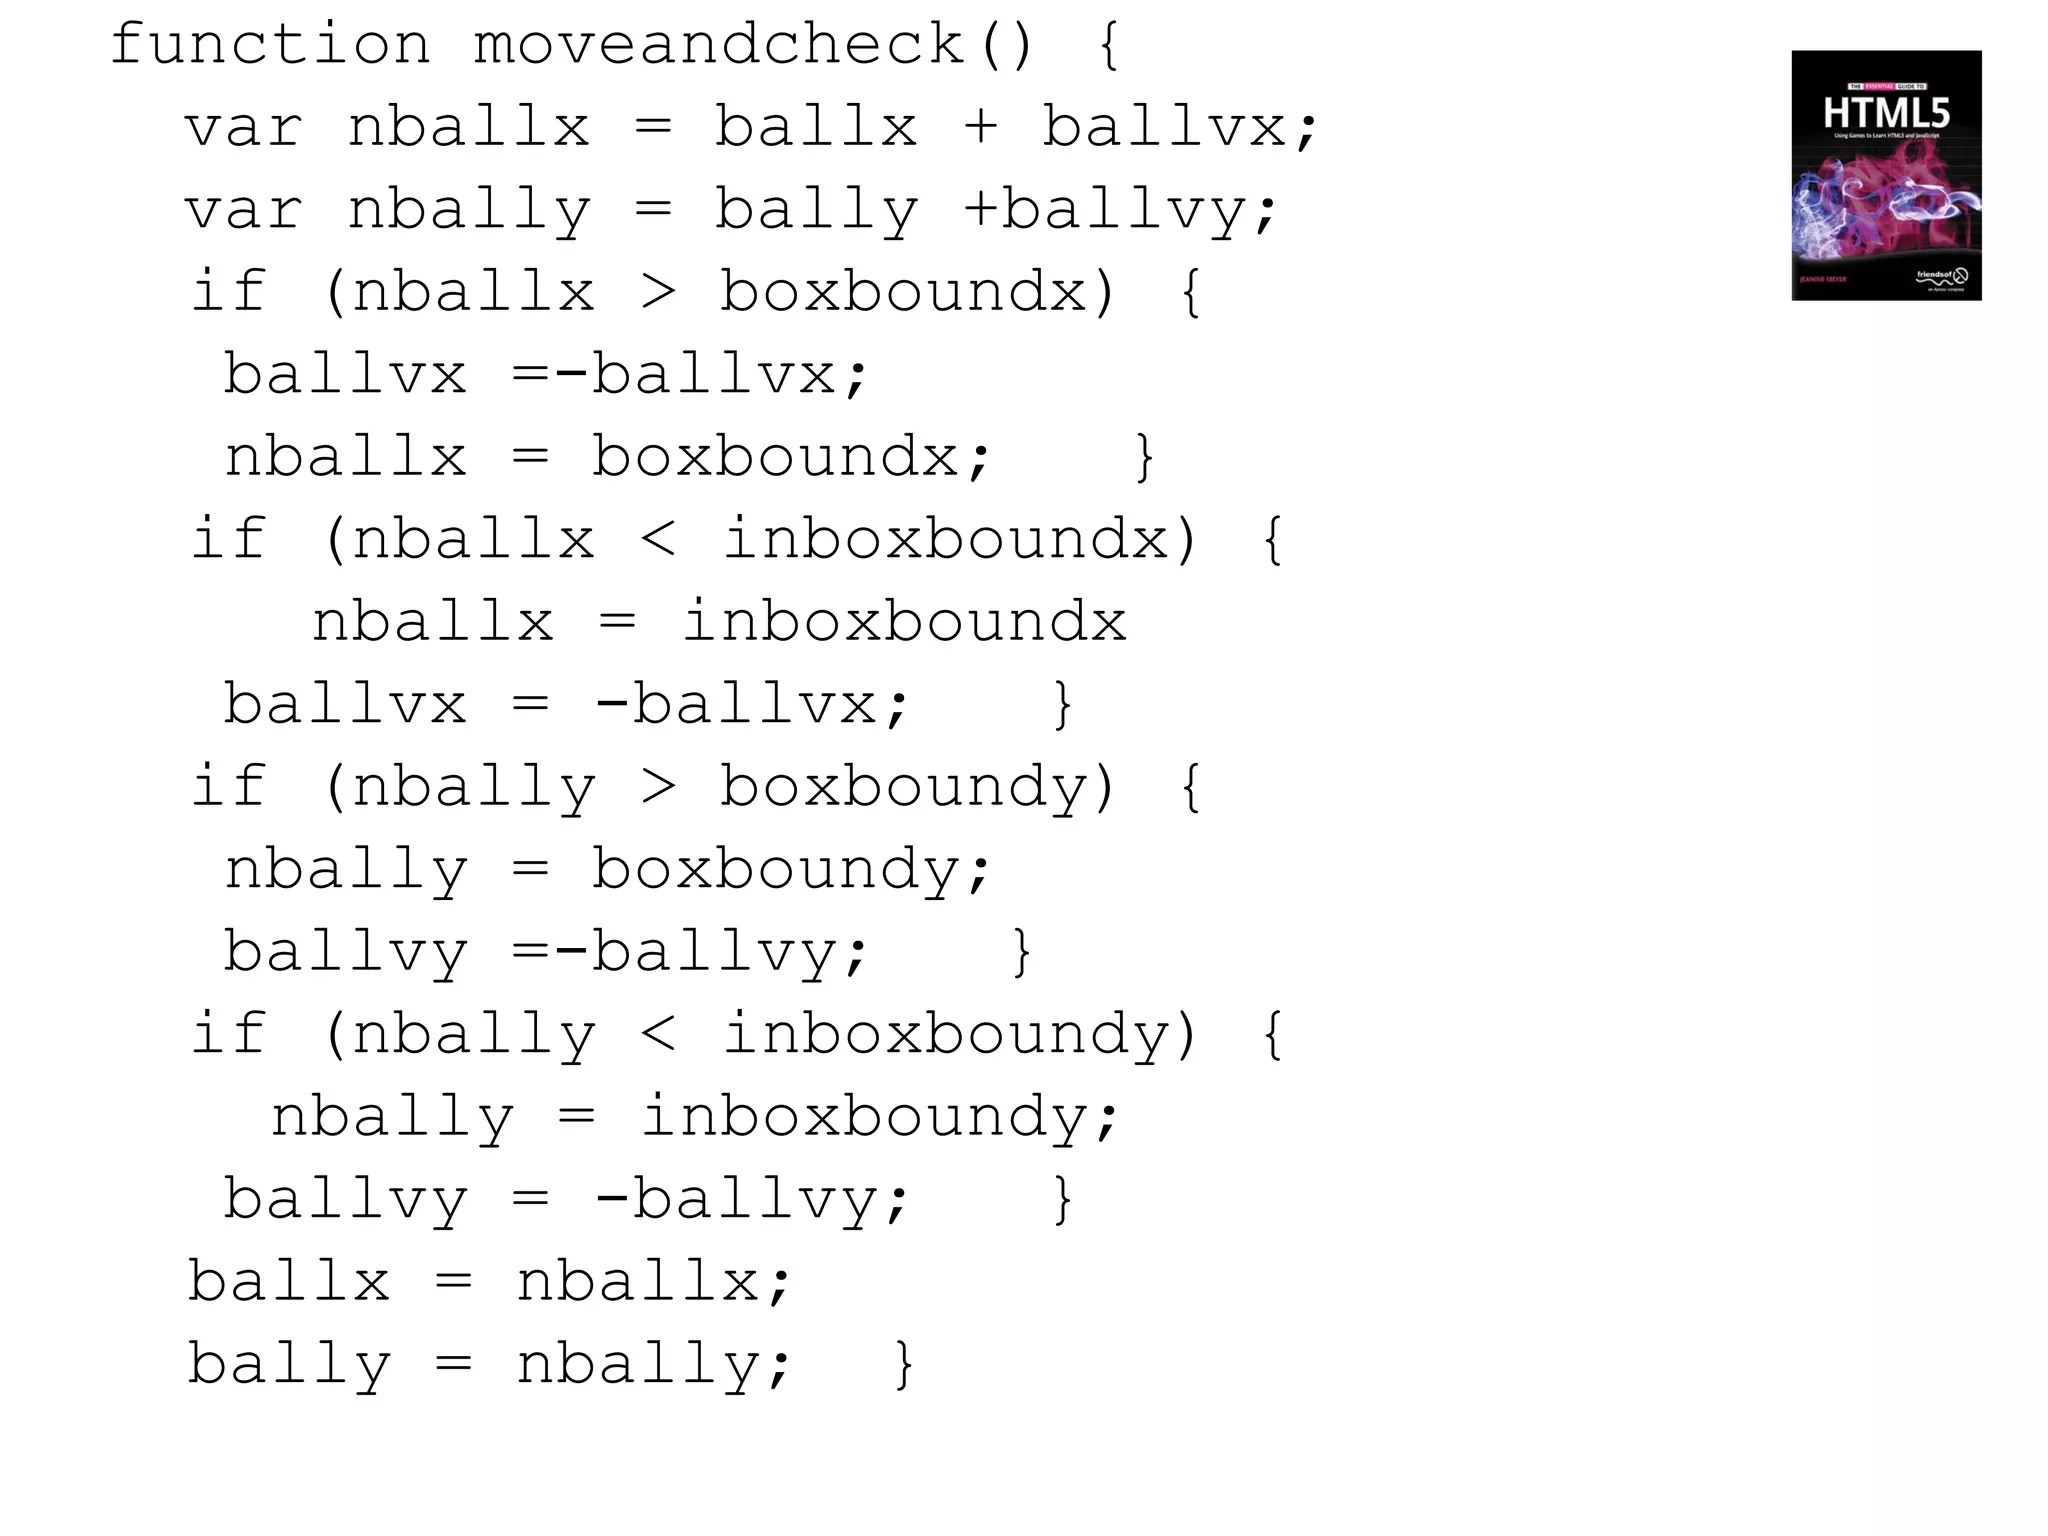
![Strategy
• Use setInterval to invoke [my] drawscene
function
– re-position video.
– Check against [virtual] walls. Apply angle of incidence
equal angle of reflection (easy to do)
– use strokeRect to draw box
• NOTE: the loop attribute did not work, so I set up
event handling for video ended event.](https://image.slidesharecdn.com/html5workshop-130116061307-phpapp01/85/Html5workshop-68-320.jpg)


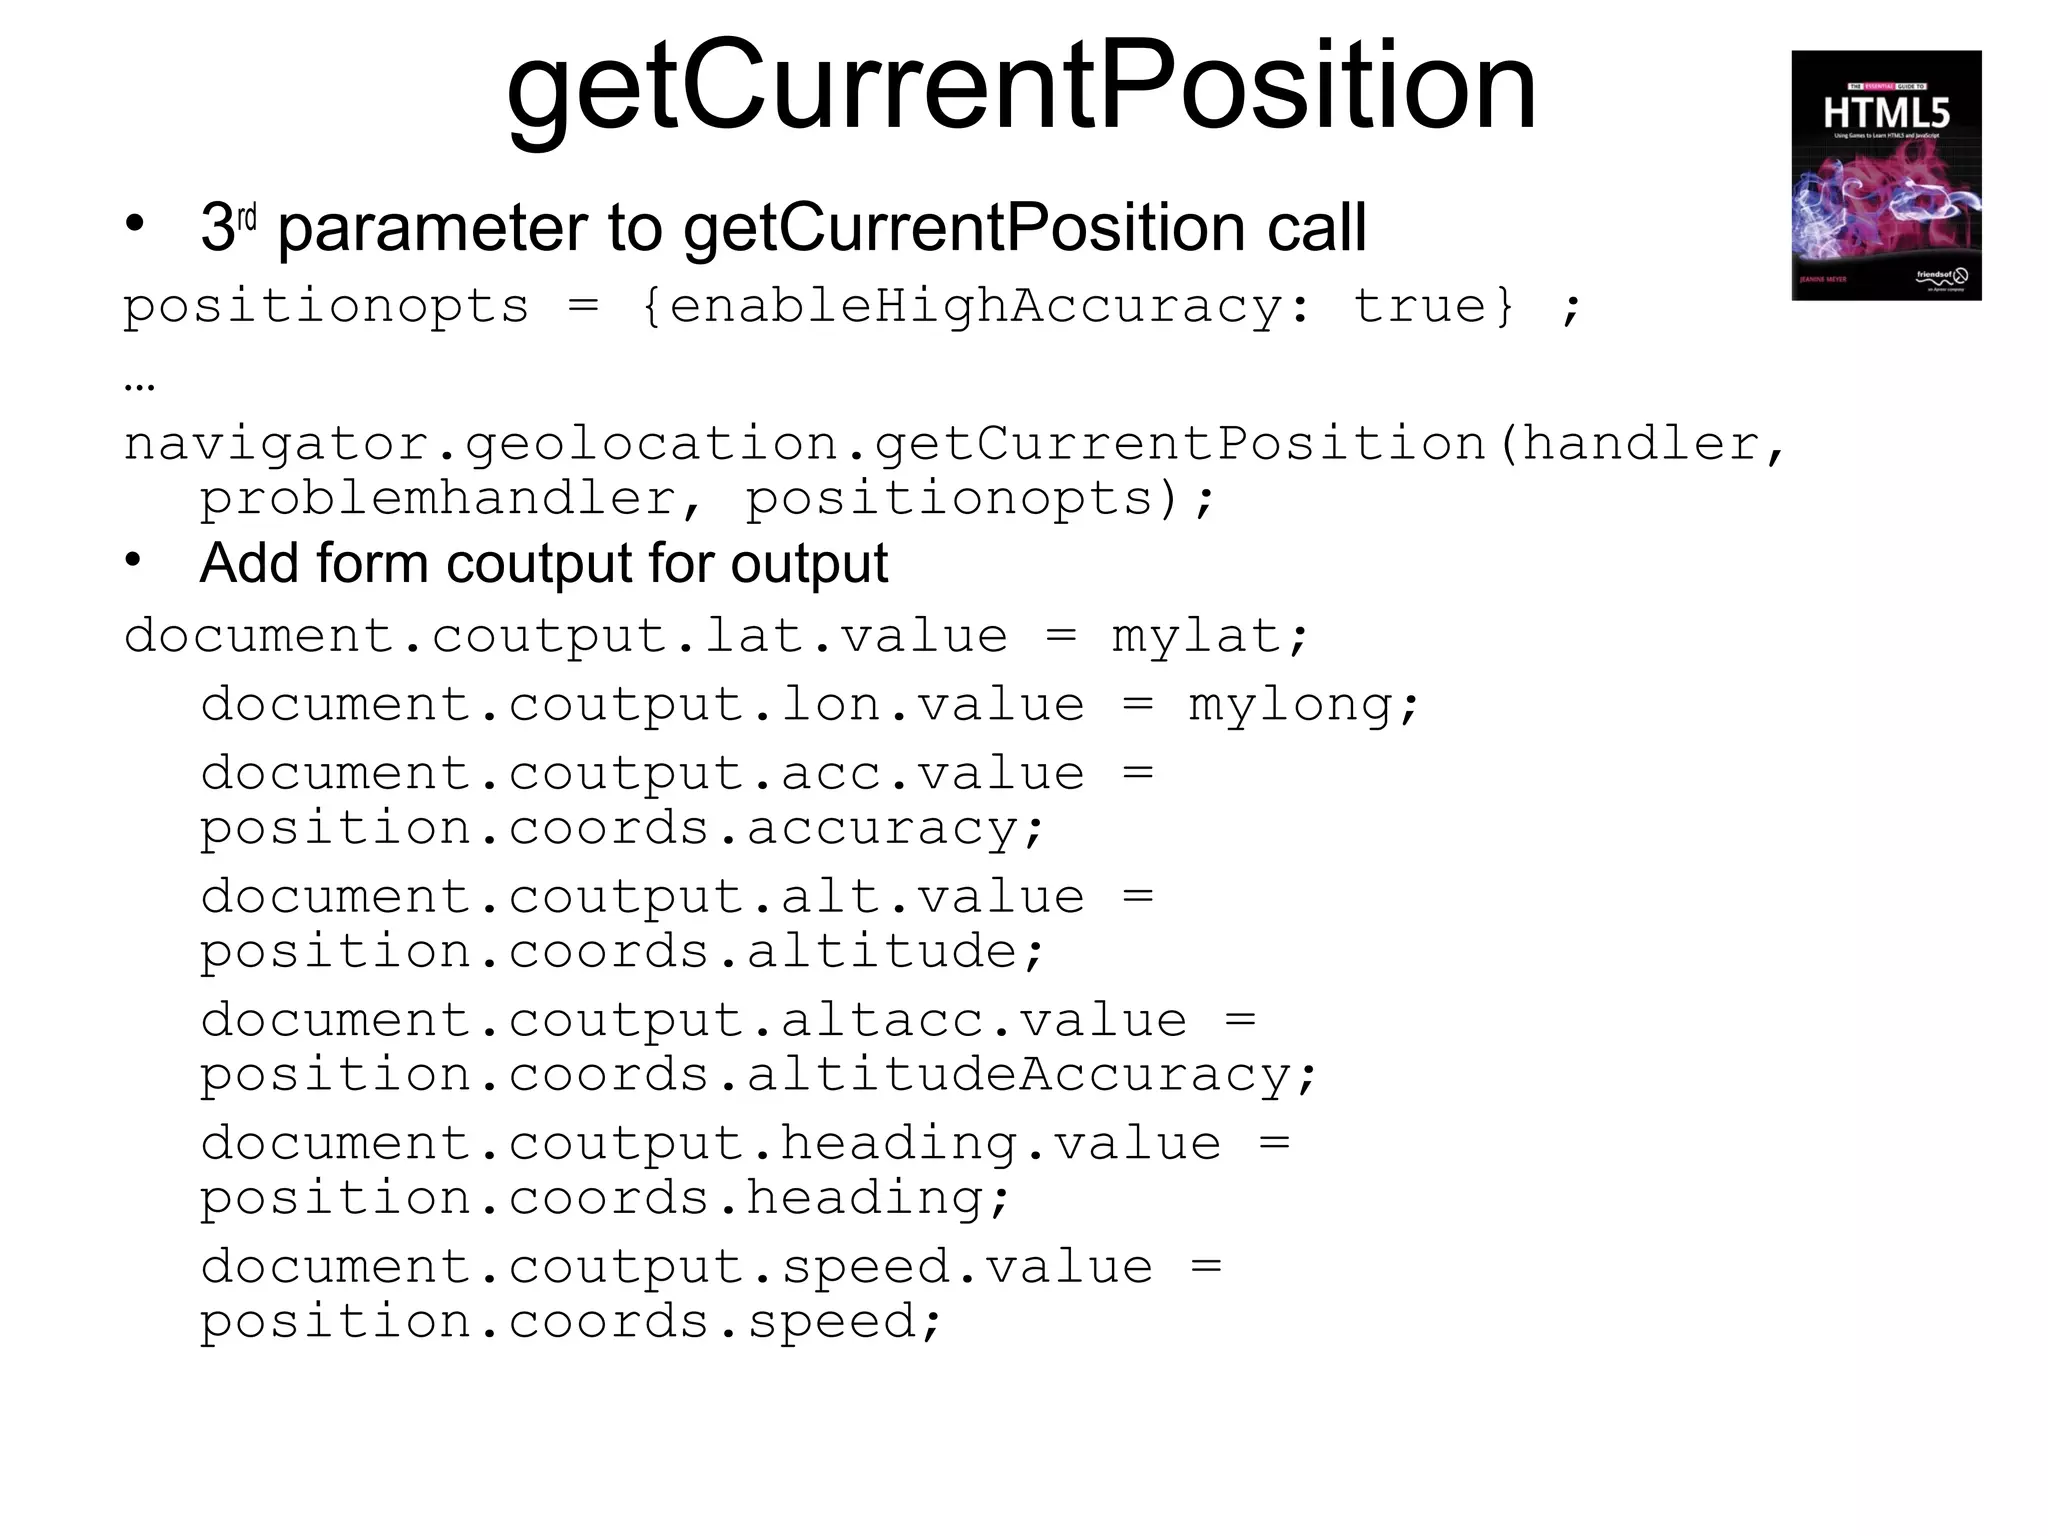
![variables
var listener;
var map;
var markersArray =[];
var blatlng;
var myOptions;
var locations = [
[35.1494444,-90.0488889,
"Memphis, TN"], [41.04796,-
73.70539,"Purchase College/SUNY"],
[41.878928, -87.641926,"IIT"]
];](https://image.slidesharecdn.com/html5workshop-130116061307-phpapp01/85/Html5workshop-101-320.jpg)
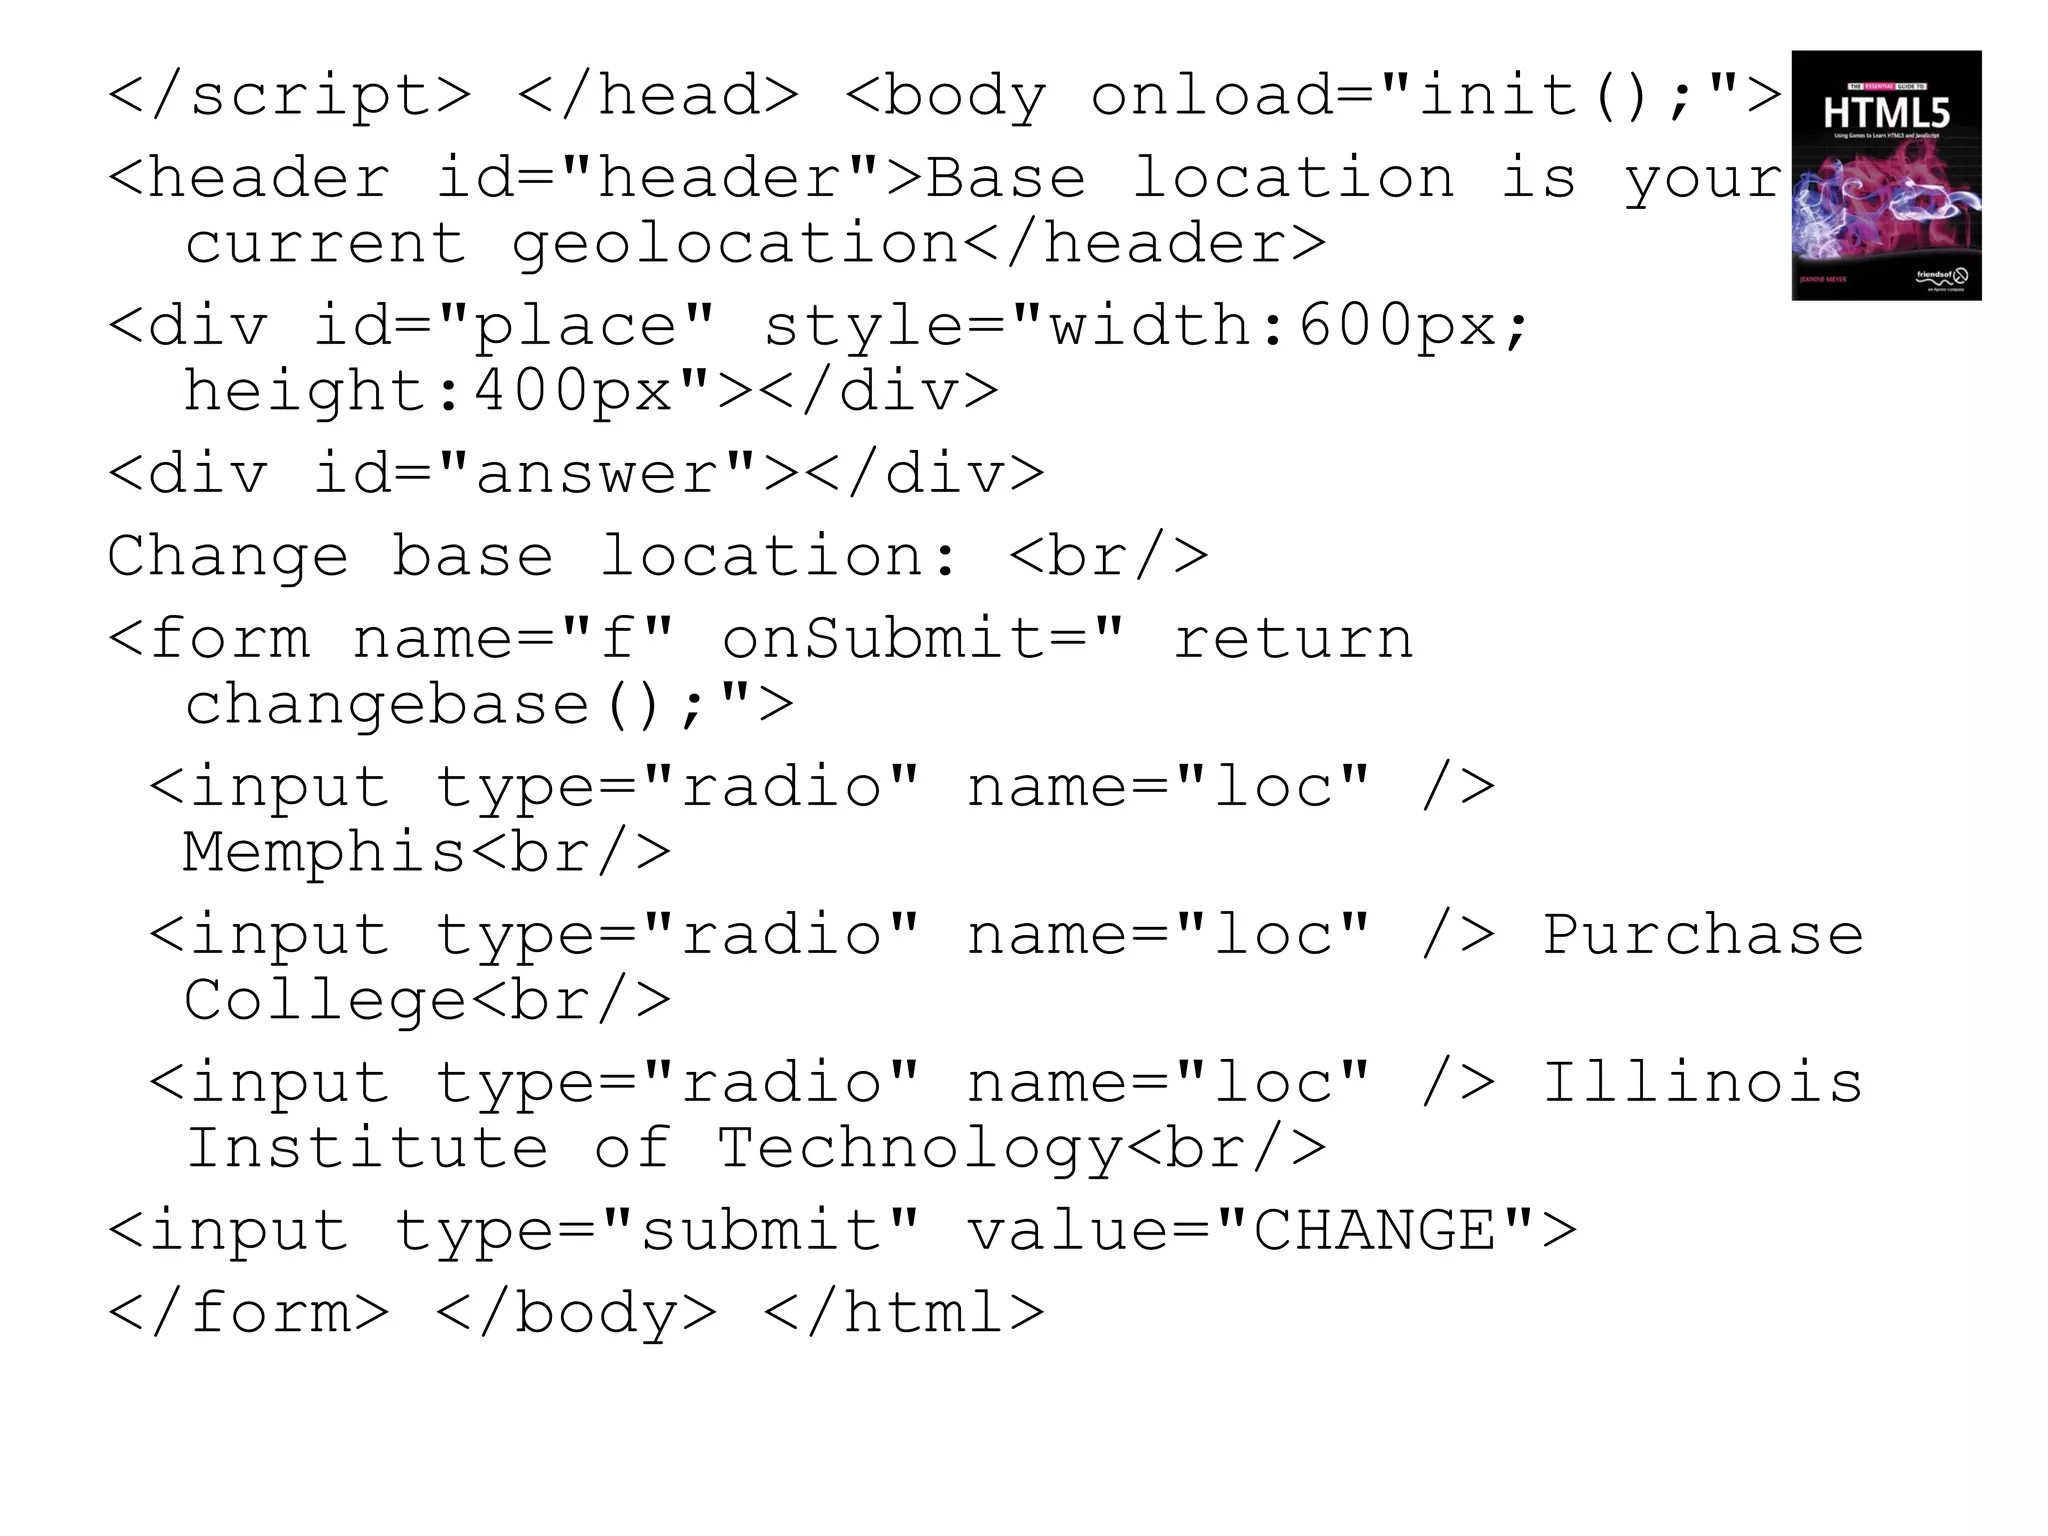
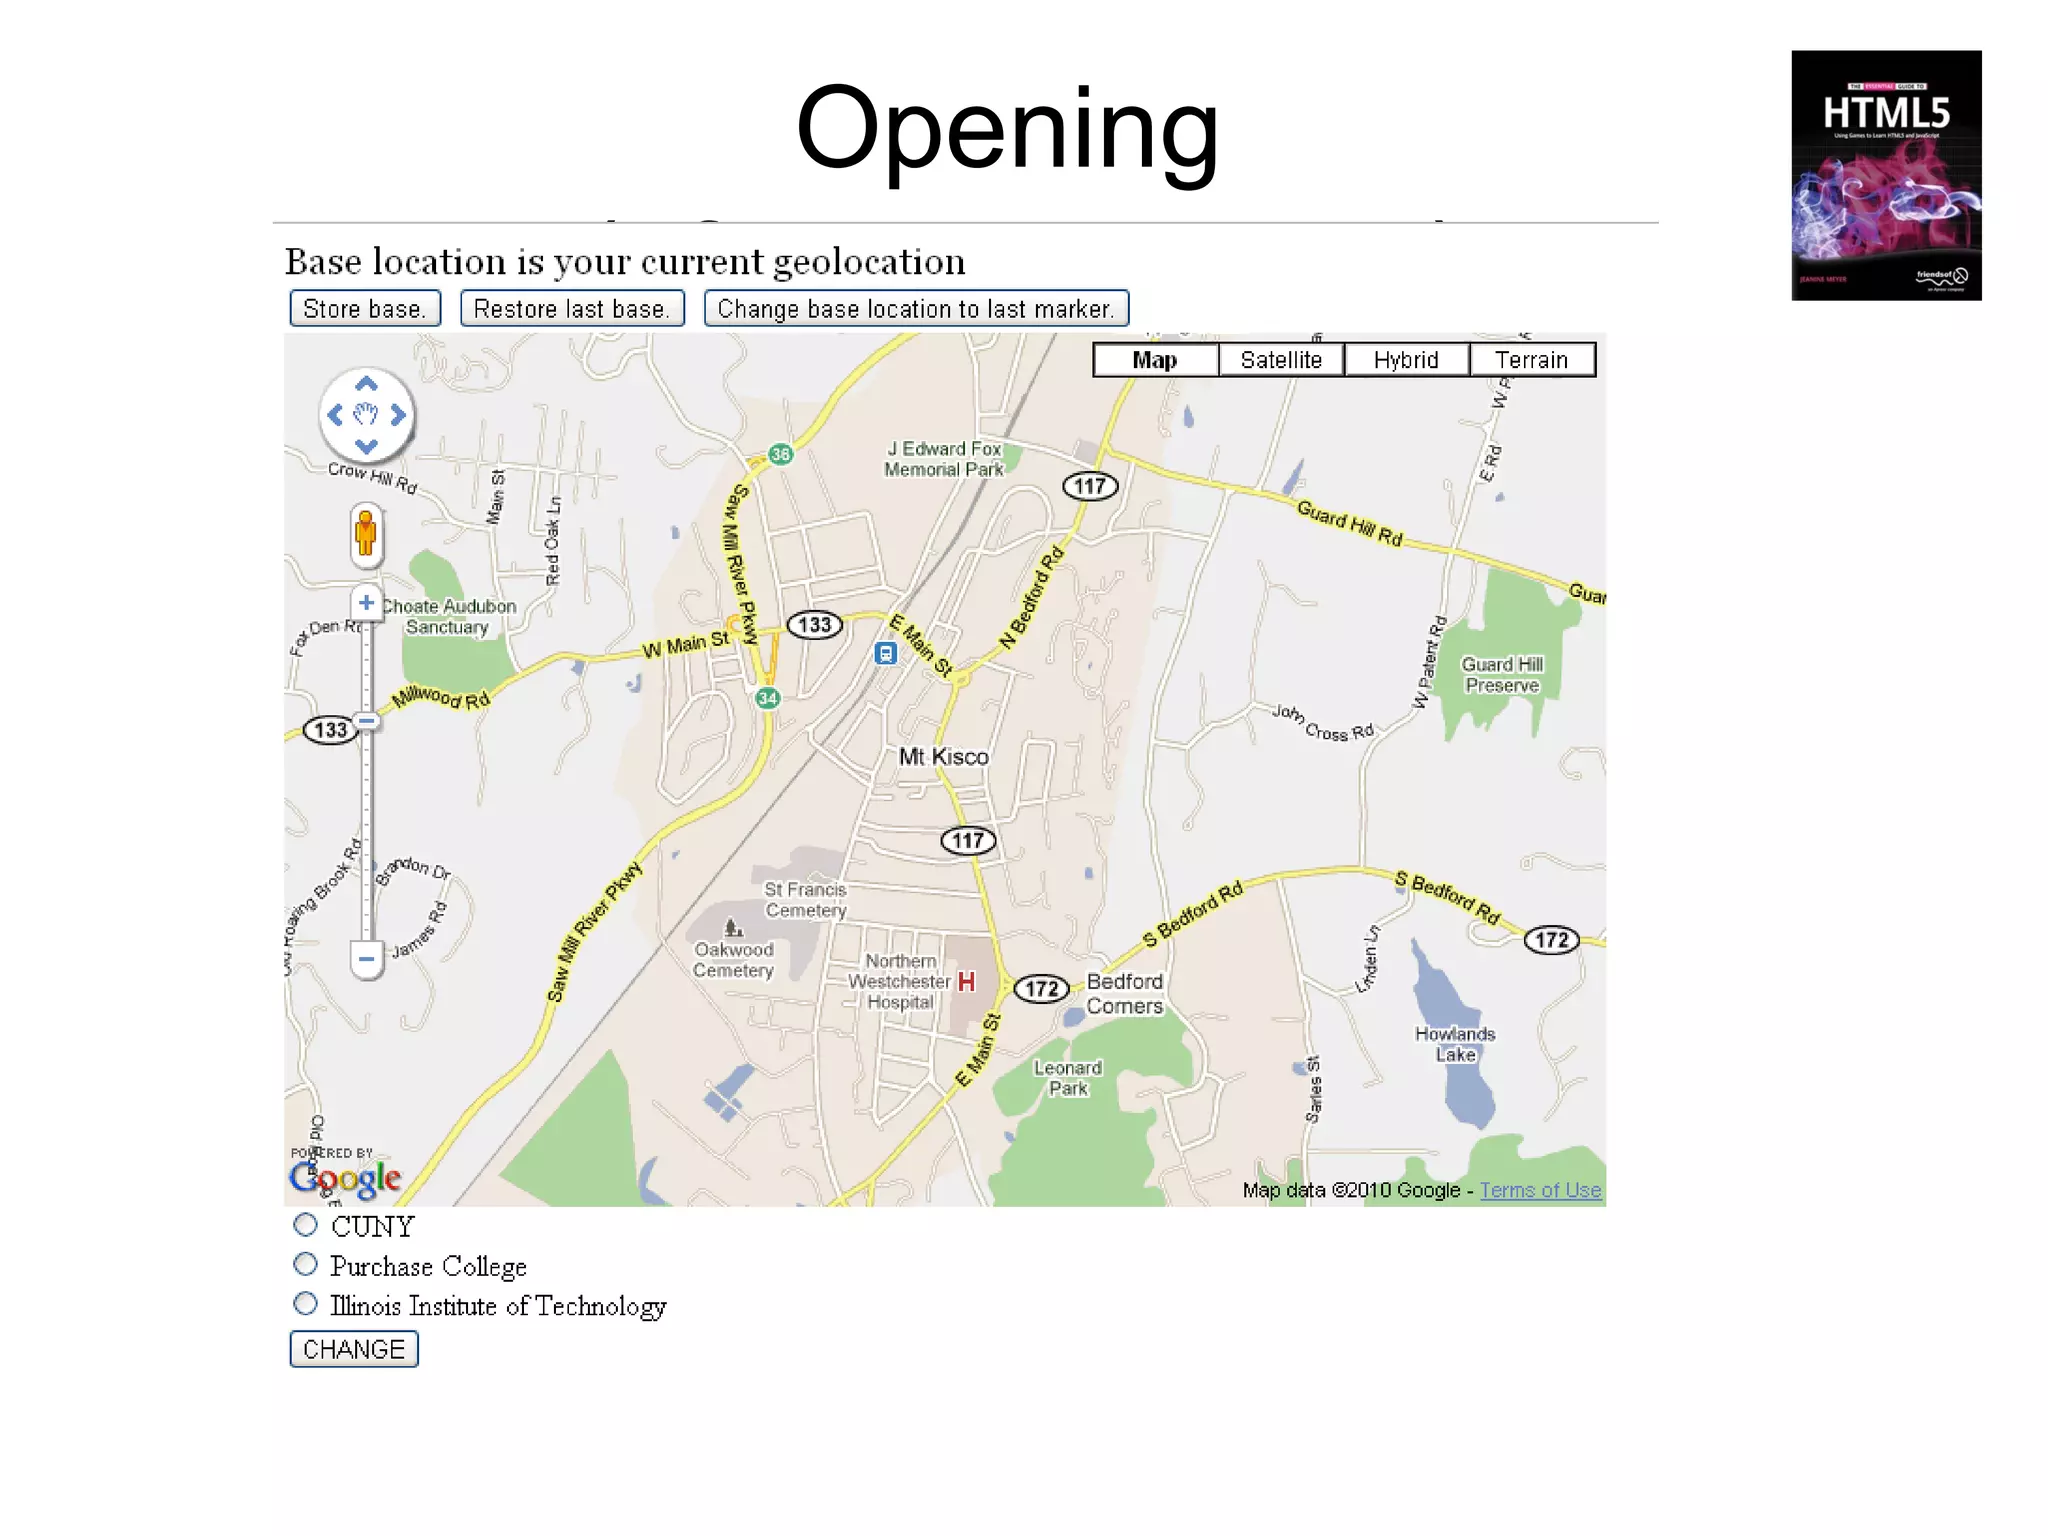
![change base
using radio buttons
function changebase() {
for(var i=0;i<locations.length;i++) {
if (document.f.loc[i].checked) {
makemap(locations[i]
[0],locations[i][1]);
document.getElementById("header").innerHTM
L = "Base location is "+locations[i][2];
}
}
return false;
}](https://image.slidesharecdn.com/html5workshop-130116061307-phpapp01/85/Html5workshop-105-320.jpg)


![variables
(in script element)
var ctx;
var pts=[
//5 points for star: rough drawing
[100,35],
[60,10],
[20,35],
[35,100],
[85,100]
];
var colors=["red","white","blue"];
//used in succession
var c=0; // points to next color](https://image.slidesharecdn.com/html5workshop-130116061307-phpapp01/75/Html5workshop-38-2048.jpg)
![variables
(in script element)
var ctx;
var pts=[ //5 points for star: rough drawing
[100,35],
[60,10],
[20,35],
[35,100],
[85,100]
];
var colors=["red","white","blue"];
//used in succession
var c=0; // points to next color](https://image.slidesharecdn.com/html5workshop-130116061307-phpapp01/75/Html5workshop-39-2048.jpg)
![variables
(in script element)
var ctx;
var pts=[ //5 points for star: rough drawing
[100,35],
[60,10],
[20,35],
[35,100],
[85,100]
];
var colors=["red","white","blue"];
//used in succession
var c=0; // points to next color](https://image.slidesharecdn.com/html5workshop-130116061307-phpapp01/75/Html5workshop-40-2048.jpg)
![variables
(in script element)
var ctx;
var pts=[ //5 points for star: rough drawing
[100,35],
[60,10],
[20,35],
[35,100],
[85,100]
];
var colors=["red","white","blue"];
//used in succession
var c=0; // points to next color](https://image.slidesharecdn.com/html5workshop-130116061307-phpapp01/75/Html5workshop-41-2048.jpg)
![variables
(in script element)
var ctx;
var pts=[ //5 points for star: rough
drawing
[100,35],
[60,10],
[20,35],
[35,100],
[85,100]
];
var colors=["red","white","blue"];
//used in succession
var c=0; // points to next color](https://image.slidesharecdn.com/html5workshop-130116061307-phpapp01/75/Html5workshop-42-2048.jpg)
![function init() {
ctx =
document.getElementById('canvas').getContext('2d'); }
function makestar() {
ctx.clearRect(0,0,600,400);
ctx.fillStyle=colors[c];
c = c +1;
// can reduce to one line using colors[c++]
c = (c<3)?c:0;
ctx.beginPath();
ctx.moveTo(pts[0][0],pts[0][1]);
ctx.lineTo(pts[3][0],pts[3][1]);
ctx.lineTo(pts[1][0],pts[1][1]);
ctx.lineTo(pts[4][0],pts[4][1]);
ctx.lineTo(pts[2][0],pts[2][1]);
ctx.lineTo(pts[0][0],pts[0][1]);
ctx.stroke();
//outline (necessary for white star!
ctx.fill(); }](https://image.slidesharecdn.com/html5workshop-130116061307-phpapp01/75/Html5workshop-43-2048.jpg)

![variables
var ctx;
var angle = 2*Math.PI/5;
var pts=[ ];
var
colors=["red","white","blue","p
urple","yellow","teal"];
var c=0;](https://image.slidesharecdn.com/html5workshop-130116061307-phpapp01/75/Html5workshop-48-2048.jpg)
![function makestar() {
buildstar();
ctx.fillStyle=colors[c++];
c = (c<colors.length)?c:0;
ctx.beginPath();
ctx.moveTo(pts[0][0],pts[0][1]);
ctx.lineTo(pts[3][0],pts[3][1]);
ctx.lineTo(pts[1][0],pts[1][1]);
ctx.lineTo(pts[4][0],pts[4][1]);
ctx.lineTo(pts[2][0],pts[2][1]);
ctx.lineTo(pts[0][0],pts[0][1]);
ctx.stroke();
ctx.fill();
}](https://image.slidesharecdn.com/html5workshop-130116061307-phpapp01/75/Html5workshop-49-2048.jpg)
![function buildstar() {
pts = [];
var x=500*Math.random(); //all these
arbitrary
var y = 300*Math.random();
var r=50*Math.random();
var sangle = Math.random()*angle;
for(var i=0;i<5;i++) {
var a = i*angle + sangle;
var px = x+r*Math.cos(a);
var py = y-r*Math.sin(a);
pts.push([px,py]);
}
}](https://image.slidesharecdn.com/html5workshop-130116061307-phpapp01/75/Html5workshop-50-2048.jpg)


![Strategy
• Use setInterval to invoke [my] drawscene
function
– re-position video.
– Check against [virtual] walls. Apply angle of incidence
equal angle of reflection (easy to do)
– use strokeRect to draw box
• NOTE: the loop attribute did not work, so I set up
event handling for video ended event.](https://image.slidesharecdn.com/html5workshop-130116061307-phpapp01/75/Html5workshop-68-2048.jpg)


![variables
var listener;
var map;
var markersArray =[];
var blatlng;
var myOptions;
var locations = [
[35.1494444,-90.0488889,
"Memphis, TN"], [41.04796,-
73.70539,"Purchase College/SUNY"],
[41.878928, -87.641926,"IIT"]
];](https://image.slidesharecdn.com/html5workshop-130116061307-phpapp01/75/Html5workshop-101-2048.jpg)


![change base
using radio buttons
function changebase() {
for(var i=0;i<locations.length;i++) {
if (document.f.loc[i].checked) {
makemap(locations[i]
[0],locations[i][1]);
document.getElementById("header").innerHTM
L = "Base location is "+locations[i][2];
}
}
return false;
}](https://image.slidesharecdn.com/html5workshop-130116061307-phpapp01/75/Html5workshop-105-2048.jpg)