The Arduino platform was developed by a team of students and teachers to create an easy-to-use and affordable electronics prototyping platform. It was inspired by Processing and aims to be open source and support a community of users sharing projects and knowledge. The Arduino hardware acts as a microcontroller that can read input and control output to create interactive projects, while the software provides an easy programming environment to code these projects.
Overview of Arduino, a user-friendly electronics platform. History of its creation by a team from Ivrea. Influence from the Processing language.
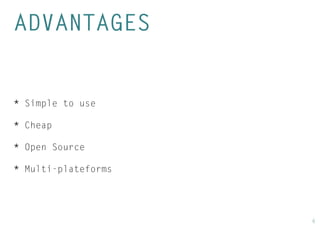
Advantages of Arduino include simplicity, affordability, and open-source nature. Discussion on the supportive community and resources available.
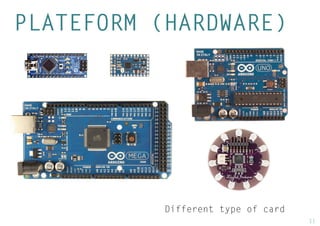
Arduino as a platform comprises hardware for prototyping, serving as a 'brain' that connects input and output through various components.
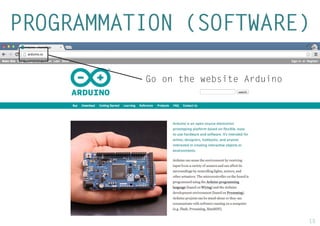
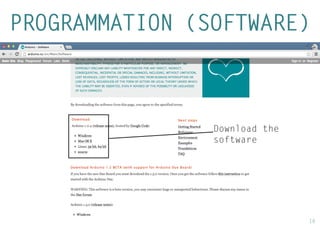
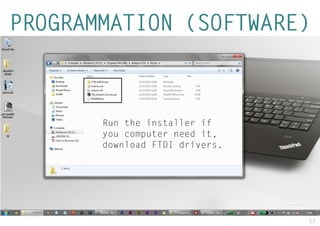
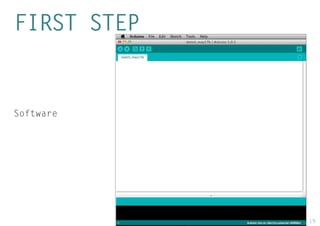
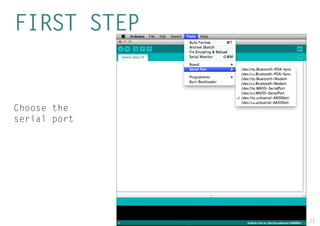
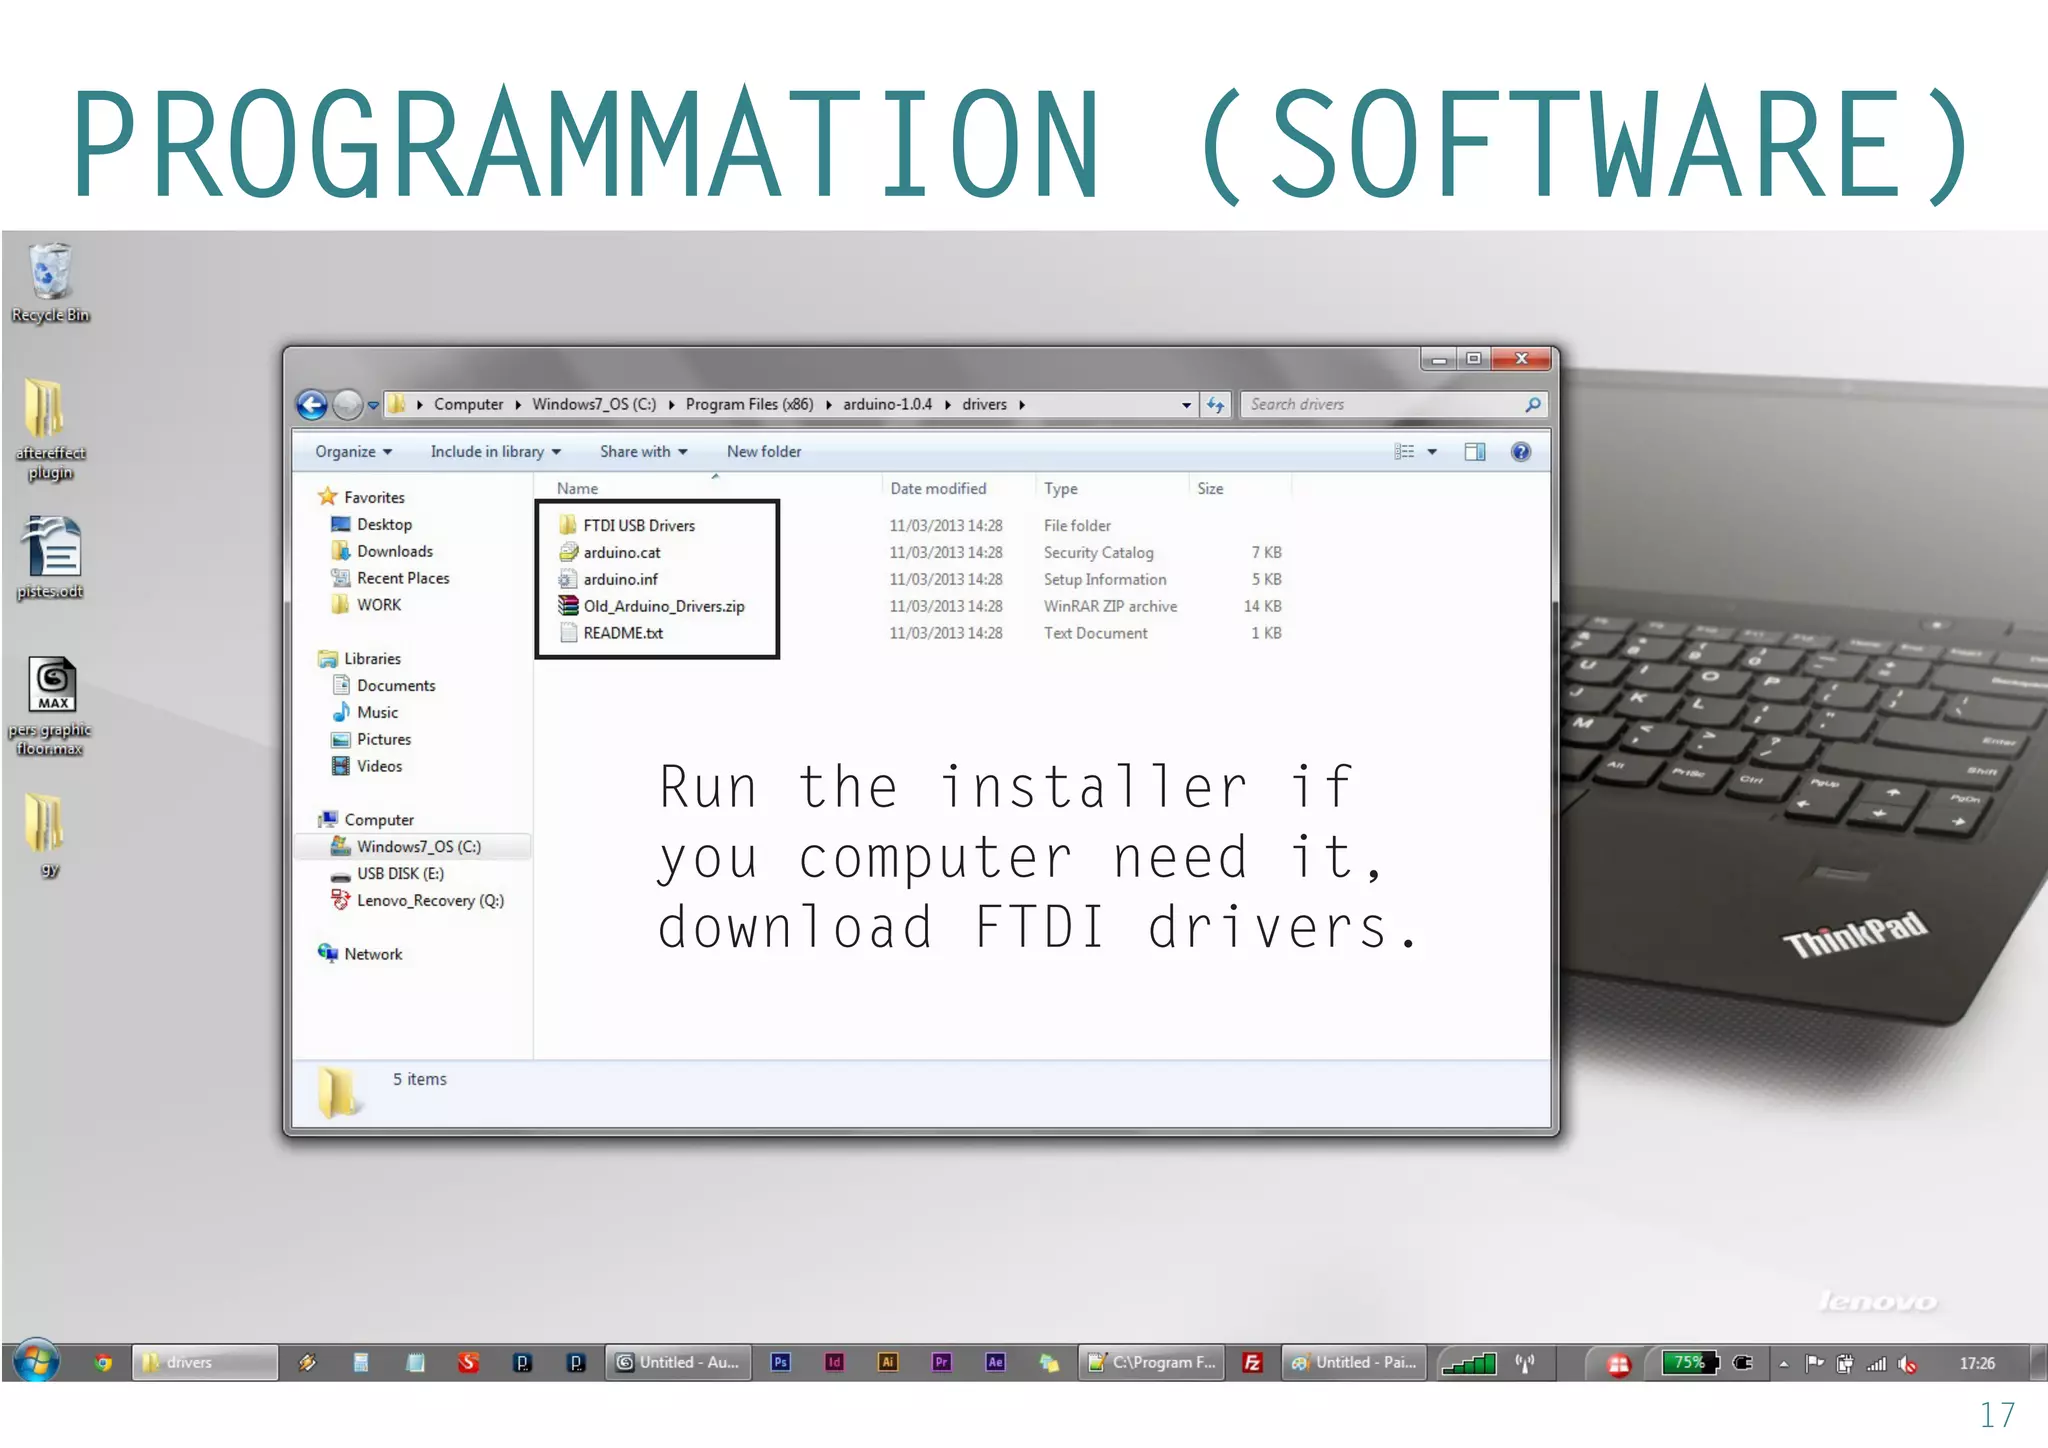
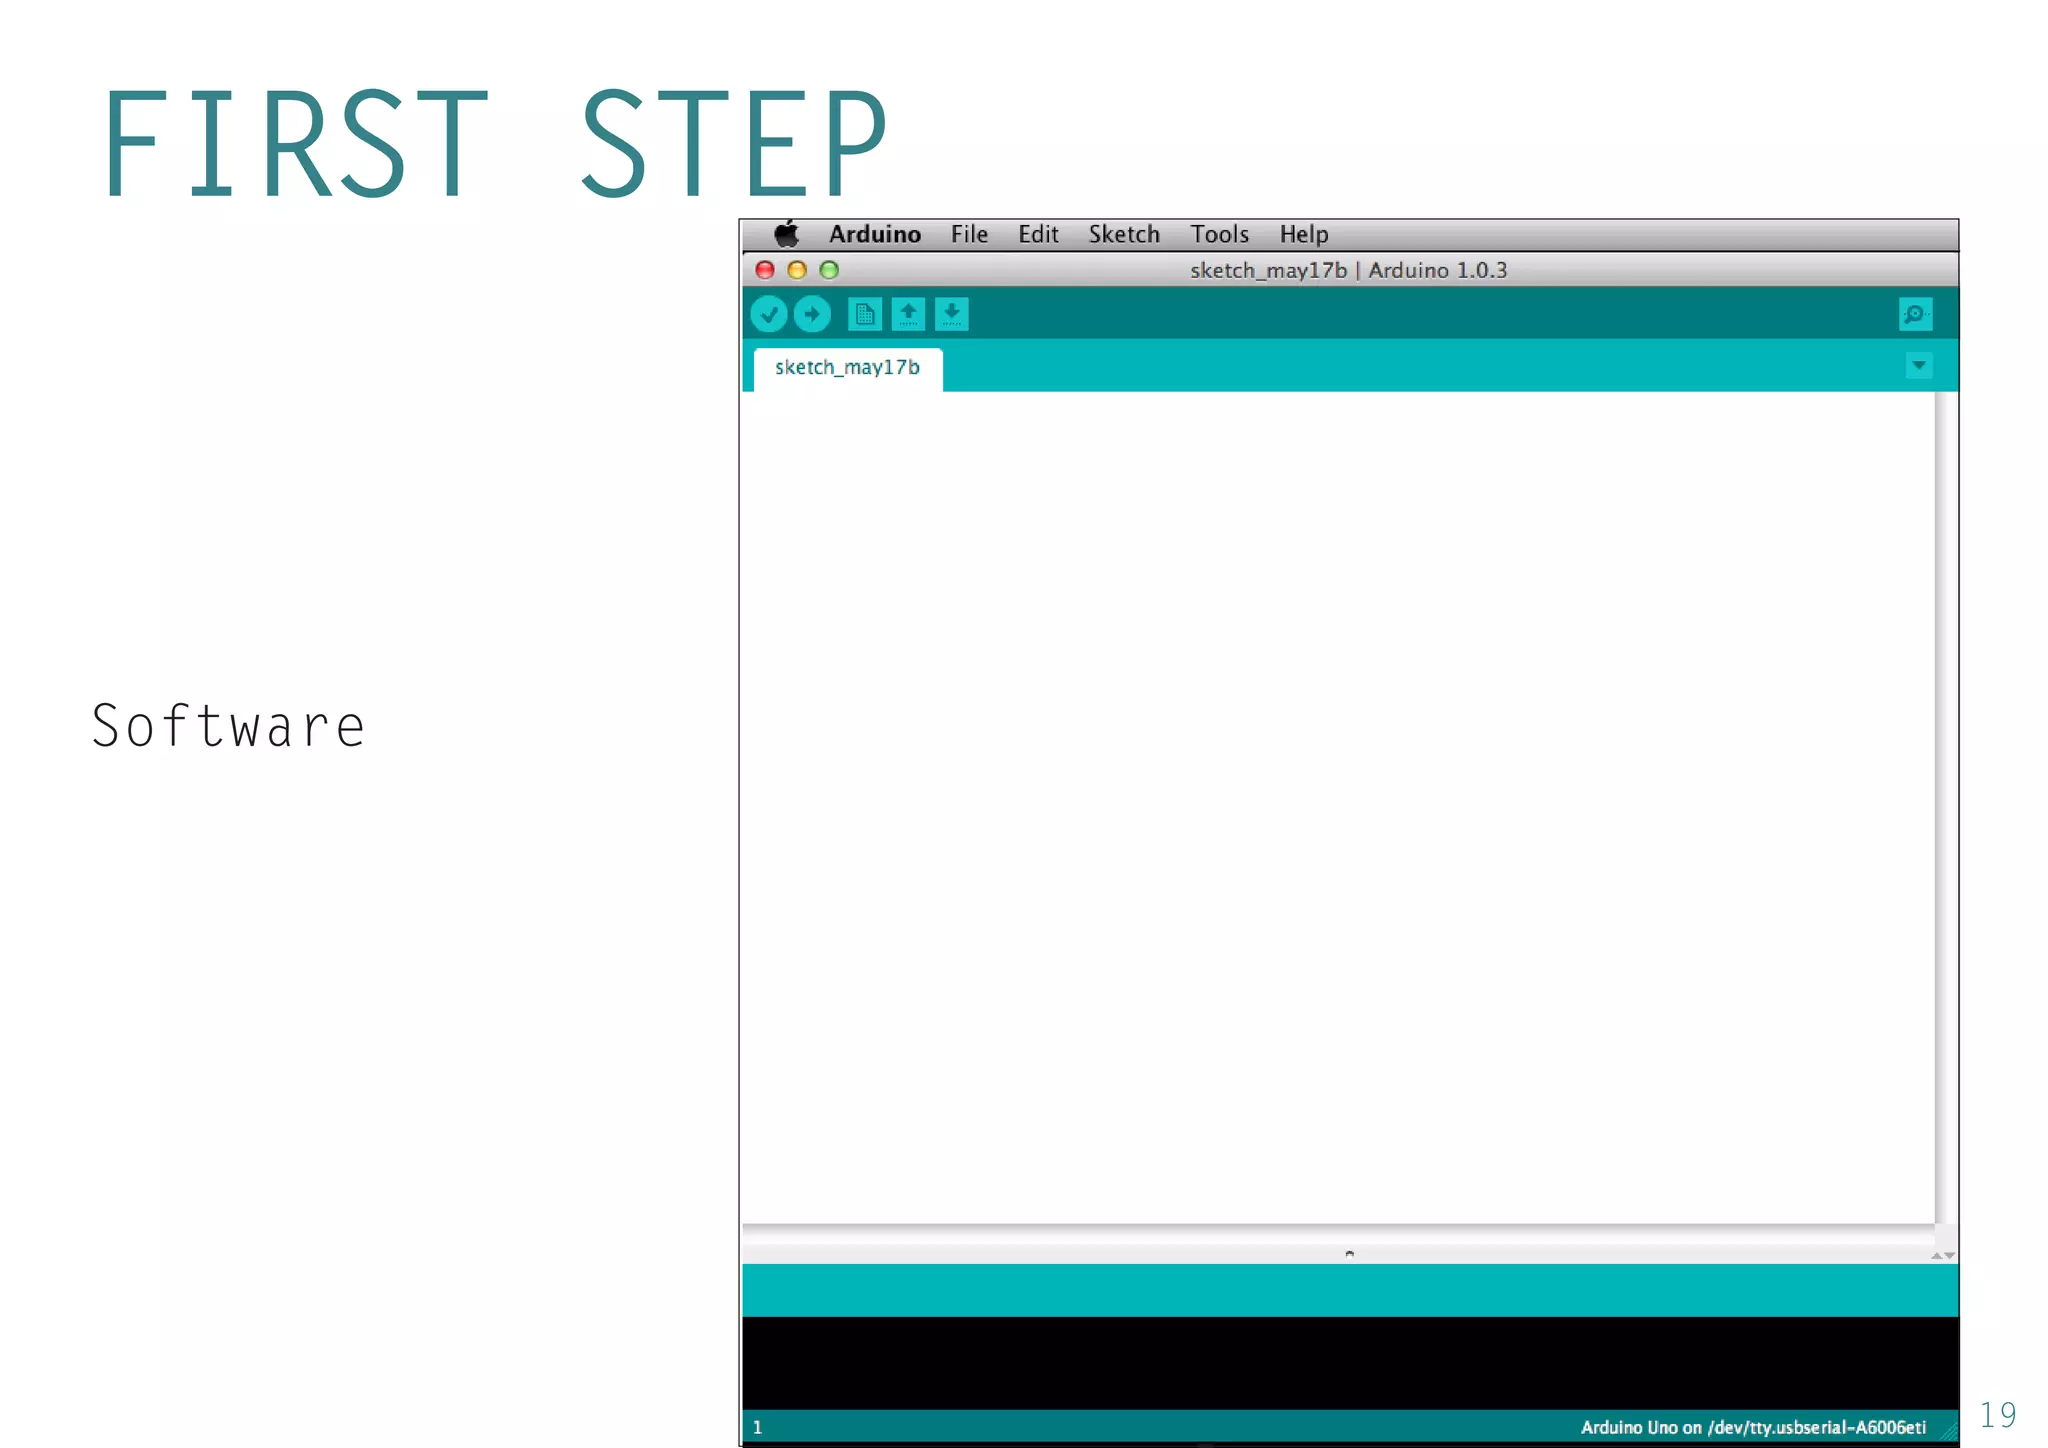
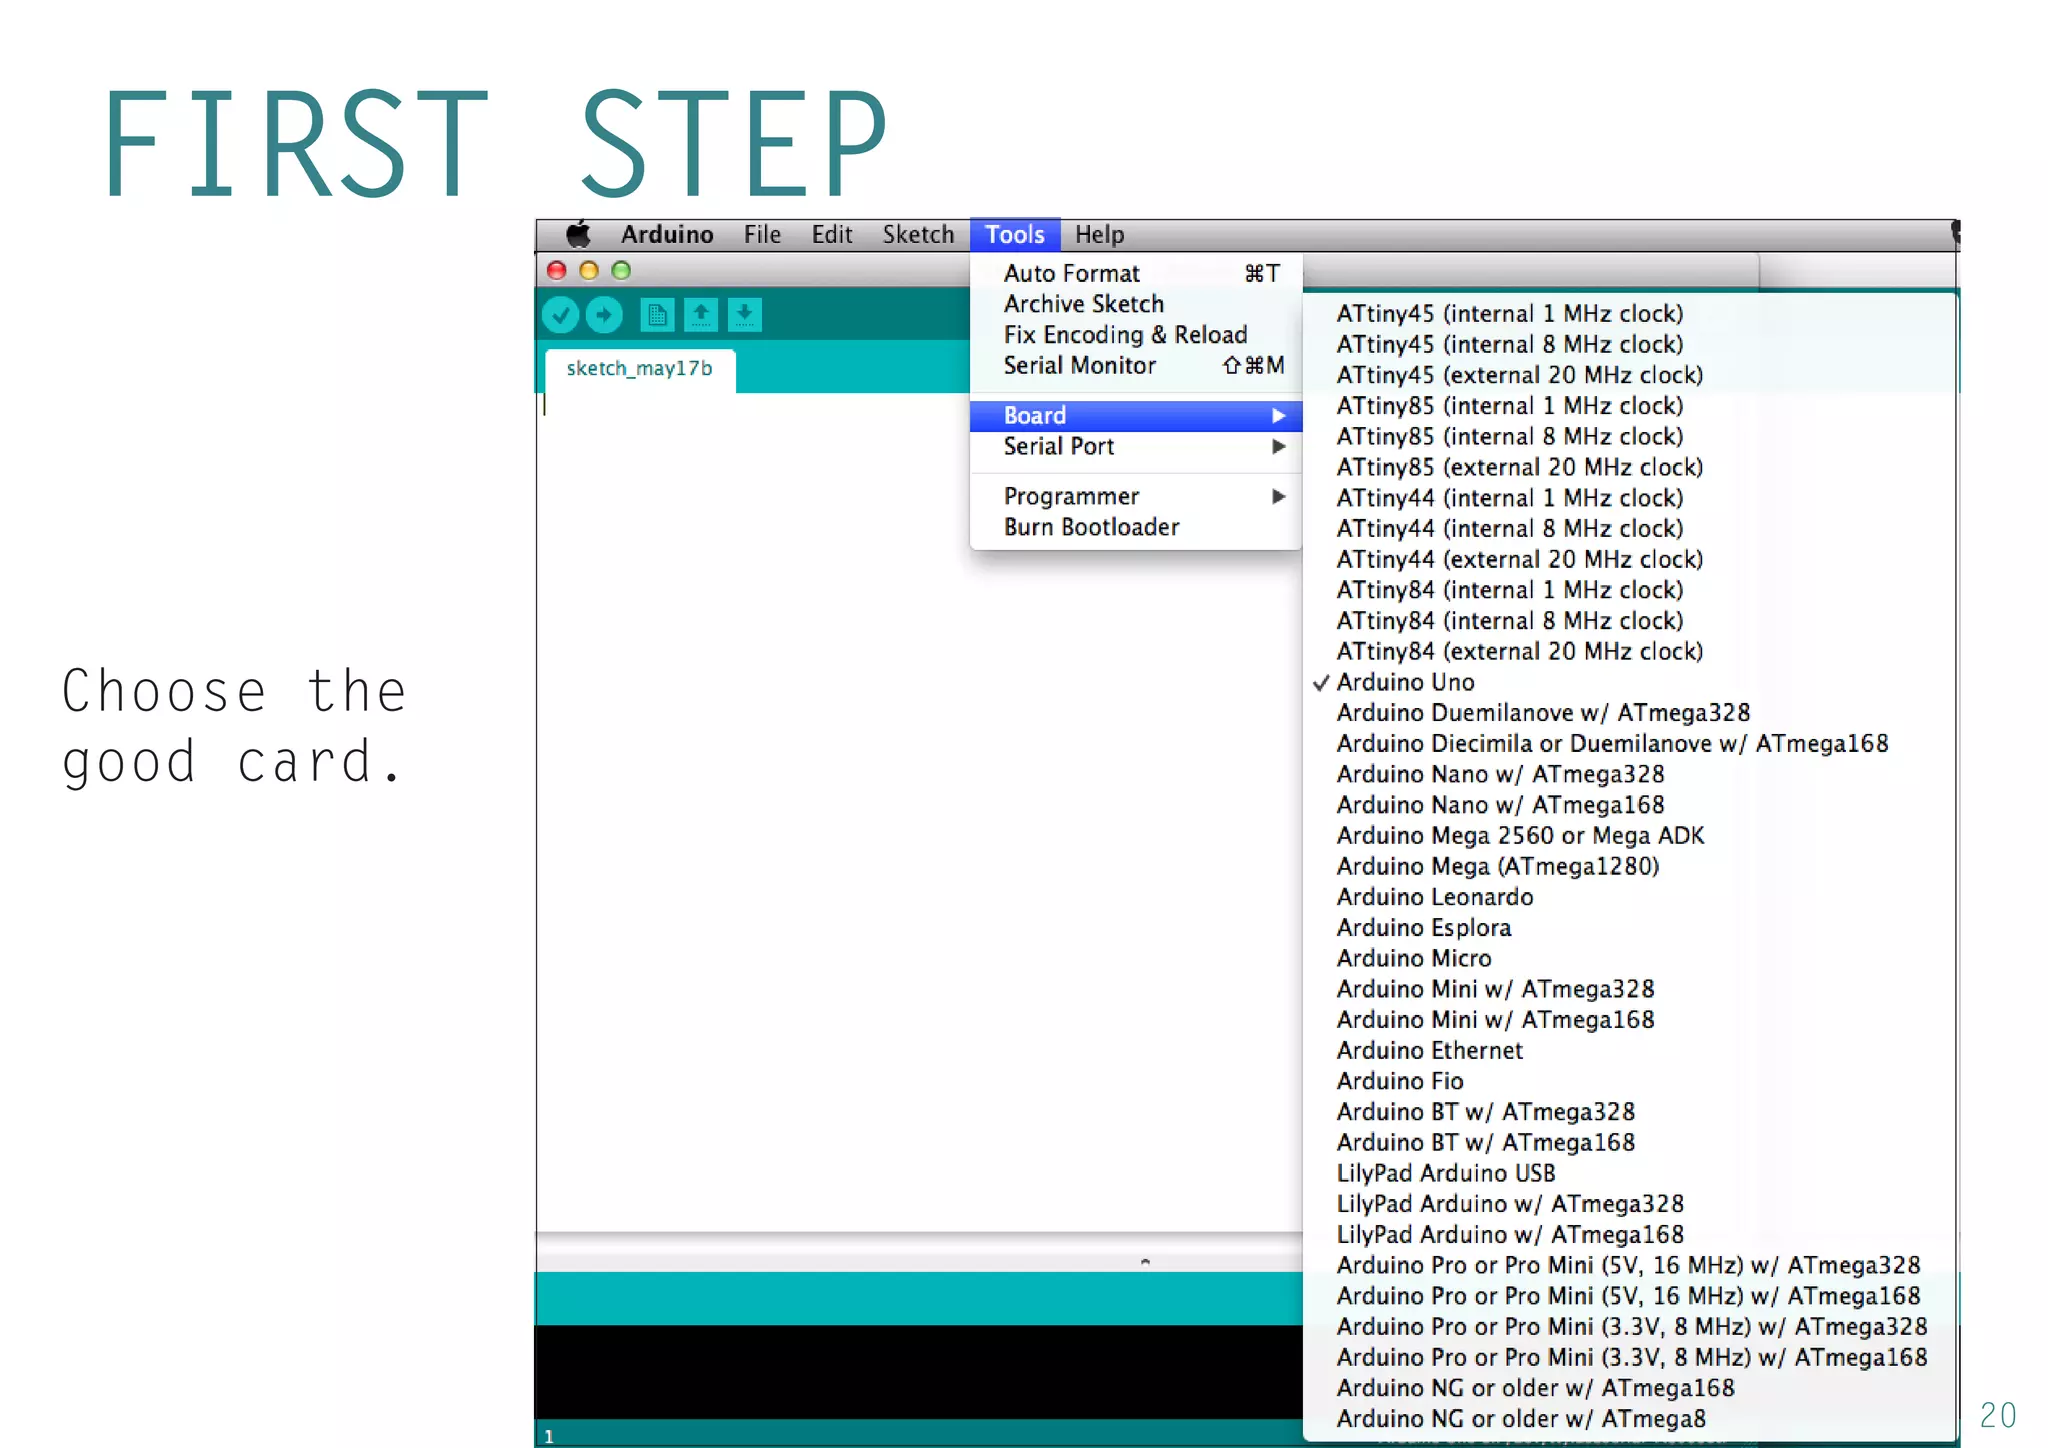
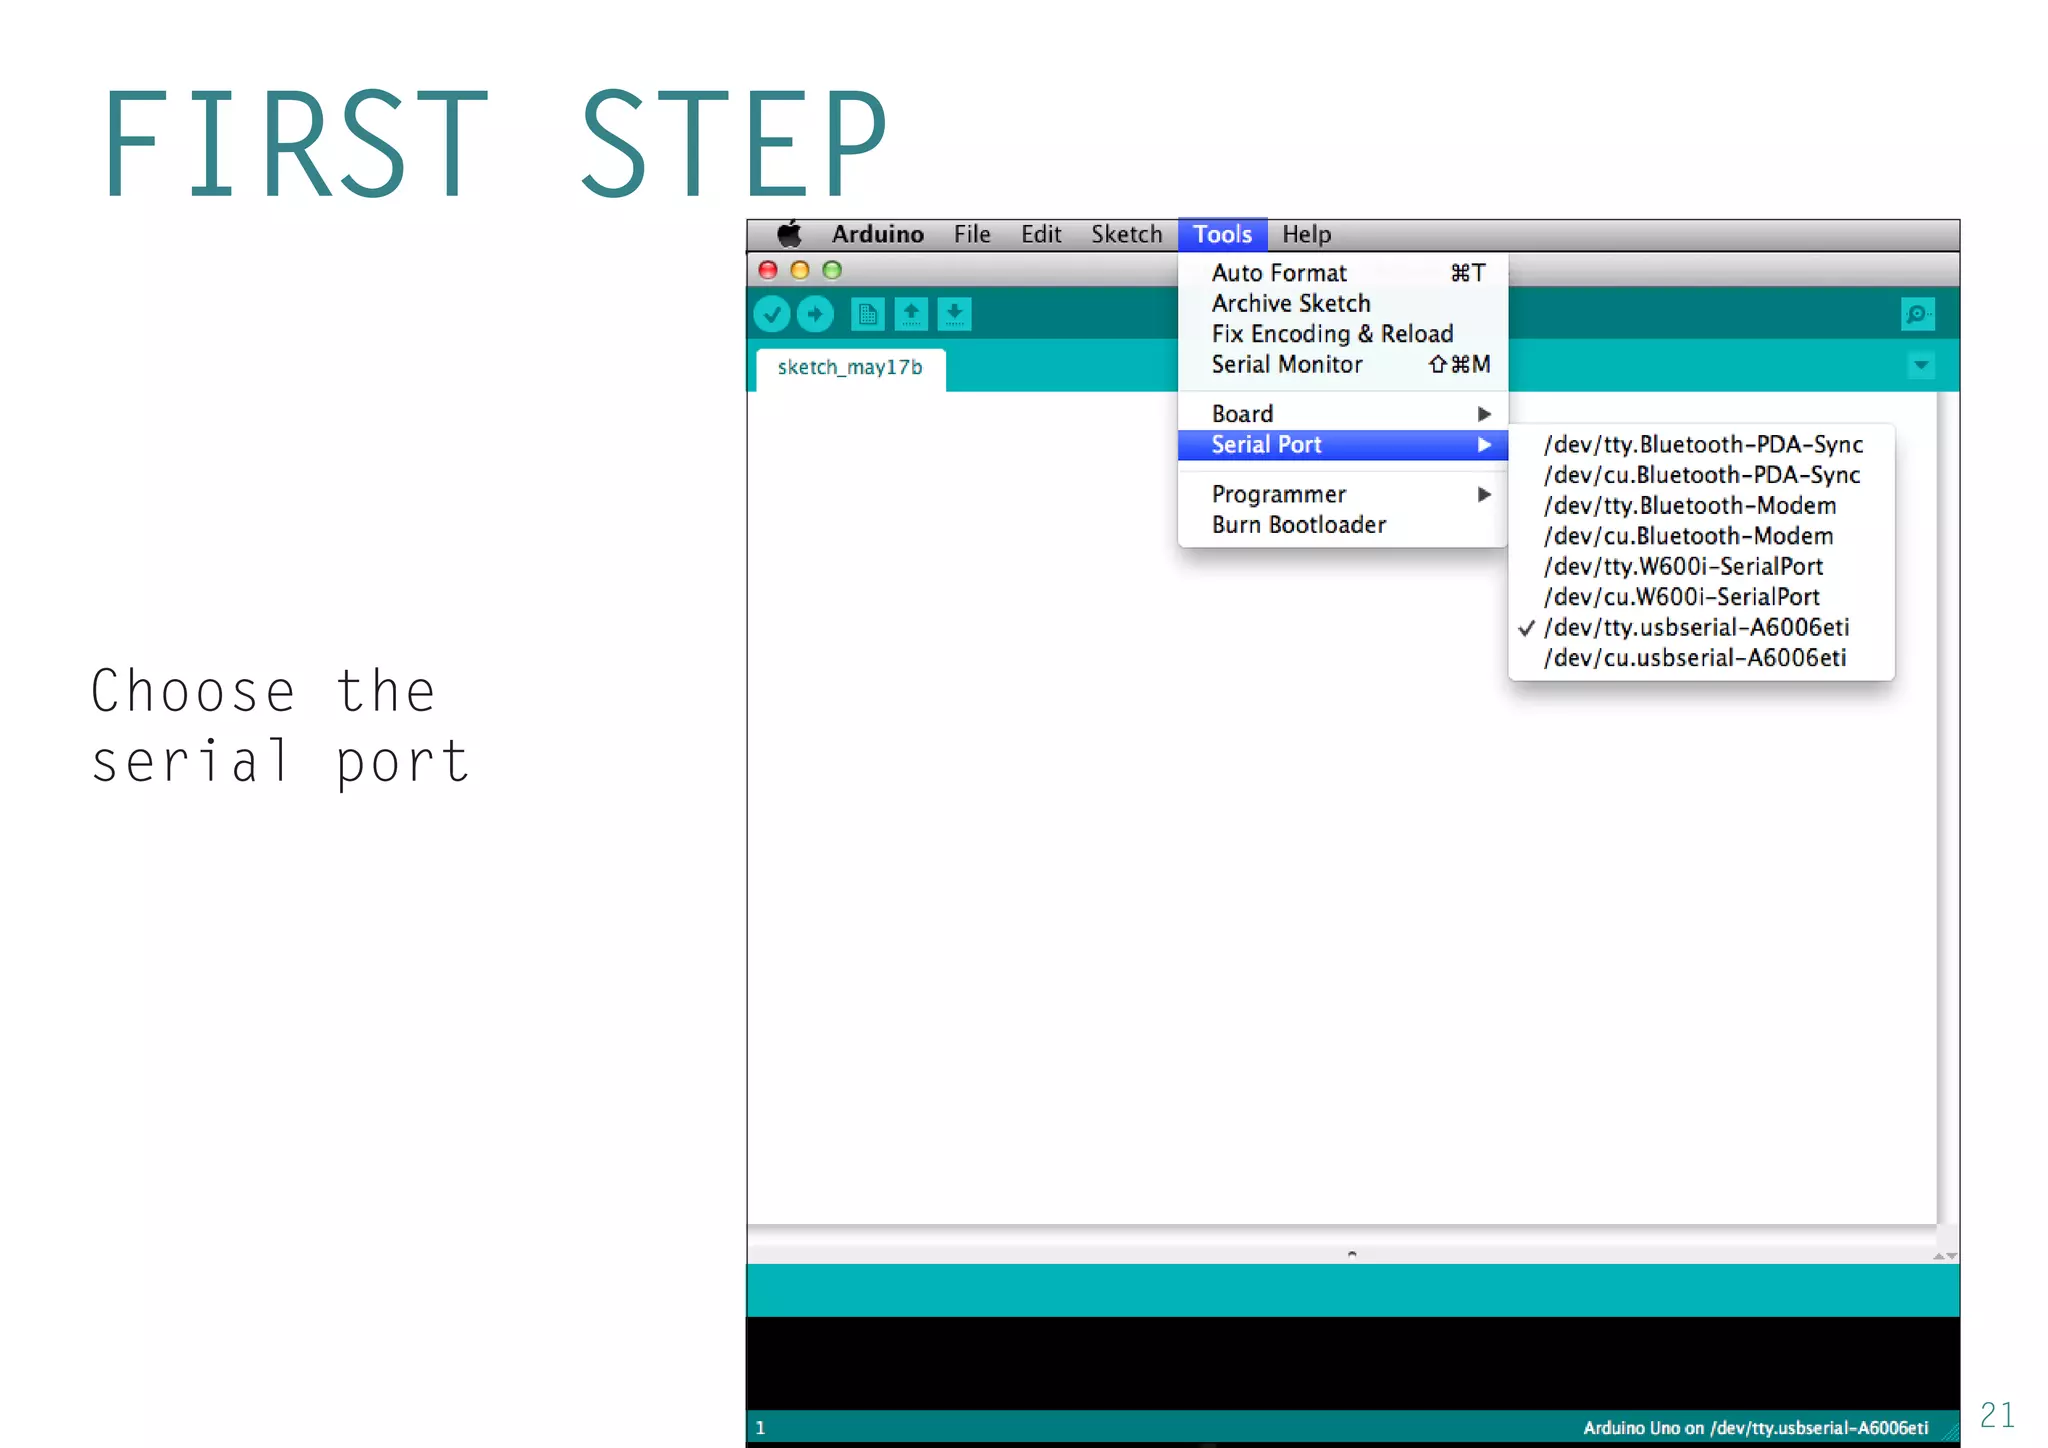
Instructions on downloading and installing Arduino software, and the first steps to set up the hardware including selecting the correct board and serial port.
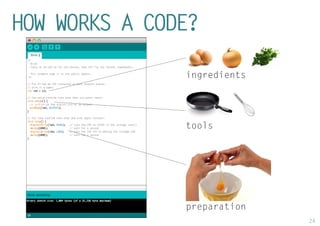
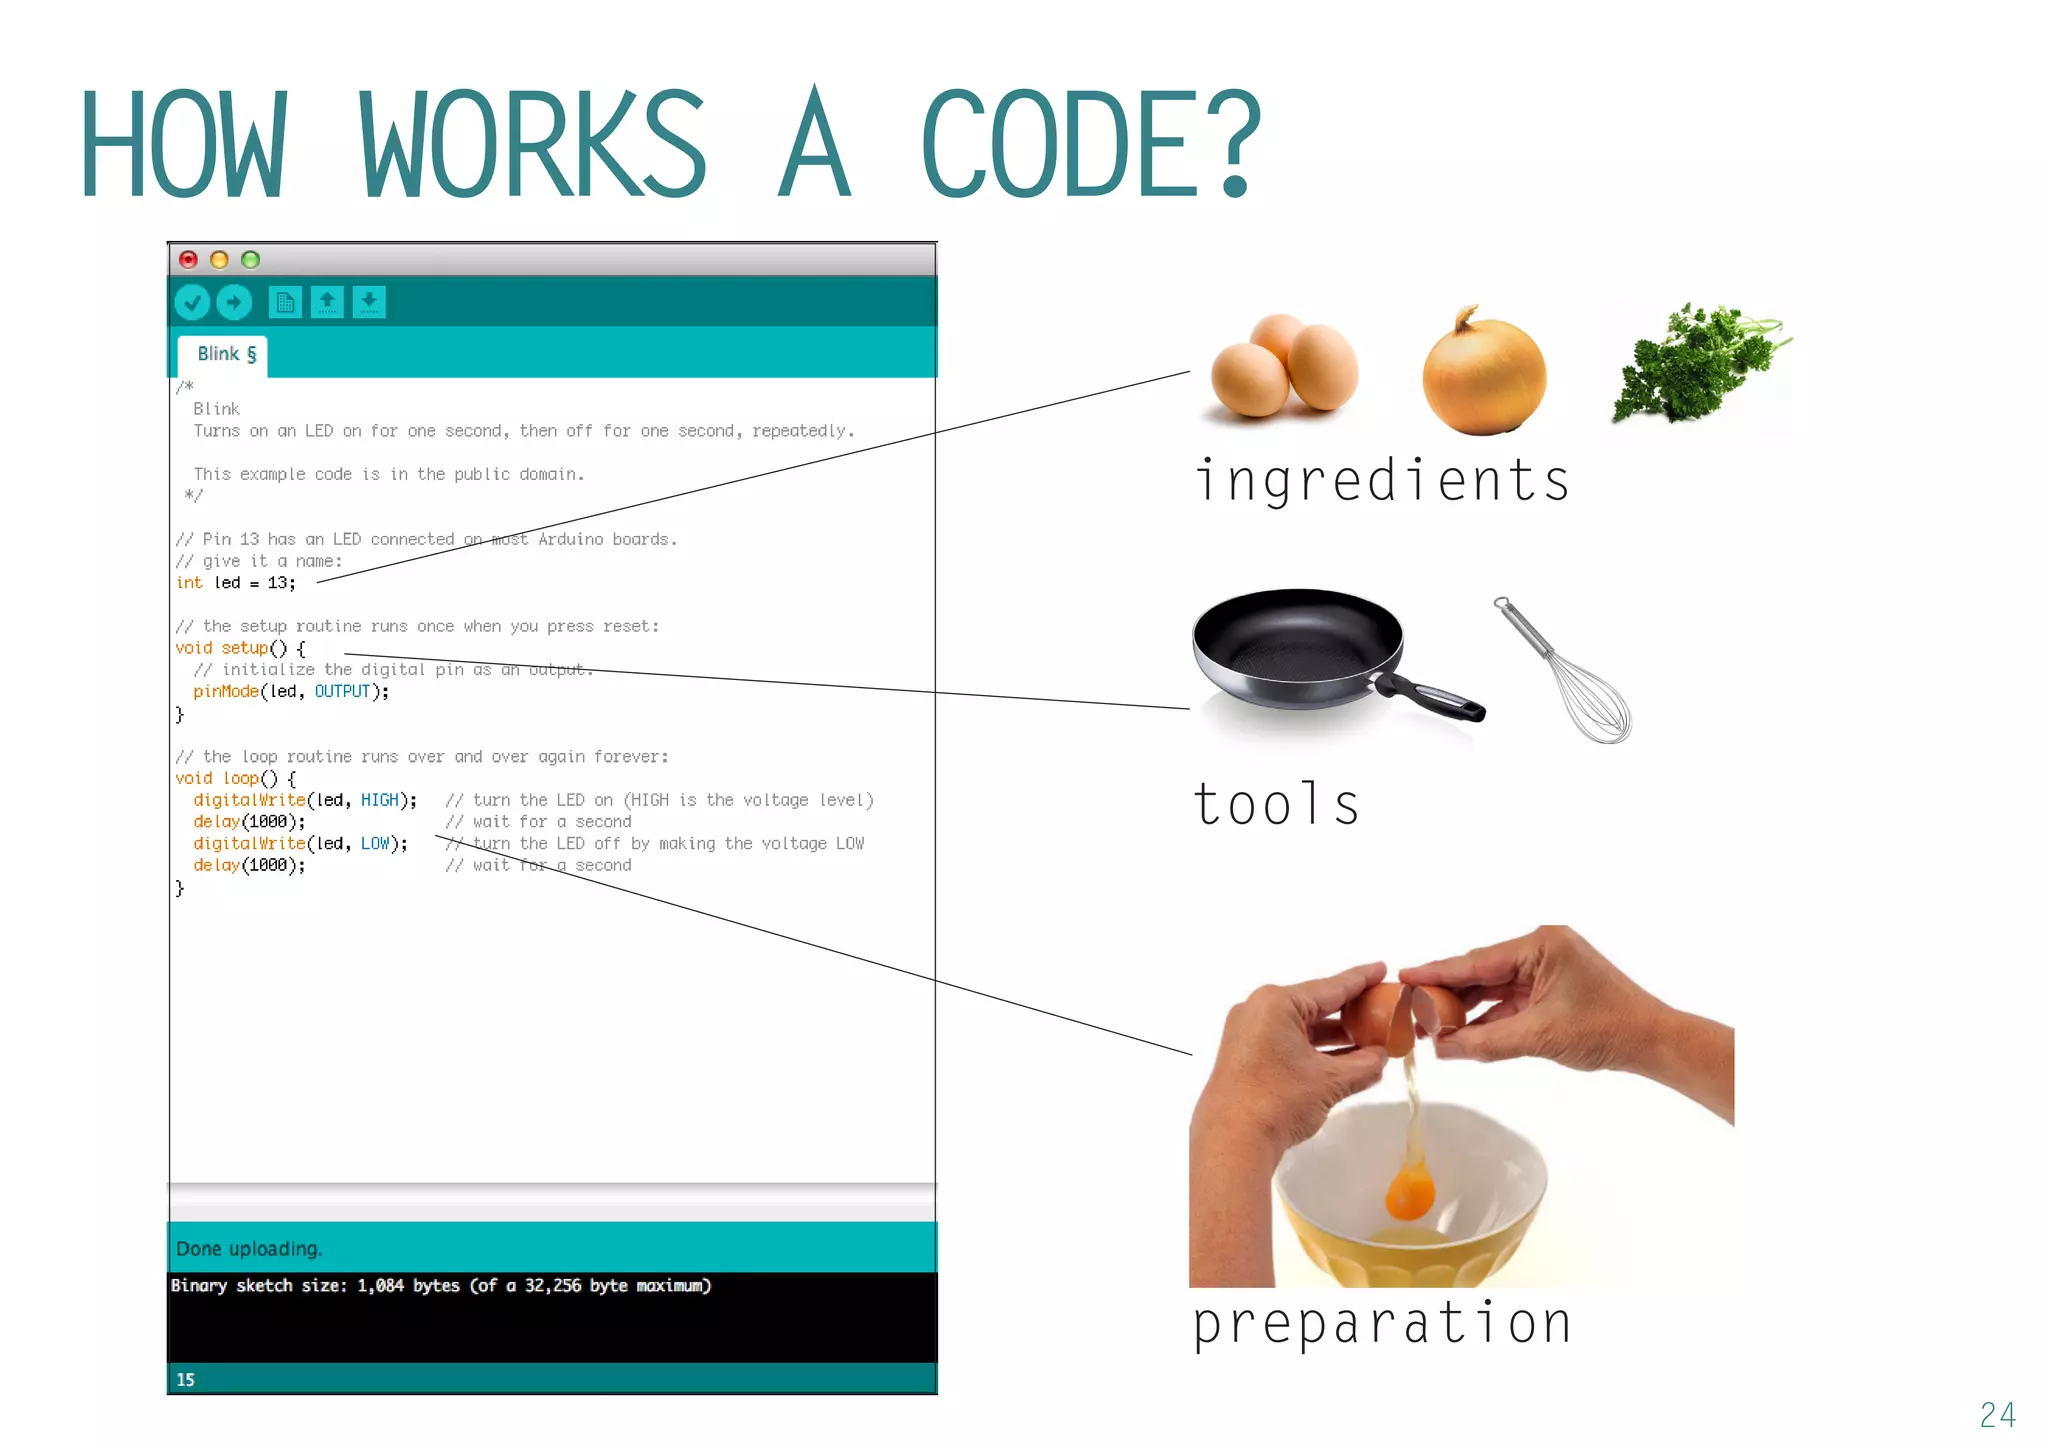
Explanation of coding basics with Arduino, likening coding to a recipe, and introducing crucial functions like pinMode, digitalWrite, and analogRead.
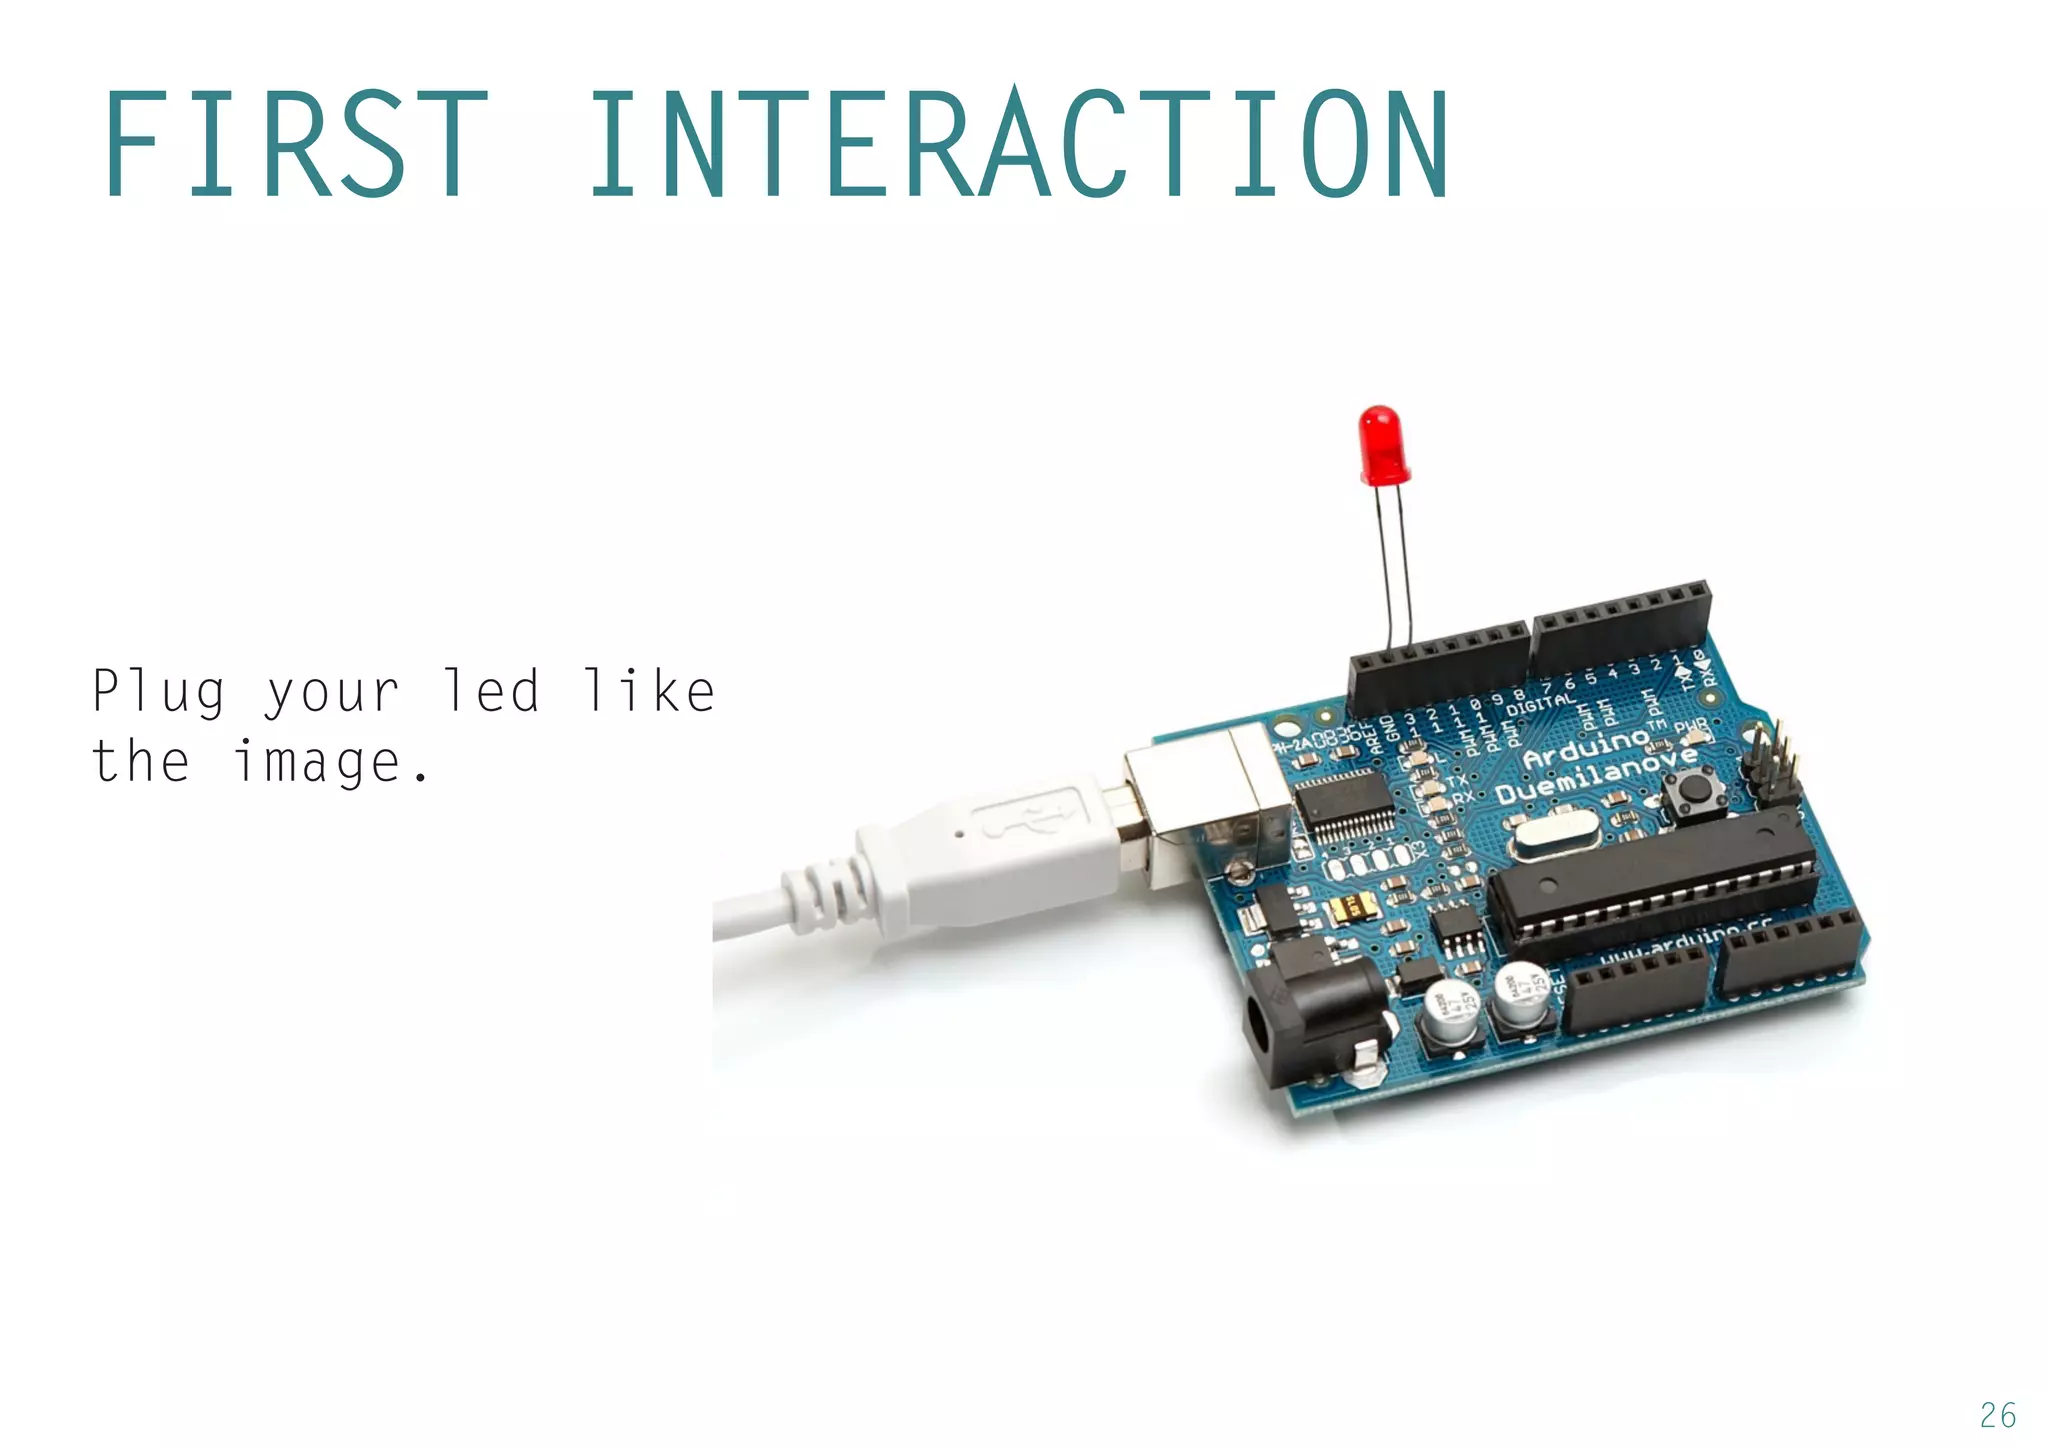
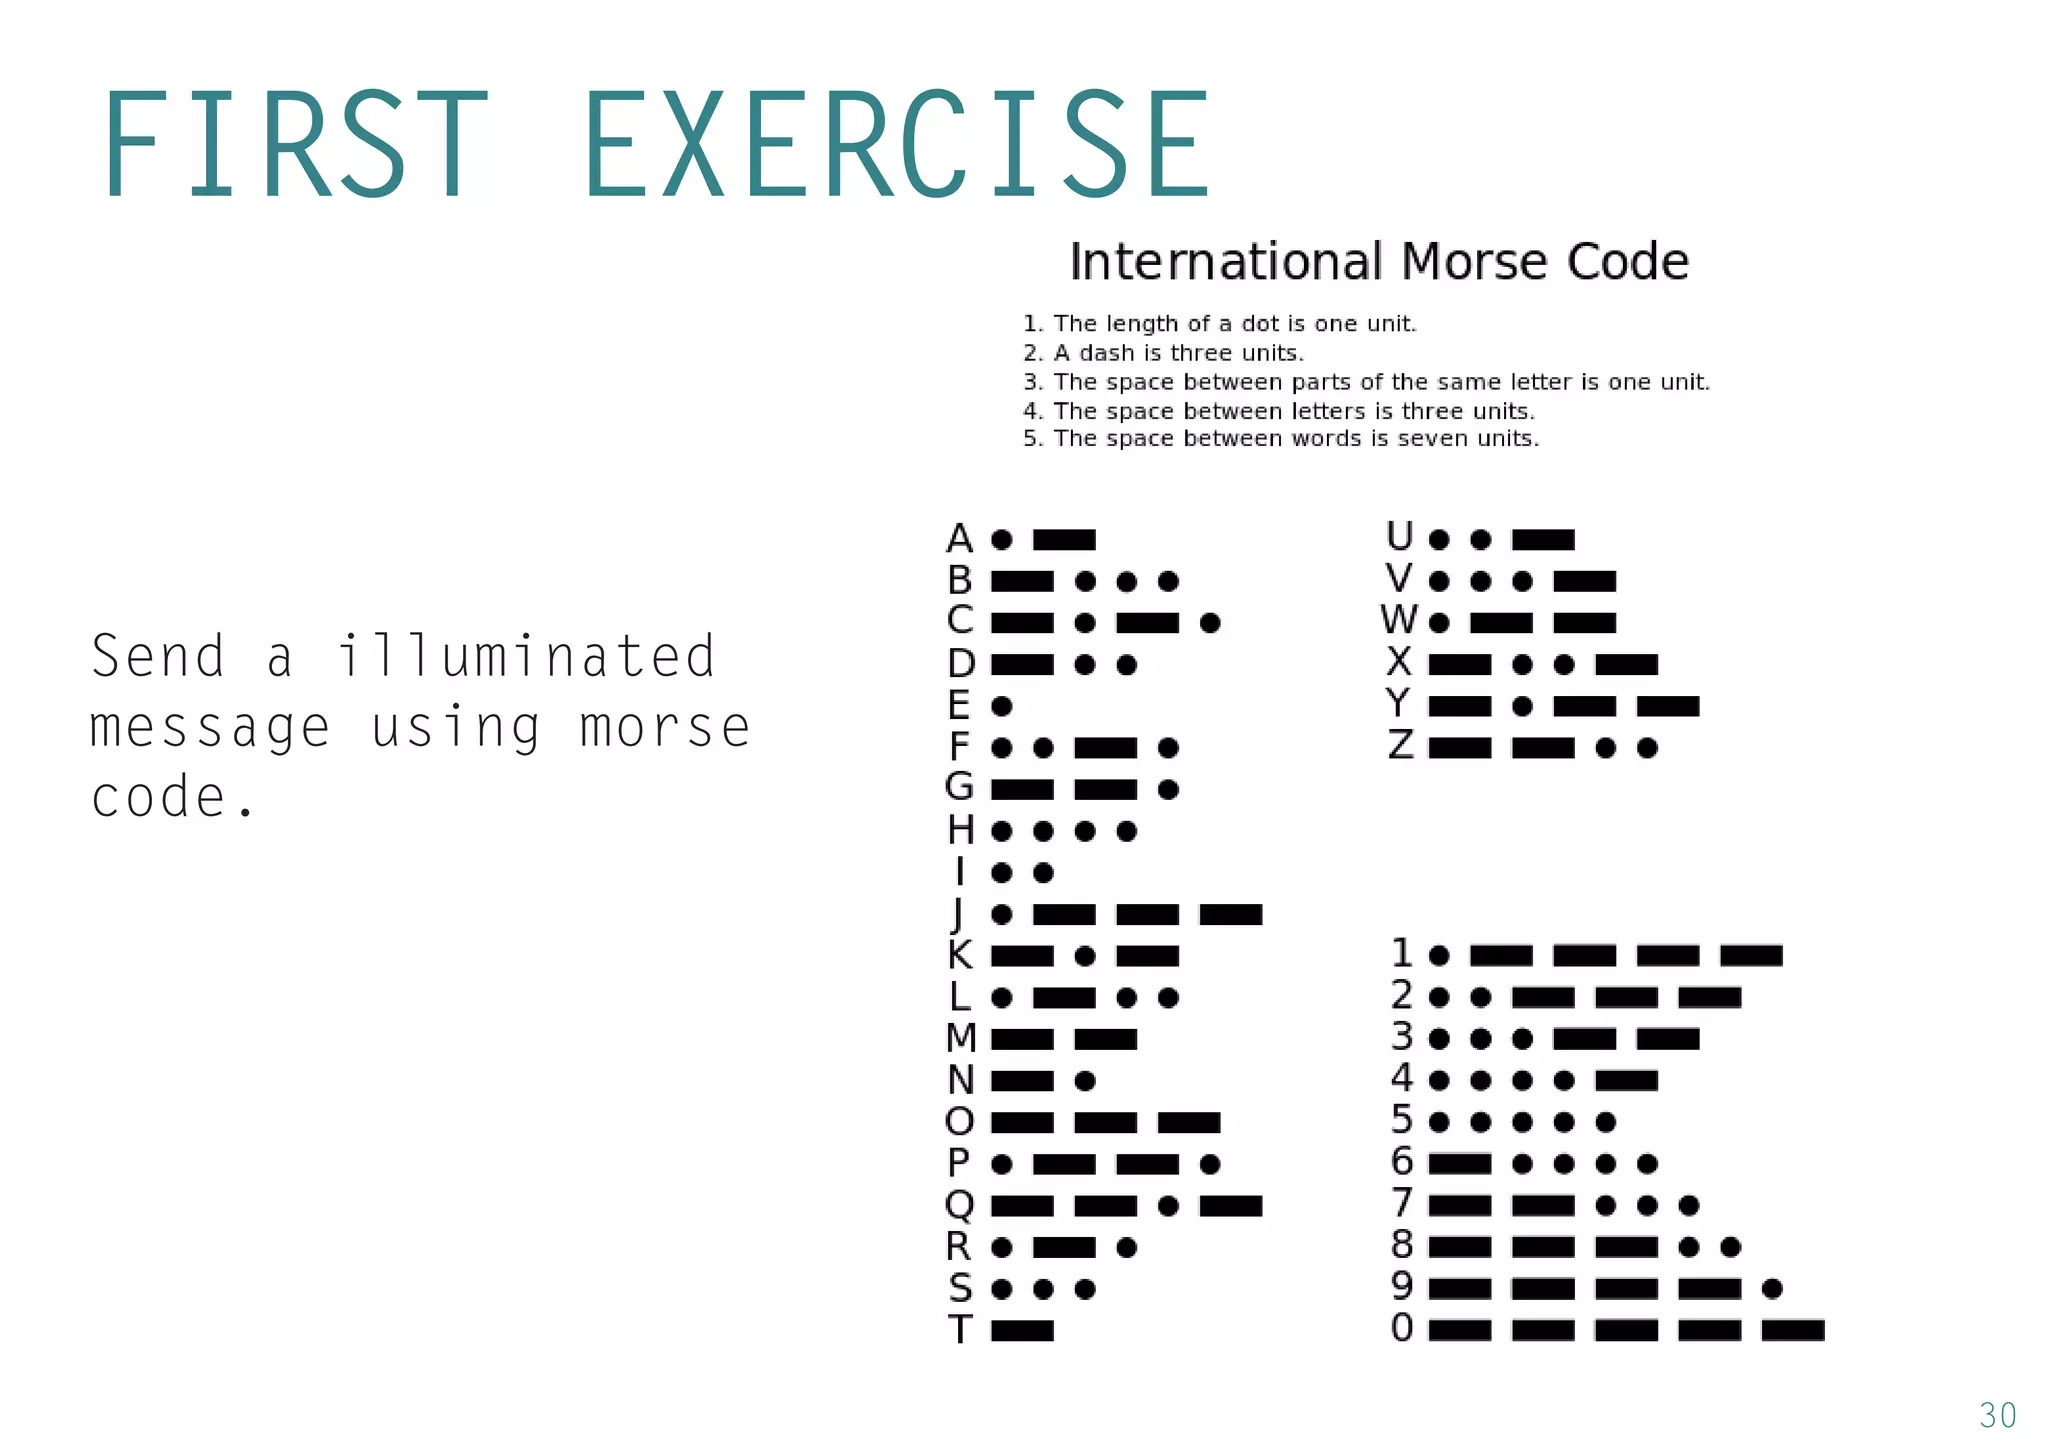
Instructions for plugging in a LED and variations like sending messages using Morse code as initial hands-on projects.
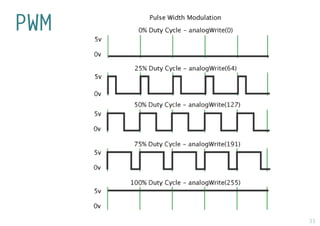
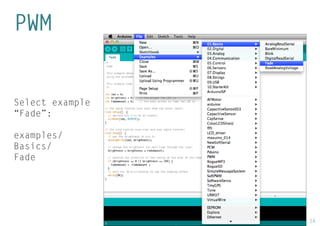
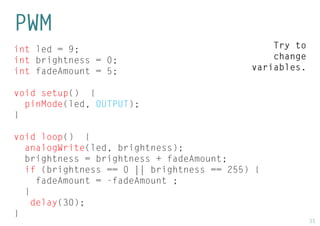
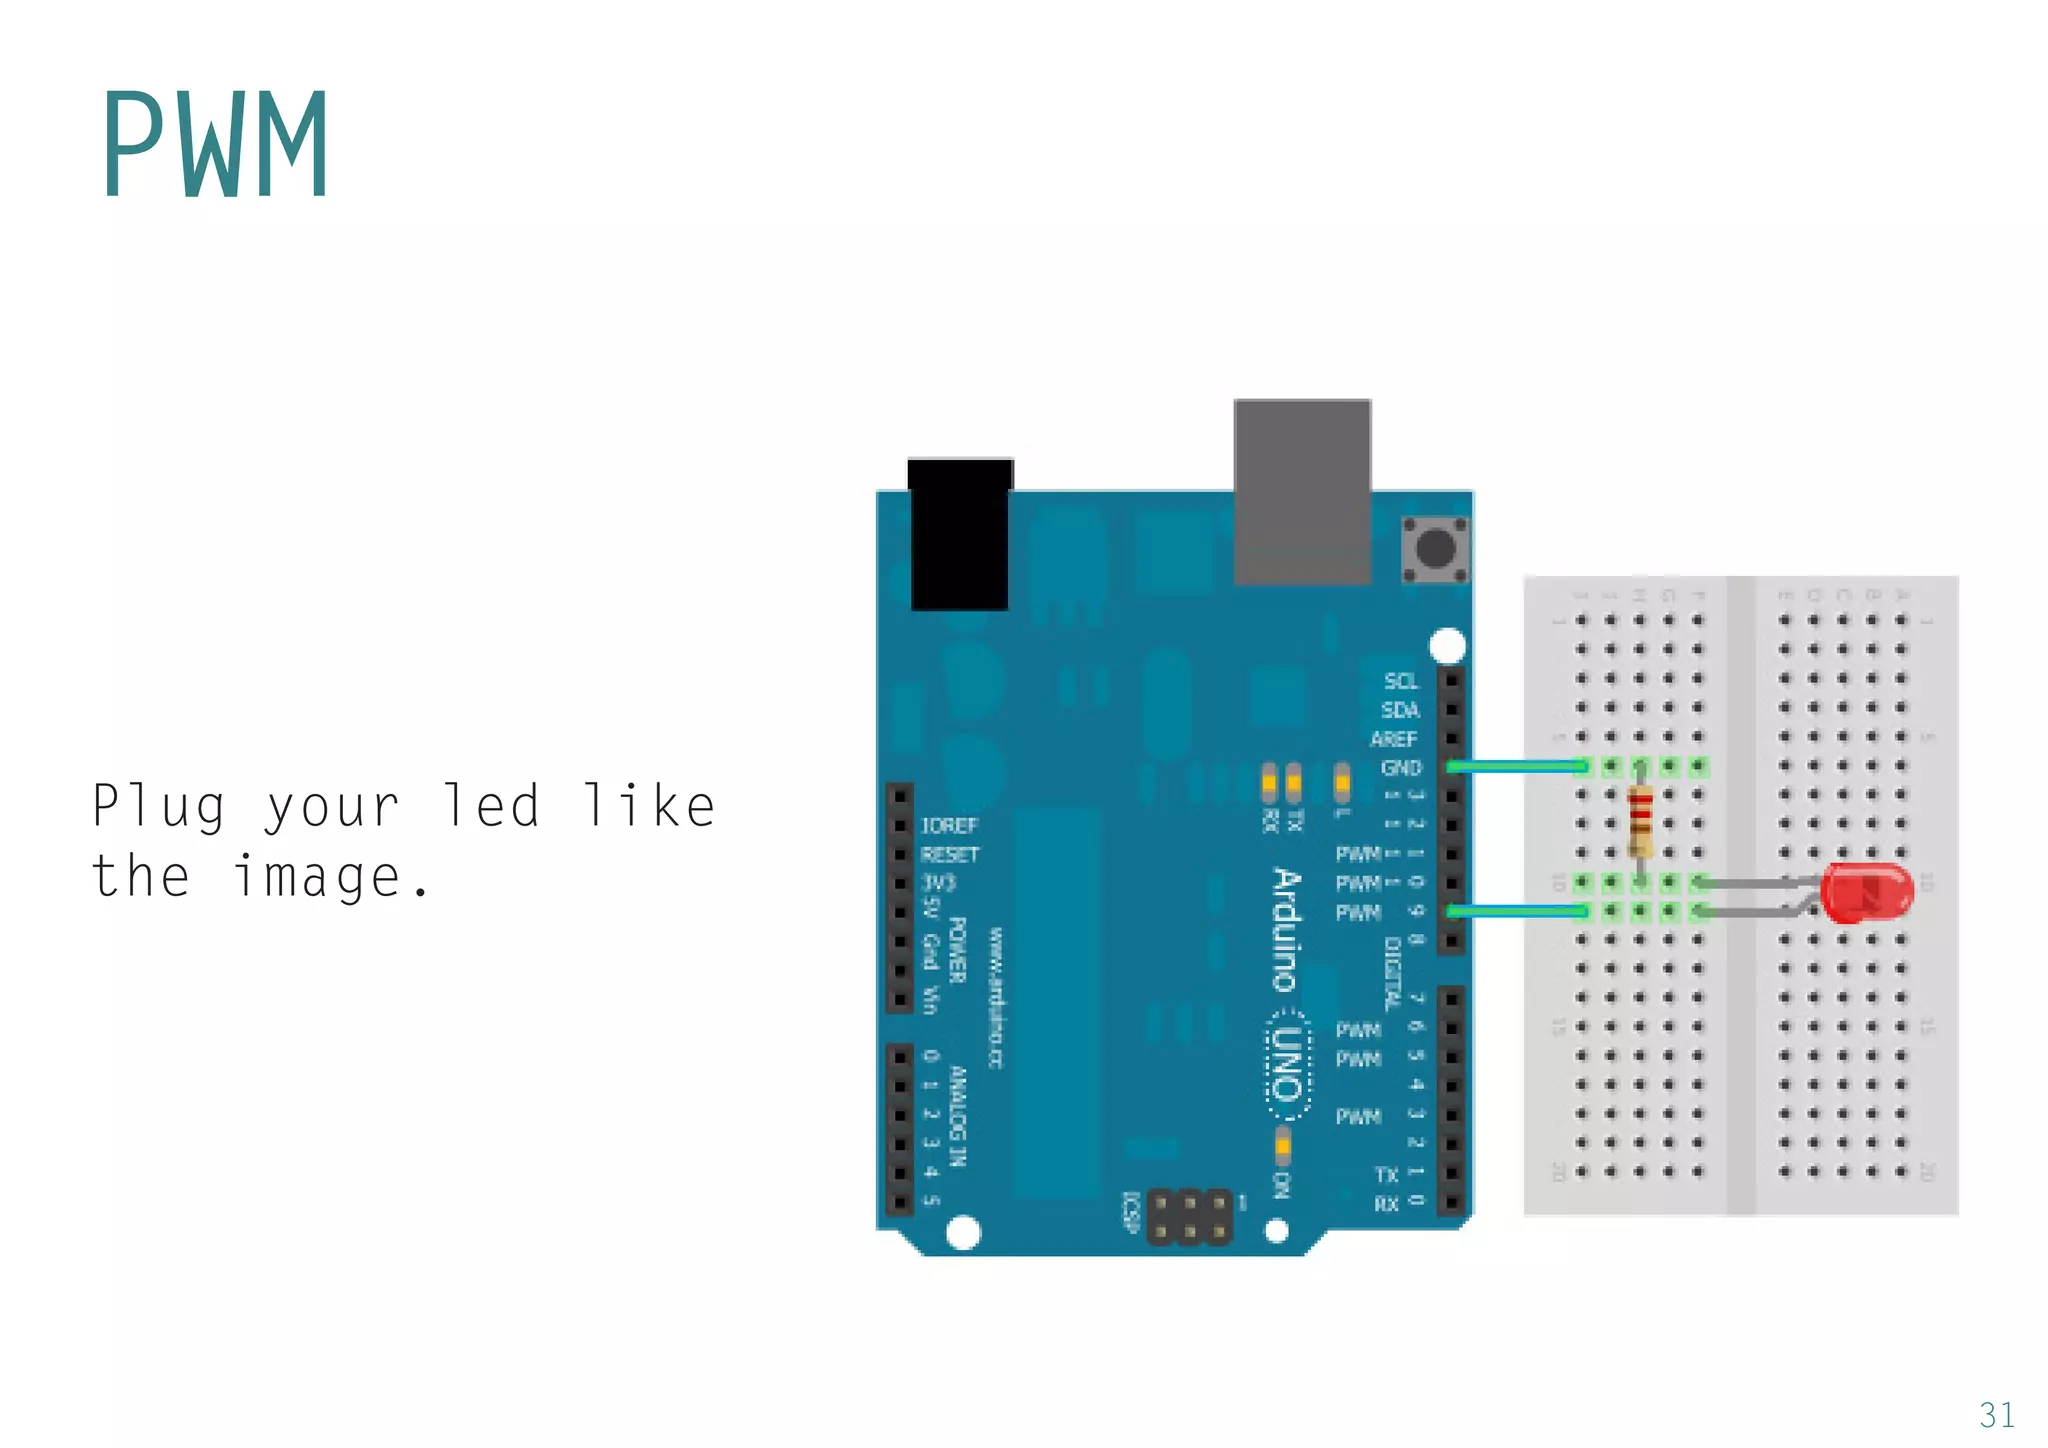
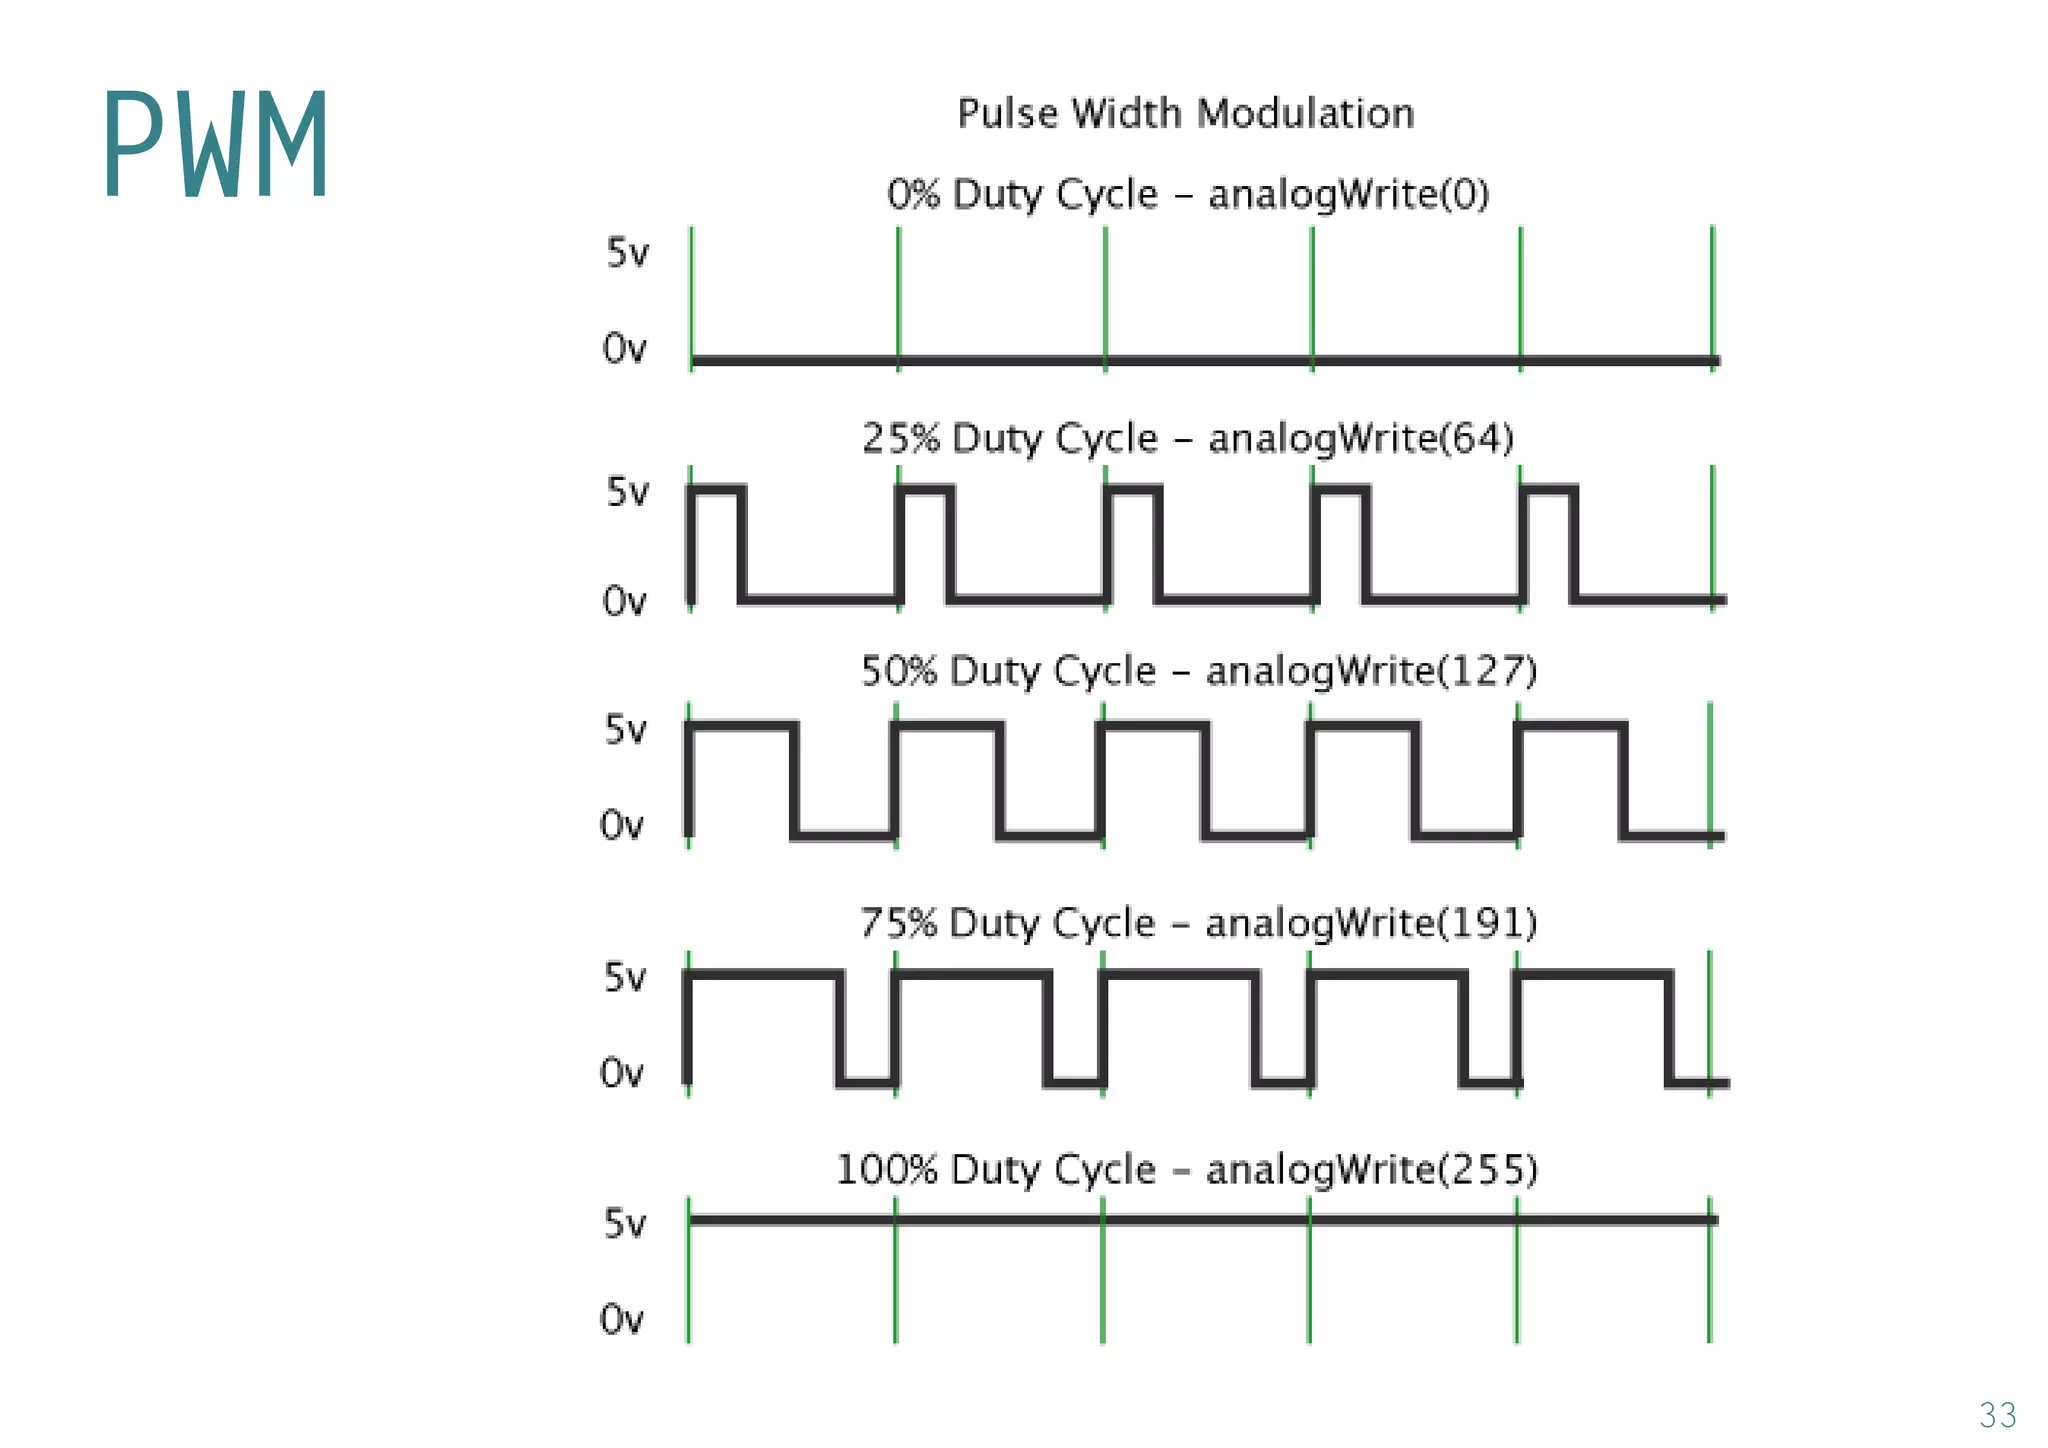
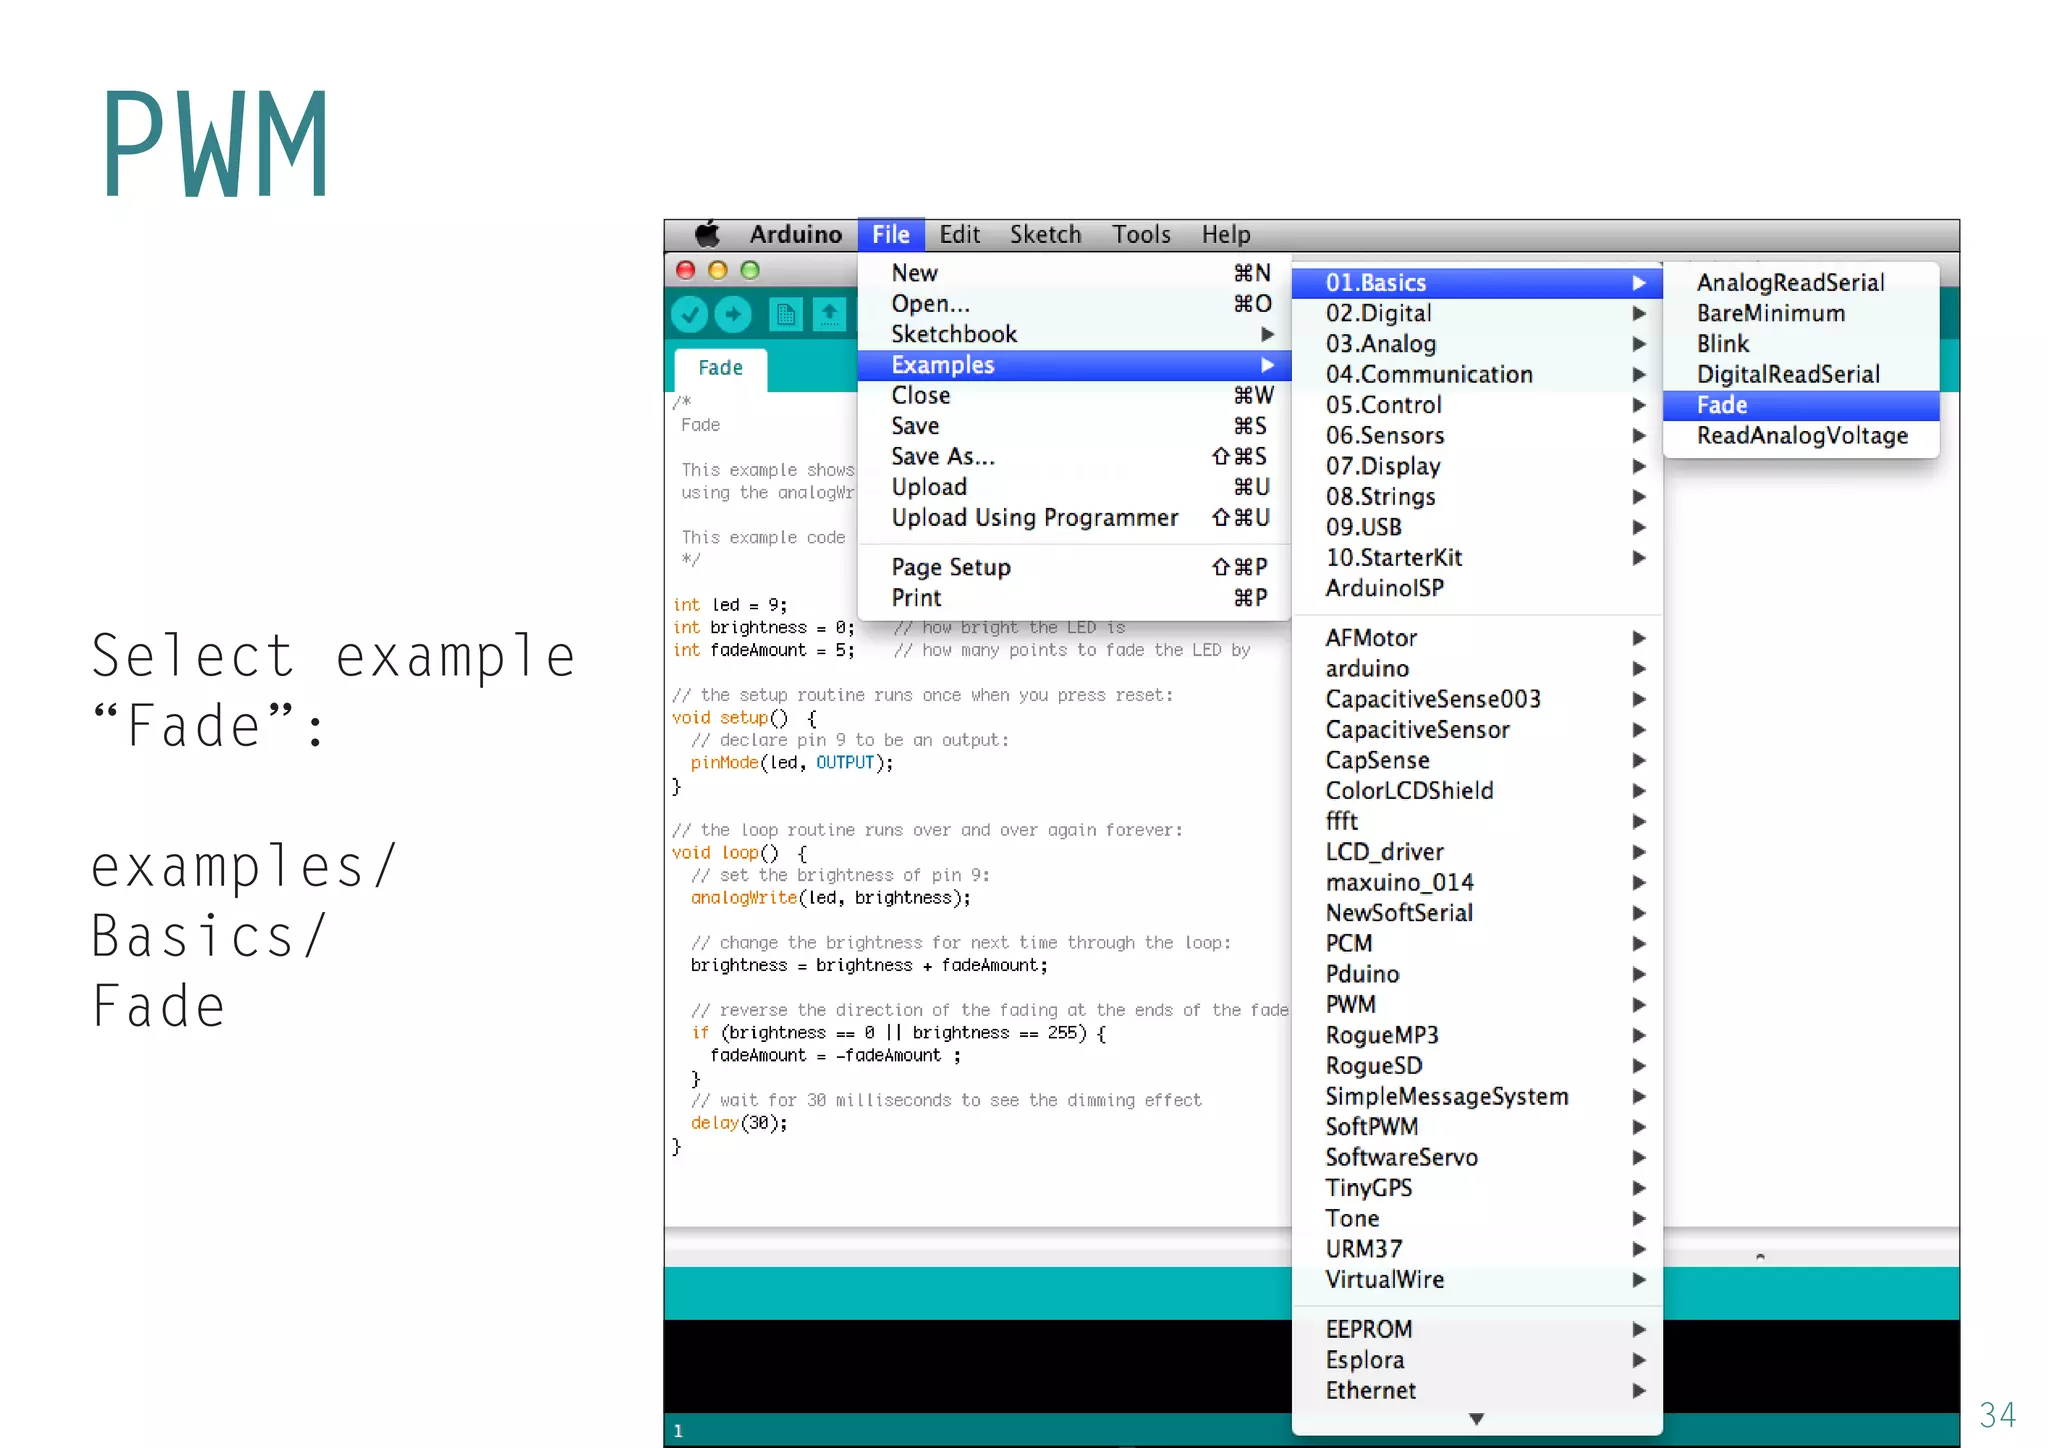
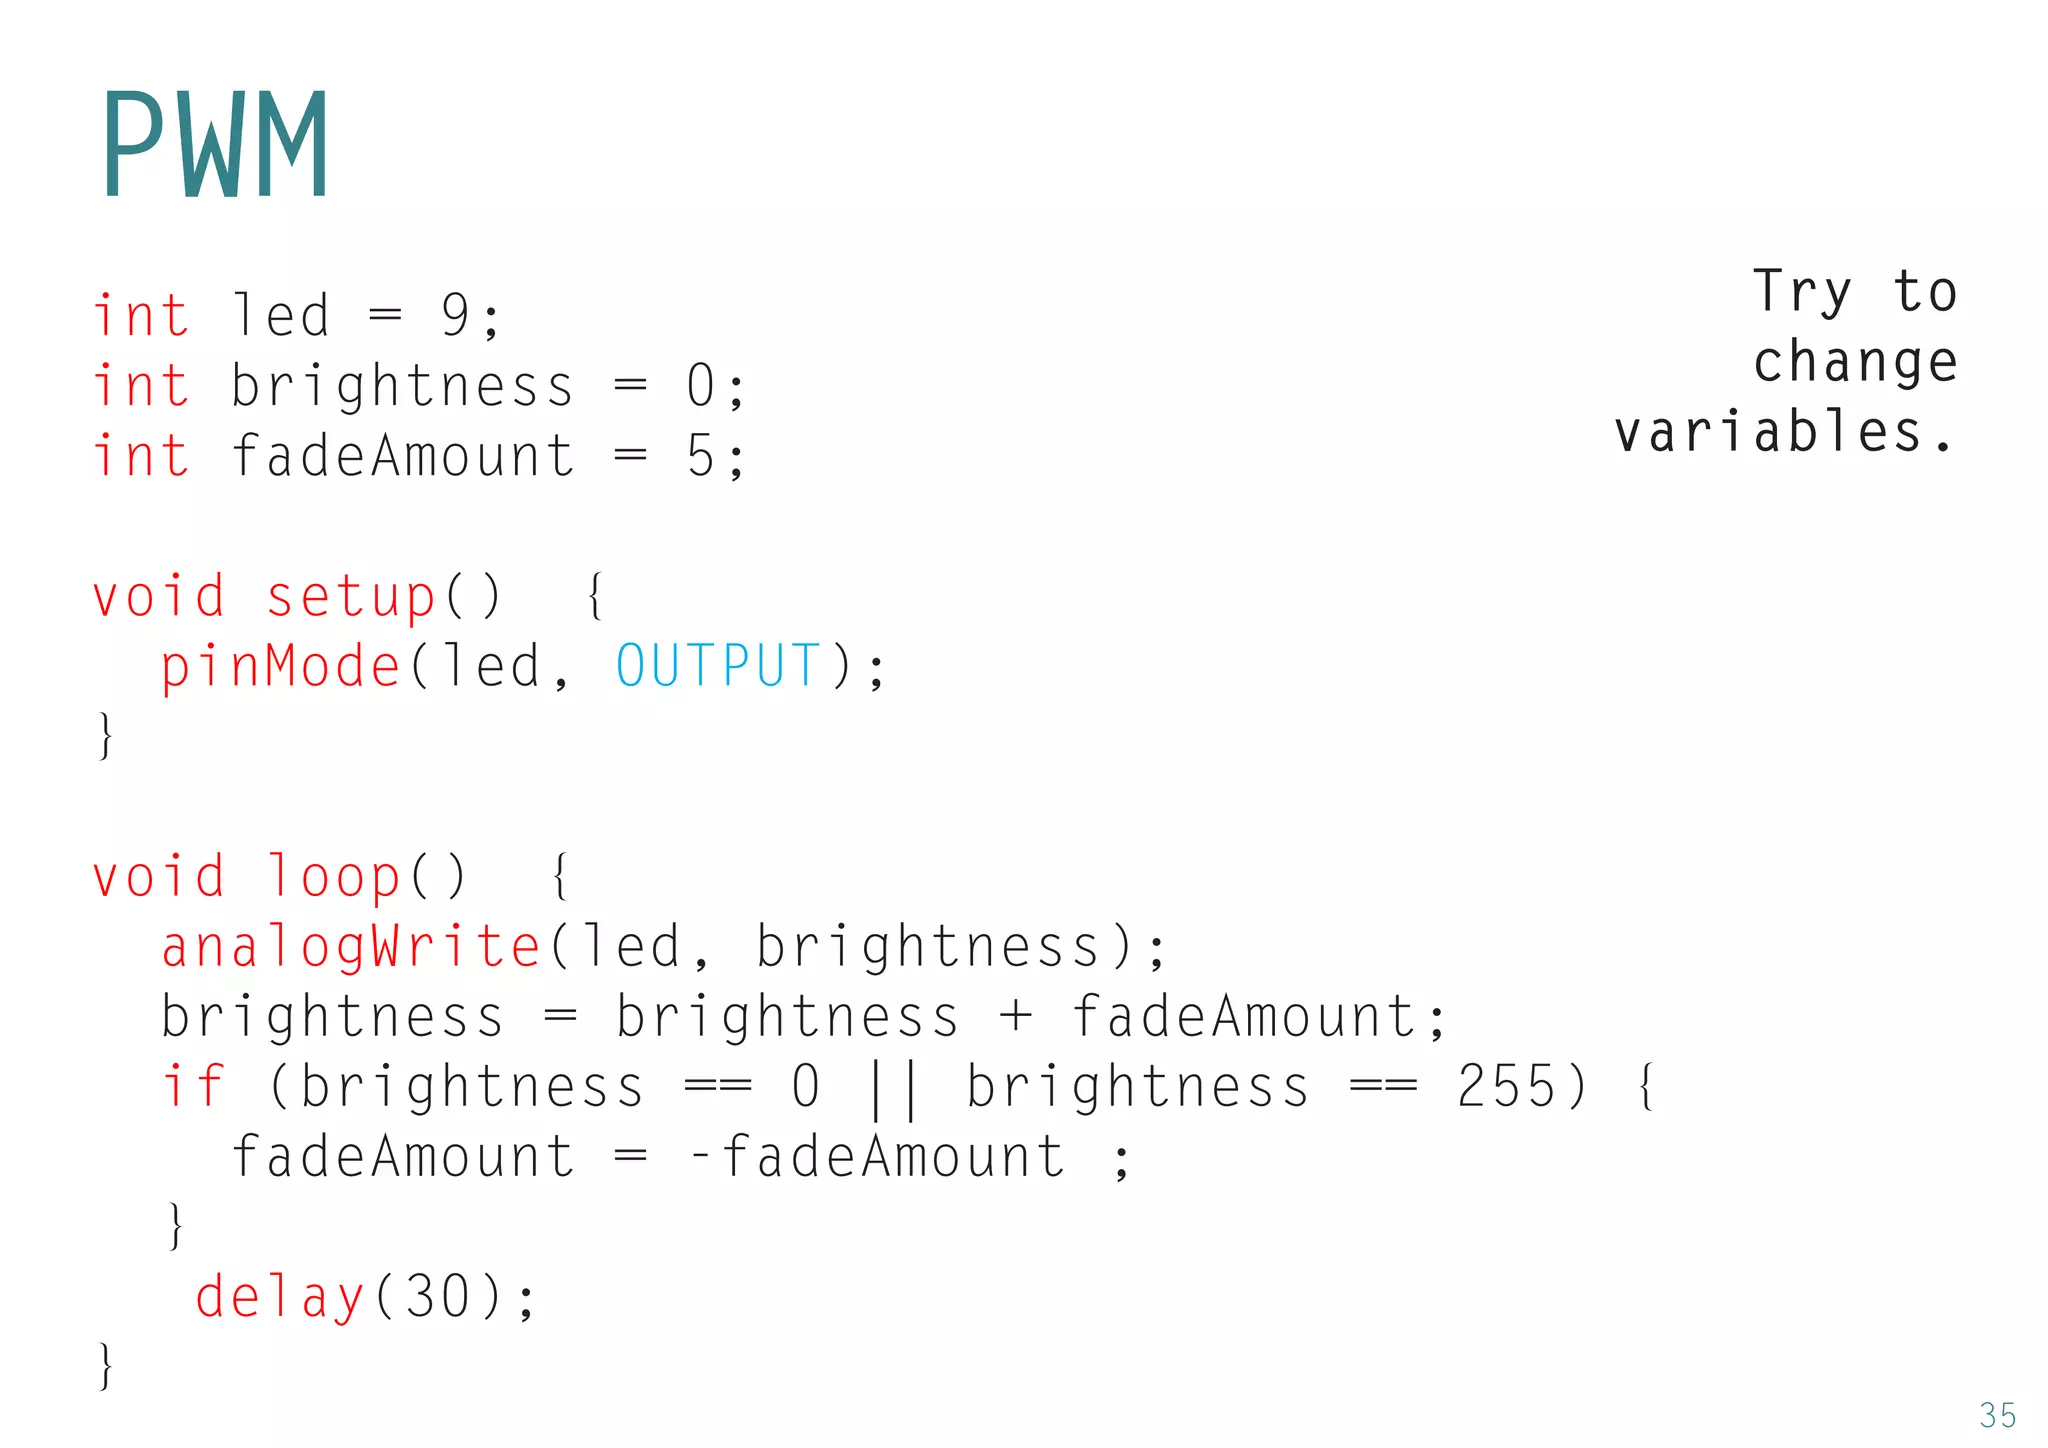
Introduction to PWM (Pulse Width Modulation) and practical examples to control LED brightness and experiment with code variables.
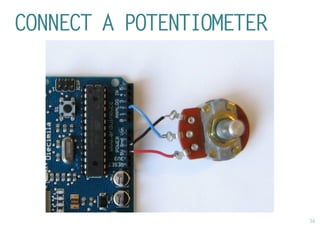
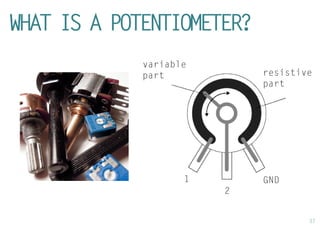
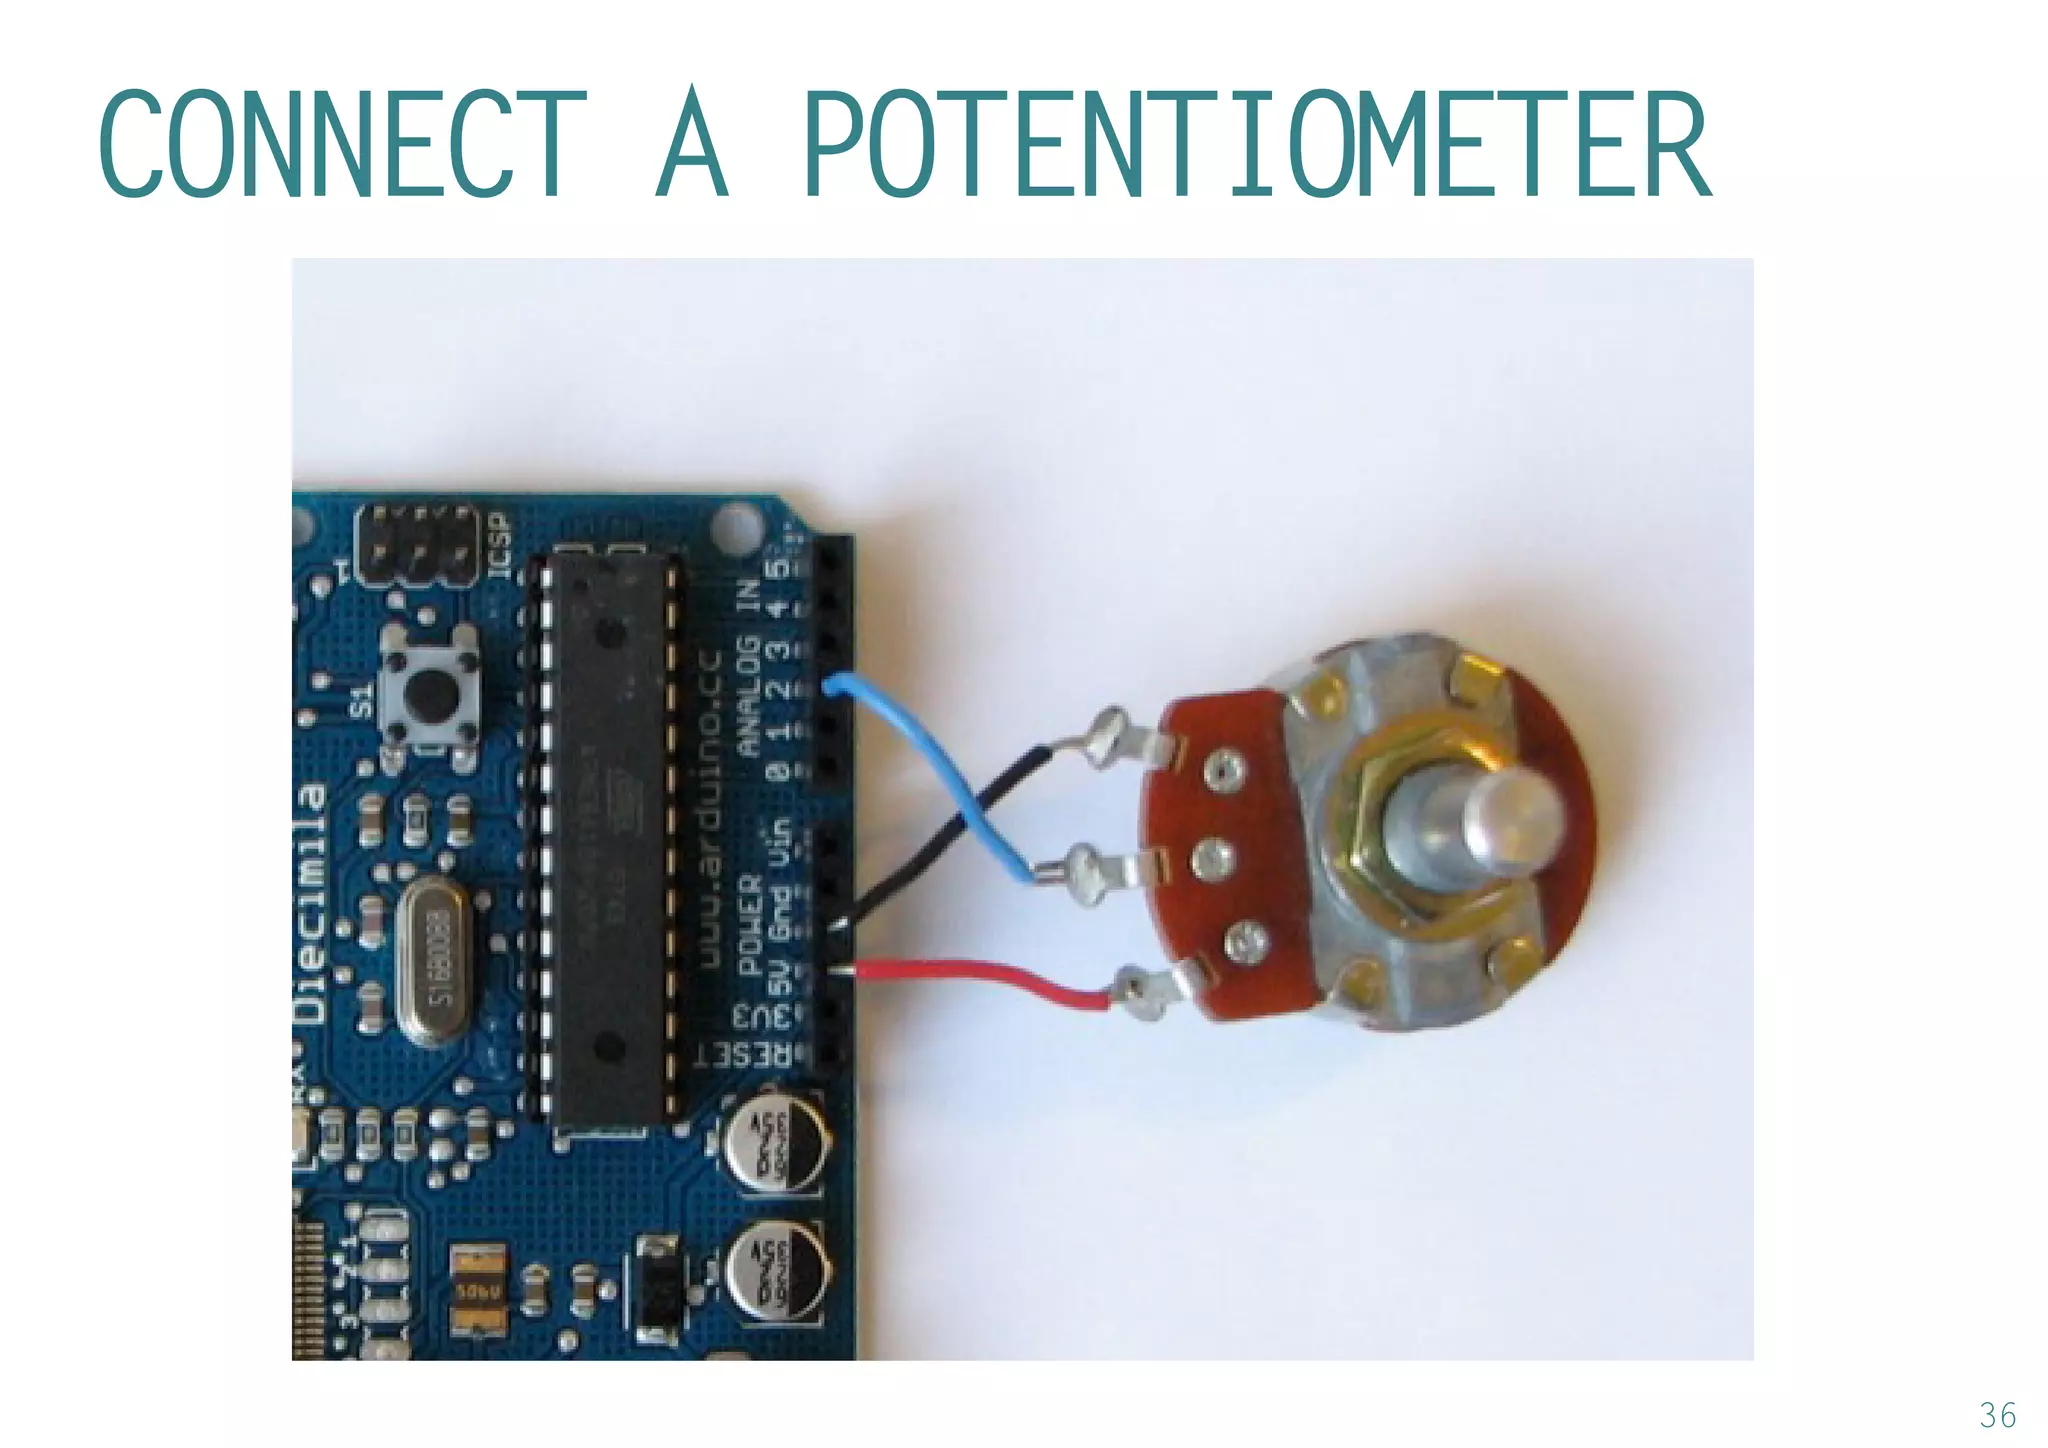
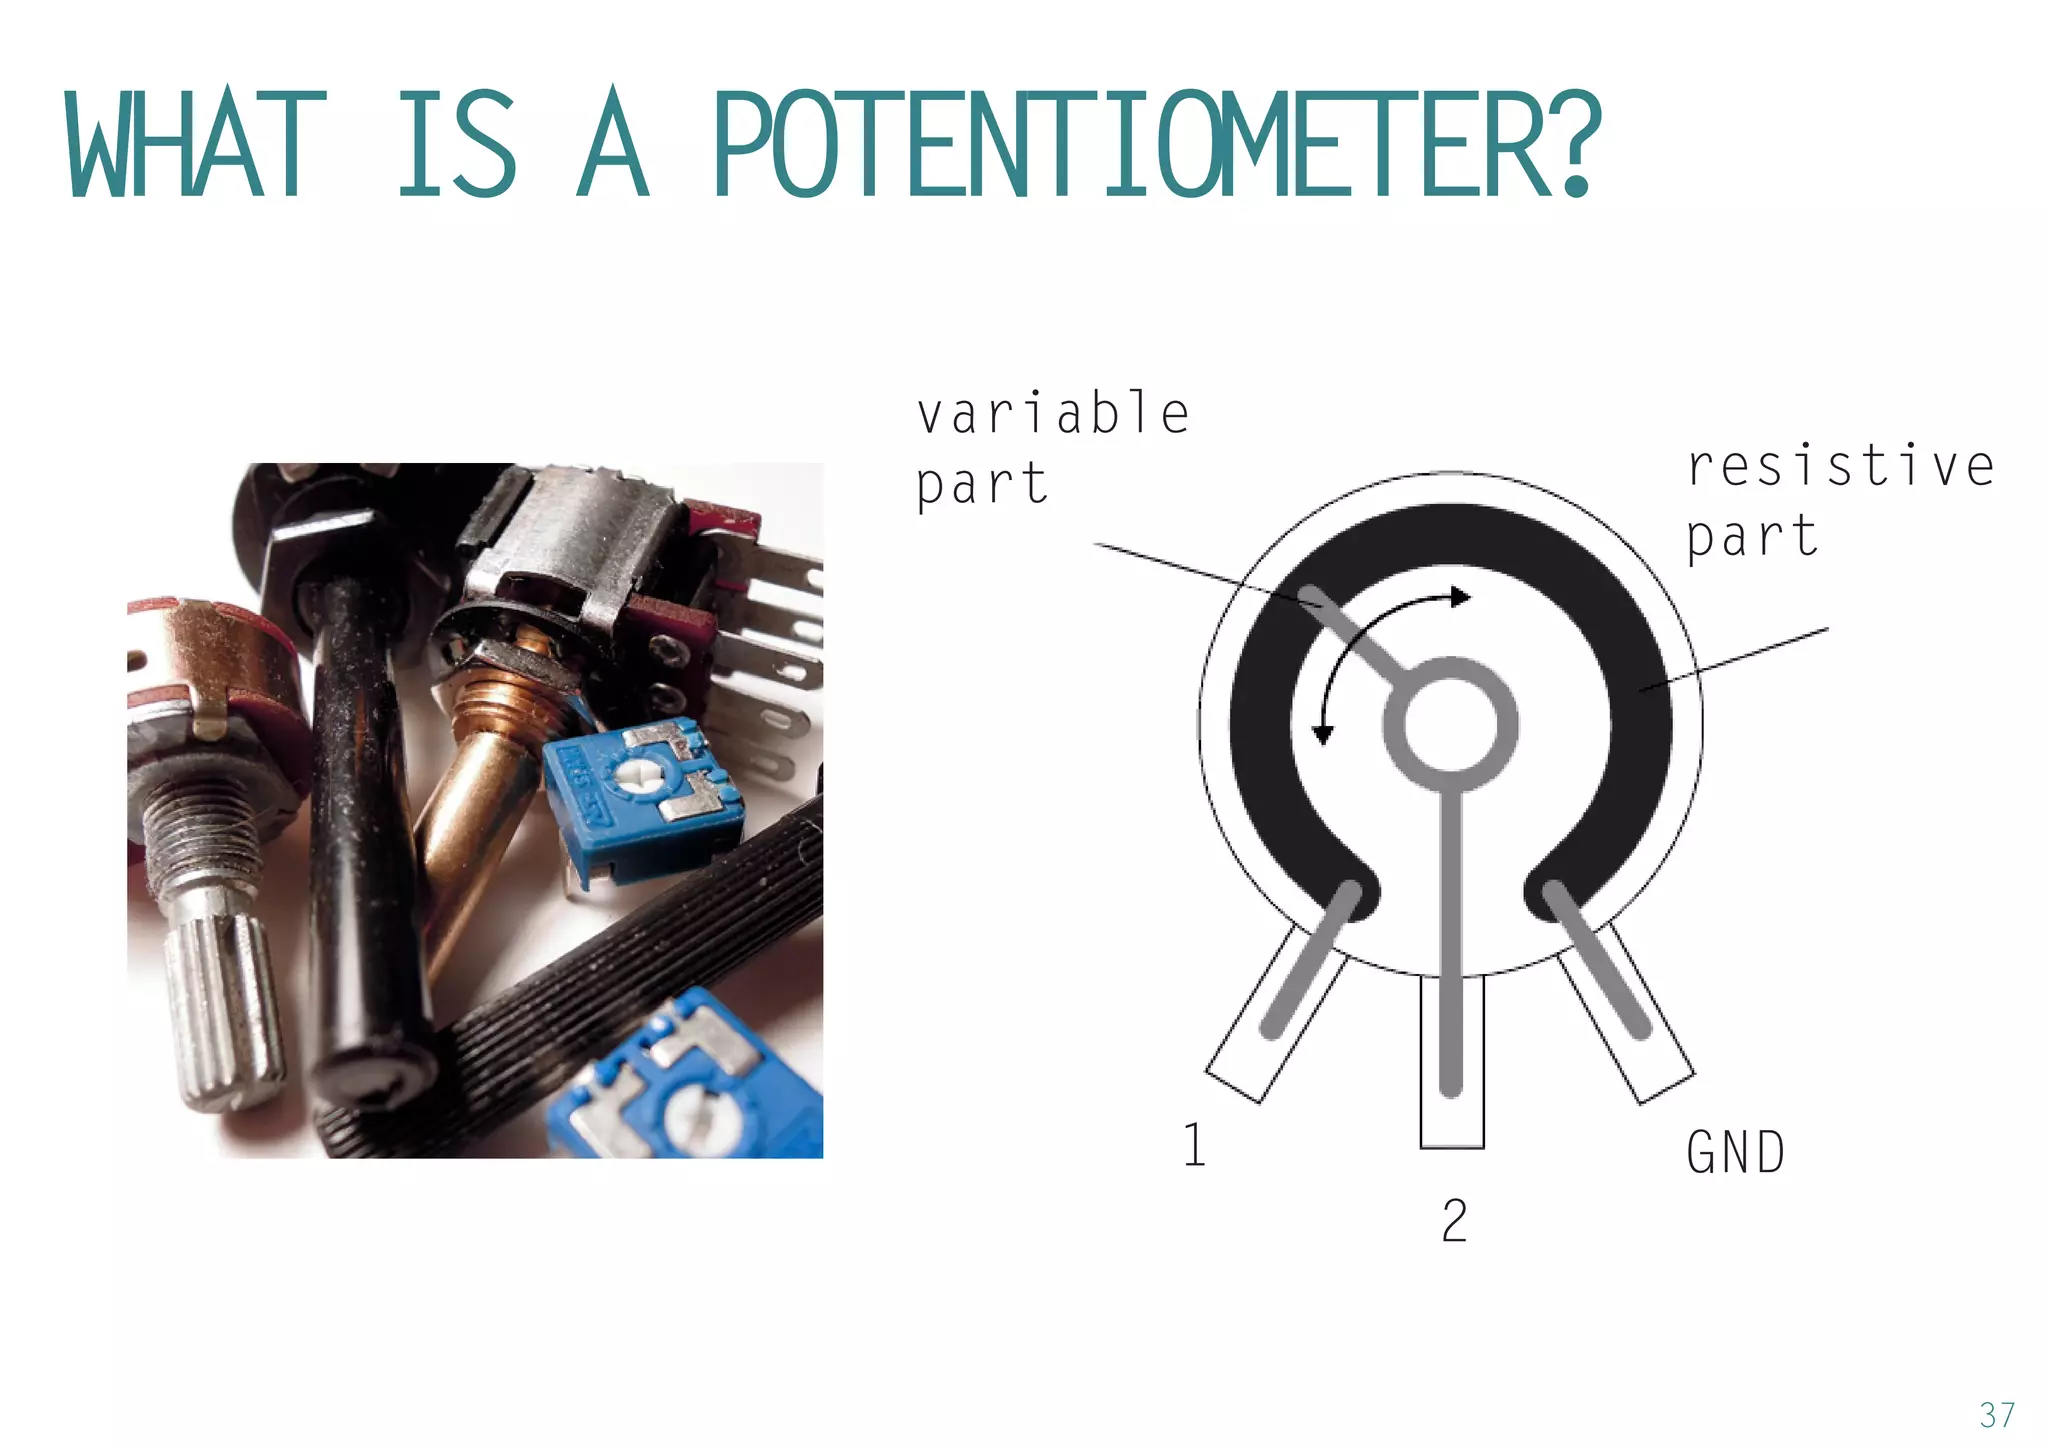
Explaining potentiometers and their function. Reading values from a potentiometer with Arduino and using this data to control an LED.
2
WHAT ISARDUINO?
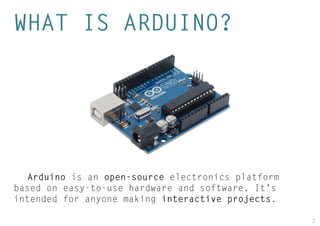
Arduino is an open-source electronics platform based on easy-to-use hardware and software. It’s intended for anyone making interactive projects.
3.
3
HISTORY
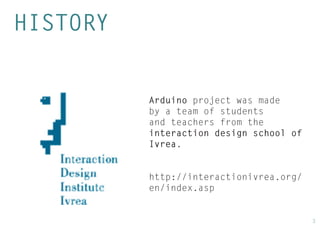
Arduinoproject was made by a team of students and teachers from the interaction design school of Ivrea.
http://interactionivrea.org/ en/index.asp
4.
4
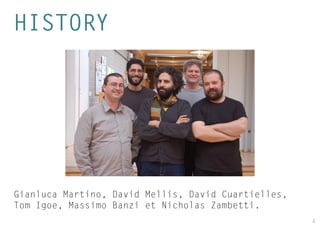
Gianluca Martino,David Mellis, David Cuartielles,
Tom Igoe, Massimo Banzi et Nicholas Zambetti.
HISTORY
5.
5
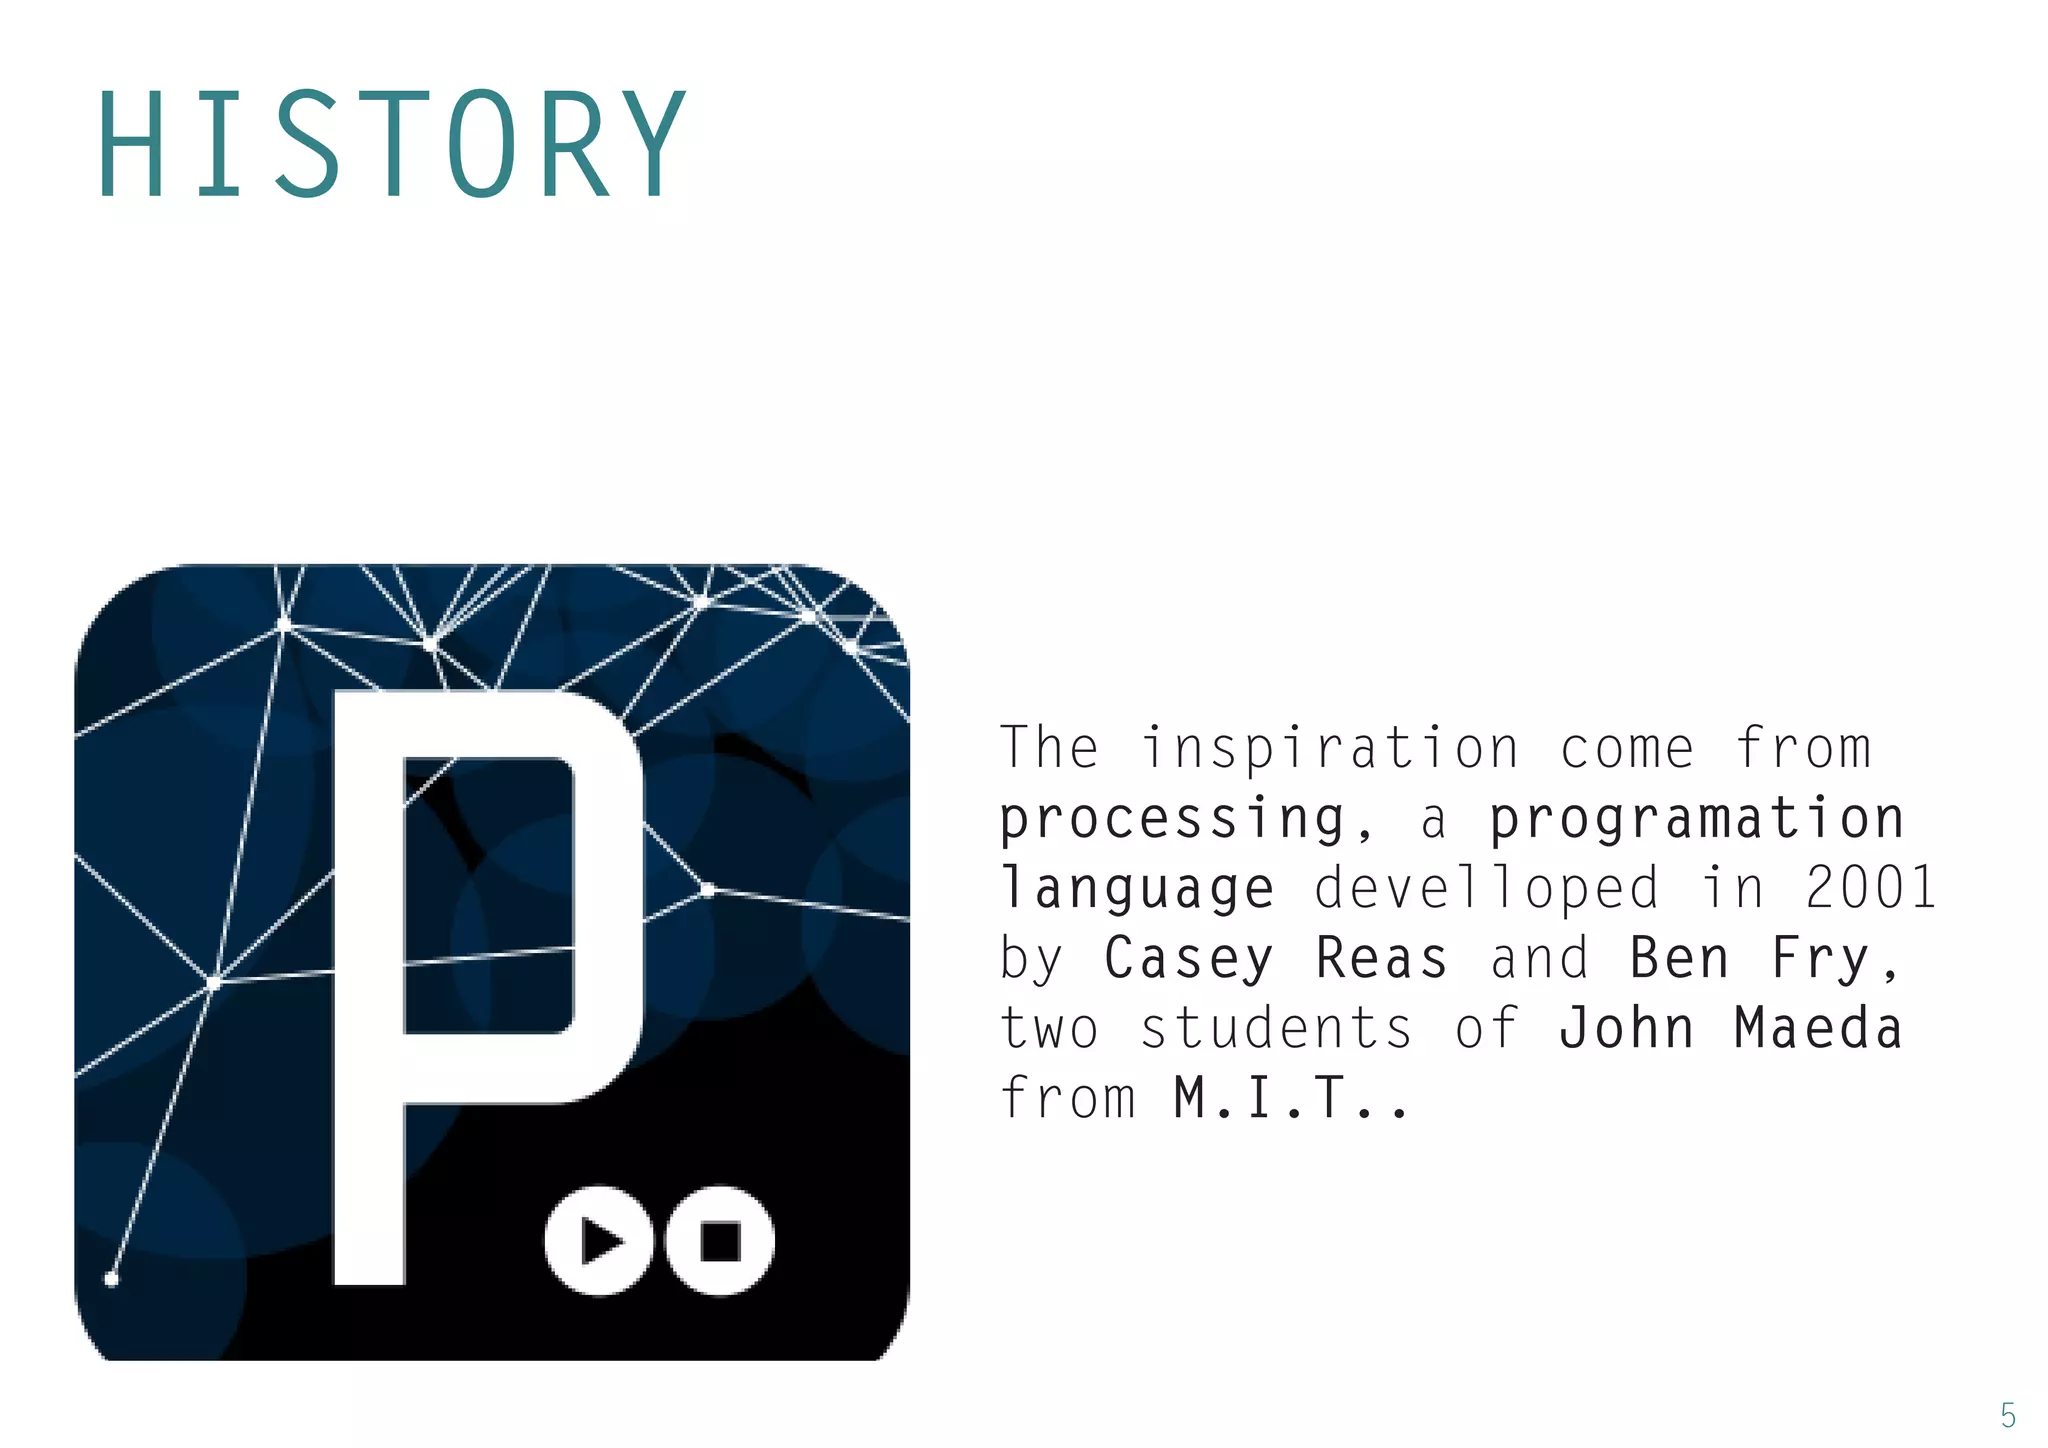
The inspirationcome from processing, a programation language develloped in 2001 by Casey Reas and Ben Fry, two students of John Maeda from M.I.T..
HISTORY
6.
6
ADVANTAGES
*Simple to use
* Cheap
* Open Source
* Multi-plateforms
7.
7
PHILOSOPHY &
COMMUNITY
Arduino project is based on a principle of open Source which has help it to have a quick developpement thanks to a community who work on the software and hardware.
There are several tools to share and learn:
- Blog (http://blog.arduino.cc/)
- Forum (http://forum.arduino.cc/)
- Wiki (http://playground.arduino.cc/)
9
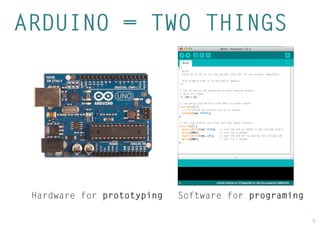
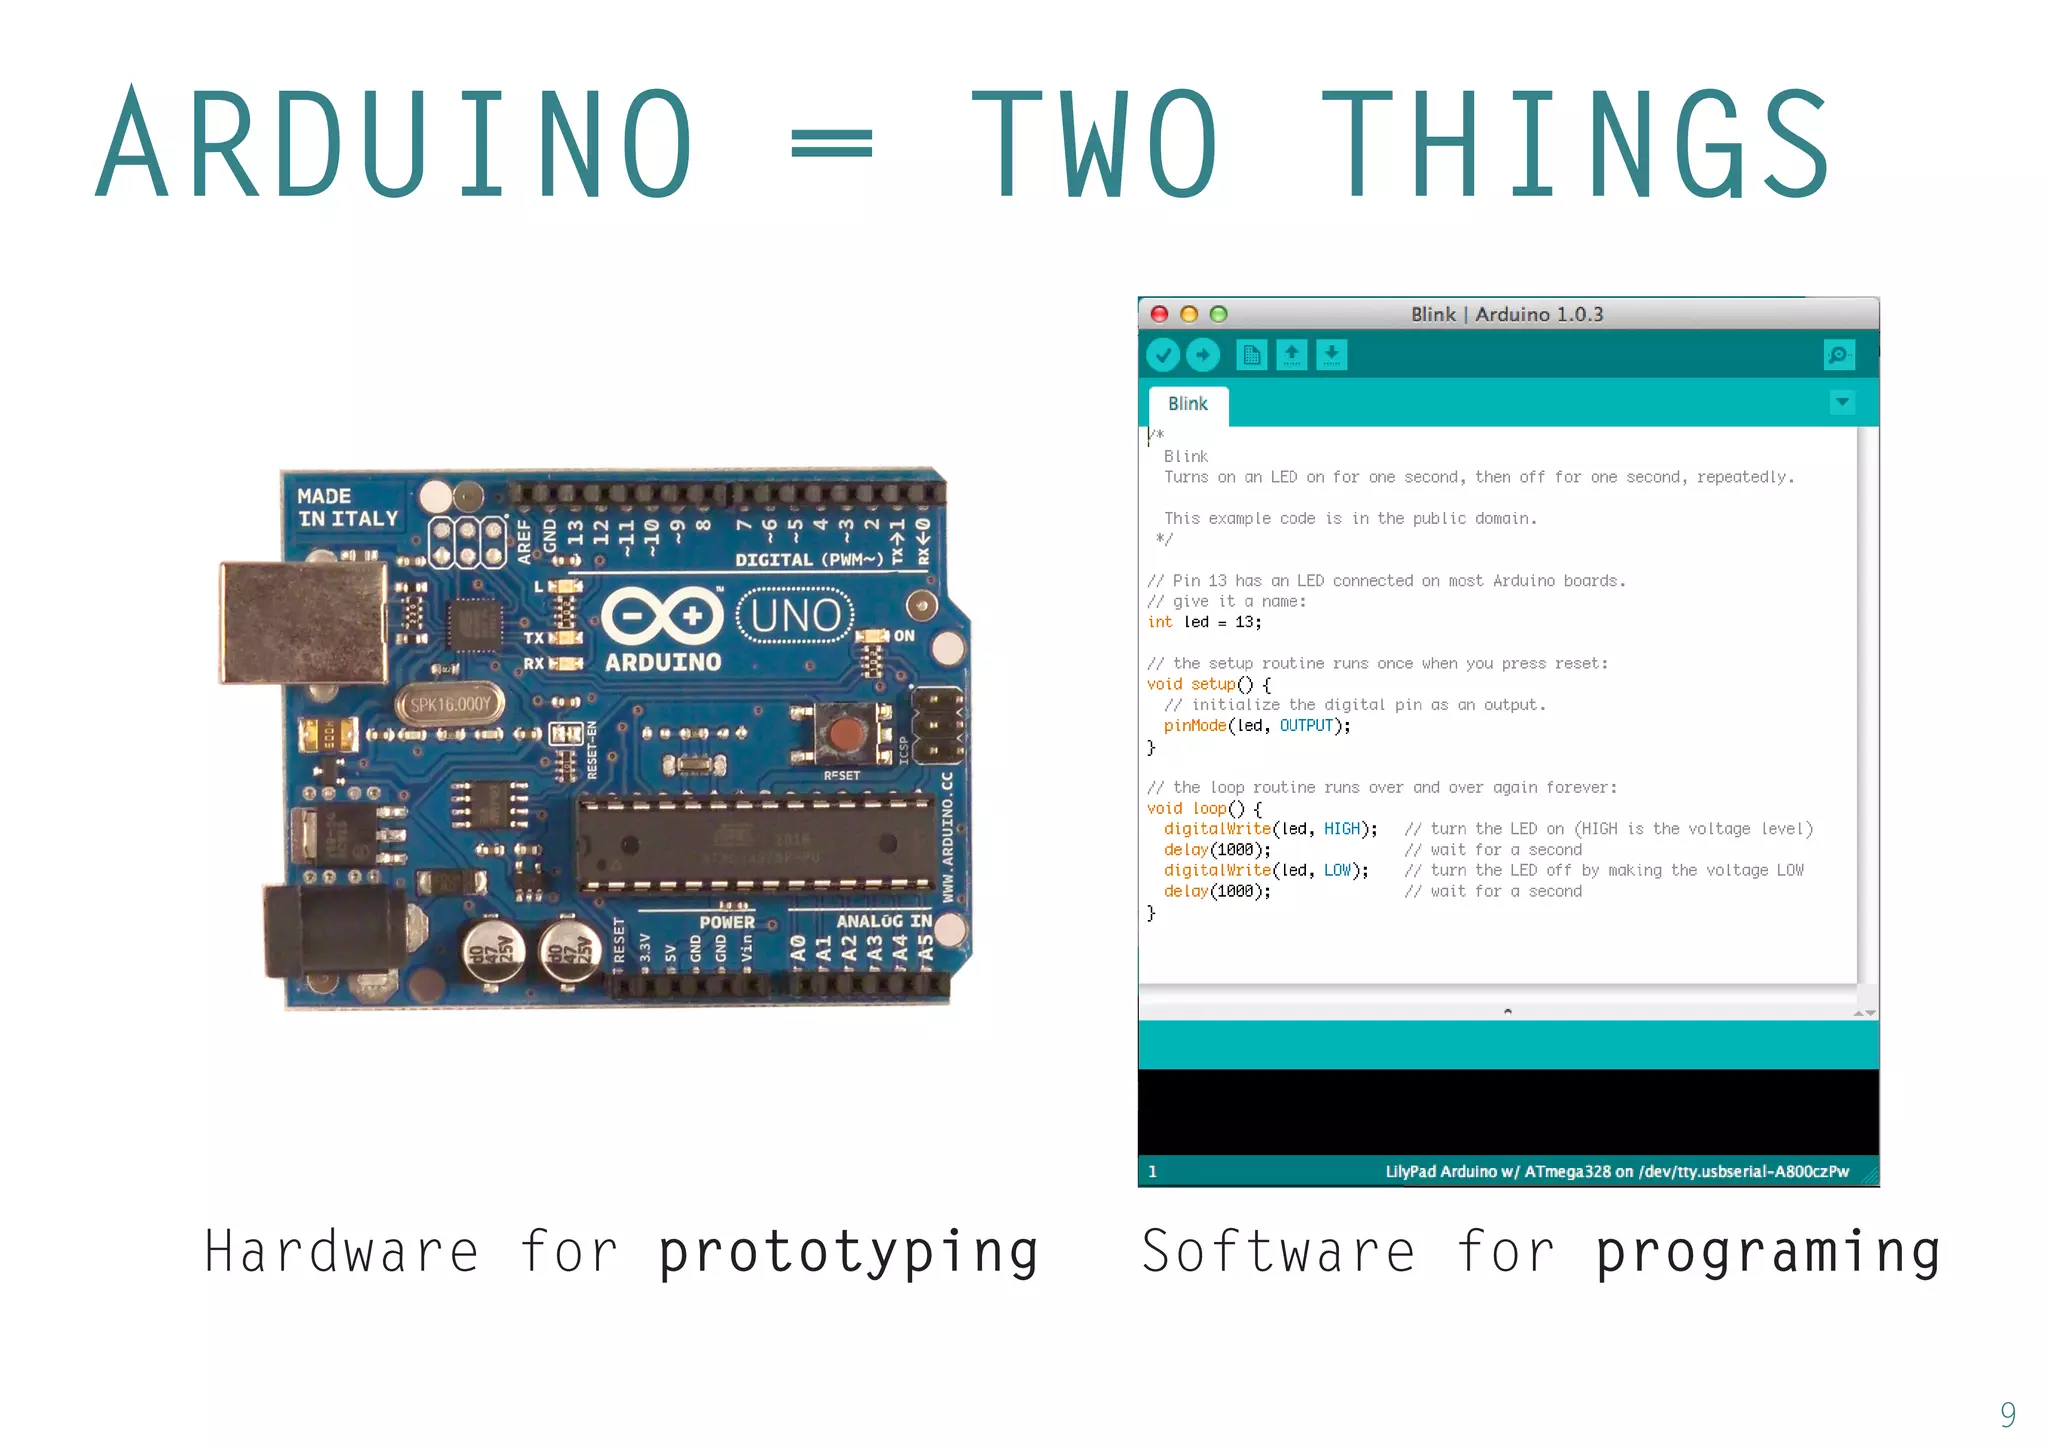
ARDUINO =TWO THINGS
Hardware for prototyping
Software for programing
10.
10
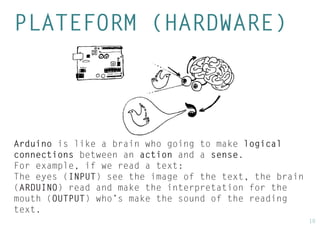
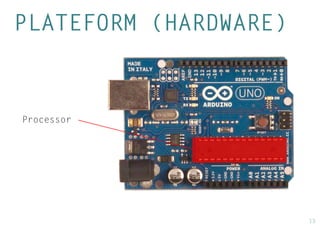
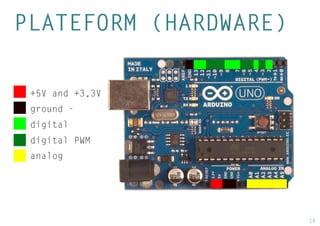
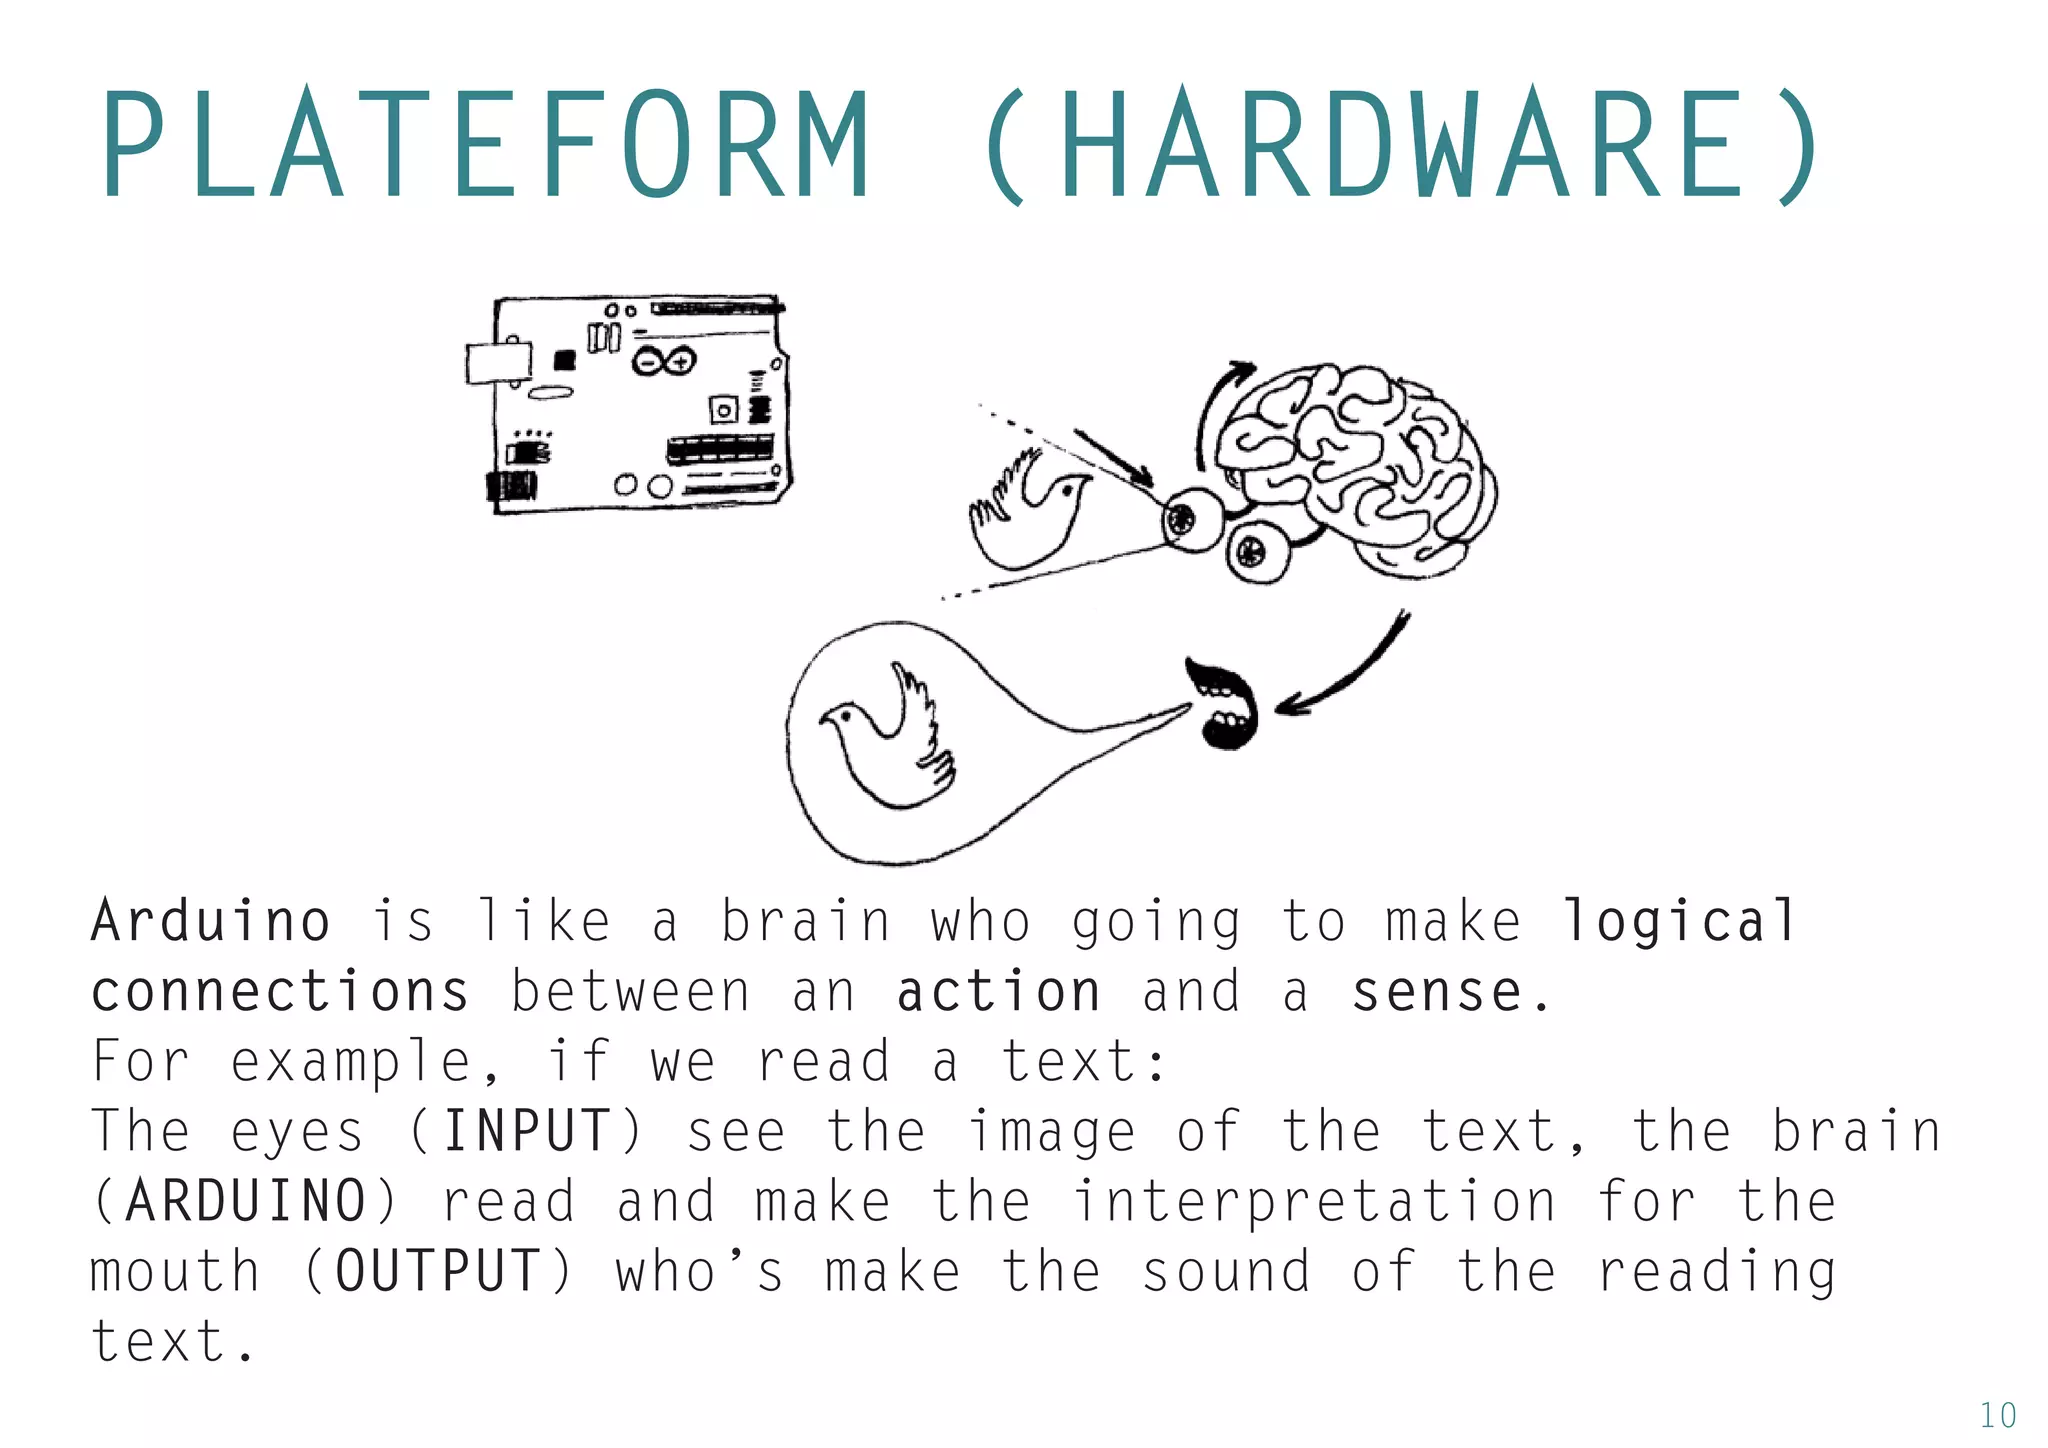
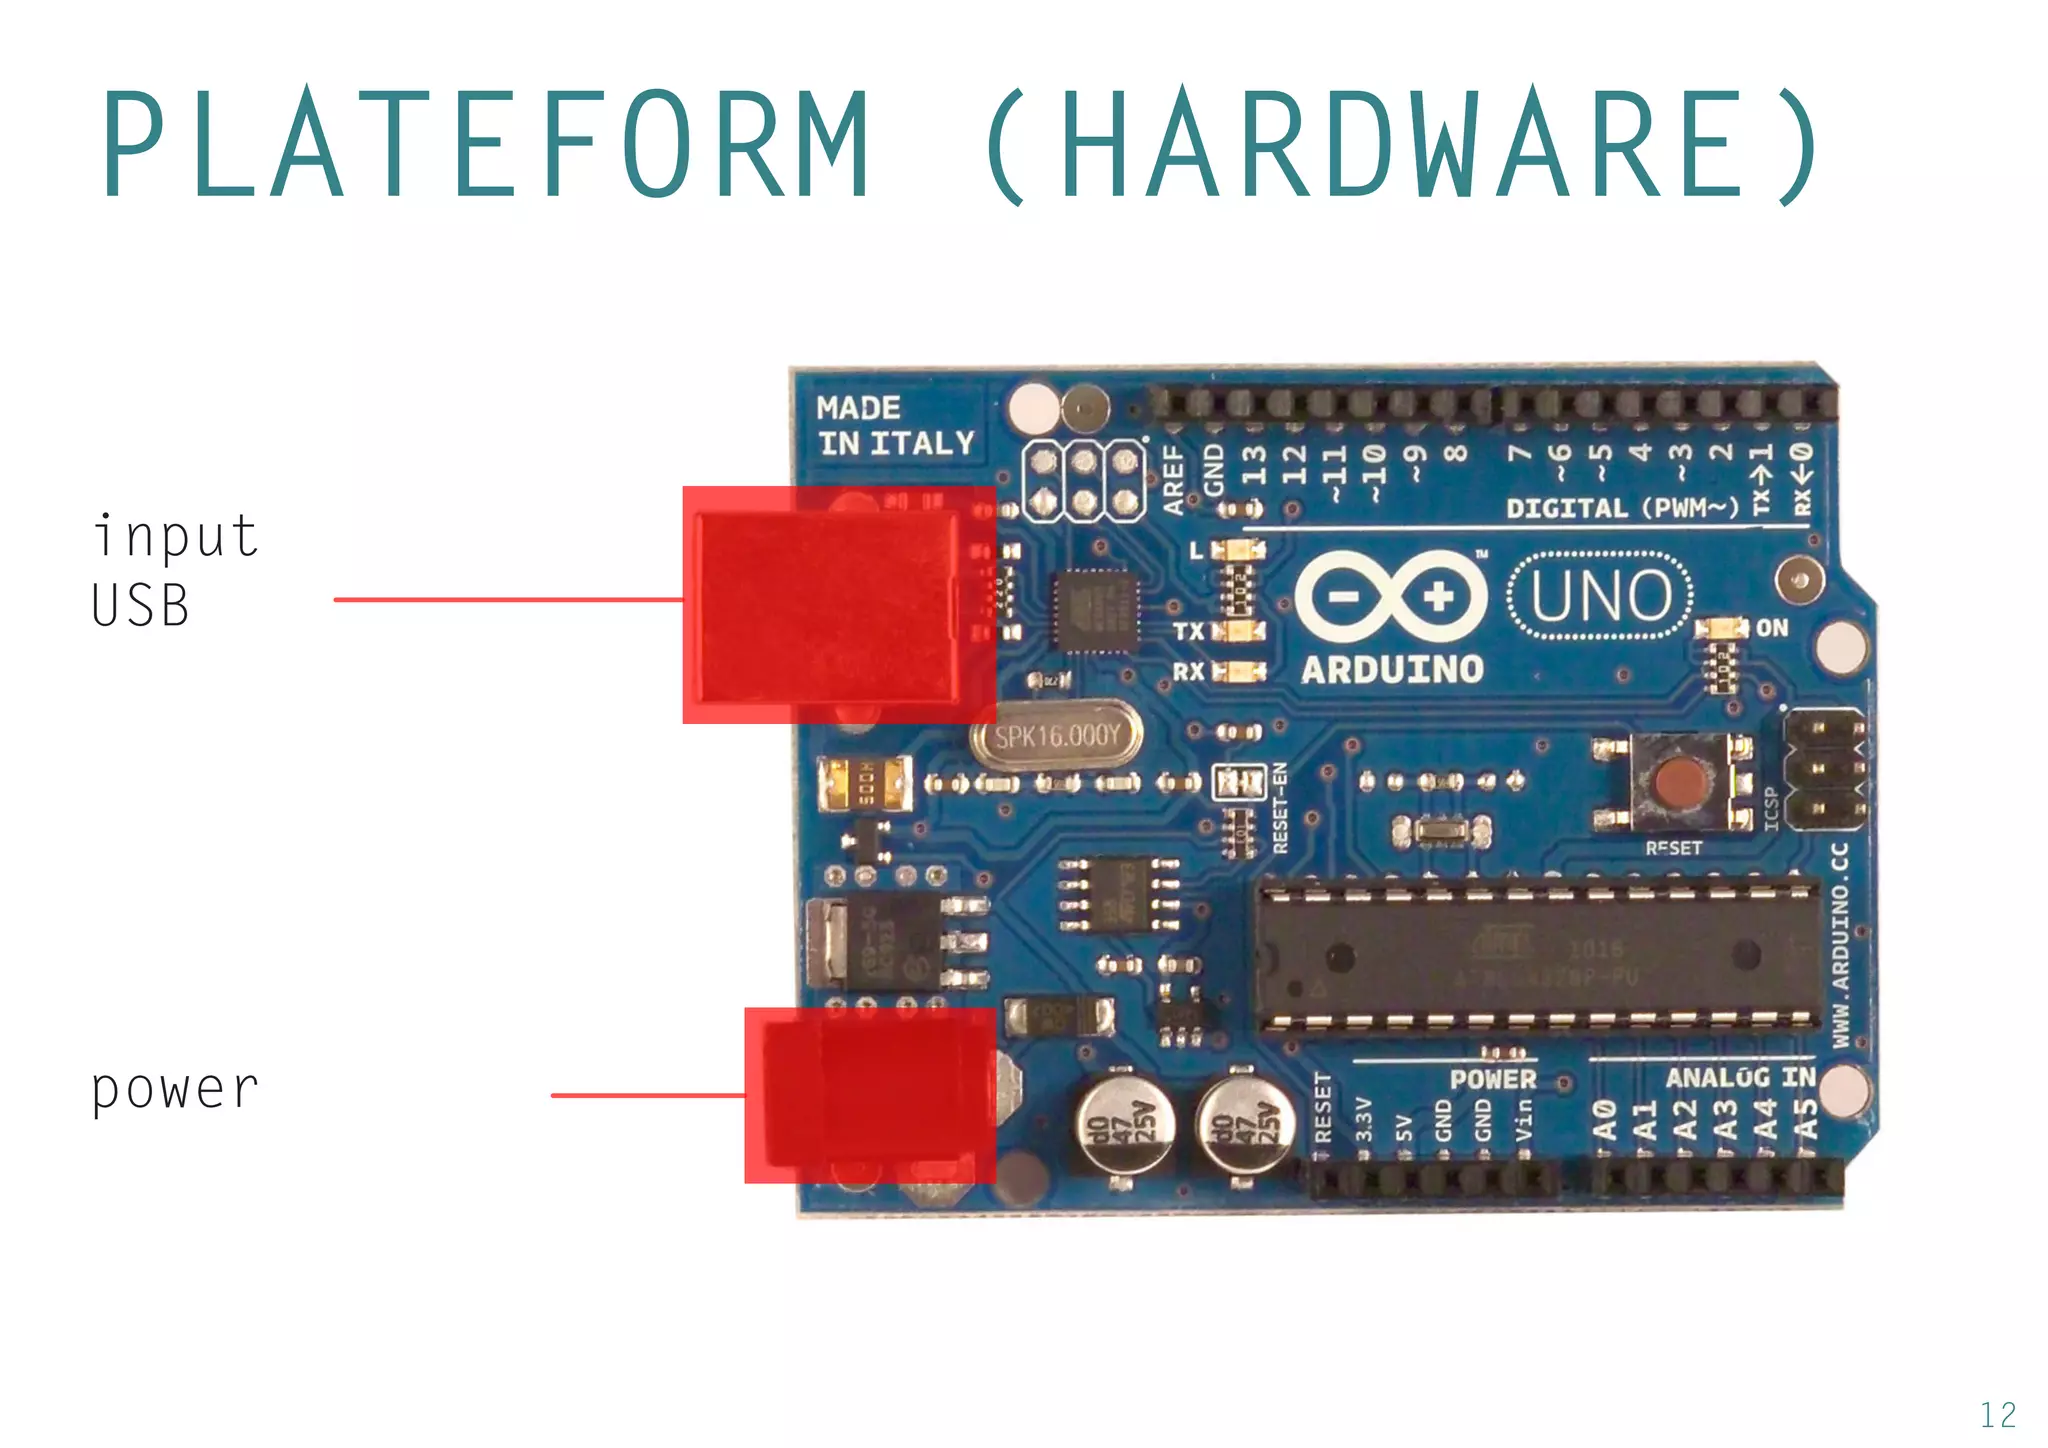
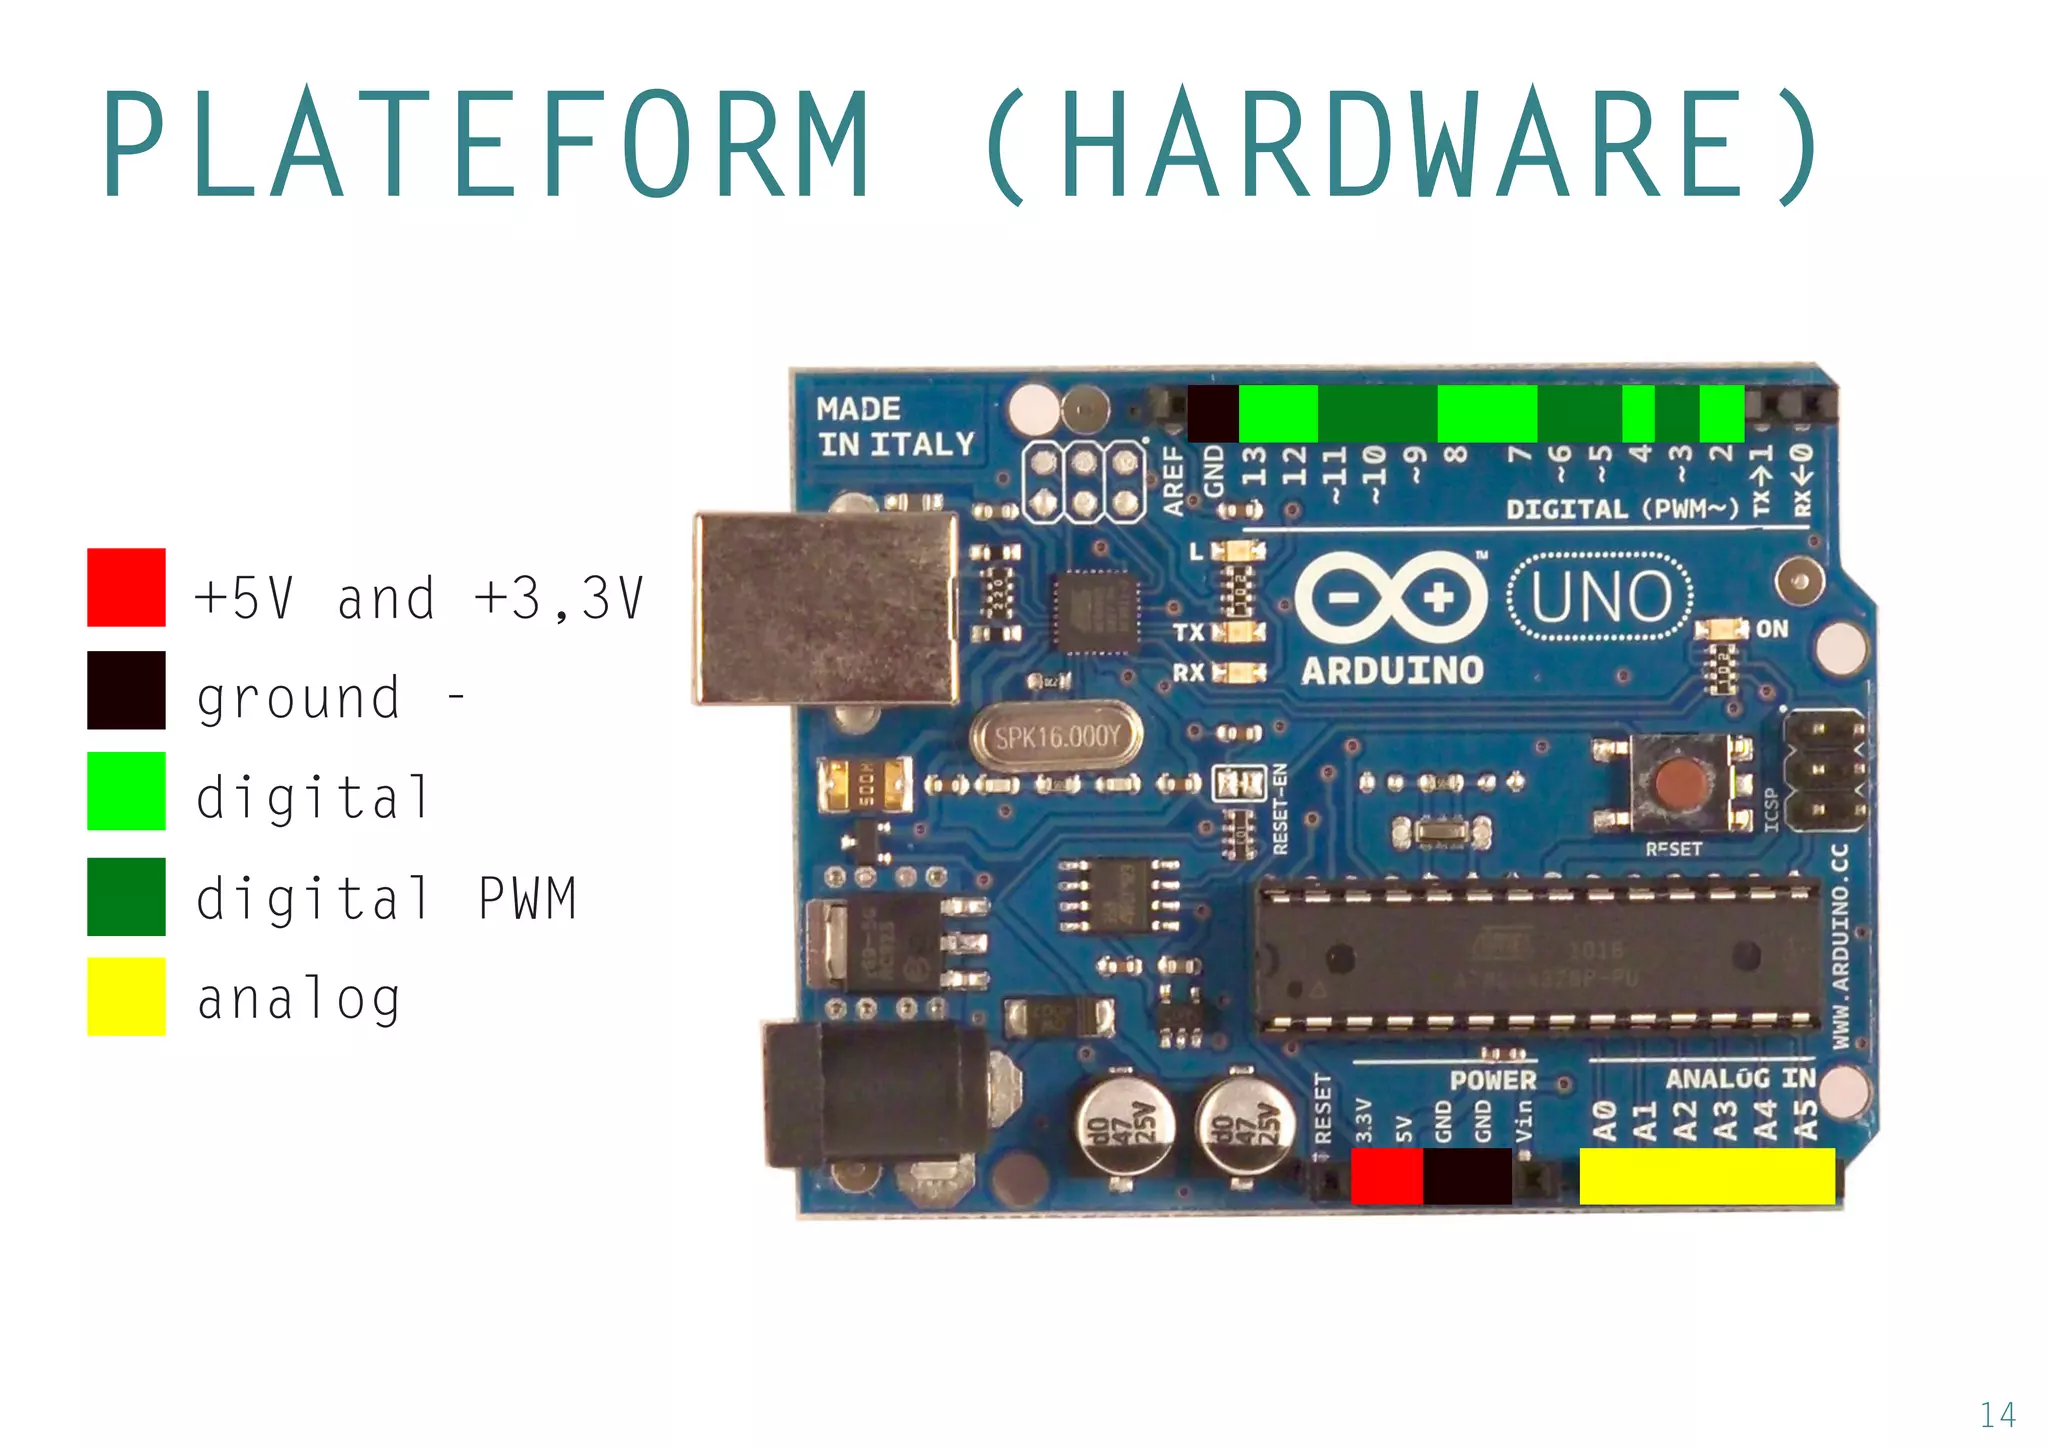
PLATEFORM (HARDWARE)
Arduino is like a brain who going to make logical connections between an action and a sense.
For example, if we read a text:
The eyes (INPUT) see the image of the text, the brain (ARDUINO) read and make the interpretation for the mouth (OUTPUT) who’s make the sound of the reading text.
25
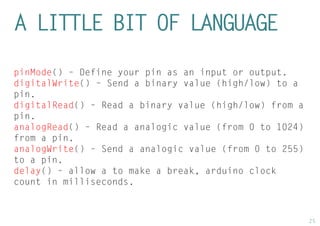
A LITTLEBIT OF LANGUAGE
pinMode() – Define your pin as an input or output.
digitalWrite() – Send a binary value (high/low) to a pin.
digitalRead() – Read a binary value (high/low) from a pin.
analogRead() – Read a analogic value (from 0 to 1024) from a pin.
analogWrite() – Send a analogic value (from 0 to 255) to a pin.
delay() – allow a to make a break, arduino clock count in milliseconds.
27
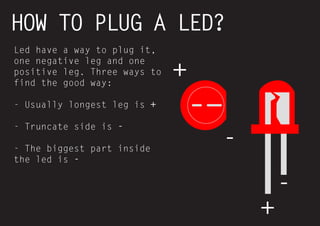
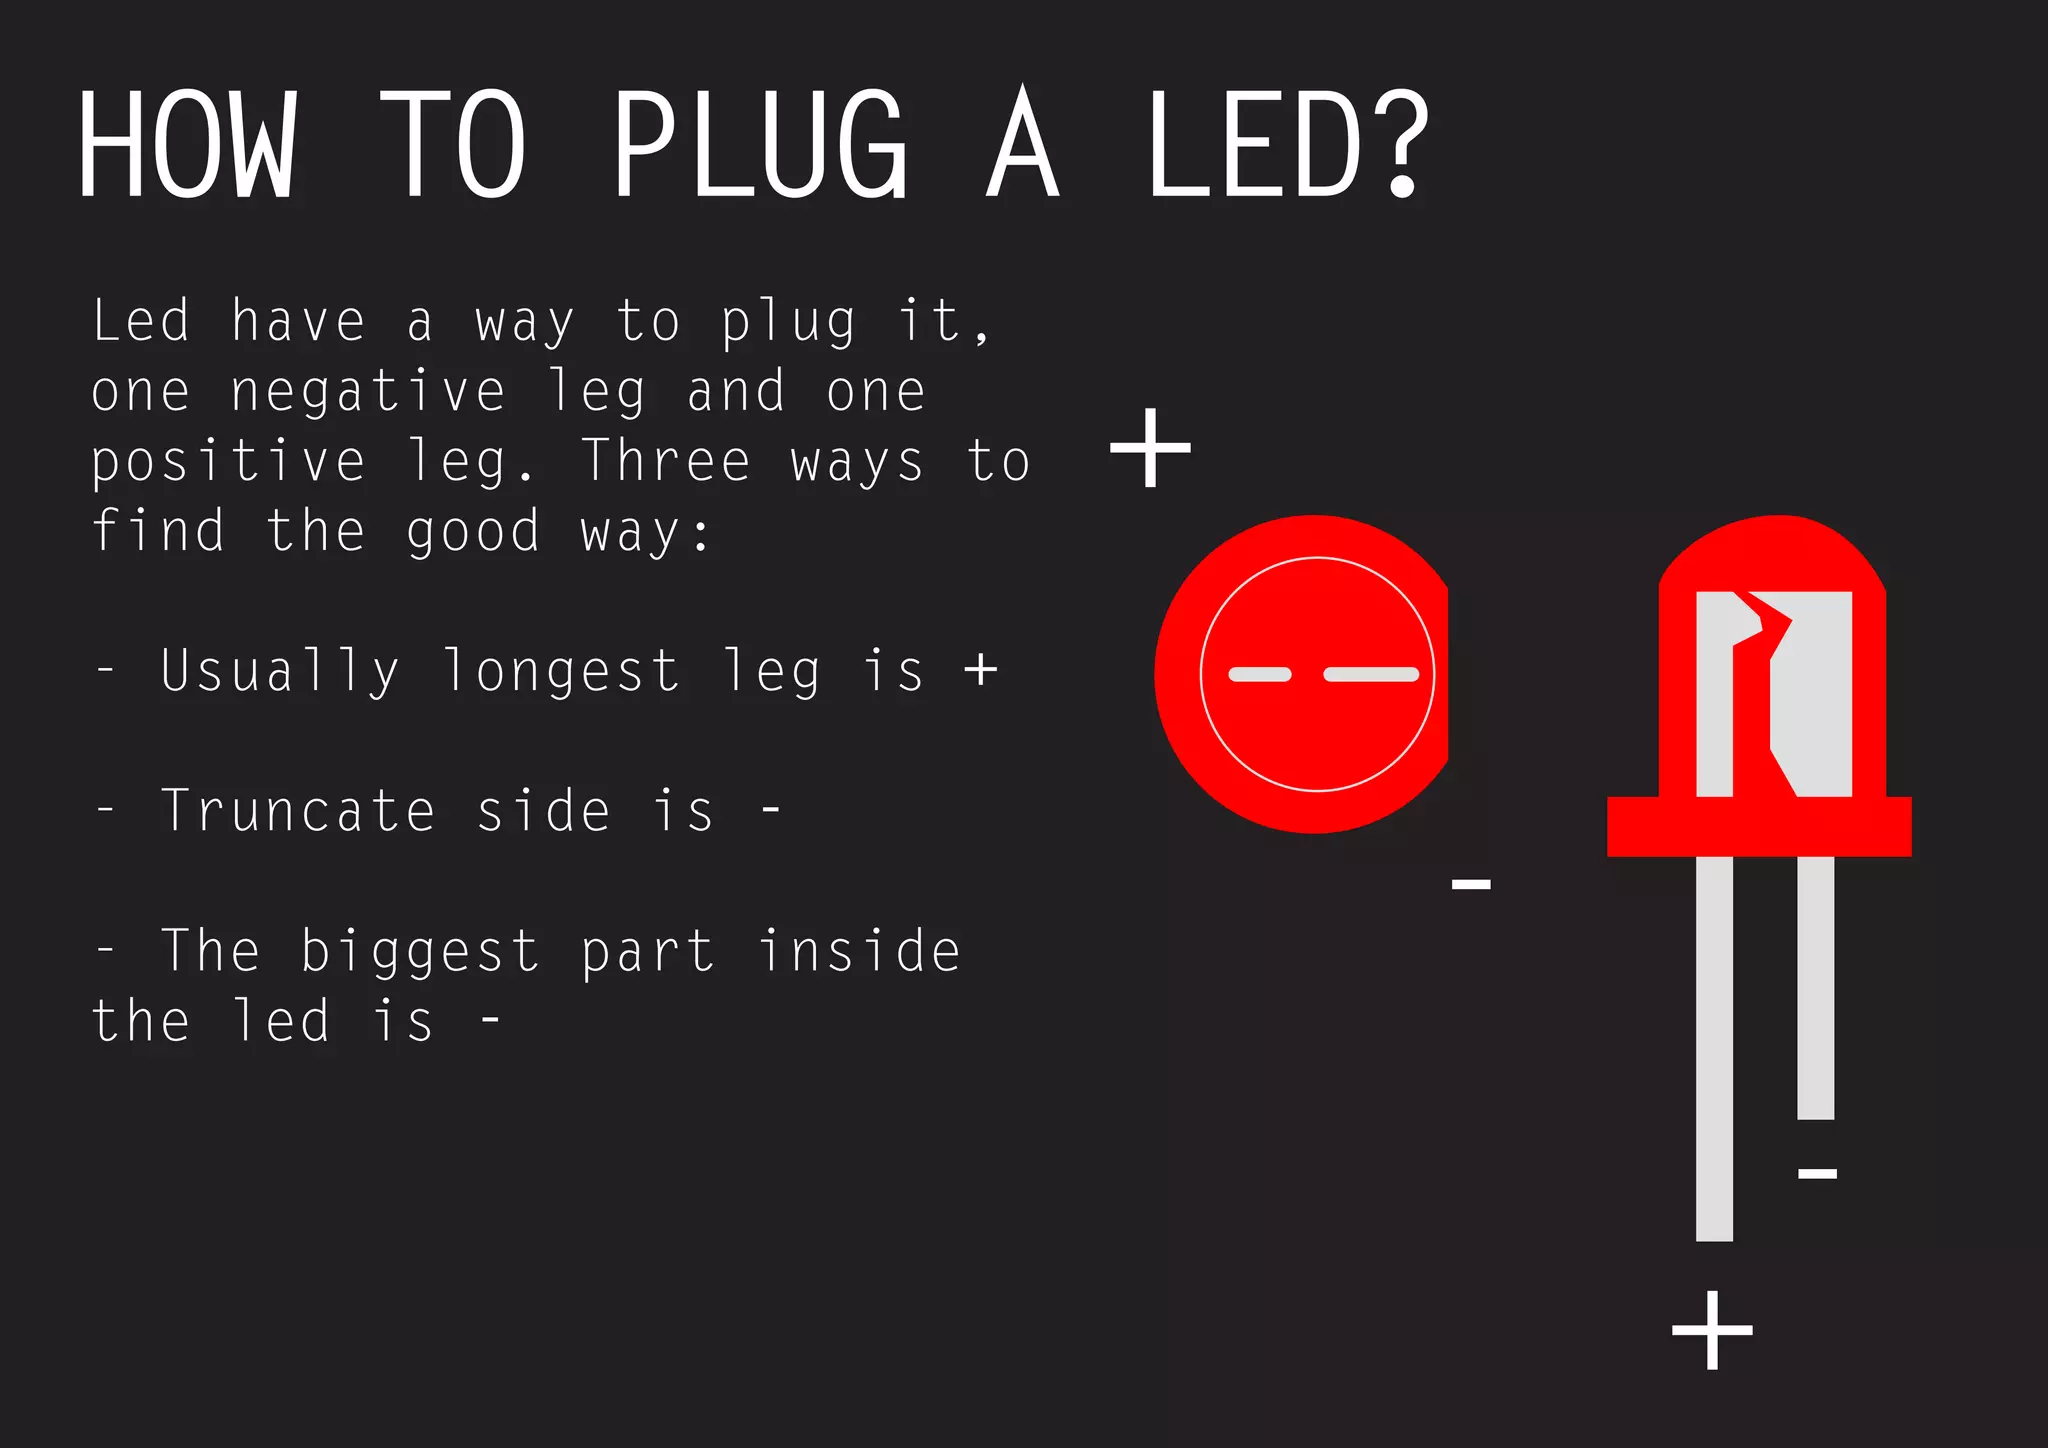
HOW TOPLUG A LED?
Led have a way to plug it, one negative leg and one positive leg. Three ways to find the good way:
- Usually longest leg is +
- Truncate side is -
- The biggest part inside the led is -
+
+
-
-
28.
28
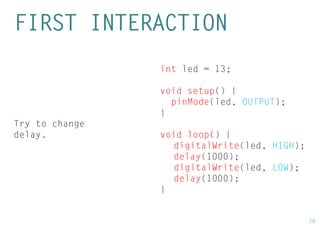
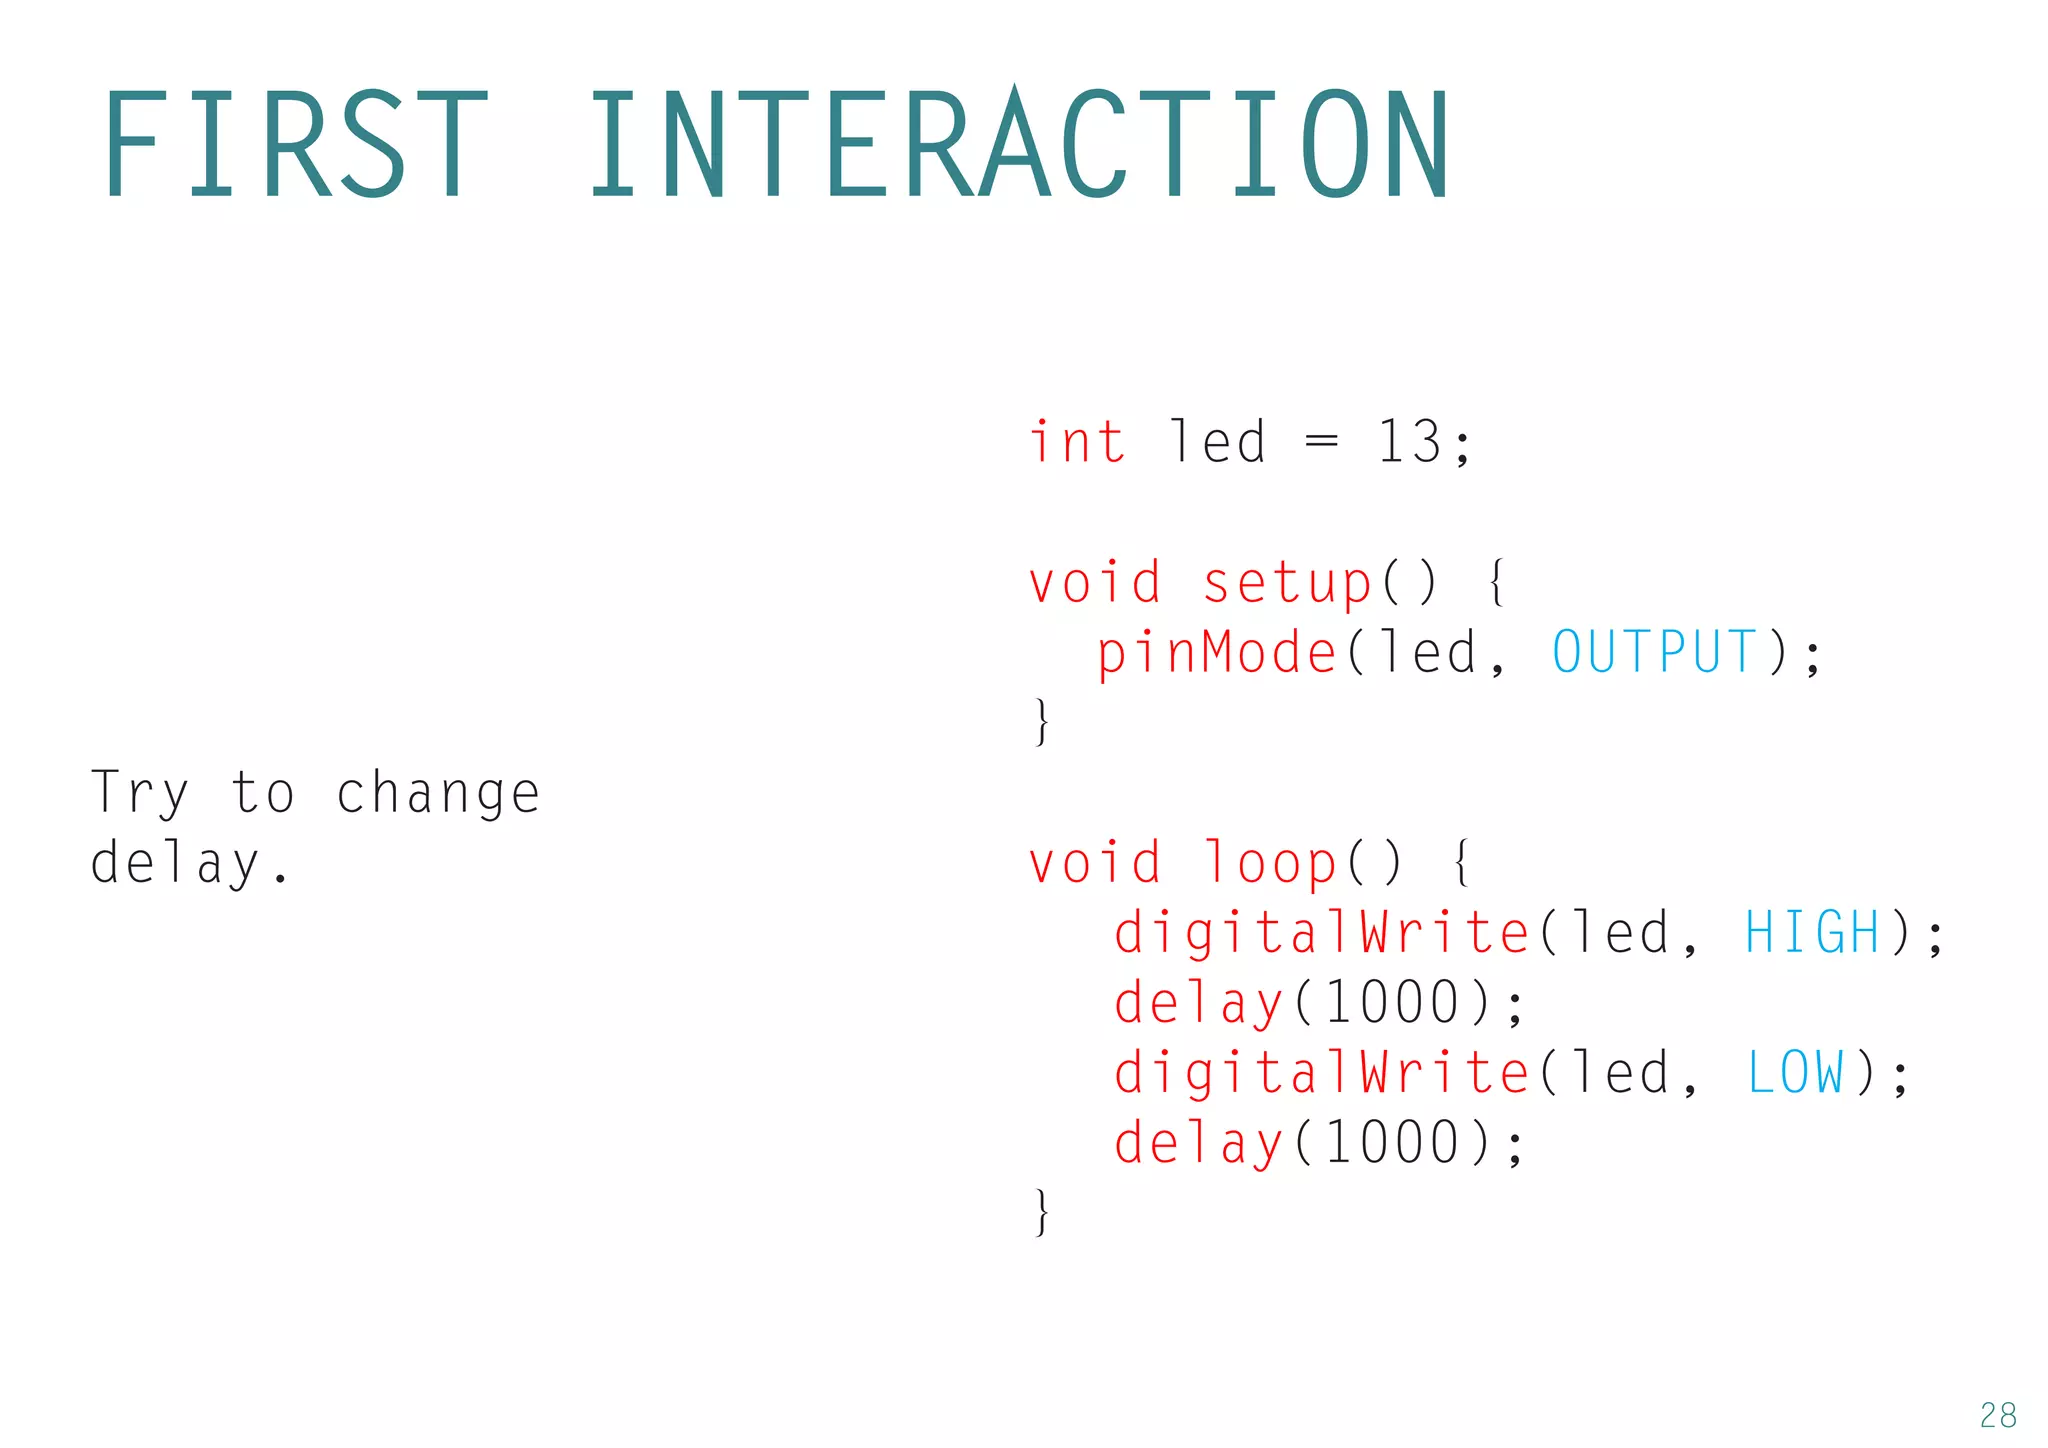
int led= 13;
void setup() {
pinMode(led, OUTPUT);
}
void loop() {
digitalWrite(led, HIGH);
delay(1000);
digitalWrite(led, LOW);
delay(1000);
}
FIRST INTERACTION
Try to change delay.


![UiPath Automation Suite Installation (Hands-On) [2/3]](https://cdn.slidesharecdn.com/ss_thumbnails/automationsuitecommunitysession2-251015095633-a6d862f1-thumbnail.jpg?width=600ounds&width=560&fit=bounds)

